
Twokidsnosleep
-
Posts
231 -
Joined
-
Last visited
Content Type
Profiles
Forums
Gallery
Events
Everything posted by Twokidsnosleep
-
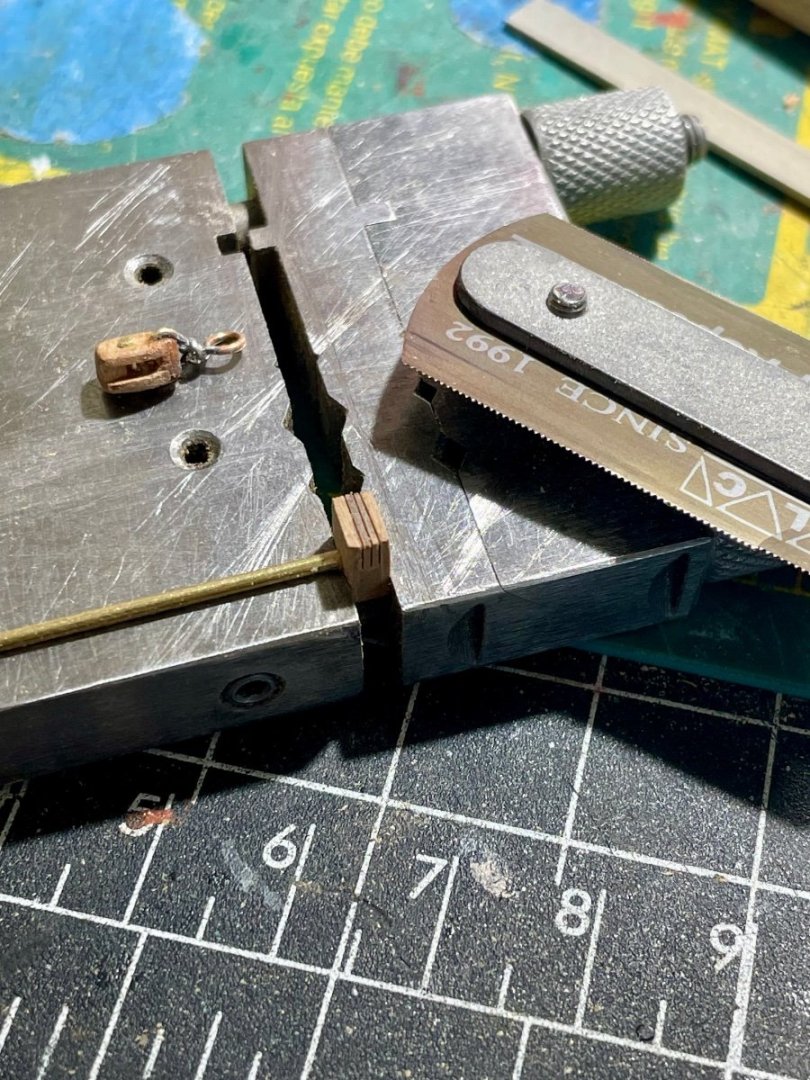
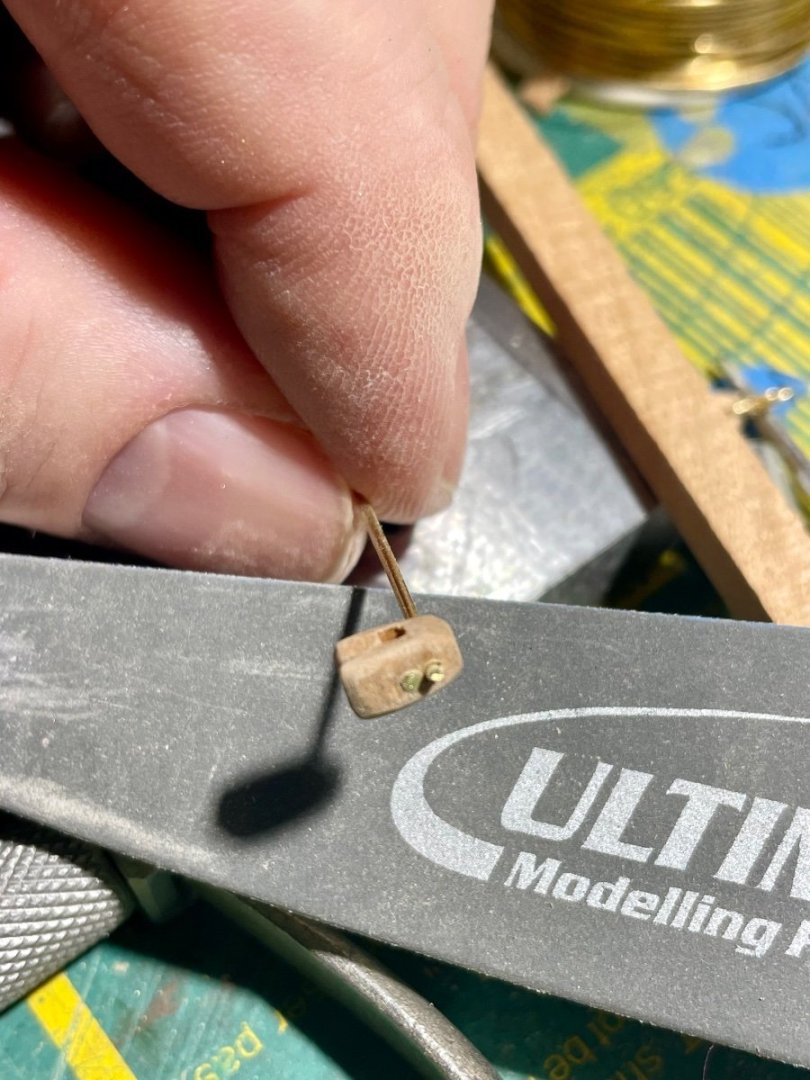
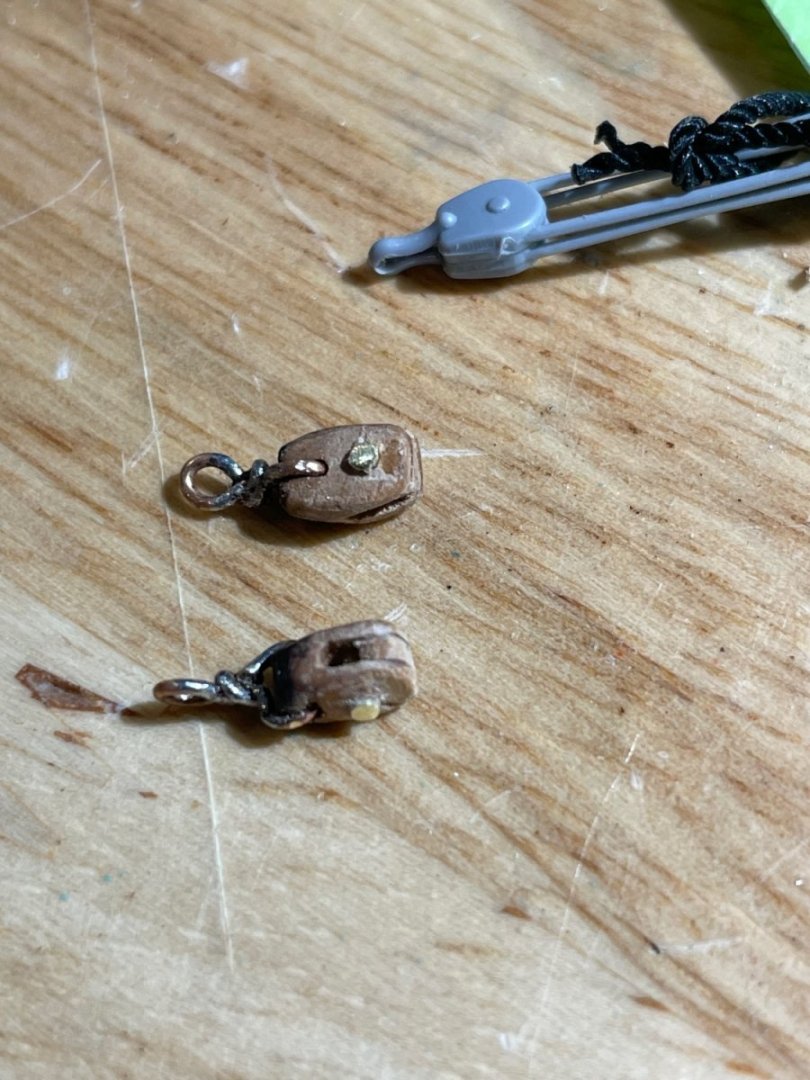
A pre-rigging exercise over Christmas break Tried to make some wooden blocks. This is Alder wood, a hard wood I used for a cabinet front a brass rod as the internal pivot and a wood splice back into the base for strength else those sides will split Then some wire bending and soldering the loop for strength. That is the kit part in the photo. The loop for the rope line is not one piece of styrene but two halves. I felt that was going to be way too weak for the ropes of scale.

-
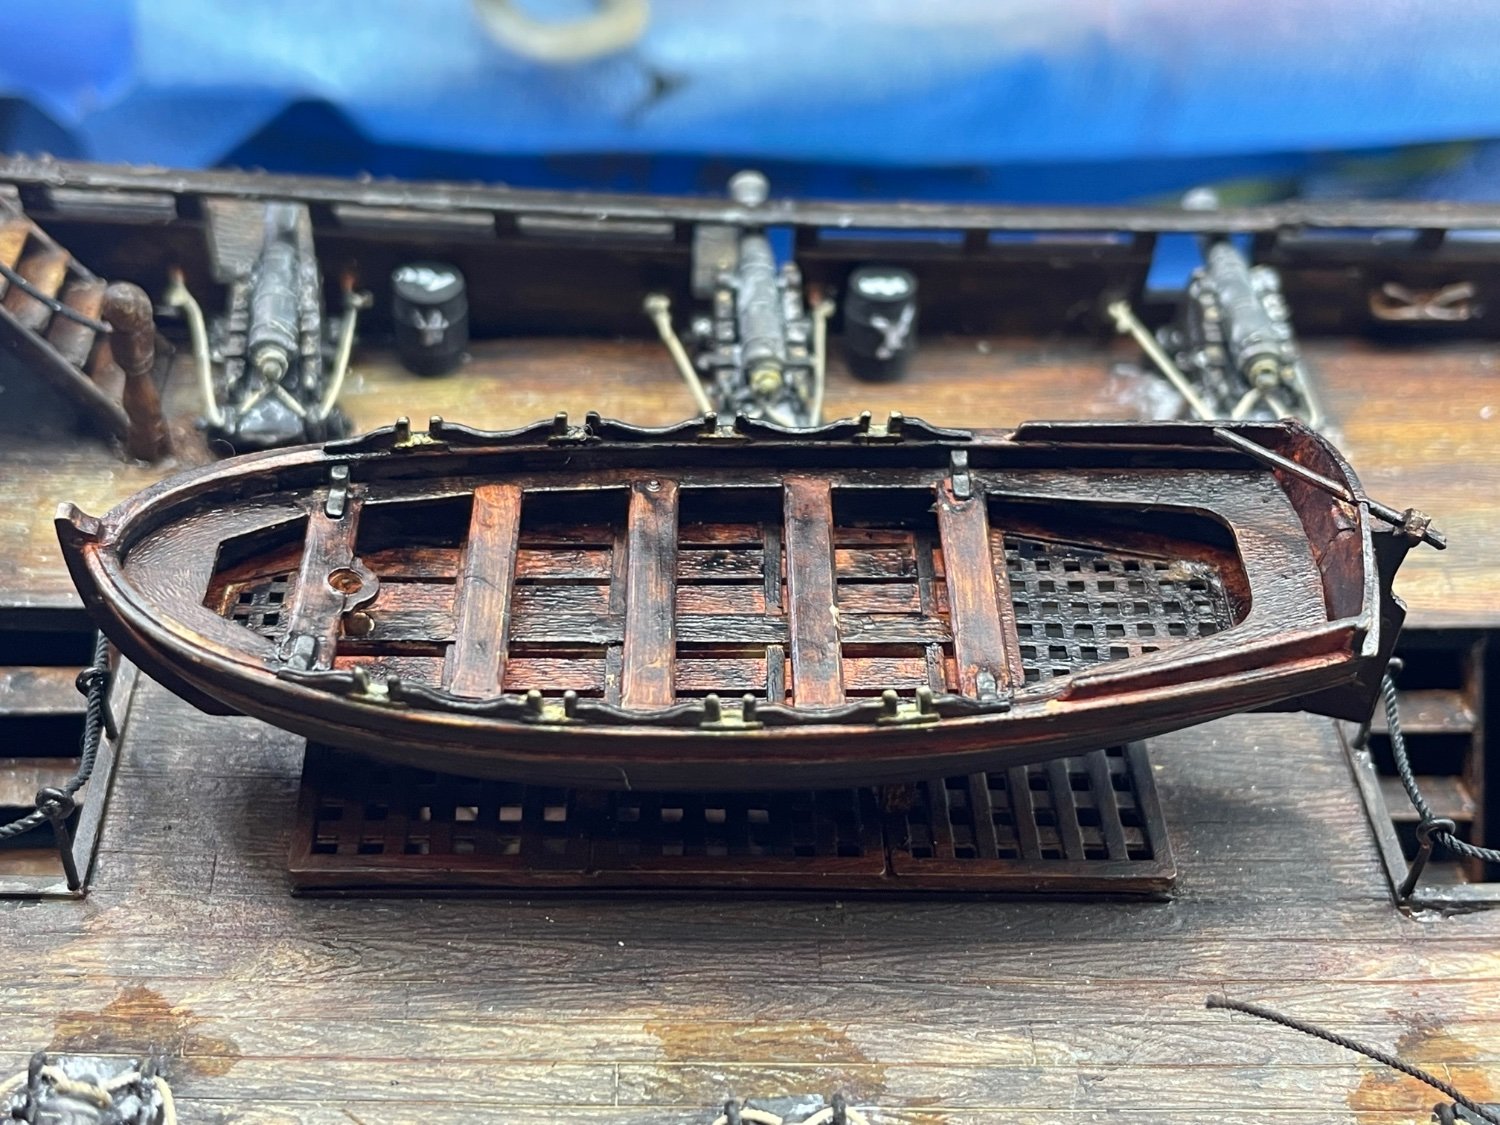
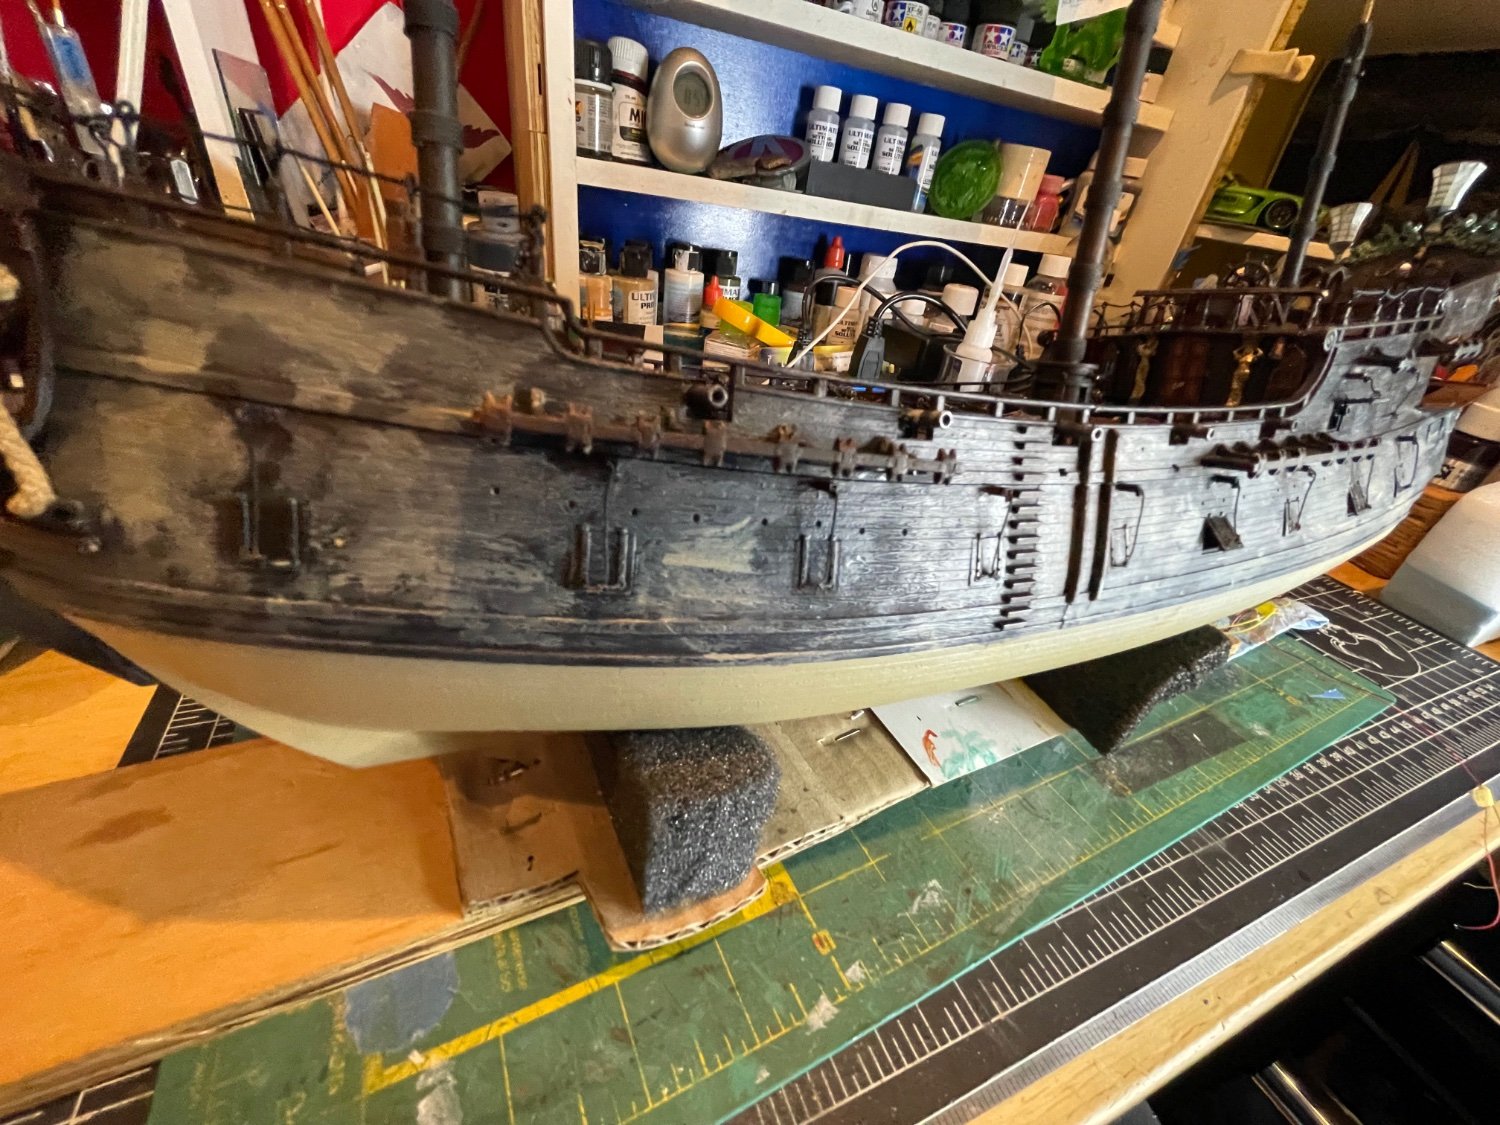
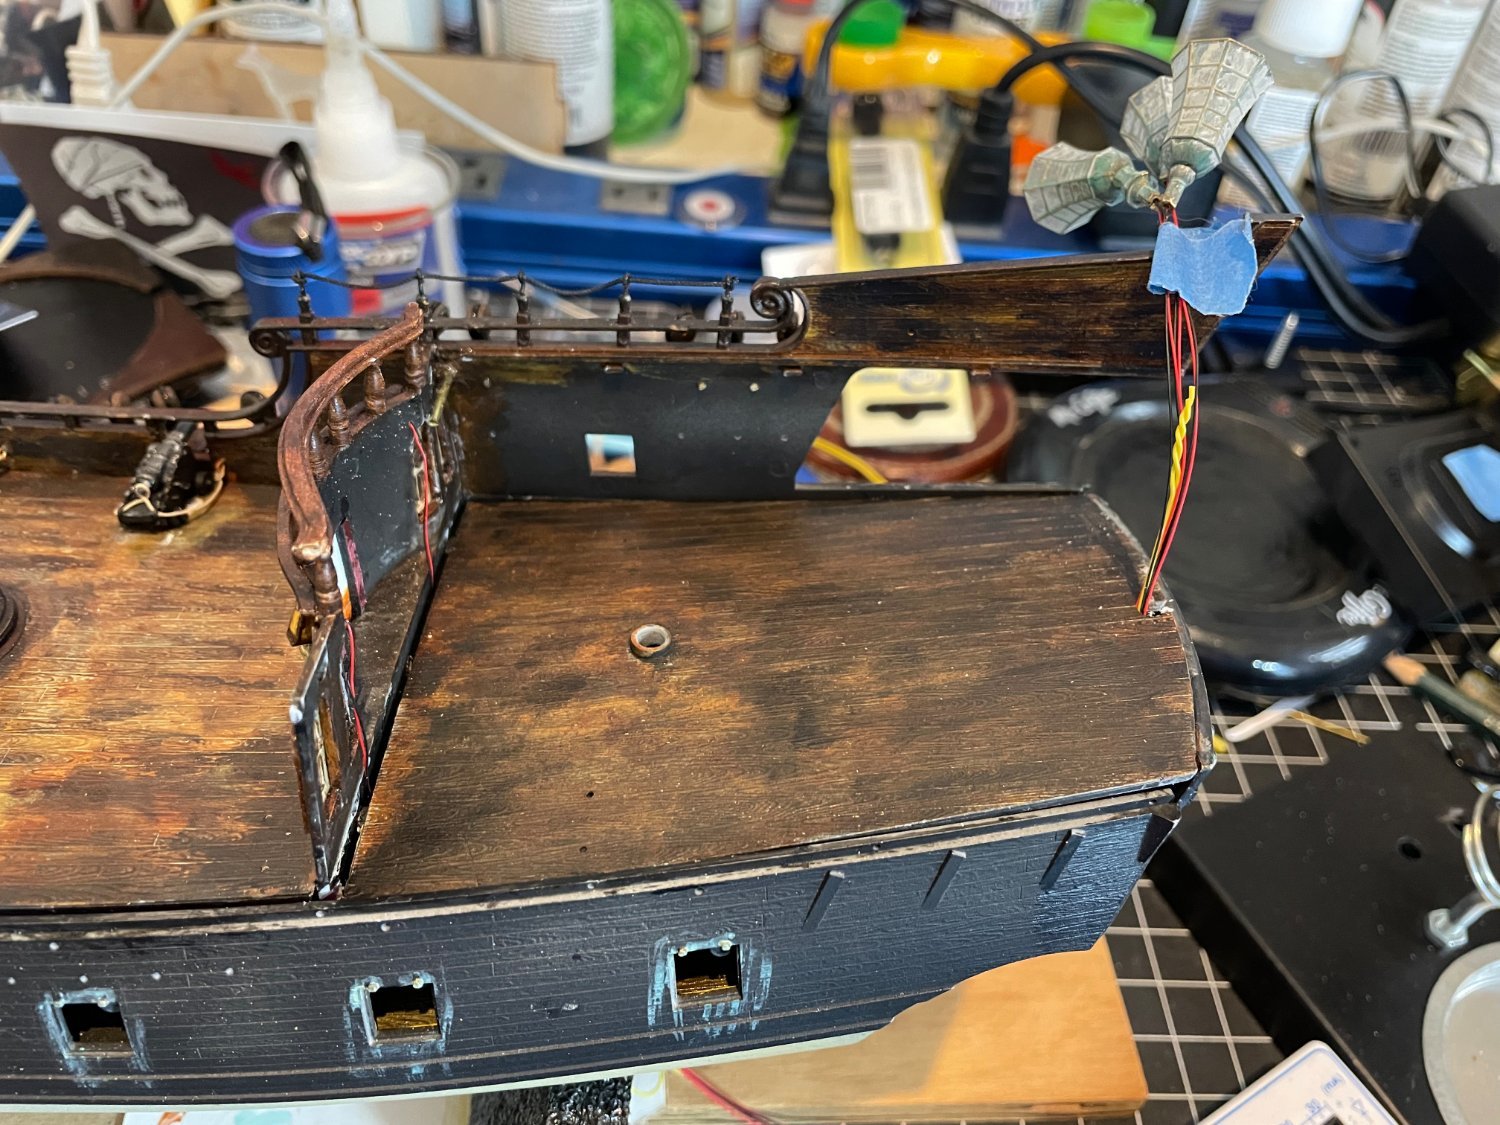
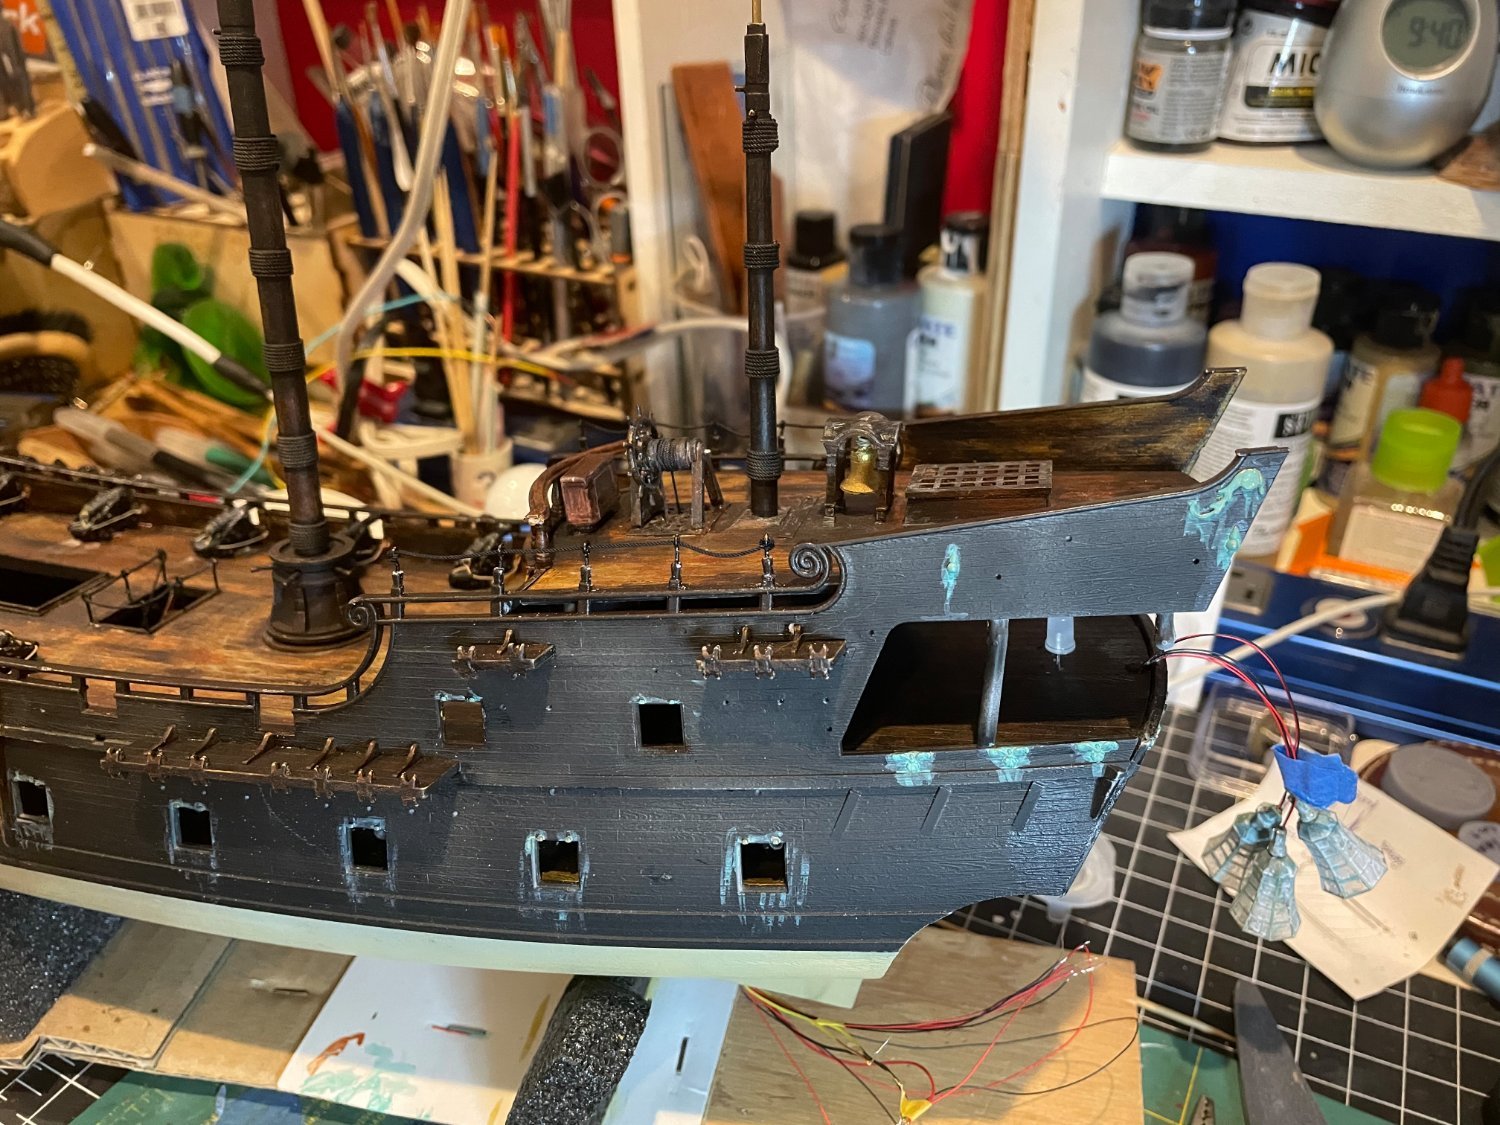
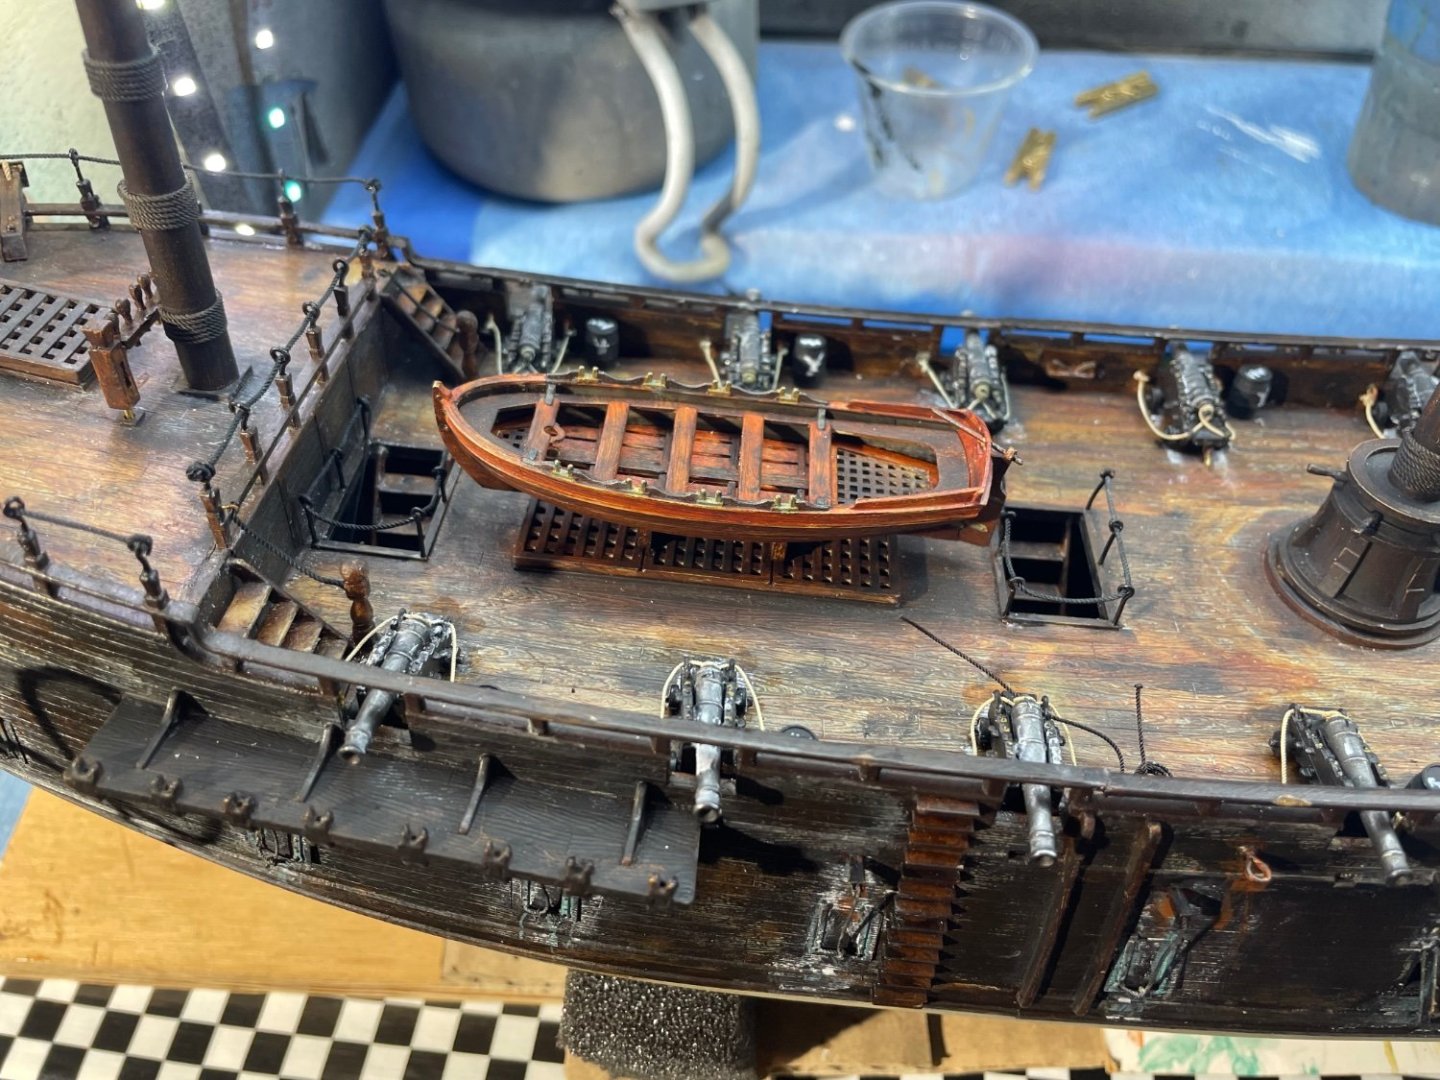
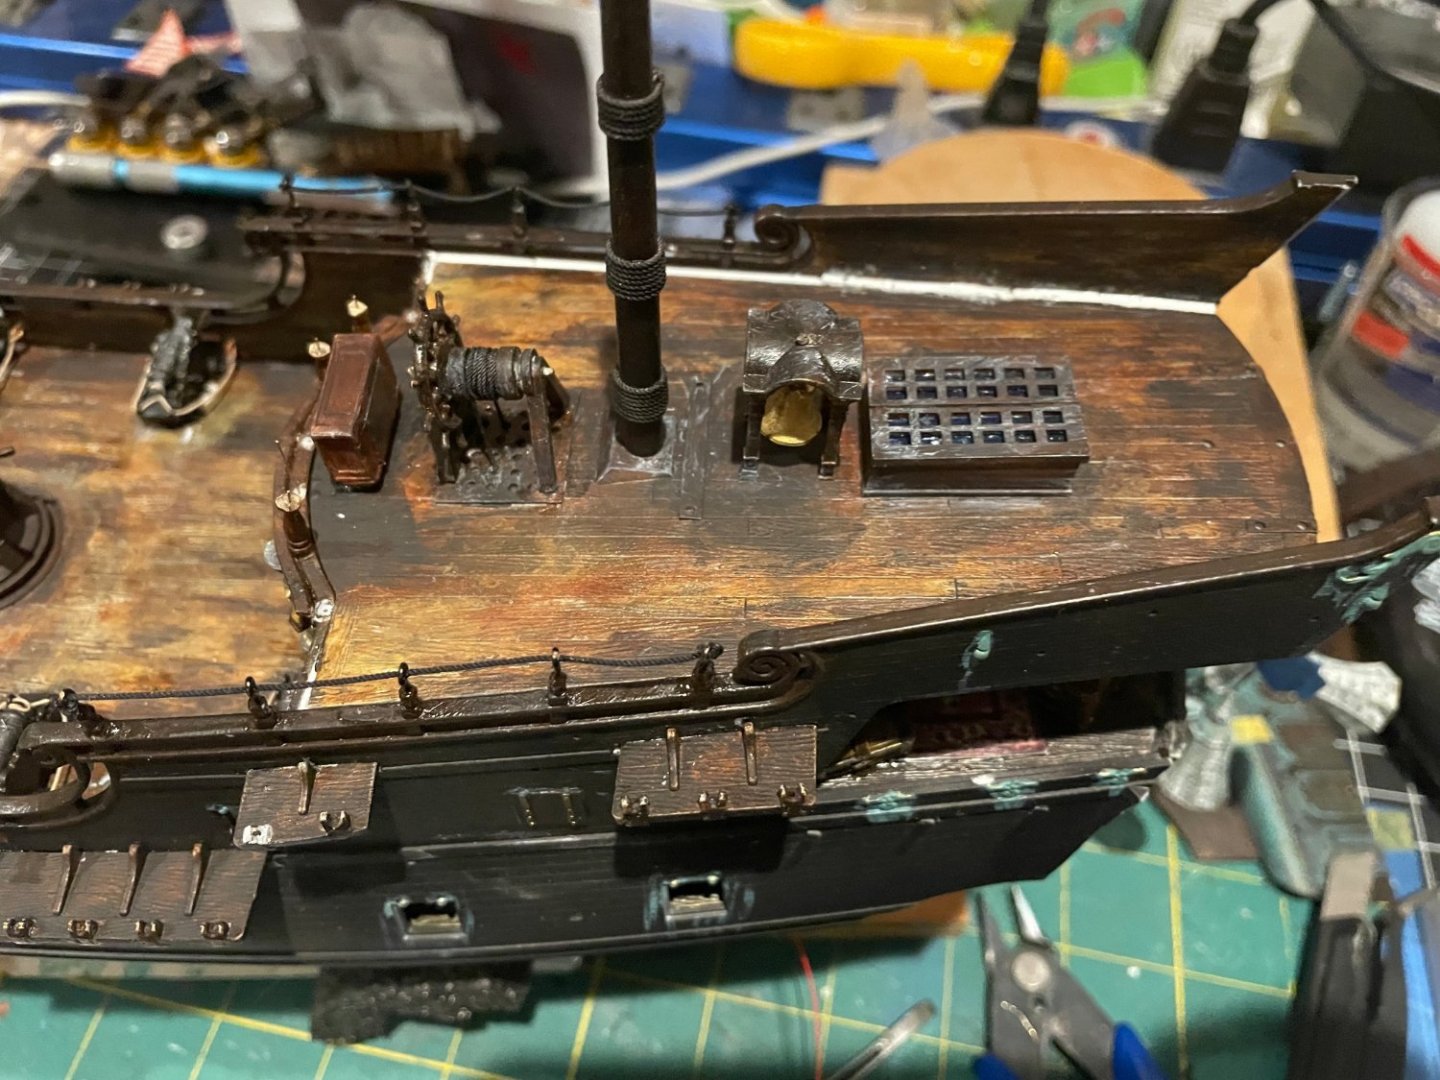
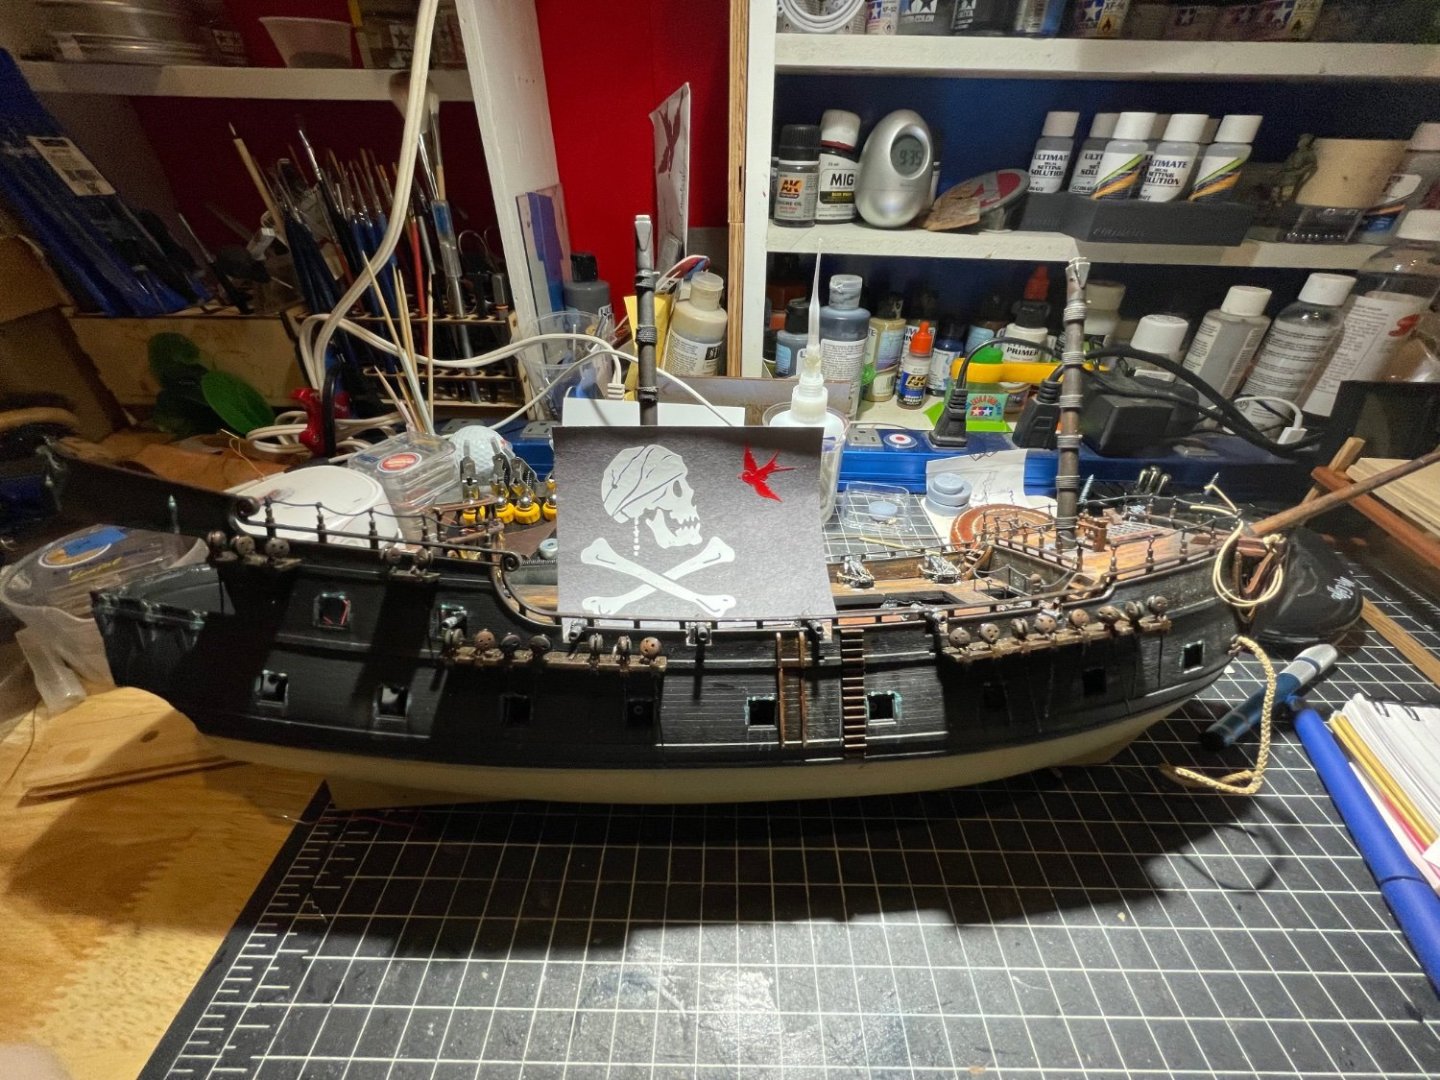
Some Christmas time modelling 🙂 Detailing the cannon doors and their rope line system. Messing with the hull and some paint blending and weathering tests Blackening the planks and then adding the sea spray, verdigris and rust areas Darkened and weathered the small boat up a bit too


-
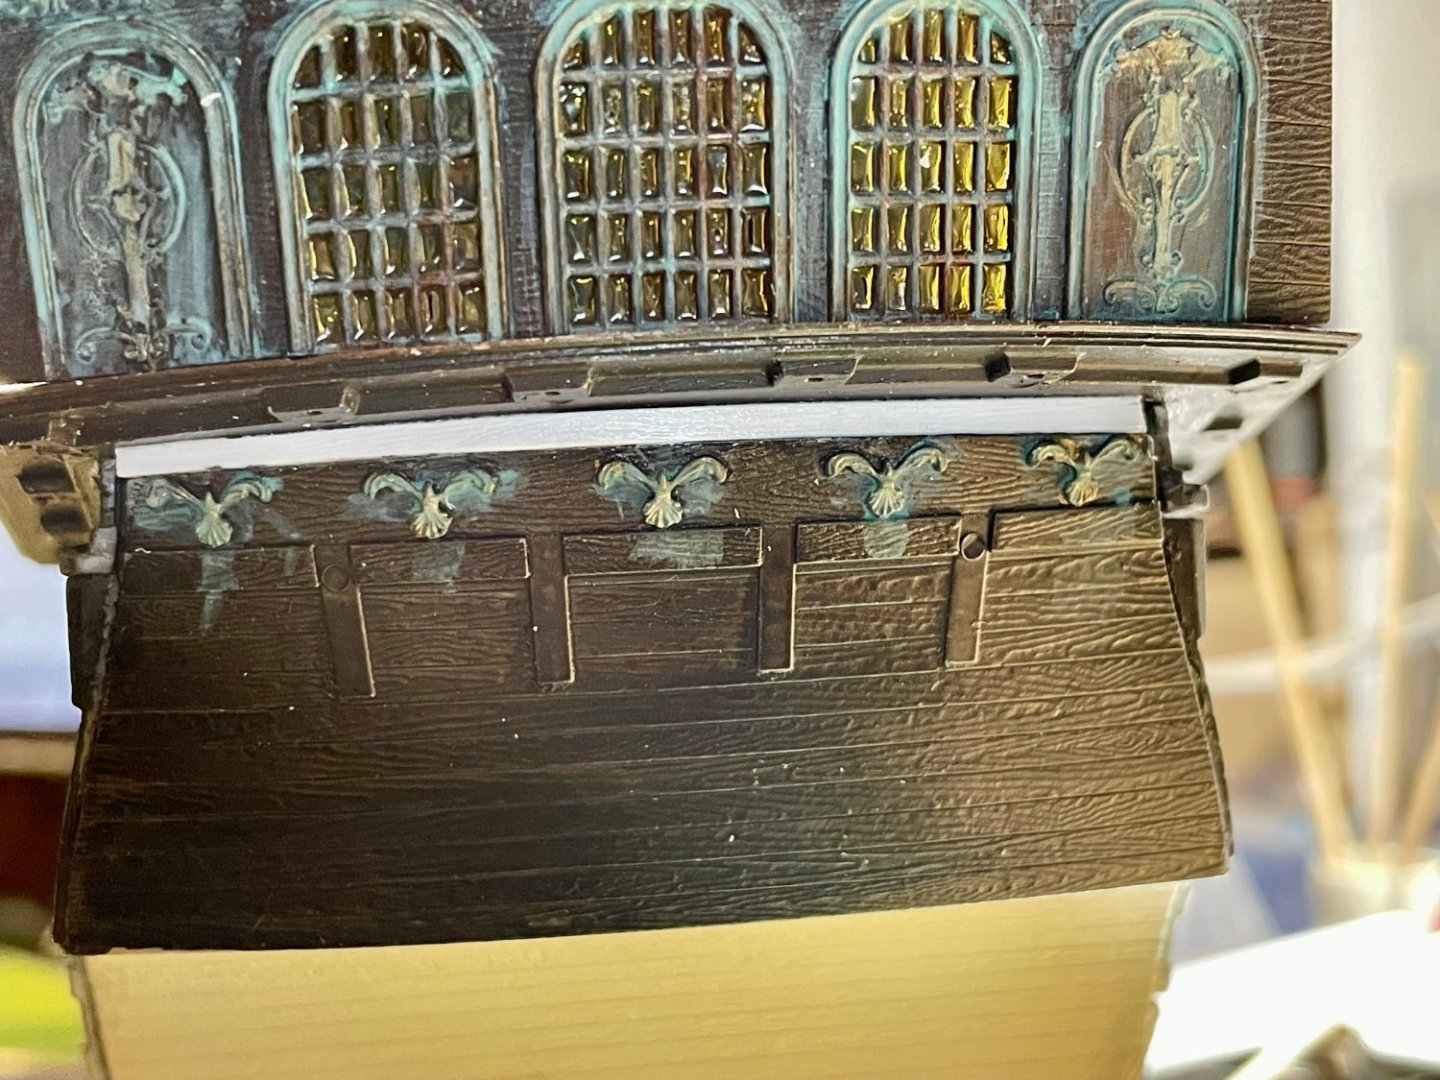
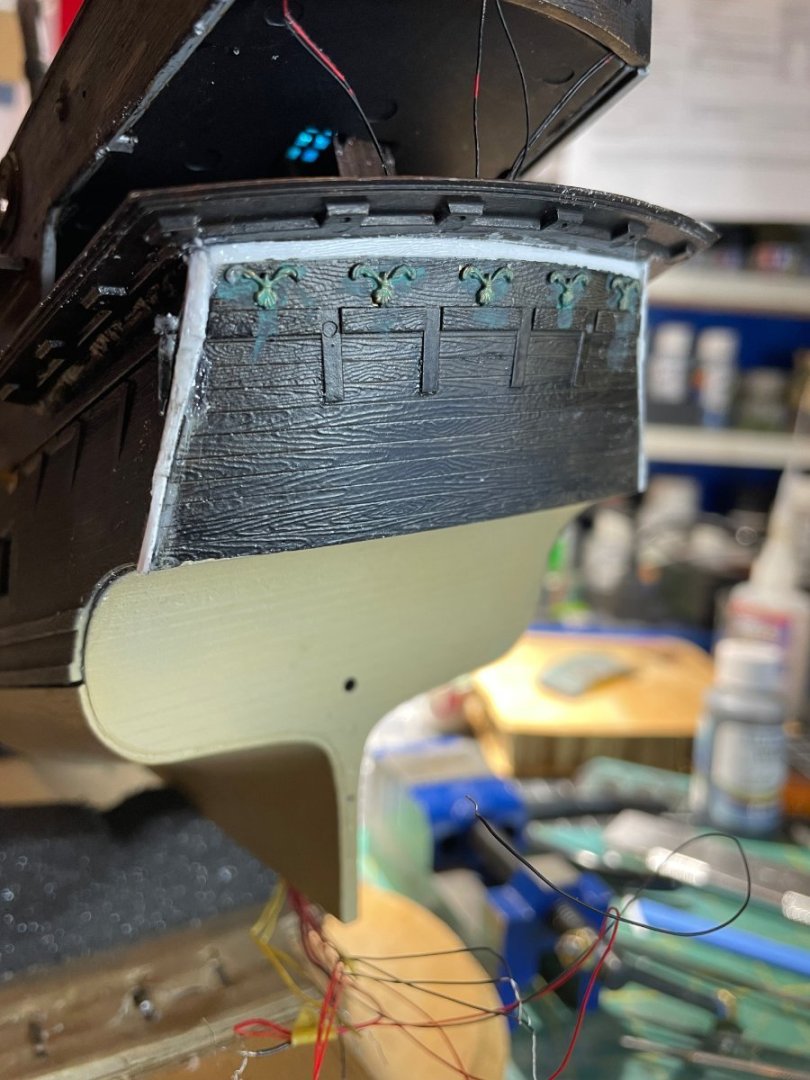
Filling in open spaces with white styrene planks on the bridge deck and the stern. These were my fault for not test fitting well before gluing and for gluing in horizontal and vertical parts separately. This was quite a gap on the stern, but that is where the window needed to sit. Would rather take up the slack with a styrene plank than mess with the window. These will get primed, painted and oiled up and disappear.

-
You are a bit ahead of me in build stages as I am making a 1/72 plastic Black Pearl. Planning to use the plastic sails as templates and make some tattered dyed fabric sails I got some sail material from Amazon to make them...away at work so will let you know what it was
-
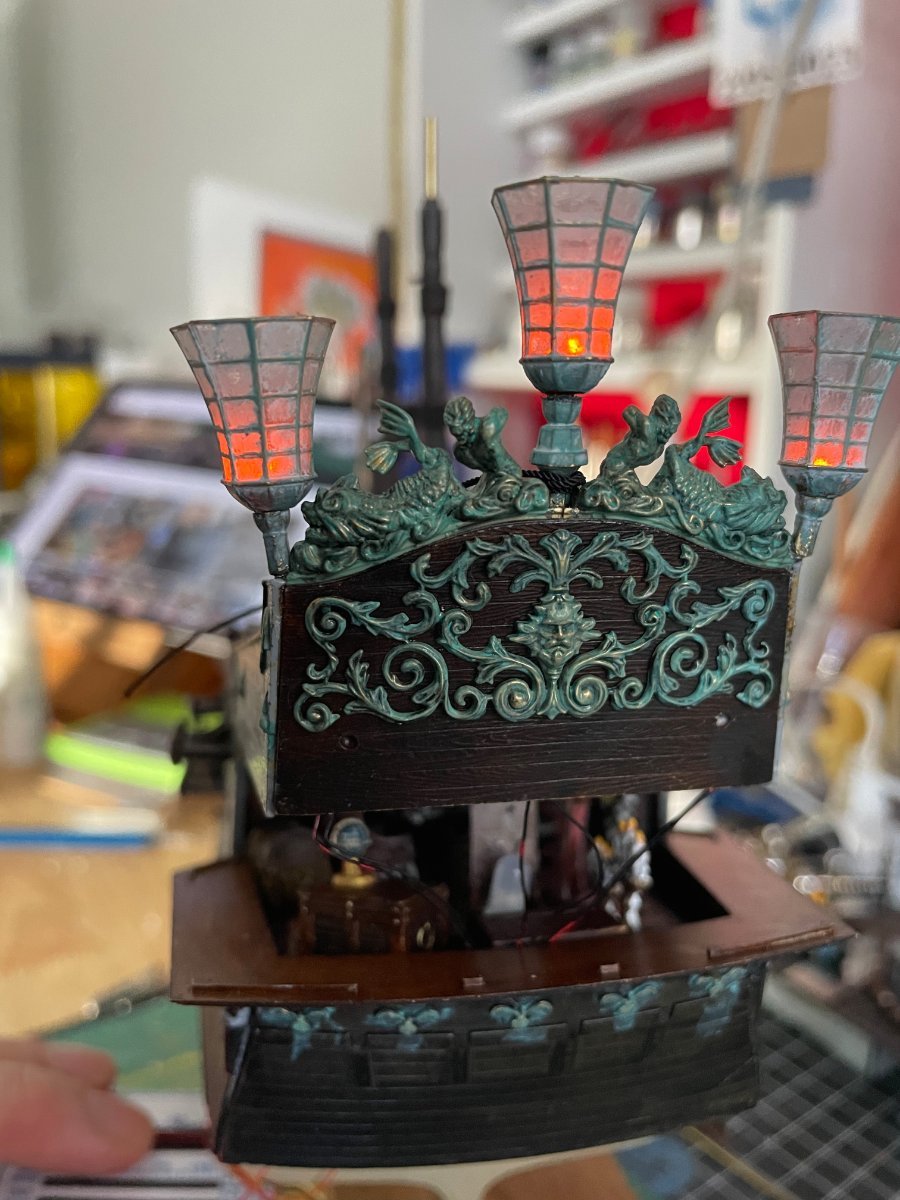
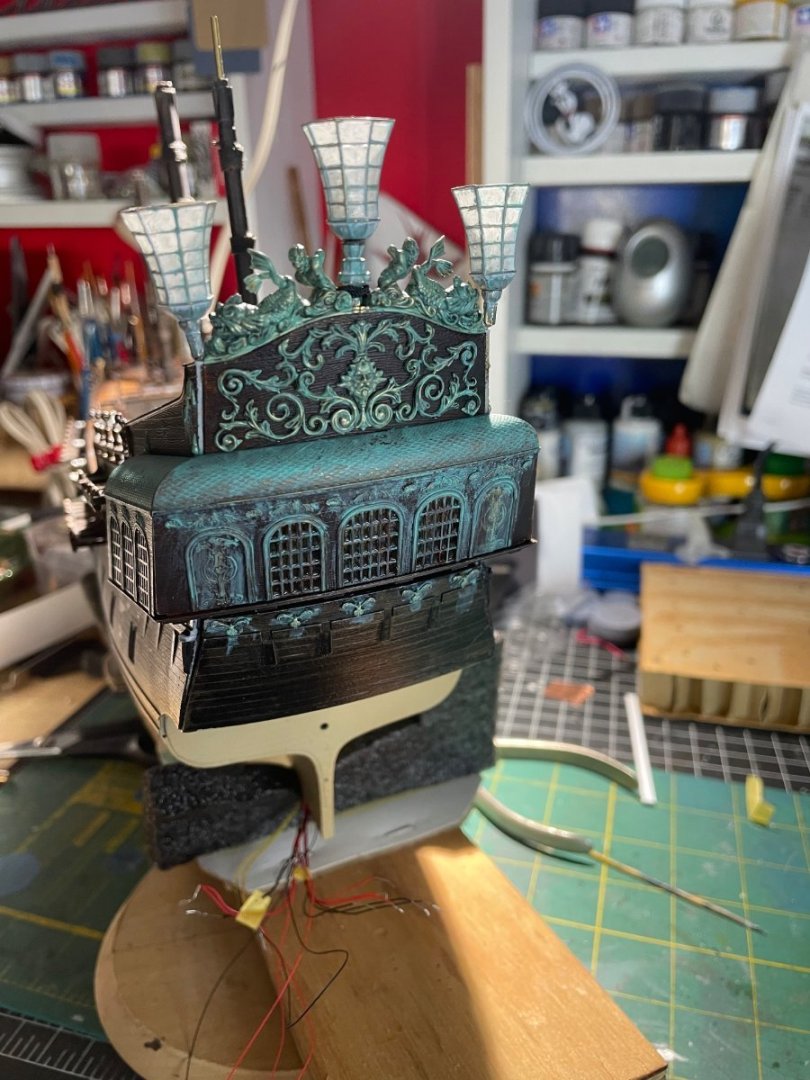
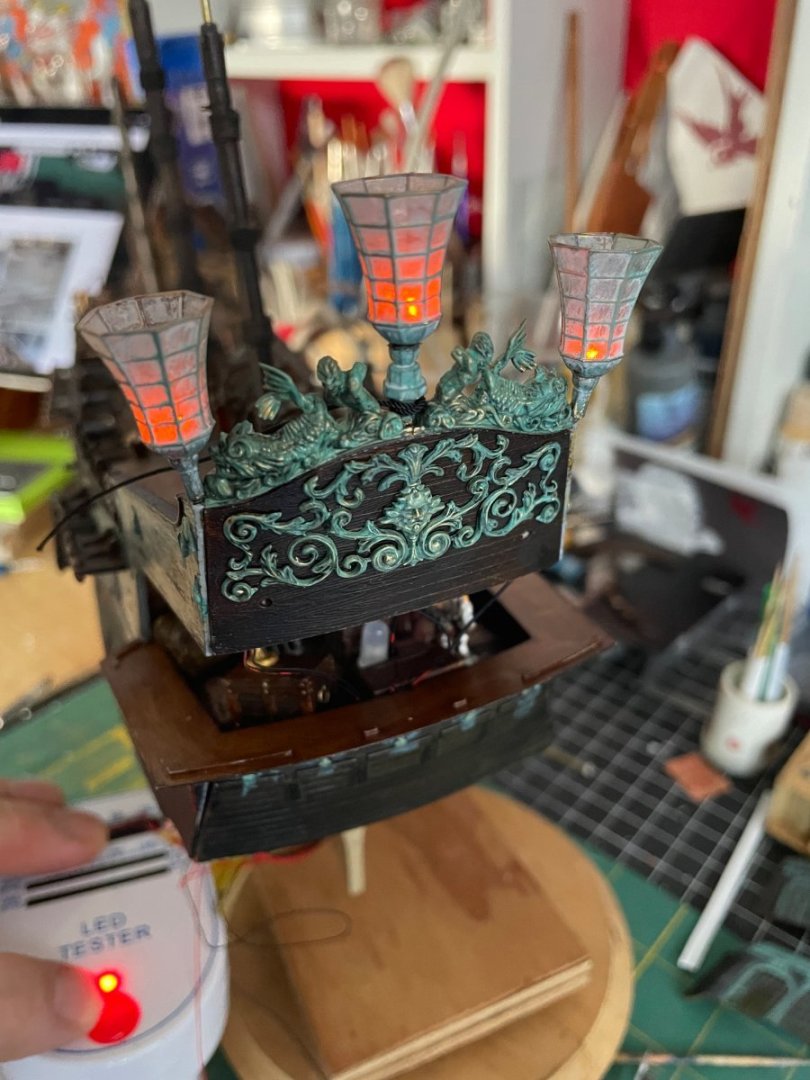
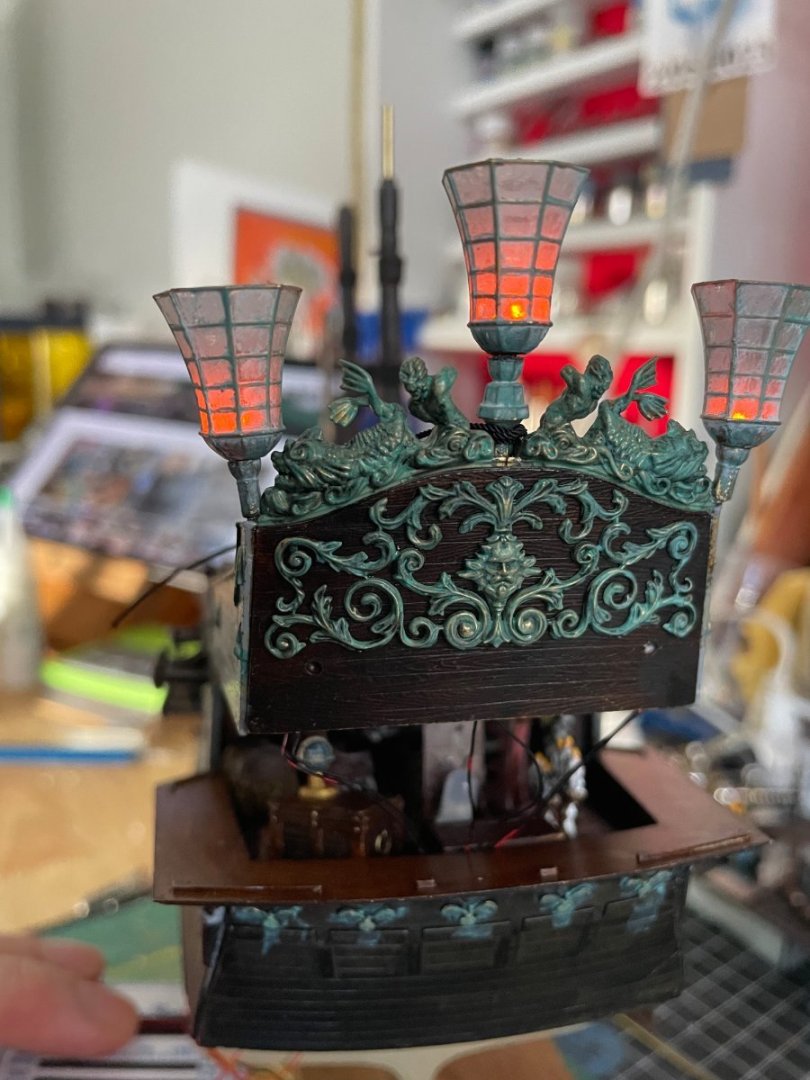
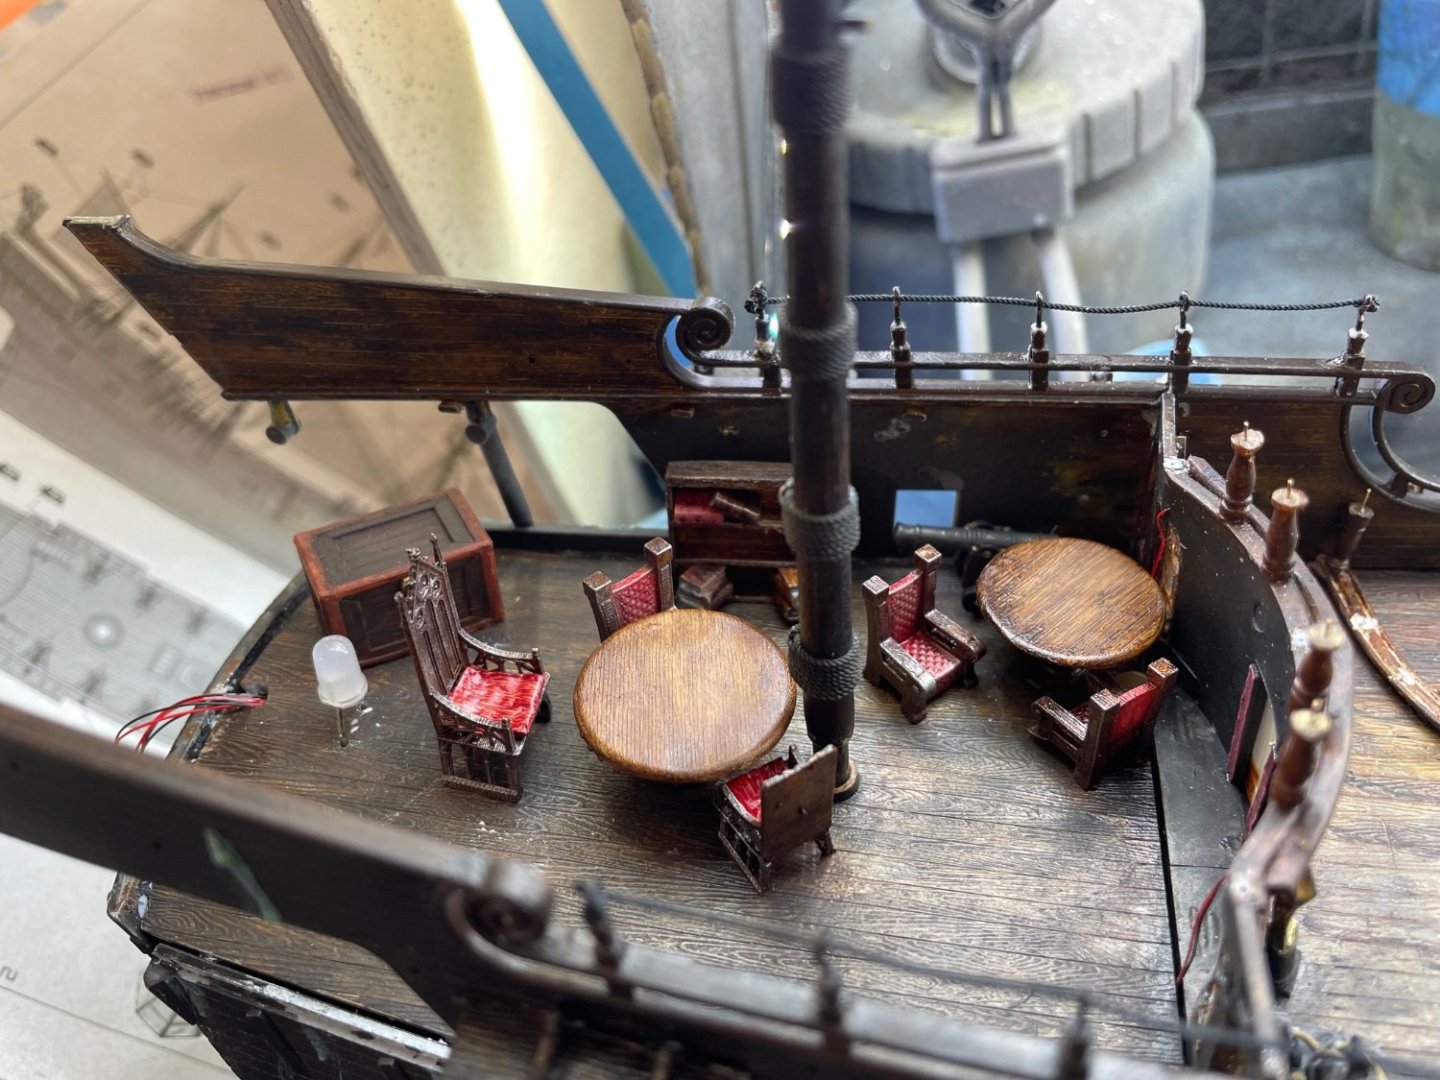
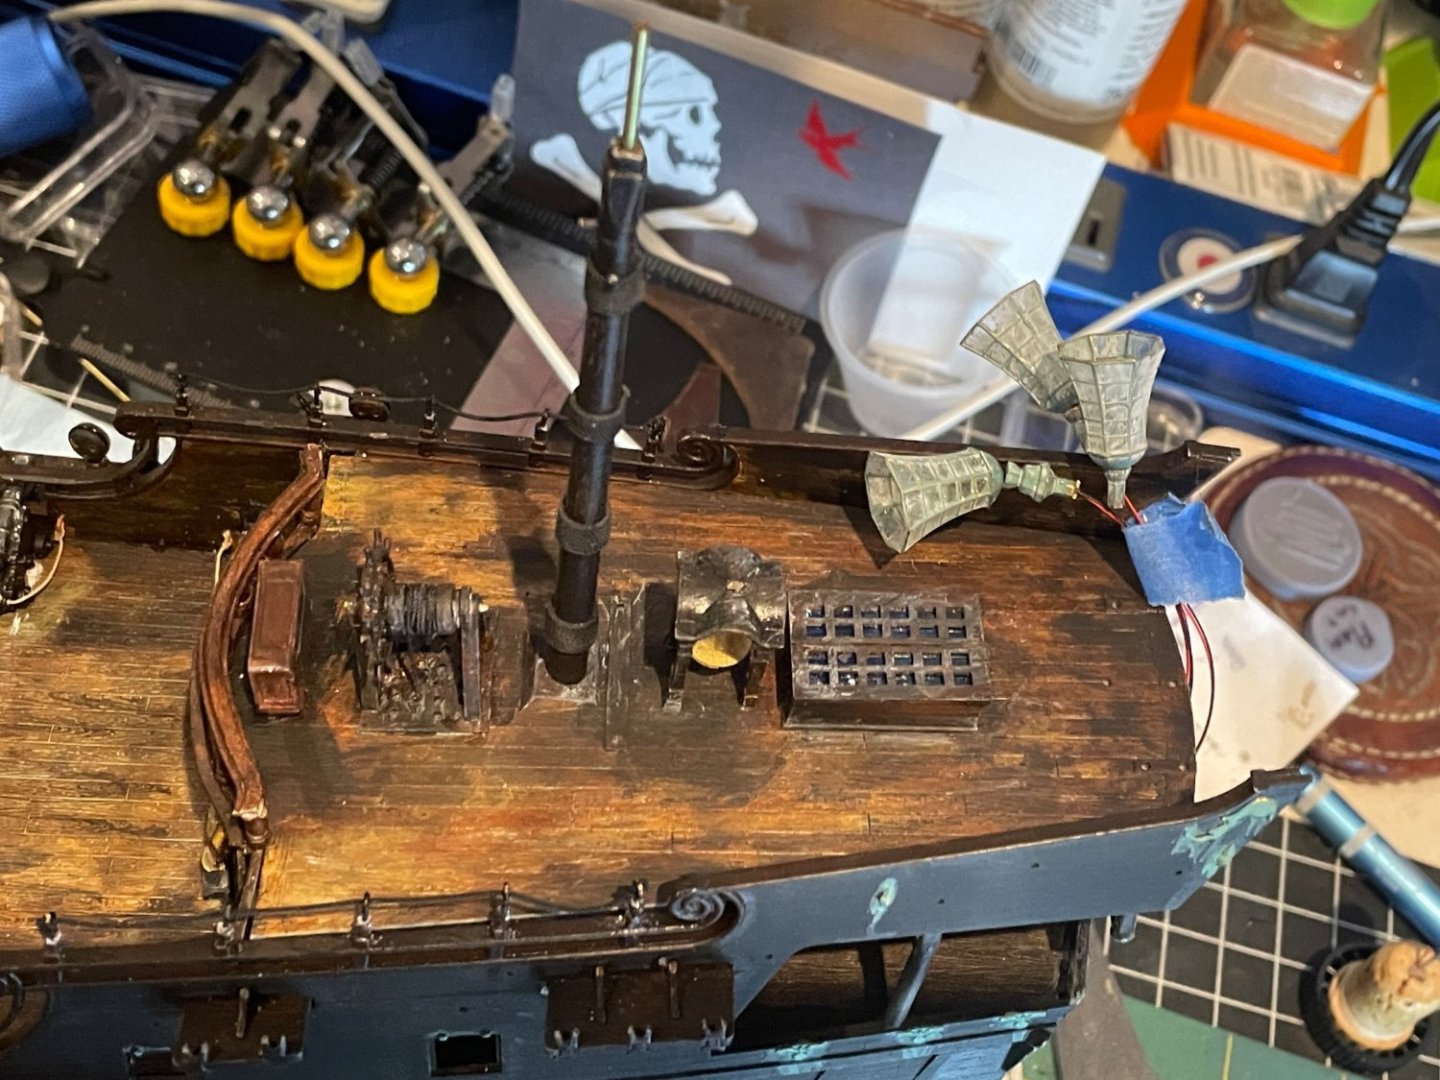
Buttoning her up more Some lovely mouldings for the stern of the ship and addition of the lamps with a quick electrical test
-
Oh this is sad news My condolences to the family and friends. If Jim’s machinery could be an indication of him, he was an incredibly solid man RIP JB 😪
-
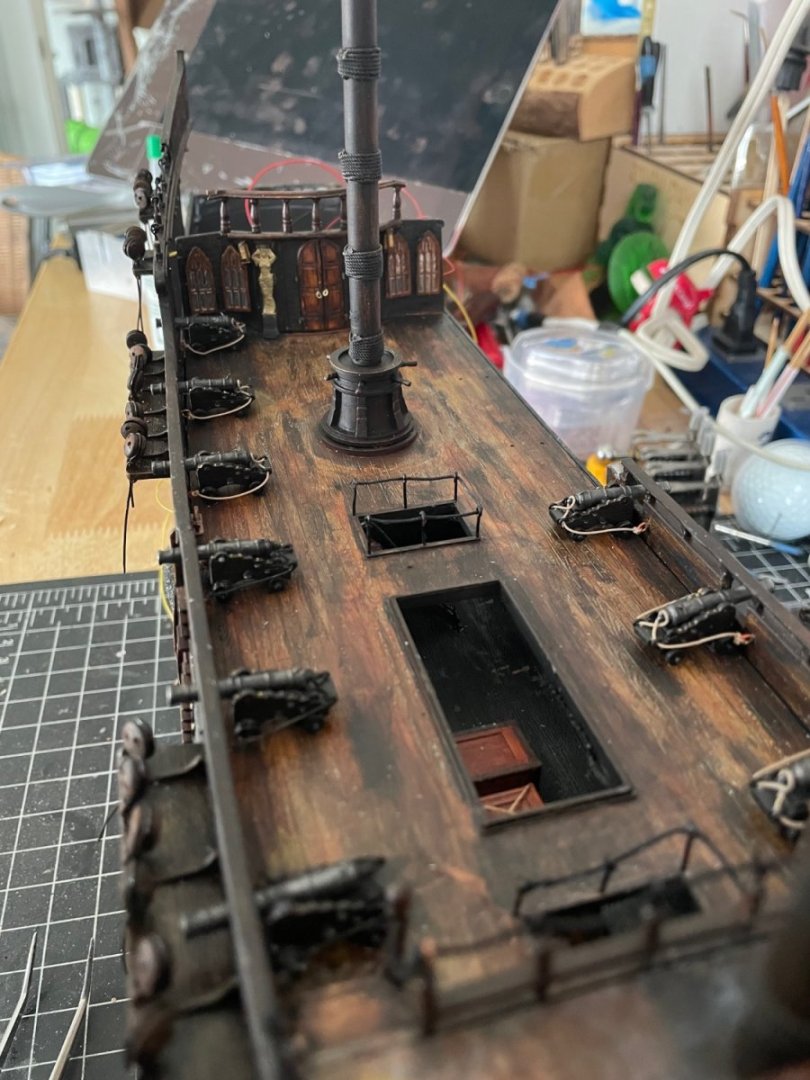
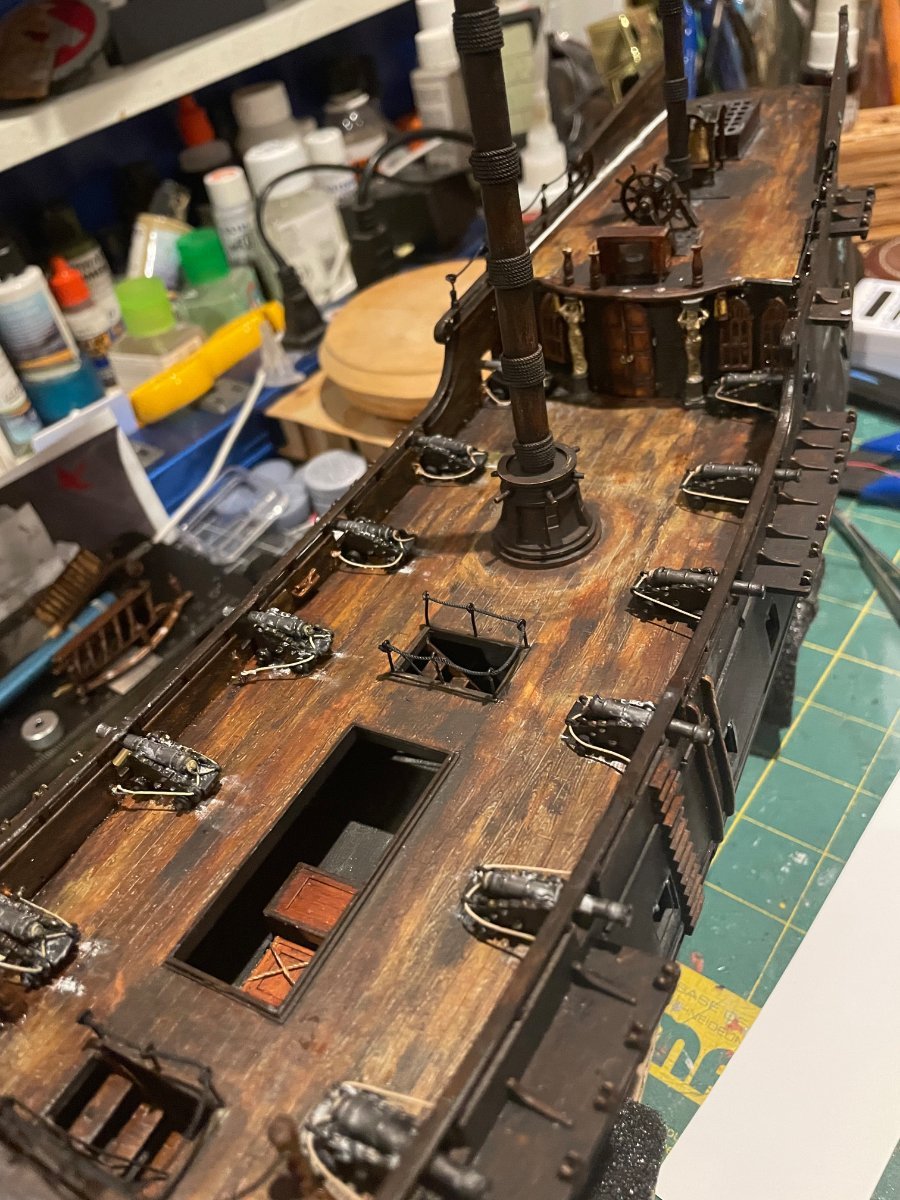
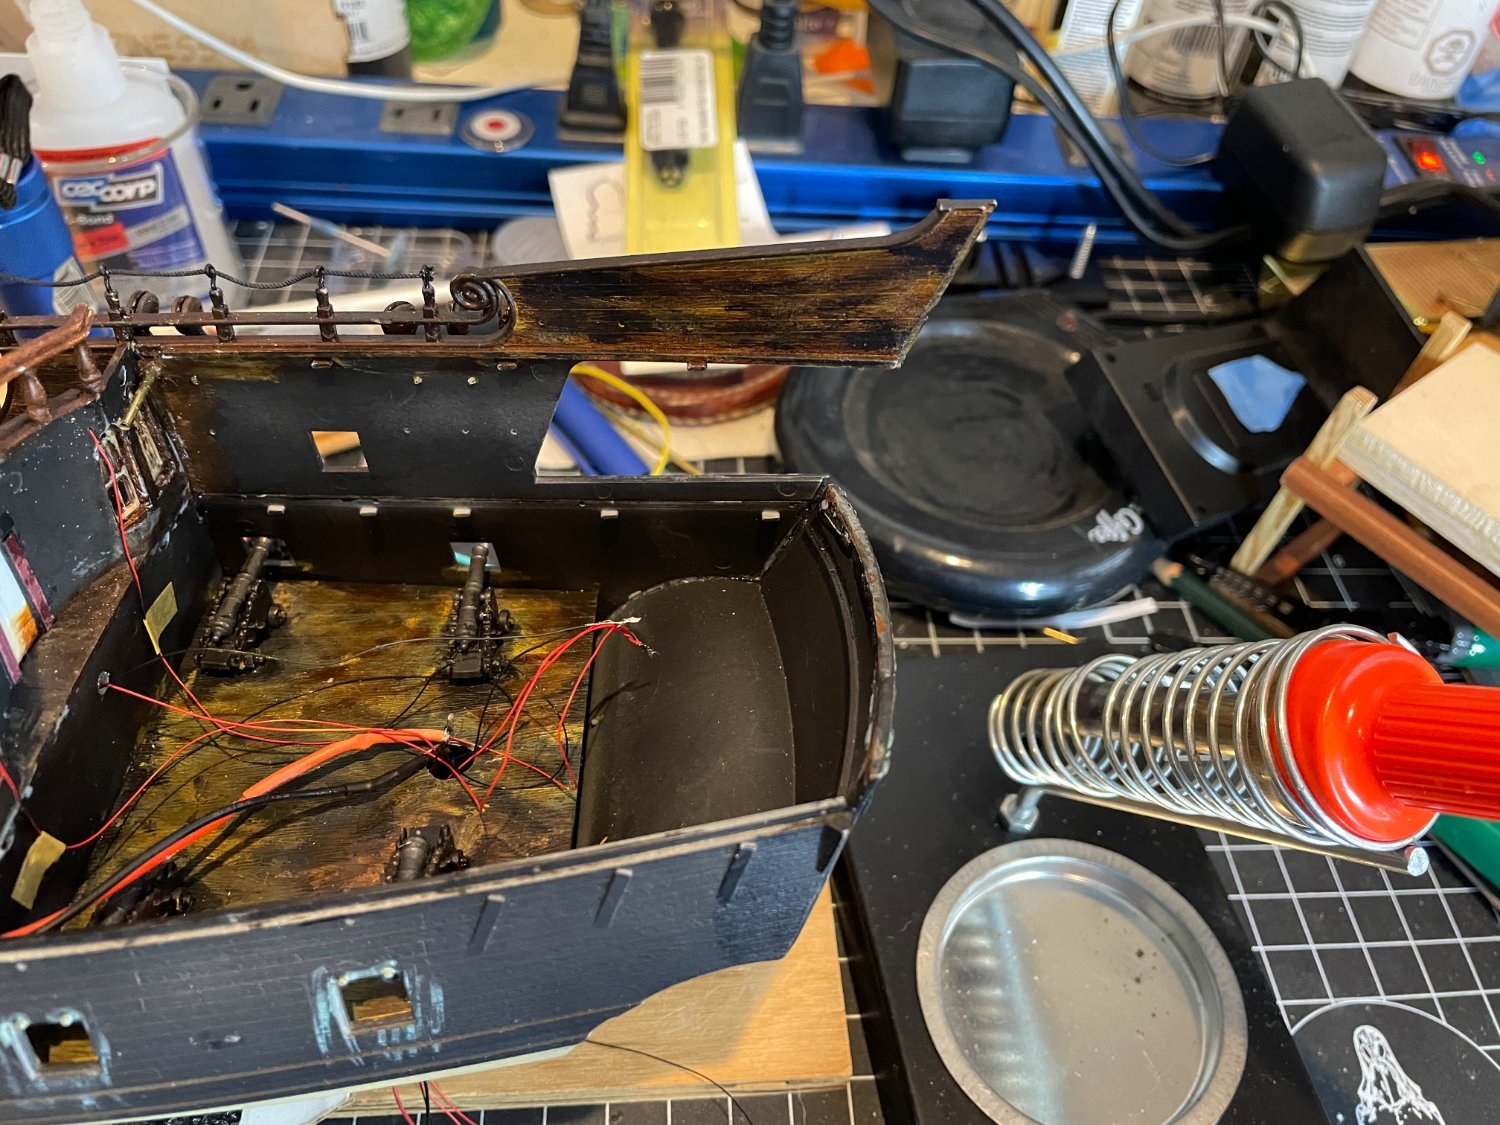
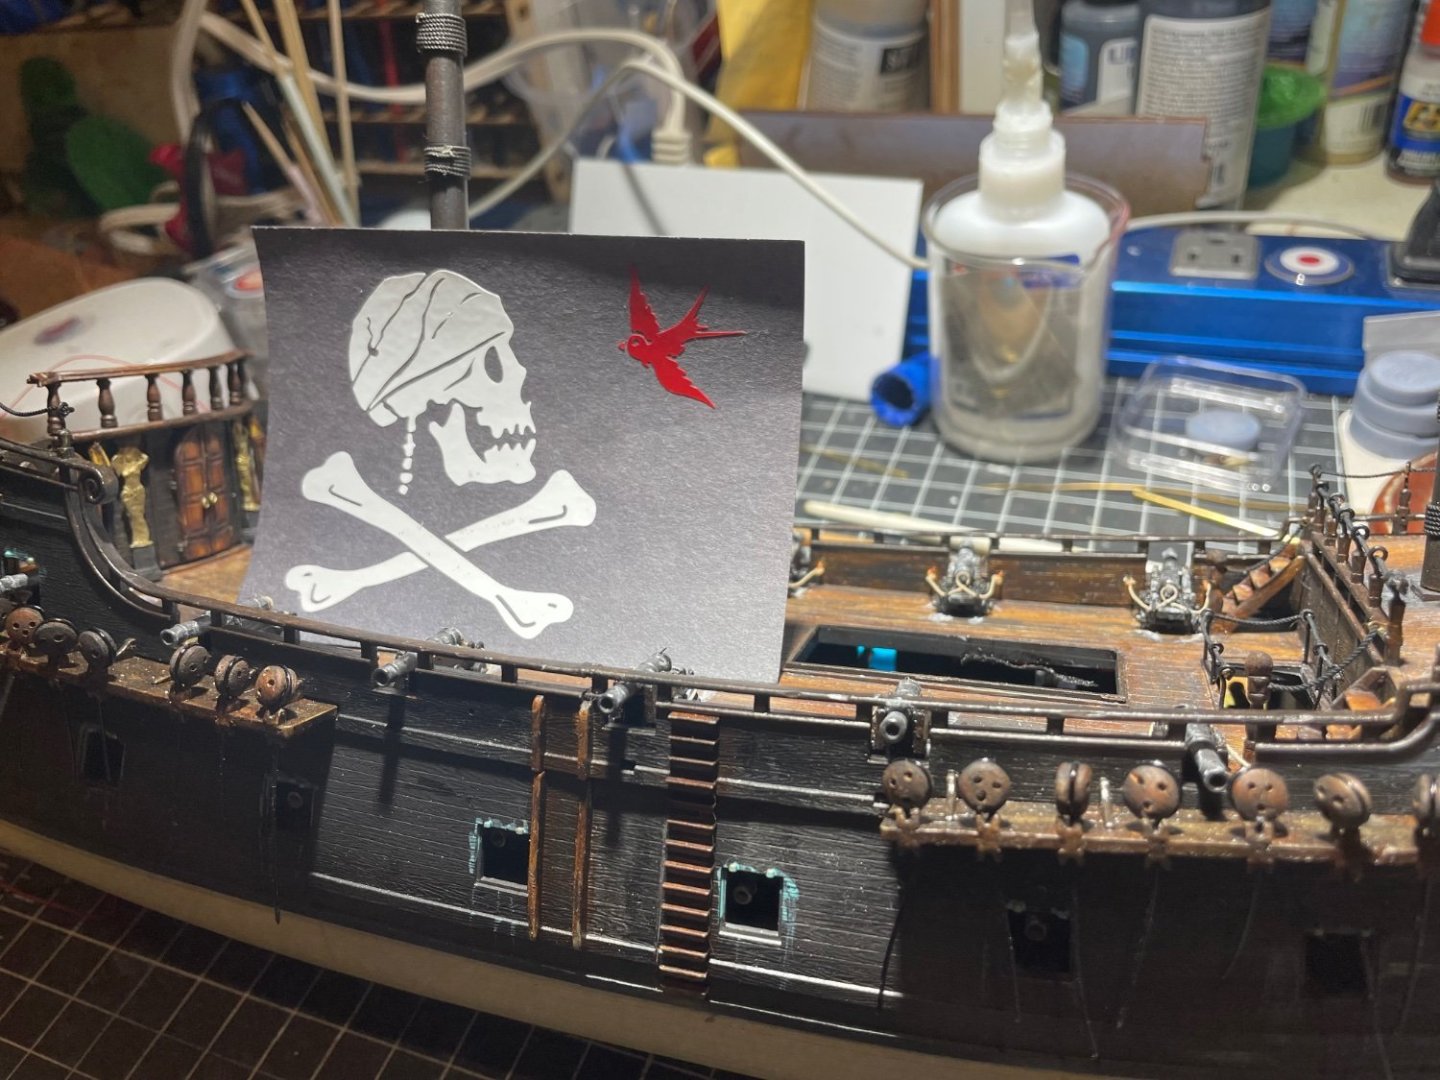
I have done more at my workbench this past couple weekends than I have for months! Feels like some good progress as I finally button up the hull and get all the decks in place permanently. Perhaps the rigging by Christmas vacation?? The last of the cannons were put on and their ropes added. Then I started refining the areas of the deck that had gaps with thin 'planks' of white styrene. Once these are properly painted, they will disappear. I have a few areas I need to close up due to fitment issues, mostly of my own doing. The railing still has to be repaired from a tumble the ship took.

-
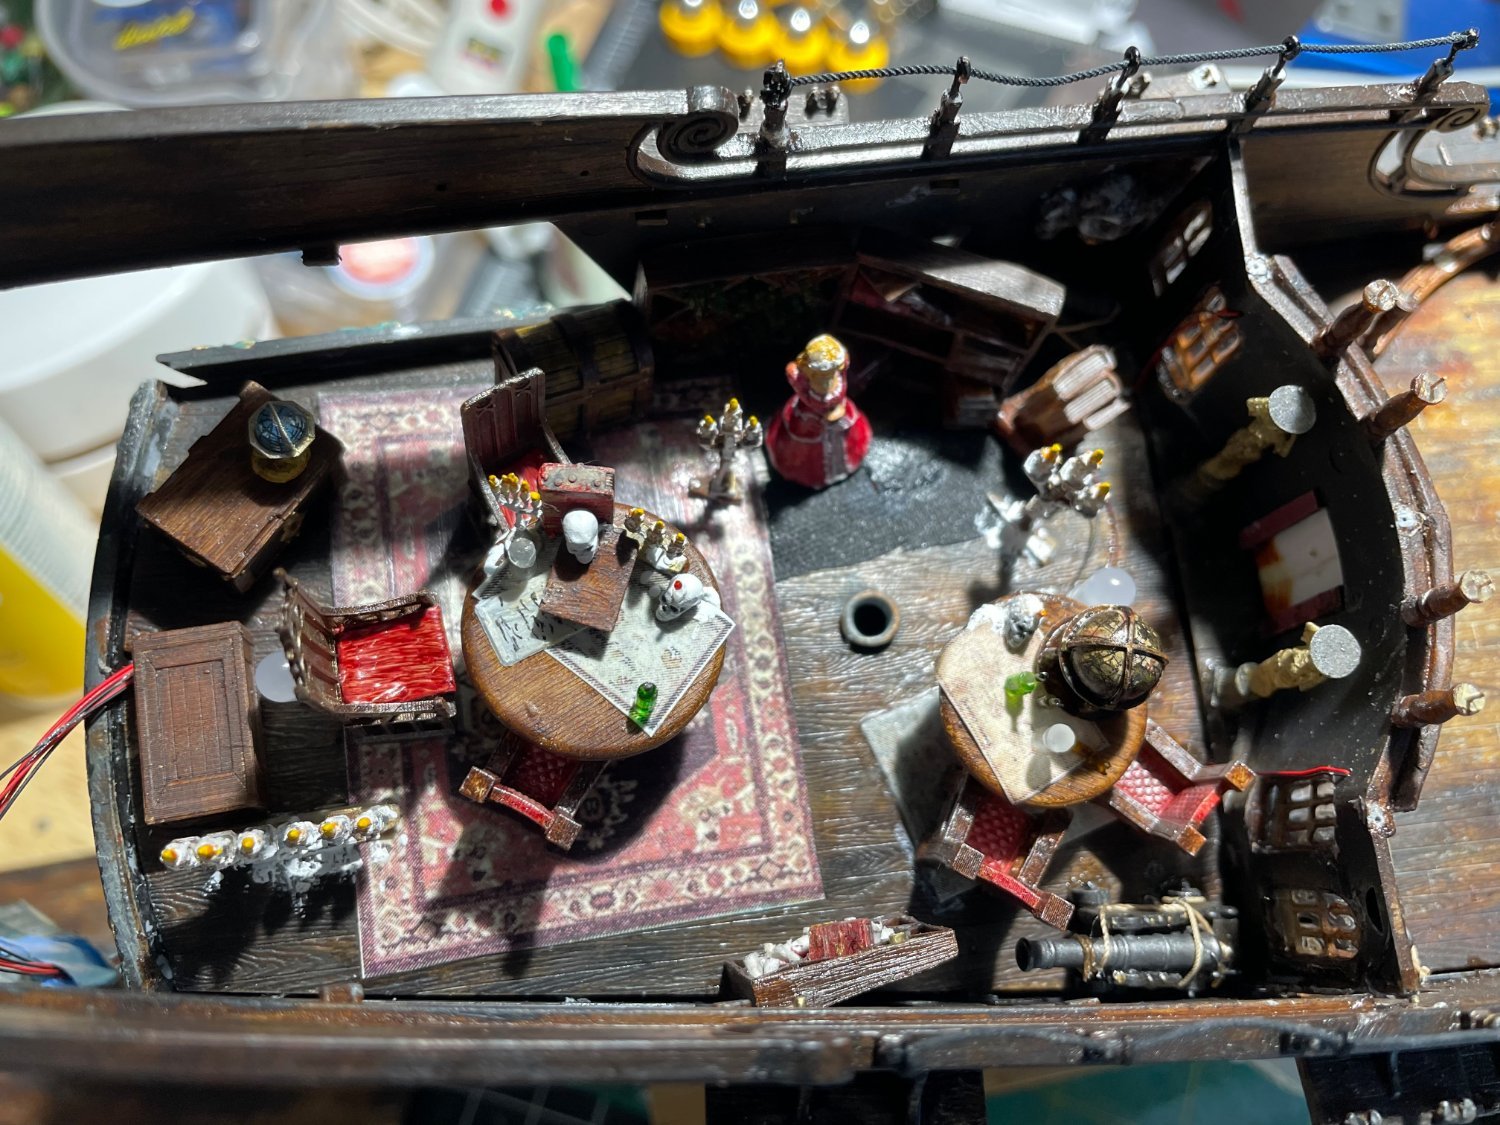
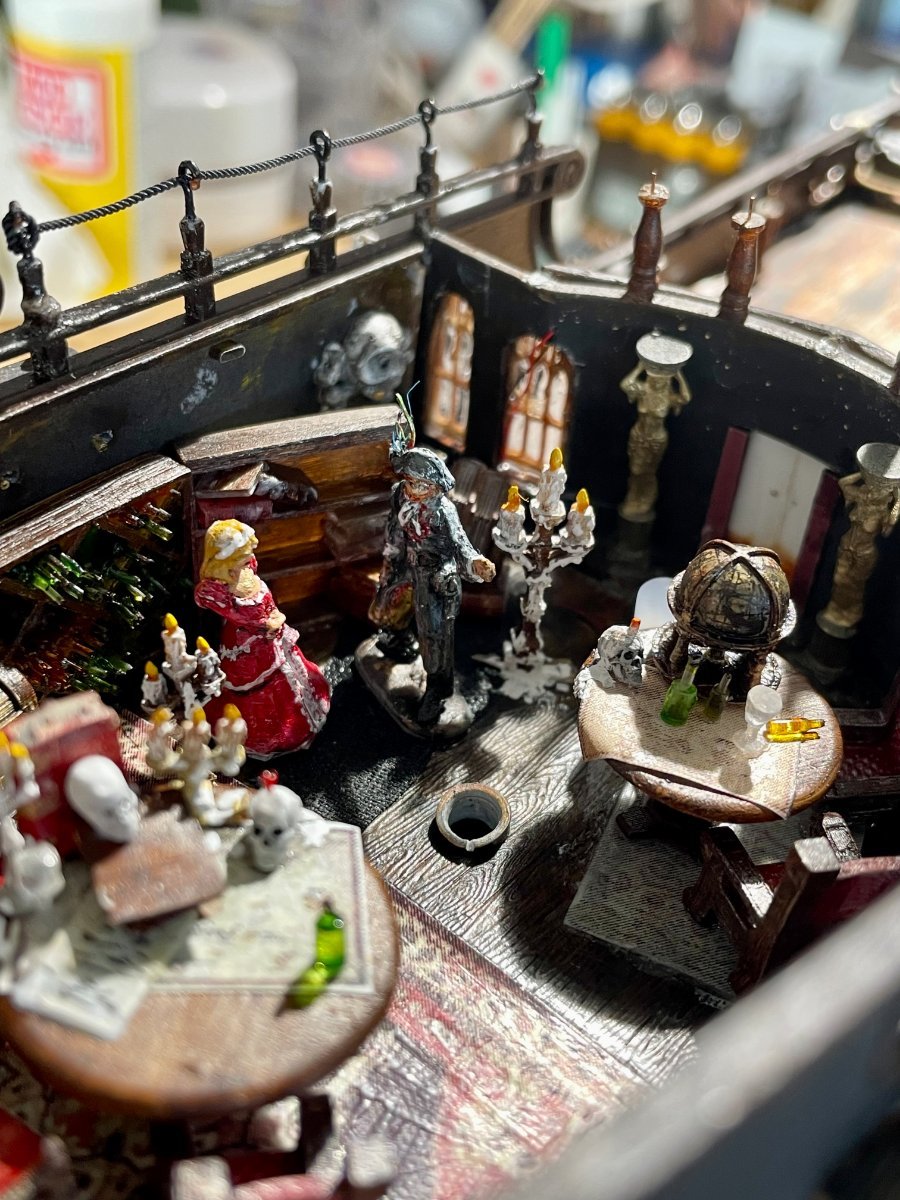
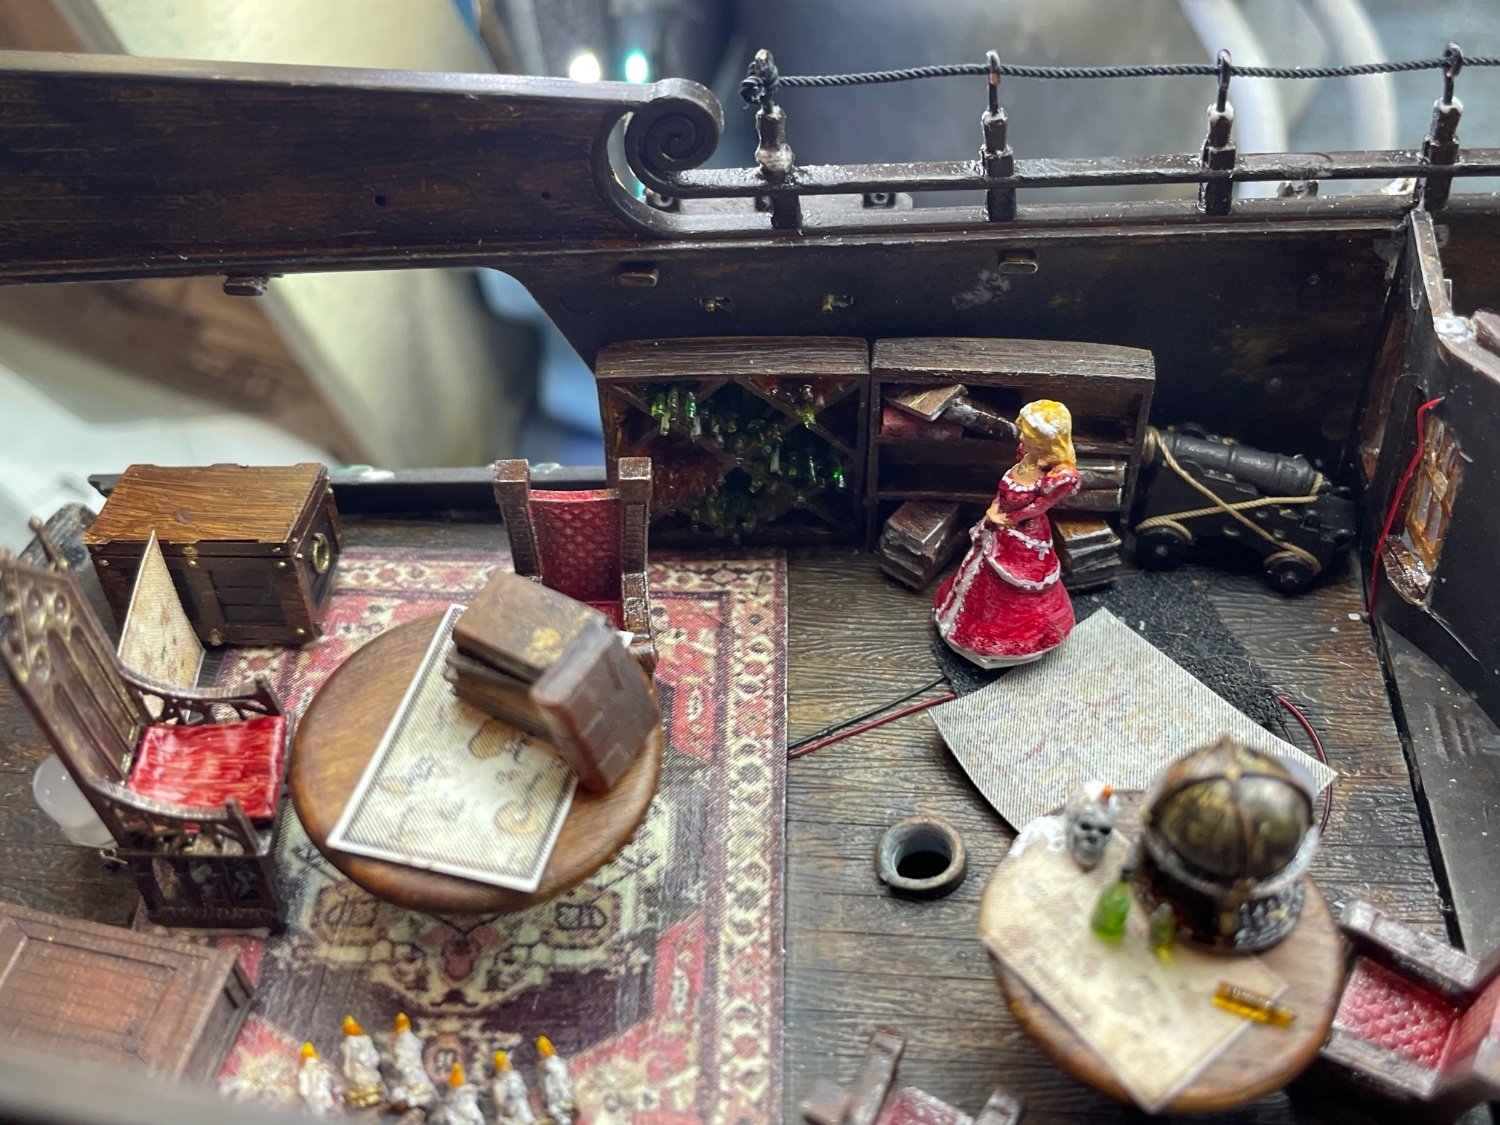
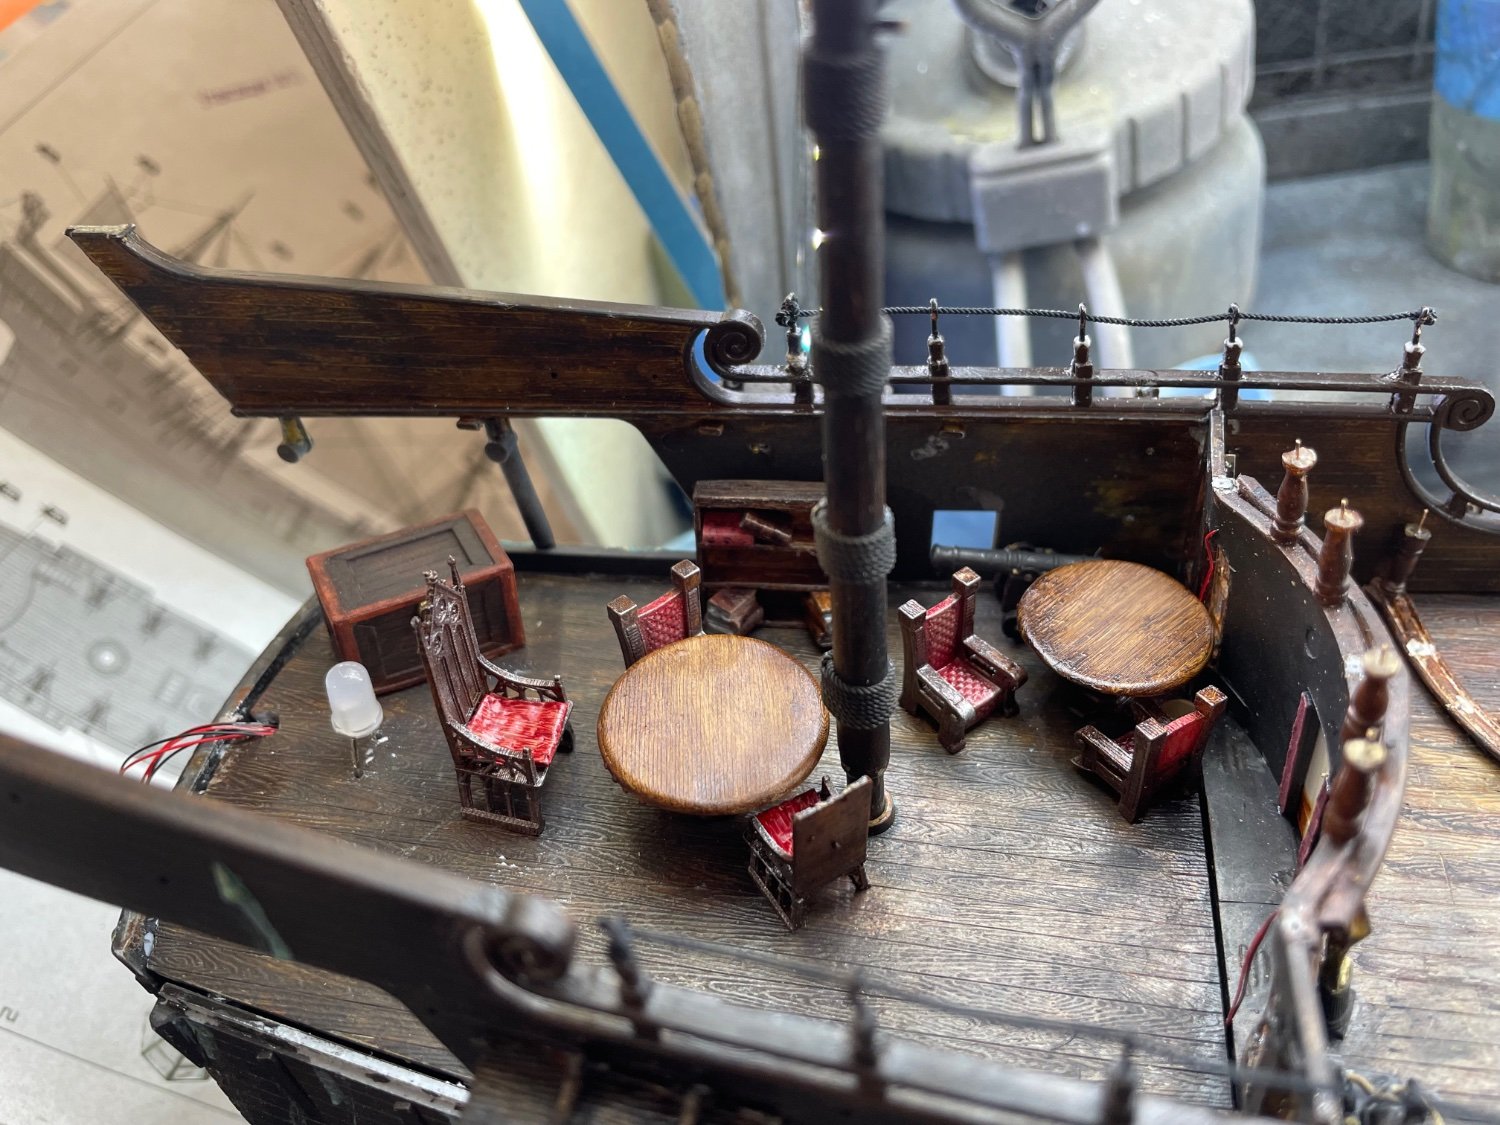
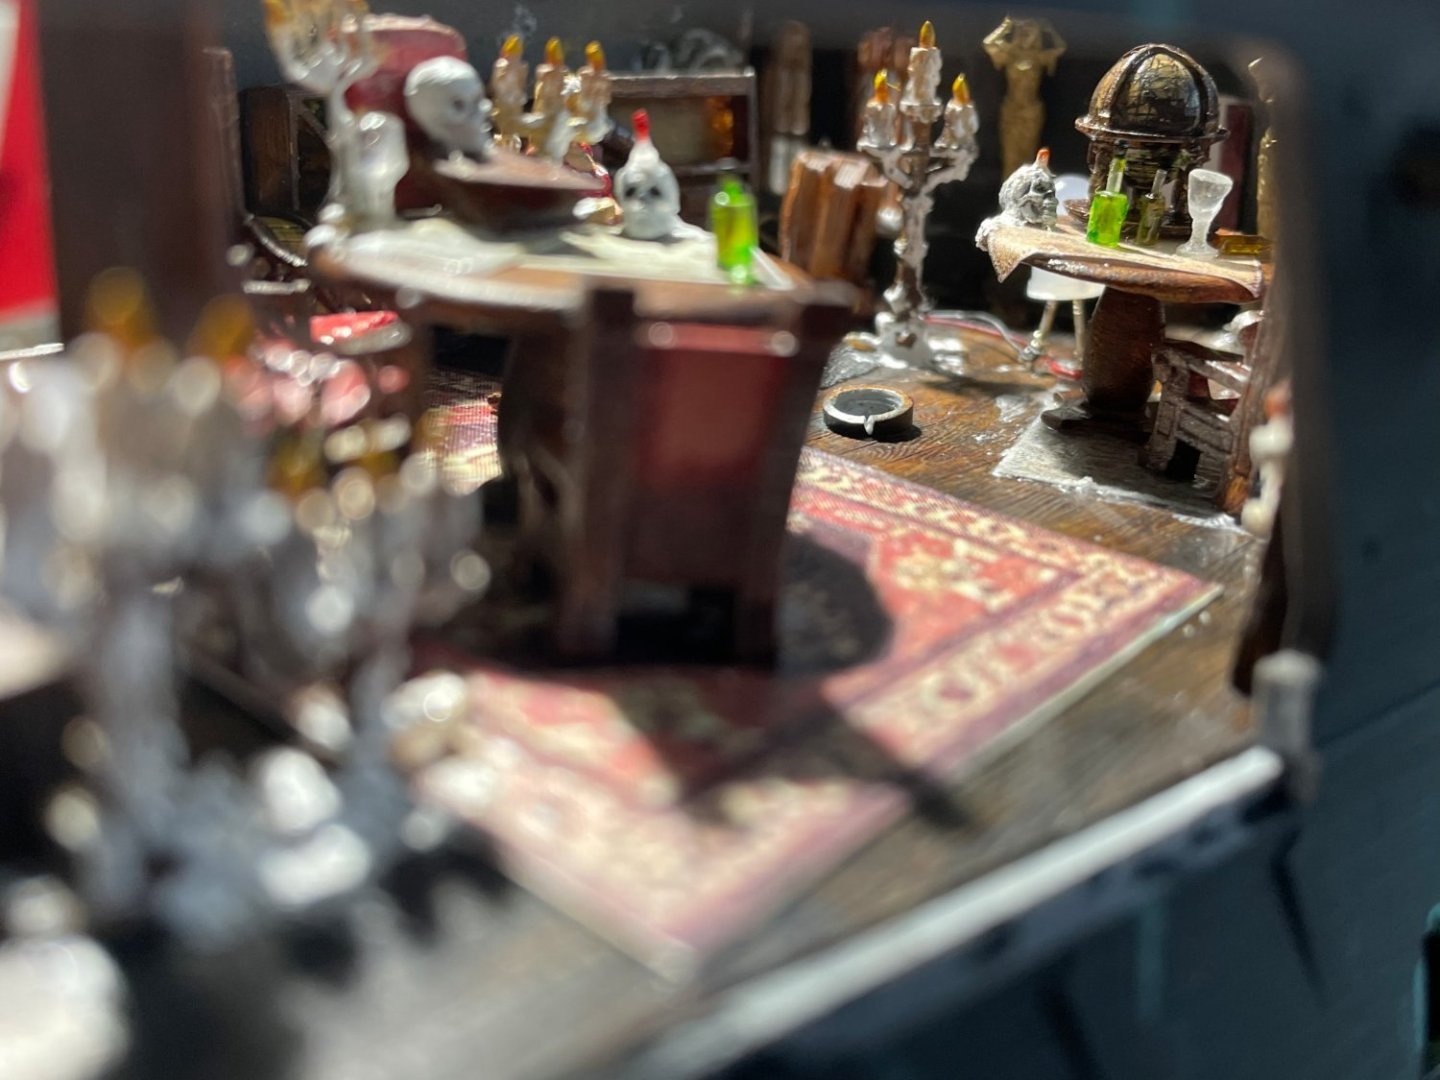
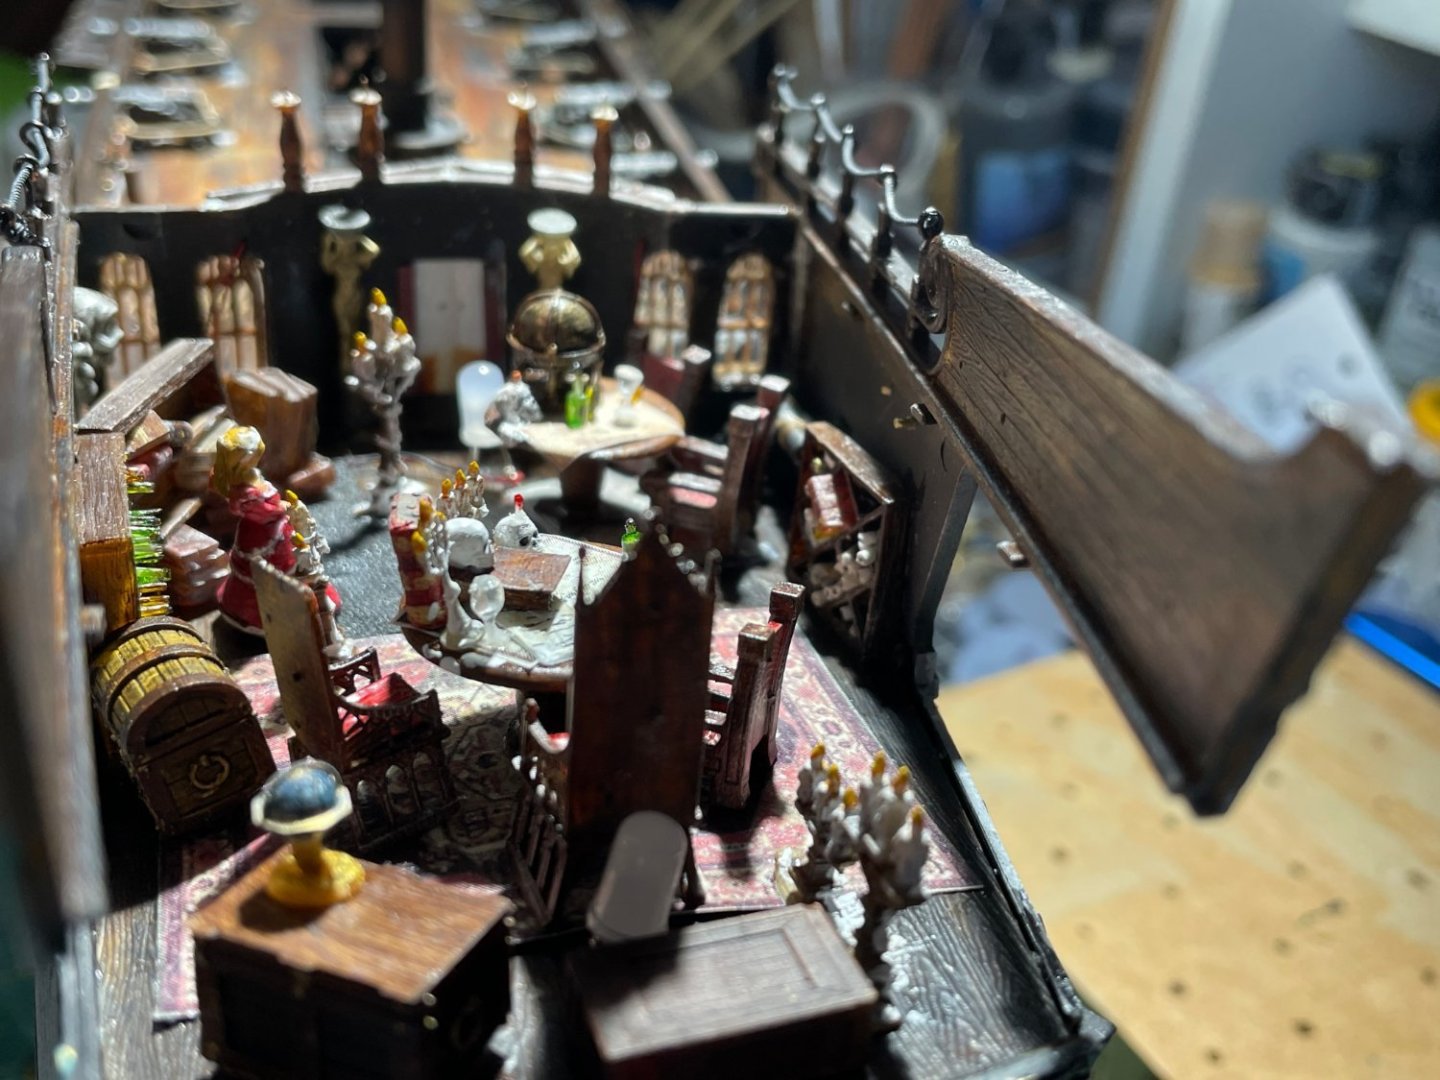
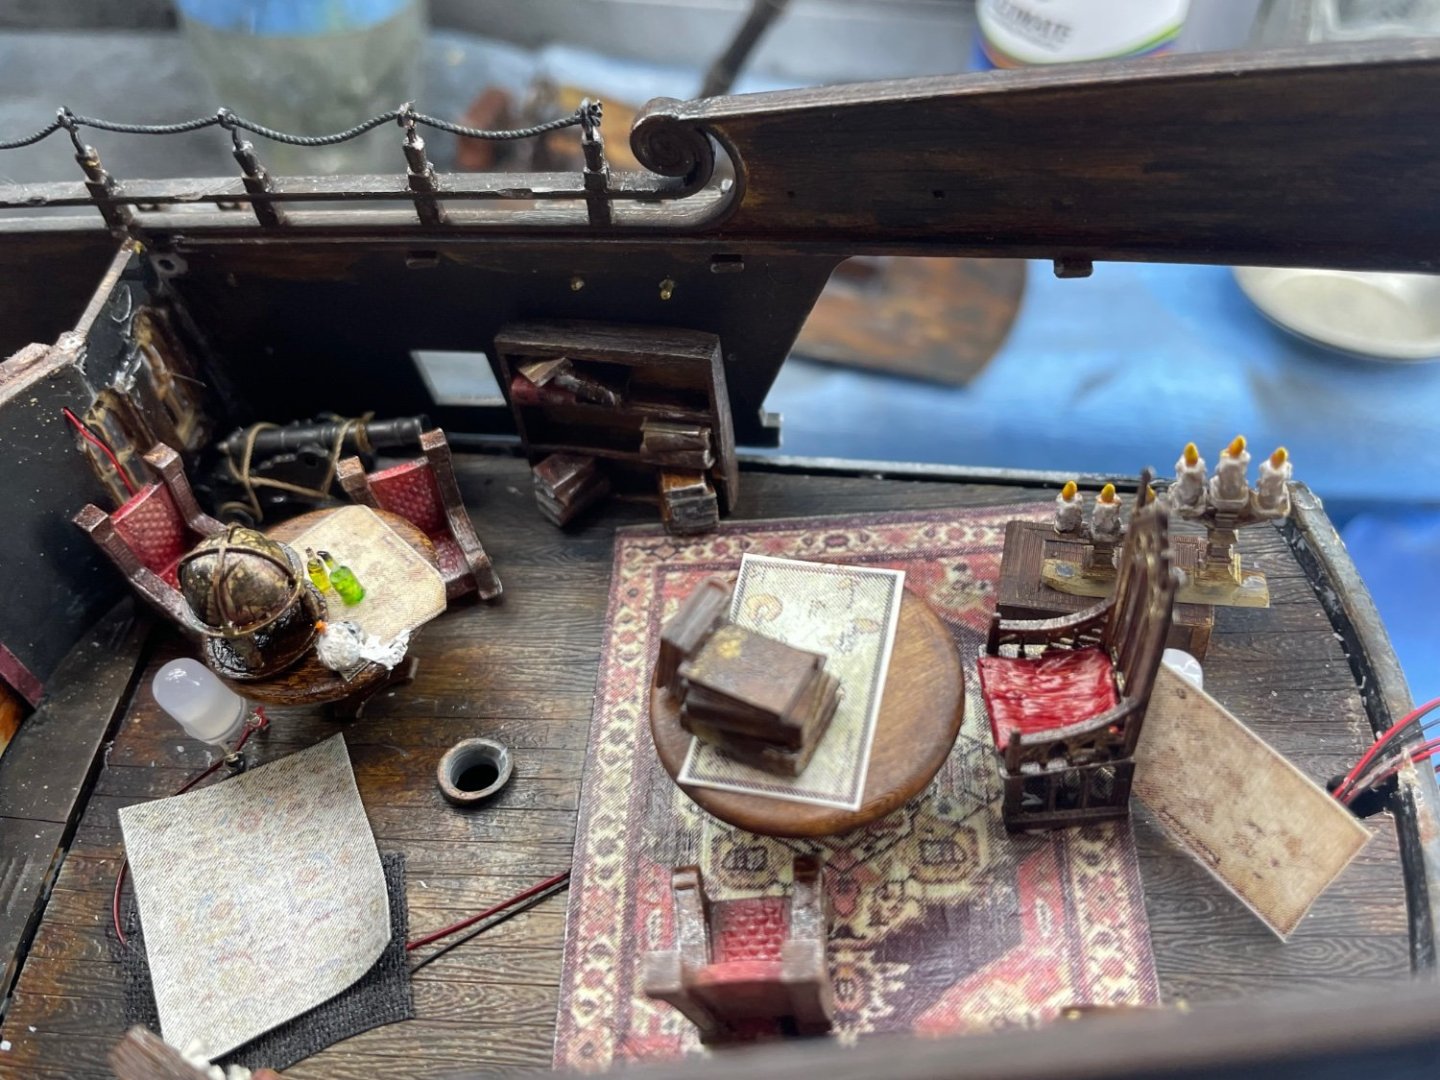
Last good views of the captain's quarters before I closed it over with the bridge deck. It gets a bit busy in there. Will make the two side windows removable with mini magnets likely Other than the canons and Barbossa figure, everything is 3D printed


-
Messing around arranging stuff in the captain’s quarters


-
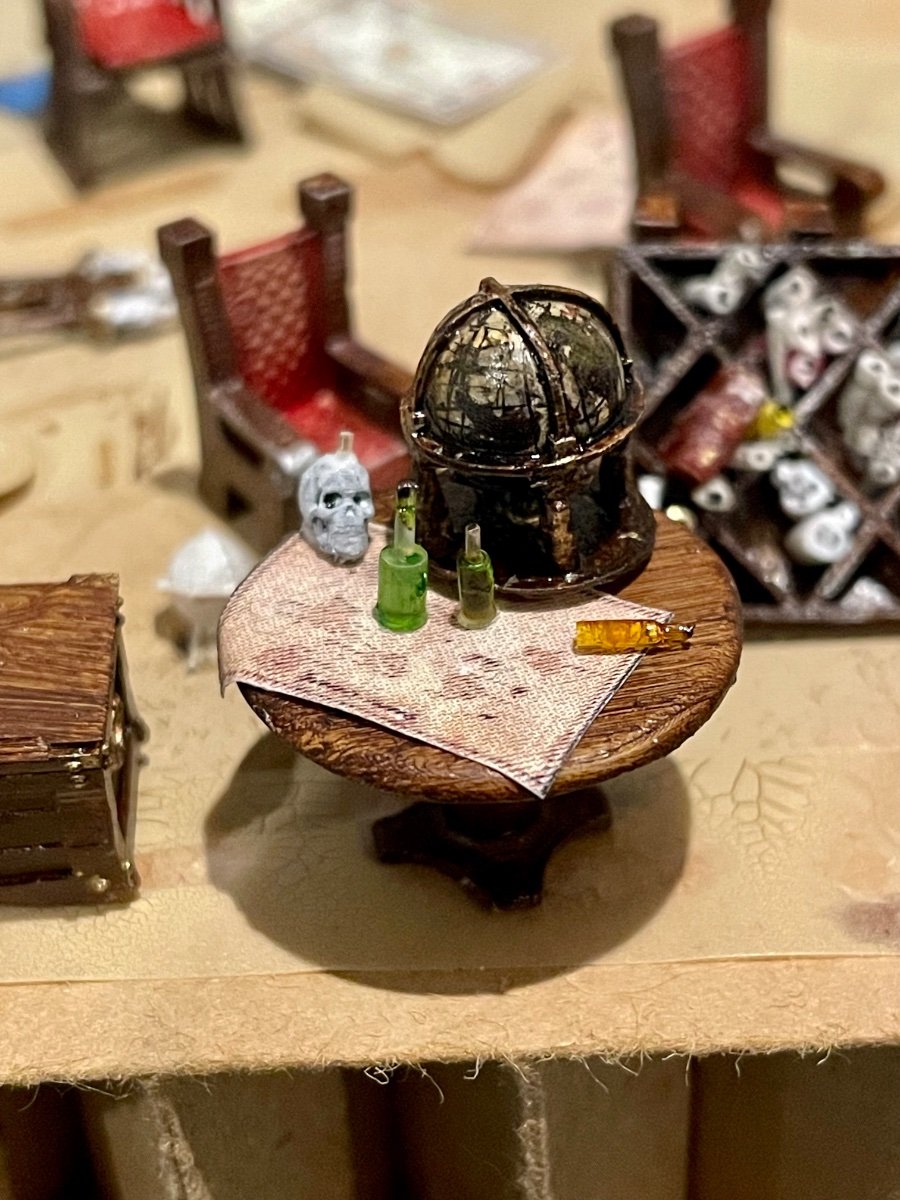
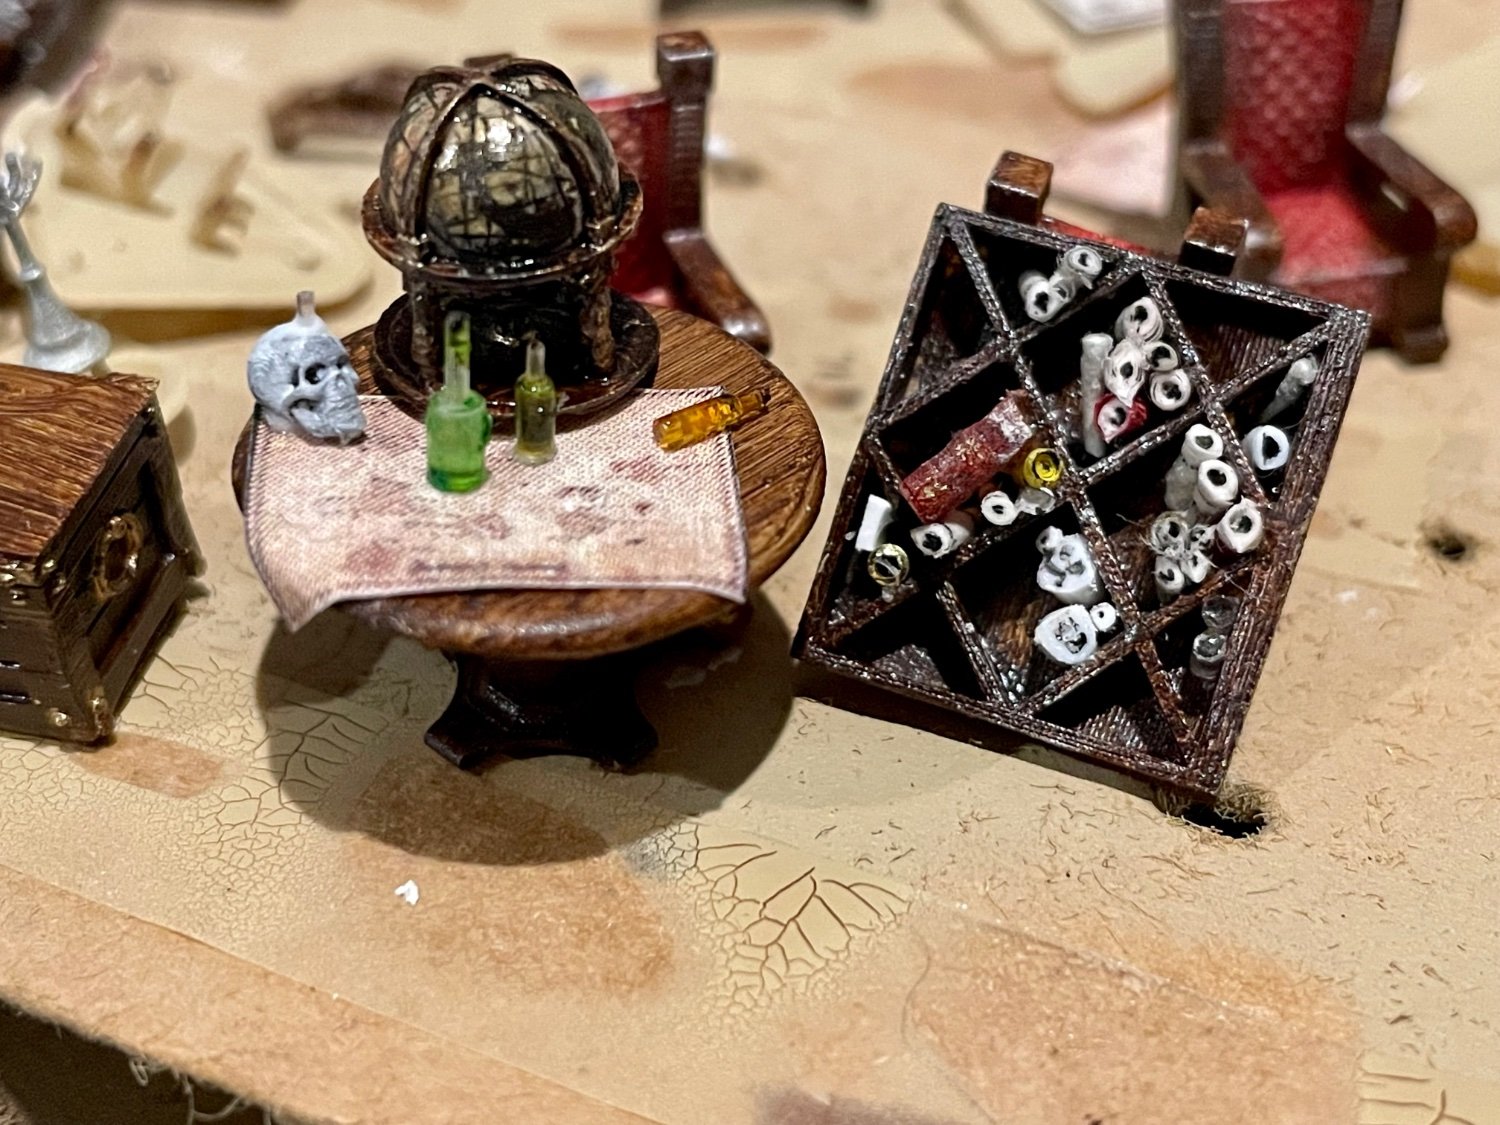
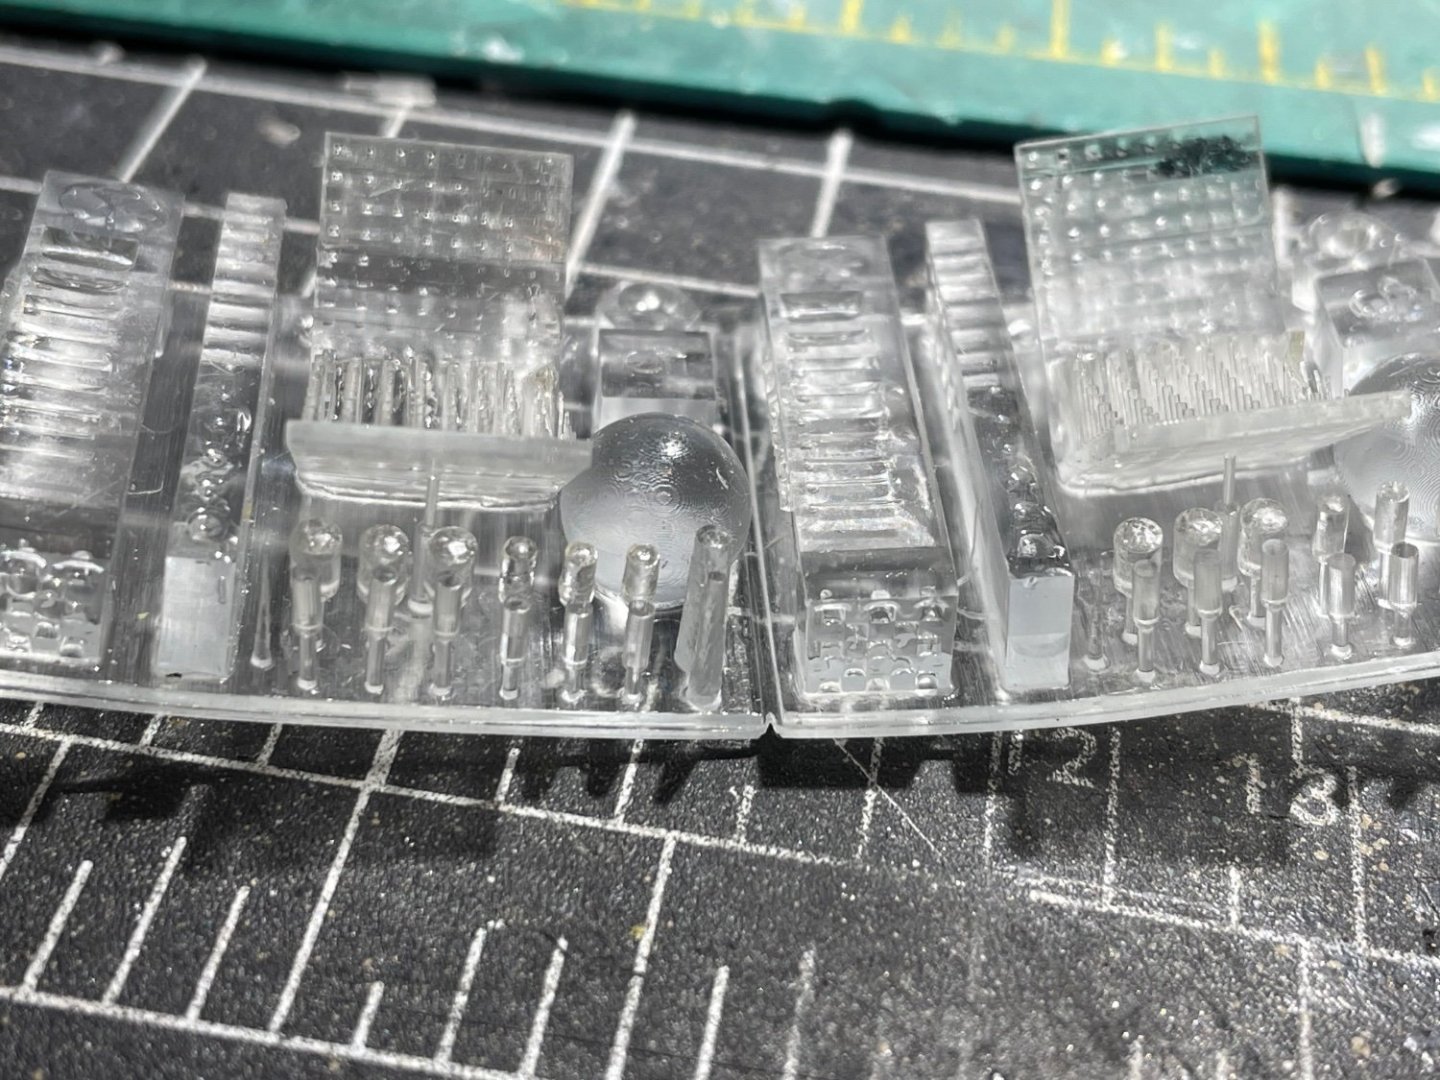
Desk globe, map and some bottles. Skull candle holder. Everything here is SLA 3D printed


-
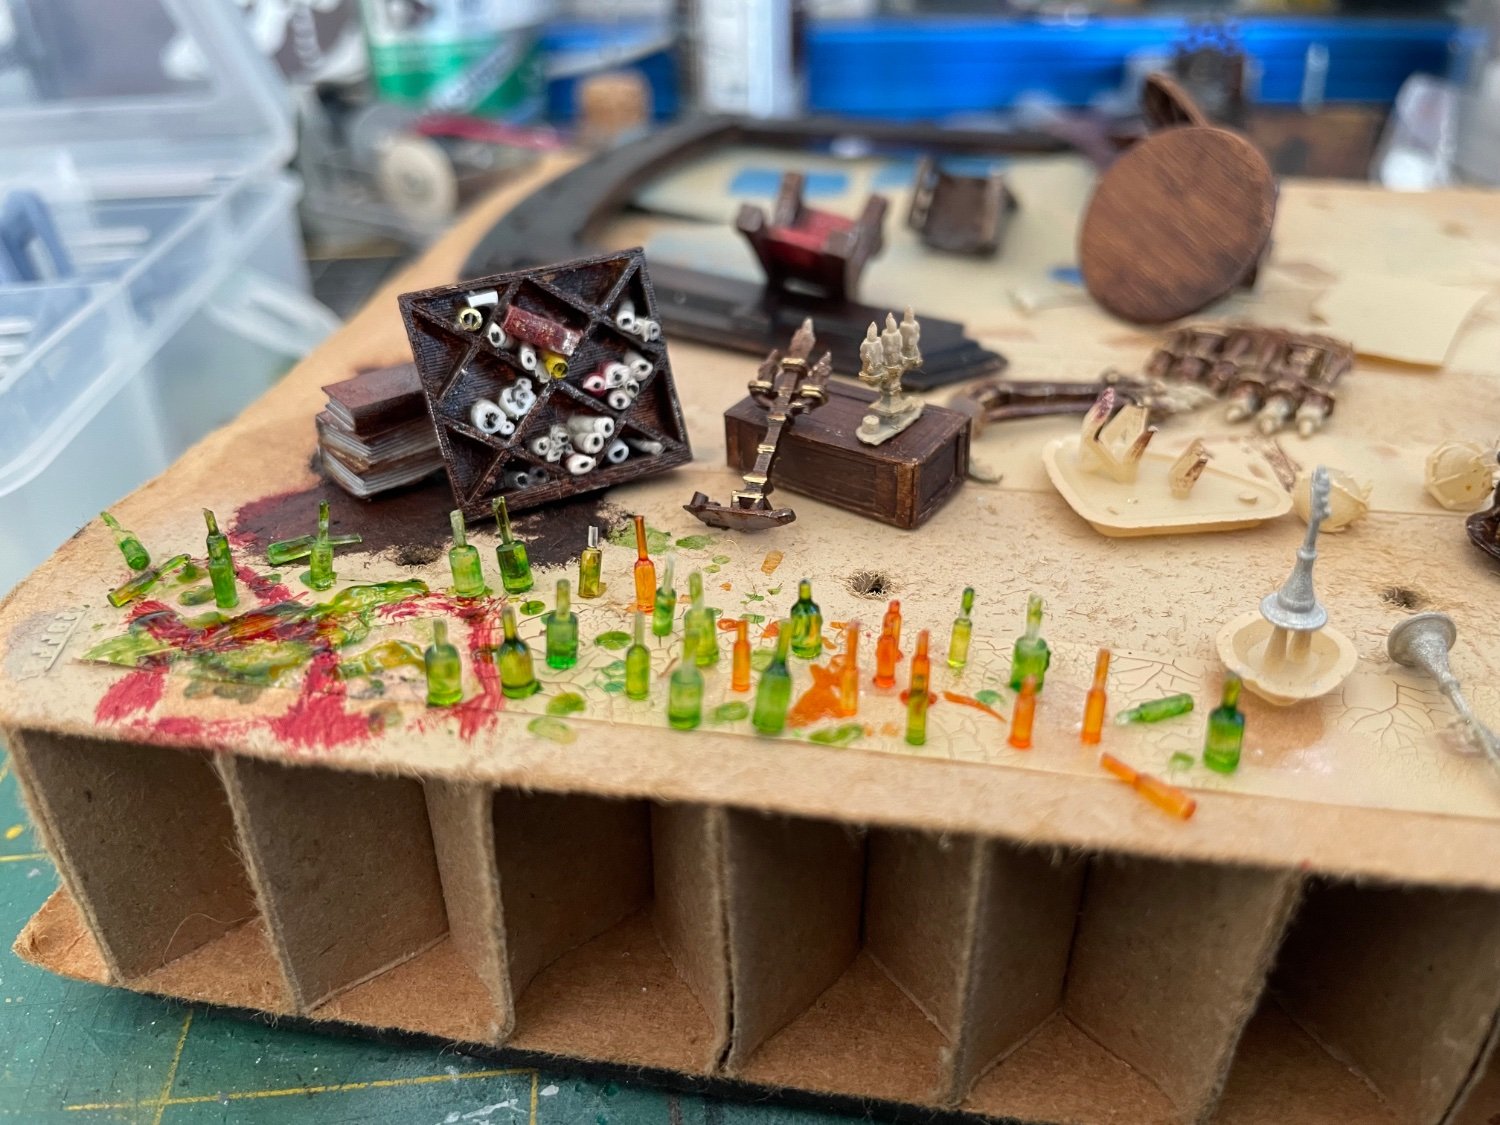
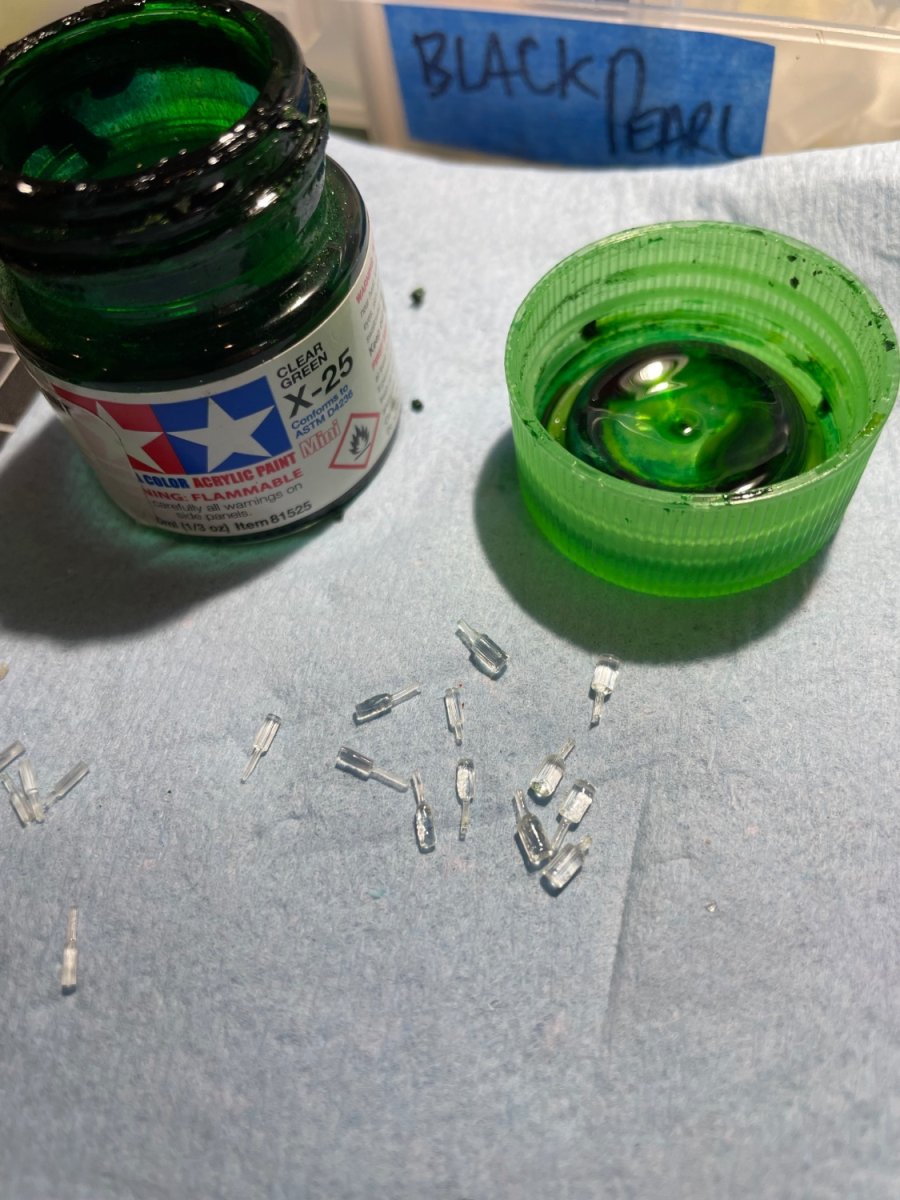
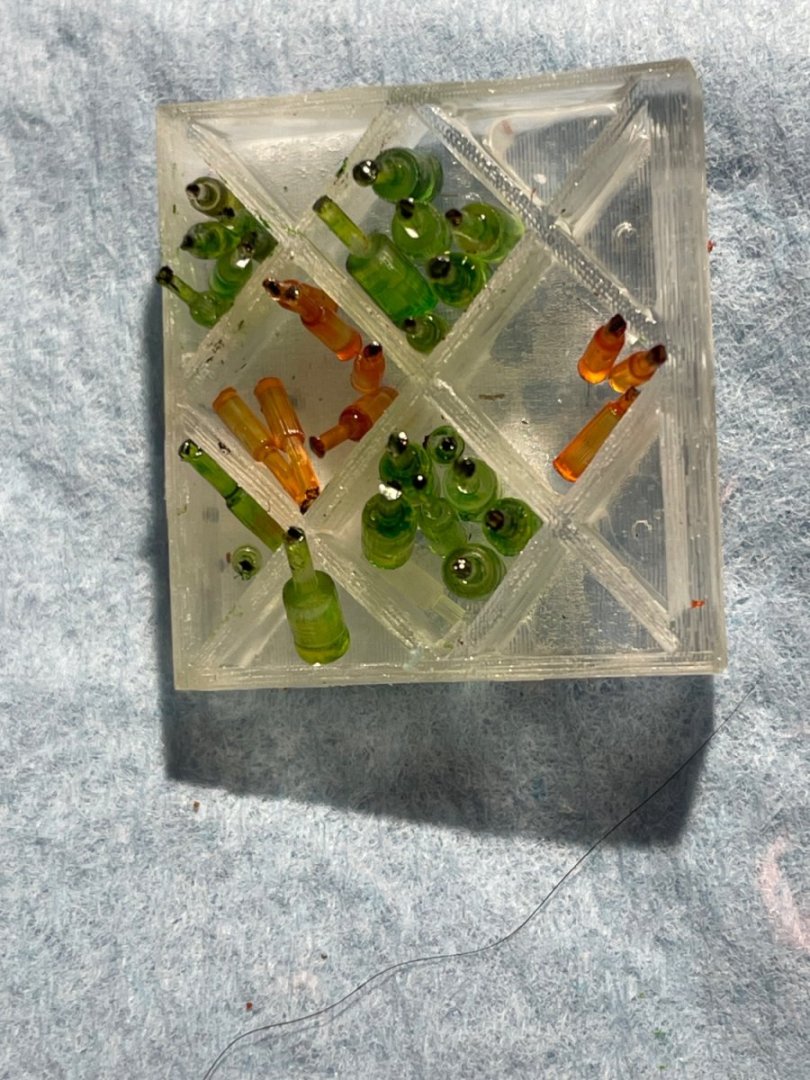
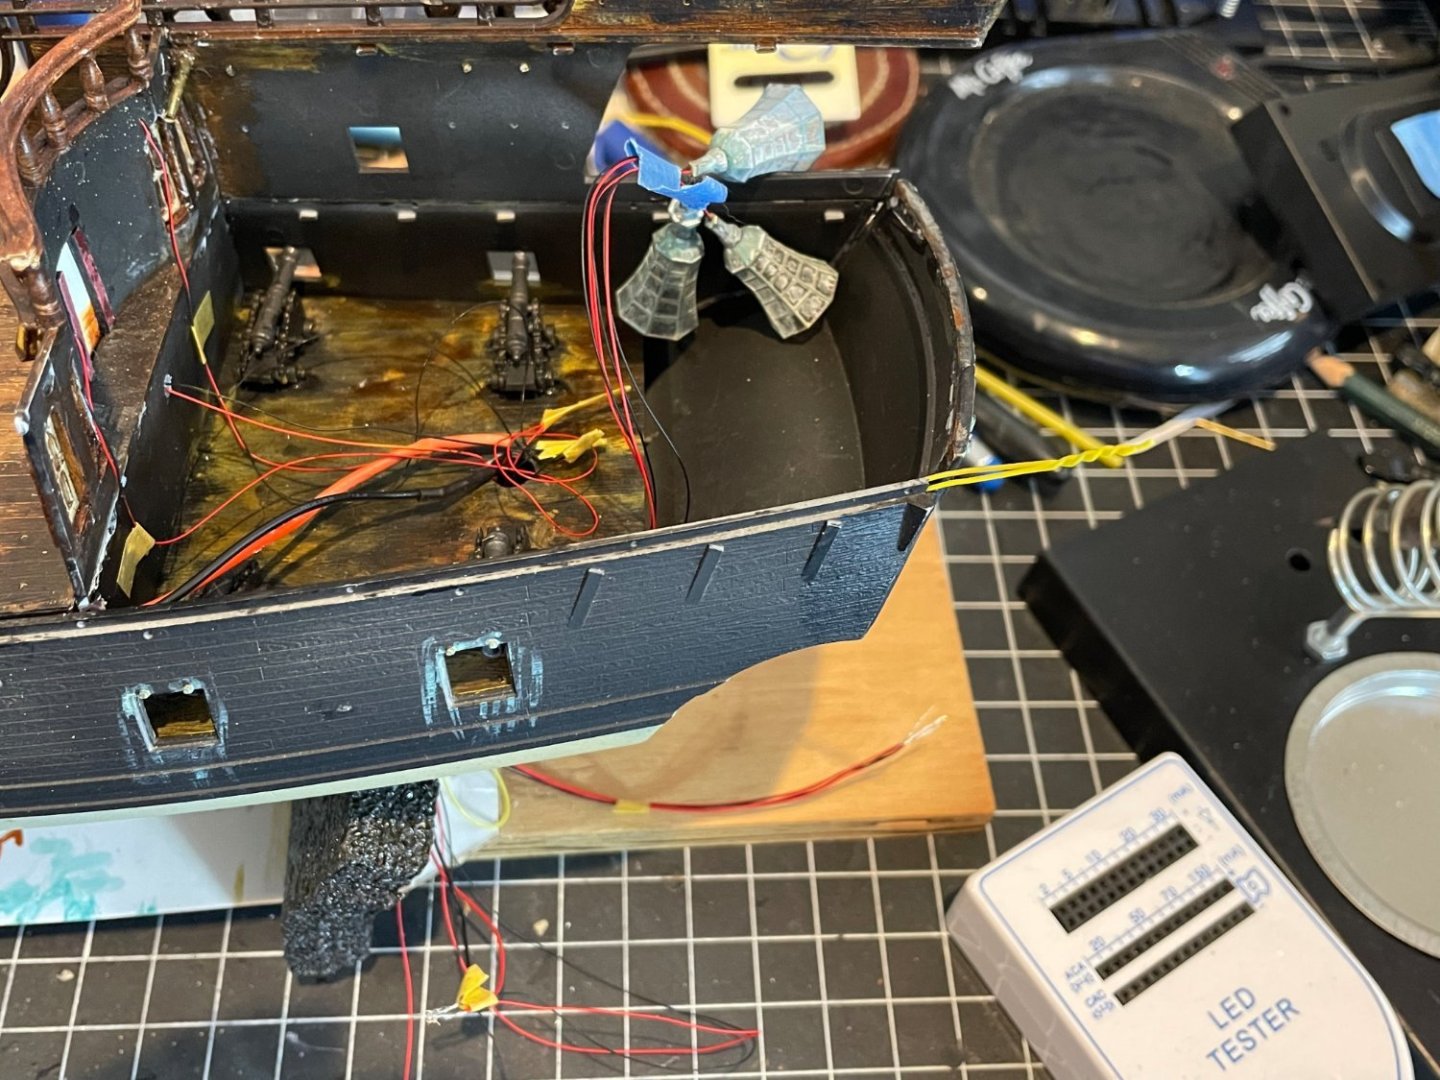
After covering the rats nest of wiring with the deck I am now detailing the captain’s cabin before closing it in. There are two LED’s that colour shift through the spectrum and I have 3D printed some furnishings Test fit here Then I made some bookcases; one will be will be an alcohol storage cabinet and the other is chart scrolls. Another is for books Those bottles are shapes from a resin test file that just happens to look like small bottles. Add a bit of clear green or orange and you have rum and wine bottles


-
Some time at the Pearl... Rats nest of LED wiring to sort and fish though the keel and then hide in the upper decks Then a test fit of the decks, mast and the plumbing of the wires


-
Fantastic, well done!!! A perfect build I love the wooden sawhorses, they also look realistic
-
Fantastic modelling here👍🏻😎
-
This is going together very nicely with some excellent modelling skills Fit and finish look really good Built a Revival T35 version and it was a wrestling match the entire way through
-
Nicely primed, super smooth👍🏻😎
-
I have not vanished the project is still alive, just summer duties have had precedence. she got out on the desk last night and some minor internal paintwork done Good to get her out and fondled a bit to get the modelling mojo moving
-
I am in!! One of my favourite cars
-
My favourite photo is the guy drinking on foredeck😂 He's perfect there. Such an excellent build
-
Vincent Black Shadow by CDW - Revell - 1:12 Scale
Twokidsnosleep replied to CDW's topic in Non-ship/categorised builds
Ahh you are in Tampa, just saw the fishing pics. Such a gorgeous place. Been to Clearwater area couple of times, blown away by the lovely shell beach, the architecture of the bridges such lovely water. Will never forget being buzzed by a huge pelican bird flying in overhead like a B52 bomber. Those guys are huge!!! -
Nice mods on the figures You are like Frankenstein...an arm from here a leg from there, different head et voila a new sailor!
-
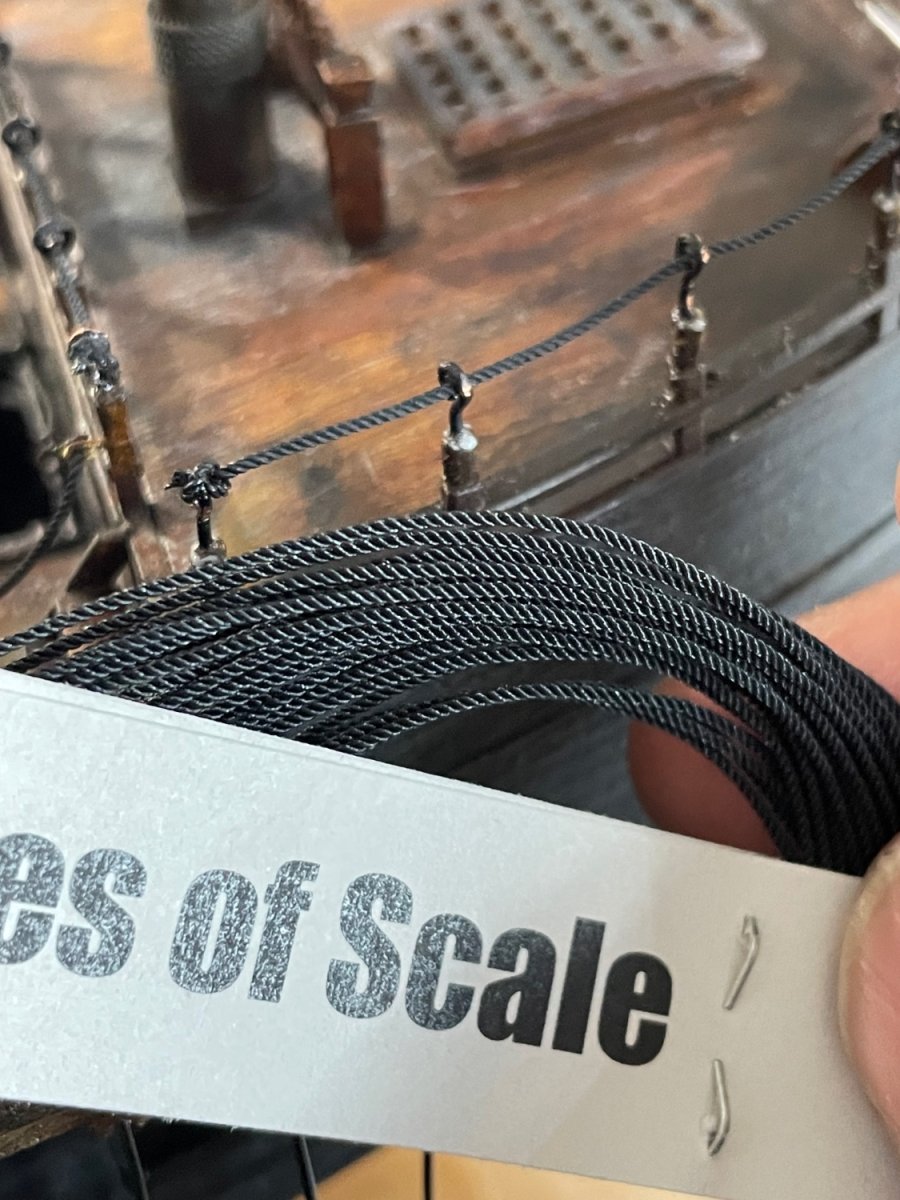
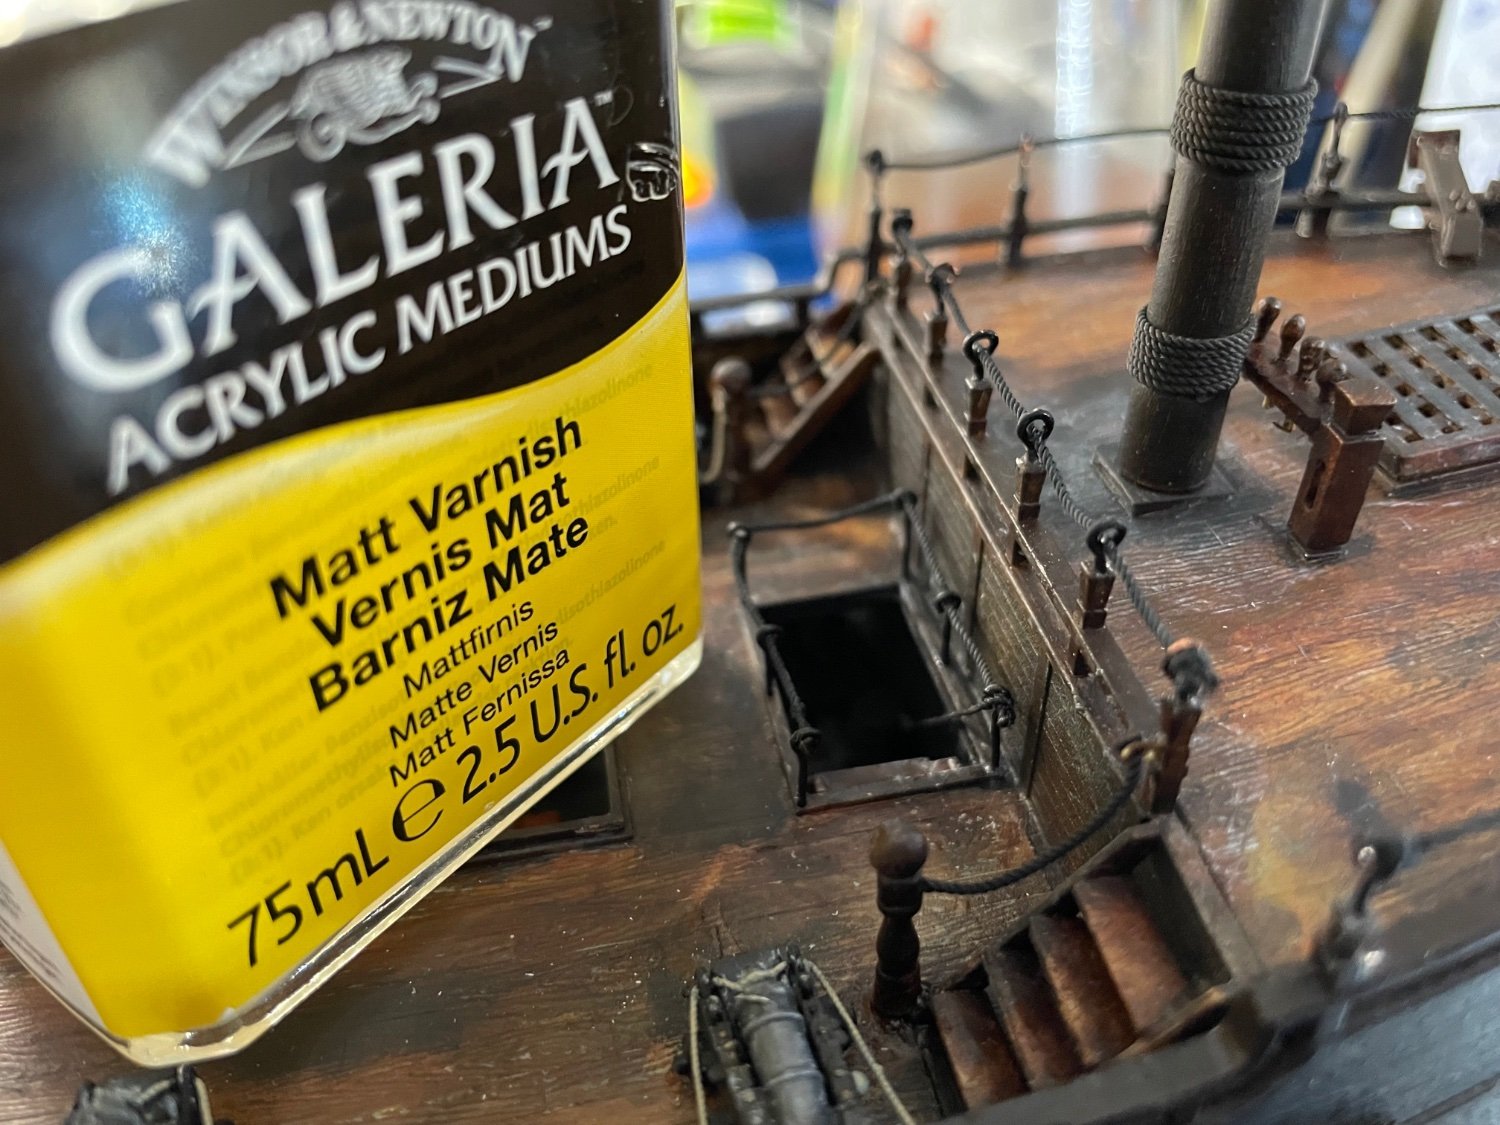
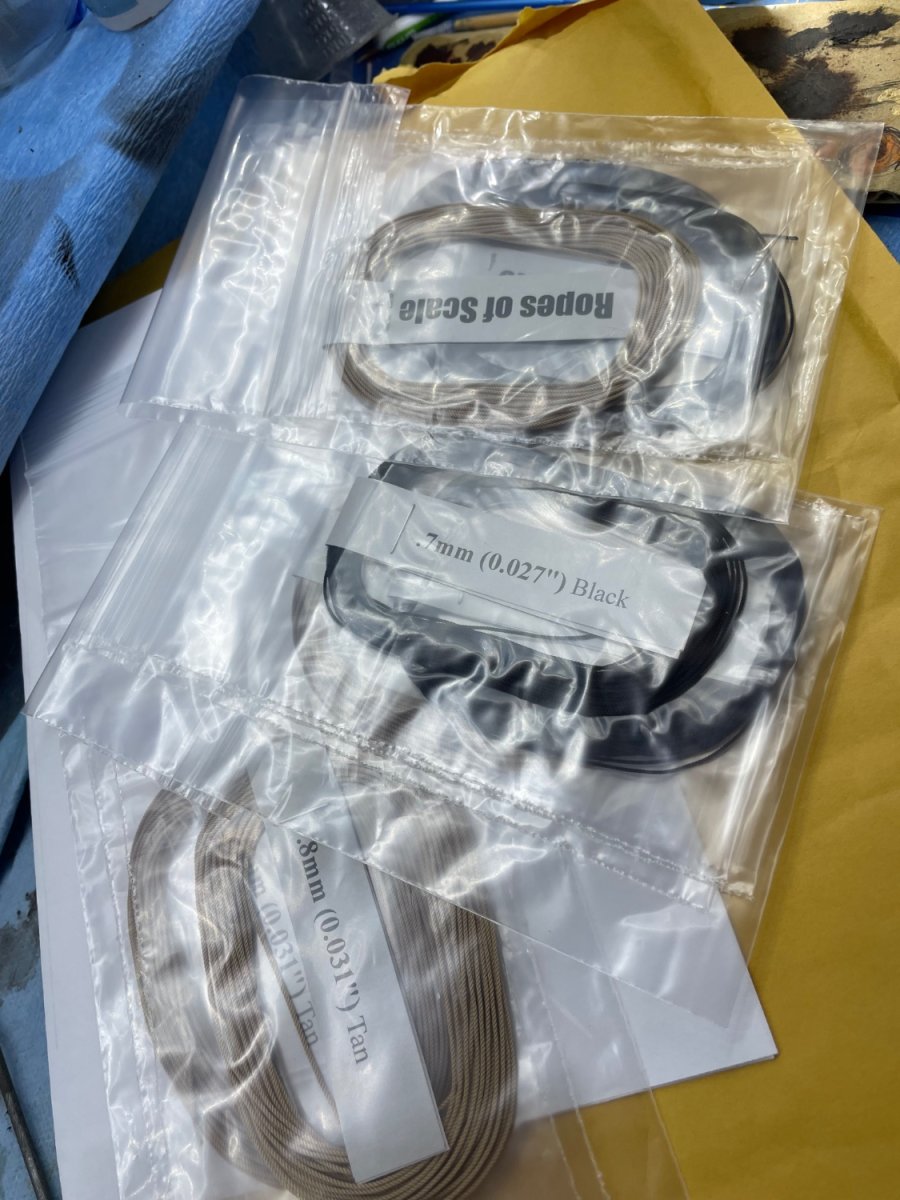
Yahoo, got my ropes of scale order in These are the shrouds and such…forgot to get some smaller diameter for ratlines, so will need to order again I did a bit of dulling in the ropes with this flat clear varnish. Seems to work well to take that slight gloss shine off the ropes takes off the shine and makes it look less toylike


-
Vincent Black Shadow by CDW - Revell - 1:12 Scale
Twokidsnosleep replied to CDW's topic in Non-ship/categorised builds
You HAVE to make the oil line loop. It is such an iconic feature of this engine Have a look at my thread I posted, it is all in there. Pretty simple, a bit fiddly but doable with wire or solder. For some excellent videos on a Vincent Rapide rebuild have a look at The Mighty Garage…he goes through the whole bike and even takes you for a spin or two. Quite enjoyable. -
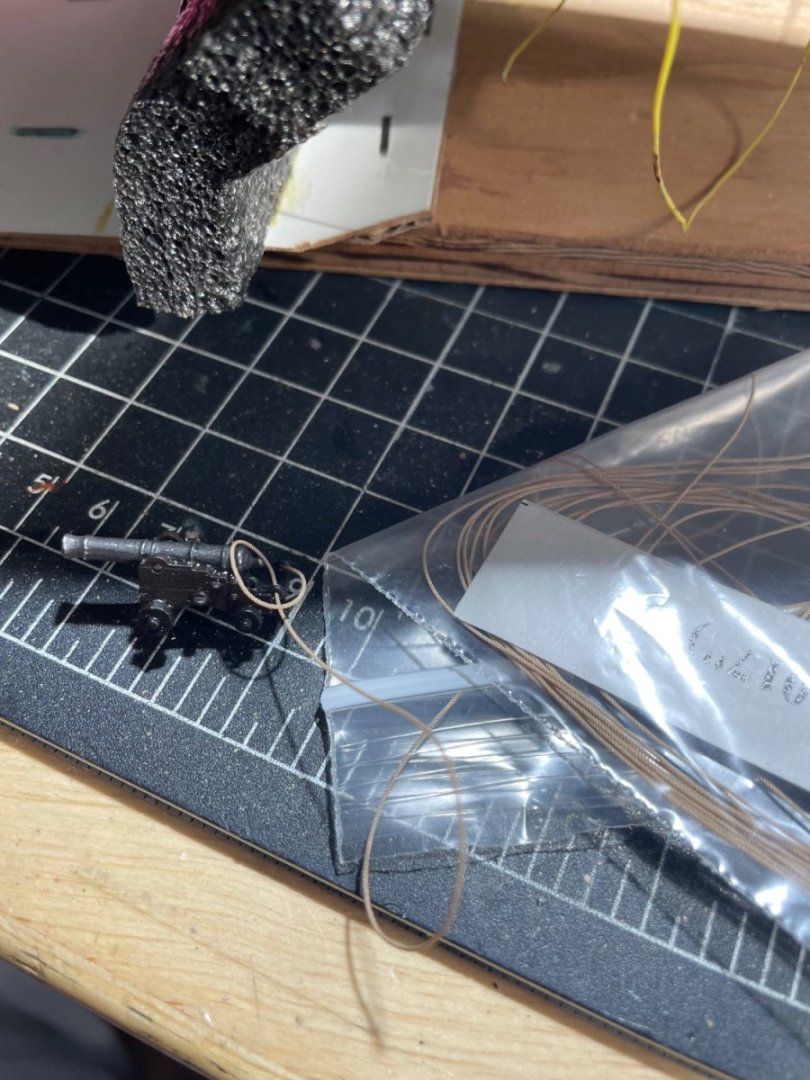
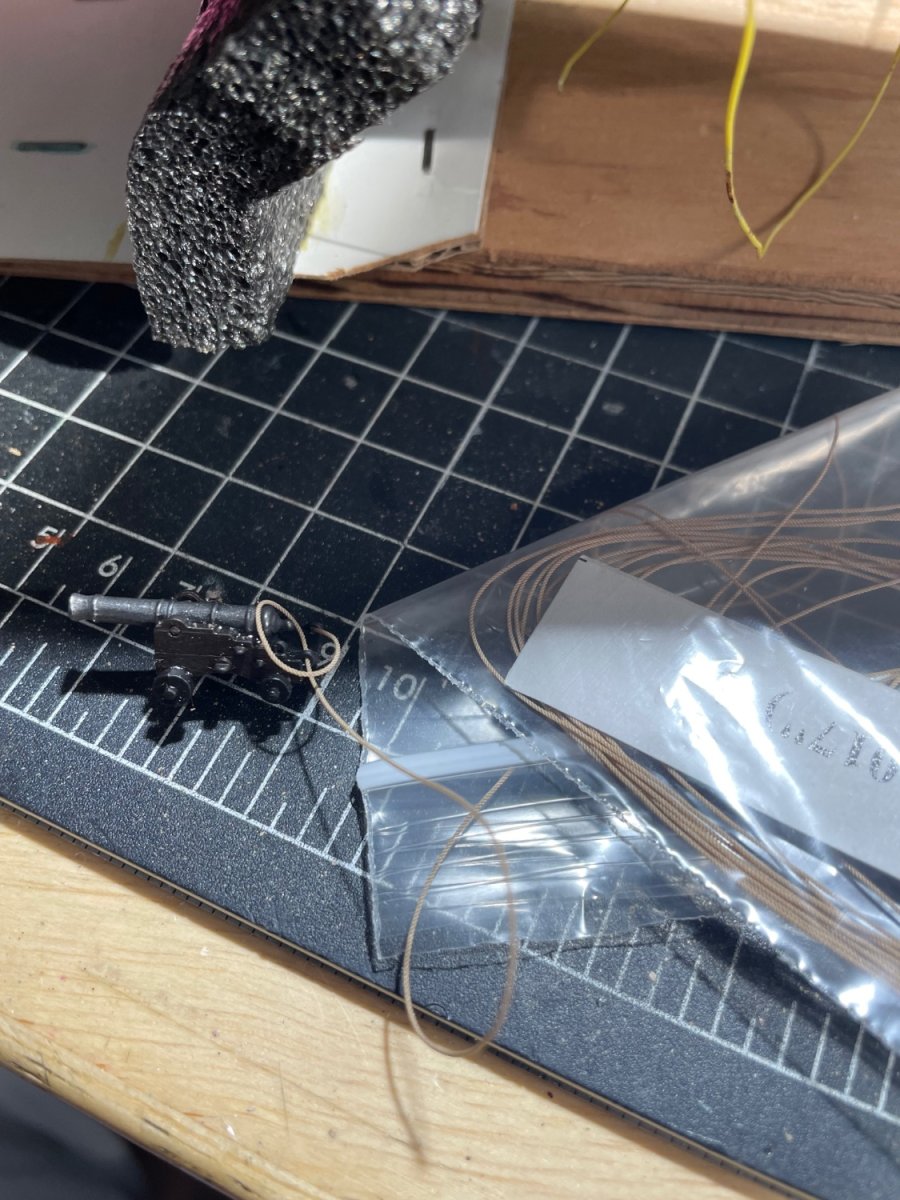
Ever notice how when you use a garden hose or an extension chord, those buggers will form an unreleasable knot spontaneously? Ya well not the same rigging up ships I have found! This is a two tweezer, often cursing, battle Royal…actually not that bad just being dramatic, but threads sure do what they want and not what you want. So I am putting in the upper deck cannons I added a black wire pin and drilled a deck hole to anchor those suckers on tight then the beautiful ropes of scale tan rope 0.45mm as a breech line the reference photo I may add in the tackle lines, but things get pretty small and busy….we shall see I kept the ropes tan to highlight them a bit more vs the black few I started with.