NavyShooter
-
Posts
693 -
Joined
-
Last visited
Content Type
Profiles
Forums
Gallery
Events
Everything posted by NavyShooter
-
 That's spectacular! I love the detail and how it all ties together. Really well done. You've created a masterpiece! NS
 -
Very dystopian...and realistic! A great build! I had to go back and catch up on the whole thread. Well done!
-
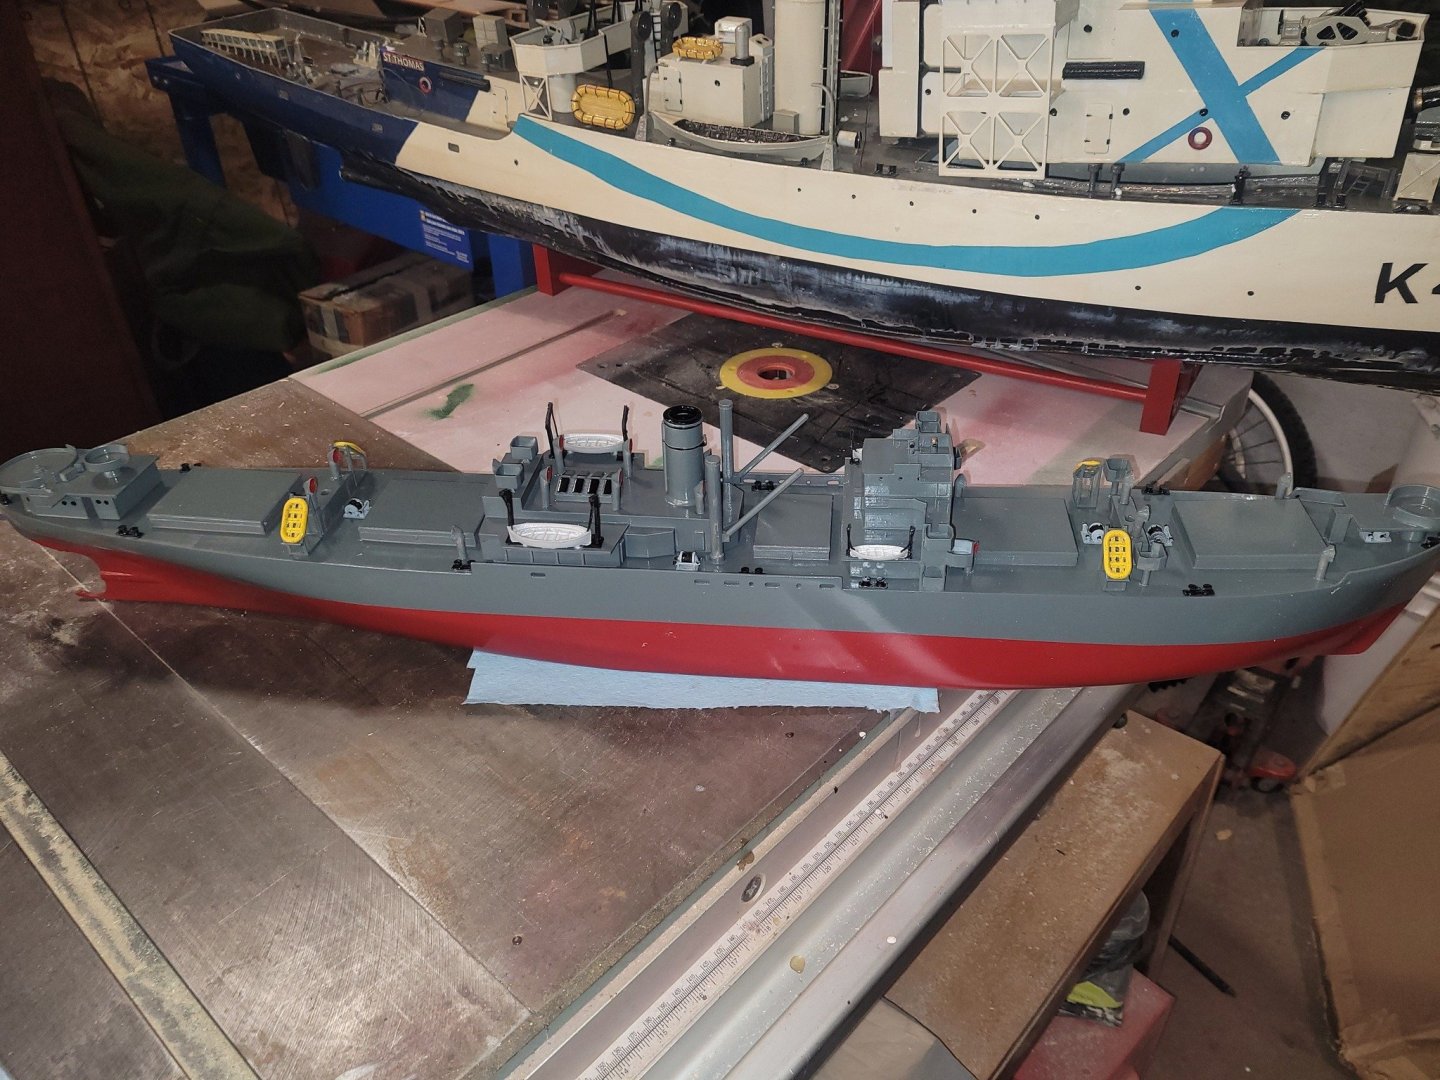
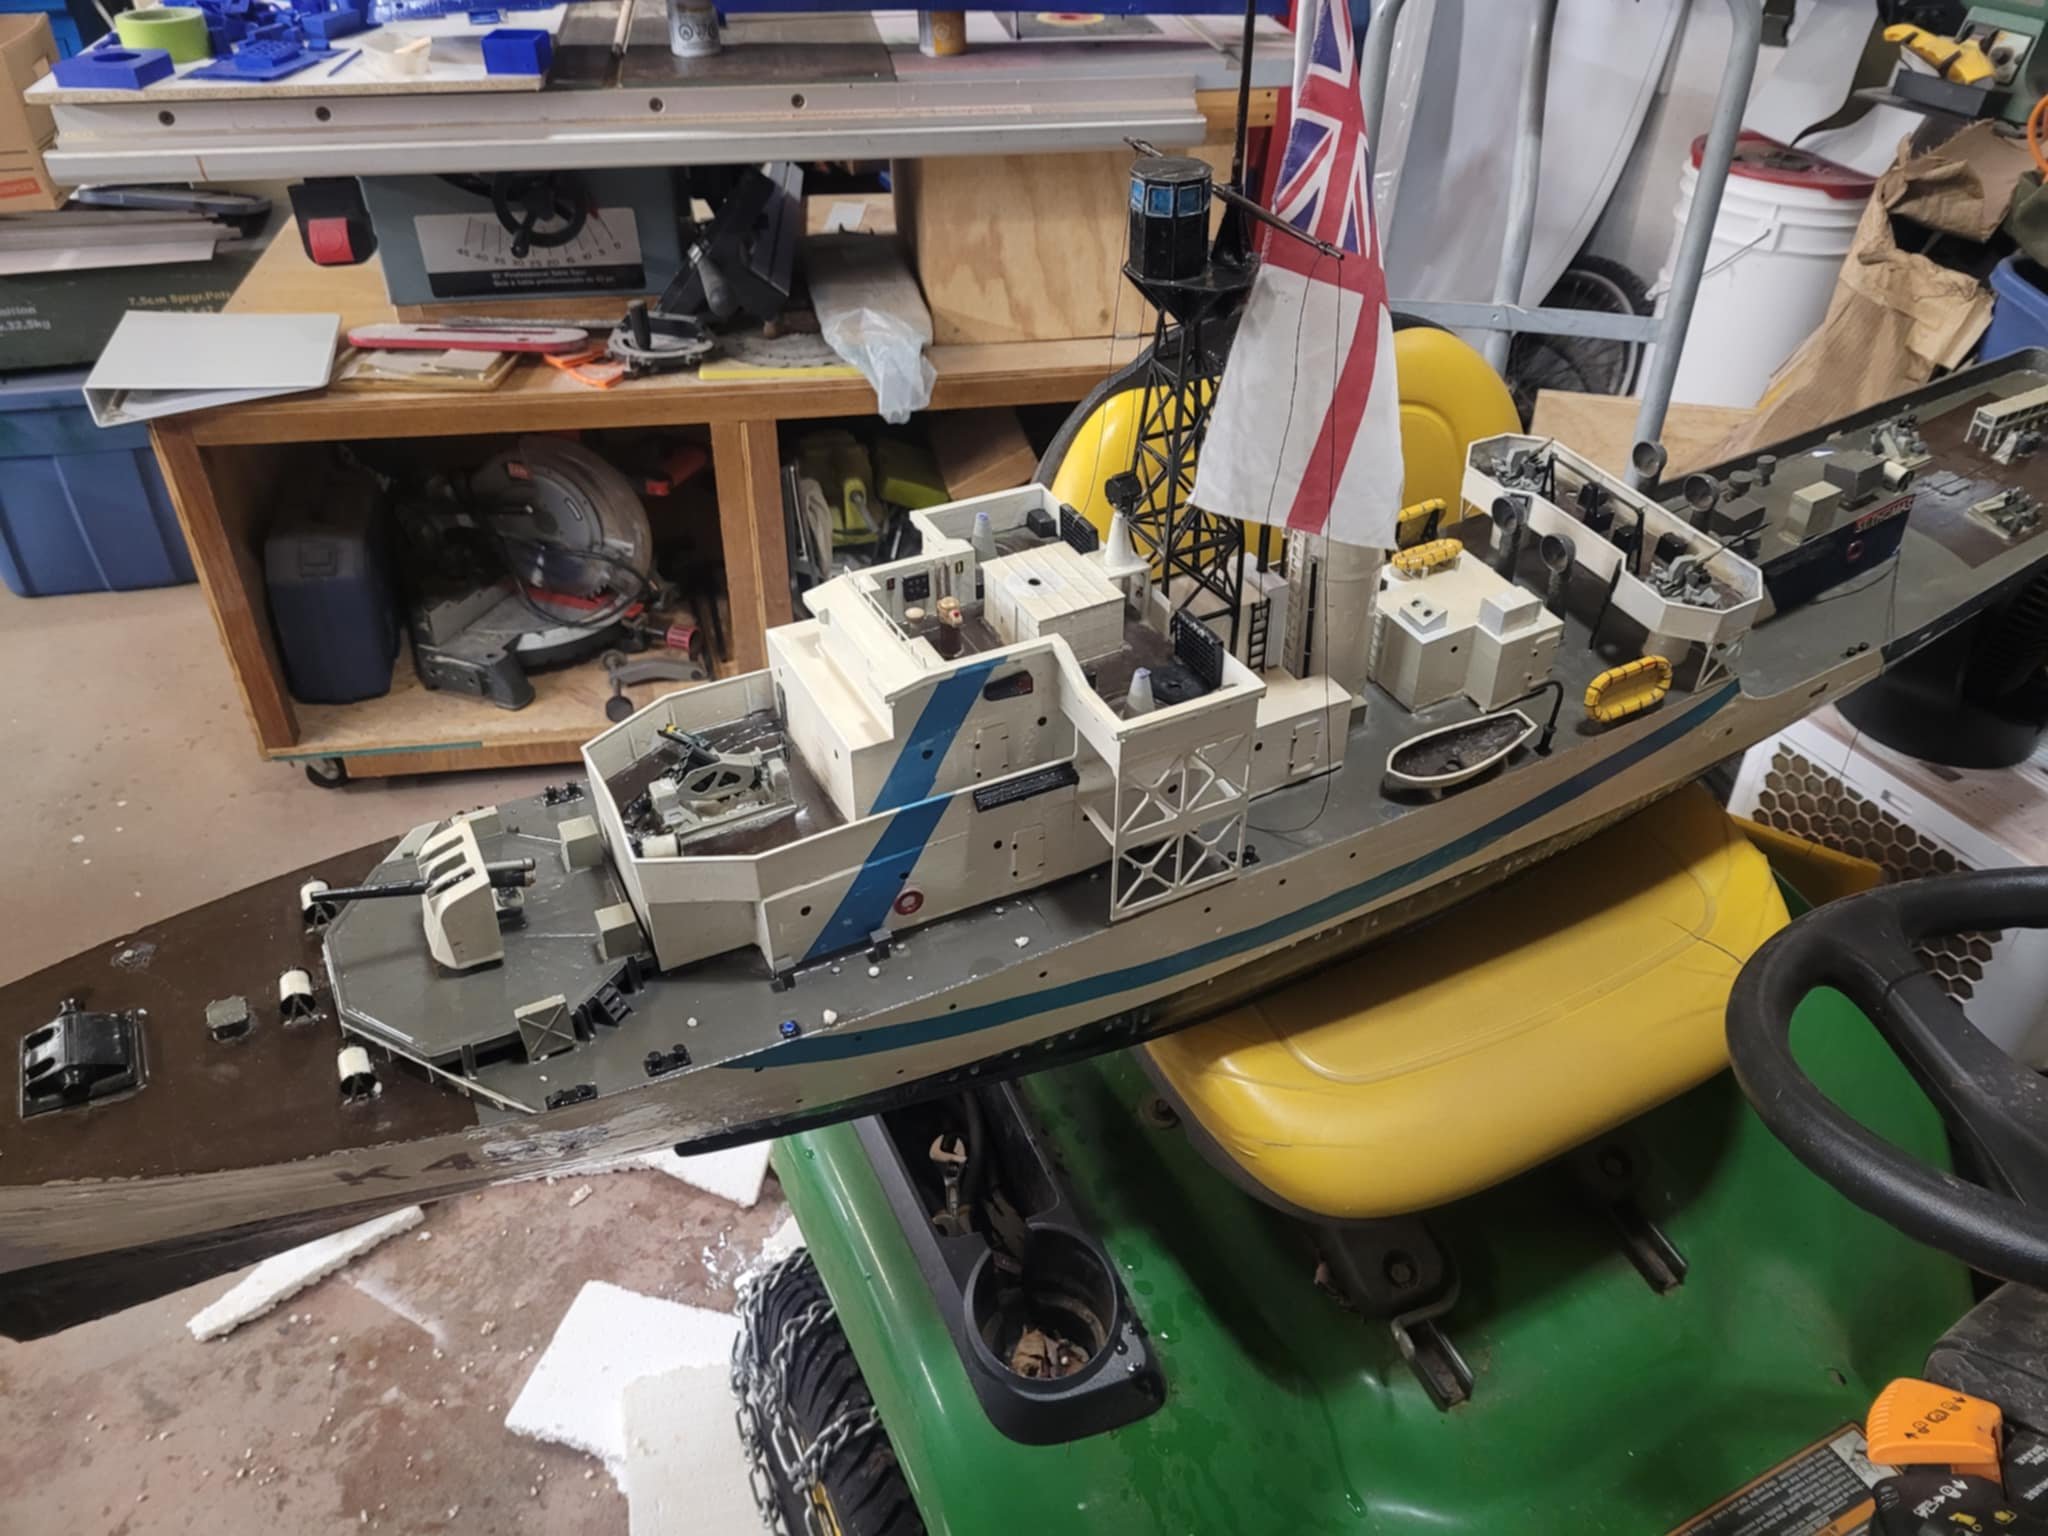
I've got most of the 'bits' glued on now. Masts, guns, crane booms, then running gear and RC equipment left to go. I'm generally pleased with how she looks.

- 54 replies
-
- 4
-

-
- Liberty Ship
- Finished
- (and 2 more)
-
The Liberty has now been joined by a Park - see here: Park Class vs Liberty Ship - Line drawings/comparisons? - Discussions for Ships plans and Project Research. General research on specific vessels and ship types.. - Model Ship World™ The line drawings have turned into a visual modification of the Liberty hull into a Park, focused on the upper decks.
- 54 replies
-
- 2
-
-
- Liberty Ship
- Finished
- (and 2 more)
-
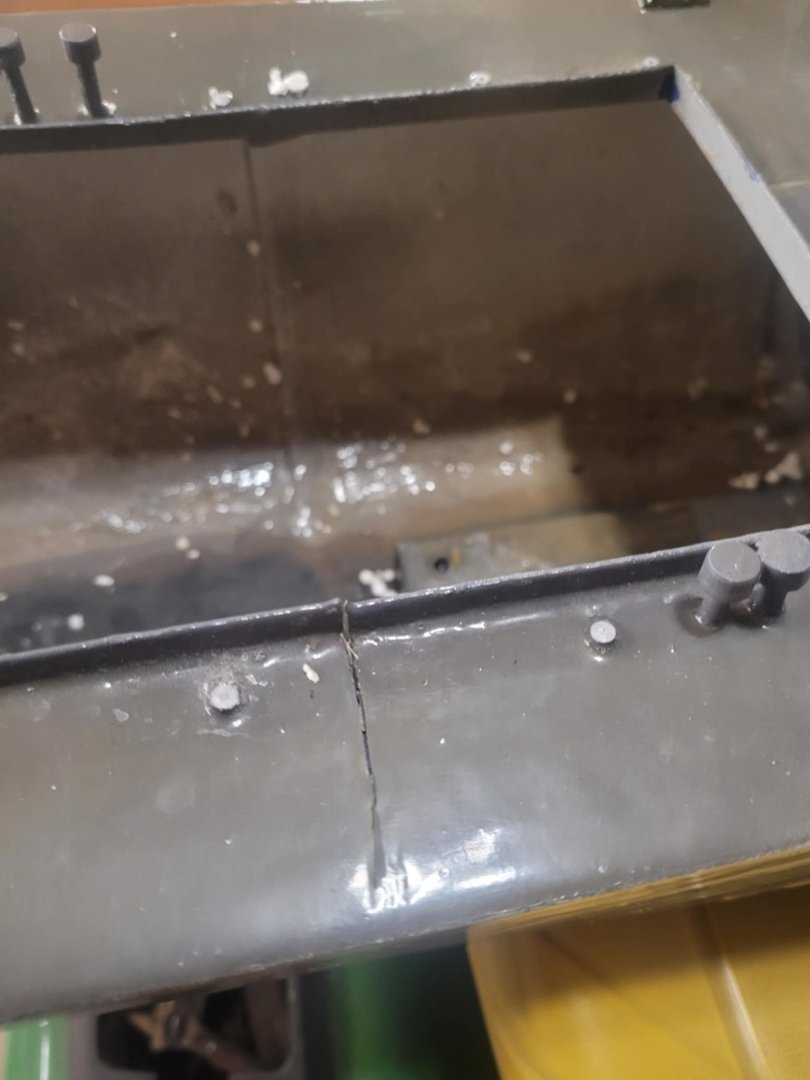
Well, launched in late June, pulled out by chopping through the ice to get to her in late December. She survived well - a bunch of the damage came from the recovery process - the park staff were somewhat chilly and hurried. There was a crack in the upper decks, and she had a full load of water in the hull - I poured it out, then had to dry it for a bit when I got her home. I'll have to do some minor repairs, some touch-up painting, then it's a matter of getting her up to Ontario. 6 months in the pond and this is how she looks. I'm generally pleased.


-
So. As I wait for the paint to dry on the hull so I can add some Gray/camo finish to it, I'm also pondering the flight deck. The flight decks of these little CVEs were wood - however - most of the pictures I see of them show them being not the natural wood colour, rather, they're gray/blue-gray. What would be the right colour for this flight deck? NS
- 51 replies
-
- 1
-
-
- Puncher
- escort carrier
- (and 1 more)
-
Here's the hull after some 400 grit sanding today...and another light coat of red paint. I'm pleased. Now to wait a few days to dry.

- 51 replies
-
- 3
-
-
- Puncher
- escort carrier
- (and 1 more)
-
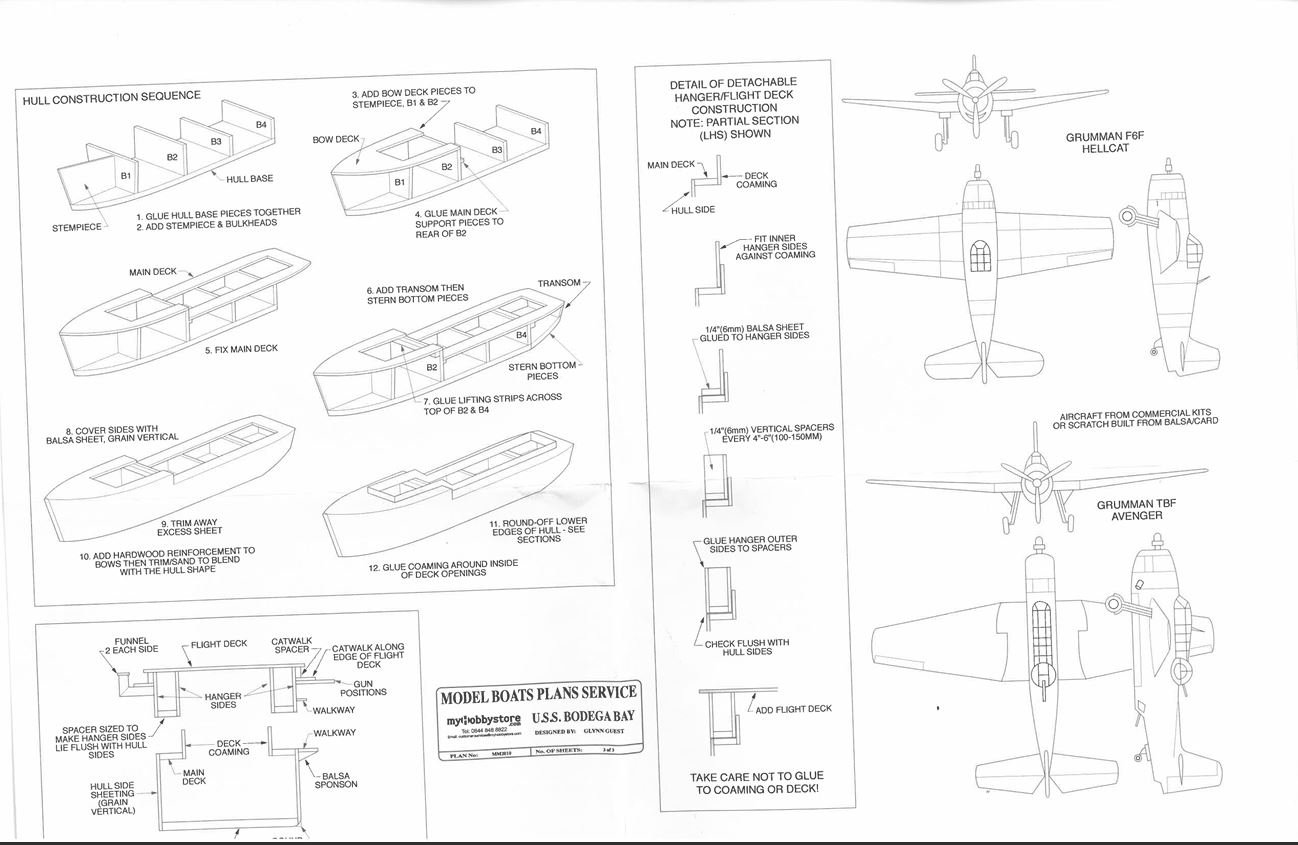
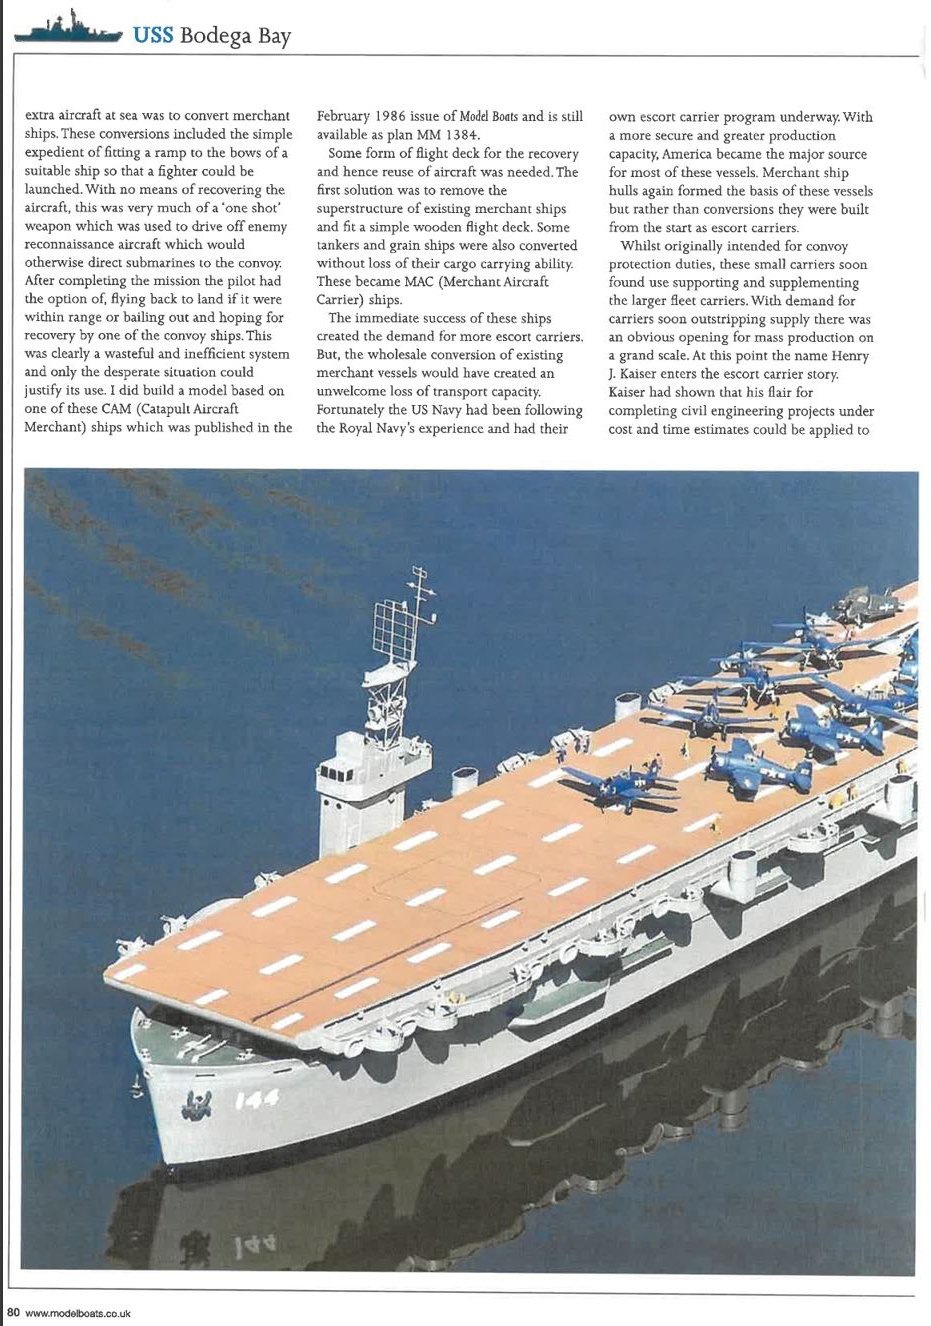
Here's the plans! USS Bodega Bay Plans 3.pdf USS Bodega Bay Plans 4.pdf
- 51 replies
-
- 1
-
-
- Puncher
- escort carrier
- (and 1 more)
-
Of note, this is the original USS Bodega Bay plan set - there's 2 additional large sheets that I'm going to get scanned and will add - but this gives a good idea of the inspiration for the build, and the level of detail of the original model.


- 51 replies
-
- 4
-
-
- Puncher
- escort carrier
- (and 1 more)
-
Or, free options that you can work from to build something up: Hughes 269C RC Helicopter fuel tanks and interior parts by TheFox70 - Thingiverse Schweizer 300C Hughes 269 Helicopter scale parts by TheFox70 - Thingiverse Floats for the MD500 Hughes RC Helicopter - RC ERA C189 by Andrej85 - Thingiverse
- 36 replies
-
- 3
-
-
- calypso
- billing boats
- (and 1 more)
-
If you've got access to a 3D printer, there's these options: STL file schweizer 300 semi scale rc helicopter on xk k123 mechanic 🚁 ・3D printing design to download・Cults STL file Hughes 269 Calypso Helicopter model ship model building 🚁 ・3D print object to download・Cults
- 36 replies
-
- 2
-
-
- calypso
- billing boats
- (and 1 more)
-
Thanks! It's sort - of scratch built. I had to modify every one of the modules of the original hull that's on the web. I appreciate DDP's attempts to help me accurize the hull, alas, despite several tries, I've not yet figured out how to loft a hull properly to the forms from hulls I've tried making. So far I'm 0/5 on it. I don't know what I'm doing wrong with them.
- 51 replies
-
- 1
-
-
- Puncher
- escort carrier
- (and 1 more)
-
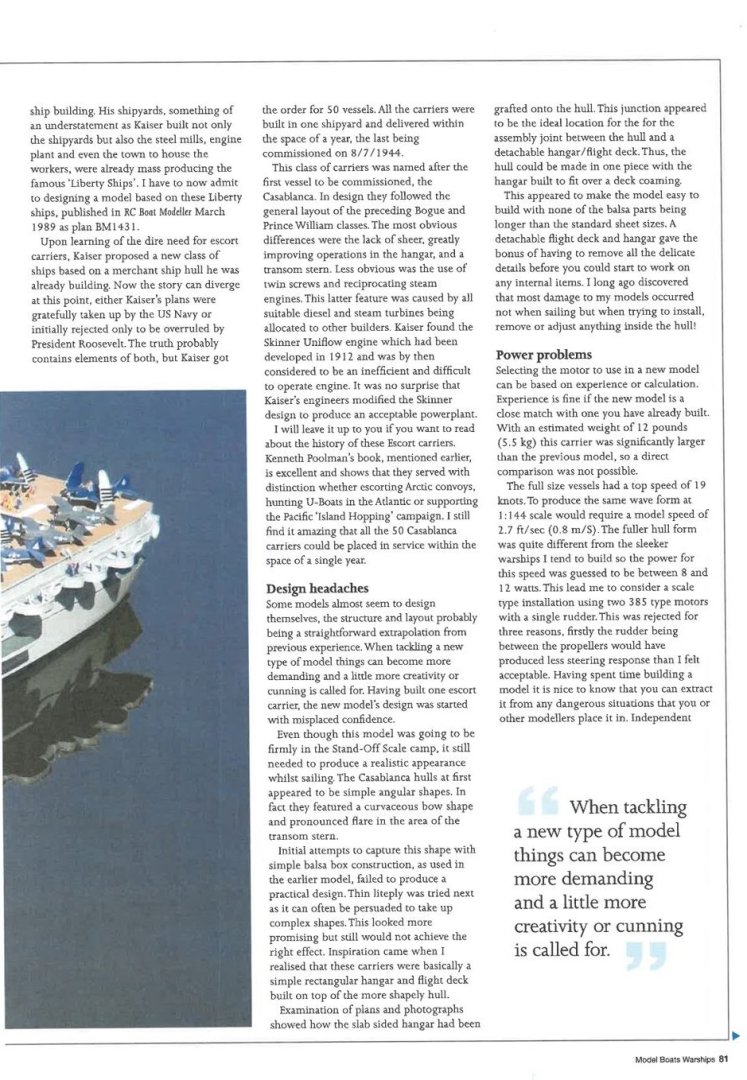
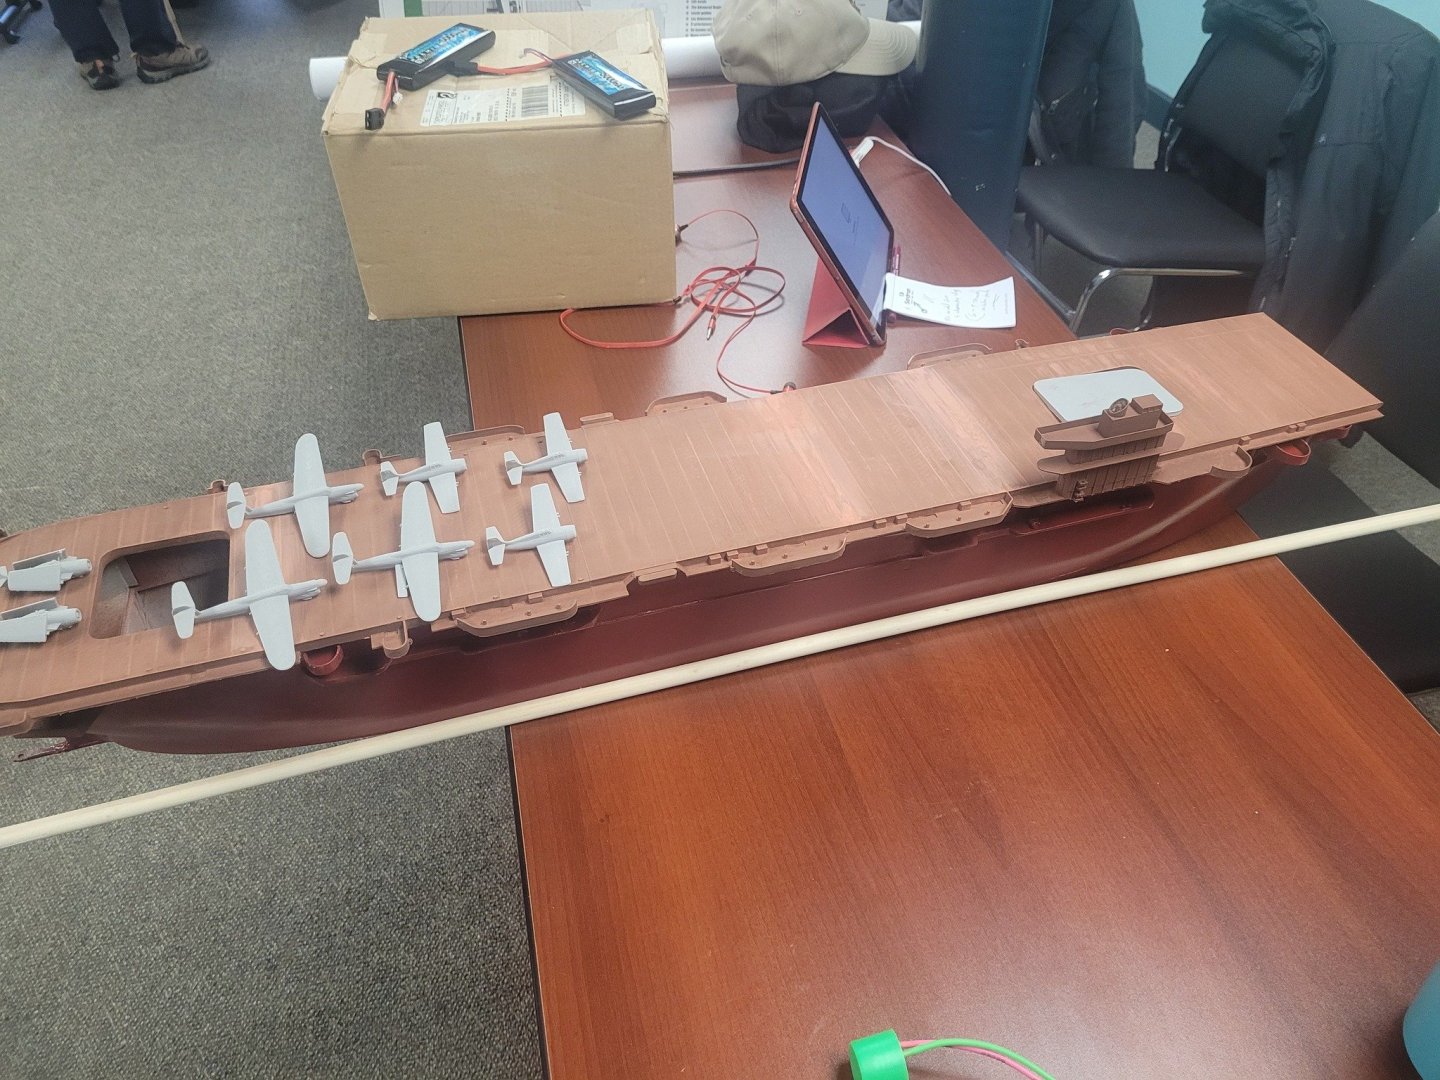
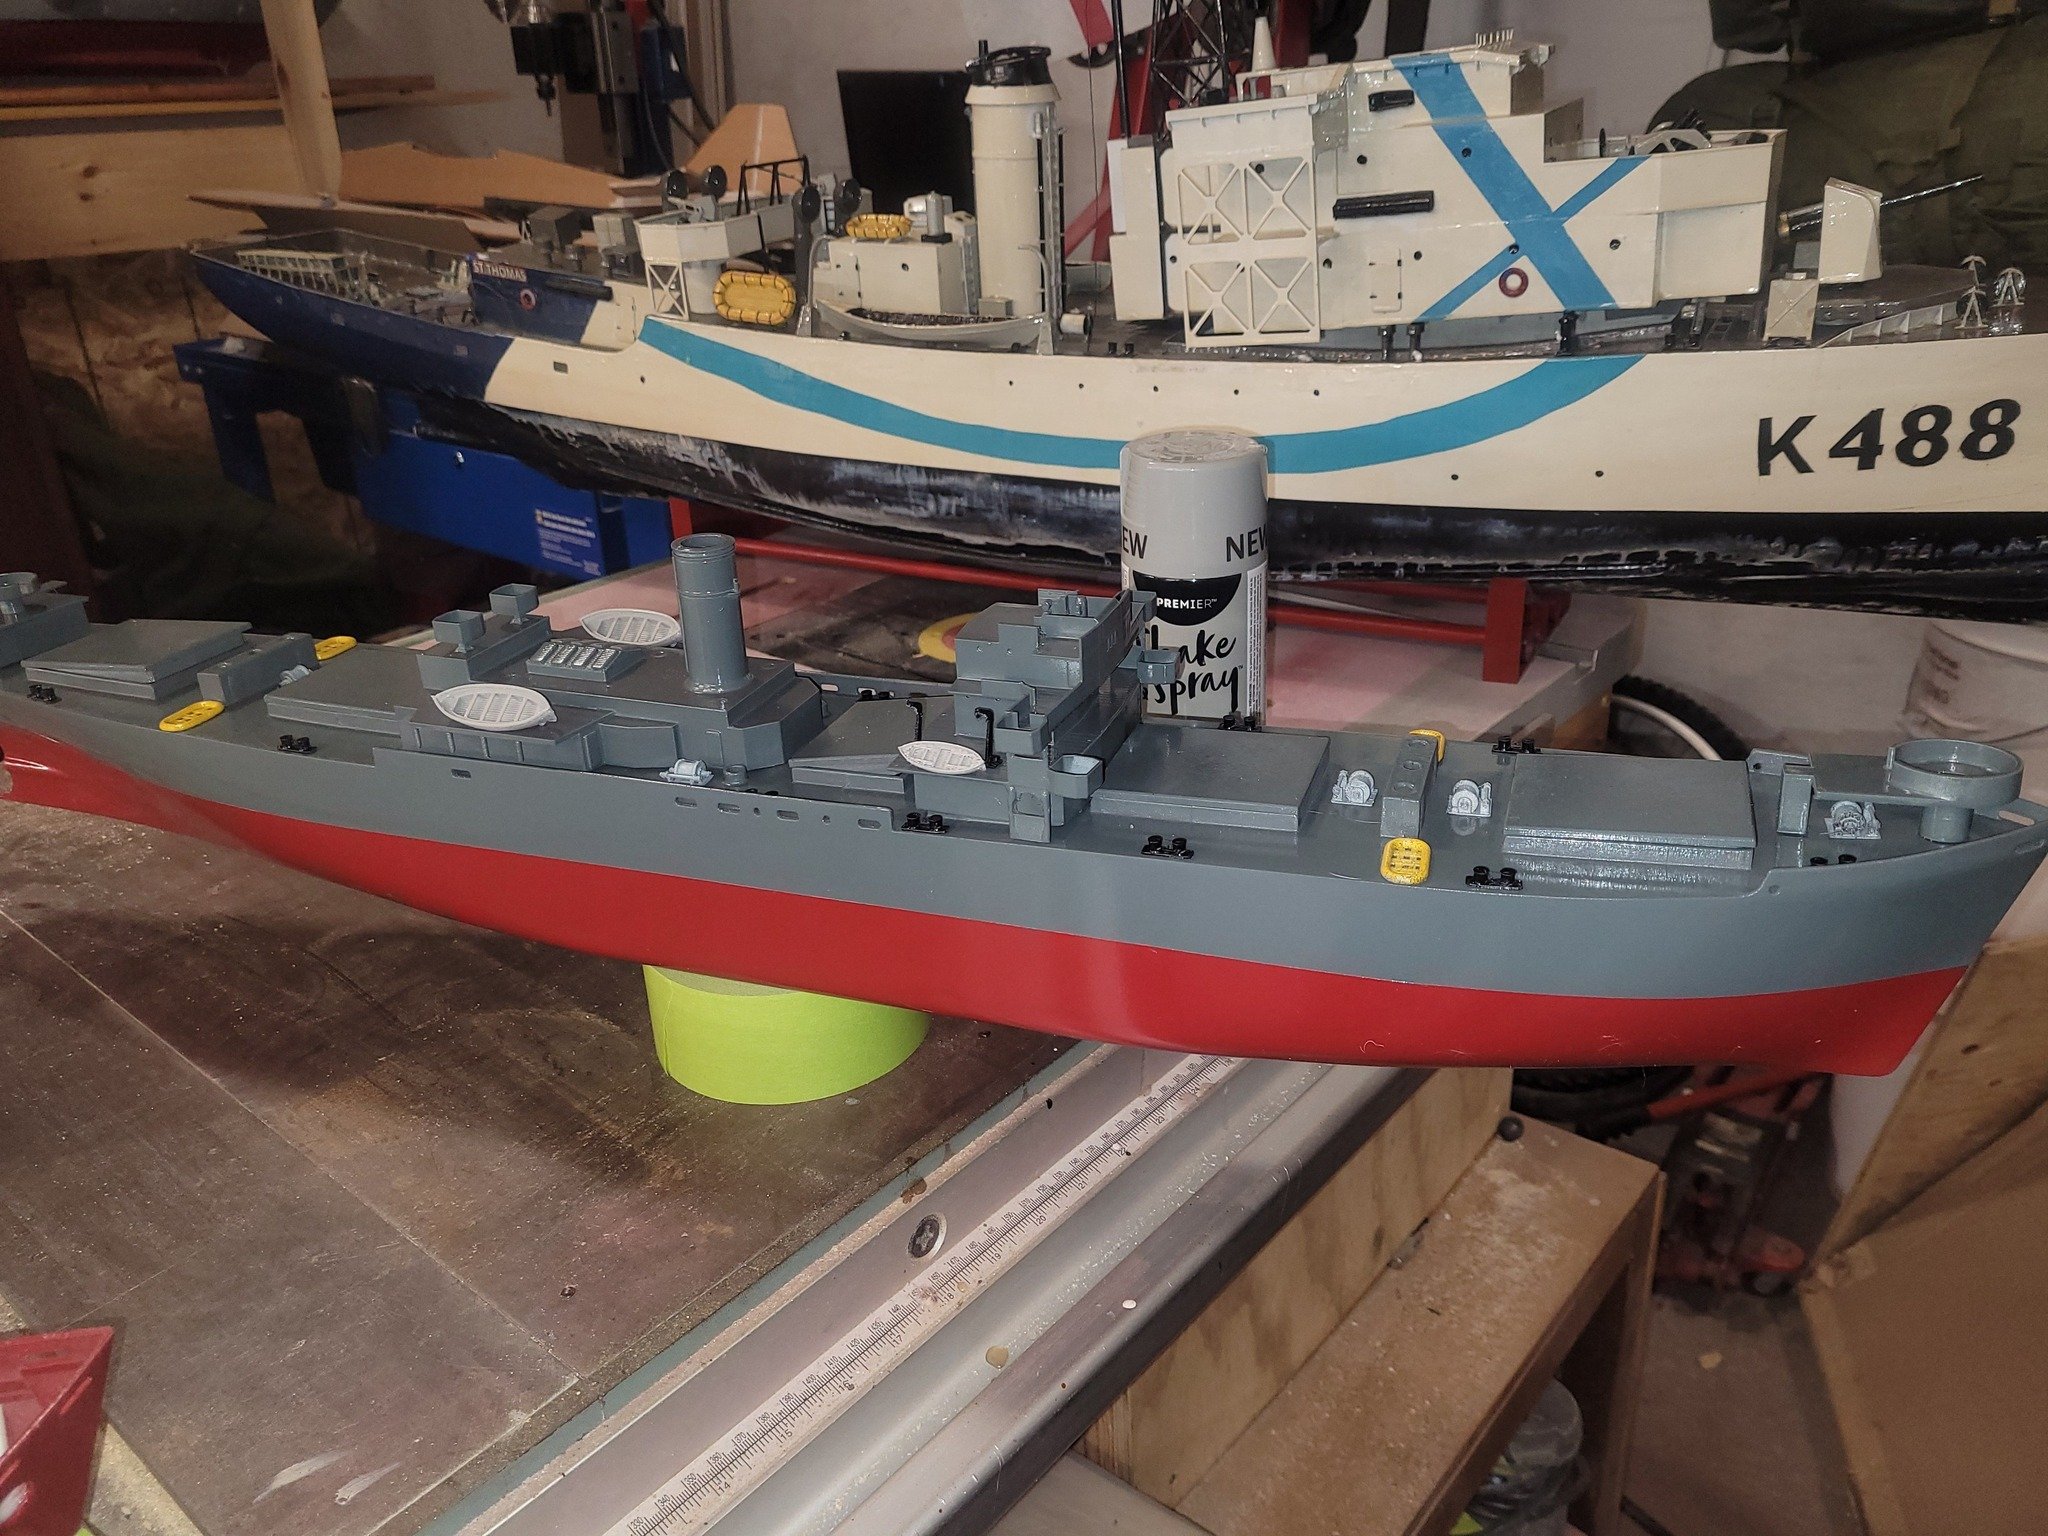
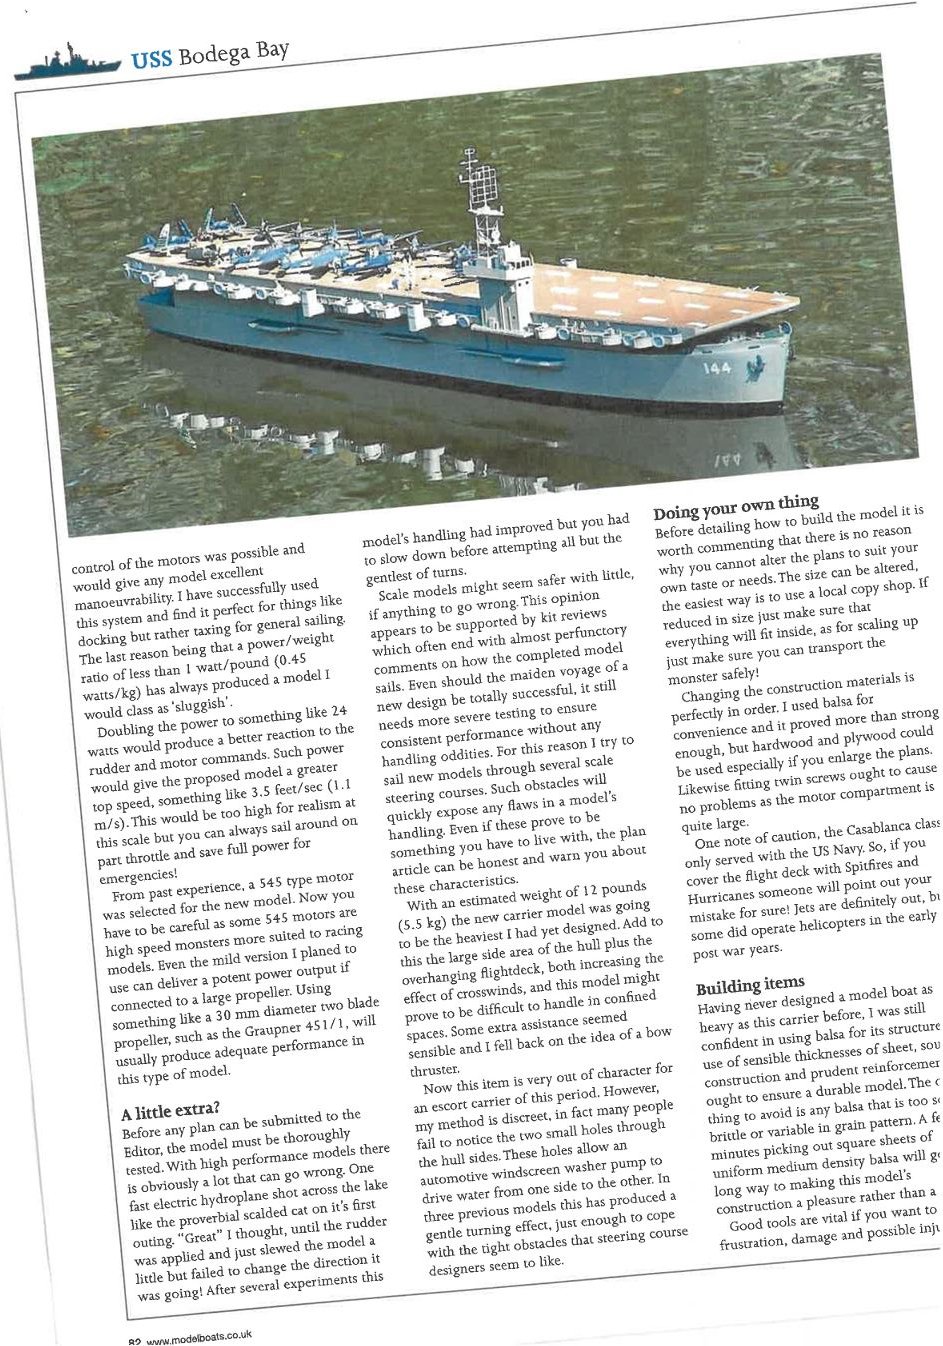
I had the model out at the Maritime Ship Modeller's Guild meeting on Saturday to show the guys, and while I was at it, I gave away the 1/350 scale sample print so someone else can putter about with that. Generally pleased with how she's coming along. This is basically where she's at right now. Actually - technically, she's further along than this - the flight deck is now painted gray and the hull has received another layer of sanding/paint and both are residing in my office in the house to let the paint cure.
- 51 replies
-
- 2
-
-
- Puncher
- escort carrier
- (and 1 more)
-
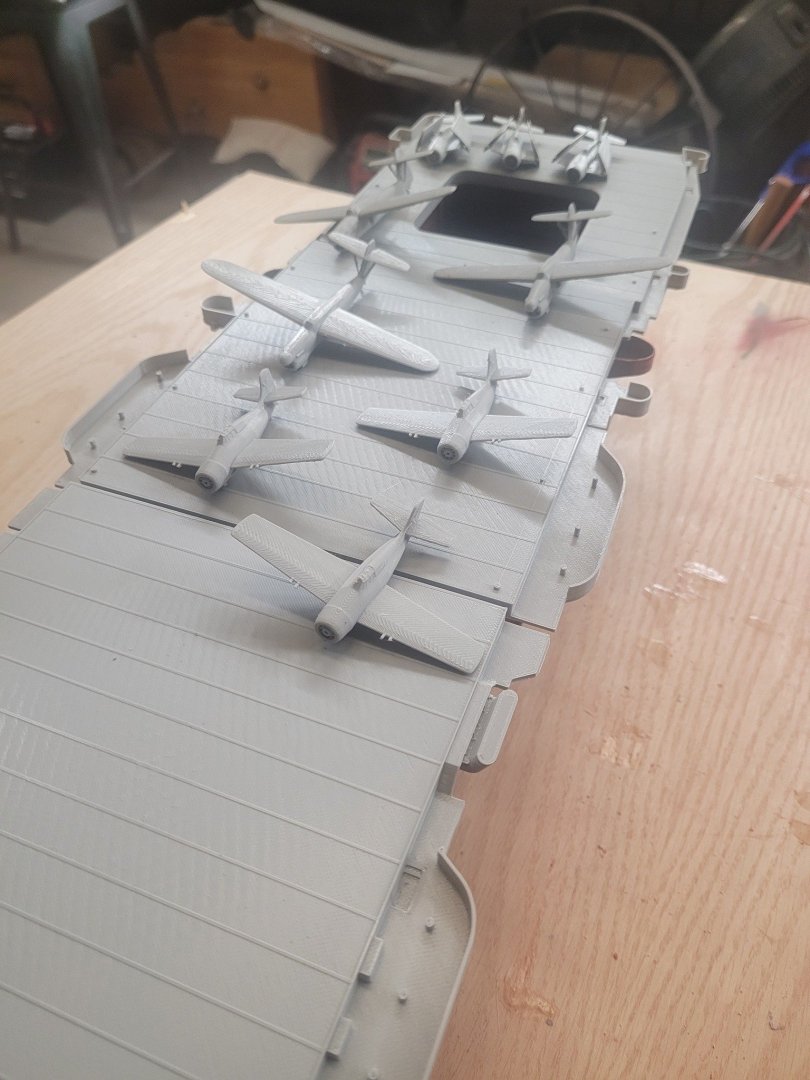
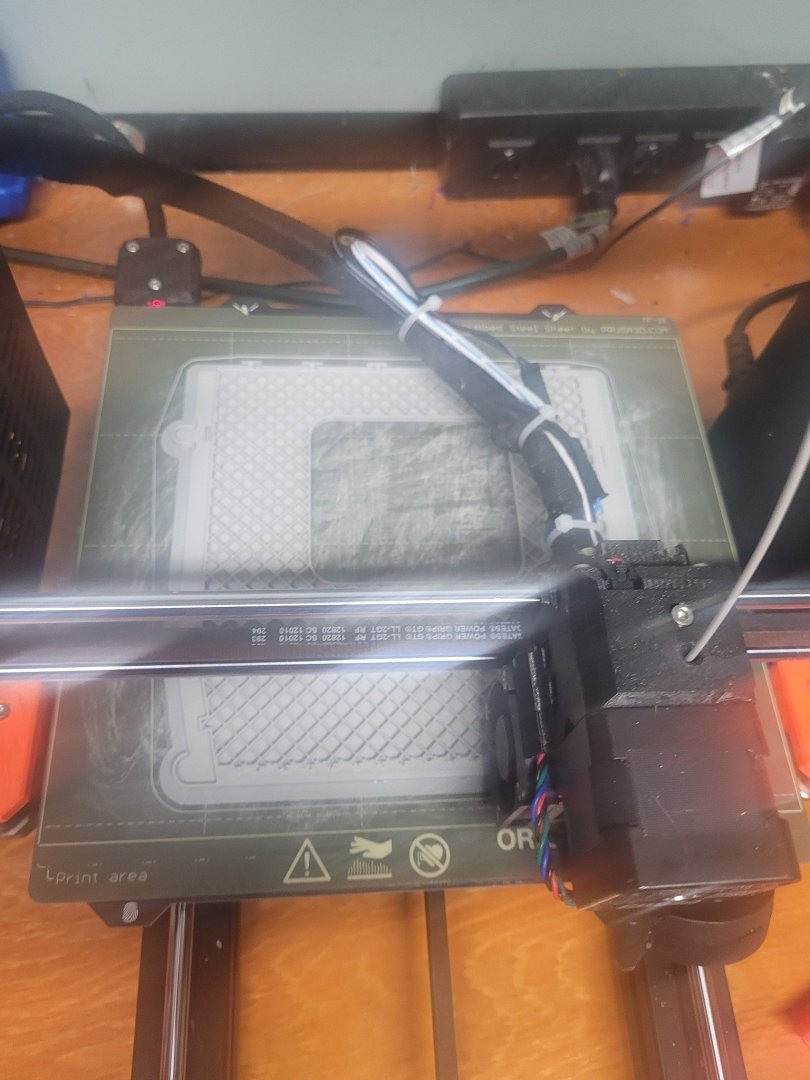
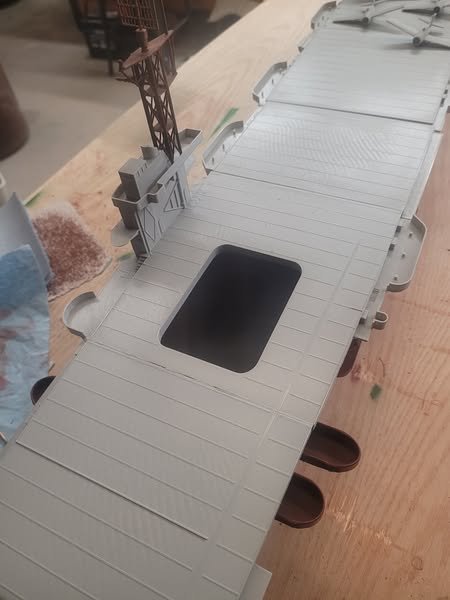
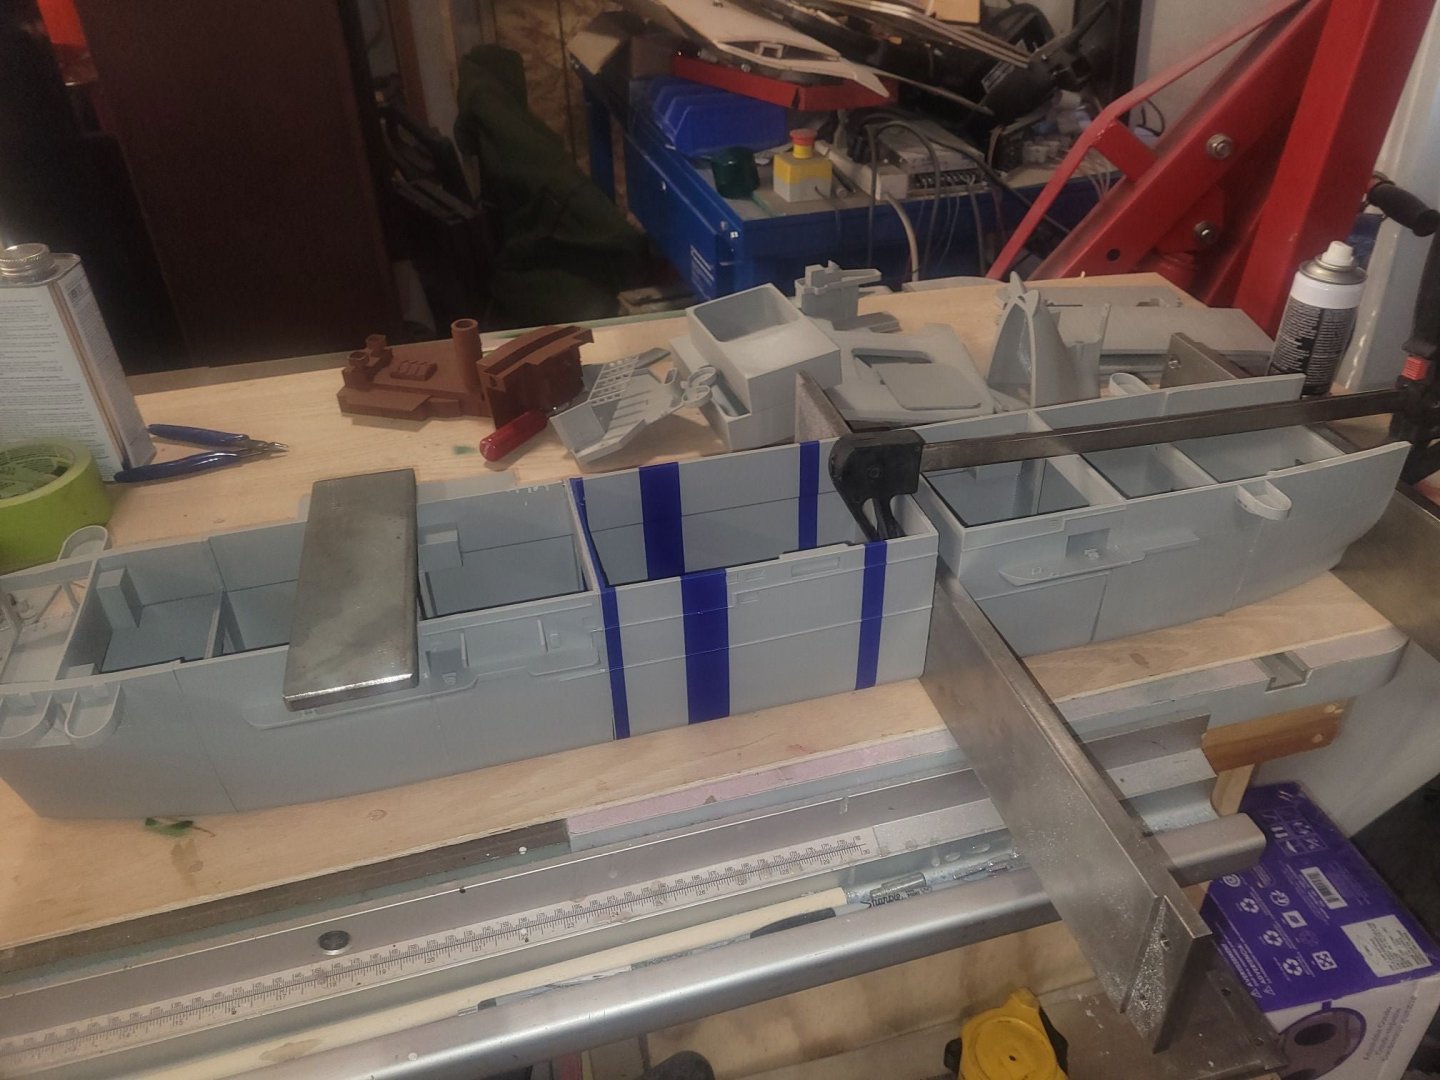
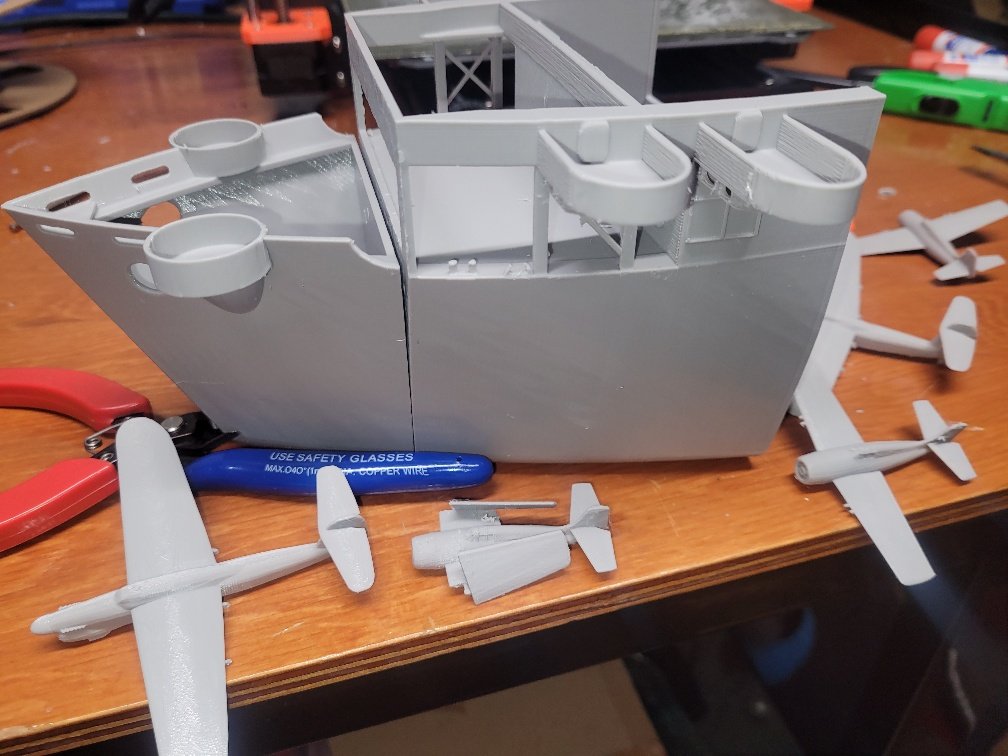
My initial concept had been to have a removable deck panel in the middle of the flight deck to allow me access to the interior - then I realized that I need to get to the rudder under the rear of the quarterdeck, so I've got the entire flight deck as a removable panel, printed in 6 sections and glued together. I had some trouble with the flight deck panels sticking to the bed of my printer - someone suggested bumping the print bed temp up from 60C to 70C...and that solved my problem. Flight deck got printed, and the air det (Martlets and Barracudas) are in progress.
- 51 replies
-
- 3
-
-
- Puncher
- escort carrier
- (and 1 more)
-
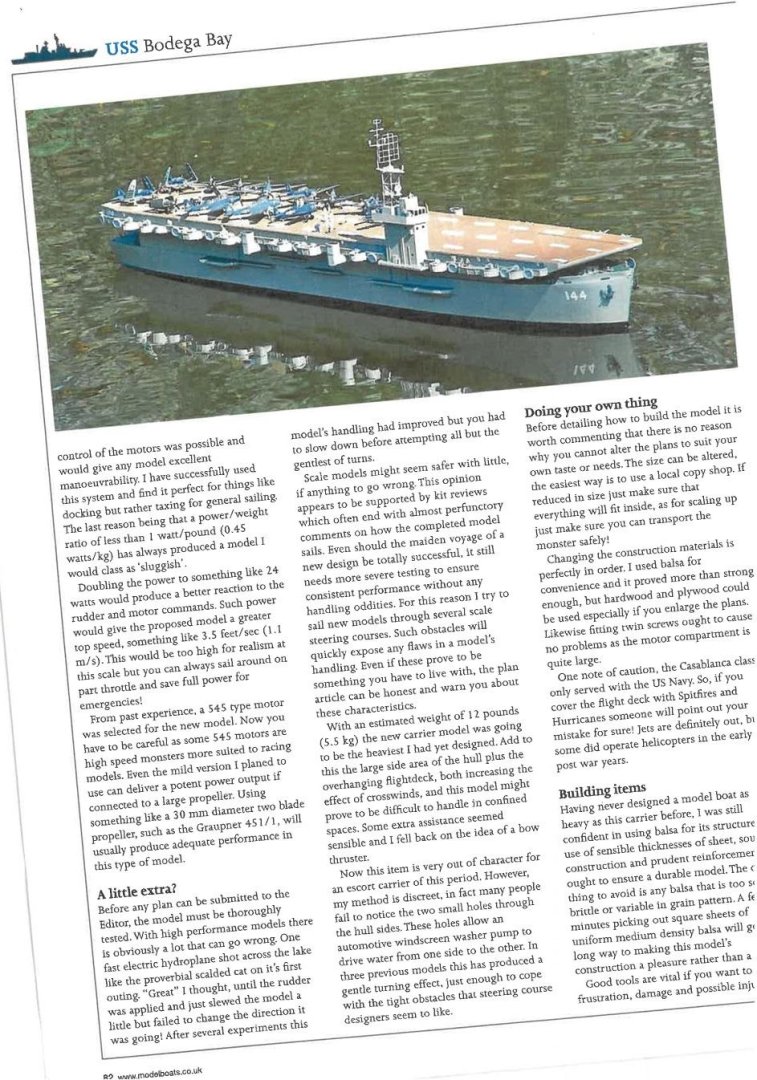
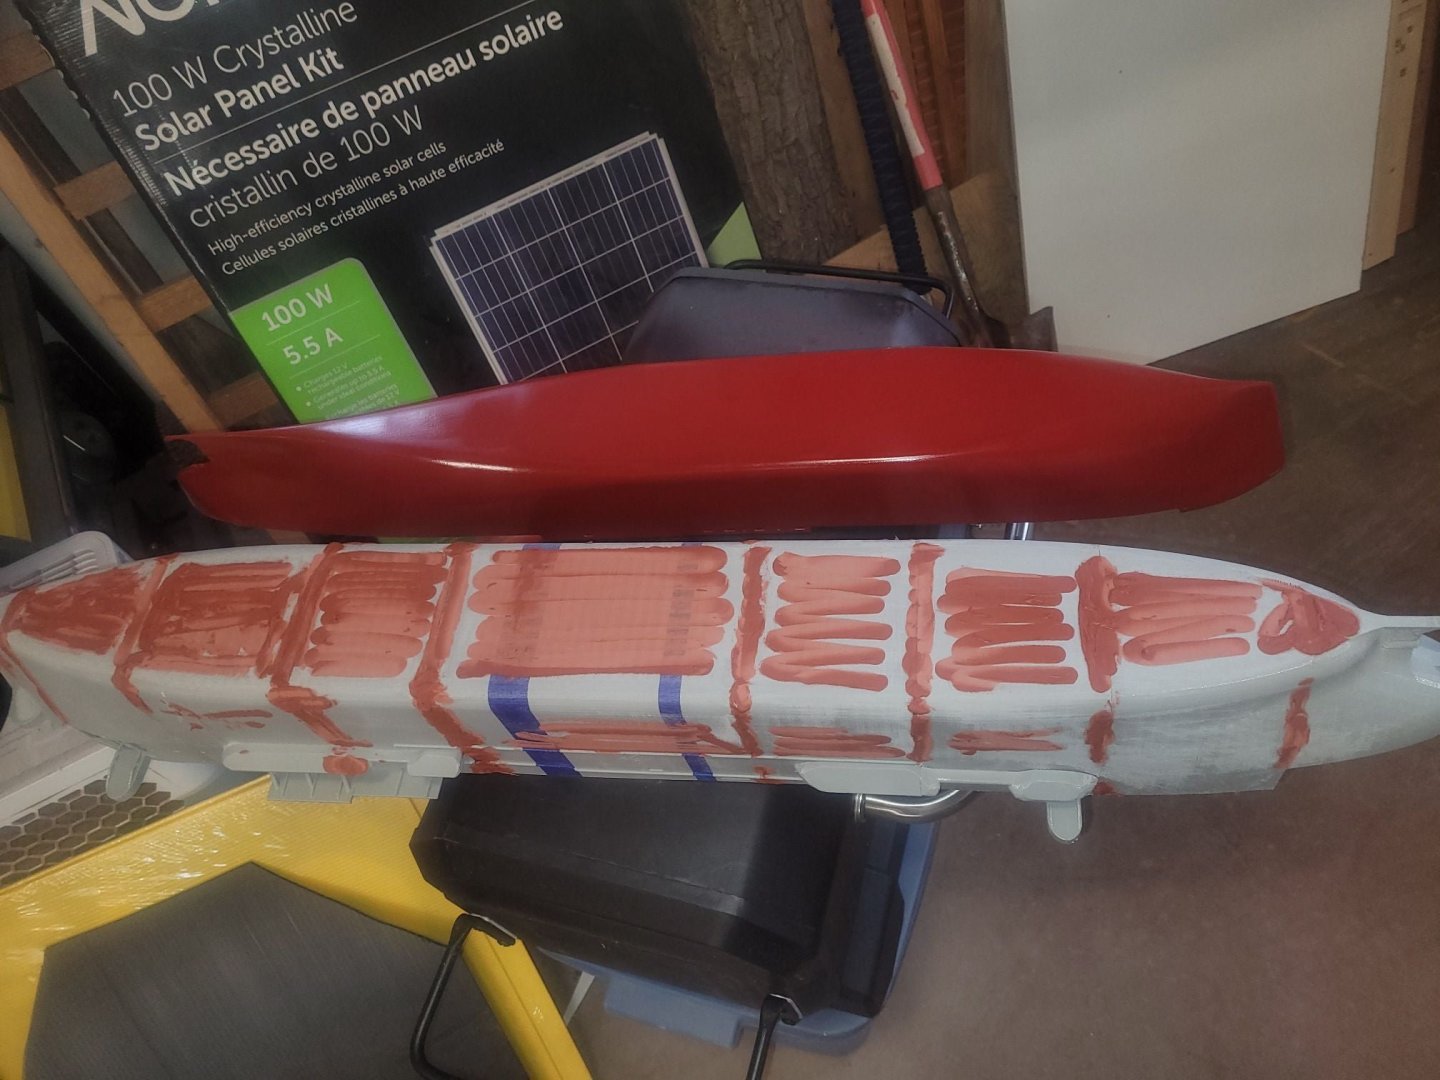
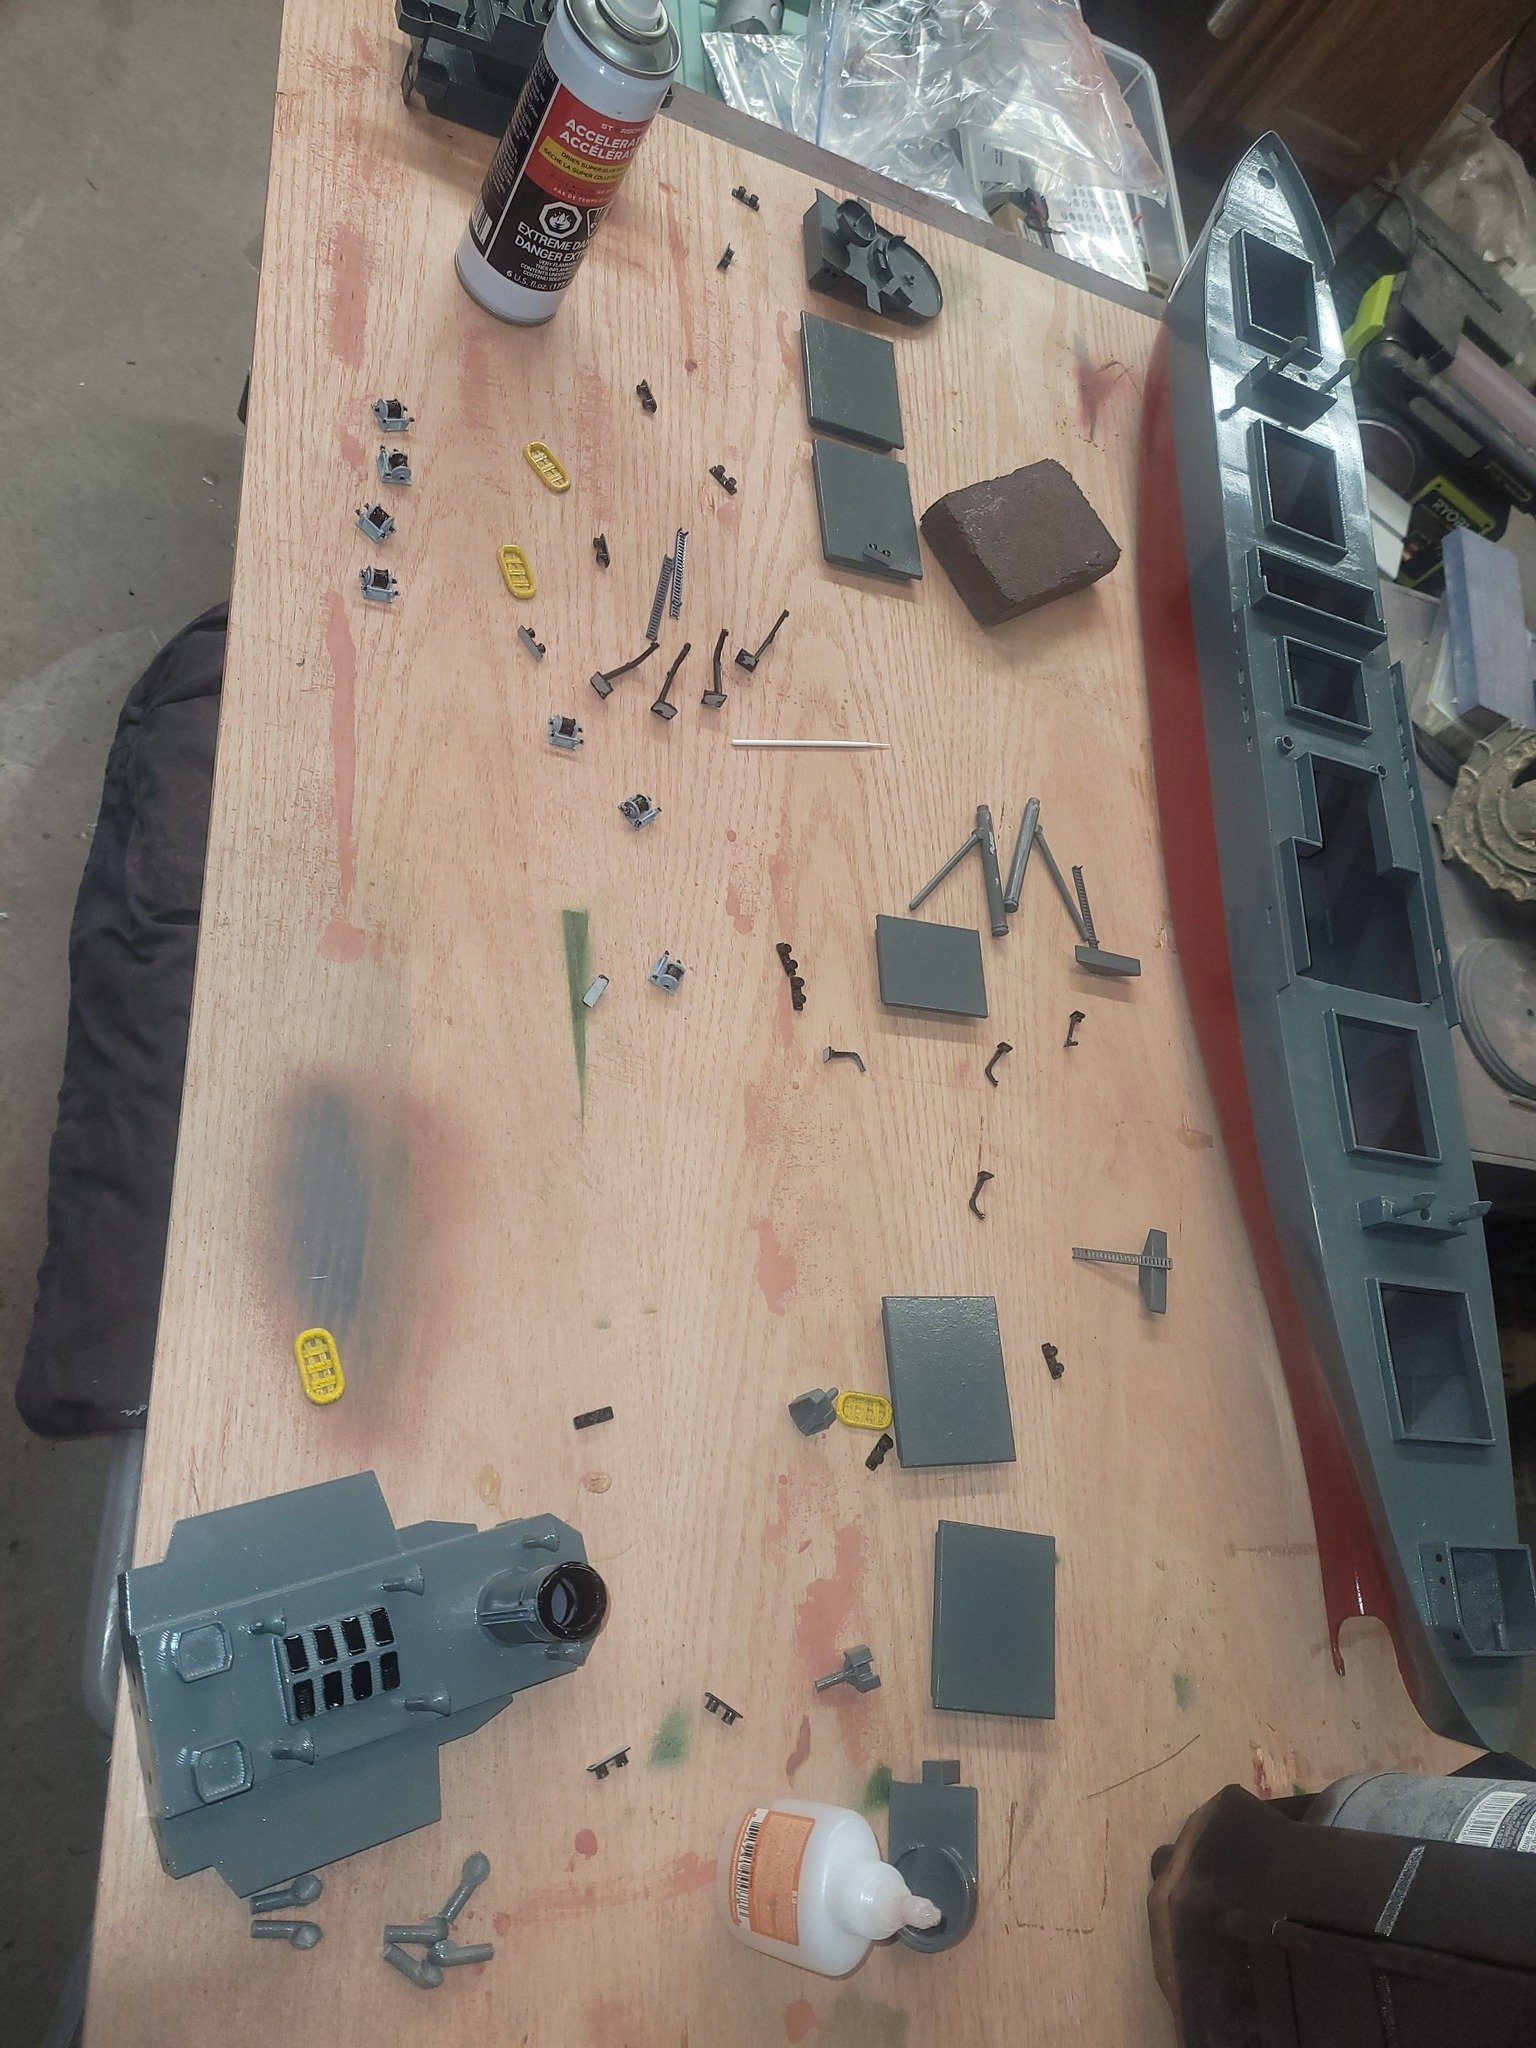
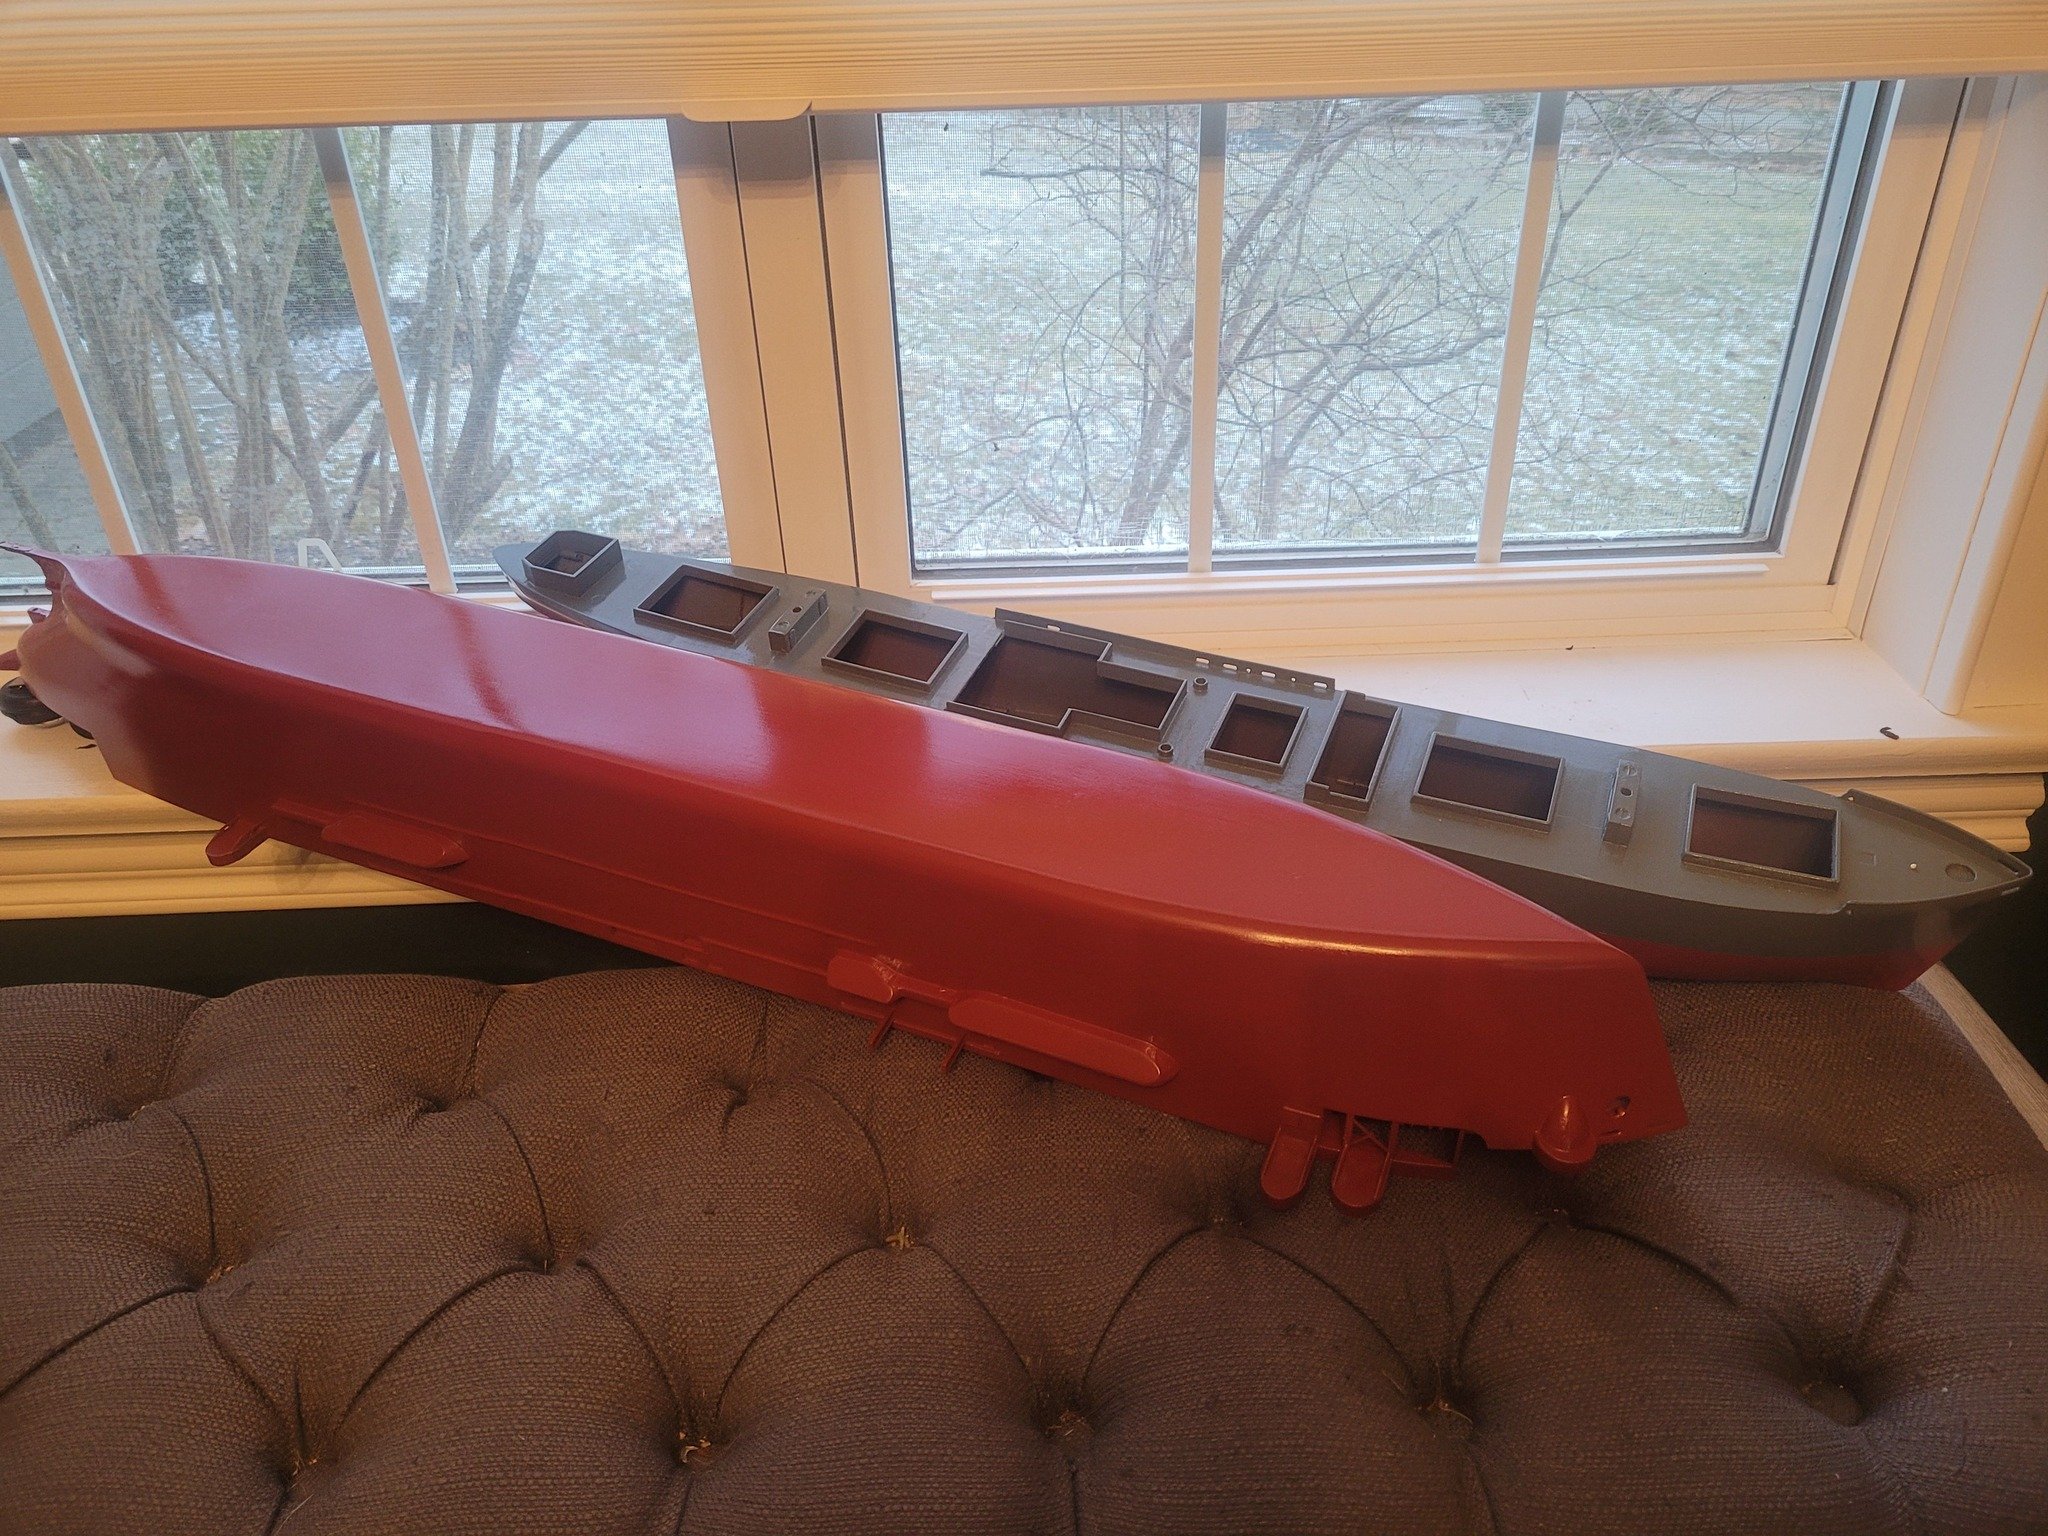
I have learned from my Bonnie model that I need to be more patient with paint - it needs to dry more before I do anything with it, be that sanding or recoating. A buddy of mine saw my putty job and suggested to me a new technique. Instead of using straight putty on the hull, you can mix the putty 50/50 with Acetone and brush it on - goes on smoothly, and saves a bunch of time. Dries VERY fast, and apparently this is a technique all the Cosplay folks do for their 3D printed Armour and stuff. So. That's what I'm going to do going forward! Here's how the hull looks puttied up and primed:

.thumb.jpg.46edd28dba04650b92629339825961cd.jpg)
- 51 replies
-
- 3
-
-
- Puncher
- escort carrier
- (and 1 more)
-
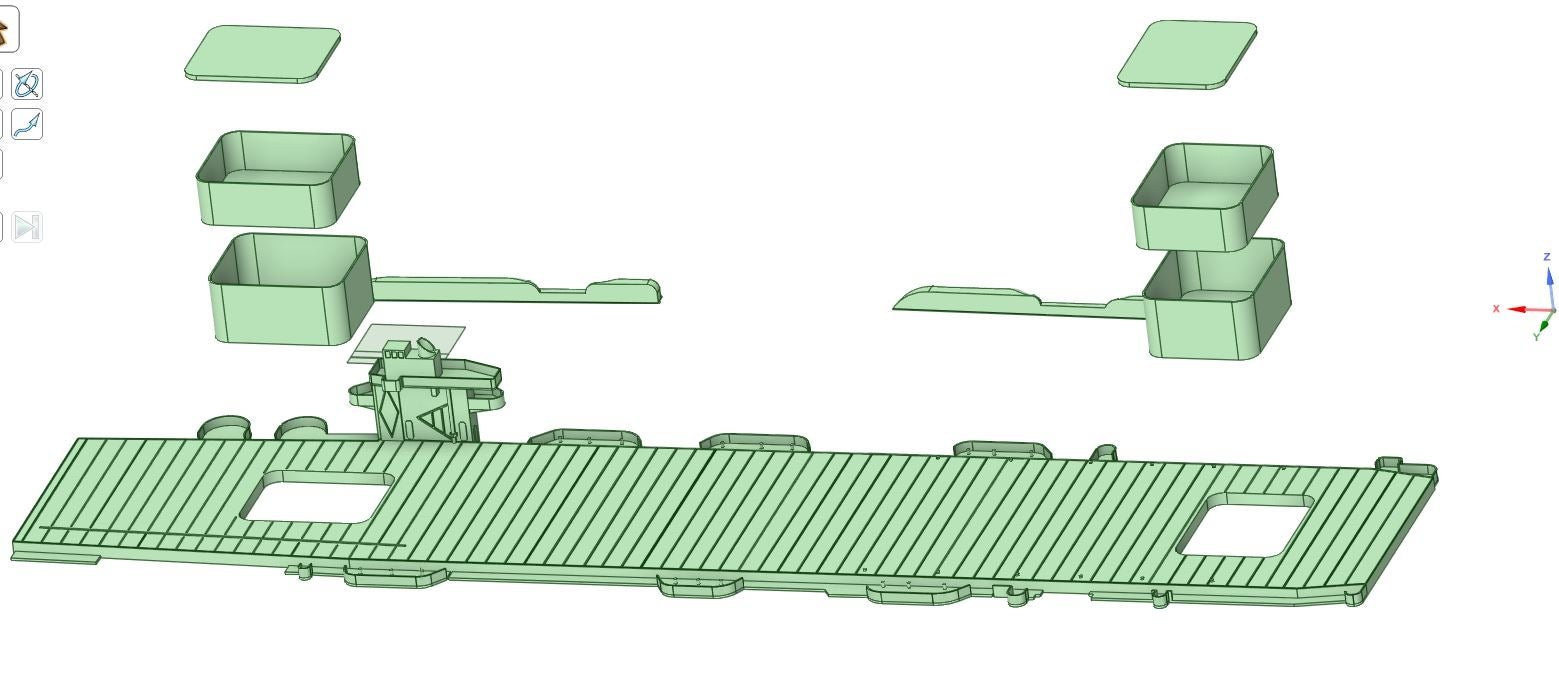
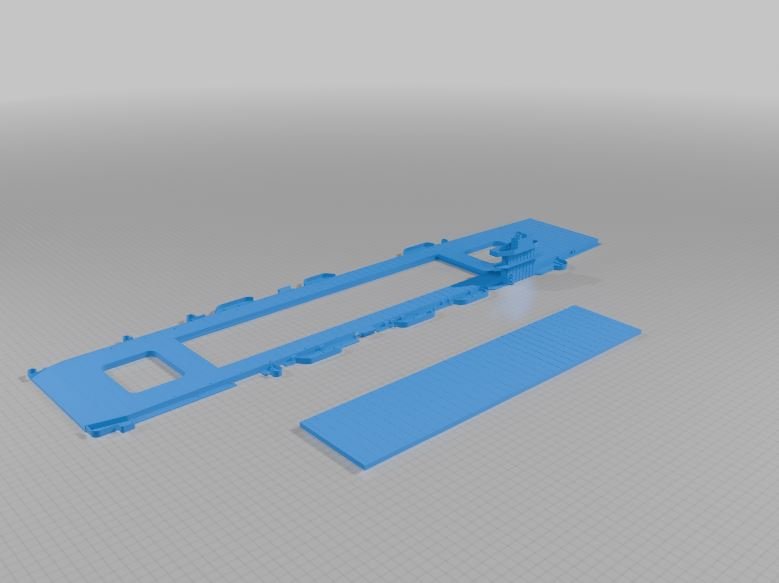
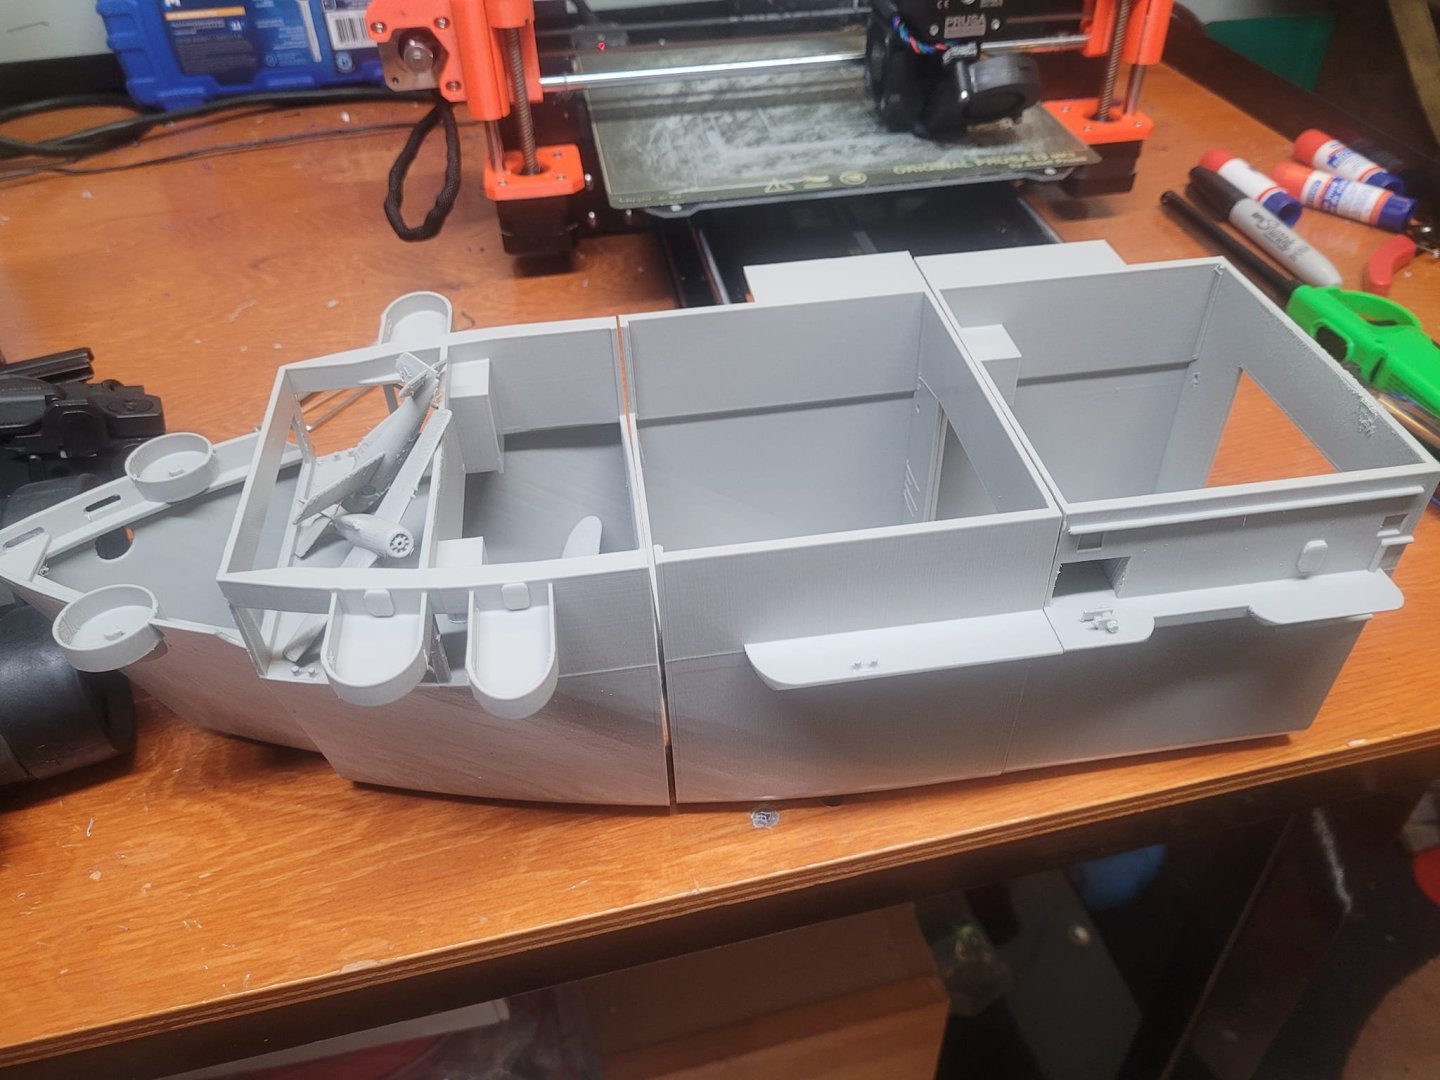
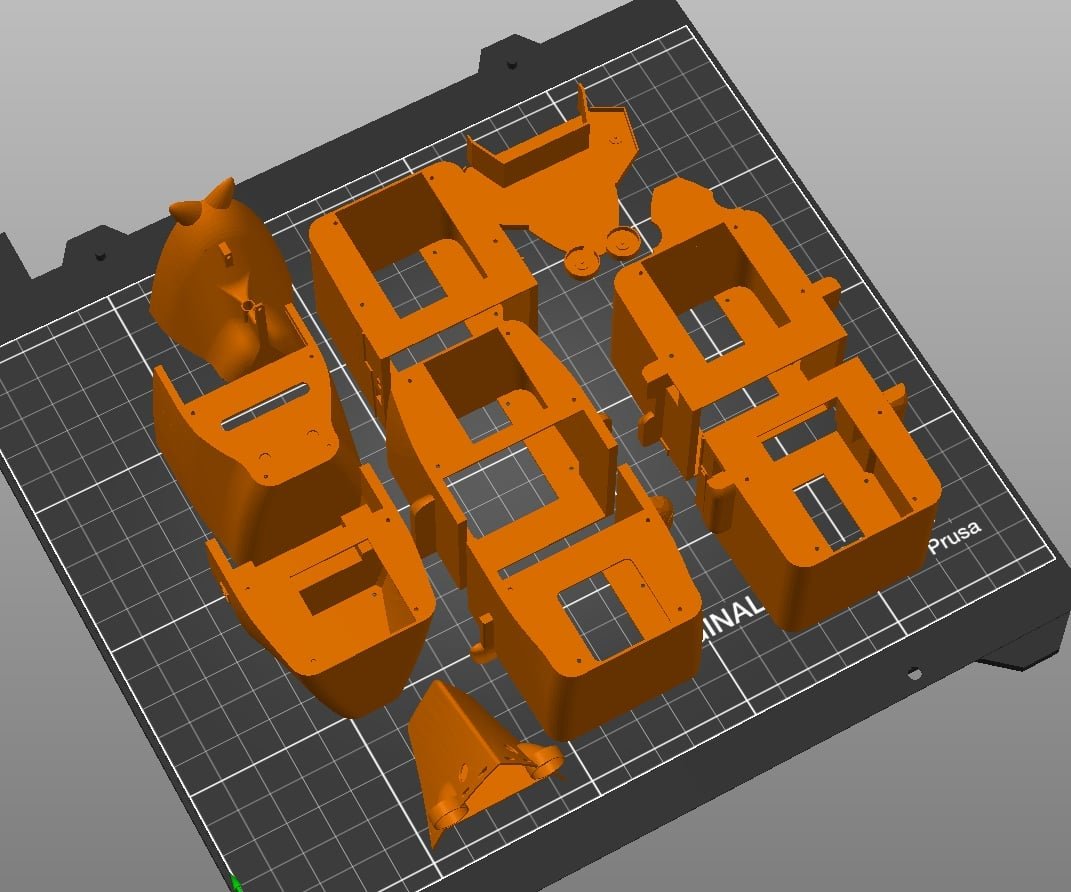
My HMCS Bonaventure model is huge - over 7 feet long, and she's a beast to move around to show, or put in the pond (when that happens) so this model is much more convenient in size - she's 41 inches long. Very manageable for a back-seat model to get to the pond. I noted that I have released the complete file set for this model on Thingiverse and Cults - here's the link to Thingiverse: HMS Puncher - WW2 Escort Carrier 1/144 Scale RC Ship by Navyshooter - Thingiverse And Cults3D: Free STL file HMS Puncher - WW2 Escort Carrier 1/144 Scale RC Ship 🚢 ・3D print model to download・Cults I'm aware that at least 3 other builders have theirs in progress - I guess there was some demand for an Escort Carrier 3D model! Here's some pictures of the modules as printed:
- 51 replies
-
- 4
-
-
- Puncher
- escort carrier
- (and 1 more)
-
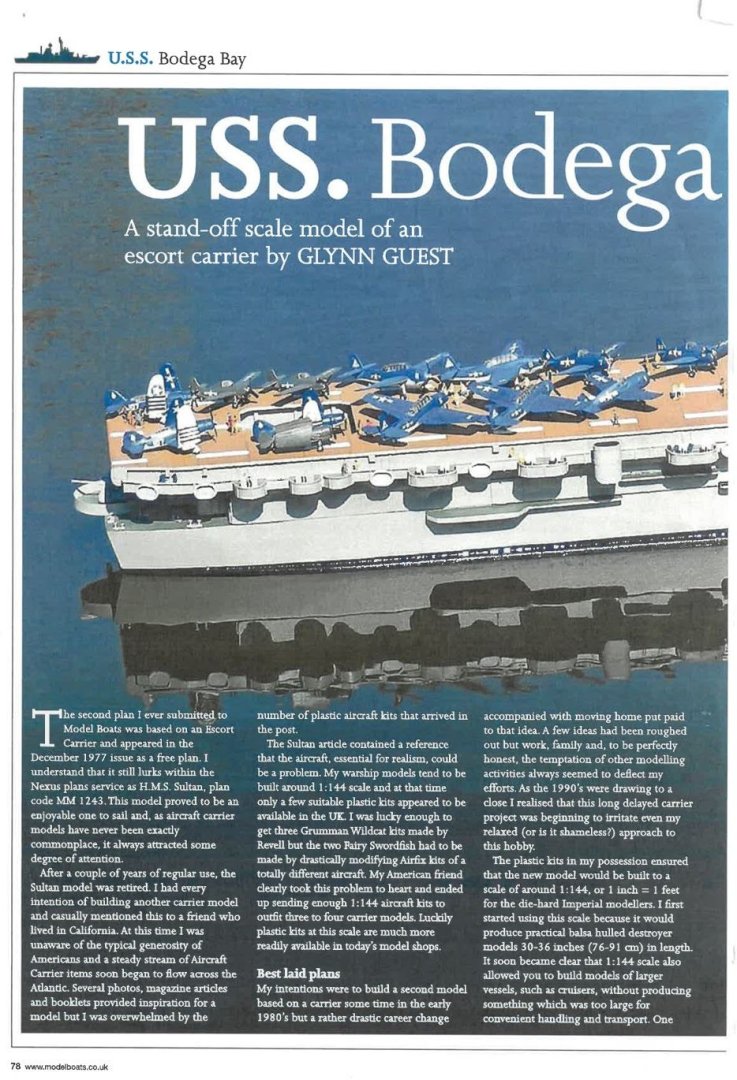
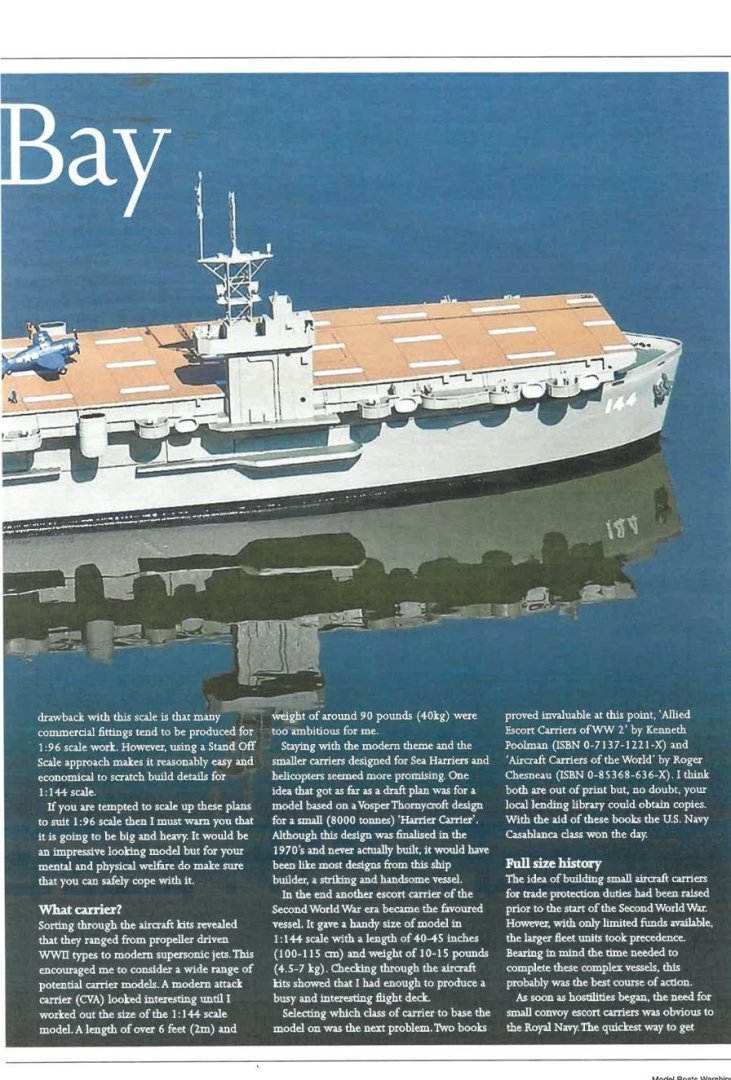
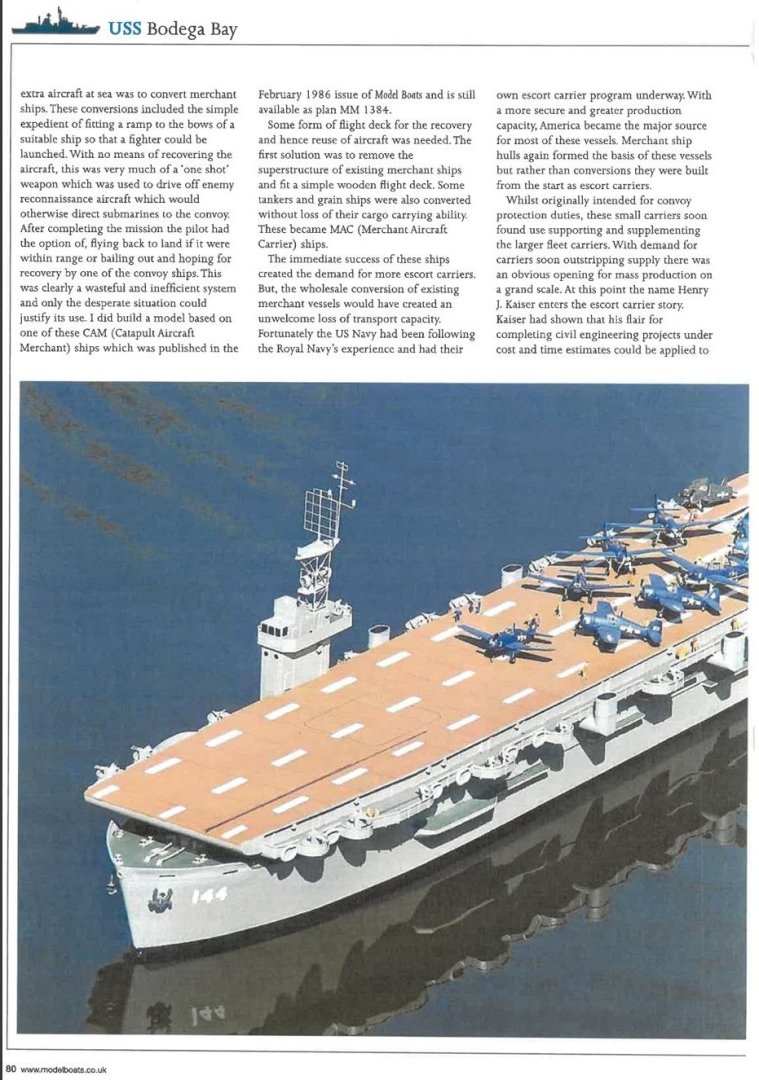
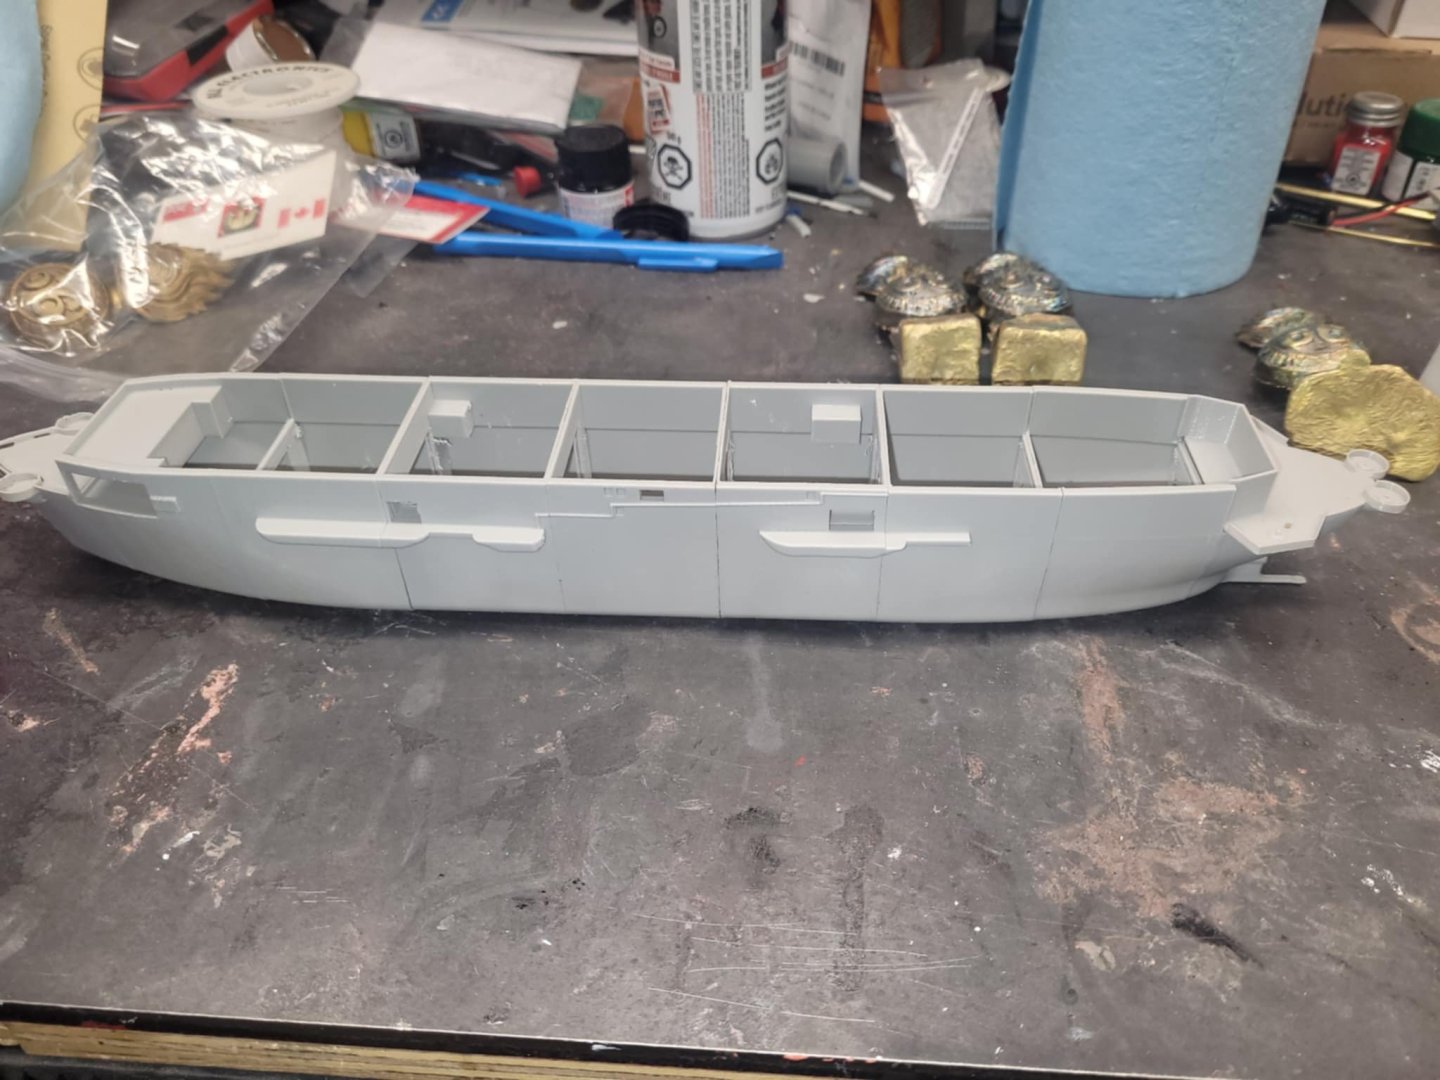
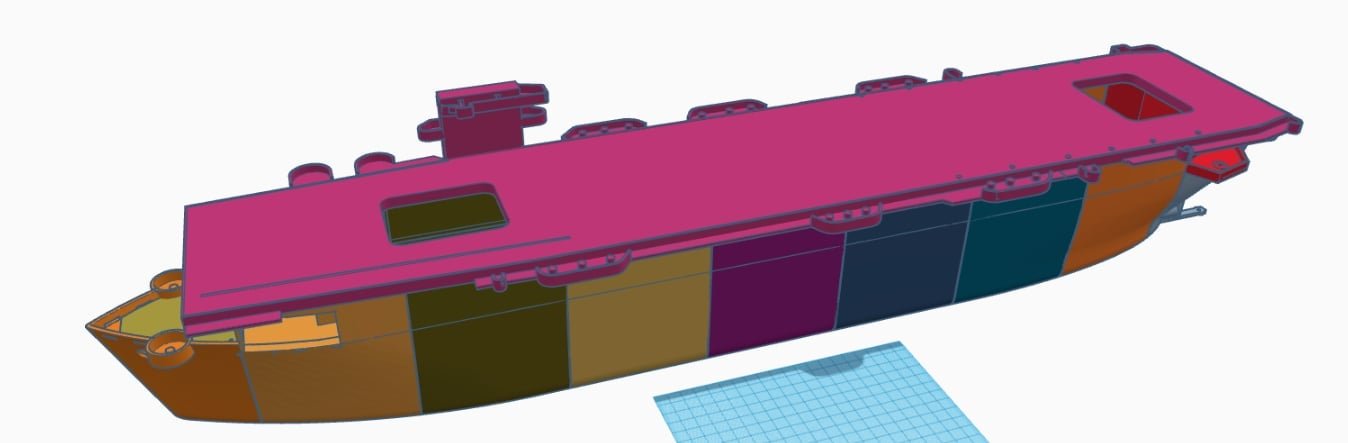
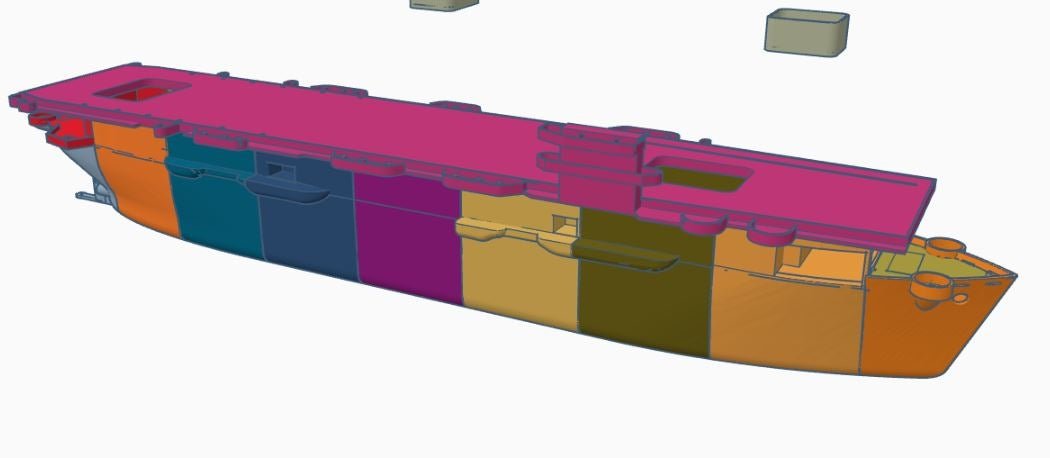
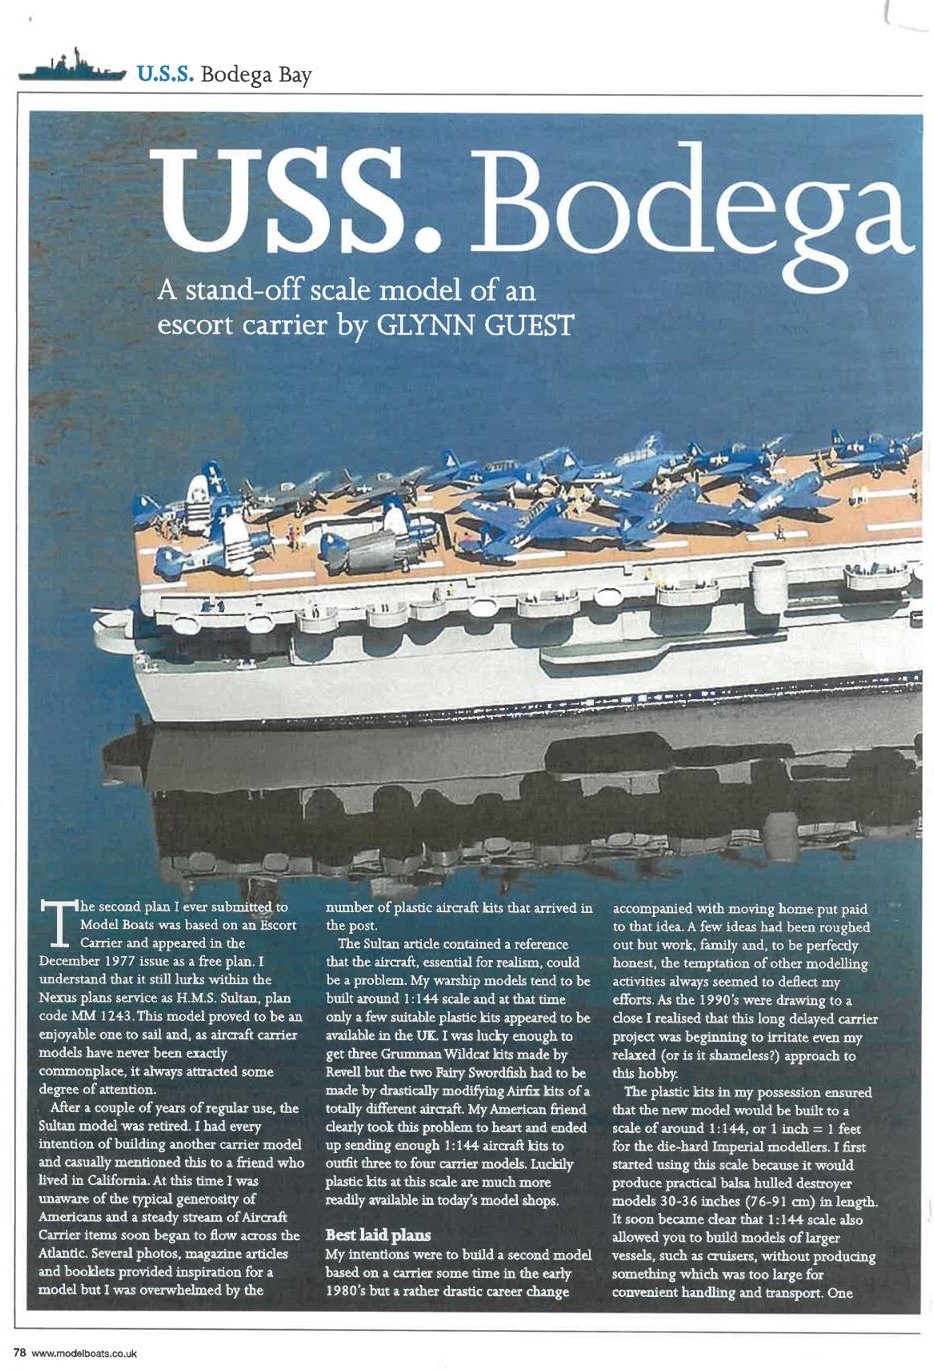
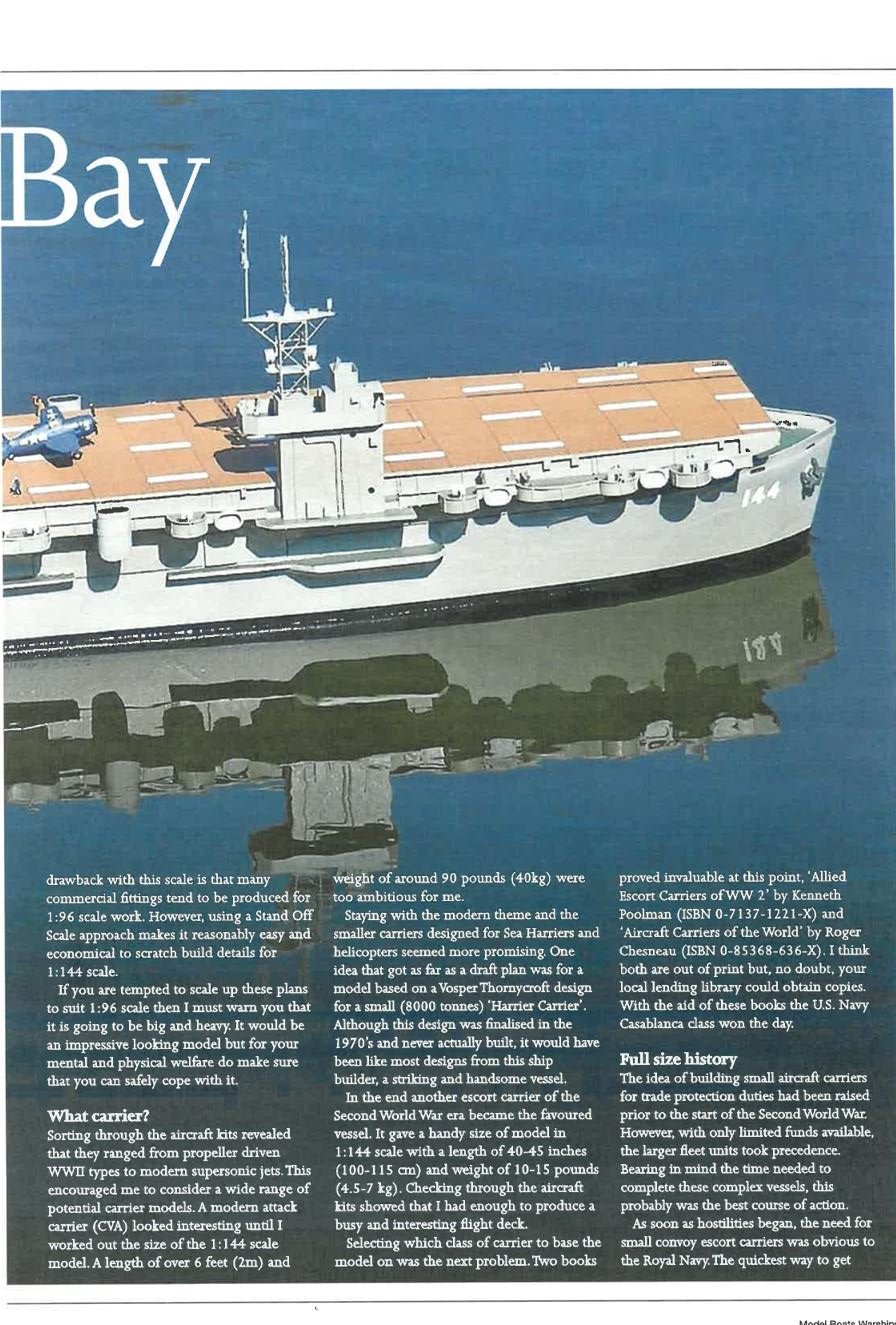
Goodday! A while back, I had a look at the RC Model Boat Magazine, and came across a set of plans for an Escort Carrier. Didn't build it, didn't save the plans...then I got back into building a couple of years back (Covid times I guess) and here we are. I wanted to try and build a model of HMS Puncher - a Brit escort carrier that was operated 'by' the RCN in WW2. I decided to try and dig up those plans from RC Model Boat magazine - research turned up that it was the "USS Bodega Bay" plans by Glynn Guest - I liked the idea of an 'easy' build...something to do in the background of 3 other ongoing builds... So, I found a set of the plans, paid the money, and they showed up in a nice yellow envelope. Yay! Then...I looked at the plans. And realized how basic they really are. I was honestly hoping for more....it truly is a pond scale stand-off model. I was tempted to go with it anyhow, then...then I had a thought. As you may recall, I was puttering away with modifying the Johnbuttery Liberty Ship file available on Thingiverse to turn it into a Vismod Park class ship - I've finished that up...it's been printed and is in the paint process now. The model is available free for download on Thingiverse and Cults3D if you want to do it. But, the thing with the Johnbuttery files is that he did a REALLY good job on the hull. The sweep of the deck is very well done too, so there's a lot of complex curves that he correctly tied into the design. That makes it tough for a hack job like me as a 3D 'designer' to adjust. I'd be better off starting from scratch. However. There is another set of Liberty Ship files on Thingiverse, a design by a guy named "Jabberwock" and I decided to have a look at those. His hull design is somewhat simpler - in fact, he's got a completely flat upper deck. That...appeals to me....it means I can easily lop off the upper deck bits and build up from there. So...that's what I did. I'm now bunch of hours into the hacking and slashing and designing, in a mix of Tinkercad and Design-Spark Mechanical, and I'm reasonably pleased with what I'm seeing so far. Here's some early pictures of the process. I'm well along in the build now, but catching up this build log. I ended up printing a 'draft' model of her in 1/350 to see how things looked and work out some bugs.

- 51 replies
-
- 4
-
-
- Puncher
- escort carrier
- (and 1 more)
-
Good morning! Avoiding the city - I cannot blame you in the least. I don't like going downtown much either. Hope you make it out at some point though!
-
Welcome aboard! In case you're interested, here in NS there is a group called the Maritime Ship Modellers Guild. We meet the 3rd Saturday of each month at the Maritime Museum of the Atlantic at 10 Am. We're always looking for new folks to join our group of builders! The next meeting is Saturday. We also have a F Book page of the same name. We have builders that make 3D printed stuff (me) others who build kits, some who build from scratch, and have some members with absolutely amazing skills. (I have no idea how they do the rigging on the sailing ships...never ceases to amaze me with the detail they can make!) You're welcome to come on out to the meeting, meet the gang, and afterwards, we have free admission to the museum to look around if you want to poke about! NS
-
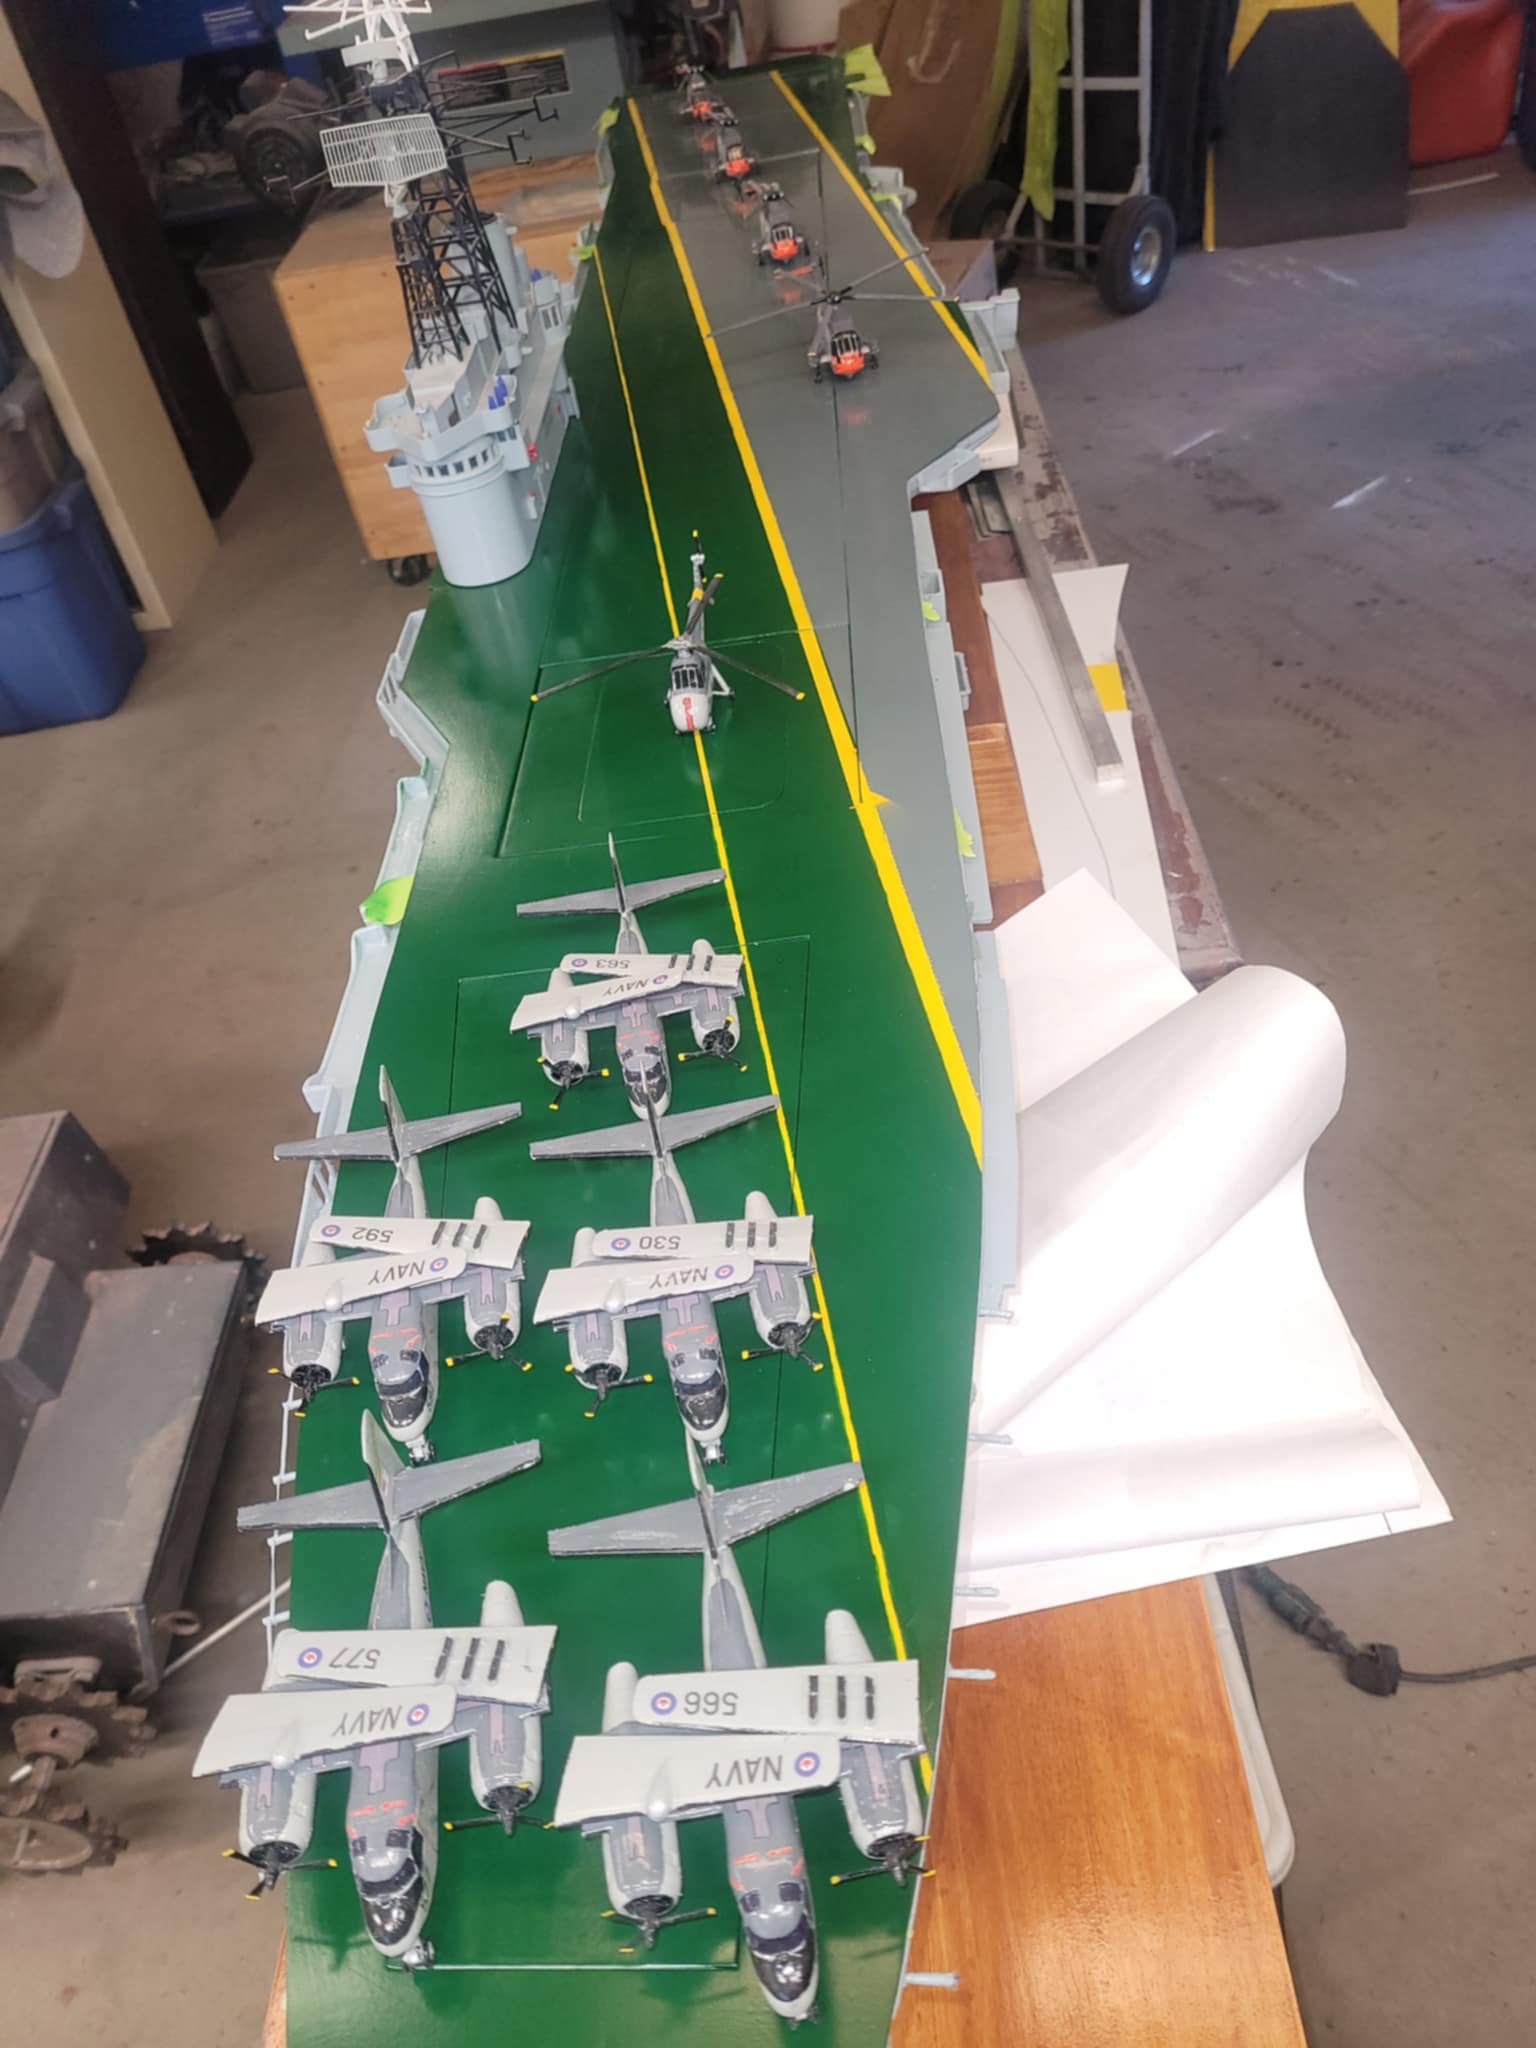
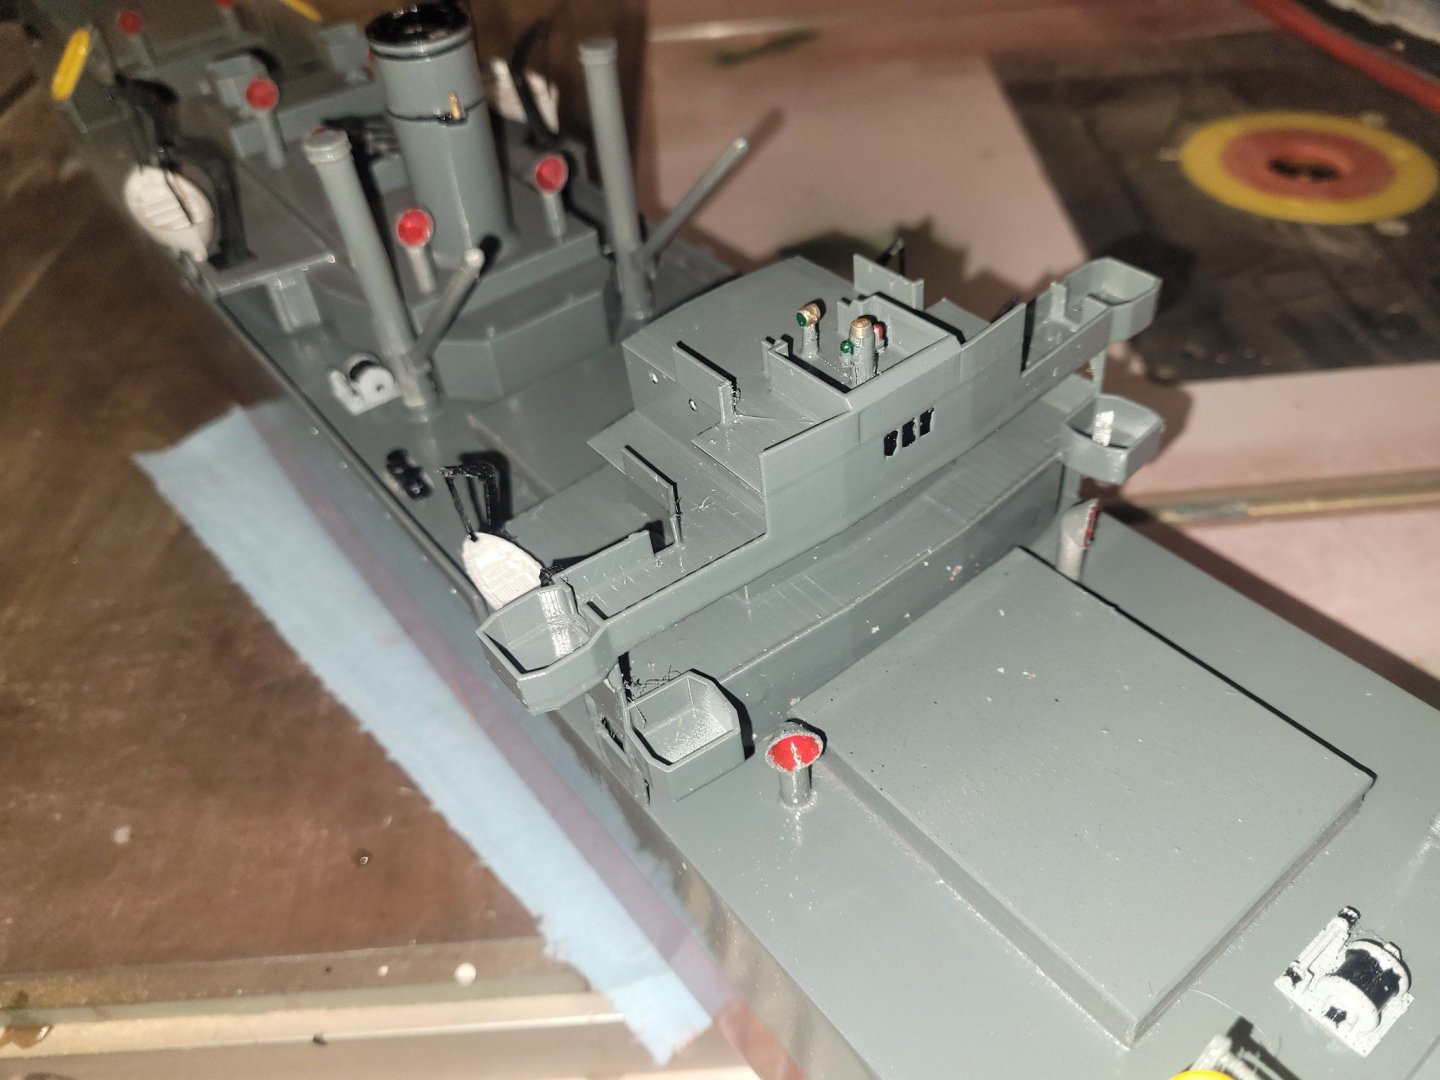
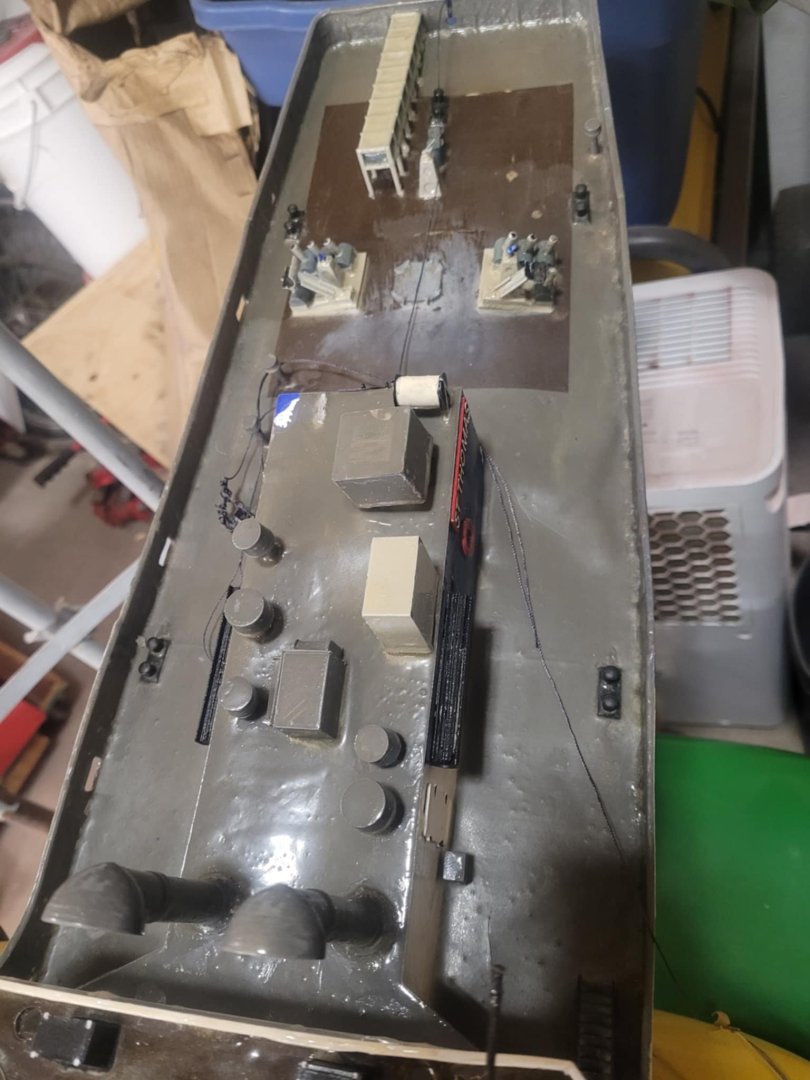
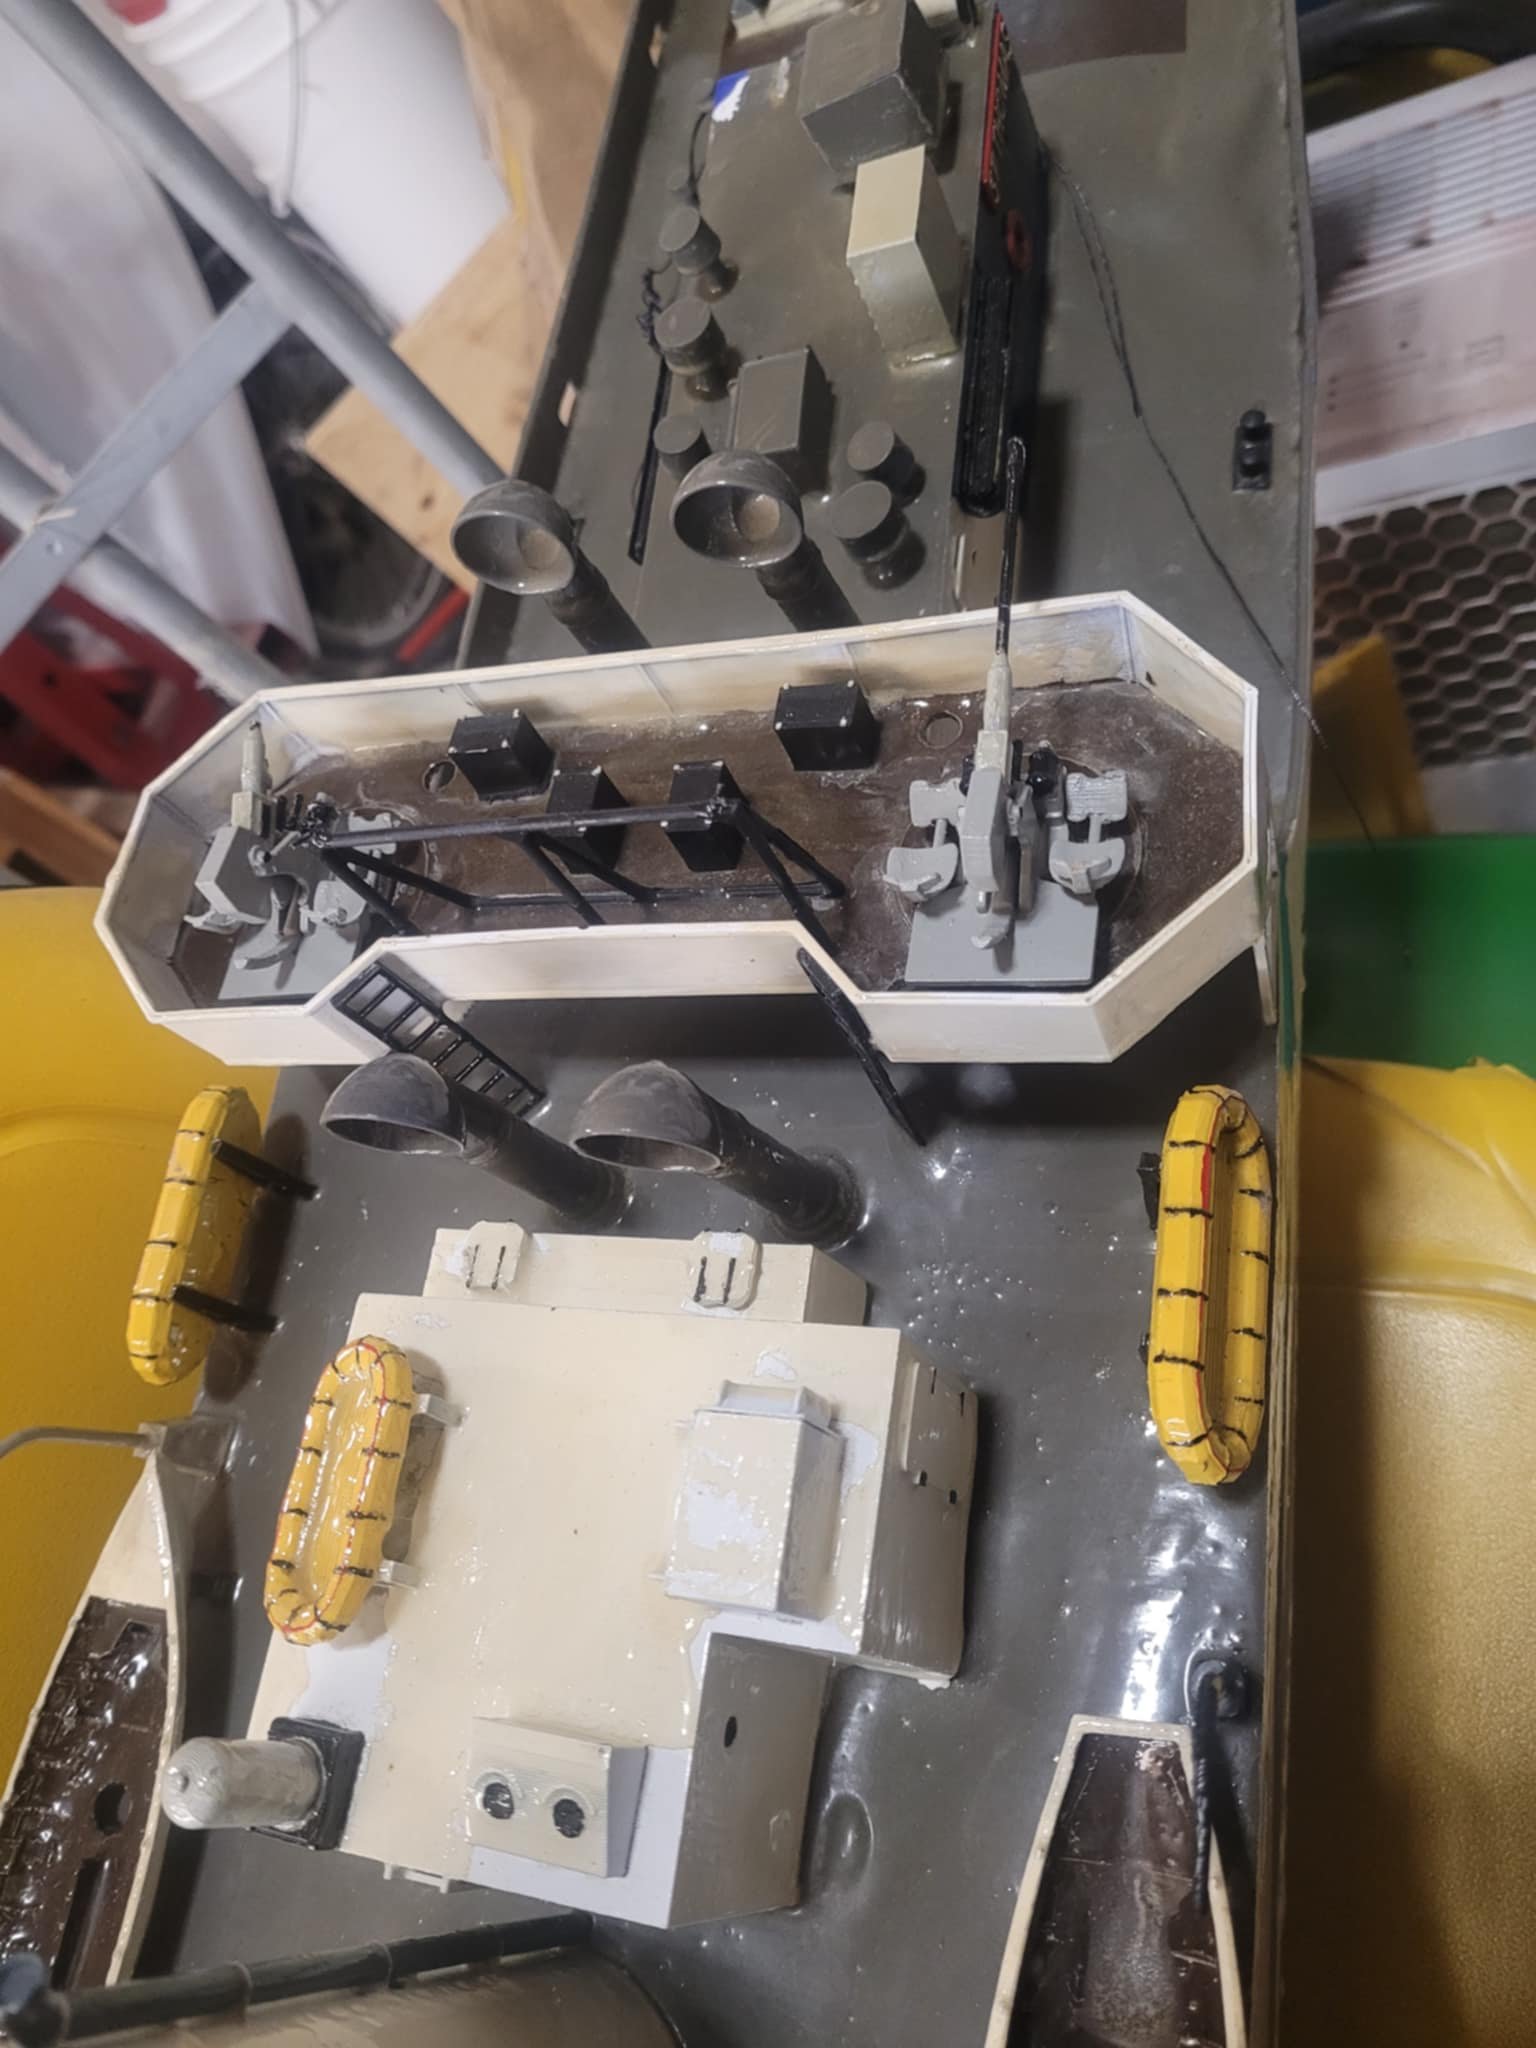
Getting there...I dug out some of the air det for visual effect.

-
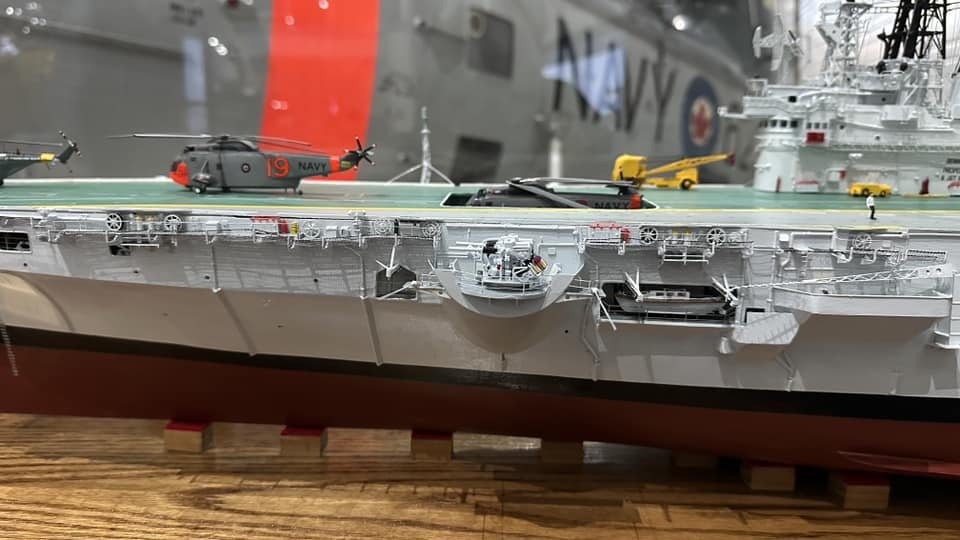
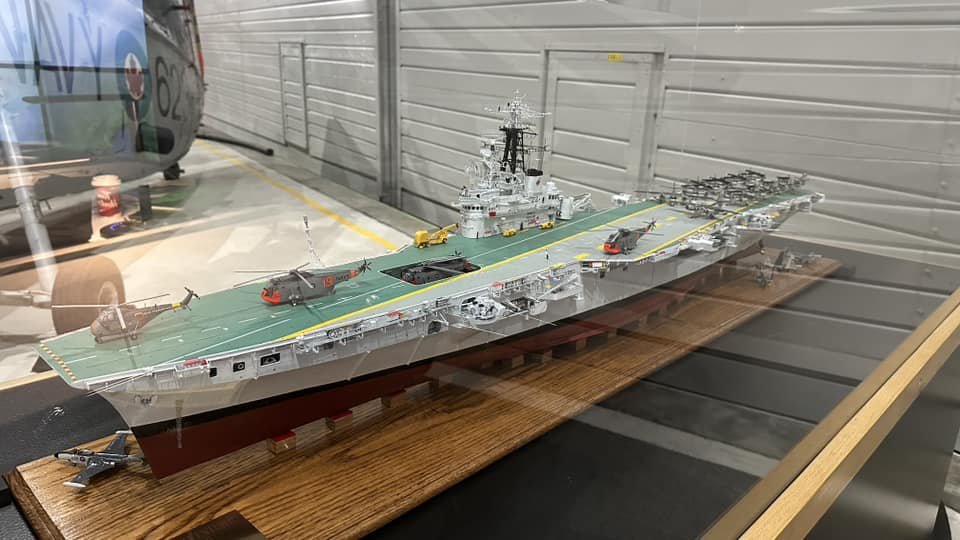
A friend of mine ended up at the Aviation Museum in Ottawa and snapped a few photos of the outstanding model that Dan Linton built and donated. Turns out that another friend of mine was one of Mr. Linton's students (he was a high school teacher!)
-
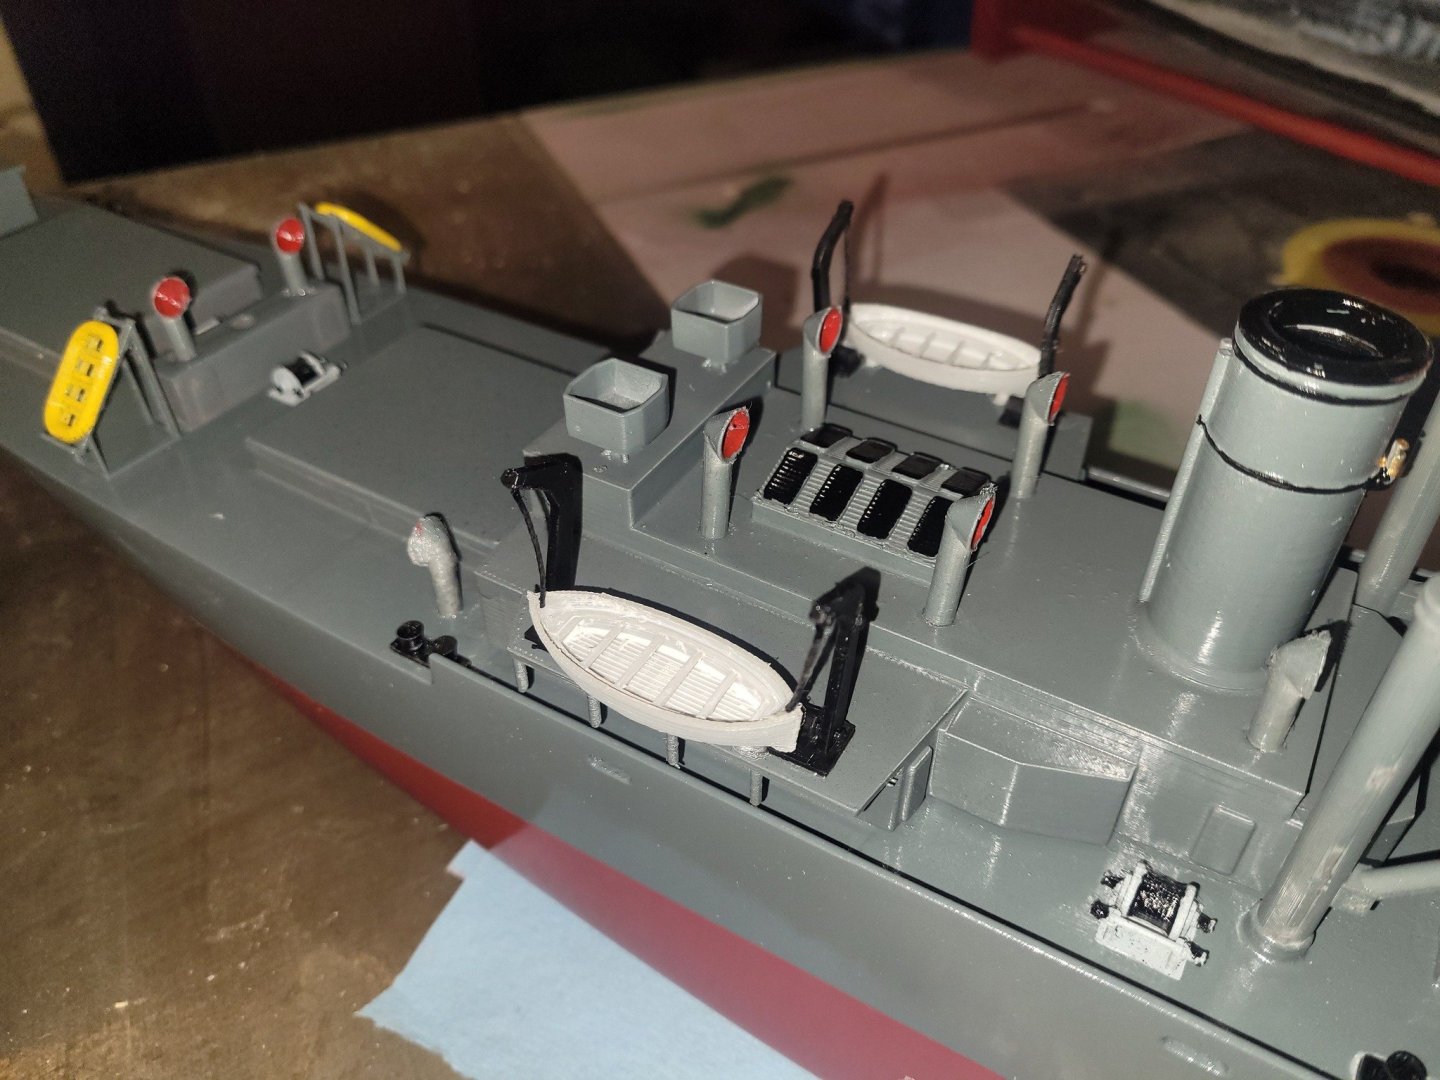
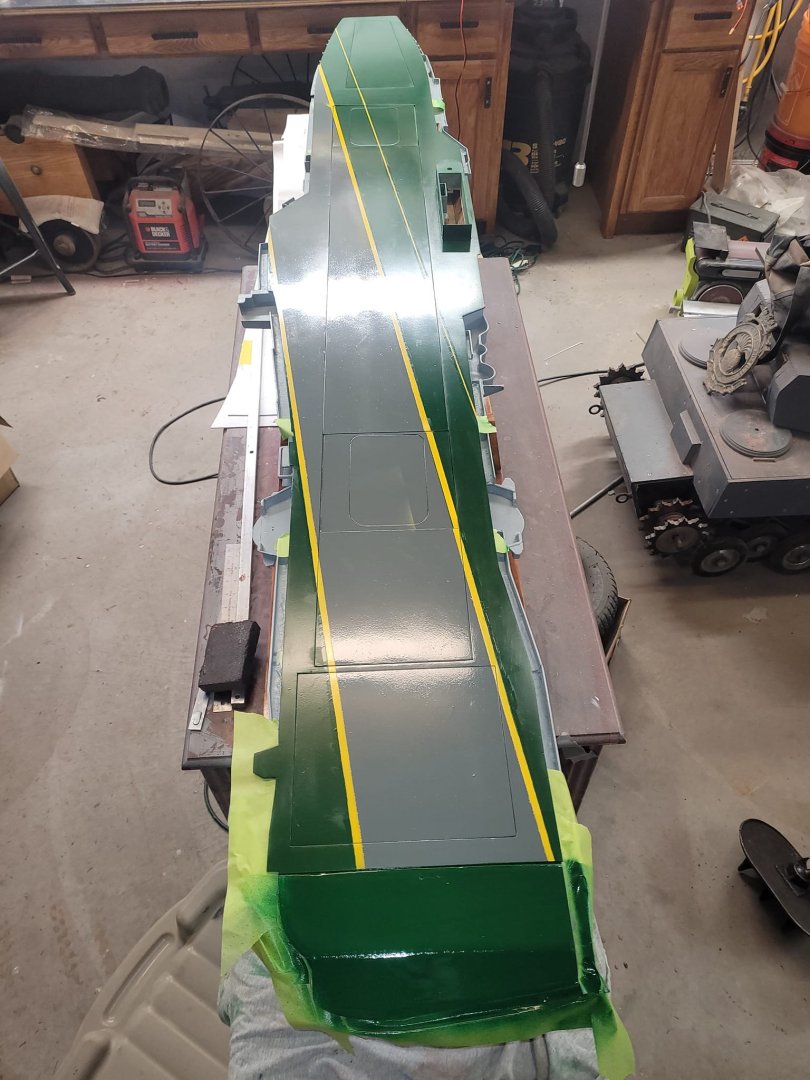
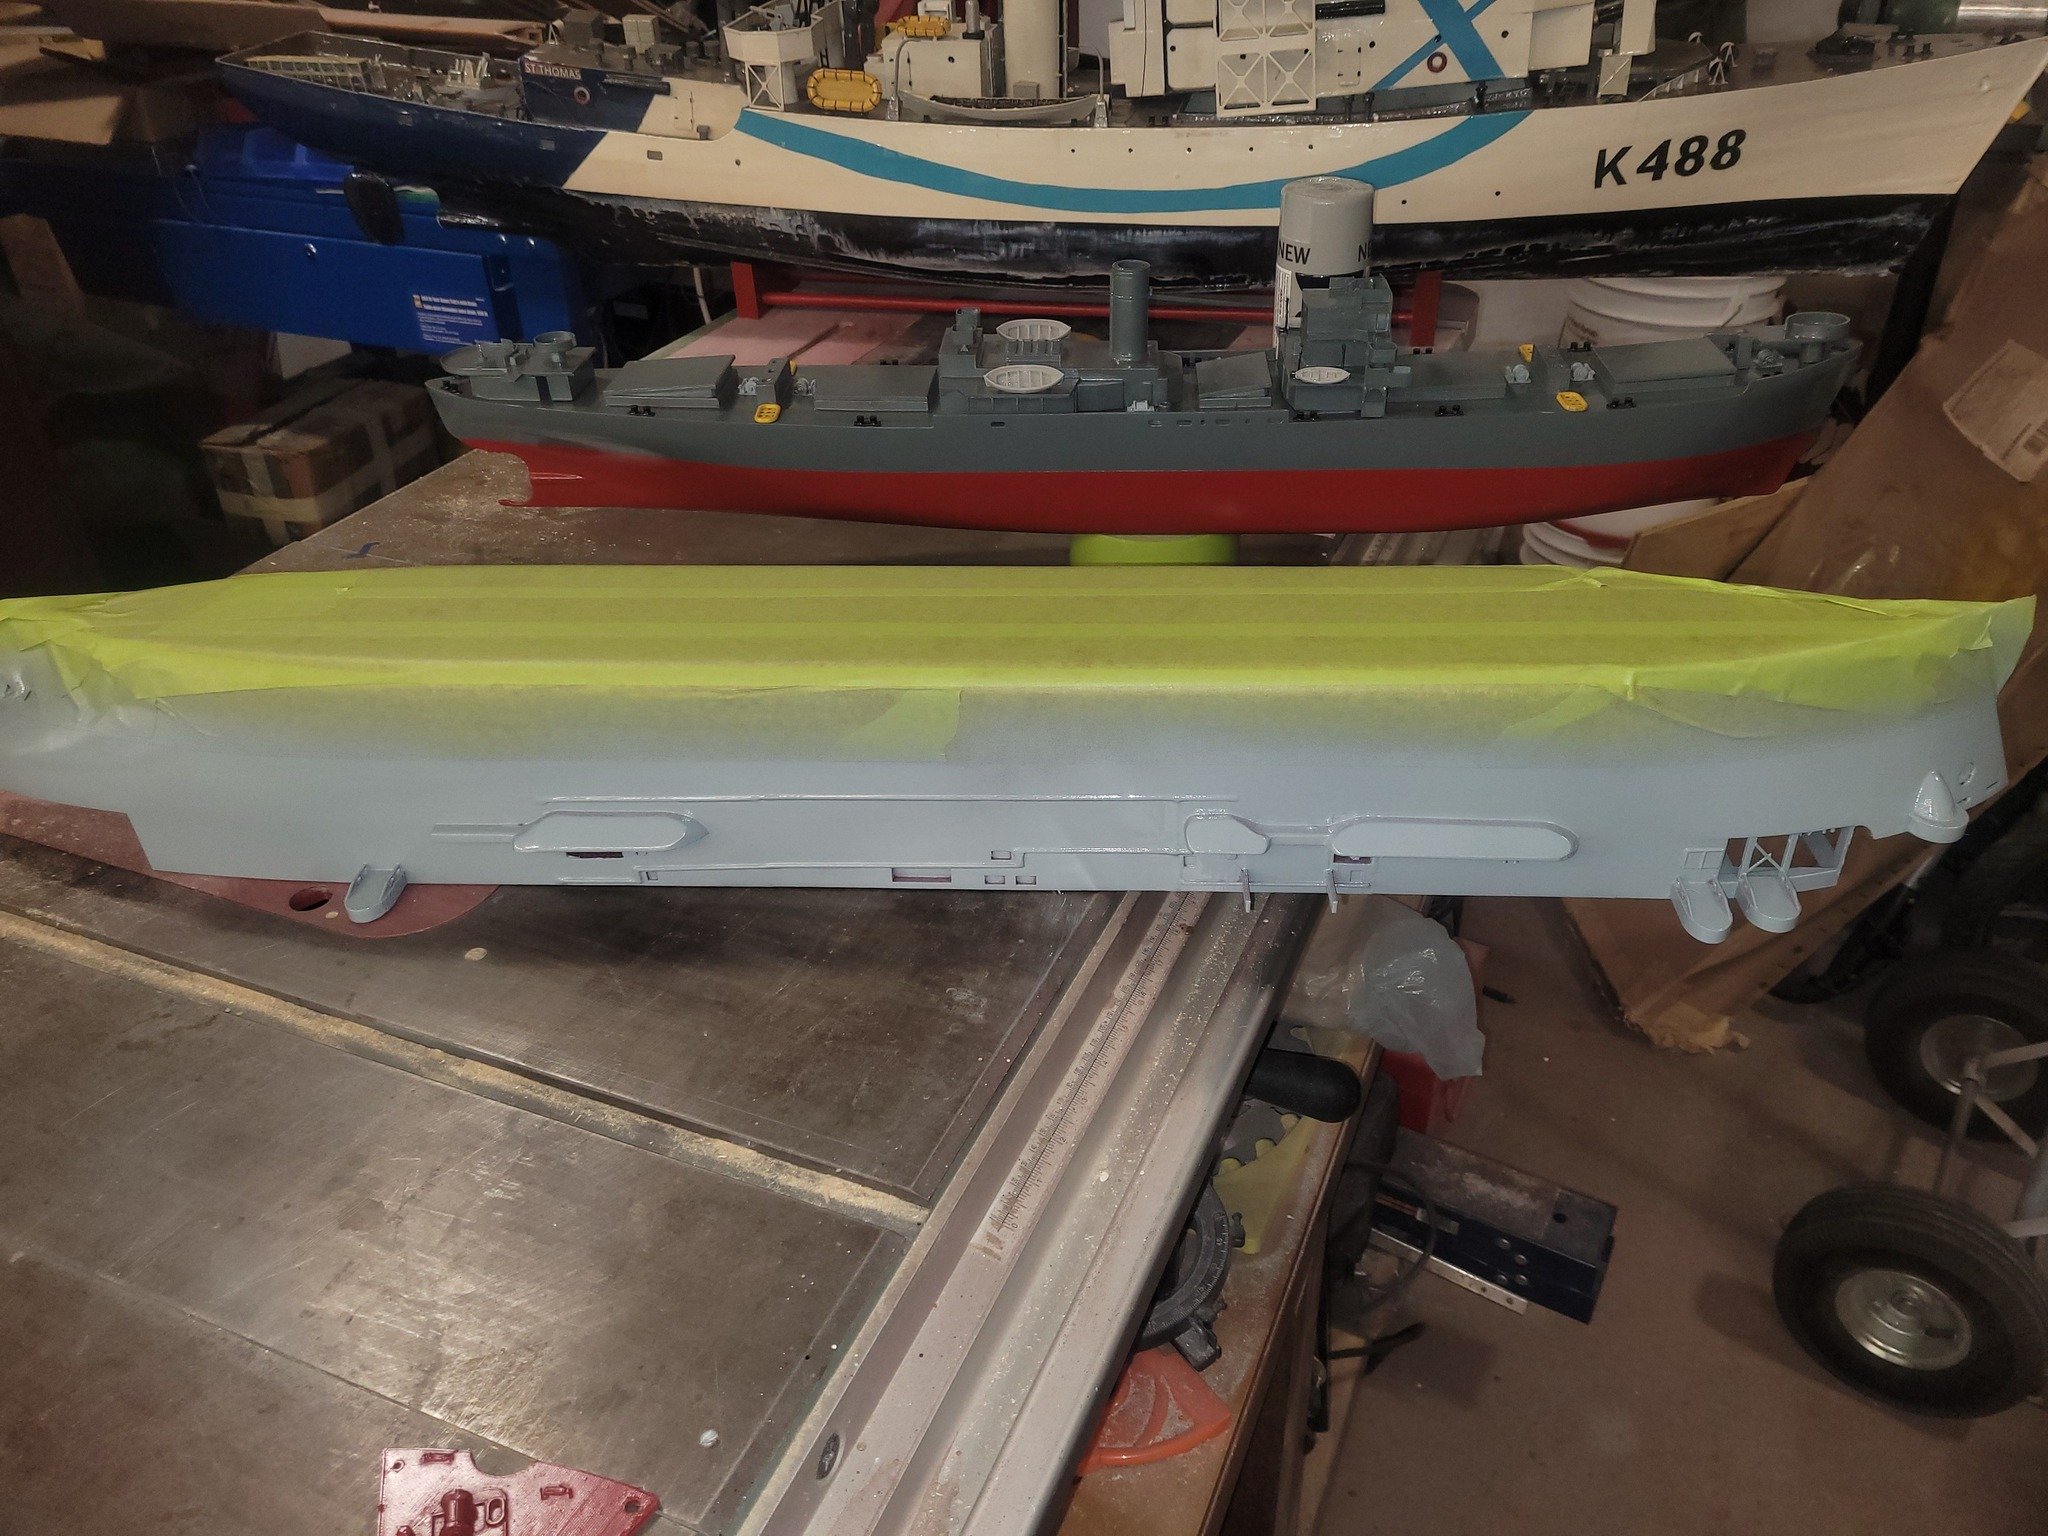
Things are moving along....
-
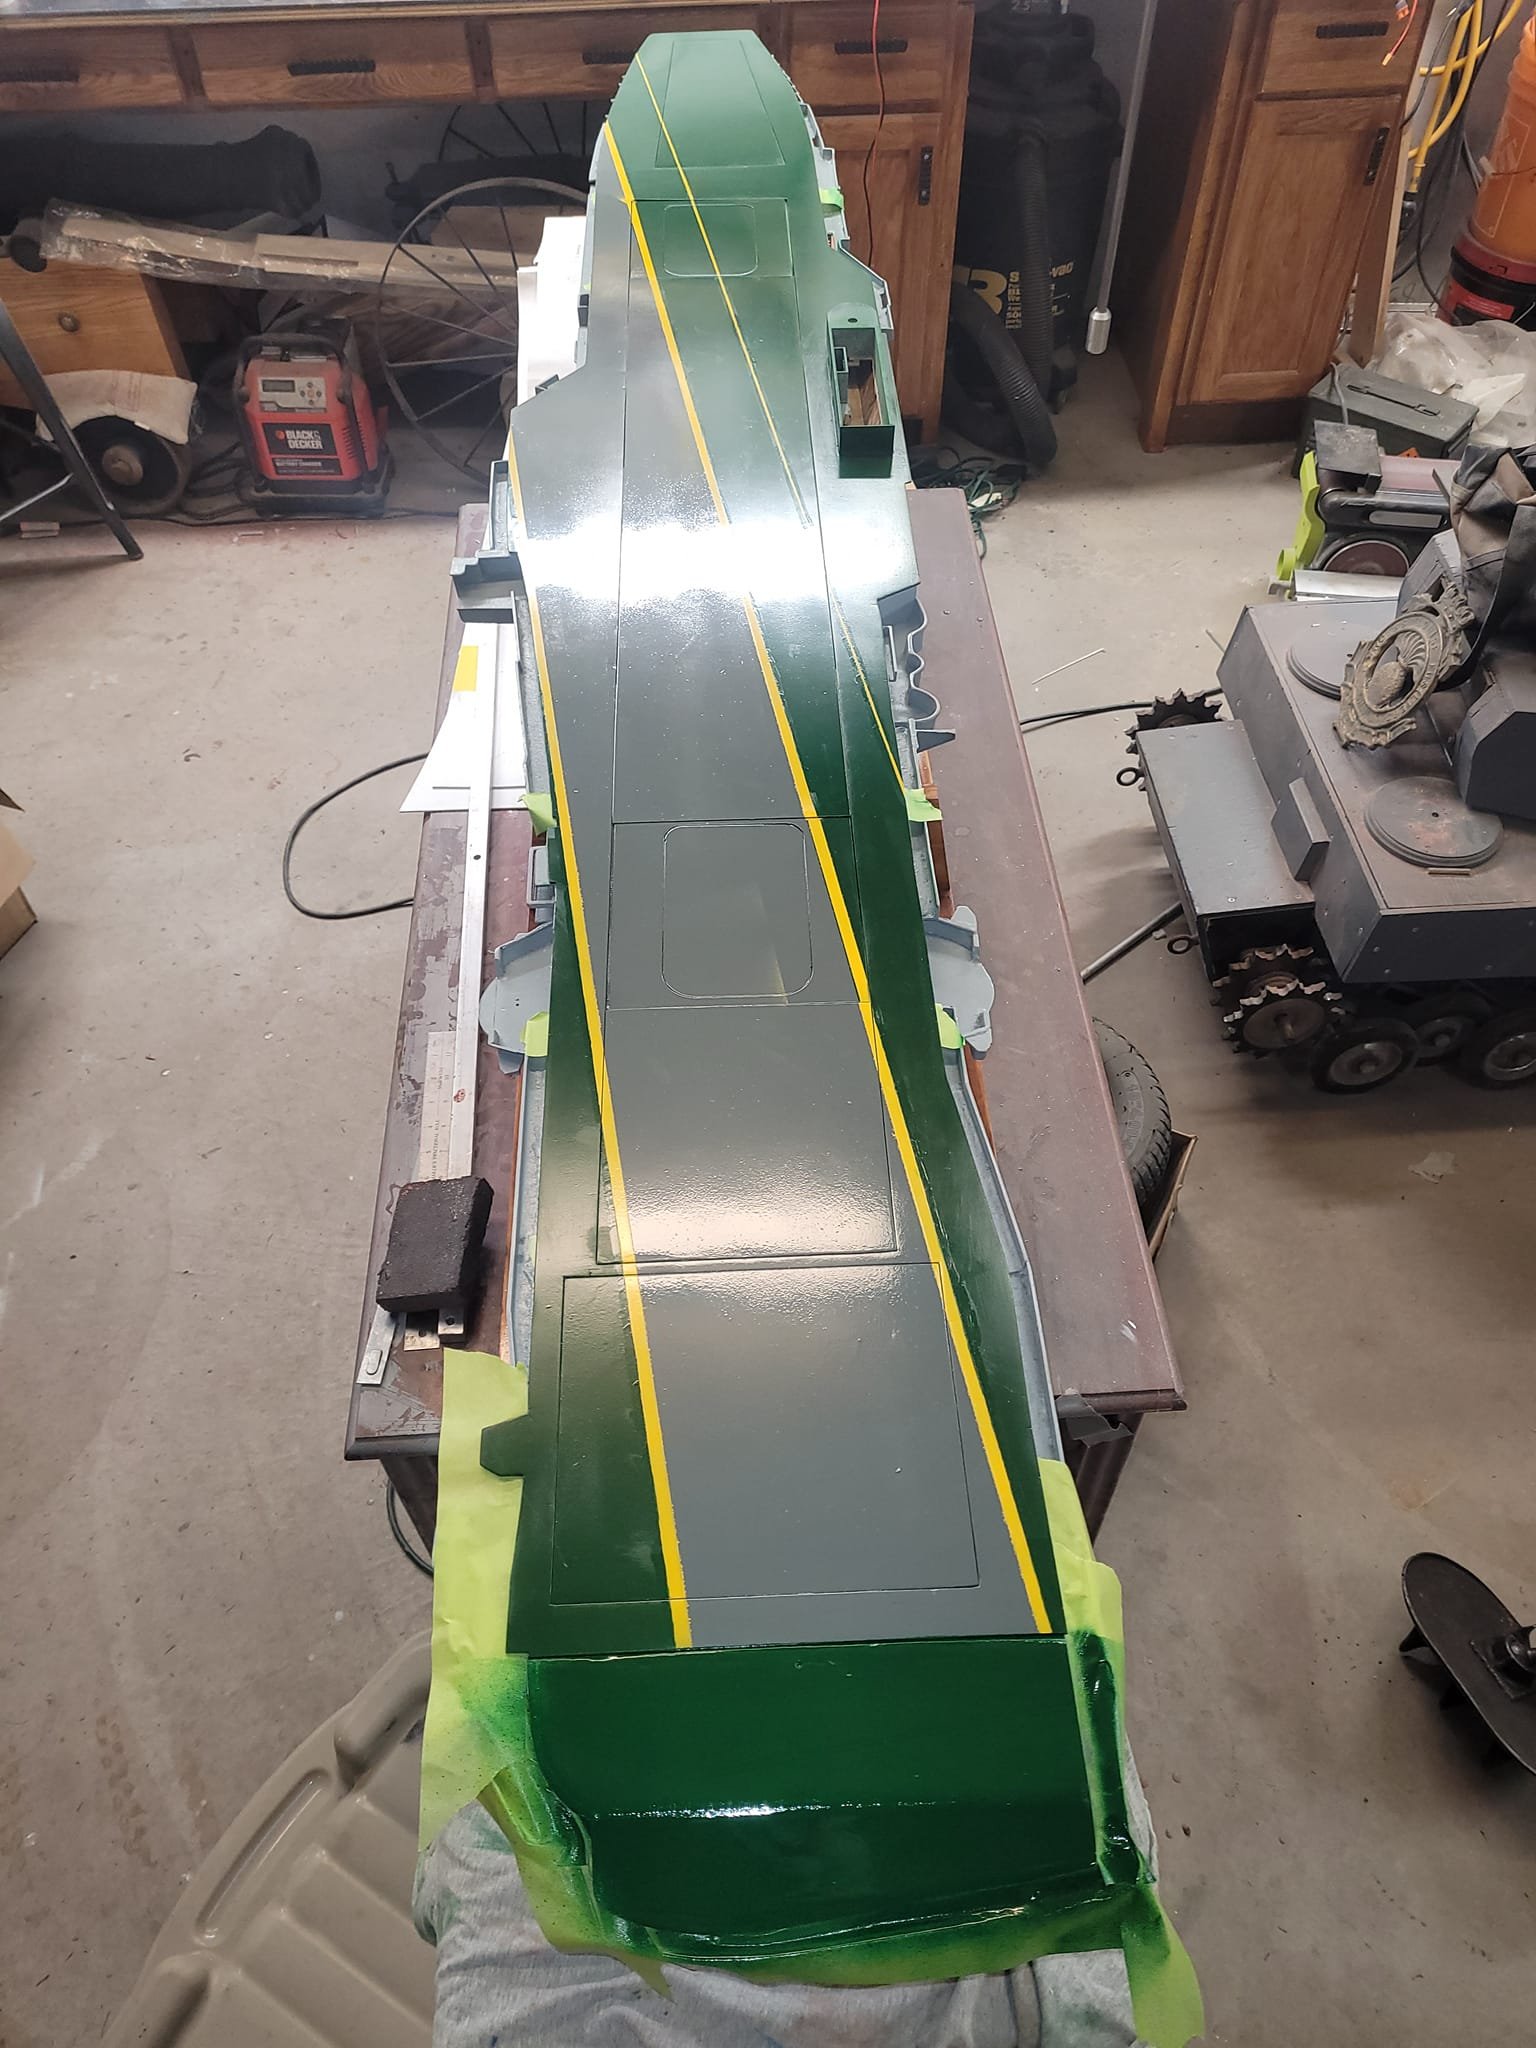
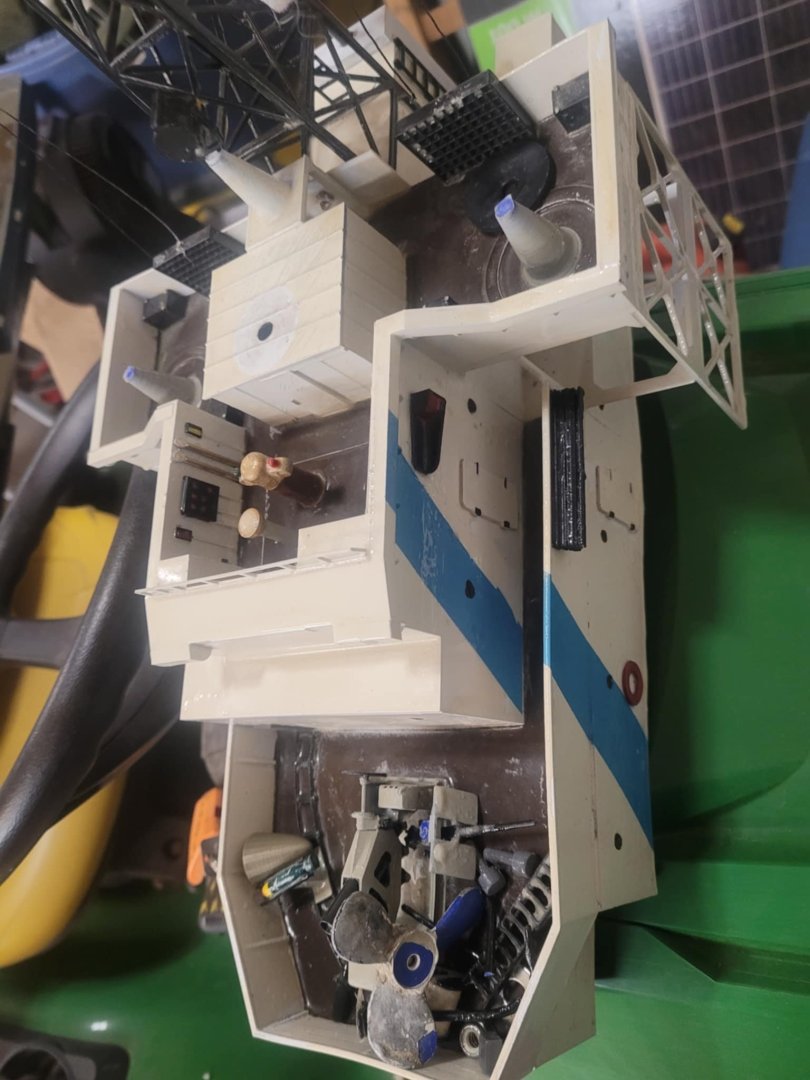
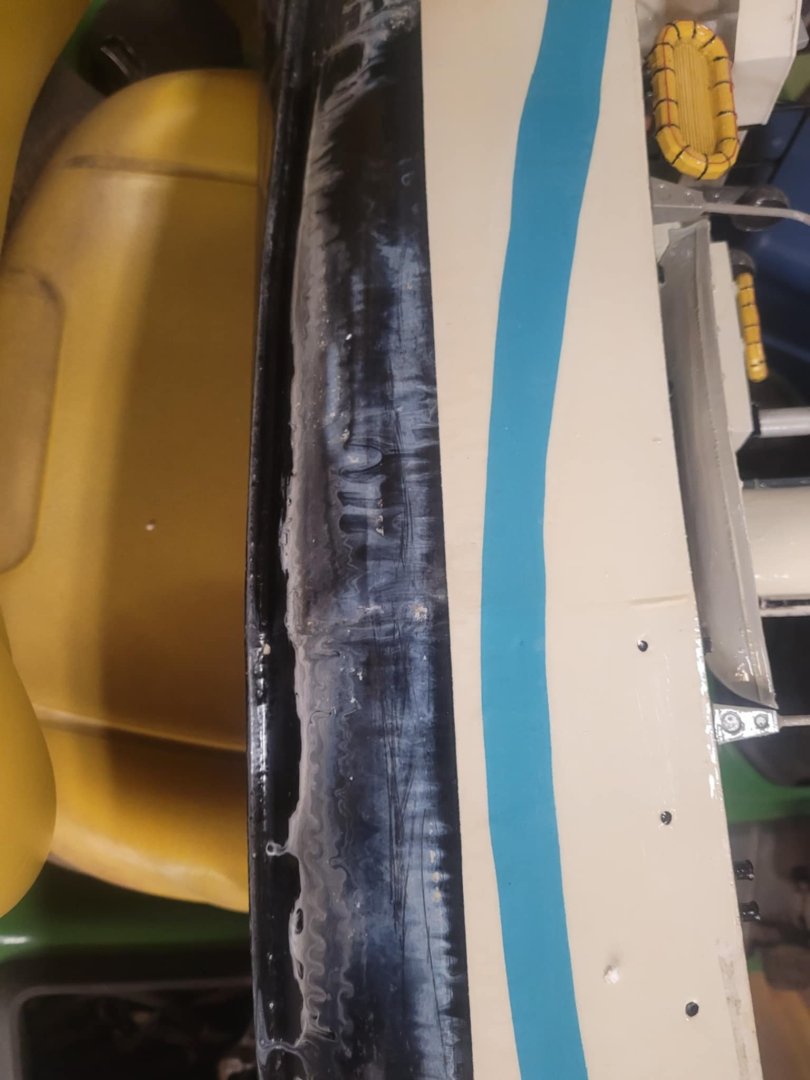
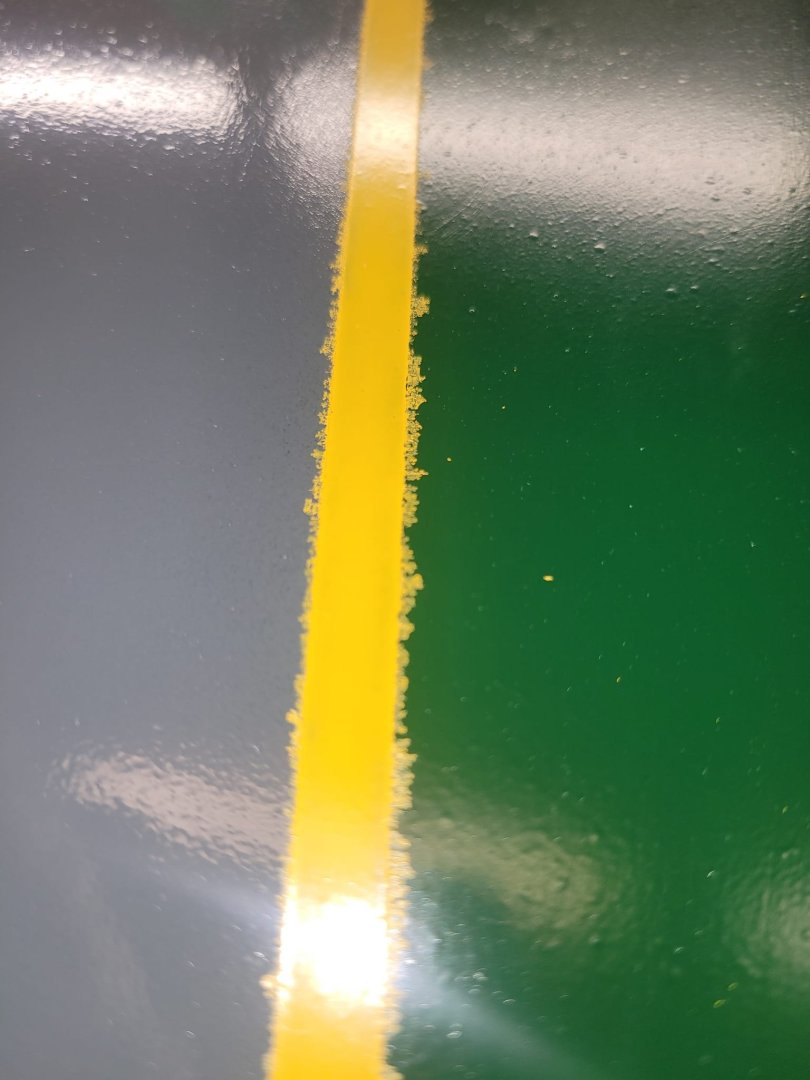
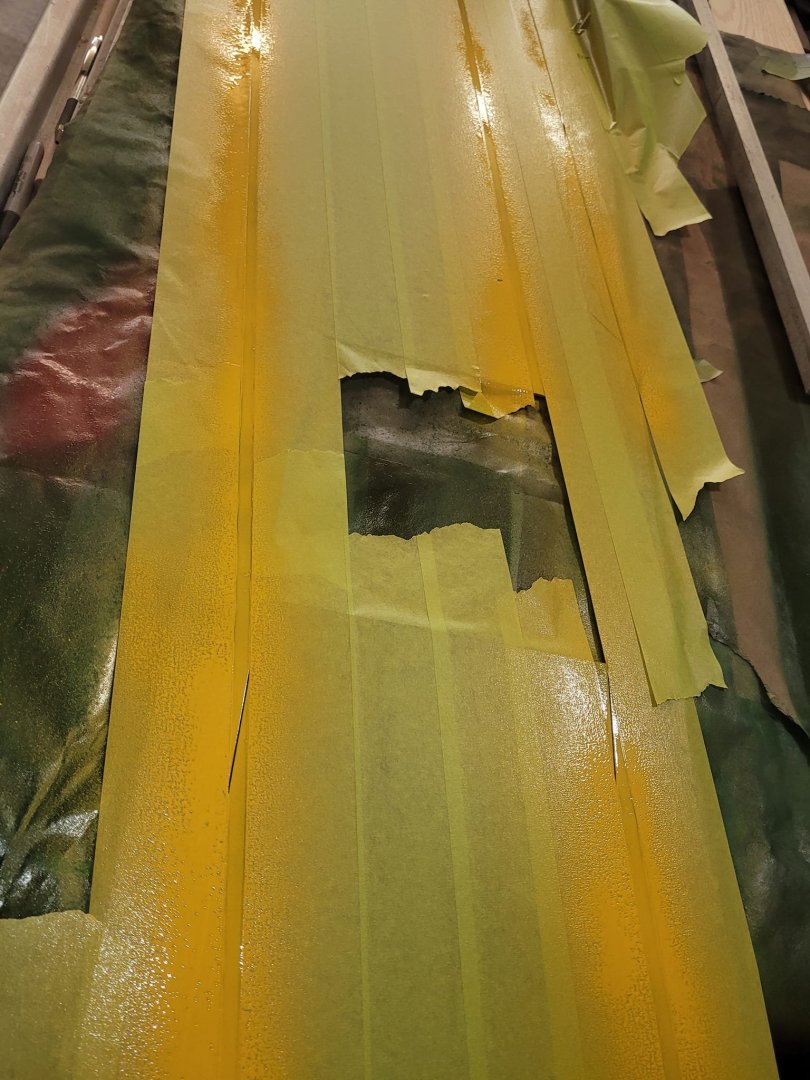
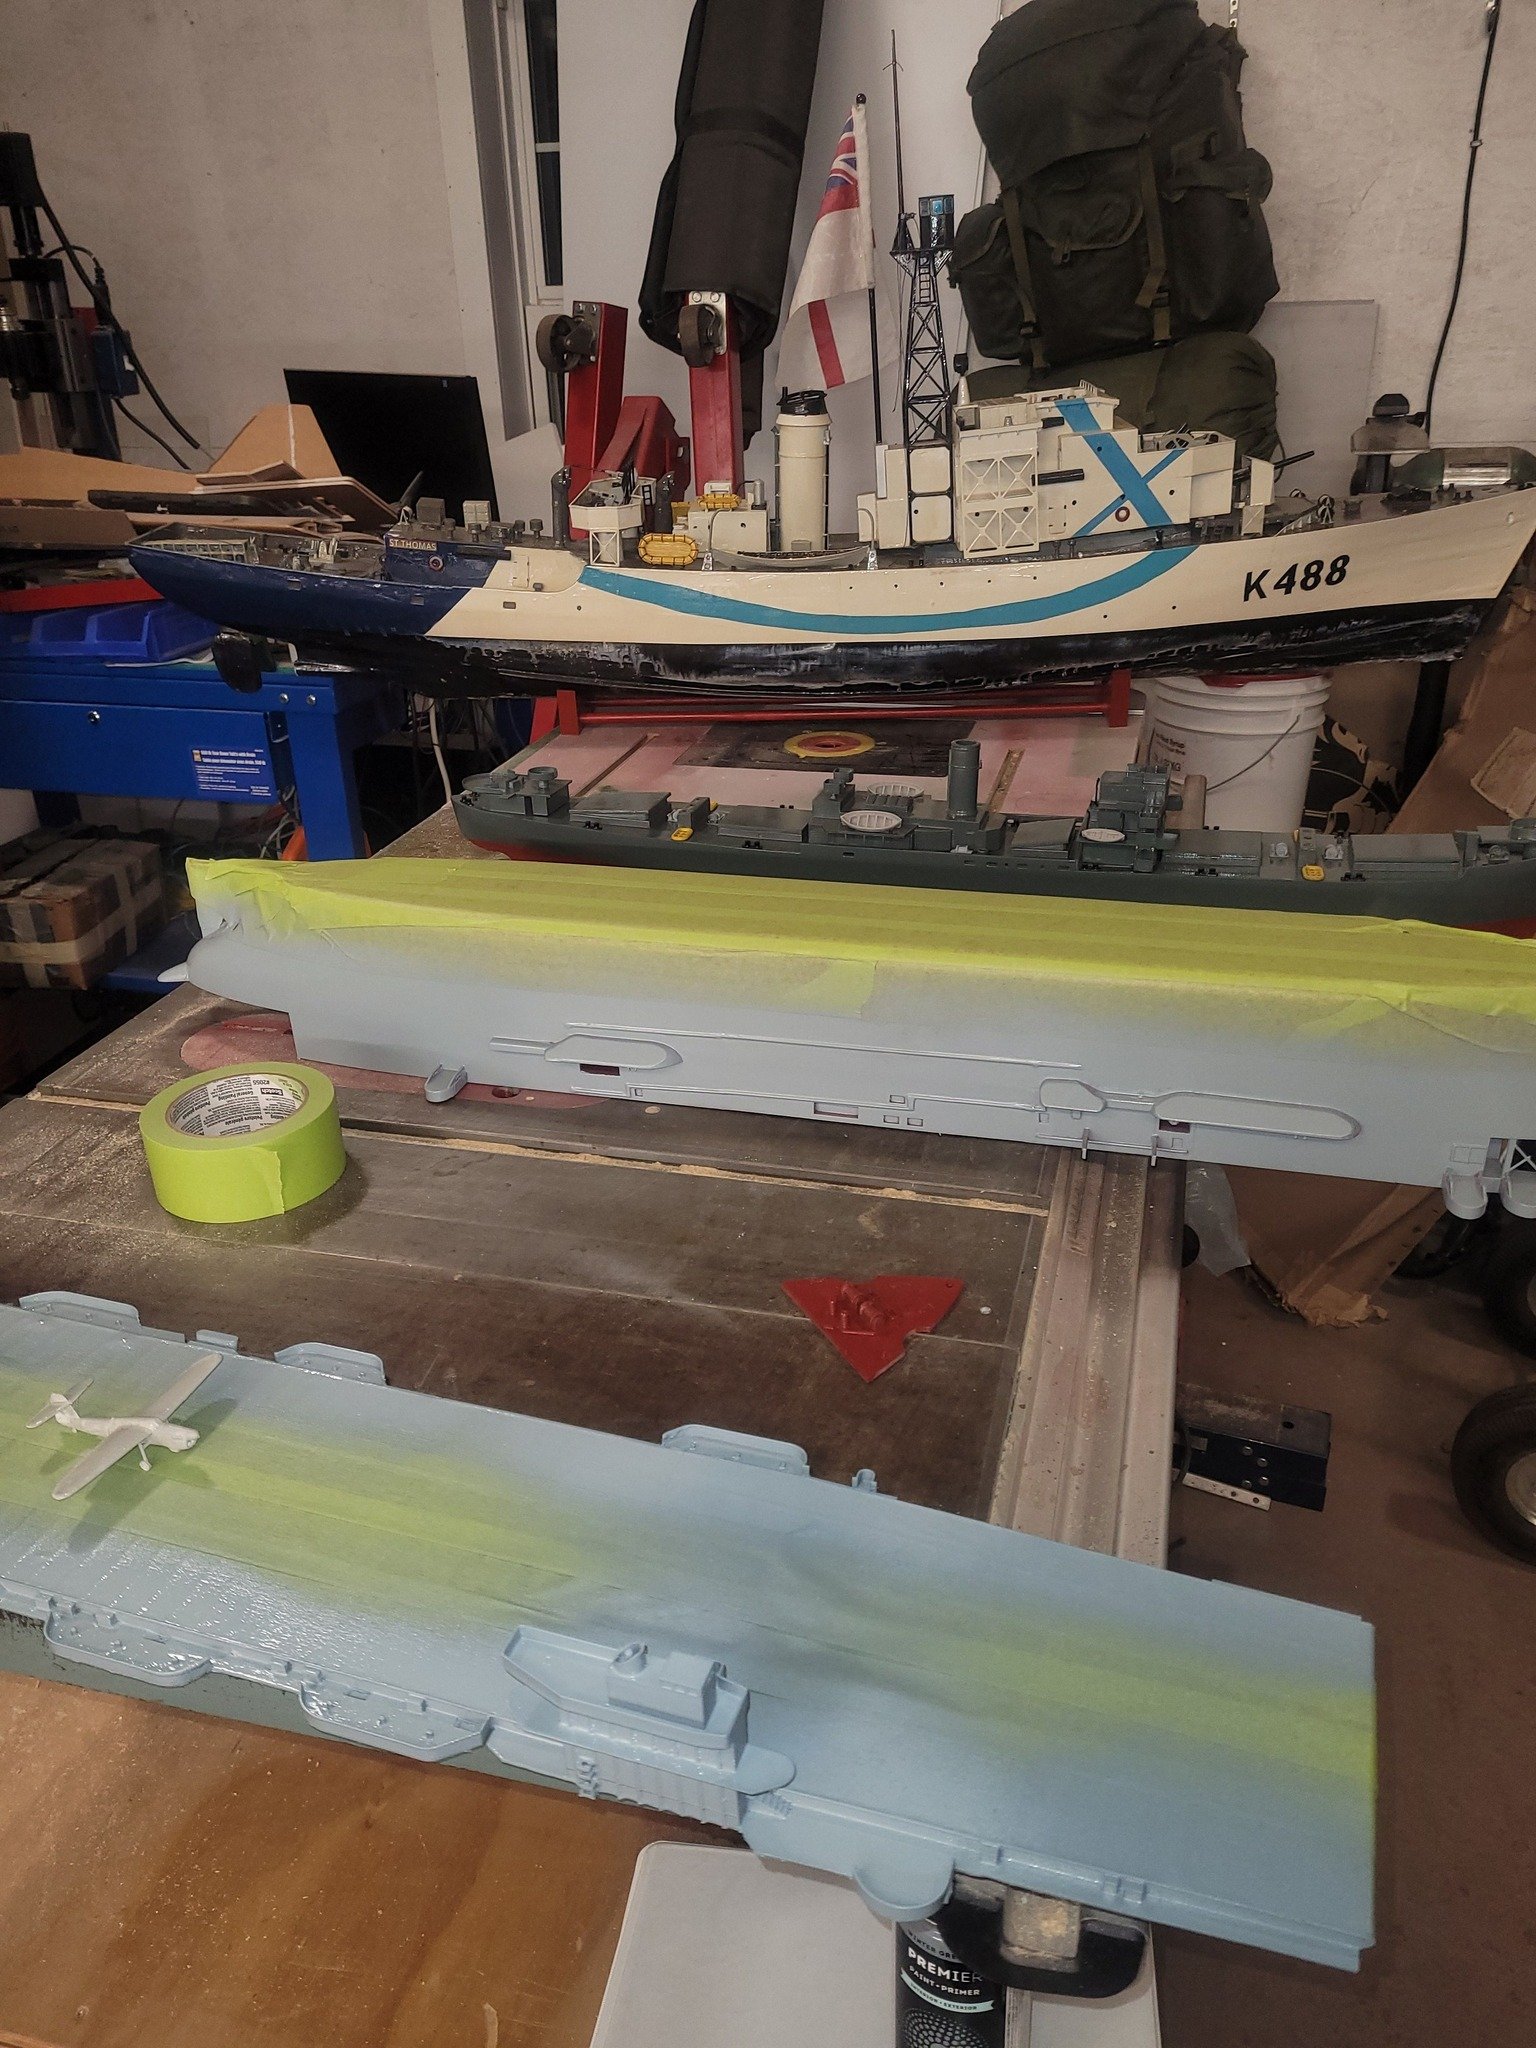
Time to add some yellow lines.... Alas, you can see that the paint bled under the tape...so some touchups required. Green touch-up completed.


.jpg.7d31b7a8aac05964acc252c4b138646a.jpg)