NavyShooter
-
Posts
697 -
Joined
-
Last visited
Content Type
Profiles
Forums
Gallery
Events
Everything posted by NavyShooter
-
 She's as good as this model is going to get....tomorrow I'm going to put a mask on the hull and do a waterline in black, then peel the tape and hope the putty sticks to the plastic....rather than the tape.
- 61 replies
-
- 1
-

-
- Type 26
- City Class
- (and 2 more)
-
I've got some 'ship's side gray' applied now - still needs sanding and touch-up, but it's getting there. I've been playing with the print files in the background - most of the walls on this model came in at less than 1mm. I've doubled that with the new version. One of the problems this set of stl files has when downloaded is that it has a lot of facets/triangles rather than a smooth hull form. I'm working to rectify that with a buddy who knows a thing or two. See how it goes.
- 61 replies
-
- 5
-
-
- Type 26
- City Class
- (and 2 more)
-
Another layer of bondo, and a bit more primer, and today's sanding saw me penetrate the plastic in one or two small spots. I rescued those with some superglue, but there is a limit to how much sanding that can be done....so....I'll do a light bit of touch-up next week (off to the field with the Army this weekend to play with drones and Carl Gustavs) and then I'll roll into masking and painting.
- 61 replies
-
- 1
-
-
- Type 26
- City Class
- (and 2 more)
-
You may well have seen a Swordfish under my name on TV.... BTW, I put up a tutorial on RCG in my USS Bodega Bay/HMS Puncher thread starting at post #30 on how to size and print aircraft for 1/144 scale RC Aircraft carriers. USS Bodega Bay - or...HMS Puncher? - Page 2 - RC Groups Have a peek - cutting the fuselage in half part-way then gluing it together will give decent results with less supports required in my experience. Your printer looks like it's got a bit of loose-ness in one axis result in those pronounced lines across the wings and tail - check your belt tension maybe? NS
-
Good 'Hobby Quality' Metal Lathes
NavyShooter replied to tmj's topic in Modeling tools and Workshop Equipment
Sounds to me as though you're looking for a Sherline or Unimat size/style lathe. I had a Sherline, and a Unimat, and found them small for the work I mostly do. I do hobby stuff, but metal work was mostly related to fire-stick linear projectile accelerator systems. If you catch my drift.... The Sher/Uni were both too small for my desires. I sold the Sher/Uni and got a used Southbend 10K from a high school sale, which I ended up selling to buy a Precision Matthews 10x30 lathe about 7 years ago. The SB was in rough shape - ways were demolished from 3 generations of kids dropping stuff on them. The PM doesn't have a quick change gear box for thread cutting, but it does have gears you can swap around to cut threads. It came with a QCTP and a variety of tooling. Runs on 120V, and does all I've asked it to do. It's not a business machine, it's a hobby machine, running it for 10 hours a day would be rough on it I think. Running it for a few hours on the weekend, and a couple nights a week? No problem. That said, since it sounds like size is the biggest concern you have, I'll suggest the Sherline, as it's got a lot of accessories available. Tooling is important and Sherline has oodles of it out there available. NS -
That was....a tube and a half. For the first layer. I used the rest of the 2nd tube on the 2nd layer. I put on rubber gloves and literally smeared it on, rubbing it into the surfaces....
- 61 replies
-
- 2
-

-

-
- Type 26
- City Class
- (and 2 more)
-
That's spectacular! The full vignette with all the details - really well done. Your work is outstanding.
-
This is a damn fine project! Well done! I think I need to learn Fusion 360....there are a few projects I would like to have a go at. NS
-
Here we see the project at the end of today - hull fully sanded, and a layer of primer shot overtop. There is still going to be some filling and sanding to do, but this is about 70% better than it was....there is still work to do, but this is much better. More to follow as the project moves along.


- 61 replies
-
- 5
-
-
- Type 26
- City Class
- (and 2 more)
-
And here we see the solution to the triangular facets on the hull.... A heavy coat of bondo body putty. I literally caked it on.


- 61 replies
-
- 4
-
-
- Type 26
- City Class
- (and 2 more)
-
So, I spent some time doing some 3D design work as the remaining modules printed themselves out, and here's what I came up with. It's got the lower main mast with the phased array represented.

- 61 replies
-
- 3
-
-
- Type 26
- City Class
- (and 2 more)
-
Here's how the forward part of the ship looks fully printed, and if you reference this website, you can see the concept drawings for the Canadian version of the Type 26, and see how the mast doesn't match. At all. BAE Systems Communications multimedia portal - Search

- 61 replies
-
- 4
-
-
- Type 26
- City Class
- (and 2 more)
-
You can see in the images from the designer, he's got the hull cut into modules already - but, when I downloaded the files, he'd gone a step further and cut these parts 'apart' even more into a port/stbd half, and split the superstructure in parts as well. I re-assembled the parts in the slicer, and printed them as 'complete' modules, so I've got 8 modules, with some small superstructure bits for the radar mast printed separately.

- 61 replies
-
- 3
-
-
- Type 26
- City Class
- (and 2 more)
-
Ahoy gents, Another project is underway - I decided to try and make a 3D printed Type 26 Destroyer. I first came across the file set last year on CGTrader. I paid the $25 for it, and regretted it. The seller indicated that it was not suitable for R/C, but I decided to try anyhow....and....it's not suitable. The details are wrong for the RCN version - missile layouts are incorrect, superstructure is incorrect - particularly the main mast. Here's the link: Type 26 City Class Frigate 3D print model 3D model 3D printable | CGTrader The designer is not a modeler, and is not well versed in what an RC model needs to have - the hull is very thin, the superstructure is not designed to be easily removed with a raised lip to keep water out, there's no shaft line holes, nor a rudder hole. Overall, it is not well suited to make a good physical model with. The designer also used a program to generate the files that leaves triangular facets on the model. Everywhere. Large triangles, small triangles...it's not a smooth hull at all. It's very blocky. All that said, I want to make a Type 26...and this is about all I've found out there that's partway suitable. So. here we go.
- 61 replies
-
- 3
-
-
- Type 26
- City Class
- (and 2 more)
-
Ian, The Castle is indeed in the background - there's a build thread for her here as HMCS St Thomas, printed at 1/48 scale Size - comfortable - she's about 4.5 feet or so - and weight is probably 15 pounds? Ish? As for 'cutting' a file in the slicer program (like Bambu Studio) I have instructions on how to use the feature in the Prusa slicer on page 3 of this thread: USS Bodega Bay - or...HMS Puncher? - Page 2 - RC Groups
- 51 replies
-
- 2
-
-
- Puncher
- escort carrier
- (and 1 more)
-
Ian, yes, she started her career with 4x twin 3"50 guns, but during one of her refits, they removed the forward sponsons and closed in some of the forward boat bays, reducing her to 2x twin 3"50. The boat bays were closed in because the ship's boats and other equipment was getting excessive damage due to the waves coming into the forward bays. The ship also had 3x 6 pounder Saluting Guns on the quarterdeck. The RCN still uses the same saluting guns today.
-
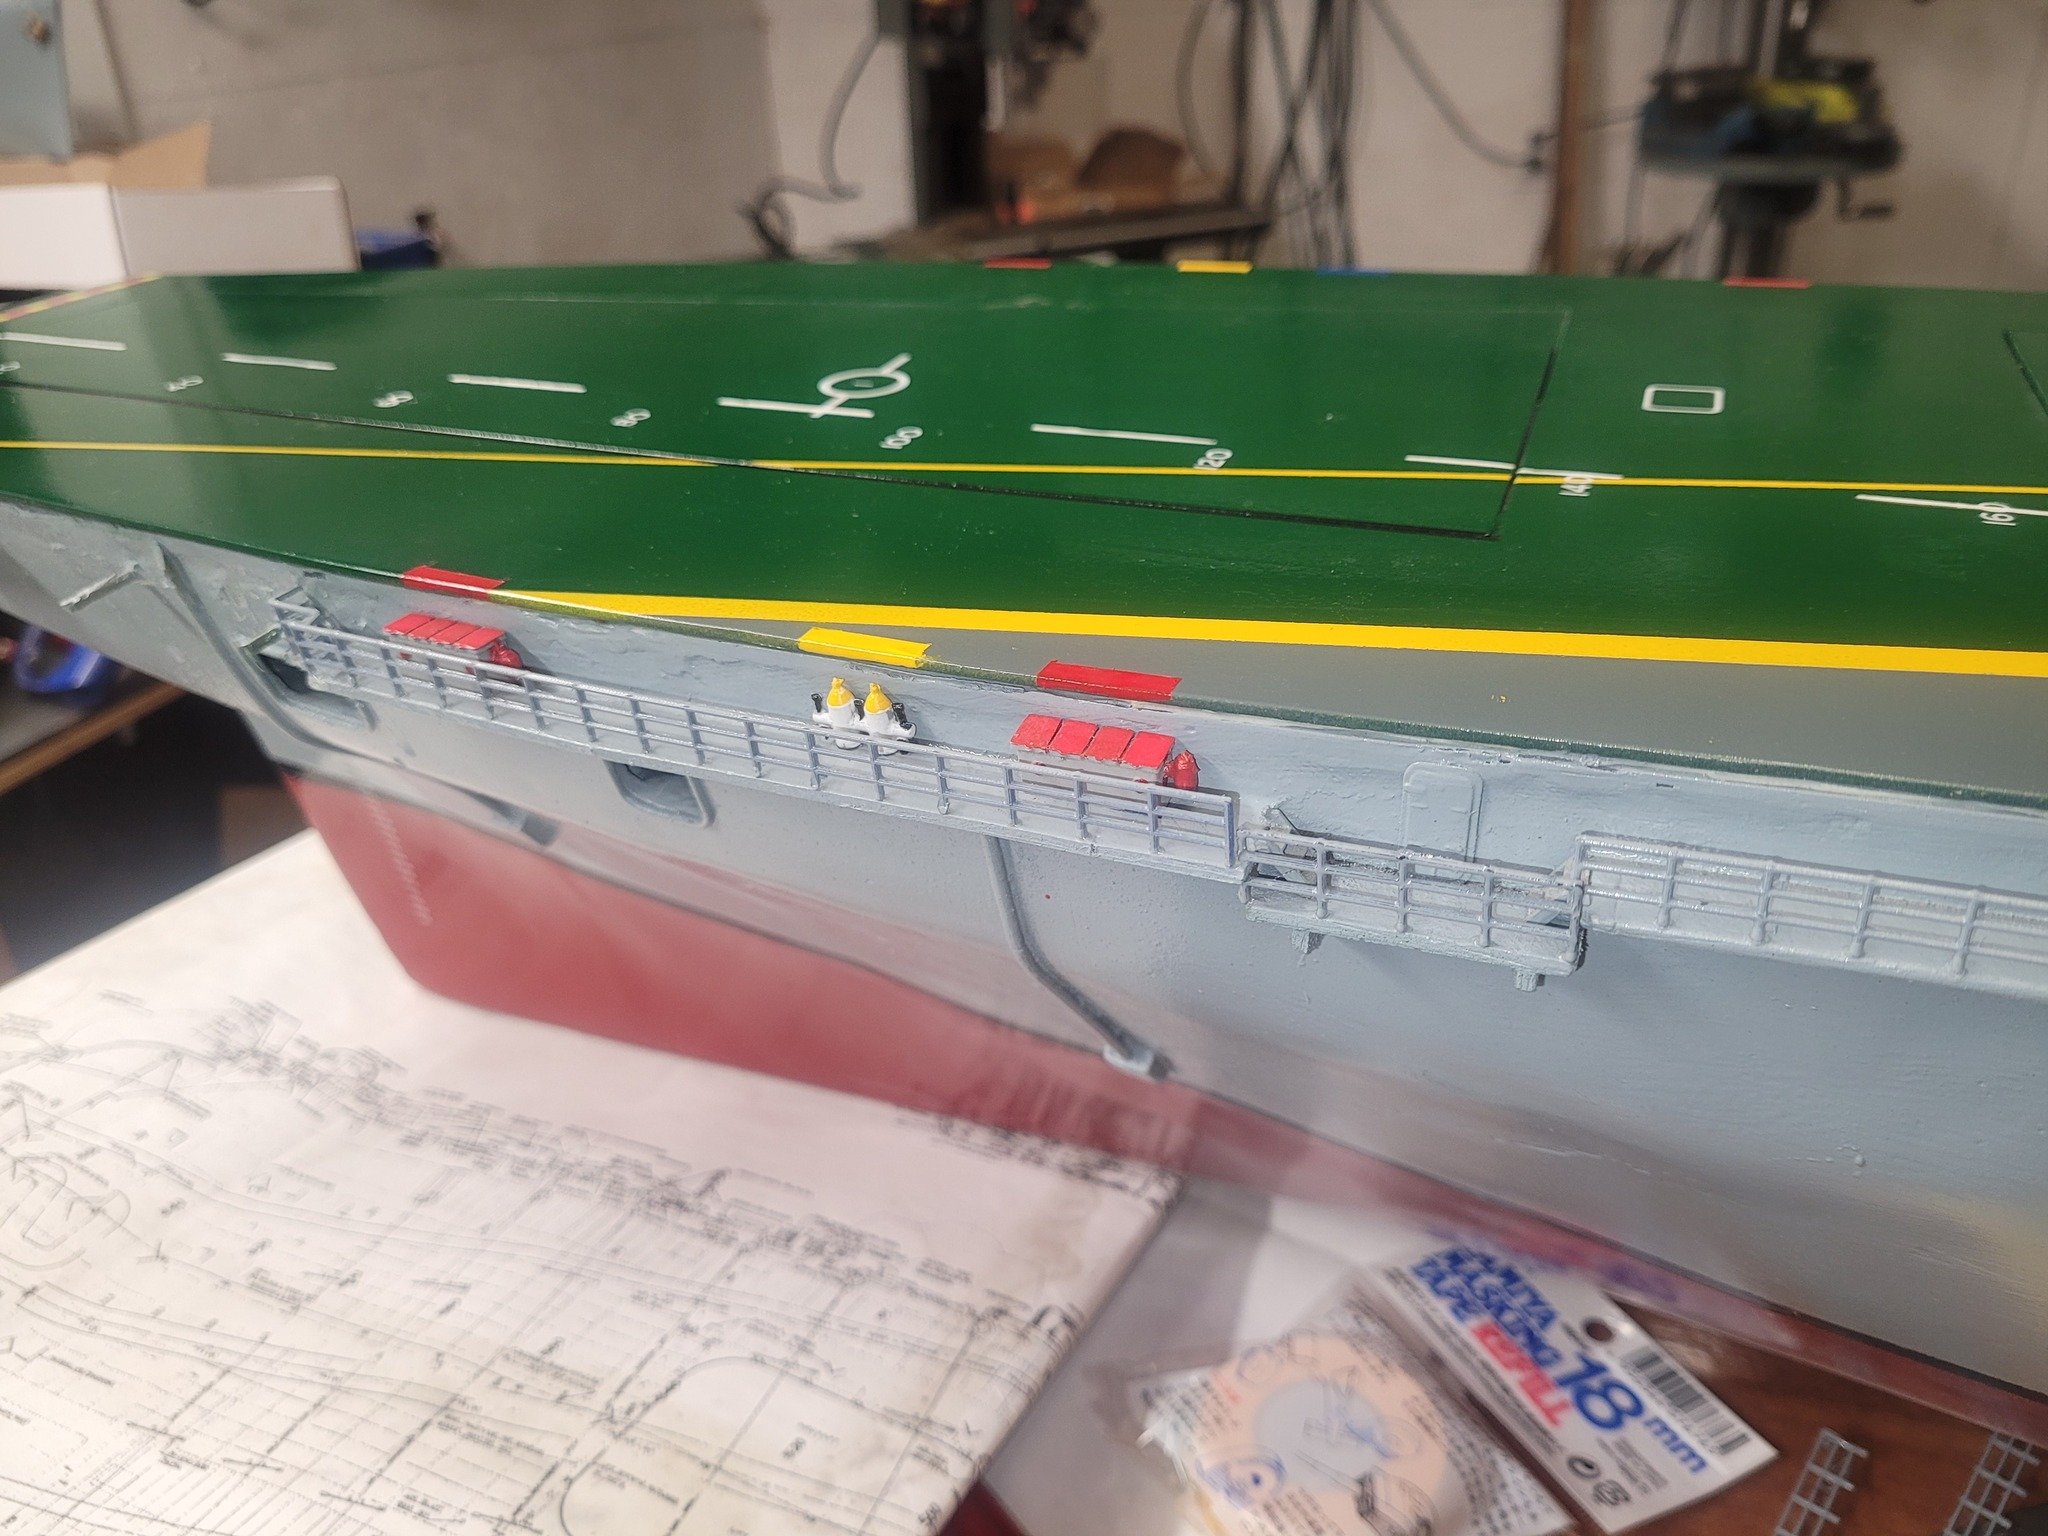
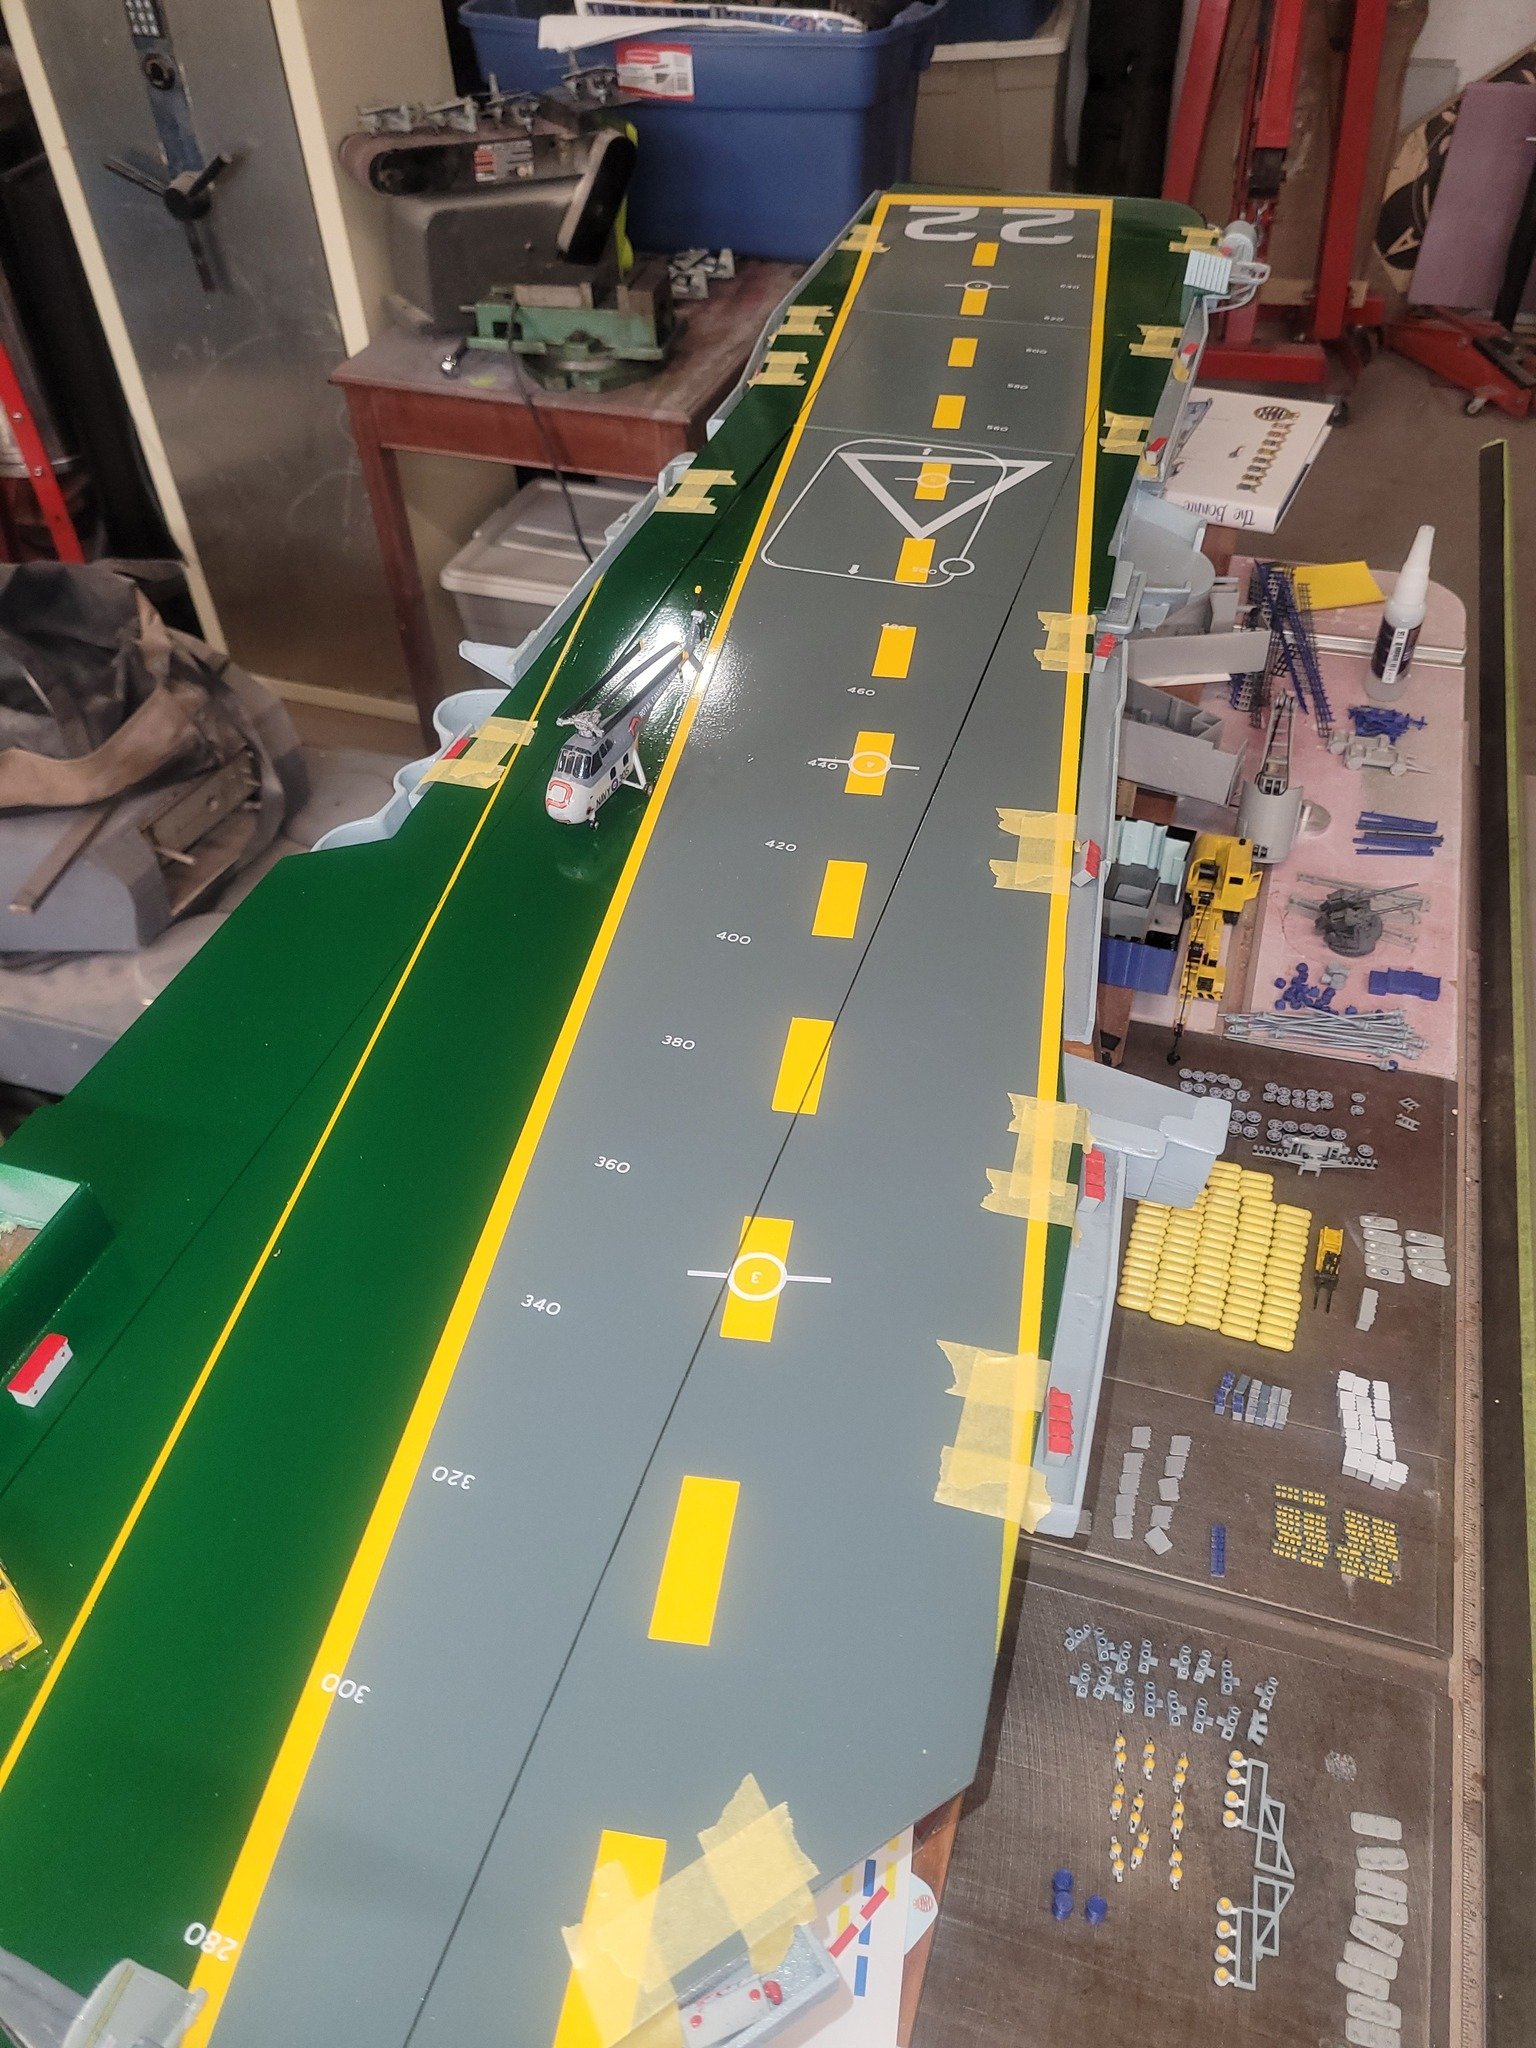
We now have some guard-rails up. Lots more stuff to add, but a big step in adding details like this!

-
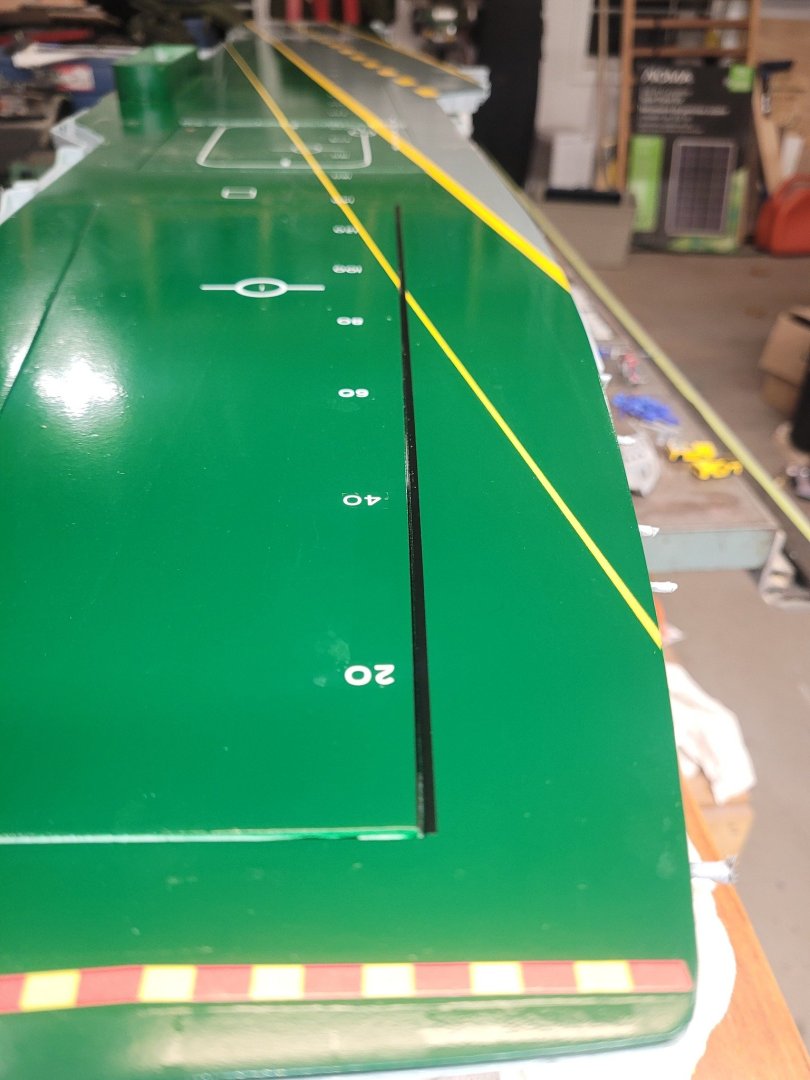
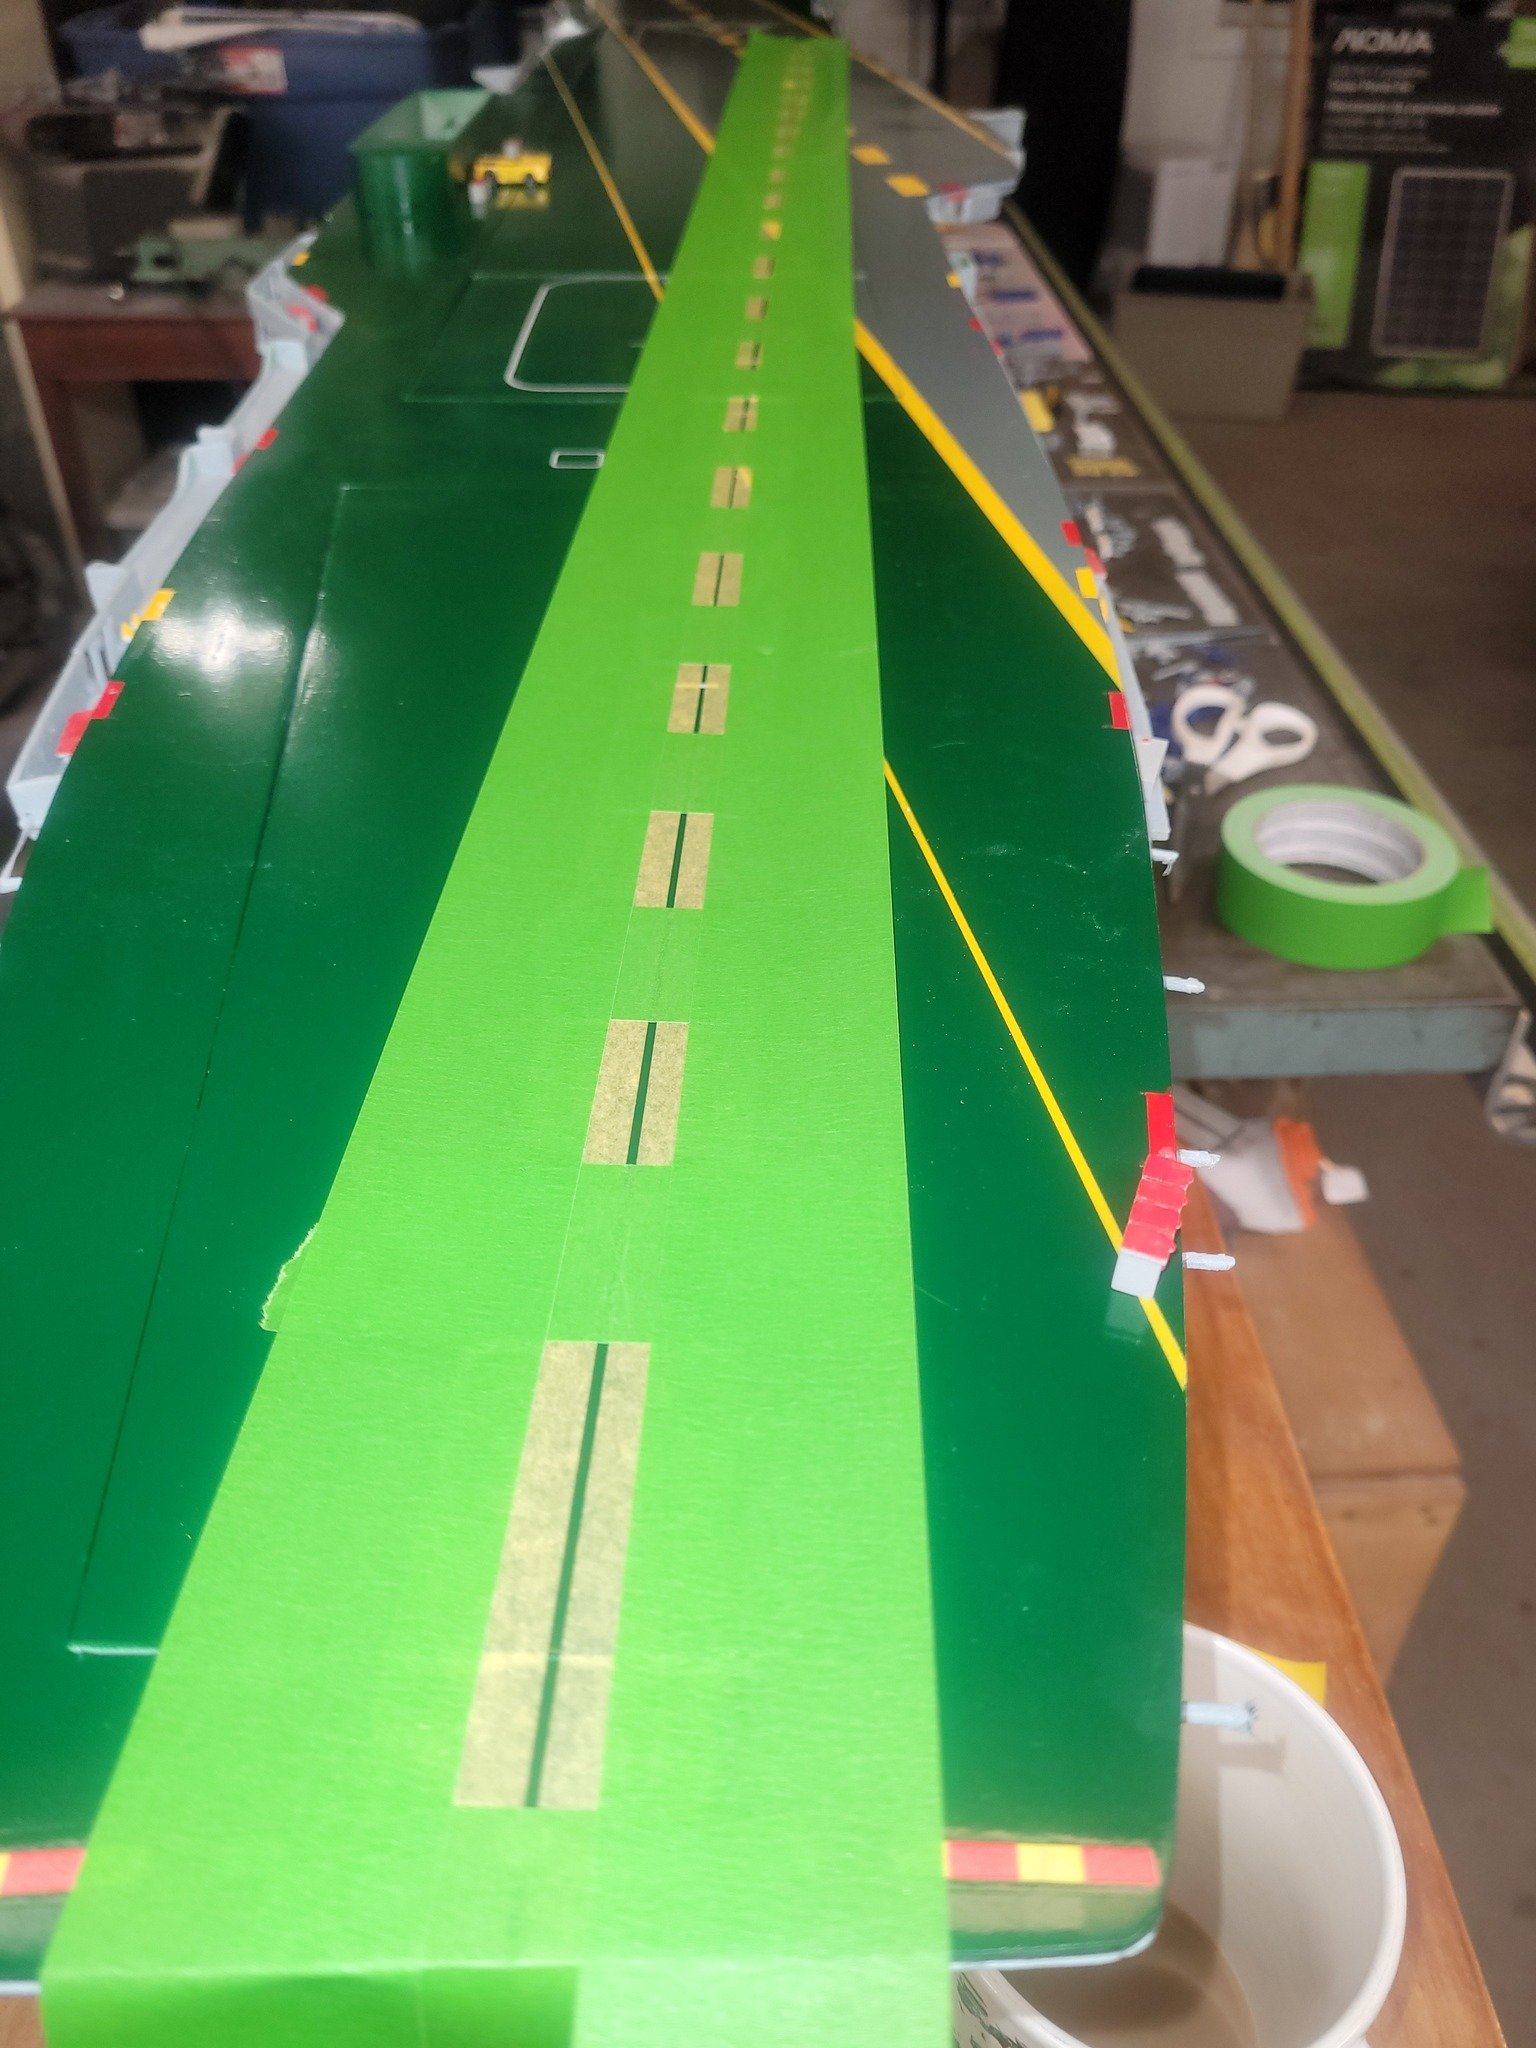
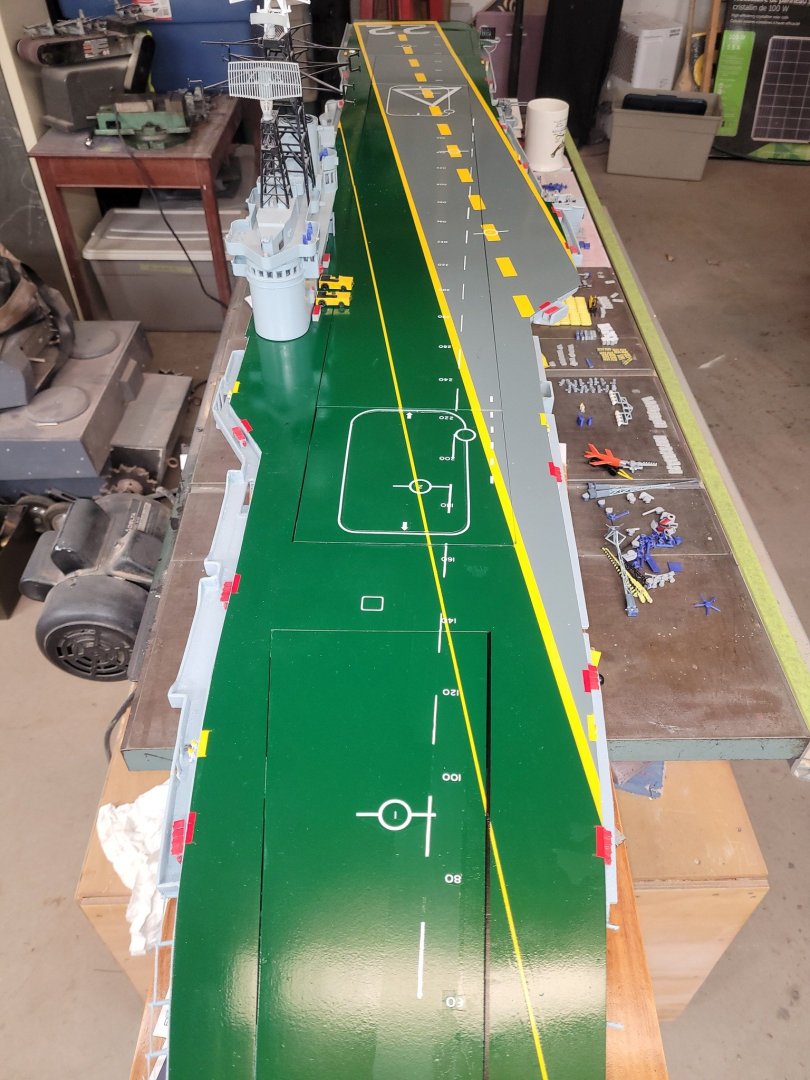
And....we have a line done...and some decal repairs conducted because that Tamiya tape sticks a bit too well...
-
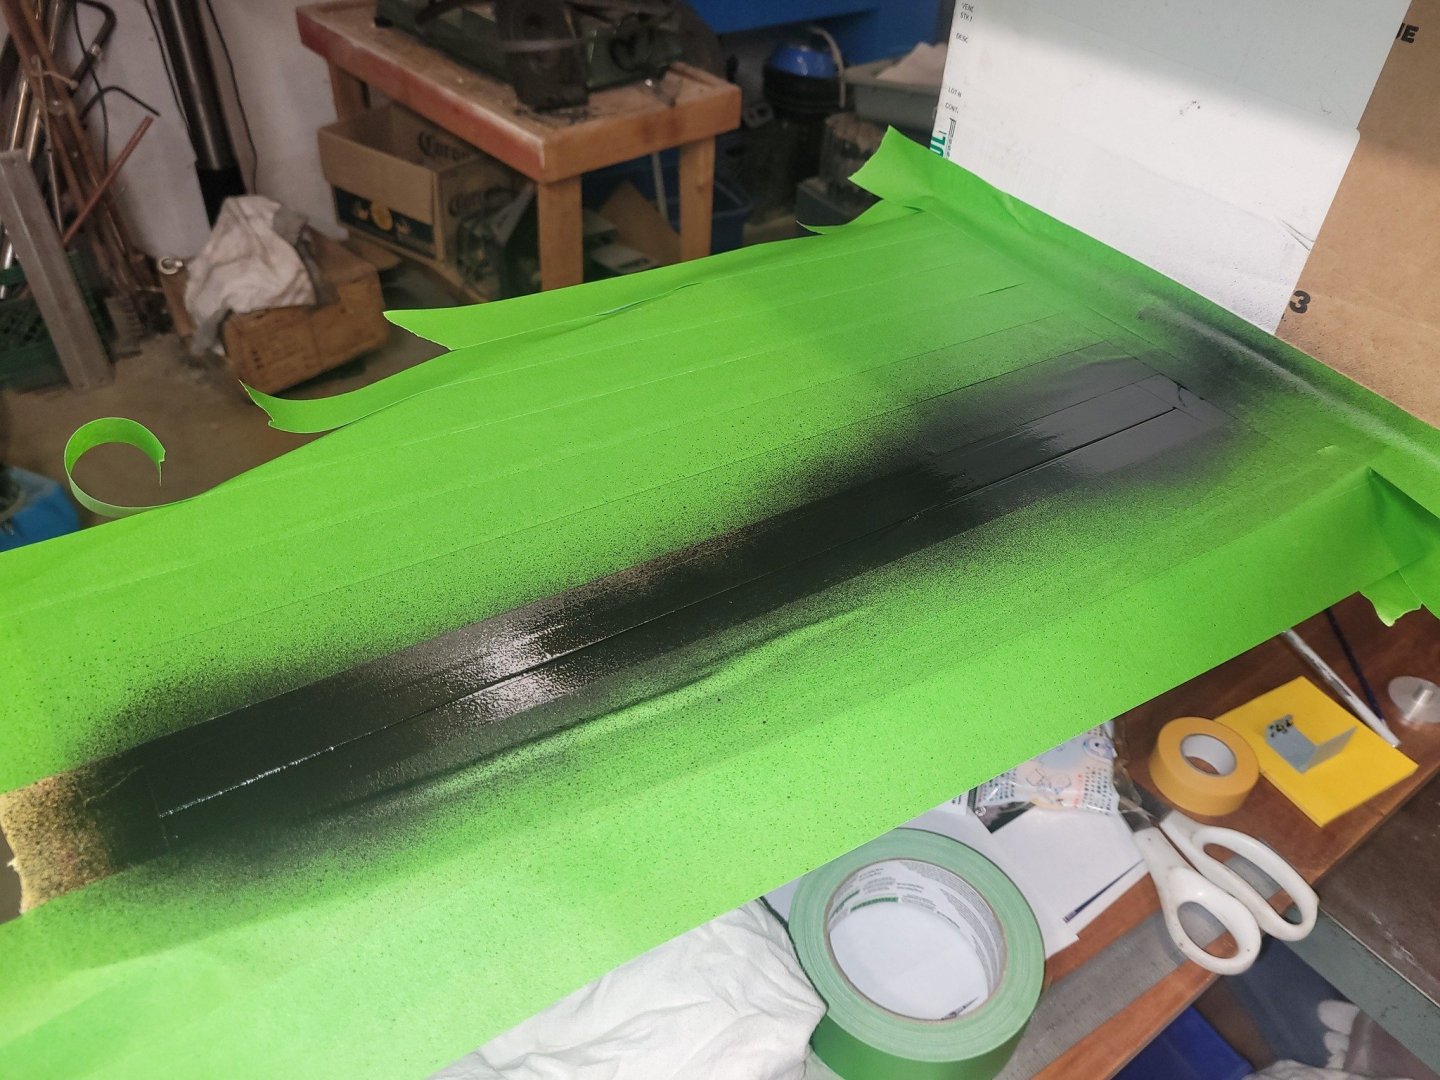
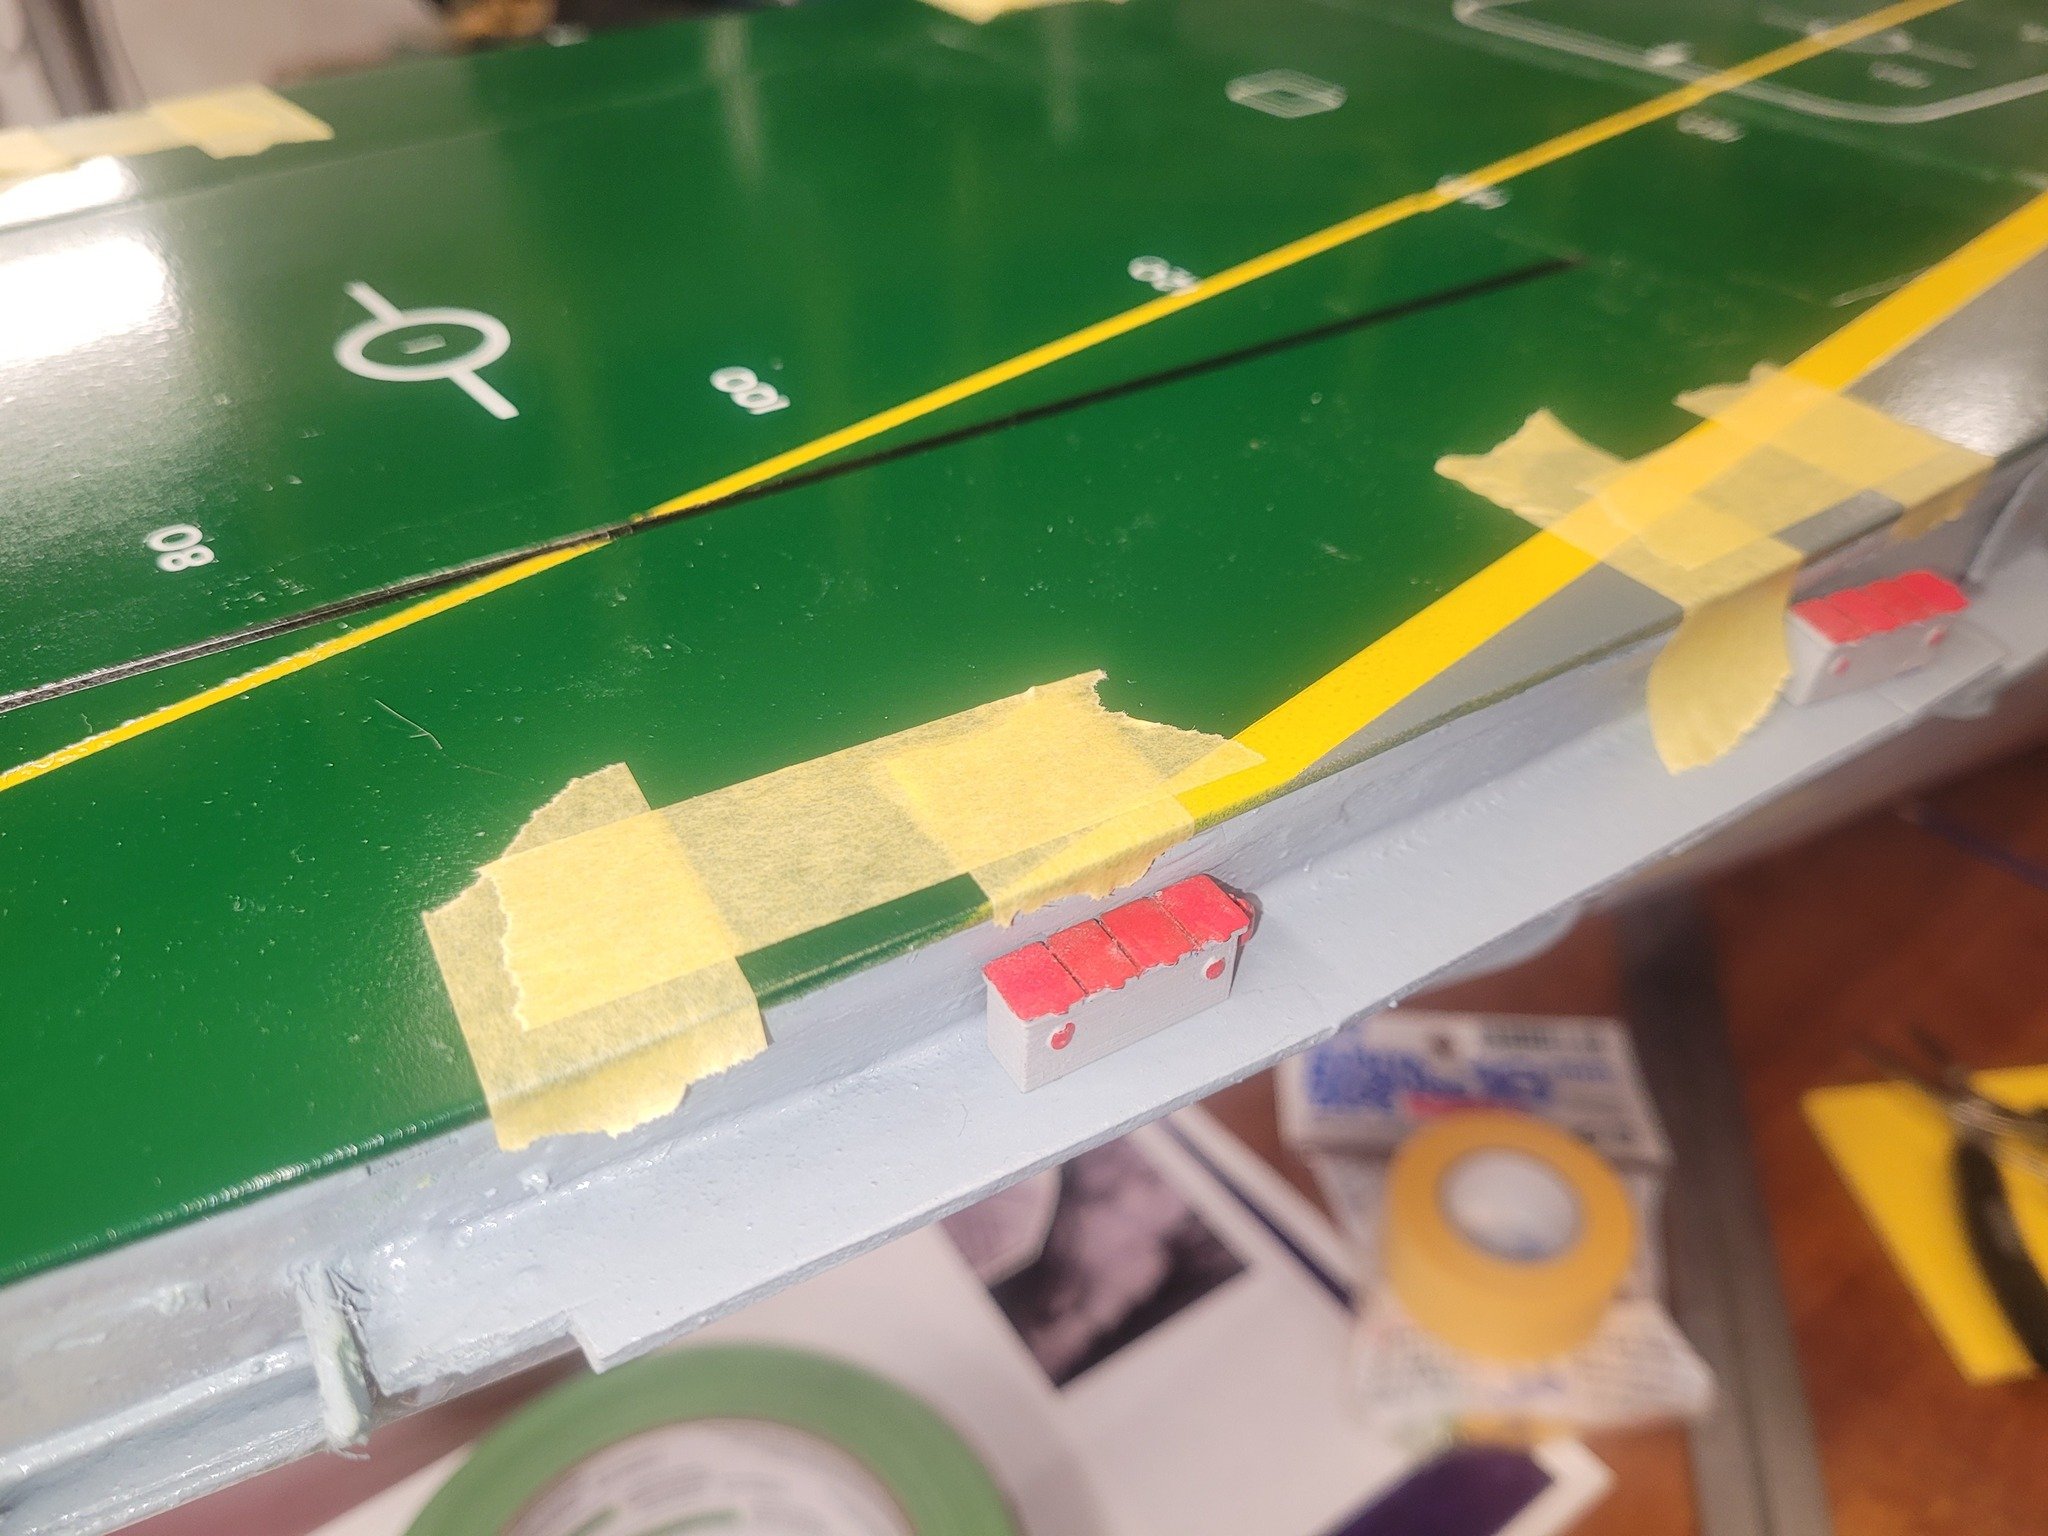
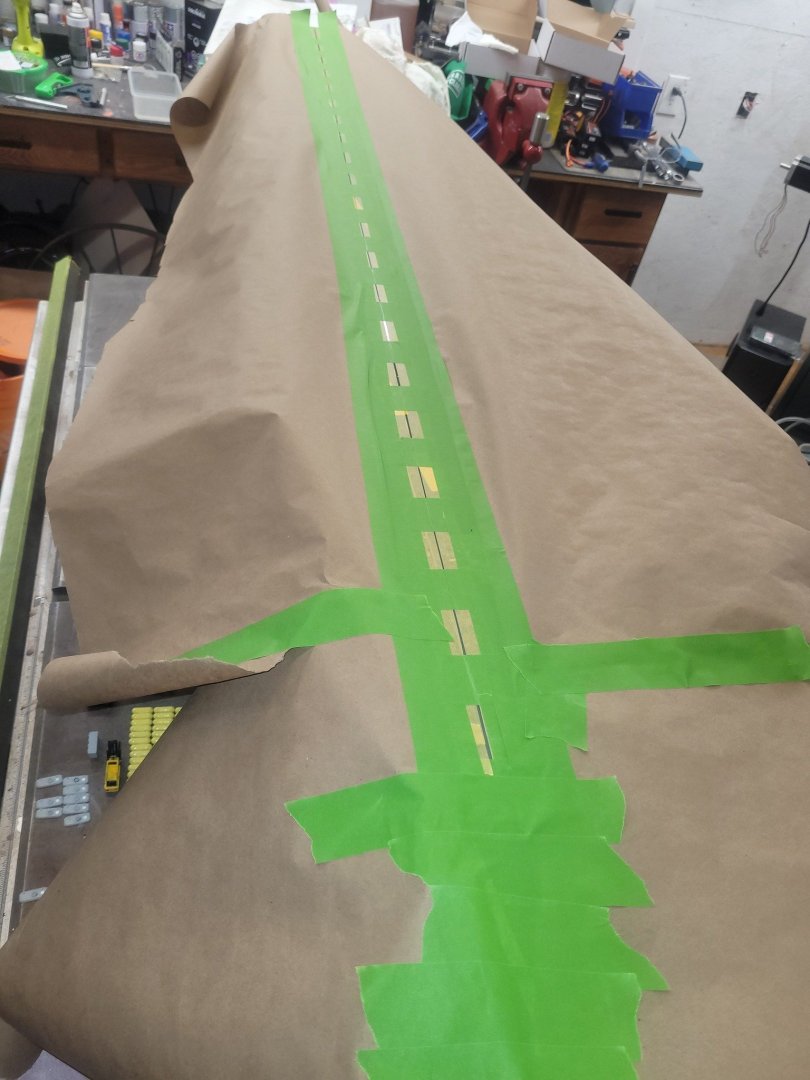
I also masked the launch line yesterday - a very light first coat that will be re-coated tonight to give it some depth. A LOT of tape for a little bit of paint!

-
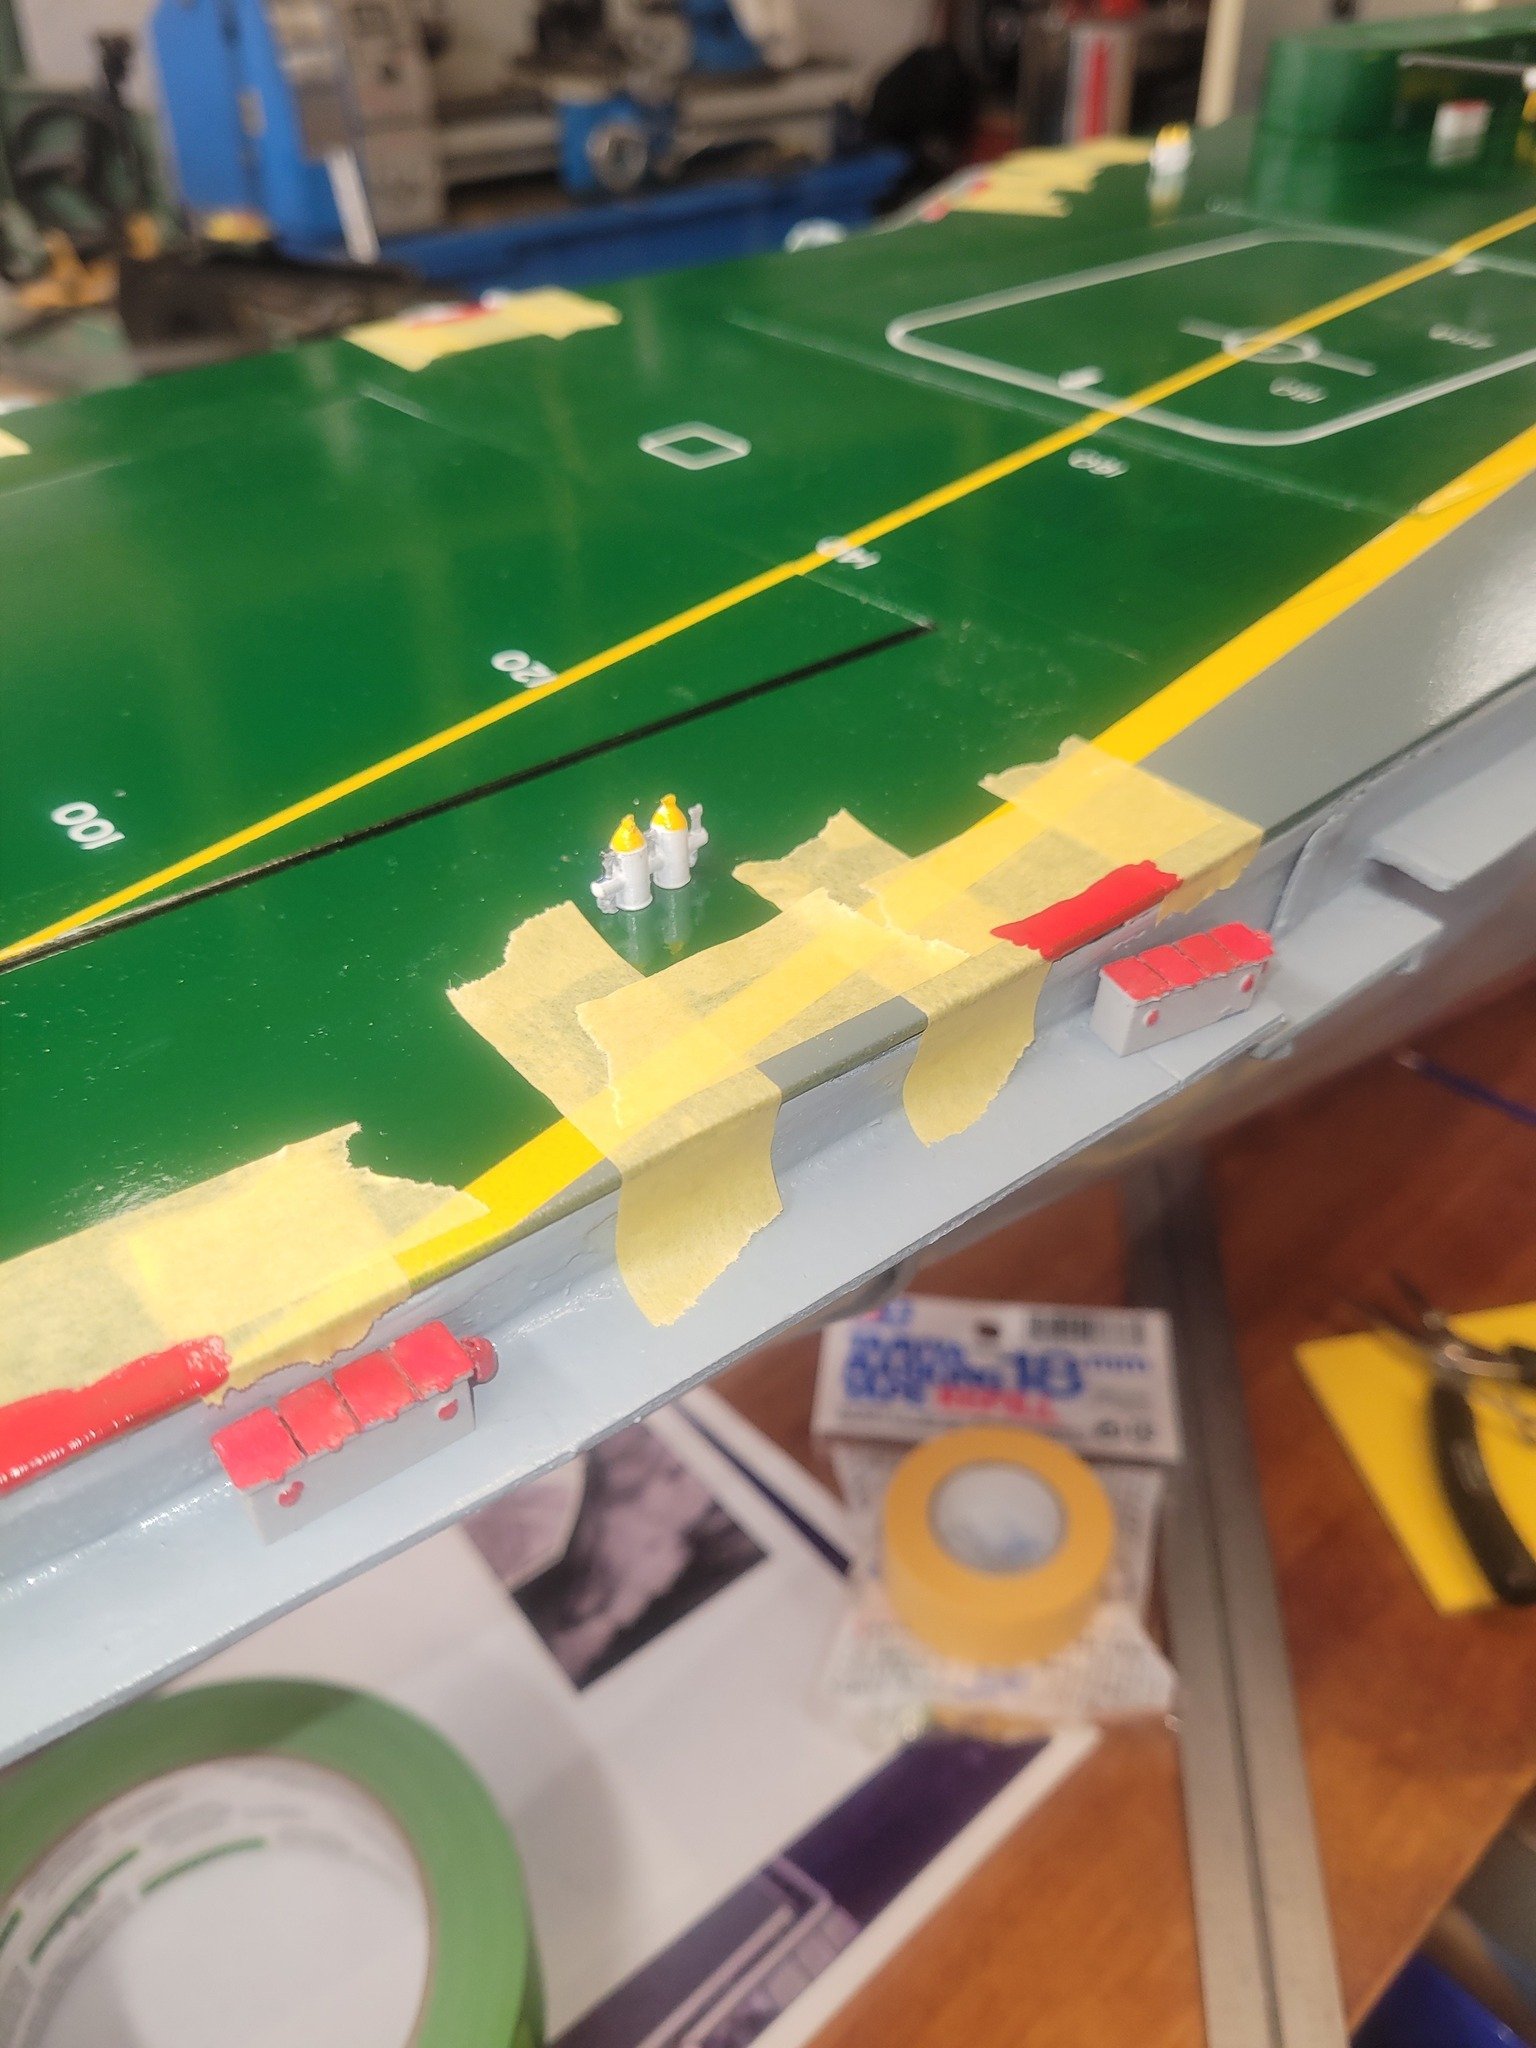
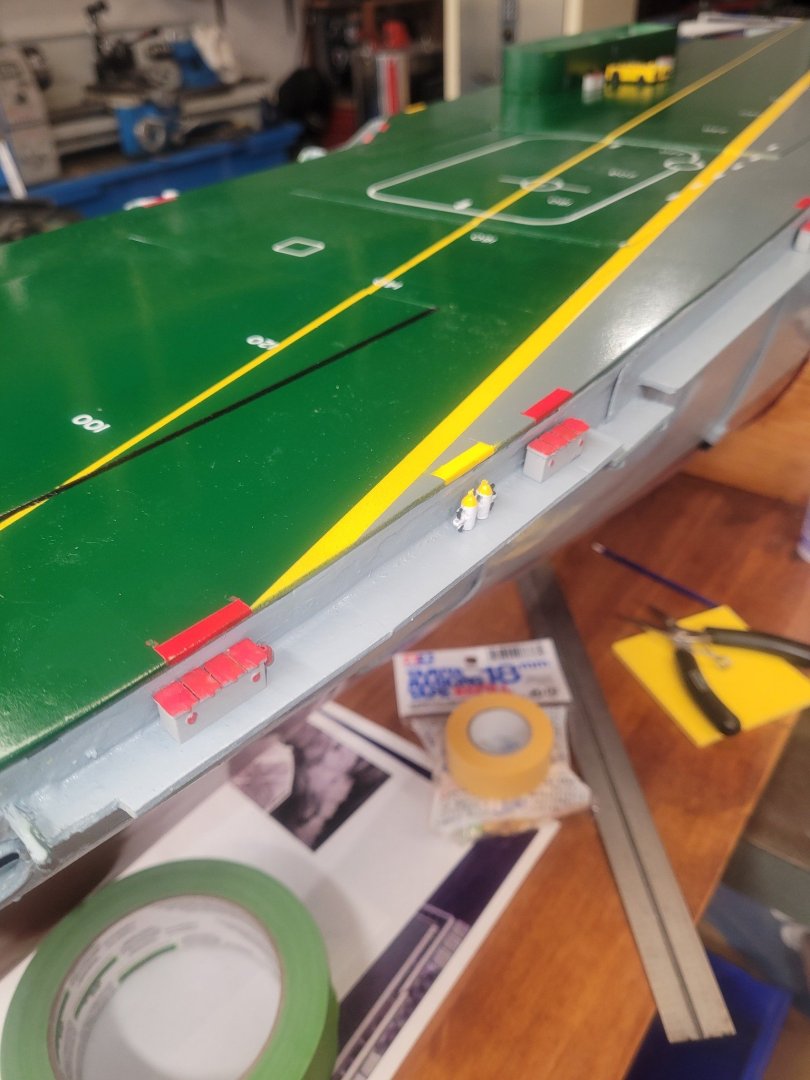
I got the LP Air station and Firefighting locker deck edge markings put on yesterday - there was a tiny amount of bleed under a few edges, but that's fixable. I initially printed red and yellow decals for these station markers, but the first decal turned out to be basically translucent, so it didn't show up the way I thought it needed to. Hence the painting....oh well. I still have the blue power supply stations to do up. I'm almost at the point of gluing down the lockers along the edges of the deck!


-
I arrived in Halifax as a brand new Ordinary Seaman in January of 1993...I suspect the waterfront hadn't really changed that much in the intervening years.
-
This is neat - one of Bonnie's Aircraft Towing Tractors is still around in the Collection at the Canadian War Museum: aircraft towing tractor | Canadian War Museumaircraft towing tractor | Canadian War Museum
-
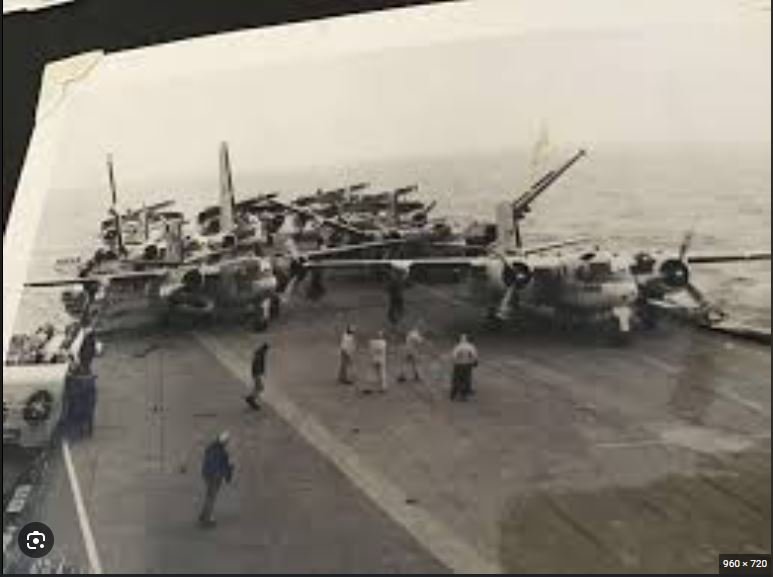
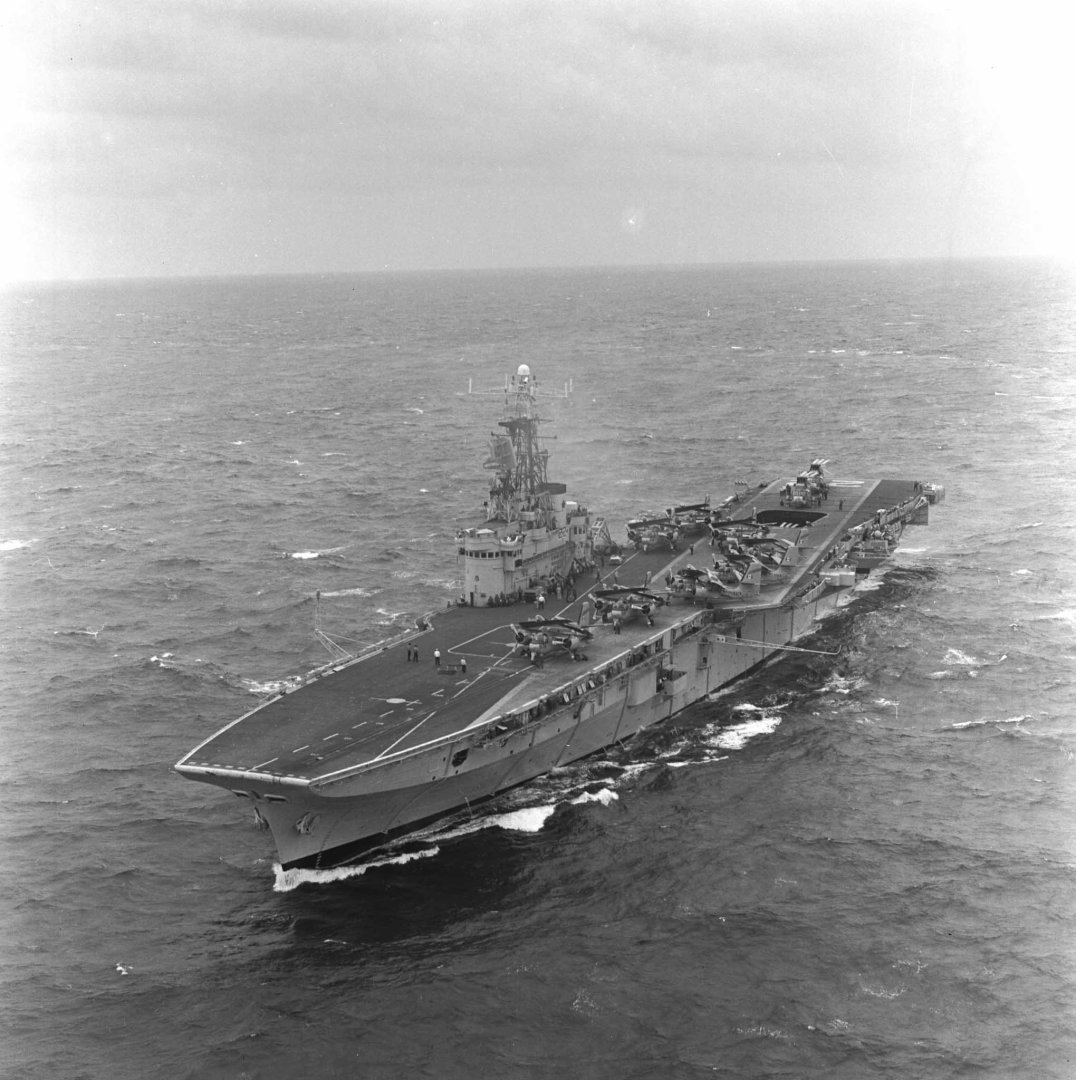
Here's a picture showing what appears to be a Tracker launch cycle from the flight deck not using the catapult, but using the line. You can see the Trackers 'stacked' on the deck astern, with the lead Tracker lined up, wings unfolded, looking ready to launch.
-
Andy, yes, I think that's exactly what it is. I've seen a couple photos of different launch spec/setups. Option 1 is the catapult launch cycle as seen below - line the Tracker up on the cat, strap her on, and launch. Bear in mind though that every launch saw the strop tossed over the bow. Option 2 - line the Trackers up and launch down the dashed line. I have no feeling for how often they did either of them, but a bit of google-fu shows that there's a lot of cat launch pictures, and while I've seen the through-deck launch pictured, I cannot find one in the first page of google results.
-
Catapult line masked....and painted.