HOLIDAY DONATION DRIVE - SUPPORT MSW - DO YOUR PART TO KEEP THIS GREAT FORUM GOING! (Only 53 donations so far out of 49,000 members - C'mon guys!)
×


LCdr Dave
-
Posts
109 -
Joined
-
Last visited
Content Type
Profiles
Forums
Gallery
Events
Everything posted by LCdr Dave
-
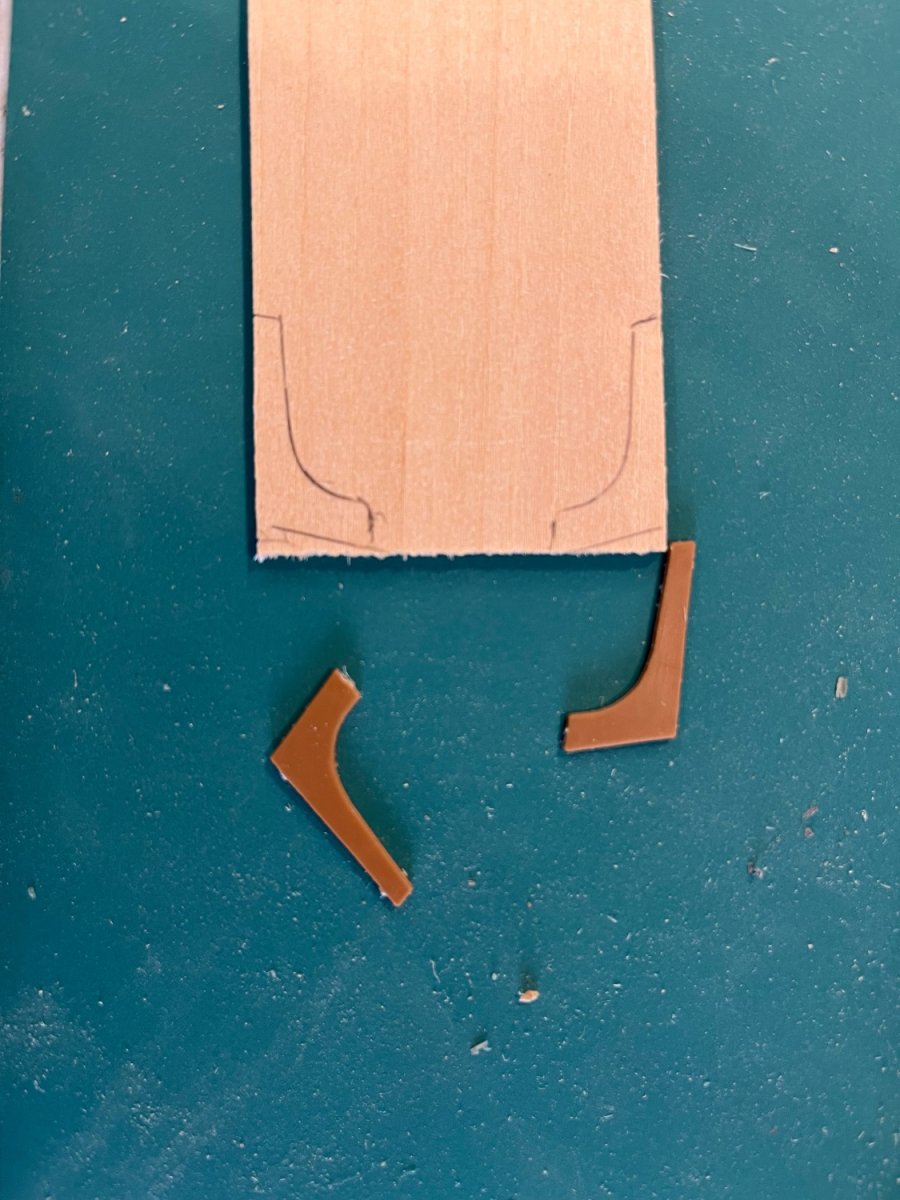
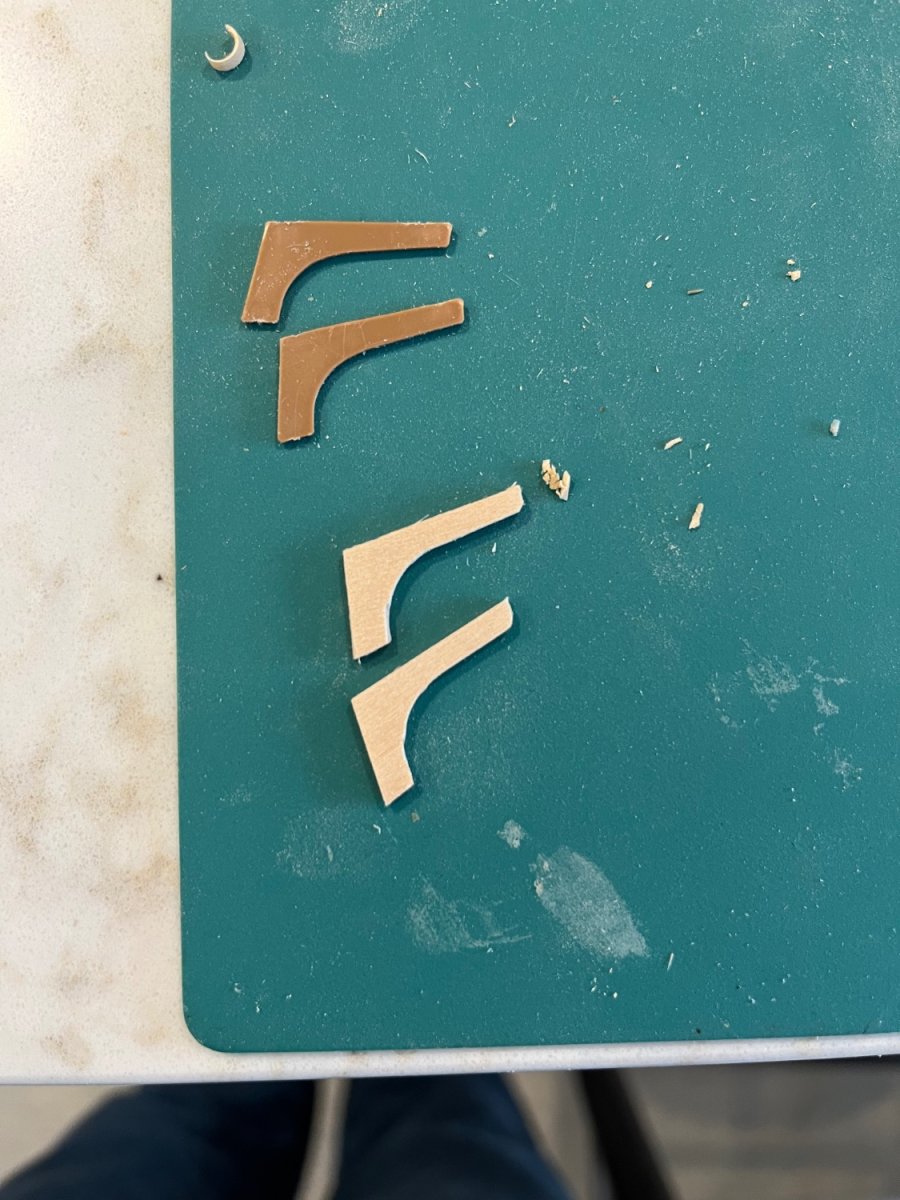
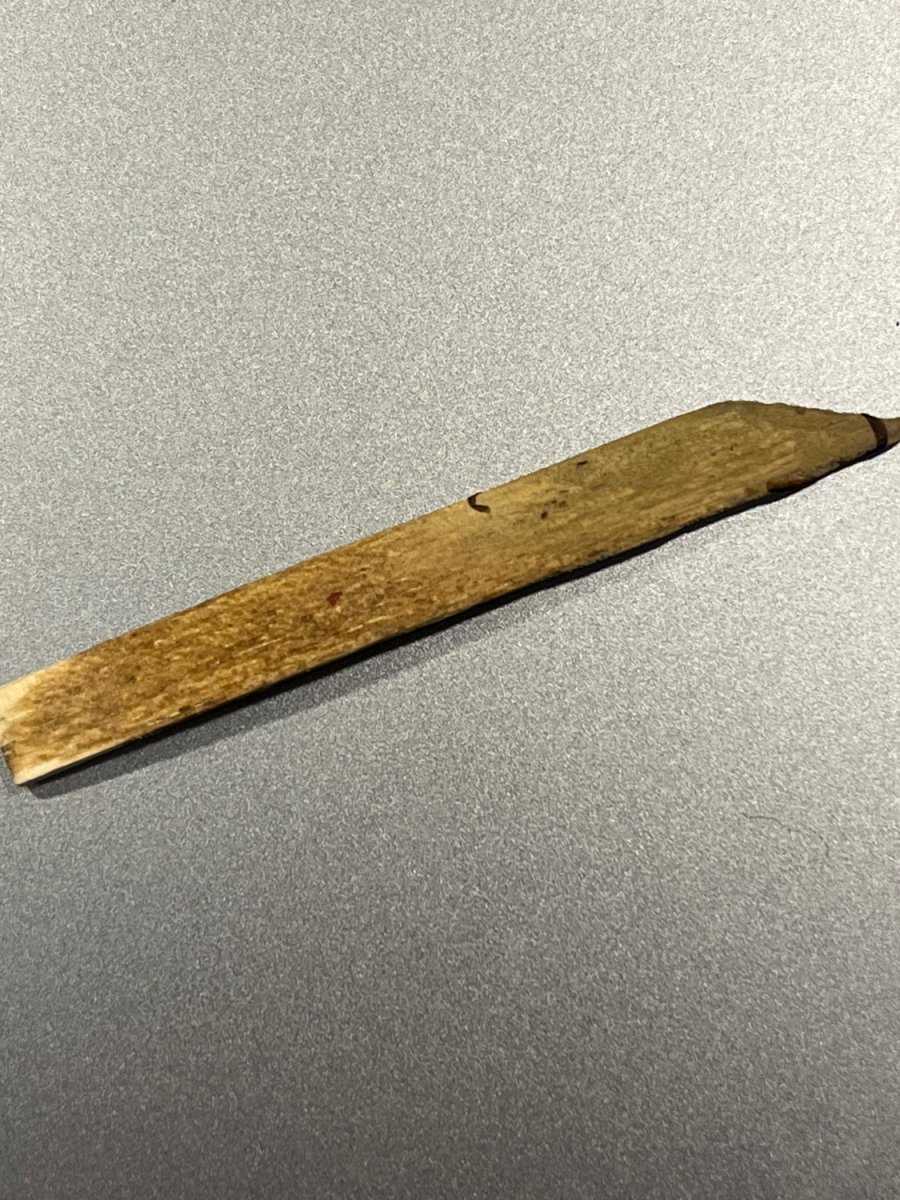
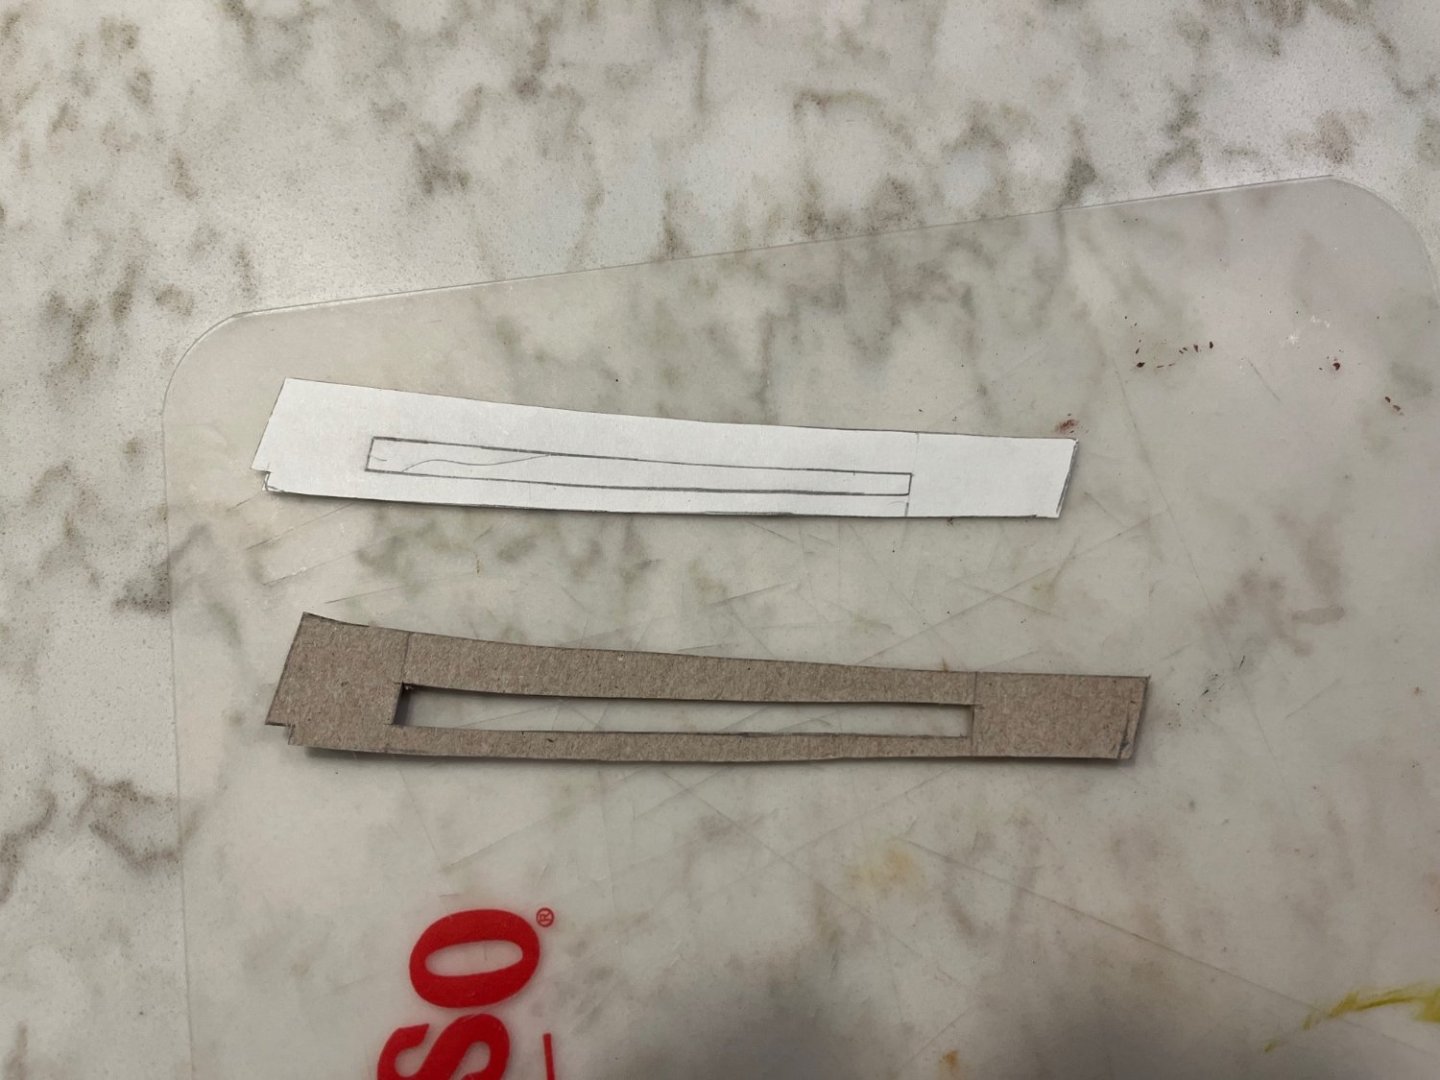
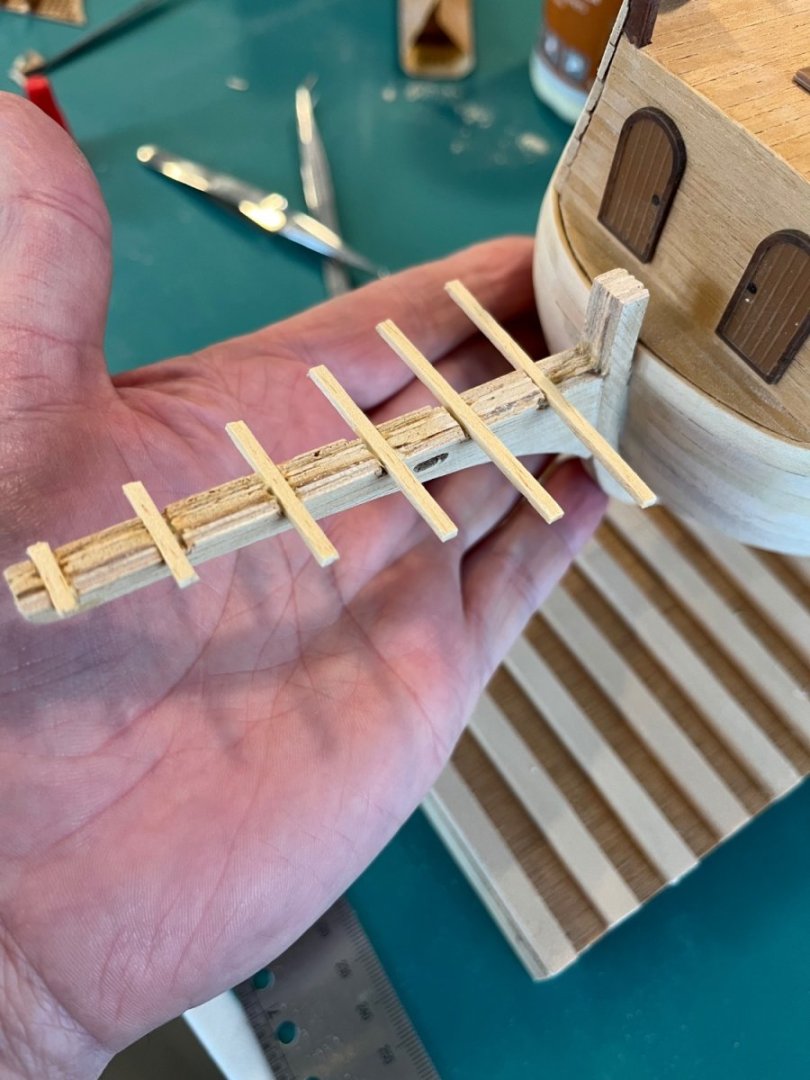
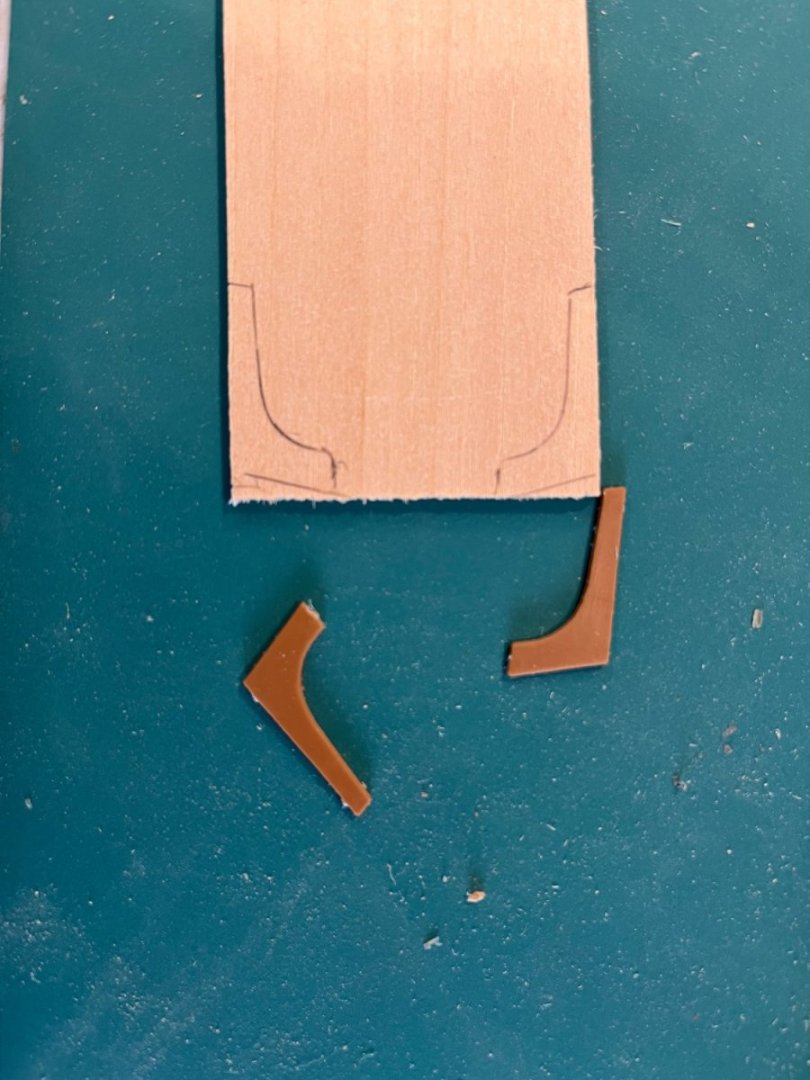
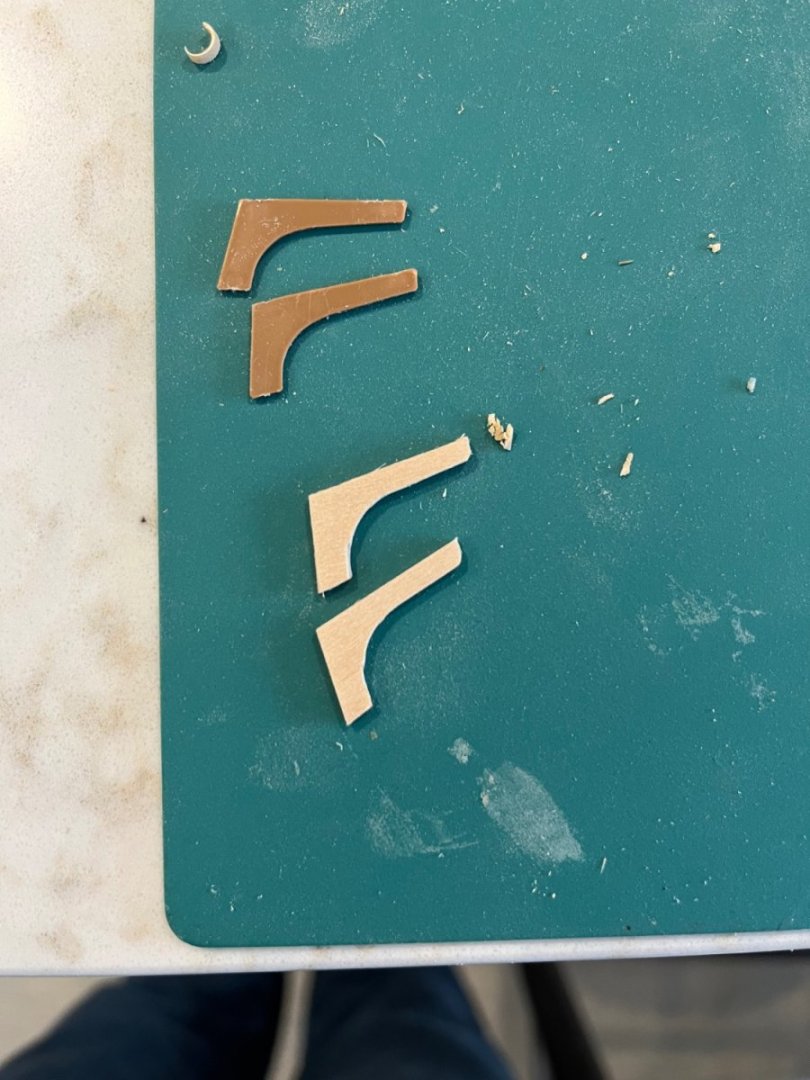
 I have decided to attempt to make the beak out of wood. I traced the outline of the plastic piece onto paper and cut some planks to match. I put a bit of curve in the top piece as well. I have a thin plastic cutting mat that I put the pattern under. That allowed me to match up the pieces and glue the edges with gumming up the pattern. I still have to sand it down once the glue dries completely. I’m pretty happy about how it’s going so far. Once the glue cures completely, I will sand it down and trim to fit. Of note, once I started down this path of modifying the beak and started looking at different models and pictures I realized that this beak doesn’t match the existing replica at all. I may try to duplicate it but since no one knows what the original looked like anyway, I may not lose sleep over it either. thanks for looking. Dave
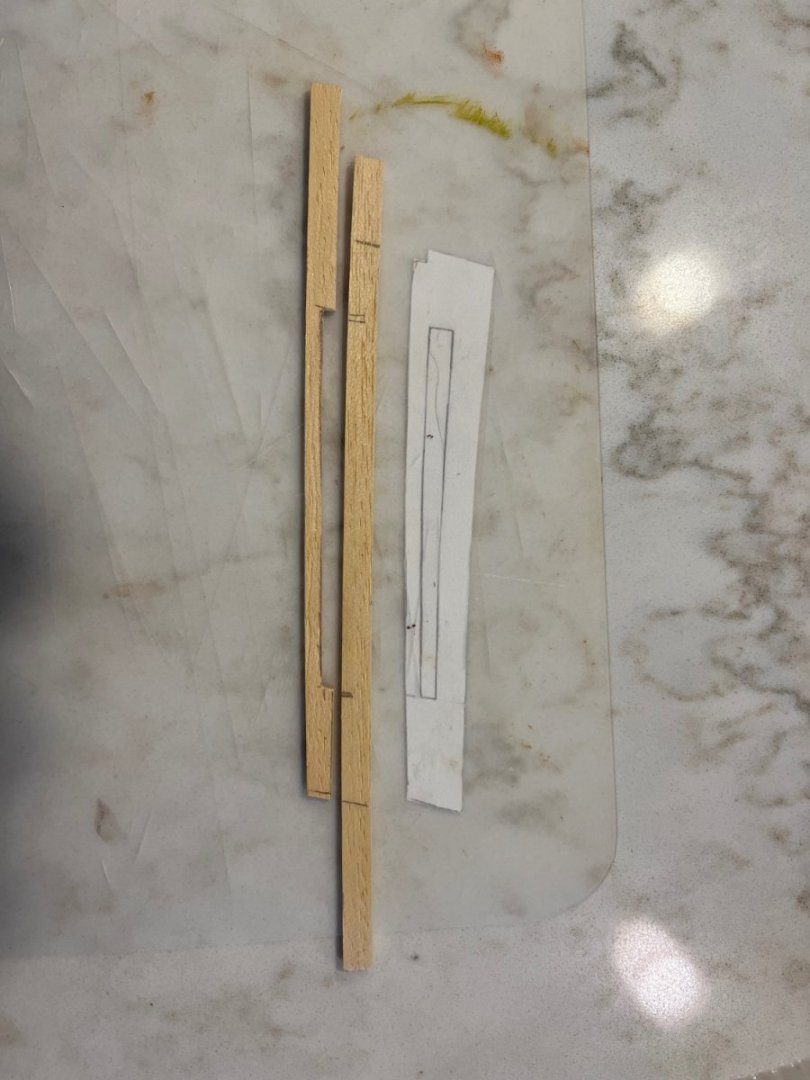

-
Coming along nicely! Cheers, Dave
-
It’s looking good! I love your ideas (or David’s) for the windows. I have waterslide transfers and I think I will just glue to whole thing onto the wood (paper and all) and add a wooden trim for a frame. In my head, it is awesome, LOL. Cheers, Dave
-
The way plastic glue works is to melt the plastic and fuse the two parts. I can’t see freezing it make it come apart. I can make the stanchions out of wood if I had to but rebuilding the grating would be beyond me (I know not for some). I think that trying to unglue the parts would be a desperation move but I appreciate the tip and possibility. Cheers, Dave
-
Thanks, Patrick. I considered that as well. I assumed that all the plastic bits should fit together properly and what gave me pause was the curve in the sides compared to the straight grating. It would also make the whole structure more rigid. There really isn’t any way to undo plastic cement so I am still pondering the issue. Dave
-
David, thanks for chiming in! There is so little information on this kit and no build logs. I found, now, two people who have built it but just have a finished product to show. I agree with the combination media idiocy. Why!? I will try your idea with the paper backing. The backside will be hard to see once the sprit and rigging is installed. I will also use your ideas for the “Y”-shaped thingy (all sailors are cringing at this landlubber’s use of lingo) and deadman. The grating isn’t glued yet. Just trying to keep multiple pieces together with two hands. I think I will need to shorten the wooden keel bit to match the length of the grating/beak assembly. thanks for looking. Dave
-
Dude, thanks for that.. I will see if I can find his build log. cheers, Dave
-
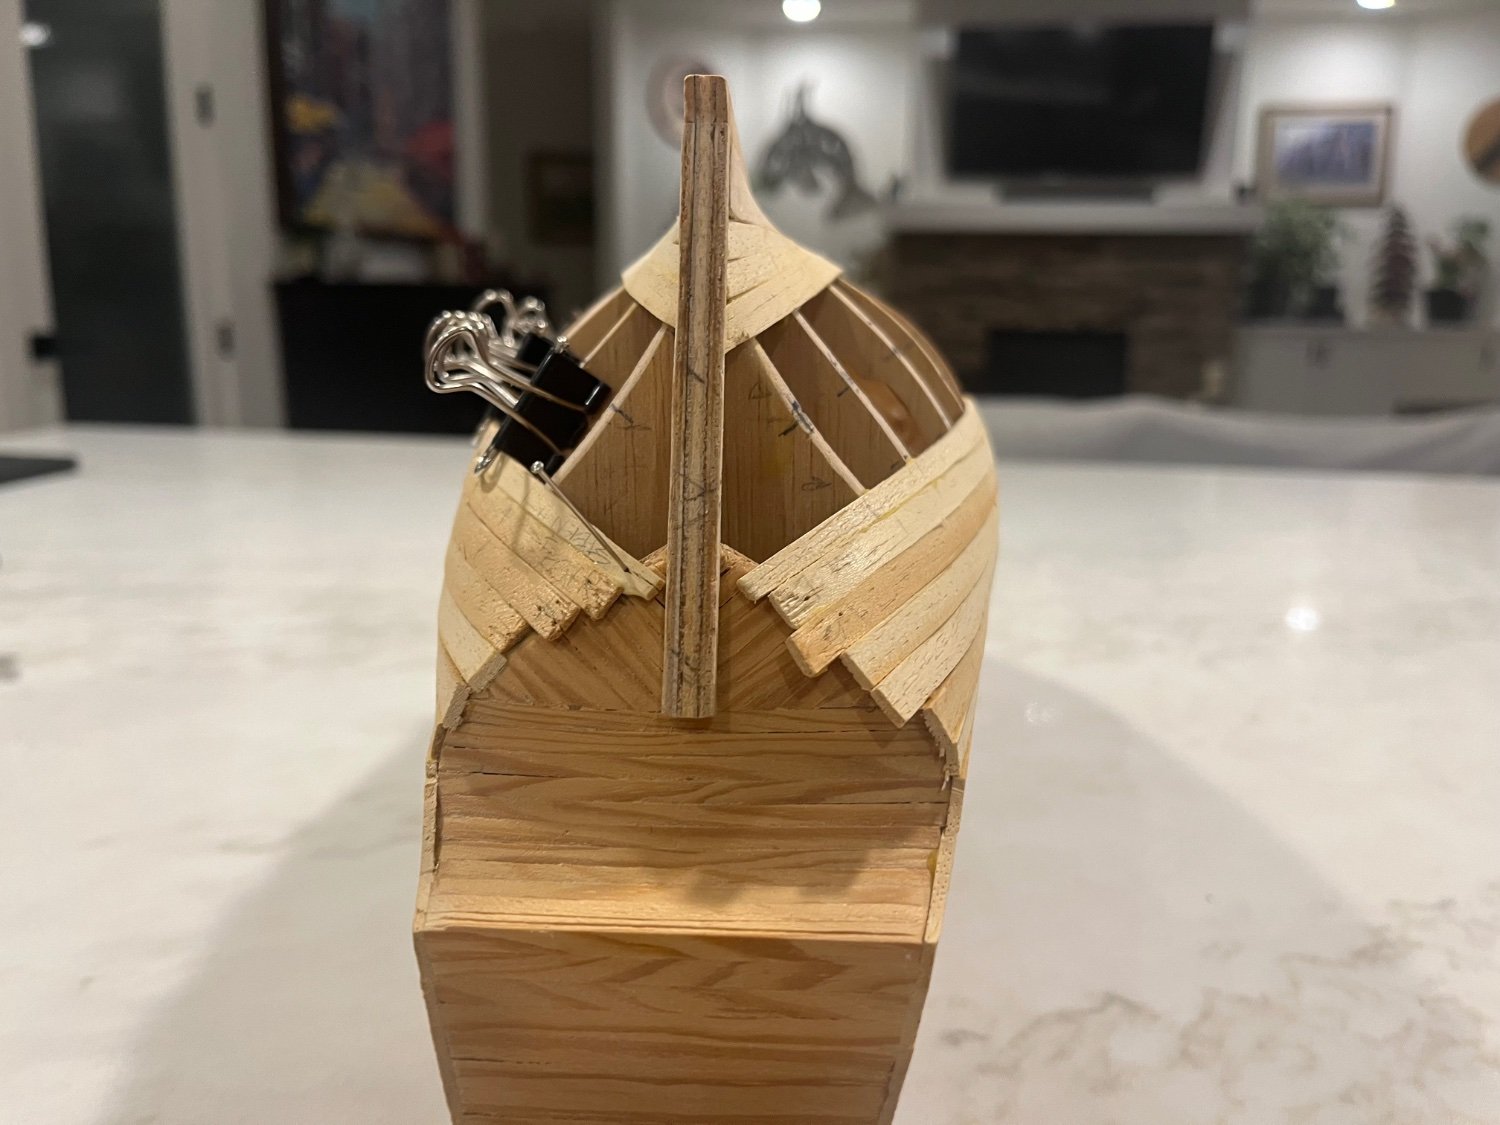
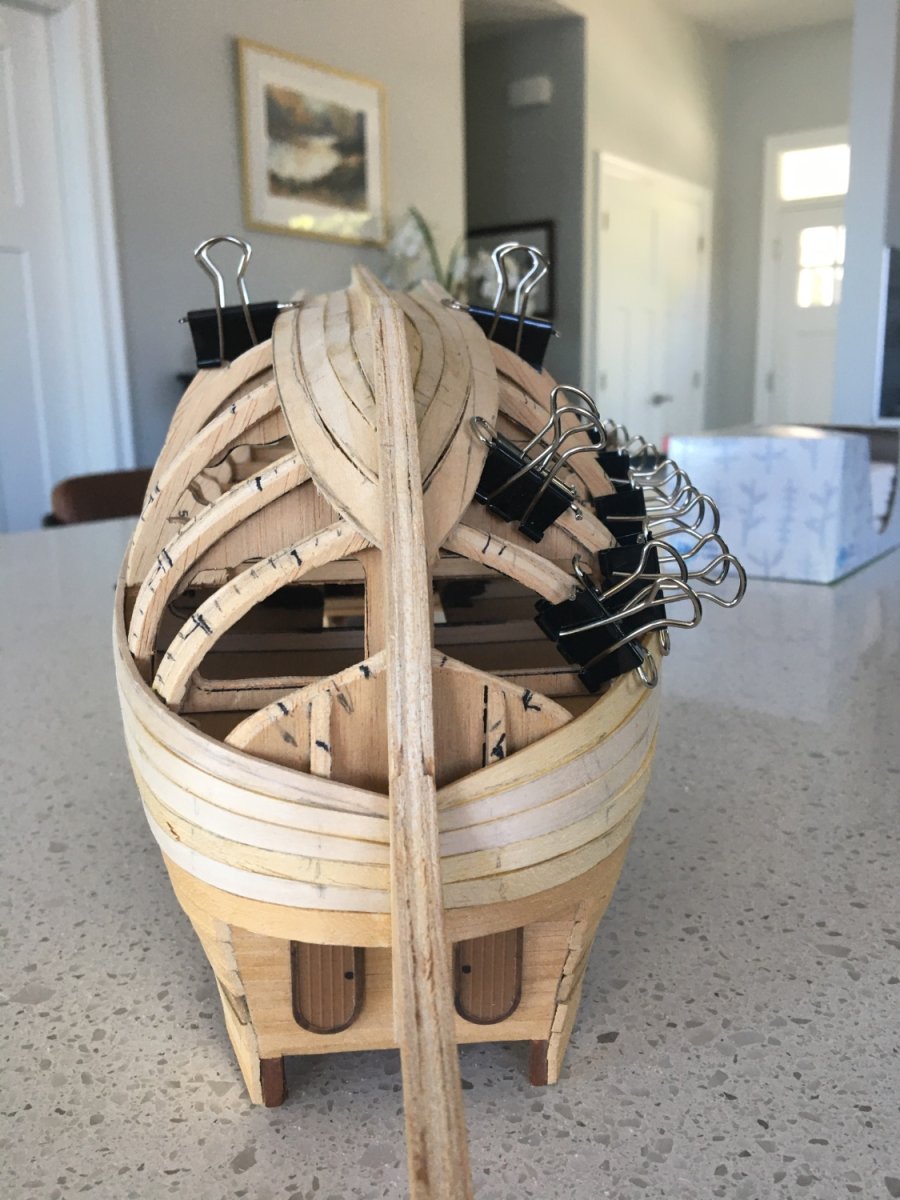
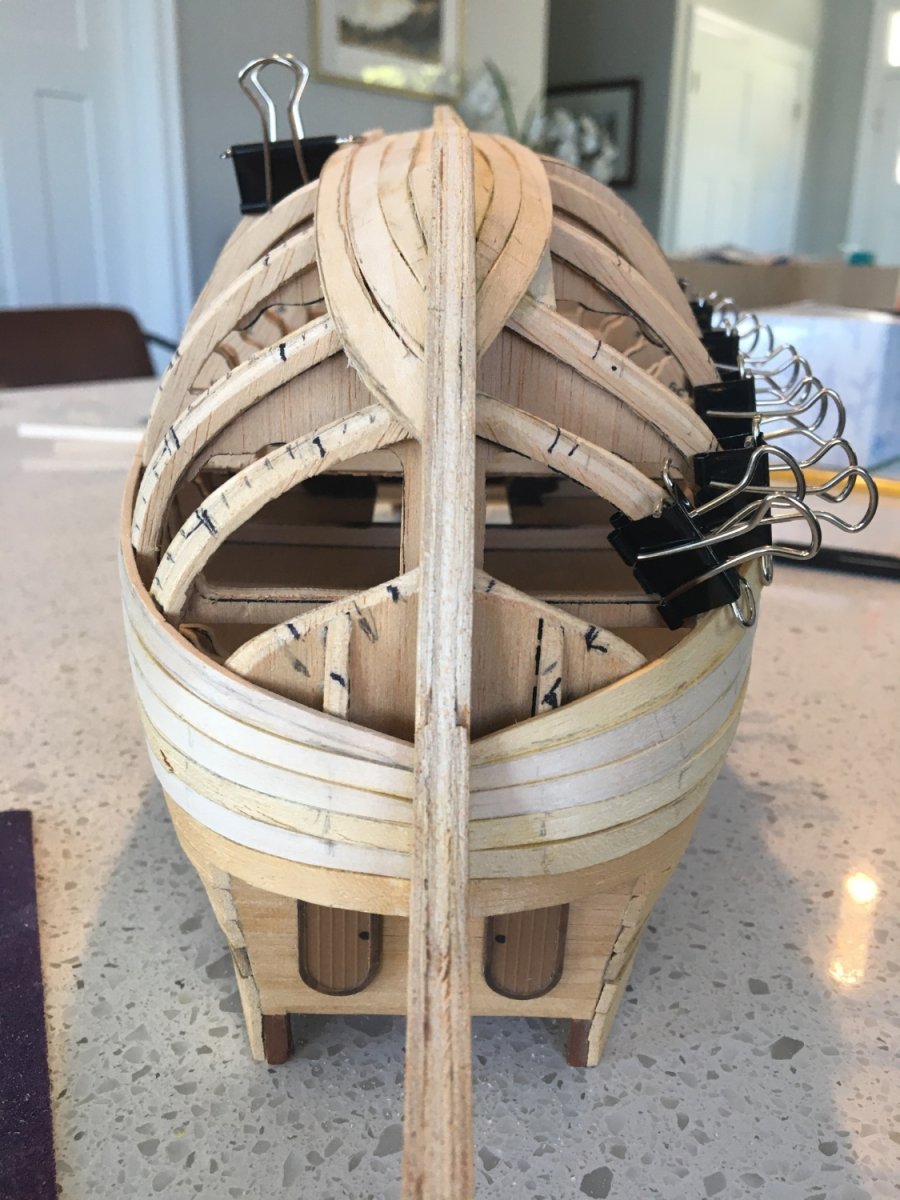
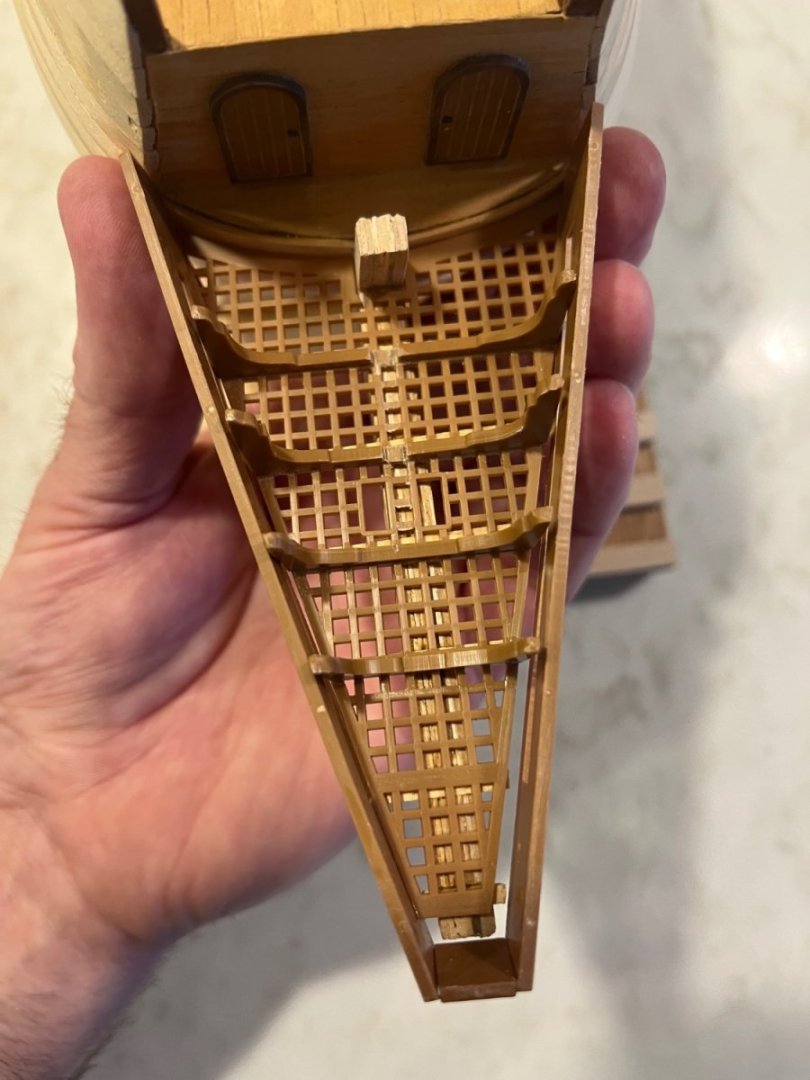
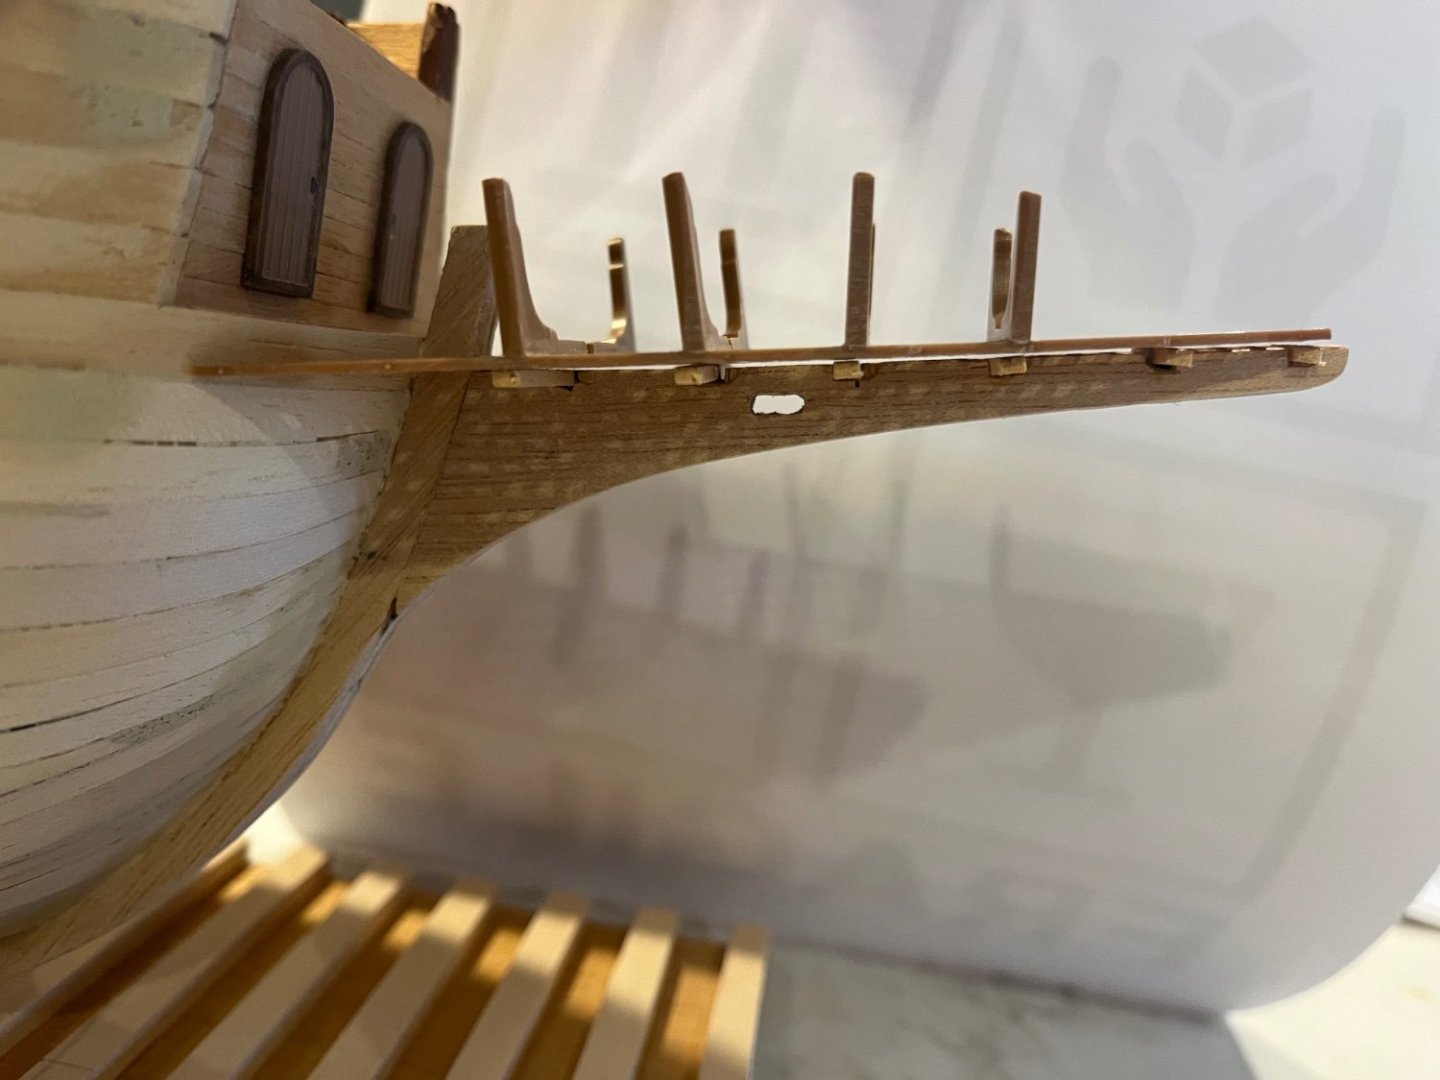
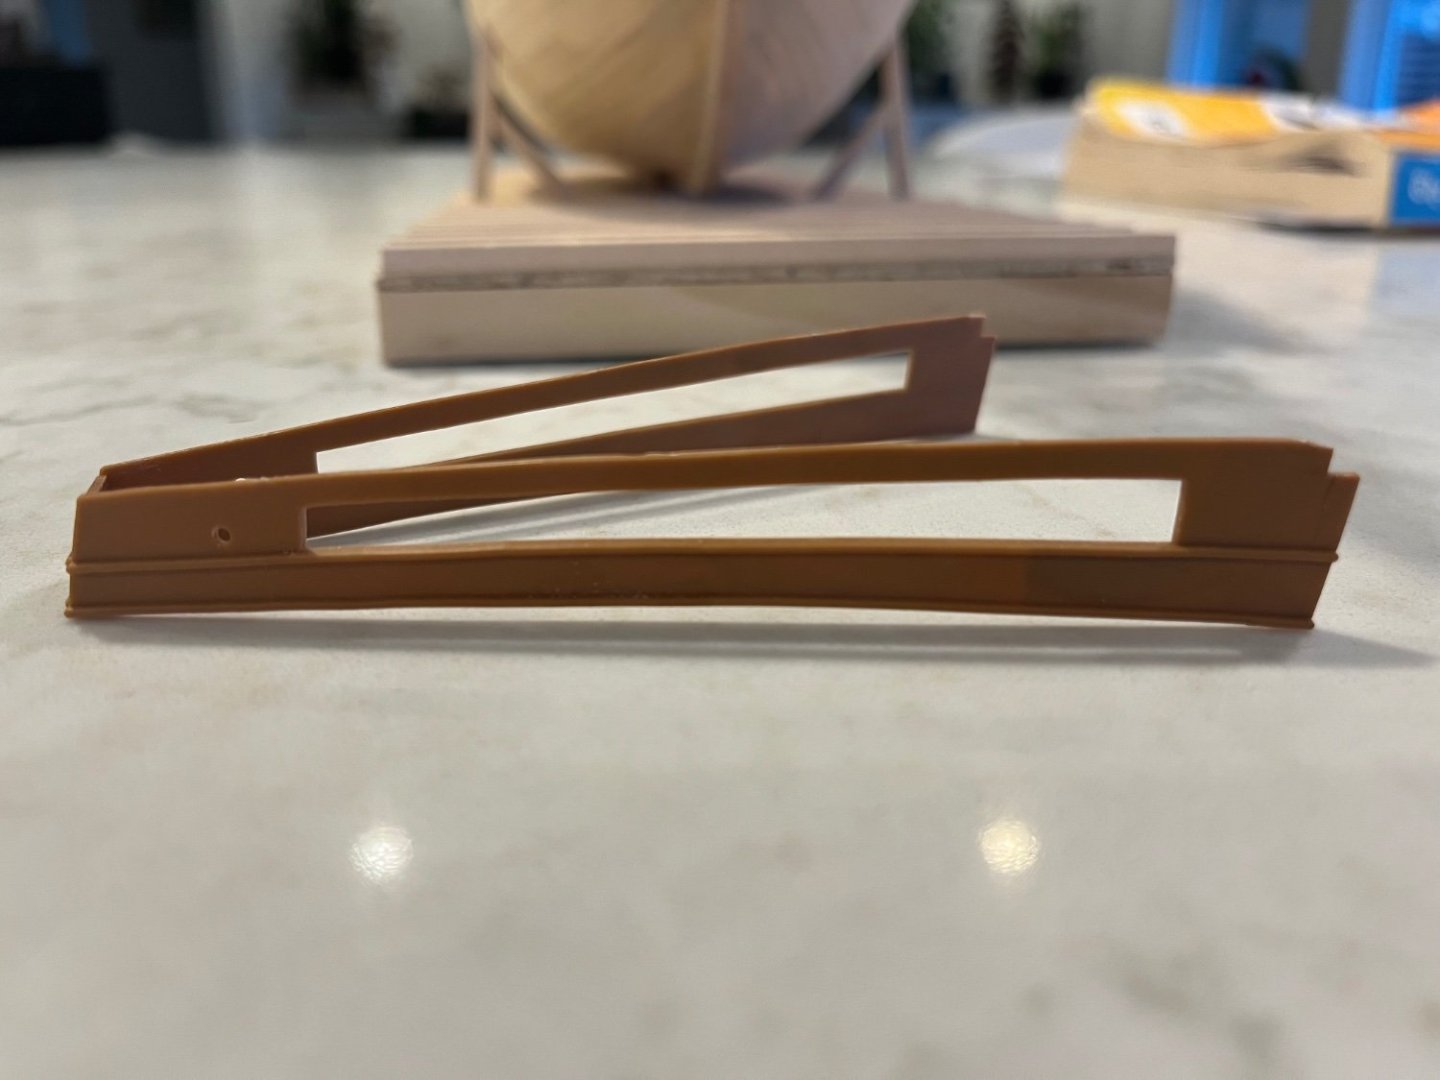
Here is my biggest beef with the kit. The plastic beak. I was considering making it in wood but it might be too much of a challenge. Not sure if anyone else has. These are the wooden supports that hold the plastic grating and beak. It seems that either the grating is too small or the plastic sides are too long or the wooden sprit (keel extension) is too long - or a combination. Without any drawings showing the assembly it is hard to know which. The grating sits flat but the sides (pictured upside down) are curved. Is one supposed to conform to the other? It’s a mystery….and one I will have to ponder over for some time. Any comments are welcome. Thanks for checking in Dave
-
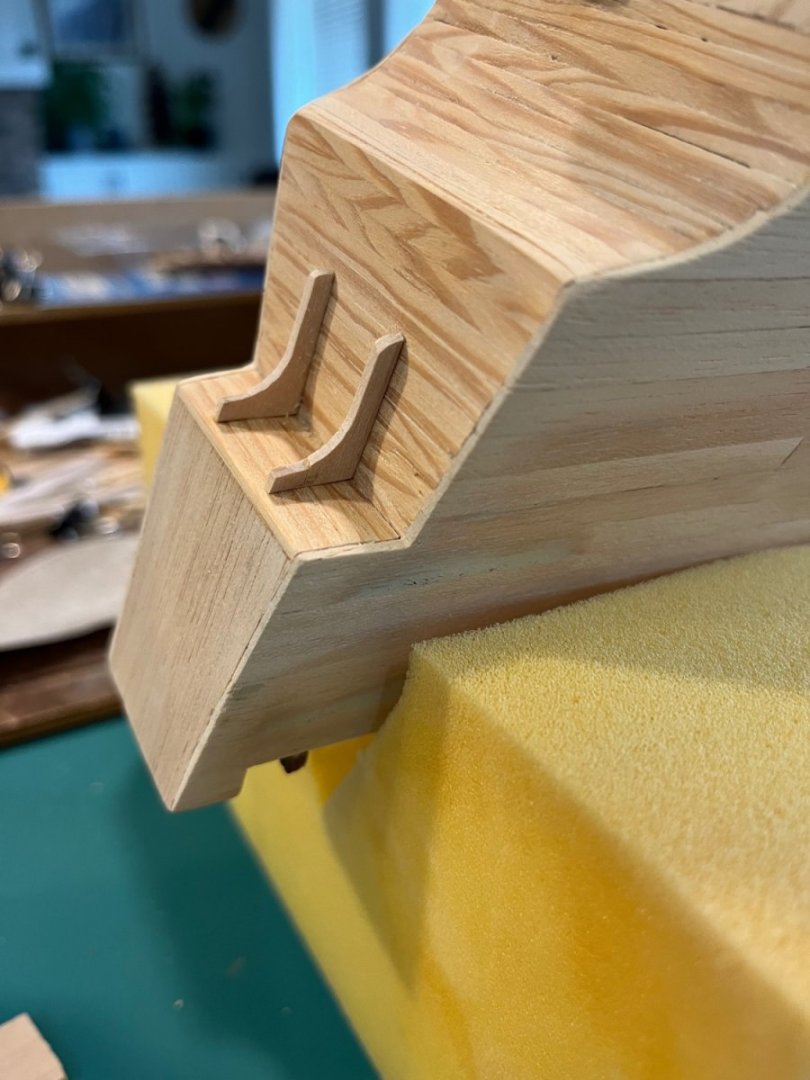
The kit has a mix of plastic and wood, which is annoying. Getting the two mediums to match in colour will be a challenge. Where I can, I will replace plastic with wood. Here are the 2 supports at the stern between the leaded lites. thanks for looking. Dave
-
Sometimes you just have to rebuild. I had to rip off my bottom planking as it just wasn’t working. After more study and reading I figured it out and I’m much happier. I only have a single planking though. Dave
-
Hi Chickpeas, Welcome to the forums. There is a ton of help here and you can google YouTube videos and find practicums and lessons that ago through planking in detail. I am not familiar with your particular model but when I started my Mayflower some two years ago, frustration let to me ripping everything off, finding more resources, and trying again a year later. I got ‘er done! I had to learn patience, how to bend wood in two directions, and more but it is all out there. From the bit that I see on yours, you are going to pre-bend the planks so that they sit without forcing them and you will likely need “stealer” planks to fill in the gaps. Definitely check out other build logs to see what others do. Best of luck, Dave
-
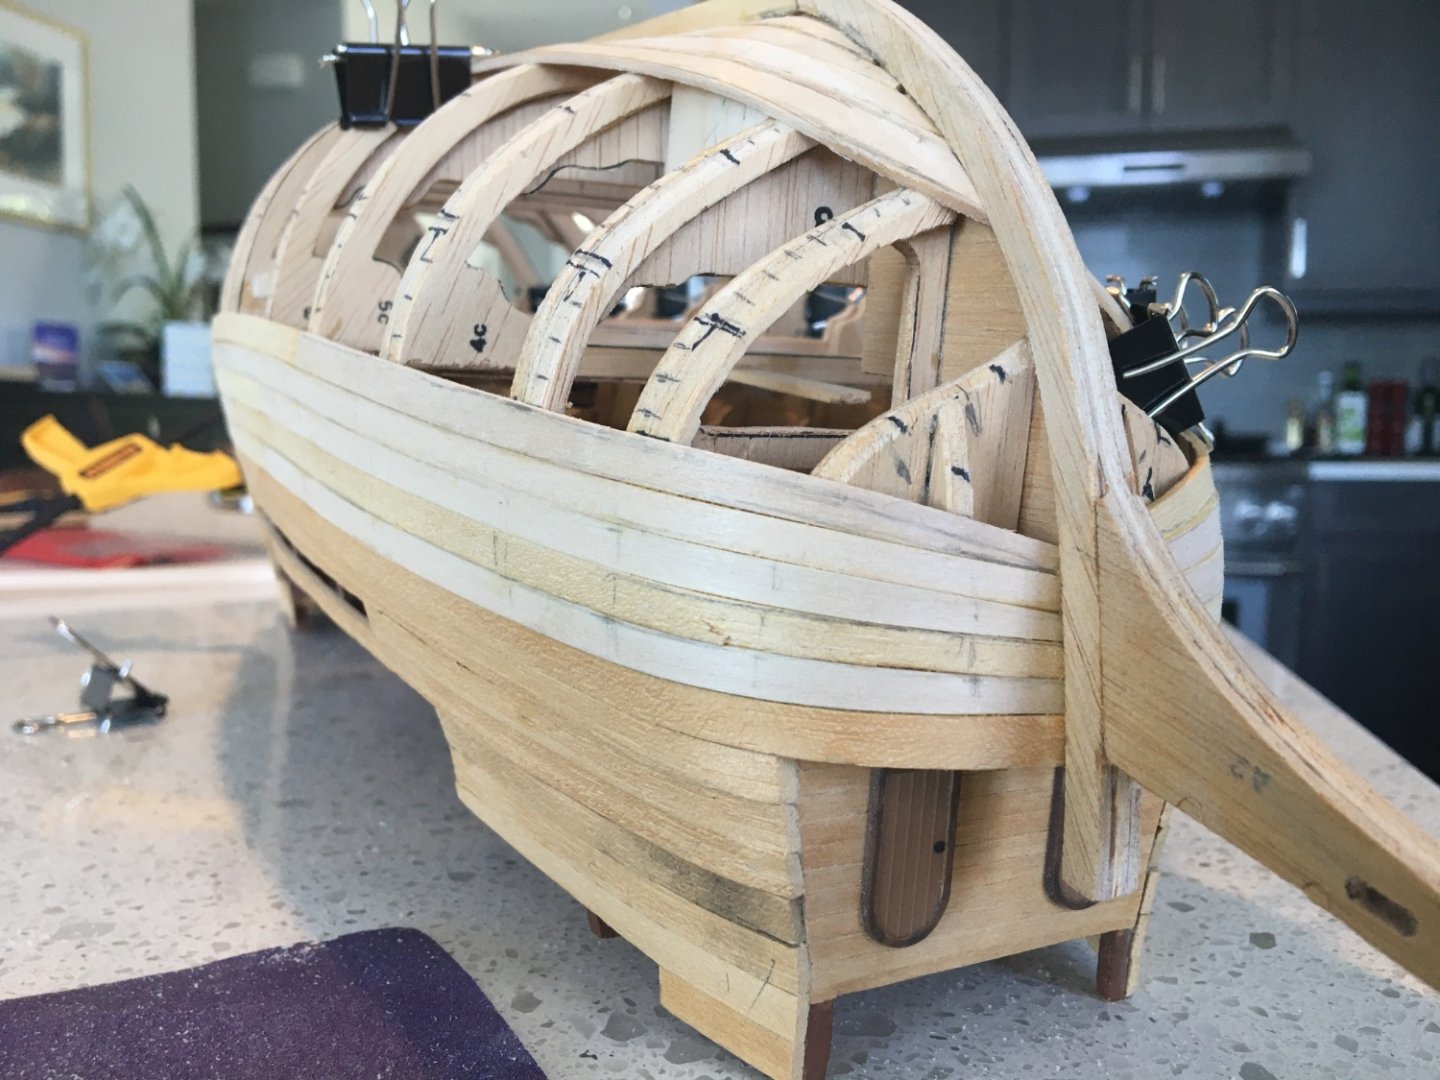
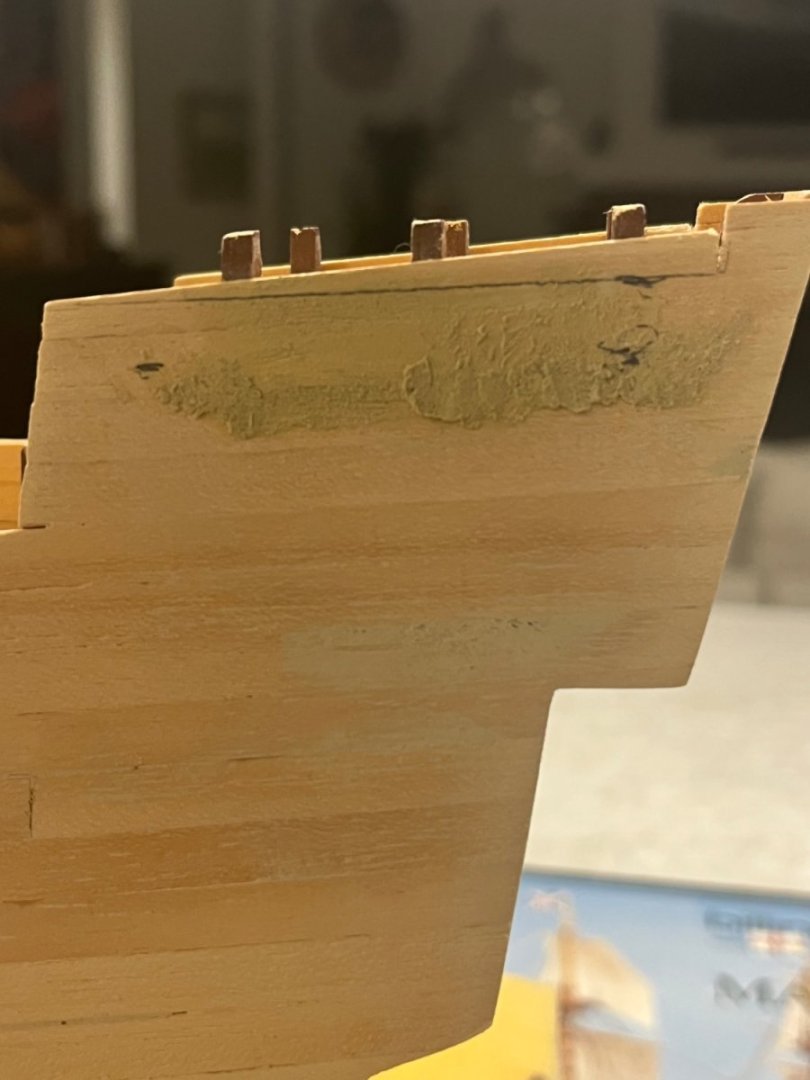
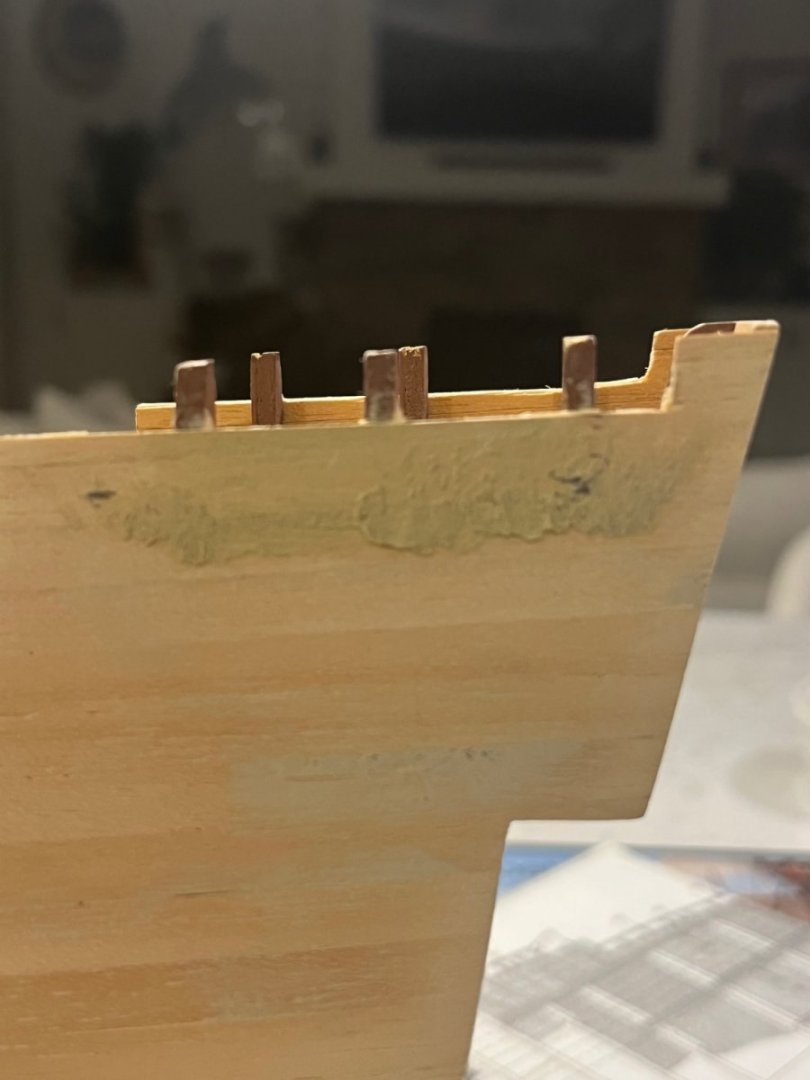
Knocklouder, isn’t it a process though? it was pointed out to me early on that the angle of the stern planking above the deck (there is probably a name for this) was incorrect. A look at the drawing proved this correct but I wanted wait until the hull was planked before dealing with. …and here we are. Measured the distance from deck to top of planking at the front and carried it to the rear and cut it out. Sharp knife worked wonders and everything came out clean. thanks for looking. Dave
-
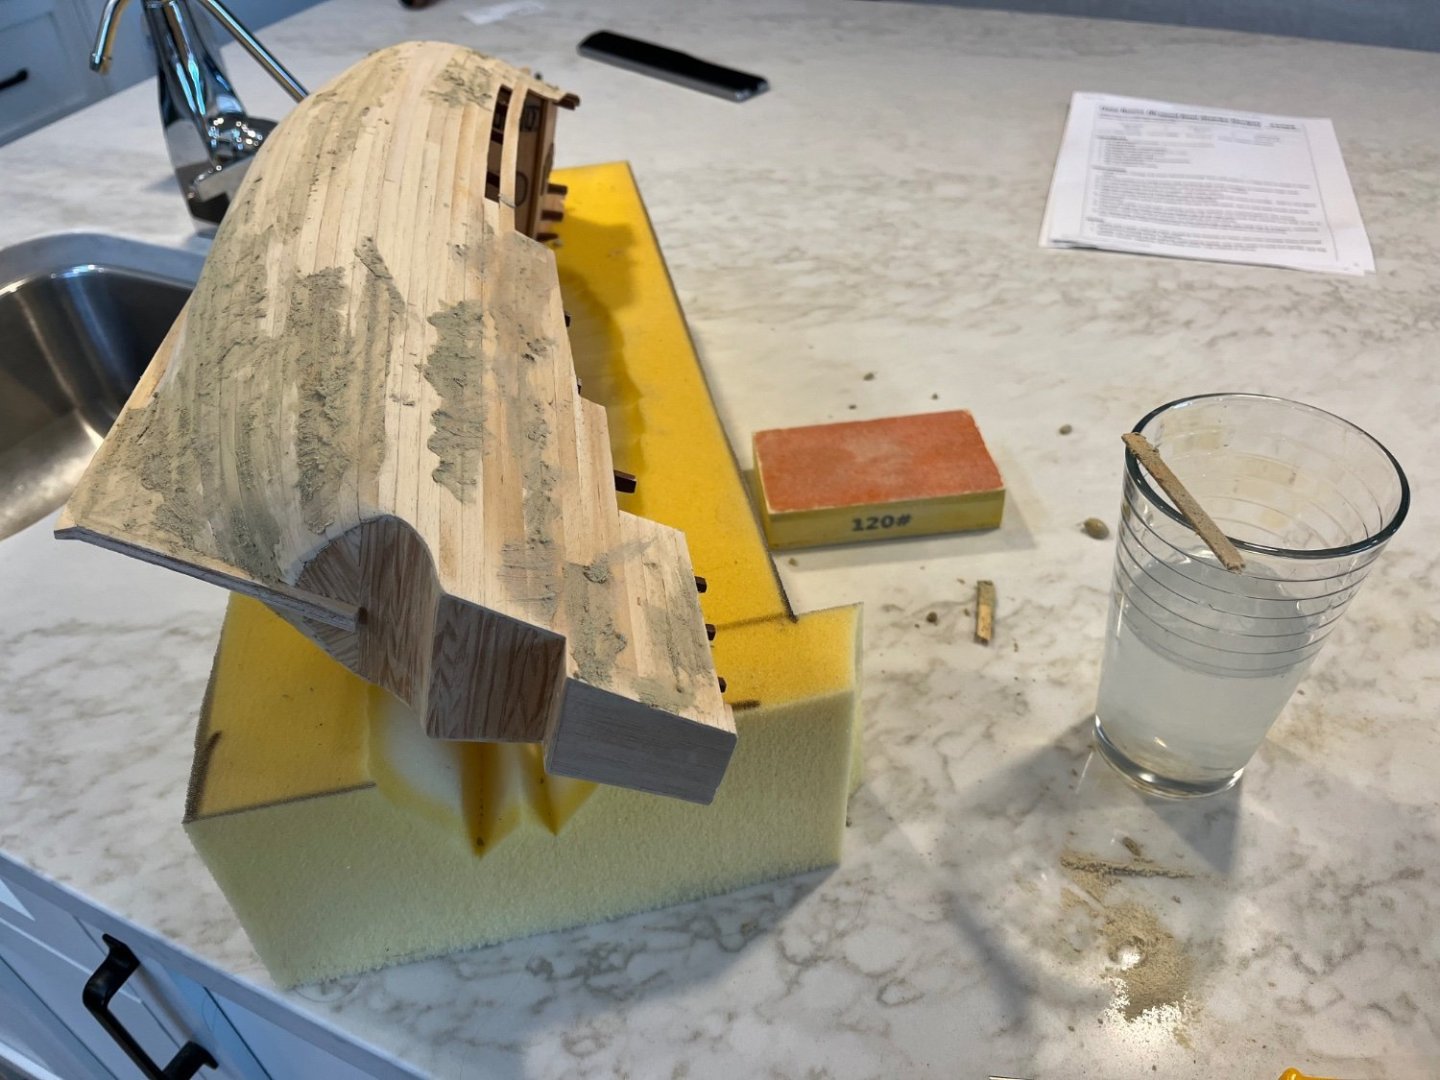
I started to patch and sand the hull. Gave it an initial knock down with 120 grit. Now I’m using Lepage’s wood filler and find that applying it with a palette knife wetted with some water helps it go on smoother. Otherwise it is dry and crumbles. I think I will need a few iterations of sanding and puttying. thanks for looking. Dave
-
Your planking came our really well. I am jealous! I am working on a Billing Boat Mayflower and so I will be following along for any procedural steps or tips. Cheers, Dave
-
Hi Knocklouder, Just found your build. I started a Billing Boat Mayflower some two years ago that was a thrift store find and partially started. I just finished closing up the hull. At the time no one was building a Mayflower so this is nice, although you are way past where I am at. I like the colours you chose - will you be adding any of the Green and Yellow you sometimes see? Is your hull double-planked? I wish mine were but some putty and sanding will have to do. Is your beak all wood or are there plastic bits in there? I am trying to come to grips with what colour to paint my plastic bits to match the wood. I will be following along with interest. Cheers, Dave
-
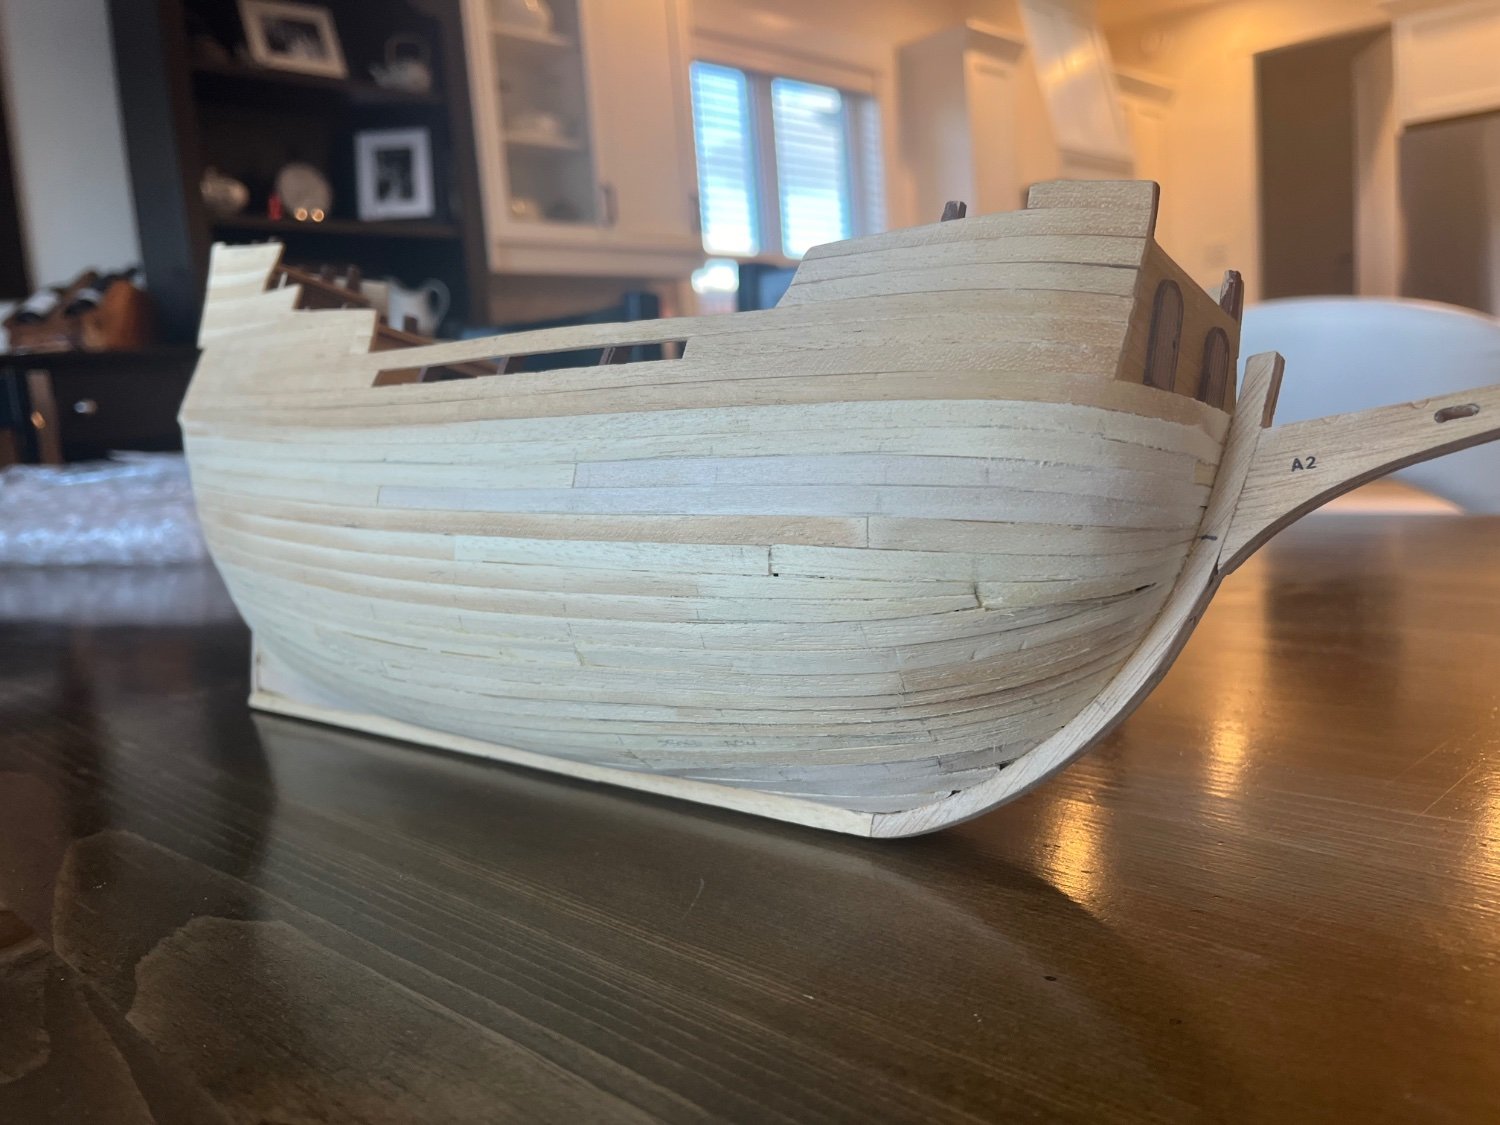
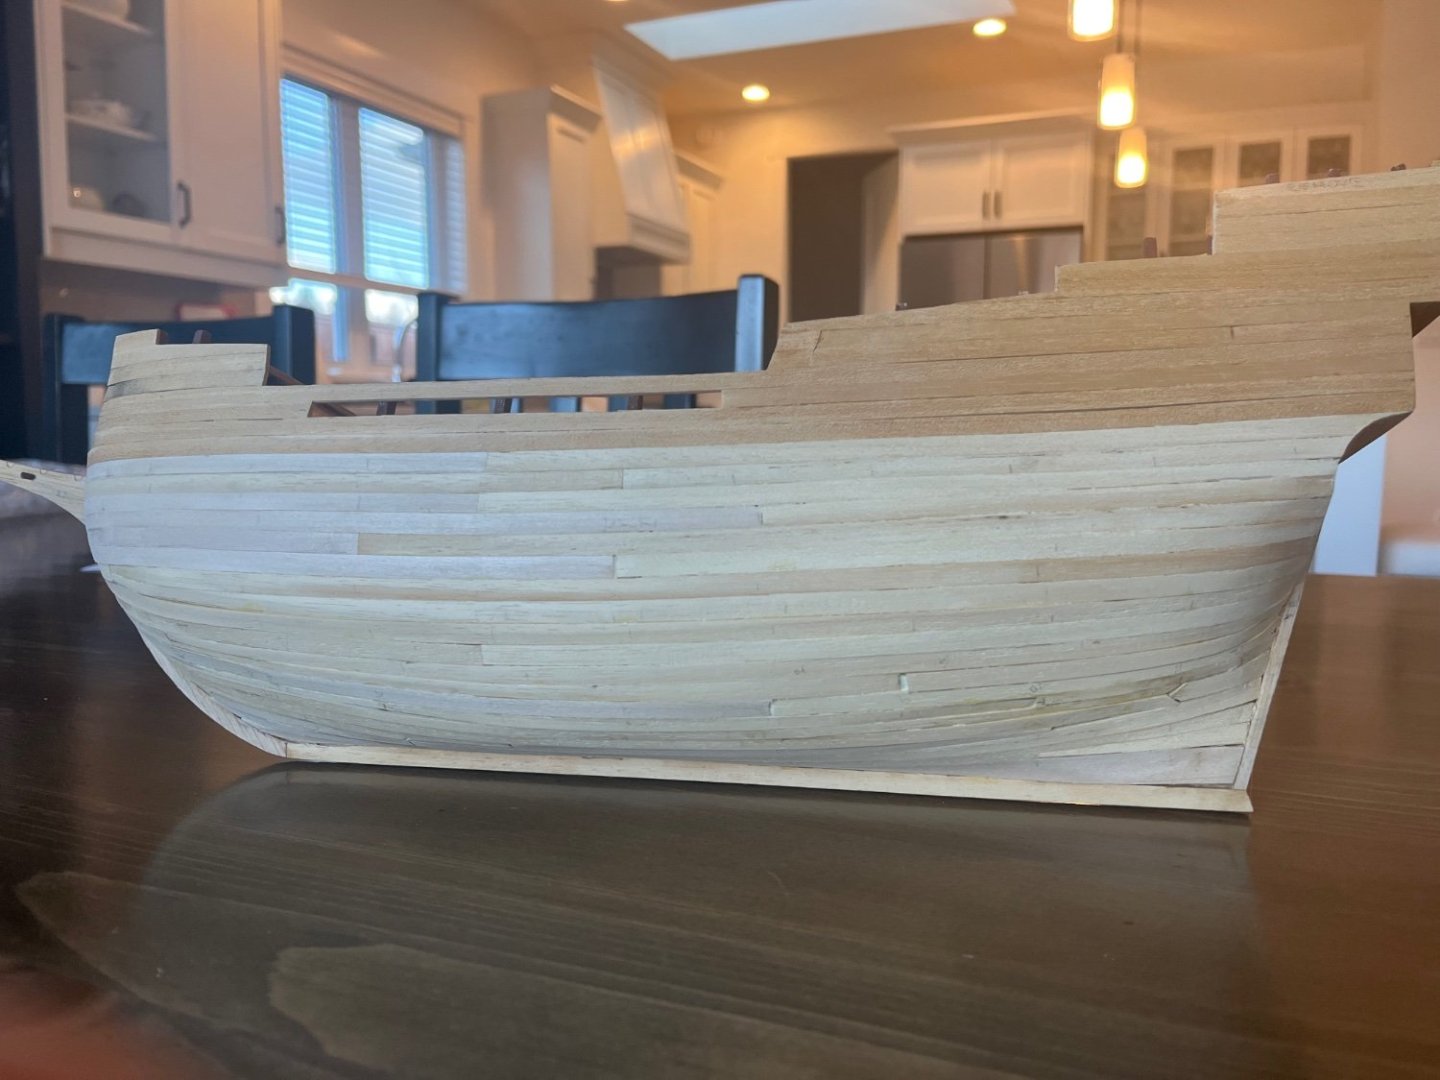
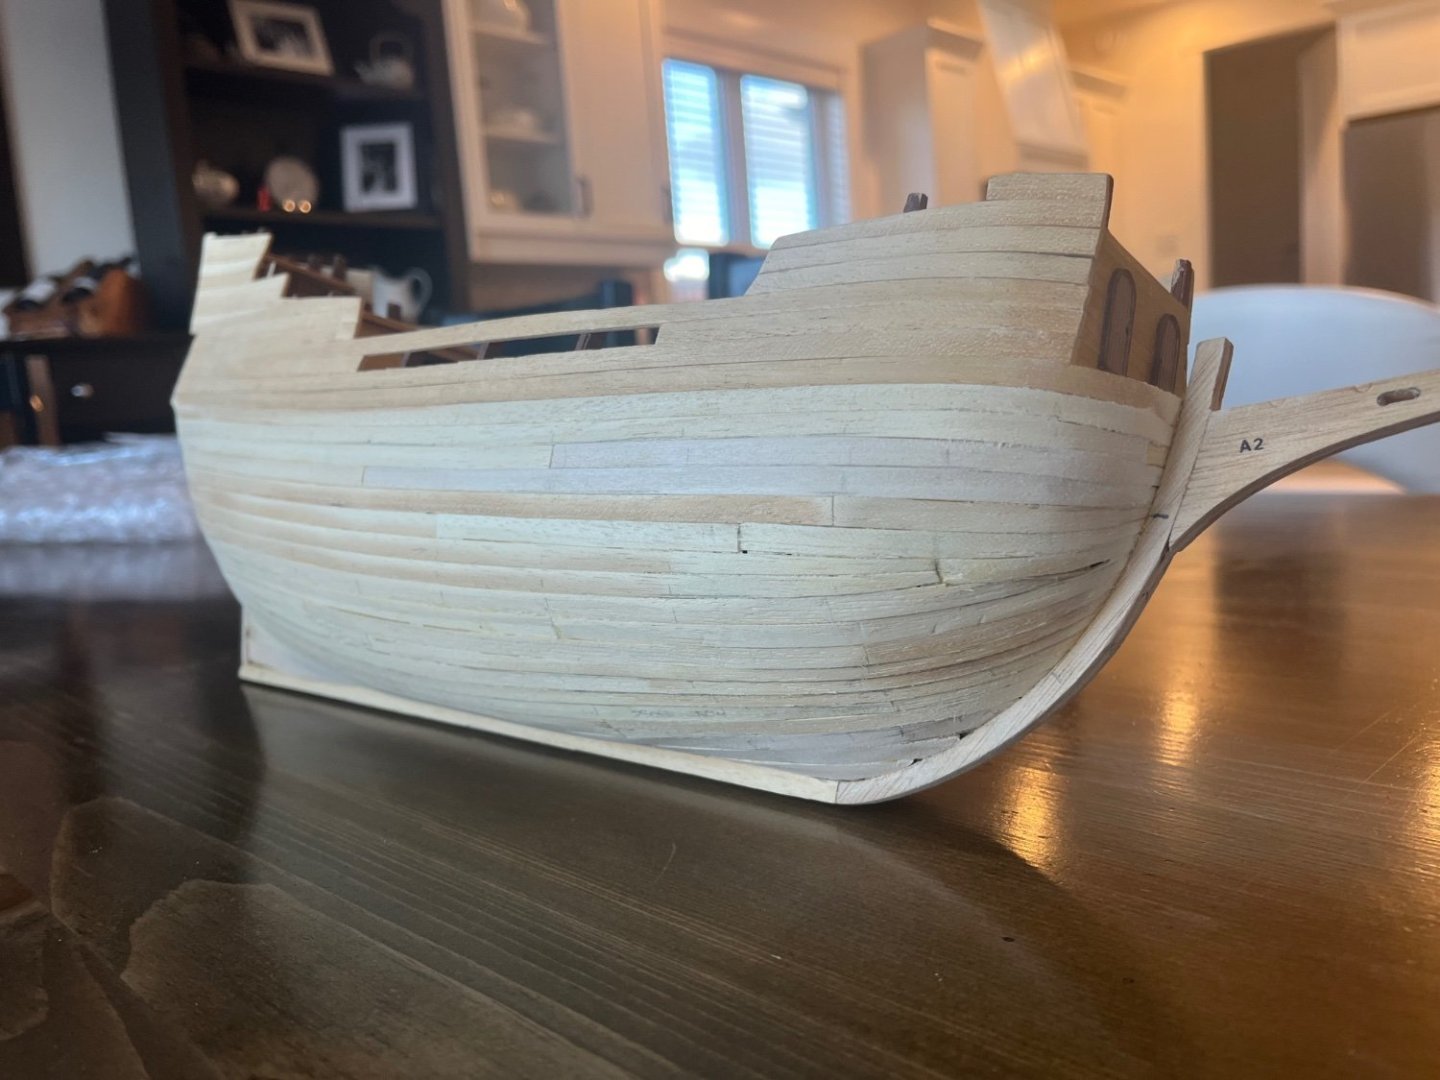
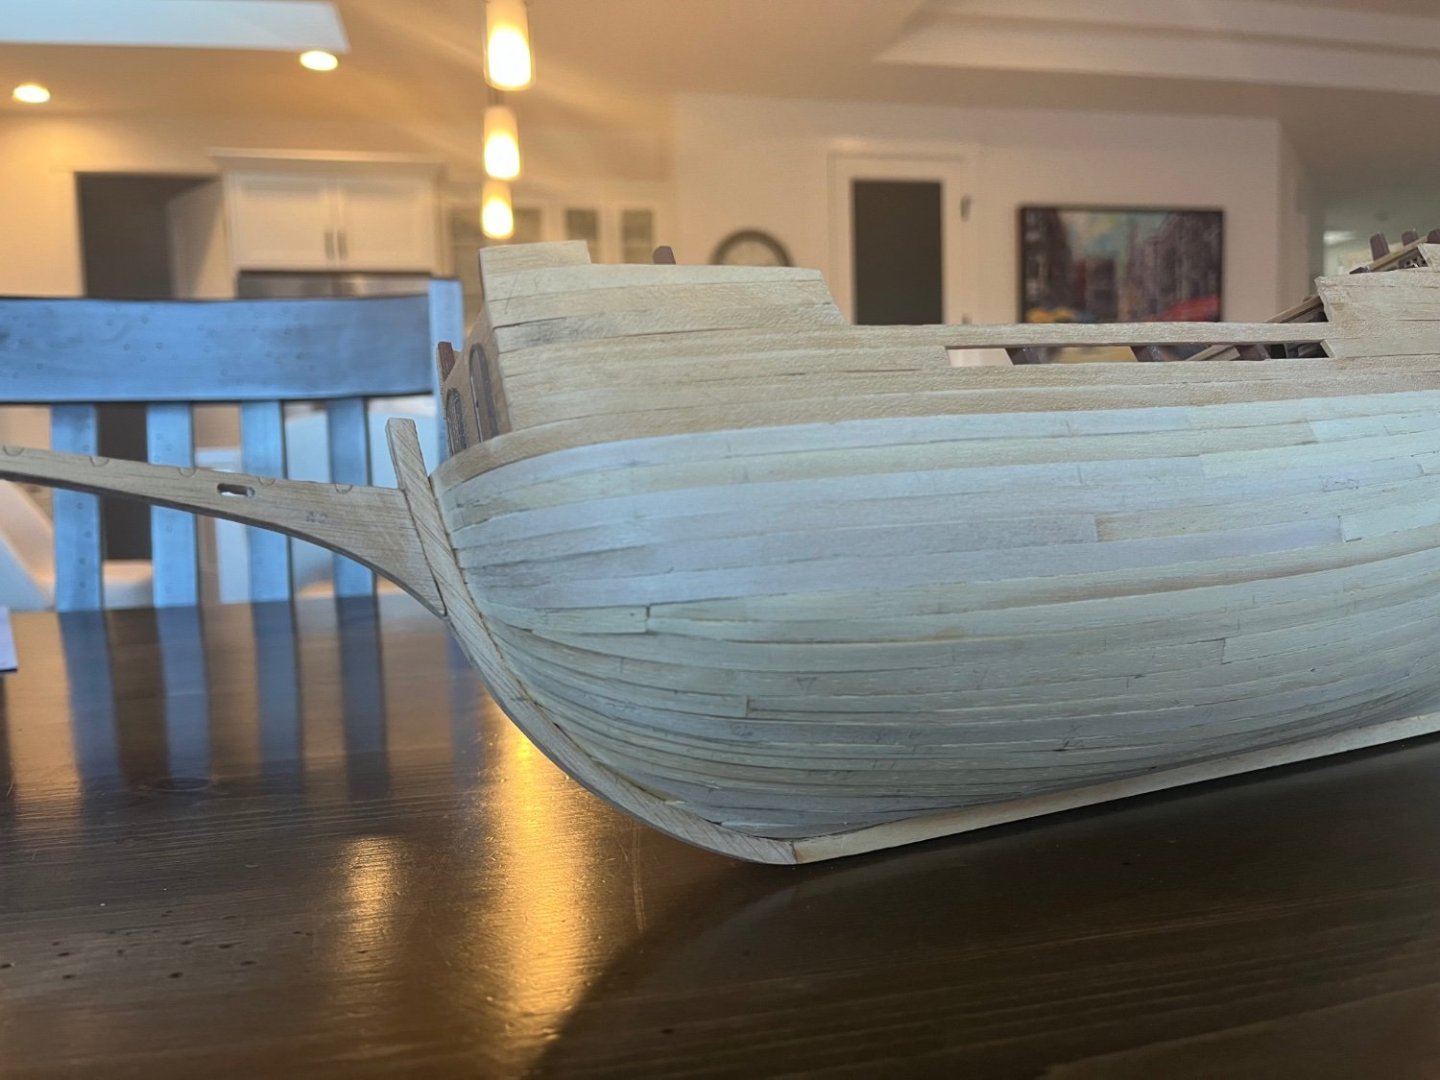
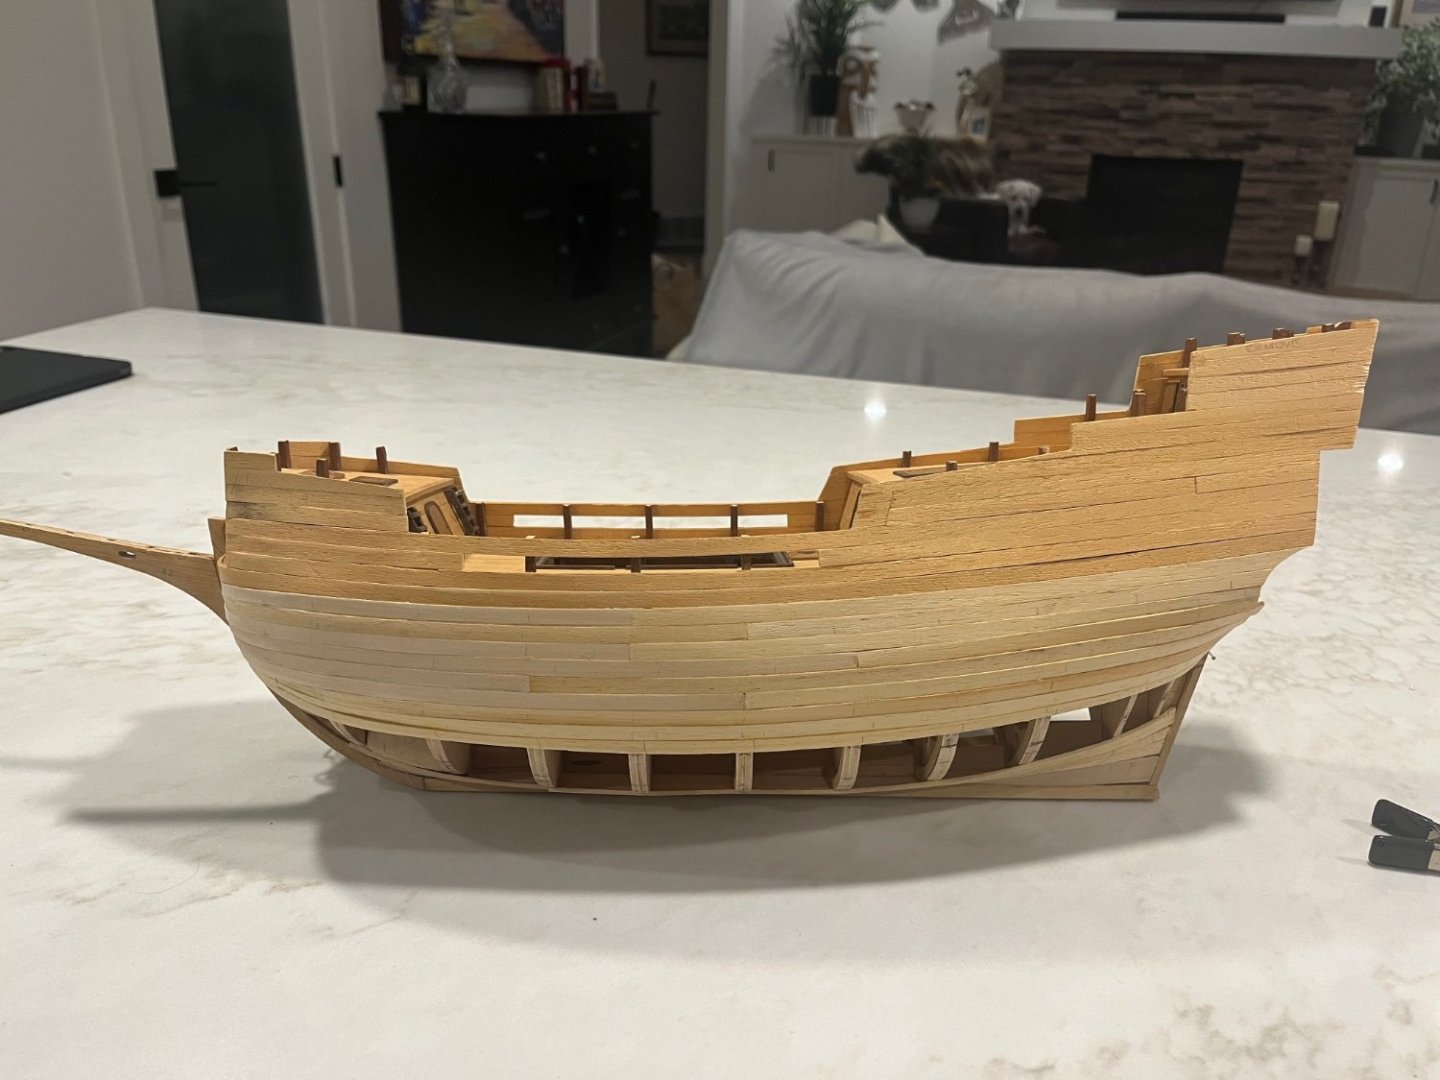
Got the hull closed in this weekend! Looks pretty rough but I think I managed ok. It will get painted so putty and sanding will hopefully give it a nice look. After this I assume the beak should get assembled and affixed, followed by the various rubbing strakes and trim. I was going to leave the rudder for last, once I was done manhandling the hull. And then…rigging!

-
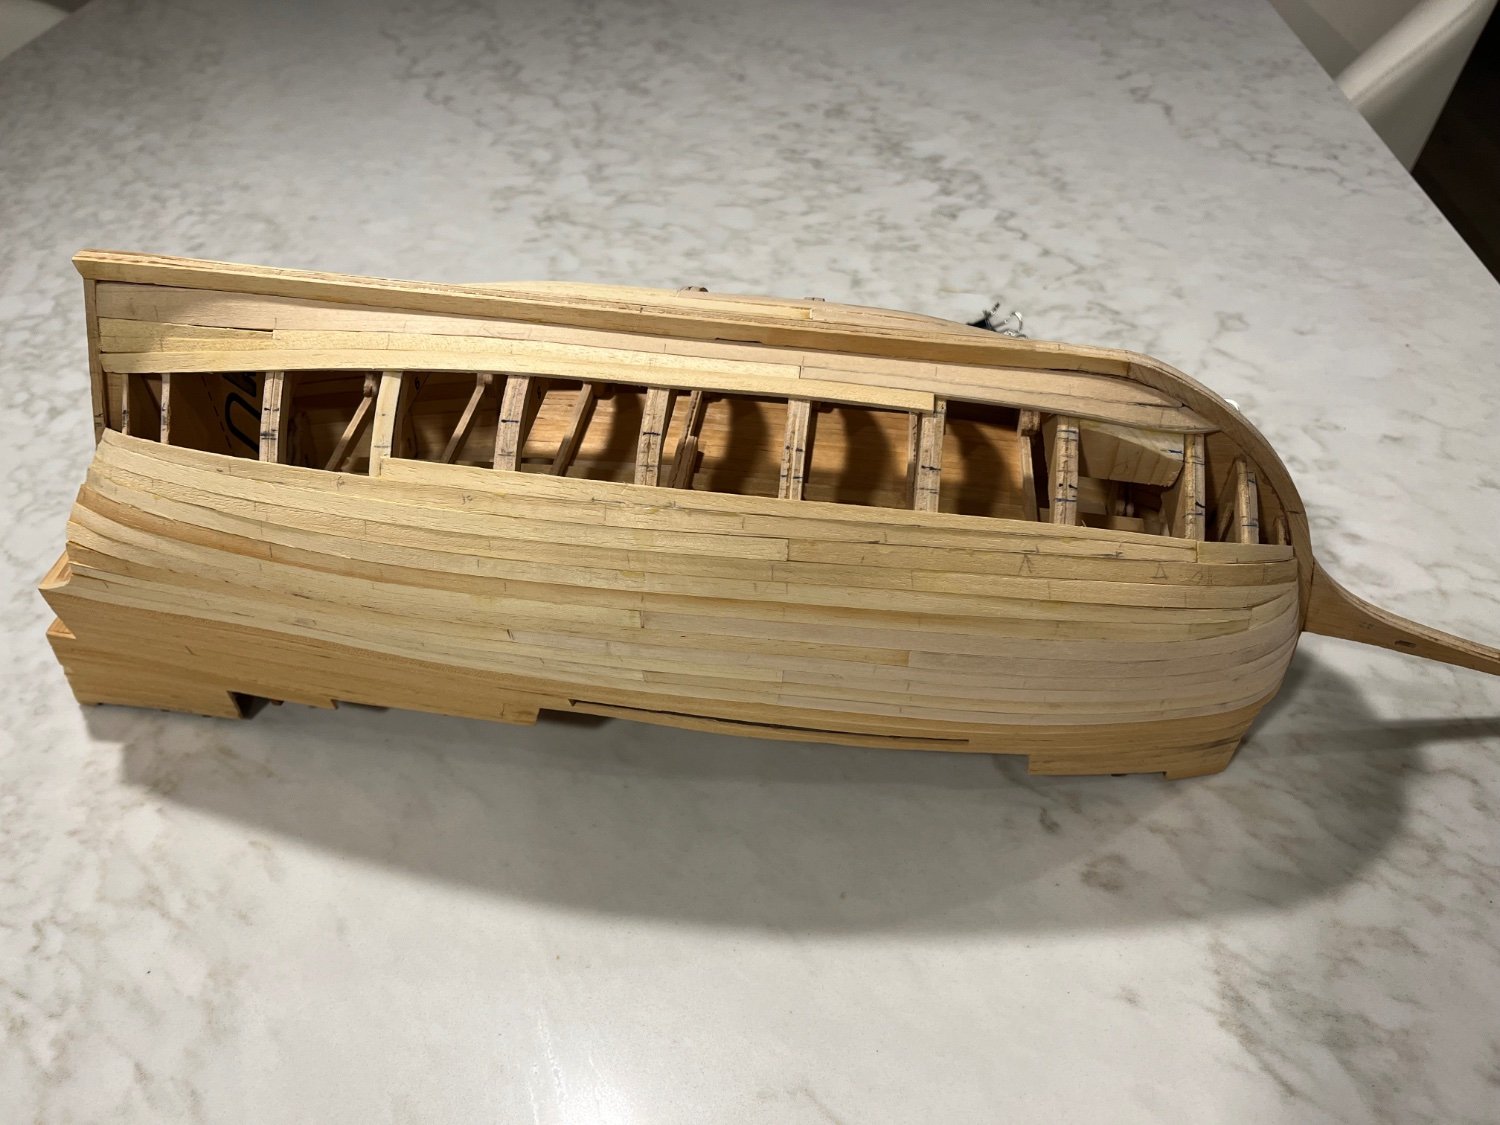
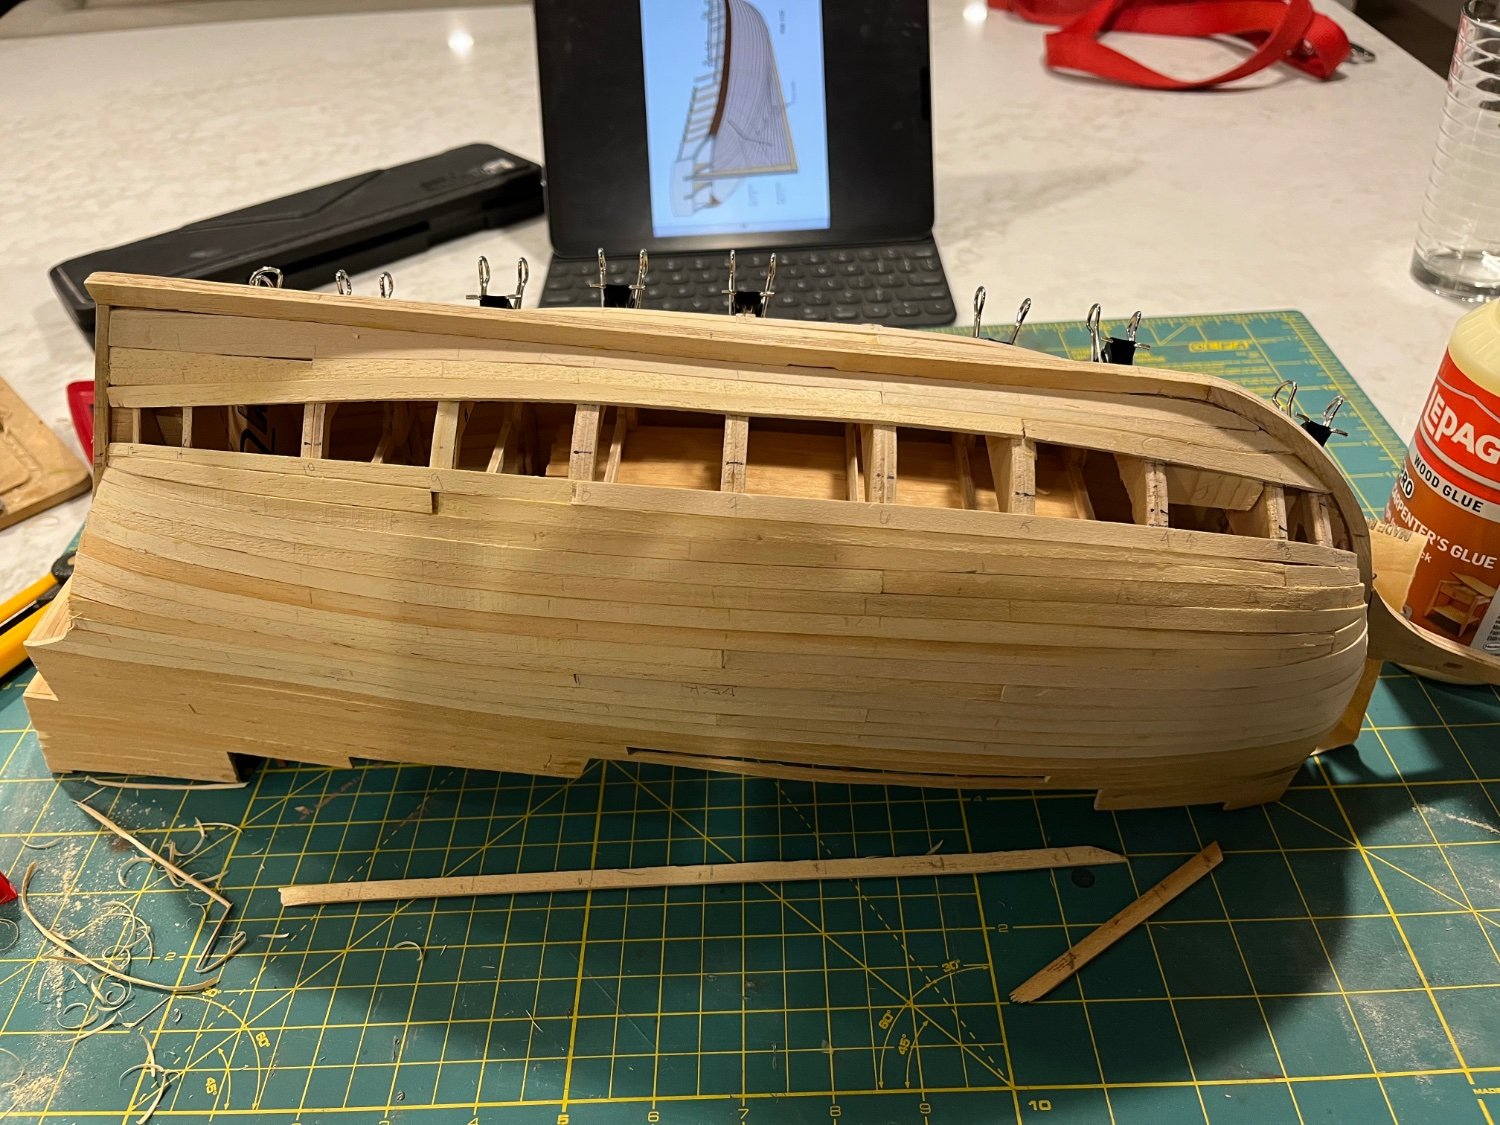
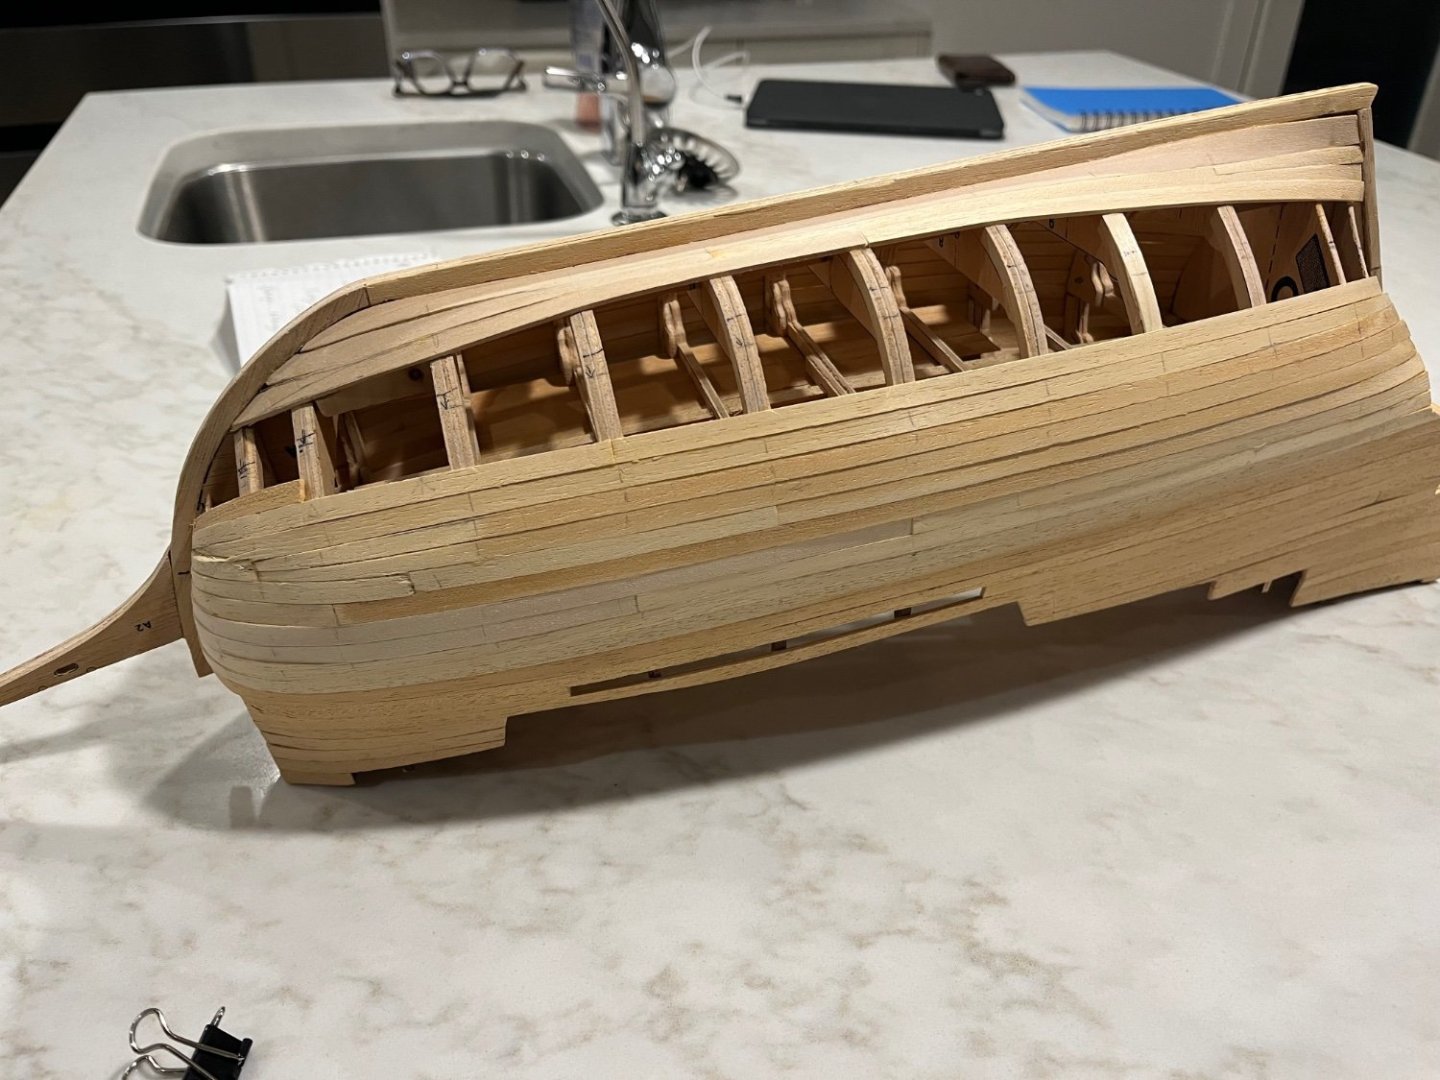
Added a few more strakes. I noticed that the gap that is forming is looking more and more wonky. I remeasured the gaps at each bulwark and recalculated plank widths in an effort to keep the planks somewhat parallel. At one point I noticed that one of the planks buckled or wasn’t clamped properly to the frame and I had to cut it out and glue in another piece. it looks worse in the picture but I think sanding will fix it. On some good news I tried the wood filler I had and stained it and it matched the wood really well. I have about 3 strakes to do on one side and 4 on the other. Getting close!


-
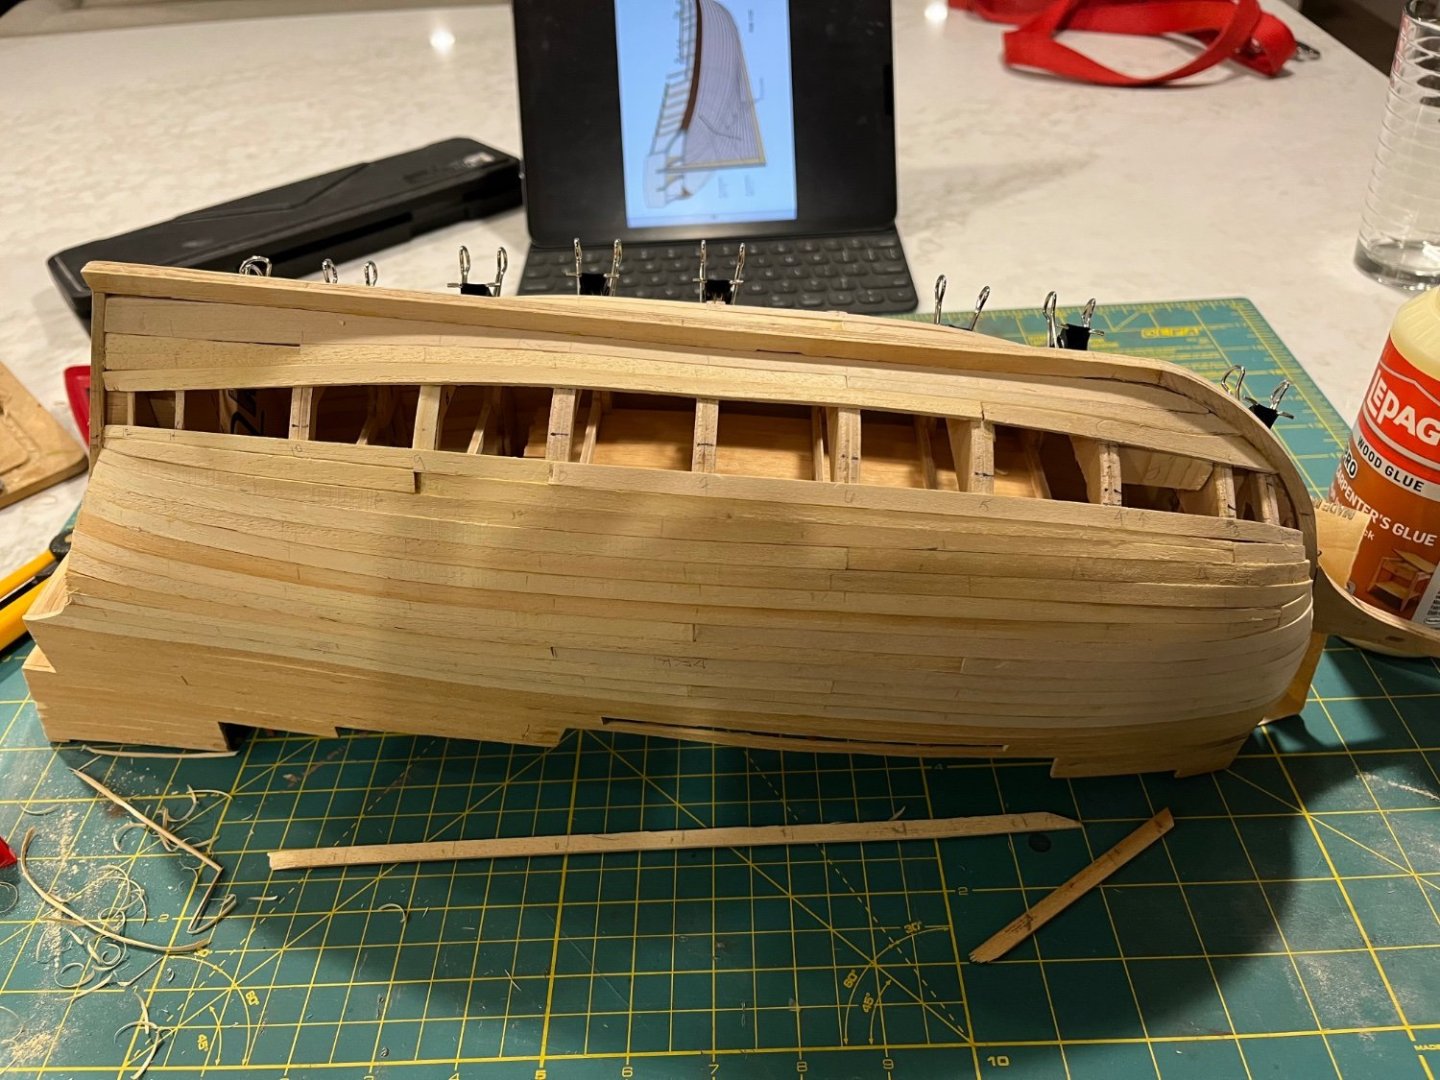
Maybe my hiatus and further study has produced results. Planking seems to be going well. I have a bit of a routine going where I form and shape the strake, leave it to set during the day or over night, glue it up and get another ready. I definitely won’t win any awards but if I can get a half-way decent shape I will be happy. Had to put in a correction strake, that I know is improper but evens out the band. As I work my way through this I am trying to figure out paint/stain schemes. As always, any comments or suggestions are welcome.


-
Here’s a question for the ether…the kit came with 4 types of rigging rope but they are all tan colour. Do people dye them or just bin them and get something after-market?
-
My apologies…it seems as if my pictures rearranged themselves…
-
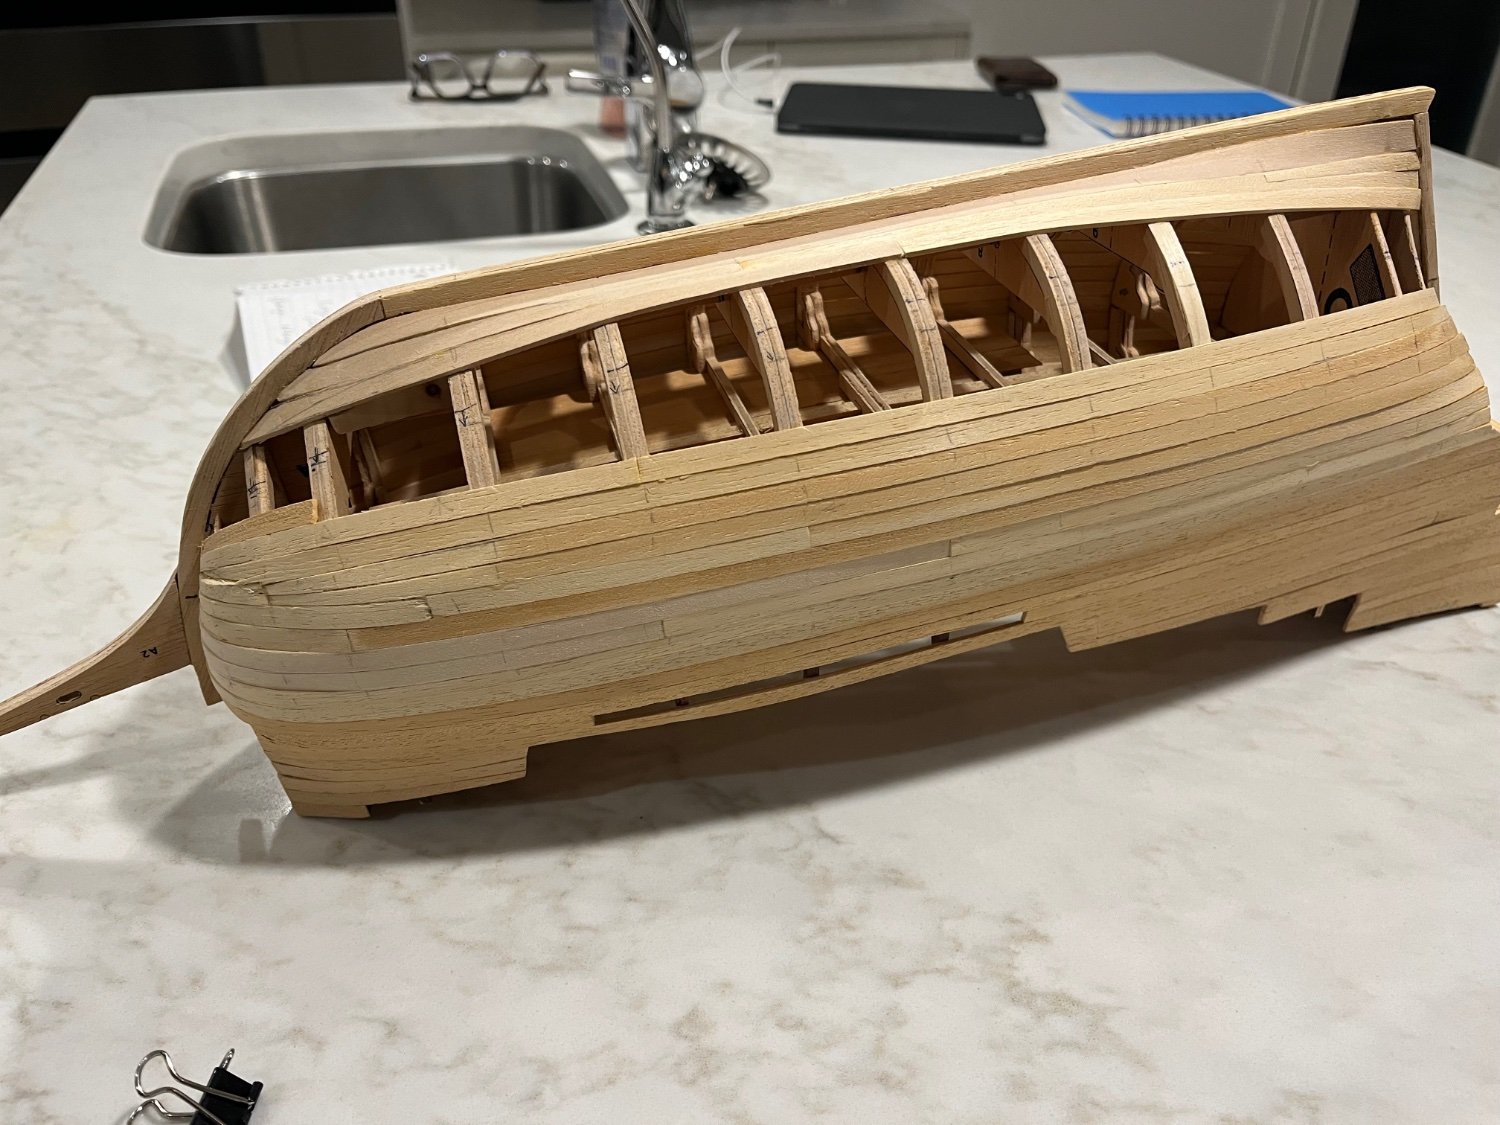
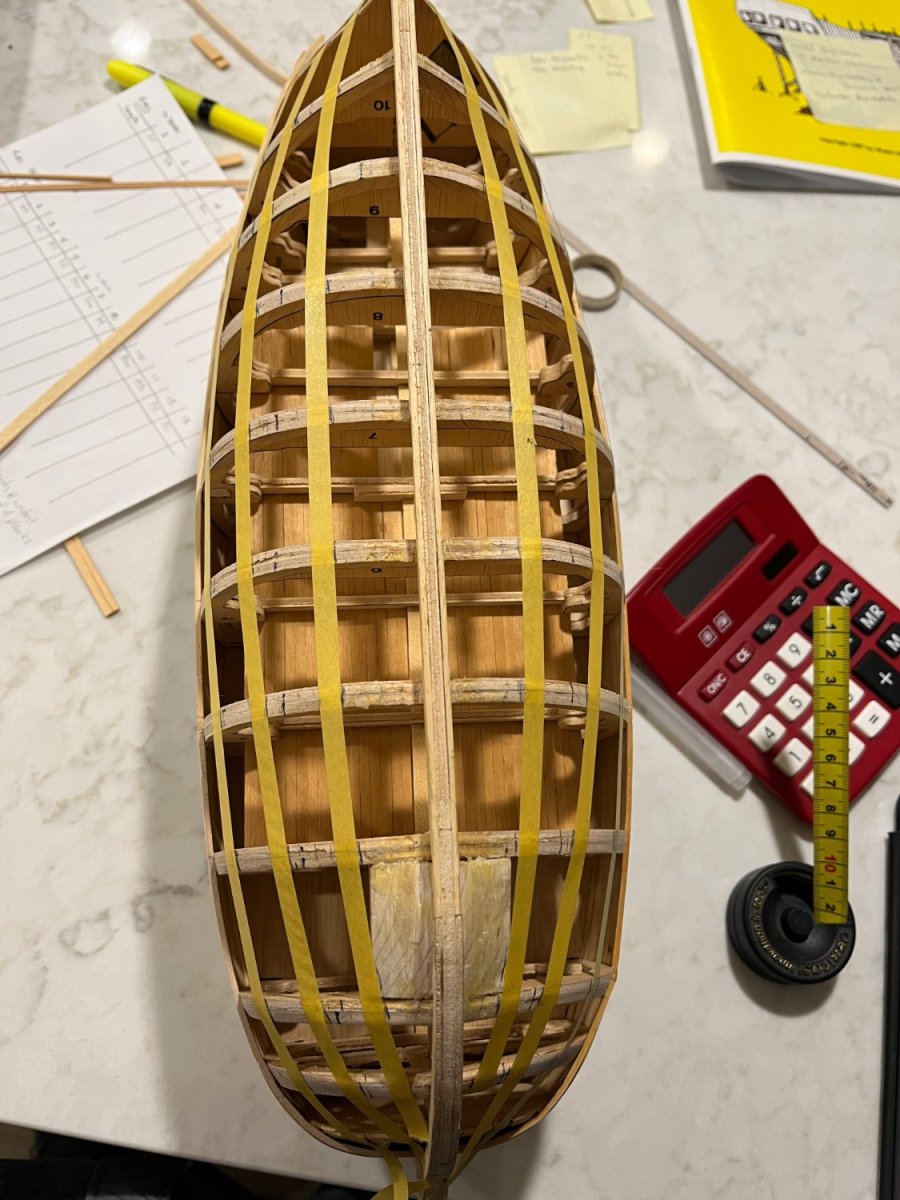
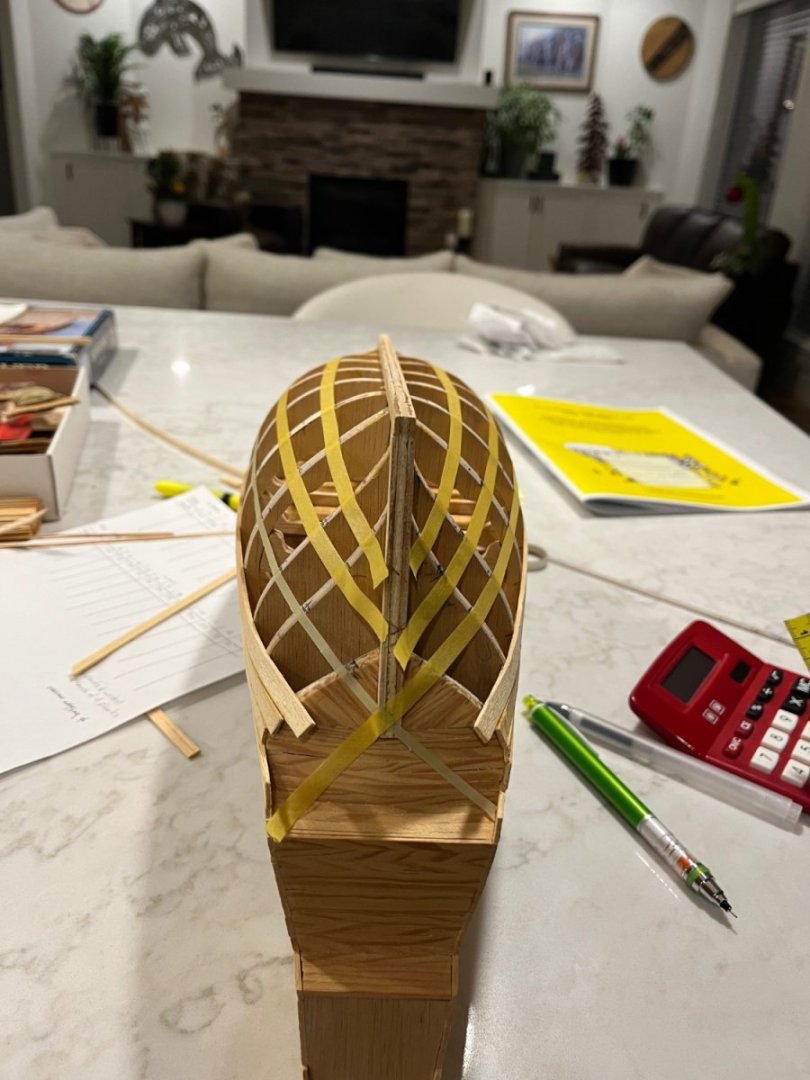
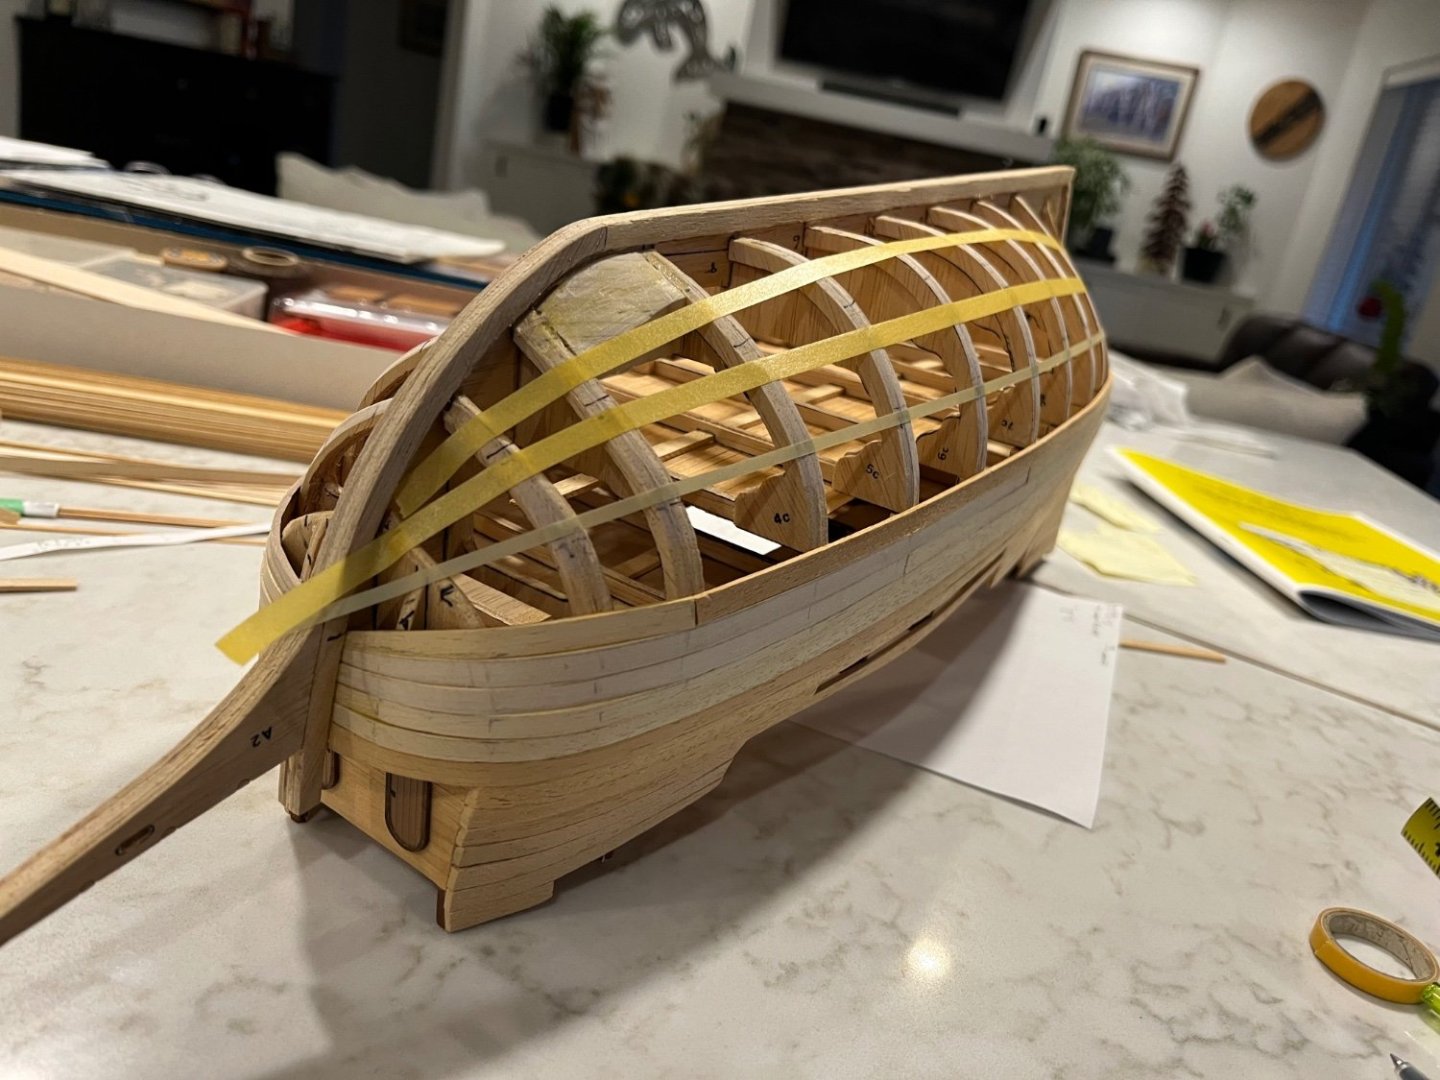
Oi, so it’s been about a year. We moved and it took a while to get things to a point where I could start hobbying again. After pulling off the planks last year I am back attempting to make it work once again. I did some more reading and attempted to find more resources but, alas, I have not been too fruitful in my search. So it continues. I will get to work as best as I can, the bottom will be painted so I am not going to worry about it too much. A bit of a cop out, maybe, but at some point construction needs to move ahead. I lined the hull to figure out where to put the planks. The tape seemed to flow well, so I went with it. I laid a few planks down and this time widened my garboard strake to see if that would help. I will also try narrowing the forward parts of the planks to see if that helps. Wish me luck!


-
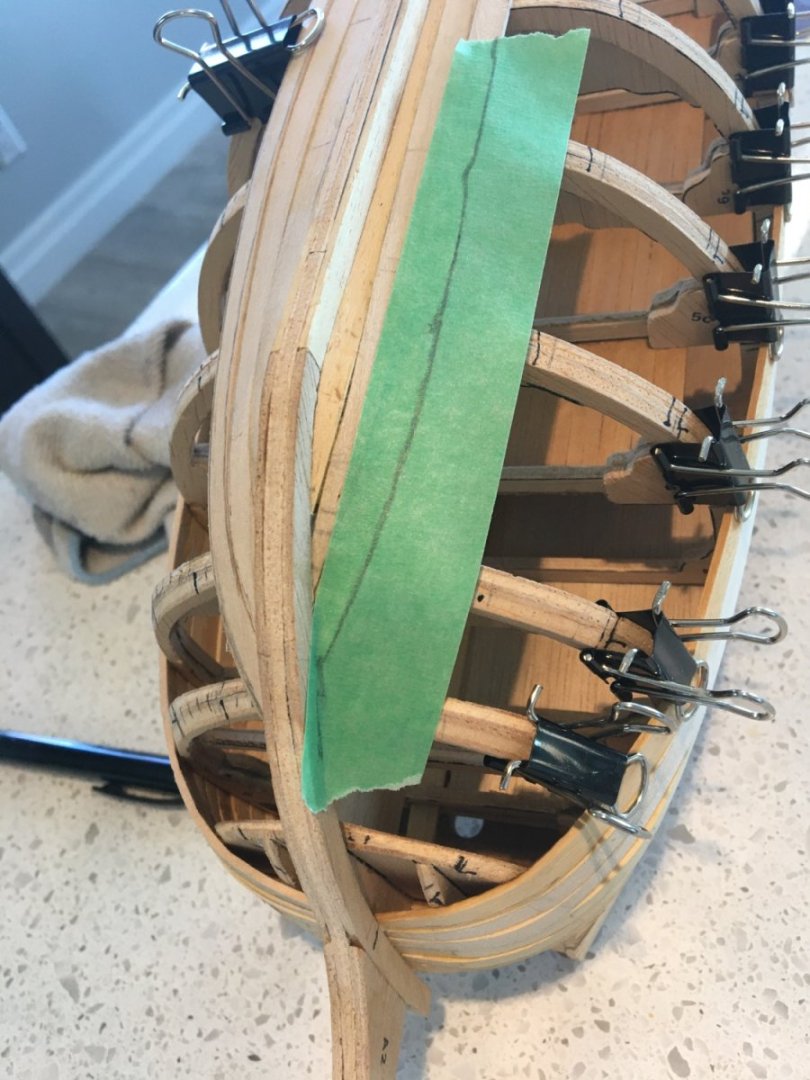
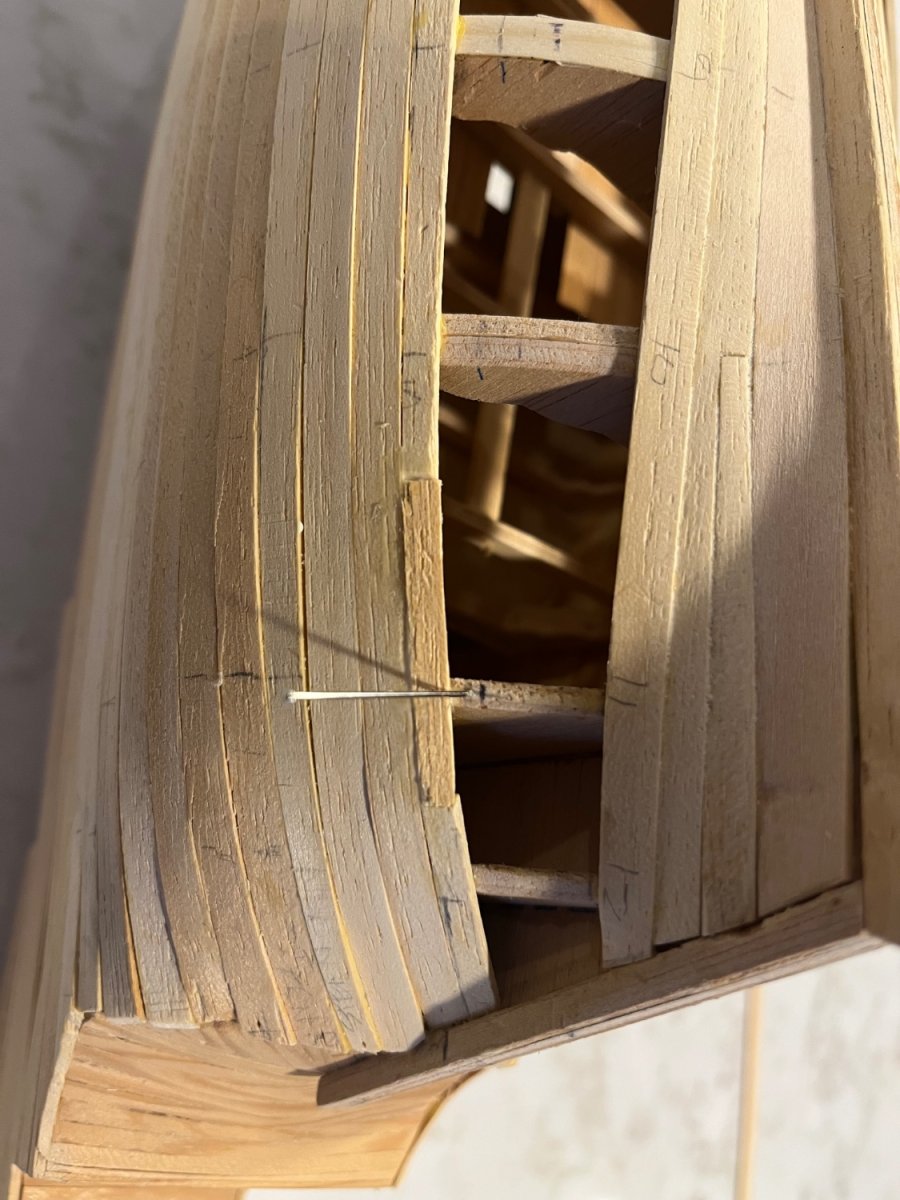
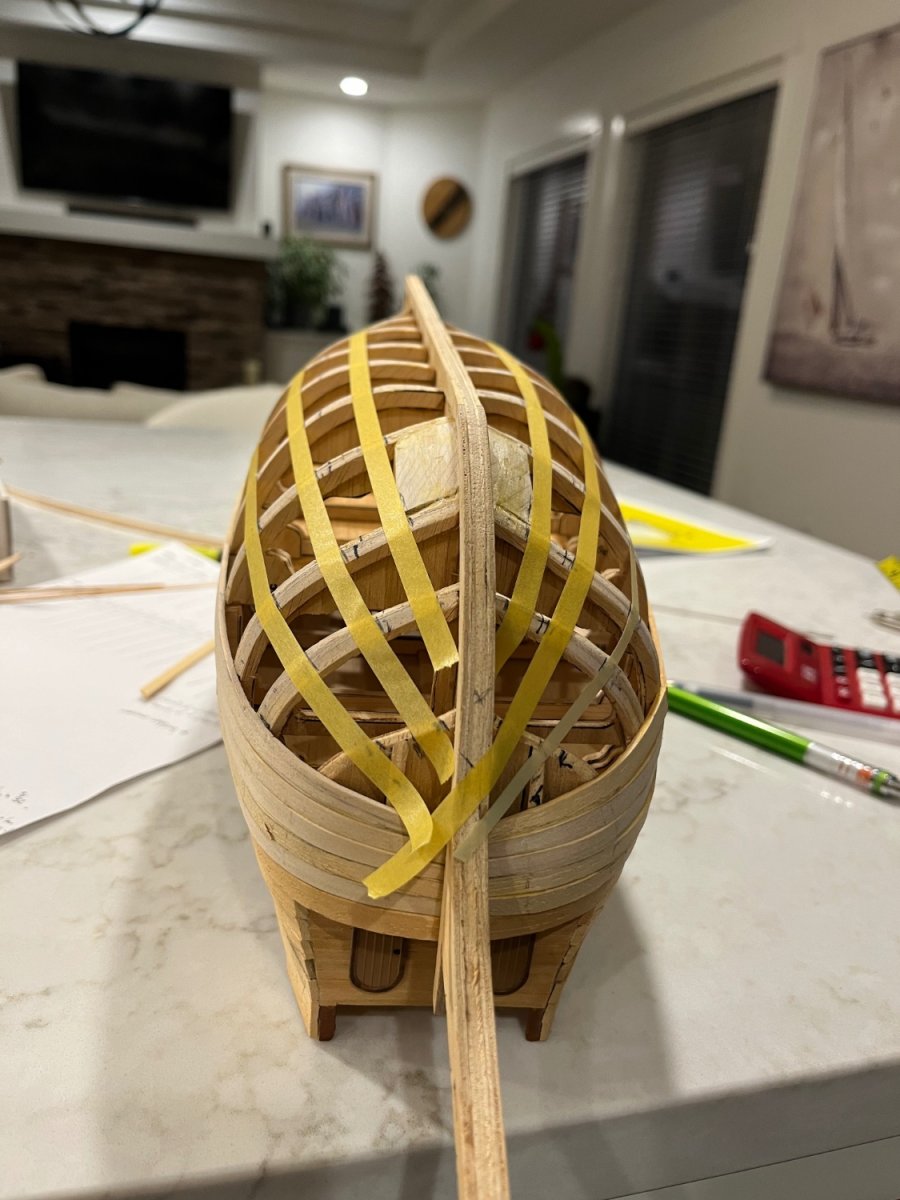
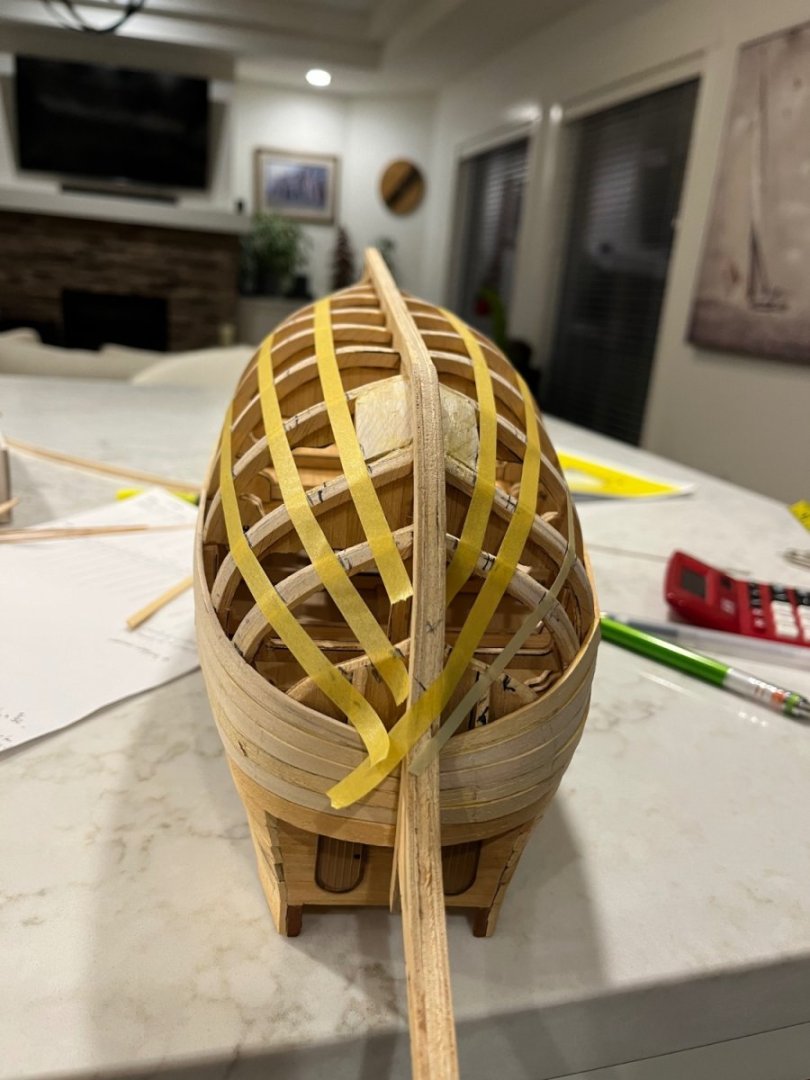
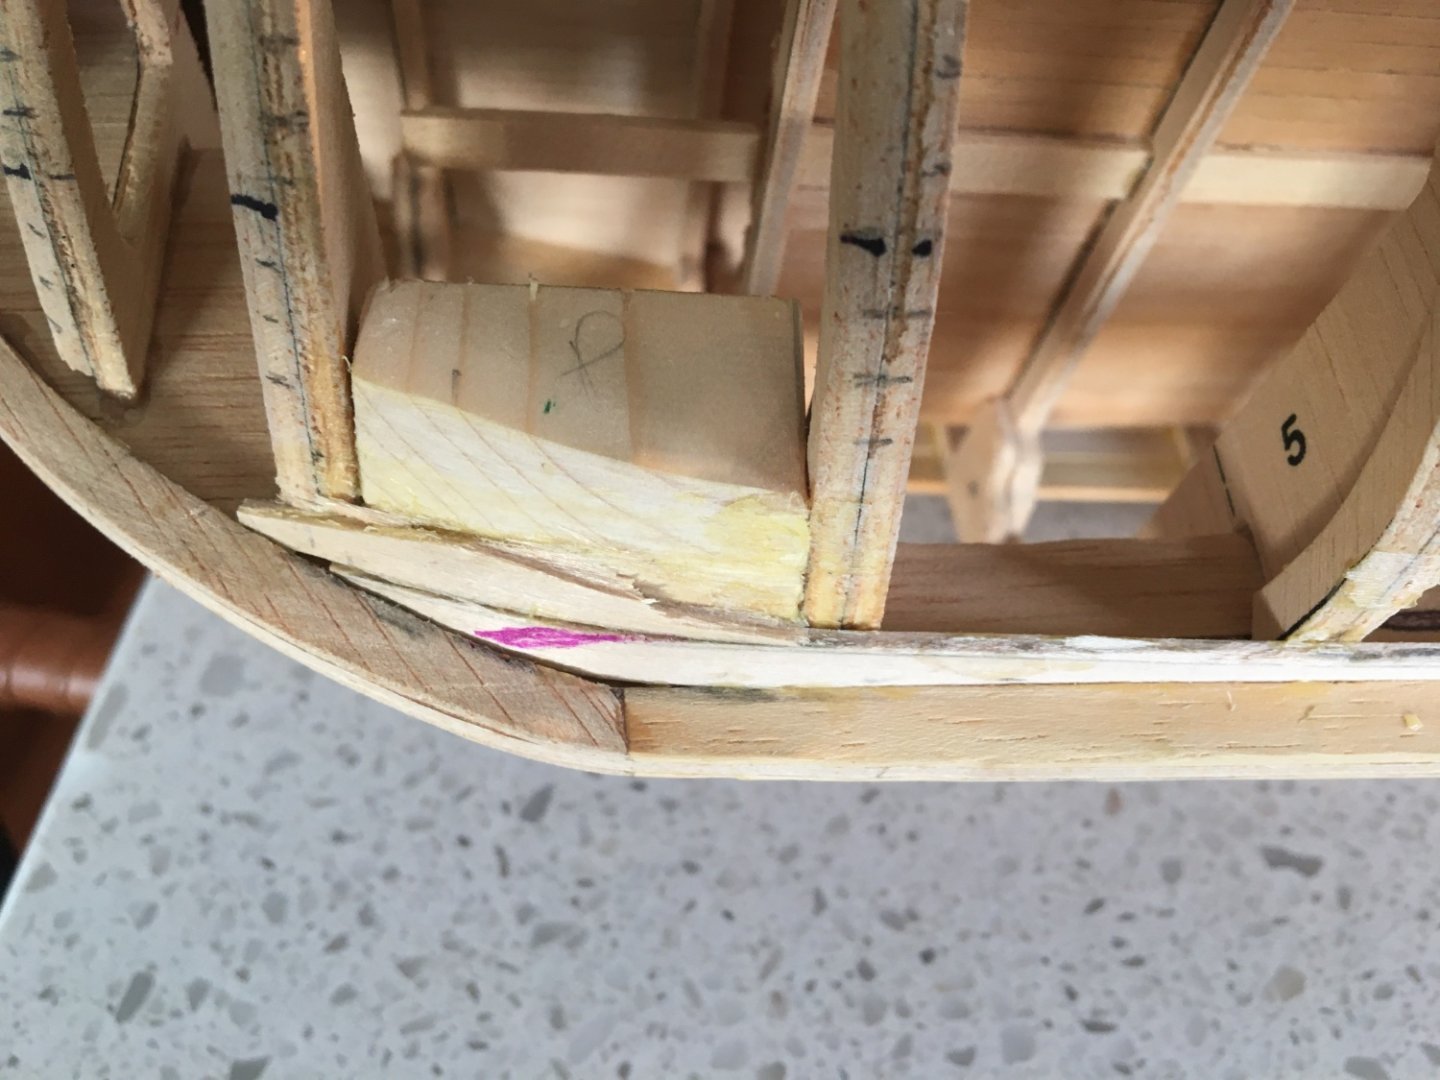
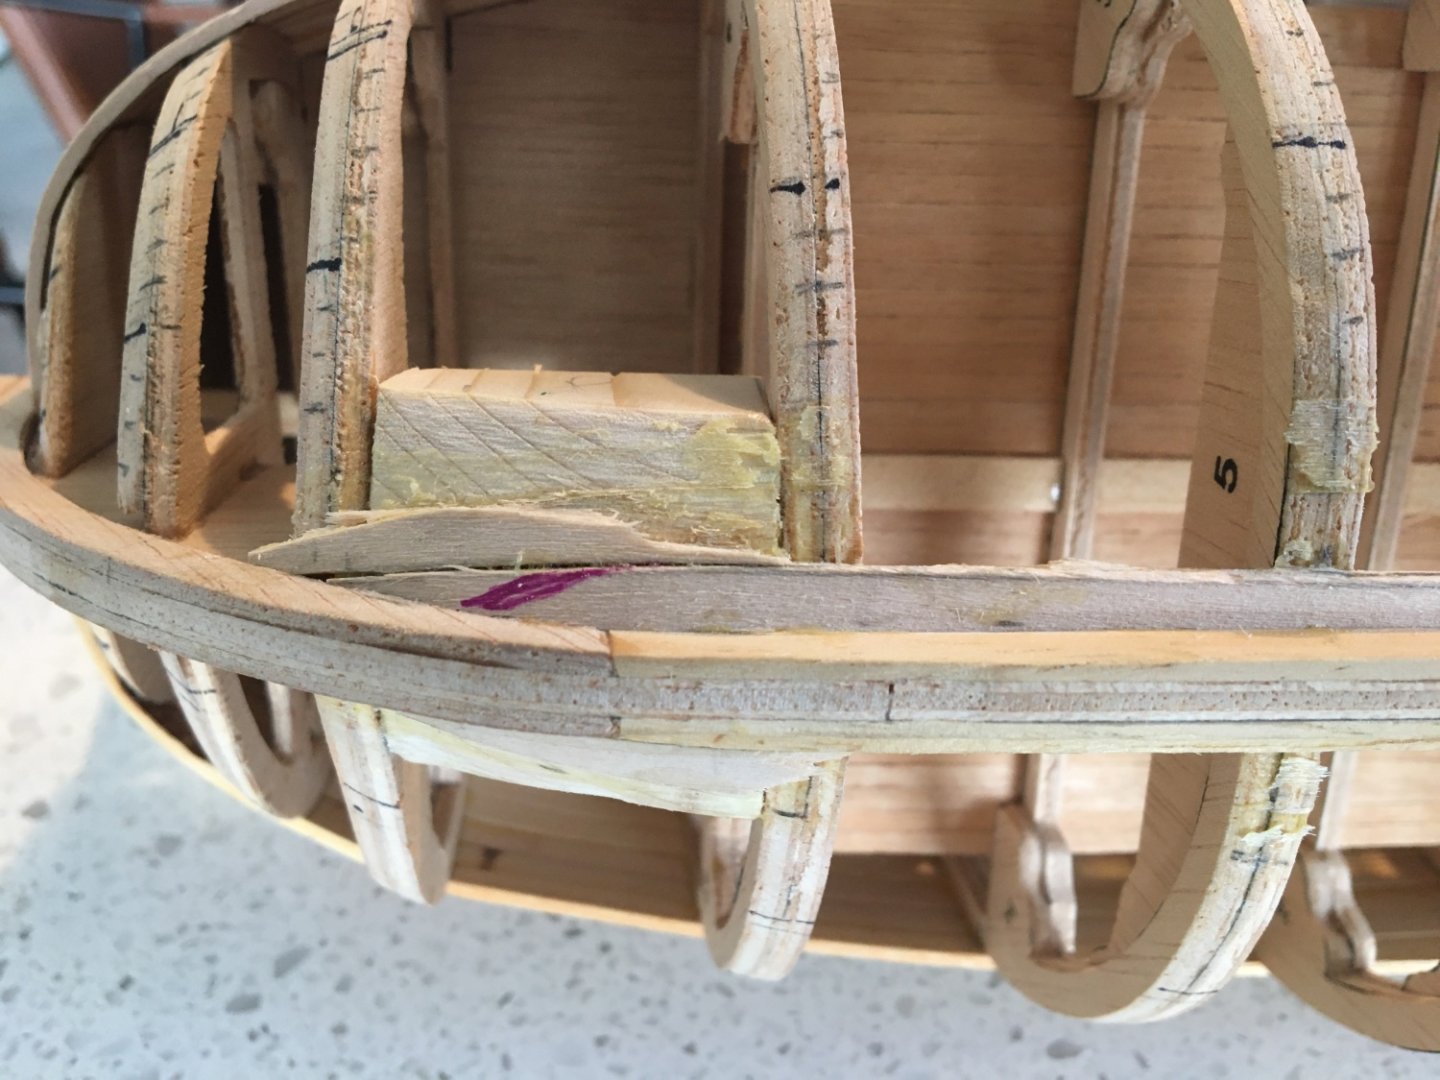
Thanks for checking in. I did read and re-read the primers, YouTube videos and “how-to”s but I am a visual learner and it seems that I am still missing somethings (obviously). The planking primer suggests that the garboard plank might be wider but I’m not sure how wide. I ended up making mine narrower because I was trying to keep it going up the stem. I guess it needs to actually curve inwards (I marked a purple line where I think it should go). To my (again) untrained eye it would appear that the garboard plank and the ones to follow will have a wicked “hook” to the keel-side - but maybe that’s just me… It also suggests putting a temporary batten at “max width of the plank to be used” which I did do the first time but not at the width of the plank so I will put it down at the 6mm width and see where that gets me. I didn’t want to pull out the existing planks but they came out without too much problem so I guess that’s something. Thanks again for the help, Dave
-
Hence my problem….what should my garboard look like? Did I make it too narrow? Should it have been wider and then curved in towards the keel/stem more? I don’t know how to make it not curve up the stem. Maybe it’s obvious to others more experienced, not to me. Back to the drawing board, I guess. Dave
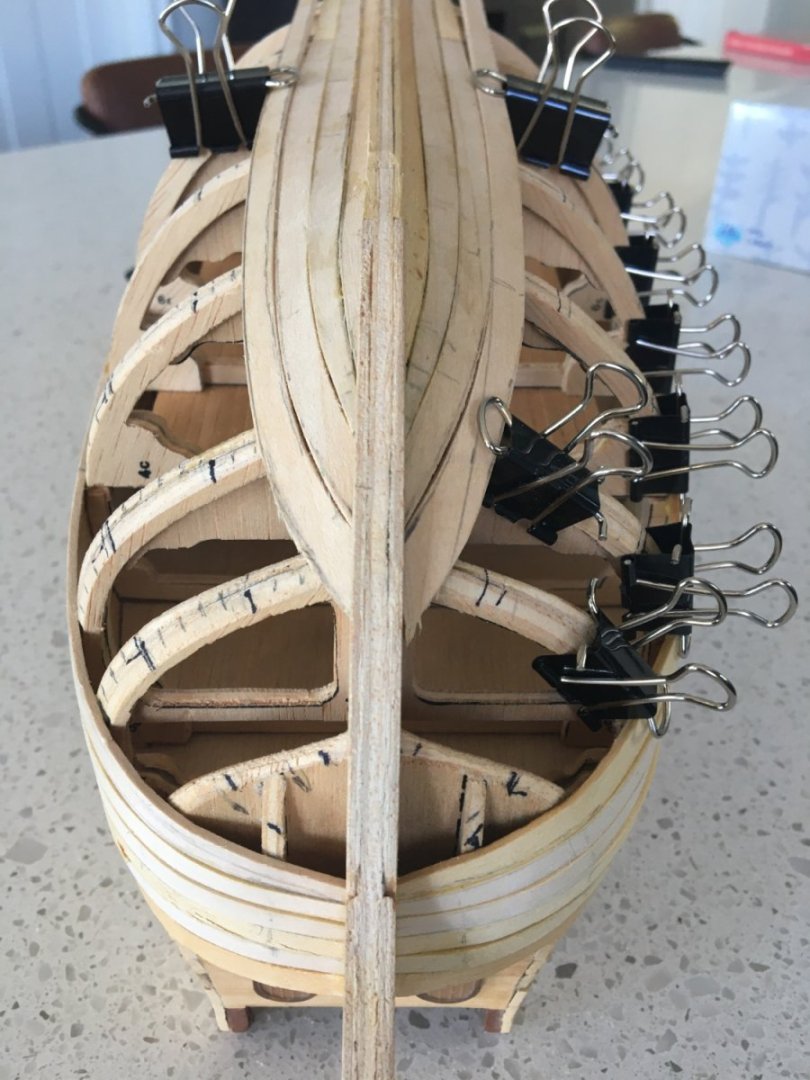
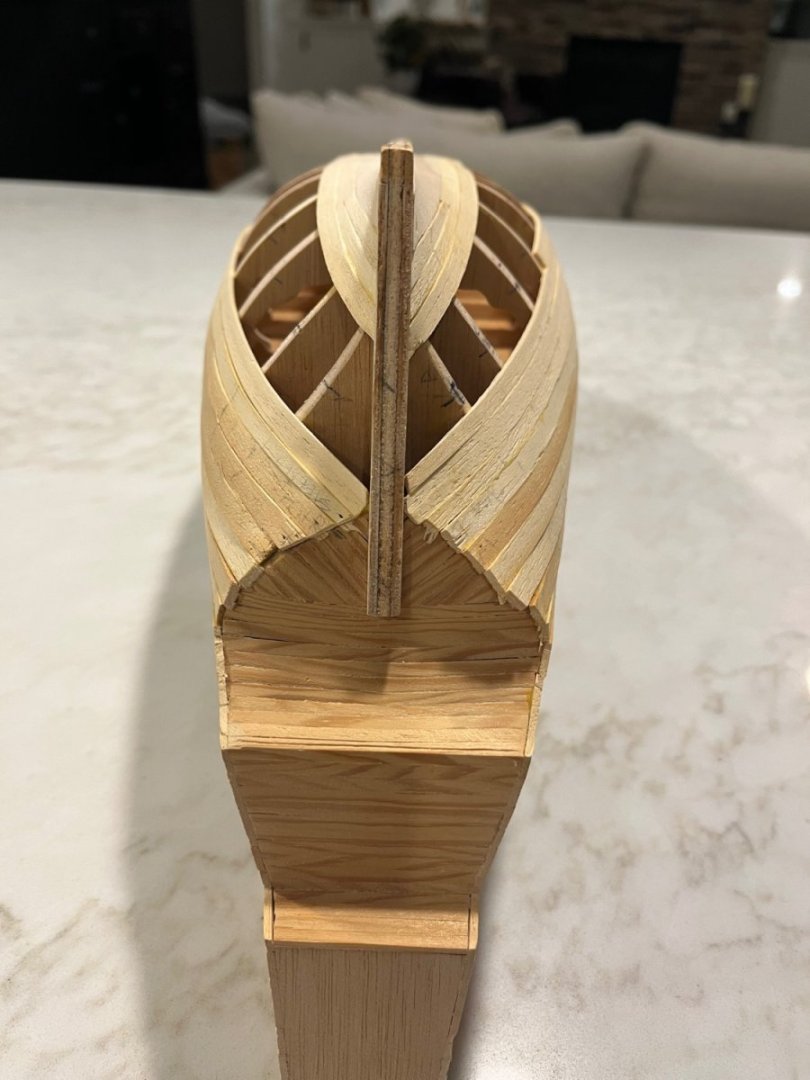
-
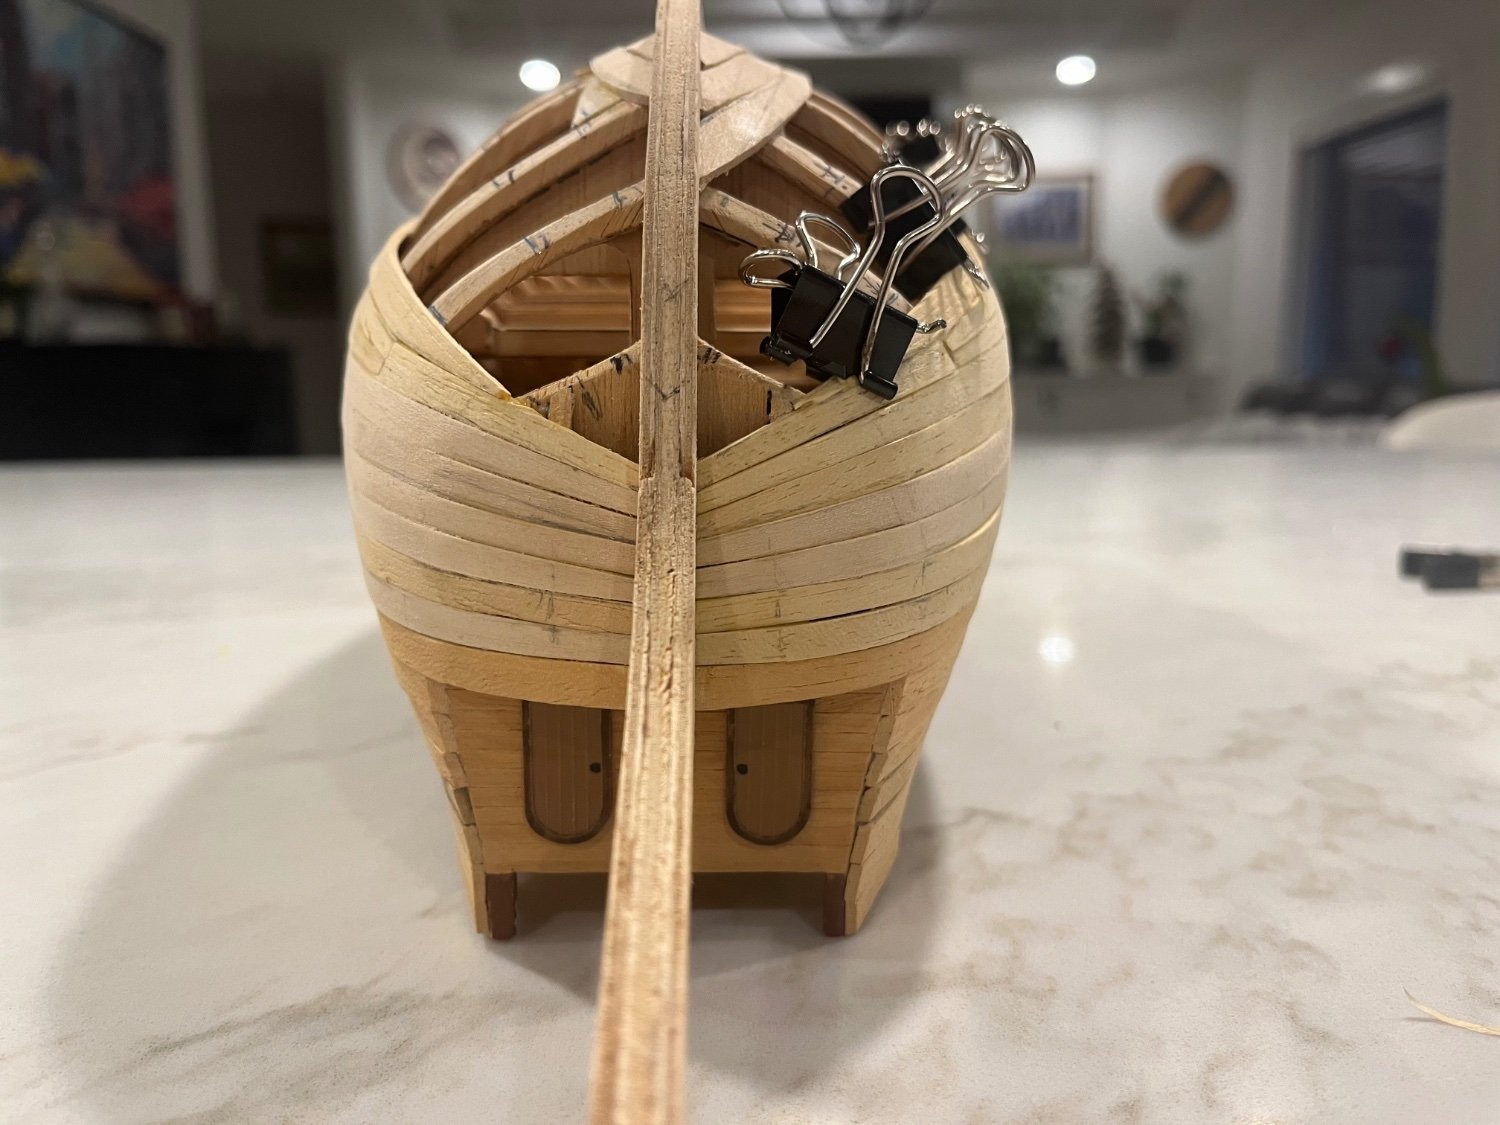
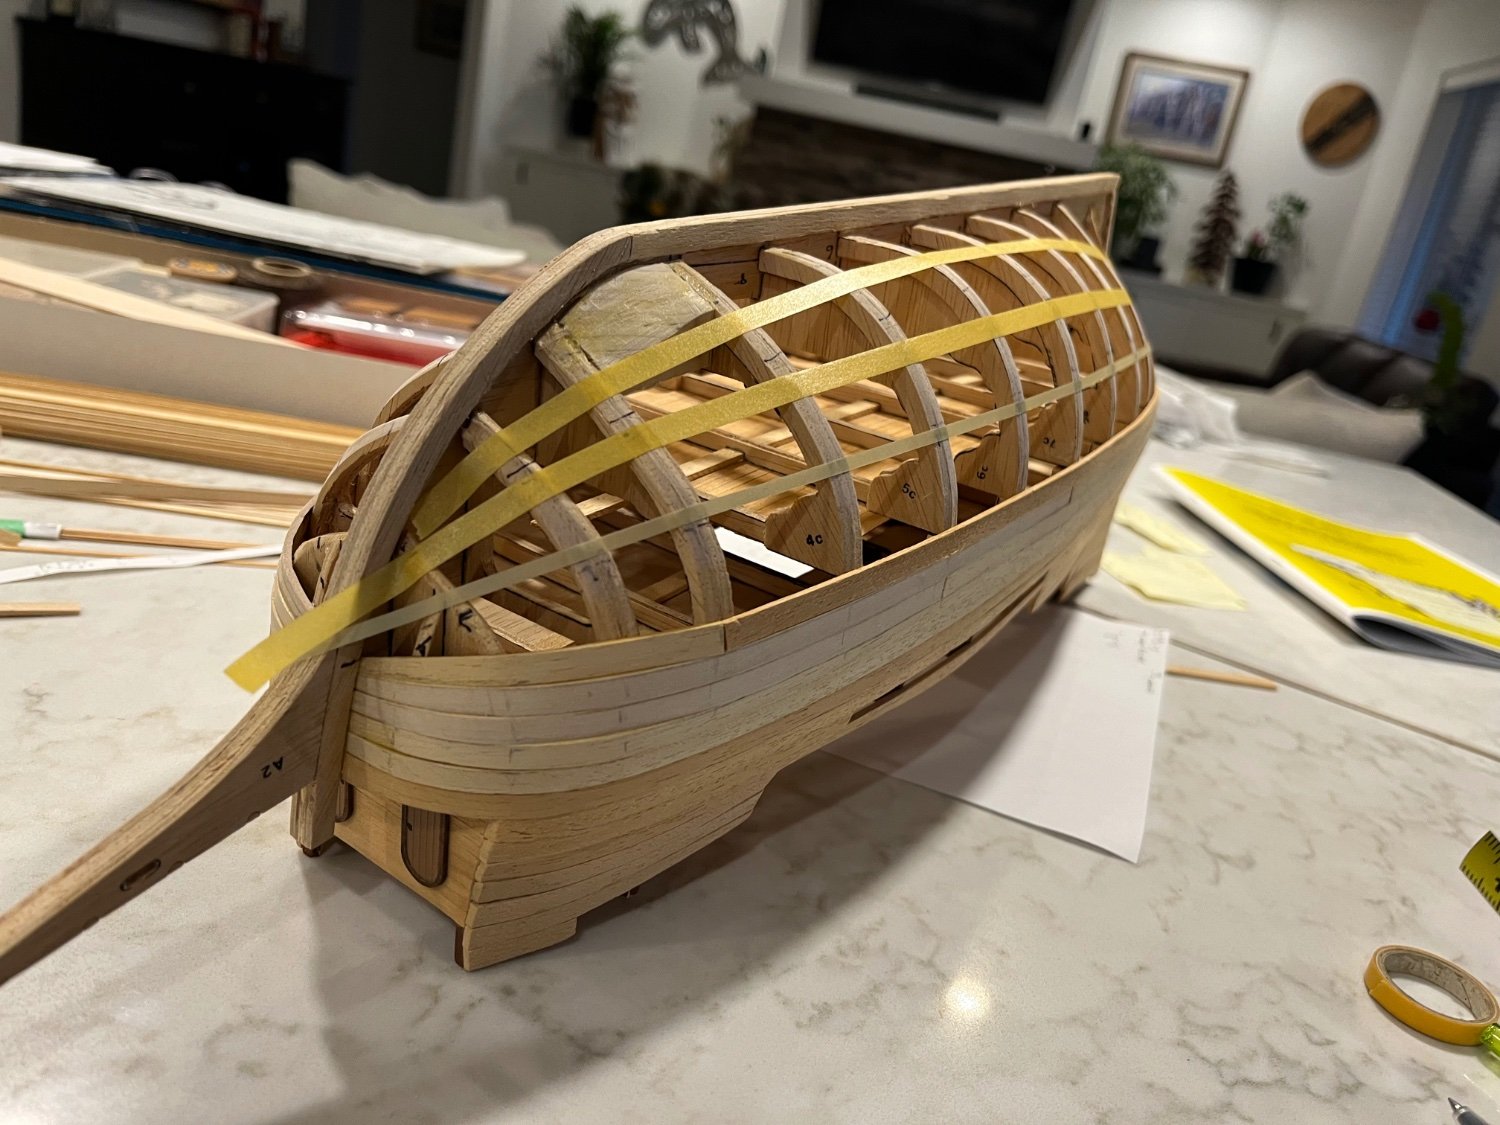
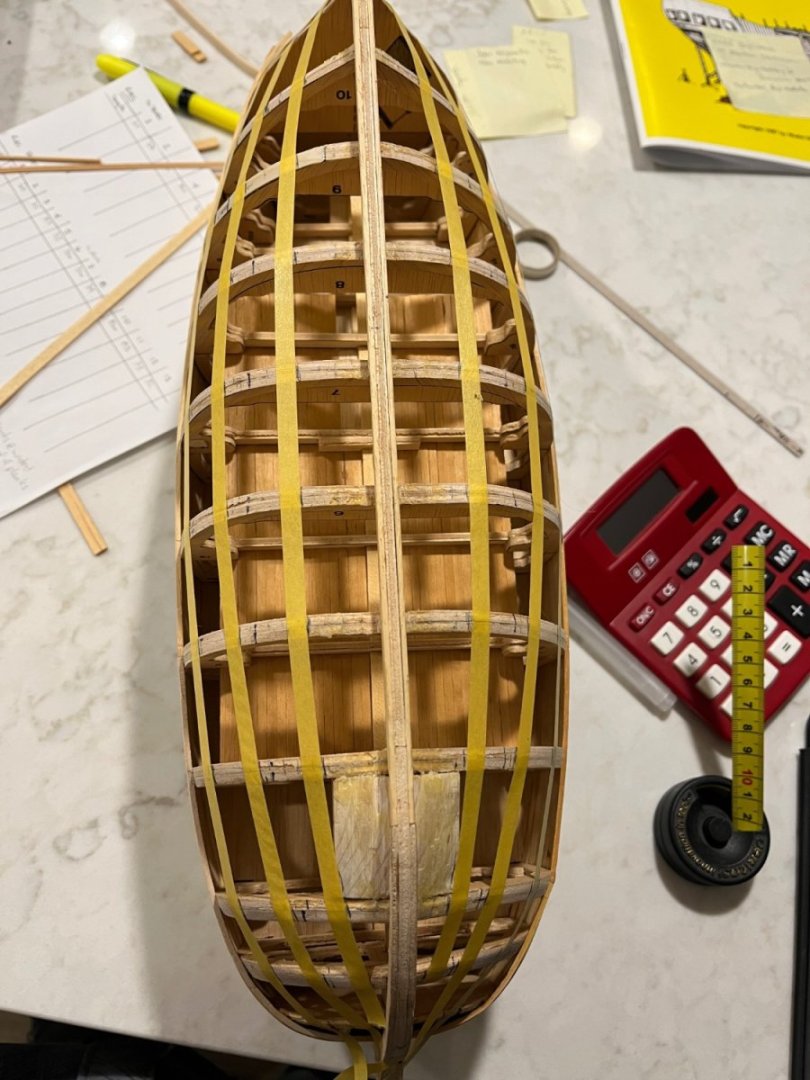
Things have seemingly gone awry. Despite my best efforts at keeping the planks from curving up at the stem, it seems that is where it is going. I am trying to cut a curved plank out of sheet basswood because no amount of bending seems to be enough to fit to the bulwarks. I used some tape to get the curve and then traced it onto the sheet and, using a sharp knife, cut it out and sanded to size. While that worked to get the curve, I am still thinking that the planks are curving up too much at the stem. You can seem from the “tick” marks, that they are all converging at the same point - like a starburst. I tried to figure out how to put drop planks in but, again, from my untrained eye, it seems that the drop plank won’t be longer than the first bulwark before it will be at full width, allowing me to put two half-width planks in. I thought that laying out the planks so that they lay flush on the bulwarks would keep me out of trouble but it seems that it just resulted in the convergence that I am dealing with now. Something happened early on that I now need to correct. I feel that, somehow, the planks at the stem need to be wider. They can’t stay at the half-width they are now at. So I need to put a full width plank in, let it lay naturally on the bulwarks and fit in a drop plank or two further on towards the stern. This may not be realistic but, as I keep reminding myself, this will get painted anyway. Here is what the bow currently looks like…. Thanks for looking. Cheers, Dave