HOLIDAY DONATION DRIVE - SUPPORT MSW - DO YOUR PART TO KEEP THIS GREAT FORUM GOING! (Only 53 donations so far out of 49,000 members - C'mon guys!)
×


LCdr Dave
-
Posts
109 -
Joined
-
Last visited
Content Type
Profiles
Forums
Gallery
Events
Everything posted by LCdr Dave
-
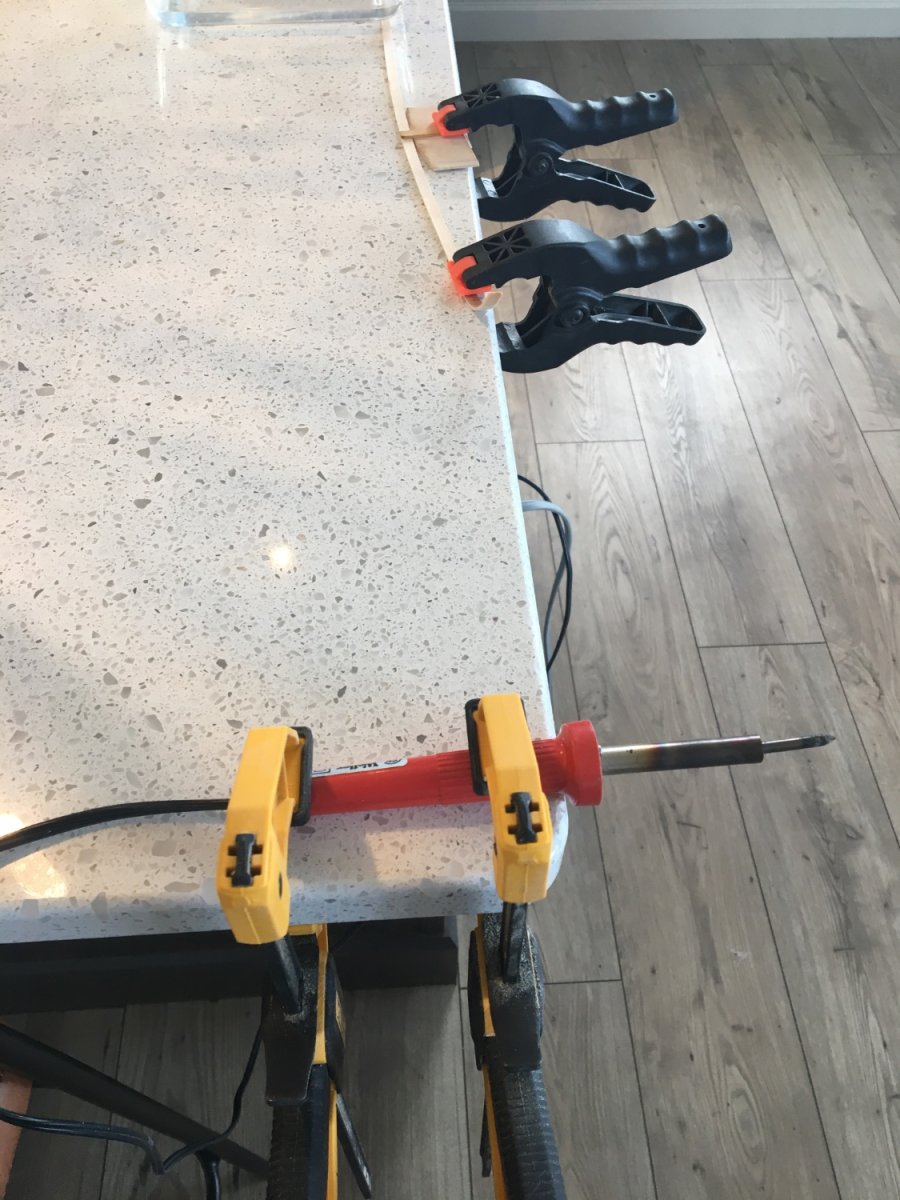
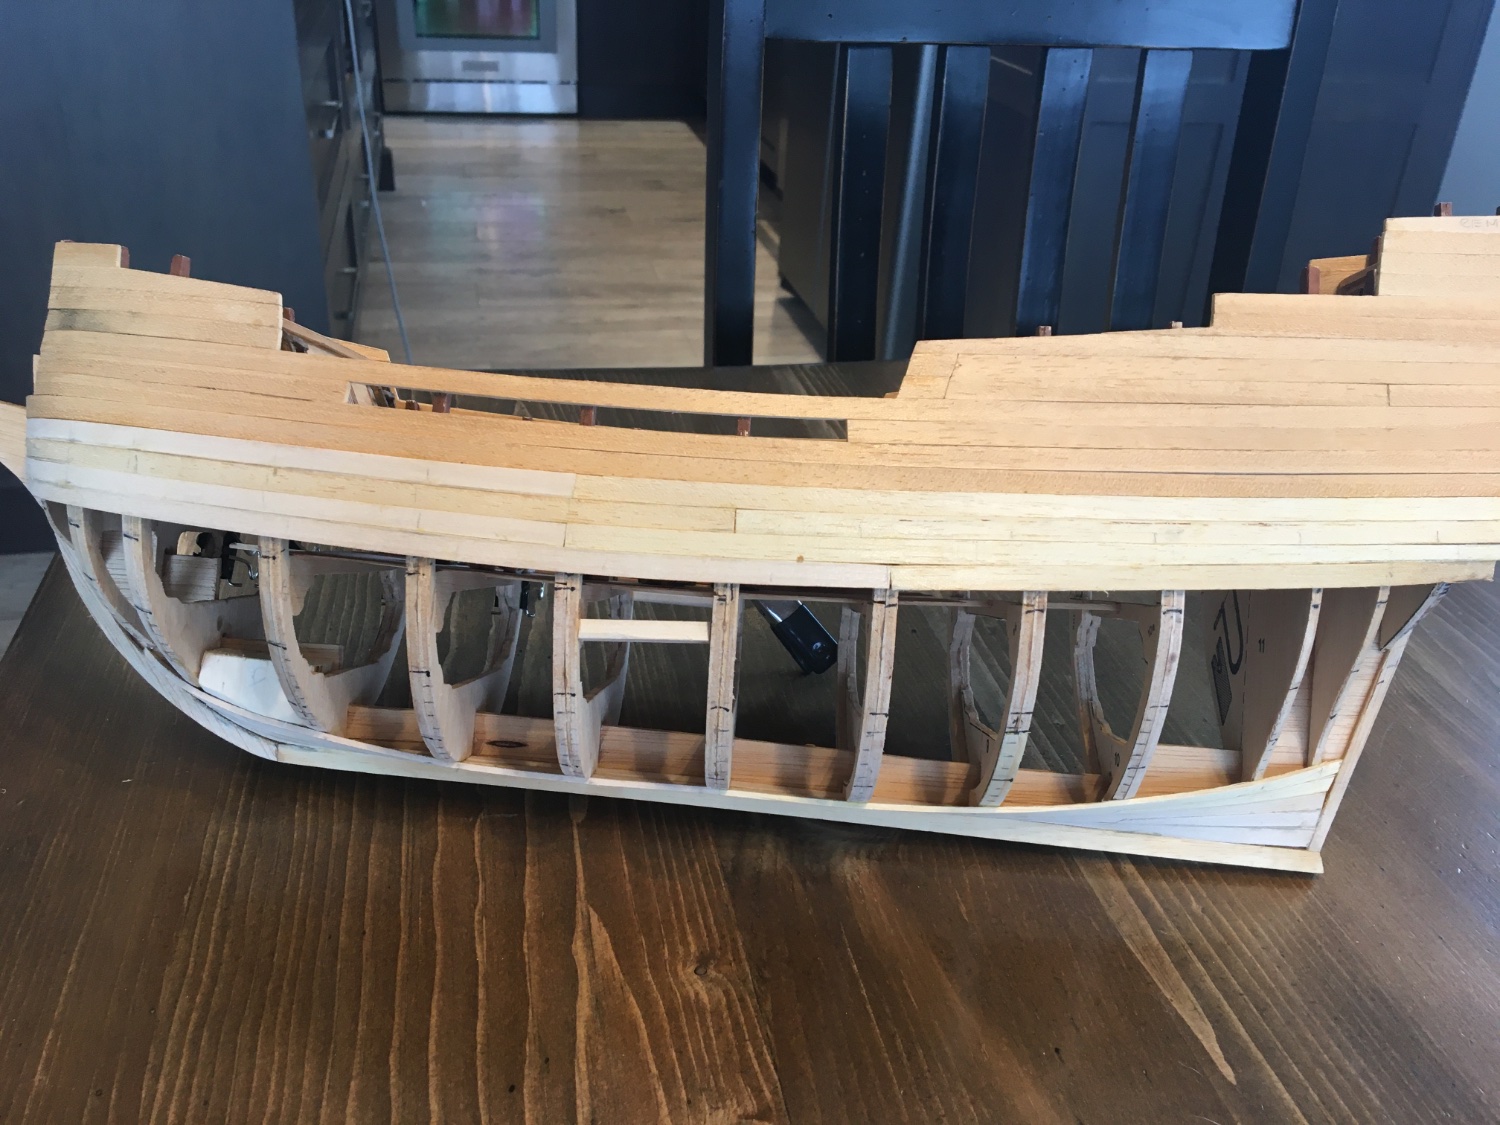
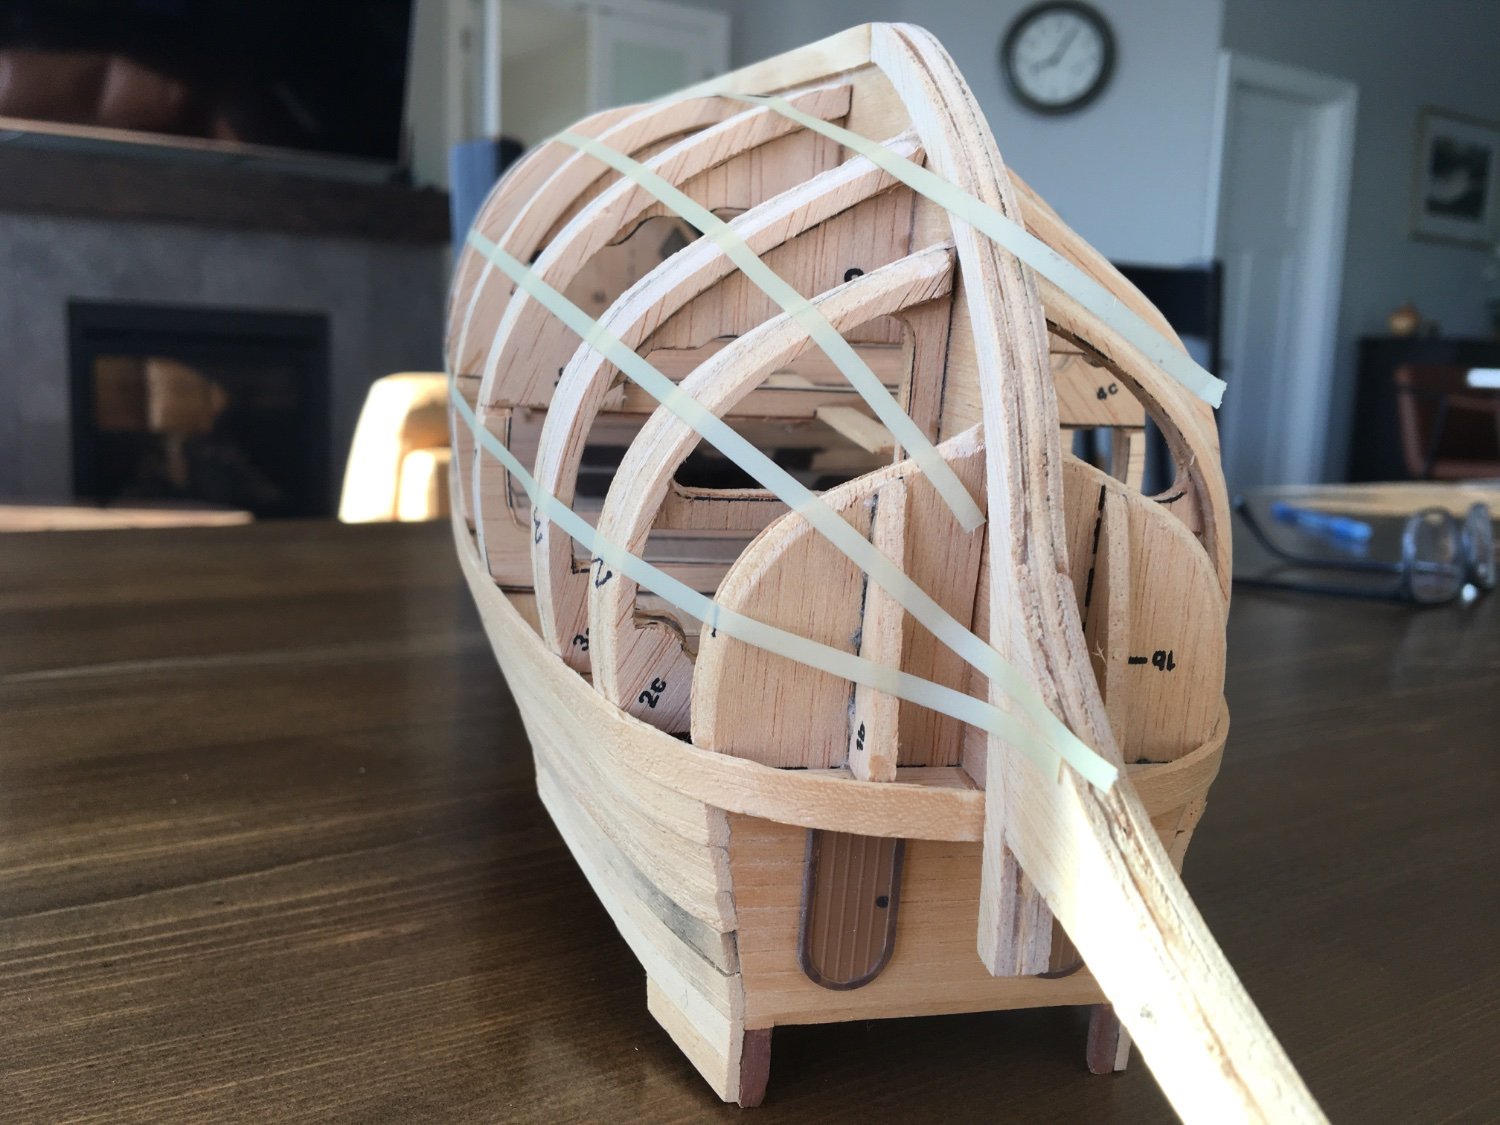
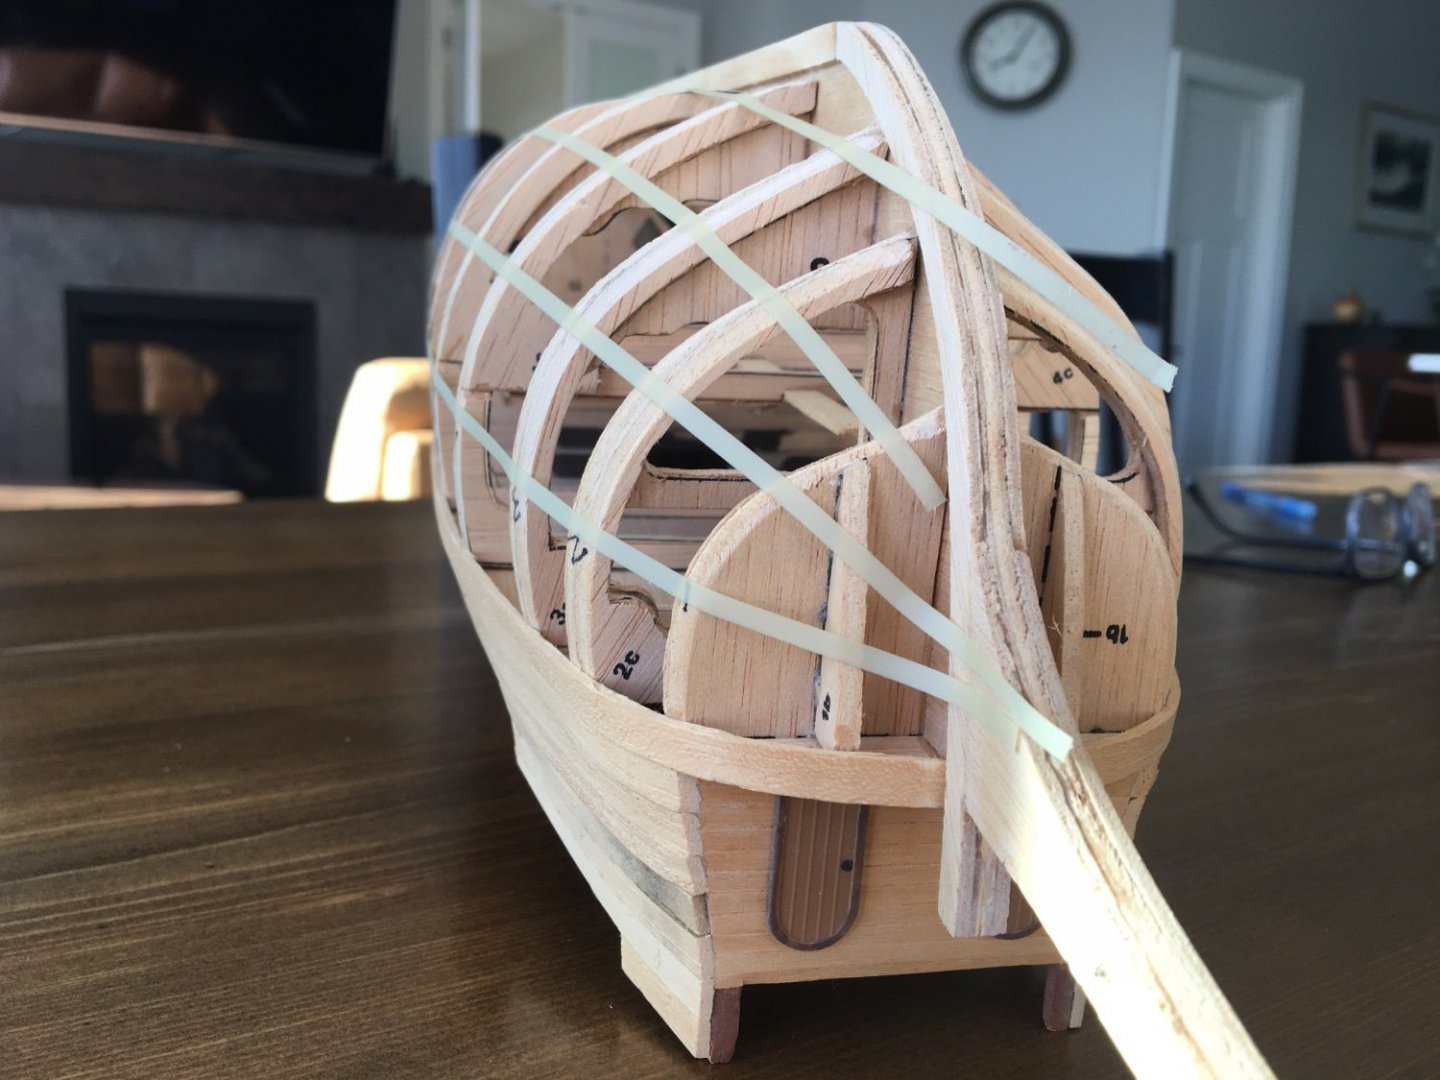
 Here’s where I got so far after an evening of planking. I added tick marks to help with the planking but then over rode them as I went because I realized that I made an error early on. Somehow I thought my planks were 7mm wide but they turned out to be 6mm. Maybe there is an inconsistency in widths and I picked the widest by bad luck? As a result I was going to have to taper each one by an extra 1mm and I didn’t want to do that. Once I get this band done, I will recalculate so that the widest bulwark can use full-width plank. As a bit of an aside, here is a shot of my bending station 🙂 Dave
-
Beautiful work! As a newbie to wooden ship building, thank you for the reminder of how much time it can take to get planks to fit. I need that reminder that because it takes time isn’t just because I don’t know what I’m doing… Cheers, Dave
- 840 replies
-
- 2
-

-
- winchelsea
- Syren Ship Model Company
- (and 1 more)
-
Hi Frank, welcome to the group. You are not alone in finding more “me” time after retirement. I also built a Cutty Sark back in the 70’s - it sailed off the shelf when a gust blew in one summer day. What will you be building? Cheers, Dave
-
BikerMart, I would say, from your signature, that you have a lot of Billing experience. You keep coming back, though. That says something. Dave
-
Here’s what I got goin’ on now.

-
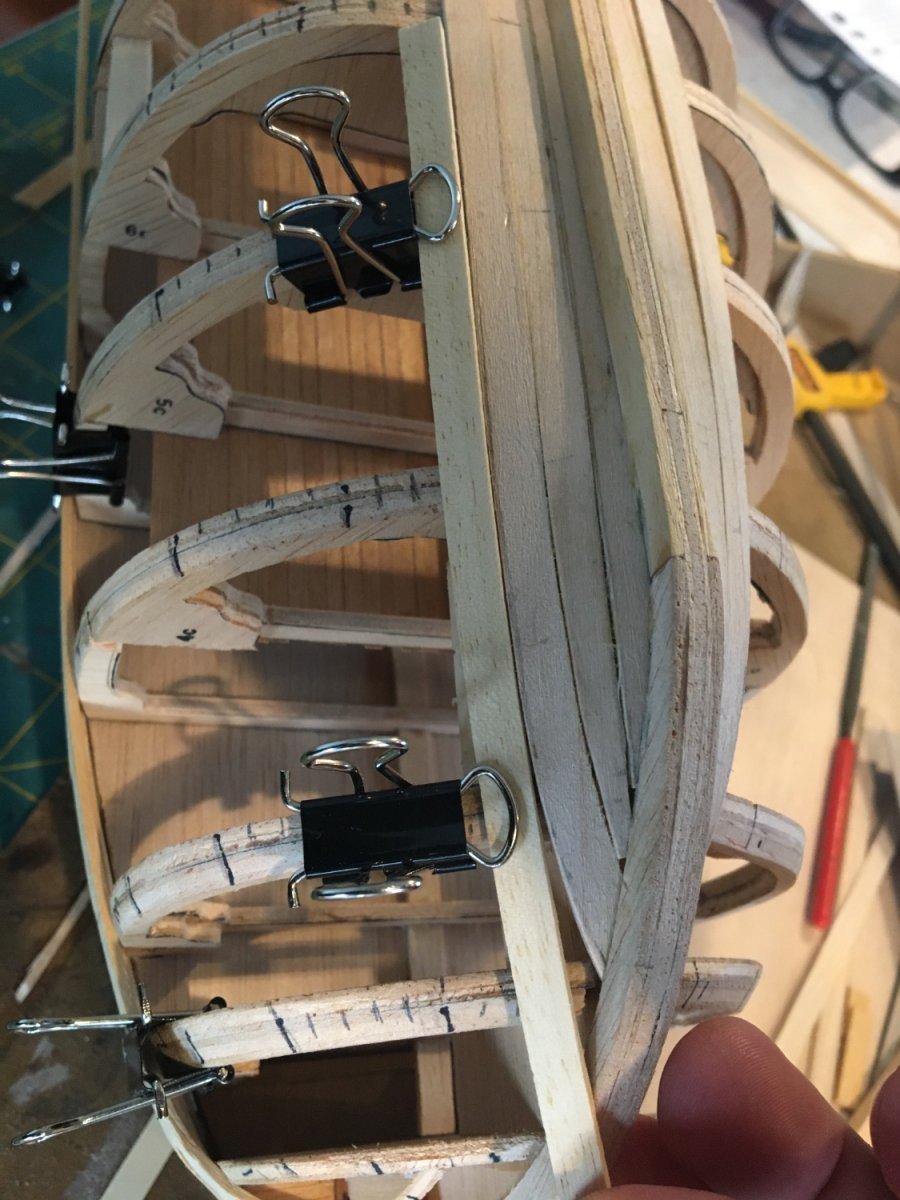
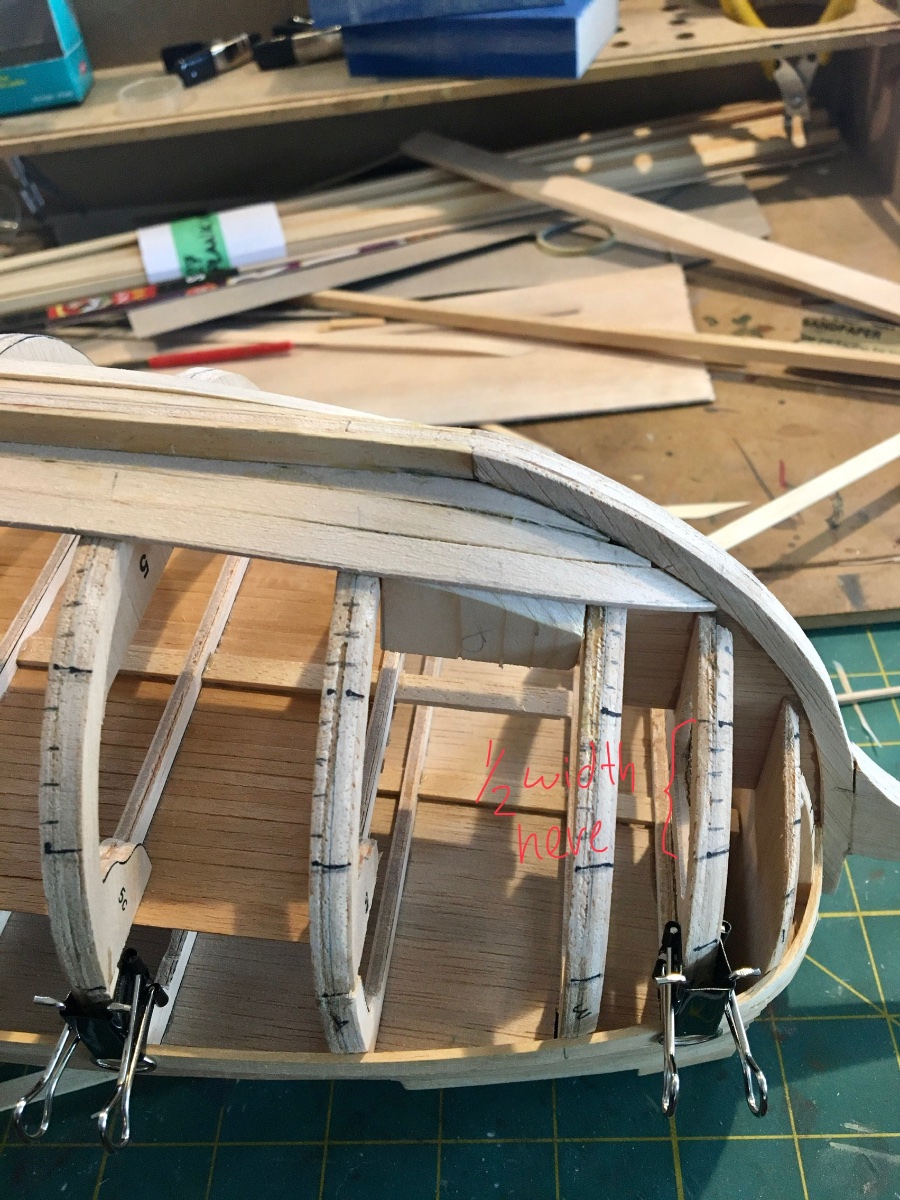
So, it’s been a few days and many struggles as I try to get the planks to go down properly. I don’t how many times I read and re-read the primer(s) and anything else I could find on planking. I’m not sure if my wood is old and brittle or I’m not letting it soak enough or I’m rushing (there seems to be multiple opinions on how much water wood needs to move) but when I tried to bend it around the bluff bow it started to splinter or delaminate. I will experiment with times and moisture levels but that makes me worried about wasting all my wood (isn’t this hobby supposed to be relaxing?) I guess I can always get replacement basswood. My other concern is that the planks on the bottom of the hull will not taper correctly towards the bow. Perhaps I spiled the garboard neighbours too much trying to get them to not go up the keel line? Maybe things will work itself out…… I am definitely painting the hull at this point so I guess I can fill and sand the heck out of it. It seems to my untrained eye that I will have planks widening at the bottom but narrowing at the top!? I also reach 1/2 plank width at the 2nd bulwark so I guess drop planks are a must. I have already added stealers to the stern. As always critiques or hints are appreciated. Thanks, Dave


-
Thanks for the input, fellas. Patrick, your ship looks amazing. I may yet resort to complete filler blocks. Allan I did see Chuck’s videos and they were helpful. I think I have confirmed my earlier thoughts. I need to spice my garboard planks toward the keel and possibly taper them. Tomorrow is a new day and I will see what can be achieved. Cheers, Dave
-
Unfortunately, it’s a single-planked model. I have gone over all the tutorials and literature I could find here but reading theory just isn’t the same as doing it. Once the rubber hit the road things were different. I guess I need to curve the garboard planks into the keel more, either by tapering or spiling…..or both. Then keep tapering the remaining planks at the bow. It looks as though the stern will need stealers or some consistent widening of planks. Once I get the garboard planks sorted I think things will be smoother. here’s hoping, Dave
-
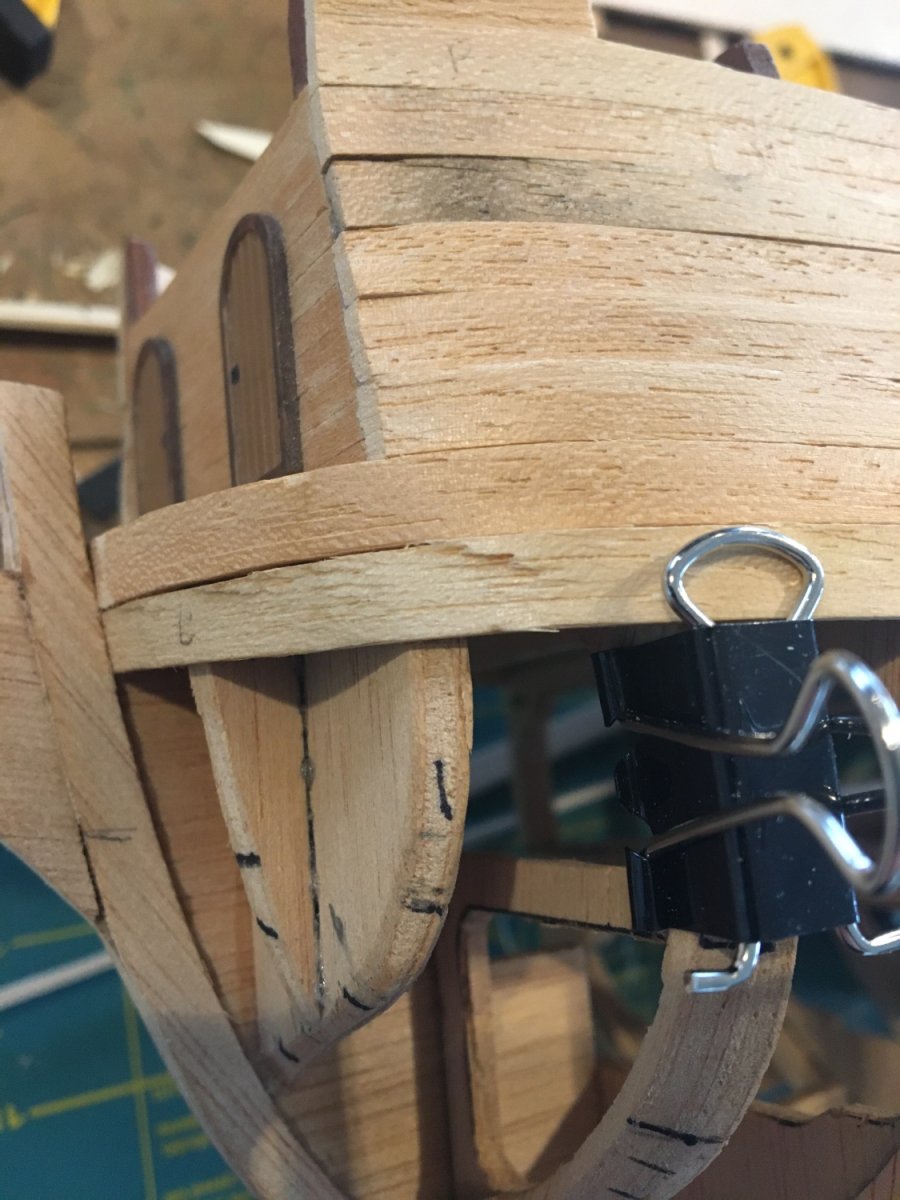
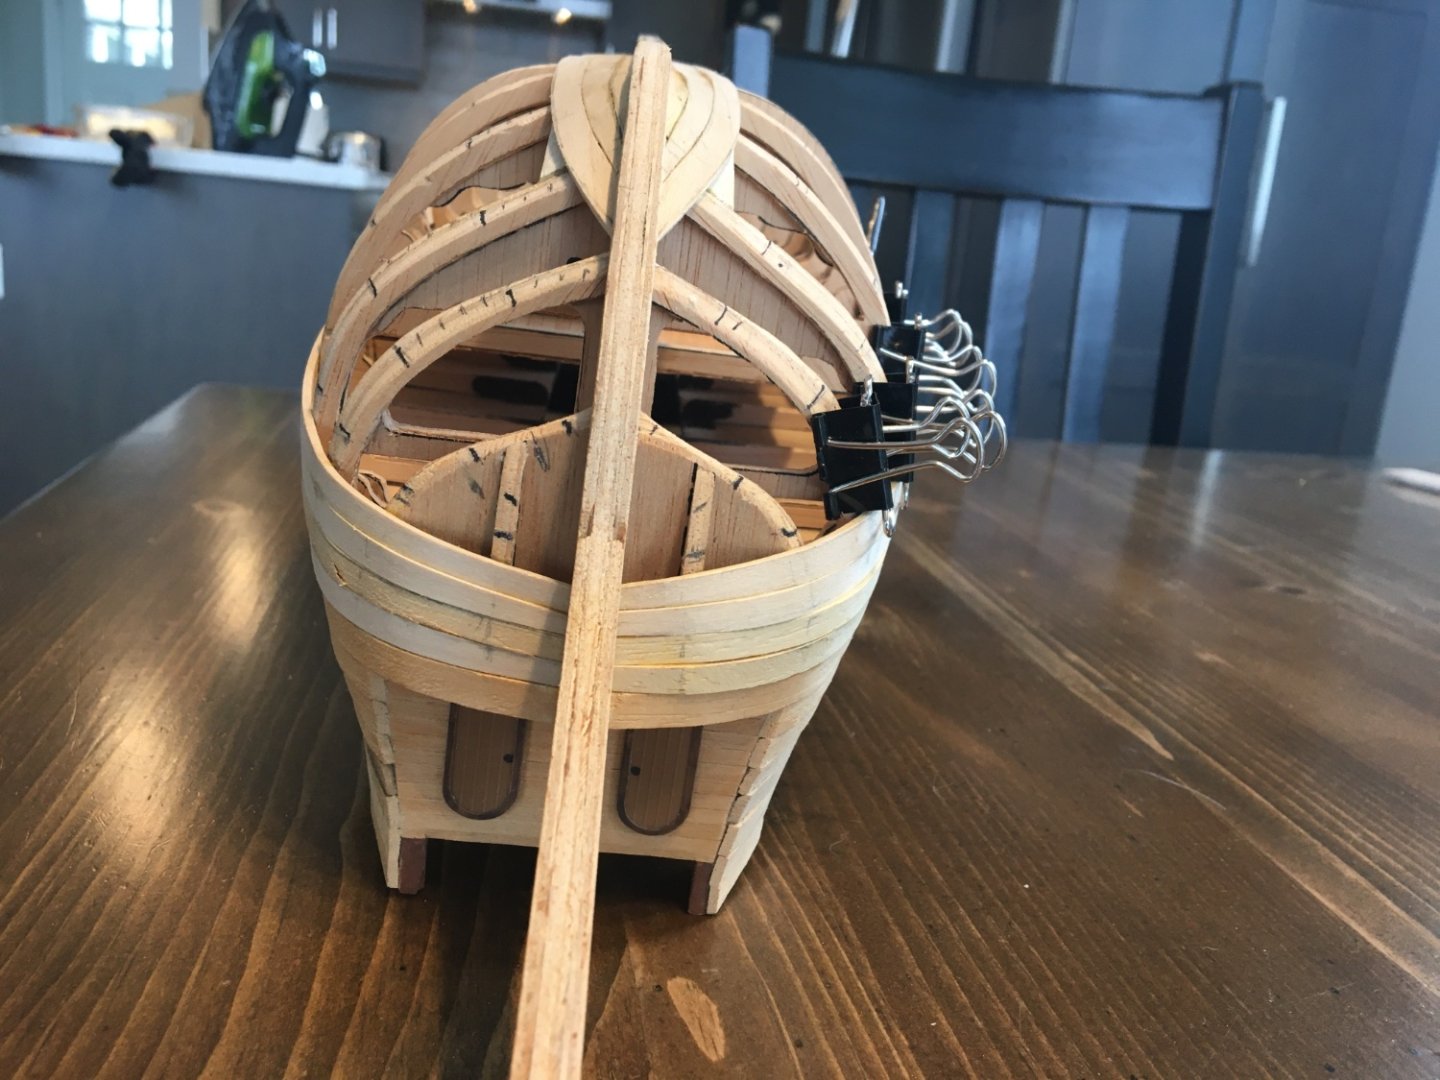
I added a couple of filler blocks to get me some help with that front bit. That was tough to shape - wasn’t sure what the shape should actually be but I kept running some planking over it until everything seemed to sit flat-ish. I finally attempted to lay the garboard planks but I’m not sure it’s going the way it should. I know I’m not supposed to let them run up the bow but I don’t see any way around that. I finally tried spiling the plank to get it to curve towards the keep a bit but I think I will still need to taper every plank and even drop some to fit them. Nothing is glued yet. I can still try something different or modify them in some way, if someone has any ideas. Of course, in the awesome instructions Billing Boats has, there isn’t a single picture showing the planking of the hull, especially from the front. In case anyone is wondering, I ended up putting a bit of water on my planks and the used an iron to bend them. I just held the moist wood under the iron, put some pressure on it, and pulled in the direction I wanted the curve to be. Worked like a charm. No waiting overnight for wet wood to conform to a shape, or boiling water, or using additives, jigs, or special tools - just pig-headedness and brute strength. Happy Canada Day to my fellow Canucks! Dave

-
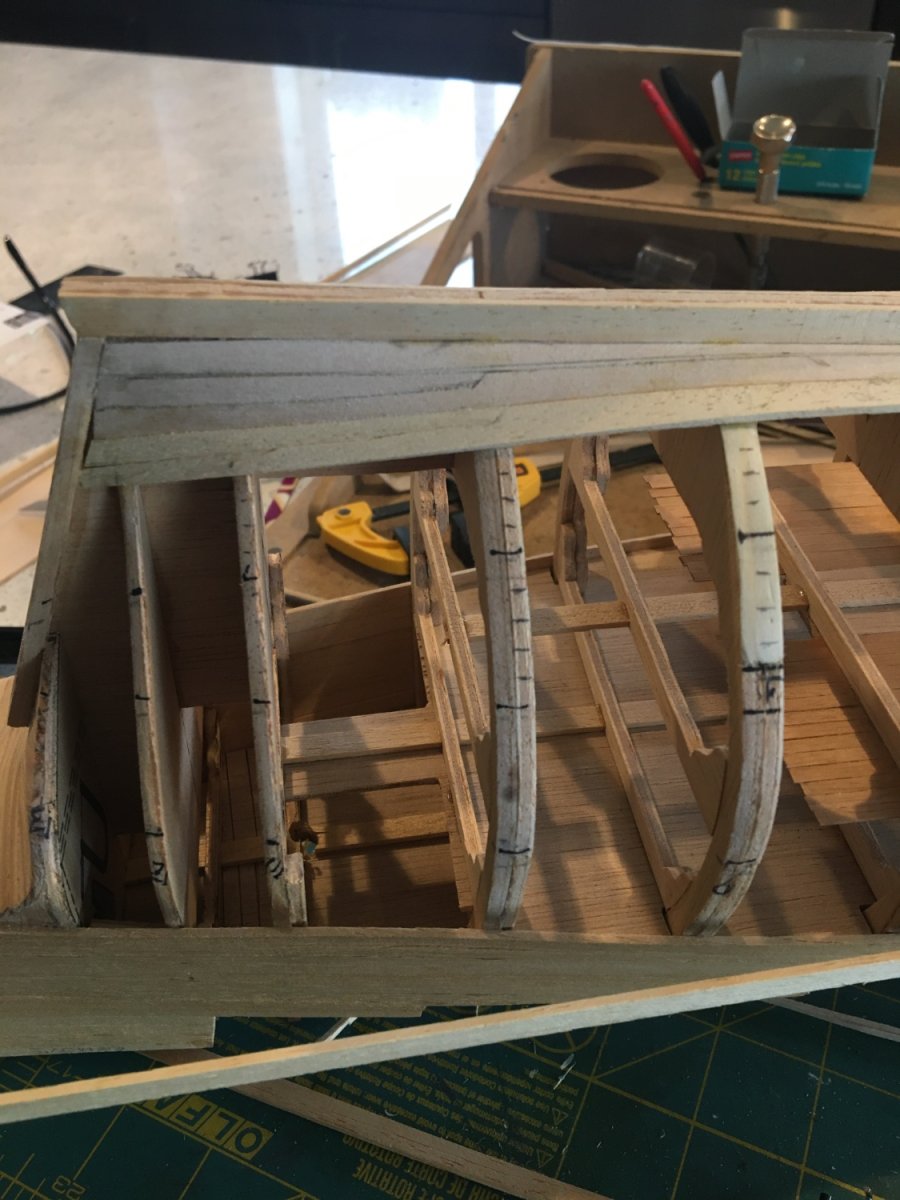
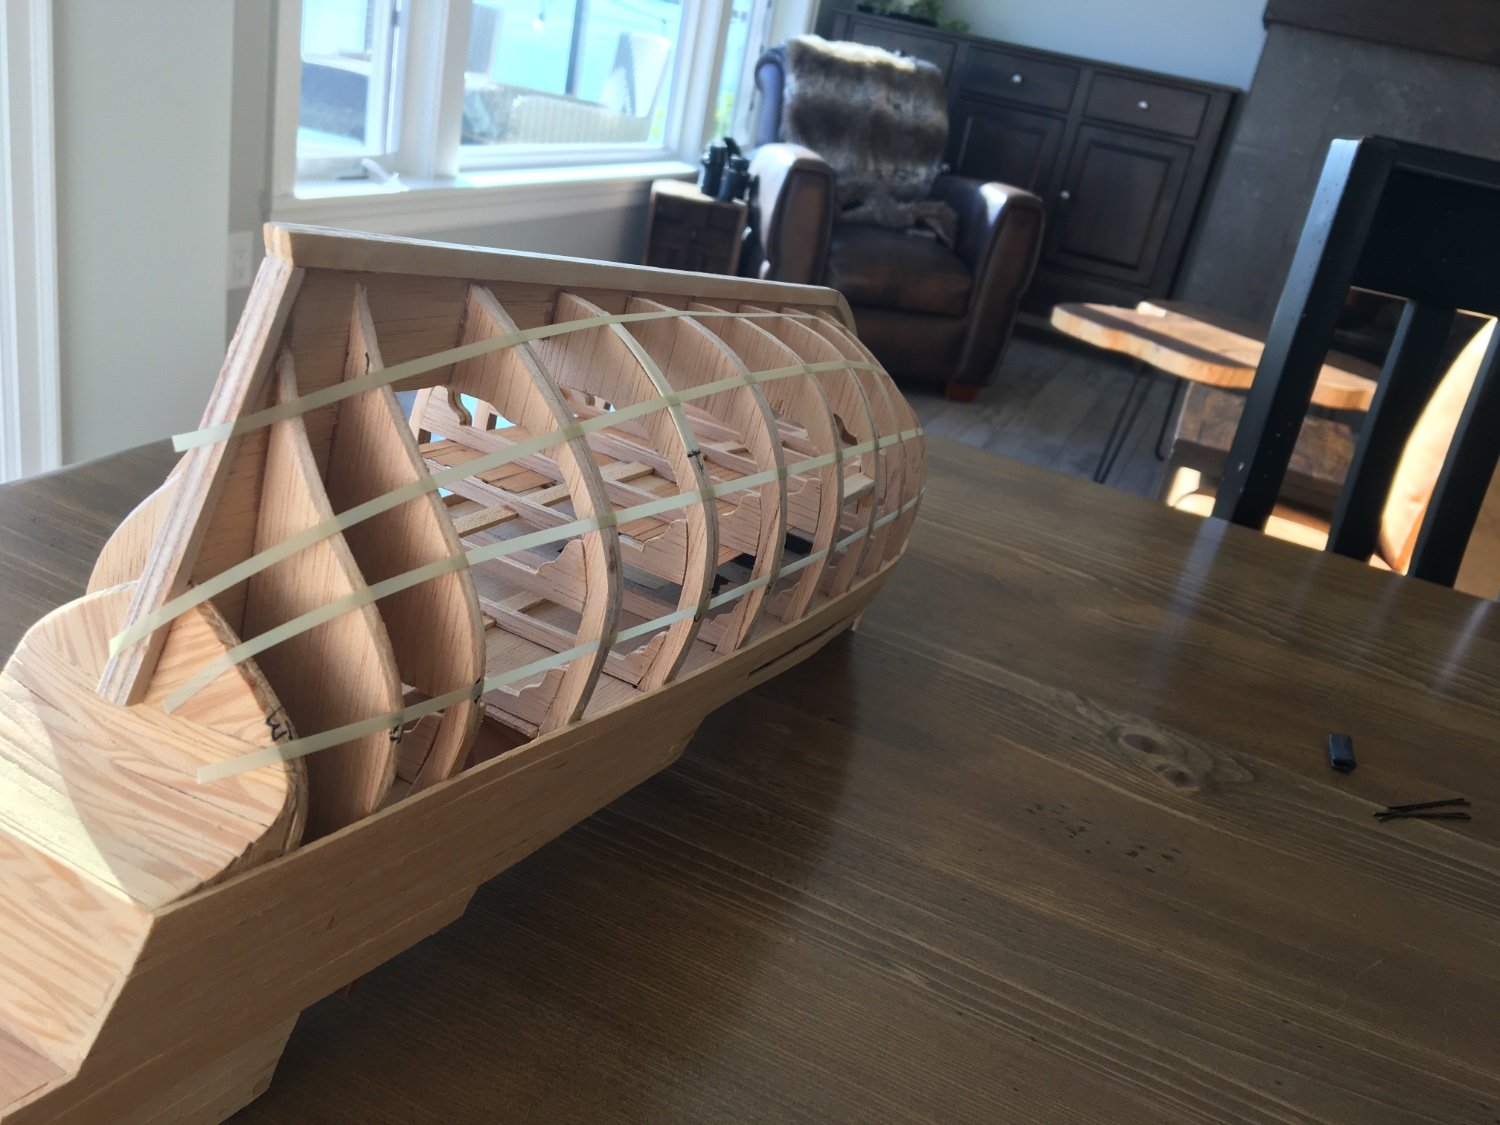
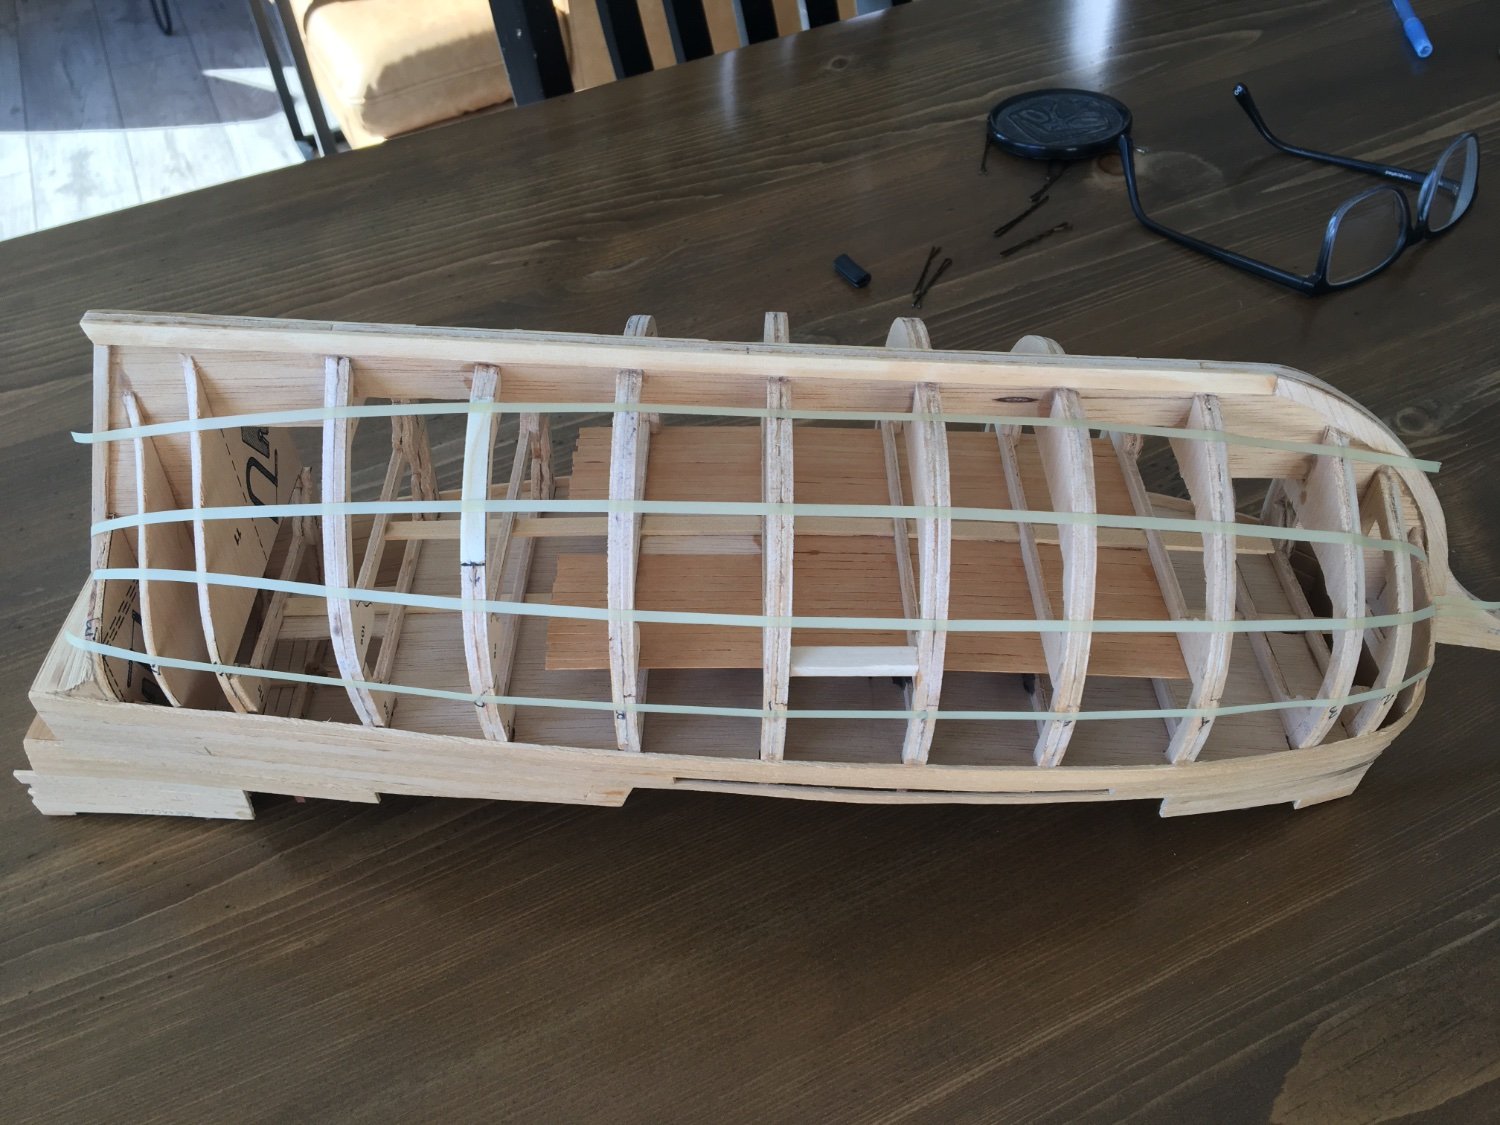
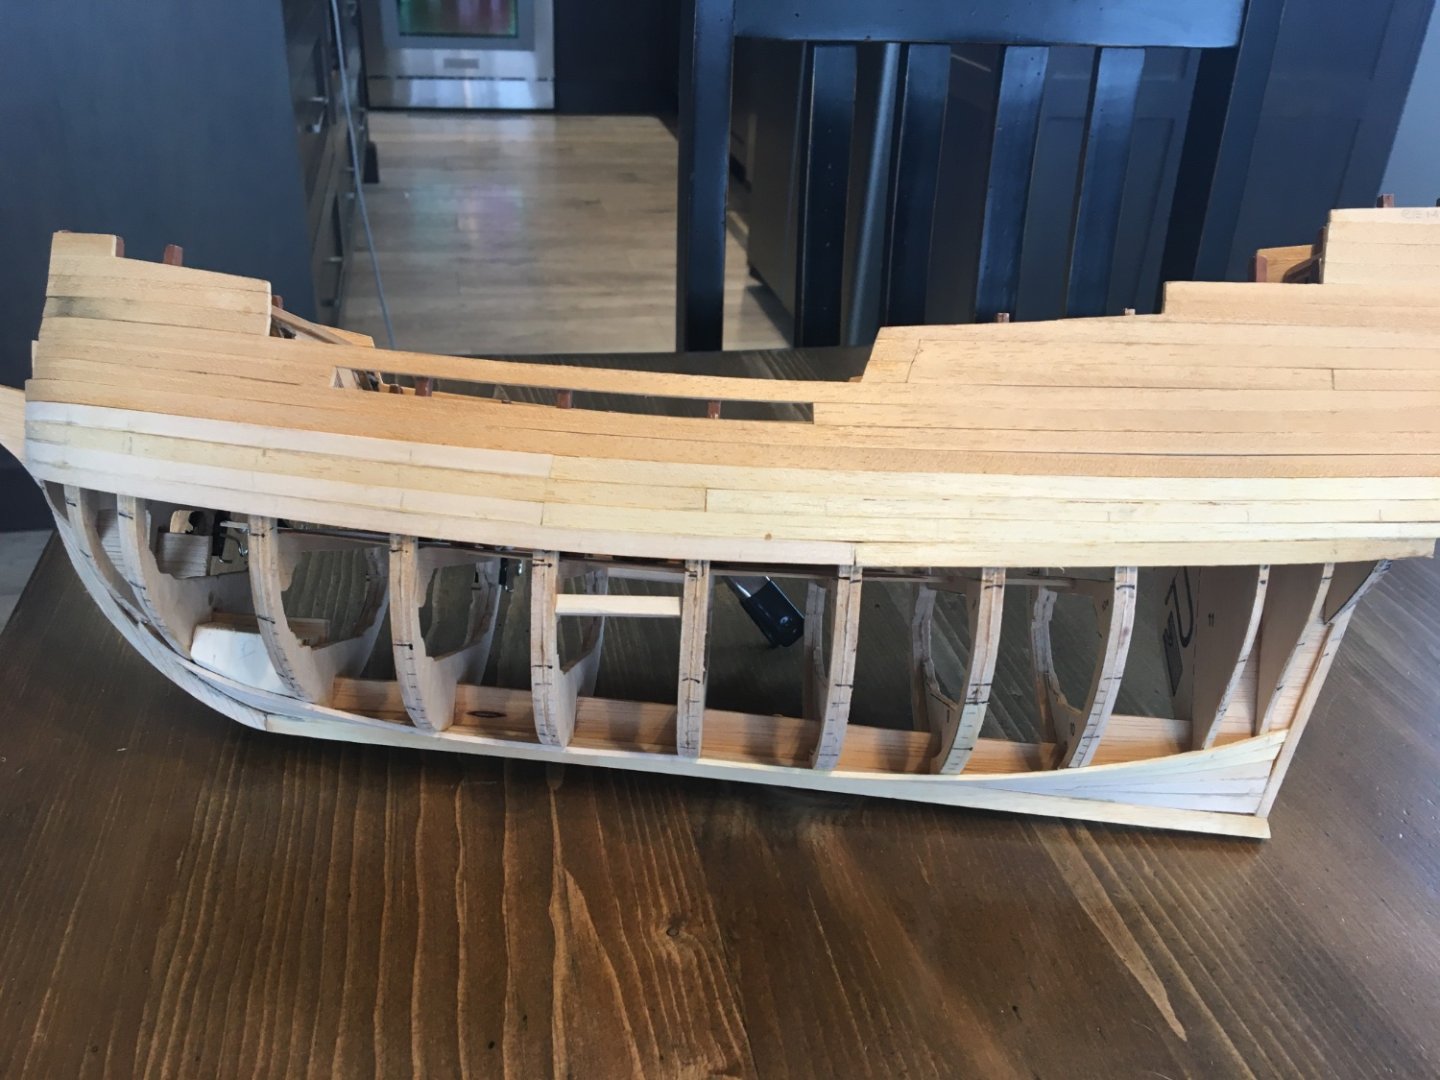
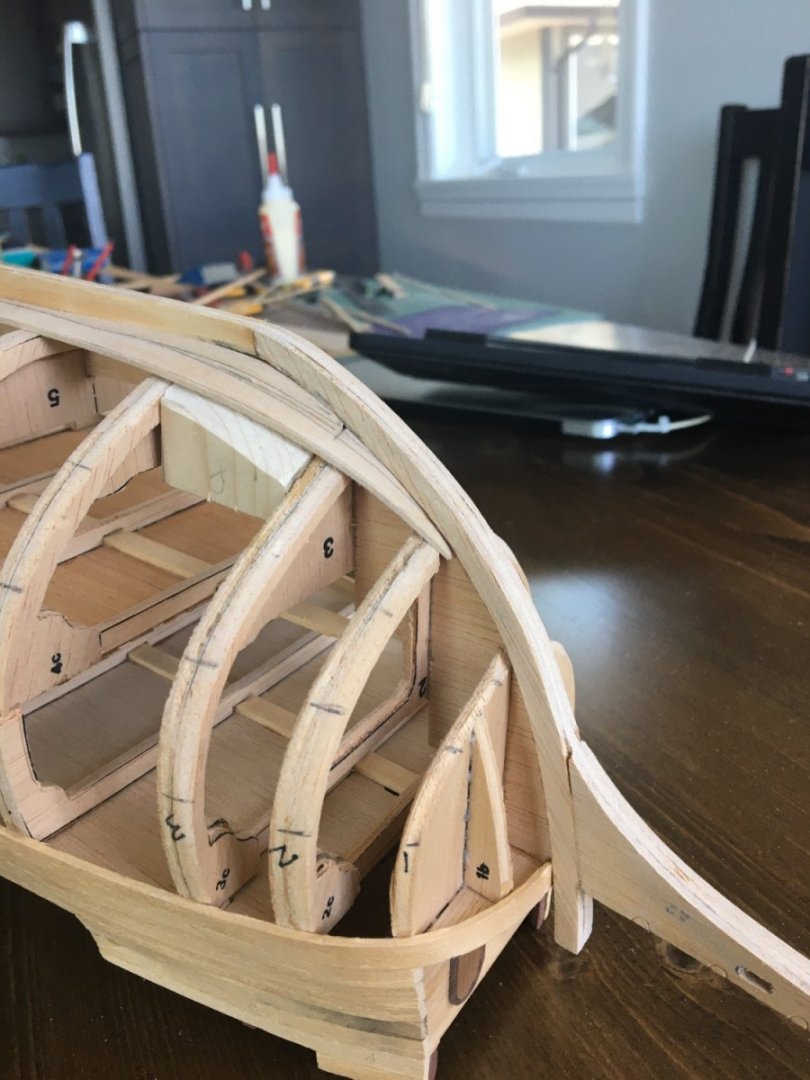
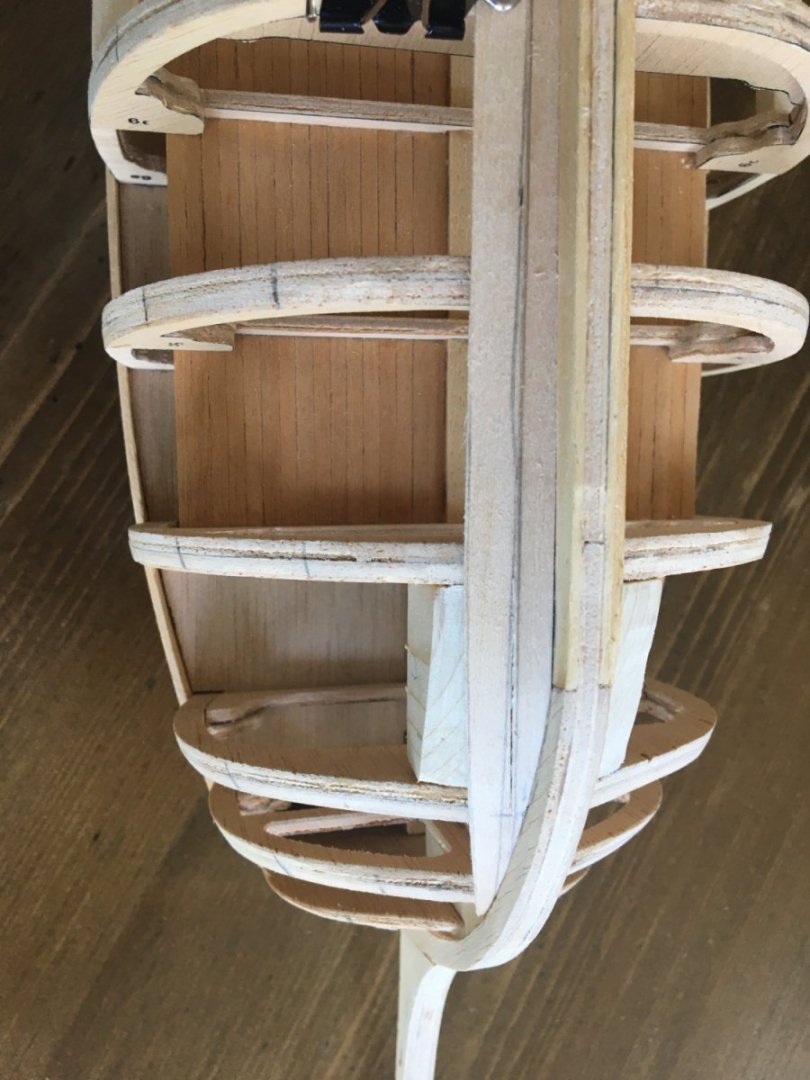
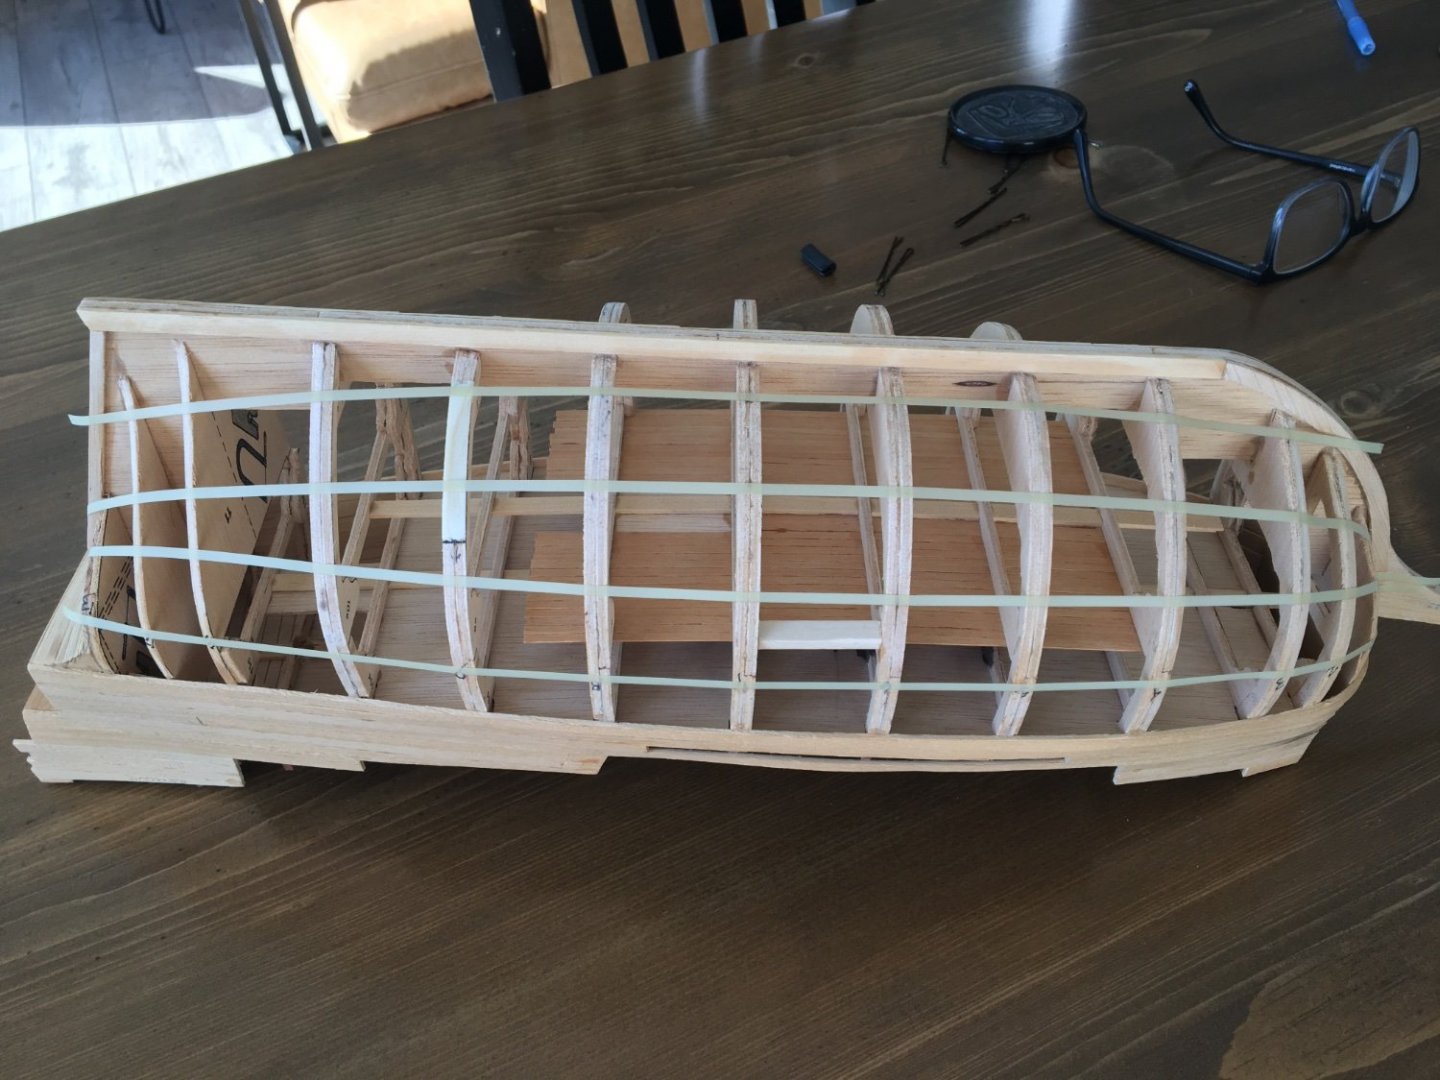
It’s been a while but I’ve been trying to figure out planking. I did some measuring and it looks like I need 4 bands to fit my 7mm planks into a neat 28mm band at the widest bulwark. That leaves about 10mm for the garboard plank. Here are some views of one side showing the proposed bands. I know I’m supposed to keep the garboard strake as level as possible and not let it ride up the bow but it looks I will have a problem with a weird double bend at the transition from bottom of keel going up the bow. …and then the stern Any hints, tips, comments would be welcome. Cheers, Dave
-
Ok, then…..we’ll there aren’t too many catfish on the Western seaboard and I was blissfully unaware of said pastime. It was more along the lines of exercising the grey cells. 🤔 Allan, I am hoping I will catch errors before it’s too late. I’m not worried about authenticity; no one I know will have a clue as long as it looks good. I never would have caught on to the railing slope if it hadn’t been for another member’s sharp eye. I'm grateful for everyone’s observations. cheers, Dave
-
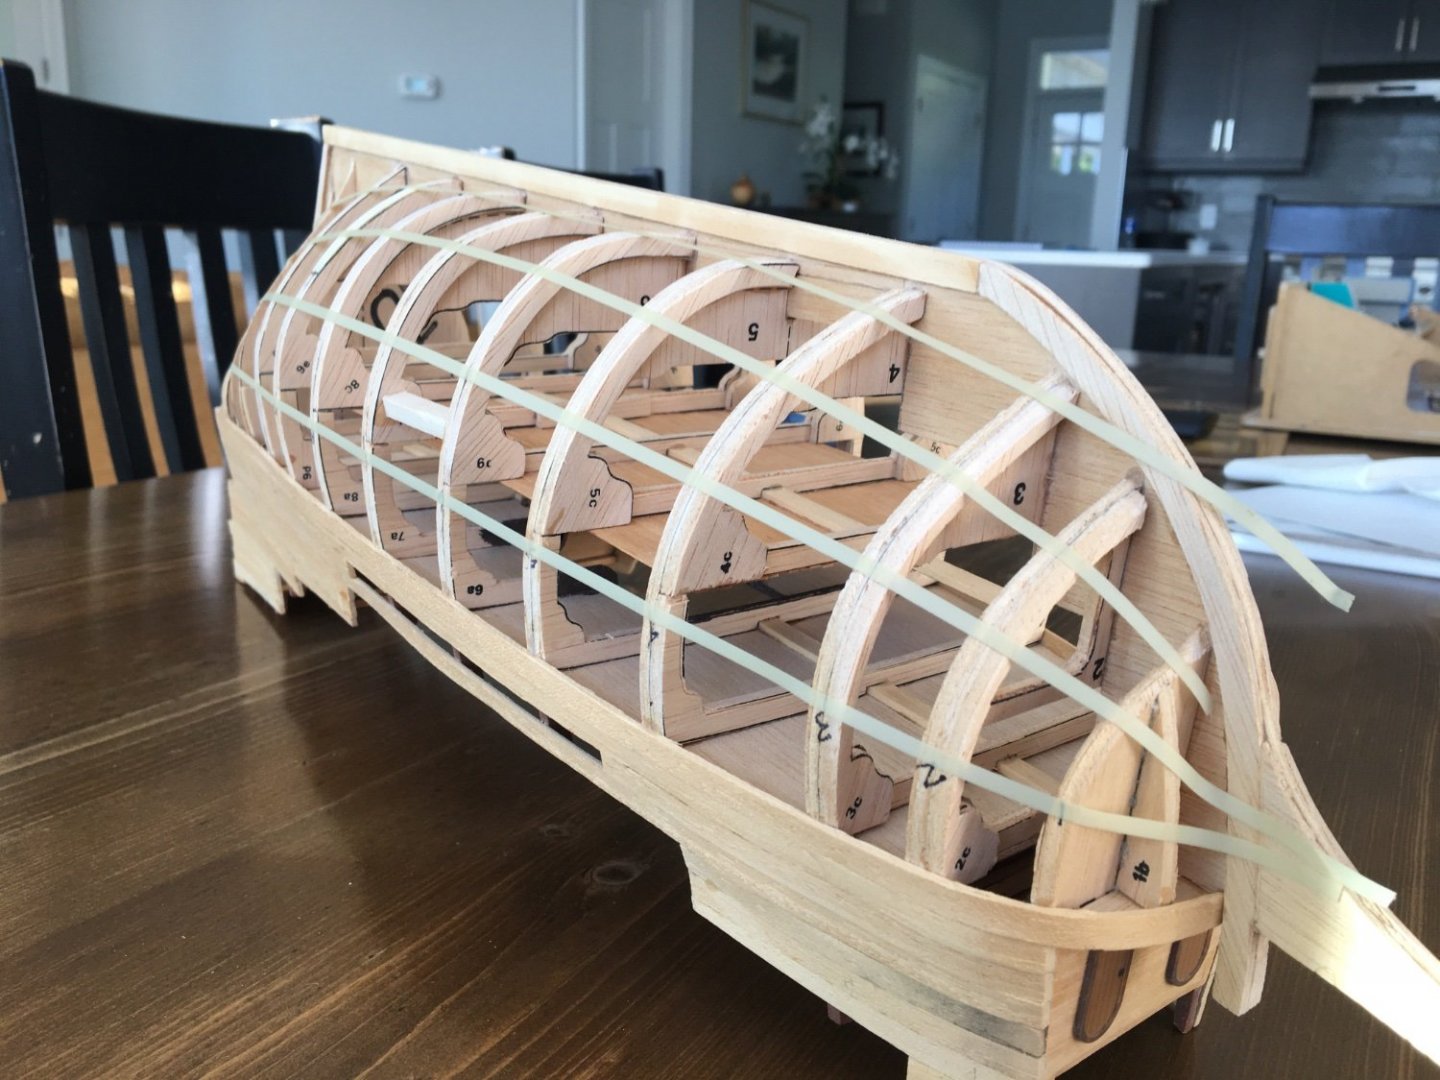
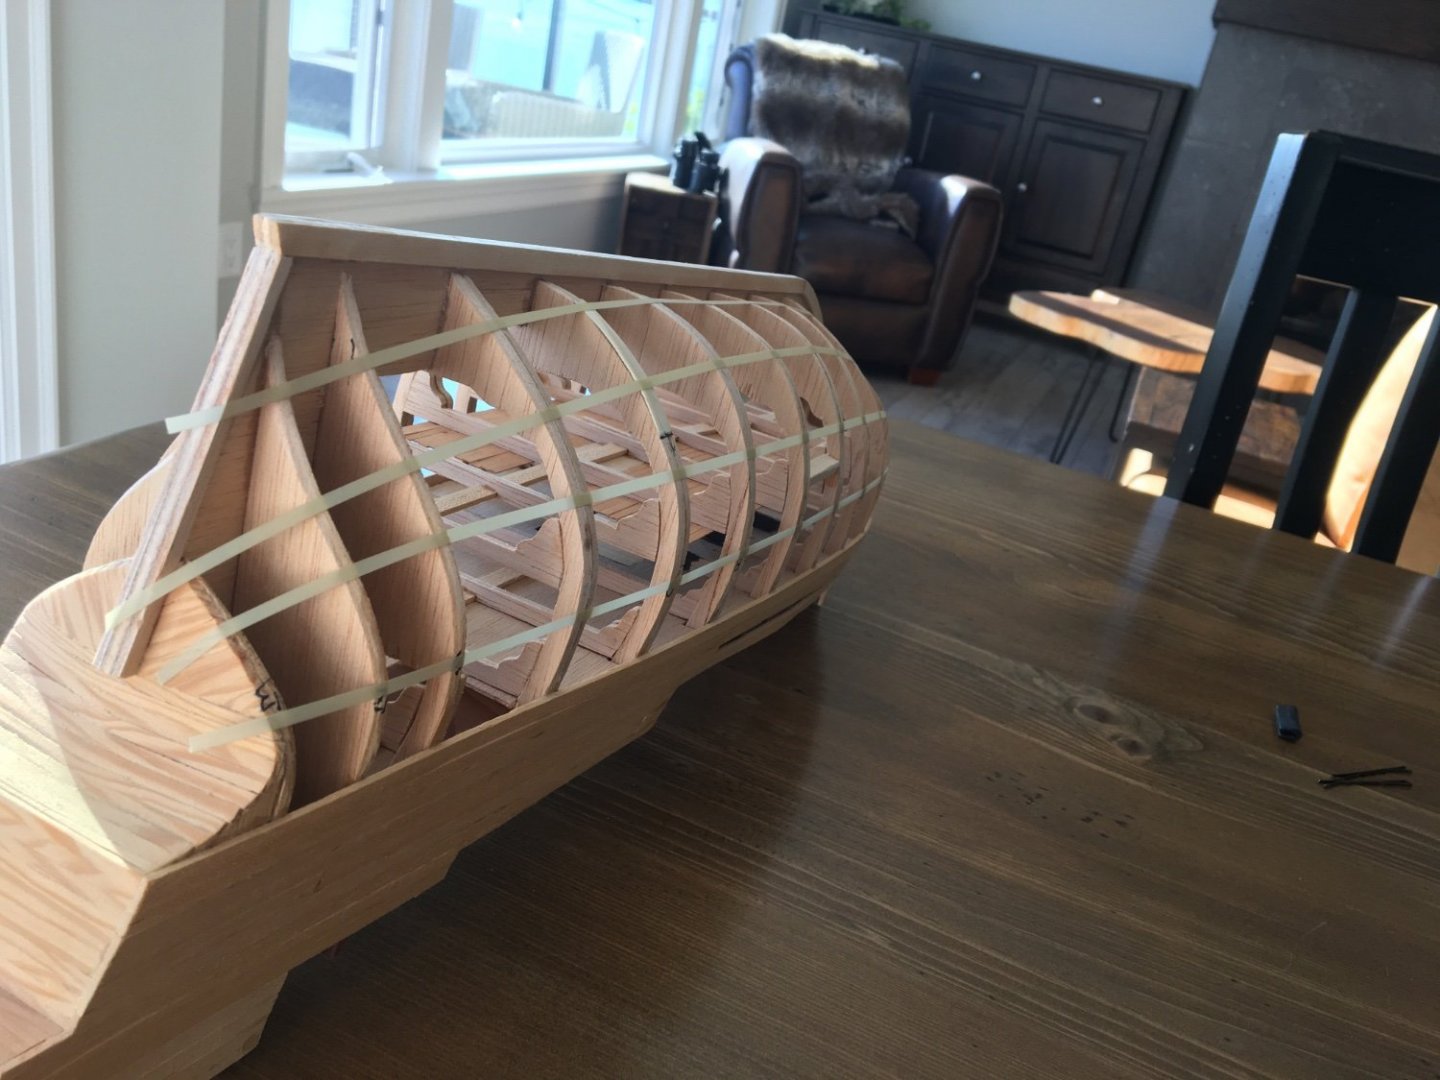
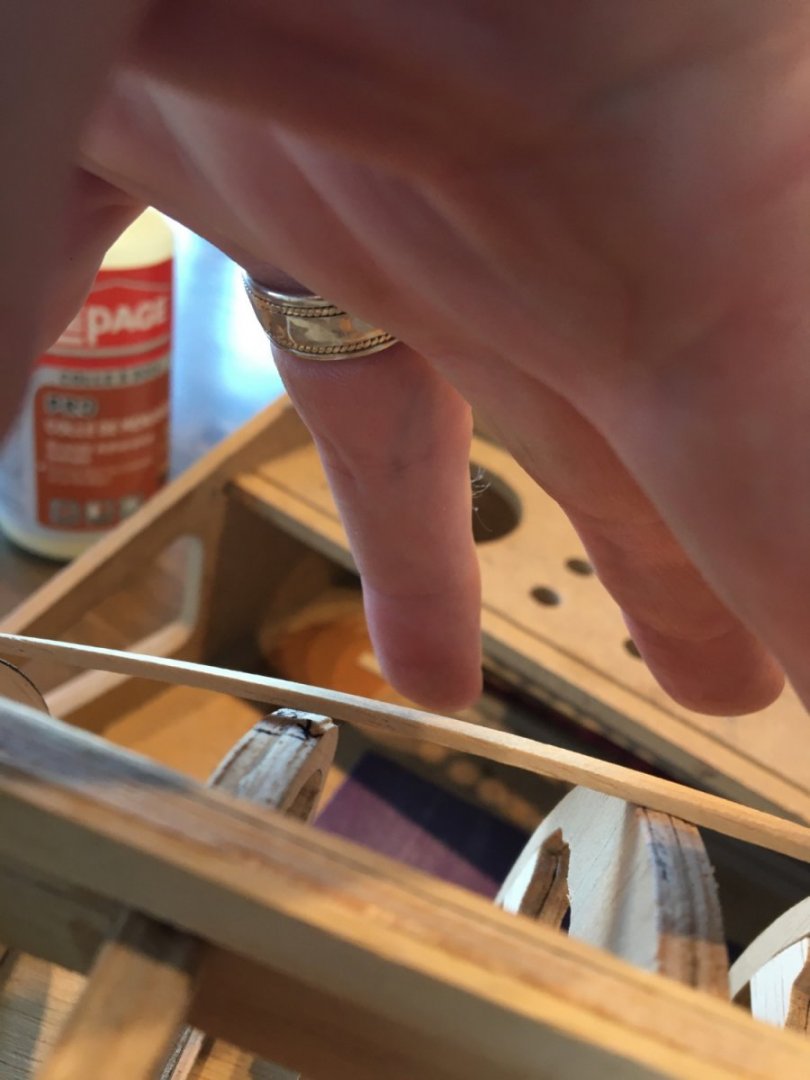
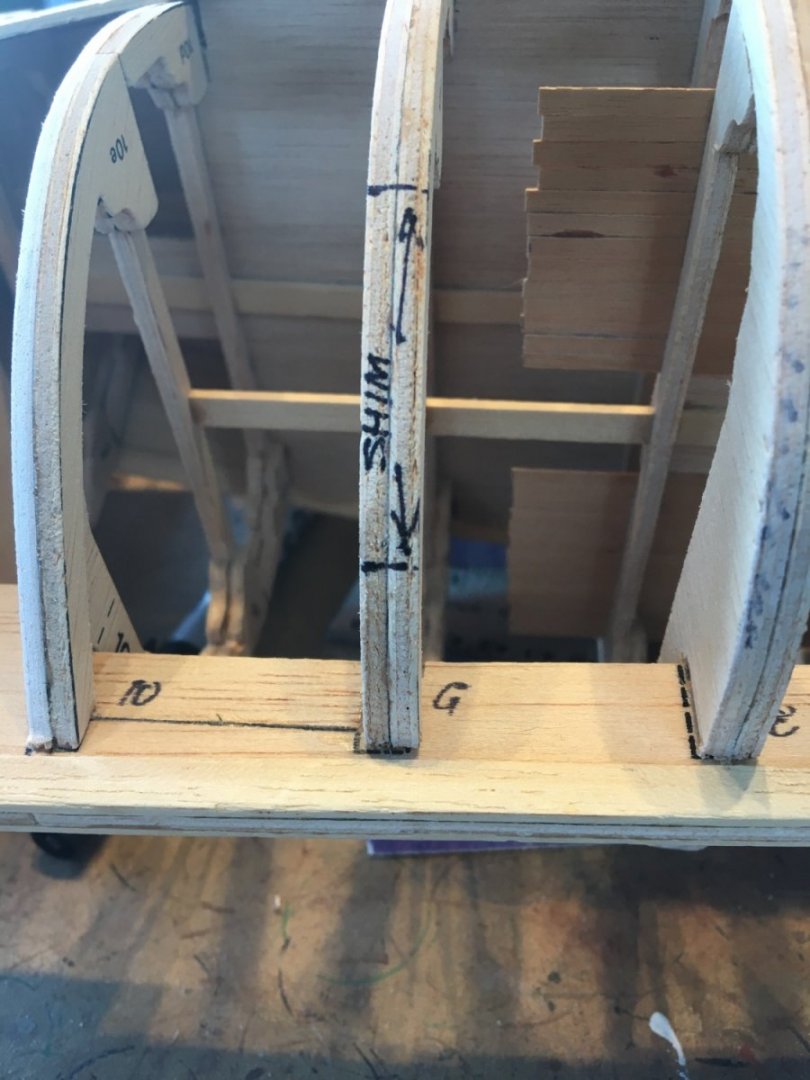
It’s been a while but my time was spent noodling and finishing my hobby desk. So now I can get back to this project. Closer examination of the drawings and my model revealed that the previous owner added one too many planks at the stern so I will need to cut one out. I sanded the bulwarks to get a more even gluing surface and to bevel them appropriately. This led to the observation that No. 9, on both sides, needed shimming. I dug around my workroom and found some thin veneer-like shavings that I glued down. Hopefully that will do the trick. I didn’t want to end up with a bit of a divot happening there. More measuring determined that some of the bulwarks are a bit too short, in relation to the drawing. What is a “bit” well sometimes it is .5mm and others it is almost 2mm. I am debating whether to remove the offending members completely and just glue in a bit of wood, similar in size, or just get them to some semblance of even so that the railing looks OK. Almost ready to start planking! I’ve been going over the various PDFs on the site here and watched a video or two over and over again and I think I have the theory down. Of course, as we said in the Army - no plan ever survives the start line. Cheers, Dave
-
Patrick, thanks for the suggestion to look at the Model Shipways instructions. So many questions answered! Freakin’ brilliant! Dave
-
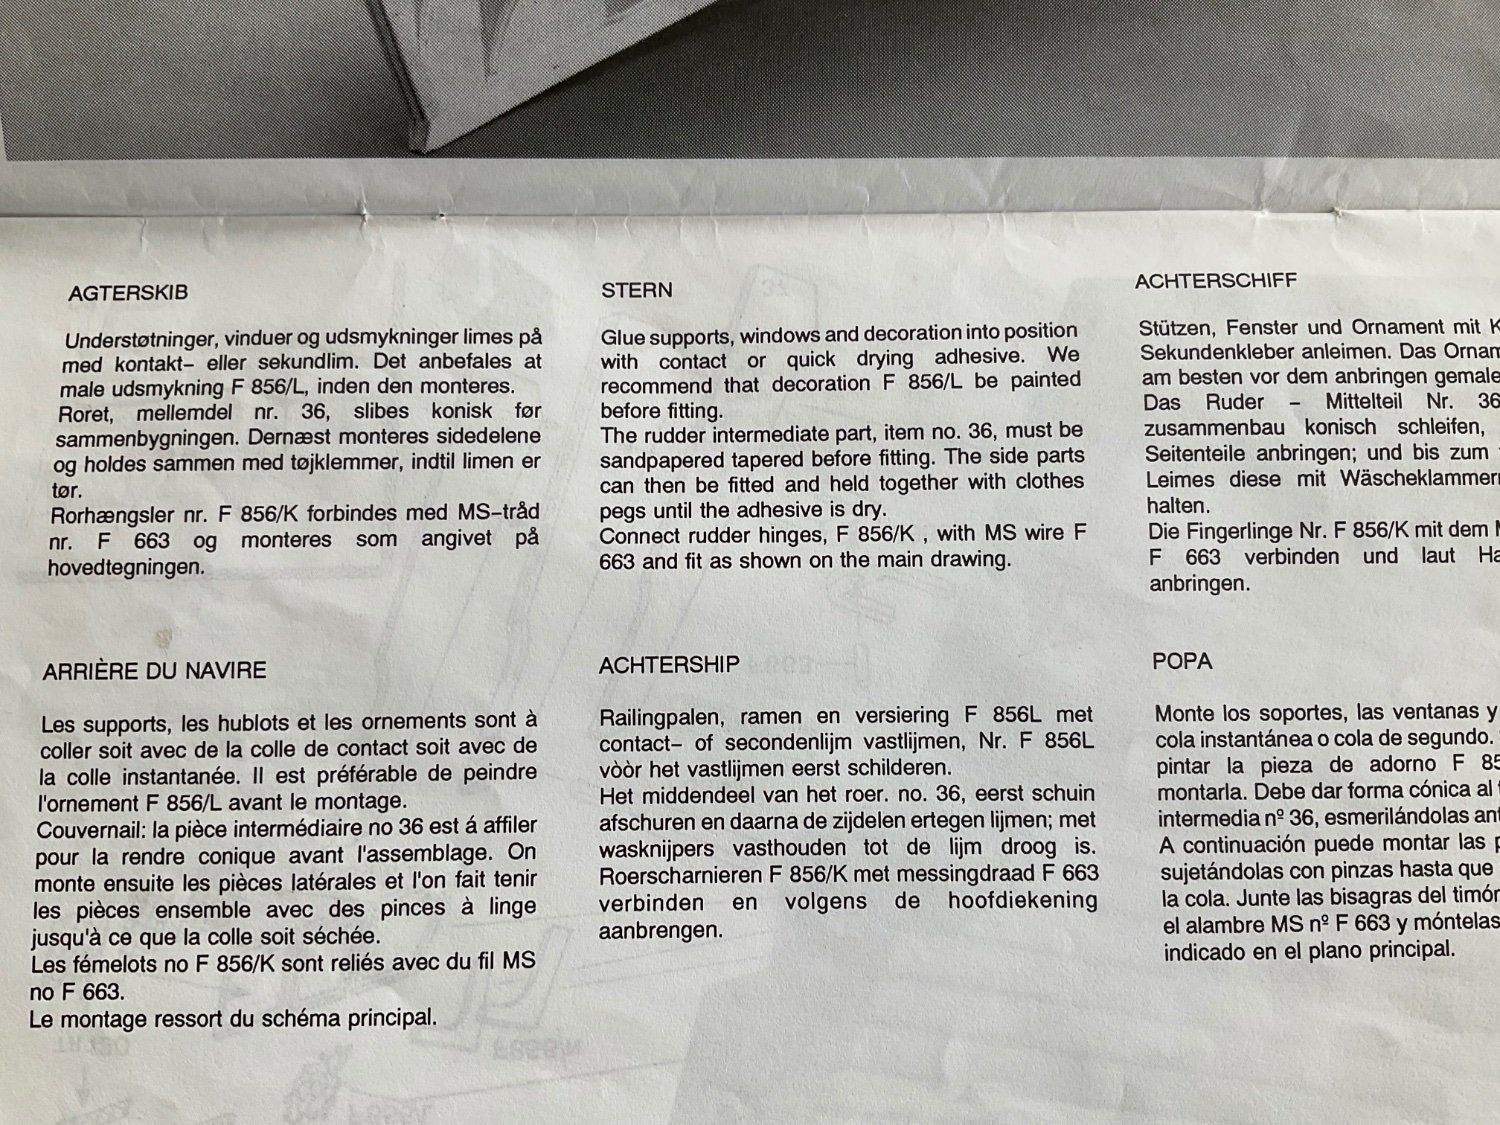
Bit of an update...I had the plans copied so I could scrawl over them. I managed to figure out blocks and eye bolts go where for the most part. There are some anchor points on the ship that don't seem to be specified. Not sure if it is a hole or an eyebolt - again, more scrutiny required. I did a complete inventory of all the parts and, lo and behold, they are all accounted for! The mizzen mast seems to be poorly tapered, however. It is definitely longer than need be but the bottom end seems too narrow - it rattles around in the deck hole (am I using proper navy terminology...LOL). It also seems to get a bit fatter higher up and I am hoping that if I cut it down, the wider part will fit OK. That brings me to another question. The upper masts seem to be the correct diameter, according to the drawings, but the tops or bottoms won't fit into the brackets that are supplied. Am I better to enlarge the holes (one is square, the other round) or taper the mast more. Bringing the diamter down to fit the hole, I think will make the mast too skinny. Maybe square off the bottom to fit and likewise step the top to fit - or a bit of both. As I write, I'm thinking that changing the proportions of the masts is a bad idea and making steps to slide into the existing holes is a better one. The anchor seems to be just hanging from a couple of dead-eyes and is tied off on the railing. No chain or heavy rope at all. I assume this is not historically accurate, but I will have to figure our how the anchor was actually deployed and fastened while travelling. There has been so much info on this site and the assistance, so far, has been great. I am looking forward to getting my hobby desk finished so I can get to work. Oh, and good news - it looks like my rudder fits the brackets, so no tapering! Cheers, Dave
-
TigerSteve, This post comes at an opportune time as I try to navigate my, apparently, old version of a Billing Boat Mayflower. When I searched for other build logs I didn’t see yours until I Googled ModelShipway plans… Go figure. Anyway, I will now be following eagerly. So far, it is looking great. Dave
-
DavidG, Thanks for that insight. I will include checking the decal fit into my list of recce assignments. BTW, I would be proud to have your ship adorning my place. I was a little worried about the garrishness of the Green/Yellow geometrics but it looks good on your model. Cheers, Dave
-
David, Brilliant! That makes sense with respect to the rudder - I will go with that. Again, that the belaying points are shown with numbers makes sense and explains why the same-looking part has a different number associated with it. Apparently my hope hope of ever making it out of an escape room are slim-to-none….. Thanks! Dave
-
Lapinas, you are making great progress. The ship is looking fantastic! I have learned quite a bit already just from “watching “ you. Some great links you posted, thanks. Dave
- 93 replies
-
- 1
-
-
- santa maria
- amati
- (and 1 more)
-
Clementine, that is a great build you have going on. I will follow along to see your progress and pick up any tips I can. Sanding the wood strips before attaching is a good idea. I usually get carried away by my enthusiasm and forget. I think your planking turned out well albeit, apparently, not to spec. At the end of the day, you will have a lovely ship and whether the planking is historically accurate or not will matter only to the rivet-counters. Cheers, Dave
-
I have used AK products, oil paints, acrylic washes and pastels for weathering all over top of acrylics. I use high quality acrylics meant for modelling - not the craft stuff, although I know many use them for ease of purchase and price point. The AK products are specific mixtures so one doesn't have to figure out what to use it for - a bit of marketing and a bit ease of use for the beginner, I think. "Oil stain" is just that and 'Afrika Korps dust" is exactly what it says - easy, peasy. The nice think about AK washes and oil paints is that they flow well into nooks and crannies, giving you that layered effect. Acrylics need a "wetting agent" (ie drop of dish soap), to break the surface tension of the water so that it will flow and not dry leaving a "ring" at the outer edge. I have never had my acrylics react badly to any of these products. If you want to stick with acrylics, however, Games Workshop, aka Citadel paints, makes a load of washes, base colours, metallics, etc for their miniatures. They all have fantasy-type names but they work really well. The washes are great. Best of luck! Dave
-
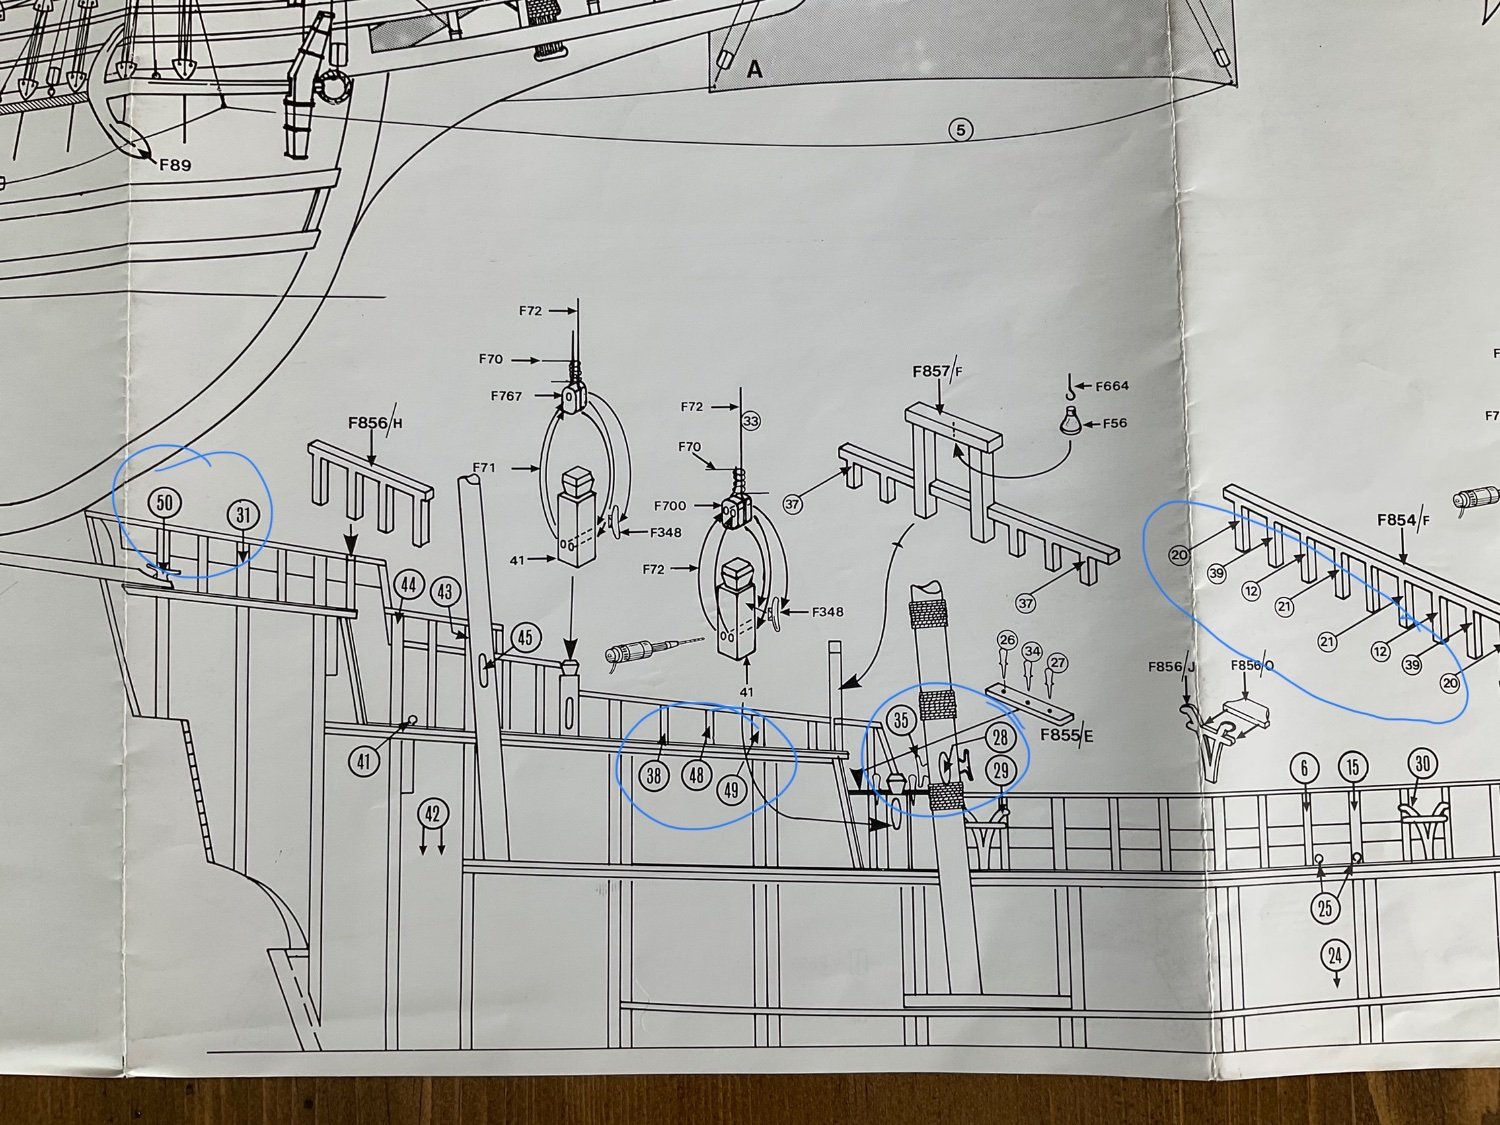
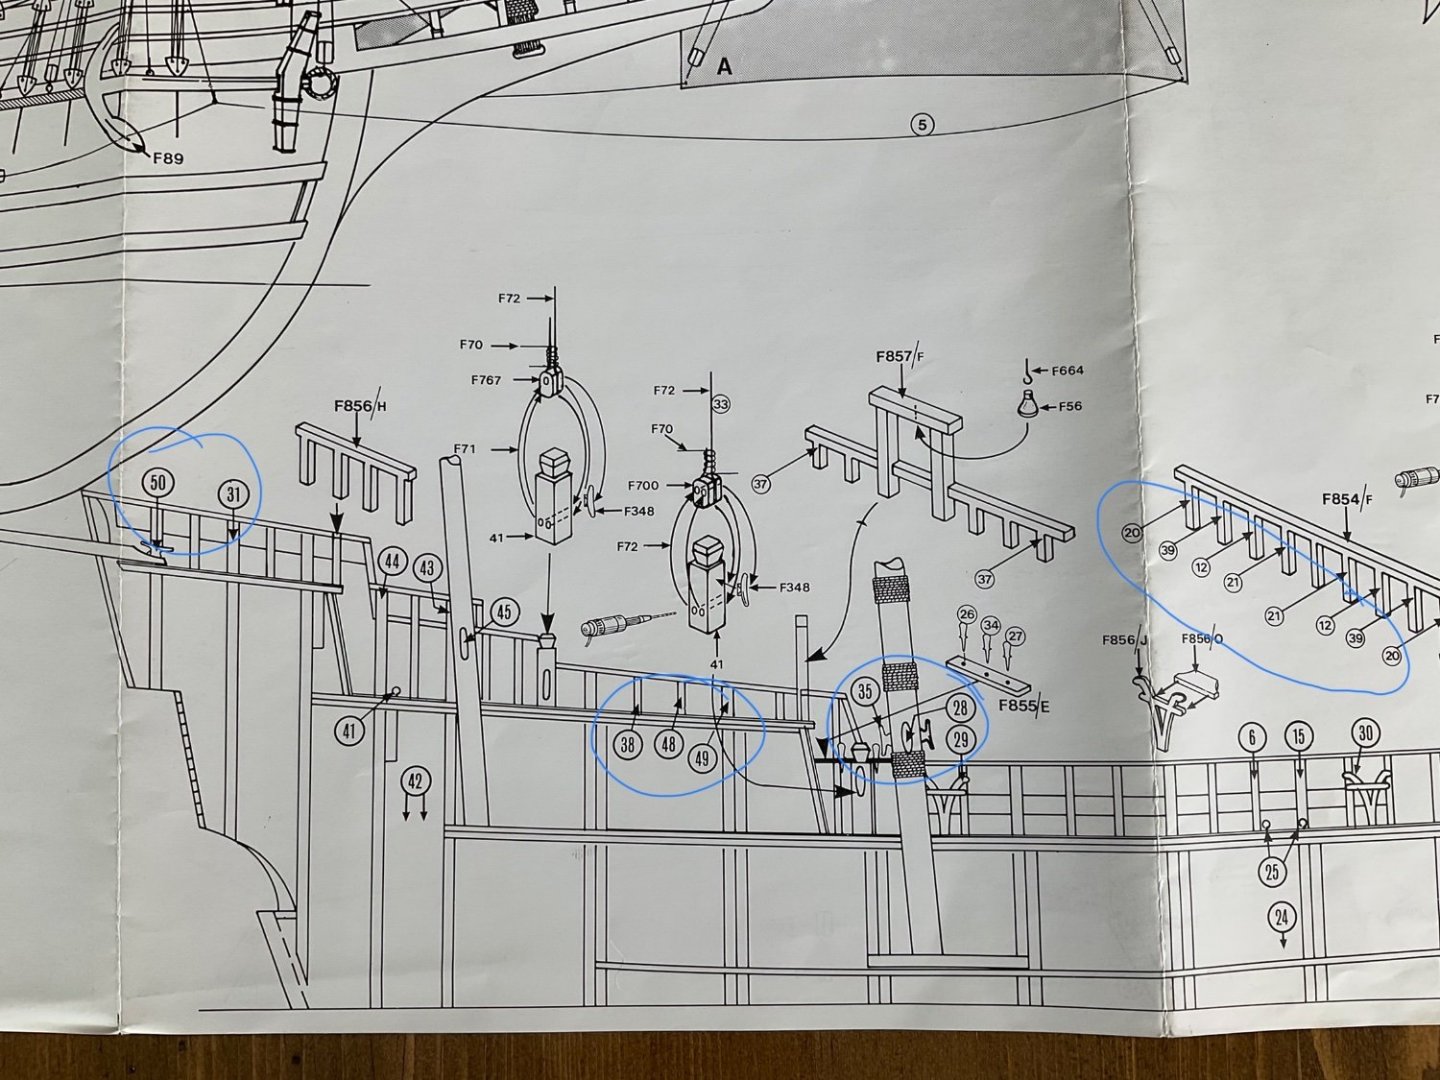
Some more mysteries to solve. The rigging diagram shows which thread to use where (fantastic!) but I also have two spools of thread that aren’t mentioned anywhere. A spool of Coats thread and a larger spool of nylon thread. Maybe PO thought she would use different thread for rigging than what was supplied? The other diagram has numbers in circles pointing to parts and I don’t know what they mean - they don’t relate to the actual part numbers, they aren’t colours, no idea. I’m stumped. More noodling required.
-
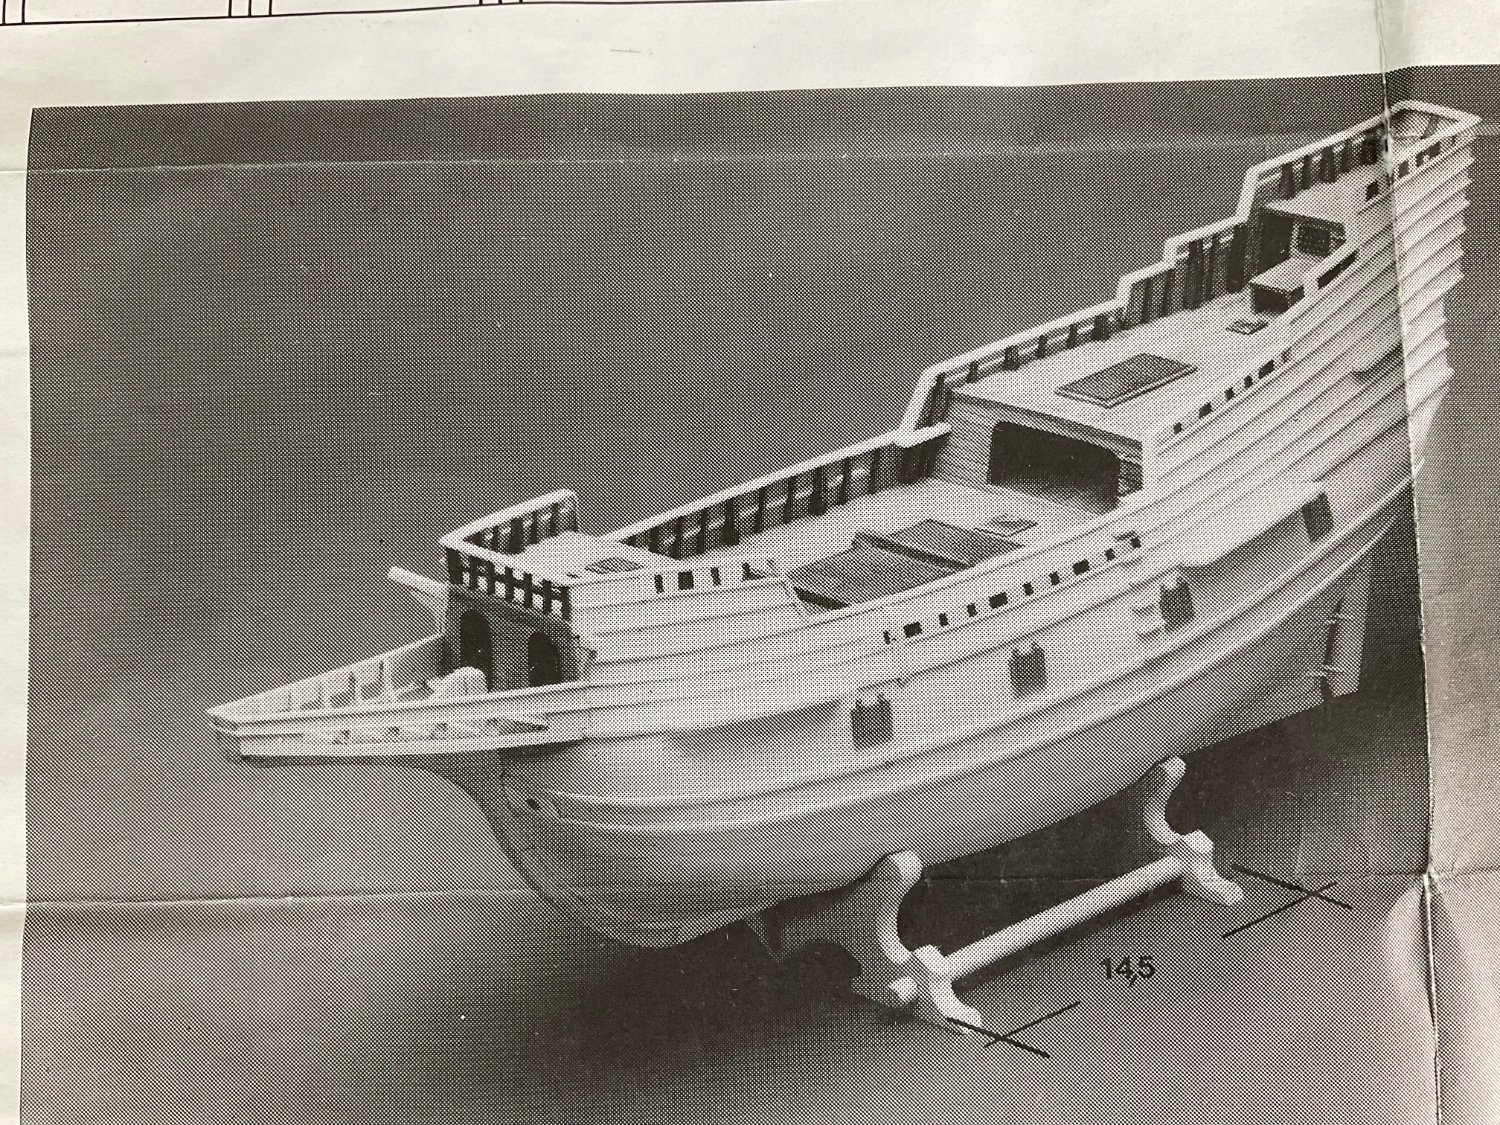
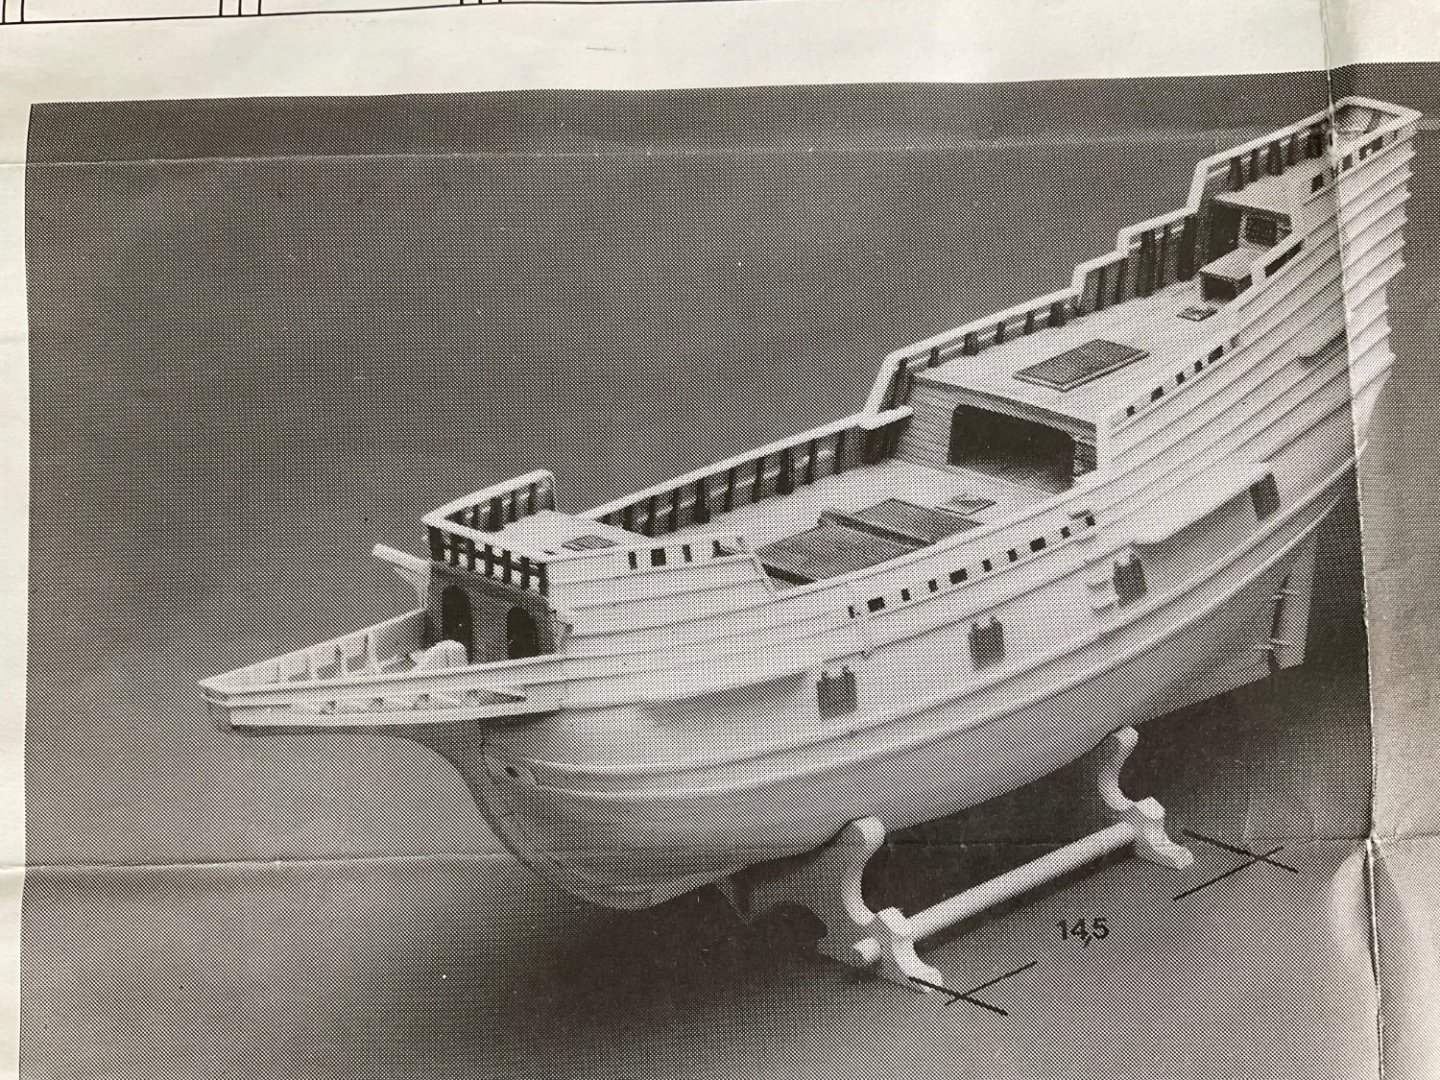
Here’s a picture of the ship from the instruction book. It seems that the bow extension is wood but the manufacturer has included a plastic piece. Wood definitely looks better. Will have to try to replicate that.
-
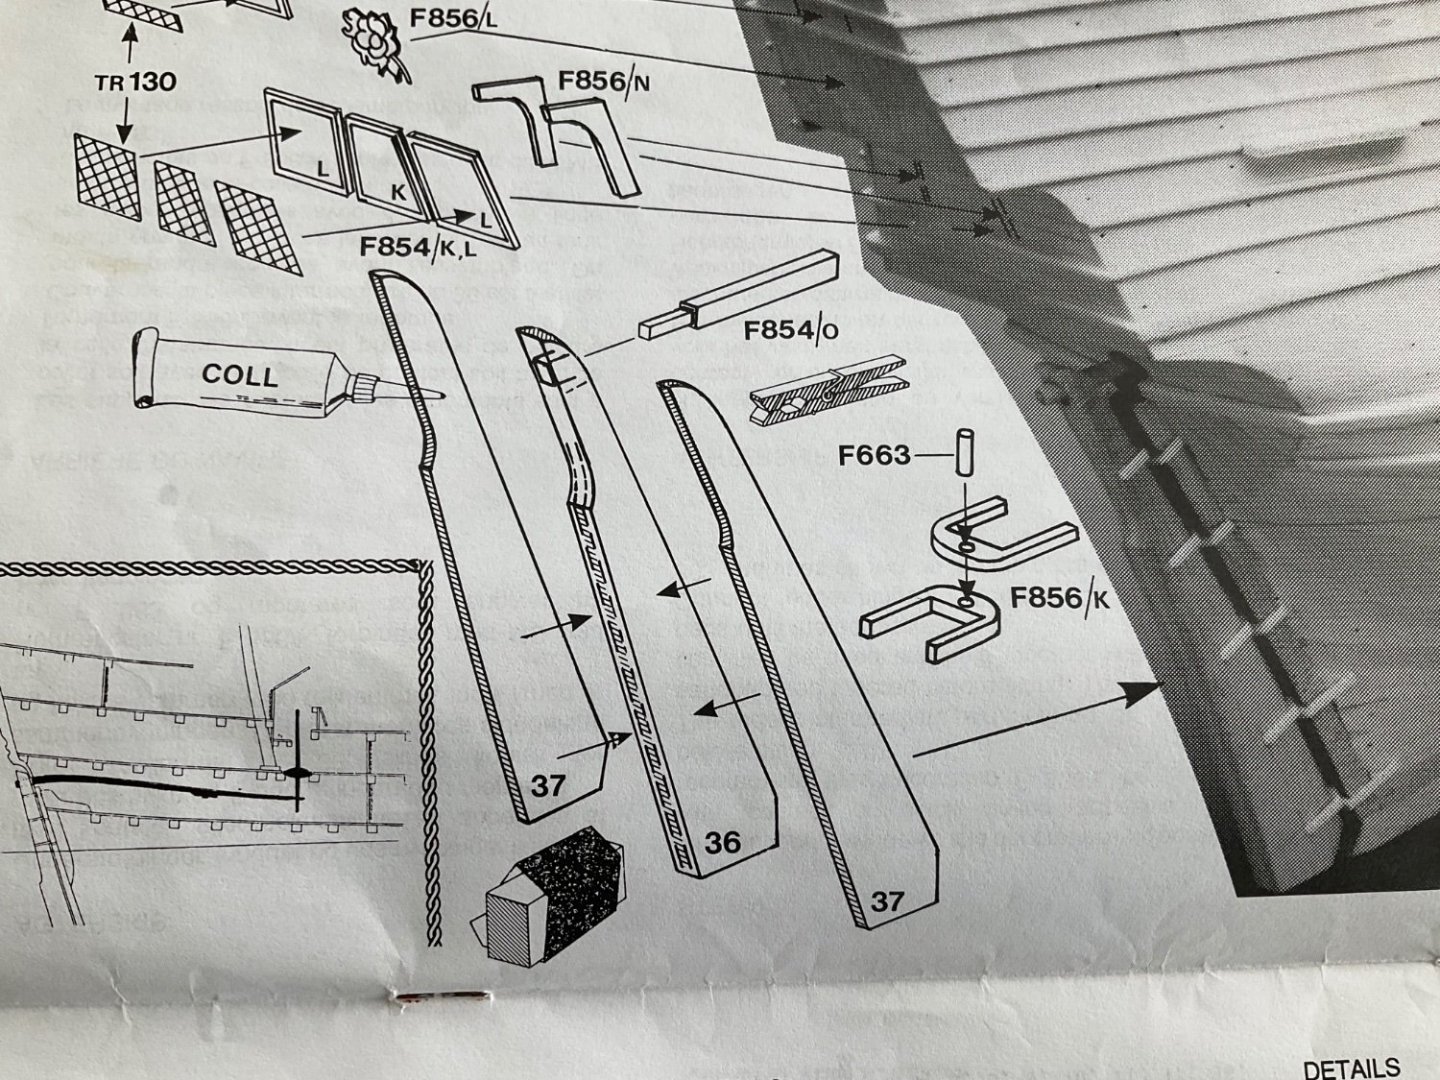
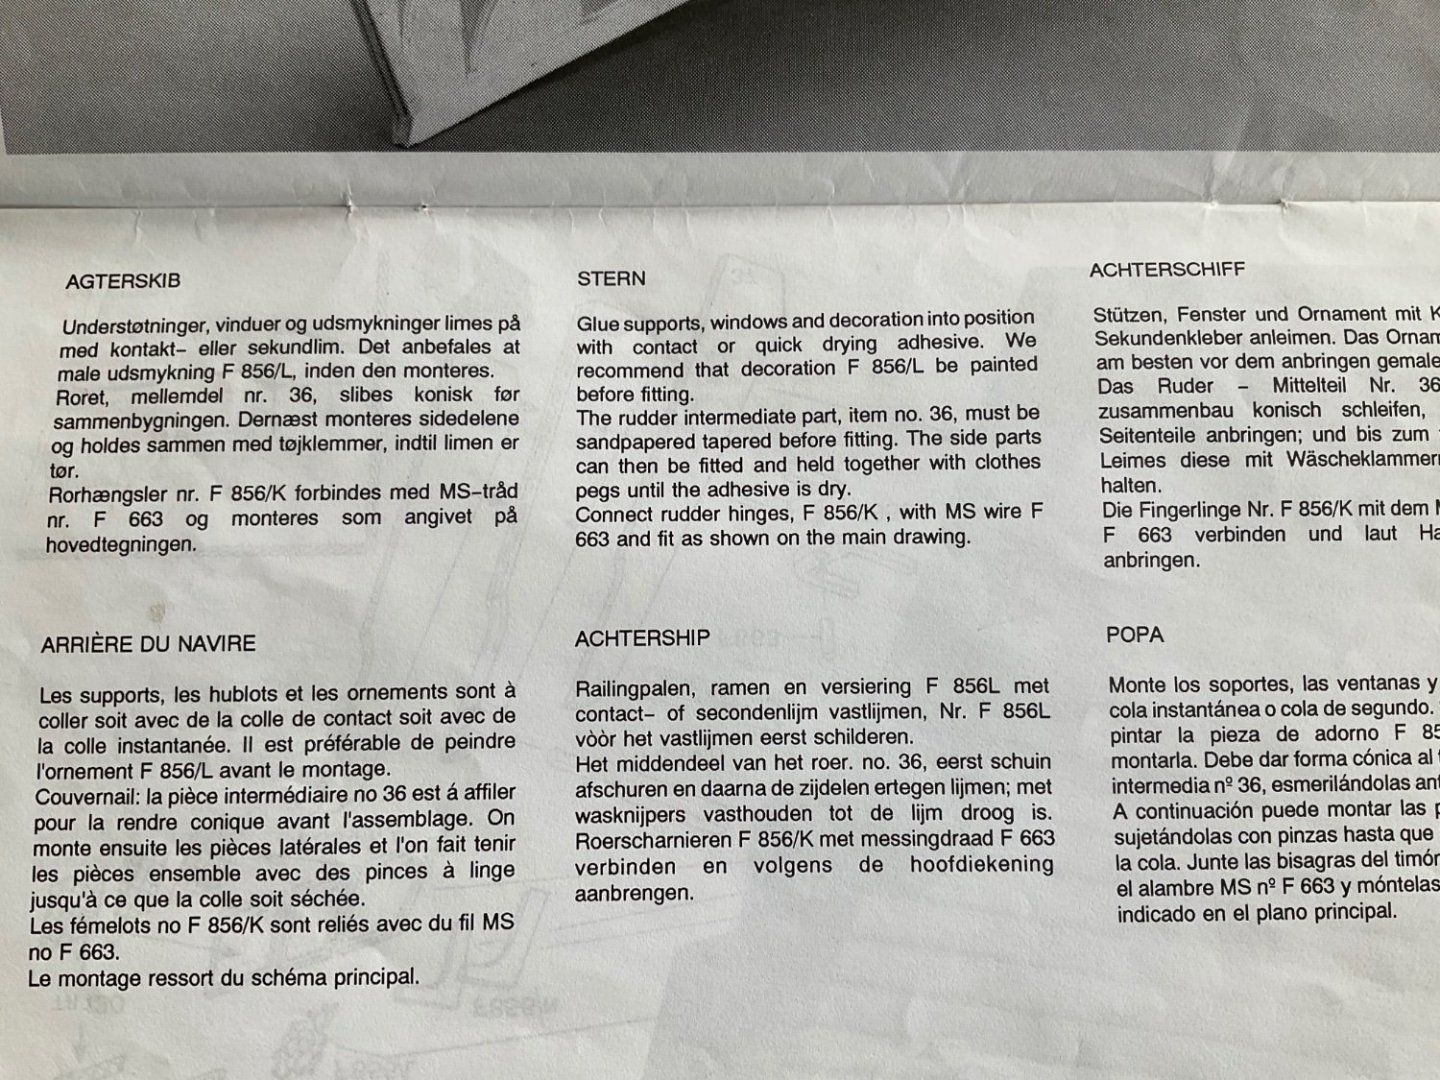
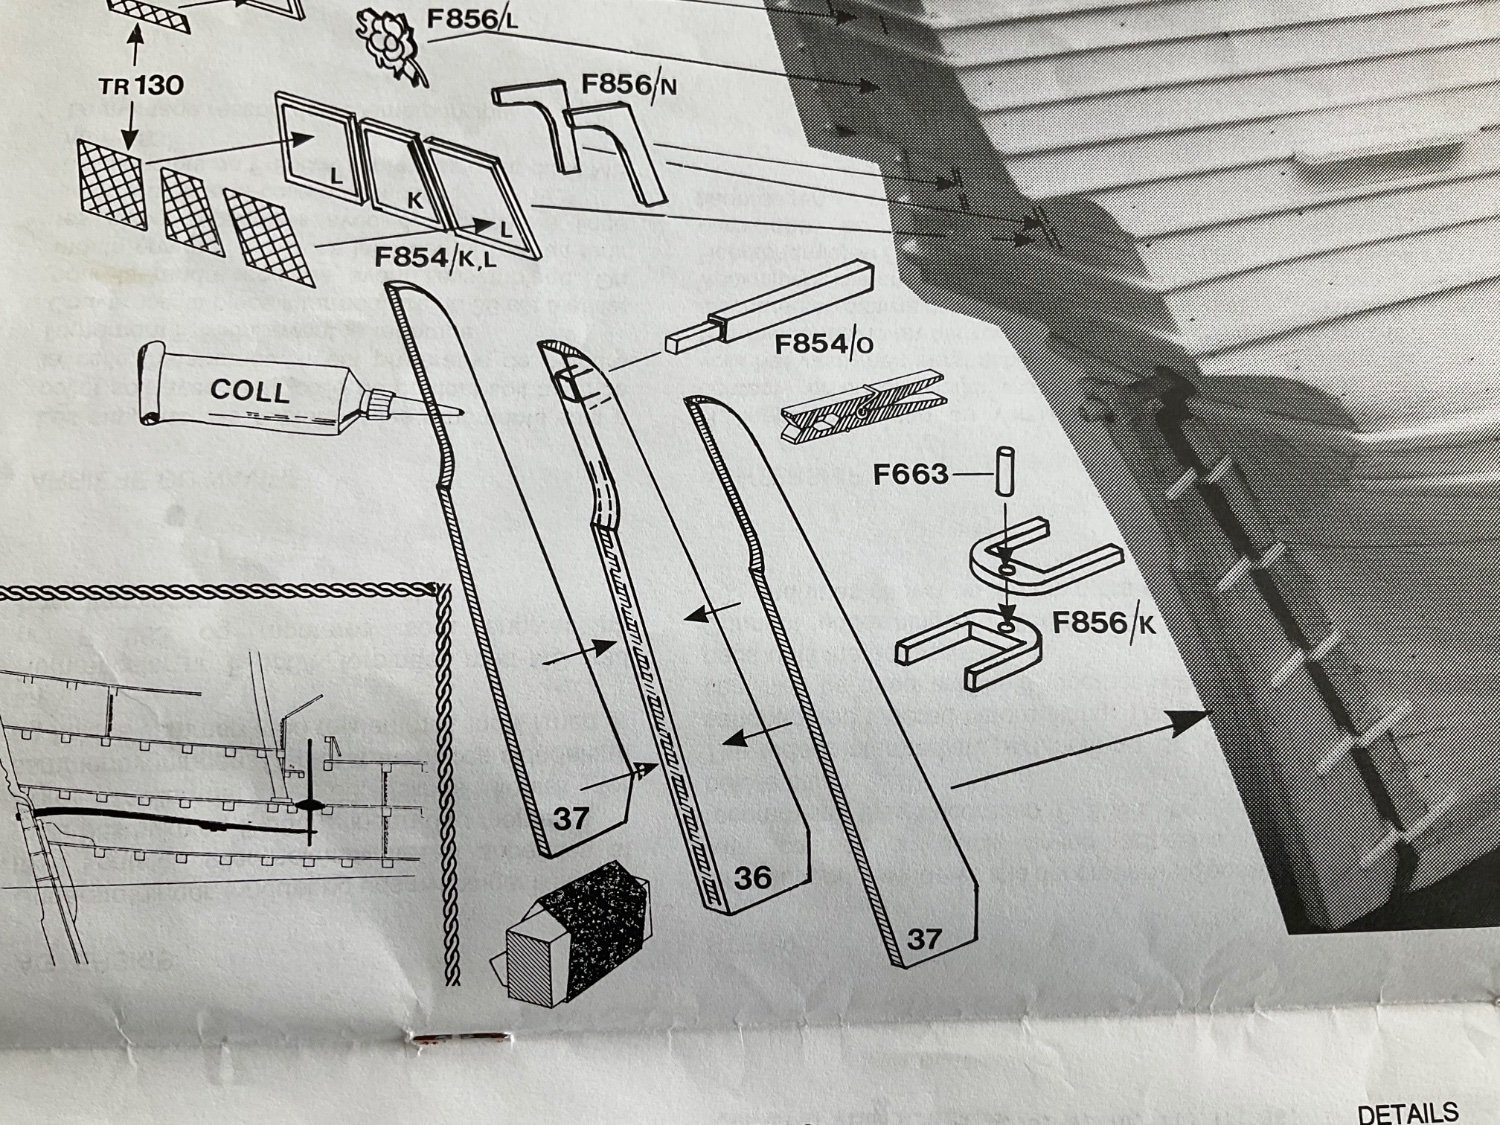
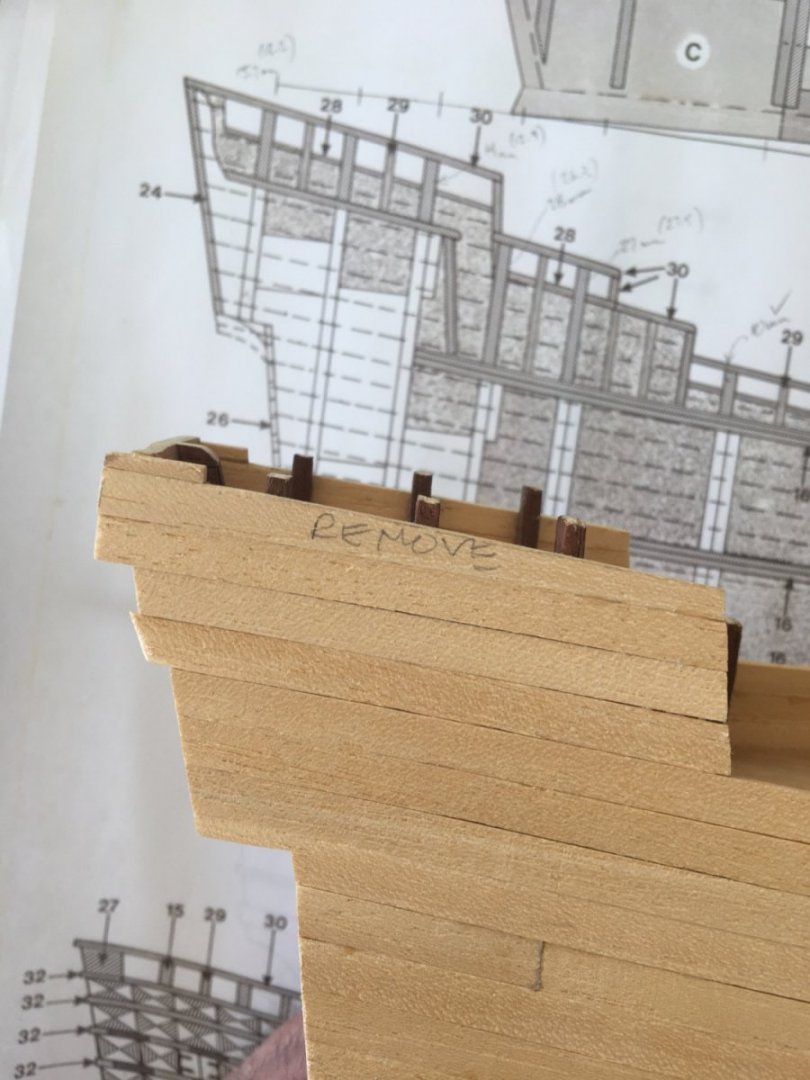
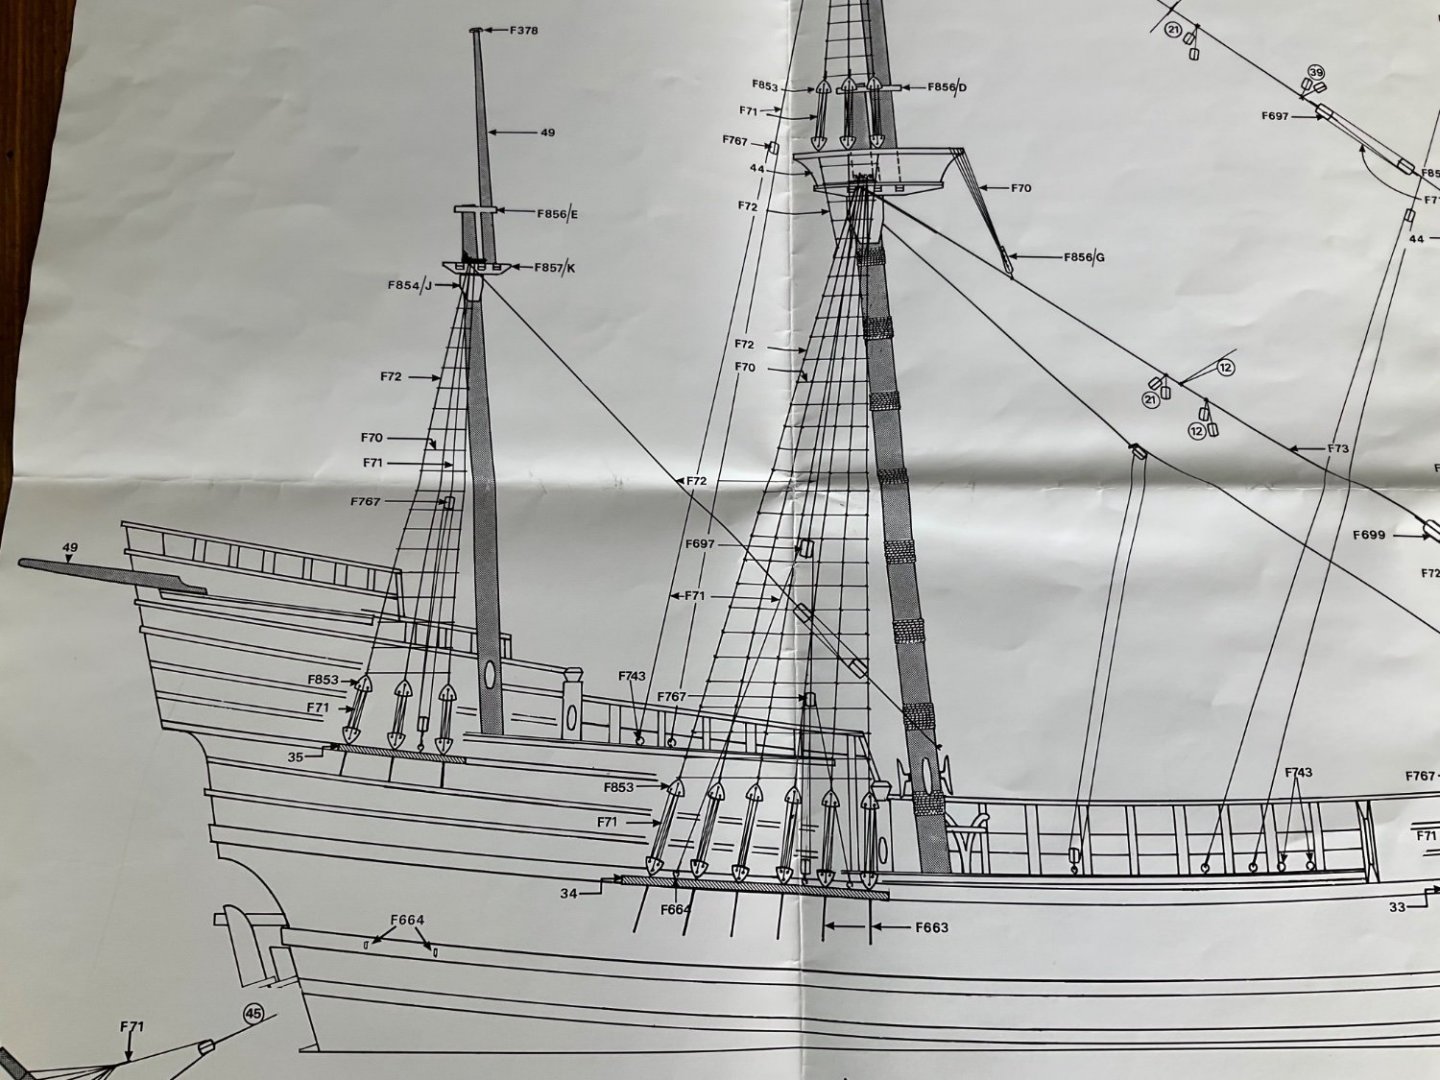
Hey, I like how easy it is to post pictures on this site. I have been on other sites where doing so required many steps and use of picture-sizing software, etc. The more I study the plans and the extremely cryptic and generalized instructions, the more I am getting a feel of the steps to build this ship, but the without an itemized list of parts and where they go, or which use they have, I am afraid of misusing something or using it up for the wrong part. More study, I guess…… My other worry (there are lots, I see) is missing a step and closing in something to which I need access later. For example, while looking at the drawings I noticed that the bowsprit gets tied down to a support (no idea what it’s called) and there needs to be a slit cut through it for the cord to run through. This hasn’t been cut out on mine but I see the mark where it needs to go. Maybe one disaster averted? Here is a sample of the lack of instructions.. I need to taper (I guess) the rudder but where and to what dimension?