


DocRob
-
Posts
1,261 -
Joined
-
Last visited
Content Type
Profiles
Forums
Gallery
Events
Everything posted by DocRob
-

Honda RC166 Grand Prix Racer by CDW - FINISHED - Tamiya - 1/12
DocRob replied to CDW's topic in Non-ship/categorised builds
I only built one bike so far, the Tamiya Ducati Panigale and it may tease you. It's an easy build, but painting is the challenge. I loved to replicate all the different metals, modern bikes are made of. This build was so much fun, that more bikes will follow, the Honda you are building is on the schedule as well as a Honda Dax with a very uncommon livery. Cheers Rob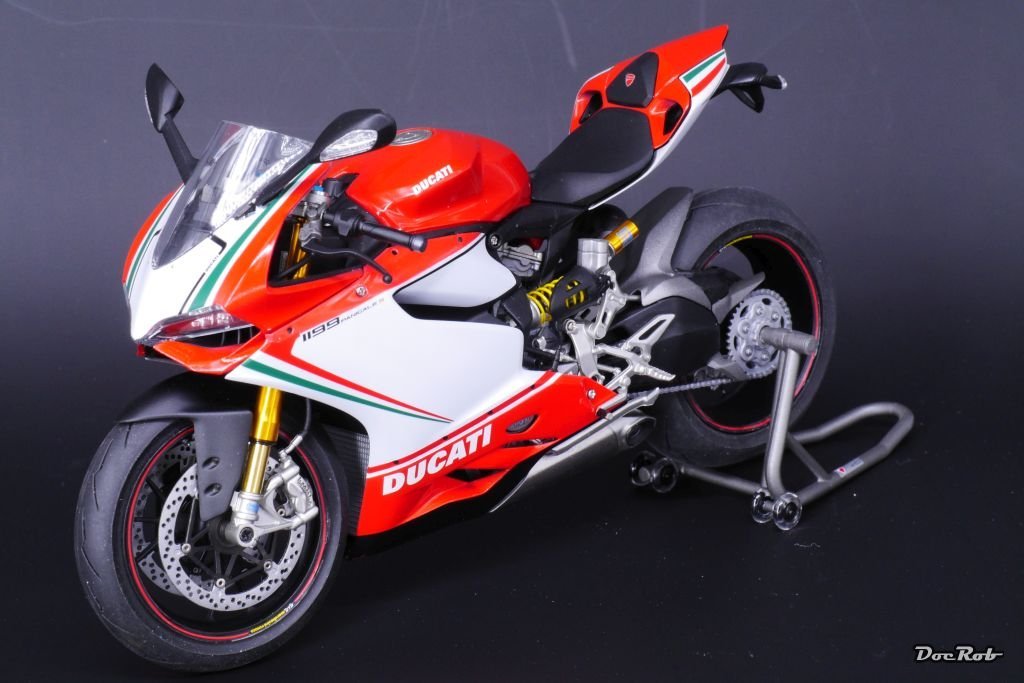
-
Matt Clear Coat
DocRob replied to aliluke's topic in Painting, finishing and weathering products and techniques
Exactly my feeling Alistair, on my island, it's impossible to get rattle cans sent to. Not too bad except for my formerly loved Tamiya grey primer. Some years ago, I changed therefore to Mr. Surfacer primer jars, but only yesterday two European online sellers claimed, that they are not allowed to send them anymore. Before I leave my island, I will find other ways or skip modeling . Cheers Rob -
Honda RC166 Grand Prix Racer by CDW - FINISHED - Tamiya - 1/12
DocRob replied to CDW's topic in Non-ship/categorised builds
Nice gal, but I wouldn't add her. Instead there is a Mike Hailwood resin figure out there from the Greek company GF Models. This also show, how small the bike really is and how the driver would have to fold himself in. I couldn't get one until now, but seriously consider it for my build. gf-12-009-_honda_rc_166_-_162_tamiya.jpg (960×720) (gf-models.eu) Cheers Rob -
Bismarck greys?
DocRob replied to Ian B's topic in Painting, finishing and weathering products and techniques
On Scalemates you can download the Tamiya manual, which gives usually a good idea for the colors from their recommendable system. German Battleship Bismarck, Tamiya 78013 (2005) (scalemates.com) There is a section for downloadable (.pdf) instructions. Cheers Rob -
Matt Clear Coat
DocRob replied to aliluke's topic in Painting, finishing and weathering products and techniques
I use Future / Pledge / Klear for clear coating a lot. I mix it with Tamiya X-21 Flat Base to achieve different grades of matteness. Never use more than 30% Flat base, or you will have fogging issues. There is a link, helping with the mixing ratios from a great designer and builder FichtenFoo. Clear Coats with Future Floor Acrylic – FichtenFoo I like Tamiya's lacquer colors a lot in general, but the flat clear of this series never dries truly flat. Cheers Rob -
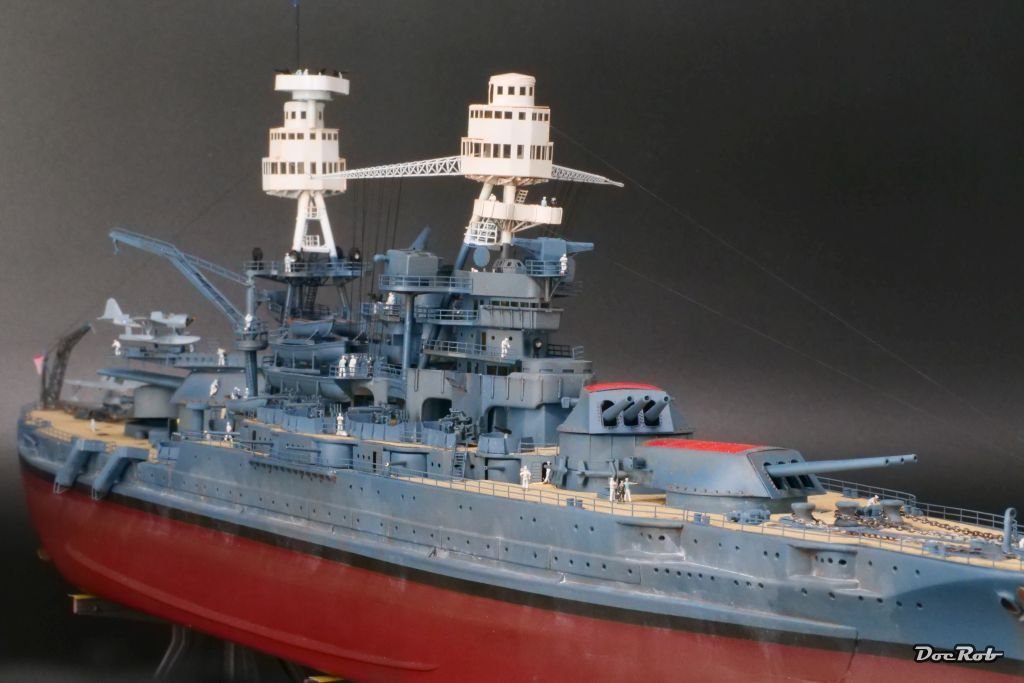
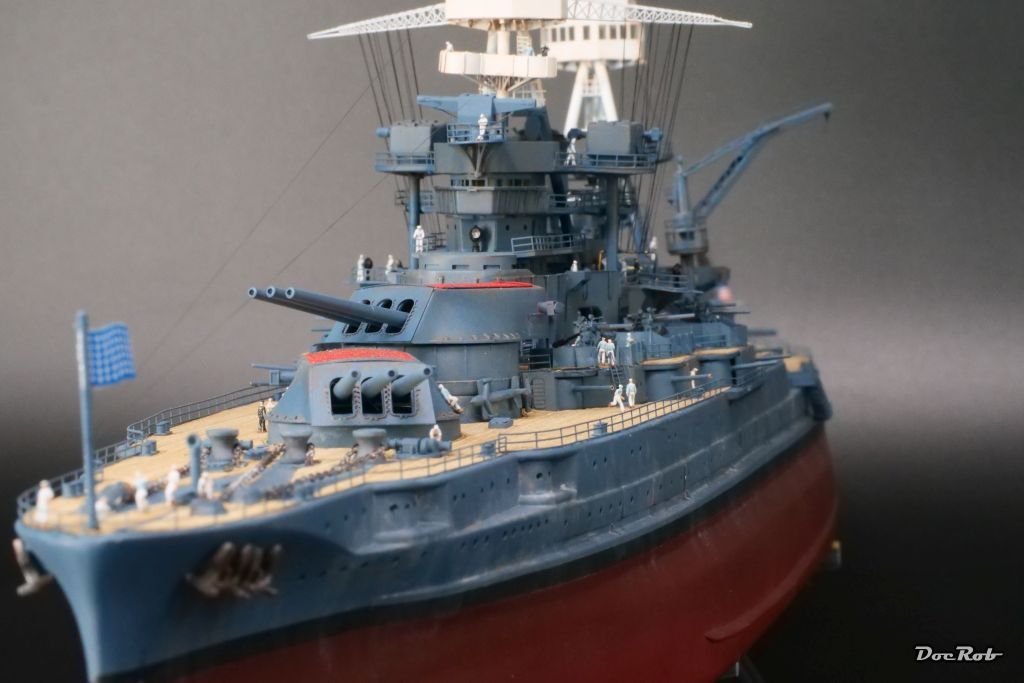
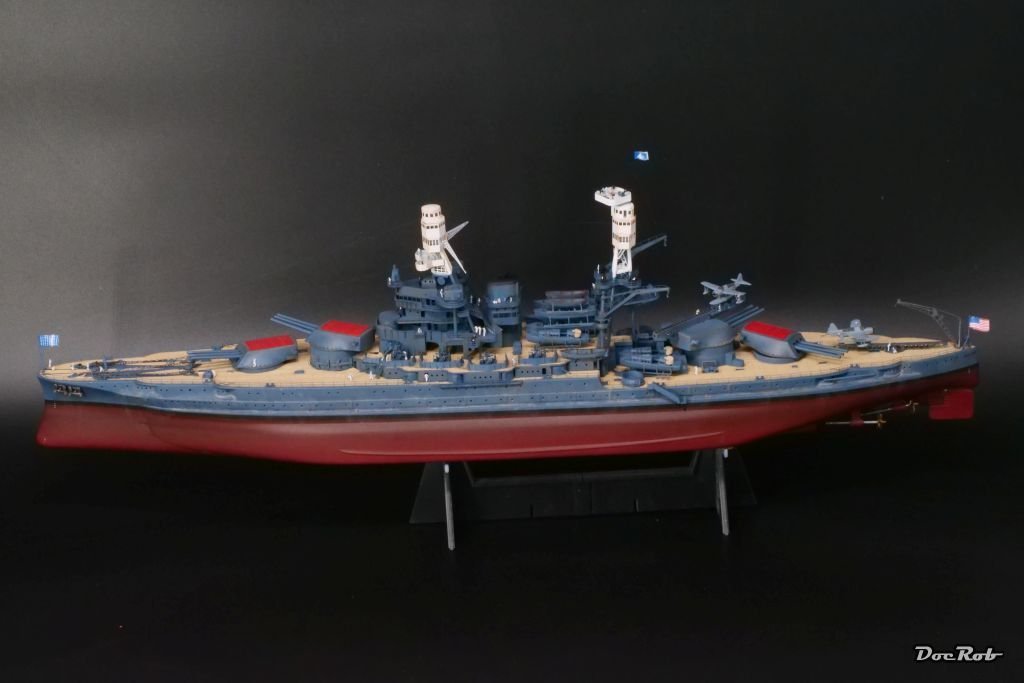
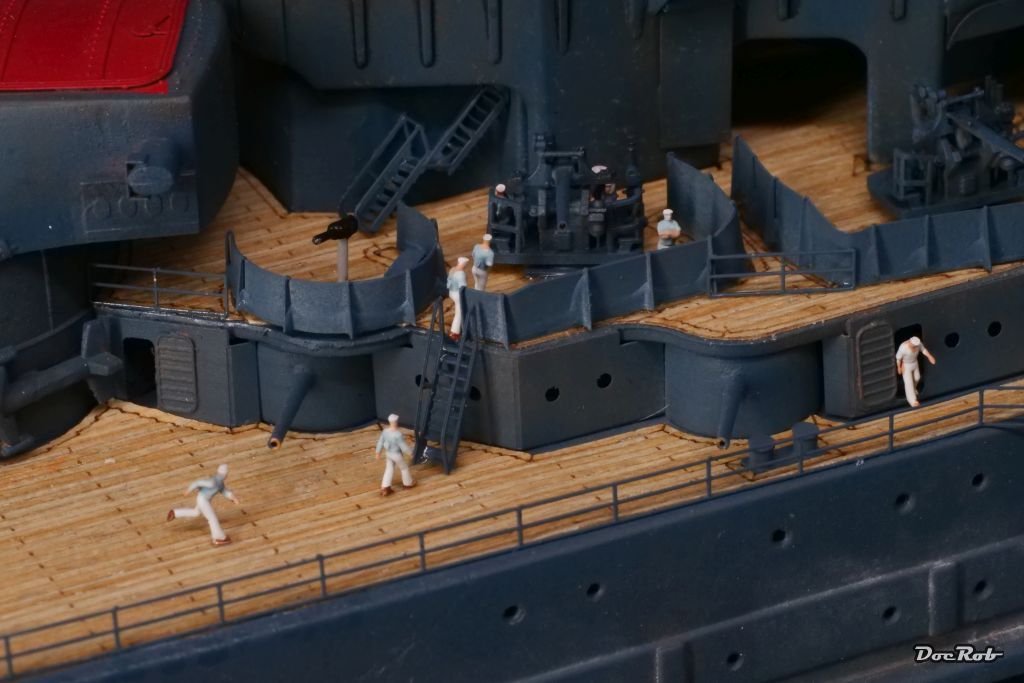
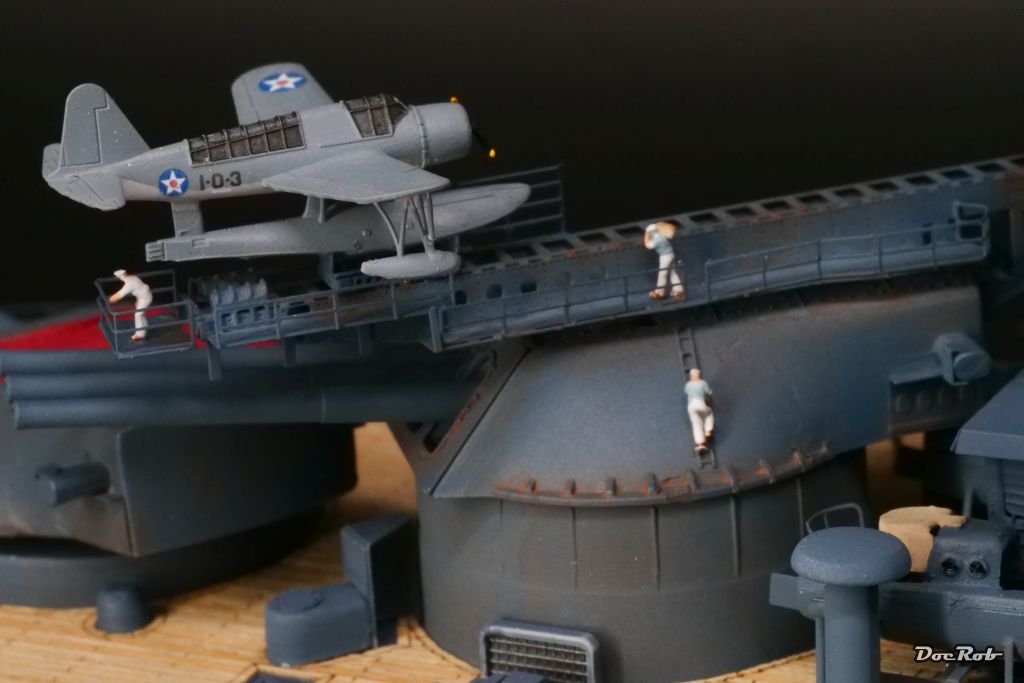
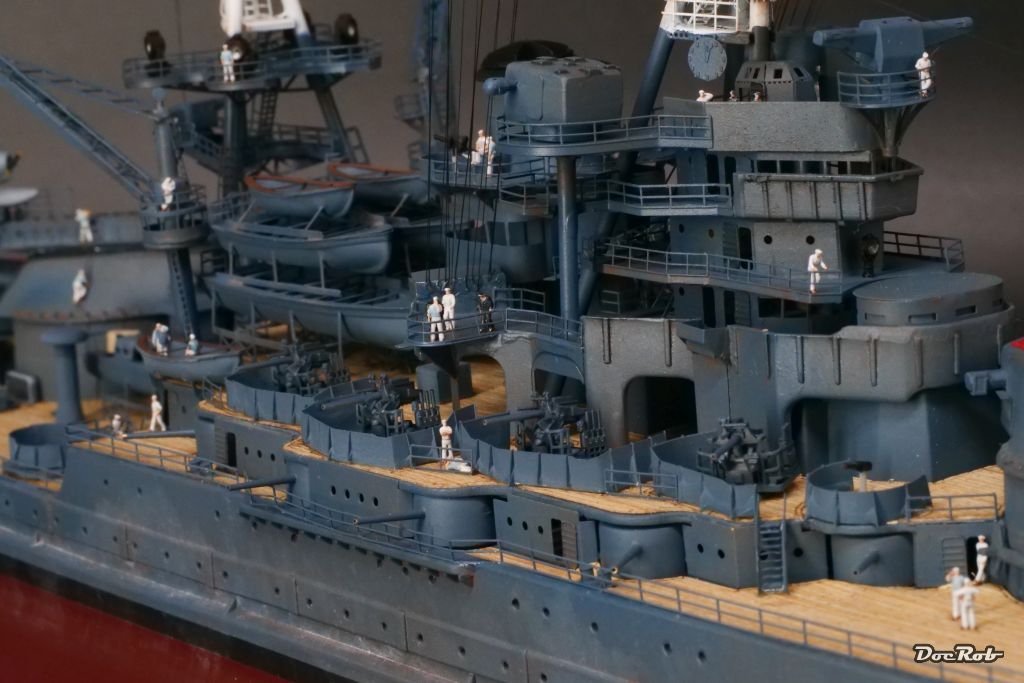
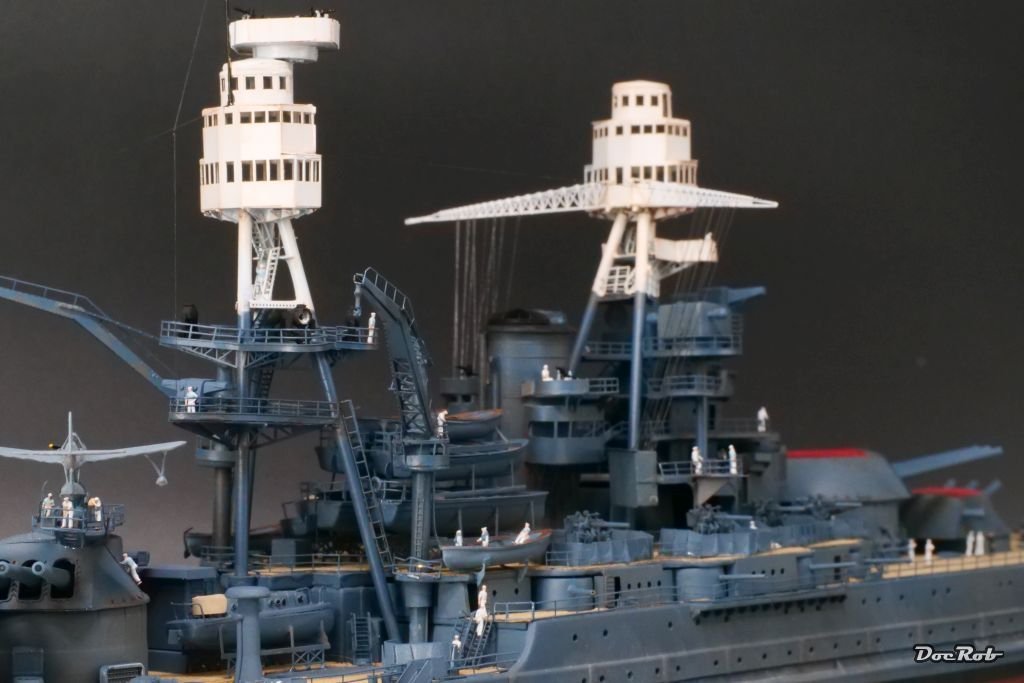
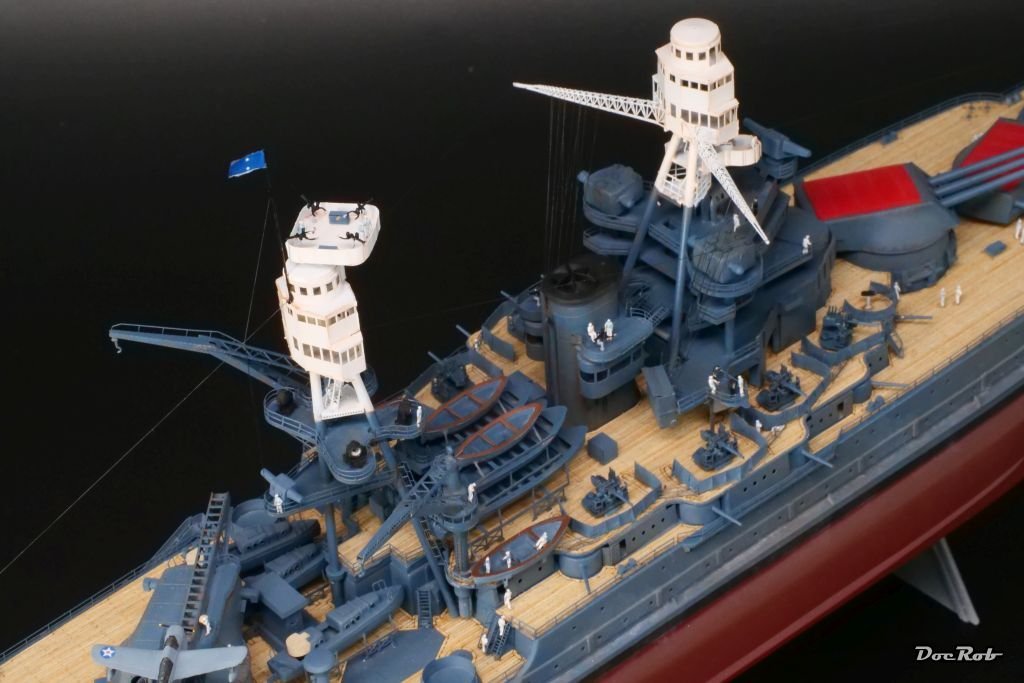
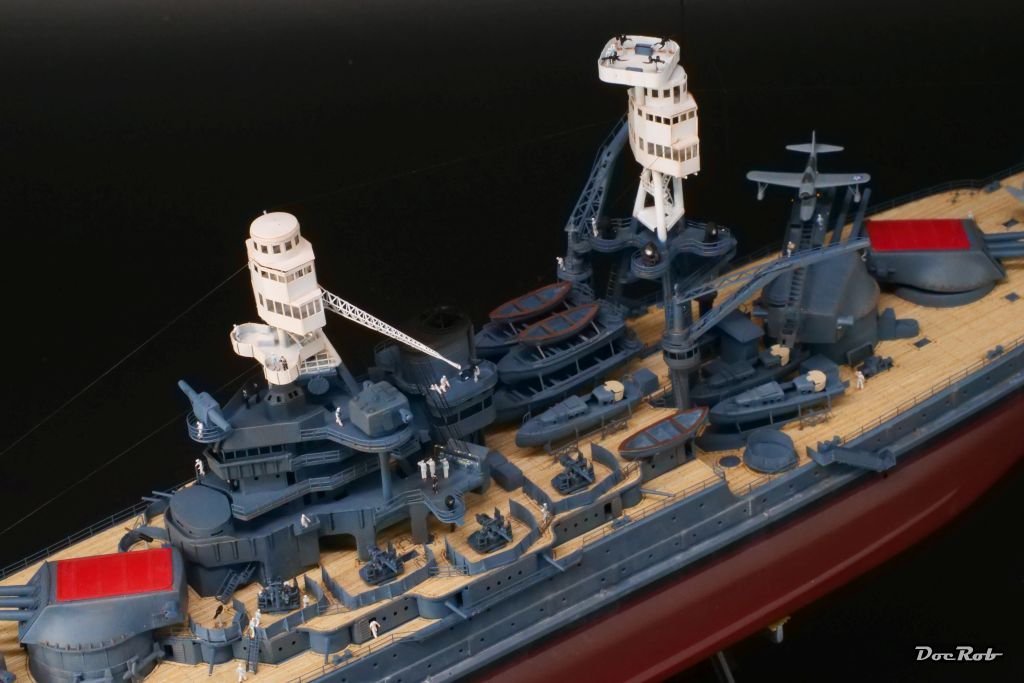
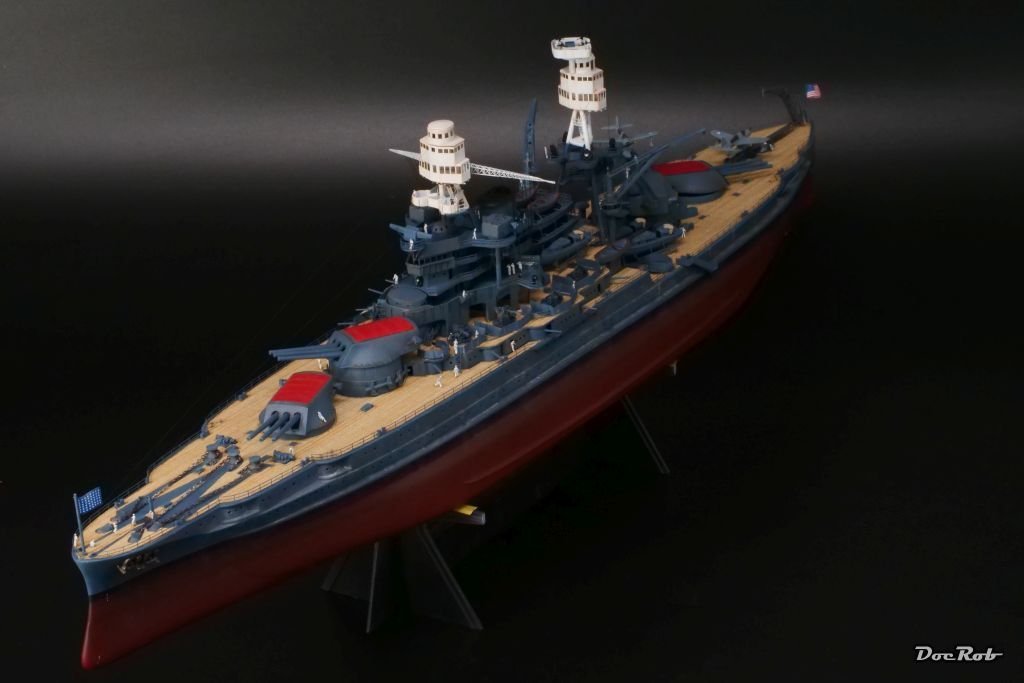
Muchas gracias Gentlemen, all around, it was a pleasurable building experience and I expected more difficulties up front. I have to thank all of you contributing lots of information for this build. I learnt a lot from you as well while building the ship. My first contact with the Arizona project, were actually the Ion Model figures, which inspired me to build the USS Arizona in a manned version. I had lots of fun placing the sailors and bring some life to the ship. It will not be my last venture into plastic ship modelling, but I like to build different subjects, so maybe some time will pass, until I lay keel on another plastic kit. I guess, the next maritime project will be the rigging of my Duchess of Kingston. The Arizona build may have given me the braveness to start with that. Cheers Rob
-
I call the USS Arizona project done. I did a lot of little things over the last days, like a simplified rigging, added flagpoles, painted lots of details, added the anchors, I had forgotten before and took some final pictures. It was a demanding but also satisfying project, where I learned a lot of new stuff, as it was my first small scale ship build. The most important lesson was, not to limit myself with upfront fear of the lots of PE and small detail stuff. Finally, I also learned something new about photographing, focus stacking, which my camera is able to do in house. It means, that a lengthy object, which normally would have out of focus areas can be photographed without these areas. It takes some pictures of different focus points in one file, which later are merged in the camera to generate a completely focused image, cool stuff. Thank you for carrying me along this project with helpful information and encouraging comments. Cheers Rob


.JPG.b2e1c99ef63bde835b1079e3af03d5fc.JPG)
.JPG.a1fa802116912dd3eda3118027cf1405.JPG)
.JPG.1b6ced3423d9a1a0a90babe8396cc602.JPG)
- 115 replies
-
- 14
-

-

-
Honda RC166 Grand Prix Racer by CDW - FINISHED - Tamiya - 1/12
DocRob replied to CDW's topic in Non-ship/categorised builds
I will try the PE variant with my build first. Maybe it's an option to bend the PE-fret sharply with a bending tool along the contact points and flatten it again. This could weak the PE material a bit. Cheers Rob -
Honda RC166 Grand Prix Racer by CDW - FINISHED - Tamiya - 1/12
DocRob replied to CDW's topic in Non-ship/categorised builds
A bit late to take a bit off your chain burden, but yesterday I found this set of 3Dprinted chains for the Honda, made by Falcon Scale Models. Never heard about that company before, but will consider this, if I fail with my PE chain. Falcon Scale Models FSM22: Chain set 1/12 scale - Honda RC166 GP Racer 250cc - for Tamiya references TAM14113 and TAM14127 (ref. FSM22) | SpotModel Cheers Rob -
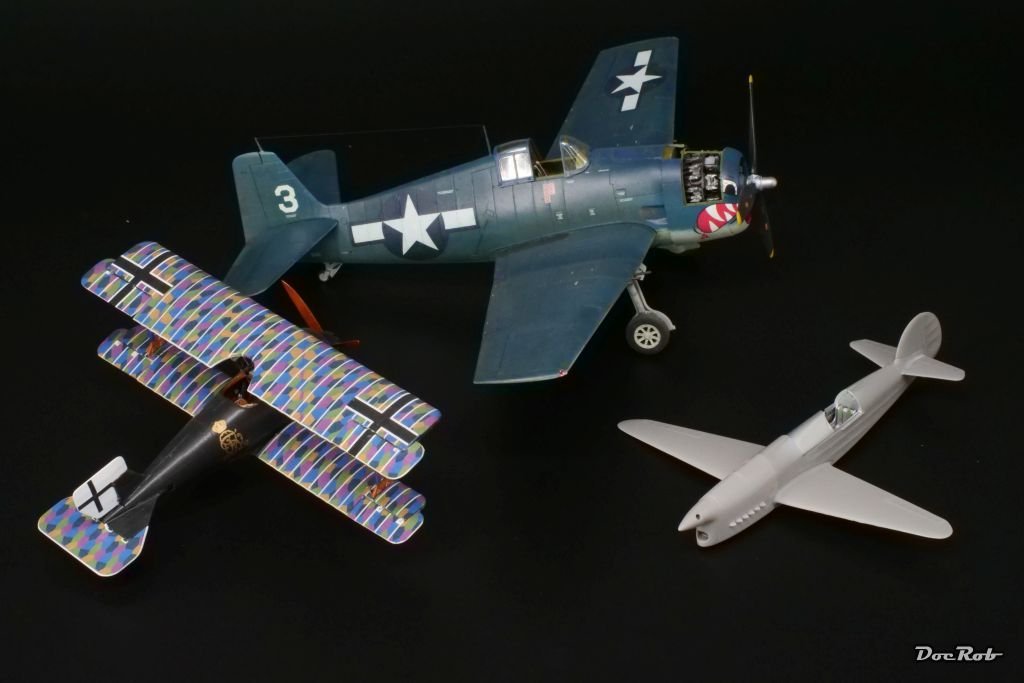
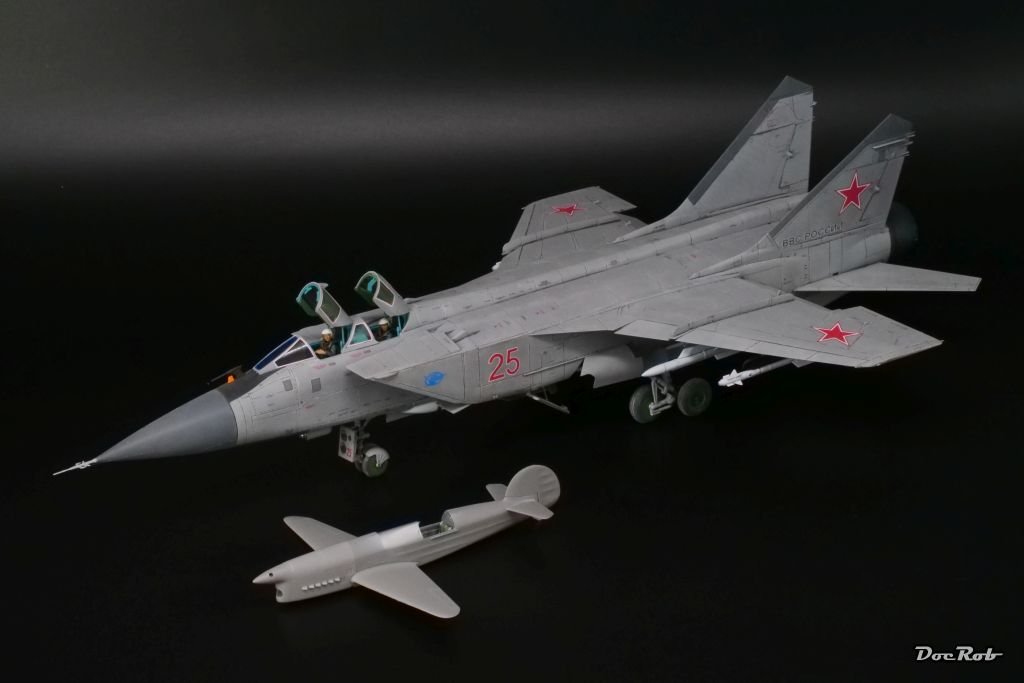
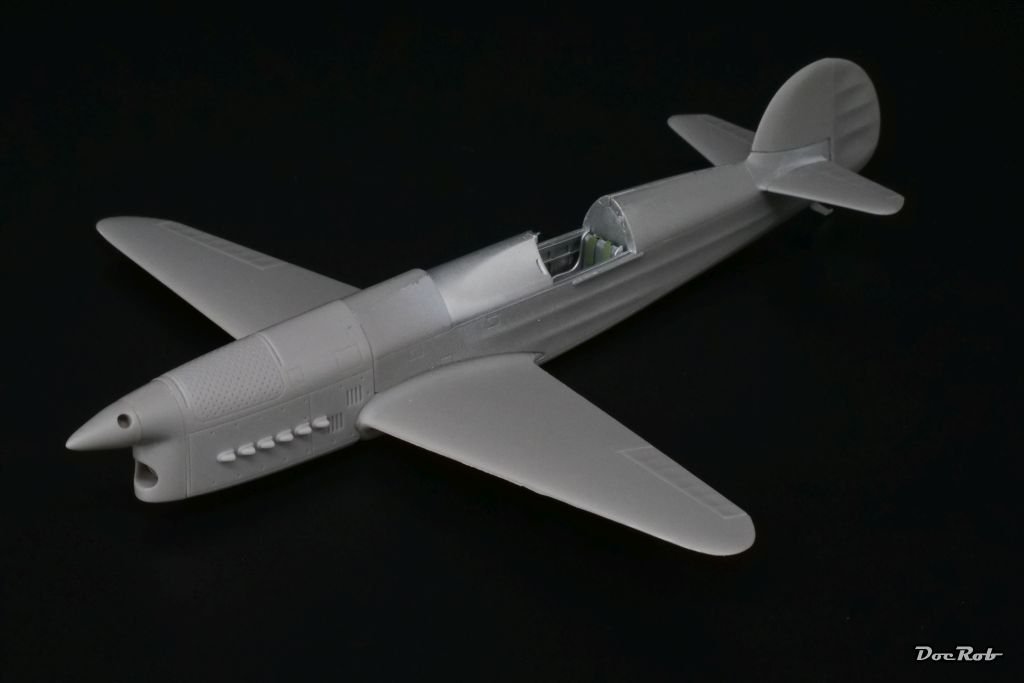
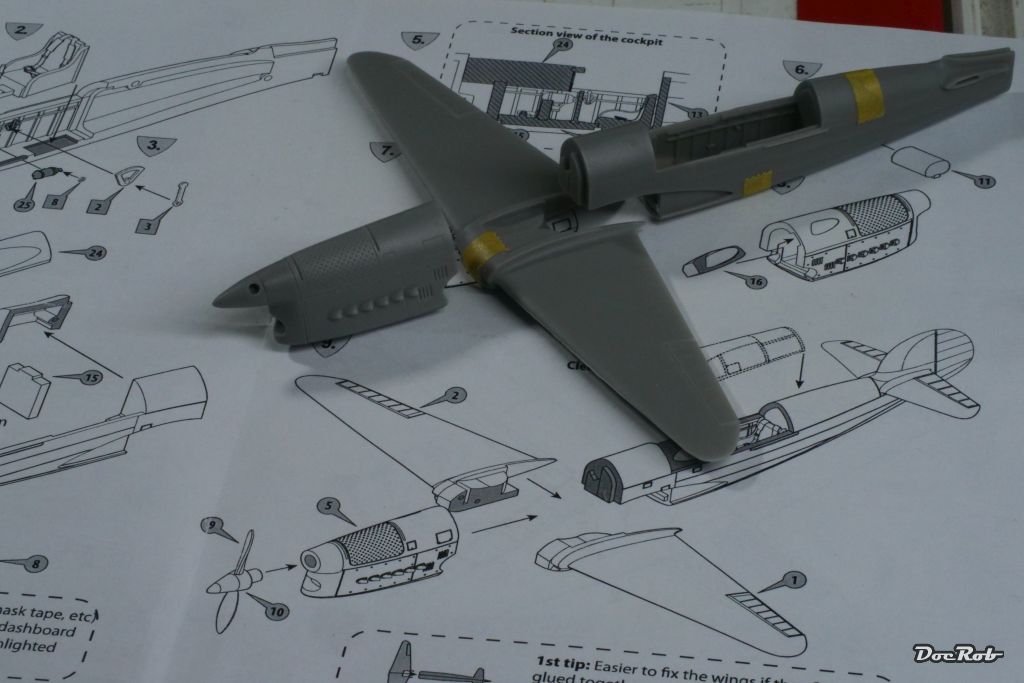
After working on the bottom fuselage seam, I added all the major components to the fuselage. You glue the wings together first, push them into the fuselage and than add the intersecting cowling piece. Smart engineering and the fit is perfect. The tail was glued into place and now I have to wait for the delivery of my hopefully good looking blue color. Because size was an issue in this thread, I wanted to make a short comparison with other 1/48 planes, I built. The mighty MIG is no real match, the Caudron looks like an external tank with wings. The Hellcat is a monster against this tiny racer and even the small WWI Siemens Schuckert D.III has a lot more wingspan, but a shorter fuselage. Cheers Rob
- 62 replies
-
- 14
-
-
Some Caudron racers competed in American pylon races, but the C.561 was designed exclusively to win the third 'Coupe Deutsch de la Meurthe' in 1936, were the rules were the following: In 1931 Suzanne Deutsch de la Meurthe initiated a new competition for the Coupe, which was contested for the first time on 29 May 1933.[12] The trial was to be run in two 1,000km stages separated by a 90 minutes refuelling stop, and was limited to aircraft with an engine capacity of less than eight litres. The starting point of the race was still at the aerodrome at Étampes. Suzanne Deutsch de la Meurthe was offering one million Francs, and the Ministère de l'Air (Air Ministry) offered another three million in prize money.[13] The course was over 100 km (62 miles), from Etampes aerodrome to Chartres Bonce and back. The race itself was in two stages, each of 1,000 km (625 miles). (Wikipedia) I guess with that configuration, there was a lot of straight flying. The only Caudron C.561 was not contending due to technical difficulties in 1936. Cheers Rob
-
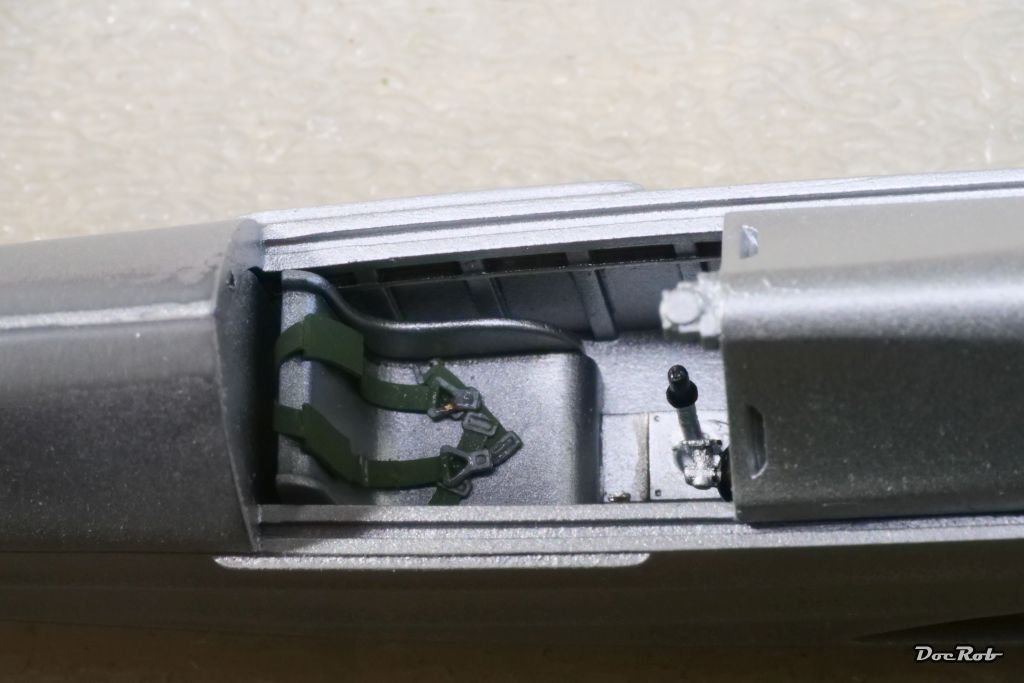
The cockpit is a sparse affair. I added an oxygen bottle, some levers and pedals, but most will stay unseen in the pit. The seat belts are made from PE and are the ones supplied with the kit. I sprayed the interior matte aluminum, as I think, the constructors would have gone for weight reduction at all cost and omit paint. By the way, I glued the fuselage halves together, an easy task, given the overall quality and fit of the resin, which is even equipped with guiding pegs. The seam on the lower fuselage was filled with some black CA, on the upper side, there is virtually no seam. Cheers Rob
- 62 replies
-
- 14
-
-
Honda RC166 Grand Prix Racer by CDW - FINISHED - Tamiya - 1/12
DocRob replied to CDW's topic in Non-ship/categorised builds
These spoked wheels look the part, CDW. Thanks for the warning about the spoke nipple count. I have no carpet in my cave, but don't want to go hunting for these tiny buggers. I may wear an apron, like jewelers do. Cheers Rob -
I guess, lightweight goes for the pilot as well in these racers, CDW. The Caudron is a very small airframe and the cockpit is as well. Cheers Rob
-
Andy and Egilman, many thanks for nearing in on the color question, it seems, like the earlier Caudron models where of a lighter blue color. But the rendition of the French flag and the GSB examples in Egilmans pictures are very close to my eye. I will mix some blue hues soon and test spray them and will decide then. Cheers Rob
-
Thank you LegoKing, if I had only used the plastic of the kit, it would have been looking like a piece of junk as well. The PE and printed parts made all the difference and some patience, of course. Cheers Rob
-
Thank you Yves and Andy. The C.460 seems to have been painted in a lighter blue tone, like the replica you showed, Andy. There are lots of pictures from that airframe and there were three built, with a bit of service time. The C.561 was only built once and it didn't took part in the races, it was built for due to technical difficulties. To my knowledge the C.460 was later also flown in US races. I also own the comic book which indicates some mid blue shade, but the pictures @Egilman has posted indicate a darker hue. I guess it will we difficult to find the correct color, given, many photos were retouched and are also not always accurate. I will make some tests on spare parts and then will decide. Cheers Rob
-
Thank you Egilman, where do you find all these pictures. The color really looks like GSB to me. Unfortunately I don't have such a dark blue in my shelf and it seem, like I have to mix something. Also interesting is the matte finish, which I would have preferred to a high gloss paintjob. Cheers Rob
-
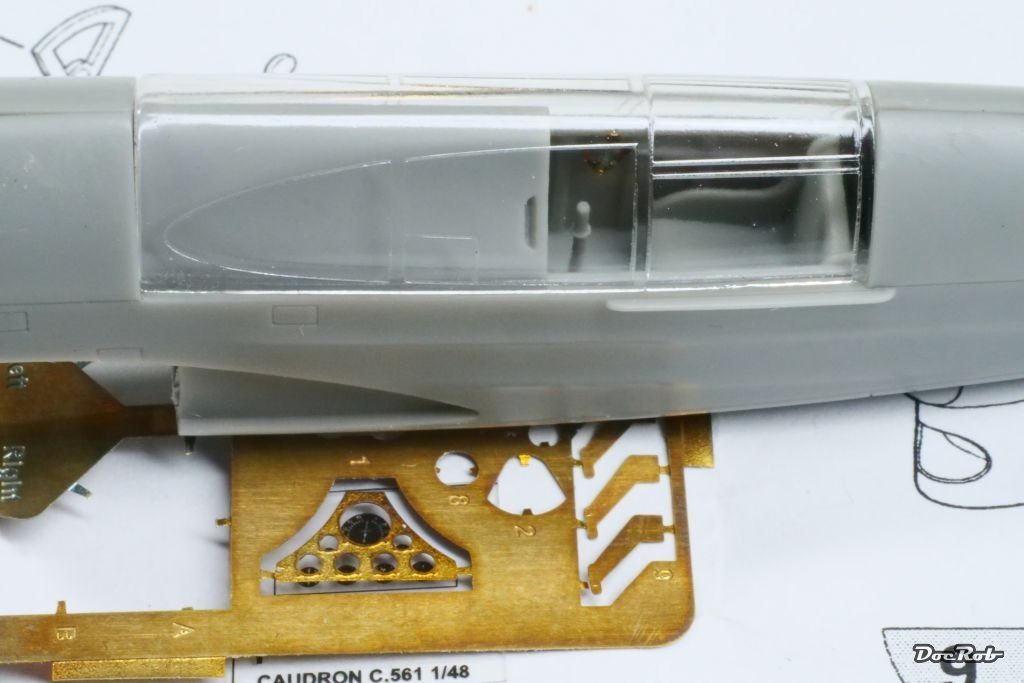
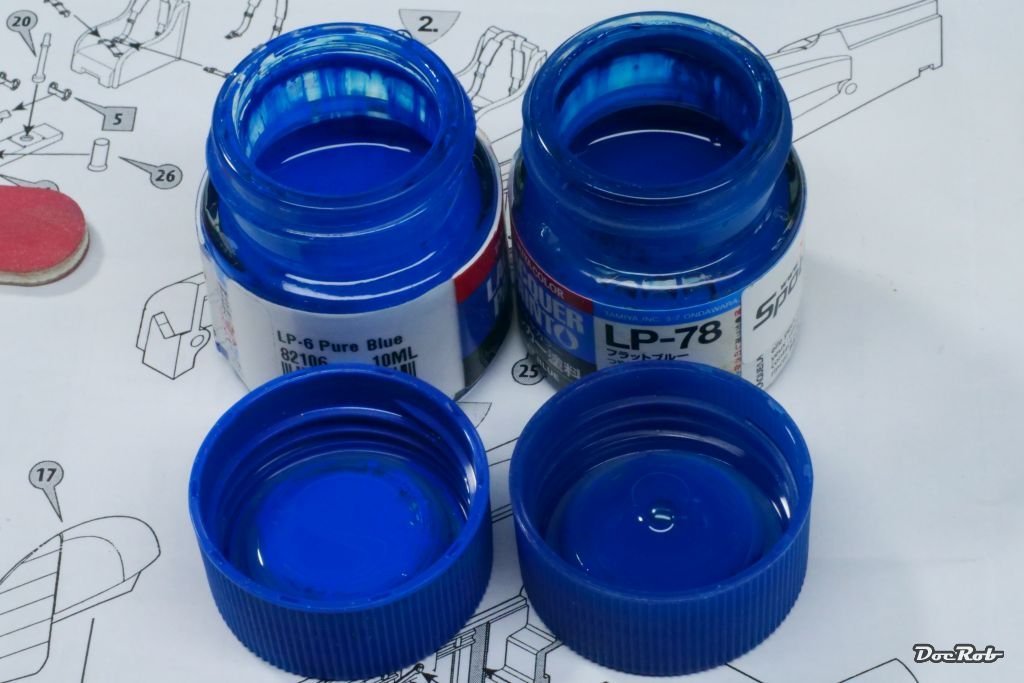
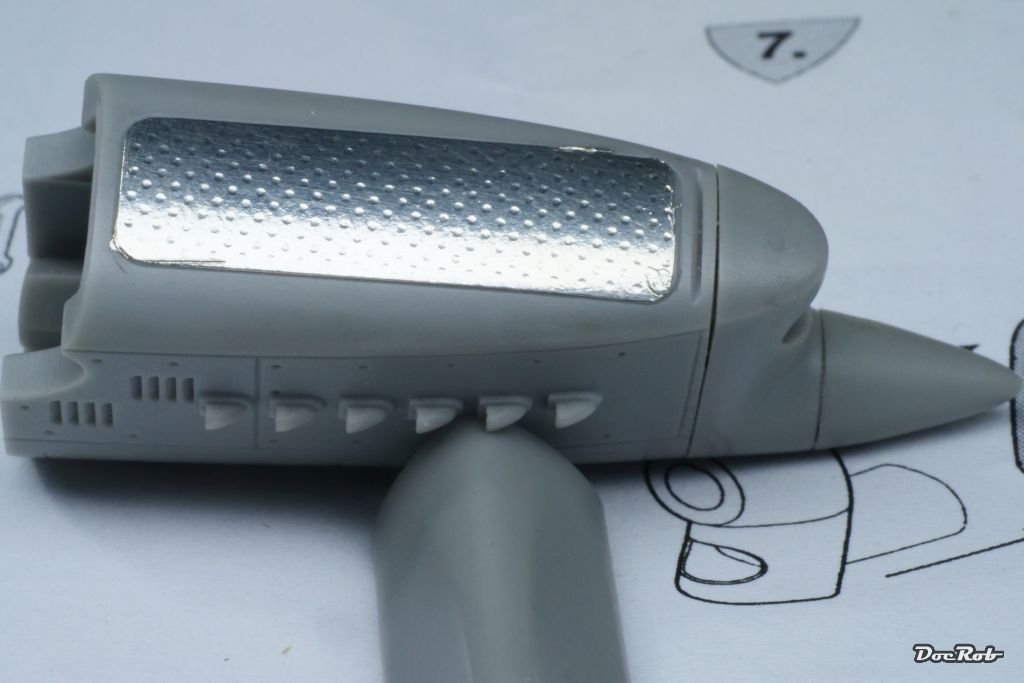
With lots of my projects, I try to emphasize the possible difficult to solve problems, before I'm at the actual stage of the build. Having the how-to's in my head, helps to keep a clear sight. I considered masking the polished aluminum covers, after spraying them with chrome or polished aluminum following a gloss lack primer. Then I remembered, I once bought a sheet of Bare Metal foil and tried it onto one engine cover. It's not perfect in the pic, but I hope, I can do better after the blue color has been sprayed on. For now it's peeled off again. Speaking of blue, I almost decided to use the left one, Tamiya LP-6 gloss Pure Blue, but will try the darker LP-78 Flat Blue also on a piece of scrap. Lastly, I detailed the cockpit with some tiny PE parts and added the futurized canopy, to see , which insights could be expected. The canopy holds only through friction and I think, I will leave it off for painting, because I had some slight fogging issues with polystyrol canopies and lacquer paints, lately. Cheers Rob
- 62 replies
-
- 10
-
-
Thanks a lot for the pics and opinion Egilman. The second picture, I've never seen before, great find, as it's far more conclusive than the well known first one. It shows not only, that dull aluminum or light grey would be the right choice, but also, how the canopy opens. The different coloring? / reflection? of the engine top cowling is also remarkable. I've not seen this before either. Cheers Rob
-
The fuselage color seems to be discussed relatively often for such a rarely build plane. It varies from Bugatti blue to dark blue and I will stay on the darker end of this discussion. Even more difficult is to determine the interior color. My best guess is natural aluminum, to reduce weight, but light grey would be an option too. Does anybody have an opinion or even facts about this? Cheers Rob
-
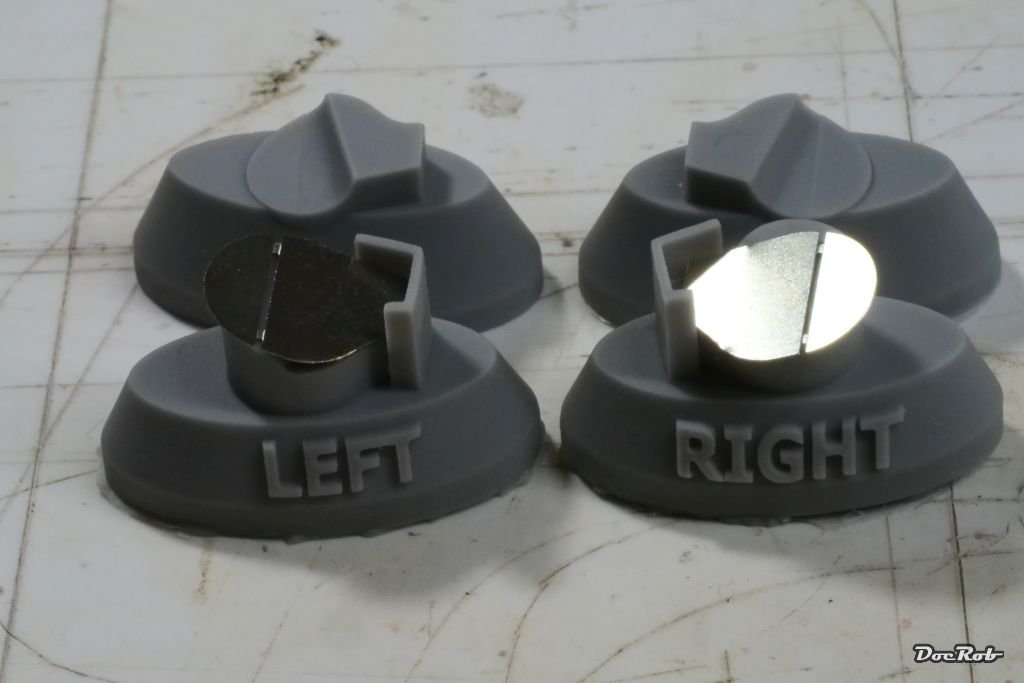
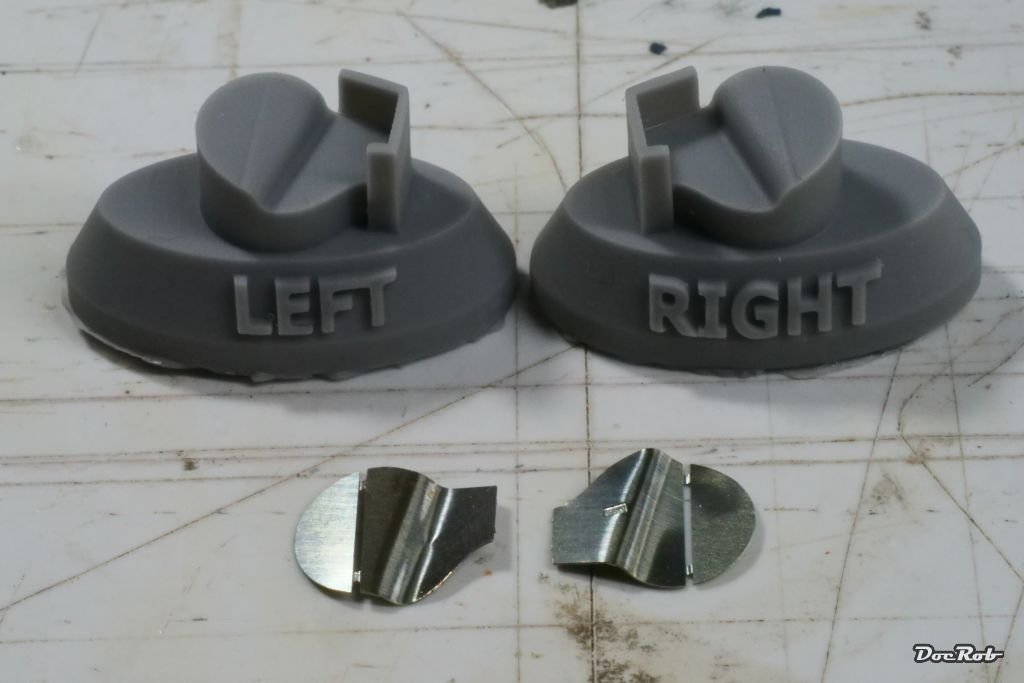
Thank you Gentlemen, Not with racer's pace, but with little steps the Caudron build continued. After some fine tuning for the fitting of the main components, I wanted to try, if the punch press method for the wheel covers works. I annealed the PE parts, until they changed to a bluish tint and then punched. ...and it worked. I may have gotten the PE-brass a bit softer with more heat, but due to the two narrow connection point wouldn't risk it. Here is an example for the clever design of the kit, all main component key into each other, do you hear that Zoukei Moura ? Finally, I cleaned all the resin parts thoroughly in soap water, Future dipped the canopy for enhanced clarity and started with the interior assembly. The front section was assembled and here again, the ingenuity shows, because the air intake in front and one on the cowling have an insert, which is cast to exact measure, to be used as a guiding element. Cheers Rob
- 62 replies
-
- 10
-
-
Honda RC166 Grand Prix Racer by CDW - FINISHED - Tamiya - 1/12
DocRob replied to CDW's topic in Non-ship/categorised builds
Me neither, I have the same kit and extras and it itched me sometimes to start the Honda. I will follow your build and take place on the sparse (non existent in fact) back seat. Cheers Rob -
Welcome on board Ken and Egilman, it's a bit crammed in that whacky little racer's cockpit, but I will see what I can do, to make it a pleasant ride for you . Cheers Rob
-
Thank you Egilman, once for the praise and second for the background info on the paintjobs of the USS Arizona. I knew, the blue-grey paint was applied shortly before the attack, but wanted to learn a bit about weathering in this kind of scales. I'm not after a 100% accuracy and take my liberties with my builds, which I often start, because I have a fascination for the subject and because I want to learn something new, modeling wise. I live a bit isolated with no modeling community around (except MSW and LSM), so I build only for my own pleasure and not for competition, it's more about challenging myself. Like you, I like the USS Arizona a lot and when I saw the Eduard boxing, I was sold. If my build struck a chord with you, I'm pleased and look forward to your rendition. Cheers Rob

