


Jaager
-
Posts
3,084 -
Joined
-
Last visited
Content Type
Profiles
Forums
Gallery
Events
Everything posted by Jaager
-
 You do not provide your location here on Terra, but the straight narrow trunk looks like a small Hard Maple I lost to a tornado - one of the bunch that destroyed Xenia, OH. My local Hardwood supplier has kiln dried Hard Maple. There is also Soft Maple - which I despise - I prefer Yellow Poplar for stock where a low density hardwood does the job. Seasoning and processing logs into usable lumber is a lot of work, ages expensive tools, and takes up time and space. I see it as prudent to only expend that effort on wood species that are either unavailable any other way, or very expensive. And expensive is a toss up. Hard Maple and Black Cherry are both available here in the eastern US and are less than $10 /BF. I have and use a lot of both, but processing either from a log would cost me way more than $10 - all factors included. No, but my present situation - age, hernia, physical location (as far from rural as it gets in Virginia and actually on The Bay) places me out of the running any more. The Bradford Pear was street trash on Pretty Lake Blvd. after the last hurricane. I had to tie a rope around the big log and drag it up the street to my condo behind my "Z". It was both too heavy to lift and I am lucky that the Z has enough room for food resupply. No way that log would fit. I tried to buy an Alaskan Mill or something like it - from Silvo Hardware. I waited and waited, then one day I got a letter stating than I was a party in a bankruptcy proceeding. I have a 16" Shindaiwa buried in the back of a closet - everything rubber is probably oxidized to brittle by now - and back when I was getting all this, there was a type of chain available that was pretty aggressive - if I had gotten the mill, I probably would have bought it - but then it must have set some regulator hair on fire, because it disappeared from the market.
 -
Vertical Scarf Joints on Keels
Jaager replied to tmj's topic in Building, Framing, Planking and plating a ships hull and deck
I have it in mind that the English keel scarphs would be a vertical line seen from the side and a elongated "Z" seen from the top. The French method was 90 degrees different - a horizontal line seen from the top and the elongated "Z" seen from the side. To me, that means that the scarph on an English can be faked with a simple butt joint - the false keel would hide the "Z". If I have it correct, then the rectangle with the "X" indicates two things: where the scarph is and how long it is. I guess that North American practice could be either one - I see heavy Frog influence here as well as English. My bet is that which ever method was more efficient and less labor intensive was preferred at each step. -
I have a bit of it. Some is on the floor of my garage - dry and waiting to be processed into billets. It is excellent for our use. I love it. Not near as much as Apple, but it is wonder stuff. Differences from Pyrus communis is that it is more brown than pink and it has a waxed sheen to it. There is some difference in the color of Spring and Summer wood and each can be fairly wide - the tree is fairly fast growing. I used an electric chain saw (el cheepo HF) to bisect the largest - to speed seasoning and remove the pith. There was significant loss to kerf and a freehand chainsaw rip cut is dangerous. An Alaska mill is both safer and produces more precise planks. A log is difficult to place so that it does not move and the end of the bar does not have the teeth digging up soil. The electric has lower power so the kickback force is easier to resist. Beyond a certain thickness, a completely round log can be a real challenge to resaw on a bandsaw. About the best that a tablesaw can do is 2" and a rolling log is a nightmare to rip cut. I used left over enamel paint to make thick coats on the cut ends - too much checking if you do not seal the ends. It dries faster if it is debarked and it removes carpenter ants and wood boring larvae eggs. Seasoning is usually one year per inch of thickness. For a lot of tree species, the branches are at ~ 90 degrees. This offers the possibility of getting compass timber. Unfortunately - Bradford Pear branches - splits into two equal forks mostly at a sharp "Y" . This does not make for much useful compass timber. For the tree itself, it means that the tree tends split like pealing a banana when exposed to high winds and the tree is old enough that there is a significant diameter ( weight).
-
Isopropyl alcohol - the 91% first aid stuff - will debond PVA and alcohol does not swell the wood and dries fairly quickly. PVA is not sensitive to acetone, but the hated CA is. Duco nitrocellulose is. Hide glue is completely denatured by hot ethanol. I use Titebond II (a yellow PVA) - with is water resistant - because we live on a water planet. Titebond III ( an amber PVA) is waterproof. A flat board wider and longer than the dory. Draw a center line the length of the board, A block of wood about 1/4" thick - cut one end at the same angle as the slope of the transom. A couple of holes - counter sunk under the base board and drilled thru the block can be used for threaded bolts to hold the transom support block - If the holes are a tad larger in diameter than the bolts, there will be some play to allow adjustment to square before the washered wingnuts tighten it to the baseboard. Fix it to the base at one end. The slope and flat edge of the block will support the transom at the angle cut and if mounted correctly square to the midline. A similar block can be cut to match the stem and fix it square. I would use Dritz 3009 1 3/4" quilting pins - at #70 hole is tight enough, but does not freeze the pin. A bamboo trunnel can fill the holes or a brass pin - do not leave the steel pins in the model - they will rust, Outboard blocks can be placed outside the dory body at each rib location . if placed square a wood strip connecting them will hold each rib perpendicular and vertical. Once all that is setup and bonded the fore and aft blocks can be removed and the side blocks used to secure the inverted hull. Use a curling iron - a rheostat may control the heat - to bend the planking - only heat is needed - water just swells the wood and it does not return the wood to its greenwood state - Prebending allows for an easier glue bond - no resisting forces. With a jig this involved, you can go into the mass produced dory model business. If you know the dimensions of any future models, the baseboard can be cut large enough for their use.
-
No, I have not. I bought a large green and a large blue single tile from Home Depot in the late 90's for the heck of it. I do not remember to price being all that prohibitive. It is just another armchair thought experiment.
-
I have been imagining using sea green or blue marble tile as a base. It does increase the weight significantly, but it sure ain't going to tip over very easily. It would be a chance to use the diamond hole boring bits from American Surplus. A dark Rosewood dye on the frame?
-
That sort of puzzle is one of the brain activating parts of all of this. Think about it when trying to go to sleep - you may wake up with an answer. Take a step back and imagine the sort of structure needed to hold the parts in place. Sometimes, this support structure is as much as 90% of the whole. Construct jigs with screws and ways that can be taken apart - so that the parts can go into a scrap box to be reused for a later project.
-
From your picture, it looks like the plans have full size patterns for every component. It may require use of a steam iron first, but you could scan the patterns, adjust for the built in scanner aberration, and print them out for a redo. Using something better than Lime gives a bit joy to work with - but I advise avoiding any roll cut veneer.
-
Contact Glue
Jaager replied to RolBerg's topic in Building, Framing, Planking and plating a ships hull and deck
I tried about every organic solvent available to civilians. Several will denature it. Nothing will wash it off. I searched the MDF for the solvent in the can. It seems to be a mixture that you really don't want to know is in it and still be willing to be in the room with. I seem to remember that rubber is one of those polymers that has no practical solvent. I remember an old saw about a way to get rich was to find a solvent for Cellophane% - perhaps rubber and synthetic rubber are the same? Some chains are probably just too long. % I was born and raised in Richmond where and when the manufacture and sale of packs of lung cancer and COPD was a major industry. So too was the manufacture of tetraethyl lead. -
Contact Glue
Jaager replied to RolBerg's topic in Building, Framing, Planking and plating a ships hull and deck
DAP Weldwood is very thick and amber. Applied from a tube, I think that the bore of the tip would need to be fairly large and would need strong thumb muscles to extrude it. I use it to hold sandpaper to a Maple sanding drum. Mineral spirits will cause it to roll into balls, but I have found no actual solvent to remove it. So, replacing the sandpaper is a major project. Clear and gel sounds like nitrocellulose in acetone - reasonable prise hold strength, but like CA, leaves a bit to be desired holding against a sheer force. -
Contact Glue
Jaager replied to RolBerg's topic in Building, Framing, Planking and plating a ships hull and deck
If it is similar to DAP Weldwood contact cement it is a synthetic rubber. It is for adhering plastic laminate to a base. The layer is thick - too thick for scale - and it is prone to oxidizing after a decade or two = brittle and a release of the bond. "You don't want it." -
The Wood Database translated to relevant the wood is hard it is essentially interchanged with Hickory - which means that it is open pore. The grain and pores do not scale well. Sealed and painted or hidden, it should do as well as Hickory, Ash, Oak, Walnut. It is apparently tricky to mill - tearout or burn if tool edges are not really sharp. If it were Apple or other fruitwood you would want to kill for it. Nutwood is better for 1:1 scale projects. If you seal the ends well, debark, protect from rain, give it good airflow, when seasoned -1 year per inch - you will have a good utility wood - jigs - inside the hull parts. I can get other nutwood - Oak, Walnut, Ash - already seasoned and in rectangular form from Yukon Lumber right now. It is not trash, (anything in the Cottonwood family is trash), but for a one off, learning to mill, not going to expand to other really desirable and otherwise unobtainable species, the specific reward from this log will be relatively low. I would probably process it and try to make something unique from a small fraction of it as a gift to the neighbor. Now, if you have neighbors with Apple trees, Plum, Crab Apple, Japanese Plum (Loquat), Hawtorn, Dogwood, possibly Peach if you can beat the fungus, and given the prices Holly - for us less than snow white and even Blue Mold infected Holly is right at the top of desirable - -- bribe them - be a wood vampire.
-
Way back when, I bought a Unimat SL. Primarily because it was as close as I could come to getting something like Longridge's Midget Universal machine. It was for the woodworking aspect rather than the lathe. At the time, there were essentially no stand alone model scale machines. I burned out a motor using the Unimat as a tablesaw. (I also bought an Emco Maier BS3 - a large benchtop 3 wheel bandsaw. - It was a well made machine, but any 3 wheel bandsaw is based on an absolutely terrible design. A perfect machine would still be awful to use.) The Unimat was pretty good at being a small under powered tablesaw, drill press, saber saw, disk sander, etc At the time, there was little or no competition. NOW, The Byrnes saw is at least 10 times more capable at its function. There are a variety of mills and drill press machines. A Rikon 10" bandsaw is a better jig/saber type scroll sawing machine. I would not advise using it for heavy duty resawing though. Byrnes has two models of disk sanders that are much better at that job. There are more capable small lathes. The Unimat was great for its time. Now, it has been supplanted. It had inspired competition from stand alone single purpose machines that were better at doing their portion of each of its functions. As for a lathe and spar shaping - a major negative is that the actual spars were shaped by cutting along the grain. A lathe cuts across the grain.
-
Great Photo Etched Saw Blades
Jaager replied to kurtvd19's topic in NAUTICAL RESEARCH GUILD - News & Information
Sprue Brothers has been a source: https://spruebrothers.com/tools-supplies/tools-cutting/?page=1&mode=6 -
The Ibex Luthier planes are carving planes. The blades are convex. Specifically for a bevel, would not a flat plane level the desired surface? Now, for a hull, one of these looks like it has excellent potential.
-
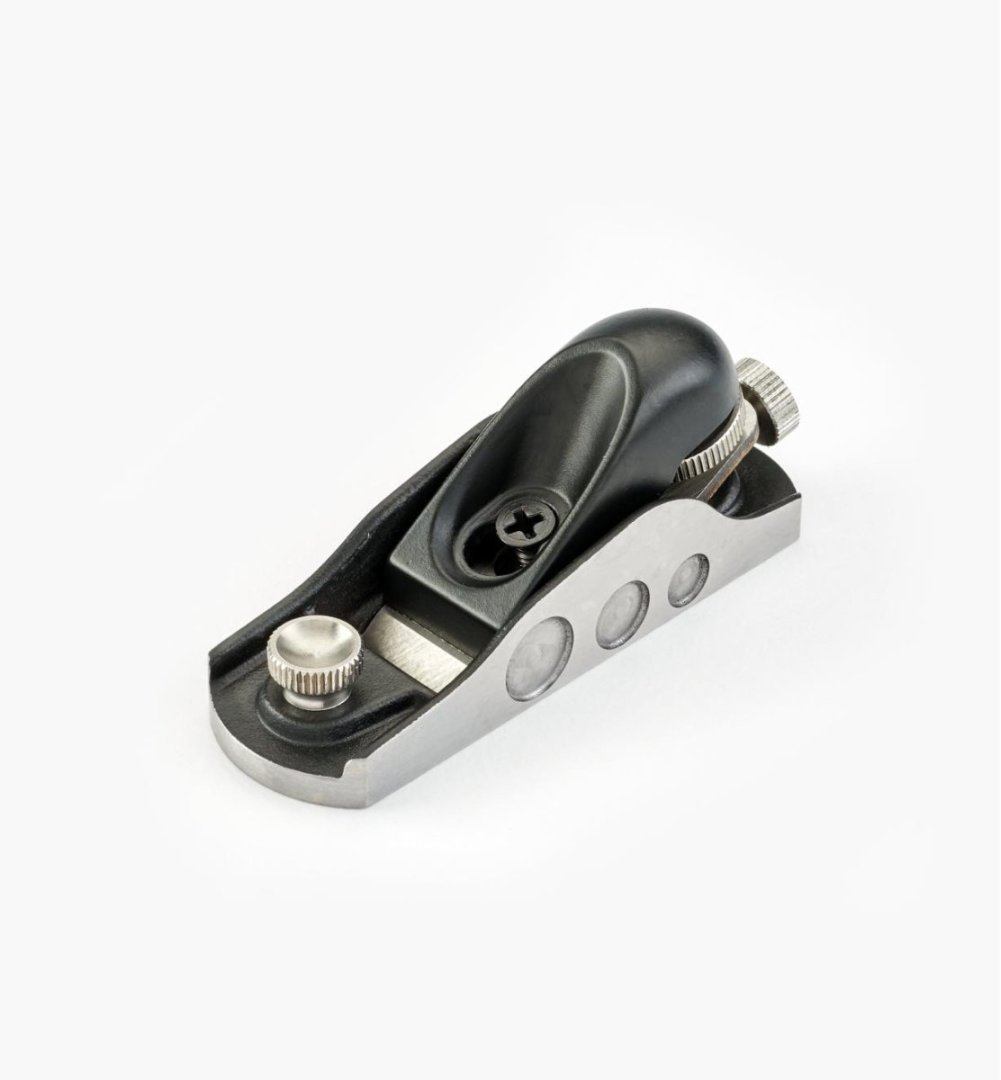
I have the thought that with practice a high quality miniature block plane would produce a smooth and accurate bevel:
-
Experience with plastic is probably more of a negative than a help for a wooden kit. The painting is a help, but for wooden sail vessels, painting a minor part. The main negative is your expectation about what the instructions provide. For a wooden hull, especially the parts that you need specialized skills to master, most of it is common to most any vessel - especially with POB. It is boring and redundant to redo the same for every kit. The trap for a wooden kit is trying to start by building a vessel that is large enough to have a famous name. The complexity can overwhelm. The skill to build a boat is one that every larger vessel will have you doing. They all have boats. You may not need to do step two or step three in the Shipwright series. You will know when you finish the first one. I can't help you with POB. I was so repulsed by the first generation Italian kits that I walled them off. Even with the now third generation POB kits - even the ones with enough molds and laser prepped stock, I can't get past how ugly and distant from a real hull the support skeleton is.
-
Mamoli Metal Fittings Oxidation
Jaager replied to mrcc's topic in Metal Work, Soldering and Metal Fittings
When viewed from a wider focus, this can be understood as being a message and a warning. Parts that degrade in the box are really telling you that they are inappropriate to use - period. Use them as templates. Replicate them using materials that will last over time. -
Size bears no relation to quality
Jaager replied to Toolmaker's topic in Modeling tools and Workshop Equipment
An additional step, and if done after every few cuts, can really delay a need to revisit the water stones is to strop on a medium like scrap leather charged with gold, green, or rouge compound. -
You should probably give yourself a fair chance with your first venture into wooden kits. Right now, your best bet is to take a close look at Model Shipways Shipwright beginner series. There is an option to get some basic tools with the first one - if you do not already have the ones in the bundle. If you have unlimited funds and wish to accumulate tools just to have tools, go on a buying spree - most will probably just gather dust. Otherwise, when you get to a point where a tool looks like it could increase speed or efficiency just get that - opt for quality in your choice. If you also start your #2 plastic kit, you can work on it while waiting for UPS. About a Dremel - The all in one models rotate too fast for shaping - it wants to skip to where you don't want it -and have no power if you slow it down enough not to burn wood. 30,000 RPM is just too fast for #61-80 drill bits.
-
I am thinking that one of these is very much unlike any of the others. The Swift - I am guessing - is a second generation POB kit. As such, it is light years better than the early Italian POB kits with not enough moulds to shape a hull, but it will still involve a serious degree degree of scratch fabrication. The instructions will probably have been written with the expectation that you have previous POB experience or have a couple of the general how-to books available at the time the kit was introduced. The airwaves here and in the NRJ say that current kits involve much less scratch building - not that this is a particularly good thing as far as gaining the necessary skills and confidence to progress beyond the need for a kit. With an eye towards you completing your tasks, in your time interval, give a thought to saving Swift until all of the others are completed and before beginning , take a detour to something like the Shipwright series from Model Shipways. Wood is an entirely different critter and an old "you just should already know what to do" sort of kit can be quicksand or a ghost coast of wrecked ambitions.
-
It has been t least a decade since I messed with it, but a 3D graphics render of a wood texture. A flat rectangle would have a perfect map - no distortion from wrapping around a tube or sphere. There should be excellent free textures or take your own photo of wood. Print out the render - glue it to veneer or card stock - touch up with paint. This as an alternative if you do not think that you can do your own de novo wood texture just using artists oil pigments.
-
Airbrush Paint
Jaager replied to CLovehitch's topic in Painting, finishing and weathering products and techniques
I am not worried about matching an outside chip. I am saying that once I have a mixture of pigments that I like, but have not prepared enough, it would be difficult to get an exact replication. I have found that even the eee tincyest bit of black can have a profound effect on the final color. I like pure colors, but I think that scale effect tends to grey pigments. It would probably be wiser to use a slight grey instead of going directly to black to dull. the effect is like this: On an lark - once in the lab, I setup a two burette - dilute HCL - dilute NaOH - large beaker of pure water and a pH meter probe - to see if I could titrate to a desired pH. It was essentially impossible without doing it in a buffered solution - pure acid vs pure base had the pH meter dial mimicking a windshield wiper on high. Doing that was a lesion that just reading could never impart as profoundly. -
Size of a printer needed
Jaager replied to Frank Burroughs's topic in Modeling tools and Workshop Equipment
My old Brother 3 in 1 died in May. Actually - the print heads became unreliable and needed frequent cleaning - the gotcha - planned obsolescence -was that the box with the sponge that collects the ink when cleaned became full and it required a visit to an authorized repair shop to replace - something probably more expensive than a new printer. The Brother was just barely adequate and ran thru ink carts without restraint. I replaced it with an Epson Eco-tank - one step up from basic - I use 8.5x14 because I can get more patterns per sheet. Boy howdy is it better than my old printer. Not having to replace the ink carts every couple of hulls is really good. My criticism is that the black tank should be a higher volume than the three color. The refill black does come separate, but still. I have not had to do a refill, but am fast coming up on it. Black at 25%, yellow at 40% , M and C at 50%. I probably would have used 10 replacement units on my Brother by now and the cost difference is close to a magnitude even with Epson brand vs generic for the Brother. No idea on longevity - but I can load 80 pages in the Epson print queue while the Brother would spit pages if I did more than 10. The Epson quiet mode IS quiet - slower - but quiet. -
Airbrush Paint
Jaager replied to CLovehitch's topic in Painting, finishing and weathering products and techniques
The only difficulty that I see with using artist's oils is if the final color used is a custom mix. If not enough was prepared with the first go, I foresee a superhuman effort plus luck required to get an exact match with a second go for spot repairs. It may be that I have only seen selected examples, but compared to organic solvent based pigments and binders, the water based acrylics look - flat - chalky - pastel-like and without the depth of enamels.

