


chris watton
-
Posts
2,334 -
Joined
-
Last visited
Content Type
Profiles
Forums
Gallery
Events
Everything posted by chris watton
-
 Slow going this week, a full time job really is a hindrance! This week, I finalised the open and closed heart blocks and have now laser cut a few sets of each and are now available to buy: https://vanguardmodels.co.uk/product-category/fittings They range in size from 6-11mm, 6 sizes for each open and closed heart block and all cut in 1mm pear wood, 4 blocks per set. After I did those, I carried on honing the designs for the little beginners kit, and have now started to build and take pics of the prototype model. Am hoping to get this finished pretty quickly but, again, my day job is still a huge barrier to progress.. ETA - Forget to add, the new Speedy and Alert are now fully updated and all options to buy with the kits available. All new kit laser cutting is now done in-house.
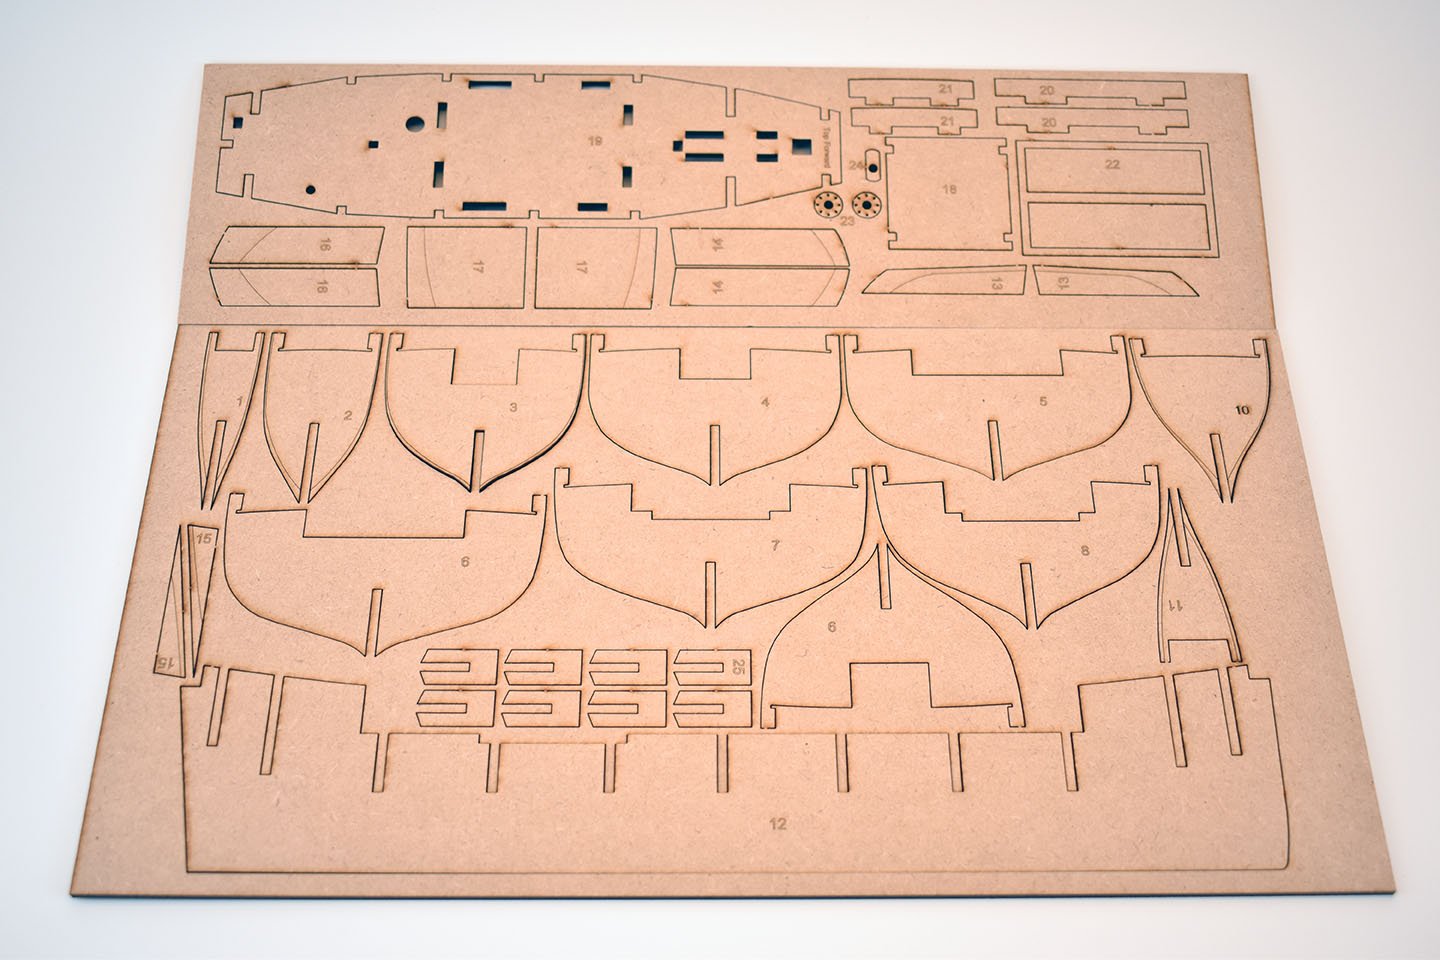
-
@Dubz, I will see what I can do over the weekend (Monday-Thursday I work full time, so no time to set up a new job on machine until then). Plus, I just realised, I am awaiting delivery of more 3mm pear sheet, as I have used it all. DelF - Thank you! I have learned a lot over the past year, and have now built up a good group of people and suppliers. Plus I will try and constantly improve what is already released. Alert being a good example, and I have now started to laser engrave part numbers on the main structural laser sheets. If anyone is interested, my wife tells me we have enough parts for one more Master Shipwright kit, so if anyone would like this, please contact me, as it will not be going on the website to buy.
-
I will start a new thread soon anyway, as this one's getting quite long. How many and what size/outer/inner diameter and wood thickness, I an guessing 2mm?
-
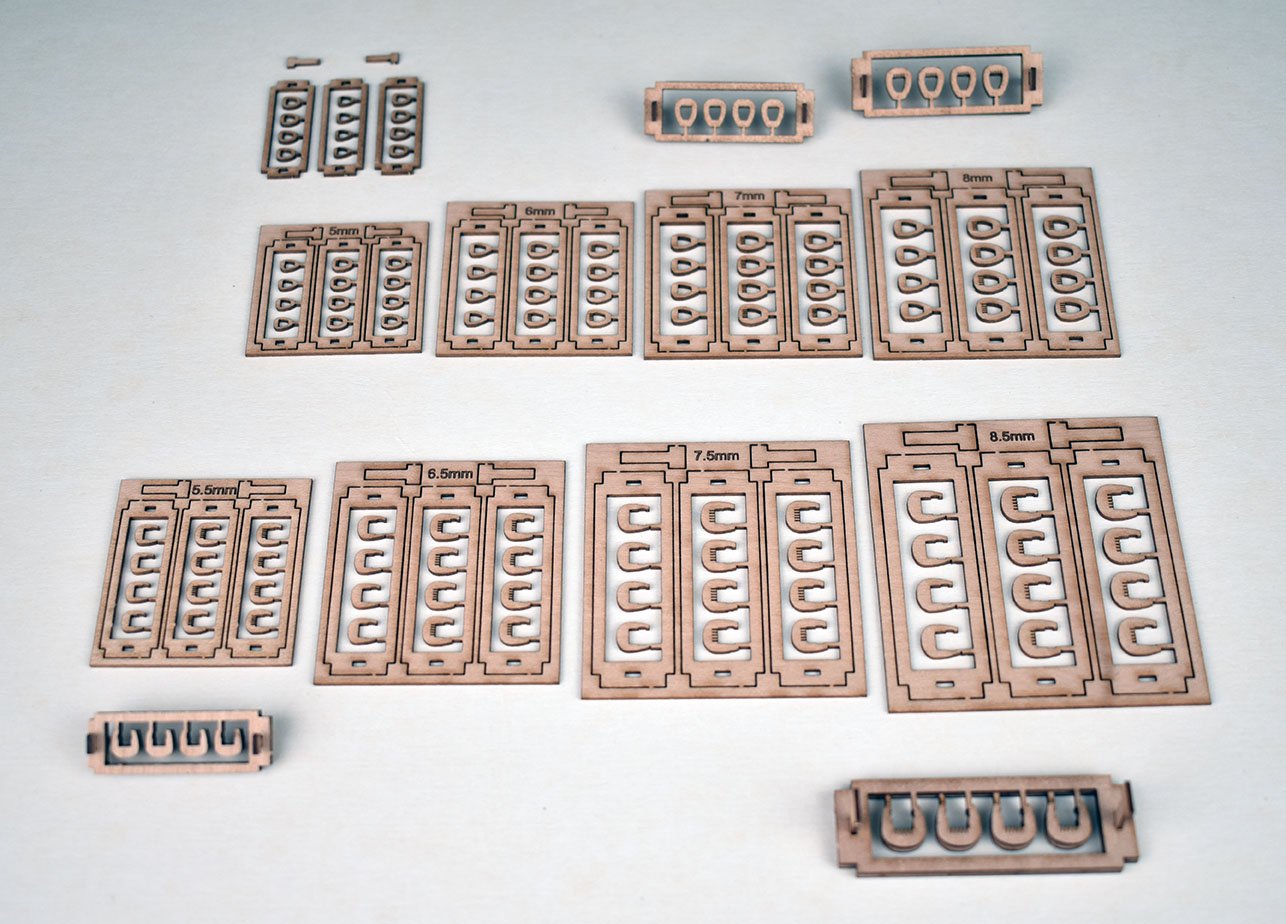
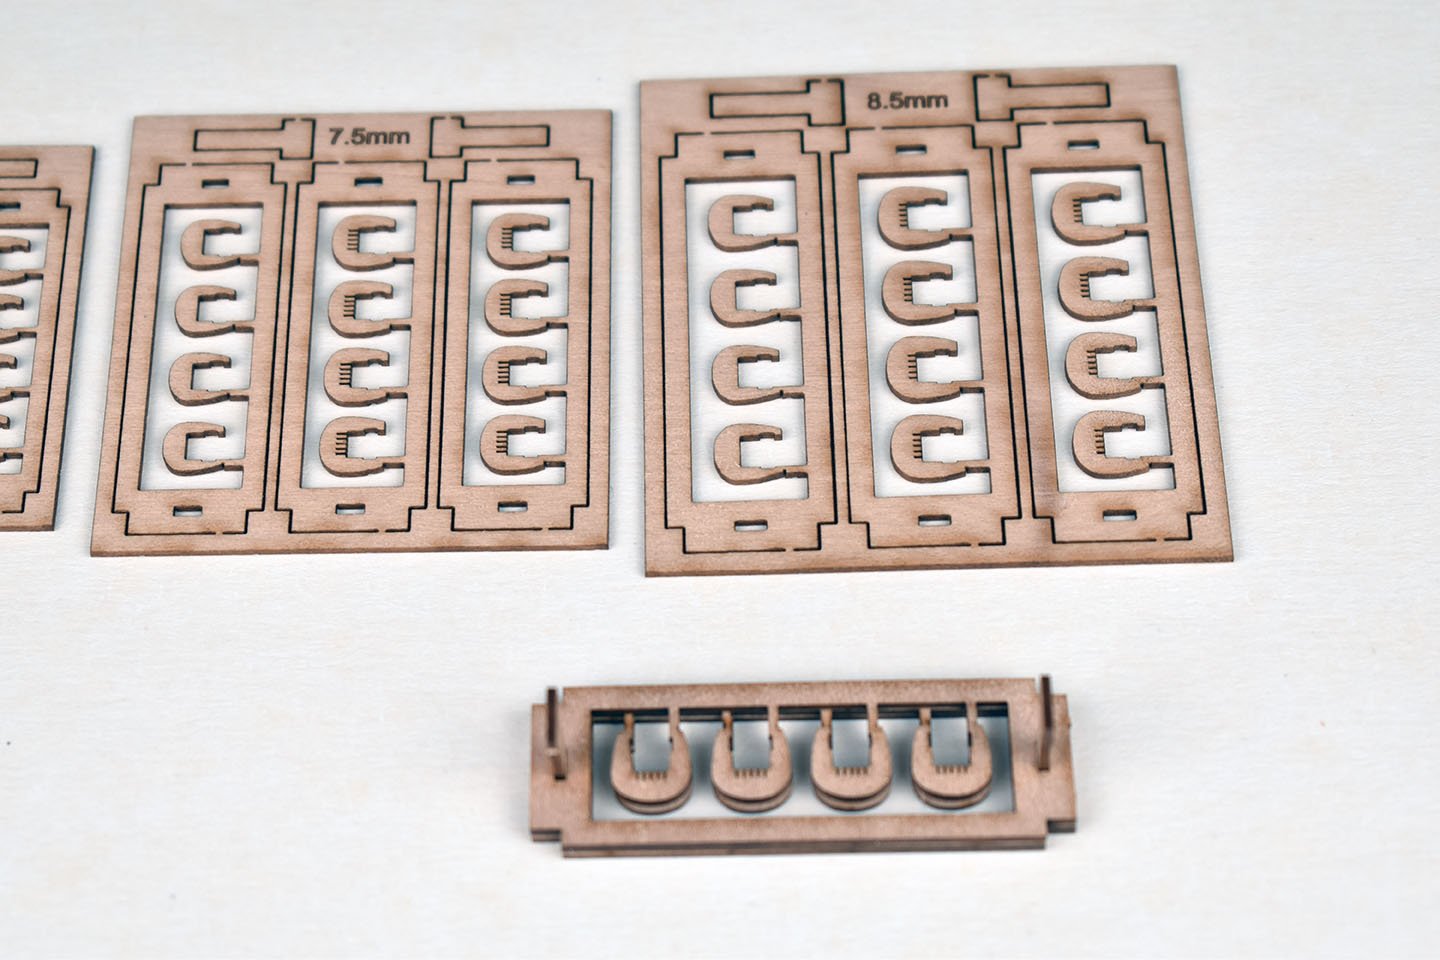
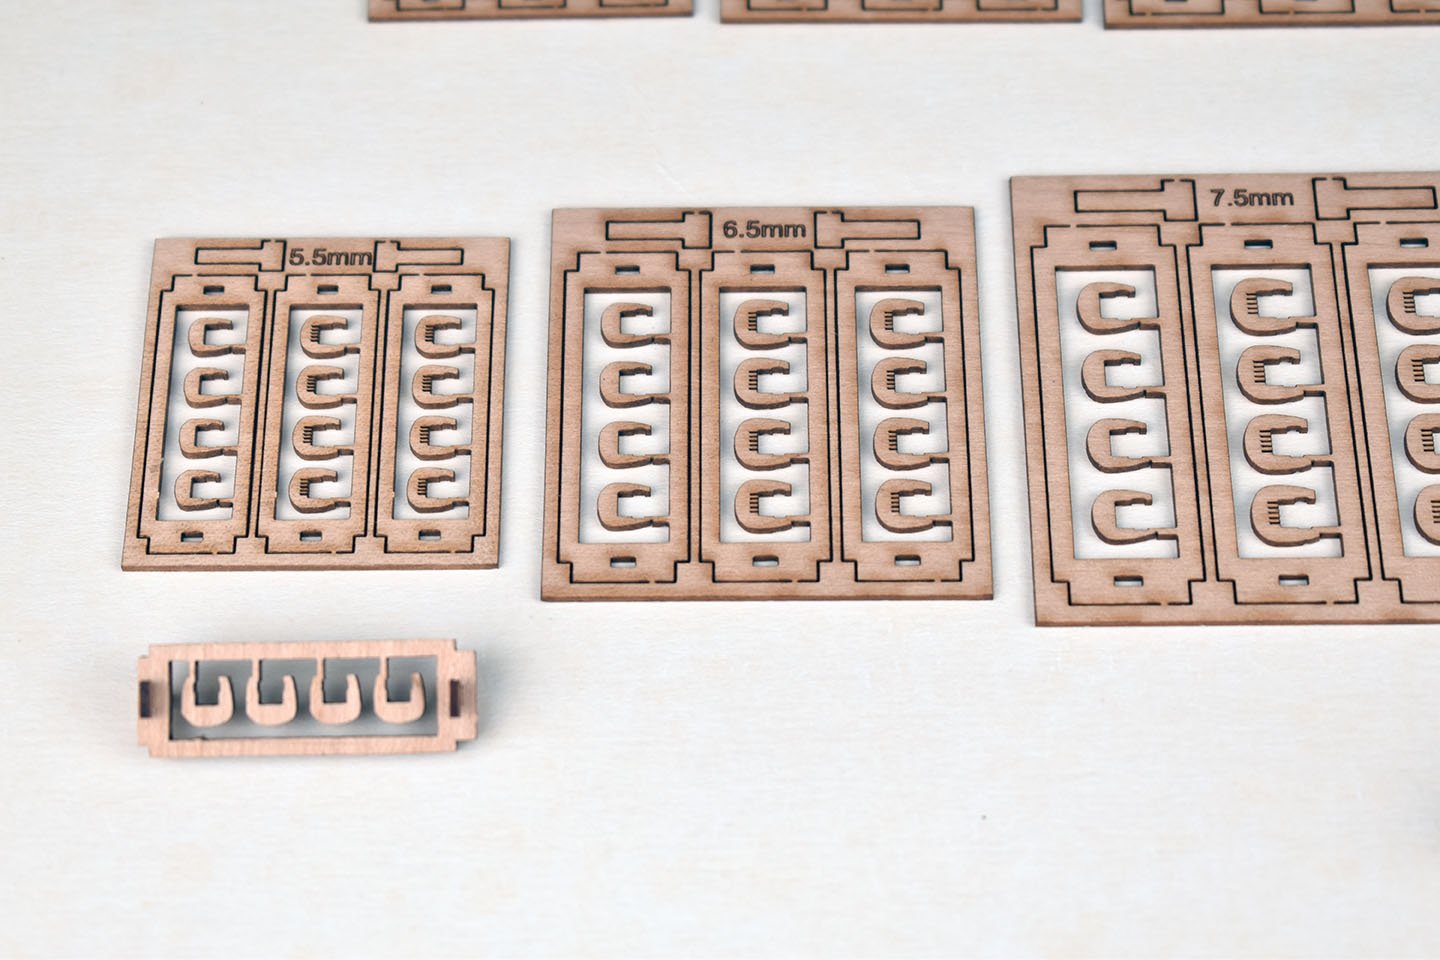
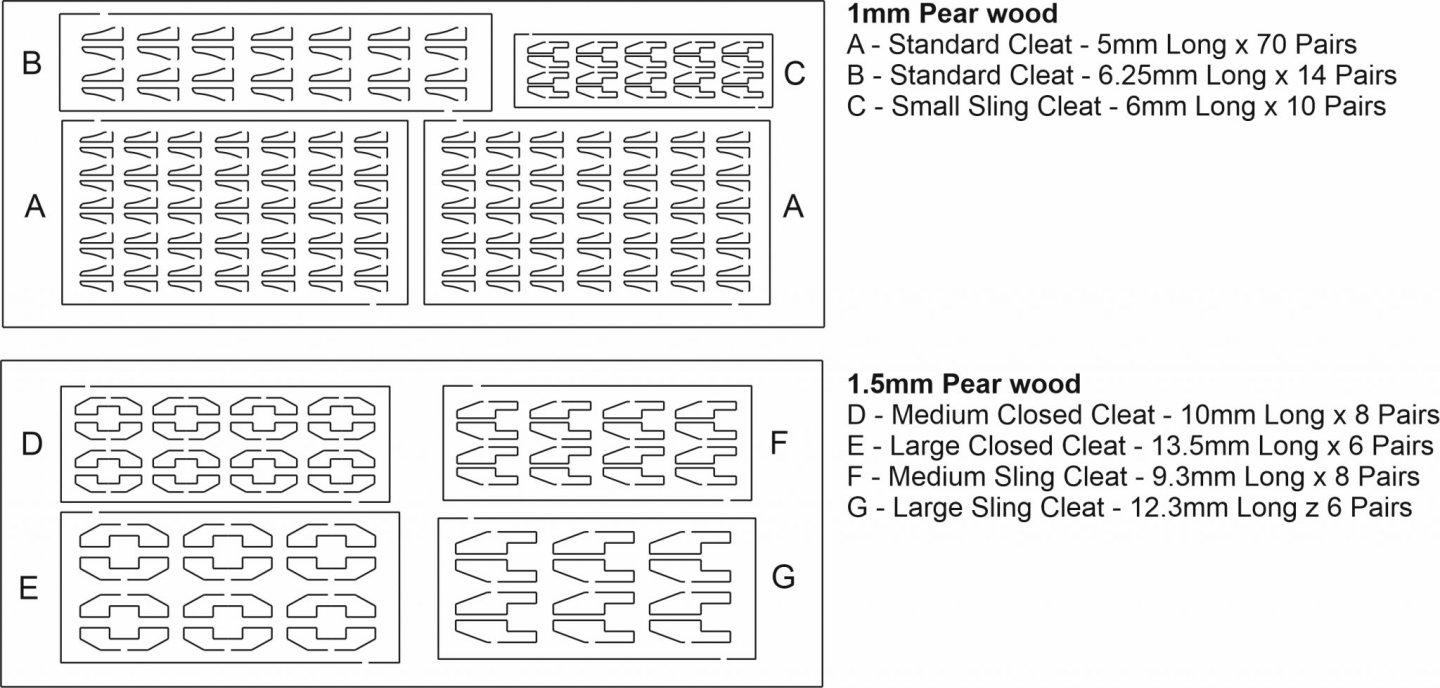
Cheers Special mast hoops? They may be too fragile laser cut in wood, and I have no boxwood sheet. I may have some PE mast hoops from an Alert, but will have to look to make sure. I have cut a few sets each of the finalised closed and open heart blocks. I am now happy how they fit together, and are pretty fool proof. The sizes I have done are (in height): Open heart: 5.5mm 6.5mm 7.5mm 8.5mm 9mm Closed heart: 5mm 6mm 7mm 8mm 9mm They will be sold as a set of four, from £1.50 for the smaller blocks and £2 for the larger ones.
-
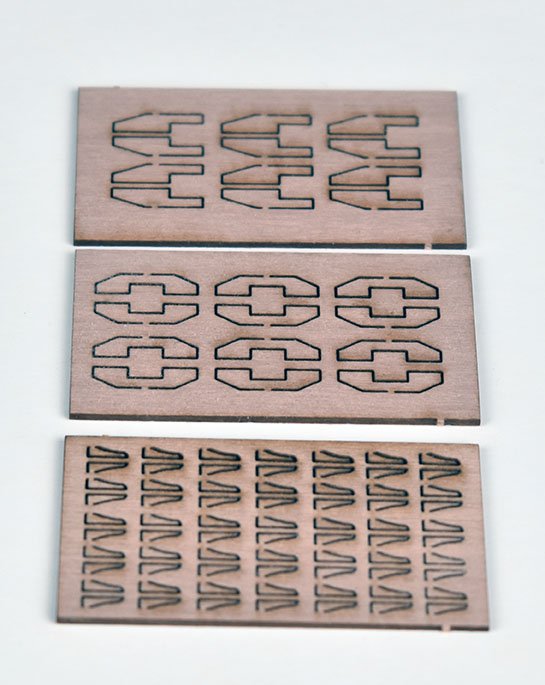
Did some more work on the heart blocks, and feel they are almost there, just a little more tweaking. Also, I have been thinking about doing a couple of small beginners kits, but easy to build and using quality materials, like pearwood laser cut parts and planking, and laser etched deck. I made a little start on one.. And finally, yesterday I was seeing what I could do with engraving options, and I did a few coasters!
-
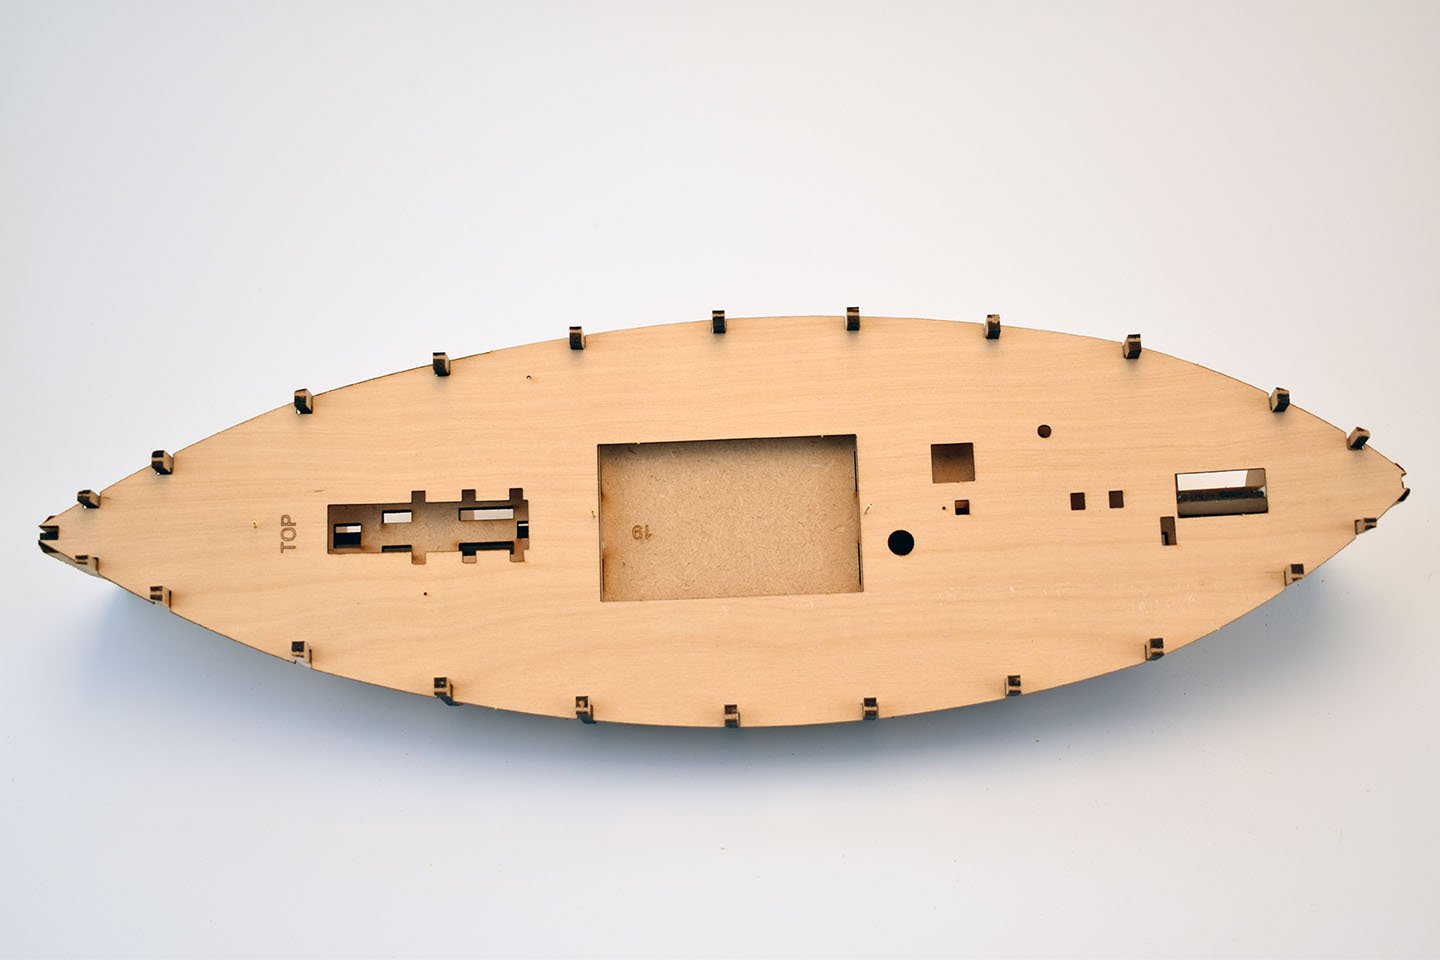
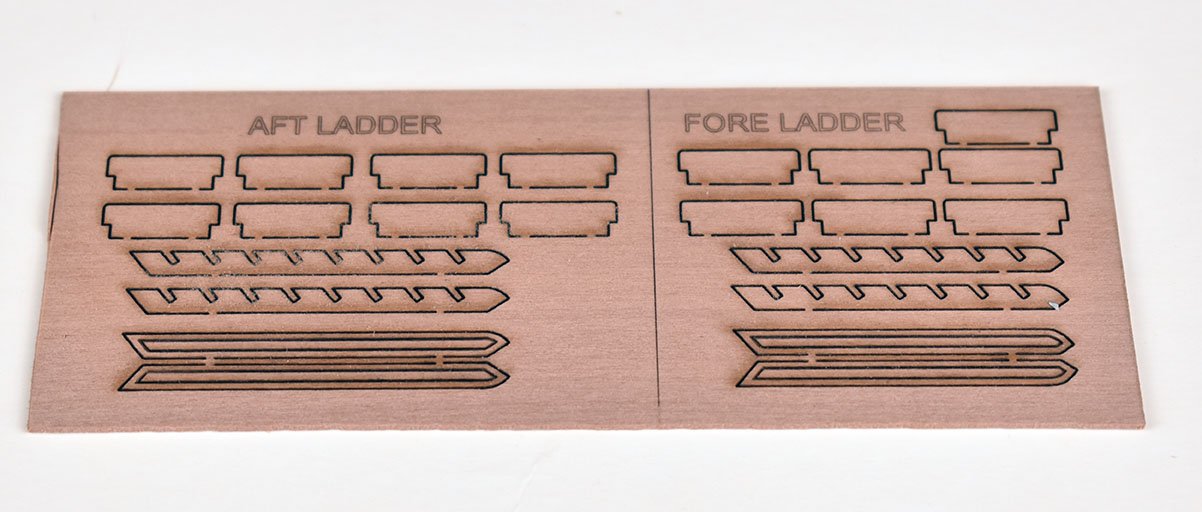
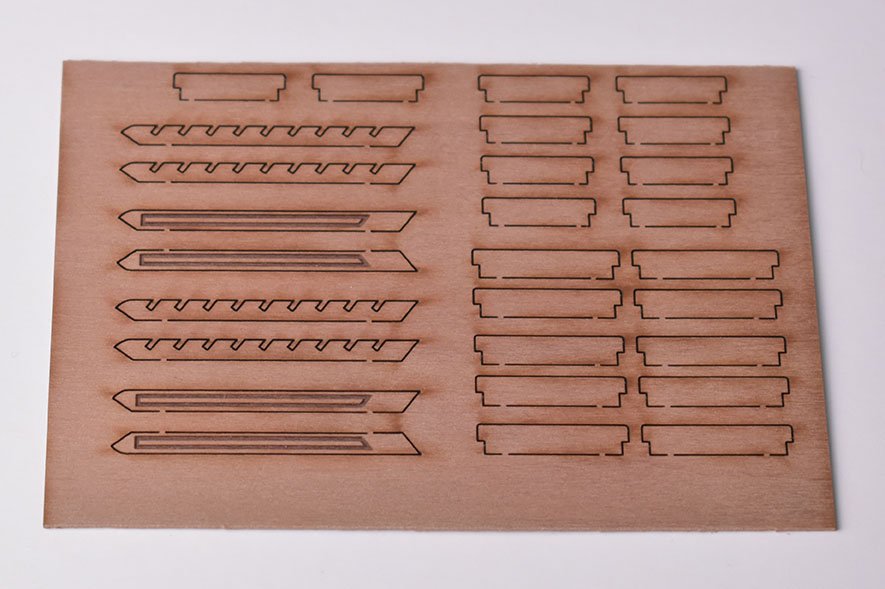
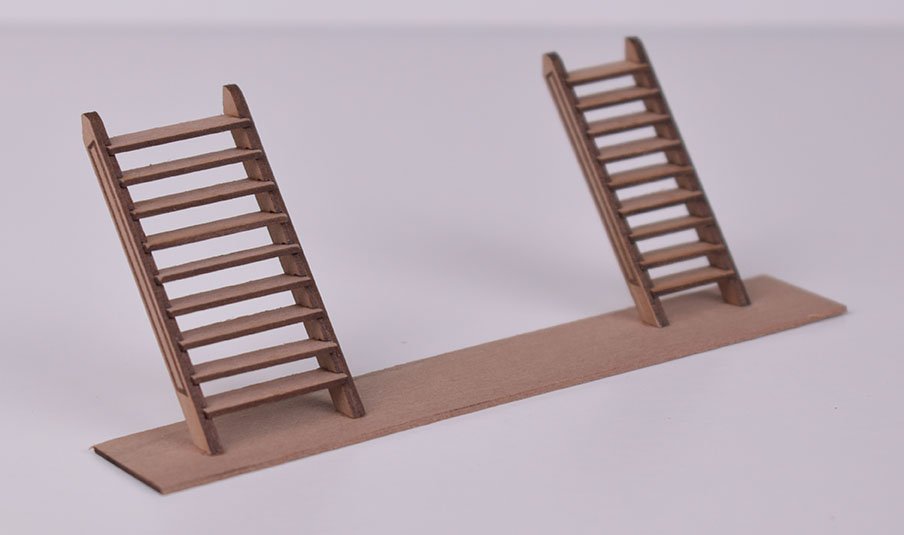
Have already done the simple assembly drawing for the ladders. I think I will have to offer these as a 'Made To Order' service, as the steps cannot be changed, length wise. With that in mind, I will ask the customer to tell me the width of the hatch the ladder assembly is to be fitted into and I can then draw the custom width and laser cut them, so they fit perfectly. ETA - Speedy ladders are ready, I just need to add them to the website. I am awaiting the MK pearwood blocks to offer the new version of Speedy. I have mentioned before, I am sure, but the 'standard' Speedy kit will be offered on pearwood laser cut parts only, with option extras for the Cochrane book, pearwood blocks and the pearwood ladders. The price for the base pearwood kit will be £285, with the remaining £240 basswood kits being the only ones I have left in stock, as I plan to do all kits only in pearwood for laser cutting from now on.

-
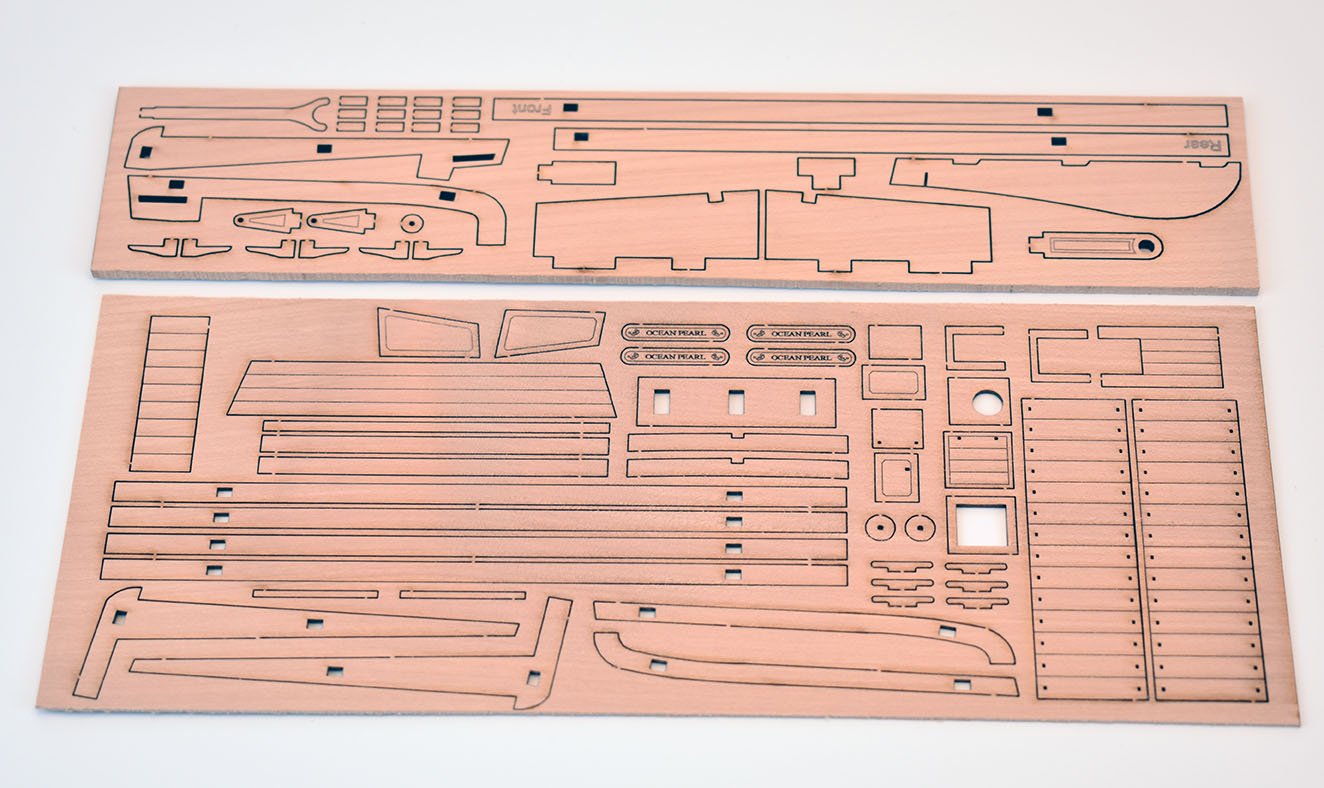
Cheers guys, This is what I have done for the cleat pack, I have laser cut 8 sets, with each set containing what is on the picture And the keval cleat I can sell in pairs (1.5mm pear wood) Still working out the best way to do the open and closed heart blocks...
-
I have always use water based wood filler, and diluted with both water and PVA wood glue. It can be thin enough to get into the tiniest of cracks, plus it is so much easier to sand back smooth.
-
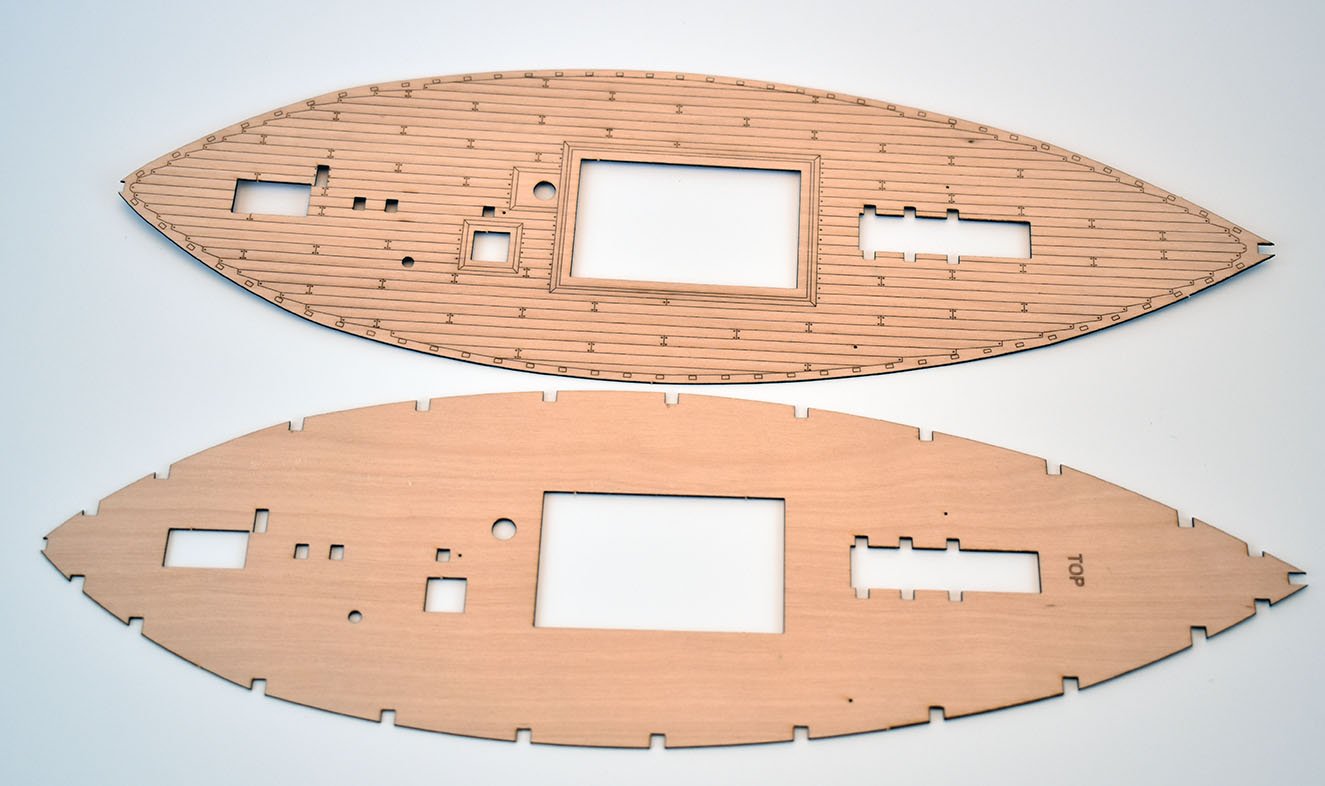
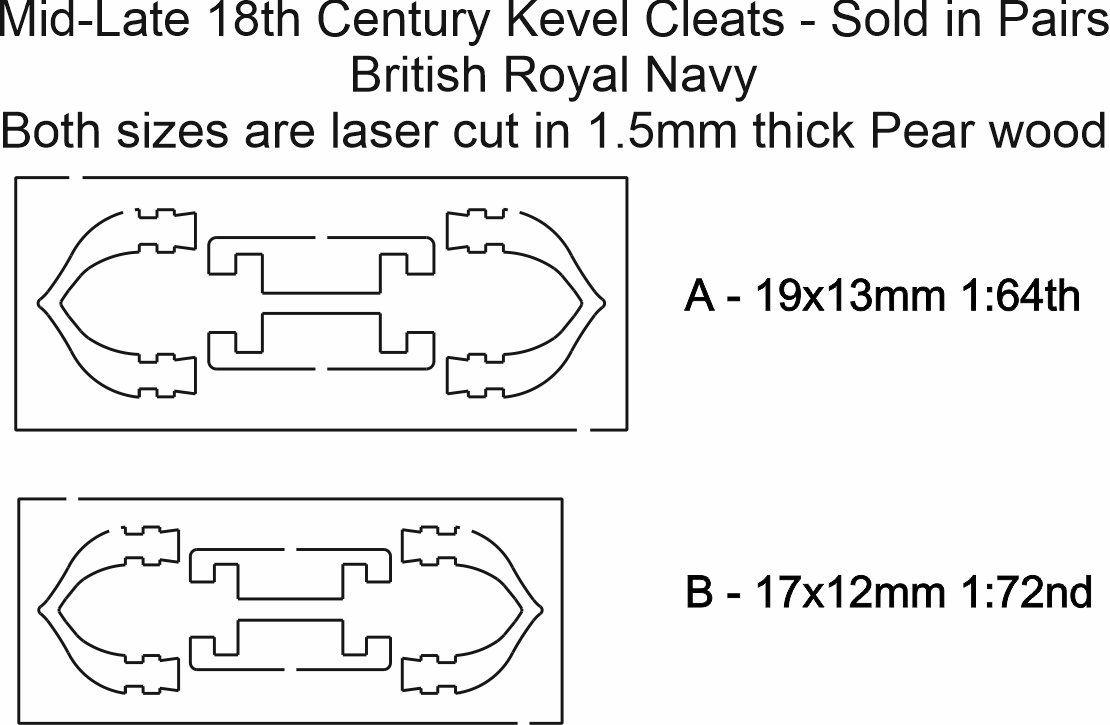
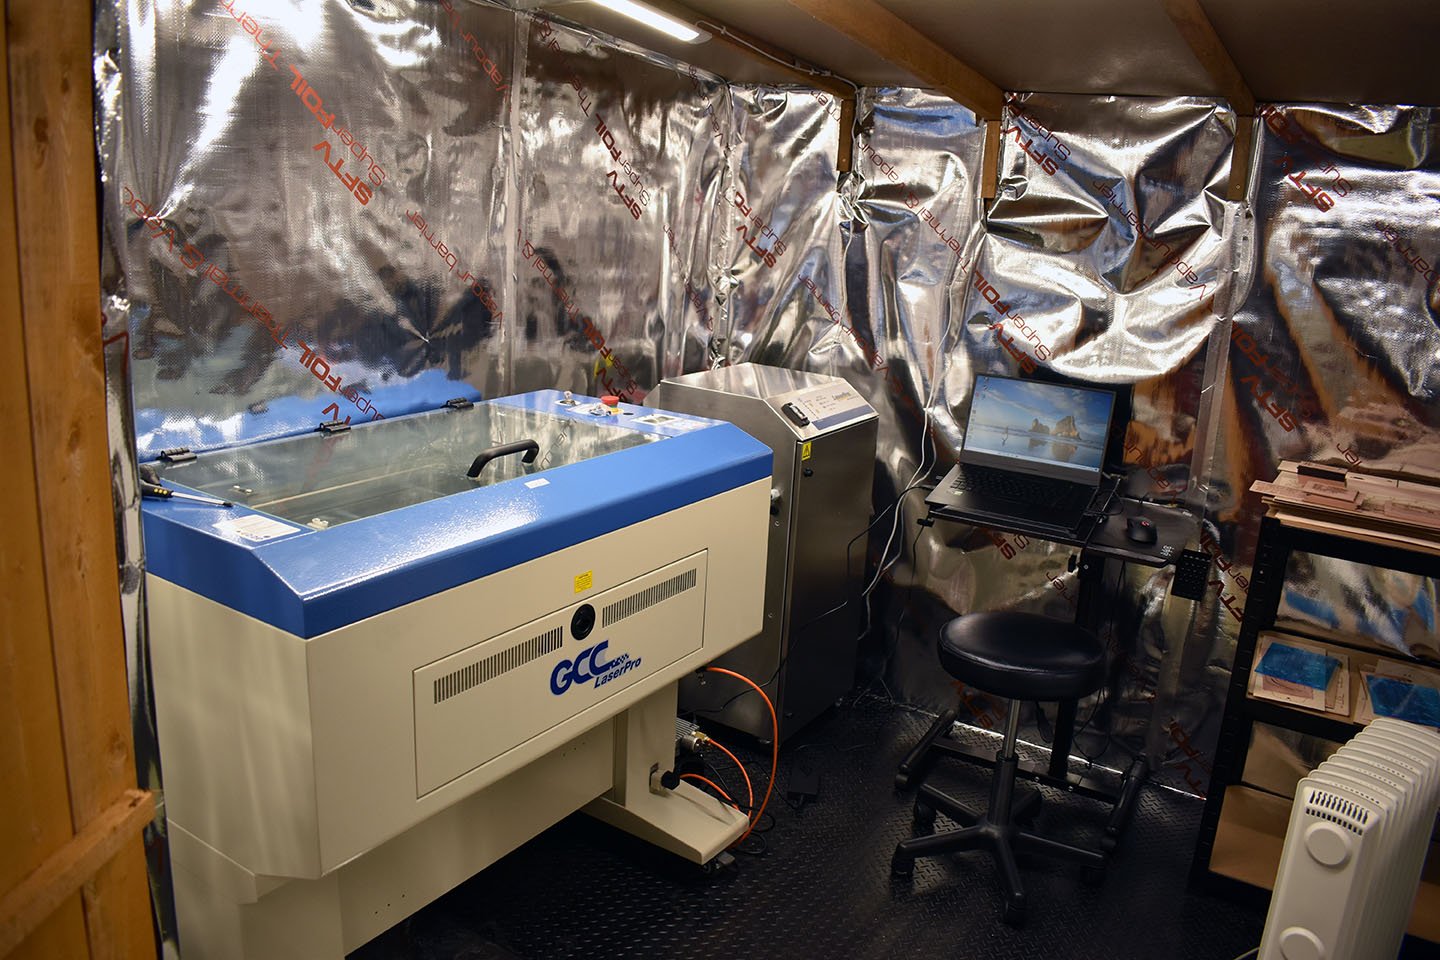
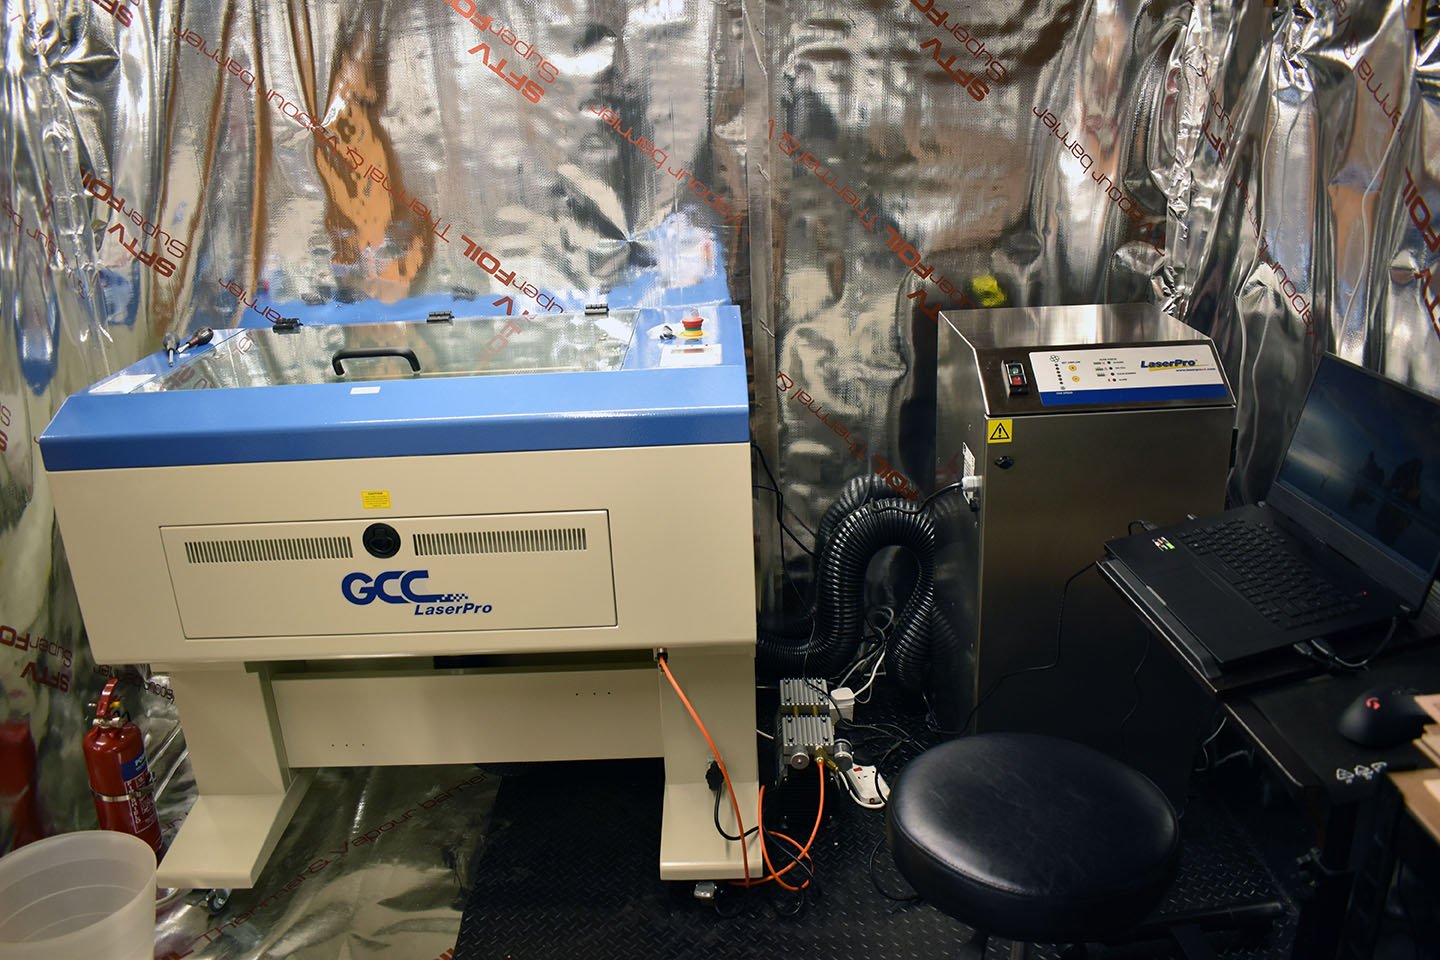
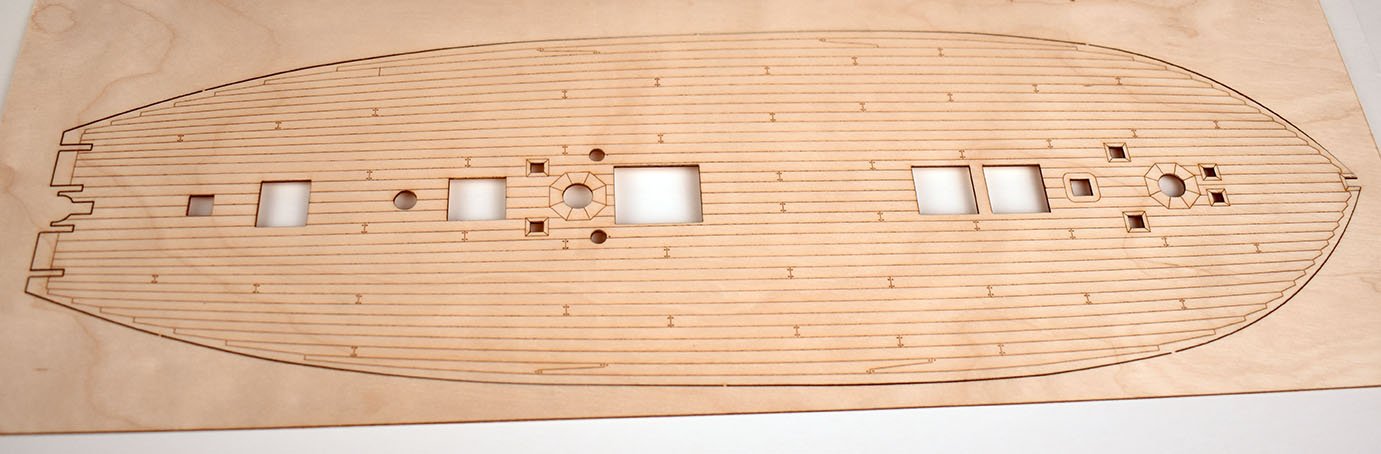
As far as I know, there are no records of how Speedy appeared, colour-wise. For a while, she was painted to look like a Danish ship to fool enemies, so you could paint her any colour and it probably wouldn't be wrong (within reason...) OK, yesterday we finished putting up the insulation layer in the laser workshop, and have just taken some pics (before shiplap is applied to interior), so it looks like a set off a low budget '80's Roger Corman sci-fi film.. I have now cut a few sets of Speedy upgrade ladders in pearwood, which I have taken a pic of. Also, I have done a few samples of cleats. The keval cleats are done in 72nd and 64th, and the staghorns I have done in three sizes, 20, 23 and 26mm long. I will sell these in pairs. I have done a 'yard cleat pack', is this a good idea? I know I hate having to cut each cleat from wood strip, and then having to make sure they all look the same. I have located the retention tabs to they are easy to file down, and none are on the contact/gluing surface, so should sit flush to whatever they are glued to. Would people be interested in that kind of thing, do you think? I will laser cut the kevals and staghorns today, and should be on the site to buy at some point during the next week or so.. Oh, also sorted out how to do the laser engraved decks (many pieces of plywood were sacrificed to get that far...), and have laser engraved the Speedy deck complete with small treenails.

-
Am still learning a lot regarding the photography. Speedy is the last model I take construction stage pictures using the blue background. In future, the background will be white.
-
Forgot to mention, The original Alert kits (limewood laser cut and cast metal cannon) are now on sale for a set time, the pearwood planking version being £145 and the Tanganyika version £125. Have just done a small update to the home page of my website to advertise this.
-
Thank you, Derek, I am so pleased you like the kit. Alert (which is being brought up to Speedy fittings & material standards) was like a trial by fire for me, and Speedy is the result of more experience and more supplier contacts. There will be a new version of Speedy soon. I am just waiting for the pearwood blocks. I am sure I have mentioned before, but this will be the main version, which has pearwood laser cut parts and planking, and drop down options for the Cochrane book and pear blocks. This makes the kit like the original Master Shipwright versions, with the only difference being the second planking is pear and not box. Also, the new kits will have the new laser cut ladder kits in pearwood, which have been designed (did these yesterday)! to fit exactly for the two Speedy companions. I have not had chance to continue the development of my third kit for a while, as I have had a lot to sort out and re-organise, for the better in the long run I hope - no longer having to pay someone else for the laser cutting is a huge plus..
-
Cheers guys, and Happy Christmas! The machine wasn't cheap (hence the business loan) due to the quality laser tube, plus you do not just buy the machine, you also need the fume extractor and special compressor for the airflow. I also bought a special airflow nozzle that focuses the air better, so the cutting area on the parts should look cleaner. But I haven't attached this yet, as it requires me to manual focus rather than auto focus the laser. I am thinking of perhaps added those laser cut pear ladders in with the Speedy kit, rather than the standard Amati fittings, if I can fit them on the 1mm pear sheet..
-
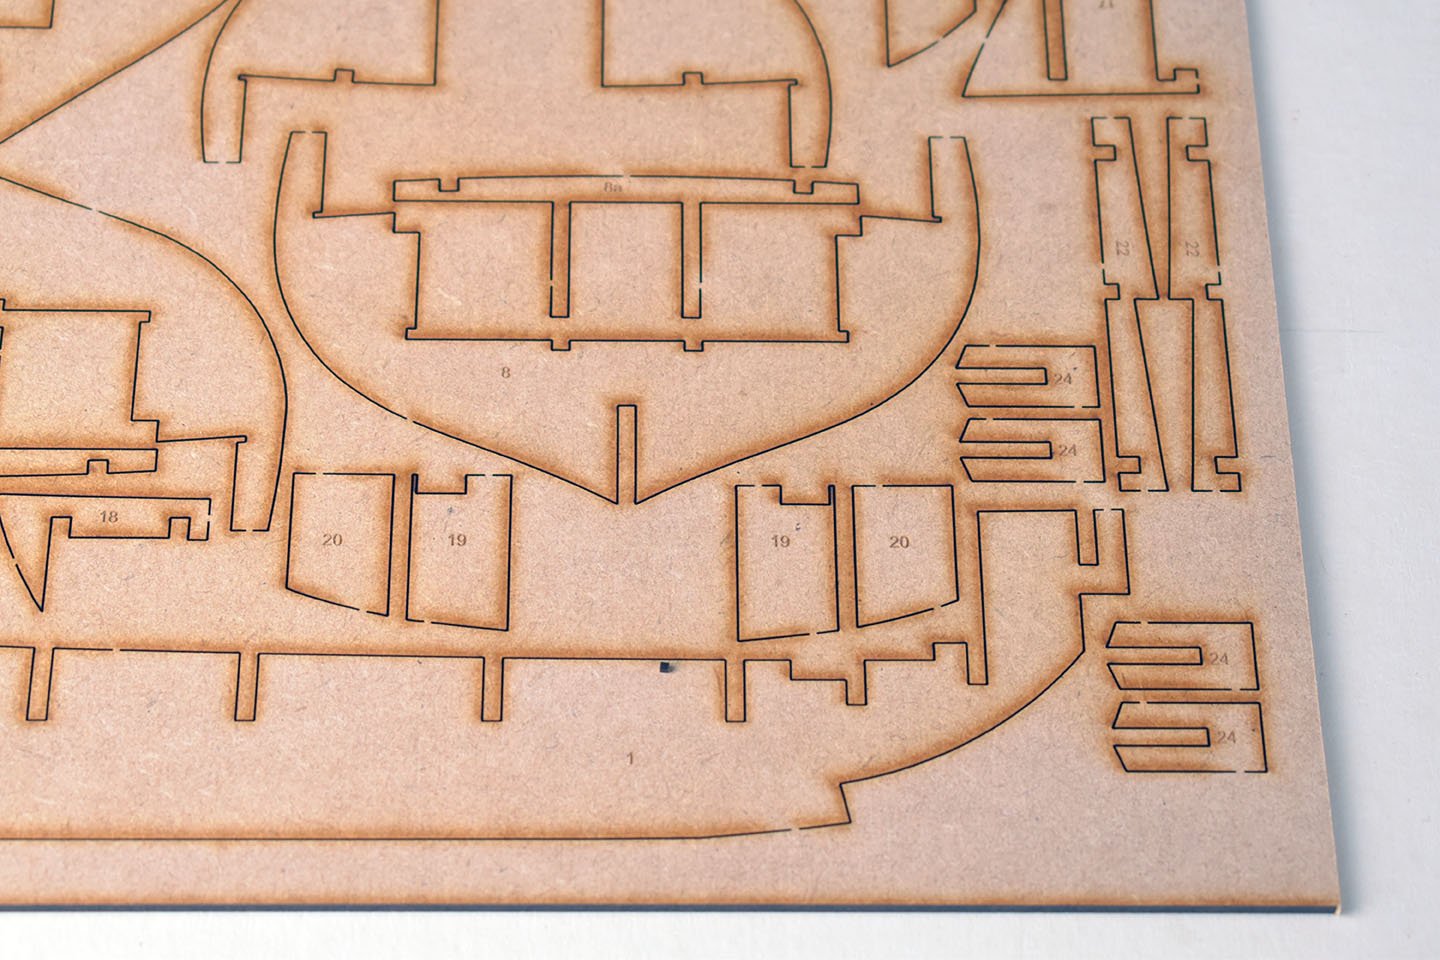
I did have to simplify the heart blocks, as they originally had the correct number of semi-circles/notches for the lanyard rope to fit into. however, the laser was spending too much time in that area (not that I mind the time), and so the parts were more burnt that I thought was acceptable. They are very small, however, and when in place, these notches are hidden completely anyway. I will also start to laser etch the part number into the structural parts.
-
Cheers guys, I have been playing around with the machine, and here are some of the results. I have cut a dozen or so sets for Alert kits, and designing 'fittings', such as 64th and 72nd scale open and closed heat blocks, and 64th and 72nd scale ladders, all in pearwood. Not sure about the ladders, as the steps are already cut to length, so am wondering if I offer these with an option for the customer to ask me to do the length they need (to fit in the combings) and I do the steps to order, is that a good idea? I have already made the steps in 1mm incremental lengths. Do these look OK?


-
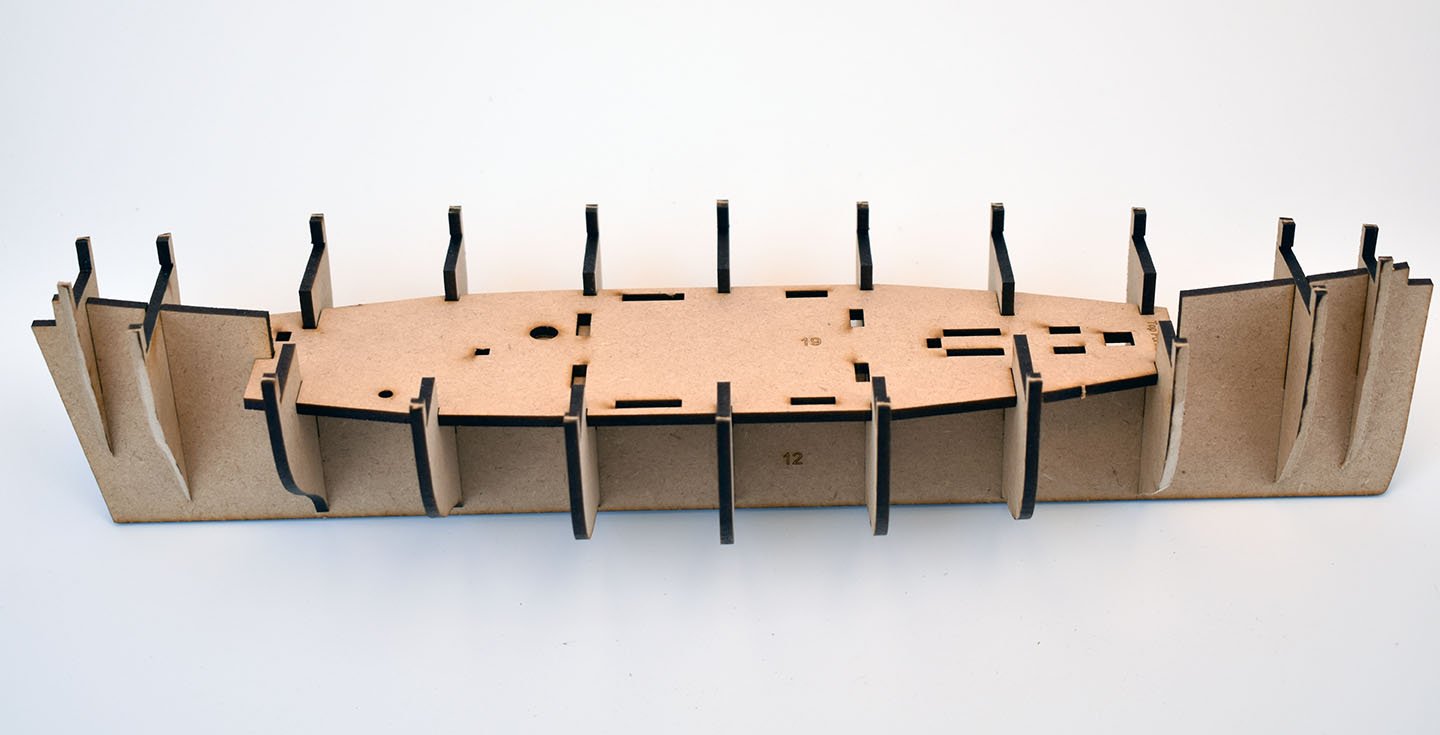
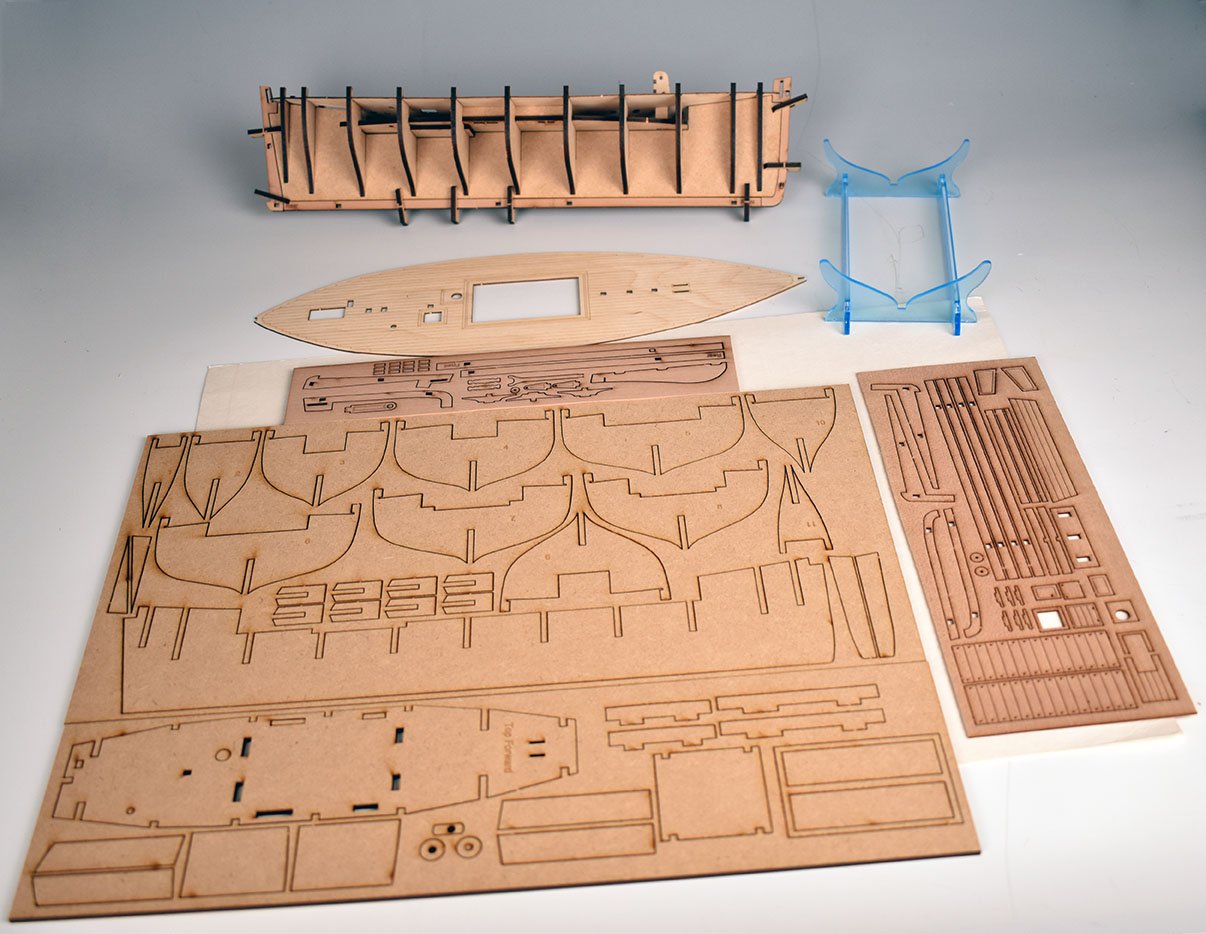
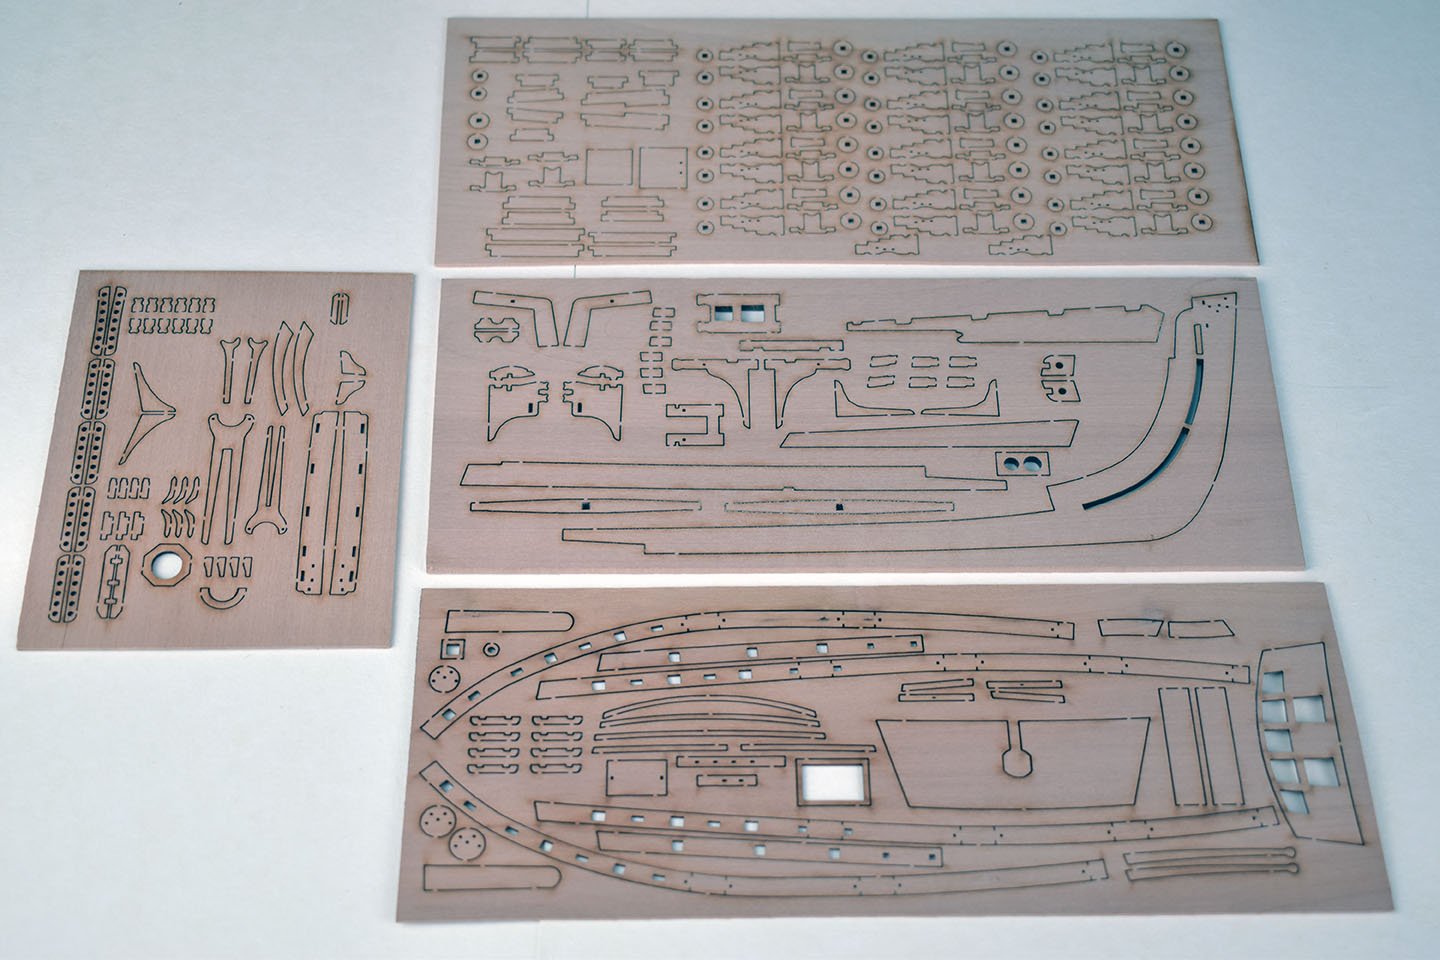
My laser machine arrived Friday, so the weekend was spent sorting out new workshop, which still needs finishing. However, I did use the machine, and I am very happy with the cutting and quality. I have cut another 12 complete sets of Alert parts (pearwood version), and parts fit together perfectly. It was one of the better machines on offer, though, with a top quality laser tube that's made in Germany. I did one set of Speedy 3mm MDF with part numbers laser etched in each part, and this seems to work very well. As I am no longer having to pay for a sub contractors time, I can now do this. Still a lot of learning regarding the laser etching side though - tried a Speedy deck and completely nuked it! Still, I am very pleased I made the investment.
-
Fantastic work!
-
Just checked my original Vanguard drawings from my files, and there most certainly are full size hull drawings, more than one, in fact. But this is for the Victory Models/Amati kit. The large full size plans were drawn in a 1000x700mm paper space with the overall length of the hull, including lanterns to figurehead is 847.304 mm.
-
Not for a while, though! I will not be able to work on the third kit for a week or two, as all time (when not at work in my other job) is taken up by sorting future Speedy kits and getting things ready for laser machine next week. At the moment, I have 7 Speedy's in stock. The laser cut is by the same company that did the Master Shipwright pearwood version, all is the same except basswood laser cut parts and pearwood second planking and blocks). I have sent off wood to the laser company for another 20 Speedy kits (in case it takes longer than I thought to master my own laser machine). These will be for the new main kit, which will have pearwood laser cut parts and pearwood planking, with options in drop down menu for the Cochrane book and pearwood blocks. This version will be £280, but not sure if I will have parts cut this side of Xmas.
-
Do you mean the completed models, side by side? If yes, then no, Alert is safely in a spare room. I figured I would take a group shot when I have more that two kits available..
-
OK, I have just finished the last UPS shipping form for all customers who pre ordered their Speedy. Everyone that ordered a Speedy will receive theirs next week. I think the latest is Friday for an Australian customer. They are all going via UPS, and are all packed as well as they can be, protected by a thick cardboard shipping sleeve. (Learnt a lot from doing those initial Alert orders...) My wife, Chantelle, tells me that her favourite job is doing the rigging lines, she loves that! Not really, this is the one job she hates, as it takes so long. Need to find a better way to 'automate' this aspect...
-
Cheers I would only want to produce fittings for kits I have done in the past, 72nd and 64th scale. Have to be careful what I choose to do though, if they have to be complimented with PE fittings (as gun carriages would need to be). Just stuff like capstans, binnacles, and when I have enough ready, a full suite of ships boats. Things like this can only be done if one has their own equipment to make them, I think, as outsourcing the laser cutting for such things is simply not financially viable.
-
Well, I have ONE Master Shipwright Speedy kit left in stock! These were genuine limited edition kits, as I will not be doing anymore kits using boxwood for planking for a very good while. Pear is a very nice wood, though. I may have to use a sub contractor to cut more Speedy kits, but if I do not receive anything this side of Christmas, I may as well do these myself, so once the stock is gone, that will be it for a while, as I need to re-organise. I never thought that I would run out of my Speedy stock so quickly. I have ordered my new laser/engraver machine, which will be arriving two weeks today. I have also ordered the materials I will need - but will probably have to re-format all of my existing laser cut CAD files.. I would like to start offering fittings. Stuff like closed and open heart blocks (never liked standard kit versions), and gun carriages, all in pearwood and 72 and 64th scales. I did get quotes for these, but the cost was so high, it was this that pushed me into thinking that I need my own laser machine, more freedom. Thank you!

