Rkapuaala
-
Posts
13 -
Joined
-
Last visited
-
 Scottish Guy reacted to a post in a topic:
USS CONSTELLATION by Tschiller - Artesania Latina - Scale 1:85 - Kit Bashed back to 1797
Scottish Guy reacted to a post in a topic:
USS CONSTELLATION by Tschiller - Artesania Latina - Scale 1:85 - Kit Bashed back to 1797
-
catopower reacted to a post in a topic:
Mayflower by Rkapuaala - Billing Boats No. 801 - with modifications
-
catopower reacted to a post in a topic:
Mayflower by Rkapuaala - Billing Boats No. 801 - with modifications
-
billocrates reacted to a post in a topic:
HMS Victory c.1765-1791 by Steve Anderson - FINISHED - 1:64 scale
-
Scotty W reacted to a post in a topic:
Mayflower by Rkapuaala - Billing Boats No. 801 - with modifications
-
Baker reacted to a post in a topic:
Mayflower by Rkapuaala - Billing Boats No. 801 - with modifications
-
 Rkapuaala changed their profile photo
 -
Rkapuaala reacted to a post in a topic:
Mayflower by David Lester - FINISHED - Model Shipways - Scale 1:76
-
CiscoH reacted to a post in a topic:
Constellation by Rkapuaala - Artesania Latina - 1:85 scale - Frigate - with mods
-
CiscoH reacted to a post in a topic:
Constellation by Rkapuaala - Artesania Latina - 1:85 scale - Frigate - with mods
-
CiscoH reacted to a post in a topic:
Constellation by Rkapuaala - Artesania Latina - 1:85 scale - Frigate - with mods
-
Knocklouder reacted to a post in a topic:
Mayflower by Rkapuaala - Billing Boats No. 801 - with modifications
-
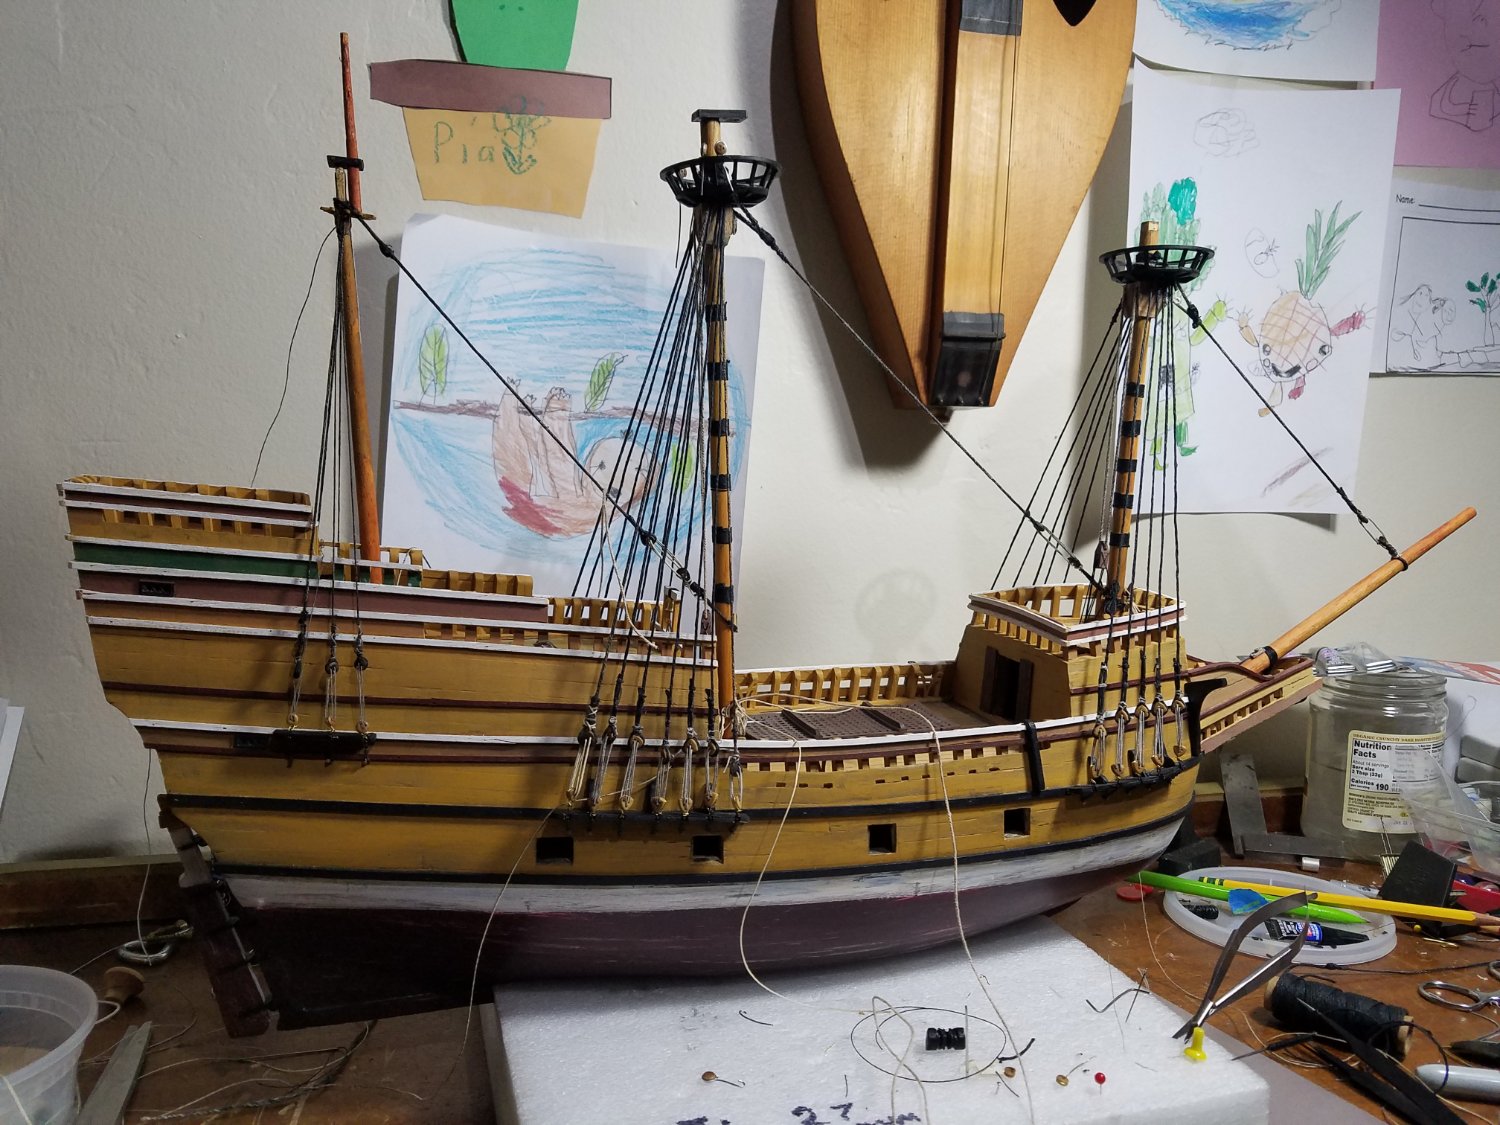
OH! I almost forgot what I was doing in here! I finished all the lower shroud stays. This model is like a record of my progress at acquiring skills and developing a process. Calculating the length of each stay was difficult at first, and it was hit or miss, but by the time I got to the forecastle I had my process down. The beading needle really helped threading the dead eyes and by the time I was half way done with the main shroud stays, I realized I needed to make a little jig out of wire. Now, my biggest fear are the rat lines! I've tried to use the proper knots with every line and cable but it is extremely hard at 1:60th scale. The rat line call for a clove hitch, which should be simple enough but since I need to tack the lines in place, to conform to a template I'm making, I'm not sure it will be that simple. I'm still learning and part of that is getting the courage to move ahead.

-
Thanks Jim. I agree it is all about learning and I couldn't have said it better myself. I'll be looking forward to seeing your build log. I looked up the product and found a 1:60 scale and a 1:72 scale, I'm assuming you're going for the 1:60 scale. From the member gallery on HobbyLinc it looks like a very close match for the Mayflower II. They even have a better jolly boat than what came with the Billings kit. Of course, those details could have been added by the members, so I can't wait to see how you're doing. I'm already making plans to build a 1:48 scale Mayflower II from scratch. I don't like how this one is turning out and I'd like to be at least a little closer to the prototype than on this build.
-
Rkapuaala reacted to a post in a topic:
Mayflower by Rkapuaala - Billing Boats No. 801 - with modifications
-
Excellent work. It's also good to know that other people have too many irons in the fire. I was beginning to think I was the only one.
-
Thanks for the link Mark. As it turns out, I'm not going all in for the "original look". I've gotten a few chapters into the American Sailing Navy and learned that the Captains of the ships and not the constructors supervised and influenced the final design of the ships. That explains why the model kit says 38 guns and the plans show 36! I've also learned that due to their unprofessional interference with the ship design and overloading the ship with more guns than they can handle, the Constellation got some huge rebuilds around 1812. The era I'm going for is 1843 when the Constellation sailed to Hawaii to restore it's sovereignty after the Brits tried to take it. Ironic that 81 years later the Americans stole our sovereignty forever but as my grandfather would always say, "water under the bridge". By the time the Constellation sailed to Hawaii, she would have been refitted to hold up to 56 guns, she was 14" wider, had a new Captain named Kearny and was refitted with 20 - 32 pd carronades and 28 - 18 pd long guns. I've downloaded some images of carronades from the internet and found a link on Shape ways for some 1/32nd scale carronades which I'm thinking of purchasing as reference. My plan is to print my versions out in 1:85 scale and cast the barrels in fields metal, or bronze. If anyone's interested here's the link to the shapeways product. https://www.shapeways.com/product/2L4WH8A8J/1-32-carronades-32-pounder-us-navy-columbia
-
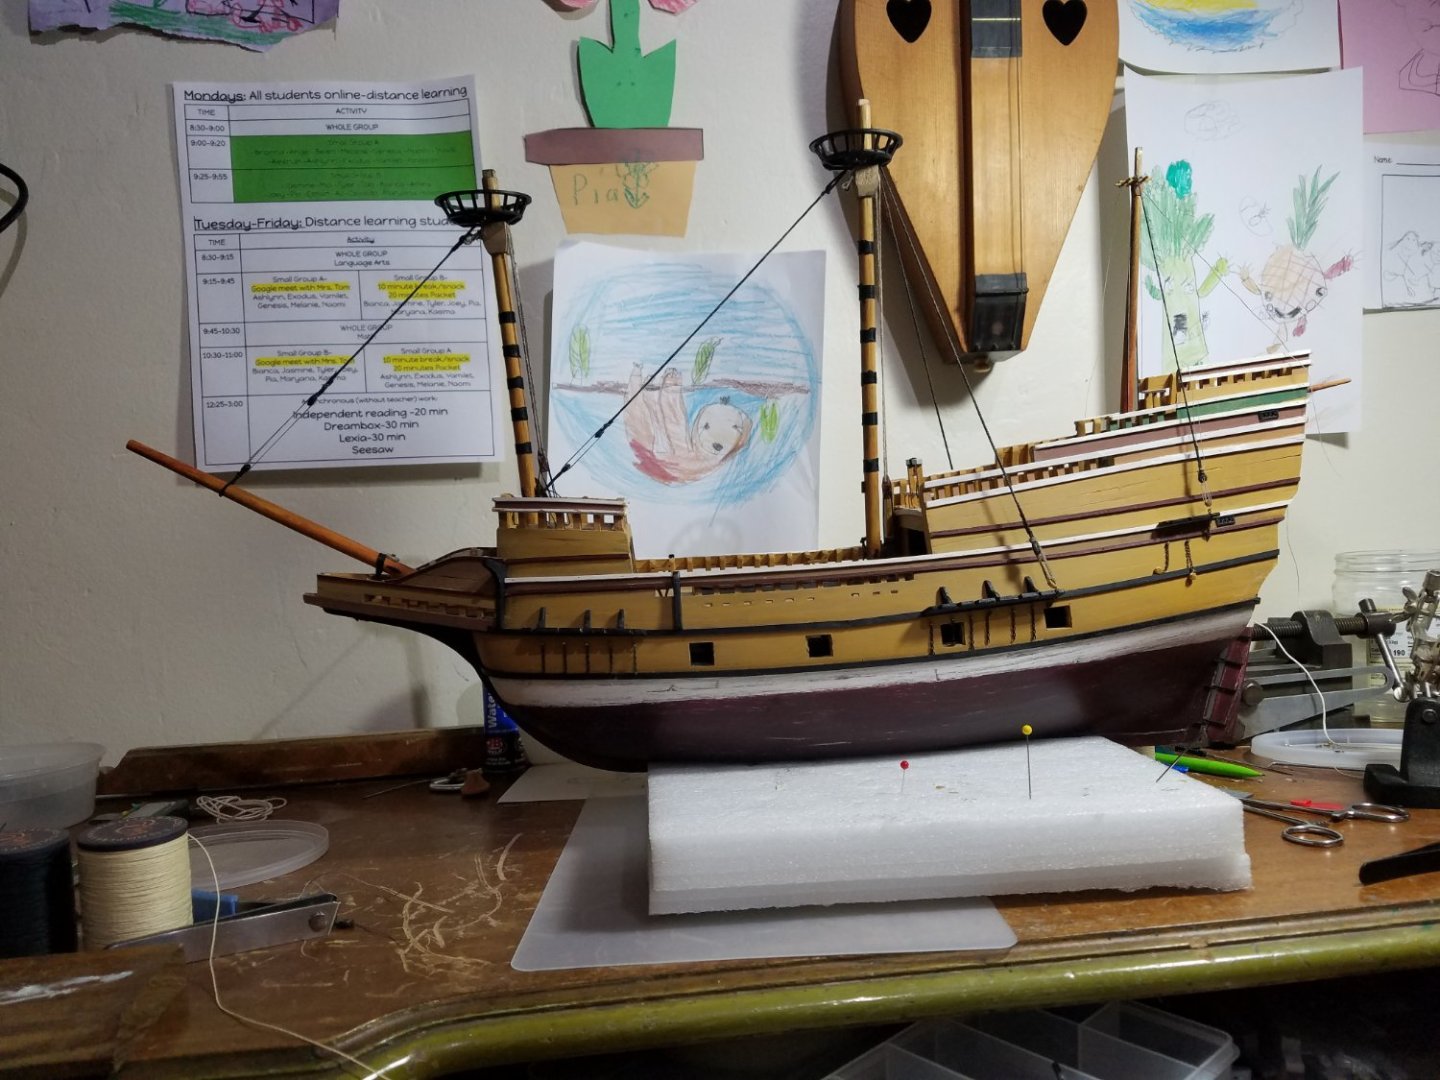
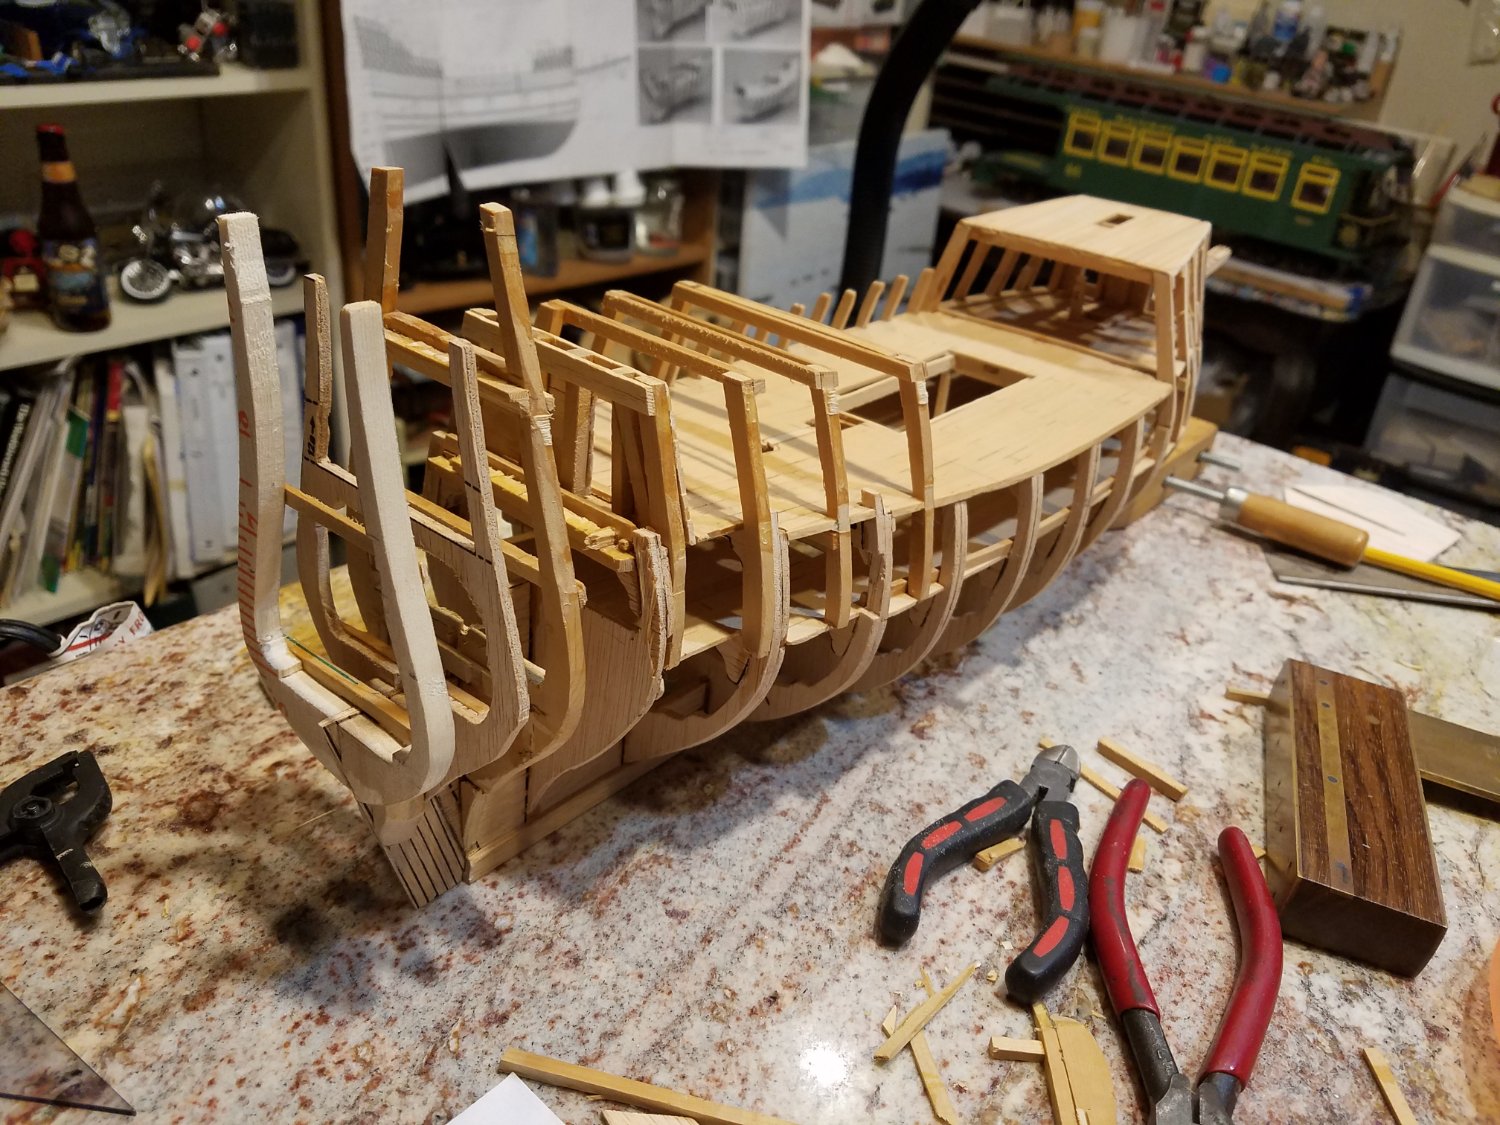
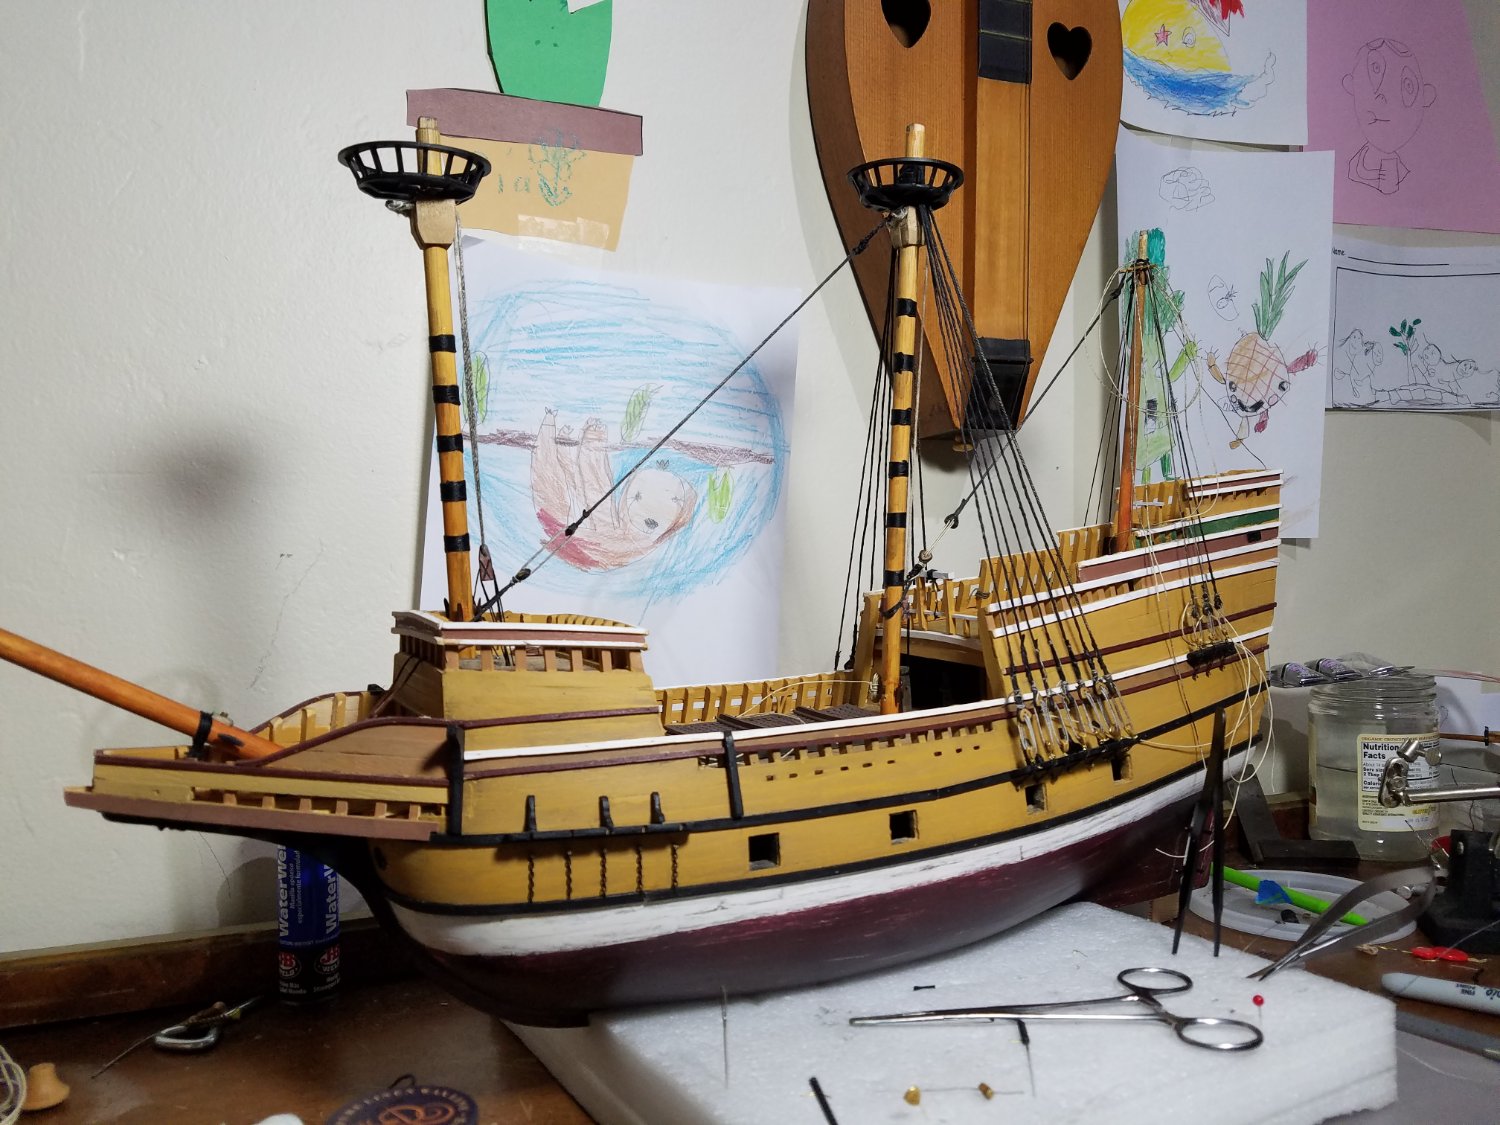
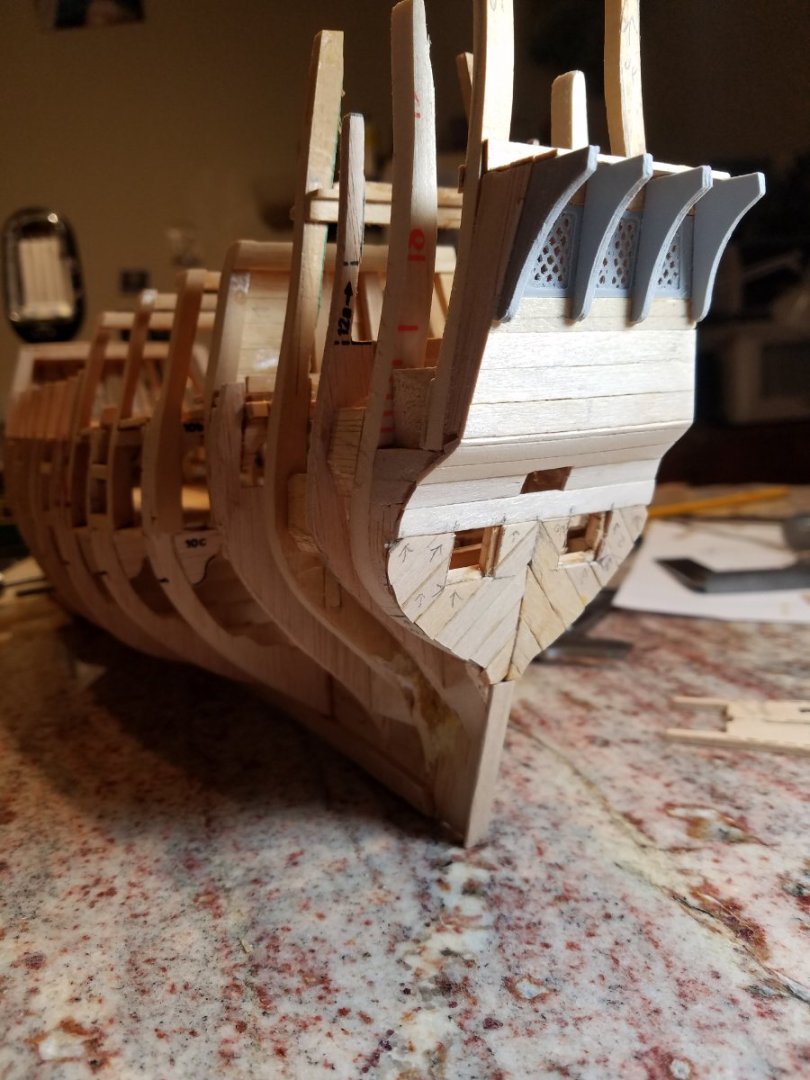
This is the first Ship model I built. It was an Artensian Latina 1805 Swift. It is one of 3 ships I bought from our local hobby store when it was going out of business in 2003. It was also the simplest build and I finished it in less than a year which prompted me to lunge into the Mayflower kit,,, blindly. The mistake I made was assuming that this kit would be a fair representation of the actual Mayflower. I soon learned that it isn't even close. Unfortunately by the time I came to that conclusion I had already assembled the framing, so I had to modify an existing frame in the most brutal way possible. I won't blame you if you cringe at the next image [ Viewer beware] After purchasing "The Frigate Constitution And Other Historic Ships" I became disenchanted with the Billings Kit. It was already - by my inexperienced standards - not as good as the Artesania Latina Swift kit. The instructions were minimal and the plans were hard to cross reference. So I did a couple of months of research and decided that I would try to model the Mayflower II which was supposedly a reproduction of the actual Mayflower although if I am to believe the "TFCAOHS" it is not. According to Thomas Miller (quoted in TFCAOHS) the real Mayflower wouldn't have had a spritsail, topsail or mizzen. So with that shocking revelation I decided to stick to a ship that was already built, the Mayflower II. After obtaining some rough images of the plans for that vessel online, I began hacking away at the kit. I used some white cedar I had in my shop and some sugar pine for the timbers. I completely rebuilt the quarter deck, forecastle and poop deck so that they were closer to the dimensions I gleaned from the images of the plans. The modifications used up all the planking material that was included with the kit, so I used stirring sticks. Then I cast away the plastic bowsprit beak assembly and built my own from scraps from my shop. It's as close as I could get from the sketchy plans I had and the plentiful images shared on the internet. I added ballast and some paint prior to blanking the upper decks because I concluded it would be impossible to add after everything was covered. I like to paint as I go, it keeps accidents from happening. I chose to weather the paint job to approximate the wear and tear that was present on most of the images I had collected. I also 3D printed a lot of the details, like the capstans. I am currently rigging the vessel, using images as reference along with the book "Rigging Period Ship Models" by Lennarth Petersson. It is well illustrated and a huge help. With any luck I should finish this by the beginning of next year. I intend to work on this model in tandem with the Artesania Latina Constellation Frigate model - which also will require a lot of mods. I know there are a lot of mistakes I made on this Mayflower model; I learn from my mistakes, so when I start building the frame for the Constellation it will be after I've made the necessary modifications to the transom and bow and after .


-
Rkapuaala reacted to a post in a topic:
HMS Victory c.1765-1791 by Steve Anderson - FINISHED - 1:64 scale
-
The American Sailing Navy arrived today. I was totally surprised that it is in excellent condition. The pages are not worn or dog eared. It looks brand new, which is surprising since it was advertised as used with some wear and possible highlighting. No notations in the margins, no highlighting. It looks like it just got printed. A steal at $8.42 after taxes and shipping. I'm still processing some of the info in the book, but one thing I found, that is similar to the Mayflower, is that no one knows exactly what it looked like and there's some debate over who designed it. I guess I'll just have to make concessions.
-
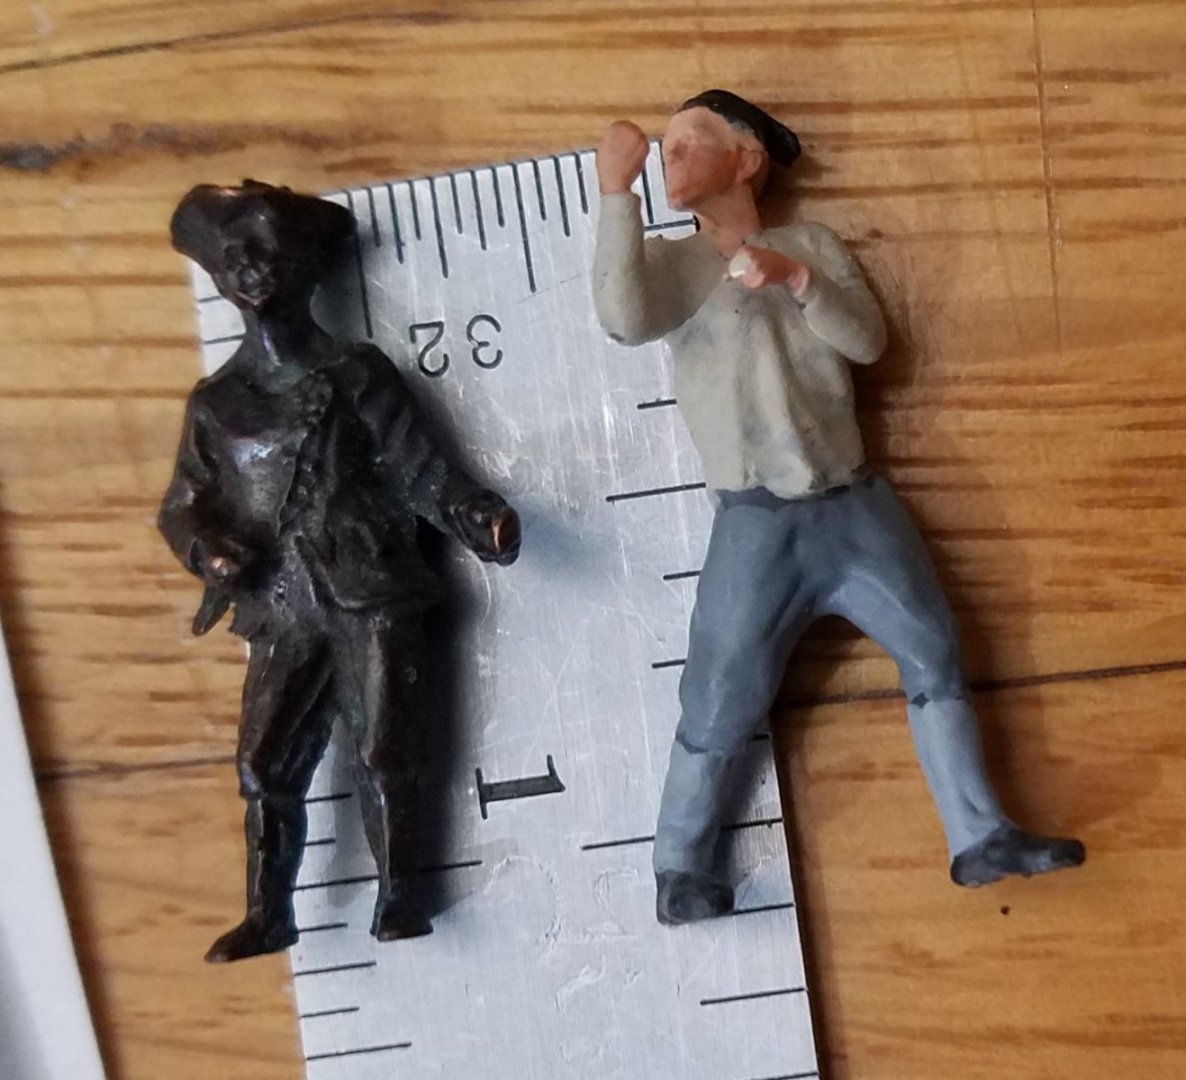
As I was doing an inventory on the parts included with the kit my eye was drawn to the small metal figures included. The Kit is 1:85 scale and while that is only 2 scale inches bigger than HO those figures looked much, much bigger than HO, so I took one of my 1:60 scale figures I'm sculpting for the Mayflower out of its box and compared it. The Mayflower figure is not much bigger. I took a measurement and found that scaled to 1:85 scale this dude with a hat would stand 7 ft and 11 inches high. I don't think there are any NBA players that tall, let alone a whole crew of 18th century sailors. Hell, George Washington was only 6 2 and he dwarfed the average man. Looks like I'll be sculpting a crew for this model too Good thing I love to sculpt and I'm retired.
-
That is a beautiful work of art!
-
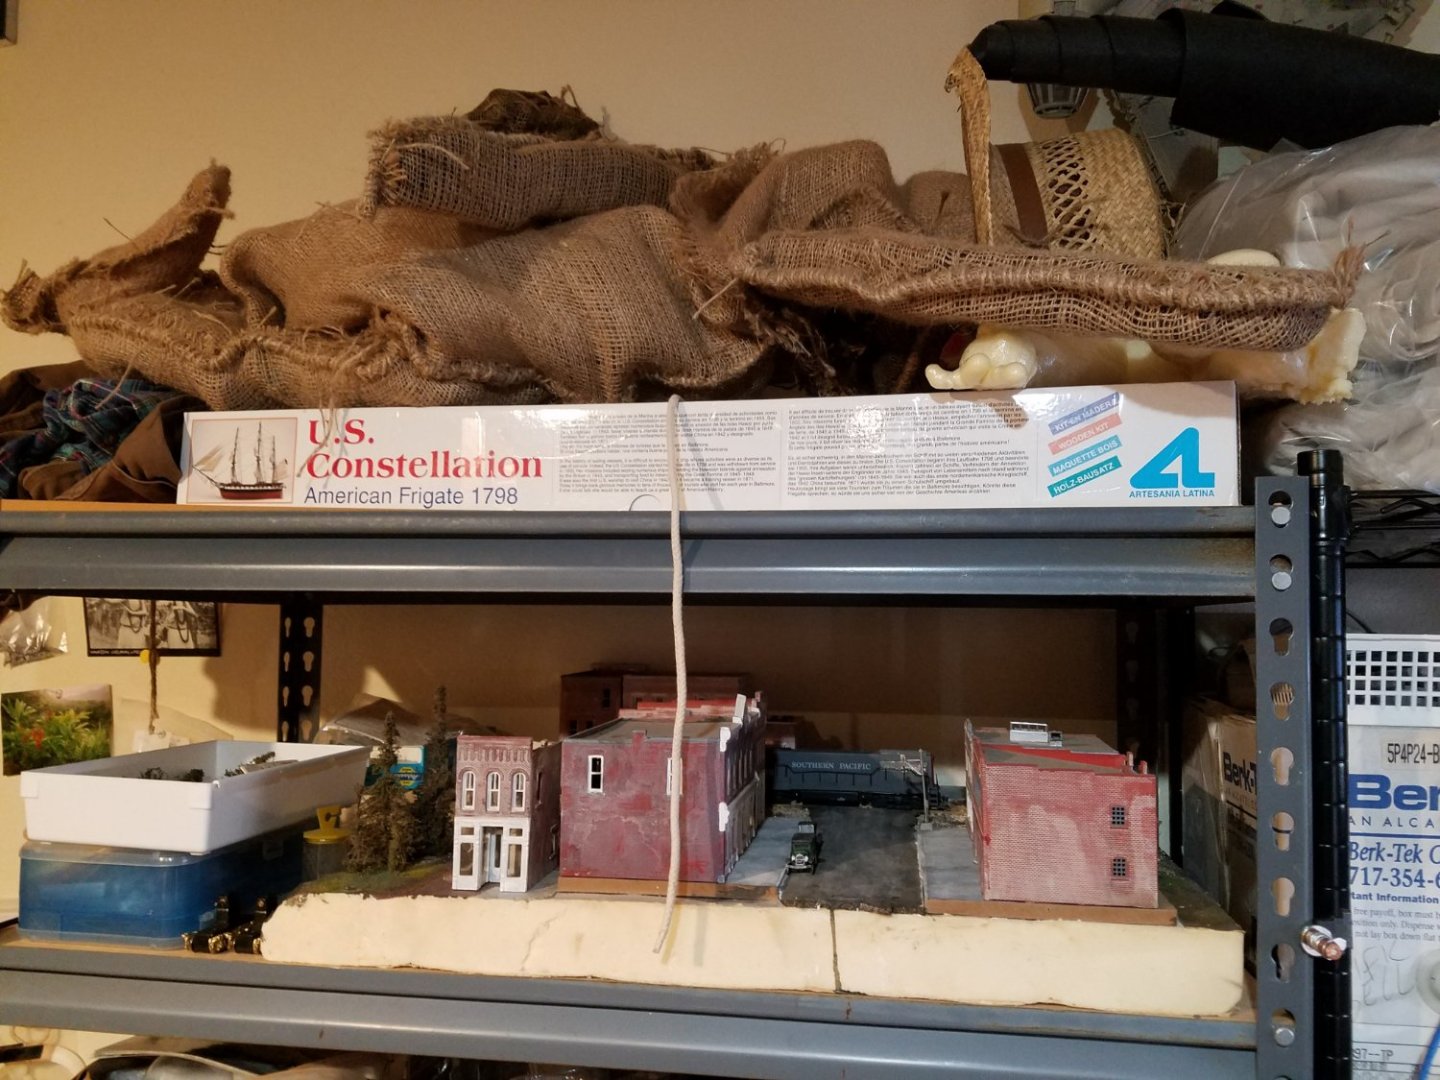
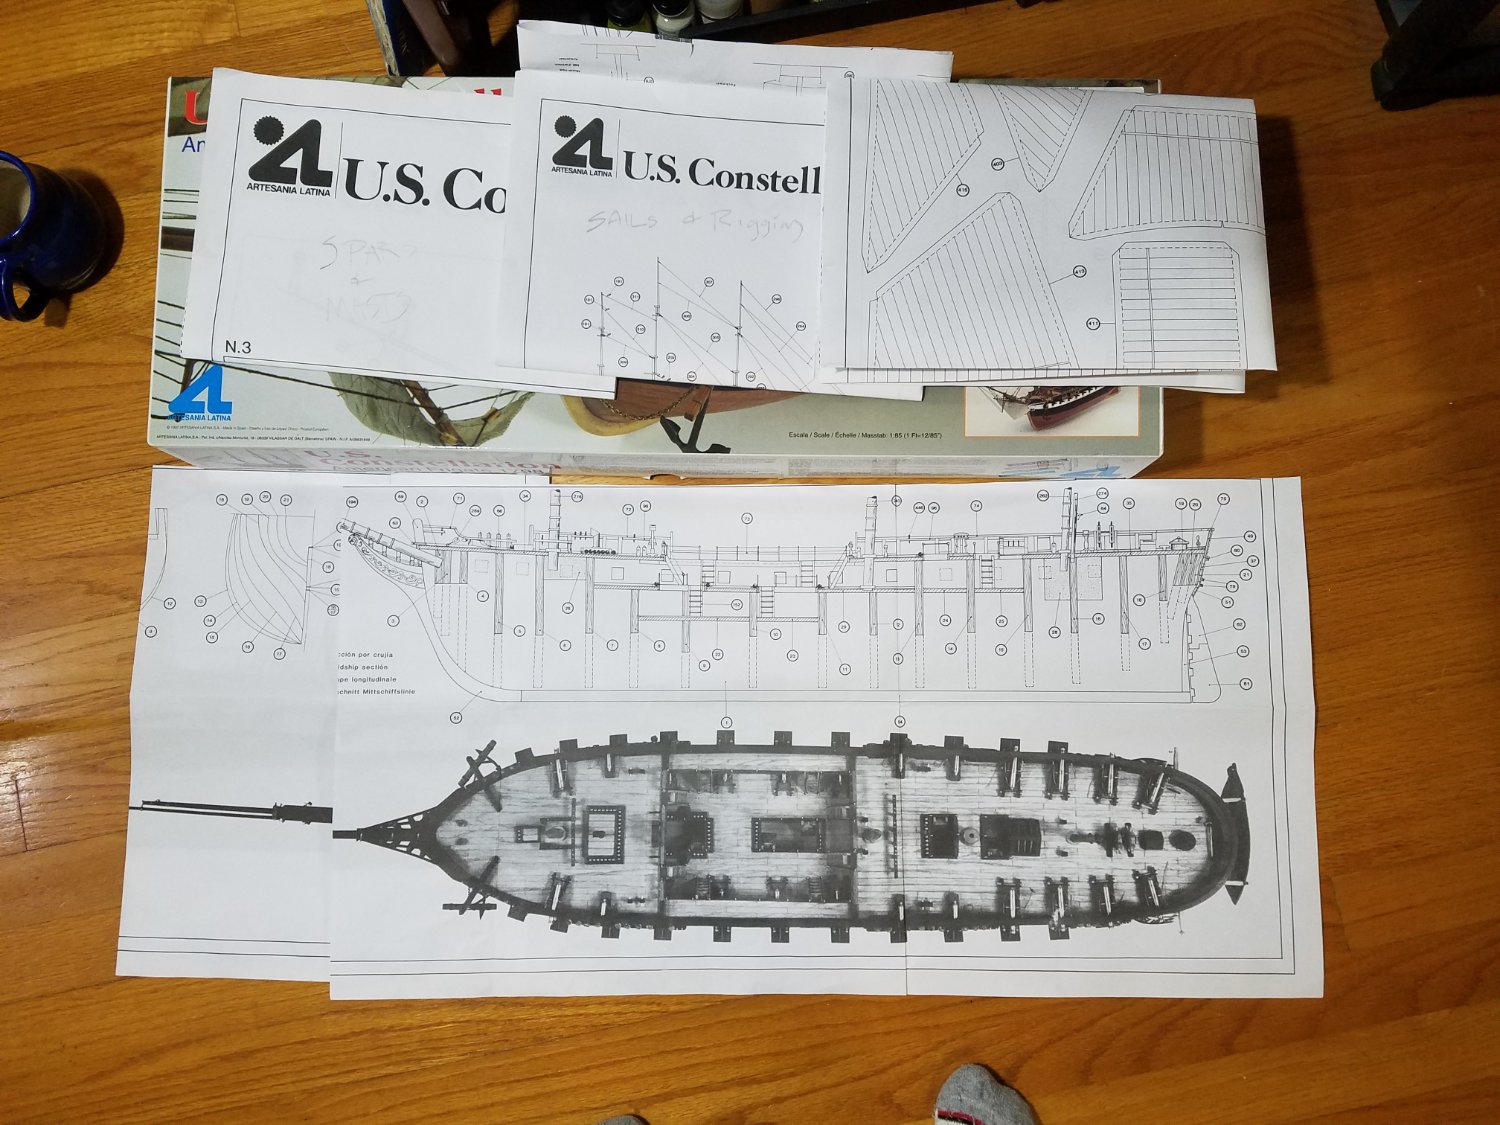
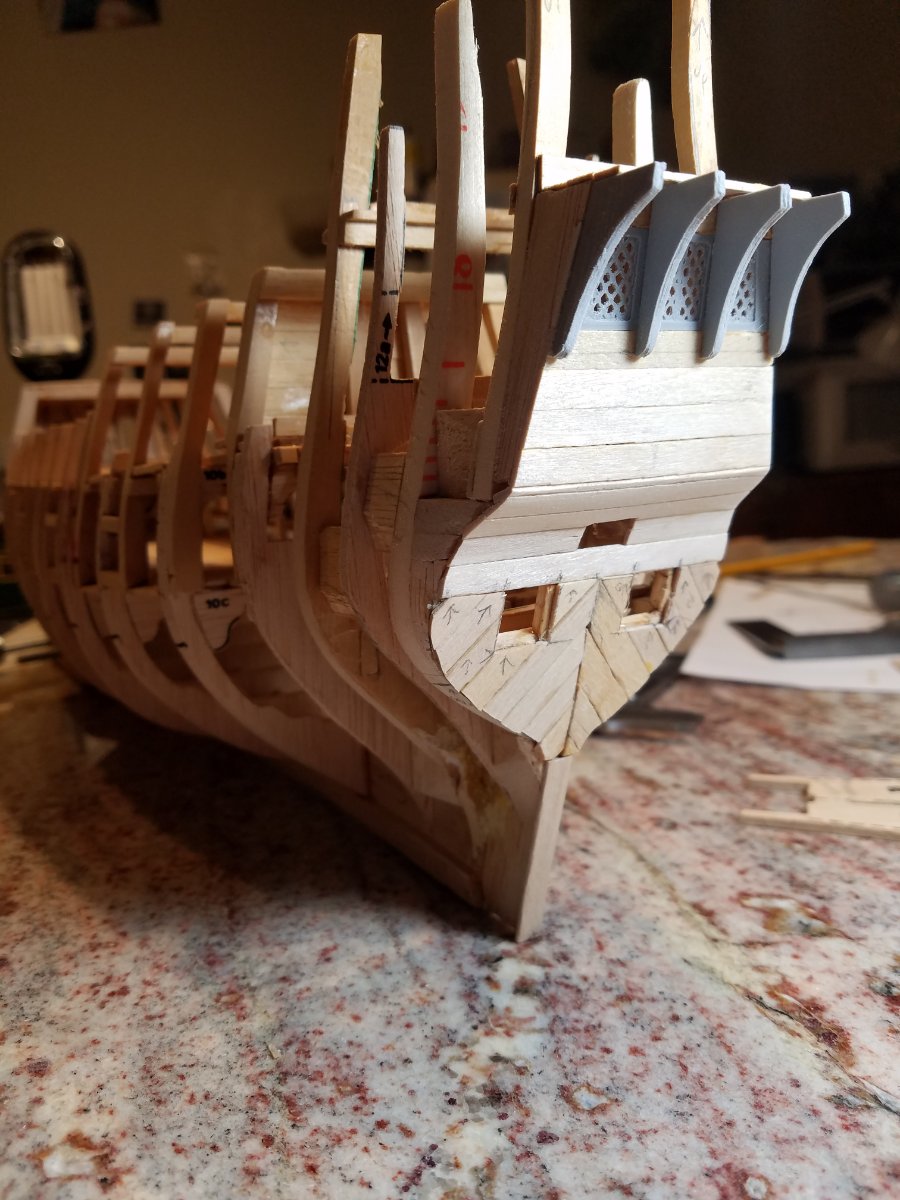
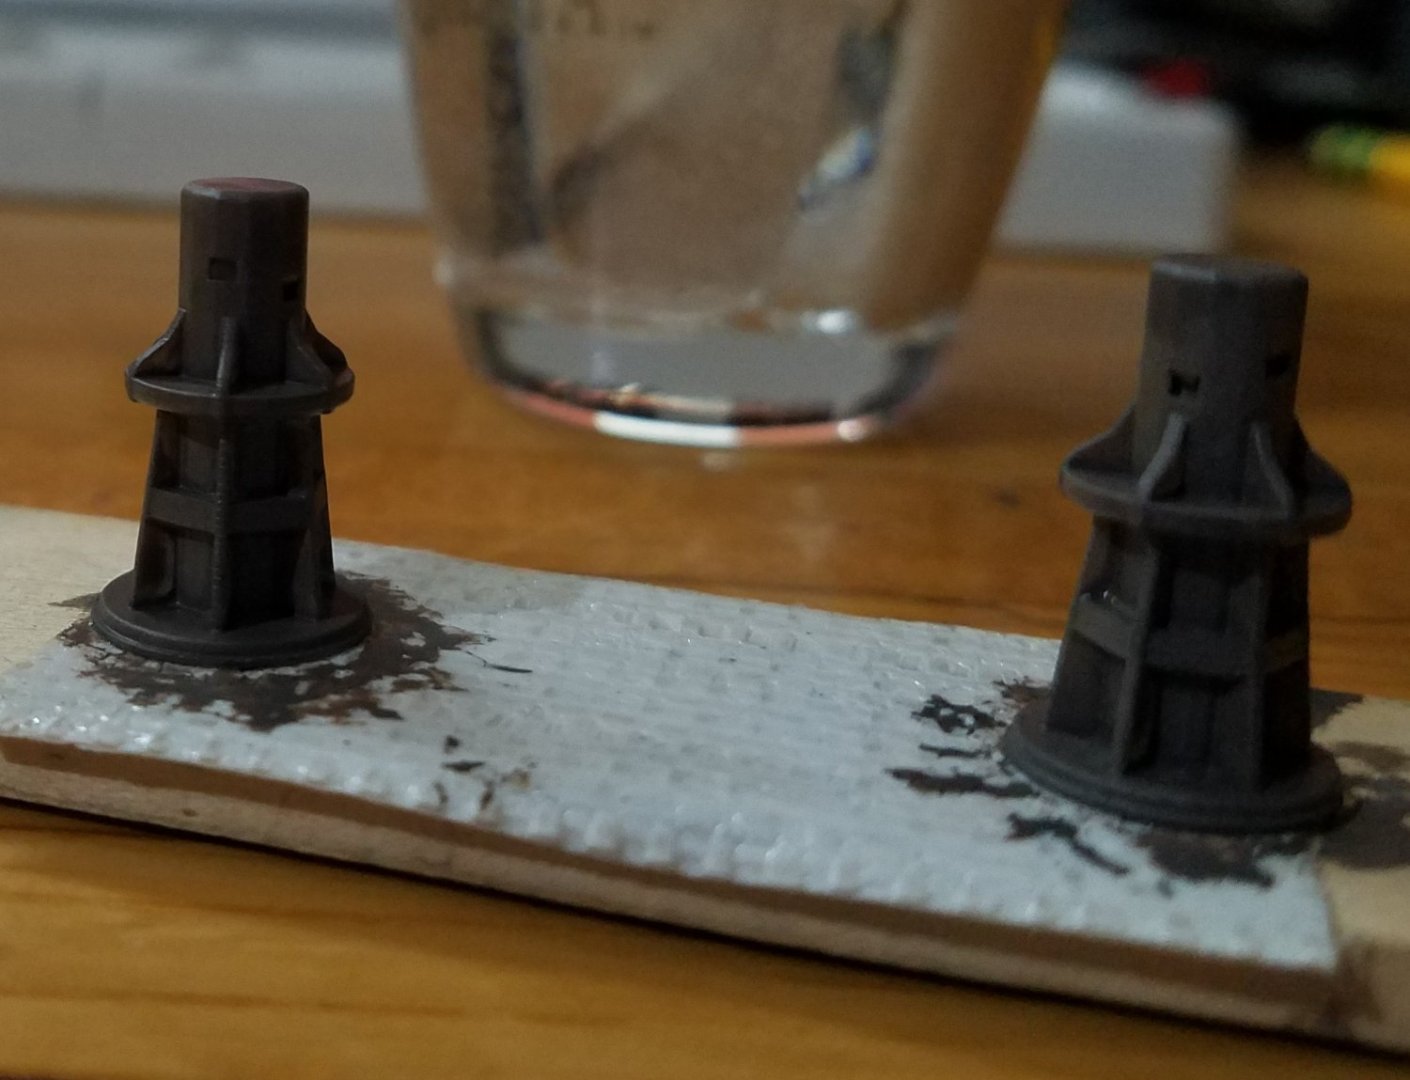
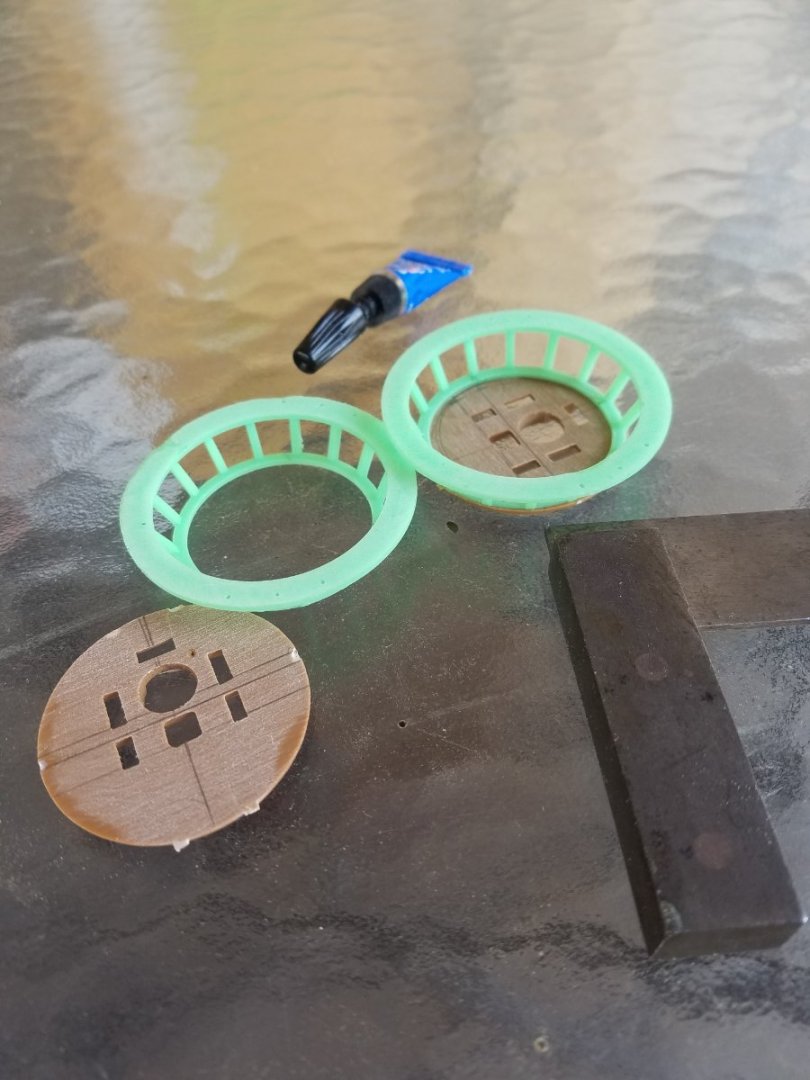
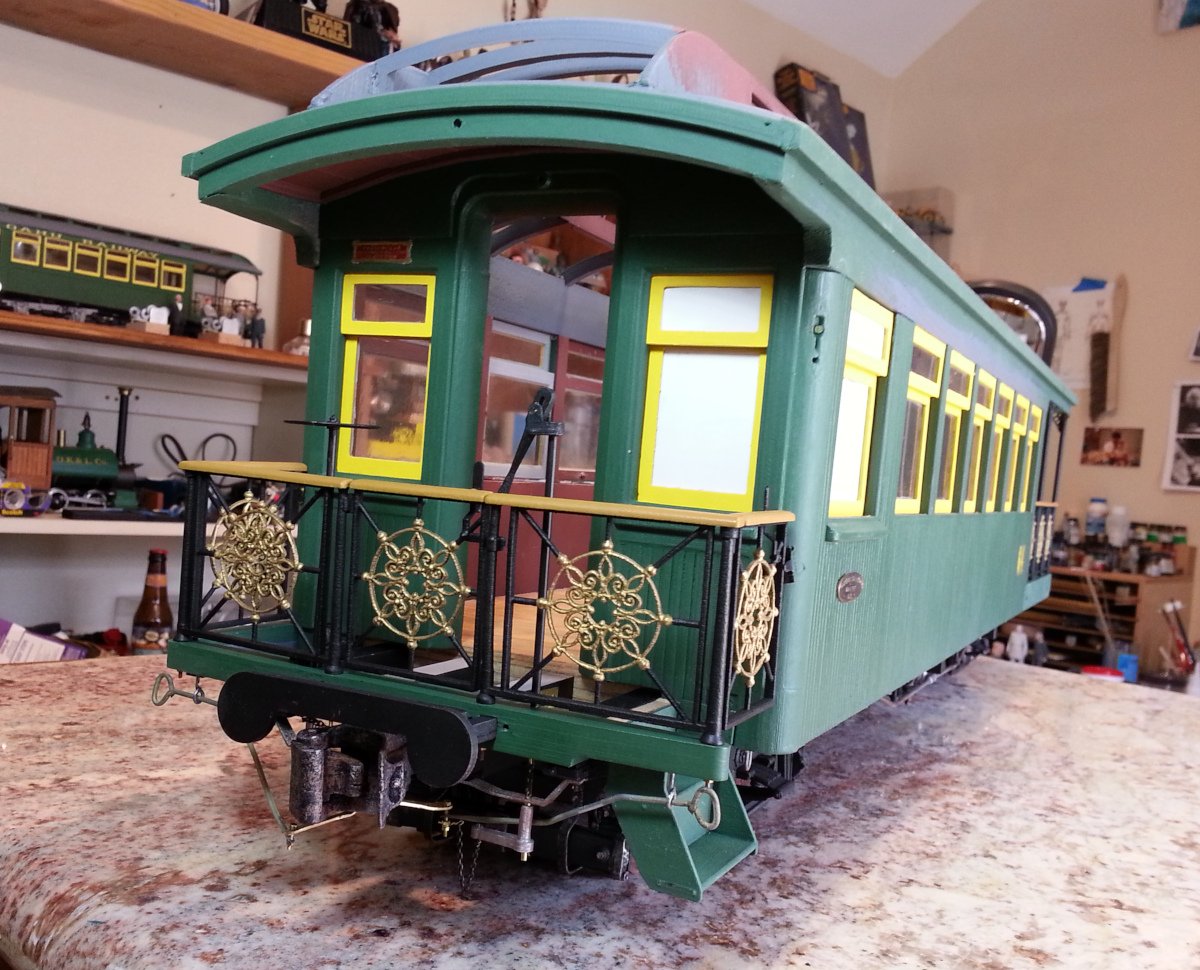
I'm in the planning stage of my build right now. It's going a lot faster thanks to the search results @ccoyle shared with me. I've read a few of the topics related to this specific kit. While most converted this model completely to the sloop, there was one that went for the frigate conversion and I paid particular interest in that one: but I still read through the others in an effort to get to know the kit and it's limitations. Following the first step in @Tschiller topic I ordered the American Sailing Navy by Chapelle. There were two volumes, so hopefully I got the right one; "The Ships and their Development." It cost a little over $8 USD. It's used and reportedly in good condition and since it is from Goodwill I won't mind if I still have to purchase the new $71 version. I'll just consider it a donation to Goodwill. The next thing I did was to divide the plans up: I separated the Sail Patterns from the plan N 3 and took a digital image of the Masts layout for later references, because I will be working on the sails as I'm working on the rest of the model. I'll hand sew them and I found this tedious part of the task easier accomplished in the comfort of my lazyboy while listening to the news. I also separated the rigging diagrams from the amid section profiles below so I don't wear them out as I make changes to the plans. I'm now prepared to start making the necessary changes to the plans when the book arrives. After reading the topics on this kit I decided that I will be redoing the Quarter Galleries in 3D instead of wood. Originally, I thought I would use wood, because I also did not appreciate the brass ones provided in the kit, but I think a nice resin print will finish up nicer than wood because the window mullions and muntins are very narrow and the wood would be too fragile. I printed out the Mayflower's leaded glass windows with a fair amount of success with my filament printer: so I'm certain I can get even better results with my resin printer. I used the resin printer to print out a lot of the parts I modified on the kit. Including the halyard cross tie blocks, the capstan and the railing on the crows nest: I'm also planning for some soft metal castings and some brass castings as well - a lot of which will come from 3D printed blanks. I've had a lot of experience building things I need in a 3D modeler, printing them out and then sand casting them for railroad parts. This whole coach is a 3D print except for the fasteners, some of the poles, handles, chains, substructures and backing behind the walls. Even the wheels are 3D printed.


-
Rkapuaala reacted to a post in a topic:
USS CONSTELLATION by Tschiller - Artesania Latina - Scale 1:85 - Kit Bashed back to 1797
-
Rkapuaala reacted to a post in a topic:
USF Constellation 1797 by Jparsley - Artesania Latina - 1:85 scale
-
Rkapuaala reacted to a post in a topic:
USF Constellation 1797 by Jparsley - Artesania Latina - 1:85 scale
-
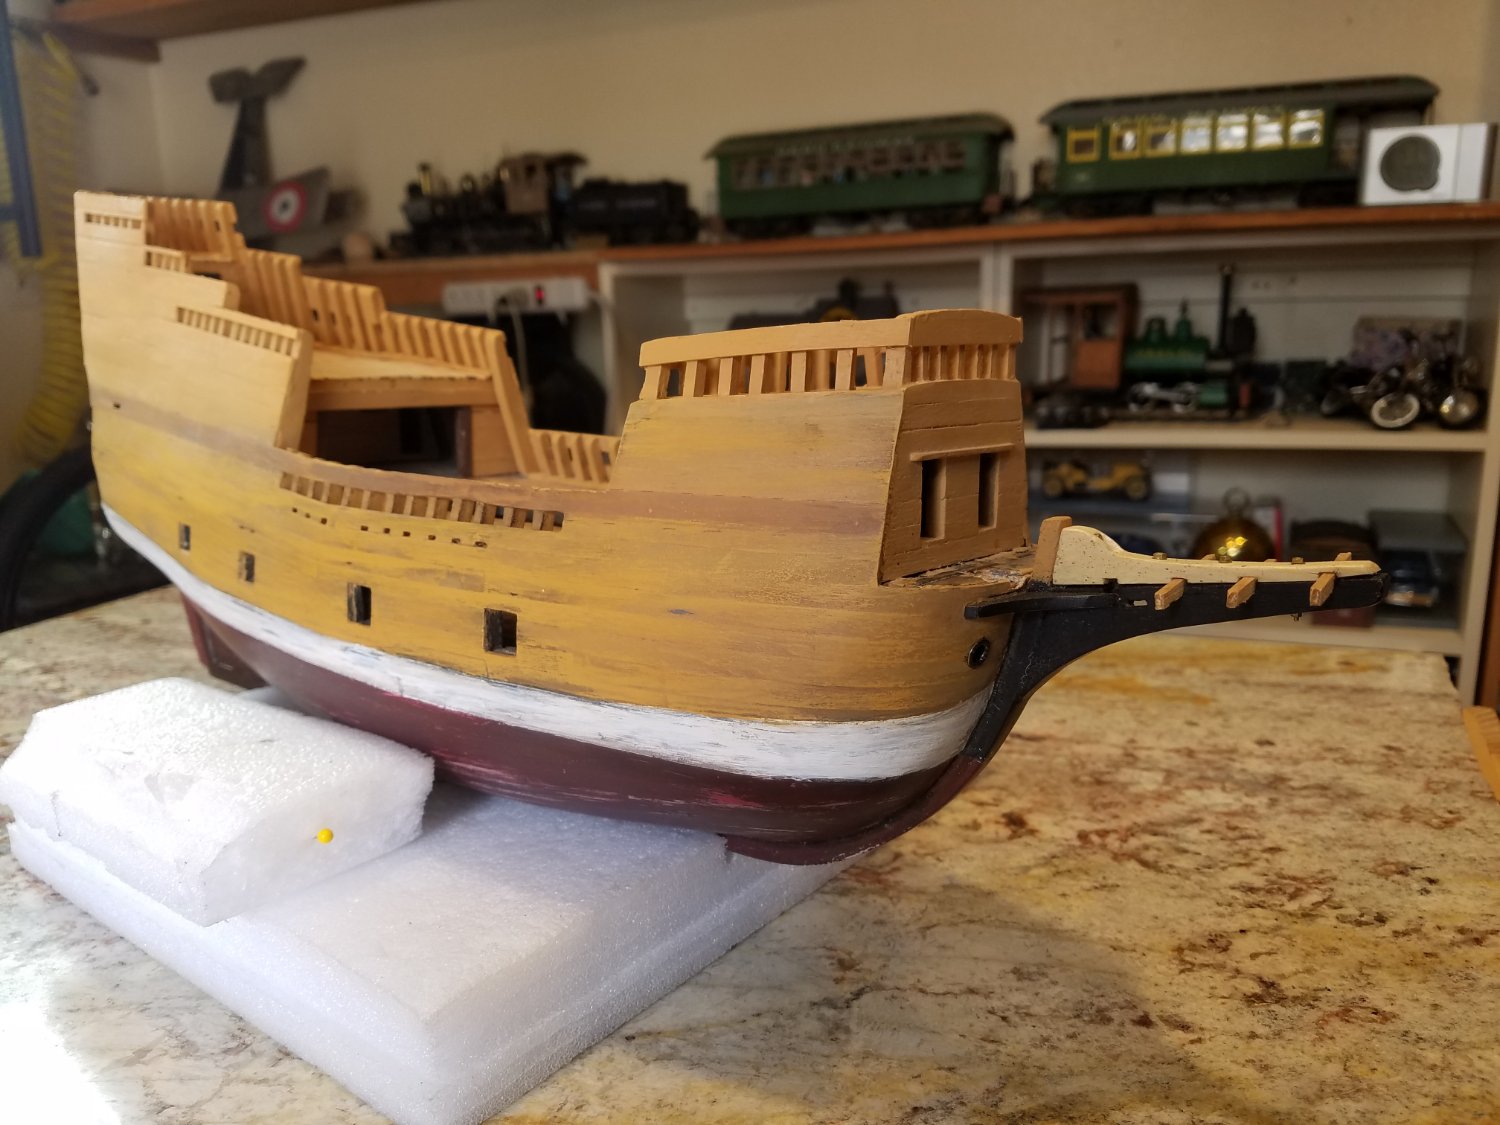
New to this site, and was reading this topic with much interest and awe, but it seems like it has just stopped at the gun deck. I myself, can take years to finish a model, so I'm wondering does the author have an update? I have the same kit and I am interested in returning it to how it looked in 1845 when it helped the Kingdom of Hawaii take back control of islands from the British. This is before it was scrapped and used for parts to build the sloop. I seem to recall reading somewhere that new sloop was intentionally passed off as the original Frigate to fool congress into financing a new ship build, which they would not fund because their budget was created for repairs and maintenance. So, instead of giving the new sloop a new name, they dubbed her the Constellation and claimed they were repairing her. Of course, I read that years ago, after I bought the kit in 2003, so I don't recall the source, and I may be thinking of the Congress or the Constitution. Anyway, great work, and I'm excited to see more of how these mods are going before I start my own.
-
Rkapuaala reacted to a post in a topic:
Constellation by Rkapuaala - Artesania Latina - 1:85 scale - Frigate - with mods
-
Hello everyone, I'm new to model ship building kits and to this site. I found this site while googling for information about the Constellation and have already learned more reading one topic here, than I have on anything else Google pulled up. It's been sitting on the shelf in my shed since 2003. It is one of the 3 models I bought from our local hobby shop which was going out of business. The others were the Swift and the Mayflower. These are the only kits I've built. Normally, I build train models, some from scratch, some from kits, some live steam, some electric, HO, O, 1:20.32 and 7/8ths. I finished the Swift in a short period of time compared to the Mayflower, which I started in 2006 and I'm just now getting to the rigging, I think that's due to the fact that this Mayflower is from a Billing's kit that looks nothing like the Mayflower II which is the prototype image I am going for. So I had to cut the bowsprit beak down 3/4" and add 3/4" to the back of the model. I also had to change the location of the masts. I've made a lot of mistakes on the Mayflower, and I want to make sure I don't make them on the Constellation. I think I'll move faster and with better results if I redraw the plans that came with the kit. I'm not sure when I'll get to building the Constellation but before I do, I am going to make sure I make the necessary changes to the plans that were included with the kit while I'm finishing up on the Mayflower. I've skimmed through this topic so far and got some good info: It helped me to confirm my suspicions that this kit is not actually the Frigate, but is more like the sloop in that it's transom is rounded while the real Frigate's transom was square. What I'm not sure about is, are the quarter deck and forecastle separated on the Frigate as Bill Morrison describes, or is the deck just one piece like it is on the plans and model shared by j11 on that same topic? I'm also wondering about the position of the Masts, the size of the masts and spars. There seems to be a lot of knowledgeable model ship builders on this site, and I'm pretty much a newbie so I'm hoping someone can point me in the right direction to some accurate plans. Thanks in advance for your help.