oakheart
-
Posts
518 -
Joined
-
Last visited
Content Type
Profiles
Forums
Gallery
Events
Everything posted by oakheart
-
 Yes they are pretty complex shapes to do in CAD Might be easier to just make one - really interesting setup. Tim
 -
Hi Craig, they say it's 1:1 On viewing, I had missed the numbers on the tail only when I read the comments did I realise. Loved the dummy pilot. CAD is always a learning, I don't use it enough to keep what I learned last time, so no 'muscle memory' Hope you are keeping warm out there...... brrr Tim
-
Hi Craig This just popped up on my radar, have you seen it? Tim
-
Gold solder for brass
oakheart replied to Richard Braithwaite's topic in Metal Work, Soldering and Metal Fittings
There is a brass ( sort of ) coloured silver solder in UK I can't remember where I got it so you will have to google for it Tim -
Really nice work BE, you really do inspire me, I think I need to add this detail to my cutters boat. Tim
- 332 replies
-
- 2
-

-

-
- Harpy
- Vanguard Models
- (and 1 more)
-
I had some high quality wood veneer work done 50 years ago and it's still sound, they used standard Evostick contact. YMMV with other brands Tim
-
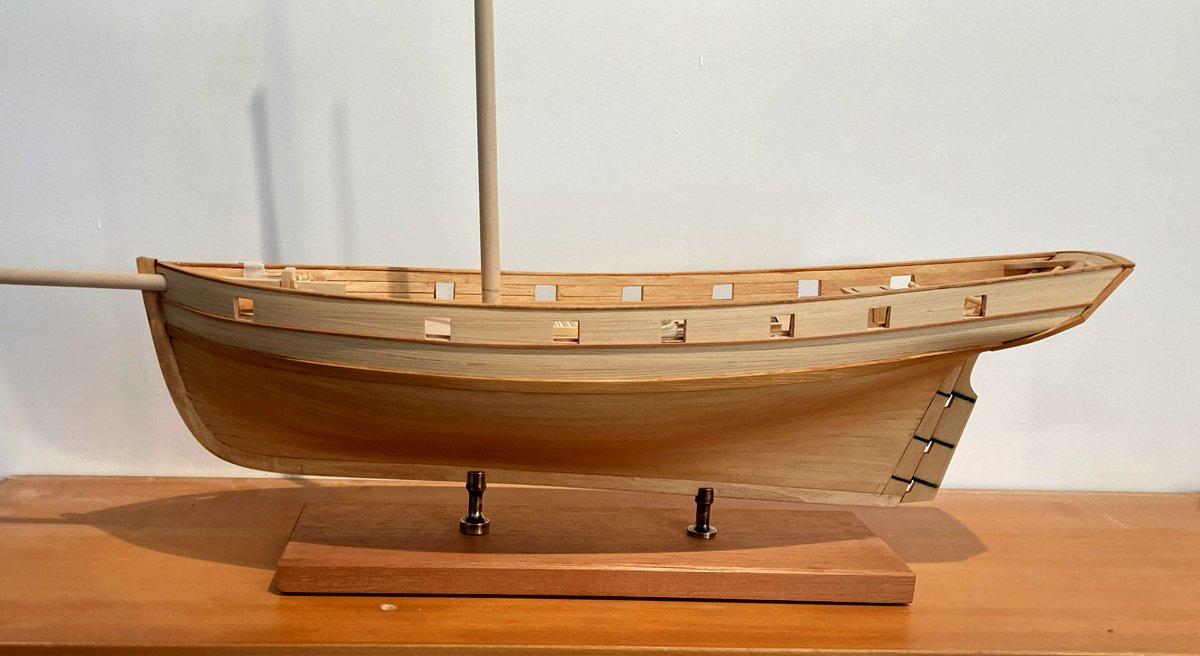
Thanks Craig, I need to make sure my mast is held tightly, at the moment it wobbles about all over the place. And thanks to everyone for their help, it's what I love about this place. Tim
-
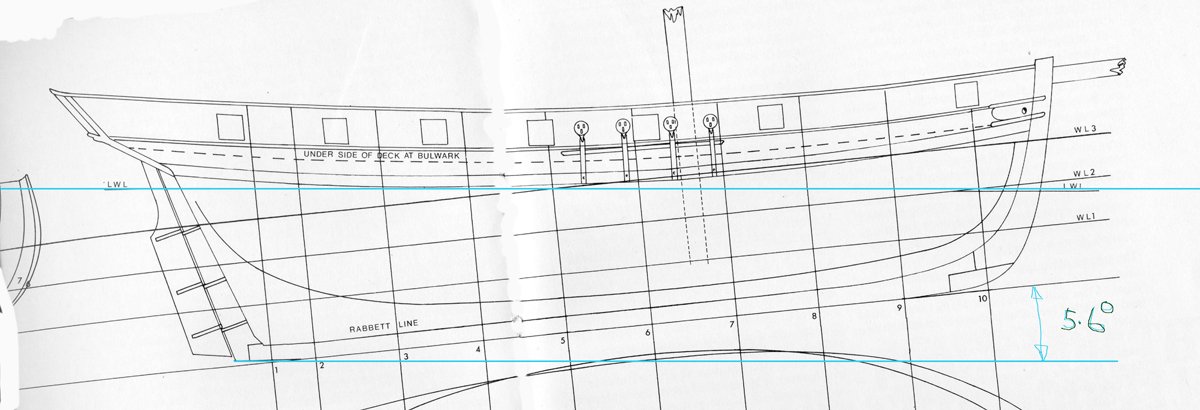
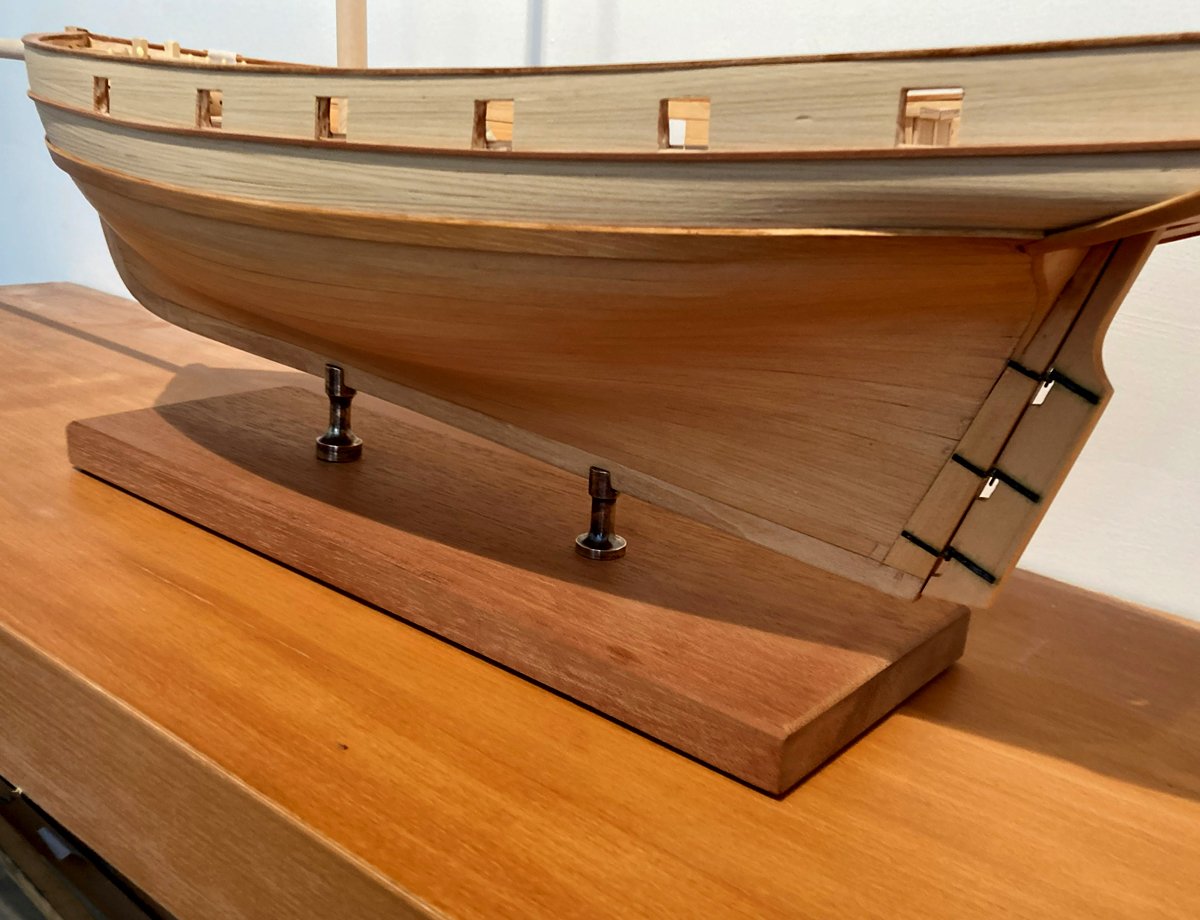
So I measured the angle on Bills drawing and as far as I can tell its the same as the RMG drawing. That's assuming LWL means the water level. Here is my stand with a 10mm spacer that brings it up to the correct angle, I think this looks too steep. Probably half that would do it, I love tinkering until it looks right, all part of the build for me. Tim

-
Thanks, I will check Bills plans to see what angle the mast should be. Much happier with the look of the base now. I can hopefully also adjust the pedestals to get the keel at the correct angle to show the drag. Tim
-
The Postie has just delivered a nice new 'Apron' block plane so now I have no excuse, on with the build. Tim
-
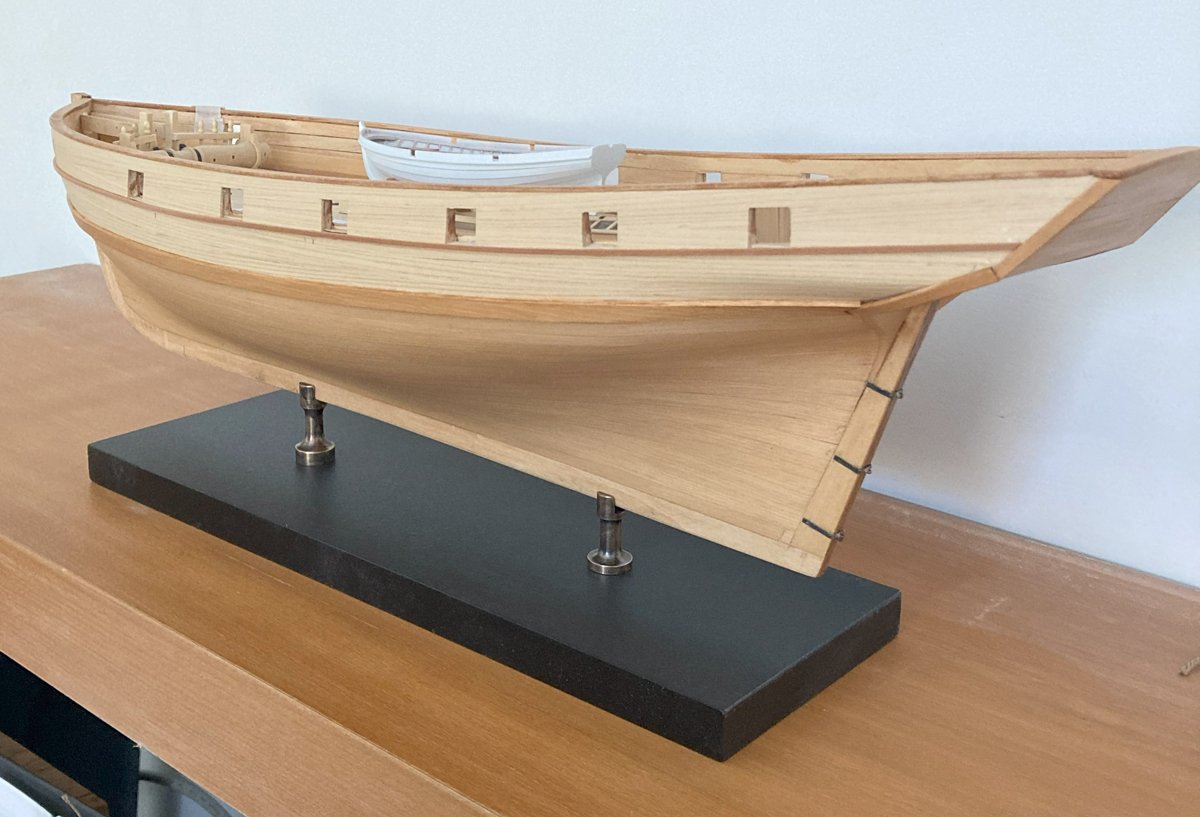
OK. I have gone for a satin black base. I think this works, some of the contemporary models at RMG have black stands. @Thukydides Thanks for the comment, I have spaced them out further and the model is then not level, is that important? I suppose the mast needs to be vertical, but as its not yet fixed in place, difficult to tell as you say this is all down to a personal choice. Tim
-
Hi Christopher, my build which was inspired by this build by Thunder and is already nearly two years in the making. I wish I could have thanked Bill in person. It's great to have a relative of his on the forum. Do you make model ships as well? Tim
-
I like that idea,. Had considered the diorama idea, with the base a lump of rough stone / rock, could be a bit 'twee' if not done right. Could even be sandy like the seabed. Endless fun could be had. I could play all day, better than doing any real work on the ship. Tim
-
Hi @Thukydides thanks for the positive feed back, I would have to agree on the spacing. I will have to do something about the heights of the pedestals to get the model level if I move them wider. On the wood front, I did find a bit of wildly grained parana pine but it looks a bit too goofey. Might even do a painted base. Tim
-
Thanks for the feedback Craig, I agree about the straight grain, its what there was ........ Will search my wood pile for something more lively, I did not want to dominate the model. maybe a paler wood with some nice grain. Tim
-
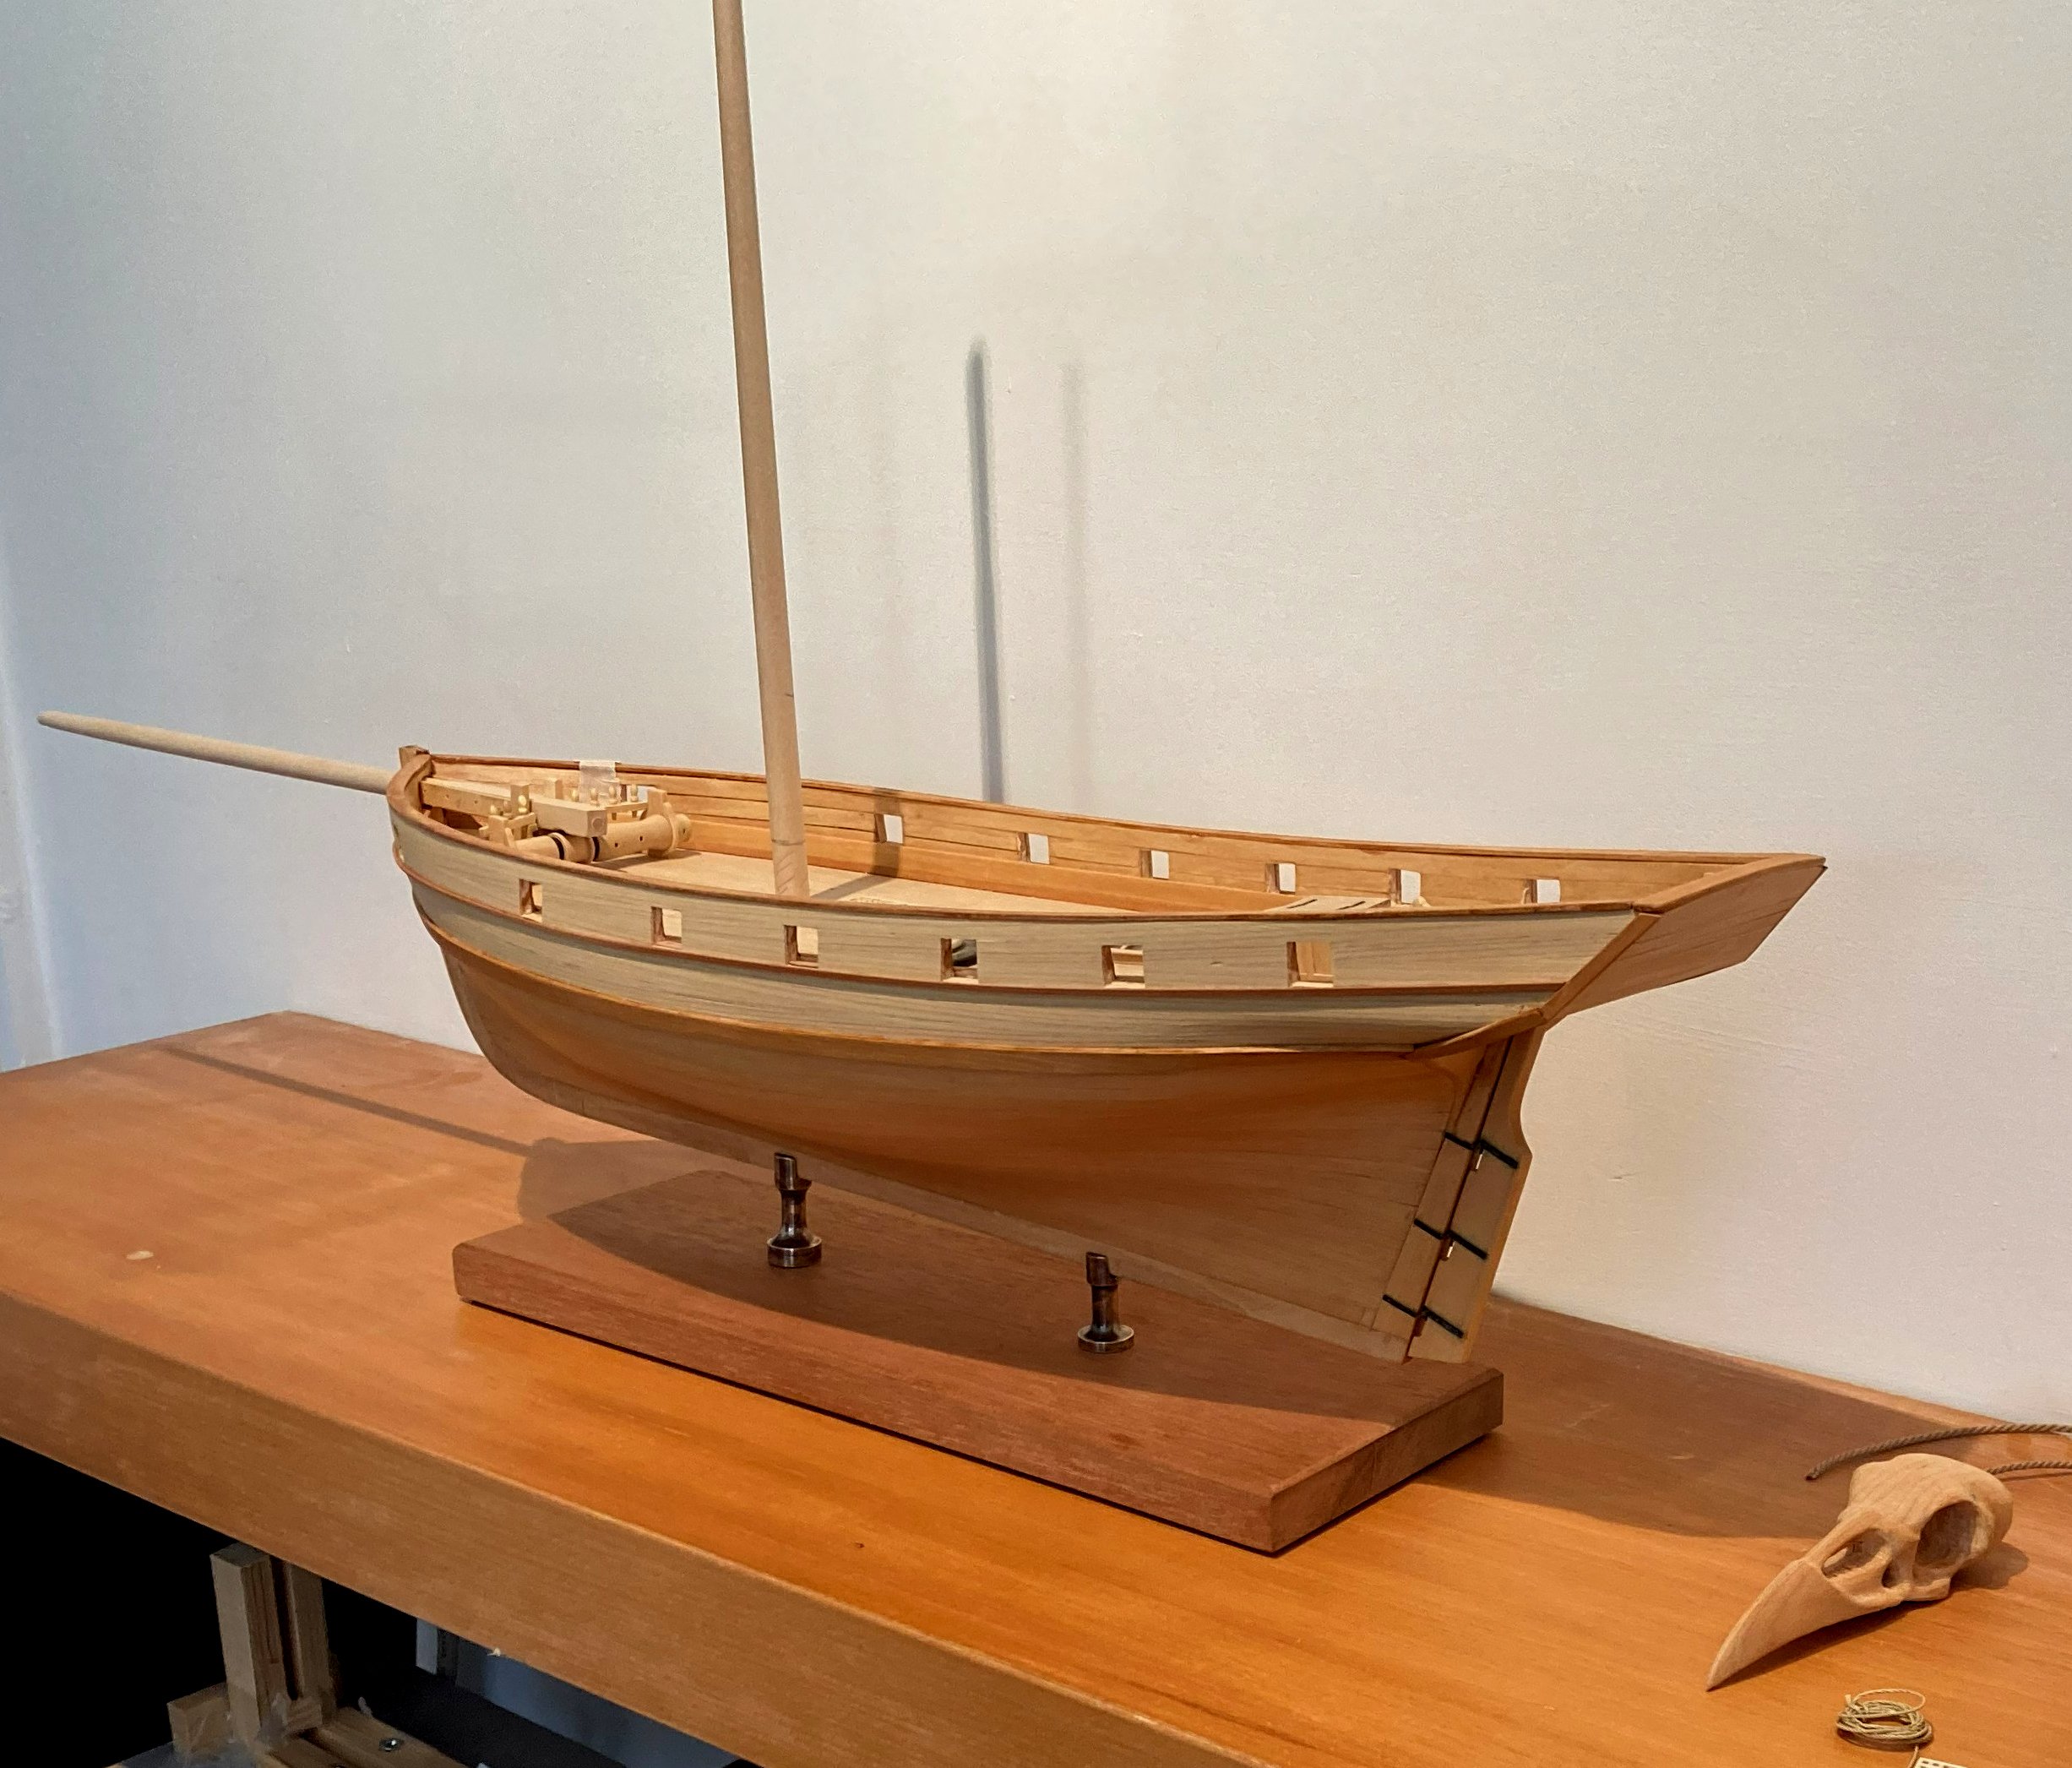
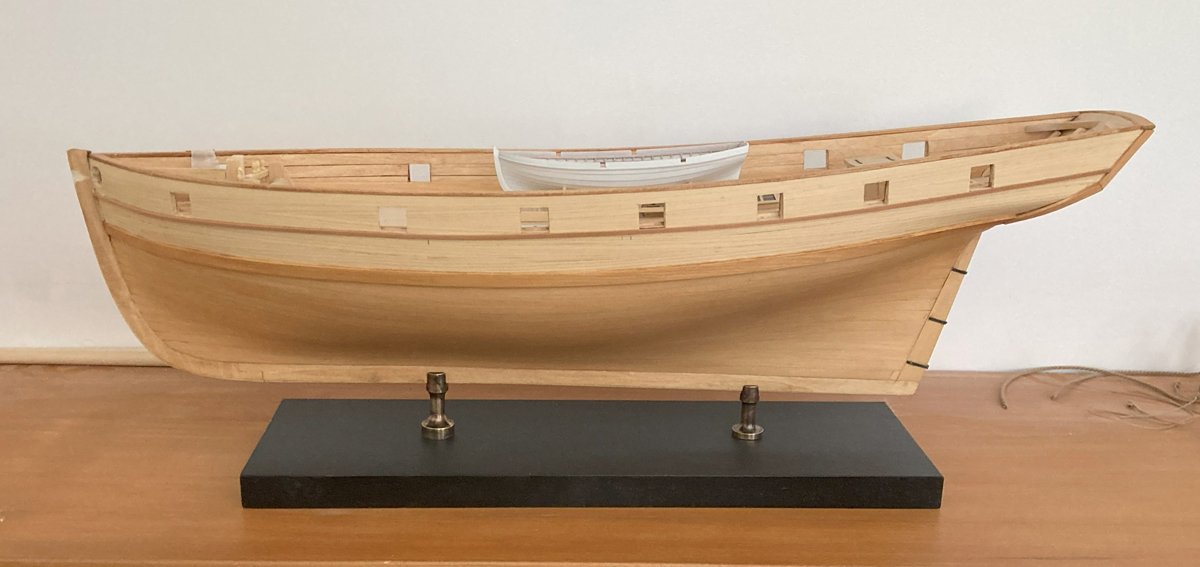
After remodeling the kitchen over winter now the garden has started up again. I did manage to get a stand made from a bit of mahogany I had, not sure if it works? It's a lot redder in real life. pleased with the brass fittings from Cornwall Model Boats, dulled down as they are bit bright otherwise. Comments please. Tim

-
Hi Craig Believe it or not, there are crazy peeps who make and fly things just like this from my local airstrip ( Shobdon ) Close up they look like they are made from ali. tent poles and ripstock with a brush cutter engine bolted on. Some even have cabins and windshields. I will stick to making my models 🙂 Tim
-
I don't know how I missed this build, great work, now I am here, you are inspiring me to get back to my build. Tim
- 1,215 replies
-
- 3
-
-
- sloop
- kingfisher
- (and 1 more)
-
using my iphone I get an A# not sure how accurate it is see you tube https://www.youtube.com/watch?v=iNnseubrRMM Tim
-
I second that it has to sound right, if I was musical I would give a note to aim for :-), it has to to be a 'ting' not a 'thunk' Also make sure the blade square to the table in all directions. Blade thickness can have an effect too, a thin blade will wander more that a thicker blade. On mine with a very narrow jewellers piercing saw blade I can cut along a printed line and get an accurate shape. with thicker blades cut as close as you feel comfortable with and sand back to the line. You probably know this, don't force the material through let the blade do the work. I have found that as the blade gets blunt it will wander more. When cutting acrylic, put Sellotape along the cut line, it acts as a lubricant. Tim
-
Thanks Johann
-
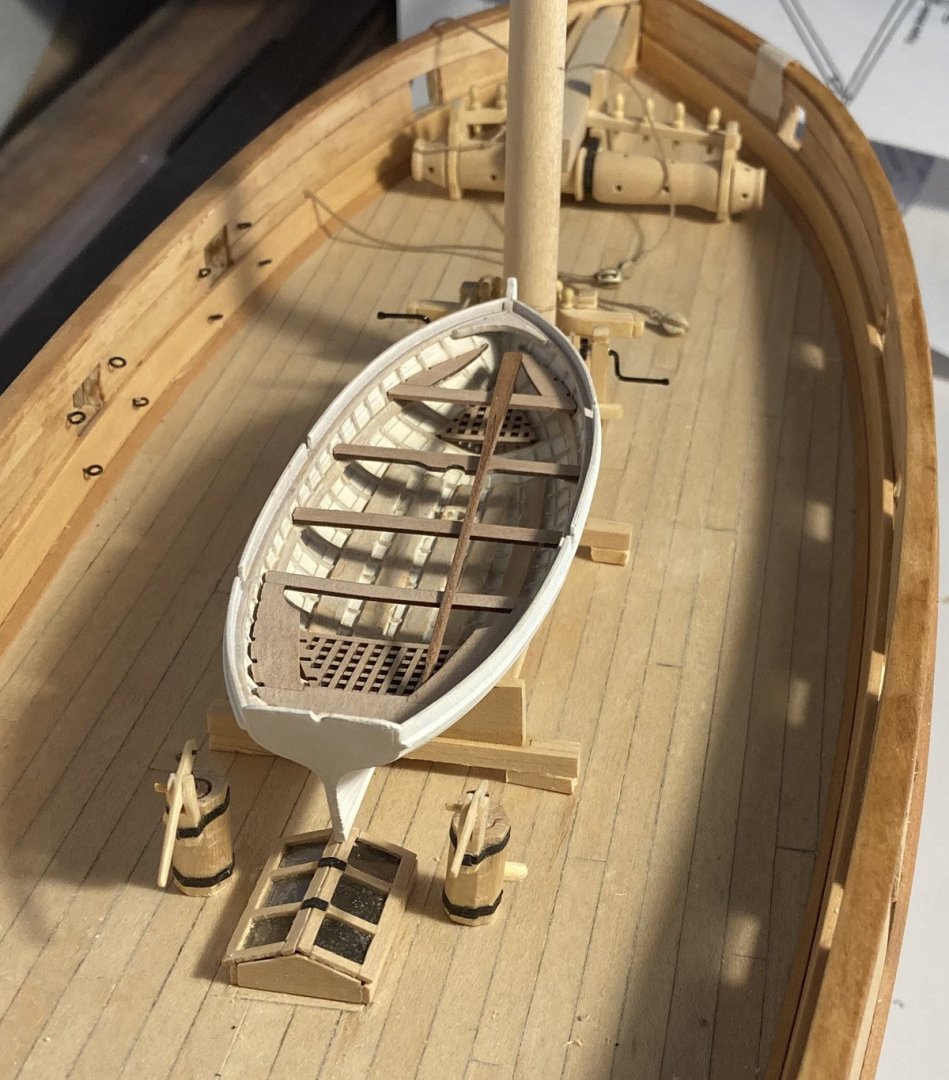
Thanks to both @SaltyScot and @Thukydides for the compliments and all of the likes. Still more deck fittings and anchors to do before I get started on the rigging, oh and the cannons. Tim
-
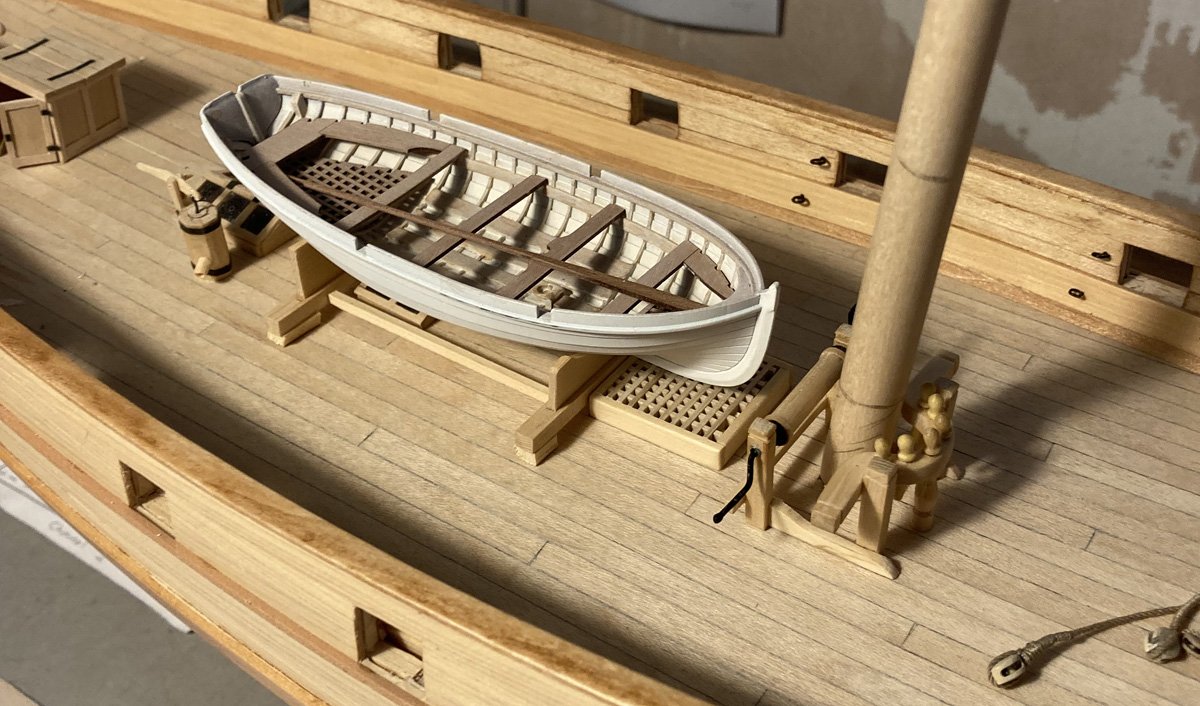
work for this year has started. I had to move the pumps back towards the stern and jack the ships boat up a bit to make it clear the skylight but I think it looks okay. Tim
-
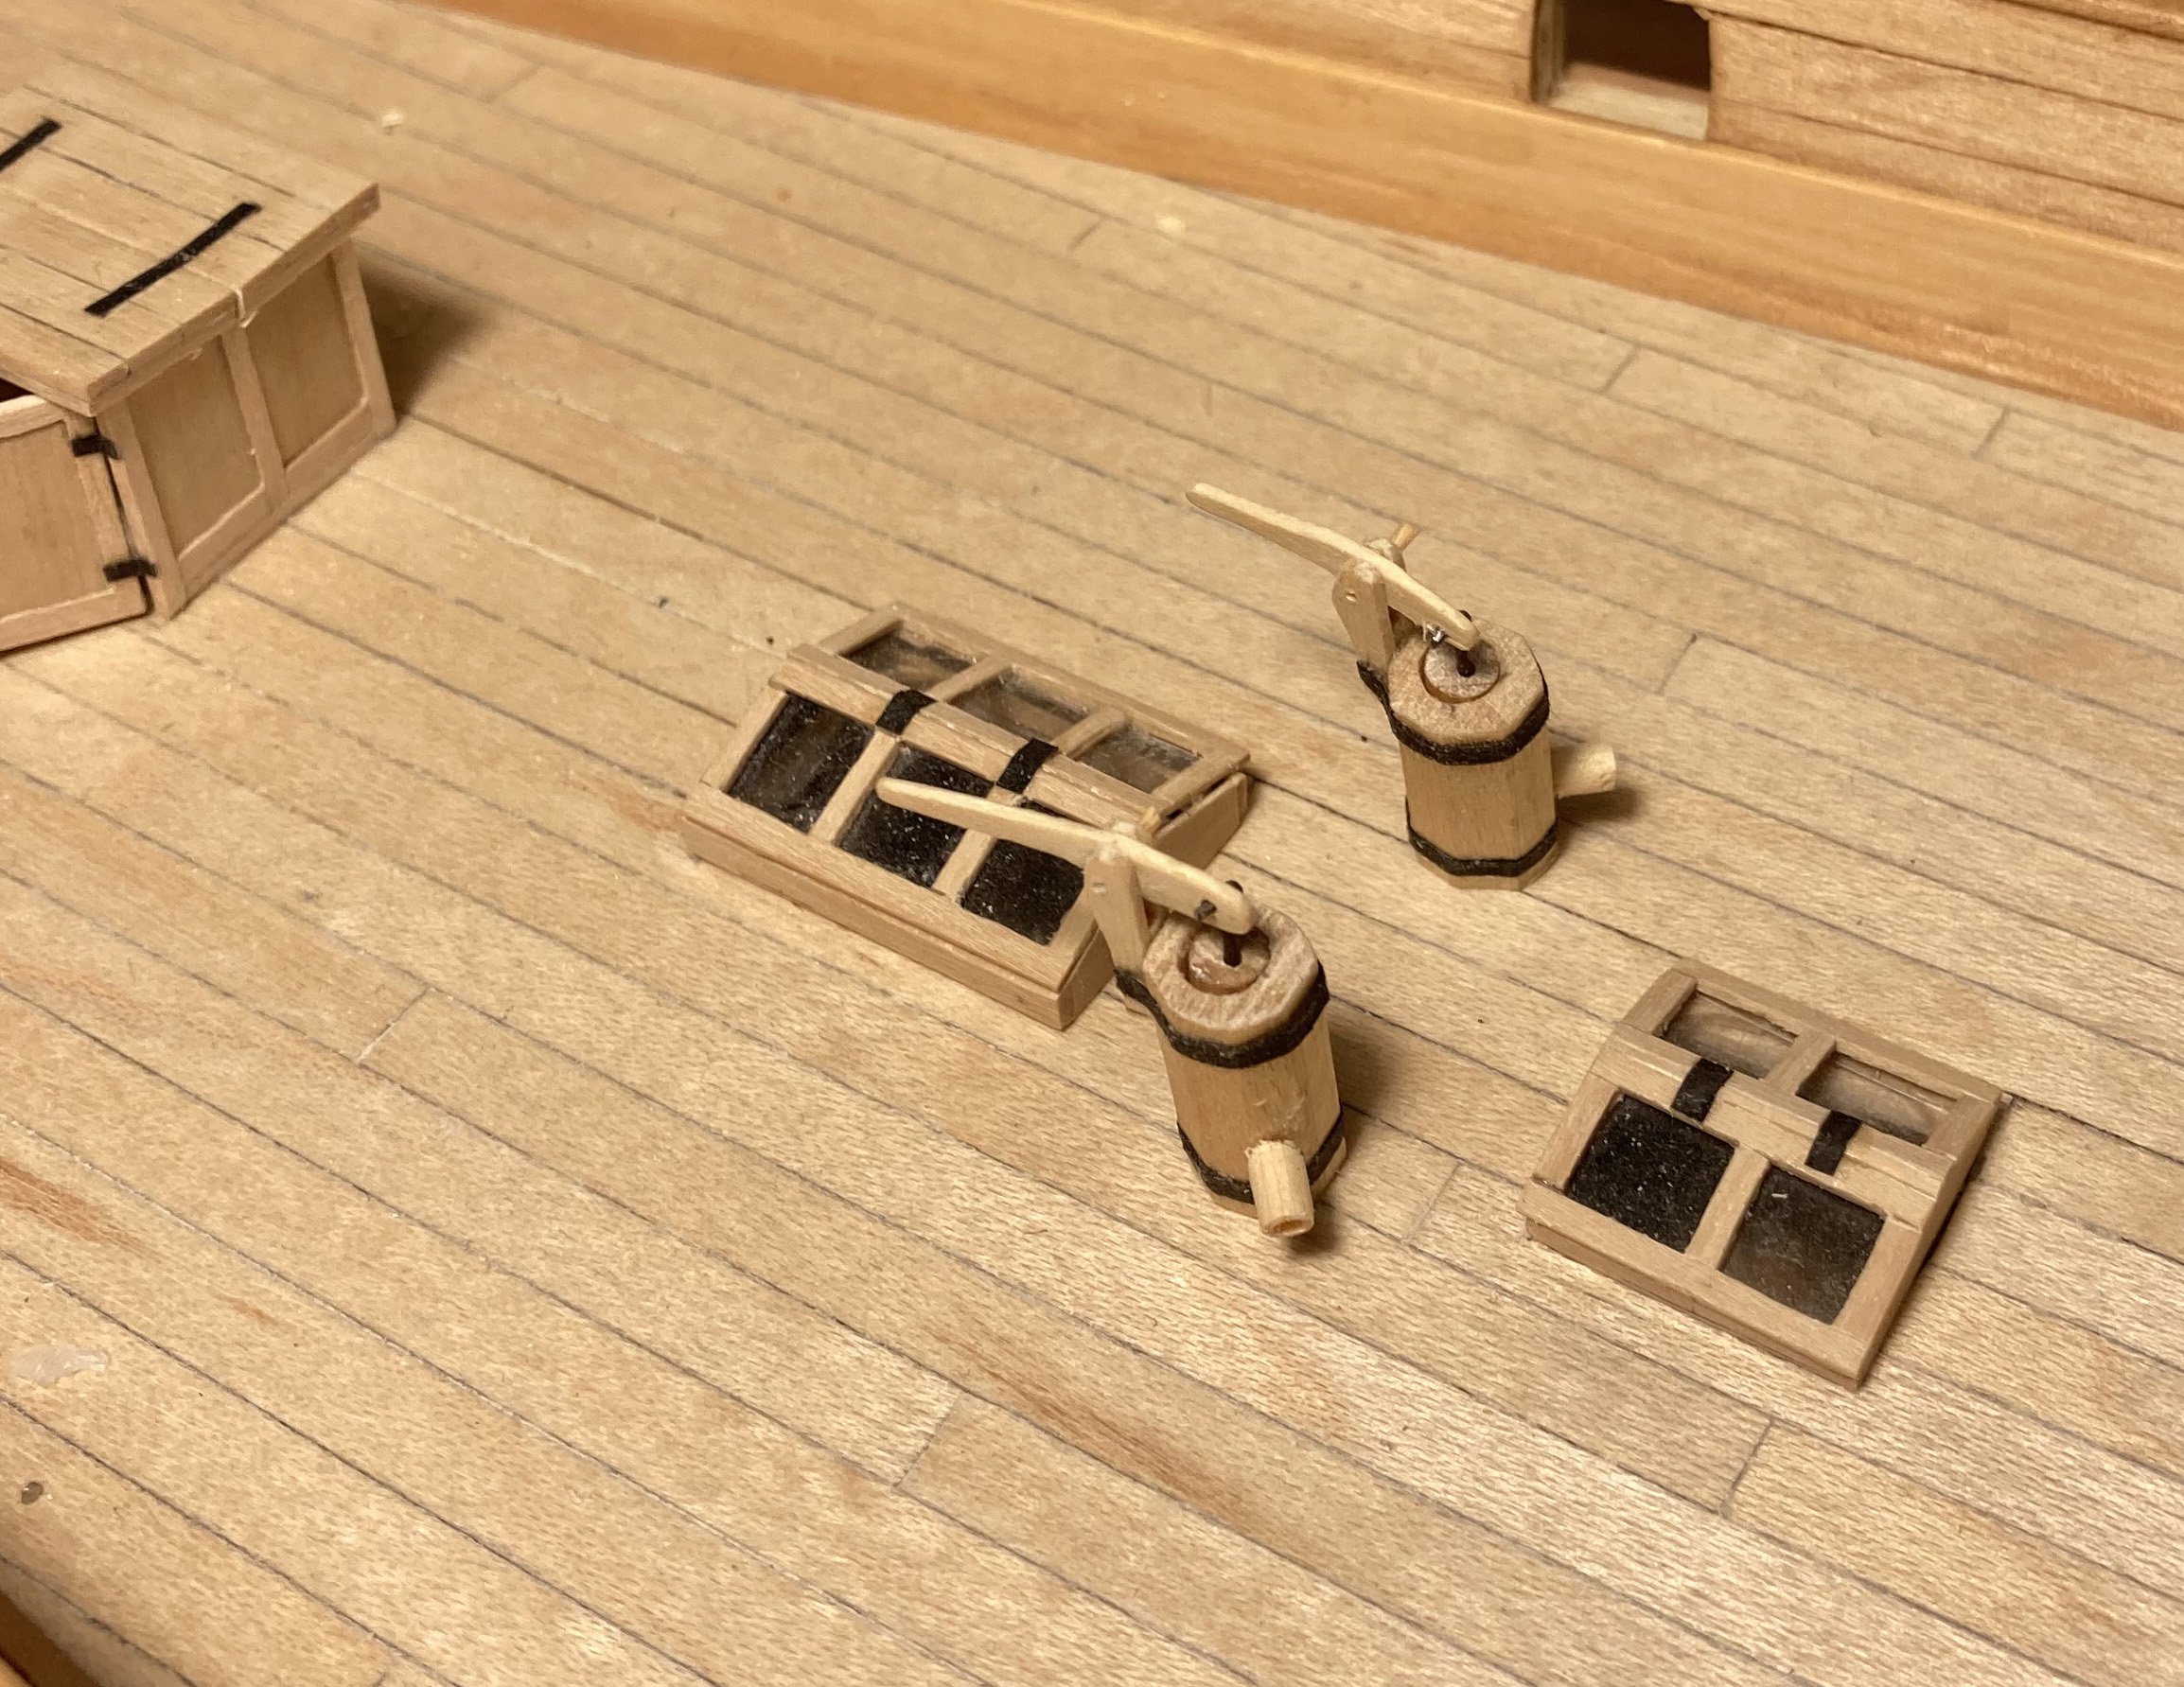
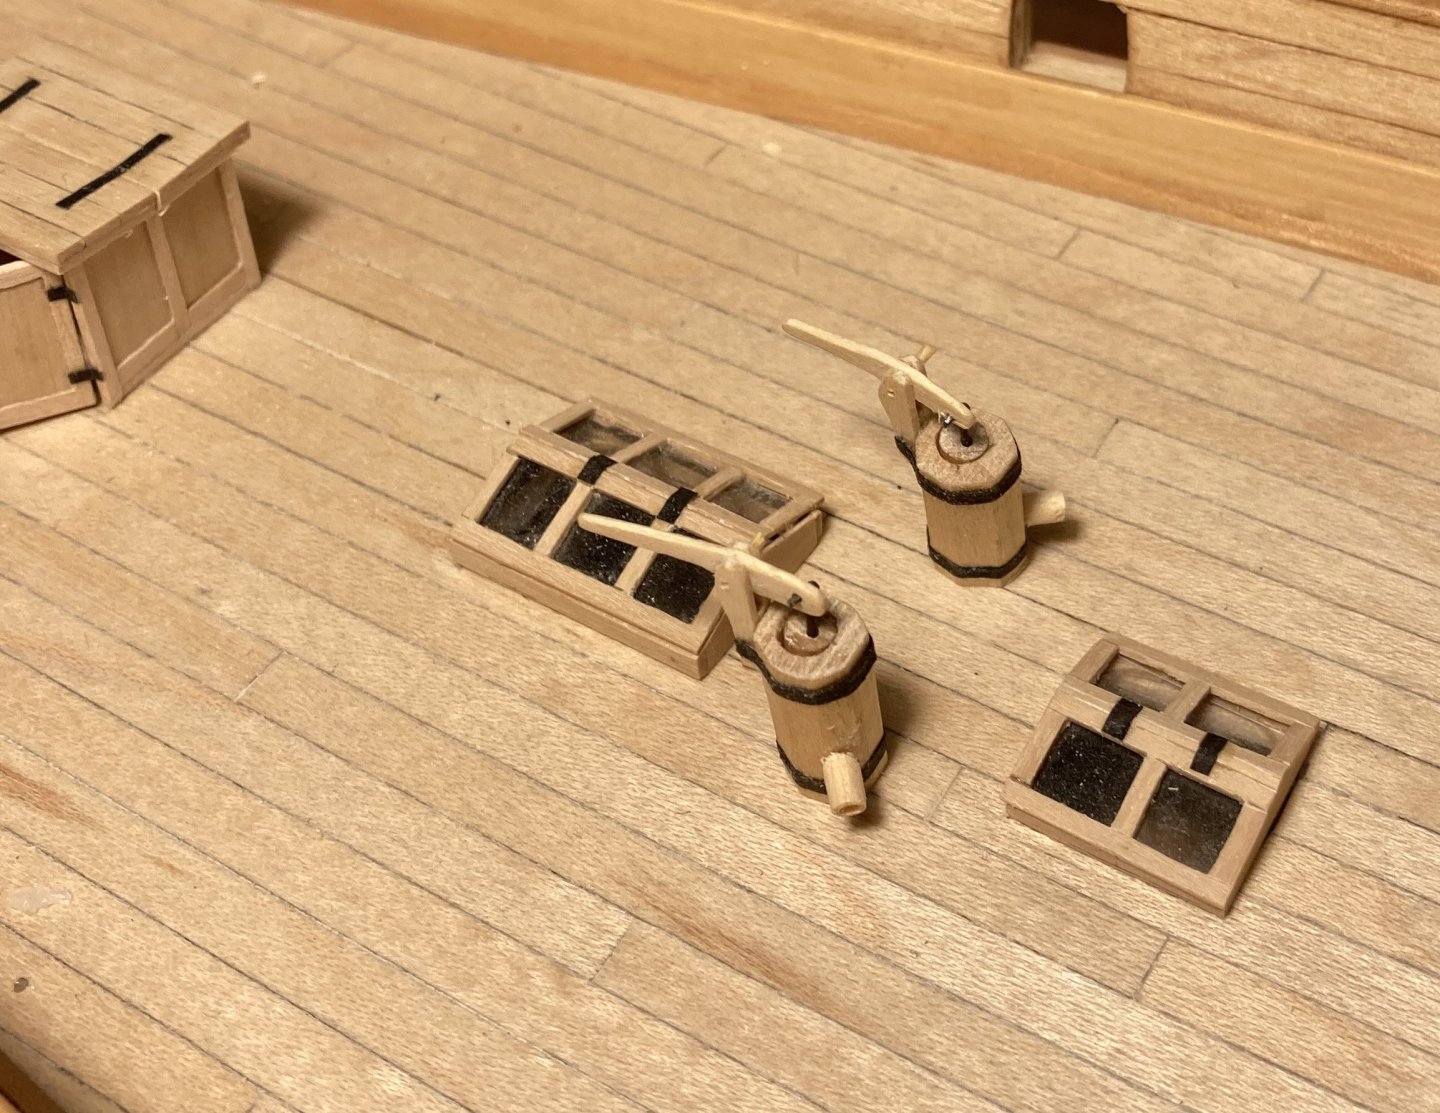
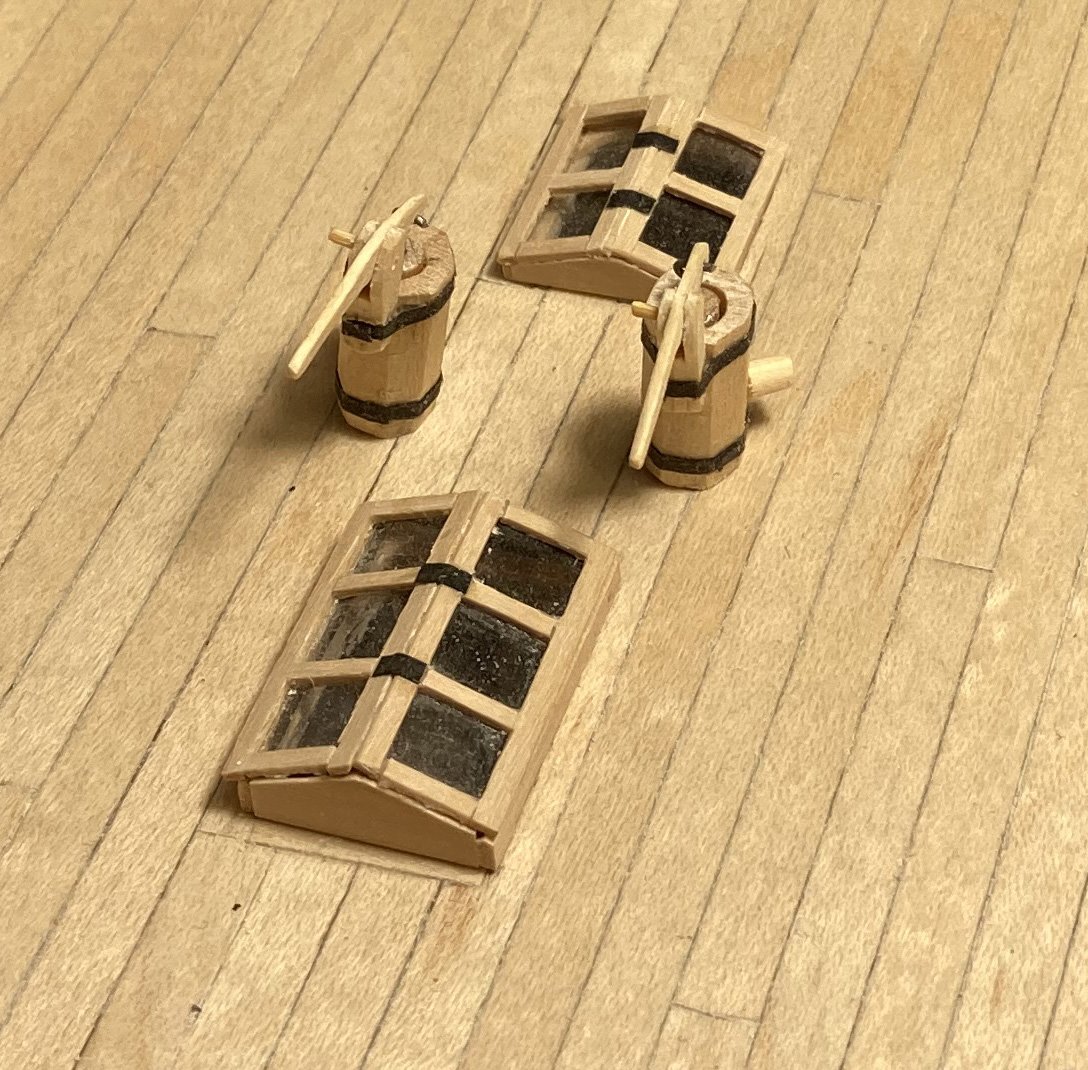
I managed a couple of hours model making between eating, drinking and making merry. Got the pumps made. Not sure if they need iron lids or not. Hope every one has a great year in 2025 Tim
-
It's also available in square and rectangular strips. I have some 0.5mm square by Plastruct, made in USA Tim