VitusBering
-
Posts
297 -
Joined
-
Last visited
Content Type
Profiles
Forums
Gallery
Events
Everything posted by VitusBering
-
 Thank you profusely George. Your Flying Fish is a wonder to behold - craftsmanship par excellence. I've considered rigging at least one side's davits with a boat suspended above the water as well. It is a passing thought but one that won't totally evaporate.
 -
Thank you Bruma. Following your lead, I have these davits and the fife rails painted and prepped for installation but not glued in yet. I am relying heavily on your CS build and experience, they have been invaluable resources. I will shelve the davit installation for now for that reason and because I'll likely need to wait on delivery of some sort of stiffening material or replacement davits - but mostly because of your cautionary words.
- 89 replies
-
- 1
-

-
- Cutty Sark
- Revell
- (and 2 more)
-
Thank you Ian but, as I alluded to above, my experiences with metal are -- not good to say the least. I know that simply bending (and perhaps tapering) a brass rod should be simple - and it is for most folks. Some materials and I have a long sad history and metals are one of those. That being said I will try to shape a reinforcing rod to match the curve of the kit's davits and attach it somehow (CA probably). I have spare davits in the spare kit and I think also in the scrap bucket maybe. At any rate, low risk.
- 89 replies
-
- 3
-
-
- Cutty Sark
- Revell
- (and 2 more)
-
Thank you George. I've considered stiffening the stems with some sort of wire but I'm not sure how unobtrusive (or obtrusive) that approach would be and if history serves I'm not good with metal (no excuse, I know, this should be simple but it is me we're talking about here. I should have added something for scale - the stems are about 1.5 mm diameter and are soft plastic. I did experiment off-ship with stiffening the ropes. The results were less than desirable.
- 89 replies
-
- 1
-
-
- Cutty Sark
- Revell
- (and 2 more)
-
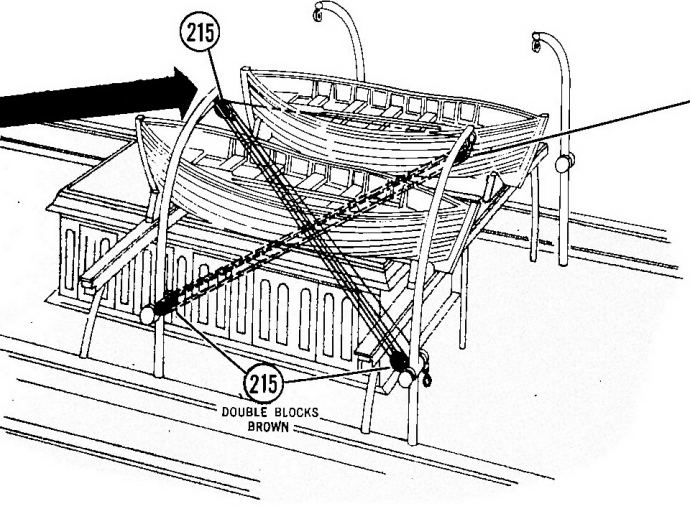
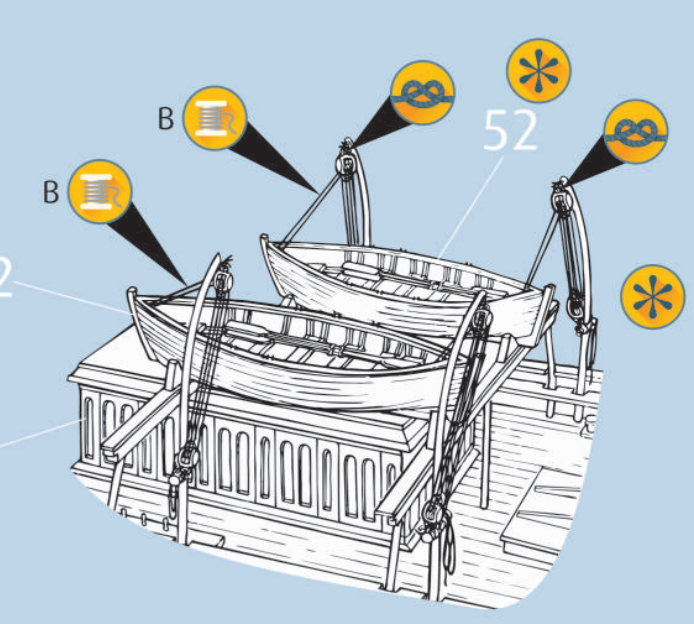
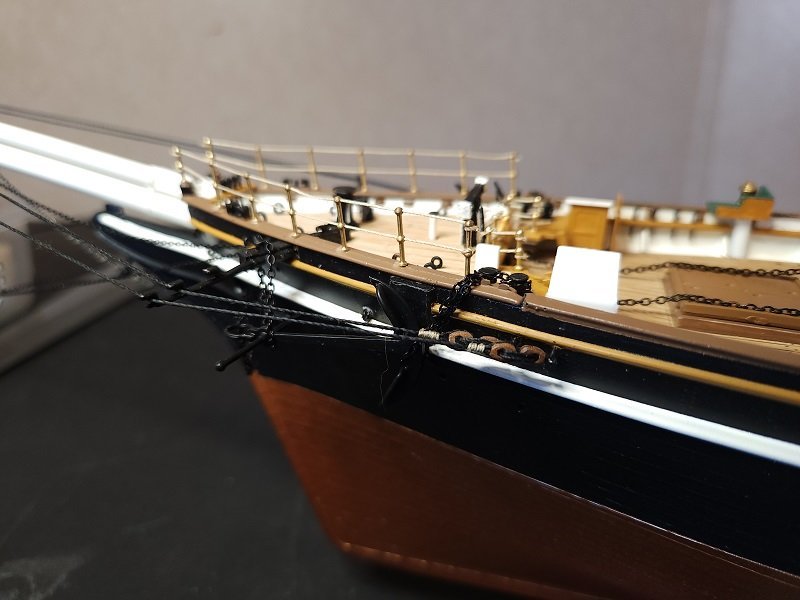
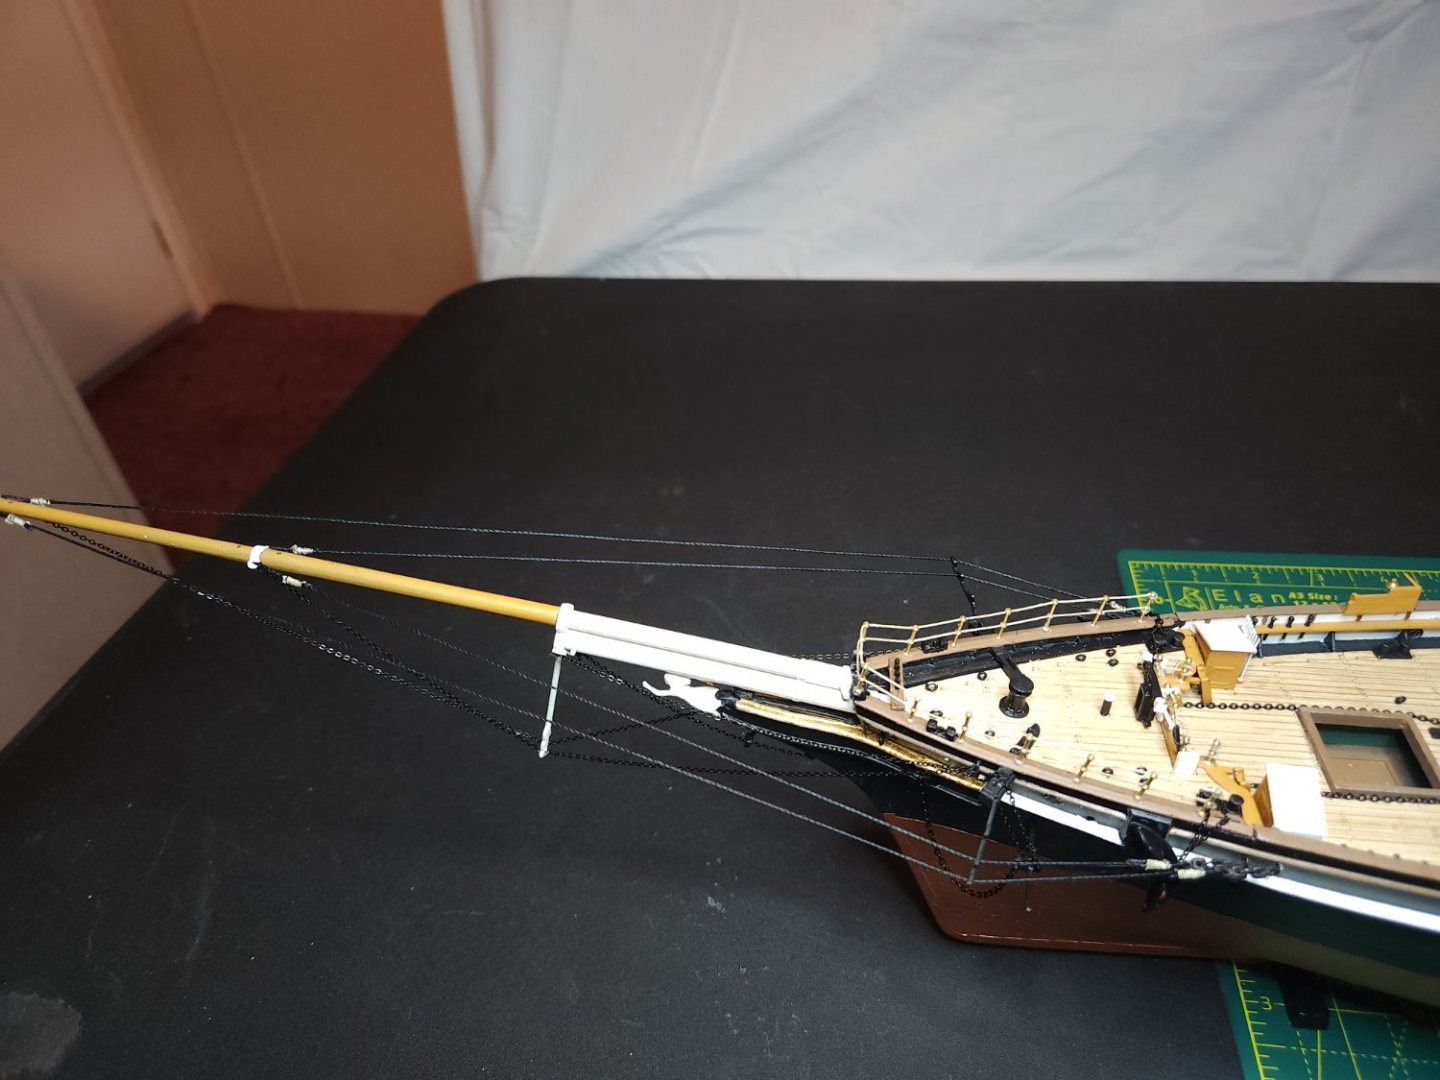
I have a dilemma. One of the last deck elements remaining to be installed is the boat davits. The 1974 instructions show the davits wired in an X pattern, much like the restored full scale vessel. The 2017 instructions show the davits wired in to themselves rather than each other. I am far more fond of the X pattern than the other but here's the real quandary. If I wire the davits in either configuration, the stems are so flimsy that the davits bend - either toward each other in the case of the X pattern, or down and to one side or the other in the case of the 2017 pattern. It doesn't matter how lightly I thread these things, the result is the same. I can wire them and take not even the slightest strain and the stems deform. If I wire them with enough slack that they don't bend, the rope looks sloppy as an unmade bed. I've tried just about everything I know, short of reinforcing the stems somehow - I have no idea of how to go about that anyway. If I had a 3D printer I'd make some out of stiffer material, but I don't have one of those yet. There is one other option, and it is one I am seriously considering. The kit's box and the instruction booklet cover art (the same pic) shows the davits installed facing each other rather than arcing over the boats. I think I sort of like this. It is impossible to tell from this pic but the tops of the davits may be tied together, facilitating an even and tidy installation. Do you folks have any thoughts, criticisms, or suggestions? Any and all comments are welcome, and I want to take this opportunity to thank all of you for your help, support, and kind words.
- 89 replies
-
- 1
-
-
- Cutty Sark
- Revell
- (and 2 more)
-
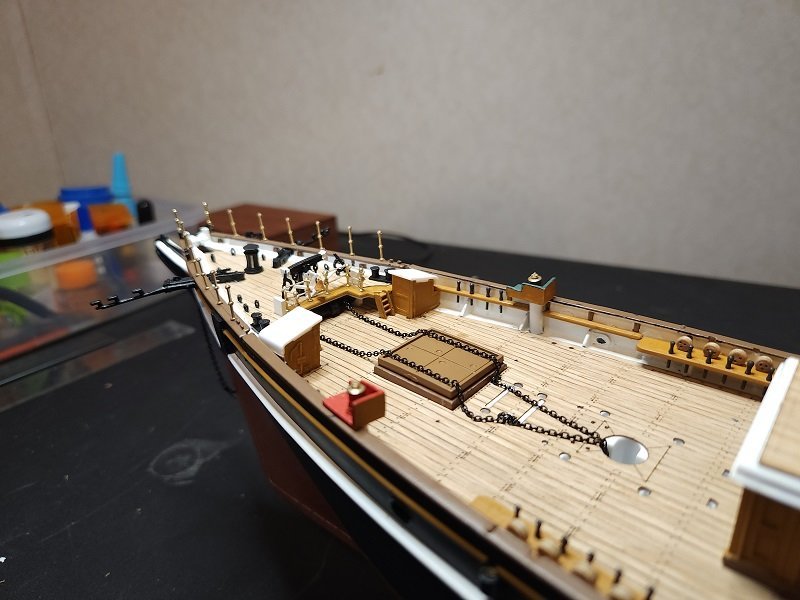
Small update - last set of pics above were premature. Fo'c'sle and poop deck are mostly done. Anchors and bowsprit stays and martingales installed.
- 89 replies
-
- 6
-
-
- Cutty Sark
- Revell
- (and 2 more)
-
Daniel, have you made any provision (or plan to do so) for access to the LEDs after the model is finished? I know the LEDs have a very long life expectancy but they have been known to fail. In my own very rudimentary lighting scheme I have (so far) tried to maintain access (the deckhouse roofs are not glued in, same for the nav lighting mounts) but it is becoming more difficult. I am not sure it is worth the hassle.
-
It is a bit difficult to see in this pic but on my Revell kit there is a cleat on the rail that I use for keeping the chain off the stanchions. I doubt it was meant for the chain. Because of the scale, it is marginally effective. [edit] wow this is an old pic of a deceased model.
- 444 replies
-
- 1
-
-
- Cutty Sark
- Revell
- (and 2 more)
-
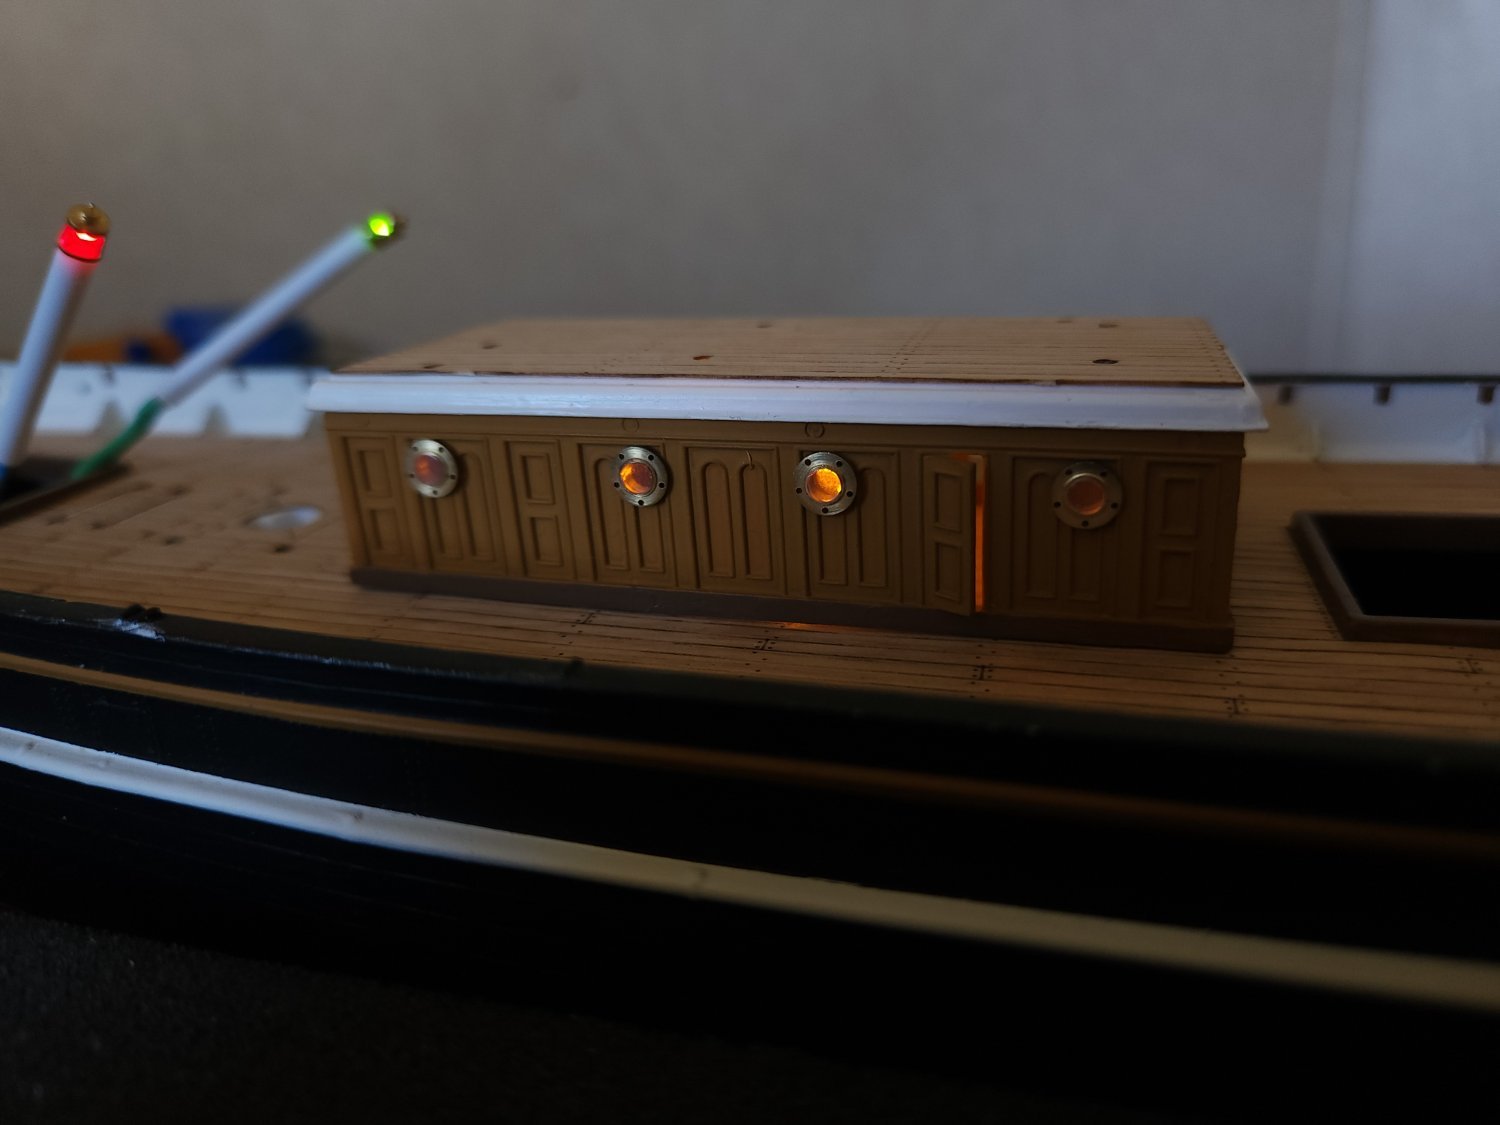
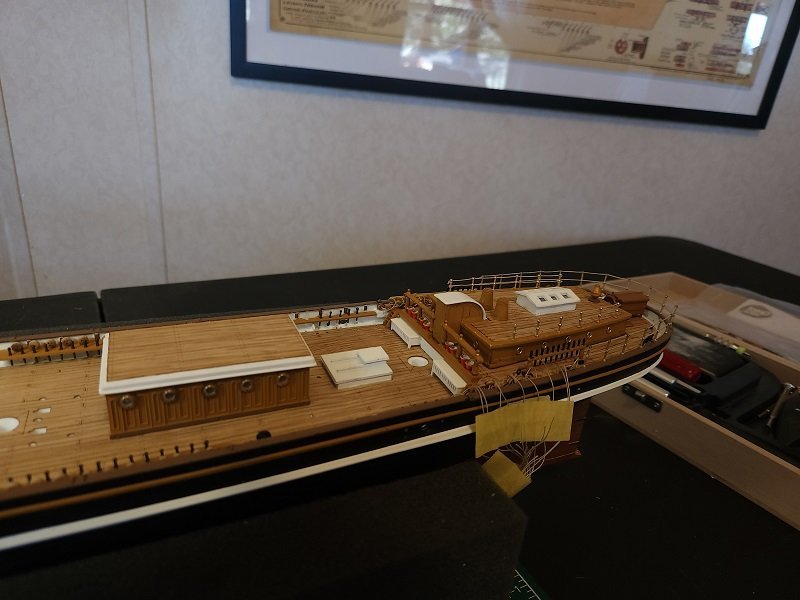
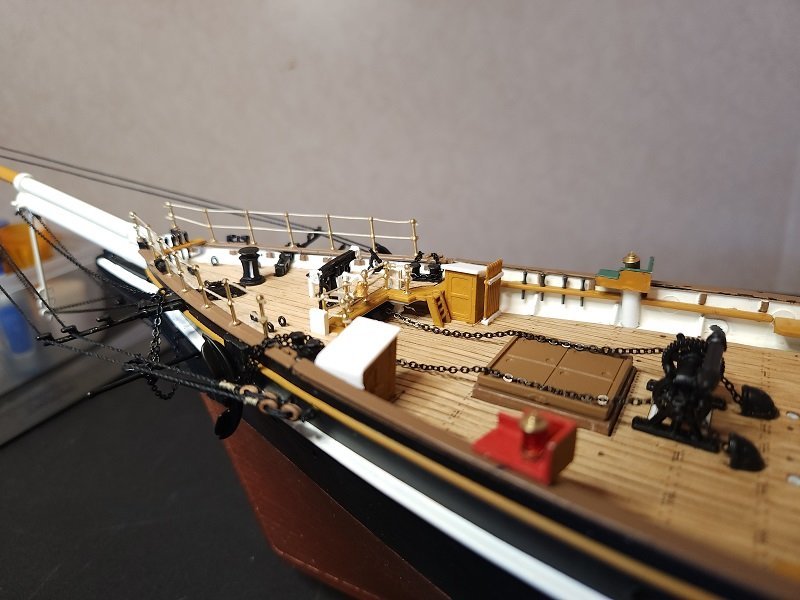
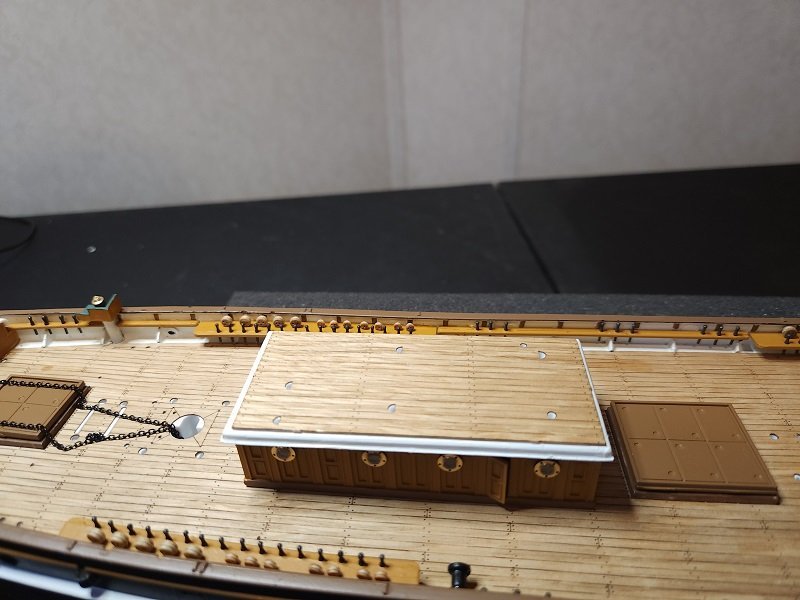
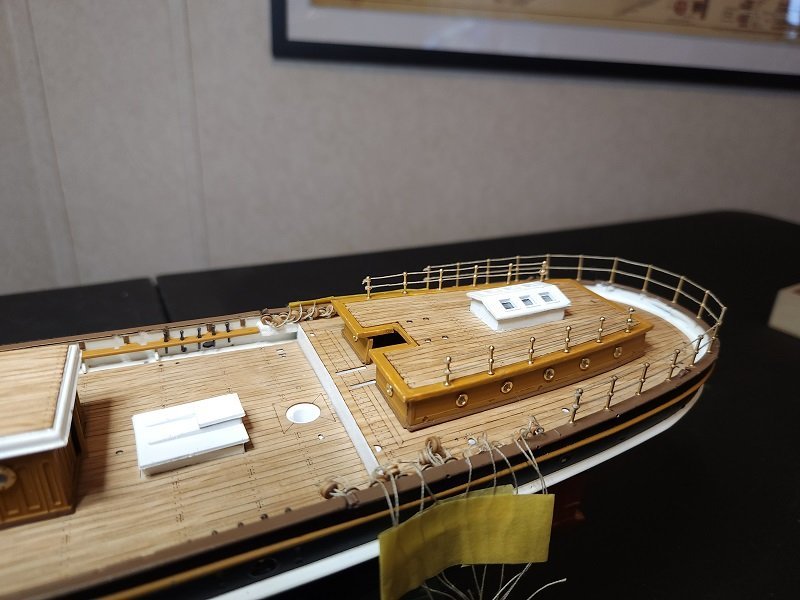
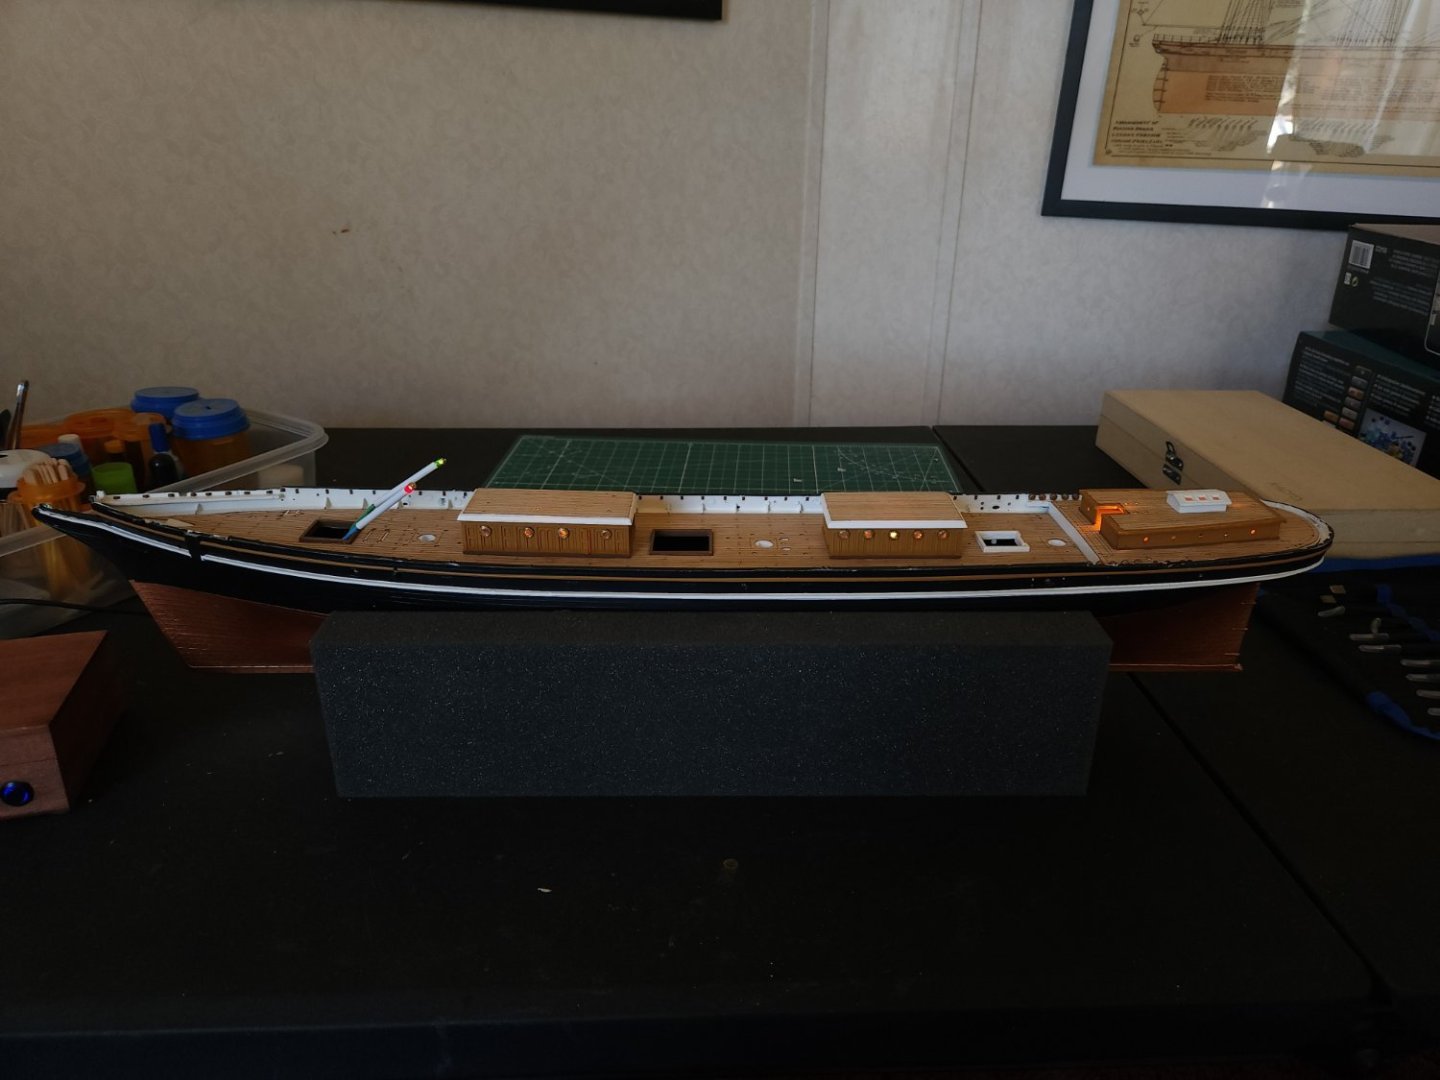
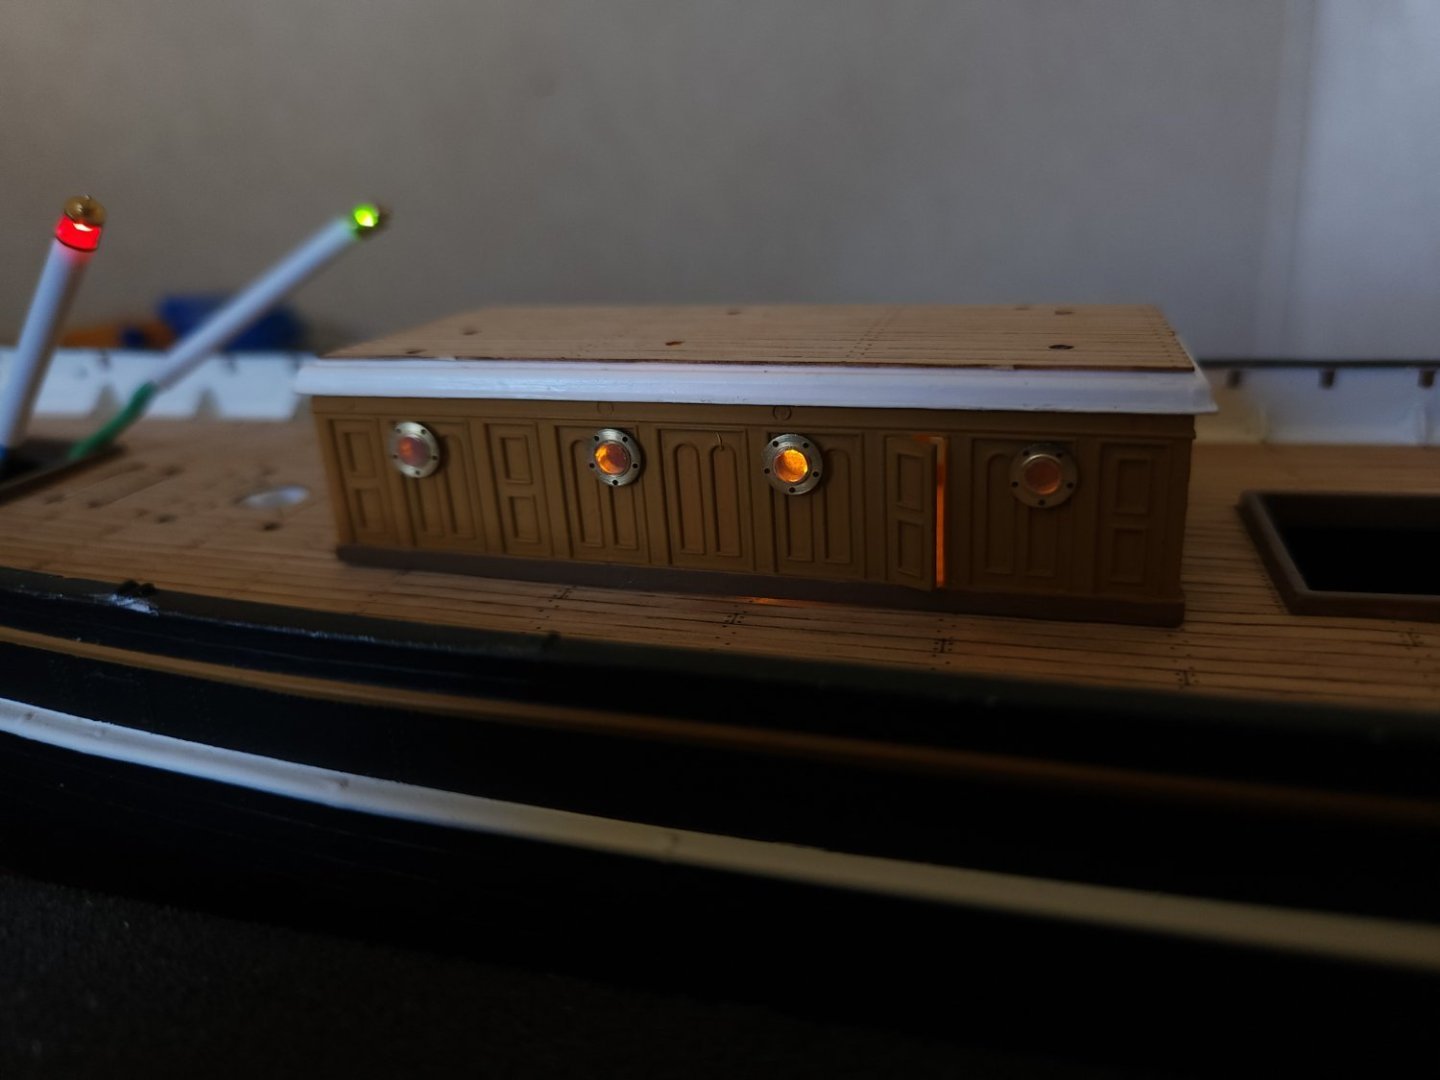
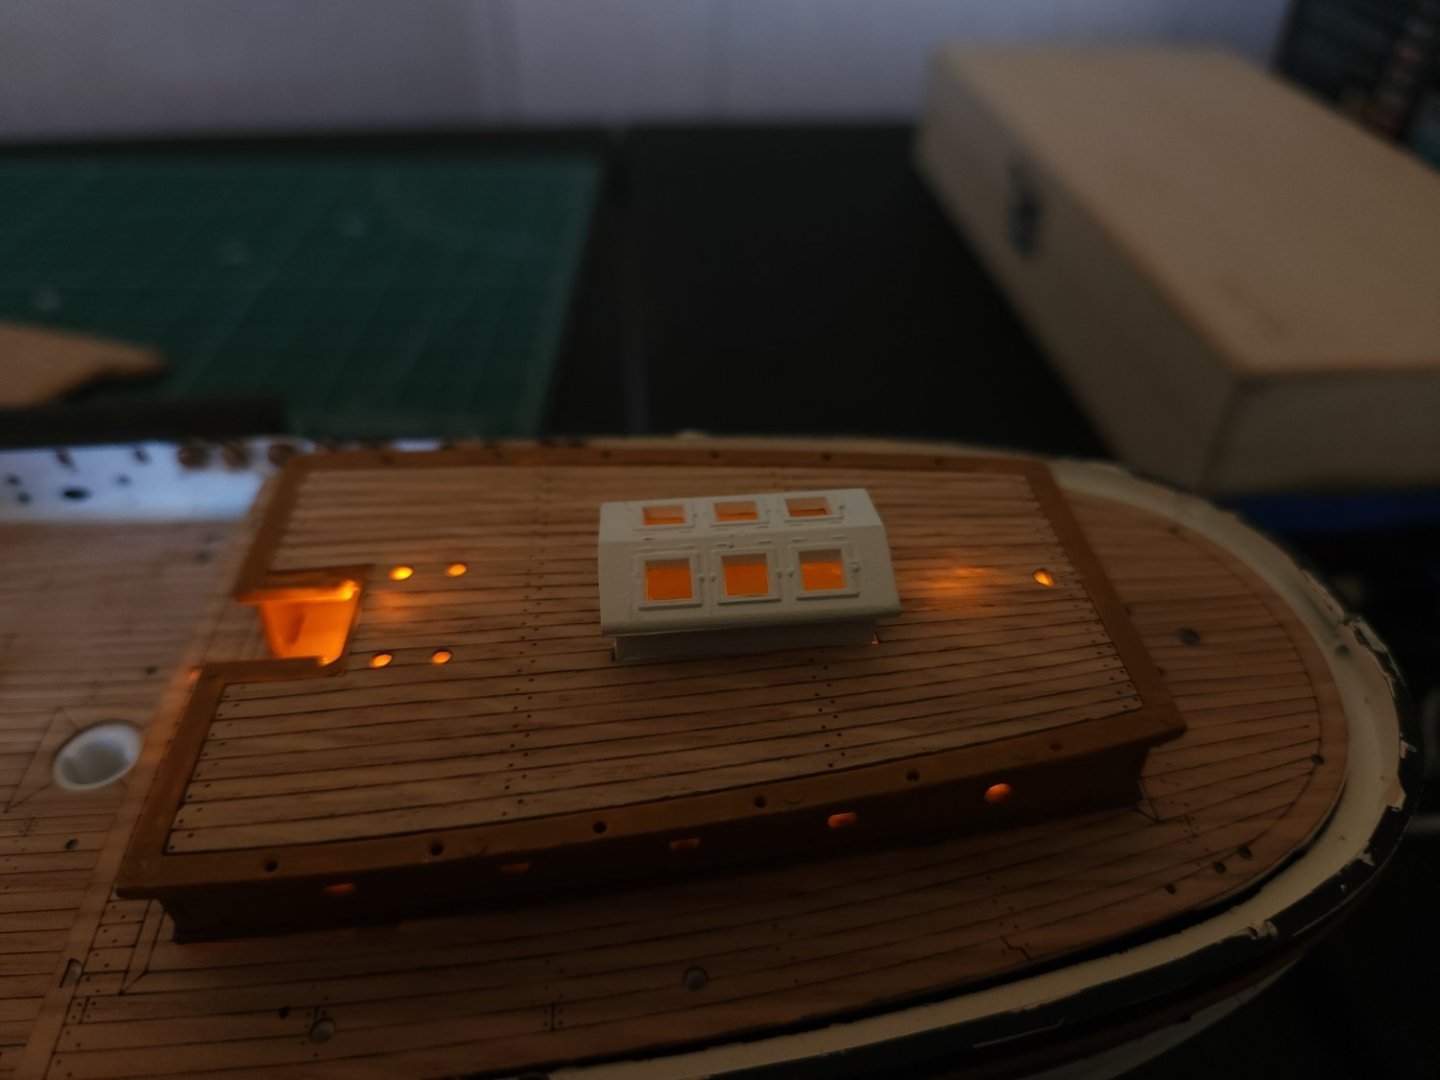
I've made some progress... The fo'c'sle furniture is mostly installed. The running light housings are installed (I'm not sure I'm completely happy with those yet, but they're easily replaced). The pin rails and main deck deadeyes are installed. The pins are blackened brass, as will be all pins in this build. The porthole windows for the aft deck house arrived so those are installed now. I'm very impressed with the manufacturing tolerances of both the 6mm and 4mm windows. The plastic "glass" in them fits perfectly - no small feat at this tiny scale. The roof is only resting on the house at the moment, I'm working out how to fix some light leakage from around the roof when the LED lights are lit. The walls of the house are not fully glued in yet either for a similar reason. That's why it looks a bit goofy at the companionway entrance - another easy fix. I may use thin vinyl tape inside. I'm not sure what I'll do next - there are lots of options. Maybe the anchors and bowsprit, maybe more of the deck furniture, I'm not sure yet.
- 89 replies
-
- 9
-
-
- Cutty Sark
- Revell
- (and 2 more)
-
Vincent Black Shadow by CDW - Revell - 1:12 Scale
VitusBering replied to CDW's topic in Non-ship/categorised builds
Oooh. *drool* I don't care if they have a reputation of being even more uncomfortable than a knucklehead, I have always wanted one of these. This is about a Black Lightning, not a Black Shadow, but still - Nortons and Indians and Greavses won't do. They don't have a Soul like a Vincent '52. -
This is an intriguing subject and will make a beautiful model. Following with great interest.
-
Is the water heated?
-
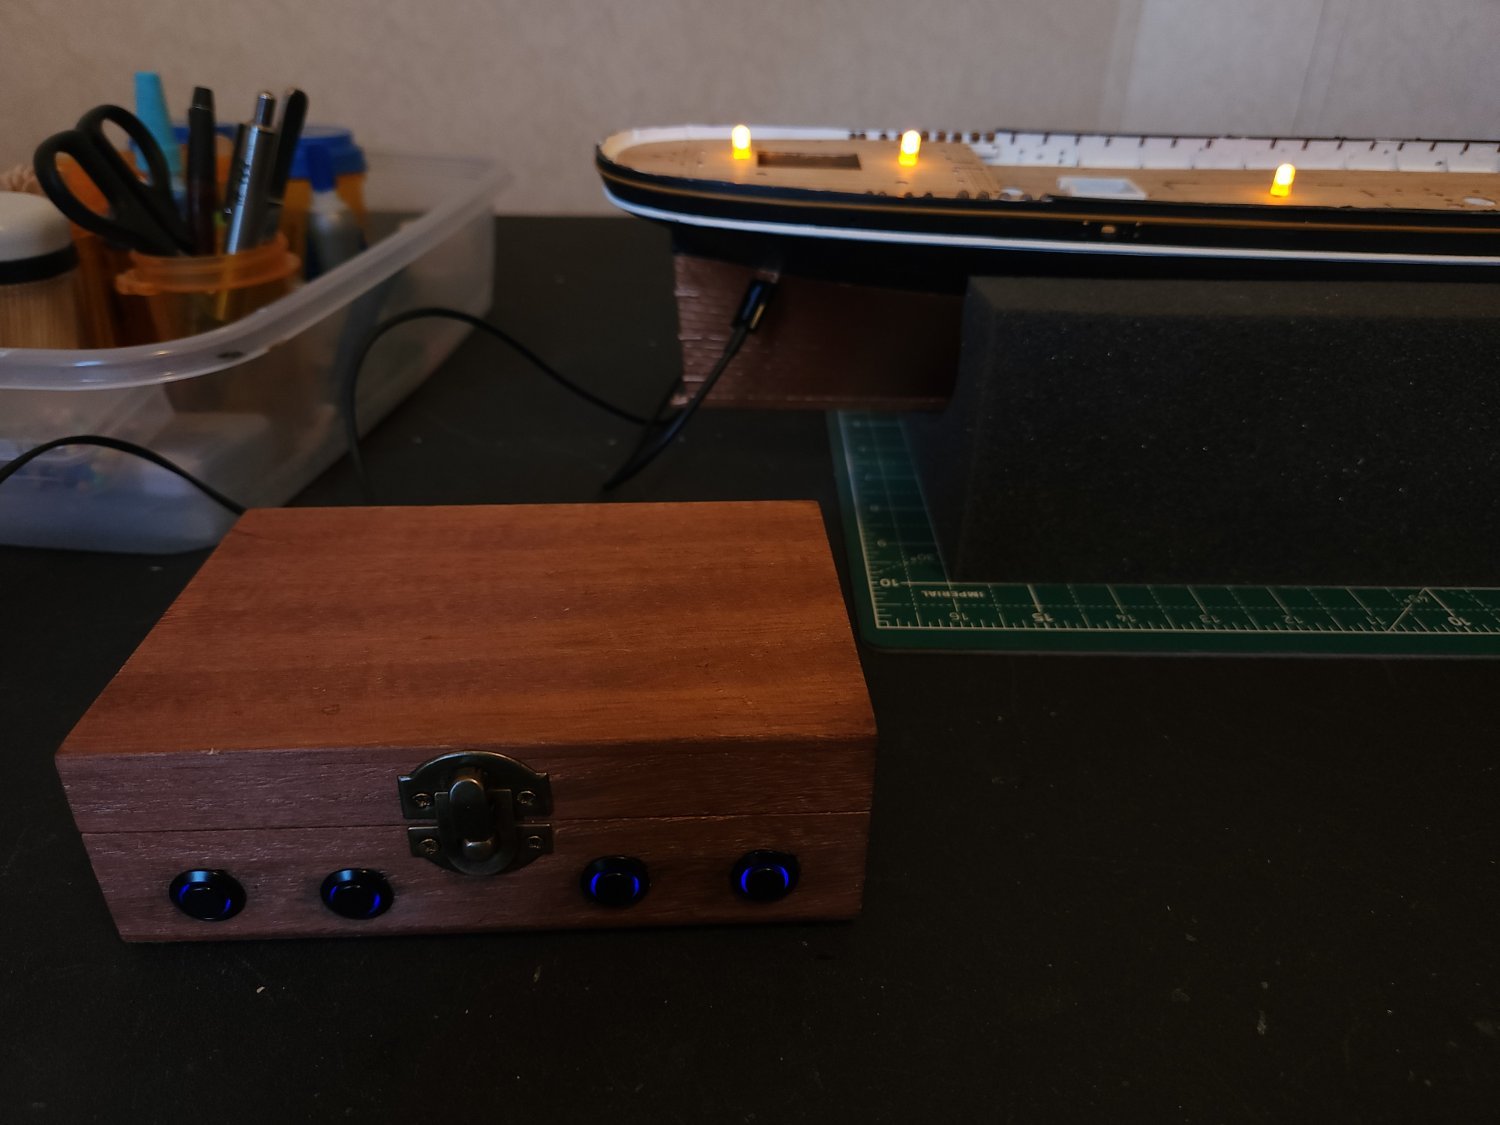
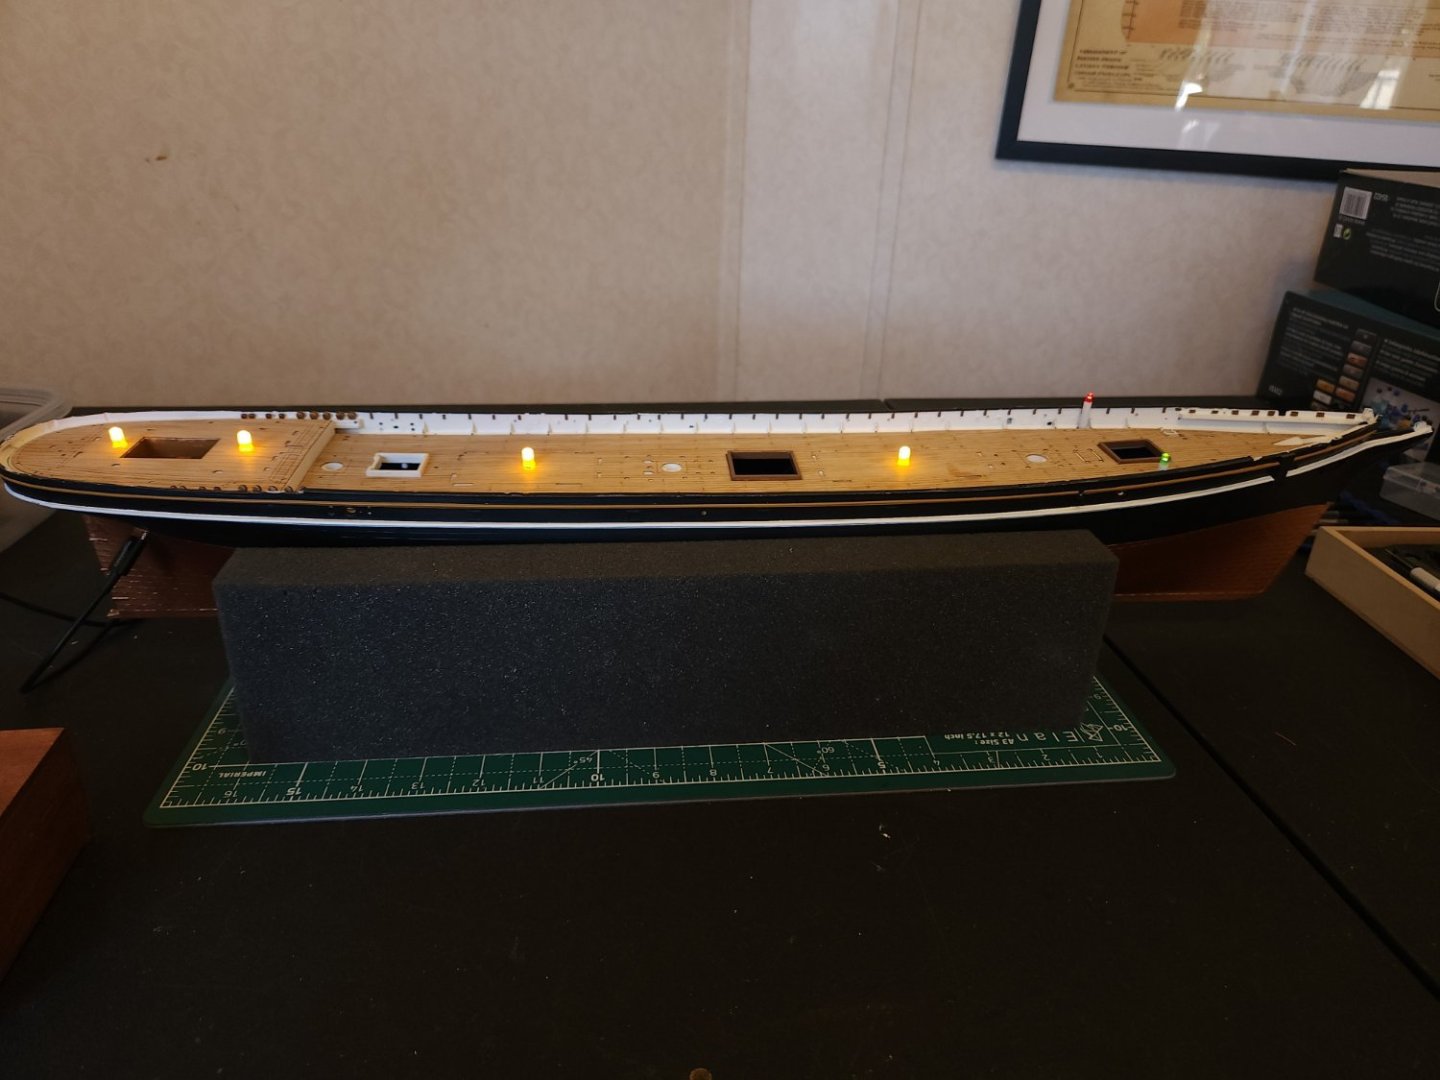
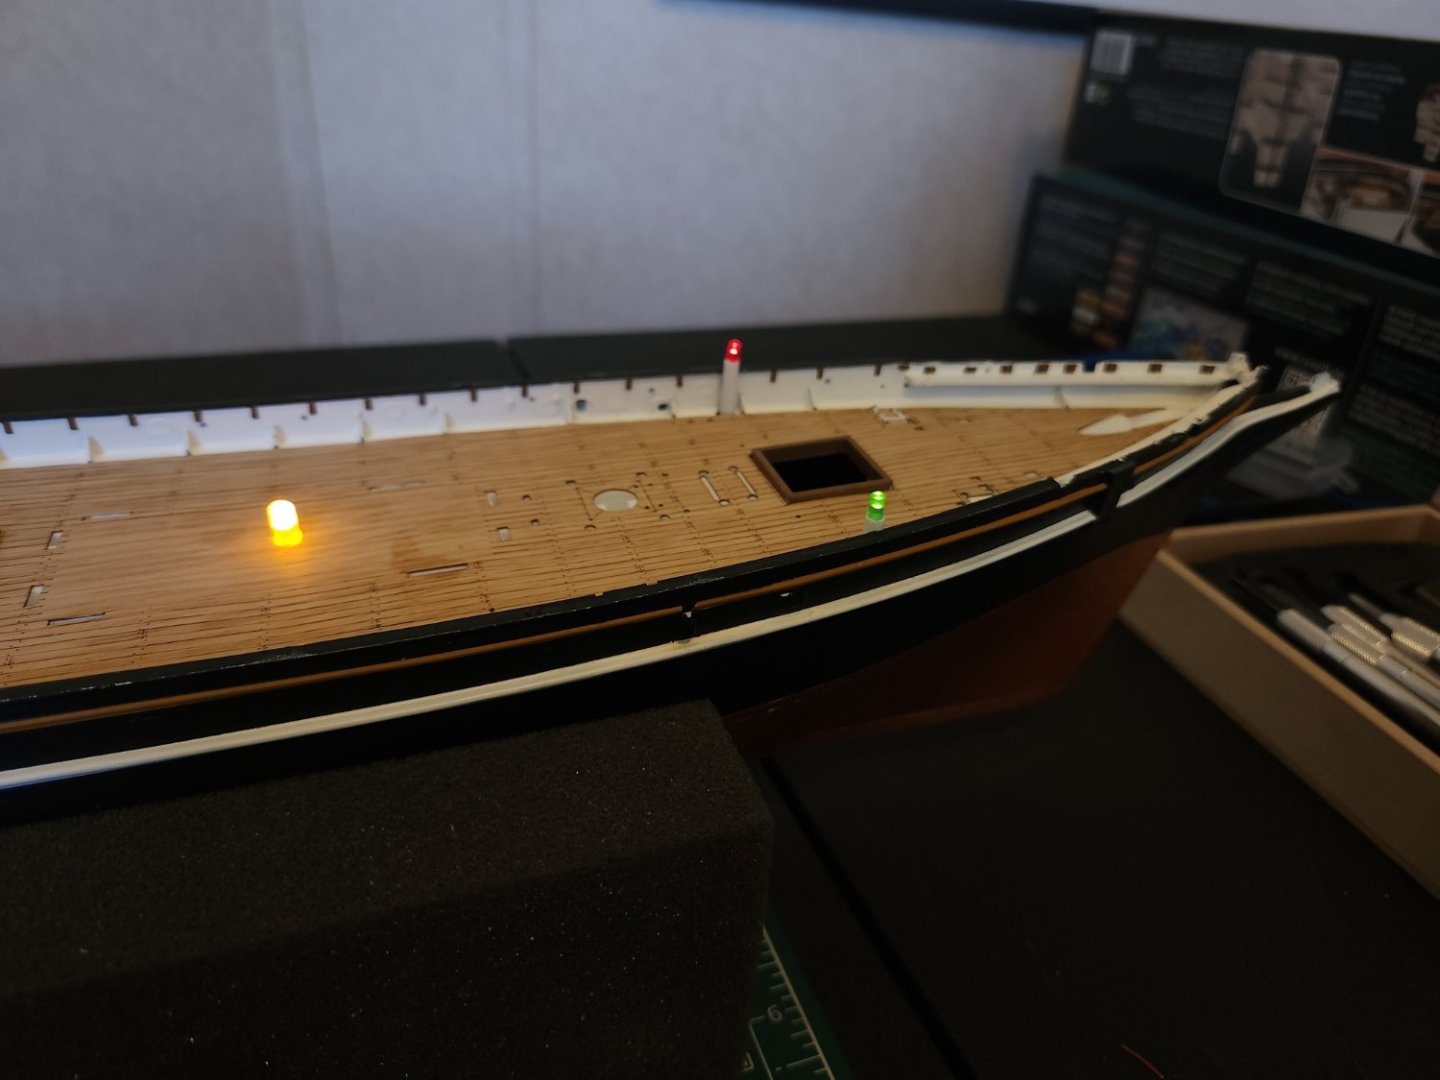
I worked out the nav light mounting. I still need to build a housing for them. I'll model it after the full scale enclosure. The control box is working out well. The usb-c through-hull connector is very discreet. It is on the "back" side of the model - this ship will be displayed with the port side facing out.

- 89 replies
-
- 9
-
-
- Cutty Sark
- Revell
- (and 2 more)
-
Lighting is almost done. I haven't worked out yet how to mount the nav lights so they're just poking up through the hatch for the moment. The kit's nav light mounts won't work, I am going to need to build something. I'll work it out. The deck houses are all dry fit right now, pending final deck install. The wood decks are installed, and when the nav light thing is worked out I'll be able to glue it down. I absolutely love these porthole windows. They're well detailed. Yeah, I sort of went overboard with them, but I do like it. I covered each side of the skylight (inside) with a strip of clear acetate and gave them a light coat of clear nail polish which frosted the windows nicely. I'm waiting on 4mm porthole windows to install in the rear deck house - the 6mm are just a bit big.
- 89 replies
-
- 6
-
-
- Cutty Sark
- Revell
- (and 2 more)
-
I agree on all counts. I'm not up for changing the deck height, not on this brand of model. Perhaps on a wood model someday. Brave interpretation is an apt description. This model and most others, and even the "restored" full scale ship bear barely more than a passing resemblance to the magnificent vessel she once was. I've avoided saying superficial resemblance, I do believe the models have a certain grandeur. As for representing that vignette of history I'm afraid I've taken more liberties than even the kit maker. For example I've added a plethora of brass porthole windows to the deck houses, considerably more than is canon but I happen to like the look especially when the interior of the houses are lit.
- 89 replies
-
- 3
-
-
- Cutty Sark
- Revell
- (and 2 more)
-
I agree shipman. With an eye toward possibly including the panel detail I dry-fit the pin rails and came to the same conclusion. There isn't any good way to work the panels in - to get them to fit would mean significantly changing their aspect ratio or clipping them so they're only partially visible. Neither solution is acceptable, in my opinion.
- 89 replies
-
- 1
-
-
- Cutty Sark
- Revell
- (and 2 more)
-
I've puzzled over that - I've thought about getting some printable decal paper or vinyl or something and seeing how that may look. I've made decals before but on a larger scale. [edit] Some explanation - it is beyond my skill level to create small frames with an oval-ish void, regardless of material. I would never be able to make them uniform without mechanical help or a 3d printer.
- 89 replies
-
- 3
-
-
- Cutty Sark
- Revell
- (and 2 more)
-
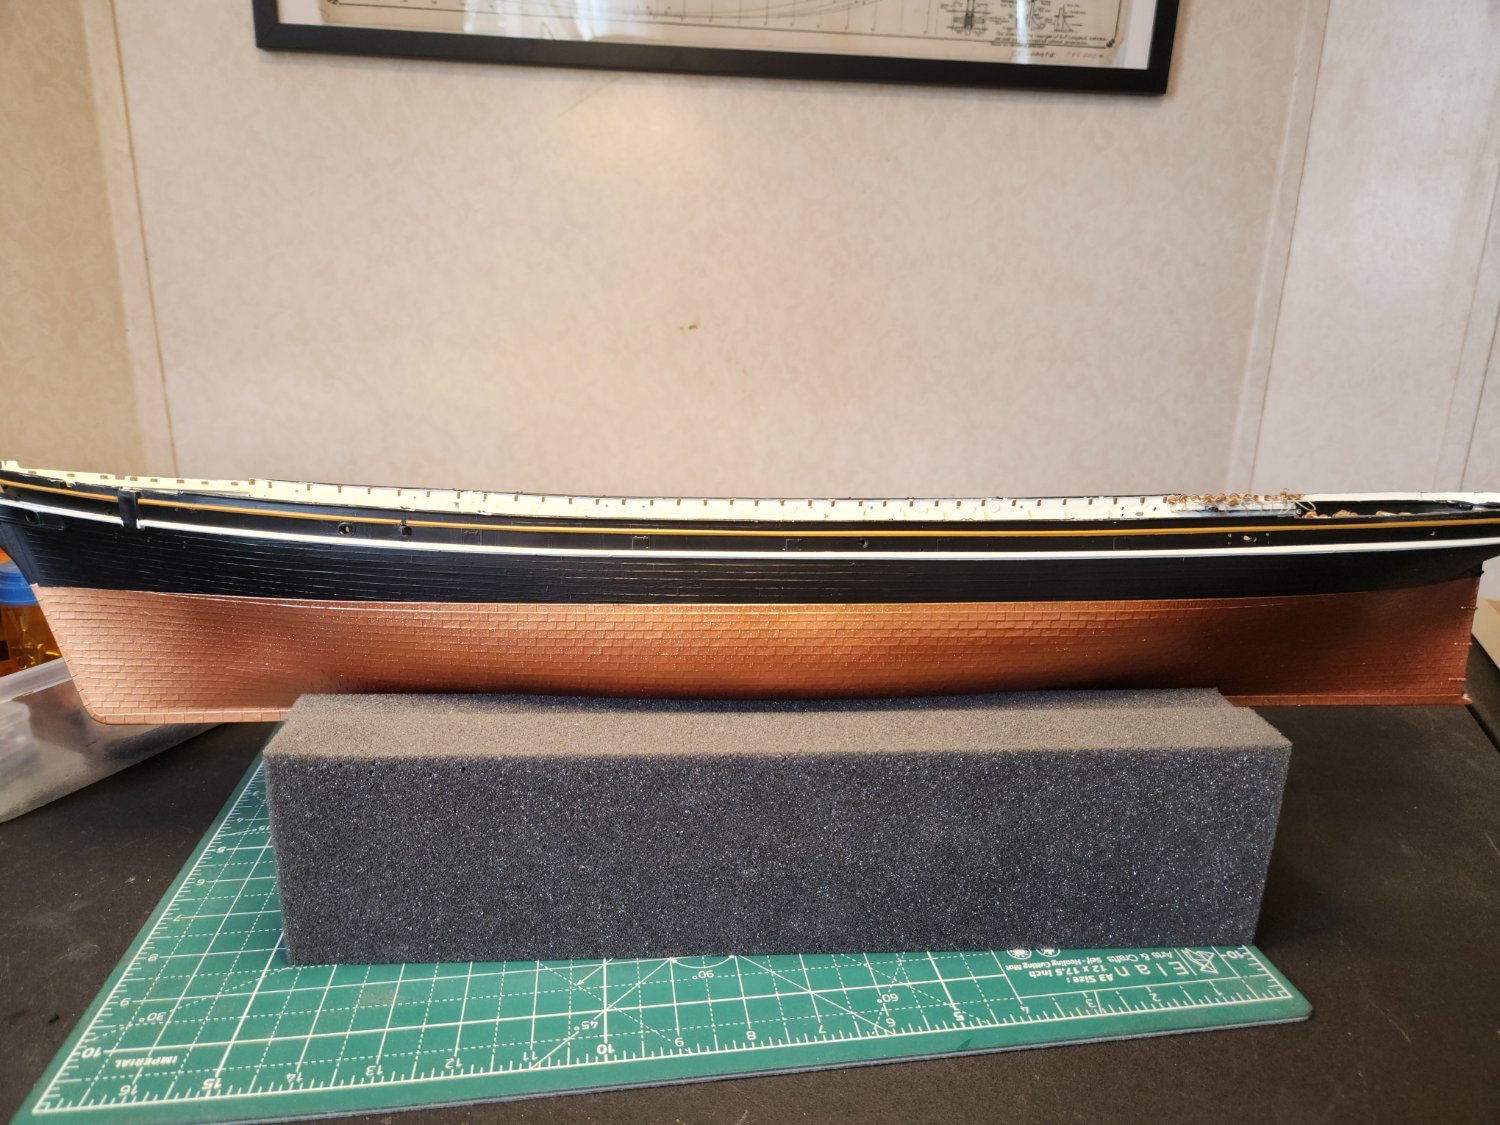
Hull exterior is painted. Next up, the lighting through-hull connector. I think Ill wait on painting the upper main rail until the deck is installed and maybe after the other rail sections ready to be installed. The deck and other goodies are in transit and are expected to arrive next week. [edit] Just after posting this I got a notice from FedEx that my package is out for delivery today. Yesterday's shipping notice said it was in Germany. Wow. Now I'm really jazzed.

- 89 replies
-
- 5
-
-

-
- Cutty Sark
- Revell
- (and 2 more)
-
Hear, hear! I lament the non-existence of a good Thermopylae kit (wood or plastic. Sergal or any other reputable kit maker). I would be wary of interchangeable components, Revell did that and it didn't turn out well at all. Some little things, sure, but they are very different vessels. LeoM, your hull is coming along very nicely.
-
Hull has been puttied and primed and the upper section in black is painted. I'm really liking these Vallejo paints. The black has taken to the airbrush far better than the Revell paint did and I expect the same from the other colors. The copper section is next (probably tomorrow, maybe the next day) then the bump rails and I can remove the masking that is protecting the interior and start on the deck. I've been in contact with Radimir at HiSModel (actually his son Jakub). Radimir has been rather seriously ill and in hospital. The business is active but most orders are delayed. My particular order has been shipped and will likely arrive early next week. That consists of an oak wooden deck, more Amati rope, nav lamps, two sizes of portal windows, a variety of wooden blocks, deadeyes, and hearts, and a variety of brass fittings (belaying pins and stanchions). It is a big order that I've been waiting on for more than a month. I have greatly enjoyed doing business with Radimir and wish him the very best in his recovery. I'll post an update pic of the hull when the bump rails are done.
- 89 replies
-
- 3
-
-
- Cutty Sark
- Revell
- (and 2 more)
-
Shellac is an insect gland secretion. It isn't harvested directly from the bug, the females leave a trail of it in the bark of the trees where they live. It has lots of uses. It is edible, incredibly, and is used to glaze pharmaceuticals and even pastries. It is used in electrical insulation and literally hundreds of other applications including, of course, wood finishing. Its performance as a wood finish is inferior to polyurethane or other synthetic finishes but aesthetically it is gorgeous in my opinion, rivaling linseed.
-
Did you make those wonderful catheads? They're very cool. I can't help with the boat tie-downs, I have no clue about that, sorry. I am jealous of your boat racks though. I need to get a 3D printer someday. I'll do that for the next build (which will undoubtedly happen, but this build will not be truncated as was the last one). Sorry for the self-reference, your model looks absolutely great.
-
Helping hands troubles
VitusBering replied to VitusBering's topic in Modeling tools and Workshop Equipment
Thank you Roger (I predict no more cold solder joints in my future), and all who have commented and reacted here. I sincerely apologize for being harsh in my first post, I was venting out of frustration and my words were way too forceful. While I'm still unsatisfied with the flexible arms, I realize this is the state of the art and I will adapt. I'll shop around nonetheless but I'll continue using this tool and the wonderful techniques suggested by Roger and Robert and of course all of you. Thank you again. -
Hull halves are joined. No pics yet, I want to paint the outer hull first. The interior rail and faux stanchions are painted. I added a 1.5mm strip under the aft deck rail so I could plug the openings intended for the kit's ludicrous deadeye mounts. Once the openings were plugged and painted I drilled holes for mounting deadeyes - 2 holes 1mm apart for each deadeye so a line can be run up through one hole, around the deadeye waist, then back down the other hole and the ends tied off underneath and the knot secured with a touch of CA. Then I threaded and installed 4 2.5mm and 5 3.5mm wood deadeyes on both port and starboard rails for the aft standing rigging and ratline shrouds. I installed and threaded them now because access to the underside of the rail will be impossible after the deck is installed, and since they are quite small and close to the rail, pre-threading them makes a lot of sense. It is something I learned the hard way from the last build. When the glue is well set I will mask and primer the hull.
- 89 replies
-
- 5
-
-
- Cutty Sark
- Revell
- (and 2 more)
-
Helping hands troubles
VitusBering replied to VitusBering's topic in Modeling tools and Workshop Equipment
Thanks Robert. I do think I'm probably expecting too much of this tool but the problem - sometimes quite minor - is still very frustrating. I'm still on the hunt for a more stable set of arms. Congrats on the YT thing, I also find it quite useful.