Der Alte Rentner
-
Posts
1,018 -
Joined
-
Last visited
Content Type
Profiles
Forums
Gallery
Events
Everything posted by Der Alte Rentner
-
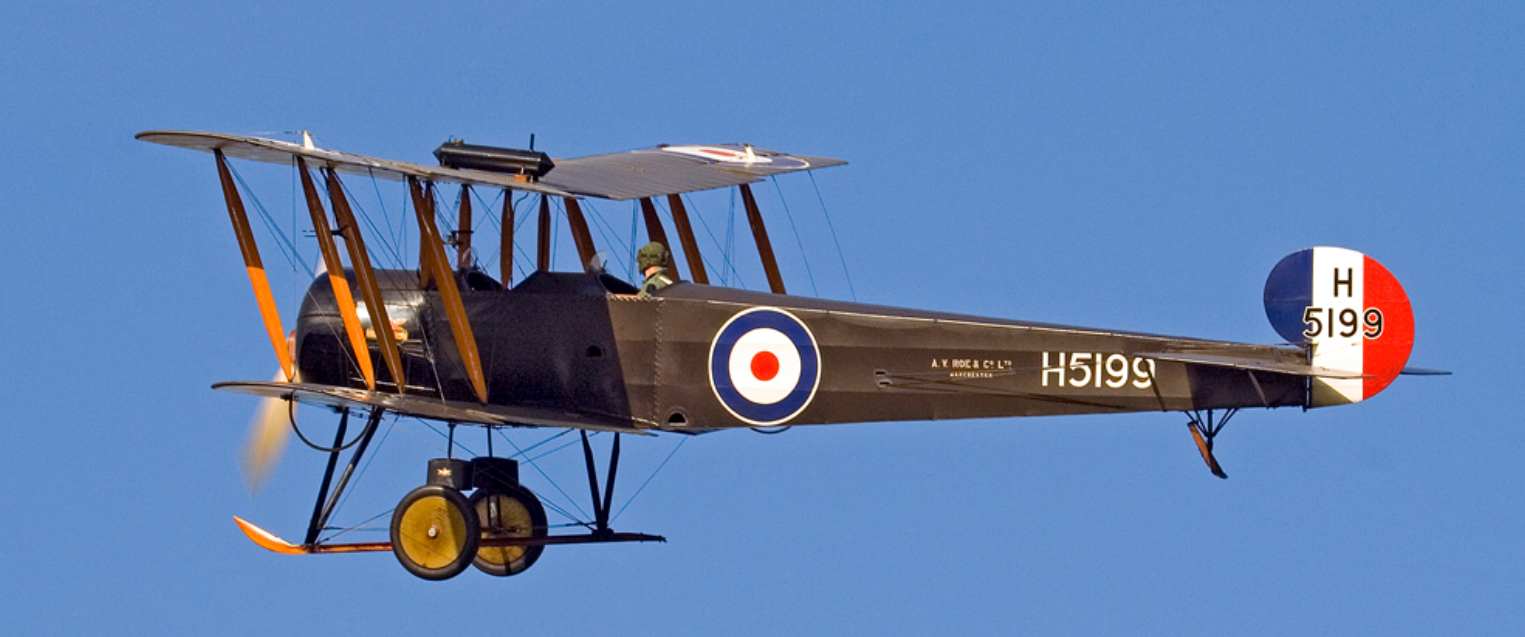
 Nice. Looking forward to seeing the finished project!! As an aside.. In a conversation with a friend who I shared my build log with, he mentioned that he grew nostalgic for the days when he build model airplanes out of balsa So, I asked him if he had any he would share with me. This was his response: "This is all that remains." 🙄 It just dawned on me that my next project, after Conny, should be a Fokker Triplane! That's something I've been wanting to do almost as long as I've wanted to build the Constitution. I saw this one at an airfield somewhere in Wisconsin in my early 20's, and I've wanted to build one ever since. Thanks for the nudge. I'm putting a recurring reminder in my calendar so I don't forget. Congrats on the hammock netting. Excellent workmanship, (which I will NOT be attempting to emulate 😁) and enjoy your sabbatical.

-
Until you start messing with the small stuff, like 1/8"double blocks.. I wish it were twice the size! The vertical reference lines are there to assist you in keeping the bulkheads perpendicular to (hmm, what exactly are they perpendicular to?) the future deck or provide parallel spacing between bulkheads. I must have missed that detail in my build, or thought it pointless. The horizontal reference line is to help correctly place the bulkheads on the false keel. In the photo on the left, note the intersection of reference lines at bulkhead F. In the one on the right, note that I did not use the vertical reference lines. My build log has no reference to how I kept the bulkheads perfectly vertical. but, I do have this note: "It seems that all this prep work with the reference lines may have been academic. So far, every part I’ve slid onto the false keel has bottomed out slot to slot and the reference marks have all lined up." Have fun!


-
For what it's worth, weaker hemostats don't seem to exist. I was on the hunt for these when I saw how much better they were for holding on to hooks and blocks. Your solution to use clips is brilliant, and I've employed that method myself to prevent crushing the blocks.

-
Added your build log to my Followed Content today and noticed you changed your ID photo. In keeping with the start of work on Conny?
-
Absolutely! I understand that the orientation is as you say - the hook being perpendicular to the eye. I take your suggestions to heart, and am grateful you think my build worthy of your time and input. I was only making excuses(?) for my not "strapping" a hook to a block as suggested in the photo from All Sails Up and Flying posted by Gregg above. Almost no builder here is doing that. Most are tying the hook to the block in the manner you and I are doing. Were I a stickler for that level of detail, (and you all know I'm not. Is my hull black? I don't think so! 😁), I would be reeving a strap over the eye of the hook and the groove of the thimble, then clapping seizing between the thimble and block. Maybe on my second build? In 2030? For now, I'll take selected shortcuts so that I'll be able to START a second build by 2030..🤣
-
Really? I don't see that at all. To me the hook looks flat. But that just could be my aging eyes. One more argument in favor of my point of view is Bob Hunt's practicum, which, despite its flaws, is still the resource I check first. In the photo below, notice that for the double block, he uses the drill-baby-drill technique that I started with. As mentioned before, had I used the model shipways blocks, this would have been the easiest way to go. As good looking as the Syren blocks are, they are somewhat problematic. Shall I keep score of respondent's votes OMG! Taking that break to check the site, I returned to the task at hand with a sudden flash of insight - new way to hold hook and block to easily tie the two together. Now I'm down to 5 minutes per unit. Hooray!

-
My goal is not to hit 100 pages. I'm just embarrassed to be using up so much space and I'm wondering how I can tighten up my work. Regardless, whether I hit 100 Pages or not, I'm always up for a party. 🥳
-
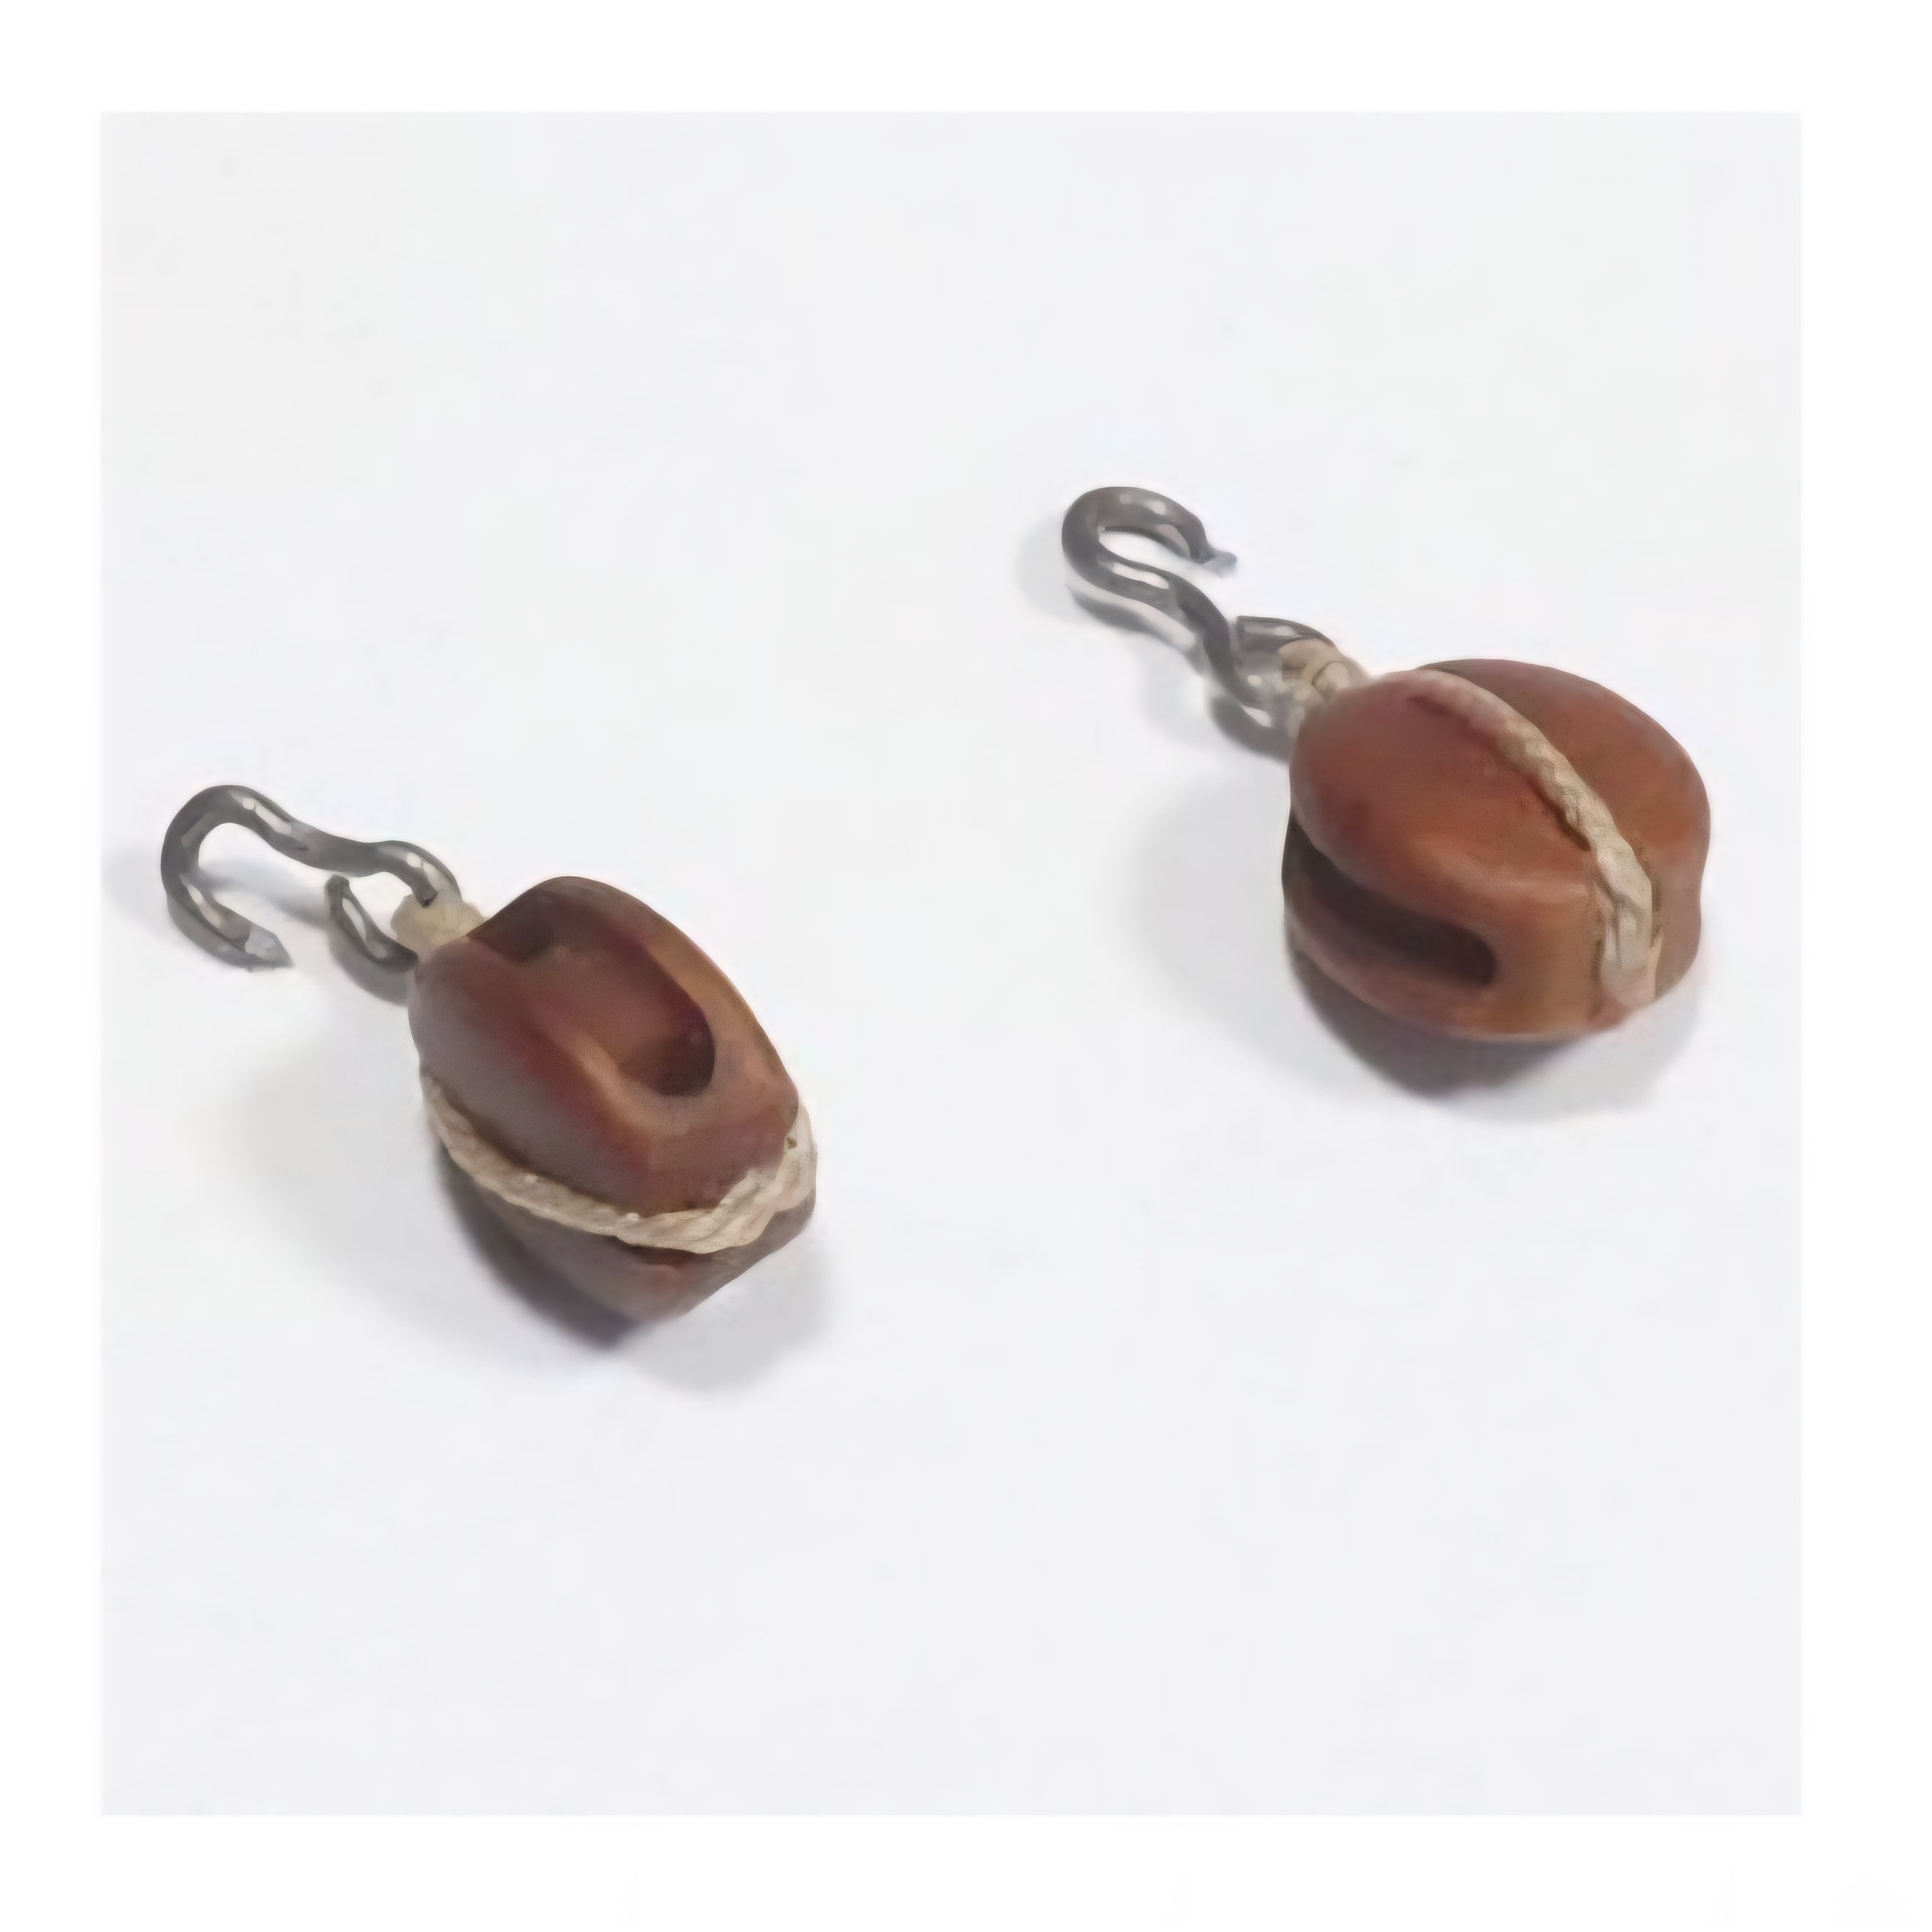
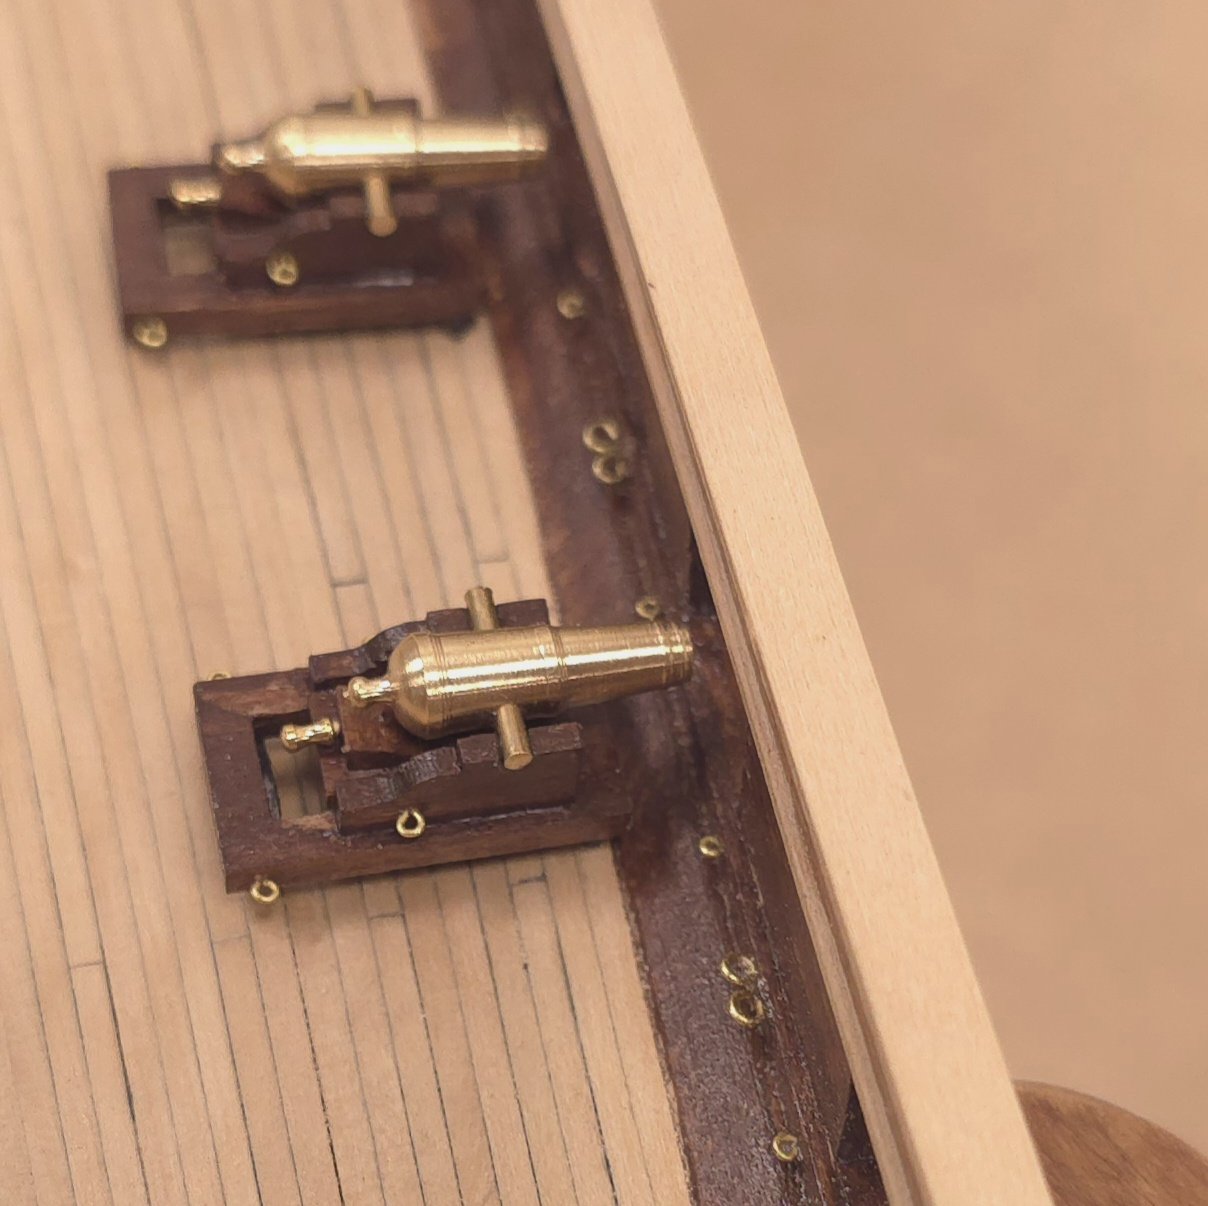
That is an excellent observation, Mustafa, and it's something that I thought about myself. Arguments for sticking with my method? 1. The Marquardt book. 1. And Syren Ship Model Company catalog itself. 3. At least one other builder is doing it the way that I am. 4. I don't know if I can bend the hooks at this point without breaking them. And I certainly don't want to remake the 20 that I've already done, which, by the way, are already a mixed bag of the two methods I've been employing. I made another four this morning and ran a stopwatch. I'm averaging one in about 10 minutes now. Wo hoo! On a roll. How do you do this in 2 minutes, Mustafa? Since I still have work to do on the hull, I can't install the coronades or cannons until I've, at the very least, installed the rudder and most likely the gun deck cannons and ports covers. Therefore, I needed a place to store the tackle, which I intend to complete first. I'm happy that the drills that came with the Craft911 pin vise have shafts that will fit in one of the Proxxon mill collets. I'm not entirely pleased with this first pair, but as has been observed many times at this website, at a distance no one's going to notice the flaws. That would also include whether or not the hooks are perpendicular to the eyes.
.jpg.b96246916176acdb36db1cde1b29de10.jpg)


-
I've asked this before, but not having received a reply, I'll ask again. Does anyone know what triggers a new page here at the MSW site? Is it the number of posts? Some specific period of time? Some number of bytes per page? Just curious, I seem to be cranking out quite a few pages, which begs the question, who holds the record for most pages in a build log? 0 At the rate I'm going, I might hit 100 well before I finish this build. 😁
-
Thank you, kind sir..
-
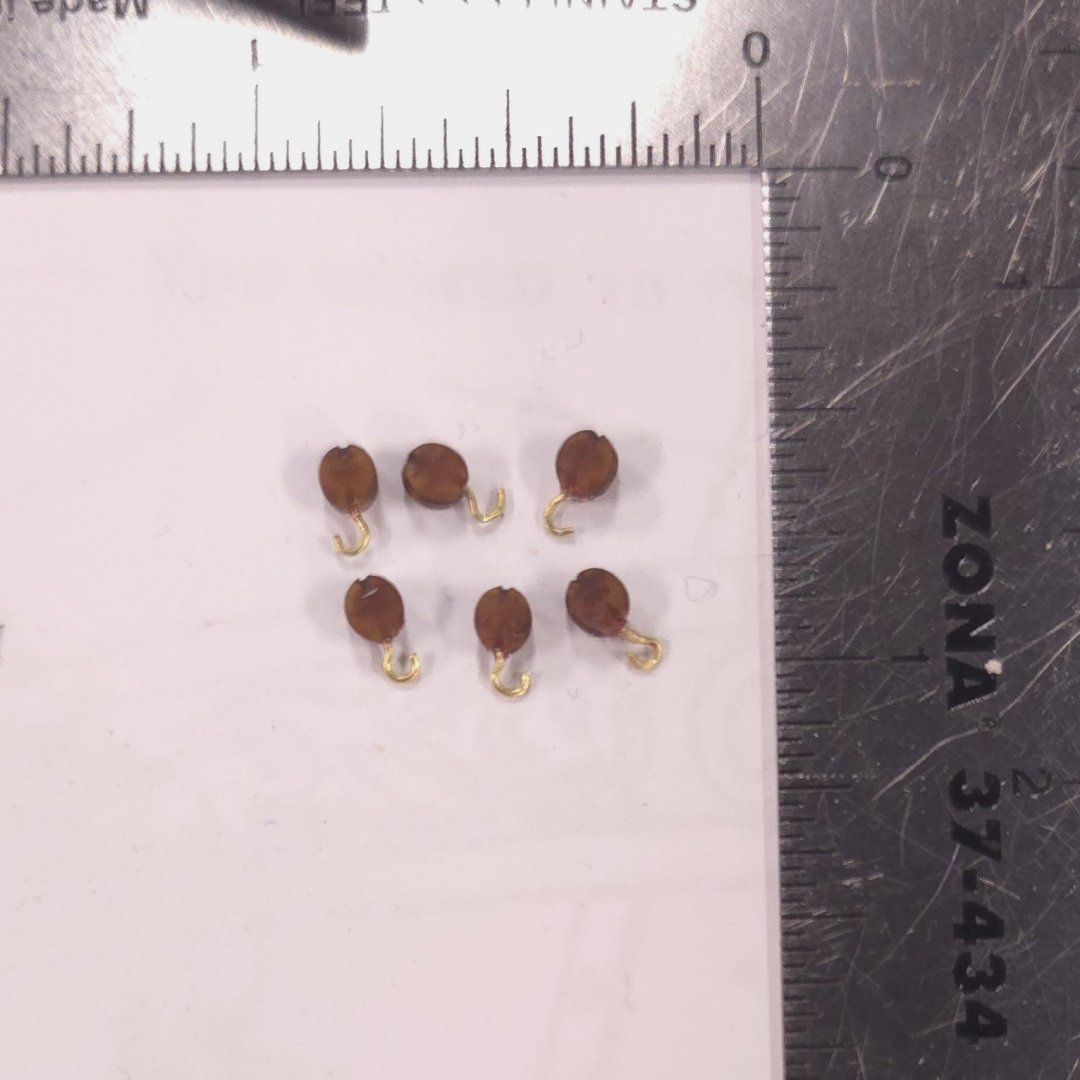
Adopting Mustafa's method and adding Gregg's three hands, I have settled on a procedure that goes fairly quickly. Sadly not as fast as 2 minutes per block, but a lot quicker than what I was doing by drilling the holes before. I loop the rope once around the eye in the eye bolt and add a small drop of CA to keep the rope from moving in the eye. The only way I can get the knot to work was to adopt Hunt's technique of keeping the hook on the left of the block, for which I made a little rigging rig. (I won't bother showing pictures of the two other methods that were only semi-successful.) Tying the knot. After this, I use a thin brass rod to drop a little AC at both ends of the block. To keep everything from unraveling. Finished product.


-
That sounds SO easy. But I have found it quite difficult to tie that knot and keep the rope in the channel on the rim of the block. That may have something to do with the small size, or simply the nature of the Syren blocks. I am experimenting with different clamping techniques to try to tie the hook to the block today. I will post my results when I've found an effective and relatively easy solution.
-
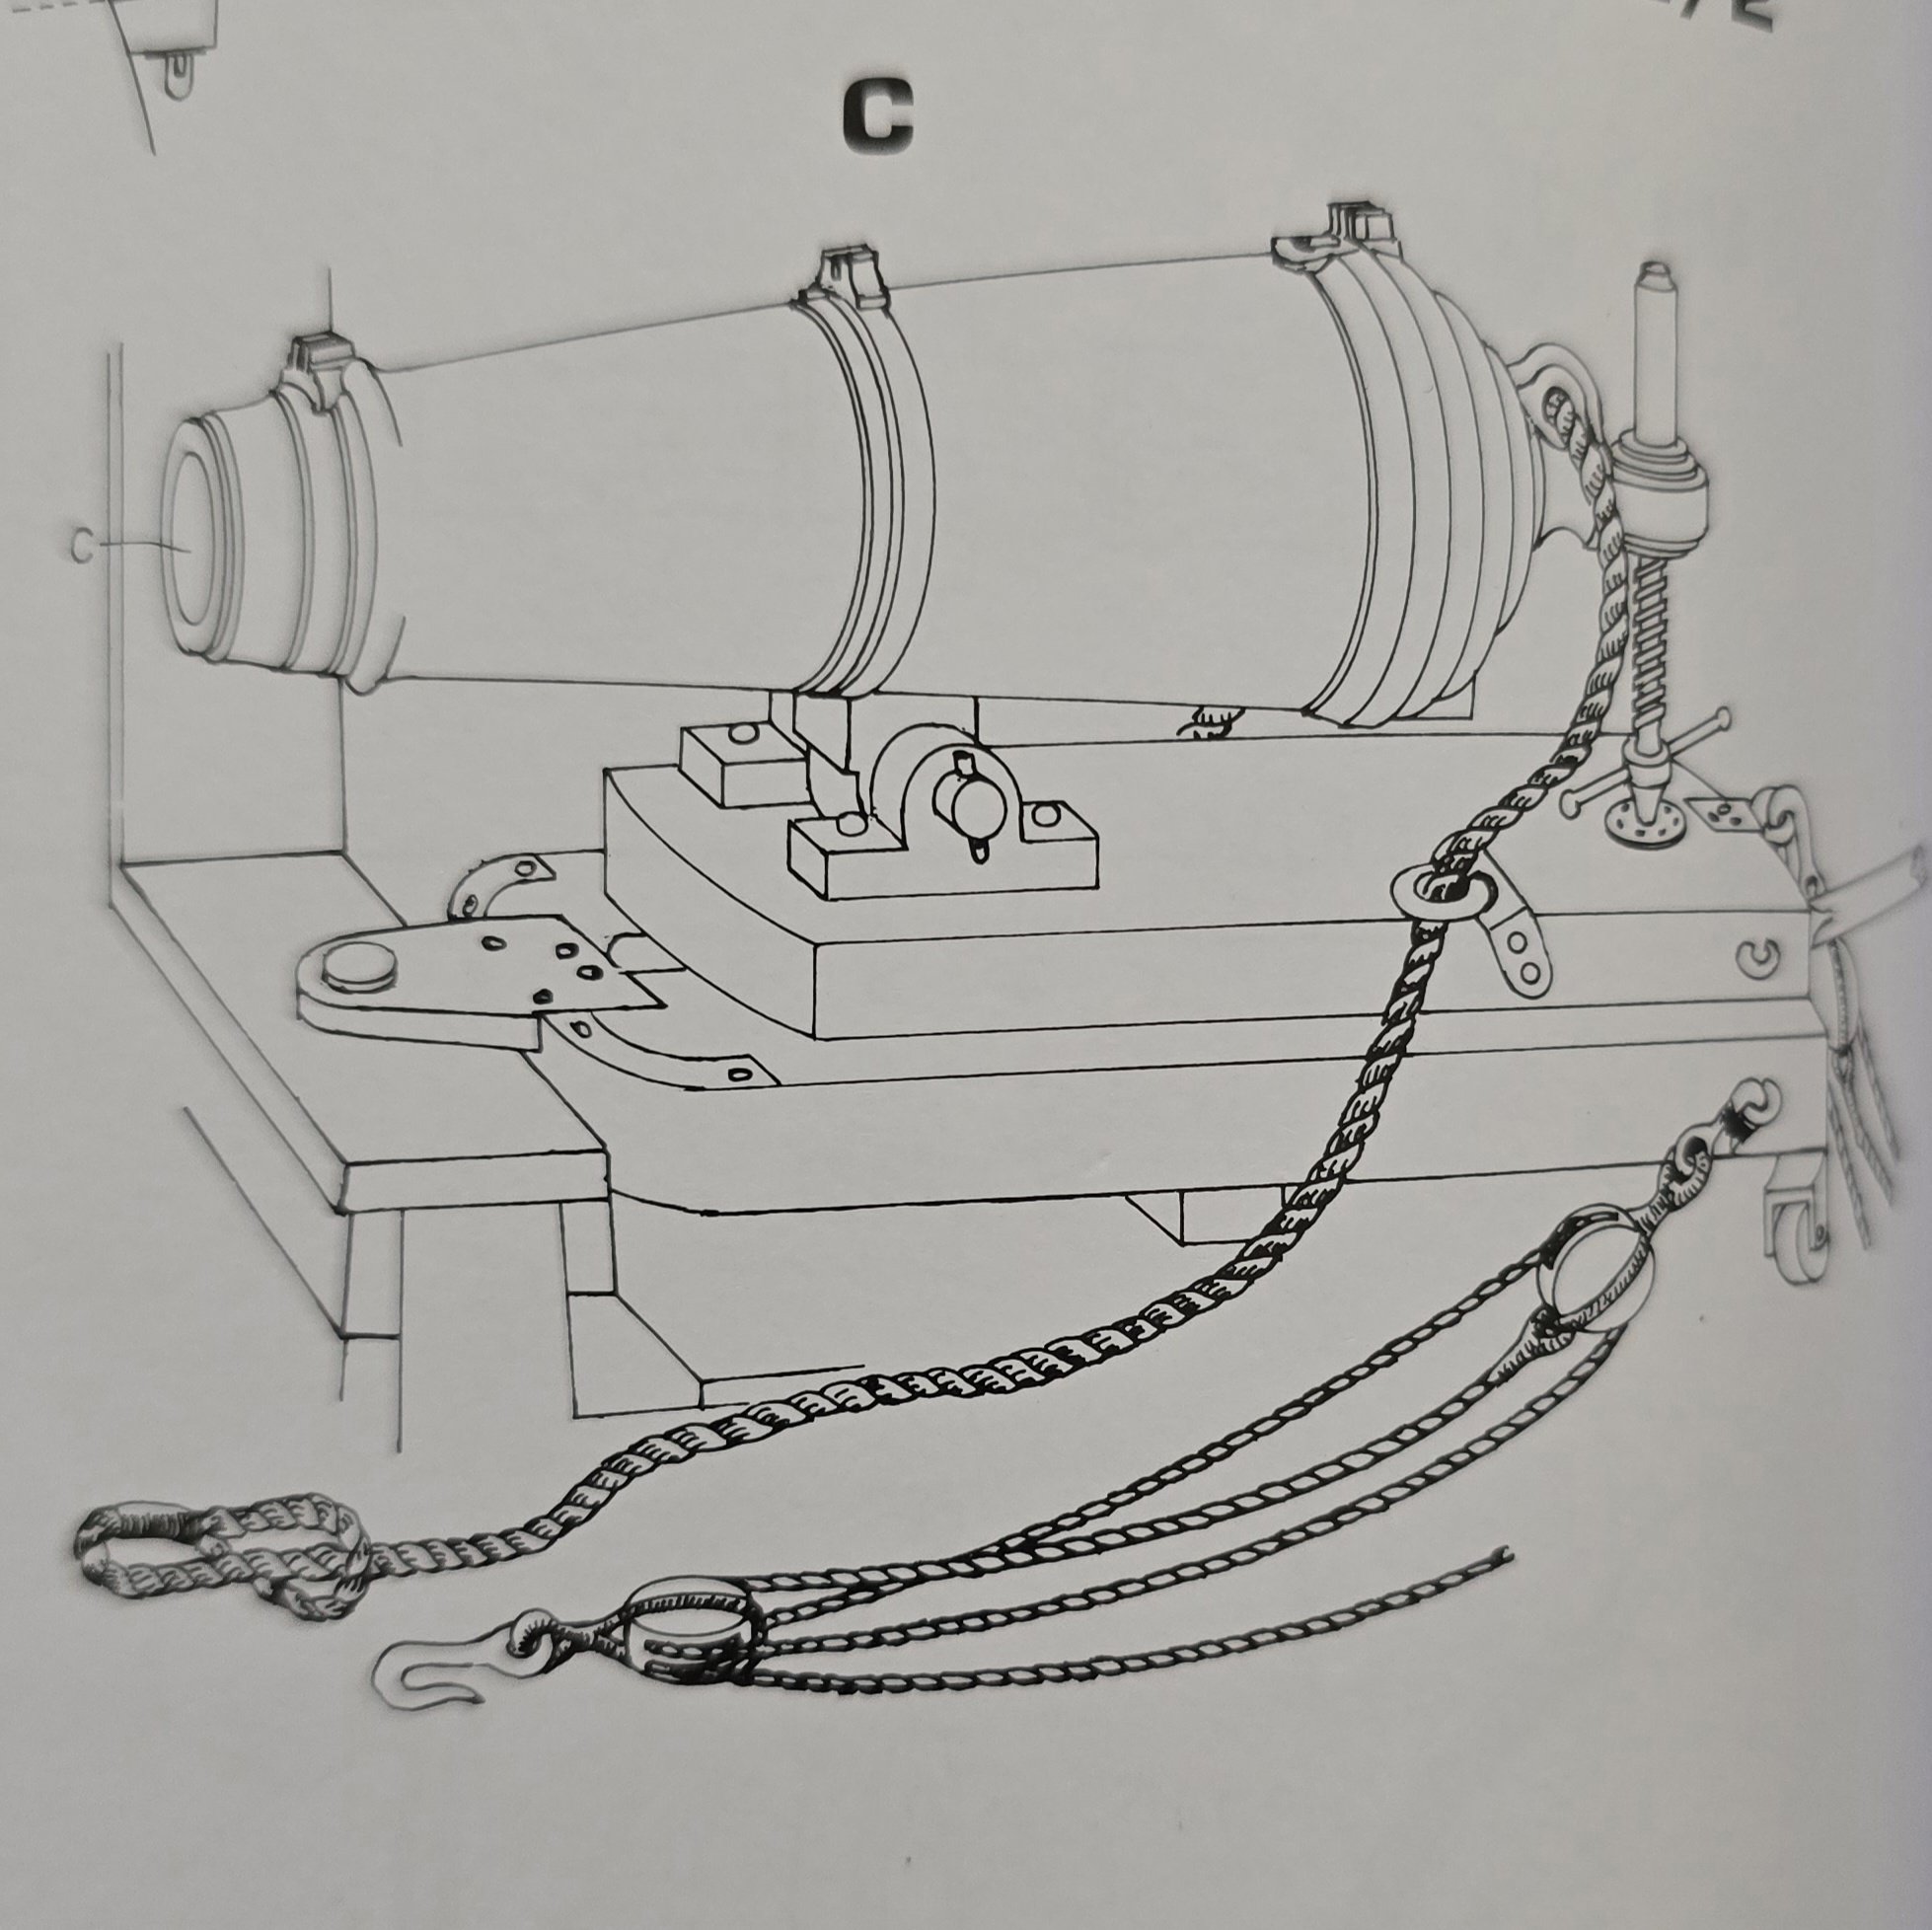
Gregg, after seeing your list of resource materials, I ordered the anatomy of the ship by Karl Heinz Marquardt. The timing couldn't have been much better. I see in the diagrams for the armament, that the hooks should in fact be stropped to the blocks. Maybe I'll just make my own brass hooks and get to stropping after all. (maybe no one will notice that the eight I've already made will look different..)
-
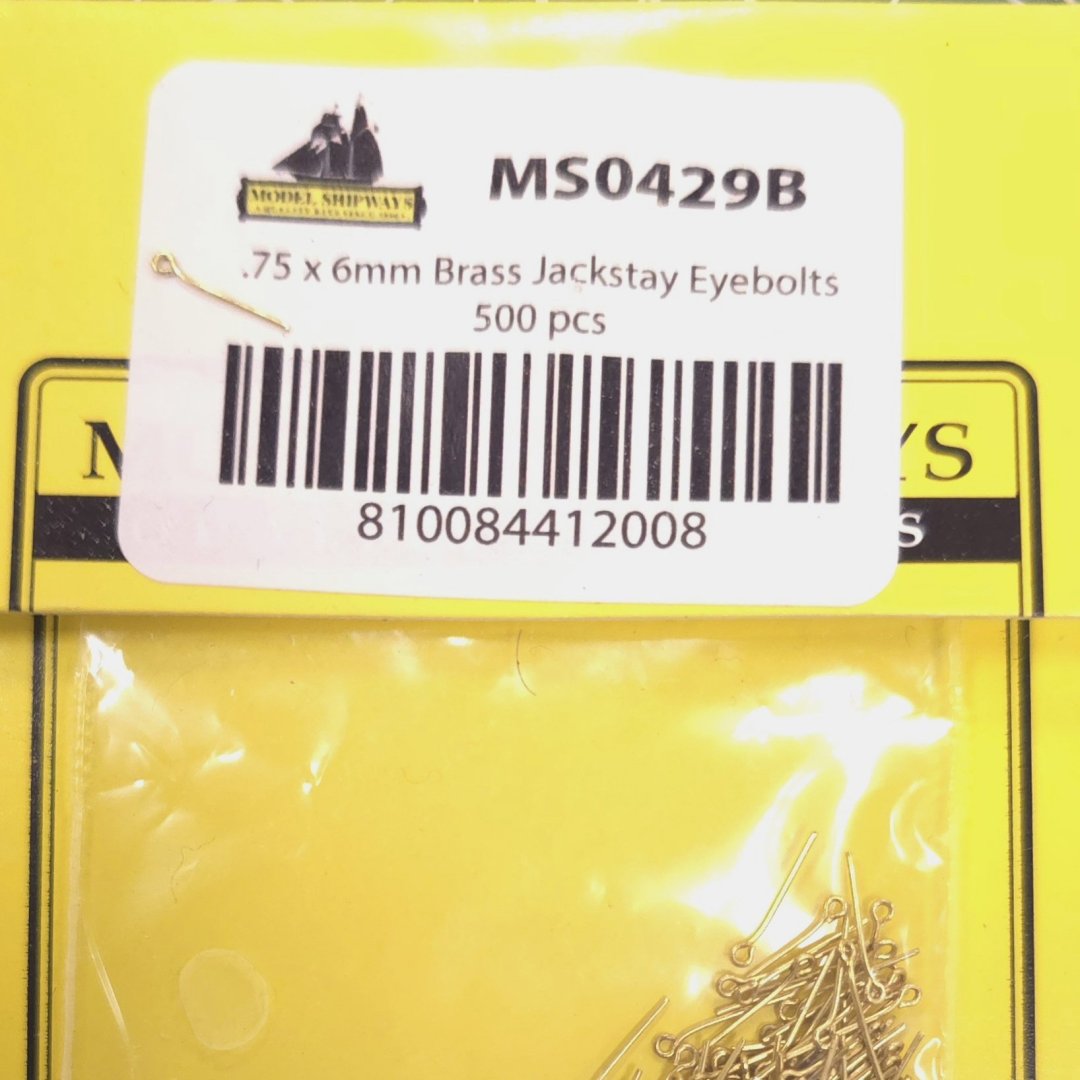
Hi Gregg, What a finish to that hockey game! I can hardly wait for the next one. (I'm glad to see that 2 ex-Blackhawks are in the finals, which gives me a reason to root for one team over the other.) As for the hooks, I'm using the standard Jackstay eyebolts that model shipways provides with their kit. I did look at Syren for hooks, but they didn't come in brass, and they needed to be stropped to the blocks, which struck me as being more work than the method I'm using now. On the other hand it took me 2 hours to make six of them today. I did lose two in the process, however. Trust me, if I could find these in brass, I might consider doing the stropping. Given that I've got eight of 40 already done, starting from scratch would mean I'd be doing those eight again. (Two of the eight are deployed on the spar dack at the moment.)

-
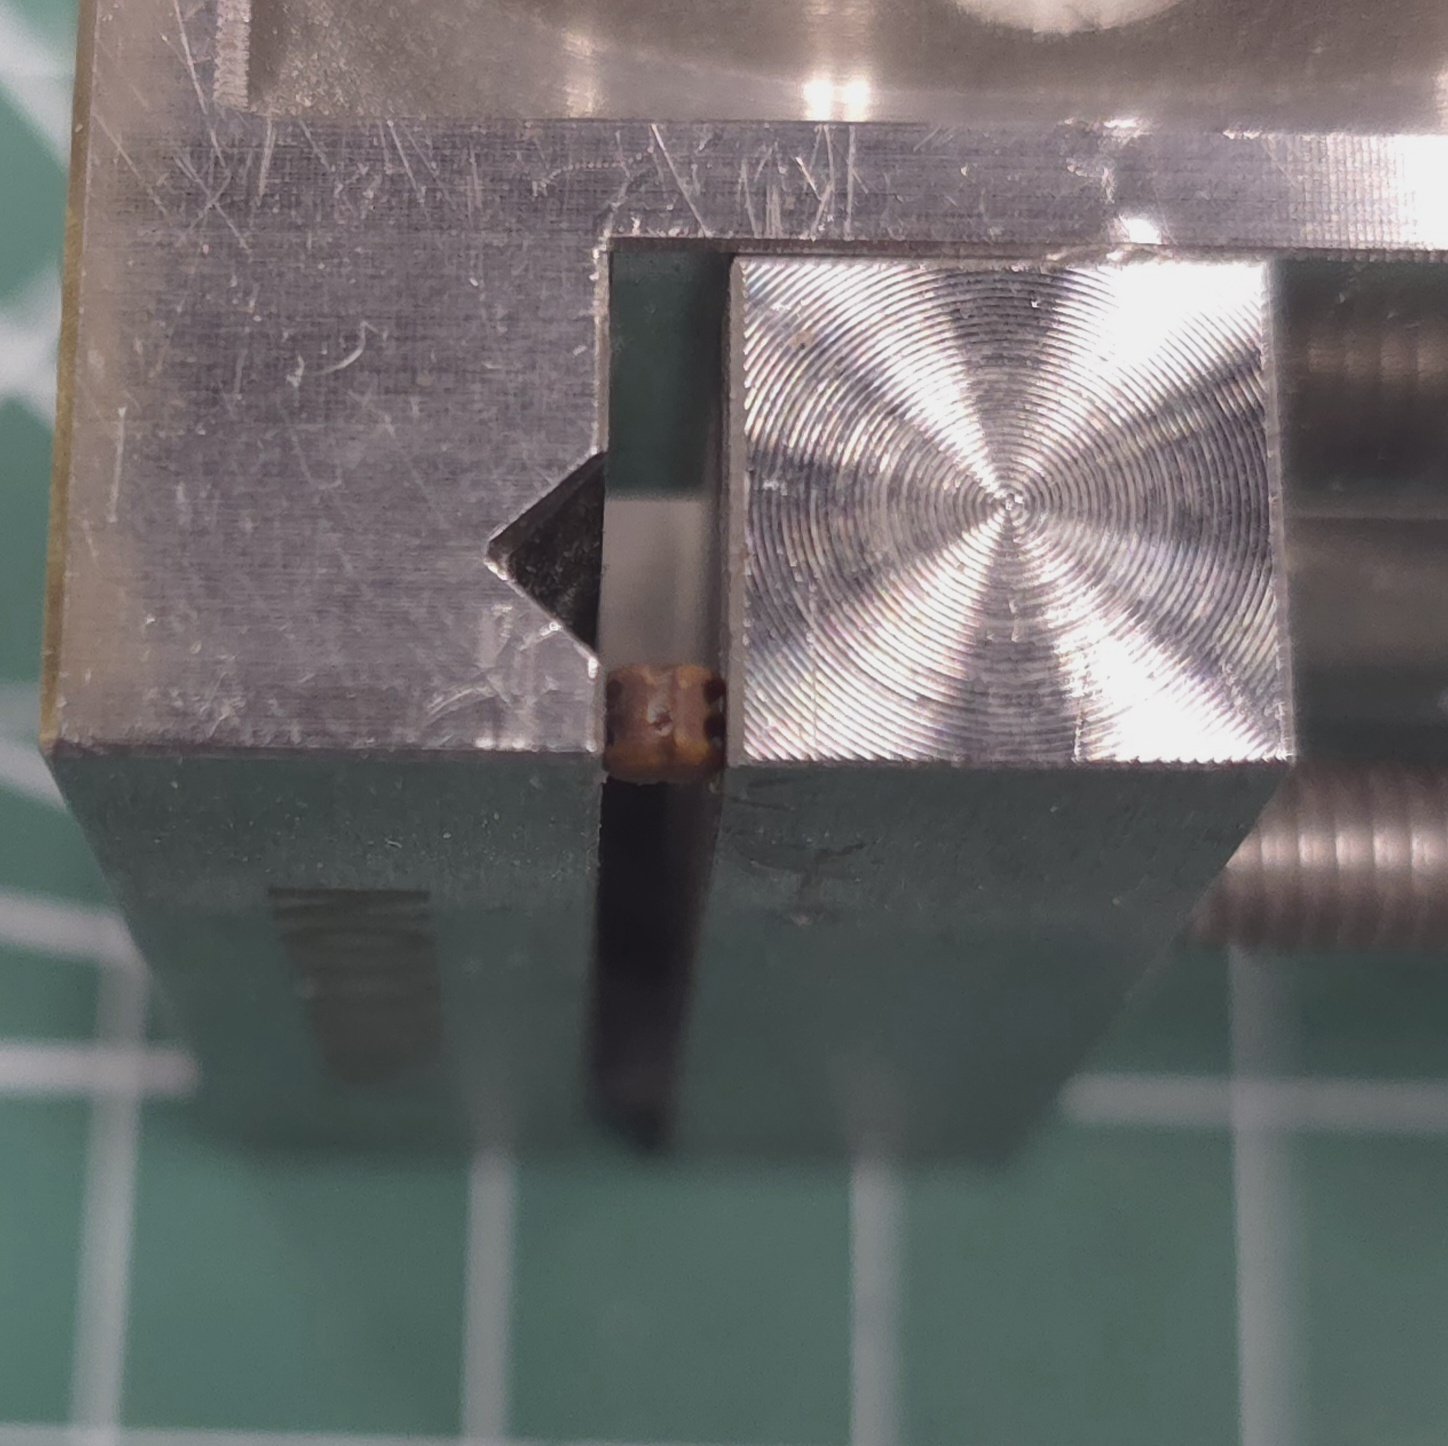
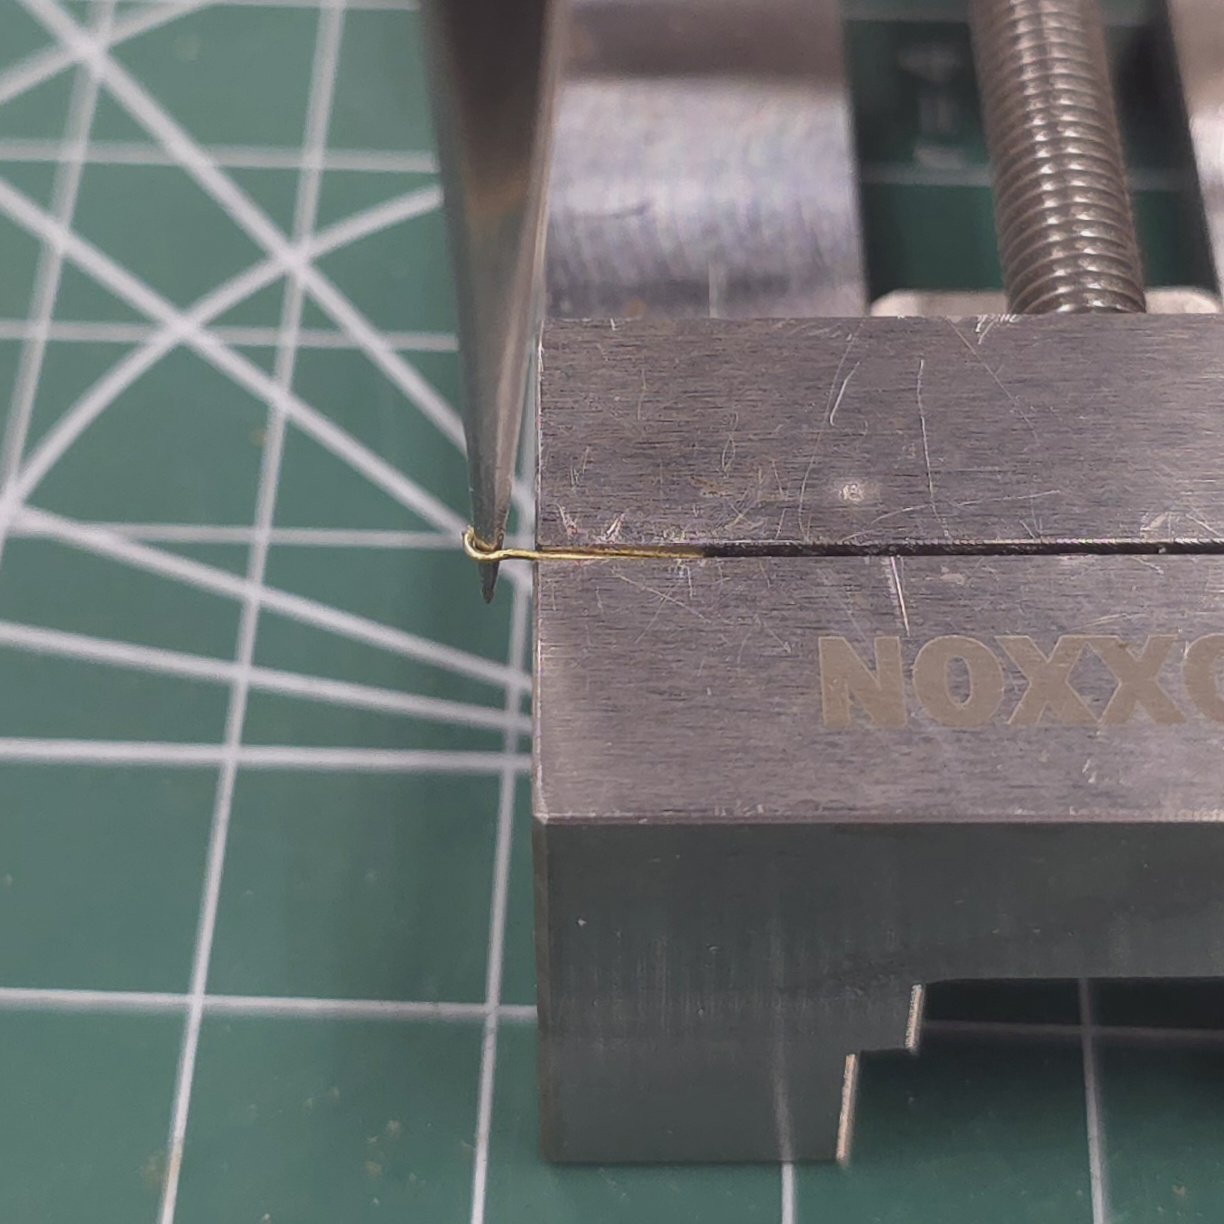
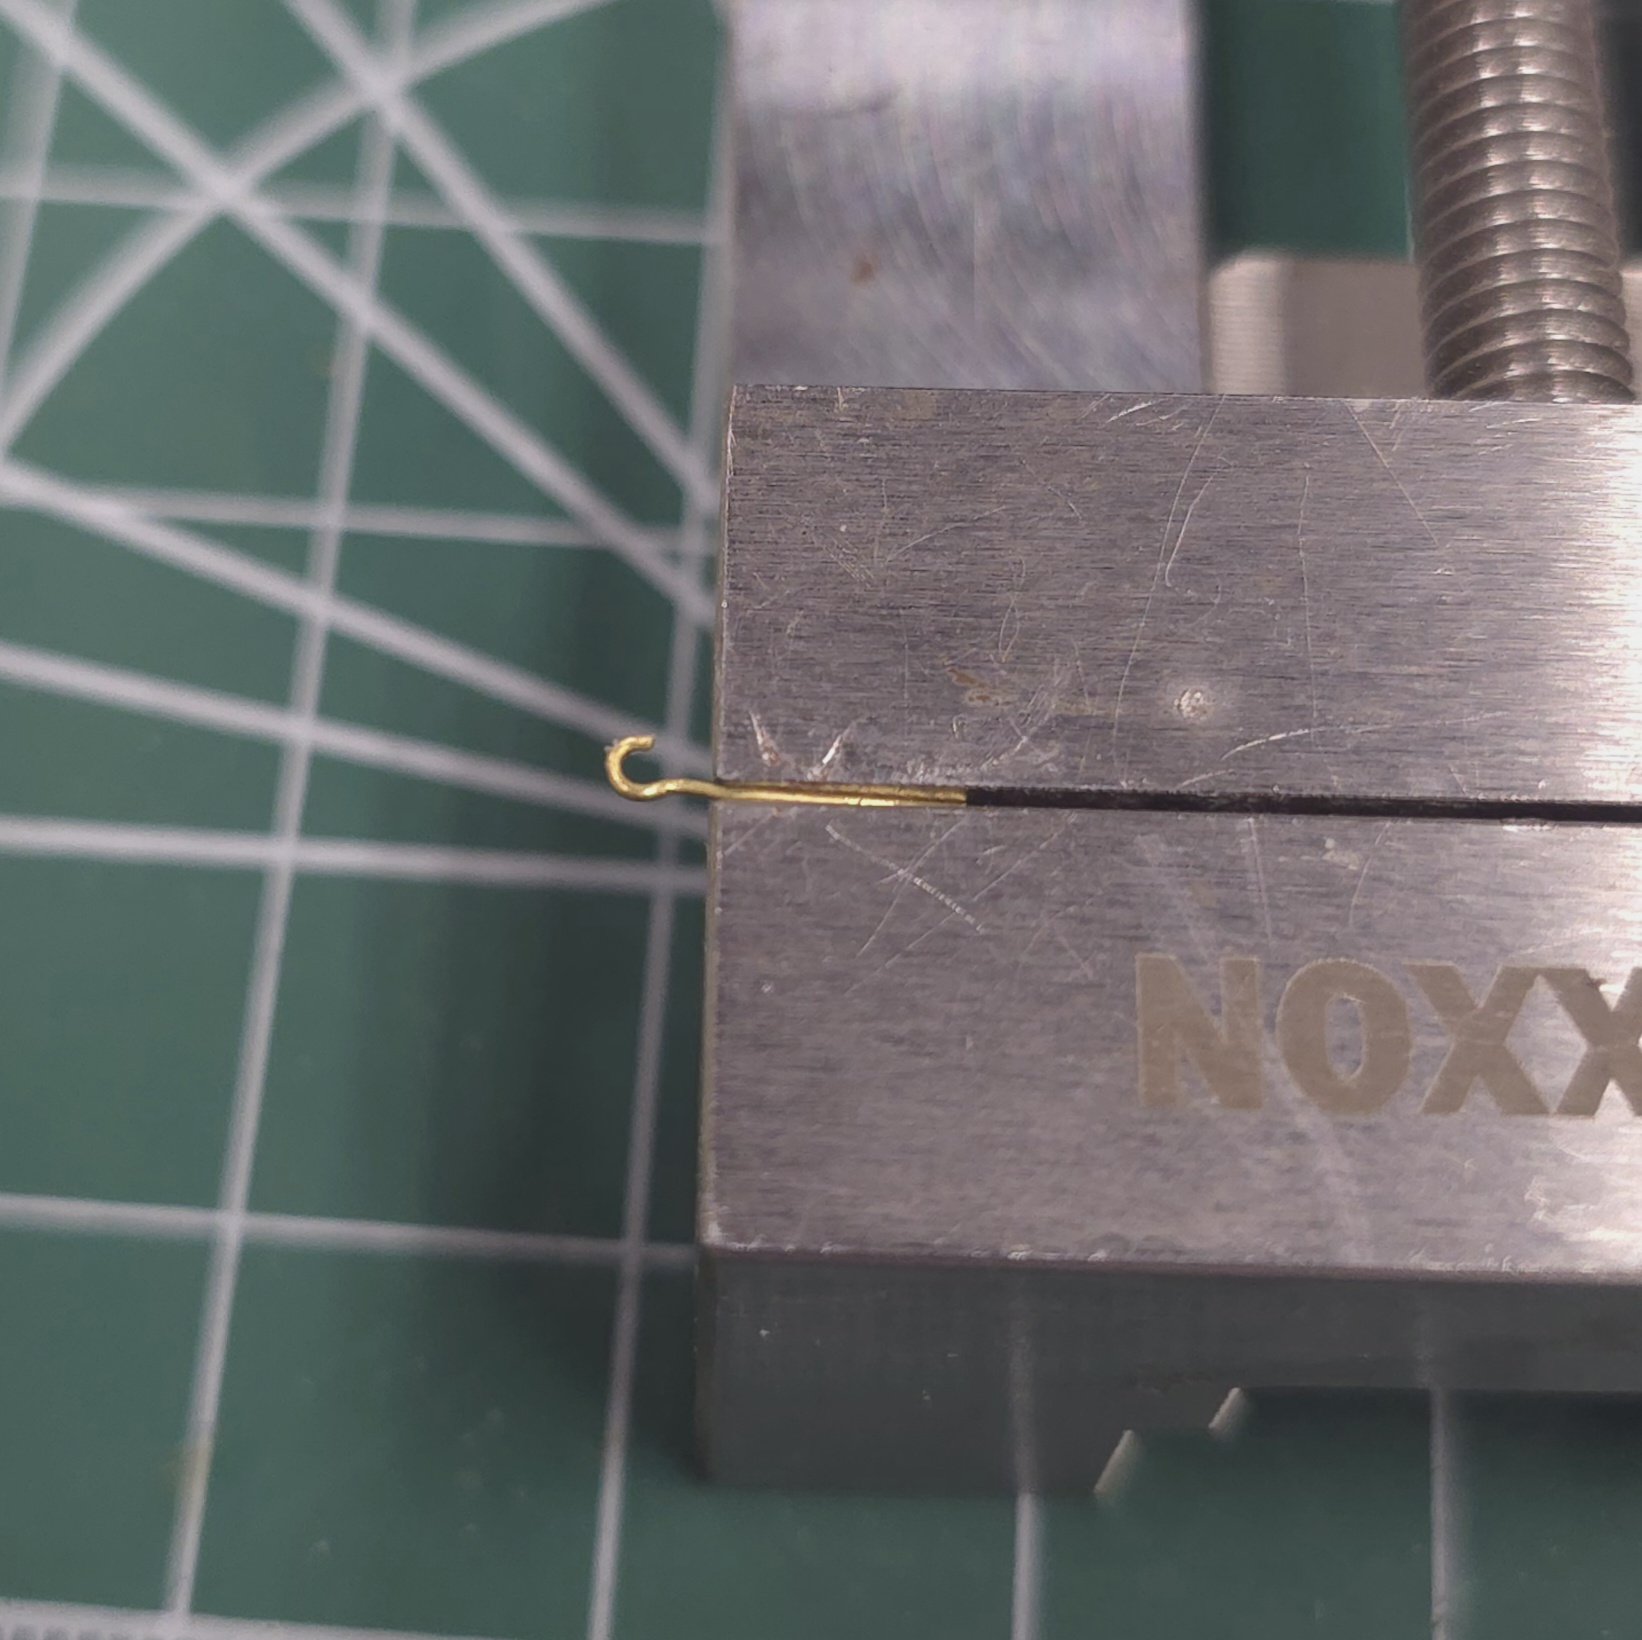
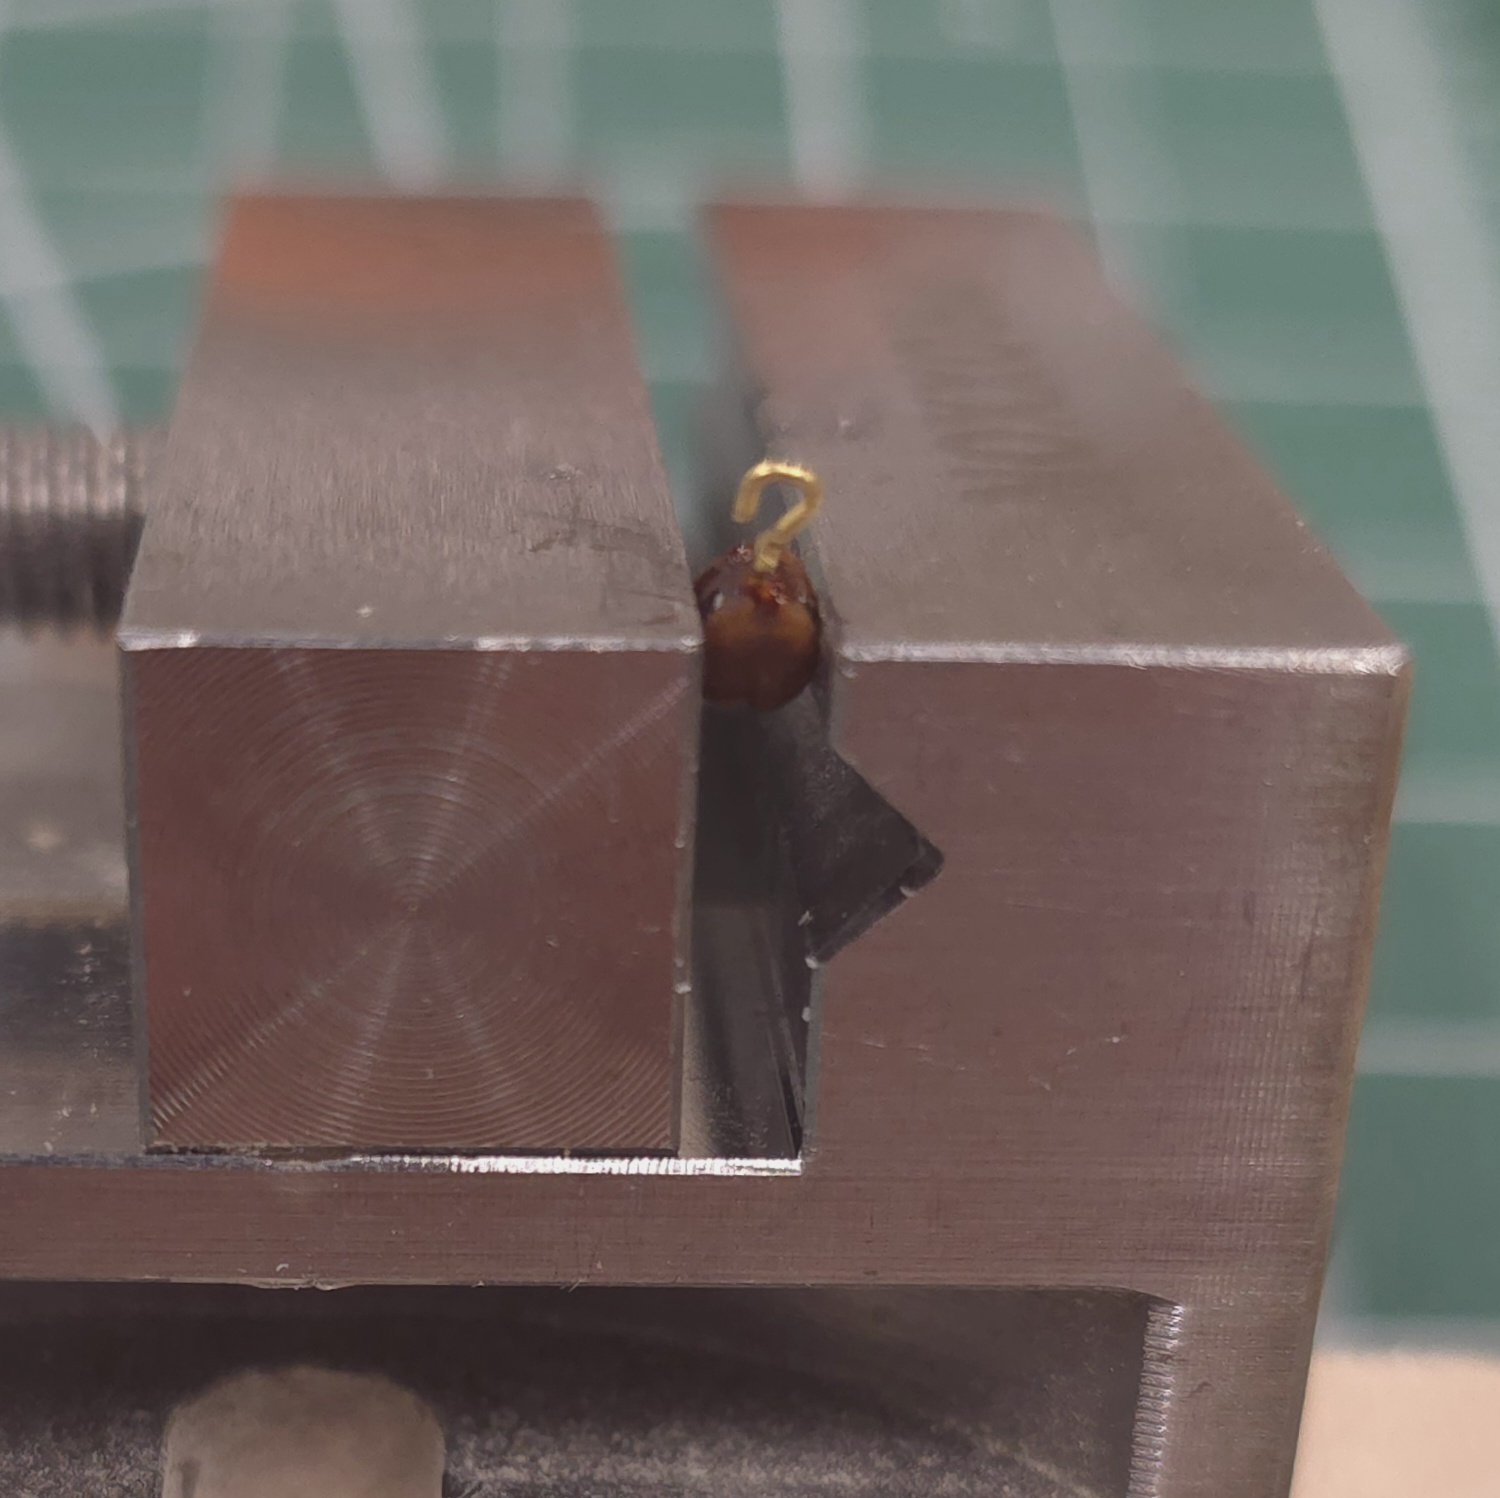
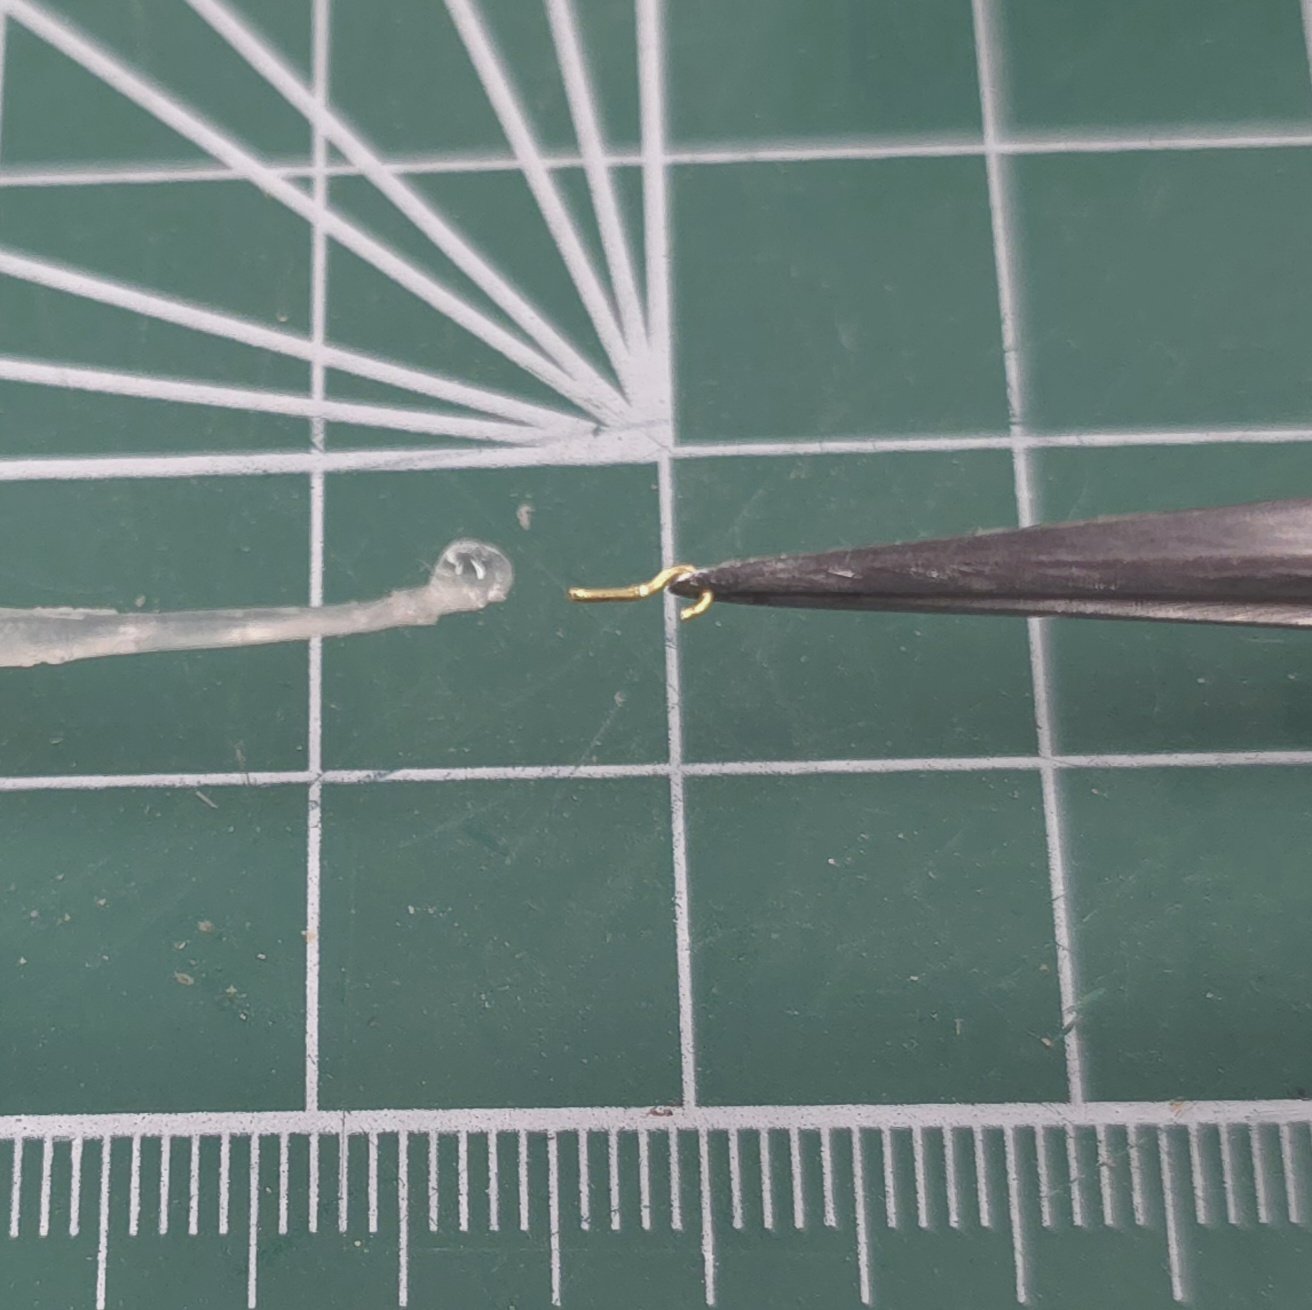
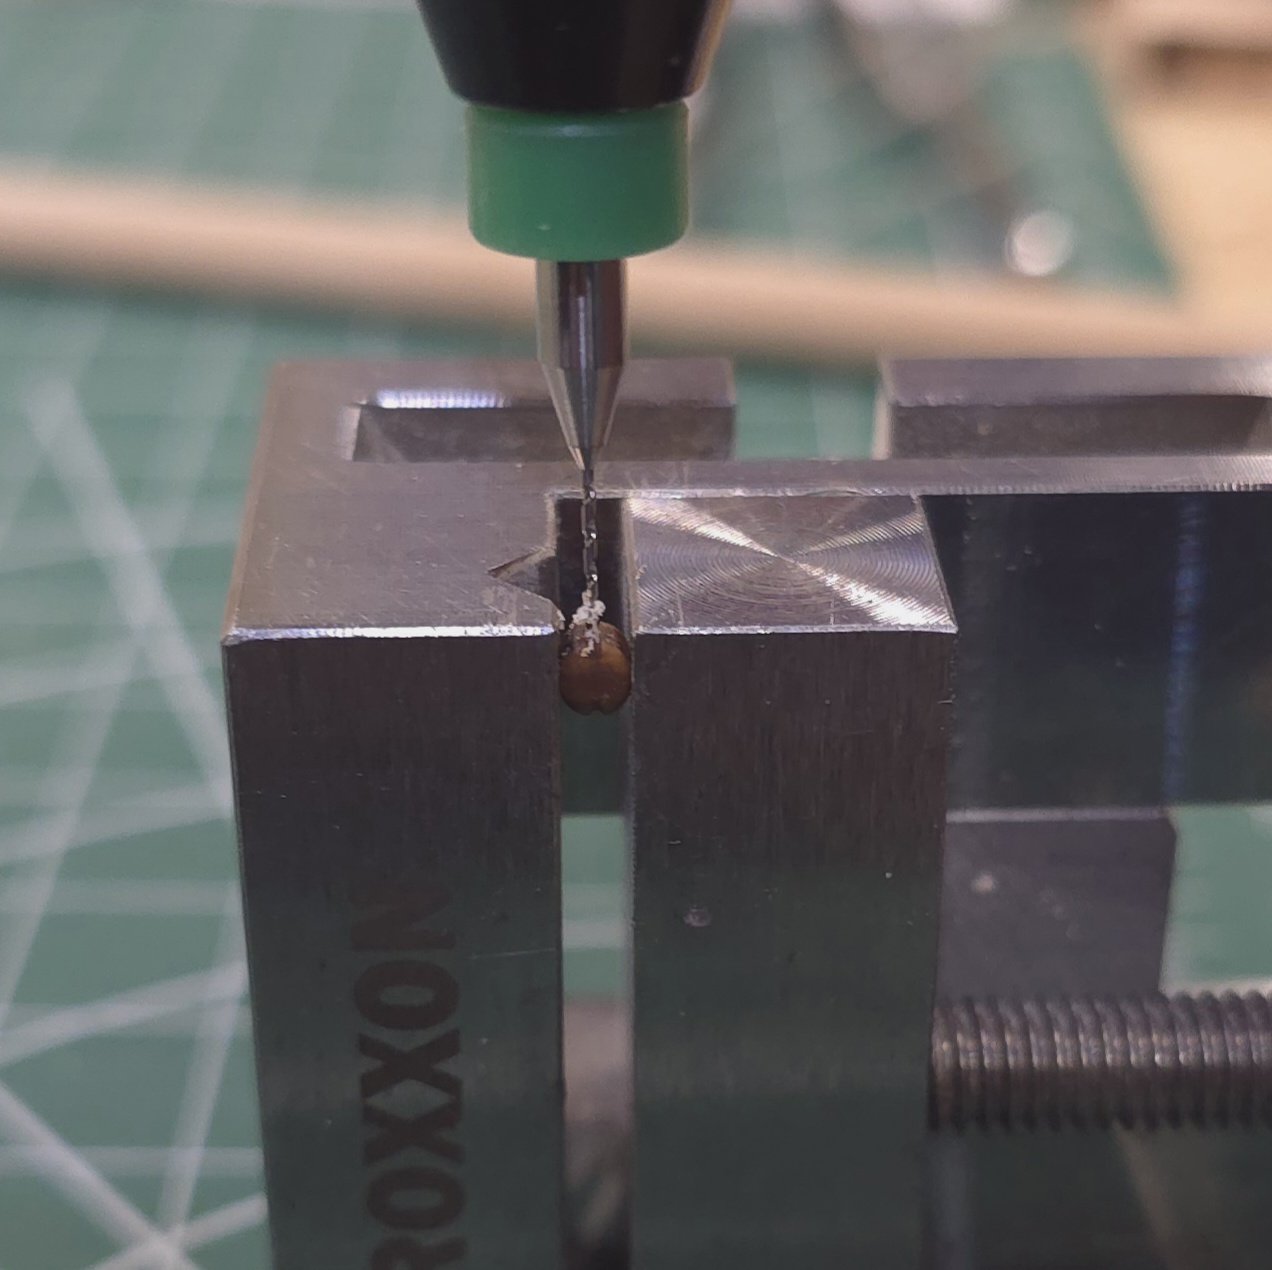
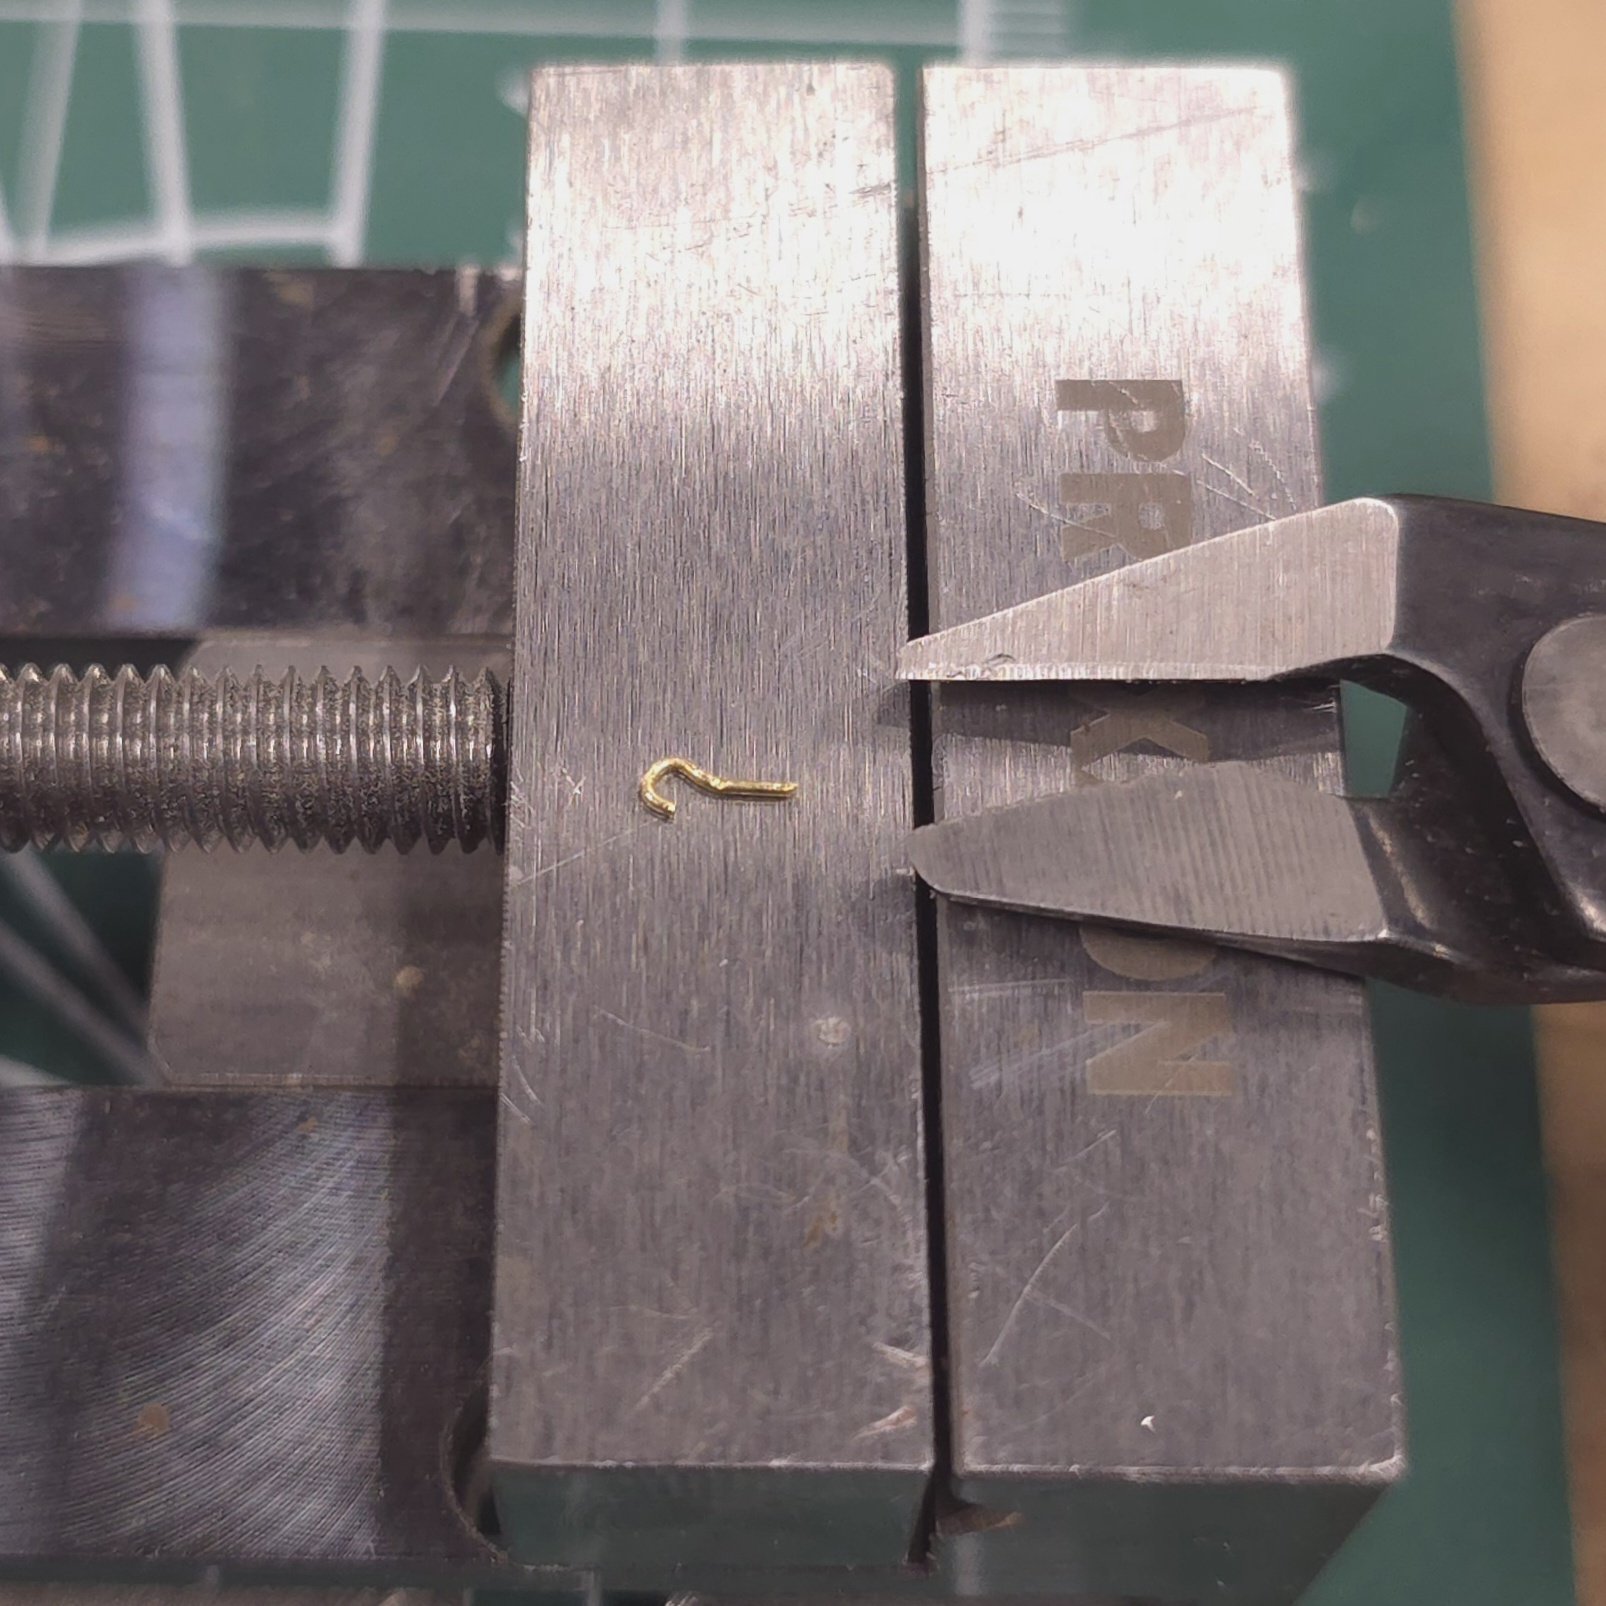
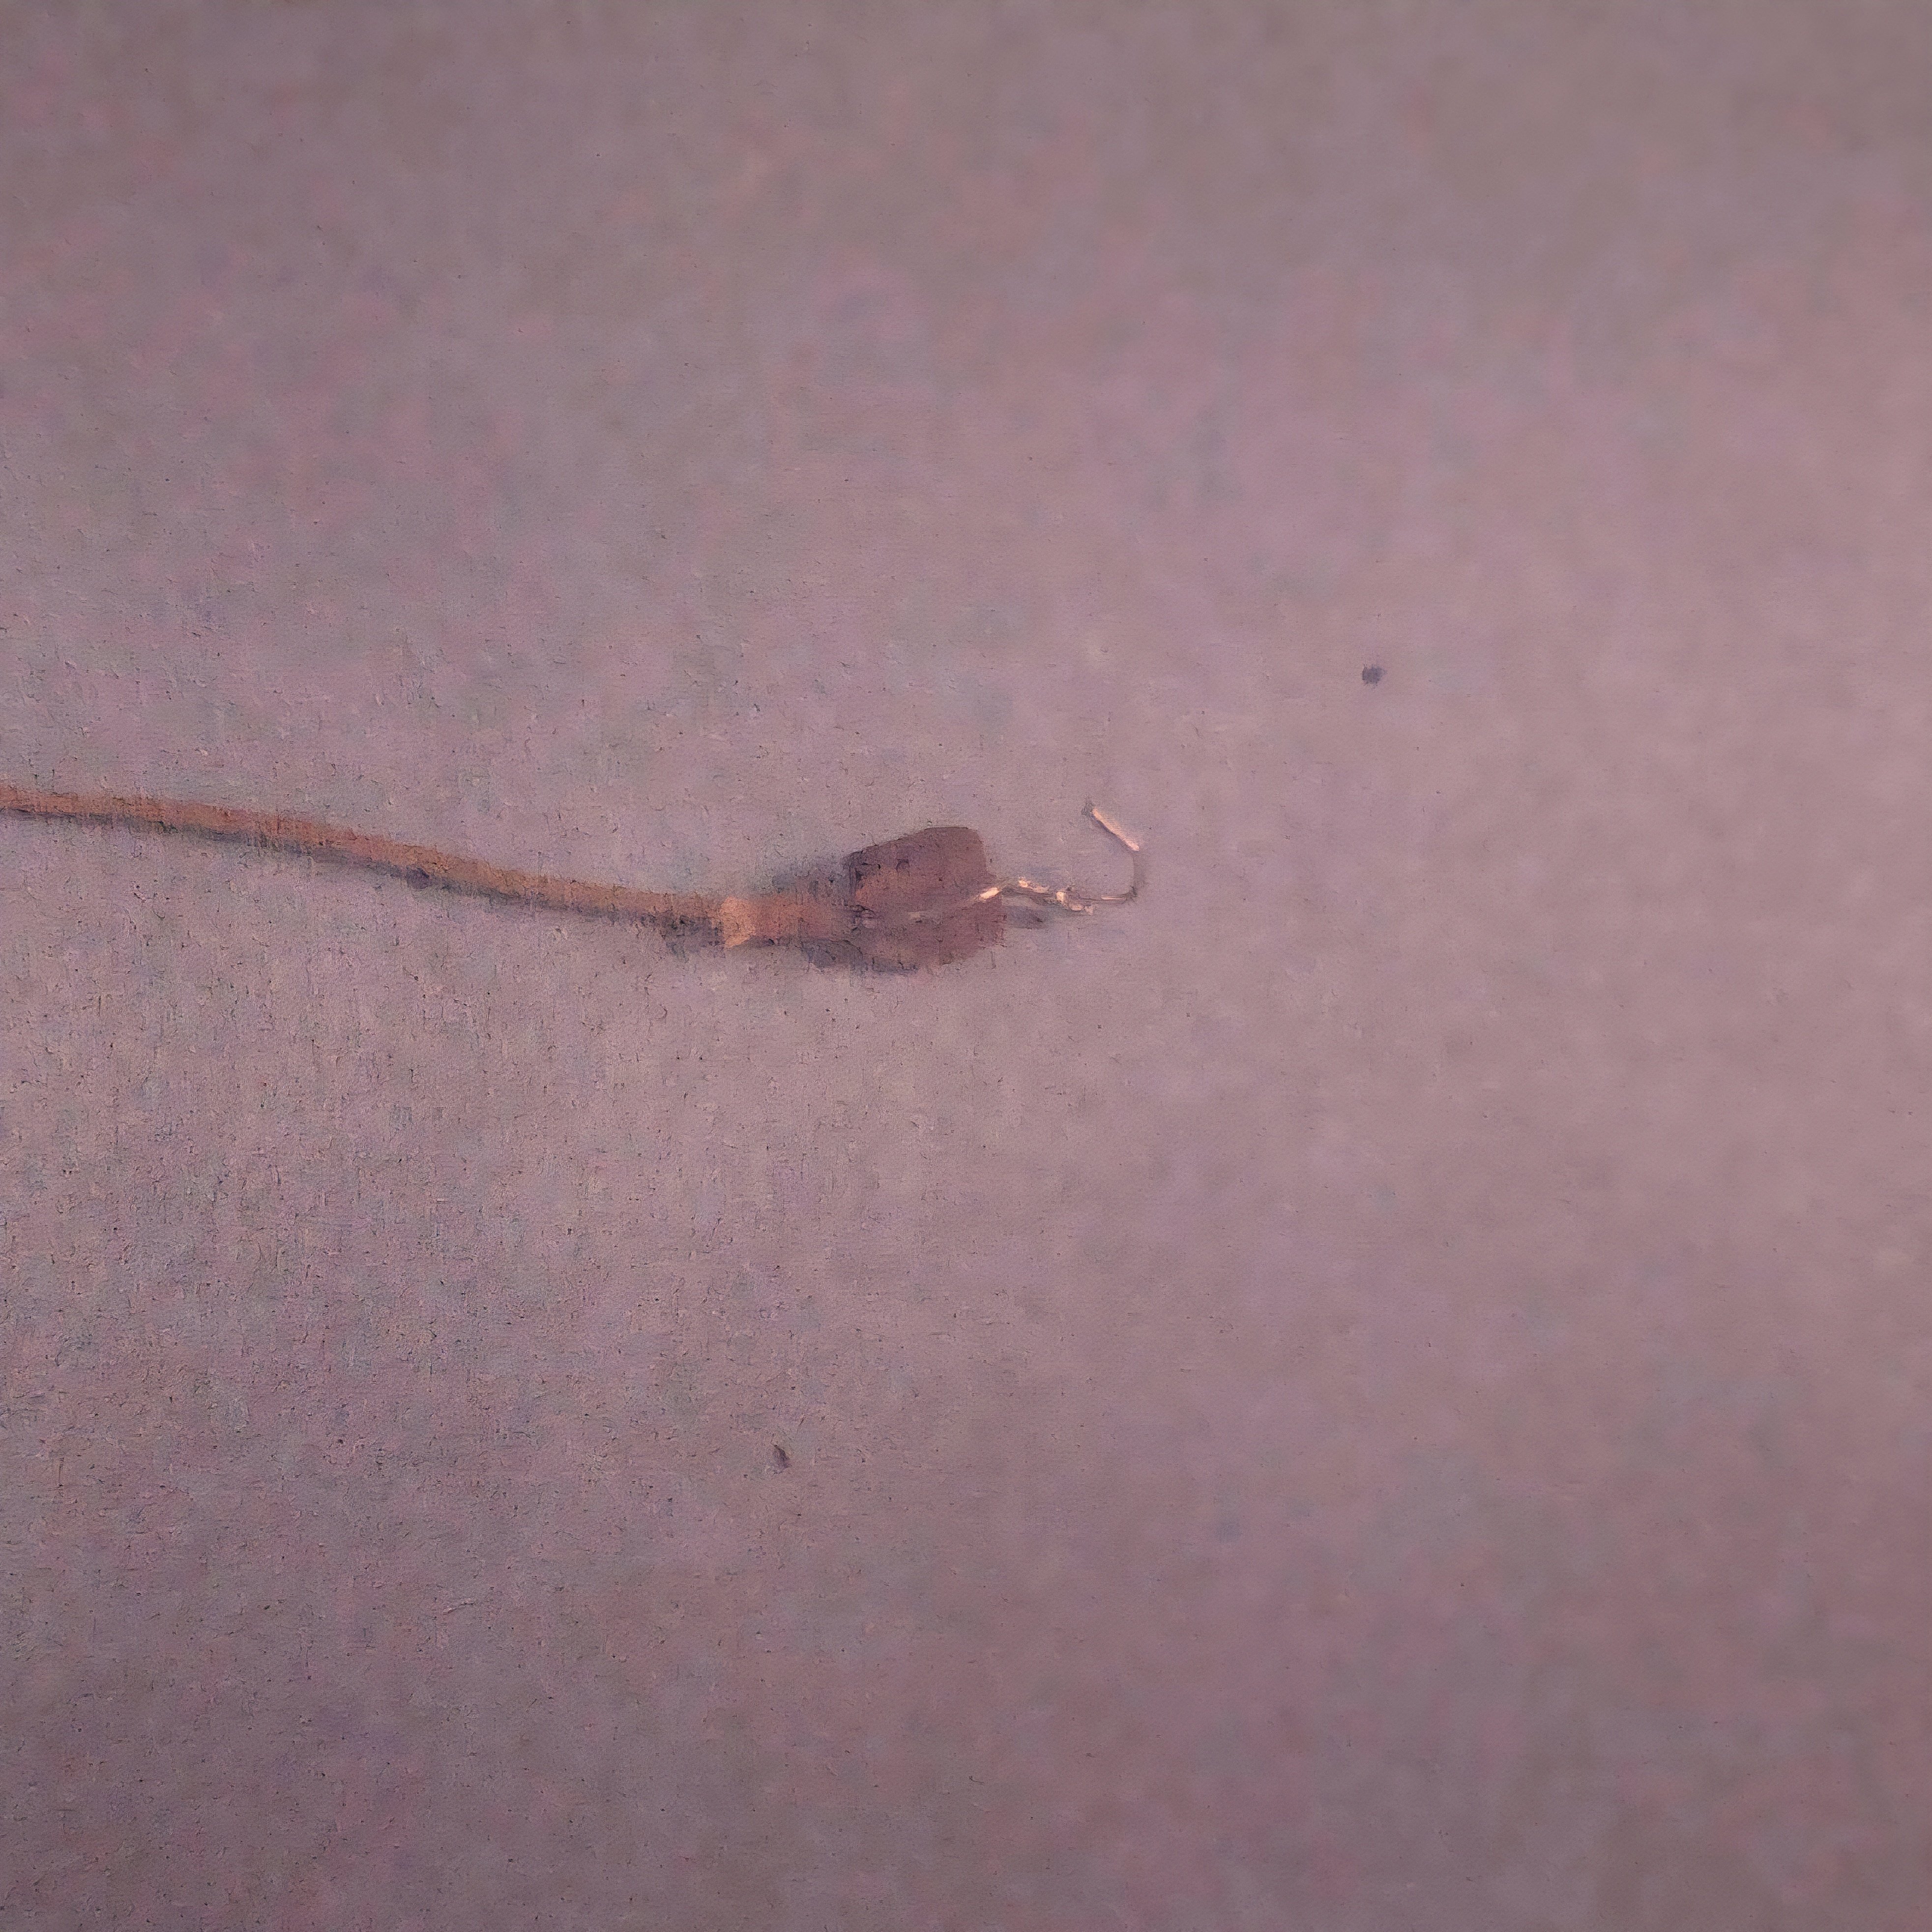
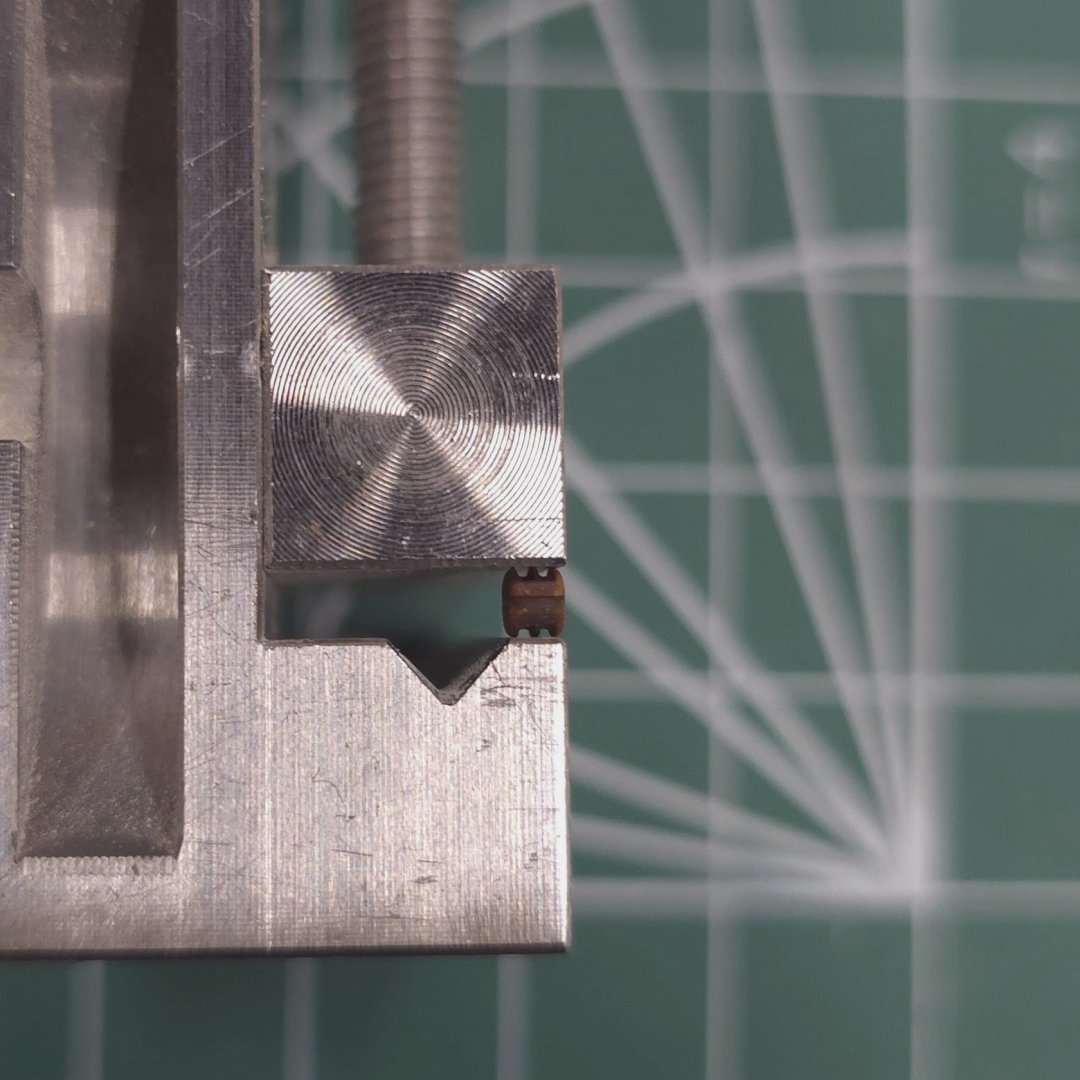
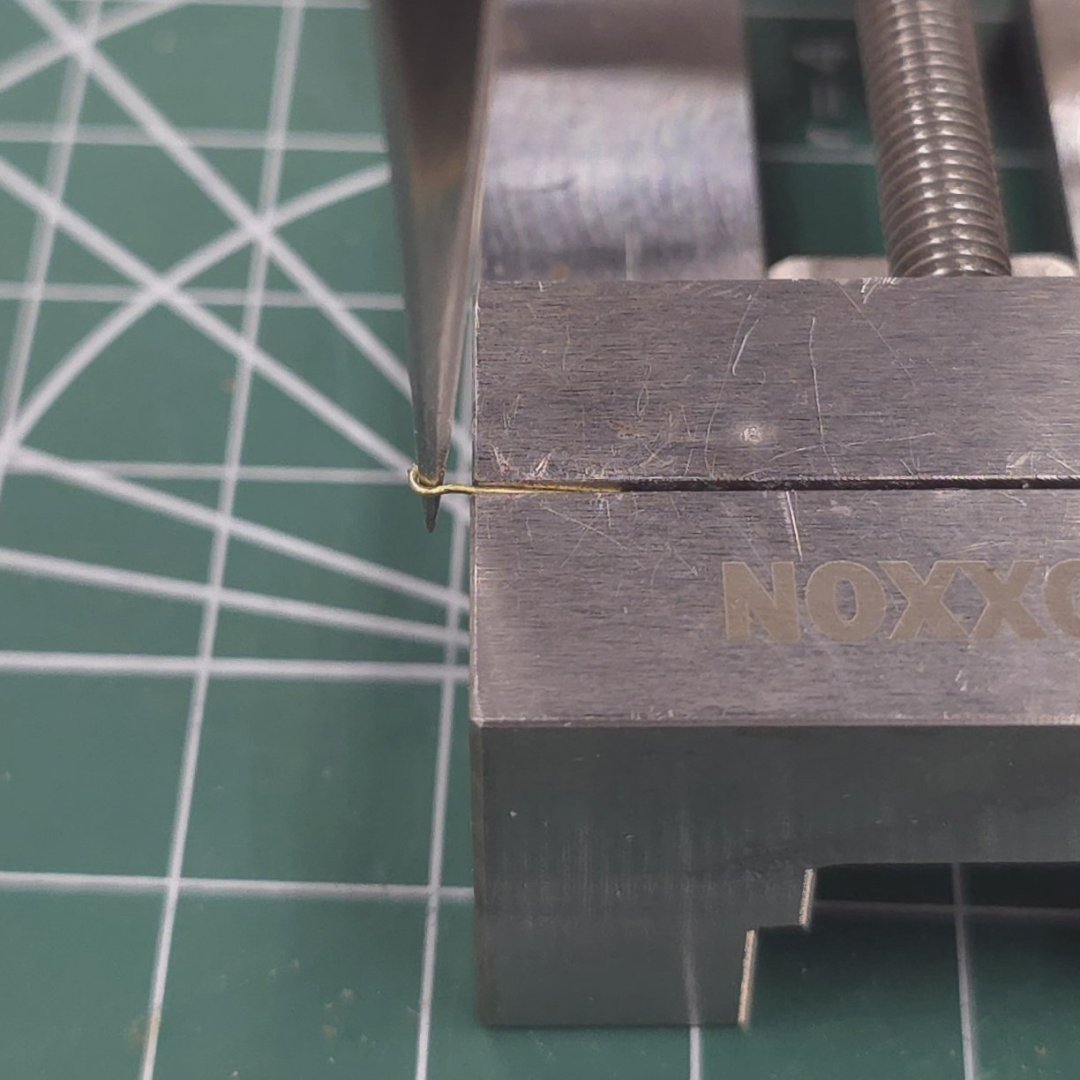
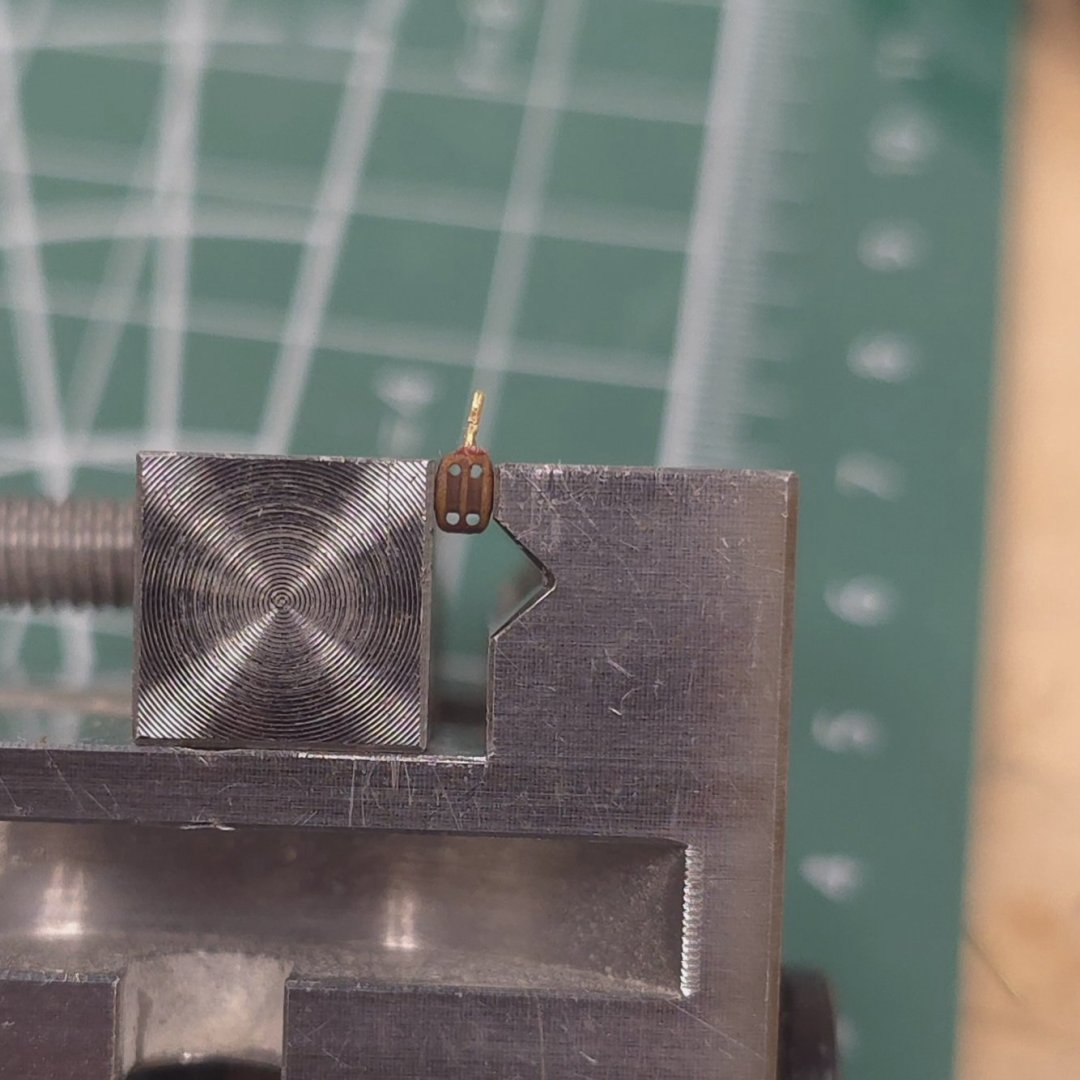
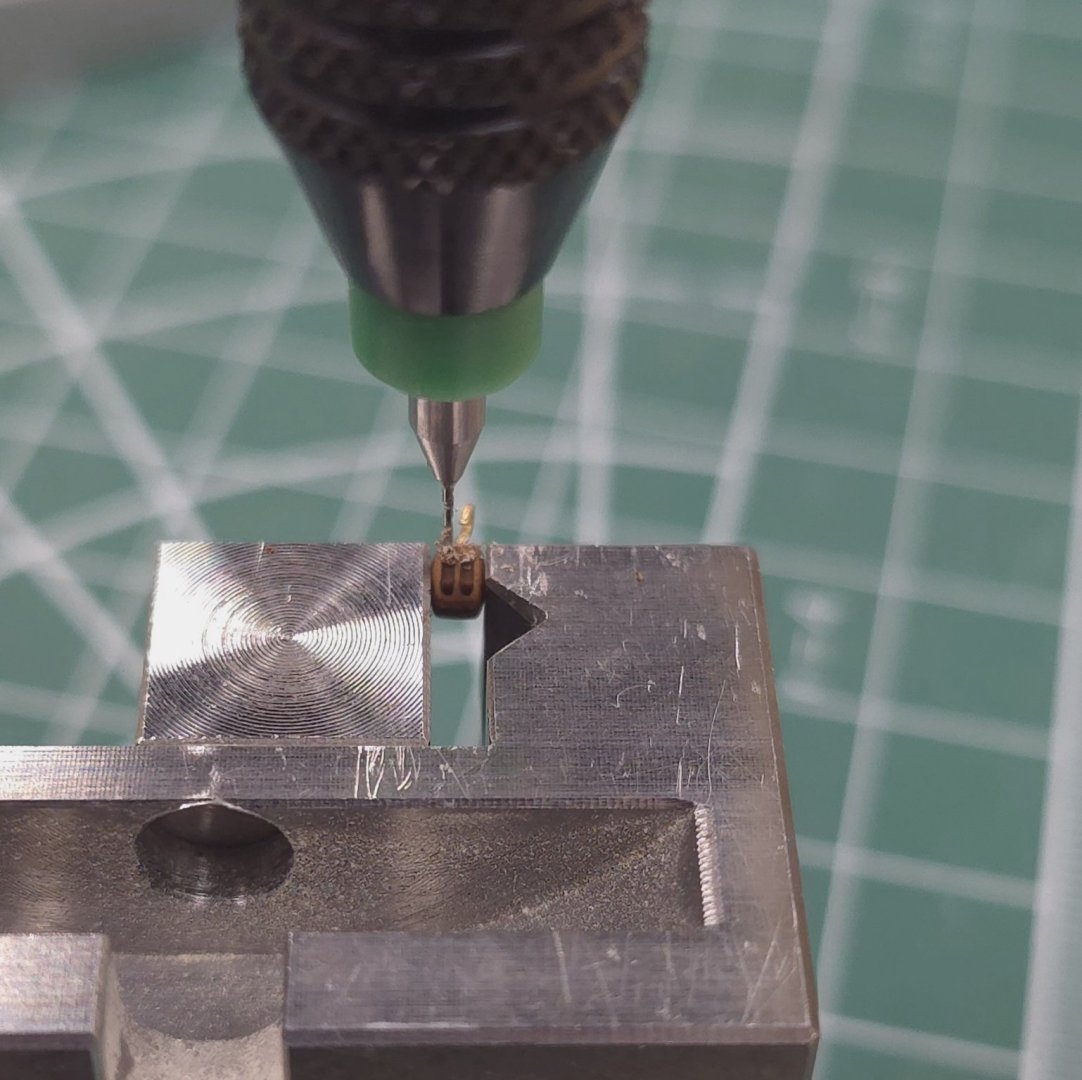
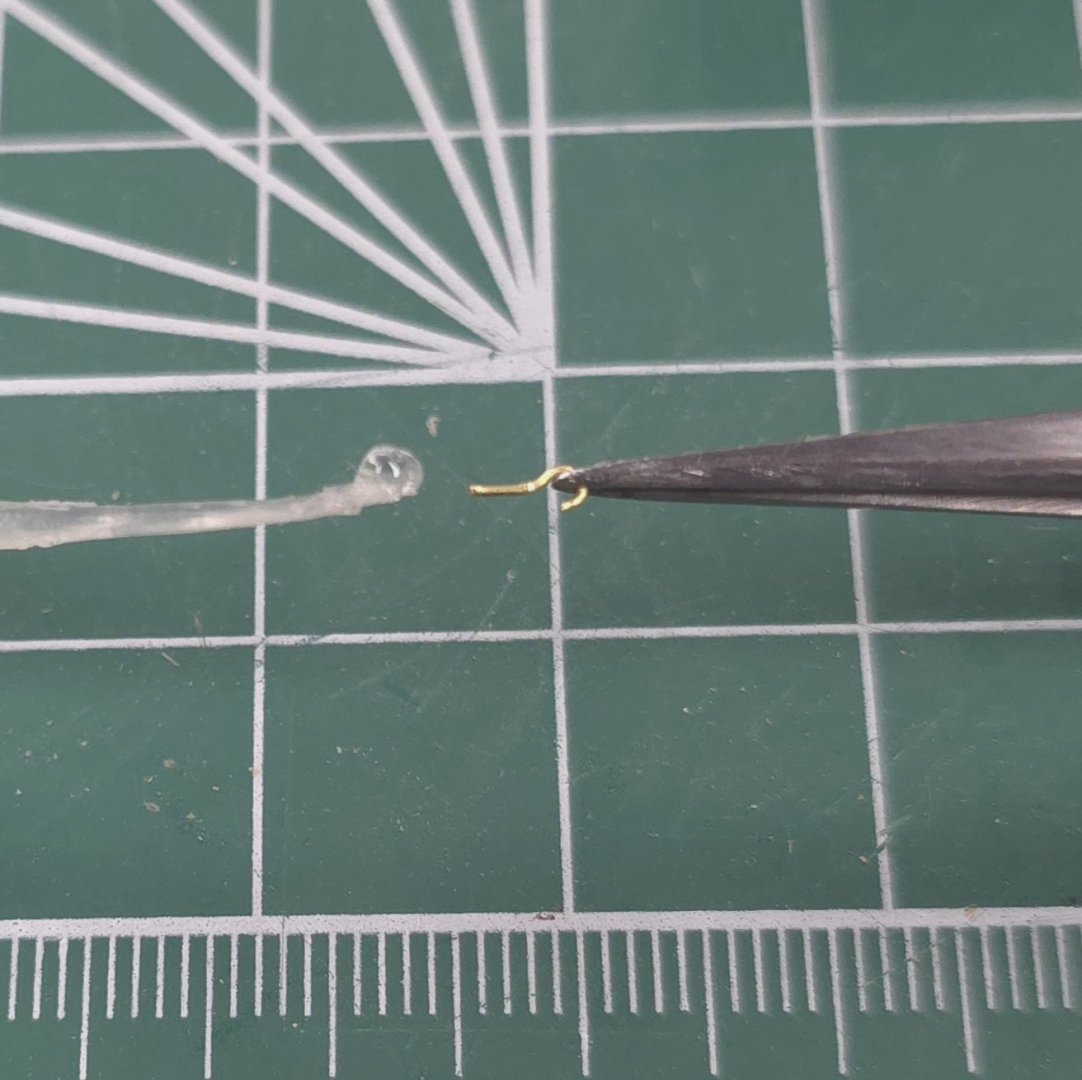
It's funny that you ask. I couldn't stay up long enough last night to watch the overtime of Edmonton Florida Stanley Cup game, so I decided to watch the rest of the game at my Shipyard while doing some busy work. The busy work is fashioning the hooks and double blocks. The steps follow: Clamp the block in a sturdy vice. Do the absolute best you can to center the drill, which in this case a .48 mm drill, on the end of the block. No, I am not using the Proxxon mill to drill the hole. I'm using a pin vise. Open up the hole in the standard kit supplied eye bolt. Trim the bolt. Glue the hook into the block. And now for the tricky bit. If you didn't Center the hook well enough, you won't be able to get the thread through the holes nearest the hook. Even if you do center it, you will need to clean out the holes. So, I used the same drill and very carefully reamed out those two holes. Ta da... Note: I tried using some .30 mm brass wire wrapped around the block then twisting the ends to fashion a hook, sort of like this: But the brass kept breaking. I've made a grand total of four of these so far, and only screwed up once, where I didn't get the drill centered. For what it's worth, had I used the blocks that came with the kit, this would have been a piece of cake. Given that they are oversized and the holes for the line are in the center of the blocks not at the ends like with these from Syren. Note to Syren, perhaps you could offer up blocks with one pre-drilled hole? Since you're already done, Mustafa, this is all academic for you. But it's going in to my hard copy build log, so the details needed to be posted.


-
I think I've figured out the processes of making hooks and attaching them to the blocks. Next up, figure out how to rig the breaching rope. Of all the builds that I have studied, I like the looks of Mustafa's the best. I can't decide if I like how skinny these tackles look. I should probably hold off until the order of new materials arrives before I go into mass production. In the short-term, I'll be attaching hooks to the double blocks, which requires no rope at all. Just a lot of patience. 🙄
-
Given that Syren seems to be out of stock in the .30 mm and .45 mm sizes in tan, Ropes of Scale just got my order. I ordered an assortment of sizes in the tan ranging from the .25 mm up to the .7 mm. I'll see how these compare to what I have from both MS and Constructo.
-
As it turns out, it may be that the holes in the syren blocks are so small that the .008" (.20mm) line that came with the kit is all that will fit through. Before I go much further, I order some .25mm line to see if that works. In terms of looks and scale, I might get by with the MS .20mm. Either way, this is going to take a LONG time..

-
Welcome aboard Gregg. I doubt the planets will align, but my wife is trying to get me out to Boston sometime in the fall as well. If calendars permit, maybe we can tour the Constitution together.
-
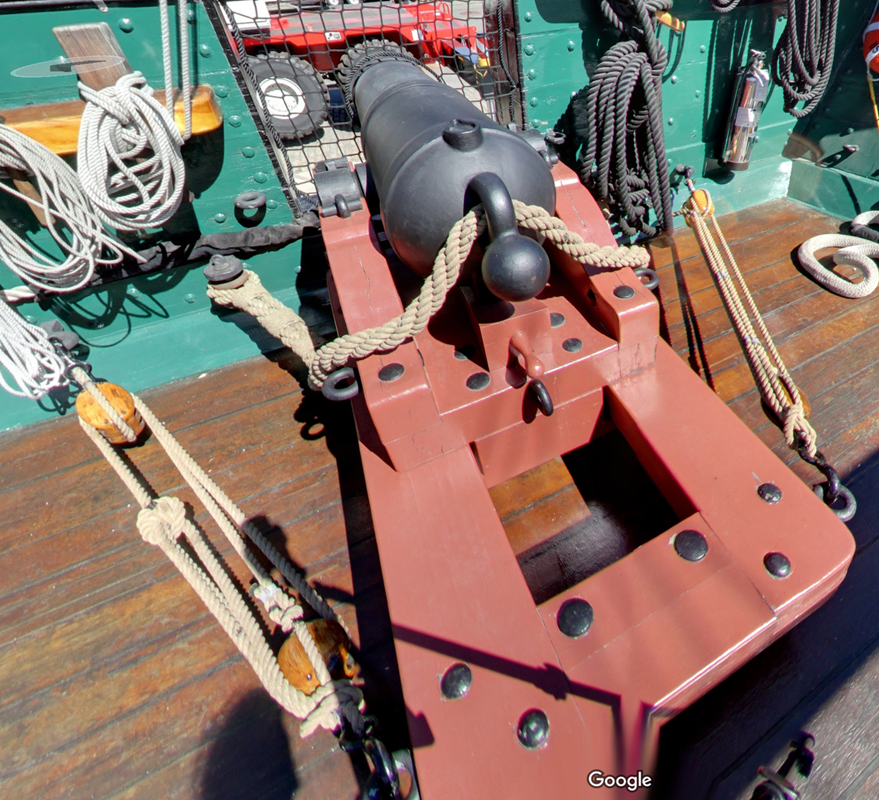
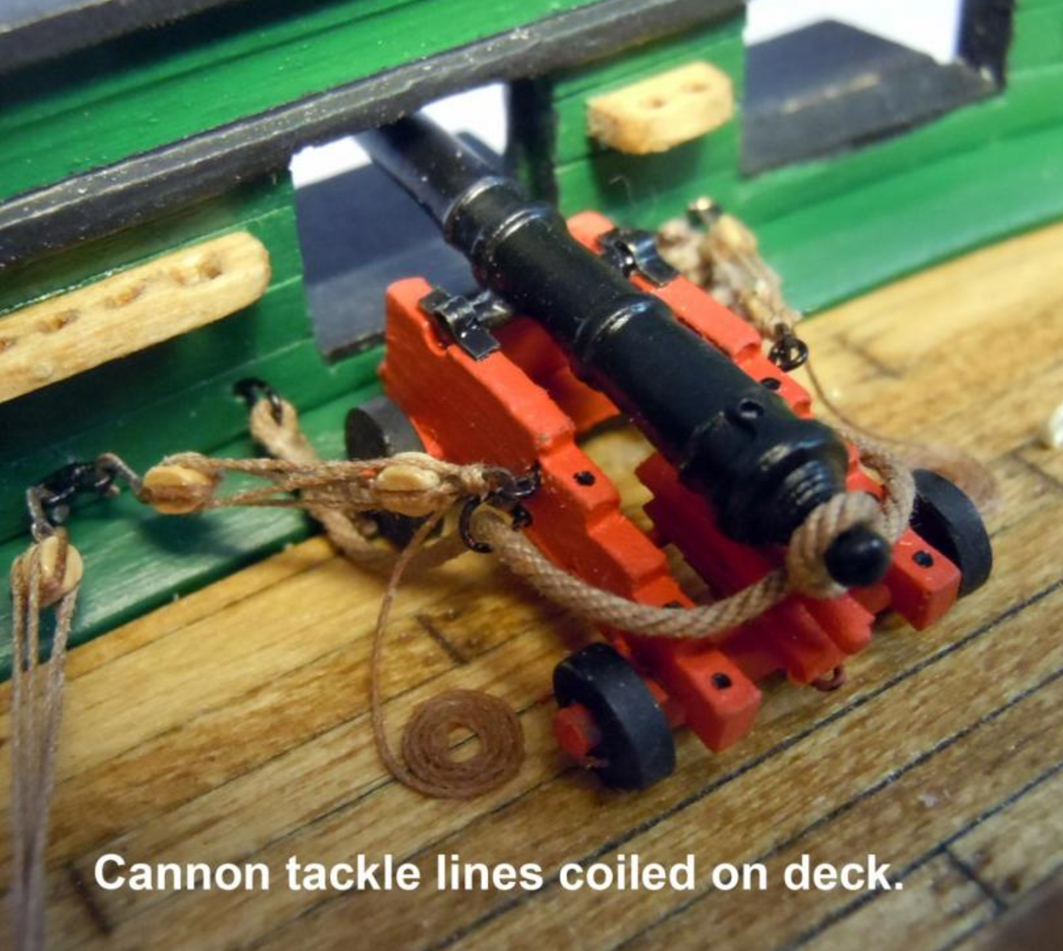
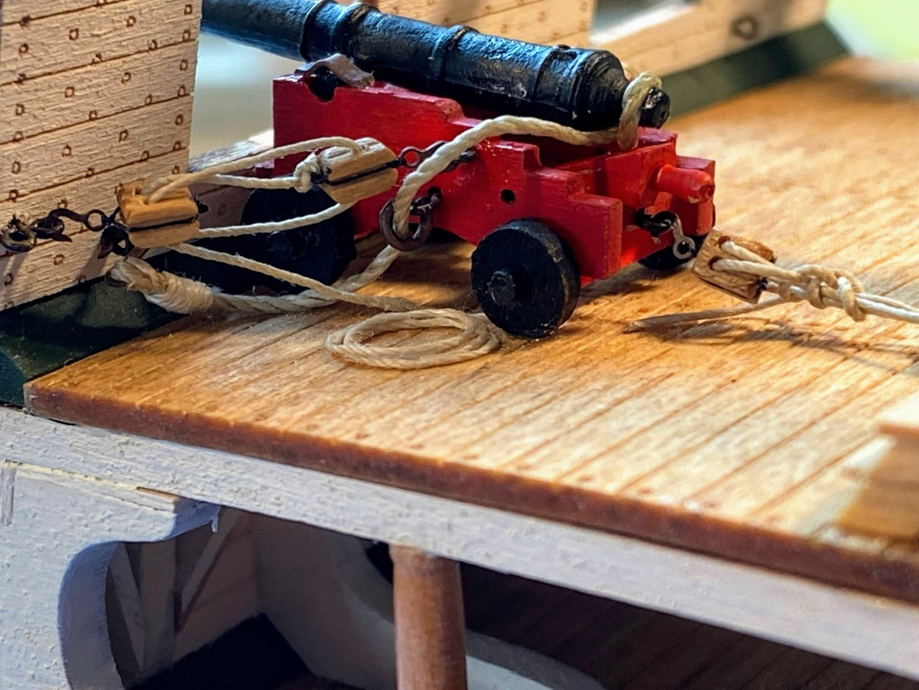
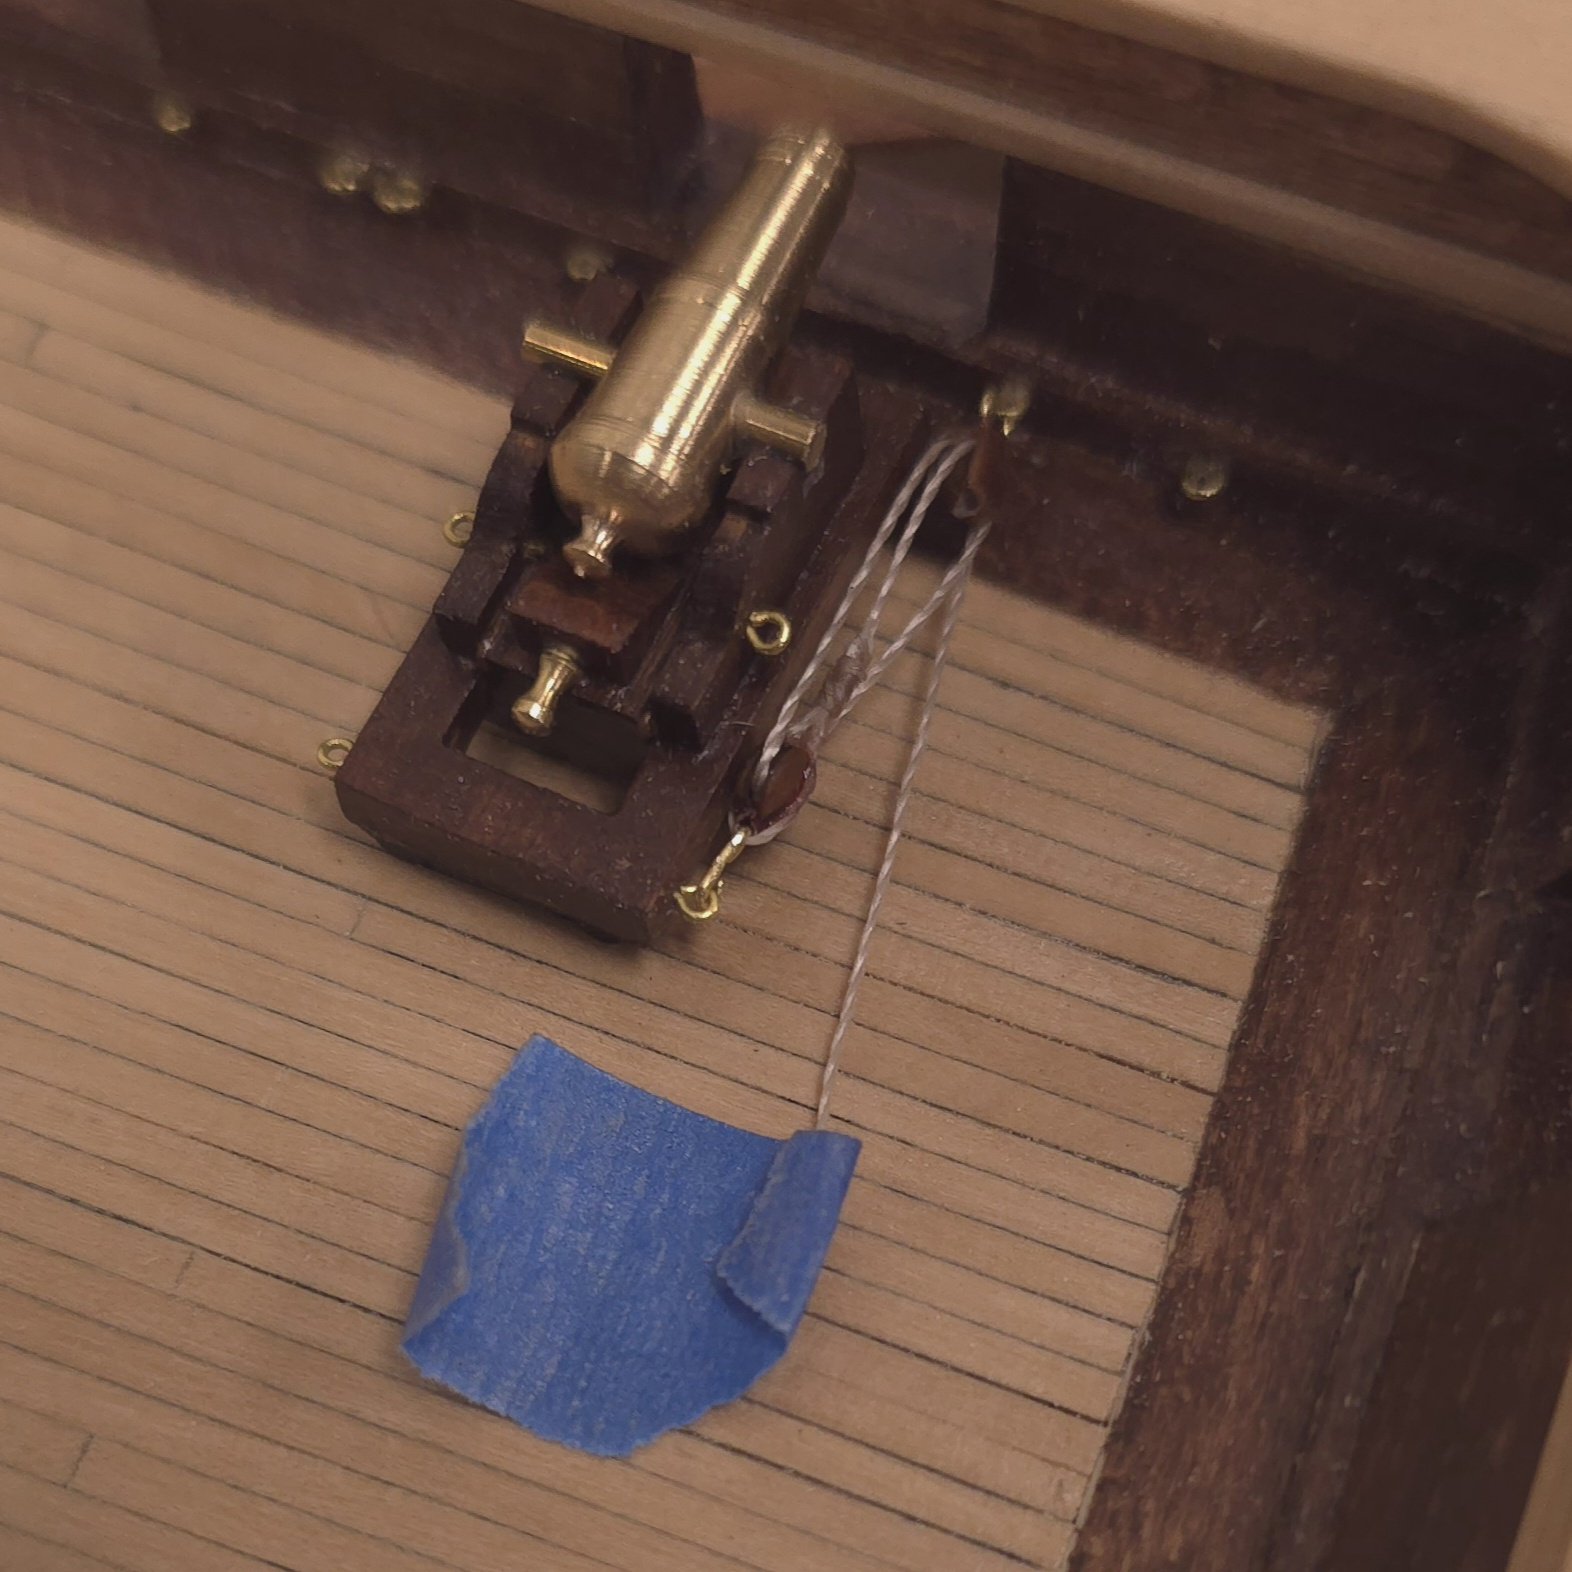
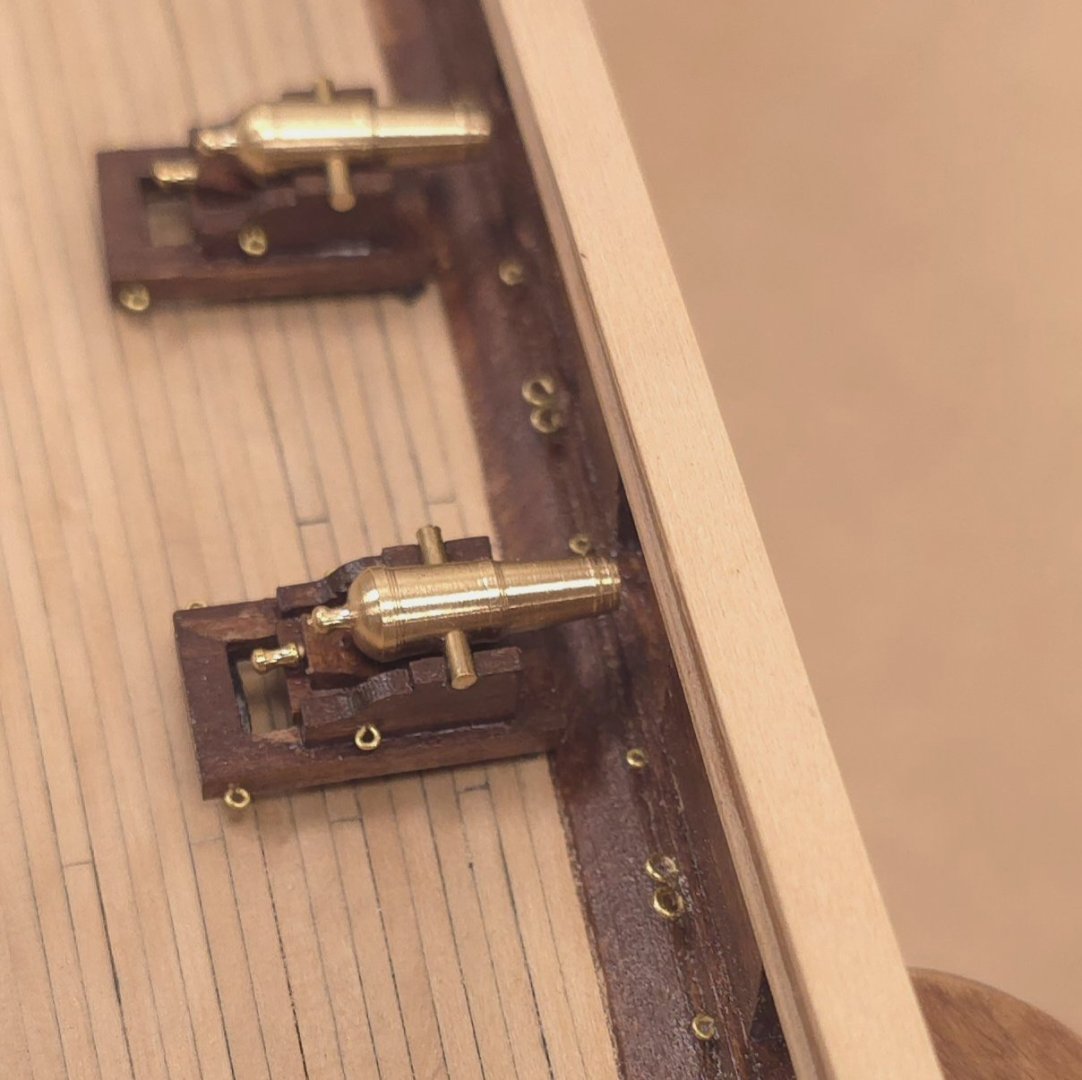
For what it's worth, because I failed to note the Hunt misdirection(?) for the waterway early on, my carronades will NOT be pulled through the gunports. I will therefore be coiling the tackle, or doing whatever it is they're doing with the Constitution today. See above.
-
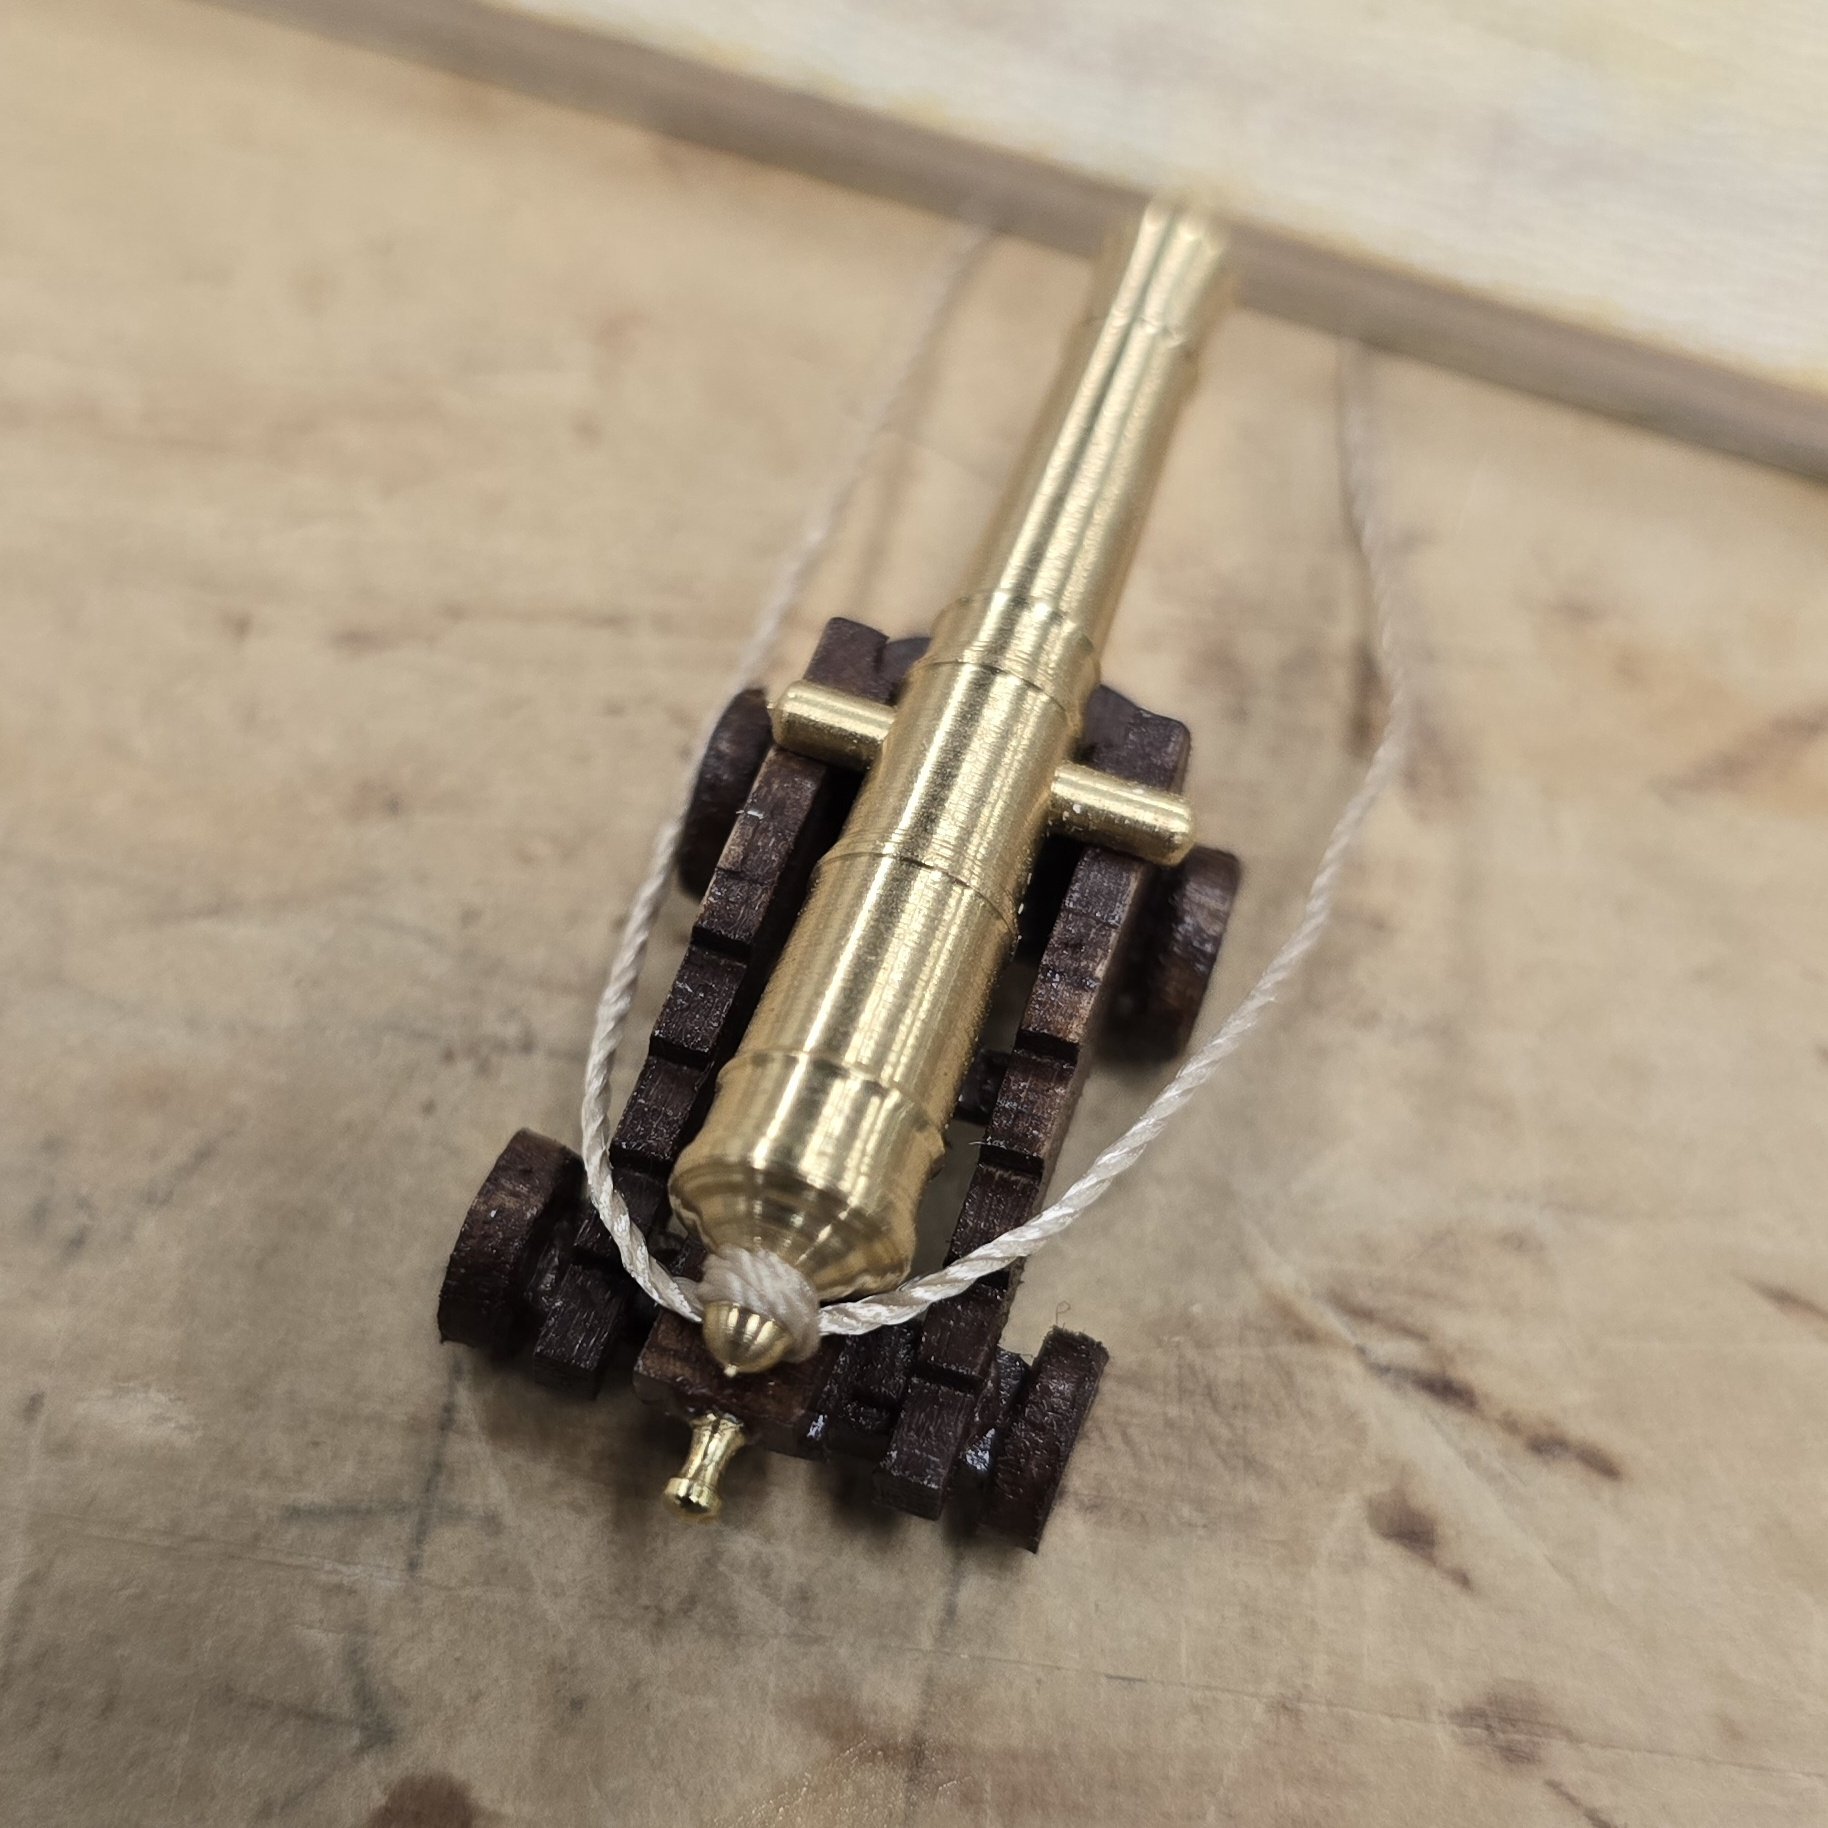
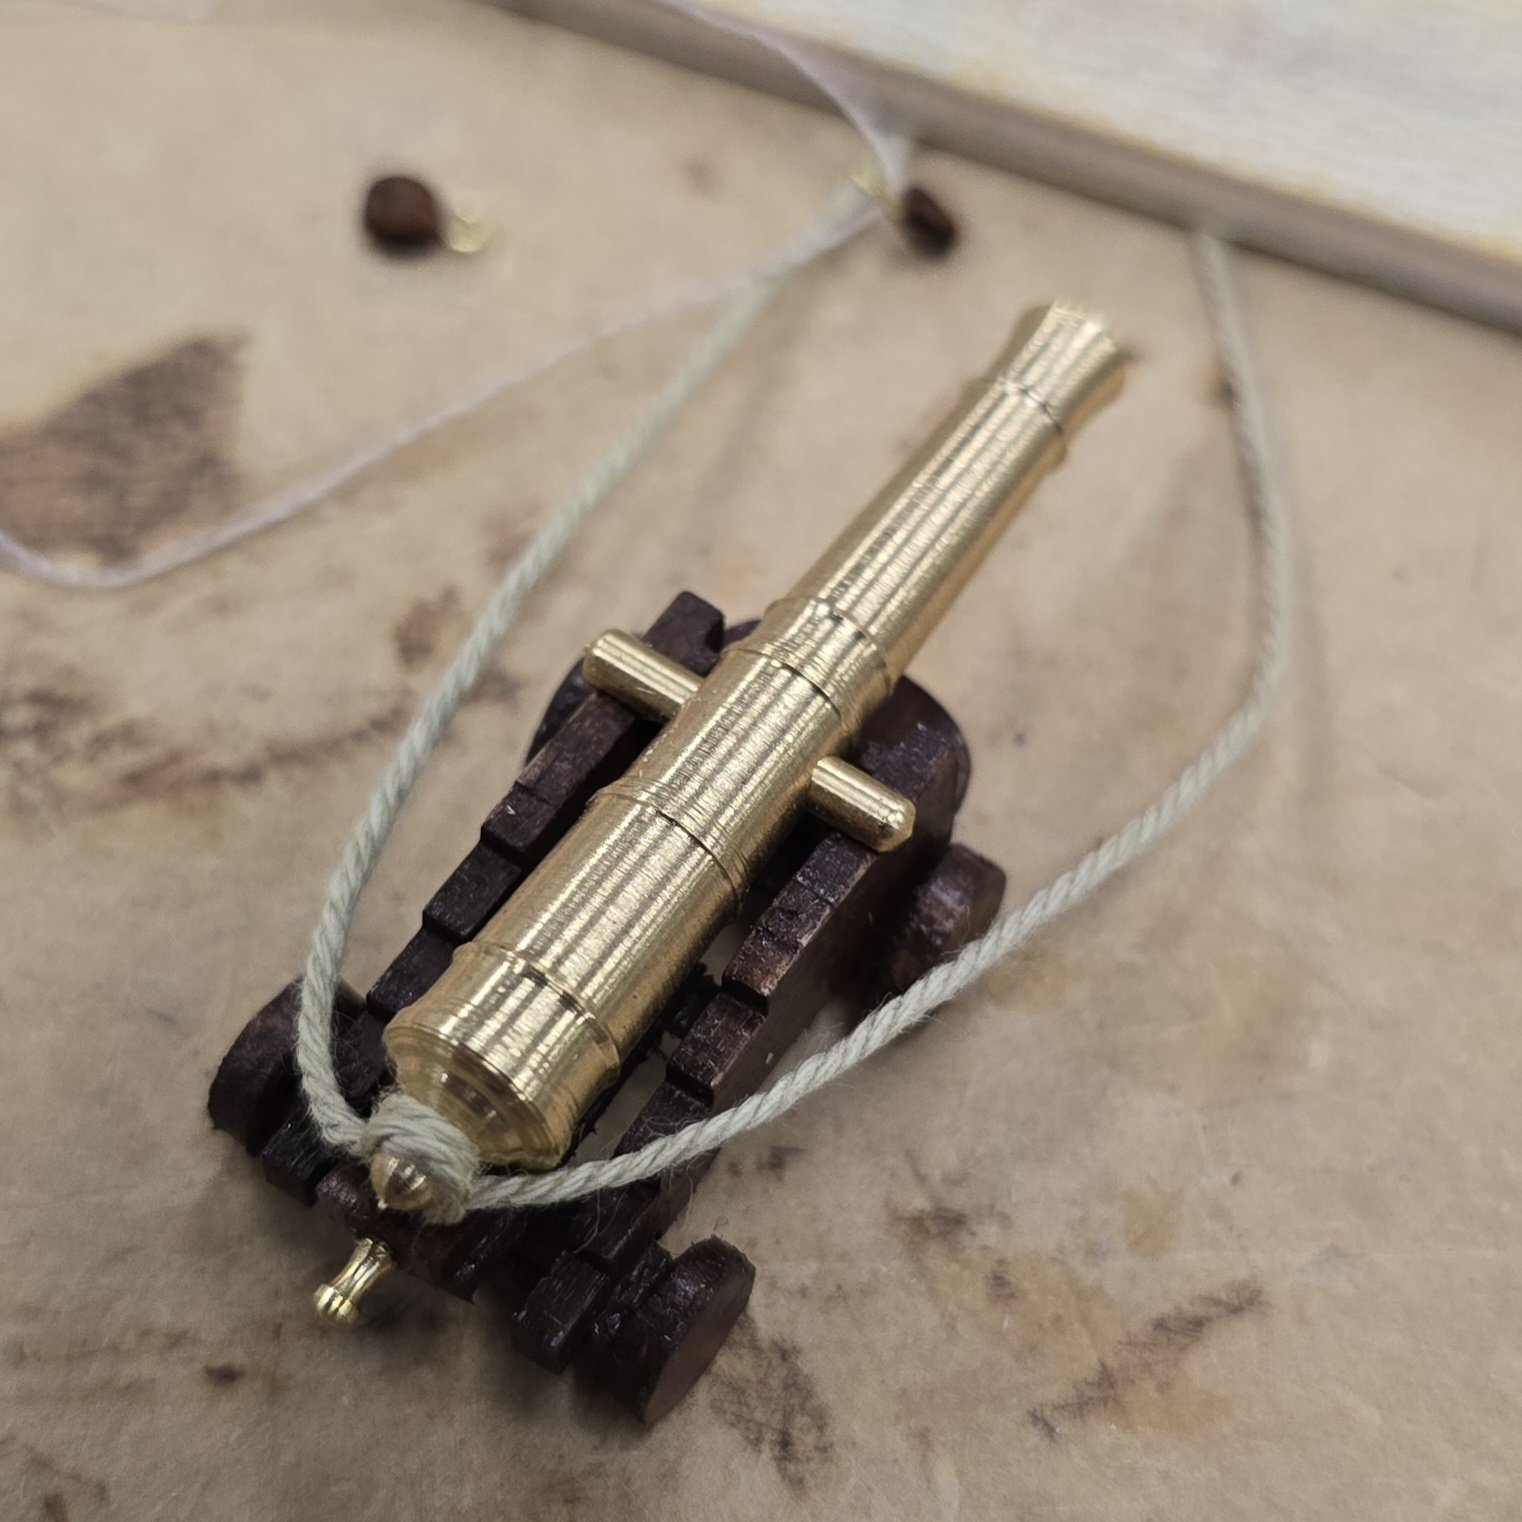
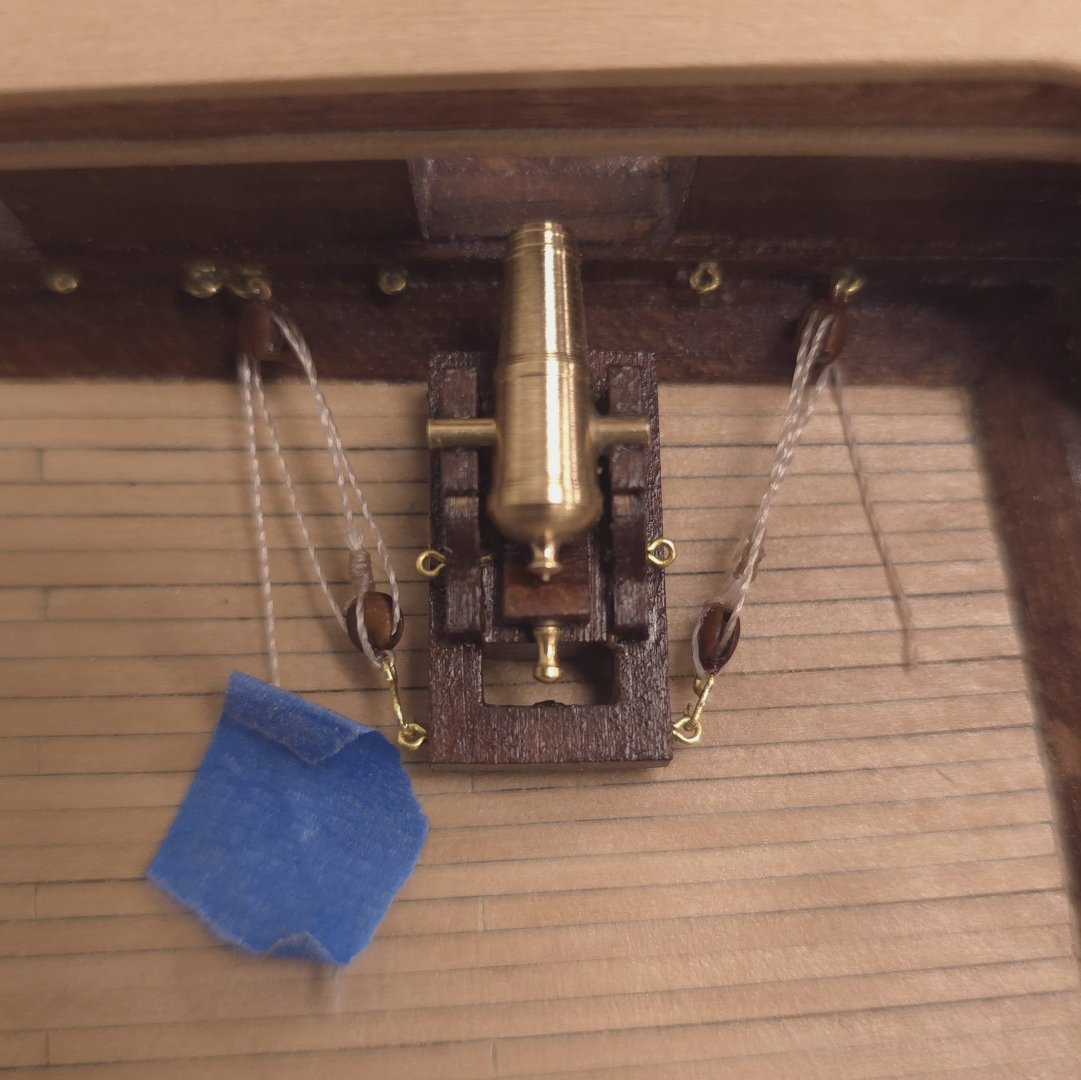
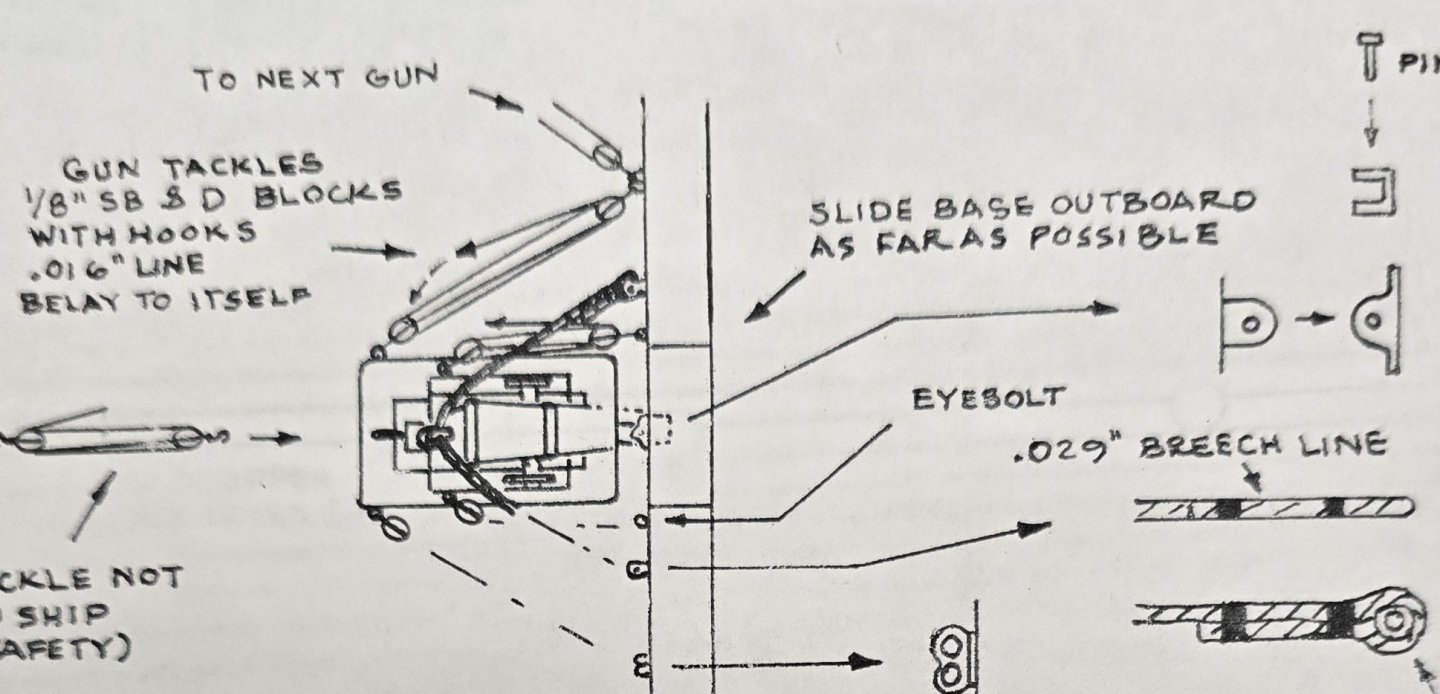
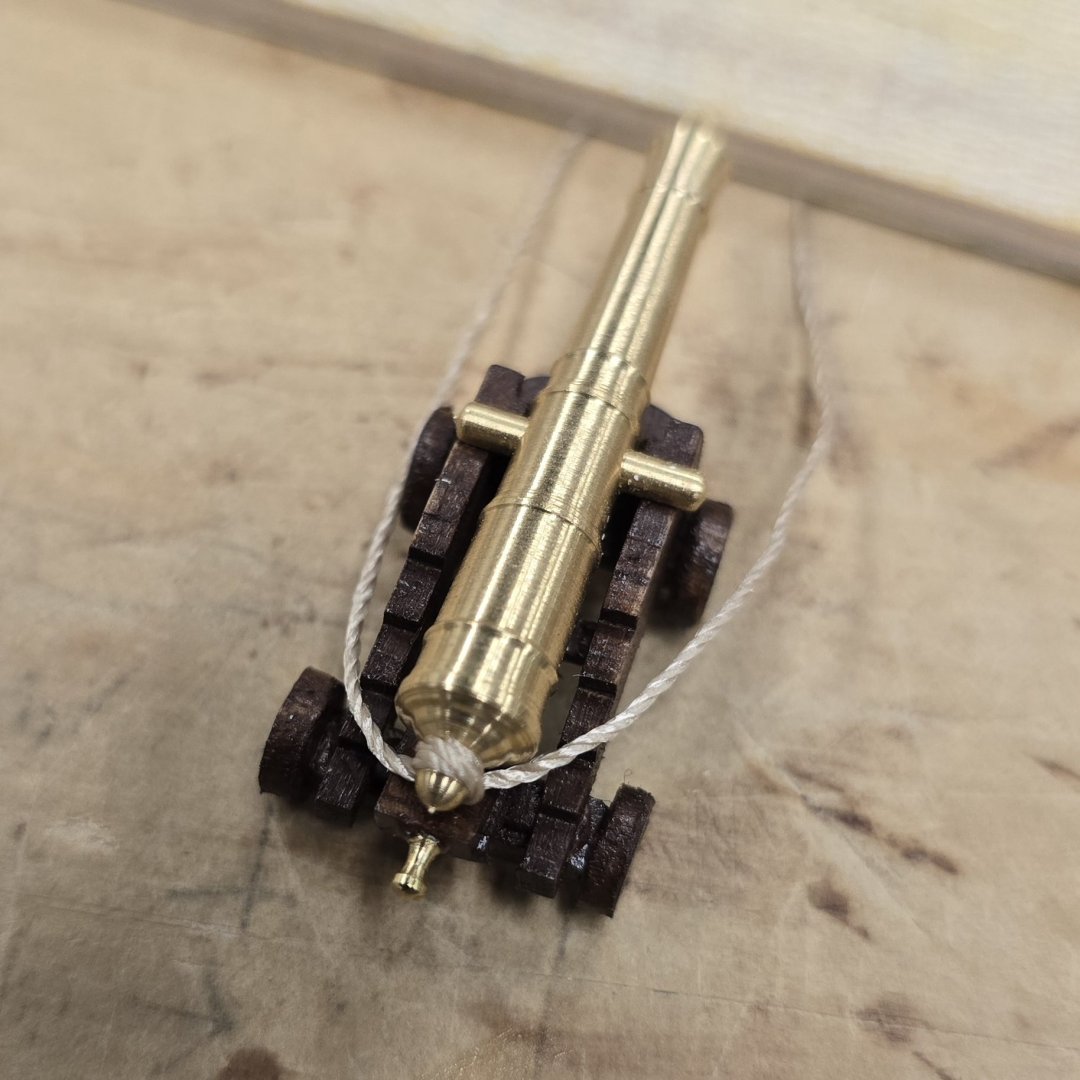
It looks I may(?) be shopping for aftermarket cordage. The plans call for .016 in (.41 mm) line for the tackle and .029 in (.74 mm) for the breaching rope. The kit provides .008 in (.20 mm) and .021 in (.53 mm) tan line. The only other tan thread that comes with the kit is so thin it must be intended to be used for seizing. For grins, I tried the thicker line on for size for the breaching rope. Unsatisfactory.. However, the Constructo kit comes with what measures to be roughly the correct sizes. No sizes are actually provided, so I'm going with what my Vernier caliper delivers by way of measurement. Here is the same cannon with breaching rope from the Constructo kit. It's a small thing, but I like the color and finish better of the material that came with the MS kit. Funny, in the photos, the difference doesn't appear to be all that great. I guess I'll order some properly sized cordage from the vendor that Gregg suggested and compare. While I wait, I'll start mass-producing blocks with hooks.

-
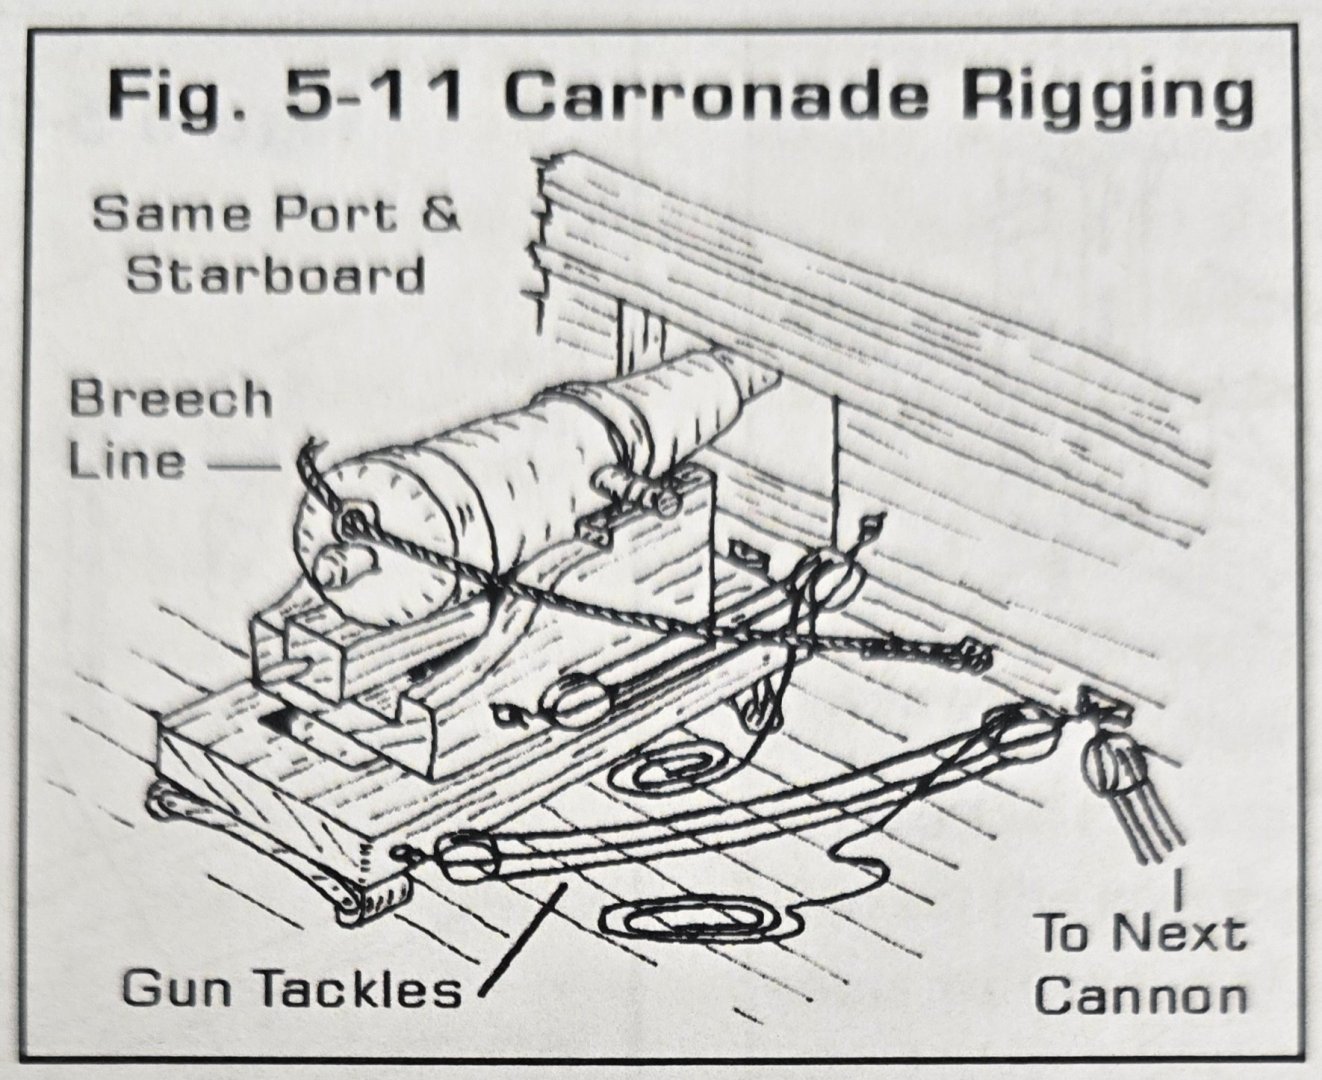
How about it. The instructions for the kit show this.
-
Interesting. Comparing size options between Ropes of Scale and Syren Ship Model Company, there seems to be a slight difference. Ropes of Scale's two smallest diameter ropes are: .25mm and .35mm. Syren's Ship's two smallest diameter ropes are .20mm and .30mm. I'll have to check to see what Model Shipways sizes are in the tan, as well as Constructo's, potentially rendering the point moot, but does anyone besides Gregg (and the DIY crown with rope walks) have a preference between Ropes and Syren?
-
So you didn't engage the lock on the hemostat, letting the spring clip do the actual clamping, yes?
-
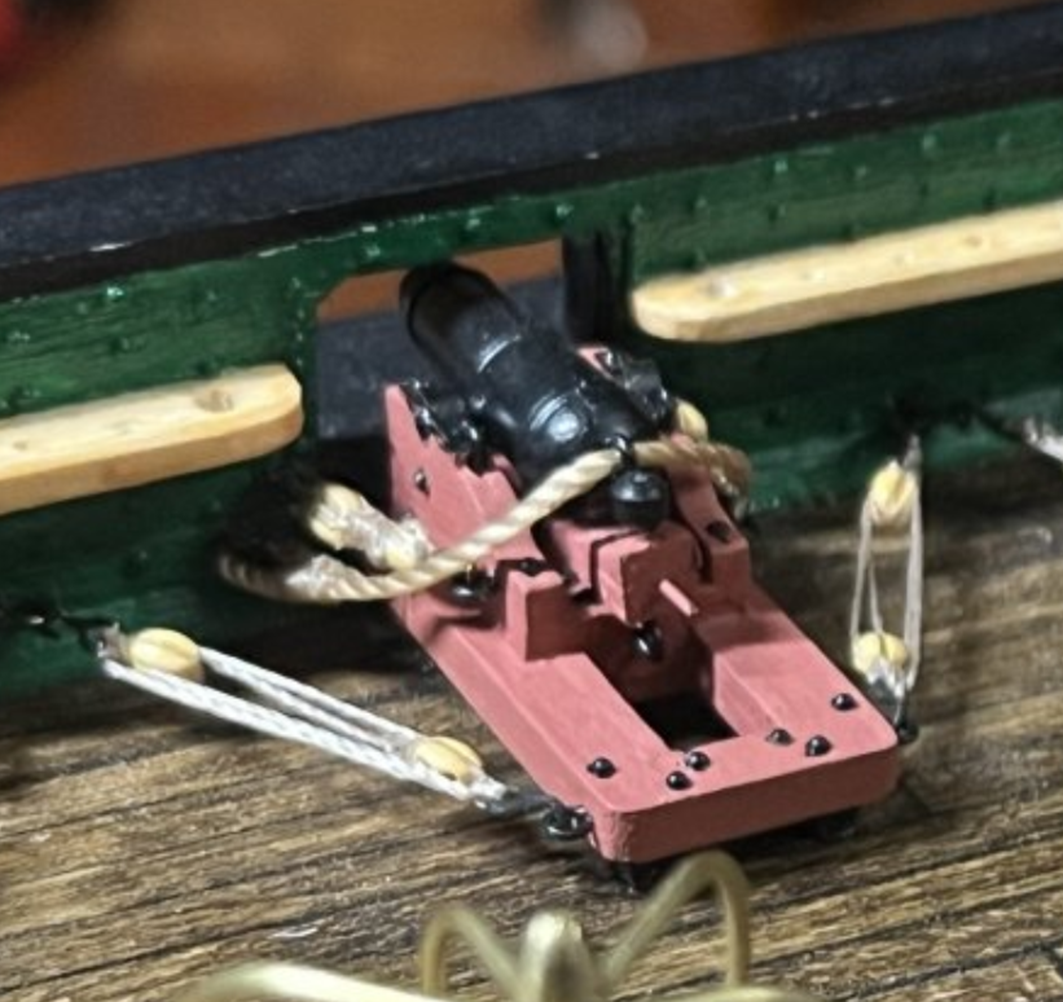
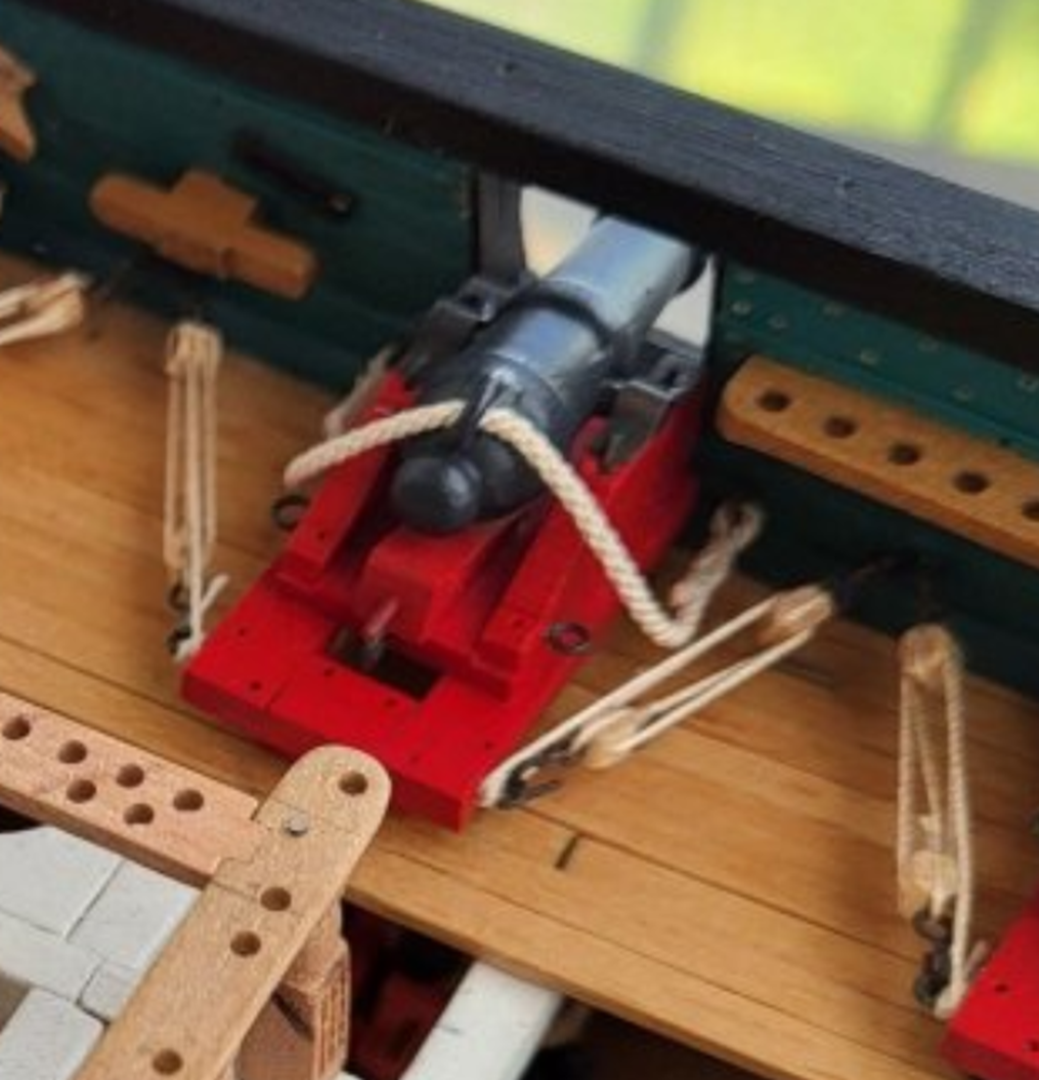
This all comes up under the rubric of rigging block and tackle for the cannons and carronades. Somehow, I would have thought that the loose end would be wrapped around a belaying pin somewhere. Evidently not. Here are some methods I've seen employed. Not even the Constitution is consistent in this. Why the difference between forward and aft rigging? Other modelers: XKEN Unegawahya Mustafa and this. Sorry, I forgot whose build I saw this in. Obviously someone working on the cross section. Jon, I'm sure you're going to chime in with the "correct" rigging diagrams (at least I'm hoping you will 😁)