


Der Alte Rentner
-
Posts
789 -
Joined
-
Last visited
Content Type
Profiles
Forums
Gallery
Events
Posts posted by Der Alte Rentner
-
-
Thanks for all the feedback guys.
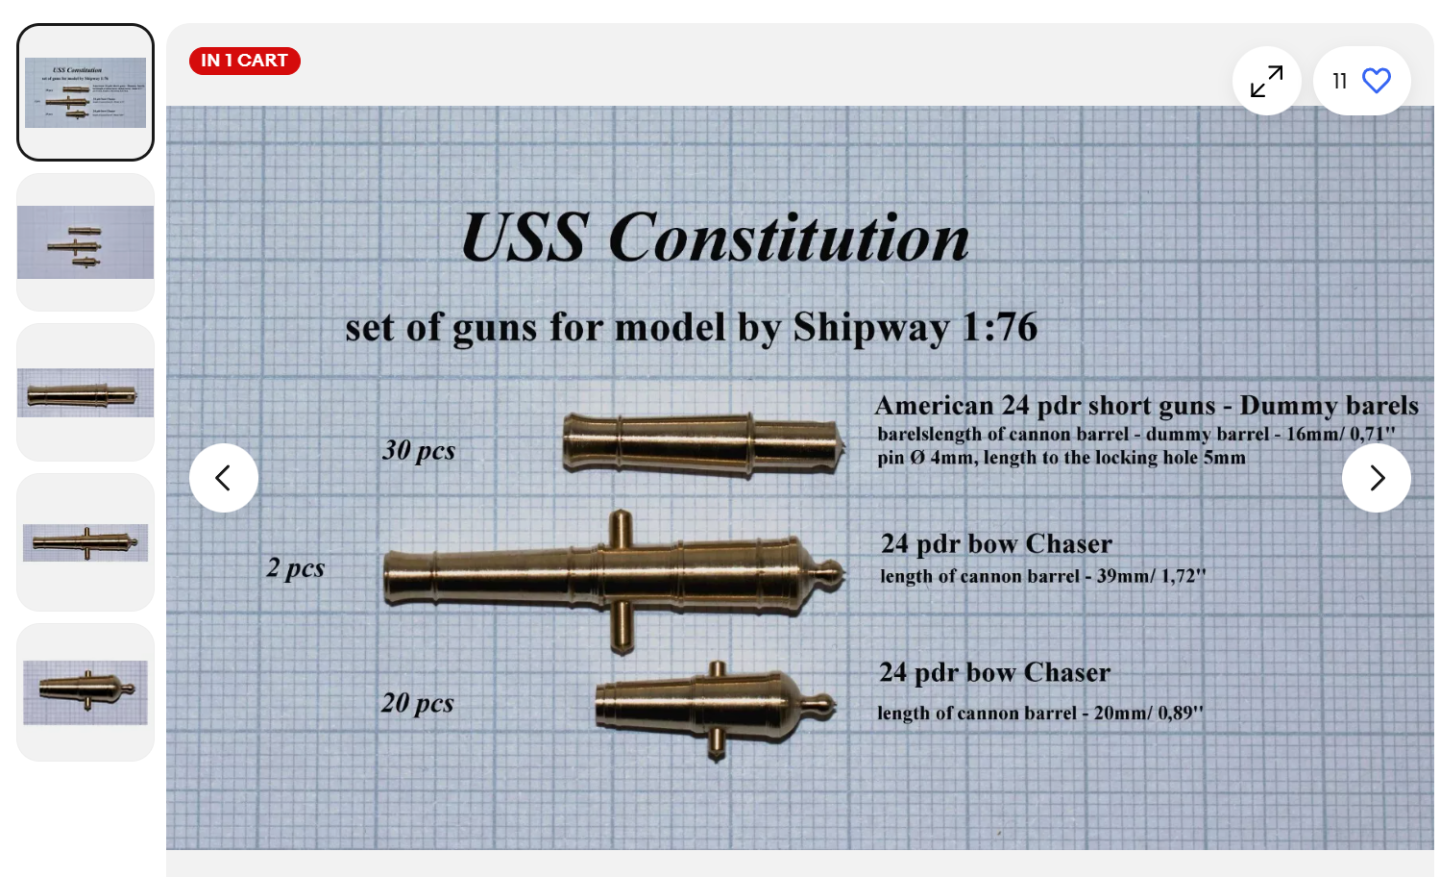
I took a look at the Model Monkey product, and while the price wasn't half bad (if I read correctly, 8 ea. for $18 and change?), I didn't like the look. Preferring brass, and wanting to avoid filing the Model Shipways dummy barrels to fit the holes in the gunports, I took a chance on this more esthetically pleasing offering from HiSModel (available through E-Bay) instead:
This is the link:
Given that I'm building the model to my own taste and (in)experience 😁, I'm not all that concerned about historical accuracy (or scale). I'm hunting around the shipyard for some ebony left over from a previous project in the hope that I can build the spar deck gun carriages from that - because I think that would net some really awesome results. If the ebony doesn't turn up, I could paint the assemblies made from the M.S. laser cut stock, or simply use the Contsructo kit carriages. The latter look pretty good. The HiSModel carronades look to be longer than those in the Constructo kit, but since the carriages appear to be the same size. I'll likely be mixing and matching.
At any rate. Construction of the carronades will be relegated to the upcoming Floridian hiatus. I'm hoping the HiSModel dummy barrels fit the gunport holes without modification..
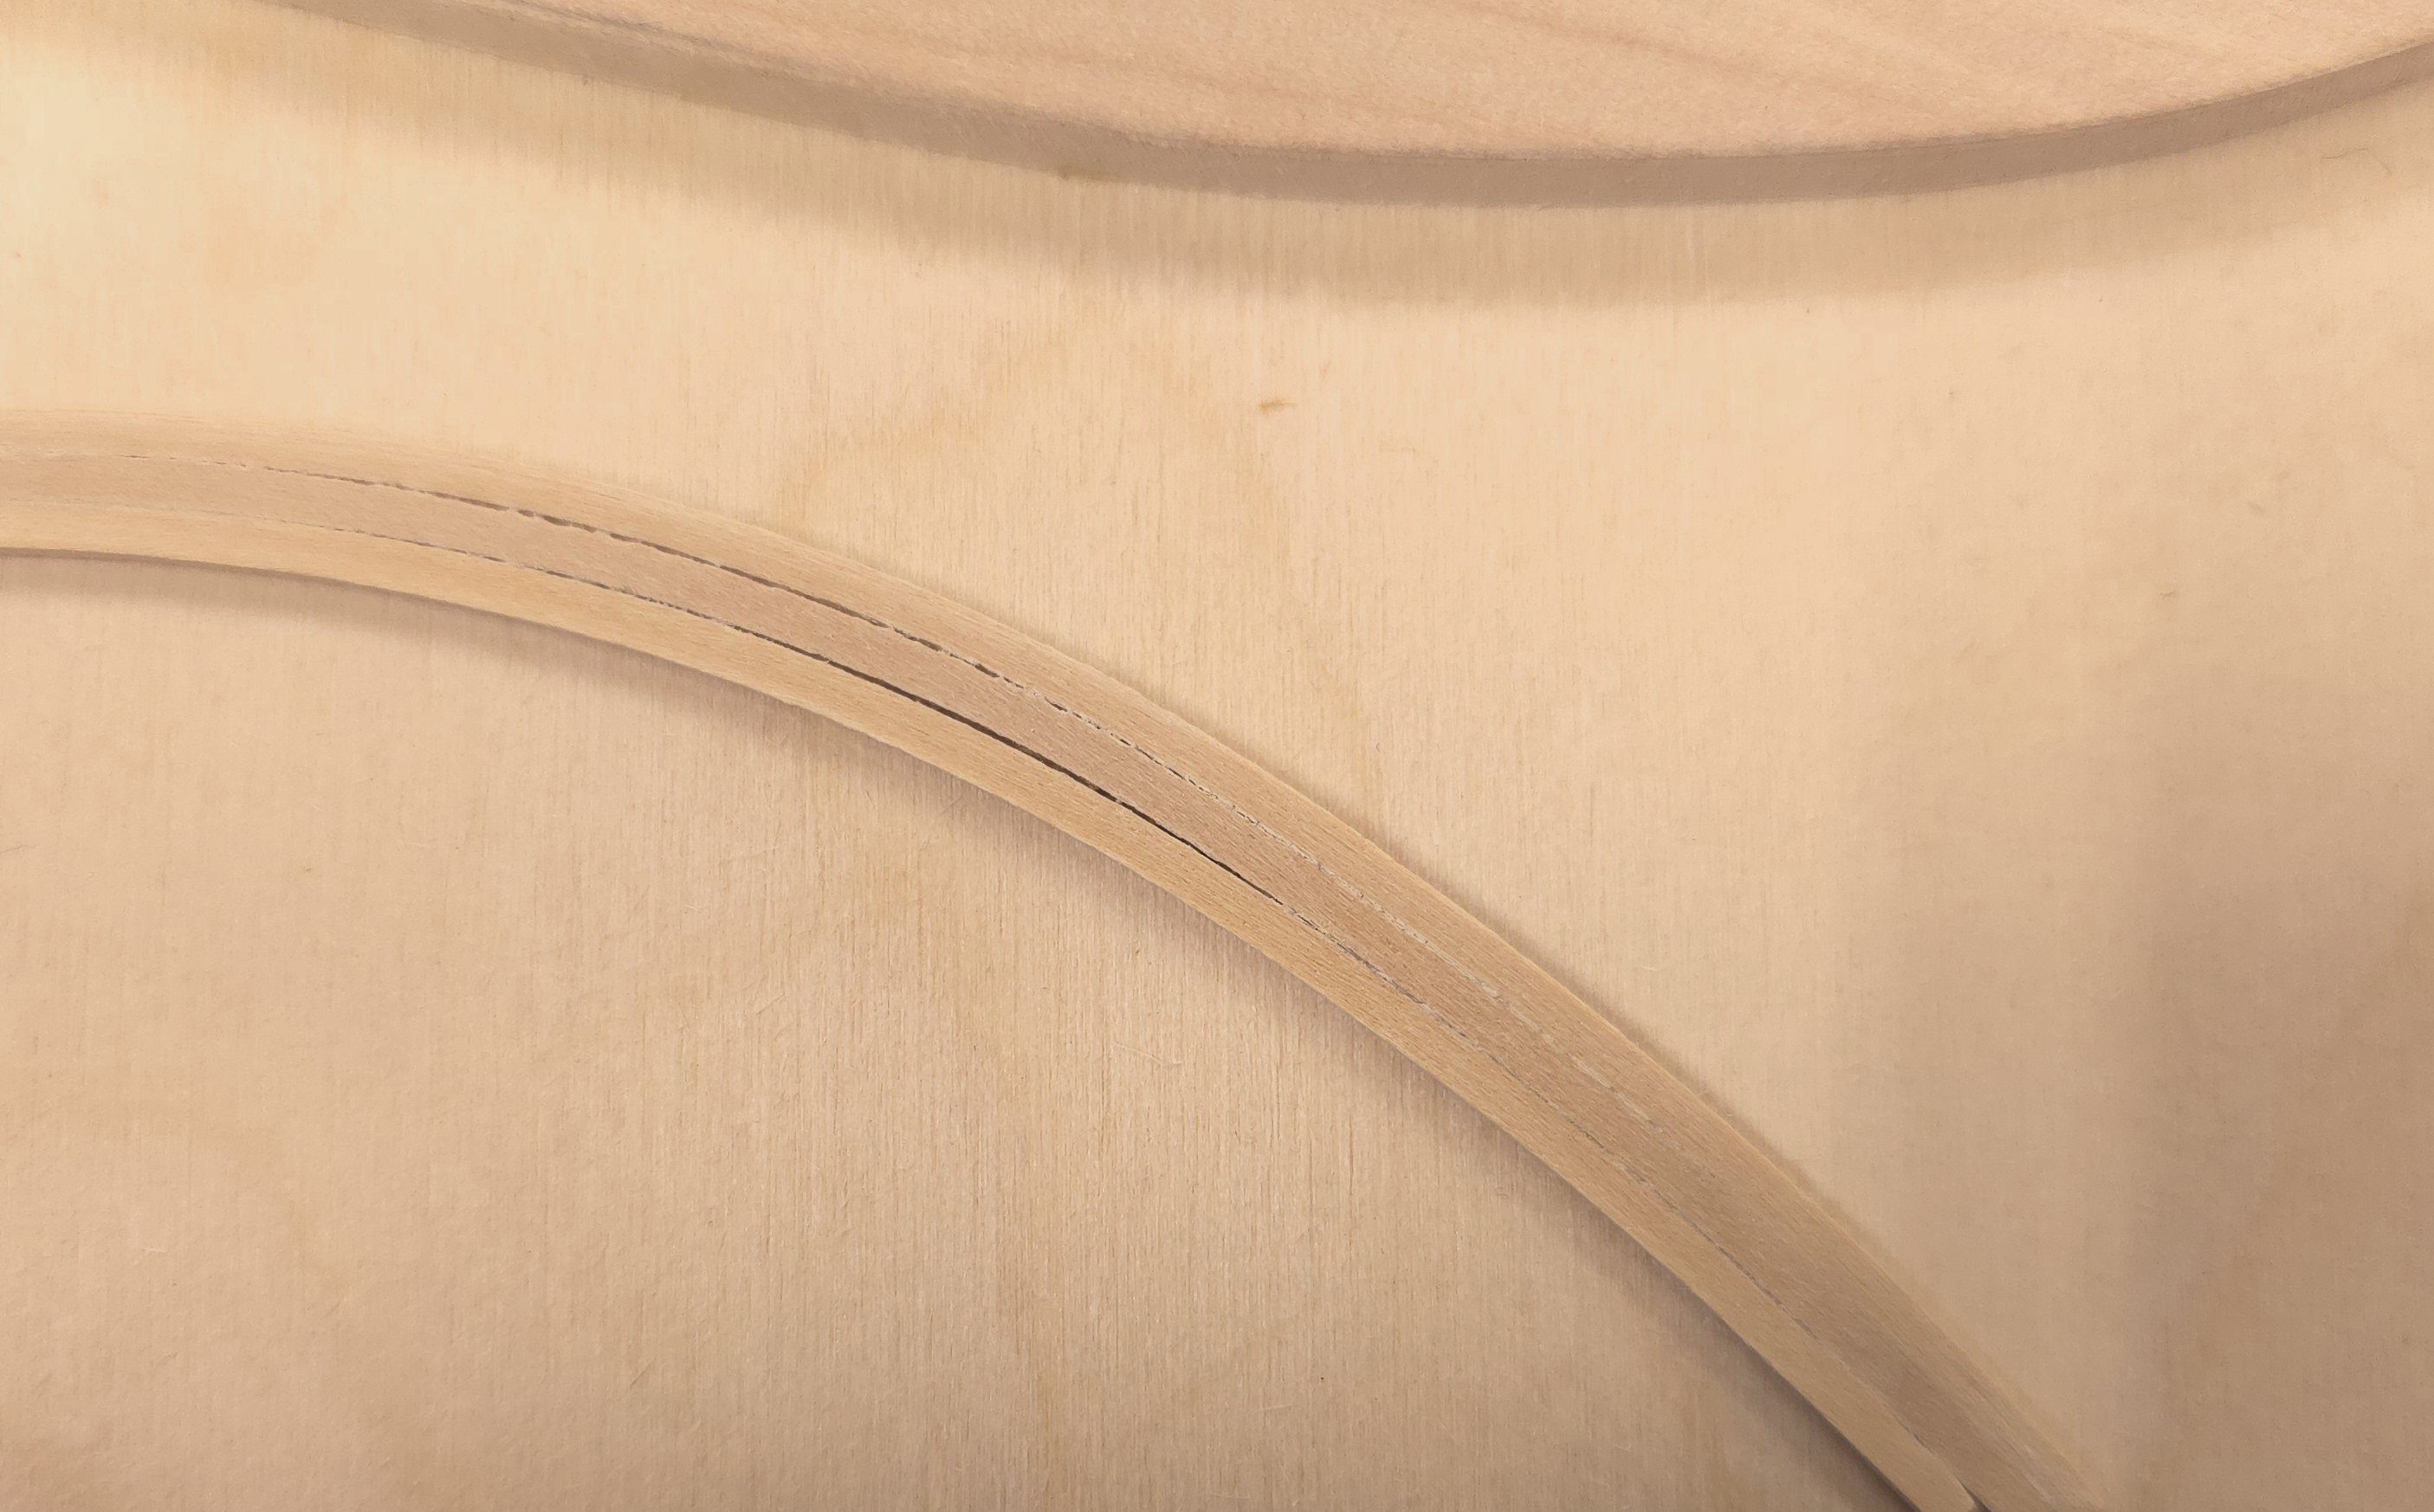
In the short term I'm still on the sidelines awaiting a shipment of boxwood sheets in various thicknesses.
Lastly, I was hoping I could find the cannons at Syren Ship Model Company. Sadly, that part of their store was "closed for maintenance"

-
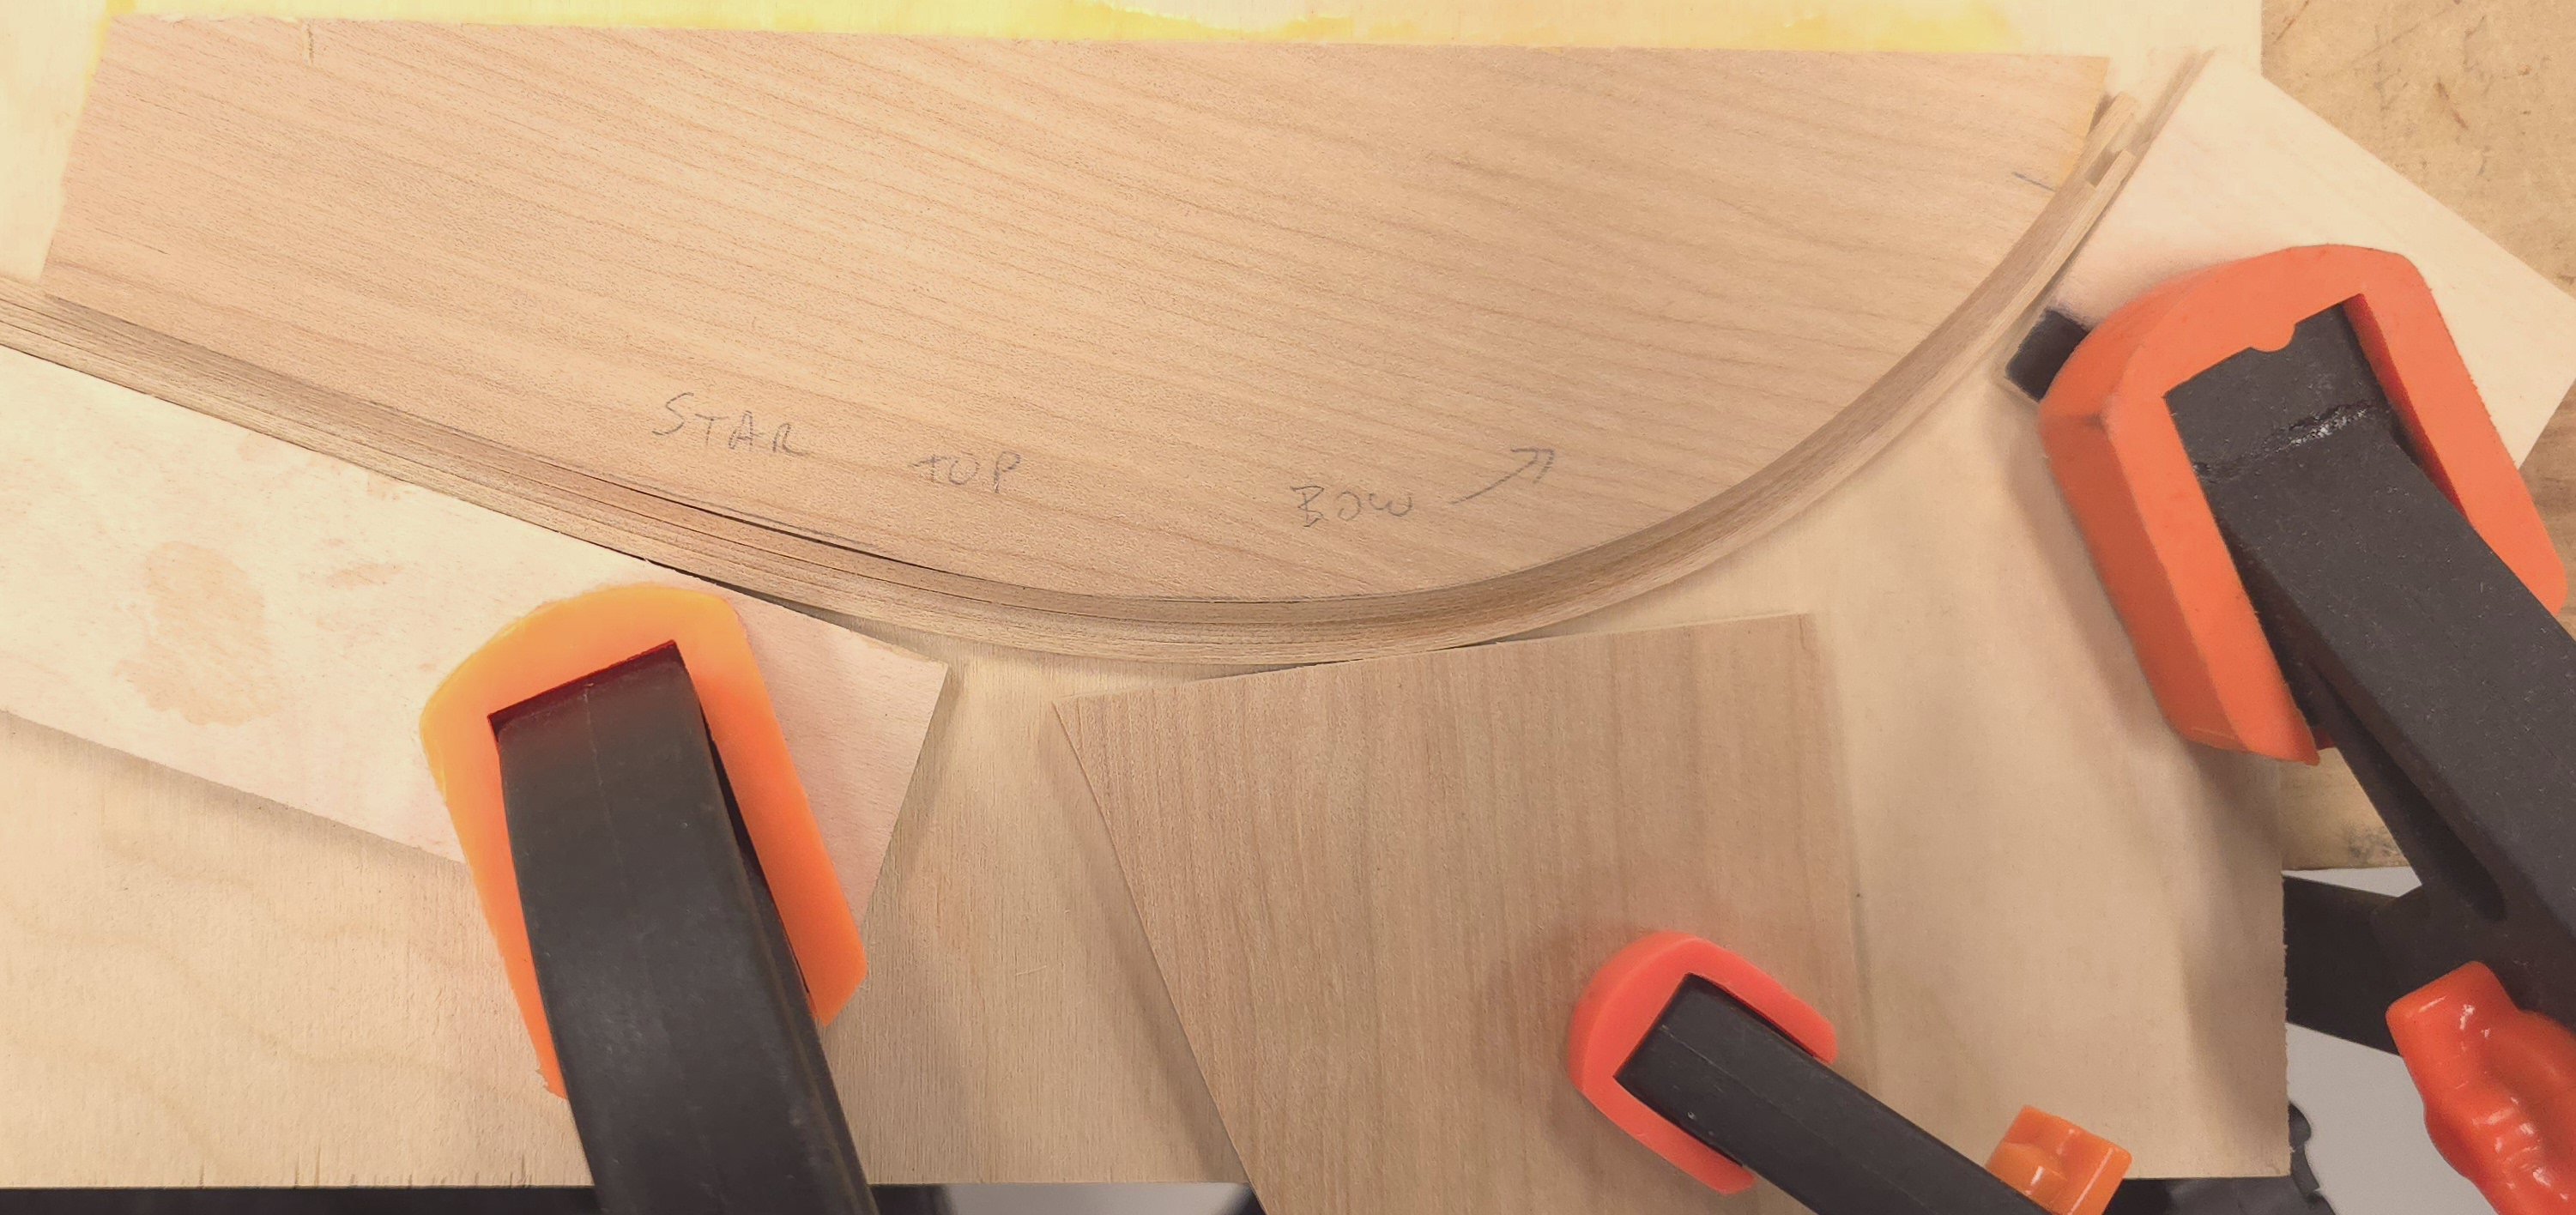
It has been a very busy holiday season, and I am just now returning my attention to the shipyard. As I await a delivery of boxwood, so that I can complete the main and top gallant rails, I'm beginning to plan my upcoming trip to Florida. What can I do to occupy myself with the USS Constitution in a hotel room?
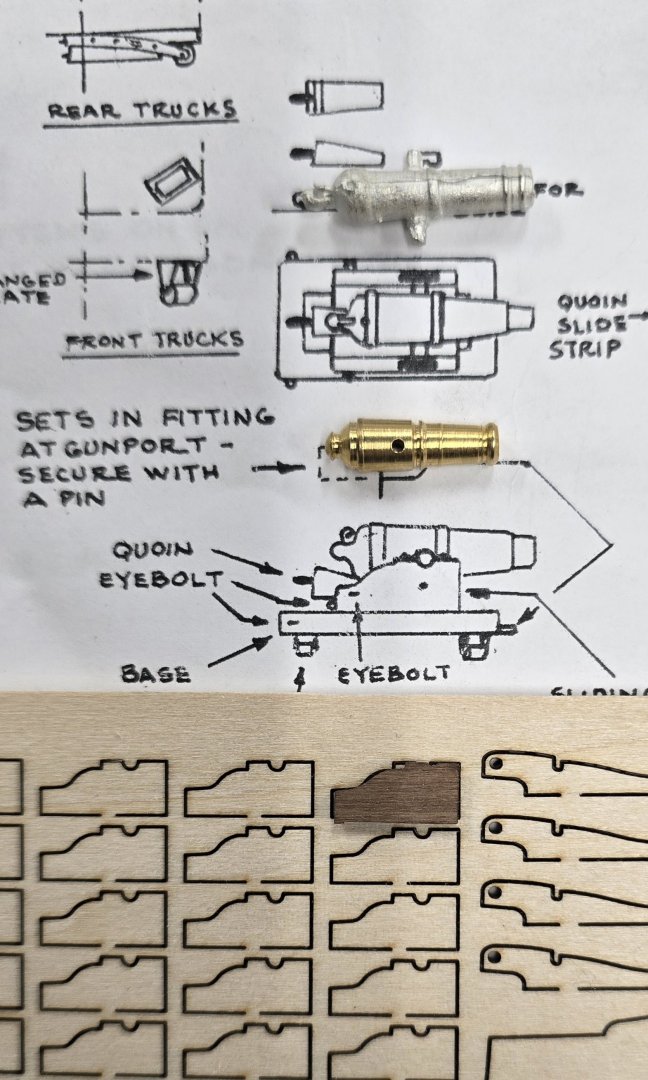
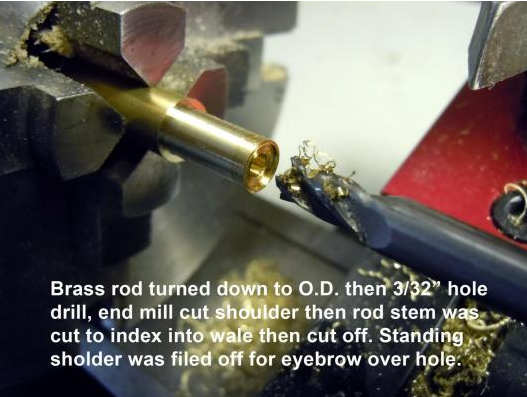
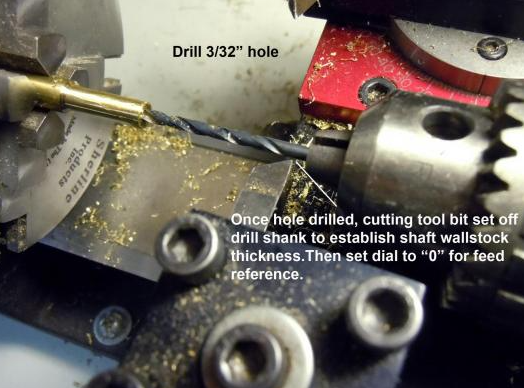
How about tackling the half barrel cannons, the carronades and their carriages? The castings that came with the kit are abysmal. But if I bring the parts along, with some files and sanding sticks, I might be able to clean up the carronades and cannons, and make the latter fit the holes in the gunports. That's a lot of busy work, which will certainly occupy my idle time in Florida. However, I compared the parts between the Model Shipways kit and the Constructo kit, and I'm wondering if I can at least swap out the carronades with those from the Constructo kit. The carriage sides seem to be identical in size. The guns themselves are shorter, but they look a heck of a lot nicer than the crud from M.S.
Model Shipway carronade vs Constructo (Constructo supplies brass and sapellly wood)
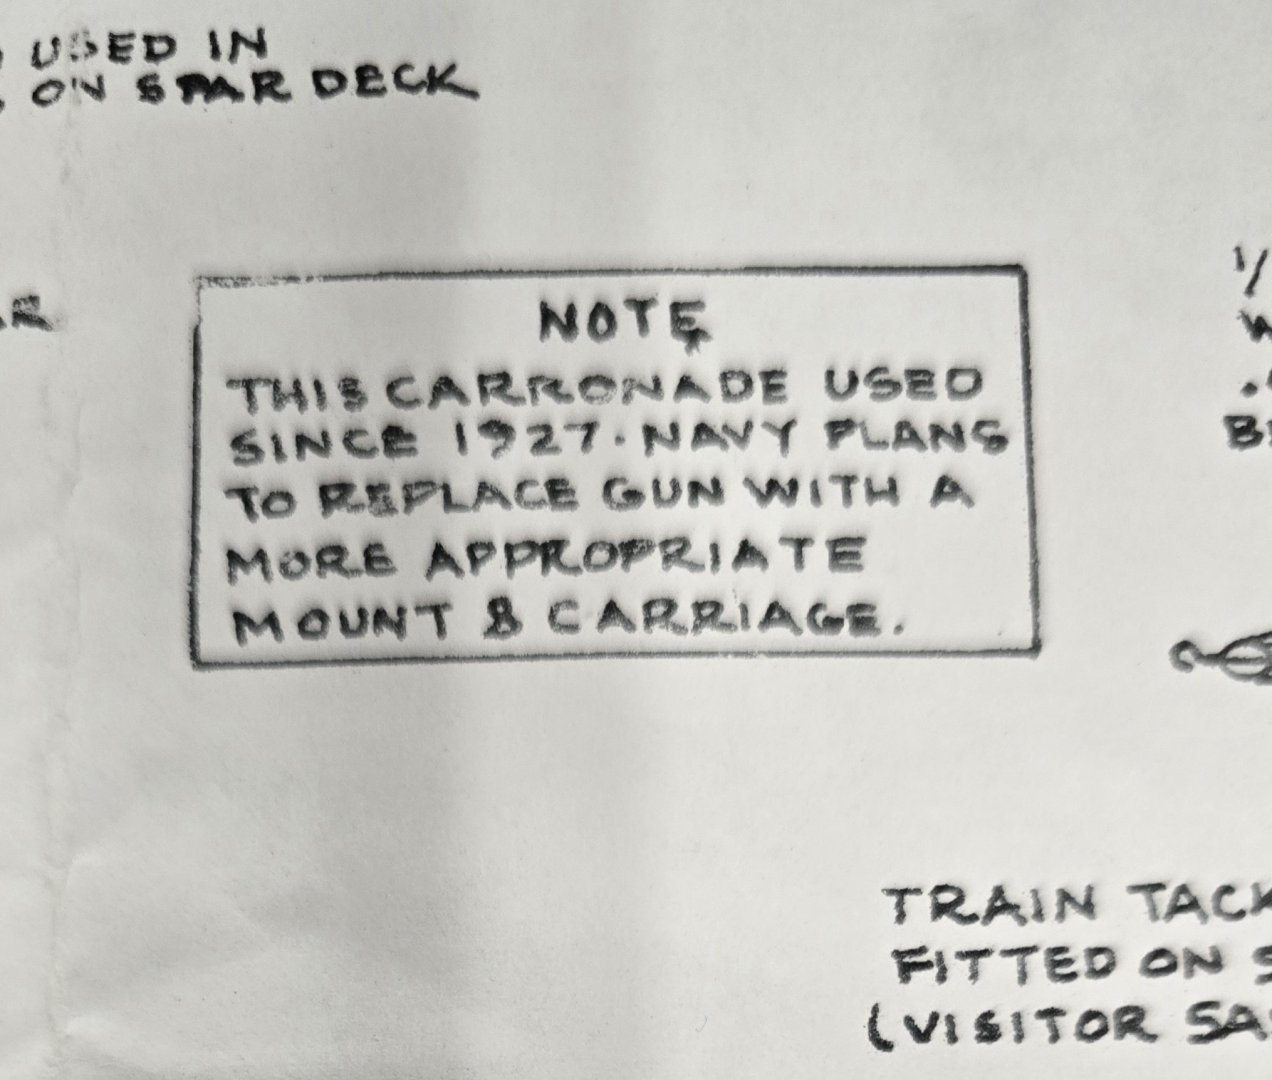
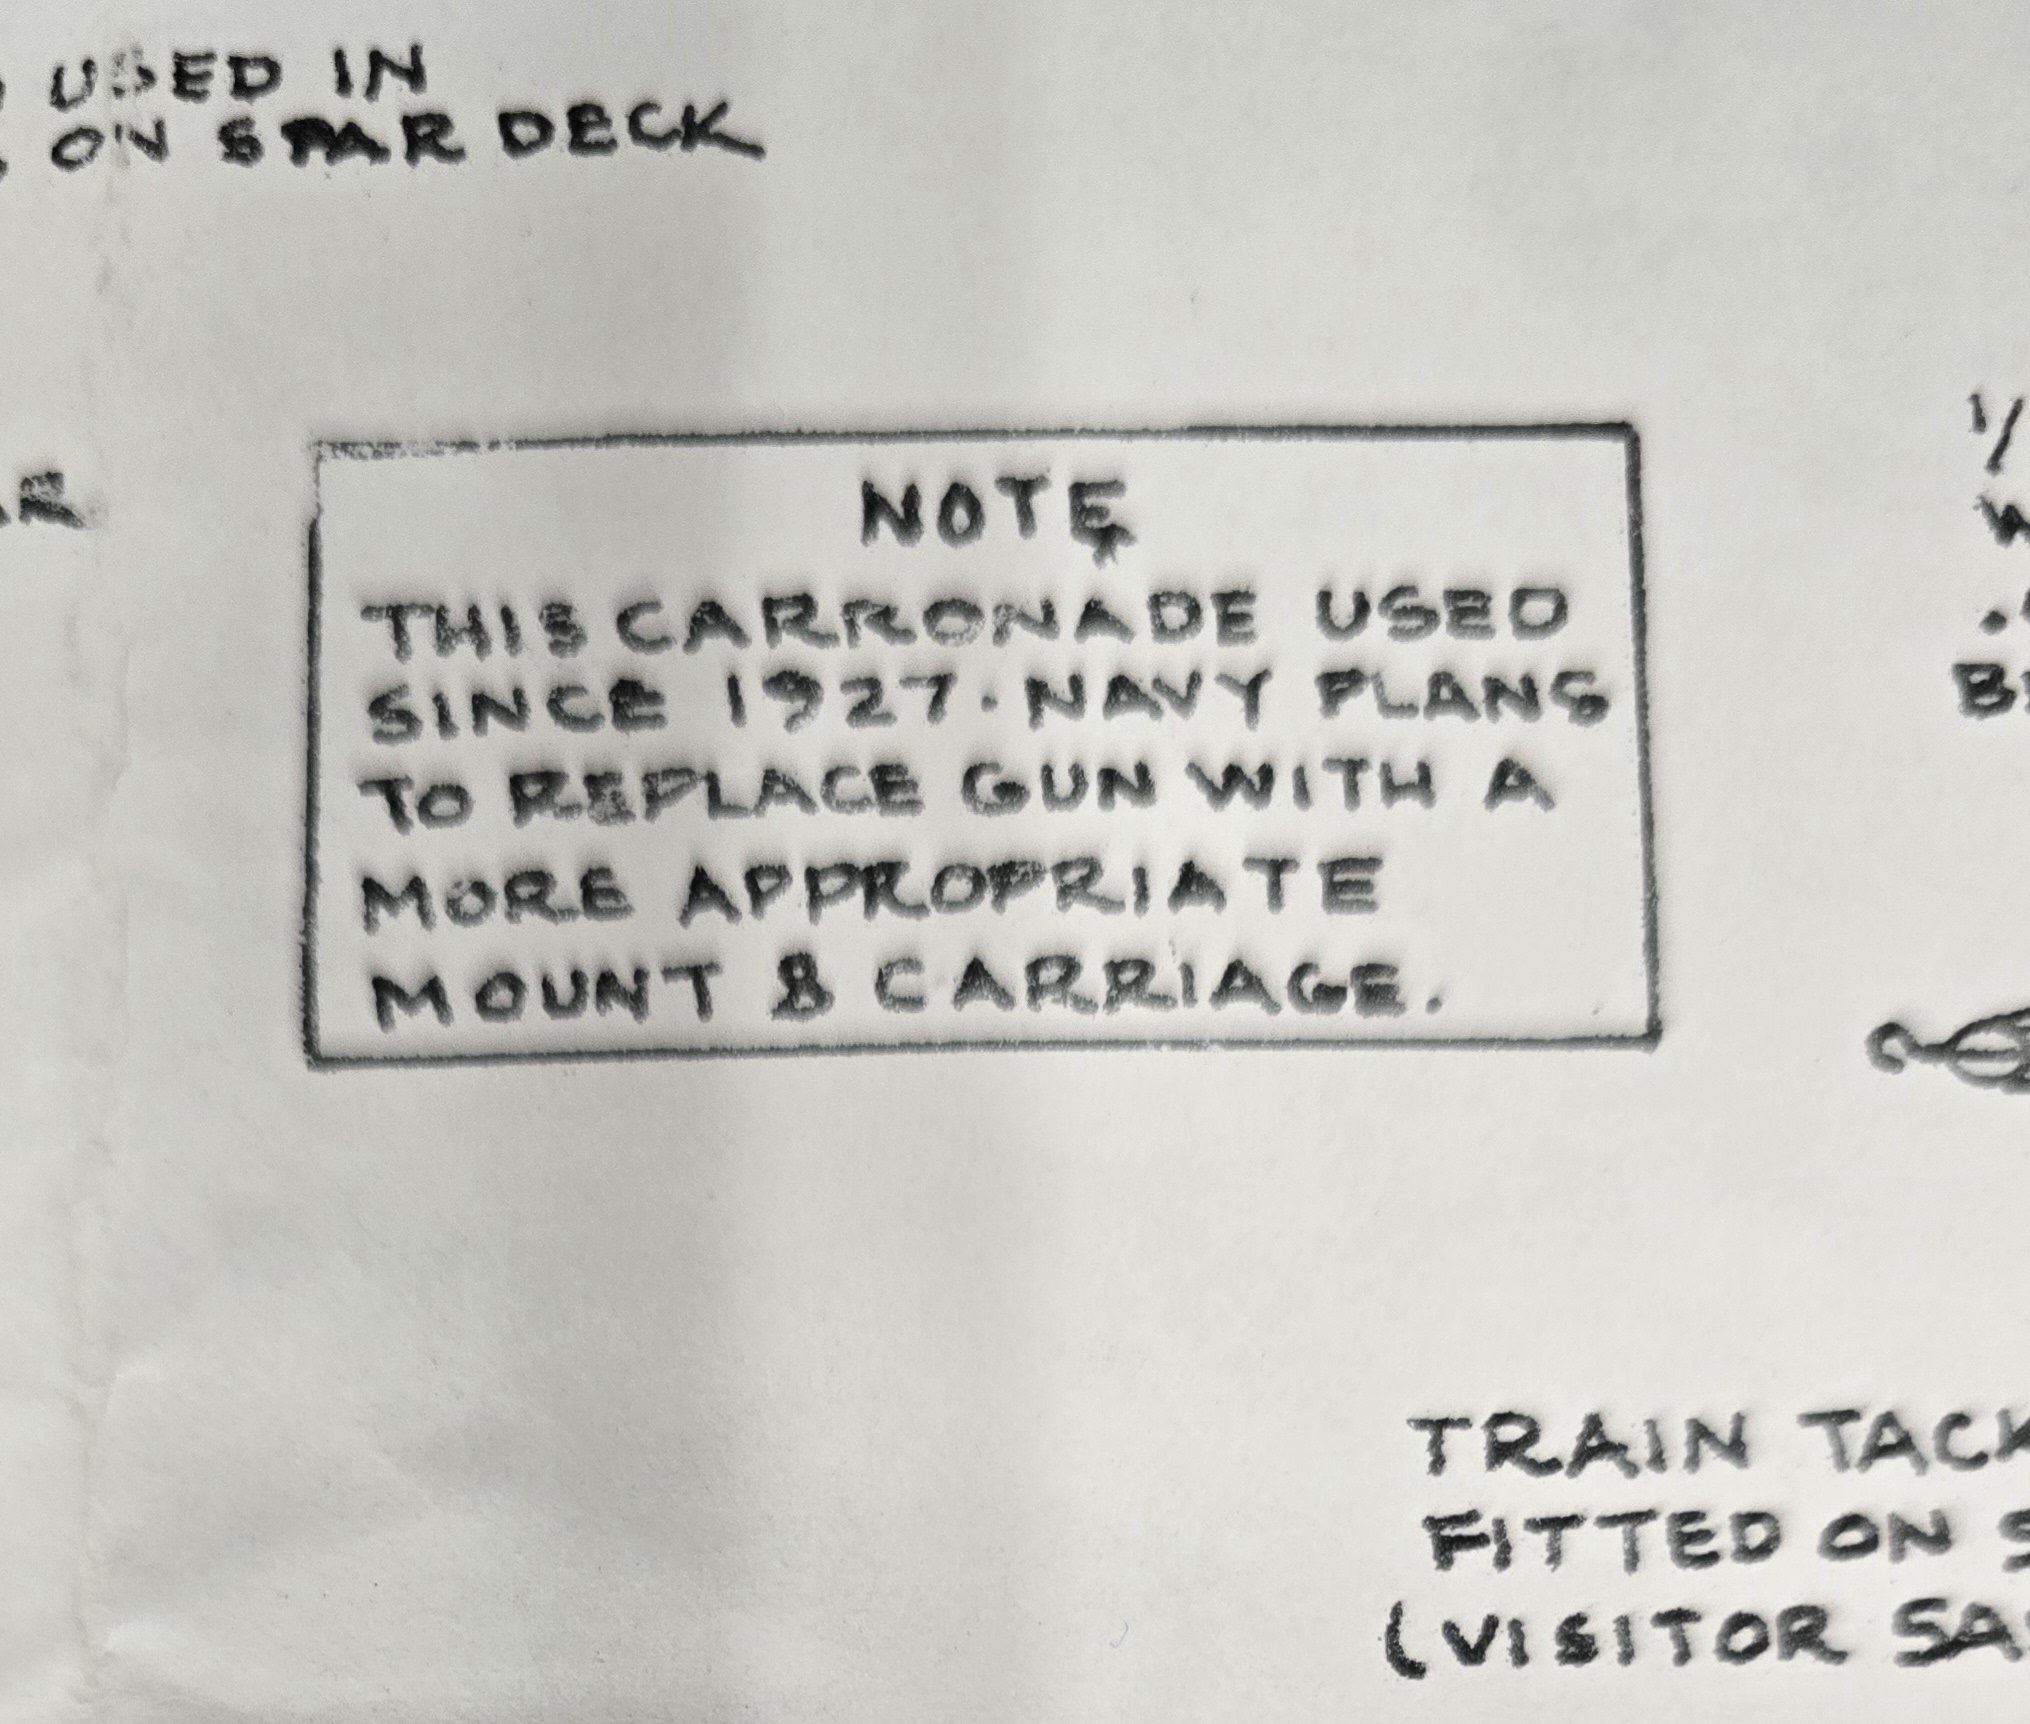
Also, what should I make of this note?
Filing the half cannon ends to fit the gunport holes might be unavoidable, as the Constructo parts won't fit.

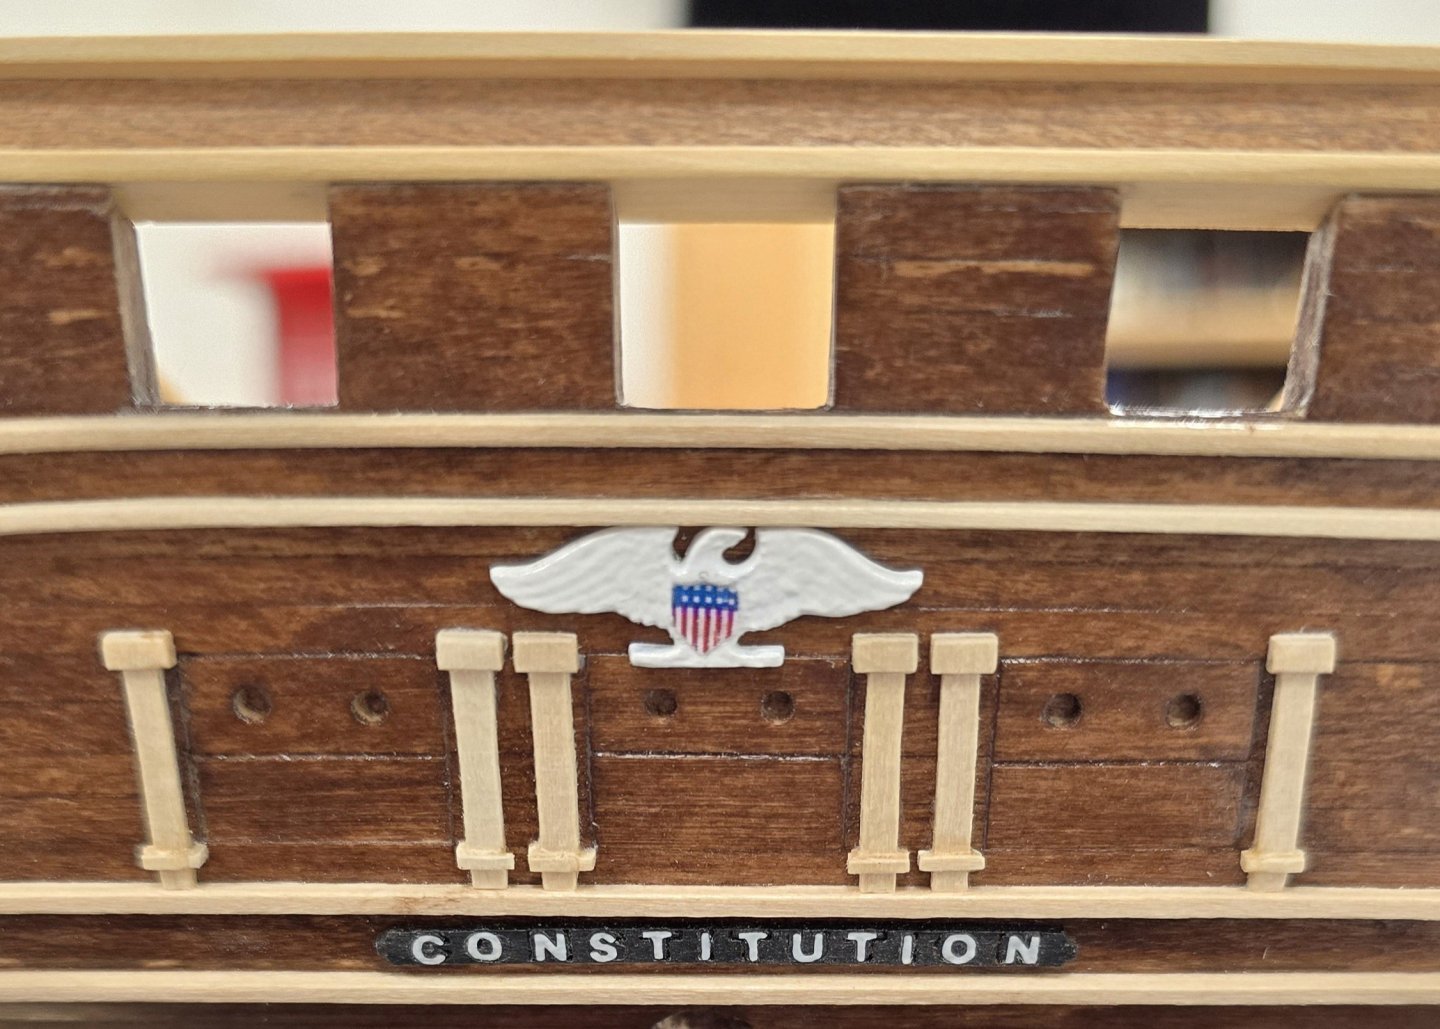
One small accomplishment - thank you Clement for printing me the Eagle!
-
Hmm, forcing yourself into a "kit bash" just because you wanted to go for open gun port lids. That was an interesting decision. I might have given more weight to "or rather had fully removable lids instead of the split lids provided in the kit", and opted to install closed lids, skipping the gun deck guns all together. Nice workmanship and attention to detail so far.
-
On 1/2/2025 at 8:51 PM, Pfälzer said:
Als fürsorglicher Ehemann tut man einfach, was man tun muss,
Als wir hier sagen,
Happy wife, happy life,
Alles Gute
-
They are indeed!
Nice work on the rigging.
-
I hear you loud and clear, Jon, and will cross that bridge (swearing all the way) when I finally get there. Though, it may take a while, given my tendency to overthink things - and for my boxwood vendor to deliver fresh supplies..
Thanks again and
Happy New Year
- Unegawahya and Nirvana
-
 2
2
-
On 12/26/2024 at 3:18 PM, JSGerson said:
The final image shows the styrene painted brass. It appears it just might work.
Perhaps it's because of the nature of a super zoomed photograph, but I'm not entirely convinced on the color. But then, when I saw the spec of 1/16" square on those styrene junction boxes, I had to gulp. Yikes!
This is a long way off for me, and I may not bother with them anyway, but, I think I would try to find some 1/16" square brass stock and drill holes in that instead of messing with styrene. Or hunt down someone who has plans for the canopy frames and can knock them off with a 3D printer (in this country). I have a friend who has a 3D printer, but he'd need plans or whatever the specs are called for him to make them for me.
I'm beginning to wish I'd started with a much larger scale, so that I wouldn't need an electron microscope and nano robotics to work on these smaller details.
Nice work Jon.
-
On 8/27/2023 at 2:02 PM, Unegawahya said:
I’m sorry for the massive delay!
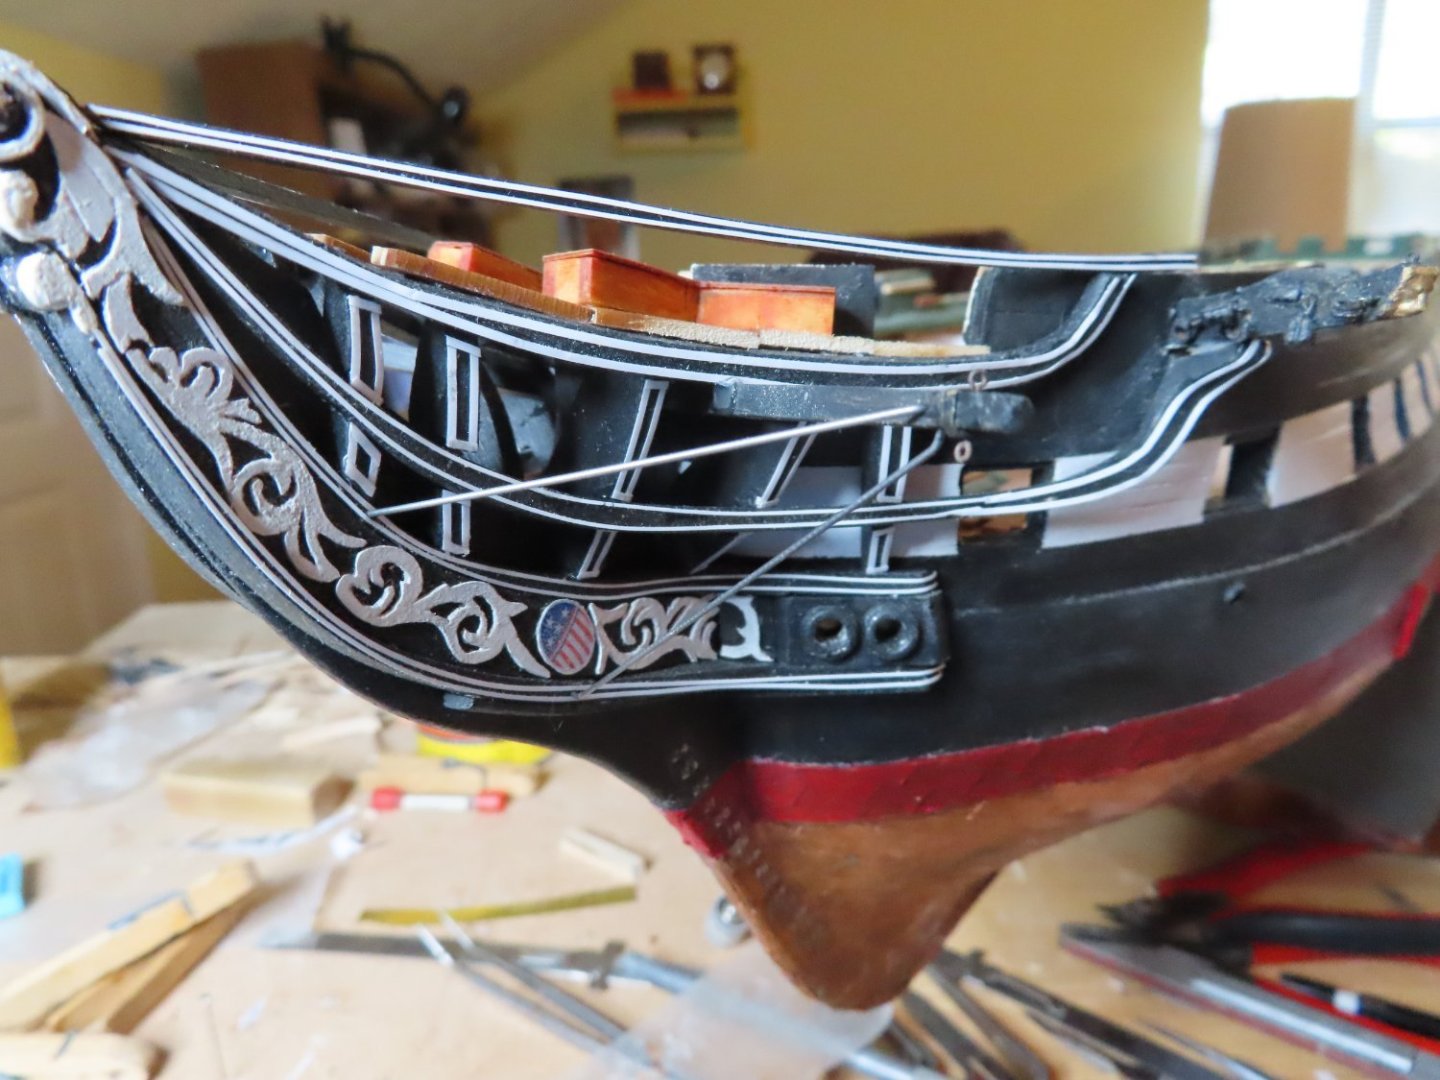
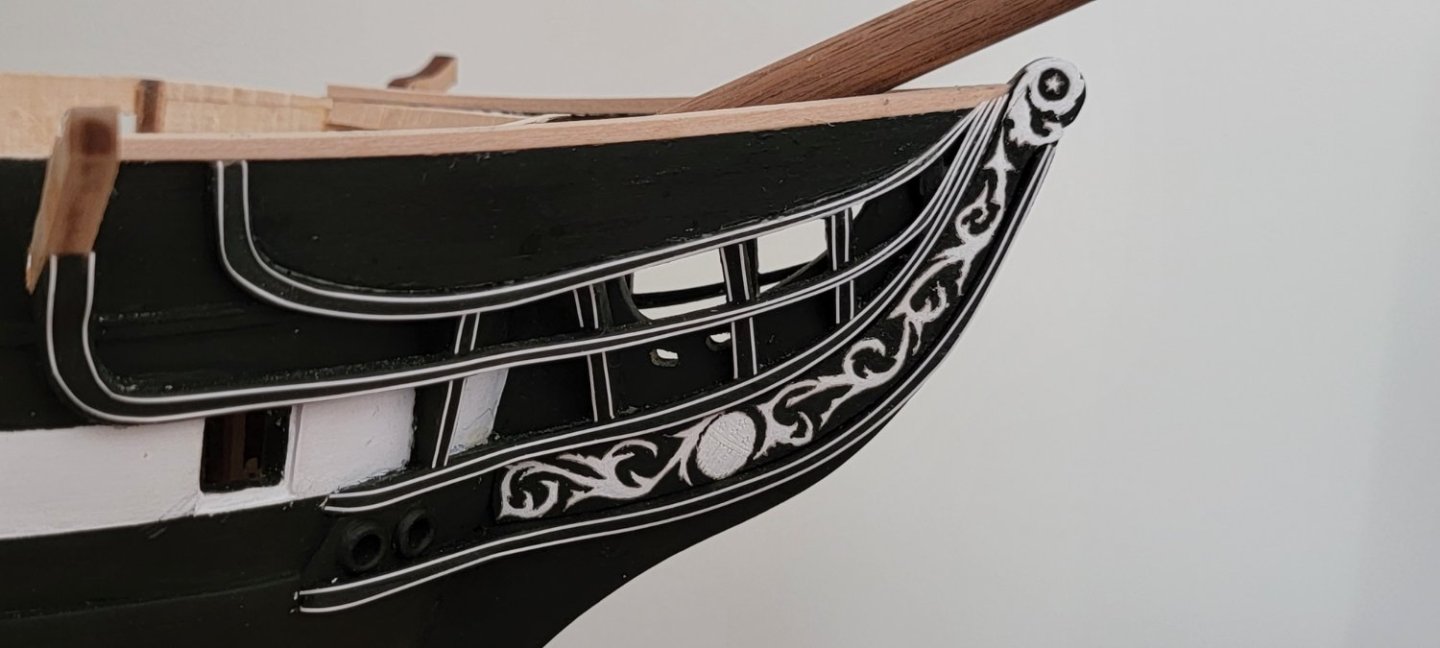
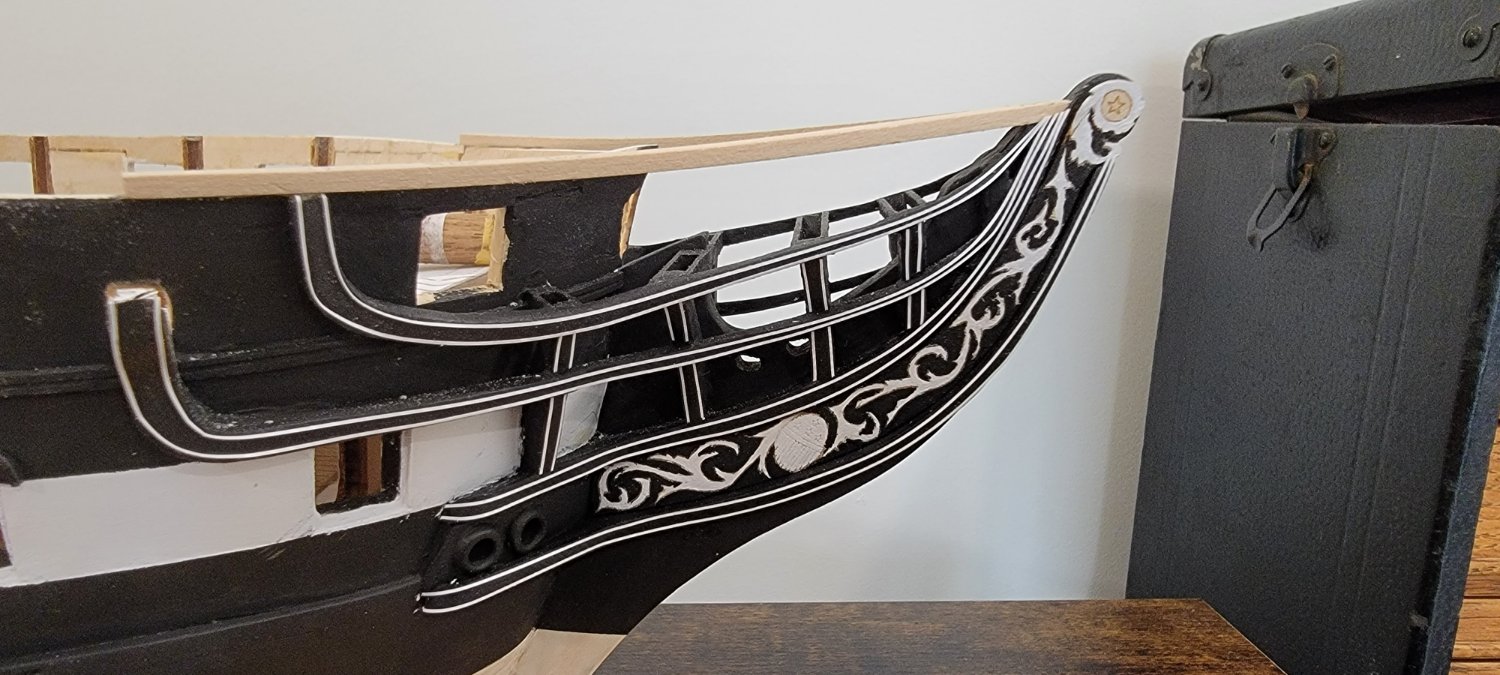
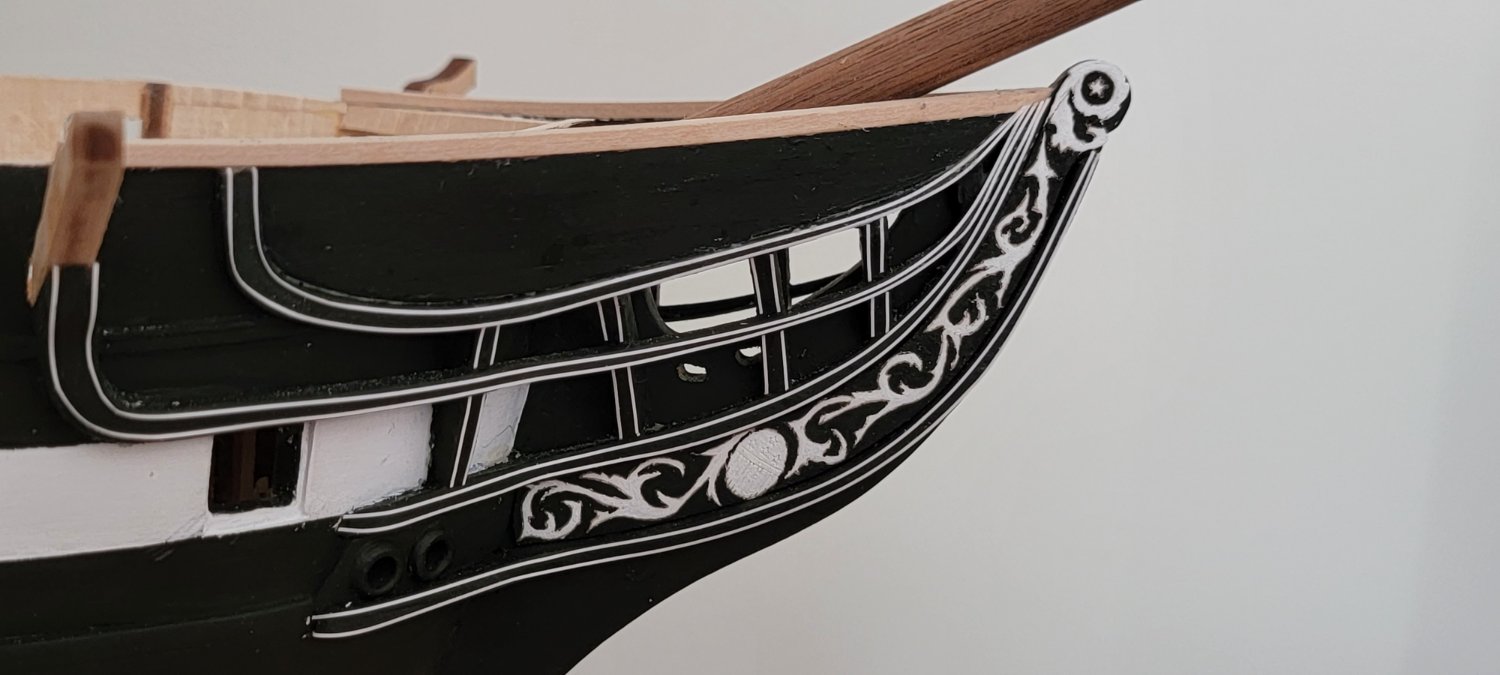
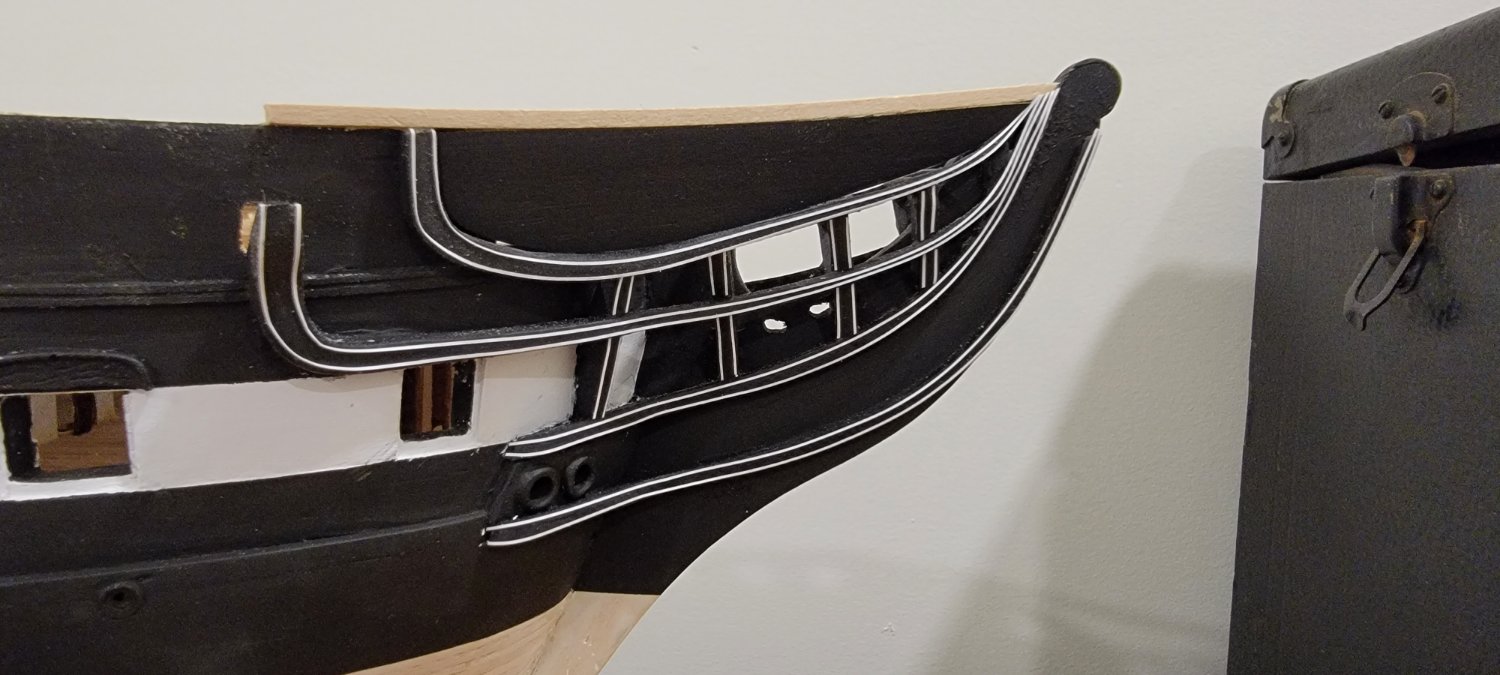
Bothe of my tailboard came partially laser cut in my kit. I used a razor blade to cut all the surrounding wood and then carefully apply the details to my bow.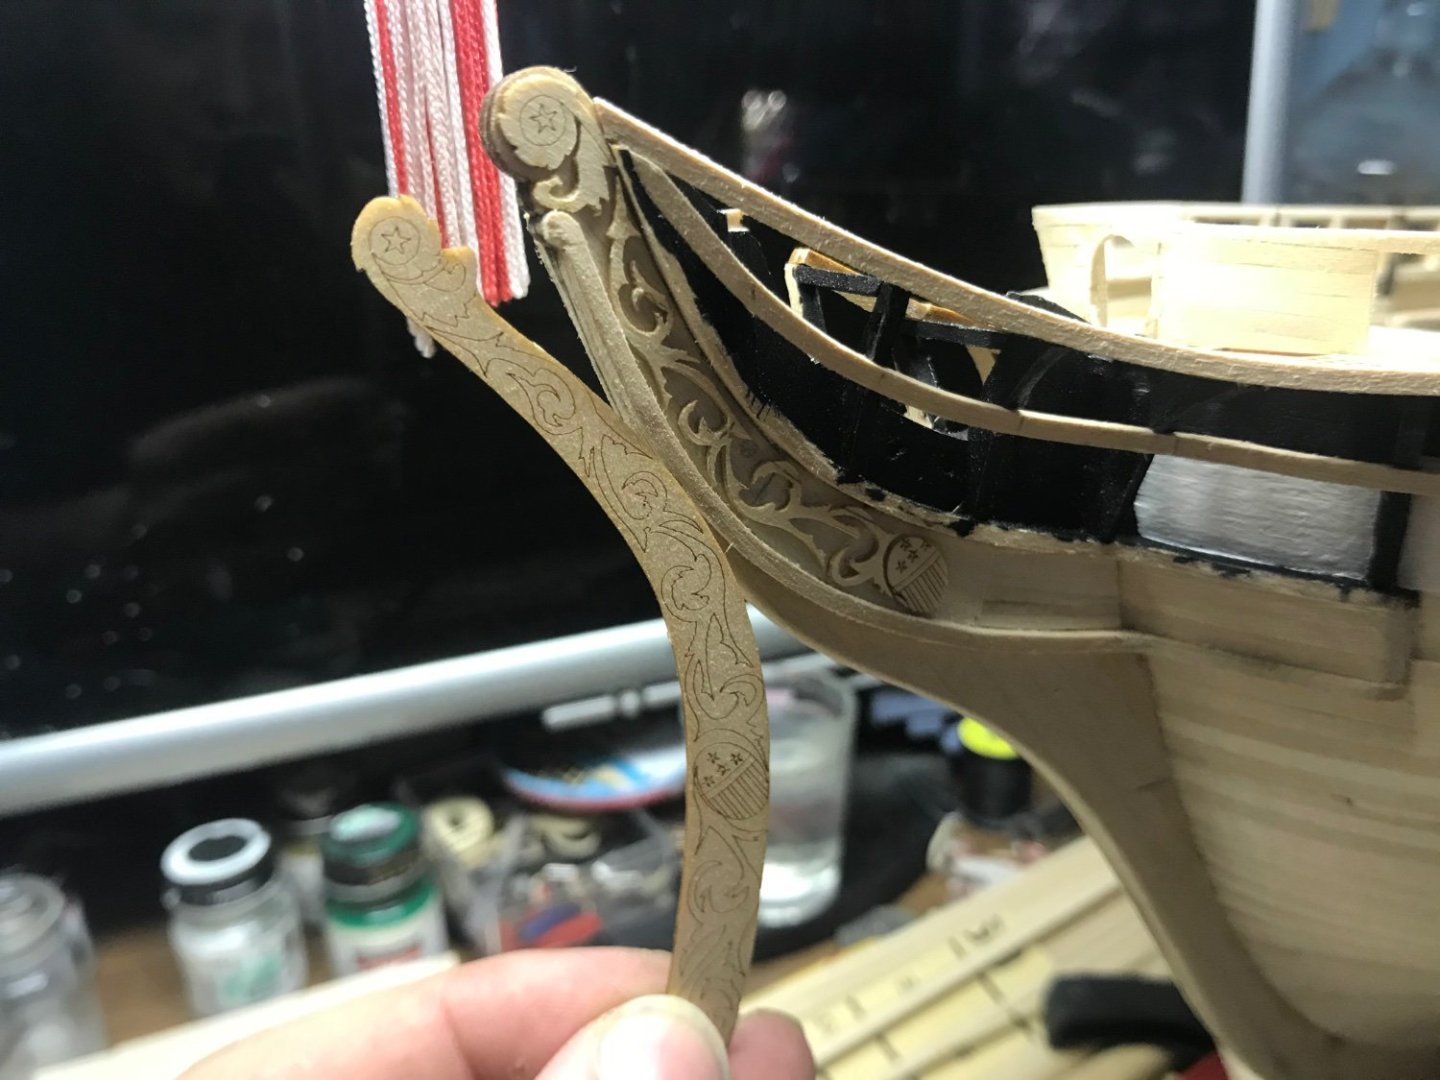
You carved the scrollwork out with a razor blade? How is that possible? Working on those pillars on the transom with super sharp Xacto blades caused all kinds of splitting. How did you avoid that on this laser cut piece? There MUST be more to this story..
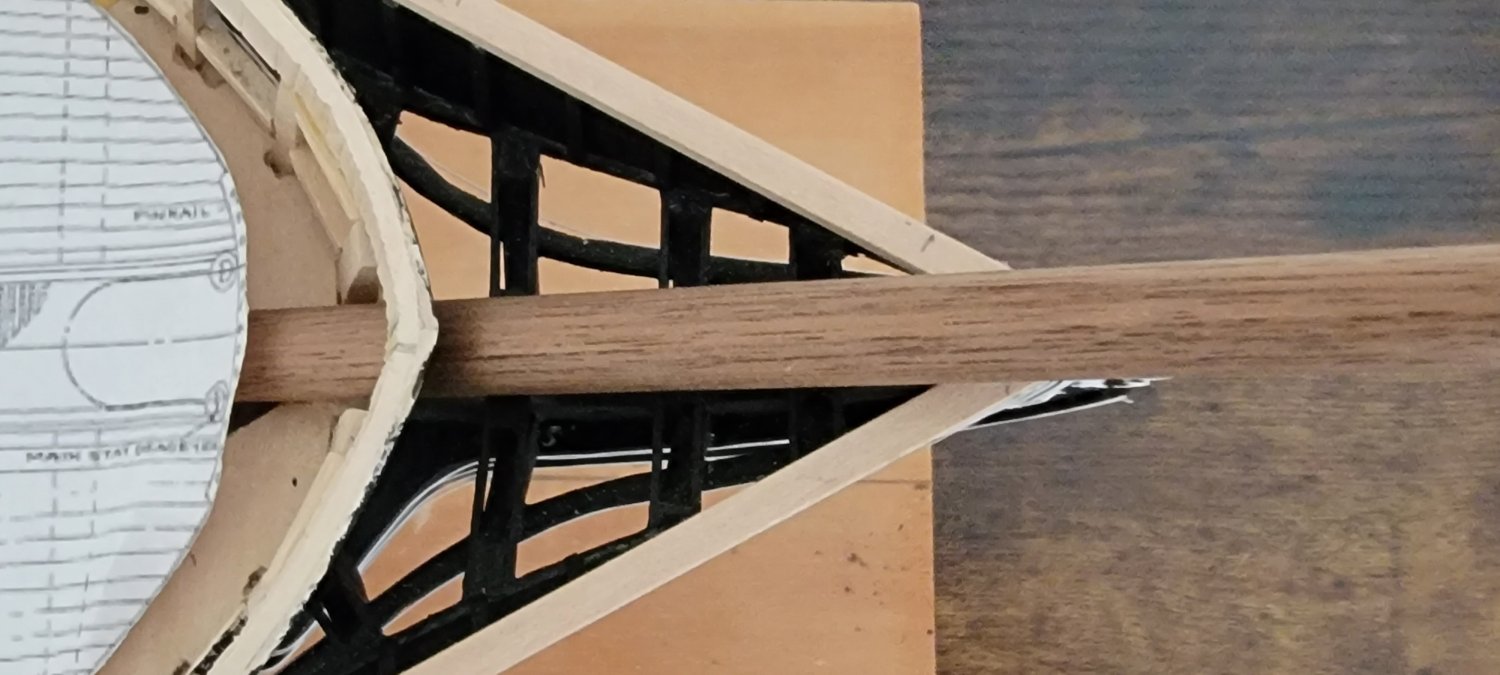
Nice work on the headrails! I haven't seen anyone else do it quite the way you did it - actually installing the timbers first.. Even the Hunt practicum put the cart before the horse in this case.
- Geoff Matson and Unegawahya
-
2
-
15 hours ago, kmart said:
So leaving mine bare, just matte clear coat seems to be the safest option at the moment
IMHO, an excellent choice..
-
Going back and forth between builds, trying to firmly grasp construction details of cheek knees, trailboard, and head rails, I was impressed by your work in this area. I will go so far as to say that IMHO you eclipsed XKen in managing the curve at the tail end of the trailboard, where he cut it short.
Boy of boy, am I dreading this step..
- Nirvana, Geoff Matson, PaddyO and 4 others
-
7
-
Jon, I spent some time today checking other build logs, one of which was XKen's. I noticed that the drills he uses seem to be very short, or have very little of the cutting end protruding from chucks. This might be a technique that would resist your drill bits breaking. He doesn't discuss it, but I suspect he shortened the cutting end of the drill bits and hand sharpened them.
E.G.
That last one might have been an outlier..
- KARAVOKIRIS, Geoff Matson and Unegawahya
-
2
-
 1
1
-
My vote is for top left. This seems to most closely match (to my eye at least) the color of the sails on the photo on the model's box cover. No?
-
11 hours ago, mtbediz said:
For this scale, a router bit with a radius of 9 mm will be needed, and I don't think our MF70 has the torque to turn it while under load, but you can still try it.
I hadn't planned on using the router bit on the MF70. I would use my router table, like I did to make the hatch coamings (post 203) and the base (post 184). I see that you've already concluded your mass production run and that you are well on the way to completing the gun carriages, so I will not pursue the topic further at this point. Instead, I've got to see how others are handling construction of cheek knees, head rails and trail boards. I thought I dreaded the galleries, but those efforts pale in comparison to what I foresee coming up next.
I look forward to seeing you you tackle those last items.. Right now, I'm looking at Usedtosail, Kmart and XKen, among others for ideas and techniques.
-
On 11/27/2022 at 12:07 PM, k-mart said:
Making steady progress.
not sure of their proper name but been working on the head boards.... that fits between the 4th rail and top rail.
Decided to make them off ship and then place them in postion after there all made and painted.
- First.. used a contour guide and traced the shape of the area for the headboards on some heave computer paper.
- Edge glued enough planks together proper size of template.
- Template was close enough to use for both port and starboard.
- Just cut pieces a bit larger and trimmed to proper side size.

Added stiffeners. Not the top and bottom edges of stiffeners need to be cut at angle in order to sit flush against the rails. This piece is angled outboard on the top edge.

Added the top rail next.
This needed to be steamed and bent in a jig. (Just slighly) in order to fit flat against the bow bulwarks and then curve up to the stem.
While the curve isn't that much... there is not a lot of surface area to glue against. easier to steam the wood and not have to force it, soo as to not have stress on the glue joint.

Cleanedd up head boards and test fit.
Painted and glued it.

I have also been working on the head gratings in parallels. They were fitted (but not glued) before putting the side boards in. just easier than trying in that tight area afterwards. Still need to stain to the right color and work on the head seats.
I'll post pictures of those next time.
I'm just about ready to declare the bow done (for now)
Next up.... start the hull coppering.
.

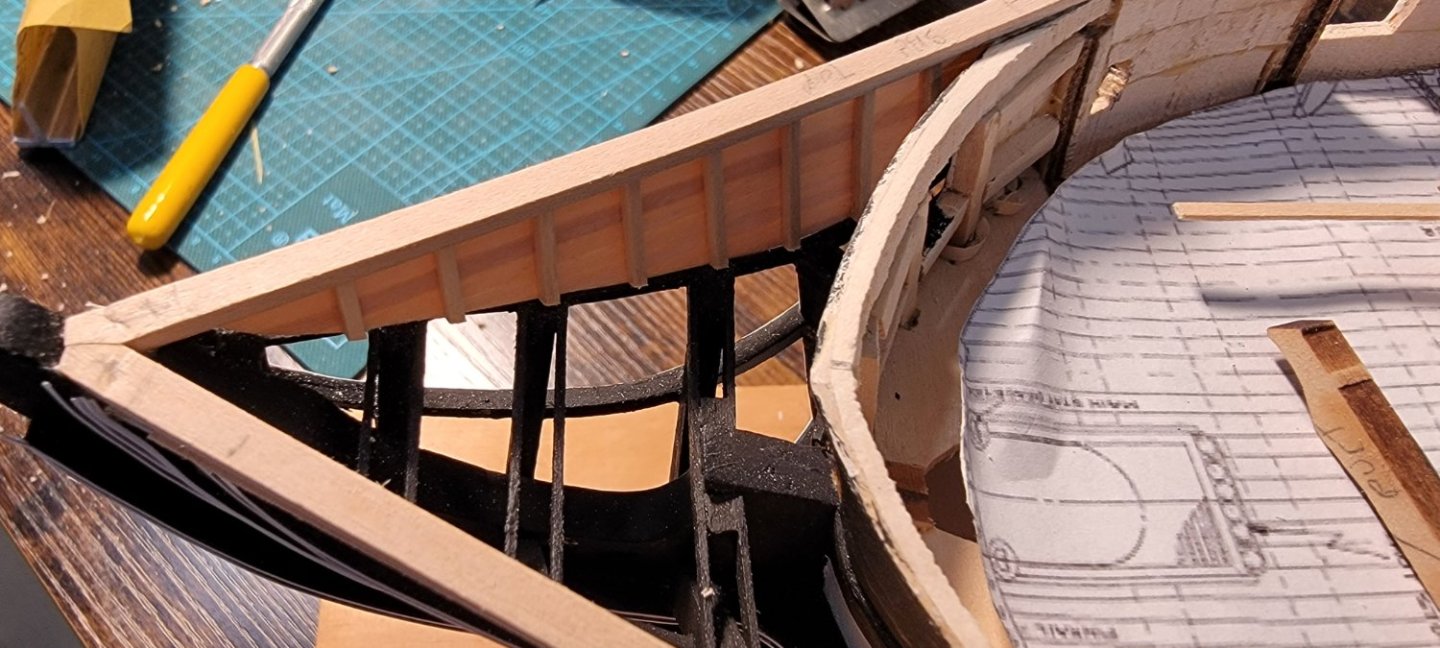
I'm finishing up the main rail and starting to think about the top rail, but dreading tackling the trail and head rail construction.
I'm studying your bill very carefully and thank you for providing such detailed photographs. The hardest problem I've had is visualizing what these would be like. Your pictures have really helped.
-
I'm still of the opinion that a router bit would be the best option here. Next time I'm at the shipyard, I'll run through my collection of bits and see if I can find anything that would facilitate the shape that you're looking for, Mustafa. If I succeed I'll show you some photos. I hadn't intended to make my own gun carriages, but if they look better than what came laser cut from the kit, this will have been an instructive conversation.
-
I wish I had a friend like that!
- mtbediz and mort stoll
-
1
-
 1
1
-
I couldn't have said it better myself, Gregg. Yes Mustafa, it looks like a simple Ogee bit would get you the result you're aiming for. The question is can you get one in that size?
I assume that you have a router table with a fence..
-
22 hours ago, GGibson said:
Good looking knees, Peter! 👍
My orthopedic surgeon would disagree, but he hasn't yet seen the model.. 😁
I did not have much success with mustafa's lamination technique. If I were painting, this would not be a problem because I could fill the gaps with putty, sand, and hide the offending areas. I might go back to just making wider panels and cutting the shapes, per the Hunt Practicum.
-
Wow! Very ingenious. And it looks like it'll work.
-
-
No worries Haiko, that's what these forms are for, the sharing of information.
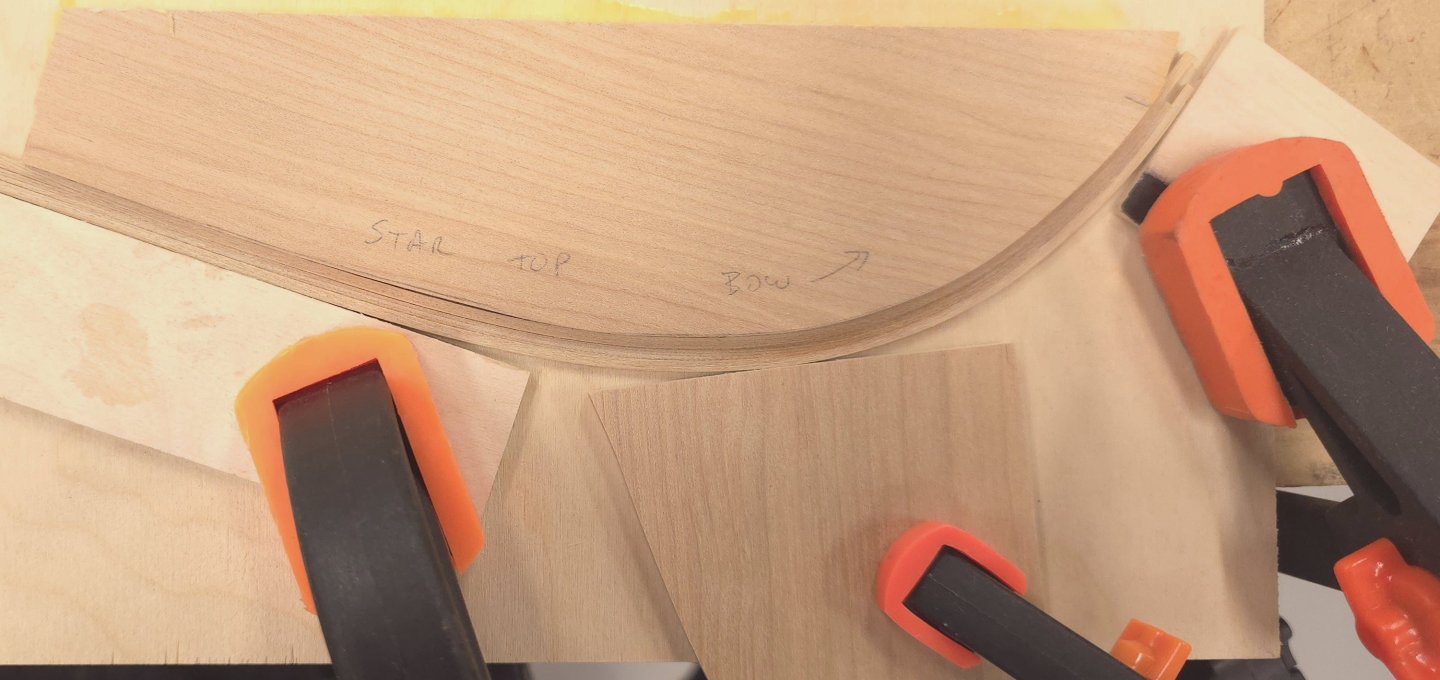
Here's a nugget of information I'm going to share today. I installed the two knees at the transom that I failed to do in the initial round of top rail planking.
Amazing how such little task can take so many hours..
- Geoff Matson, mtbediz, PaddyO and 3 others
-
6
-
-
5 hours ago, The Bitter End said:
It was incredibly difficult to cut 2.38mm square strips on my full sized table saw
I cannot stress enough the value of a thickness drum sander for situations like this. You can get fairly close with a saw, then run the parts through the thickness drum sander for final dimensioning. It's a shame that the Byrnes company no longer makes theirs. I've had my Jet drum sander for about 15 years for my woodworking hobby and with proper setup, I can dimension with amazing precision.
-
5 hours ago, The Bitter End said:
I am about the start planking the gunnel (I dont even know if this is the correct term). Can anyone tell me if there should be visible caulking between these planks? I know its a strange question
I've never seen that spelling for gunwale before, but turns out it's a legit alternative spelling. You're referring to the planking at the top of the hull, working your way down toward the wale.
I haven't seen anyone at MSW put any visible caulking between these planks. Oddly enough however, for the deck planking people do attempt to simulate caulking. In reality I'm guessing there must be caulking between the planks on the hull to keep water out. No?
I would think that since most people sand, apply putty, then send some more, and then paint the hull black, no one is concerning themselves with this issue. In my experience, I glued the edges of all the hull planking. As carefully as I prepared the planks, there was still much trimming with a chisel and some finish sanding. In the end I couldn't see any glue seams. I don't think I'd worry about it if I were you.
By the way, you are working away a quite the pace there. At this rate you'll be done by the end of the year.. Kudos on what you accomplished so far.


USS Constitution by Der Alte Rentner - Model Shipways - 1/76
in - Kit build logs for subjects built from 1751 - 1800
Posted
As always, Jon, thanks for the images. My reference library grows, but it will never compare to yours.