Der Alte Rentner
-
Posts
1,018 -
Joined
-
Last visited
Content Type
Profiles
Forums
Gallery
Events
Everything posted by Der Alte Rentner
-
 The styrene solution is the one employed in the Hunt practicum. It's a fairly easy material to work with and may have been an easier route for you to take, Mustafa. But yours is definitely an out of the box alternative solution. And, the more I look at Unegawahya's work, the more I'm impressed. Cheers
 -
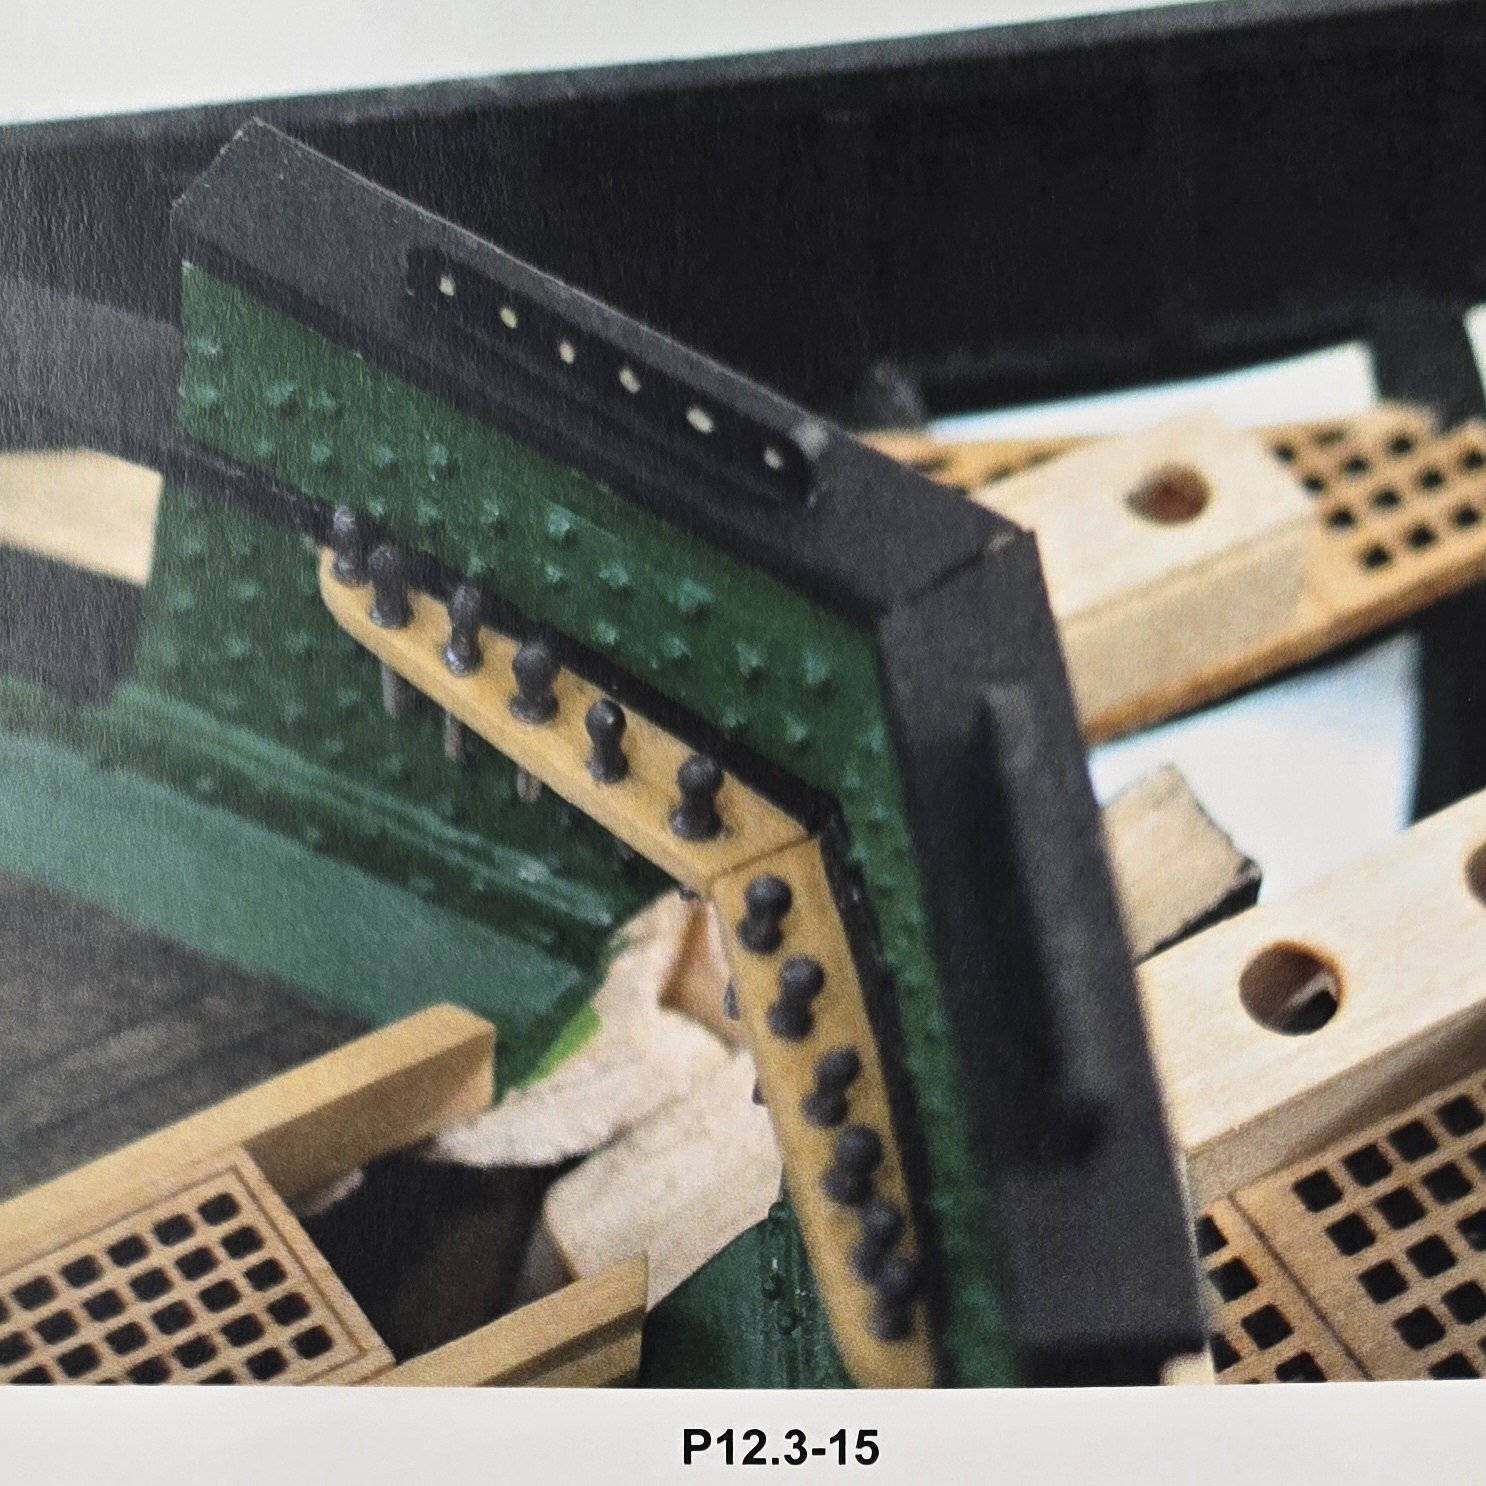
There has been discussion about the 3rd rail at Unegawahya's site, but since he's well past that point, and I'm still gathering information, I thought I'd stay out of his hair and ponder the issue here. My usual go to reference on matters such as these is XKen's build log. But on this subject he's a little short on detail. ERS Rich however, has quite a lot to say and, from what I've seen, has the best documentation of a way to go about dealing rails 3 to 5. I know I won't construct the actual rail the way that ERS Rich did, but the photographs he includes in his log are the best I've seen to illustrate how to deal with the supports for rails 3 to 5. And of course there's Jon's (JSGerson) log, which follows the Hunt Practicum's methodology. Here, I don't care for the two (three?) part construction of rails 3, 4 and 5. Also, not keen on the idea of adding the supports for those rails - after they're installed. However, I continue to be impressed with the amount of research and attention to detail that Jon brings to the table. Geez Jon, you built the catheads as a laminate! Just added Usedtosail's log entry. He constructs the rails differently than either ERS Rich or Jon, and takes a middle ground approach on the supports. If you go to page 1 of his build log, his is the best index of anyone's. Drill baby drill! Unfortunately, the photographic detail is a tad disappointing. He painted the supports and rails and it's hard to pick out some of the details. April 28: After looking at photos Mustafa provided of a build at another site (look ahead a few posts), I remembered someone else tackling the job by making the supports first. This was KMart. I just added the link to his build where he begins making theses. The wool gathering continues.. As I find other methods to consider, I will add them to this post, so as to keep the links in one place for easier reference. I'm going one step further and bookmarking this post so I can get to it more easily as well. May 4, How could I not have added a link to Xken's build? He's solidly in the camp of build the rails first, add supports and grating later. Sadly, not much of use here except for a view of the head area after construction, which helps me visualize how it should fit in to the scheme Added it below.. See the links below:
-
USS Constitution by mtbediz - 1:76
Der Alte Rentner replied to mtbediz's topic in - Build logs for subjects built 1751 - 1800
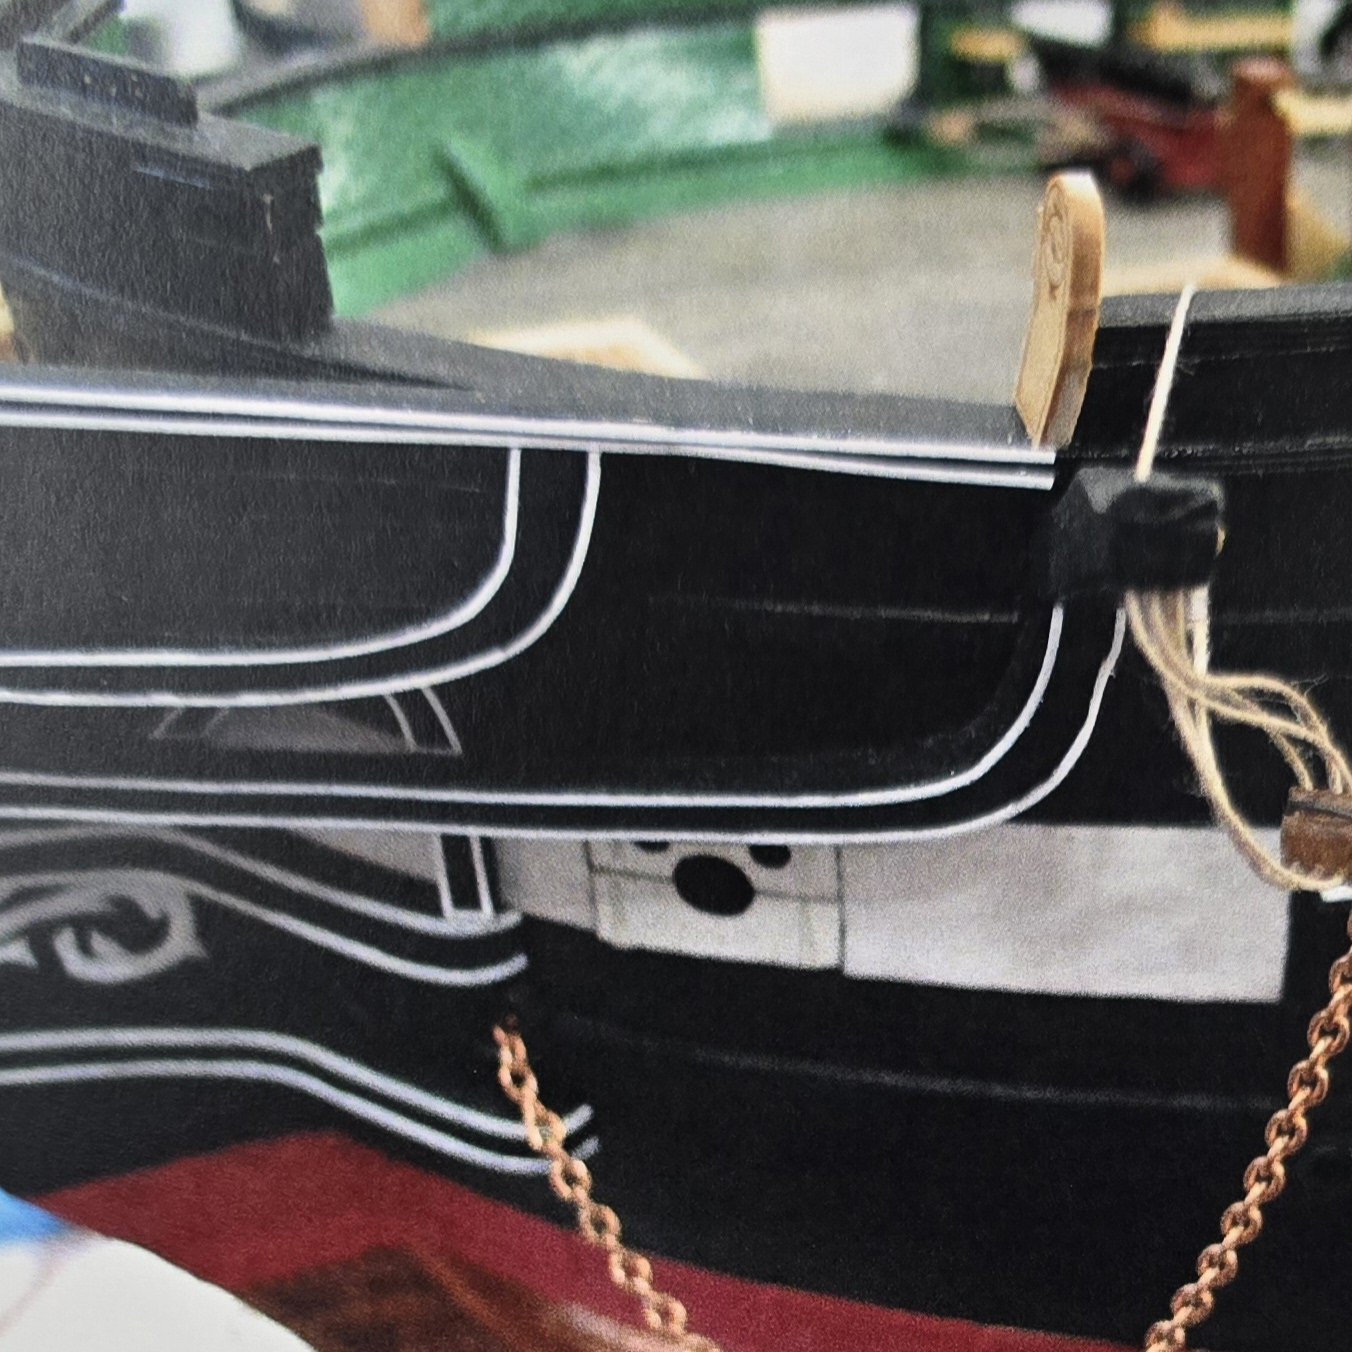
Like you, I've been distracted with family matters for a few days and haven't had time to get to the shipyard. I'm looking at every picture I can lay my hands on to see the shape of the third rail, before I start construction. Now that you're back to work, maybe I can tap into your expertise in a couple of days. Amazing result on the pinstriping! -
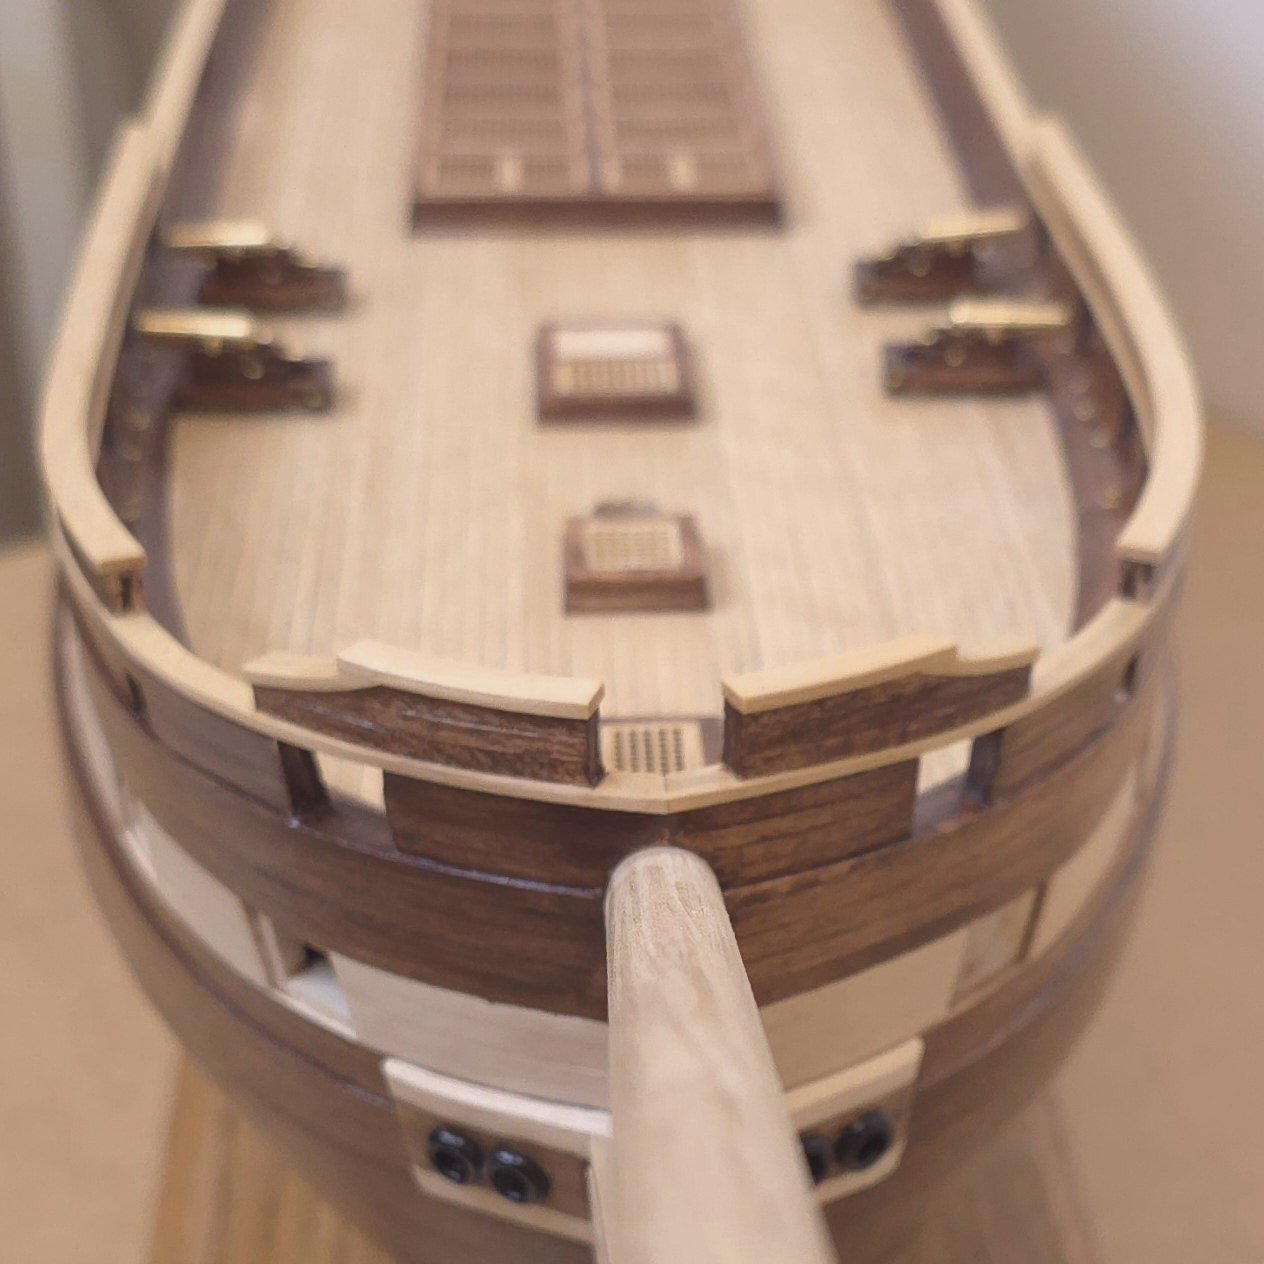
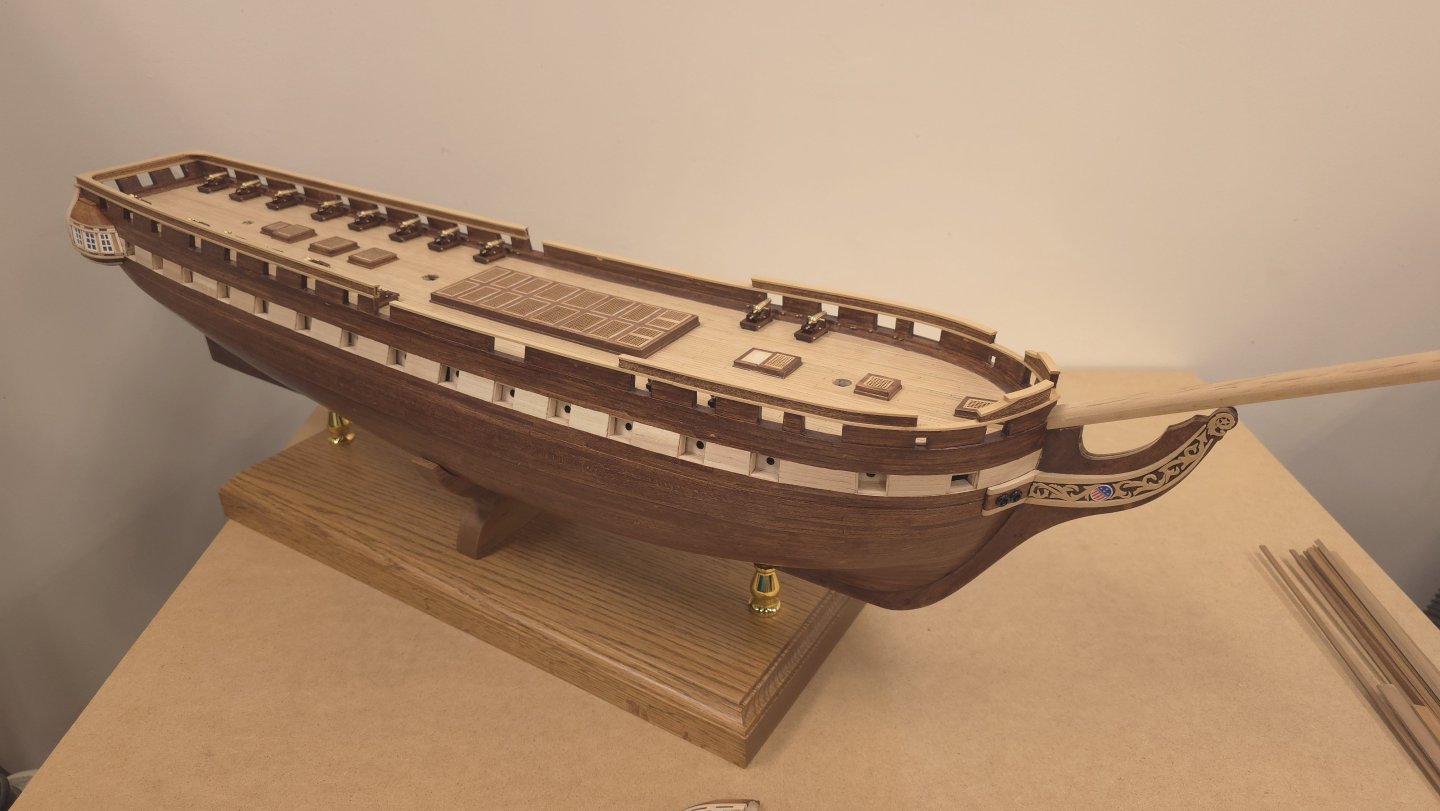
Could you please add a couple of photos from the top so I can see detail on the curve in the rails?
-
Words I'll continue to live by. 😉
-
I stand corrected. As good as yours look, I can only say, press on! Say, are you actually making the netting? If not, what materials are you using?
-
Jon, Again, I don't plan to install the catheads until later, so as not to risk damage as I handle the hull for subsequent work. I predrilled the holes for the eyebolts that are between the cleat and the bulkheads. So, adding them later wouldn't be a problem. Having said that, Unegawahya's point about the pinstriping and supports below the catheads is valid. Since this is the next area I'll be tackling, I'll be giving the matter a lot of thought. Thanks to you and Unegawahya for the photos!
-
Nice work. Looking about your spar deck, it's dawning on my how much I still have ahead of me. Daunting, to say the least. and anticipating a comment by Jon, you look to be building Conny as she appears today. In which case, why the hammock stanchions and netting? Lastly, fantastic looking canopies! I paged back to review your techniques. May I say, you could hold a Master's class on the subject. I don't think I'm going to bother, but as nice as yours look, I may reconsider..
-
Thank you kind sir. Positive feedback is always appreciated.
-
I'm ready for a twelve step plan to deal with that addiction.. Having said that, after pretty much an entire day at the shipyards, I got to my first coat of poly on the top gallant rails and went back to dealing with the cat heads. I need 24 hours for the stain to dry, then I'll coat it them with poly. I don't think I will install them or the gangway boards until I'm about ready to do the rigging.

-
Mustafa, feel free to post on my blog anytime. As you mentioned to me several times, that's what this website is here for. Also, I agree that the smaller eyebolts are the better fit when it comes to scale. Meanwhile, back at the shipyard.. Top Gallant rails are more or less done on the starboard side. Port side will have to wait until tomorrow or wednesday. Sigh, why does this fiddly work take so freaking long?

-
Smart move. I can confirm Jon's assertion, that Hunt never finished the build, as evidenced by the fact that the photo he submitted at the beginning of Chapter 12, is not a photo of the Constitution, rather one the ship's boats. It has been Hunt's practice in the first 11 volumes to show a photo of what the build would look like at the end of the chapter. Mr. Hunt goes on the state on the final page of his last volume - Rigging the Constitution Chapter 6, which by the way doesn't contain a single photo of the Constitution, "Because of other projects I have been working on at the time of this writing, I was unable to complete the rigging of my model and opted to complete this practicum by using the kits plans and organizing the final rigging in a more effective manner". But God love Capitalism, he's still selling the Practicum.. By the time you get around to the Constitution, you'll have at the very least Mustafa's build to draw inspiration and examples from. I plan to stick it through, with or without Geoff's finished build to reference. (Come on Geoff, we NEED you! 😄) And there's no reason to believe that Jon, The Bitter End, and Unegawahya won't cross the finish line. Having said all that. The Hunt Practicum does have value, I wouldn't have gotten this build off the ground without it. As long as you reference the creme de la crem references here along the way, you should be able to avoid the pitfalls. By the way, I wonder, will you be doing the kit bash?
-
Blast! Right you are!! I stared at that plan multiple times and completely missed that detail. Once again, Jon, you da man!
-
I appreciate the thought. Now that I've been staring at this model for a couple of hours, my path forward is set. Especially after Jon sent me straight..
-
The plans that came with my model shipways kit are really beat up - especially page four around the top view near the bowsprit. The plans do not show any front views of the rails in that area. Only side views and that top view at the center of page four. What remains somewhat visible on my version of that plan suggests that the top rails do meet at the center of the bowsprit. In other words no gap. I think that's what I'm going to be going for. And I'm still debating on the notion of the flairs. Did I say 5 years? Maybe six..
-
All the pictures in the world are not going to help me Jon. In retrospect, I wish I'd never installed the top gallant rails at all. And to be honest, getting rid them altogether hasn't been completely ruled out. But since the rails up to the catheads are already in place, or mosty underway, I have to find an aesthetic solution, and I don't particularly care what era of the build that does or does not reflect. I'm heading to the shipyard now, where I intend to stare at this thing for a little while longer. This is why my buld is going to take 5 years. And Geoff, I'm expecting you to start posting again sometime soon. In about 3 years I'm going to need your build as a reference on rigging to have any hope of finishing this. Hop to it please! 😁
-
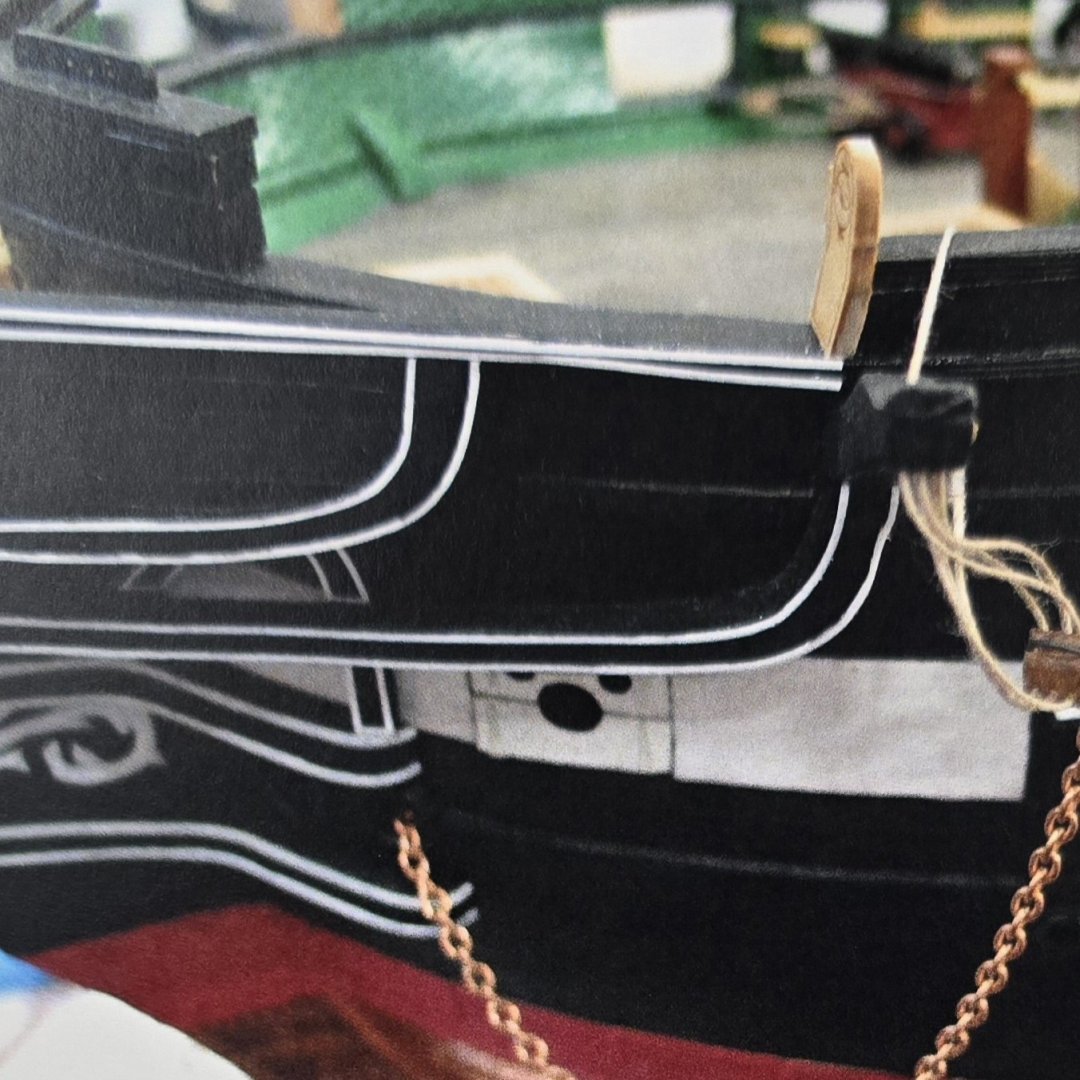
So will I (look forward to see how it looks).. Another variation that I'm sure Jon will comment on is the one used by Bob Hunt. In shopping around for easy ways to finish this railing, I consulted many old logs, then went back to look at chapter 5 in the Hunt practicum, where he constructs the bulwarks. But doesn't add the top gallant rail until chapter 12. There's not one reference anywhere between. Note the missing curved section that tapers down to the main rail as appears in the 2015 version.


-
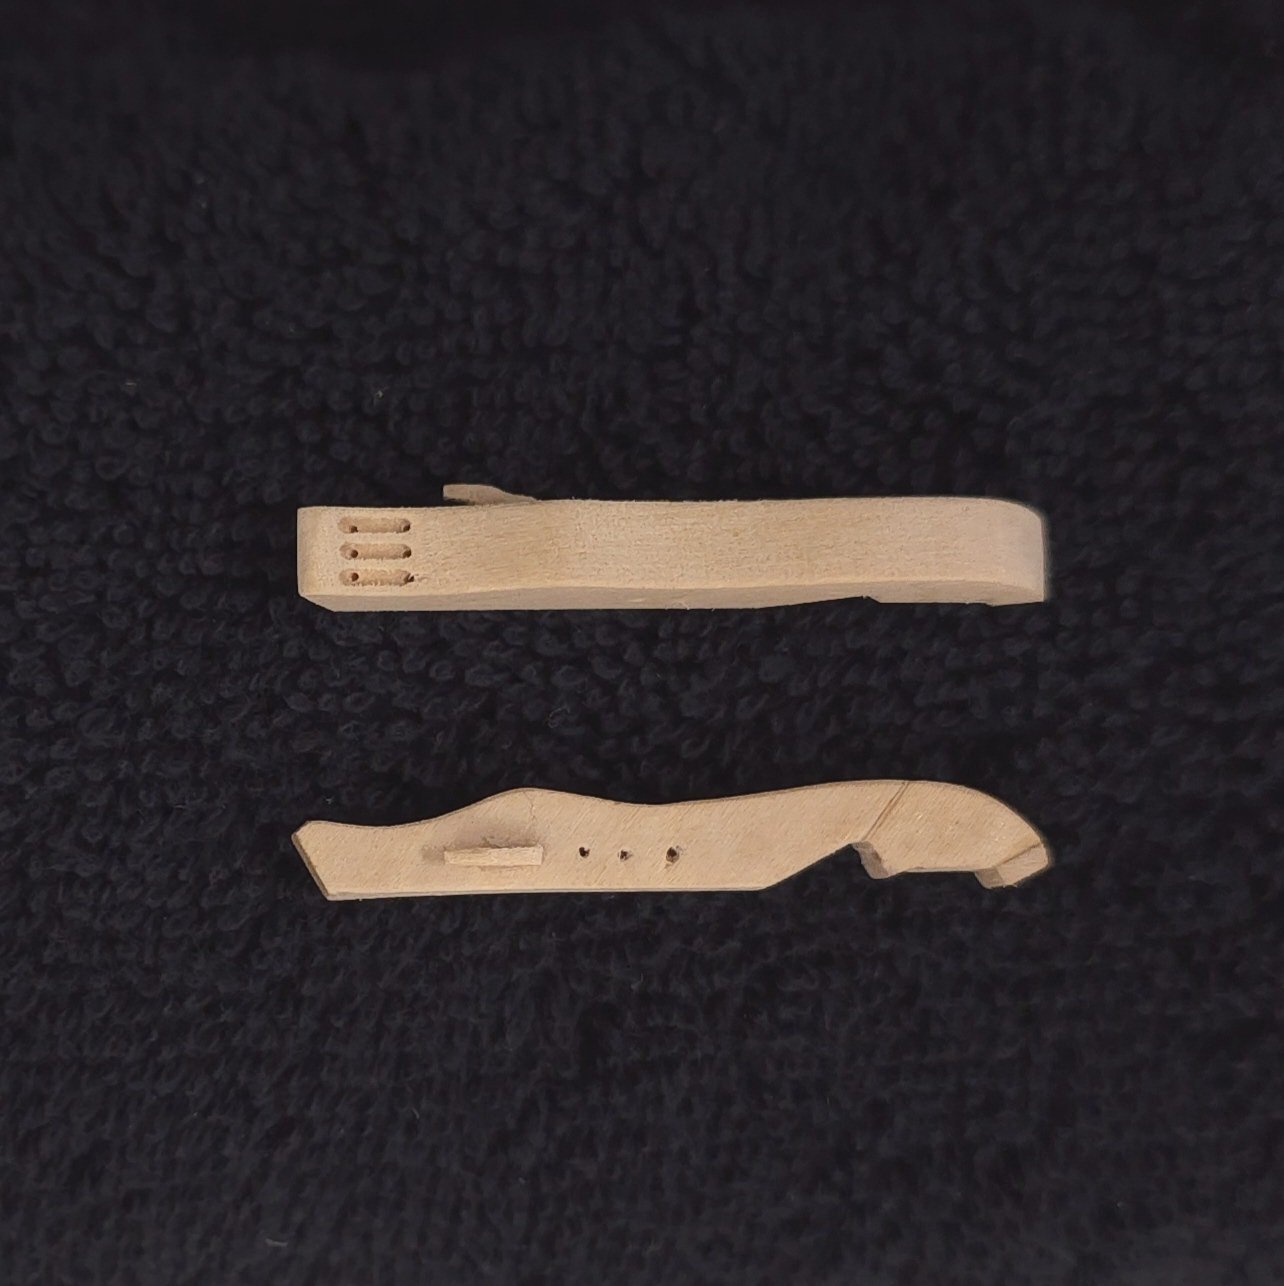
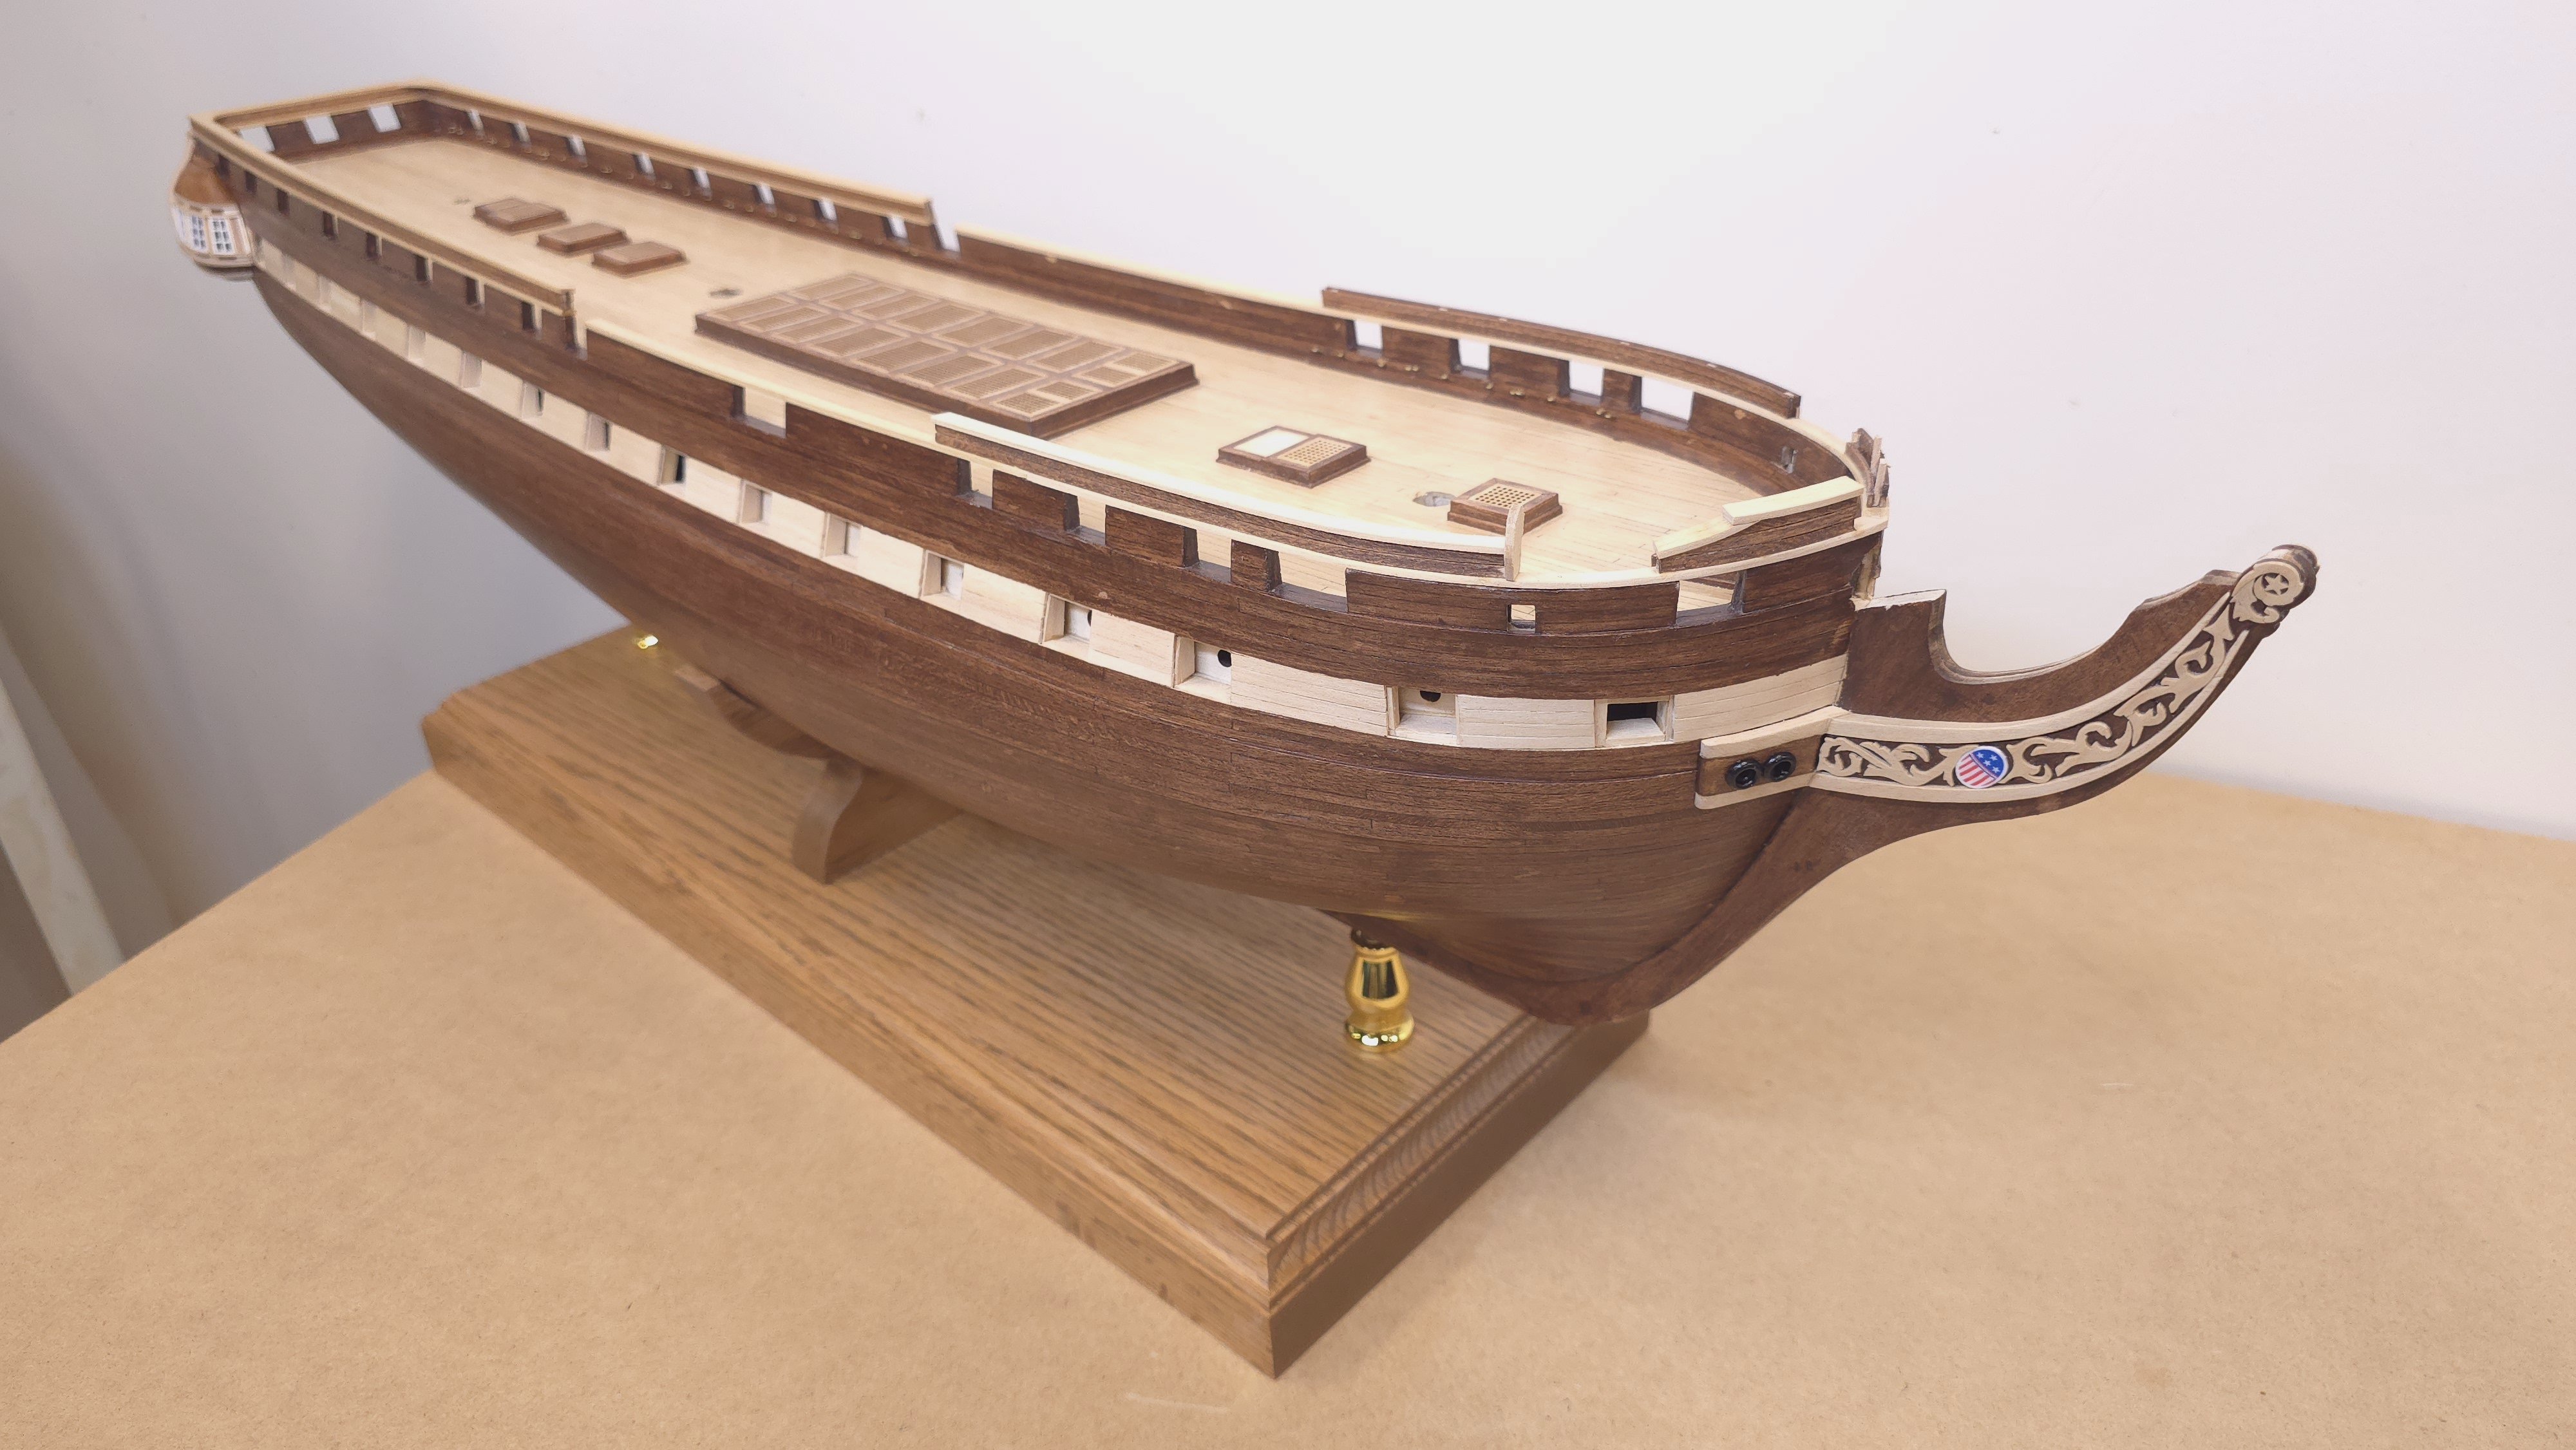
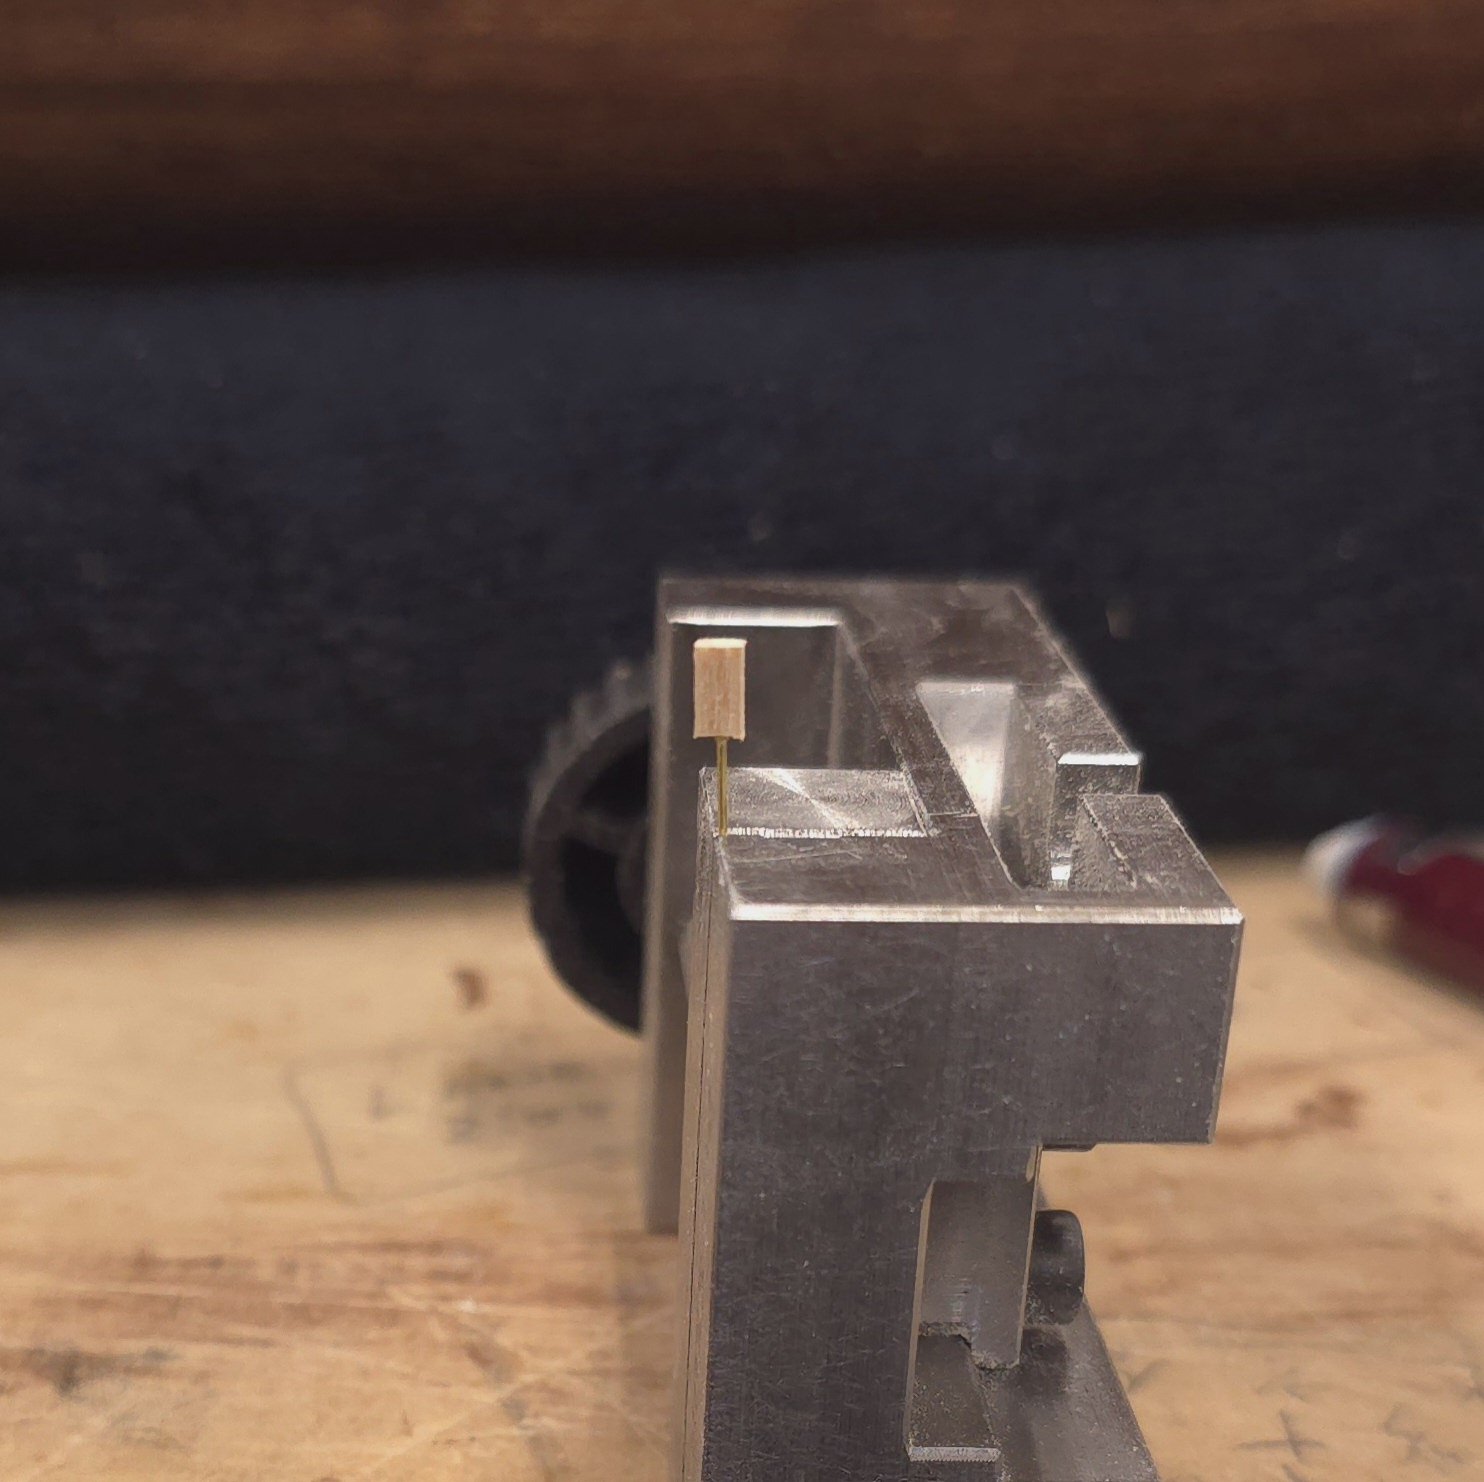
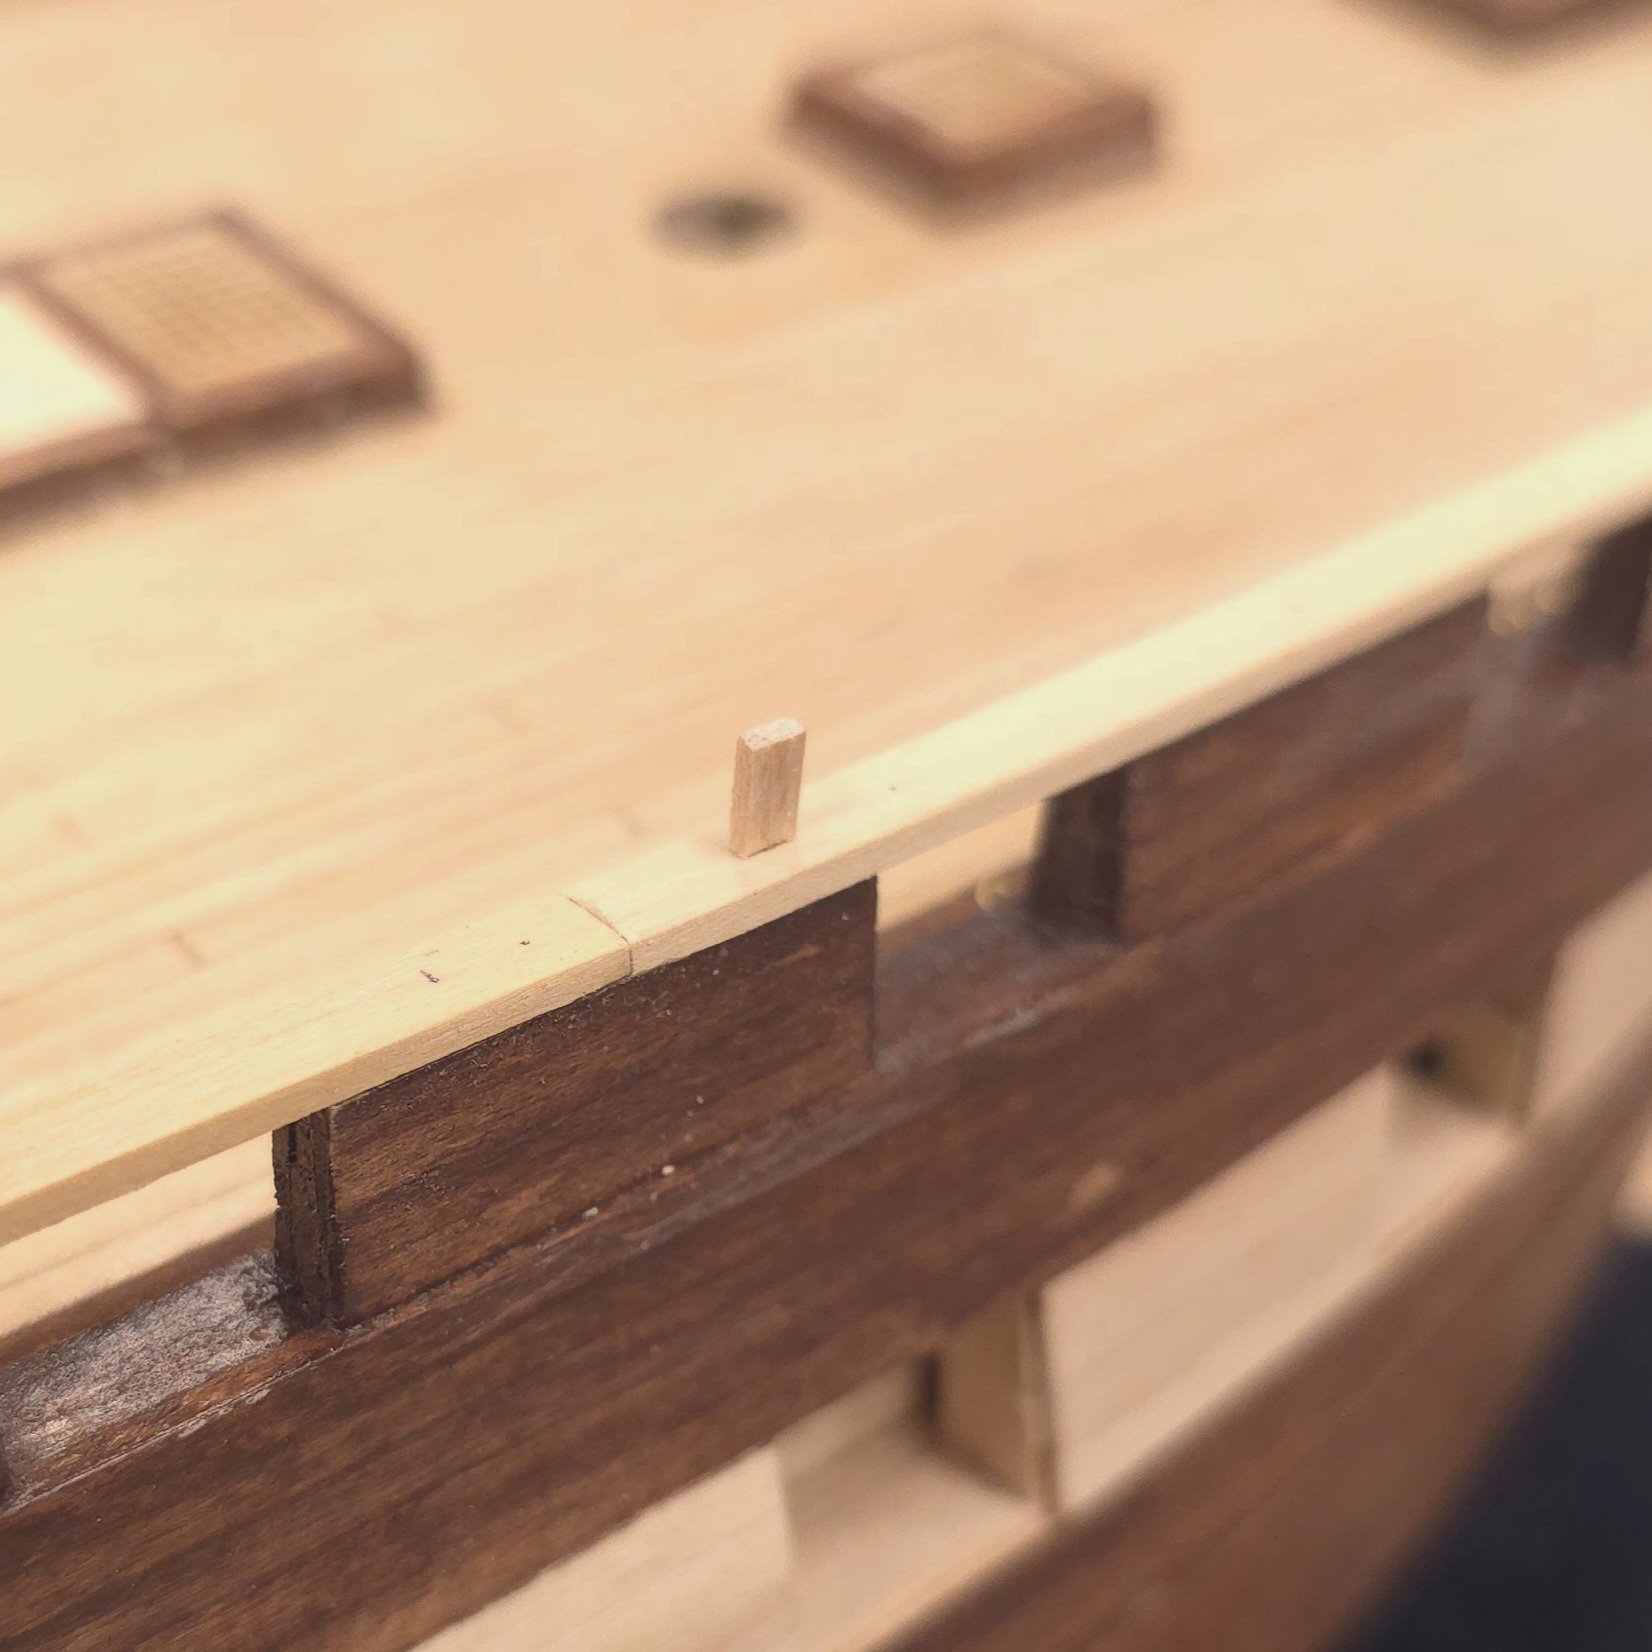
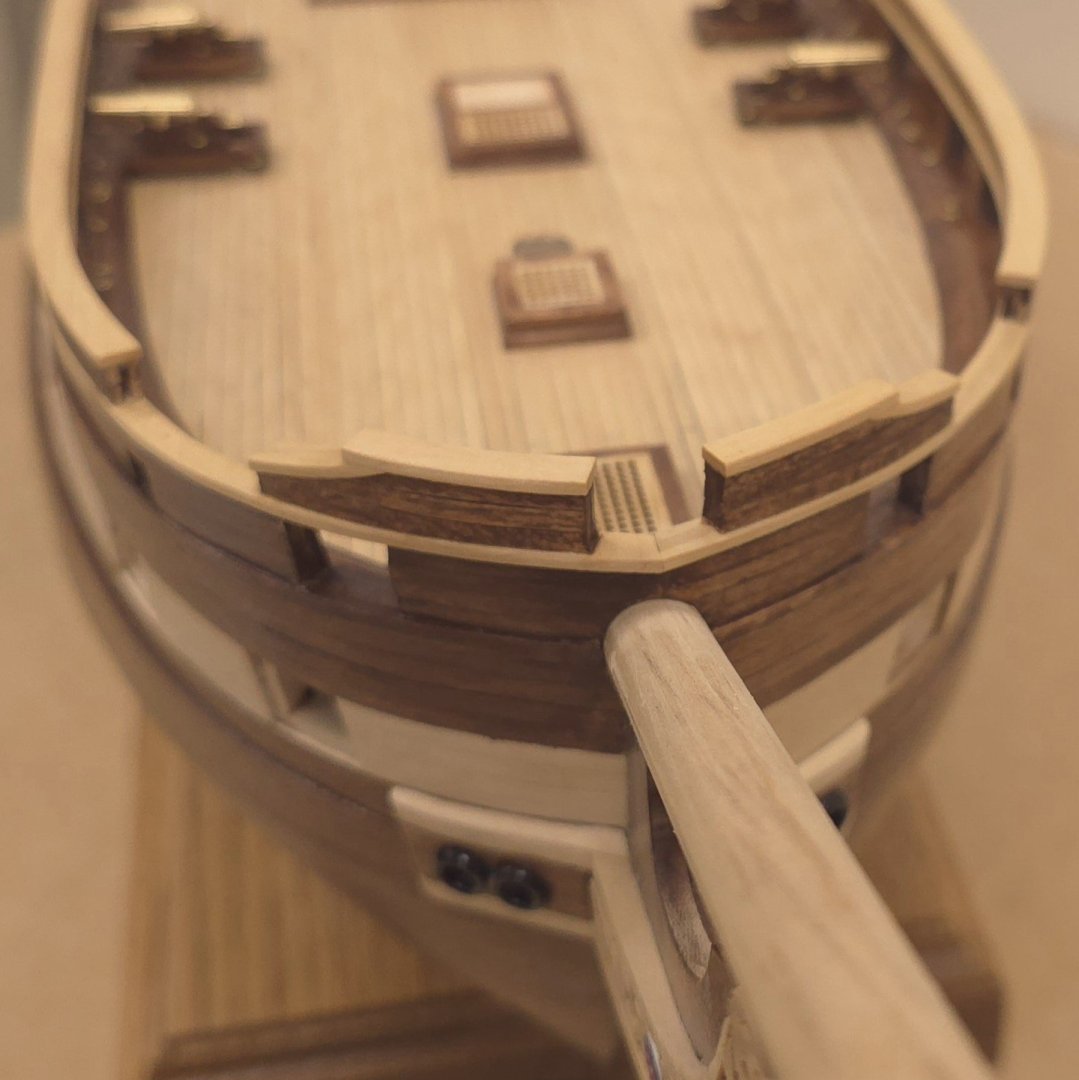
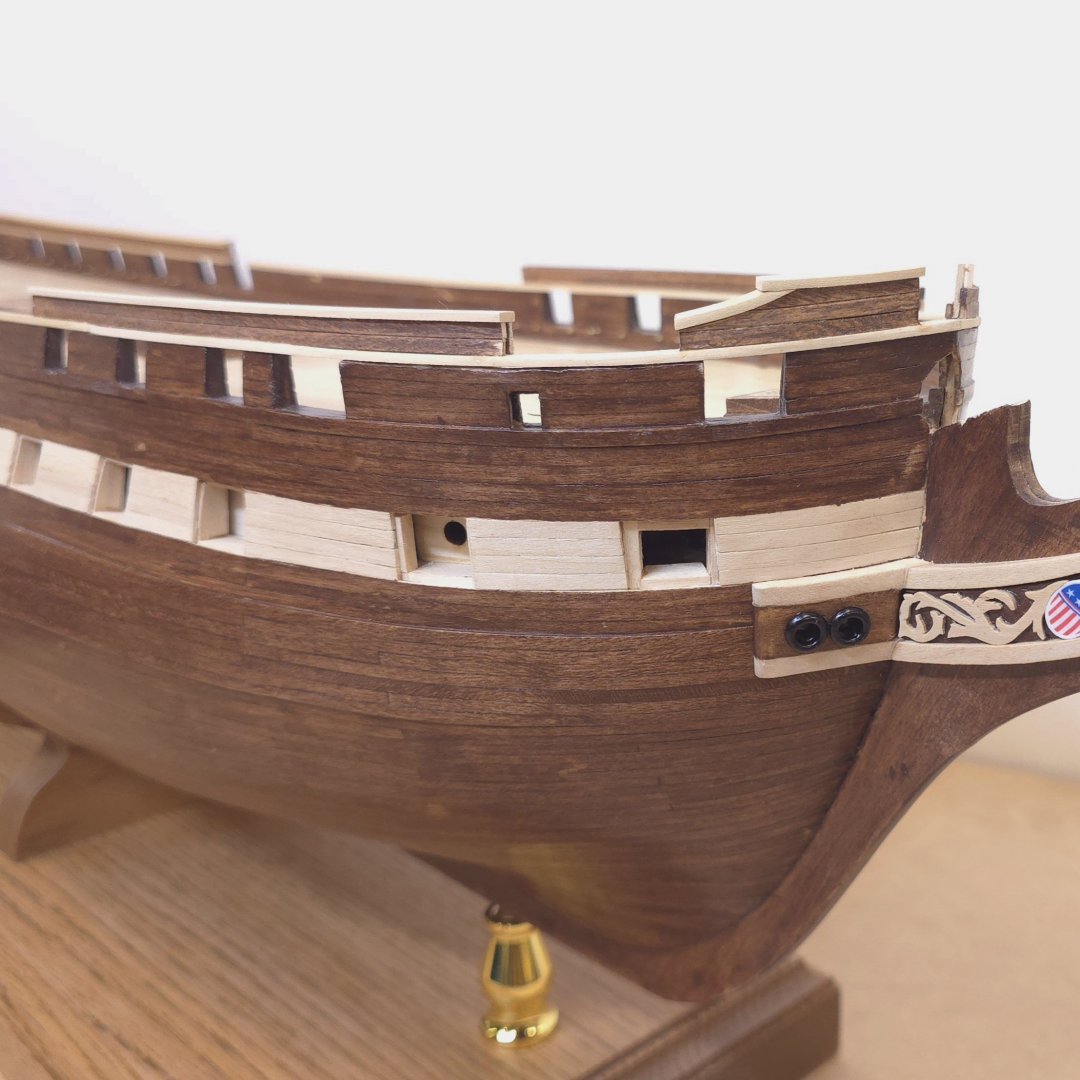
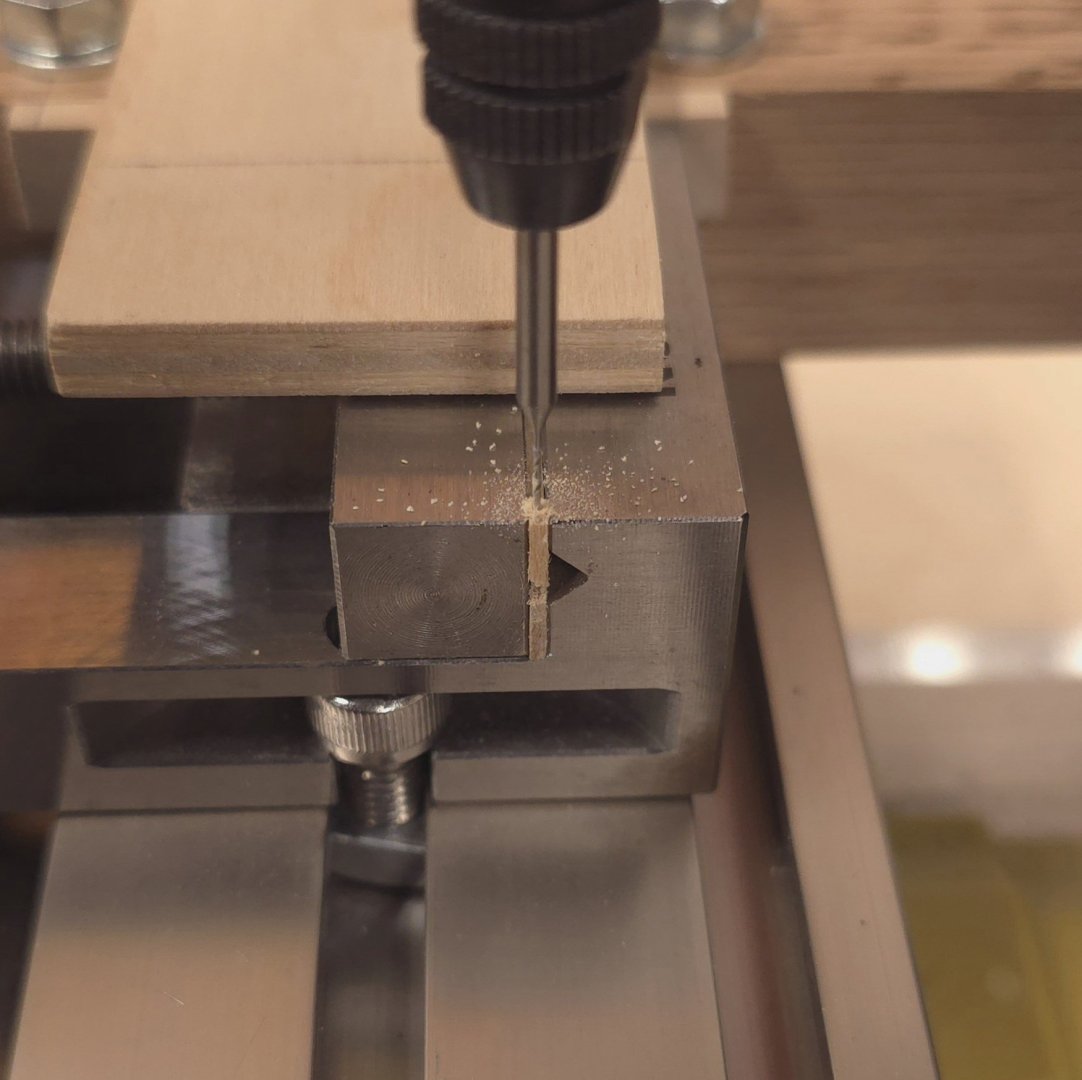
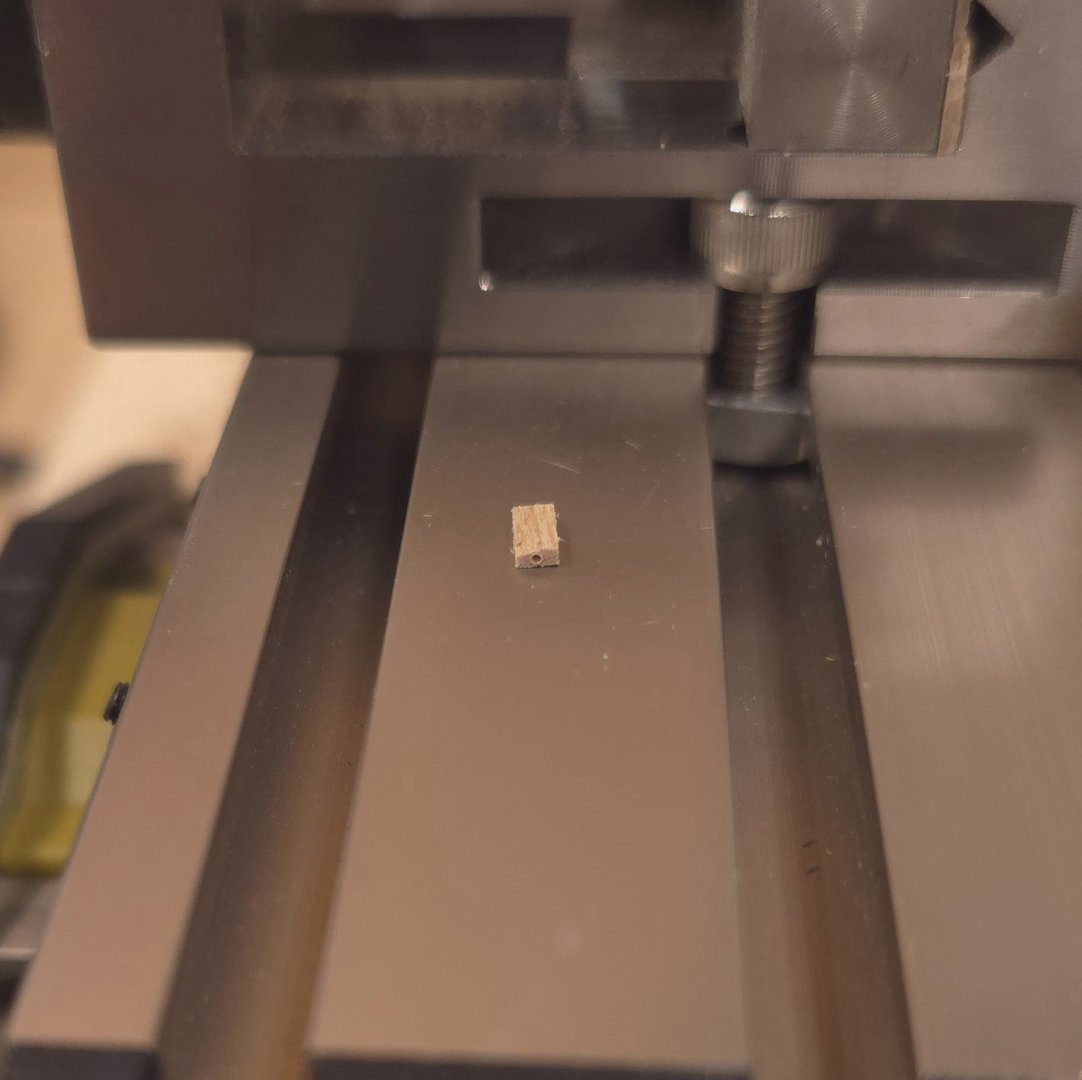
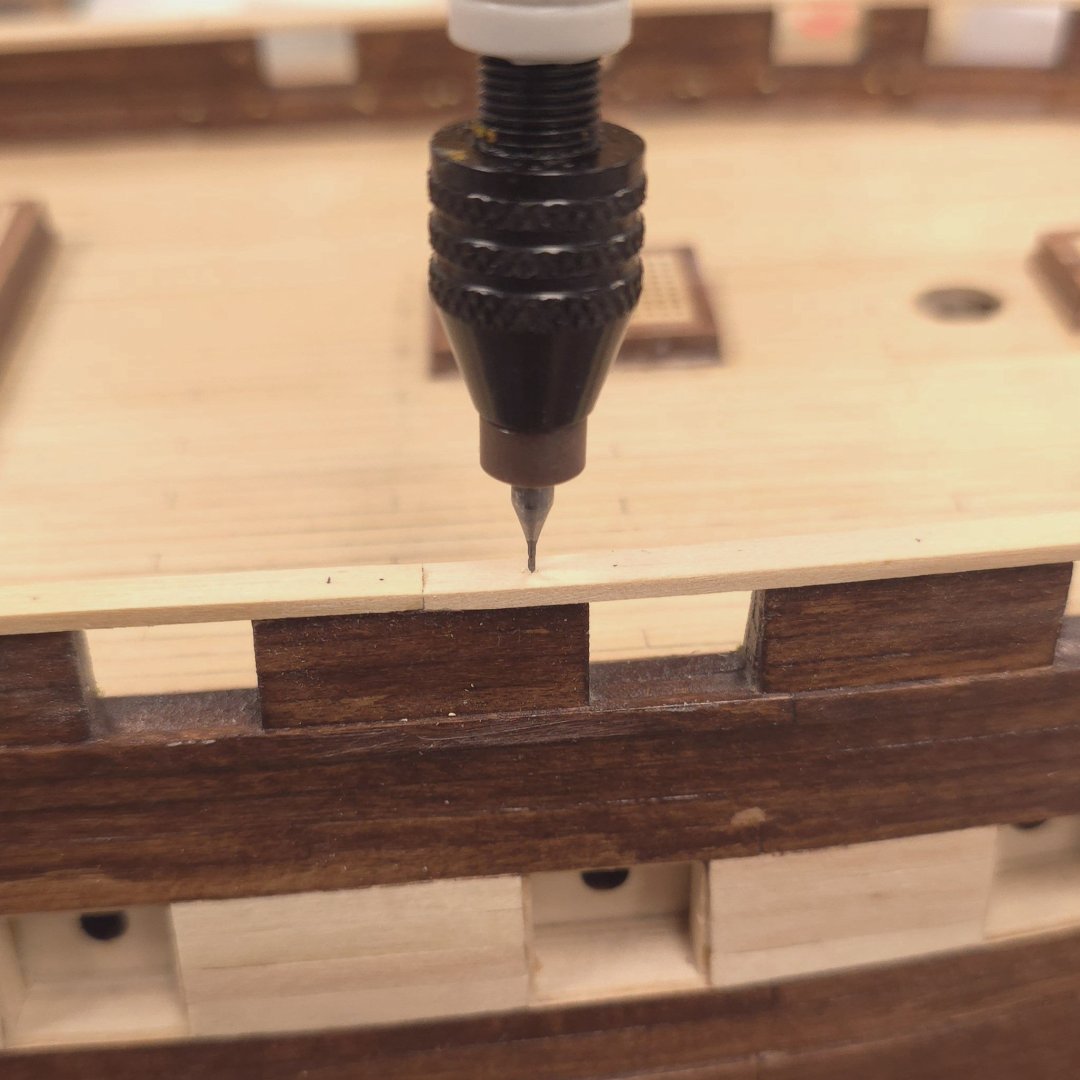
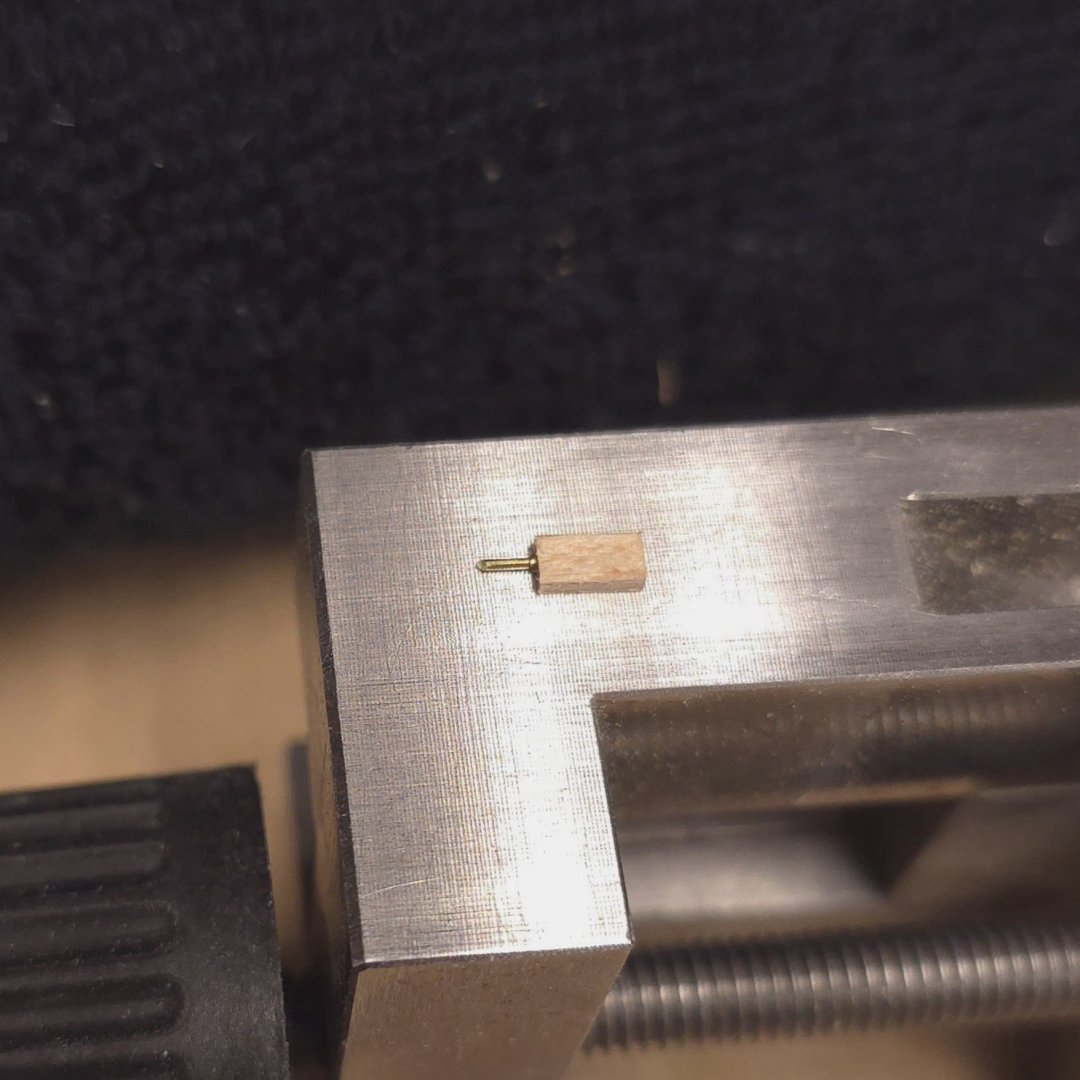
Looking closely at my model, I've decided not to dismantle the top gallant rails astern, rather to add them at the bow. Borrowing from a tip by Mustafa, I'm launching into the effort today. First I had to cut a bunch of 3/64 x 3/32 x 3/16" blanks. Next up was setting up the Proxxon mill to drill a hole to accommodate a 1 mm brass wire, which I cut to fit and inserted. Then I hand drilled a 1mm hole into the main rail to accommodate the assembly. Rinse, repeat.. These vertical posts will accommodate the planking for the bulwarks. I may add some more photos later today, but you'll get the idea from this.


-
Sorry David, no, I was asking Woodartist, who responded to your post with, "I will have a nice scotch on the rocks." I've been following three of his builds for quite some time but noticed he hasn't posted in many months on any of those three. I checked to see if you had a build log, but didn't see one. What are you building?
-
I'm cleaning up my Followed Content folder, which had ballooned to two dozen build logs. I have seen you chime in on my build log from time to time lately, but haven't seen you update any of the three build logs I've been "following". Have you carried your oars so far inland that someone asked what they were? An obscure reference - to be sure.. Basically, I'm asking if you've closed your Shipyard. You seemed to be so close to finishing this and I had hoped to see the finished product. I'll keep this log on my following list for the time being, and Hope you're doing well.
-
I did. 5 years from now, when I finally get around to building the ship's boats, I'll pull the details from the archives, but I'm hoping by then you'll be finished with Conny and reconsidering a little subcontracting.. 😉
-
No. It's not a lack of materials, it's more of a time consuming replacement issue. And as I mentioned before, unnecessary. To wit:


-
USS Constitution by mtbediz - 1:76
Der Alte Rentner replied to mtbediz's topic in - Build logs for subjects built 1751 - 1800
Brilliant idea! The brass must be significantly easier to work than wood or styrene. Can't wait to see the finished product! -
I'll ask again. Would you like to become a subcontractor for these? The
-
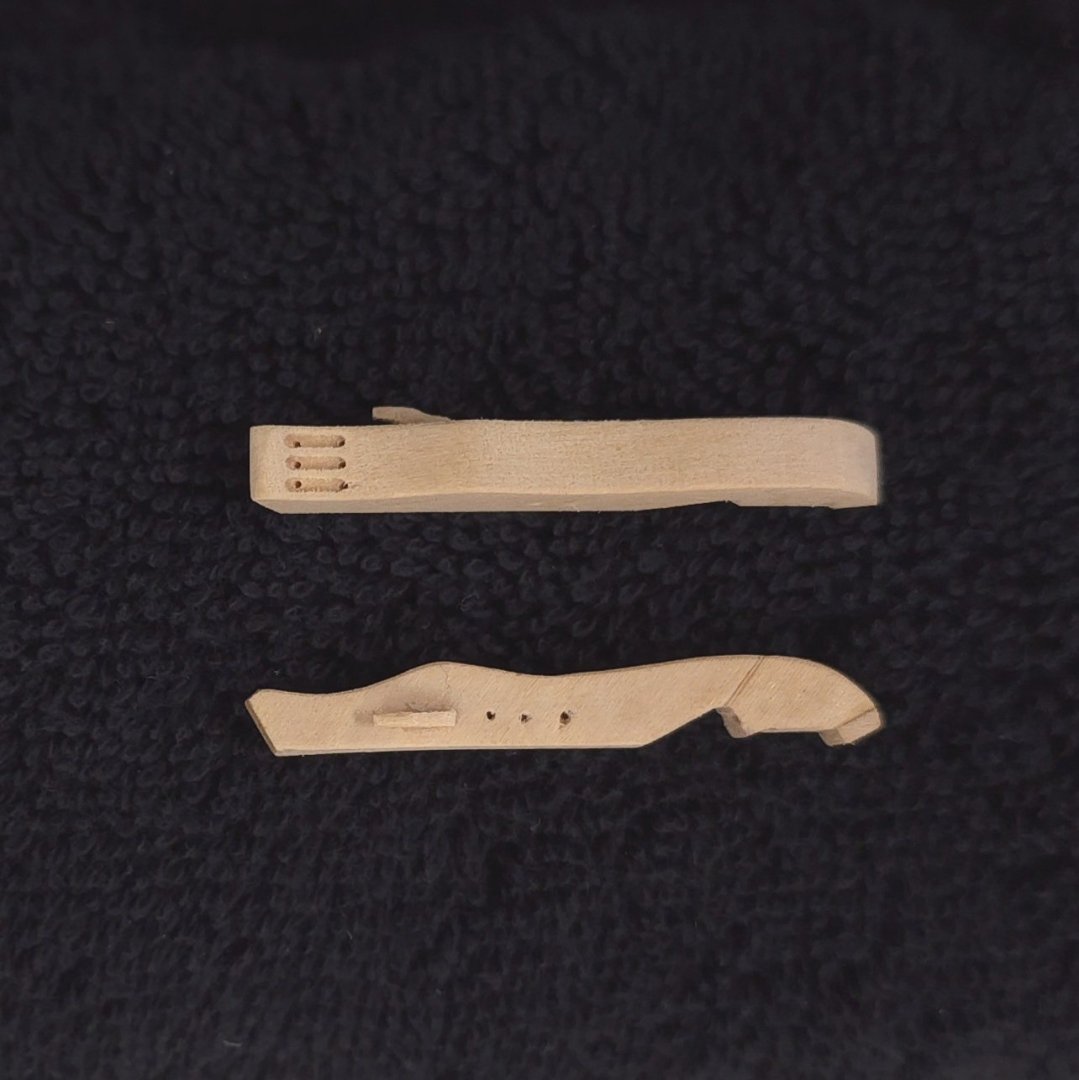
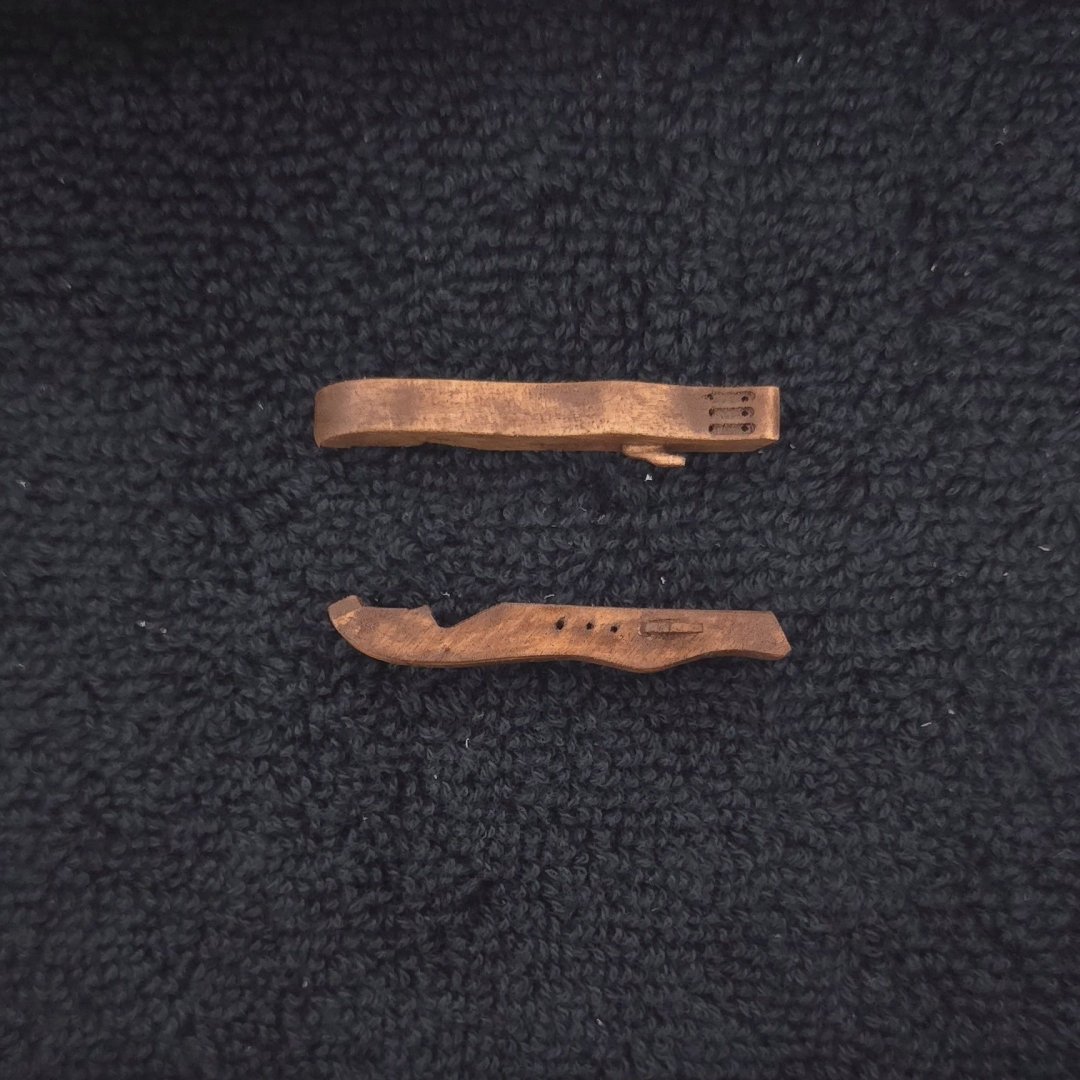
The worst of the break lines will be covered by the hawse pipes. I tried drilling with smaller diameter drills, also making sure I had a backing piece behind the piece I was drilling into. I think I should have used the jewelers saw and curved file instead, but it's all good. No one is going to be looking that closely in the first place, and the hawse pipes cover the worst of the damage.