Der Alte Rentner
-
Posts
1,018 -
Joined
-
Last visited
Content Type
Profiles
Forums
Gallery
Events
Everything posted by Der Alte Rentner
-

USS Constitution by mtbediz - 1:76
Der Alte Rentner replied to mtbediz's topic in - Build logs for subjects built 1751 - 1800
Makes sense, if you didn't have a hole saw or forstner bit in the diameter of the inside circle. Since you're already done, I won't bother digging out the photos of the process I used to create a perfectly round base for my poker chip tray using (you guessed it) a fixture and drum sander. It's always interesting to see how people come up with different solutions for the same problem. Kudos to your skill in obtaining a perfectly round wheel with the disk sander. -
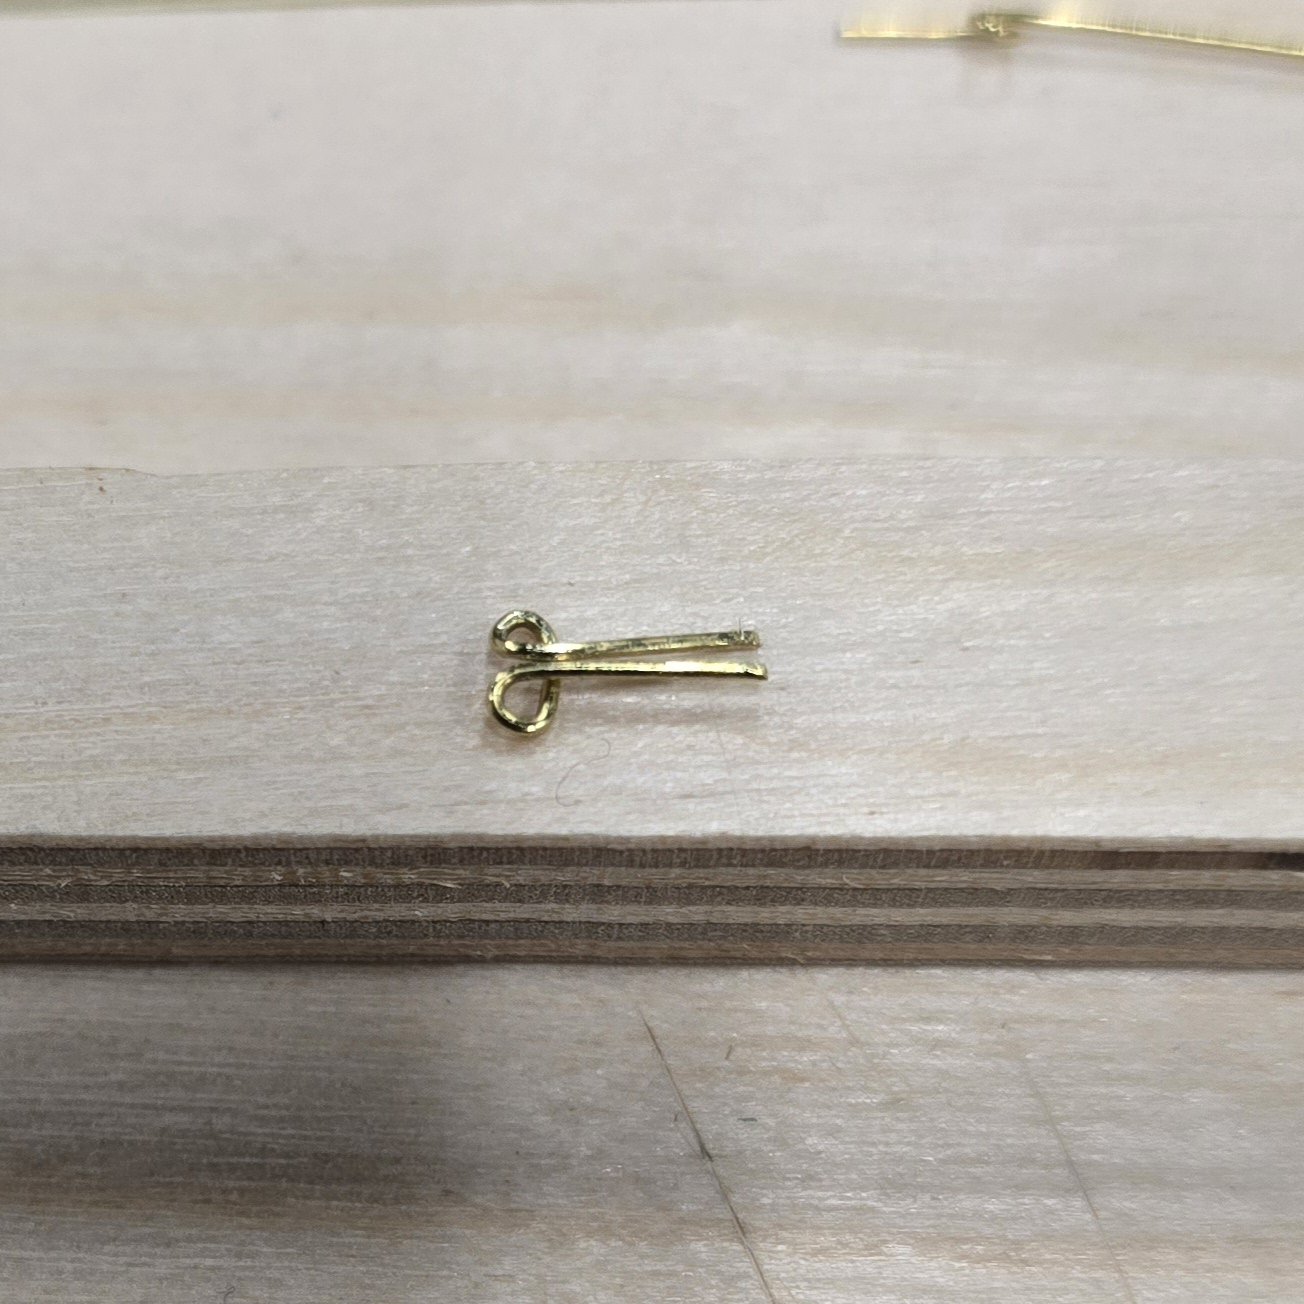
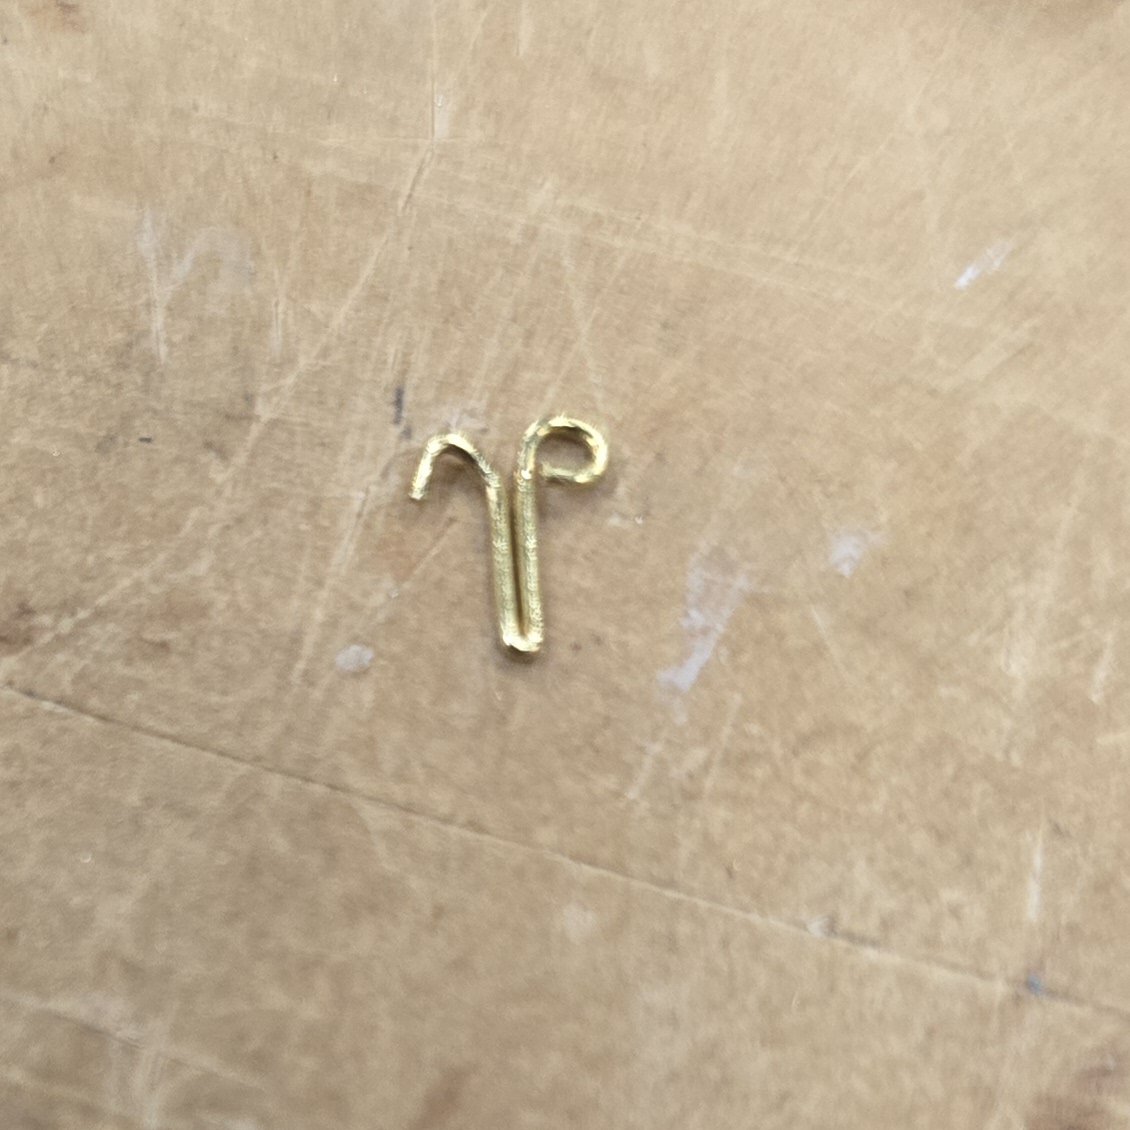
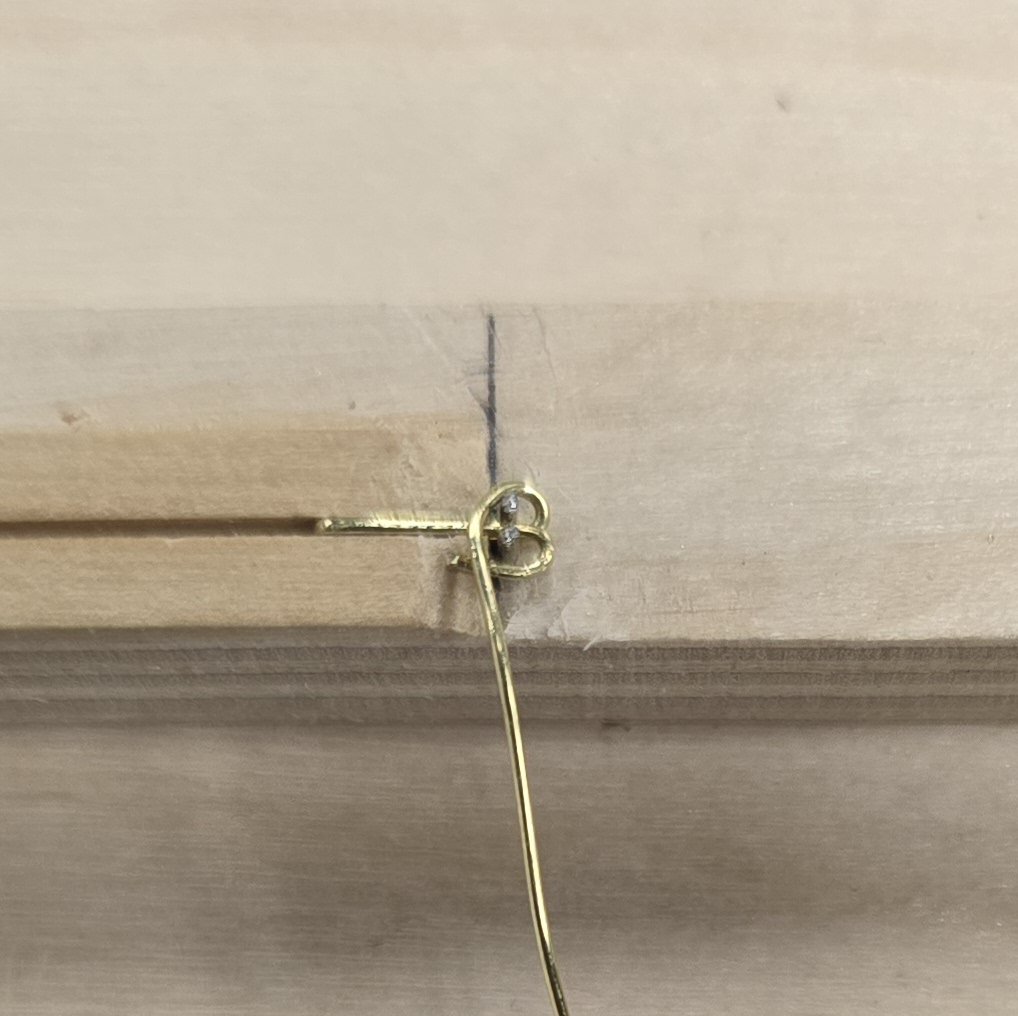
Jon, I don't intend to paint over or otherwise color any brass components. I'm going with the Constructo kit color scheme (see Hipexec build). So, fiddling with solder or covering mistakes with paint won't work for me. As you can see above, Mustafa showed me an easier way to deal with these eye bolts than my method. I lucked out in that a friend gifted me a very small pair of round needle nose pliers that I did not remember I had until today. These pliers will make short work of the hooks I'll need for rigging the carronades as well. Thanks for chiming in, 😎👍
-
USS Constitution by mtbediz - 1:76
Der Alte Rentner replied to mtbediz's topic in - Build logs for subjects built 1751 - 1800
The tool you used in the second photo, is that a hole saw? -
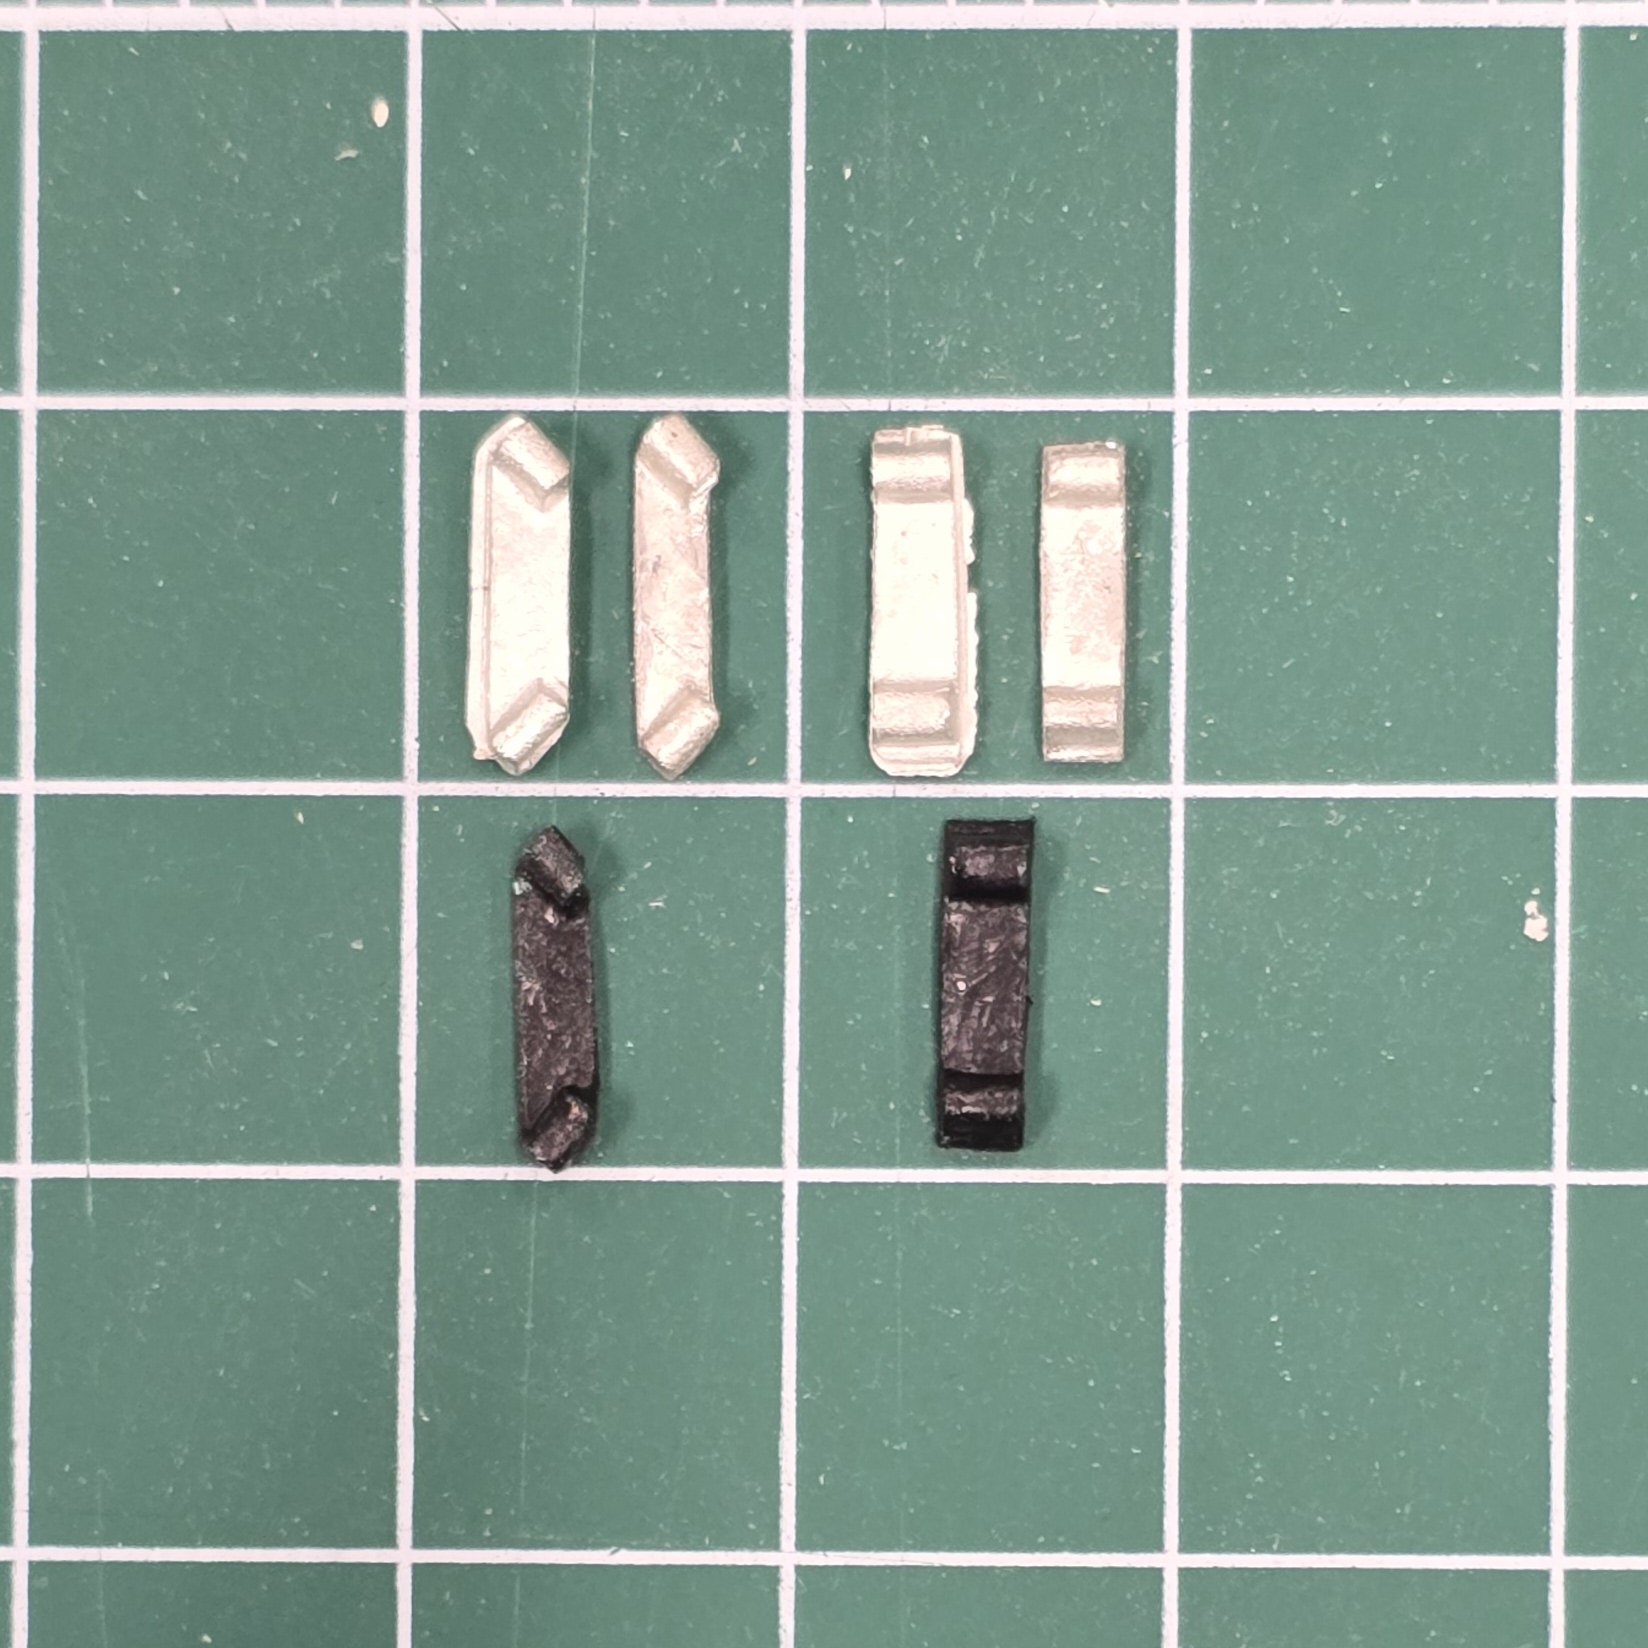
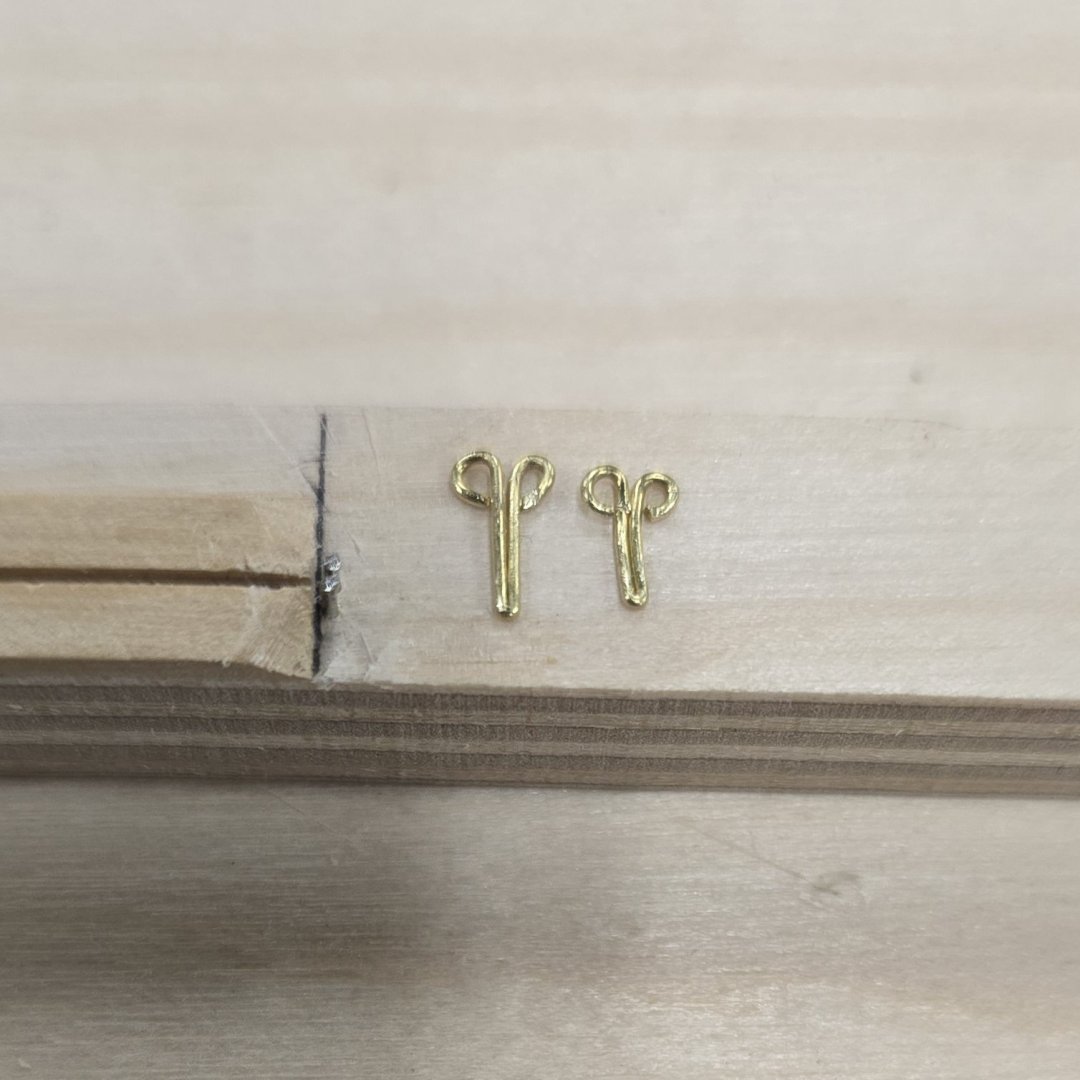
It wasn't until I found a pair of very narrow needle nose pliers that I could use your method. Even after finding a pair, I was afraid the loop would be too large. It turns out that by not completing the loop, then squeezing it closed, that I could get fairly small eye bolts. Thanks for sharing those photos. Your method is a whole lot easier than trying to find a way to clip excess material off the ends of my loops. 😎👍
-
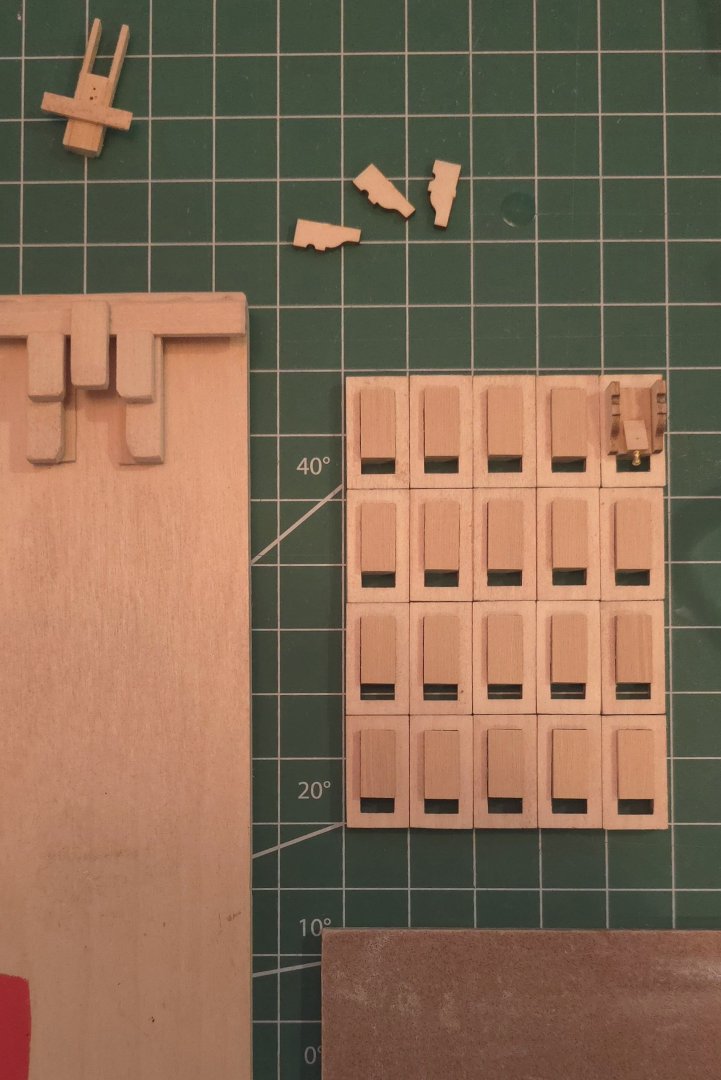
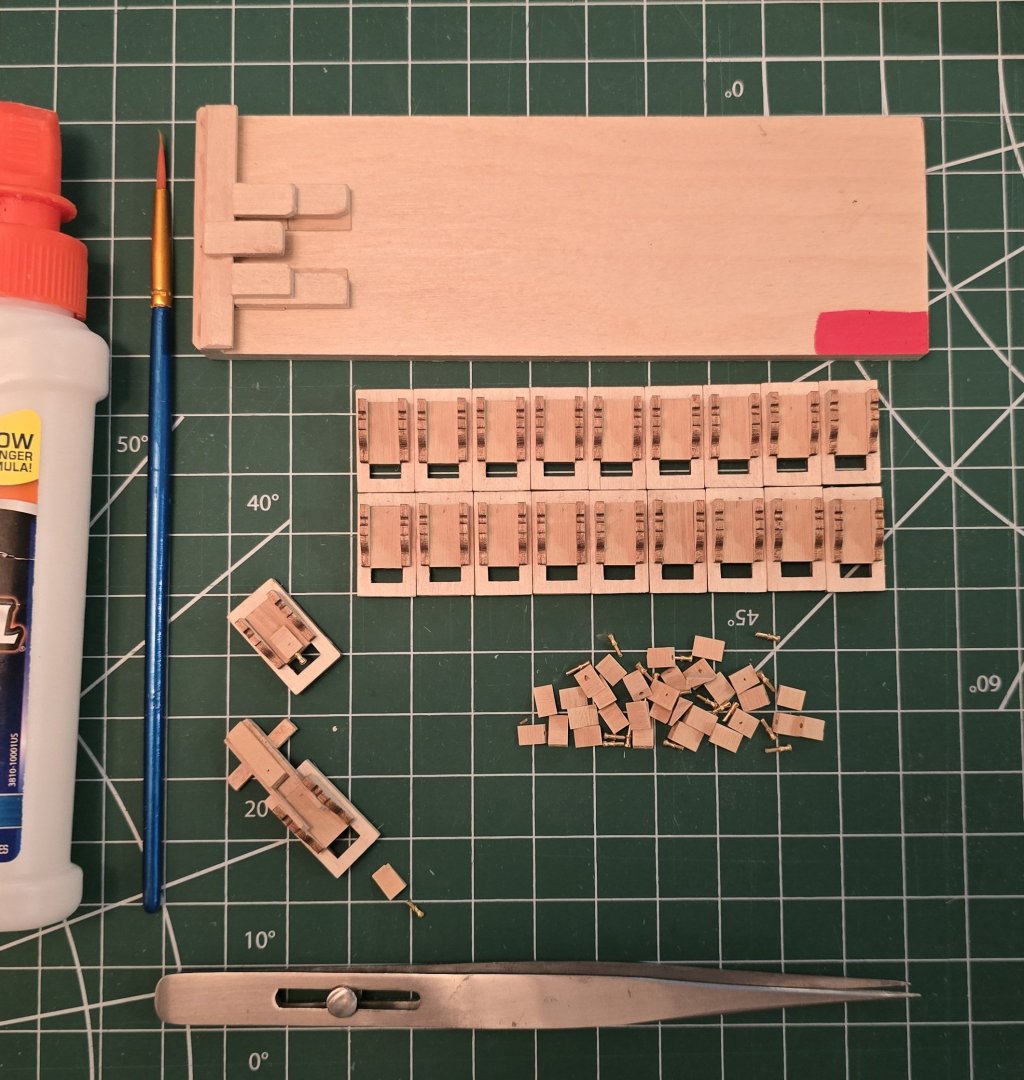
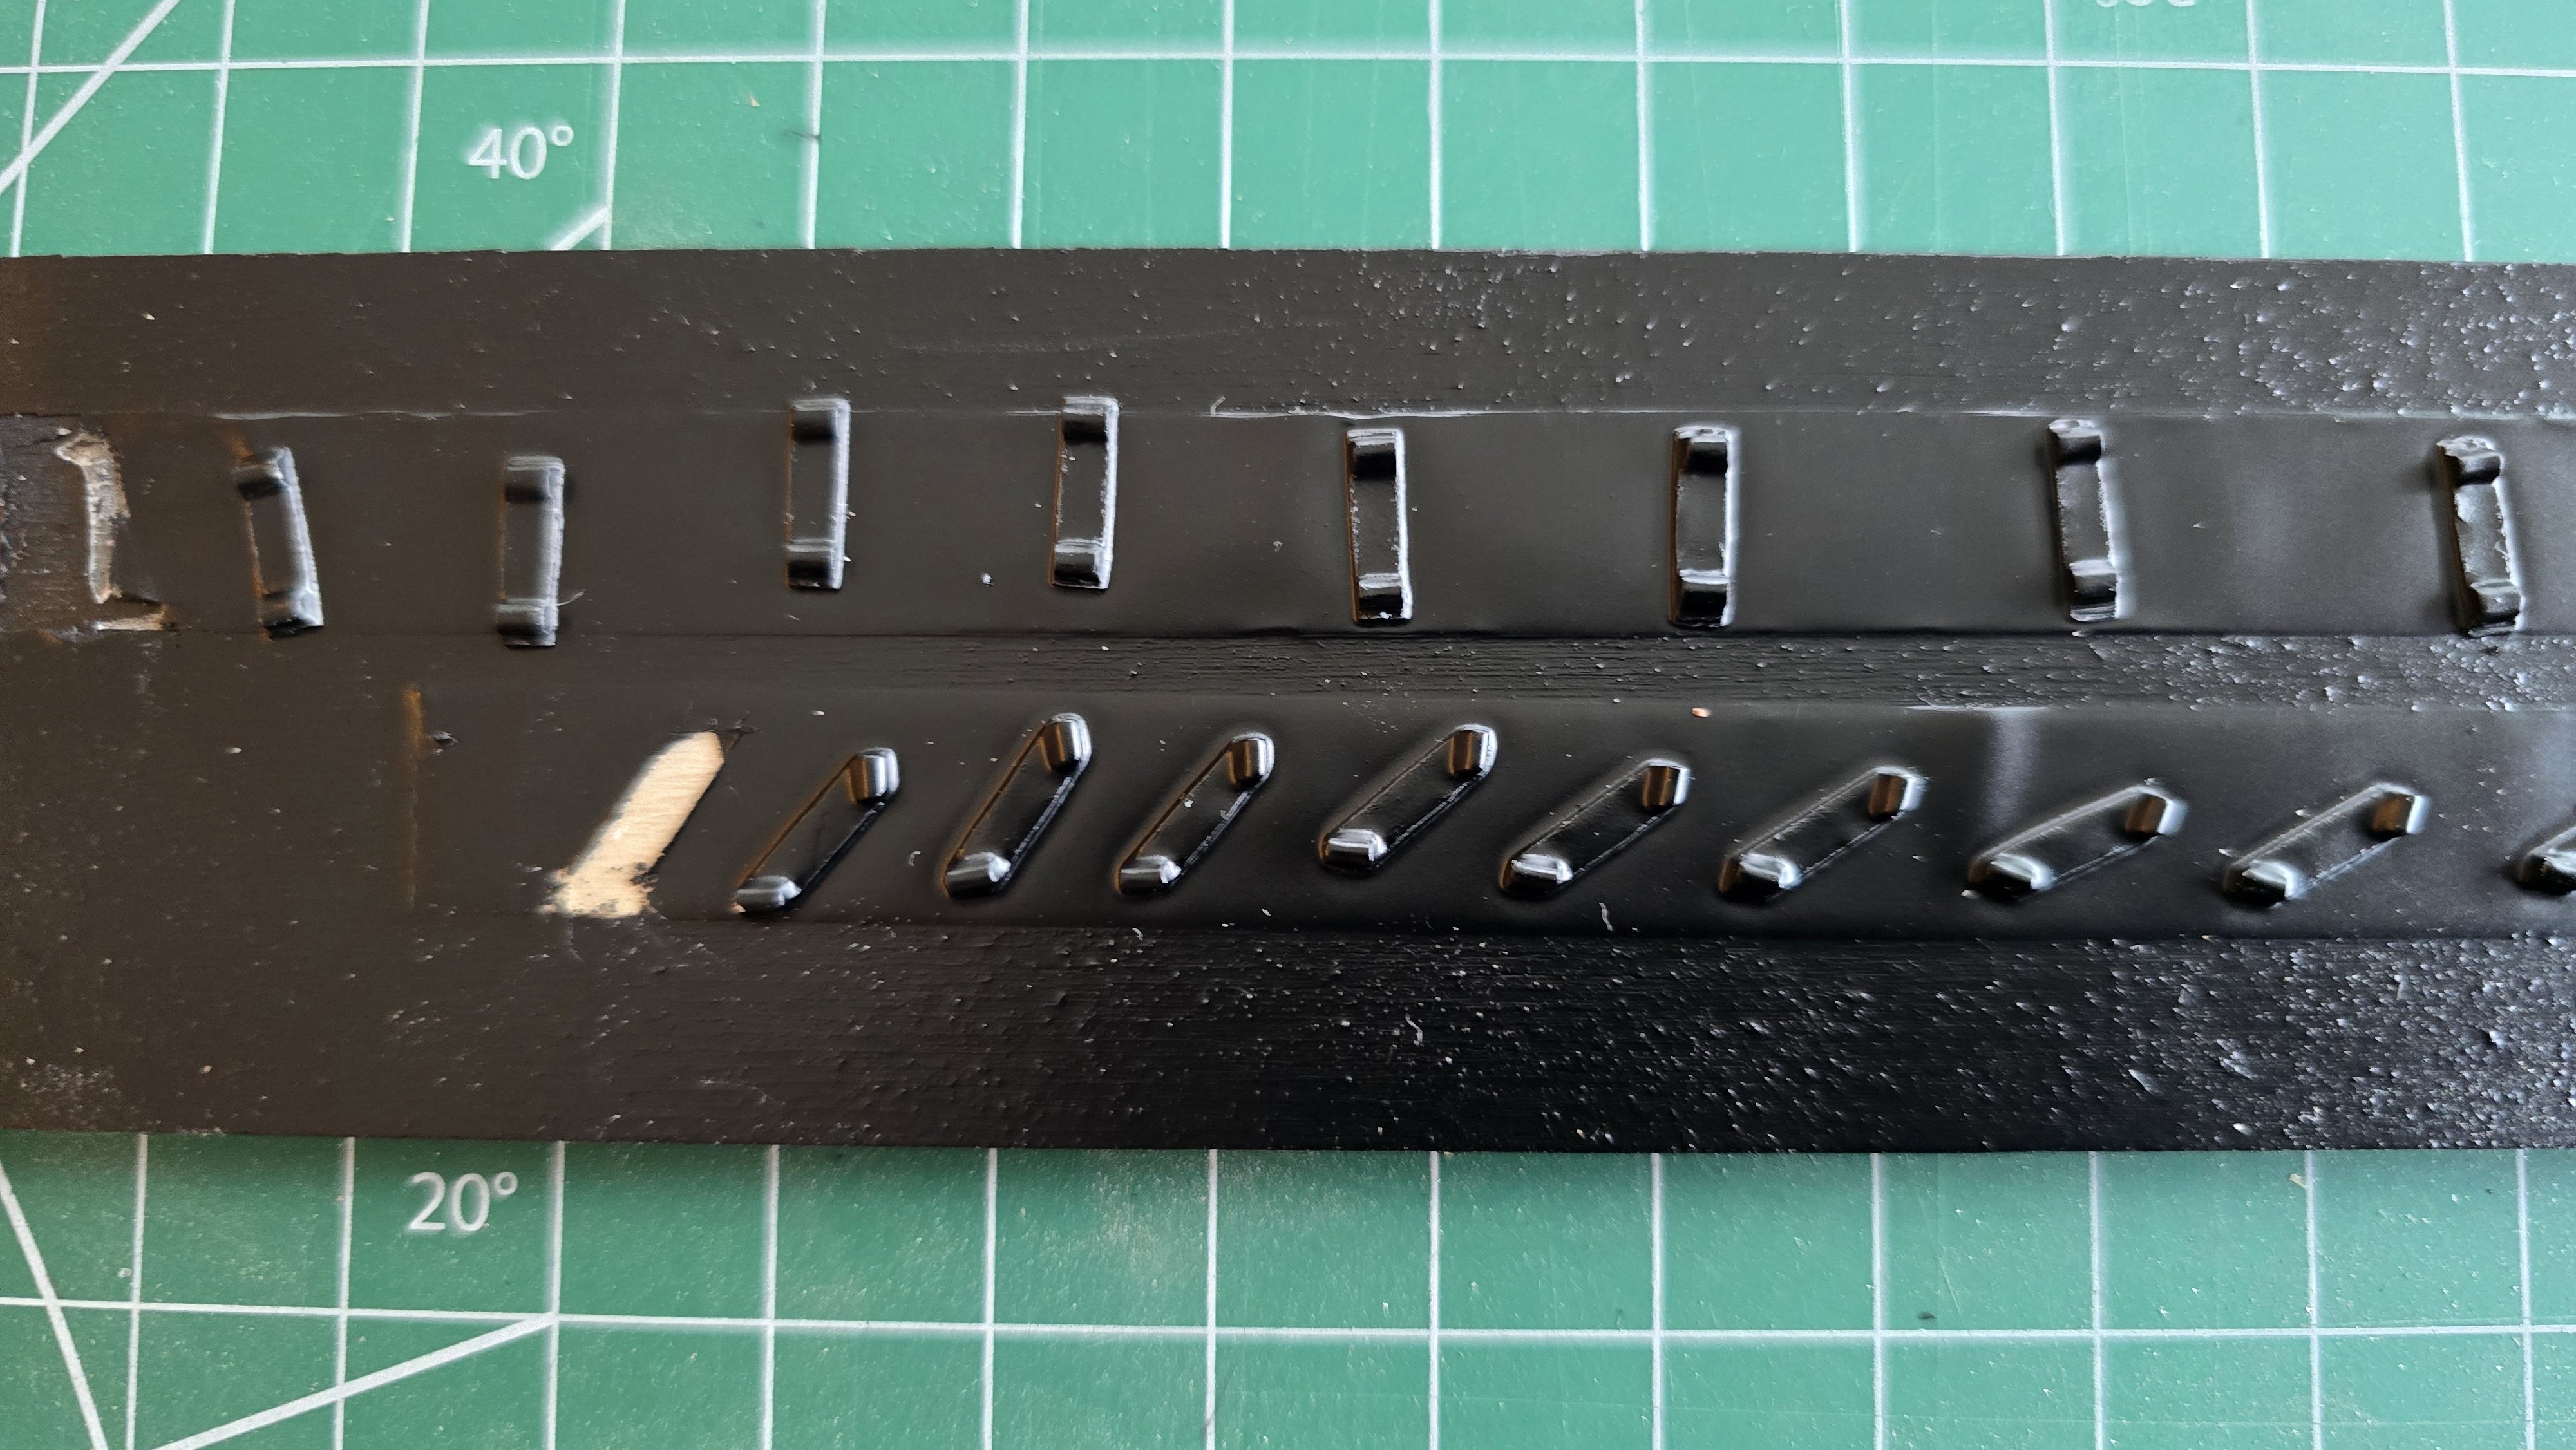
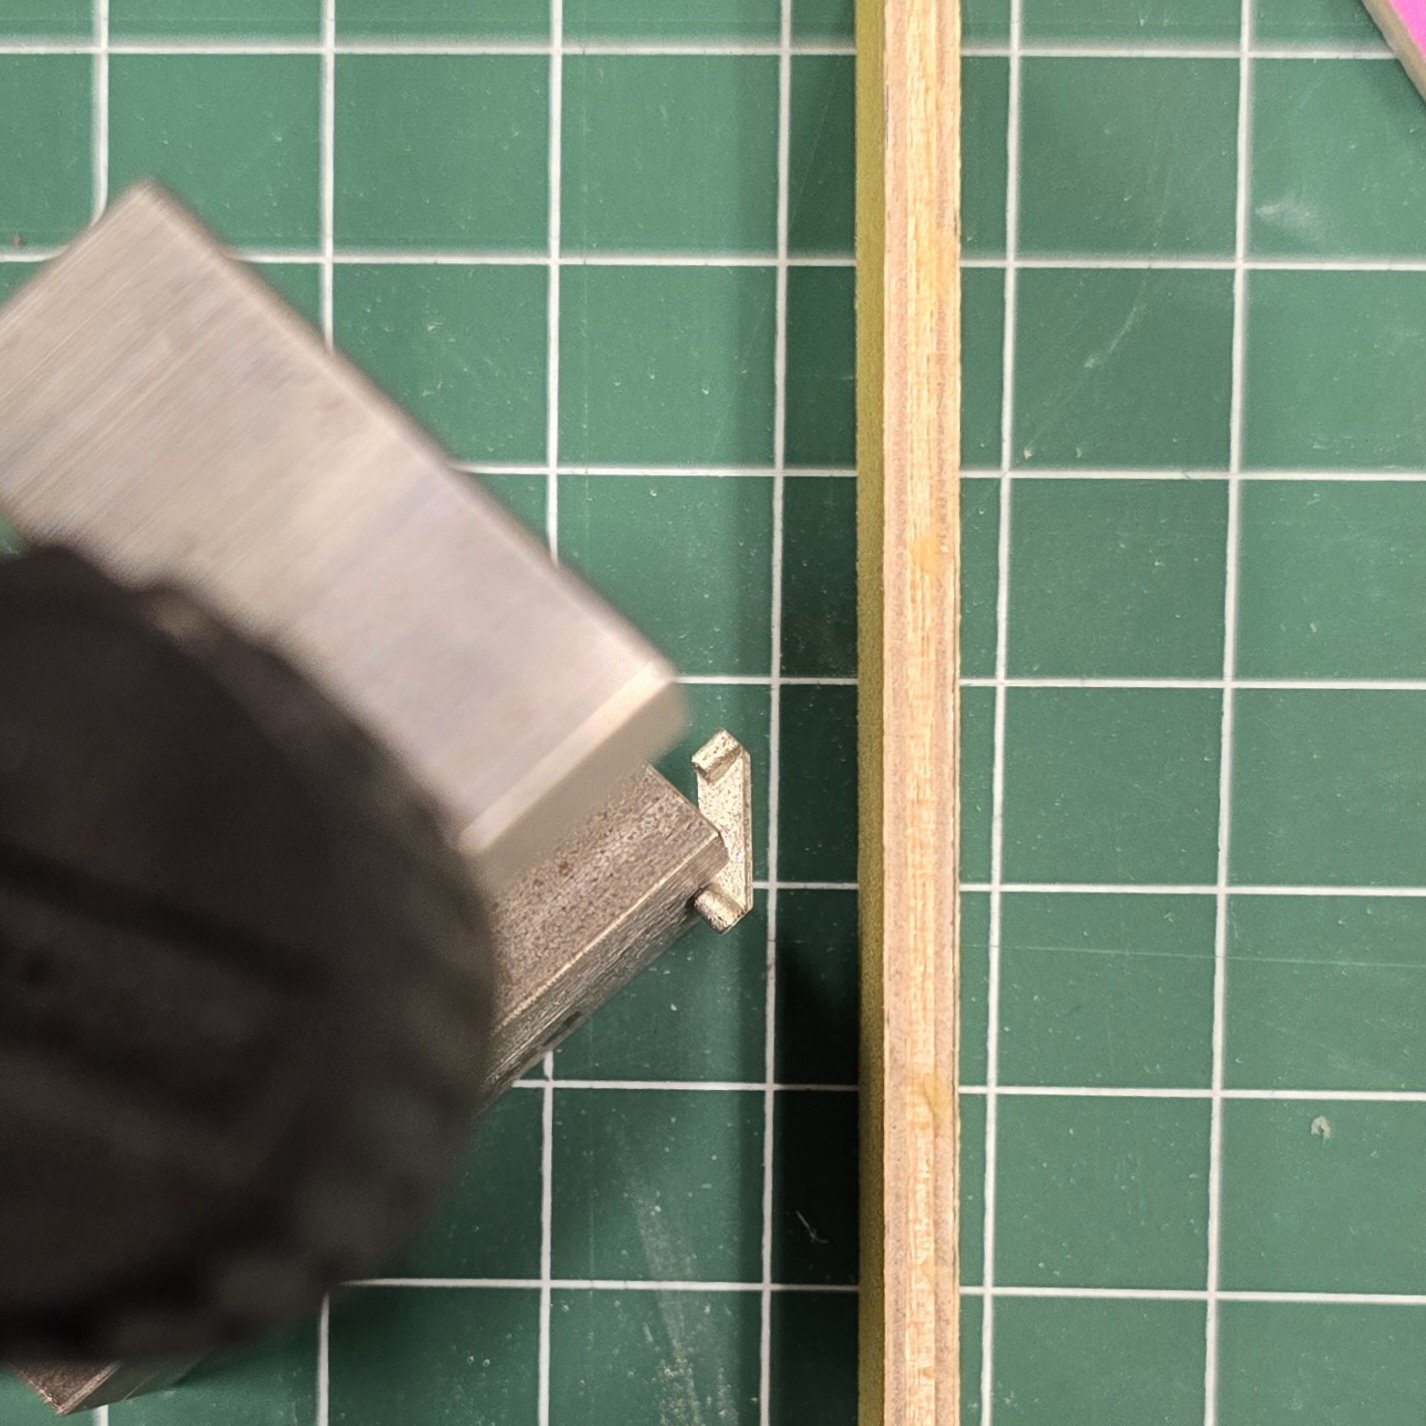
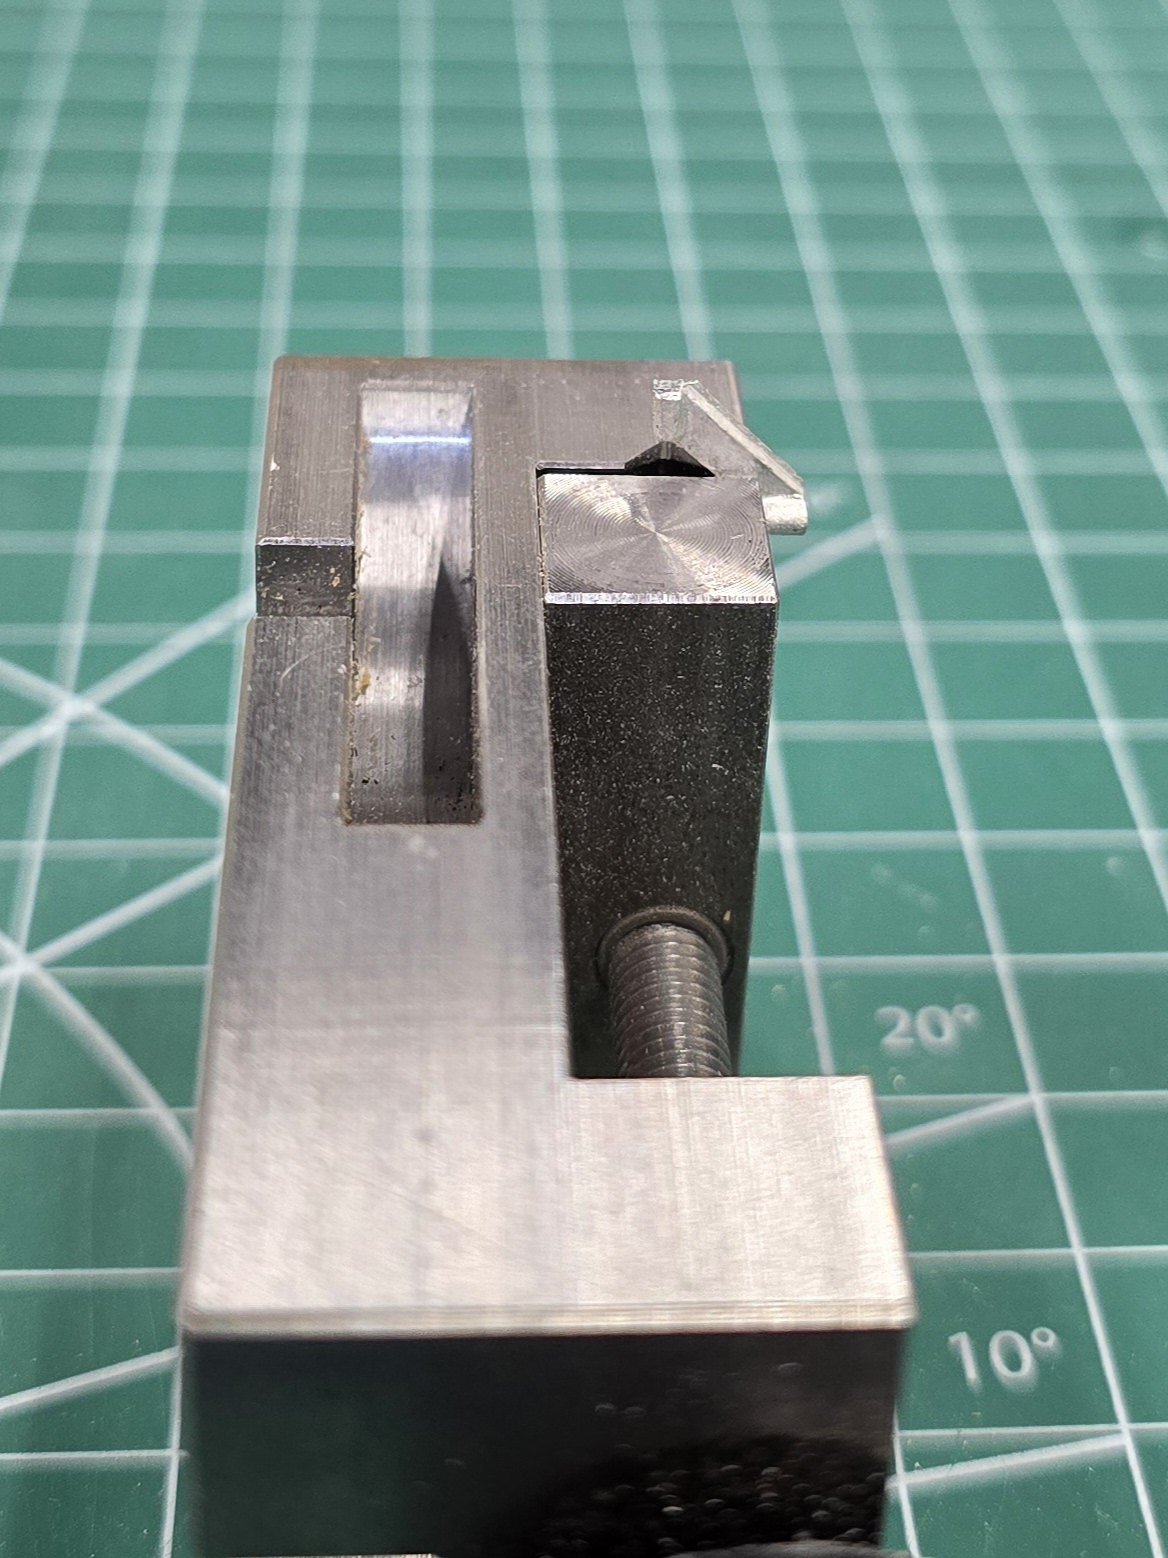
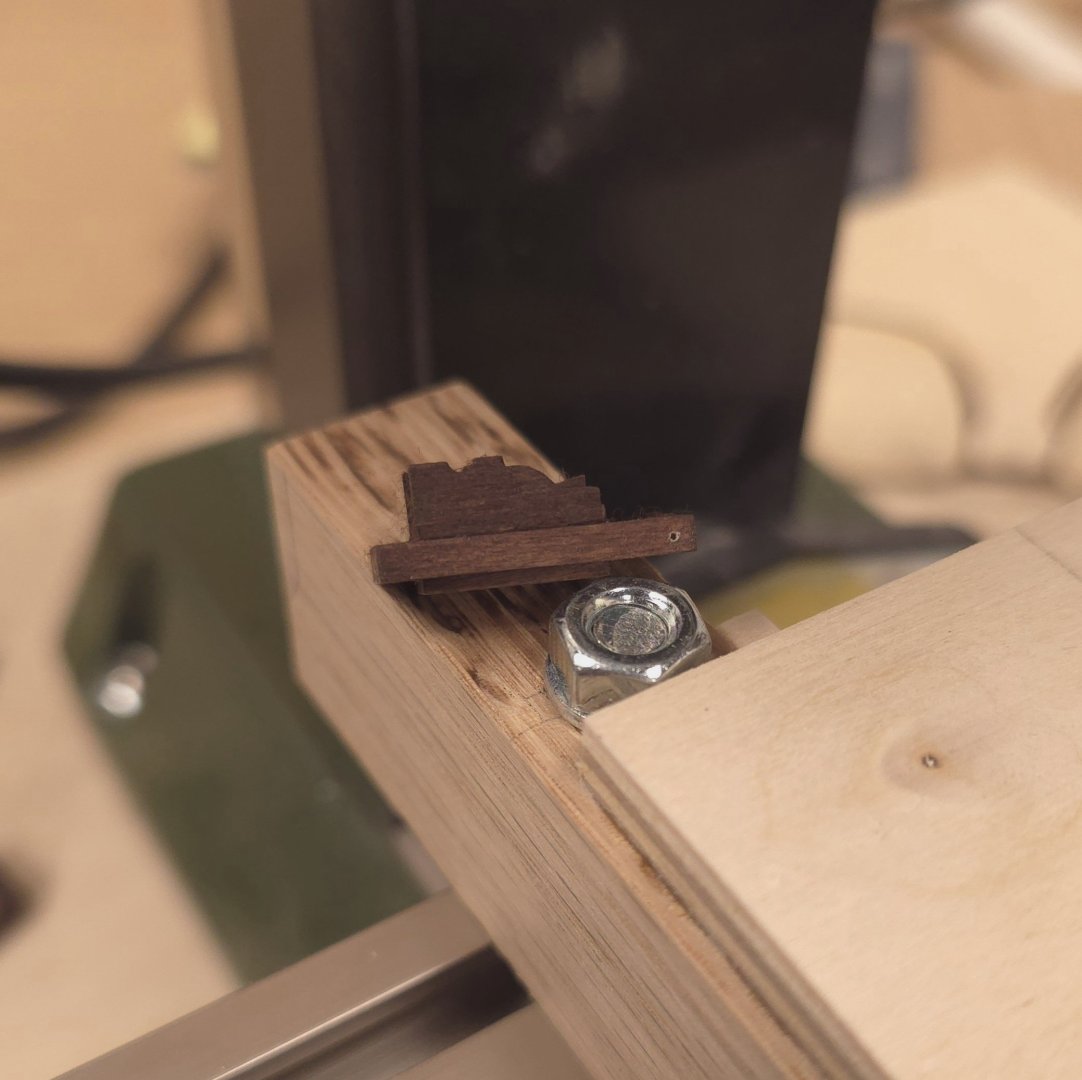
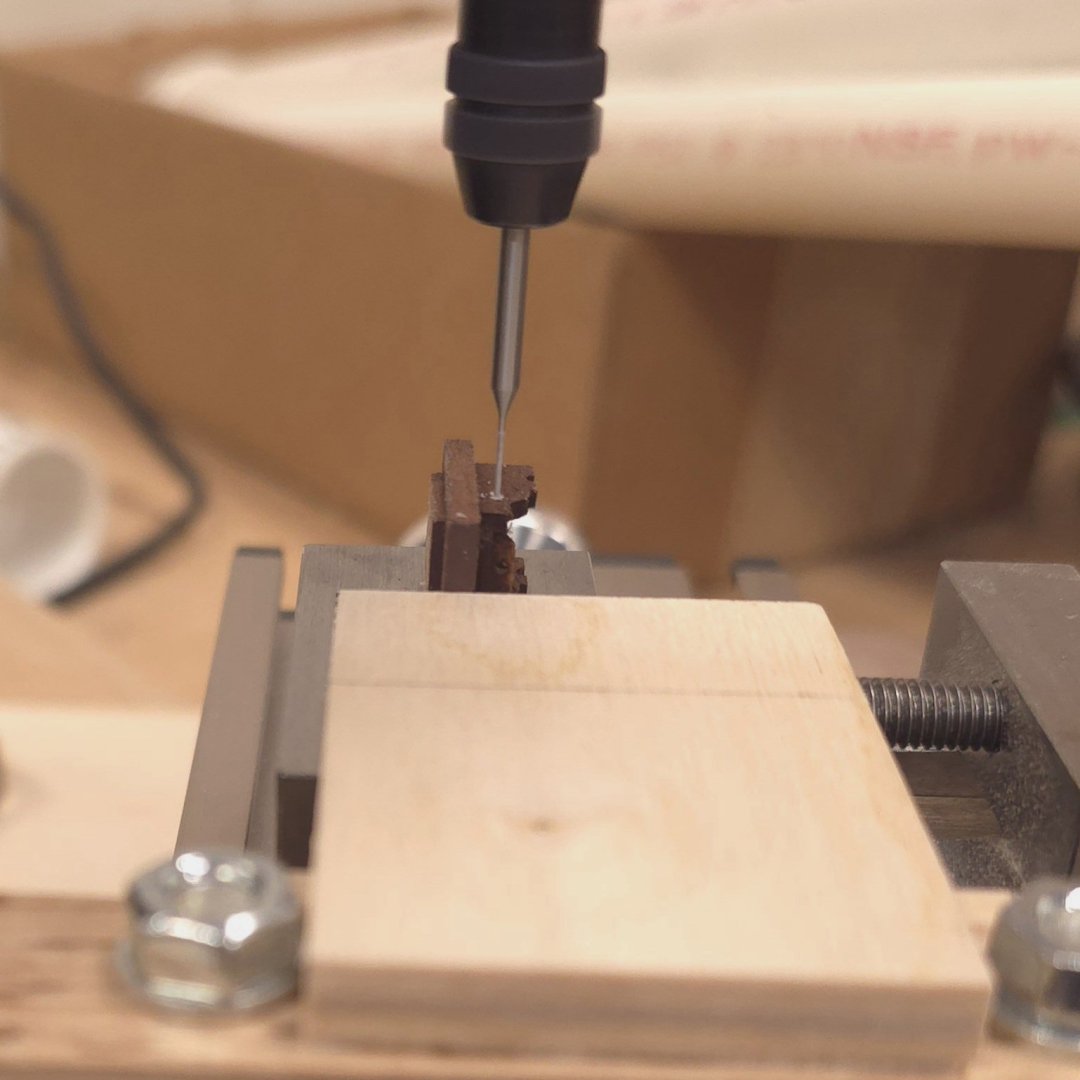
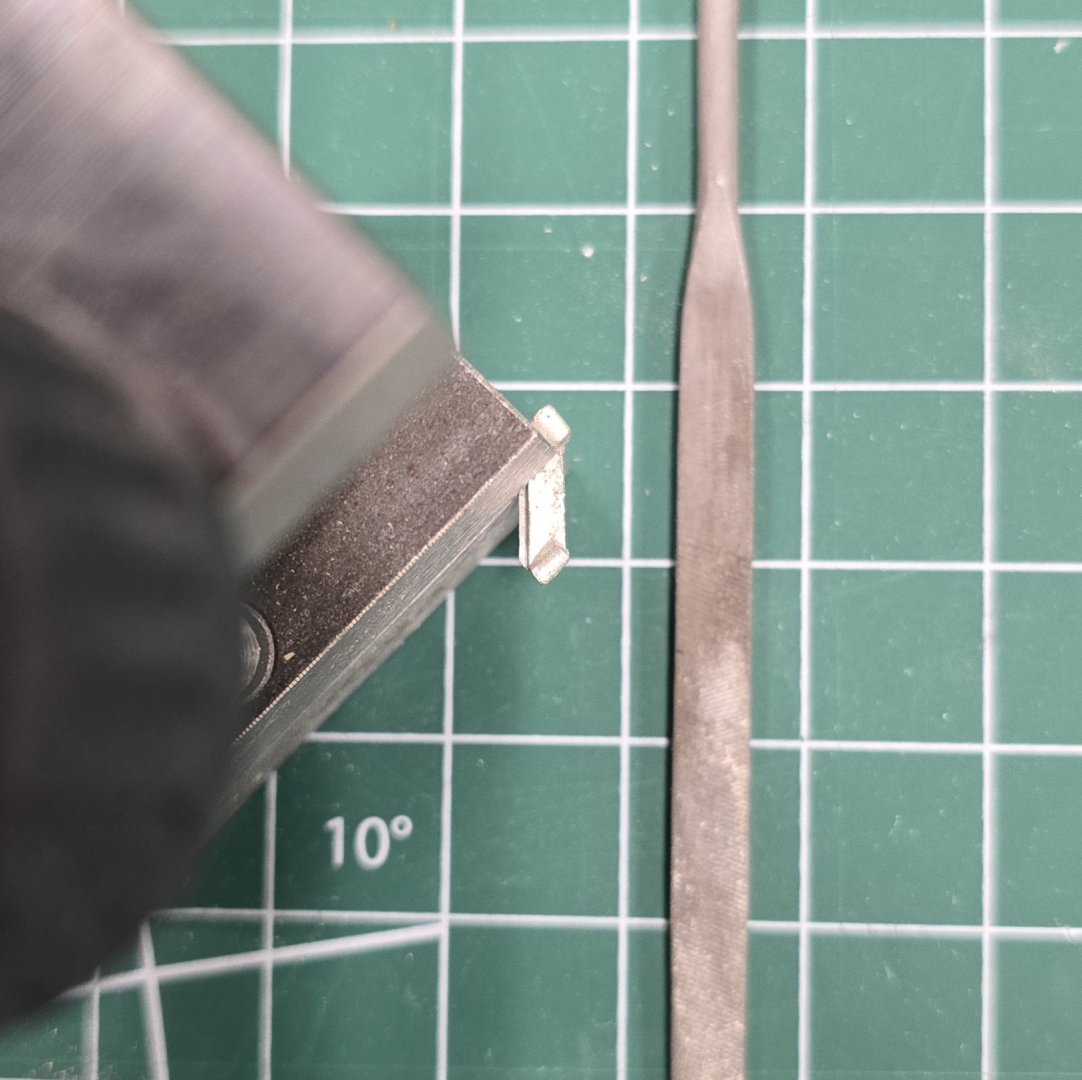
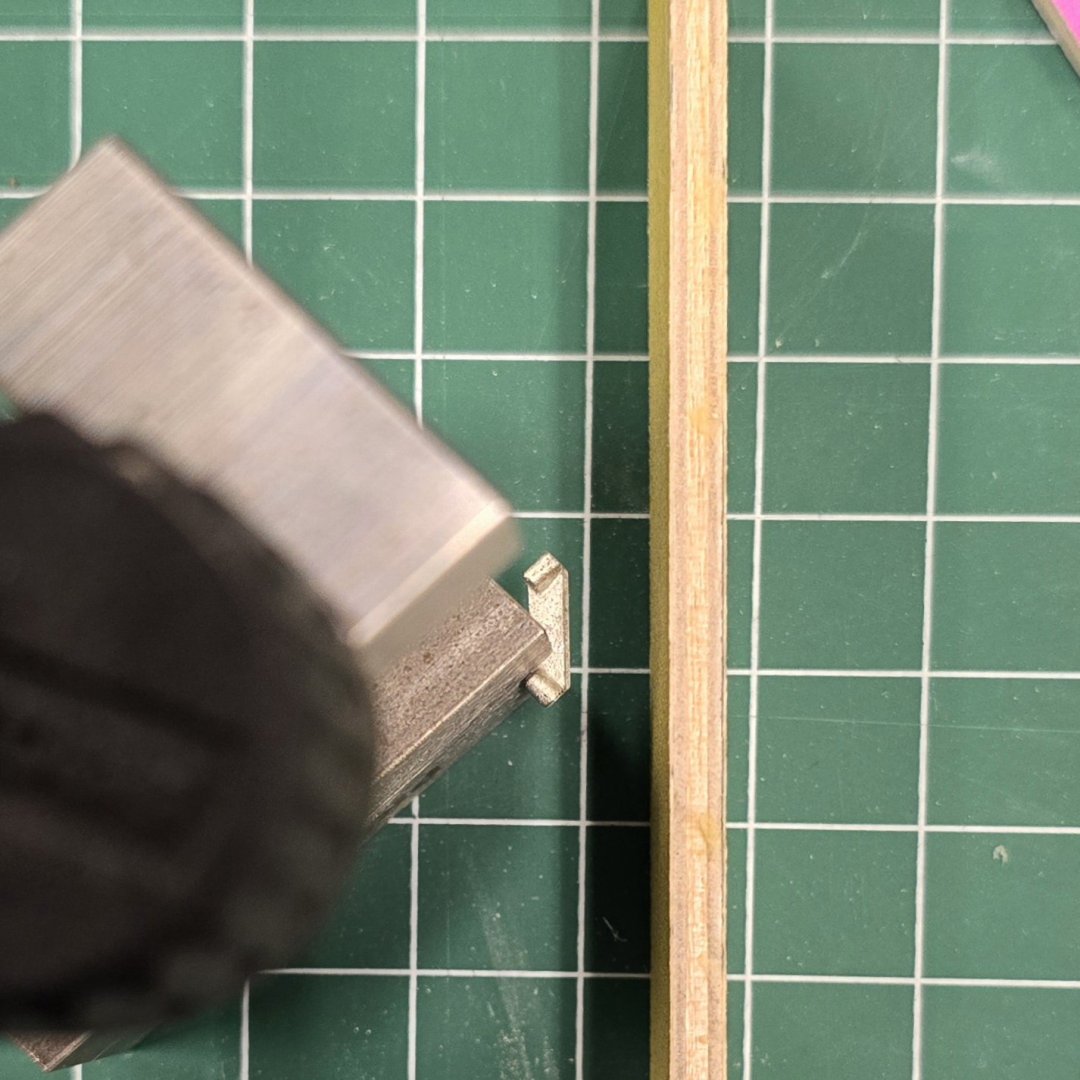
Man-oh-man, is this tedious work. I figured out a way to mimic Mustafa's results. After 4 hours in the shipyard today, strategizing and developing this technique, I'm exhausted. I think it might be easier just to get more of the single eye bolts, bend them slightly and plug them into one hole. The practicum's method of building these out of styrene doesn't seem to be any more practical. I'm going to go home and sit in my sunroom, read a book, and put this on a back burner for now. I thought I was on to something clever with my first experiment. Then realized I'd have a hard time compressing the ends to squeeze them into a single hole. Not only that, but I was not happy with the overlapping straight parts. Doesn't really look like an eye bolt. Second try, without using a jig/ fixture. Close, but no cigar. The solution? Well, sort of.. I have to cut excess brass wire to close the loops on the eyes. A lot of fiddling with tiny stuff using big fingers. Time consuming, but doable. The process is, fold the wire over itself, tuck the fold into the slot in the fixture, twist the wire around the pins at the end of the slot, remove and cut away excess brass, tweak, fiddle, curse, pray, and hopefully produce the above.


-
USS Constitution by mtbediz - 1:76
Der Alte Rentner replied to mtbediz's topic in - Build logs for subjects built 1751 - 1800
This morning I spent a solid hour trying to fabricate a single double eye bolt. I'm ready to start considering using two single eyeballs and just shoving them into a 1 mm hole. I know you've shown the pictures of the finished product above, but can you tell me what tools you used to make your double eye bolts?
-
As confirmed by Marcus and Jon, I'm going with bridle port.
-
Are you referring to the red painted port cover all the way forward? Or the natural wood finished one just aft of that?
-
USS Constitution by mtbediz - 1:76
Der Alte Rentner replied to mtbediz's topic in - Build logs for subjects built 1751 - 1800
While zooming in really closely to examine the junctions of the canopies, I took another look at your carronades and noticed the unrigged pair of eyebolts. I'm happy to see the example and fully intend to follow in your footstep, when I get that far. -
I do indeed wish you all the luck in the world. Having just noticed for the first time on over a year the one repair for a misplaced gunport on the spar deck, I can offer that it does bother my perfectionist leanings. On the other hand, I can live with the bad bones.. What was your reference point for locating your gunports? The MS kit plans?
-
USS Constitution by mtbediz - 1:76
Der Alte Rentner replied to mtbediz's topic in - Build logs for subjects built 1751 - 1800
Ah! The dreaded canopies.. Looking forward to seeing the final product. I assume you'll be filing away excess solder and then painting them brass? -
USS Constitution by mtbediz - 1:76
Der Alte Rentner replied to mtbediz's topic in - Build logs for subjects built 1751 - 1800
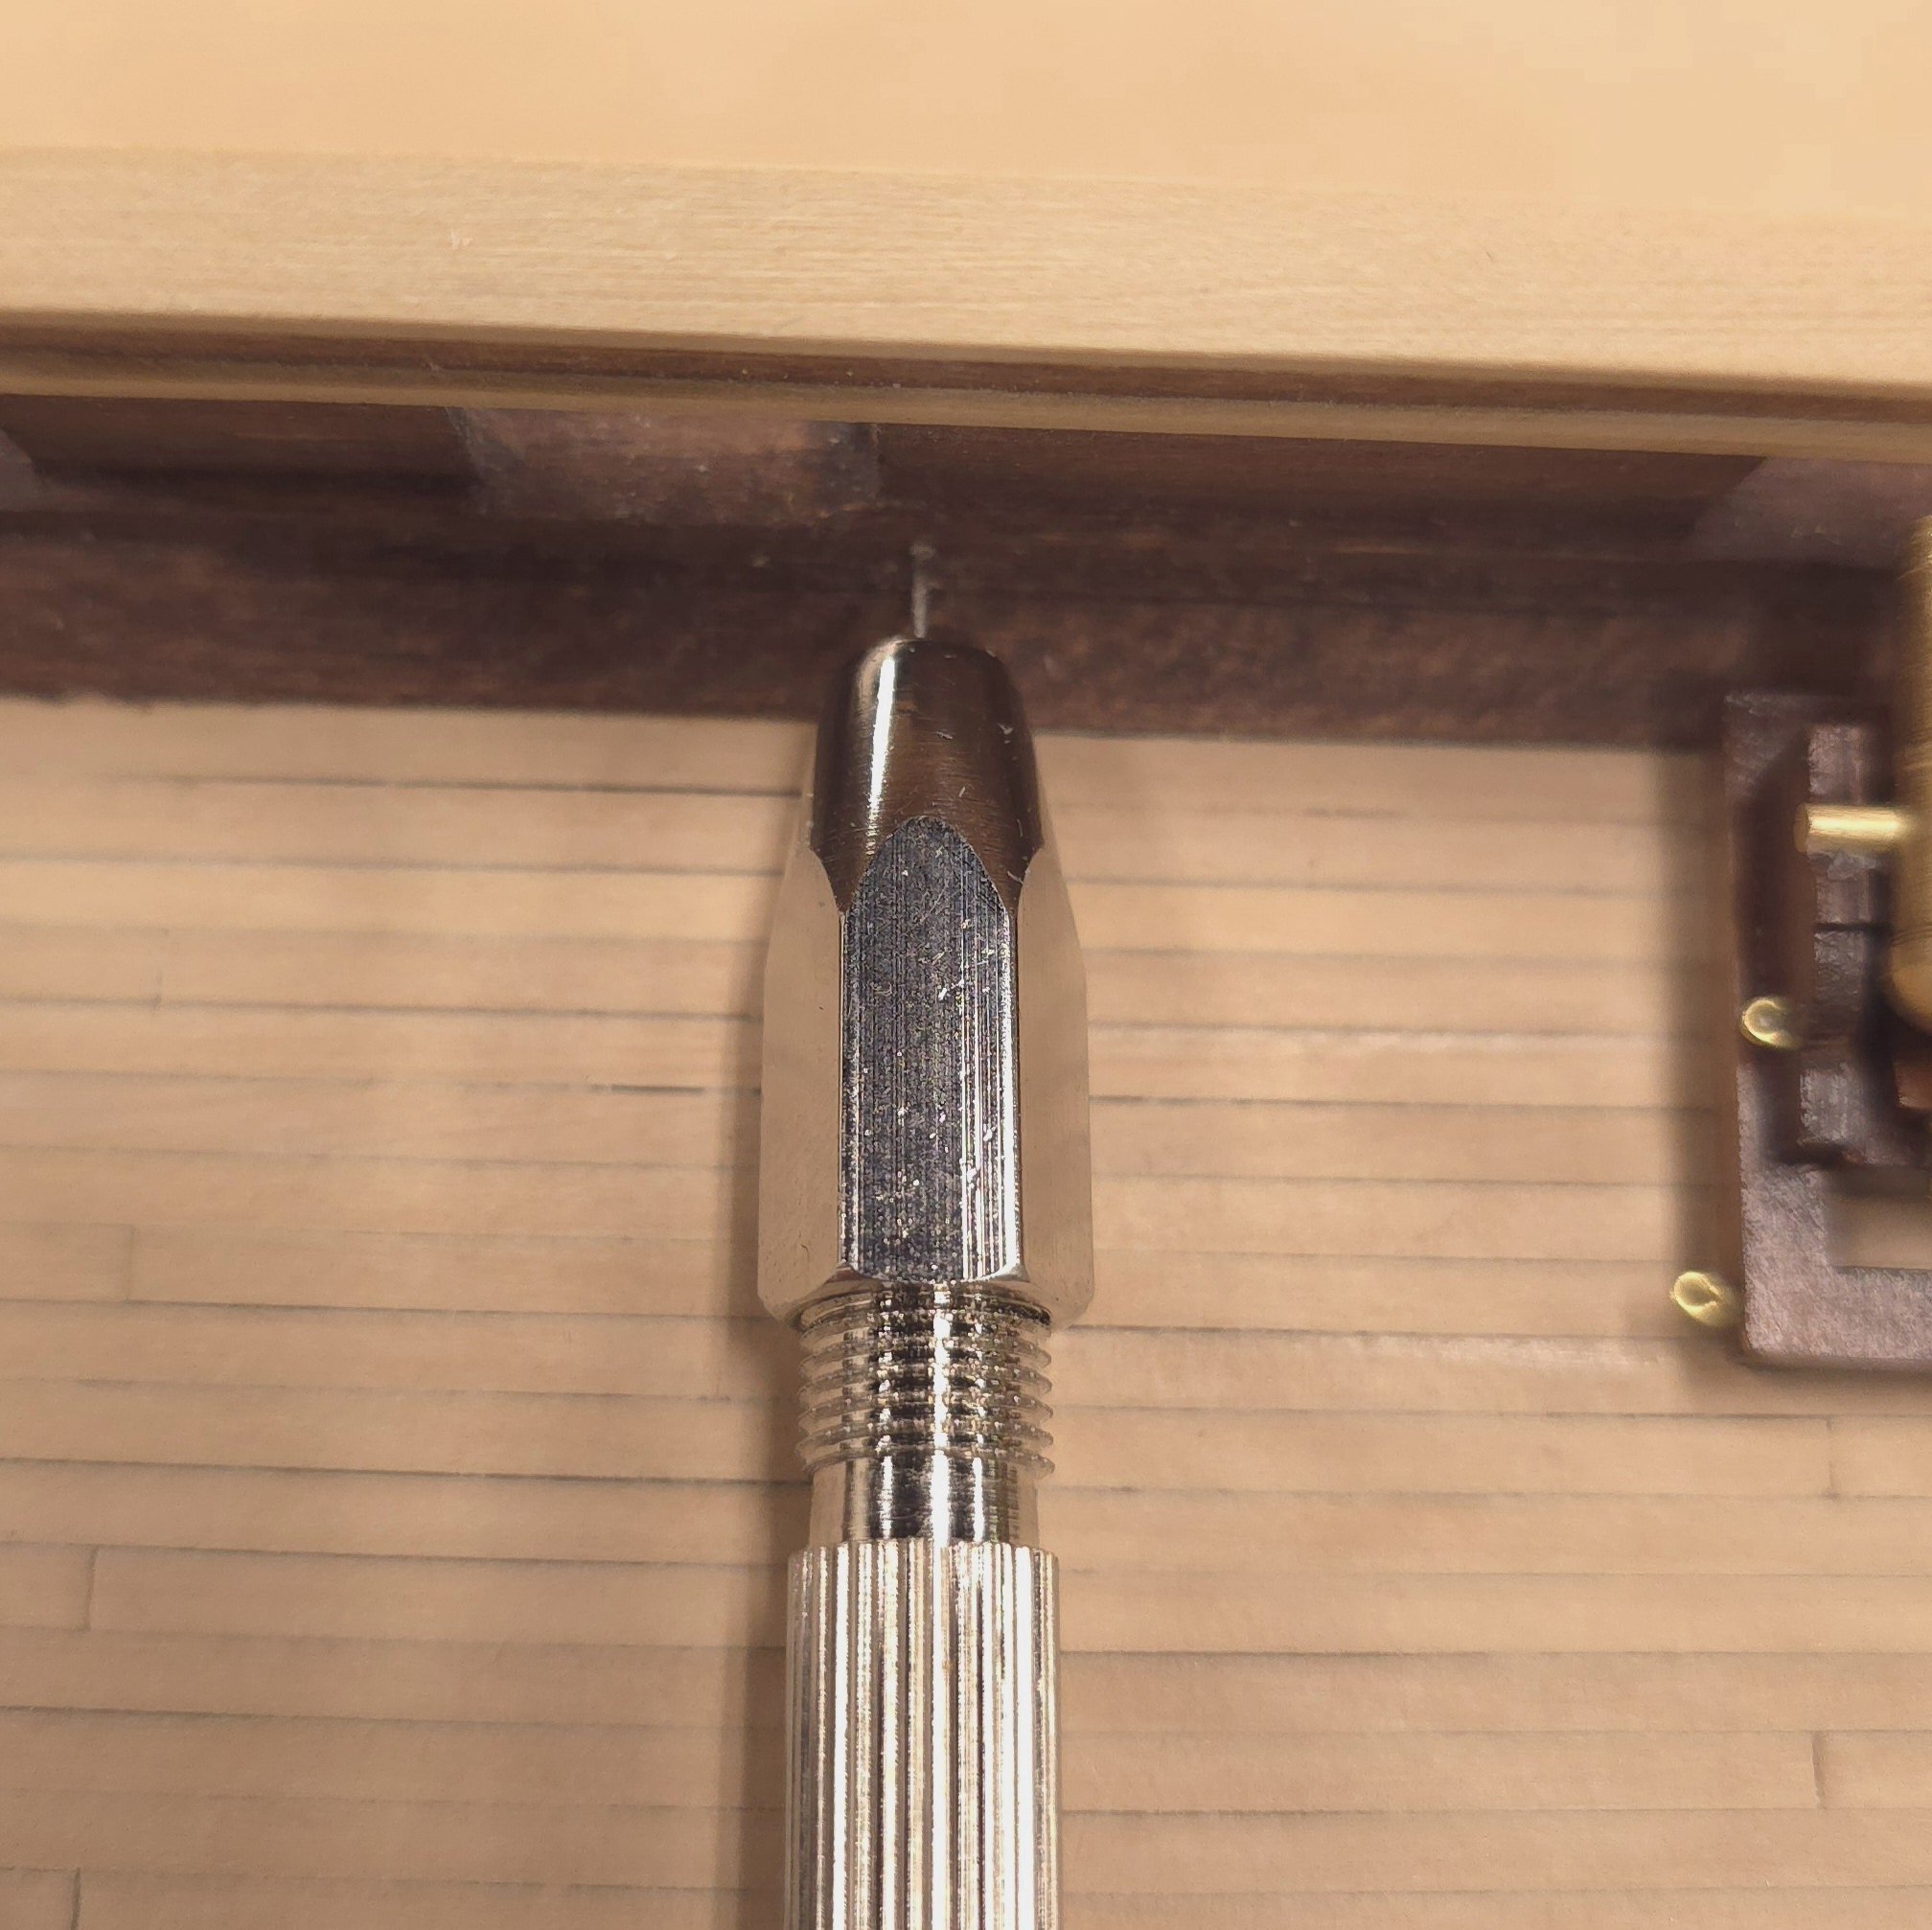
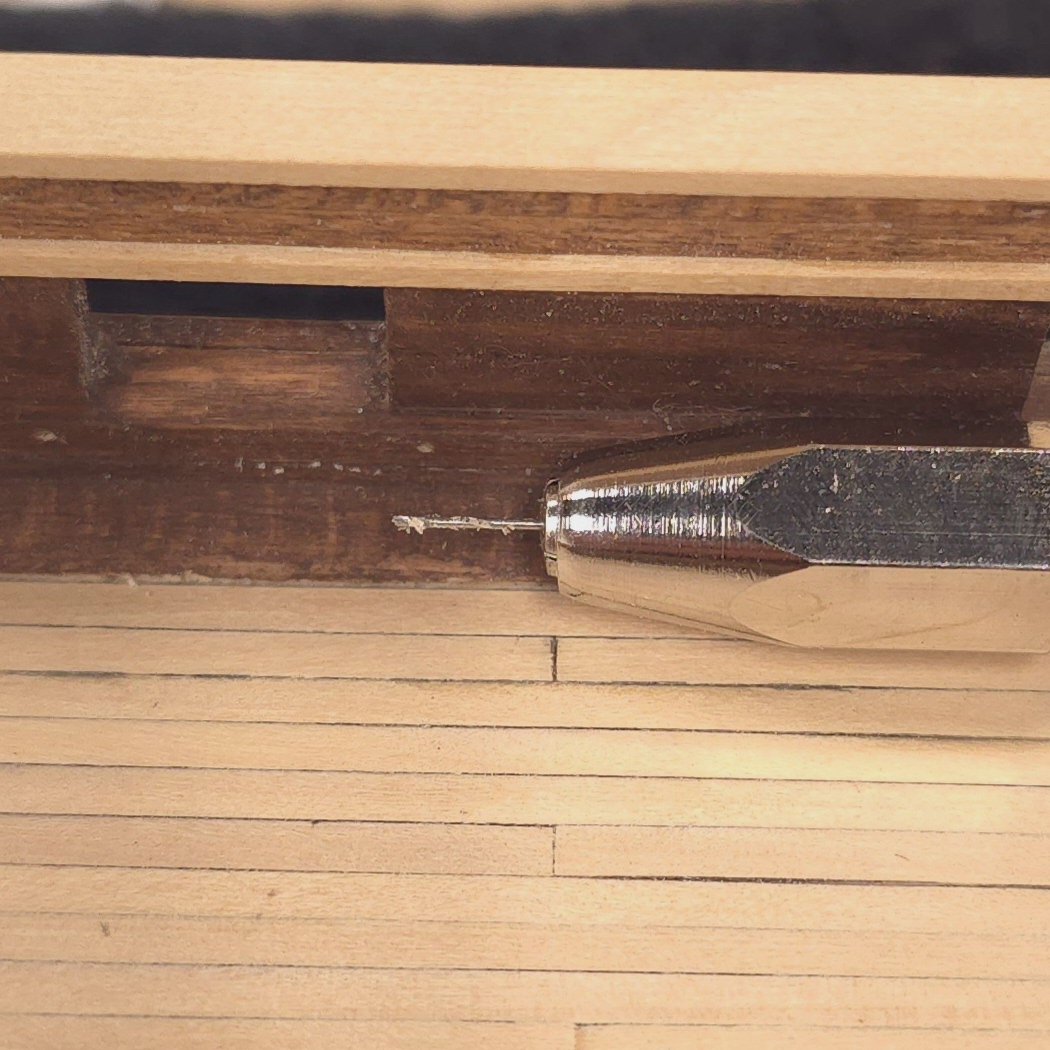
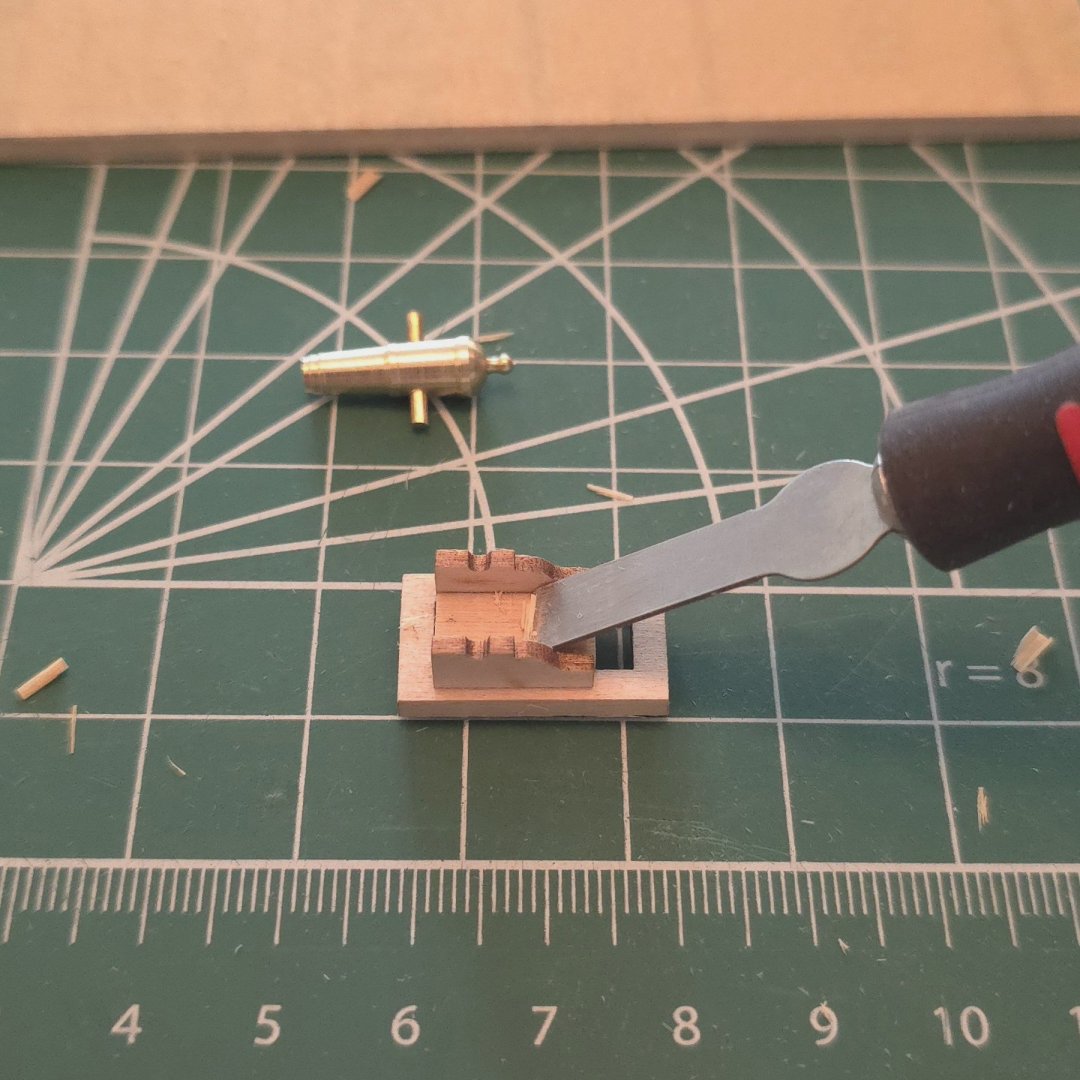
I assume you used a 1 mm drill for mounting these double eye bolts into the bulwarks?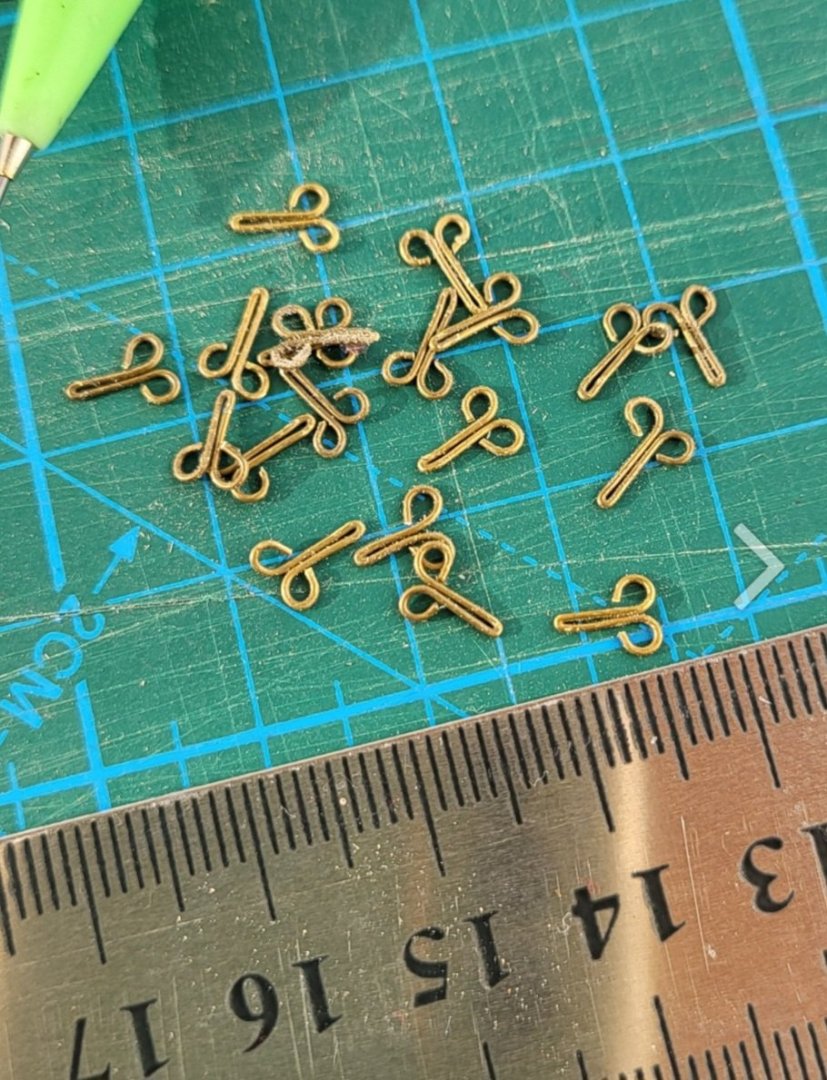
-
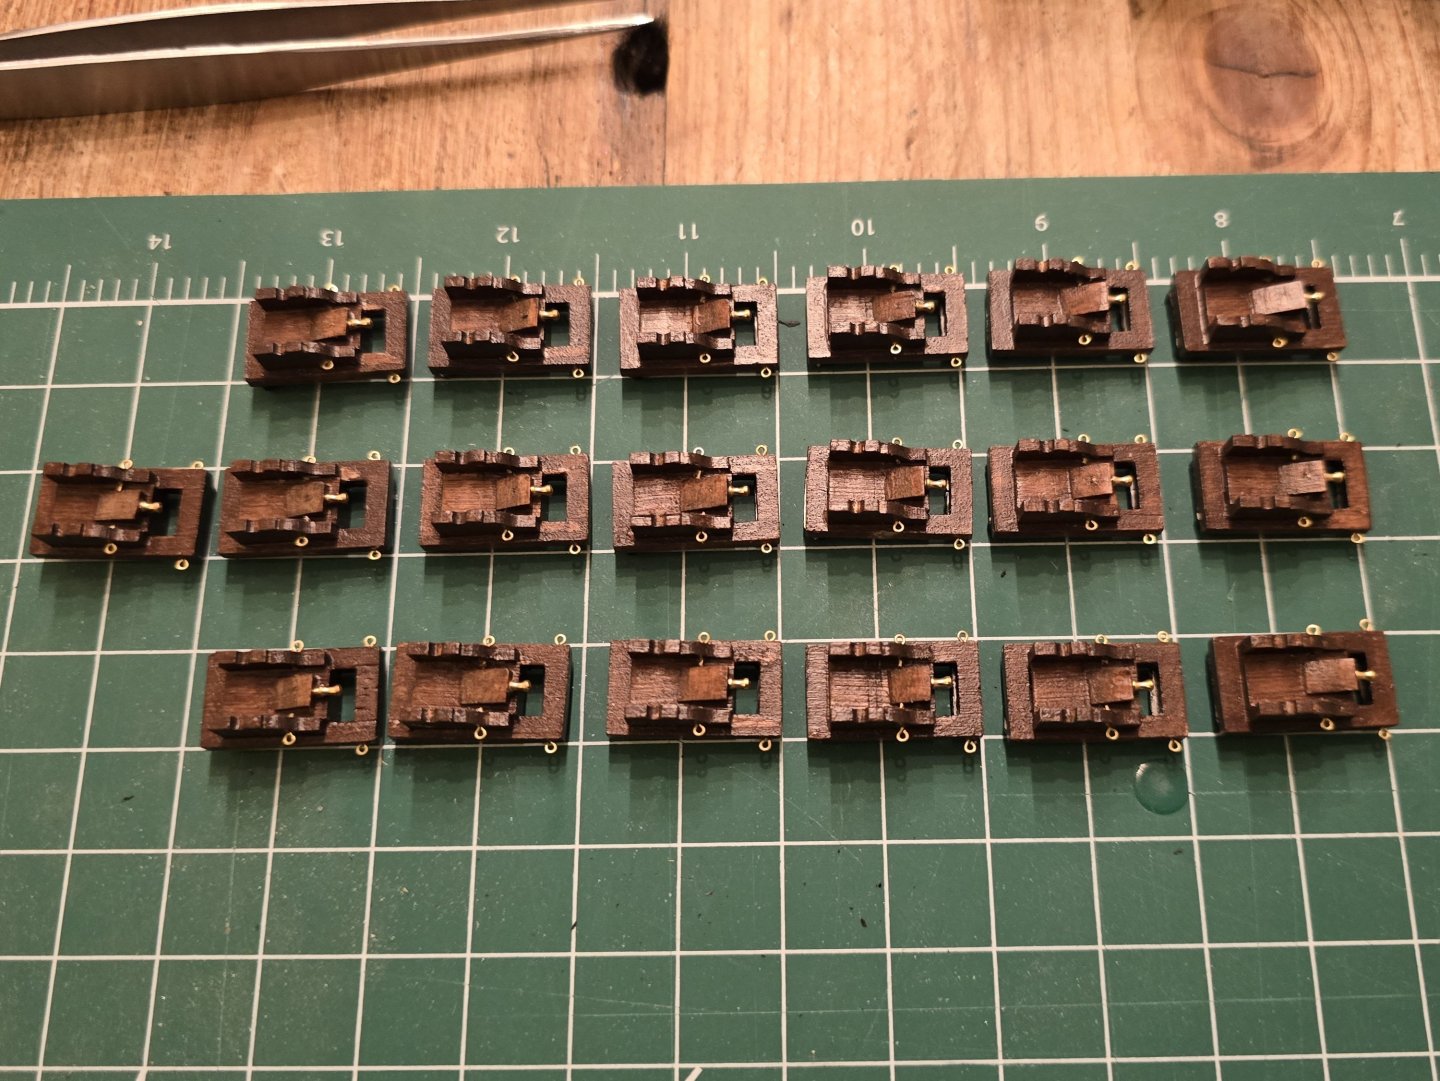
44 holes drilled by hand, which wasn't easy on the arthritic fingers. A belated thank you to Mustafa for sharing the tecnique..

-
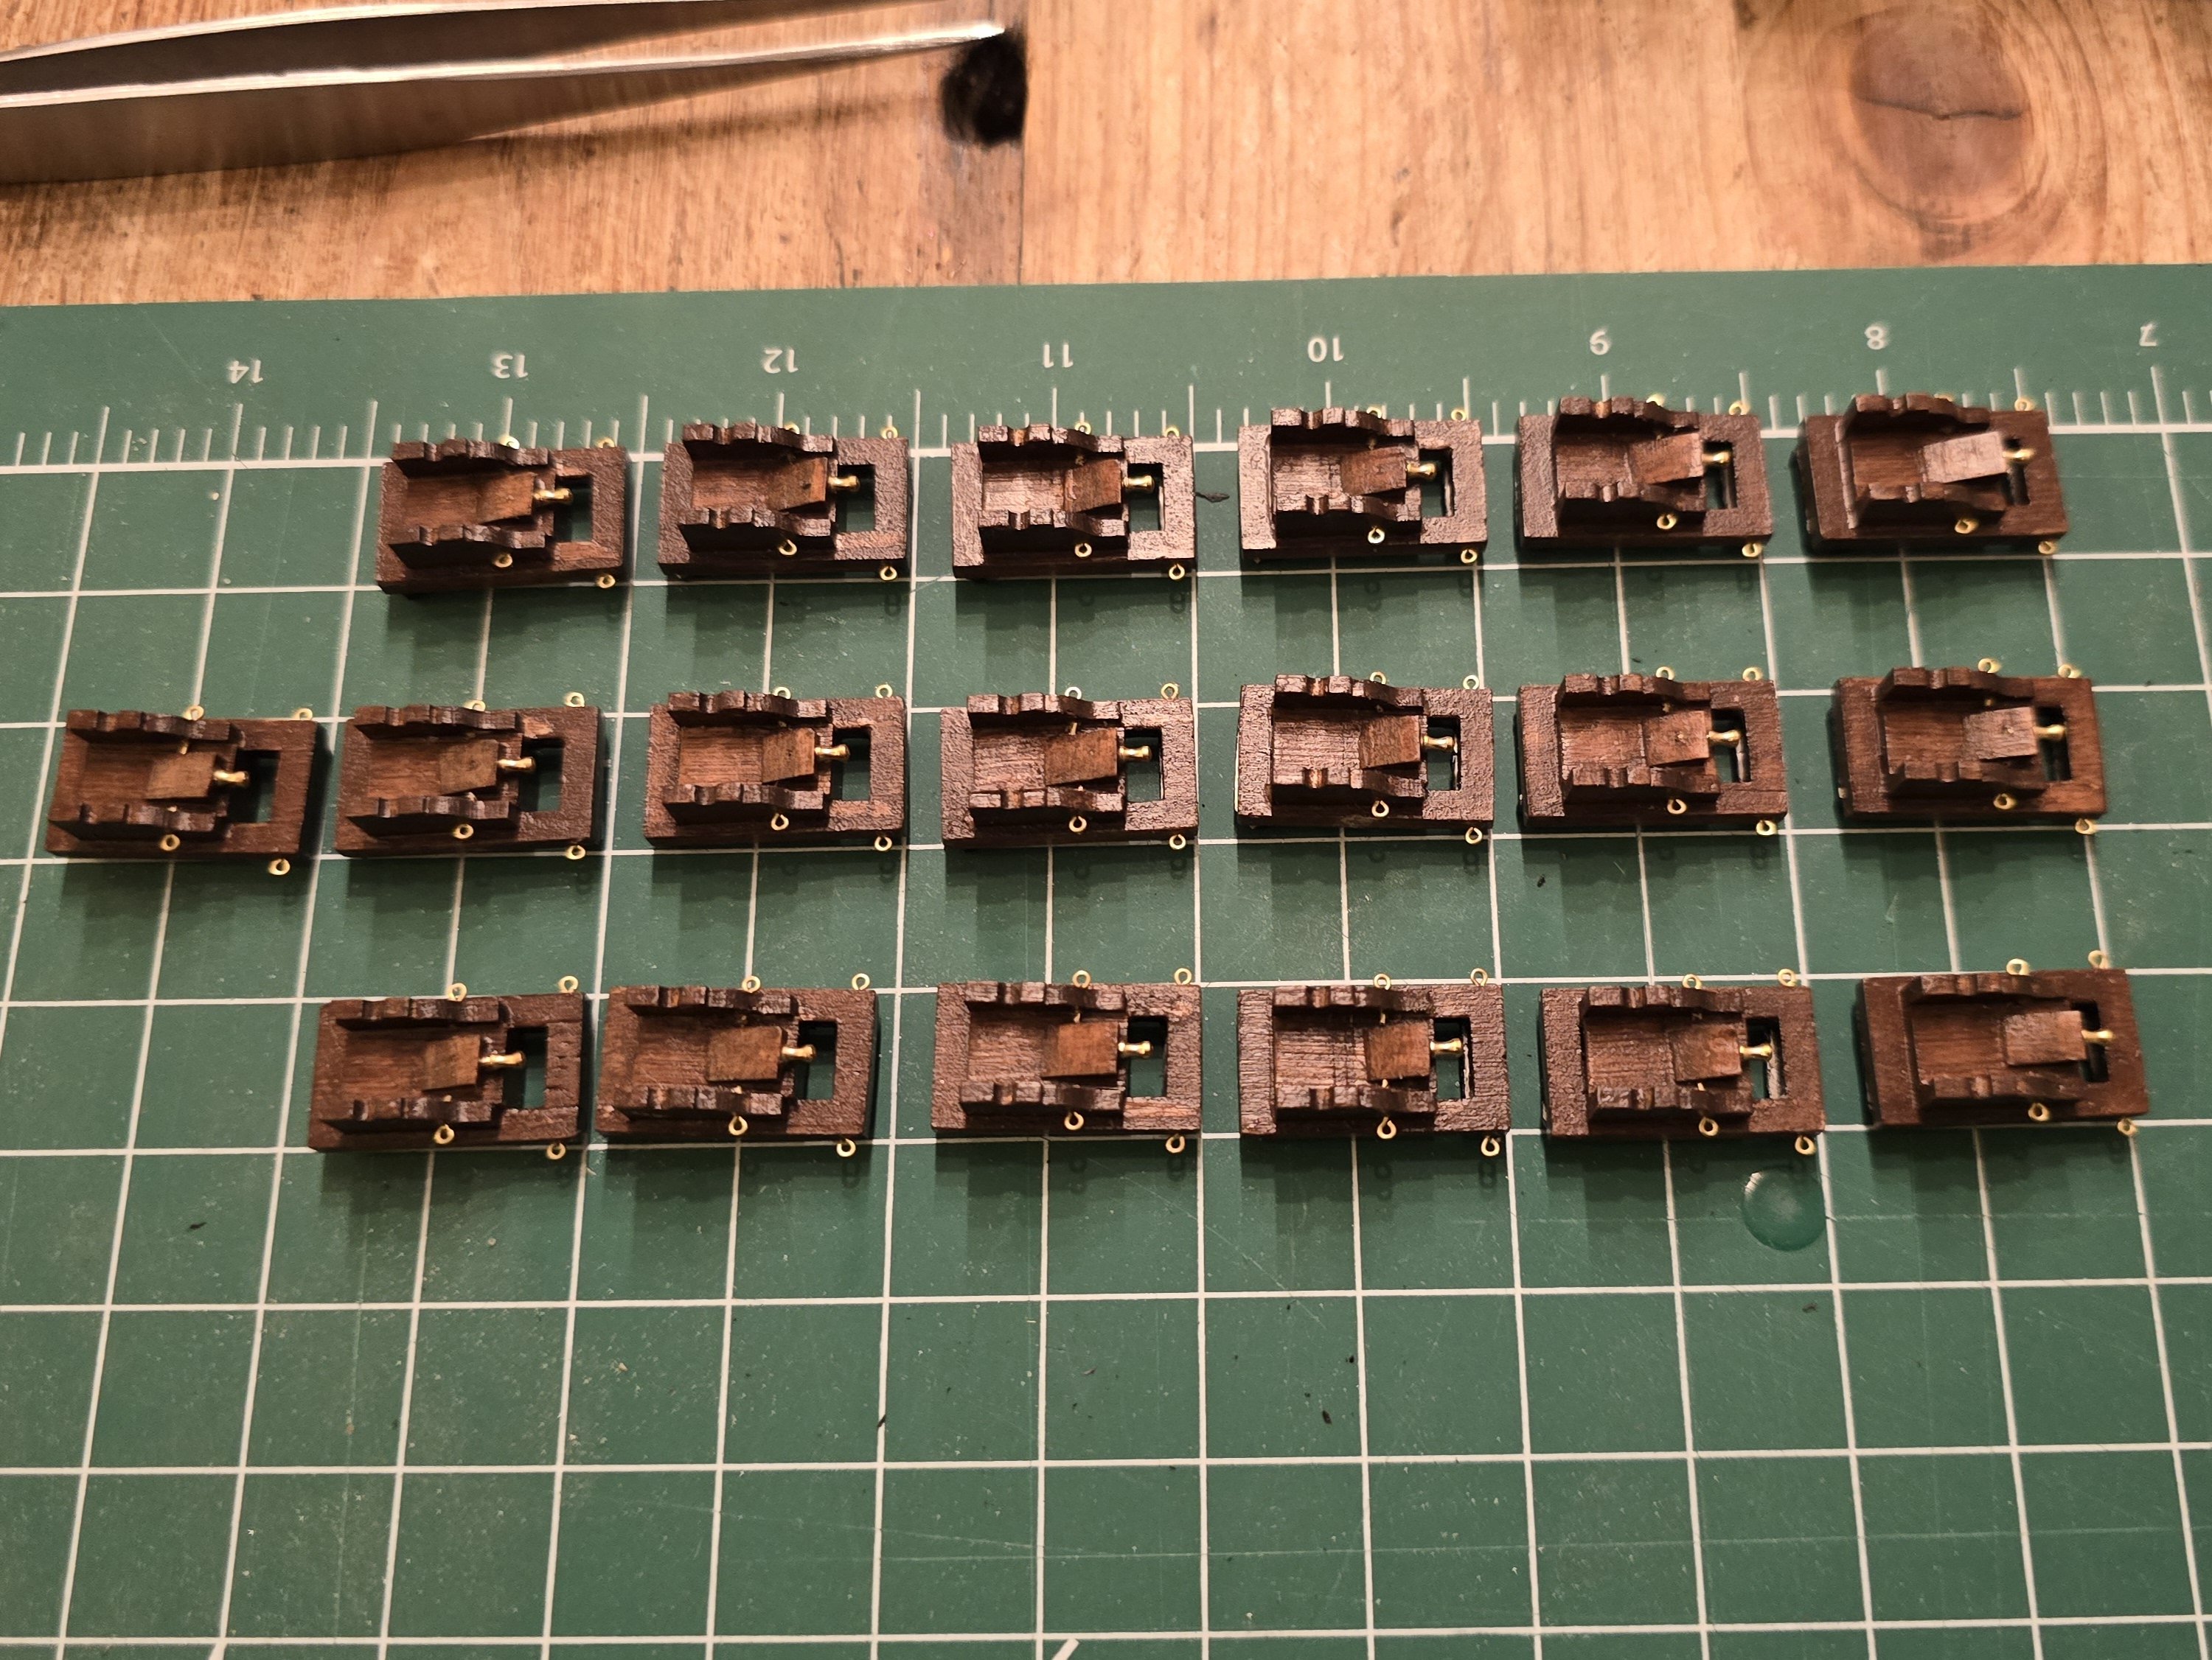
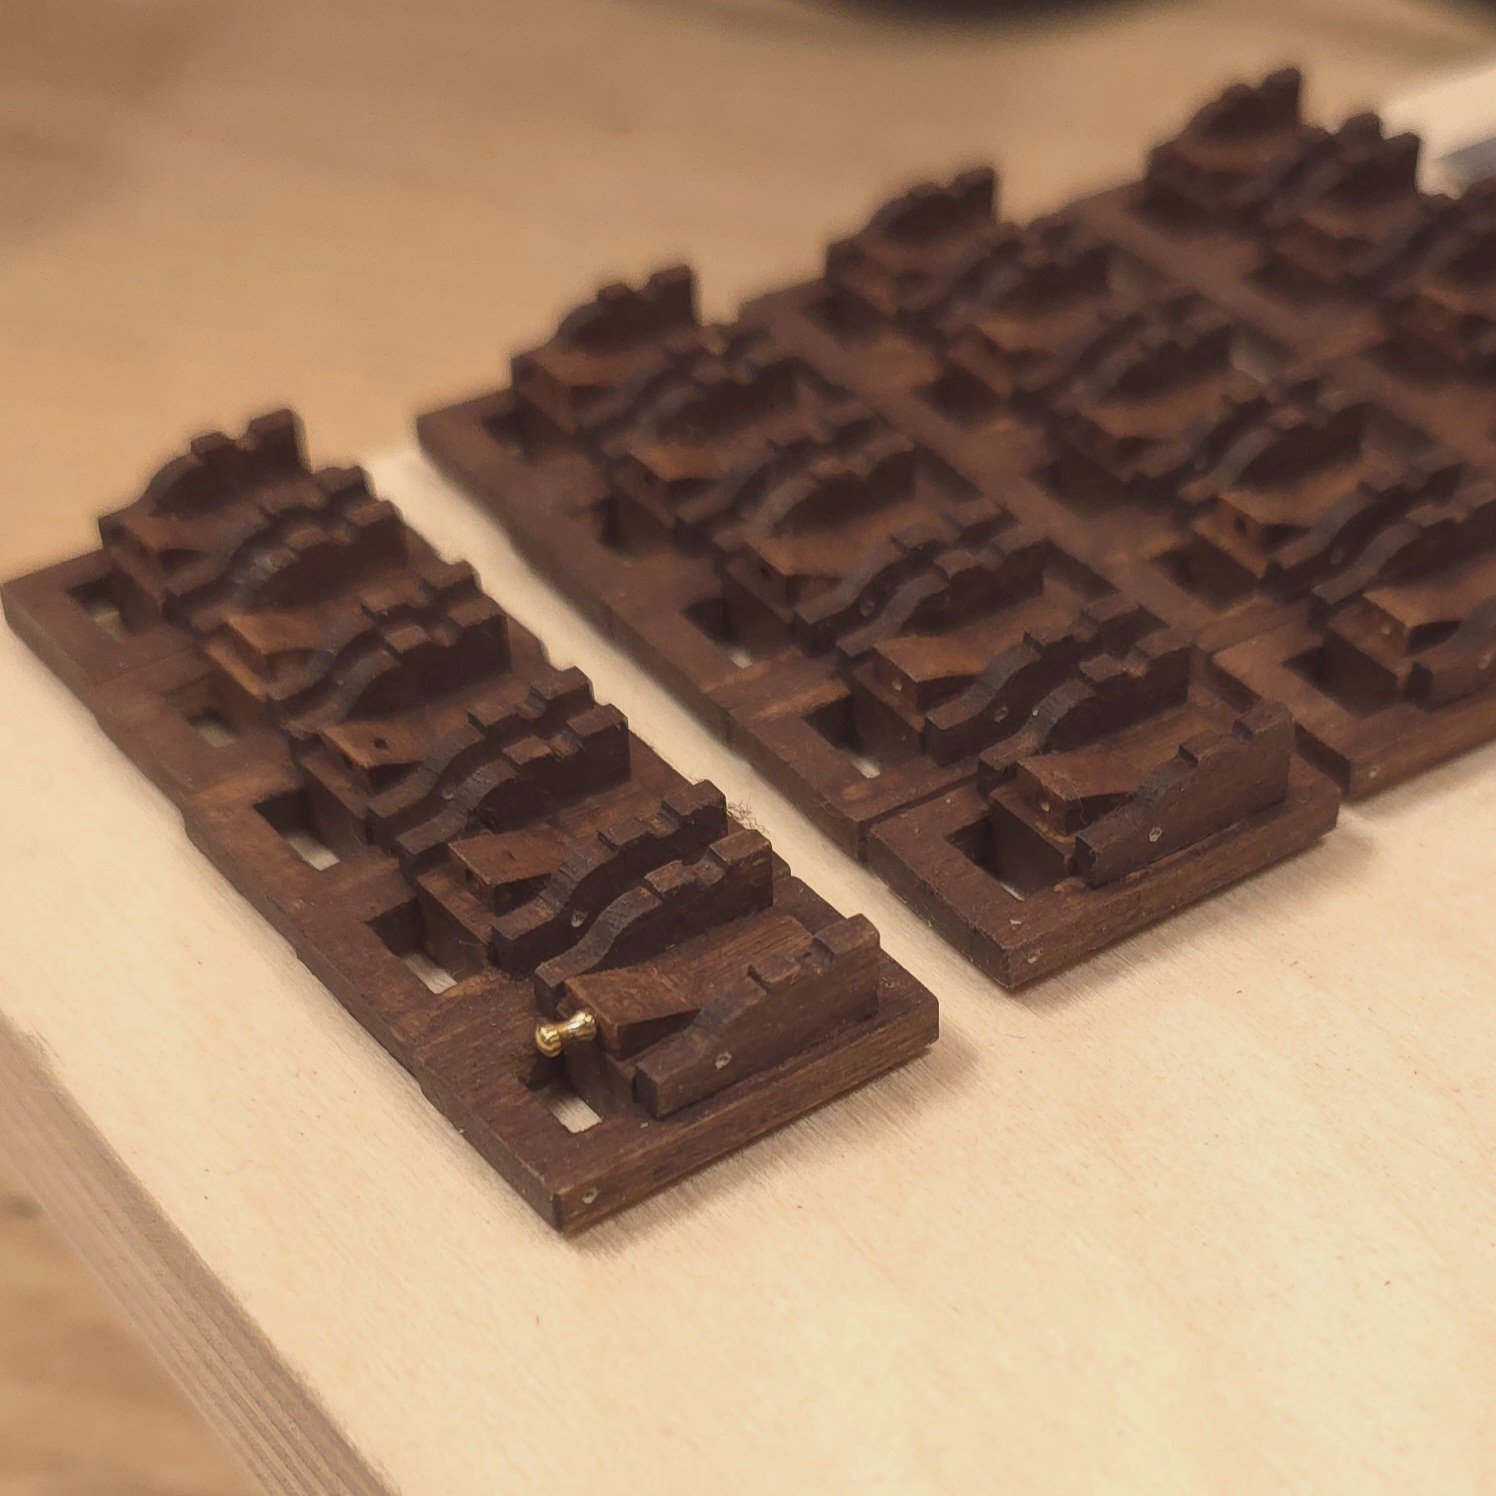
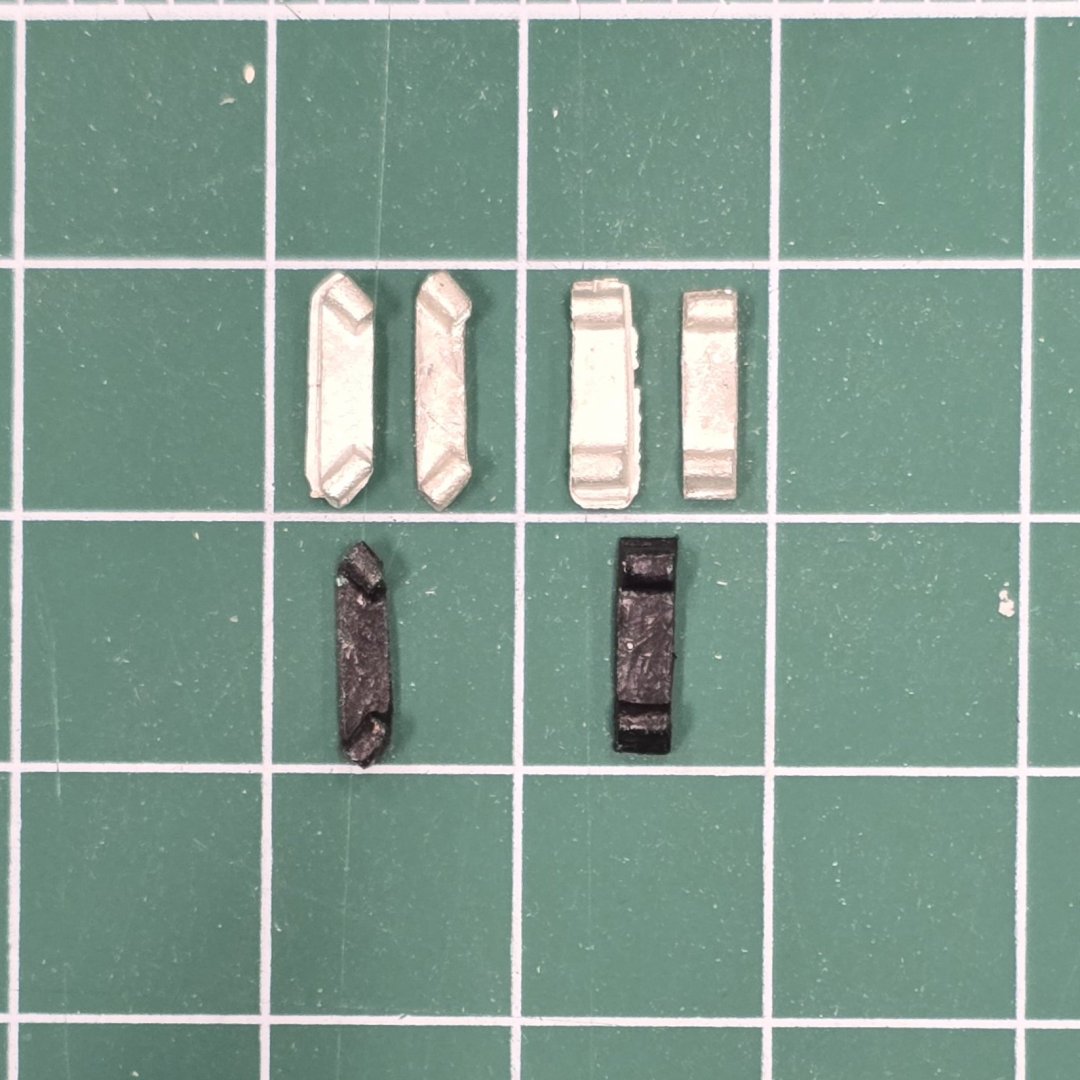
Decision made. I'm sticking with the status quo. I made more work for myself by applying 2 coats of clear polyurethane to the carriages before adding the eyebolts and pins on the quions. The poly clogged the holes, which then had to be bored out by hand. I didn't like hand painting the wheels, so used double sided tape and spray paint/primer instead.
-
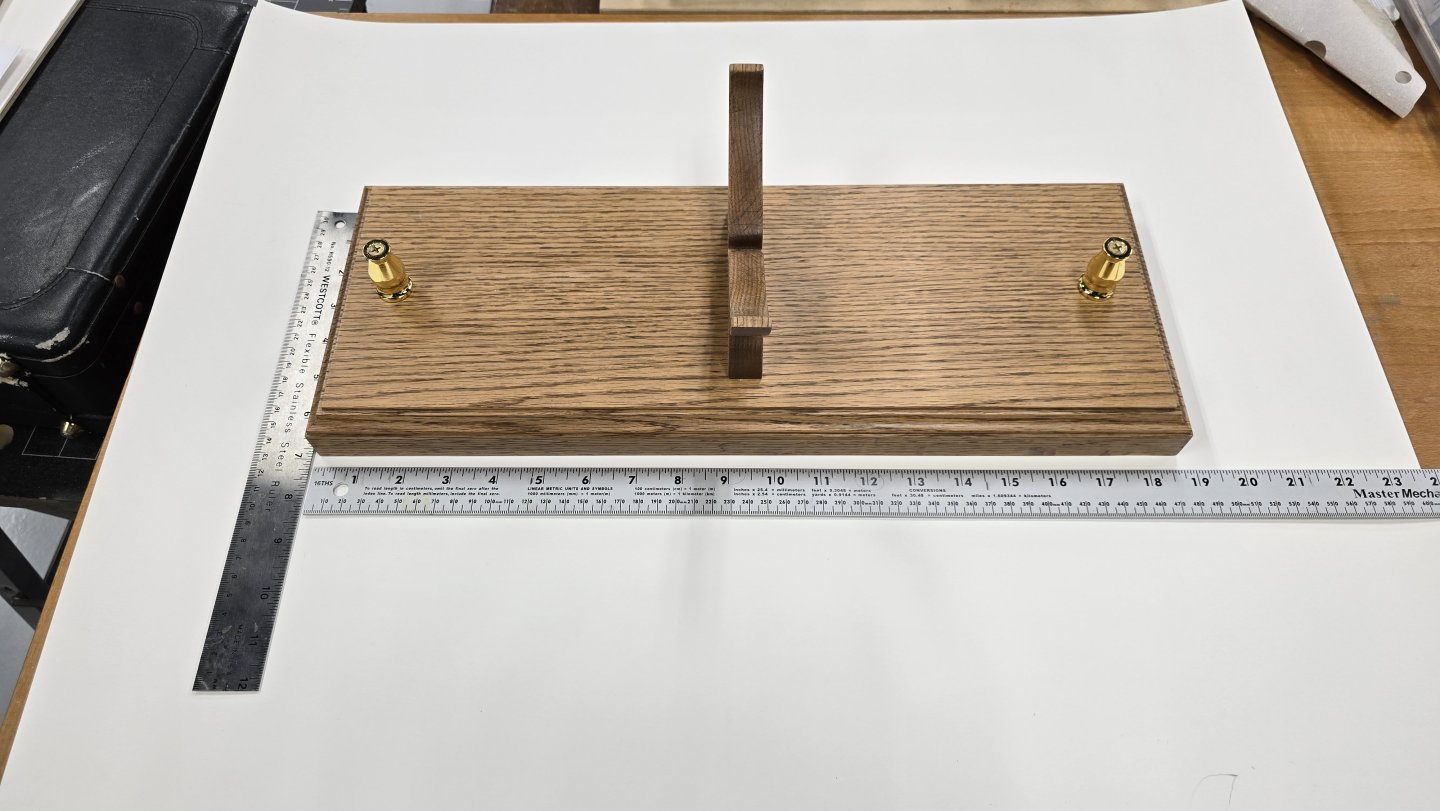
By trestle, I assume you mean the display base that I made for the Constitution. If so it's roughly 18 1/2" wide, 7" deep and 1 1/2" tall. As for the central support, I use the billet from which the bulkheads were pulled to get the shape. The height of the pedestals and the measurement from the base to the bottom of the groove in the central support are 1 3/8".
-
No, I very carefully painted on wood glue for all of the assembly on the carriages. I wanted to have a little bit more work time, and I didn't want to risk anything sticking permanently to the fixture. I am not going to take those carriages apart. I just arrived at the shipyard and I'm going to spend a couple of hours scratching my head over the matter and see where it goes from there. Thank you, Mustafa.
-
Don't sweat it Jon, I'm a long way from getting to that. I only jumped ahead to the carronades because I needed something small that I could pack up and take with to work on during my absence from the shipyard. I'll finish those and then return to the hull for the time being. If you do find that source for the printed versions, great. If not, I'll cross that bridge when I come to it. Who knows, if I put on my metal workers hat and tackle plan C (see my most recent post) and do so successfully, I might consider following in your footstep on these canopies.
-
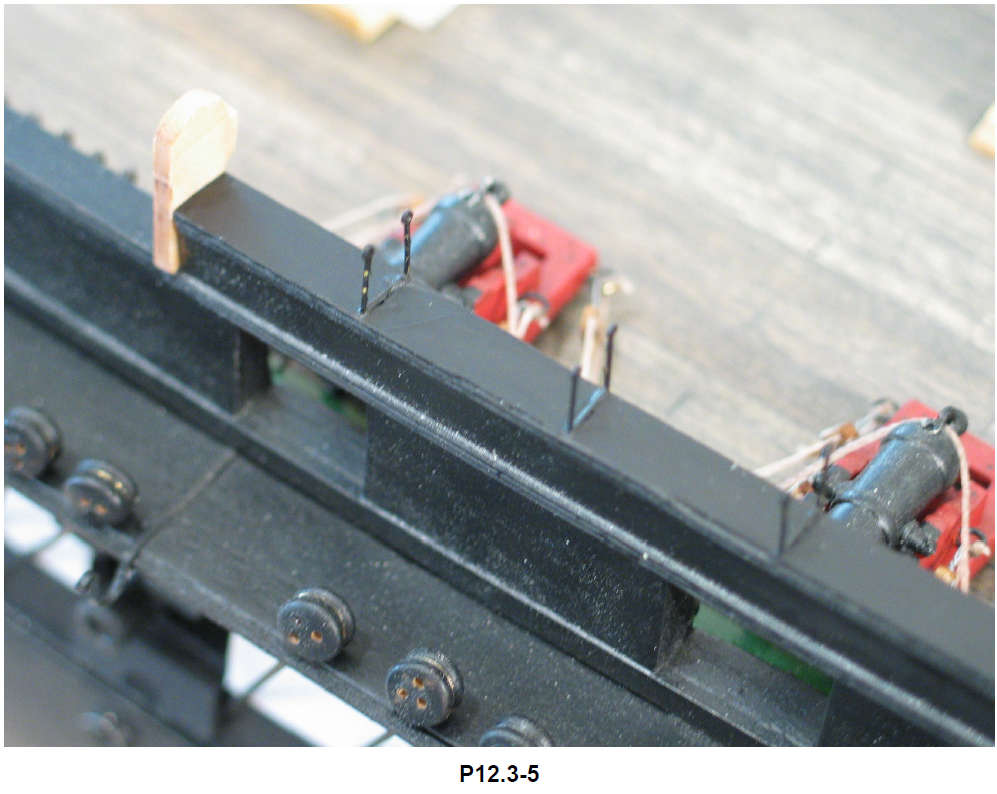
Thank you Gregg, Bob and Mustafa. I had the exact same thoughts as Gregg and Bob this morning, and reached much the same conclusion as Mustafa. It's too late to move the upper part of the carriage. However, Since I haven't yet glued the front wheel pieces to the remaining 19 carriages, I could simply glue these further back under the carriage to get a smidge closer to the ports. Not enough to really matter, I think - and if one looked carefully, one would question why the they were placed there. Were I to do that, I may as well ditch the wheels altogether and glue a small rectangle to the bottom of the carriages in lieu of the wheels - saving time and effort in shaping those infernal cast parts - period! I'll experiment with that to see If I can get away with it. Another thought was to try to trim/carve the waterways back without destroying them or the planking butting up against them. (Danger, Danger, Will Robinson!) 🤔 No, I'm don't think I'm going to attempt that. Plan C - Maybe I can attempt to make some extension out of brass and affix them to the business end of the carronades? I think matching the color and "finish" of the rest of the carronade will be problematic. Plan D - Replace all the carronades with long gun barrels? Costly, and I'm sure I'll get an earful from the historical purists out there. Or I can go the way of Bob Hunt himself. Ignore it.. I took a much closer look at Chapter 11, page 42, of the practicum and realize that Bob himself attempted to conceal the issue in the way he photographed the carronades. Of course, he used the crappy materials from the kit, which did afford him the luxury of a couple extra millimeters, but even his carronades fall short of poking through the gunports. Here's a photo from Chapter 12 that I think clearly illustrates that Bob fell short, and didn't care(?). After I submit this post, I'm going back into the early pages of this build log and issue a caveat to others about the error in the Practicum that led to this dilemma. I knew then the waterways were not according to plan, but I didn't realize how big a difference it made until now.
-
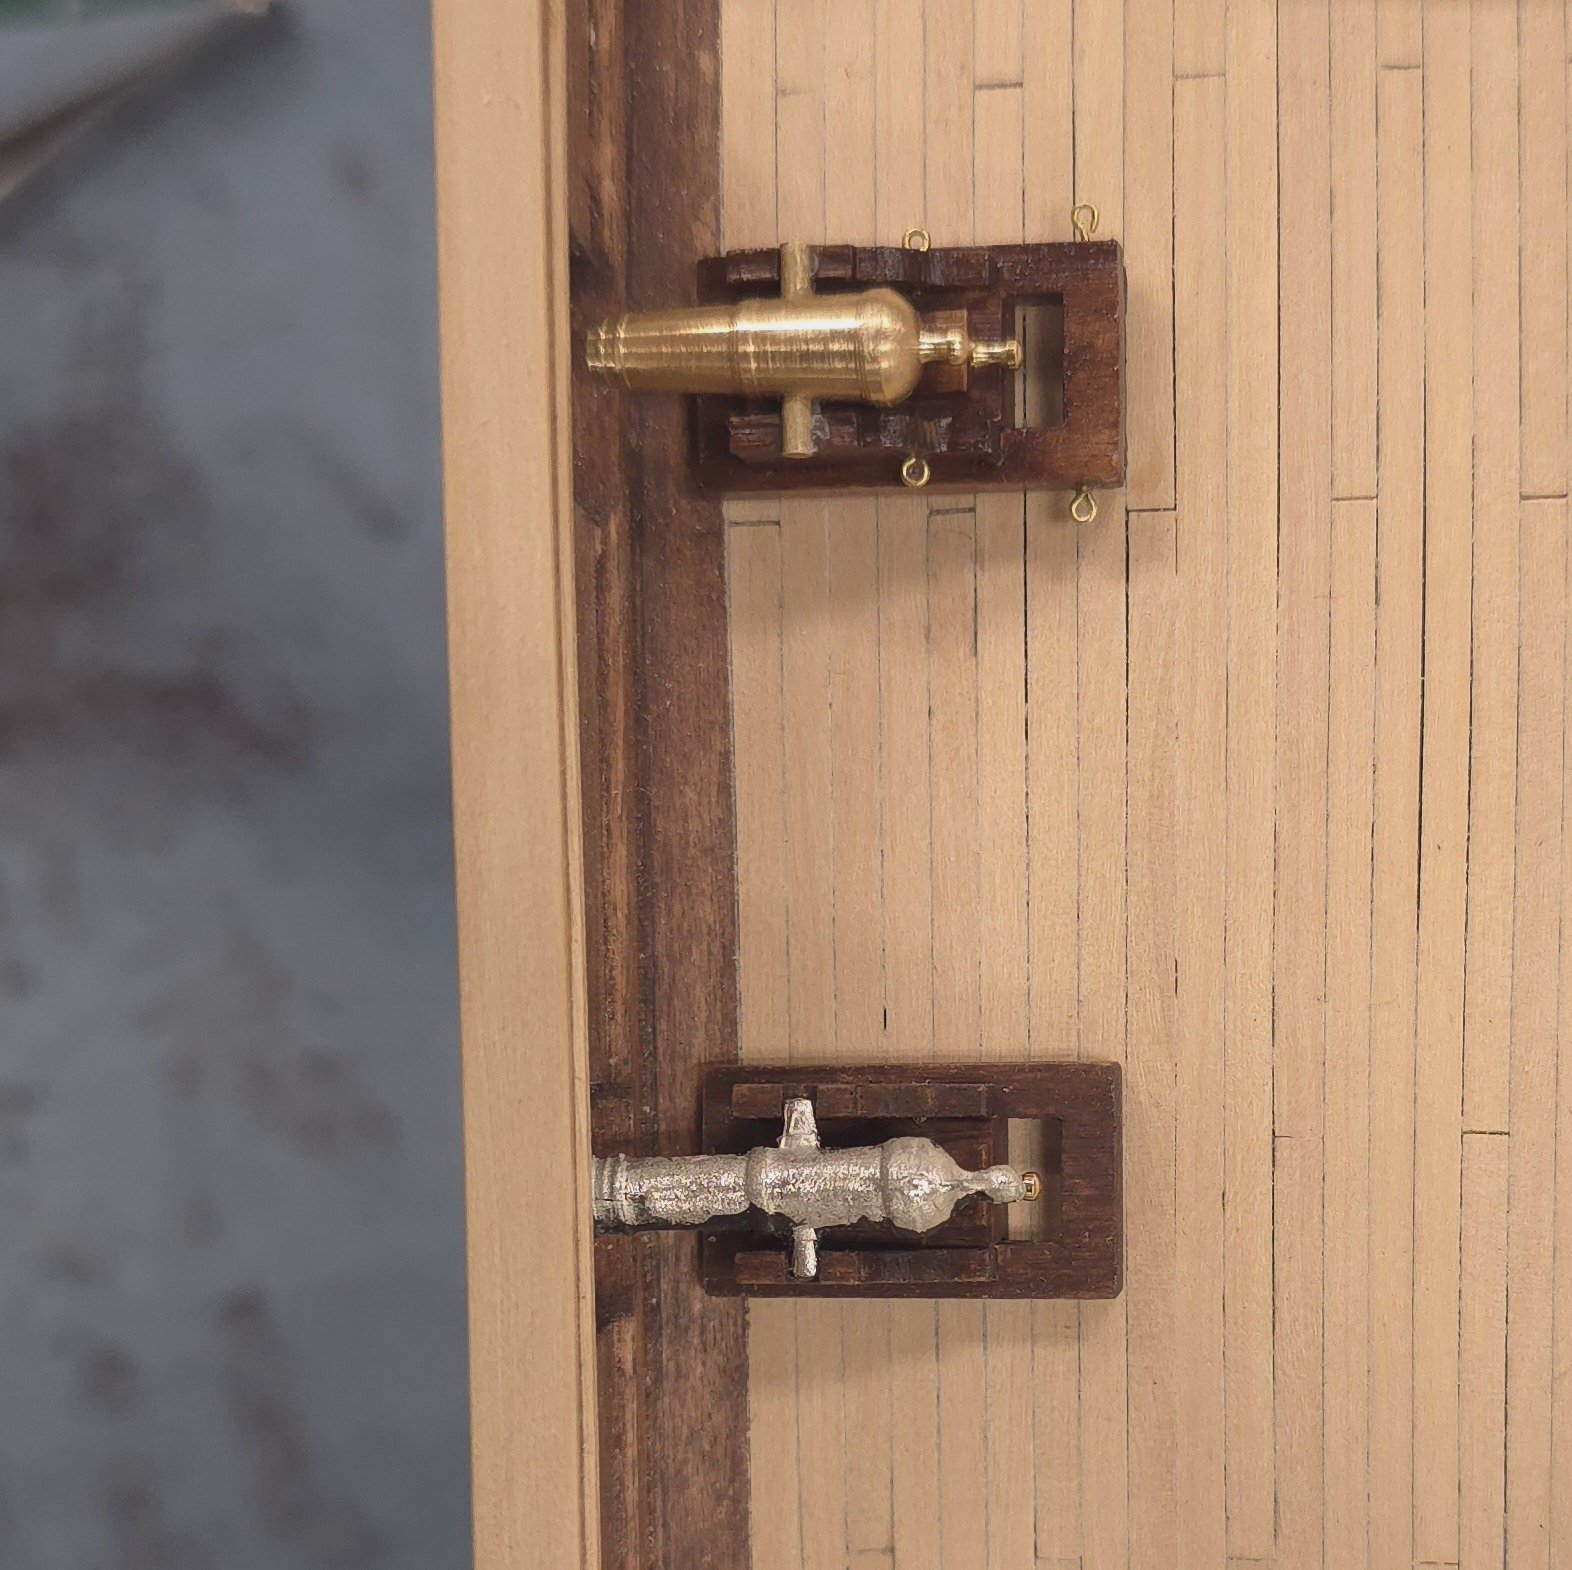
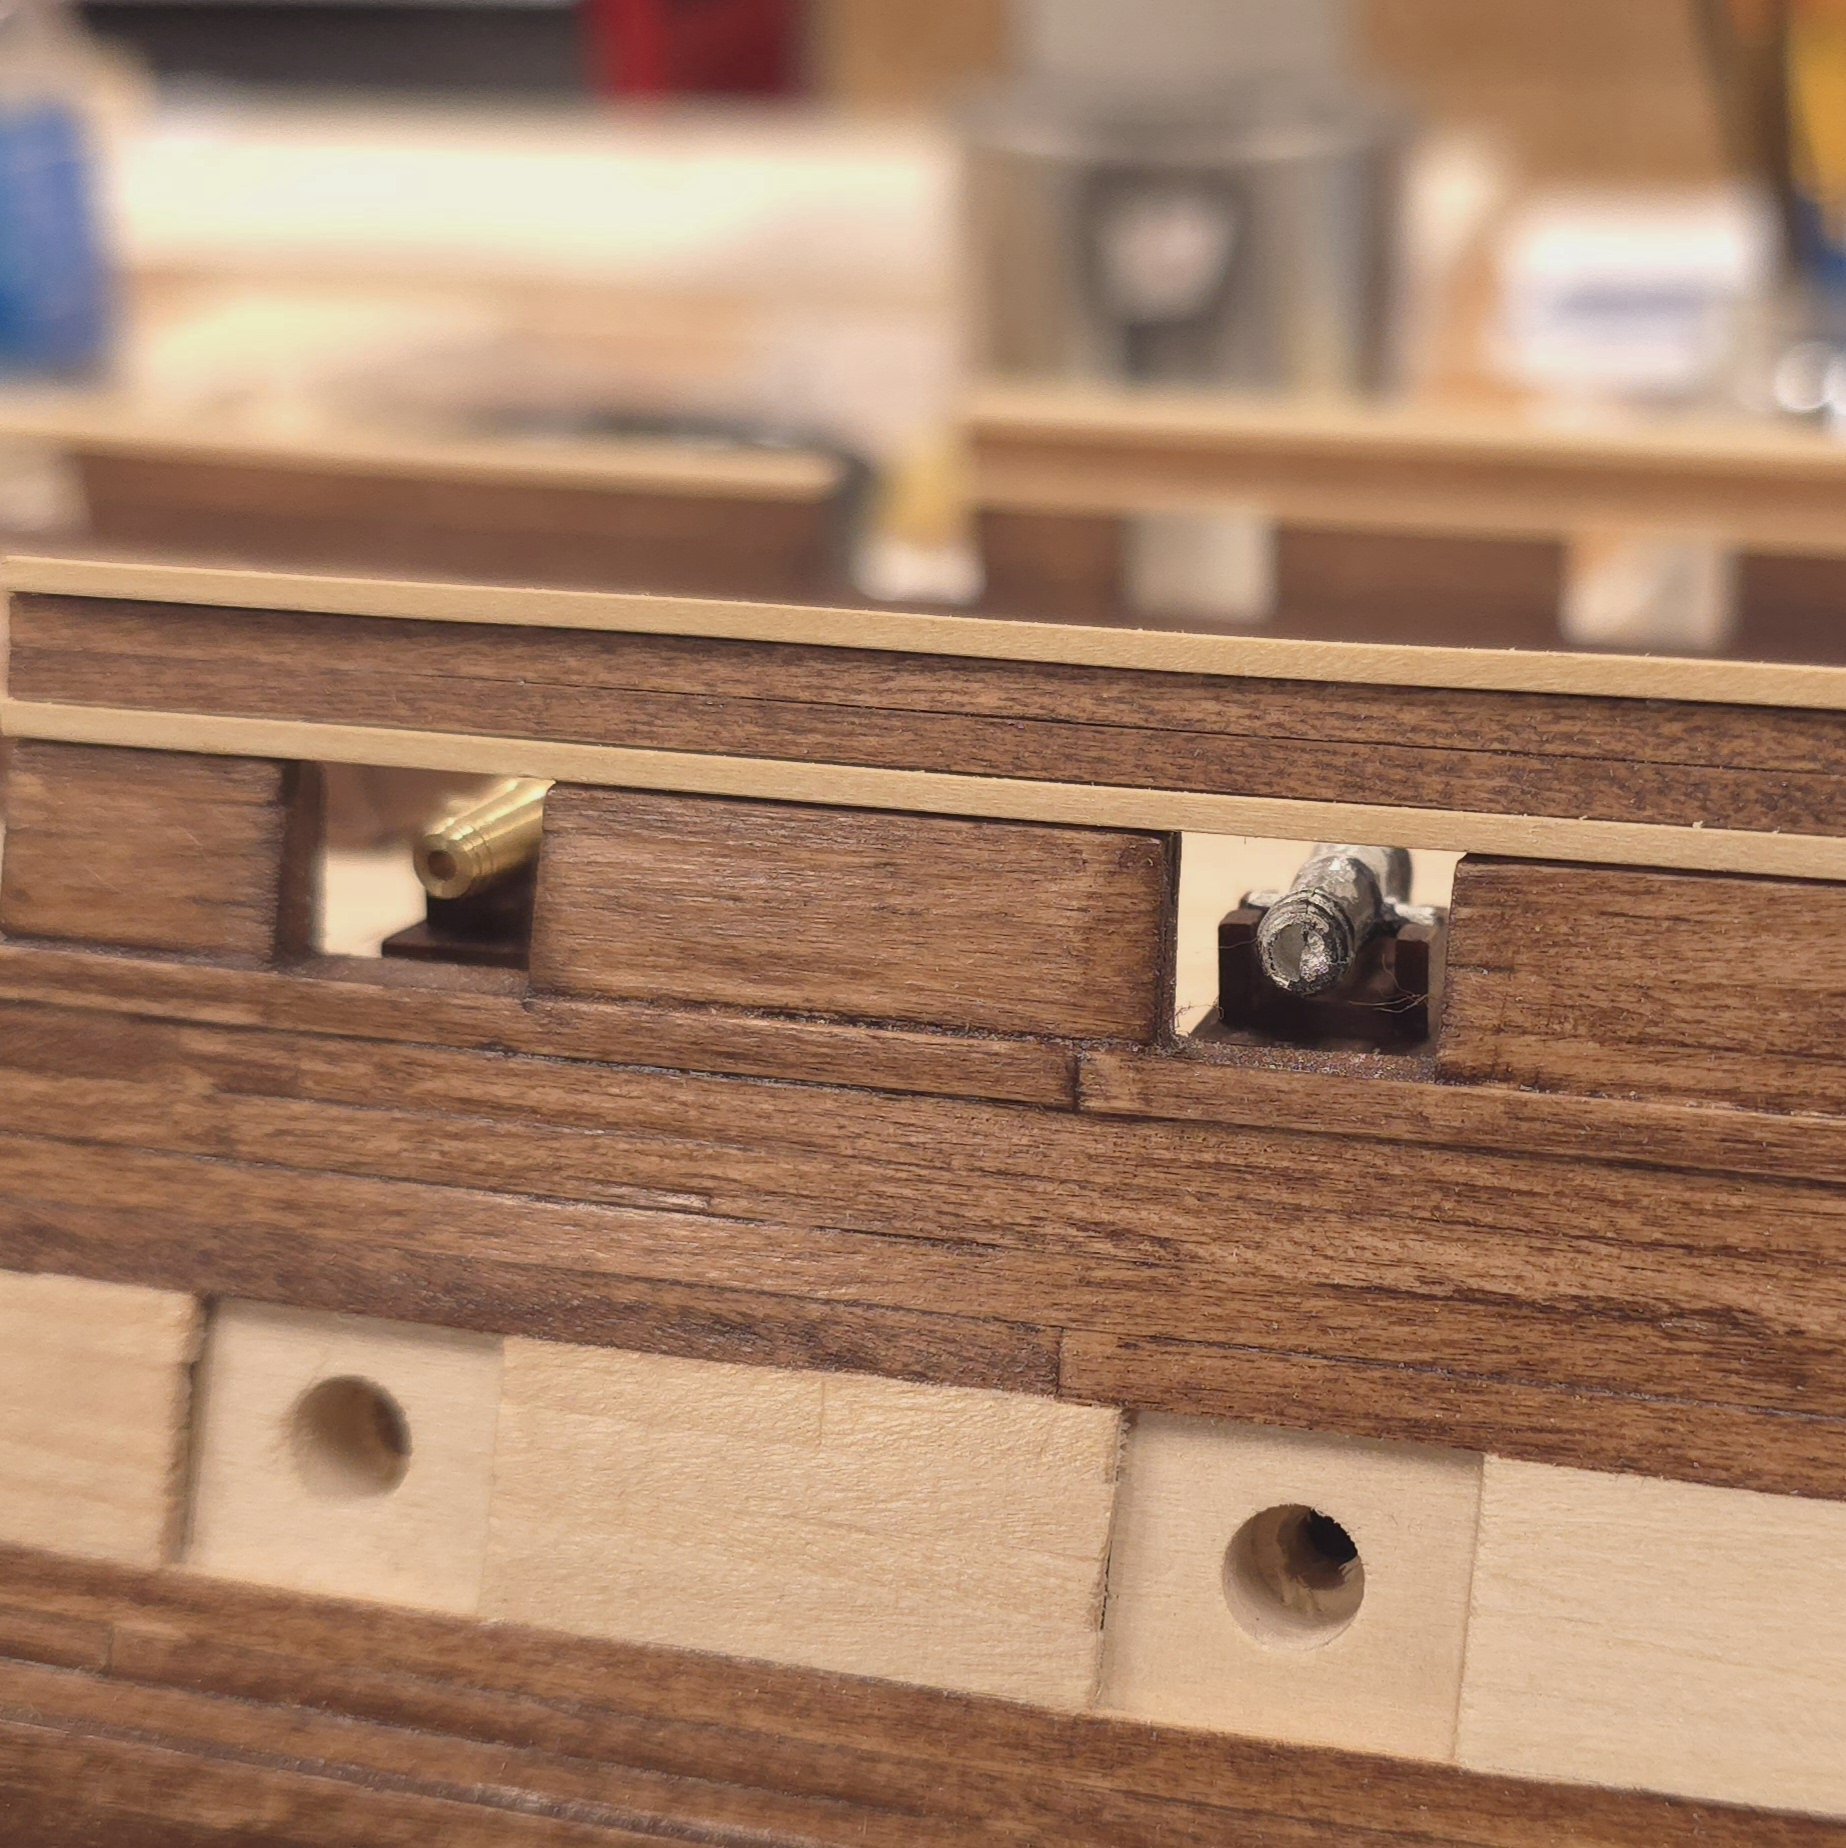
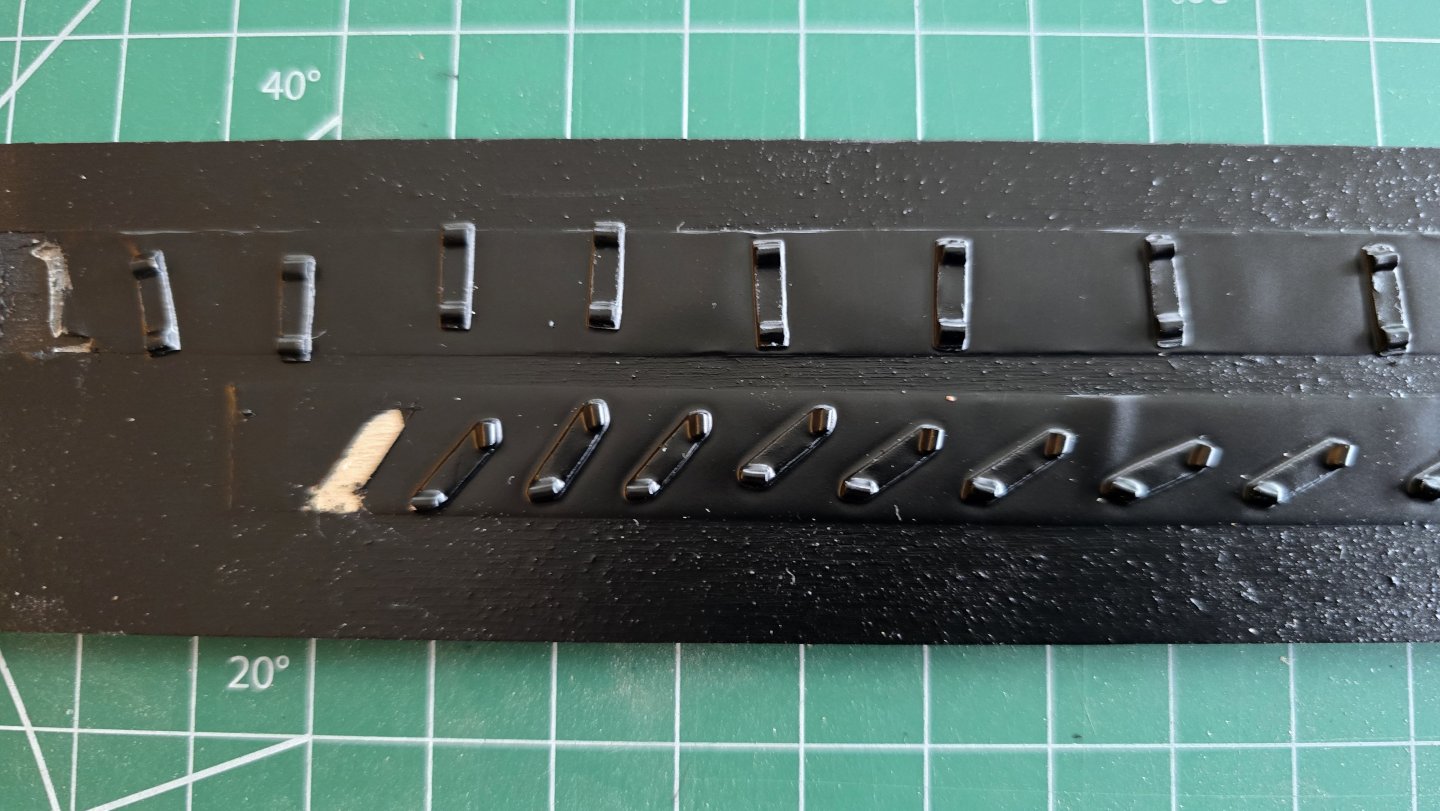
Oh snap! Thanks to a mistake I acknowledged way back when when installing the waterways, my carronades do not fit well on the spa deck. The waterways are way too big and I can't get the carronade anywhere close enough to the gun ports to look good. Hell's bells, not even the longer parts that came with the kit will reach the gun ports. Sigh.. See last two photo in this set to see what I'm talking about.


-
Very impressive Jon. Do not take this the wrong way, but I'm pretty certain now that I will skip this entire process, if I strike out on acquiring manufactured versions of the canopies.
-
Wow! talk about a labor intensive process.. In the end, it all comes down to the results. And yours are spectacular.
-
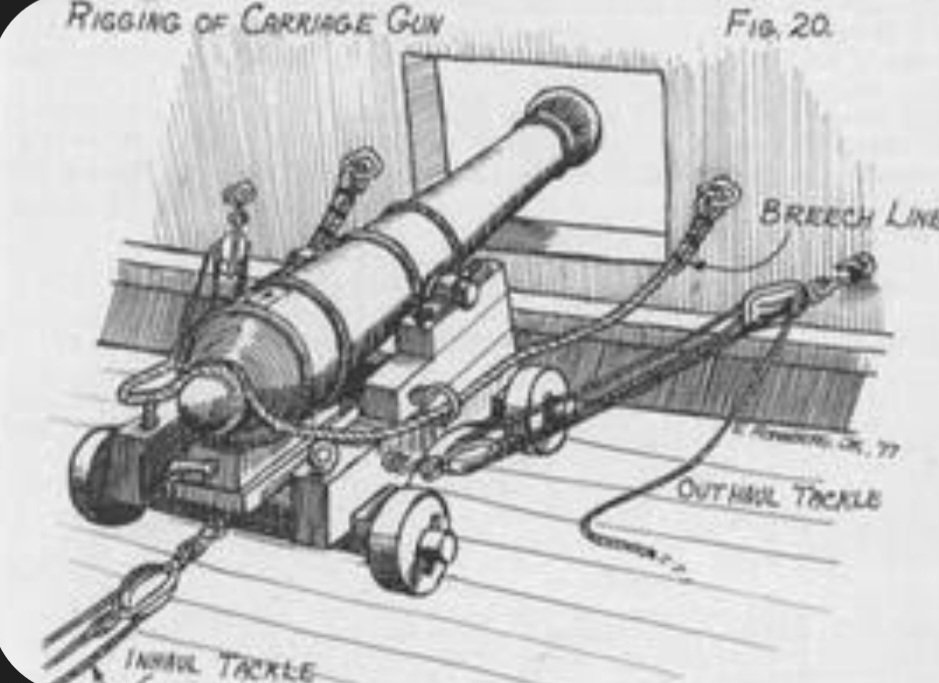
As I mentioned on my post to your build log, I plan to follow in your footsteps for the long guns on The Spar deck. I did do a quick online search and found this sketch of the rigging that I foresee you, and subsequently me, employing for the long guns.
-
USS Constitution by mtbediz - 1:76
Der Alte Rentner replied to mtbediz's topic in - Build logs for subjects built 1751 - 1800
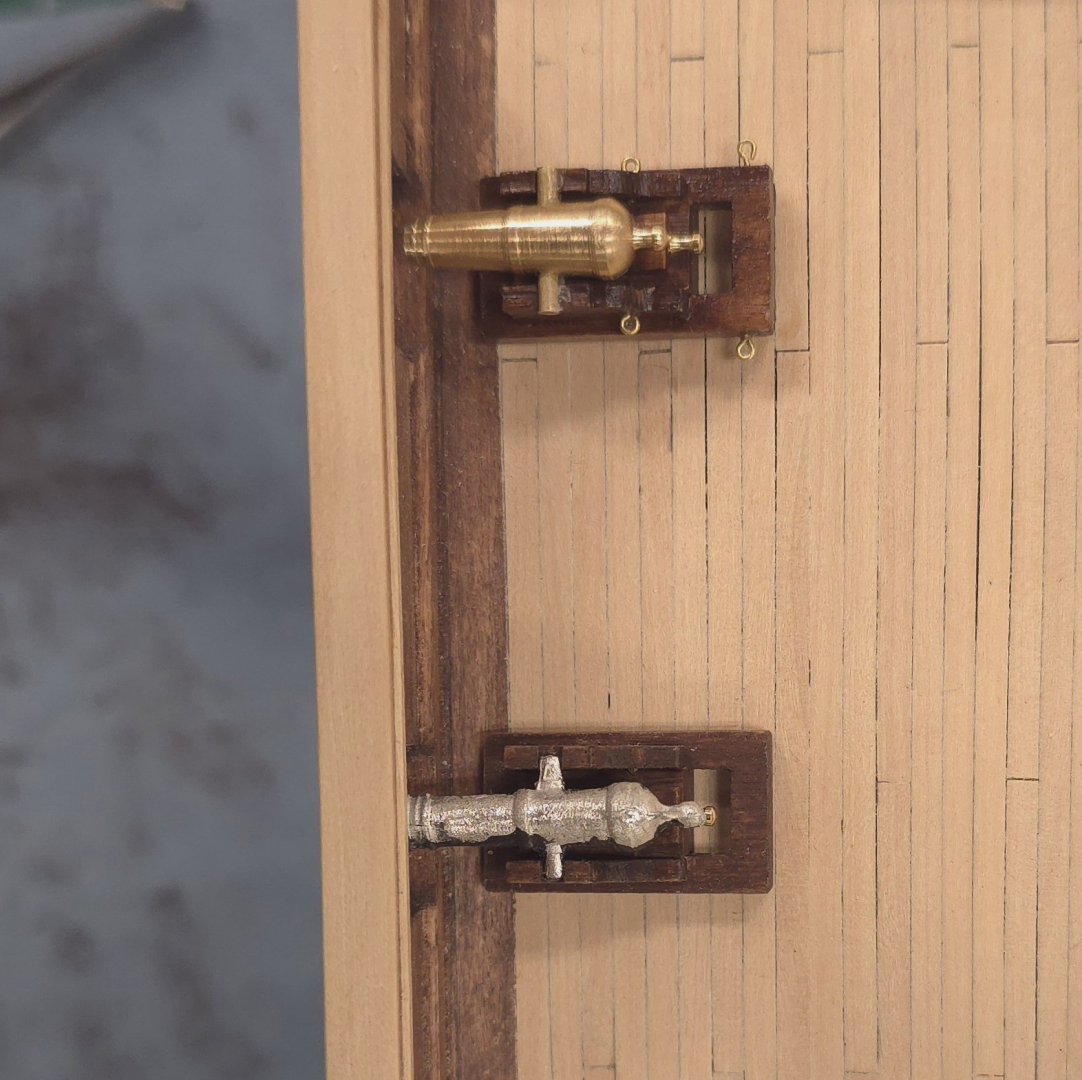
Once again Mustafa, beautiful work! I can hardly wait to see how you rig the long guns, given that the long guns do not have that ring at the cascable. I just decided to jettison the MS kit carronades and go with the set I got from Czechoslovakia. So, my plan will be to steal your rigging Technique. 😁 -
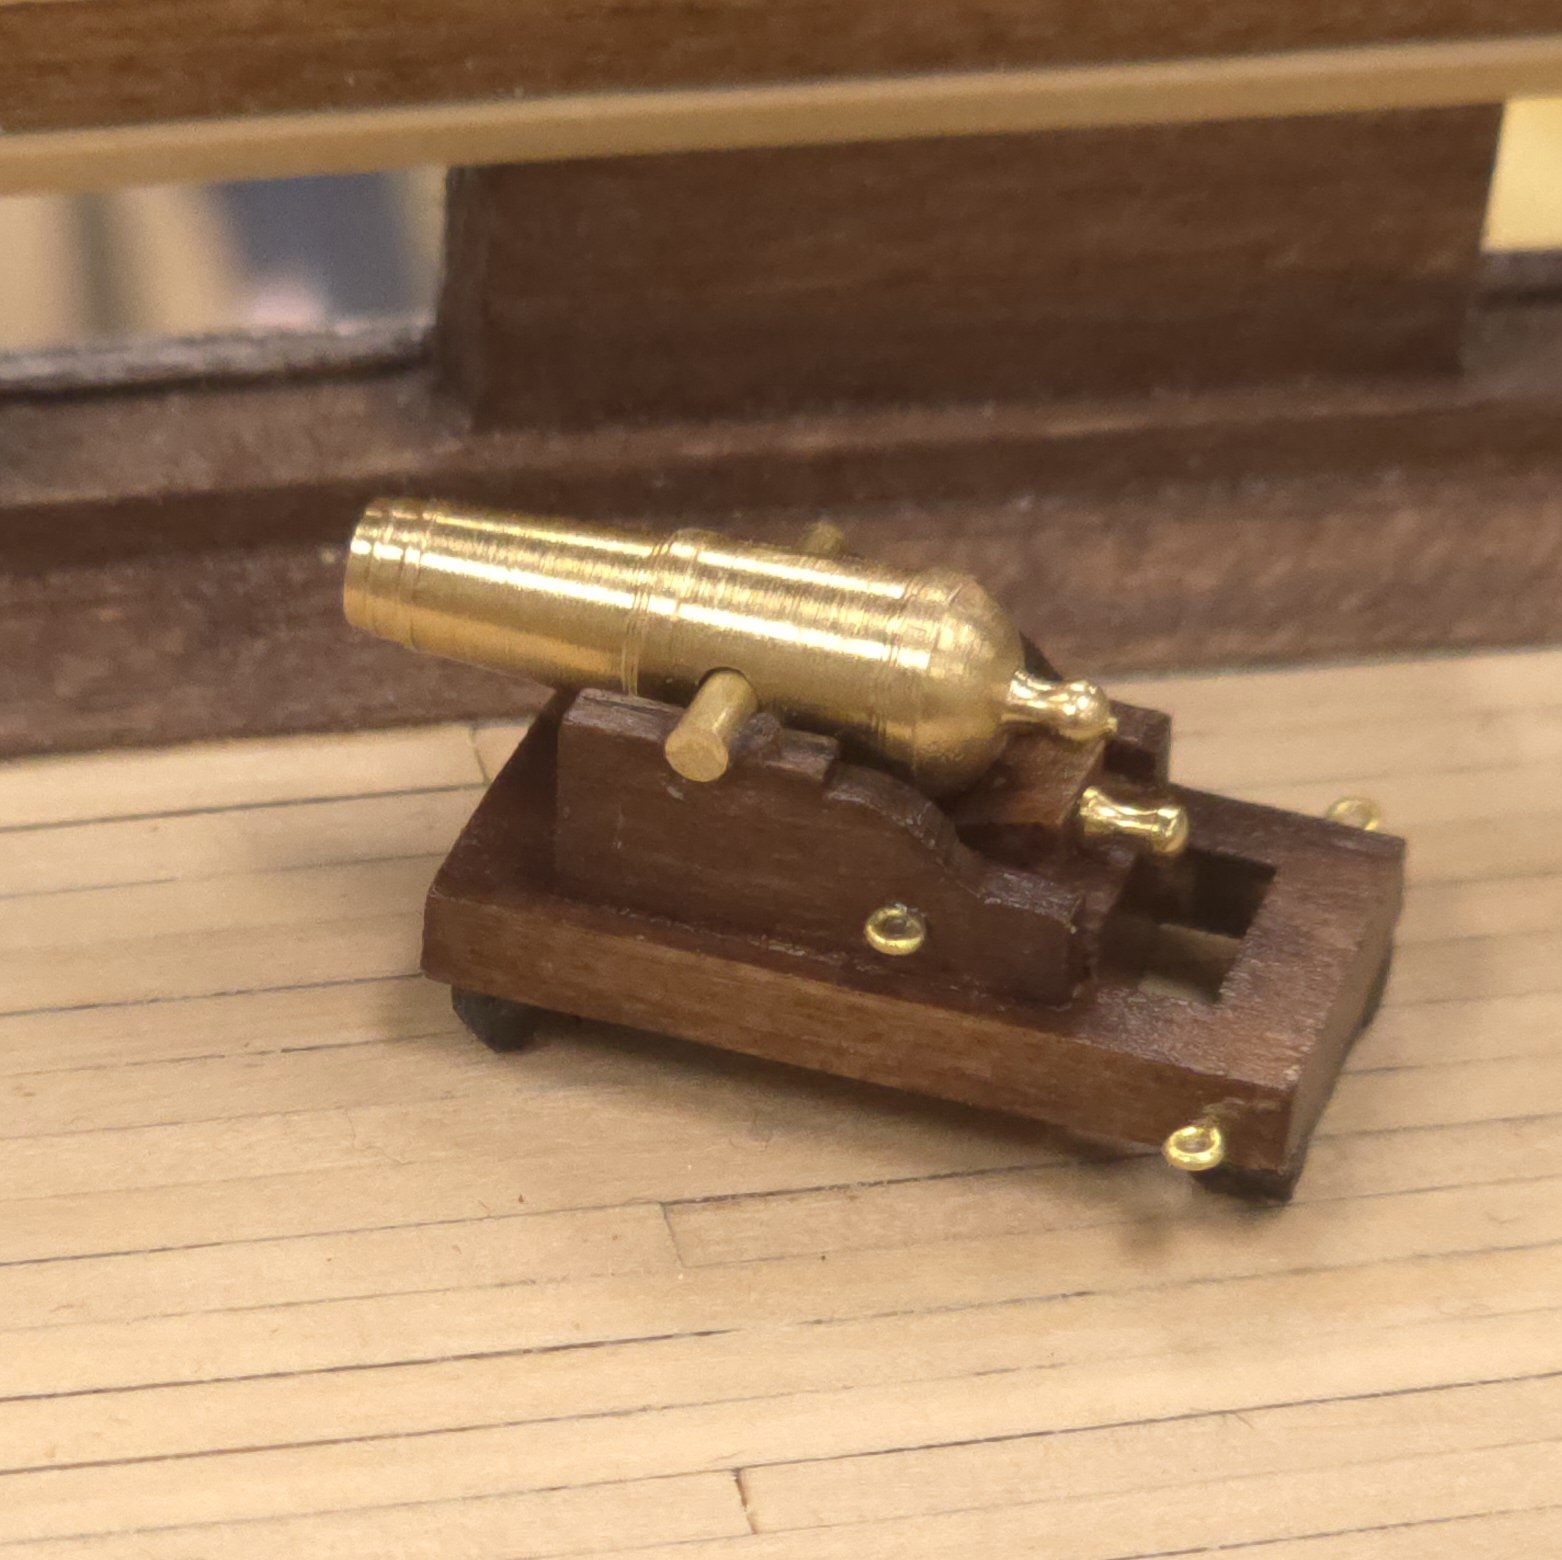
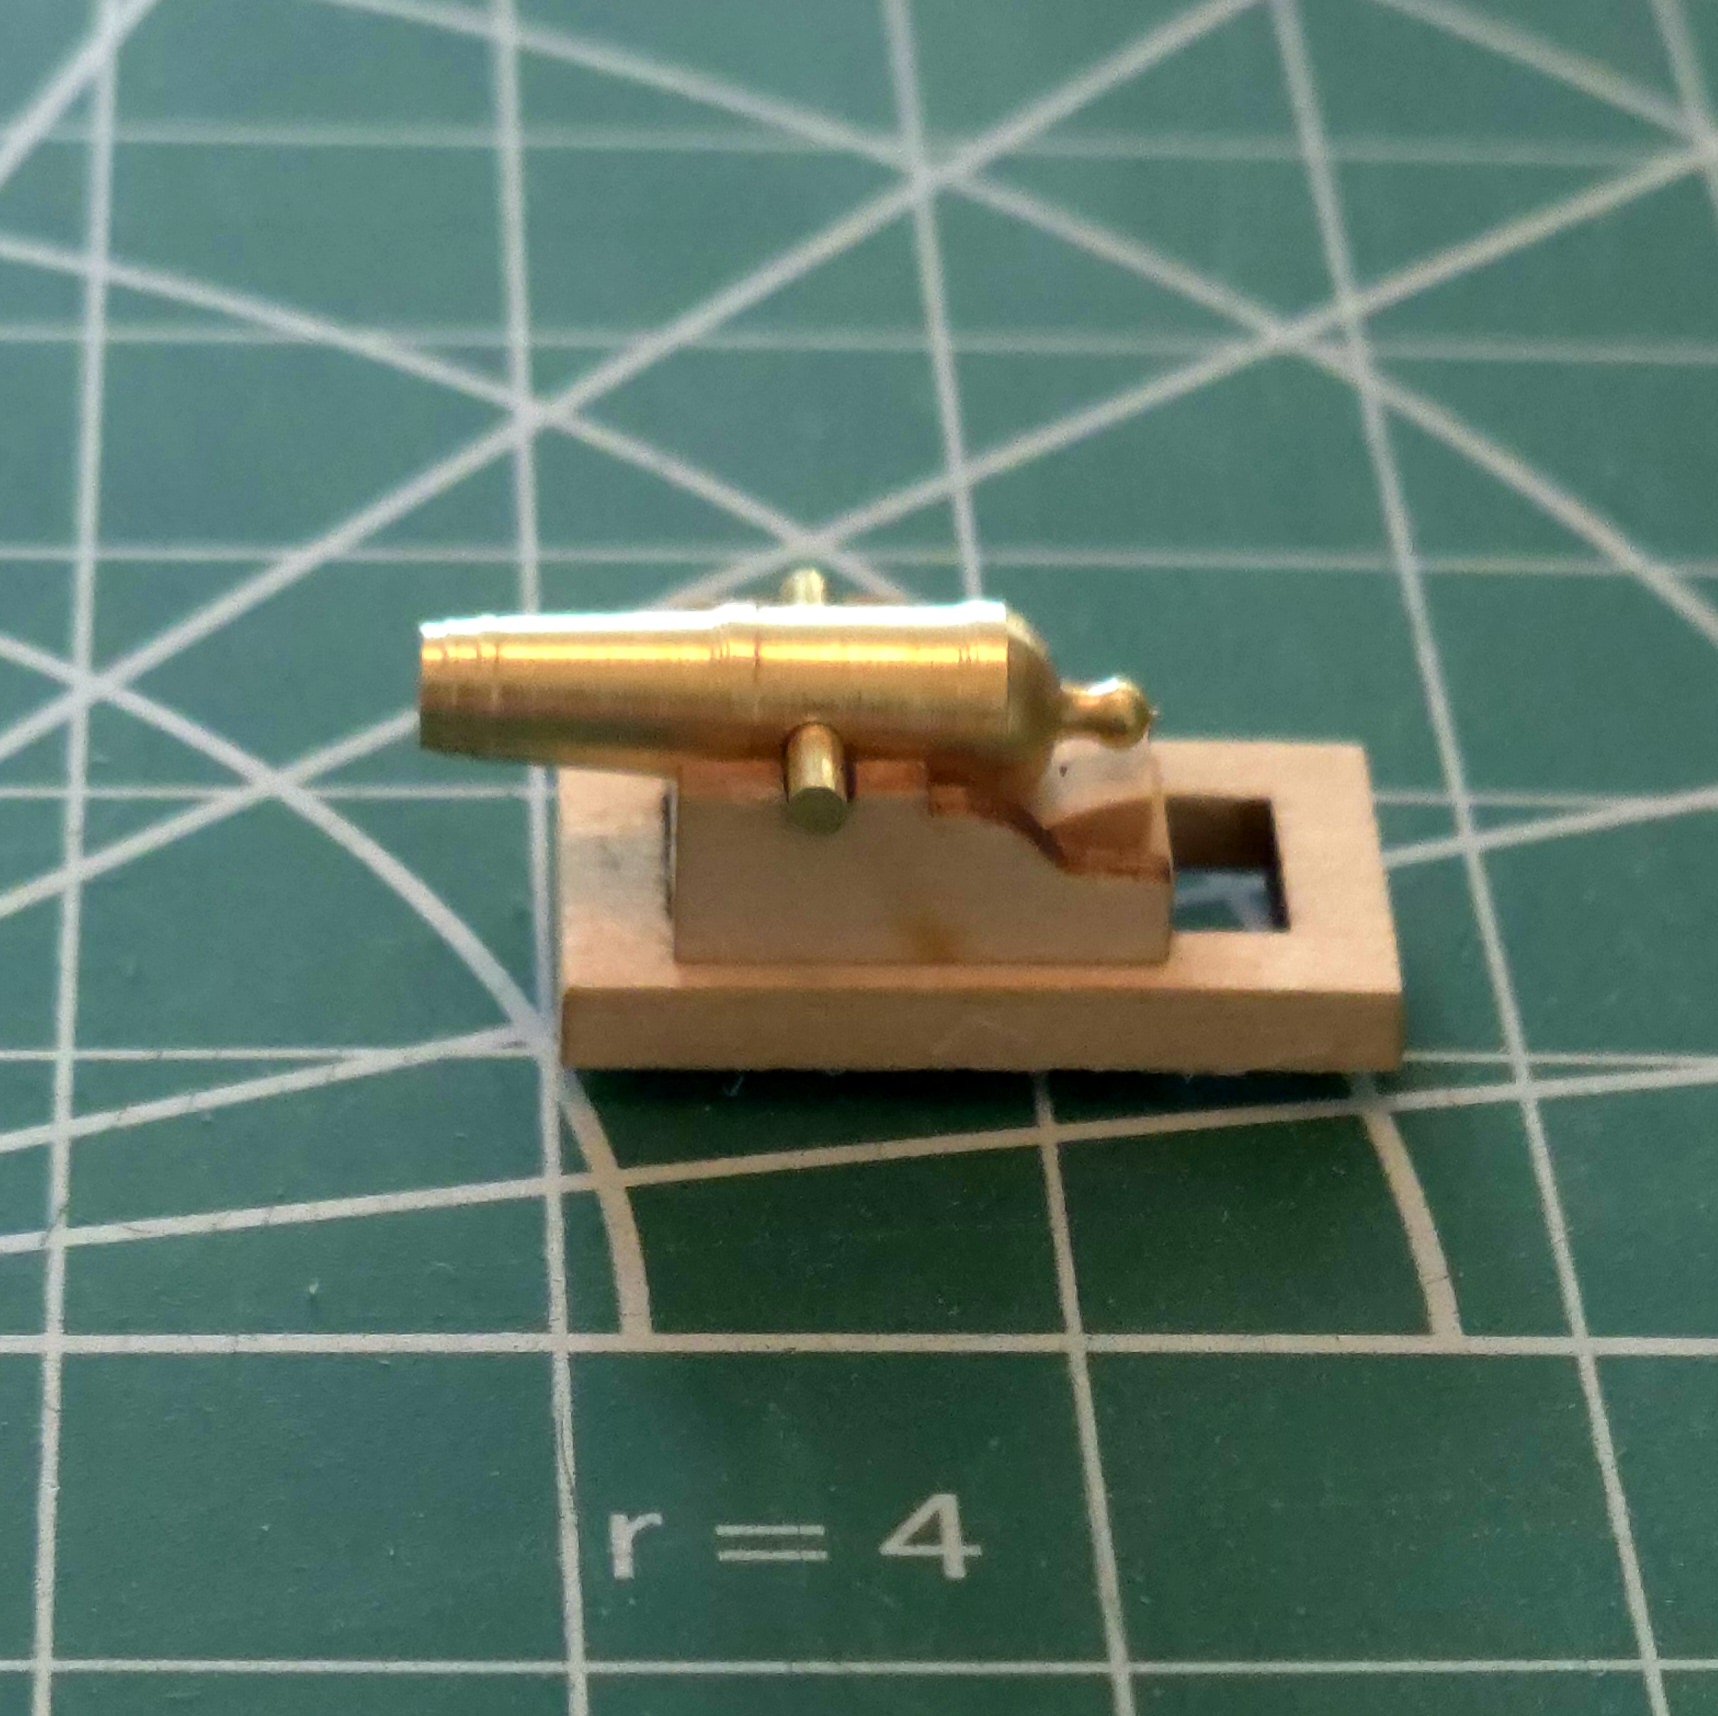
Some whittling was required to get the carronades to sit level in the carriages. The longer guns from the MS kit would not have required this modification, but I think my direction is decided. I'm going to stick with the brass carronades, and stain the carriages the same color as the hull planking. I just couldn't see going with black carronades and red carriages everyone is using on their MS builds. It's just not in keeping with the character of my vision for mine. Drat! The stain I purchased here isn't the same color or consistency as the gel stain I used on the hull. It was the only thing I could find at the local Ace Hardware, so, next steps will have to wait until I return to the shipyard next week. Oh well...

-
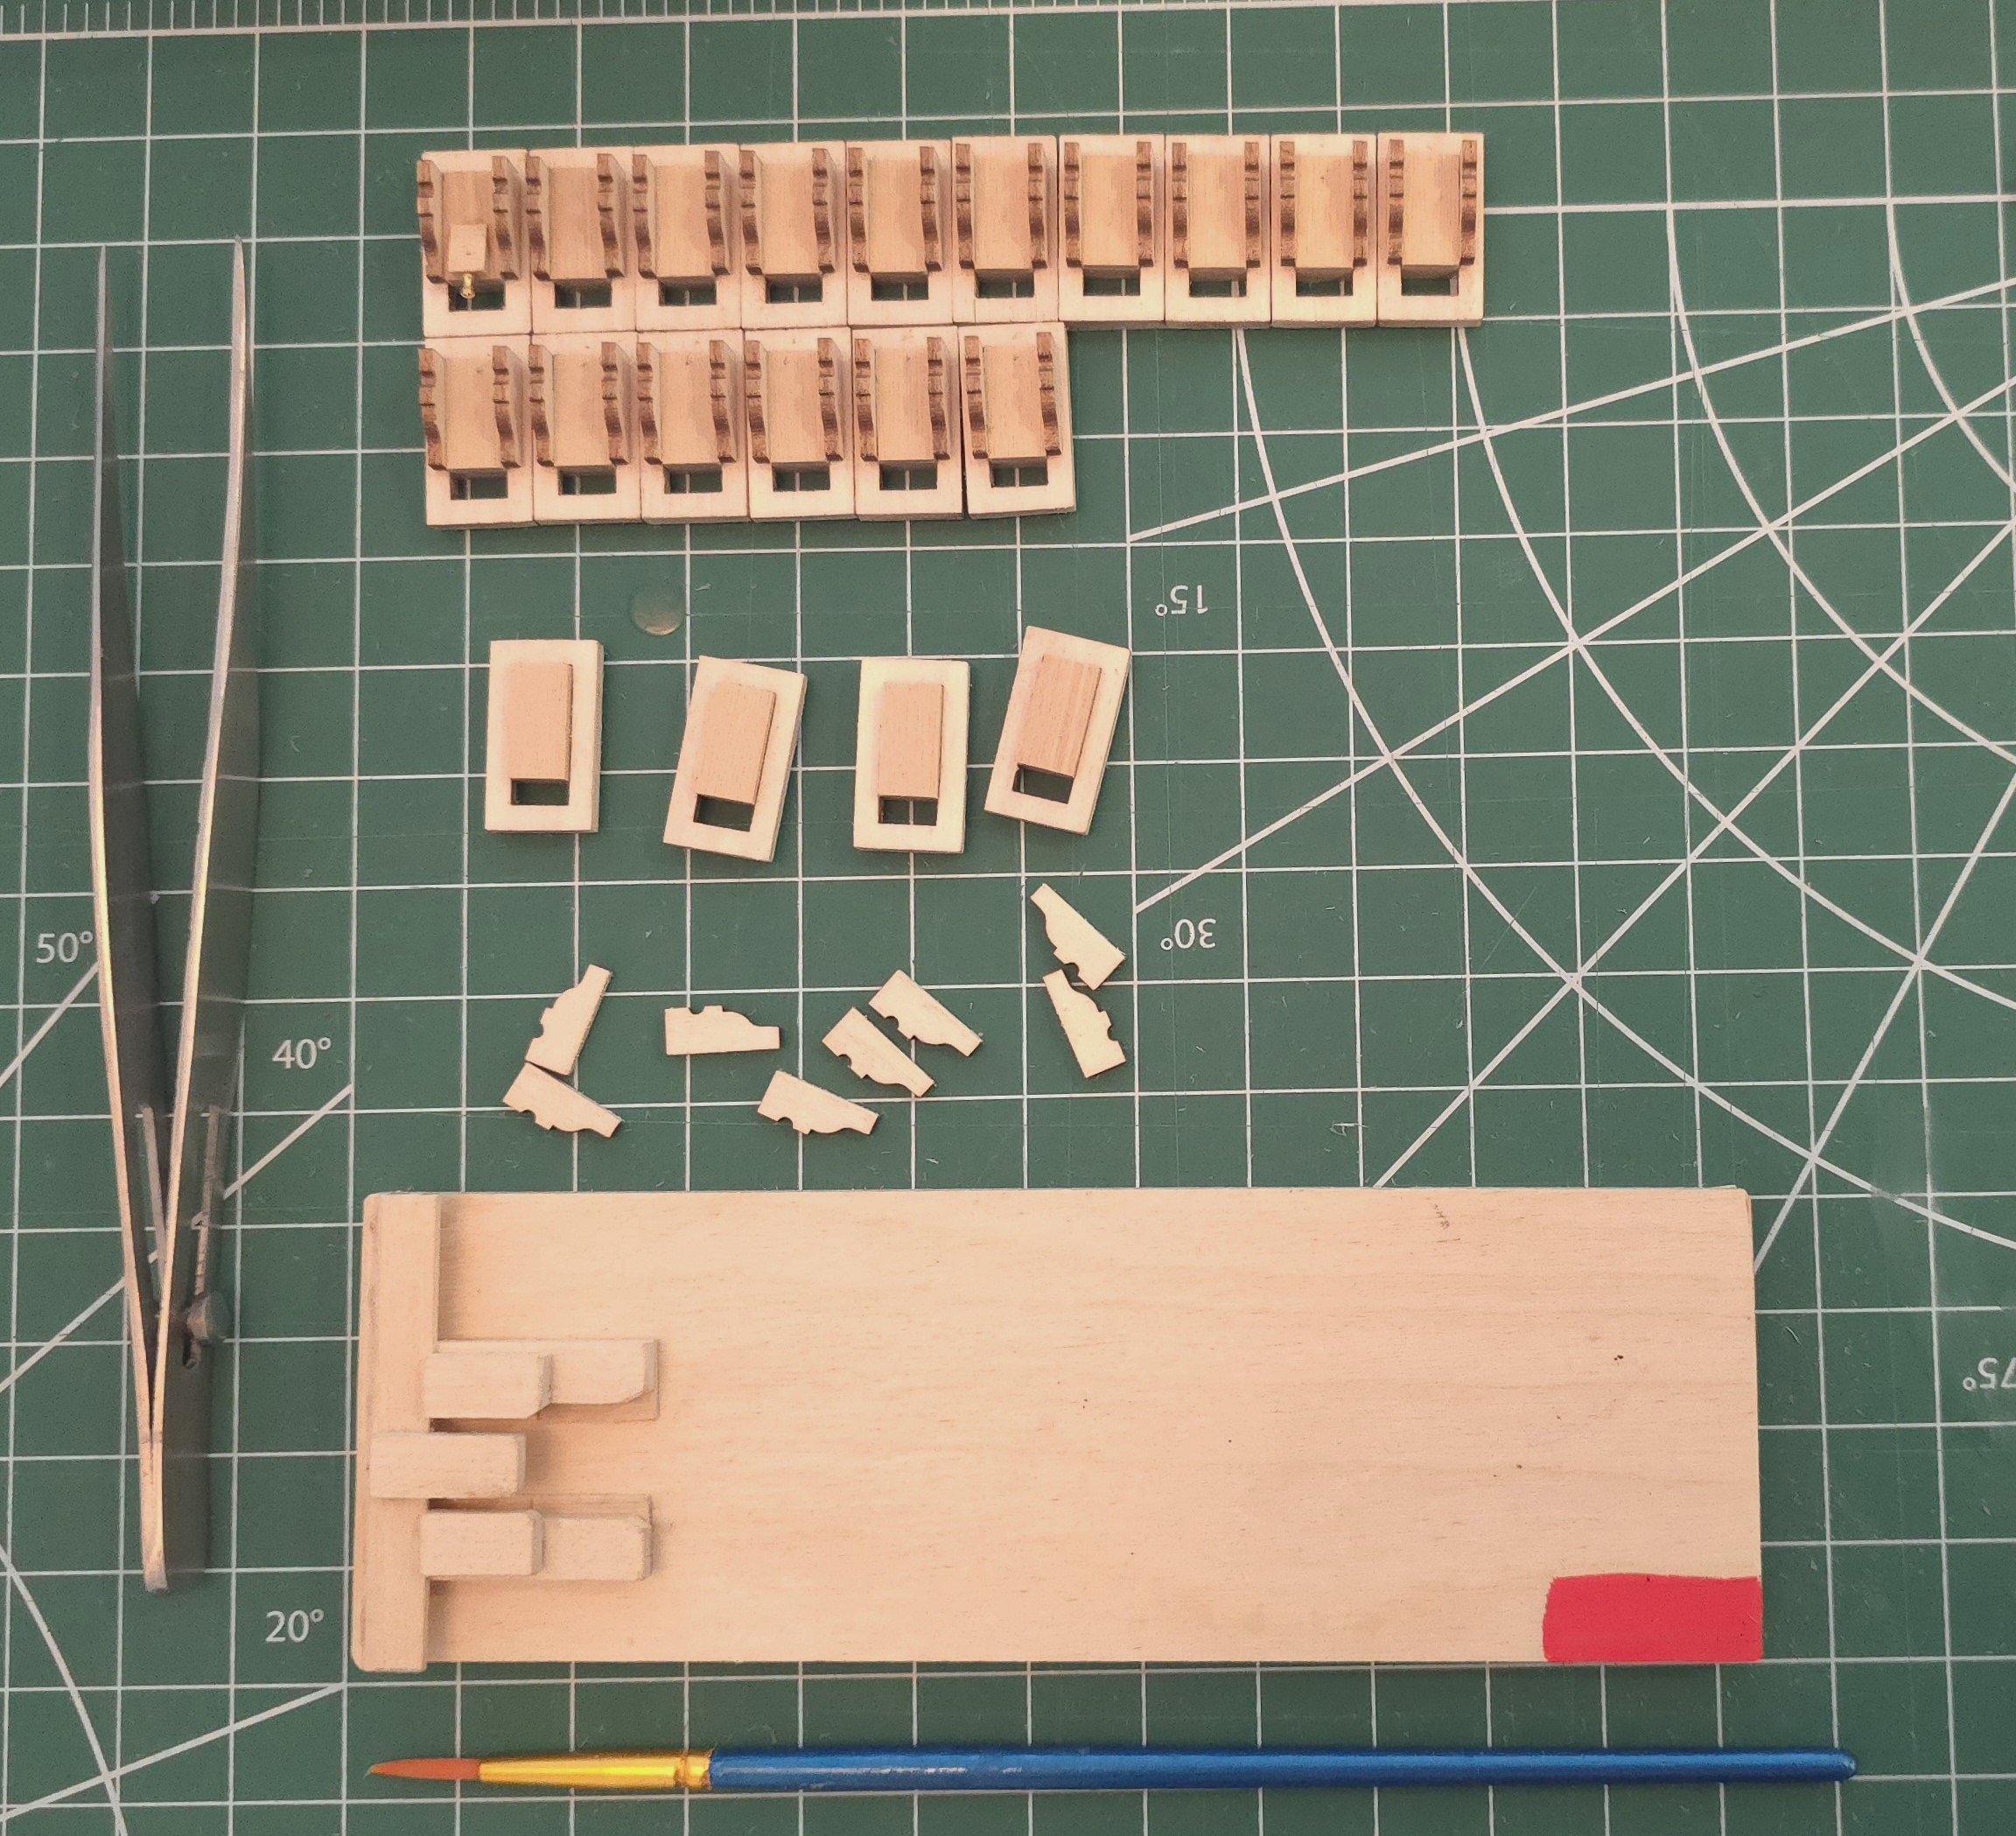
Progress. Slow going, but the assembly line is at least moving.