Der Alte Rentner
-
Posts
1,031 -
Joined
-
Last visited
Content Type
Profiles
Forums
Gallery
Events
Everything posted by Der Alte Rentner
-
 Your citing the steering wheel reminded me of something I asked you when you were constructing the wheel on your Conny - Could I sub contract you to make me one too? (If I'm misremembering, apologies in advance), but in either case, If you're up to making a few more of these canopies, you've got at least one customer. 😁
 -
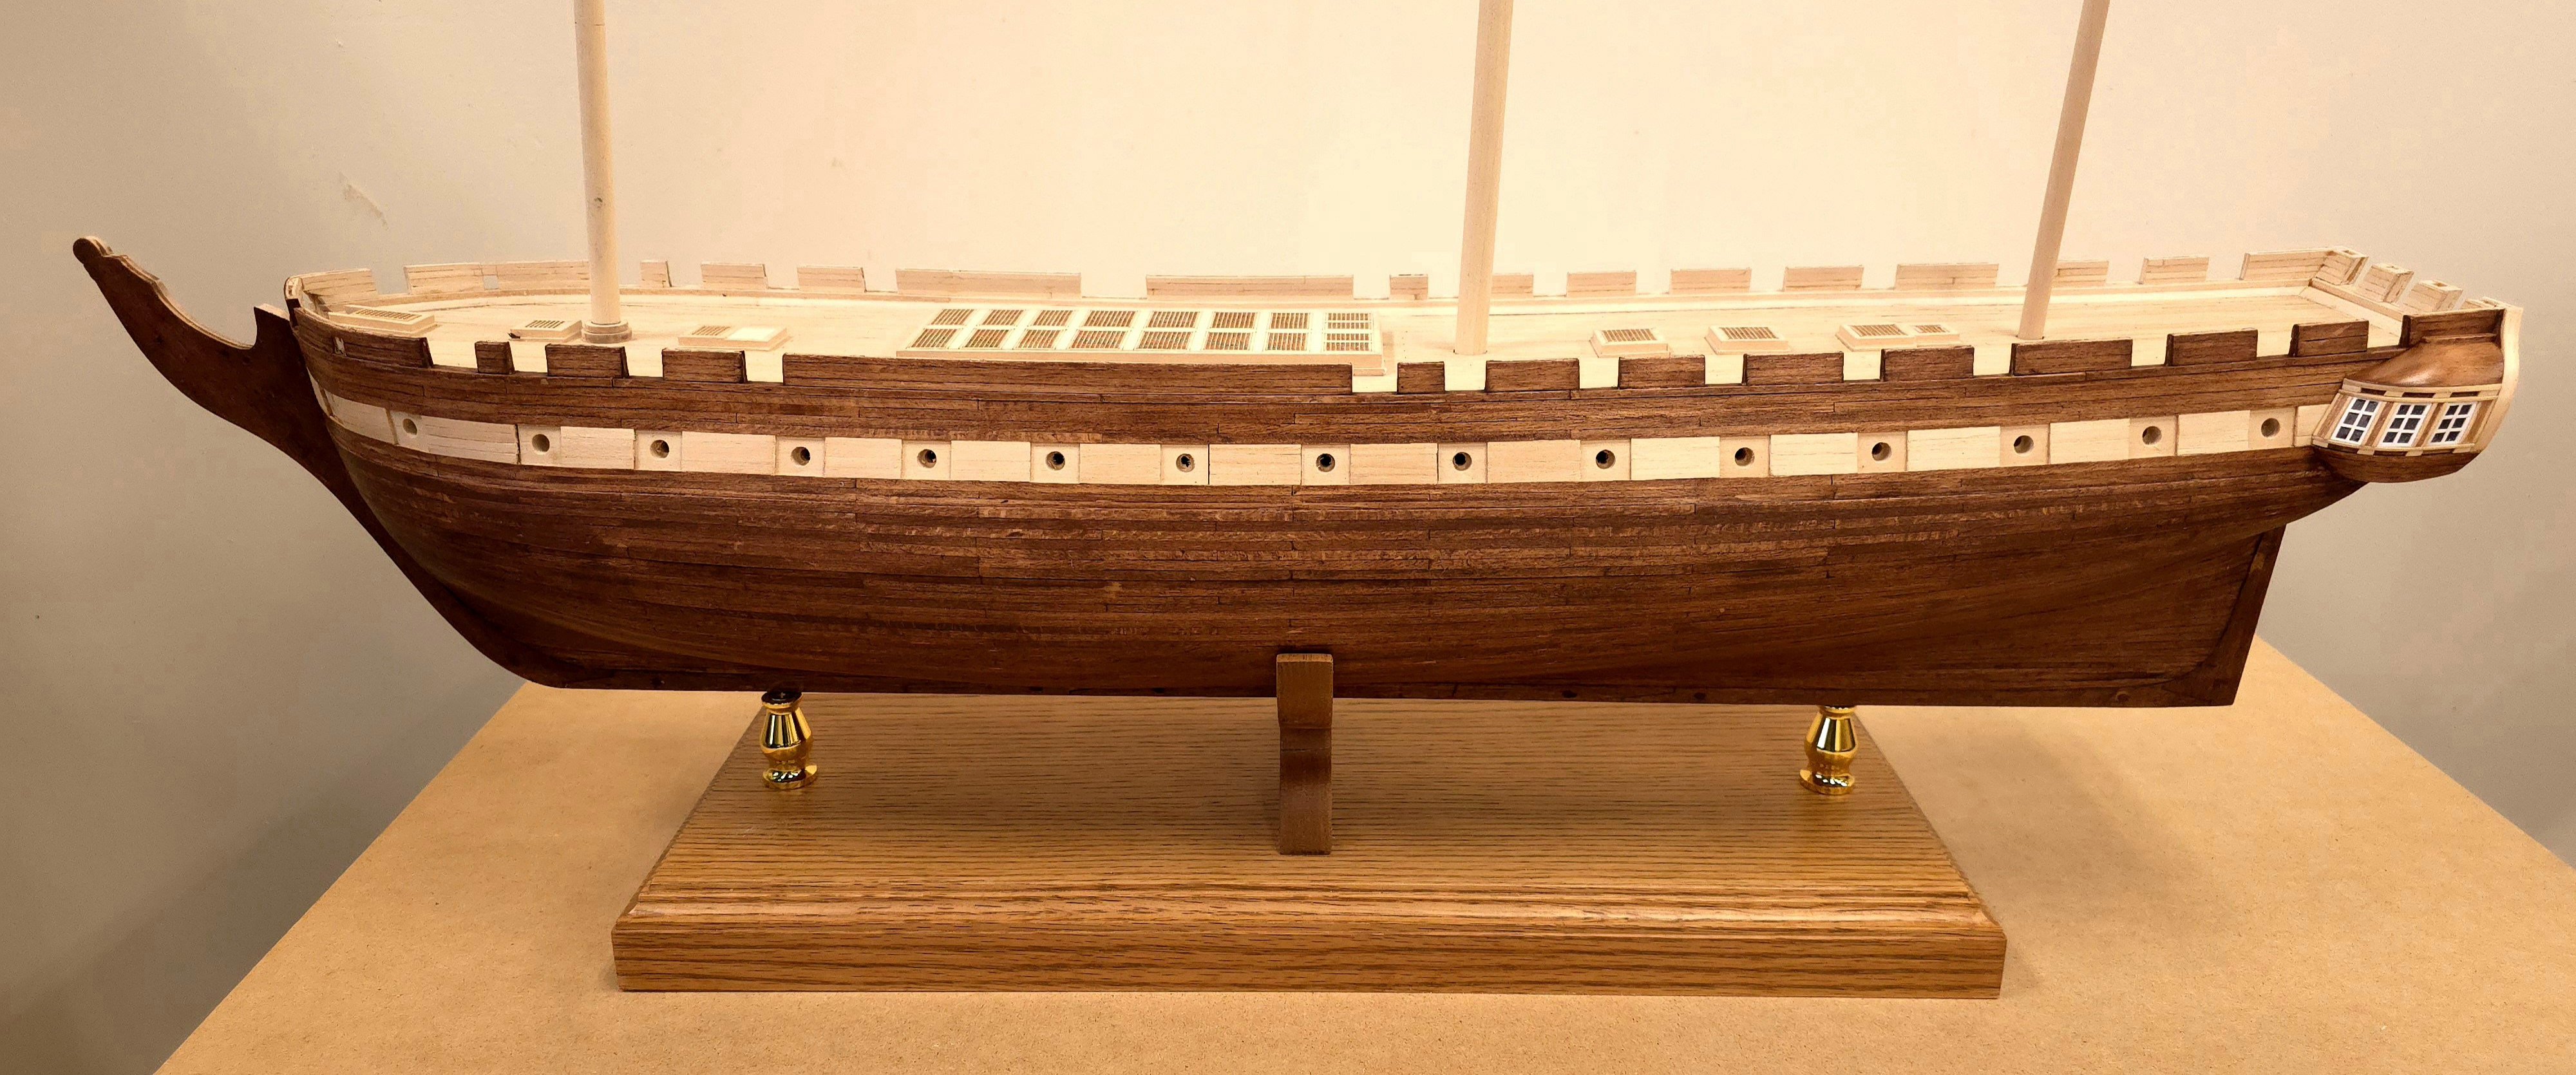
Hey Jon, Given as I've said many times, that you're this website's go to guy for Conny related info, may I ask? Do you know who build a very nice version of the Constitution but quit after completing the hull? I seem to remember the build included the lower segments of all masts and the bowsprit, but apart from the guns, there was no rigging.
-
USS Constitution by mtbediz - 1:76
Der Alte Rentner replied to mtbediz's topic in - Build logs for subjects built 1751 - 1800
Somehow, your photos make your model seem so much larger than scale. Perhaps it's the realism that you've achieved making me think I'm seeing a full sized construction. I'm in total agreement with those who've chimed in above. Excellent, beautiful and impressive workmanship. -
Ich glaube nicht, dass es in diesem Maßstab eine große Rolle spielt, welche Seilgröße Sie verwenden. Aus praktischen Gründen würde ich das wählen, mit dem man leichter arbeiten kann. Niemand wird Ihr hervorragend konstruiertes Modell betrachten und ausrufen: „Der Maßstab die Seileschlaufe ist falsch!“
-
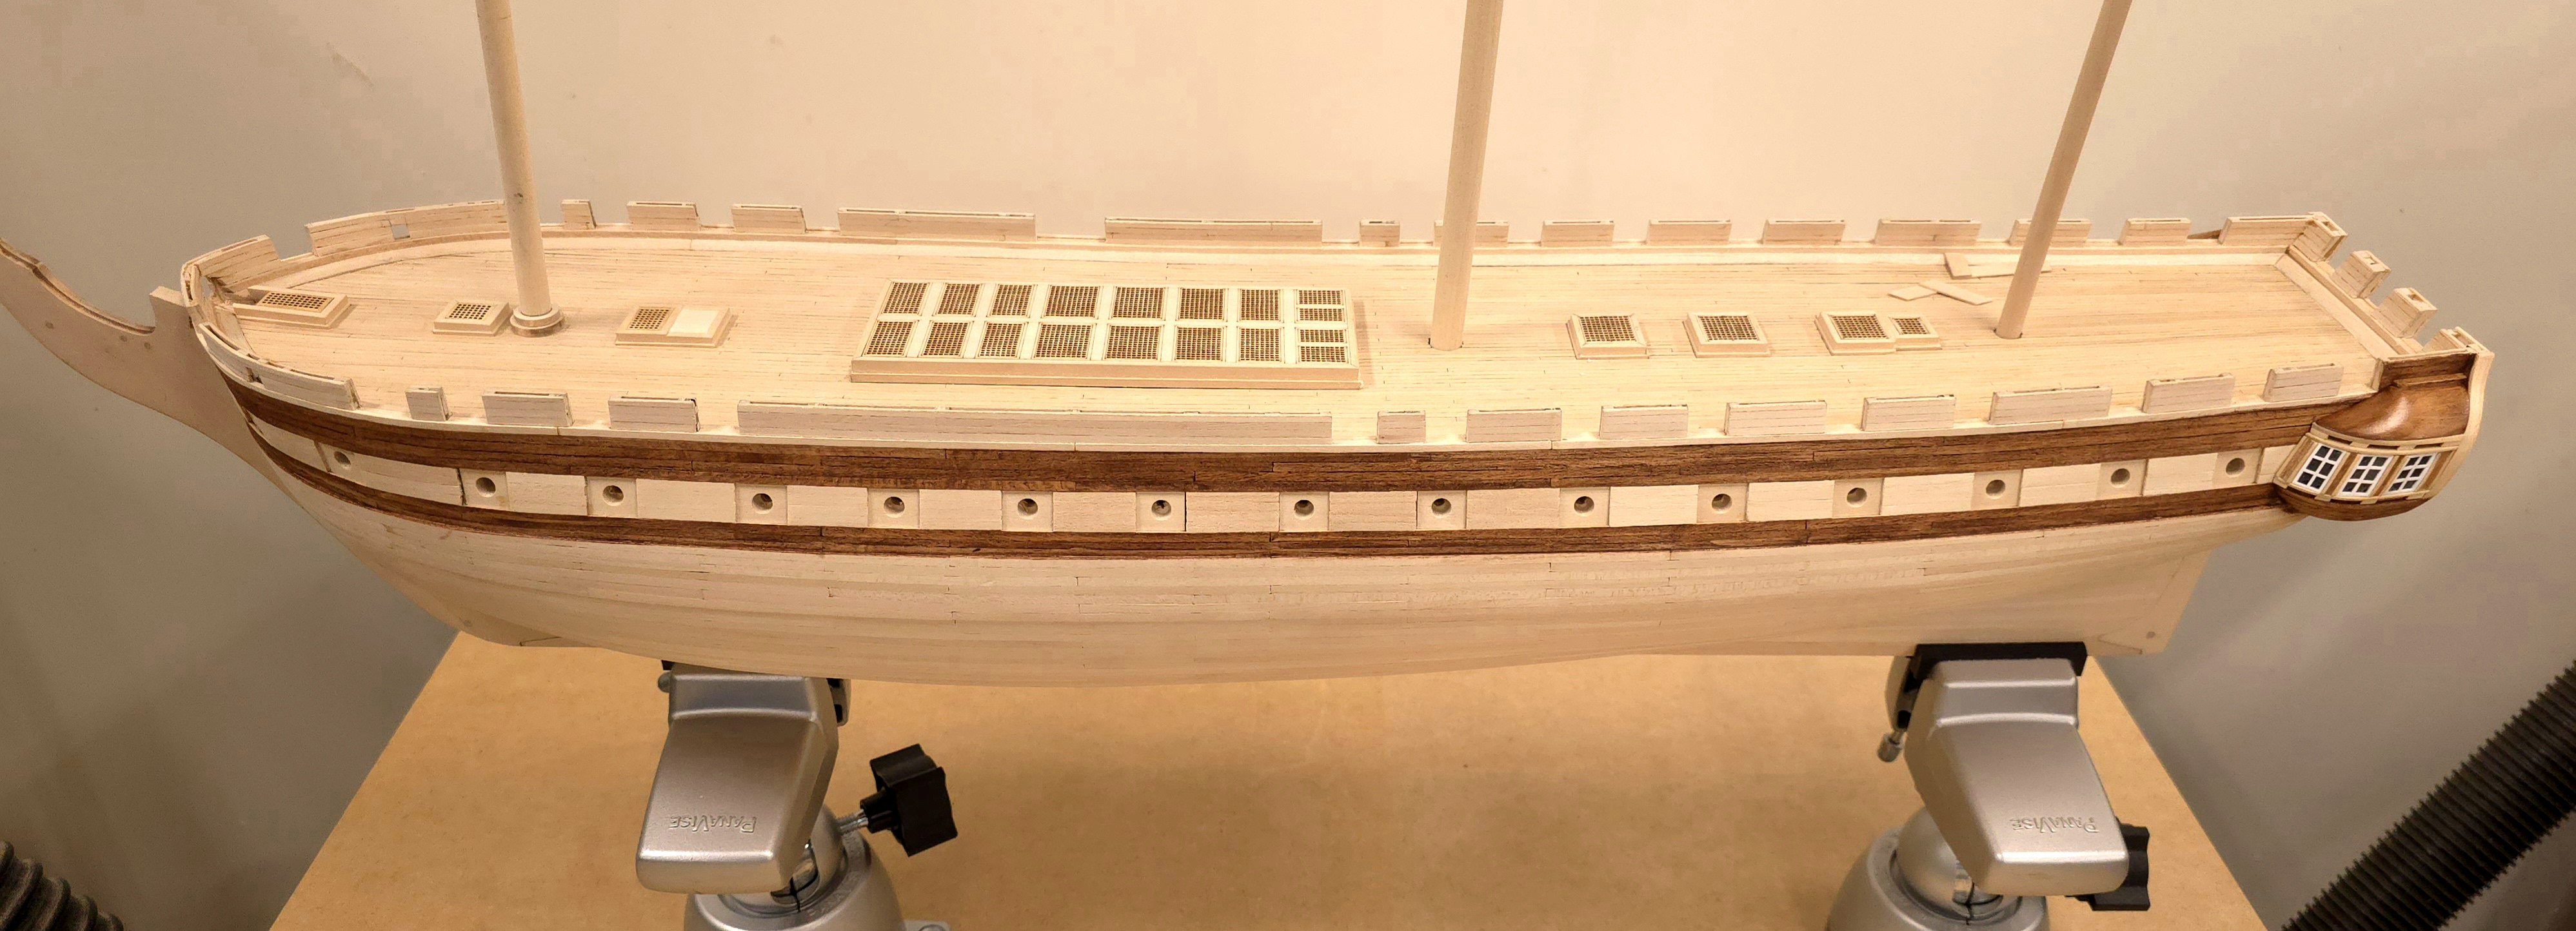
Well, it looks like my decision has been made. Here's how I left things at the shipyard today.
-
Wow, Woodartist, long time no see? I check in periodically to see if you've gotten any further with Lady Isabella and Fifie, or if you resumed work on Conny. Unless I missed a shift to another project, you seem to be sidelined these days. Thanks for chiming in with your vote to stay with the stained finish. I guess I'm still headed in that direction, having I spent a couple of hours staining and applying clear poly to the port side today. Hope to see you back in action soon. Best
-
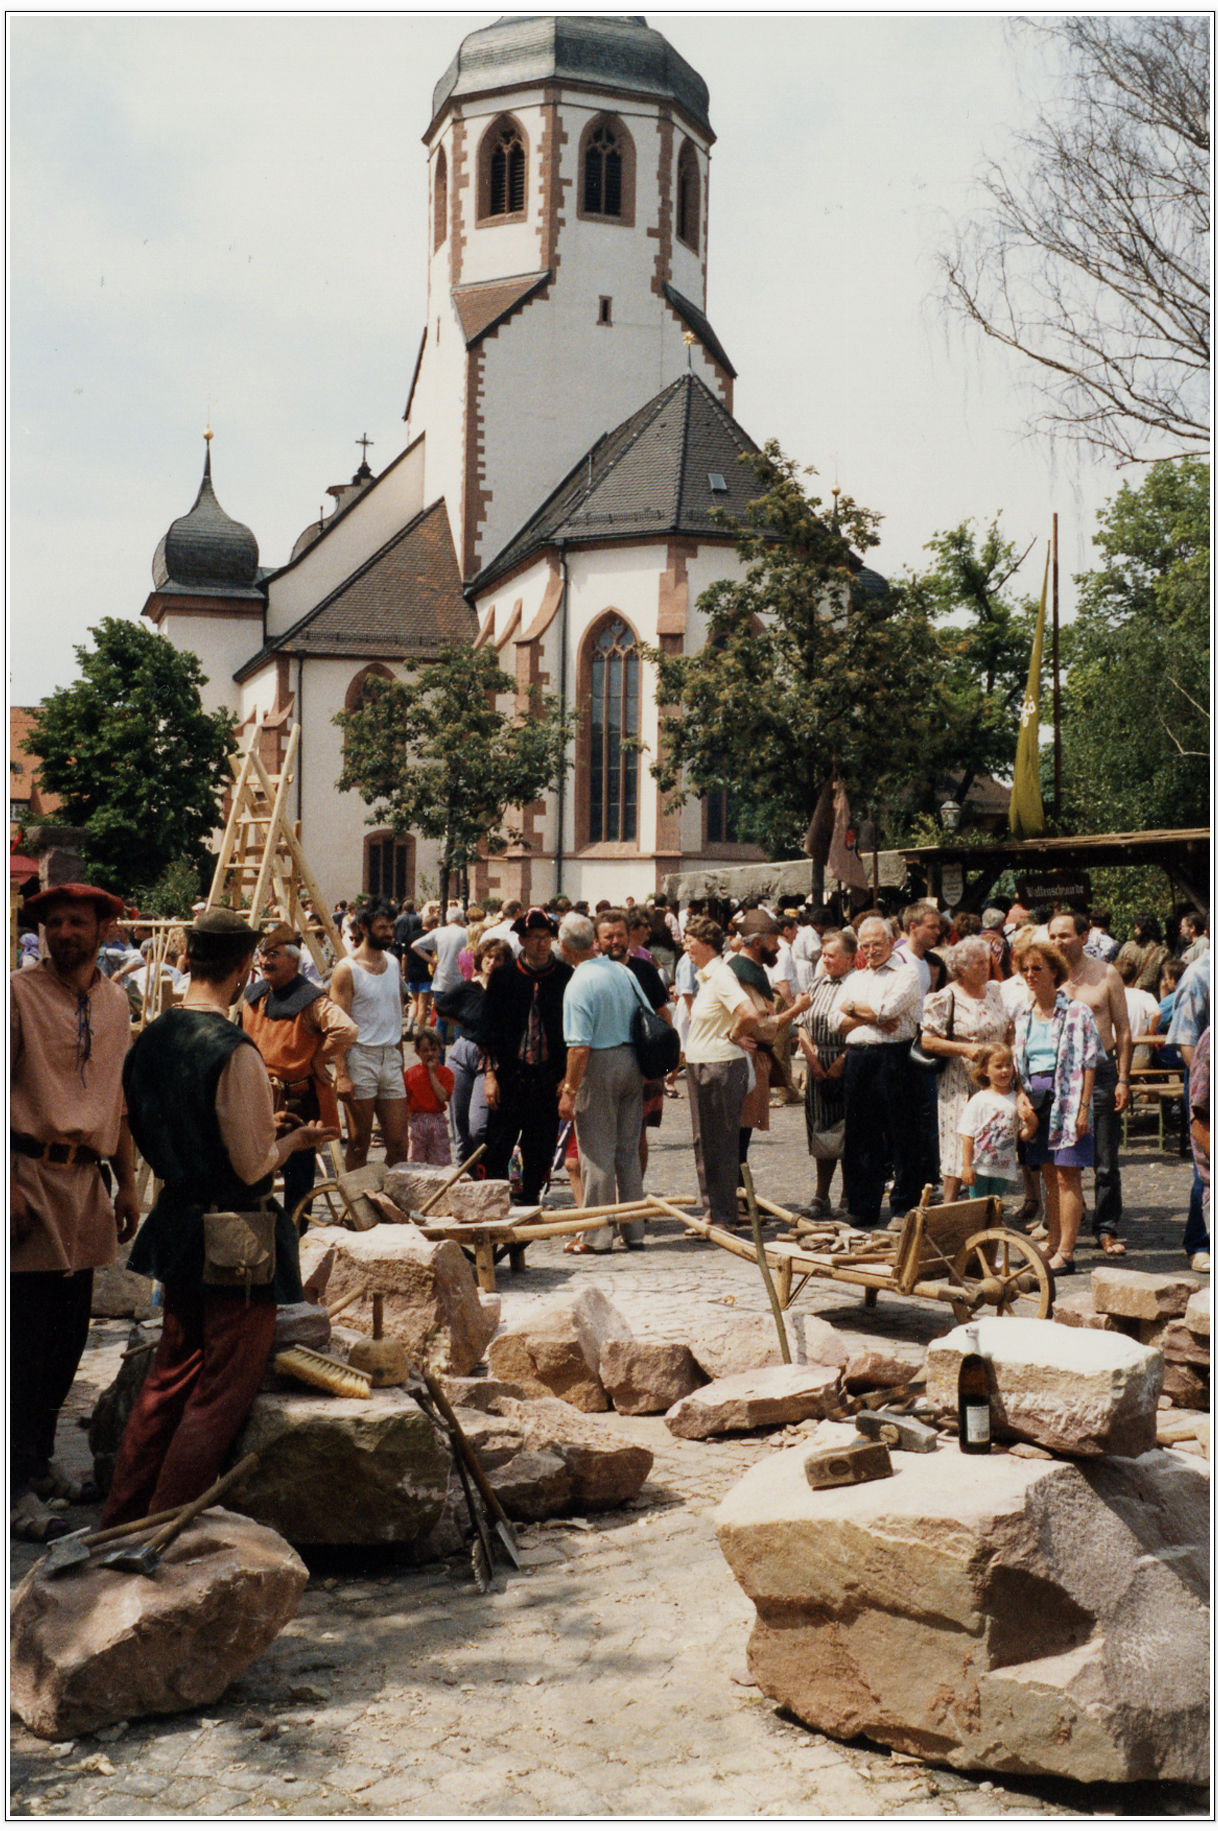
Sollte ich jemals wieder in ein Flugzeug steigen, werde ich Ihr Angebot auf jeden Fall annehmen! Da mir heute bewusst wird, dass mein letzter Besuch in Ettlingen schon 32 Jahre her ist, muss ich meinen Boykott der TSA vielleicht noch einmal überdenken. Bis dann, muss ich stellvertretend durch die damals aufgenommenen Fotos leben. Die meisten von dieser Reise zeigen meine Familie, aber ich habe eines gefunden, dass ein Wahrzeichen enthält, das Ihnen sicherlich bekannt vorkommen dürfte.

-
My mistake, The build I mistakenly attributed to you is the San Martin by Pfälzer. I apologize for confusing you with him Marcus. Looking back over a number of my posts, I can't understand where or how I became aware of Pfälzer's build log, let alone how I got the two of you mixed up in my mind, but his is the build I was referring to. Thank you for bringing this to my attention. As an aside, I have family very near Karlsruhe (Ettlingen) and I visited Karlsruhe some years ago on a visit to my uncle and cousins in the Black Forest. I have very fond memories of my time there. Here is a link to the San Martin build log I was referencing.
-
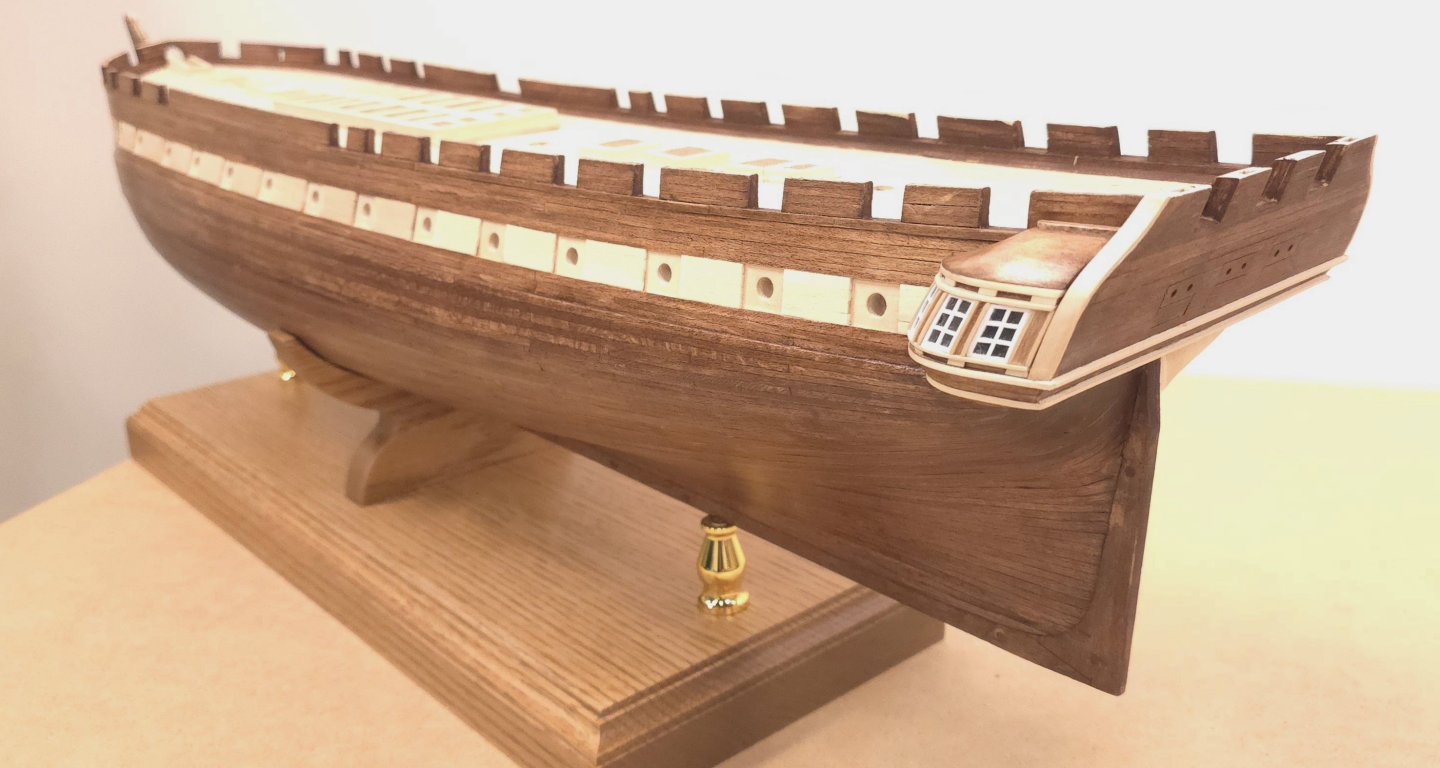
No pix today, just a status update. I've been staring at the hull for days now, and still can't bring myself to prime and paint it black. Marcus was one of the contributors to the discussion chiming in on the side for the switch to black. I confused him with Pfälzer in the commentary below and have edited the post to correct my error. Pfälzer's build of the San Martin is part of the reason I'm still on the fence. Even though he used oak for his planking, he stained it and, to my eyes at least, the result is not so different from my Conny. And I like the look.. I just went back to have another look at San Martin' Pfälzer build, and realize that my hull is a shade or two darker than I would have liked. Having said all that, I started adding the molding beneath the port side gallery and stained the transom. Yes, I still wish I'd used better wood, and I keep telling myself I can switch at any time, yet I keep inching forward with the stained basswood.
-
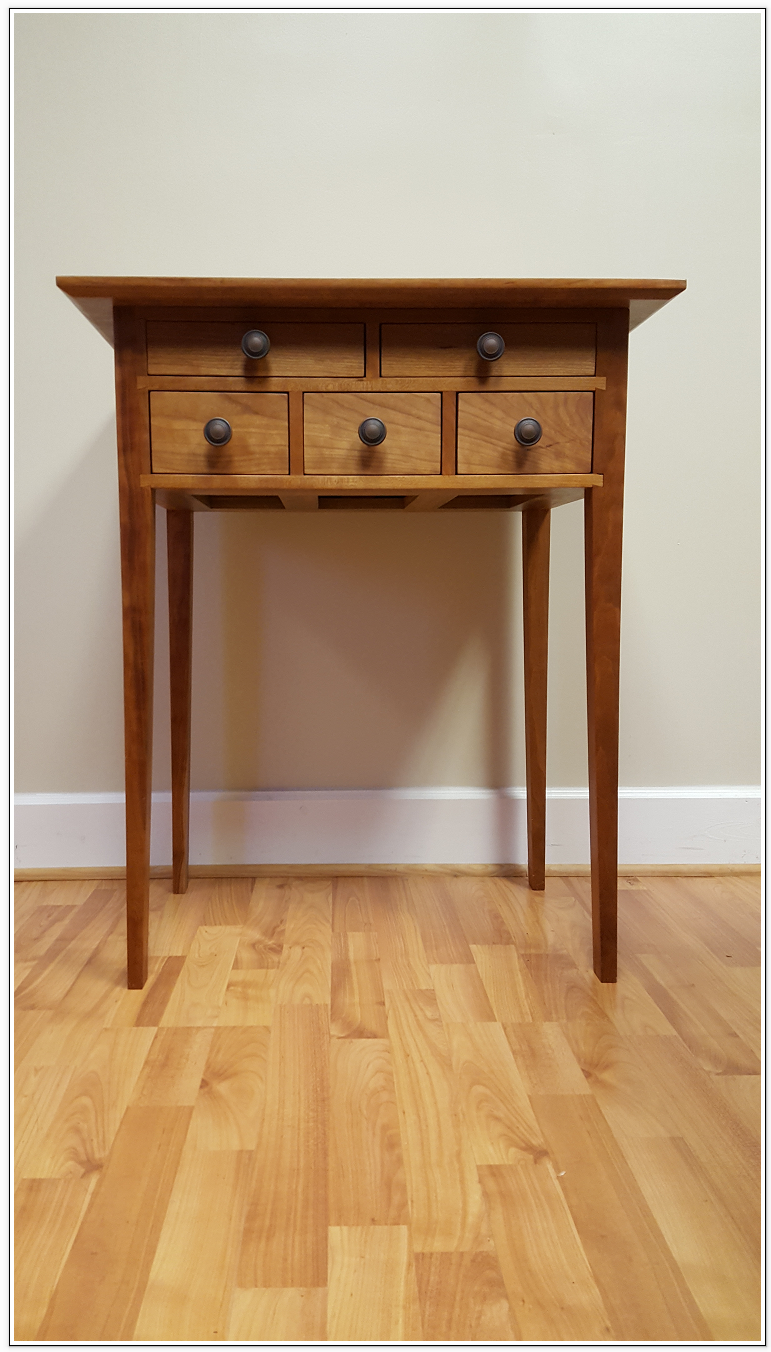
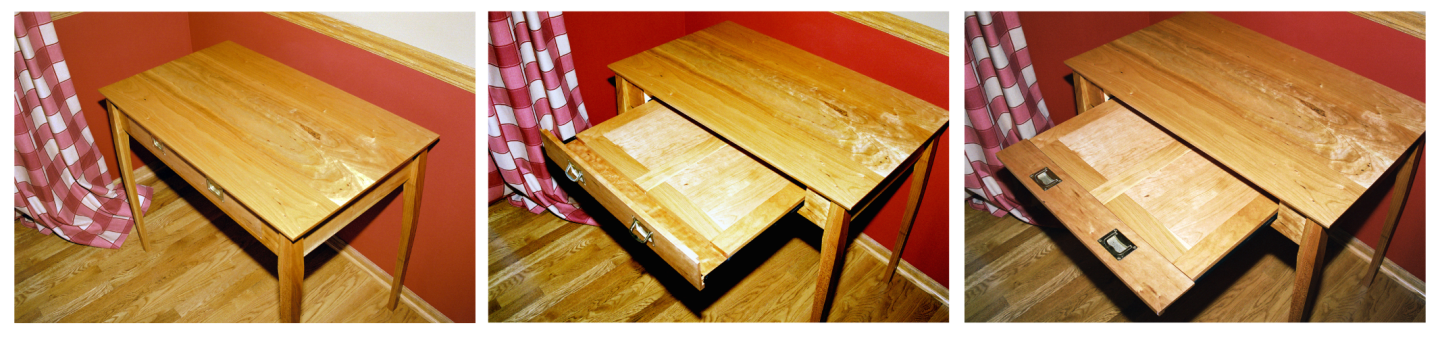
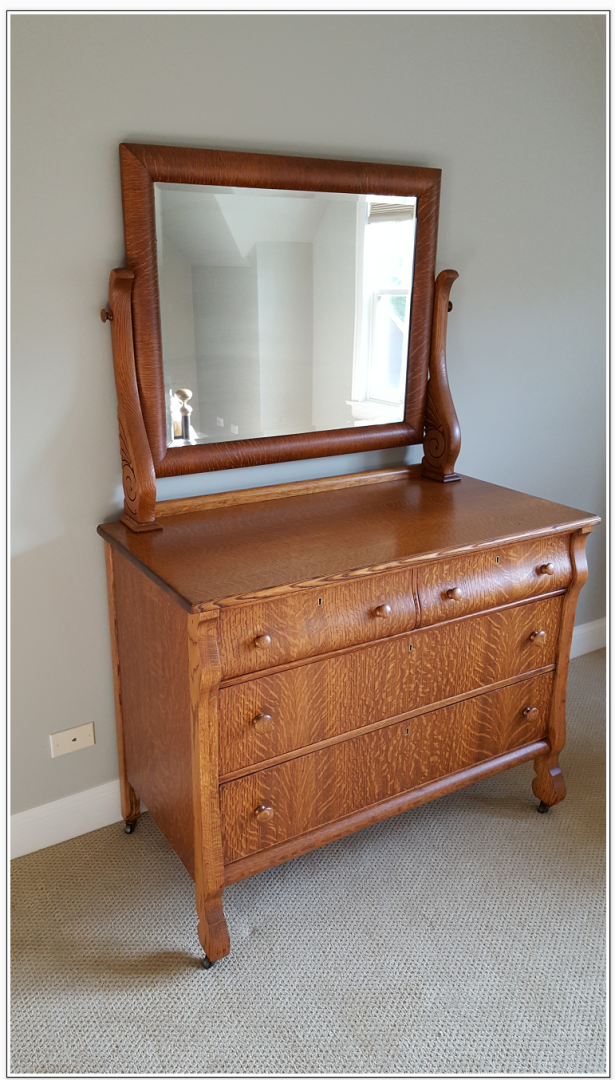
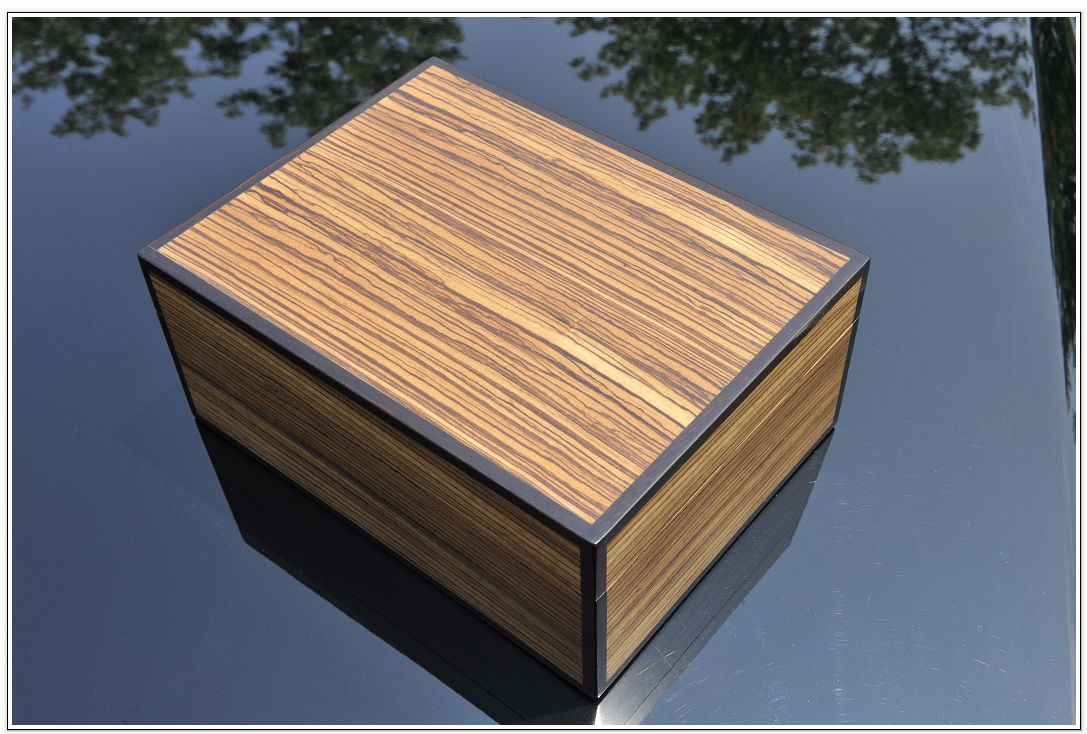
Hard to believe I flunked my first semester of Woodshop in high school, eh? 😁 No, not a profession. I took up woodworking as a hobby in my 50s because I wanted to have something concrete to show for my labors - after watching the computer I spent 15 years programming being pushed into the back of a van to be recycled after the company upgraded computers and retired my programming in favor of an ERP software system. I saw the plans for this laptop table in an issue of Fine Woodworking and made it my first project. The pictures are not the best, but I'm quite proud of the finished project. It's been a very satisfying hobby, but I got tired of big projects and decided to try modelling for a change of pace. Thank you for the kind words. Best Peter
-
Vielen Dank Marcus.
-
USS Constitution by mtbediz - 1:76
Der Alte Rentner replied to mtbediz's topic in - Build logs for subjects built 1751 - 1800
Oh my, It's too late for me to even think about poking a million holes in the spar deck. and as I mentioned earlier, I'm certainly not going to attempt to simulate the rivets on the bulwarks. Now I really feel like a slacker. 😁 Maybe next time.. -
As a long time woodworker favoring natural finishes, I just hate the thought of giving up, but I think I must reluctantly agree with you on this Mustafa. I'm going to spend a few hours at the shipyard just staring at Conny to see if I can't convince myself to make the switch. One thing I won't like to do, if I change directions, is to prime and paint the galleries. I assembled them the way I did so that I had nice clean demarcations between contrasting colors. In a worst case scenario, I'd have to remake the pilasters and windows. Ugh.. Stay tuned..

-
So, now I have to ask myself, would I rather switch to black so that I can use styrene for the molding and scroll work later? Stain applied, but need to wait 24 hours to clear coat.. Boy, do I wish I'd used better wood for the planking. It would have been nice to not have to stain at all. Oh well, this is a learning experience.

-
USS Constitution by mtbediz - 1:76
Der Alte Rentner replied to mtbediz's topic in - Build logs for subjects built 1751 - 1800
I was wondering if you were going to bother with those rivets. Frankly I think you've stumbled on a more elegant and nicer looking solution. More detail than I'm prepared to go through, but as usual, you've added the Masters touch. Kudos. -
Okay, here goes. Staining begins (in baby steps).. Speaking of baby steps, I'm using Q-tips, the pointy kind, as well as the standard ones, to apply and remove the stain. I tried brushes, they are problematic at least around the gun deck ports. I might resort to a brush for the bottom of the hull.
-
Ausgezeichnet!
-
Thanks for the offer, but with that long a turn around time, I'll just soldier on with old school techniques, or invest in the learning curve to print my own stuff.
-
If you're that handy with a printer, could you build the windows for the galleries with a printer? Also, where do you get the detailed information to input to the printer to get these results?
-
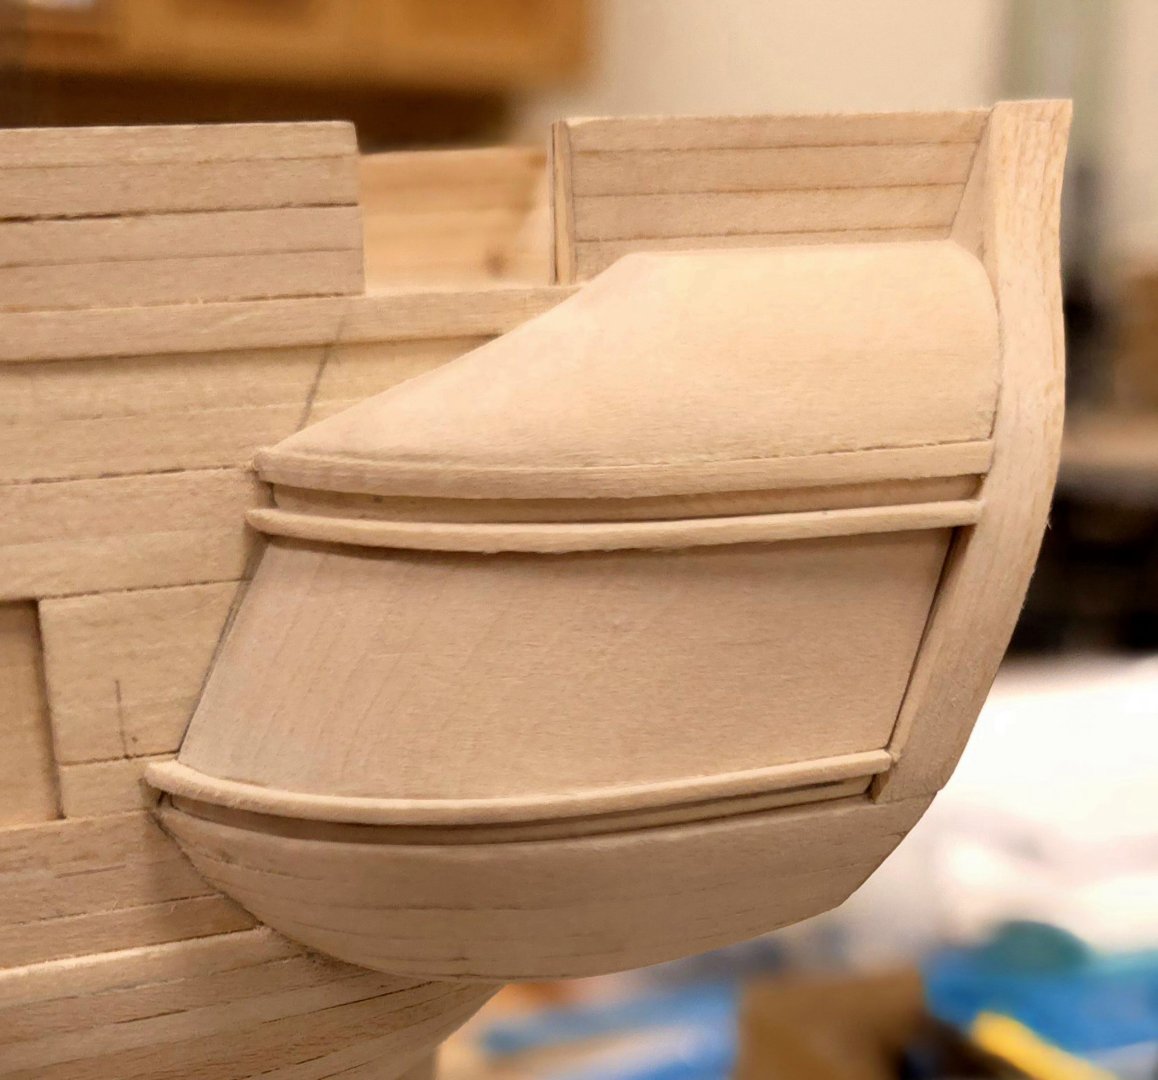
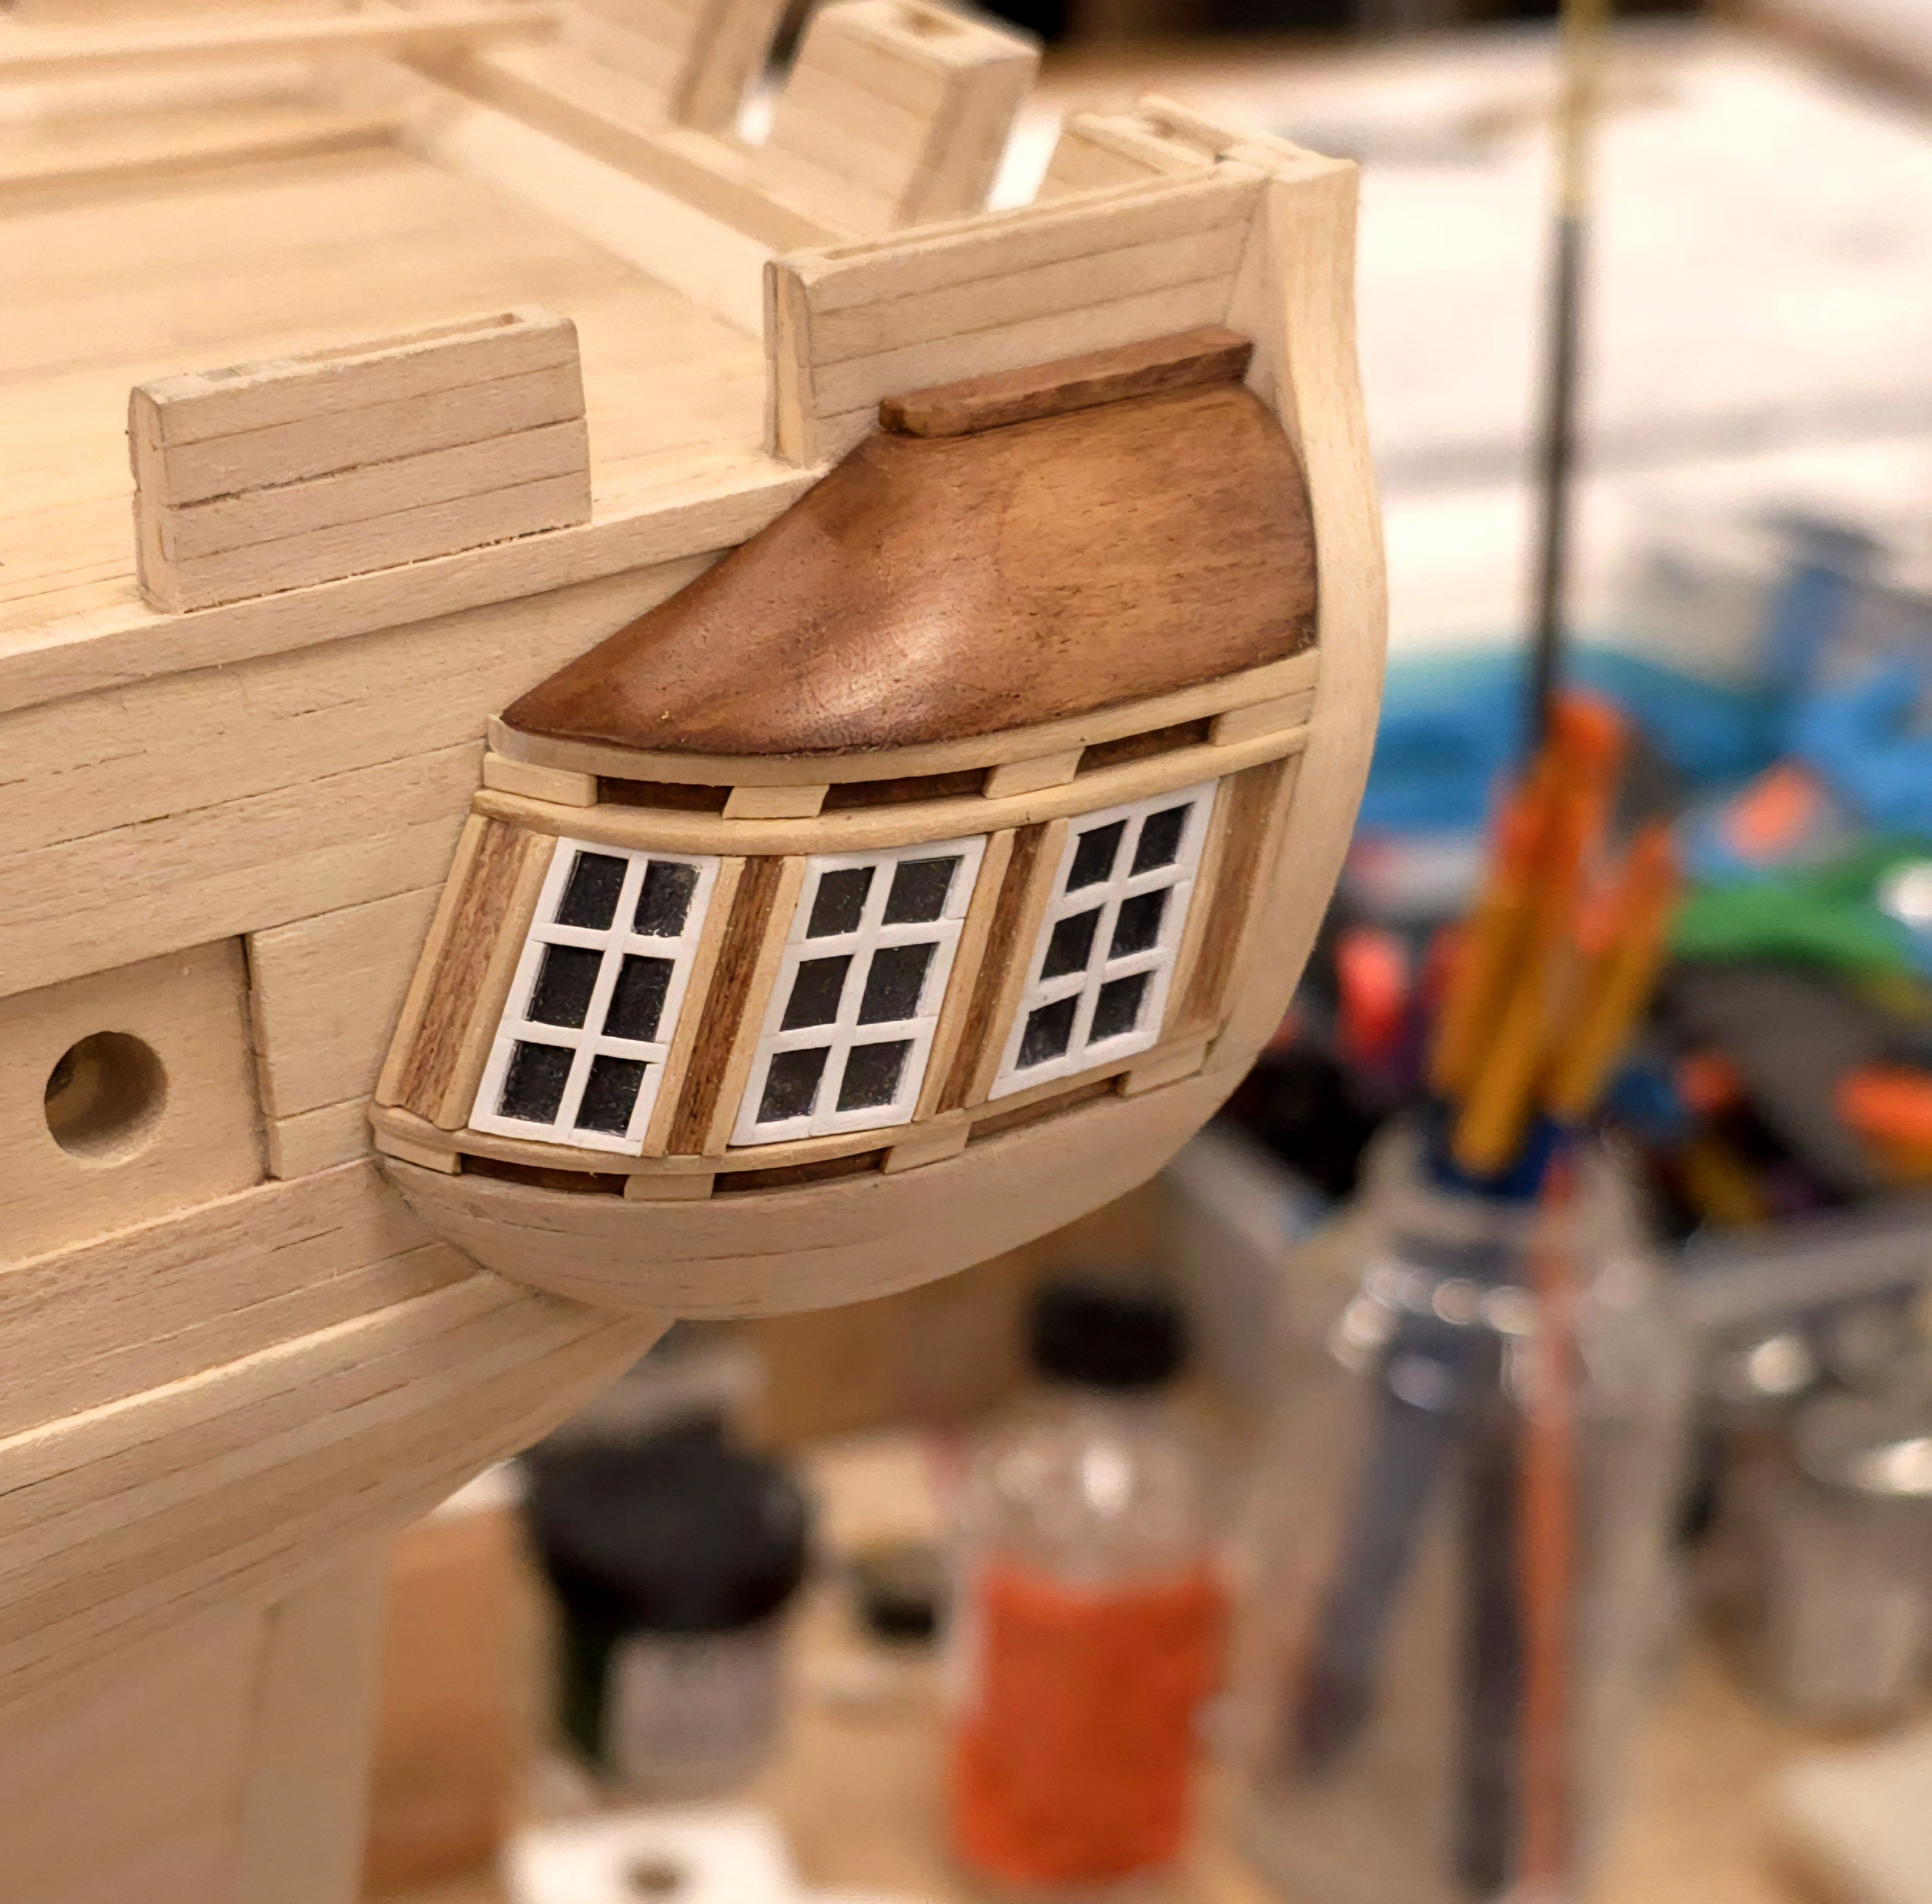
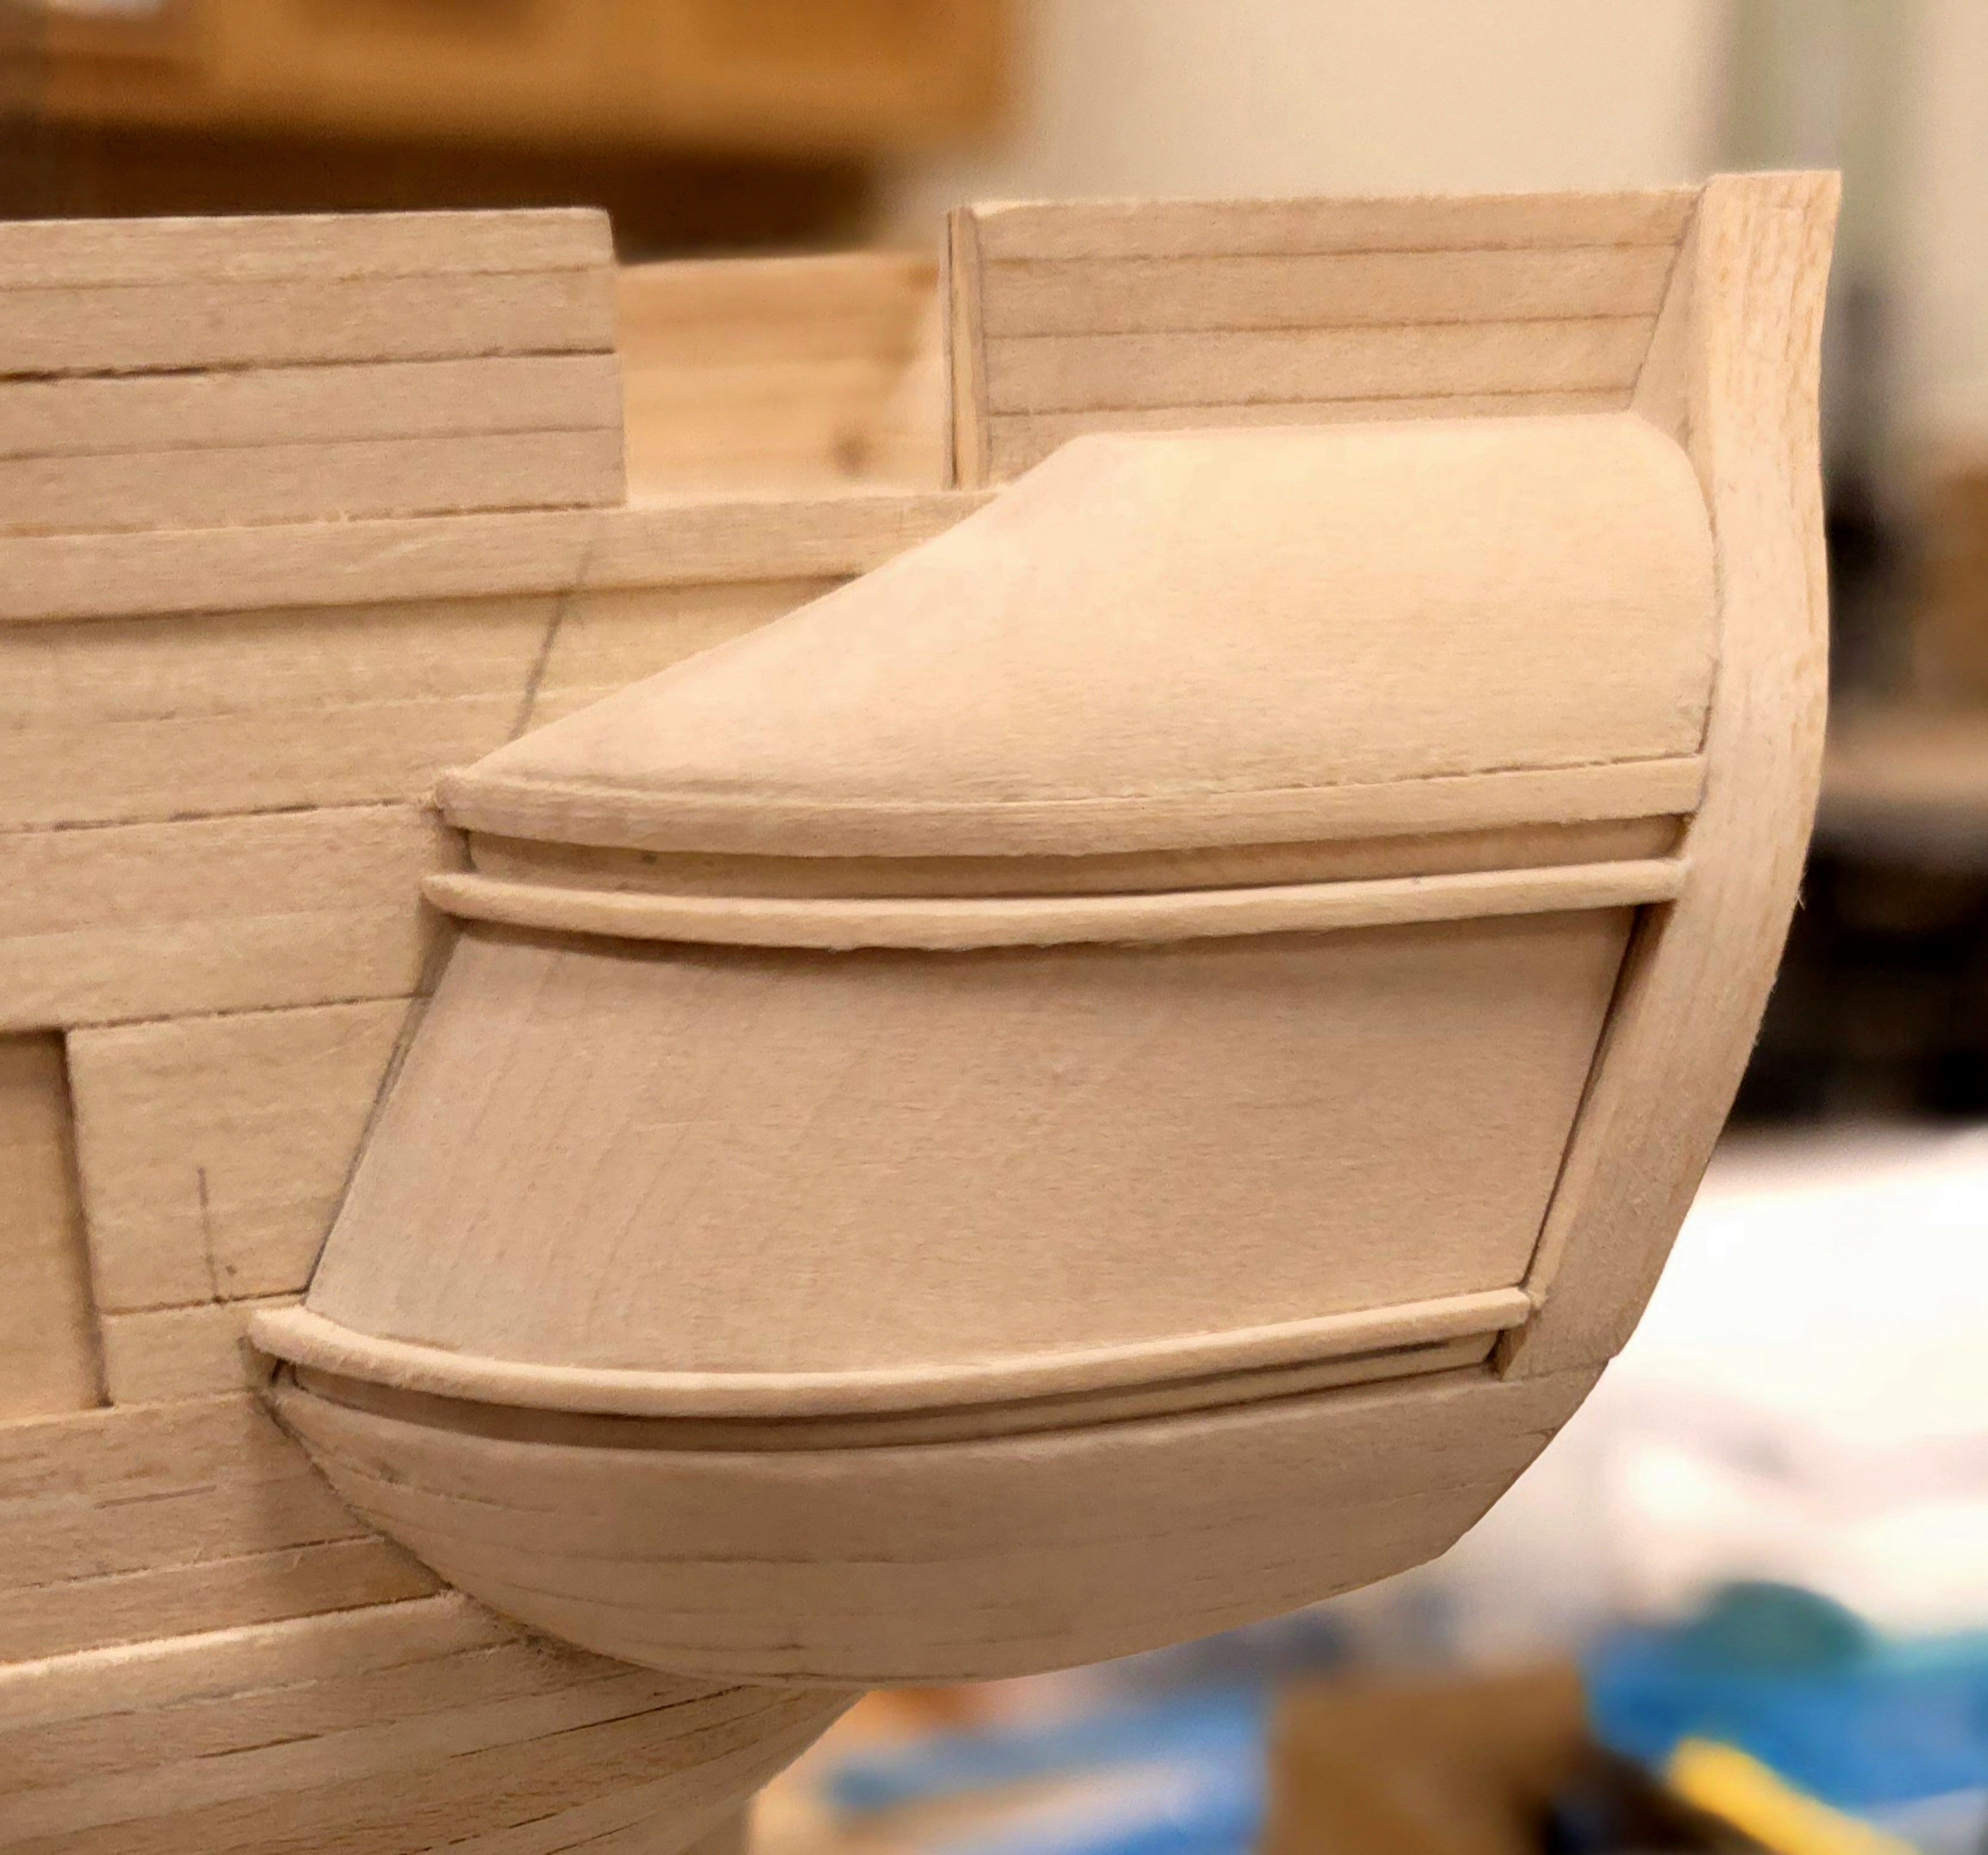
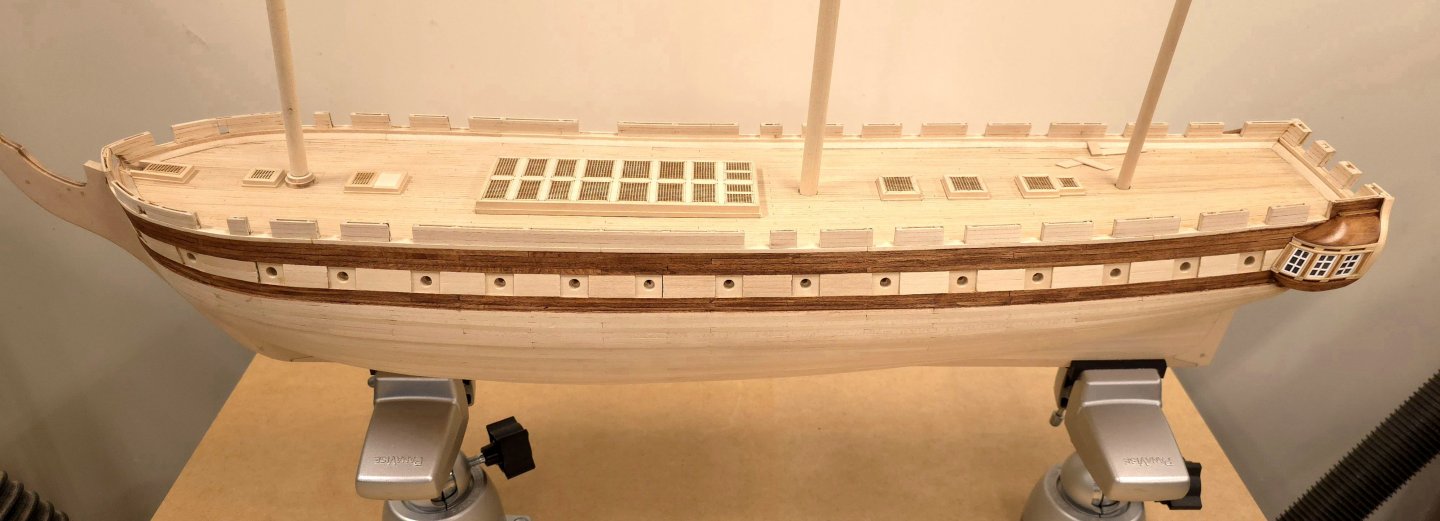
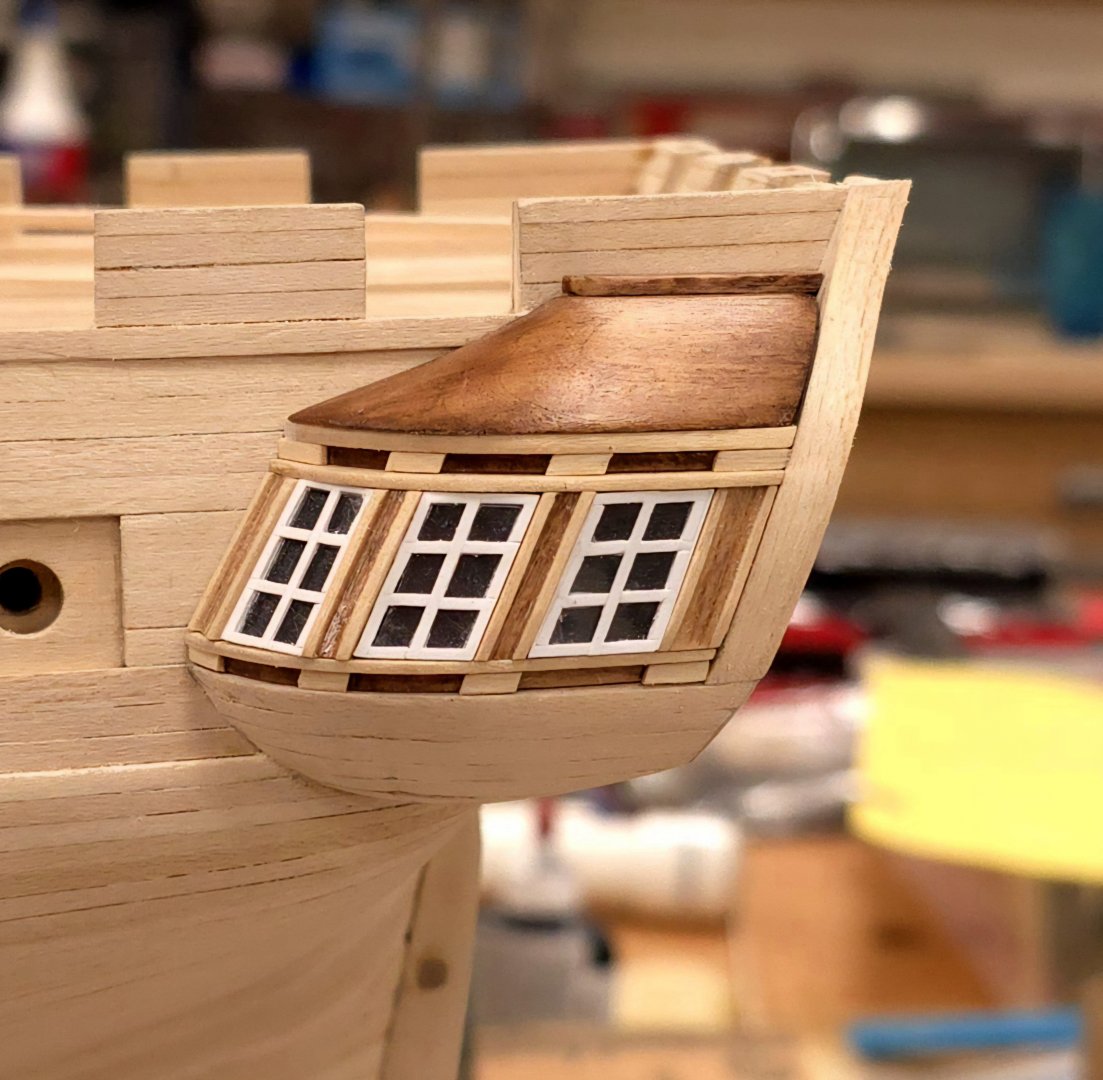
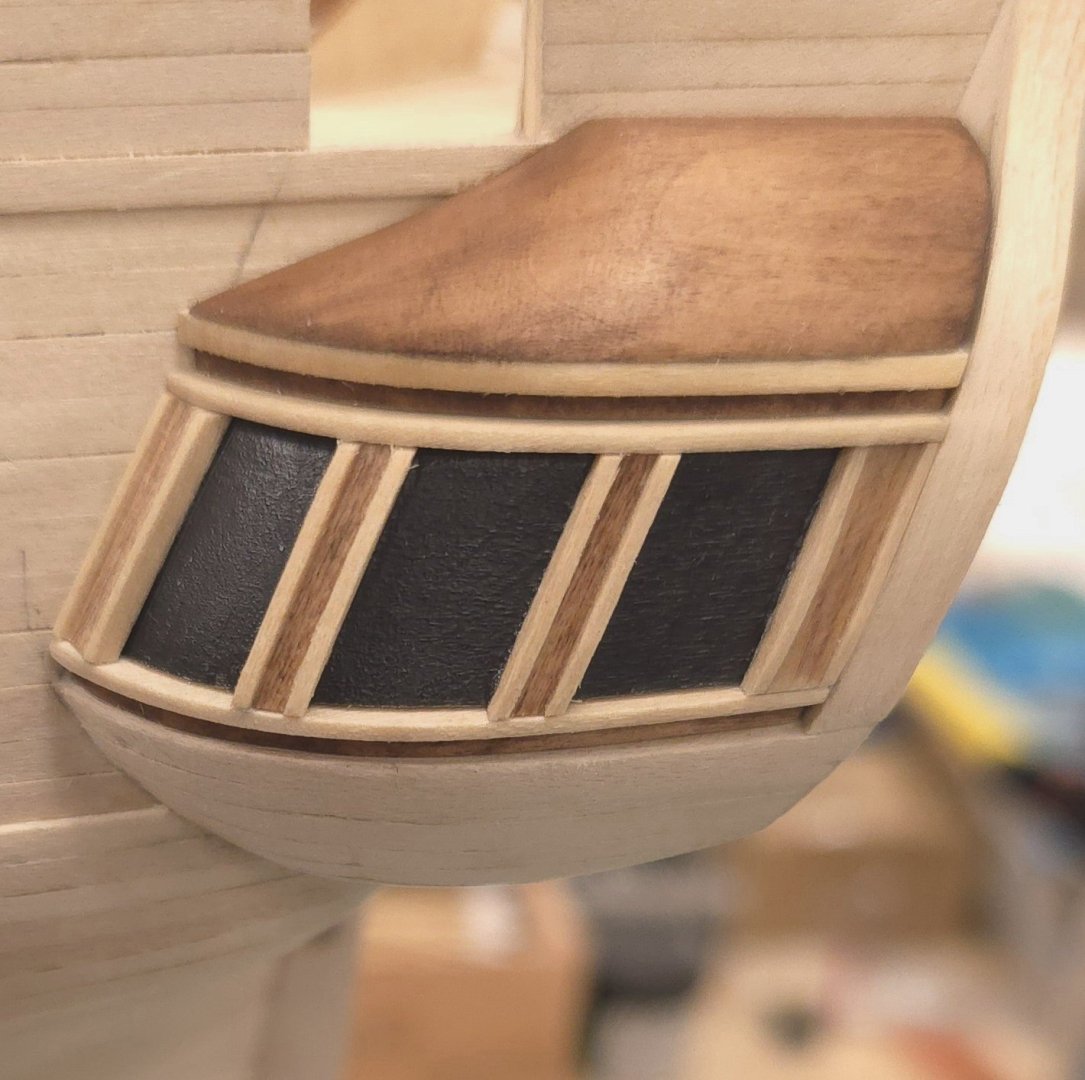
Pretty much done. Some fine tuning still required, but the hard work, at least on these galleries, is done. Note, everything is still unglued. I'll hold off just a bit while I figure out the best way to go about staining the hull. Also, looking ahead, I see that fashioning the two bottom moldings beneath the gallery windows and crossing the transom is going to take some thought as well. I see now that a black hull with white trim lends itself to working with styrene in this area. I've got some work ahead of me here my friends.. And before anyone asks, yes, I did try various stains and paints on the styrene. None of the results looked better than keeping it white, at least for me. A tad more construction detail. The port side gallery.


-
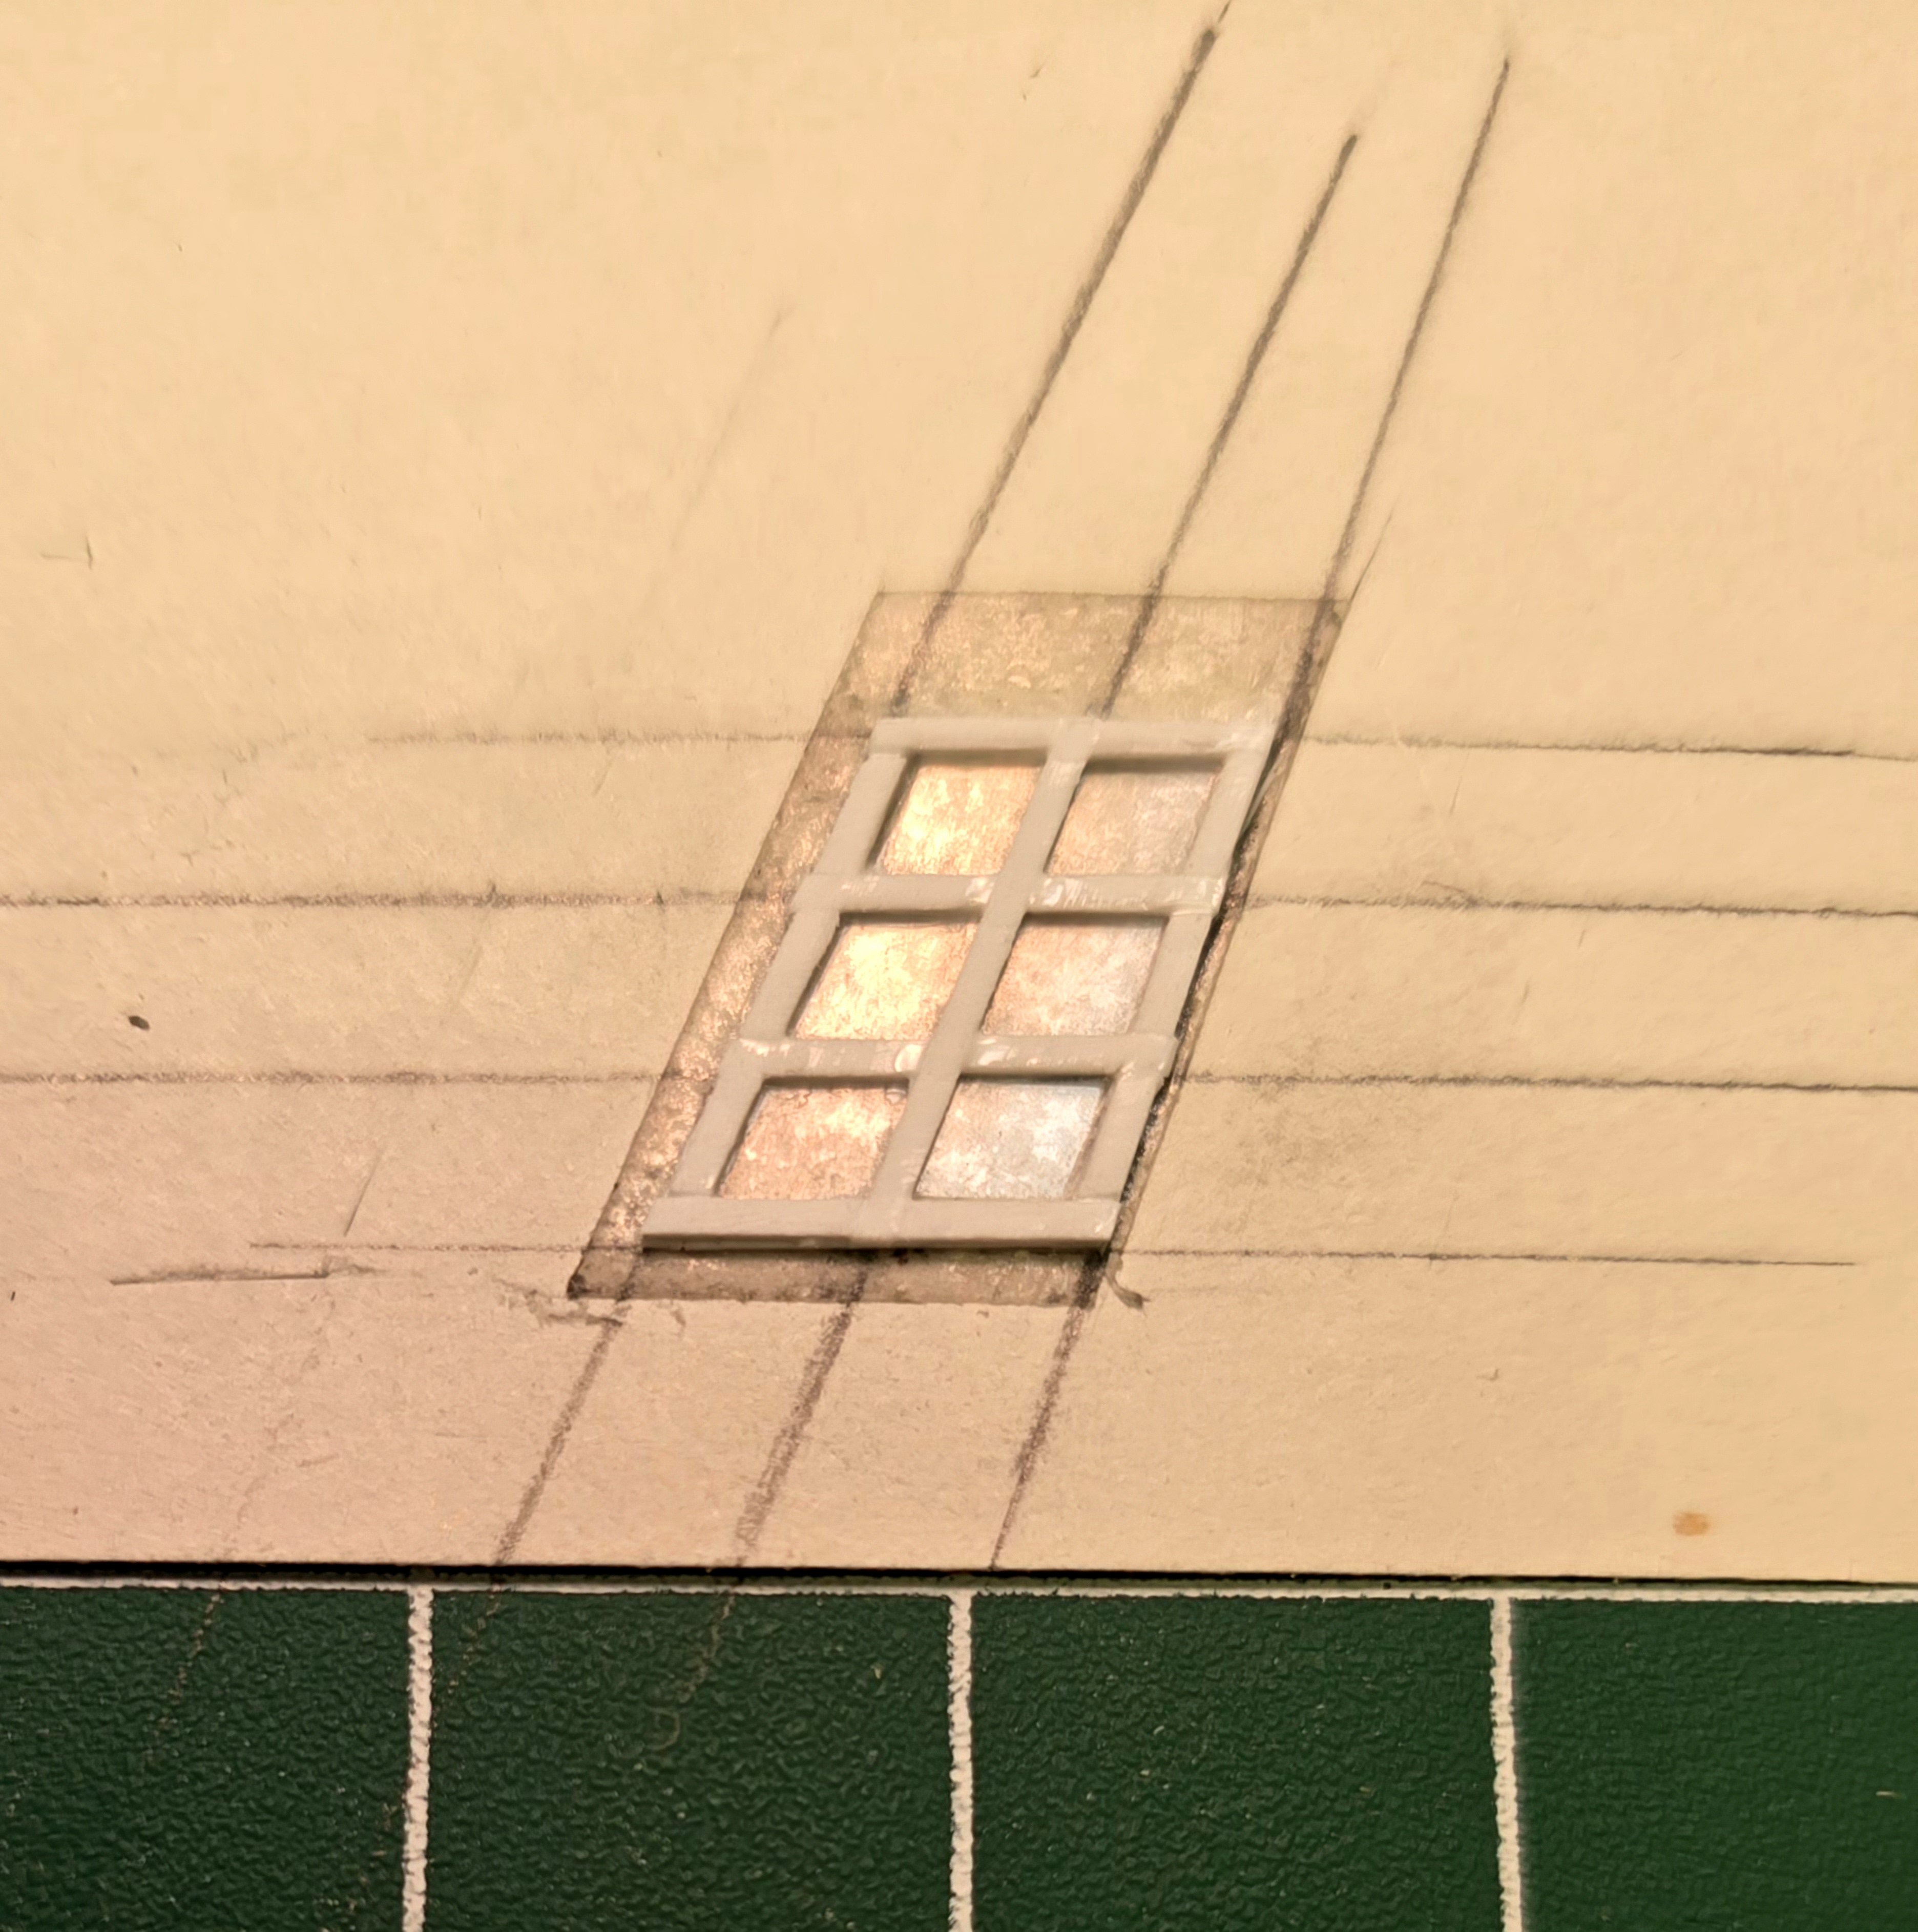
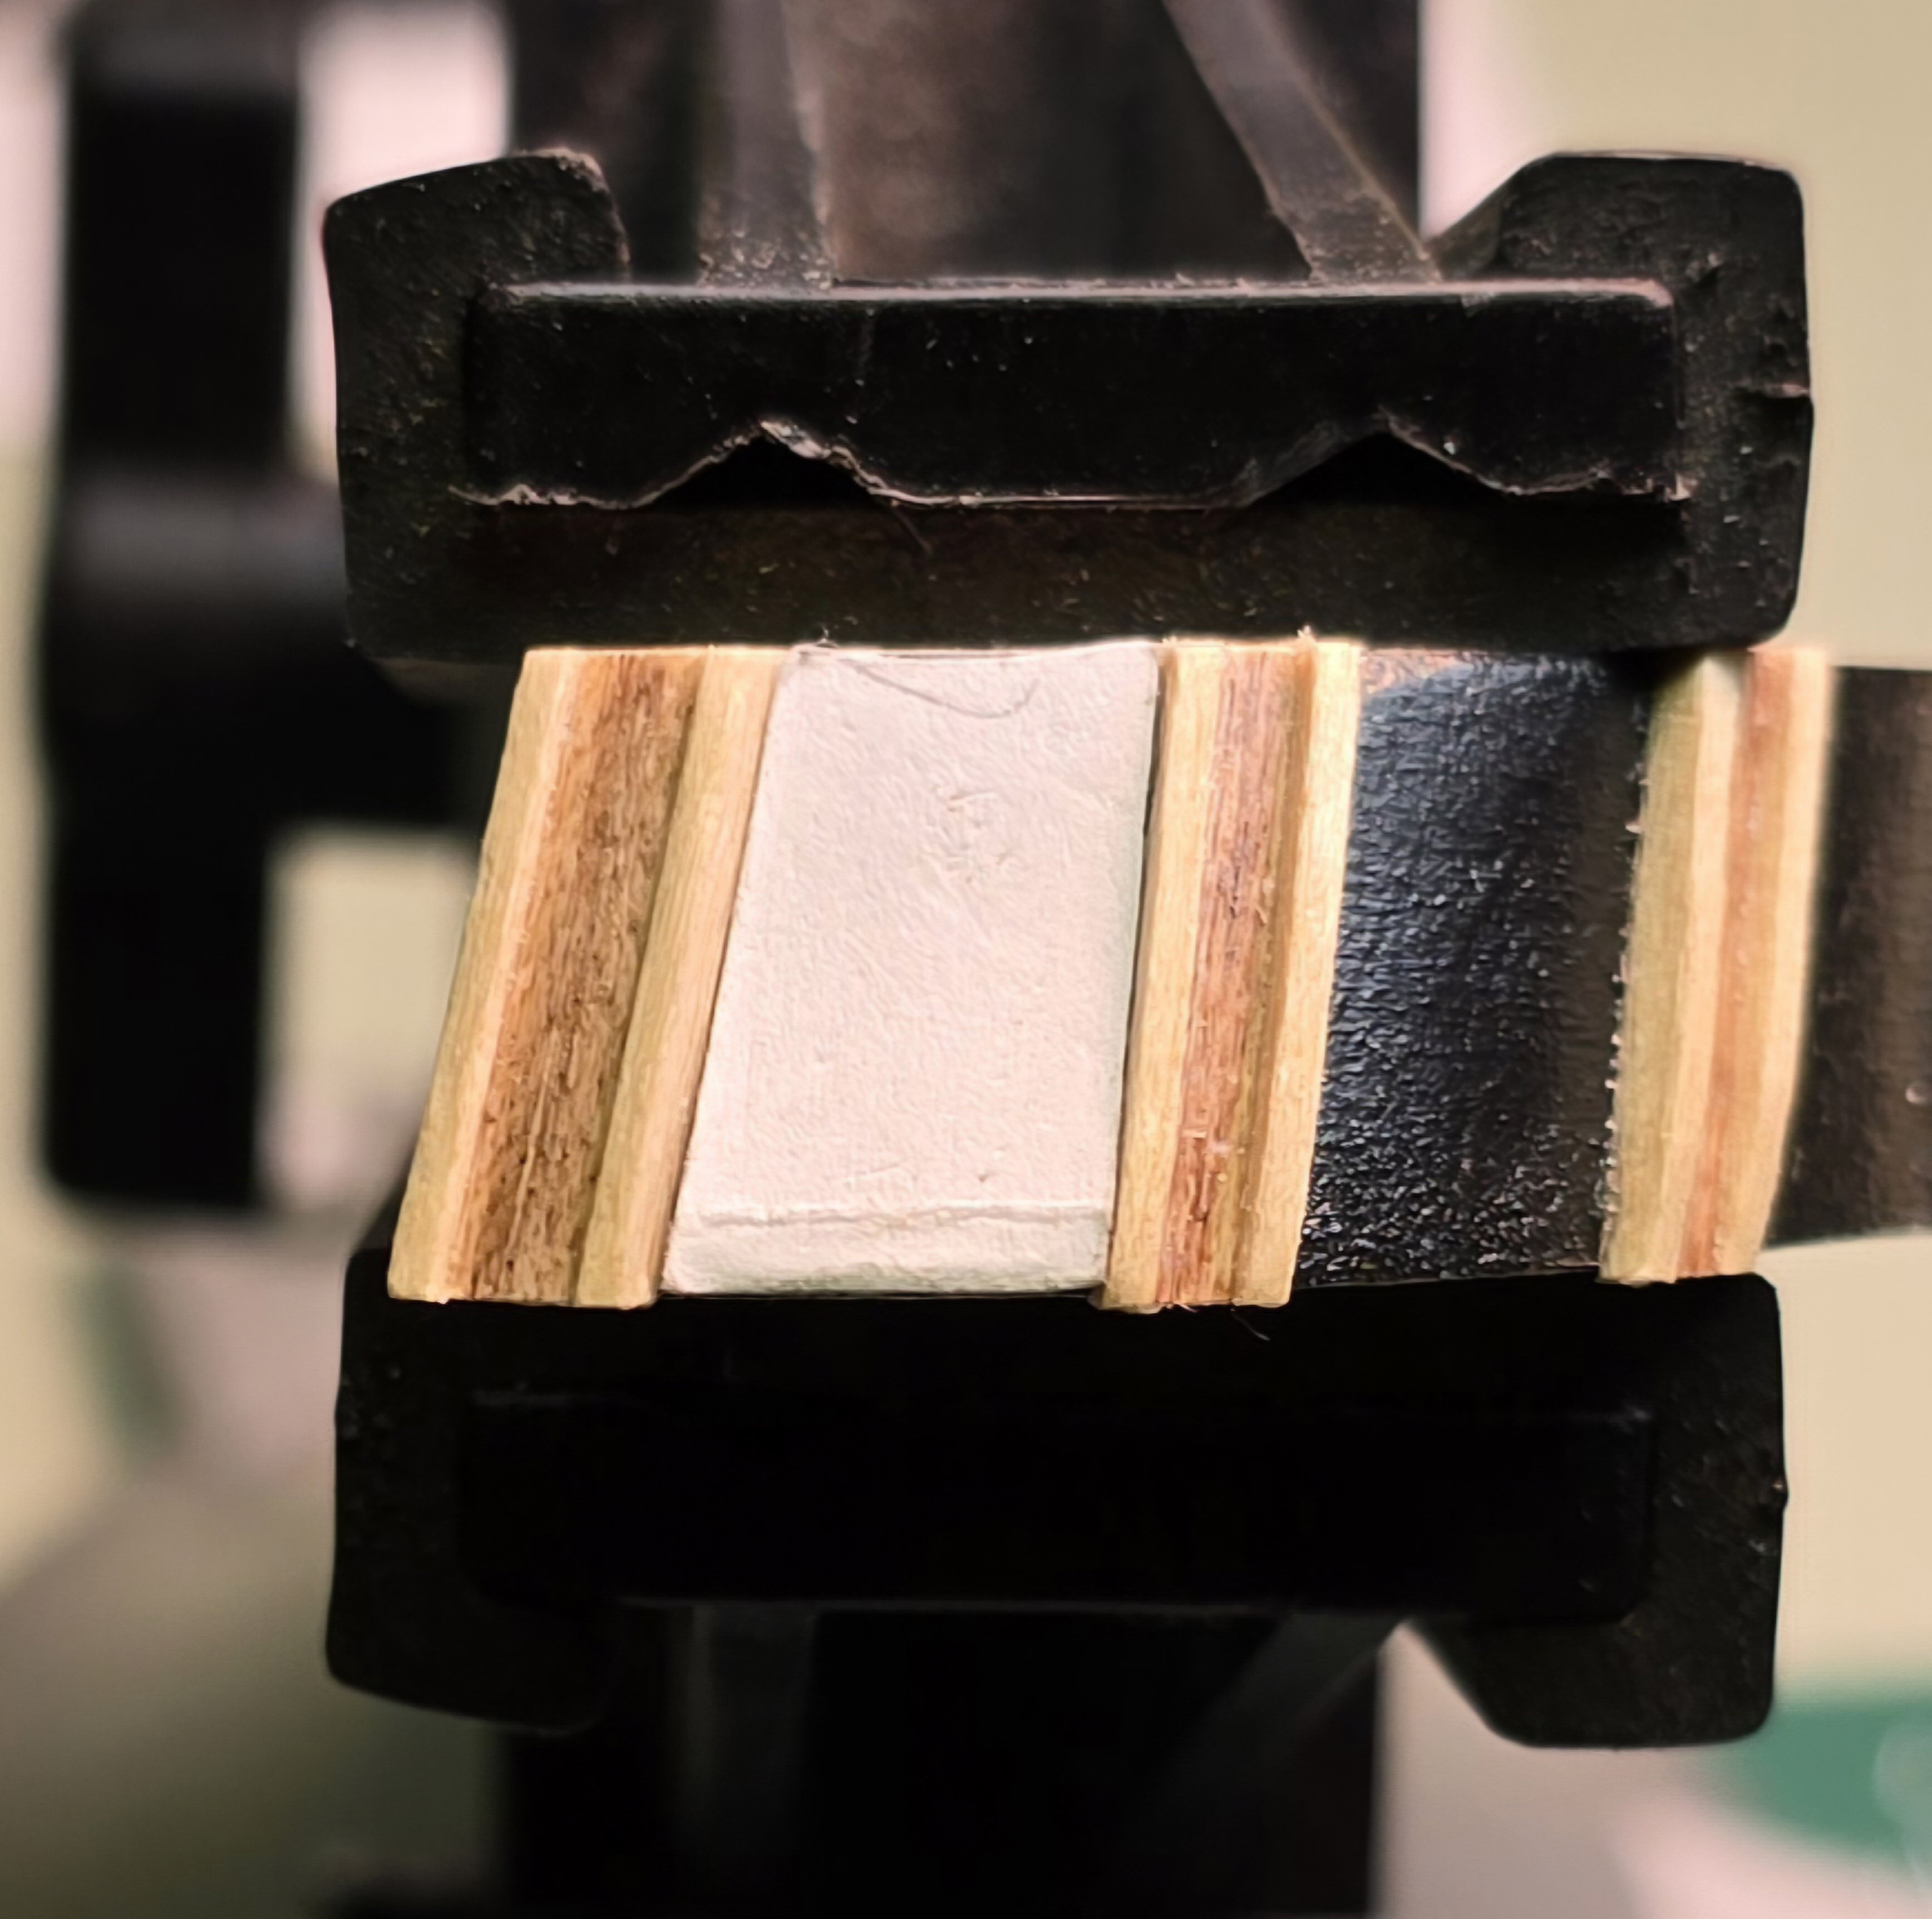
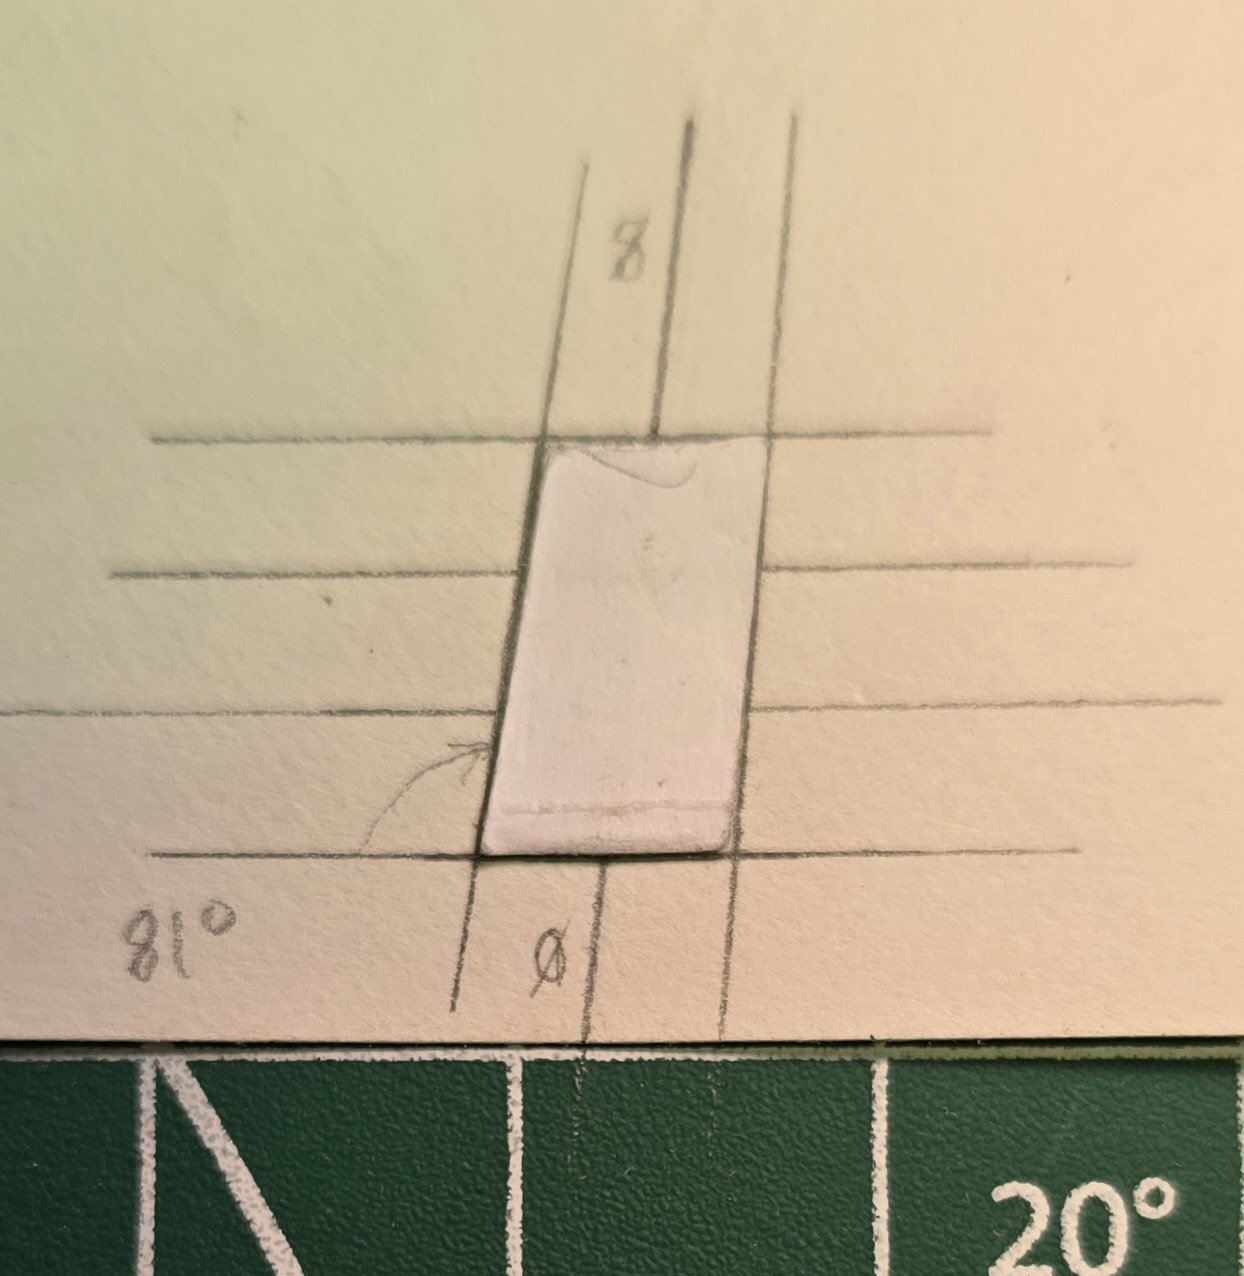
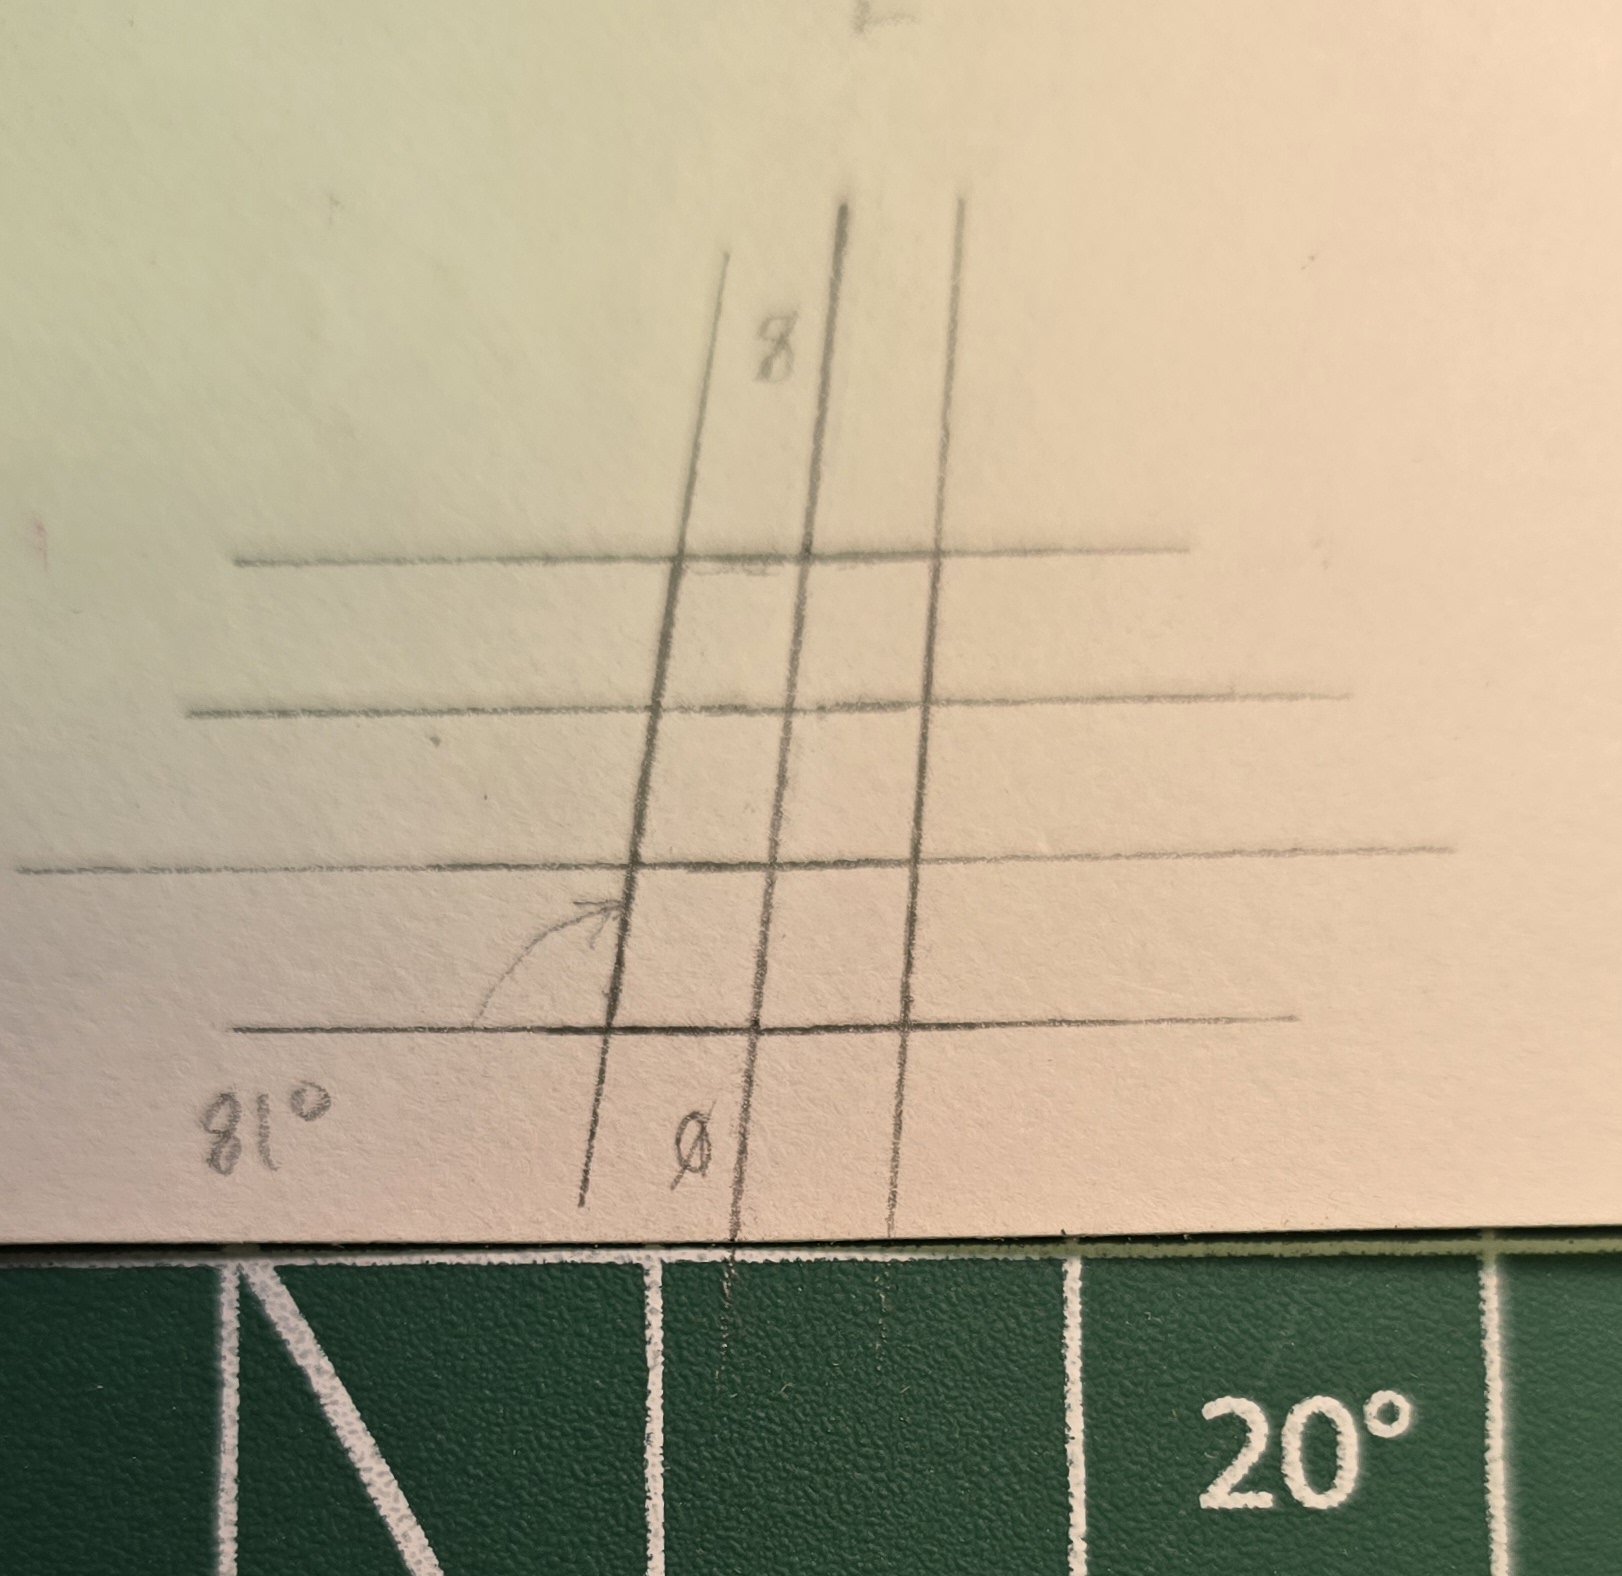
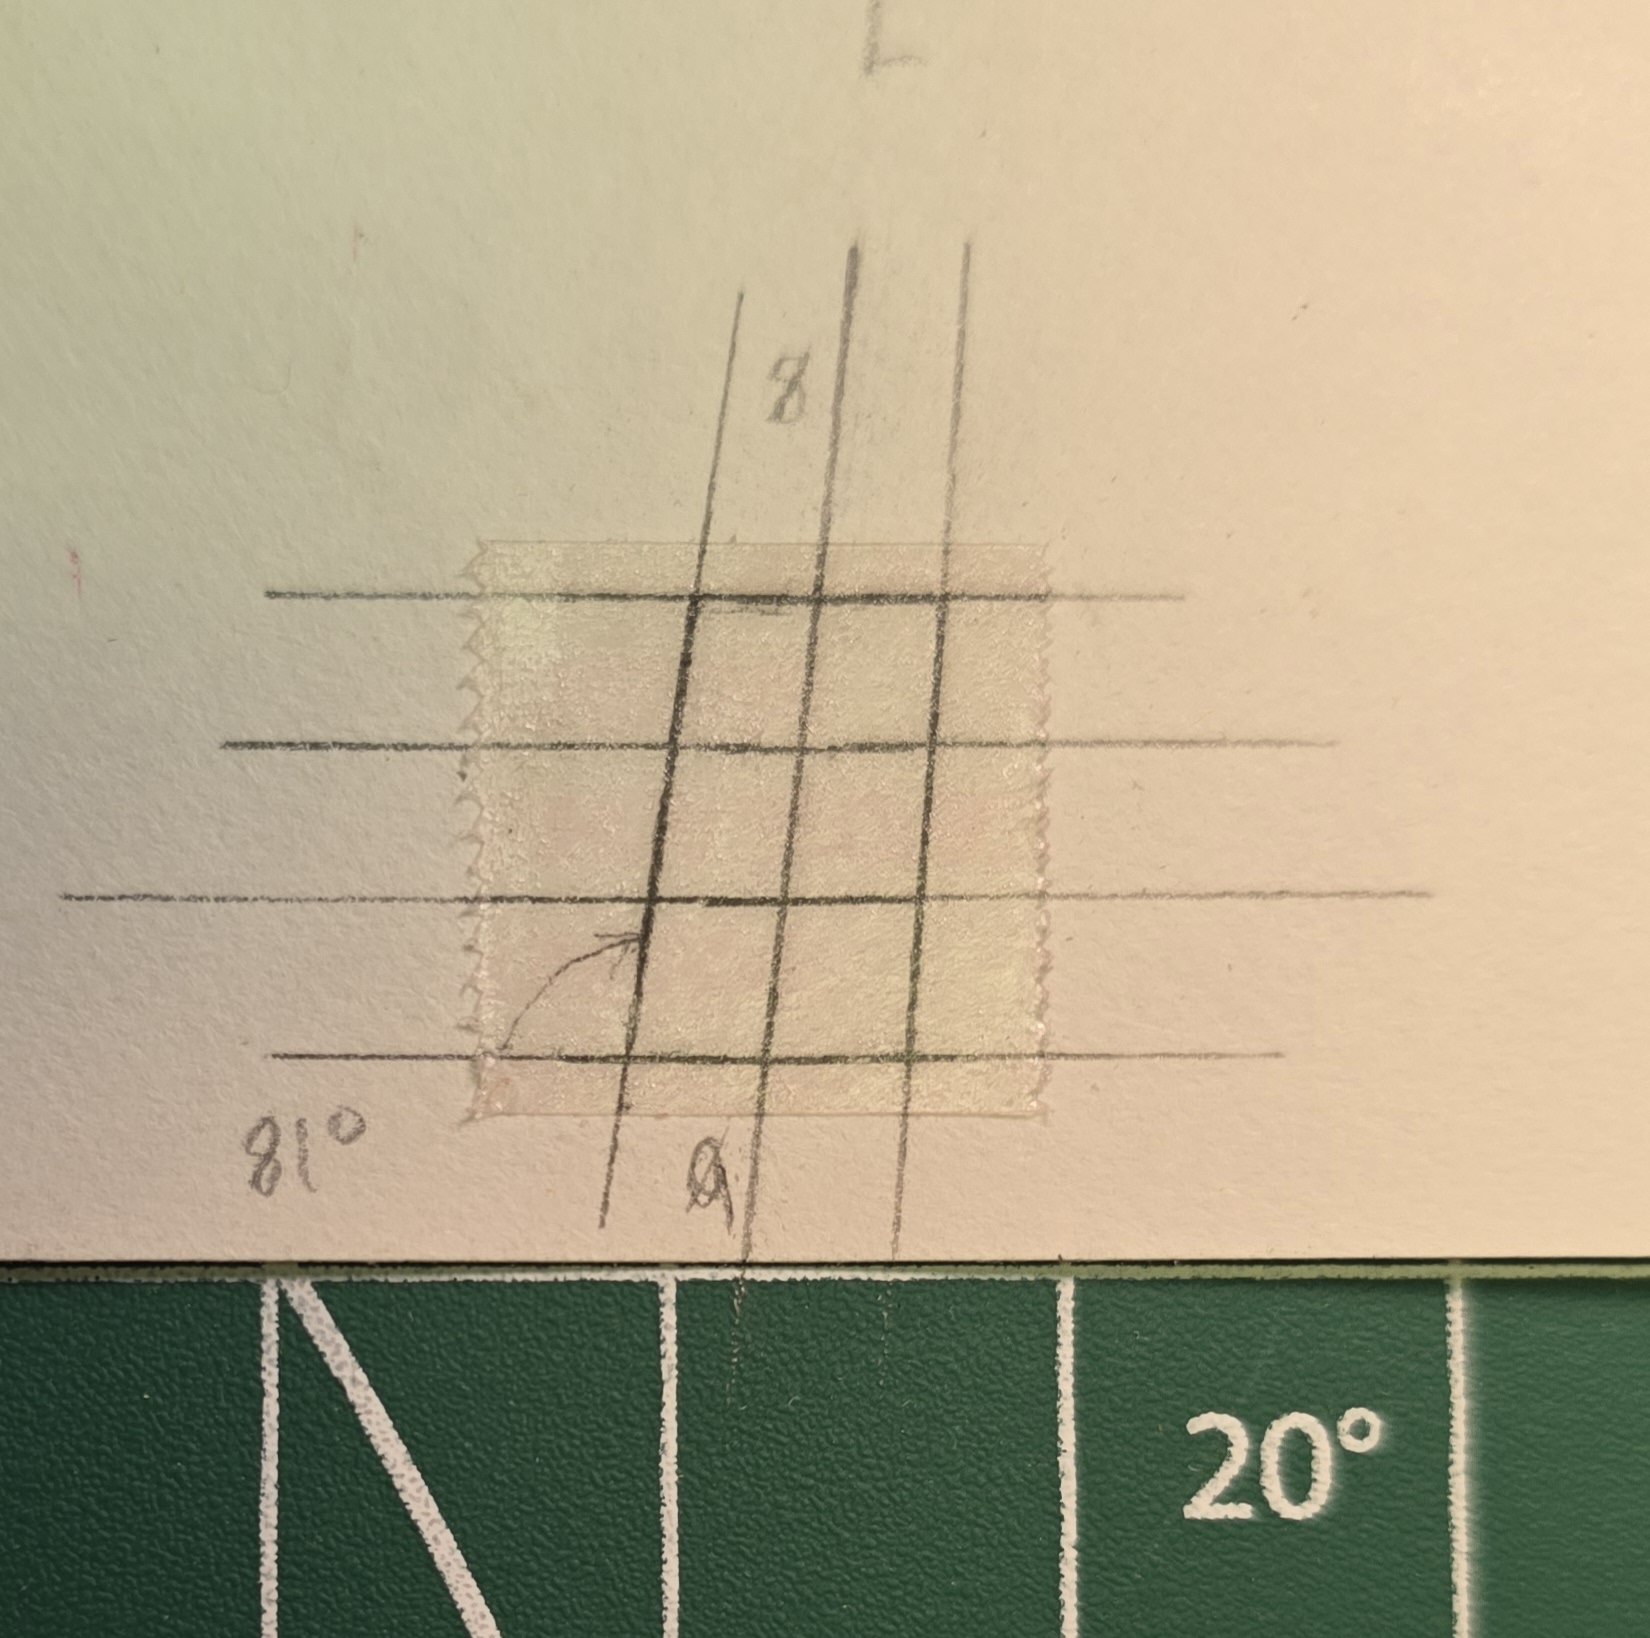
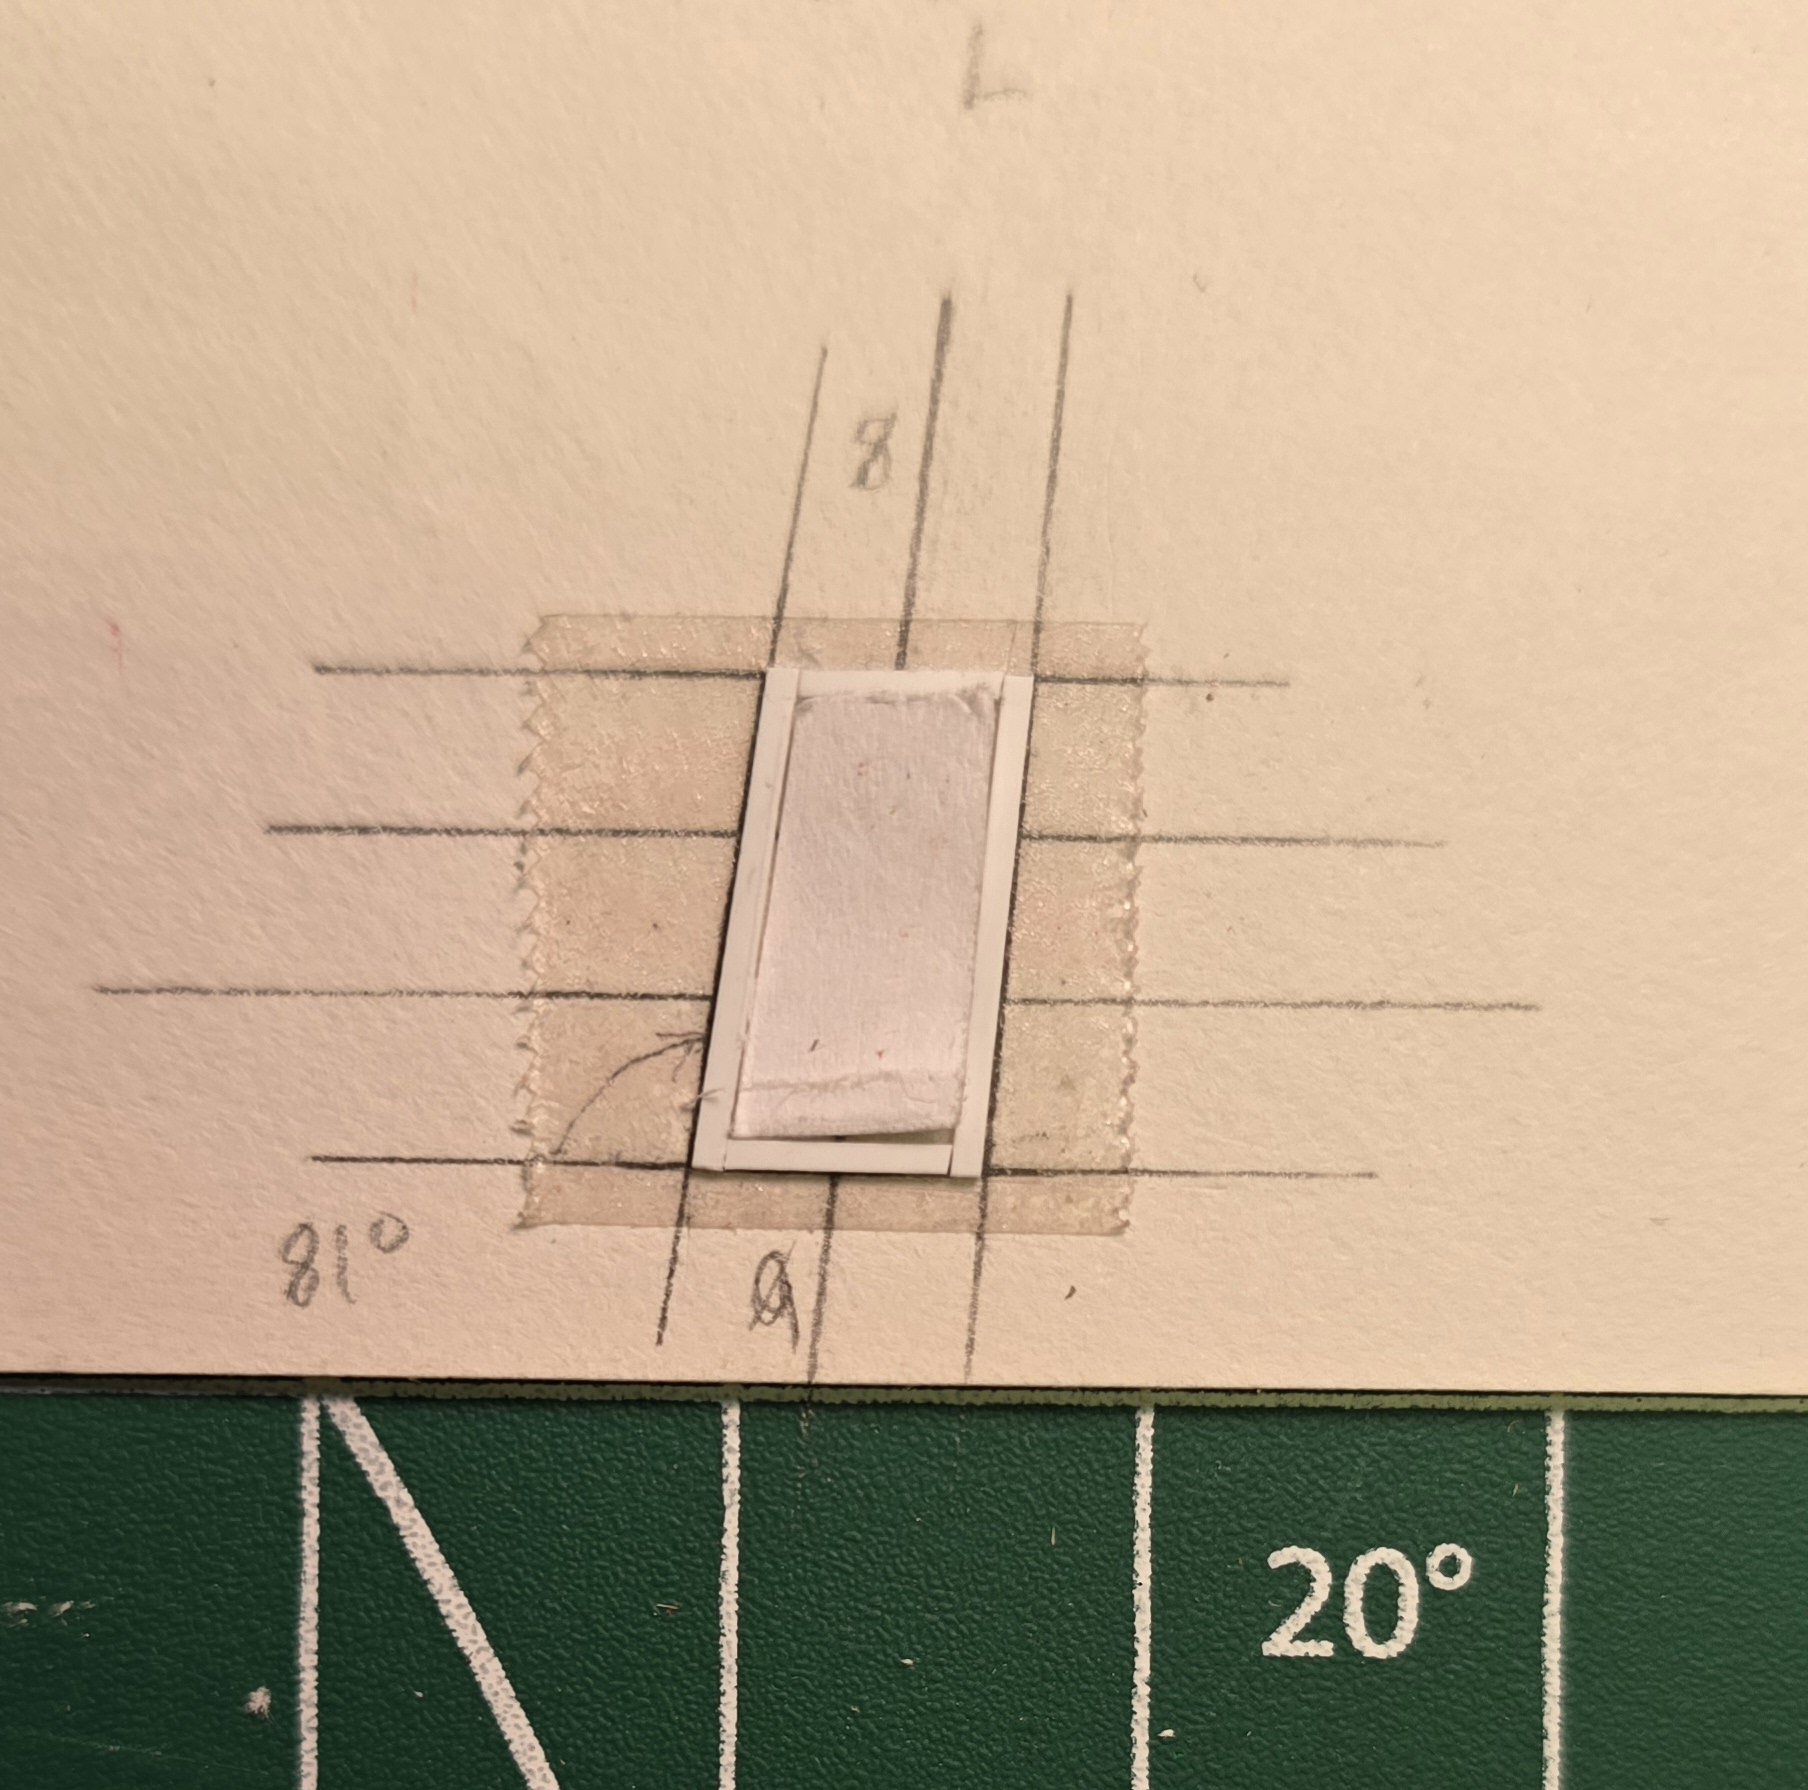
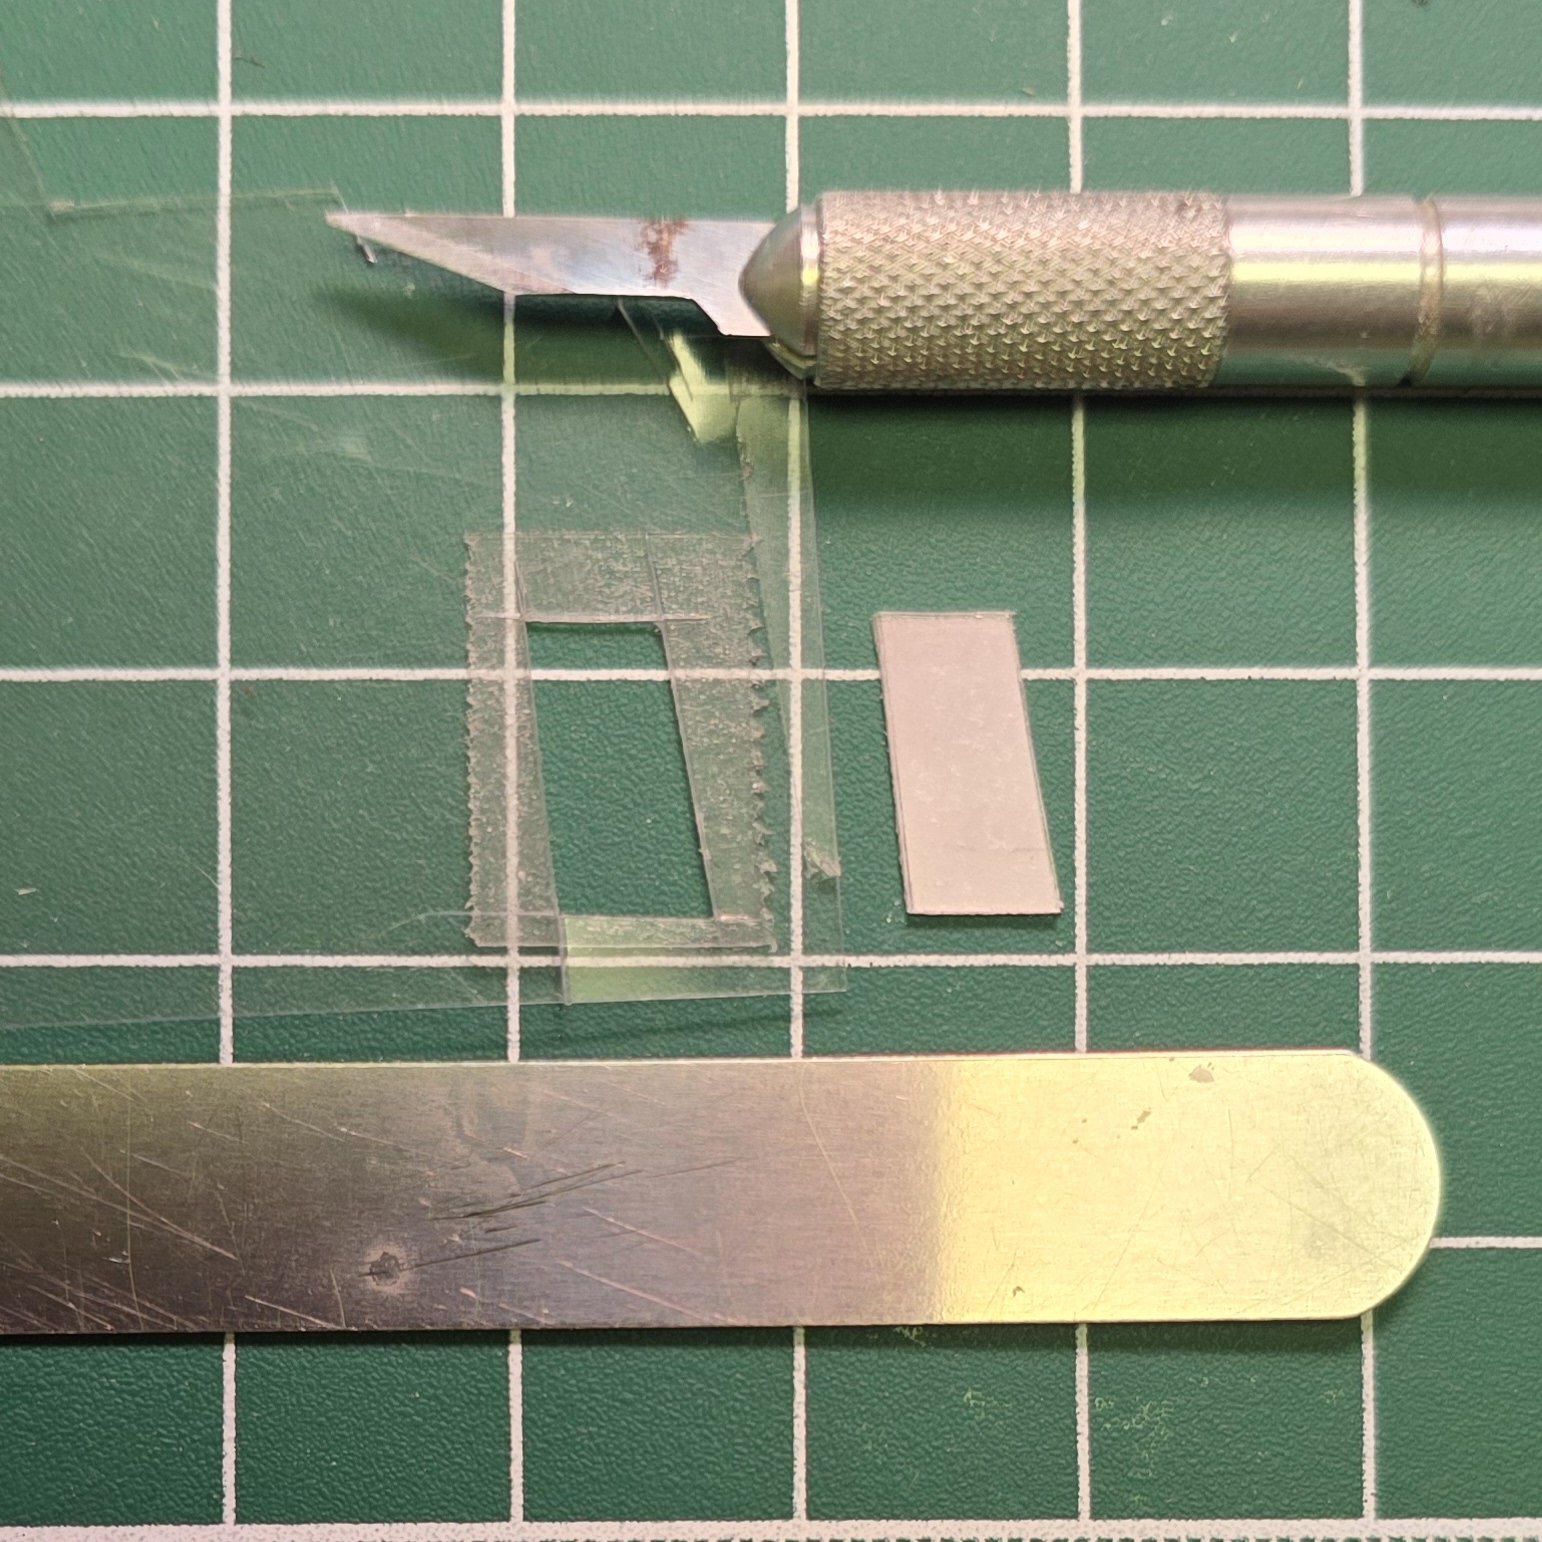
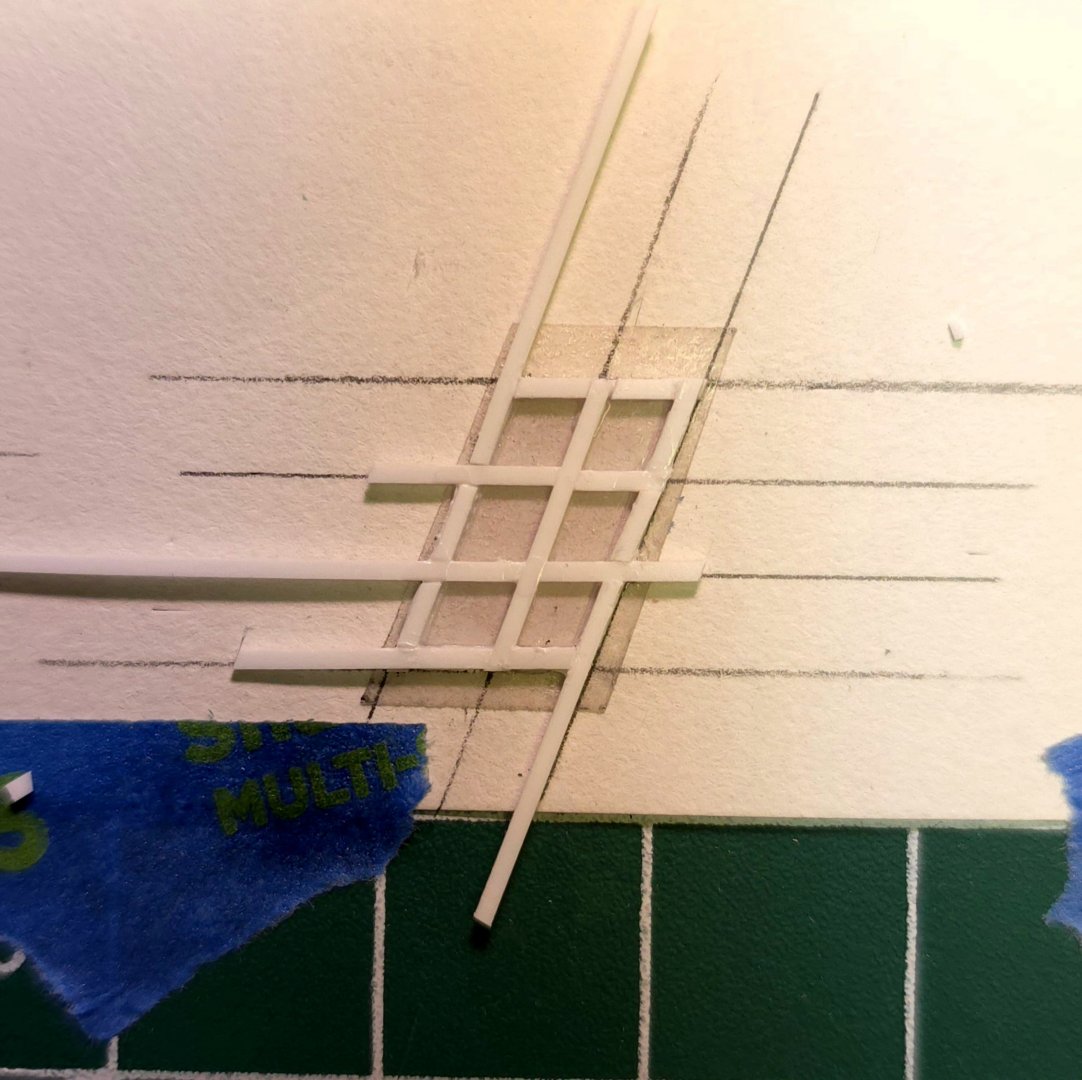
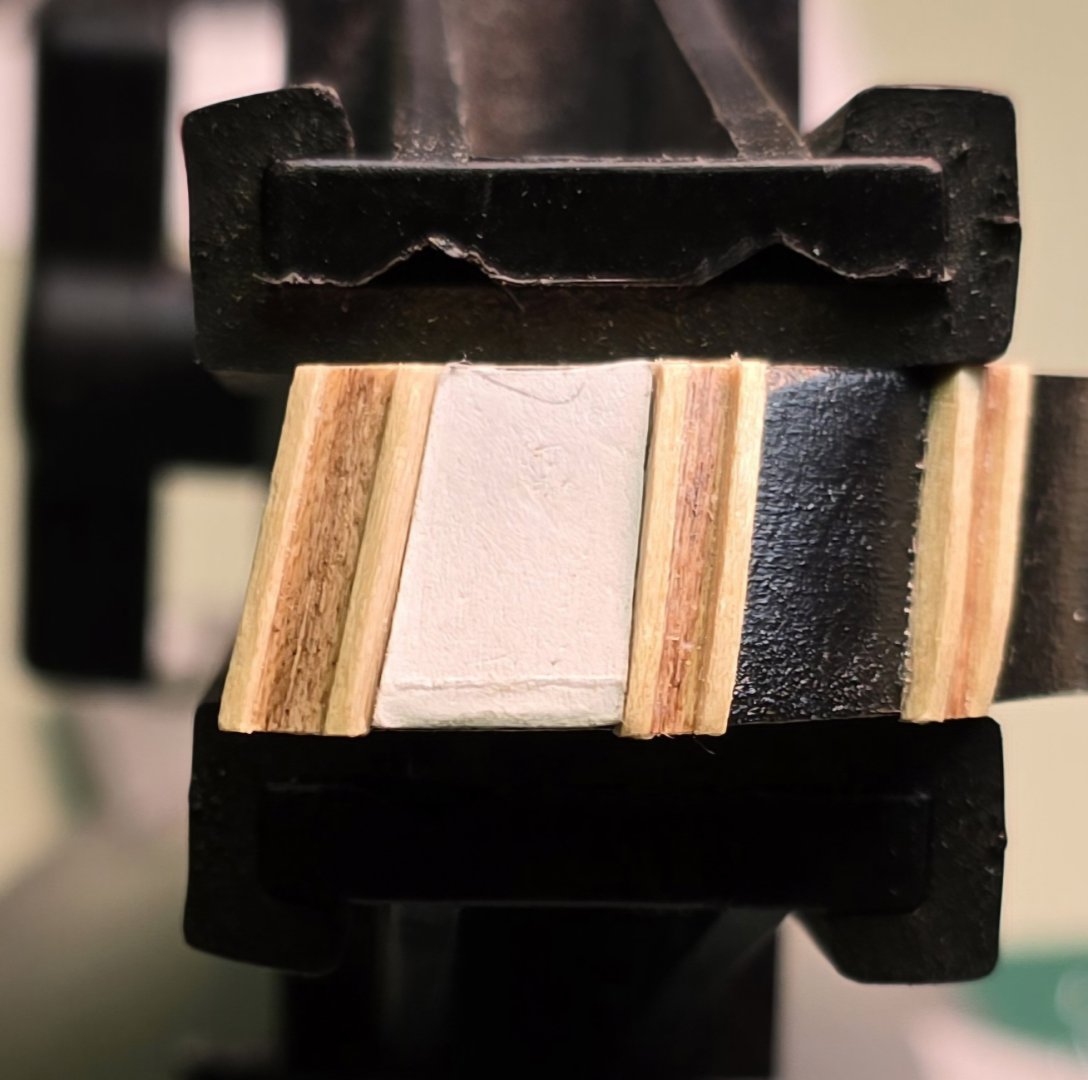
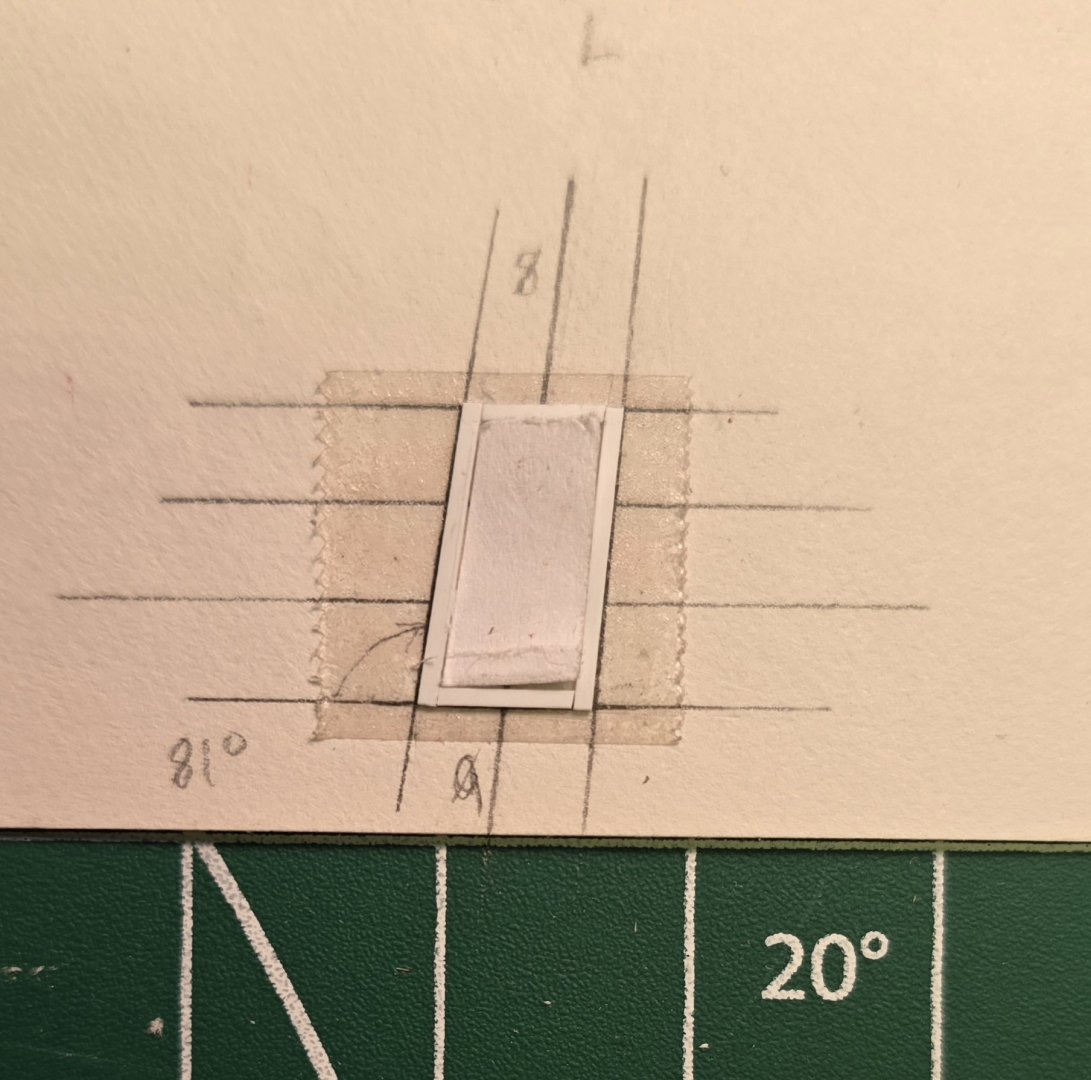
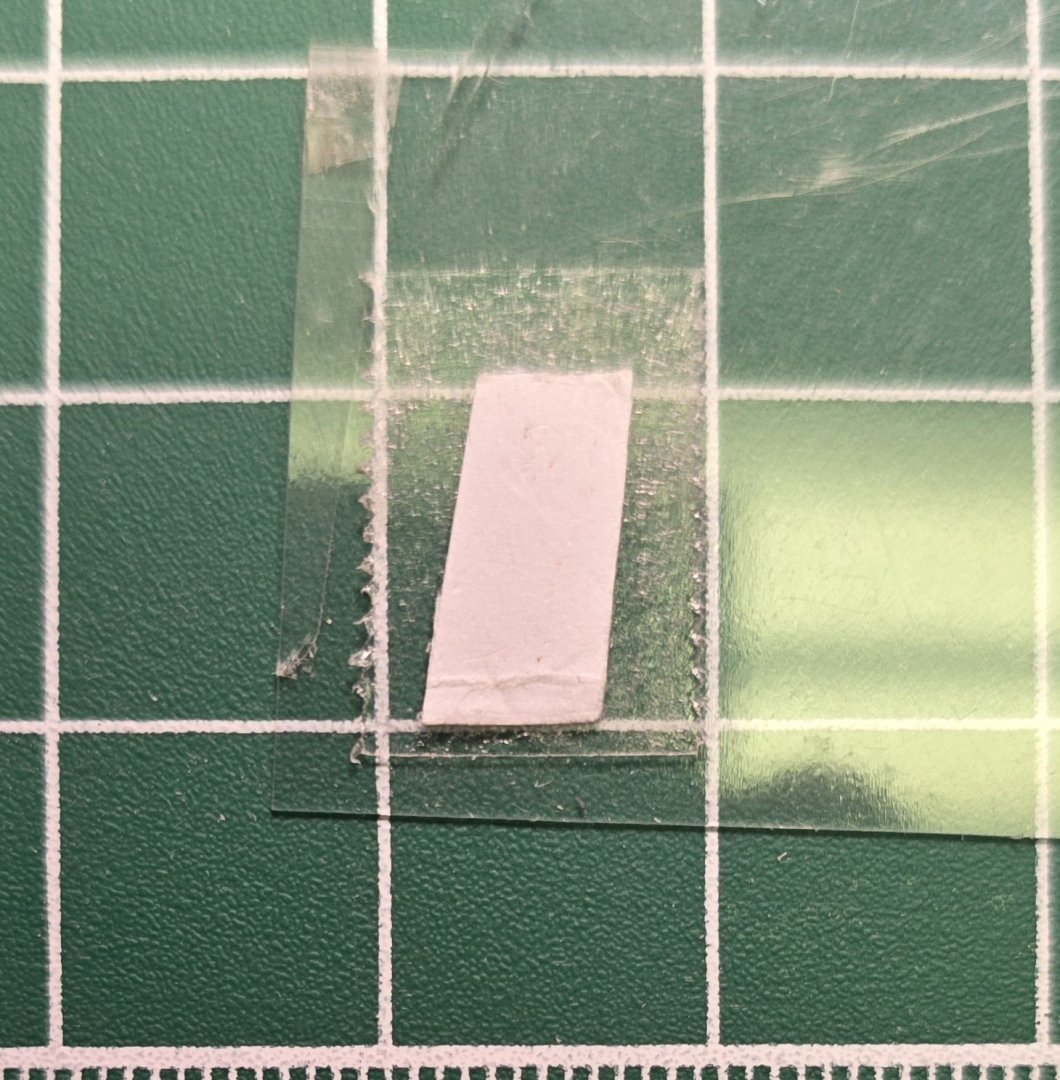
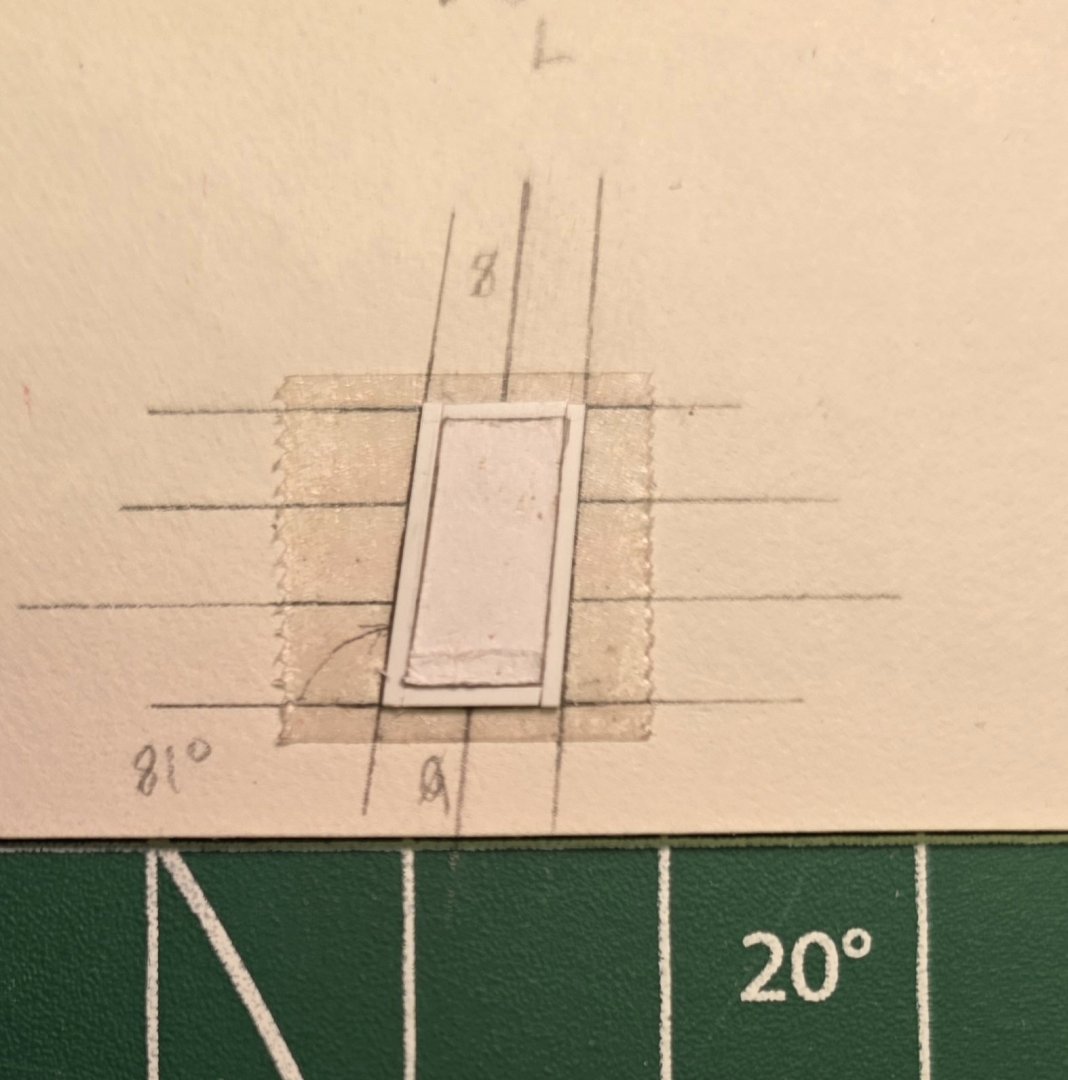
I'm refining the process for making the windows. The next time I do this, things will go a little faster. 😁 1. Make a paper template to fit the space. 2. Transfer the shape to another piece of paper. 3. Add guide lines for the central rail and styles. (I took the previous photo after I had added the guide lines.) 4. Add double sided tape. 5. Cut styrene for outside edges. Test the fit with the paper template. 6. Use double sided tape to transfer the pattern to plexiglass for the window. 7. Cut the window. (Note: pattern still attached to plexiglass.) 8. Test fit the window. 9. Take the wife to city hall to vote. 10. Return to the shop another day to form the rest of the window.


-
Getting closer..
-
I wish I could recall exactly where I saw it, but in the last week or two, I read somewhere that these canopy frames could be omitted. I thought I saw a note in the copy of the plans I have at the Shipyard, but since I have a second set at home, I thought I'd make sure my memory was not faulty. Sadly, the old grey cells, they ain't what they used to be. The plans themselves don't seem have this note in them. The instructions for the kit say to omit them if they are too difficult to fabricate, but that's not the note I SWEAR I saw. 😕 I must admit they do look nice when done right. So, go for it Jon. The only thing I can think to contribute to the conversation at this point is to see if you can't find a really sharp pointed tool, like an awl, and poke a divot into the brass rod - use the awl like a center punch. But given the materials you're dealing with here, this may be equally as challenging. Slow and steady is indeed the way to go with drilling, if the center punch technique works. Good luck!
-
Your workmanship here rivals XKen. Kudos.
-
Port side. Rinse, repeat.. I forgot how much effort went into making and shaping the filler and roof blocks. Hoo boy.