


Der Alte Rentner
-
Posts
282 -
Joined
-
Last visited
Content Type
Profiles
Forums
Gallery
Events
Posts posted by Der Alte Rentner
-
-
On 1/21/2024 at 2:20 PM, woodartist said:
Second planking is proceeding, although slowly. Still have not gotten the knack of using super glue without getting it on adjoining pieces.
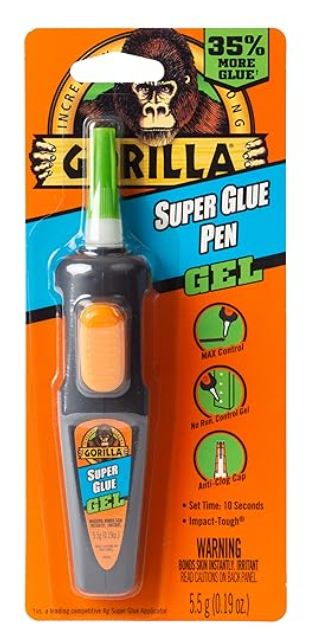
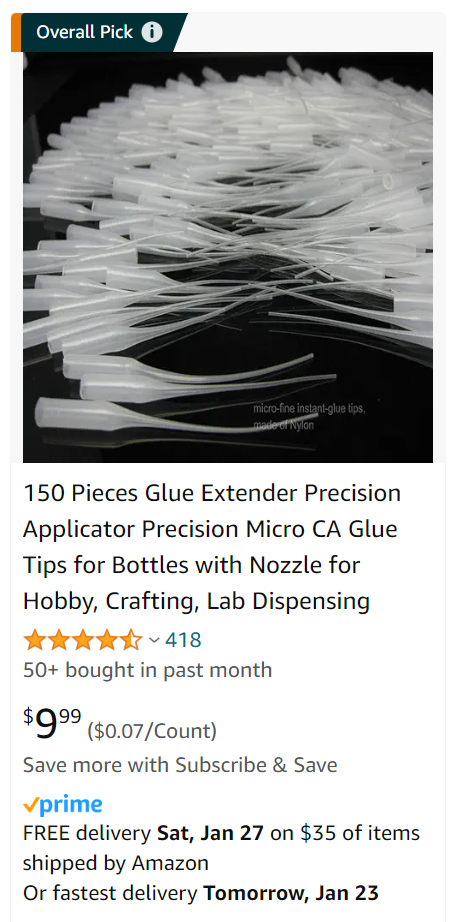
I started using Gorilla brand super glue pen in the gel formulation. Also got a box of those super thin extension tip. The combination of those two nets some very consistent and predictable glue flow. This should solve your problem.
-
On 1/22/2024 at 12:49 PM, JSGerson said:
If I remember correctly, Mr. Hunt planks one whole side, then does the other. I alternated back and forth every "band" in order to ensure my strakes mirrored each other.
Jon
I like that approach myself now. When making the strake segments, I'll see if I can double up the planks in the milling process. From the numbers I've seen in my most recent spreadsheet (yes, I took the laptop to the shipyard and went digital), the dimensions port and starboard are pretty much the same. So, I might be able to save some time.
P.S.
I may regret this later, but because the wale on one side had such a deep divot in it, I actually pulled segments off of three strakes near the bow and am patching that area with slightly convex(?)/curved segments. From what I saw after replacing one of the first segment, I will have fairly well evened out the offending area. Since I'm editing this reply, rather than posting a new log entry, probably no one will see these pre-travel Post Script comments.
As always, thanks for your time and attention Jon.
Peter
-
May 08, 2024 Note from my future self: Now that I've completed planking, I am sharing notes and observations of lessons learned in the process that I wish I'd thought about earlier in the build.
1. Don't sweat scale. Much is made of this business of scale. Unless you're building from scratch using original plans, you will not actually be doing much 'to scale'. And! Since most will likely be painting over the planking, there's no reason to be so darned fussy. You may want to observe some planking pattern that alternates over say four rows of planking so the butt joints are not on top of each other. Go with whatever length and thickness of plank that is convenient to work with. e.g. Mustafa (mtbediz) used planks twice the width recommended in the Hunt Practicum and saved himself about half the time it takes to plank the hull. Frankly, if you're going to cover the lower hull with copper sheeting, there's no reason to do much more than cover that area with more than the basics.
2. If you prefer a natural finish, choose different materials for planking than provided in the kit. The Constructo kit provides contrasting woods for hull planking, the deck, gun port strip, rails, etc. (Sapelly, Ayous, Manzonia, Mukaly and Anatolia). Using anything other than the materials provided in your kit will probably net you a nicer result than staining basswood.
3. Stick with the same planking pattern from the rails to the keel. Either I missed it, or the Practicum doesn't address this, but If consistency on planking pattern is important to you, then adapt one from the onset. I lost track of this somewhere along the line and reverted to the Hunt pattern (more or less) below the wales. Again, don't bother with this below the area you plan to apply copper sheeting.
4. Use filler blocks between Bulkheads A and B - possibly all the way to C, Likewise, use more at the stern, perhaps extending as far forward as bulkhead P. Fairing the bulkheads themselves only gets you so far when planking at the stem and stern. Unless you really take care forming the correct bend in the planks, especially in the gaps between Bulkheads A and B, those sections could end up looking flat. I think it would be easier to fair the hull with more filler blocks and the end result will be a more consistent hull shape in these areas.
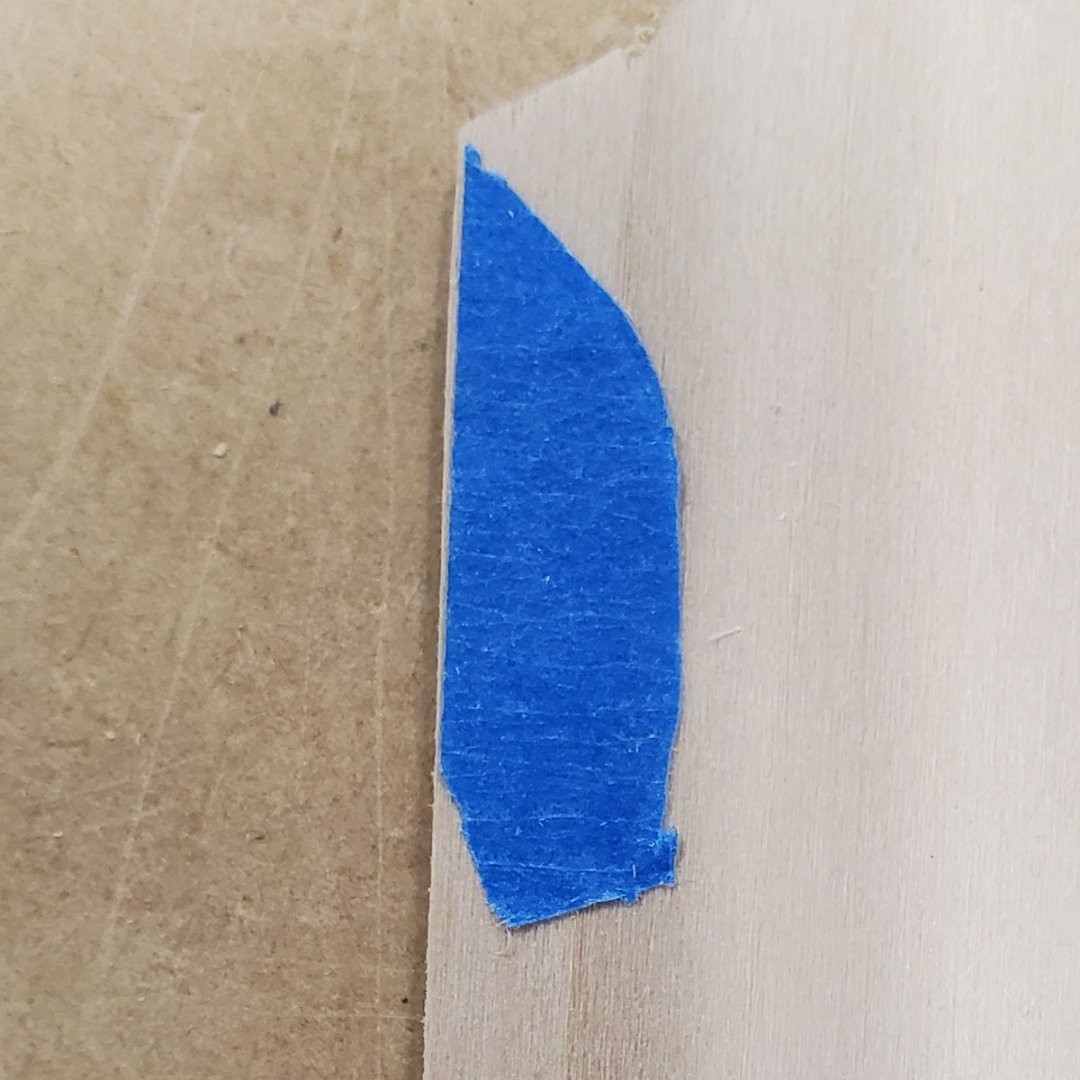
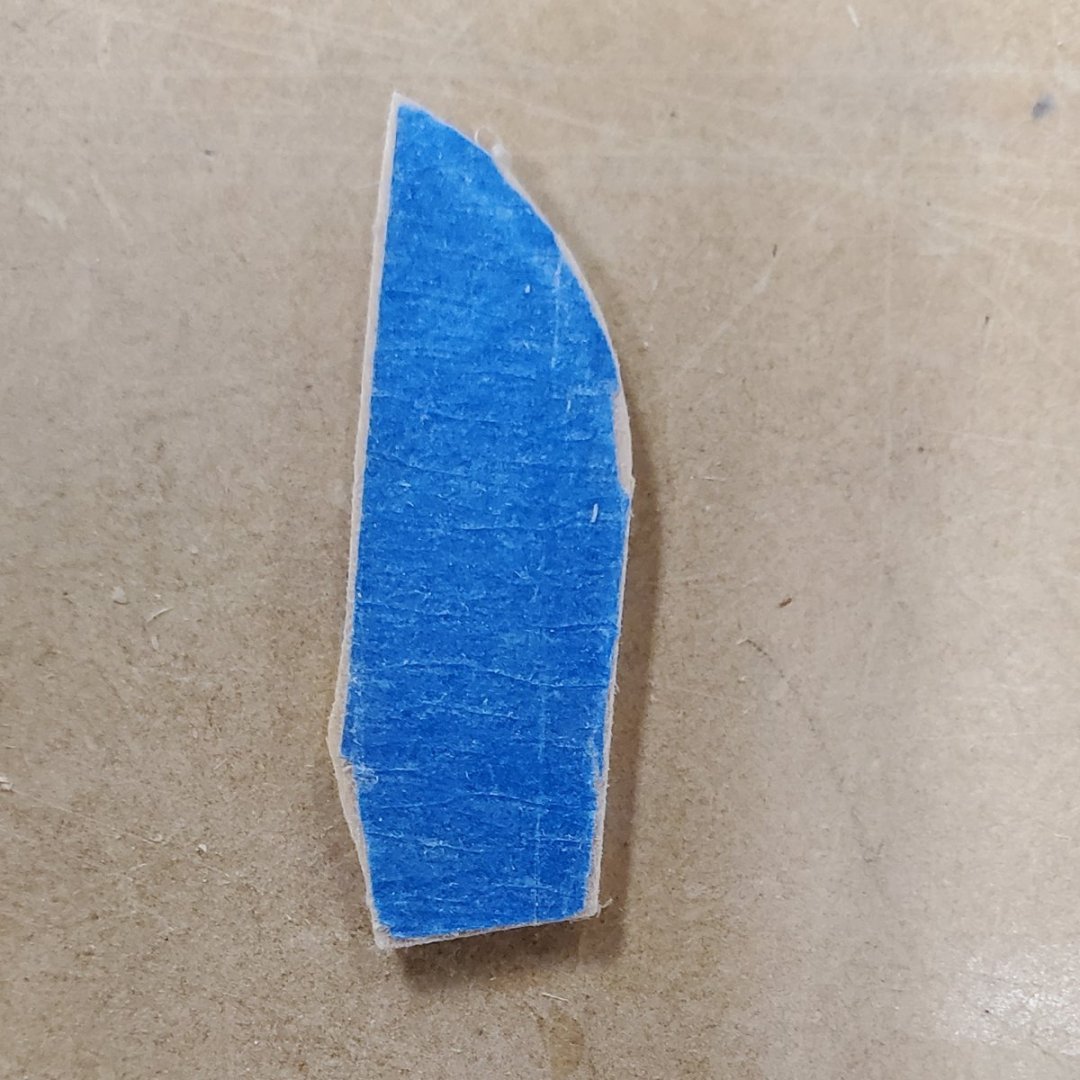
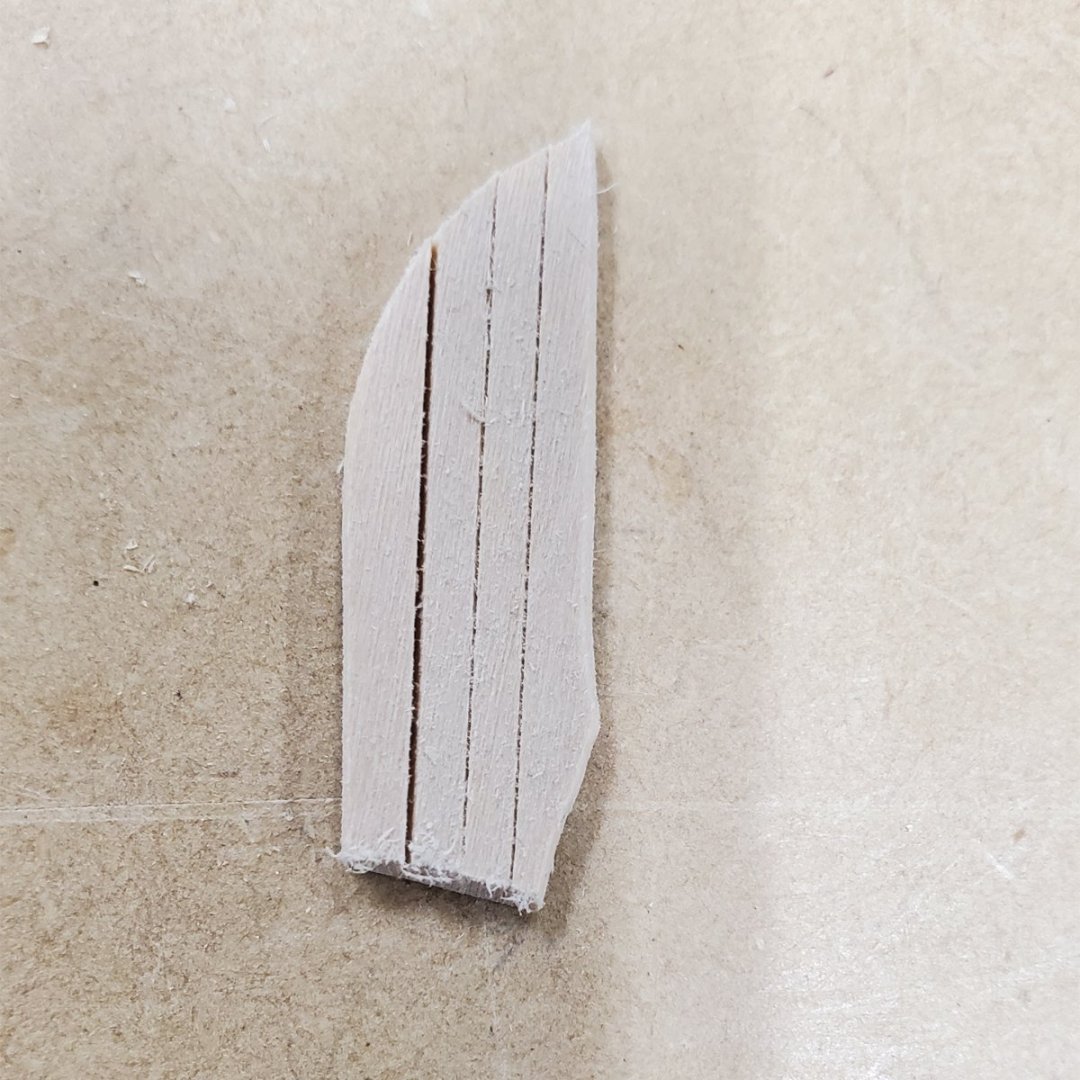
5. Do the math! and use tick marks. Regardless of the width of the planking materials you choose to use, you will be tapering planks at the stem and stern. To get a consistent lines, for and aft, especially in the wales, use tick marks. The more the better. I used them to define the zones of five strakes suggested in the practicum, and wish I'd paid closer attention to the slight variances I introduced in each strake within a zone. This isn't easy, but take your time, do the math, build a spreadsheet of plank thicknesses at each bulkhead - port and starboard, and mark the bulkhead as best you can for each strake. Again, if you're going to paint, maybe this is overkill anywhere other than the wales, where carelessness is most likely to be noticed.
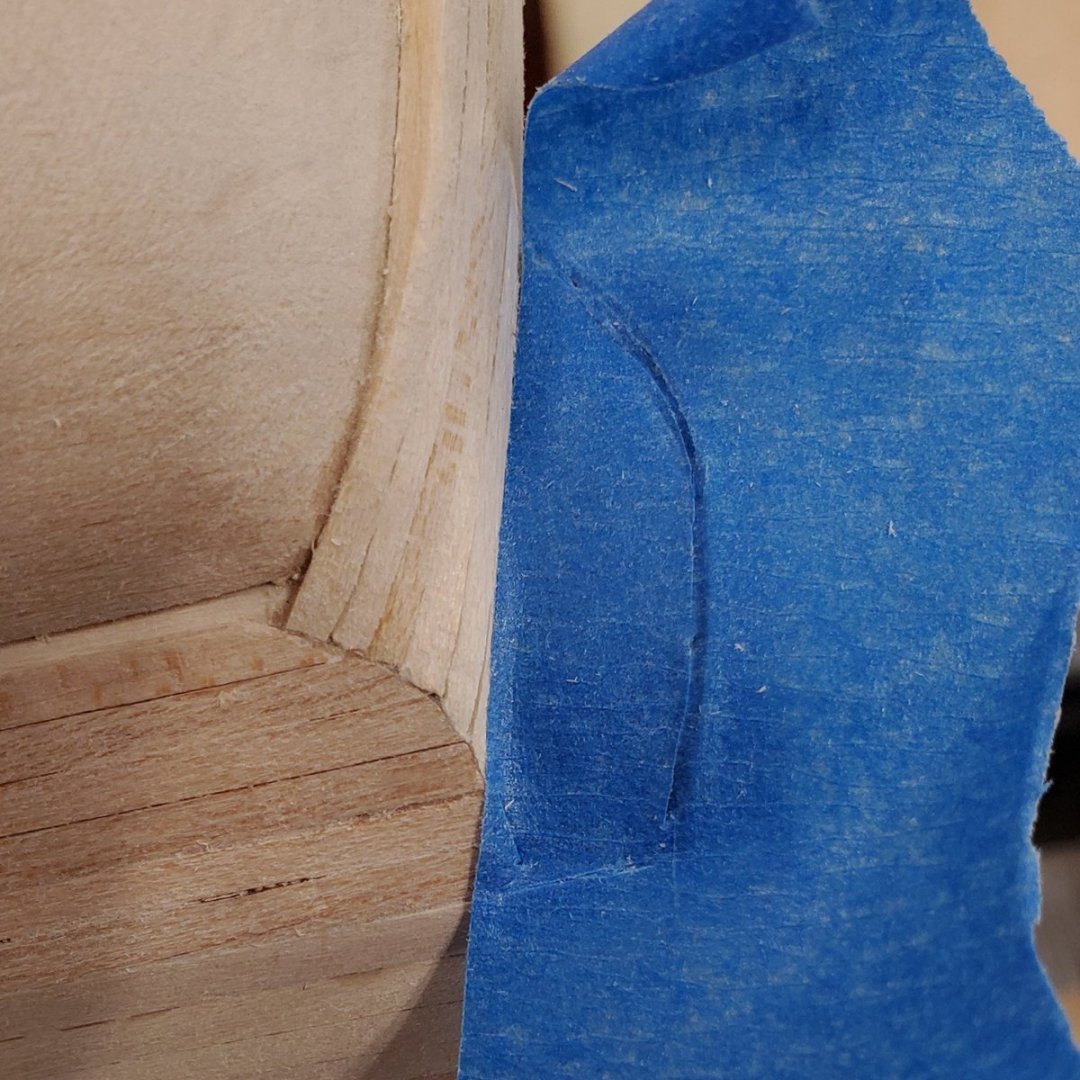
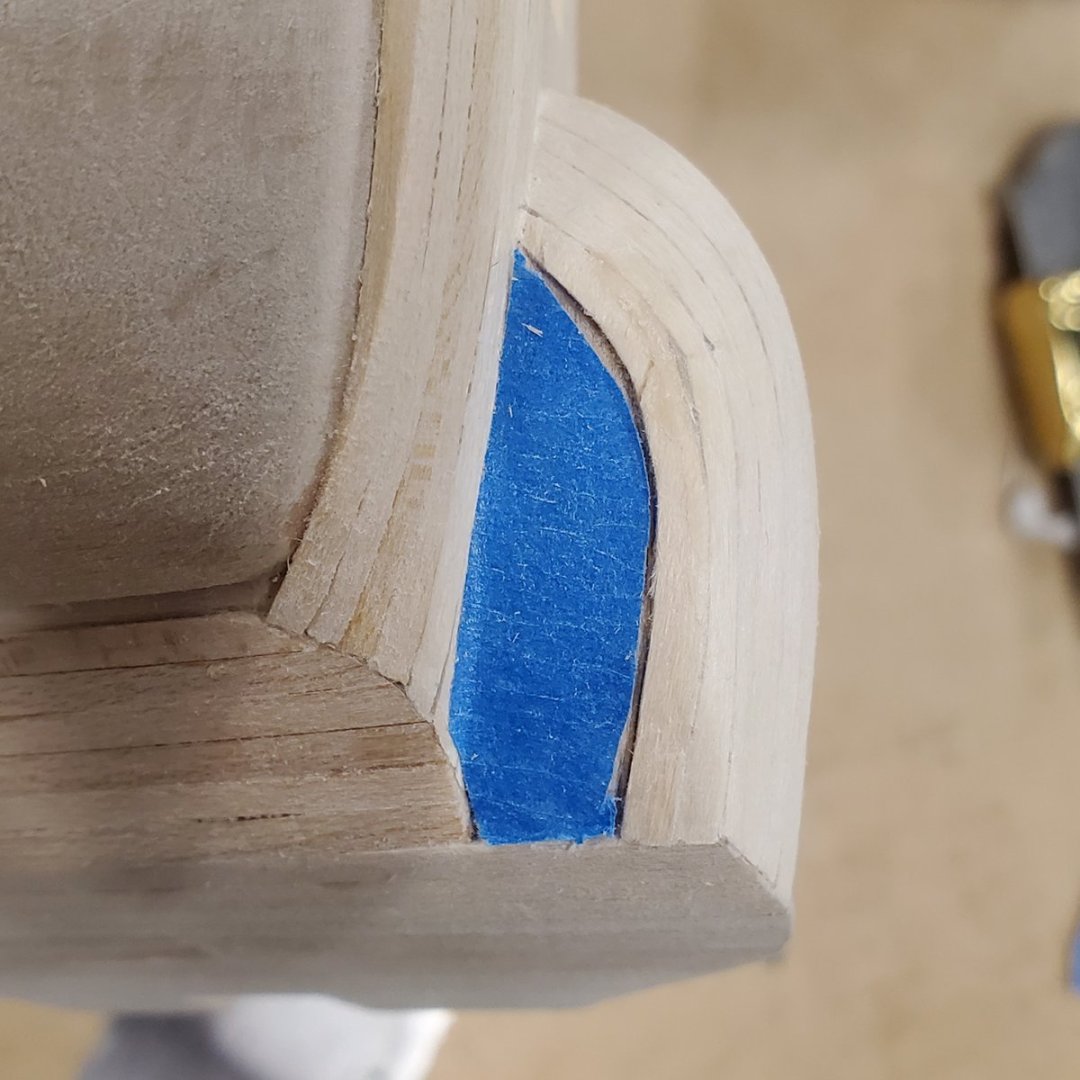
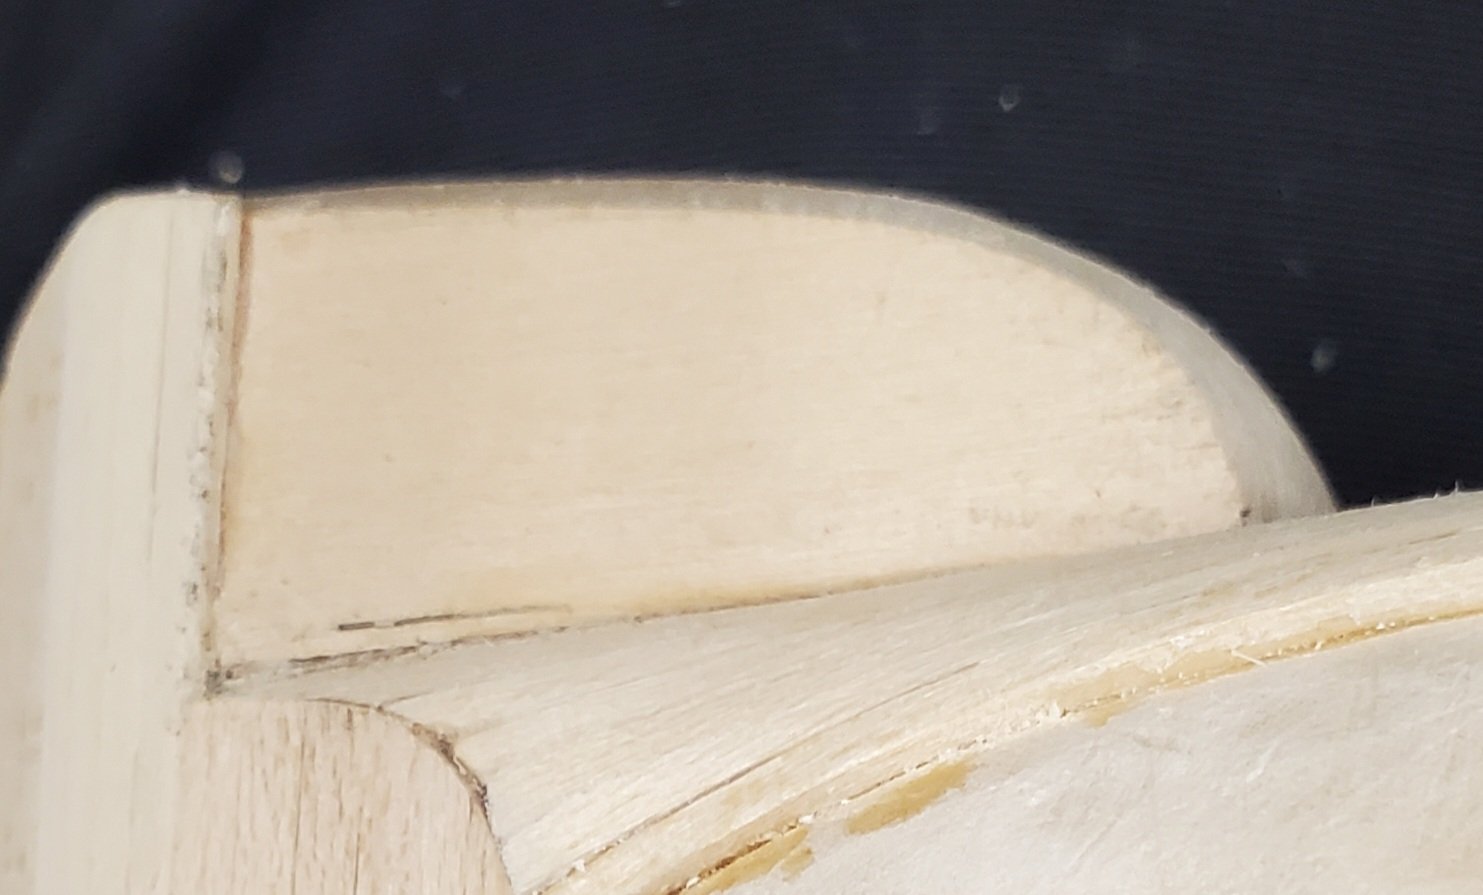
6. Pay attention to where the bulkheads meet the bearding line and rabbets. I thought I did such a great job shaping the bulkheads, until I got to the planking the last few strakes near the false keel. Before you plank, you may want to see how well planks butt against the false keel and how they fit into the rabbets. I needed to do a lot of tweaking at the end. I feel much of this could have been avoided had been more careful in "fairing the hull" early on. This is also why adding a few more filler blocks may assist in visualizing how planks will sit when you get that far.
7. Super Glue as clamps. As useless as the instructions that came with the Constitution kit are, they did contain a very useful nugget of advice. Use white glue on the edges of the planking in general, but use a drop of Super Glue at the bulkheads. The latter sets quickly, so, if you work carefully, you can forget about using clamps for the bulk of the planking. I began the planking at the spar deck using Titebond (yellow wood glue) and the seams between strakes all showed a dark cured glue. Once I switched to plain old Elmer's white glue, I got clean nearly invisible seams. The Super Glue itself also shows a browning color at the butt joints if you're not careful, so, use is sparingly.
8. Get a good brush to apply the white wood glue. Don't even think about squeezing glue out of the Elmer's glue container. Use a good fairly stiff brush to apply this to the edges of the planking. I used a Master's Touch paint brush (700 B-8 Bright) from Hobby Lobby. Keep a cup of water and paper towels handy to clean the brush after each application of glue.
9. Do use needle tips and gel version of Super Glue. These long thin applicator tubes (aka needle tips) that you can attach to the Super Glue dispenser really aid in precision application of adhesive. They also seem to prevent the glue from drying in the tube. I found that the Gorilla Brand has containers that have micro precise dispensers that are so much easier to work with than the standard tubes.
10. Magnifying glasses are a must. Maybe in my 20s and 30s, I could have gotten by with my version 1.0 eyeballs, but the over 40 disease has wreaked havock with my close vision and made working without magnifiers virtually impossible.
11. Work in metric. All my life I've worked in standard US fractions for woodworking, but I learned very early on in this project that it is so much easier to work in metric. The math is so much easier.
(enough for today. back later to finish..)
Original January 22, 2024 post begins here:
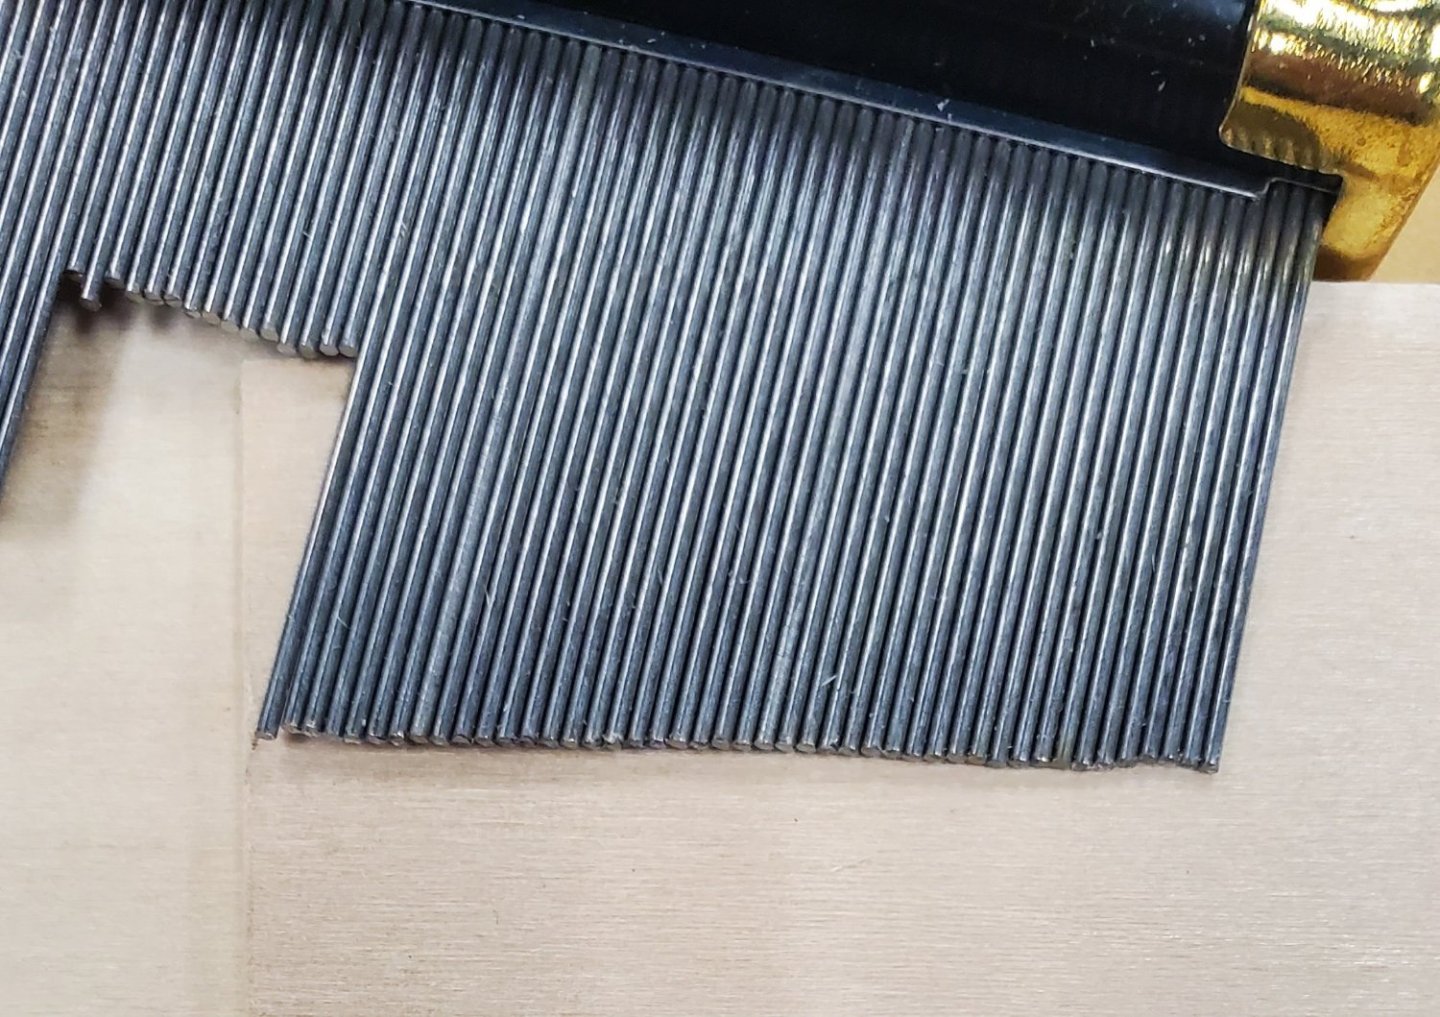
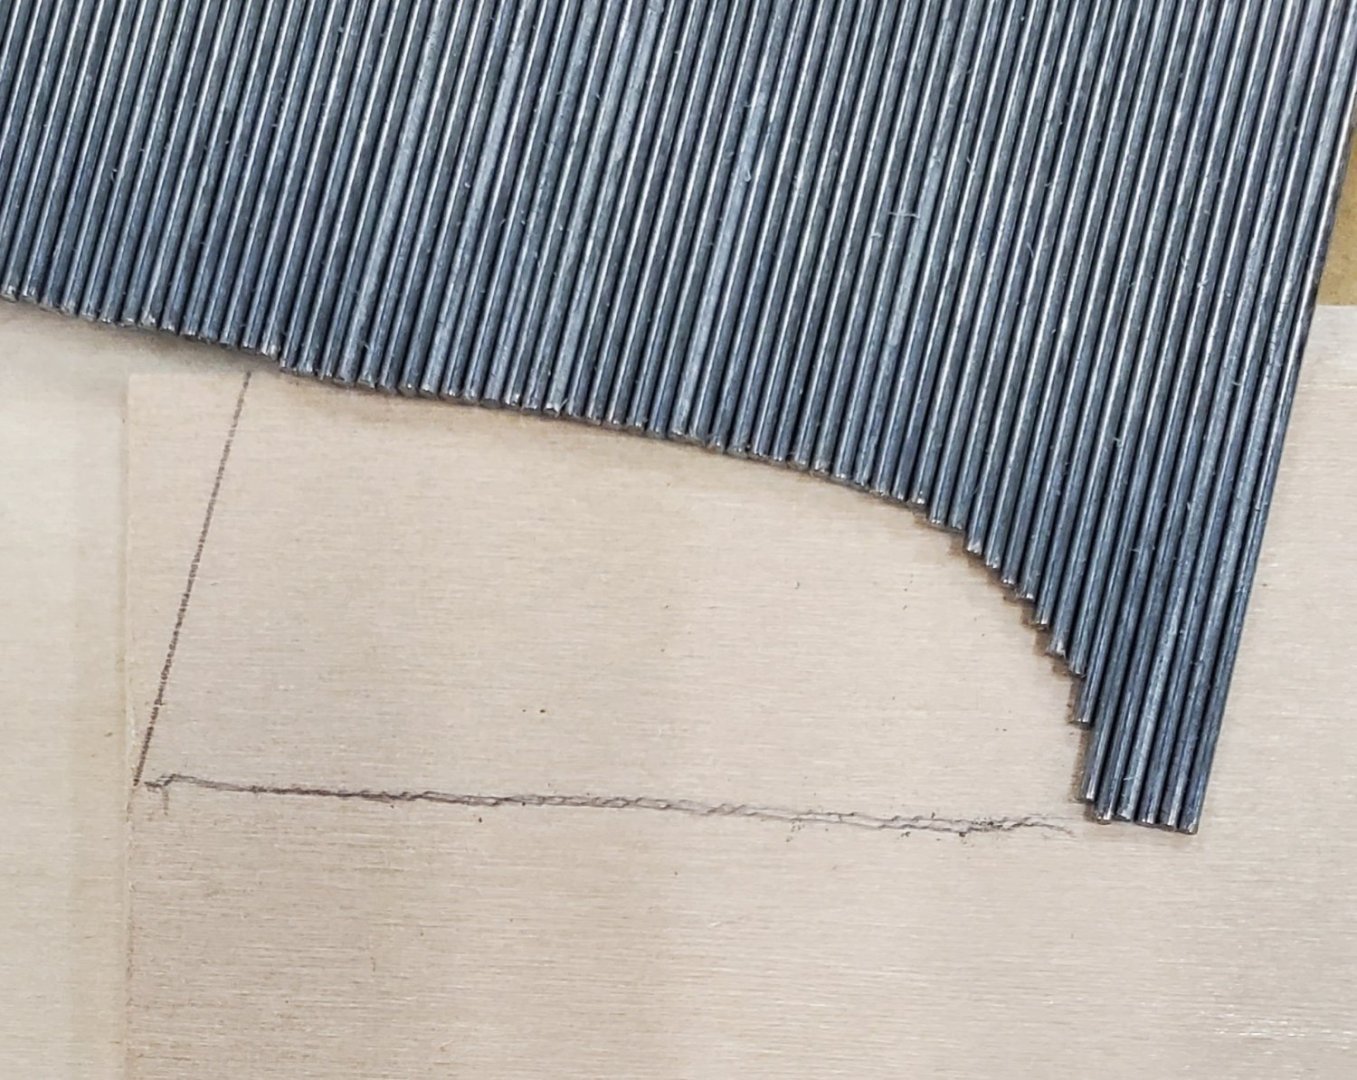
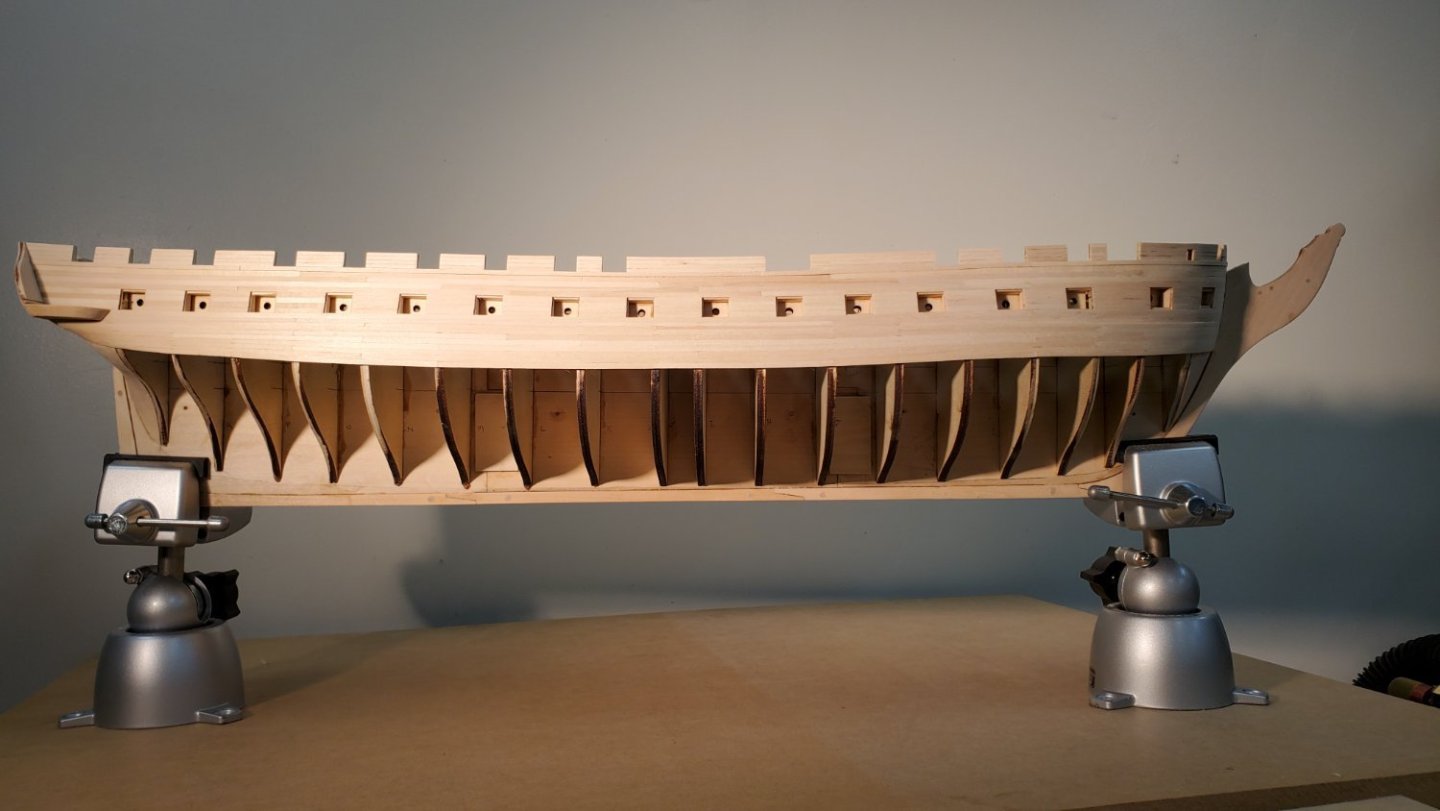
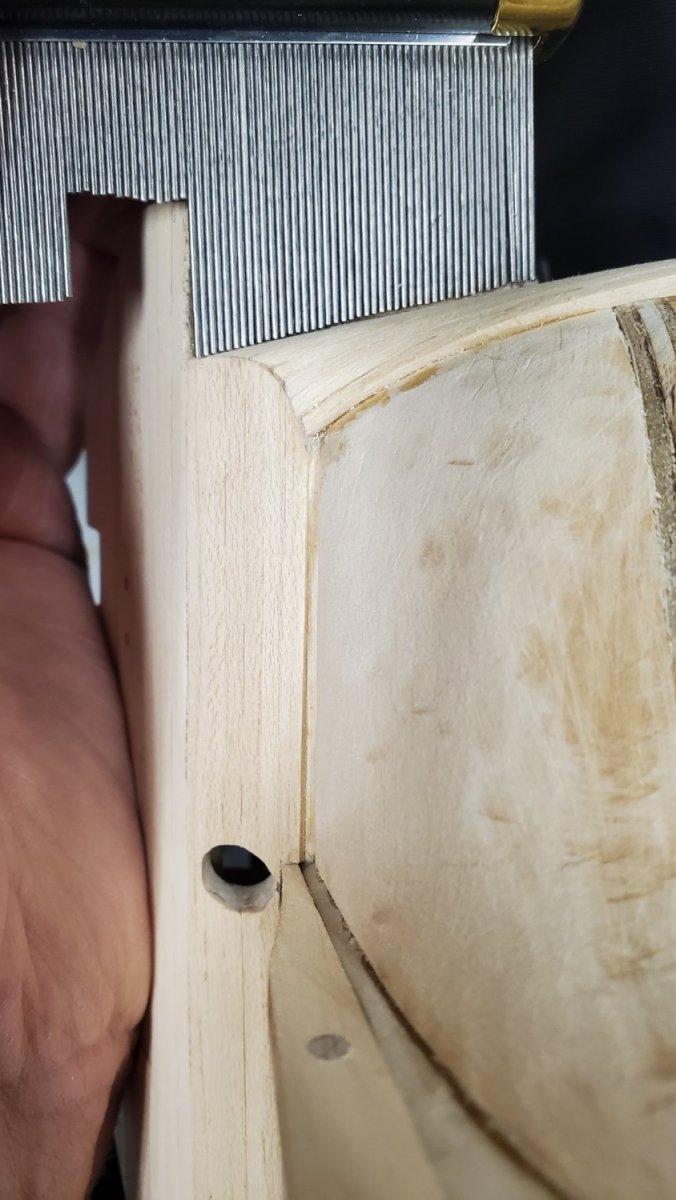
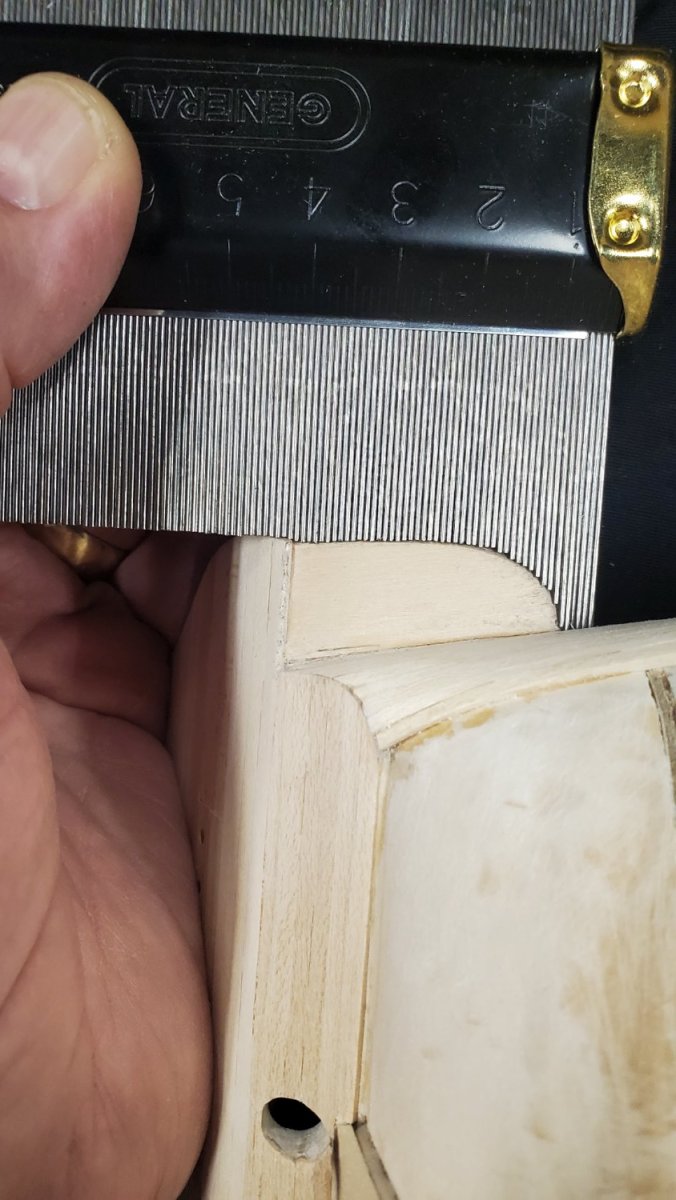
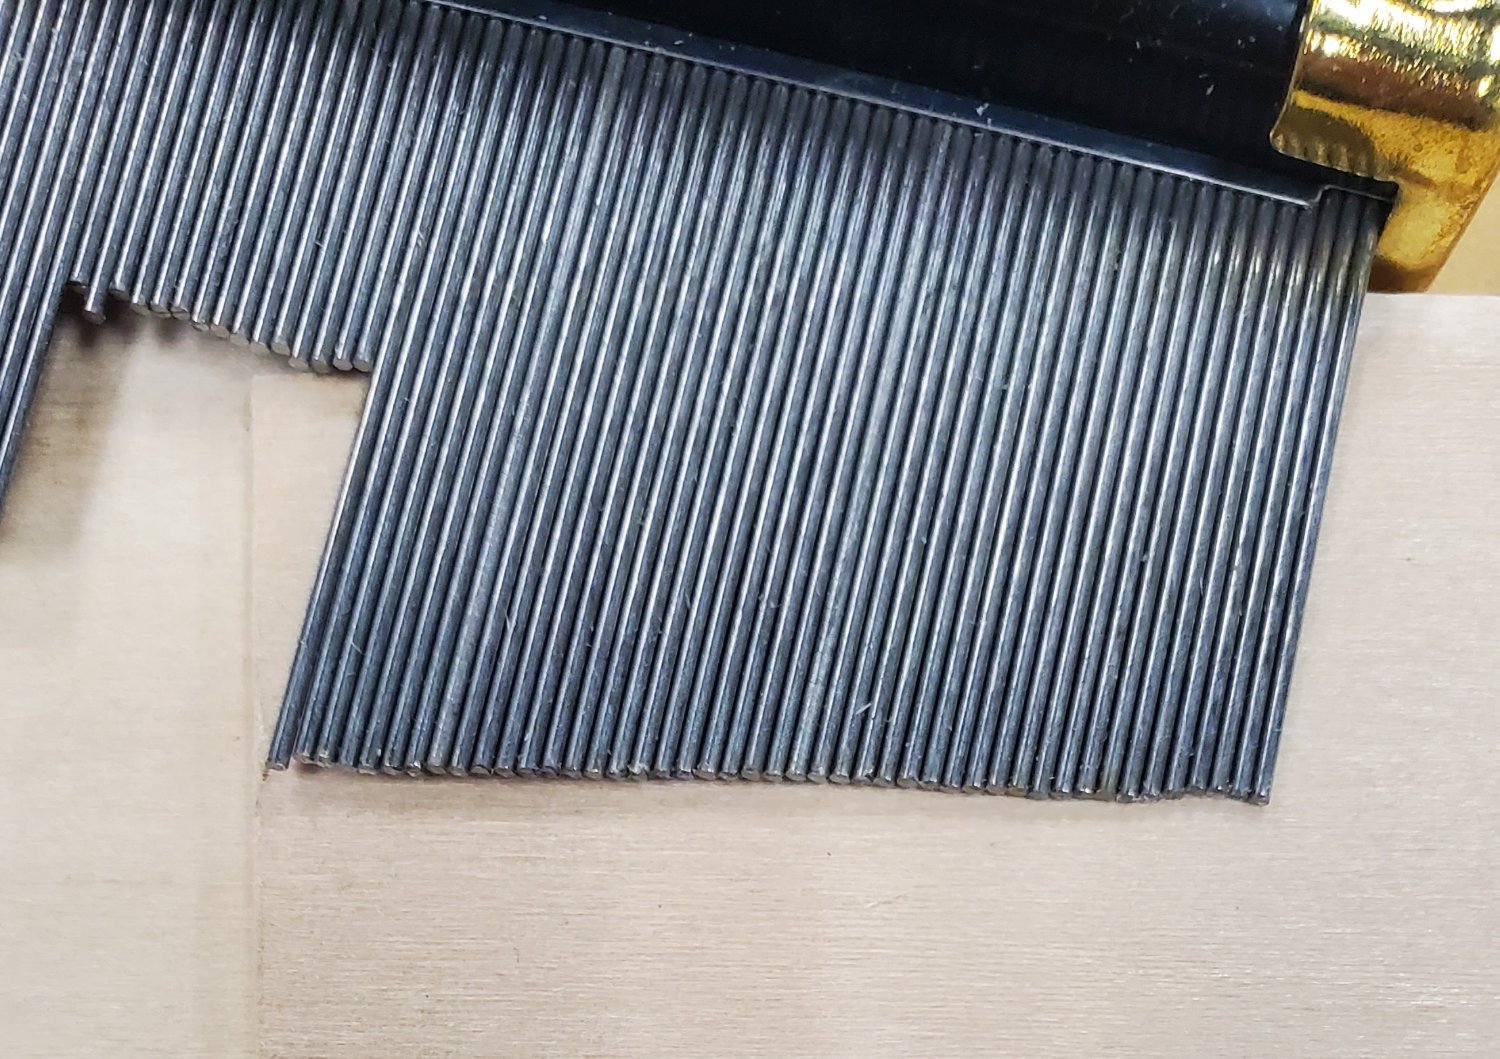
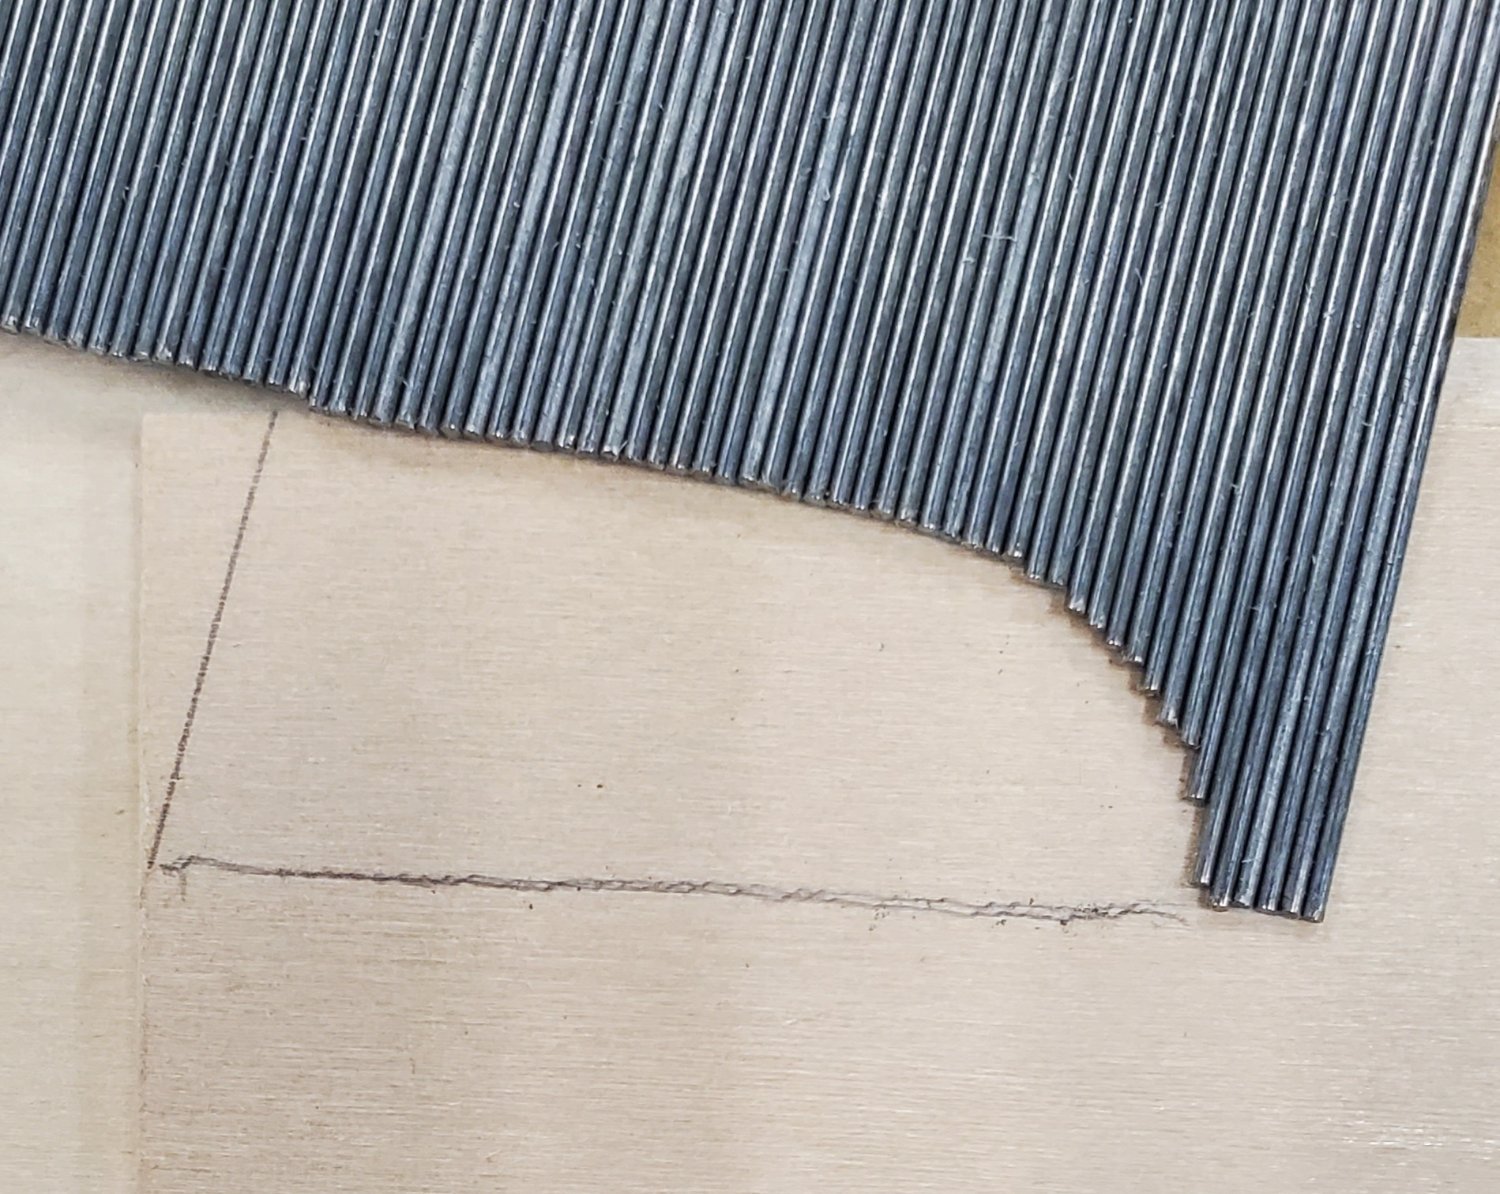
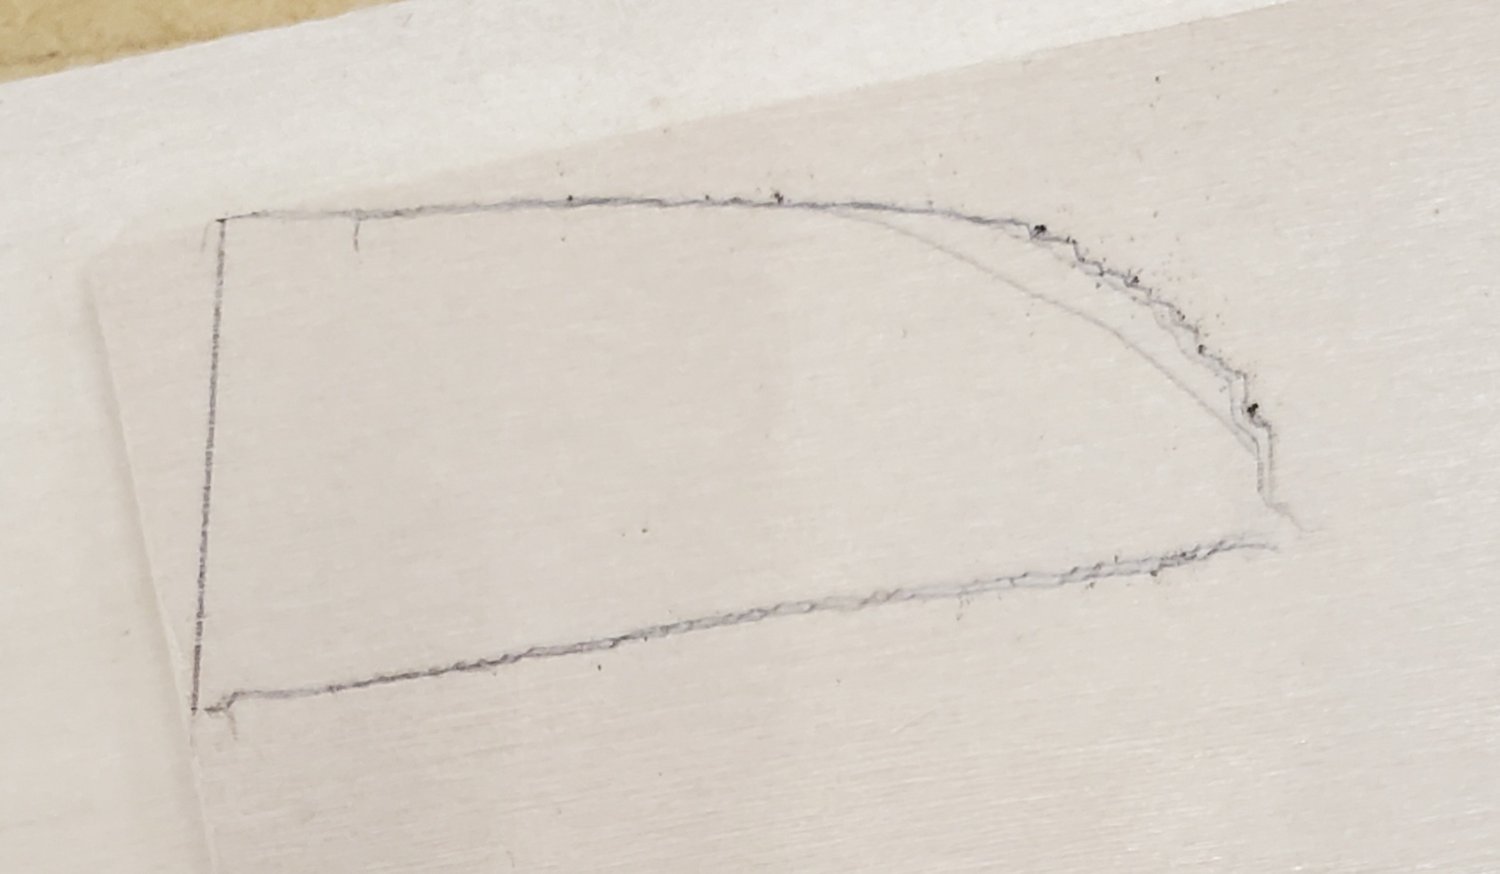
I was at the shipyard yesterday starting the "Hull Analysis" as per chapter 6 in the Hunt Practicum. This was a very enlightening process. I think I'll be doing more tweaking on the bulkheads - especially as they approach the rabbet at the keel.
Somewhere along the line, I lost track of the planking scheme Hunt outlined on page 28, when I did the wales. For some reason, I used a three strake pattern there vs Hunt's four strake pattern from the plank sheer to the top of the gunports. Worse, I noticed that I didn't use the same pattern on the port side as I did the starboard. My notes do not indicate why I changed up the planking scheme for the wales. So, for the remaining 40 strakes (8 zones of 5 planks each as suggested by Hunt), I will go back to the 4 strake formula.
My thoughts on that are that Hunt should have/could have suggested continuing the planking pattern when he started his discussion on the wales. For those of you just getting to that part of the build. Take note..
After marking the zone ticks on each bulkhead, I fabricated one strake segment (stem to bulkhead D) to get an idea of how long it would take. This was without the bending, shaping and gluing that will yet need to be done. It took 10 minutes to do the one piece. Let's do the math:
40 strakes per side
5 segments per strake
2 sides
10 minutes per segment
40 x 5 x 2 x 10 = 4,000 minutes or 67 hours just to fabricate the segments. Eeek!
I won't chime back in until I've planked to the keel. So, factoring in my time away from the shipyard for that trip down South, see you sometime in (early?) March.
Best to all.
-
On 1/19/2024 at 5:59 AM, mtbediz said:
Your planking work is very nice, far better than mine. Have a nice trip Peter.
I'm pretty sure from one of your build logs that you too know your way around Photoshop. My philosophy is everyone deserves a good picture..
Thank you.
Best
Peter
-
On 1/8/2024 at 9:29 AM, JSGerson said:
Thanks Geoff, a very informative log! For those who do not want to search for the site, here is the link.
Thanks for the link Jon. Man oh man, what a splendid build. I almost can't wait to get to the rigging now!
-
On 1/17/2024 at 10:29 AM, JSGerson said:
You did an excellent job and you should feel proud of your workmanship. Just so you don't feel too bad, Ken Forman (xKen) is a professional model maker so he sets a pretty high bar to match. He designed the Model Shipways cross section kit of the USS Constitution, the Model Trailways Allerton Steam Fire Pumper, and written books on making brass models. So yeah, you did a fine job.
Jon,
Without yours, Ken's, Geoff's, Mustafa's, and all the other wonderful builds at MSW to draw energy and inspiration from, I'd never have gotten this far. I'm delighted to be past these "gallery drops" (thanks Rick). I have about a week to make a dent in the rest of the hull's planking before I take off for warmer climes for a few weeks.
Thanks
Peter
-
On 1/17/2024 at 11:41 AM, Geoff Matson said:
Great job on a real tricky concept. The one thing about this KIT, is you will be an accomplished scratch builder after completing your build. I know there are many frustrating parts, but you learn so much and solve so many problems. Again, great job
Thank you Geoff. Your kind words are greatly appreciated.
-
On 1/17/2024 at 11:08 AM, rlwhitt said:
I'm impressed that you're able to plank these gallery drops at all, and they look great!
Thank you Rick. I looked up your Essex build and am likewise impressed with your finished product. I will be referring to that build when/if I do the copper plating. I wish you had included more detail on the processes, especially the gallery window build. Beautiful.
Thanks again.
Peter
-
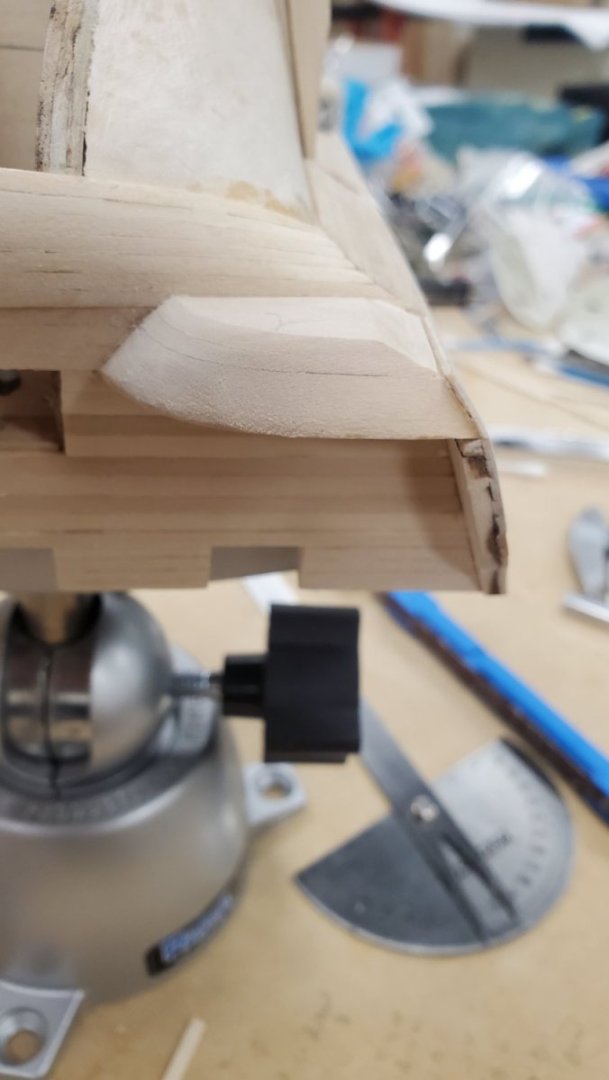
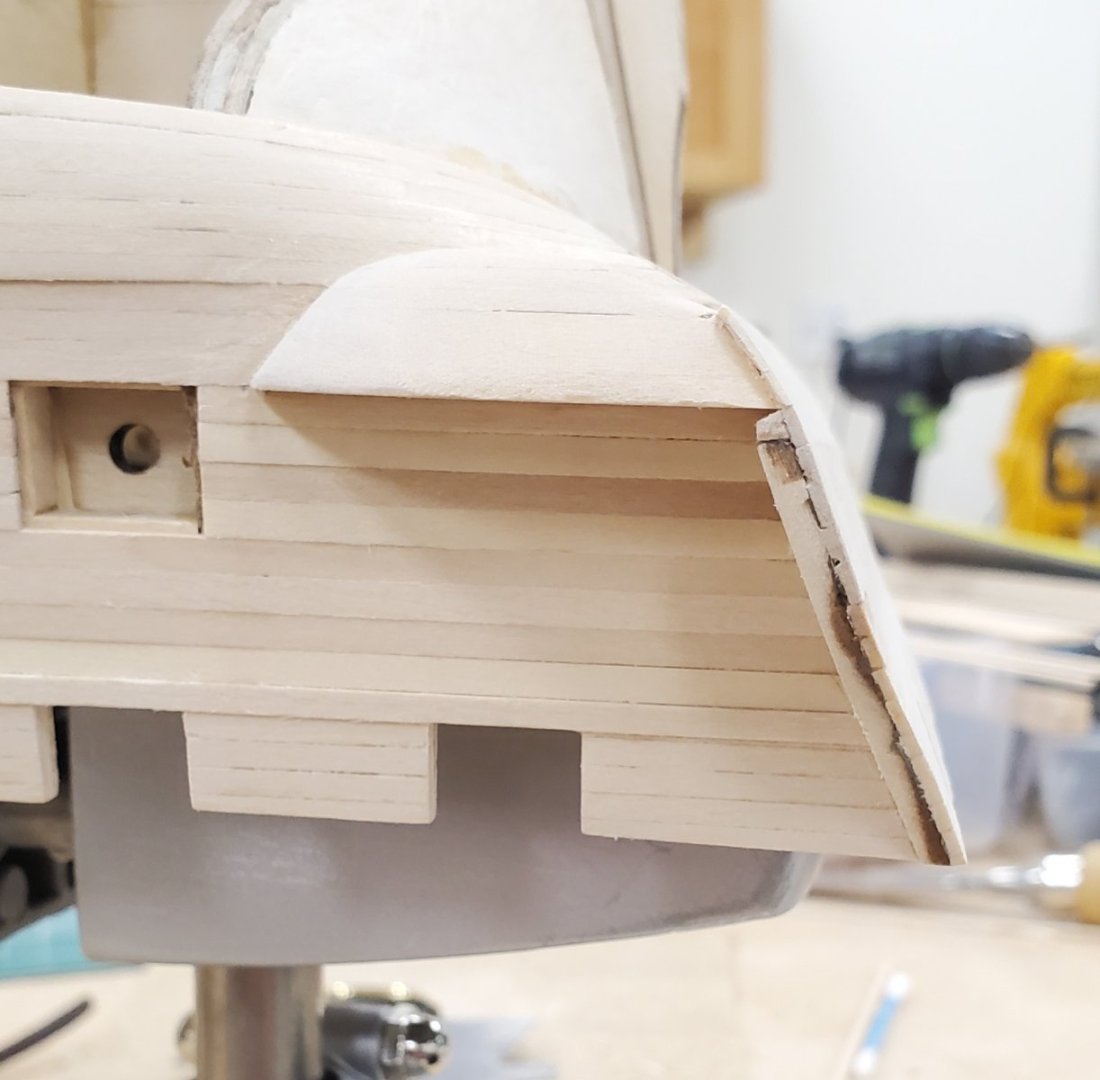
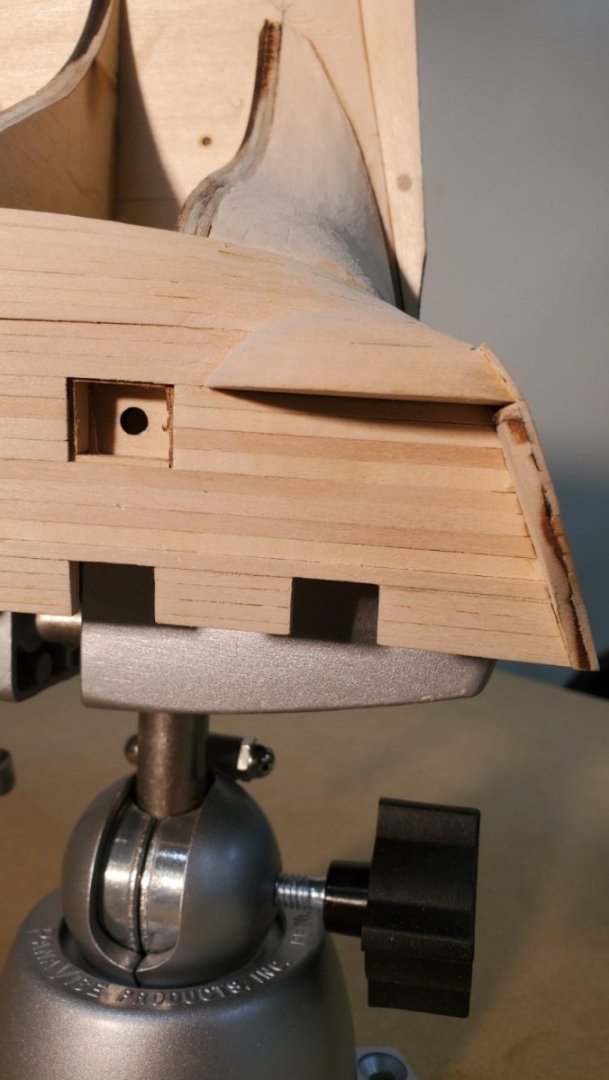
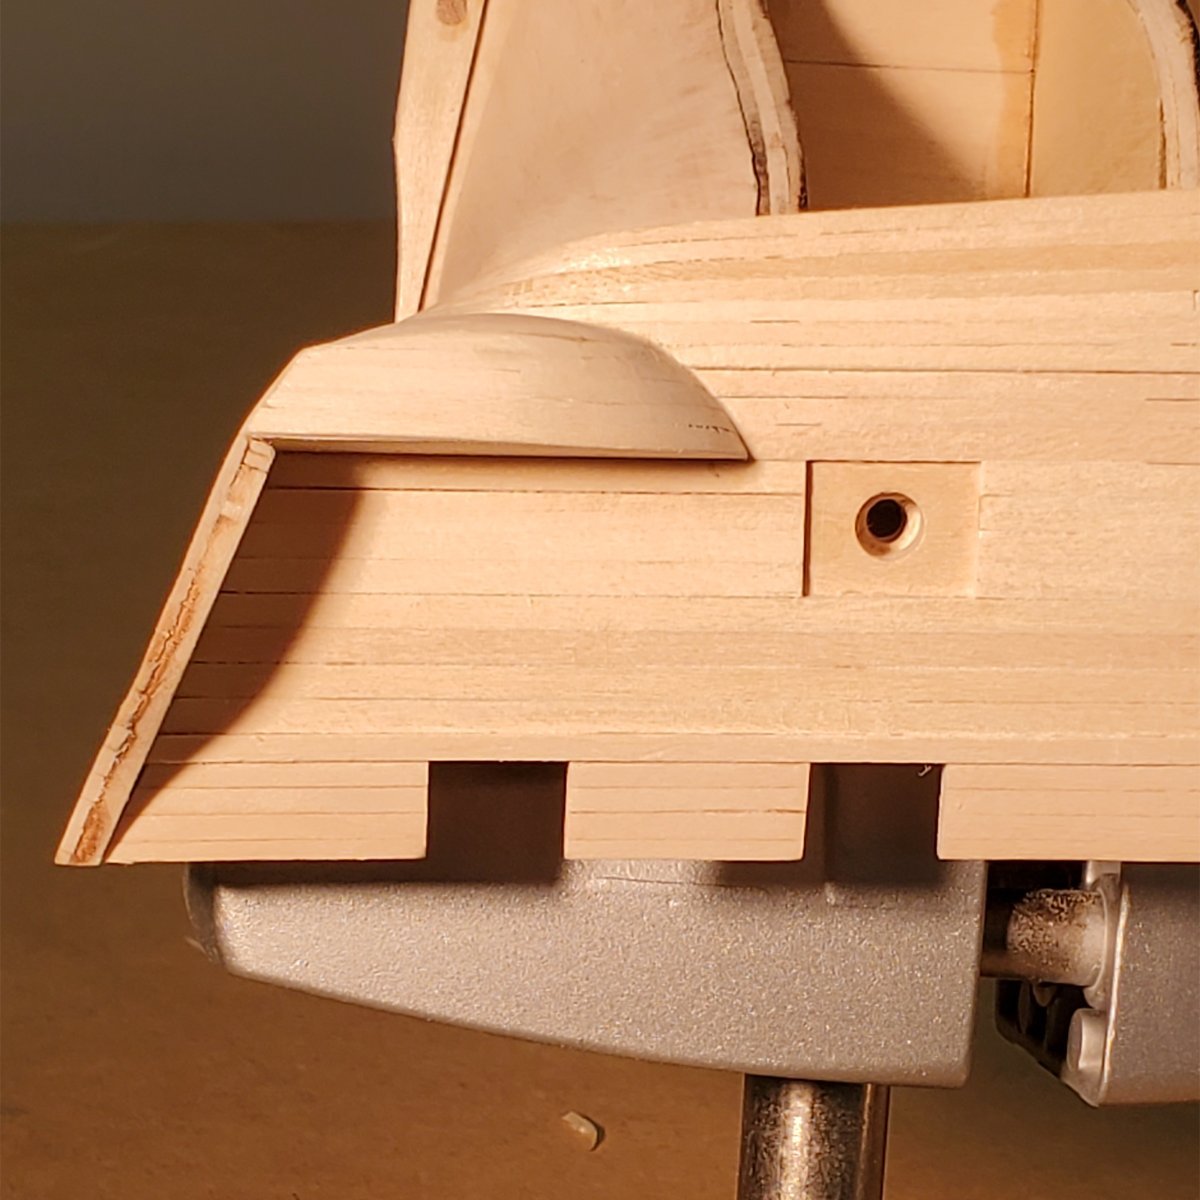
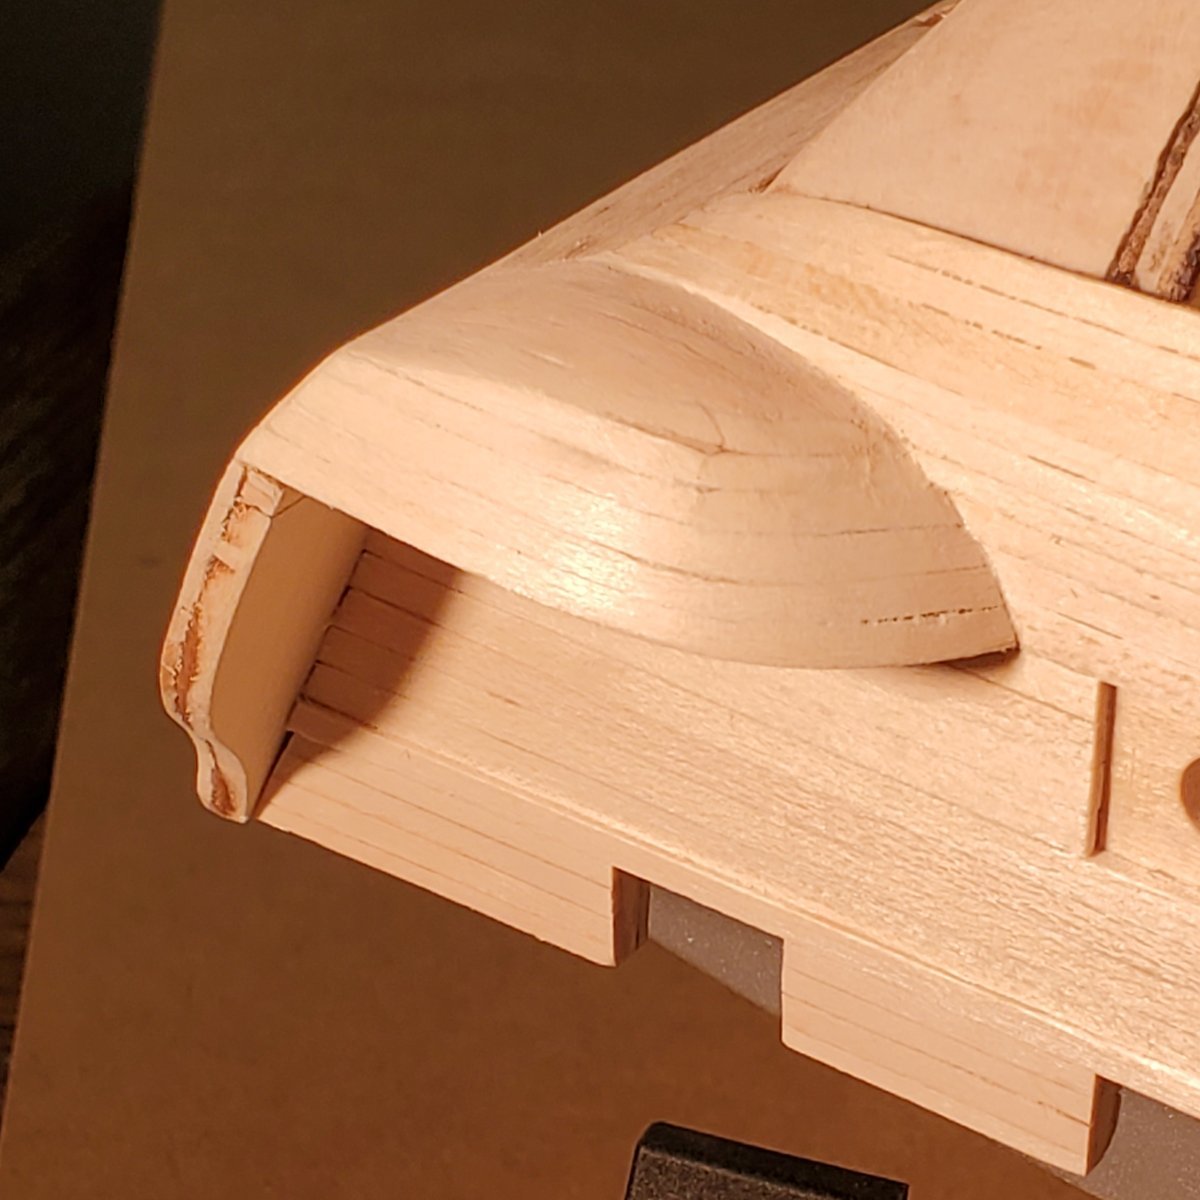
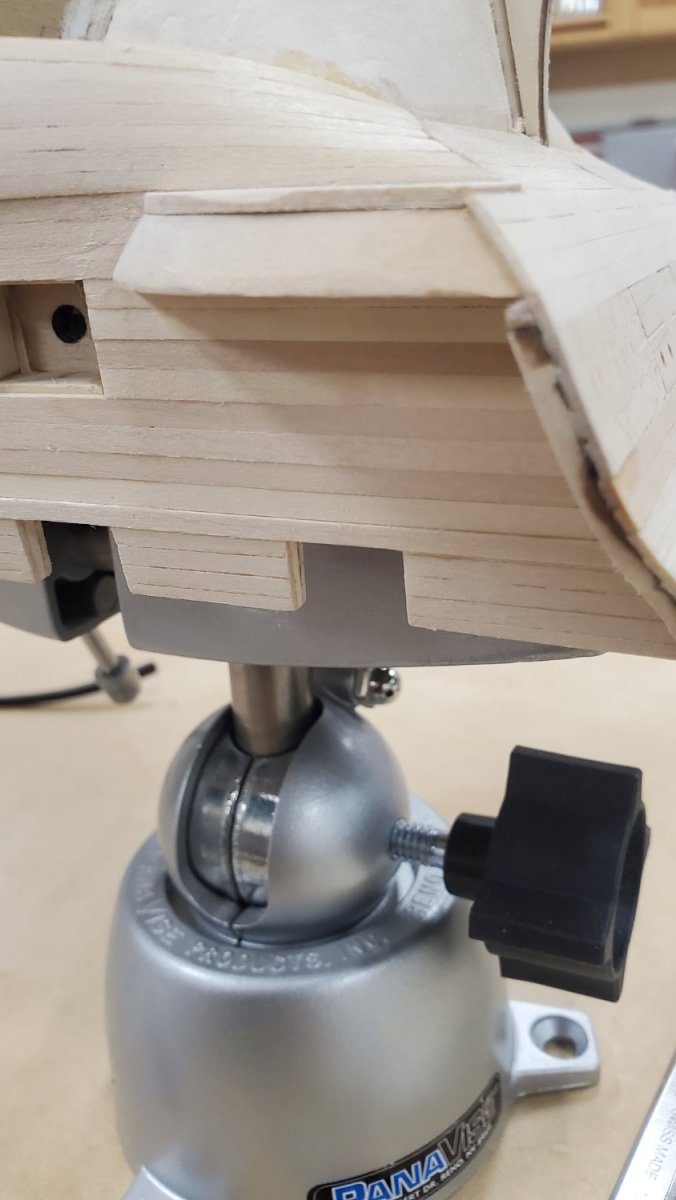
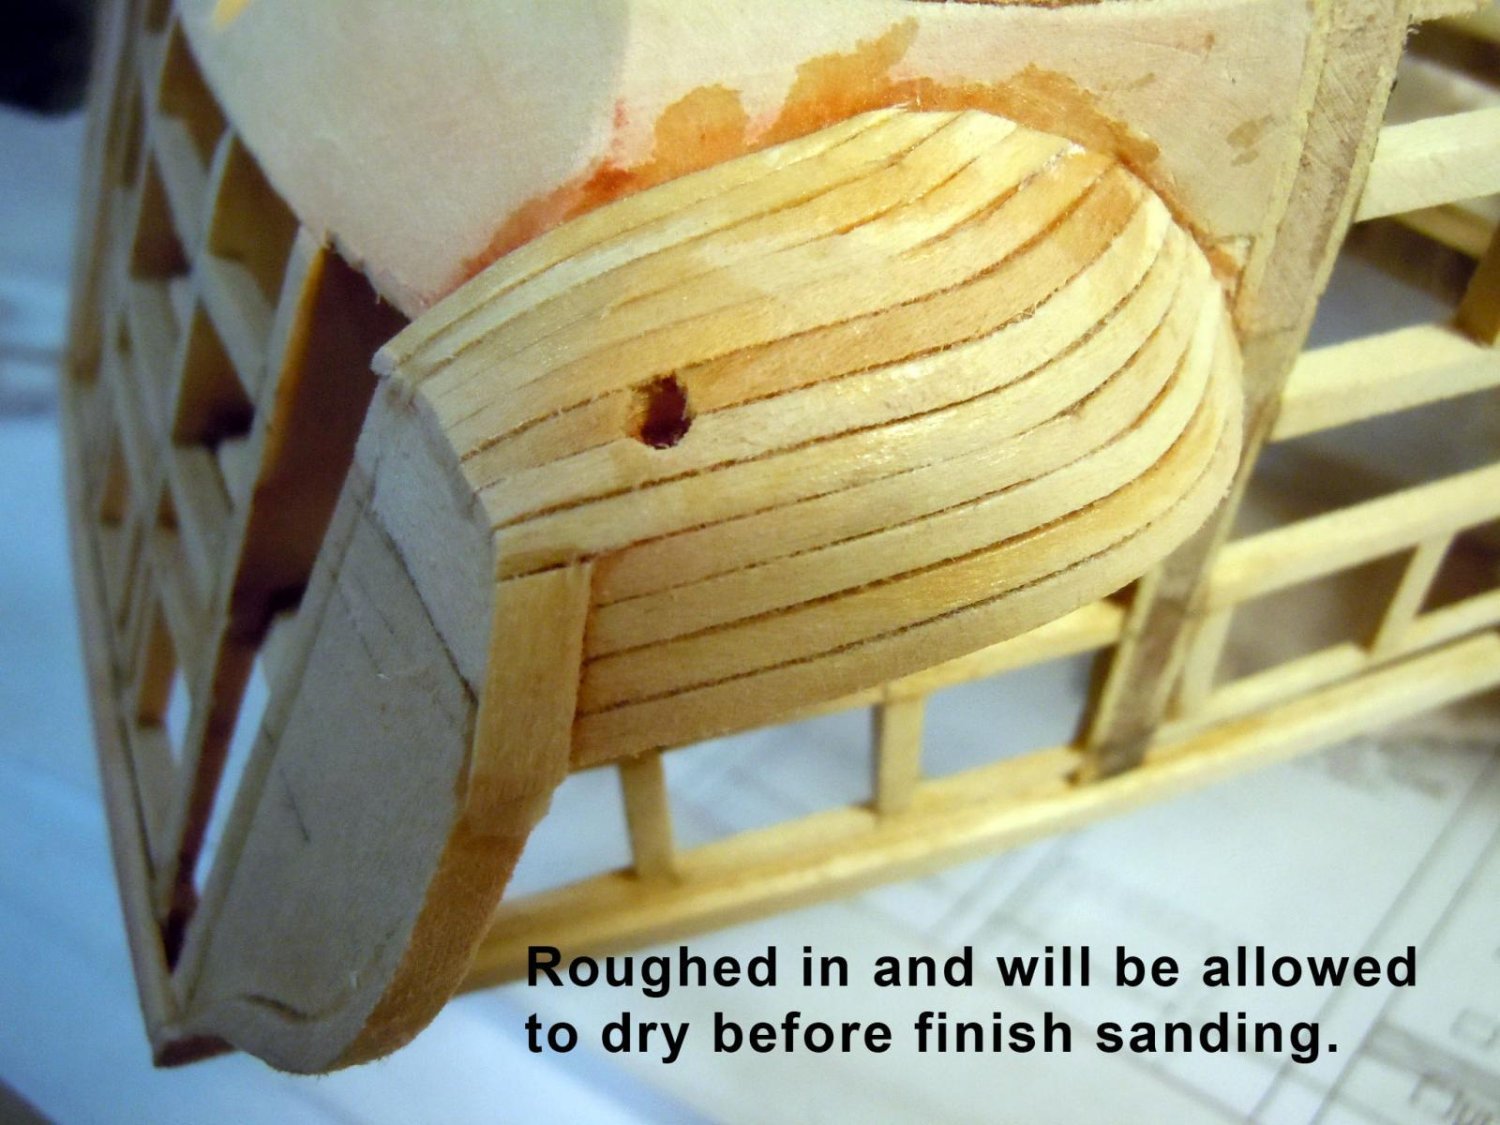
I can't believe how much effort it took to plank these gallery bottoms. Six hours at the shipyard yesterday to do the port side. And I had to find another way to get the last 4 planks in. Sadly, the results are not as clean as Xken's. But again, once Conny is right side up, the compromises won't be noticeable.
On the starboard side, I actually formed these shapes with 3/32 x 3/64 stock. That was painful. This wasn't perfect, but it worked.
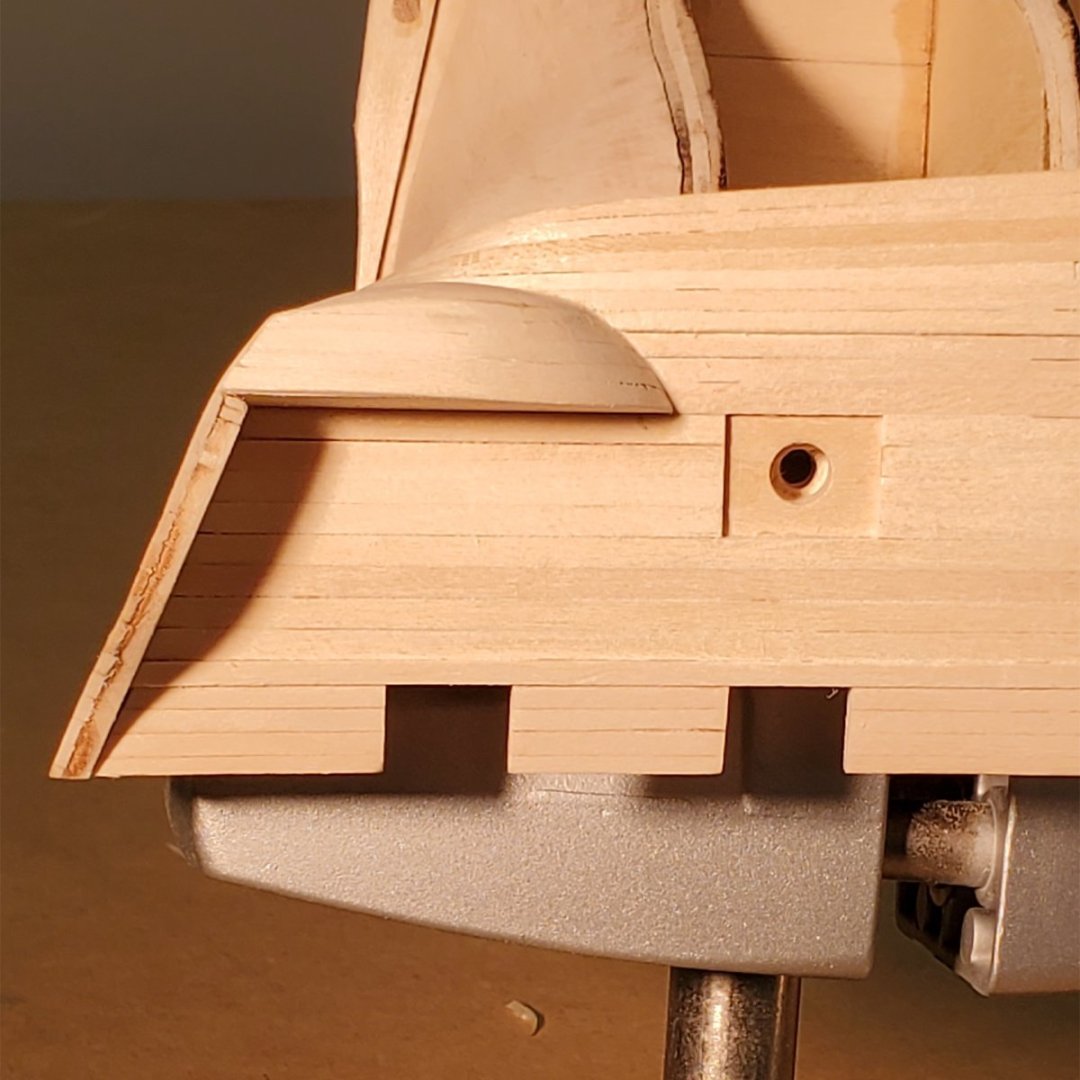
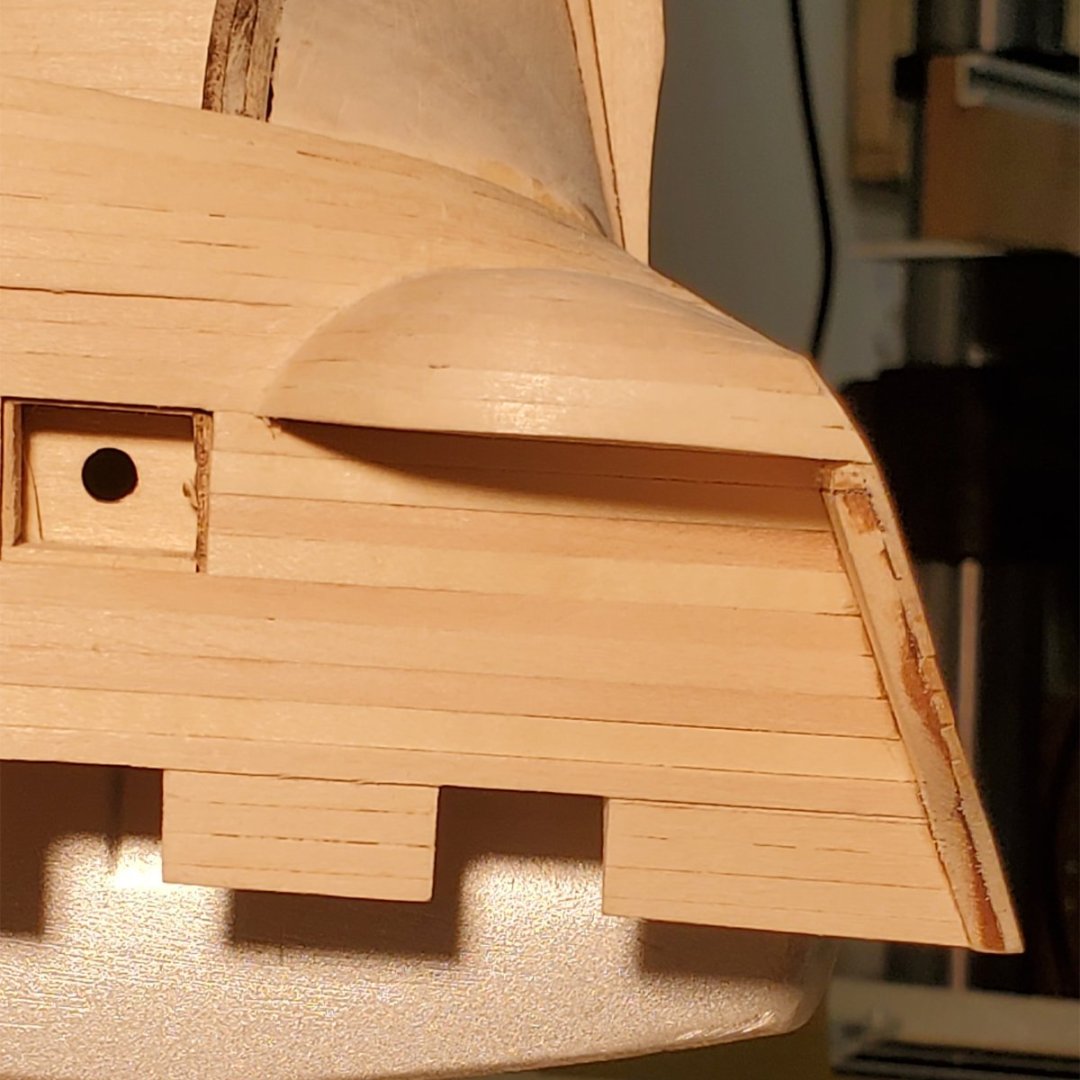


Comparing the sides of the hull, I have much work to do to cleanup the starboard side planking so far. A lot of chisel and sandpaper work ahead of me there. Then I can finally get the rest of the planking underway.
- mtbediz, rlwhitt, Geoff Matson and 1 other
-
 4
4
-
Looking at these pictures, I am reminded that I did actually attempt a wooden model ship a number of decades ago. I can't remember the name of the boat, but it was a two hull planking project like this. My results were similar to yours, but then I got busy with work and never got to the second hull. Nice thing about this scheme is that you don't have to be terribly exacting on the first round of planking. I wonder what happened to that kit?
I had a tool that made pushing those pins in fairly easy. It was a spring loaded gizmo that you loaded a pin into and pushed the handle to drive home the pin. It was a low tech nail gun, if you will. No air needed, just elbow grease. I don't know how tough the wood in your kit is, and you're done with this phase anyway, so it's academic now.
Looking forward to good things from you sir.
Best
Peter
-
8 hours ago, JSGerson said:
It looks like you learned a bit from my mistakes. I just didn't understand how all of these three dimensional surfaces merged together and ended up having to use wood filler. Nice job!
Jon
Thank you Jon,
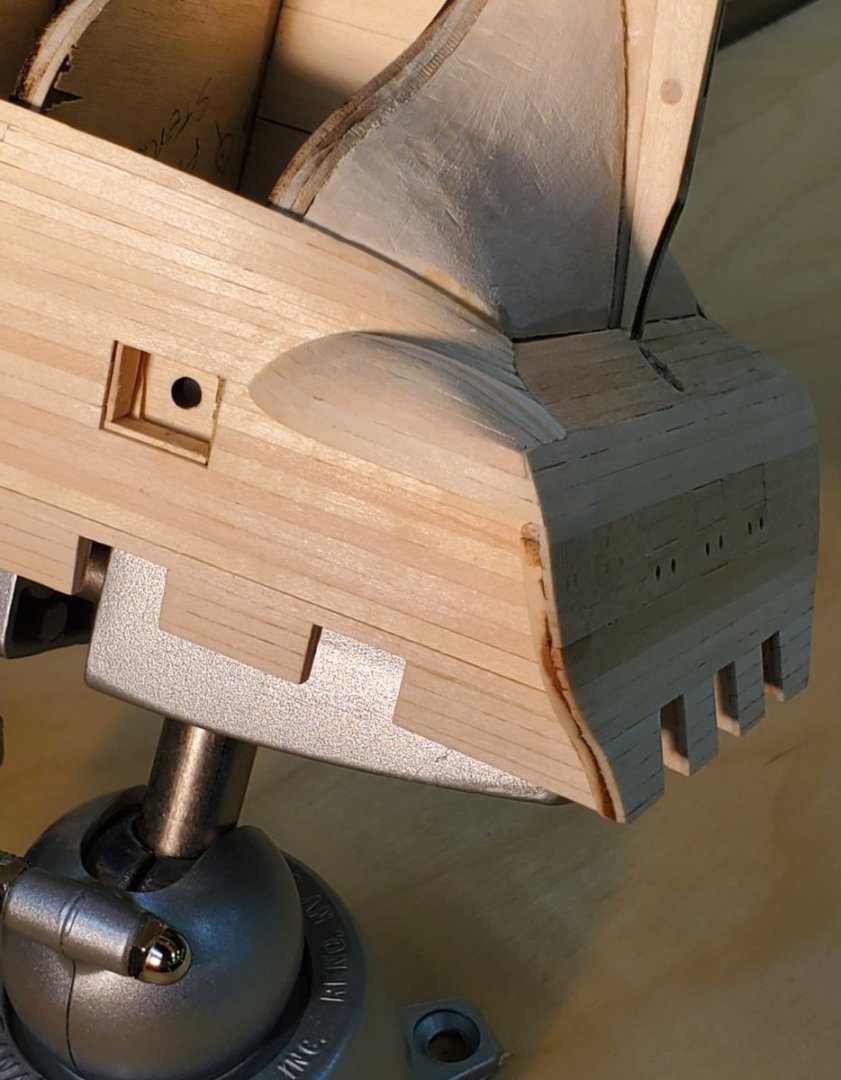
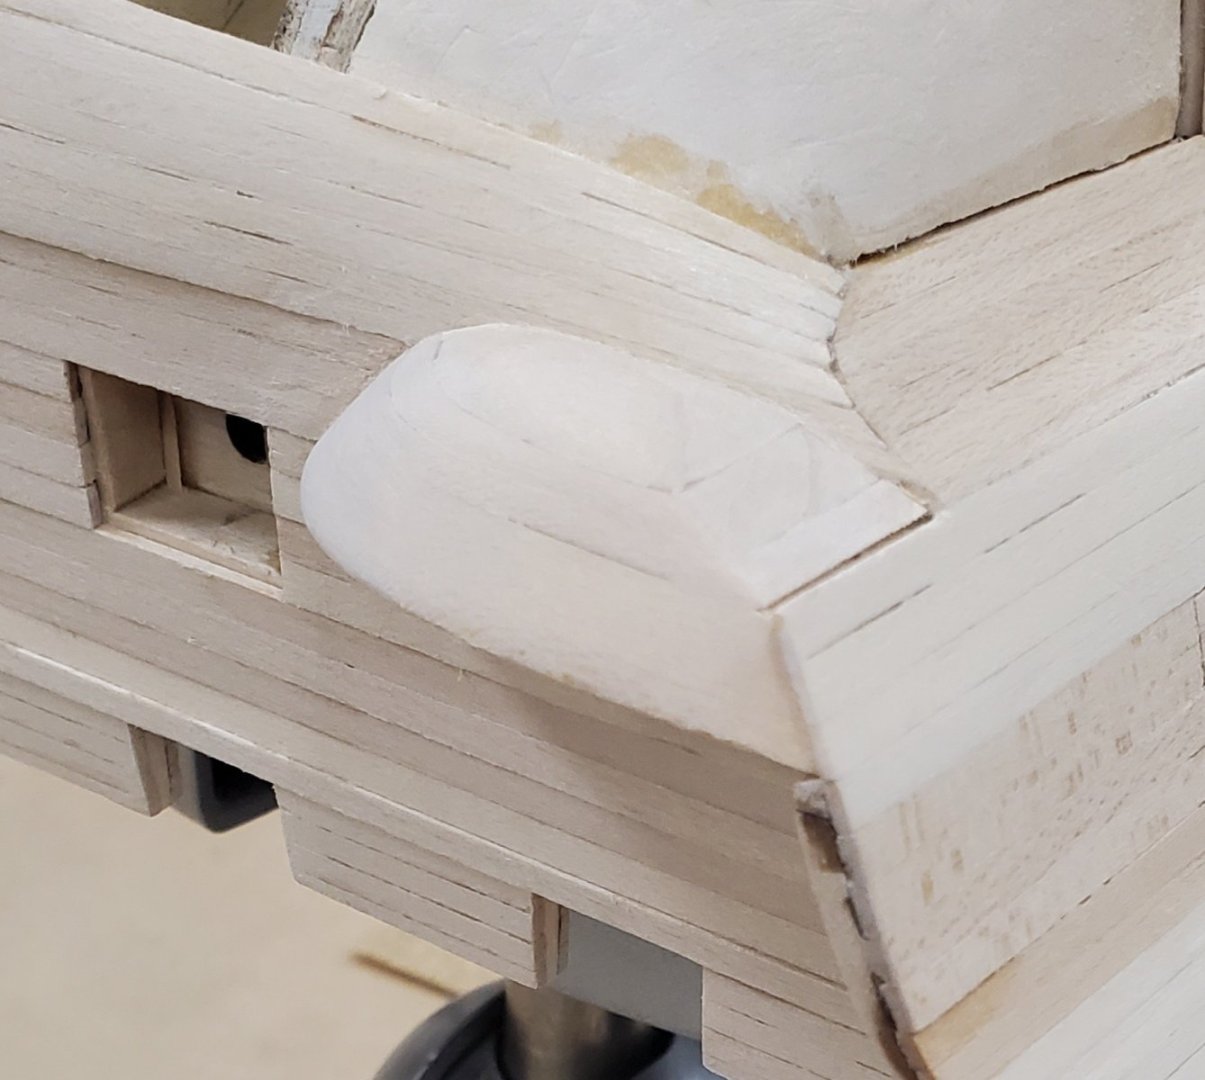
Frankly, I couldn't quite figure out the three dimensional scheme either - hence my two dimensional approach.
Having spent 6 hours at the shipyard today planking just the starboard side gallery bottom, I'm not sure I'm learning the right lessons. Seems to me that wood putty and paint could end up saving me a lot of time and effort. Had I not seen the Xken photos we recently discussed, I may not have planked at all. While not entirely happy with the results, I console myself with the notion that once Conny is right side up, the flaws will be less noticeable.
For what it's worth, I have a smidge more to show for today's effort. I do have two planks installed on the port side.
-
6 hours ago, woodartist said:
it looks awesome to me, I keep reading you log daily, to get my mind adjusted to going back to Connie 2. However the knowledge I have gained on planking Lady Isabelle will surely pay dividends when I return.
Thanks,
I've been watching your progress on Lady Isabelle and am thinking about my next one - in 2026?
I added some photos to the above. After posting, I returned to the shipyard to do the port side. Once I had the technique down, I only needed a couple hours to repeat the process. I think I'll follow XKen's lead and plank the gallery bottom before I plank to the keel on the rest of the hull.
-
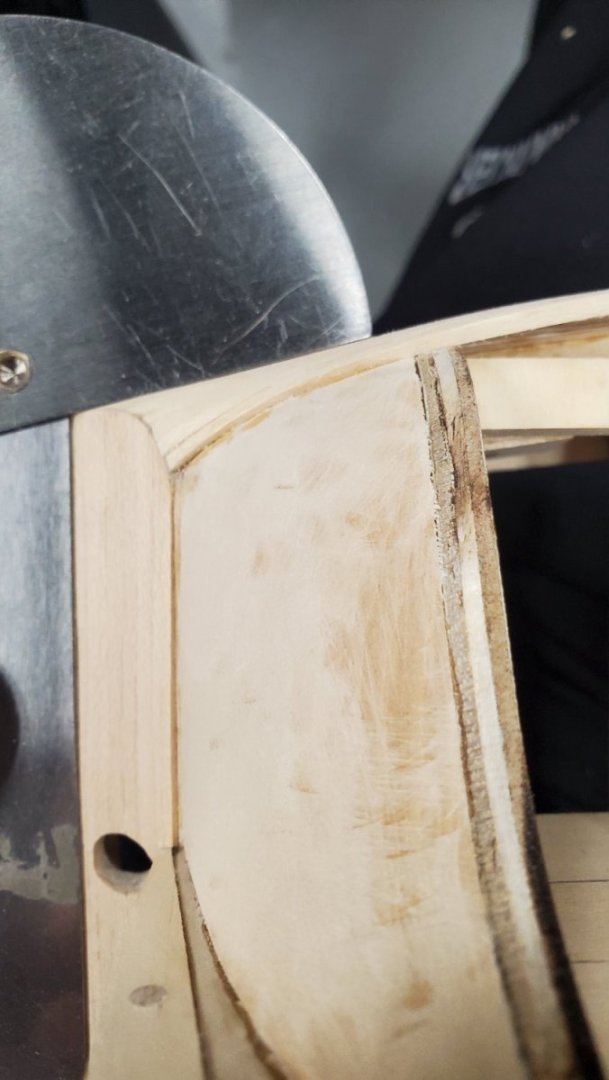
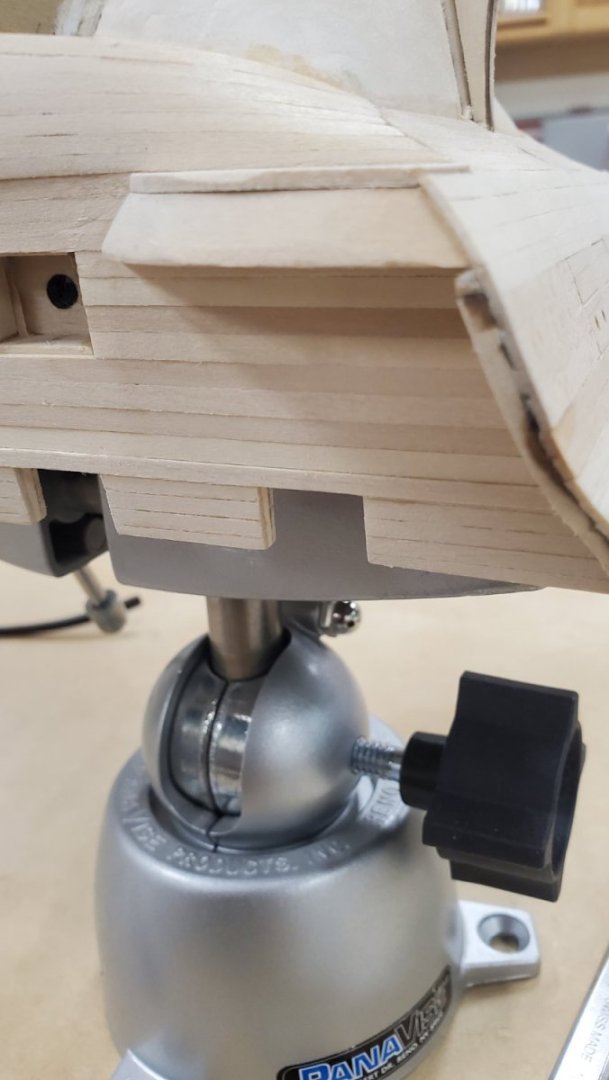
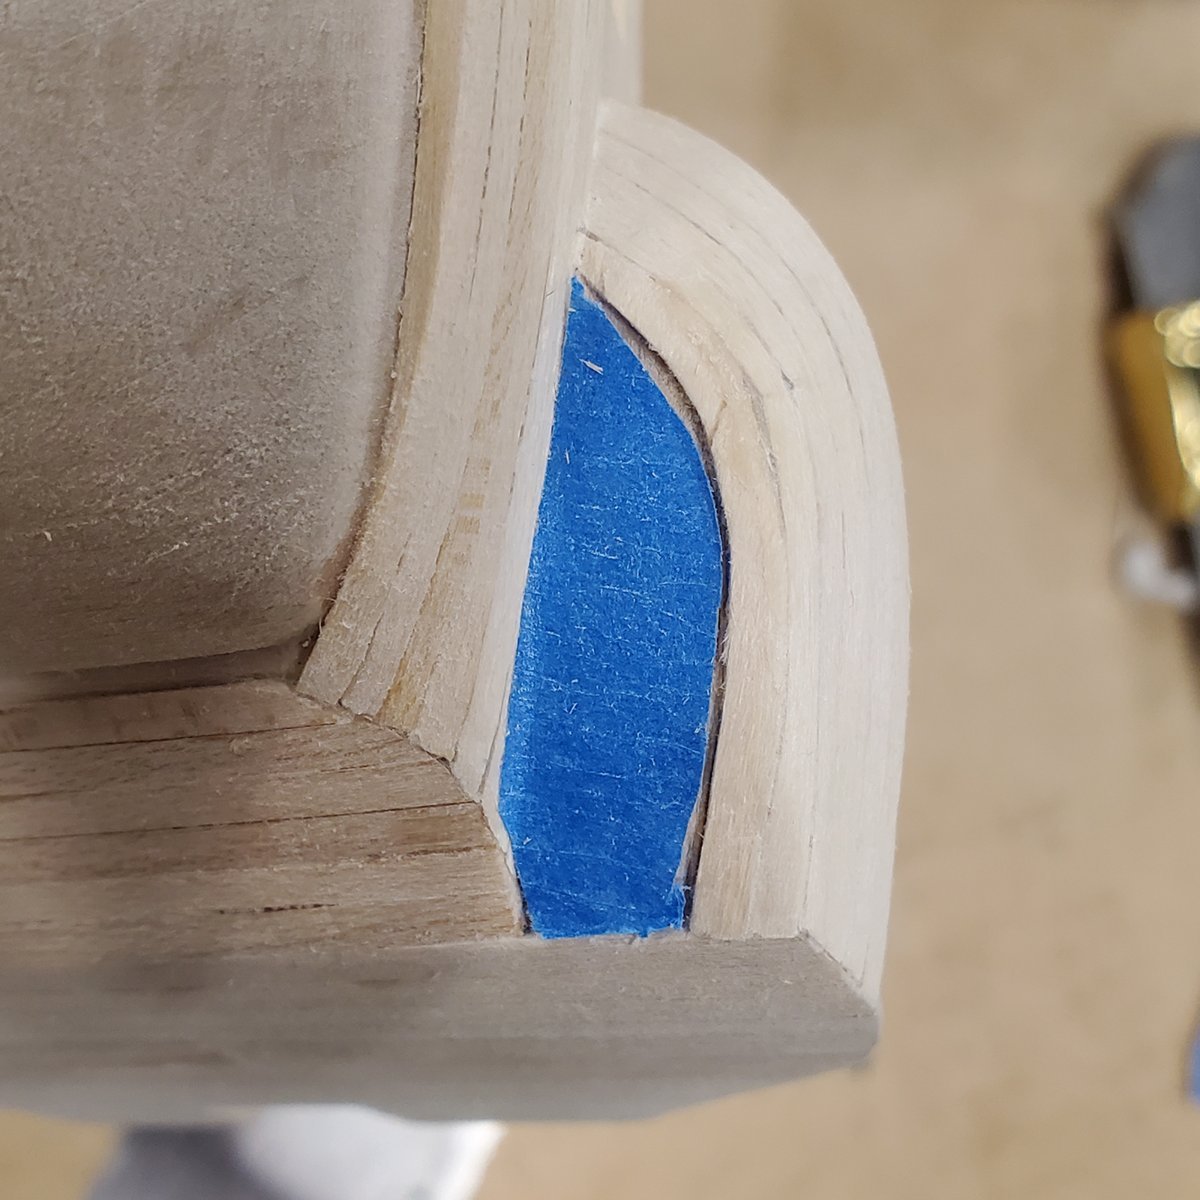
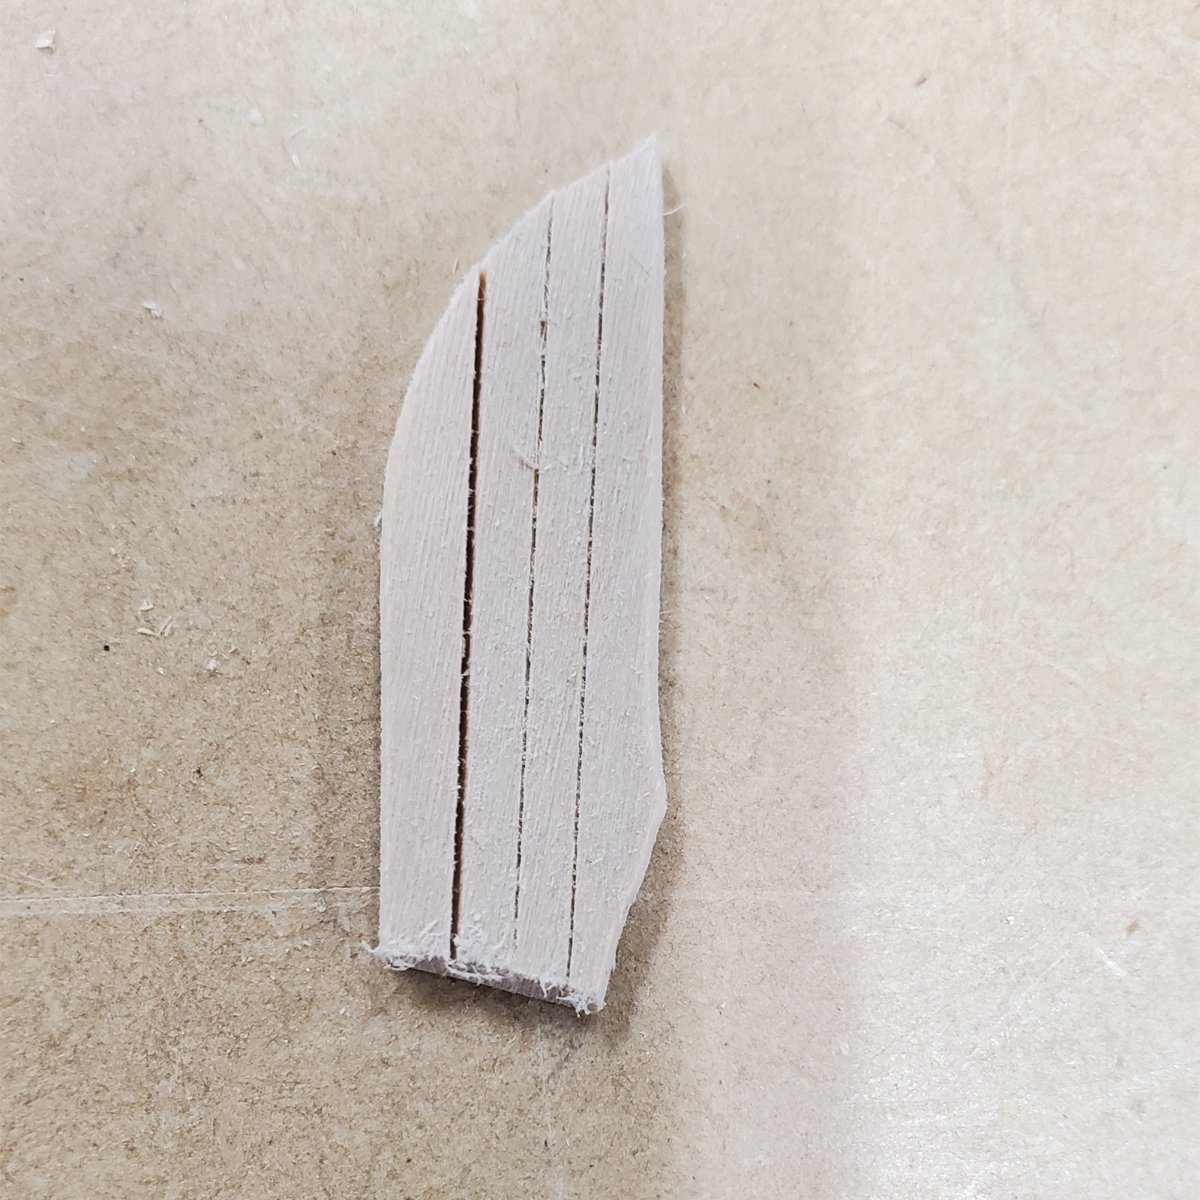
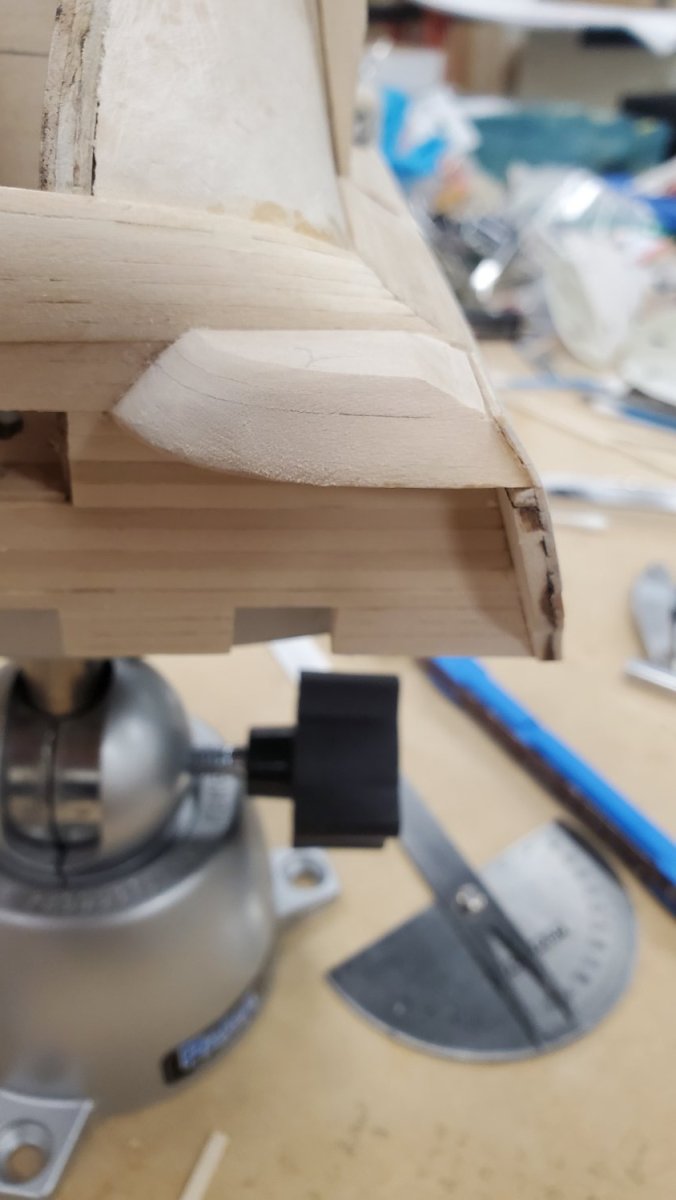
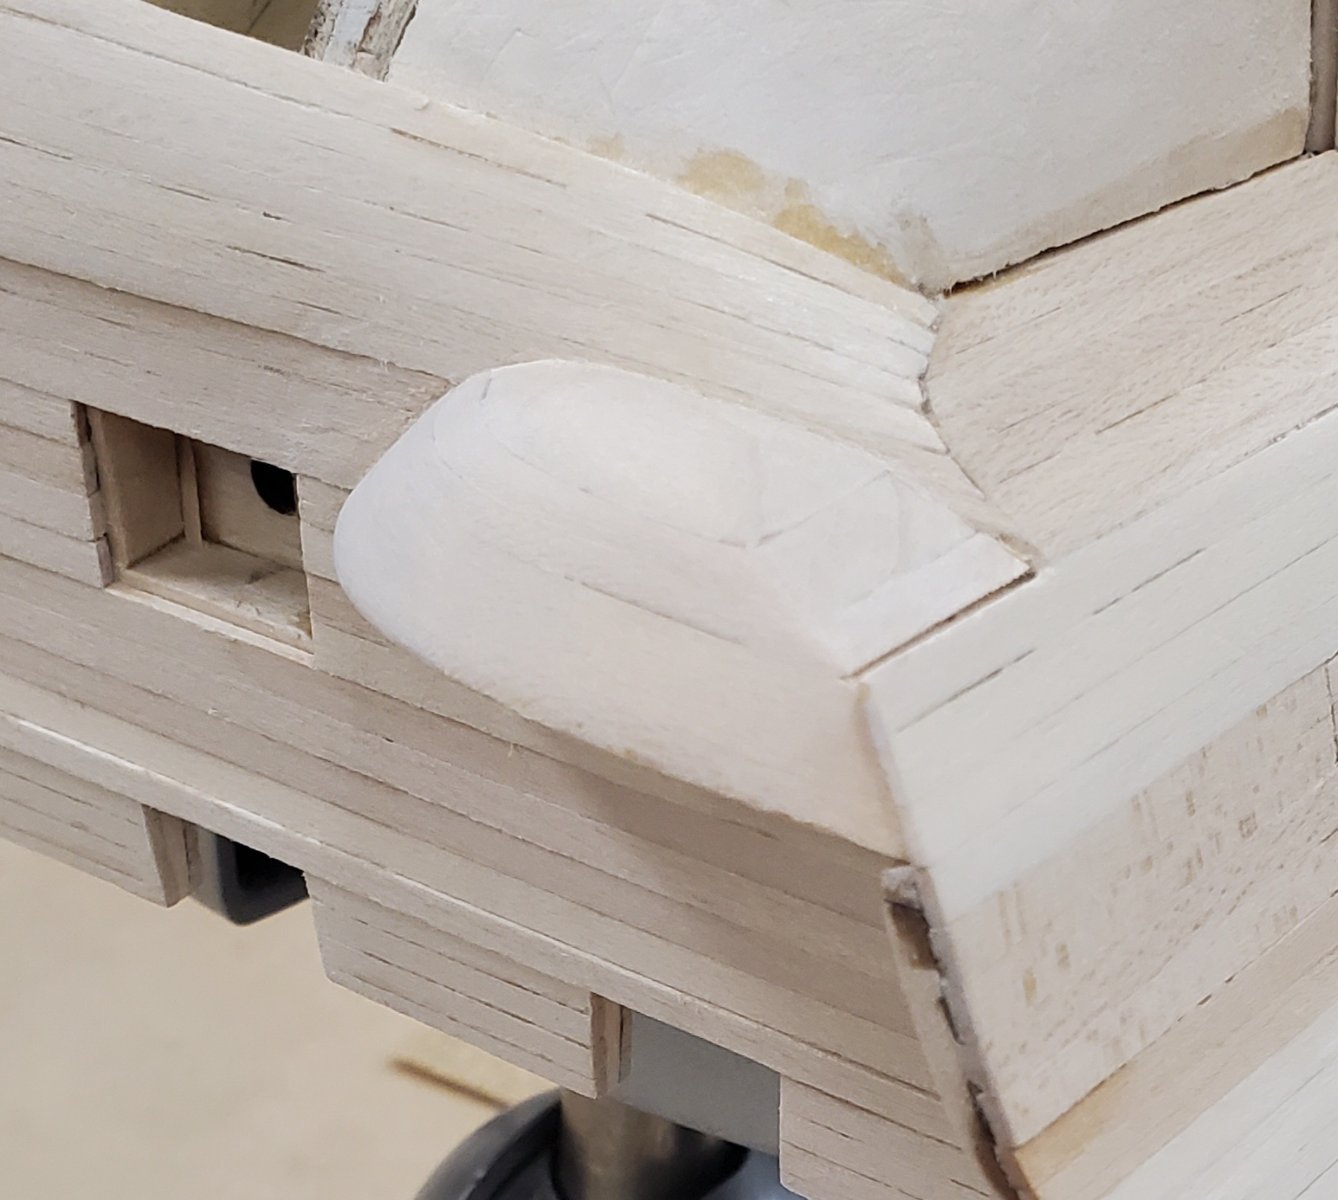
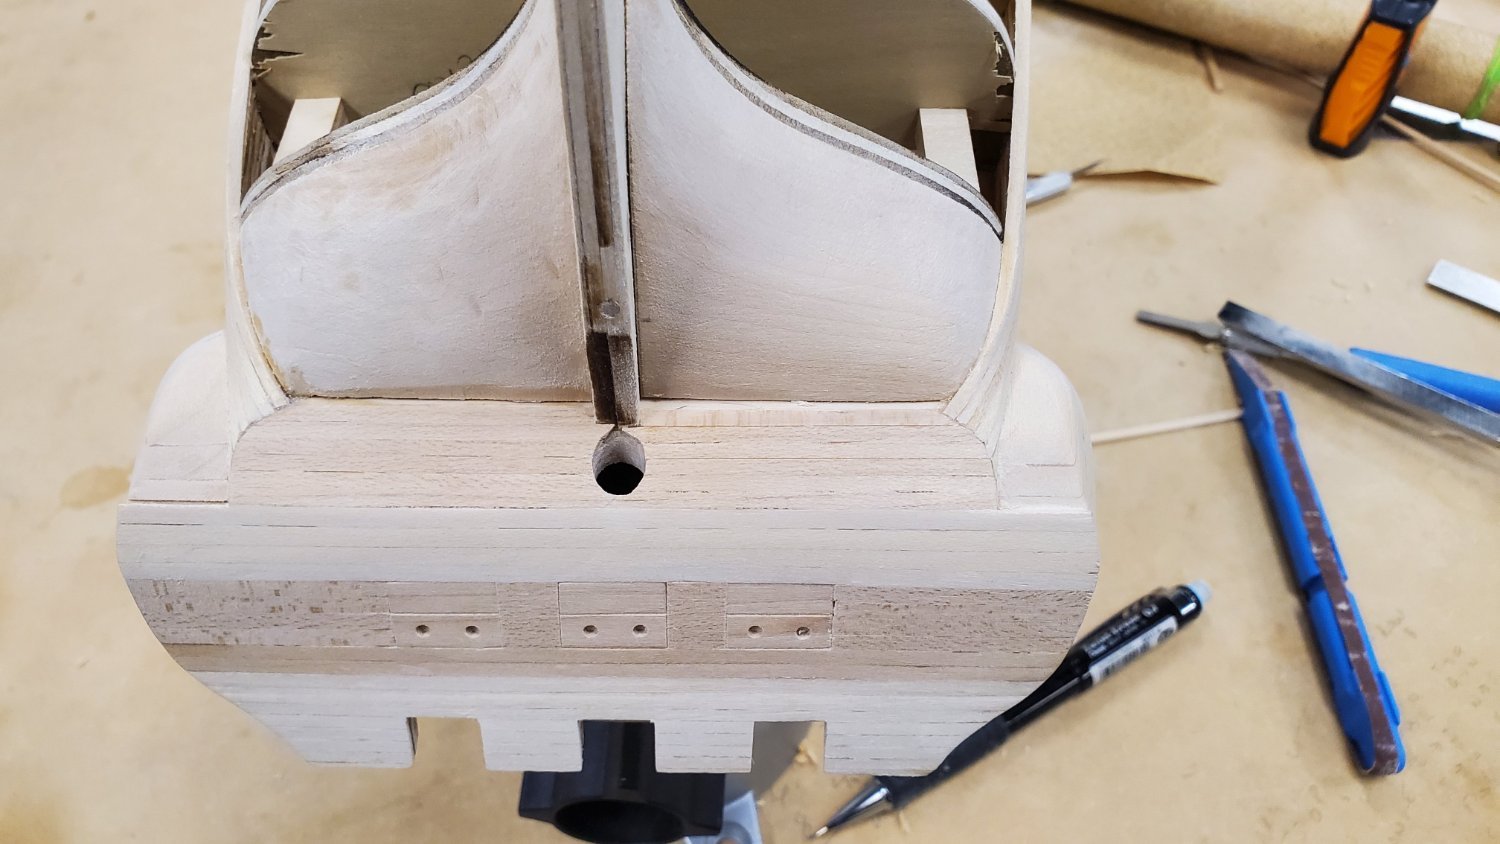
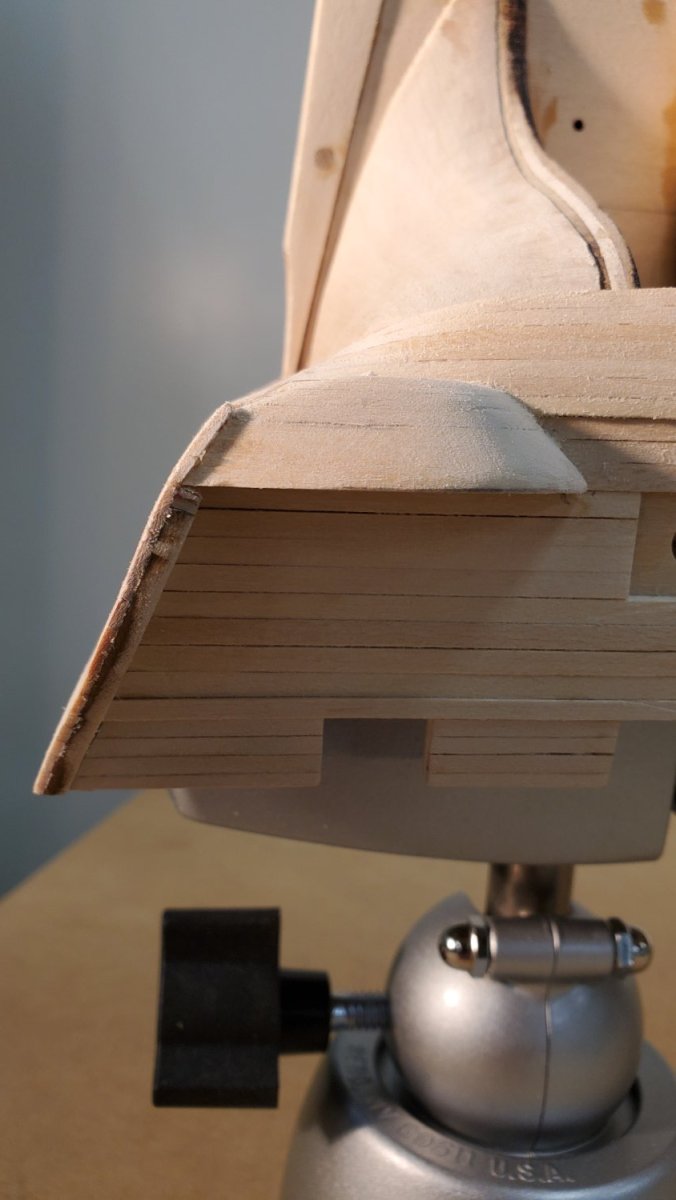
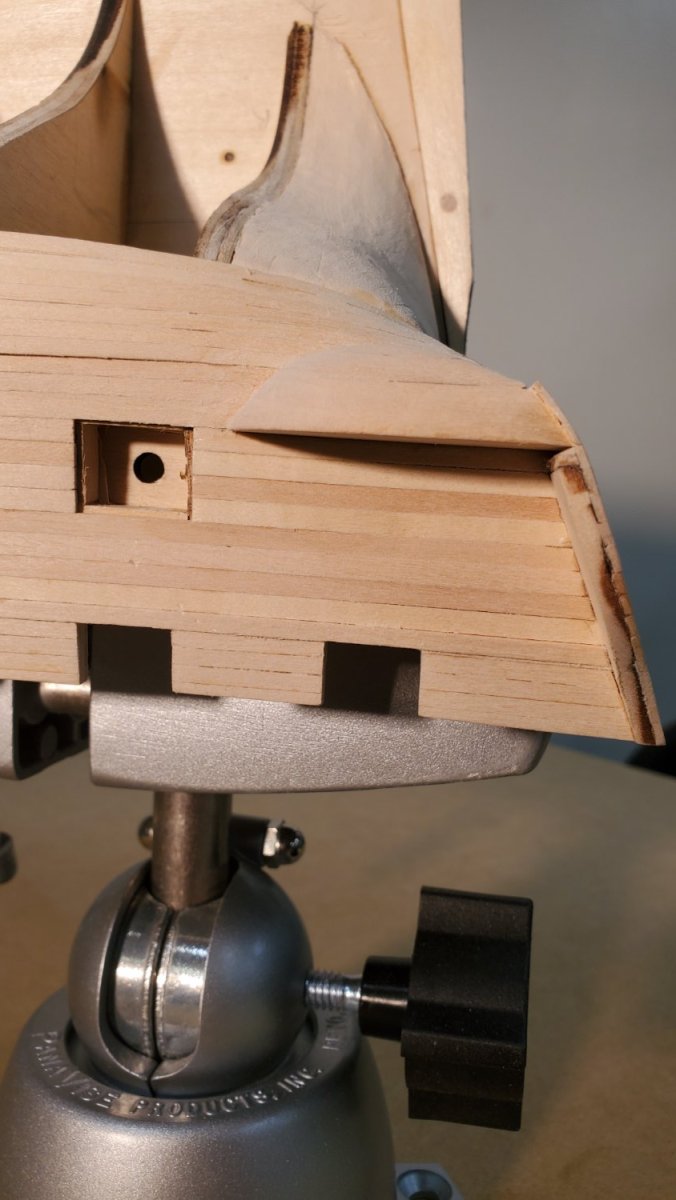
2024 Jan 14, I figured out an easier(?) method for fabrication the lower gallery. Using a bevel gauge, contour gauge, scroll saw, 1/16" basswood, chisel and sanding sticks, I made three thin layers to affix to the counter extension - adjusting the shape after the addition of each layer. I left room for planking later. Looks good as far as I can tell. Some shape tweaking may be required when I get to the planking.


-
-
22 hours ago, JSGerson said:
The photos came from post 83.
P.S. The pix did in fact come from post 83. Thanks!
-
21 hours ago, JSGerson said:
The photos came from post 83. I basically followed the practicum for the basic skeleton of the quarter galleries, then added my own touches. Basically everything went smoothly until I attempted the windows as you will see when you read my log.
Jon,
I spent about an hour and a half today going over your build log and reading your commentary. Focusing for the moment just on the galleries, methinks things didn't go quite as smoothly as you remember. Given that I am your contemporary (hmmm, come to think of it, is everyone posting build logs here on Social Security?), and recently having reread the first half of my own build log, I fully understand how time has a way of softening the bumps and potholes on Memory Lane.
Hunkering down at home in the aftermath of the blizzard here in the Midwest, today I'm spending the day researching this tiny aspect of the build. My wife will be out of town for about a week, so I'll be in the shipyard more in the coming days and hope to have benefitted from the time invested today.
Looking at another aspect of your build back then, I marvel at the effort you put forth on those darned rivets! 4k plus brass hand punched divots applied with poly and a brush. Yikes man, do you have patience! Kudos for that. Me personally? I'll be skipping that level of detail. I'll chime back in AFTER I finish those gallery bottoms.
Best
Peter
-
51 minutes ago, JSGerson said:
Peter, you also need to look at post 199. Ken had to rip out the quarter gallery due to it being mis positioned.
Jon
When I was saving the photo above, I noticed there WERE other XKen pictures in my files that did in fact show him constructing the lower galleries.
It's maddening! Where did I get these pictures from? My naming convention identifies these as coming from XKen. Where are these hiding?
No sense looking again, this appears to be the Hunt approach, over which the builder planks. I will revisit post 199 and see what I may glean from that.

Any thoughts from you on a better way to approach the lower gallery? The more I think about it, the more I like the idea of using 1/16" thick stock to build the gallery bottom one layer at a time. Each layer should be easier to shape than carving a blob of basswood. Either way, I realize now that, If I don't paint, I'll have to plank anyway.
Thanks Jon
-
On 1/30/2016 at 5:13 PM, xken said:
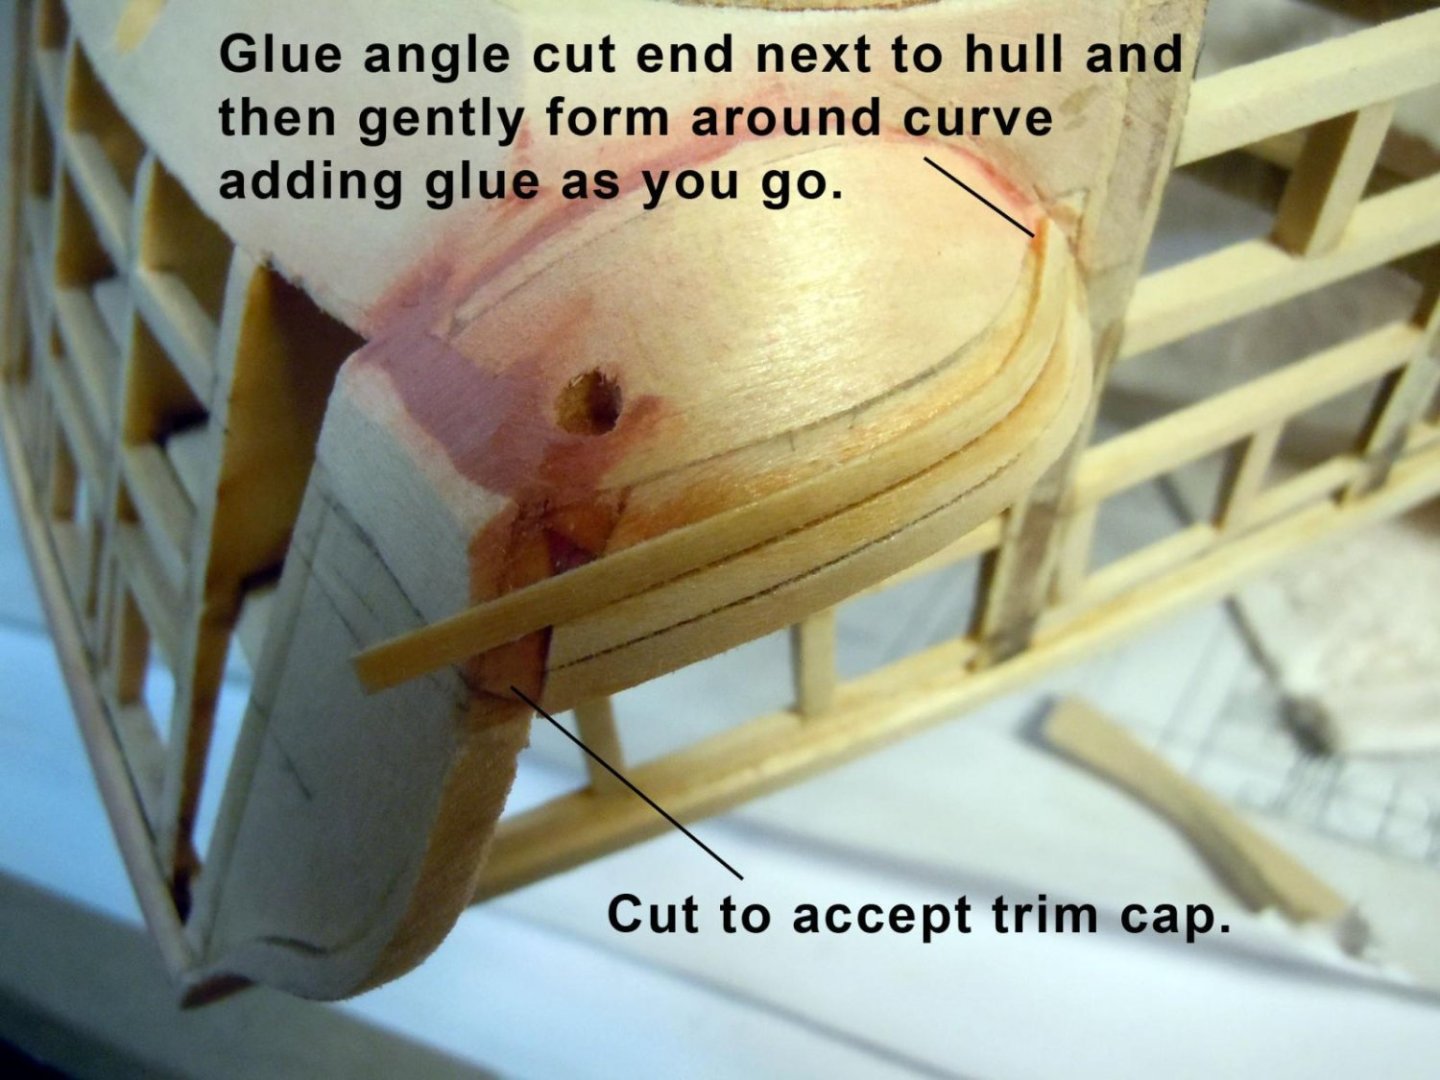
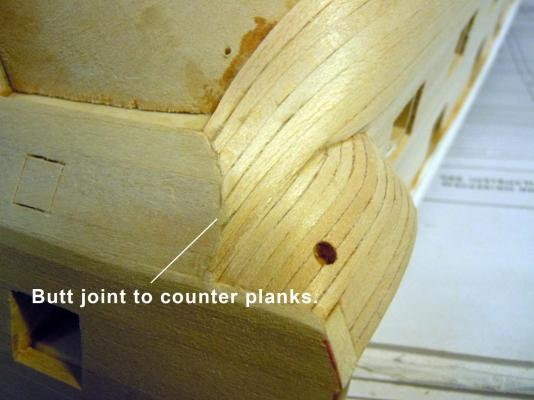
The stern needed some real carving and twisting to butt properly to the counter planks. While wet I first cut away the back side of the plank from just before the last bulkhead to the tip and thinned it down to 1/32". I then cut a taper from the thinned point to about 1/16" all this while still wet. I then carefully added it and pinned it in place at the bulkheads and very carefully bent and twisted it into place and then trimmed the end to match the counter. Once satisfied with the fit it was glued in place.
I know this question comes M A N Y years after your post on January 30, 2016, but I have to ask..
How did you form the gallery bottom?
I've been back and forth between pages 4 and 6 of your build log multiple times. Until the photo of the planked gallery bottom here on page 5, there's no mention of the method you used.
I'm at the point in my build where I'm either going to plank down to the keel, and deal with the gallery bottom later, or do the gallery bottom first. The method in the Hunt Practicum is not my first choice, in that I've tried to model that piece at least three times and failed miserably. I'm thinking of tackling it in layers roughly the thickness of the planking you used to cover it. Another thought is to cover the area with masking tape, to protect the planking around it, and use wood putty to form the bottom. After the shape is satisfactory and cured, I'd remove the masking tape and glue the bottom in place. (I'm leaning towards the layered method because I might actually kill two birds with one stone. It should look planked when done (if done well)).
Any advice you could provide here would be greatly appreciated.
Thanks,
Peter (aka Der Alte Rentner)
-
-
4 hours ago, JSGerson said:
Of the 100 or so completed models I have images of, only one was unpainted; a scratch built model by Peter Henrick Ness. Sorry, I did not record where I found them.
Wow, there's something quite charming about Conny without the makeup. Thank you so much Jon. This gives me all the more incentive to really concentrate on the details early - to have the option later...
-
On 11/2/2023 at 7:56 PM, Unegawahya said:
the 3D printed parts come from Model Monkey. The guns were just about perfect size, but the carriages were just a bit too long and way to narrow according to the plans from the US Navy.
Seems to be the story of my life. I get a lead on a website that could make my life easier, then the site ends up "temporarily closed".
Oh well. At my pace of construction, I'll have several months before I need to consider alternatives.
Long time no see. Are you still working on Conny?
-
On 1/5/2024 at 2:36 PM, Geoff Matson said:
Welcome to the group. The Constitution can be an overwhelming model. I think of our plan of working on an easier model to build your skills will pay off in the end
I can confirm that this is quite the challenging build - and I too welcome you to the group. Geoff's is a great build to reference, as are XKen's, Mustafa's and JSGerson's - among others. I've been at it since July, and am finding the process enjoyable, if slow going (just finished the wales, which took two weeks).
I'm glad you have the Bob Hunt Practicum as a starting point. It sure helps if you're coming into this project stone cold, which I did - if you don't count the Revell plastic kit I built about 45 years ago, but that was child's play compared to this.
I wish you every success and look forward to following your progress
Best
Peter (aka Der Alte Rentner)
- Scottish Guy, Geoff Matson, mtbediz and 1 other
-
4
-
January 10 update. Starboard side wale finally complete.
Yep, 4 hours per strake. I hope the rest of the planking goes more swiftly. I lost a bunch of time with the segments that end up at the counter. Today I spent nearly 2 hours just with a plank that ran from bulkhead P to the counter. Yeech...
At quick glance, things look fairly good. The stern looks fairly even, but closer observation reveals wale planks are a tad off in terms of symmetry at the stem. It's plainly obvious in the last photo, but as Jon and Mustafa pointed out, I can compensate with subsequent planking. I suspect once all the planking is in, these variances won't be as noticeable.
Jon, If you are reading this..
In your massive photo database, do you have pictures of USS Constitution models that are not painted? If so, please share.
Thanks


- woodartist and mtbediz
-
2
-
On 2/18/2013 at 10:53 AM, Modeler12 said:
on hind sight I could have used very narrow white tape for the window panes. It is available in widths down to 1/32 inch.
I was introduced to your build by JBGerson. This note caught my attention. With arthritic fingers, I may follow your advice when I get to that stage of my build, presumably in the next month or so.
Happy 2024, if you're still following along online..
Best
Der Alte Rentner


USS Constitution by JSGerson - Model Shipways Kit No. MS2040
in - Kit build logs for subjects built from 1751 - 1800
Posted · Edited by Der Alte Rentner
added P.S.
I can't speak for any of the Captains of the Constitution in its prime, but I have spent quite a bit of time aboard tall ships as voyage crew for ocean passages. Every Captain I sailed under insisted on a neat and orderly deck. Of course none of them had gun decks, but all lines on the decks were neatly coiled.
P.S. What song are you working on?