


Der Alte Rentner
-
Posts
282 -
Joined
-
Last visited
Content Type
Profiles
Forums
Gallery
Events
Posts posted by Der Alte Rentner
-
-
I know the feeling. My shipyard seriously needs some renovation, my motorcycle needs an oil change, my wife's honey-do list is growing (and is encroaching on shipyard space as well as my time there), and a new keyboard will be arriving this morning, which will require assembly and at least a few days of dedicated time to pour over owner manual and get used to. (Can't wait!) The next zone of planking on my build may be delayed..
For someone who doesn't like rigging, you sure do it well. 😉
I'm watching your progress carefully now, but will really zoom in to the details when I finally get to that stage of my build.
- Geoff Matson, SUBaron and GGibson
-
 3
3
-
-
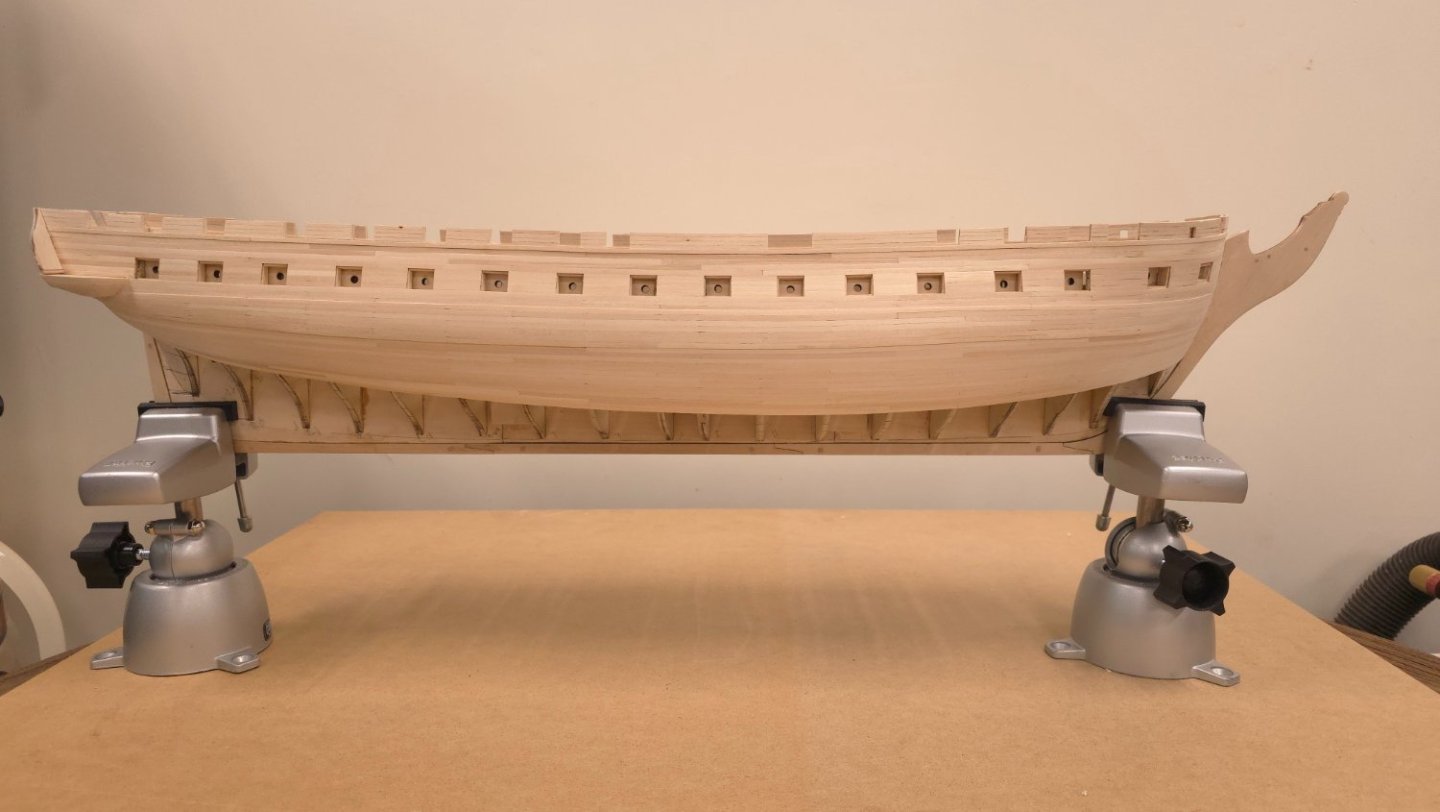
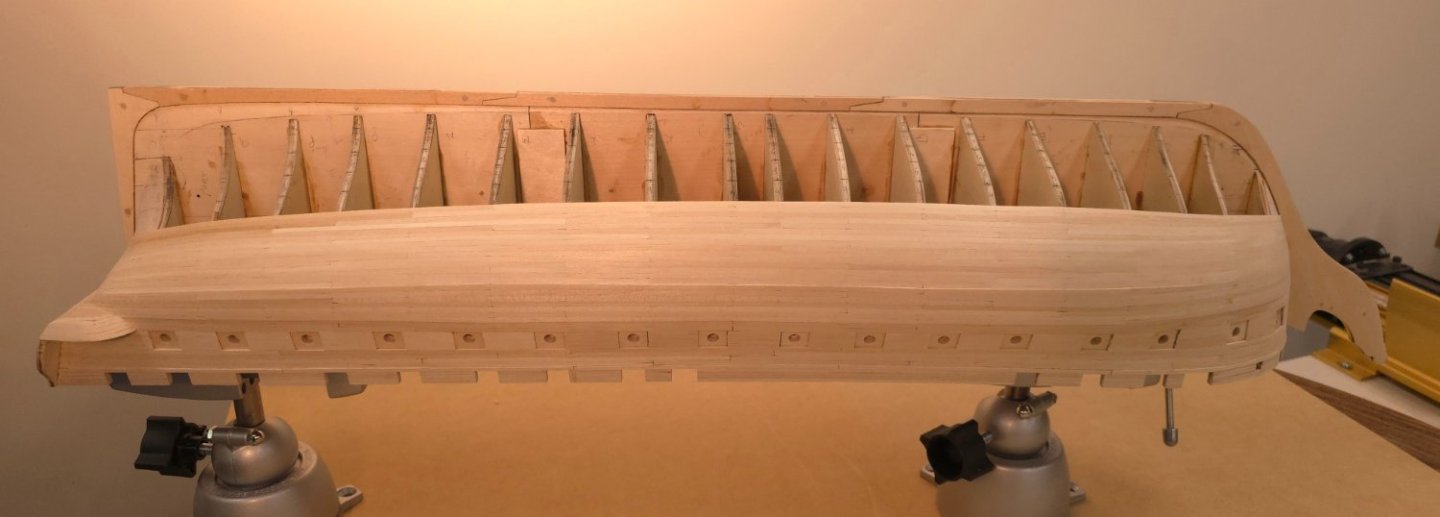
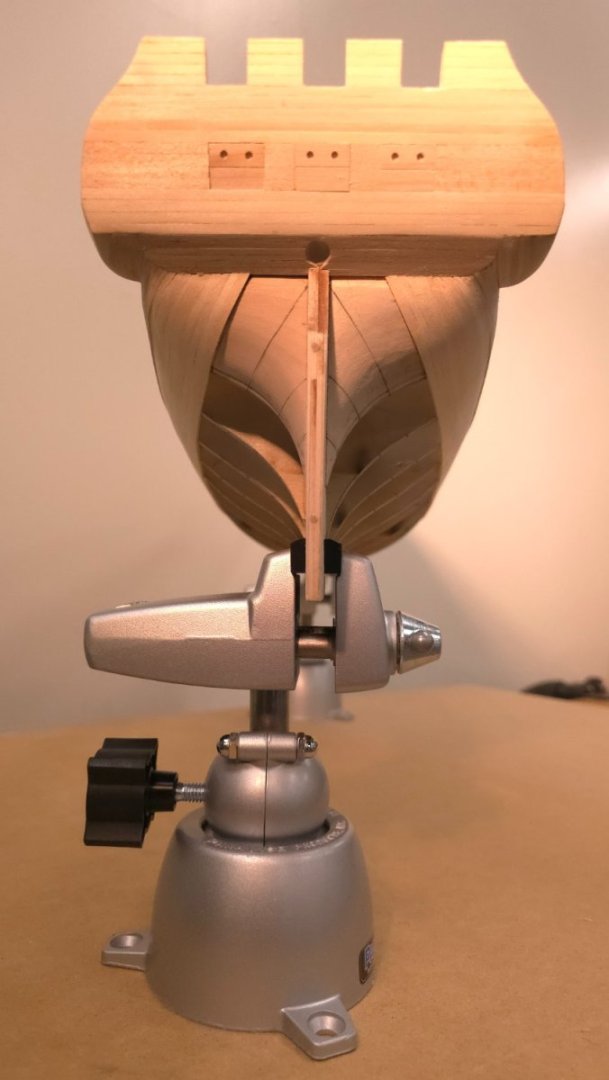
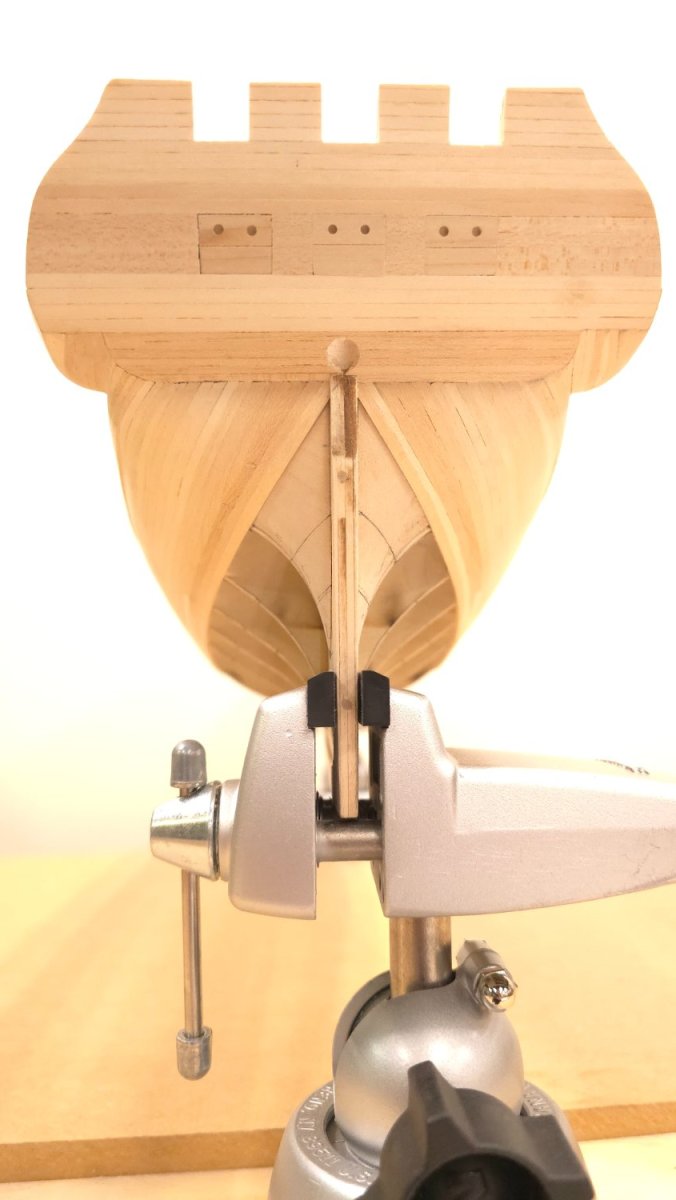
Zone 4 complete. 4 to go. Pictures follow.
Note: the experiment with the rare earth magnets as clamps was failure. The magnets I got were too small in diameter. I can barely separate them. and when I try to position them between planks they reconnect. Weaker magnets were manageable but didn't have the holding power. I'm getting to the point where I can't use clamps. So, I've got to prep the bulkheads and planks very carefully so that when I glue the planks up, they lay the way they're supposed to. Sorry, no pictures of the experiment. I'm going to try one more time with larger diameter magnets. Stay tuned.
Note to SUBaron (Andre):
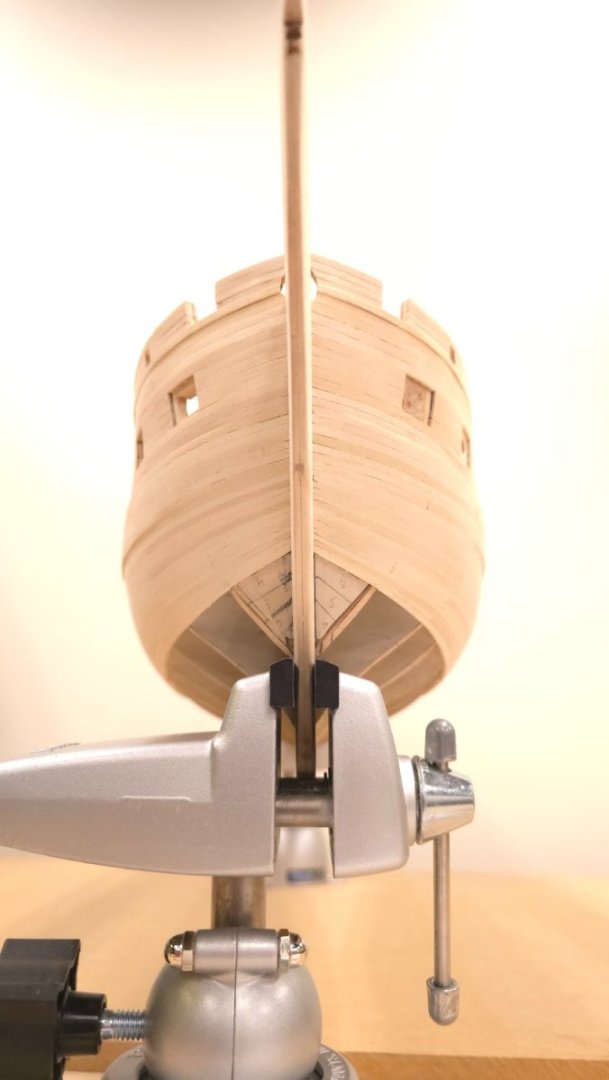
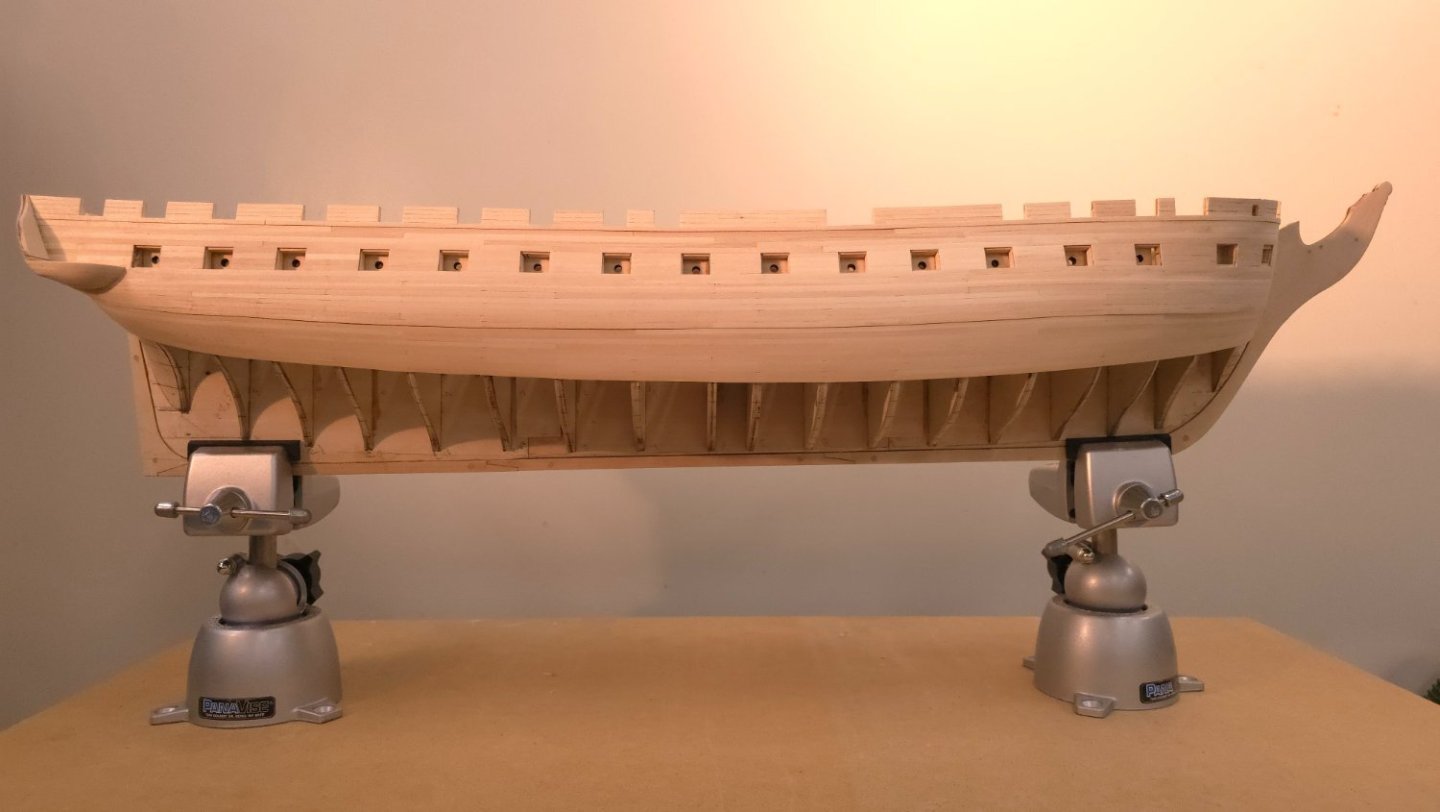
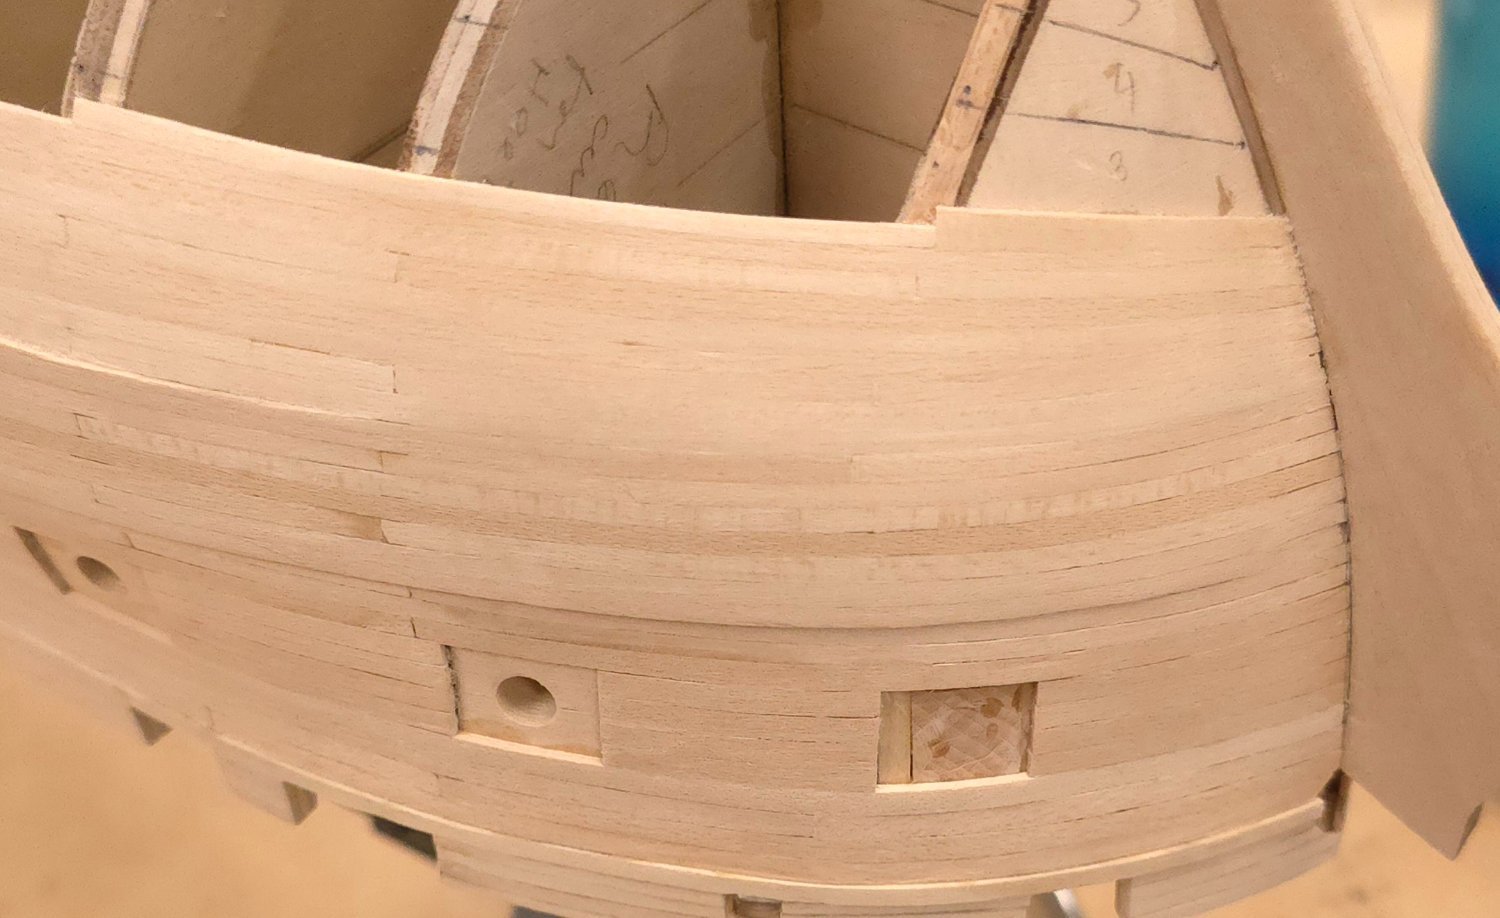
When you shape the stern filler blocks, pay attention to the way you flare the aft end of those.
You can't really tell from this photo, but the angle coming to the stern isn't flat enough. The
aft end of the planks need to run all the way to the the rabbet. If the filler block is too rounded,
the ends won't reach. I just spent an hour with chisel and x-acto knives to modify the shape.
I may have a small gap to fill with filler for the absolute aftmost portions of the last strake I just
added, but for the next four or five, I should be good.


-
-
On 3/20/2024 at 3:51 PM, SUBaron said:
Your planking is fantastic so I understand not wanting to paint it after all that work. Are you also going to forego the copper plating? I’m wondering if the copper would get a little lost in the natural wood color - or it may just be beautiful!
I’ve loved this ship my entire life - so I’ll be painting and coppering. I’m actually considering using real copper plates if I can find them.
Good question, one that I've been asking myself from the beginning. The photo below, from HIPEXEC's log here at the site, shows how it could look without copper. (He built the Constructo kit, which was the kit I purchased 10 years ago and abandoned within a couple of days of starting my own build log. I liked the way it looks, but the instructions seemed sketchy to me. e.g. they have you plank before adding the keel, which just seems wrong.)
Now the Constructo kit came with material for a second planking - the look of which I really like. I'd have to stain to approximate that, but then I think the copper would get lost. So, maybe not..
I'll have to decide before I add the deck planking, which may only be a month from now.
With the exception of one photo someone sent me (Jon?), I haven't found any pictures of Conny au natural. I wonder why no one's doing it that way.

- SUBaron, Scottish Guy and Mr Whippy
-
3
-
On 3/17/2024 at 9:23 AM, SUBaron said:
Peter - after sleeping on it - a new day brings renewed enthusiasm.
Now that's the spirit!
I'm glad you thought better of restarting.
And. In support of your artistic deliberations, I too hope to depart from the mainstream on this build. The more effort I put into planking, the more determined I become to dispense with painting Conny.
- GGibson, Stevenleehills, Mr Whippy and 1 other
-
4
-
3 hours ago, GGibson said:
Great work, Jon, as usual! I am always looking for new and interesting hobby tools. Where did you find the four-corner brace/brackets in the 1st photo of this post?
And... for what it's worth, I have admiration for what both you and Mustafa (and Peter aka Der Alte Rentner, as well) are doing with your Constitutions! I took advantage of Model Shipways recent sale and have added the Constitution to my shipyard. Couldn't pass up a great deal on an iconic ship. Besides the fact that I have some great modelers who have paved the way in front of me! Carry on, sir!
I'd like to know your source for the four-corner brace/brackets as well Jon,
I had a thought last night as I was contemplating how I'm going to clamp the remaining strakes in the planking. The spring clamps I've been using are no longer working given the shrinking open space at the bottom of the hull. Flipping through the Micro Mark catalog, I saw a picture of a pile of rare earth magnets. I think these would be perfect to hold a new strake flush with the previous one. They come in varying strengths. I get a small variety to try and post the results to my build log.
Lastly, on days when I don't get much done on Conny, I wander through all the Constitution build logs here at the site and marvel that each build is unique.
- Stevenleehills, GGibson and mtbediz
-
3
-
I don't see that starting over is necessary. You can glue on some tapered scrap material to clean up the bottoms of those two bulkheads - or do as a number of others have, use wood putty to smooth the transitions. As for the deck side of the bulkhead, some careful work with a file, sandpaper, chisel, shims or combinations thereof should solve any issue with the deck when it gets that far.
I went through the same thought process when I started out. Looking at scratch builders logs got me to thinking I could solve the laser cut issues by making my own bulkheads. I'm glad (at this point) that I stayed the course. Just about all missteps can be corrected. Just think of them as minor challenges. As you pointed out in a comment to me at my build log, once the planking and deck are in place, no one will be the wiser - or toss them out of the party!
Regarding the earlier dilemma, I agree with Targa, the deck is designed that way.
Hang in there!
-
On 3/10/2024 at 3:12 PM, Knocklouder said:
All 45,700 and some of us lol.
I had wondered about the size of this club. Glad to be in such good company..
-
-
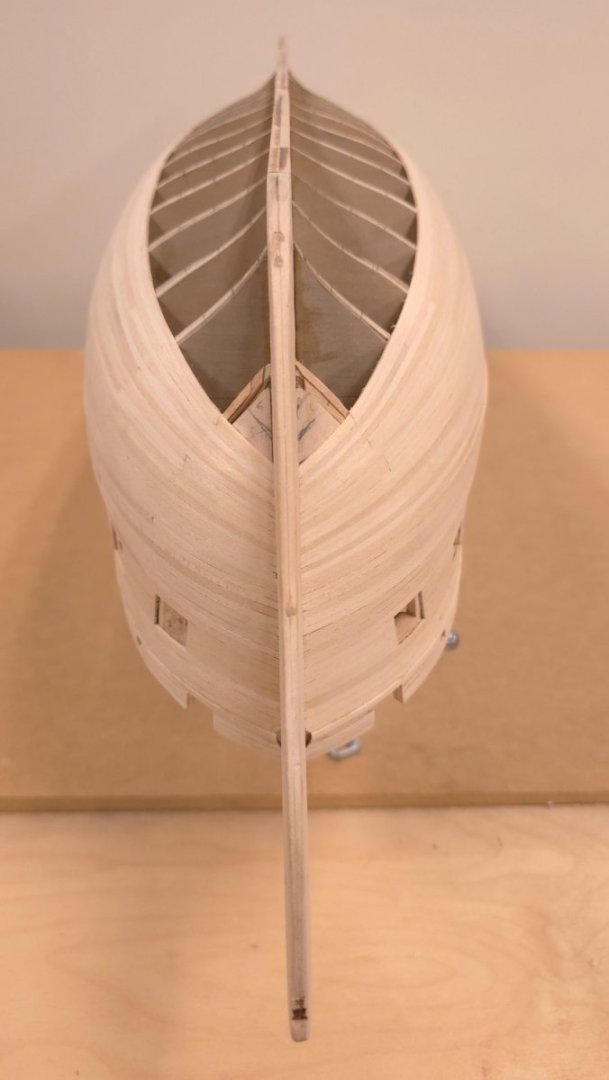
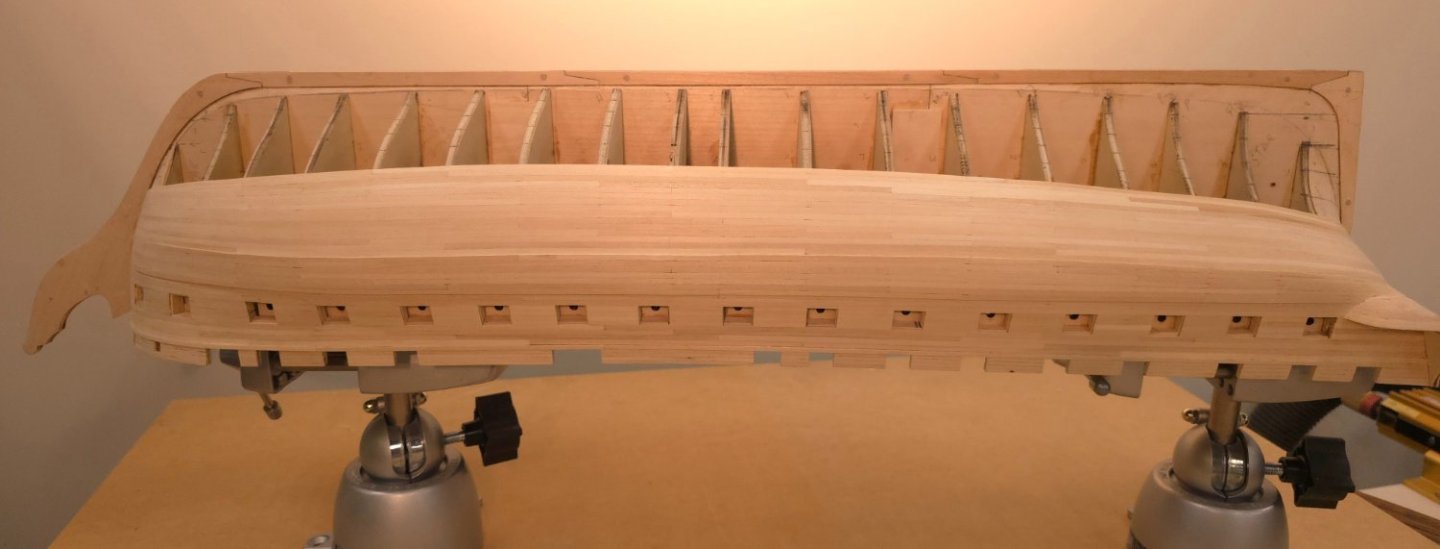
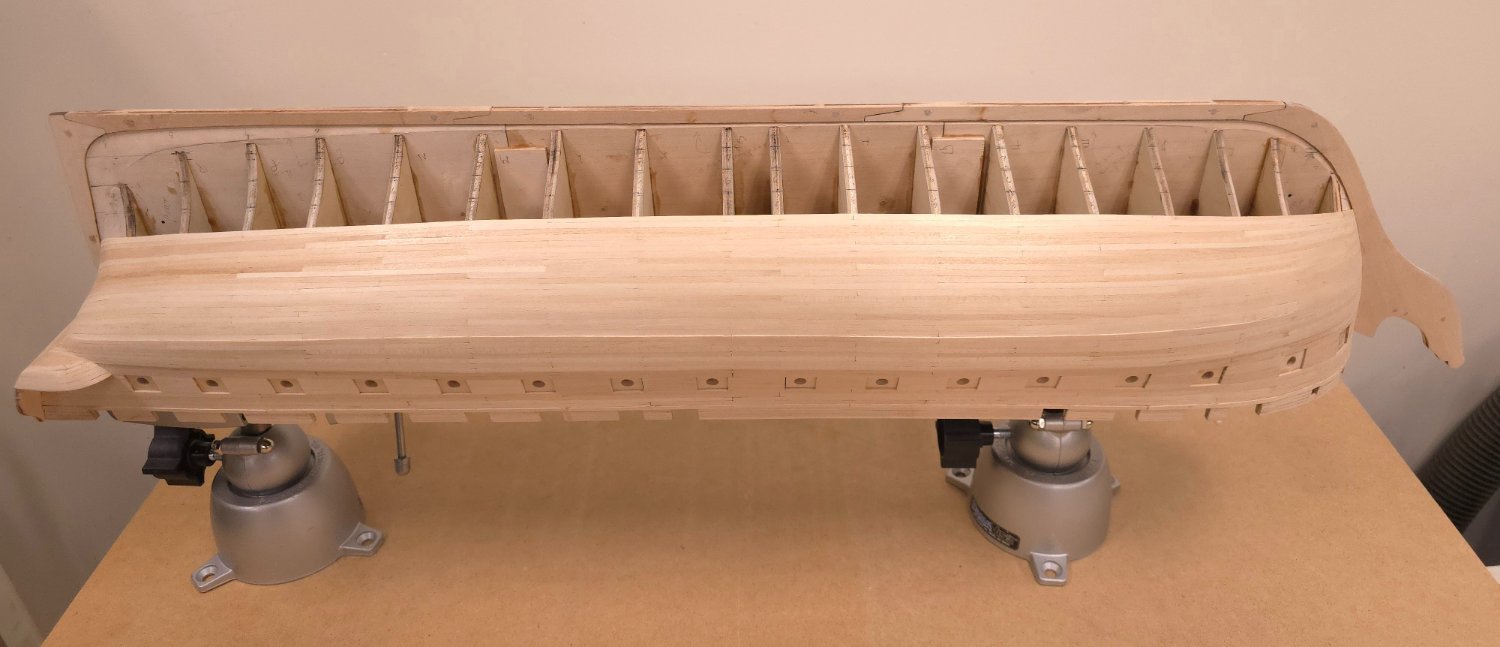
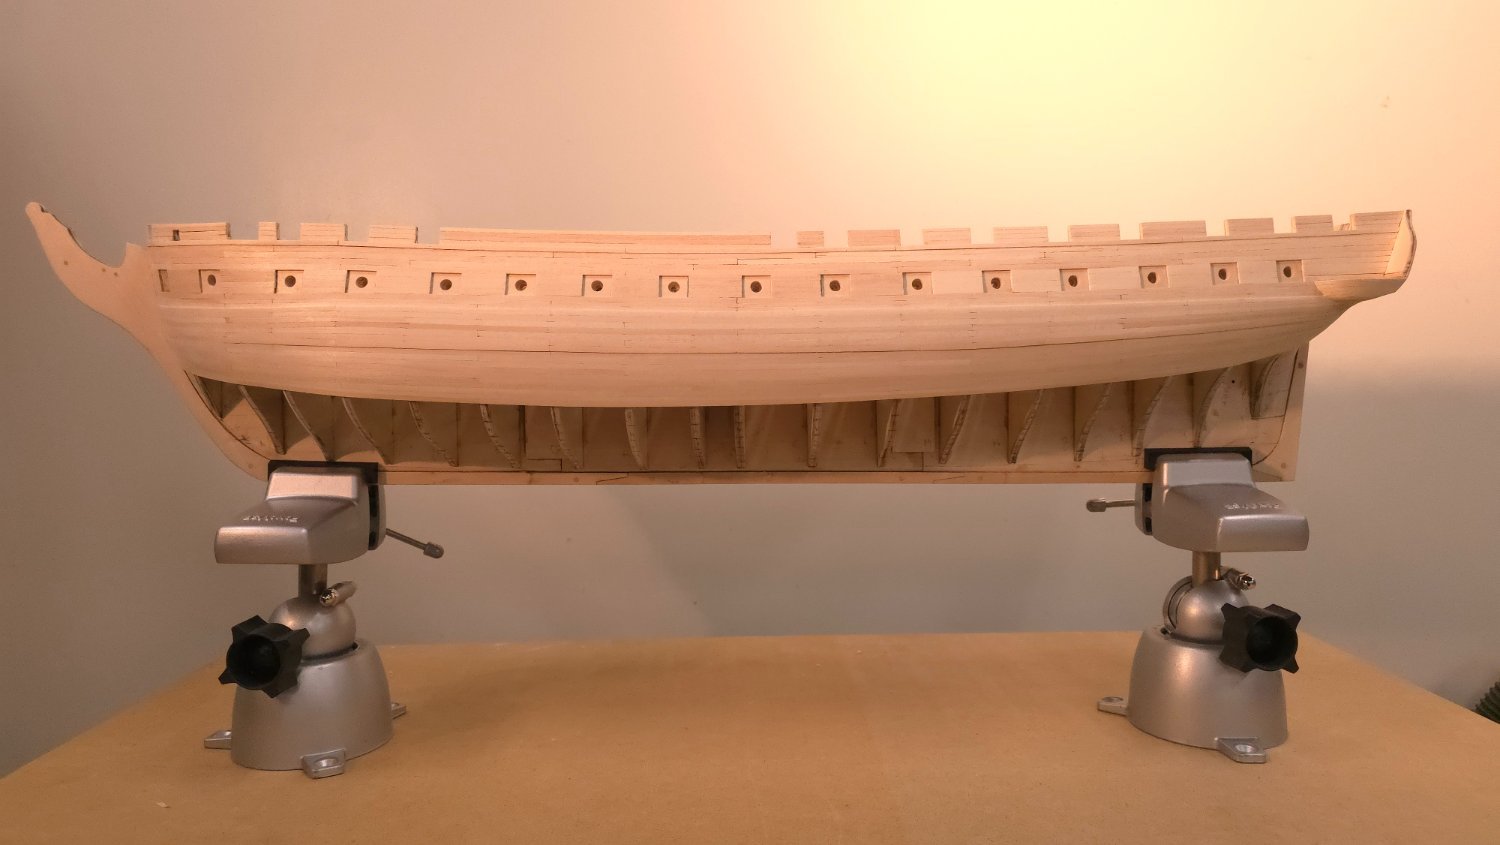
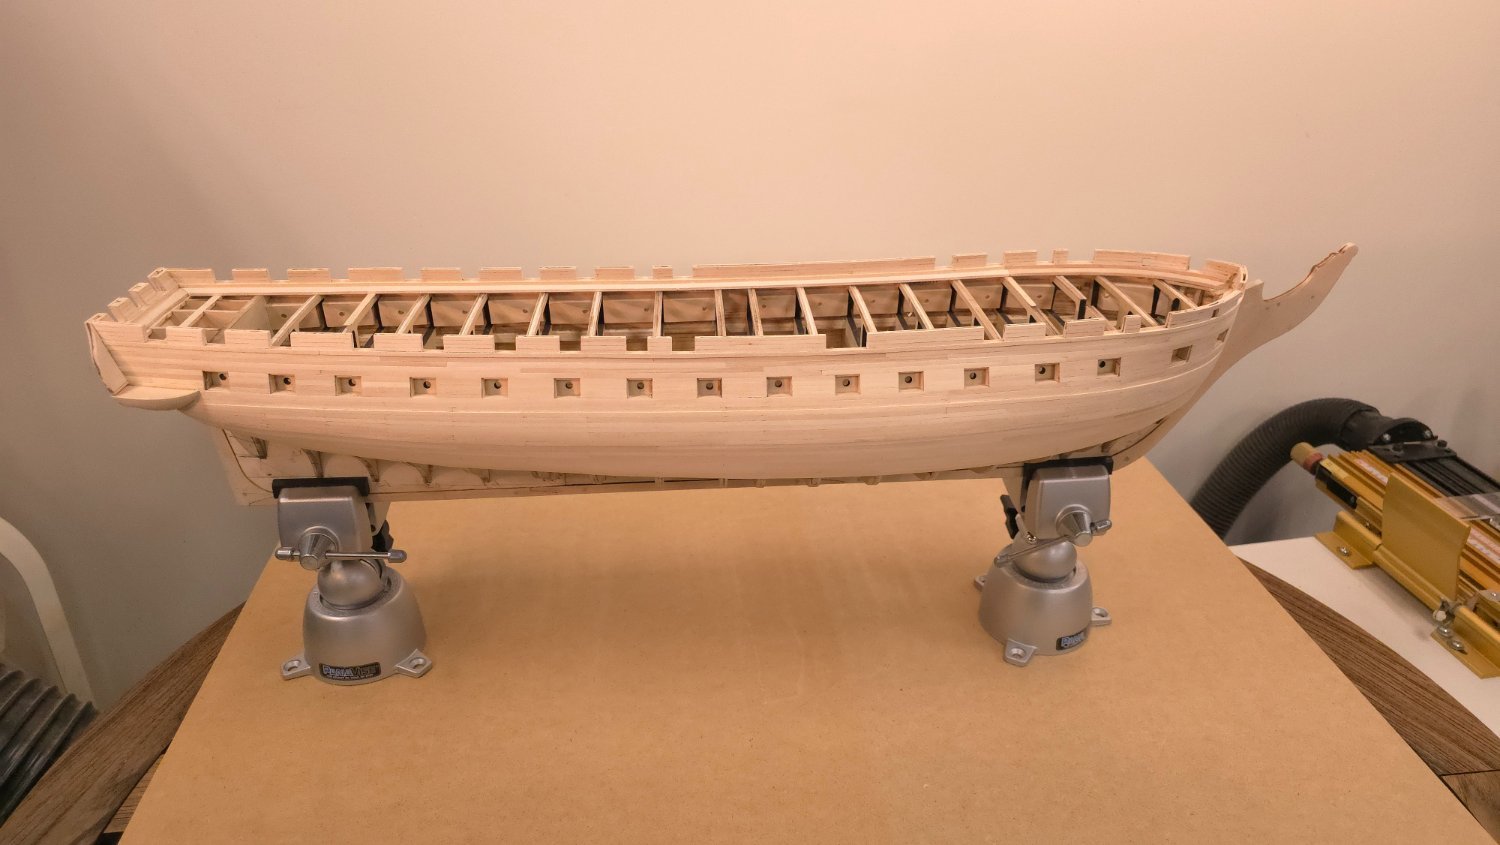
Zone 3 complete. 5 to go.
First four, right side up. Last 4, work side up.

Still struggling with the lighting. Note to self: Self, bring camera and tripod to shipyard.

The camera picks up details the eyeballs don't. The symmetry is slightly off again. Oh well..
Not so obvious in this view.


- mtbediz, Ian_Grant, Geoff Matson and 10 others
-
13
-
-
It would be nice if somehow the proportional dividers had a similar locking mechanism. For what it's worth, the $25 Amazon offering did lock nicely. I do see the value of using the proportional dividers for the remaining 27 strakes I have to plank, and may yet risk using the pliers to torque it/them(?) into submission.
Thanks Gregg
By the way, I had breakfast at the Little Chef in McHenry this morning. Know it?
-
I'm only guessing here, but if I were a gambling man, I'd wager you built your own work bench. I've never seen a vise installed at the end of an arc like that. Cool!
-
Having strolled down memory lane (or relived the nightmare?) just now to review my adventures/misadventures in stern transom frame installation, I think I need to point out that the gap at the bottom of the outer frame piece is a smidge larger than the 1/16" that Bob suggests you'll have there. In Chapter 2.2.2, refer to photo P2.2.2-1. For comparison, I checked my own photo archive and saw that my filler piece was pretty close to that thickness. Also note in his photo the relatively smooth transitions between the outer frame, counter, transom and bulkhead R. You may be doing some fine tuning in this region. I bring it up because this will rear it's ugly little head when you start planking that area.
Also take a look at the early part of chapter 6. P6.1.1-7 eg. I guess it doesn't matter when you do it, but you will be doing some tweaking.
Having said all that, the planks themselves do hide quite a few imperfections.
- SUBaron and Scottish Guy
-
2
-
28 minutes ago, woodartist said:
Where did you find your proportional dividers? I have been looking for a pair but the only ones I see on ebay are $100 plus.
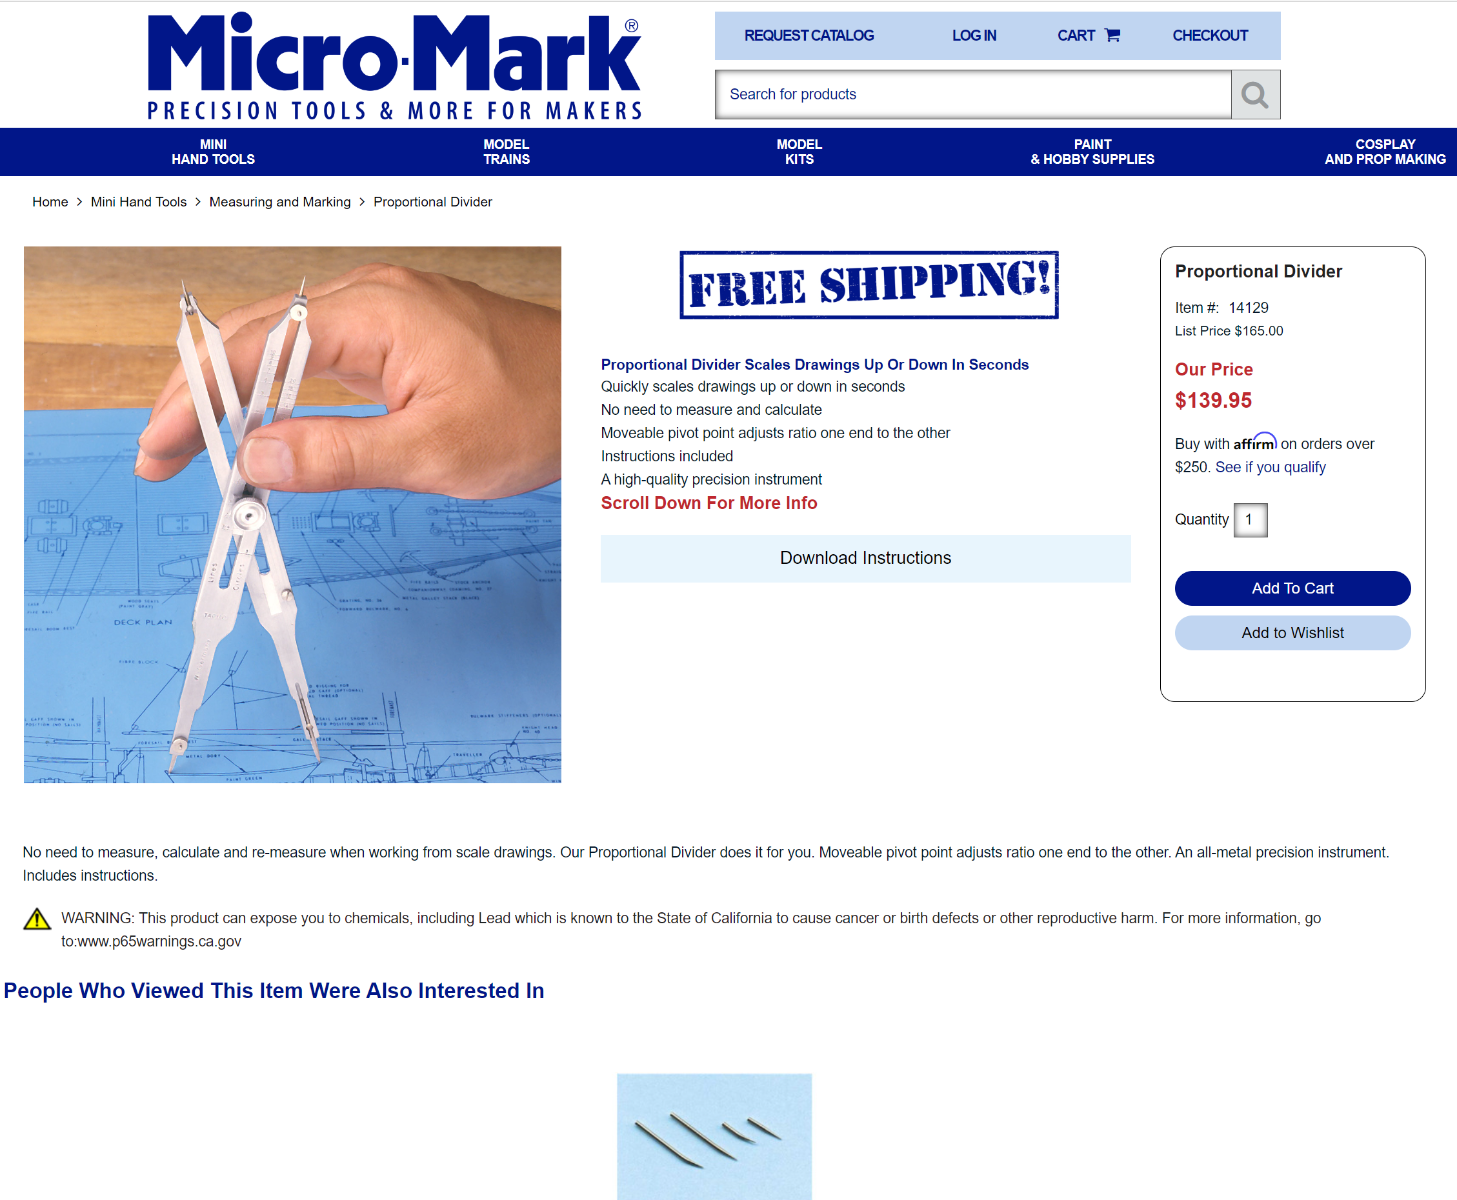
After extensive research, I ended up with MicroMark (last image below) at well over $100. The cheaper ones available elsewhere seemed clunky or flimsy. Until just now, I completely forgot that I even tried this pair from Amazon first. They are useless for close work given the thickness of the points - especially on the small end of the tool. I suggest you pass on this one, unless you want to try machining the points to something less fat.

These are cheap, but I was turned off by the fact they're plastic. Who knows, maybe a $10 investment may prove worthwhile.

This is where I ended up. I think it was a clever stroke of marketing to show the dividers with the points looking straight. Notice the curved points on the replacement kit photo at the bottom of the ad. It took a little getting used to this, but they work.

A caveat! I did not find these very useful for making tick marks on the bulkheads (5 marks per zone). If you press hard enough to get marks on the bulkhead, you're likely to nudge the dividers out of position. I do find them easier to use than my old drafting set of dividers to check spacing between marks I already made when marking out the zones. I didn't want to risk really torquing down that knob, but perhaps that's the way to use them to set the tick marks within a zone.
Good luck
-
On 3/7/2024 at 7:36 PM, SUBaron said:
You’ve given me all the reason I need to pull the trigger on that purchase
The proportional dividers are not perfect. You can't really tighten up the nut enough to keep the tool rigidly locked. I often accidentally move the tips merely by putting the tool down. I haven't wanted to use a pair of pliers on that locking nut for fear of stripping a thread.
Also, you will need to do some experimenting to find the true index number to use to get the proportion you need. To get a 5 to 1 proportion, I needed to line the tool up to the number 6 on the index. Still, it's a lot better than any of the sketchy ones available at that mass online retailer.
-
15 hours ago, SUBaron said:
Stern Transom
For some reason, I’ve really been looking forward to this section.
I would guess that you're in the minority with that mindset. Several build logs have run into issues with the Stern Transom - mine included. But I love your optimism!
P.S. Love that you're using Lego blocks...
- GGibson, Scottish Guy and SUBaron
-
3
-
glad you got that tenon into the bowsprit end. My guess is, you didn't make the mis-step in the Practicum.
- Scottish Guy and SUBaron
-
2
-
5 hours ago, SUBaron said:
Peter - hope you don’t mind my friendly practicum discussion with Jon on your log - and great job on the planking! 🙂
Cheers!!
-Andre
Not at all, I've done the same thing with other build logs. I was hoping to be able to quote Mustafa when I did the same thing at his build log, but couldn't find the post. (I'm sure Jon will chime in with the particulars, however. I believe he and I were having an exchange of thoughts in Mustafa's build log).
The gist of it was this, that's what these build logs and this website is for (IMHO).
As to your earlier comment on the Hunt WTF moment. I can't find this either, but I posted pretty much the exact same comment about that reference to the 1/8" addition to the transom frames. Deja vous all over again..
I am finding a use for the proportional dividers after all. With every new strake, I double check the math on that spreadsheet. It's an easy tool to use to mark the distance between tick mark on the bulkhead and the last strake. I put the pointy ends on a metric ruler to get the measurement and divide that measurement by the number of remaining strakes in the zone. Turns out, there are quite a few on the fly changes.
One other tool I use a LOT is a 3/8" chisel. I keep a very sharp edge on it and use it to trim the newly added strake. It really saves a lot of sanding time.
You've got lots of fun stuff to look forward to.
😁
- SUBaron, mtbediz and woodartist
-
3
-
On 3/1/2024 at 9:52 AM, SUBaron said:
I get impatient and have to move on. It is funny how much research I end up performing before I get to that point though. The starboard side bow framework was a bit of a headache - mainly because I spent a lot of time making the parts precise from the plans, but still, nothing lined up very well and a lot of fudging was to be had. Now that it's complete, the Port side is moving along smoothly. Lessons learned are getting put to good use 🙂
I noticed your spreadsheet - that was some impressive detail. I'll likely do the same when I get there. I was thinking about getting some micro-calipers, or possibly the proportional divider (Micromark - #14129) for planking. Any suggestions on a must have instrument/tool for that future effort?
Cheers!
Andre
Tell me about it. I probably spend more time researching, thinking and prepping than actually working on Conny. Take your sweet time and enjoy the hobby. If you're getting stressed out, go swimming!
The digital vernier caliper is a must have. I did by the proportional dividers but have found I don't really use them. But I'm a firm believer in, better to have it and not need it, than need it and not have it. But I also have more cents than sense. 😉
- SUBaron, targa4403 and Scottish Guy
-
3
-
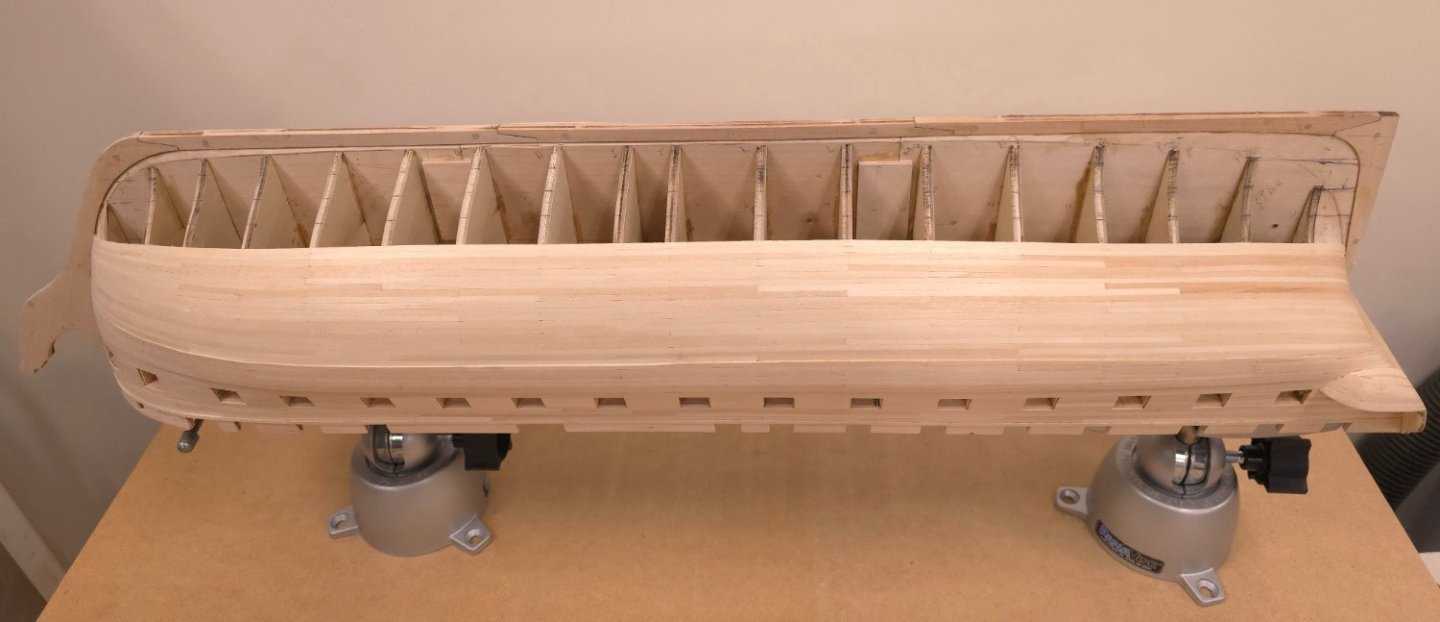
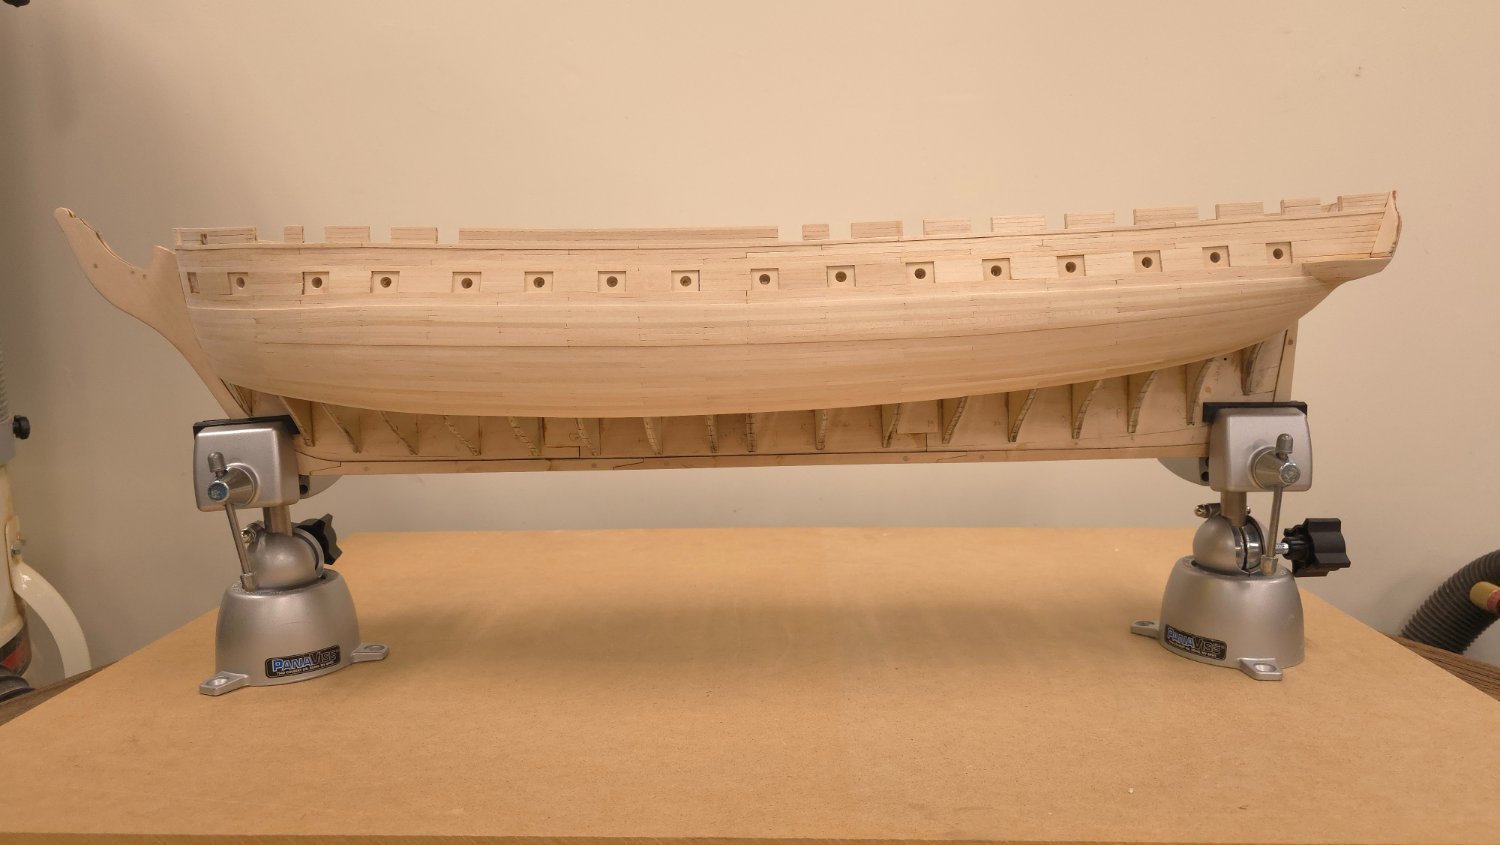
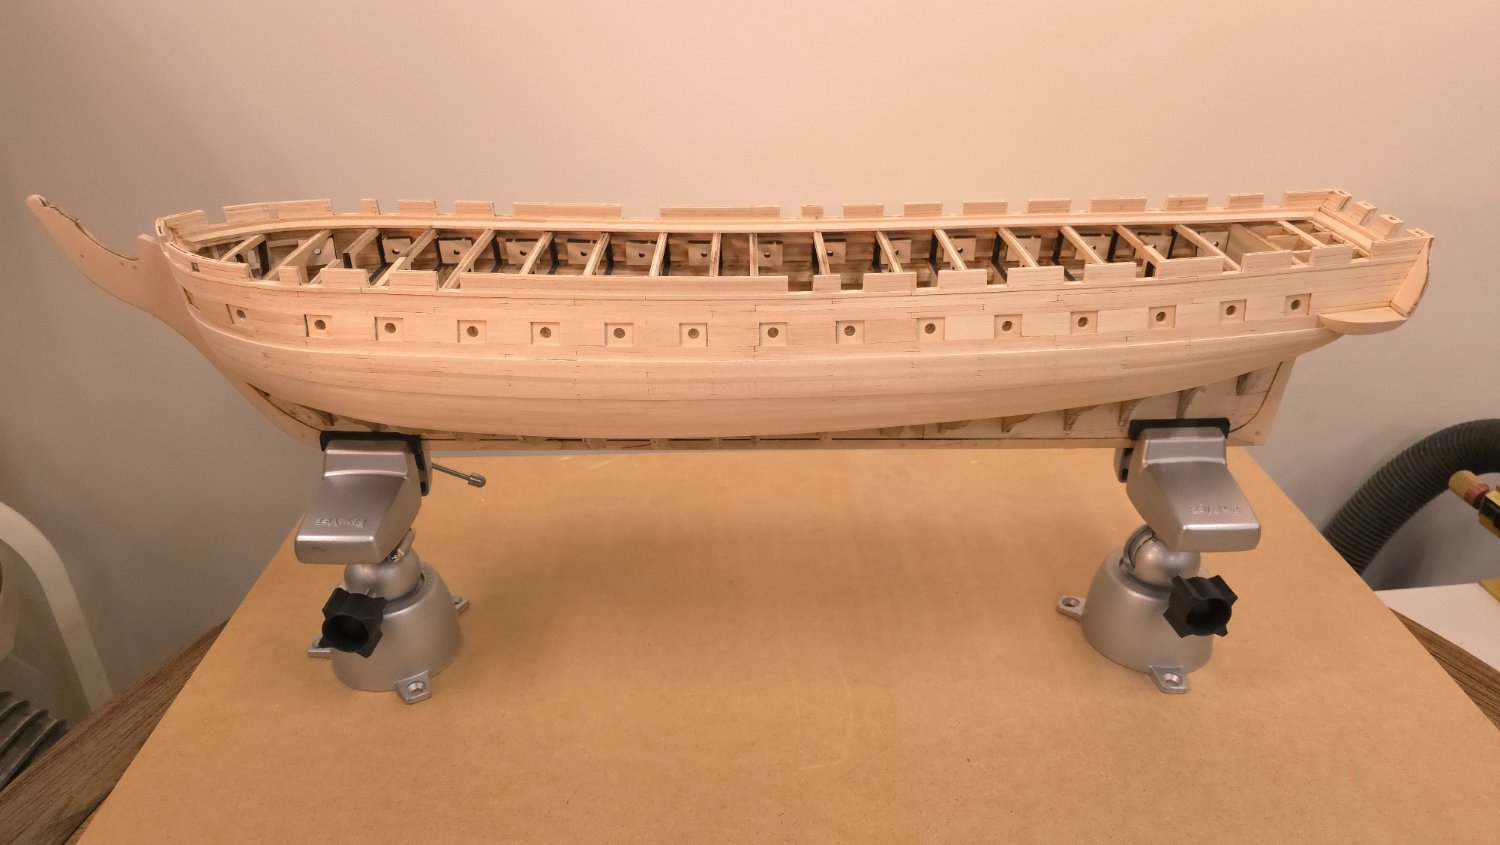
My first jog

4 zones done. 12 to go.

crud, I just noted the lack of symmetry! Gotta fix that with the next strake..


- mtbediz, Altduck, Geoff Matson and 5 others
-
8
-
15 hours ago, SUBaron said:
After reviewing 4-5 build logs and the ship plans, I can’t see a plausible reason for the 9/16” precision measurement on the 3-5 timbers.
There's a spar deck port there, and if memory serves, these ports are all 9/16" wide. For a spar deck opening, I too doubt that double decimal precision is necessary here. But then again, I'm someone who built a spreadsheet with plank width dimensions down to 1/100 of a mm. 😉
- SUBaron and Scottish Guy
-
2
-
Being unfamiliar with the kit, I must ask, are those winch parts included with Lady Isabella? or did you build the winch from scratch?


USS Constitution by SUBaron - Model Shipways (MS2040) - 1:76
in - Kit build logs for subjects built from 1751 - 1800
Posted
I too followed the Hunt recipe. I looked at my own build log to refresh my memory. This is all I have on the subject of foremast reinforcement tab.