HOLIDAY DONATION DRIVE - SUPPORT MSW - DO YOUR PART TO KEEP THIS GREAT FORUM GOING! (Only 44 donations so far out of 49,000 members - C'mon guys!)
×


Bluto 1790
-
Posts
324 -
Joined
-
Last visited
Content Type
Profiles
Forums
Gallery
Events
Everything posted by Bluto 1790
-

Help with Proxxon MF70
Bluto 1790 replied to Bluto 1790's topic in Modeling tools and Workshop Equipment
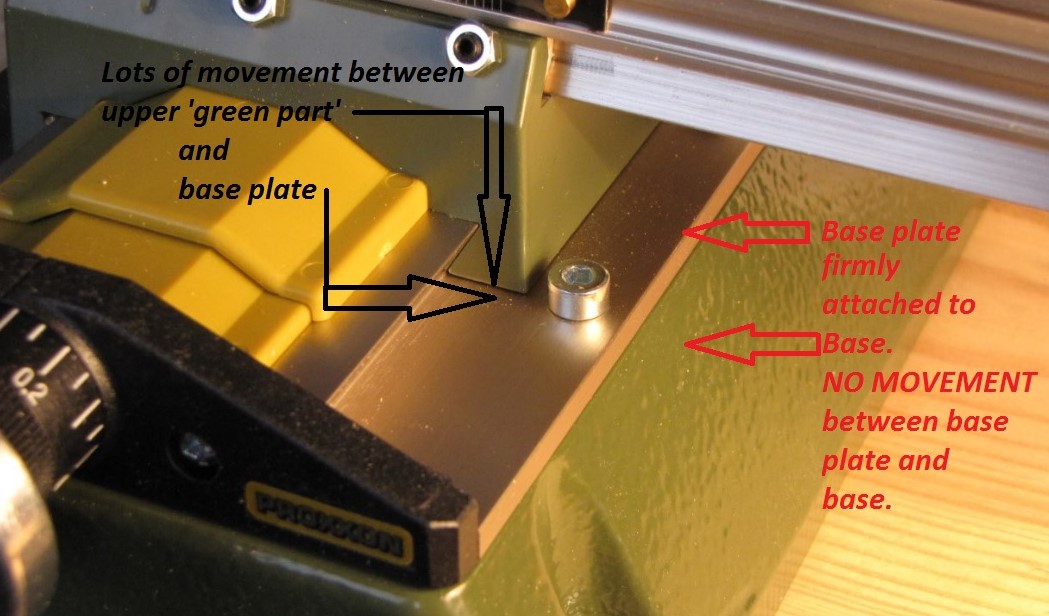
Thanks to all for your comments. I haven't had time yet to implement any advice given or to check out the links but I've done a short video of the problem so that you can all see it. First ~ Druxey --- When this problem became evident the first thing I checked was to see that the base plate wasn't the offending part, and it was rock steady on the base. Here's a pic, then the video >>> Short video here >
-
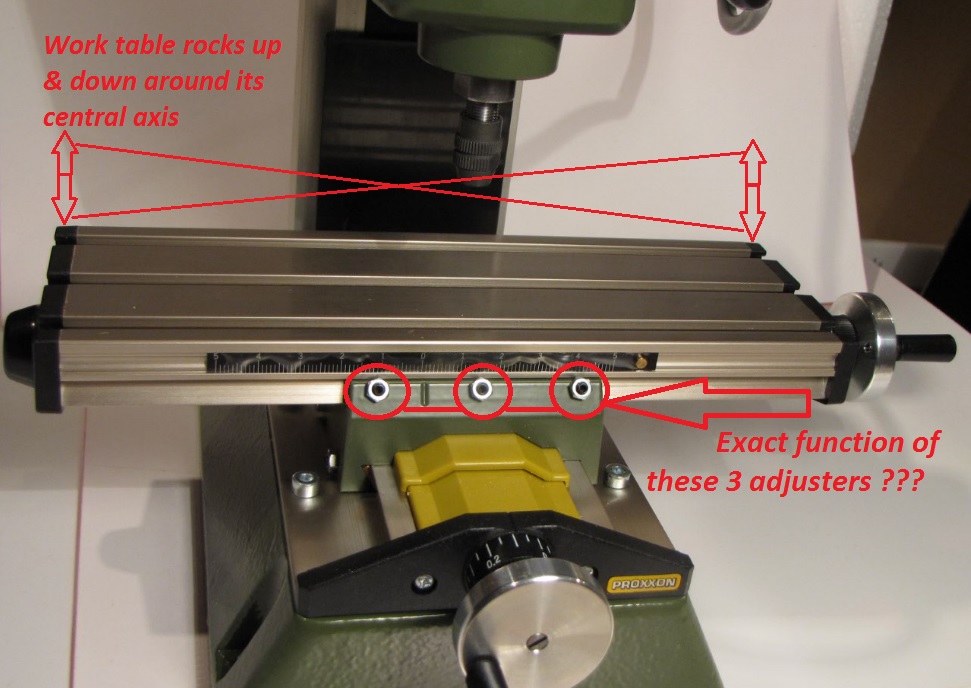
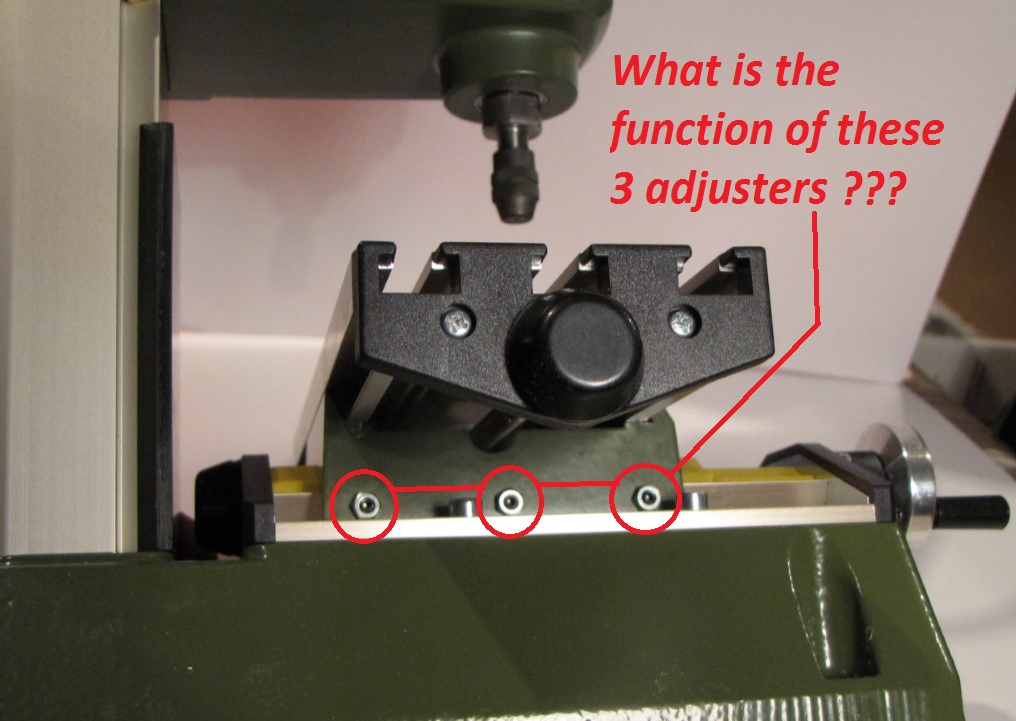
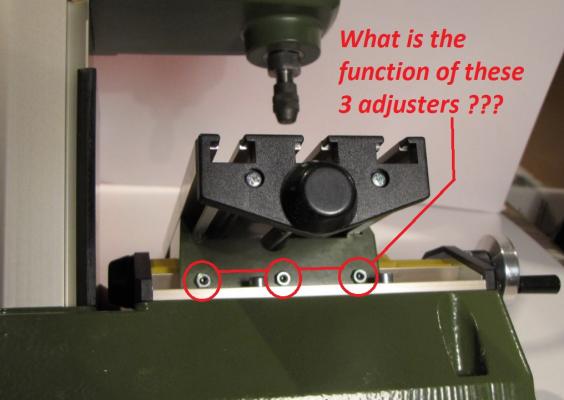
I decided to treat myself to an MF70 milling maching and it arrived today. Everything seems OK, with the exception of what I feel may be a little more play in the worktable than should be 'normal'? I've inserted a couple of photos below and I'd be grateful if anyone can explain exactly what I should do to minimise the amount of play. (I've read and re-read the instructions that came with the machine but there isn't much advice of the kind I need.) I first felt the up and down movement when winding the traverse handle at the right hand end of the table and without having measured with a micrometer (which I don't have) I estimate the amount of vertical movement to be around 2mm - 3mm at each end. I imagine there must be adjustment to minimise this, but I don't want to start slackening and adjusting screws and locknuts without knowing exactly what I should be doing. (B.T.W. ~ the worktable IS firmly attached to the base with the 4 allen-head set screws provided.) So your help will be greatly appreciated . . . thanks in advance!

-
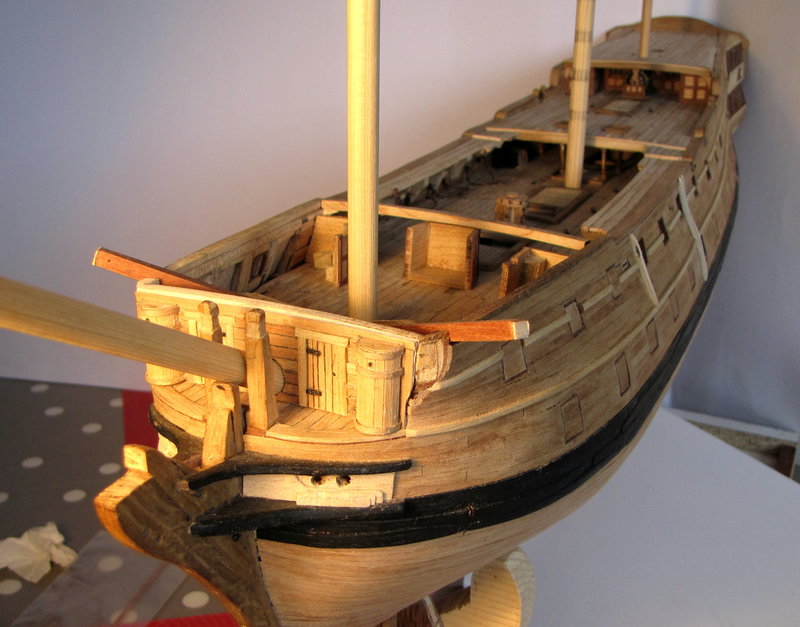
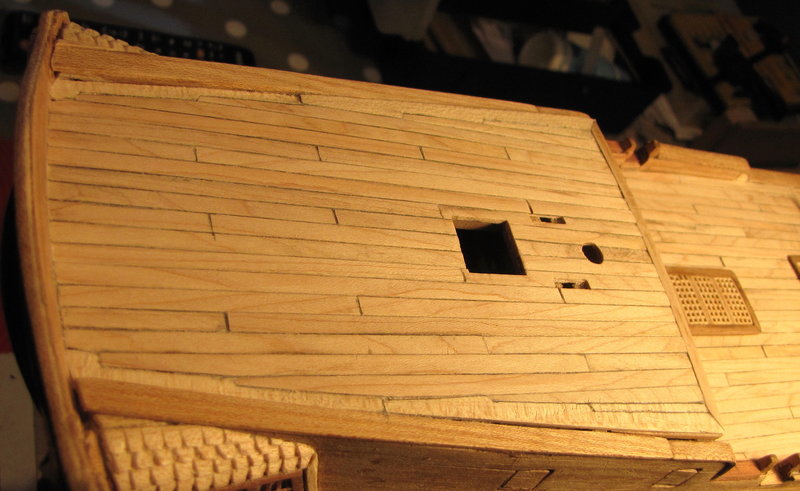
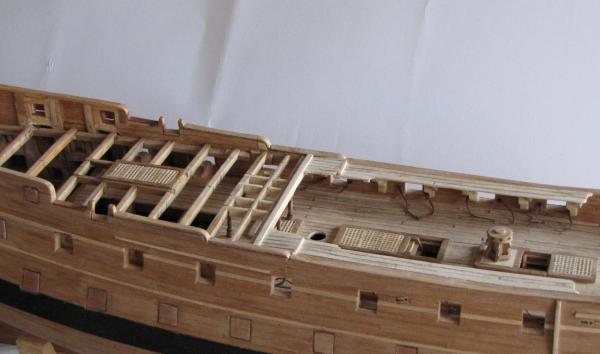
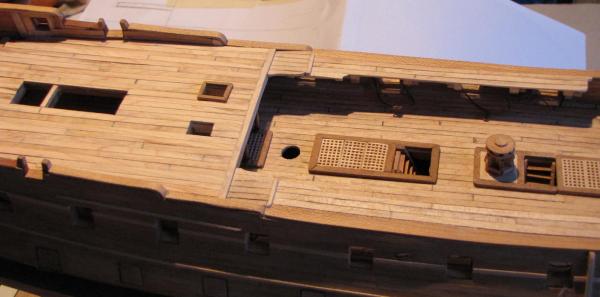
Catheads now a permanent part of the ship and the foredeck planking is underway >>> WHEEE !!! ~ Leopard is now 'all decked out' >>> The foredeck planks are still to be scraped and sanded . . . then it's onto the other million or so things that are all part of the ship . . . . . . . .
-
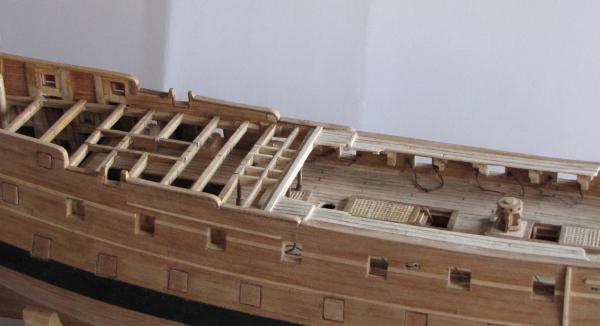
Foredeck beams fitted after posts for forebitts were fitted. In the pics the catheads are still just placed roughly in position. >>> Just checked my "stock" of previously cut Maple deck planks and it looks like there isn't enough to cover the foredeck, so it's back to the 10" (250mm) table saw where it's a bit tricky cutting 1.5mm strips.
-
ancre Le Fleuron 1729 by rekon54 - 1:24
Bluto 1790 replied to rekon54's topic in - Build logs for subjects built 1501 - 1750
Hi Giorgio, It has taken me several visits and I'm still just at page 12 of your log . . . . . my eyes have seen so many of your photos but my brain is struggling to accept that anyone can do what I've seen !!! If your build was of a full size, real ship the quality of workmanship would be amazing ~ but this seems almost impossible for it to be "ONLY" a model ! -
Thanks for your comments, Jason and Gary. Gary ~ thanks for the photos you posted. As you said, John McKay shows the foredeck as being completely flush with the catheads completely "sunk" below it. I've already formed the catheads, and in the absence of any details (in the Winfield book and plans) of how they are shaped inboard, I just made them straight. I've also made inclined 'platforms' for each of them to sit on under the foredeck, so they will be well supported at least there. (These platforms will be completely concealed once the deck planking is done.) I've already made angled cut-outs for the catheads in the top of the hull and when done it'll be a bit of a compromise as part of them will (unlike McKay's plans) still be visible above deck at the outer edge before disappearing below at the angle I've seen on other builds. My main concern was for their safety after fitting, but I'll just have to make sure I take extra care when handling the ship. The build is now approaching the stage when there are going to be more and more vulnerable bits and pieces being fitted.
-
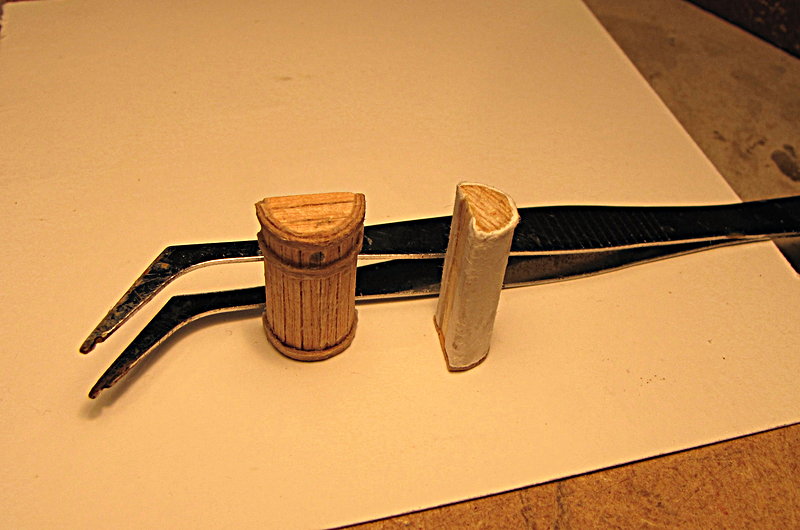
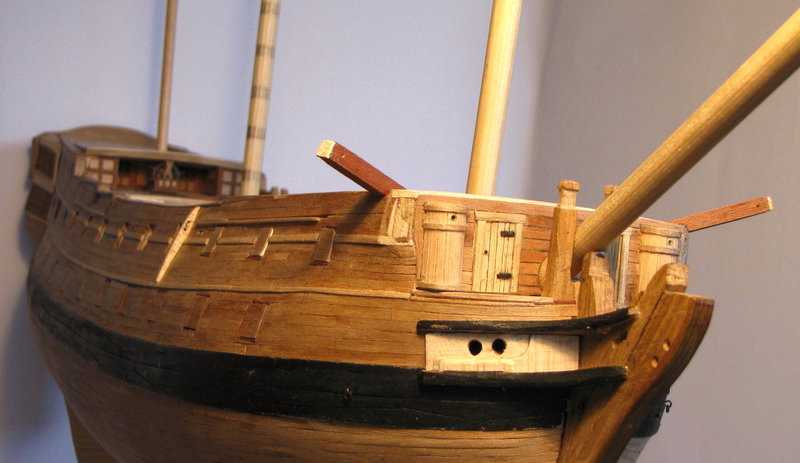
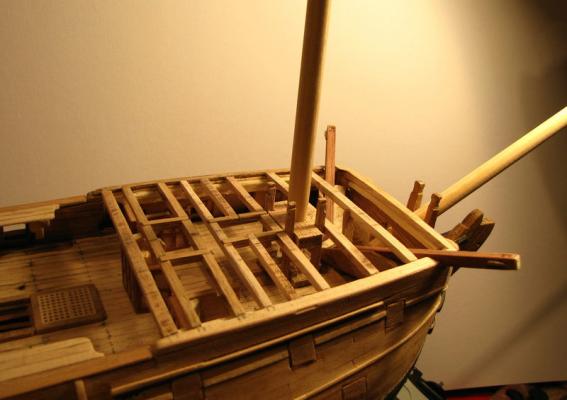
Some stuff done up at the sharp end . . . and a couple of questions to come. Catheads and roundhouses made. Finished roundhouse stands beside the blank for the other one >>> I used a 12mm dowel for the form of the roundhouses. The dowel was sliced lengthwise to leave just over half of its diameter. At 12mm it was a little underscale for the model, so before applying the vertical planks I wrapped the half-dowel with thin card then glued the planks and the bindings on to the card. Here's the front end with the catheads loosely placed in position, and some dowels placed in 'holes' while they pretend to be masts >>> . . . and now the questions ~~~ The catheads -- at what point is it 'normal' to fit these? Just looking at how they stick out they seem a little vulnerable to me. However, I want to be getting the forecastle deck planked soon and the inboard parts of the catheads are virtually concealed below that deck but I don't want to be messing around trying to make a neat job of fitting the catheads through the deck planking. (As this is my first build I don't want to be fitting one part only to find that later on it hampers my attempts to fit another part or parts.) . . . and a general question about the roundhouses ~~~ I've never been sure what their function was -- I've googled looking for an answer but only found reference to the roundhouses at the stern of the ship. In my absence of accurate knowledge of this I've imagined they may have merely been "posh toilets" for some ship's officers ??? --- but someone may know differently ???


-
Hi Piet, just found your buildlog here and it's great to find someone else building at 1:80 ~ I thought I was the only one! What a great build . . . I'll be watching closely.
-
Holiday over ~~~ back to ship building Them pesky little fenders don't look all that much clinging there to the sides of the ship, but they sure provide some fun tweaking them to get them to match the curves of the hull ! Some structural work has been done in preparation for the foredeck beams and planking. Some partitioning 'dry positioned' on upper deck >>> . . . and the rough blank for the aftmost beam 'dry positioned' >>> Now for the fun of preparing the catheads and the beakhead bulkhead

-
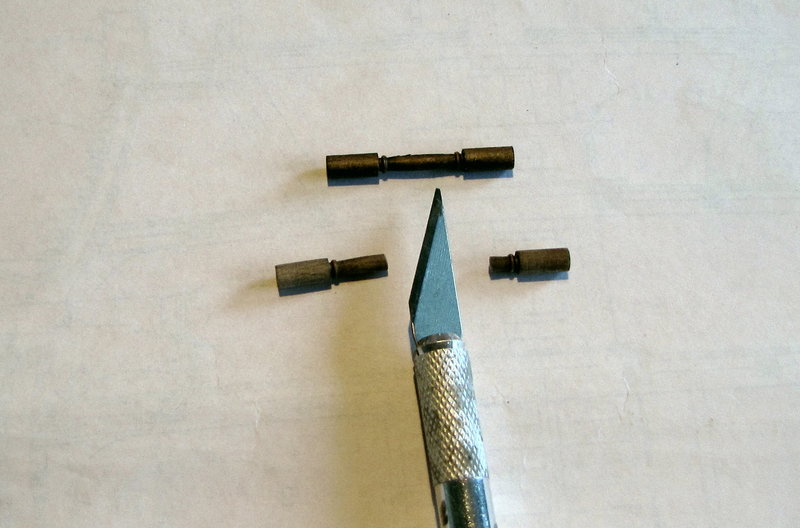
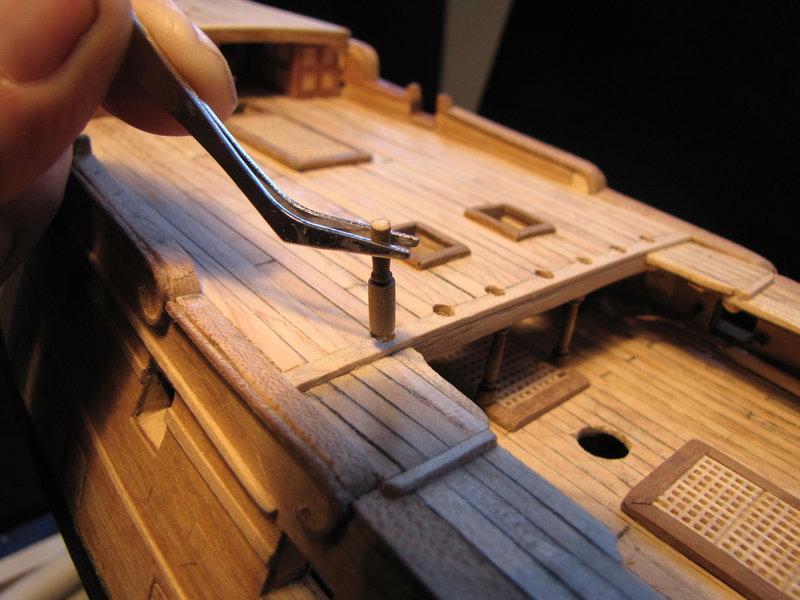
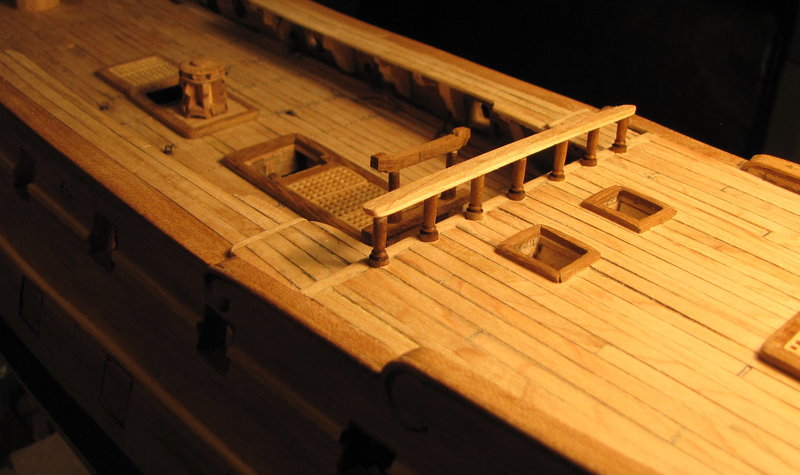
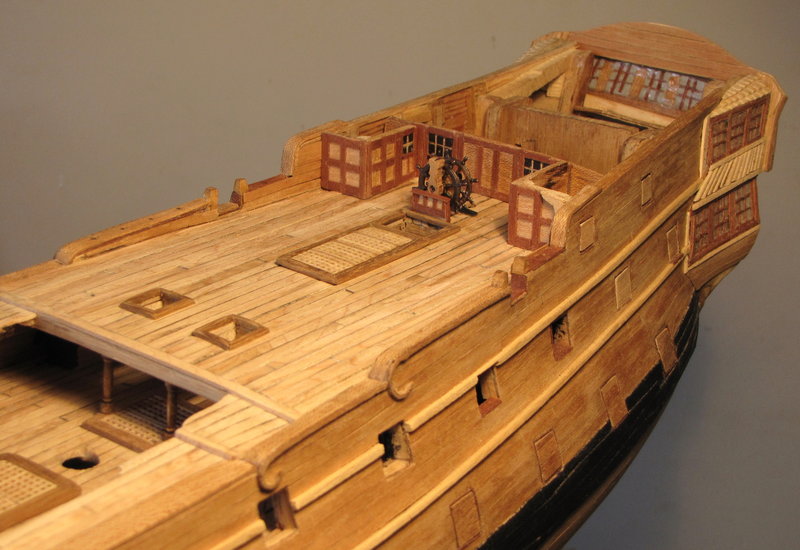
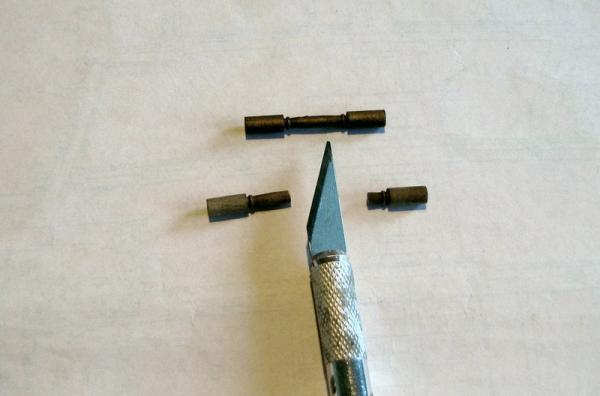
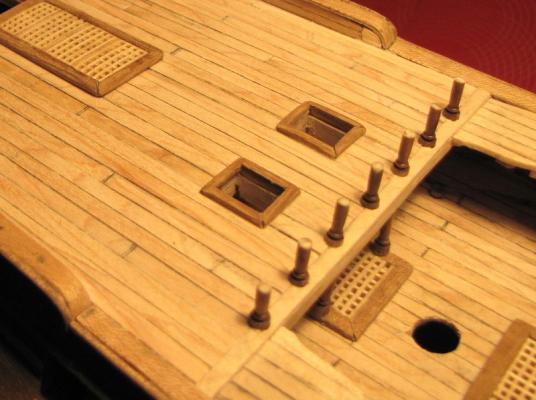
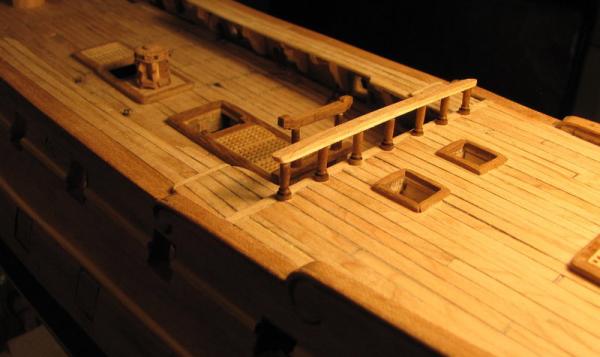
Most of the photos in all of my previous posts have pretty much been 'historic' ~~~meaning that they represent parts of my build that have taken place over a period all the way back to late 2010. I've already mentioned that there were a few lengthy lay-off periods . . . . . . but now this log is pretty much in 'real time' and whatever is posted from now on will be of current parts of the build. Right now, I'm wrestling somewhat with the stern parts and will be putting that to the side while I pay some attention to other less frustrating parts. In the last few days I've been fiddling around with some smaller bits n' pieces. Picture stories > > > These 'over-the-counter' spindles cut into large and small sections >>> . . . the larger sections going here >>> . . . to form this >>> A few deck rings, a single shot garland, and the main bitts have been attempted; and while the garland and the rings are now a permanent part of the ship, the bitts and the quarterdeck rail are only dry-fitted. The rail and bitts are just too fragile and vulnerable to be fitted at this stage, and will go in "the box" with a few other delicate things already made. Now, a 10 day break in France beckons in a few days time, so there won't be much progress for a couple of weeks.


- 257 replies
-
- 12
-

-
Christian, As I'm having a measure of success with the wood I'm pressing on with trying to make wooden spindles. When I say I'm having success I'm also having some failures, but I'm having more successful cuts than failures, so I'll keep going for now anyway. However, while I grind away at the tedium of trying to sort the stern quarters I'm also diverting to other (less tedious!) parts of the build from time to time. The poop deck now has its planking done.
- 257 replies
-
- 13
-
-
Hi Joe. I've never tried to upload or link a video on my hard drive directly onto a forum. I'm not sure if it can be done in the same way that can be done with still photos. I've always uploaded my videos to youtube or photobucket, then linked or embedded them from there' I see that the direct upload feature here on the forum limits each file size to 2Mb and any video of more than about 1 second would more than likely exceed that limit, so I can't imagine that it would be easy to do the direct video link to the forum. I don't know if you have ever used youtube to host any of your videos but it is really easy to upload there, and in case you wouldn't want the whole world and his brother being able to view your stuff, you can opt to keep your videos restricted to only people who have the link. I believe you can make them even more private than that, but I've never used that option.
-
O.K. ~ just looked at my previous post, and to my eternal surprise, my attempt worked !!! So, for anyone interested here's the webpage where I found the tip :- http://www.virtualassistantforums.com/blogs/vaf-admin/54-how-embed-youtube-video-your-forum-post.html
-
Thanks for the responses, guys. I've done a bit 'googling' and am about to try something to see if it works. (If not, I'll soon be back to edit this post ! ) Here comes the attempt:- (For this test I just selected a short sailing related video.)
-
Thanks Mark. I DID try both "embed" and "share" options on youtube but when I clicked to preview my post all that appeared was the url as it had appeared on youtube and it didn't appear that there would have been a "live" video inthe post. . . . but perhaps it doesn't show as "live" until it's posted into the forum thread ??? Perhaps you could test it when you're home fromwork ? In Oregon it's around 3.30 PM and you're working, right here it's around half past midnight, and I'm just going to bed.
-
I tried various buttons and 'right-clicks' etc in my efforts to embed a couple of videos in a post but failed. I know it can be done (at least I've seen it done on some threads here on the forum) so is there something I've missed? There are several examples of embedded videos in posts 54 thru 58 in this thread > http://modelshipworld.com/index.php?/topic/854-royal-caroline-by-doris-card-1749-140/page-4
-
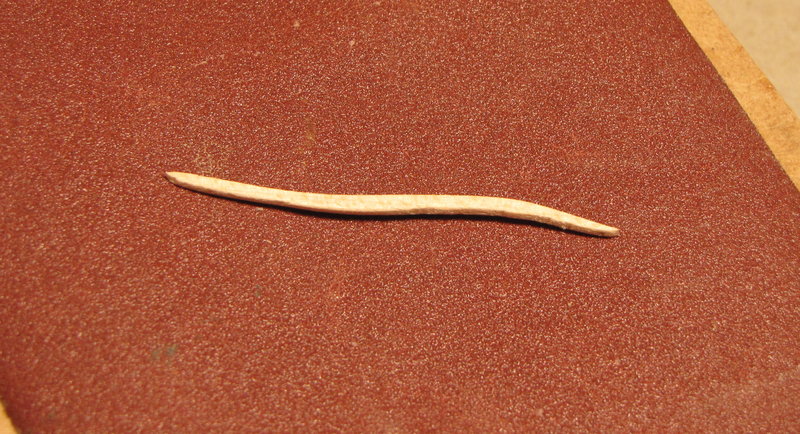
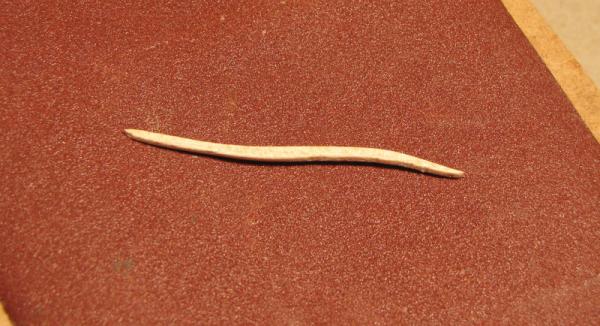
I've gone back to my Nemesis! I've still to re-work the stern window frames, but I have started to fashion some spindles rather than the square section balusters I had made previously. I did not think that I could create such small spindles as shown on my drawing ~ and while I still can't create exact replicas down to that scale I hope that I can get closer than before. I decided to have a try at Christian's suggestion and used my drill as a lathe. I used toothpicks/cocktail sticks so they were already round, but at almost 2mm they are too thick so needed to be reduced in diameter. I couldn't make the thinnest part of the spindles any less than about 0.75mm - 0.85mm as they just wouldn't survive at less than that. I had a few failures even at that thickness. (or should that be 'thin-ness'?) Here's what I attempted >>>
-
Thanks Christian. As I said in my previous post, I have removed the offending parts of these stern window frames and have made a brief start at trying to remedy the problem. I'm attempting to attach individual horizontal muntins between the verticals and it is proving to be very tricky ~ they are only about 2mm - 2.5mm in length and less than 0.5mm thick so I don't know how successful this will be. Meanwhile, I find it is sometimes better to walk away from a difficult task and to do something else, then return at a later time. If this doesn't prove to be reasonably satisfactory I will have to re-think another strategy. I'll be looking at some of your suggestions. After I had initially attached these 'not-so-good' stern parts (several weeks ago) I set about making preparations for the poop deck >

-
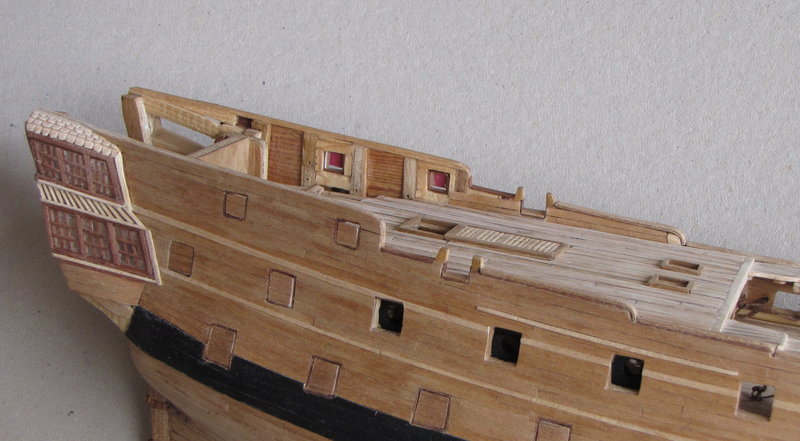
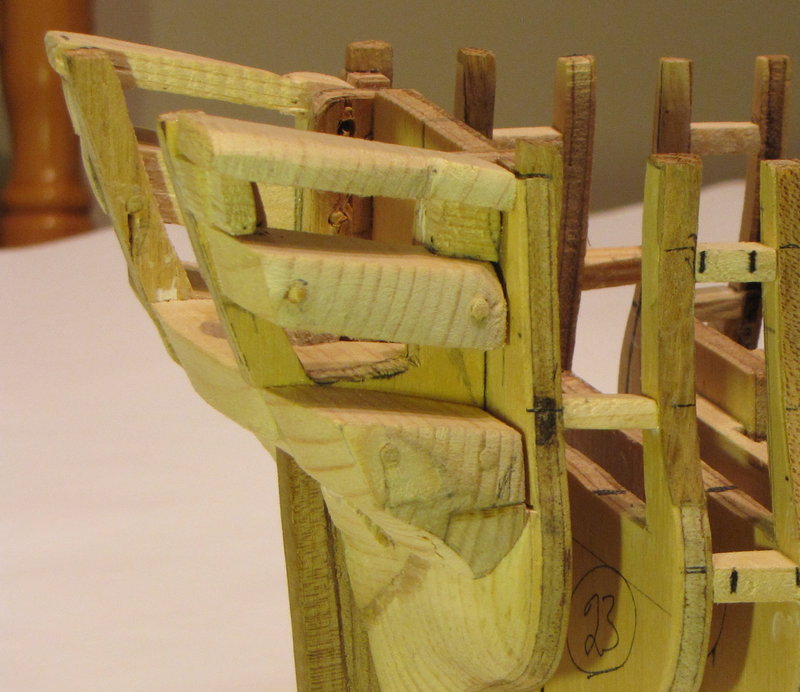
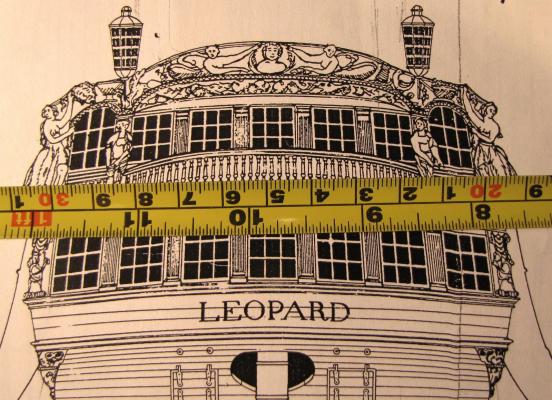
Thanks Nils and Christian. You're right Christian ~~~ there is always plenty of work before us! Thanks again for your photo. When I reach the completed hull stage I may place it on a pedestal for a while . . . before I move on to the rigging. So now you are reading 4 books! . . . you'll have to make sure you have time to get on with building your Wolf - I'll be watching your buildlog. Back to Leopard. By the time I had planked the quarterdeck I was beginning to think about that part of the build that I had been "putting on the back burner" for some time. THE STERN QUARTERS ! Oh Dear !!! ~ I felt it was time to think about how I could possibly create anything that would resemble what I had been looking at in the drawings. . . . and here is what I saw every time I looked at the drawings :- >>> The photo above shows the spindles/balusters that run along the stern 'balcony' and round the port and starboard galleries are hardly 1mm at their thickest point and at their thinnest part they are less than 0.5mm, and the window muntins are also less than 1mm in thickness, so I knew that there was no way that I would be able to create anything so tiny that would look like these spindles. In my lack of knowledge I had already "created" these unconventional 'structures' at the stern as shown below :- So ~ after lots of attempts to think of how I could transform that monstrosity into a 'look-alike' stern I decided to form each side (port & starboard) and the upper and Q'deck sterns as individual units that could be brought to the ship and glued in position. Here's what it looks like in the early stages -


-
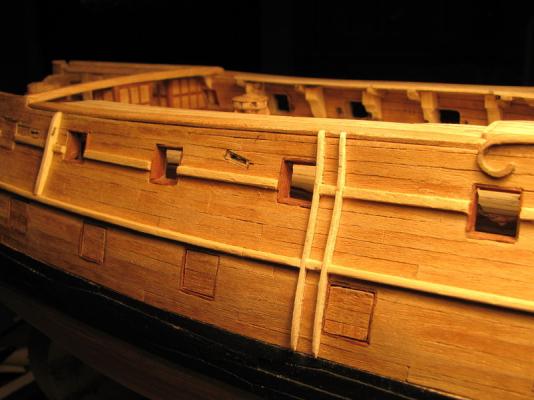
Thanks Christian, John and Robbo. Hi Christian, When I set out to build the Leopard my intention was to build a complete model (fully rigged but without sails). At the present time it is still less than half of a hull model and there are still so many tasks to carry out before it even becomes a hull model. It is still my intention to go for the fully rigged ship but I'll wait and see if my intentions are still the same at that stage ! Although the gunports will be closed there will still be 18 guns visible and they will be 'run-out' so perhaps the model won't be 100% historically accurate . . . but hey! ~ it's my ship and I want to have fun building it and looking at it afterwards! At the moment it's my intention to paint up to the waterline, and there will probably be some paintwork carried out around the sternquarters. Thanks for posting these photos of Portland and Experiment. There are a few photos of them in The 50 Gun Ship book, but they're in black & white. In the book there is a colour picture of the stern of Leopard so I'll try to replicate these colours. (if I can!)
-
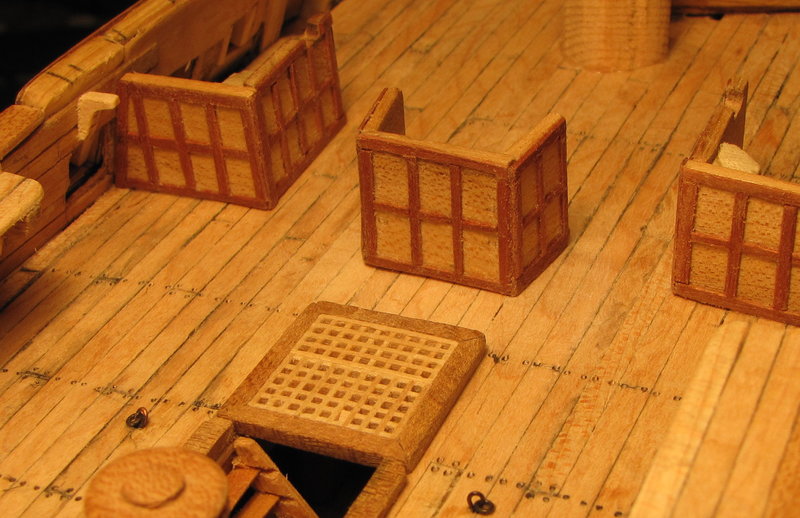
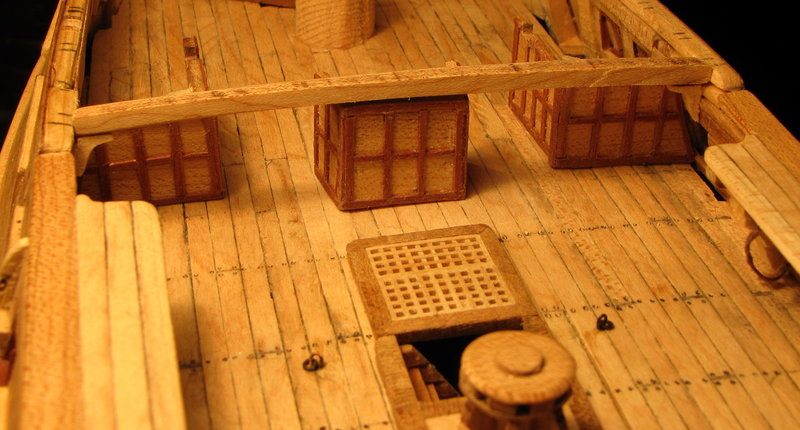
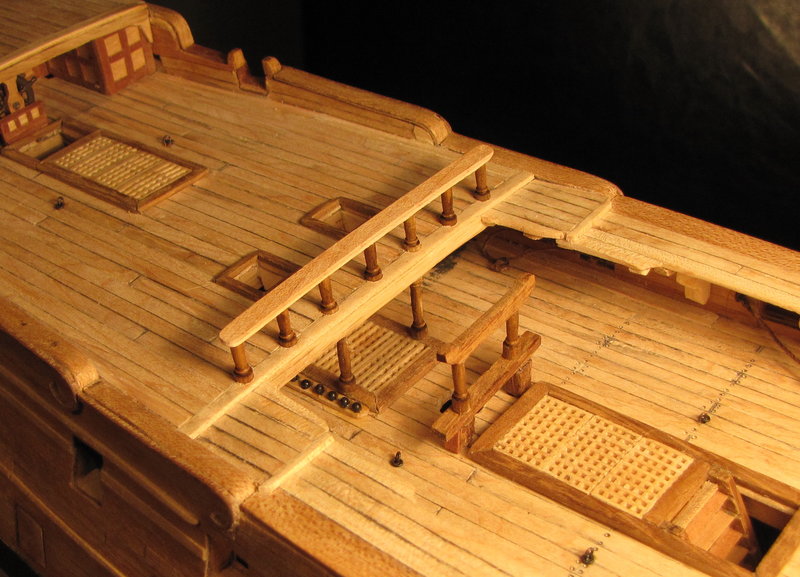
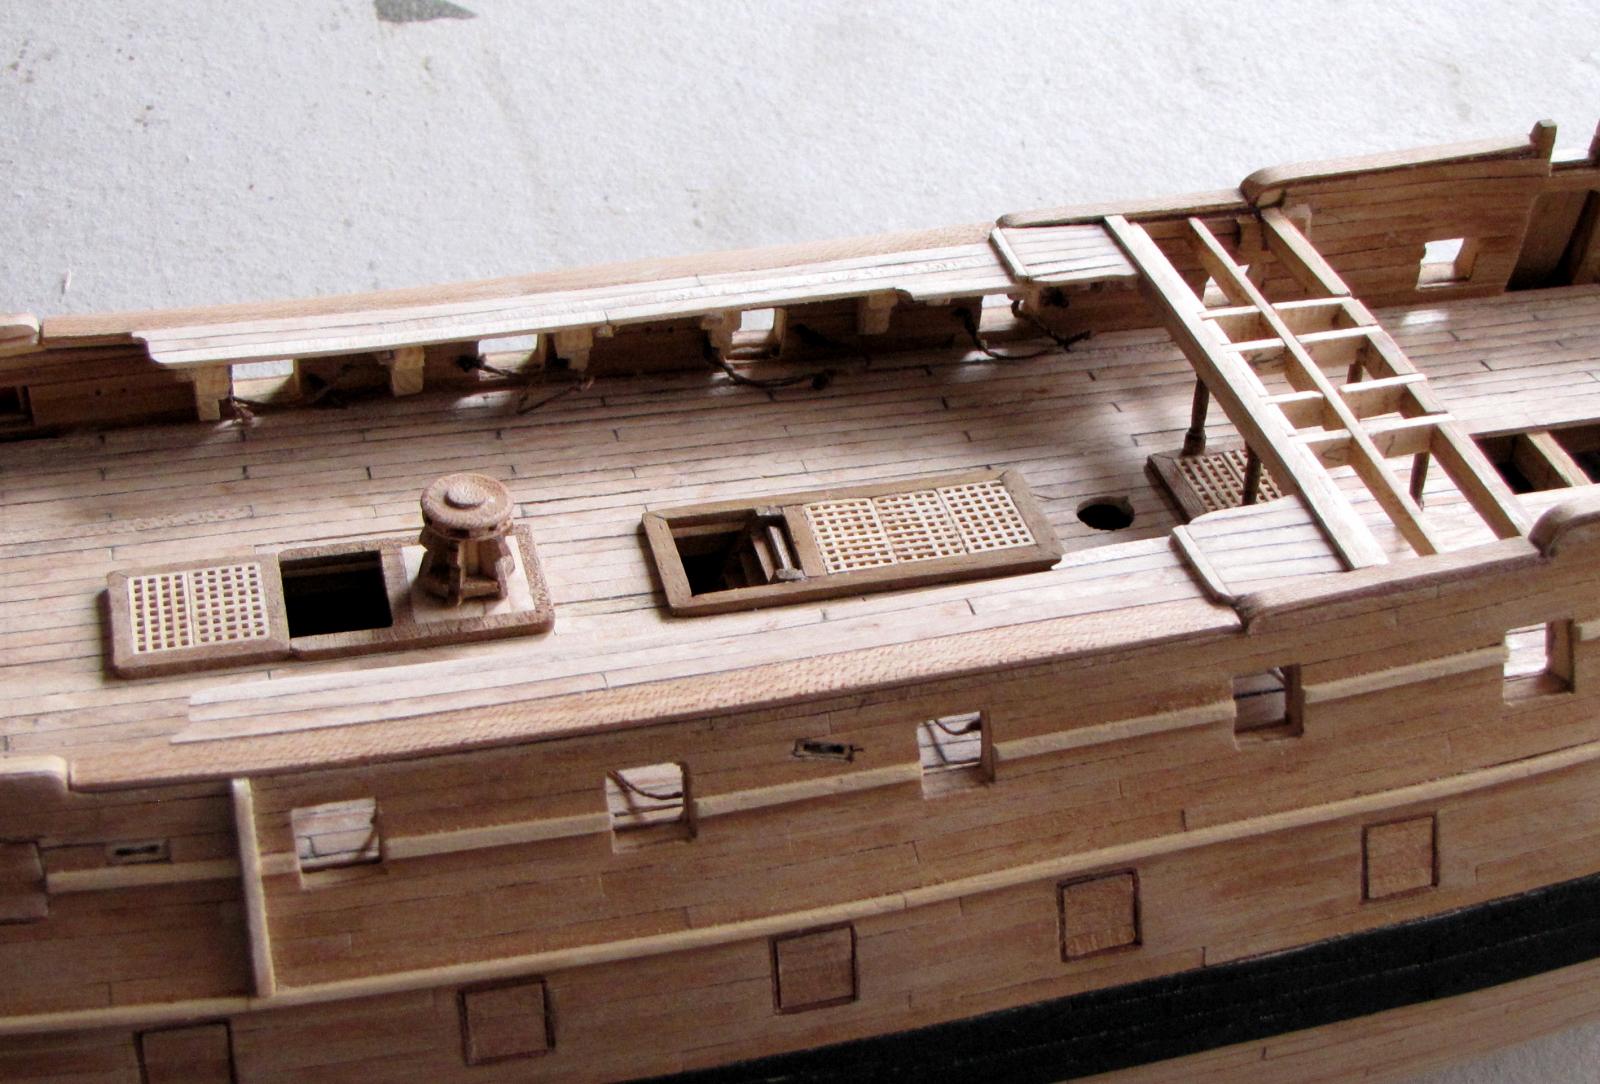
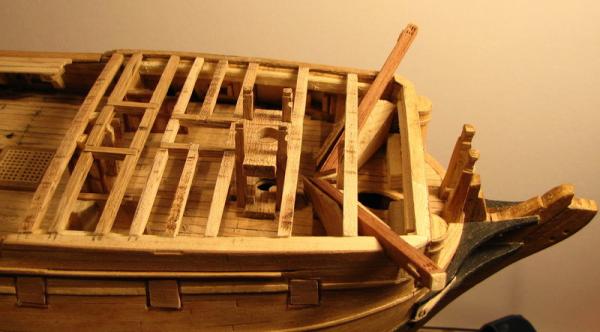
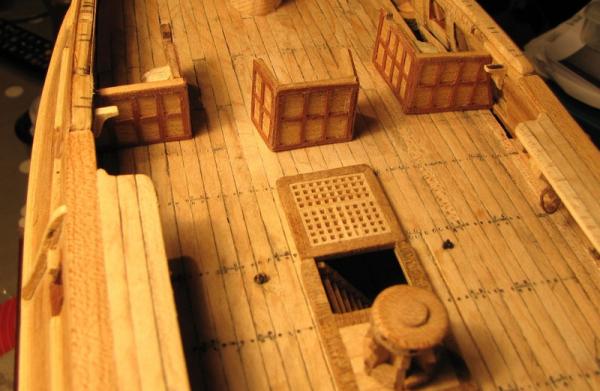
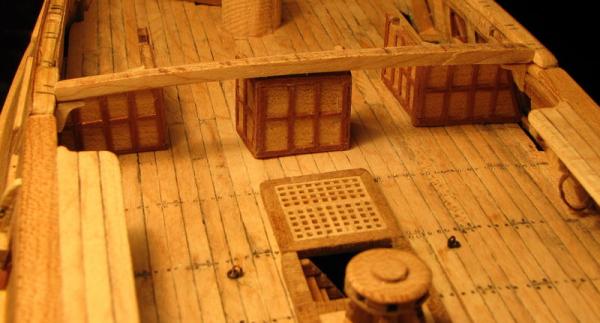
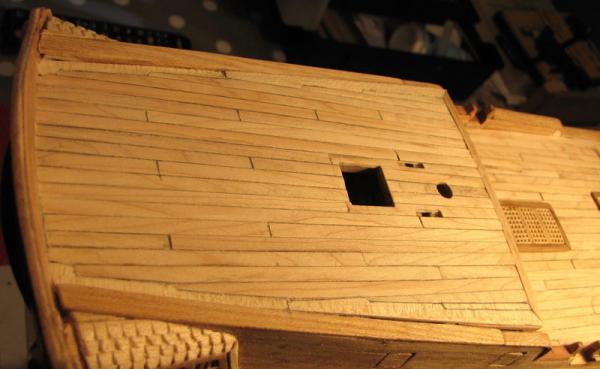
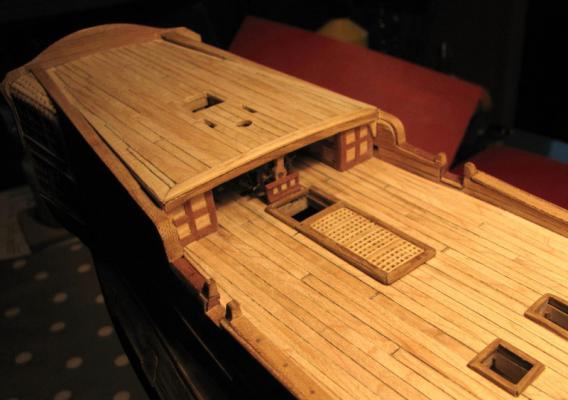
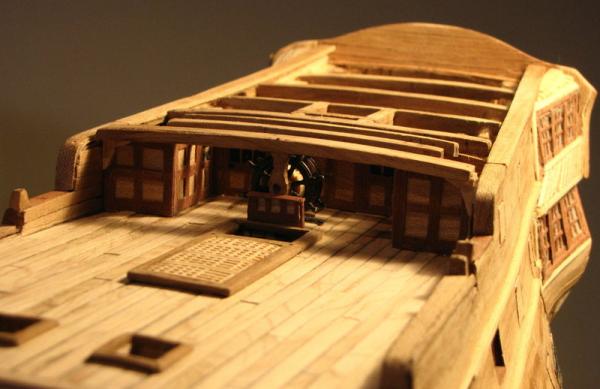
Thanks Juergen. With the hull now "done" I had to decide what part of the build I would tackle next. I wanted to do something that wouldn't seem to last forever but would also make it look like I had achieved something, so I chose to make the gangboards at the waist. In order to create a support for the aft end of the platform that rises from the aft end of the gangboards, it seemed like the right time to form and instal the foremost of the quarter deck beams . . . as well as a few more beams >>> . . . and when I had done these few beams I couldn't resist the urge to do the rest ~ if I could just get that quarter deck laid I would feel like the build was going somewhere ! >>> Another roughed-out grating "test-fitted" before commencing any deck planking on the Q/deck . . . >>> Compared to the hull, the Q/deck planking was done in fast mode. So much so that I neglected to take any intermediate photos. Here it is with the coamings dry-fitted to one of the 2 "holes" down through to the upper deck for the rigging. The deck still had to be scraped and sanded at this stage >>>

-
Thanks Chuck, Mark and Robbo. Robbo, although I find there are some challenging aspects in building Leopard due to my lack of previous experience (and lower skill level than I would like to have) I think it is a good ship to build. When I look at so many buildlogs on here, I think Leopard may have a few less intricate parts than some of these other ships, but it still has plenty tricky parts for me! Yes, there are plenty good pictures and drawings in the book ~~ did your copy also have the ship's plans folded inside a pocket in the back cover? Let us know when your "some day" for building Leopard arrives!
-
HMS Royal William by kay
Bluto 1790 replied to kay's topic in - Build logs for subjects built 1501 - 1750
Kay ~ you don't have to worry about my wife . . . she's not as scary as I make out! In fact she thinks your modelling and carvings are also a big WOW !!! -
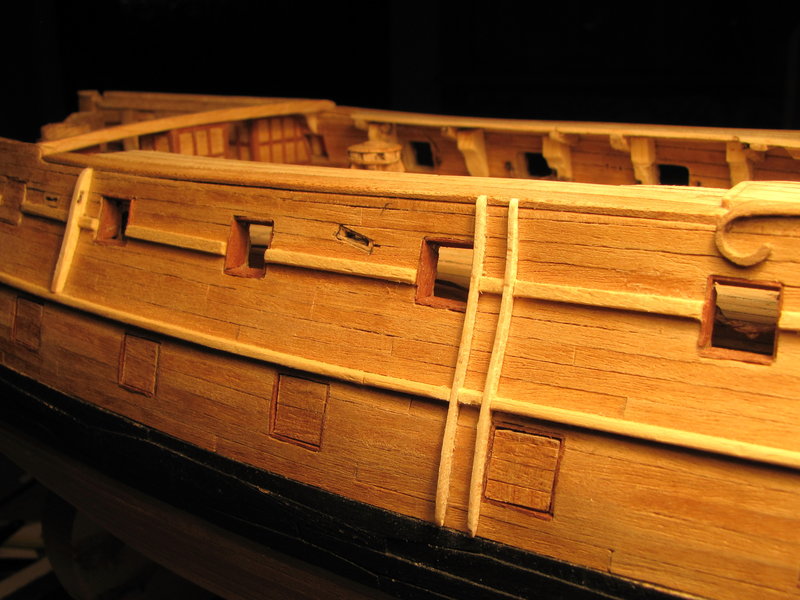
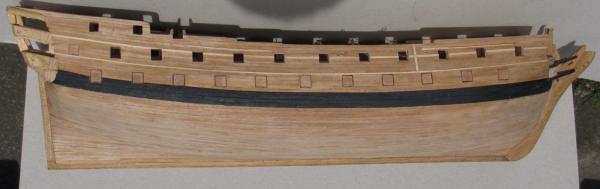
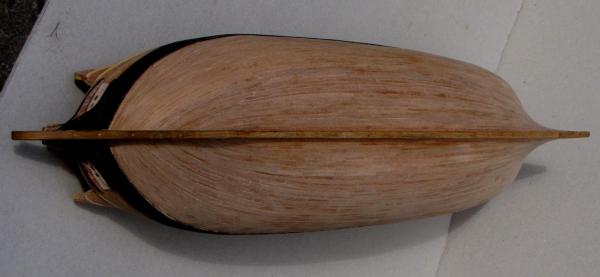
Yeah Frankie! ~ it was beginning to look like a ship by this point . . . . . . and then . . . WooHoo !!! ~ the hull planking was finished! . . . and both sides too! > > > By the time I had got to this stage I had learned another lesson. I would have done myself a bit of a service if I had opted to use slightly wider planks. There were only 2 widths readily available to me -- 5mm and 3mm. The 5mm was a bit too big to be in scale when laid on the plans, and while the 3mm was a little smaller than scale, it was just a bit closer so that's the one I opted for. Now ~ if only there had been 4mm planks available to me at the time . . . With the planking behind me I could now move on and try to figure how to tackle some of the "interesting" bits . . .

- 257 replies
-
- 11
-