MORE HANDBOOKS ARE ON THEIR WAY! We will let you know when they get here.
×


Bluto 1790
-
Posts
324 -
Joined
-
Last visited
Content Type
Profiles
Forums
Gallery
Events
Everything posted by Bluto 1790
-
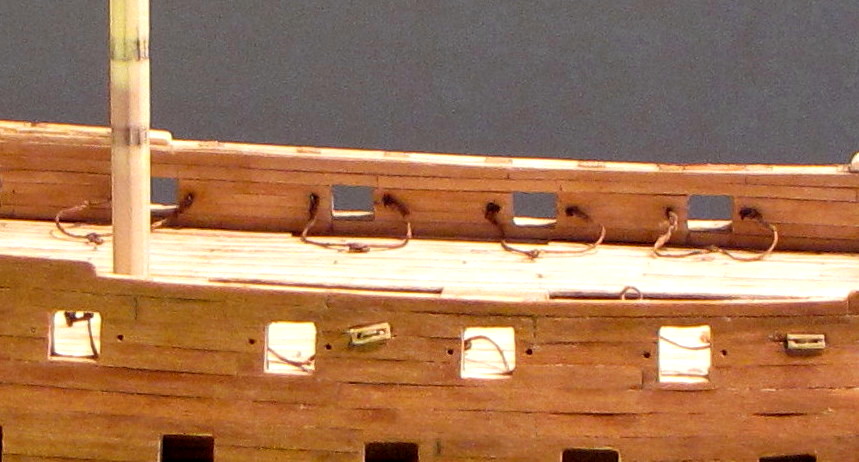
 Hi Mark, what a great and inspiring build you have going here. I'll be watching with interest. I was glad to read your comments on how the photos are really brutal in relation to what we "think" we really see!!! I thought that I was the only one who gets scared when I see some of the close-up pics of my model ~ scared to let anyone else see some of them! Now, if only I could photoshop them to make everything look perfect . . .
-
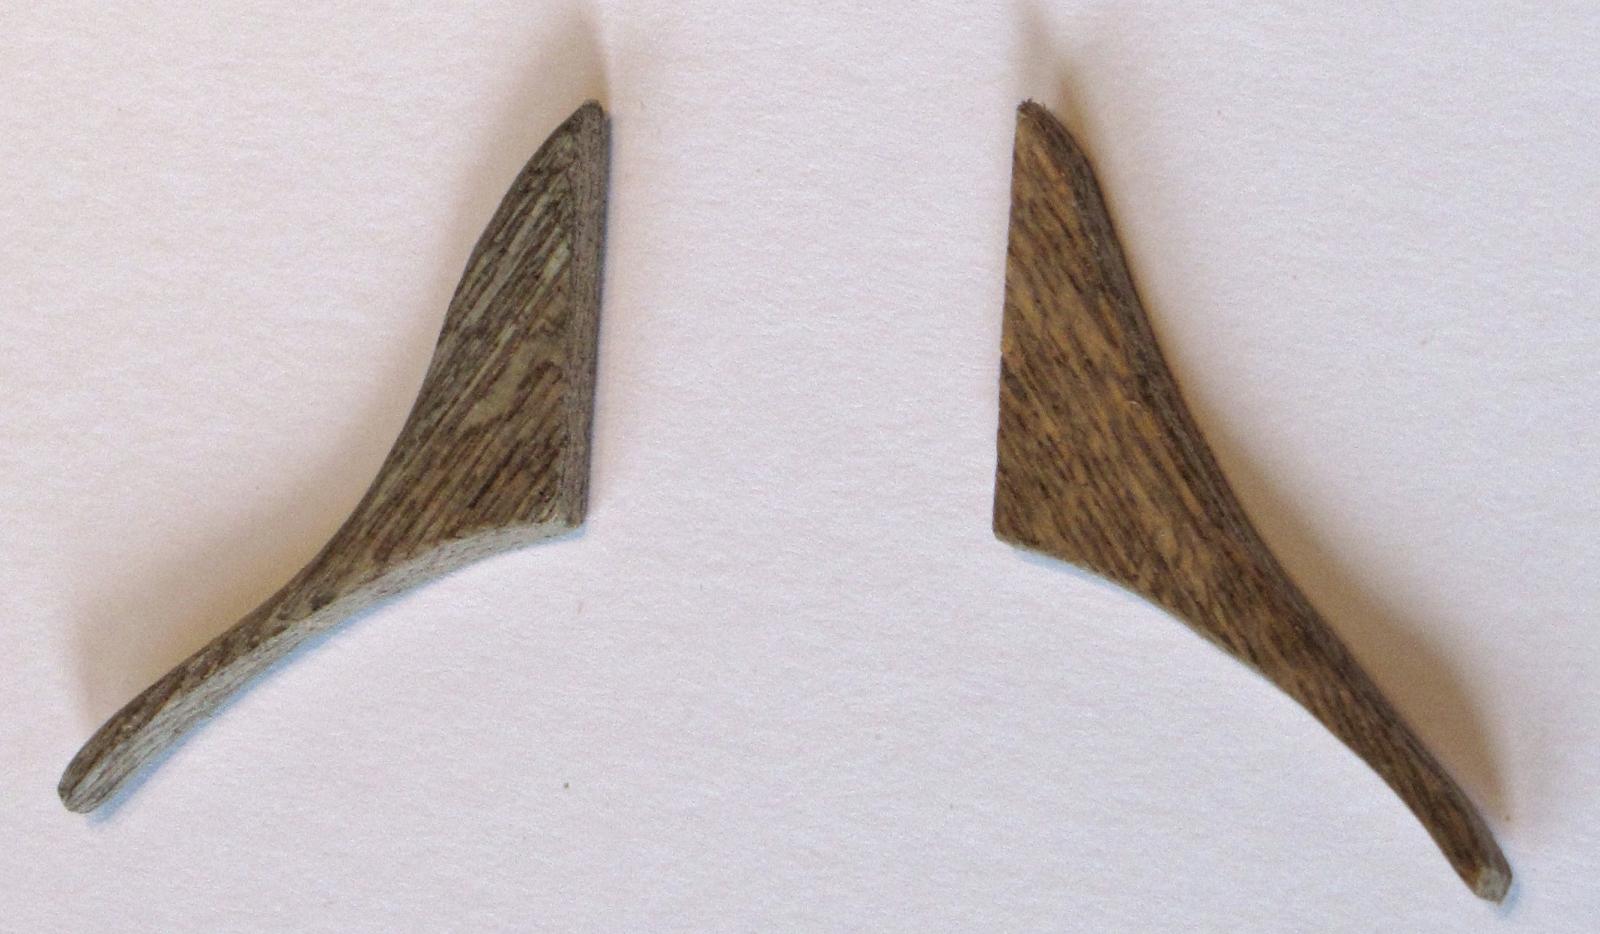
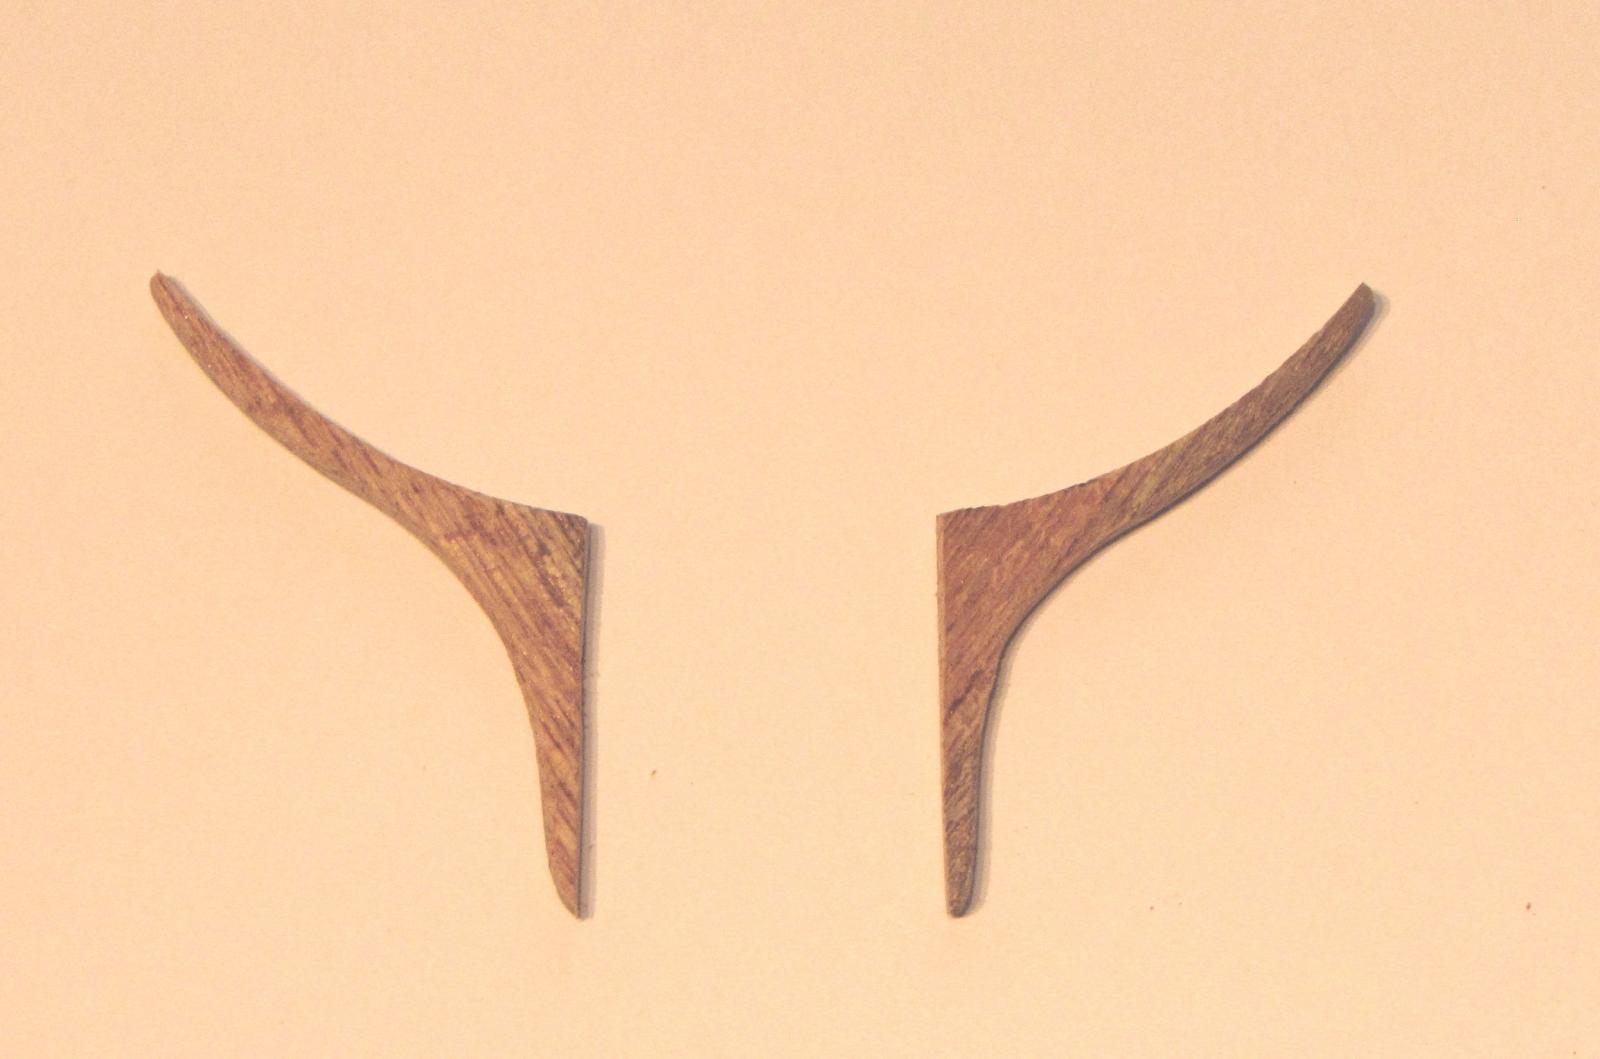
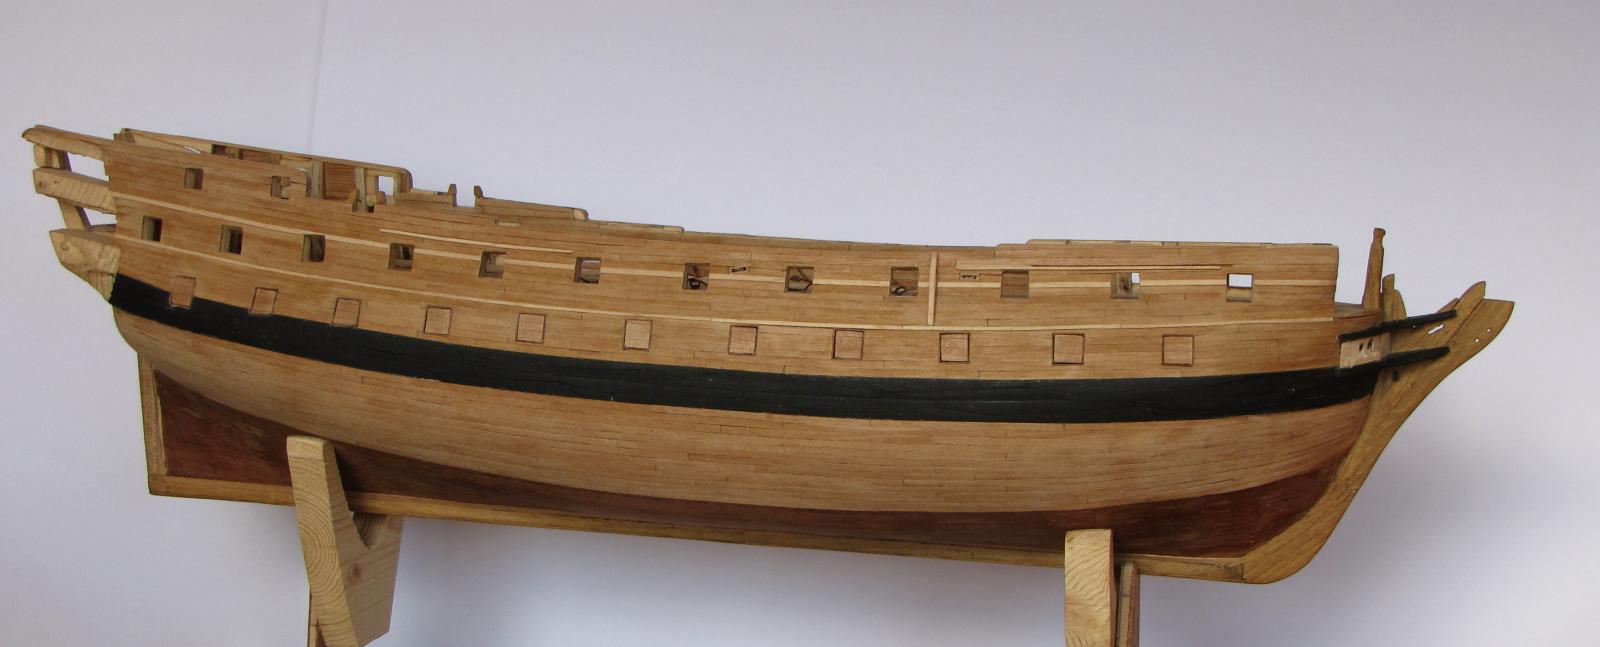
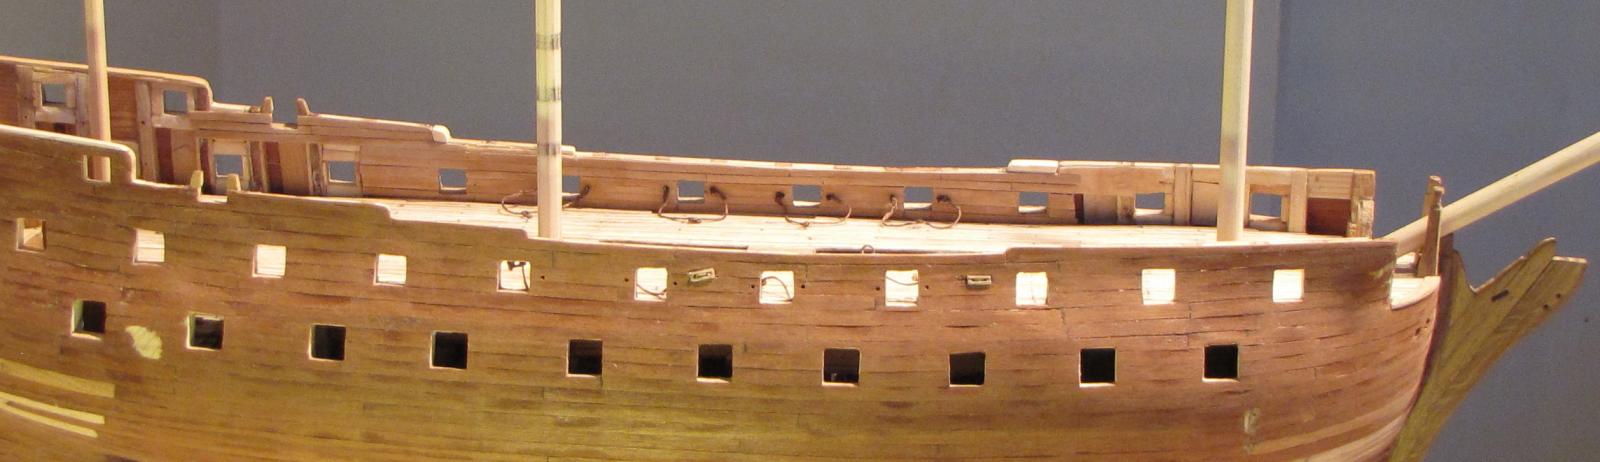
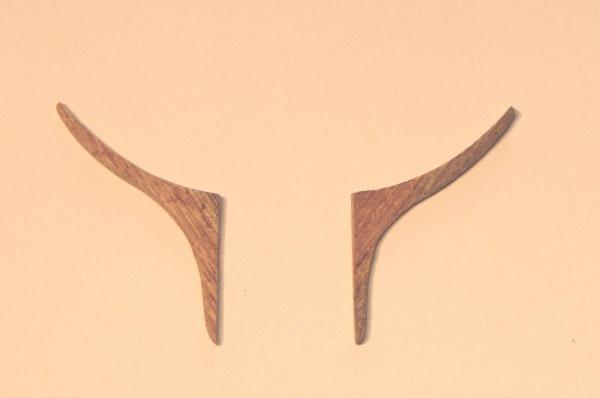
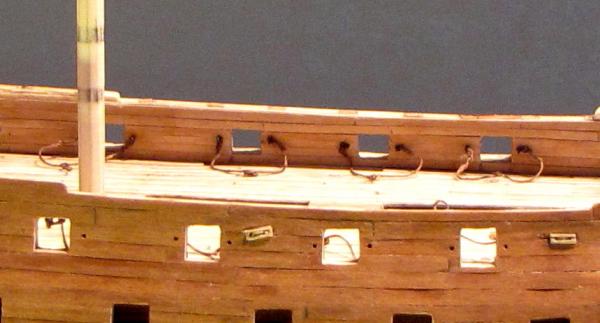
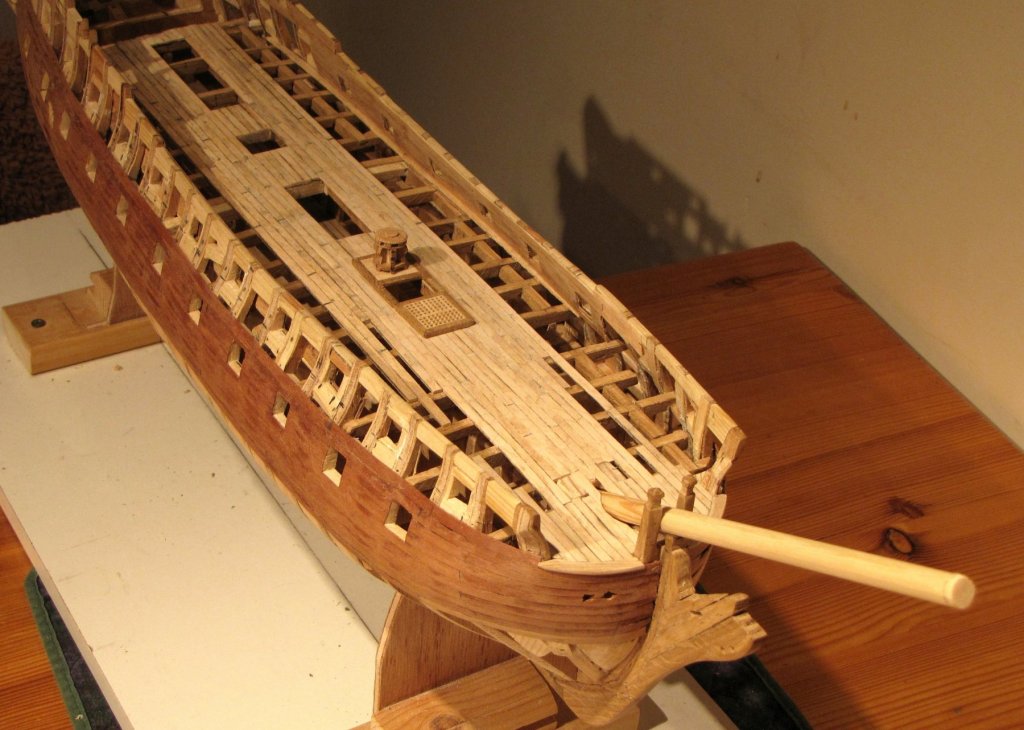
Leopard eventually came back down into the shipyard (again). Before I resumed the planking I made another couple of diversions. A channel seemed like it might be a little project to help uphold my interest in the build because, as close as I was to finishing the planking, it seemed like it was taking forever. So I had a go at the starboard fore channel. Since the planking was now complete above the main wale I decided to have a try at making the upper and lower cheeks at the hawse holes. I also made a start at forming and fitting some of the gun port lids. The next pic shows some lids fitted, the fore cheeks fitted and the chesstrees fitted to both sides of the hull. The hawse holes still need a bit tidying. The fore channel is in "the box" awaiting its turn to be fitted ~ which will be some time yet.


- 257 replies
-
- 10
-

-
HMS Victory by willz
Bluto 1790 replied to willz's topic in - Build logs for subjects built 1751 - 1800
Hi William, That's very nice work on the barge. Waiting to see the ship progress! As for your question about going on and off the boil, I can't answer for everyone, but it's almost 3 years since I began my build (which is nowhere near half-way yet) and I've had several "on and off" periods. -
ROYAL CAROLINE 1749 by Doris - 1:40 - CARD
Bluto 1790 replied to DORIS's topic in - Build logs for subjects built 1501 - 1750
Hi Doris, I don't know where I've been but I've just found this buildlog of yours and I've spent so much time looking through it that I could have probably built a model ship in that time! I find it difficult to believe that an Earthling could create so many tiny, intricate and perfect sculptures that I saw from around page 3 of your thread here. . . . and I'm finding it impossible to find a word that hasn't already been used to describe your incredible work !!!- 883 replies
-
- 1
-
-
- royal caroline
- ship of the line
- (and 1 more)
-
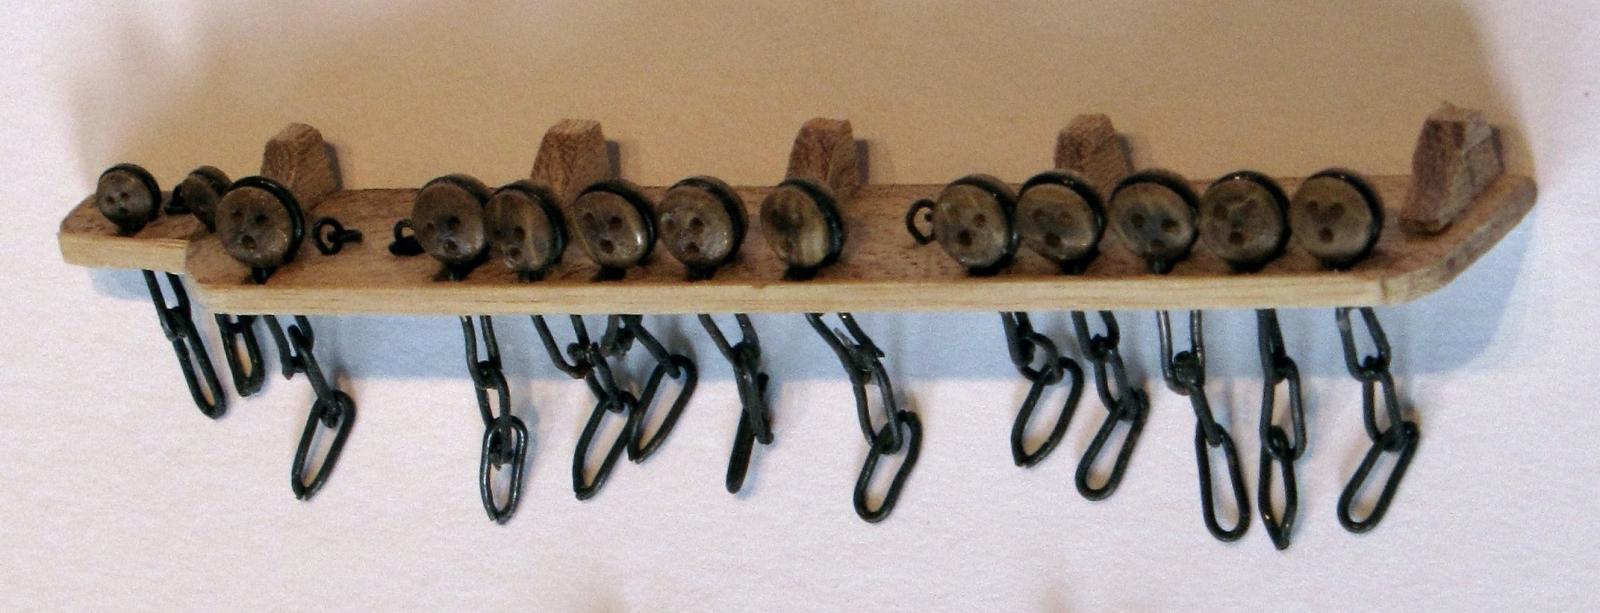
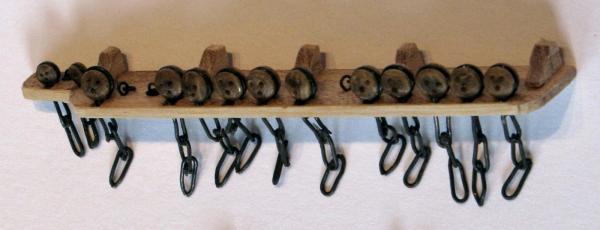
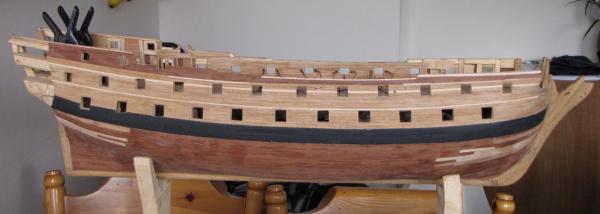
Thanks Mark. Before commencing the final planking I figured that it may be a good idea to install the gun carriage tackles at I couldn't imagine how I would be able to drill blind holes from inside the bulwarks if I waited until the planking was finished. So I drilled through the hull from the outboard side while it was still just coverd by the primary planks. The second "dreaded hour" had arrived and it was time to be getting on with the second hull planking. The first planks had been 5mm wide but these second planks were only 3mm wide, so in theory at least, they would take an additional 66% more time to fit !!! (I think my arithmetic is right?) . . . and ~ I would have to take more care when fitting these as I definitely wouldn't be doing a third planking to cover any ugliness ! Initially I planked up from the main wale and tried to plank each side of the hull equally. I got to about this stage on each side when there was a long lay-off period and for several months Leopard sat on top of the wardrobe wondering when I would again move her back into the shipyard. When she at last came down from the wardrobe I resumed the planking until it got to about the stage shown below > Another lay-off period followed, but now, I didn't cringe as I looked up at my Leopard on the wardrobe as all (or most) of that ugly early planking was now hidden.
-
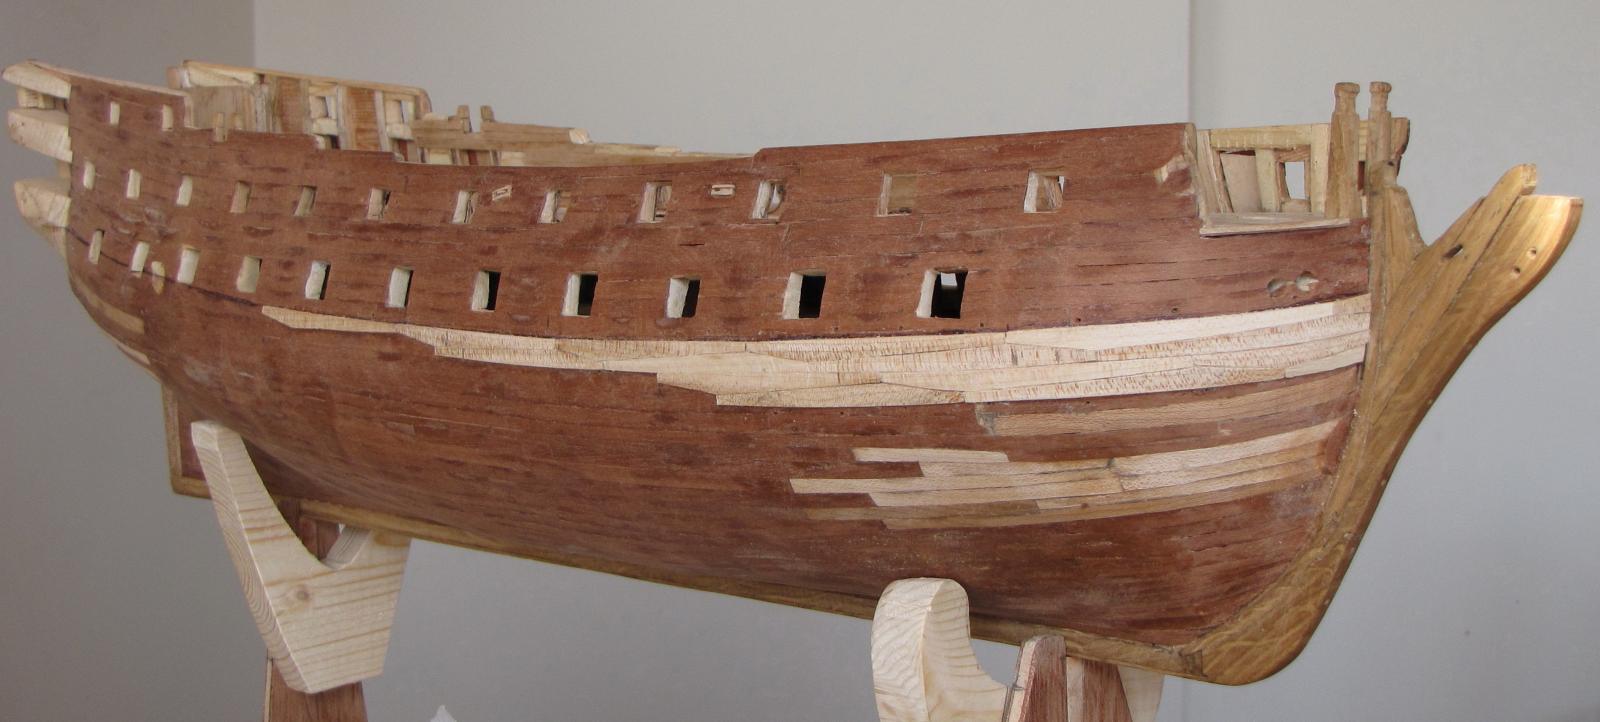
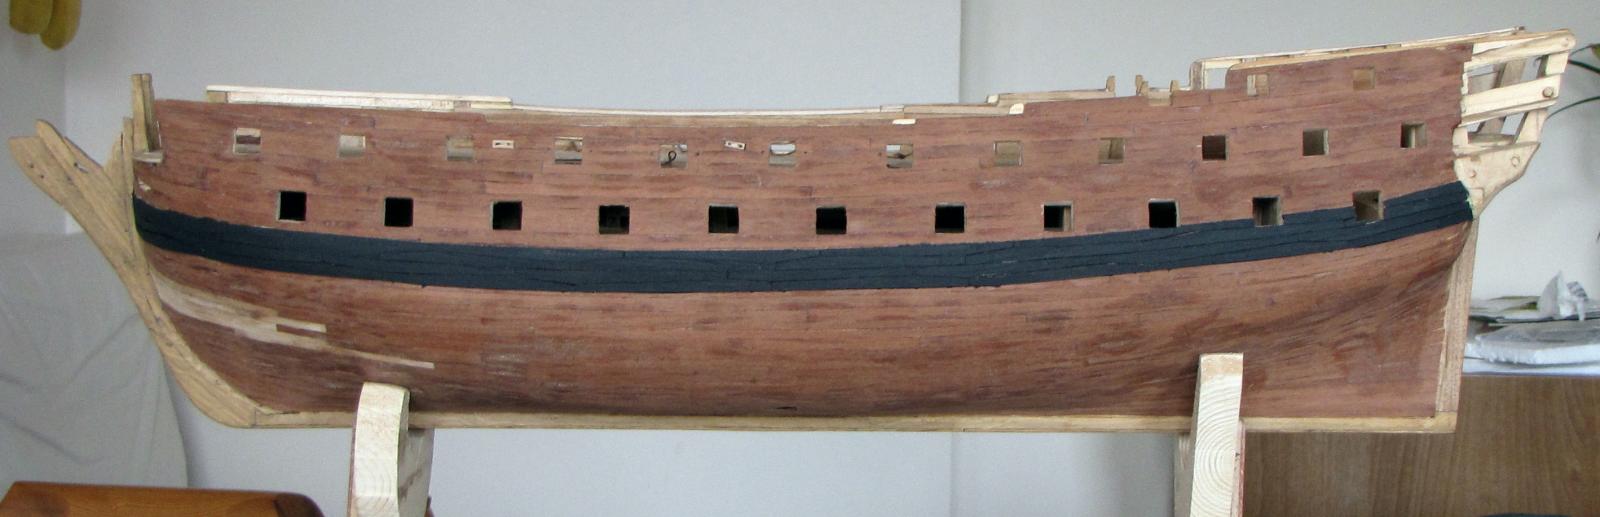
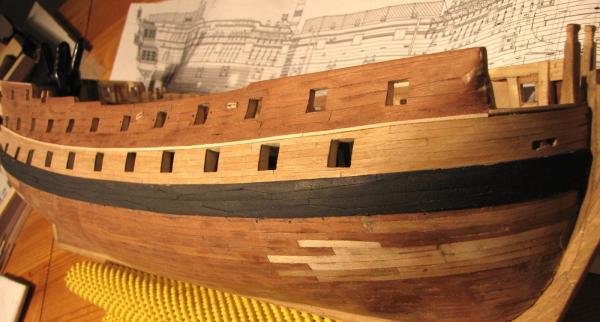
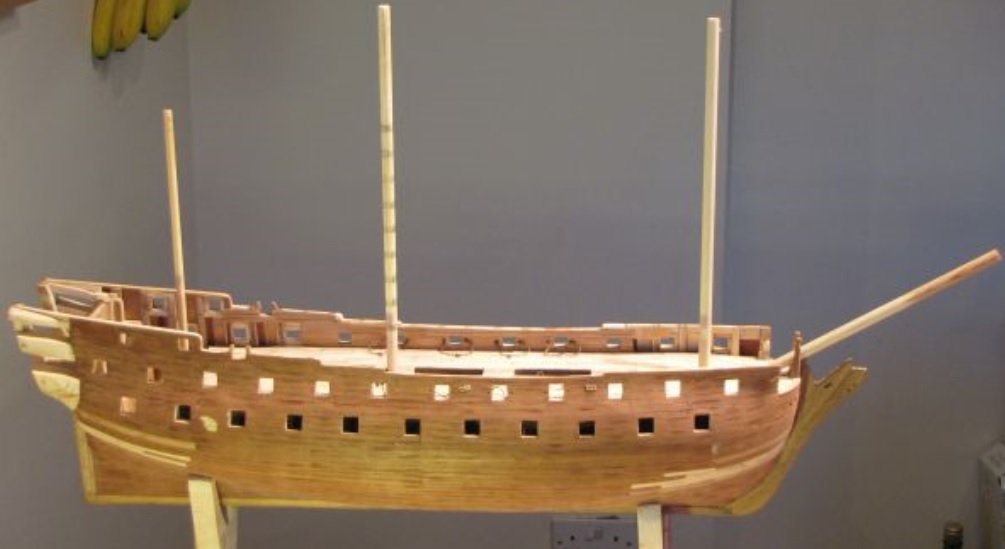
Before embarking on that epic voyage called 'final hull planking' I completed the planking on the upper gun deck. Planking for ALL decks was cut from pieces of Maple I had left over from other woodworking projects. > > > On most builds that I've viewed here on the forum since I carried out the hull planking I have noted that the main wale is fitted before any planking is applied to the hull. Another lesson learned. I had, however figured that the main wale would have to come before the final planking, and that's what came next. John McKay's drawings show hook and butt planks for the main wale, and while I made several attempts to replicate these, I was having more failures than anything else. So, I cheated a little and opted for top and butt wales > > > Again, the timber for the main wale was cut from my pieces of Maple. I cut these pieces to a thickness of around 1.6mm so that they would be almost 1mm proud of the final planking when complete, Many ship modellers use Ebony for the wales, but for a few reasons I decided against Ebony. #1 ~ For even a very small quantity I found it was extremely expensive. #2 ~ It was not going to be easy to source. (locally) #3 ~ I had read how other users found it extremely dirty to work with. So ~ I simply painted it black > > >


-
HMS Royal William by kay
Bluto 1790 replied to kay's topic in - Build logs for subjects built 1501 - 1750
Kay ~ everyone else has used all the words that I would use! I can only say that my wife has a serious complaint about your buildlog ~ ~ ~ I sit with my laptop only about 2 metres from my wife and as I look at all the photos of your carvings I keep saying "WOW!" I think my wife is getting weary of hearing me constantly saying "WOW!" -
Thanks guys ~ Kay, Sinan and JerseyCityFrankie. So Frankie ~ which one in that cartoon do you think resembles me ??? Wheee ! ~ primary planking almost finished (after several months) > > > . . . . . then all I had to do was start hull planking all over again!
-
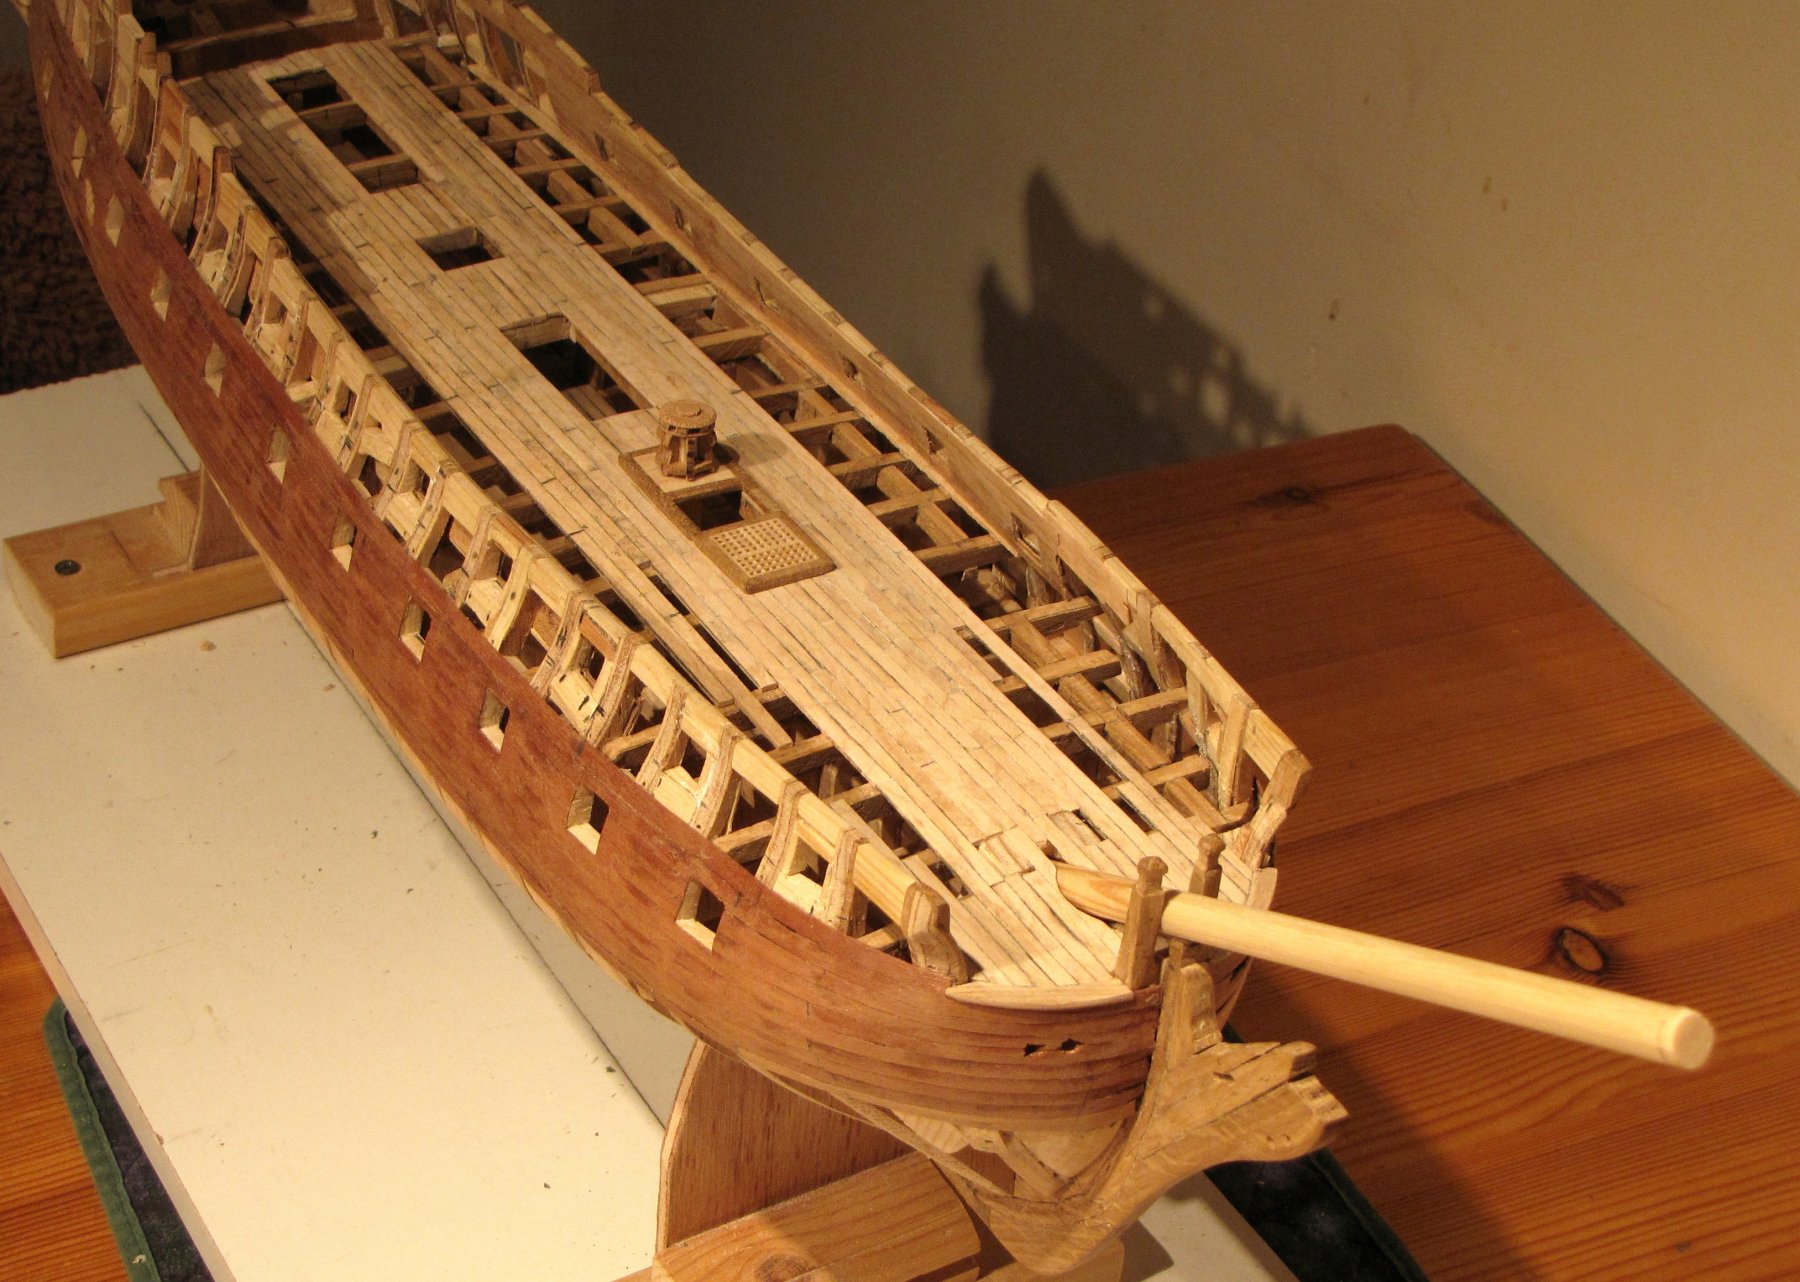
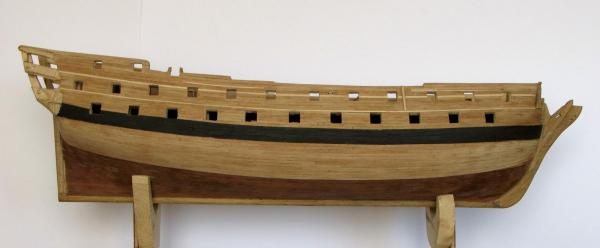
Tedium delirium ~ ~ ~ By the time I had done the planking shown in the last photo of my previous post I had also done around the same amount on the port side of the hull and I was beginning to get somewhat weary of that task, so I diverted my efforts to another part of the build. I played around making a grating and a capstan and laid around half of the decking on the upper deck. The photo below shows that part of the decking that had been done, but the grating and the capstan were just dry fitted so that I could get an idea of what it may look like later. Then, back to the hull, and many hours later, some more planking had been done. Pretty much the same amount of planking had also been done on the port side of the hull at this stage. Prior to commencing any of this planking I had taken considerable time to fair the frames and the infilled stiffener pieces, and while I thought I had done the job properly, an un-noticed high spot evidenced itself later when I got to this stage of the primary planking. It can be seen in the photo below, and it shows up like a whitish blotch between the 2nd and 3rd aftmost lower gun ports. As I progressed I would lightly sand the planking after every dozen or so strakes and at that point the high spot was noticed and the sanding completely wore away the planking to reveal part of one of the stiffeners. I'm just glad that I discovered it at this stage and not after the final planking as it wasn't really going to be a problem having found it early enough. I'm sure that most who have already viewed this topic will have noticed the strange structure at the stern! . . . I know it is most unusual, and the reason for that was my total lack of knowledge as to how to construct that part, and what is seen there was about my third attempt at creating something that may work for the stern quarters and galleries. At this stage of the build I had no idea how I would go about completing that, so I put it out of my mind while I carried on with other parts of the build about which I had a slightly better construction ideas. The stern area will be mentioned at a much later posting. Jim.
-
Thanks Robbo and Michael. Michael, when I "claim limited skills" that's a statement relative to the awesome skill and patience I have witnessed on so many buildlogs here on the forum. I know that as I'm working with a scale of 1:80, on the average, that's a bit smaller than many of the "super-builds" which are more often at scales like 1:64 or even 1:48. So,my claim of limited skills isn't borne of false modesty ~ it's borne of brutal reality ! The reality of now being restricted to this smallish scale to which I've already committed myself. If I ever get this current model finished and I decide that I would like to do another build I would seriously consider a larger scale of possibly a slightly smaller ship . . . although I don't regret embarking on this model as it's serving me well as a steep learning curve. Jim.
-
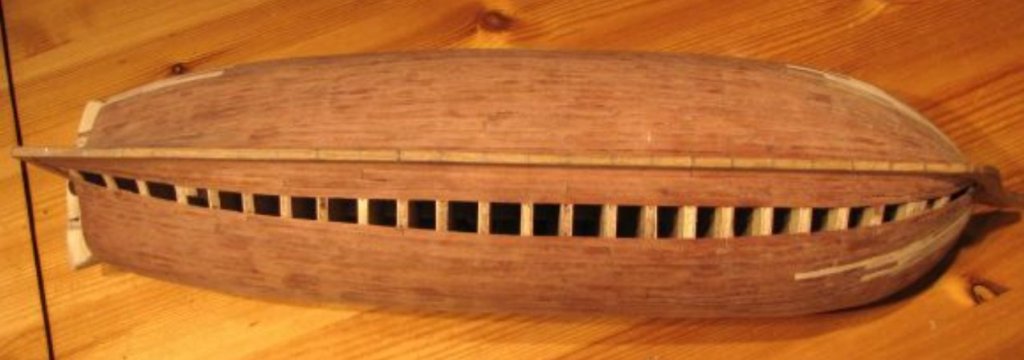
Thanks Mark and Juergen. With the lower deck partially planked, I decided to instal the upper deck beams before proceeding with any hull planking. (I think I may have been delaying the hour at which the hull planking would commence ) I'm struggling to remember the exact sequence in which I carried out the various build stages in the early part of the build and am relying on the dates of the photos to help me here. The deck beams I installed bear little or no resemblance to the way in which they would have been configured, nor to the way I see so many intricate and complicated beams in so many buildlogs here on the forum . . . . . and that's for more than a couple of reasons:- My skill level (and possibly my patience) is not up to that task; I intend for the finished build to be "closed" and only that which appears on the outside of the ship, or above decks to be visible; and what's more, the plans include no details of the deck beam's configuration. O.K. ~ got that out of the way ~~ a couple of pics now: "The Hour" arrived . . . let the hull planking begin . . . . . Early on I decided to double plank the hull, and the planking seen in the pic is 5mm X 0.7mm Mahogany. The final planking will be 3mm X 0.7mm, bringing the total thickness to around 1.5mm . . . but that would be a long way down the line. At some point between the top photo and the bottom one I had a little accident and the top of the foremost frame was damaged, so it required a repair and while I was at it I reinforced the tops of all of the frames.
-
Thanks for your reply Allan. When I posted this question I wasn't really expecting a complete tutorial on building the stern, just some hints/tips from builders on how they went about some of the proceedures. I followed your advice and I've spent some eye-popping hours(!) trawling through Ed's buildlog of his Naiad. I'm now not sure if I'm overwhelmingly inspired or if I'm totally disheartened by what I saw there! Disheartened because I know I'll never be able to get anywhere close to that standard of work! In case anyone is reading this and would be interested to see Ed's method of creating the stern quarters, a lot of forum page reading can be avoided by clicking here to go directly to the appropriate pages. Hi uss frolick, it wasn't so much a case that I chose one of the most complex parts of a ship to build, but more a case that it picked me !!! . . . because that's now the part of the build I've arrived at. So I just had to get my head down and get on with making the best of the job that I could. It's just as I said earlier that as I spent so much time on that part I wondered how others have tackled the task. Although I've completed about 80% of these stern lights & gallery they're not an exact replication of what is shown on the drawings but more of a mere representation.
-
First, I hope this is the correct forum section for this, and second ~ I DID do a search for the subject of my question but came up empty, so here's the question:- When scratch building a (sailing) ship, how do you set about constructing the stern quarter lights and the stern gallery (as well as all of the fancy, ornate carvings)? Seeing as there are so many styles of sterns I'll be more specific about the one I have in mind, and here's a pic of the drawings of the one I'm working on > > > I have already carried out most of the structural work on the lights and gallery of my model, but as I've spent the best part of the last month doing so, I'm curious as to how other modellers carry out this work.
-
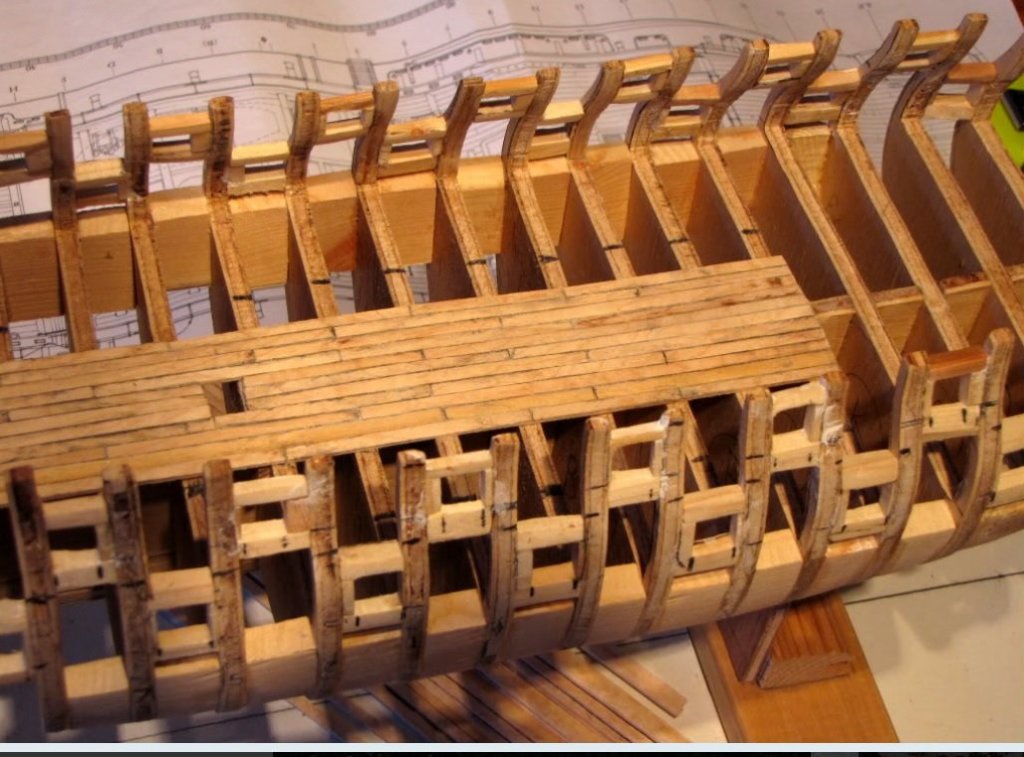
Thanks Tim. Some time later, lower gun deck partly planked > At the outset I had determined that the ship would be "closed" ~ by which I mean that nothing below the upper gun deck would visible as, for the sake of making this a simpler build, all gunports (with lids) would be closed and only 14 guns on the upper deck, 2 on the quarter deck and the 2 bow chaser guns would be visible. Accordingly the lower deck was only partially planked as only a tiny part of that planking would be visible by peering down a couple of companionways. In my opening post I neglected to say that the build is being done (as close as is possible for me) according to the plans and drawings by John McKay in Rif Winfield's "The Fifty Gun Ship". Anyone familiar with the book will be aware that the accompanying plans are at a scale of 1:96. I felt that scale was a little too small for me to work with, and while I would have been happier with a scale of 1:64 (or bigger), because of display space constraints I decided on a compromise scale of 1:80 so had the plans expanded to equate to that scale.
-
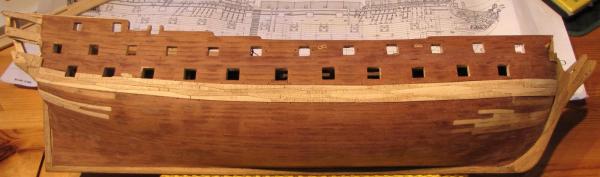
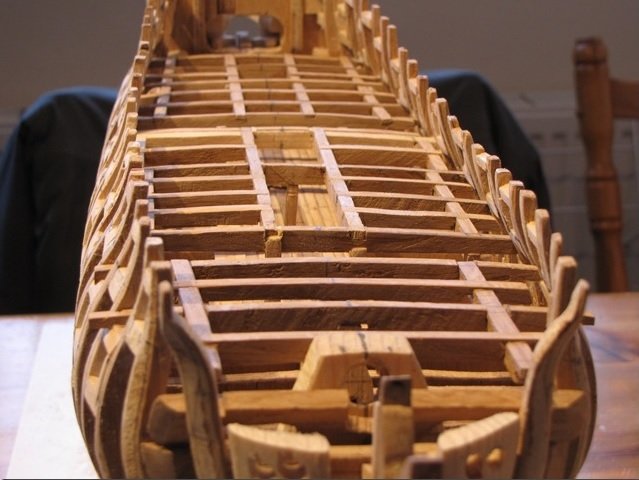
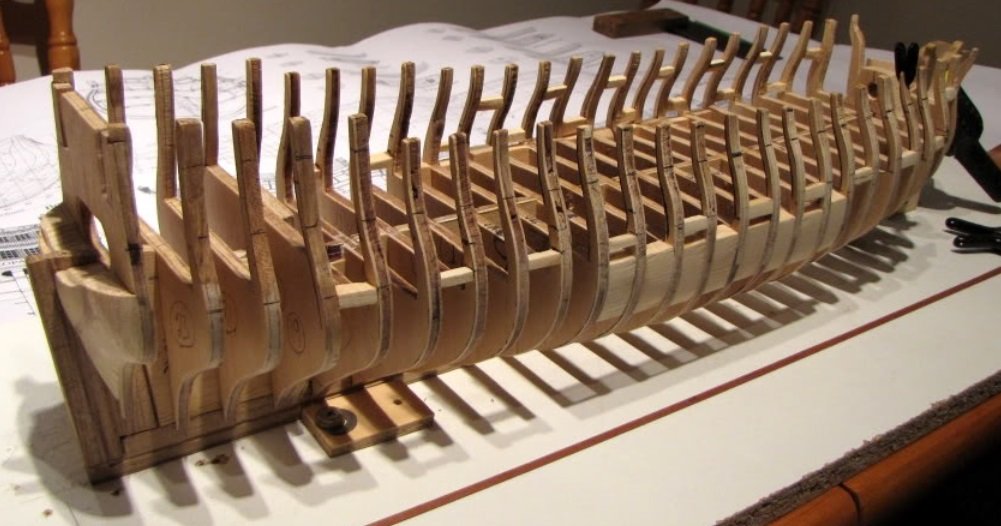
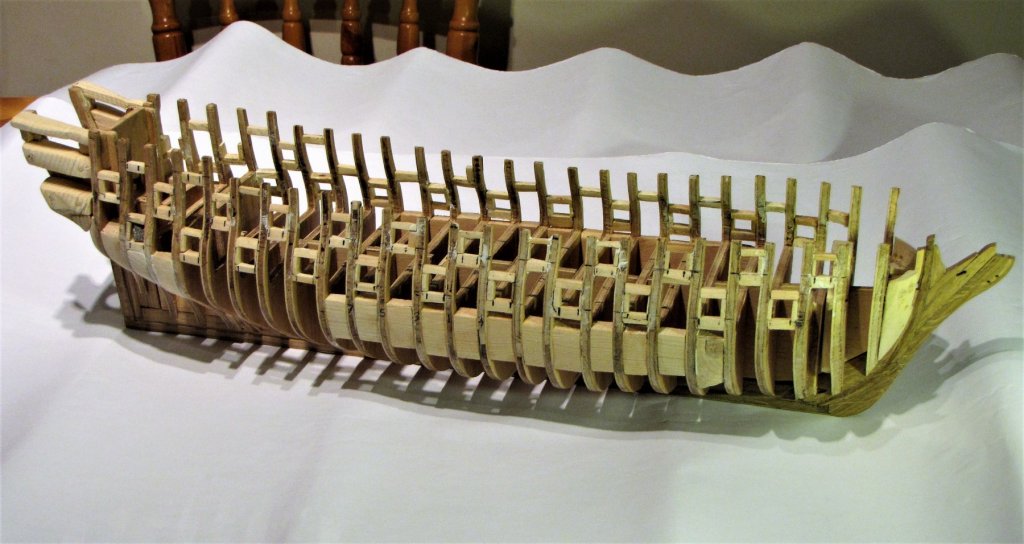
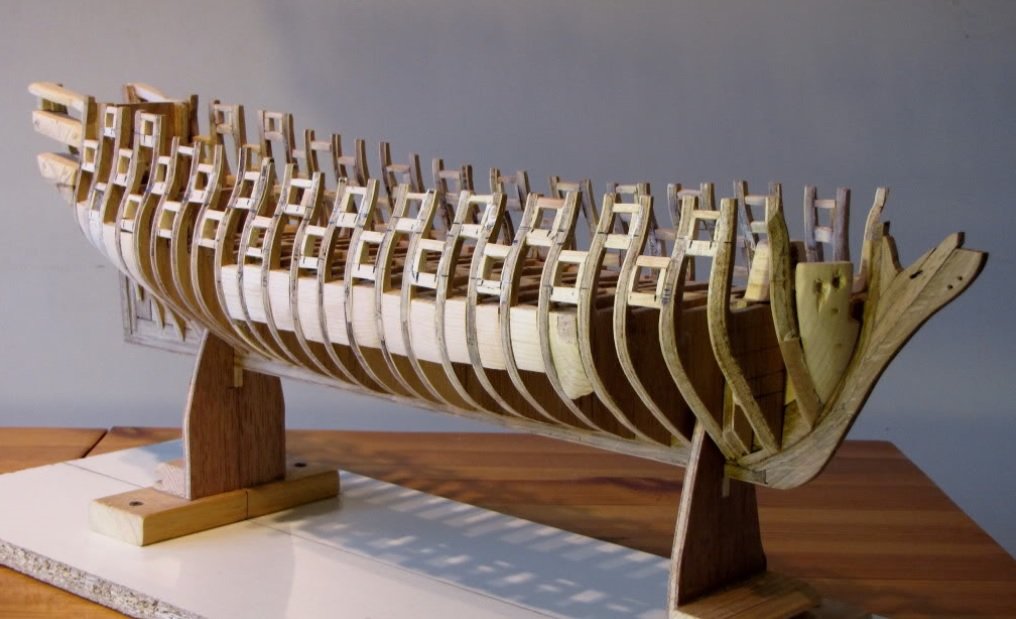
With a measure of reluctance, but because I've been encouraged by one of the forum moderators, I'm making an attempt at creating a build log of my ship. I should preface this with a warning ~ and that is to point out that anyone viewing this should not expect to see the awesome build quality that can be seen in so many threads on this forum. Apart from a very crude attempt at building an (imaginary) ship a few years ago, this is my first ever attempt at building a model of a ship that actually existed. That said, I'll point out at this stage that there are, and will be certain details of the ship that will be beyond my level of skill (and experience?) to replicate as they are shown in the plans and drawings. There will also be some proceedures or sequences of progress that may not conform to the normal practice for a scratch build and these anomalies are the product of my lack of experience and knowledge of how to go about certain tasks. So, please don't jump on me too hard ~ I'm doing my best! It's close to 3 years since I started the build but there have been a few lengthy lay-off periods when nothing was done to 'Leopard', and there are no photos of the earliest stages of the build. I'll kick this off with one of the earliest photos taken after all the bulkheads had been attached and some stiffeners added > In this pic I had already fixed most of the lower cills of the gun ports on the lower deck and a few cills of the gun ports on the upper deck. This pic shows some of the gun port upper cills fixed. Early in the build I decided I would form the gun ports before any hull planking was commenced as I had already seen some builds where the ports were cut out after the hull planking and that seemed like an awful lot of work that I didn't want to encounter later on.
-
Although I haven't made a post on this thread before, I've been following for a while. . . . and all I can say in this first post is WOW !!! Such exquisite quality !
-
Hi Jürgen, That Leopard is looking great! Can't wait to see her fully planked and the stern quarters and quarter galleries finished. I hope you're going to show us how you construct all that intricate work around the stern. I've been having some "fun" trying to construct mine! . . . as I don't have any previous experience of doing that. (I don't even want to think about all the projects for the build that lie ahead of me, and for which I have no previous experience!) Jim.
-
Hi Jürgen, Thanks for your response. When I began the build I intended to make it as close to the plans and drawings as possible, but there have been a few details and proceedures that I have found a little difficult so I opted for an alternative way of doing them. My intention for the ship is only to have it as a display item in my livingroom, and while I want it to be as accurate as possible I won't worry if there are a few things that were done a little differently. After all, it will be mostly myself who will be looking at it ! Jim.
-
Hi Jürgen, I've just found this thread and I'll be following it closely! I started building Leopard about 3 years ago and it still has a few years before it will be near completion, but following your thread will keep me motivated. I'm also using the Rif Winfield book and plans, and as you know the plans are at a scale of 1:96. I felt that scale was going to be a little too small for me to work with so I had the plans expanded to equate to a scale of 1:80. Did you have the plans expanded to get to 1:64, or are you just making the calculations as you go? I am in awe at your fabulous hook and butt wales! -- I tried to make these for my build but I found it was too much of a struggle, so I cheated and just went for top and butt wale planks! I'm also very impressed by your scarf jointed planks and other intricate joints that you have built in to the upper hull. This is my first real attempt at modelling anything like this, and when I started there were a few proceedures that I approached from different angles than I've seen here on the forum, but watching your build will help me stay closer to a more "proper way to build". Keep us up-to-date with photos of your build!