
HOLIDAY DONATION DRIVE - SUPPORT MSW - DO YOUR PART TO KEEP THIS GREAT FORUM GOING! (Only 36 donations so far out of 49,000 members - C'mon guys!)
×
madtatt
-
Posts
257 -
Joined
-
Last visited
Content Type
Profiles
Forums
Gallery
Events
Everything posted by madtatt
-
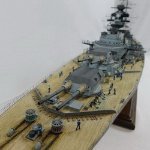
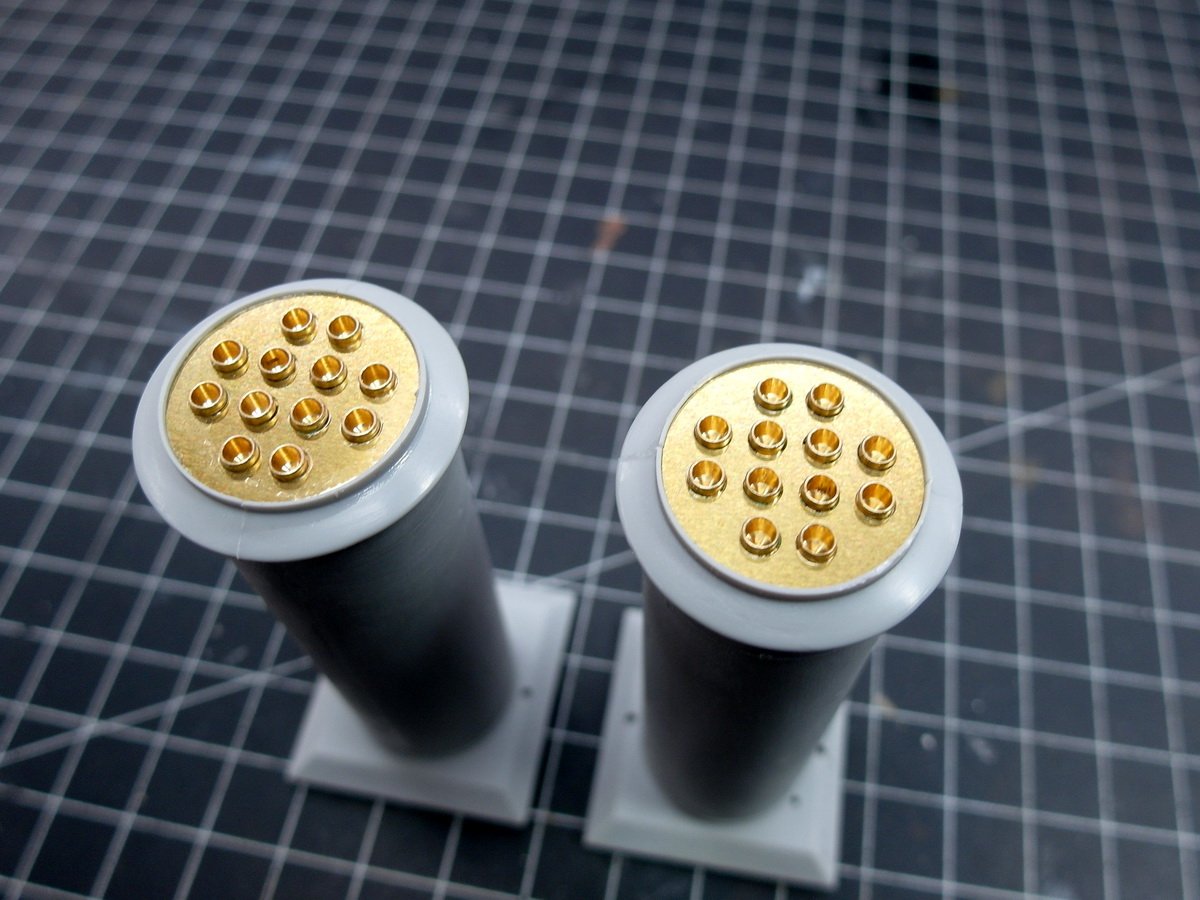
 Hello dear forum community. Today I just want to share a small step. The reason: Micro Master’s boats look absolutely fantastic when painted, and I don’t want to keep that from you. So here are the two of them, piggybacking. A nice duo. When painted you can see all the fine details. The extra expense was definitely worth it.
- 193 replies
-
- 9
-

-

-
- Russo-Japanese War
- Mikasa
- (and 2 more)
-
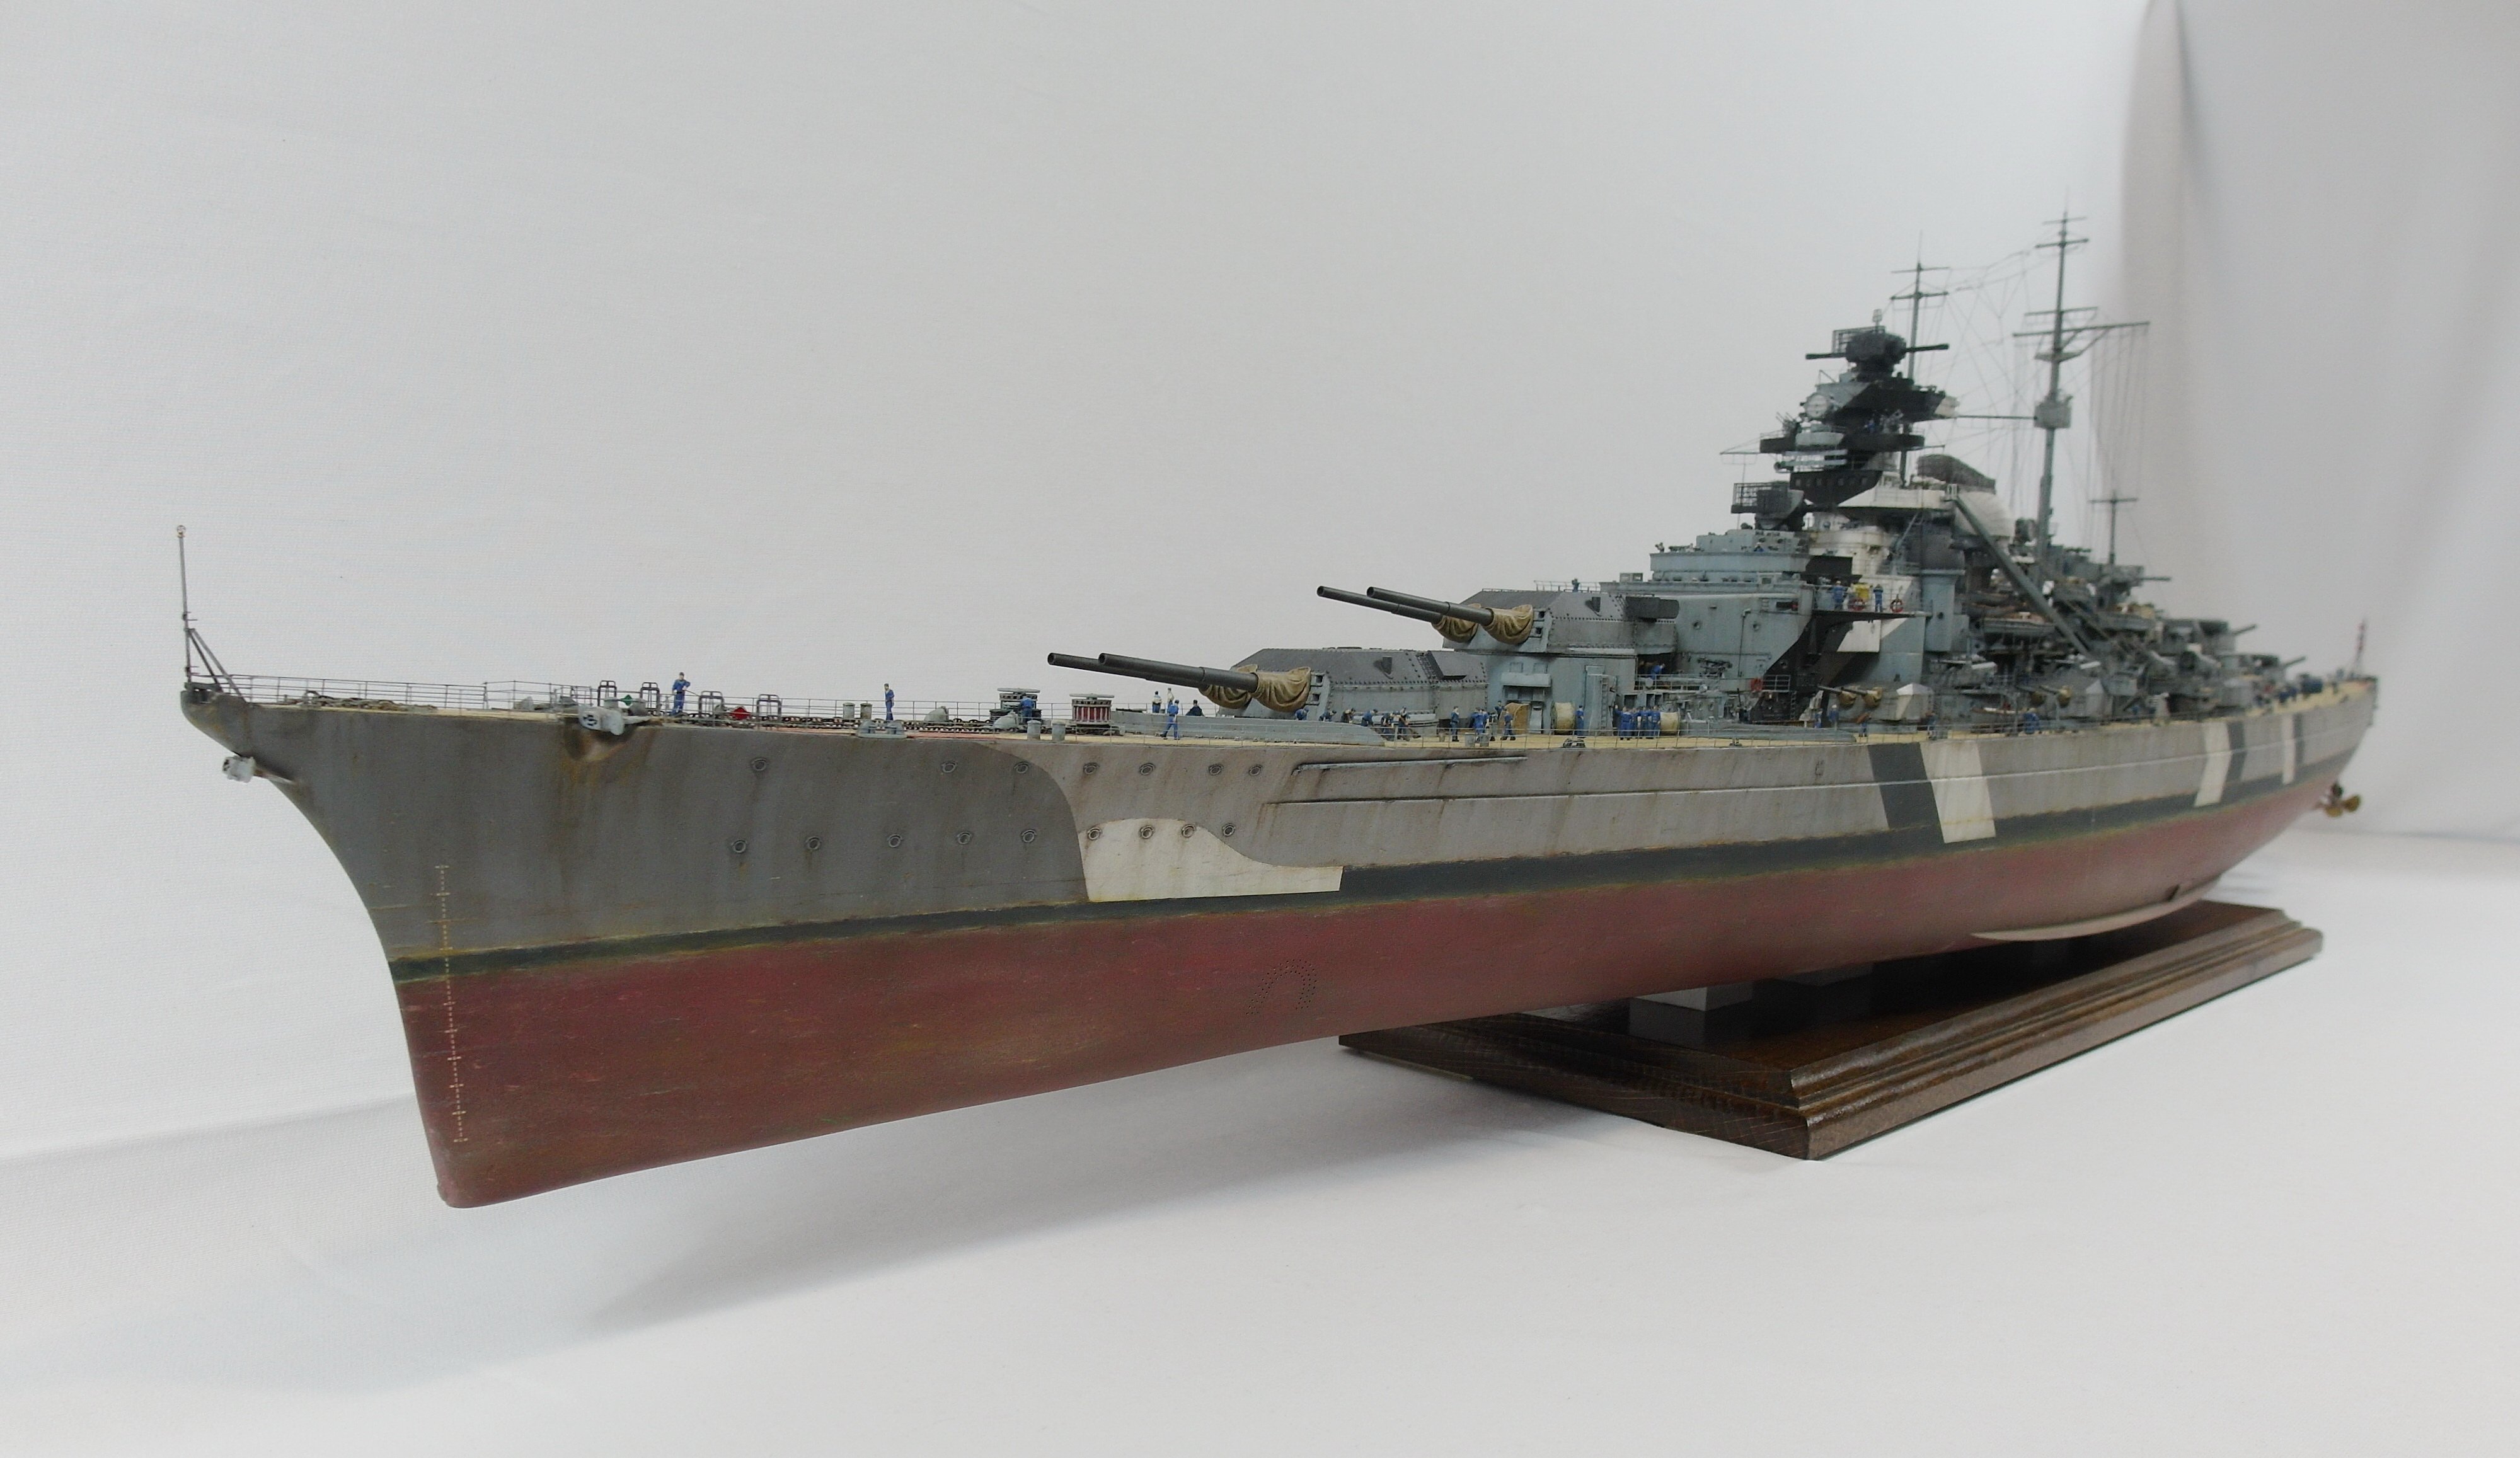
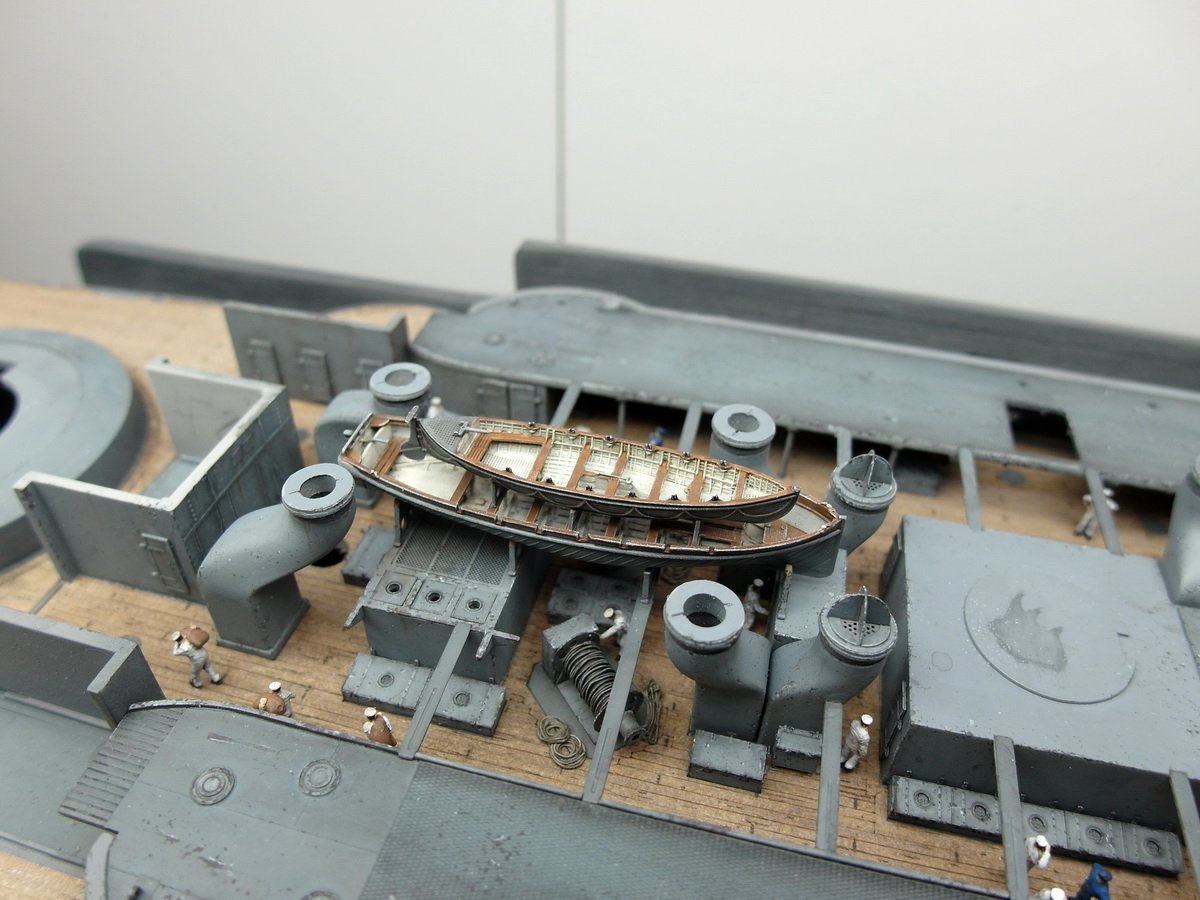
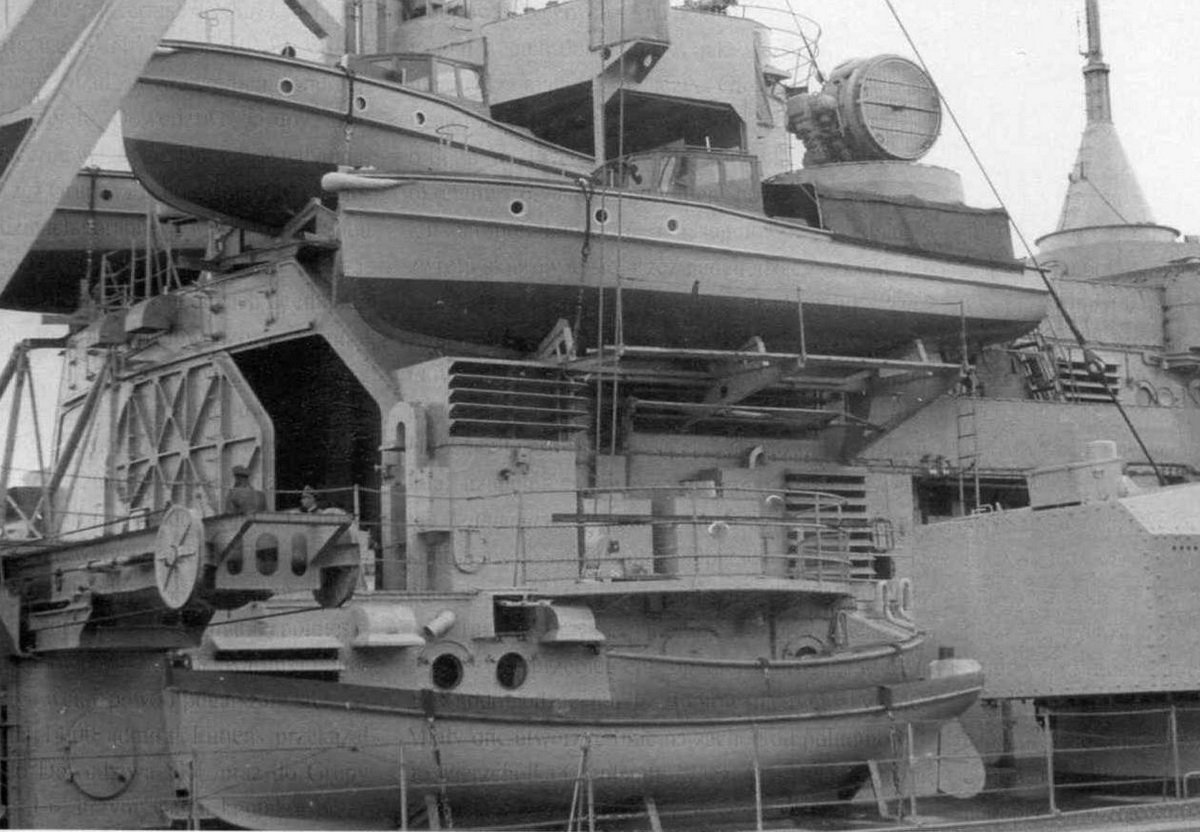
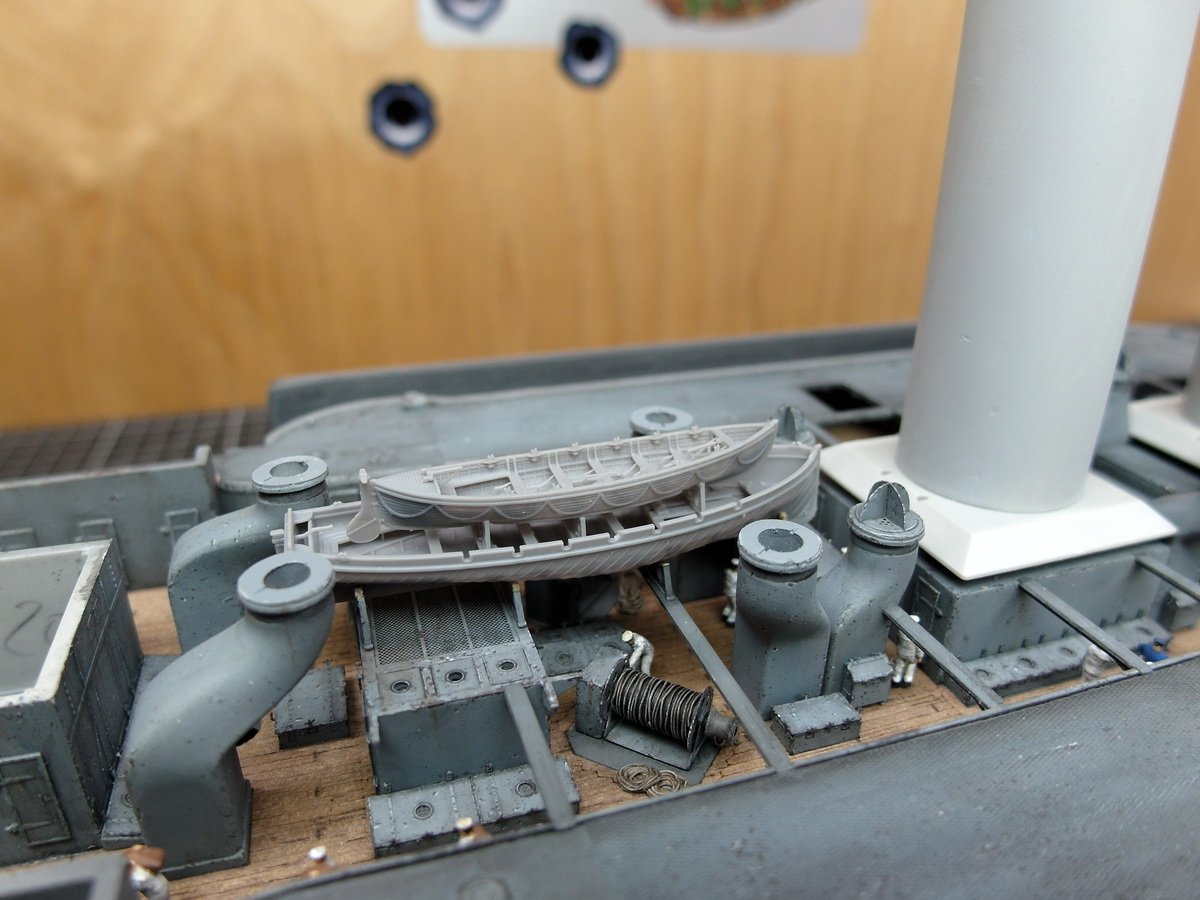
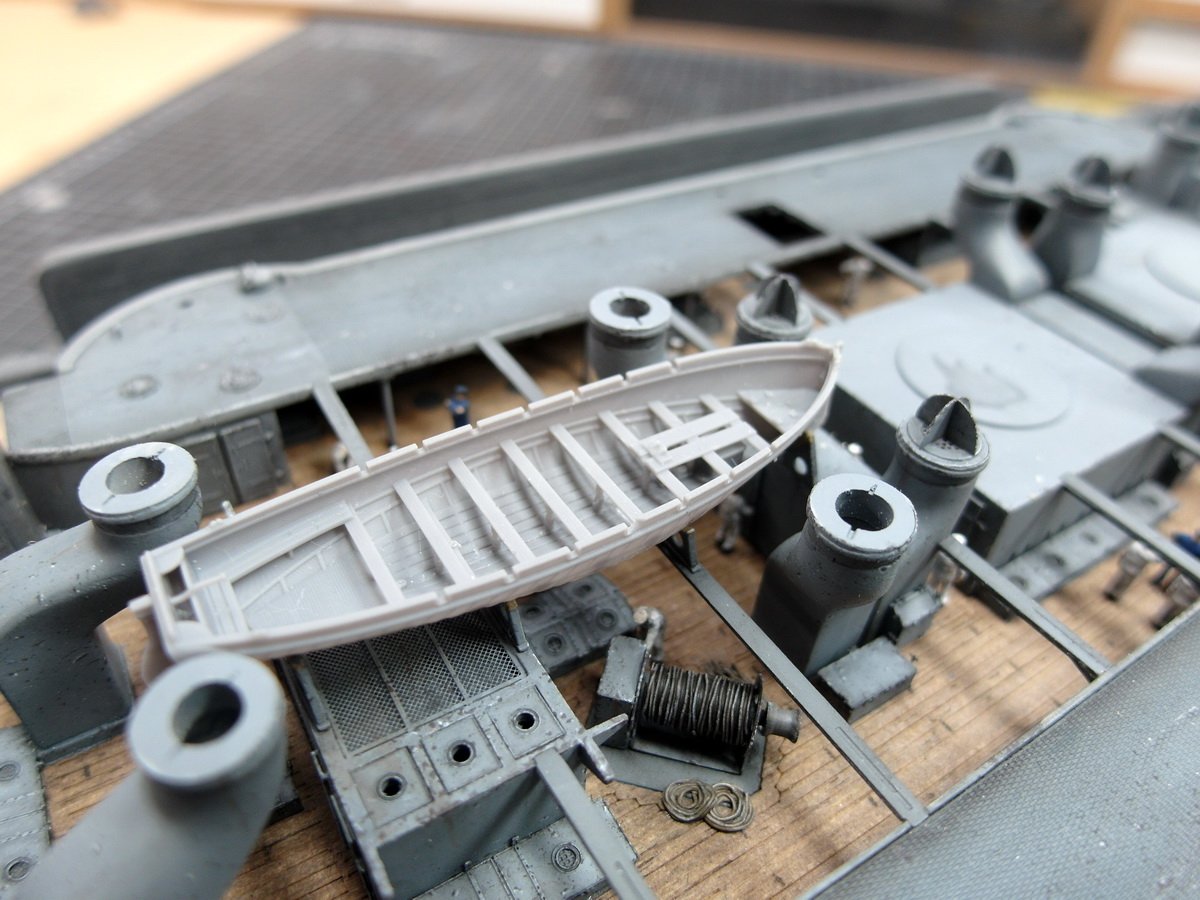
I did a little research in my archives and came across this picture of the Bismarck’s tenders amidships. I then placed the rescue boat on its cradles and positioned it in the pinnace. Liked it.
- 193 replies
-
- 6
-
-
- Russo-Japanese War
- Mikasa
- (and 2 more)
-
Good idea, Chris. However, there's still a small boat on cradles in the pinnace.
- 193 replies
-
- 1
-
-
- Russo-Japanese War
- Mikasa
- (and 2 more)
-
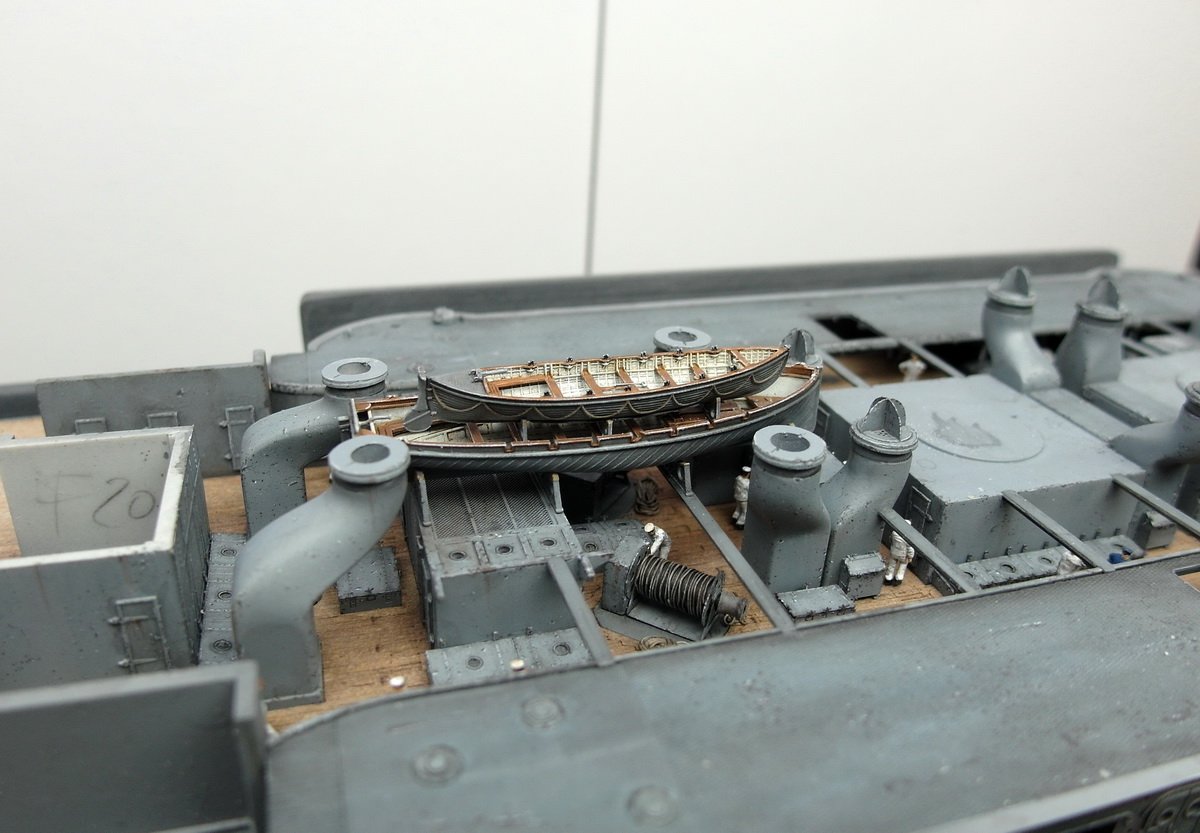
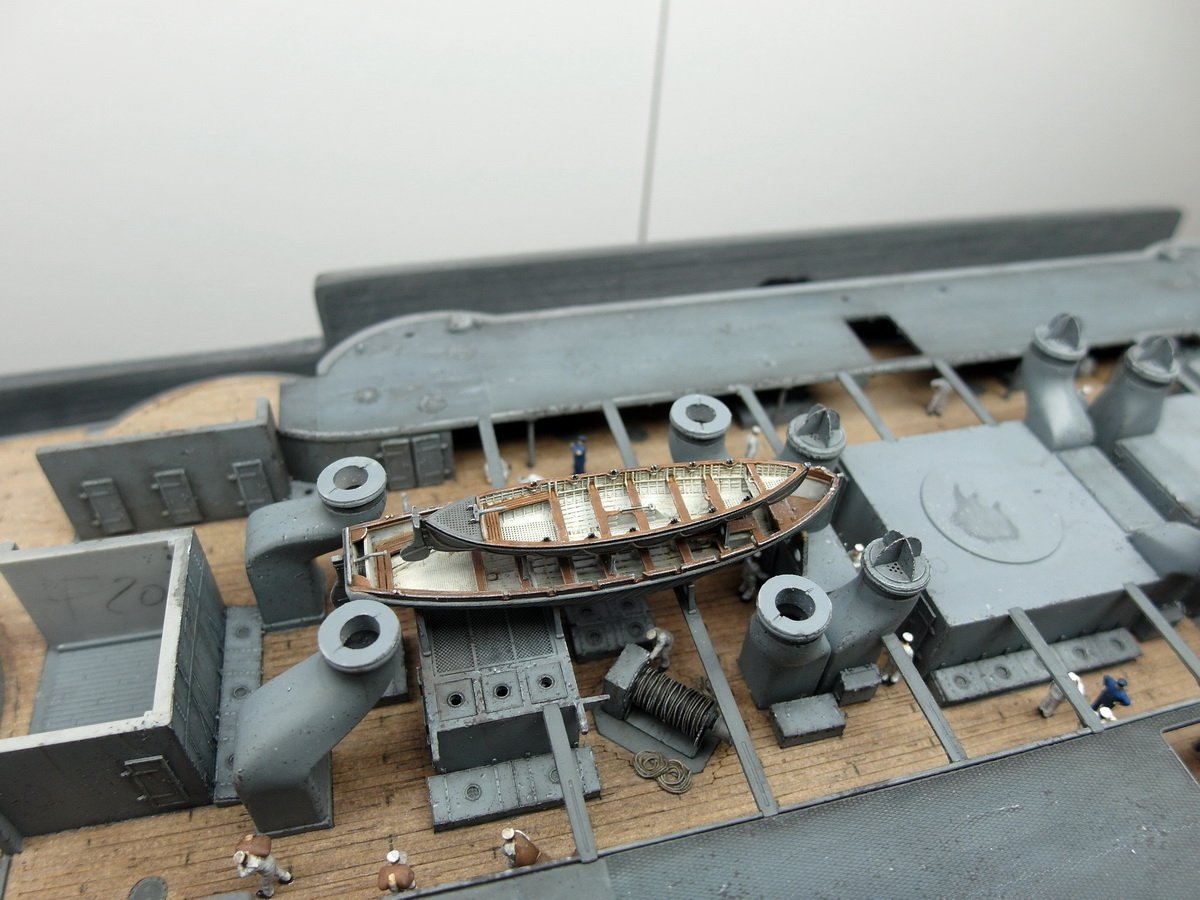
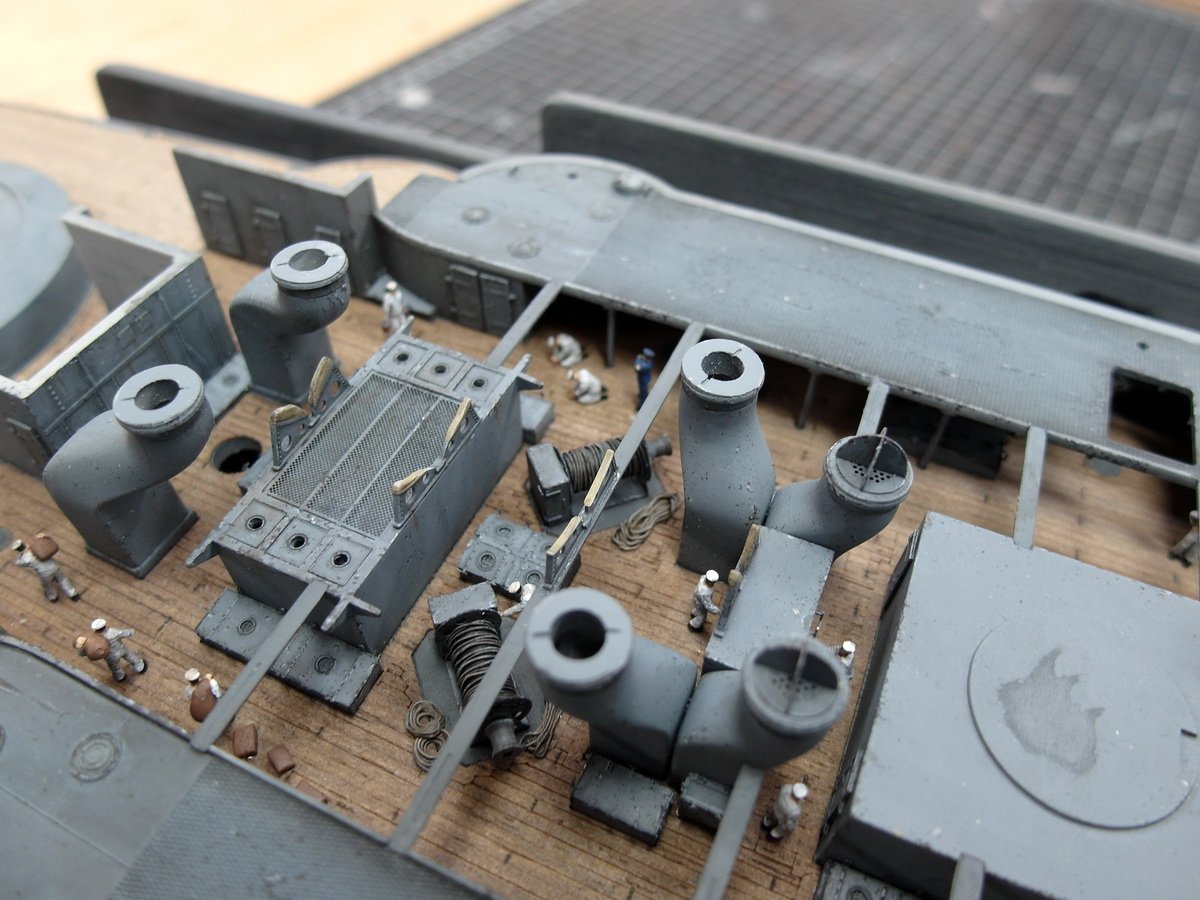
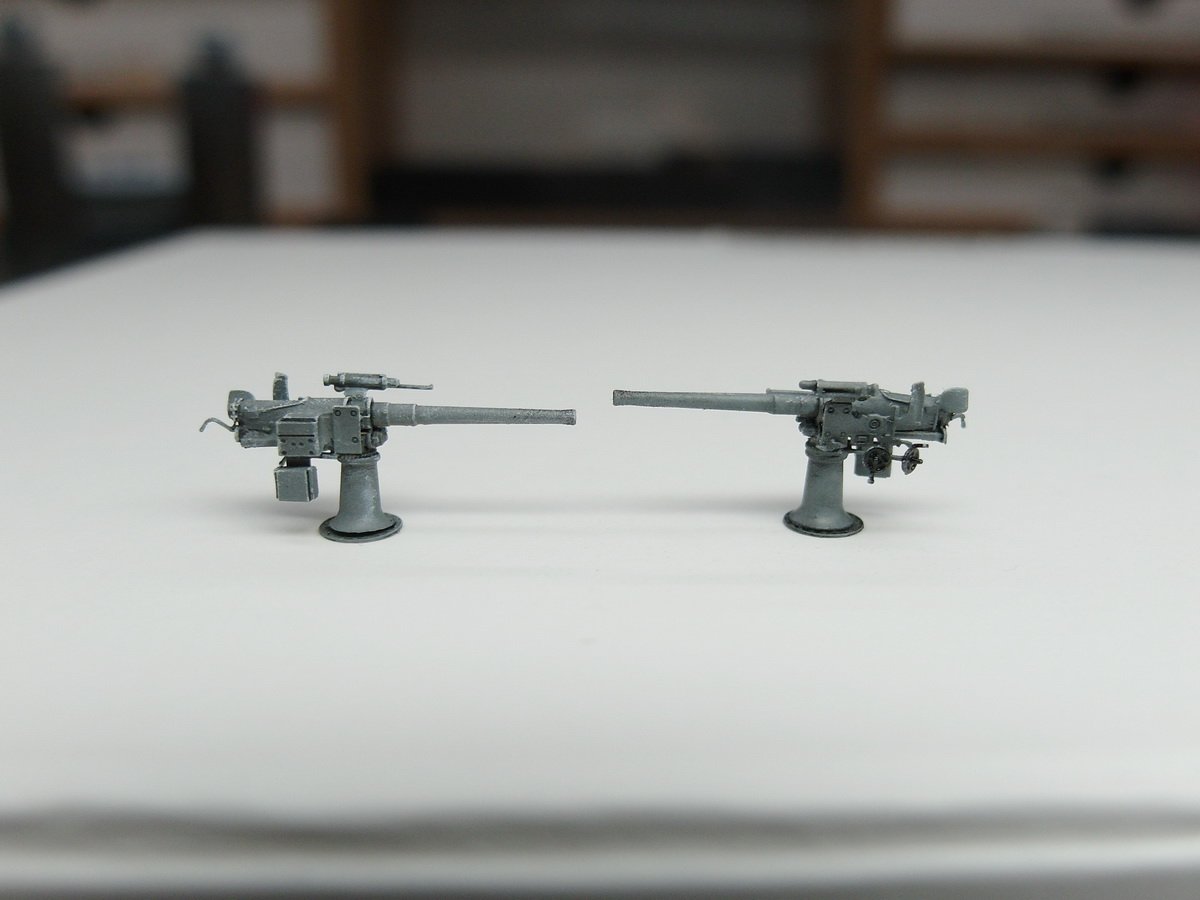
Thank you, Mike. Yes, that's true. I had the Northstar figures for my Bismarck, which were already good. But the ION ones are even better. A new little update. Continuing with the preparations for the next internal structures. The MK set also clearly wins the race for the chimney stacks over the Pontos set. The brass sleeves look excellent. Here too, Pontos had no improvement to offer for the original component. I’m amazed at how well the MK set is performing. The extra expense was definitely worth it for me. The fourth cradle for the pinnace has also been adapted and installed. And so the boat can take its place. Which brings me to my next dilemma. Micro Master’s boats look so incredibly good that I’m considering leaving the boat cover off. 🤔

- 193 replies
-
- 9
-
-
-
- Russo-Japanese War
- Mikasa
- (and 2 more)
-
It's amazing how much effort you're putting in. But it will look fantastic when it's finished. 👍
-
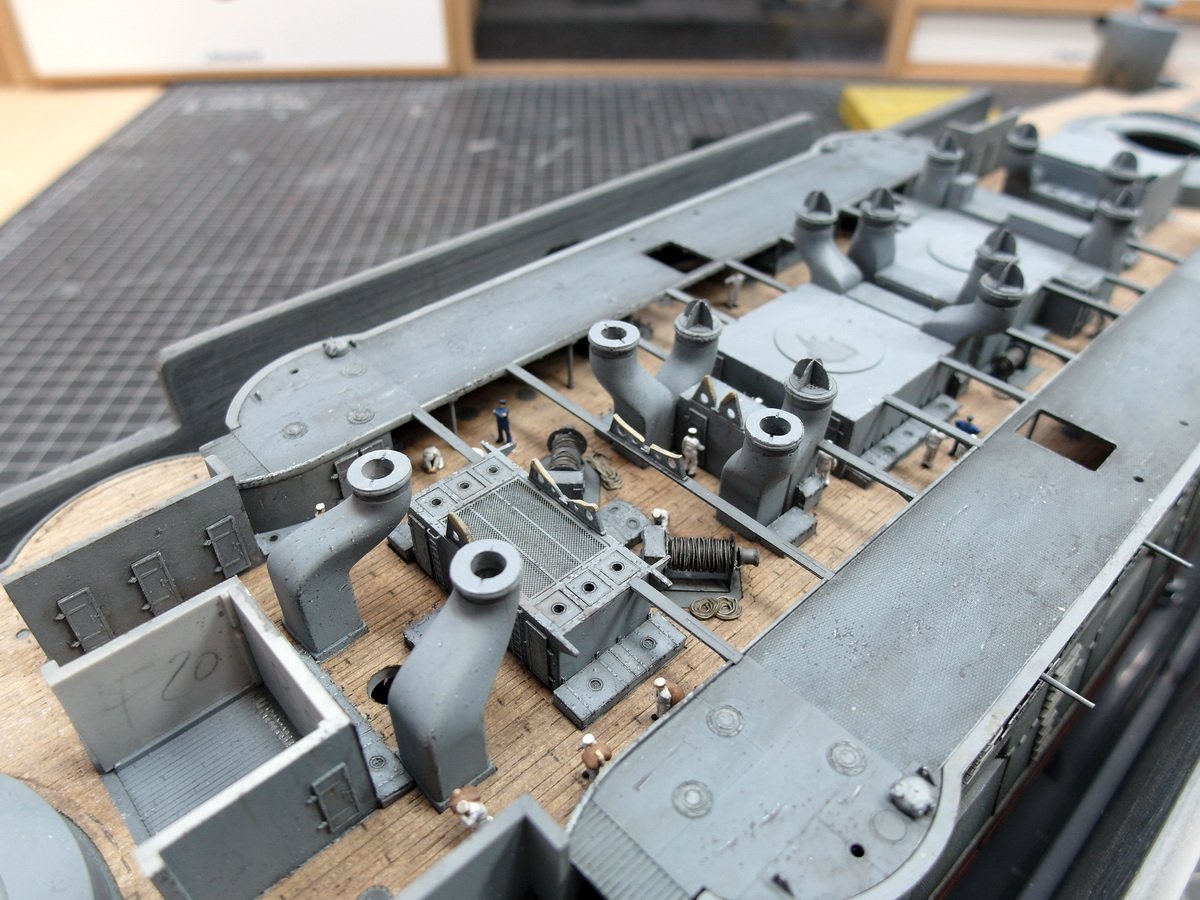
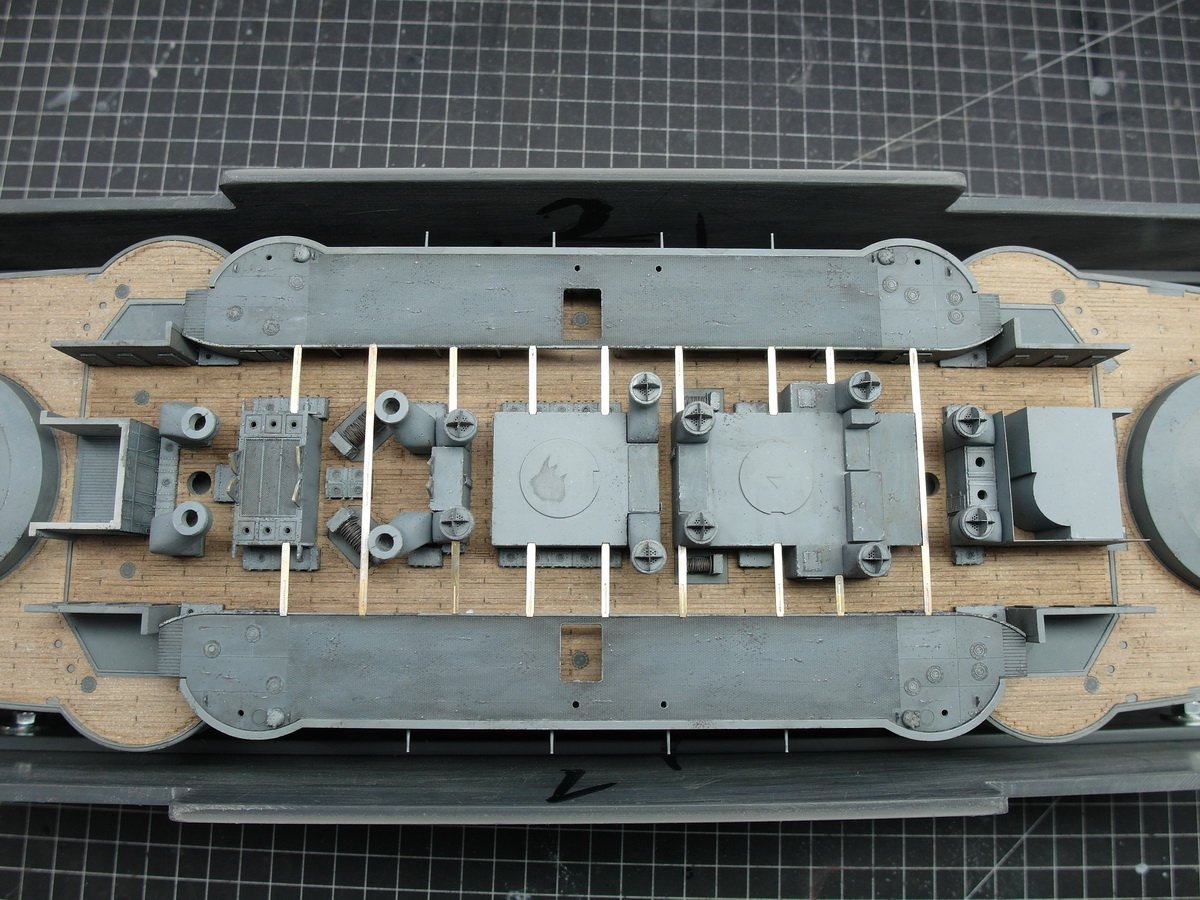
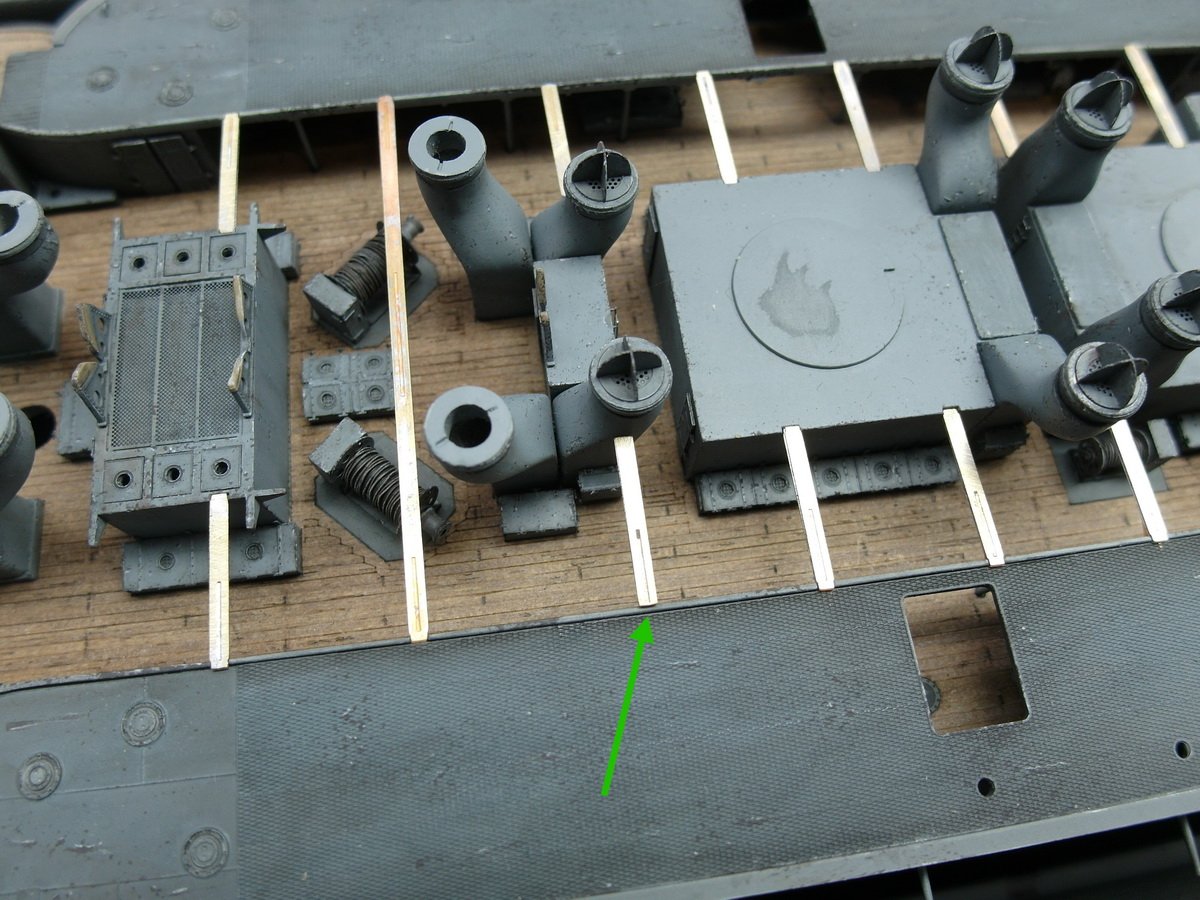
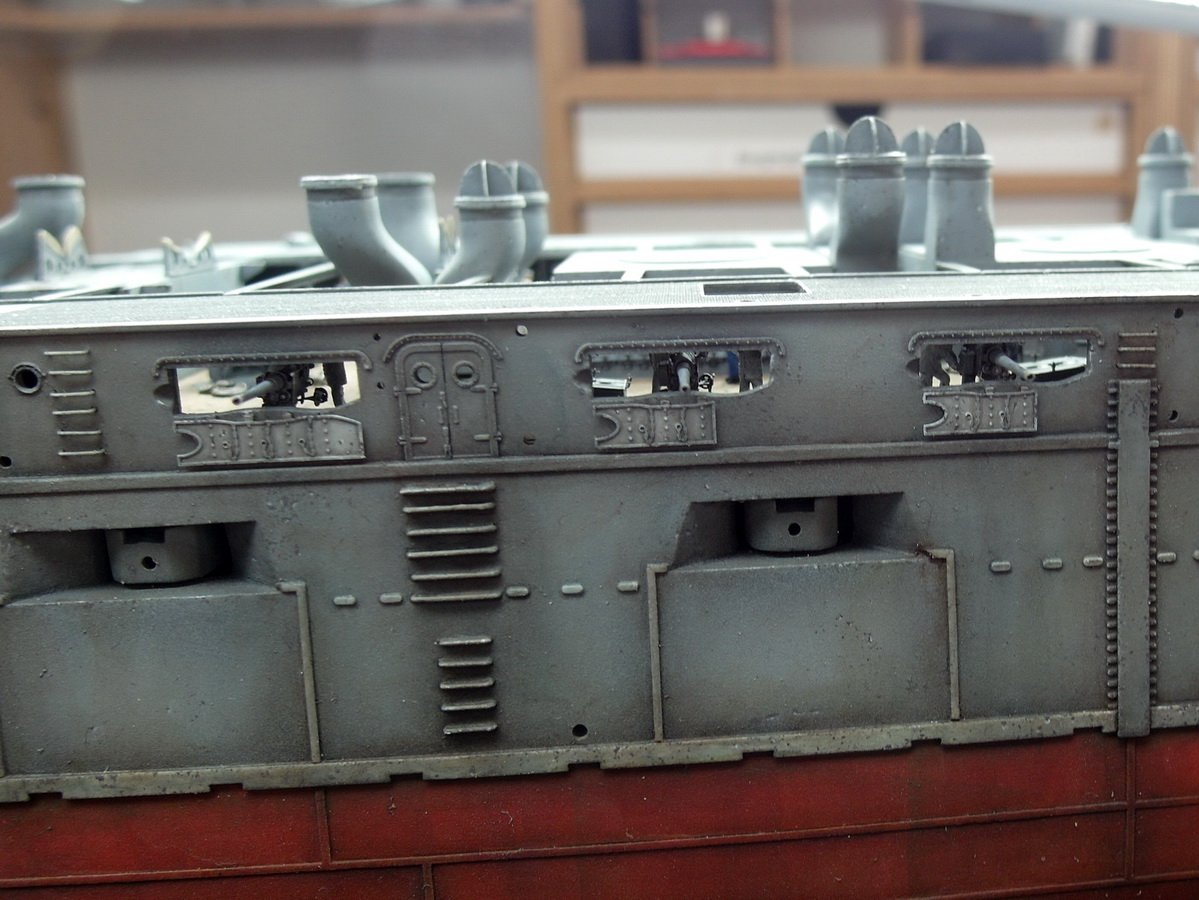
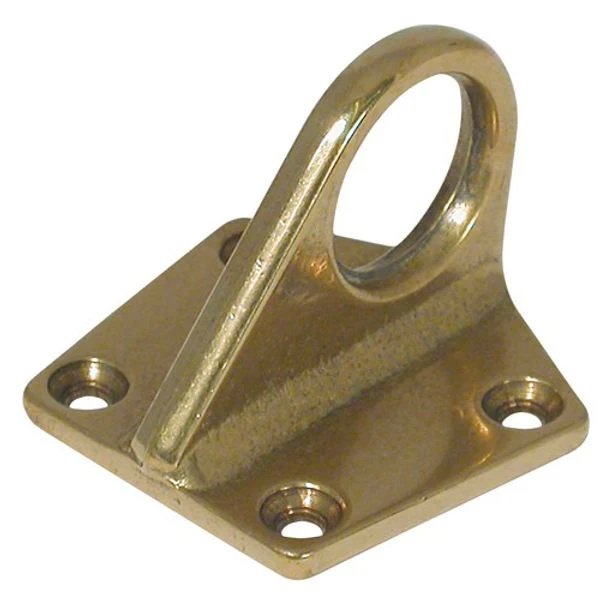
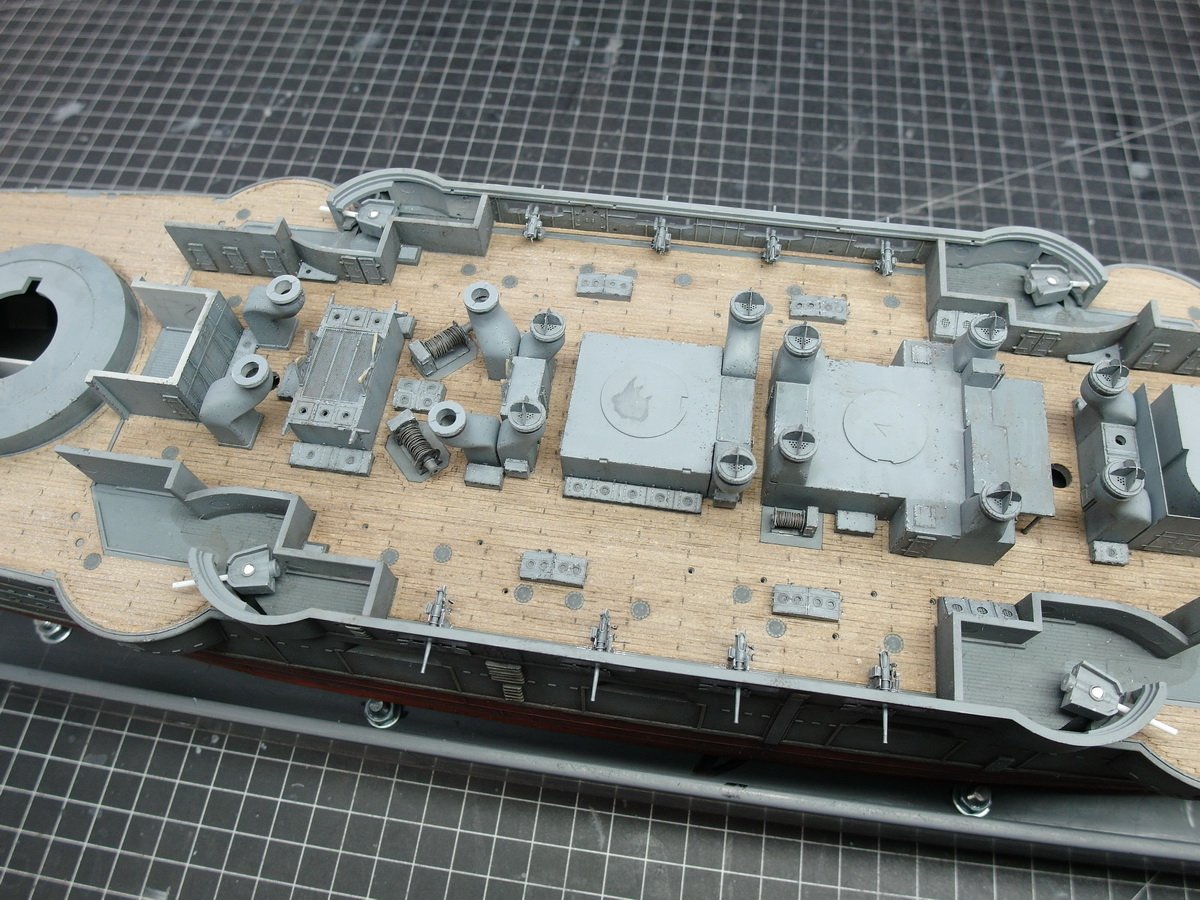
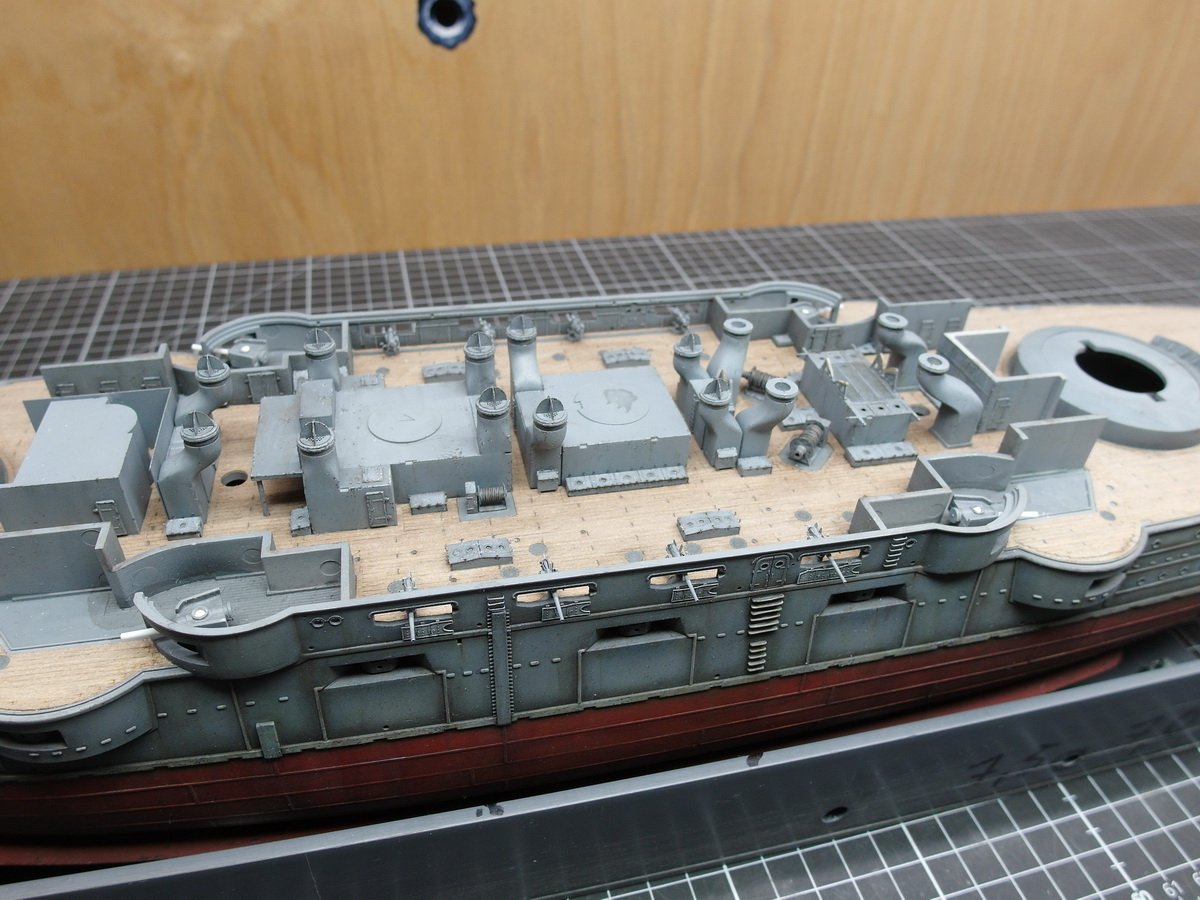
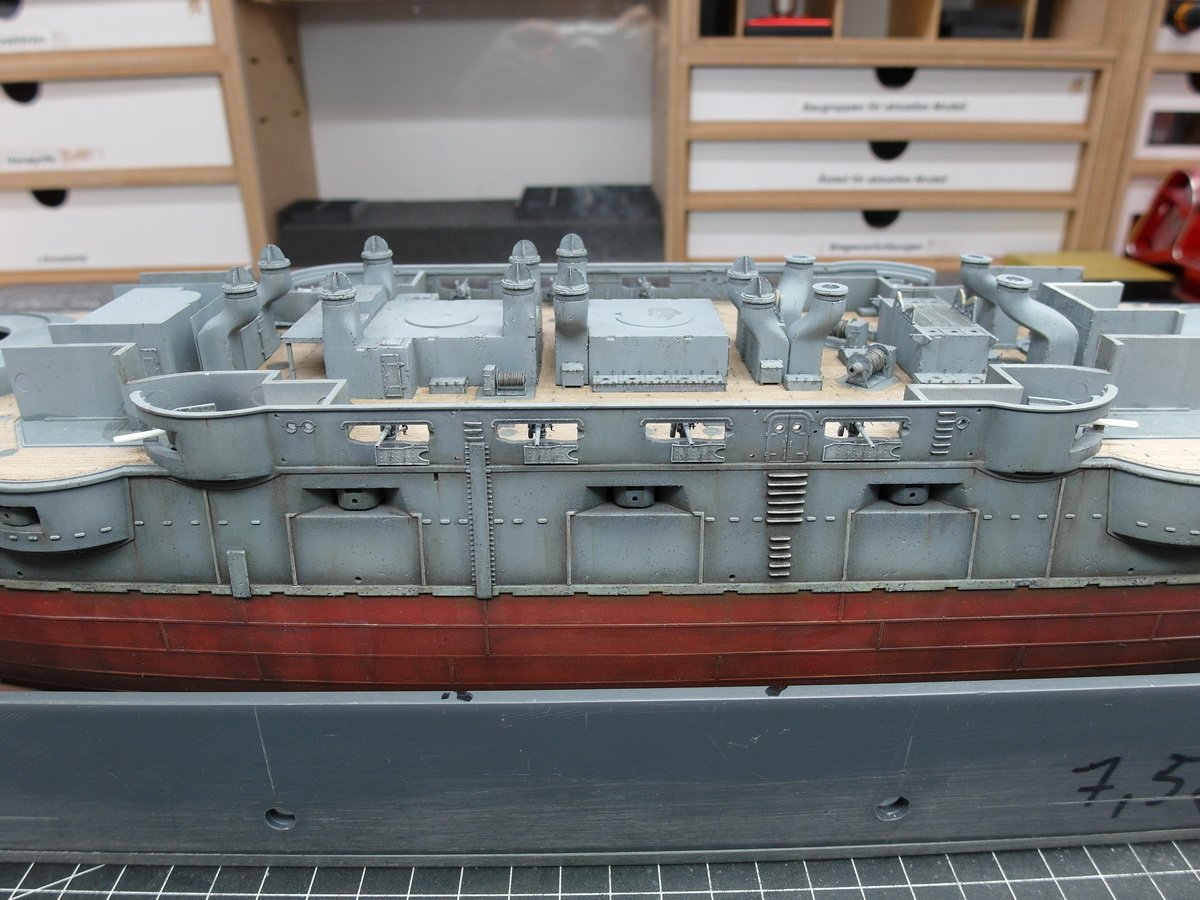
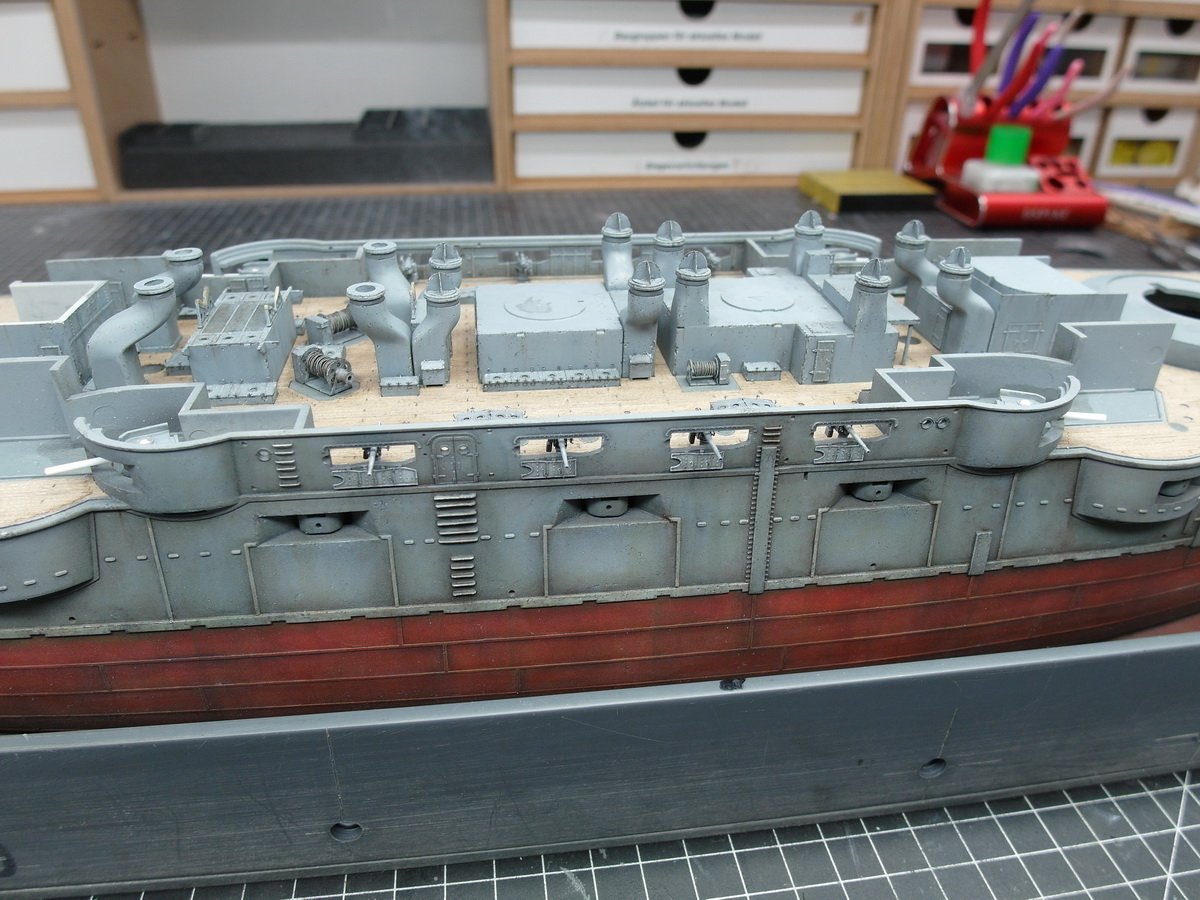
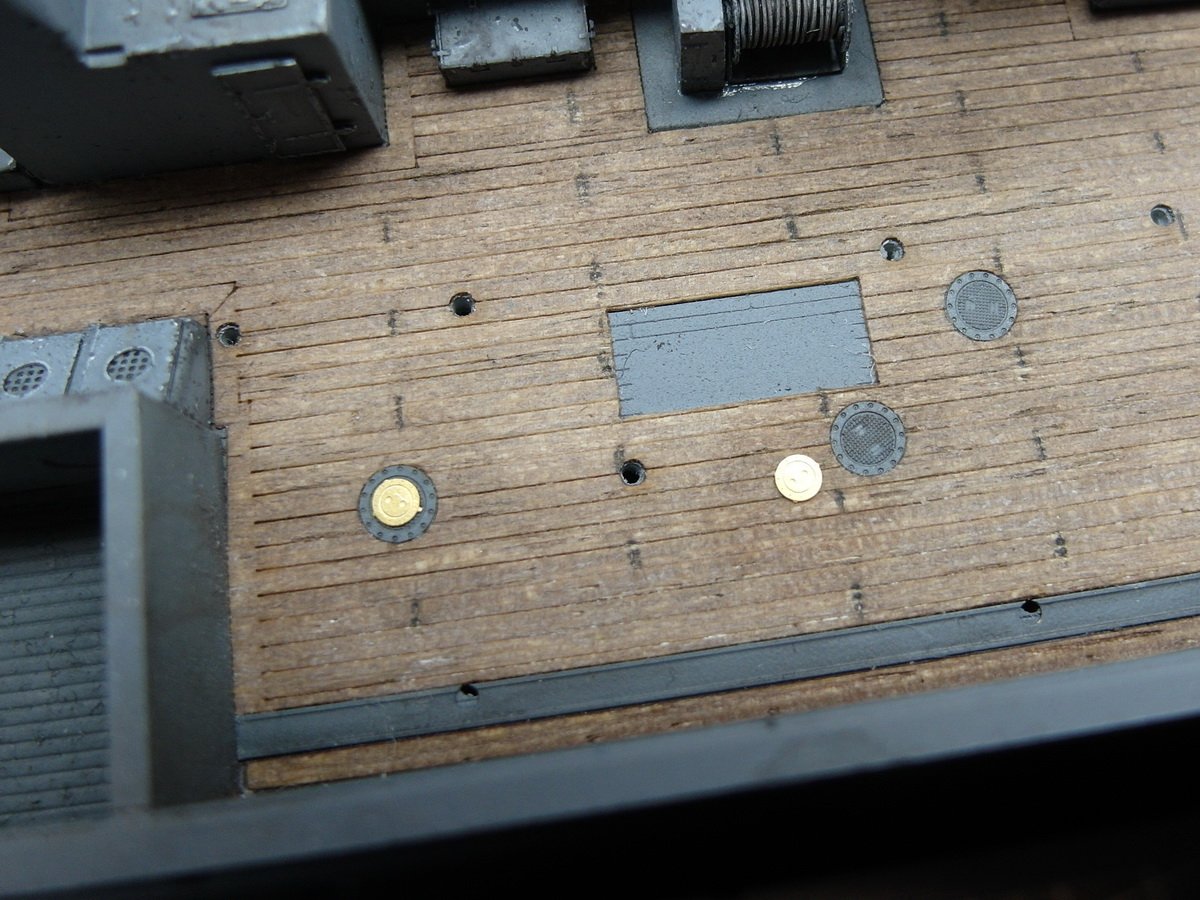
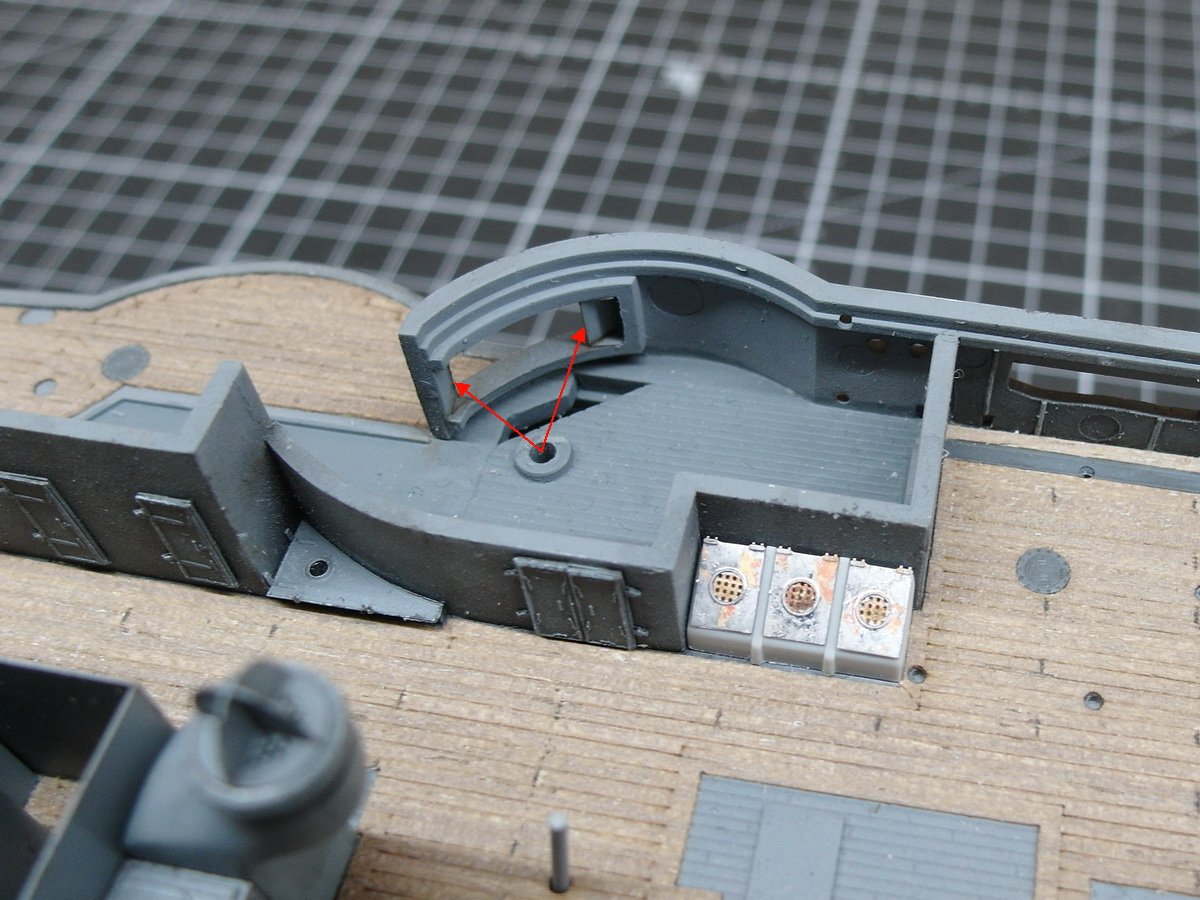
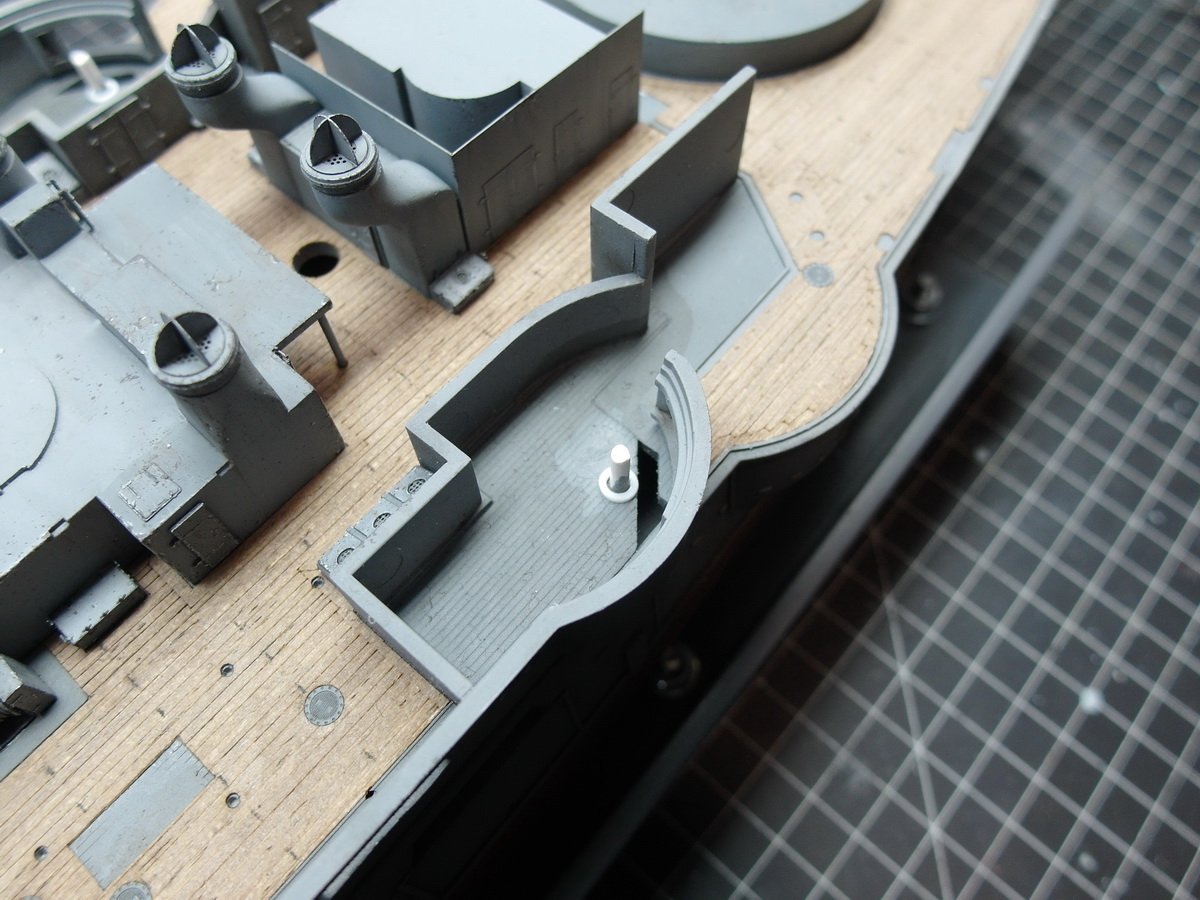
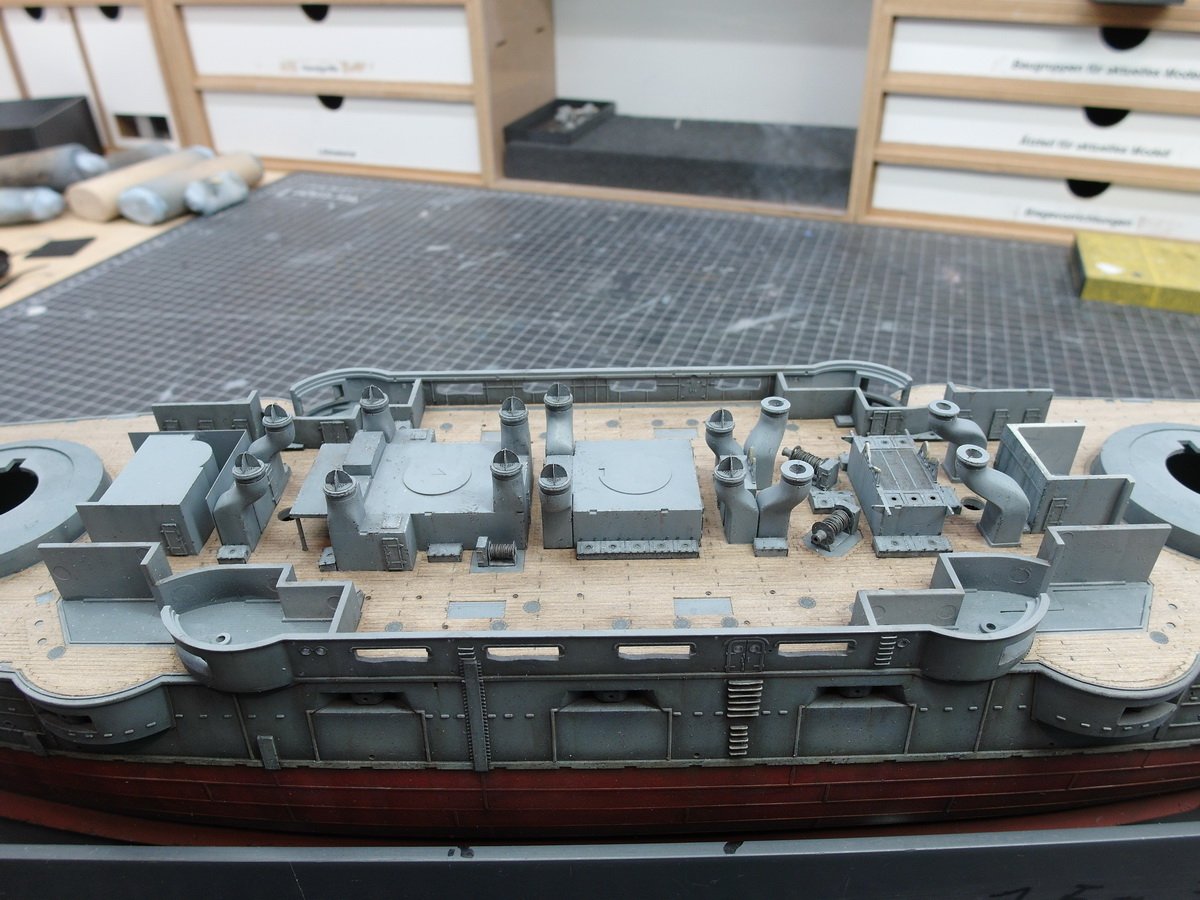
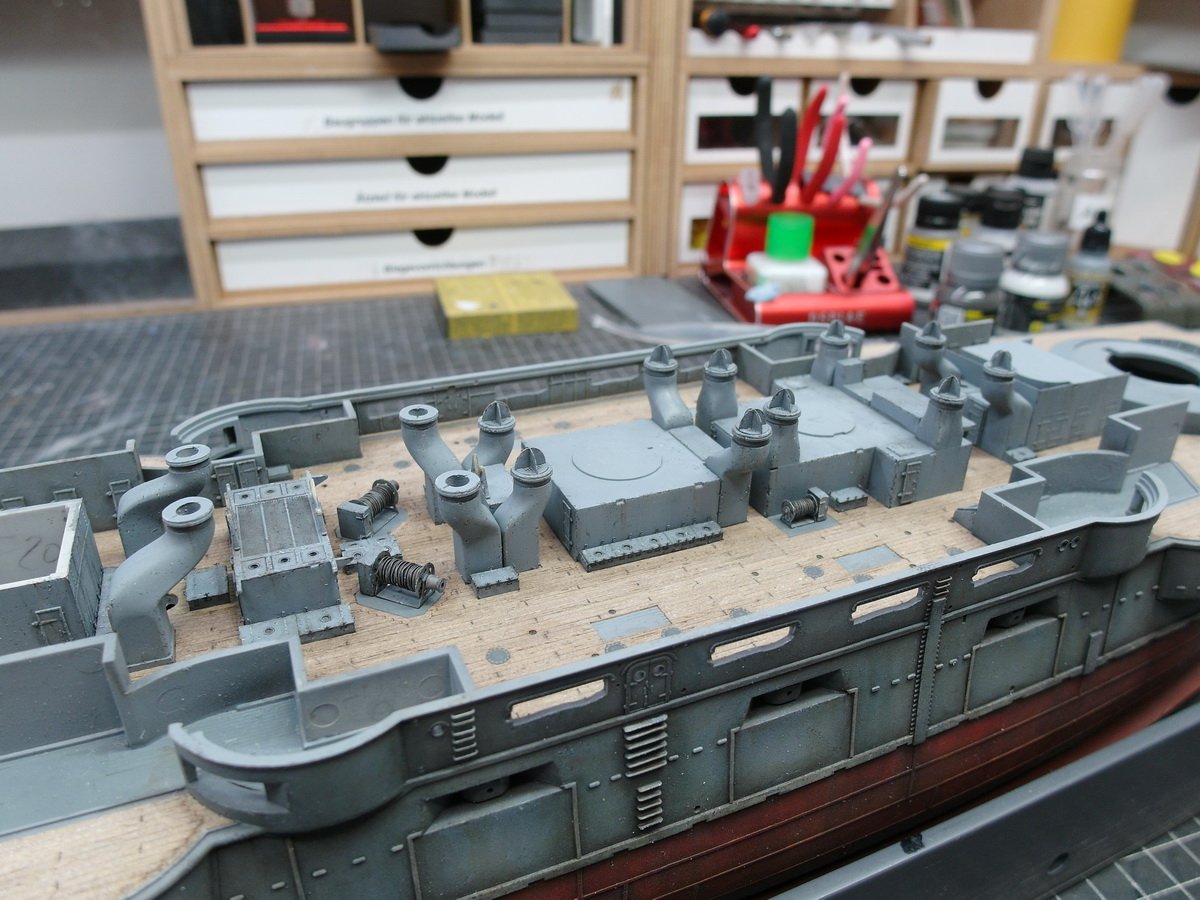
Hello Jeff. That's how I always work on boats, always from the inside out. It served me well on the Bismarck, too. I'll take a slightly different approach to the funnel rigging and use deck eyes on the boat deck. I don't know the technical term in English, but they look like this. And by the way, your build report is my standard reference when building my Mikasa.😉 Let’s move on to the support structures that connect the boat deck and the internal superstructure. I soldered these to ensure maximum strength for these delicate T-beams. After testing it, everything seems to be fine. Only this connection needs to be slightly adjusted. It’s only provided by Pontos; it’s simply missing from the original kit, and it would create a large gap. Therefore, there’s no offset for it in the model, and the length of the component needs to be exactly right to ensure proper attachment. New sailors have taken up their duties. Get to work with them immediately. Spread nicely on the deck. Provisions have to go into the belly of the ship and the first sailors have to scrub the deck under the supervision of an officer. A sailor climbs the ladder to search for the missing funnel. Afterwards, I opened the dry dock again to see how it all looked through the gun ports. I think it looks very lively.
- 193 replies
-
- 8
-
-
-
- Russo-Japanese War
- Mikasa
- (and 2 more)
-
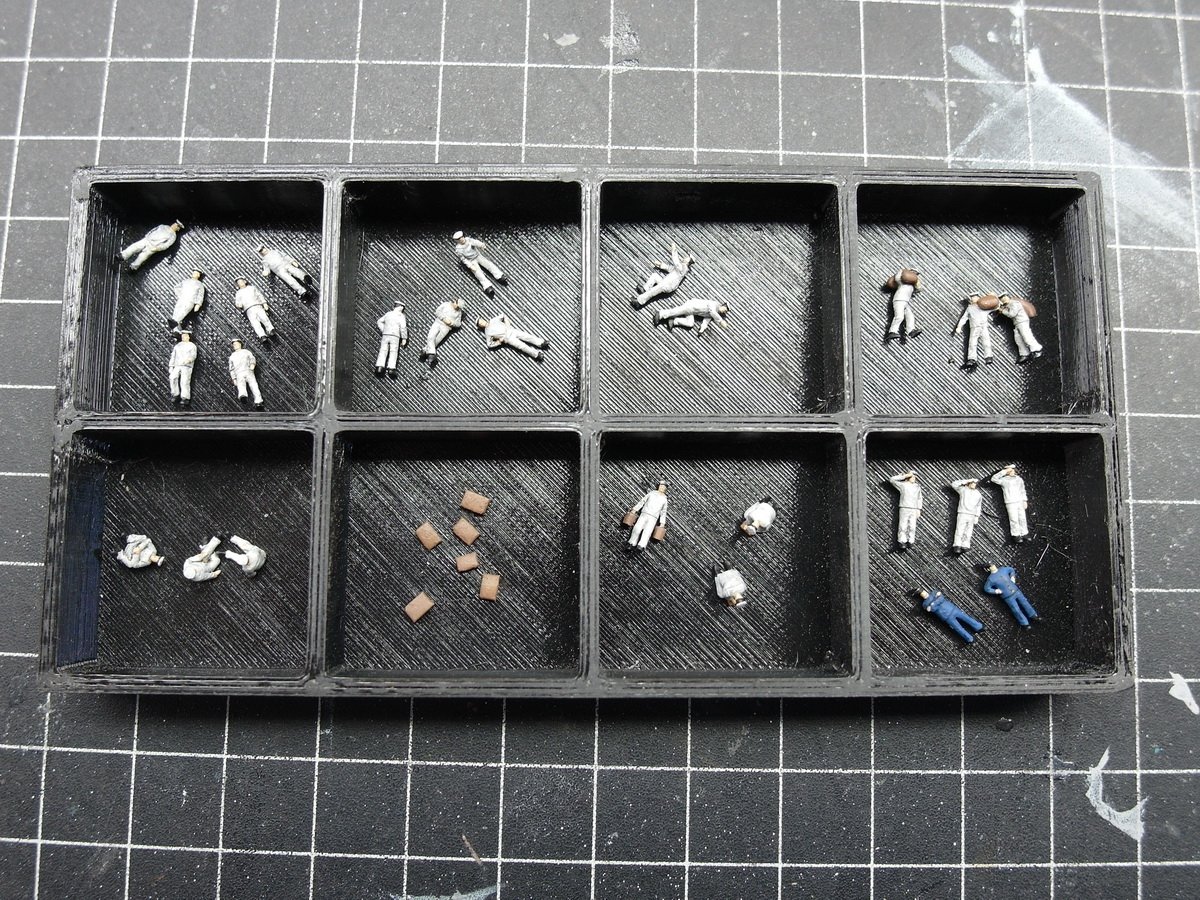
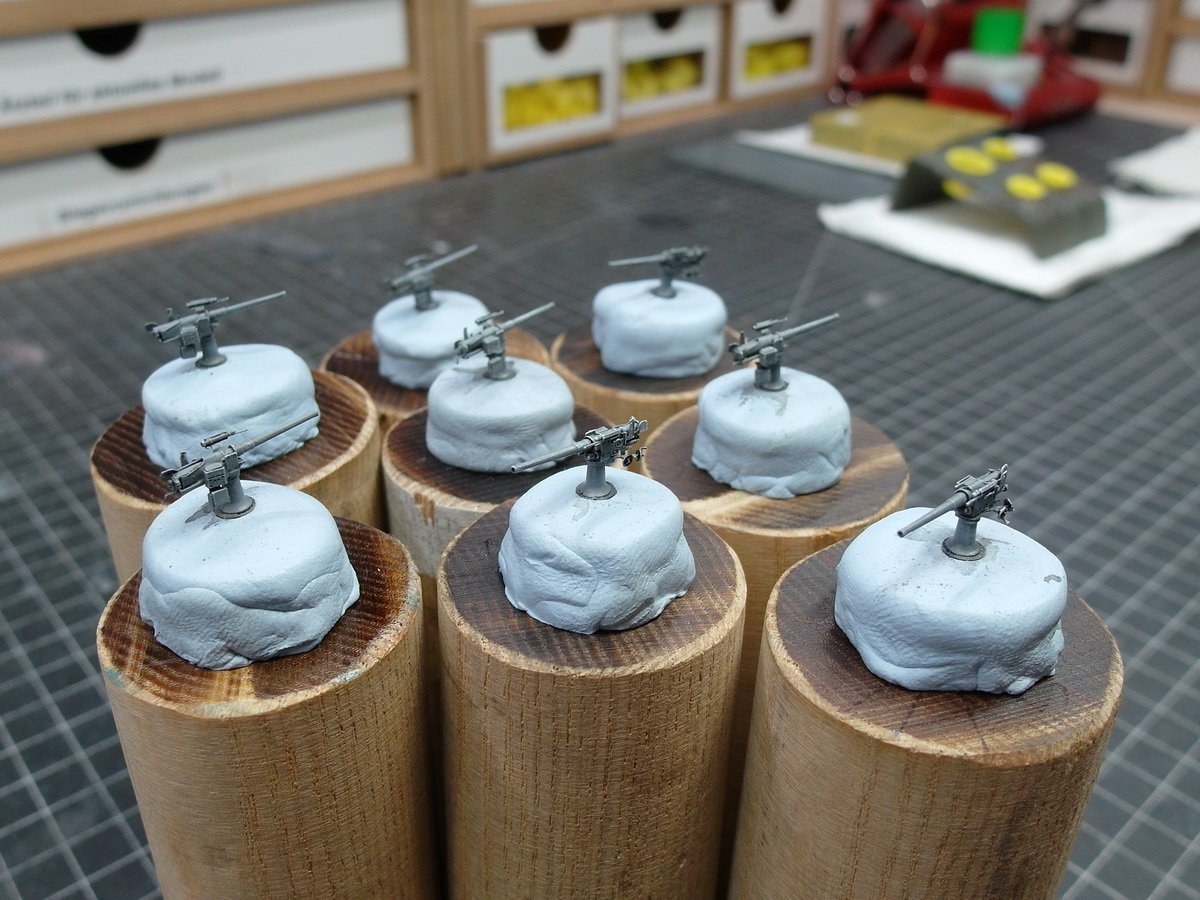
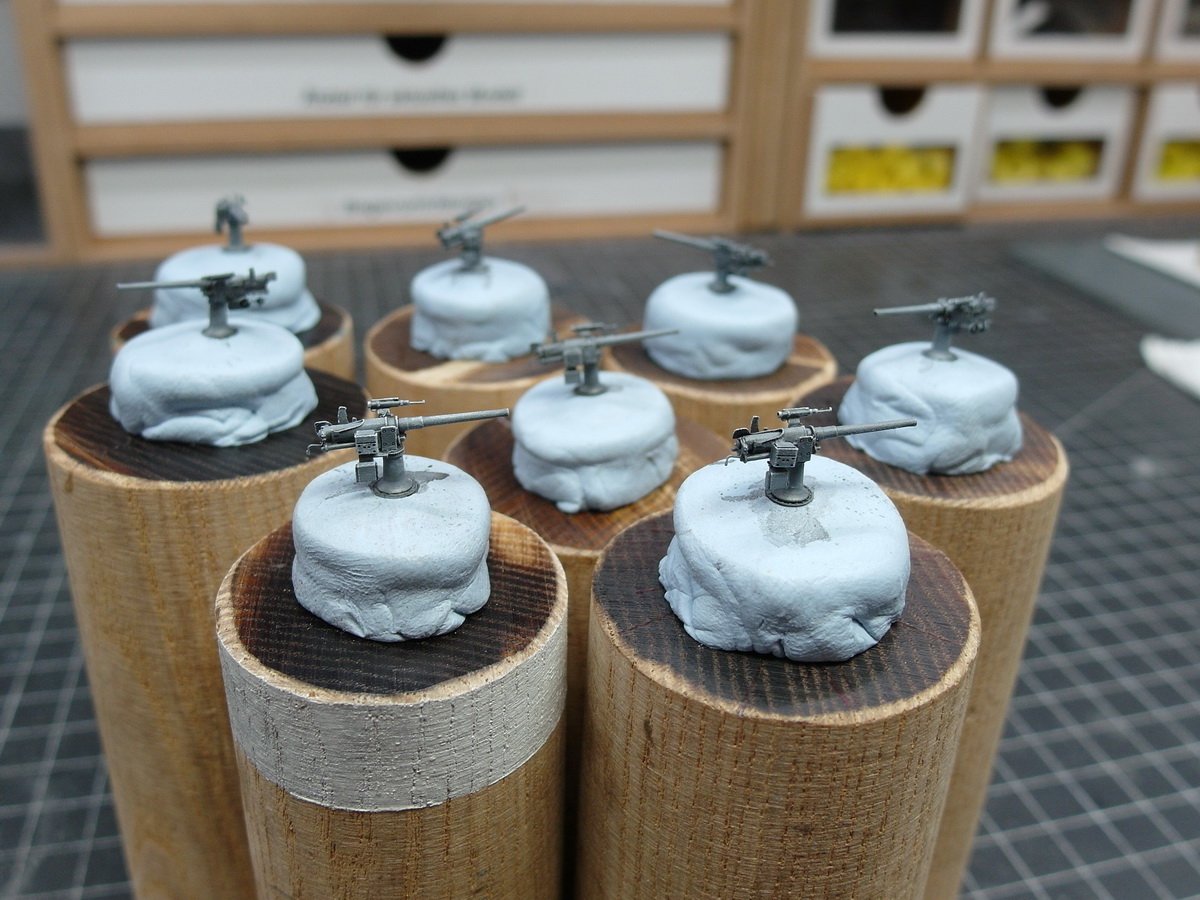
On to the next construction phase. The plan is to breathe a little life into the deck in the form of a crew. And this is where the next 3D print comes into play. This time I’m using the figures from ION Model, which I won in a competition with my Bismarck. After an initial inspection, the quality is excellent. Then I started looking for photos showing IJN sailors in their uniforms, like the following image: Wow, much easier to paint than the DKM guys. I had a few leftover Kriegsmarine sailors and wanted to use them to save on figures. The first ones were supposed to go behind the gun ports, where they’re almost invisible. So I shaved his head and punched out flat caps from styrene. A small dot of superglue on the top hair, and the Japanese sailor is complete. Painted and ready to go on deck. To the cannon sailors, ahrrrrg… Fire free… And so the lid can go on. And the deck portside Aged and found to be good You don’t see much of the figures, but that’s how it’s supposed to be. The hint of the sailors at work below deck adds depth to the whole thing.


- 193 replies
-
- 12
-
-
-
- Russo-Japanese War
- Mikasa
- (and 2 more)
-
Another litle update. To protect my model from further harm, I wrapped it up nicely. This should protect it pretty well from any carelessness on my part. 🙄
- 193 replies
-
- 7
-
-
- Russo-Japanese War
- Mikasa
- (and 2 more)
-
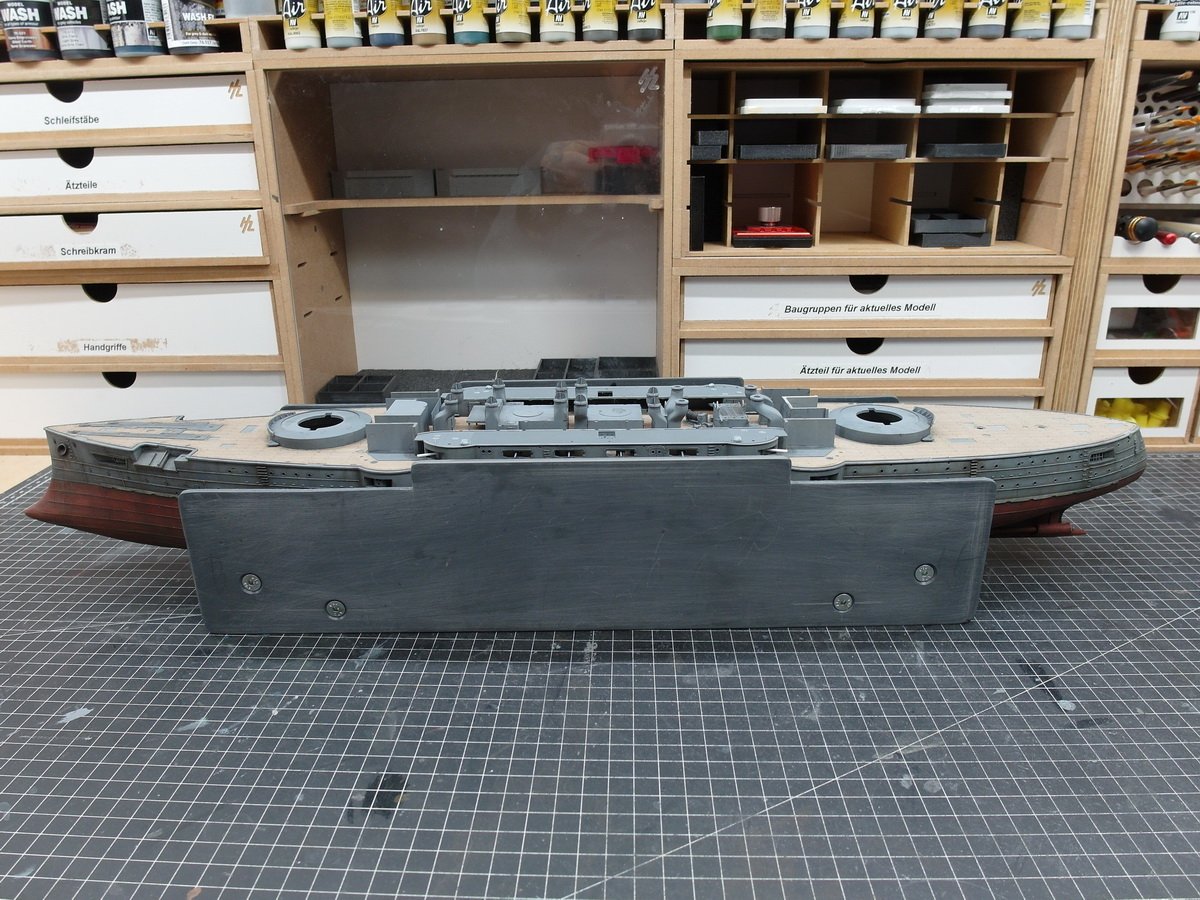
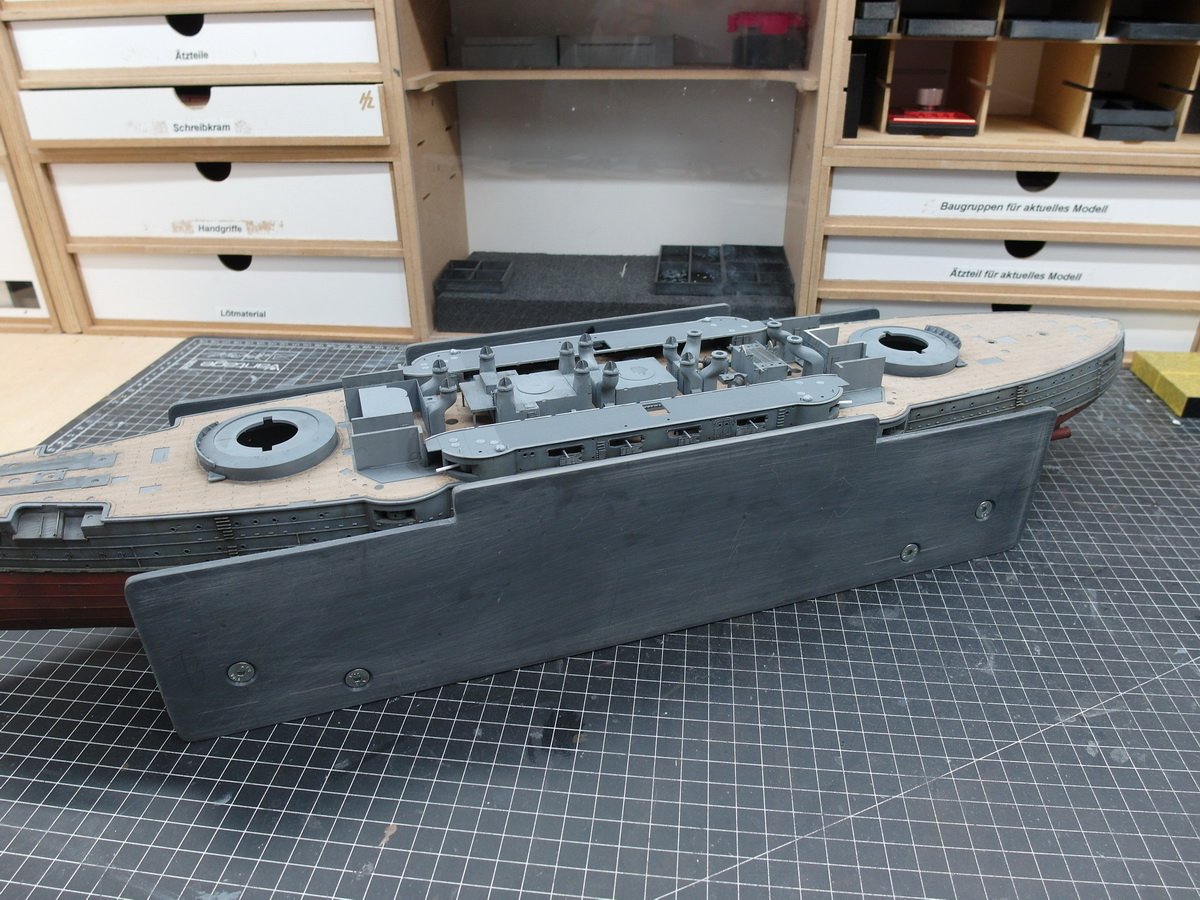
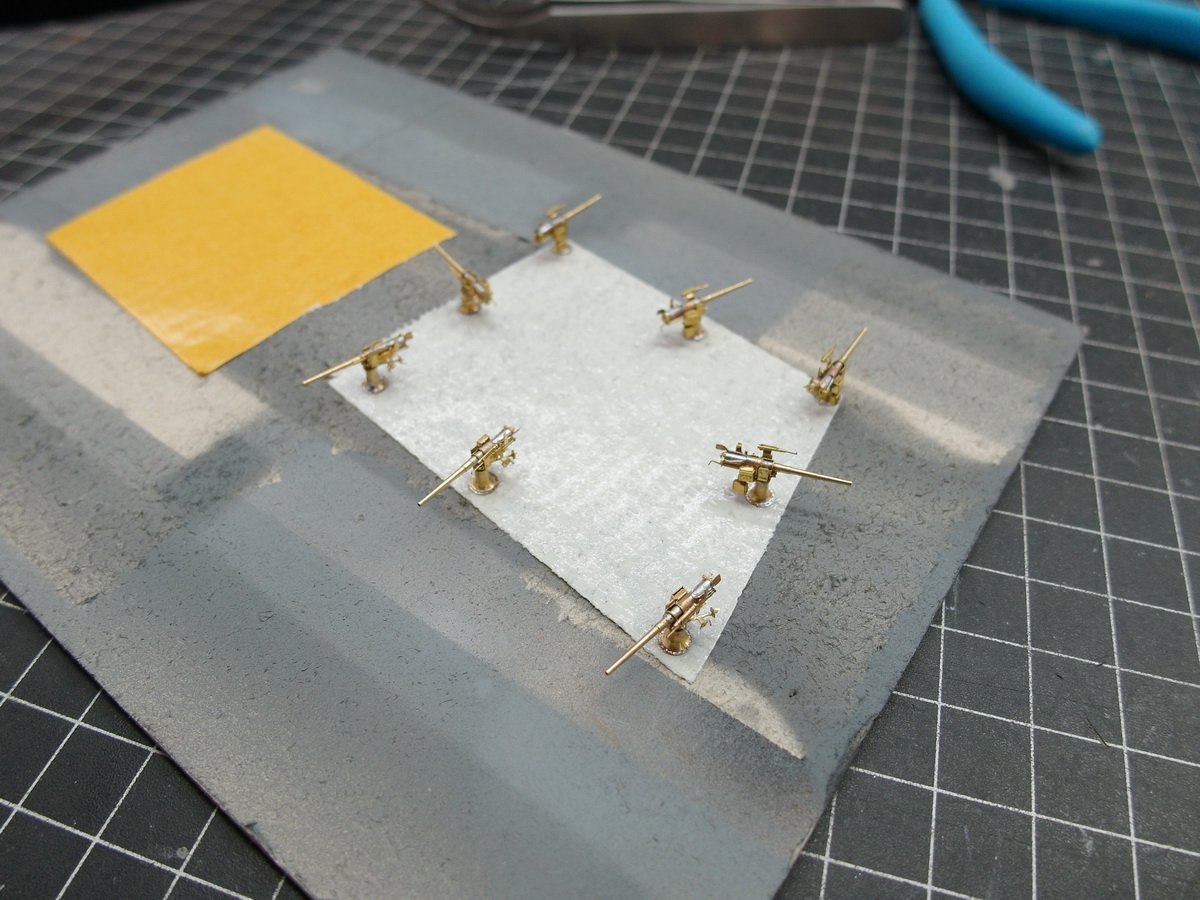
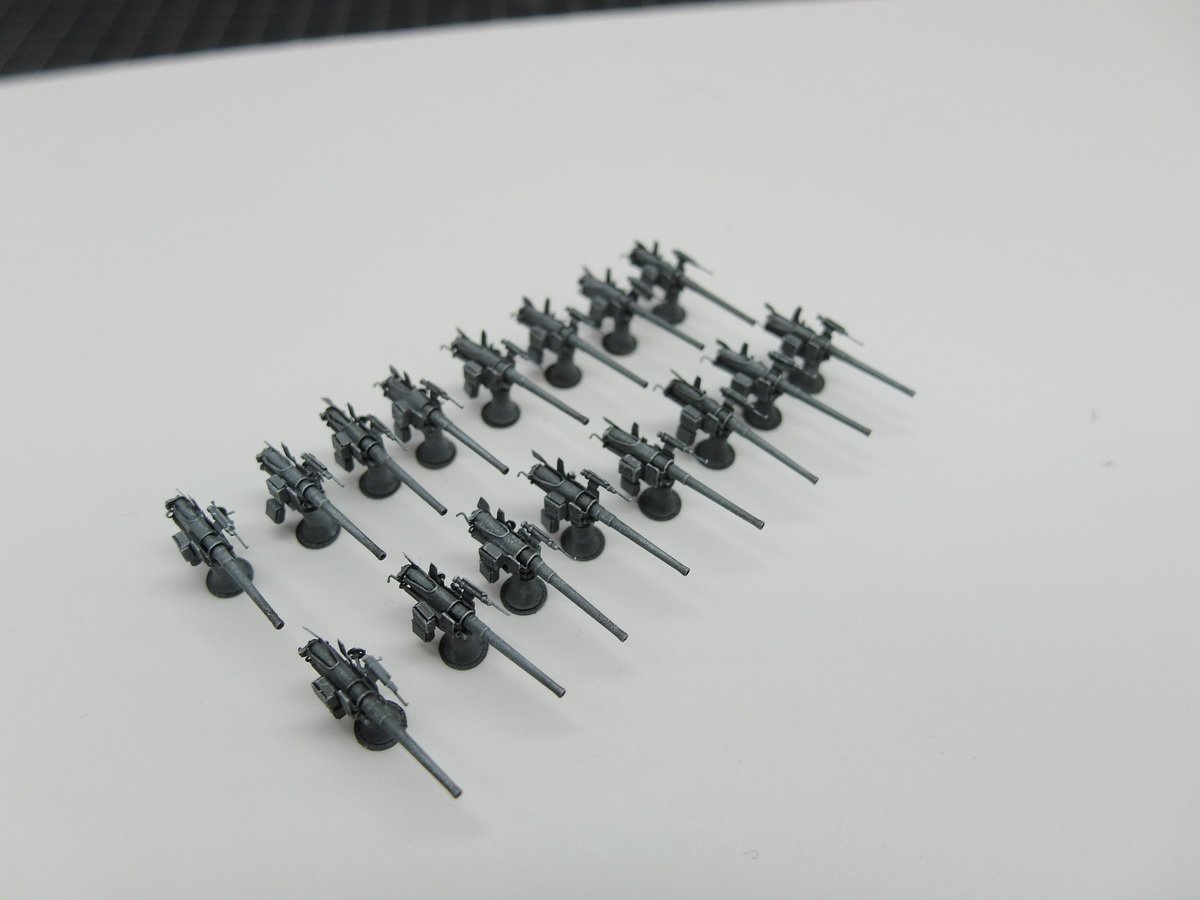
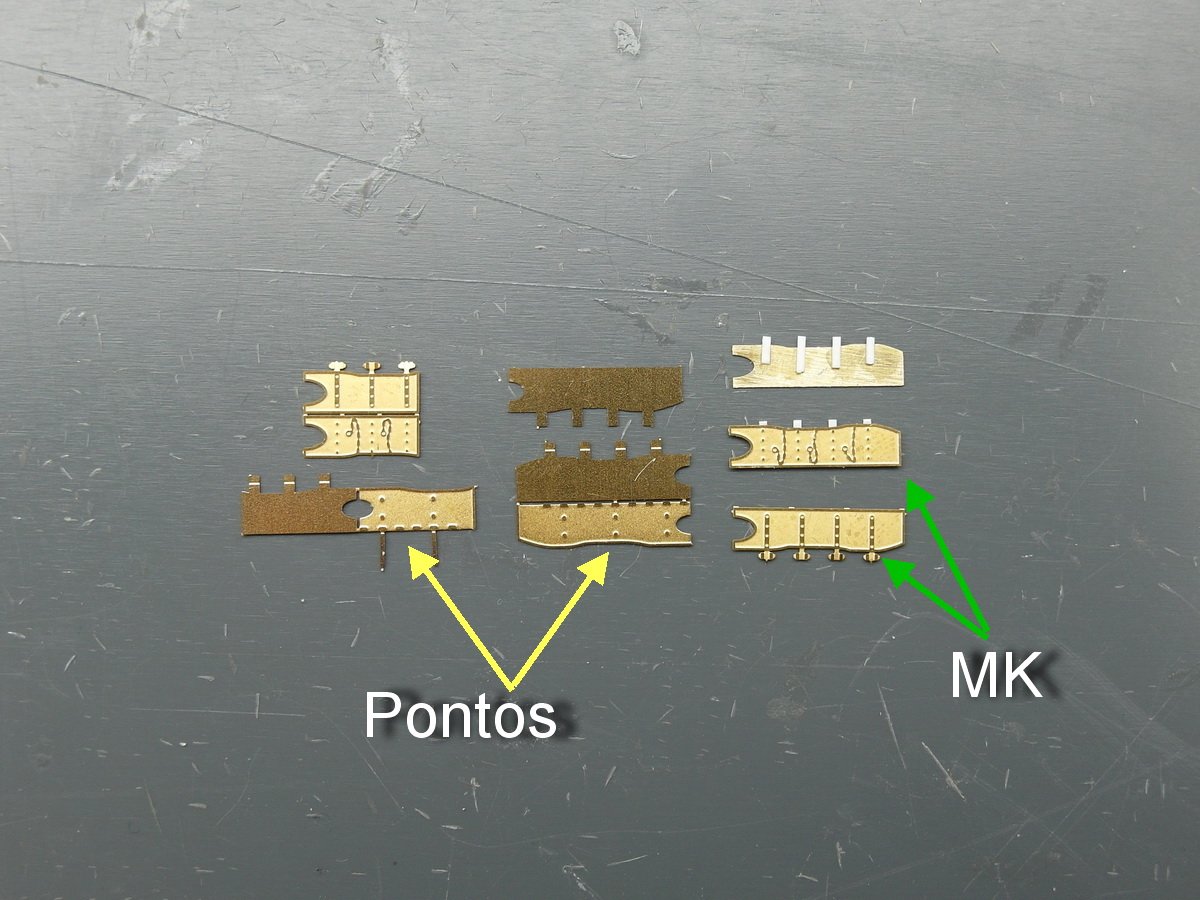
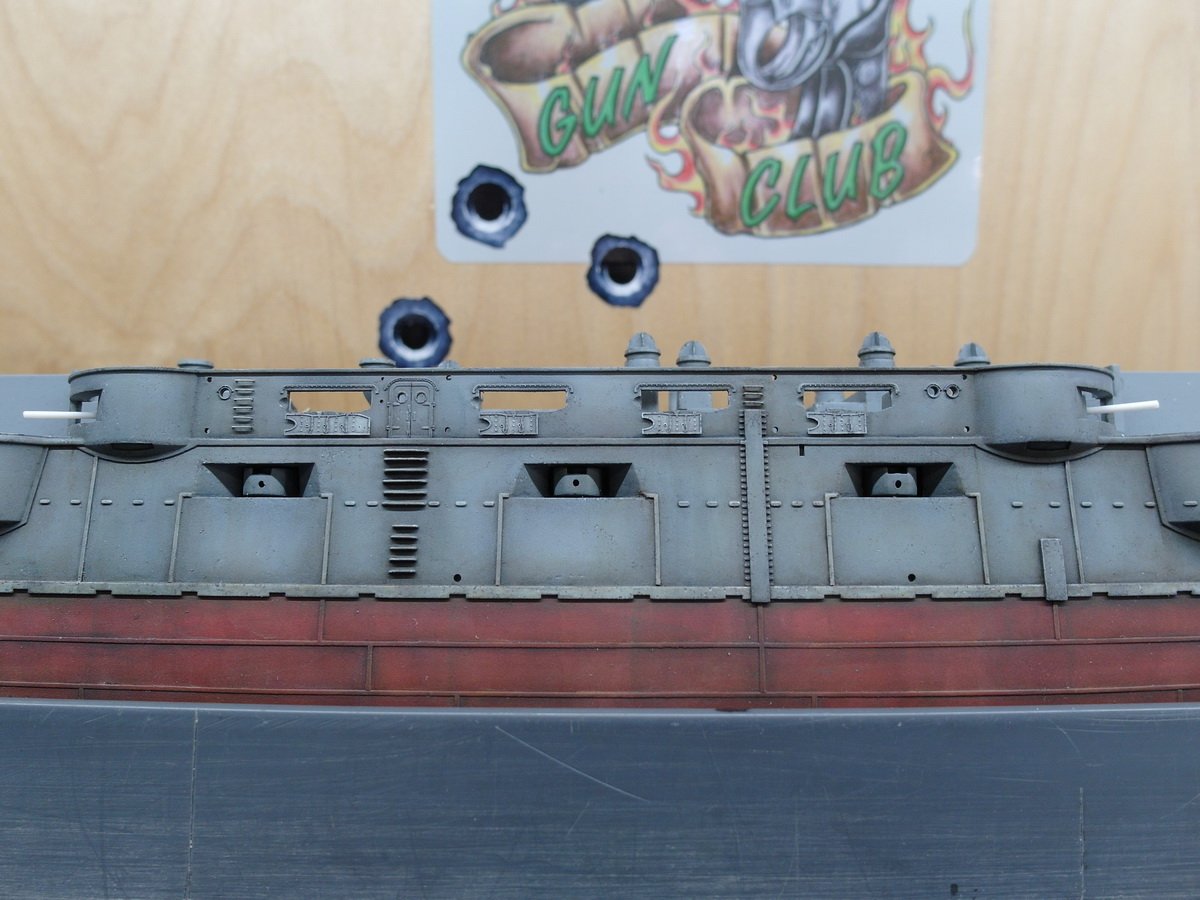
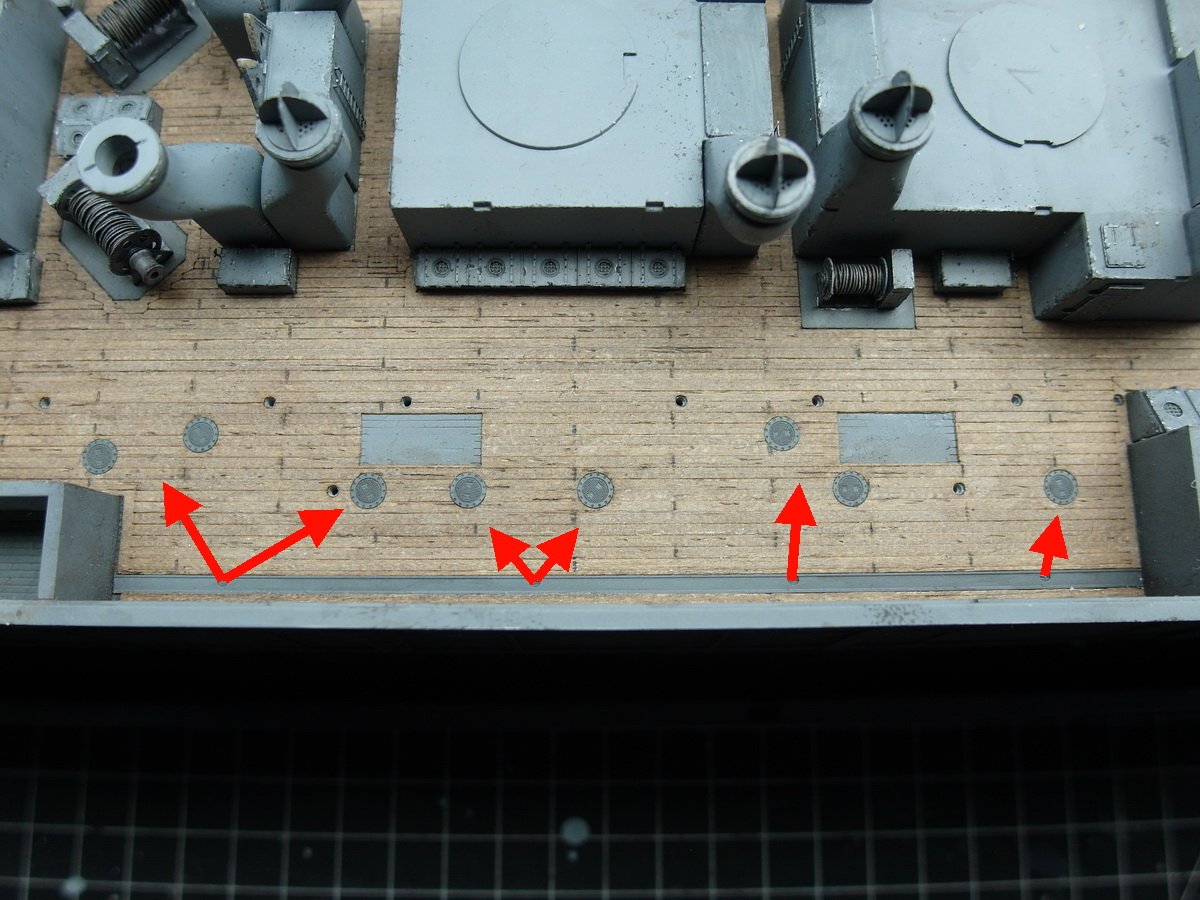
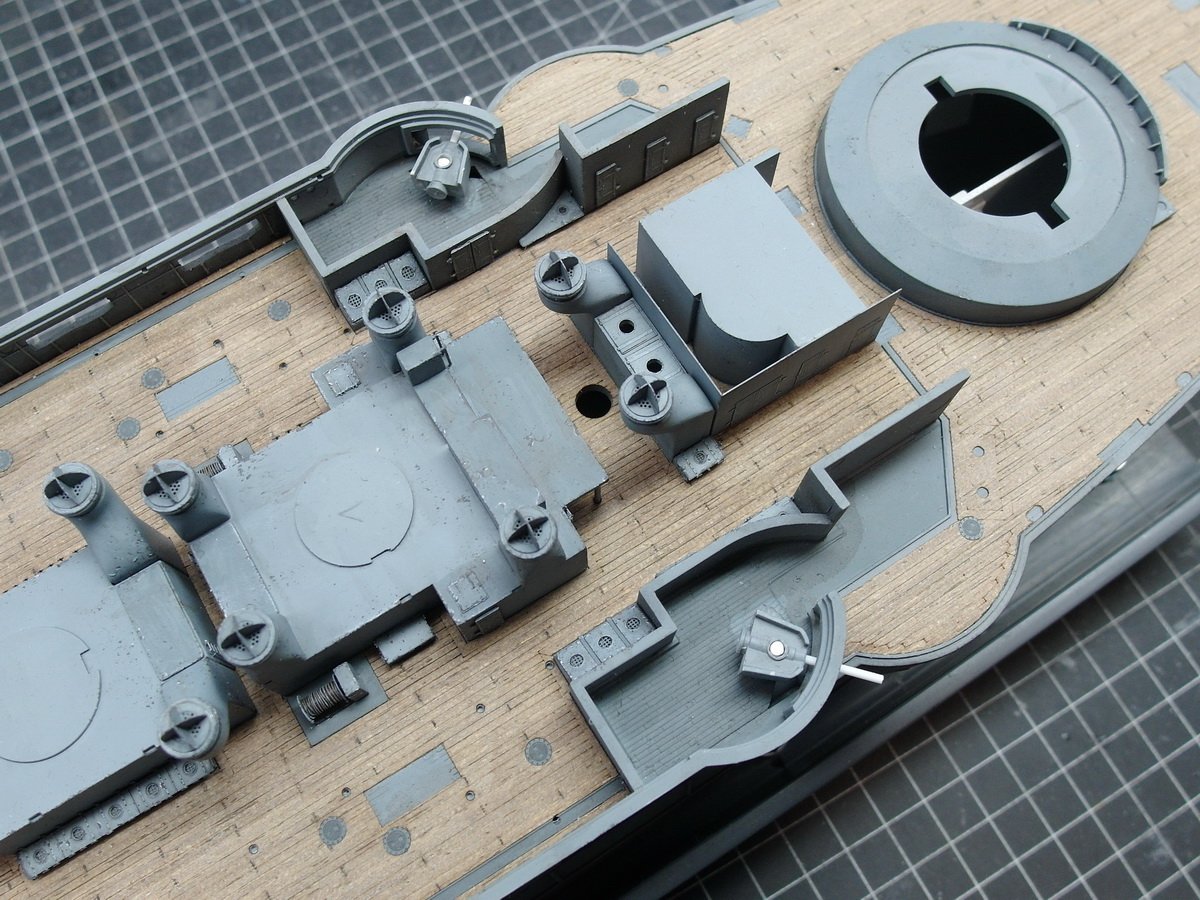
After a long break, I'm finally getting back to work. Thanks to Jeff's tip, I've been thinking about the deck being too high and how to deal with it. I also created the remaining 12-pounders. And since it's very monotonous, it took quite a while. They stand beautifully in rows. And again, Jeff, you're not annoying at all. I'm very grateful for your advice, as it helps me avoid such annoying mistakes. What would be the point of a model building forum if you couldn't build on the experiences of others? And so I simply shortened the carriage of the eight guns that go below deck. Let’s move on to the next conversion. Again, I liked the MK set better than the one from Pontos. Since I will be showing all the gun port covers open, I thought the rope shown was very nice. What I changed are the hinges. Since they fold down when open, I simply replaced them with a narrow piece of profile. This is what it looks like for me. I used a slightly lighter grey to accentuate it. And attached to the gun ports. These are the first external structures. Since it is inevitable that the gun barrels will stick out here, I wanted to have them attached already. And so the eight 12 pounders could take their place. A few boxes are still missing. And so I am quite happy with the position of the guns. Now they urgently need the protection of my sheet pile wall. After applying the clear varnish, I will screw it to the dry dock . I am curious to see if I will tear it down again before the construction is finished. 😵💫
- 193 replies
-
- 12
-
-
-
- Russo-Japanese War
- Mikasa
- (and 2 more)
-
Thank you all very much. I'm glad that you wish me luck and that makes me a winner already. Great community here.. 👏
-
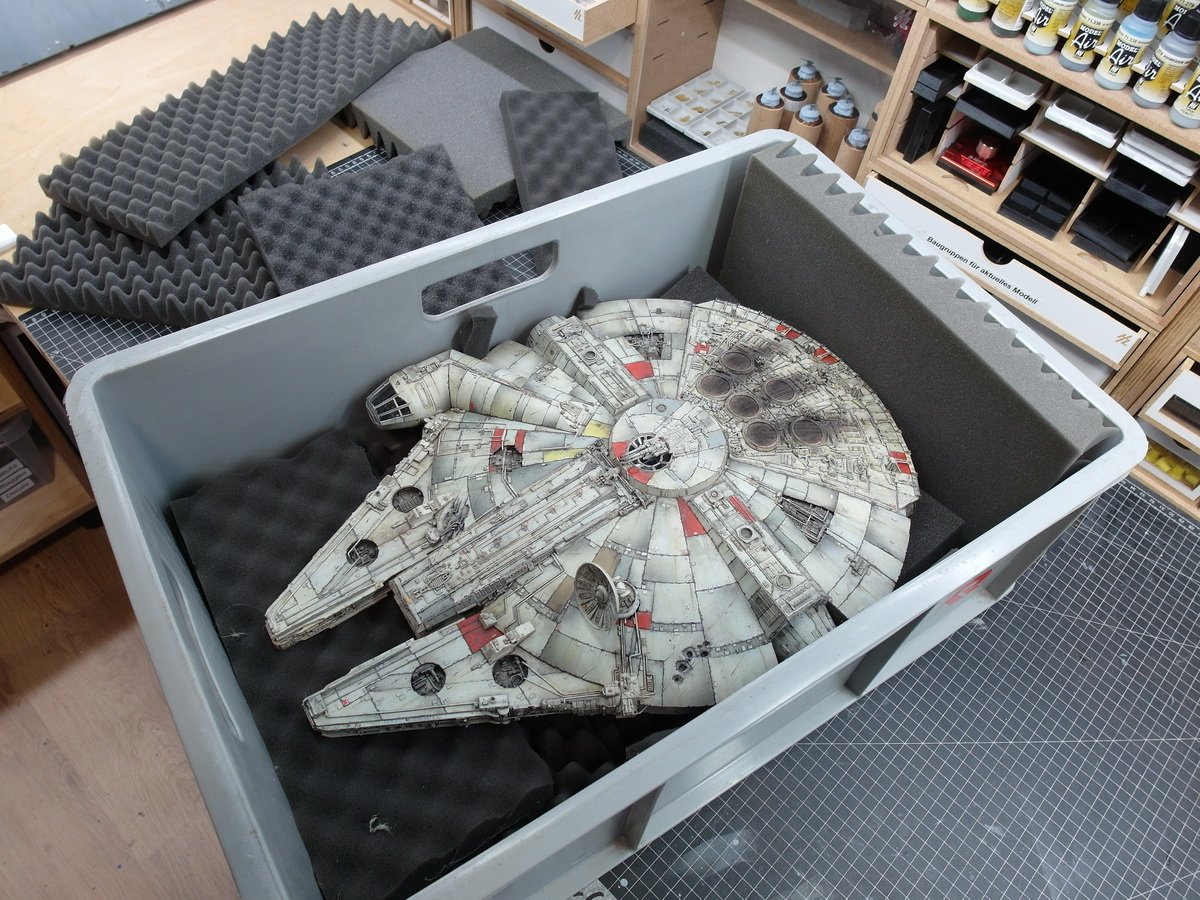
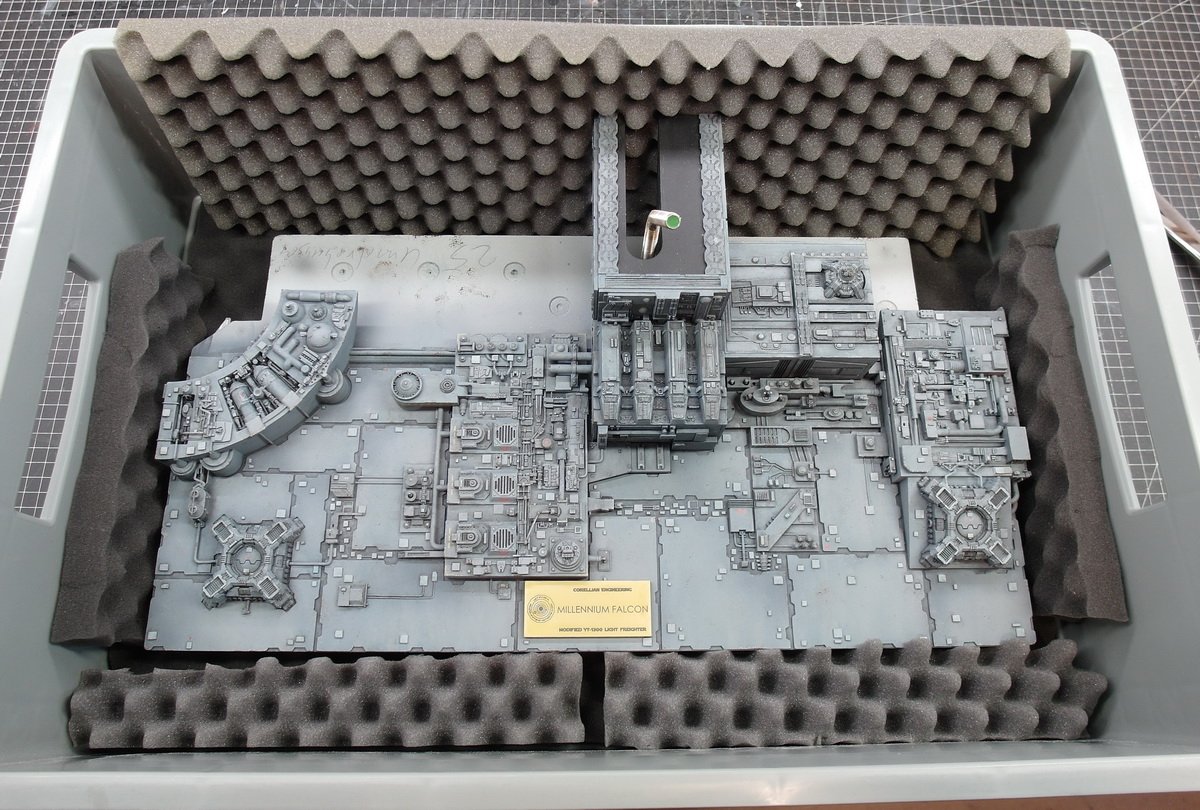
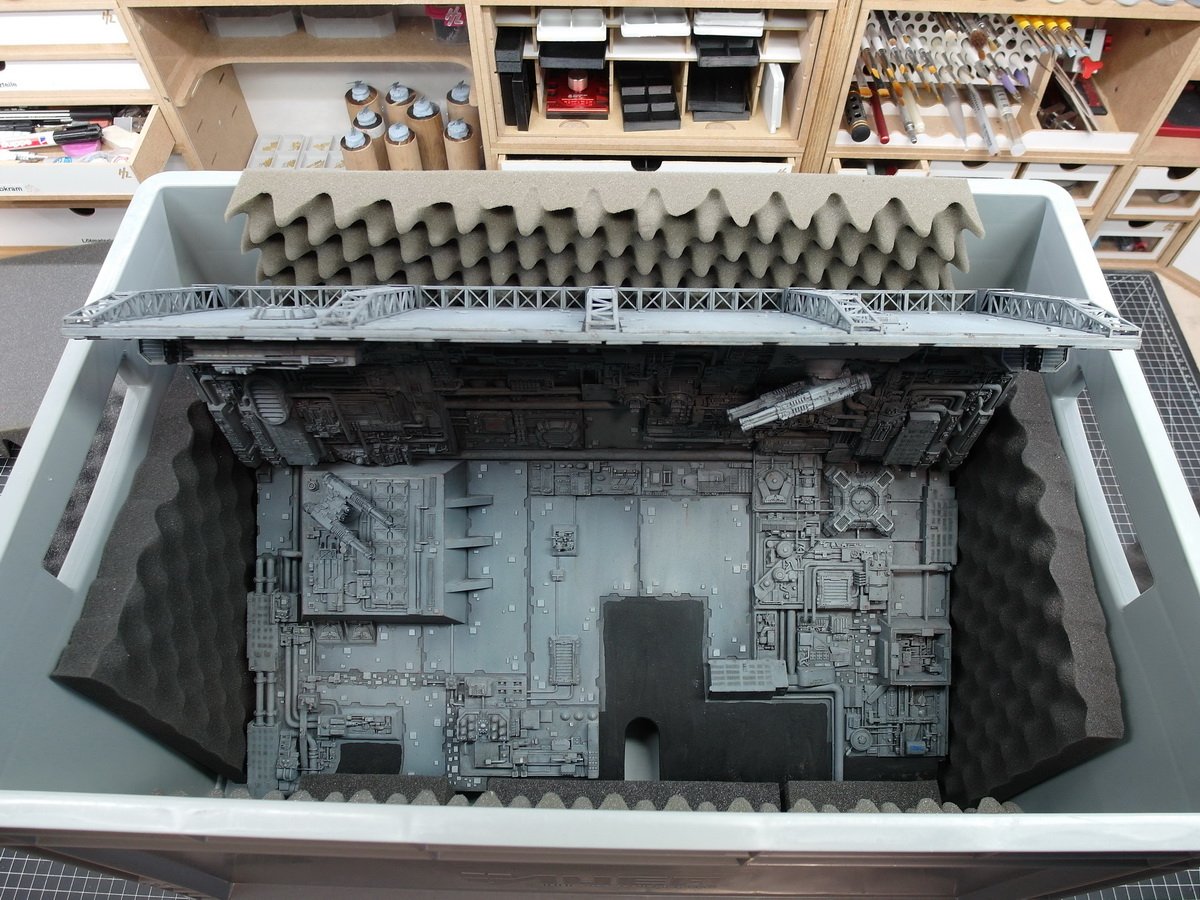
Hello, dear model building friends. After almost a year, I’m opening my Falcon thread again. I want to give it a new try and take part in Germany’s largest plastic model show, “The Euro Model Expo”. As you may remember, I was unable to do this last year due to my wife’s serious illness. But she is now doing very well again and she wants me to finally enter the competition with my model. And so I started to dismantle the diorama into its individual parts and carefully pack them into transport boxes. The Falcon itself is a tight box in the truest sense of the word. The base plate does not cause any problems at all as it has a large, smooth surface, the floor is level, and therefore the foam does not slip. You had to be careful with the large top part. It’s damn heavy. But I carefully hoisted it into the box and packed it safely with all the foam for transport. And so it can start at the end of the month. EME here we come….
- 86 replies
-
- 10
-
-
Absolutely not Jeff. I'm happy about any hint you can give me. I think that the purpose of a forum is to pass on the experiences that have arisen during such a construction.
- 193 replies
-
- 2
-
-
- Russo-Japanese War
- Mikasa
- (and 2 more)
-
Extreme what you show us here, Jeff. It's a crazy amount of work that you're putting into the hull alone, but I'm convinced it will pay off and result in the most historically correct Bismarck model. 👍
-
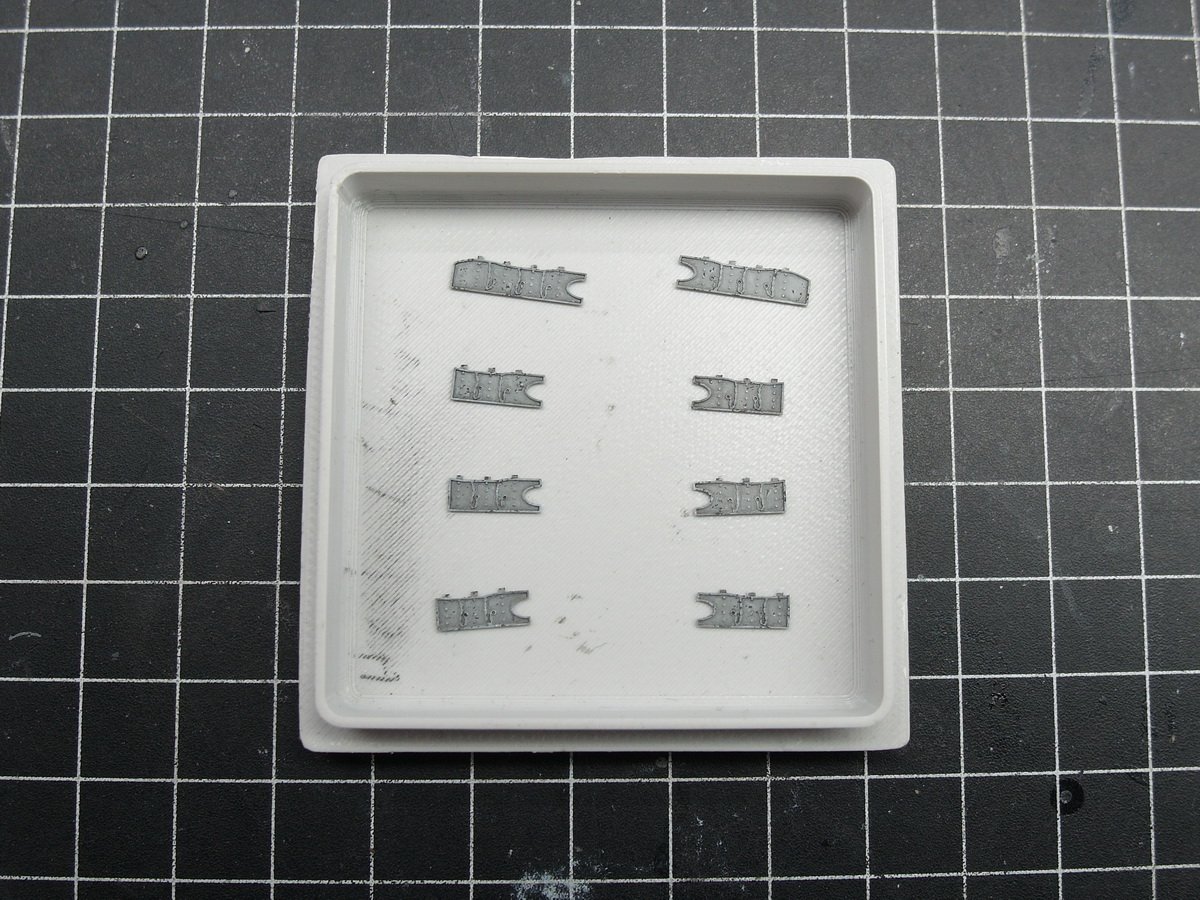
Hello Jeff. That's very kind of you. Respect that you bought an extra Pontos set for it. I just thought I was crazy enough to work with two sets. Nice to find a like-minded person here. But I'm afraid that despite everything there wouldn't be enough coal hatches. There are 22 on the main deck and another 14 on the outer deck. So basically you can only have eight hatches. But that's not a bad thing because I still have plan B. There are still hatches from my KA set, but they are much smaller. And since I followed your build report closely Jeff, I don't use the Pontos guns for the 3 pounders. I also have them as a 3D print from Micro Master. And so I can use the bottom flange of the gun. In conjunction with the too small KA component, a formidable coal hatch is created. I'm really happy with that. And by the way, I put the deck together loosely. Fits perfectly even before sanding and looks really great.

- 193 replies
-
- 8
-
-
-
- Russo-Japanese War
- Mikasa
- (and 2 more)
-
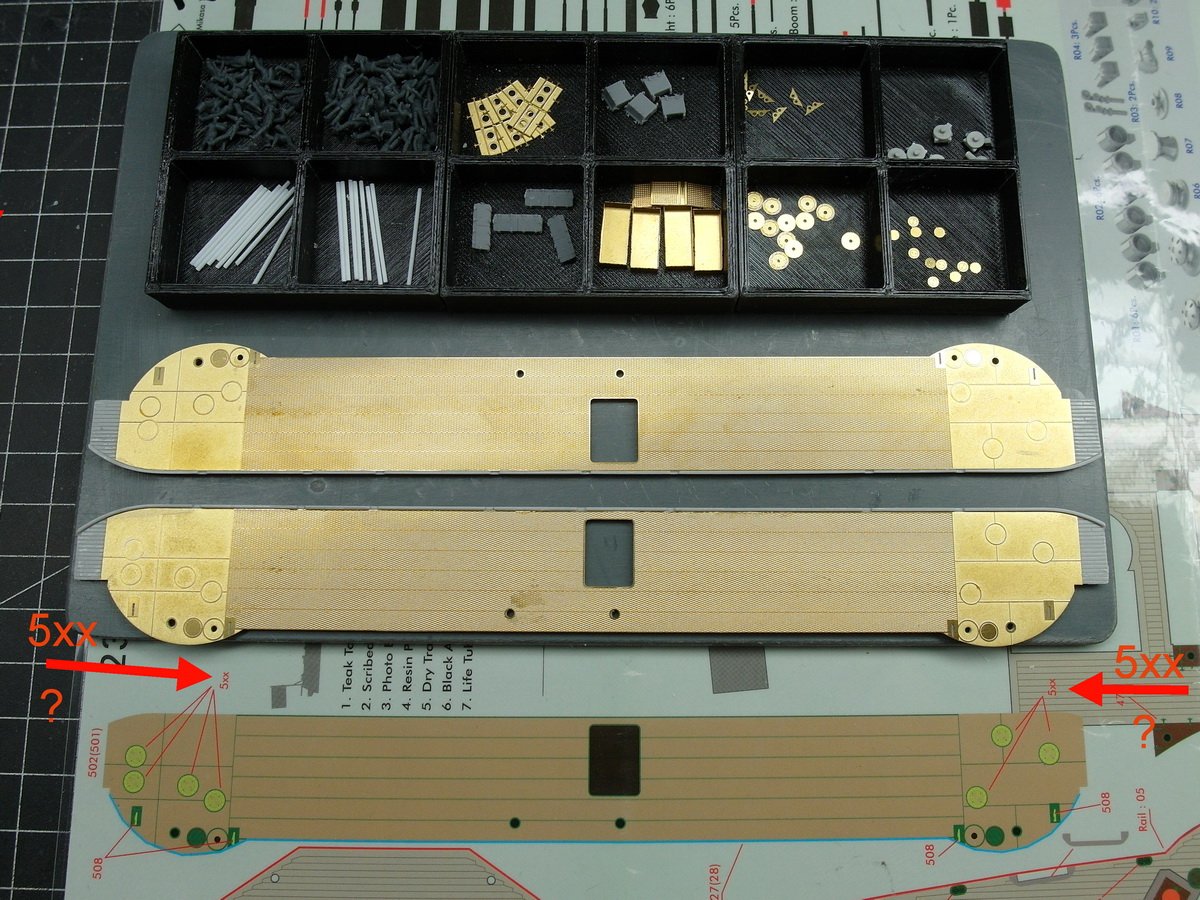
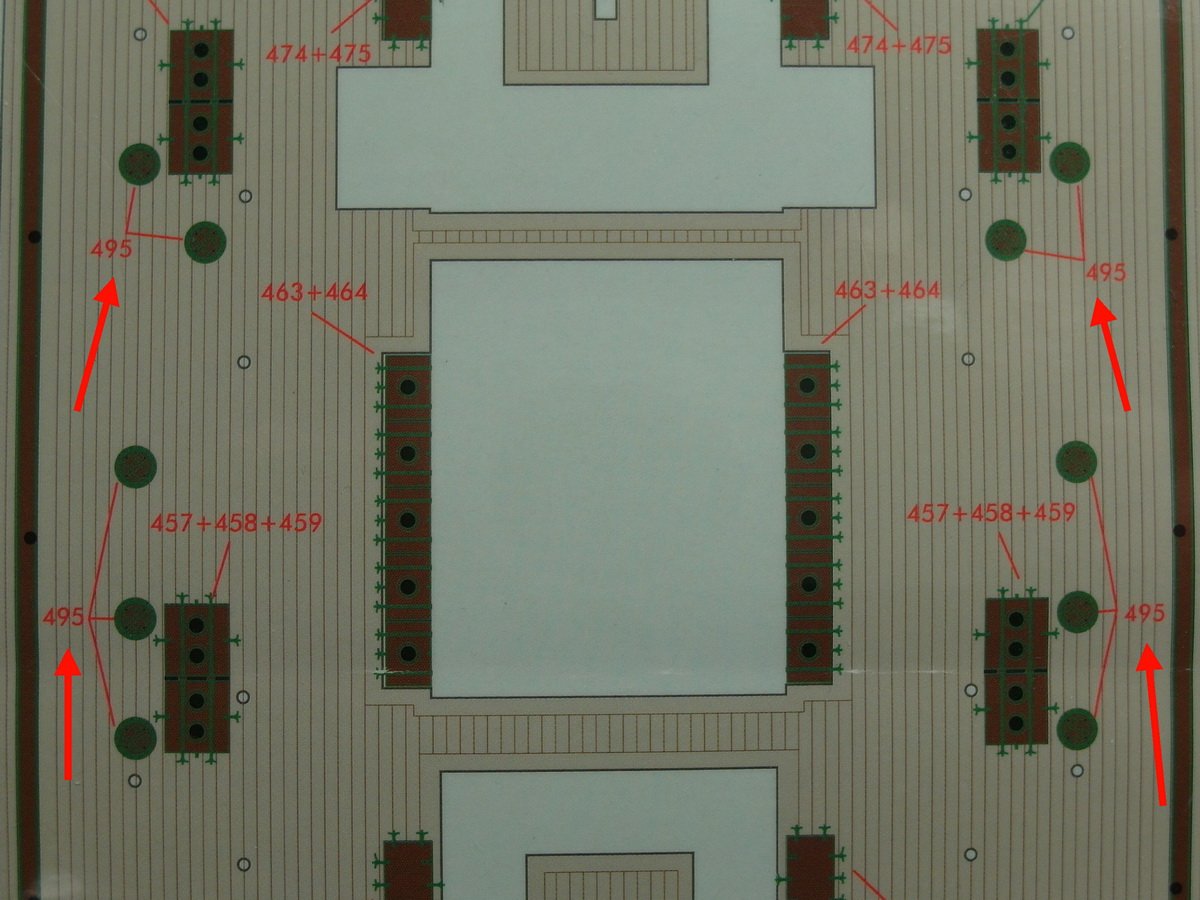
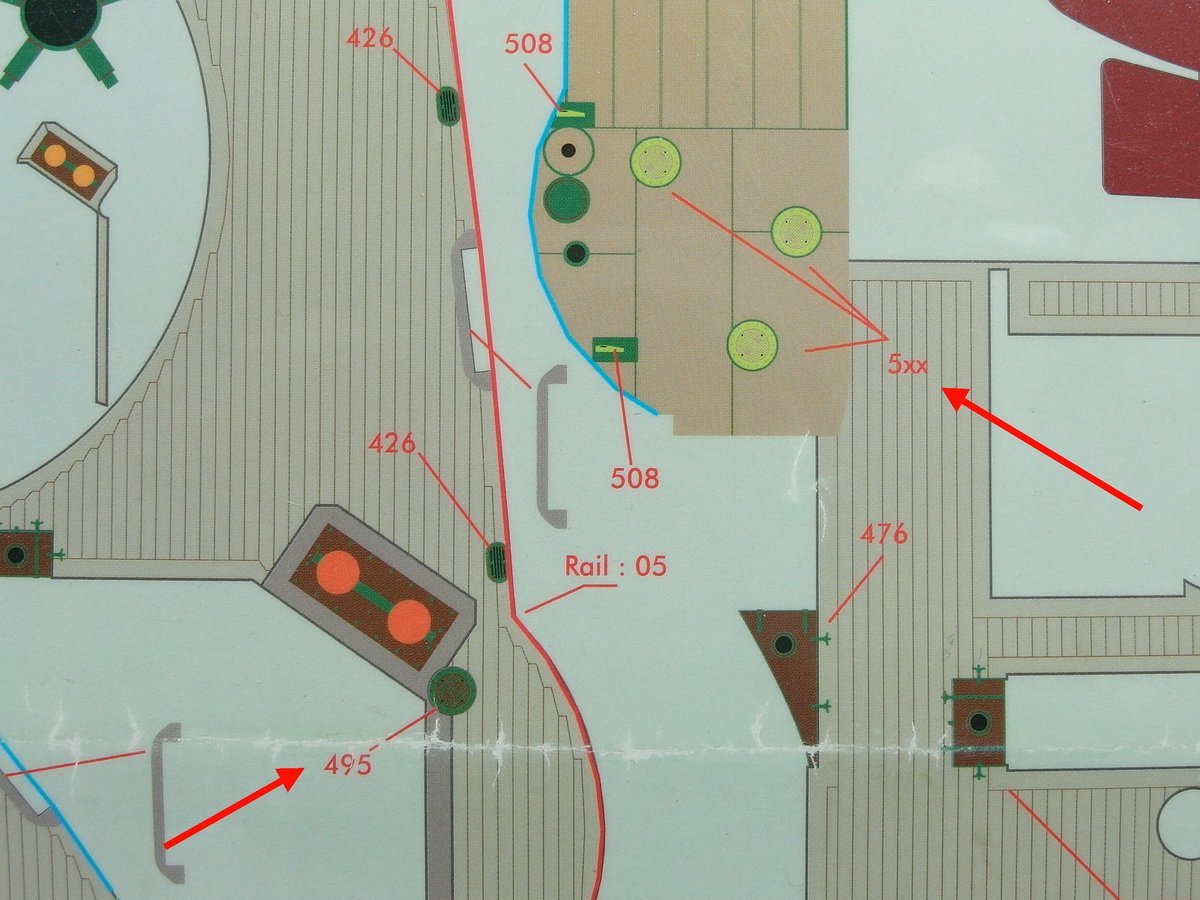
That's right Jeff. But the journey is the destination, right?! 😅 We continue amidships with the deck above the casemates. I put the guns aside to concentrate on the next Pontos puzzle. The deck is covered with two large brass pieces, which look fantastic and greatly improve the deck. So far so good. Above you can see various small parts that are missing from the deck. In addition, the first sailors will take their positions in places that would be difficult for me to reach later. But to the new mystery of Pontus. It’s about the coal hatches. I have already distributed 22 of them on the main deck. You have number 495. As you may notice, these hatches can also be seen on the deck above. Only here they have the number 5xx. However, this number does not exist on the Pontos boards. This time too I checked all the circuit boards several times. But I can only find the hatches with the number 495, which of course I installed completely. Maybe someone who has already installed the Pontos set can give me a tip. I’m at a loss. Of course I already have plan B, but I don’t want to carry it out until none of you can solve this puzzle for me.
- 193 replies
-
- 7
-
-
- Russo-Japanese War
- Mikasa
- (and 2 more)
-
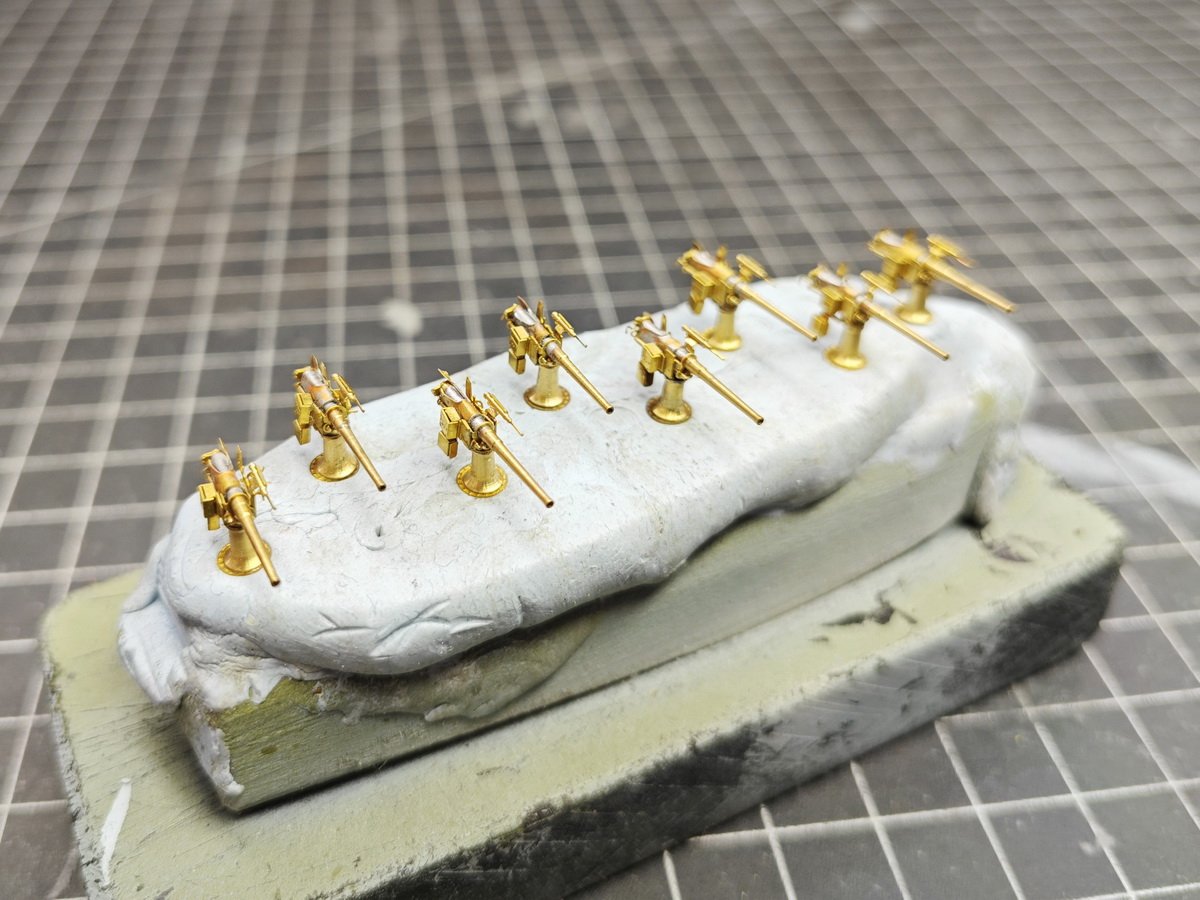
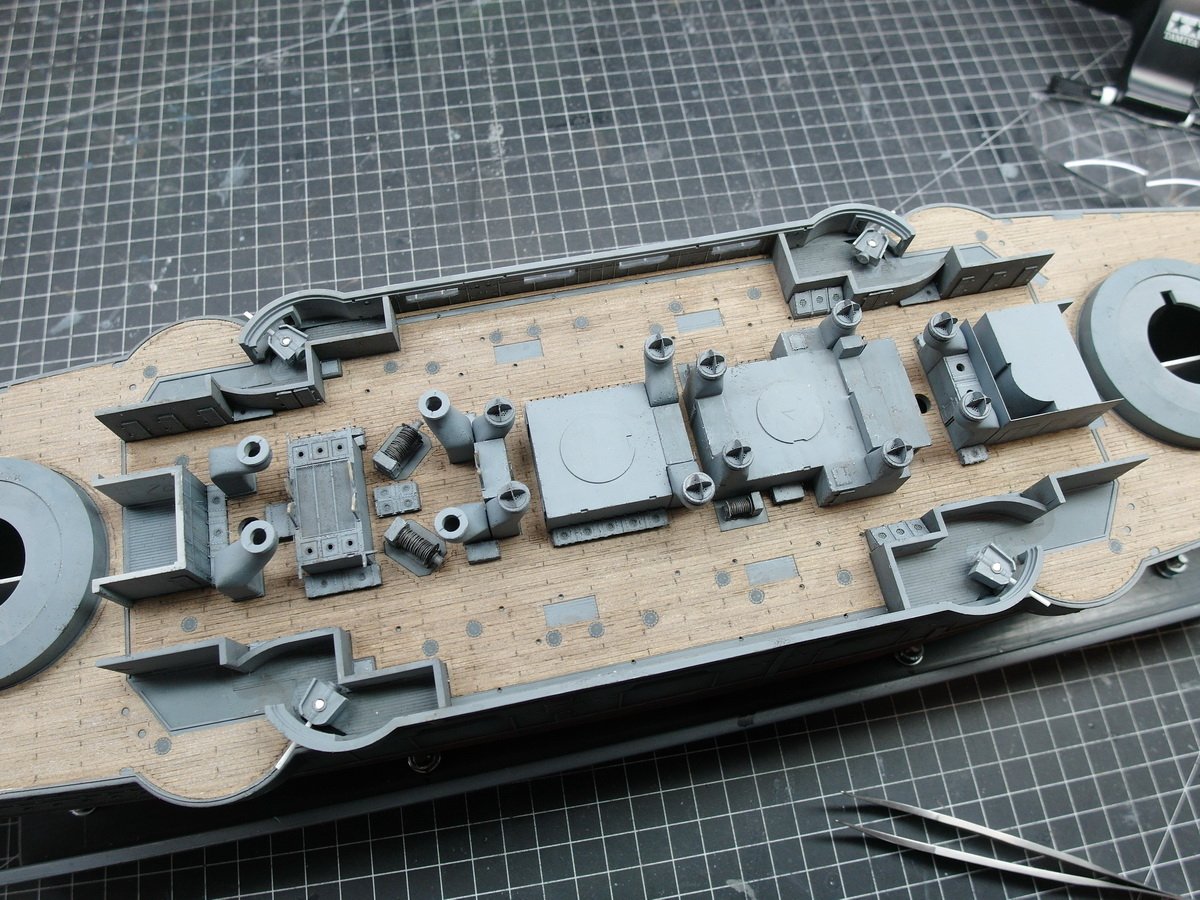
Thanks for the tip Jeff. 👍 Let's see how I implement this. But first of all I built the 12 pounder. There are eight of these to build for this deck. With 14 individual parts per gun. First I solder the gun barrel. Just holds up better. The rest is then attached with superglue. What a fumble. But as always with Pontos, fantastically detailed Painted and aged, they look so good. I have to make eight more of these for the upper deck, sweat.
- 193 replies
-
- 10
-
-
-
- Russo-Japanese War
- Mikasa
- (and 2 more)
-
That's absolutely right Jeff. Not only is it funny, but it benefits both of us. I have already incorporated so many of your tips into my Mikasa. I hope that my construction report on the Bismarck, can help you a little too. And yes, slow and easy is the best way forward. 👍
-
Thank you very much for your participation. @ Landlubber Mike Mike, I'm sorry that I'm only answering now, but my head was full of other things and model building is only slowly getting going again for me. Thank you for the compliment. Since I know that your model building skills are in no way inferior to mine, I am very excited to see what you will conjure up with the 1:700 kit. I hope you let us be part of it here. @ Jeff59 That's right Jeff, our nice hobby lets you clear your head from the worries of everyday life. Especially if you get helpful ideas from users to make your model even better. When I was testing the cannons, I asked myself what was wrong. And you give me the solution now, Jeff. The axis must move further forward and into the middle of the casemate. Just made a spacer out of styrene. And then the cannons could take their place. That looks better.... They are now sitting nicely in the middle. And the height is also right thanks to the spacers.
- 193 replies
-
- 8
-
-
- Russo-Japanese War
- Mikasa
- (and 2 more)
-
Wow, it's amazing how meticulously you correct the hull and bring it to historical accuracy. This is plastic model making on a higher level. Respect. Please be allowed to come on board the Titanic. 🫡
-
Thanks Scott and Herby. That's some information, Herby. I didn't know that. My Bismarck build also had a correction sheet, but it was included in the set. Exactly, this is the box that would fit. I'm sorry for you that you didn't get it. But it calms me down a little because I would have been very annoyed if I hadn't gotten it. Thank you Herby for solving this puzzle for me. 👏
- 193 replies
-
- 2
-
-
- Russo-Japanese War
- Mikasa
- (and 2 more)
-
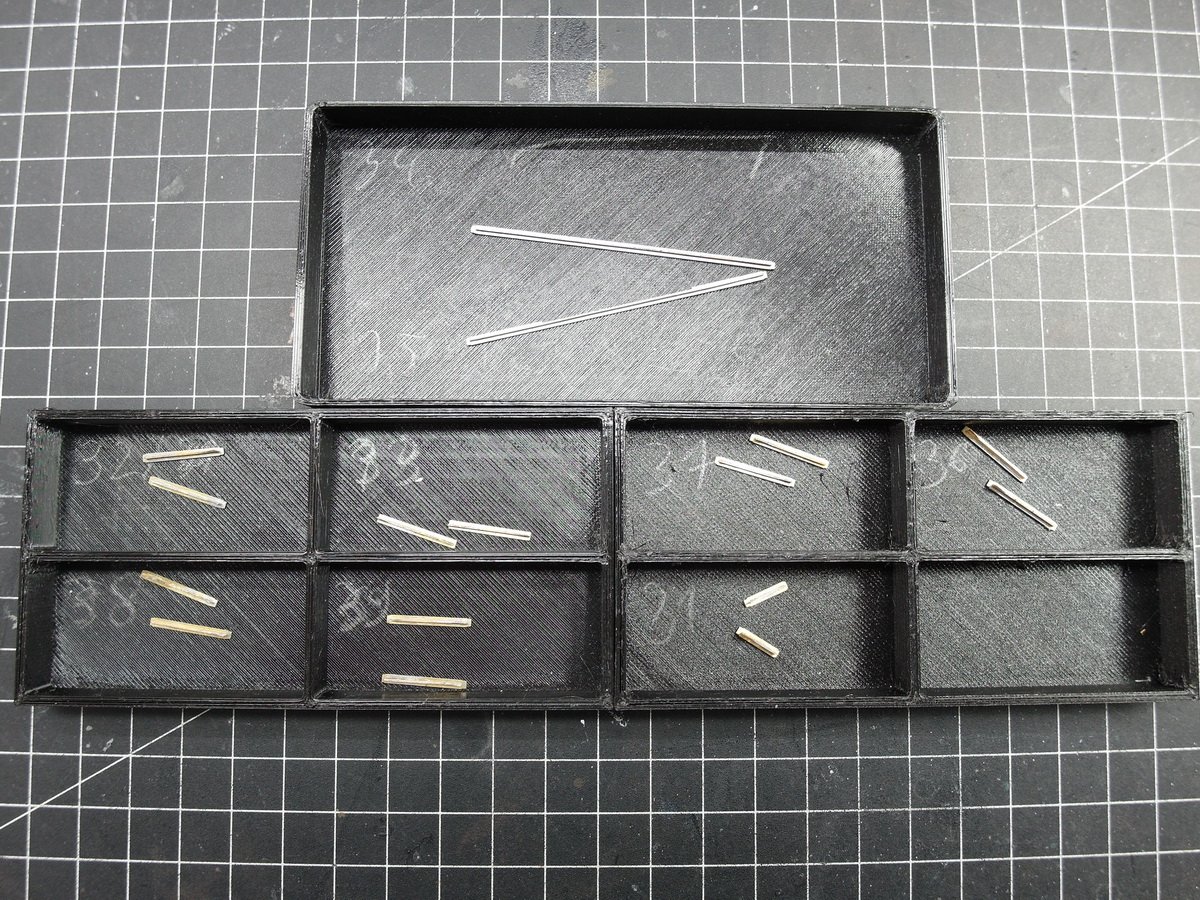
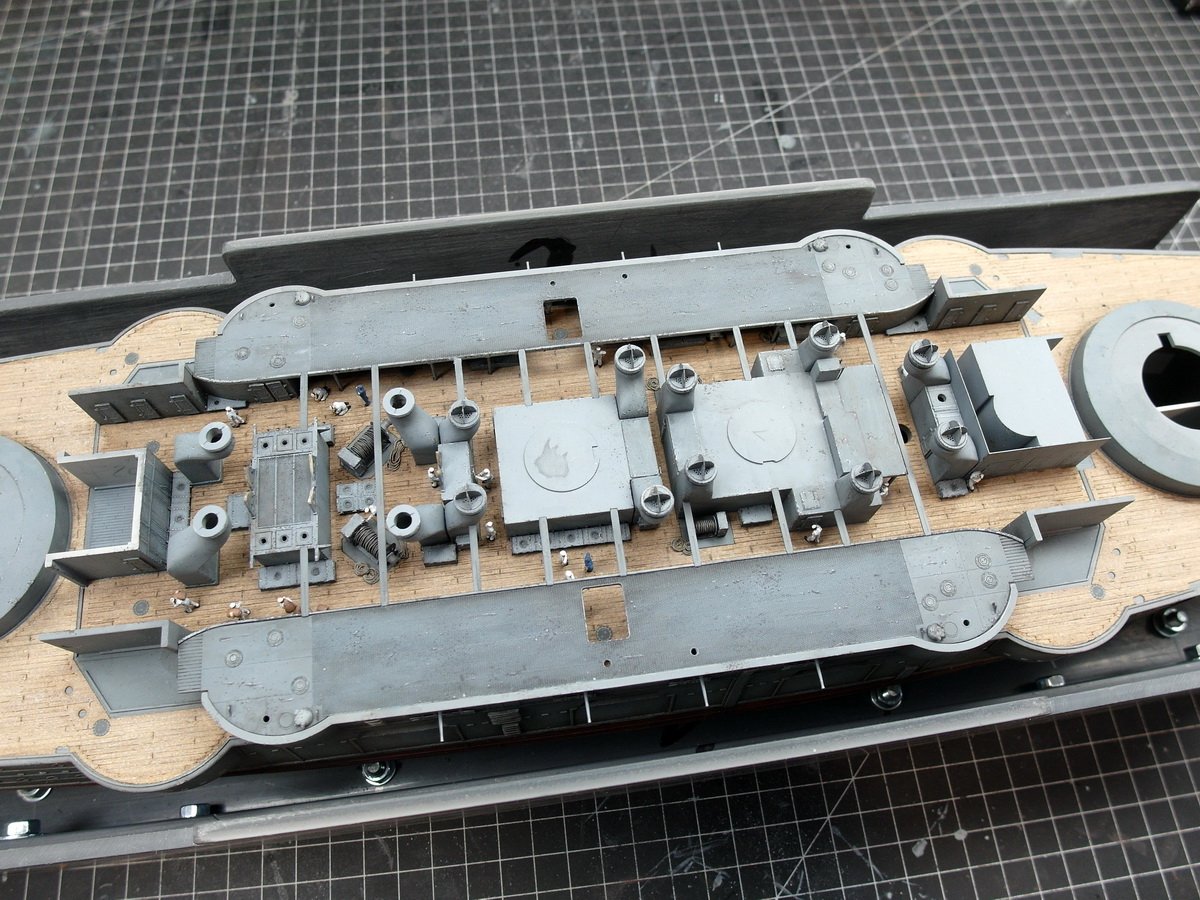
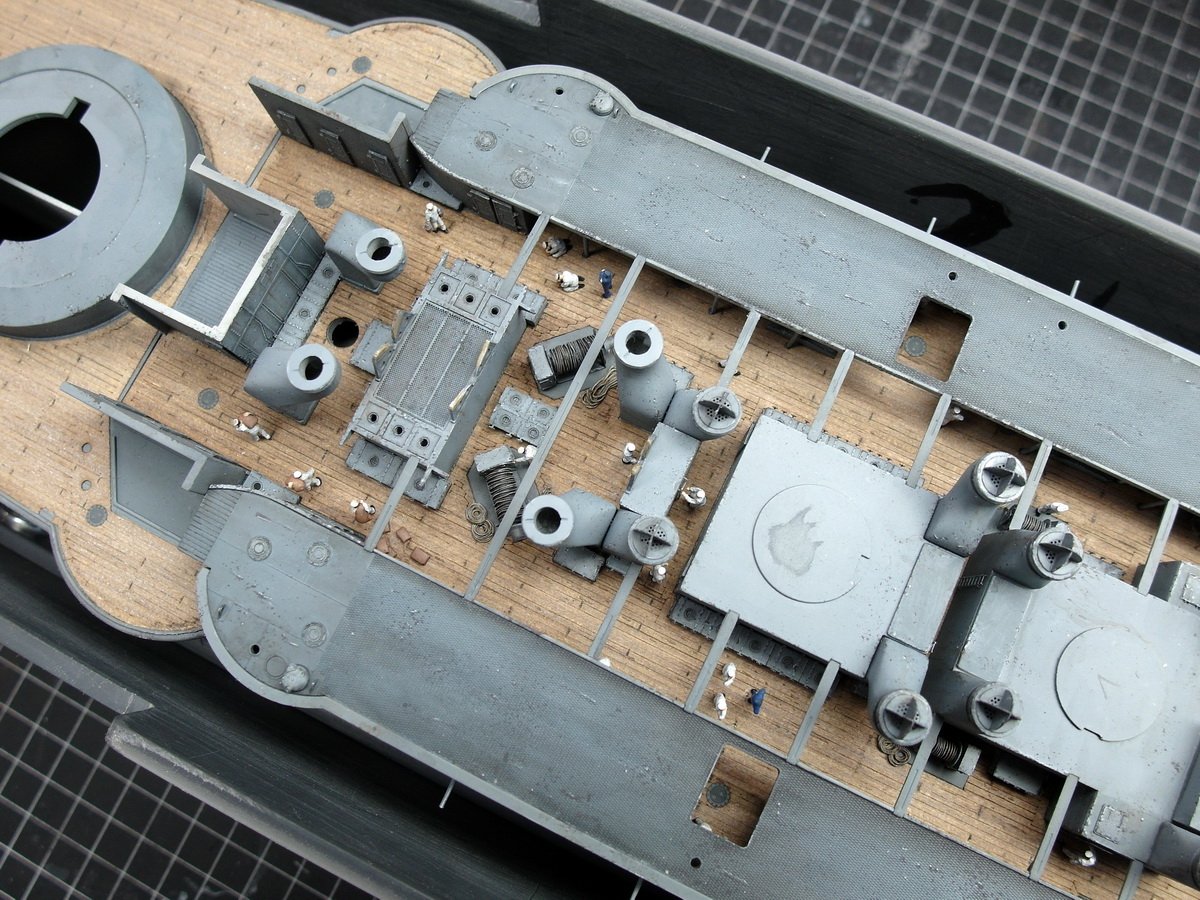
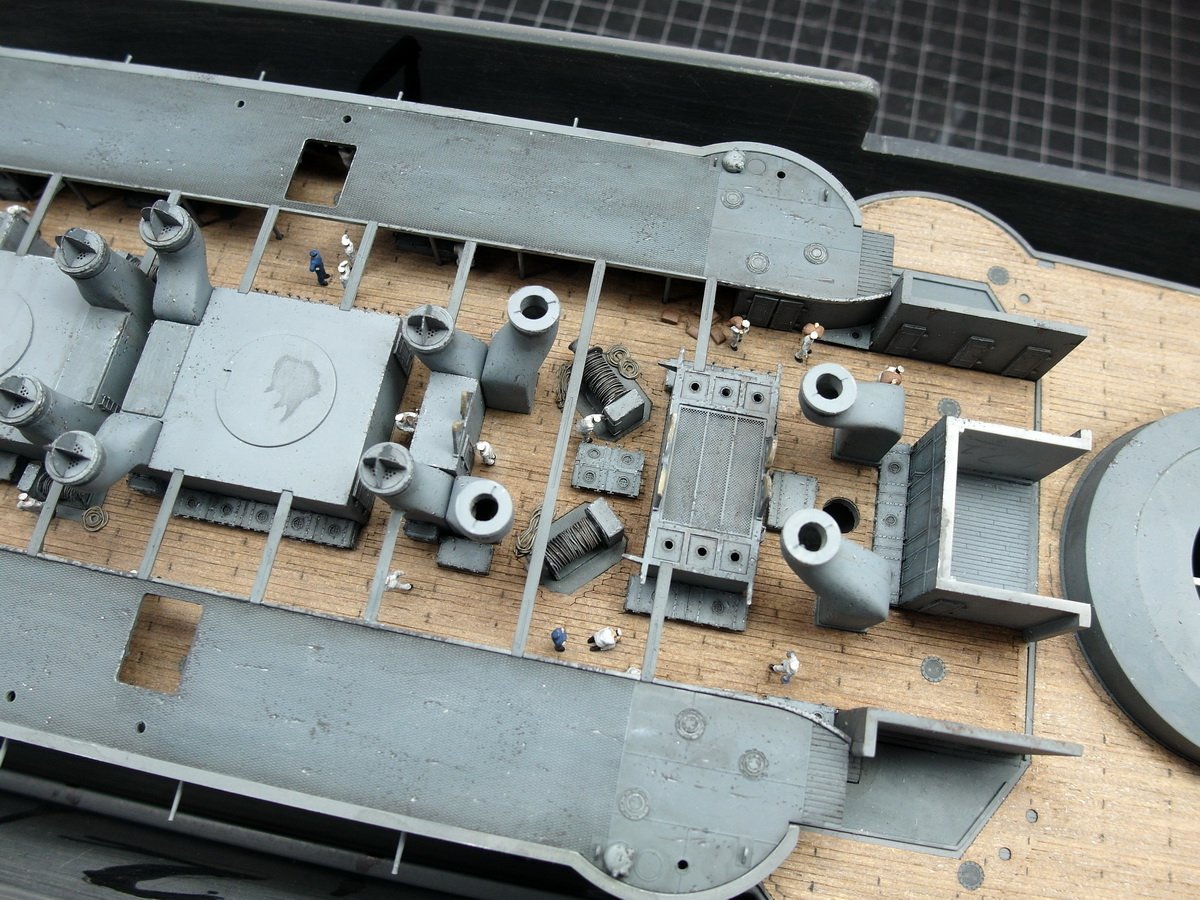
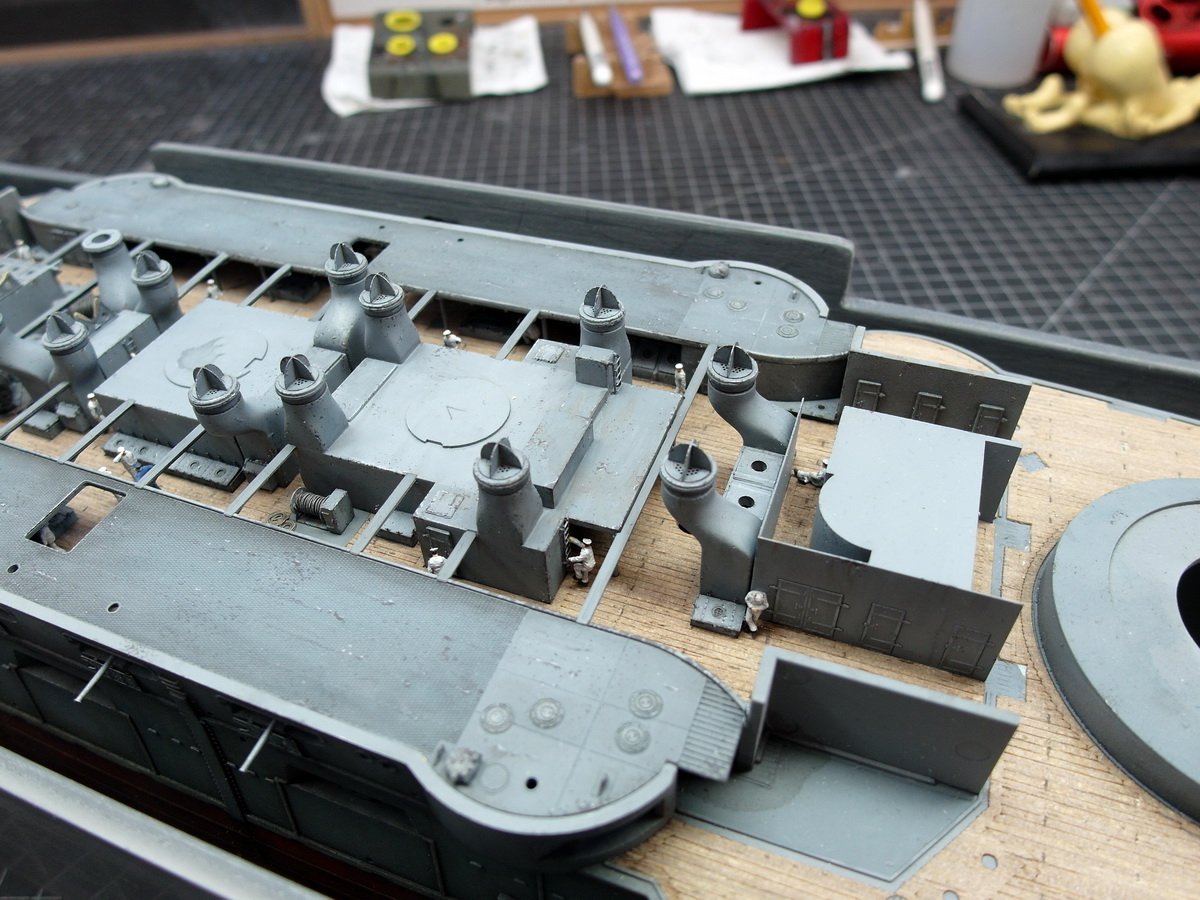
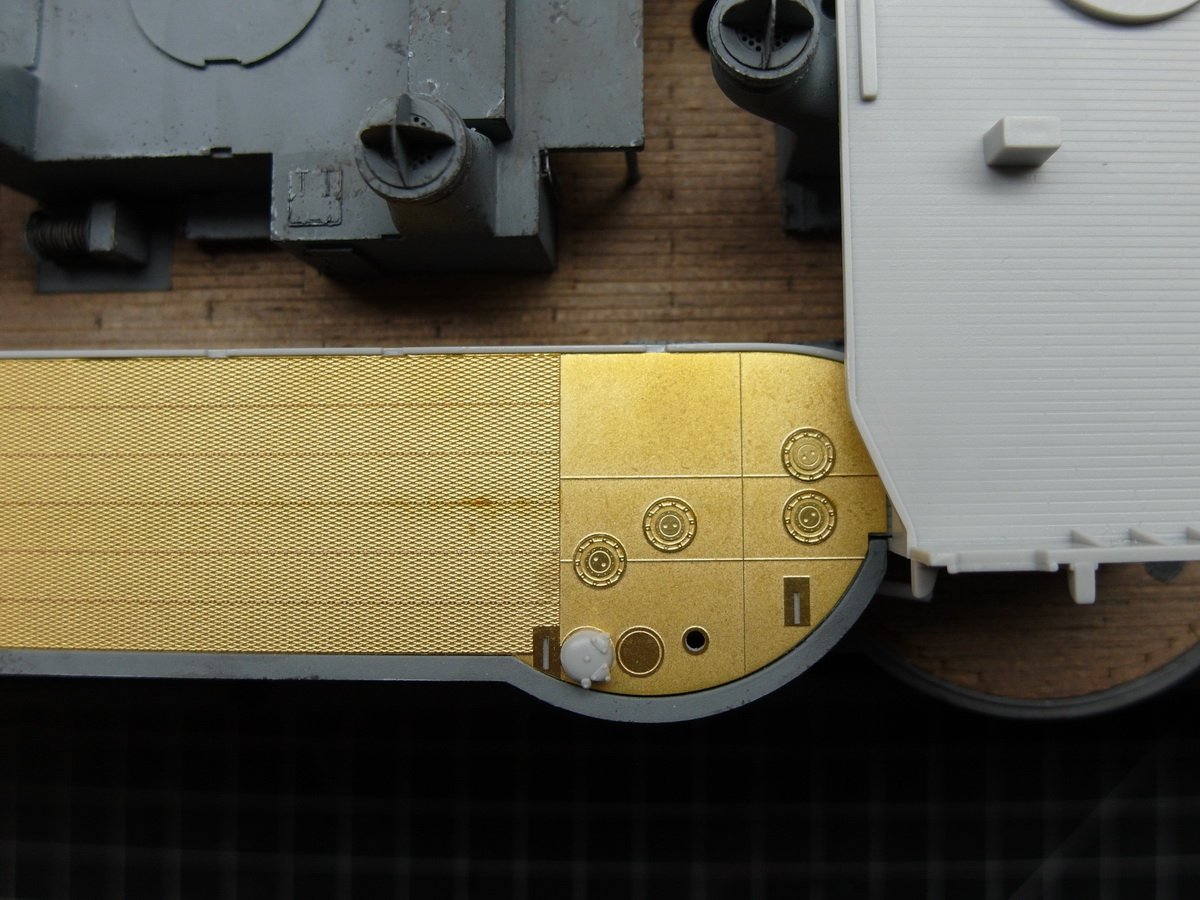
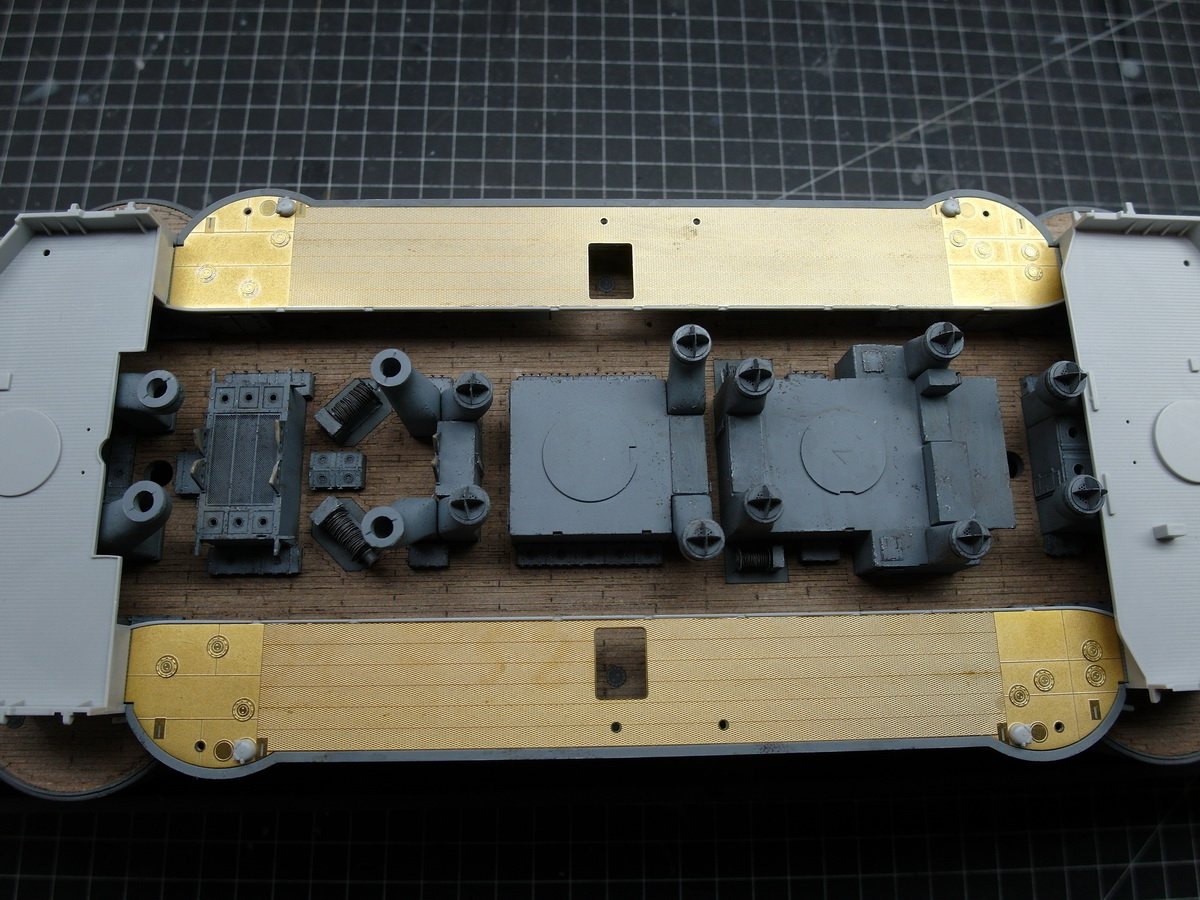
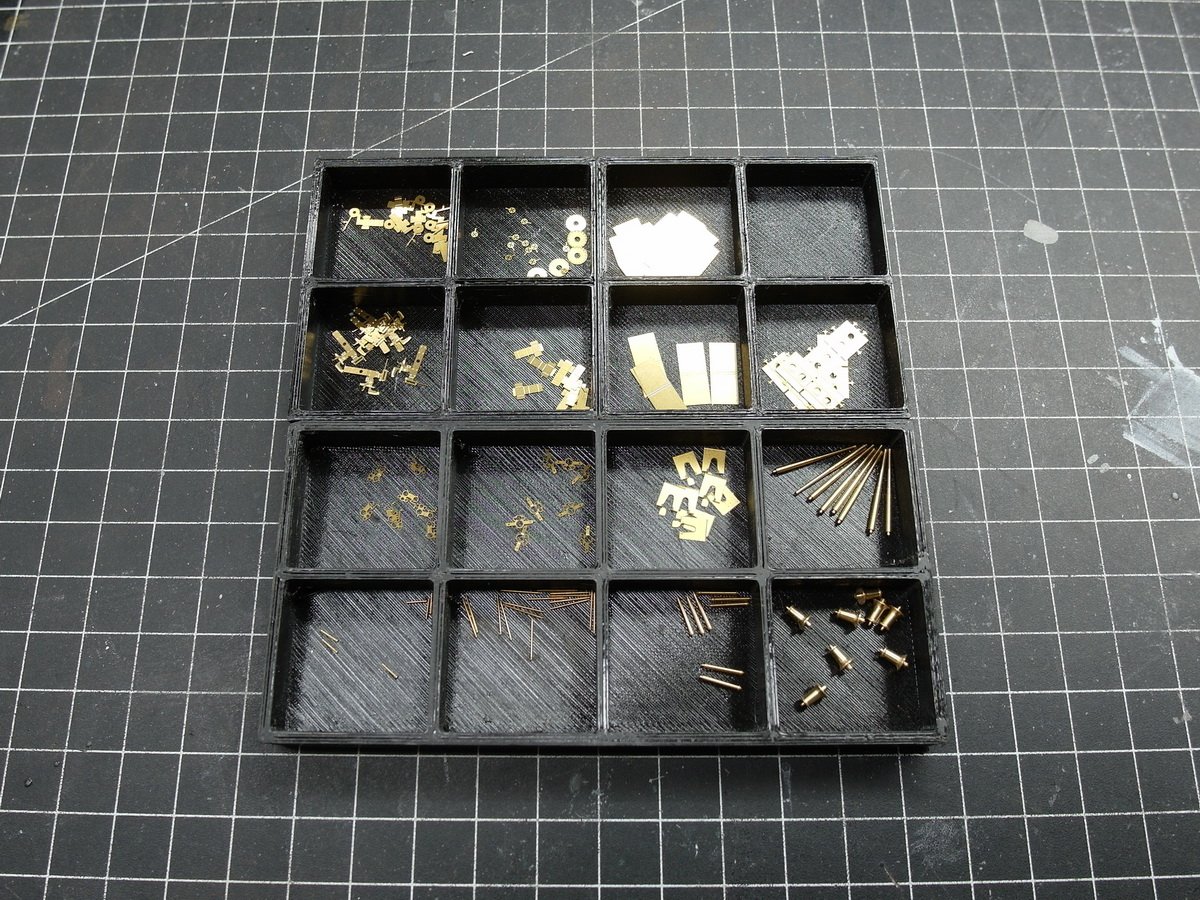
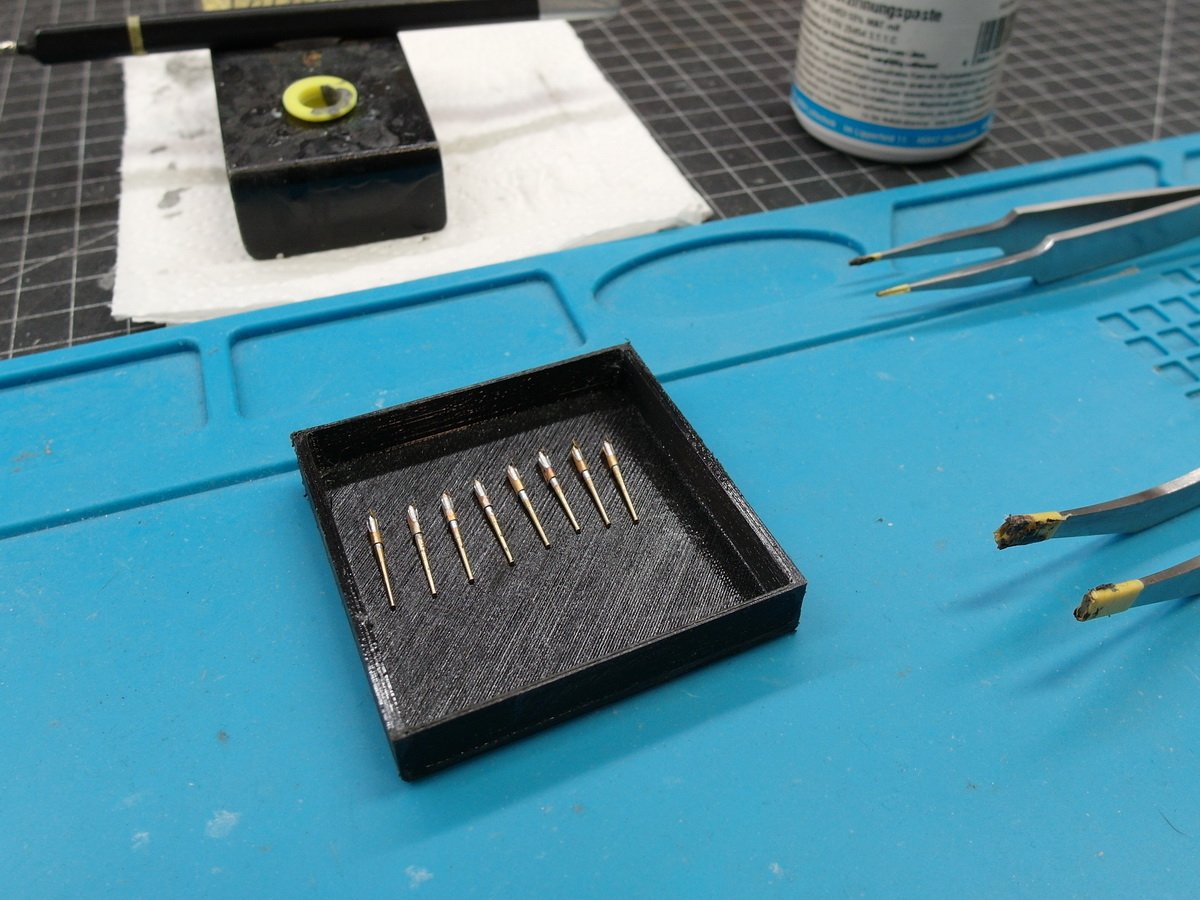
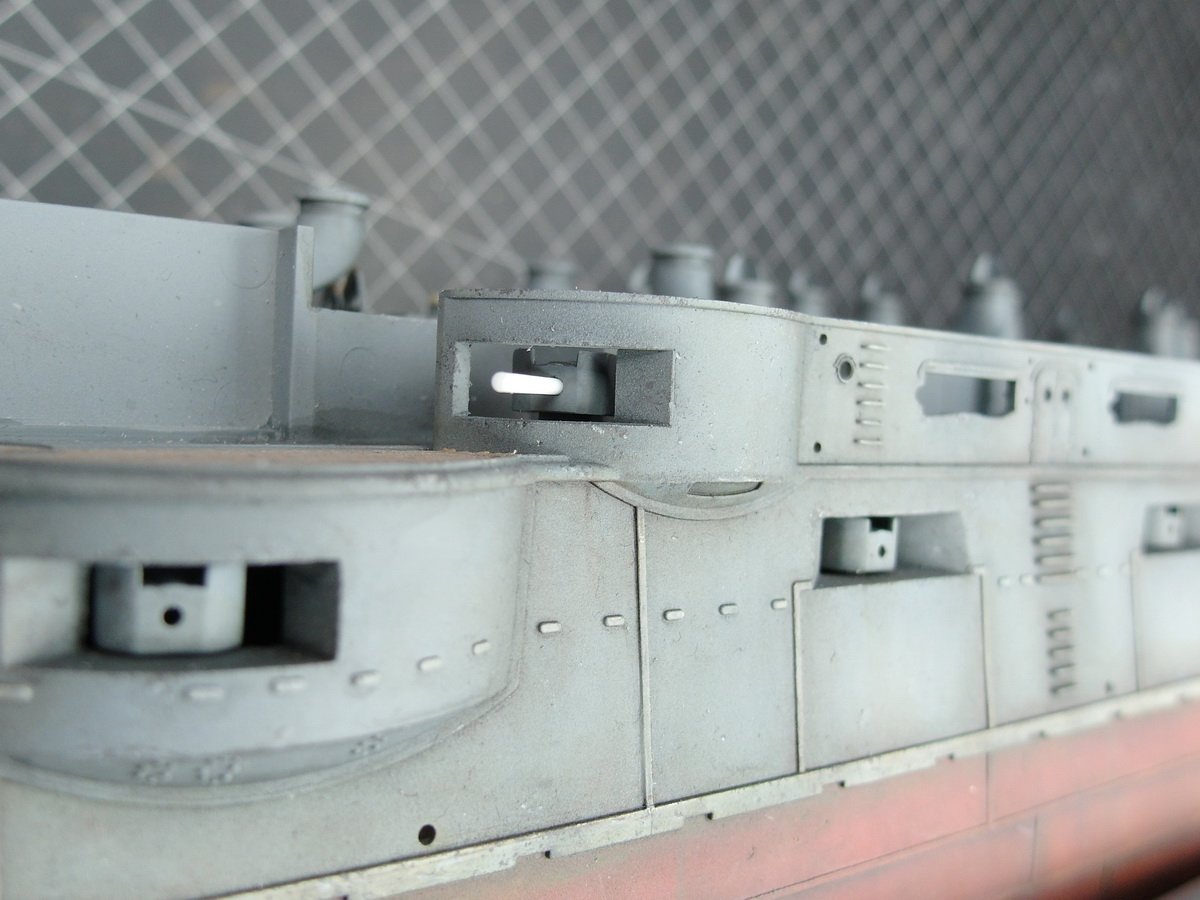
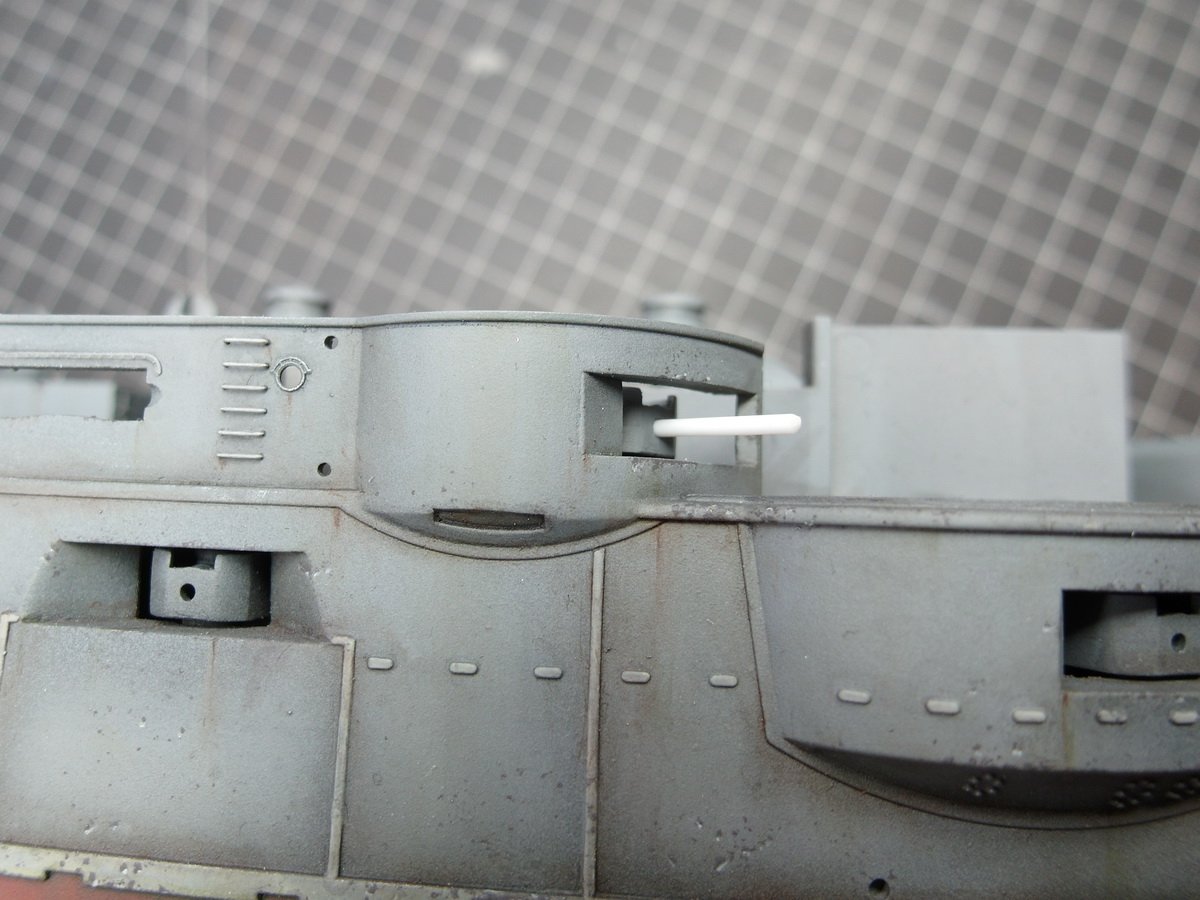
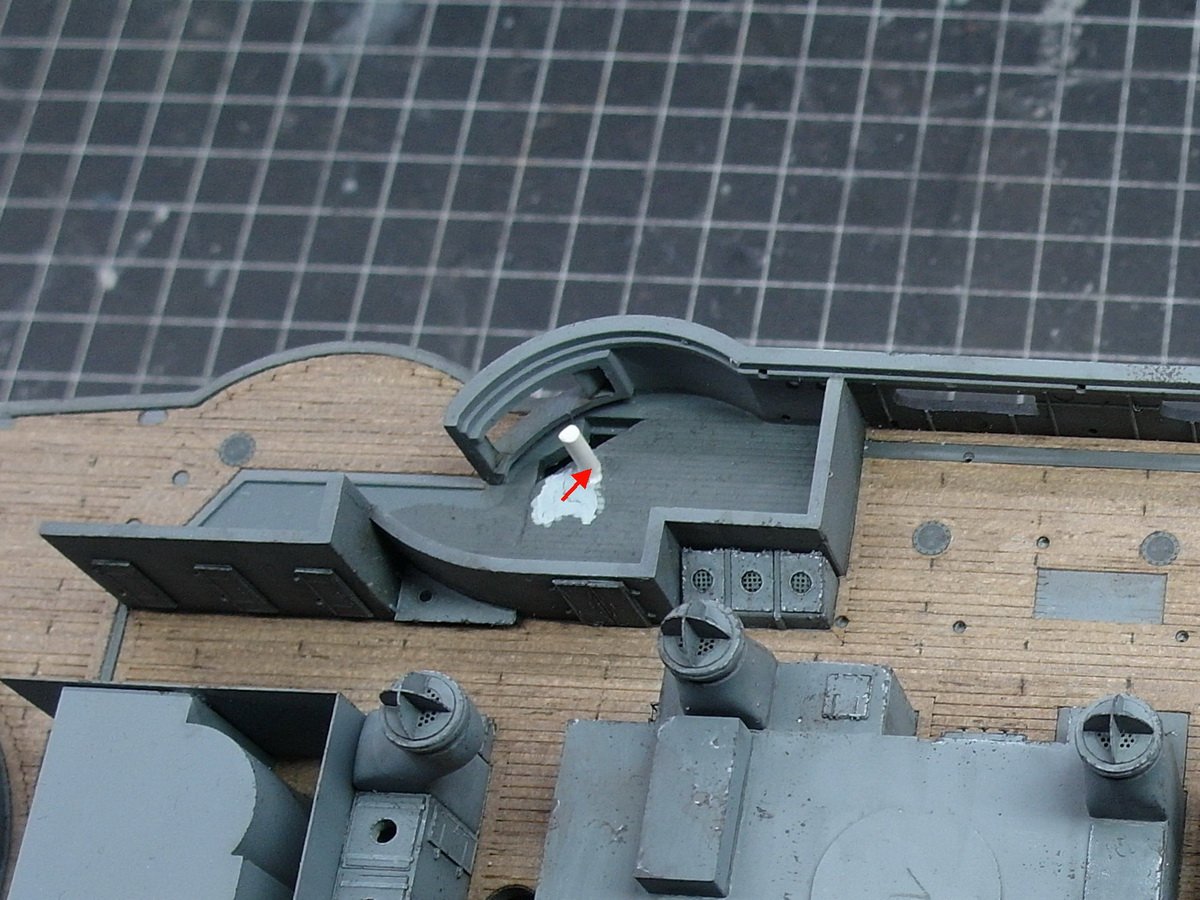
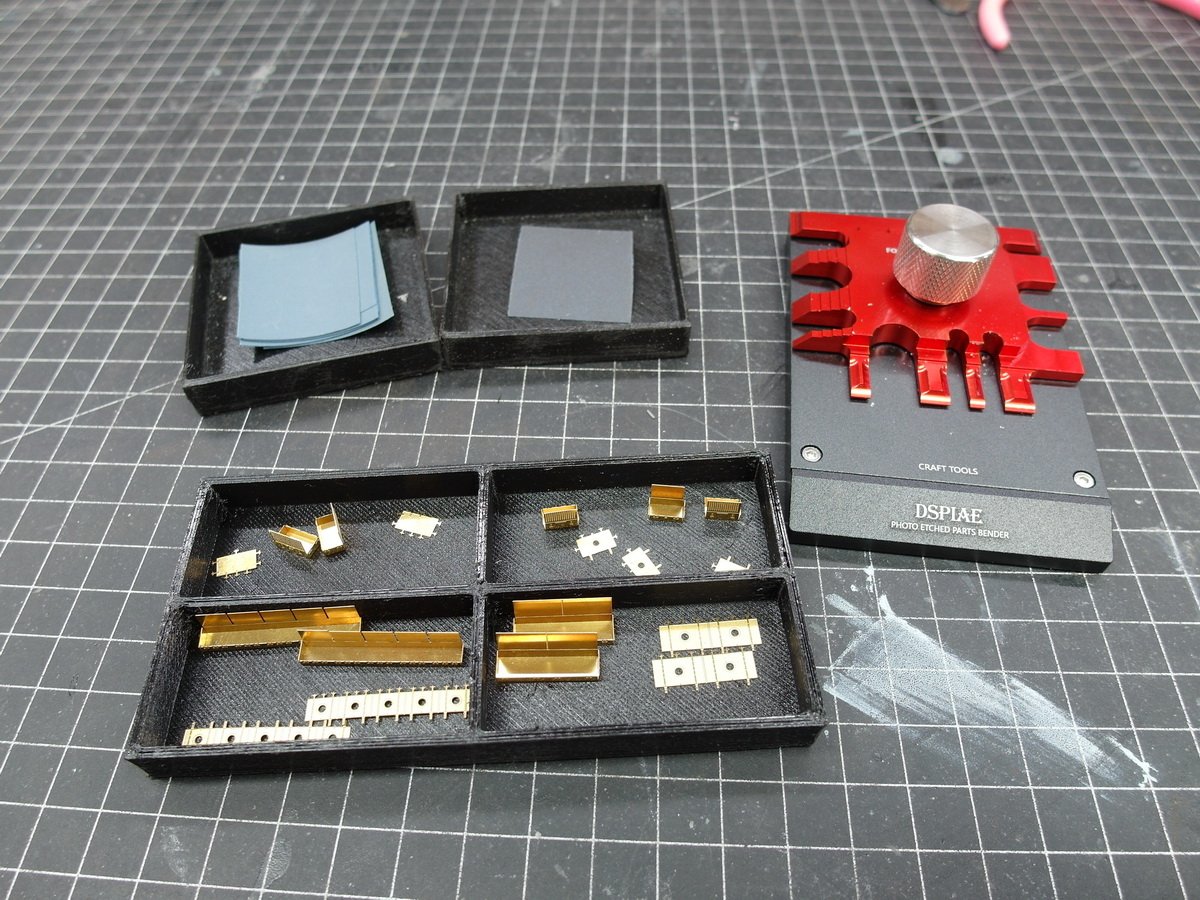
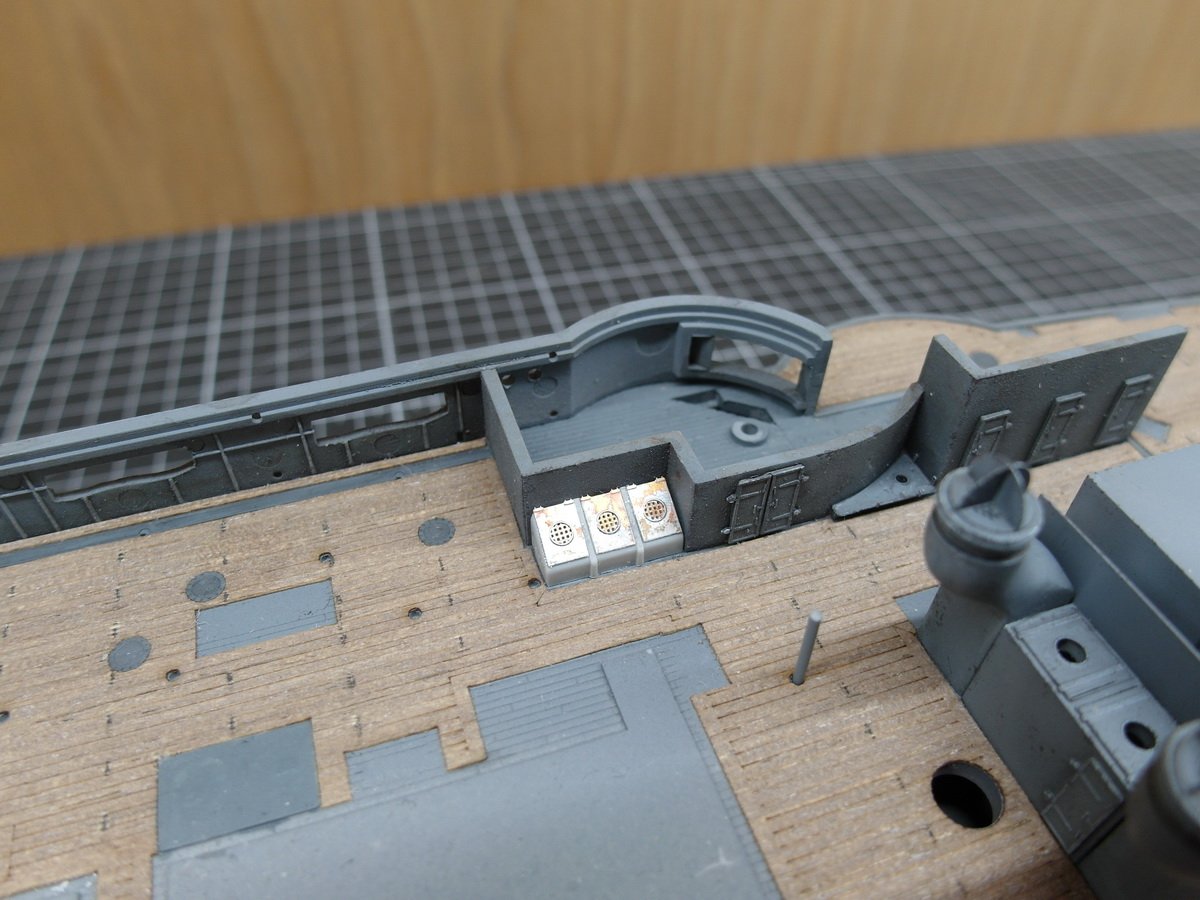
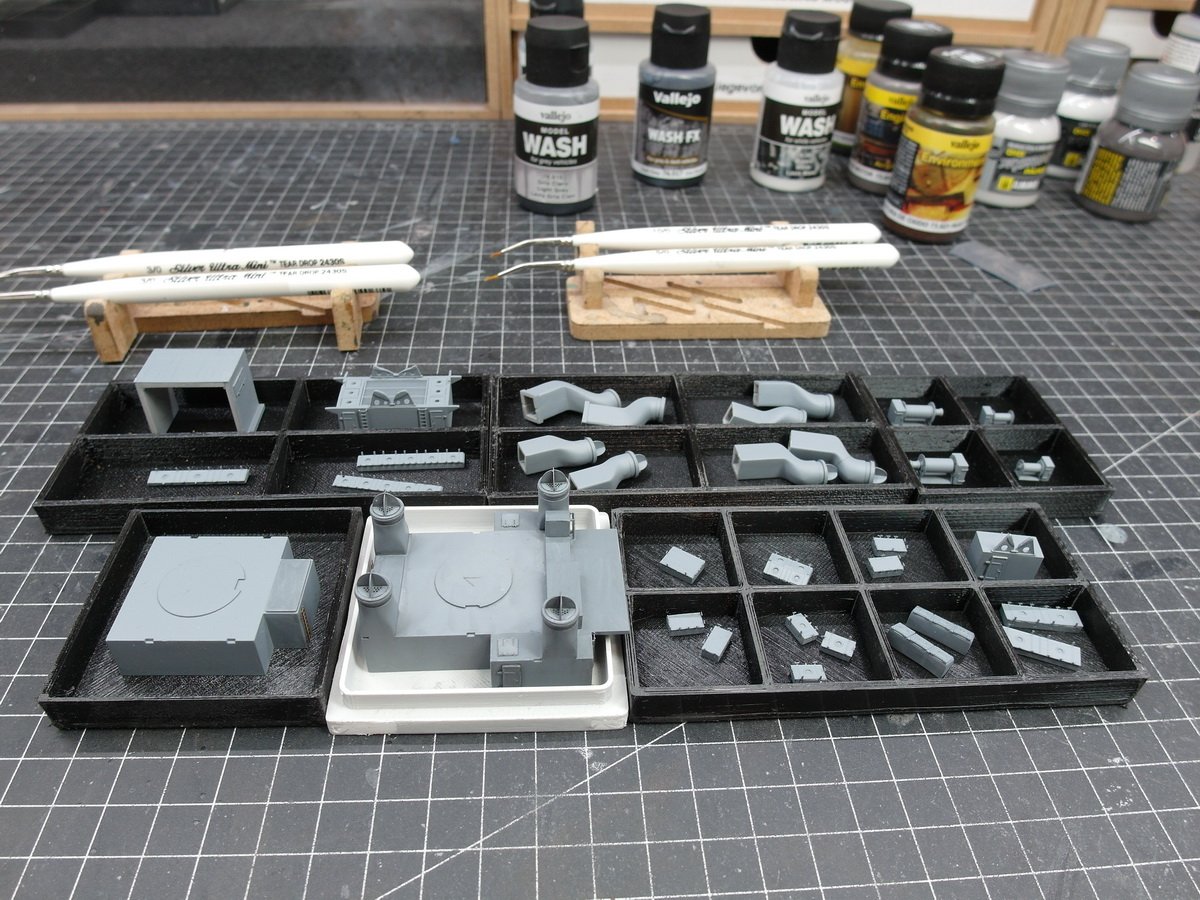
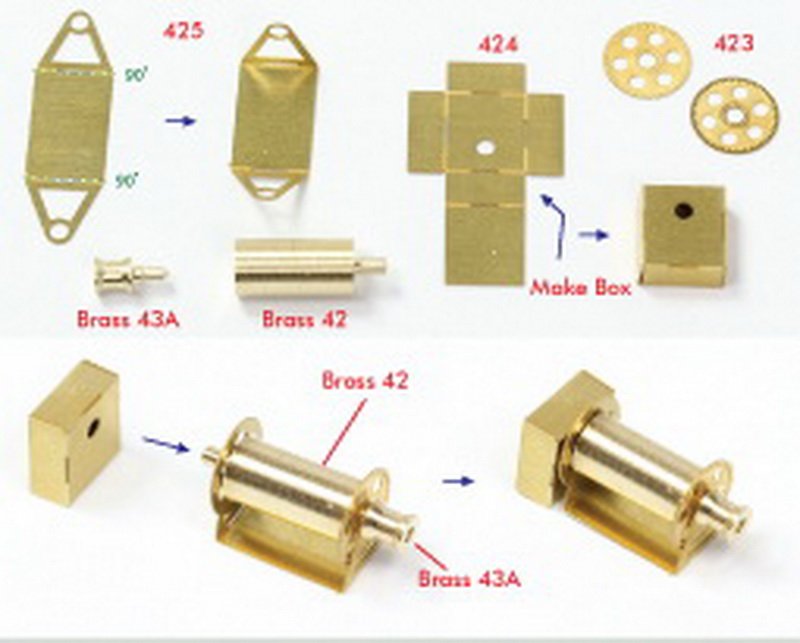
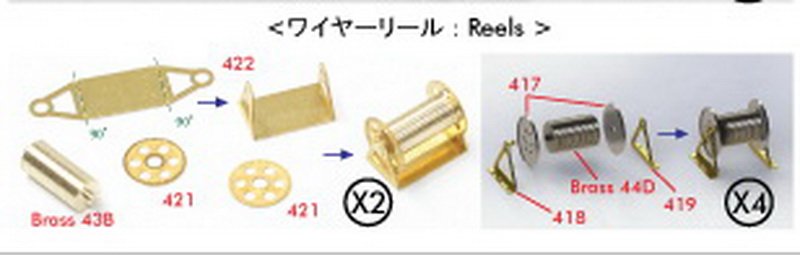
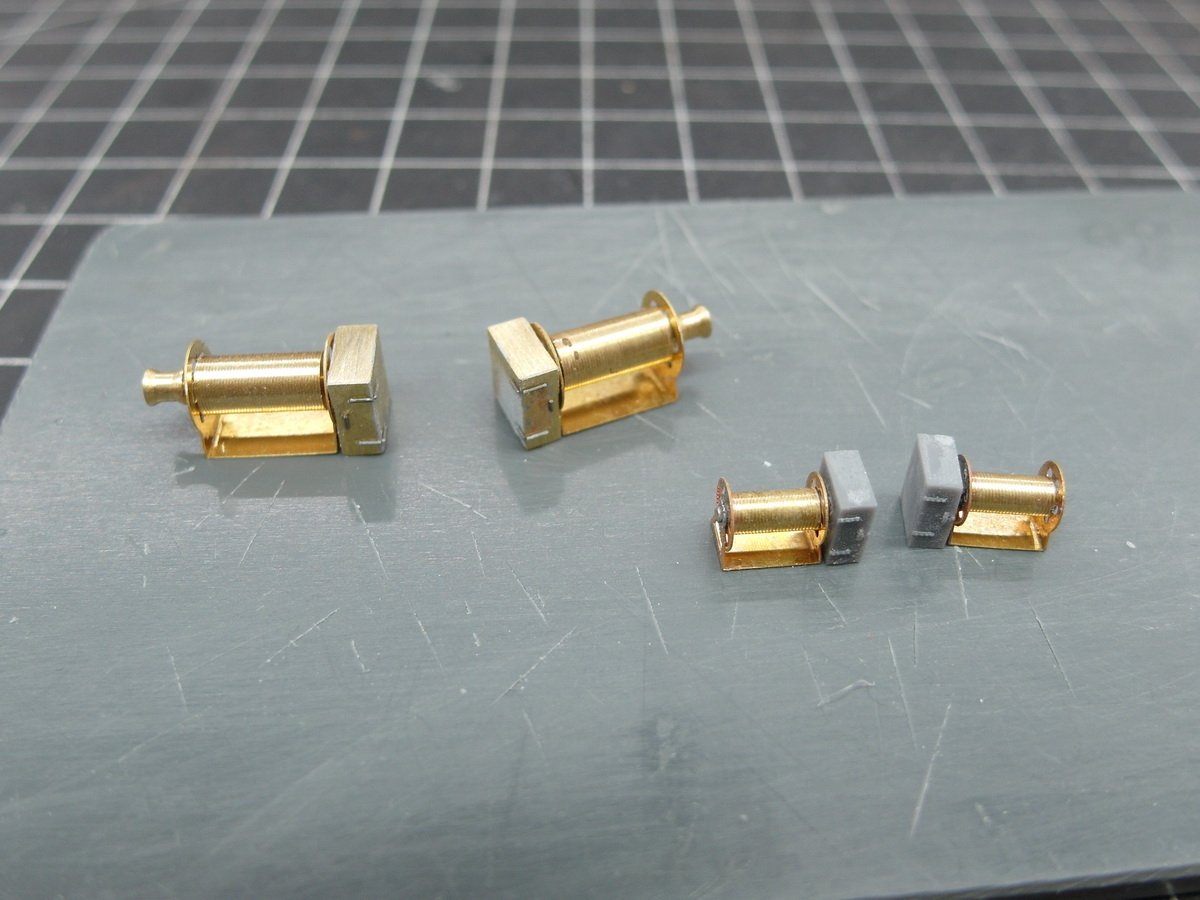
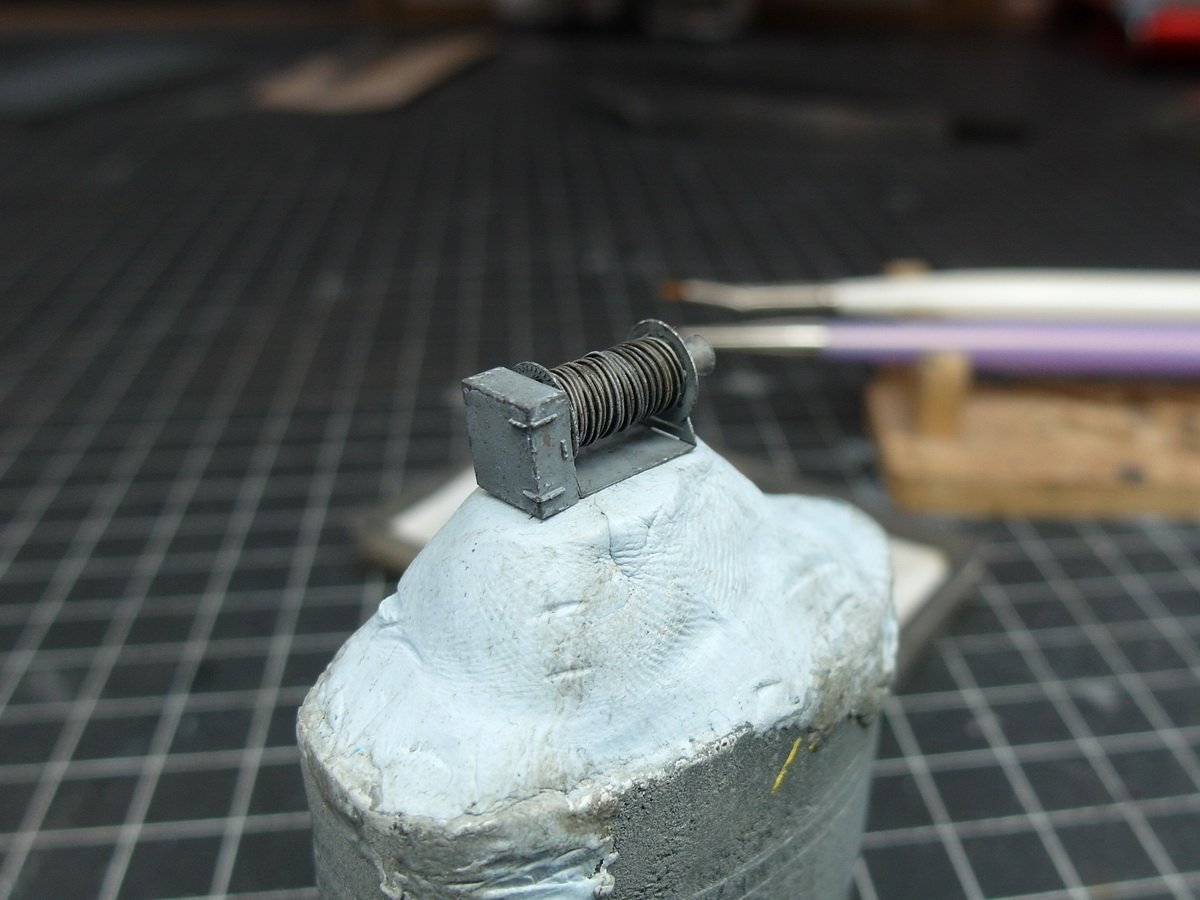
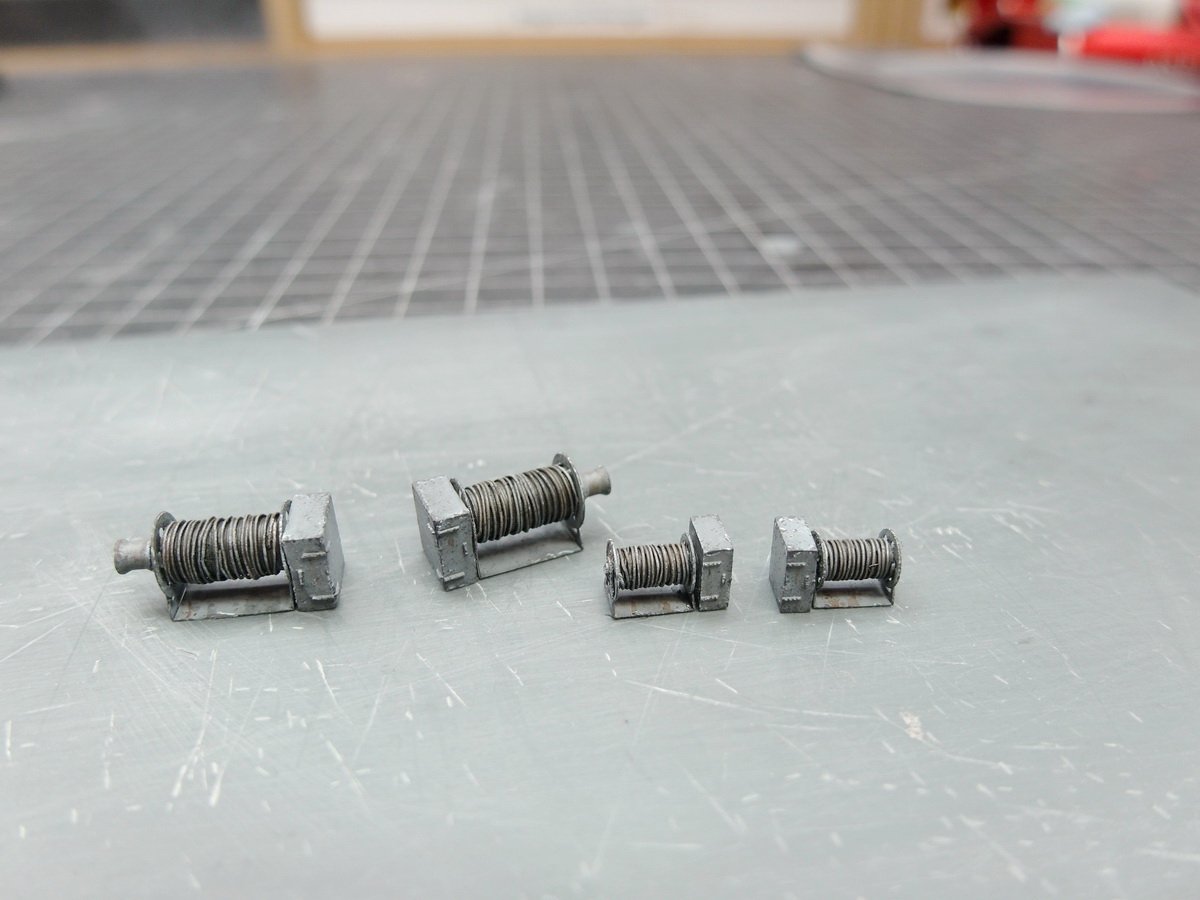
And off to the next etched part battle. A lot of small boxes had to be bent and soldered. I also got a smaller bending aid, which makes such delicate things easier to handle. The first error in Pontos’ sentence is also quickly identified. The component of the box that is supposed to be attached to the front superstructure is unfortunately faulty. It would result in a box whose dimensions would not fit into the recess in the wooden decks. I checked the Pontos set what felt like a hundred times but unfortunately without success. That’s why the KA sentence saved my butt. The slightly simpler lid was underlaid with cut-up etched part gratings and glued to the original component of the model Then brought to its position for inspection. Little by little, the internal structures and boxes are made and collected in my printed organizers to be aged afterwards. I made a few improvements to the winches. The large one did have a small cabinet included, I think a distribution box and the drive for the winch, but without any structure on the outside. The little winch would even be complete without everything. However, I found out in another forum that it could well be the case that the small winch did not have an electric drive. So I did a little handwork and gave the big winch hinges and a closer made of thin lead wire. The little one got an upright box that functions as a closet. I liked it better. Still aging and with lead wire wrapped around the drum. I deliberately wrapped it layer by layer, not quite perfectly, to make it look more authentic. Accomplished. And so everything could get on deck.


- 193 replies
-
- 7
-
-
-
- Russo-Japanese War
- Mikasa
- (and 2 more)
-
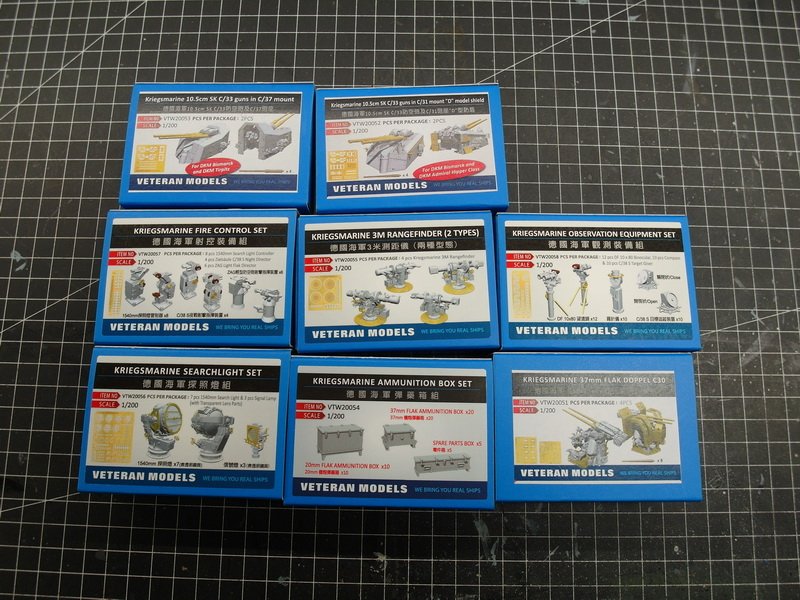
Hello Jeff. I'm particularly looking forward to your construction report on this famous battleship, since I've already built her. I'm curious how you will implement this model. Knowing your Mikasa, fantastic. The ingredients are very similar to mine. Pontos, CMK and the excellent book by Draminski. This will serve you well. Maybe take a look at the company Veteran Models, they have a few fantastic details for DKM ships in their program.
-
A really fantastic model. The little beauty is beautifully built, aged and staged. Bravo Greg 👏
-
Thank you Jeff. I'm excited to see how you'll implement your Bismarck. Knowing your Mikasa, it's going to be a blast again. 👍
-
Hello Phil. A very interesting pre-dreadnought ship. The frame is very neatly built. I'll stay on board.
- 288 replies
-
- 4
-

-
-
- Card
- Pre-Dreadnought
- (and 3 more)