

brunnels
-
Posts
337 -
Joined
Content Type
Profiles
Forums
Gallery
Events
Everything posted by brunnels
-
 I'm amazed at the amount of information you are obtaining. That bowl is super cool.
 -
Looks fantastic so far, one day I will get some boxwood to work with.
-
An office with 11 amazing models is a life goal I didn't know I needed until now 😃.
- 131 replies
-
- 3
-

-
- Medway Longboat
- Syren Ship Model Company
- (and 1 more)
-
best SECOND model ship kit recommendations
brunnels replied to palmerit's topic in Wood ship model kits
Personally I think anything other than Vanguard would be a step down as far as entry/mid level kits go. Also I think a lot of the time harder rated kits aren't necessarily harder skill wise than what you will have experienced with the Sherbourne, they just require more time to complete. I think a good step up would be some of the two masted vessels from Vanguard like the Adder, Speedy/Flirt, or even the Dutchess of Kingston. -
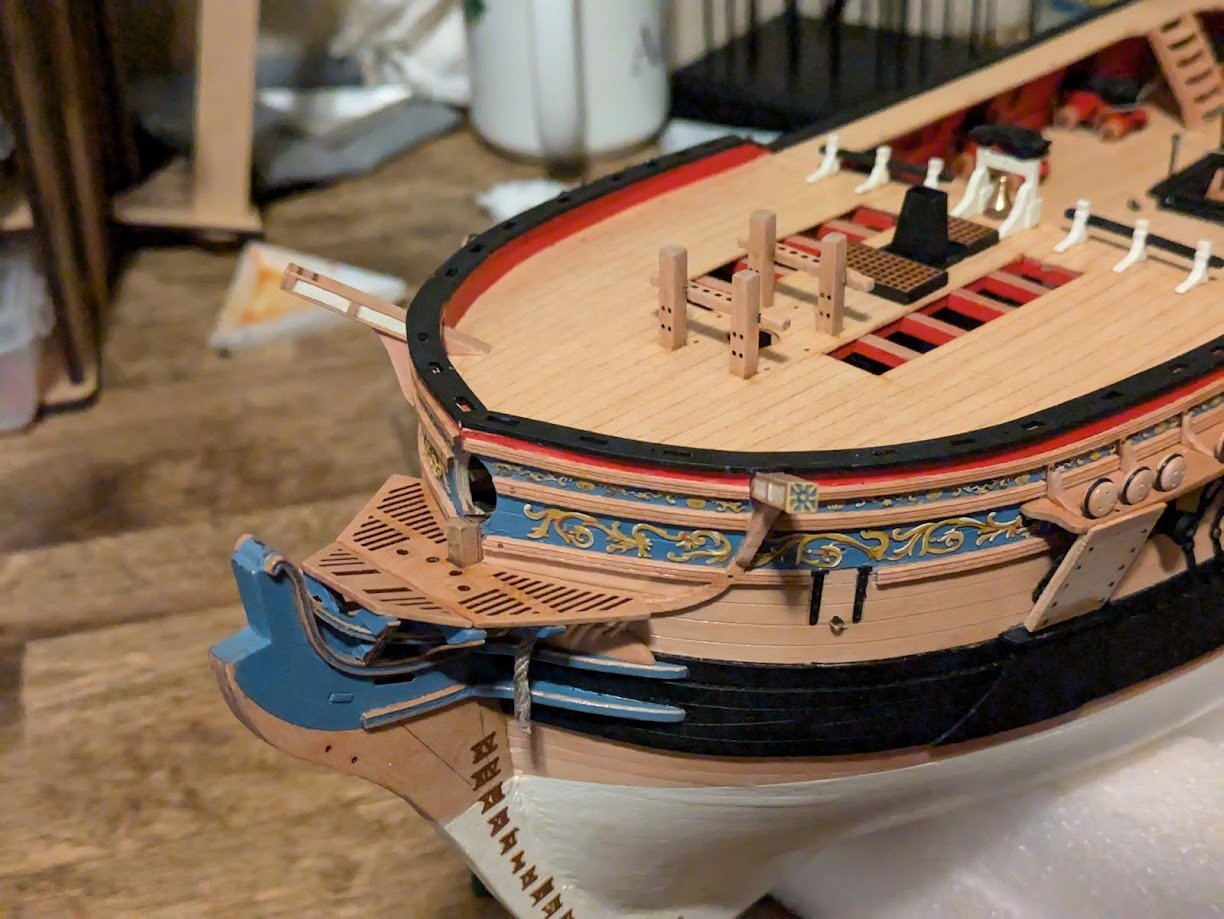
Bow/Head Main Rail: Finished up the head railing with the large main rail patterns. These are 3 pieces glued together, then painted blue infill and WOP as a finish. Next I added all the eyelets and deck cleats to the Quarter deck and forecastle. I have also started on the Quarterdeck rail by gluing the bottom piece in place.
-
Looks fantastic so far.
-
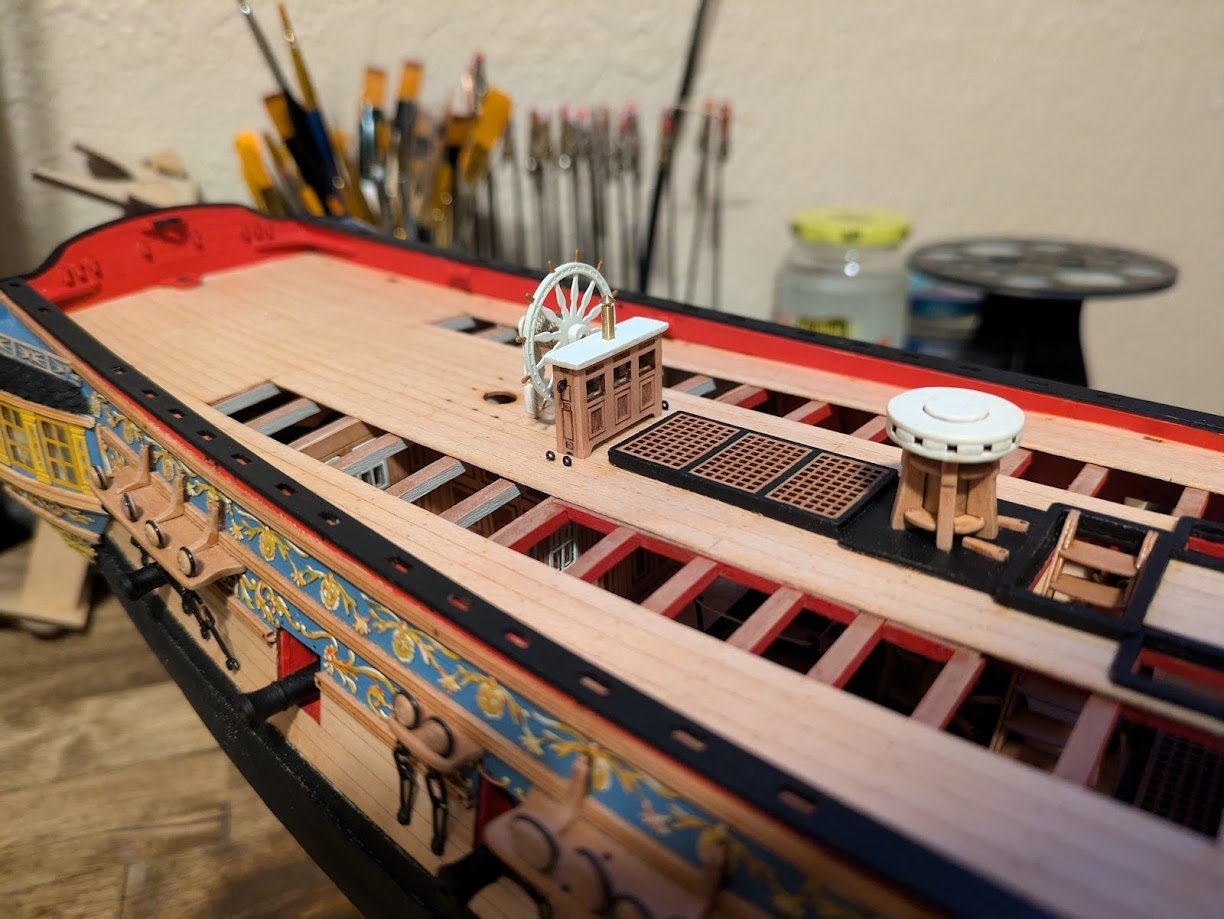
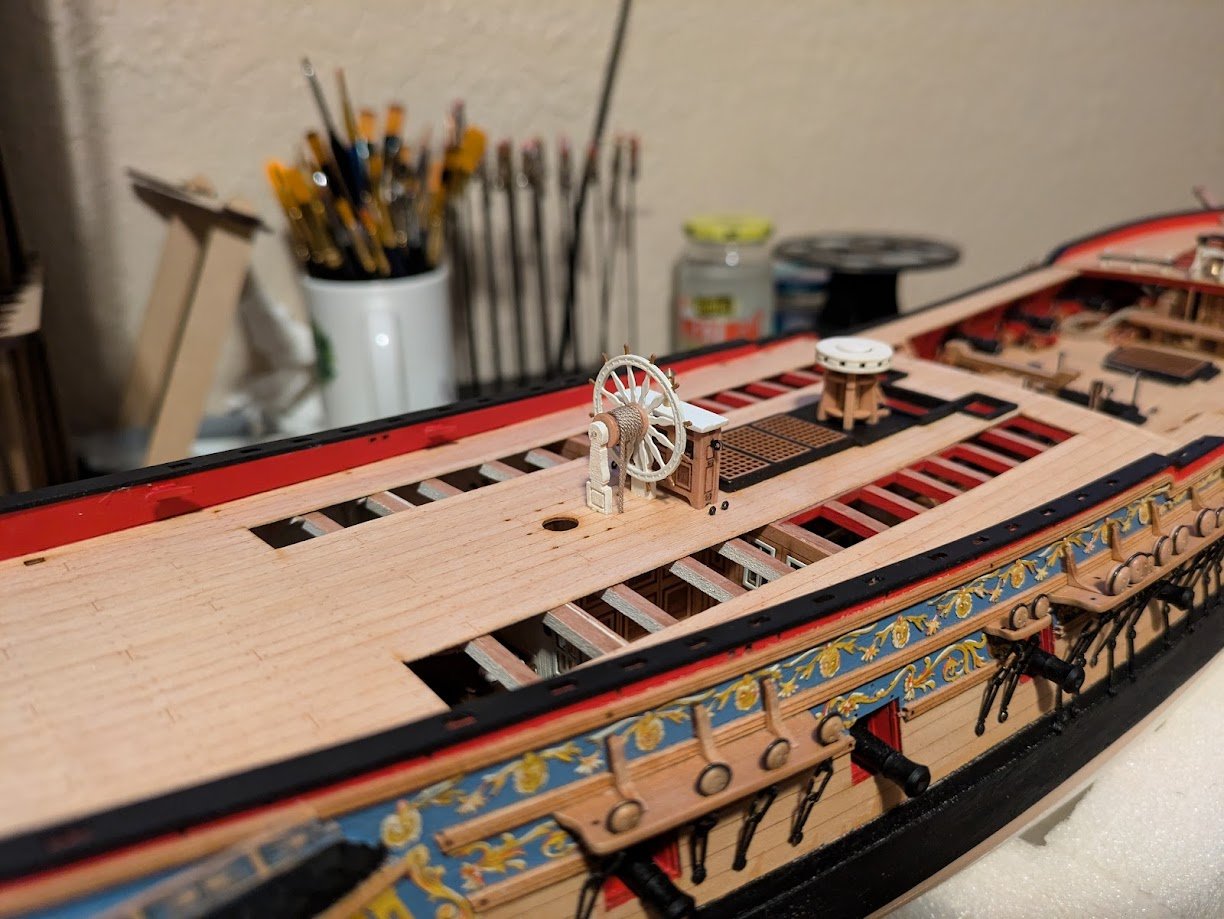
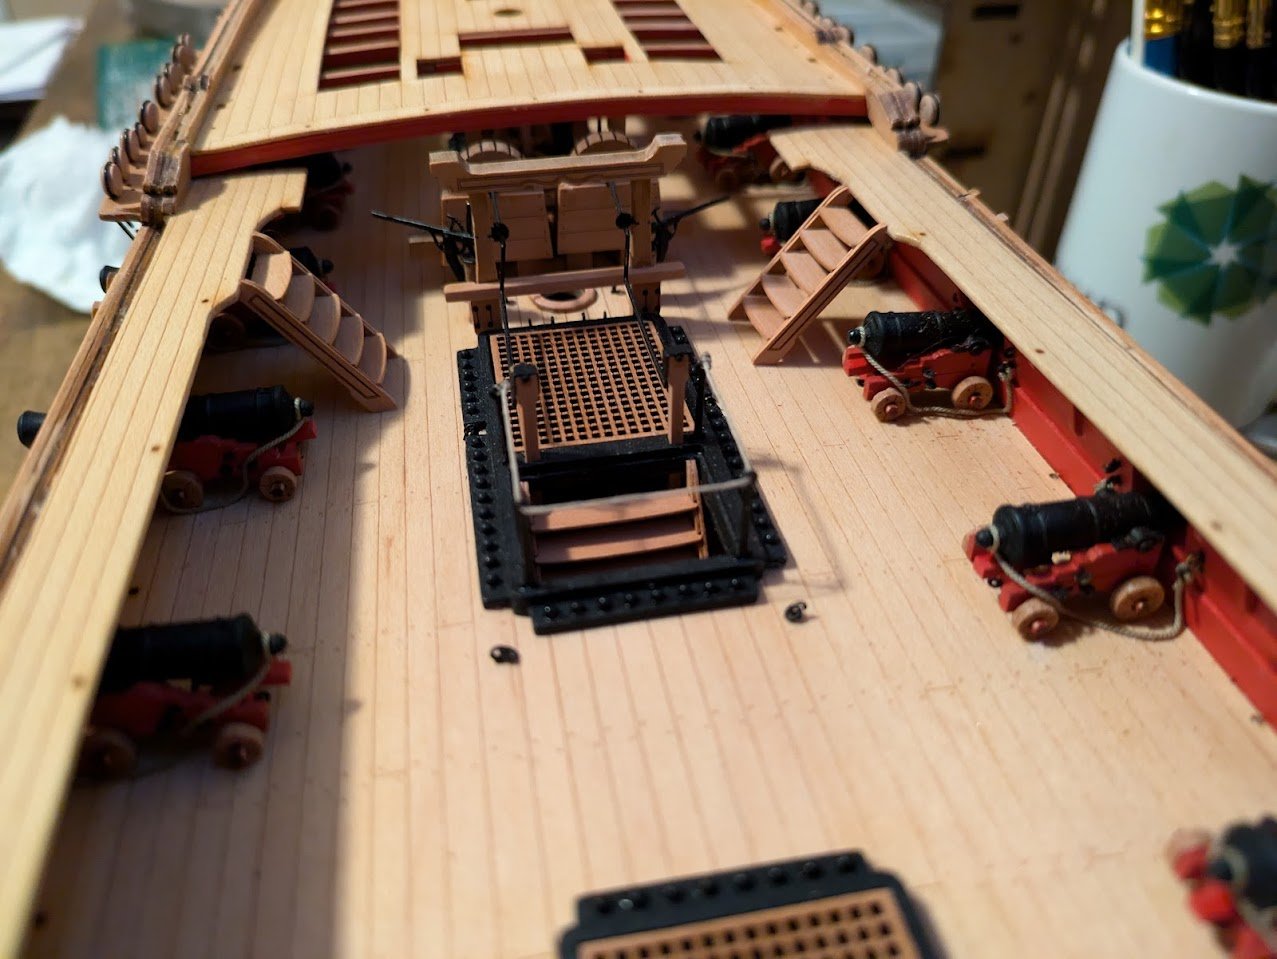
Ships Wheel, and Binnacle: Binnacle, Ivory white top, with WOP applied on the wood. I plan to add the securing ropes to the outside as well. Ships wheel. I wasn't sure I would like the wheel being made out of PE, but once built up it looks really good and to scale and not nearly as flat as I was expecting it to look. The hardest part was trying to figure out how to make the two ropes from below deck look like one rope wrapped around the drum. My solution was to just cut them both as cleanly as I could and glue them end to end at the bottom of the drum, It ended up looking better than I expected, and the two ropes split can only really be seen if you look pretty closely under the drum.
-
Yes I will be rigging, I actually really enjoyed the rigging section of my last model. First I have to get through the 3 small boats and the masts/yards which will probably take me another month or more.
-
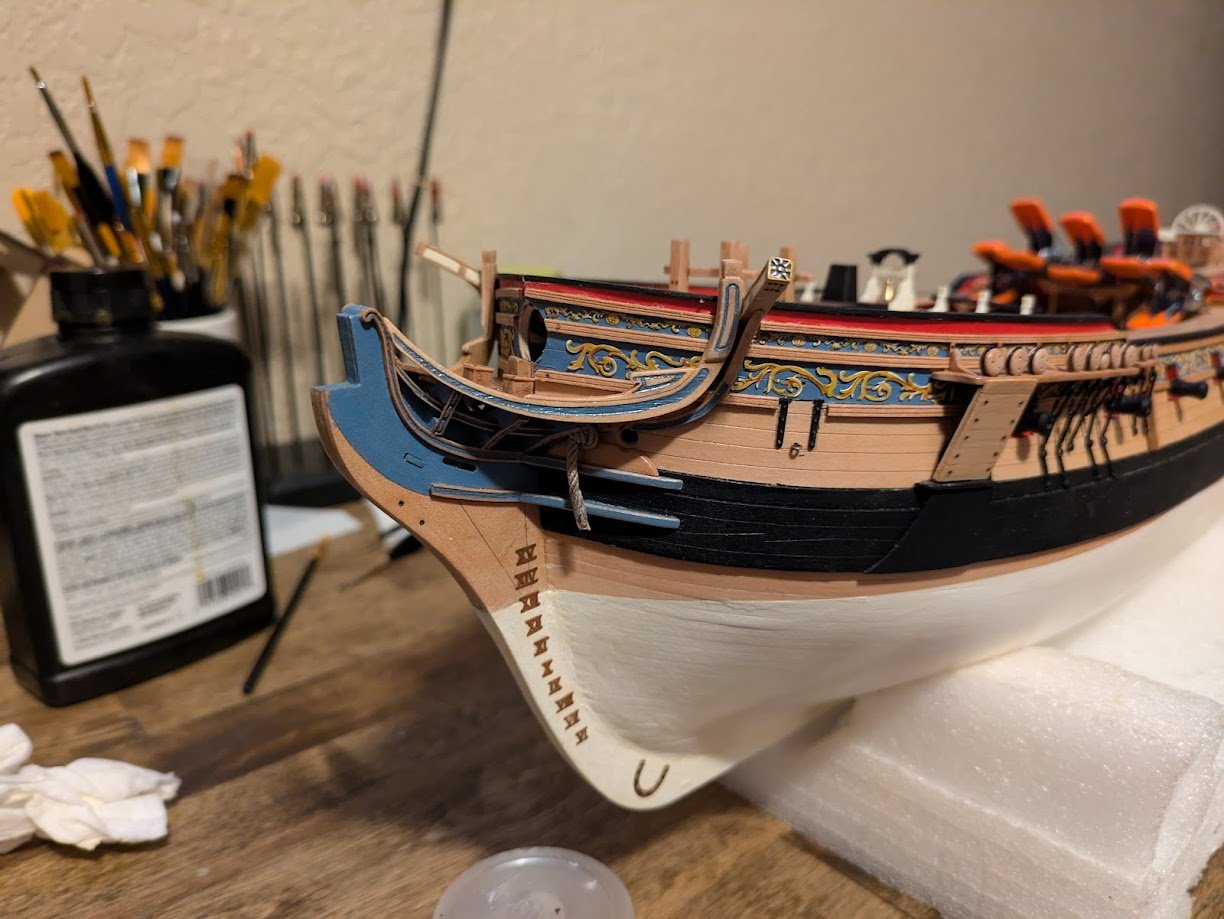
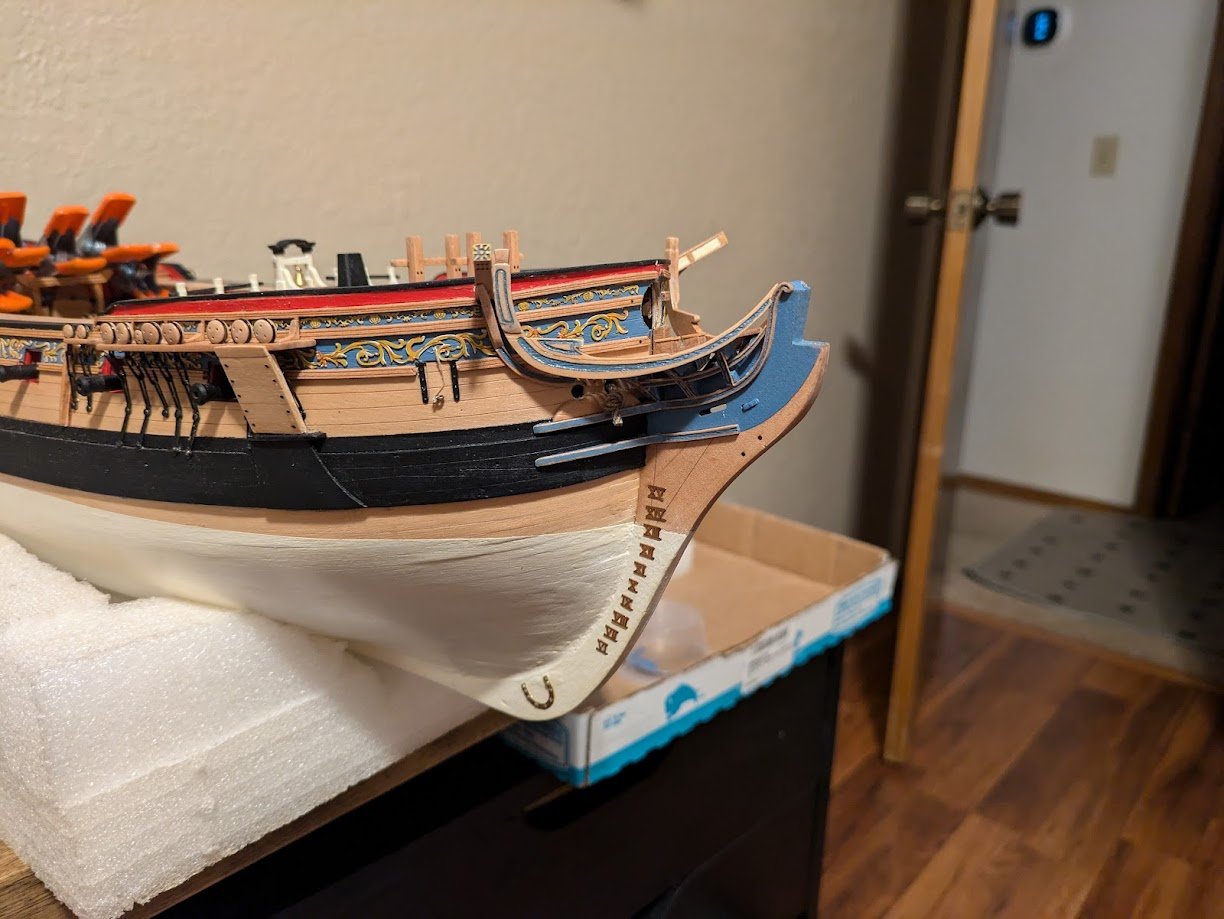
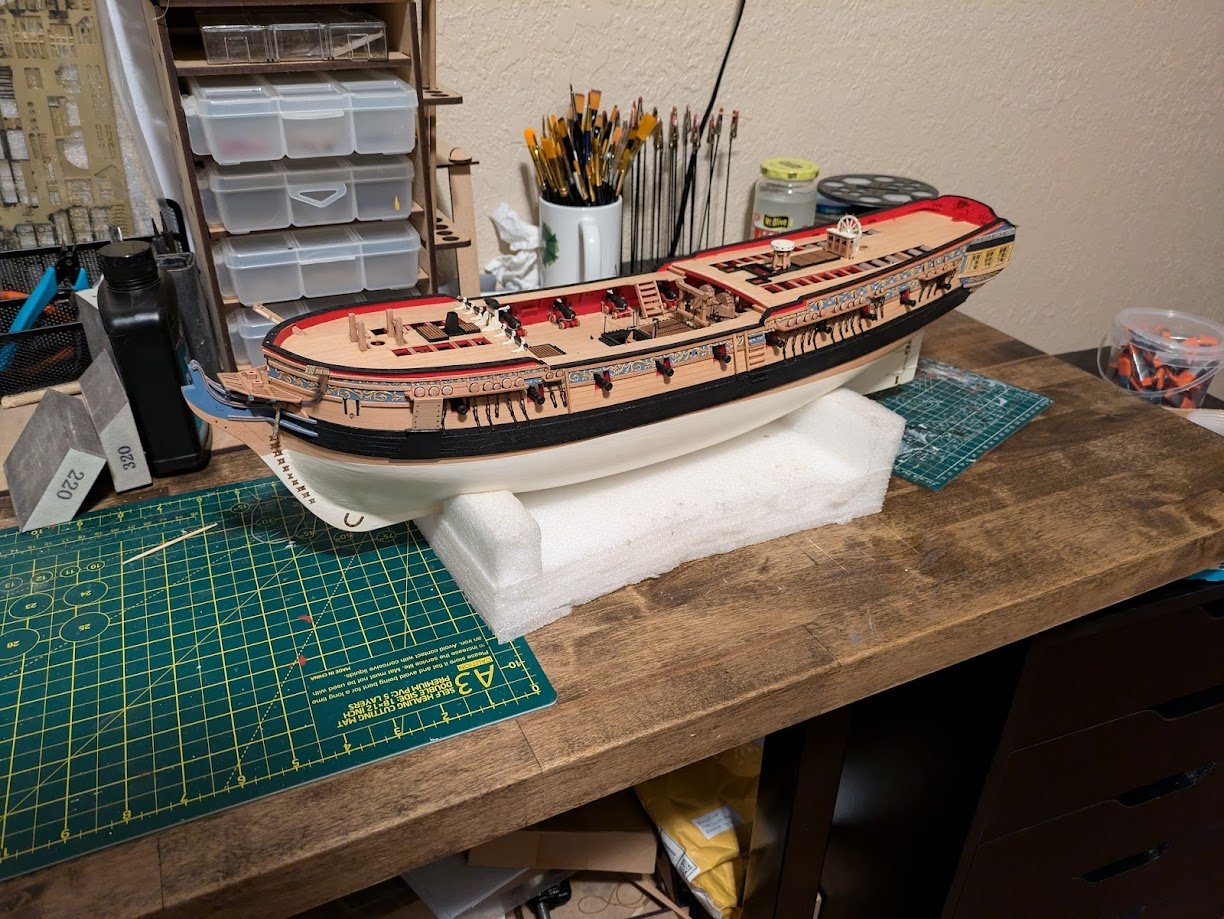
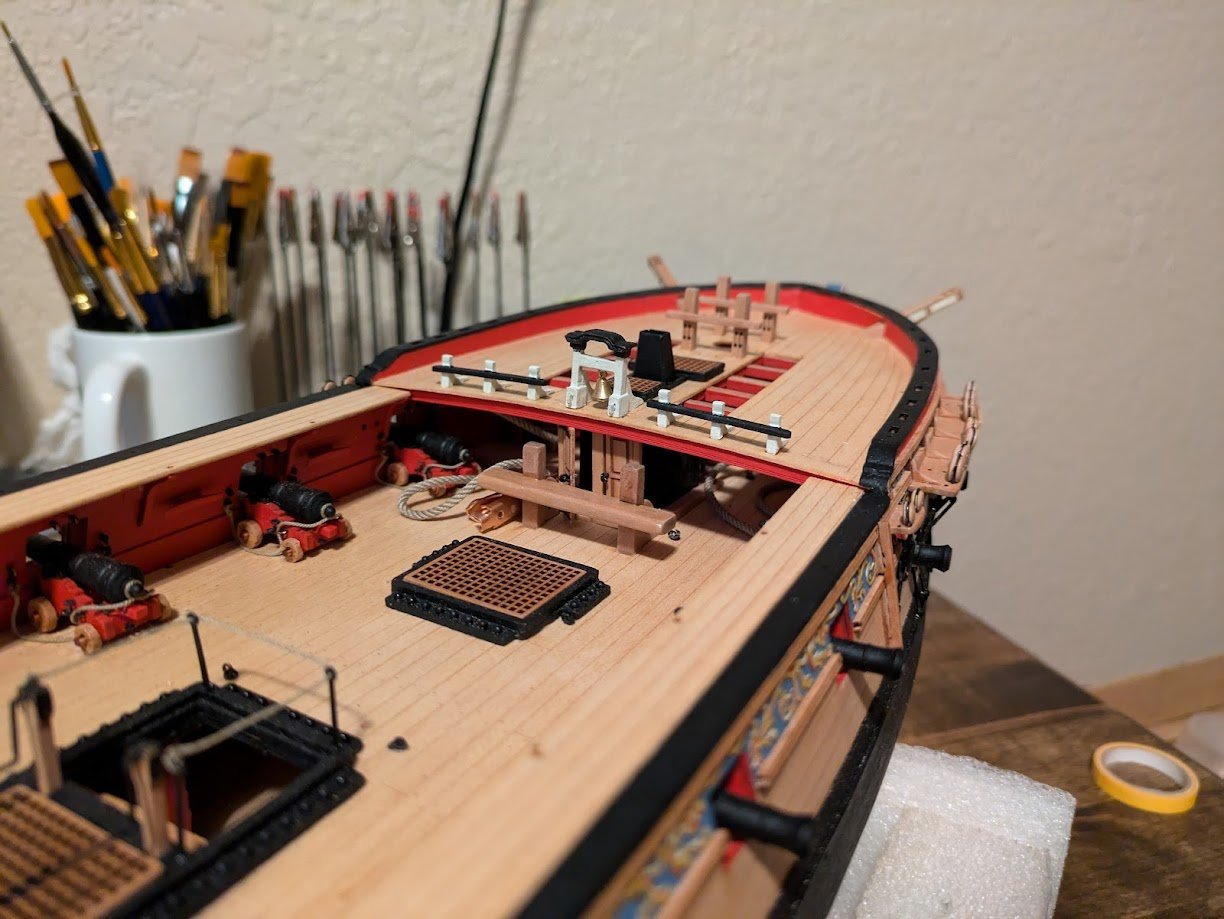
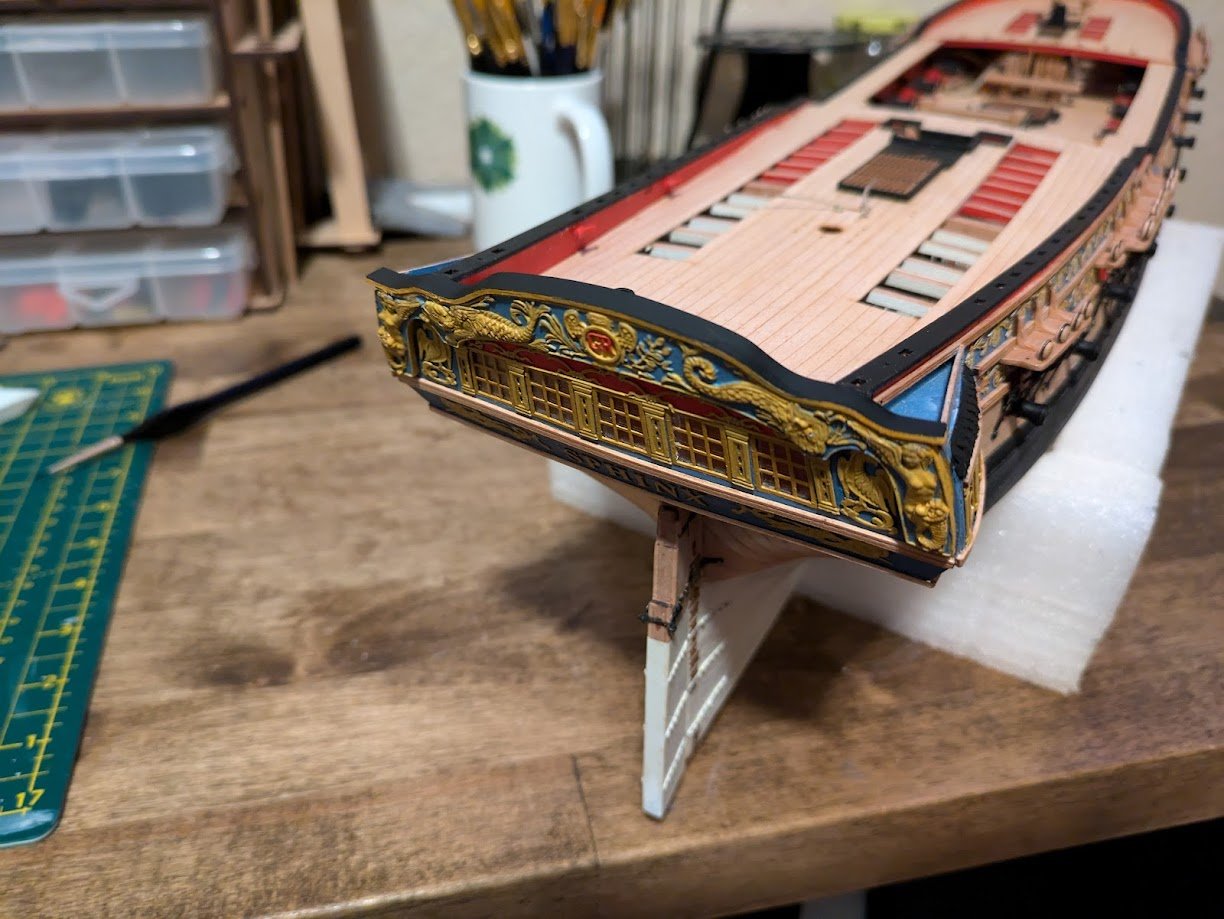
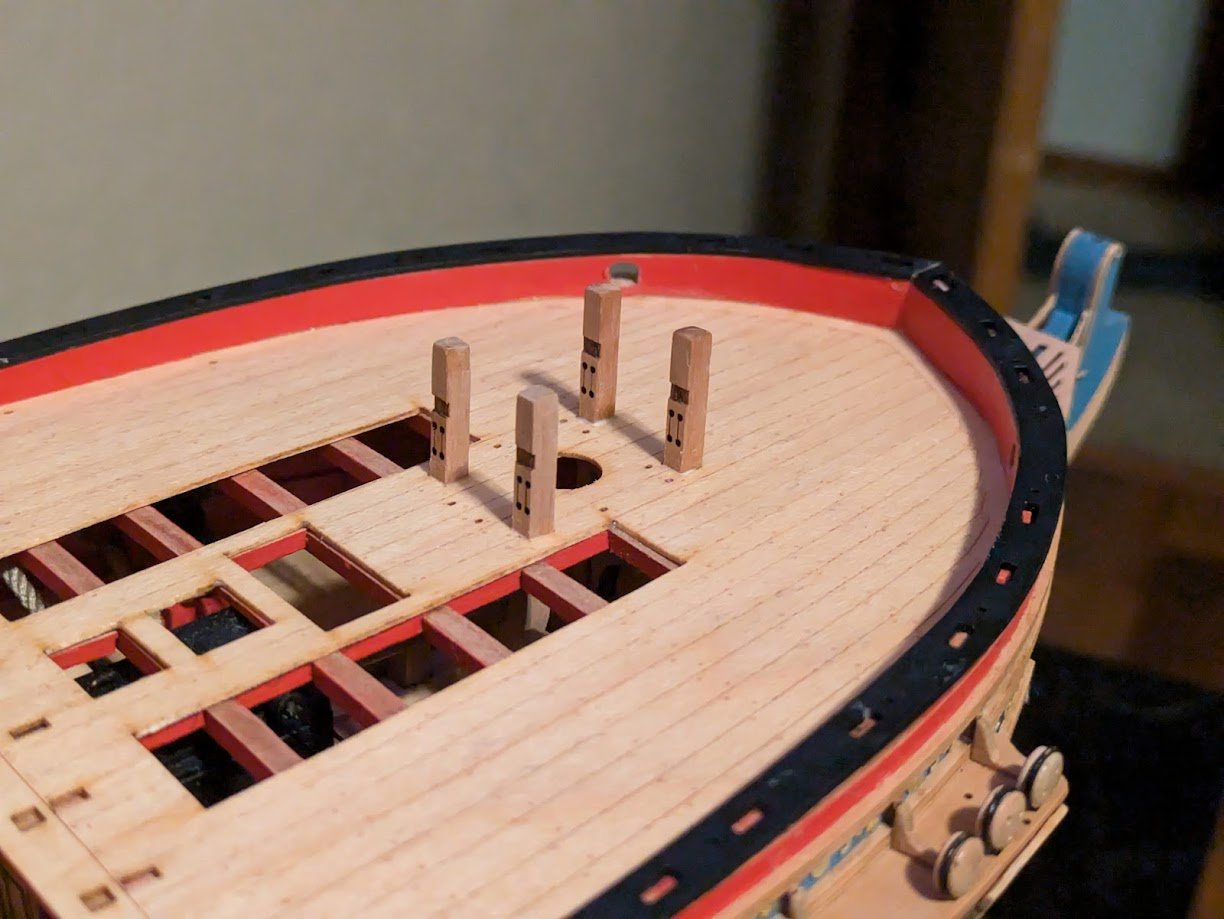
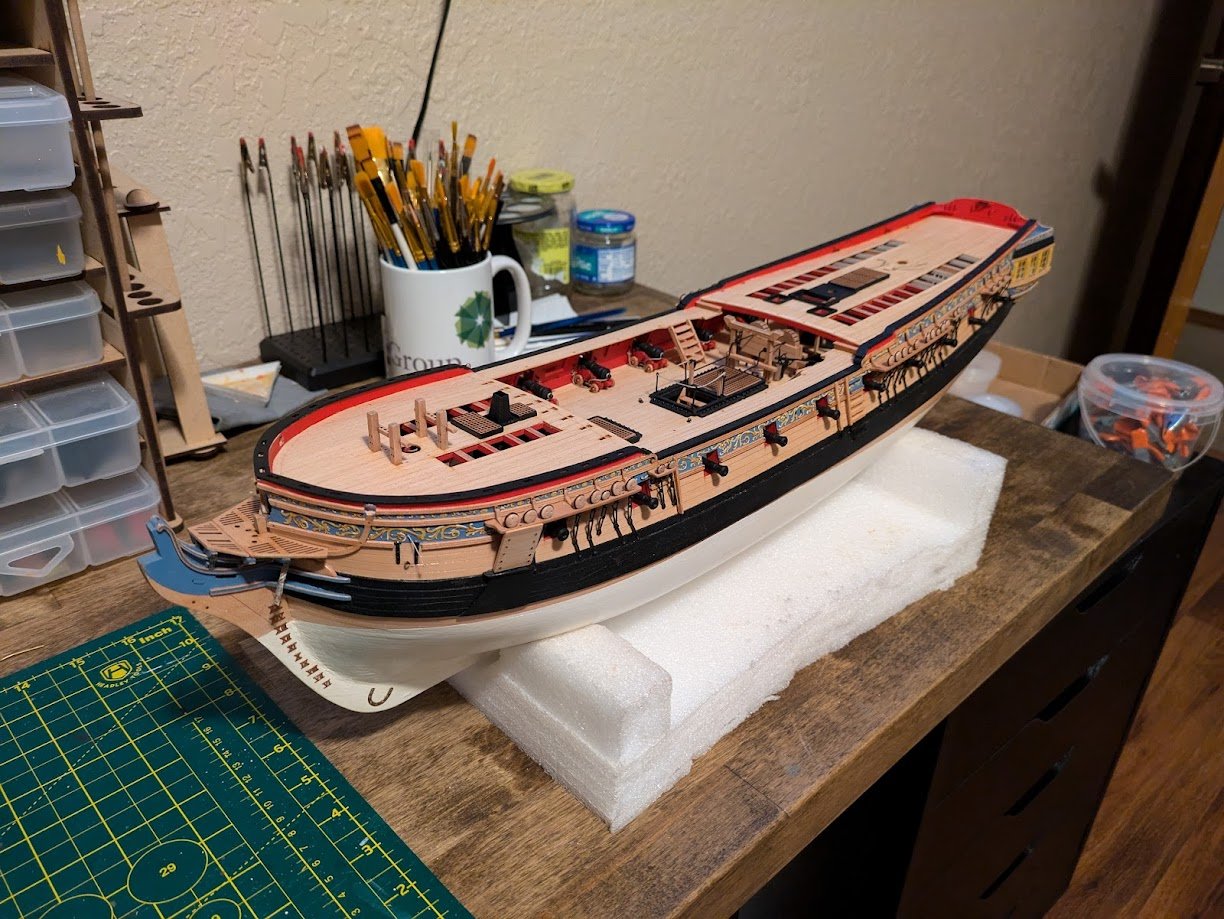
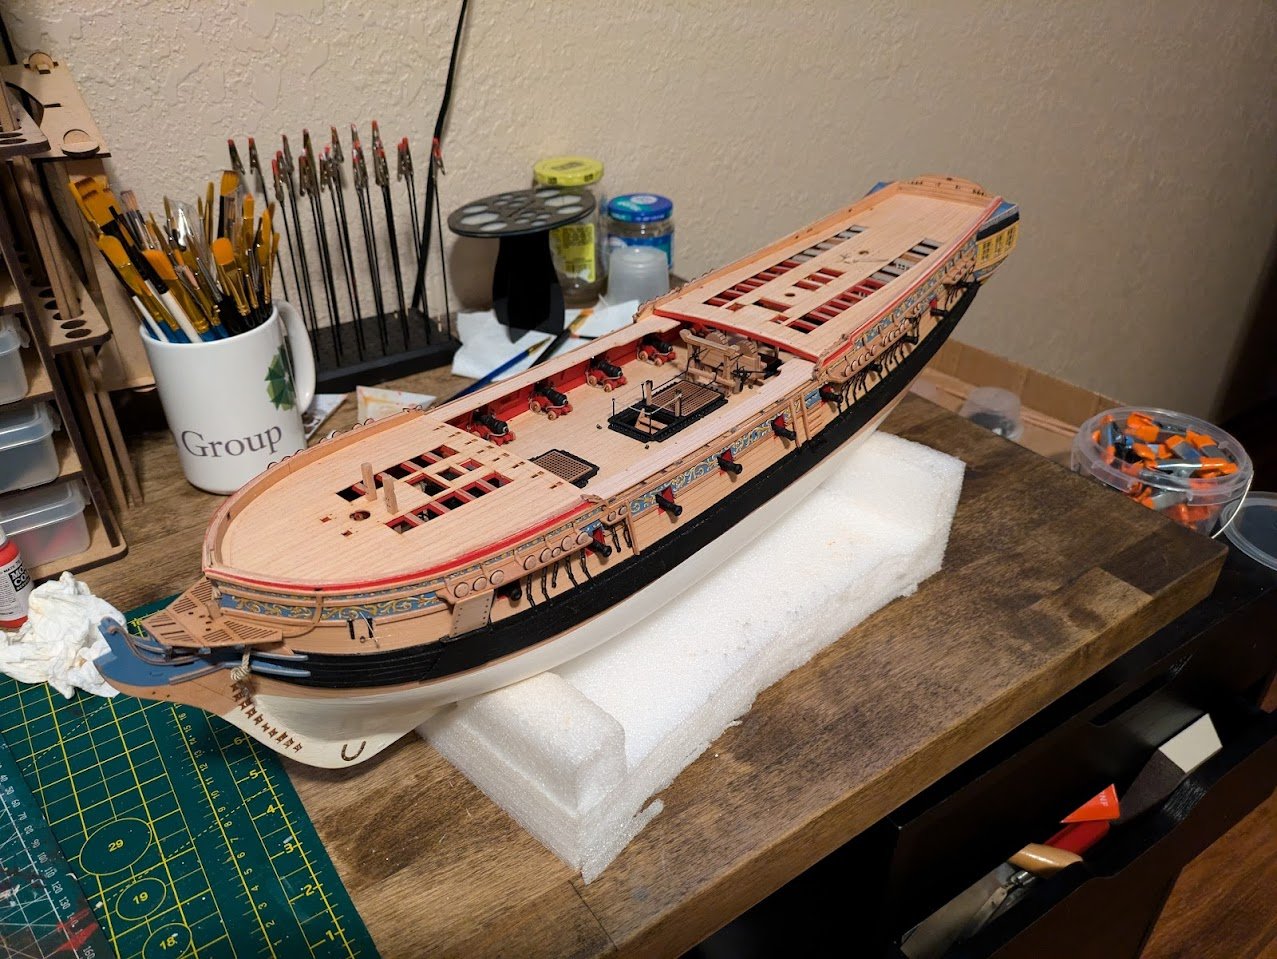
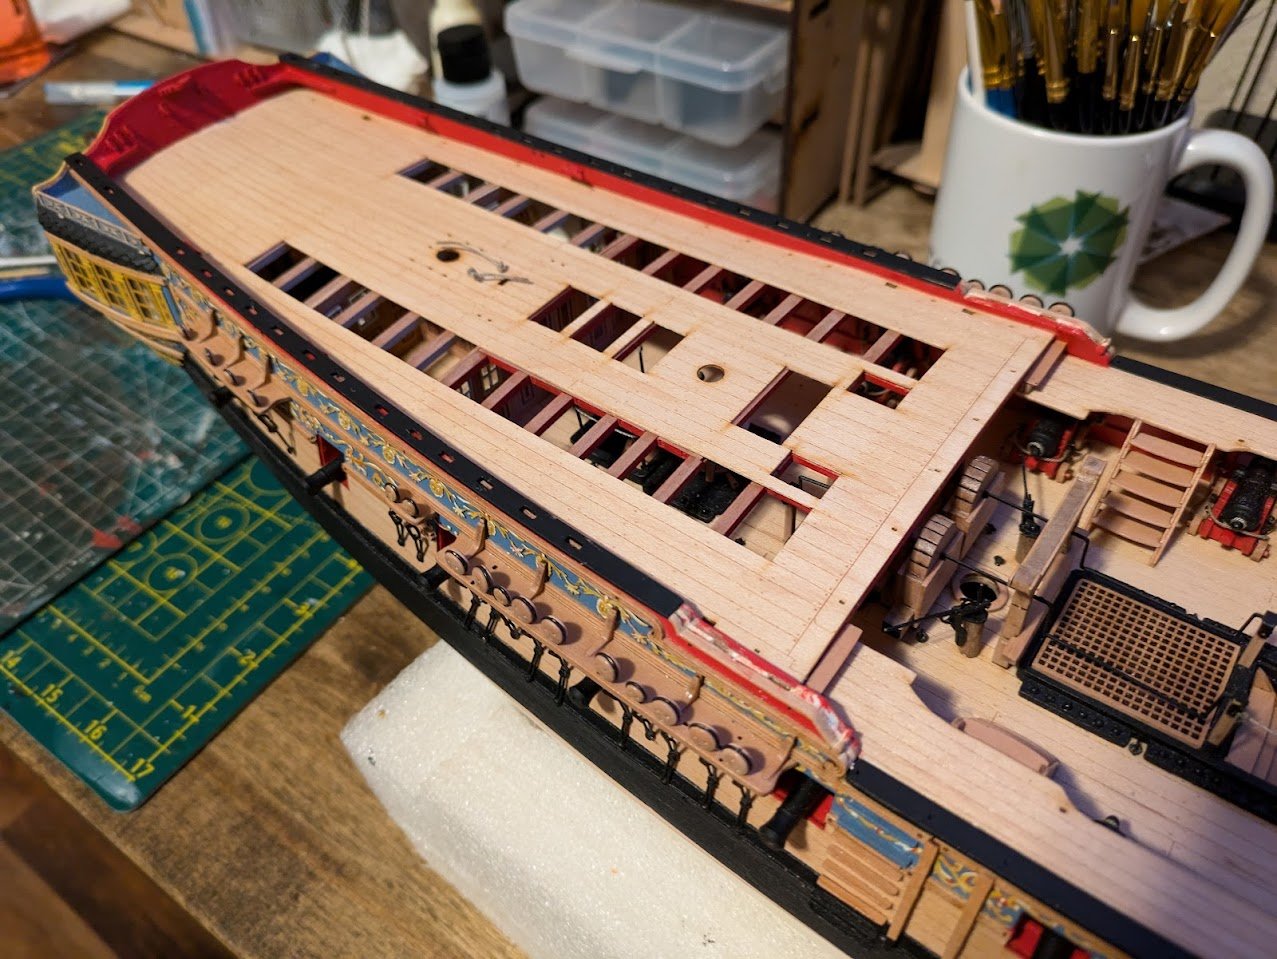
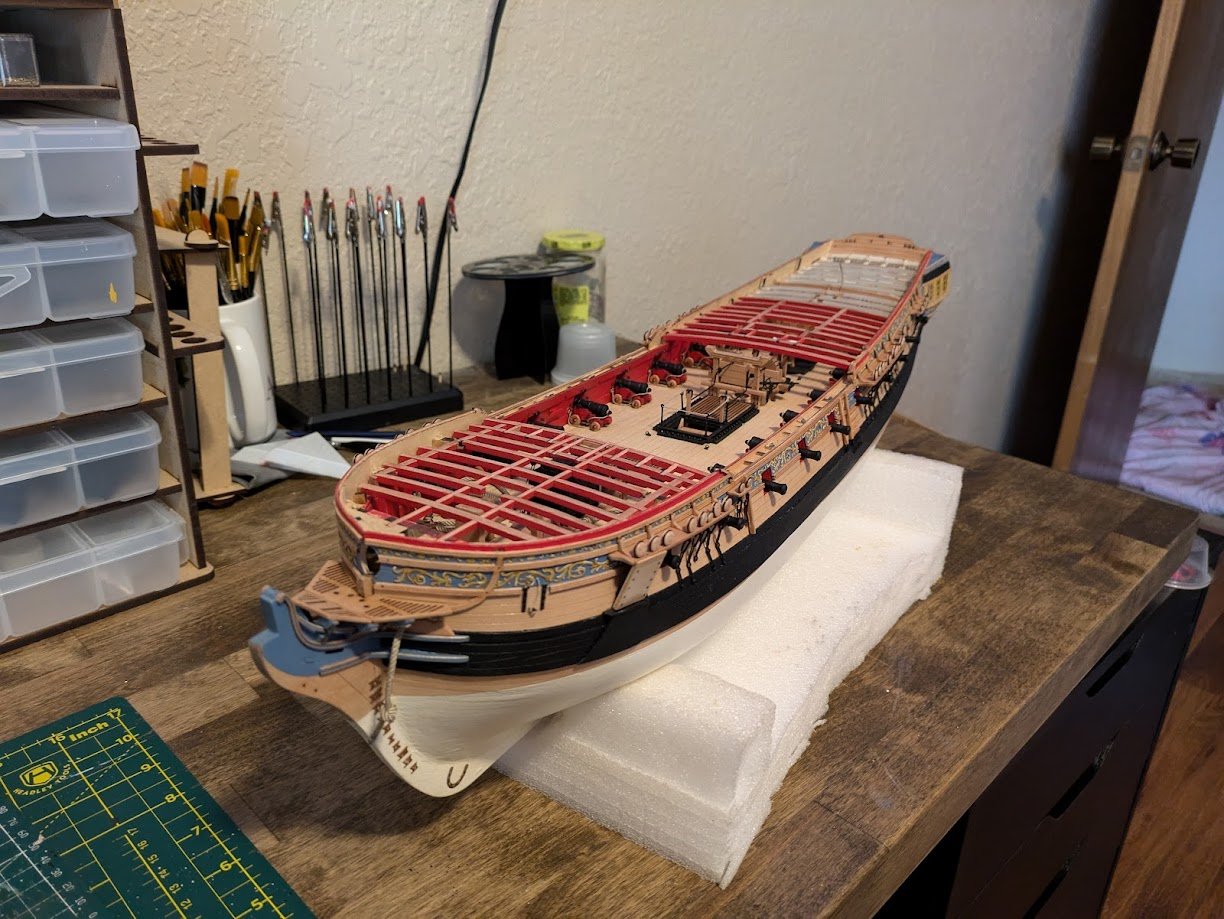
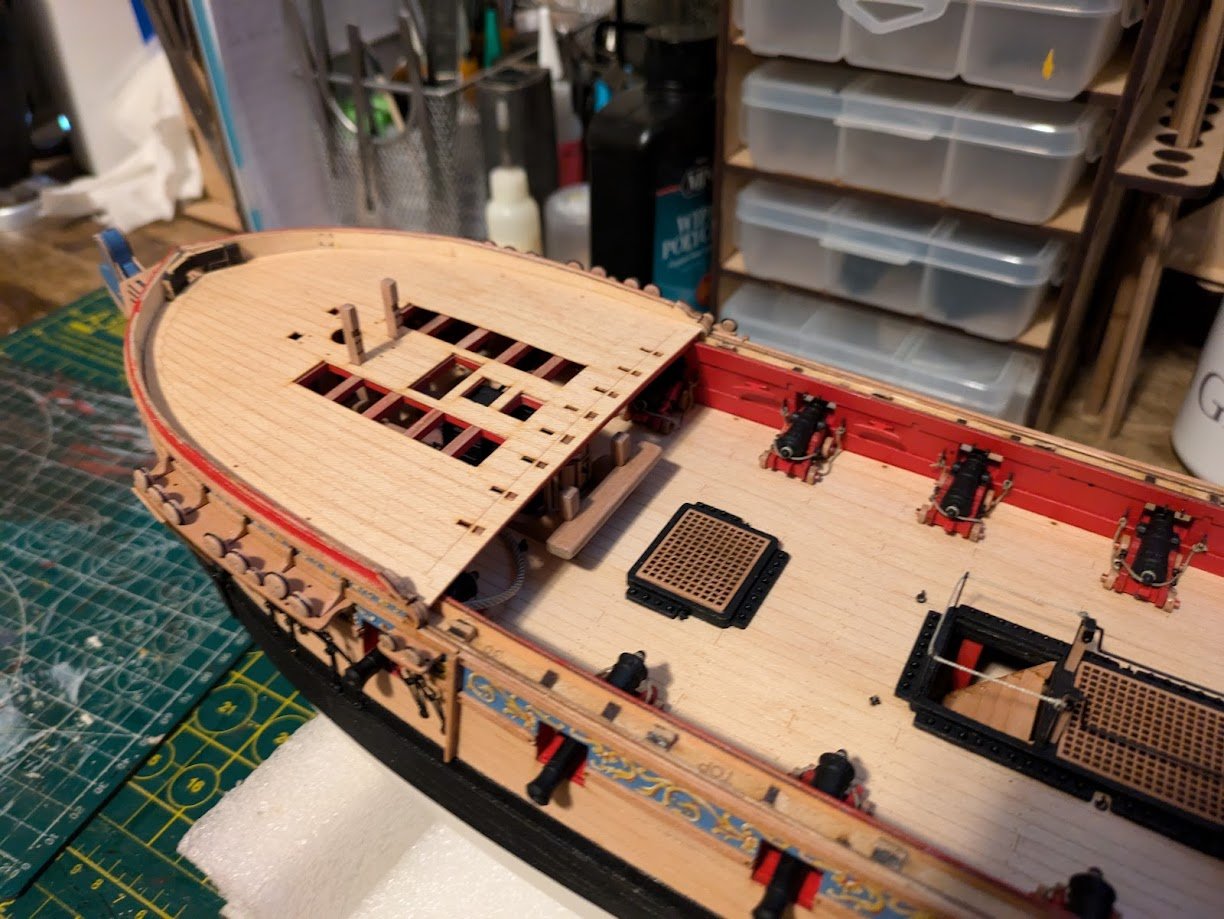
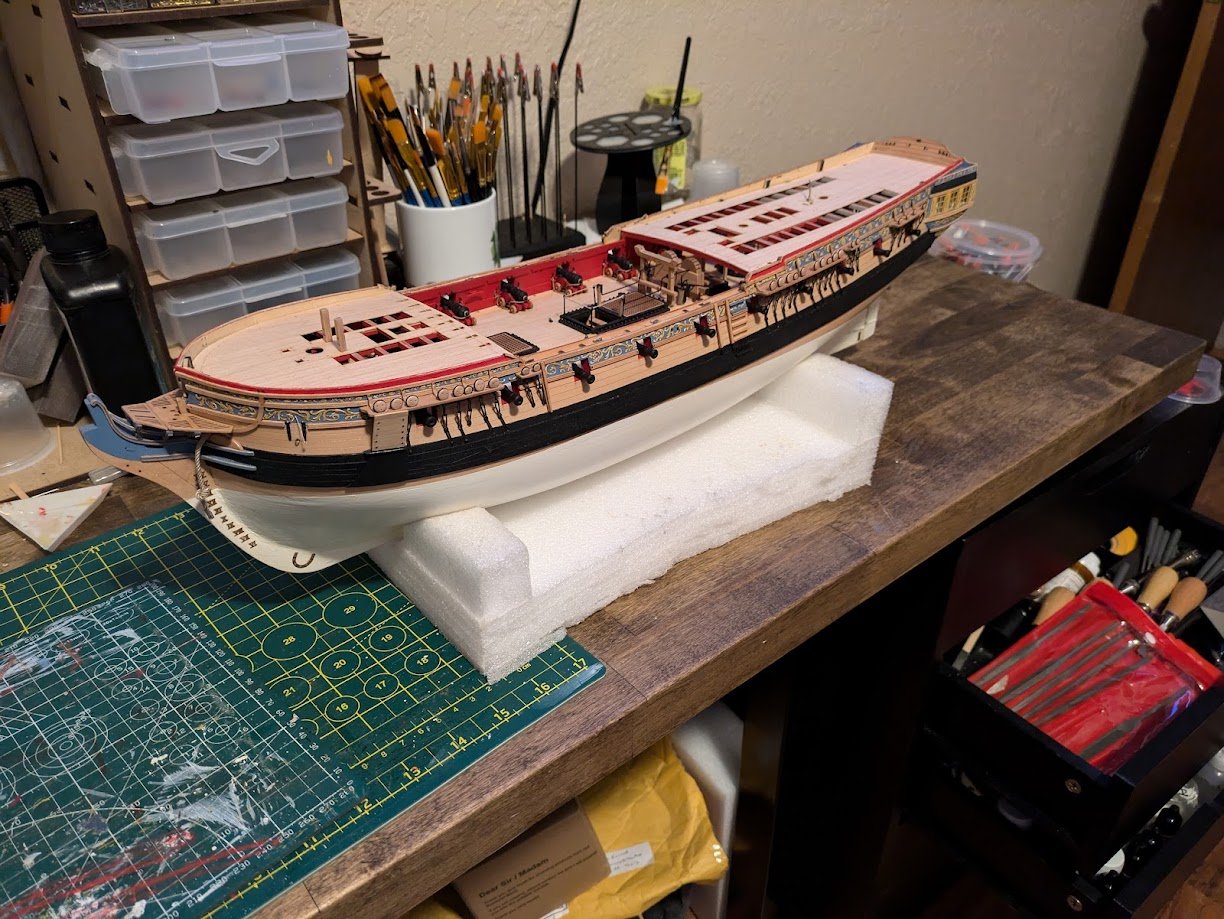
Finishing off the forecastle fittings: Belfry and forecastle railings: The belfry and railings went together very easily. I painted the Stanchions and Belfry with Ivory white, and the railing black. The only issue I had was the Belfry cleats are very fragile, I dropped the Belfry and both the tips of both the cleats snapped off, so I will have to fashion a new set up. Next I painted and installed the 2 catheads and their supports. It took a bit of time with a file to get the holes opened up just enough, but I do like how Vanguards catheads go together. This is only my second ship model, but I have learned that catheads always take me more time to fit than I always expect. Now that the fittings on the forecastle are mostly complete, I am turning my attention to the Quarterdeck fittings. First is the capstan, and the QD ladder. Next I added a cap rail to the stern piece of the ship. I feel the ship has a more complete look with a capping rail on the stern. I used a piece of styrene for this, as I didn't think I would be able to get a strip of wood to do the wavy shape the stern piece has. And here is how the ship currently sits. I am in the middle of putting together the ships wheel assembly, and the binnacle.
-
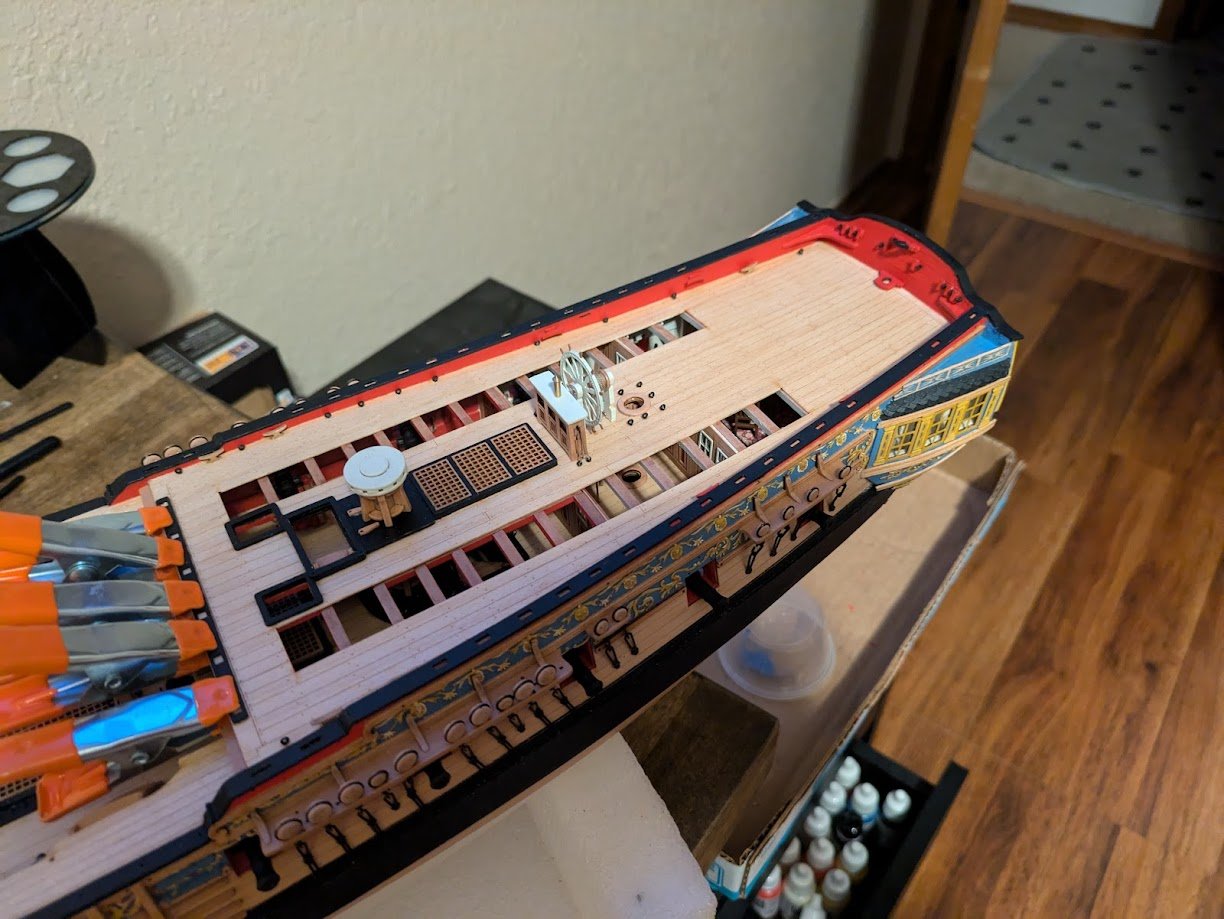
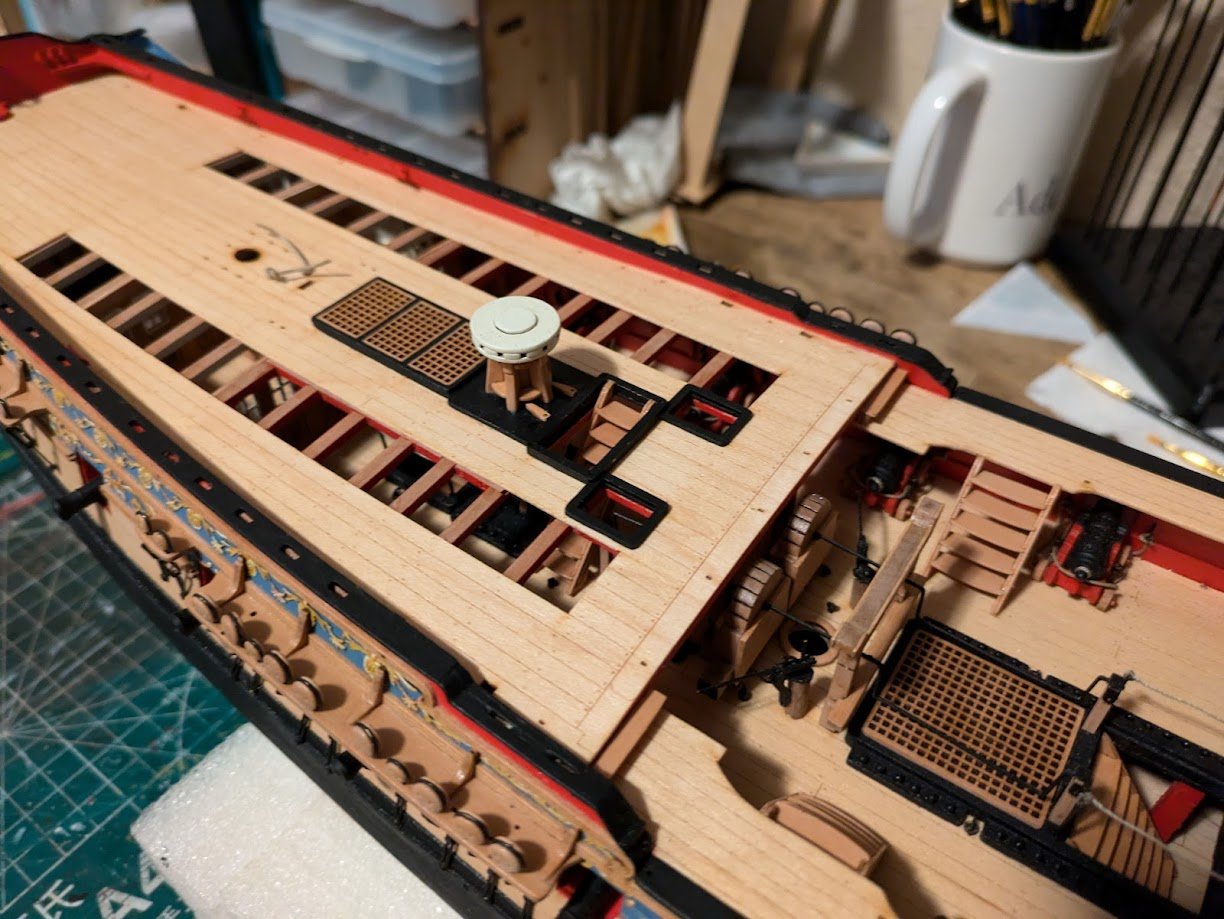
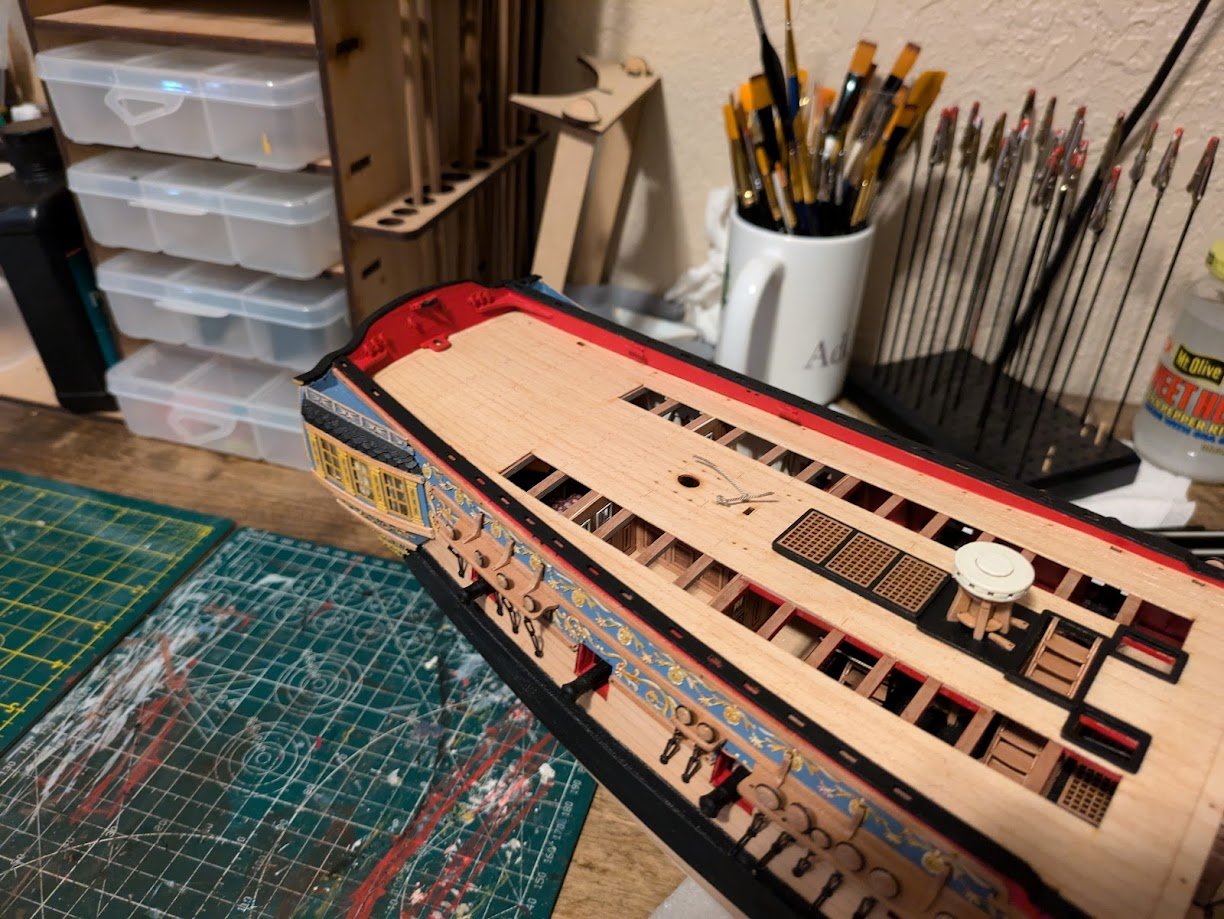
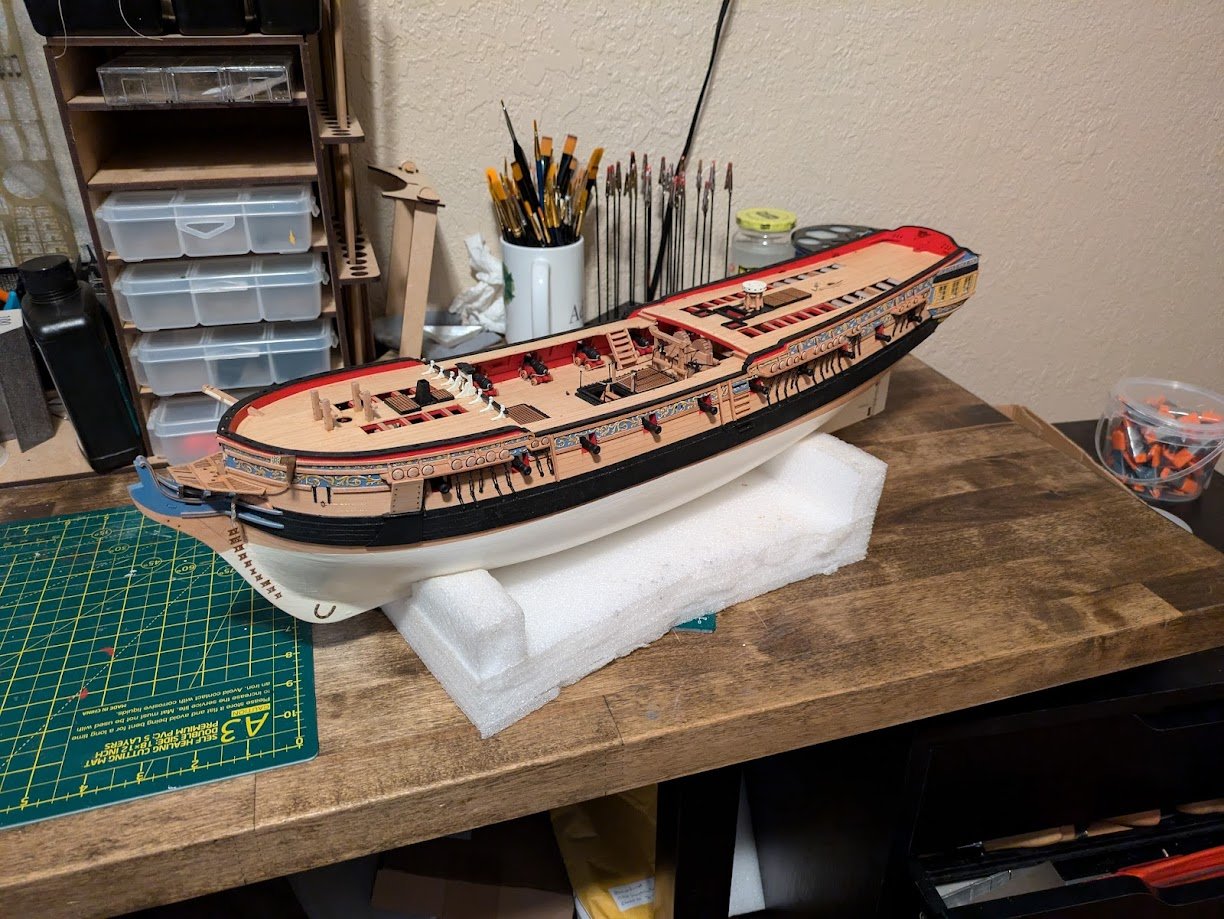
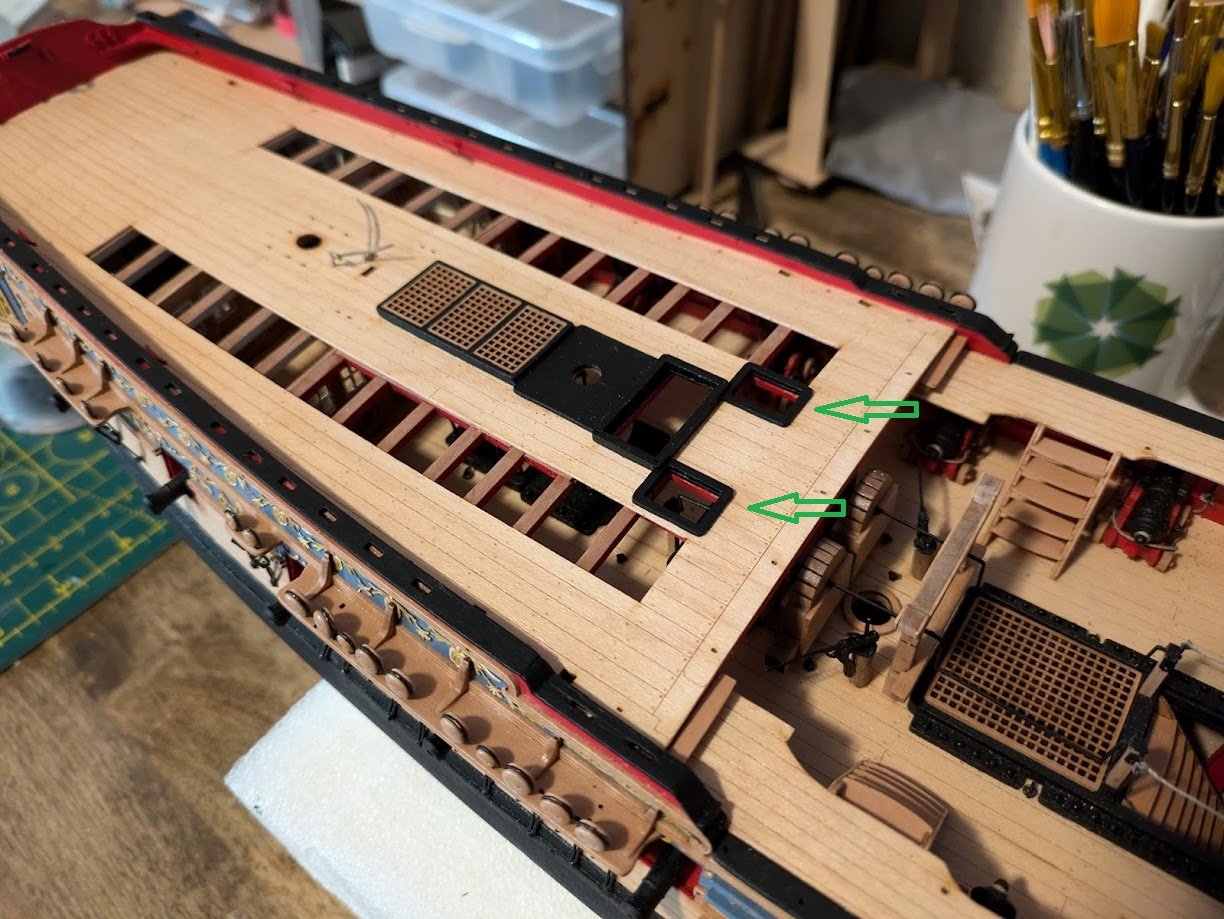
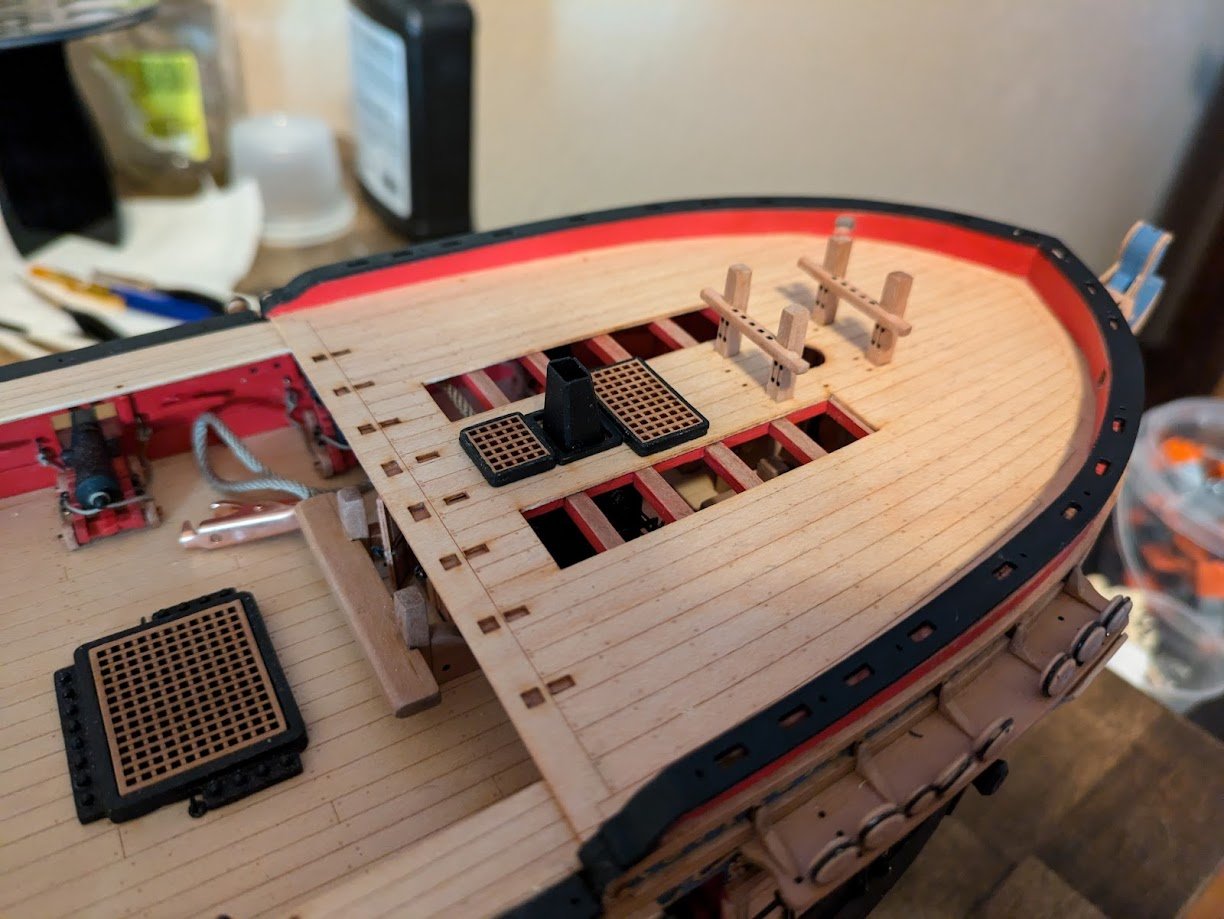
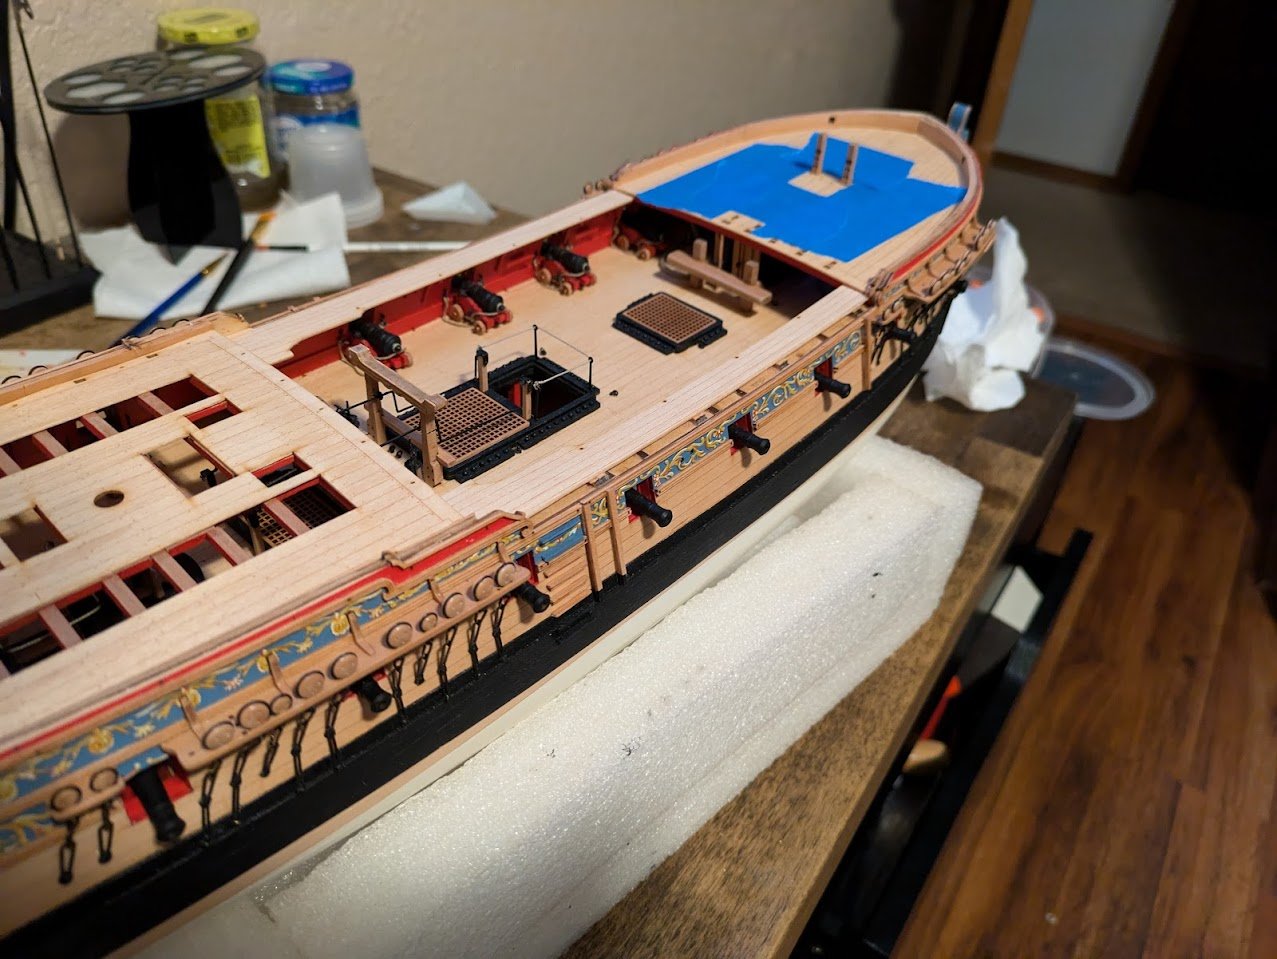
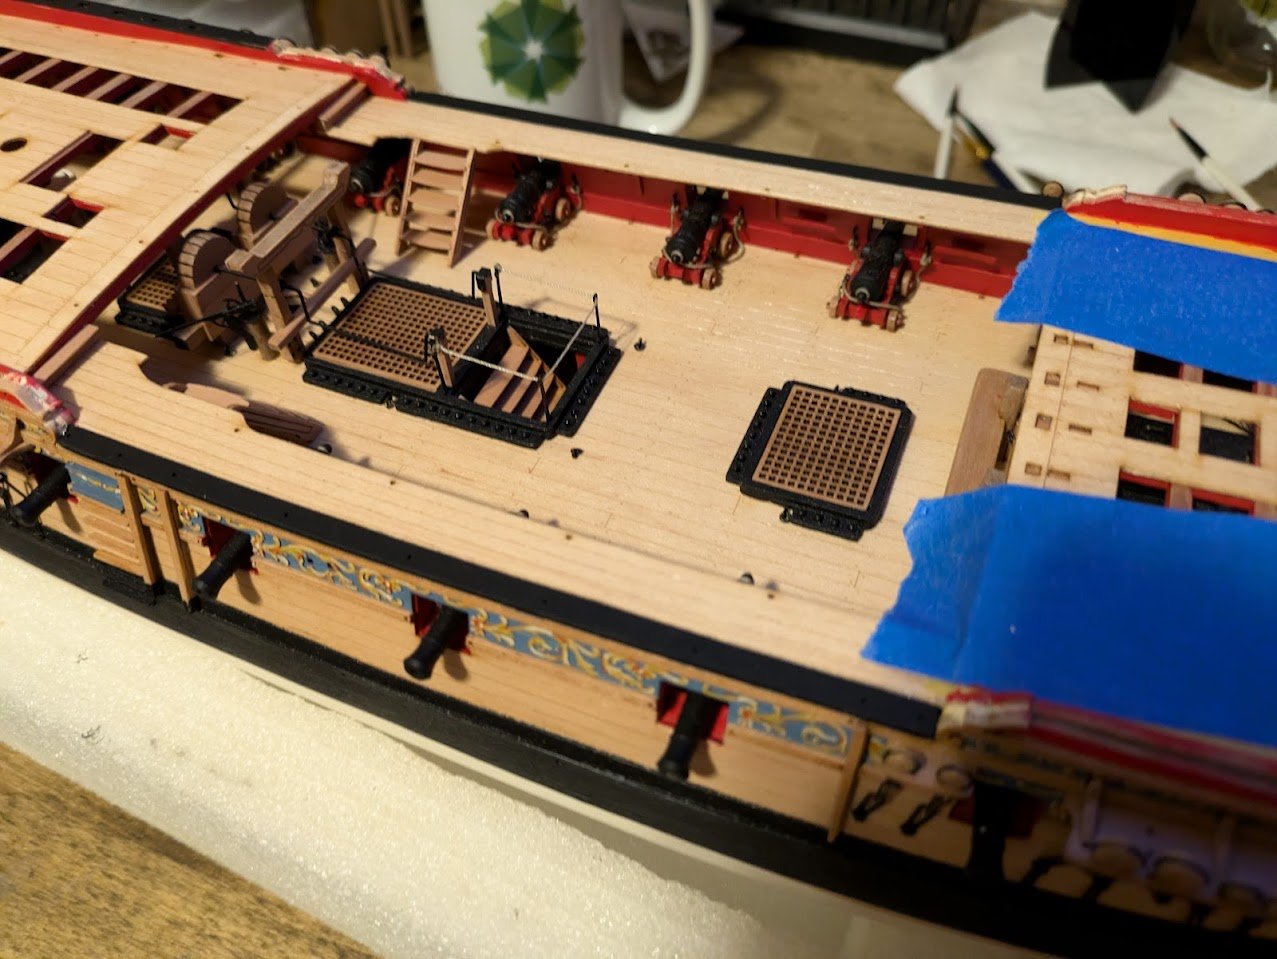
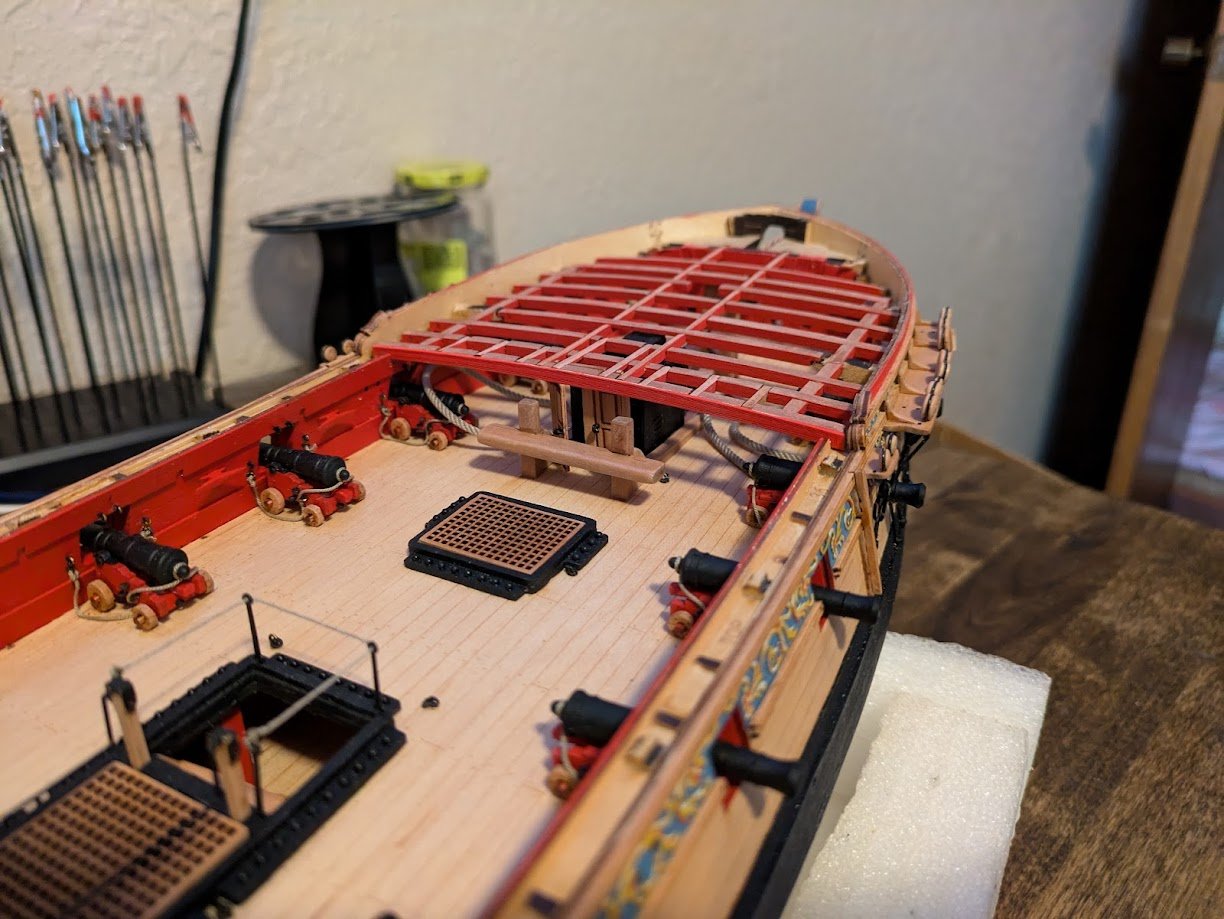
Apologies for my lack of pictures on fixing my scroll work, I took several of pics of the process and then when I went to check my photo gallery this morning the pics weren't there. Quarter Deck and Forecastle Gratings: Started off by removing all the char, sanding and applying a coat of WOP. Gratings glued on framing, painted black and varnished. I also completed the QD ladder while I was waiting for things to dry. Foremast bitts: Gratings glued to forecastle, along with the stove flute and the completion of the foremast bitts. Quarter deck gratings glued in place Full ship shot showing the current progress. My next task is working on a black capping rail for the stern piece. Can anyone explain the purpose of these two openings in the quarter deck? No gratings or anything in the instructions covers the openings so I assume there was a purpose to have the openings in the deck. Thanks for looking, have a great friday all.

-
Looks great, I can definitely see the benefits of tying the rigging off beforehand like that, but since I've only ever rigged one ship I feel like that would be overwhelming for me and I would get lost haha. I like that you added the black trim rail on top of the stern piece, I was thinking about doing the same.
- 422 replies
-
- 1
-
-
- Vanguard Models
- Sphinx
- (and 1 more)
-
That looks great welcome to the exclusive club 😁 , are you going to open up the Quarter Galleys as well?
-
Luckily I looked ahead on that part as I was curious what the slots were for. I removed the timberheads and slotted them in place while I applied the filler. Definitely a good thing to point out though for anyone else getting to that step.
-
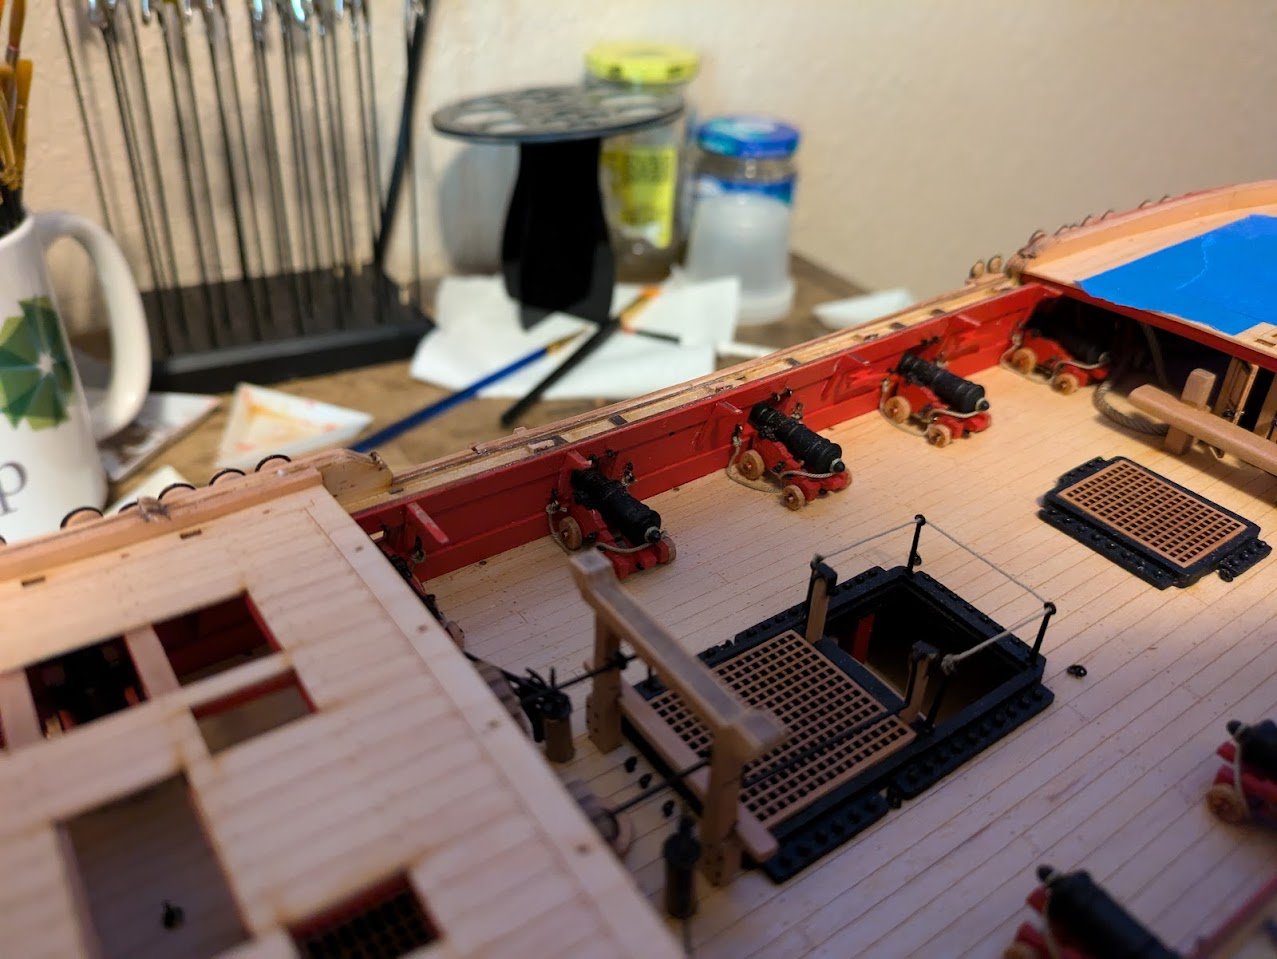
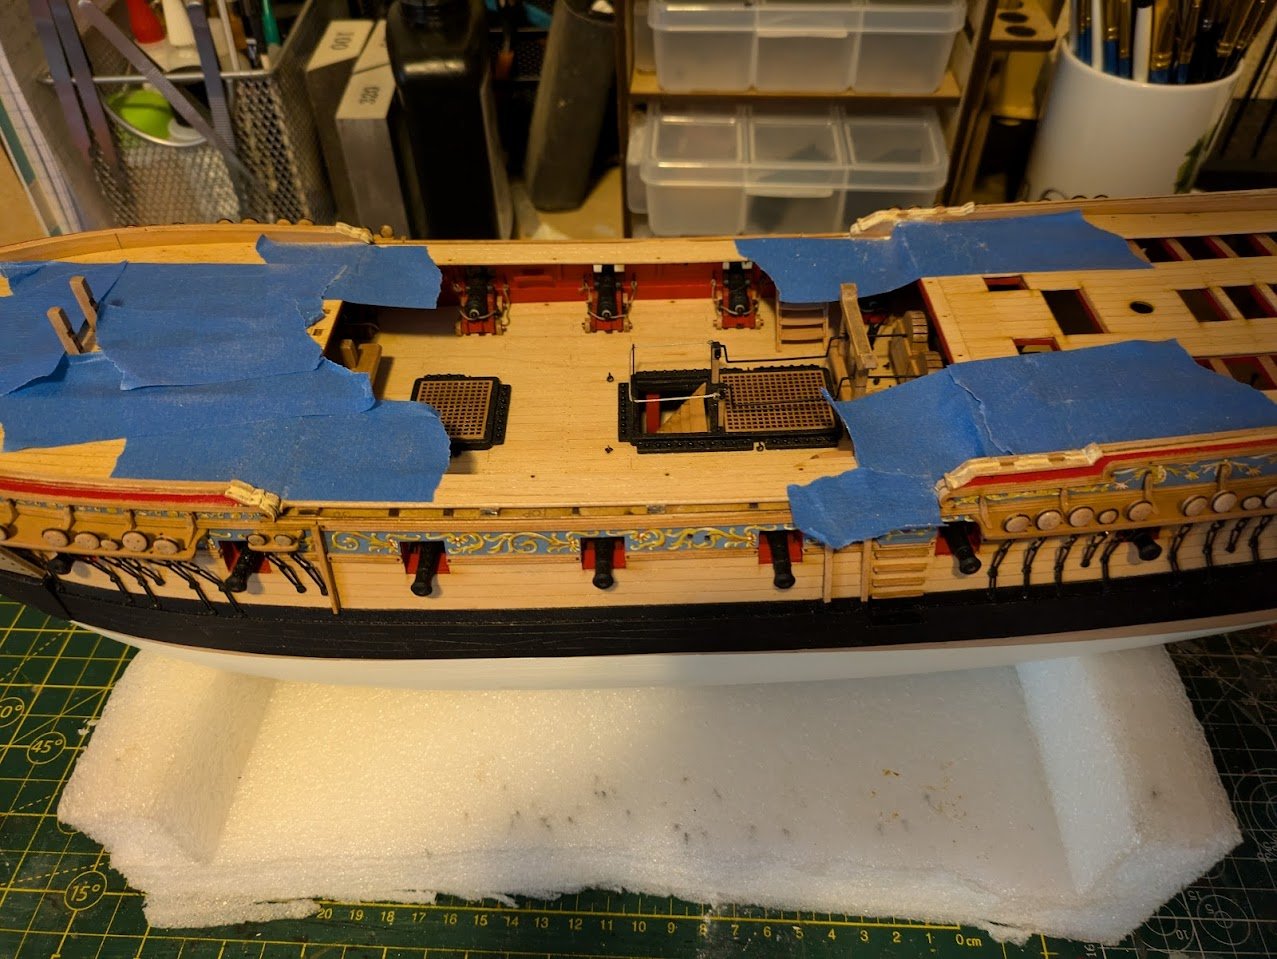
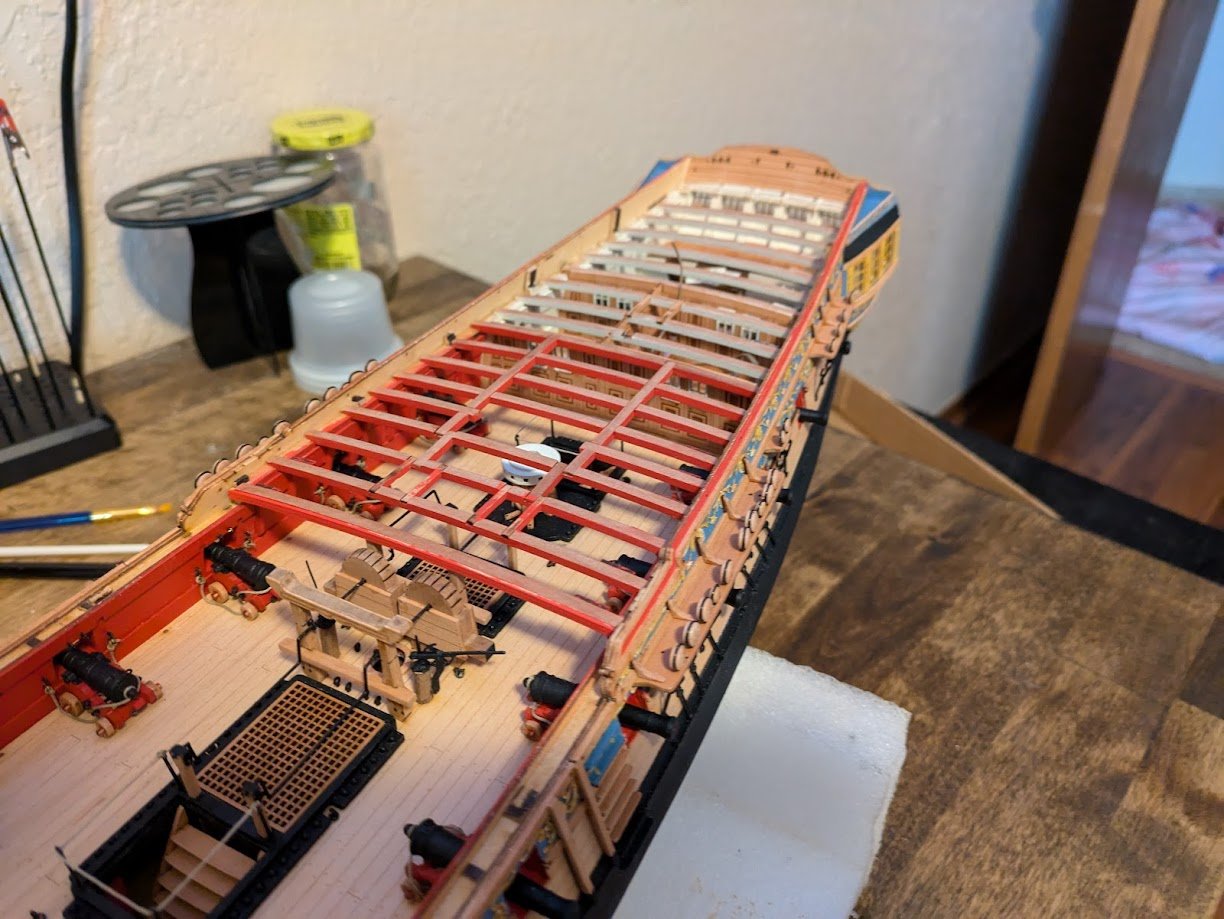
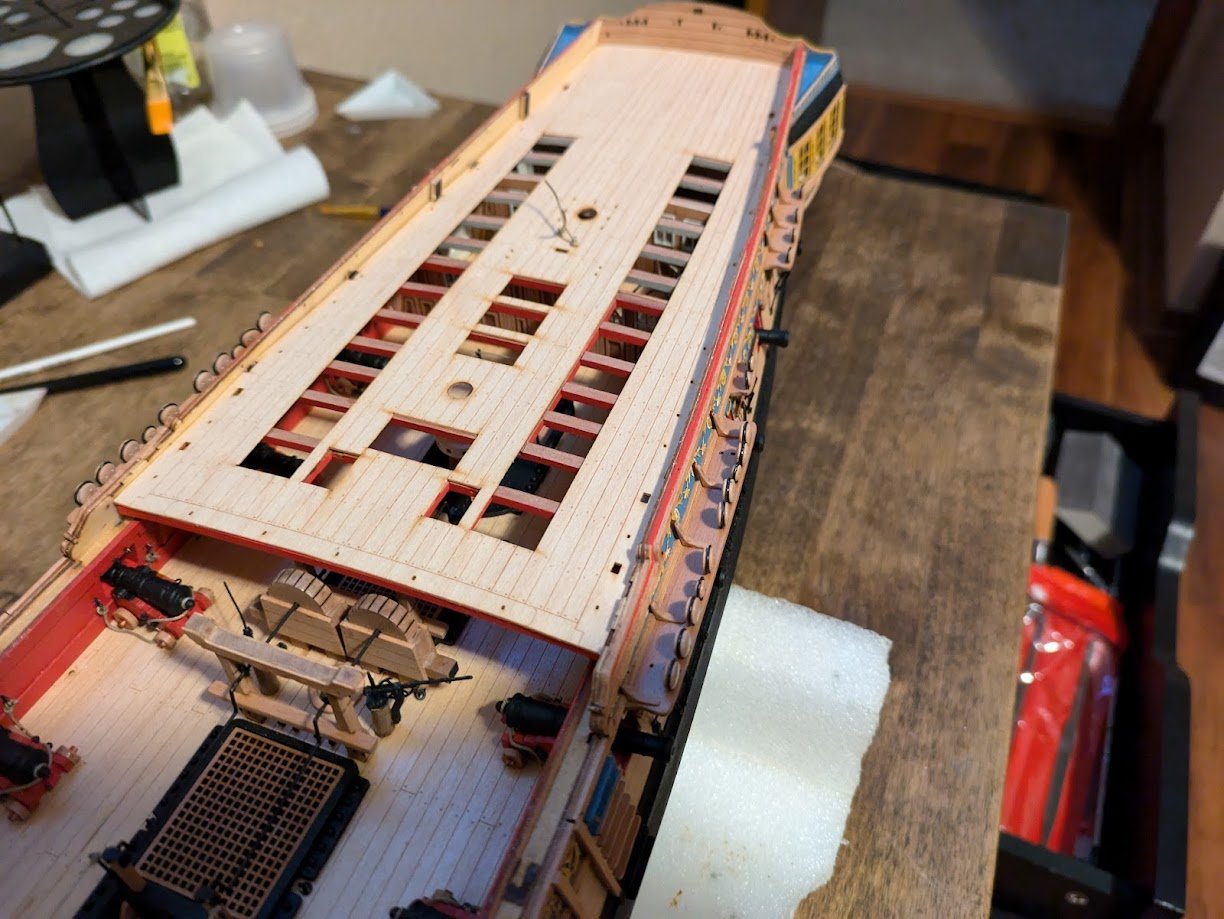
Gangways: Gangway knees, I removed the char, primed and painted all in flat red. Each knee is specific to a spot, so it is important to keep them numbered and separated throughout the process. Knees glued into location Next are the gangway decks. I first glued these together and let sit between some heavy books as they wanted to curl from the glue. I then applied several coats of WOP. Next were the gangway steps Before I painted any of the upper decks bulwarks, I wanted to get the scroll work done. I honestly had concerns how these would turn out as mine weren't perfectly aligned. I taped off the deck, and added filler to the gaps of my scroll work, and then worked it with some small files. To my surprise they actually came out looking pretty decent, I haven't painted them yet, but will post better pics once that step is complete. Now that the scrollwork filing was done, it was time to add some Vallejo Flat Red to the Quarter deck and forecastle. I then painted the gunwales black. Here are the waist gunwales installed next to the gangways. Then I glued in place the QD gunwales. Next step will be adding some filler between the QD gunwales and the scroll work to make it seem like one piece, then the scrollwork will get some paint as well. I plan on adding the catheads to the forecastle before I cap it off with the gunwale.

-
Quarterdeck and Forecastle Deck Beams: Removed the char, painted and glued in place the quarter deck and forecastle deck beams and their corresponding knee joints. QD, FC Decks: Next I sanded the deck pieces to a good fit. The forecastle deck didn't take a ton of fitting, but the QD needed a bit of fitting at the rear. Once glued in place I followed up with several coats of WOP. I then soaked the 2 inner bulwark pieces on the forecastle in water and clamped in place to form up. While the fc pieces are forming, I started work on the QD inner pieces. These required minimal fitting, and glued easily in place.

-
Loving the progress, such a unique model so far. Those MDF port jigs are ingenious, a big reason I love Vanguard models is that Chris seems to continually put a lot of thought and effort into developing solutions to minimize mistakes on the consumer end.
- 76 replies
-
- 6
-
-
- Harpy
- Vanguard Models
- (and 1 more)
-
From what I have researched they had two LT's.
-
I ordered a complete set of blocks and deadeyes a couple weeks ago for my next model, they are fantastic quality and they really do look quite good, I honestly forget they aren't wood when looking at them. I will probably use these blocks for all my models in the foreseeable future as the price to quality just can't be beat. Keep up the great work Chuck, I have yet to be disappointed in anything I have purchased from you.
-
On my Beagle I shellacked my masts and then used a Matte varnish on top to tone down the glossiness of the shellac, maybe you could try the same with a bit of Satin varnish?
- 21 replies
-
- 1
-

-
- Santisima Trinidad
- OcCre
- (and 2 more)
-
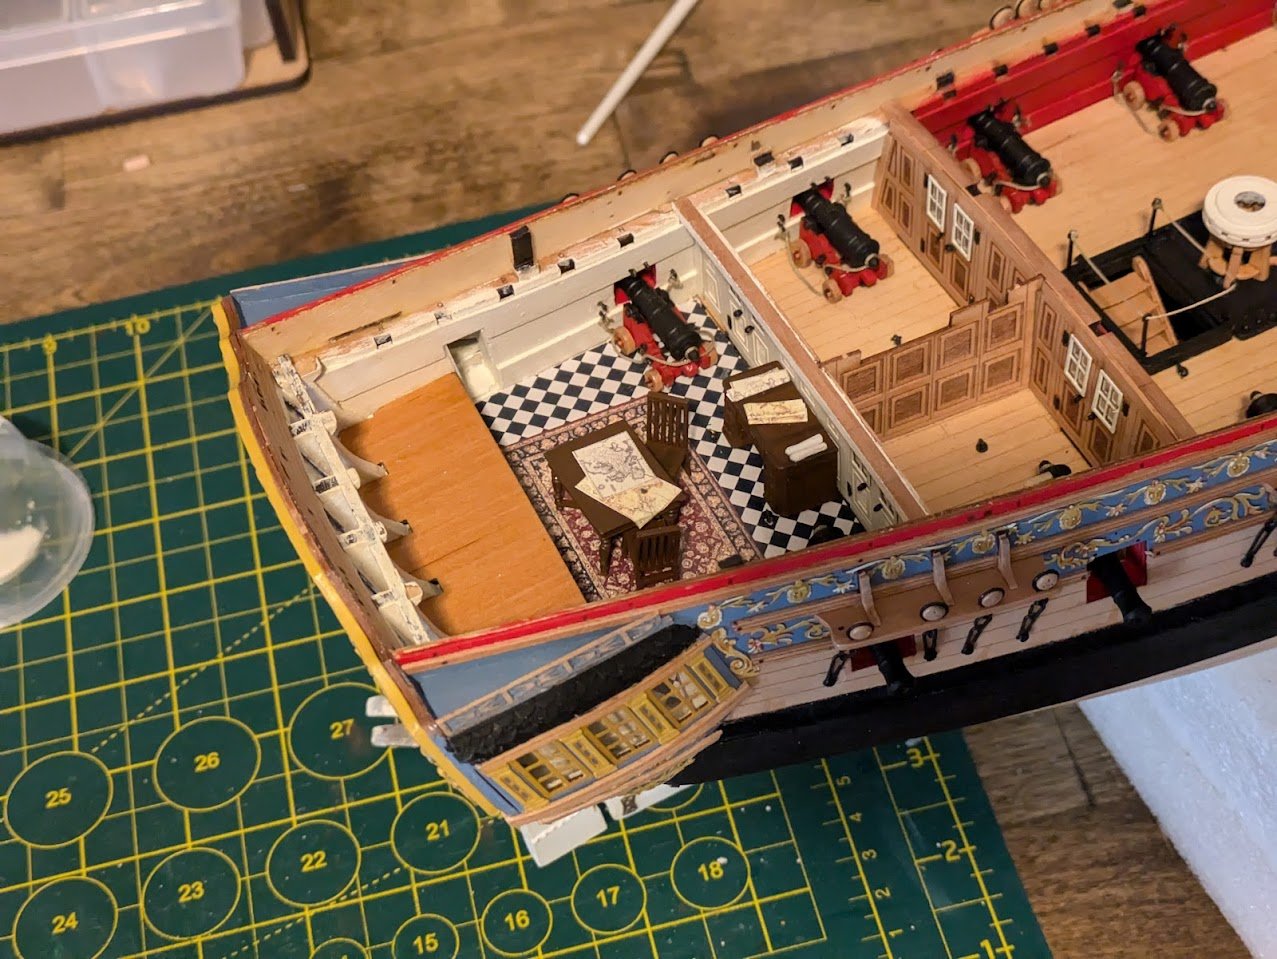
Unless I'm mistaken I believe the captains hammock was strung up in the small starboard side cabin outside of the great cabin.
-
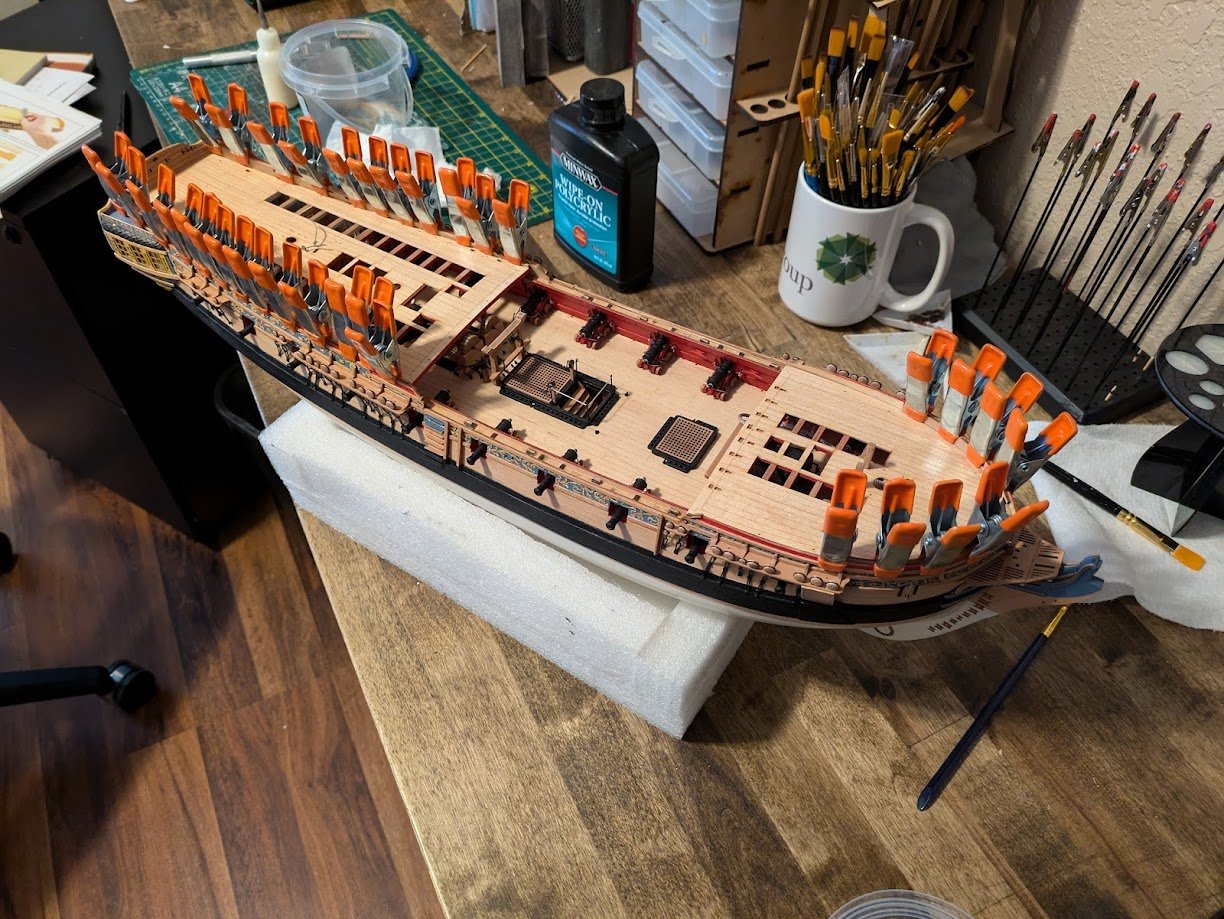
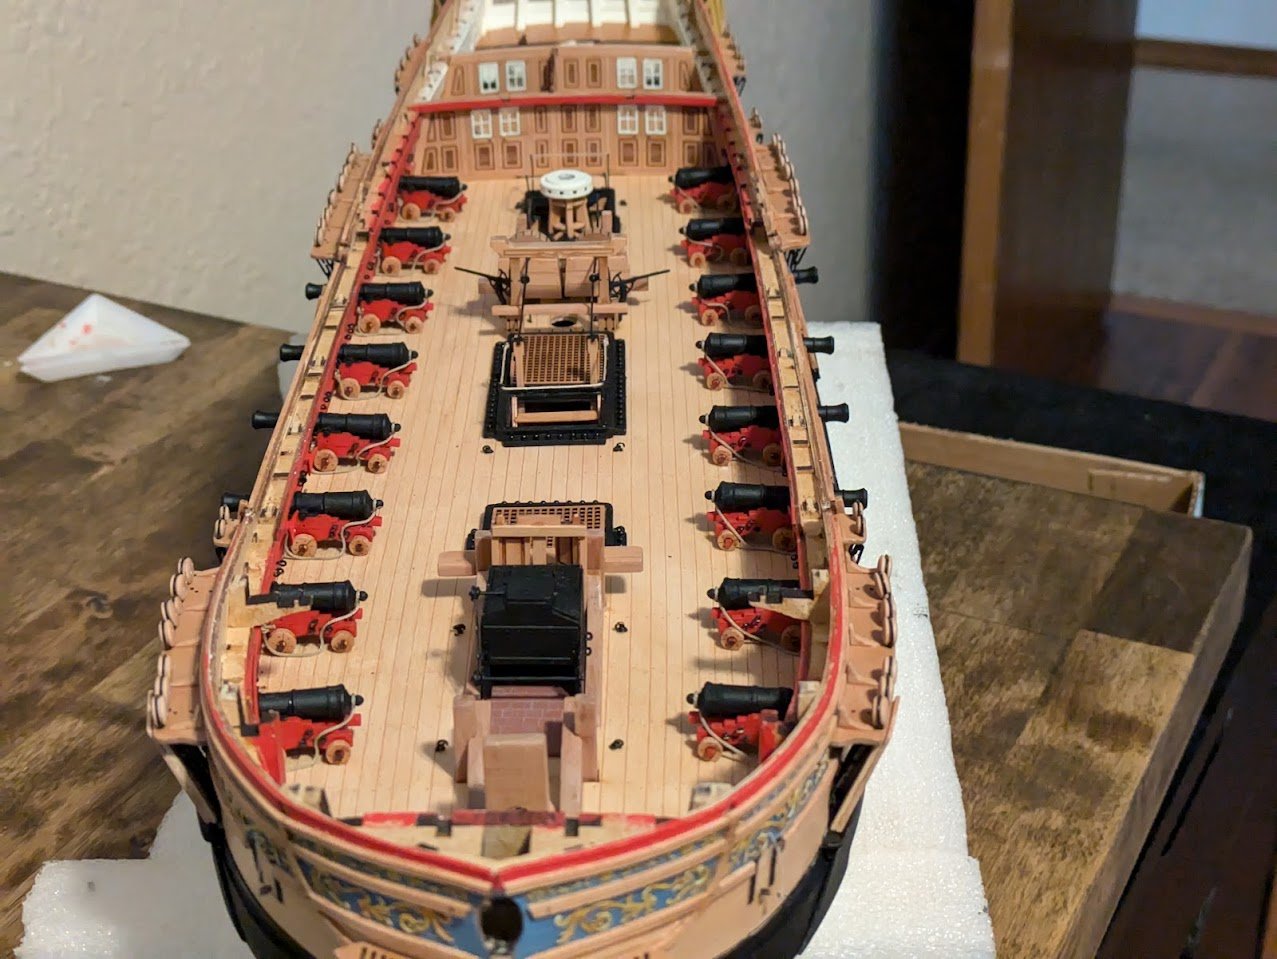
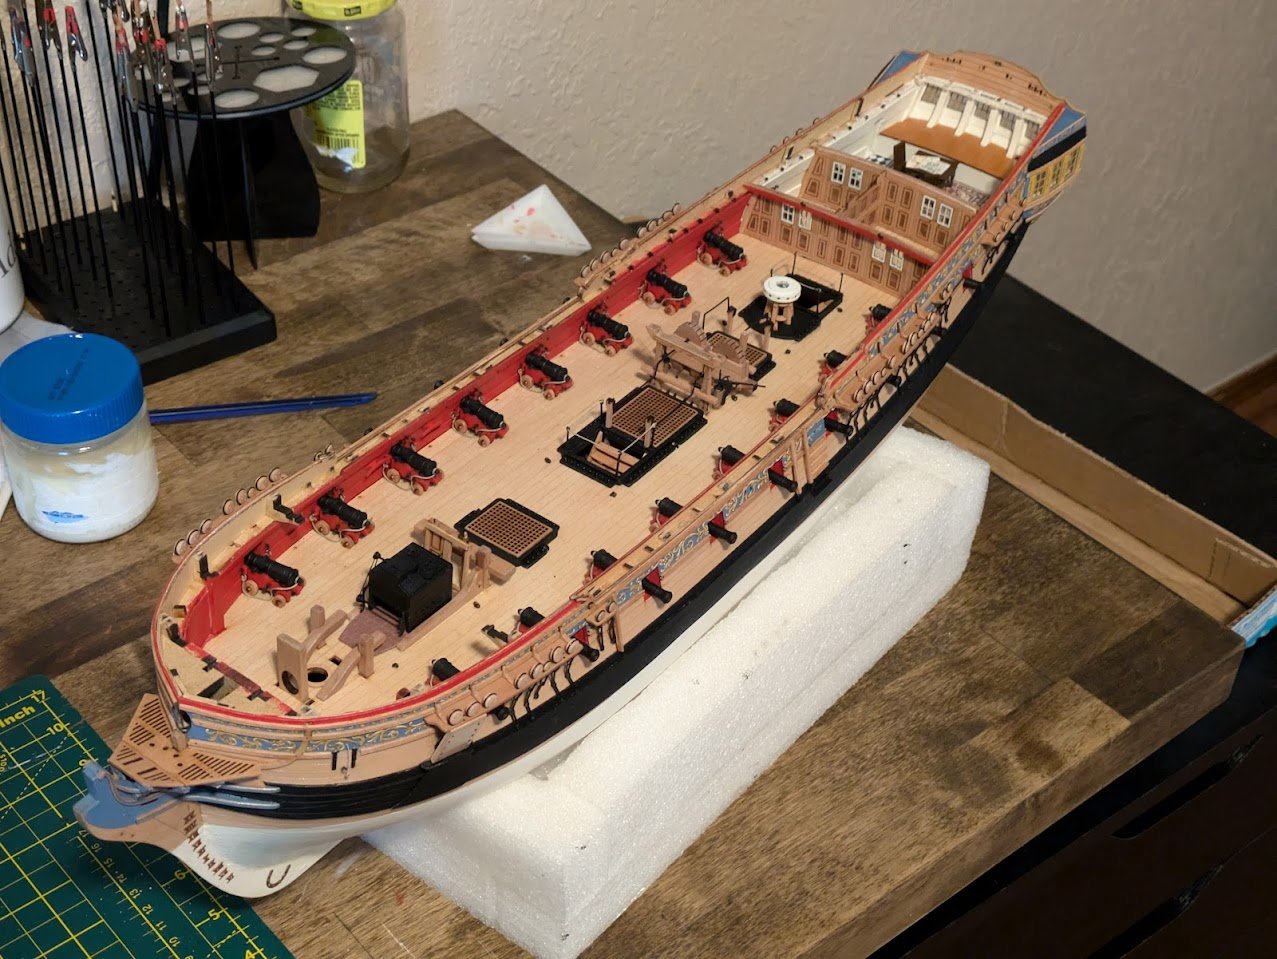
Finally got the guns in. I gave up on the gun tackles and just put in the breech lines. After more than a week I just couldn't get a result I was satisfied with, so I threw in the towel to move on. I will have something to research and improve upon on my next model. Now that the cannons are in, I glued in the Great Cabin furniture. My next task is the quarter deck framing, I have started to de-char the pieces and prep for painting.
-
That looks great, much better than I could probably manage.
- 422 replies
-
- 1
-
-
- Vanguard Models
- Sphinx
- (and 1 more)
-
Definitely thinking about a Sphinx set if it fits the budget, I'm awful at making those little buggers out of wood lol.
-
Looks great, your really booking it now.
-
I have had the same thoughts as well, I also would think there would be concerns with the guns being more exposed to the sea water, but like you said it must have not been a big problem as it seems to be the standard an many ships.
