-
Posts
592 -
Joined
-
Last visited
Content Type
Profiles
Forums
Gallery
Events
Posts posted by bcochran
-
-
2 hours ago, Kevin-the-lubber said:
Re' the deadeyes, I'm planning to reeve these off the ship, using some sort of jig, and then dropping the wires (that we've discussed previously) of the lower deadeyes into their respective holes in the pinrail. Is that not going to work?
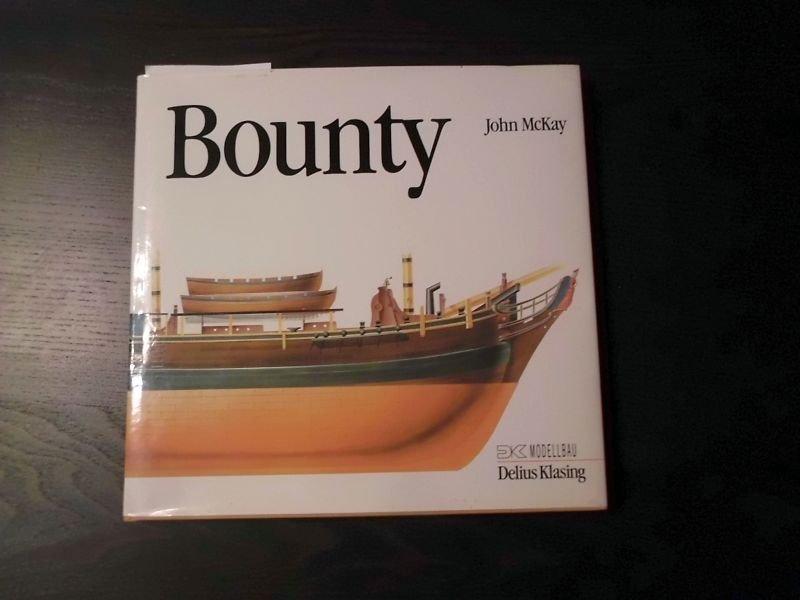
That is my plan also. I have seen some ship pictures and plans where one boat is placed on top of another. The Bounty pictures and plans sometimes show a cutter above the lifeboat.
I would think a fourth boat on the Cutty Sark may be a cutter and be place upside down on a lifeboat, or right side up. Though I don't think it would be on a boat hanging from davits. Possibly placed on the boat on the forward deck house, both boats right side up, the cutter being the smaller.
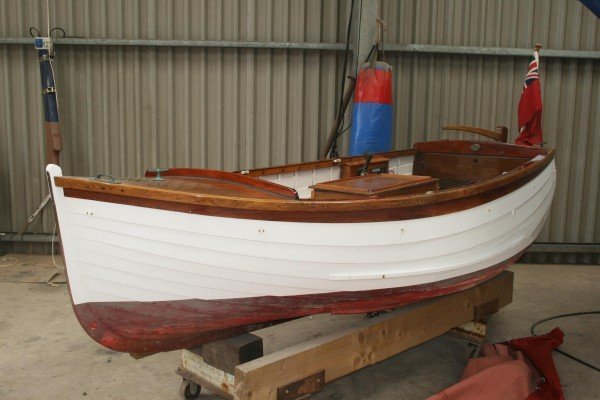
Here is a picture of a cutter.
-
7 hours ago, Kevin-the-lubber said:
I’ll second that. It also had me looking again at the museum model you posted; I too want a fairly busy looking deck by the end of the process but haven’t yet given much thought to how I’ll achieve this. I’m not too keen on making loads of figurines but they do give the model some life. About as far as I’ve got is to have some random coils of rope and other ‘stuff’ dotted around. What are your own plans? In that vein, I’ve wondered and wondered where the fourth, missing from the kit, ships boat would have gone. On the quarterdeck cabin roof perhaps?
I might use the kit figures on the deck and rigging. I don't know about the 4th boat. Longridge talks about two lifeboats over the aft deck house. Woodget had a boat he would use when he photographed the Cutty Sark. It had a sail, I think. I don't remember where I read about it.
-
18 hours ago, Snug Harbor Johnny said:
'Thought about it some, and here's my 'take' on the instructions, which appear to be done by computer translation. Rad admits that he does not know English, so uses a translator.
Step 1, Degrease carefully (on both sides) with a 'Q-Tip' (cotton swab) on a PAPER shaft using one of several known liquid degreasers. Don't use the swabs where the cotton ends are on a thin plastic tube, since the tube could be attacked (and/or dissolved) by a solvent. Possible solvents: CRC circuit board cleaner, Automotive 'Gunk' (trade name), acetone, toluene ... one can't get tricholoethylene anymore ... or MEK. Lay the entire sheet on a felt backing and use a light touch. Do with plenty of ventilation, and allow to air dry.
Step 2, Paint the outer surface as appropriate with enamel - do not use water base paint. You can use 'micro' brushes. Allow to dry.
Step 3, Cut the part with a NEW (sharp) X-Acto blade - or surgical scalpel. The decorative sheet needs to be on something with more substance than an 'ordinary' cutting mat - they make polyethylene mats that have the 'right' firmness, but a piece of vinyl floor tile will do as well. Use a deft touch.
Step 4, You can peel the backing off the transfer tape, but then what do you do with the tape in the interim? Rather, just lay the decoration painted side down on a trimmed piece of waxed paper somewhat larger than the piece of decoration. THEN, carefully apply gel CA with a micro brush to the back (unpainted) side of the decoration ... sparingly. If any should get through the decoration to the waxed paper, it won't stick to the wax ... but try to be neat without wasting time in the process.
Step 5, Un-peel the transfer taper (if you have not done so already) and lay it on a smooth working surface 'tacky side up' ... that's the side that was protected by what was peeled off. Pick up the piece of waxed paper (slightly 'curling' opposing edges) so the decoration will only slide off the far end. Position the waxed paper where you want over the transfer tape, and let the decoration 'slide' off the waxed paper and onto the transfer tape. It will tend to stick where it lands. The painted side will be against the transfer tape, with the CA gelled side facing up.
Step 6, Pick up the transfer tape and move it so the decoration is where it needs to be on the model. In the case of the 'wrap around' stern art, press the center first. If right handed, you will position the artwork centered on the stern (with the right hand) and press the center down with the left thumb - and the left forefinger will reach around to the inside of the bulwark so to help 'pinch' the center point of the decoration in place. Then smooth the right side (as you're looking at it) around with gentler but firm pressure with the right thumb. The sticky side of the transfer tape that overlaps the decoration will stick somewhat to the hull as you go. Once the right side is wrapped around, use the right forefinger to get hold inside the bulwark to help 'pinch' to hold that side of the decoration in place. Then (while holding the right side of the decoration in place), relax the 'pinch' of the left thumb and forefinger so the left thumb can smooth the left side of the decoration around before re-pinching. (This is what is known as using 'finger clamps'.) Then I'd hold on to everything for a while to allow the CA to set.
Step 7, When you dare, try letting go and see if the decoration stays in place. IF not, then you let go too soon - and can hold everything down a while longer ... that is, until it stays. 'Don't know how long a good CA cure is, but I'd give it a rest for at least a couple hours. Then the transfer tape can be carefully removed. Don't just pull up on either end, but rather lift one end slowly while tugging out as much as up - and the tape should 'lift off' leaving the decoration in place. For smaller flat (or relatively flat) decorations, they go on much easier that something that has to 'wrap around'.
'Hope this helps someone ... Johnny
Thank you for that description. I will follow it. I am going to try it out on the name etching that goes on the bow first. That is the one where you paint the bits holding the letters black.
-
As per my Constitution, I broke the bow point off it, so I need to start over. I want to use the Hismodel deck on it. I won't detail the gun deck because you can't see it. Only the part you can see.
In model planes and ships, modeler's go to great lengths to detail some places that will never be seen once the hull or fuselage is buttoned up. At least they know it is there.
Anyone who wants to understand the last voyage of the USS Constitution in 1815 should get the book "The USS Constitution's Finest Fight, 1815" Edited by Tyrone G Martin. It is the actual journal of Acting Chaplain Assheton Humphreys, US Navy, while on that voyage. He titled it "Recapitulatory Journal" of Assheton Y. Humphreys, Acting Chaplain, USS Constitution 17 December 1814 - 26 March 1815. You can't get better descriptions than first-hand knowledge.
I haven't read it in a while, but I seem to remember that the Constitution was disguised as a British frigate. Her stripe along the gun ports was yellow, as were her masts. Also, she did not have covers over her gun ports so that it was wet much of the time on board since the crew's hammocks were below the gun deck, and it leaked.
I am slowly getting back to my Cutty Saark after some days off. I need to finish the port bulwark and pin rails, add the boats and bowsprit then begin rigging. I am still worried about reeving the deadeyes. They look too small and close to the bulwark to work with. I know one modeler rove them off the ship by holding them in clamps. I might do that.
-
Radimir at HISmodel is sending me a free replacement set of etchings. I don't understand his directions. I guess you could also use scotch tape to apply them. Stick it to the front side of the etching when you cut them off the set, but you would have to be careful not to get glue on the tape. Most likely the tape would be too tacky.
He says that here is the url for instructions: http://www.hismodel.com/ornaments
On the stern ornament the badge that says "Where there is a Willis a way" is very fragile and beds easily and breaks off, as are the two arrow shaped parts pointing down and the lower part of the curl on the ends. If you have bumble fingers like me, you'll break them off. You need to handle them with tweezers or something. I think putting them on the transfer paper before cutting them out then trimming around the paper then put on the glue would prevent this.
-
Here is Hismodel's directions to apply the etchings:
We recommend using gel second adhesive for gluing. You can find a detailed procedure for gluing the ornaments in our workflow here: https://www.hismodel.com/ornaments
Description of use is here, too:
First Clean ornament with an alcohol cleaner and spray it by gold paint. Pay attention to spray a very fine layer. Then paint relevant spots by blue color and by mat black color paint fine sticks, which holds a letters of name of ship.
Then cut ornament from a plate by scalpel. Try placing of these parts on relevant place on model. Unstick transfer foil from paper which you have in plastic bag. Put ornament on paper from transfer foil and spread gel superglue on the back of side of ornament. Then put ornament on sticky side of the transfer foil for easier manipulation. Finally with a help of transfer foil to glue ornament on its place. -
Well, I failed for the third time to put the photo etch on the stern. I don't know what to glue it with. It is too fragile for me to handle. Several parts of it can bend and break off by handling it.
I'd much rather put on the decals if I had a good set, but since the model is so old either the decals are useless or not available. I have reached a frustration point where I should give it a rest.
What do the wood kits use for the stern decoratons?
-
40 minutes ago, Kevin-the-lubber said:
That looks good, do you mean the type where you mix the two tubes e.g. araldite?
Yes you mix two types
-
1 hour ago, shipman said:
Mmmm. My main concern is that the etch is pierced, ie there are gaps between the lettering etc. So whatever adhesive you use, it's bound to spread and squidge out and around the detail. CA often turns white, epoxy....well, it behaves like chewing gum that sets. Again, messy.
The clear when dry properties of PVA types would seem to avoid those issues.
I agree, pre-forming the etch to the surface it's going onto is a vital key to success.
The stern decoration etch is a delicate filigree and needs some thought as to how it's applied, without destroying the whole point of using it.
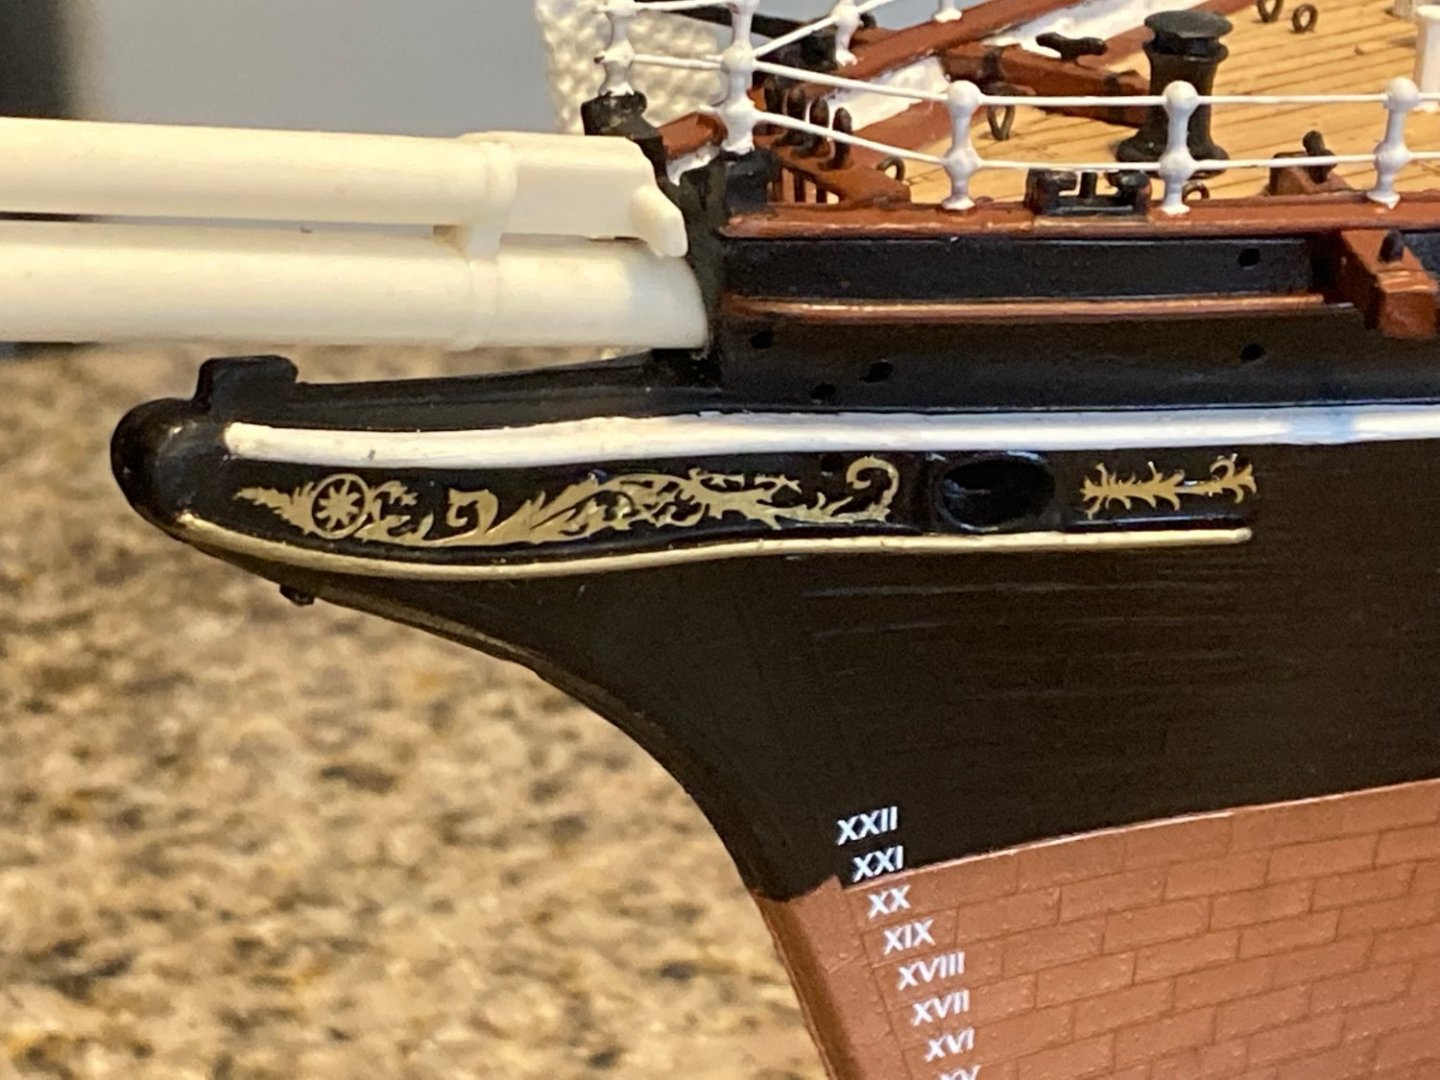
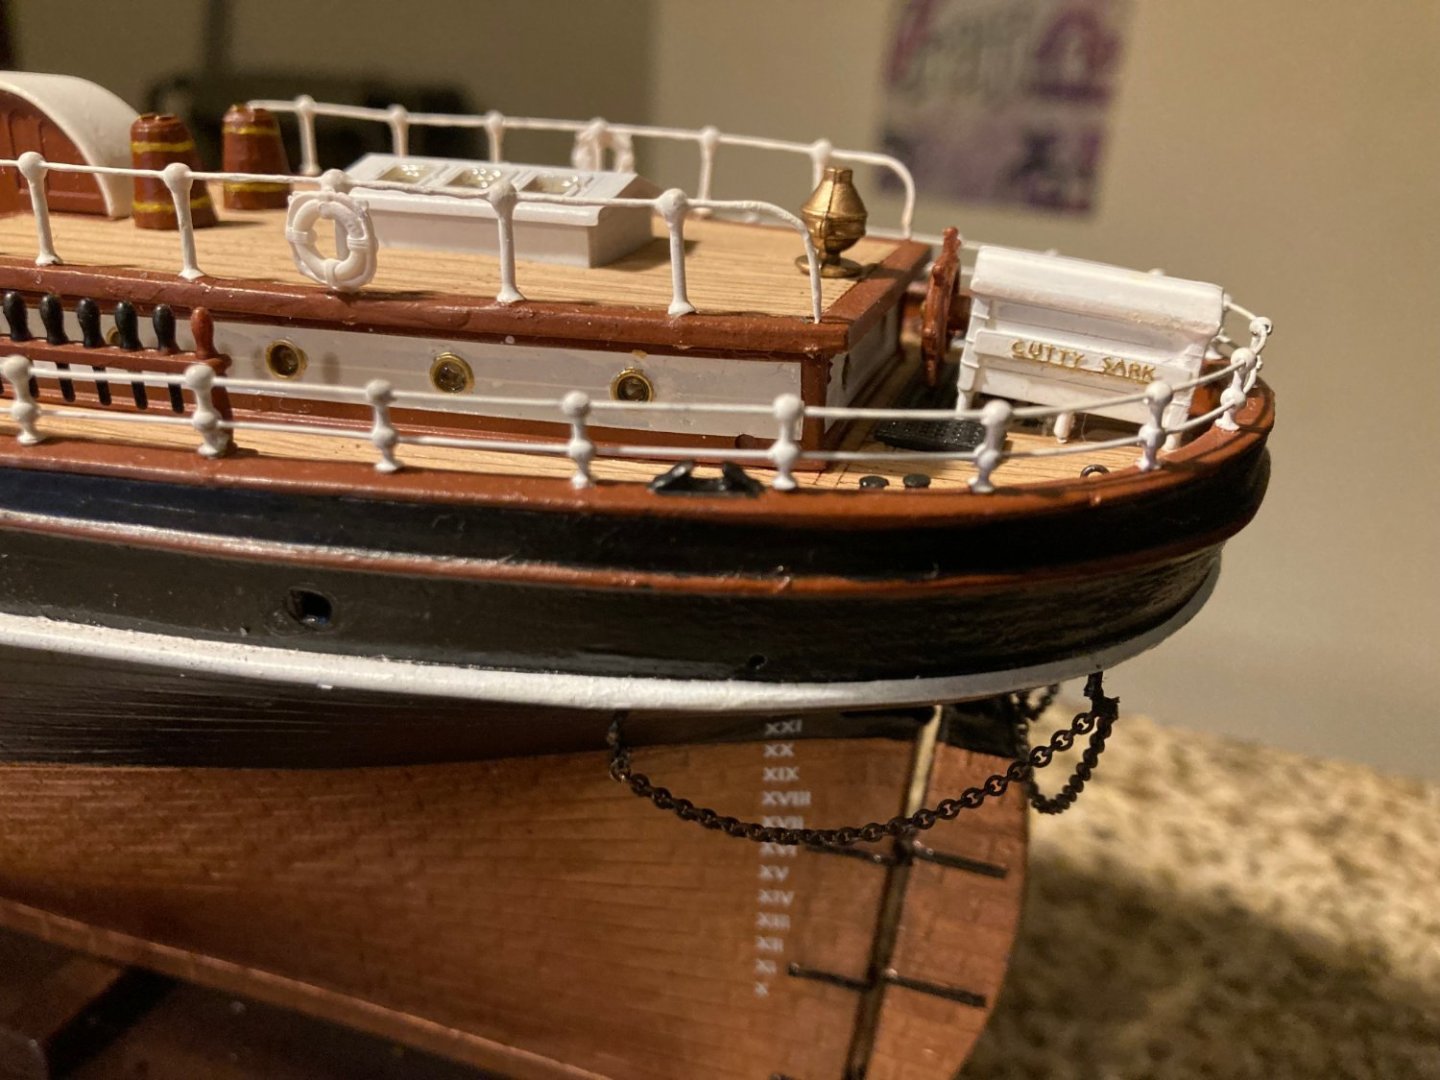
Here is a pic of my bow etching held on with 5 minute epoxy.
- popeye the sailor, Cirdan, ccoyle and 1 other
-
 4
4
-
5 minutes ago, shipman said:
Can I be the first in the cue and be cheeky and request a set of your lozenge decals? I have no means of printing and haven't a clue how to do the origination on my laptop.
Kevin, see my comment #122 here. I share your pain.
See my reply to Kevin
-
1 hour ago, Kevin-the-lubber said:
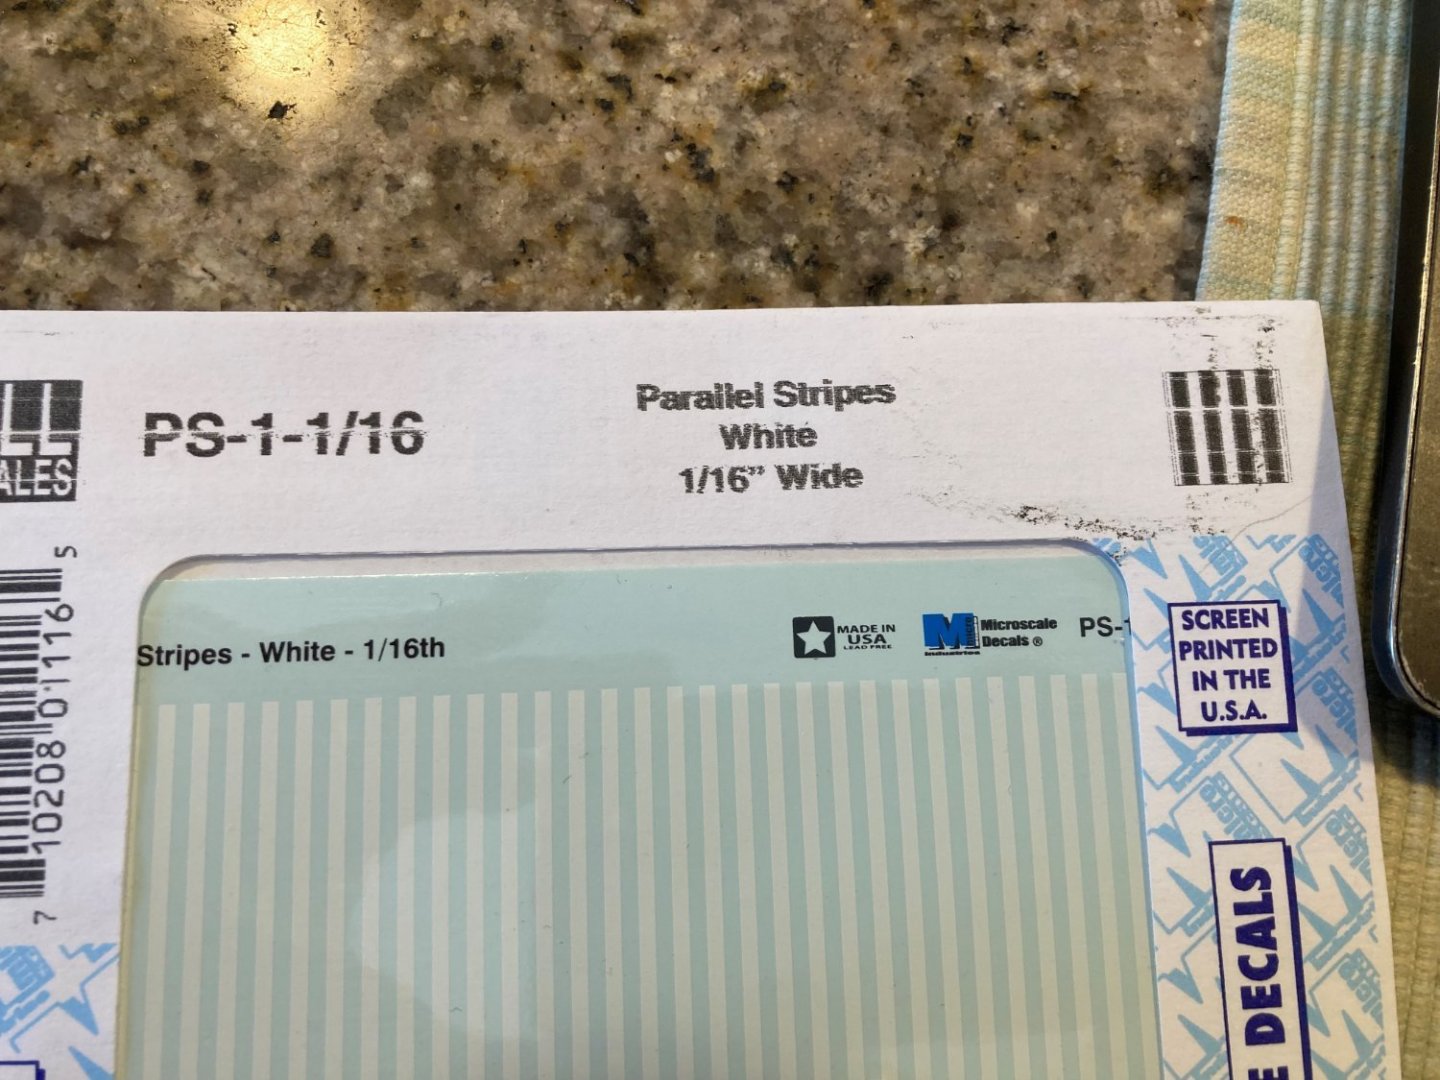
To you bcochran - earlier in the log you mentioned you were using decals for the lozenges and, I think, white side stripes. DIY decals are another thing I mean to try out sooner or later and was just wondering if you made yours yourself and, if so, what products did you use?
I also have the hismodel etch so am listening closely to this conversation. It's such a critical piece and I'd hate to make a mess of glueing it on. I've wondered about spray mounting adhesive, like 3M SprayMount Permanent Spray Adhesive. I've not had much luck with the 'glue the centre, then work along' method. I tried that with my deck but found it difficult to get tiny amounts of CA behind the object without some getting on the edge. Might be easier with the PE, but I'd also be concerned about it ending up with small ripples through being bent back. I'll probably experiment with the blank first.
I used Microscale decals. I cut perpendicular across the sheet to get a bunch of them. I touch the corners of each one with a tiny bit of the background color to make them look rounded on the ends. At a distance, they look rounded.
- popeye the sailor and shipman
-
 1
1
-
 1
1
-
2 hours ago, Kevin-the-lubber said:
Microscale - which reminds me - did you make the decals yourself?
I am not sure who that is addressed to. I am using the photo etch set sold by HisModel.
-
3 hours ago, shipman said:
The 'Pledge' used to be called 'Future'; aircraft modellers dip canopies in it, which makes them perfectly clear.
Not sure how good it is as a 'glue'.
This Microscale product is brilliant for clear windows. It's a sort of PVA.
There again, I've used ordinary PVA and got the same results.
Glad you brought this up, as it seems ideal for attaching the bow and stern etch, though I have no idea how to hold the etch in place while the stuff sets.
https://www.google.com/search?client=firefox-b-d&q=microscale+crystal+clear
Again, I feel Longridge is as good a source as you'll find. It's worth remembering he did his own research in the 1920's when she was still afloat and had the opportunity to crawl all over the ship.
Pledge is not acting like glue does. I think it can only hold very light things, like the Cutty Sark lettering on the wheelhouse. As it dries, it solidifies around the lettering, thus holding it. I used 5 minute epoxy to hold the etched scrolling on the bow. I laid the ship on it's side and coated the back of the etching with epoxy and put it in place on the bow. I think it was important that I bent the etching first so that it laid flat on the ship. I've failed with the stern etching twice. I tried the 5-minute epoxy there, but it is slippery, I destroyed the etching by trying to keep it in place. I think next time I will superglue the center badge part in place to hold it then work my way down the length with superglue behind the large shapes. I think I will have to curve it first to the shape of the hull.
-
45 minutes ago, Ian_Grant said:
Man, that's a lot of future work! The Heller Victory alone is a years-long effort for most.....happy modelling!
I probably will not finish them. I am coming close to the end of my time to model.
-
47 minutes ago, Kevin-the-lubber said:
I like that (the wheelhouse). I got hold of a copy of Longridge and have been doing some reading up this weekend, usual case for me, make it, then read how I got it wrong. You're quite right about the colour scheme and I have a feeling the white on the cabins may give more shape and texture to the model. But I don't think I could face painting over my faux teak. Reading Longridge also explains a few oddities with the kit, such as the forward hatch being in the line of the chains, and there being one too many fife rails at the foremast. I'd make a mess of plugging the holes now so will probably leave it as is.
I've been in need of something like pledge; I can make very precise translucent windows etc, but would like a method to make them transparent, so I'll add this to the memory bank.
The white cabin and deck house panels were there during Cutty Sark's wool ship days. I am pretty sure the panels were varnished teak during her tea clipper days and today. I don't know whose idea it was to paint them, but the reason, I understand, was to cut down on the labor it took to varnish all the teak. It is the same reason the masts were shortened, the spars were shortened, and the stunt sail booms were taken off. So it depends on what period you want to model, since the Cutty Sark's appearance changed over its life.
I am trying to model her during the late 1880's when she set most of her speed records. Also, during that time all the spars, wood masts and bowsprit were painted black. So that's how I will model her, no stunt sail booms and black spars, wood masts and bowsprit boom.
I am no expert on the Cutty Sark so what I am saying I got from other people online and from pictures taken in the 1880's. I don't know if Revell's masts and spars represent the cut down versions or not. I guess you could measure them if you can convert 1/96 measurements to feet and inches.
-
I put the HisModel brass "cutty Sark" on the wheelhouse. It's held on with Pledge Floor Care liquid. It is basically a clear, thick acrylic liquid that is tacky until it dries. After it dried, I painted another coat of Pledge over it. I am not sure how permanent it will be, but I won't be touching it. I learned to use acrylic liquid, putting clear lenses on model cars and canopies on model planes.
-
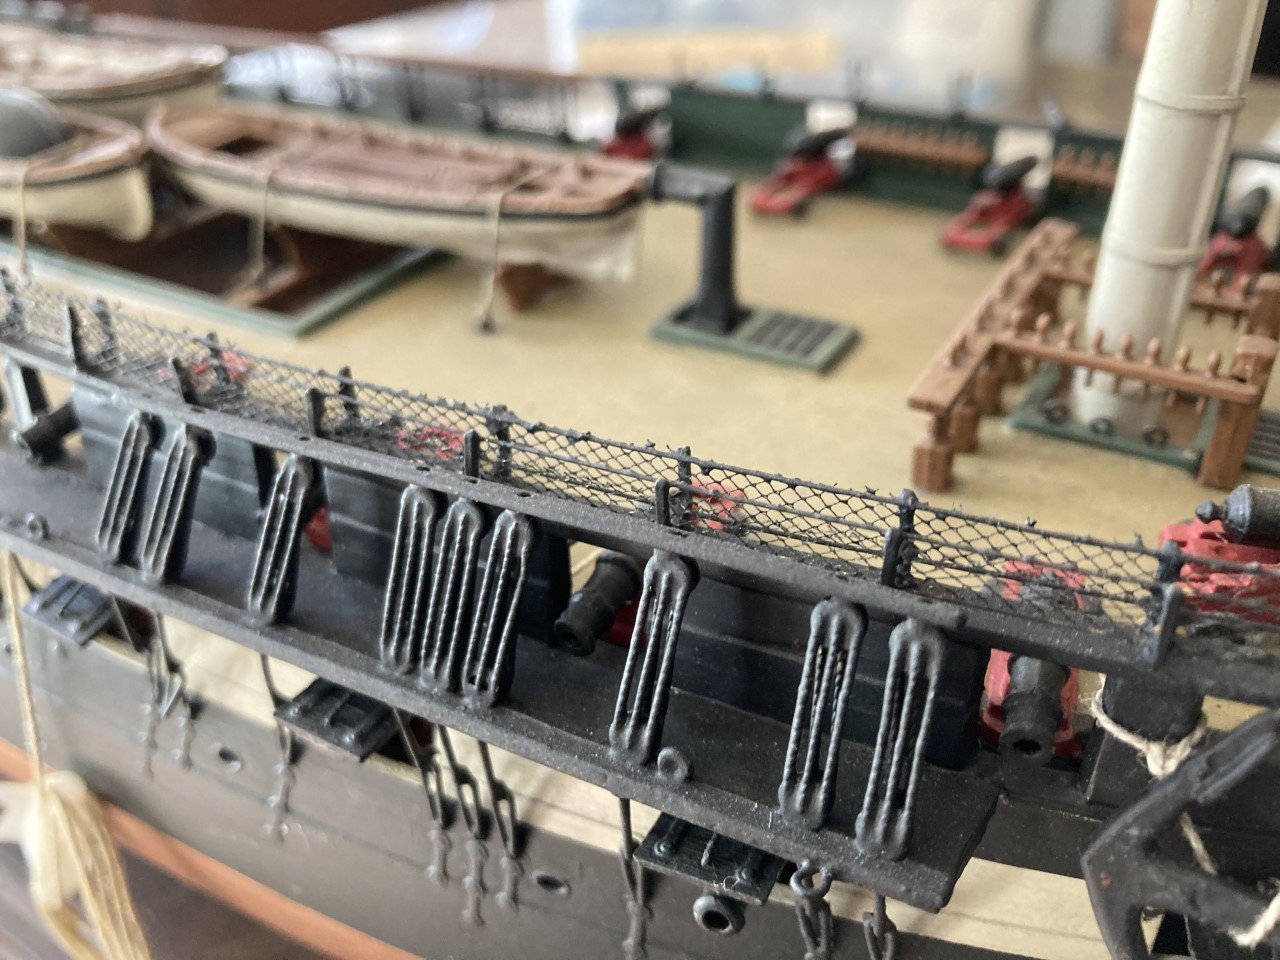
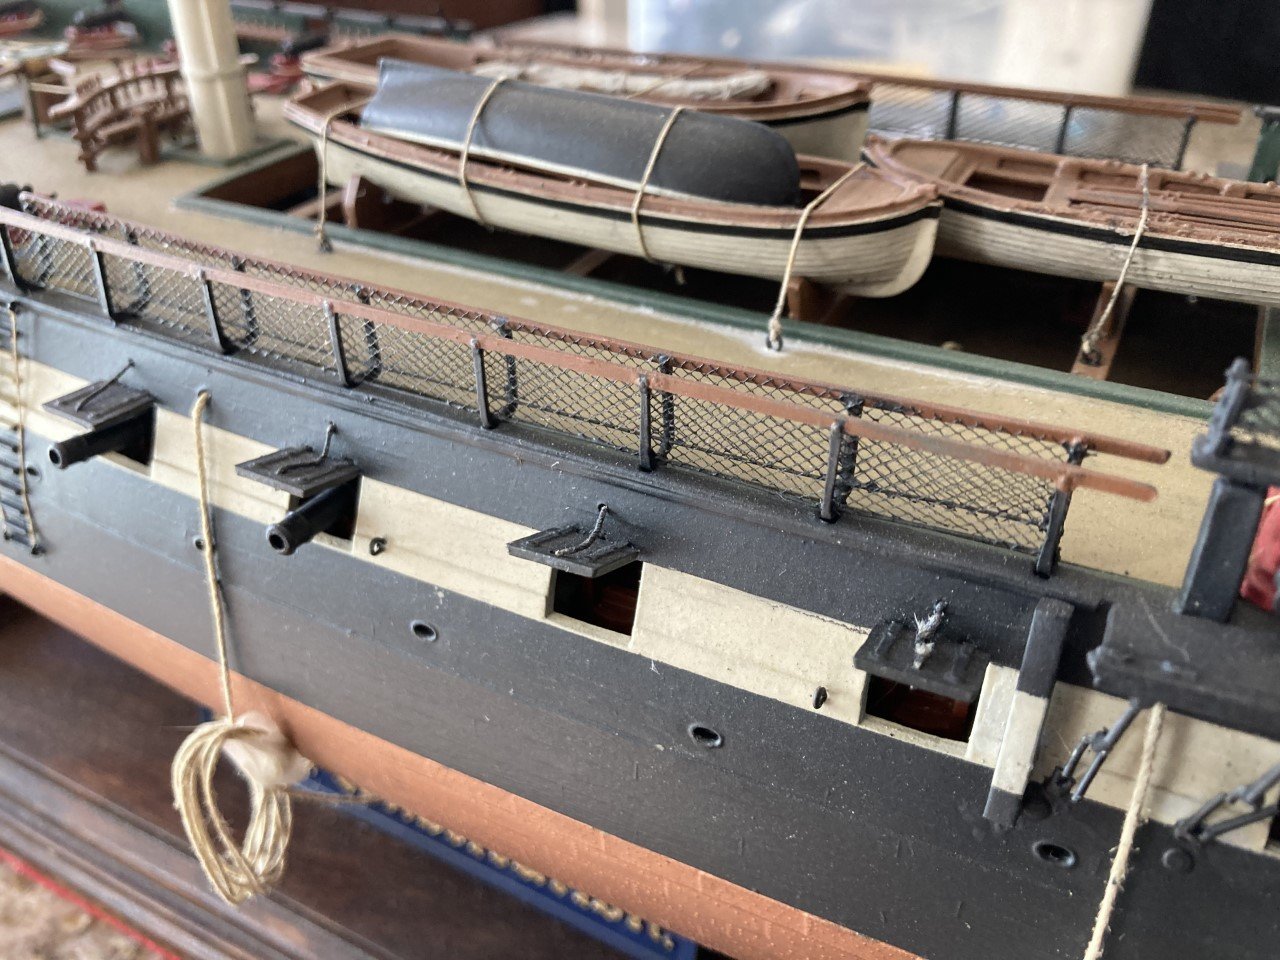
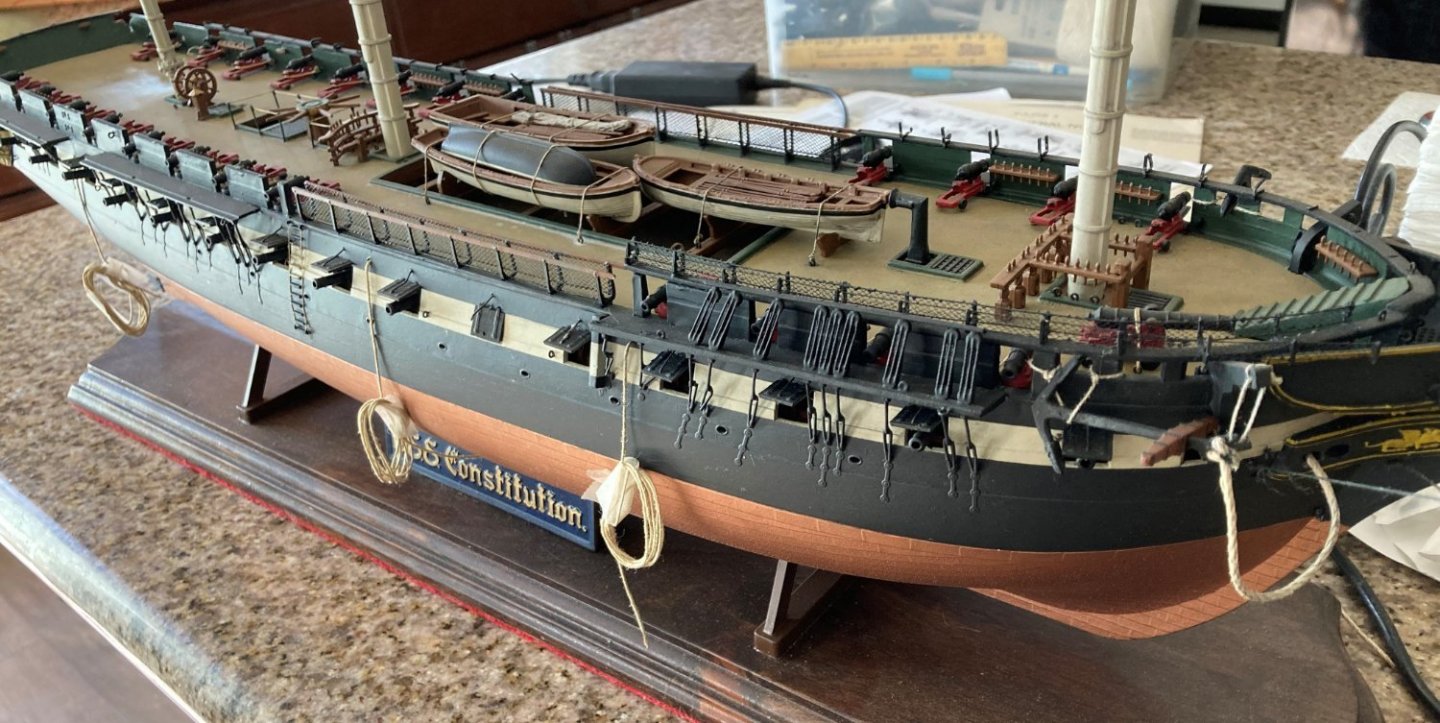
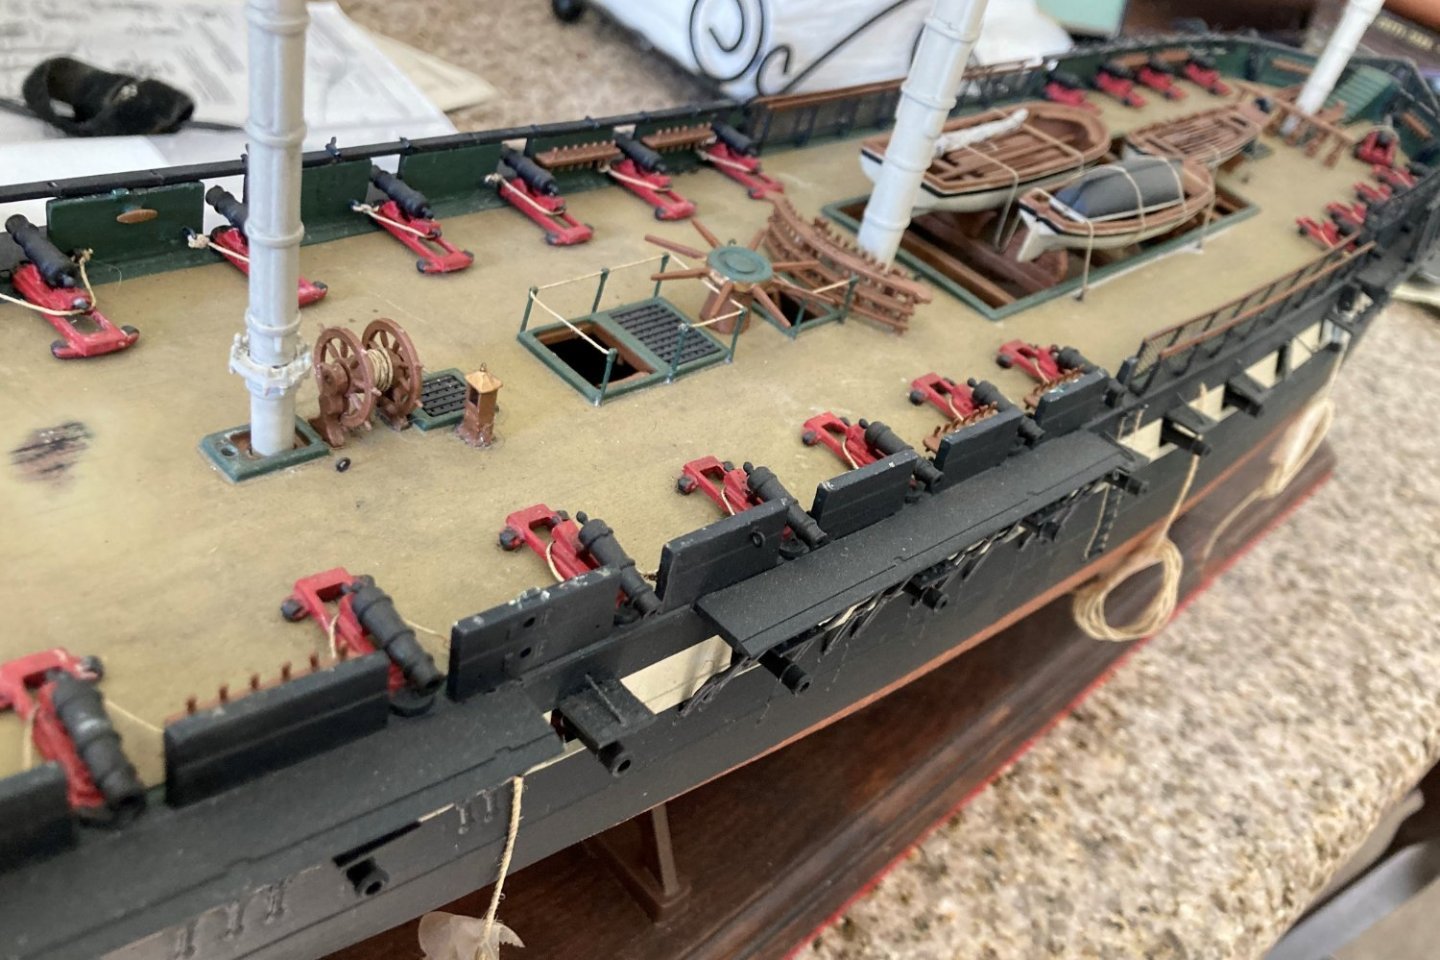
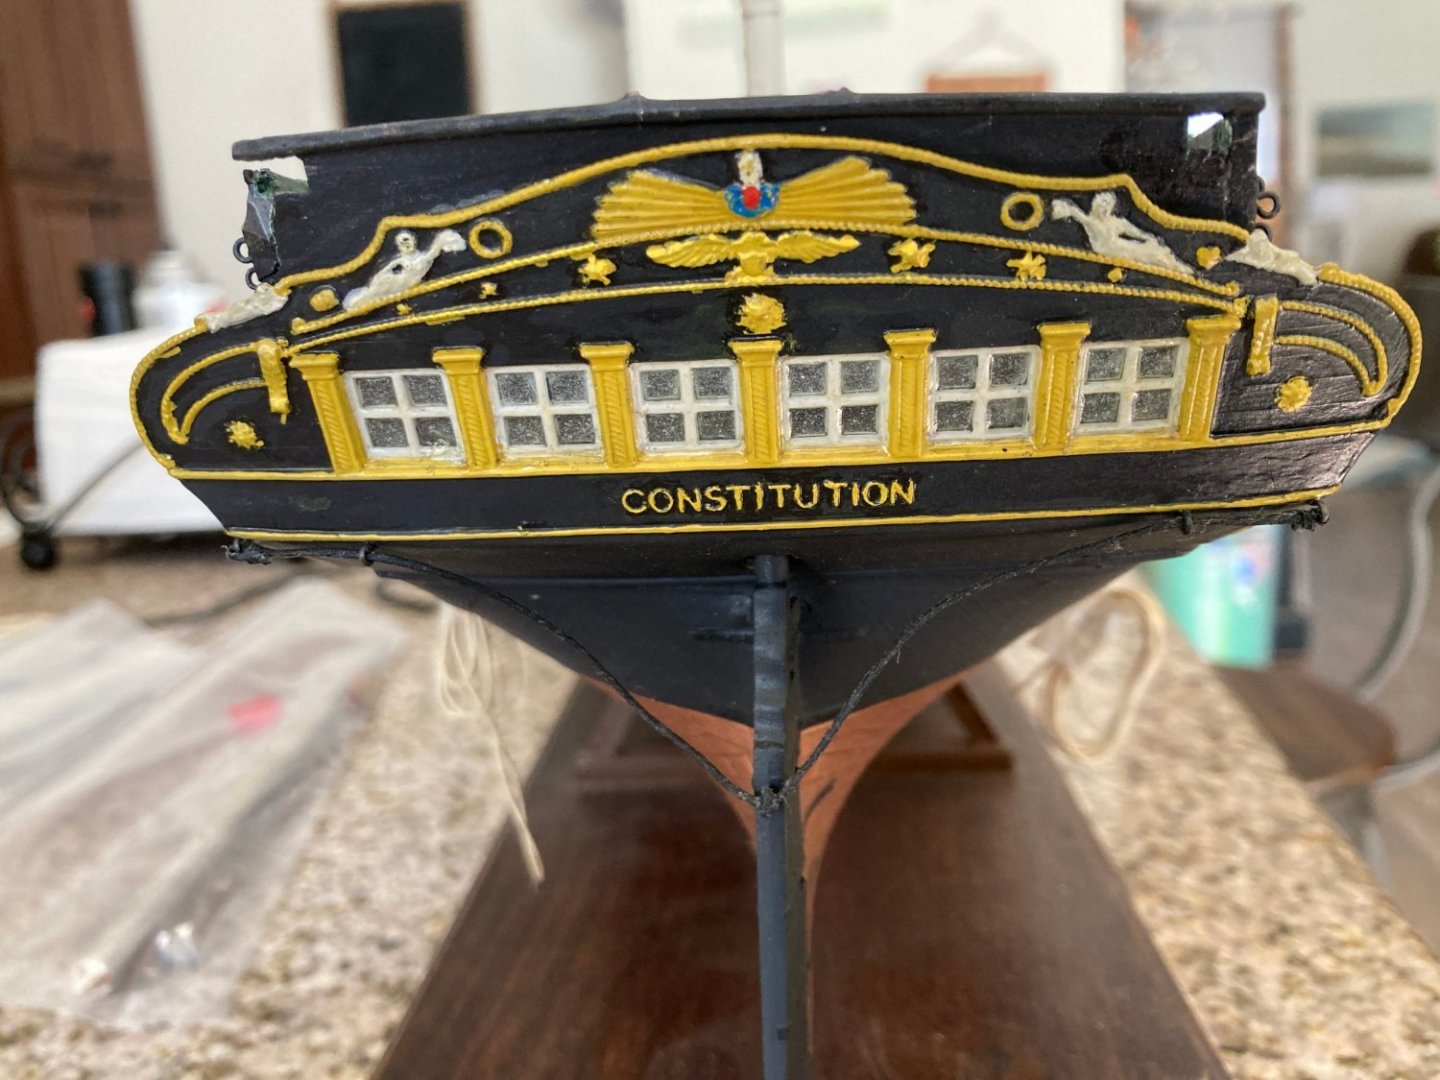
Here are a few pics of the Revell USS Constitution I was working on before I started breaking parts off. I could not get the deck to look the way I wanted. I detailed the gun deck, even though you can't see it. I am anxious to do another one if and when my Cutty Sark is finished. I keep the busted Constitution on hand for inspiration.
In my stash of large ship models, uncompleted are the Heller Victory, Santa Maria, the Revell Yacht America, Kearsarge, Constitution and Lindberg Sea Witch.
-
1 hour ago, Terry Foster said:
I have just located this forum and am through building this plastic Revell 1:96 plastic kit
It is my first build.
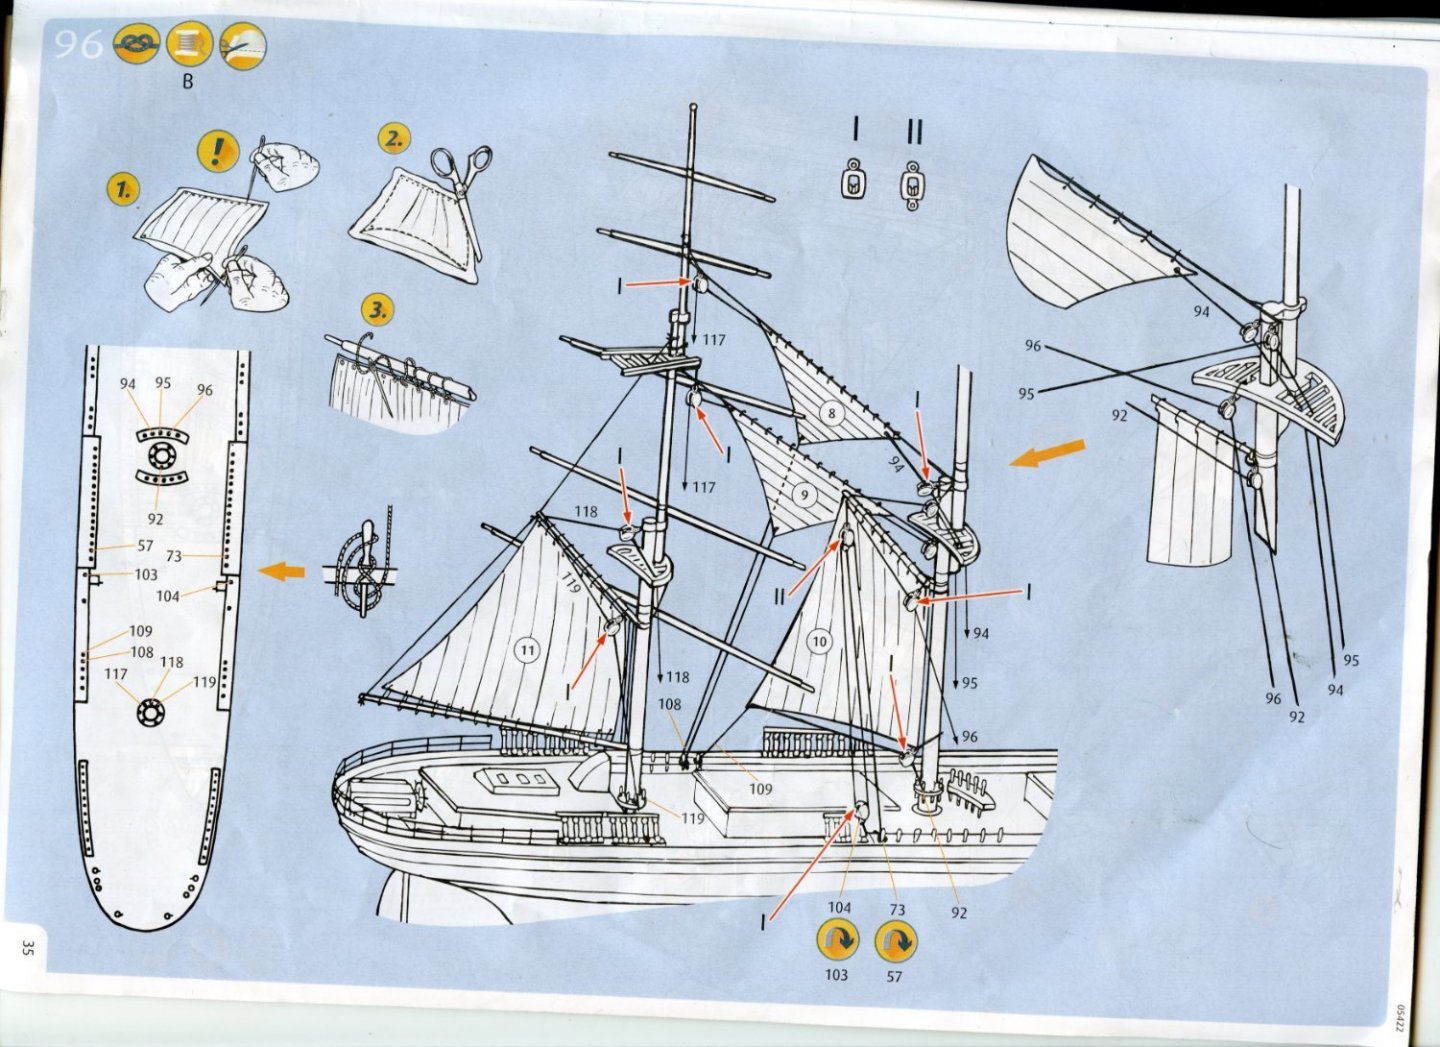
I am puzzled by the pin numbers on the attached diagram.
Sail9: where does the bottom right fixing go to?
On main diagram - cord 96 ties to pulley top right of sail 10
However on detail closeup on same page it fastens to pulley on platform.
Sorry I am new to this and do not know the names of parts of ship where sails and poles are concerned.(teach me)
Furthermore on main diagram - cord from (109) goes to pulley on mast then down to pin 92.
On detail in manual rope 92 appears out of space to pulley at top of sail (10) on mast.
The manual is ever so confusing.
I would be thankful for any feedback
Thank You,
Terry
I am building the same kit. I haven't come to the rigging yet, but I am planning for it. I have several sources for rigging clipper ships that I am reading. I think it is good to know your subject before going ahead and trying it. My references say that most clippers were rigged basically the same. Sailing ship rigging has a definite purpose for each type of rig.
My suggestion is to get some references about rigging clipper ships and understand the purpose of each line, then you can decide for yourself where each line starts and ends.
I know when it comes time for me to rig my model, I will have every source I can read and understand why and where each line goes.
-
9 hours ago, shipman said:
I concur with your opinion of most of the wooden kit renditions, though I have no wish to denigrate the folk who build them.
Most (as an example) have planked bulwarks; they are sheet iron/steel on the ship.
In addition, the wood provided is appalling quality, the grain being open and out of scale.
By contrast the basic hull of the revel kit is pretty accurate, not withstanding obvious small detail issues which are easily remedied. As for the masts and spars, the fragility of the parts justifying scratch replacements in brass and wood.
On the ship the belay pins are iron, painted black. The deadeyes are made of that very hard wood, Lignum Vitae, which is a dark brown.
The often regarded as the bible 'plans' by Campbell, as someone here recently observed, aren't entirely accurate either.
As I understand it he was commissioned to do them to compliment the ships first public appearance at the Festival of Britain in the early 50's. He was employed by the London County Council engineering department. I have no idea what his connection was to maritime affairs before or after. It would be enlightening to hear more of his background, what his sources were (other than 'conversations' with surviving sailors of the period).
The original ships spec listed (naturally) accurate builders plans and a model. No trace of which survives.
We do know the decorative elements at bow and stern were originally far different to those on the ship now.
Like so much of history, there will be so much we'll never know.
As I am not going to materially change my Revell kit, you might say the Revell kit is my plan. I have the Campbell plans and I like reading them. I have mostly looked at photos of the ship in its wool days. I can imagine Woodget deciding for me what colors the ship should be.
-
Hi Kevin,
I thought I would drop over to your build. This isn't the first time here. My impression is, even if you don't finish, the components of your ship are fantastic models in their own right.
-
3 hours ago, Kevin-the-lubber said:
I think I may do the same, I have some very thin wire which might work for this. Are the belay pins too long, short or just plain out of proportion, which is the impression I get from photos? I've made a load but haven't attached them to anything yet.
I ordered from Amazon some 26 gauge white floral wire. I think it would look good with black deadeyes on the pin rails.
-
I’ve seen some completed wood Cutty Sark models online where most of the fittings, deck houses, monkey poop cabin are all out of proportion. The rigging may be correct or not I couldn’t say yet. But these are considered fine builds and reproductions of the real thing.
My Cutty Sark will fall into that category because I don’t want to put in the time and effort to research and fix every item that is out of proportion and I lack the talent. All the fun would be gone, and I’d feel I was on a quest or something. The search for the most accurate Revell Cutty Sark. That ain’t me. I do admire those who do, though. Their work is amazing.
Once I entered a model airplane in a model contest. I did an exceptional job turning a not to detailed model into a very detailed one. I did not know about dipping canopies into clear floor polish to get perfectly clear canopies. Mine were not clear, all the others were. I was not even in the honorable mention. Boy did I feel dejected. Ever since, I developed the good enough for me attitude. If other people like it, that is icing on the cake.
As for the rigging, I am reading a lot about it. I like the idea of learning something new in my old age. I will be 76 next month. I understand there is a reason for every line, and knowing that I want to again represent “harbor” rigging just as I want to represent the bulwarks. Not to perfection, but pleasing to my eye. Most of the people who would look at my finished model if it gets that far will see a bunch of string going this way and that, but I will know there is a method to that mess of string.
-
15 minutes ago, Kevin-the-lubber said:
I completely get that; I think for me, given that this is my first attempt to build a model properly (I'm not counting the parked Victory) and I simply don't yet know enough about the whole process, or sailing ships, it'll be enough to be able to look at it afterwards and feel it was a decent effort. Even at this stage there are things I'd do differently next time - my deck colour is one of them - it was intentional and I like it well enough, but doubt I'll go in this direction again, in part because I've learned a little about model painting along the way. 3D printing is just a tool, it allows me to learn from my mistakes and learn about the parts. Behind those finished items are a heck of a lot of binned versions and if I was building this straight out of the box I'd either have given up by now or been too embarrassed to maintain a build log. However, the 3D process itself can get quite boring and time-consuming as half the battle is finding ways to print what you design.
I'm also going to do the deadeyes and rigging from scratch as I don't like the kit parts at all. I wasn't going to do the stanchions to the pinrail, was going to more or less replicate the gussets as I'm fearful that the rails might not be strong enough for the rigging, but I might rethink that as it definitely looks better having stanchions.
I'm amazed that you got such a fine, thin coat of gold from a rattle can. After seeing yours it occurred to me to try a gold paint pen and wish I'd used that.
I am going to strop the deadeyes with wire which will be long enough to pass through the pin rail and waterway, where I will superglue them at both places, that way the pull or strain will not be on the pin rail,
-
20 minutes ago, shipman said:
When the time comes to be belaying lines to the pins I would guess it would be prudent to be careful. A tad too much tension could easily snap a few off; remember it's only plastic.
I have two examples of the kit, one of which is the original UK issue (around 1962) with pre-painted hull, not only is the plastic on that one very brittle, it has dark brown swirls and smears as if the molten plastic wasn't mixed thoroughly.
Looking forward to your updates.
No pressure 😏
I have snapped a bunch of the belay pins off just painting and attaching the pin rails to the bulwarks, I drilled out the place where they were and put in plastic rod.



Cutty Sark by bcochran - Revell - 1/96 - PLASTIC
in - Kit build logs for subjects built from 1851 - 1900
Posted · Edited by bcochran
Just for fun, a Revell HMAV Bounty I have been working on for years. Last time I was putting on standing rigging. I want to build the Airfix 1/87 Bounty.