


bcochran
-
Posts
598 -
Joined
-
Last visited
Content Type
Profiles
Forums
Gallery
Events
Posts posted by bcochran
-
-
My grandmother on my mom's side was from Naples. She always said in Italian, "If you don't work, you don't eat." My parents found jobs for us when we were in the fourth grade, when I was 10. I retired at 70. So it was either school or work for me for 60 years. But what I did was nothing compared to boys on ships or in the mines.
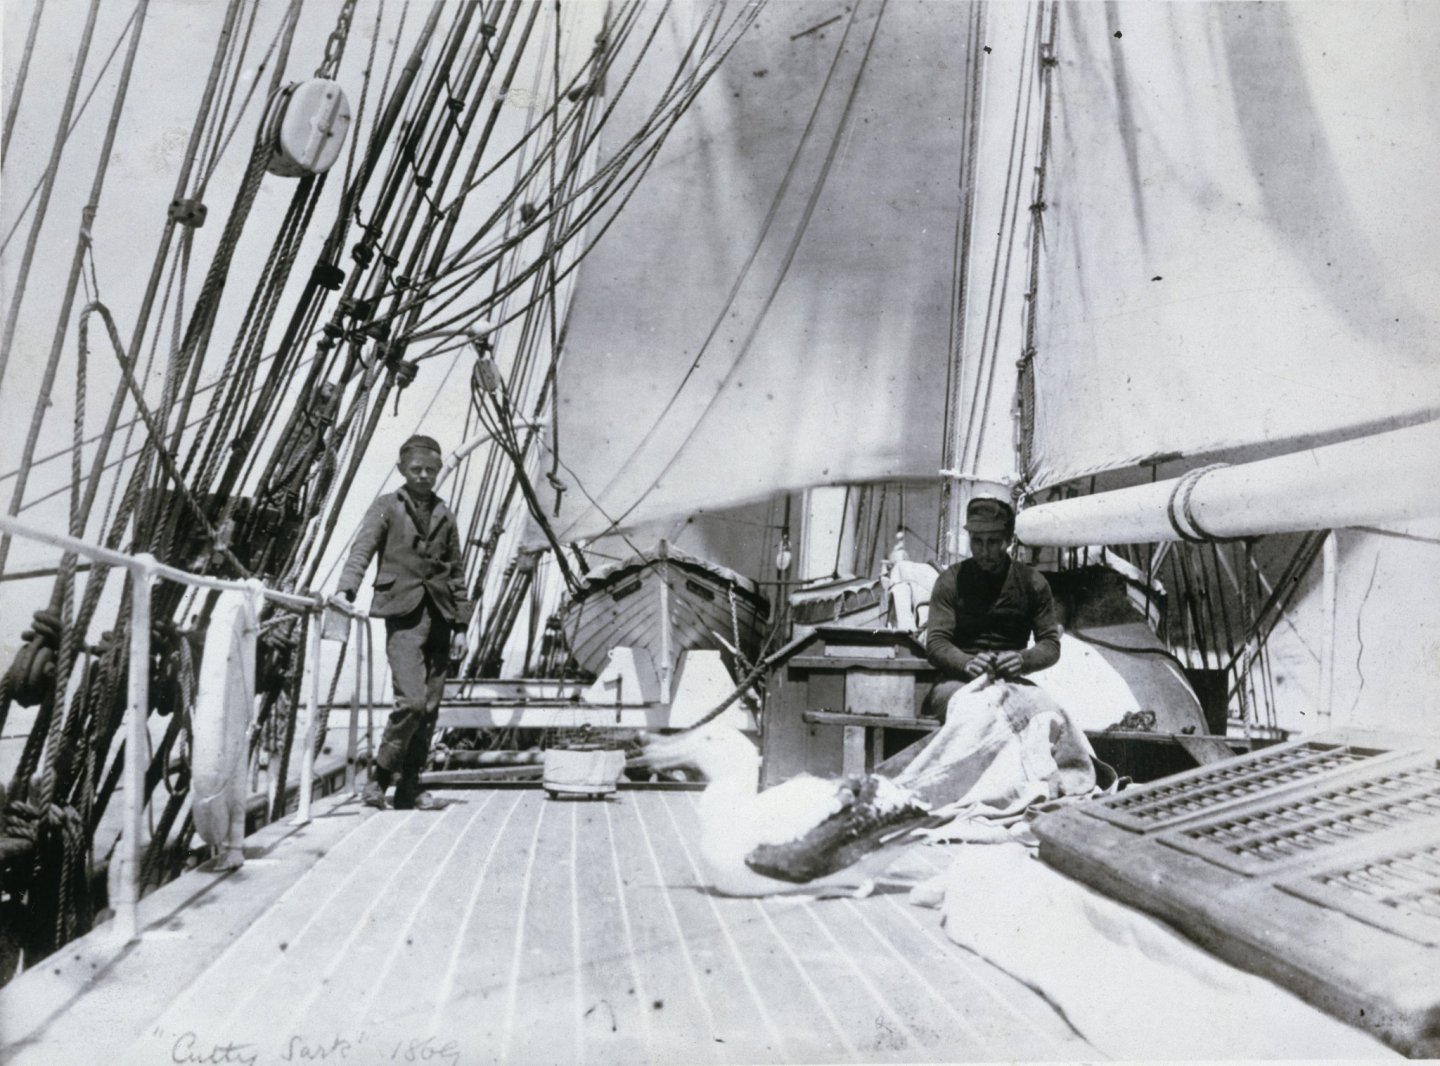
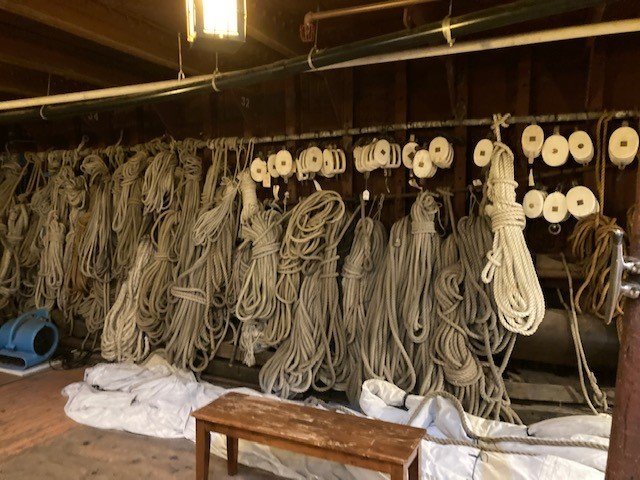
These boys risked their lives, so some others could sit and sip tea.
-
What I have read about the two casks, one was for salt pork and the other for salt beef. Fresh water was held in a tank under the main deck. That little pump next to the deck house was for the fresh water. The pump on the port head had a pipe that went down below the water line and out through the copper plates. It was a salt water pump. This was what I read in Campbell’s book.
Another interesting thing he says, candles on board were of a mixture of tallow and rat poison.
In that picture, I wonder if the kid is an apprentice who climbed the rat lines and worked out on the yards during a raging snow squall at a young age?
-
Just for information
I was reading George Campbell's book, "China Tea Clippers". On appearances, he wrote, "The raised poop decks were, as often as money permitted, of teak or an oiled hardwood, and the deck seams in white putty, purely for appearance. The white seams also appeared frequently on the tops of deck houses.
-
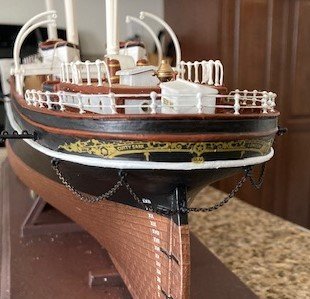
I finally have the stern decorations added to my ship. They are decals. Thanks to Kevin.
-
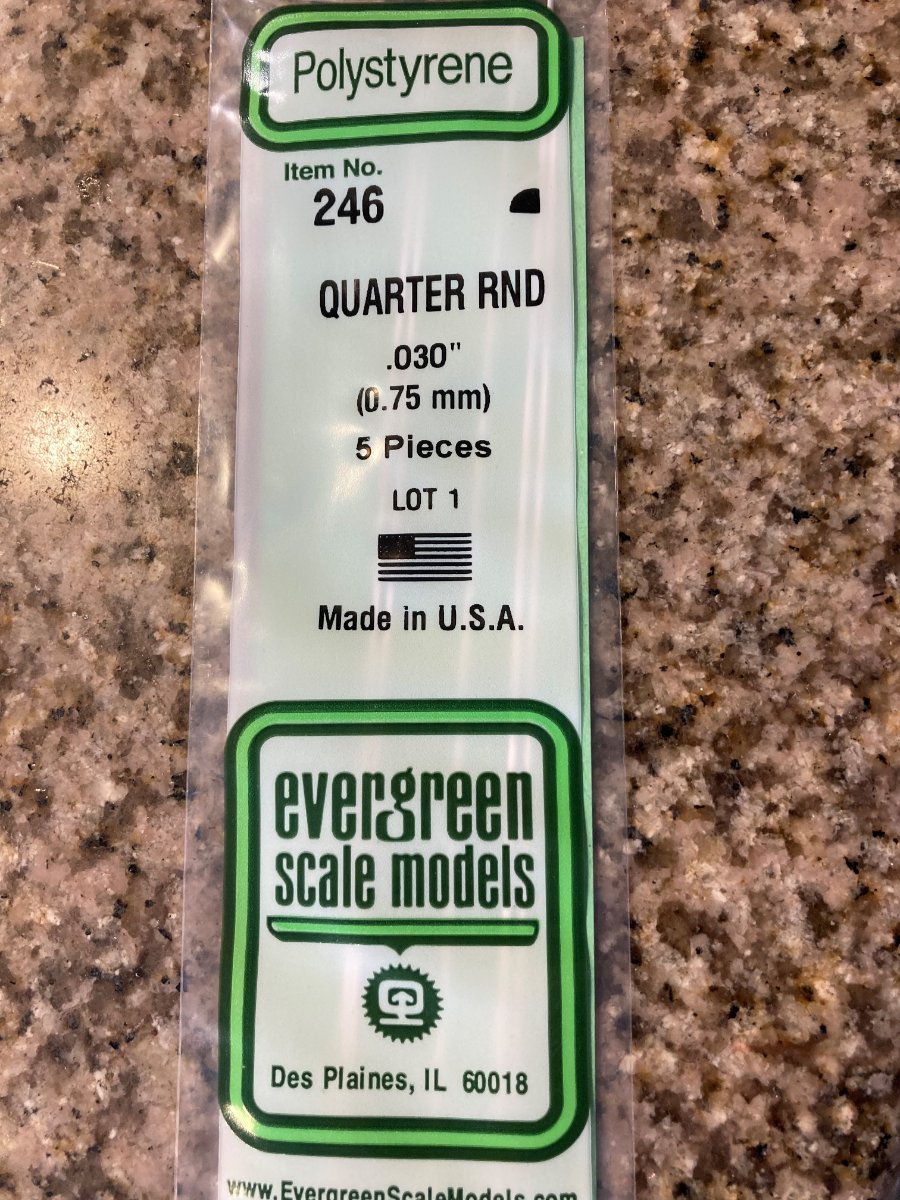
Today I received this Evergreen Styrene package of .030 quarter round. It is perfect for the base of the deck houses.


-
I never got into Game of Thrones. But then I am from a much older generation. My favorite fiction as a kid was Aesop's Fables.
-
I think you have Campbell's book about Tea Clippers. Read the part about building iron ships and the methods for forming the plates and the clothes they wore doing it.
-
What is amazing to me is that these relics from the past remain for us to admire today. That these ships were built without the tools we have today just astounds me. In my mind, I compare the methods of the builders in the 1700 and 1800's and what tools they used with methods and tools that would be used today to replicate those two ships exactly.
In San Diego they have a replica of the San Salvador, the ship Cabrillo sailed here from Spain. I watched them build it. It is in no way constructed like the real ship was. Nobody has the skills used to build the original ship today.
-
13 hours ago, Kevin-the-lubber said:
Bob, take a look at Bill's Victory log. It might be easier to work backwards from the end, rigging is discussed virtually step by step and I'm sure much of this will transfer to the Cutty. It's also a great build.
.
I have seen his Victory build, but didn't see all of it. I would like to complete the Victory I have in my stash. I love the YouTube video of HMS Victory firing rolling broadside.
I hope to visit her and Cutty Sark before I die.
-
12 minutes ago, Kevin-the-lubber said:
Bob, take a look at Bill's Victory log. It might be easier to work backwards from the end, rigging is discussed virtually step by step and I'm sure much of this will transfer to the Cutty. It's also a great build.
.
Thanks Kevin I will do that.
-
15 hours ago, shipman said:
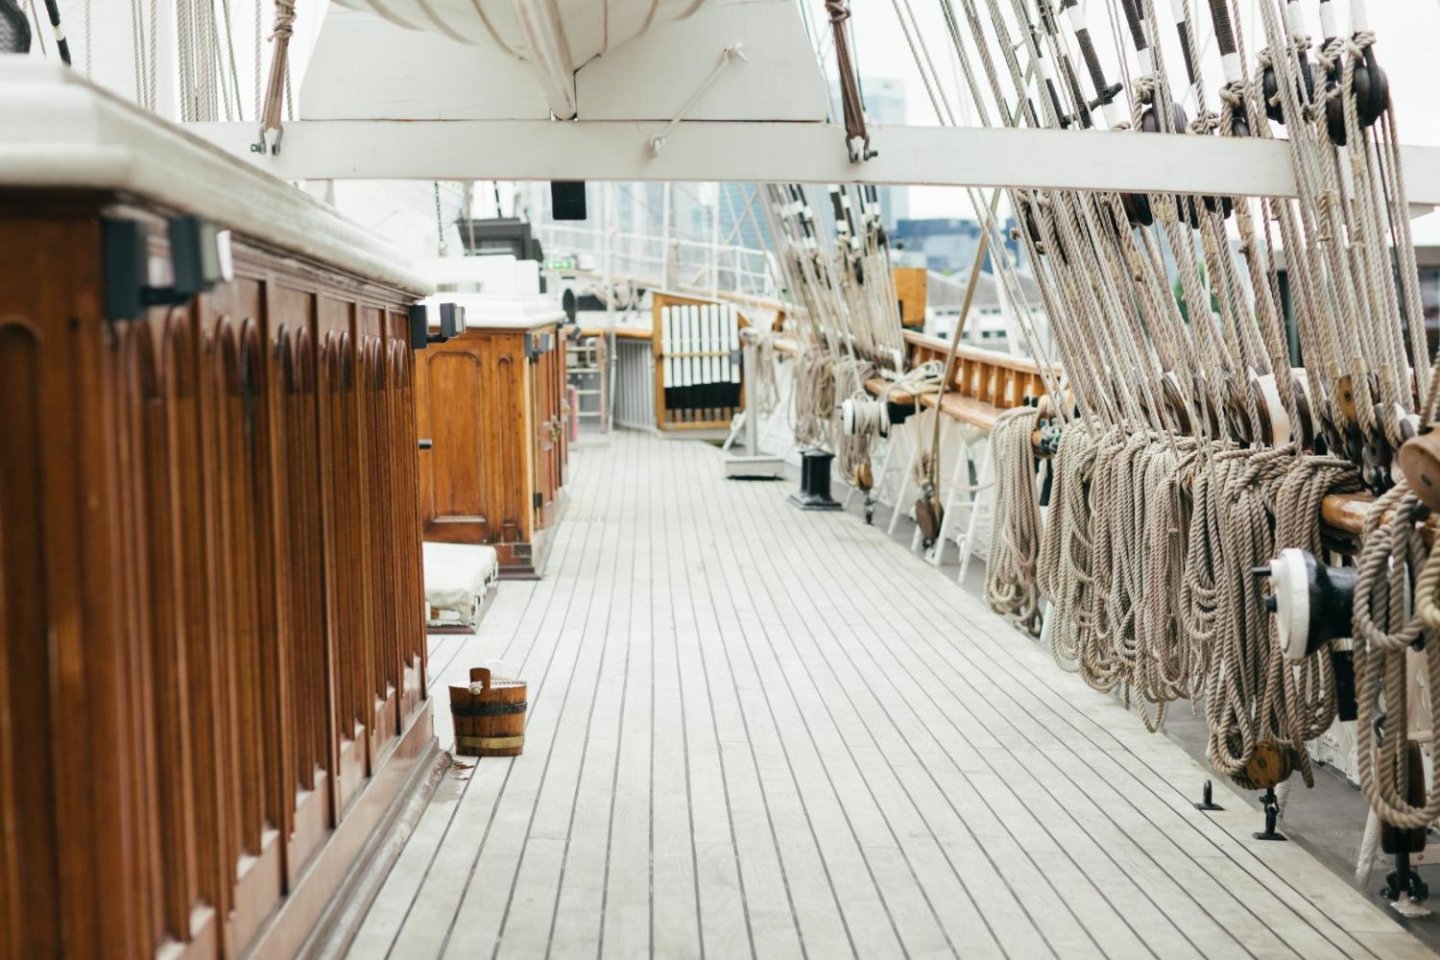
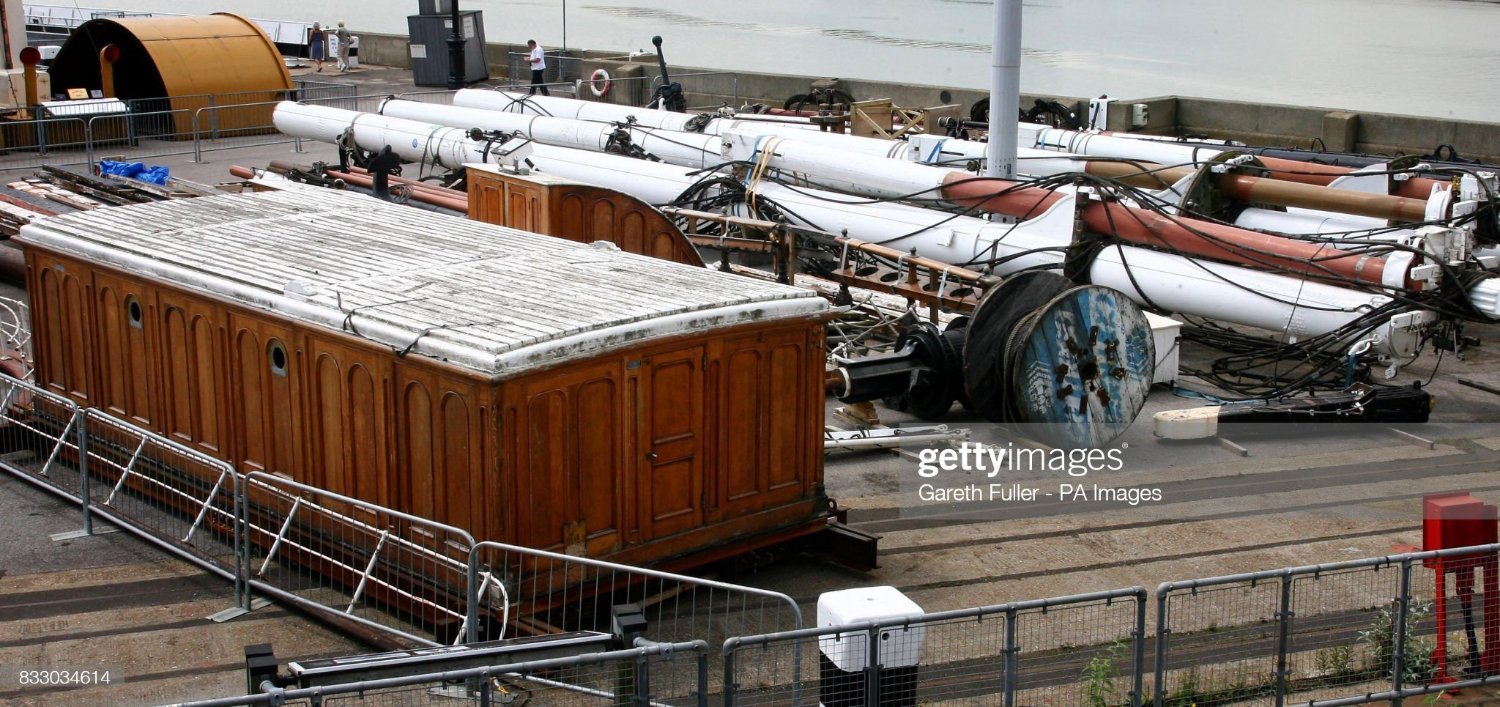
There are photos of the complete deck houses when in storage at Chatham dockyard. Clearly they were directly lifted off the deck. I imagine they were originally built as one assembly, lowered directly onto the deck, which would indicate there were no margin planks.
I am not sure what is meant by margin planks. Revell had something like raised platforms that the deck houses sat on. I sanded them off before gluing the wood deck on. It looks to me that at the base of the walls there are quarter round moldings currently.

-
20 hours ago, Kevin-the-lubber said:
This may be useful. On mine, I included margin planks in the deck and flat skirting on the dechhouses. This photo has reminded me that the ship only had one deckhouse originally, so wouldn't have had margin planking, and from my february visit photos, that was true of both houses. The quarterdeck cabin has something very similar but more quadrant-shaped. Nice little pump here too, on the aft deckhouse at the main mast end: this looked like it was added later. I decided not to model in the duct tape, I sense that too may not be part of the original ship. (Lazy tykes, you'd think someone would have sorted that out on a showpiece!)
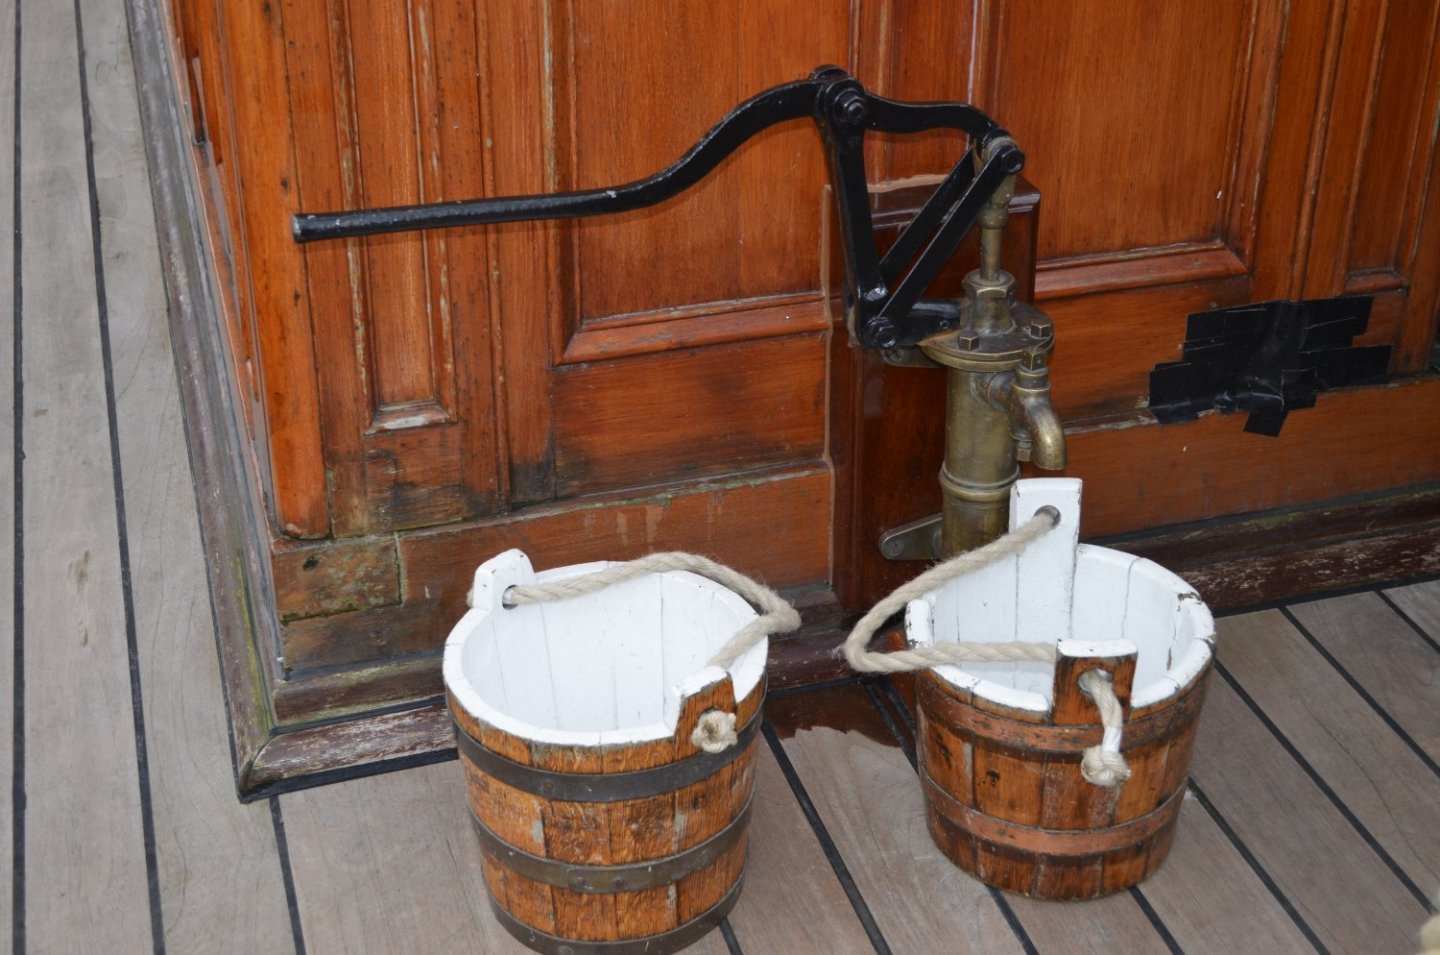
There were two pumps on the ship, one for fresh water and one for salt water. The other was on the port head. I forget which was which.
-
16 hours ago, rwiederrich said:
I hope you left yourself enough room to belay on those pins.
Rob
I think I did. The method I have in a rigging book shows using a needle with the tip of the thread end cut off to push the line under the lower part of the pin, then to bring it up and over the top of the pin. I have room enough to do that.
But you've helped to increase my apprehension about rigging. I have yet to build up any confidence in my ability to finish the rigging. At this point, I have no knowledge of the order to follow in rigging. For instance, if I work on masts off the ship, I don't understand the amount of or what work that is needed. I will have to figure that out by trial and error, I guess.
We have a lot of information on how to build the structure of the model, but little information on how the rigging was done. We have pictures of completed rigged ships but no progress discussions on what was done, like we do in building the structure.
My guess is that people get to where I am and quit their builds. Or they go off and rig their ships, then show us pictures of the finished product. I have not seen any build logs where people have spent pages and pages on their rigging work.
So I think I need to get out my rigging references and read up. While reading about rigging the bowsprit, I found that Underhill jumps all over the place from page 10 to page 31 and beyond, with bits of needed information about the bowsprit and jib boom interspersed with other parts of the ship.
Hackney is more orderly as Shipman has pointed out a while ago. So is Revell, but Revell is not complete. Then there is Longridge who has a whole book about rigging Cutty Sark.
Radimir at HisModel has Campbells plans available, broken down by types of rigging and what blocks to use where. He has gone the furthest in helping beginners, I think.
So for me, I expect rigging will be a lot of reading, starts and stops and do-overs all the while gaining experience and understanding. If I get into it, I plan to show here every step I've taken.
-
11 minutes ago, rwiederrich said:
I love polystyrene formed strips...they come in every imaginable form/shape.....love-em.
Great job.......
Rob
I think I found some quarter round that is the right size on Ebay. I bought it and await delivery.
As I get into rigging later on, I want to ask you if you had a plan when you did your running rigging. I mean, like did you do all halyards then all lifts in any kind of order?
-
On 6/7/2022 at 1:03 PM, Kevin-the-lubber said:
Minor catastrophe earlier this evening - fiddling around with the quarterdeck assembly to see if I could gently remove a couple of bits for improvement when the entire thing jumped out of my hands and landed upside down on the floor. A few bits broke off and I'm not sure whether it's worth the effort of salvaging or make it again. This all arises because I really don't like how similar in colour the decks are to the coppered hull and furniture was exploring whether I could remove the furniture in order to repaint them a lighter colour. That'll teach me. I think I'll mull on this for a few days and just carry on making those gorgeous boats while I think on it.
Kevin, I can relate. I almost completely ruined my model back in May. I recovered luckily. I have many goofs and do-overs that no one knows about. When I get distraught over it, I walk away until the urge to continue returns.
I hope you can recover to your satisfaction.
-
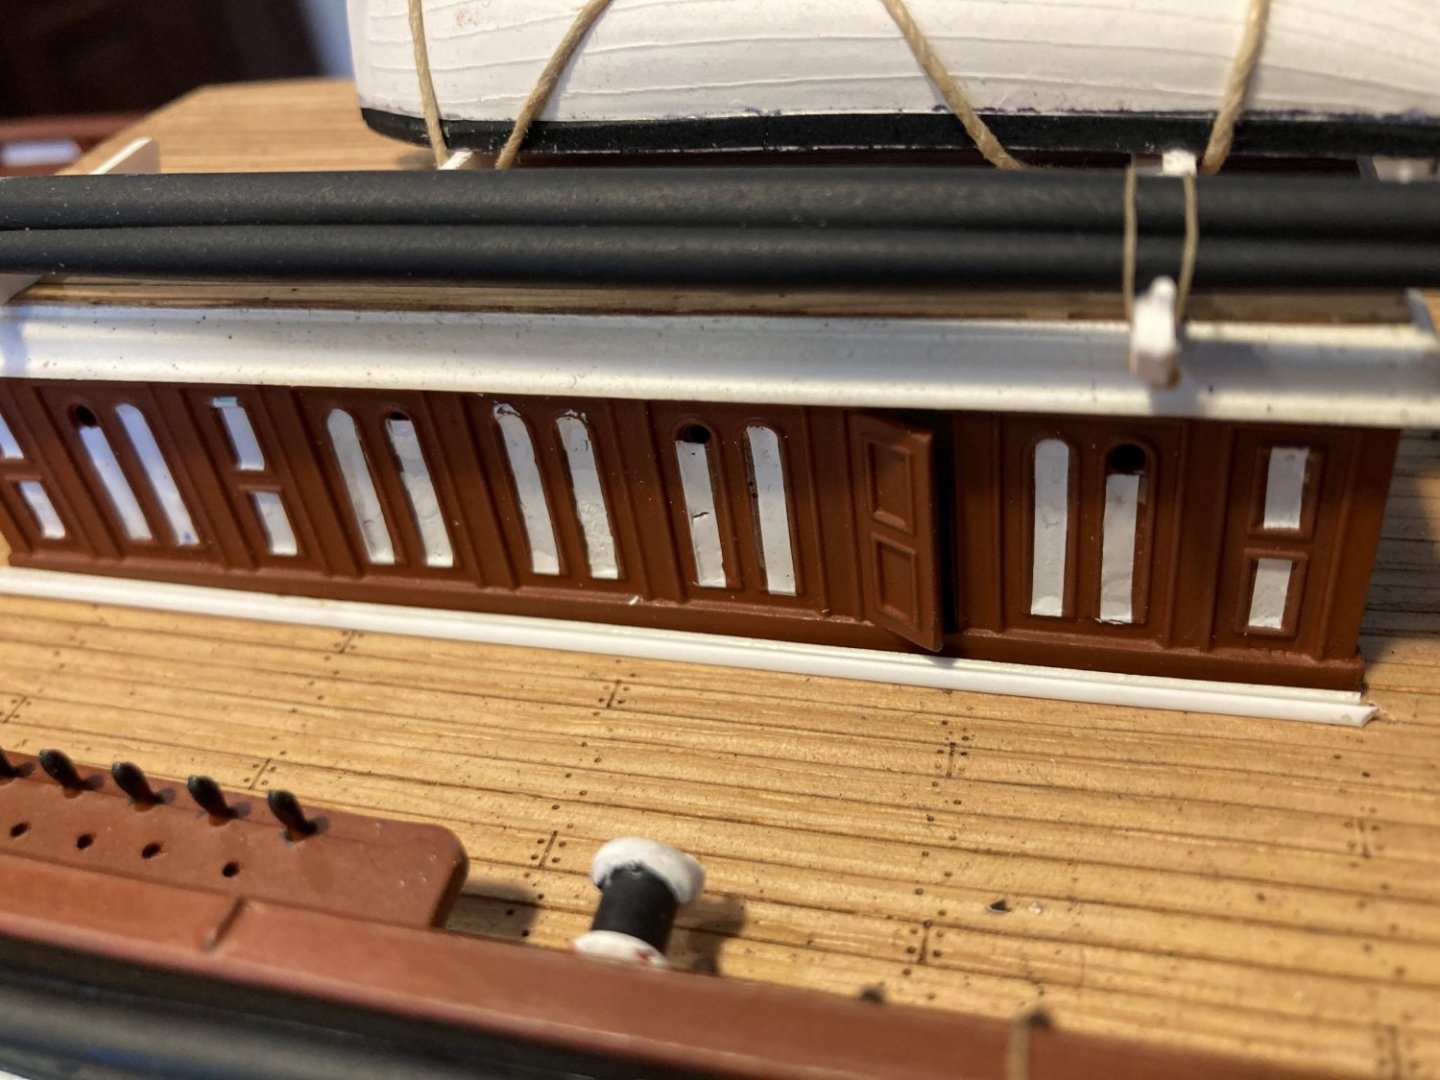
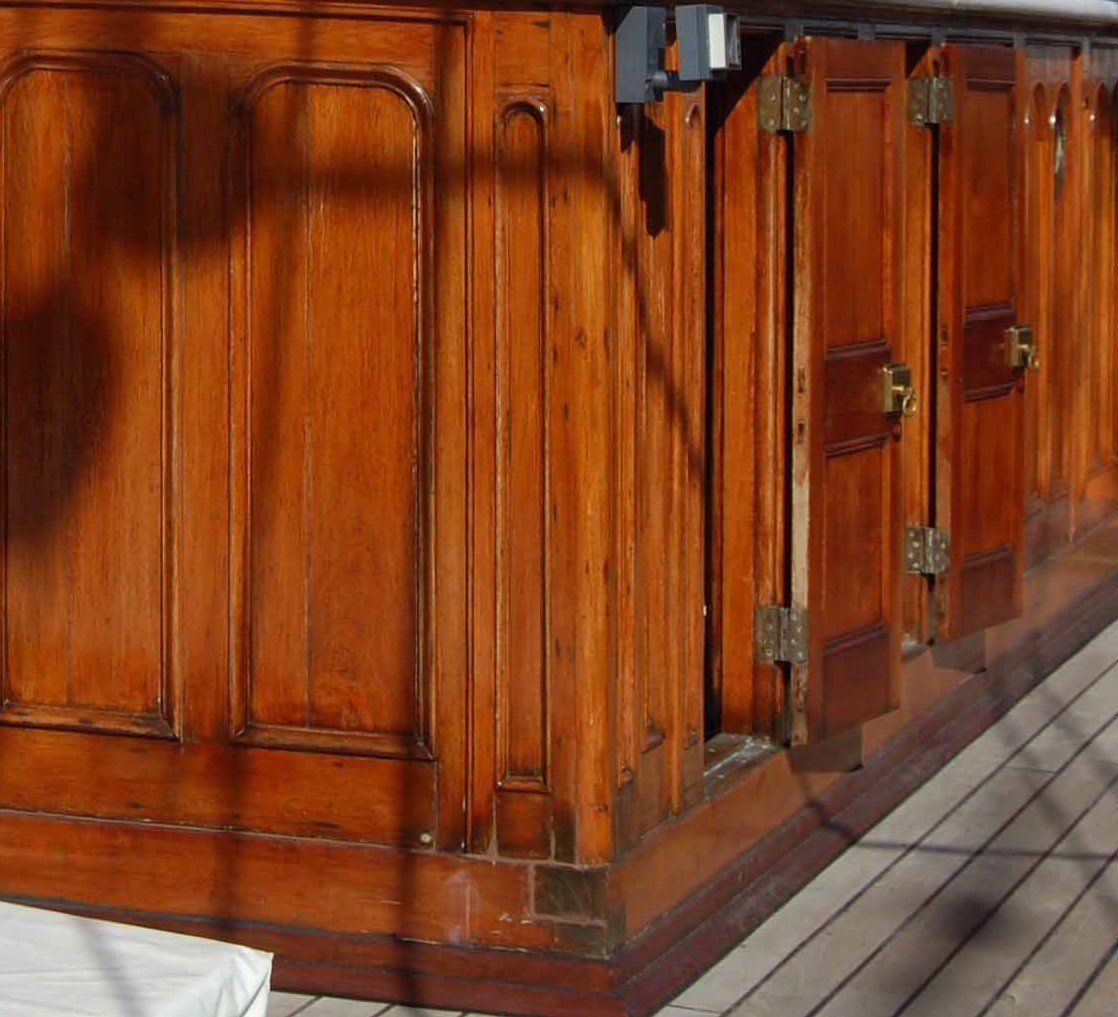
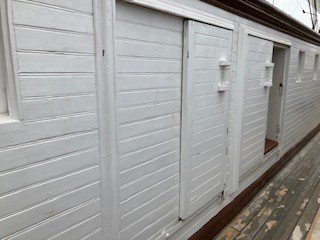
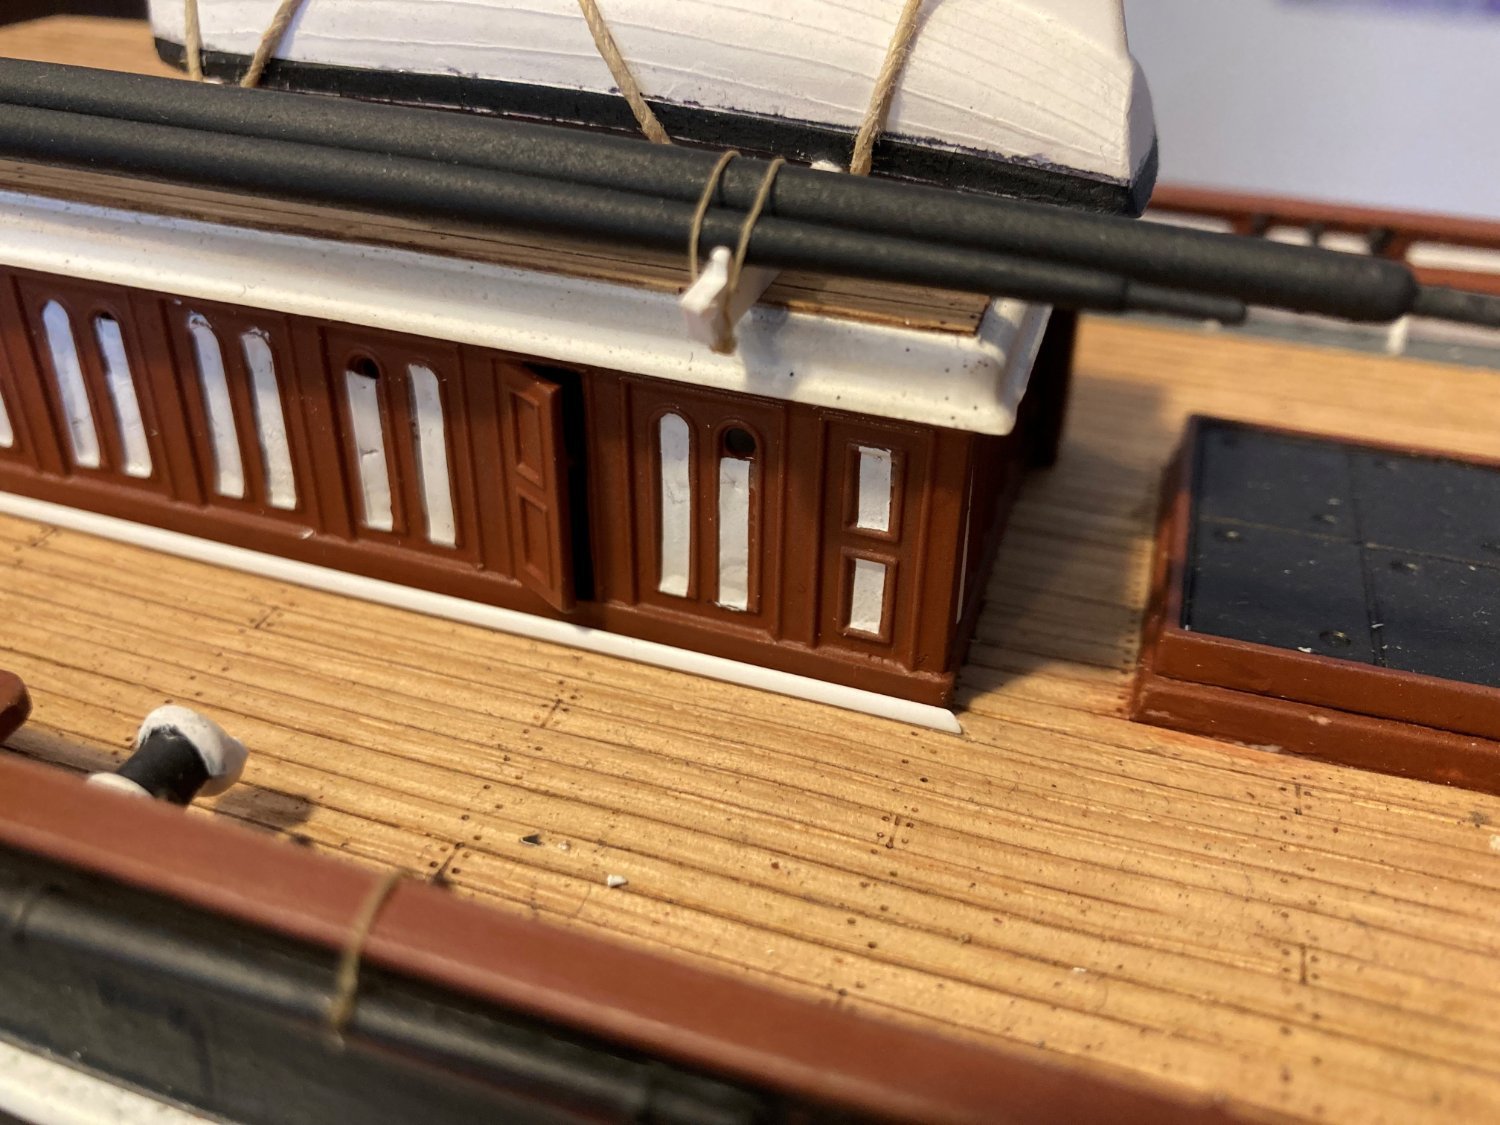
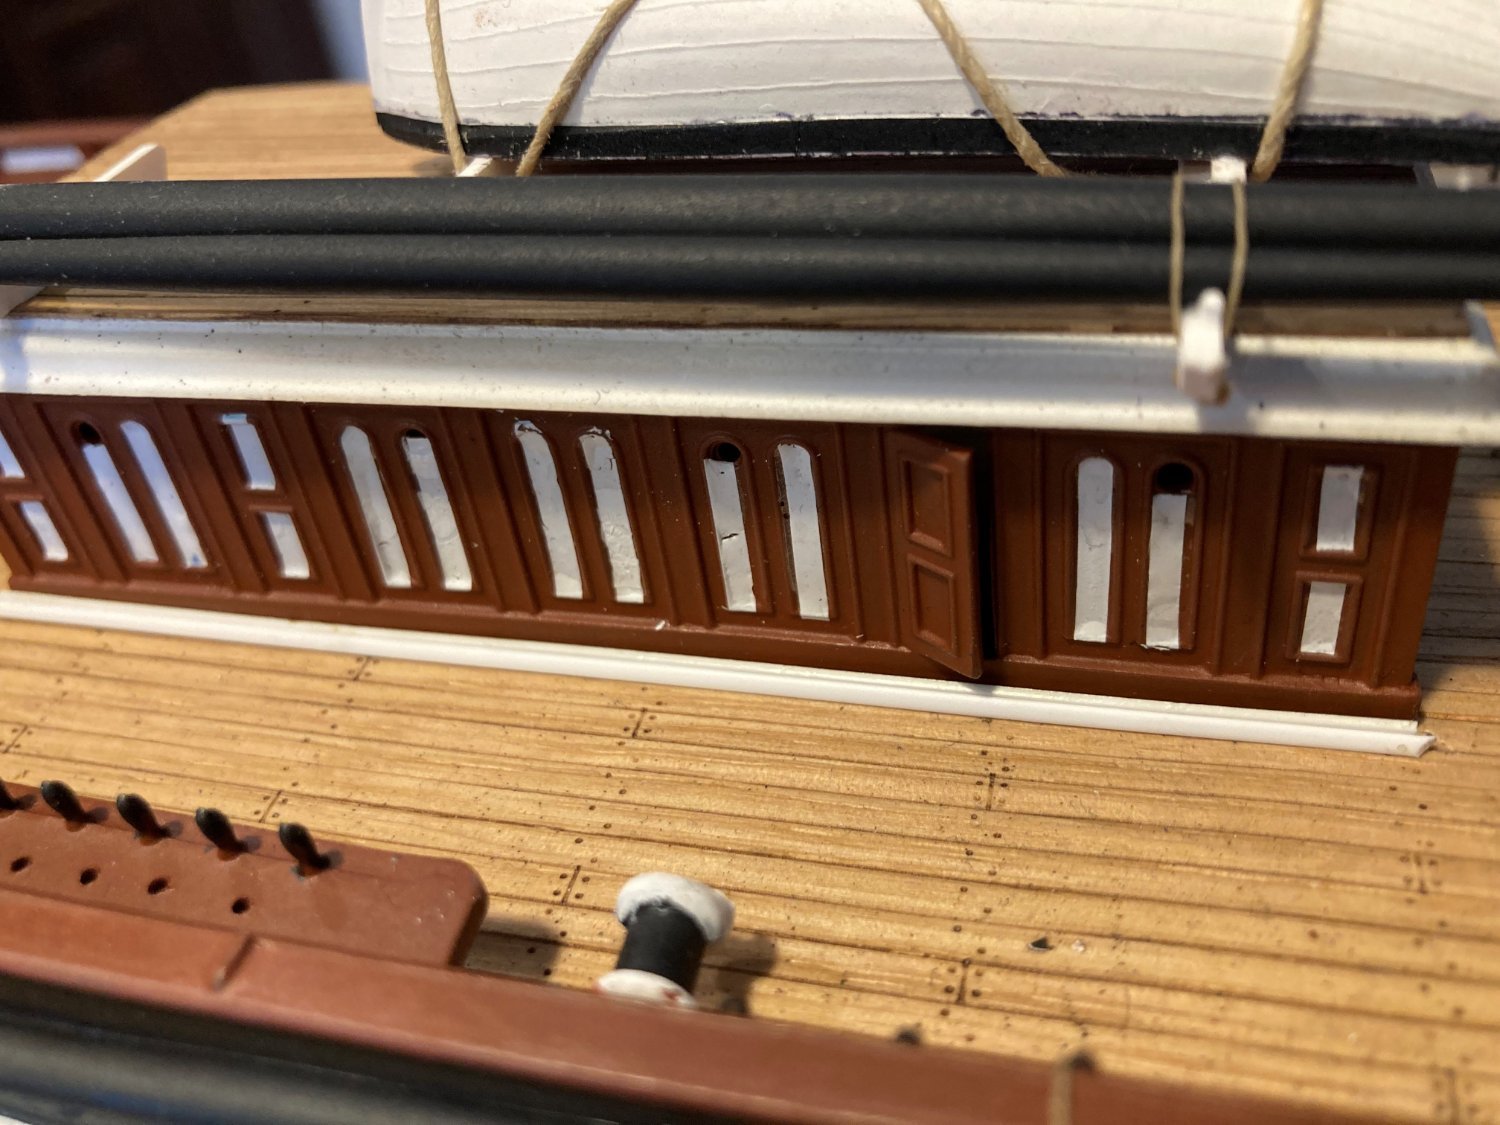
I noticed in pictures of the Cutty Sark deck houses, there is a wood edging along the base of the walls. On my ship, with the HisModel decking and the Revell deck houses, there seems to be something missing along the bottom where the two meet.
I plan on using plastic angle to replicate that edging. I really need quarter round, but I could not find any small enough, I will keep looking first. I will cut it to shape, paint it and glue it on with canopy glue.

-
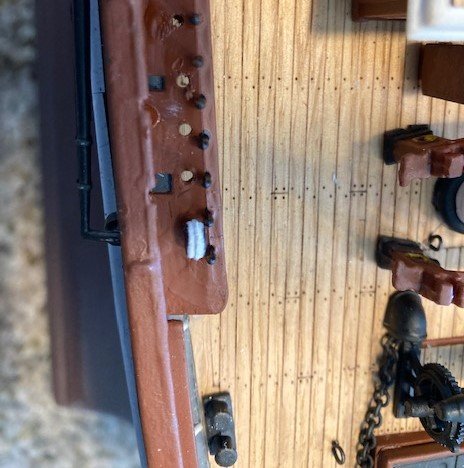
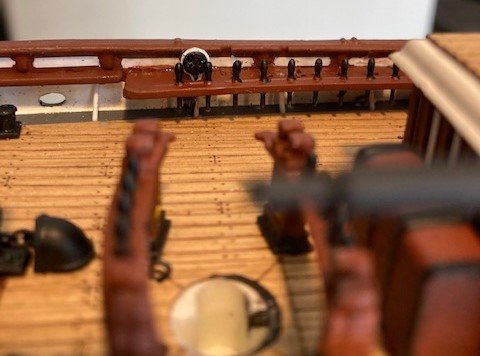
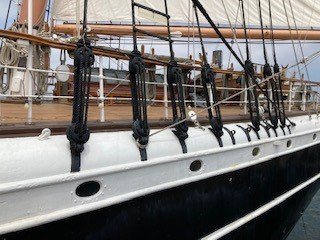
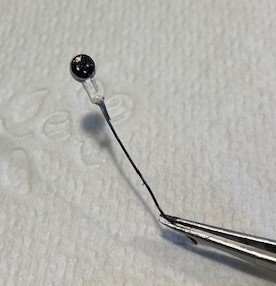
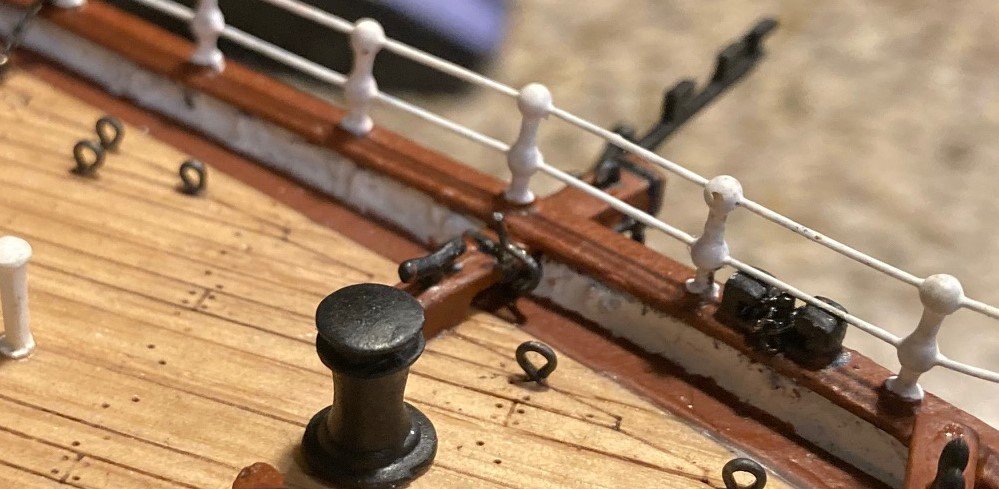
So I finally settled on my way of attaching the lower deadeyes. I am using HisModel deadeyes and strops. I attached a piece of black colored annealed steel wire to the strop with superglue. I squeezed the strop and wire with pliers to fit in the enlarged hole in the pin rail. I painted the sides of the deadeye and part of the strop white, the rest was colored with a black sharpie pen, which does not plug the holes. The wire will be superglued into a hole in the waterway, thus putting no strain on the pin rail.
I made room to reeve the lanyards, which will be black.
I think it resembles the real thing at 1/96 scale. I realize the pin rail is too big, and my deadeye is too far from the bulwark and too big, and the belaying pins are too big and out of place and the number of shrouds may be different from the real ship and my chain plate won't slant with the shroud. Revell is my ship plan mostly. If I tried to do something about all that, I would never finish. Chalk it up to artistic license. I need to invent ways of doing things that are not complicated and look realistic, so that I keep up my steady progress. I don't want this build to drag on and on. I am anxious to work on other ships.
I plan on doing something similar to the deadeyes on the tops, but the attached wire will be the futtock shroud attached to the mast.
I won't glue the wire to the waterway until the deadeye is rove. I will get the correct distance between the upper and lower deadeye the usual way with a wire template. Then strop the upper deadeye and seize the shroud. Then reeve the lanyards, raising the lower deadeye if need be, adjust the lower deadeye and lanyard and glue the wire to the waterway.
Easy as pie, I hope.

-
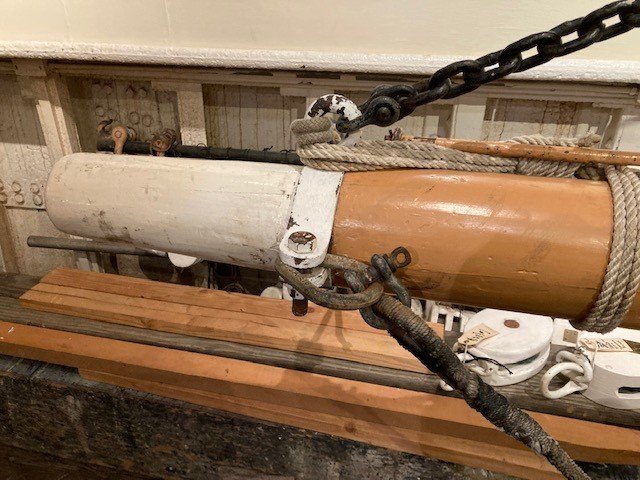
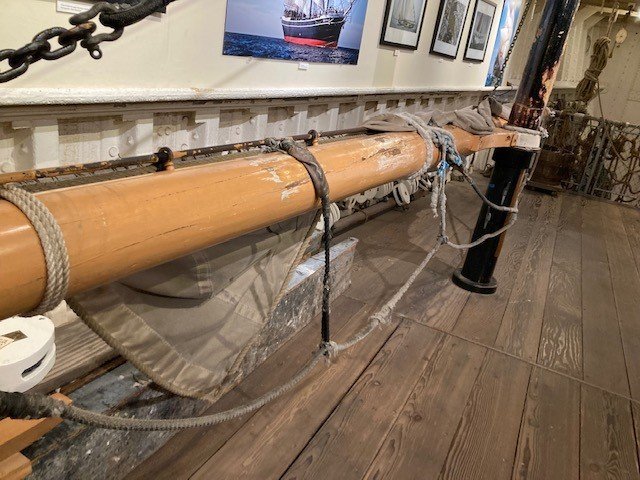
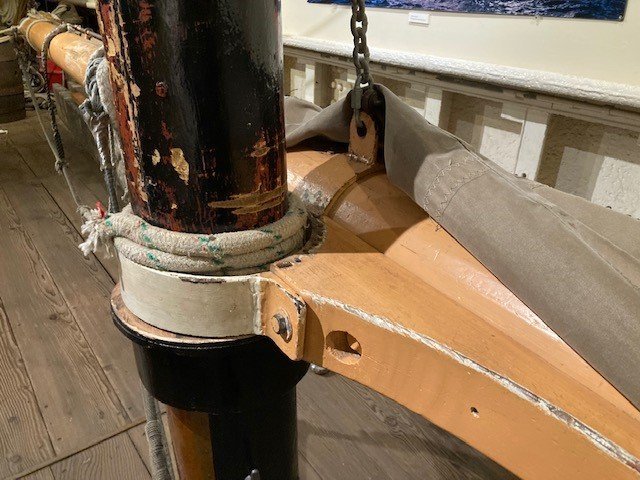
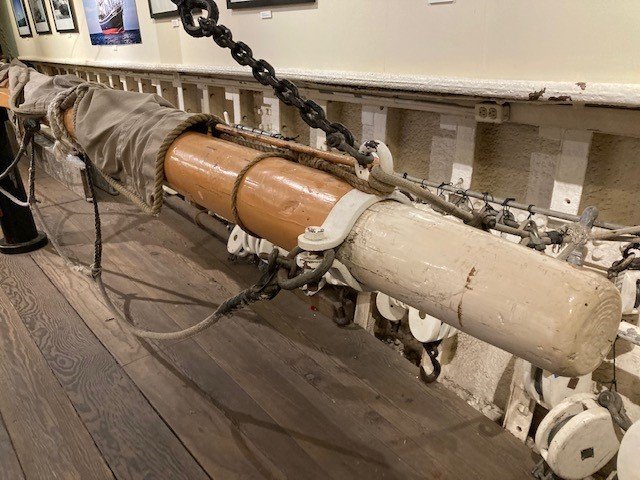
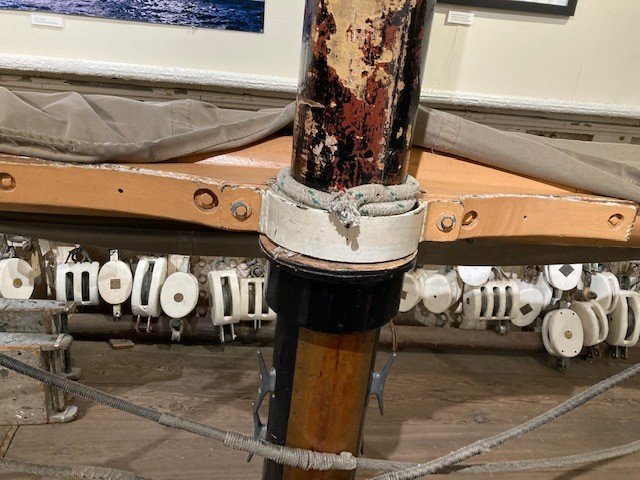
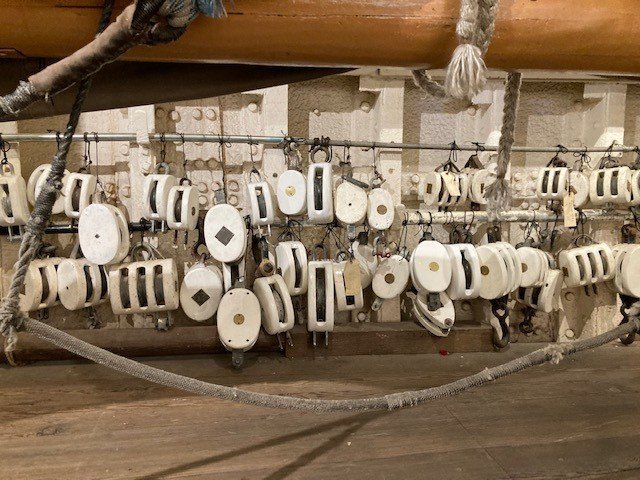
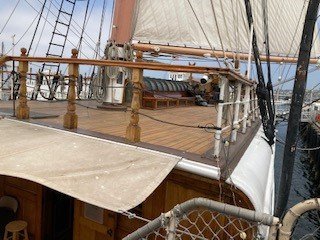
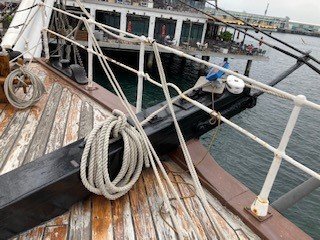
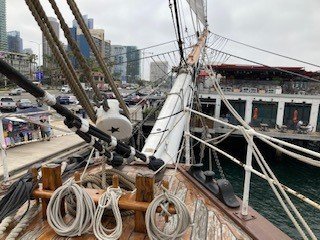
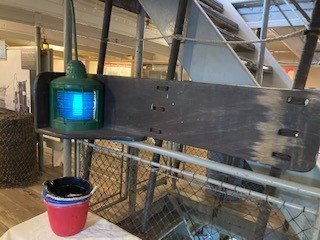
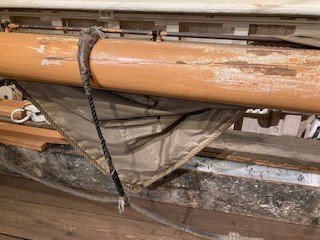
Here are some more Star of India detail shots, mostly of a wooden spar. I noticed that the jack stays were not at top dead center, but more at the 11 o'clock position, and no rings of any kind on this spar accept at the ends for cable connections. Rings may be added to attach more lines, I suppose.
Note the designs on the sides of the white painted blocks. My guess is that the designs tell where or how the block should be used.

-
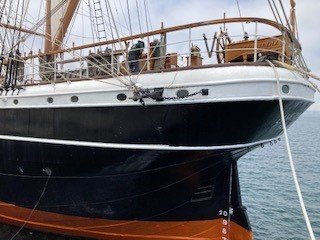
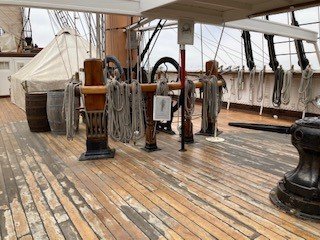
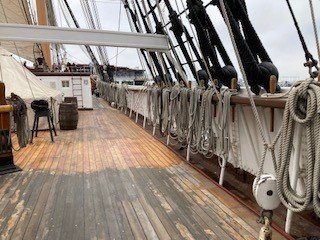
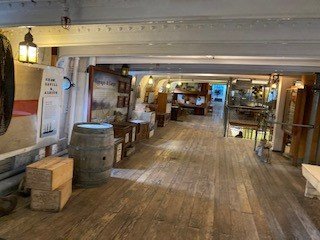
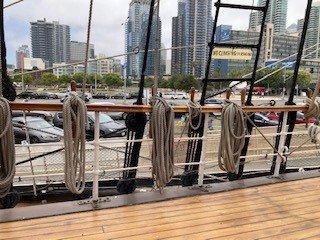
Here are some detail pictures I took of the Star of India yesterday. Now, don't use the pictures of the deck as reference of what color to make a deck. The original deck was teak when the ship was built in 1863. It leaked so bad that it was completely removed by the museum and a new deck not of teak was added. It in no way was built as the original, which was around 6 inches thick. The deck in the picture is made of several layers of wood and sheets of waterproof material. What looks like caulking space between the planks are groves they made in the wood and painted black. The brownish color in some places was a varnish sealer they painted on because the wood deck was not standing up to the weather. The worn places are where that coating has worn away.


.jpg.02d96f315d71e39f24561e18312e988d.jpg)

- robdurant and GrandpaPhil
-
 2
2
-
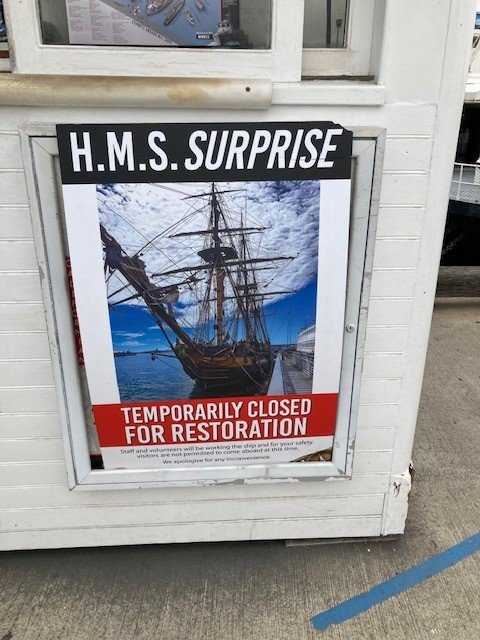
I am sorry to say to Snug Harbor Johnny that I did not see the Rose (Surprise) today. The Coast Guard condemned the ship due to rotting of the hull, especially the rudder.
This morning, she was being towed to the Navy Yard to dry dock and be repaired. While doing this, she ran aground. So now there may be even more damage.
I got this information from men who work on up keeping and repairing the ships at the museum.
- ccoyle and Snug Harbor Johnny
-
 1
1
-
 1
1
-
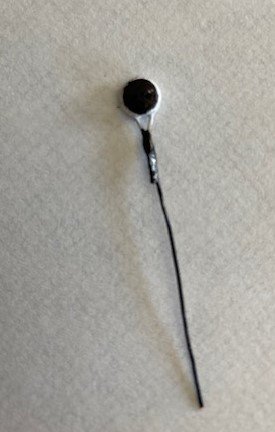
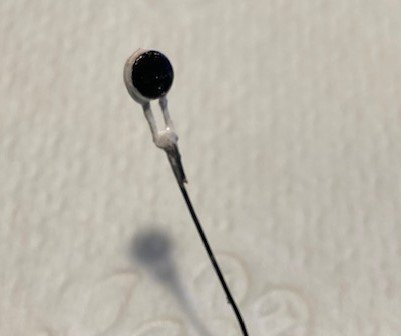
I am getting to the point where I can't put off thinking about the lower shroud deadeyes. I think I have settled on my method. I will use the HisModel deadeyes and strops. I painted the sides white and colored the deadeye with a sharpie pen. I superglued the deadeye in the right position and superglued a piece of black annealed steel wire to the strop. The wire will be superglued into a hole drilled in the waterway as I first intended. The only problem is to make openings in the pin rails for everything to fit through.
This is the 3.5 mm deadeye. I will do the same for the 2.5 mm ones. They need to sit a bit above the pin rail for looks and access to the lanyards. I will practice with the lanyards on this test deadeye before gluing. I think I can reeve them ok after they are fixed in place.
I'm learning new things with building this ship model as apposed to building an auto or plane. The time it takes to build a ship is longer, the skill sets needed must be developed if not already a part of my being. As I go, I must invent the wheel so to speak or learn from someone else if I am to build this ship into the one I have in my mind. The decision to be made is to find a way to build an area so that pleases me, then go on to the next hurtle and tackle it until it pleases, or just take Revell's base instructions and build at that level, or give up. So far I have gone beyond Revell's instructions, and I am not at the give up stage. I am lucky to have the people on this web forum and the reference material available.
I have put over two months into this model. I've had many goofs and do-overs that teach patience. There will be a few more months to go, but I hope to complete it, get it into a protective display case and leave it to someone when it comes time to go meet Davie Jones.
One thing I learned from building other kinds of models is to take a close-up picture, and you can see areas to improve that you didn't notice without the picture. The minute I see an area that needs repainting or something, I stop and correct it on the spot. If I put it off, I will forget where it was.
-
16 minutes ago, rwiederrich said:
Good job, very clean.
I was out yesterday and I found a CS kit at a local steam tractor museum for sale(believe it or not), and it is still in its original plastic wrap. I’m gonna use it for parts.
Rob
Do you know what issue it is? What year it was produced?
-
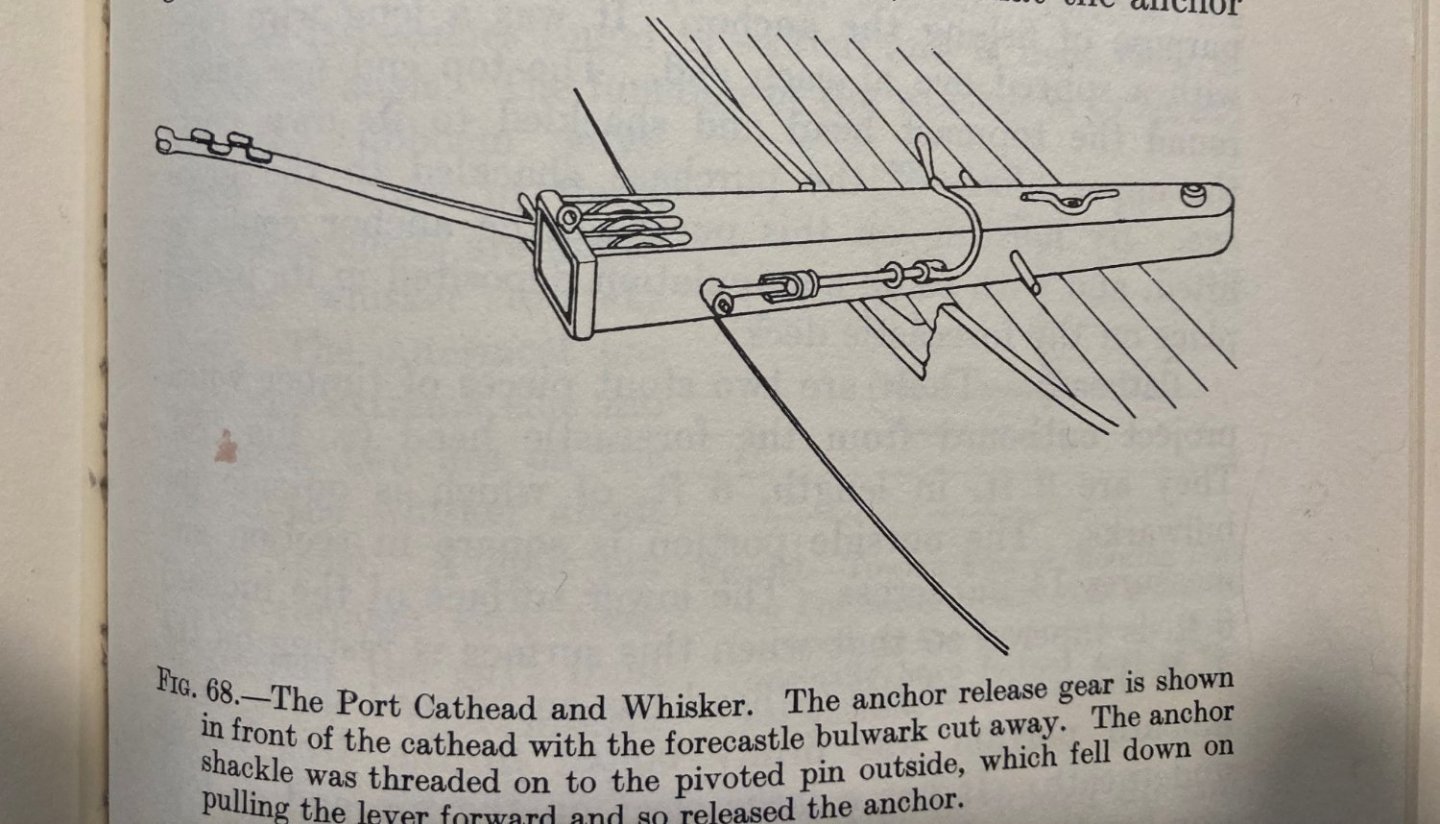
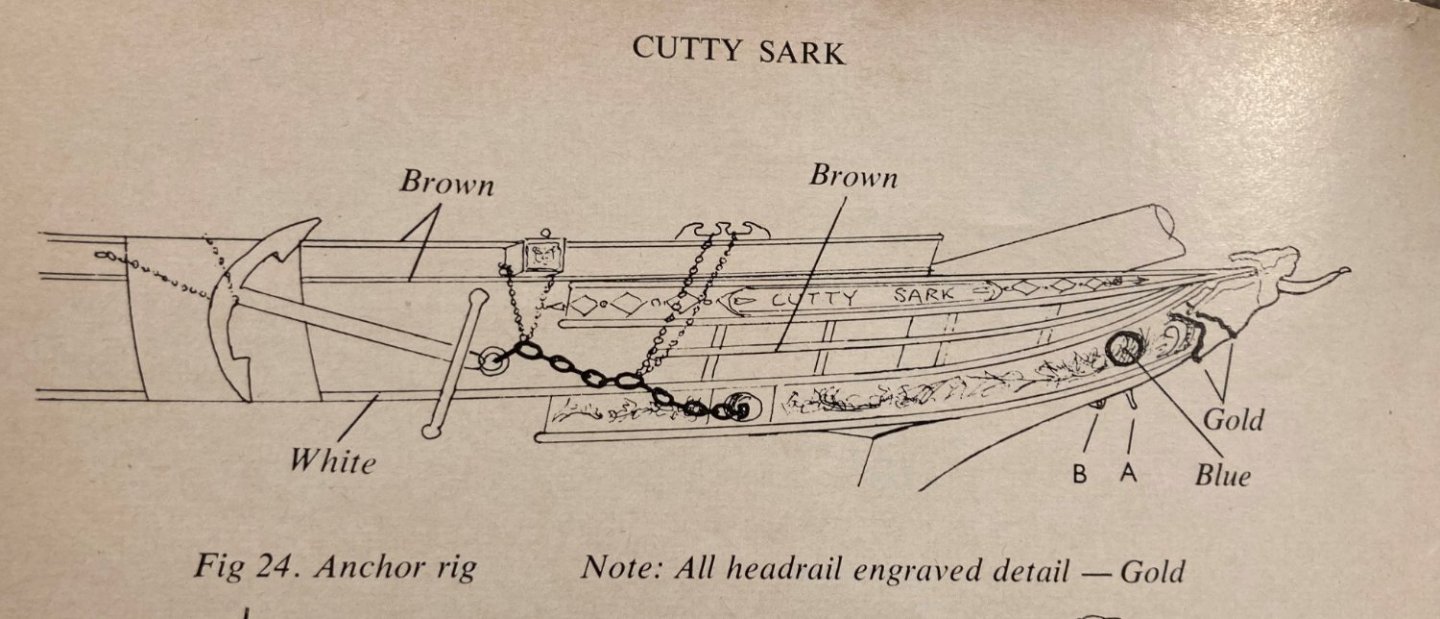
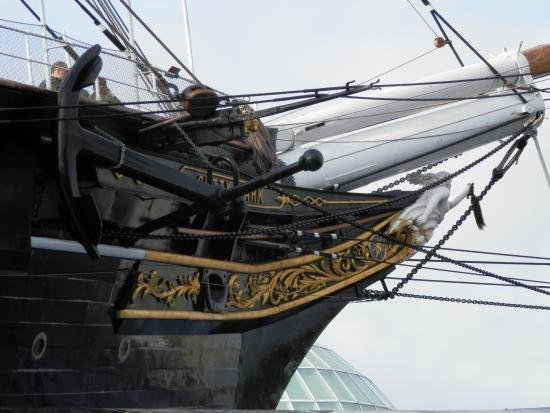
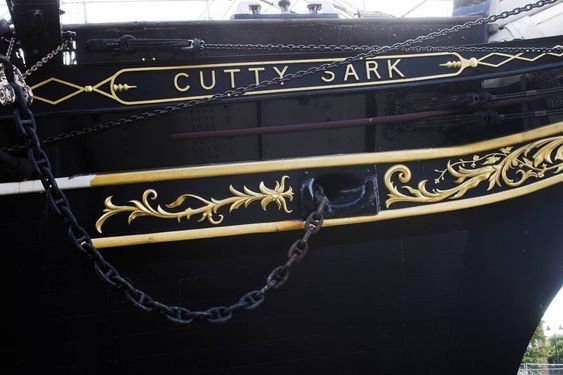
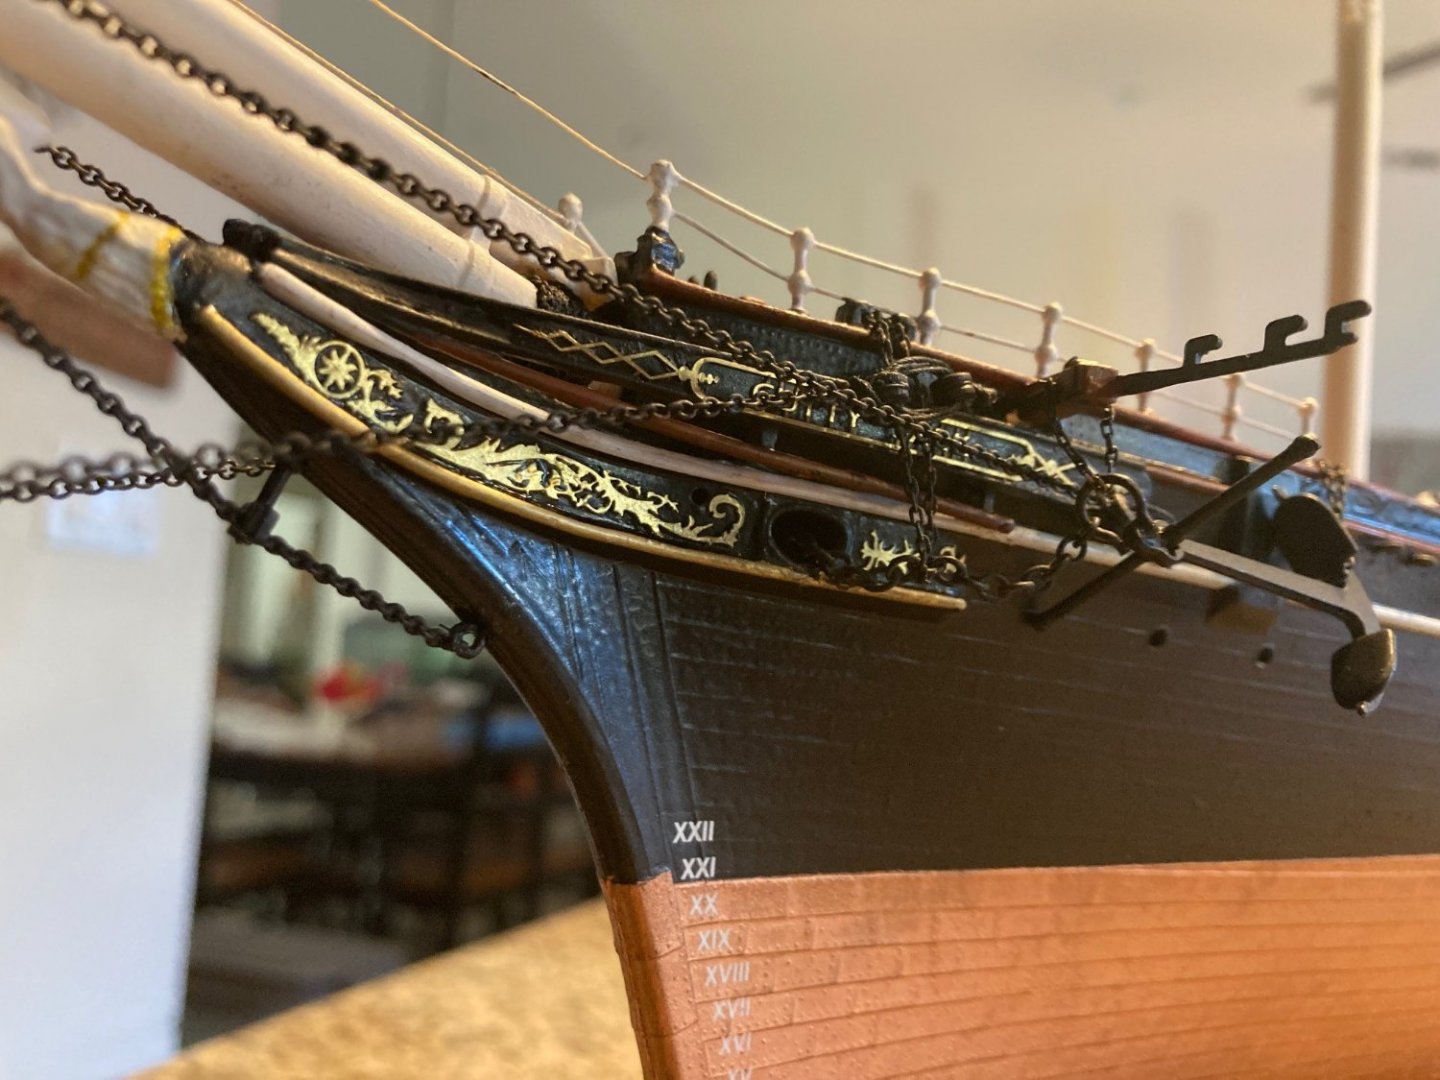
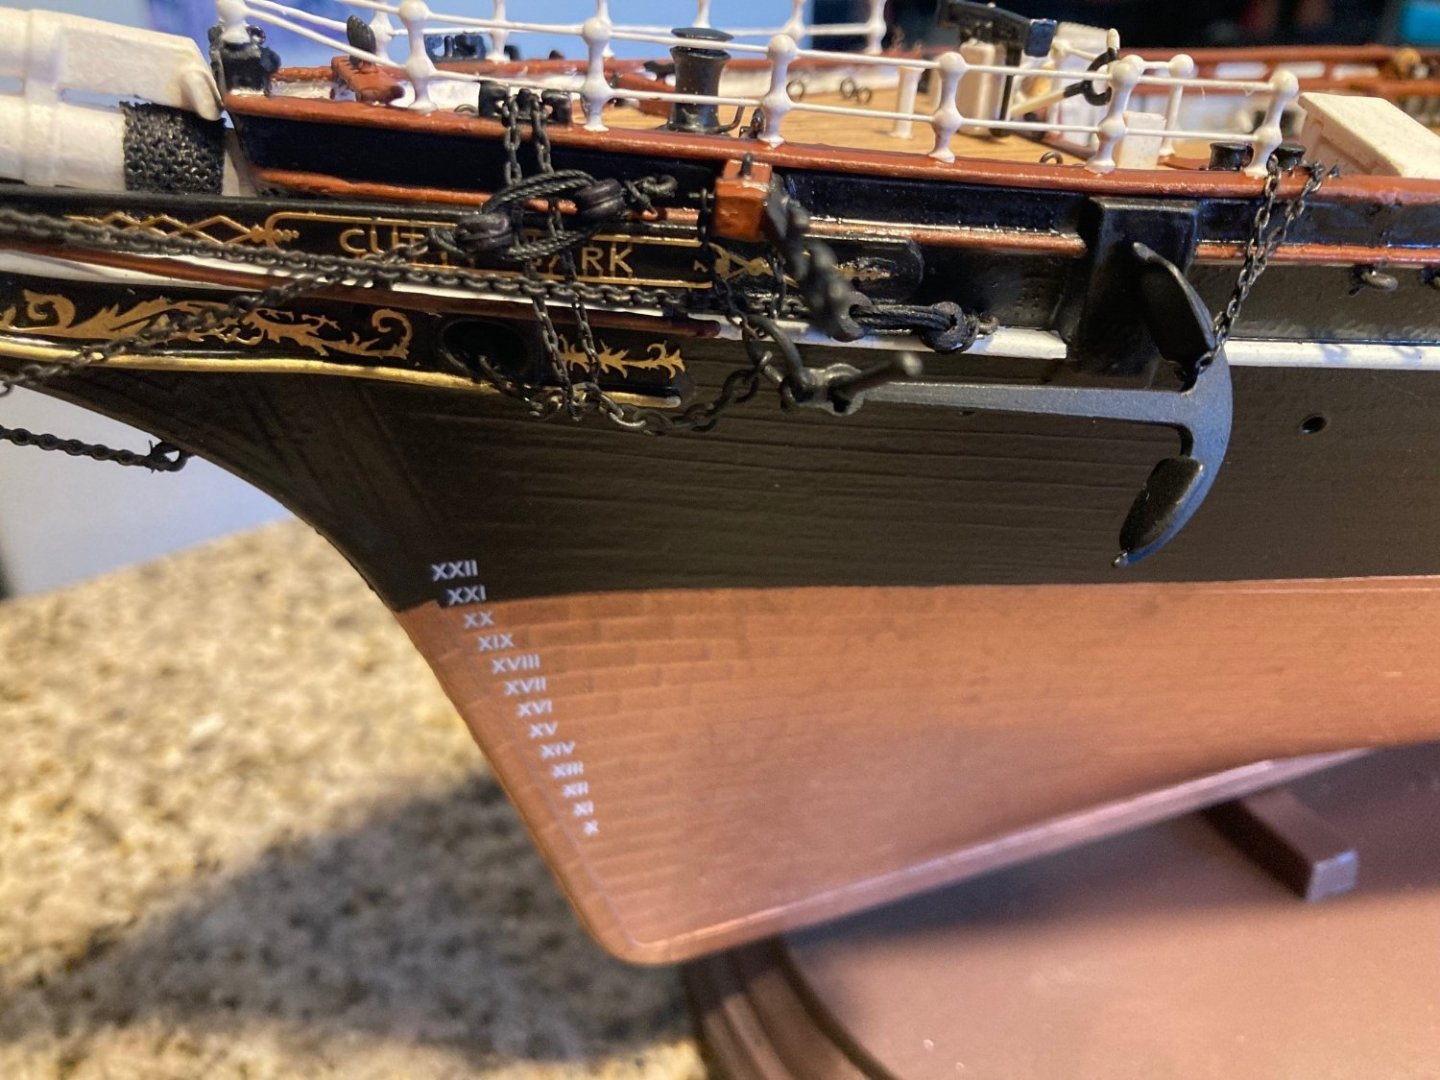
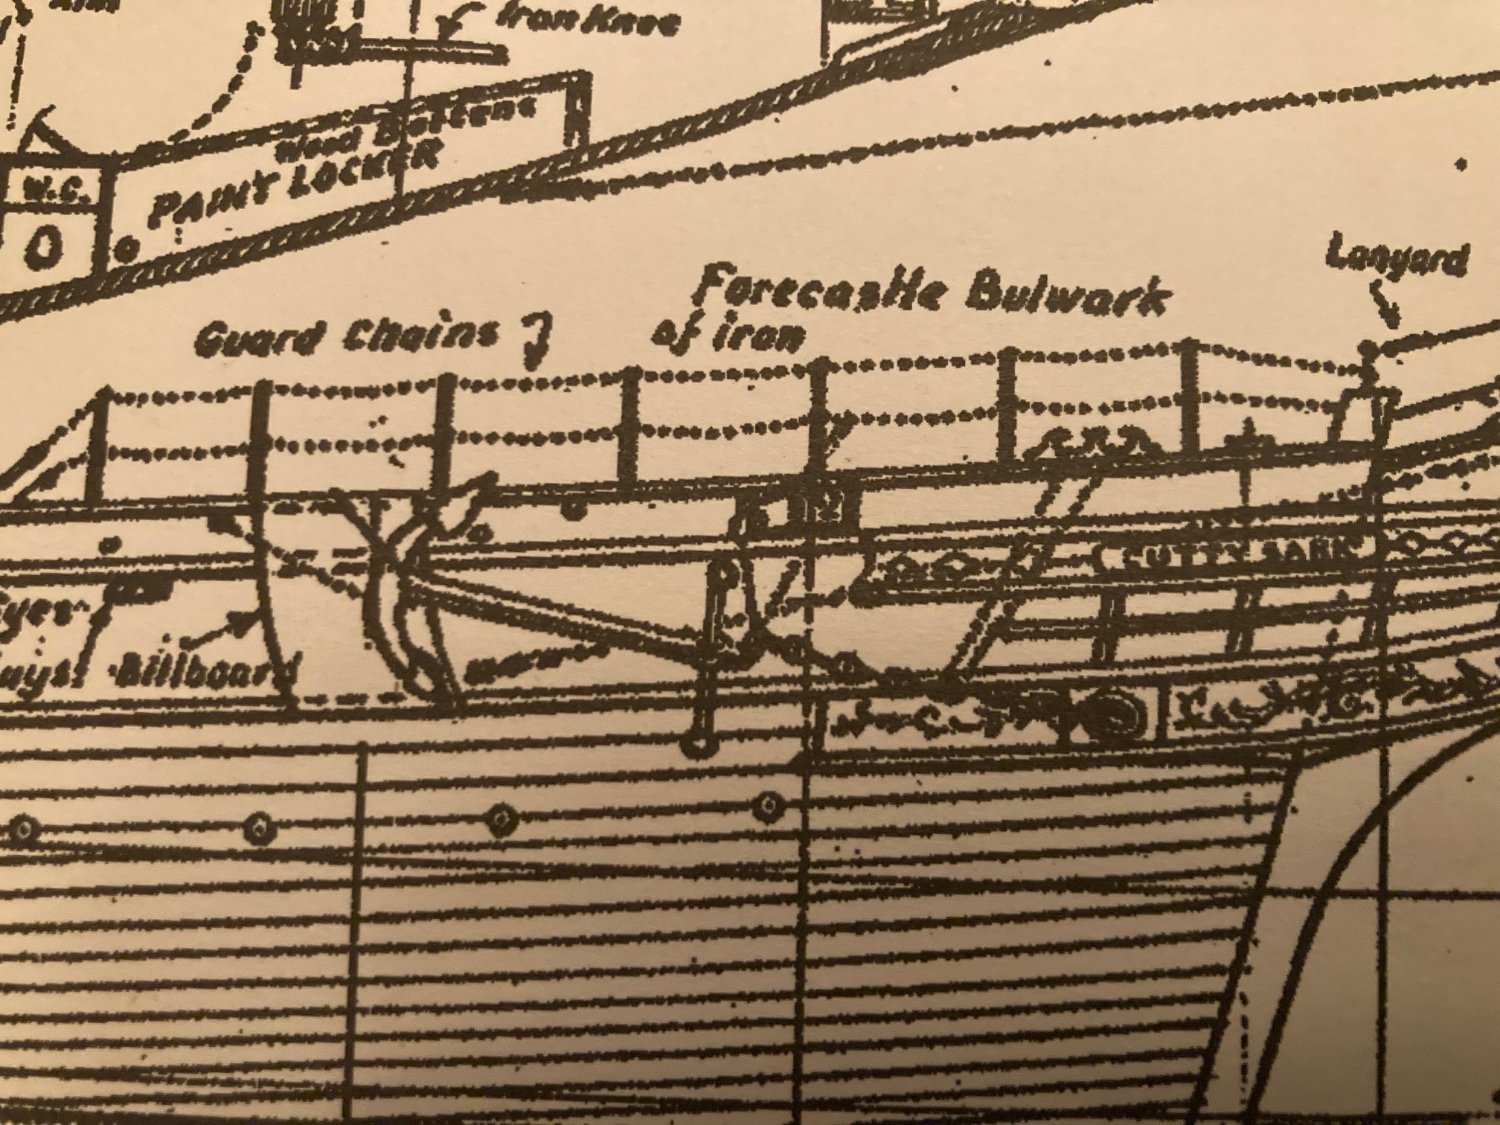
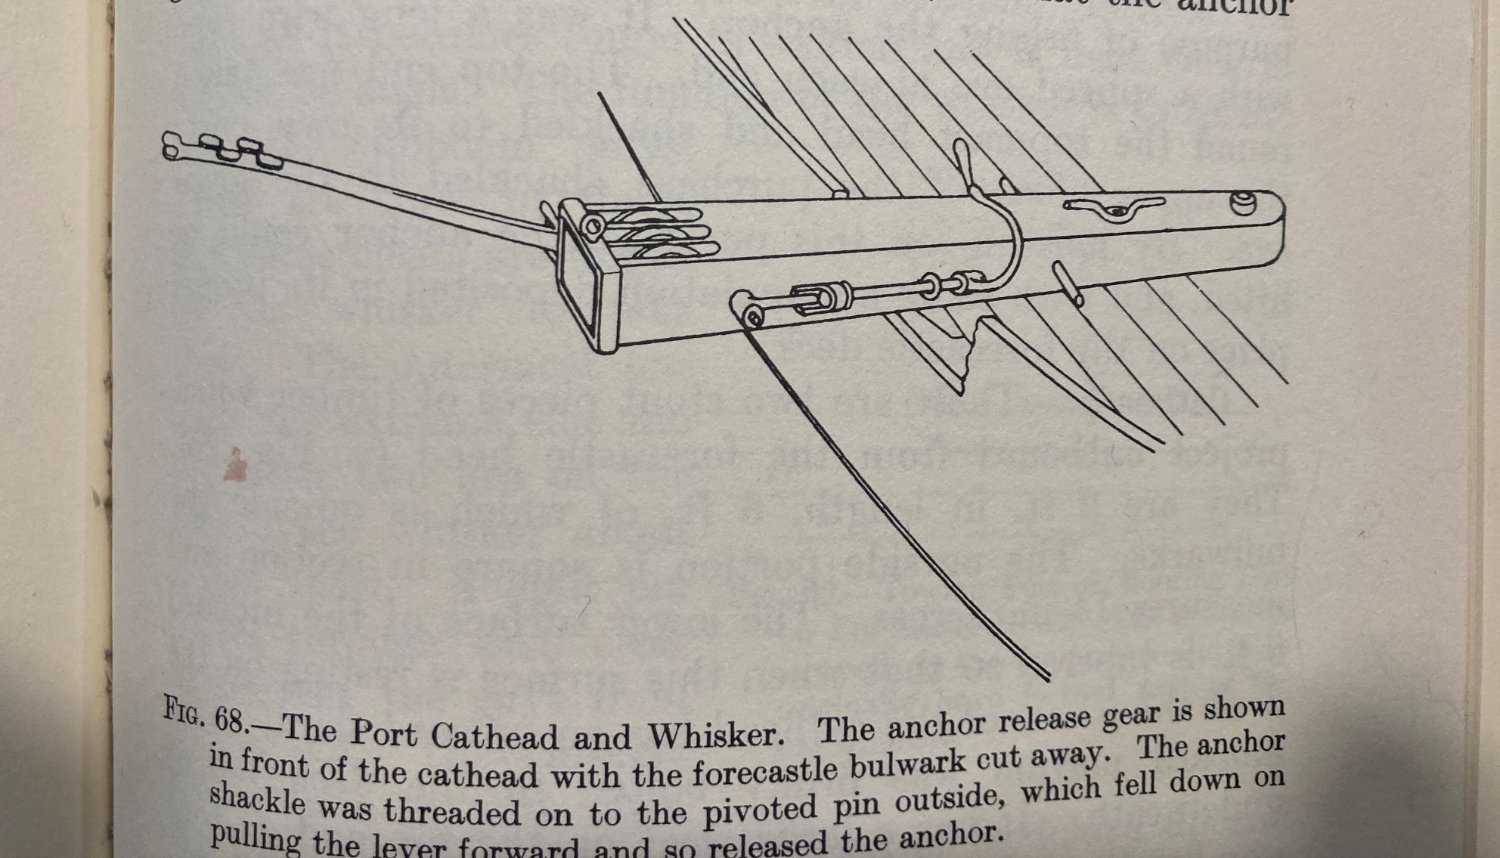
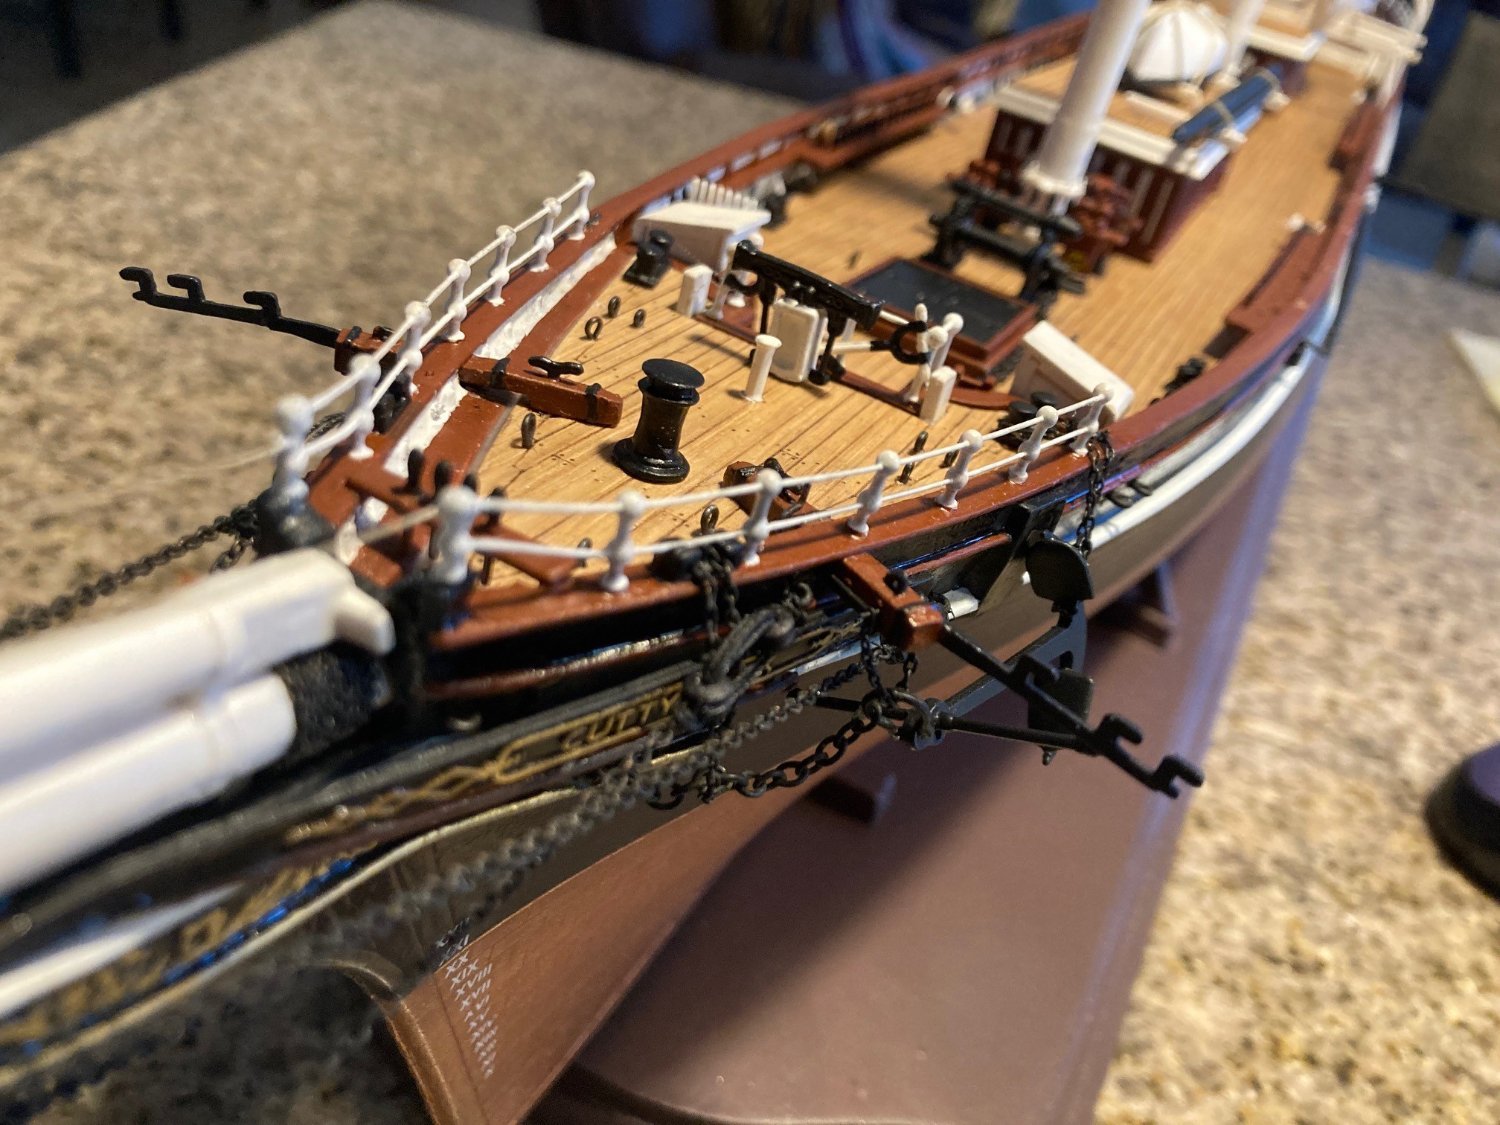
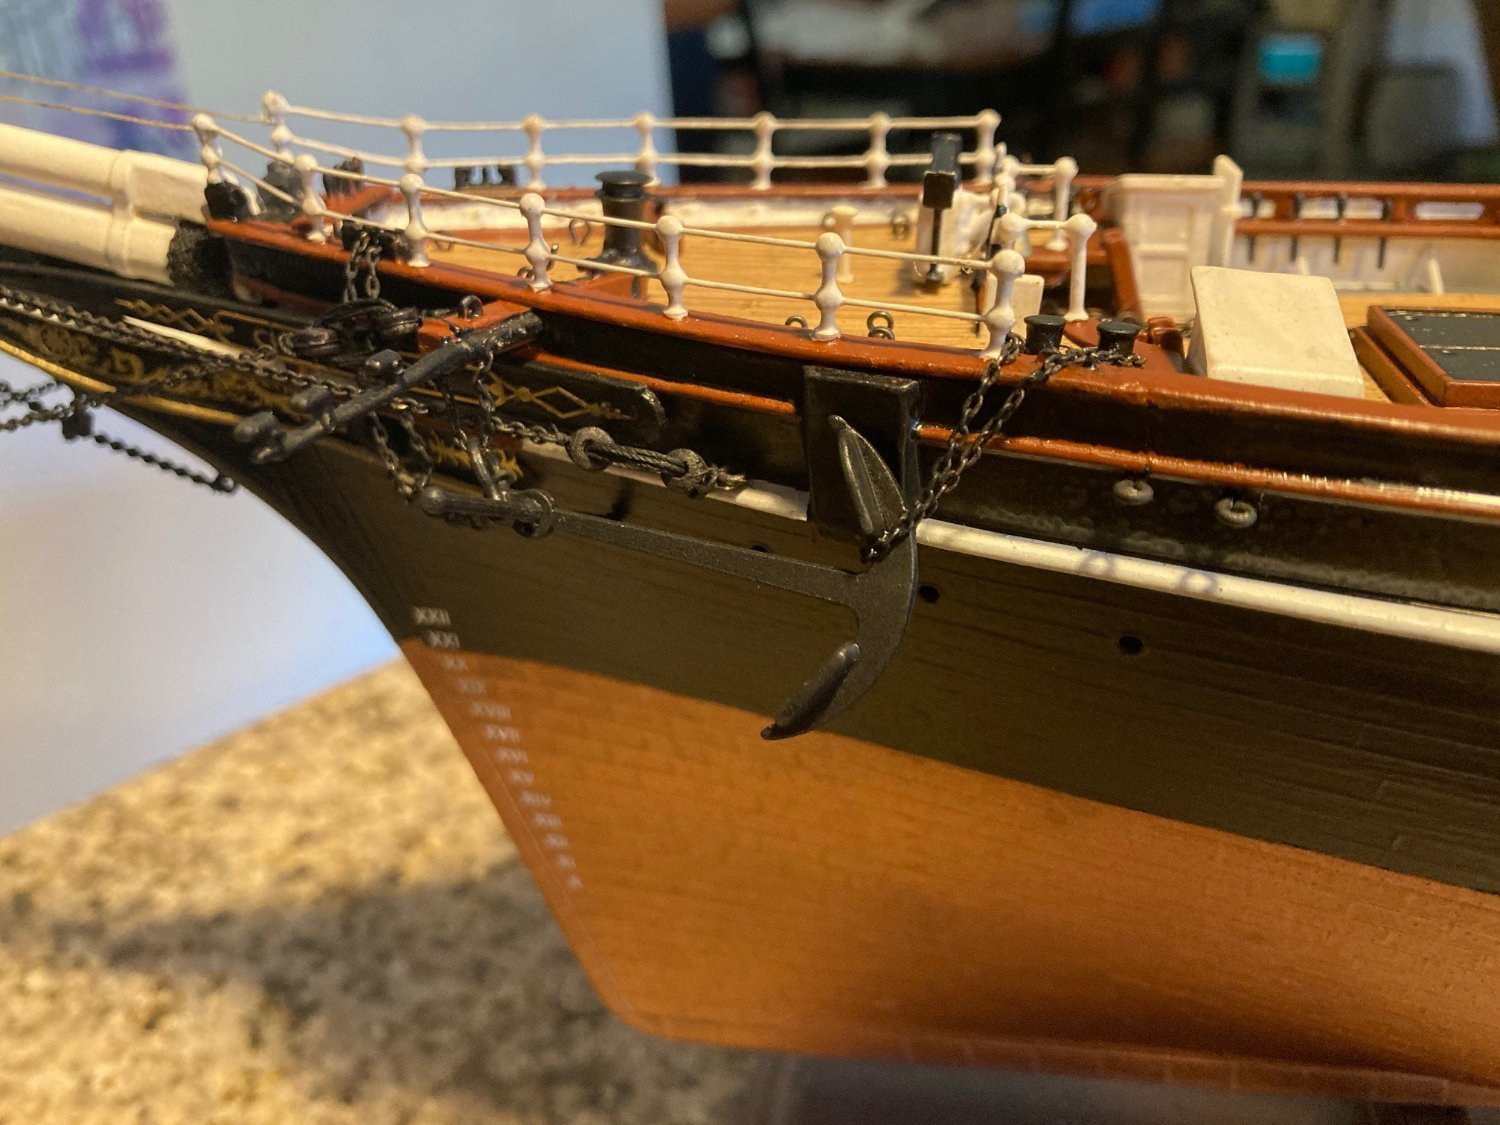
I rigged the port anchor per Campbell, Longridge and Hackney, making a simulated anchor release gear. There are four sizes of chain here. Longridge's fig 68 drawing looks to me like the starboard cathead not port. The whisker boom is toward aft.
Another Revell discrepancy that Kevin might want to remedy with 3d printing, Revell's trail board is too big per the actual ship and Campbell. But then the photo etch won't fit if you make it smaller. Oh, the woes of perfectionism.


-
1 hour ago, Kevin-the-lubber said:
That's a pretty good idea. Even though my pin-in-the-bottom worked on the test piece, I still feel a bit nervous that the base of the 'strop' might break. It would all be so much easier if the eye was at the top 🙂. Also, painting the strop parts is challenging, as they say. So I'm still thinking I'll at least see whether I can form wire strops from the 0.6mm or 0.8mm brass wire I have, and solder or glue them closed at the base of the deadeye.
The idea I have in my mind is to use single strand copper wire with a white coating. I haven't found any at all. I am going to an electronics store to see if I can find it.


Cutty Sark by bcochran - Revell - 1/96 - PLASTIC
in - Kit build logs for subjects built from 1851 - 1900
Posted
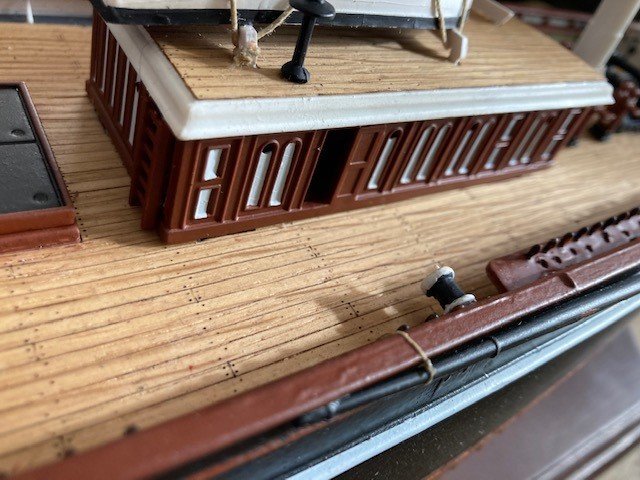
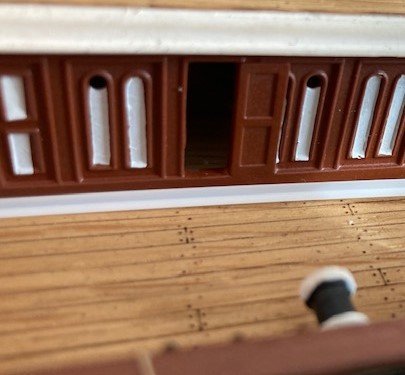
This is what my edging along the bottom of the deck house looks like. So now to complete the rest of it and the aft deck house.