


bcochran
-
Posts
615 -
Joined
-
Last visited
Content Type
Profiles
Forums
Gallery
Events
Posts posted by bcochran
-
-
-
-
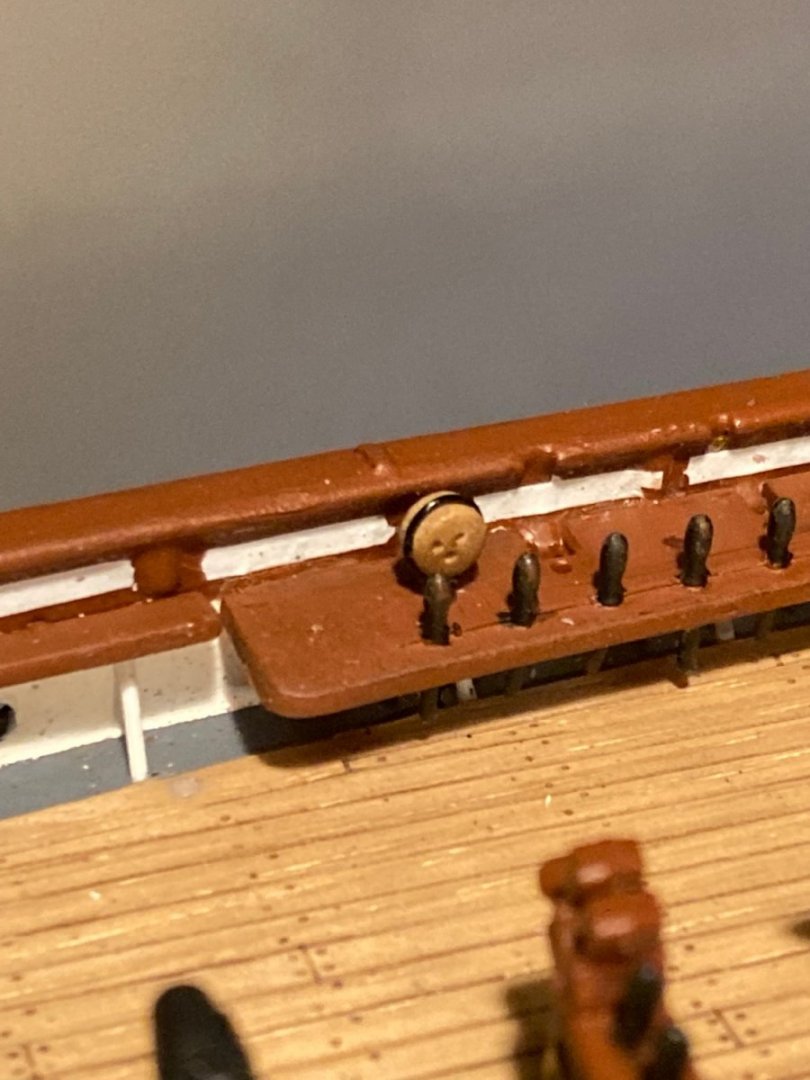
4 hours ago, shipman said:
Are you sure that's a deadeye?
looks like a gingerbread man to me😎
They are little ginger bread deadeyes so that if I get tired doing this I can eat them all.
-
3 hours ago, rwiederrich said:
Stropped deadeye looks good.
You could pre bend the wire...paint it white..then finish up with the twist and then touch up.
So the stropping can be white. Unless you have some other plan. White coated wire?
Rob
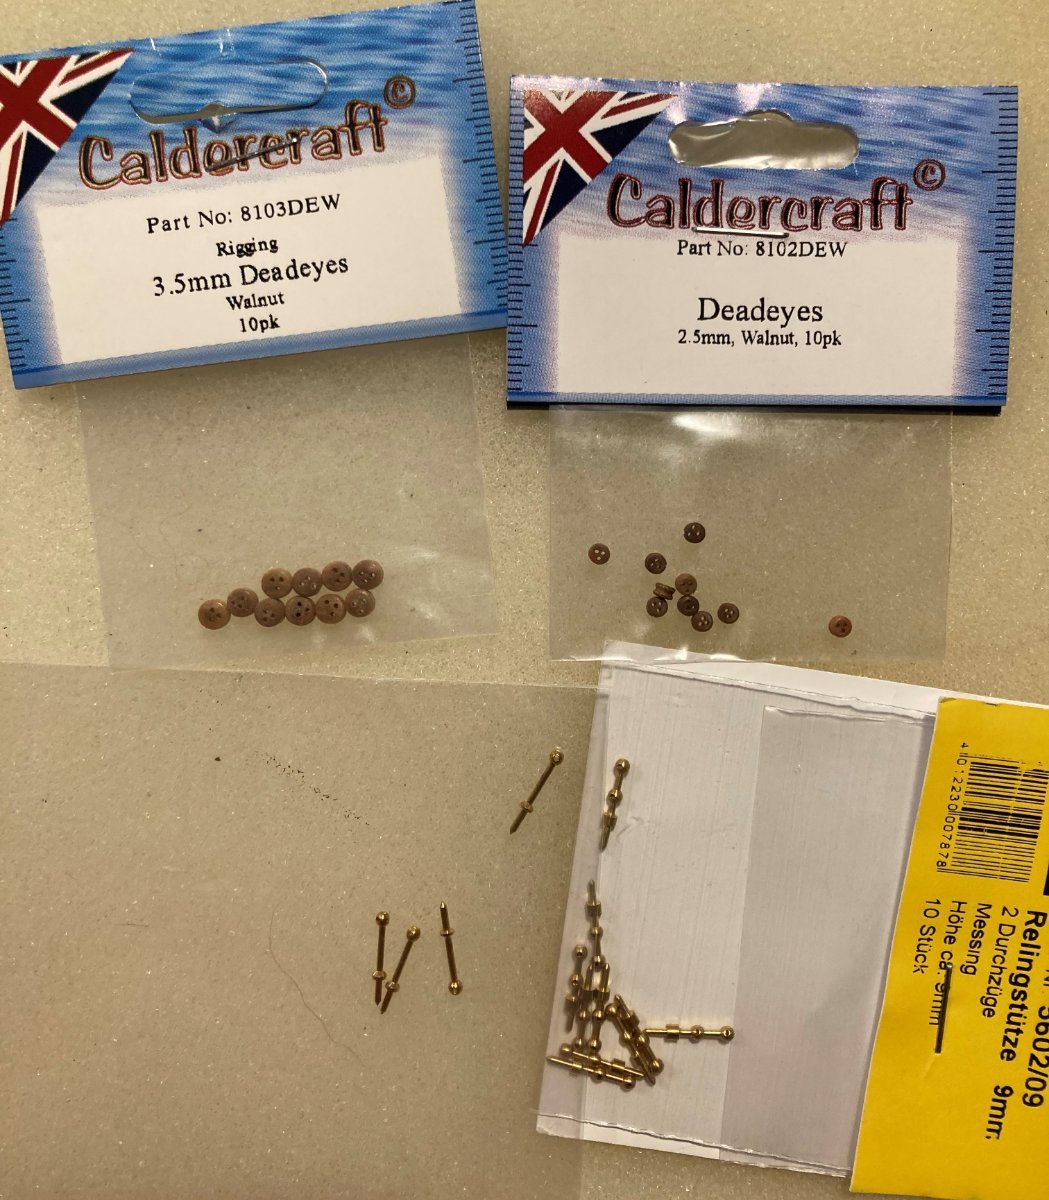
I ordered some white floral wire. It will take a few days to get here. I am not sure if it will work. I was going to blacken the deadeyes with a magic marker.
-
33 minutes ago, rwiederrich said:
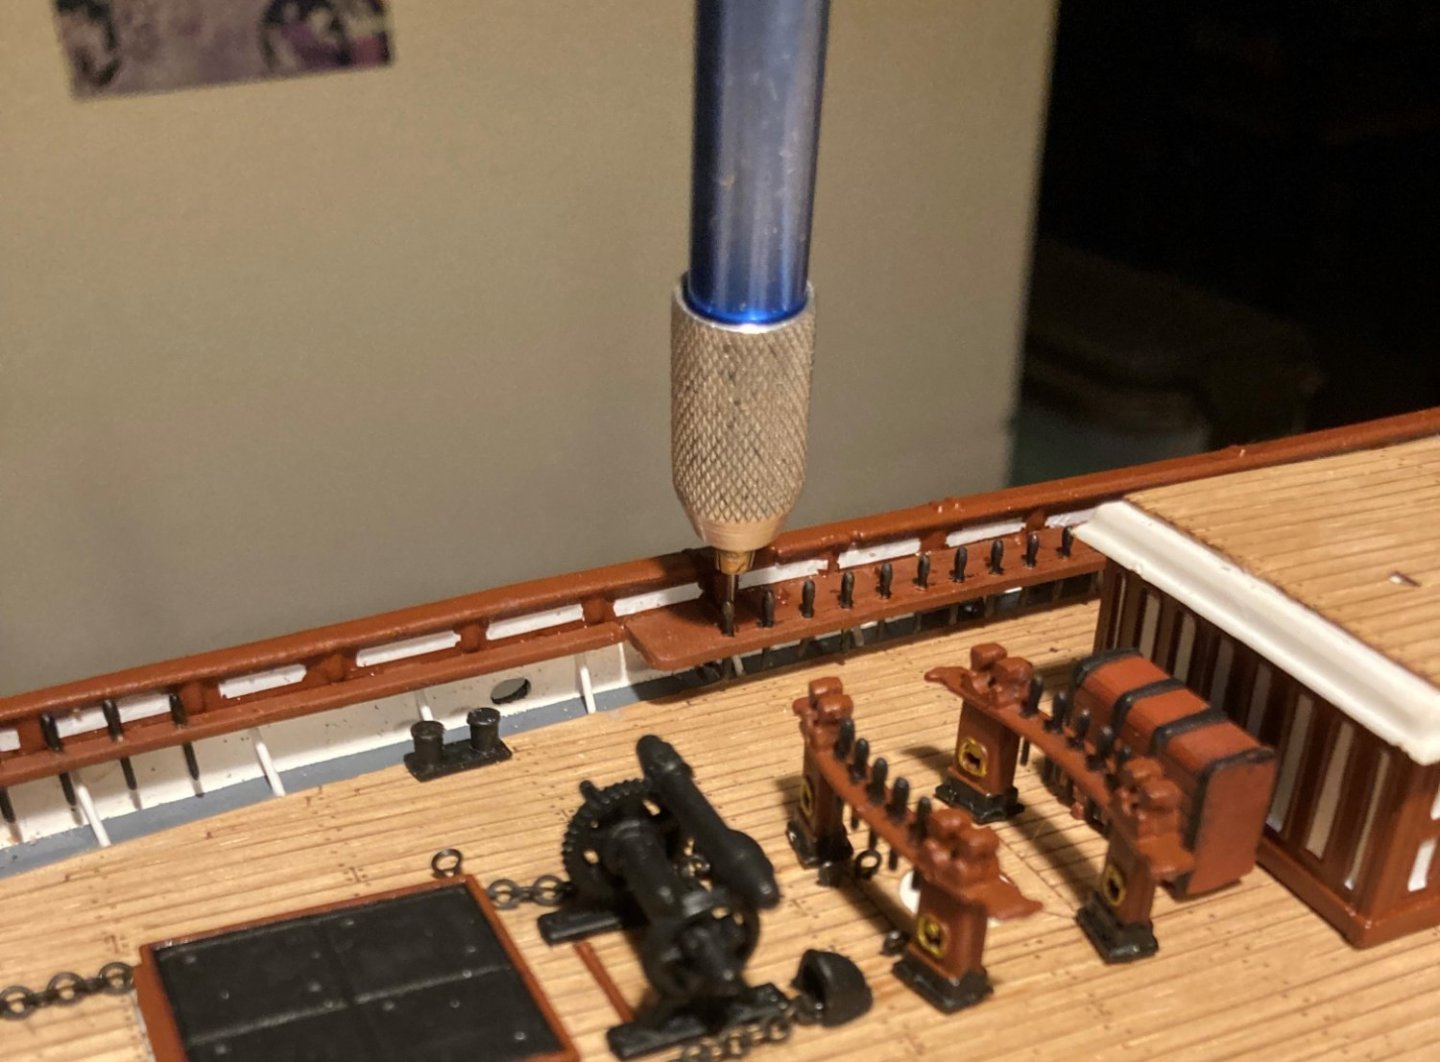
Tour doing a fantastic job for sure. I bet you had to drill very slow to make those holes in the pin rails for the deadeye braces? I almost opted to do the same on my last Cutty build 15 years ago, but opted to let that detail go, as it would become invisible once the rigging was in place. Pick and choose your battles...I guess.
Wonderful work.
Rob
I use a pin vice and slowly drill the hole. The thing that is touchy for me is to not break the belaying pins off.
-
18 hours ago, shipman said:
Are you aware of the book by Noel Hackney?
Though it relates to the smaller Airfix kit it's a well written step by step guide on how to build and rig.
The basic principles will translate to the Revell kit, especially the methodical rigging tutorial.
Just translate any specified sizes and dimensions to what you need.
It's so easy to get bogged down with research. This book will guide you every step of the way without numbing the brain.
Of course things can be done better, but this will give a convincing representation of what you're after.
Well worth getting your hands on a copy.
I have his book. I am reading Underhill's "Masting and Rigging" to get a basic understanding of standing and running rigging.
-
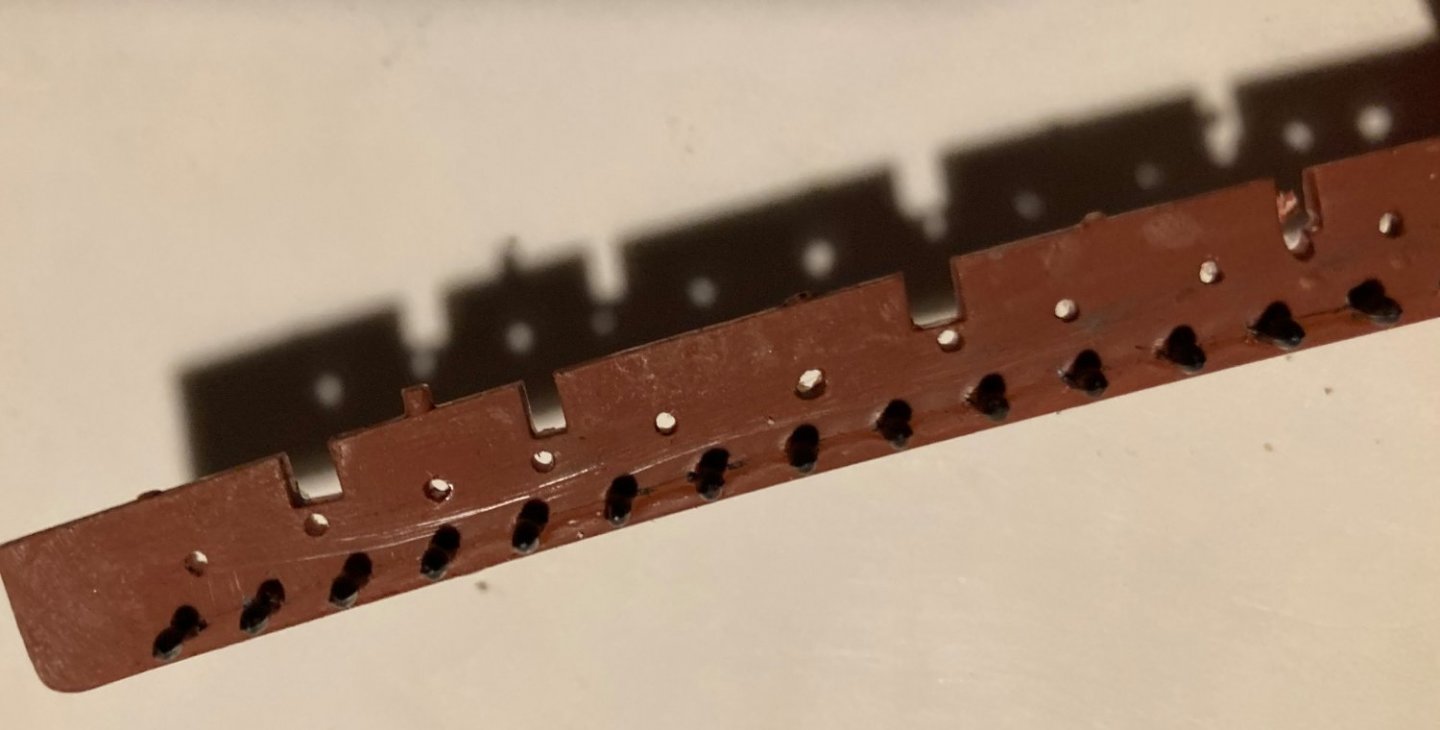
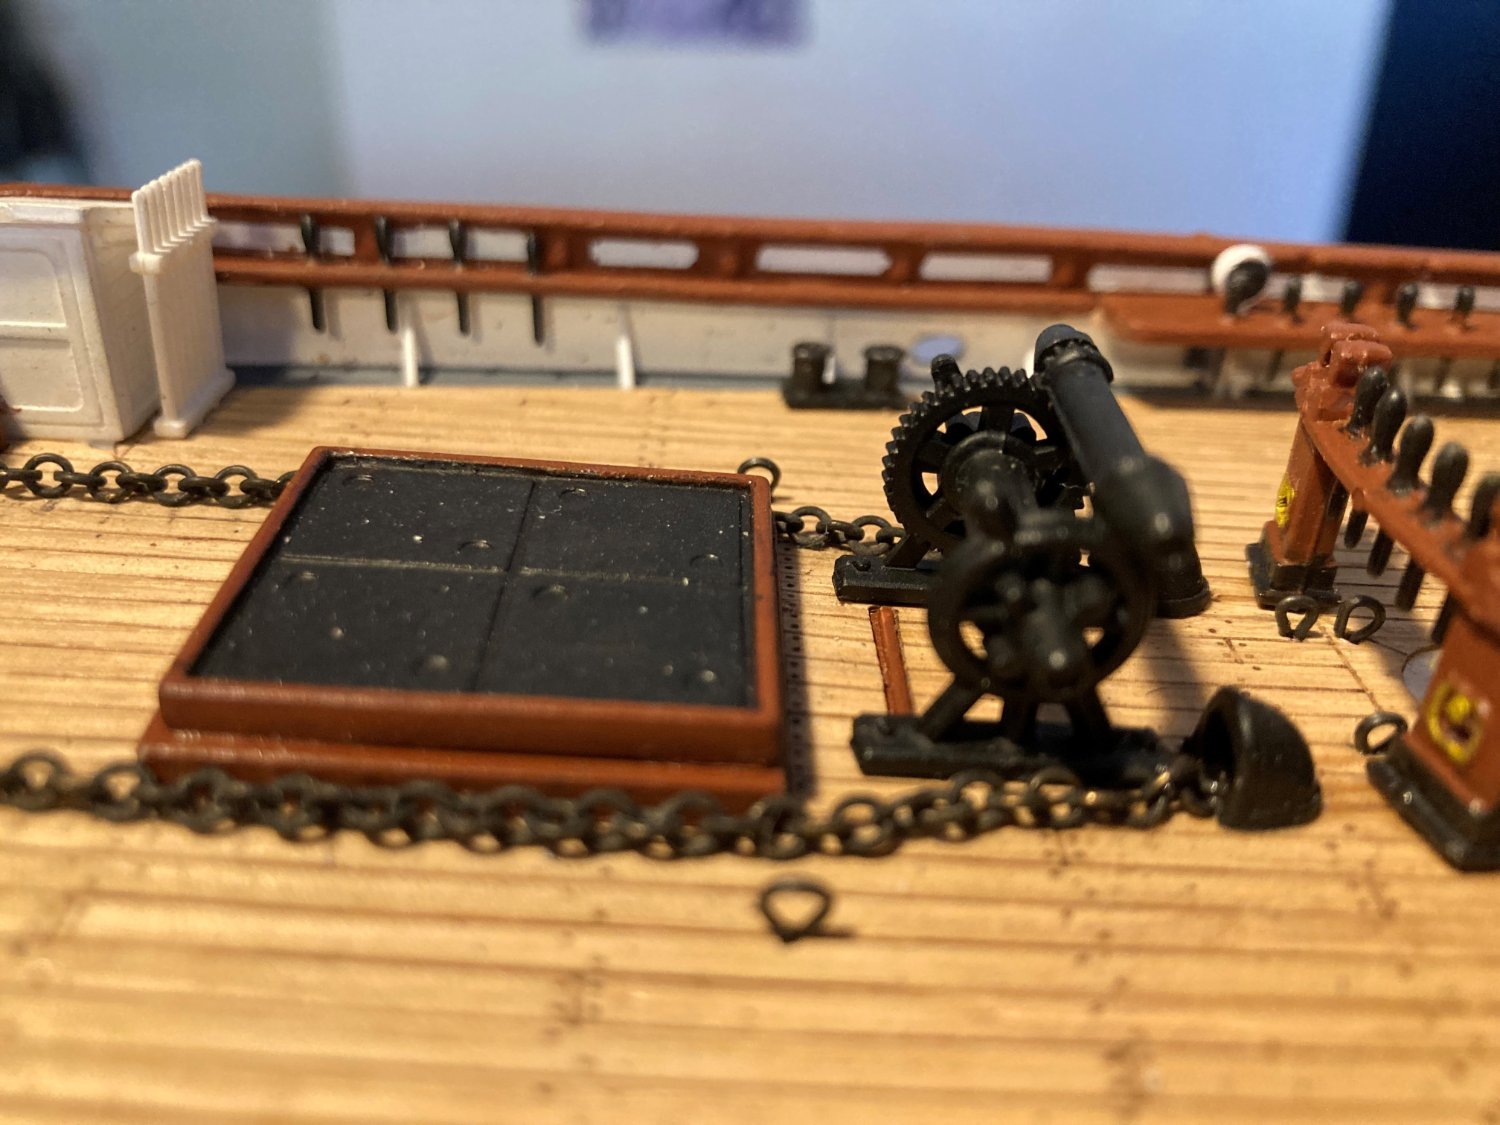
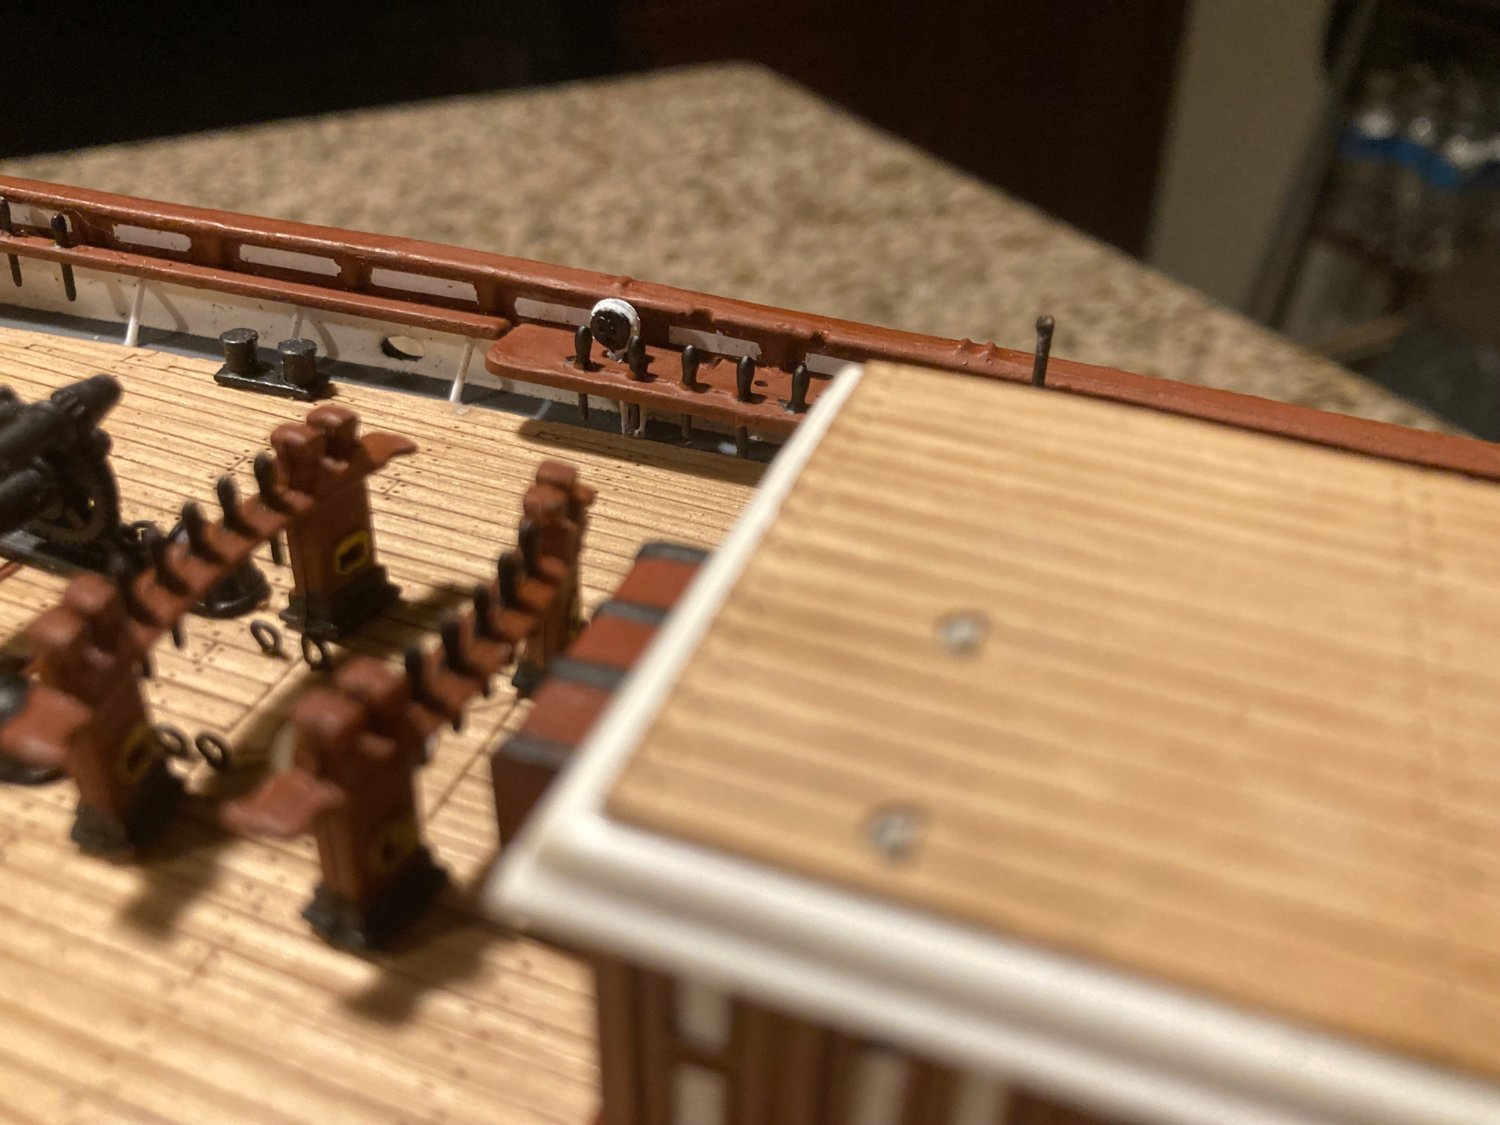
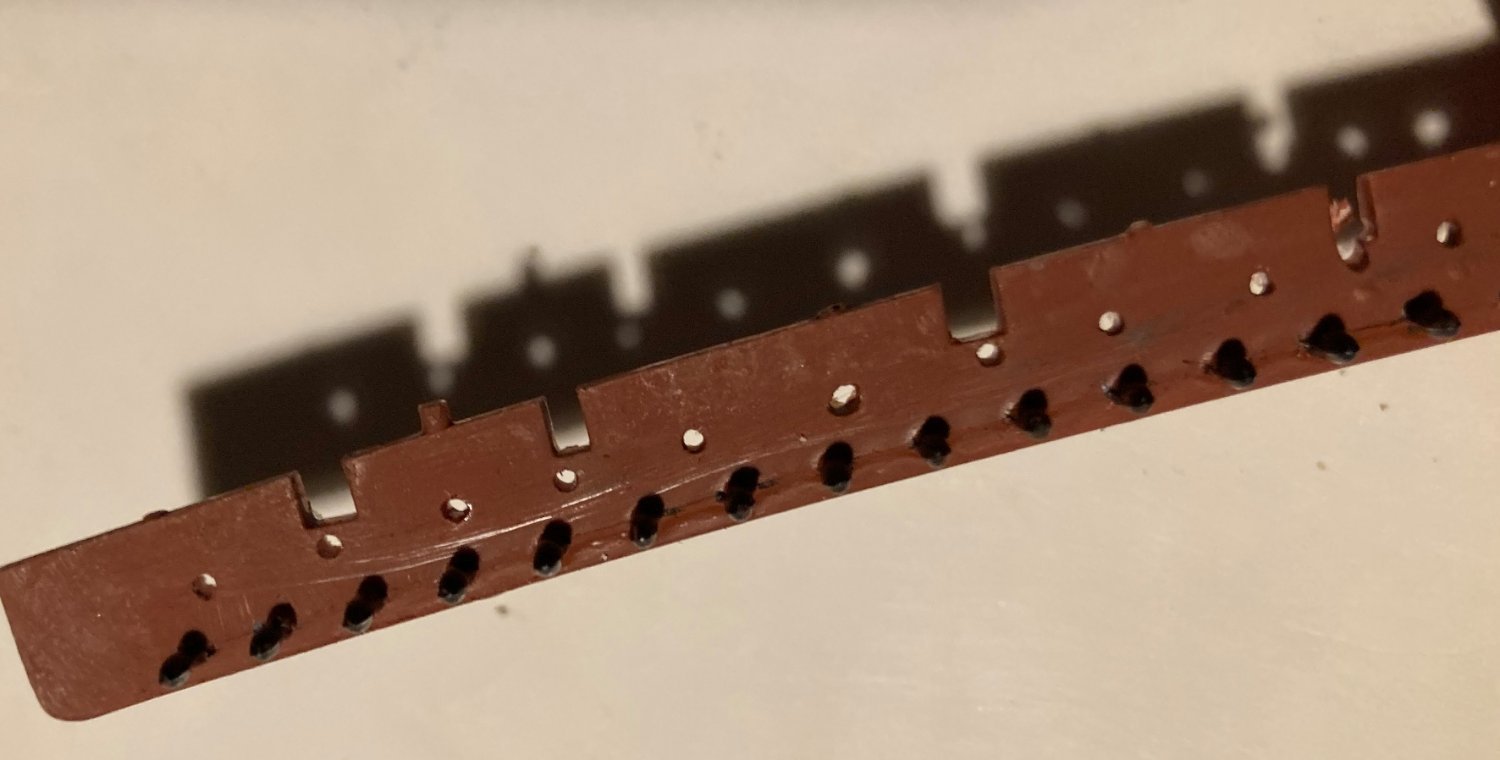
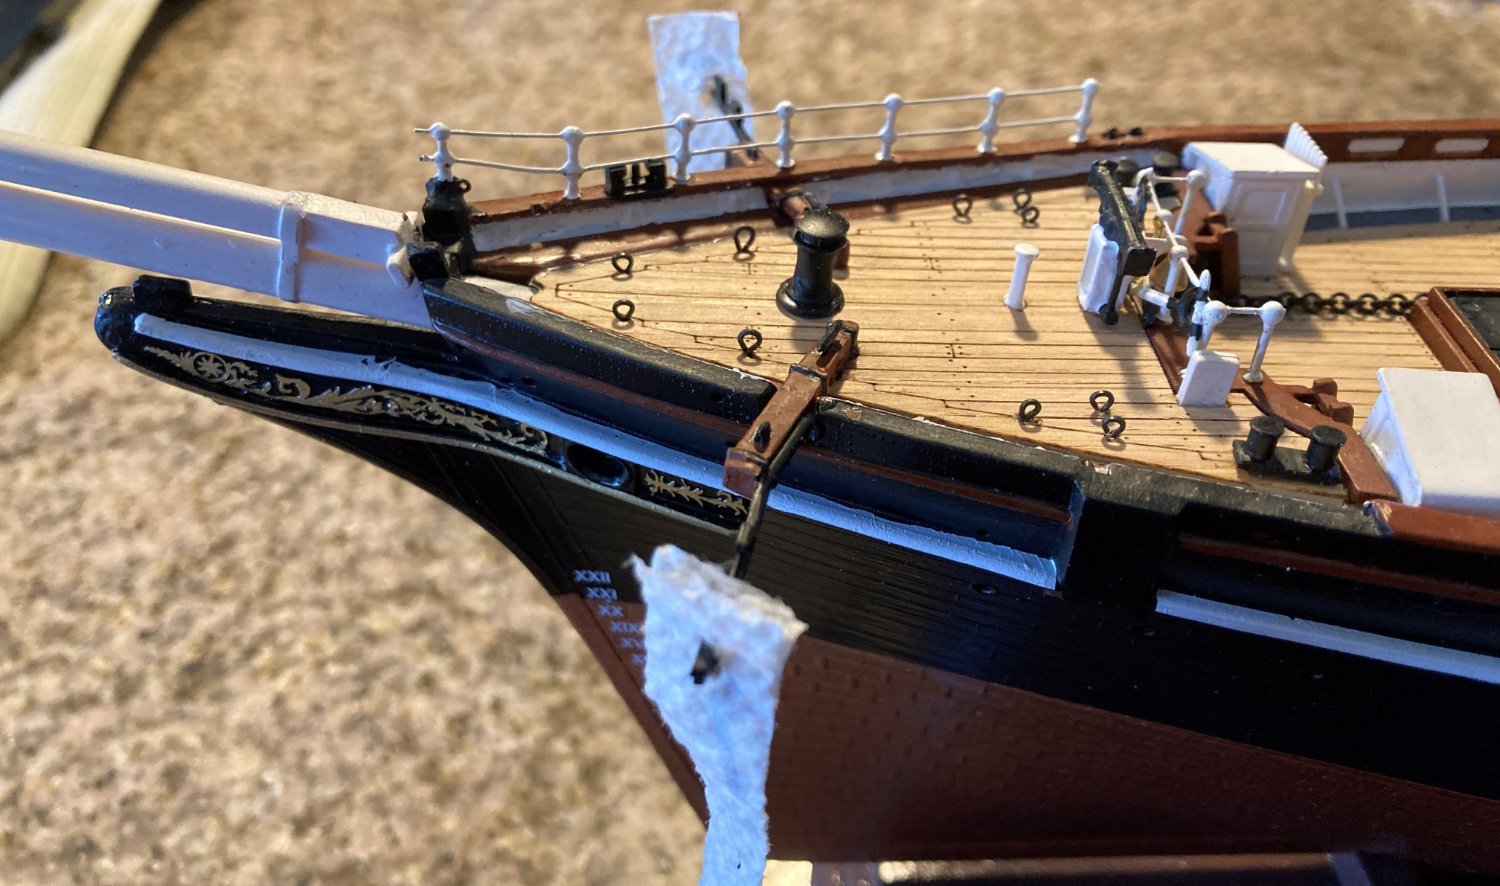
I drilled holes in the pin rail for the deadeye strops. These holes will be used to drill holes in the waterway. The strops will have a long wire end which will be glued to the waterway and the pin rail.
I used the kit deadeyes to mark where the holes should be drilled. I am experimenting with a deadeye.

- Ian_Grant, popeye the sailor, Cirdan and 1 other
-
 4
4
-
-
On 4/22/2022 at 1:45 PM, LeoM said:
According to Wolfram Zu Mondfeld, deadeyes should be 6 mm on 1:96 scale, but Longridge mentions 1/4 inch for the big ones and 3/16 for the smaller ones, which translates to 1/8 inch (3,2 mm) and 3/32 (2,4 mm) so your order seems to be perfect. According to my NWM plans the big ones should be close to 3,8 mm and the others and 2,8 mm for my 1:78 scale. I am not yet there to start rigging but installing the lower deadeyes will be fun, I expect.
Did I already tell you fantastic you Cutty Sark looks? 😉
Thank you. What size thread and what composition (linen, silk, cotton ?) would you use to rig the dead eyes of my size? I am just learning about rigging. I am reading Harold A. Underhill's book "Masting and Rigging." In the article about the building of revell's Cutty Sark in Model Ship Builder Jan/Feb 1986, the author rigged the deadeyes off the ship because of their position next to the bulwarks. I might try that.
-
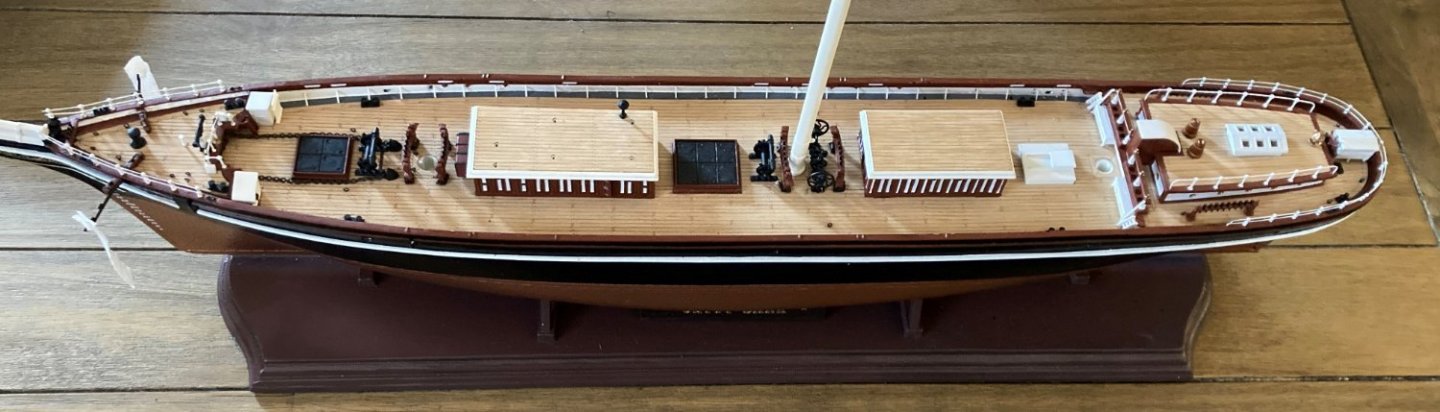
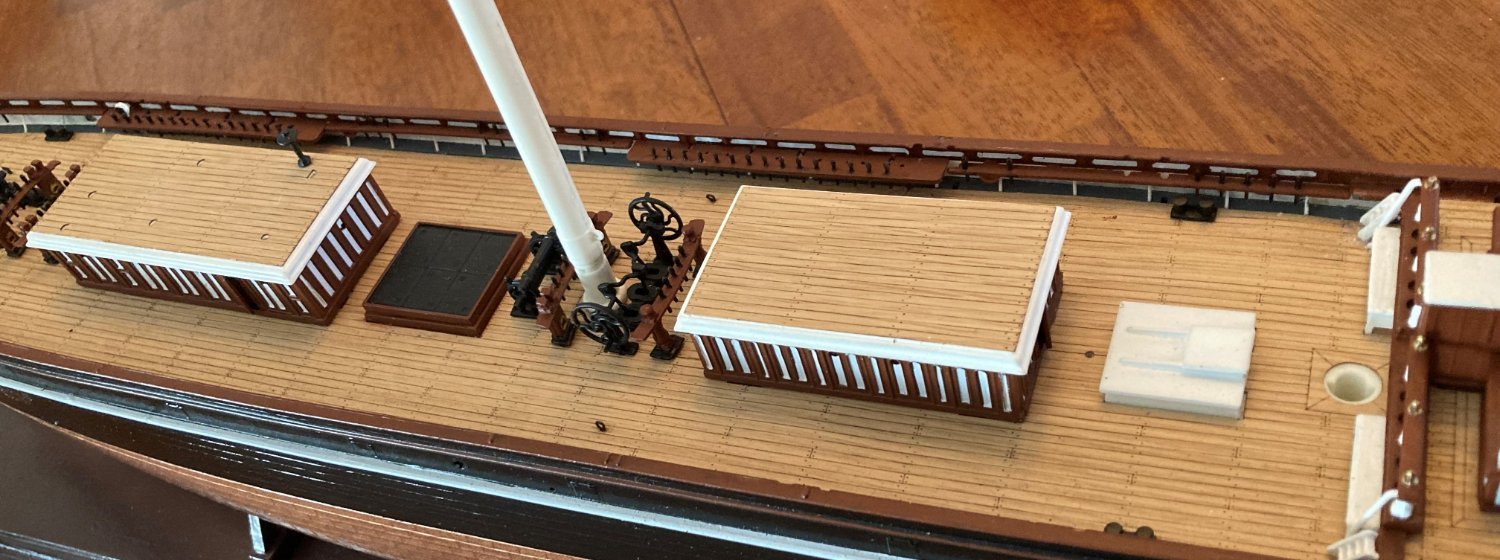
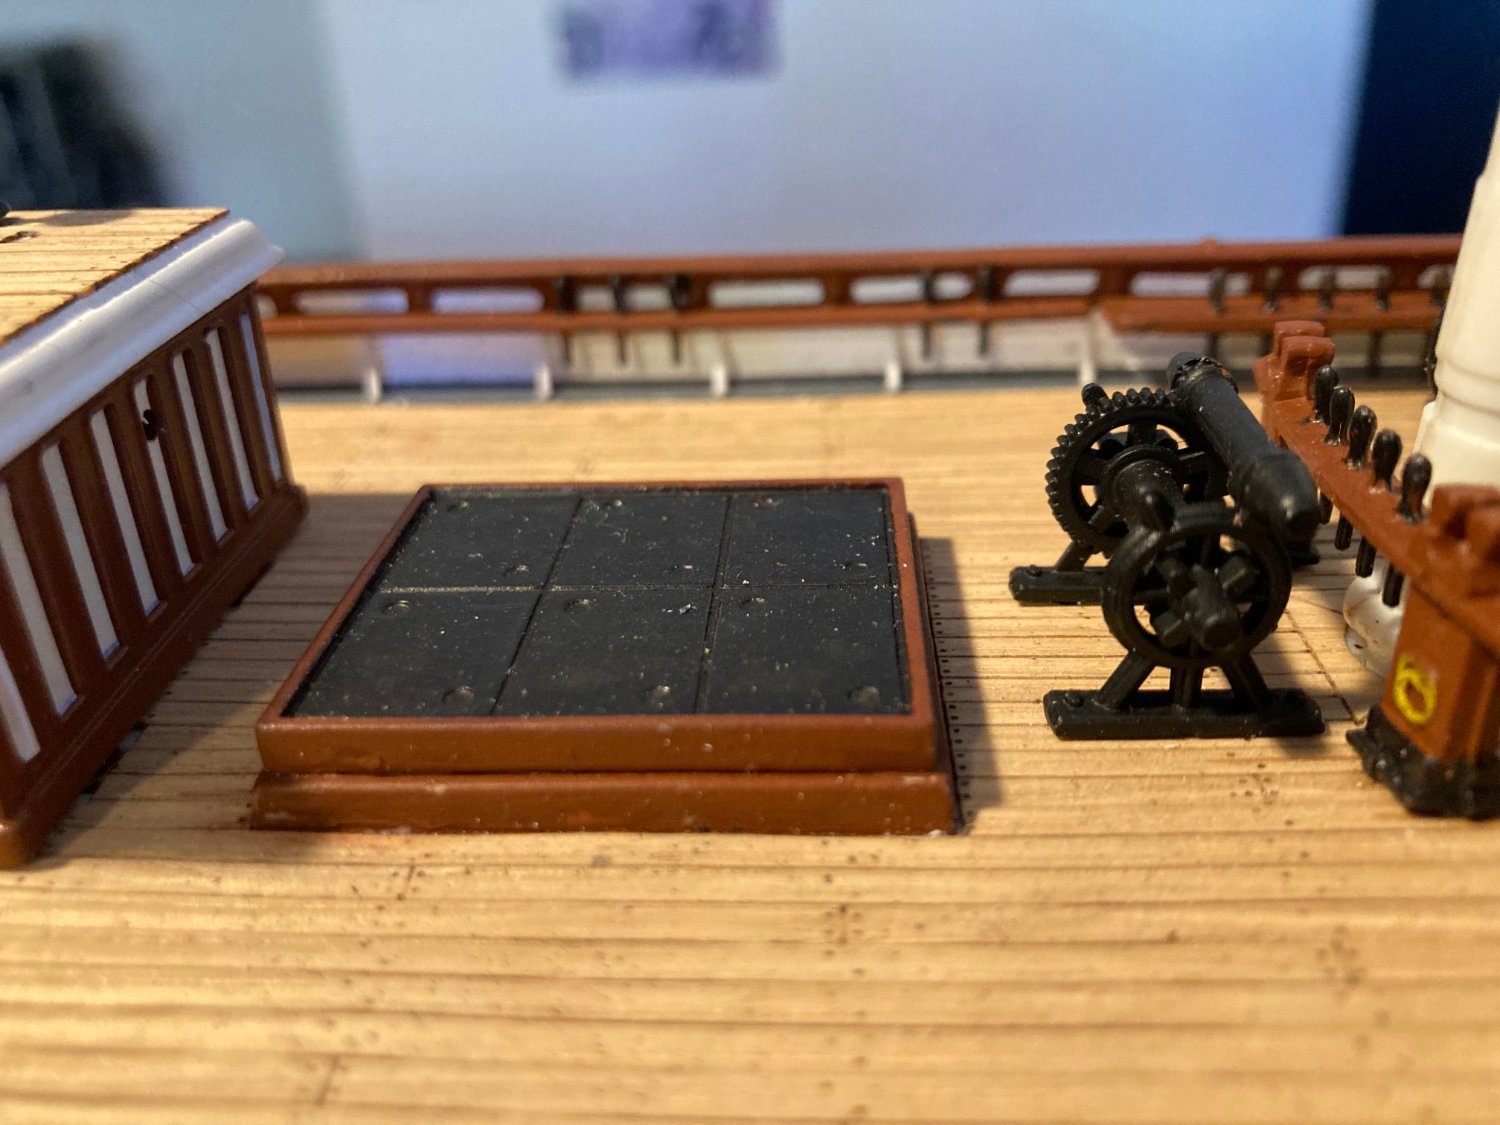
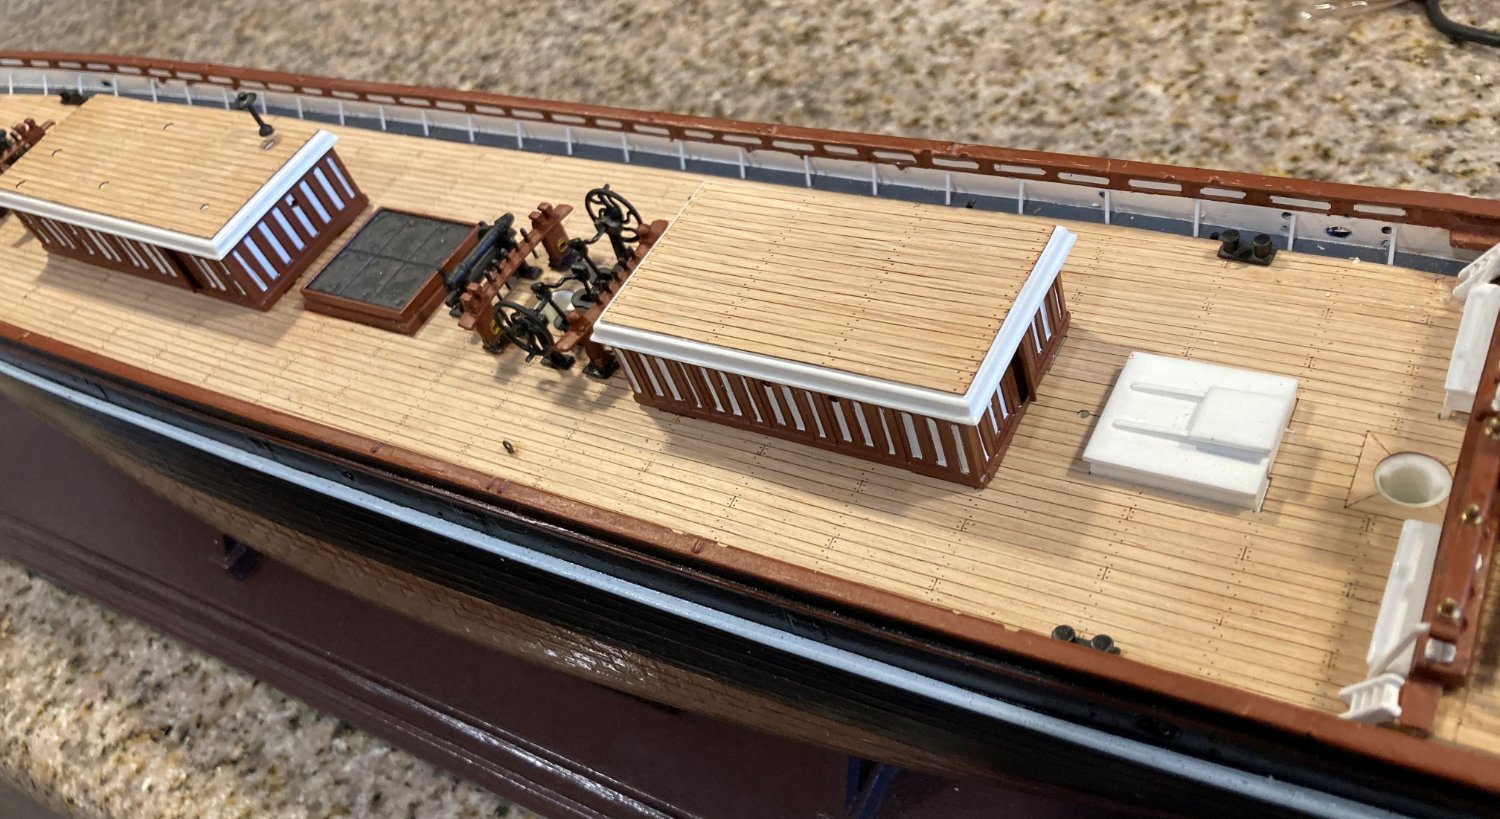
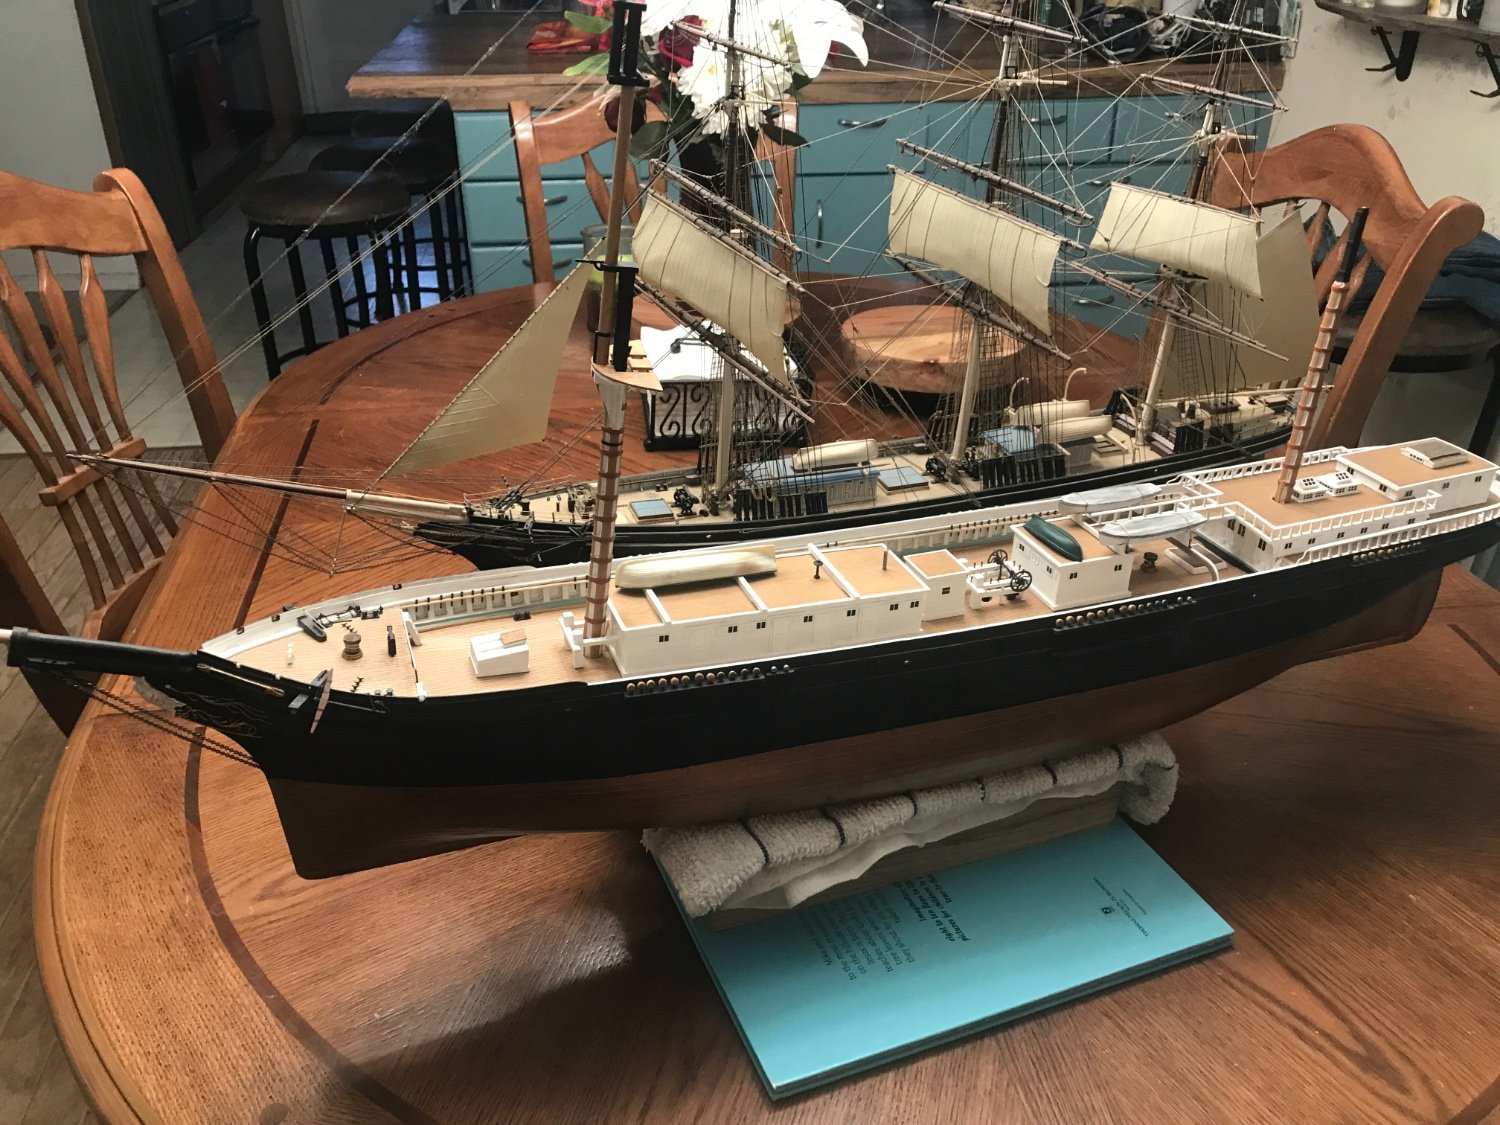
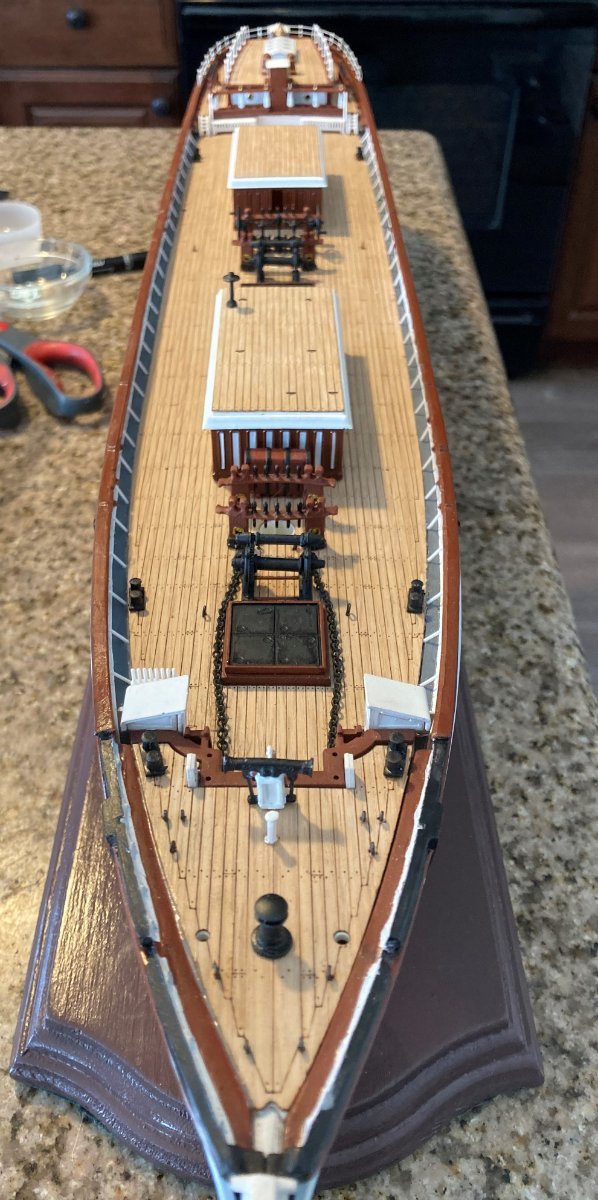
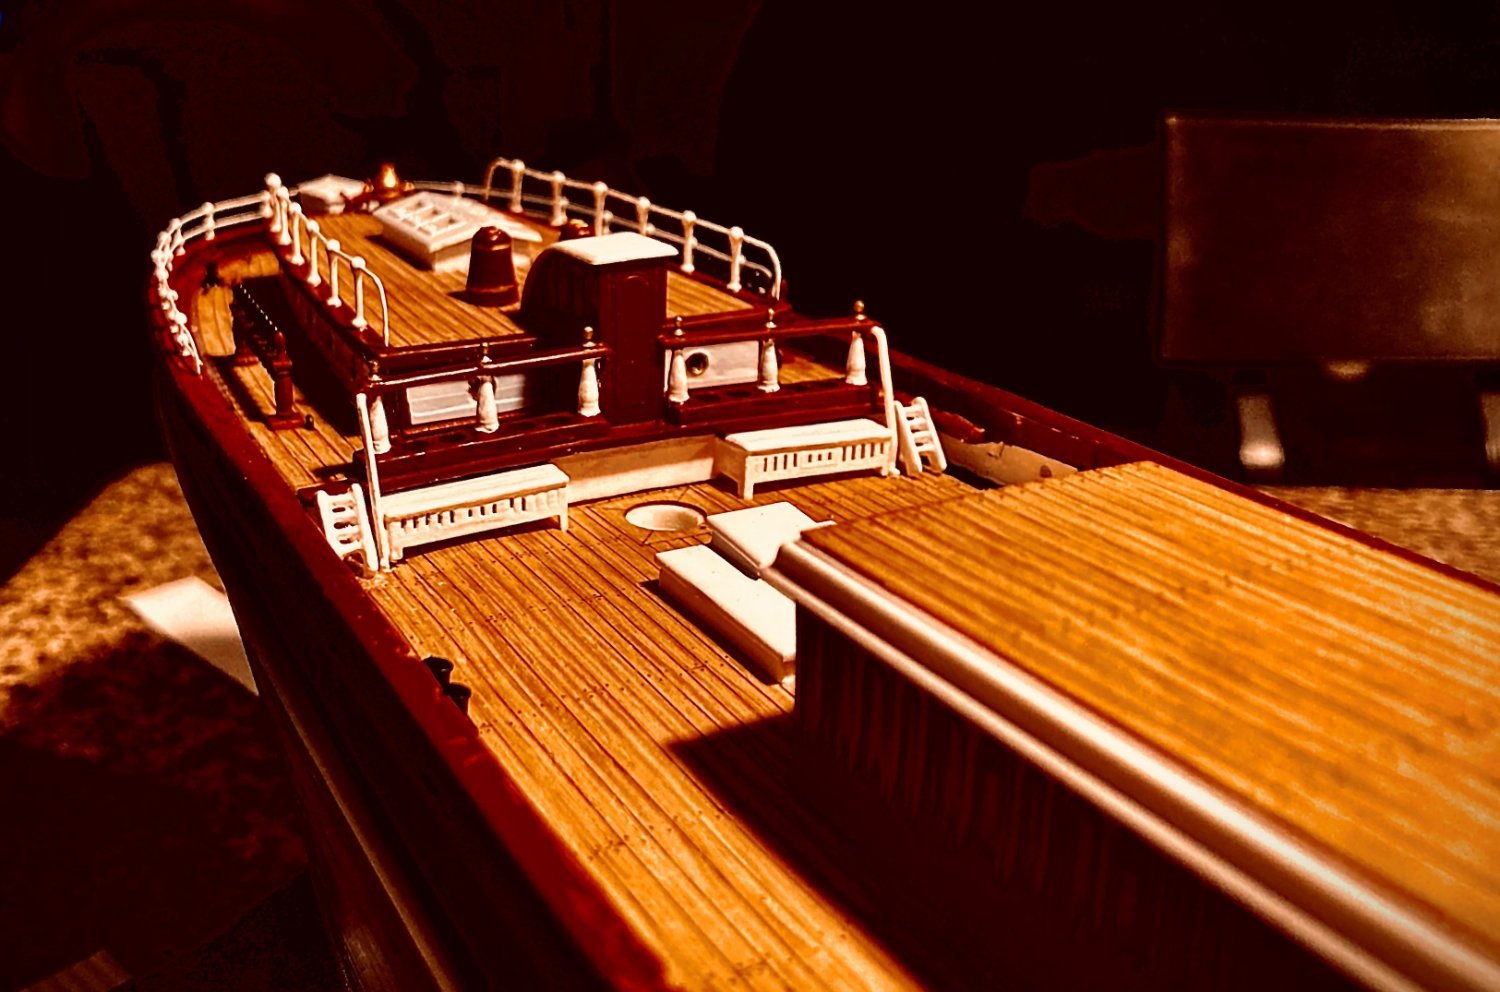
The deck at this point. Next I need to finish the white panels on the bulwarks and the hull decorations. Then begin the pin rails and deadeyes. The mainmast is only temporarily stepped.
-
15 hours ago, rwiederrich said:
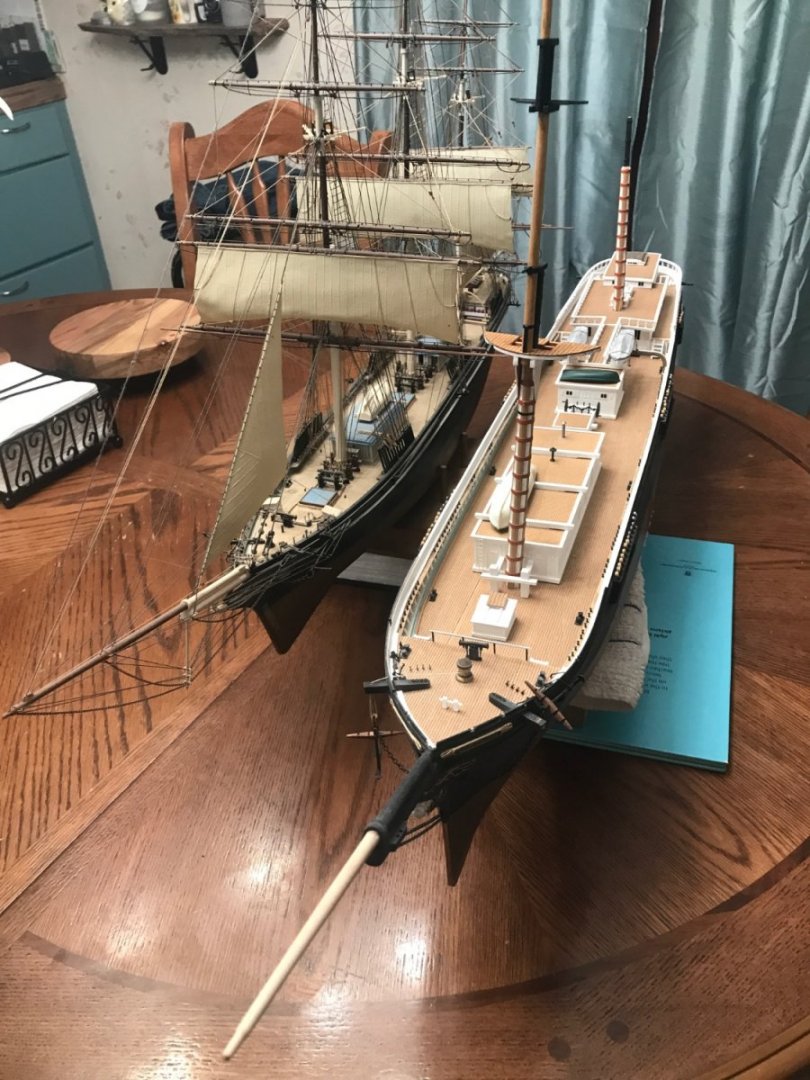
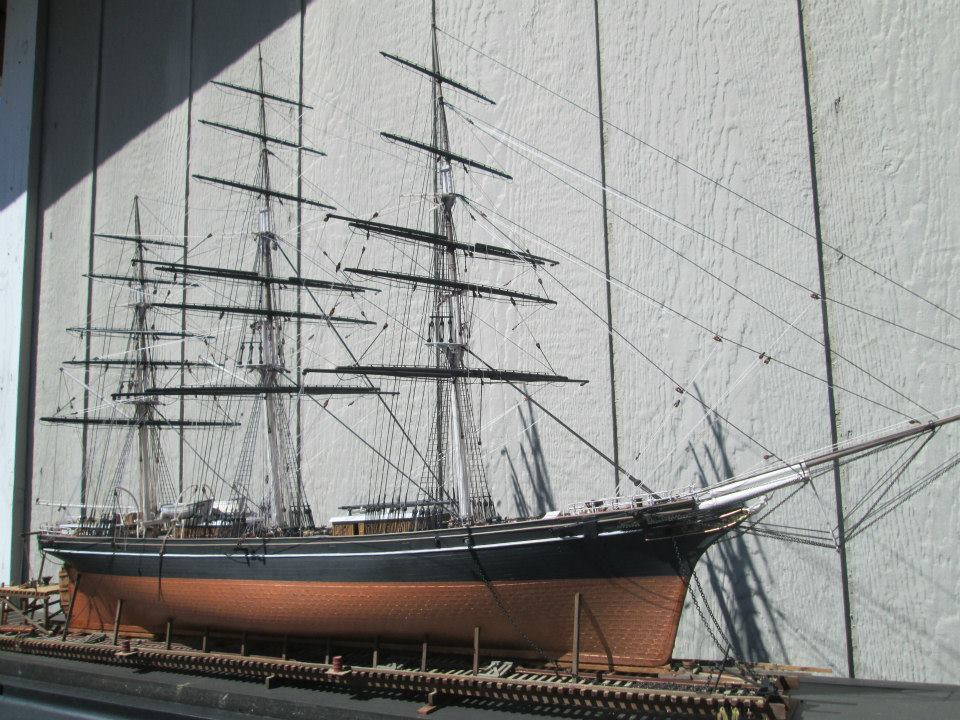
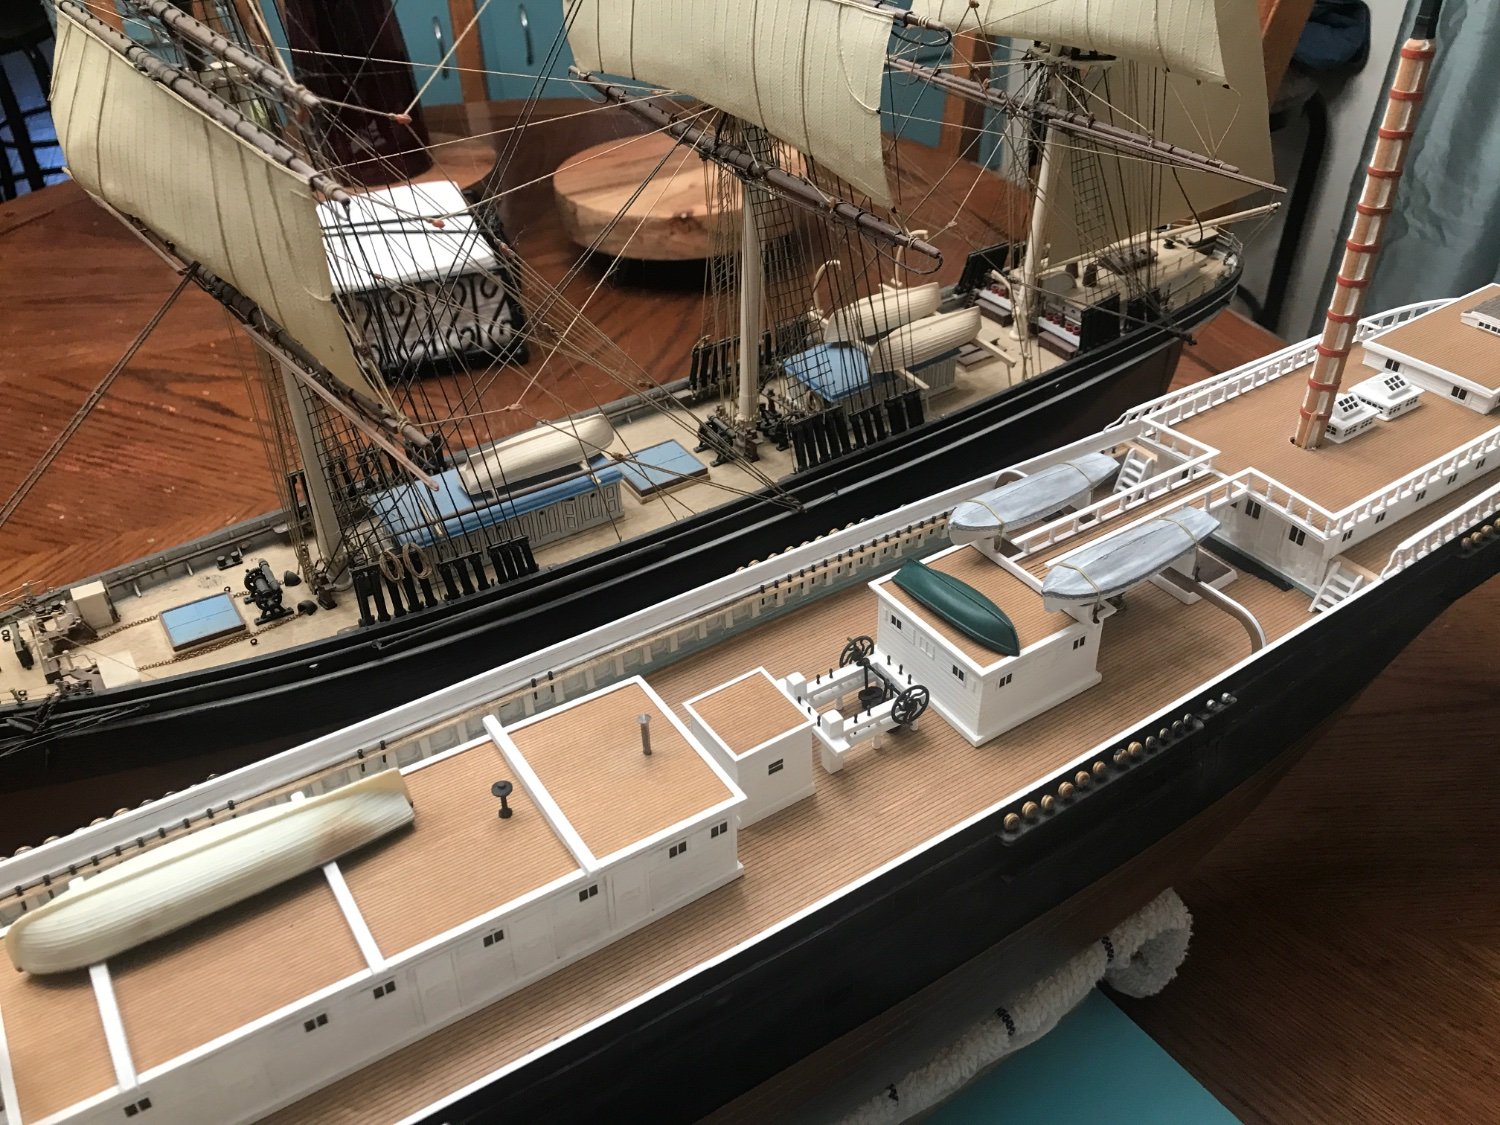
I look through my pics. Here is a scale comparison between the Cutty and my new Glory of the Seas. Amazing size difference. 960 tons compared to 2100 tons. This is an old CS I built 25 years ago.
Rob

Great work. Gives one inspiration.
-
1 hour ago, rwiederrich said:
My latest version.

Beautiful. I hope I get that far along.
-
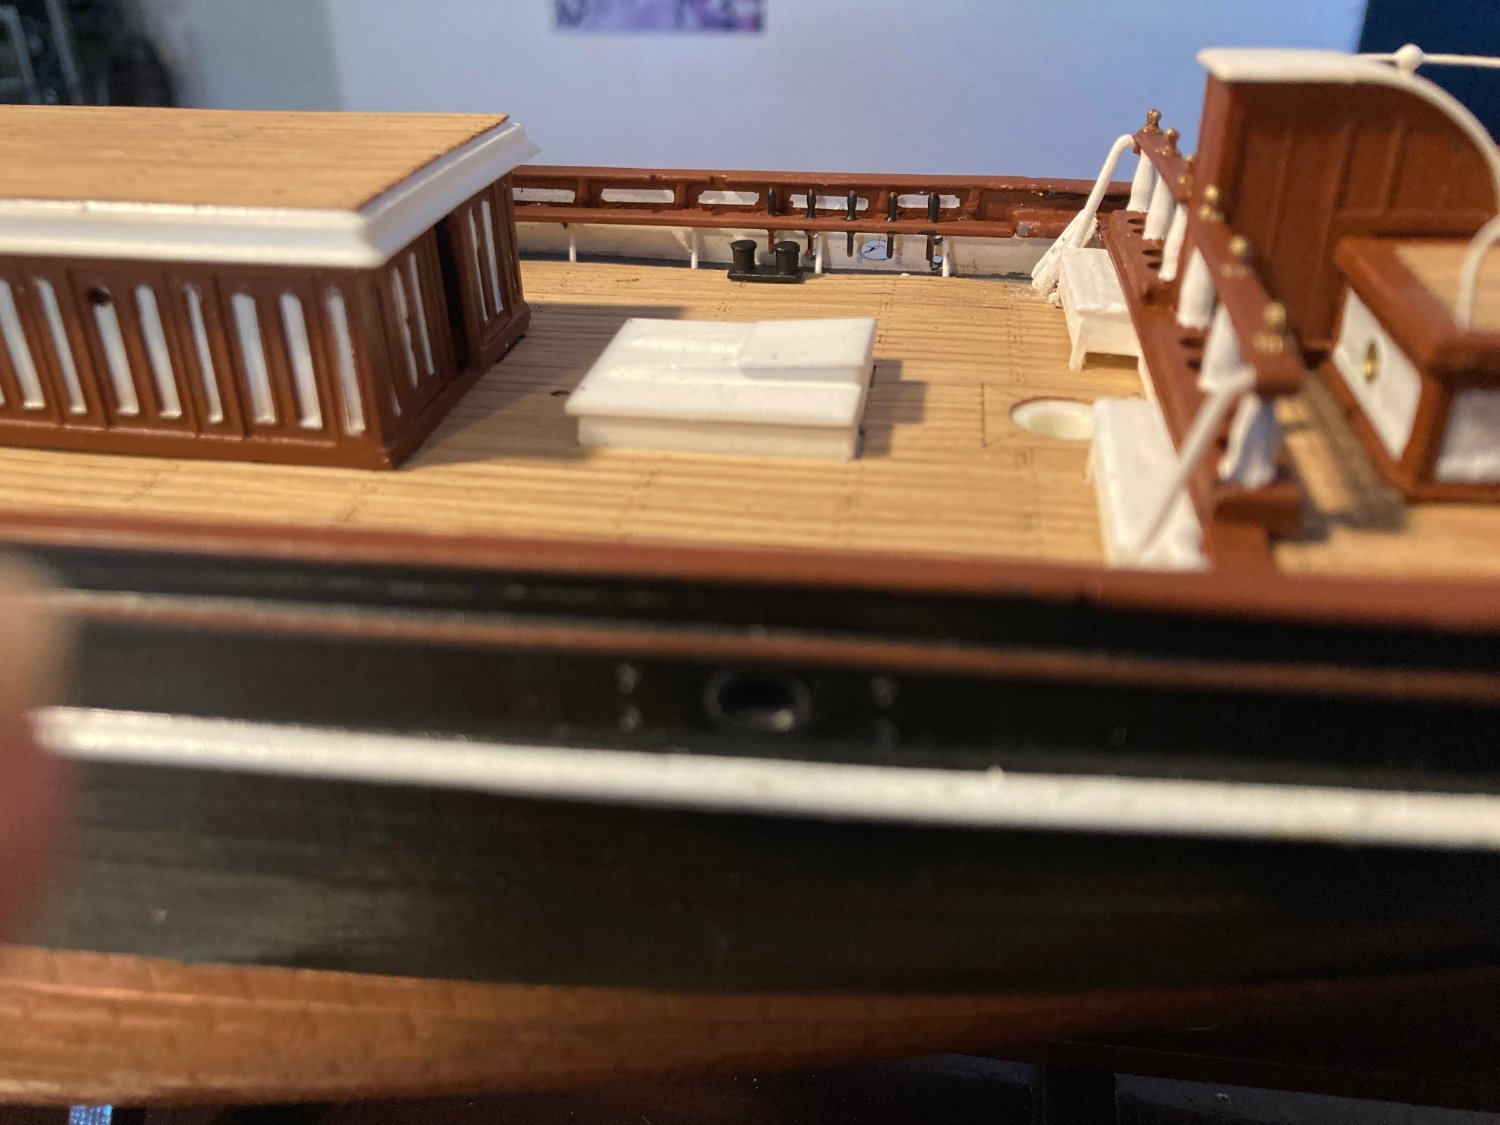
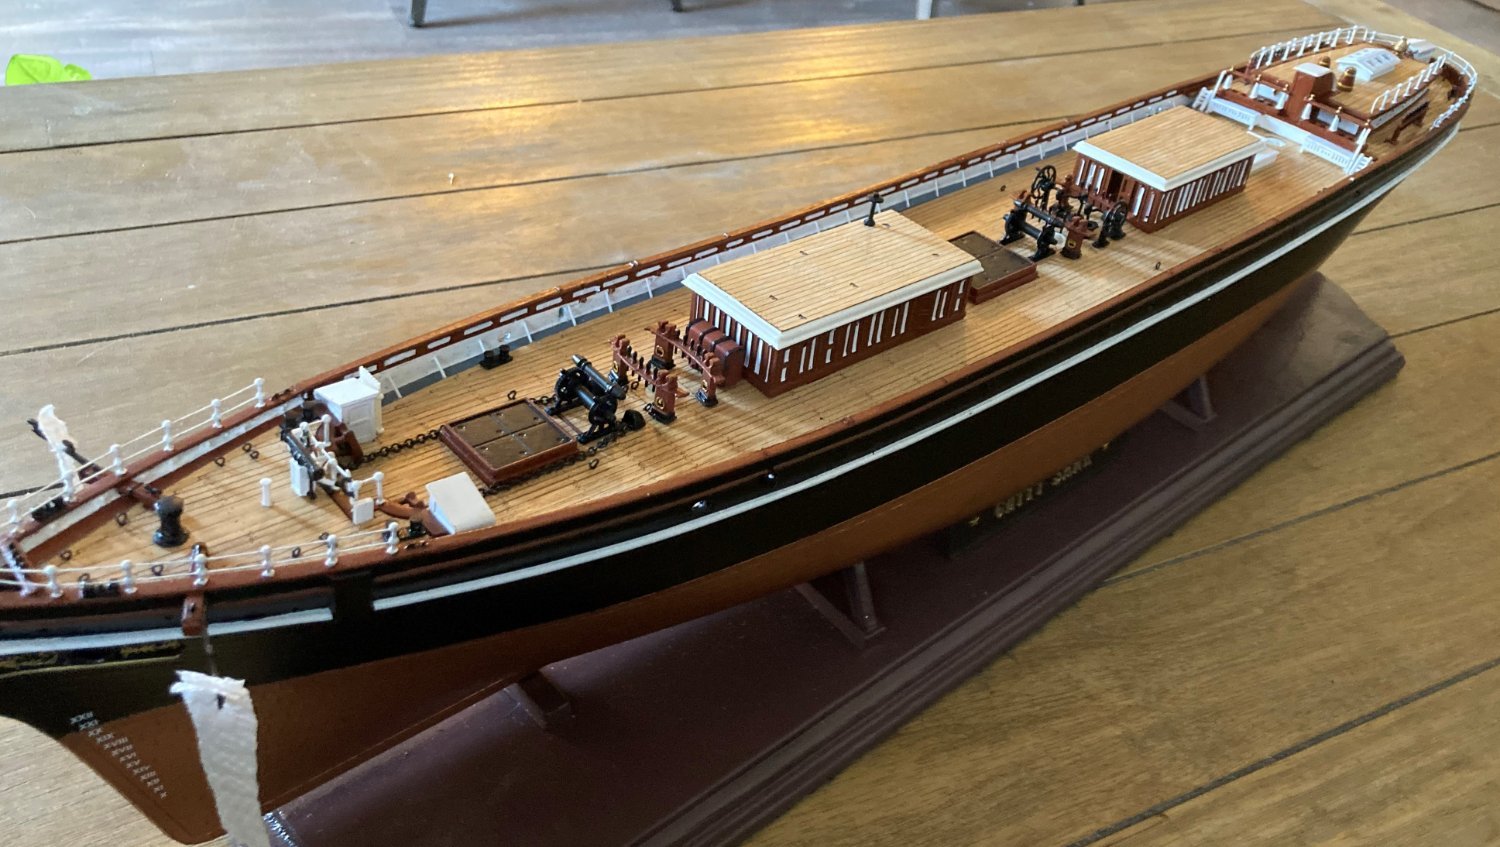
I added the starboard bow stanchions. They are not the same size as the stern stanchions, but I'll live with them. I had to counter sink them into the rail. I don't like the cathead sticking out there like that. I hope I don't break it off.

-
8 hours ago, rwiederrich said:
I'm not sure...I think Fine Scale Modeler drew their images from a website I no longer use for the image capture. What images in particular are you seeking?
Rob
I was hoping to see more of your model. I could pick up pointers I'm sure.
-
I got my deadeyes and stanchions today. The deadeyes seem too small. I was told that 3.5 mm and 2.5 mm are the right size to get, but they look very hard to work with. I have never rigged a ship model, so this is all new to me.

-
-
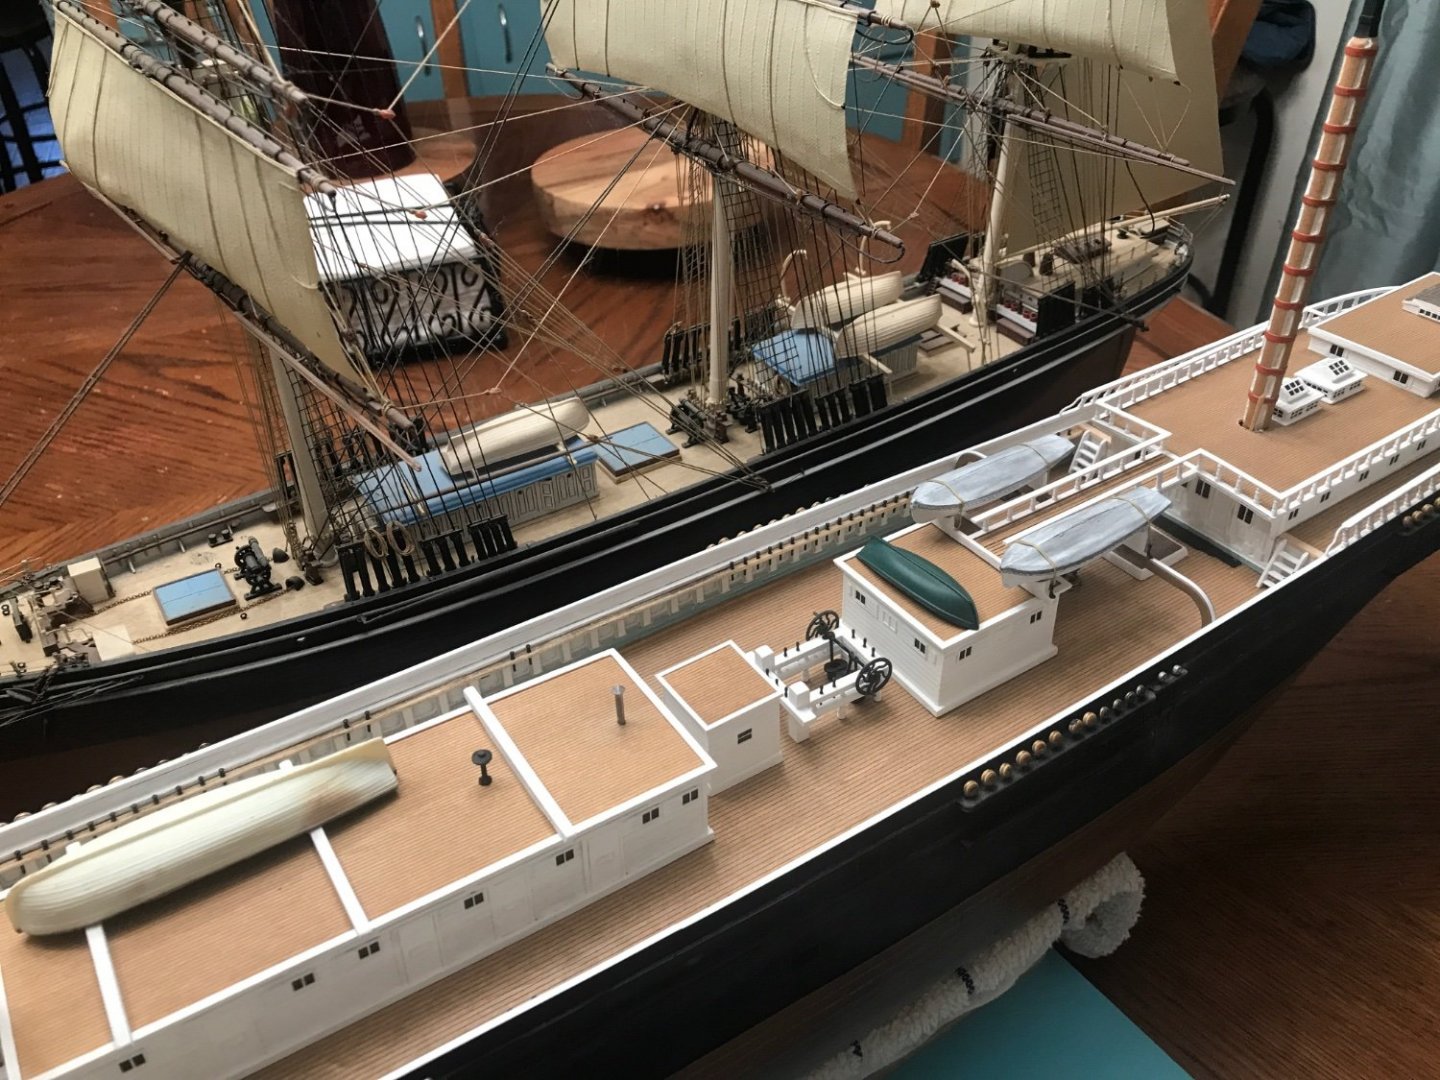
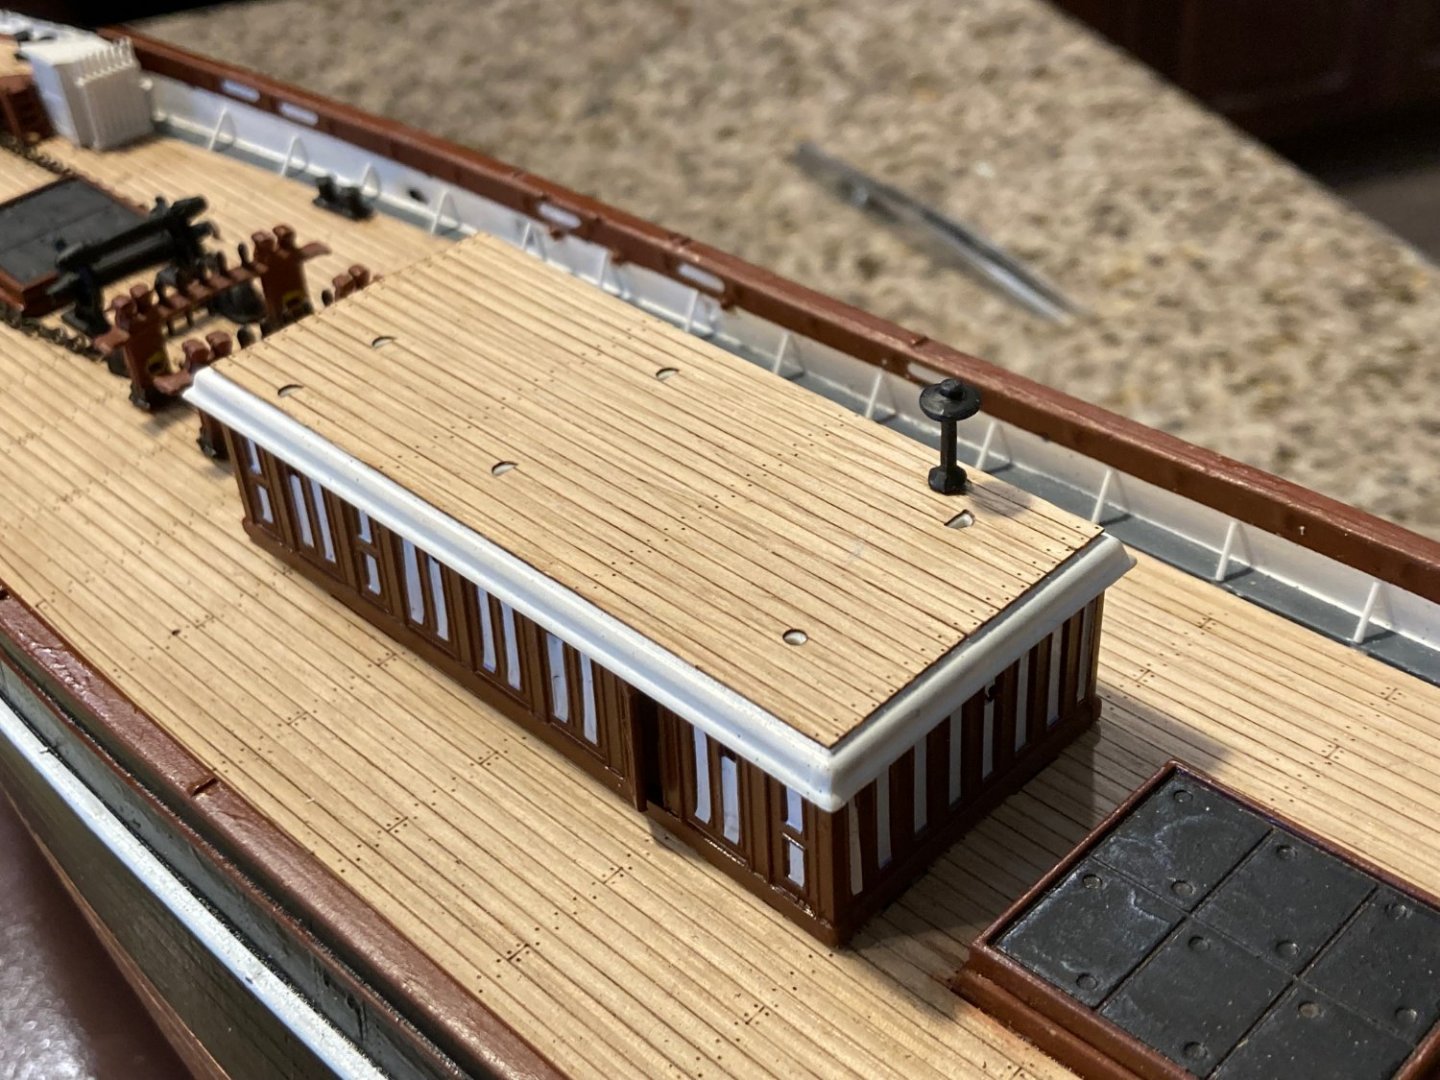
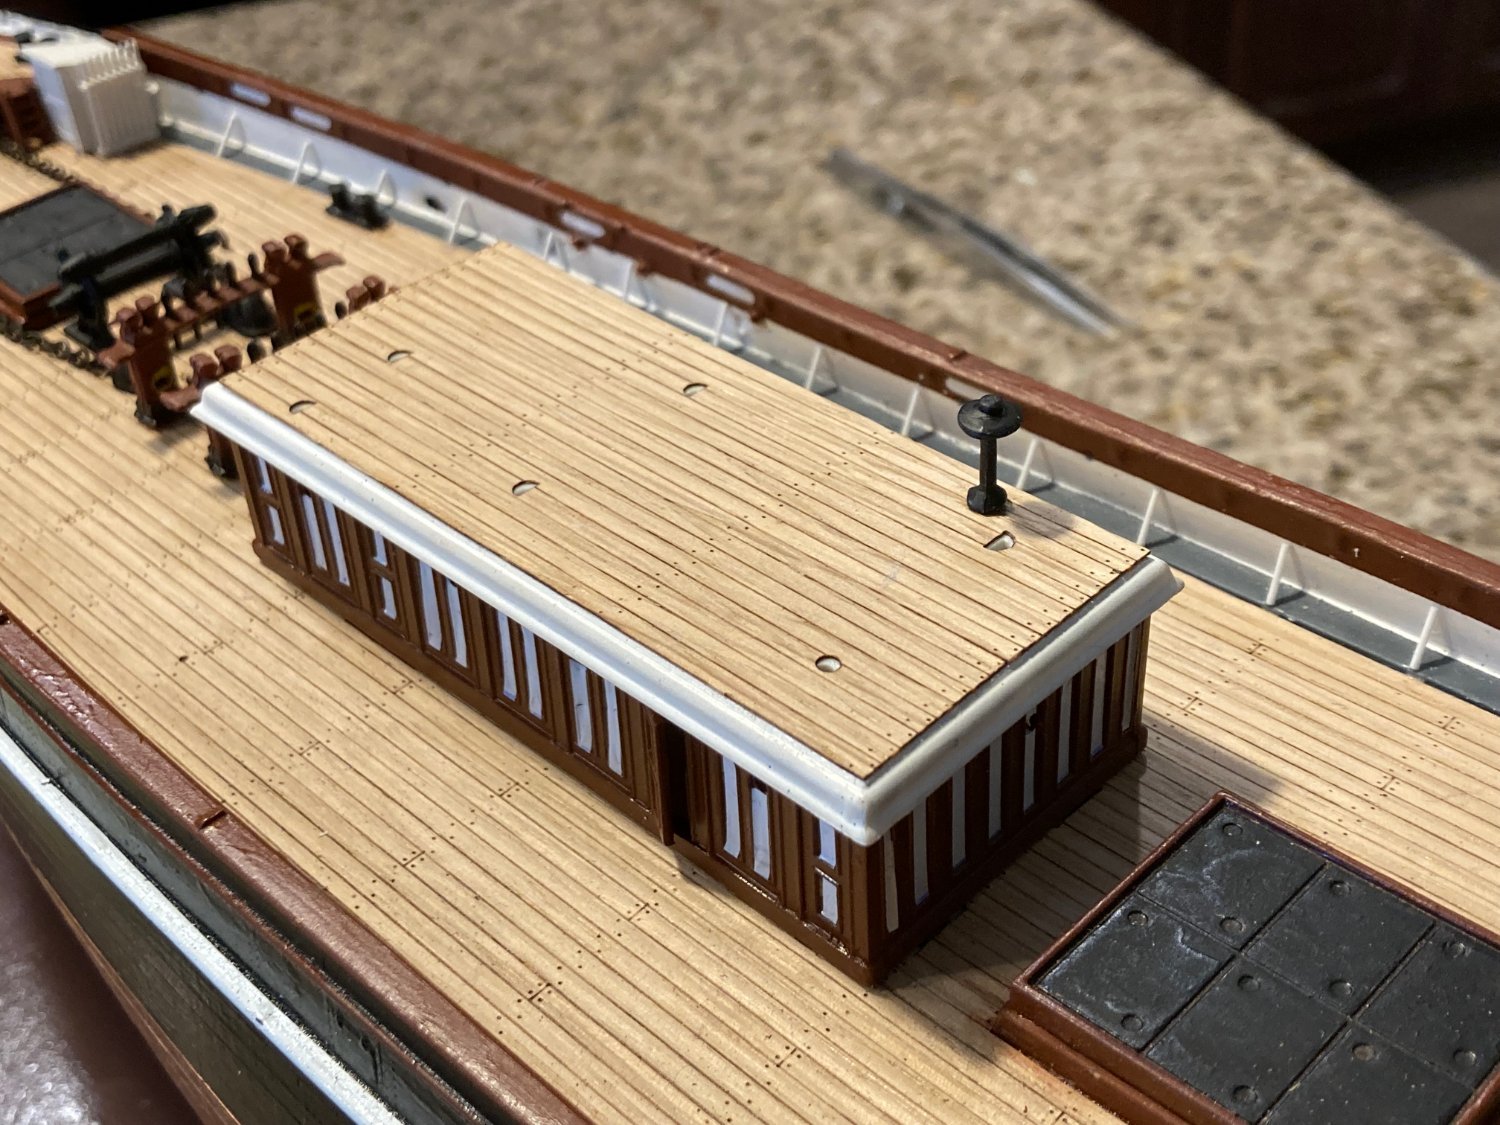
White panels on the deck houses

- ccoyle, popeye the sailor, LeoM and 3 others
-
6
-
rwiederrich,
You can't see your images of your Cutty Sark build on Fine Scale Modeler. Do I need to join to see them?
-
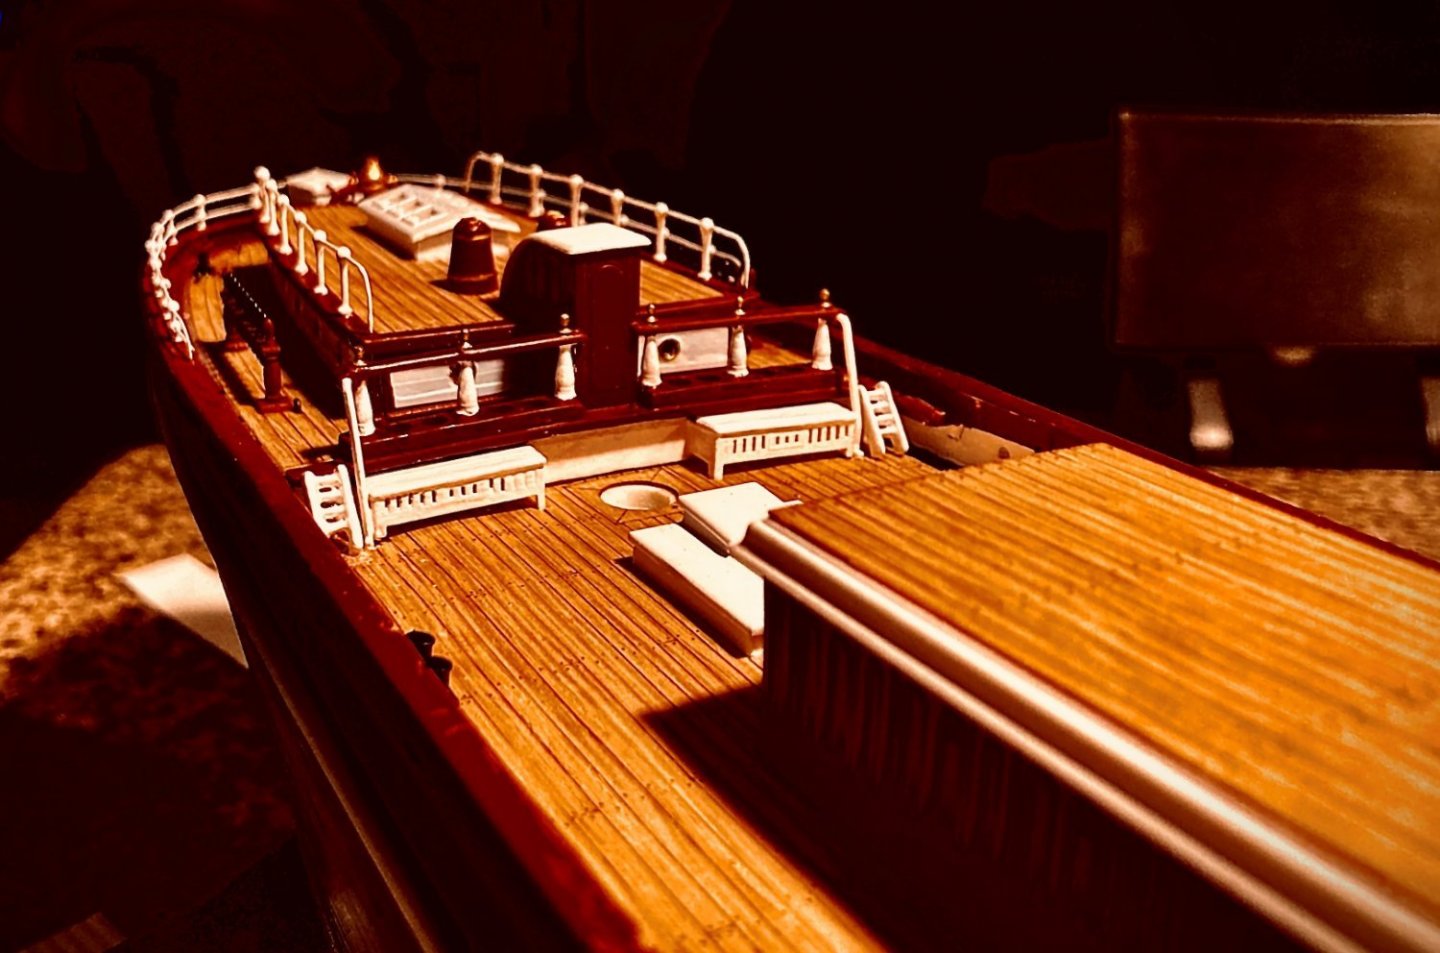
A look astern as is so far.

- popeye the sailor, LeoM, ccoyle and 4 others
-
7
-
Nice to know my work might give someone a buzz.
- popeye the sailor, Ian_Grant and shipman
-
2
-
 1
1
-
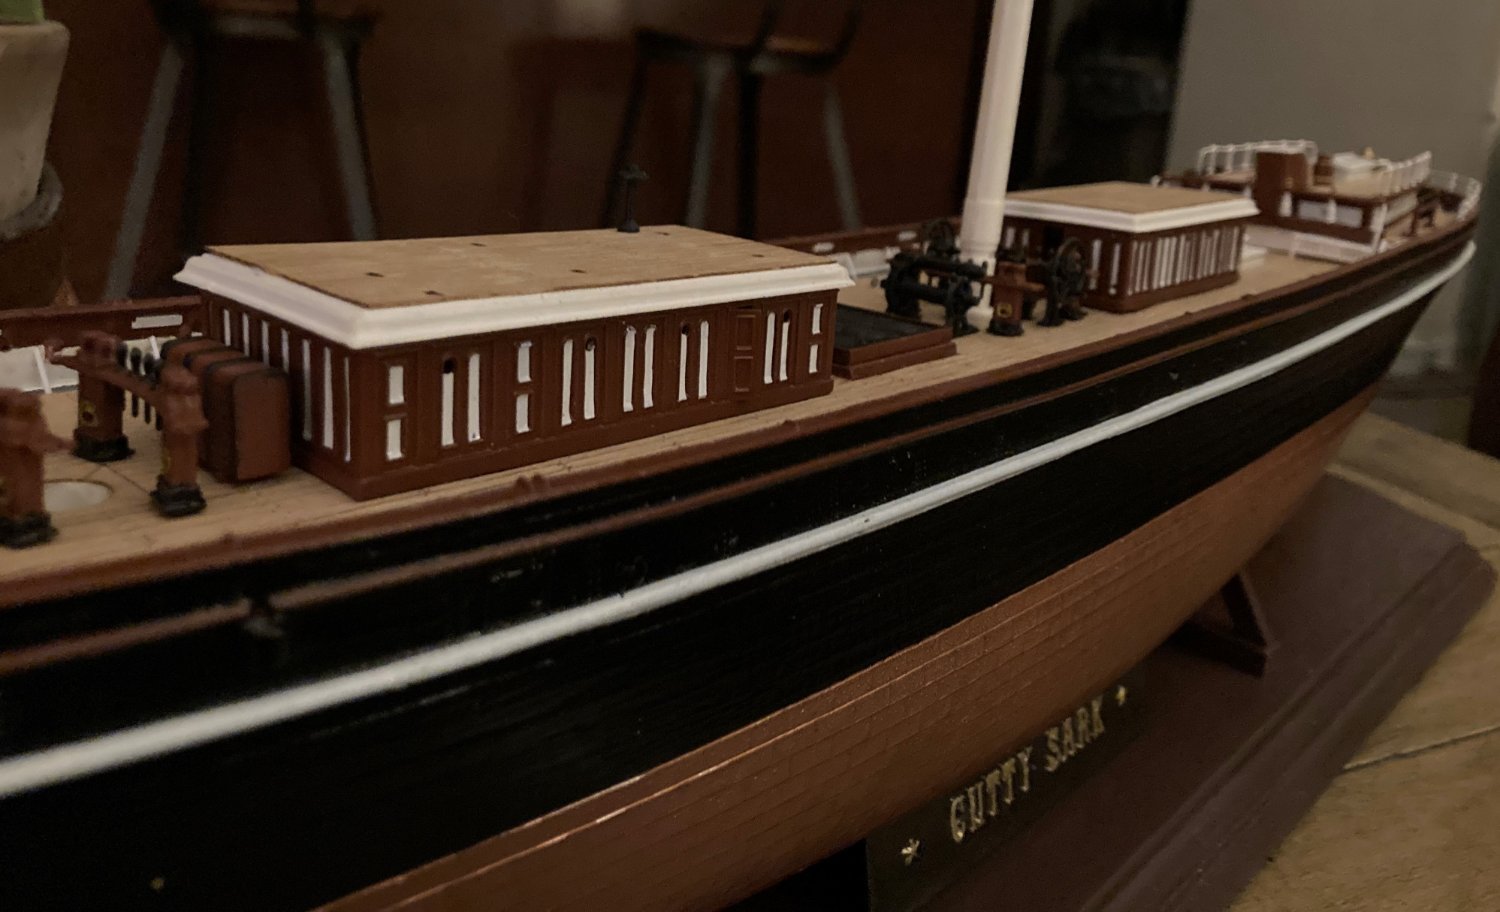
Shipman you are right the model looks to be different from the actual ship in that area. The model is out of proportion to the real thing in areas such as my railings. I never intend the model to be an exact replica in every detail. It is a representation of the Cutty Sark as a painting is a representation.
If and when I ever complete it and someone looks at it, they should get an idea of what the ship looked like in the late 1880's not as it looks today.
-
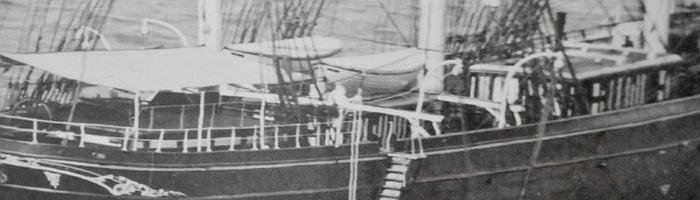
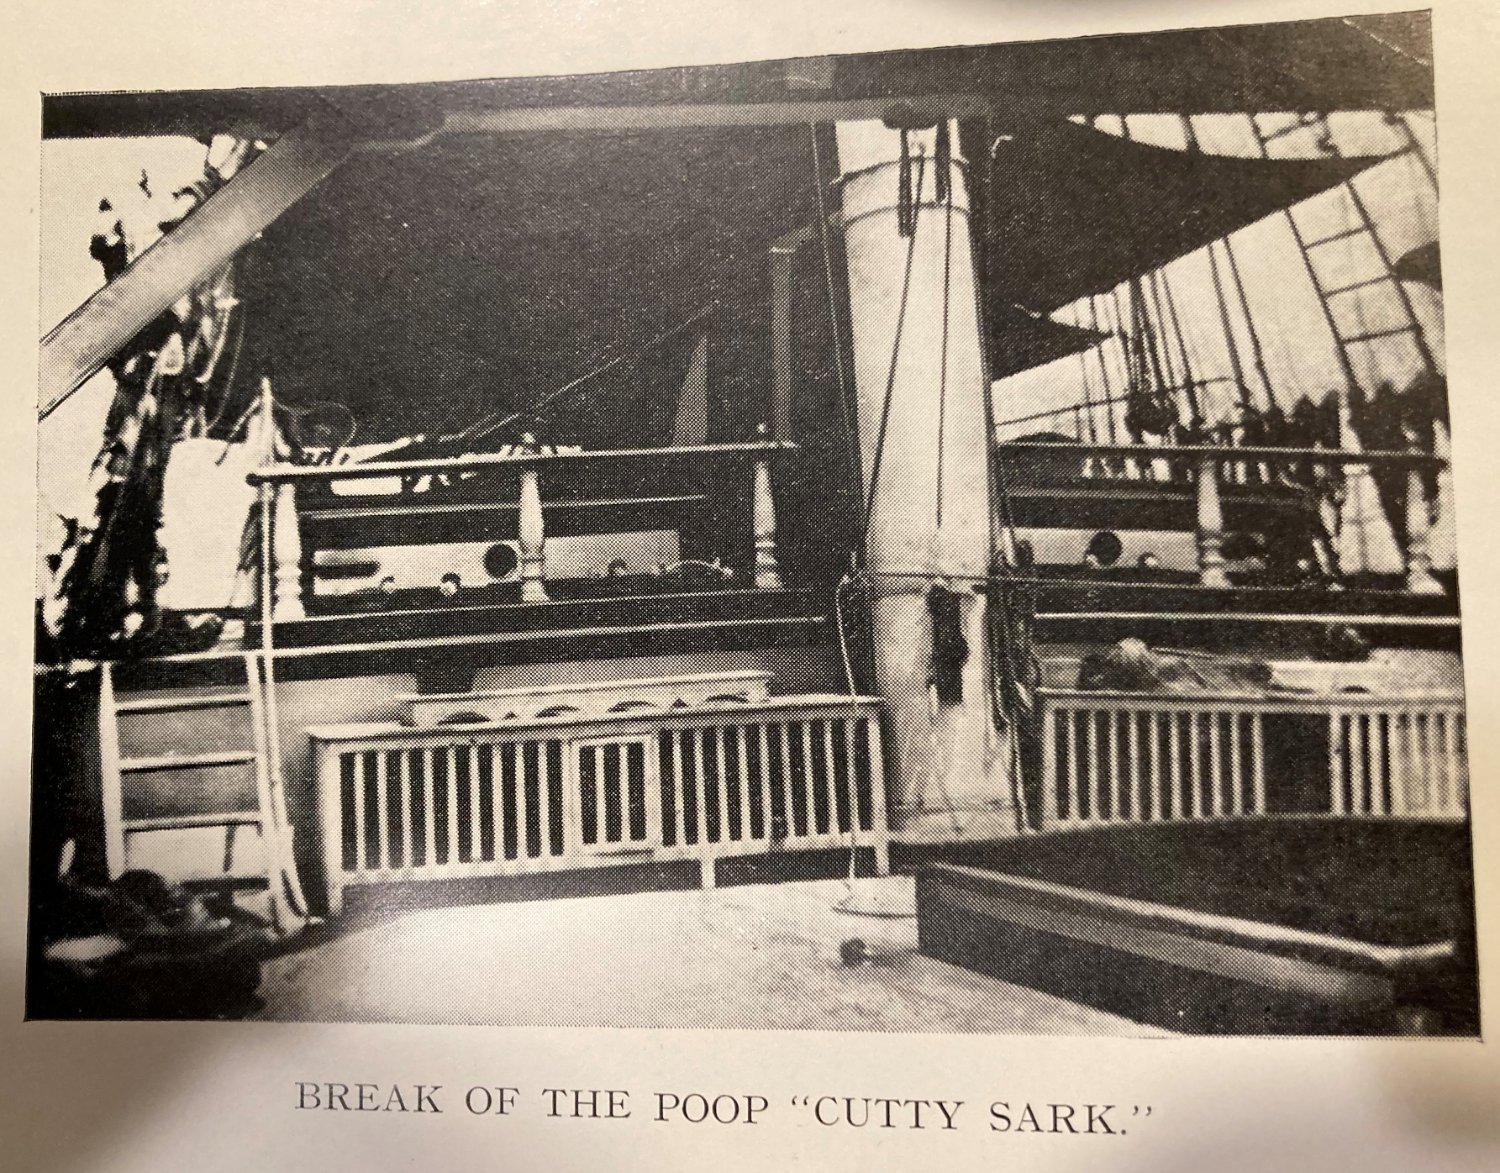
This is a quote from "The Log of the Cutty Sark" by Basil Lubbock, p234. It is about J. Selby mate of the Cutty Sark in her wool days. It describes the ship's look.
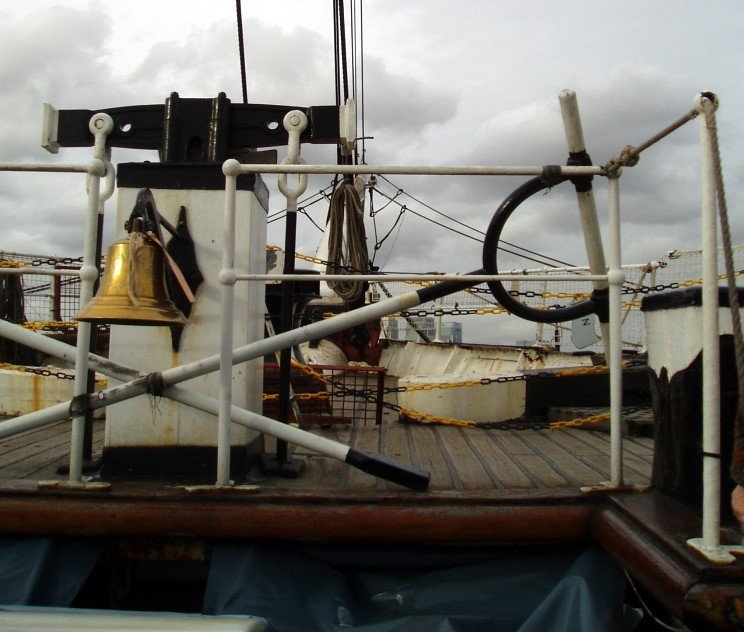
"In port he invariably was out in a boat every evening when the "Cutty" was lying off, and was most particular in seeing that the masts were aligned to the last fraction of an inch and the yards dead square. Indeed the Cutty Sark was never more perfectly kept than when Selby was mate. Under him her bright work was always kept well cleaned and varnished, and the white paint of the iron bulwarks, panels of the deck-houses and monkeypoop was always spotless."
This was just before 1891 when Selby left Cutty Sark.
"Captain Woodget's photos, notably the one in Sydney Harbour, a detail of which is below, show the way in which the fore and mid house panels and a horizontal stripe of the Liverpool cabin were painted white, that the heads were all white, that the entrance to the officers' cabins was all varnished, and that the wood masts, wood bowsprit, deadeyes, blocks and shroud fairleads were black. " John Sankey
This is what I am representing in my build.
-
I am experimenting with the white panels on the deck houses and bulwarks. Some of these photos, I have tinted for effect. I think I saw that on another build log.
- Bill Morrison, Cirdan, shipman and 2 others
-
5
-
I wanted to post this picture of the Cutty Sark's poop which I think may have been when she was a wool ship. The ships had to wait in Sidney
harbor for a couple of months before being loaded, and the awning over the poop was used then. I am using it as a reference for my build as to the colors of the steps, chicken coop and cabin, which all look white to me.


Cutty Sark by bcochran - Revell - 1/96 - PLASTIC
in - Kit build logs for subjects built from 1851 - 1900
Posted · Edited by bcochran
Shipman,
In Noel C. L. Hackney's book on page 35 about making eyebolts, he says "with 3/4 inch rod formed to a 2 1/4 inch hole and 1 inch rod formed to a 4 3/4 inch hole". What in the H E Double Hockey Sticks does that mean? Is he talking about actual 1 to 1 scale, or is it some magical 1:168 Airfix scale measurement?
Later he says to bend 40 SWG wire round a 1/64 inch drill for the small ones and bend 38 SWG wire round a 1/32 inch drill for the large.
Of what useful information is his first description of what to do?
What ever, how big are the eyebolts that he is telling you to make? This makes no sense to me.
I bought some model railroad HO lift rings on eBay to use for making jackstays. The seller said they were 2 1/4 inch size. I ignored that because it made no sense, I know what size HO lift rings are, so I bought a ton of them. I got them, and they are more like N Gauge lift rings. I sent them back as unusable for my purposes.
Why do these people use such meaningless information? What I need to know is the size of the actual eyebolt I am buying not what 1 to 1 scale size they are.