


bcochran
-
Posts
615 -
Joined
-
Last visited
Content Type
Profiles
Forums
Gallery
Events
Posts posted by bcochran
-
-
1 hour ago, Kevin-the-lubber said:
Send me a pm with your address, I have a spare set of decals. Don't get too downhearted, modelling at this standard is bound to have some really bad days but the quality of your work so far tells me you're perfectly capable of dealing with the rigging. By the way, do you have a first name, it always feels a little impersonal to refer to you as bcochran!
My name is Bob
-
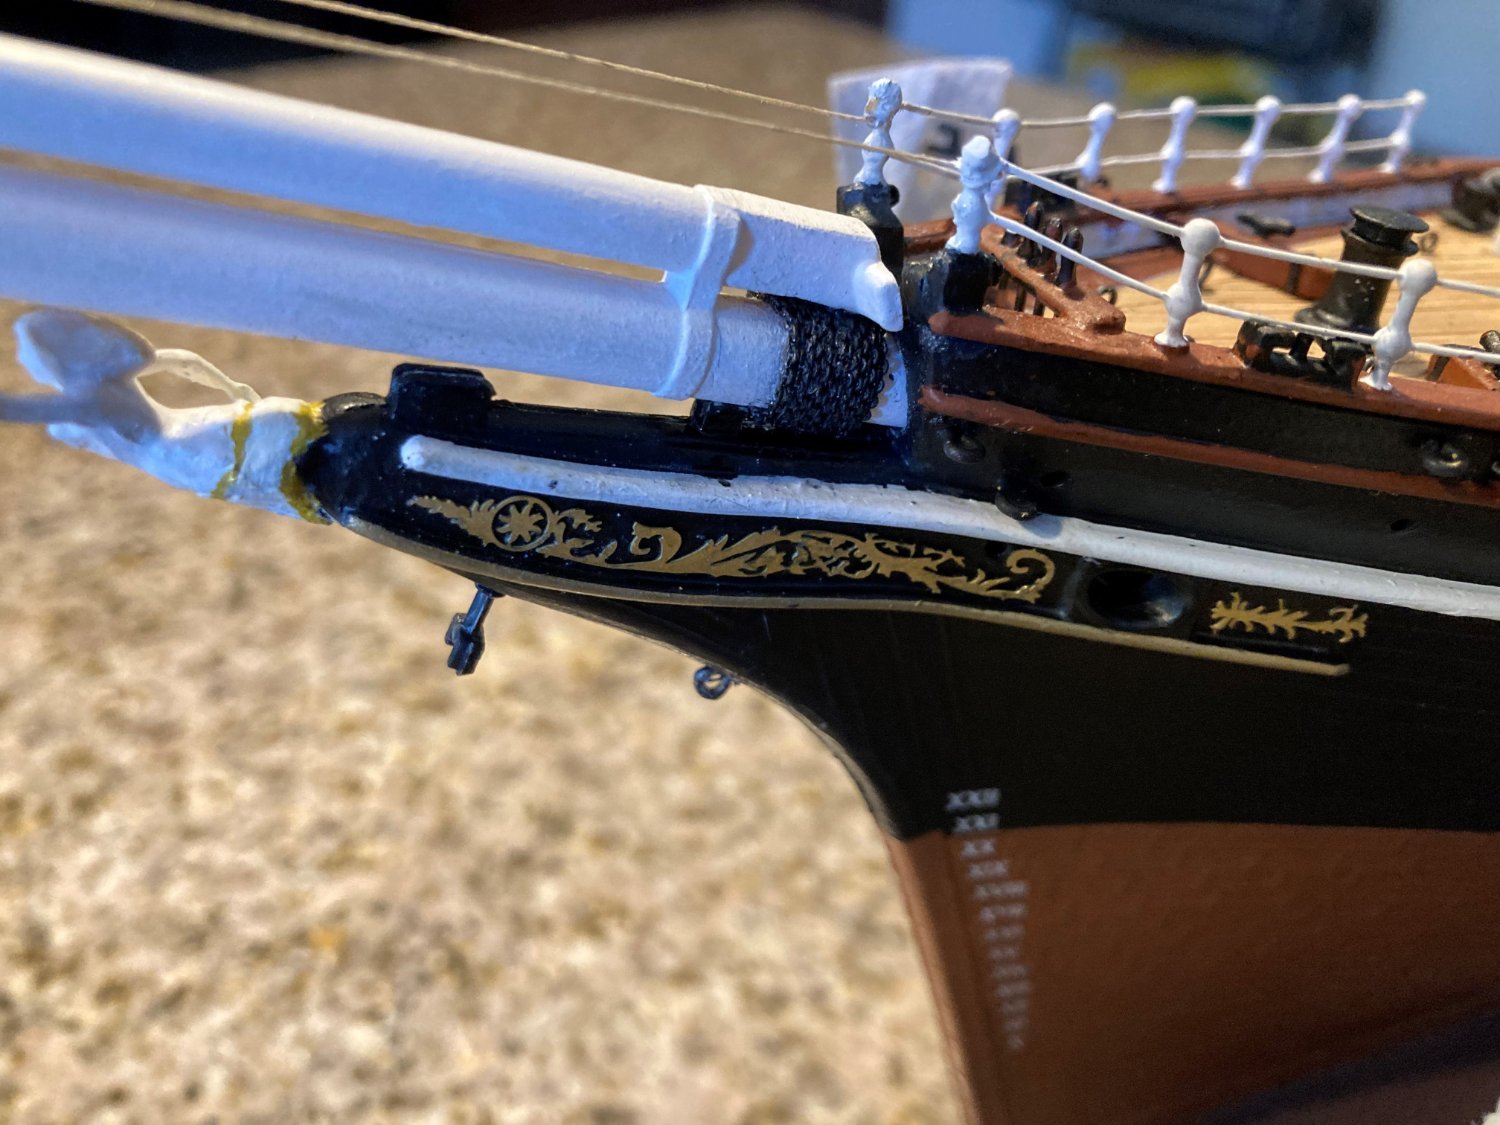
I have tried and failed five times to put the photo etch decorations on the stern. I am completely frustrated with it. I hope to get a set of the decals that came with the kit somehow.
I am not going to try a sixth time. I am tied of removing glue and repainting the area. The photo etch is just too fragile for me to handle. I'll move on to the rigging, but I must admit I doubt my ability to complete that. I am at my lowest point since starting this model. I hope to get my confidence back soon.
If anyone has a set of the decals to this kit and can part with them, I would rally like to have them.
-
Looks to me like you will have the most highly detailed Revell Cutty Sark there is online anywhere. I am envious of your skills. I know for myself, if I tried to put that much detail into my model, I would never finish it.
-
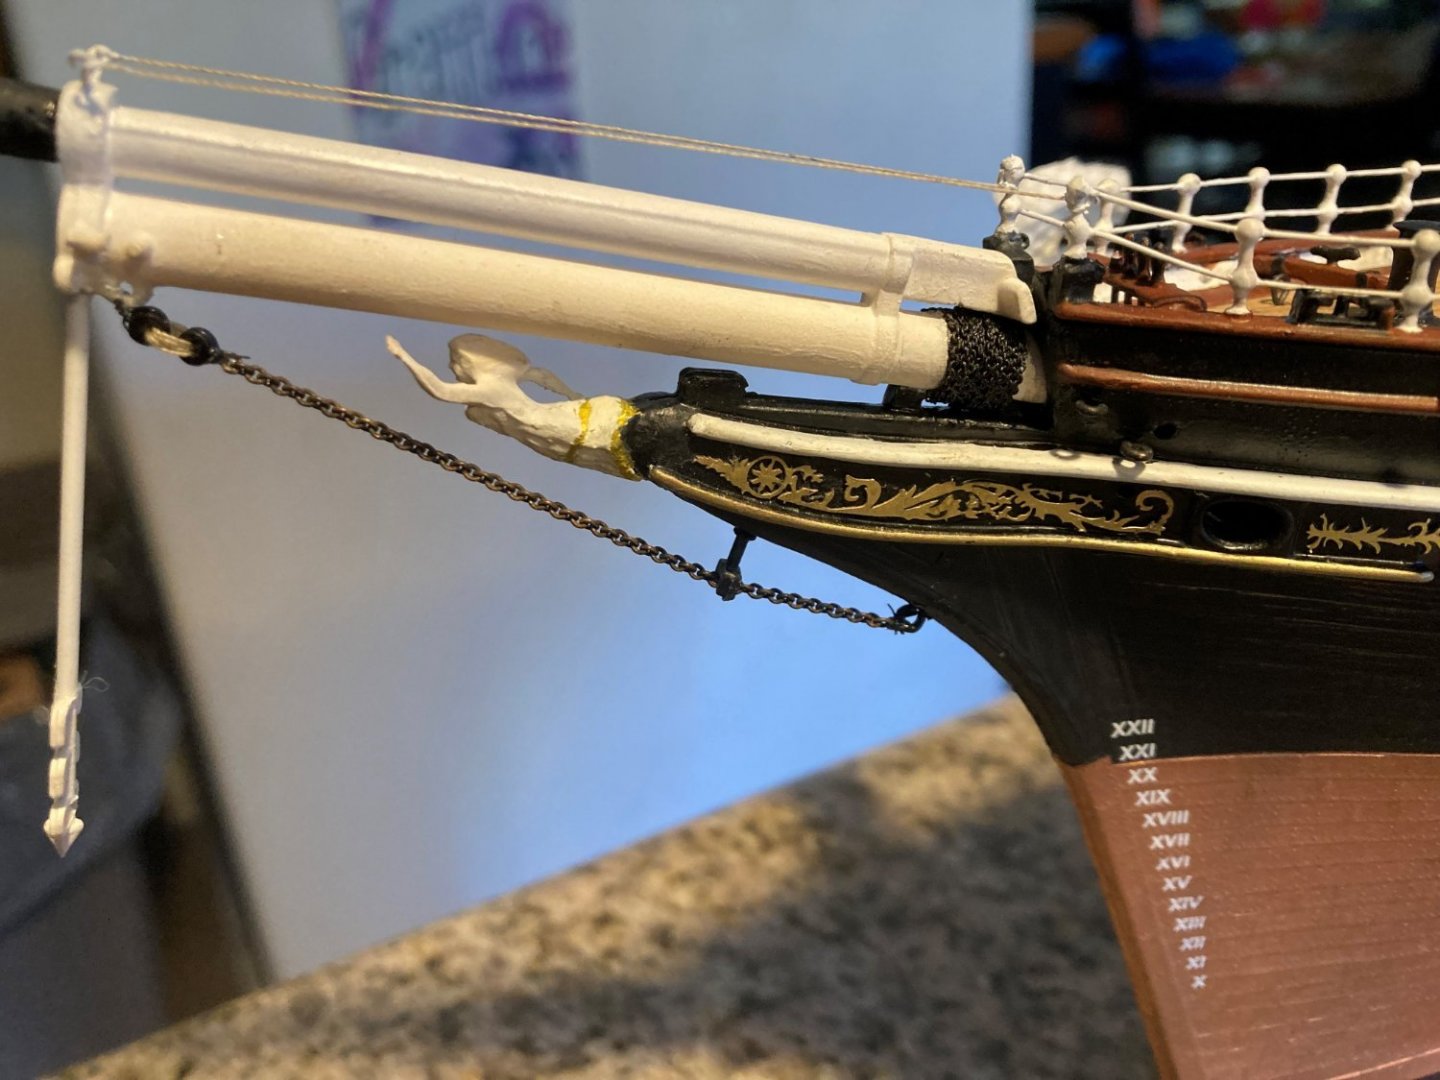
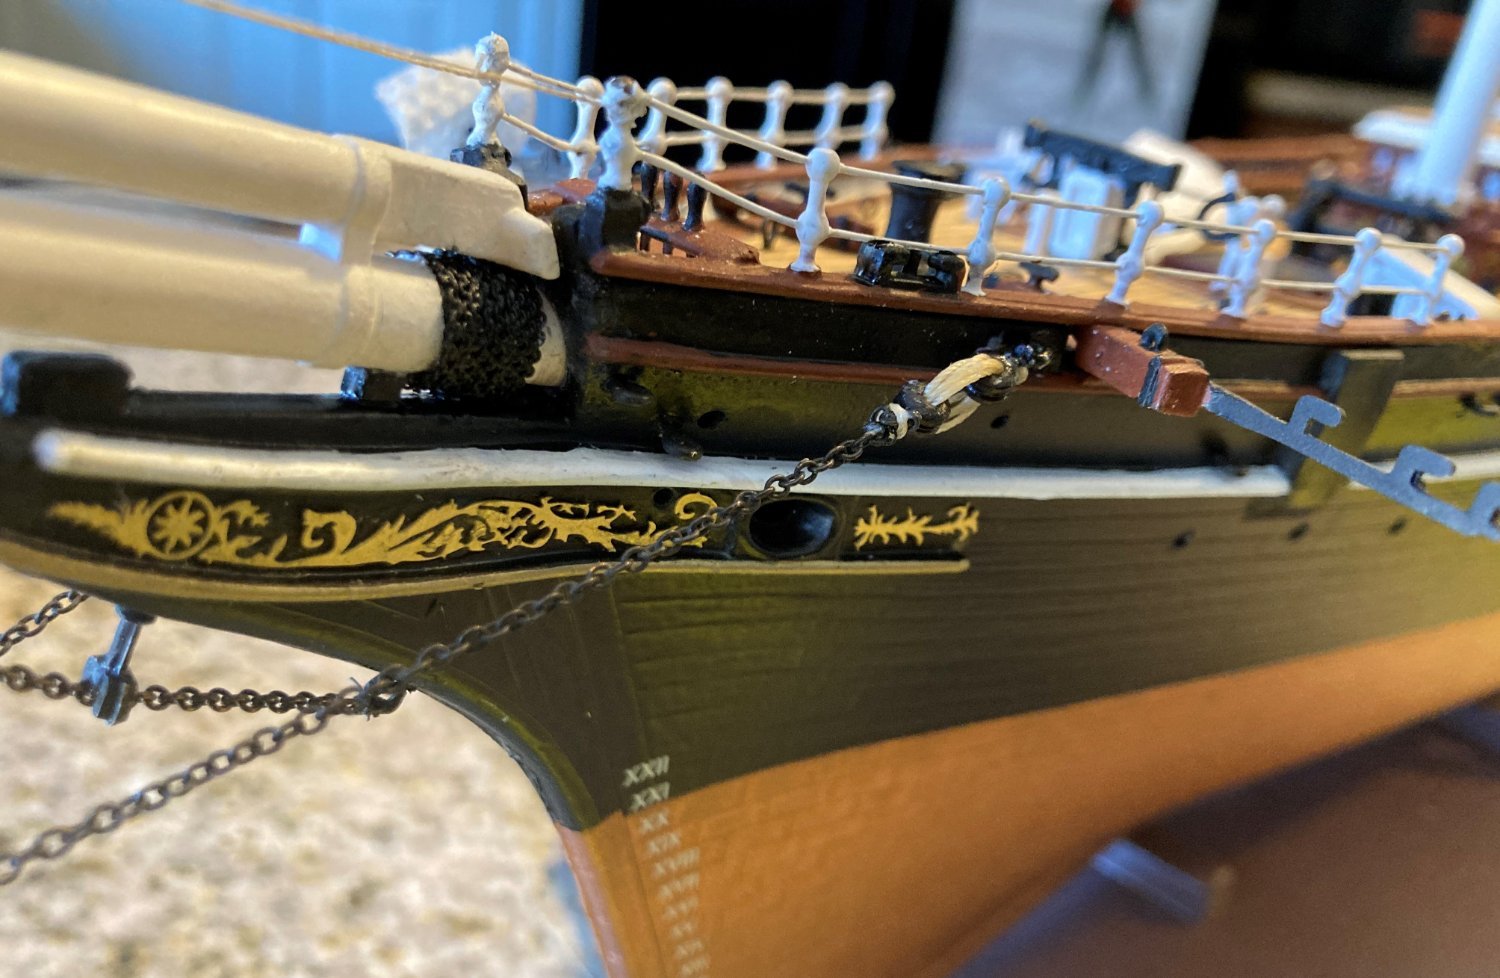
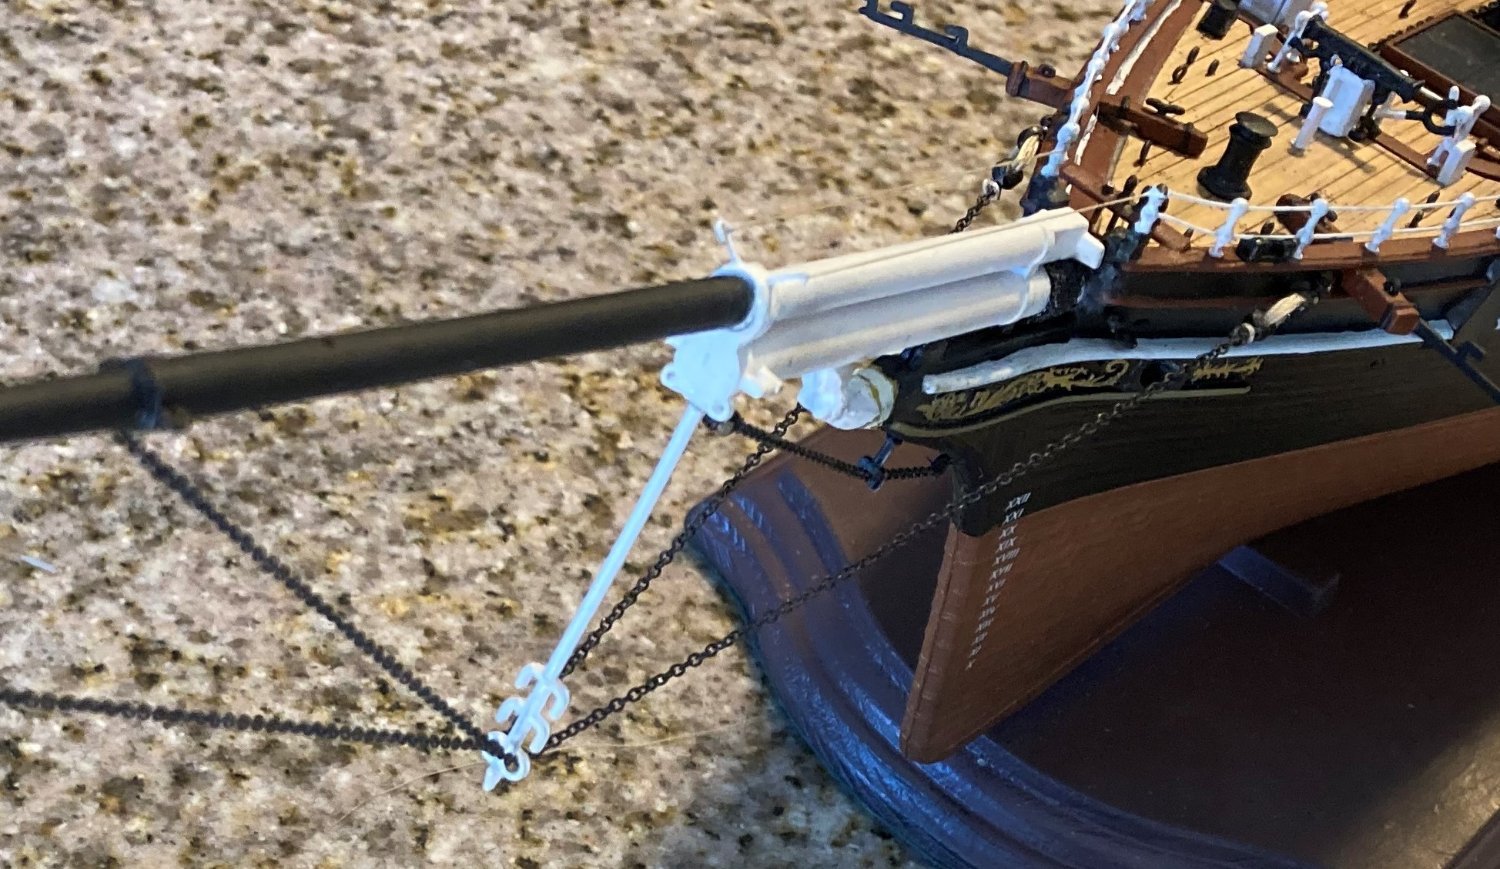
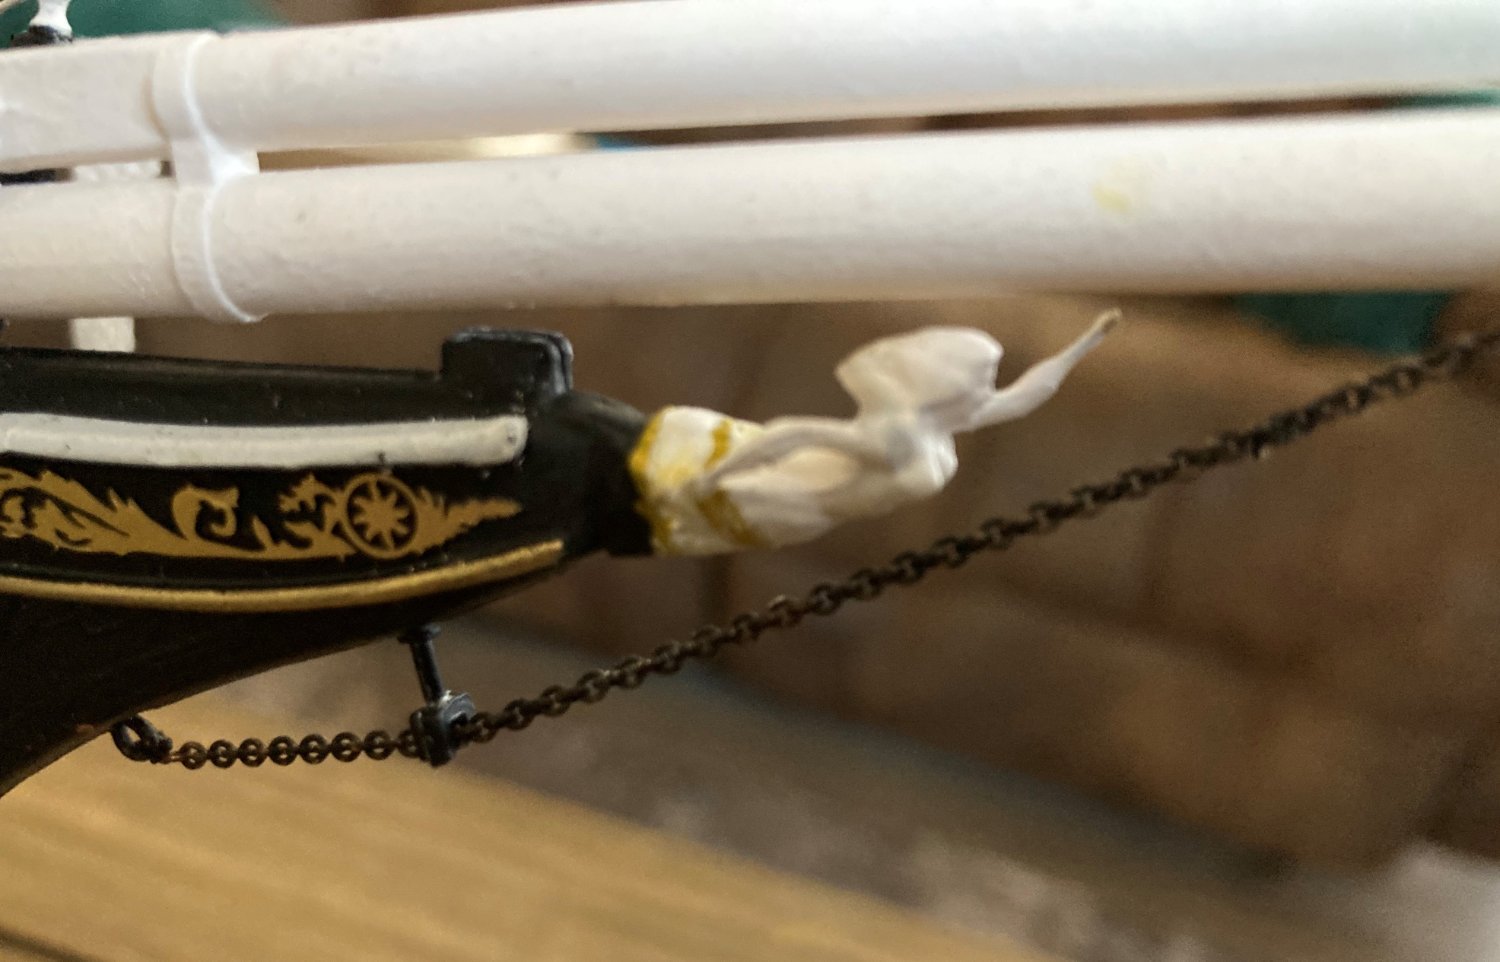
This is my first piece of chain on the bowsprit with two bullseyes.
To those who have done rigging, it isn't much but to me who has never done it before it is a big deal.
I added 2 more chains. I am not sure if it looks right or not. Then I did the other chain with thicker thread. I still don't know what looks right.


- shipman, popeye the sailor and ccoyle
-
 3
3
-
Back to my ship. I put some gammoning on the bowsprit. I added some plastic pieces below the bowsprit as the part of the ship the bowsprit is gammoned to.
I used some 45 links per inch chain. It is not as good as I would have liked, but this I will keep.
Some days you can't make a mistake. You just fly through the modeling that you are doing and everything comes out right, easy as pie.
Then there are days like today when all I get done doing is fixing goof ups and causing more.

-
I have to put the Cutty Sark on hold for about a week. I need to get some G scale trains together for a memorial weekend train run at the Best in the West Machinery show.
-
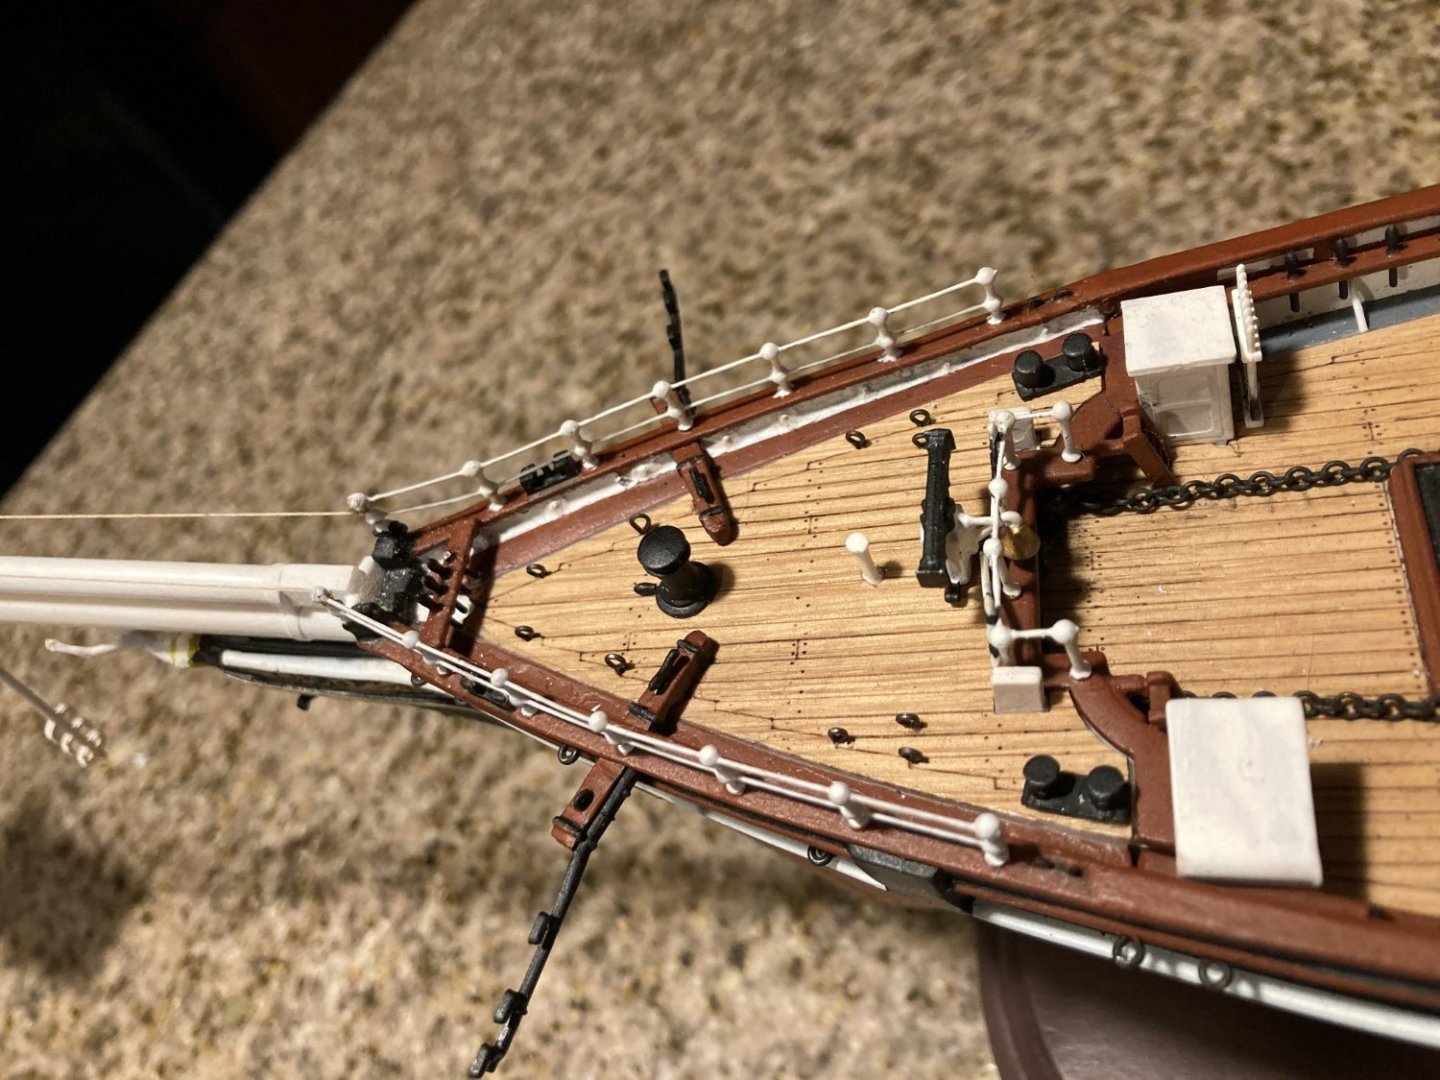
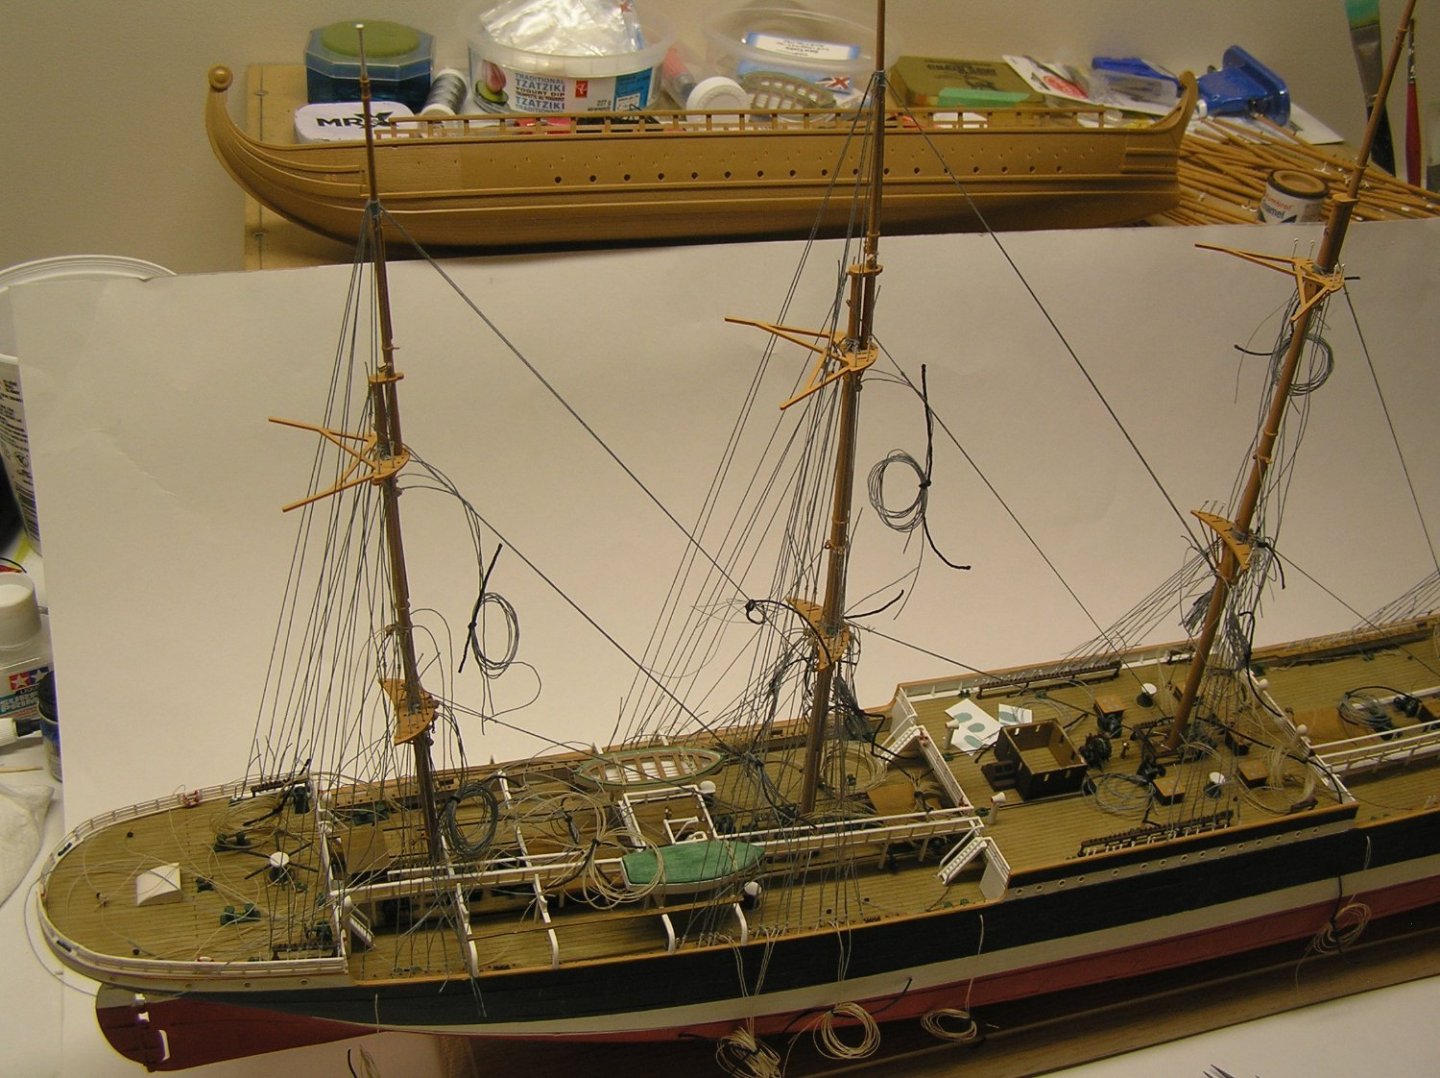
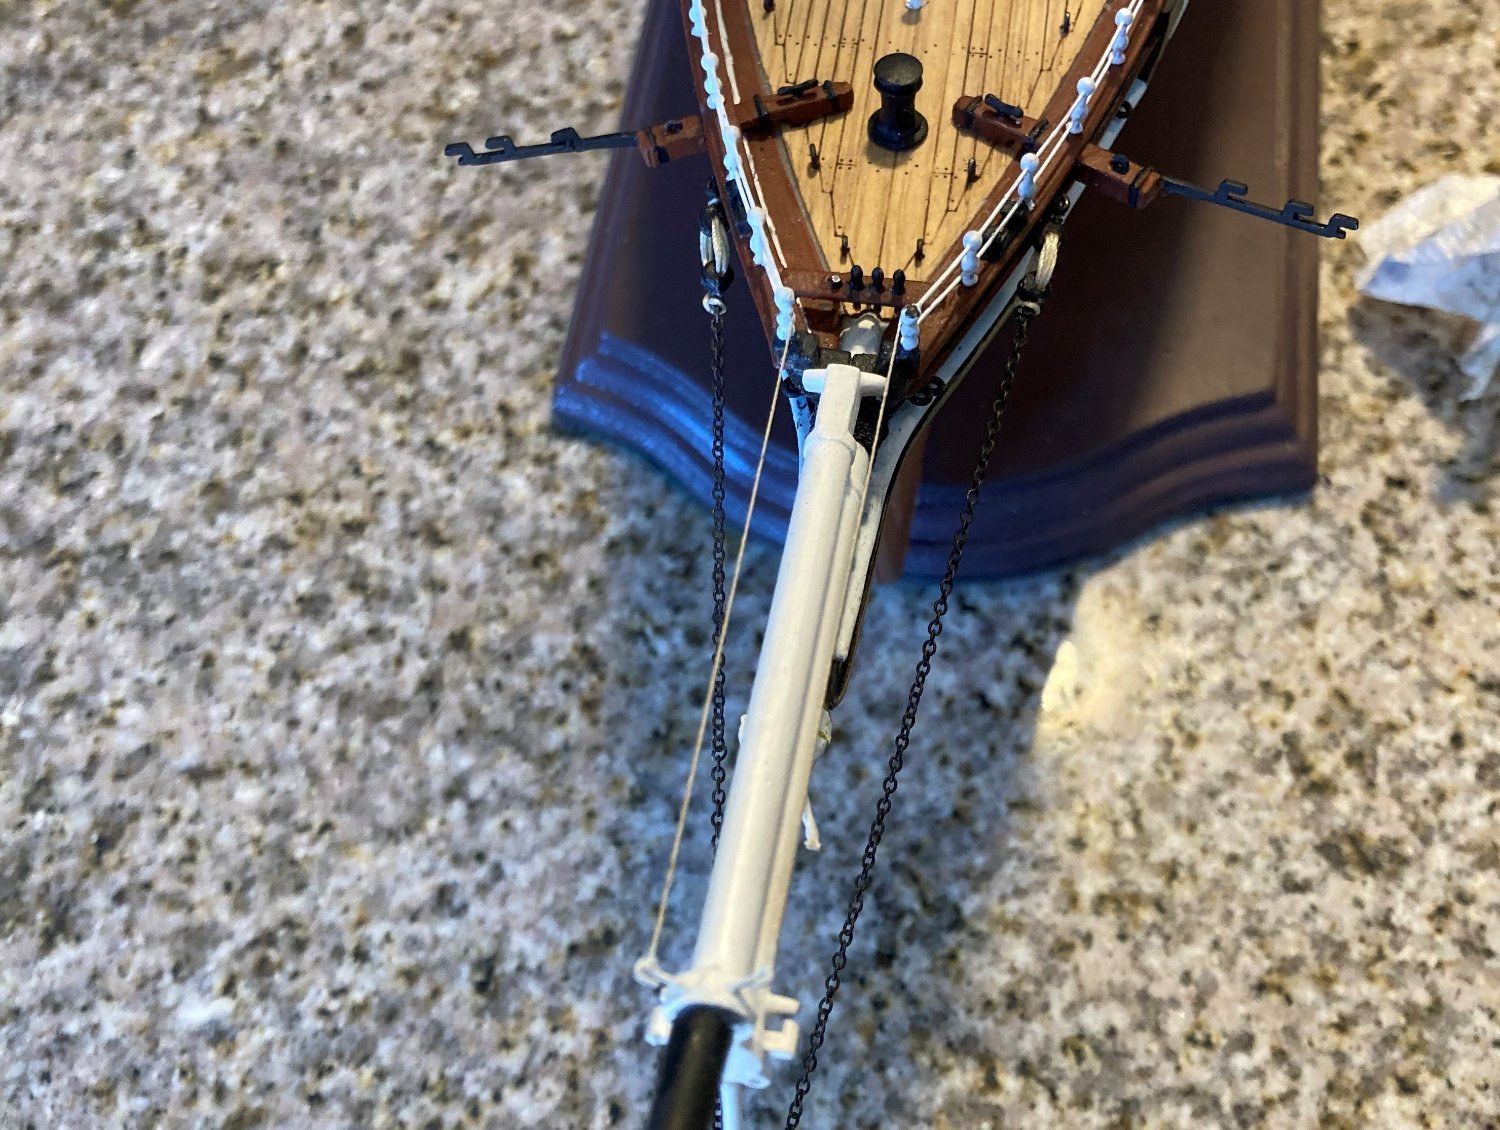
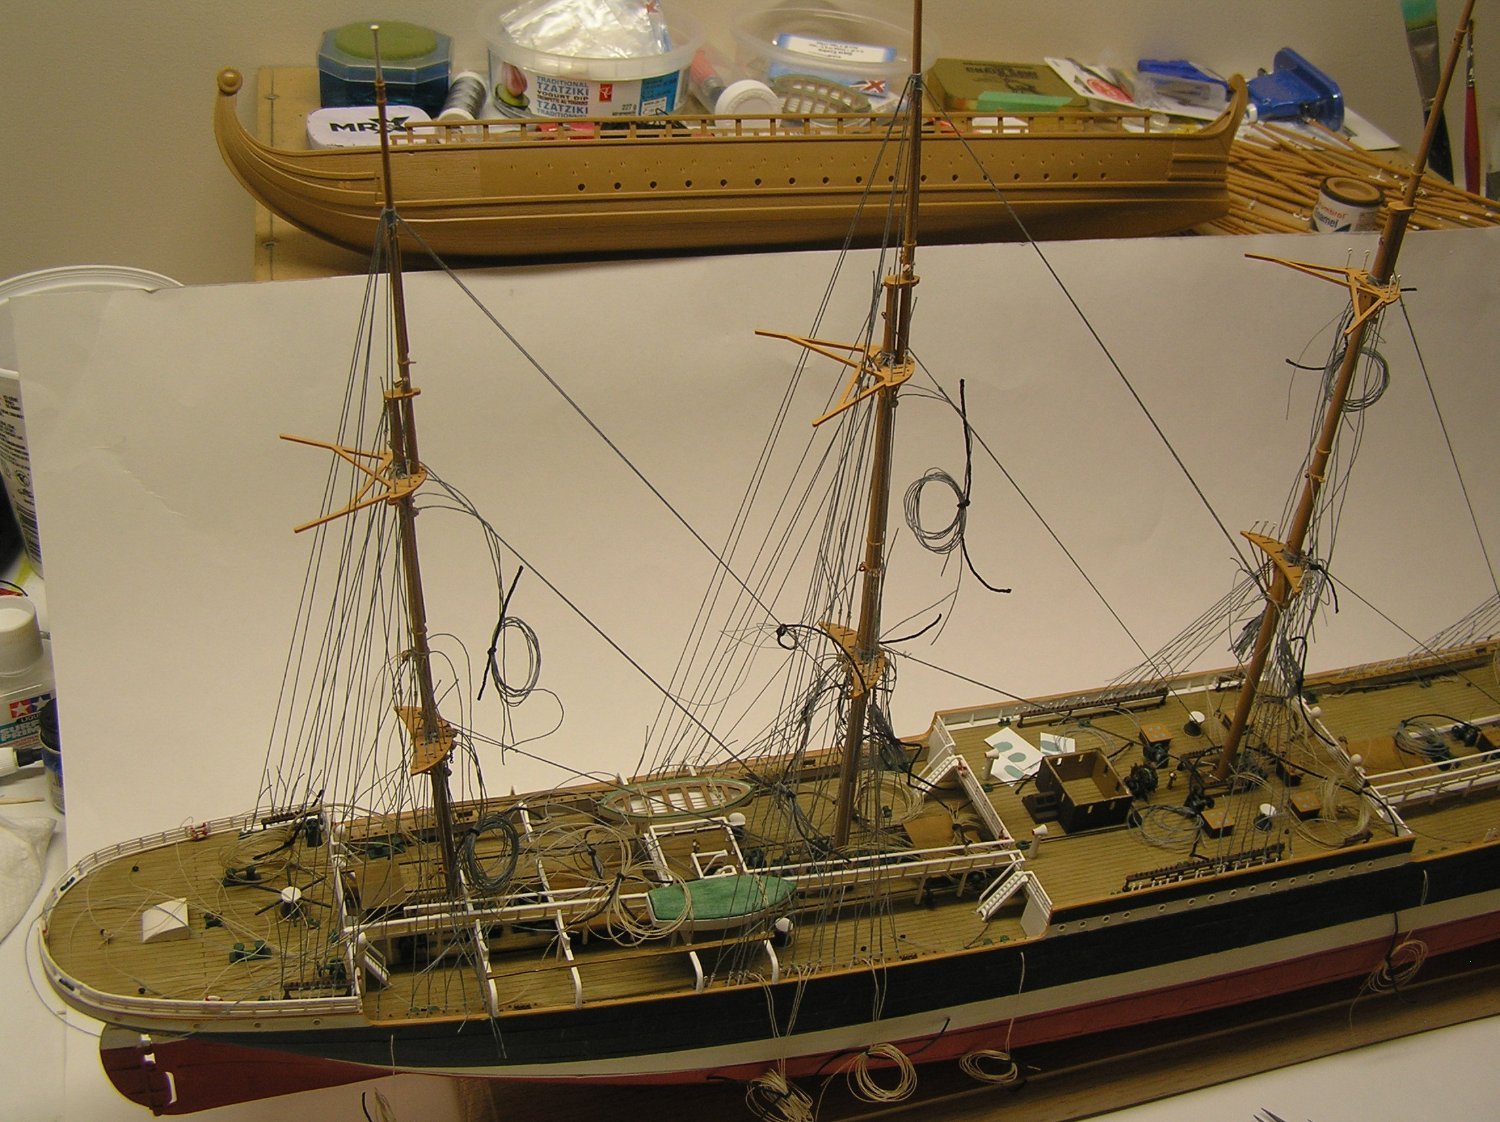
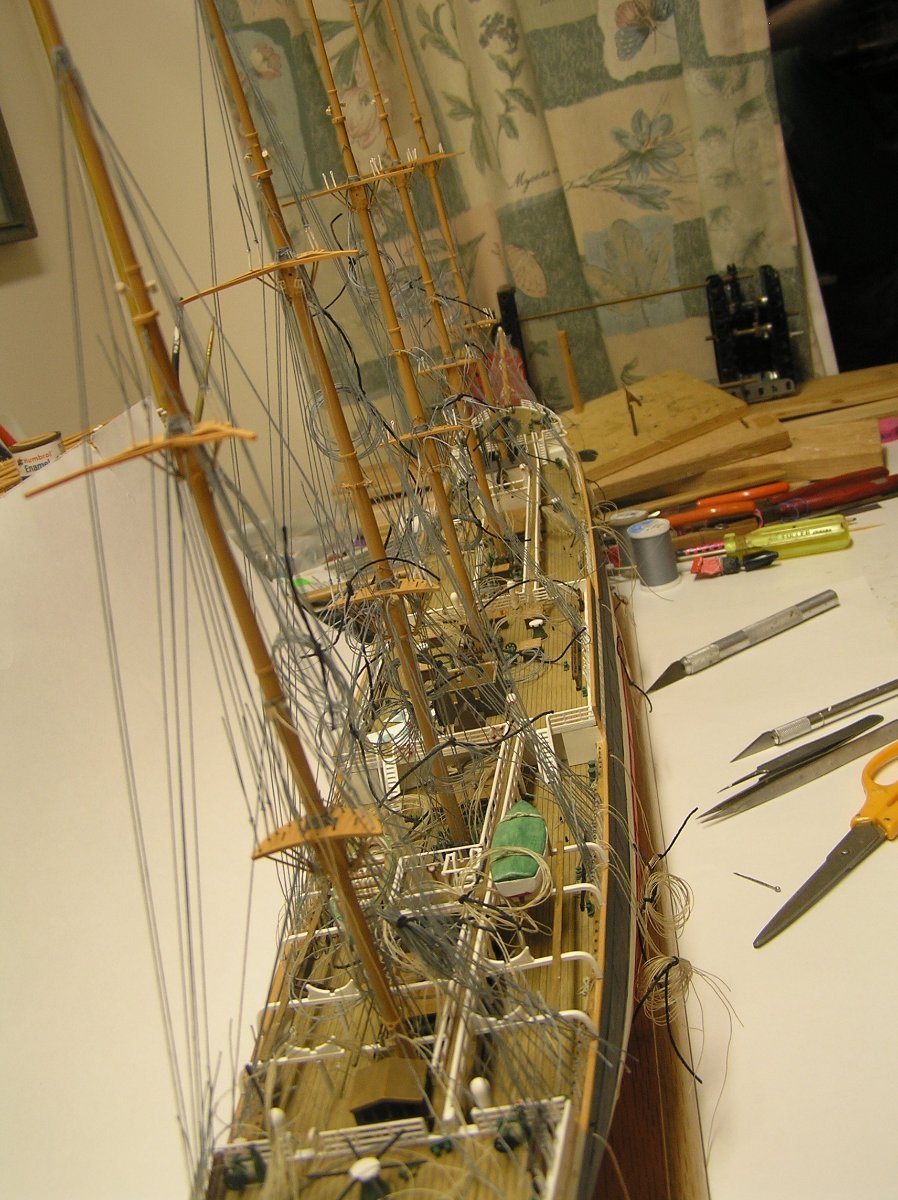
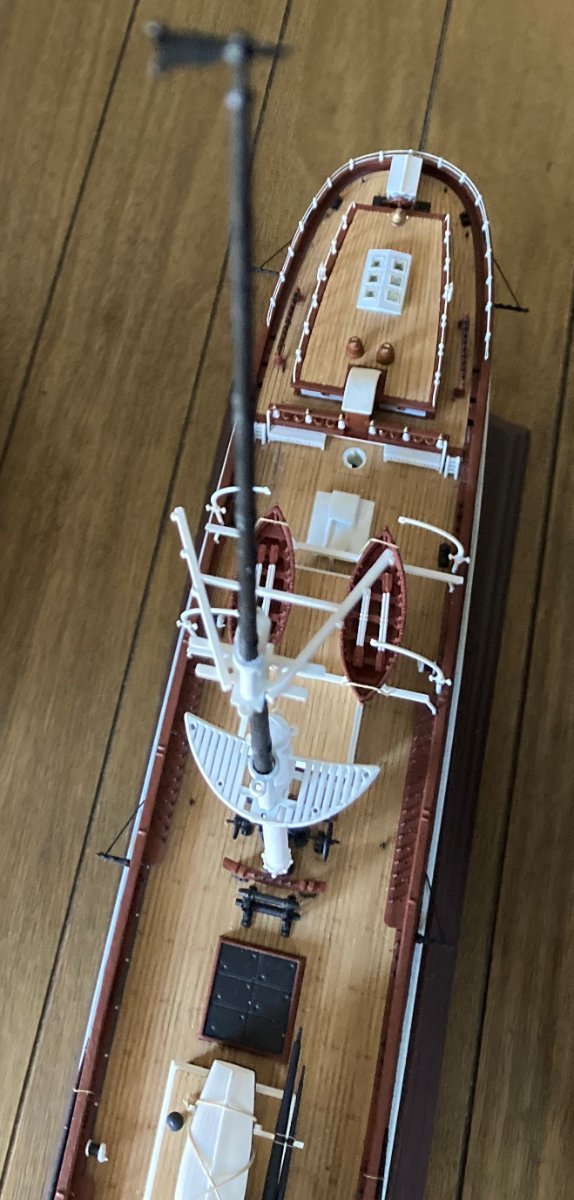
The masts are built. I'm beginning to rig the bowsprit and jib-boom.
I ordered HisModel's blocks. I don't know how to strop them yet, but I will learn. At his website's photographs, there is a very good build of the Cutty Sark. My goal is to do as good or better. I am starting to feel better about rigging.
I think my model is looking less and less like plastic. I am doing over things that were complete, but I was not 100% pleased with. In my mind, I have a level of quality I am willing to accept. If an area or part is not up to that standard, I'll do it over until it is.


-
On 4/8/2022 at 7:19 PM, Ian_Grant said:
All standing rigging (except stays and backstays on the royal) complete on mizzen and jigger masts. There sure are a lot of backstays on these steel ships - at hounds, fixed yard bands, and mast caps as well as all the usual backstays. No wonder they could drive them so hard.
I added the forward-most boat on each side as they are now behind a wall of backstays. I decided to tie on the upper braces terminating at the mizzen bulwark pins after all; these can be seen coiled in the first pic, emerging between the mizzenmast shrouds/backstays. I will now do this at each mast in turn before adding its backstays, for access reasons.
It came to bother me that the wheelhouse windows were empty cavities whereas all the skylight ports are painted a sky blue, so I managed to pry off the wheelhouse roof. Plan is to paint some styrene sheet sky blue and glue on inside the walls then reapply roof. Sadly my sky blue paint has dried up so off to the hobby shop, sometime........you can see some sheets lying to port of the wheelhouse with blobs of what I thought was the correct paint but it was too green.

And to think I am worried about rigging the Cutty Sarl in 1/96. I love to look at your pictures of your work.
-
On 5/16/2022 at 5:02 AM, Kevin-the-lubber said:
Looking good. Music wire is a good idea - it occurs to me that the thinner wound guitar strings might pass for served cables if blackened.
I've changed my mind about the music wire. It does not look as good as chain. I drilled a hole in the bumkins after they broke off when removing the wire. I drilled a hole in the piece left in the hull also and superglued a piece of the music wire in the bumkin and hull. Now they are mounted well and I added chain. The rear bumkin chain needs to be added after the stern decorations.
-
-
-
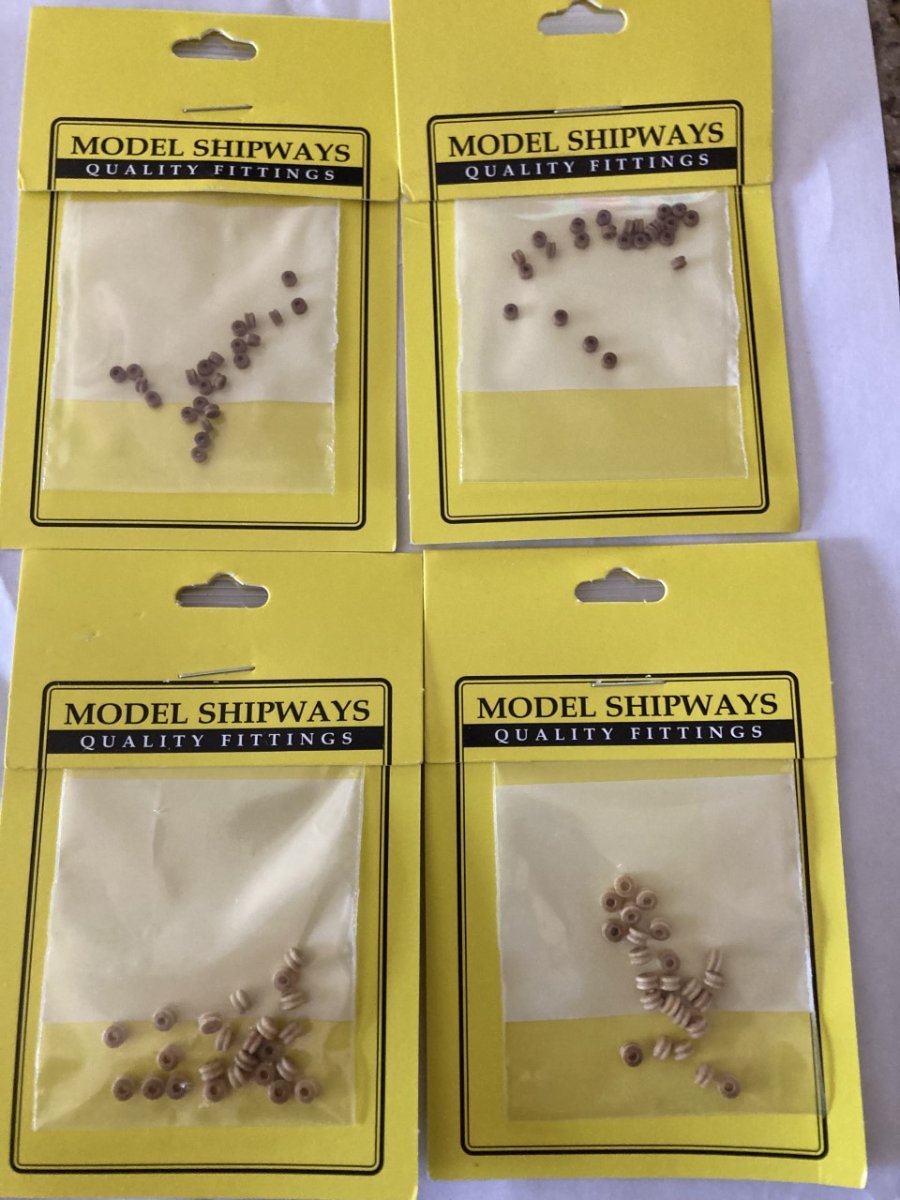
I got my bullseyes in the mail today from model expo. Now I will have to begin to rig the bow sprit and jib boom.

-
On 5/20/2022 at 1:11 PM, Snug Harbor Johnny said:
The Surprise (guess that name will be permanent, with the popularity of the film ... too bad they did not make the sequel) was originally the HMS Rose - famous in Colonial Rhode Island history. It was independently build (by contract) by a good friend of mine, John Fitzhugh Millar (now of Williamsburg, Virginia) back in the early 70's. This was around the time the repro. of the sloop Providence was built in preparation for the Bicentennial. John explained how expensive maintaining and sailing a ship the size of the Rose (now Surprise) can be, and although leased for a couple films (one of which was Man Without a Country), sold and repossessed twice - he was lucky to about break even when a sale finally went through.
John did come away with a real treasure - for he met his future wife Cathy while conducting sea shanty sessions aboard the Rose, and the couple run a B&B in Williamsburg to this day, where the inestimable JF Millar has written a number of books on colonial history, architecture and art (13 Colonies Press).
I know it was the HMS Rose. I visit it often in San Diego. The bell still says ROSE on it. The San Diego Maritime Museum calls it the Surprise. It was closed for a while until the new deck was finished. I wouldn't need the model to be called Surprise. I like that era and size of man-o-war over the ships of the line and large frigates. There isn't a plastic model of one. Lord Thomas Cochrane was the real Master and Commander. He might be my relative. My ancestors came from just west of Paisley, Scotland. Our motto is "Success Trough Endeavor". That is what I need to complete my Cutty Sark.
-
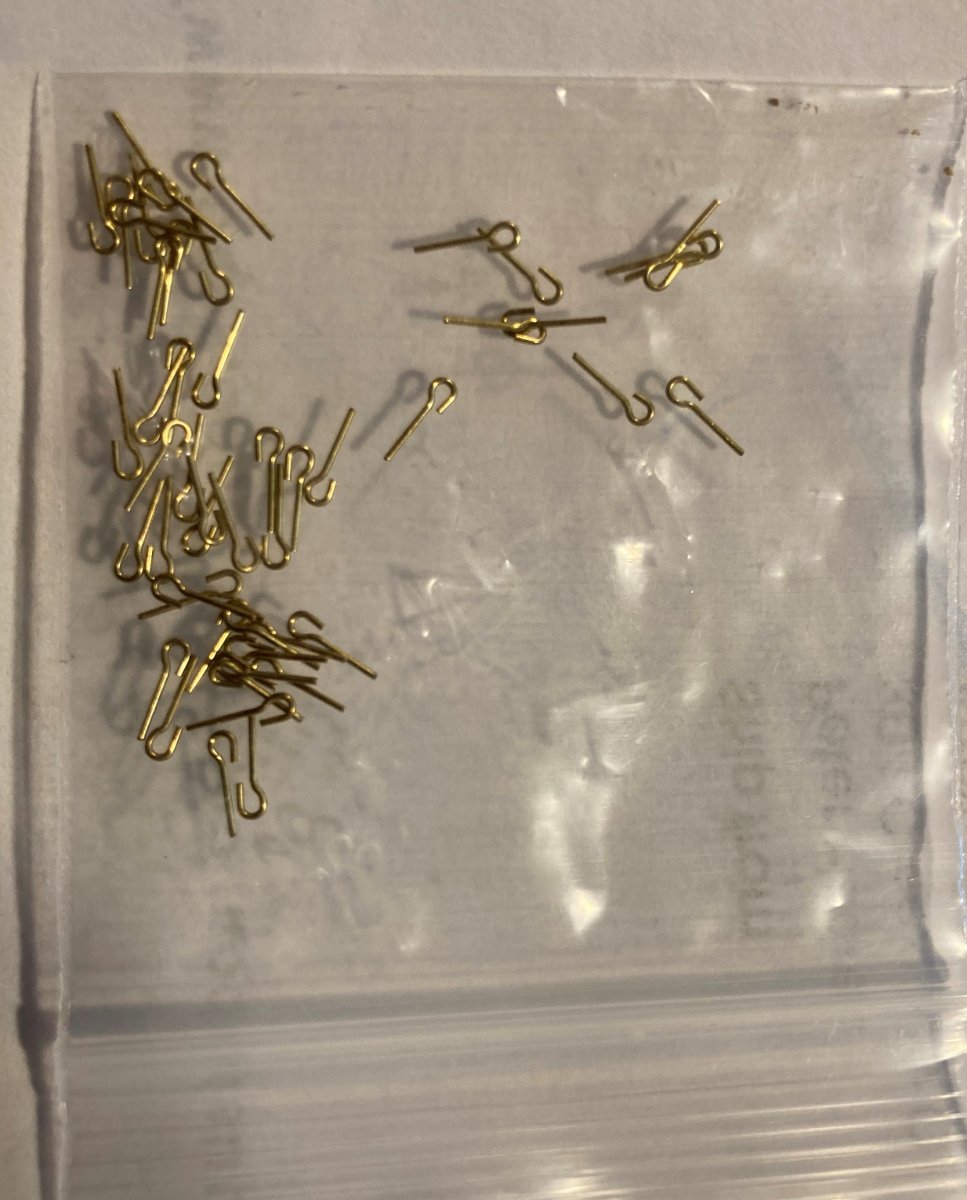
I'm making eyelets for the chain slings on the lower masts and yards. I will have one eyelet for the mast and one for the yard. I will then connect them with a piece of chain, then fix them to the yard and mast.
- Cirdan, popeye the sailor and shipman
-
3
-
5 hours ago, Ian_Grant said:
All the guys I see at my local model shops are older. By and large the new generation just isn't interested, or has no exposure to dad at home making things. Nor do they get shop classes at school any more, at least here in Canada. Around 1970 or so, we were brazing with oxy-acetylene torches in grade 7 or 8 shop class. Today, nada; liability you know.........
The world has moved on. My dad's trade of tool and die maker now features CAD'ed CNC-everything, not the experienced tradesman cutting from a drawing in such a way that the gear backlash effect is minimized. And you're now considered a cabinetmaker if you can lift melamine panels off the router table and run the edger machine to tape the exposed edges.
There are maybe six people in Ottawa who make sailing ship models; I don't know any firsthand. I doubt manufacturers could recoup their tooling investment if they made a new ship model. It's sad, but 3D printing is on its way to help those interested. Soon we will make our own kits with software. Just the same route blazed in so many other areas.
I think the tooling for the Cutty Sark was made by hand.
-
4 hours ago, shipman said:
Kevin, I agree with every point you made.
Same goes for Ian's.
I dare not mention to anyone I know of my interest in models, for fear of hoots of derision.
If you show someone, the usual comment is ''That's nice, did you make it yourself?''
When you say how long it took, you get gasps of disbelief.
Instant gratification is the thing today. All the effort goes into watching TV.
I have been playing with model trains since the 1950s. Back then, you made your equipment. You bought wheels and couplers, but everything else was scratch built, even engines. Then came crude kits and later more accurate ones. Today everything is highly detailed and comes from China and is called ready to roll. As soon as a new train car or engine comes out, the "experts" on the model train forums have listed all its inaccuracies. They couldn't begin to imagine the junk we loved to run in the 50s and 60s.
-
10 hours ago, shipman said:
Veszett, hi.
You made a good summary above. As far as I know there hasn't been a new tool sailing ship released for decades.
In my enthusiasm I have suggested to Airfix that they design a 1:48 18th century armed cutter, which would be capable of being built to the highest standard, potentially incorporating every detail, including working rigging.
Such a kit would fit the boxing common to their sailing ship range, use no more raw materials etc.
Unfortunately Airfix (and the rest of the plastic ship industry) have no enthusiasm for such a project.
It would seem they regard ship models having little commercial potential.
My wish would be that they make a model of a 28 gun ship like the Surprise from Master and Commander in say 1/48 scale. The Constitution has too many guns, as does the Victory, though I hope to work on both before I meet Davie Jones.
The actual Surprise is pretty realistic, except for below decks. The gun deck has a middle isle that is lower than the level that the guns sit on, so you can stand up and walk through. I've visited it many times in San Diego and wanted a model of it. I know there is a wooden kit made, but I doubt my ability to build it well. I may try, though.
-
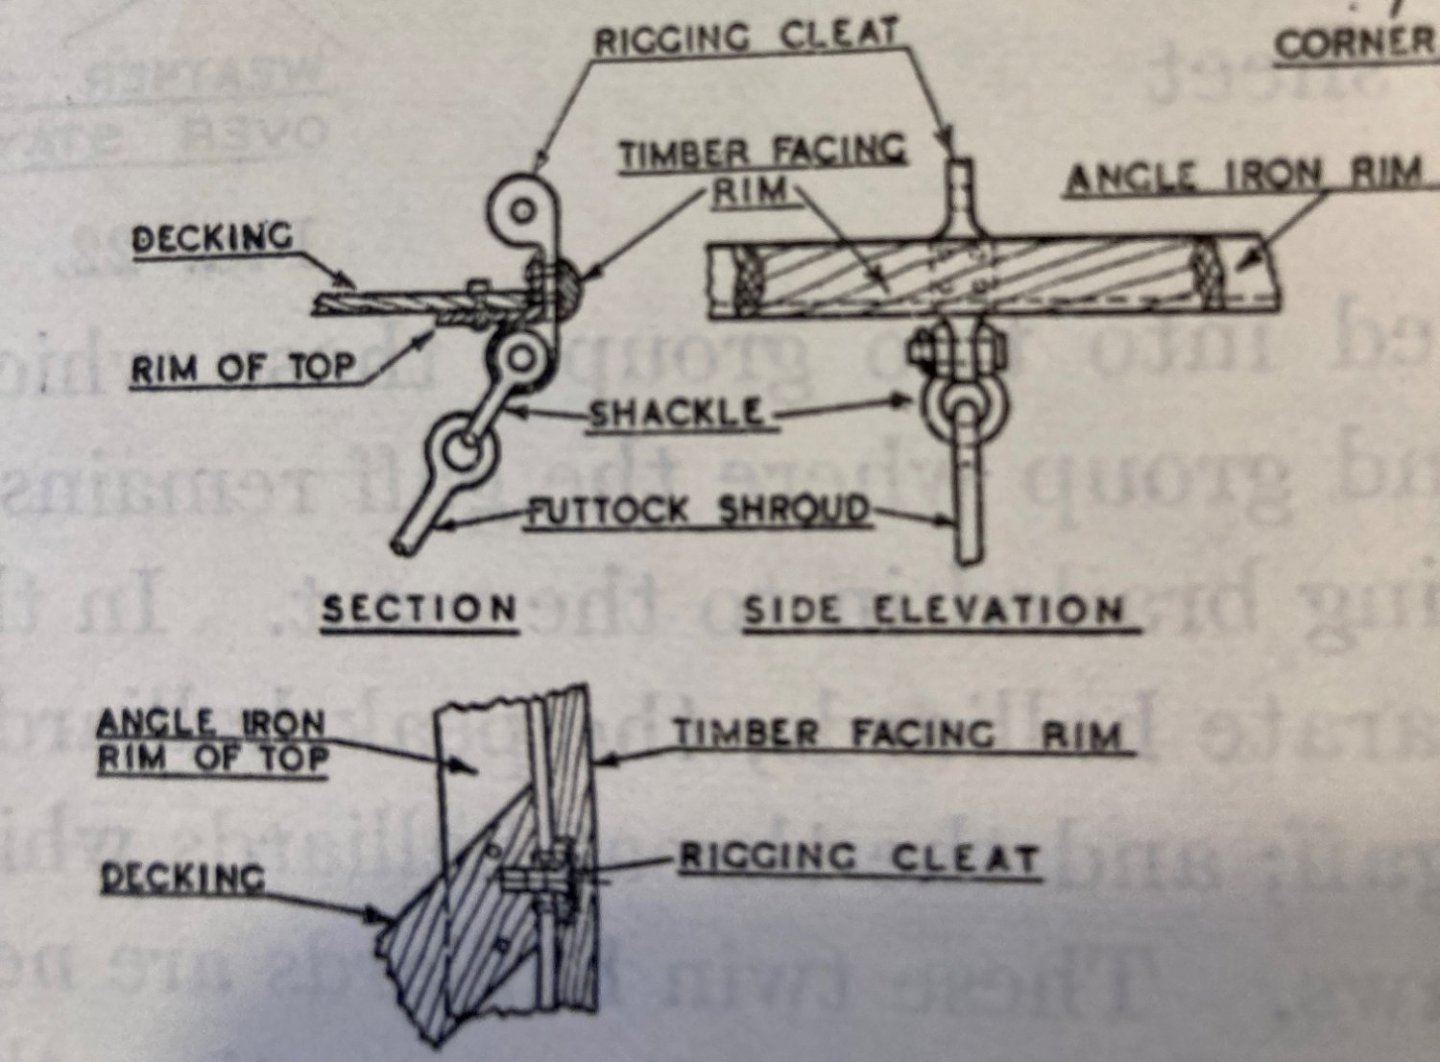
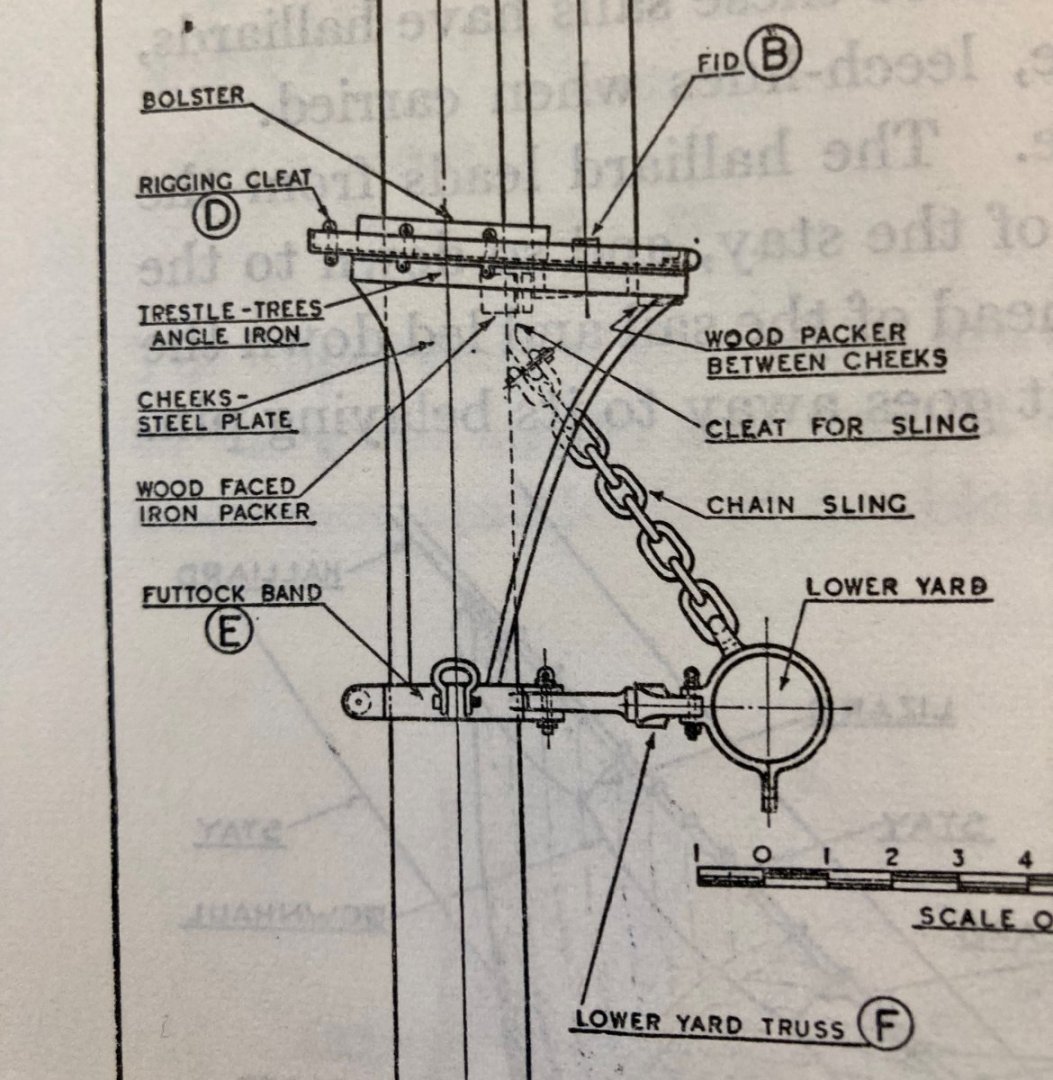
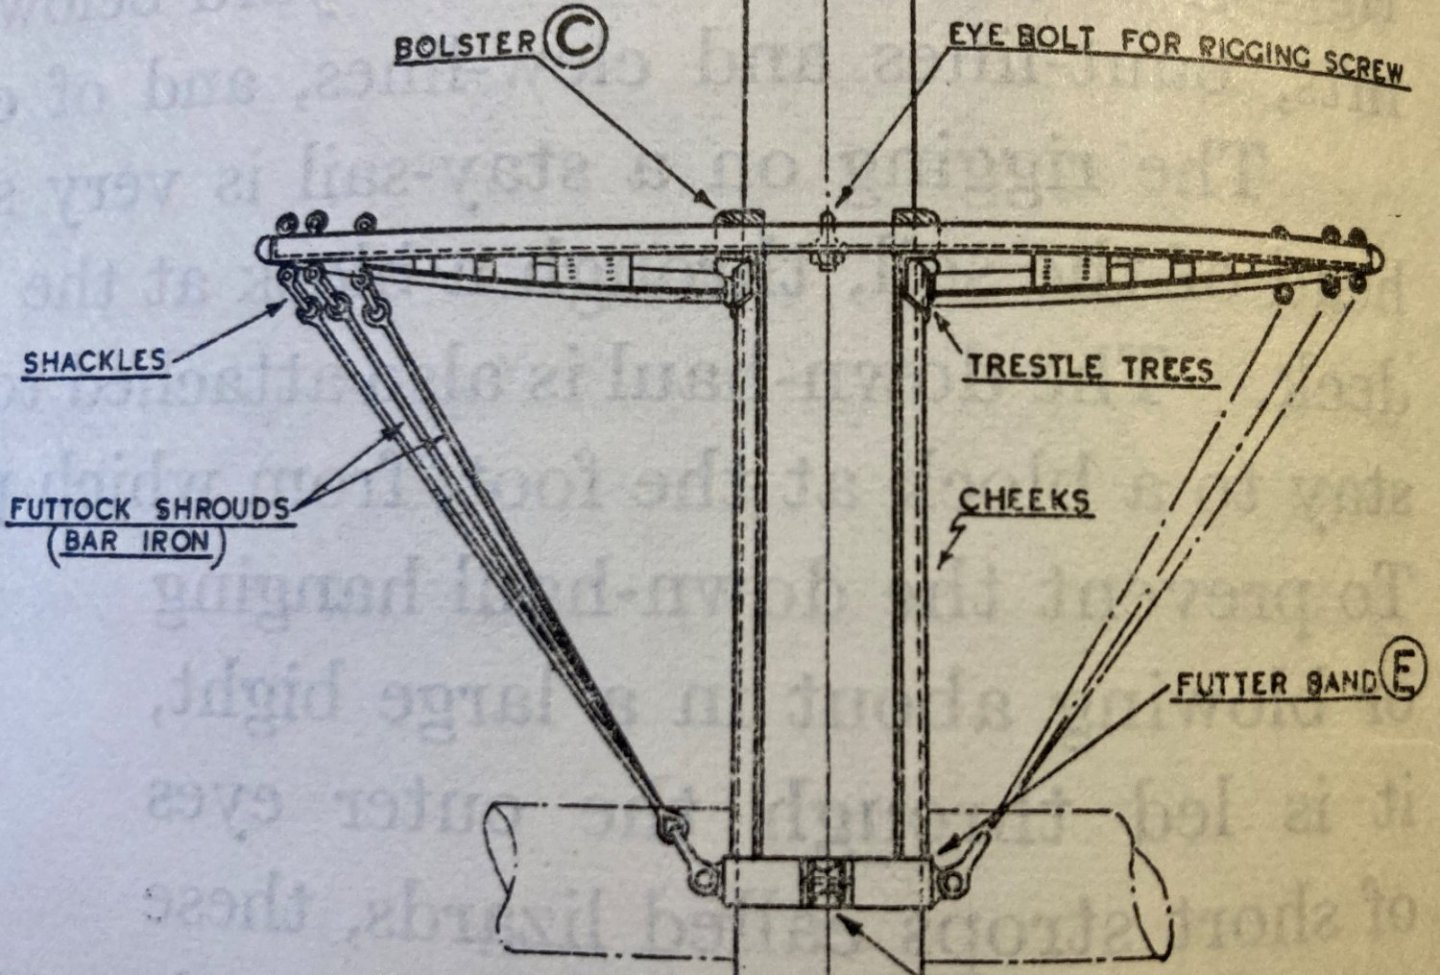
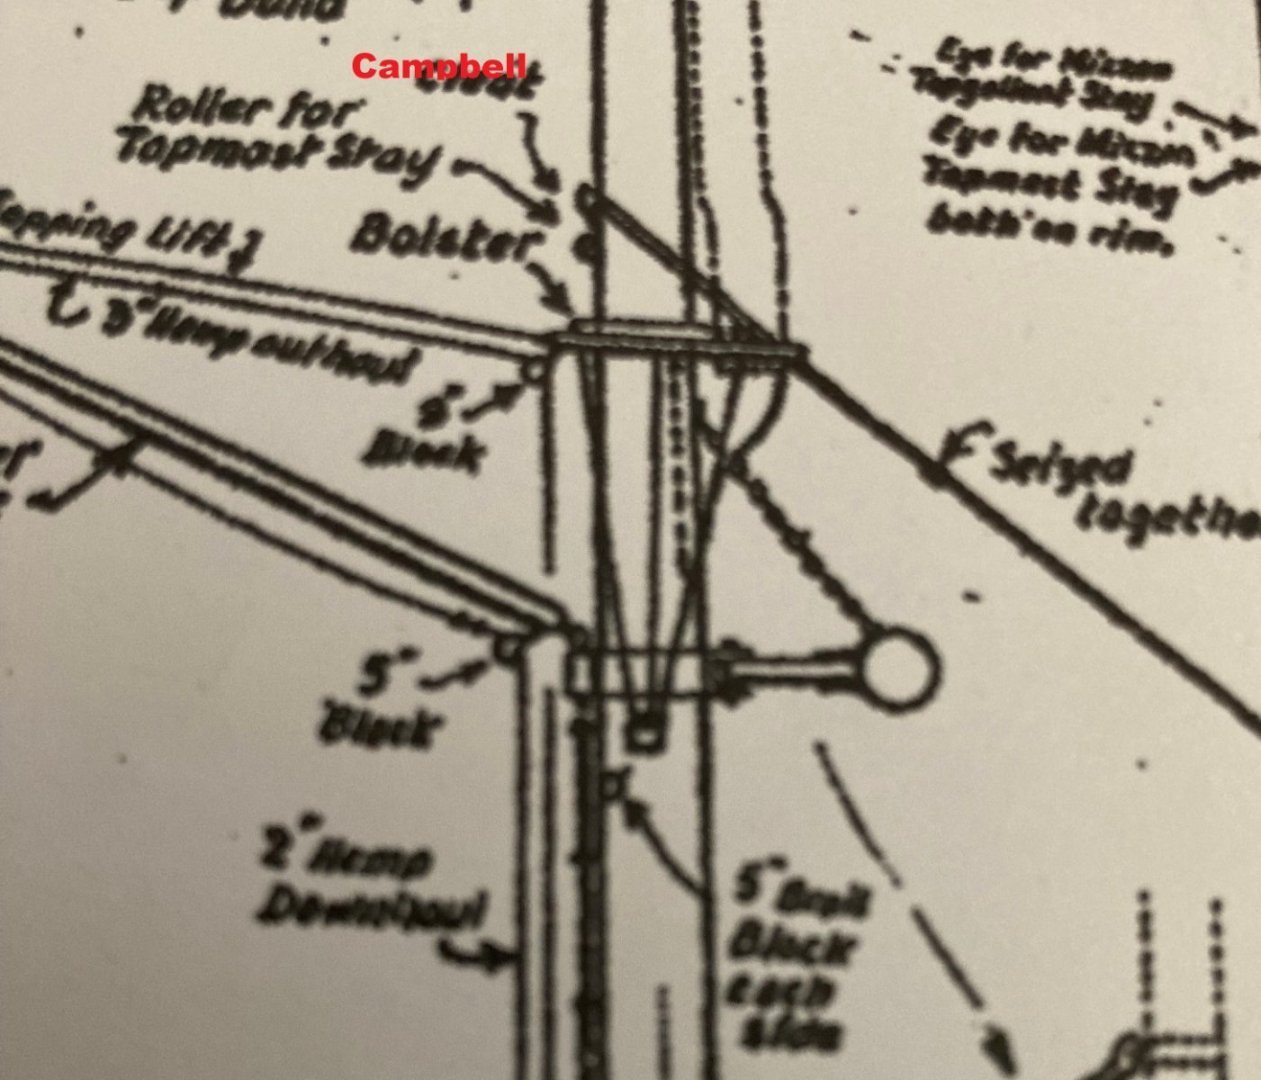
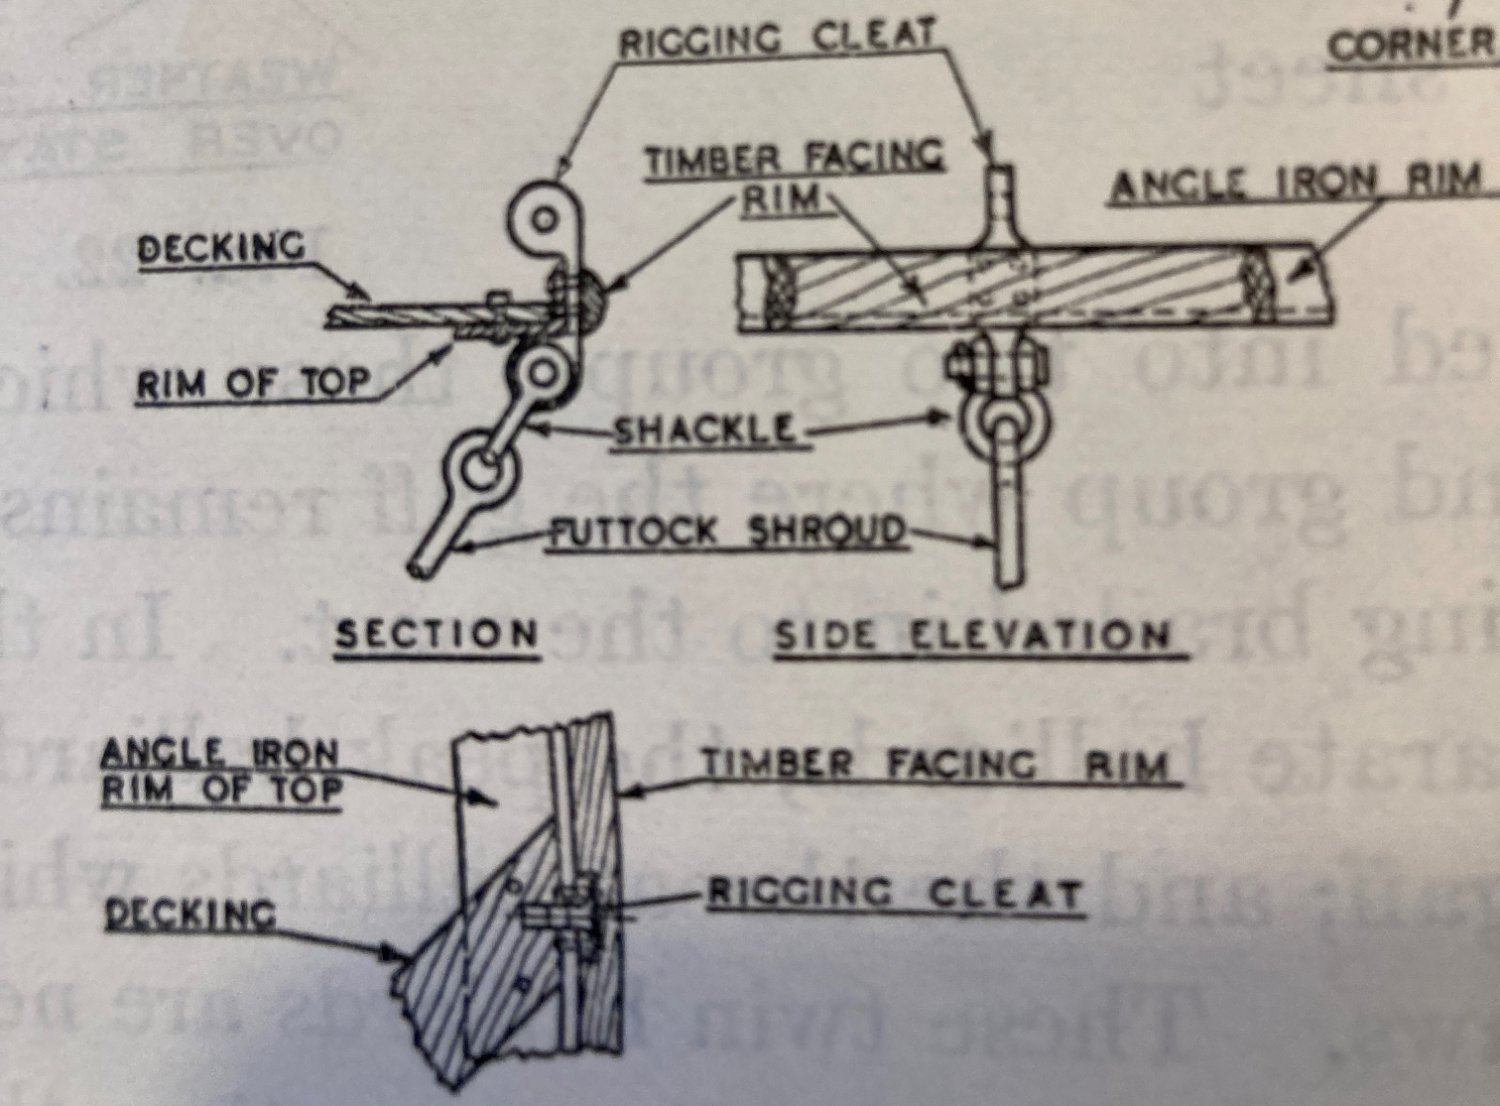
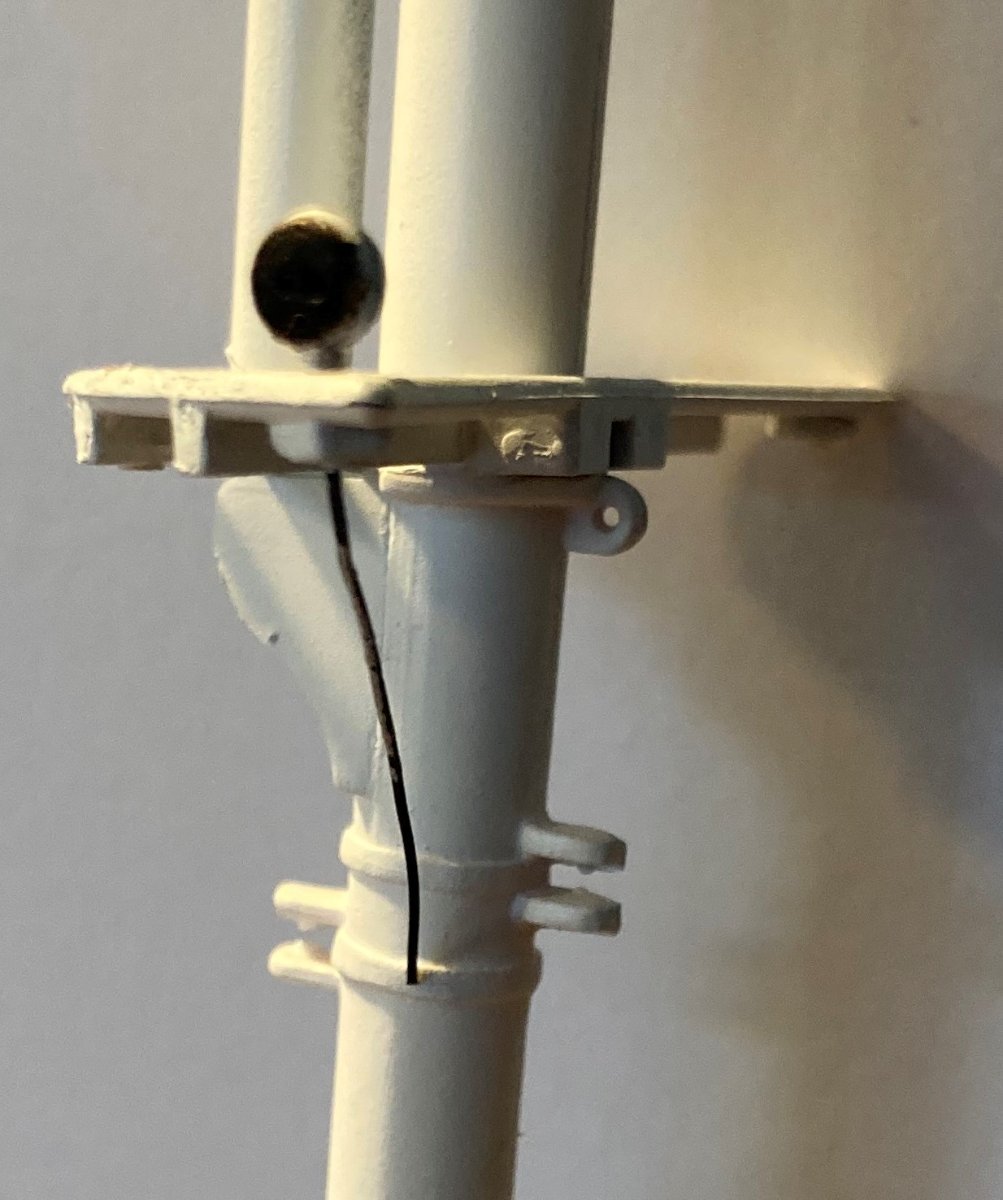
For futtock shrouds I was thinking of putting an eyelet in the band around the mast where the lower yard attaches. Underhill calls it the futtock or futter band. Or put it a bit lower as in Campbell's plan. Underhill is generic and Campbell is the Cutty Sark. Using the wire that straps the deadeye as the futtock shroud and putting its end in the eyelet. One eyelet for all three shrouds. I think it would be too much to try and represent the shackles.
Here are some illustrations from Underhill's book, Campbell and the model's main mast

- popeye the sailor and Cirdan
-
2
-
Here is an email I got from Radimir at His Model. I told him that we appreciate what he does.
Thank you, for yours valuation.
I've been a wheelchair-bound paraplegic for 20 years. And now I can only do the bare minimum of things on my own. I was been building models of historic sailboats since I was a kid, and I was been sailing for 25 years. Inventing and making and selling model merchandise for historic sailboats is what gives me purpose in life.
I wish you a beautiful model.
Radimir -
1 hour ago, Hubac's Historian said:
What so you (metaphorically?) mean, Shipman?
Working with resin can be unhealthy if you are not careful. Sanding or sawing resin can make tiny particles that can get in your lungs. It is always a good thing to were a mask when making resin dust.
- Hubac's Historian, shipman and Ian_Grant
-
2
-
 1
1
-
28 minutes ago, Ian_Grant said:
Being a teenage boy when I built the CS in the 70's, I painted Nanny with flesh colour and dark hair, and two tiny dots of red paint for nipples. Sheesh.
If I ever refurbish her (the CS) job one after cleaning will be painting Nanny white. 😀
If I am not mistaken, I think the Portuguese painted her.
-
Main mast complete and temporarily stepped and Nanny the witch.
-
14 minutes ago, shipman said:
Hi, again.
Following your link to hismodel, all I can find are reproductions of Revell instructions; nothing remotely resembling Campbell plans.
I just got the Campbell 'General Arrangement' plan (hull) off ebay. Interestingly, the quality is very clear, not the usual over reproduced blurry copies which are now so common.
I put the download link on my post here it is again: https://www.hismodel.com/_filemanager/download.php?Id=110
-
About Campbell deadeye placement, if you look at the rigging plan, look at the main mast lower deadeyes. Below the ship outline he has 11 deadeyes and a place for a cap stay. There are 6 large deadeyes and 5 small deadeyes. Now if you look at the rigging plan for the main shrouds and stays he has 5 large dead eyes and 7 small dead eyes just as Revell has, plus what I think is the cap stay.


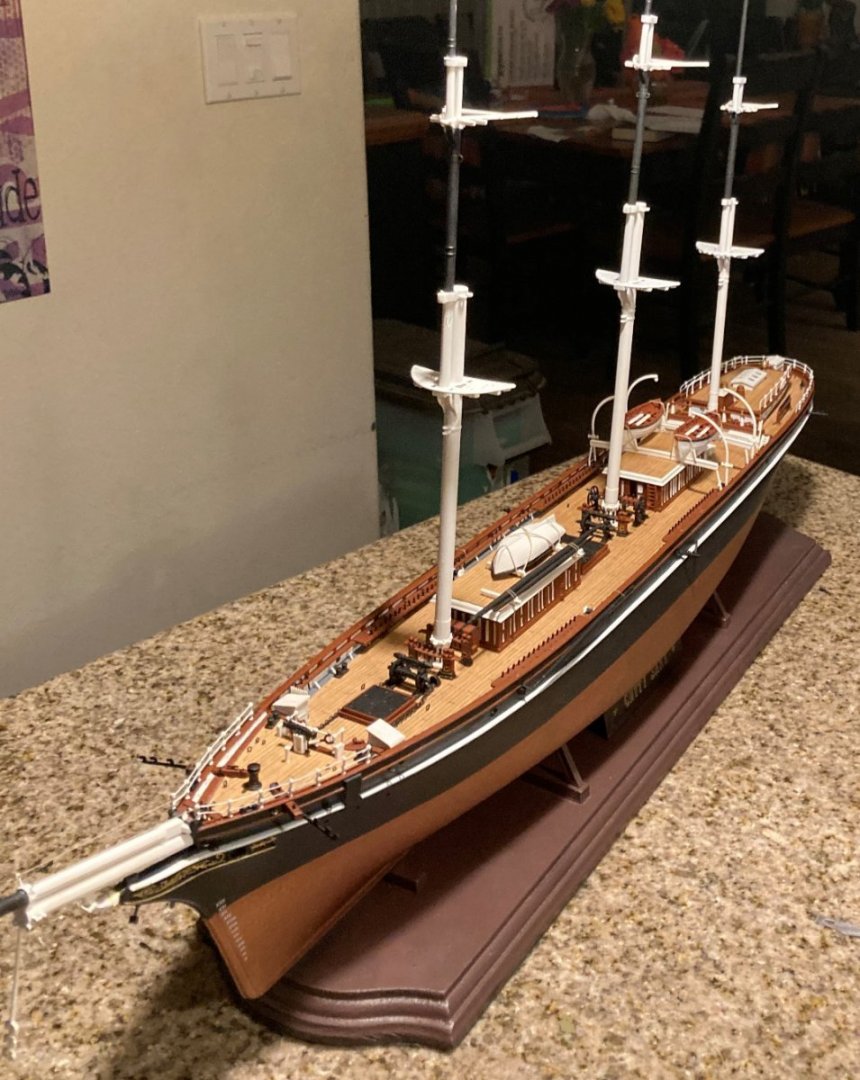
Cutty Sark by bcochran - Revell - 1/96 - PLASTIC
in - Kit build logs for subjects built from 1851 - 1900
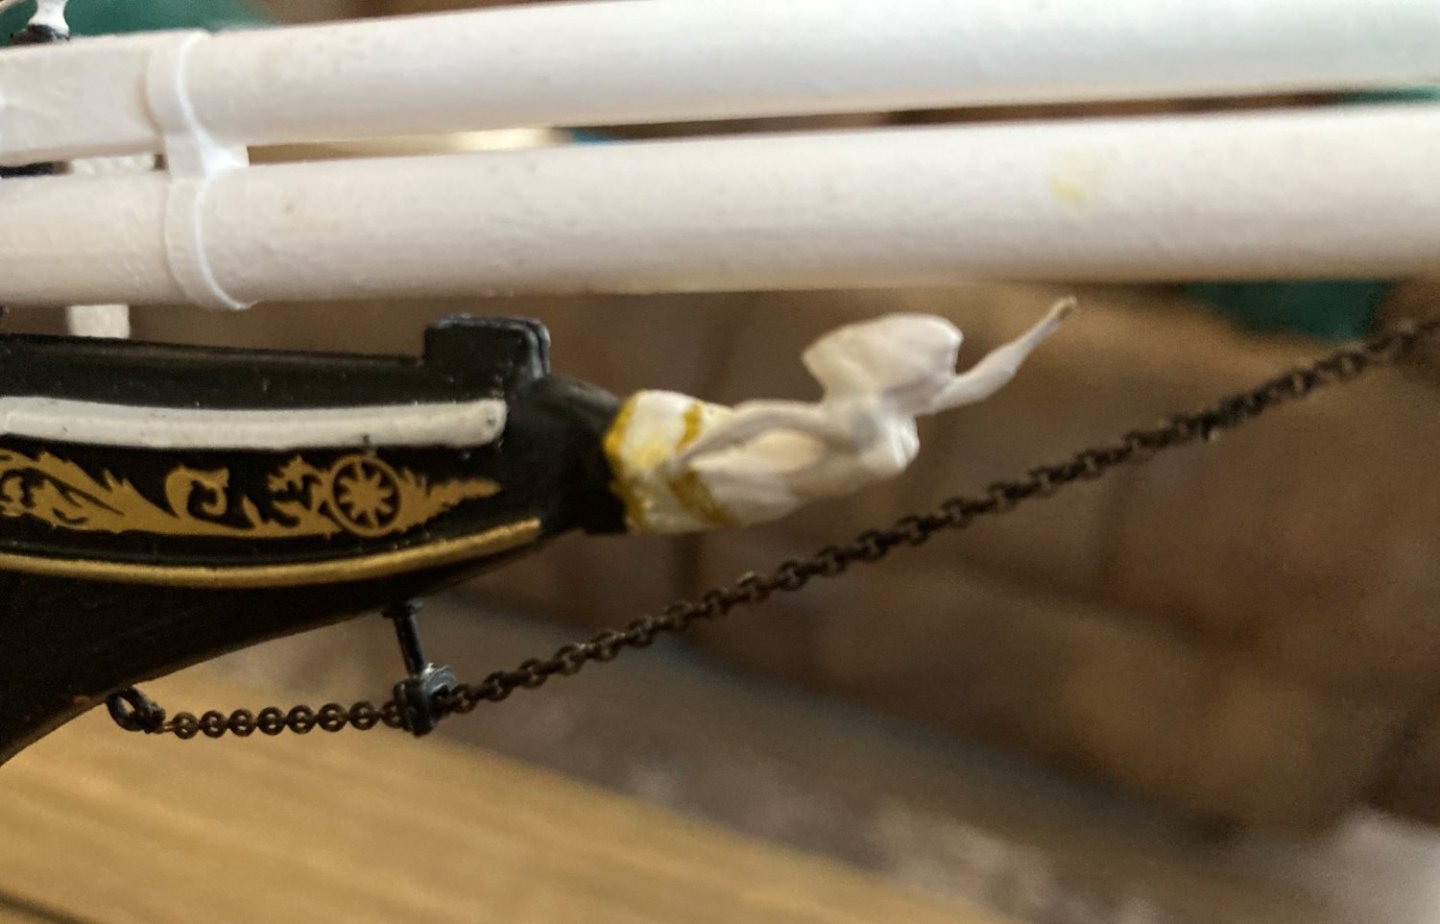
Posted · Edited by bcochran
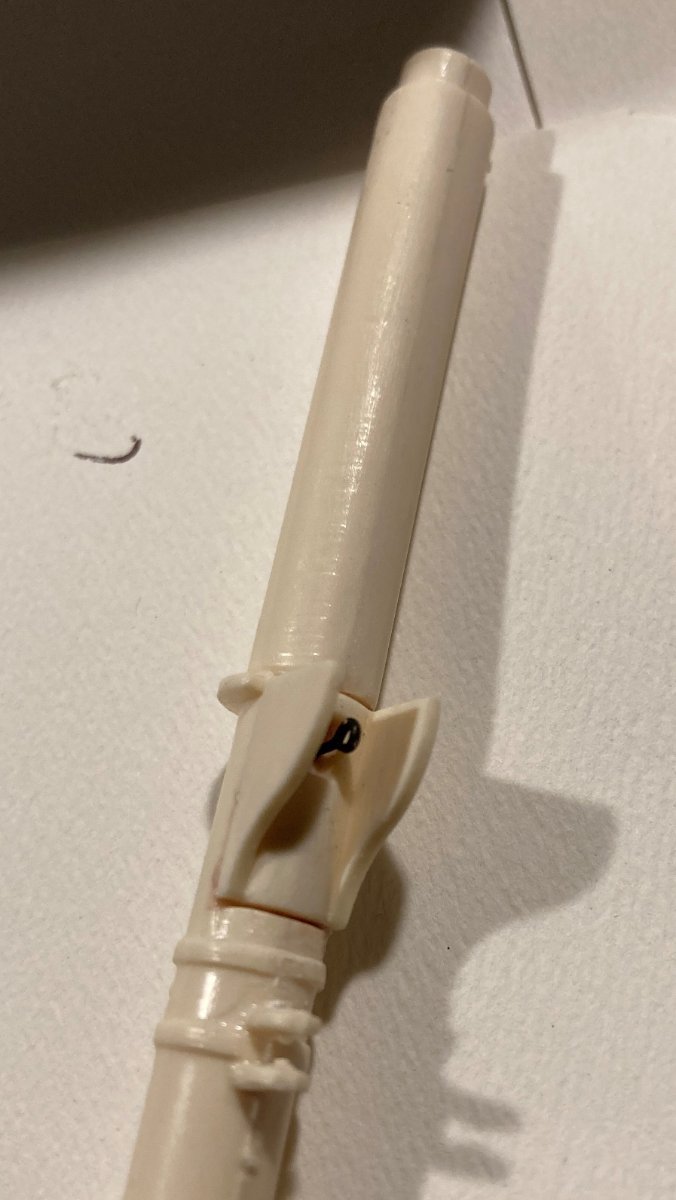
I was able to get the photo etch decoration on the trail board. It is not as fragile as the stern decoration. I used gell superglue. It gets a bit cloudy if you goof up and move the etching around. You need to put it in the right place the first time. I still need to paint the connecting points black on the etching.