


bcochran
-
Posts
592 -
Joined
-
Last visited
Content Type
Profiles
Forums
Gallery
Events
Posts posted by bcochran
-
-
7 hours ago, shipman said:
Your and 'kevin-the-lubber' are both posting builds of this kit simultaneously on this forum. Each I;m following and where I can I hope to be making pertinent comments. Confusion between the two has made me realise you are approaching your builds with slightly different philosophy. In future I'll try and be more aware of that.
Everything you posted so far on my build is ok by me. I like your sense of humor, too.
- shipman and popeye the sailor
-
 1
1
-
 1
1
-
5 hours ago, Kevin-the-lubber said:
Thanks for the linking, Shipman! Hello bcochran, you are ripping along with yours at an impressive pace, especially given all the fine modifications you're including. I'm a veritable snail by comparison. I've picked up several good ideas from yours - decals for the lozenges etc, what a smart idea. I'm replacing the whole of the pinrail with a 3D printed version in which I'd included the lozenges, but it still needs a bit of work on those so if that doesn't work out too well I now have a plan B. I also chopped out the wedges/gussets even though there are a few on the real thing; though I'm not sure if these are original as they look very crudely made.
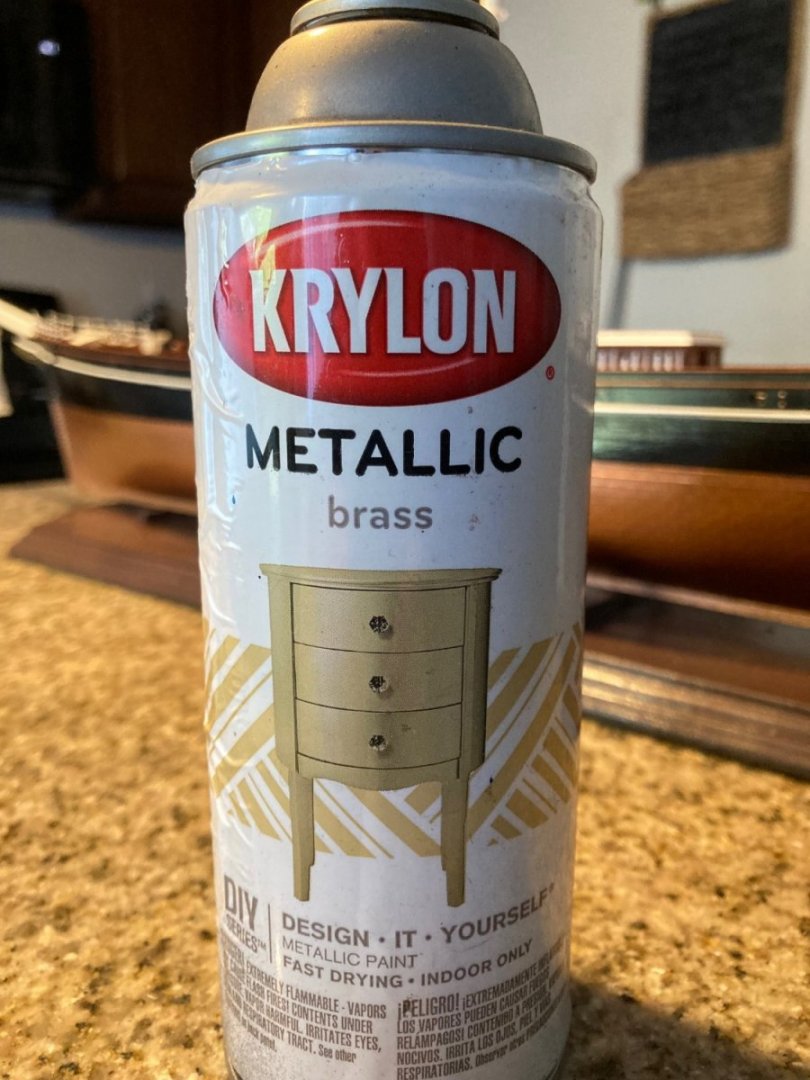
Can I ask what you used to colour the binnacle? Yours is a much better finish than mine, on which I used vallejo gold paint.
I couldn't bring myself to spend £80 on a wood deck when the kit itself only cost me £40, so re-made it. I realised today that the kit has it set about 4mm - 5mm too high. I'm re-making quite a lot of parts while trying to avoid over-obsessing, as you rightly say, all the fun can go out of it if you spend too long on detail. I'm also absolutely fearful of rigging, having never done this, and I'm avoiding glueing stuff down for as long as possible until I can see what would be better left until later. I'm just finishing up on the catheads as we speak, and those may well be in the 'later' category. Incidentally, if you have access to resin printing take a look at my latest page, in case you're interested in adding an easy micro-detail (the cat's head).
Hello Kevin,
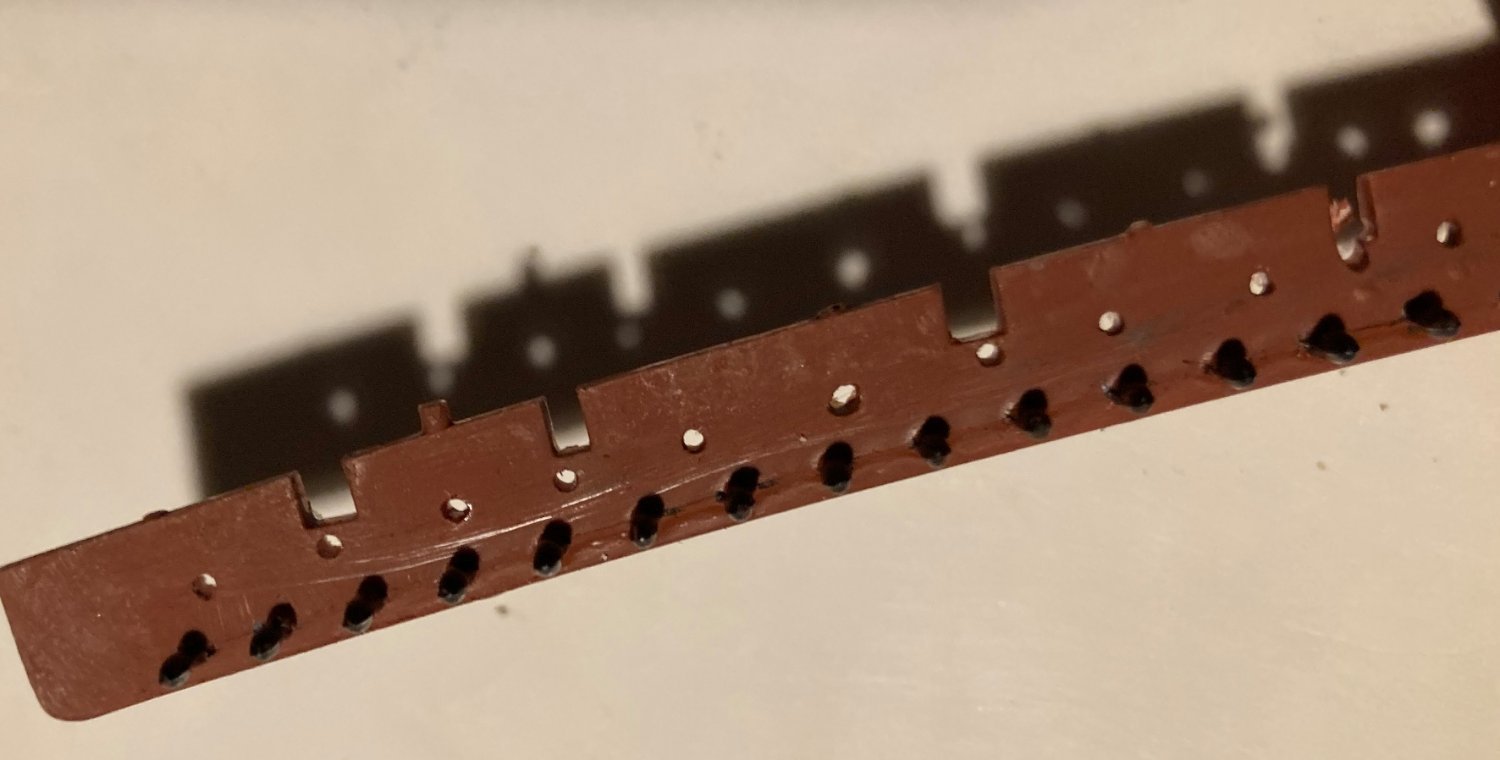
Per Longridge the Cutty Sark had 26 bulwark stanchions per side. There were 5 different types. I wasn't going to go into that much detail making 5 different types and I did not add the horizontal bar portion to them.
Here is how I judge what I am doing and how much work I want to put into it. If I can look at my model in any particular place and feel that it looks "shippy" all though it is just a representation, I am happy with it. Those wedges just did not look right, nor did the bulwarks without the lozenges. I have the starboard side done, and I get the right feeling when I look at them. The other major thing that I think doesn't look right are the Revell deadeyes. I look at some builds using them and there is an angle to the plastic deadeye and the rope tied to it, rather than a straight line from the lower deadeye to the point on the mast where it ends. So I am going to attempt to use individual deadeyes.
I used Krylon metallic bras spray paint on the binnacle.
I like all the detail you are putting into your model, and feel much of it is beyond my talents. I know nothing about 3D printing.
I wanted the deck to look better than what I could have done with the plastic. The rest of the detail just would not be so pleasing to my eye if the deck didn't have the same level of detail.
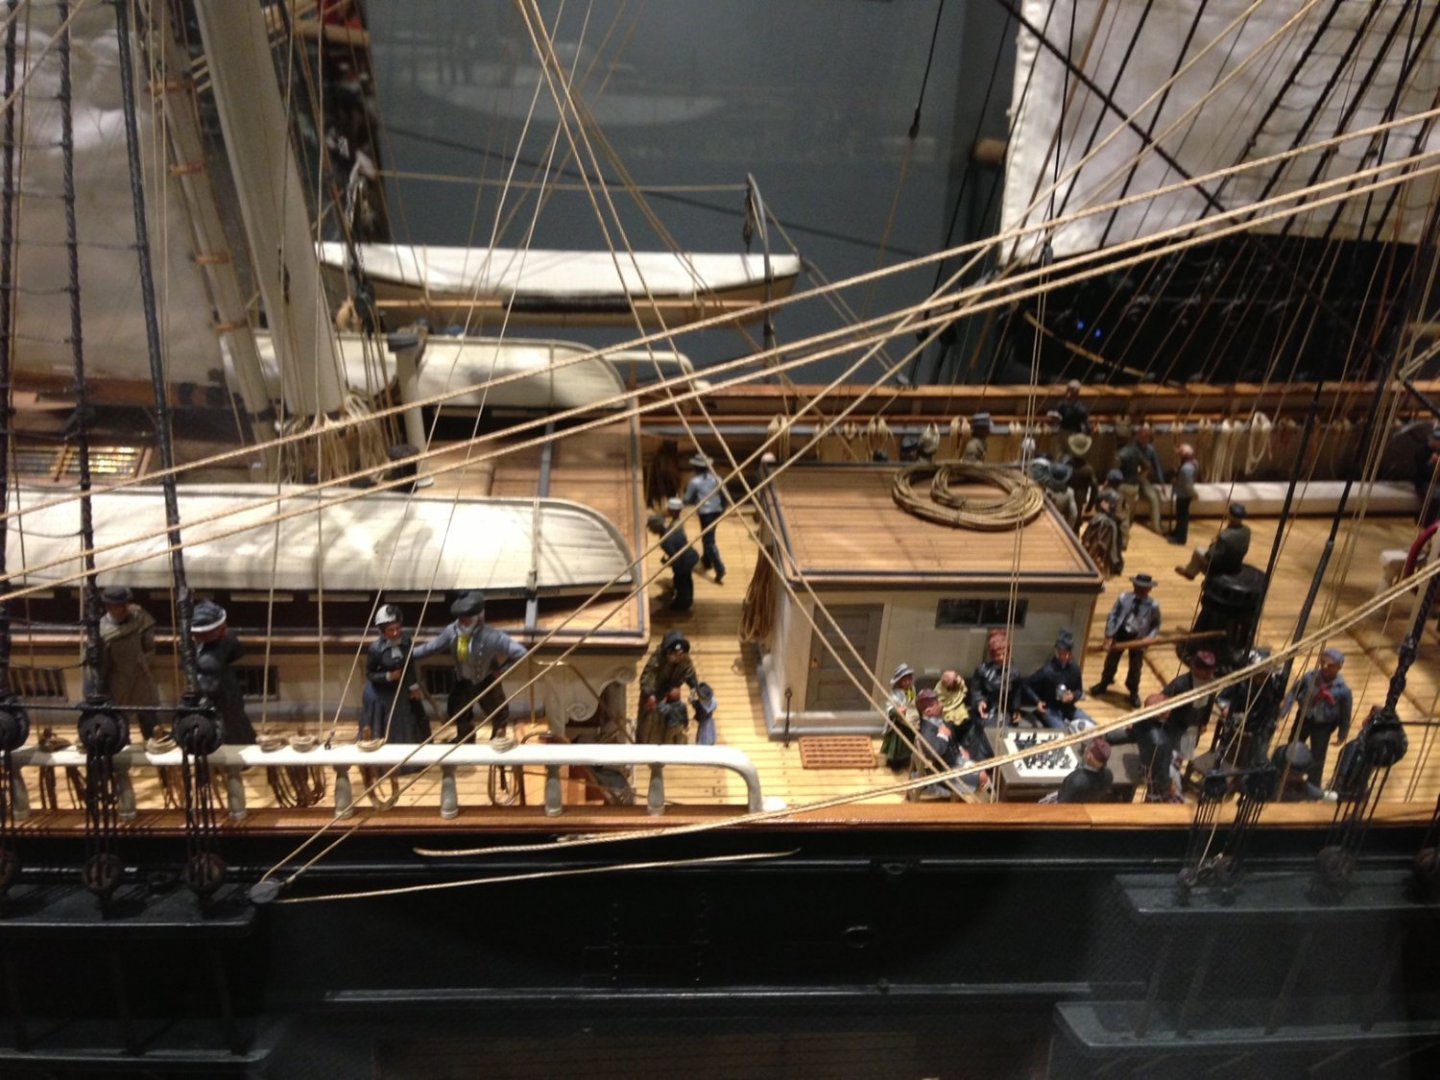
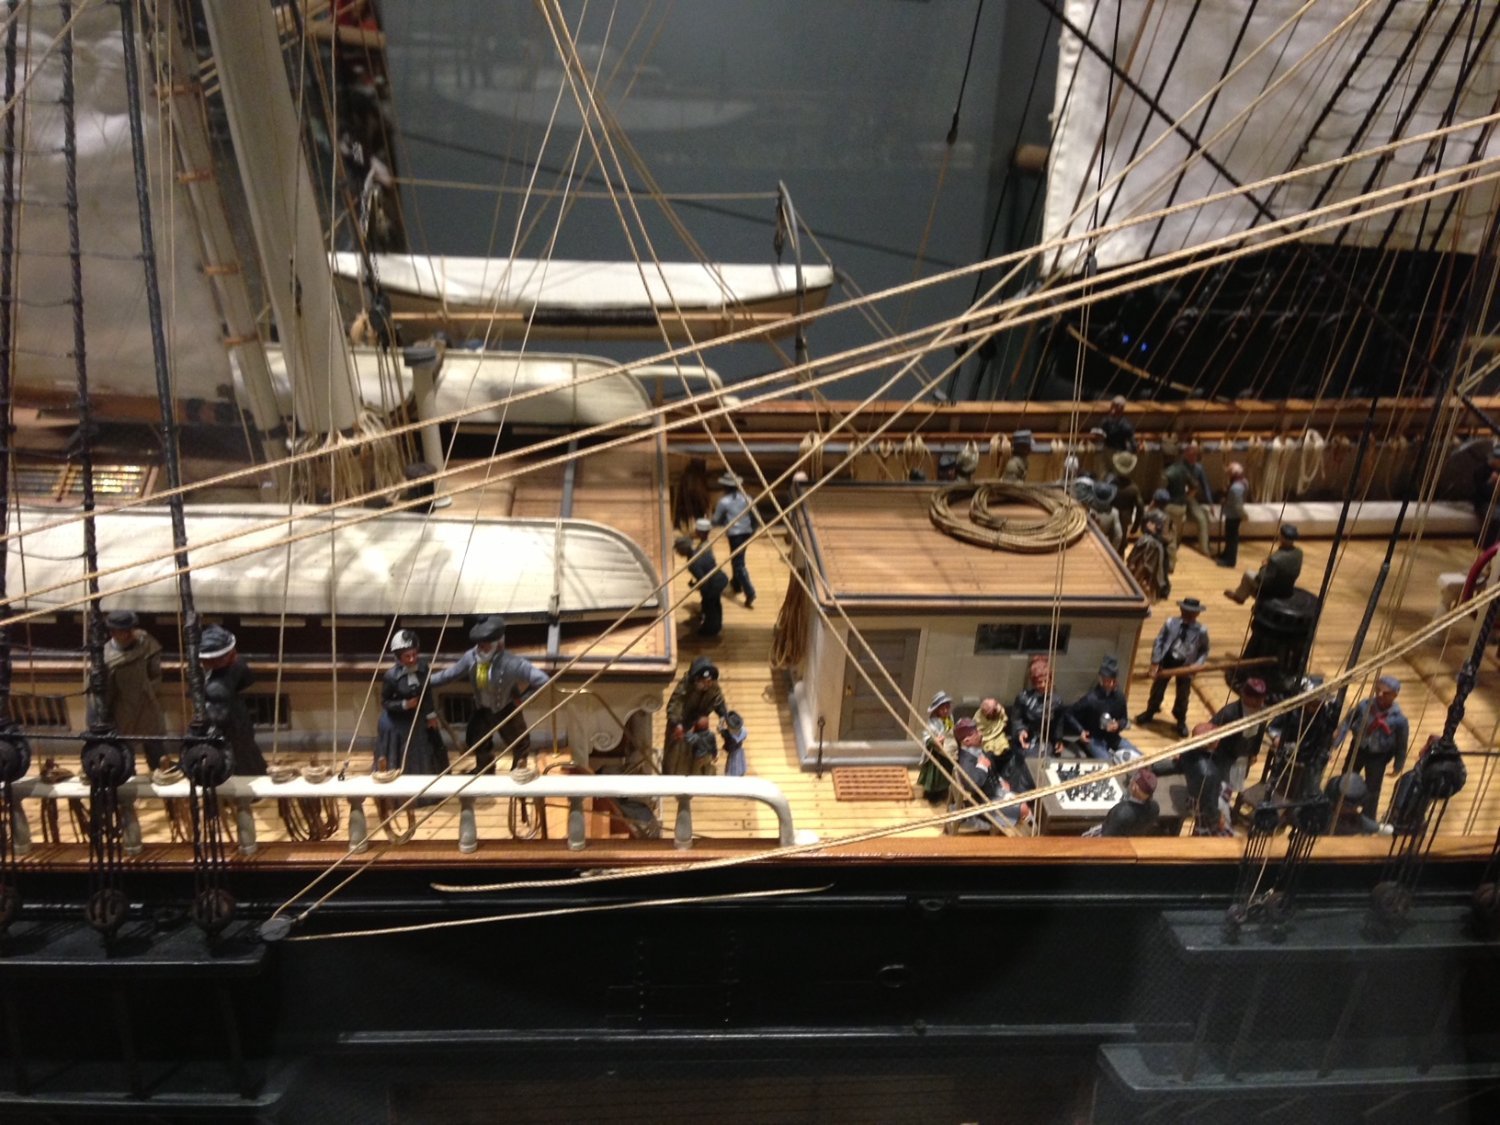
The pictures I am including with this post is a model that is in the Mormon museum in Salt Lake city. It has always been my inspiration to build a ship model. I needed my deck to have the same level of detail.


- popeye the sailor and iosto
-
2
-
2 hours ago, shipman said:
Yet you seem to be retaining the grossly over scale belay pins?
It's been a while since I actually read the Hackney book; however I have a lasting impression that he managed to produce a fair model of the Cutty, baring in mind the book was written in the mid 70's, primarily for the youth of the day with few tools or other resources. A touch of common sense would be required today.
If I would build the Airfix kit as Hackney did, I'd be more than happy with it. And it wouldn't cost a fortune to do it.
I am not going to replace the belay pins. I read most of the other builds where the correctness of the Revell Cutty Sark kit is discussed.
I am amazed I made it this far.
I almost completed the large Revell USS Constitution up to the beginning of the rigging and spent a lot of time agonizing about the correctness of that kit, including what color she was in 1812 on her last voyage, did she have gun port covers or not? I added hammock netting, railing around the deck openings, thickened the hull around the gun ports and lots of other things until it got too boring and time-consuming.
This time I decided not to do that, or I would never finish.
-
Shipman,
In Noel C. L. Hackney's book on page 35 about making eyebolts, he says "with 3/4 inch rod formed to a 2 1/4 inch hole and 1 inch rod formed to a 4 3/4 inch hole". What in the H E Double Hockey Sticks does that mean? Is he talking about actual 1 to 1 scale, or is it some magical 1:168 Airfix scale measurement?
Later he says to bend 40 SWG wire round a 1/64 inch drill for the small ones and bend 38 SWG wire round a 1/32 inch drill for the large.
Of what useful information is his first description of what to do?
What ever, how big are the eyebolts that he is telling you to make? This makes no sense to me.
I bought some model railroad HO lift rings on eBay to use for making jackstays. The seller said they were 2 1/4 inch size. I ignored that because it made no sense, I know what size HO lift rings are, so I bought a ton of them. I got them, and they are more like N Gauge lift rings. I sent them back as unusable for my purposes.
Why do these people use such meaningless information? What I need to know is the size of the actual eyebolt I am buying not what 1 to 1 scale size they are.
-
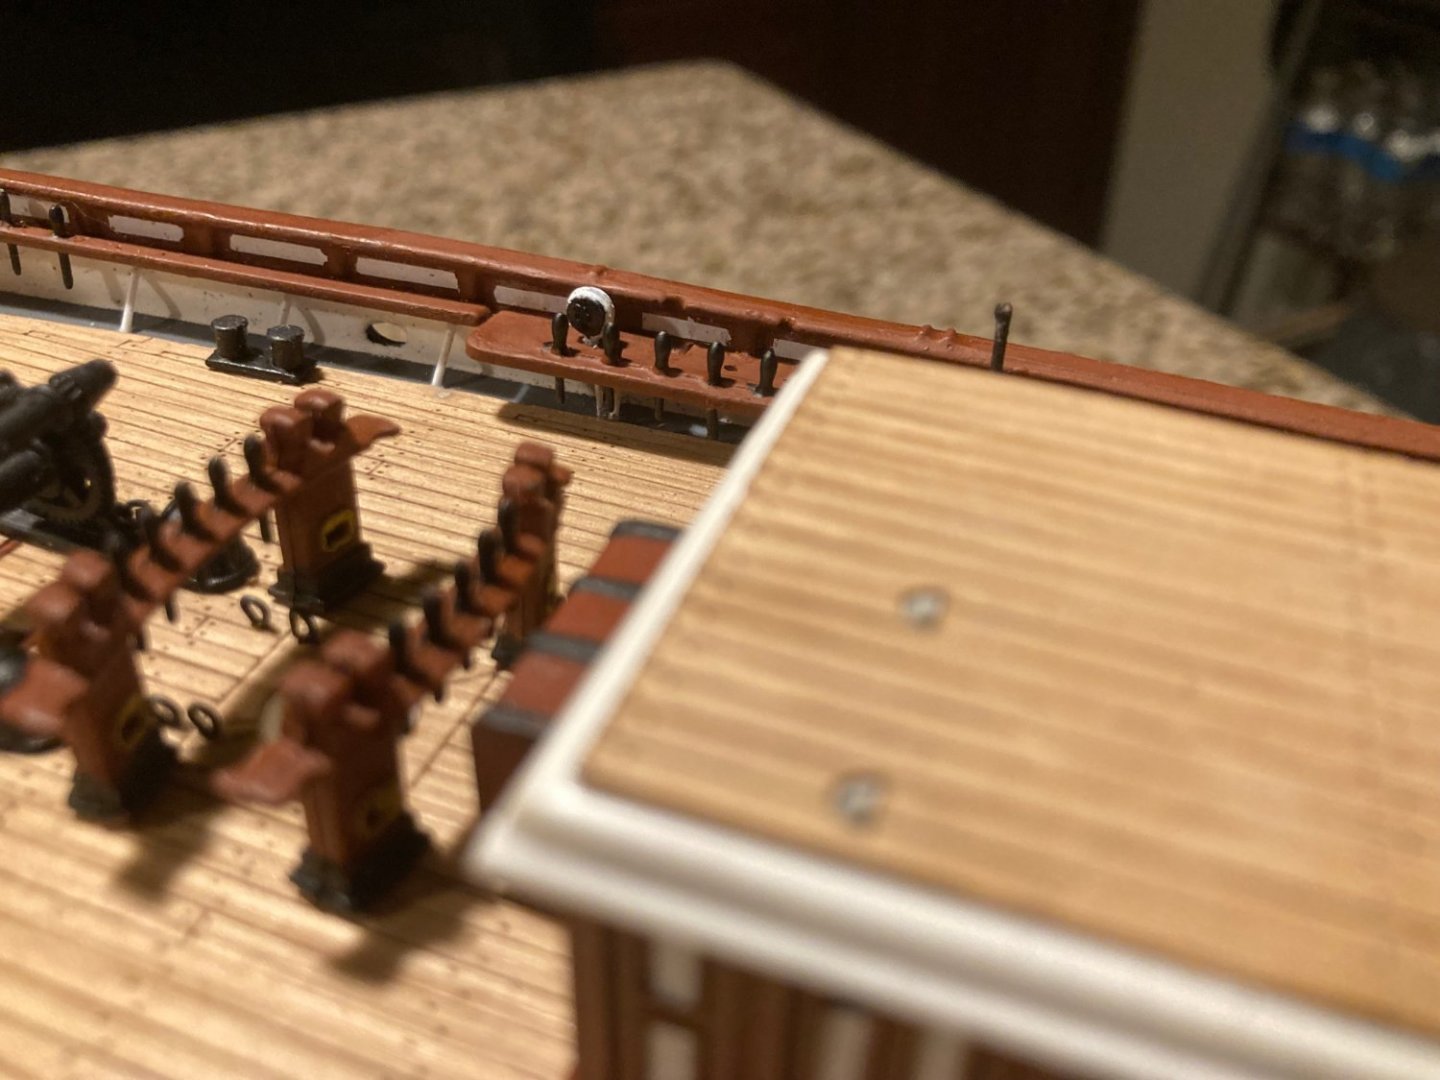
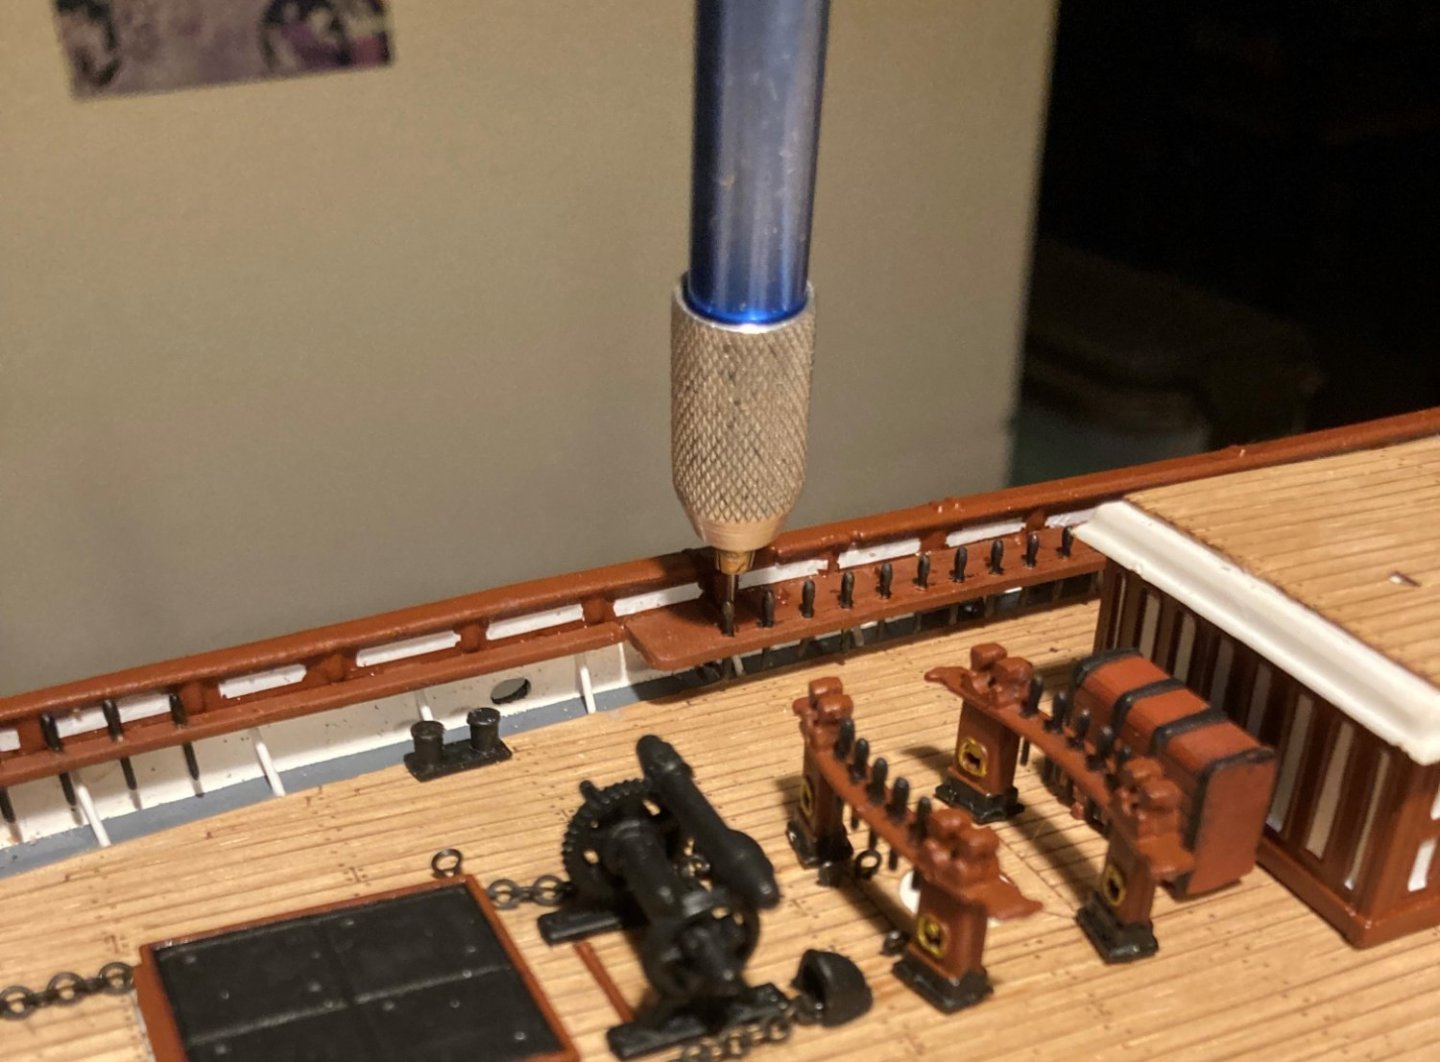
Starboard pin rails


- shipman, ccoyle, Bill Morrison and 3 others
-
6
-
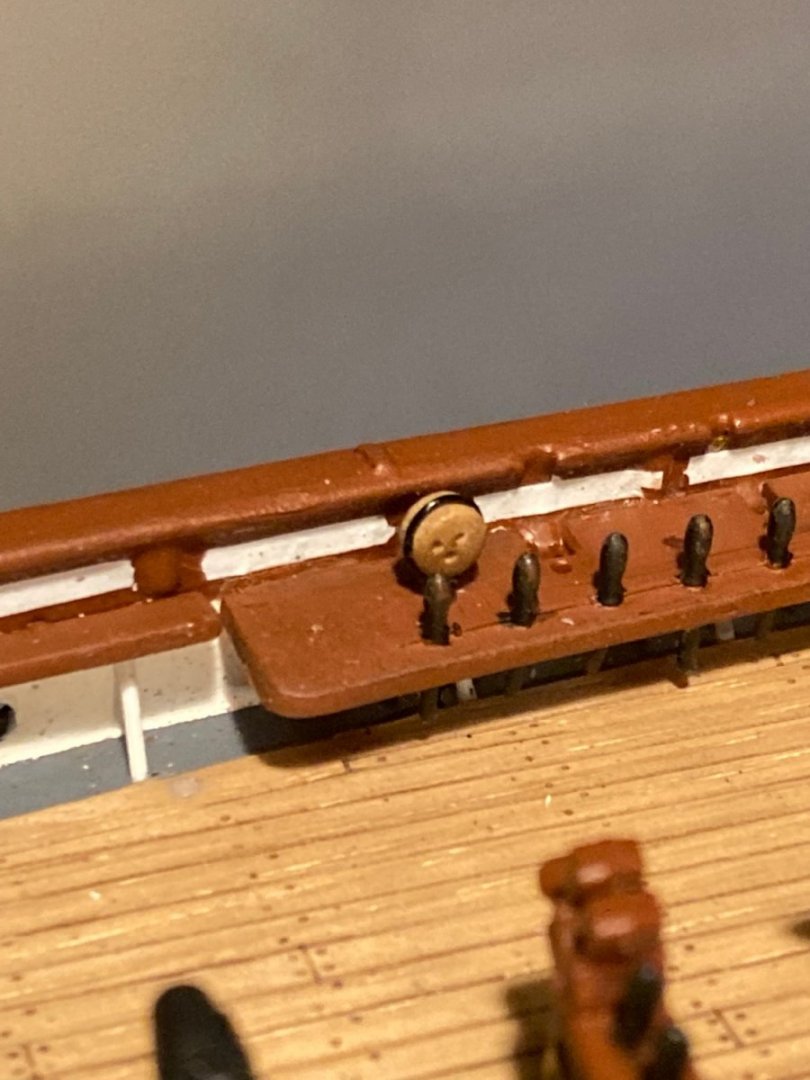
This experiential deadeye was colored with a white paint pen and a sharpy.
- shipman, popeye the sailor, ccoyle and 3 others
-
6
-
4 hours ago, shipman said:
Are you sure that's a deadeye?
looks like a gingerbread man to me😎
They are little ginger bread deadeyes so that if I get tired doing this I can eat them all.
-
3 hours ago, rwiederrich said:
Stropped deadeye looks good.
You could pre bend the wire...paint it white..then finish up with the twist and then touch up.
So the stropping can be white. Unless you have some other plan. White coated wire?
Rob
I ordered some white floral wire. It will take a few days to get here. I am not sure if it will work. I was going to blacken the deadeyes with a magic marker.
-
33 minutes ago, rwiederrich said:
Tour doing a fantastic job for sure. I bet you had to drill very slow to make those holes in the pin rails for the deadeye braces? I almost opted to do the same on my last Cutty build 15 years ago, but opted to let that detail go, as it would become invisible once the rigging was in place. Pick and choose your battles...I guess.
Wonderful work.
Rob
I use a pin vice and slowly drill the hole. The thing that is touchy for me is to not break the belaying pins off.
-
18 hours ago, shipman said:
Are you aware of the book by Noel Hackney?
Though it relates to the smaller Airfix kit it's a well written step by step guide on how to build and rig.
The basic principles will translate to the Revell kit, especially the methodical rigging tutorial.
Just translate any specified sizes and dimensions to what you need.
It's so easy to get bogged down with research. This book will guide you every step of the way without numbing the brain.
Of course things can be done better, but this will give a convincing representation of what you're after.
Well worth getting your hands on a copy.
I have his book. I am reading Underhill's "Masting and Rigging" to get a basic understanding of standing and running rigging.
-
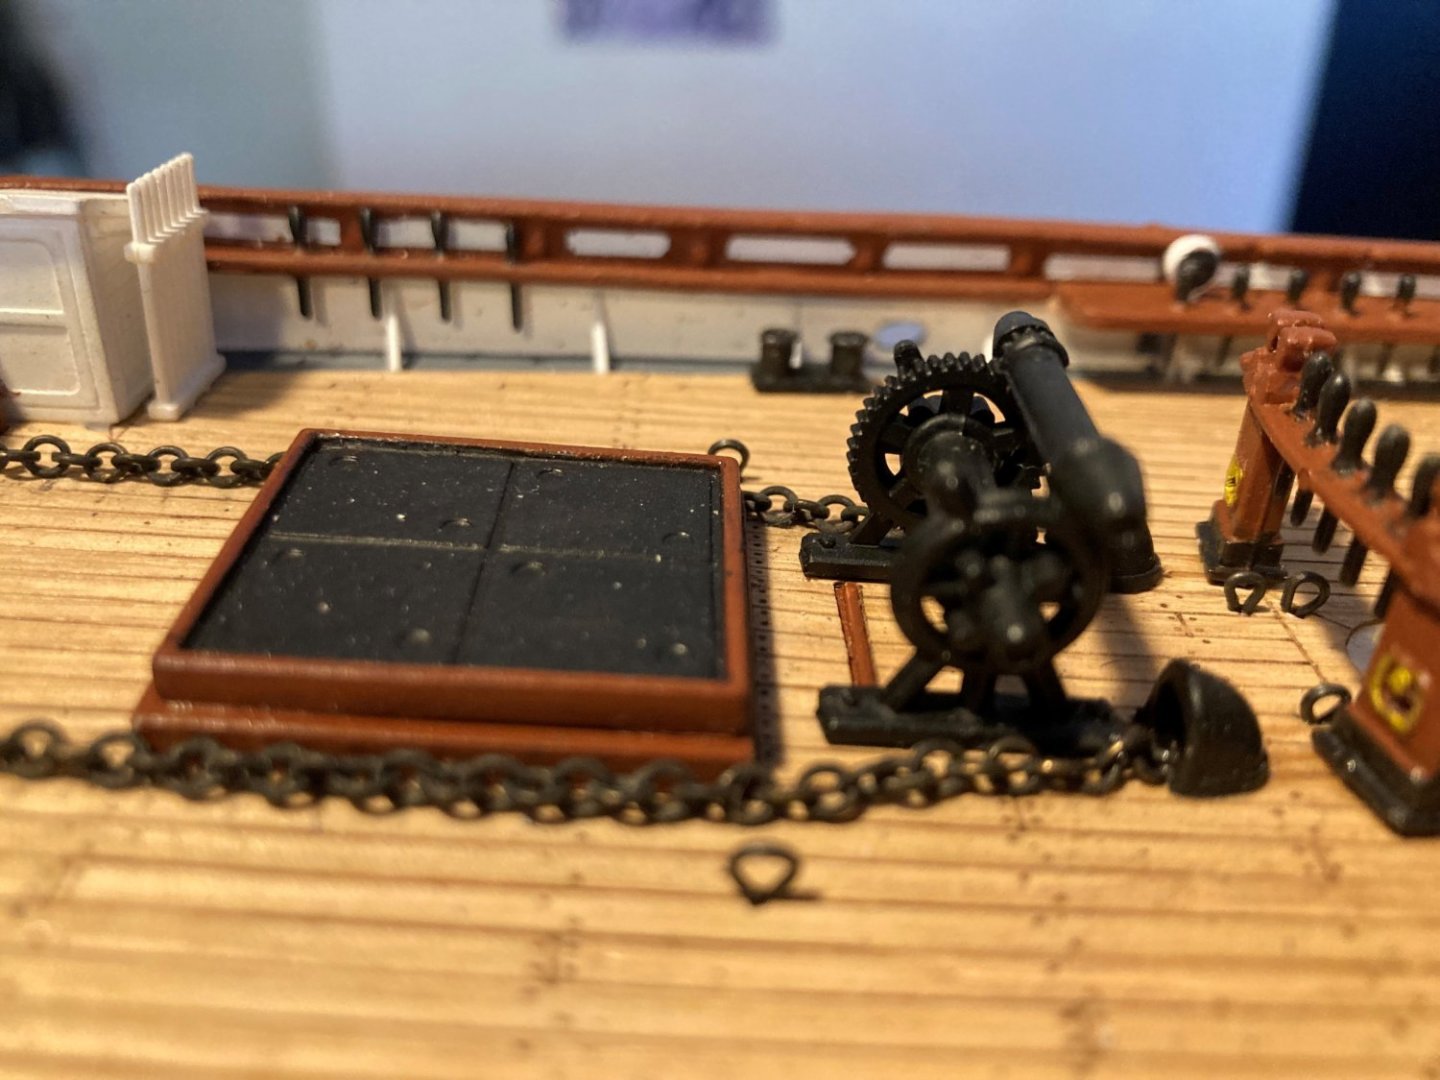
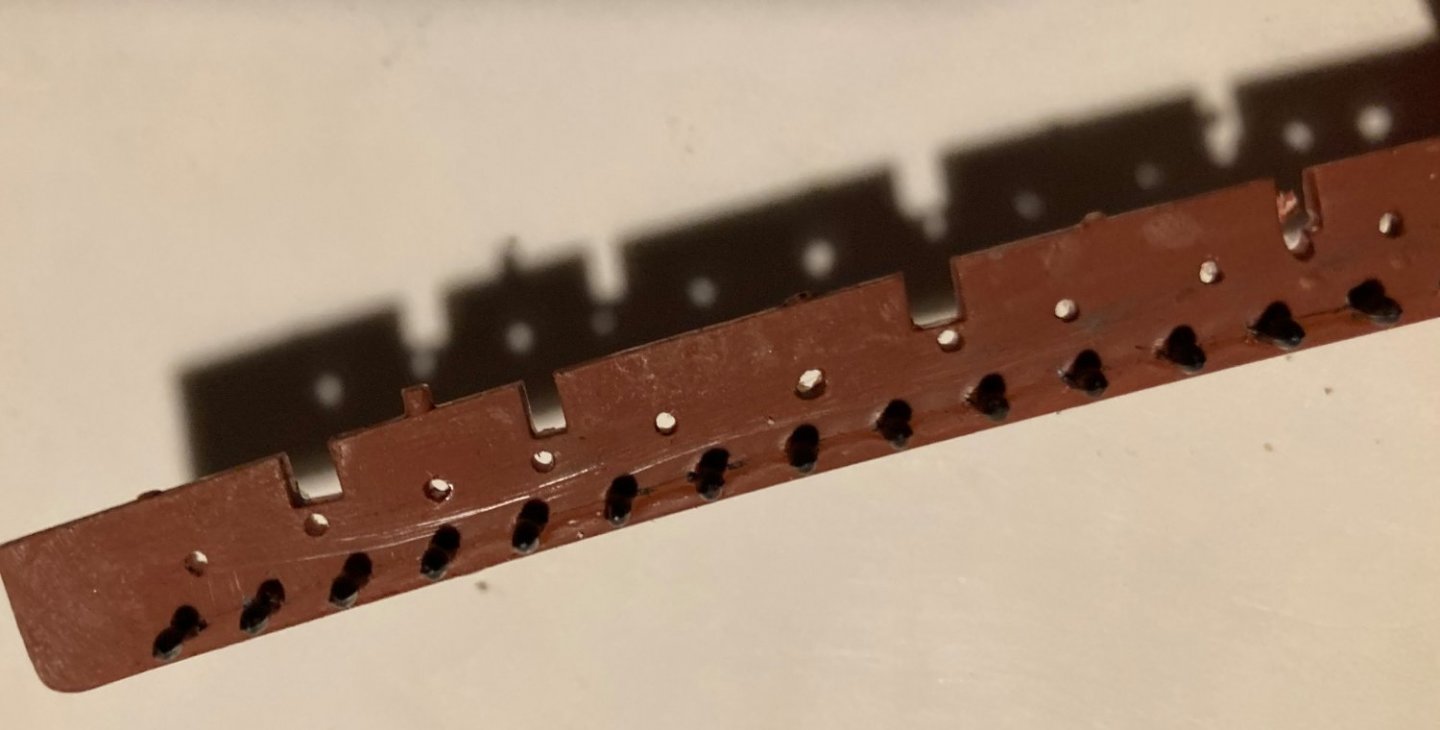
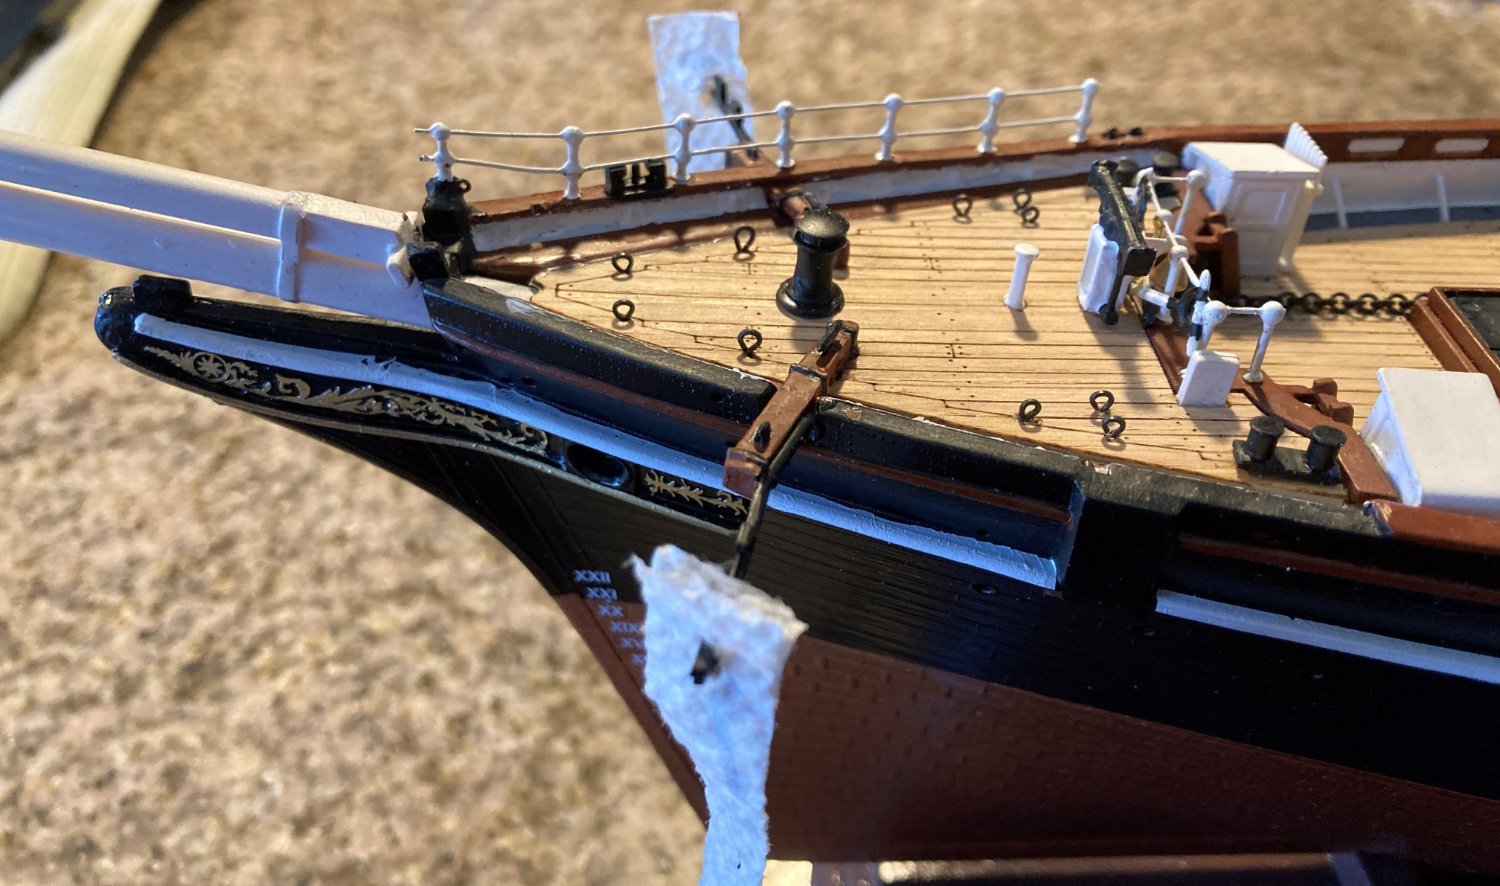
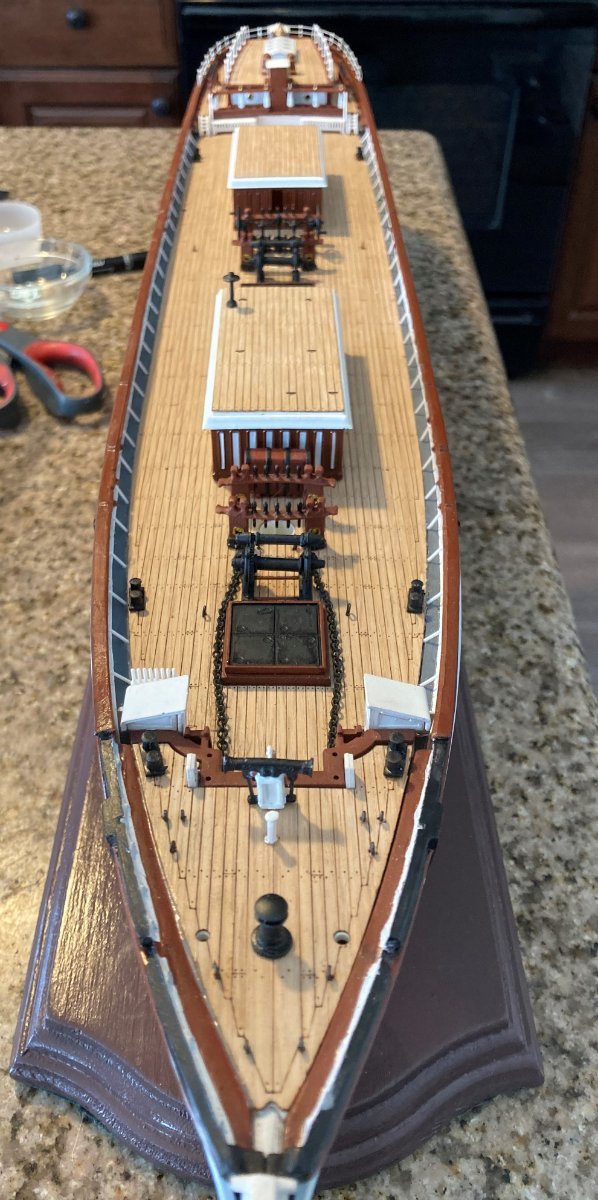
I drilled holes in the pin rail for the deadeye strops. These holes will be used to drill holes in the waterway. The strops will have a long wire end which will be glued to the waterway and the pin rail.
I used the kit deadeyes to mark where the holes should be drilled. I am experimenting with a deadeye.

-
-
On 4/22/2022 at 1:45 PM, LeoM said:
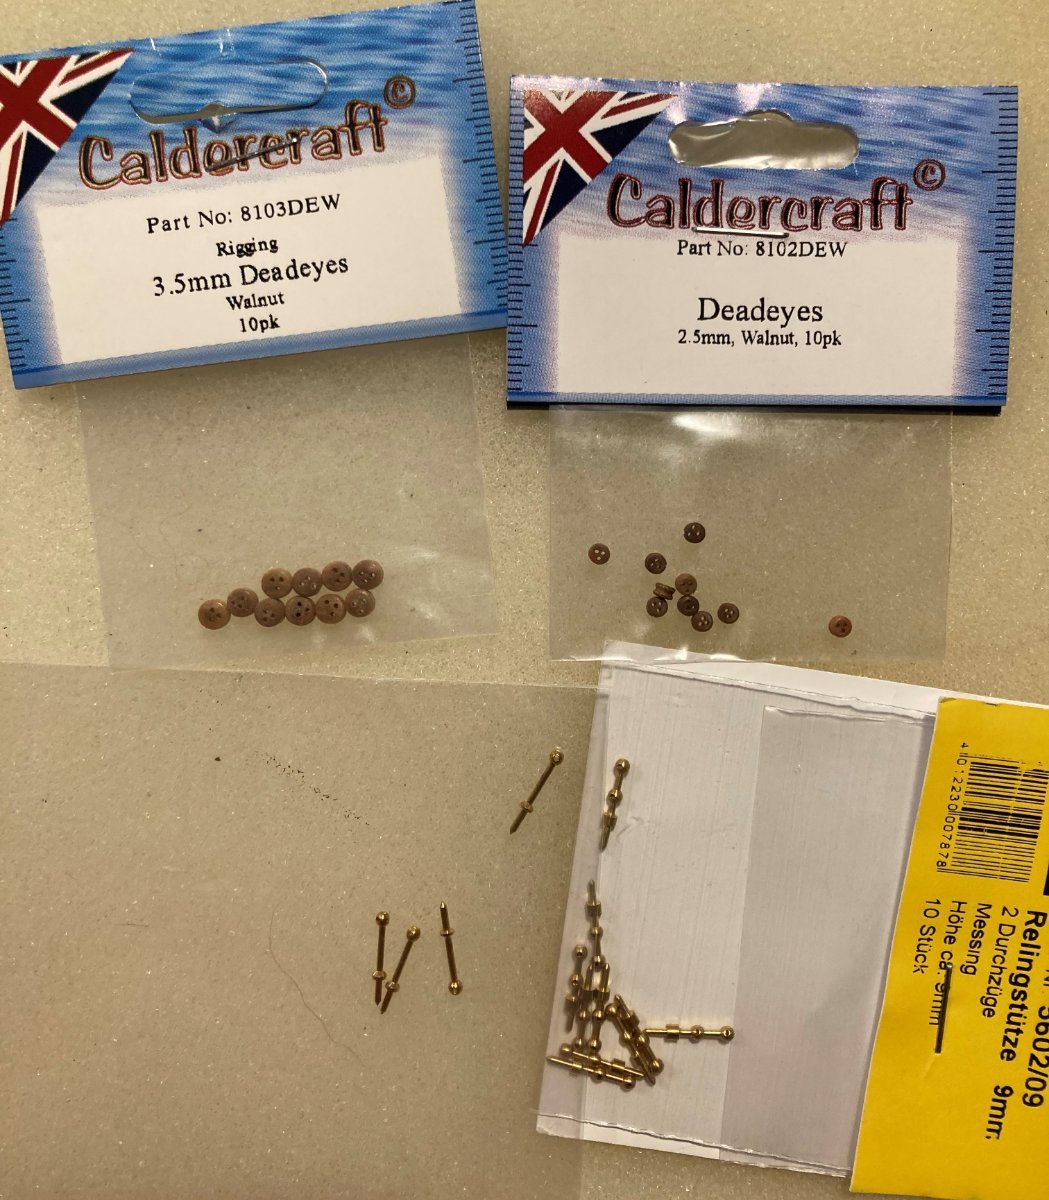
According to Wolfram Zu Mondfeld, deadeyes should be 6 mm on 1:96 scale, but Longridge mentions 1/4 inch for the big ones and 3/16 for the smaller ones, which translates to 1/8 inch (3,2 mm) and 3/32 (2,4 mm) so your order seems to be perfect. According to my NWM plans the big ones should be close to 3,8 mm and the others and 2,8 mm for my 1:78 scale. I am not yet there to start rigging but installing the lower deadeyes will be fun, I expect.
Did I already tell you fantastic you Cutty Sark looks? 😉
Thank you. What size thread and what composition (linen, silk, cotton ?) would you use to rig the dead eyes of my size? I am just learning about rigging. I am reading Harold A. Underhill's book "Masting and Rigging." In the article about the building of revell's Cutty Sark in Model Ship Builder Jan/Feb 1986, the author rigged the deadeyes off the ship because of their position next to the bulwarks. I might try that.
-
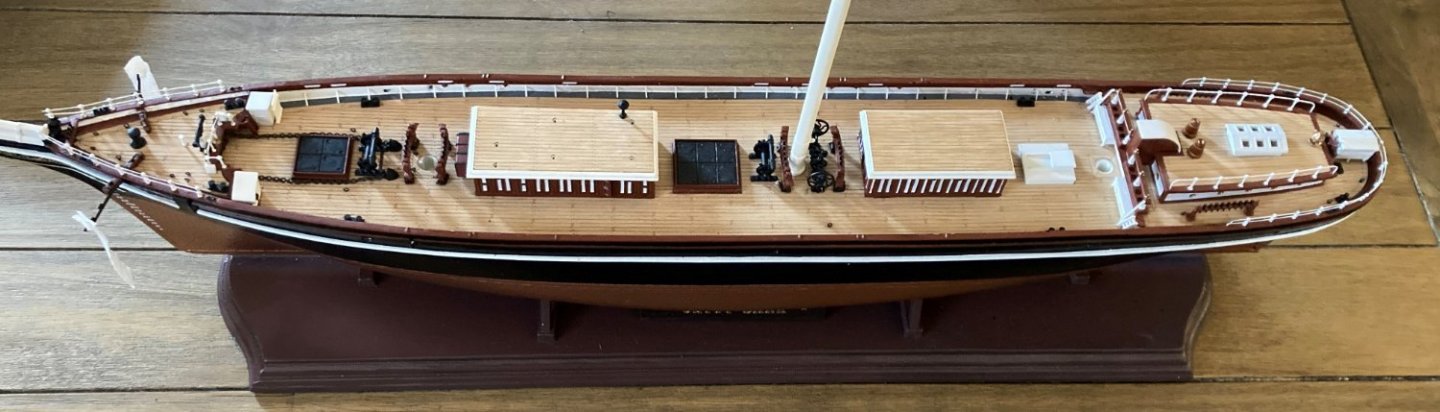
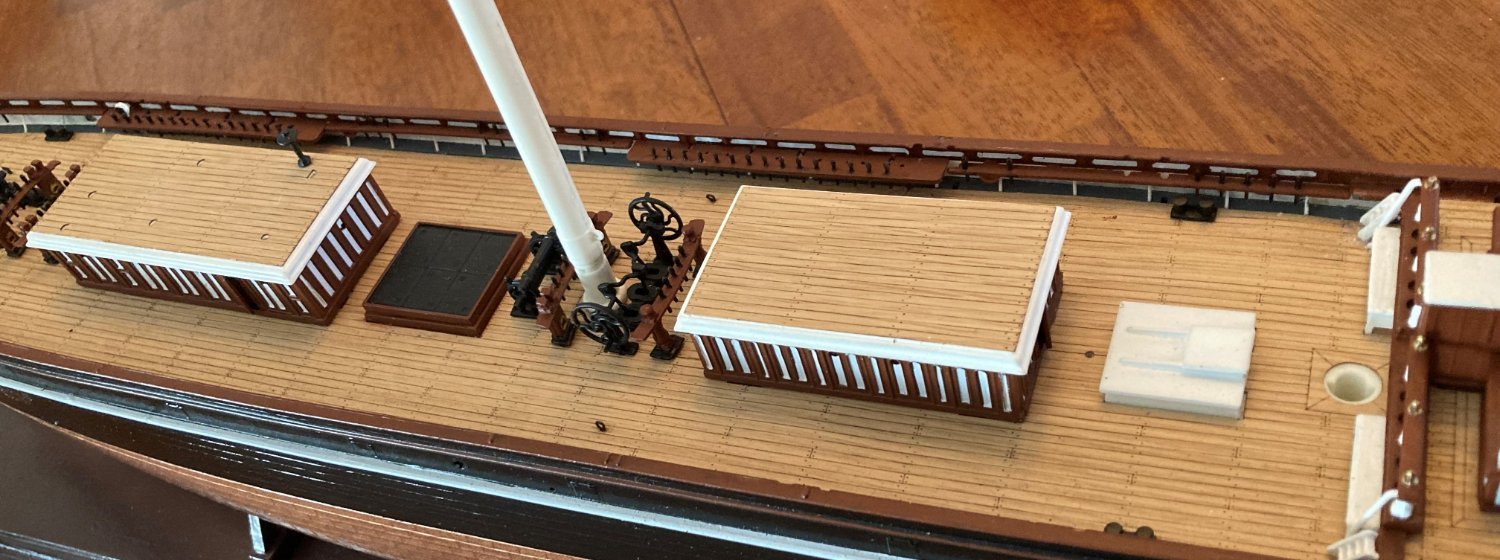
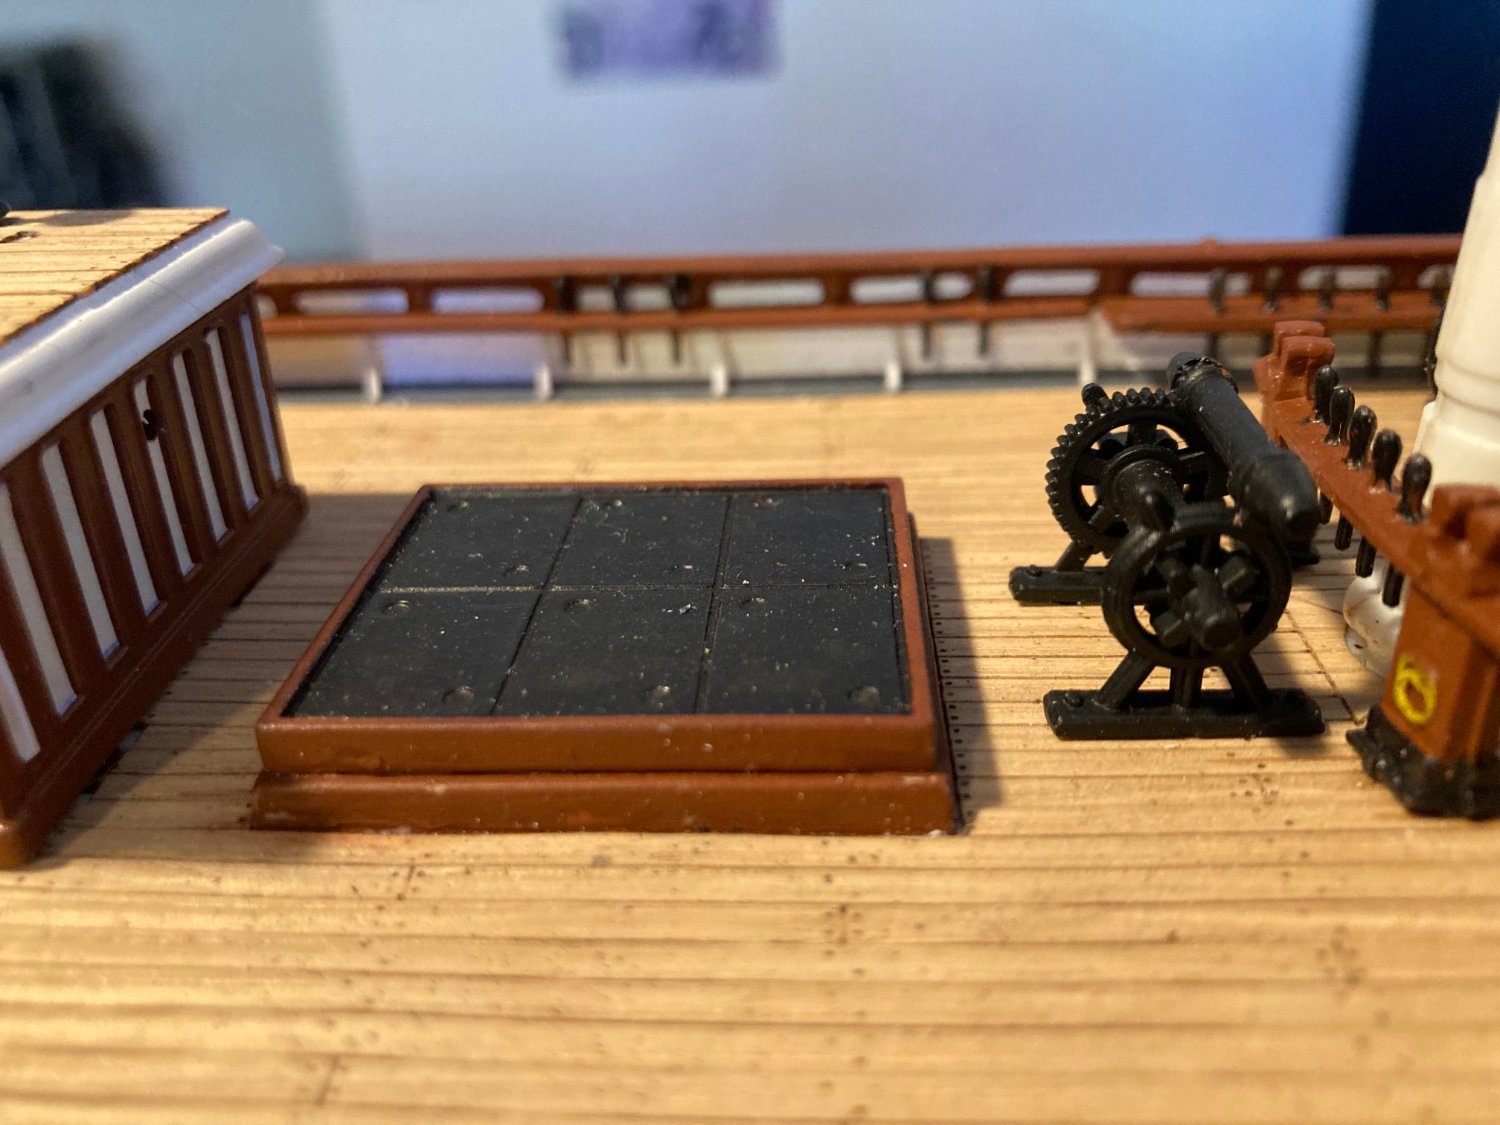
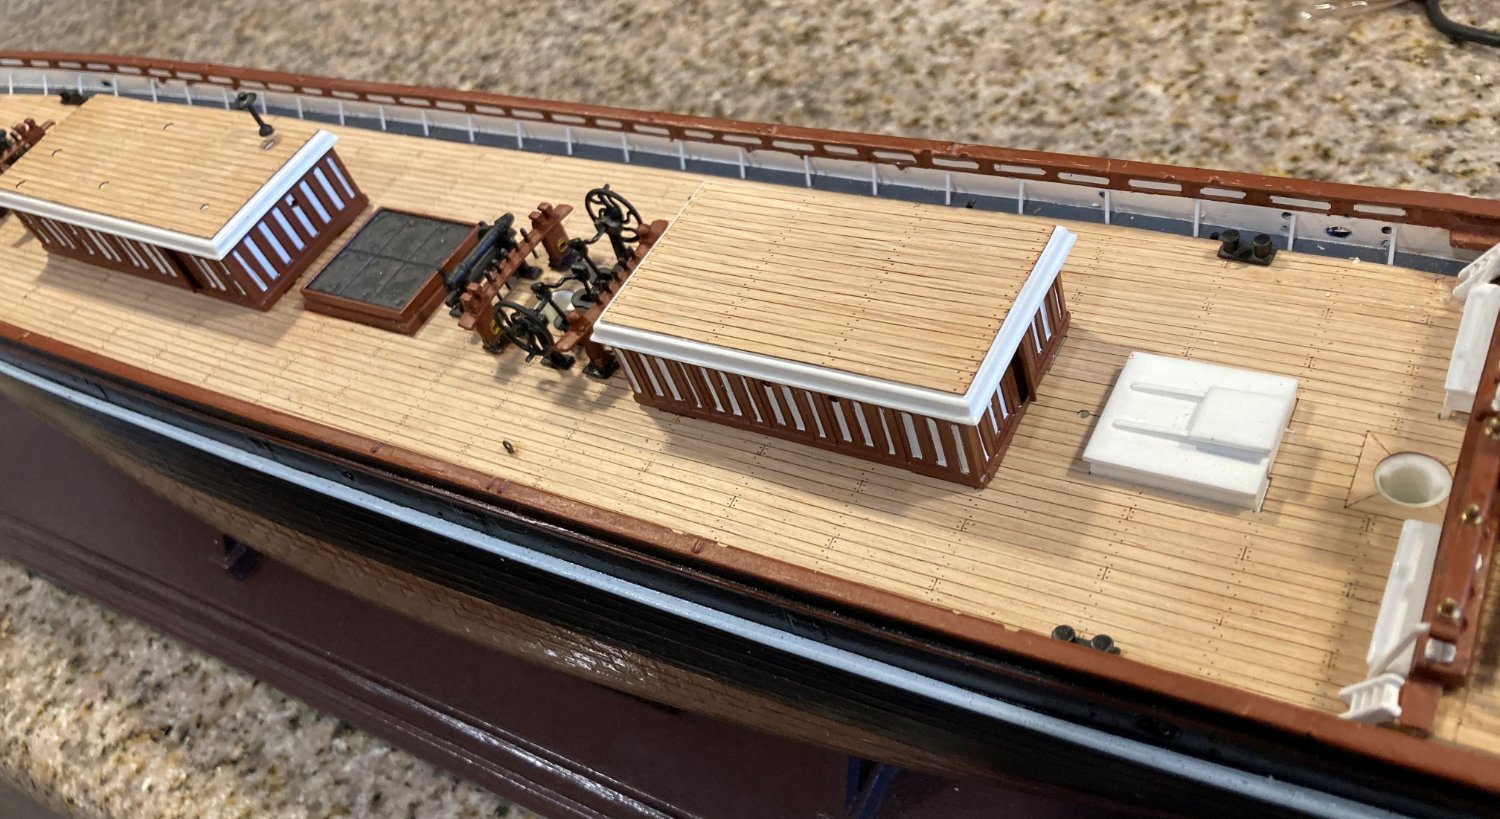
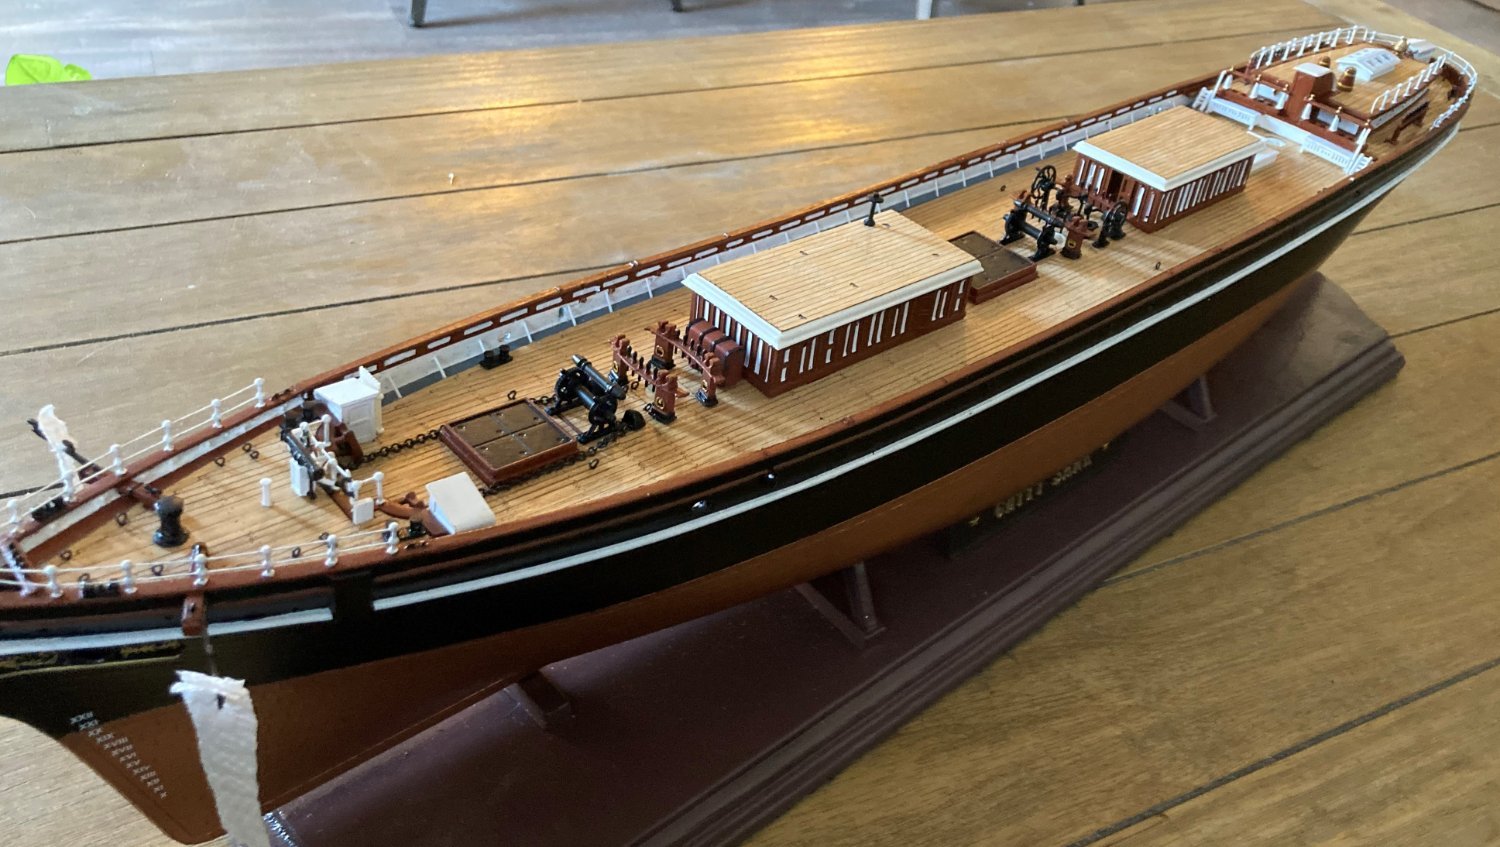
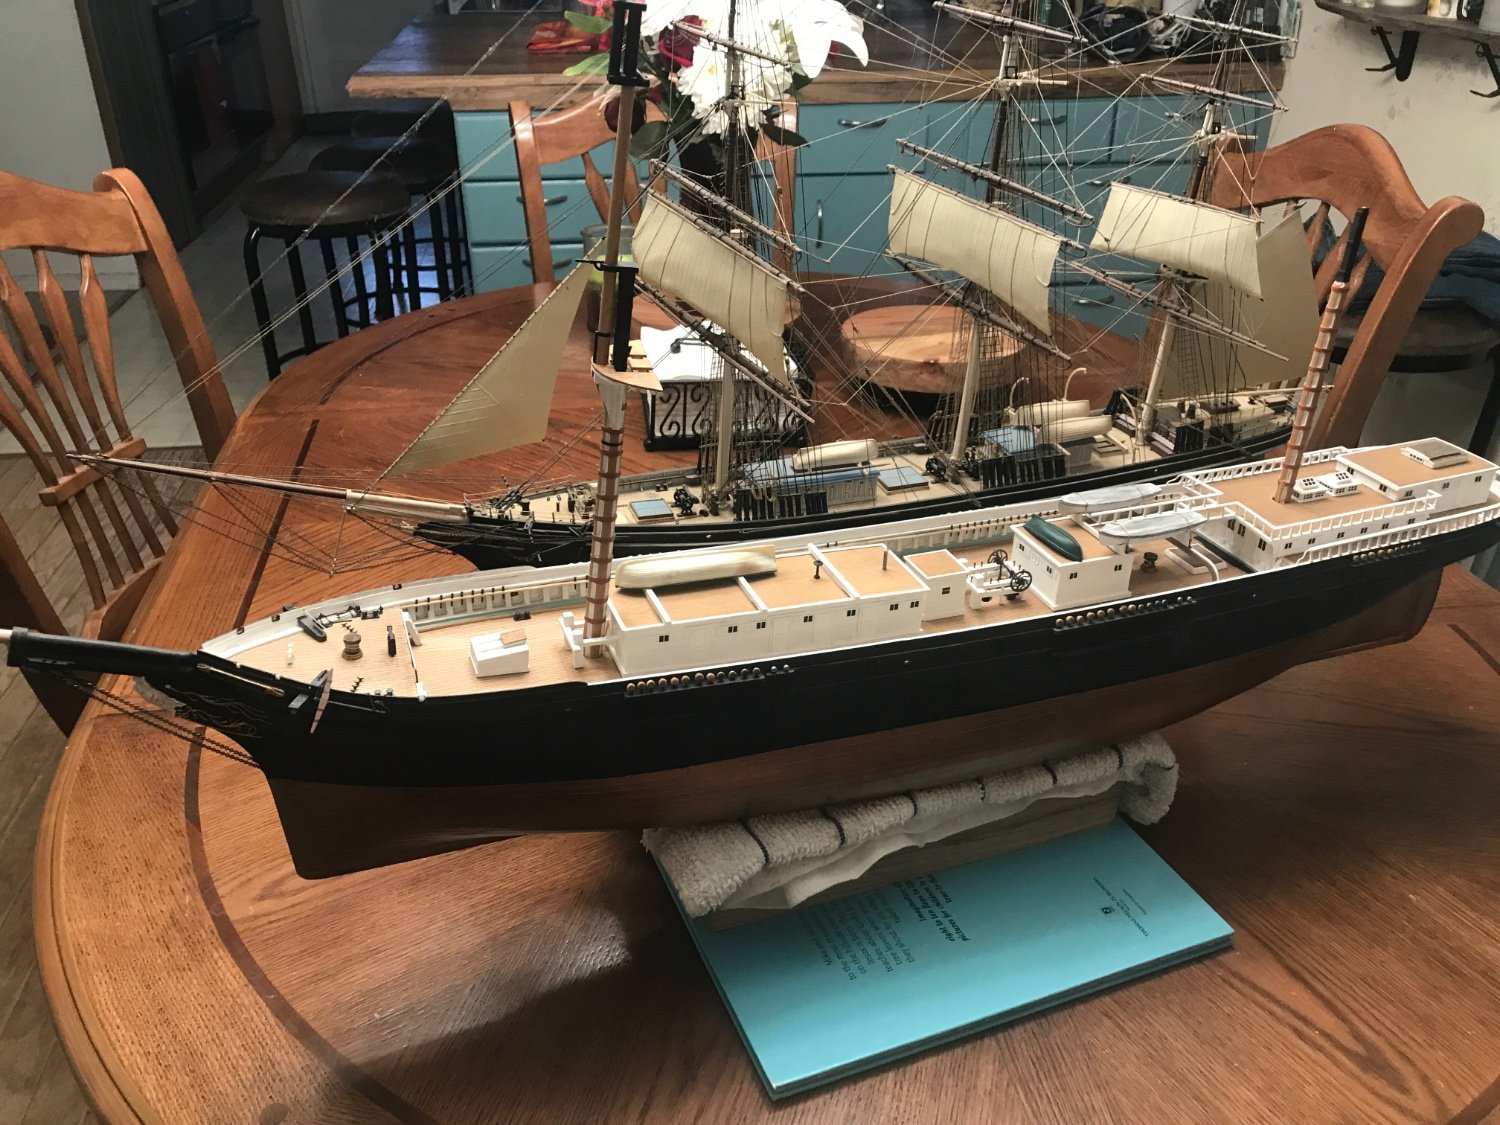
The deck at this point. Next I need to finish the white panels on the bulwarks and the hull decorations. Then begin the pin rails and deadeyes. The mainmast is only temporarily stepped.
-
15 hours ago, rwiederrich said:
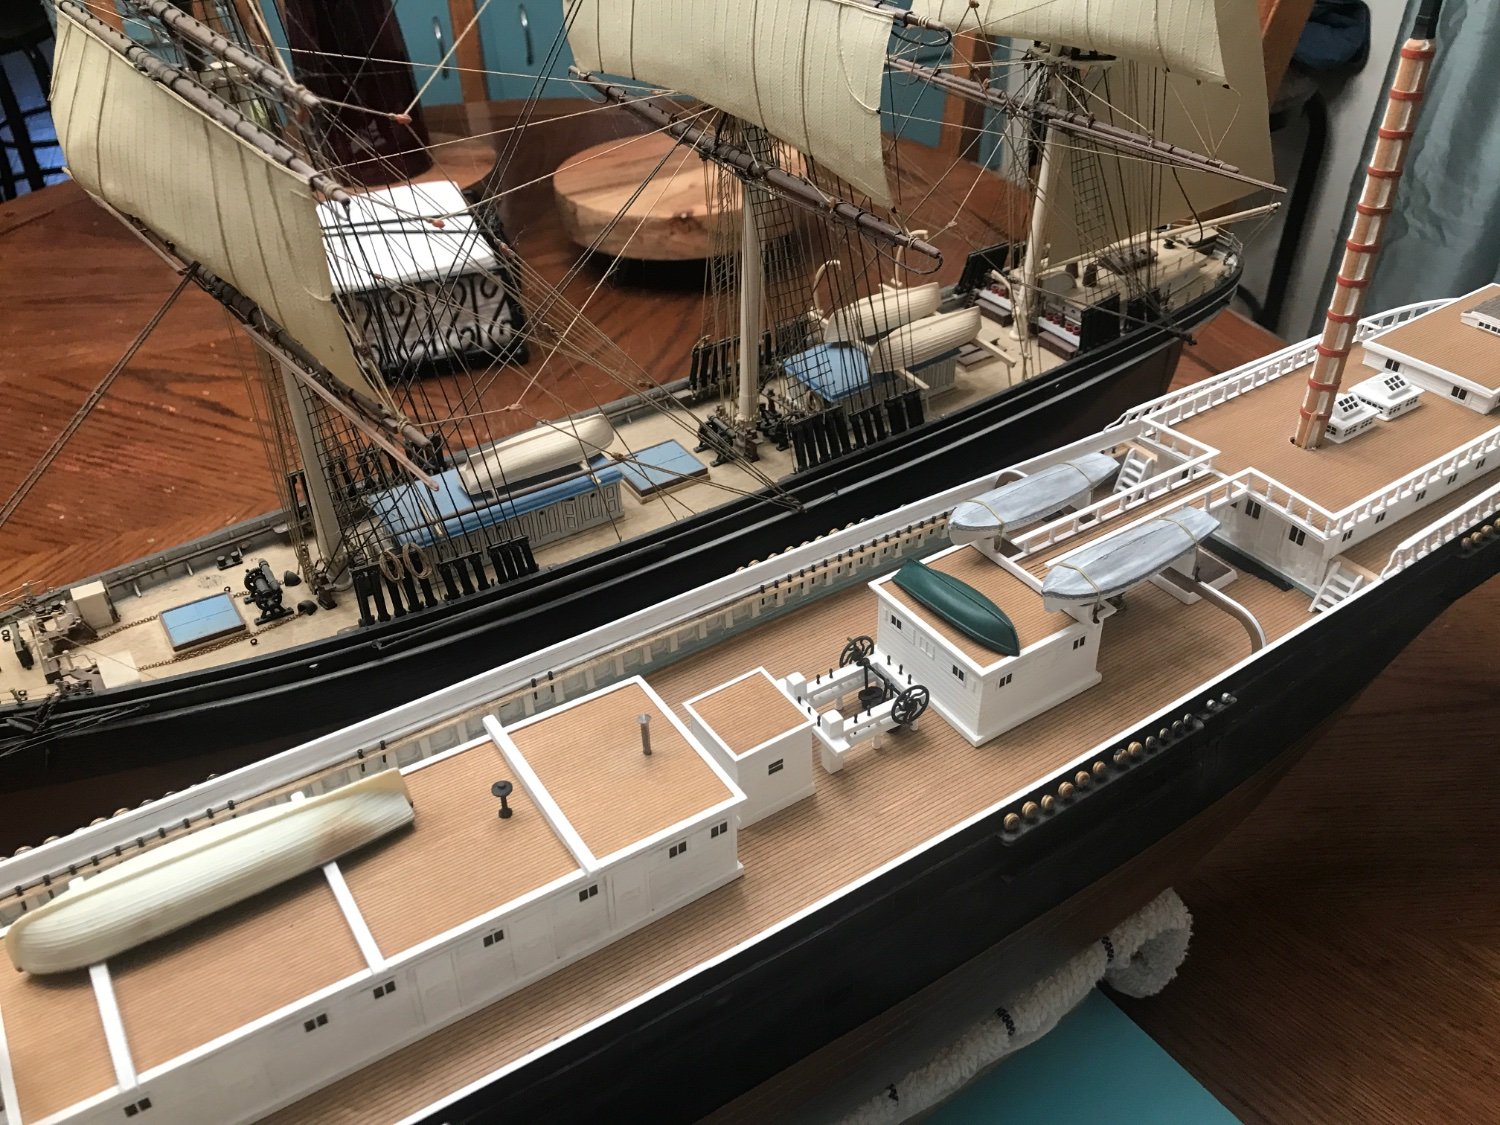
I look through my pics. Here is a scale comparison between the Cutty and my new Glory of the Seas. Amazing size difference. 960 tons compared to 2100 tons. This is an old CS I built 25 years ago.
Rob
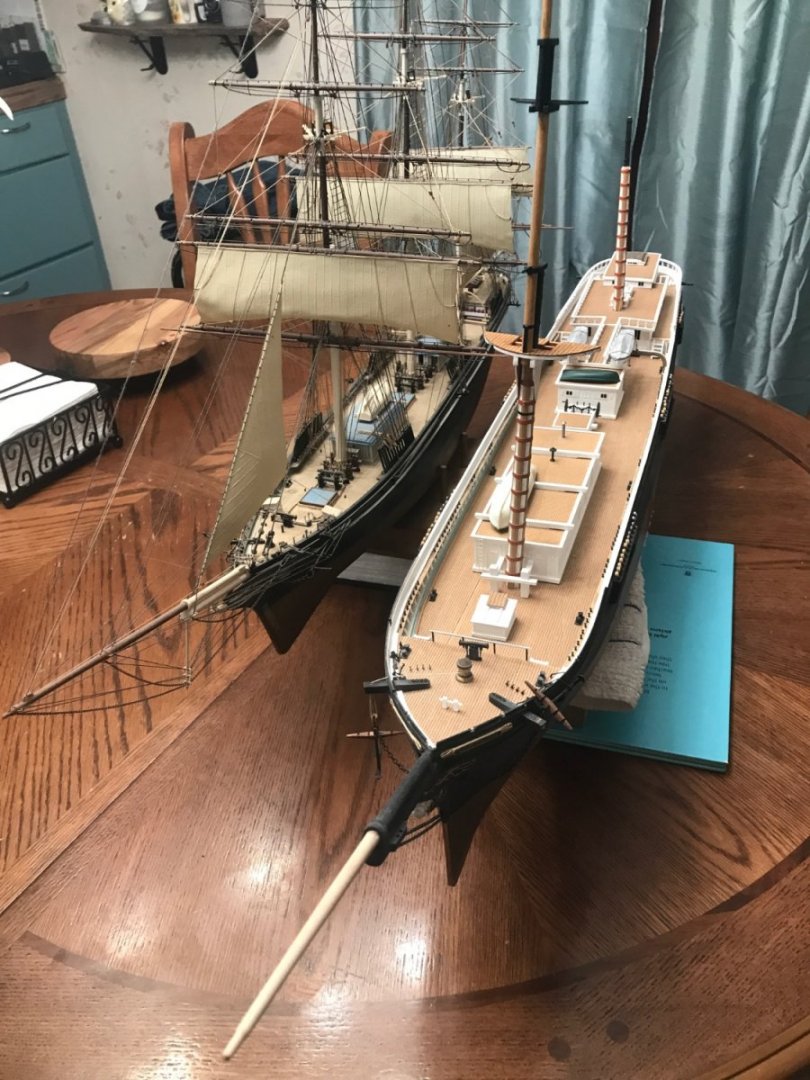

Great work. Gives one inspiration.
-
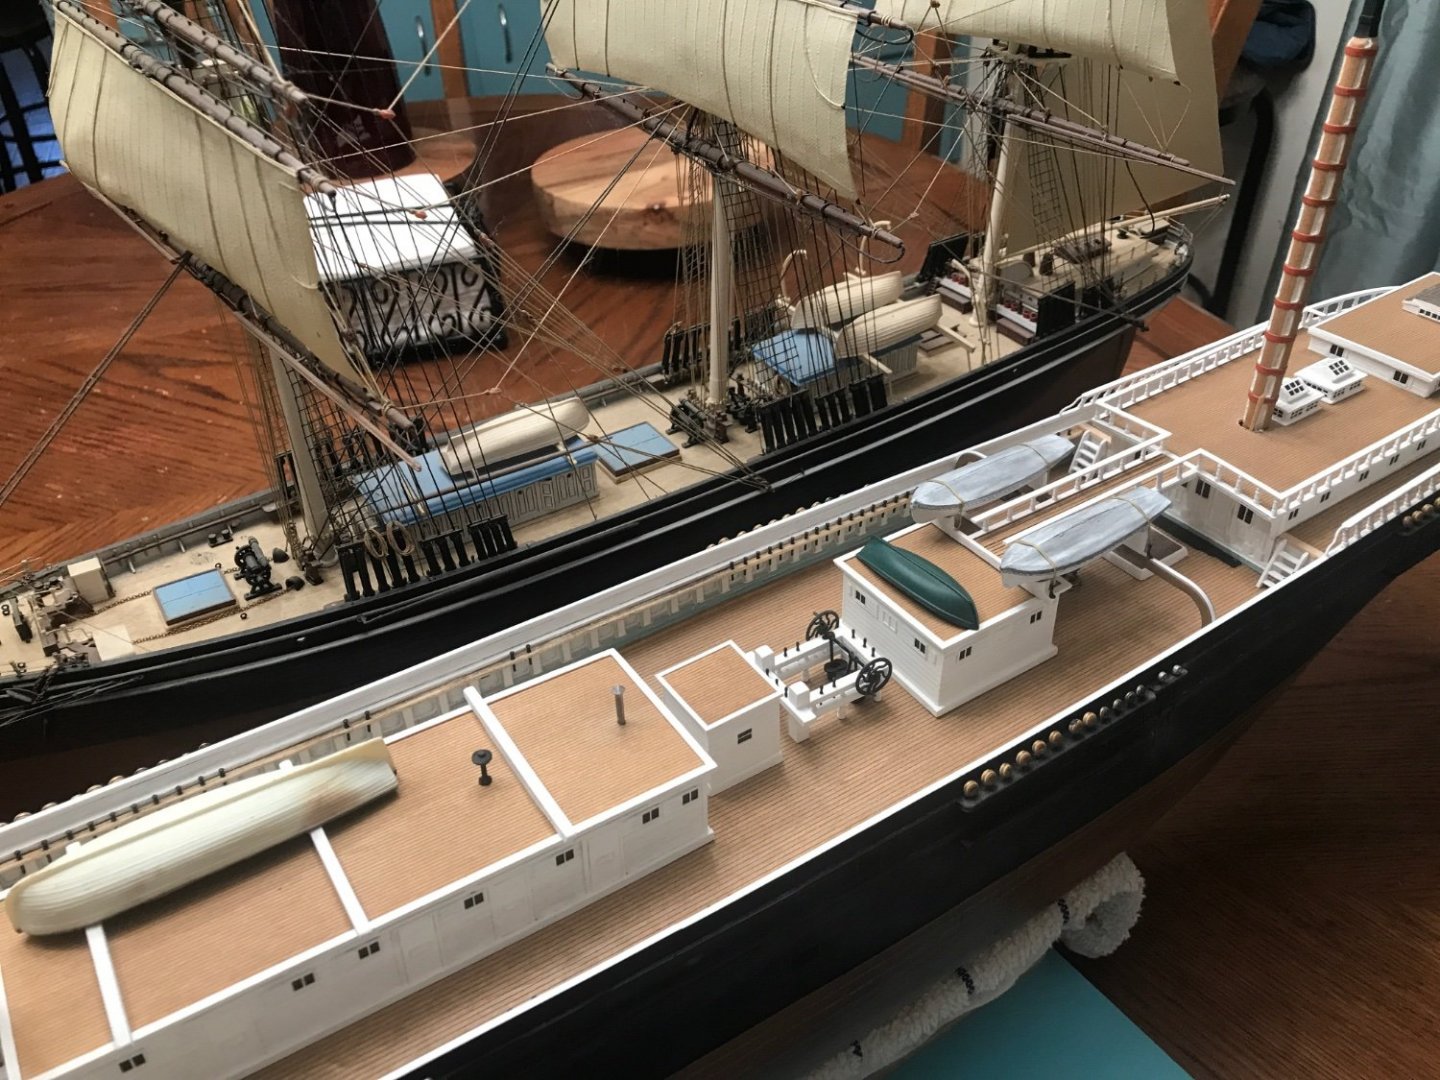
1 hour ago, rwiederrich said:
My latest version.

Beautiful. I hope I get that far along.
-
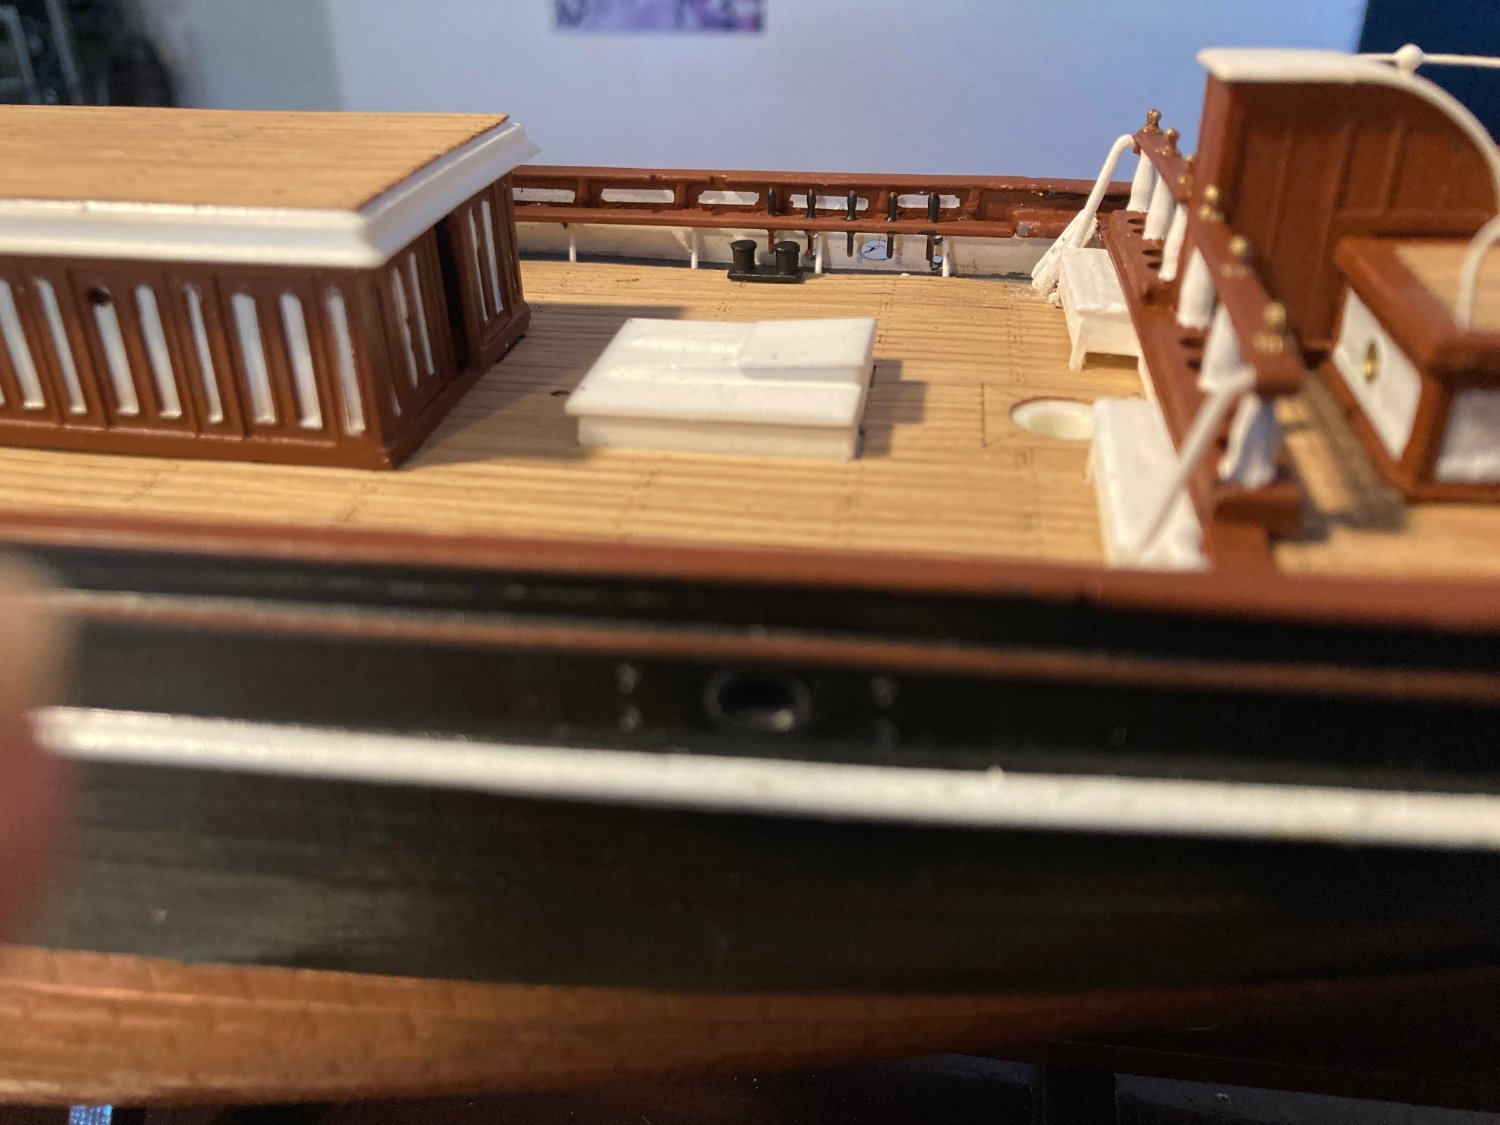
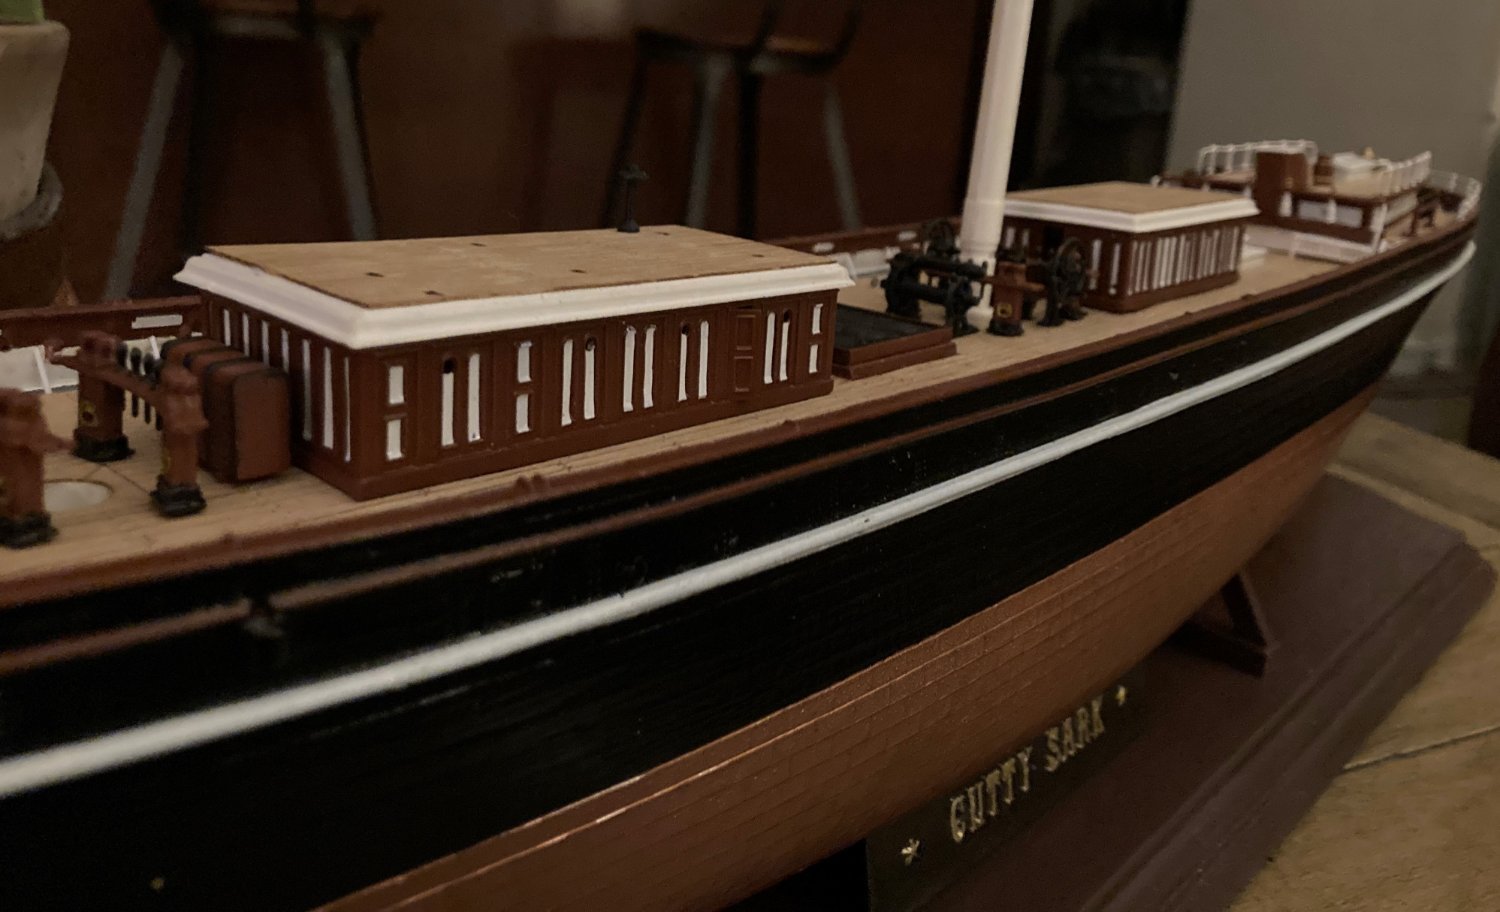
I added the starboard bow stanchions. They are not the same size as the stern stanchions, but I'll live with them. I had to counter sink them into the rail. I don't like the cathead sticking out there like that. I hope I don't break it off.

- Bill Morrison, shipman, coxswain and 2 others
-
5
-
8 hours ago, rwiederrich said:
I'm not sure...I think Fine Scale Modeler drew their images from a website I no longer use for the image capture. What images in particular are you seeking?
Rob
I was hoping to see more of your model. I could pick up pointers I'm sure.
-
I got my deadeyes and stanchions today. The deadeyes seem too small. I was told that 3.5 mm and 2.5 mm are the right size to get, but they look very hard to work with. I have never rigged a ship model, so this is all new to me.

-
-
White panels on the deck houses

-
rwiederrich,
You can't see your images of your Cutty Sark build on Fine Scale Modeler. Do I need to join to see them?
-
-
Nice to know my work might give someone a buzz.
- shipman, popeye the sailor and Ian_Grant
-
2
-
 1
1


Cutty Sark by bcochran - Revell - 1/96 - PLASTIC
in - Kit build logs for subjects built from 1851 - 1900
Posted · Edited by bcochran
Today's state of affairs