


cdrusn89
-
Posts
1,605 -
Joined
-
Last visited
Content Type
Profiles
Forums
Gallery
Events
Posts posted by cdrusn89
-
-
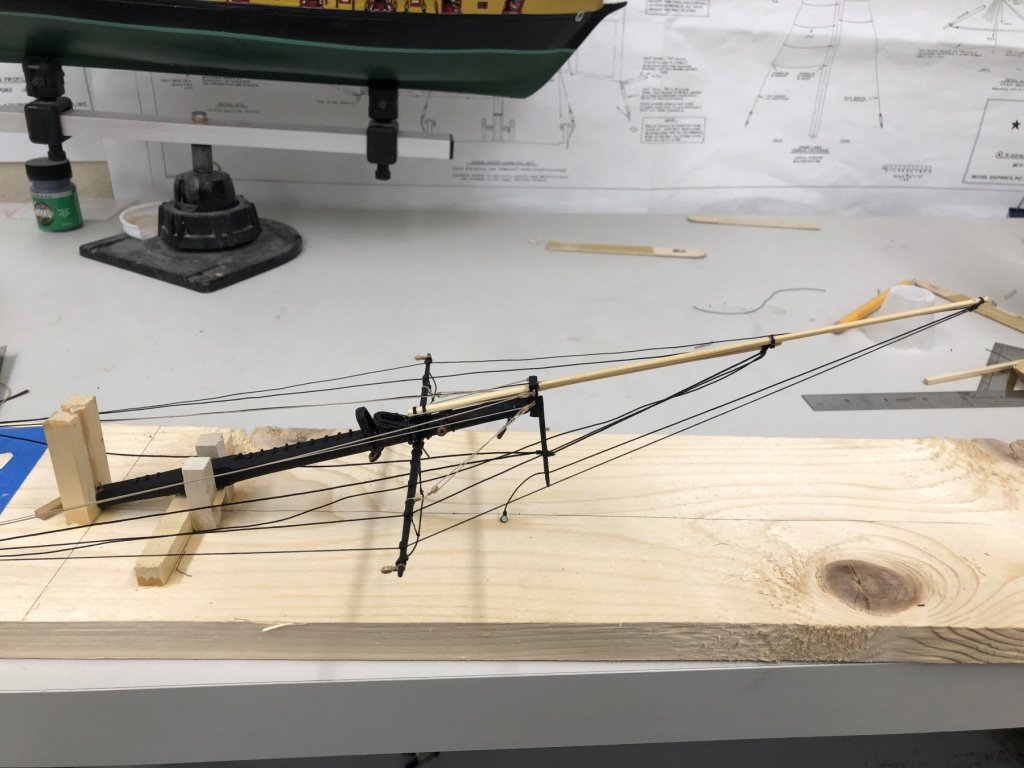
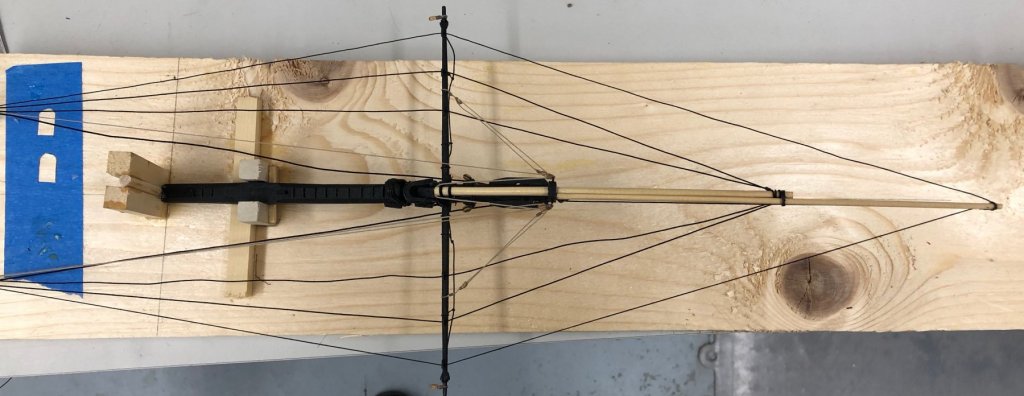
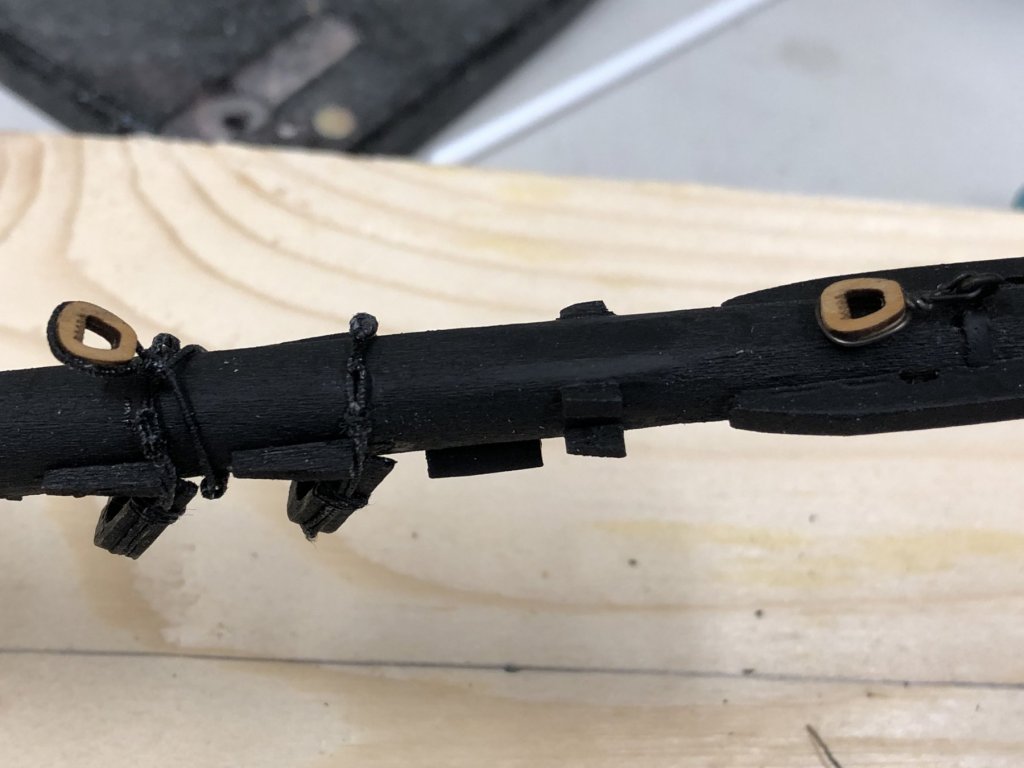
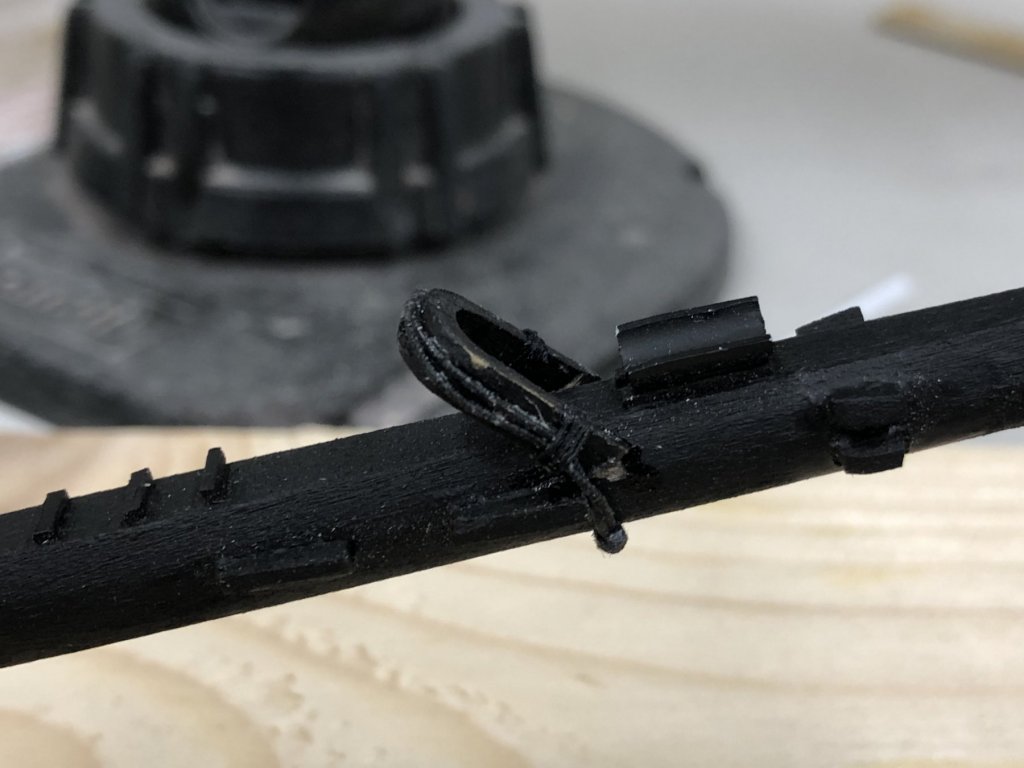
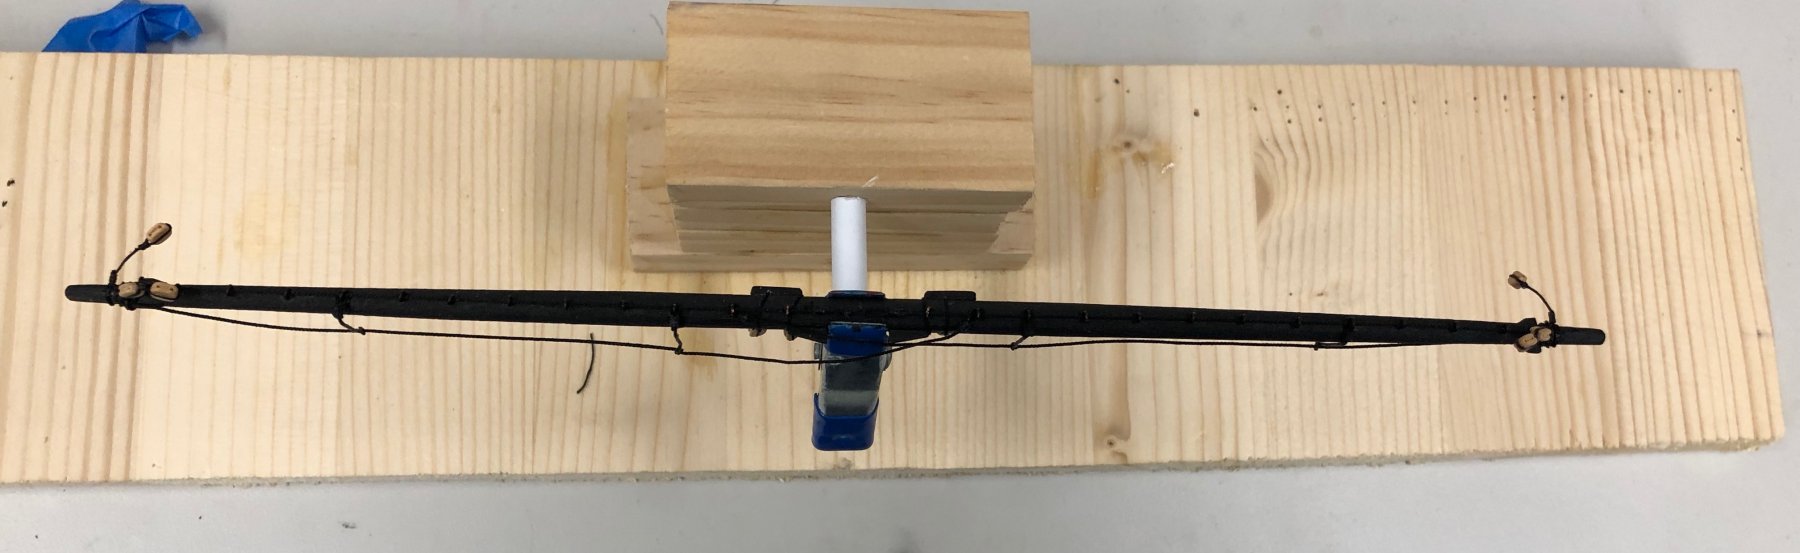
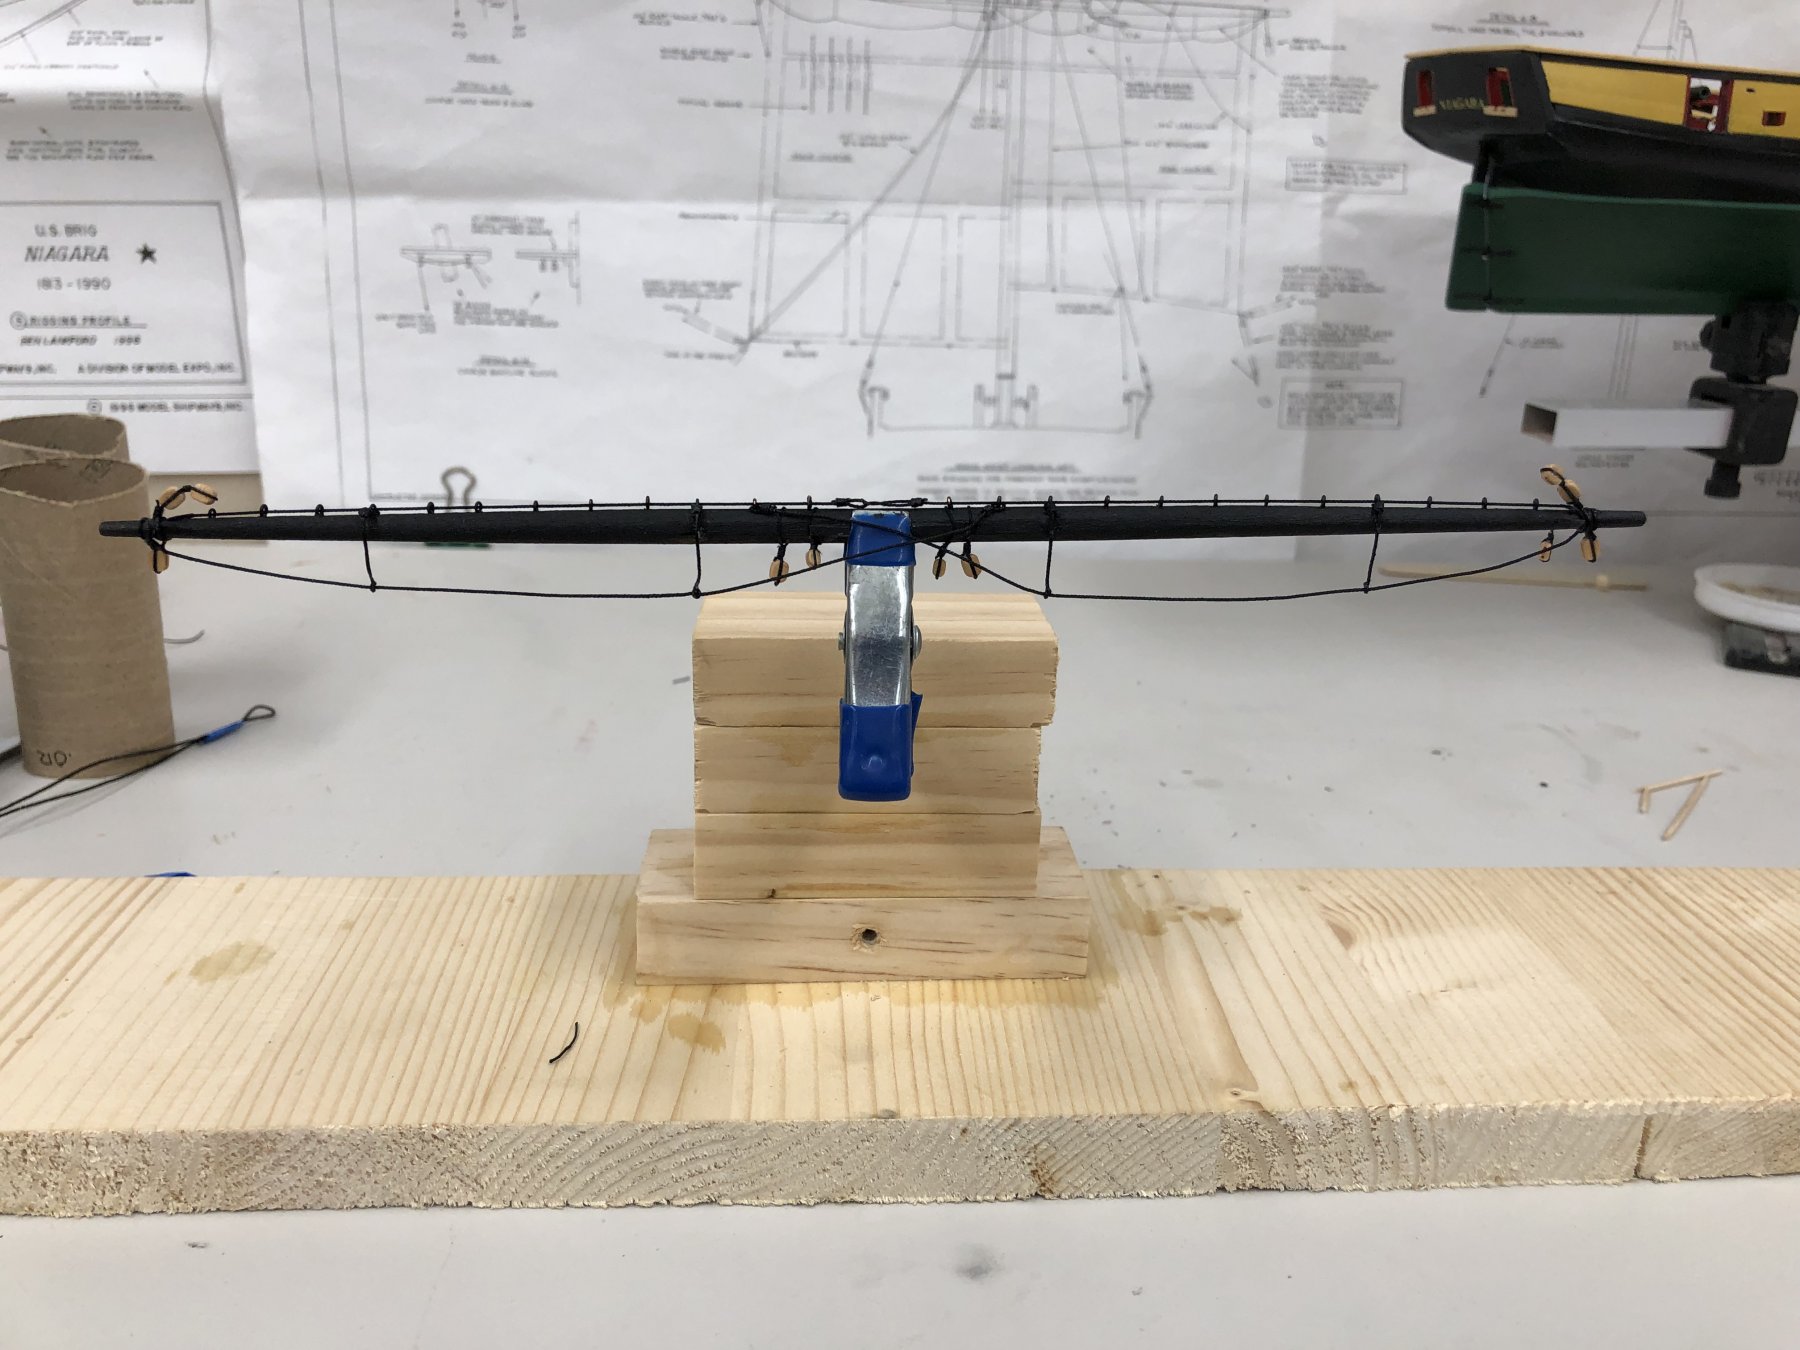
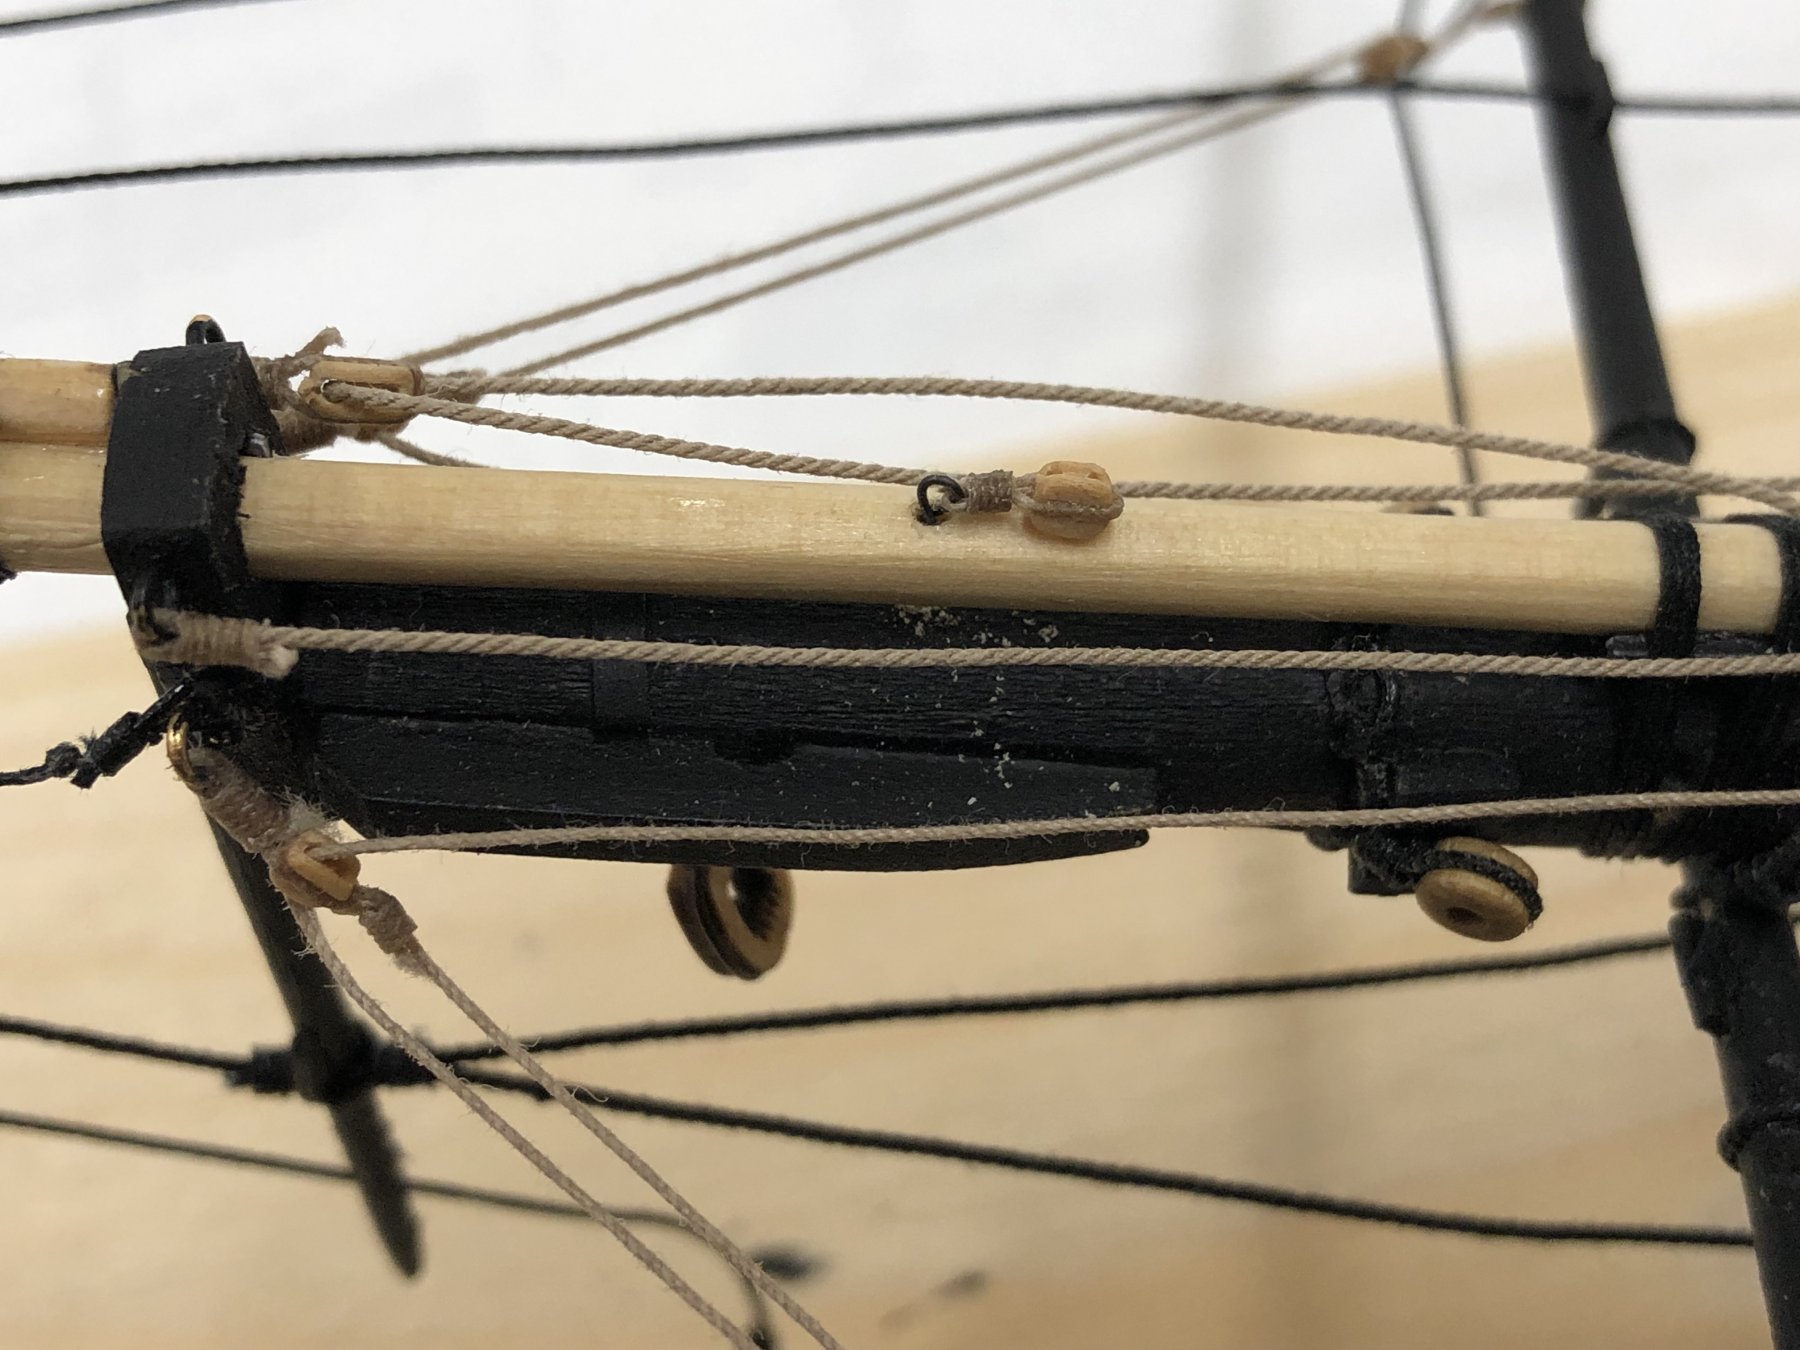
Completed rigging the fore course yard. Jackstay, two foot ropes and ten blocks.
P/S Braces (5/32 Single)
P/S Clew Garnets (1/8" Single)
P/S Reef Tackle (5/32 Single)
P/S Lower Yard Lifts (5/32 Single + 5/32 Clump Block)
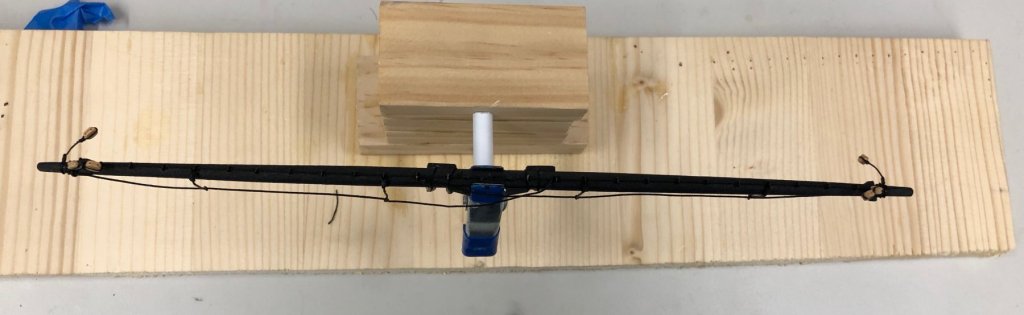
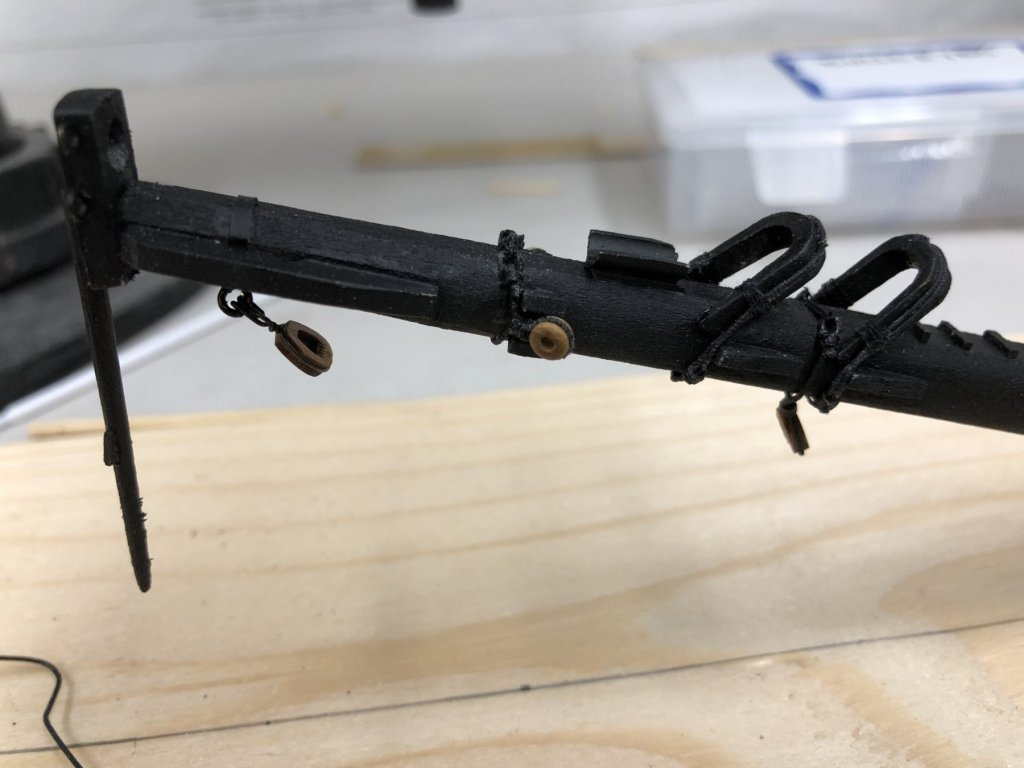
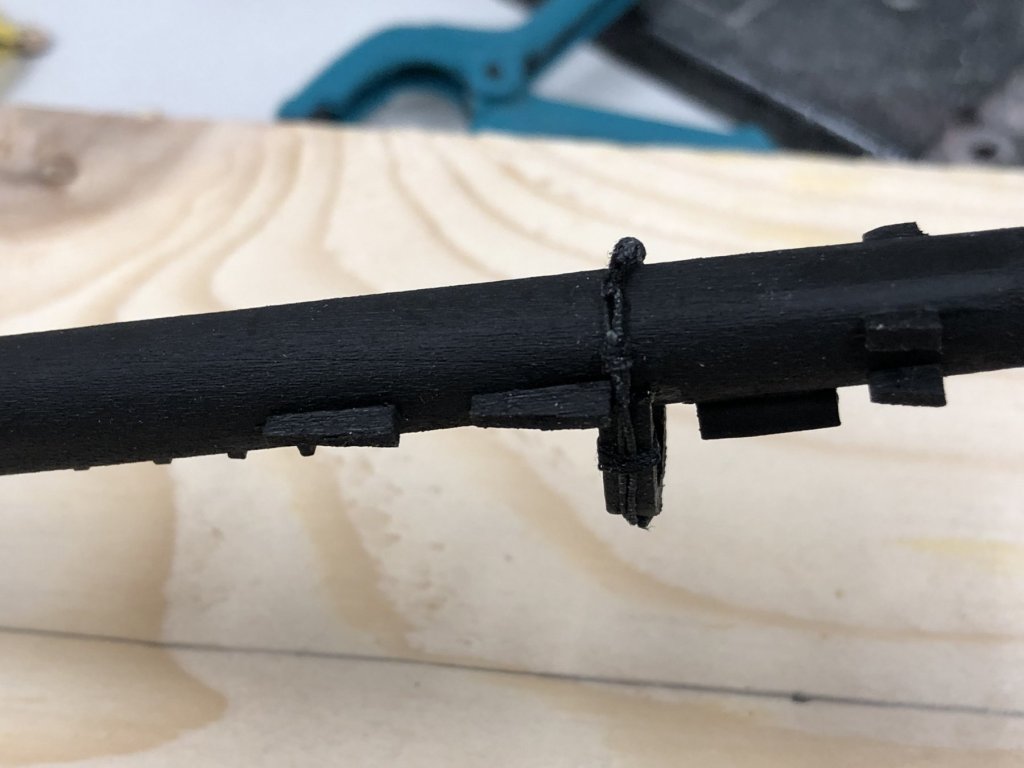
Here are two pictures of the yard in my newly modified "yard holder" (moved the clamp up and out to support having weights on the footrope stirrups to hold them in the vertiucal while the 50/50 glue/water mix sets.

- Jim Rogers and Tom E
-
 2
2
-
-
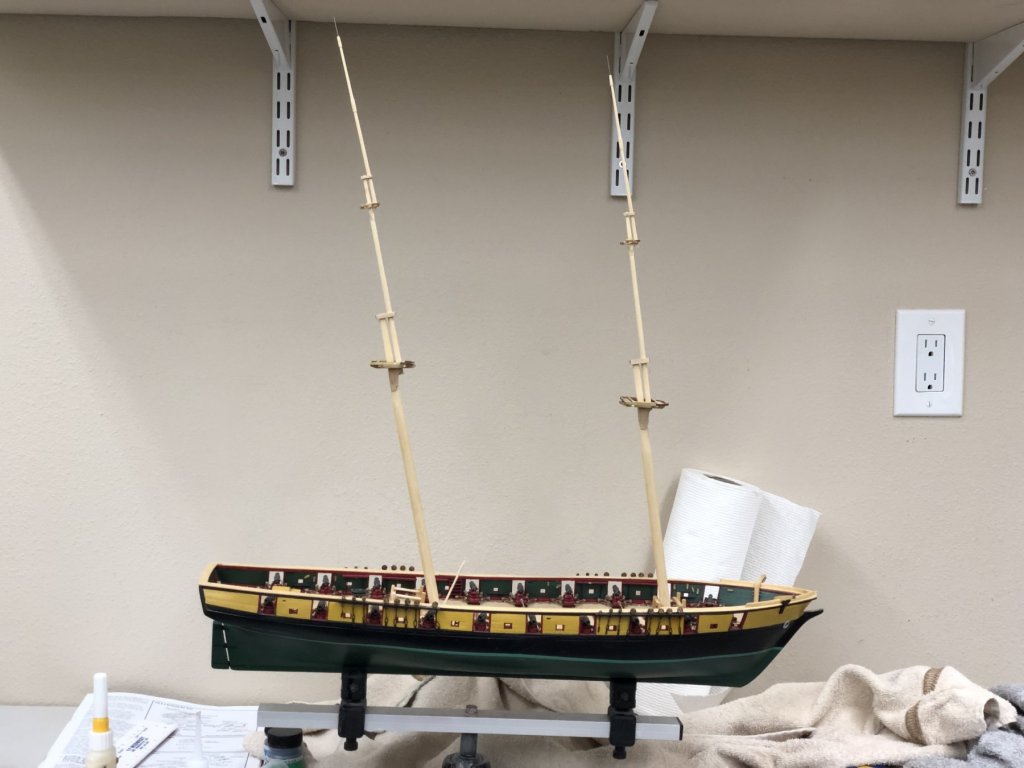
Main and spanker masts are now complete (except for the metal band around the boom rest - I just noticed that it is missing) including the two blocks (and running line) for the spanker gaff throat halyard (or halliard as it is spelled some places). Now on to the yards and their appendages (after I get the metal band in place).
- Jim Rogers, Tom E and JpR62
-
3
-
-
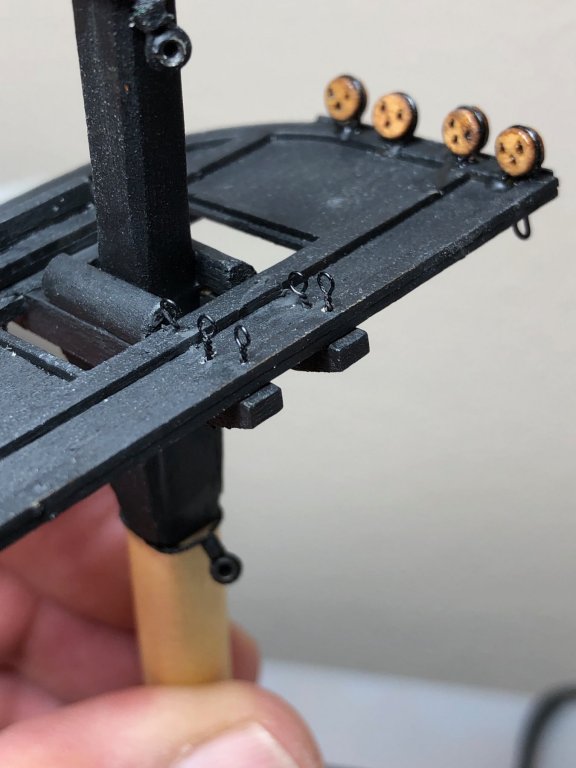
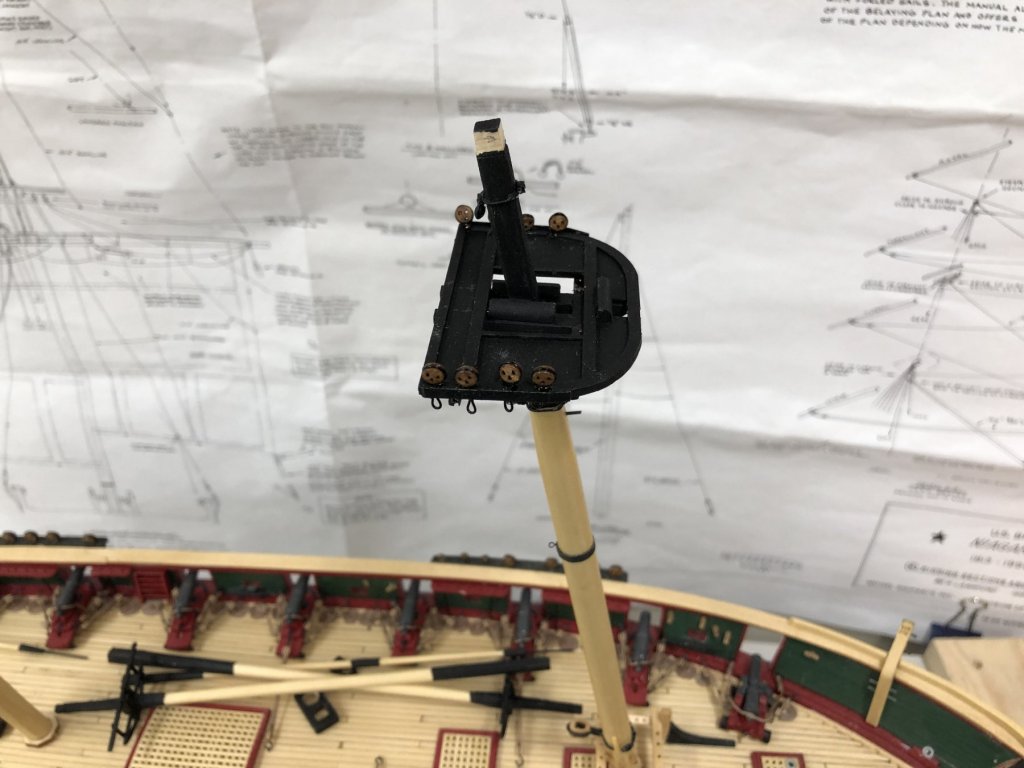
With the fore top installed I looked over the plans and it appears there are five eyebolts needed on the fore top to support tackles of various configurations. I believe they are:
Main Top Gallant Stay Port Side aft of mast (aom)
Fore Reef Tackle Port side aom
Fore Reef Tackle Stbd side aom
Fore Top Gallant Yard Halyard Port side aom
Main Royal Stay Tackle Stbd side aom
So that is three eyebolts on the port side and two on starboard. Spacing is going to be a challenge as all have 1/8" single blocks (with becket) attached.
I left them a little fair of the fighting top surface to make it easier to thread the blocks in when the time comes.
-
More Syren rope arrived today so I started serving what will become the lower shrouds. I got two pieces a little less than two feet long each. I am still undecided about how much of the shrouds to serve. It took just under a hour to serve the two lengths and I was operating about as fast as I could spin the wheel most of the time. What seems to take time is having to stop three or four times on each piece and reposition everything.
Given the hurried nature of the construction and the manpower limitations that the shipyard and Navy were operating under it is at least possible than none of the shrouds were served - just one of those things that never made it to the top of the bosun's "to do" list.
There is at least one Niagara build on this site (6ohiocav) where the entire fwd shroud was served and the others just the part around the mast down to where the two individual shrouds split from the "pair". That might be a good compromise. I also got around to the getting the deadeyes stroped and installed on the fwd top and the top onto the mast. Have to add a few eyebolts and search the plans for other "goodies" that mneed to go there BEFORE things get really crowded.
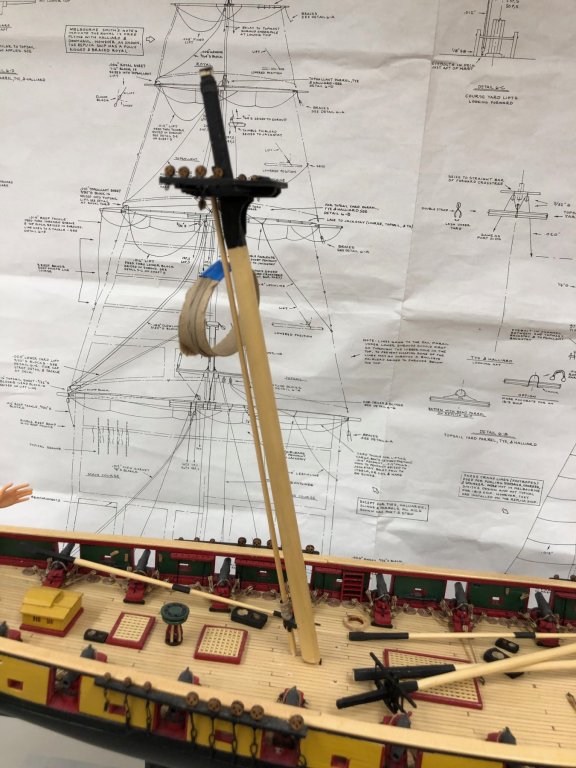
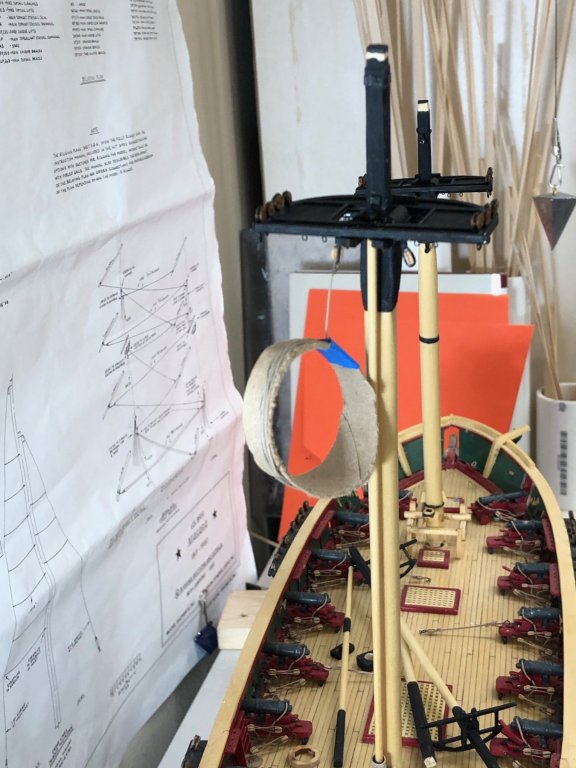
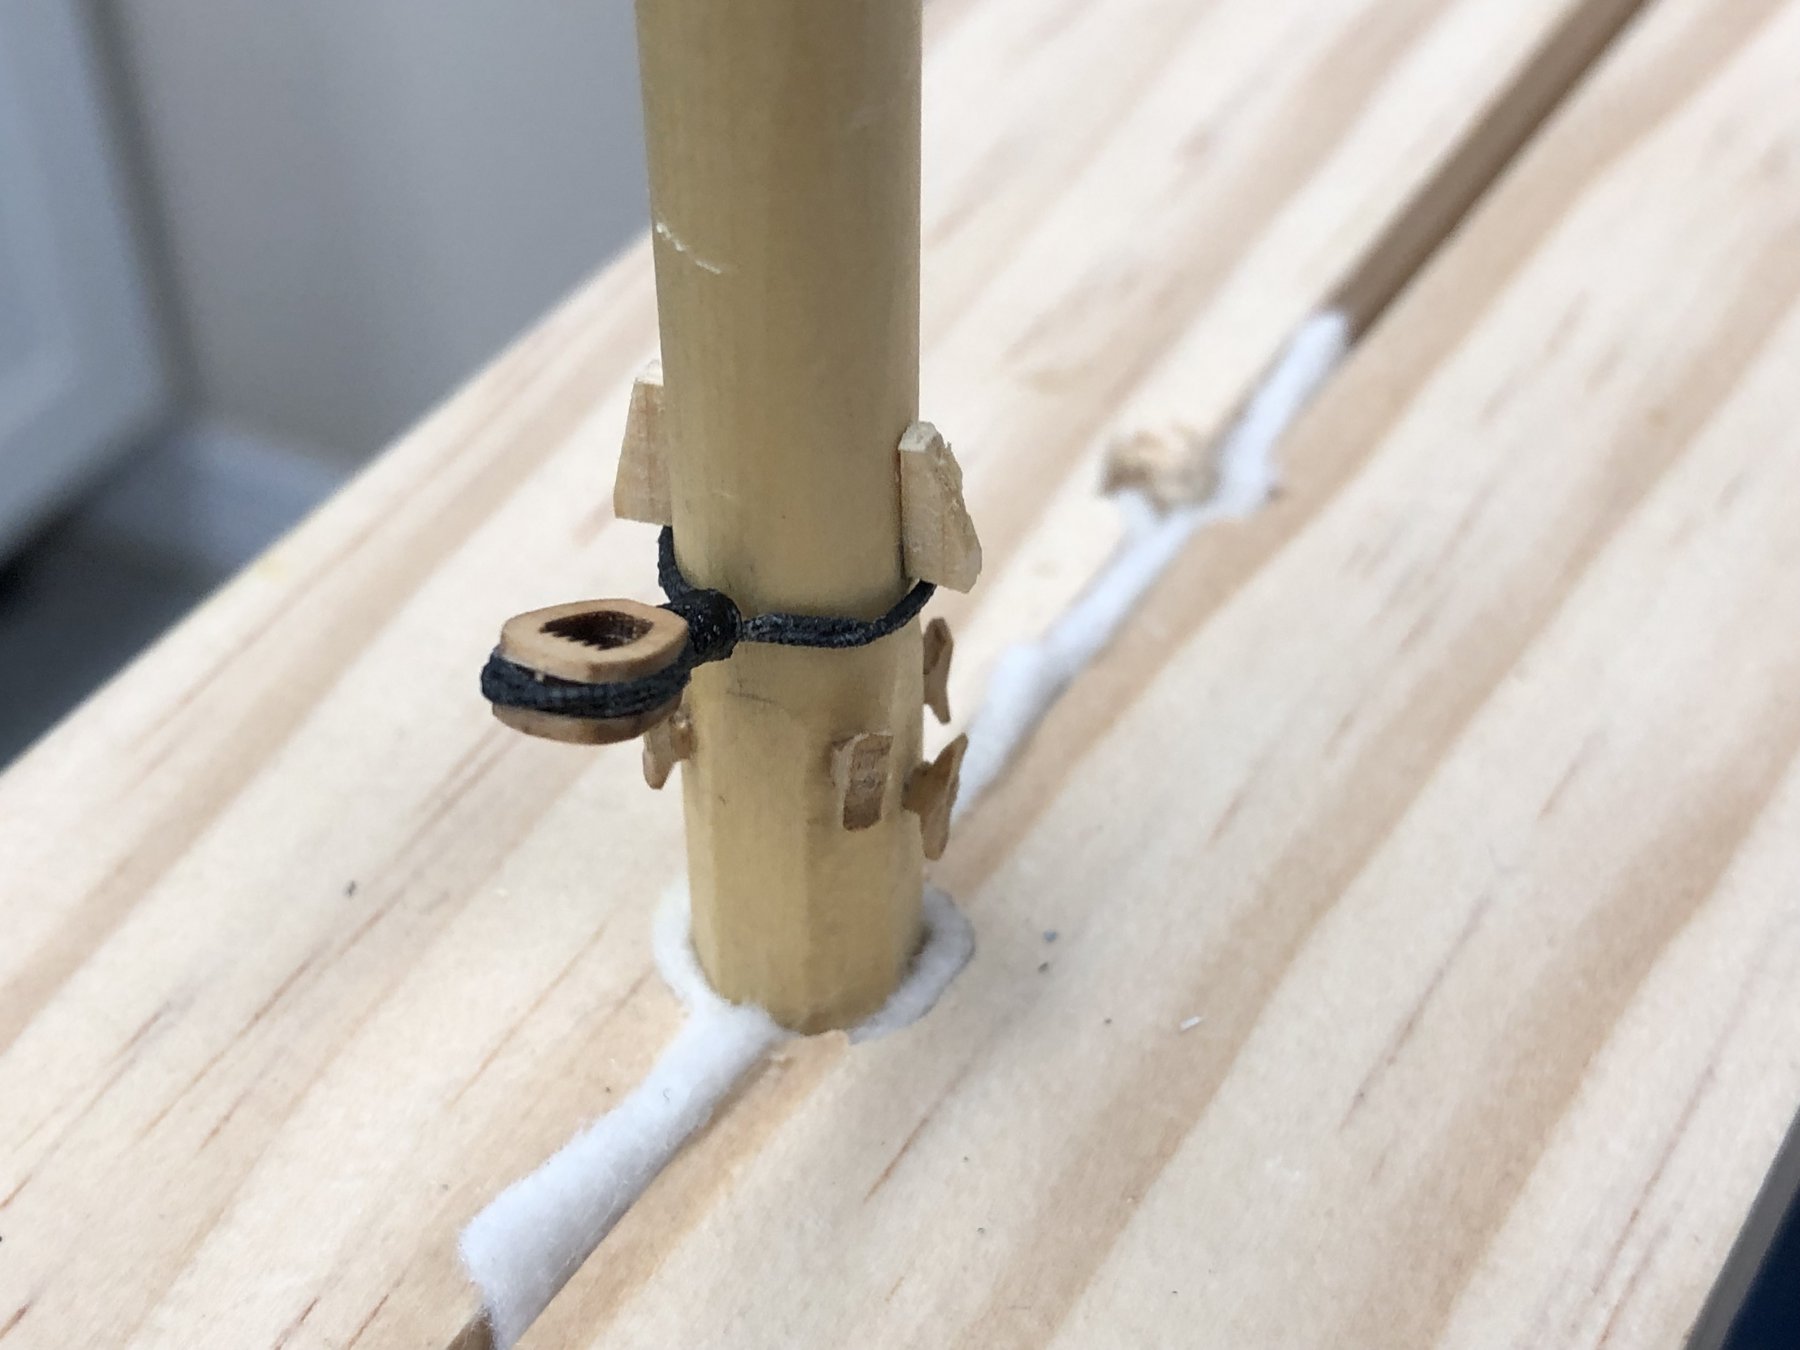
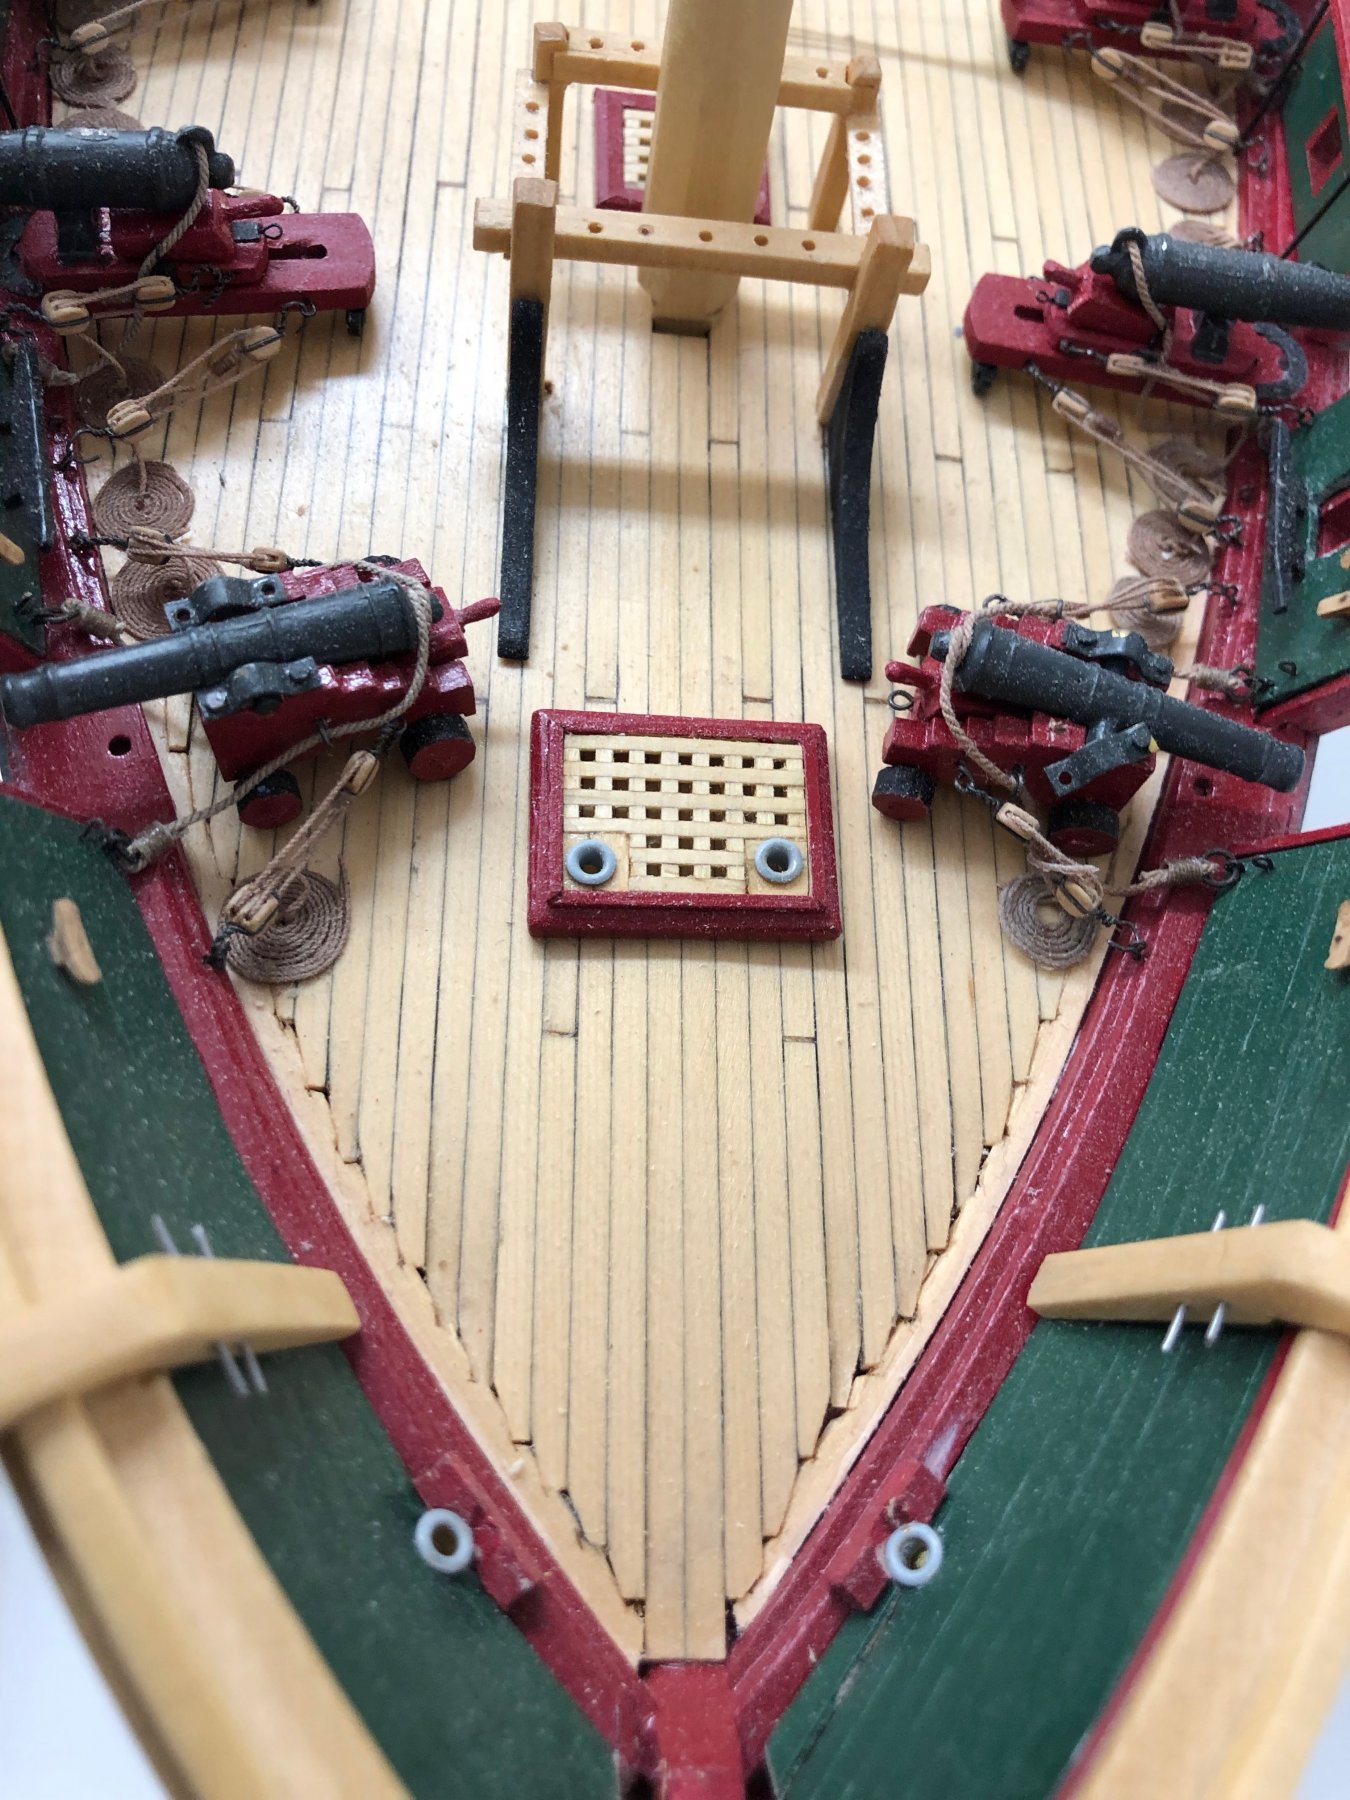
And yes, that is a pin to position and hold the course yard - I am not so trusting of my abilities to try and get the course yard to "hang" only by the truss and sling.
-
Foremast cleats, chocks (except for the Main Preventer Stay chocks which go on when the stay does), Main Stay collar and Spring and Main Topmast stay collars and thimbles and the mast band and fairlead. Next come the blocks for the various lines - there are at least 10 blocks that go under the fore top (and I think about that for the main top as well). Making a spreadsheet to help keep track of everything.
For those interested the the closed heart is from Syren (7mm closed) not the one in the kit, the cleats are Syren (5mm) and the thimbles are 3/32 bullseyes from Bluejackets.

- JpR62 and Jim Rogers
-
2
-
Added the three blocks for the head sail downhauls and the bowsprit/JB/FJB assembly is as complete as I think I can get it at this point. I used 3/32" blocks for the downhauls although the plans call for 1/16" and 5/64". Syren sells a 2mm block which is pretty close to 5/64s (1.98mm according to Google) but the difference to 3/32 is not worth the effort IMHO and 1/16" blocks are too small for my aged fingers to work with.
I am going to put this away somewhere safe (I hope) and move on to completing the masts and serving the shrouds (or at least parts of the shrouds) before turning to the rest of the yards.

- Tom E and Jim Rogers
-
2
-
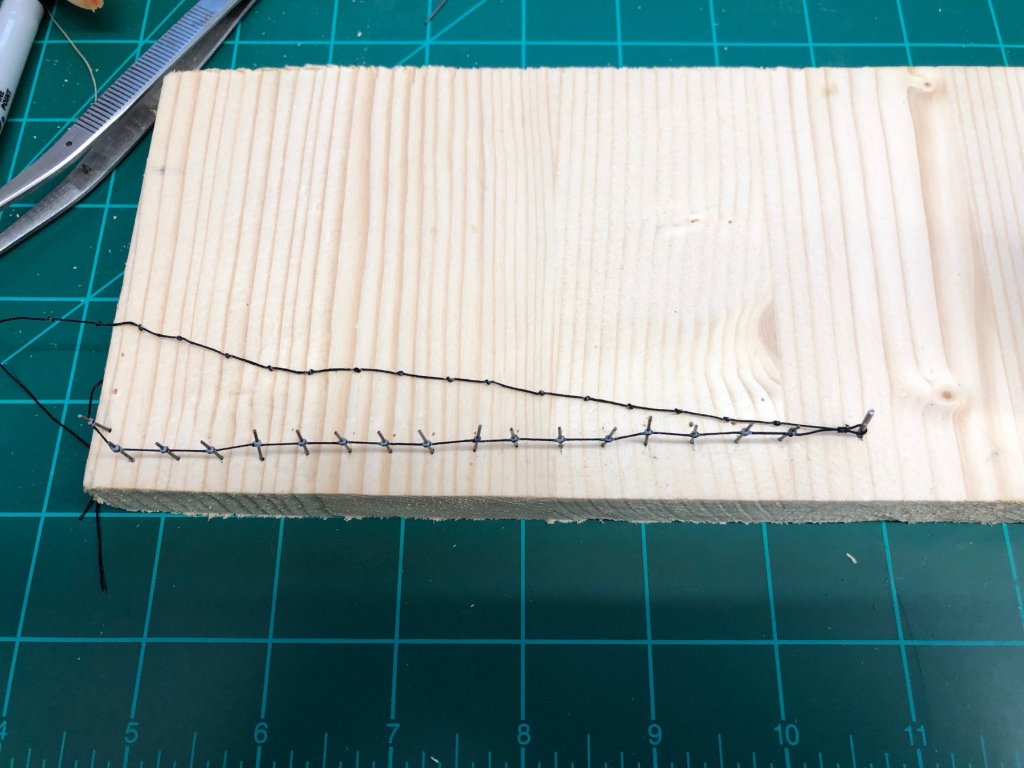
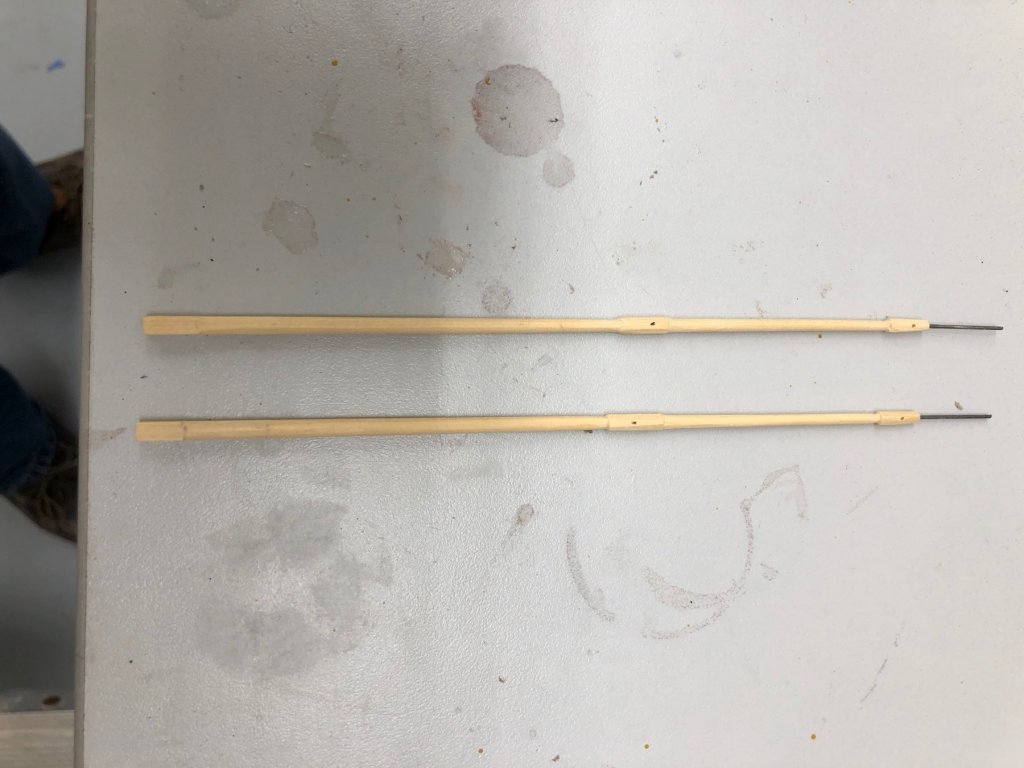
Having looked through the thread on this site on foot ropes, and thus determined that indeed there are two foot ropes required for the jibboom/fjb and the drawing shows that they have knots (to give your foot some purchase as you get closer to the ends I assume) I had to come up with a way to put the knots in the .012" line (black Syren in this case) evenly spaced, and (hopefully) more or less the same on each foot rope. Being a fan of the brute force approach I used short pieces of .025" music wire in my yard arm jig spaced per the drawing. Then I tied a simple overhand knot in the line around each piece of wire starting in the middle of the line. I used 50/50 white glue and water on each knot and when dry used a pair of tweezers to lift the knots off the wires and then did the other half in a similar fashion. After the knots are off the wire a gentle jug on each knot will close up the gap where the wire was and produce the required knot. Here is the line with one side done and the other on the wires.
Here is also how they look installed. I discovered that there are similar (not as long) foot ropes on the spanker boom so I am getting double duty out of my little row of wires.
-
Oliver,
I am not sure what you mean by "running blocks". Could you explain a little more and I will be happy to tell or show you what I can
-
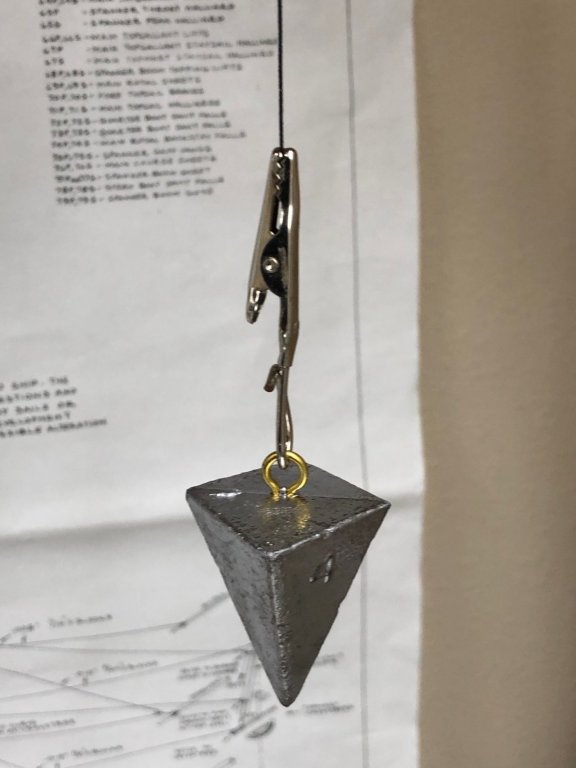
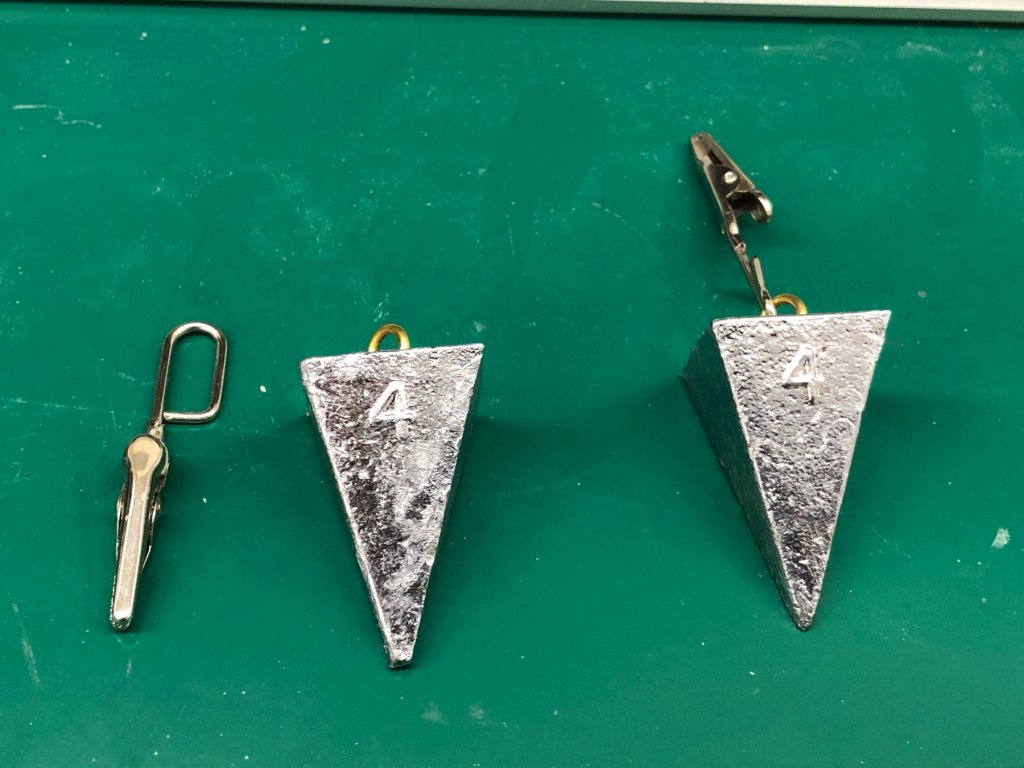
HQ had to look for something at Walmart and as we were passing the fishing tackle (on the way to fabric as I recall) I saw some tackle weights on the shelf and got the idea for some line (or anything you can hold with an alligator clip) weights. I bought some pyramid (Aztec not Egyptian) sinkers with an integrated swivel and used some existing alligator clips that I got (I think) from Micro Mart. Put the two together and you have a 4 oz weight with an alligator clip. I bent the attachment on the alligator clip to try and get the weight directly under to clip.
At the moment I am using them to tension some rigging line after it has been served. I am trying to get pieces long enough to do at least the forward most lower shroud completely served.
-
Don't forget the spanker boom rest and the mast hoops before you glue up the spanker/main mast assembly. Don't ask me how I know.
- Tom E and Jim Rogers
-
2
-
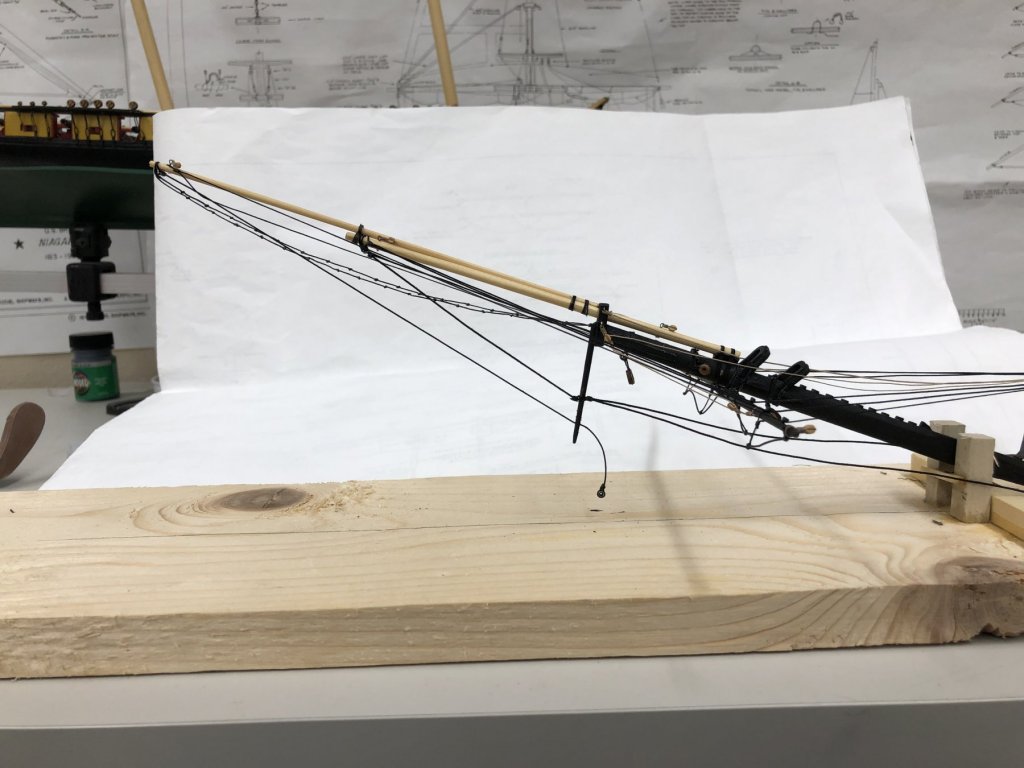
Except for the foot ropes on the jibboom and FJB I have assembled and rigged the bowsprit/JB/FJB about as far as I can without the fore mast to supply the stays and the hull to provide the end points. I will put this somewhere safe and out of the dust (although that has been considerably reduced since the mast/yards were completed). I will paint the "thimble" (actually a small Britannia metal bullseye) black before this goes onboard. I think I also have to add some blocks on the JB and FJB for the head sail downhauls. Will research that tomorrow before football.
By the way, does anyone know where the jibboom outhaul tackle belays? The tackle is shown in the upper right on sheet 5 below the plan view of the bowsprit but there is no mention of the belay point and the belaying pin table is also silent on the subject. No big deal, I am sure I can find somewhere up forward to secure it, just wondering.
- Jim Rogers, Tom E and JpR62
-
3
-
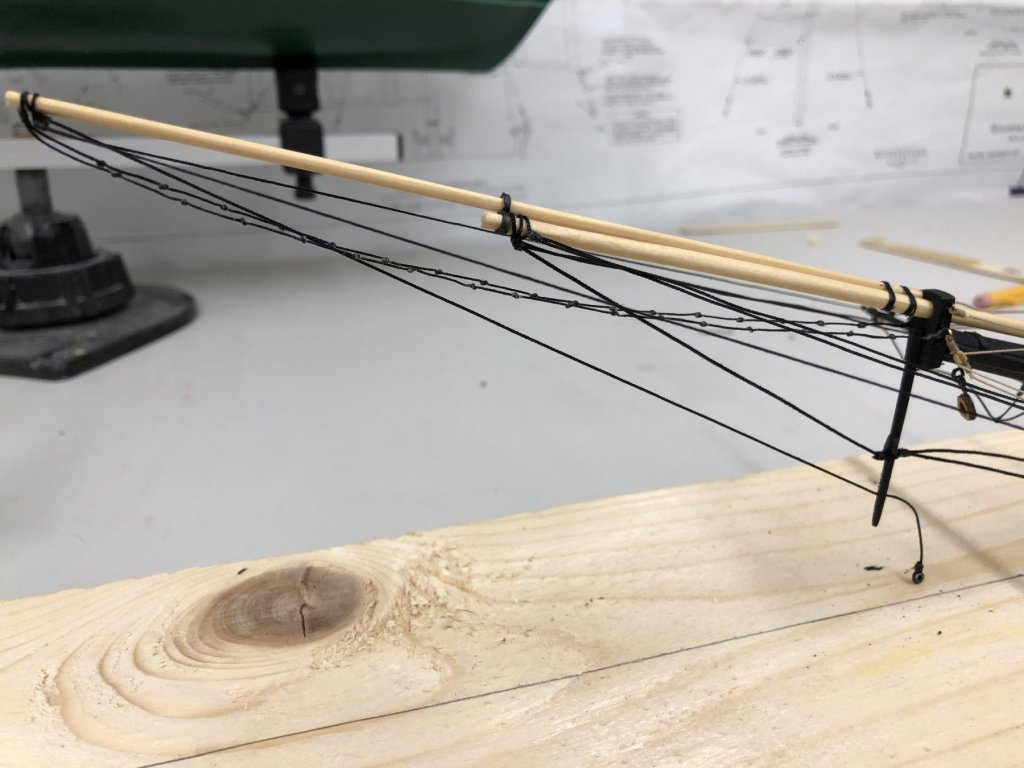
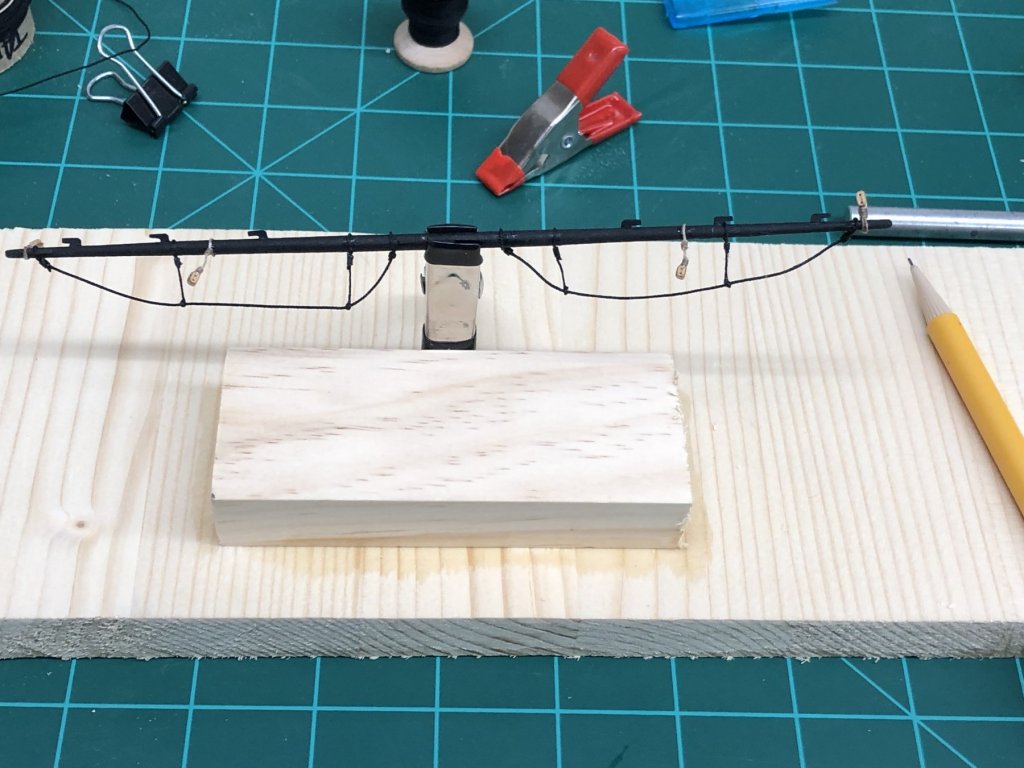
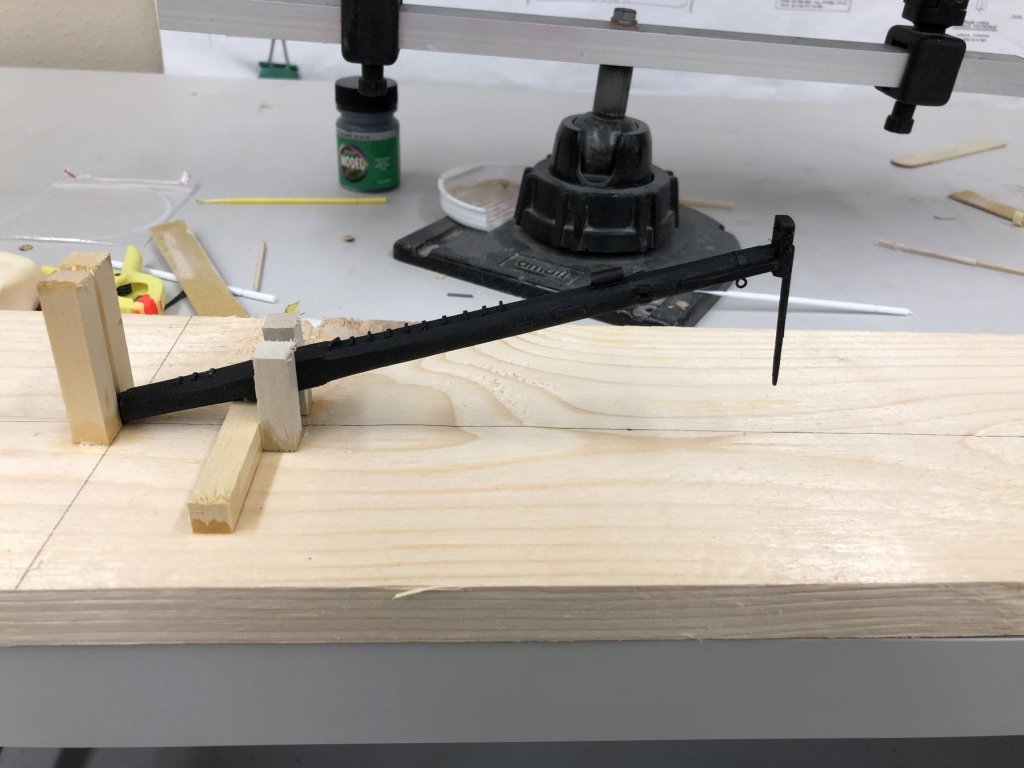
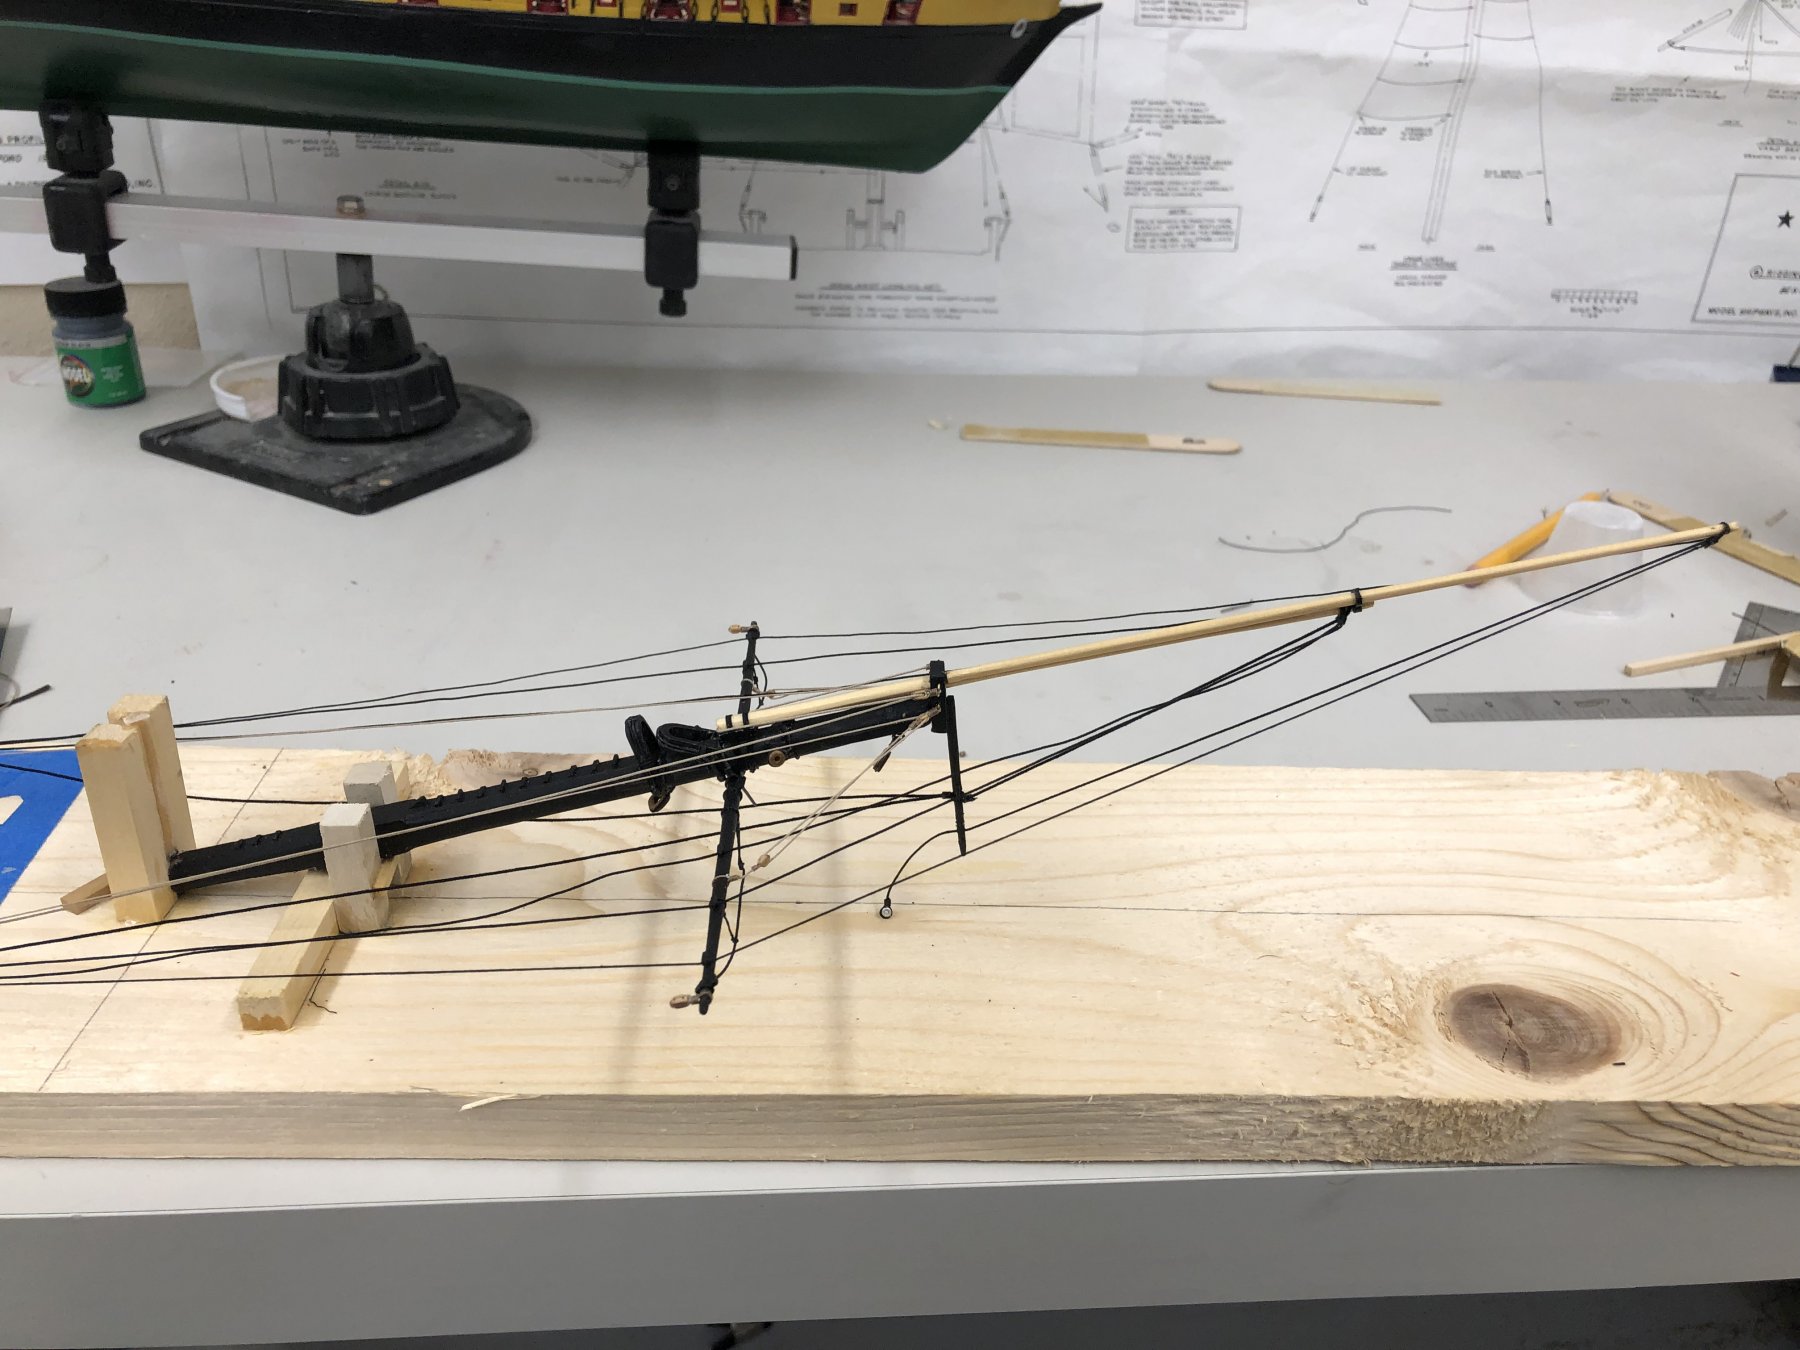
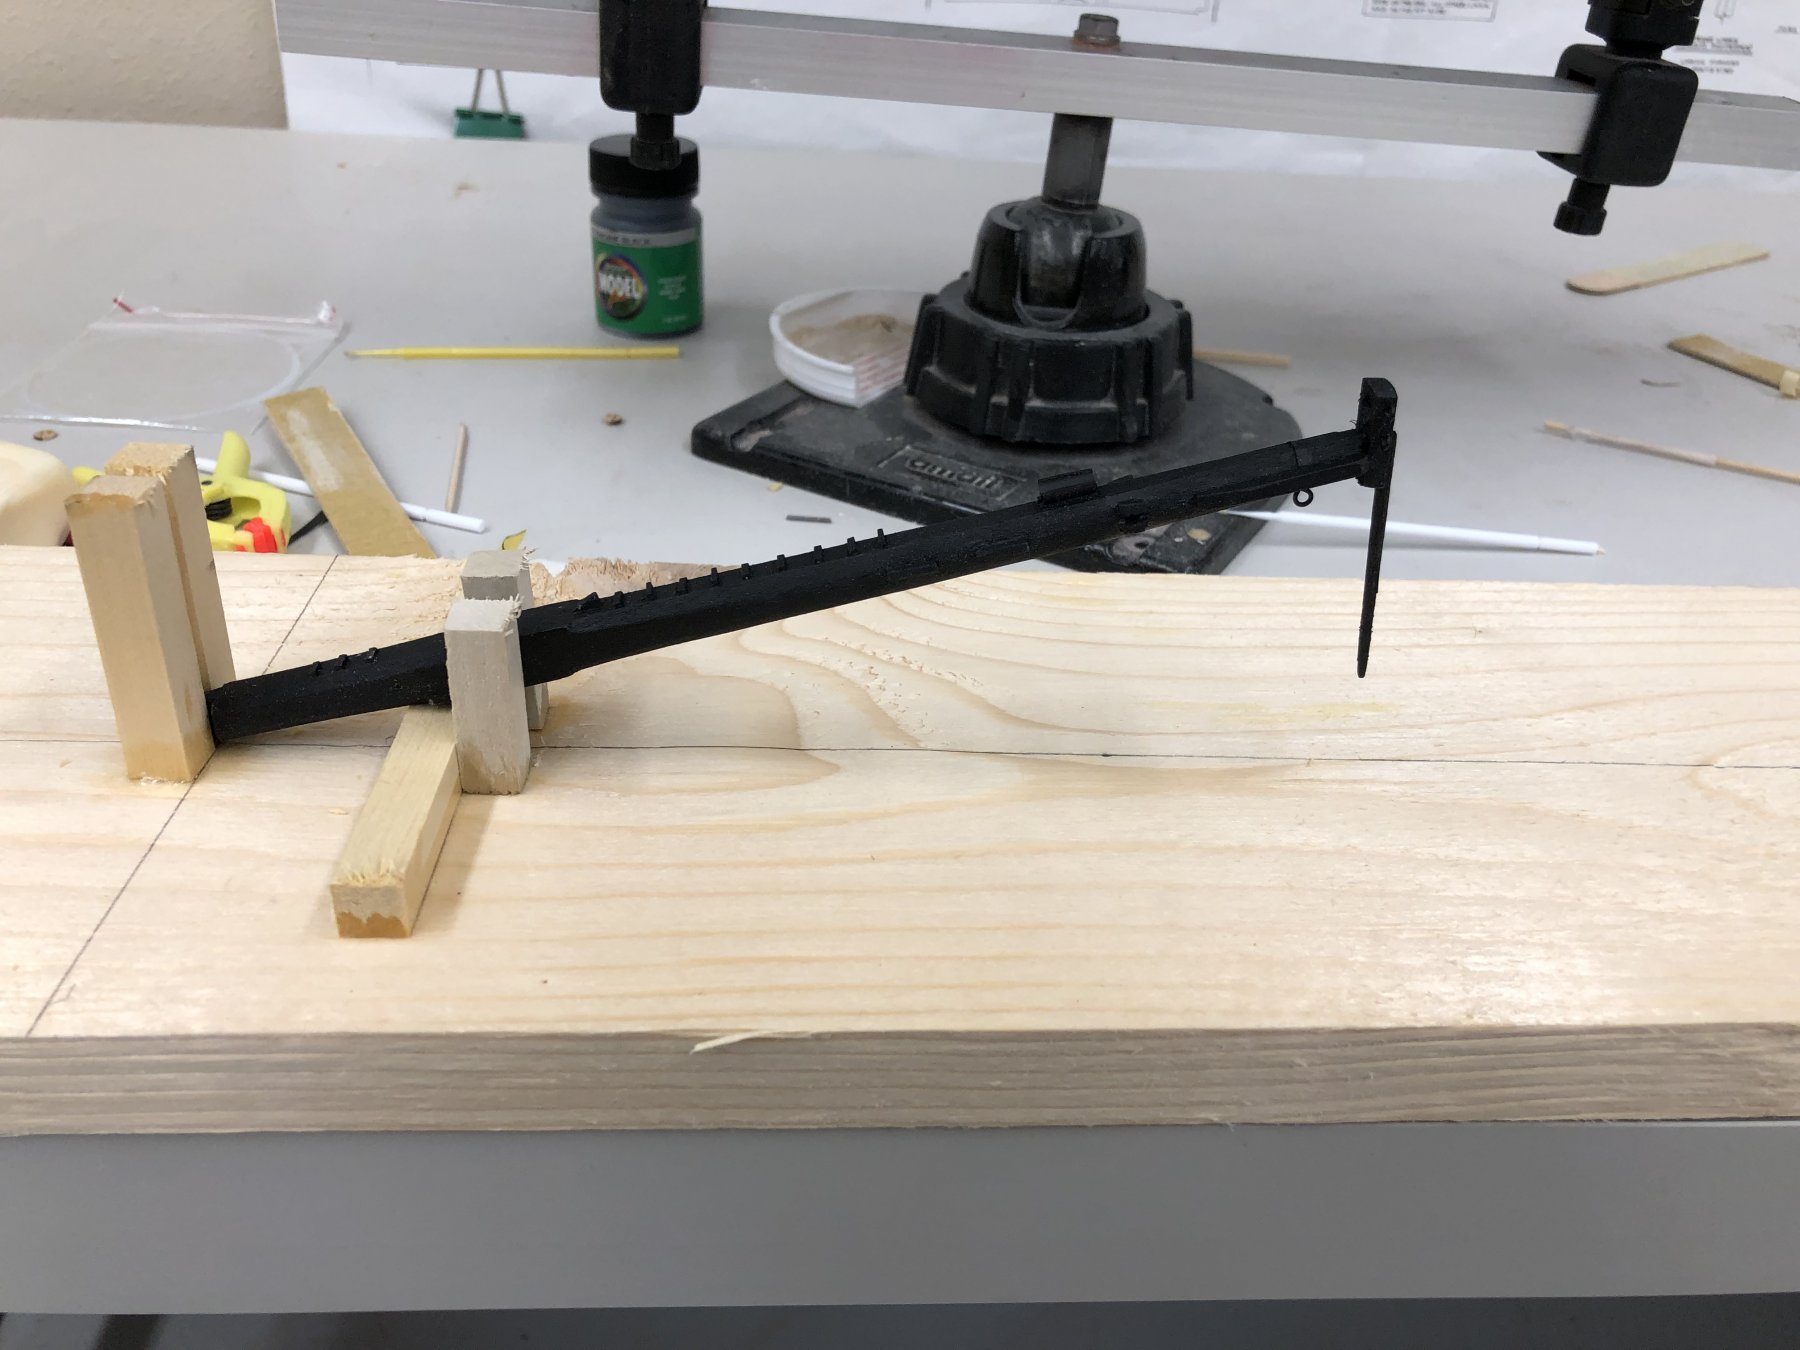
Completed work on the sprintsail yard prior to mounting on bowsprit. Considering all the "yard work" coming up I built a little jig to hold the yards securely while adding foot ropes and the various block that have a home on the yards. I added the yard lift tackle to the bowsprit as well. Hopefully I will not regret having those lift lines "hanging around" while I add the jibboom and FJB.
-
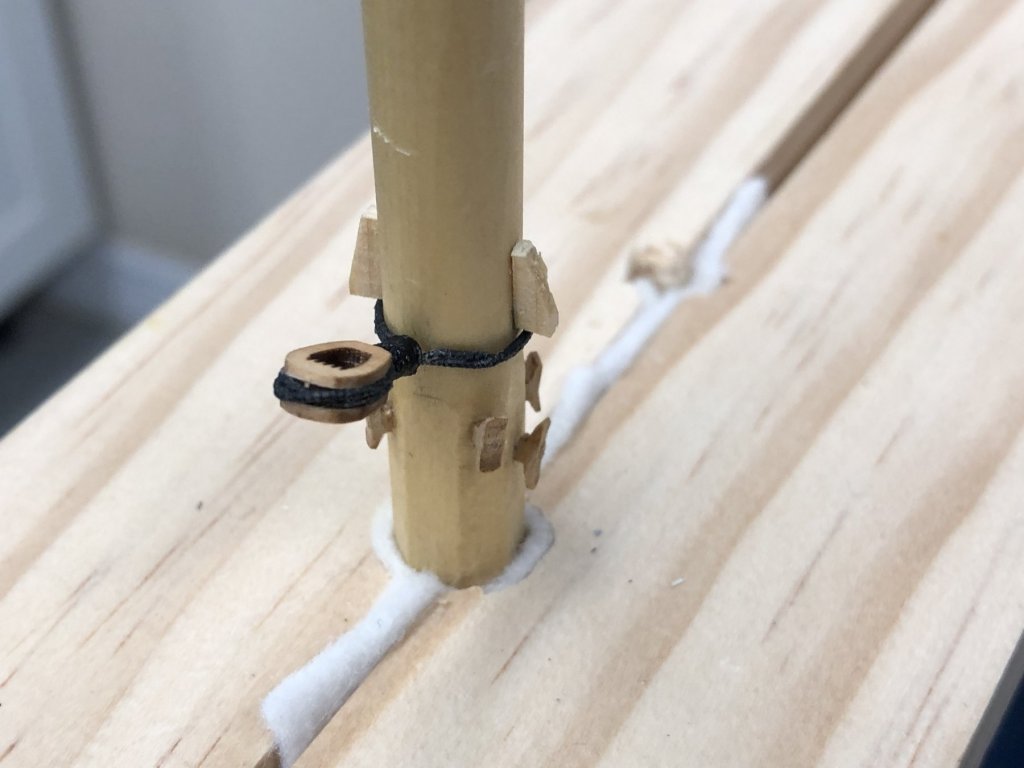
Slowly working off the various things that attach to the bowsprit before attaching the jibboom. Here are the hearts for the bobstays. I used the Syren 5.5mm hearts instead of the 1/8" called for in the plans but I though the Syren hearts were too thick so I glued the outer two pieces together and filed a groove in that. I think it looks okay if not exactly "in accordance with the plans". As you can see I also got the Fore Stay Preventer hearts.
Got the Bowsprit shroud collar attached too.
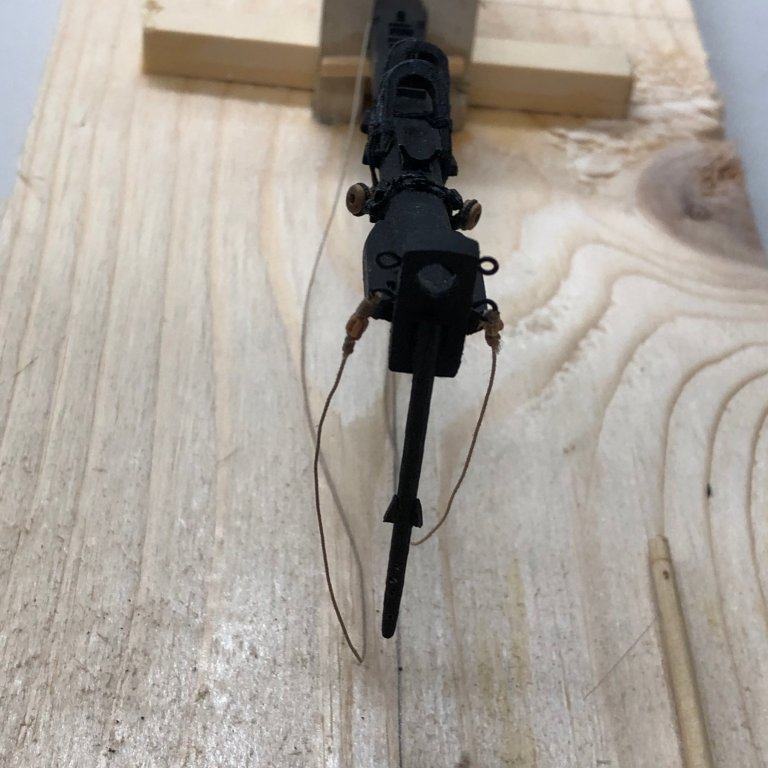
I (finally) read the note on the plans about the footrope for the Sprintsail yard (not show on the drawing of the sprintsail yard, nor is the note on that sheet). So I am now preparing tom put a footrope on the spintsail yard before it gets attached to the bowsprit. Since the spintsail yard sling goes right behind the jibboom I think it probably goes on before the jibboom.
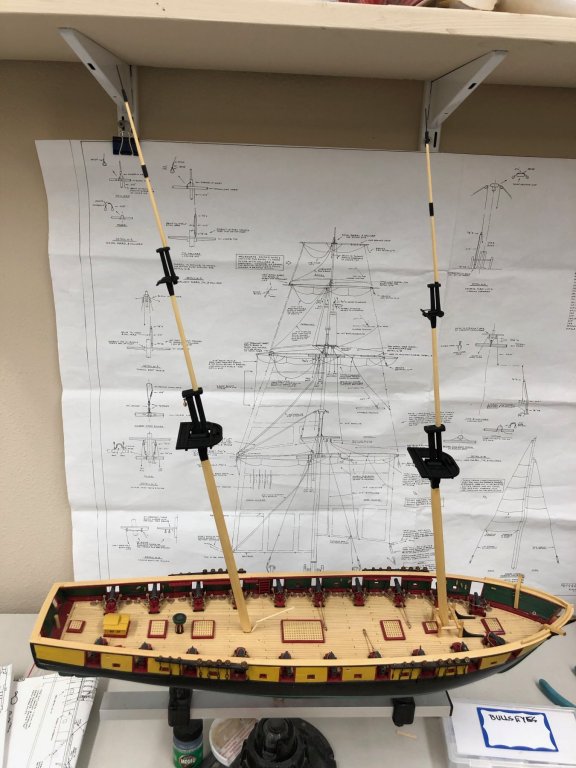
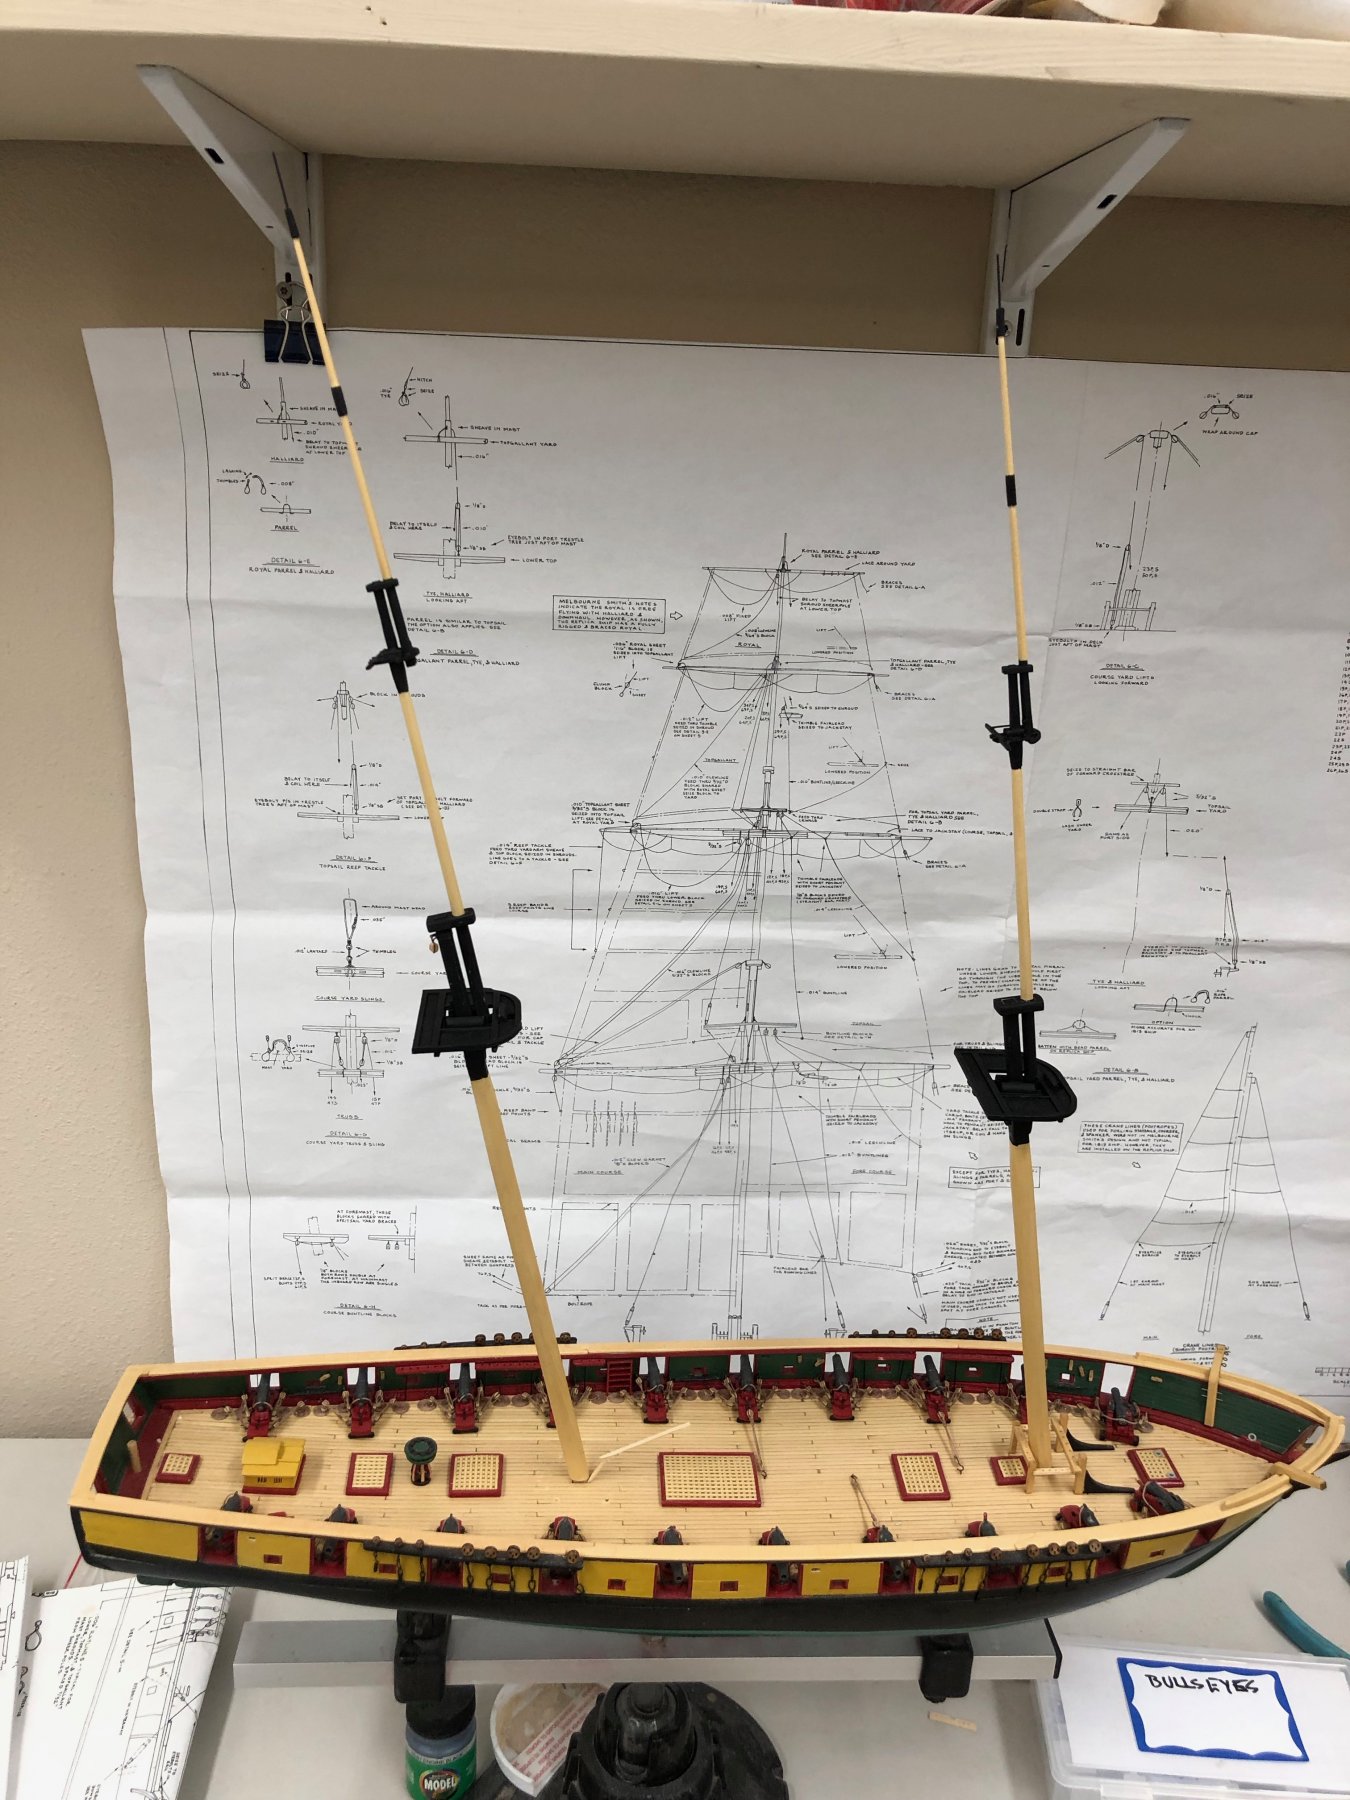
Paint is dry on the masts and I could not resist a dry fit. I also finally got around to hanging the plans up where I can see them I have the sail plan going to the immediate left of this one.
-
Tom,
Clearly there would have to have been some way to get the anchor rode through the hatch. Maybe they only had the anchors connected to the rode "as needed" although Lake Erie is shallow enough most places that anchoring would have been at least possible. I am not sure what would happen on my version in heavy weather probably disconnect the anchors (not very useful in heavy weather) and put the solid hatch as you have it over the grating. You could just leave the anchor rode off the model or just run them to the hawse and not worry about it beyond that.
-
I decided to work on the bowsprit while waiting for the paint to dry on the masts. I built a jig to hold the bowsprit while I work on assembling and doing what rigging I can before it going on the ship. I read on one of the build logs that you should get as much of the fitting on the bowsprit before adding the jibboom and FJB so I started with the Forestay heart. I decided (not sure why, maybe I needed to see some return on the Syren Serving Machine I bought last year) to serve the lines that secure the heart to the bowsprit. The serving machine works as advertised and it only took 15 or 20 minutes to get two pieces of .025 line served with 80 WT thread. I did have to add a collar in the tube where the thread passes through to the crank to keep the line from abrading and eventually failing. That is the good news. The bad news is that I have a hard time noticing that the line is served, even when I know that it is. Am wondering if the effort to serve all the shrouds and stays, or even just the ends is worth the time and effort. Once you start on the shrouds you are pretty much committed -like pig at breakfast.
So here is the bowsprit jig and the Fore Stay heart. The heart is only attached (for now) by the bridle. It needs to adapt to the correct angle when the Fore Stay is rigged. Yes, it needs some paint touch-up, all in good time. And the jig works for accessing the underside of the bowsprit too.
- Tom E and Jim Rogers
-
2
-
Tom,
I think the anchor rode went into the fwd hatch. It would have cluttered up the deck too much running all the way back to the main hatch IMHO. Here is what I did. The hawse and these are painted gray to simulate the lead that was likely used to reduce abrasion to the anchor cables as they were handled.
-
-
-
Tom - welcome aboard. I was beginning to think ship modelers were pretty scarce this side of Florida. They seems to have an active community on the other side (at least in and about Tampa) but I have not found anything on this side. Would be great to get together sometime.
-
Thanks Jim - Note the toothpick stuck in the base of the main mast to get it to line up with the centerline. Should have been more careful forming the tab that fits into the hull.
-
Tom,
Burton pendants - they are shown in the plans (sheet 5, very top left hand corner) and in the period rigging book I have (Rigging Period Ship Models by Lennarth Petersson) but they appear to just hang there (along with the top mast shrouds although the book shows them at the top of the lower masts also). I can't see anywhere in the plans where something is attached to them. If they really just hang there I will probably not include them. There is sooooo much rigging here I am looking for way to simplify things. Any thoughts?
-
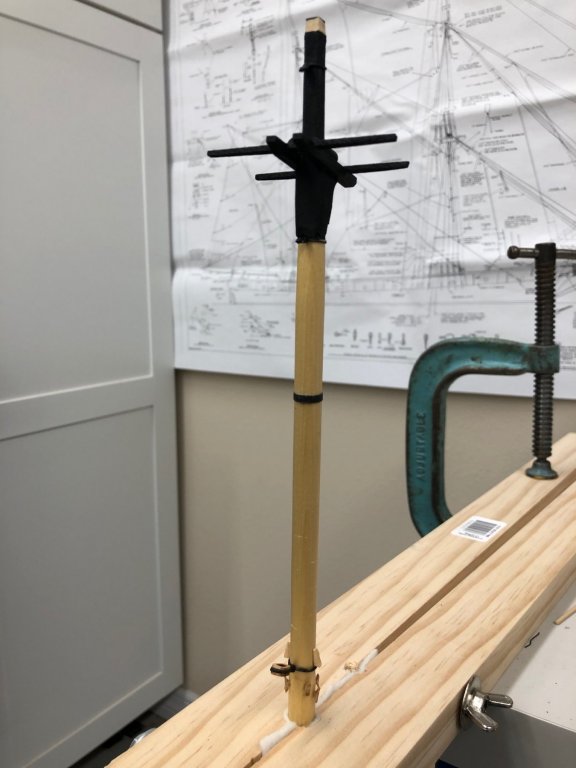
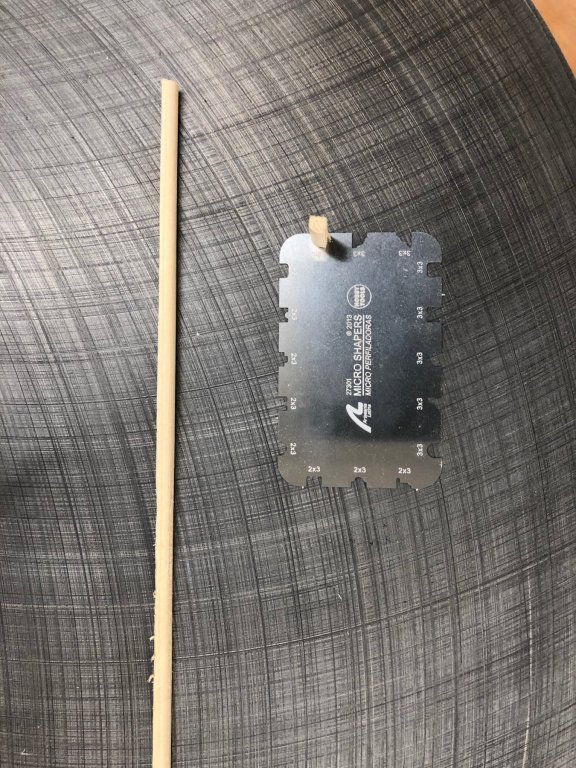
I continued working the upper masts. It took six tries to get two acceptable royal/top gallant masts. They get pretty fragile if you thin them down per the plans (don't ask me how I know). I am sticking with using .032 wire for the extreme upper section. Once they are painted it will look okay (I hope - not really interested in try to make any more masts. I dry fit all the masts to see how they look all together and I am impressed with how tall they are. I am going to see the replica this summer - should be quite the sight.
I also got a chance to use the molding cutters I got from Artesania Latina for Christmas. I used it to cut the quarter round needed for the bolsters on the mast platforms. I used 1/8" X 1/8" stock and the quarter round 3 X 3 (millimeters I assume) cutter. Came out pretty good but I am sure there is a technique to this that I have not yet mastered. More practice required before tackling anything more complex. Should be great for adding a little spice to deck furniture.
Speaking of sights - I got to sail on the James Craig (1874 iron hulled, three masted barque) through Sydney harbour (as the Aussies spell it) and out into "The Great Southern Ocean (aka South Pacific) in early December. Quite a sight with four sails set on the fore mast, three on the main, spanker, two jibs and two staysails. An all volunteer effort with the paying passengers lending a hand where necessary to get the sails raised and set.

- Tom E and pythagoras
-
2


US Brig Niagara by Tom E - Model Shipways - 1:64 Scale
in - Kit build logs for subjects built from 1801 - 1850
Posted
Looks good - I did not use any buff paint. If the instructions said buff I left it "bright". I also cheated on the deck furniture and moved the companionway aft and used grating in place of the salon and Capt skylights. Do not see how you could use the capstan with those structures as shown. They probably do not use it on the replica but I am trying to get what IMHO the Niagara might have looked like when built.