


NenadM
-
Posts
3,253 -
Joined
-
Last visited
Content Type
Profiles
Forums
Gallery
Events
Posts posted by NenadM
-
-
At first, it seems Ok ... but ... too big! I dont lke it! Bad work.

I.have to rethink whole thing.
- fake johnbull, GrandpaPhil, mtaylor and 1 other
-
 4
4
-
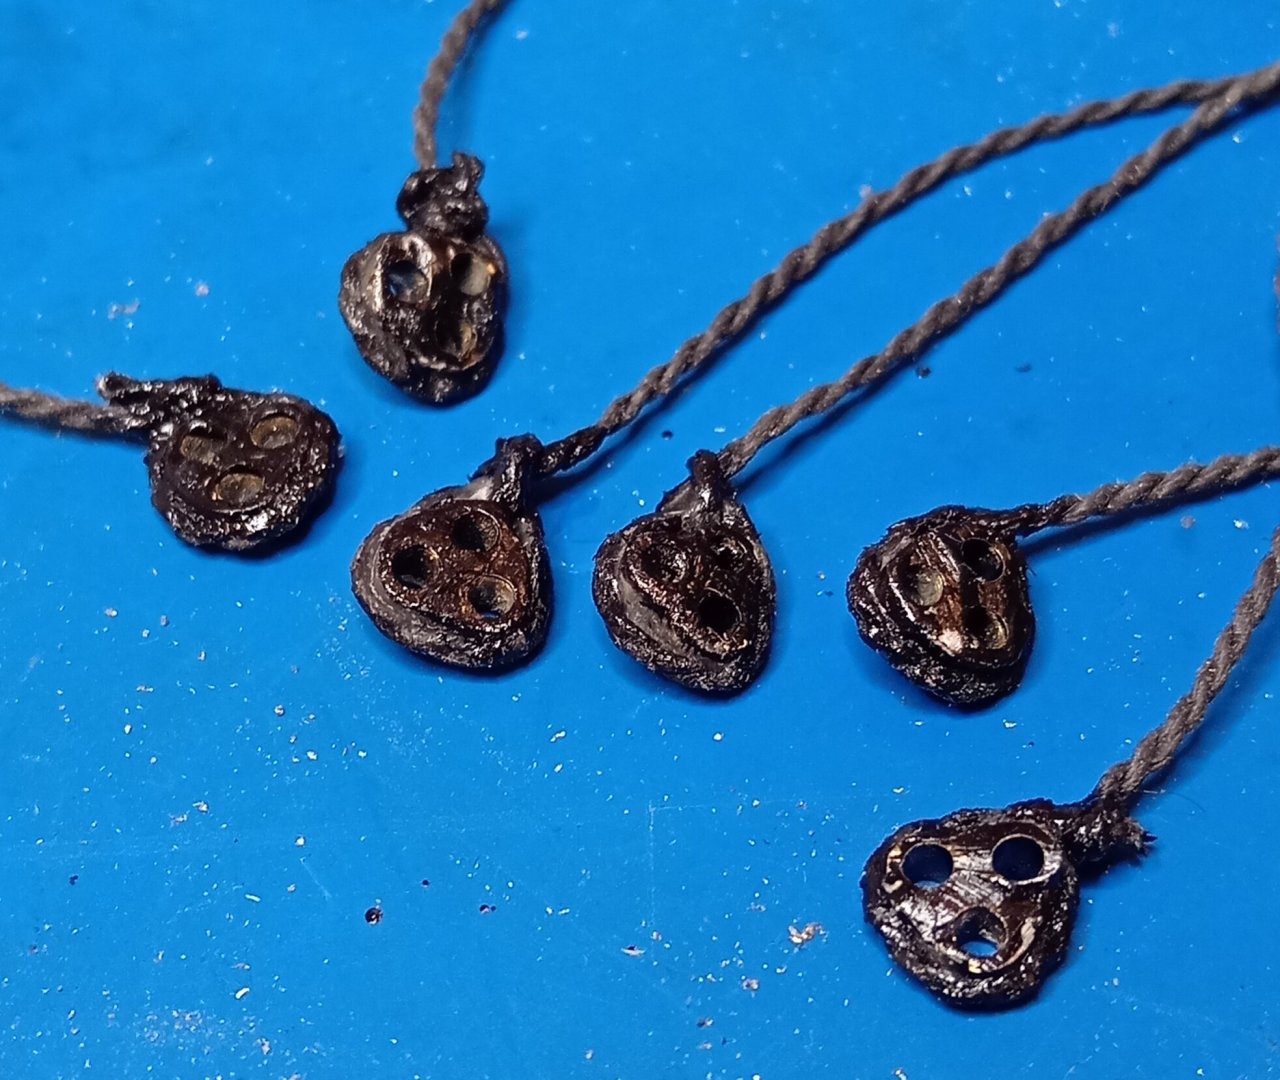
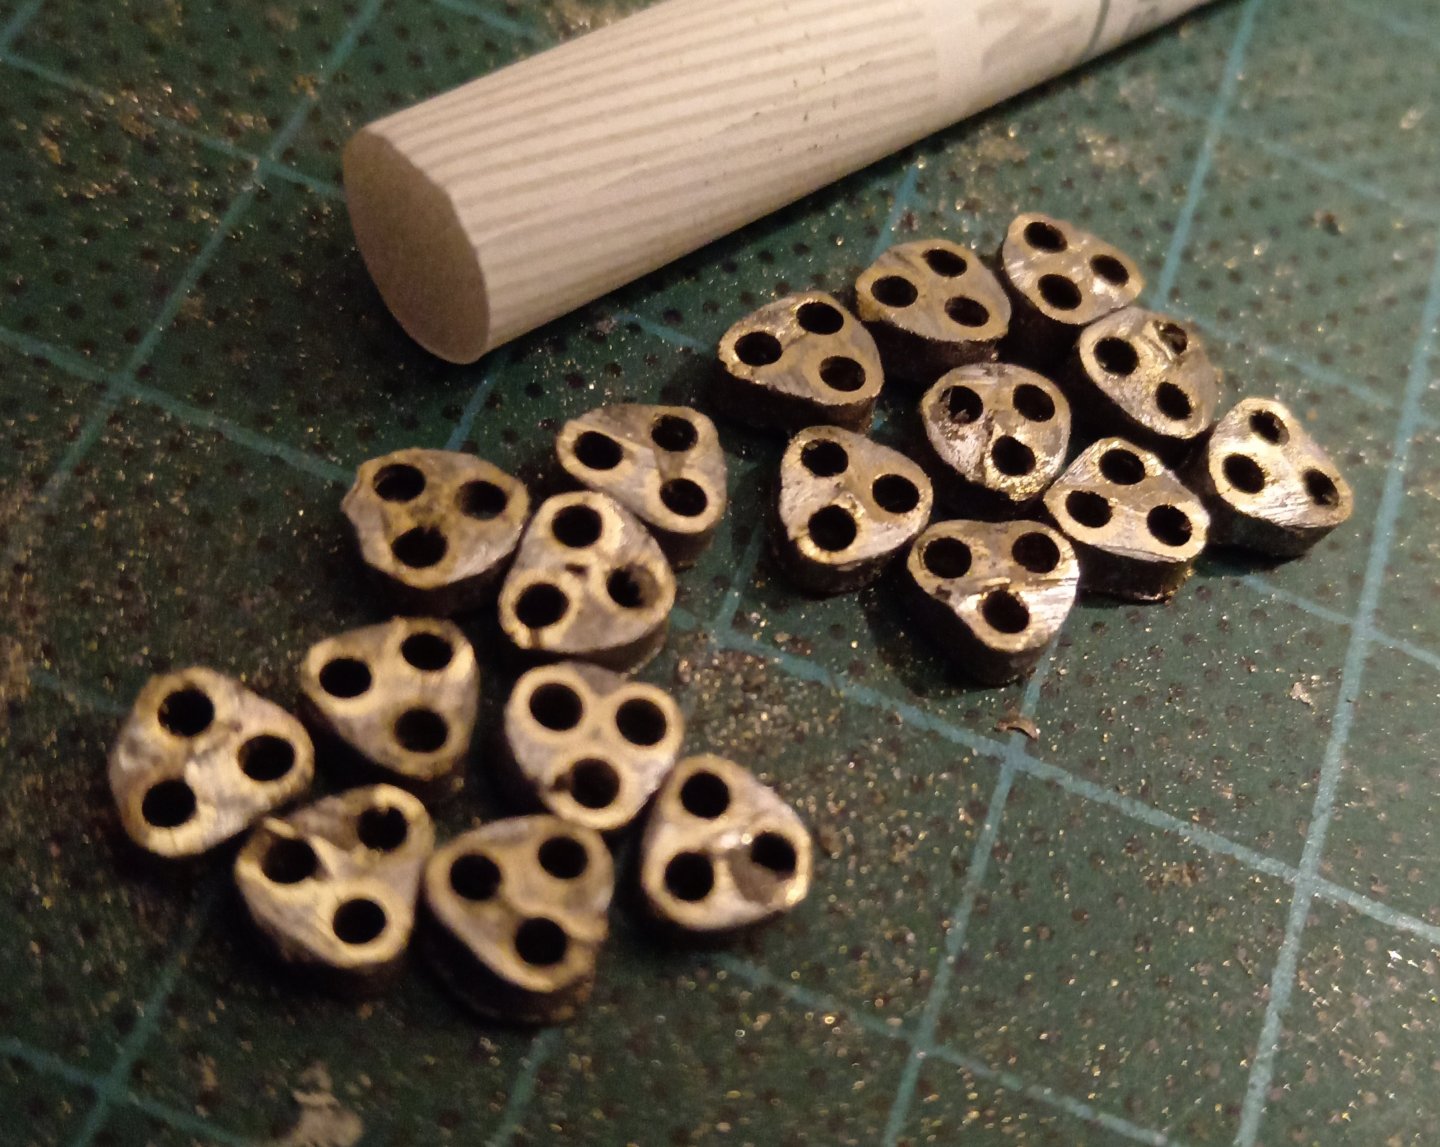
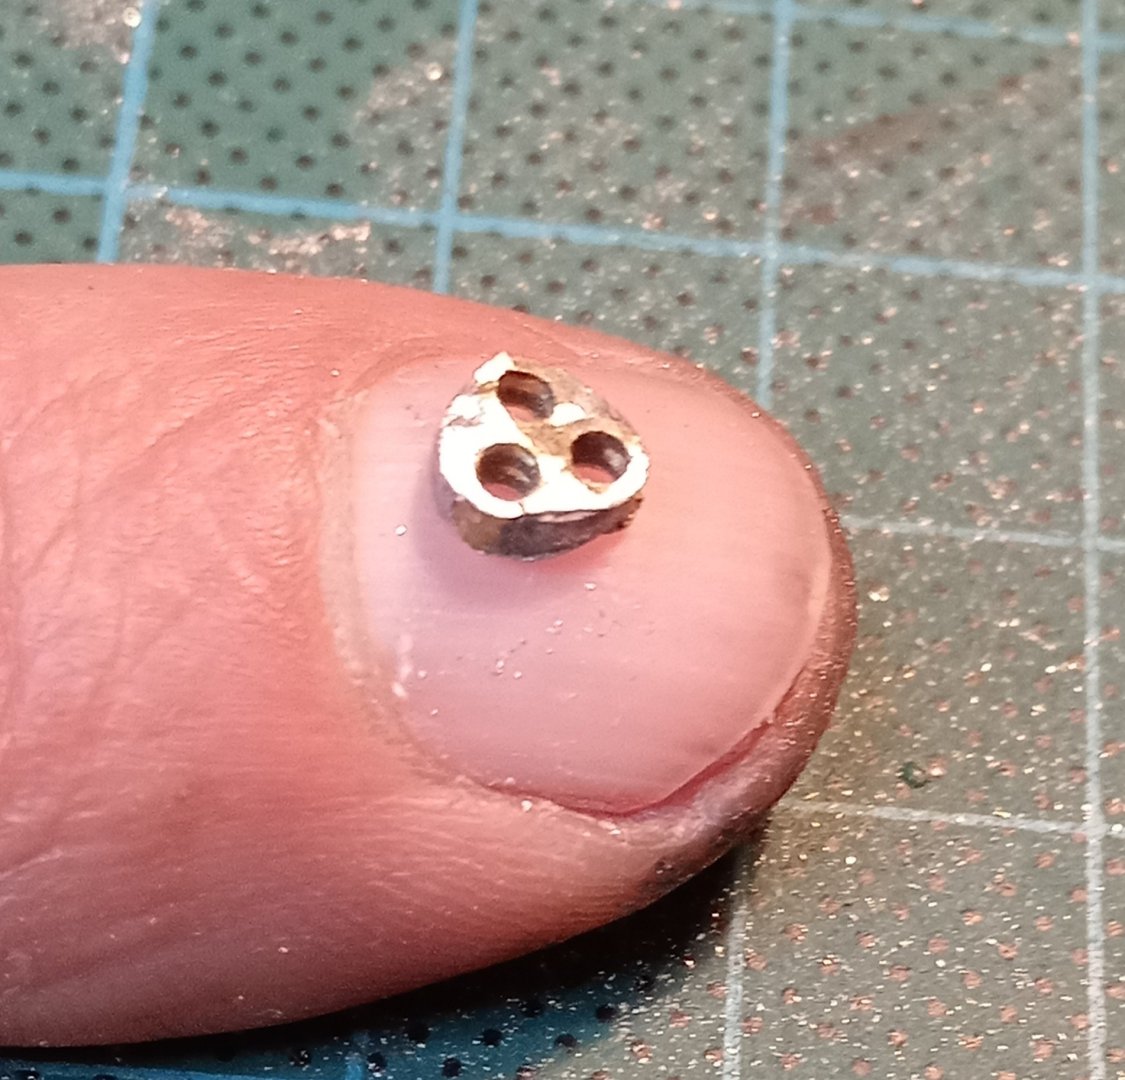
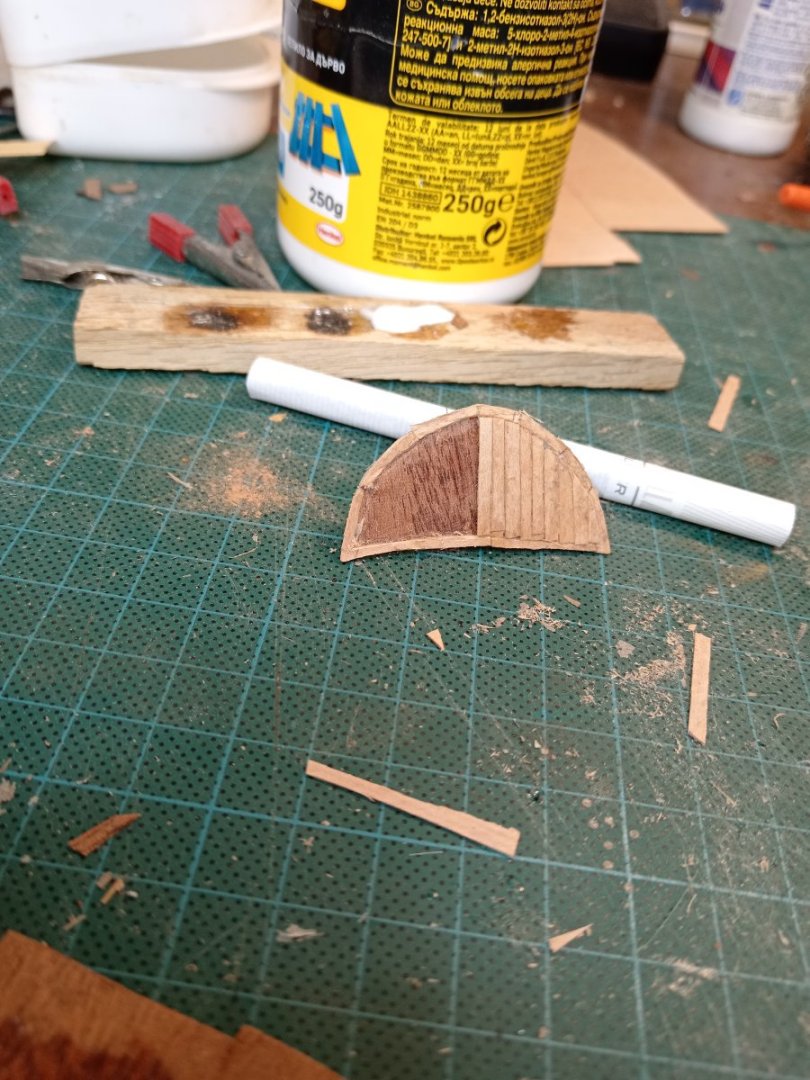
18 dead eyes ready for next step
- GrandpaPhil, mtaylor and fake johnbull
-
3
-
On 5/11/2024 at 1:15 AM, uscharin said:
Hello NenadM!
Fairly new to MSW and have been exploring all things Cutty Sark. Have enjoyed catching up with your modeling project. I started a model of Cutty Sark 40 years ago and am now ready to finish it now that I am retired. Will be starting a build log shortly once I get myself organized. Black River Monastery looks very interesting, and thanks for sharing that. I have visited underground monastic caves in Penza oblast, Russia (before war) so this sort of experience is very interesting to me.
All my best to you,
Ron
Hello Ron, and wellcome to MSW. I am glad if anybody is inspired by my attempts. Thank you for your nice words.
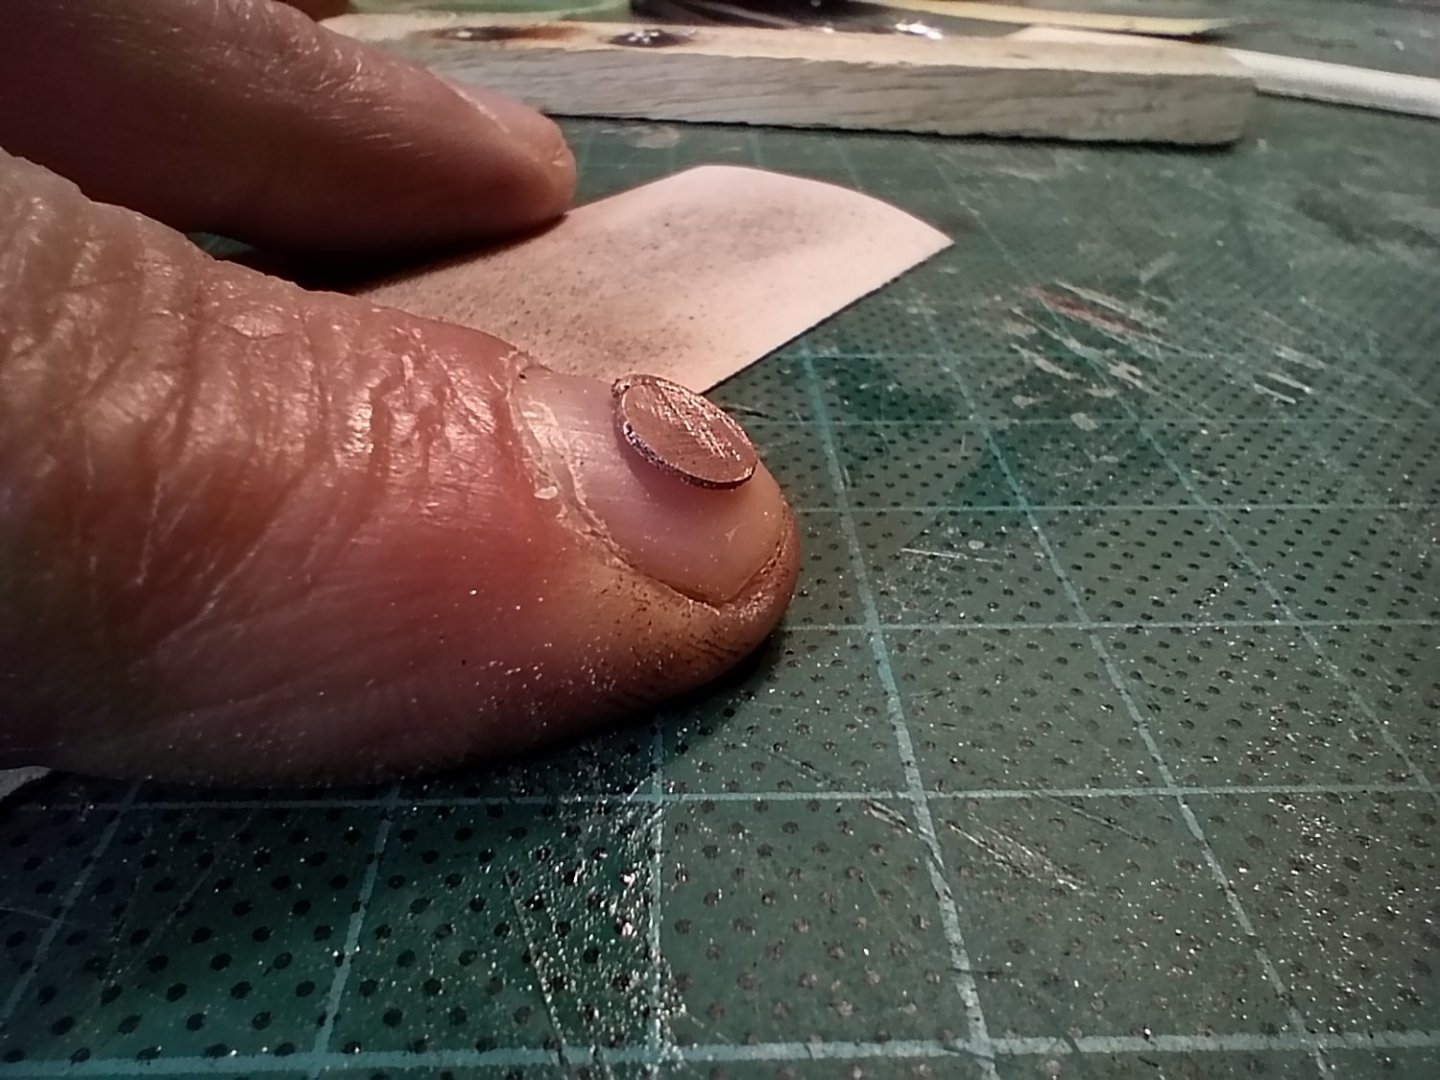
Here is last step I made today -dead eye 4mm dia

- uscharin, fake johnbull, GrandpaPhil and 1 other
-
3
-
 1
1
-
Short pause in shipyard.
Job trip with little travel to see incredible Black River Monastery at south of Serbia, situated in deep wood on mountain gorge with steep cliffs ...
Monastery church is situated in cave, miniature hermitages and monk cells are around and partially drilled in stone, narrow passages as labyrinth, wooden terraces above the precipice .... all walled with stone ...

Enjoy as I did!
-
Final touch and weathering before thiny varnish

- GrandpaPhil, mtaylor, berhard and 1 other
-
4
-
Final touch and weathering before thin v
arnish
- fake johnbull, mtaylor, GrandpaPhil and 1 other
-
4
-
13 hours ago, ScottRC said:
Hi Nenad,
I am back for a short visit here on MSW and am so glad to see your back on your scratch build. Your metal work is coming along fine. She looks so good with all her furniture on the deck and now her masts are going up.
Regards,
Scott
Thank you, Scott, for nice words. As I wrote earlier, in early stage of build I have big mistake which can not be resolved, and which I noticed after mounting 4000 foil strips as mynz metal under water line, except to start model from begining. Deck and deck rails are not paralell ... deck fence has different random height ...
So, then I decide to overdetail Her to turn off attention of anybody who will se Her.
And that is simply - that.
Beside that, making this little beasts is chalenge! And fun.
All the best.
Nenad
-
-
-
-
-
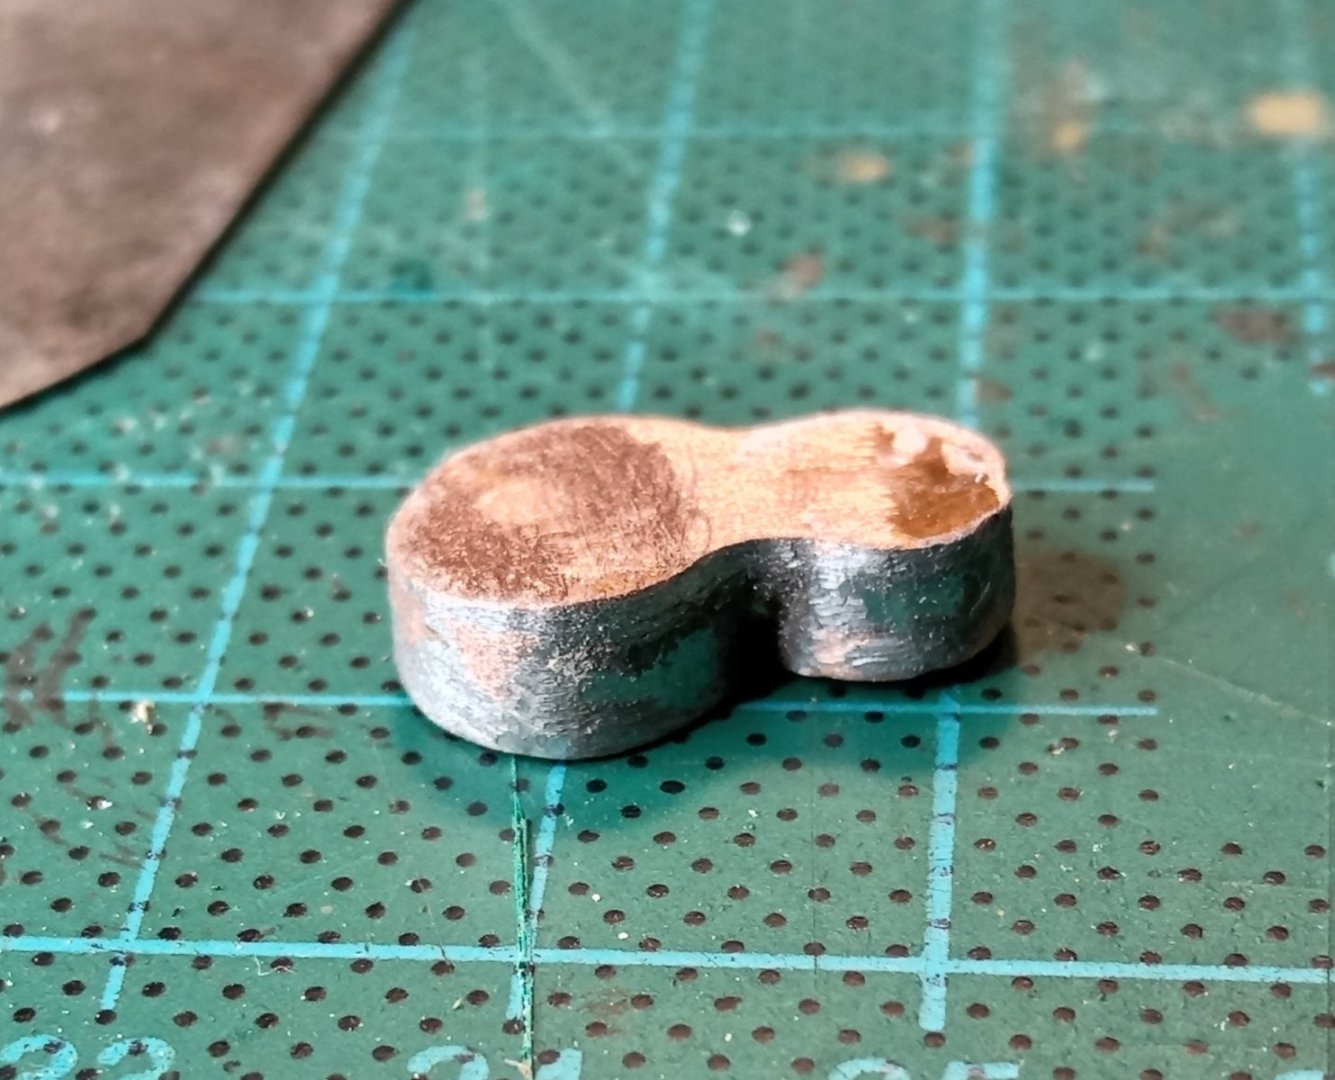
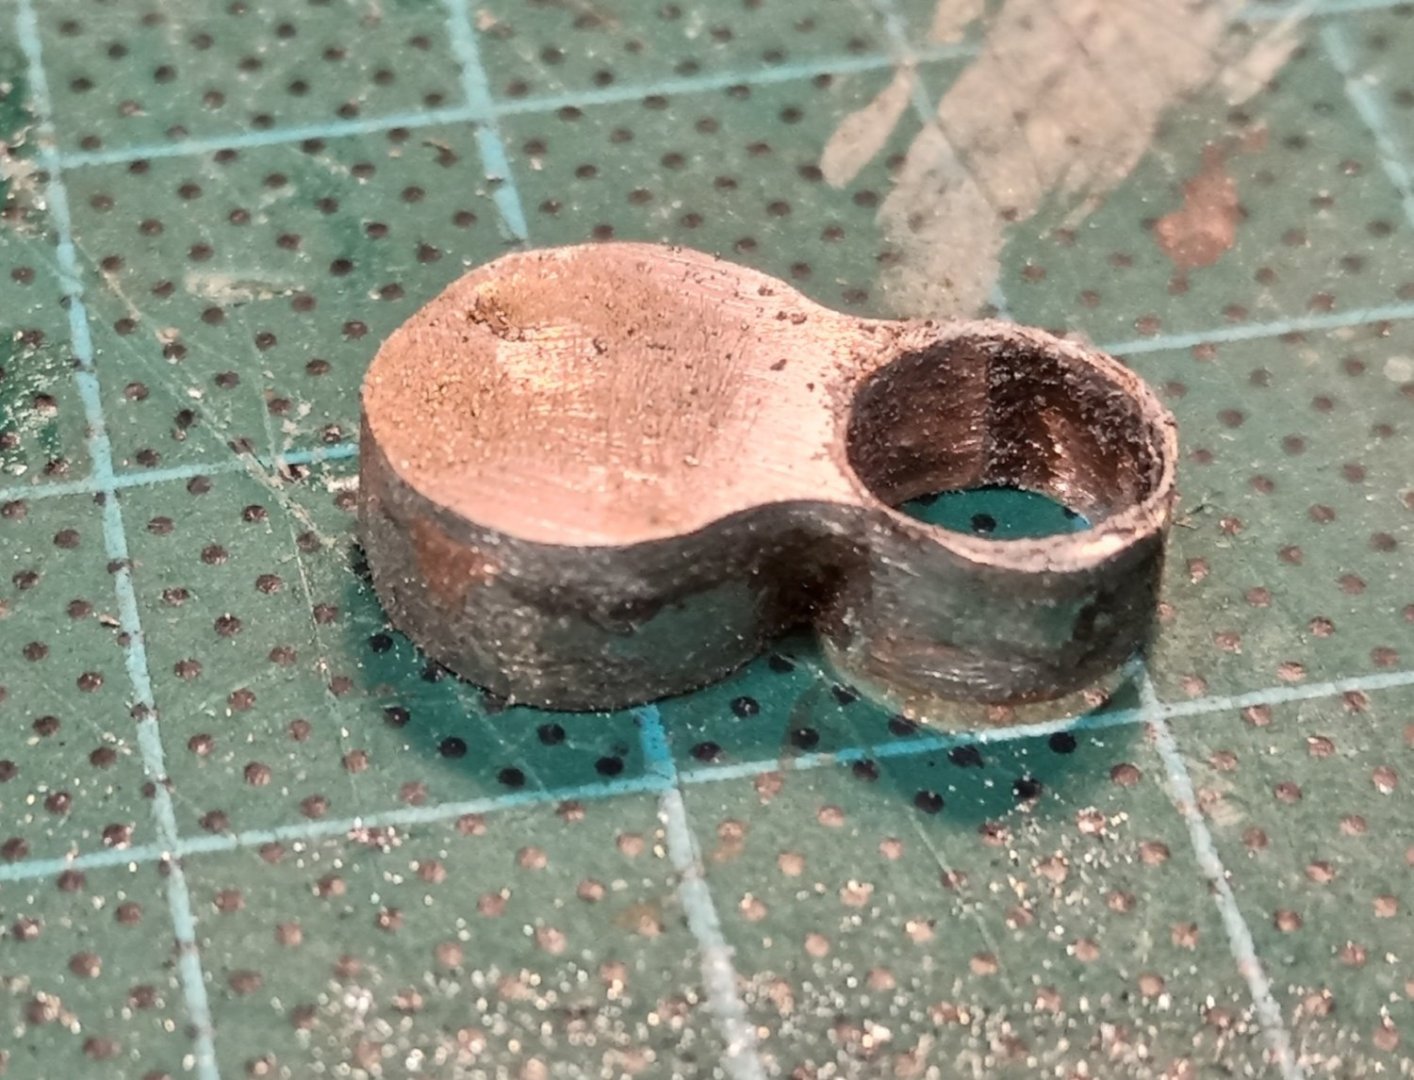
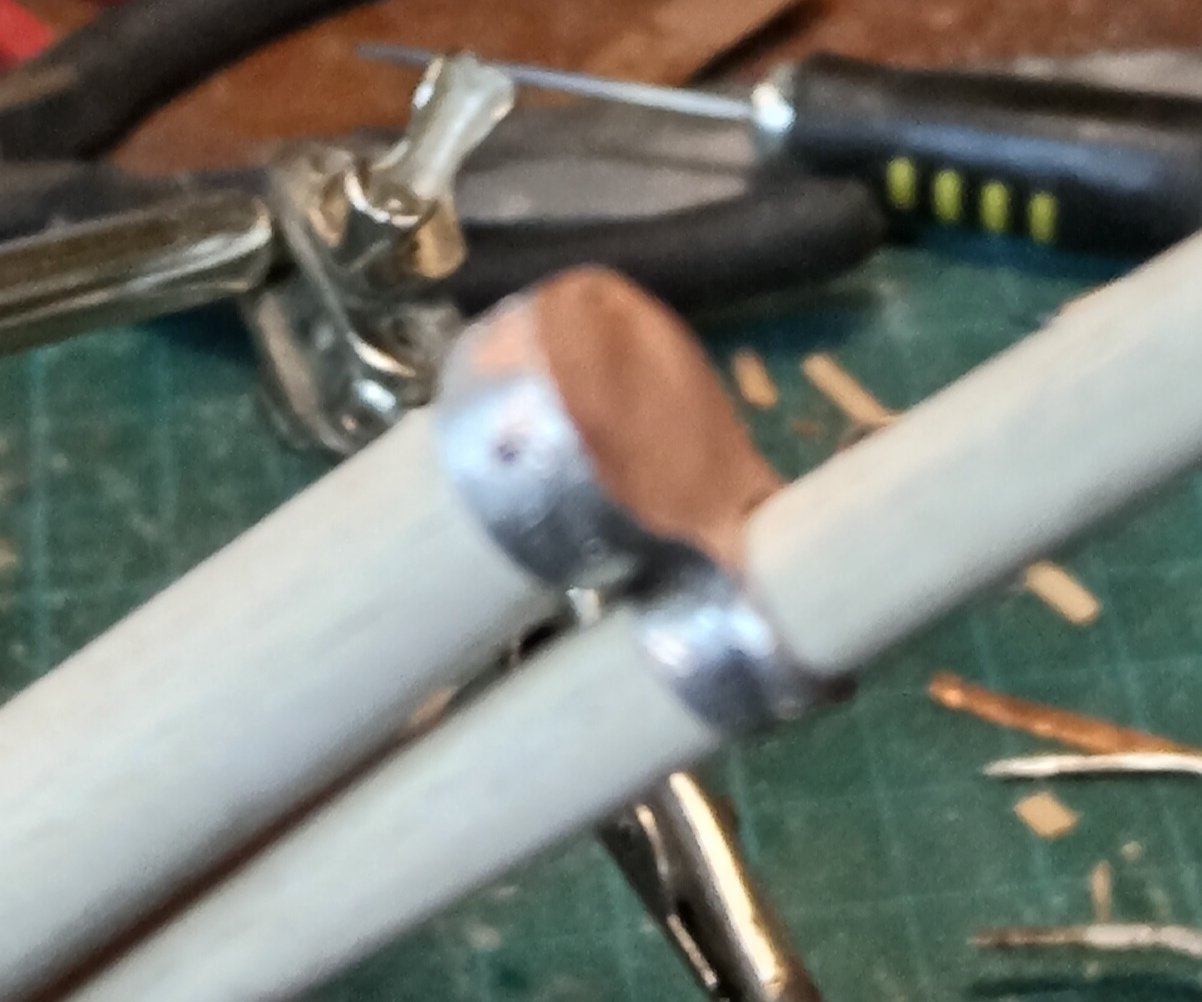
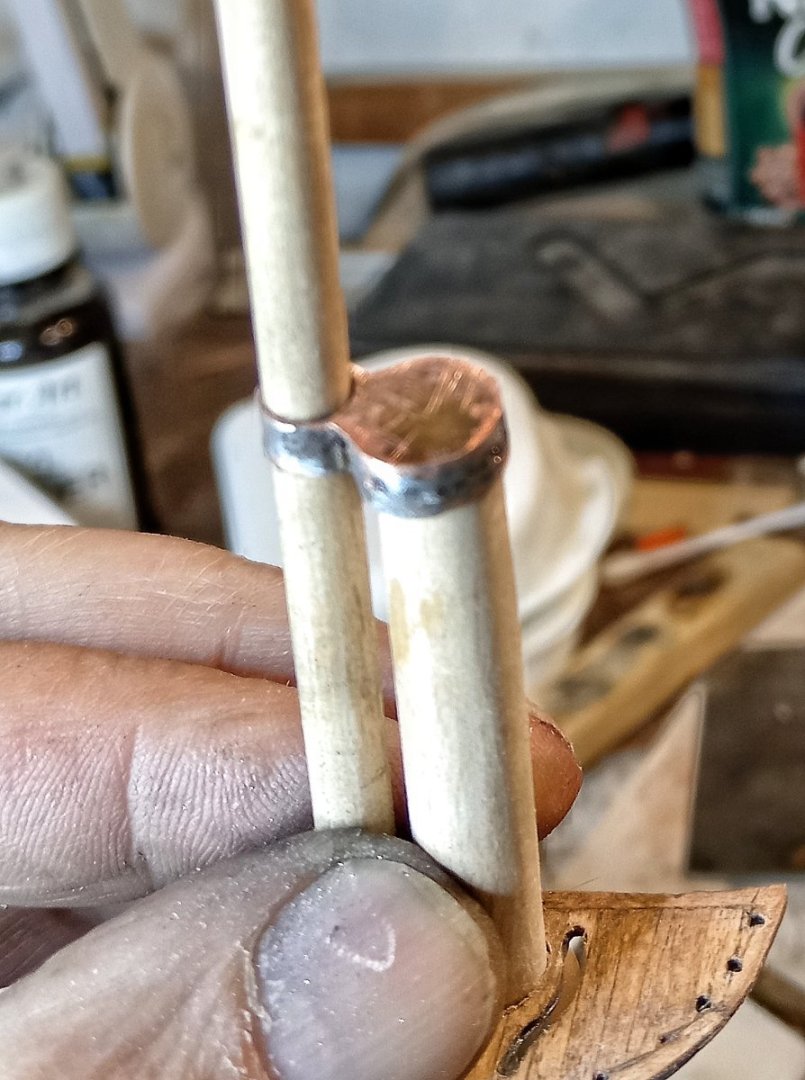
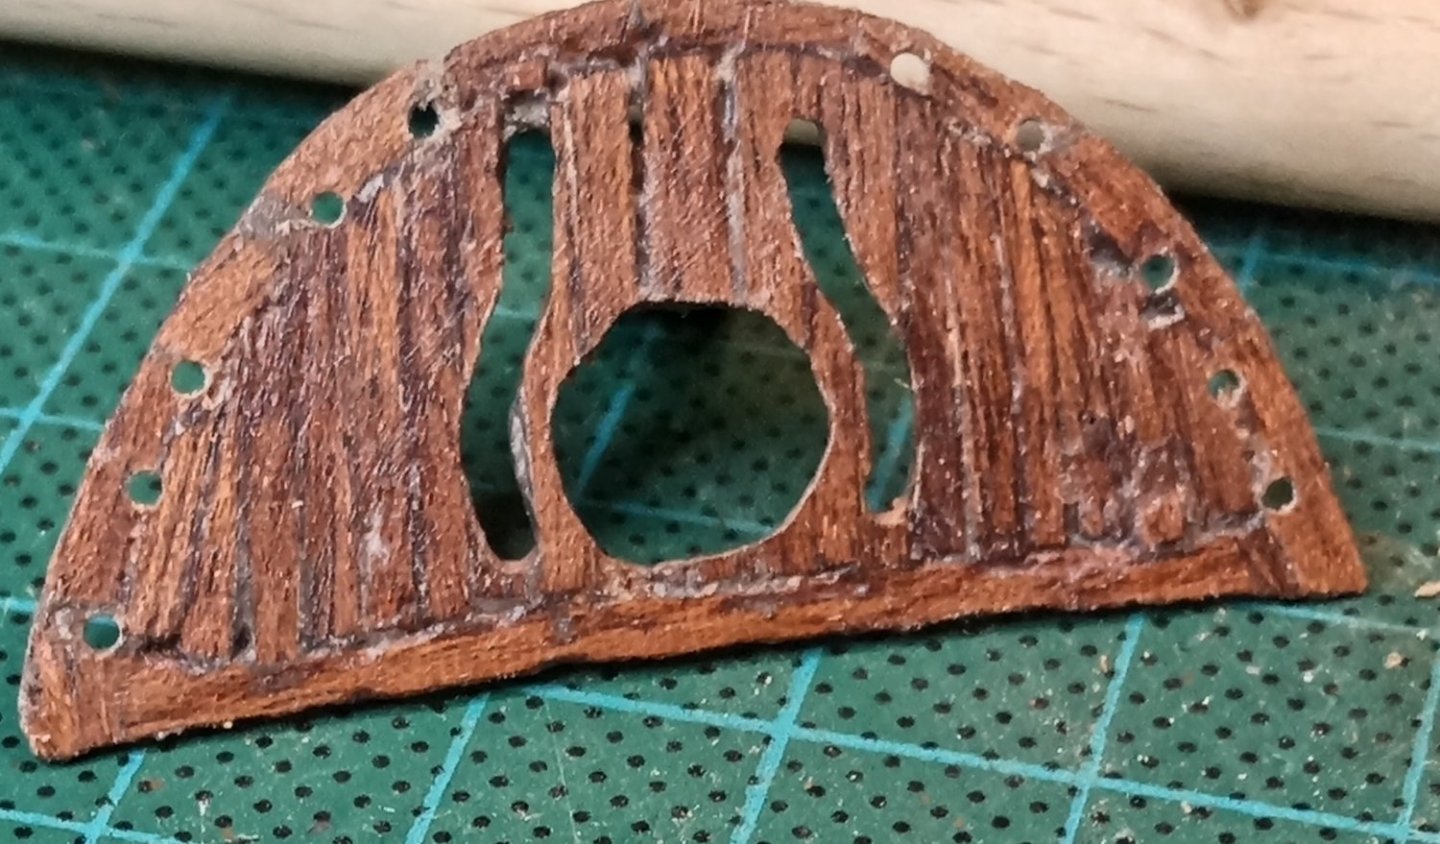
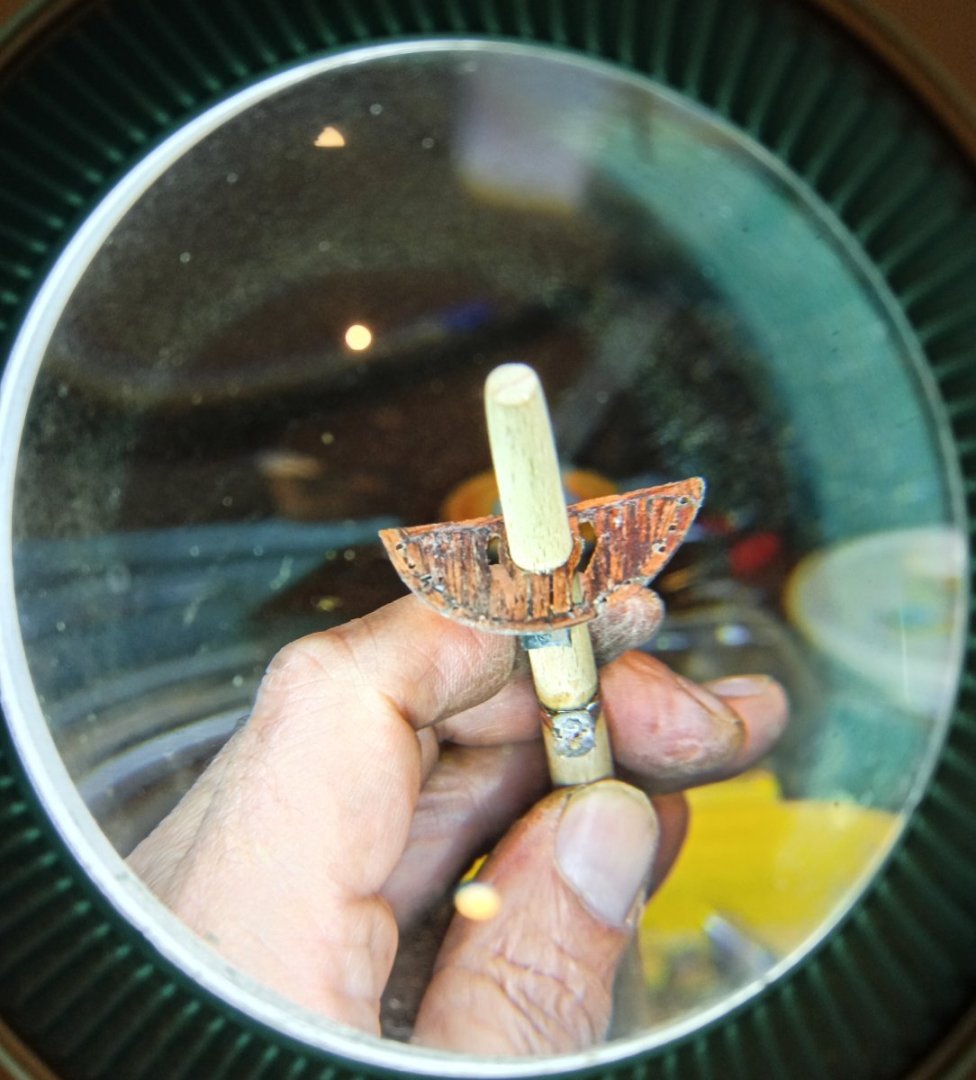
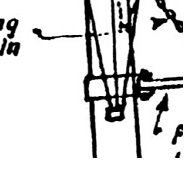
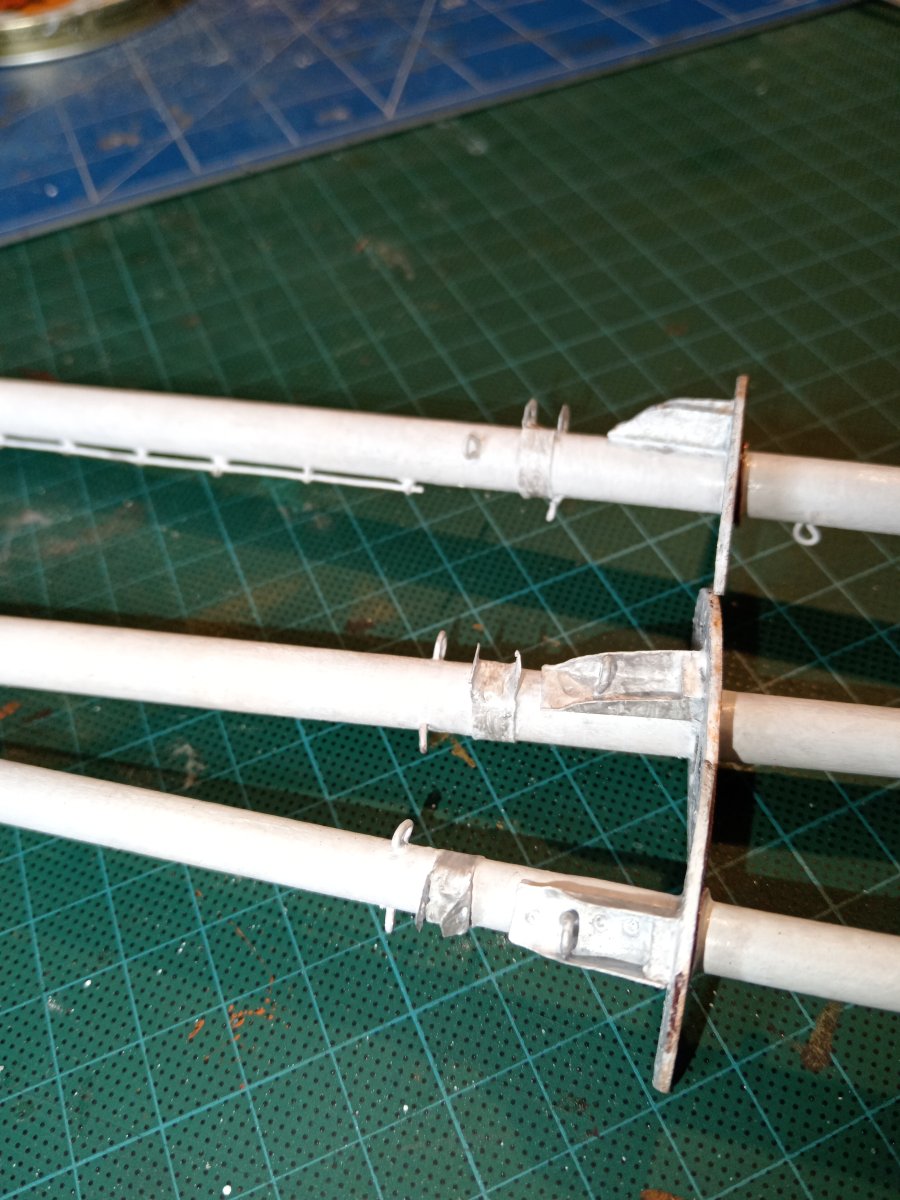
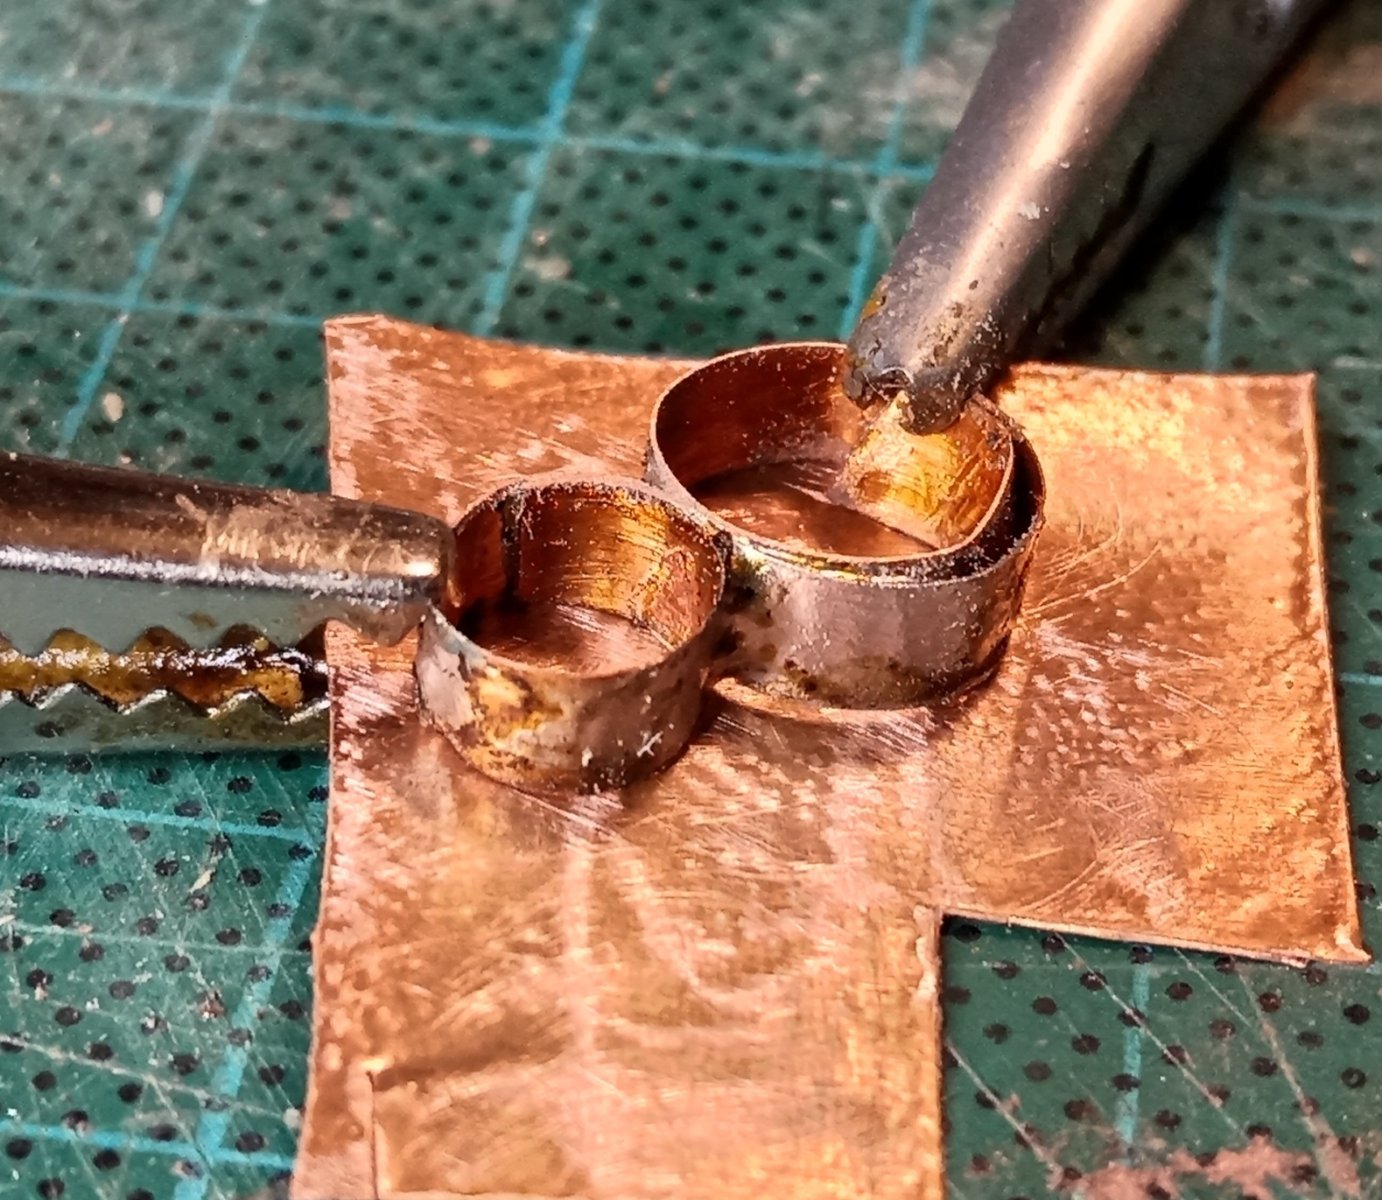
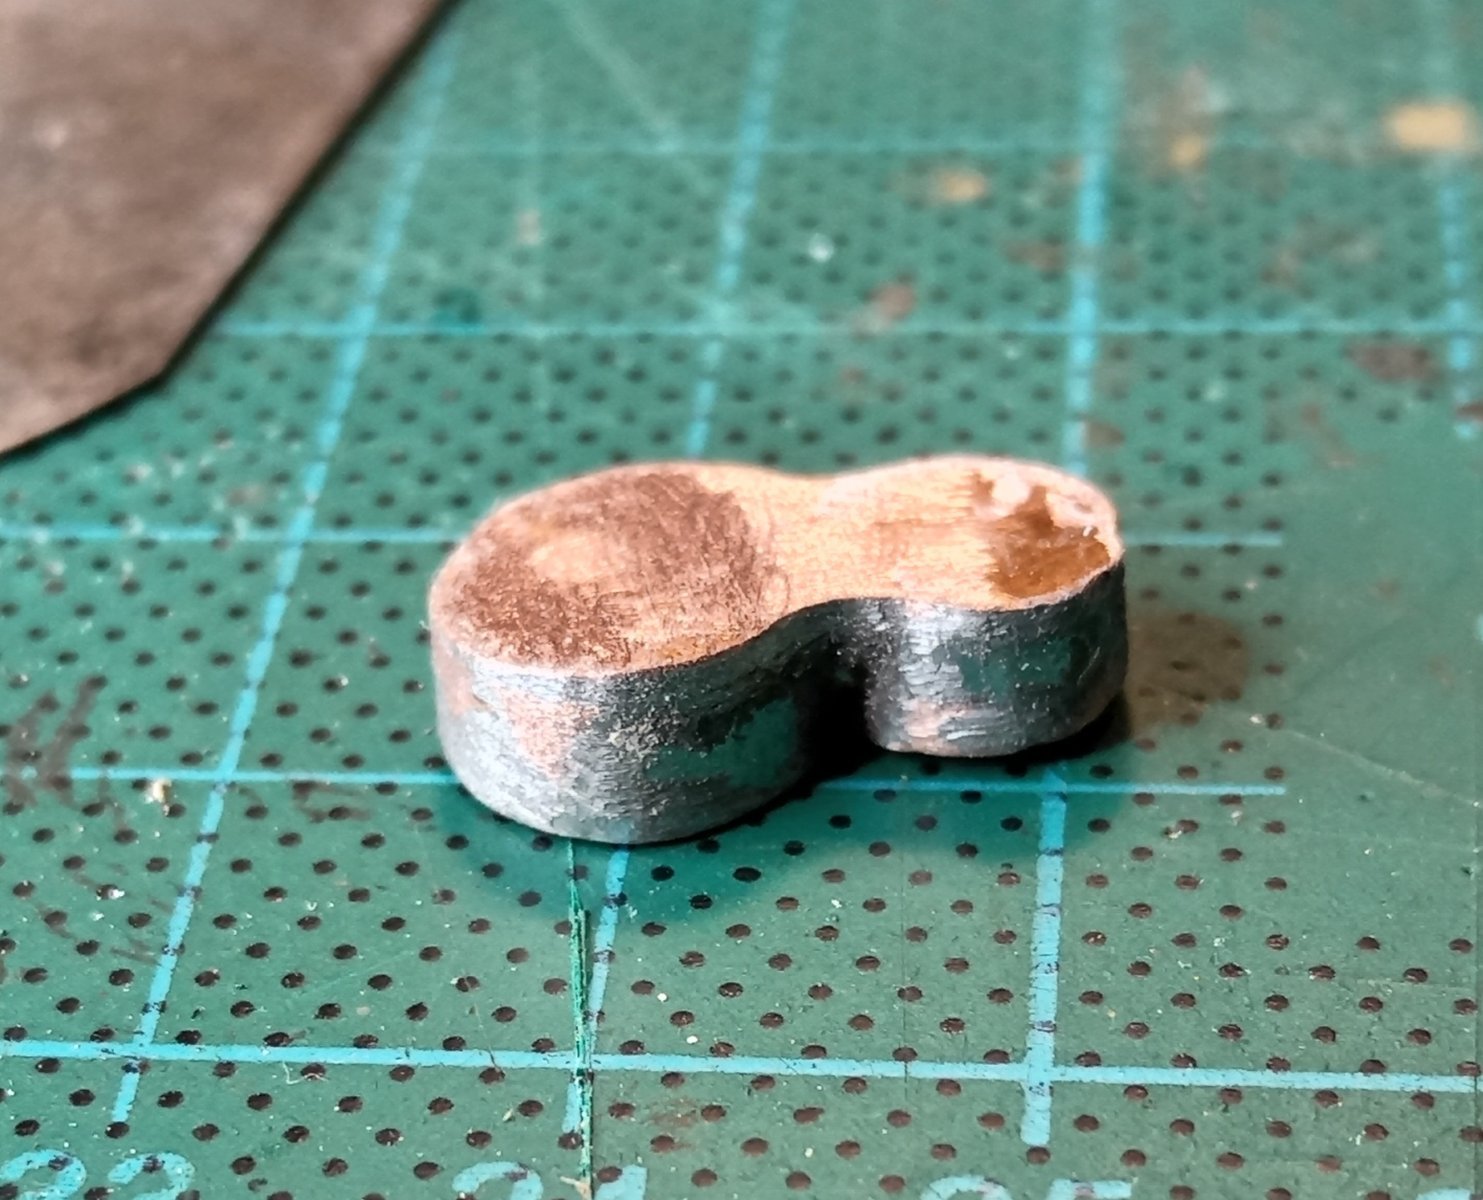
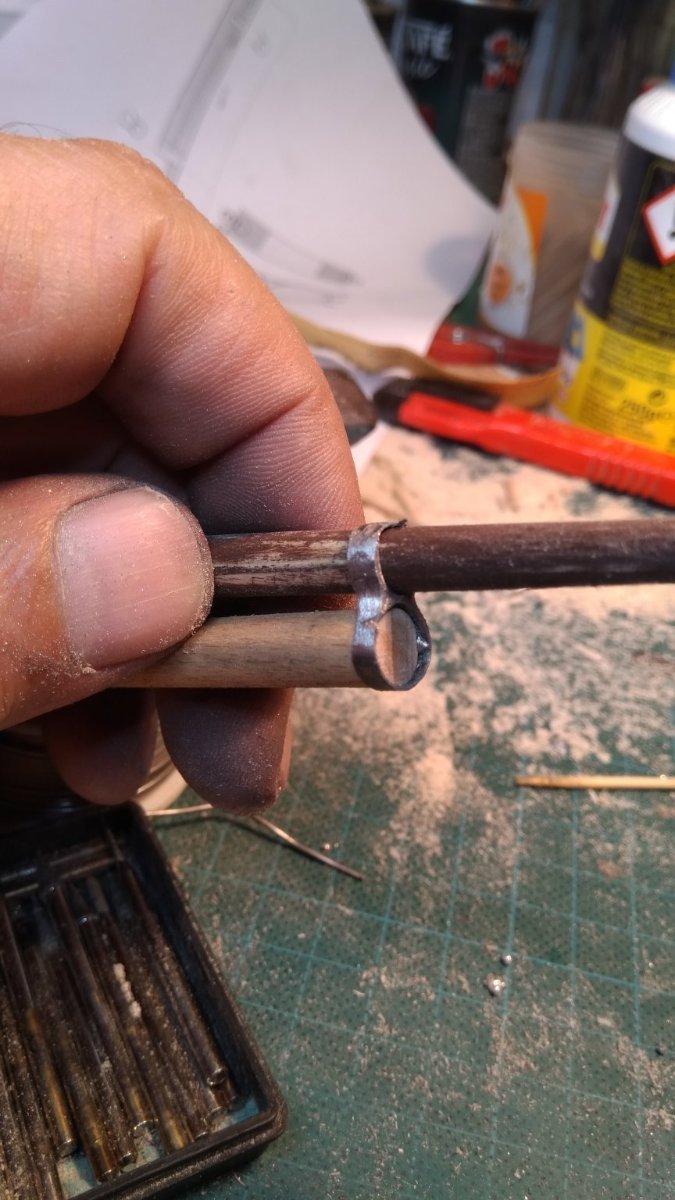
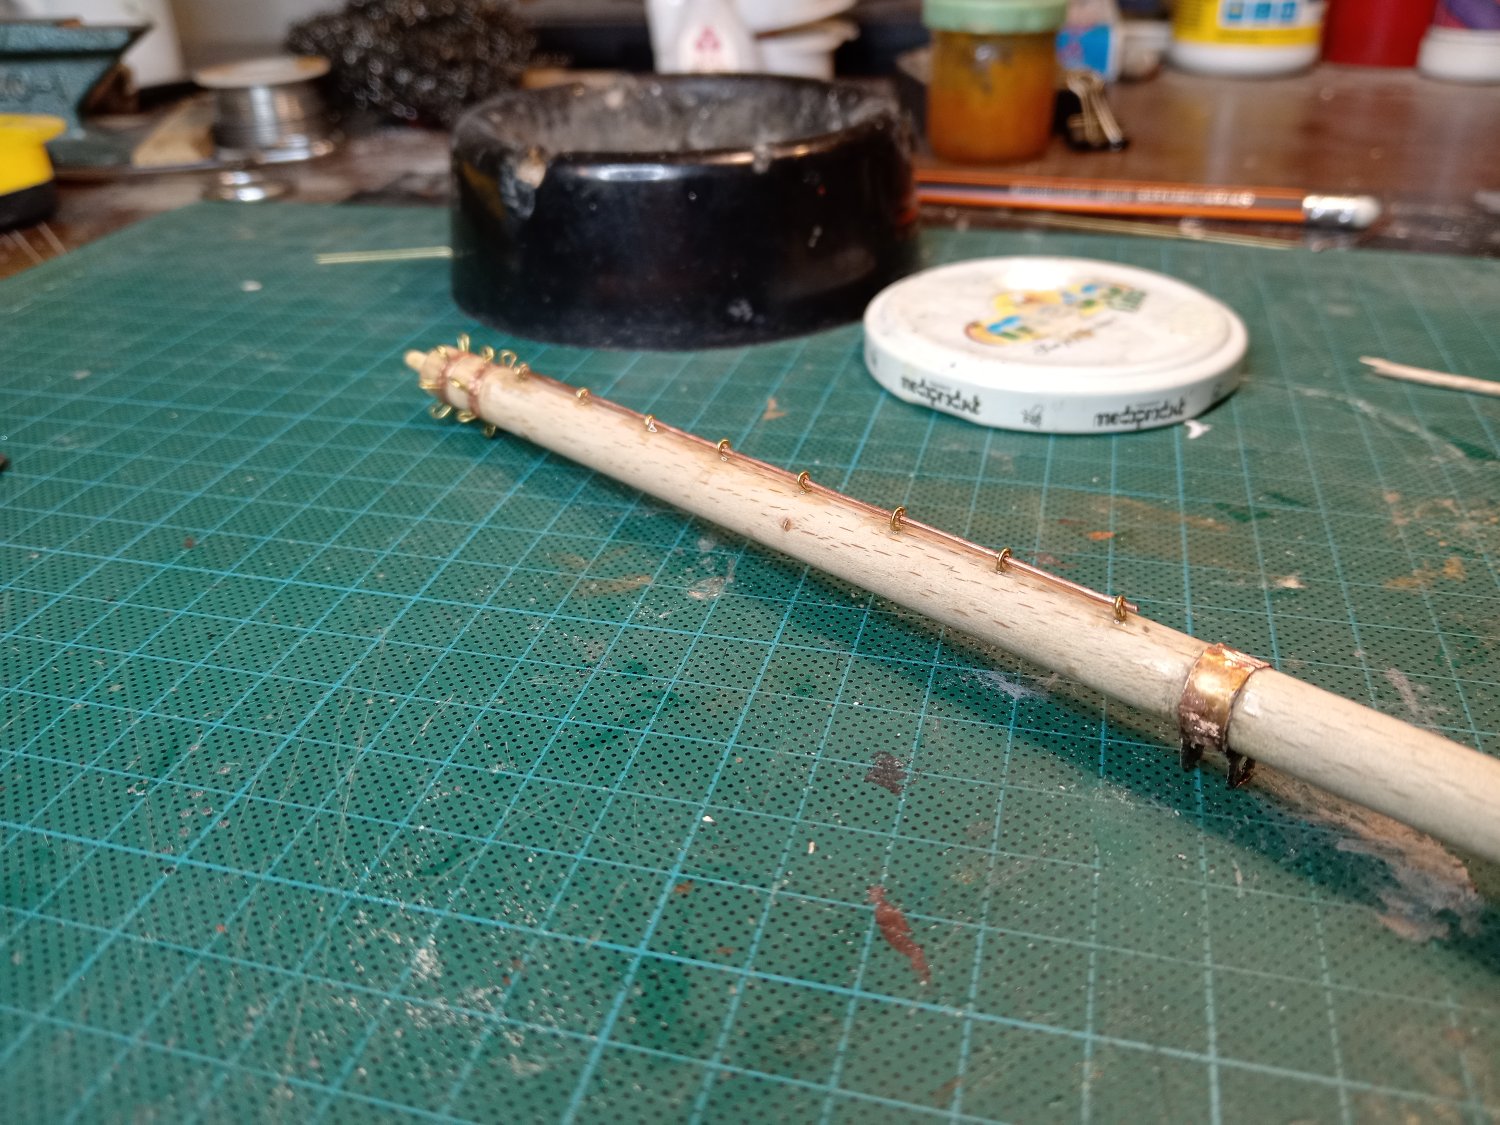
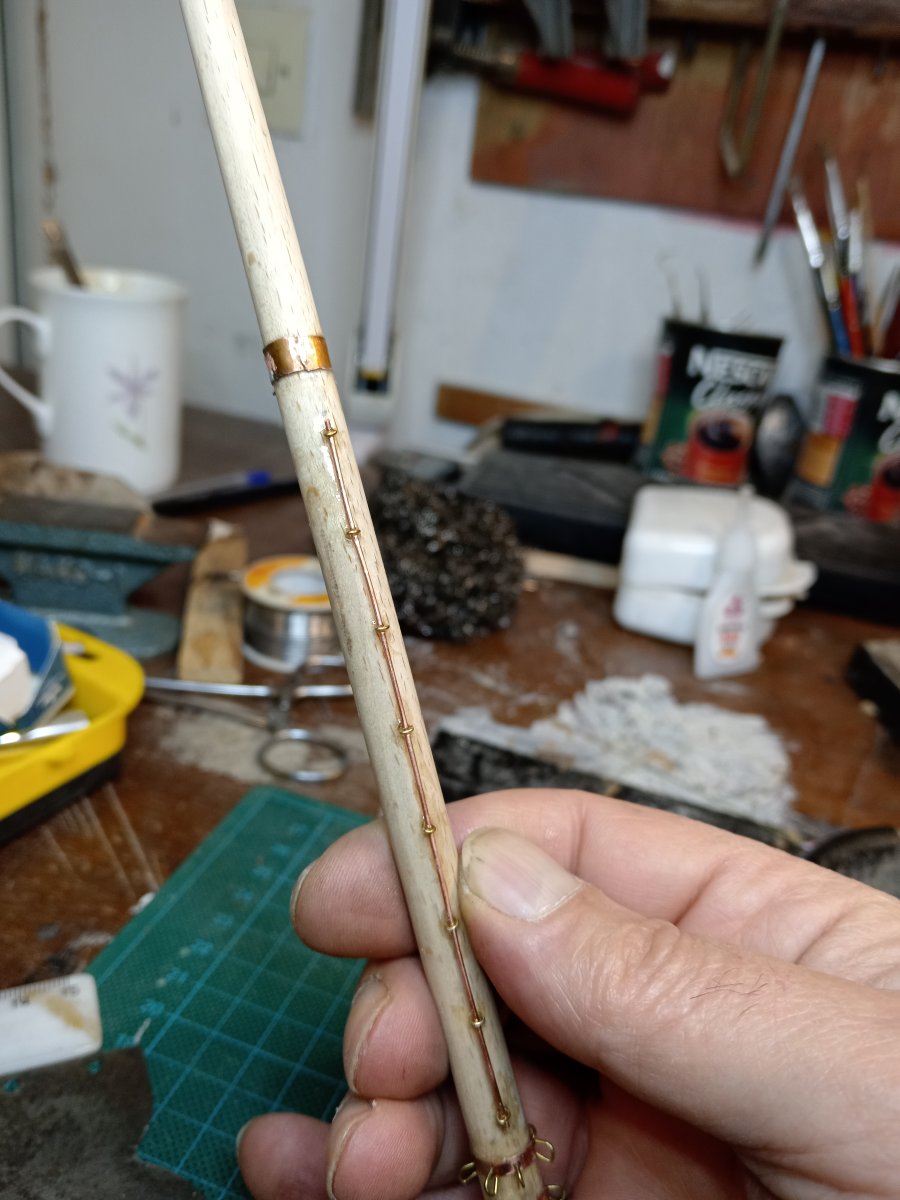
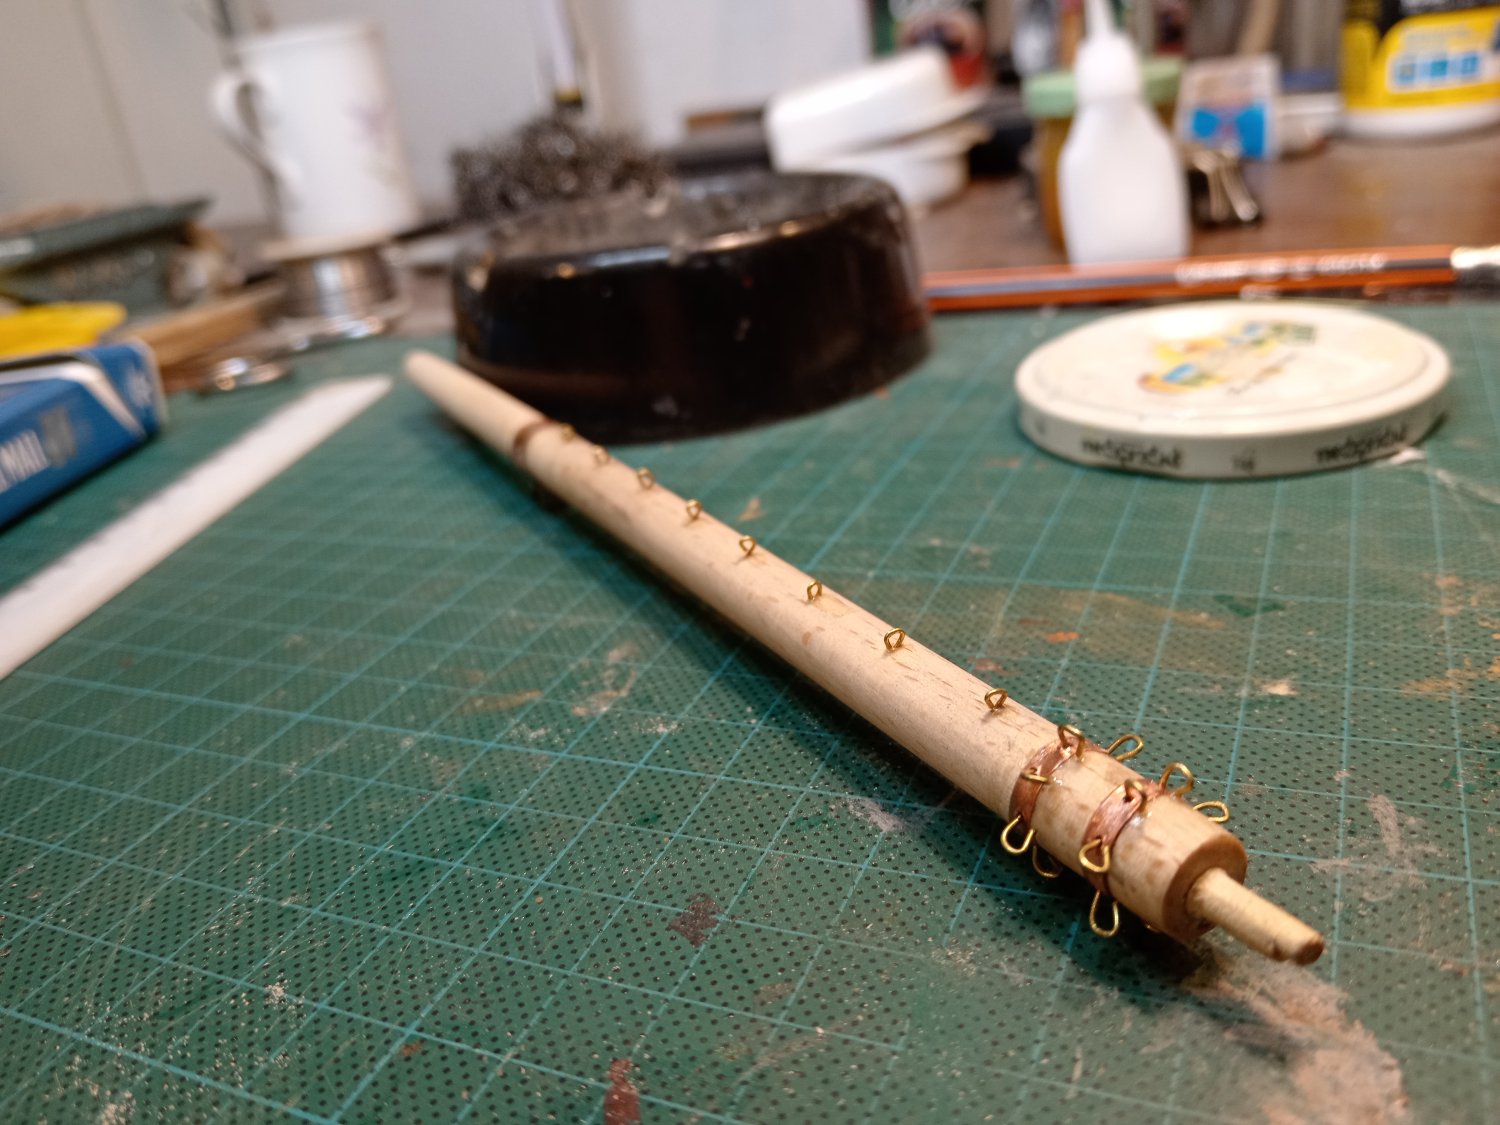
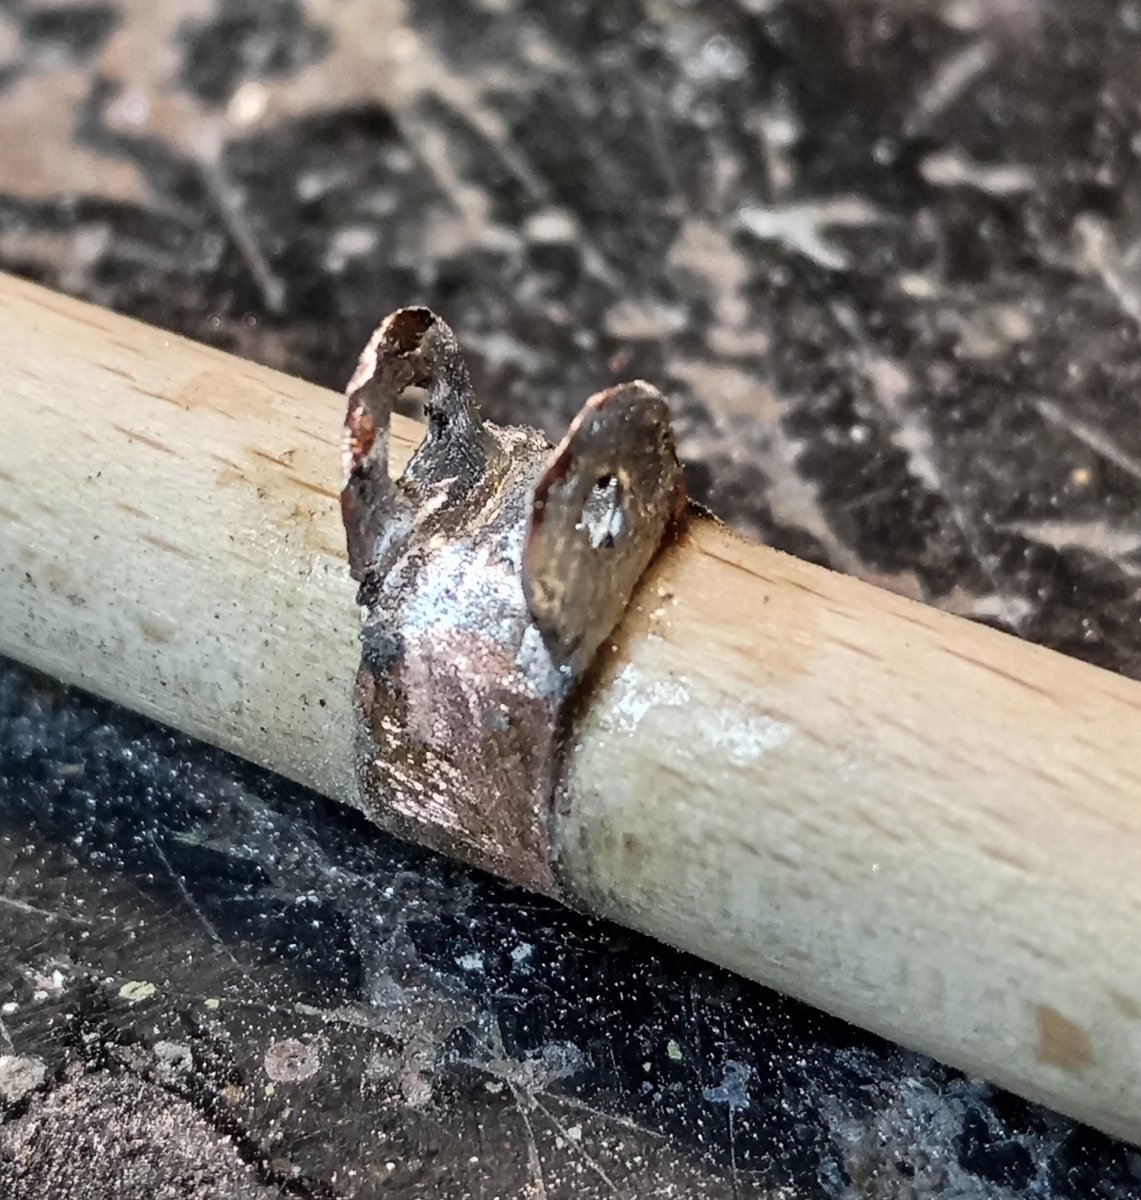
Cap Band,, step by step
Remarks
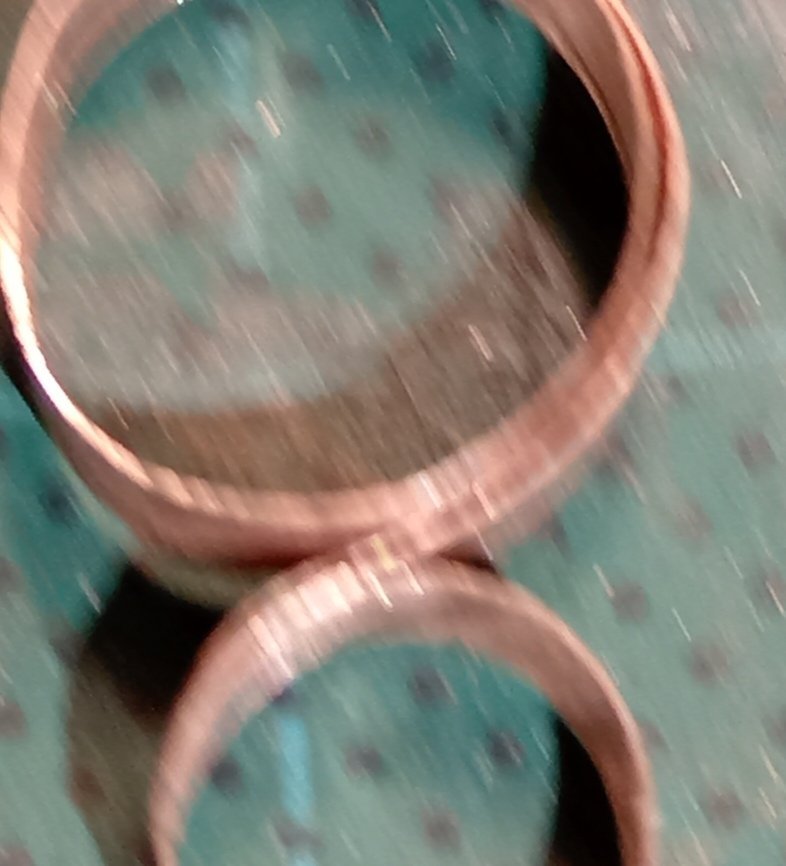
Strip of Cu foil on start is spiral, with ends INSIDE
Dont forget to apply thiny foil of soldering on surface of strip.
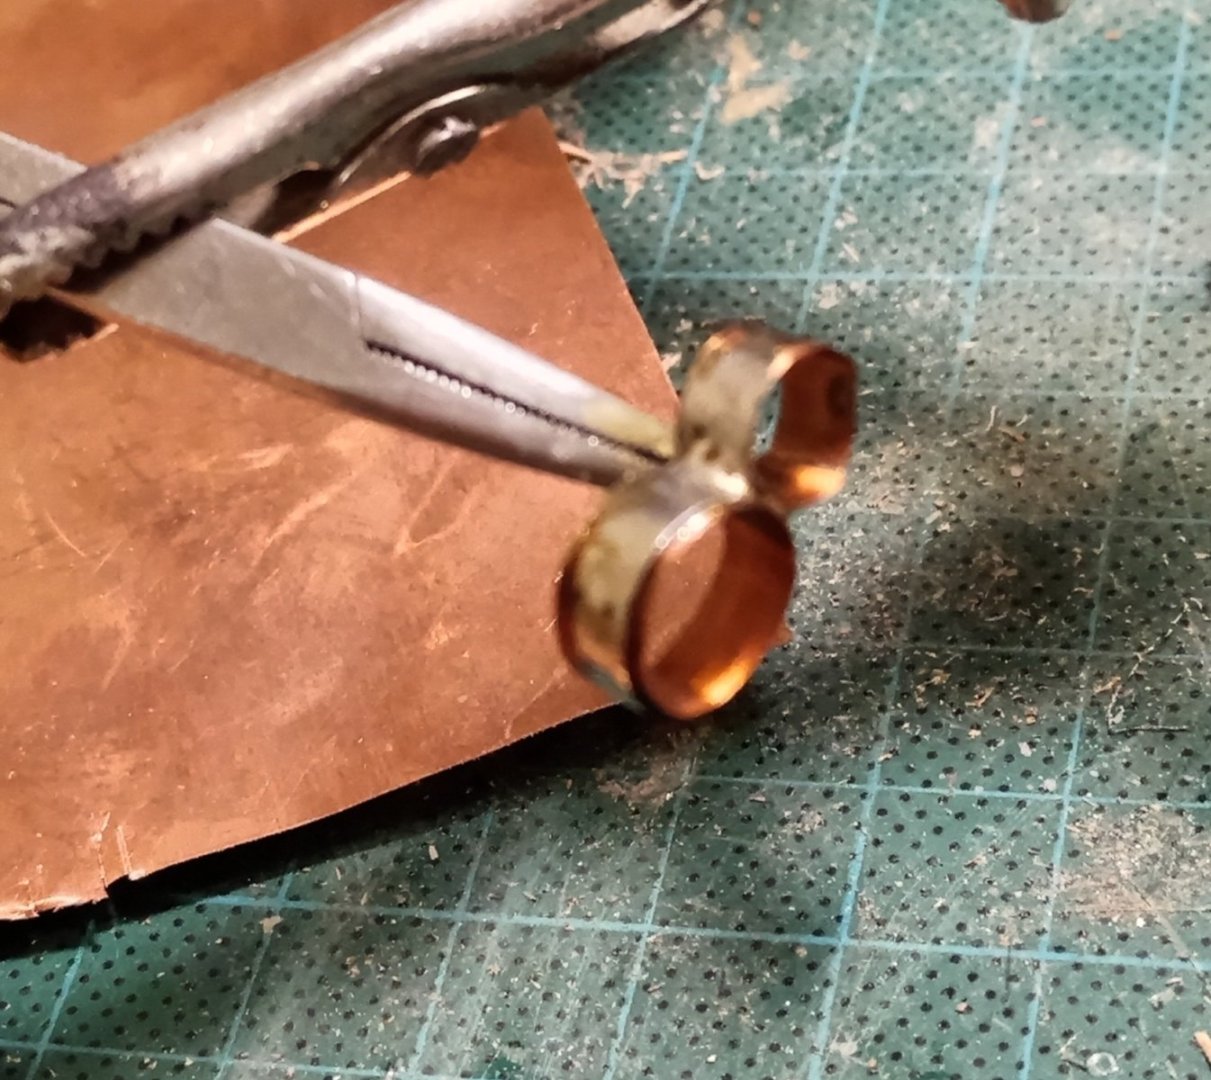
1. Cut a strip of copper foil of the required width, long enough to wrap twice around the mast. Sand well
2. Bend the tape around both masts in a spiral, so that the ends of the tape are on the inside
3. remove from the mold, adjust to the correct dimensions and tighten so that it does not unroll, then solder the assemblies. Apply a thin layer of solder paste to the surface of the ring to strengthen it
4. Solder the foil over as a cover
5. Remove excess material
6. Drill the holes for the hooks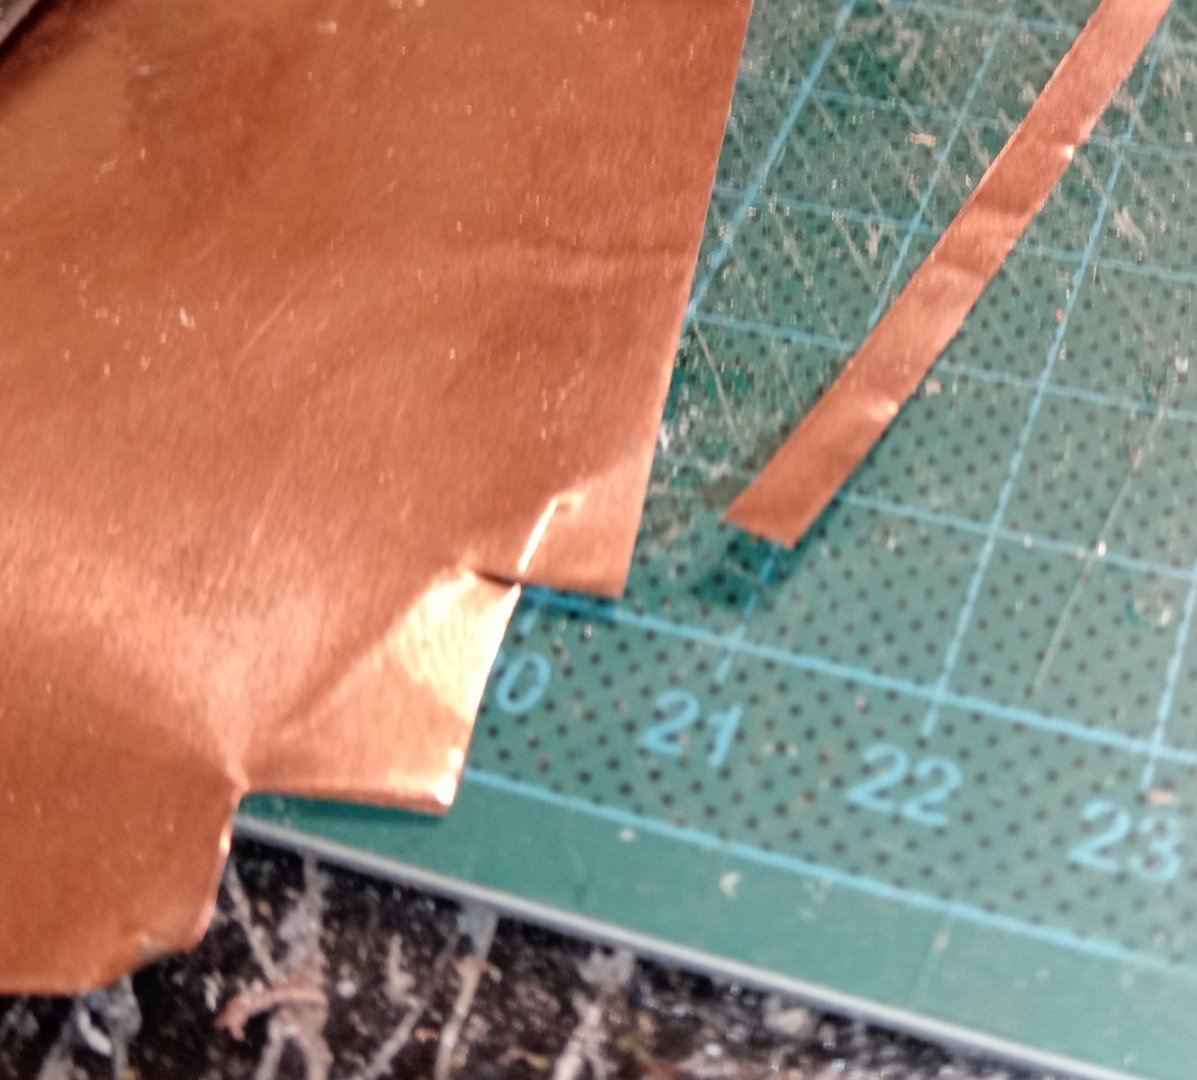

-
Making Cap Bands dia 6mm and 8mm is pretty tricky task, which take me couple of months thinking about "how to hell to do this".
I forgot how did I make this little beast on bowsprit couple of years before.
Thiny, slim, and at the same time it has to be strong enough to hold whole structure and ropes. This is a place where all pull forces from mast ropes came to gather.
So, yesterday I had brainstorm, and this is it.
In one of next post I will explane step by step my idea

- Jack12477, GrandpaPhil, mtaylor and 2 others
-
5
-
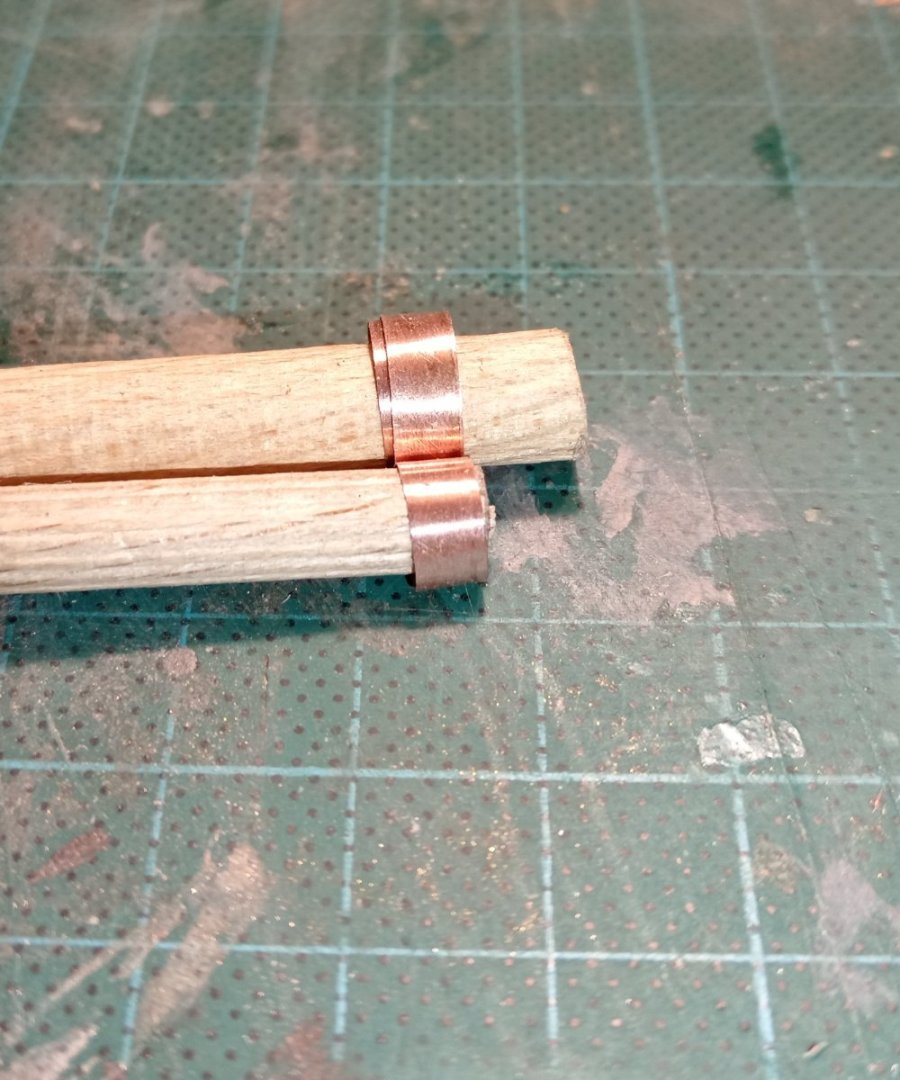
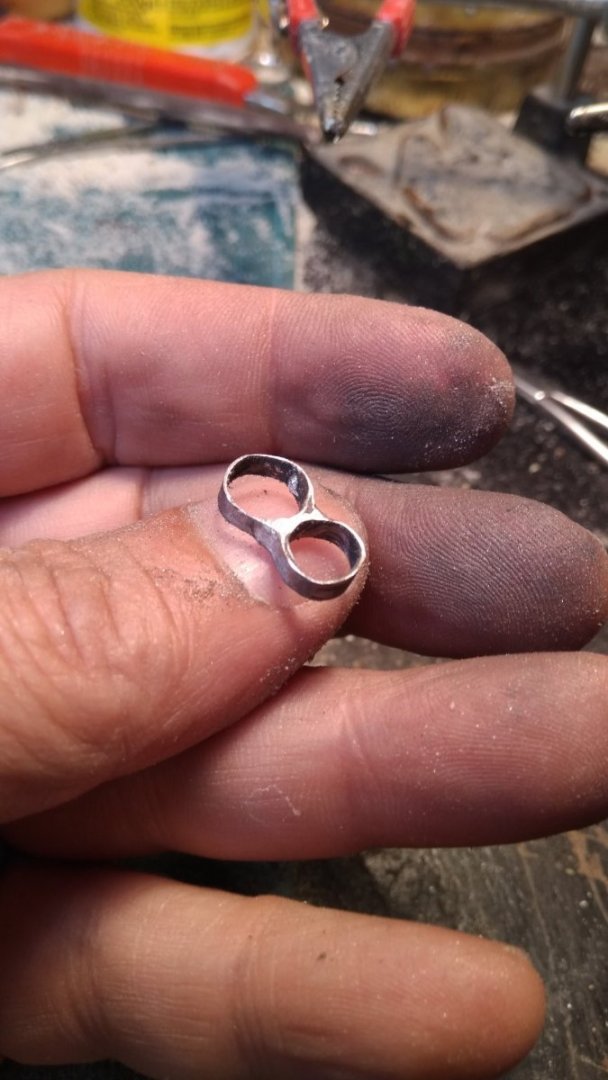
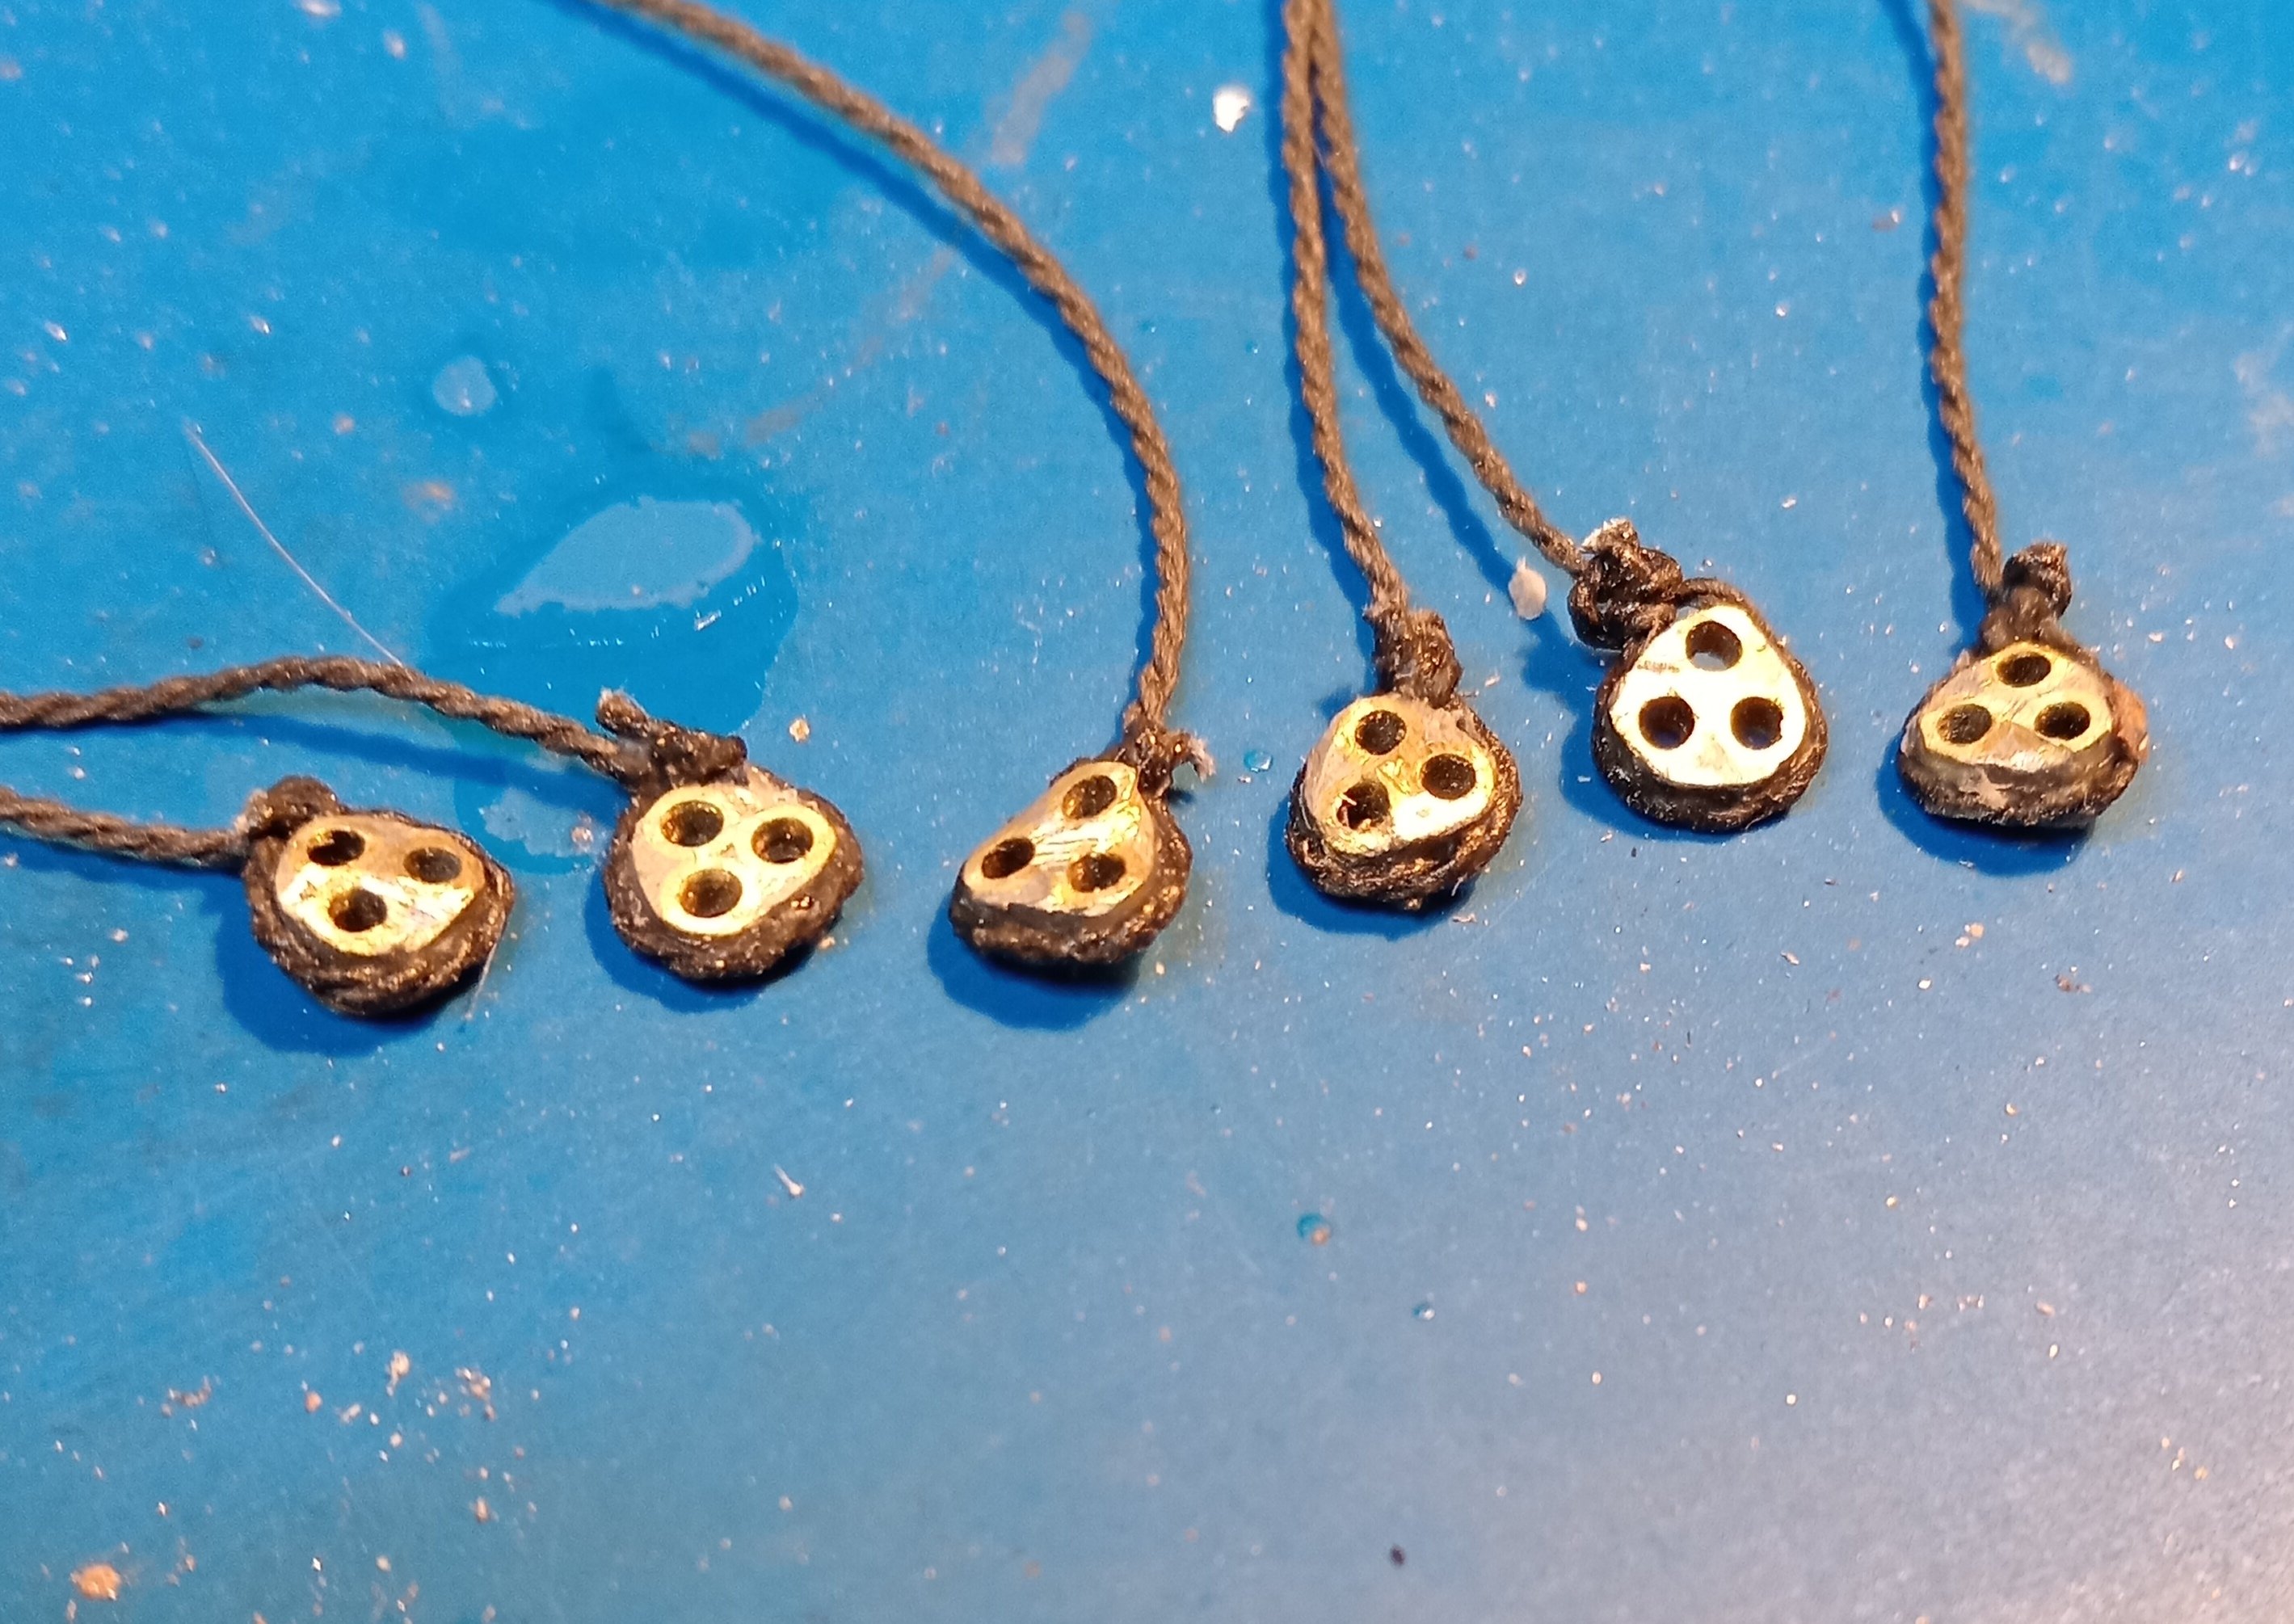
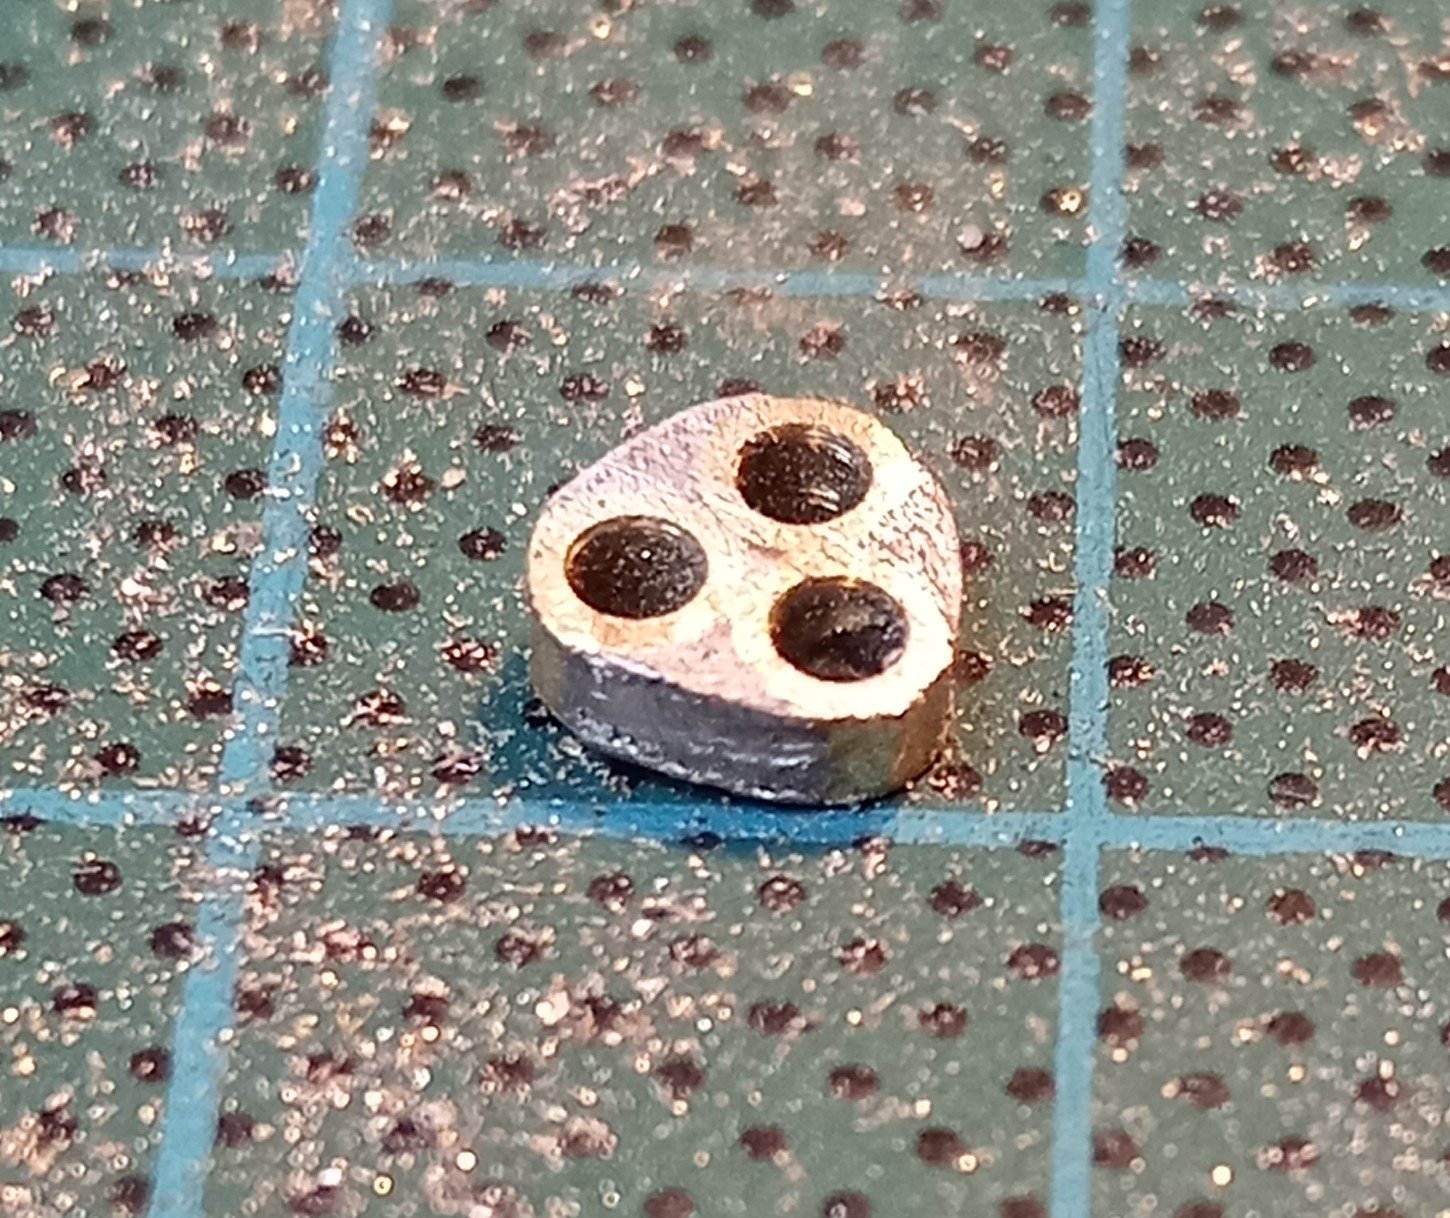
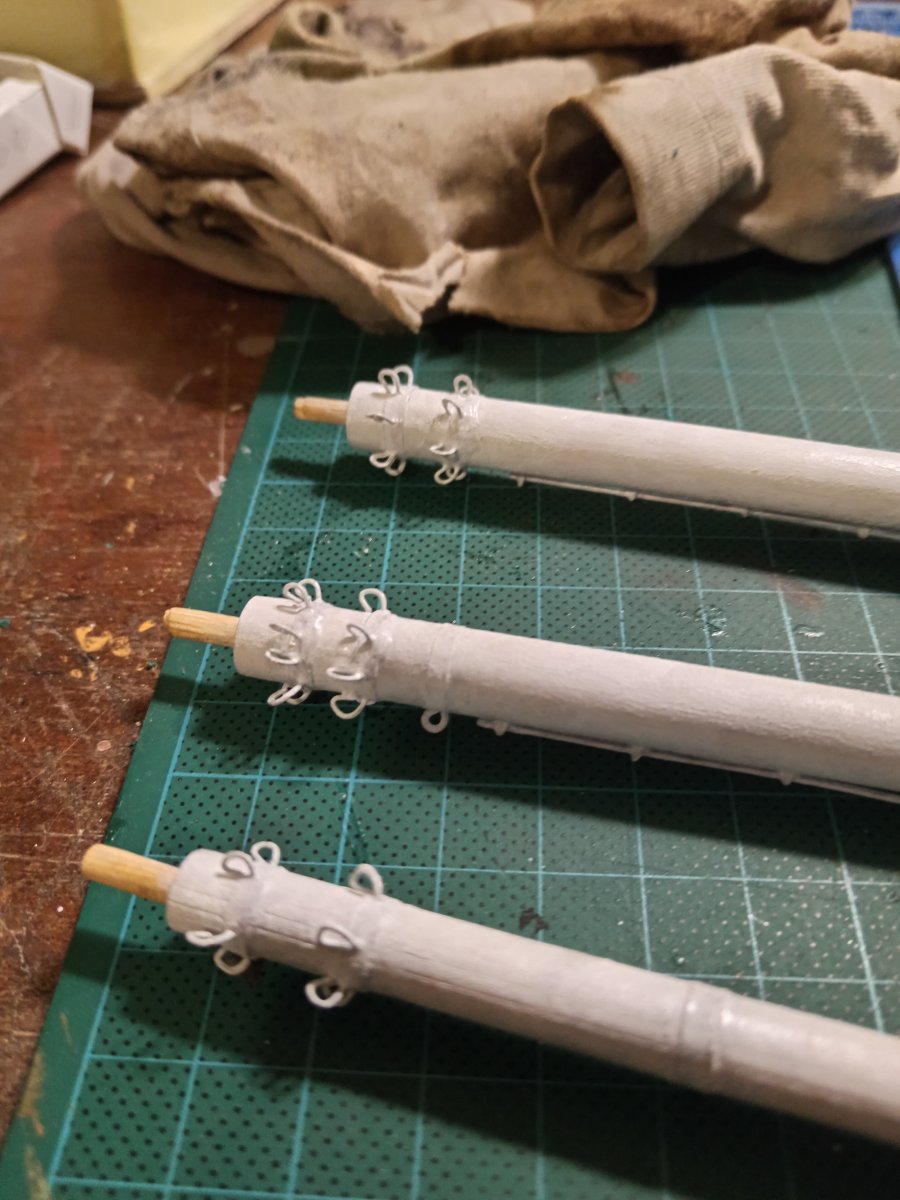
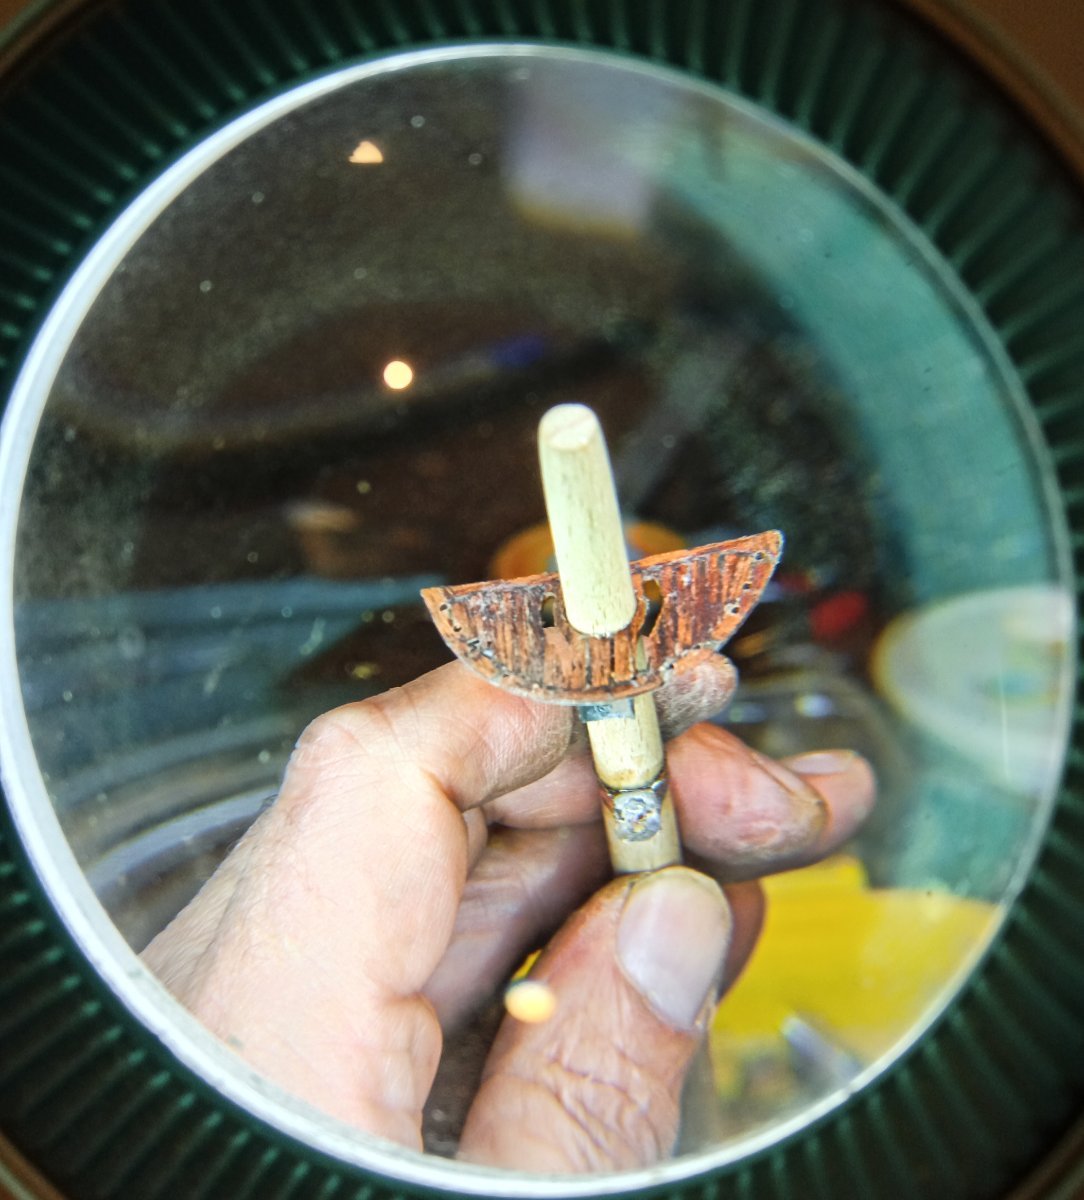
Micro soldering
First Cap Band

- fake johnbull, GrandpaPhil, mtaylor and 2 others
-
3
-
2
-
-
And off course, a mistake!
Fortunately, yesterday I temporary put masts on their place to make some pictures, and ... realised .... connection ring on Mizzen for lower yard for spanker is positioned too low!
Where were your eyes and brain, Nenad?
Happy me!
For now, I am curious can I remount CA without damaging wood, and reuse ring with yard holder, or have to make a new mizzen mast ....
- mtaylor and GrandpaPhil
-
2
-
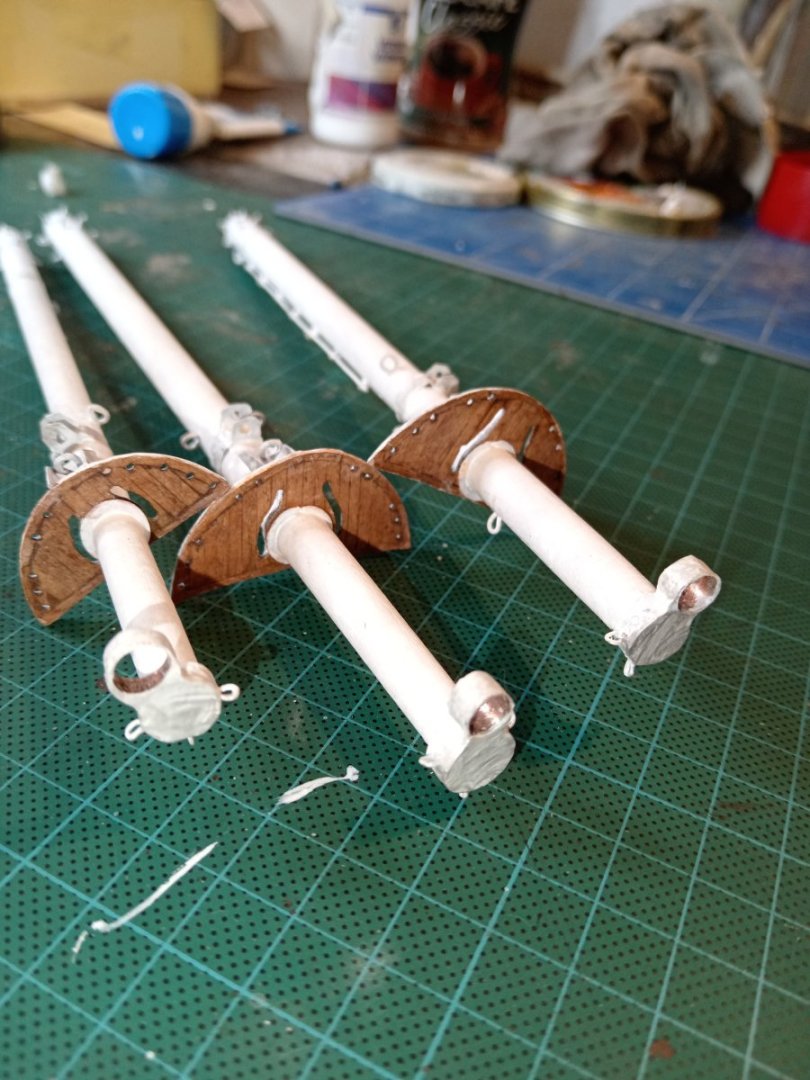
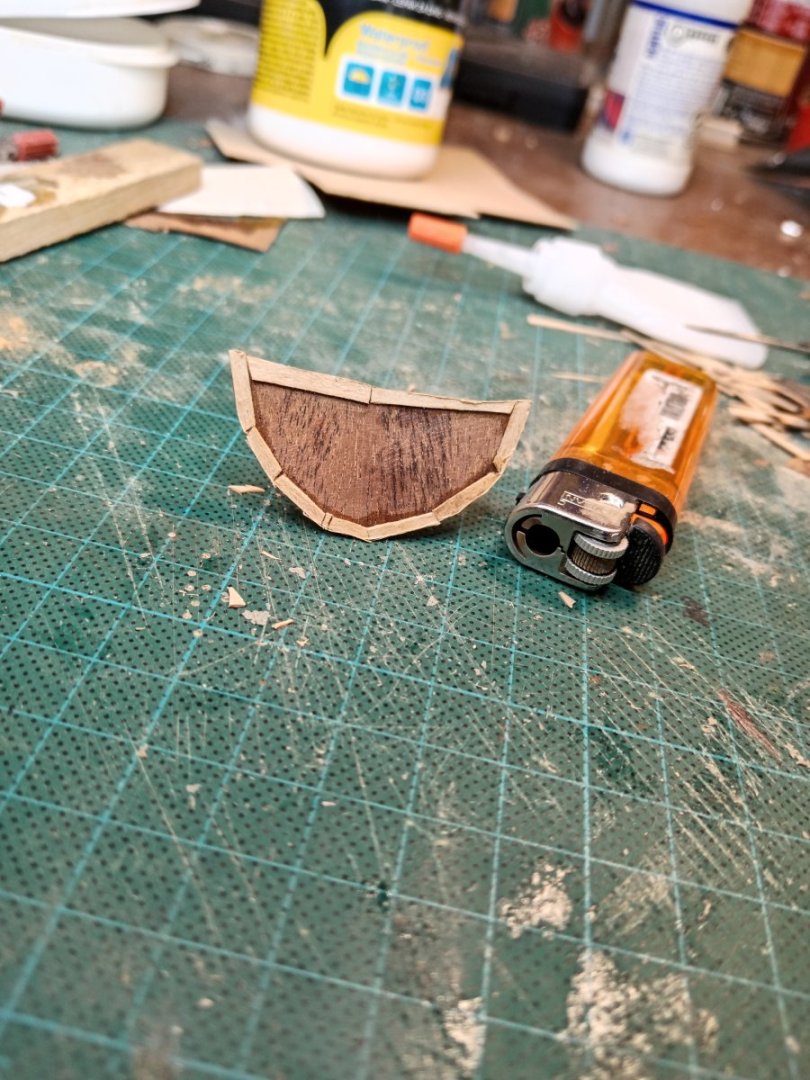
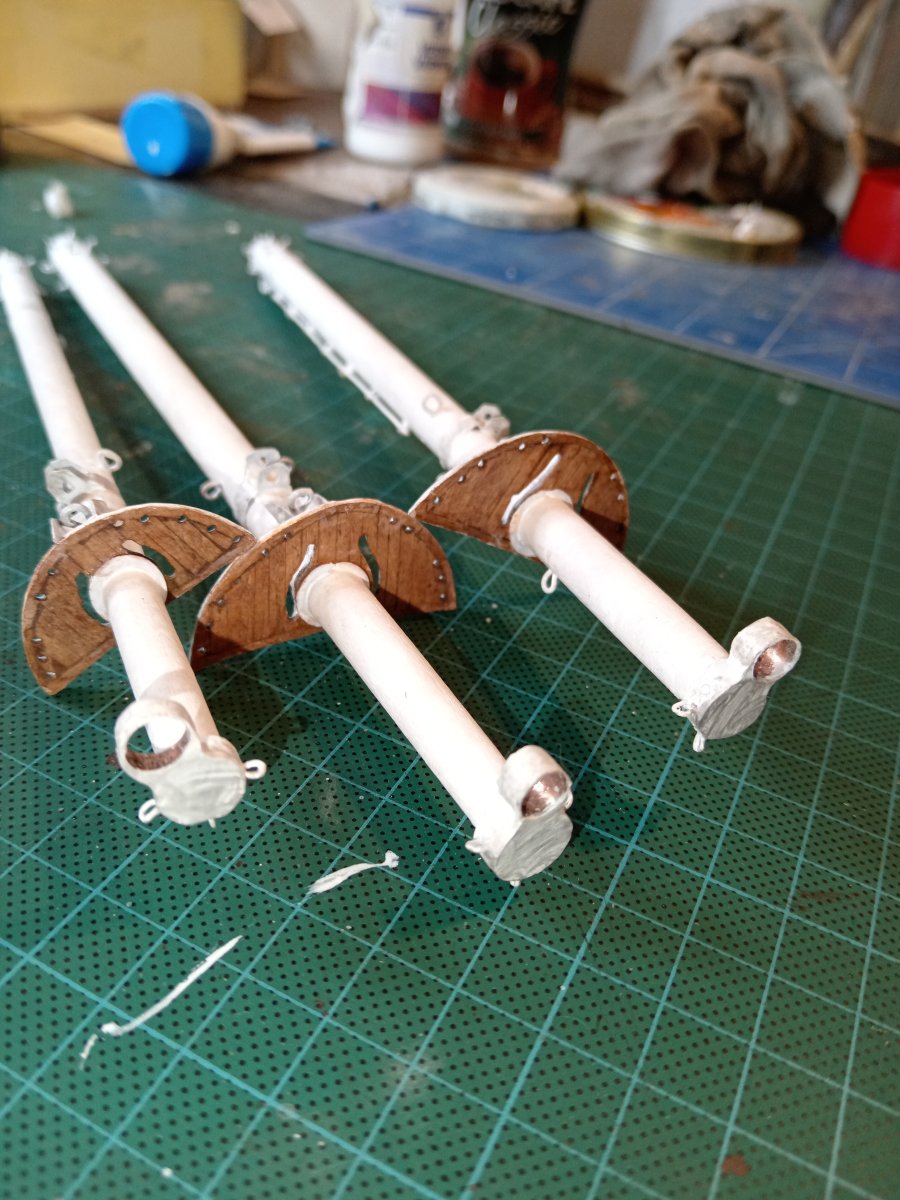
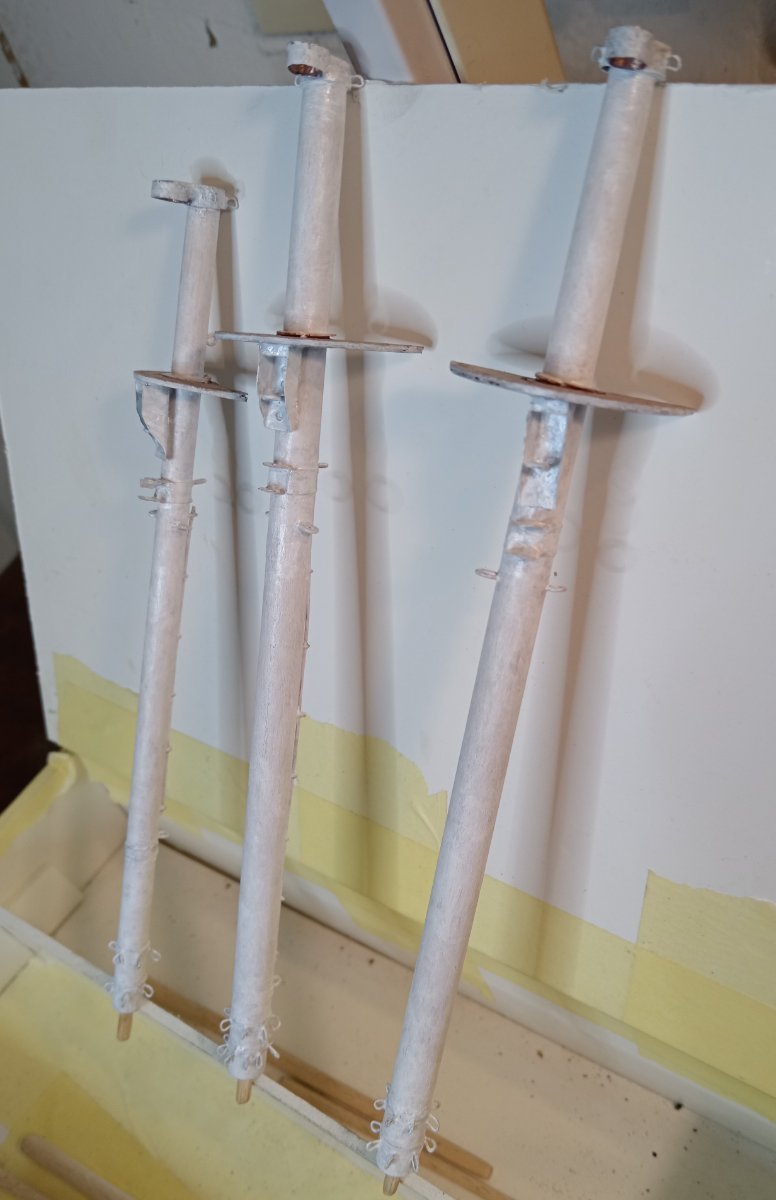
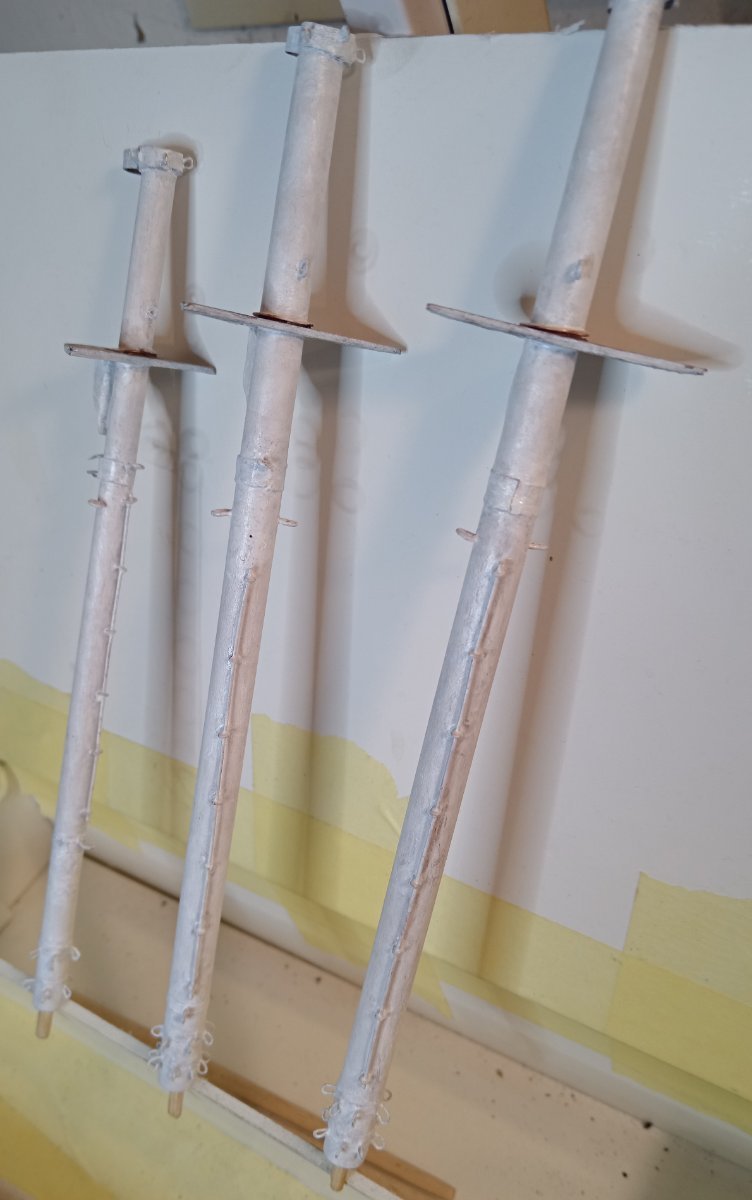
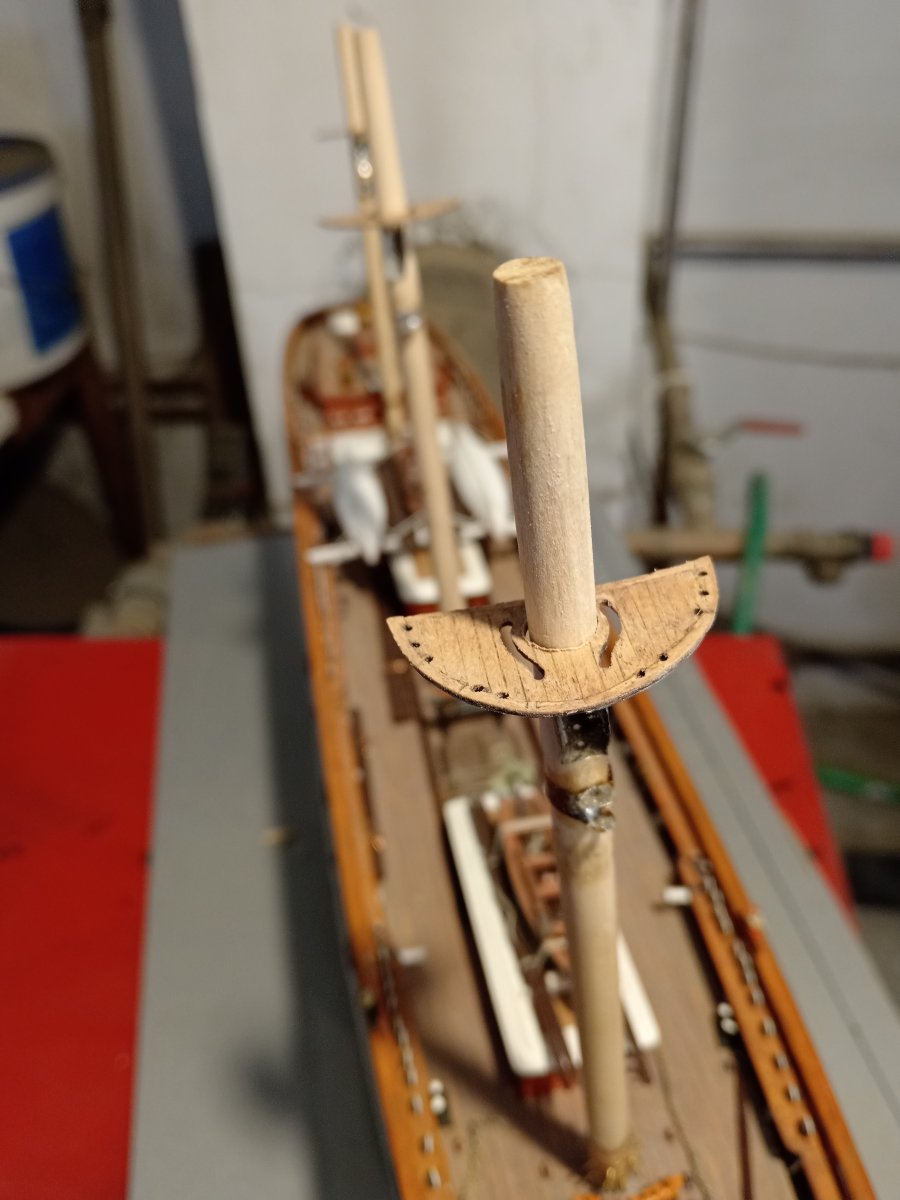
Progressing
All three nests got plankung with light weathering, so, they are done! Exept painting in one of next stage.

 .
.
- ScottRC, usedtosail, GrandpaPhil and 3 others
-
5
-
1
-
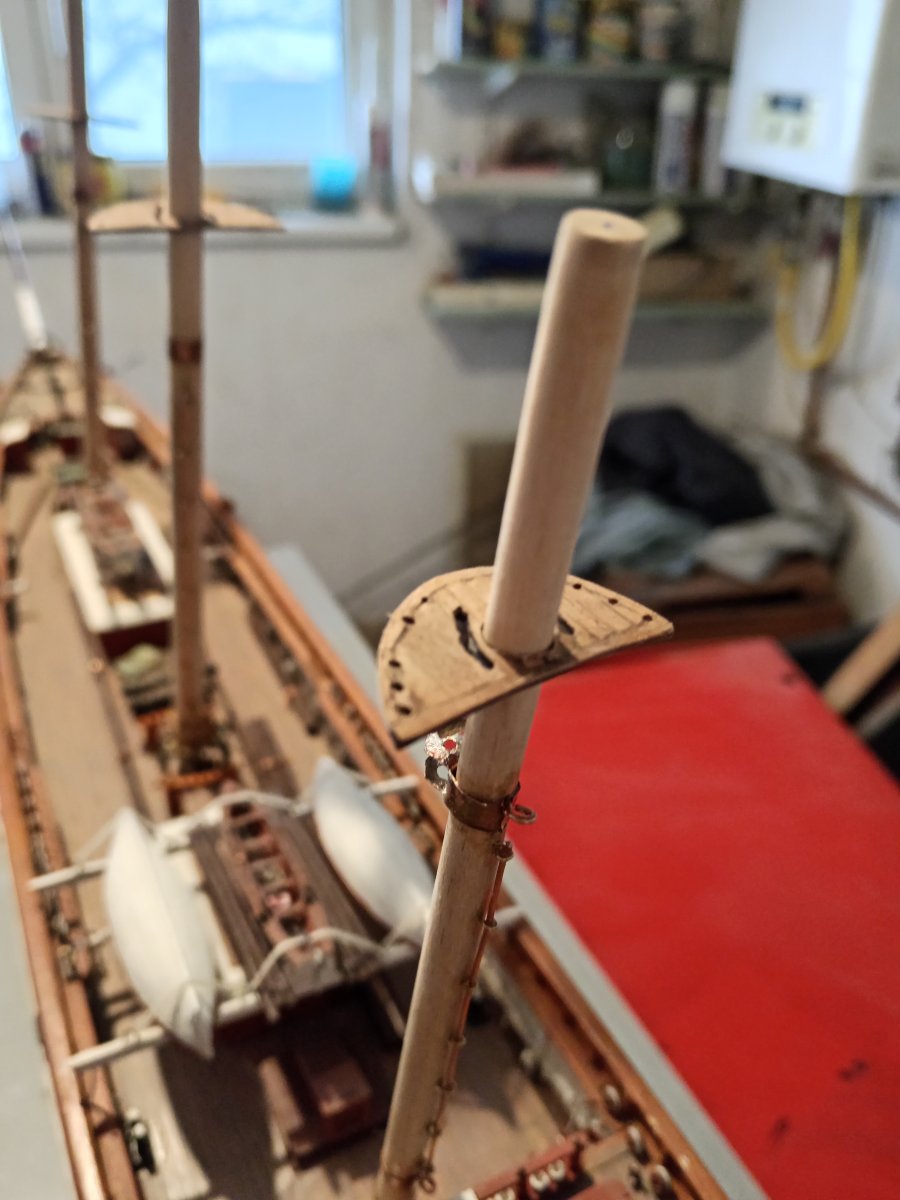
Micro-soldering, testing on way for top of mast
- Jack12477 and GrandpaPhil
-
2
-
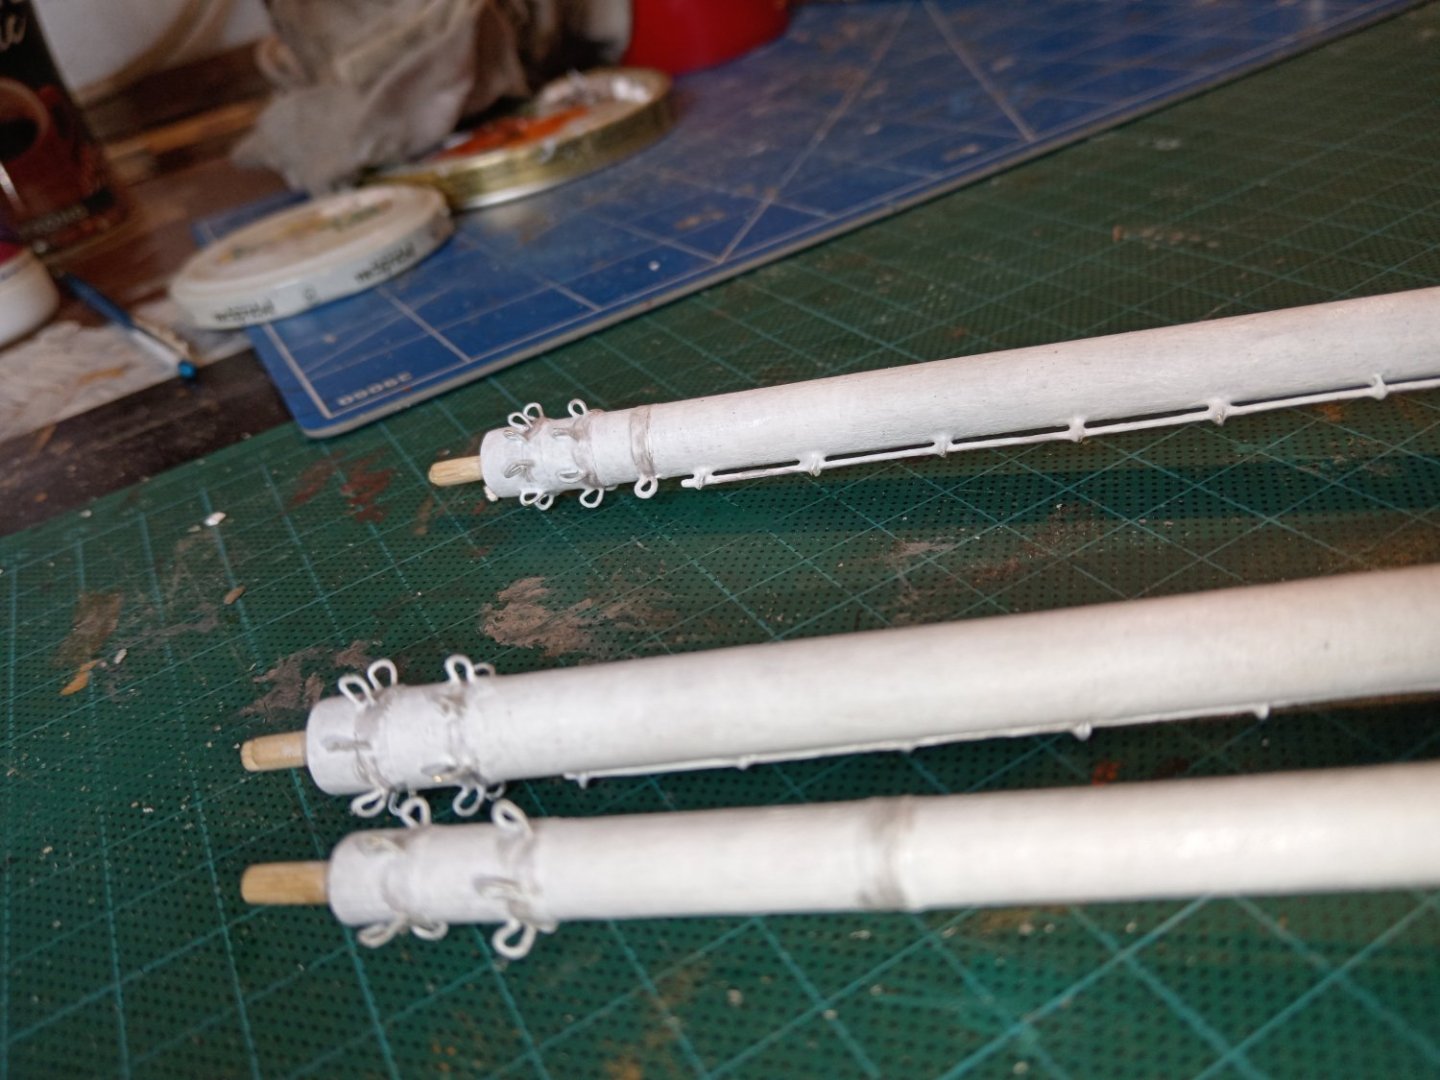
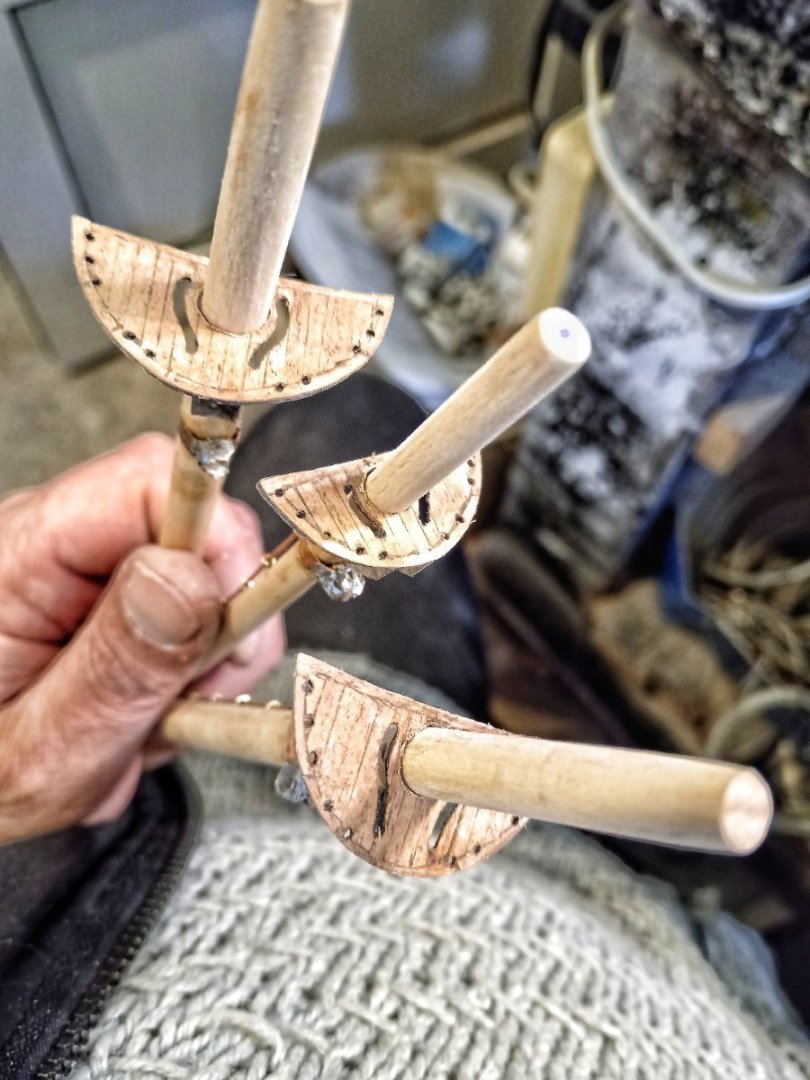
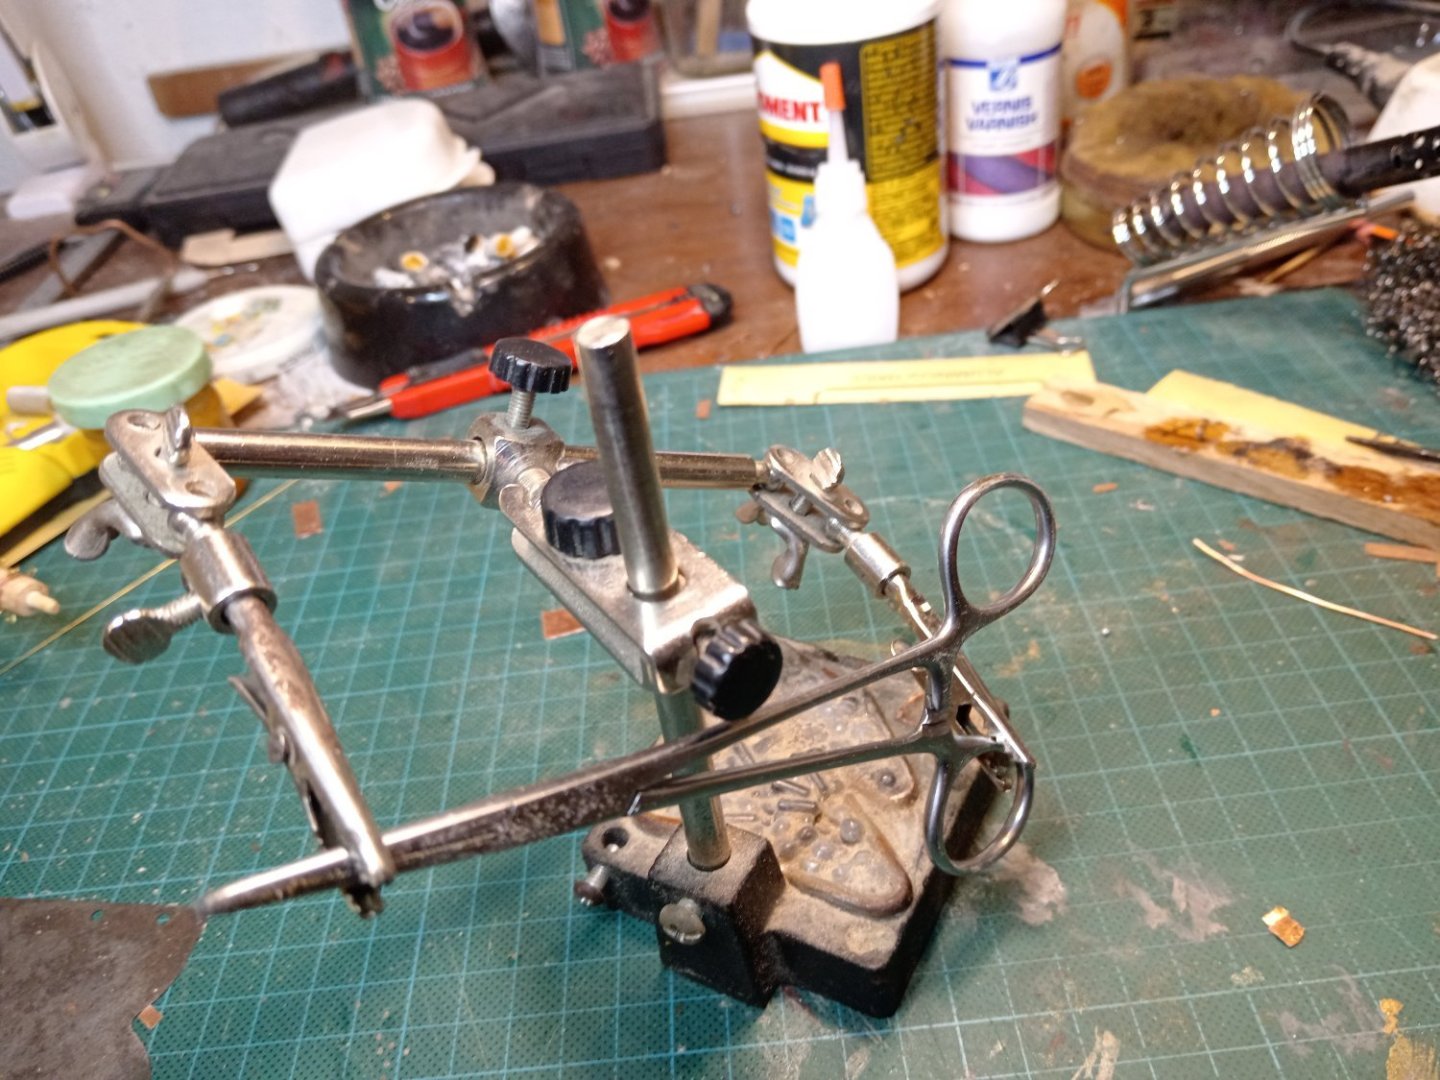
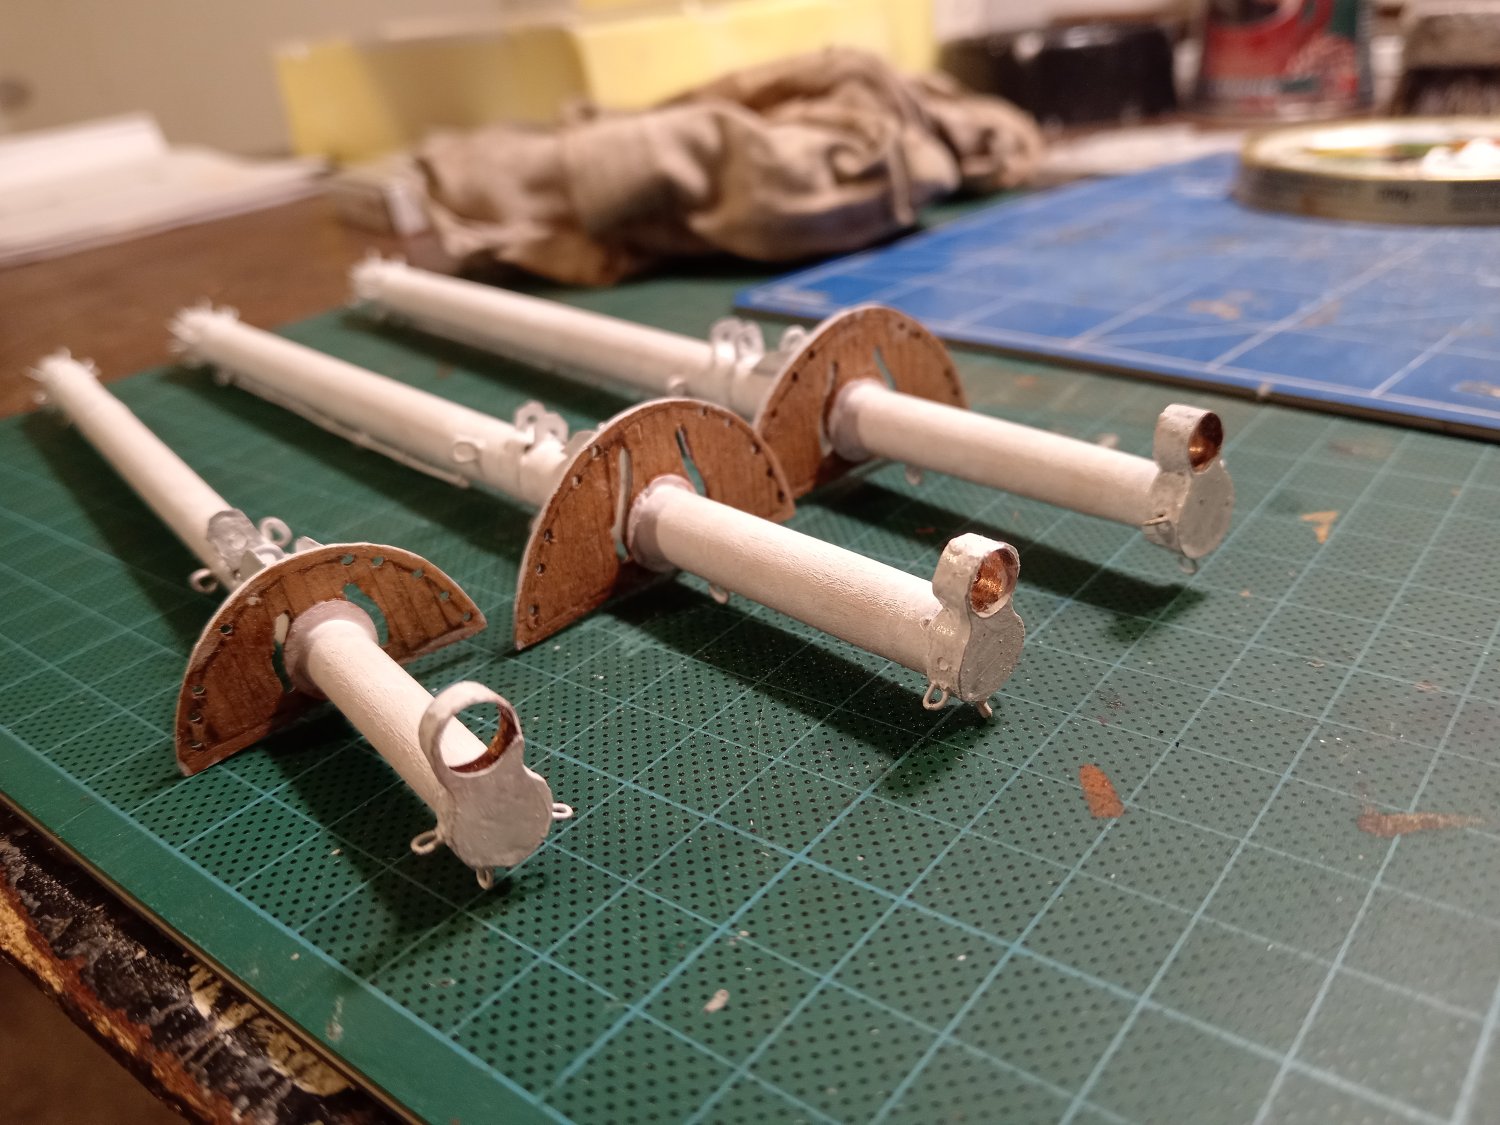
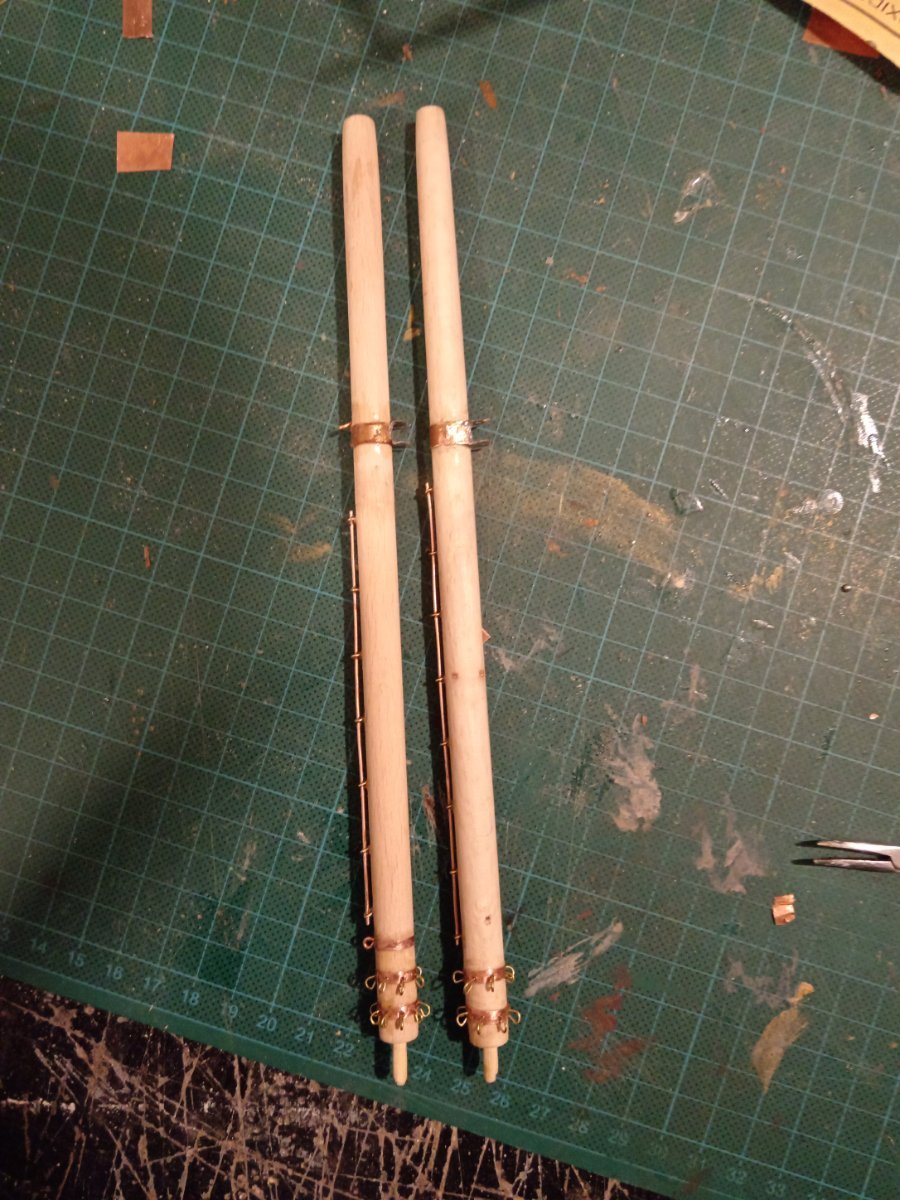
When you have not enough hands ...
Second mast almost done

- Mirabell61, ScottRC, mtaylor and 3 others
-
6
-
And the nest ...
- mtaylor, Jack12477, GrandpaPhil and 1 other
-
4
-
-
-
-
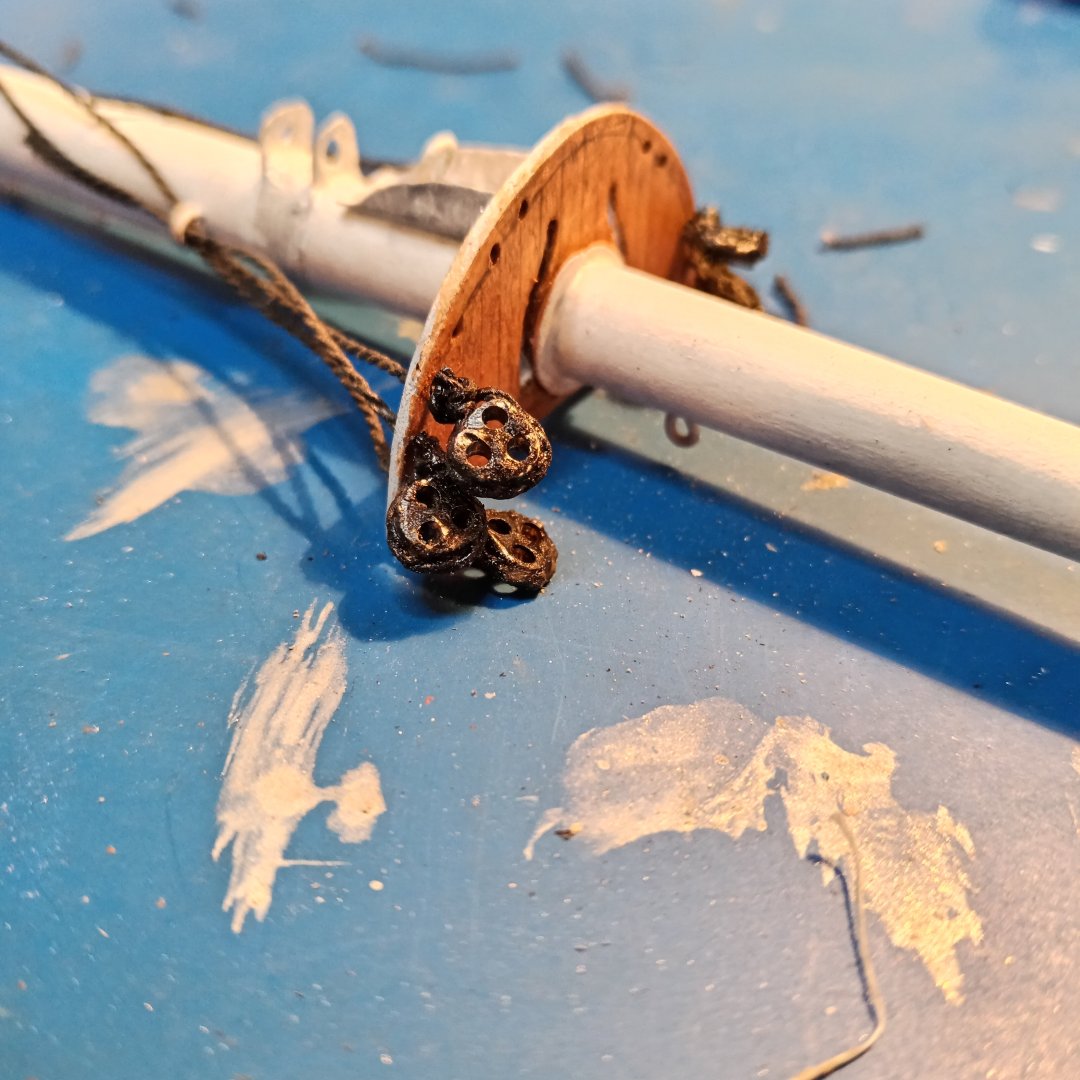
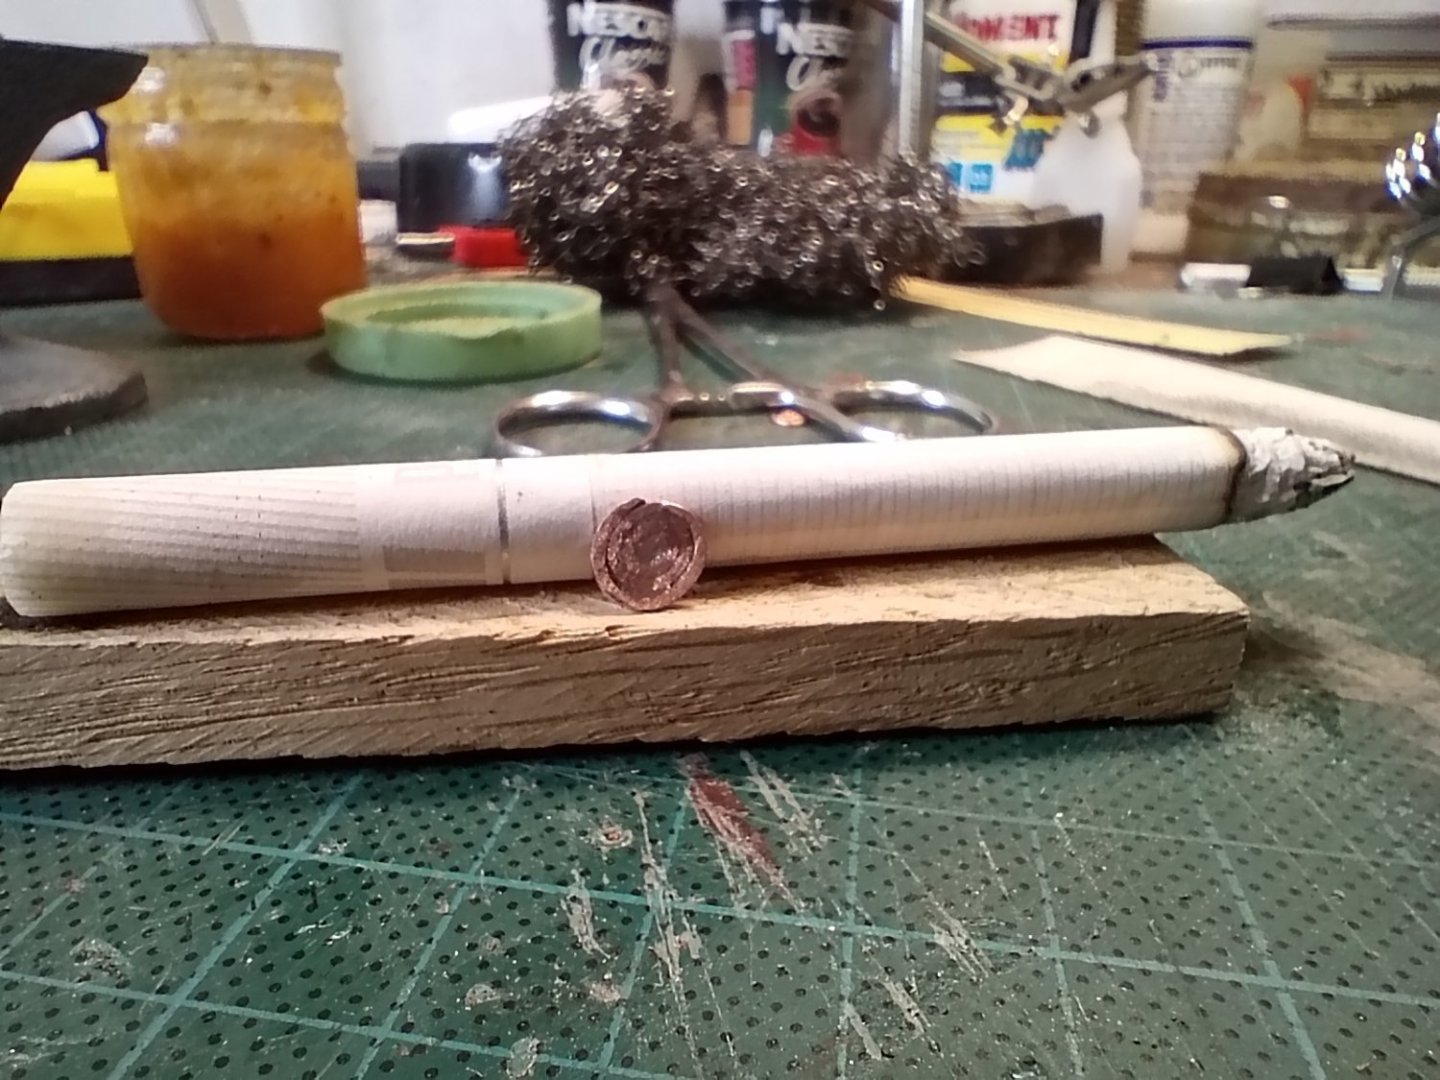
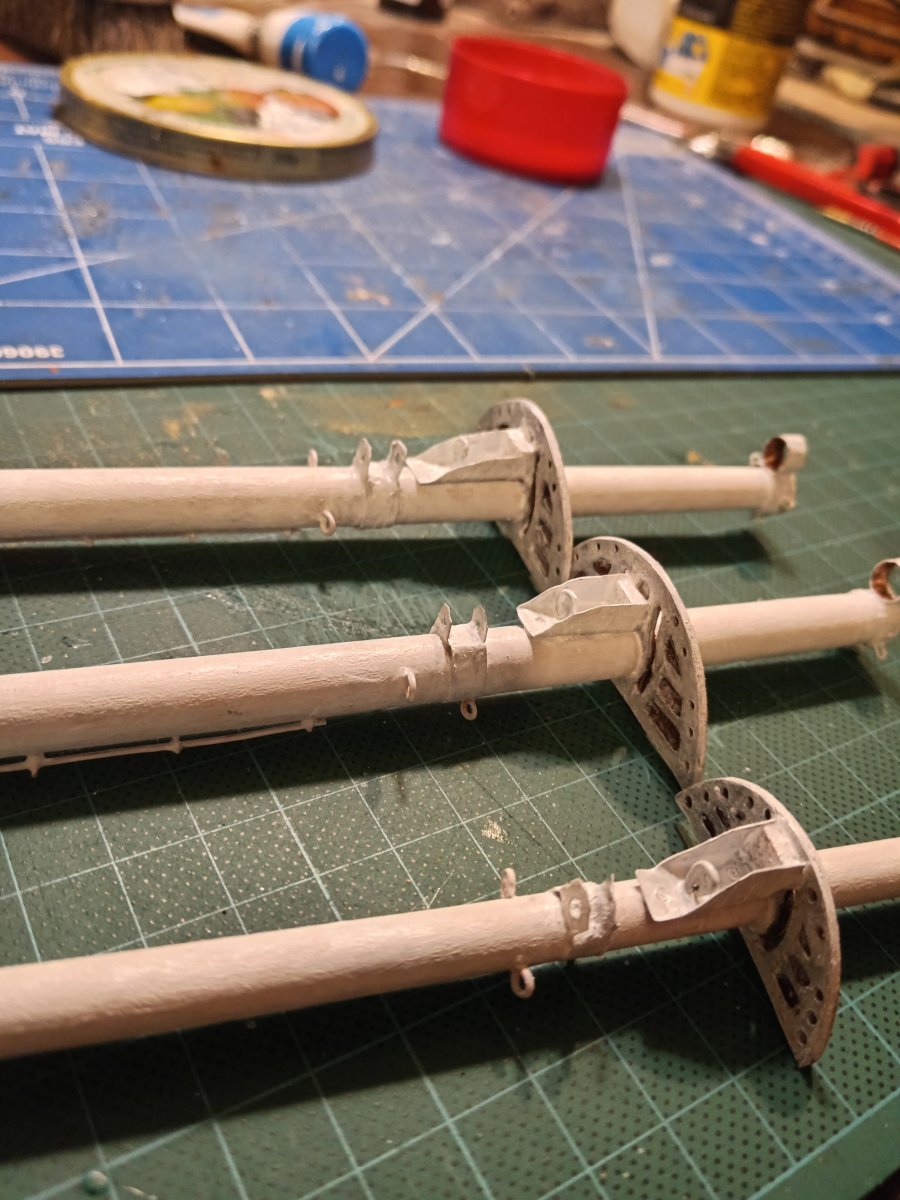
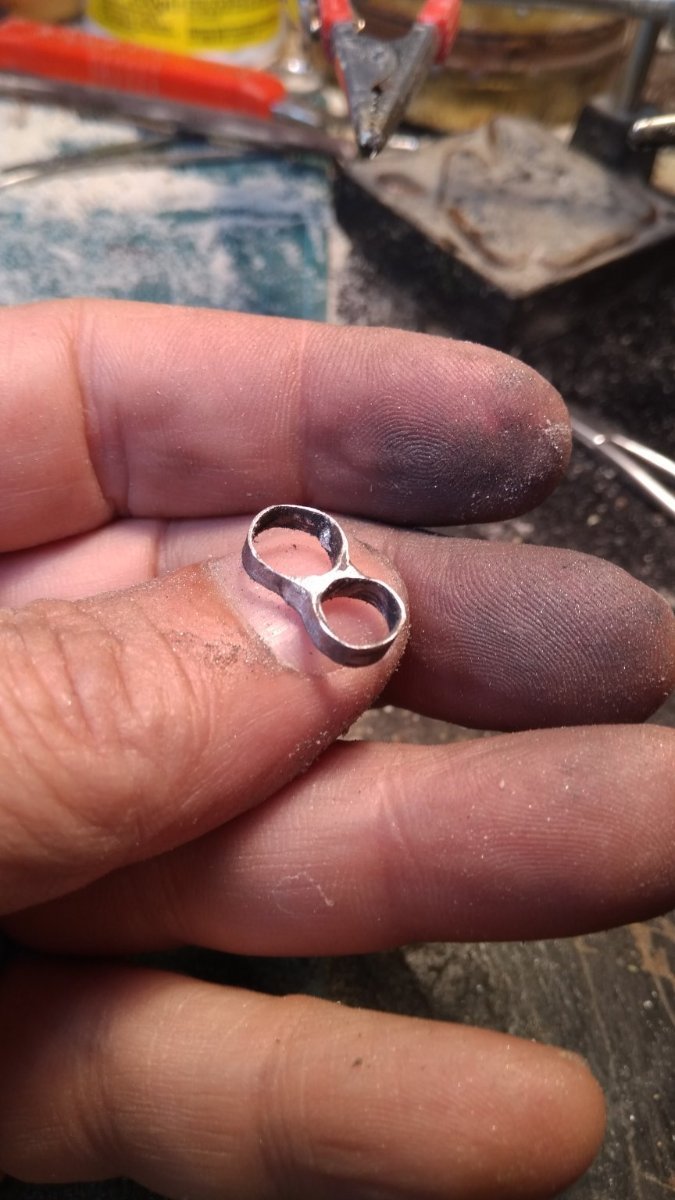
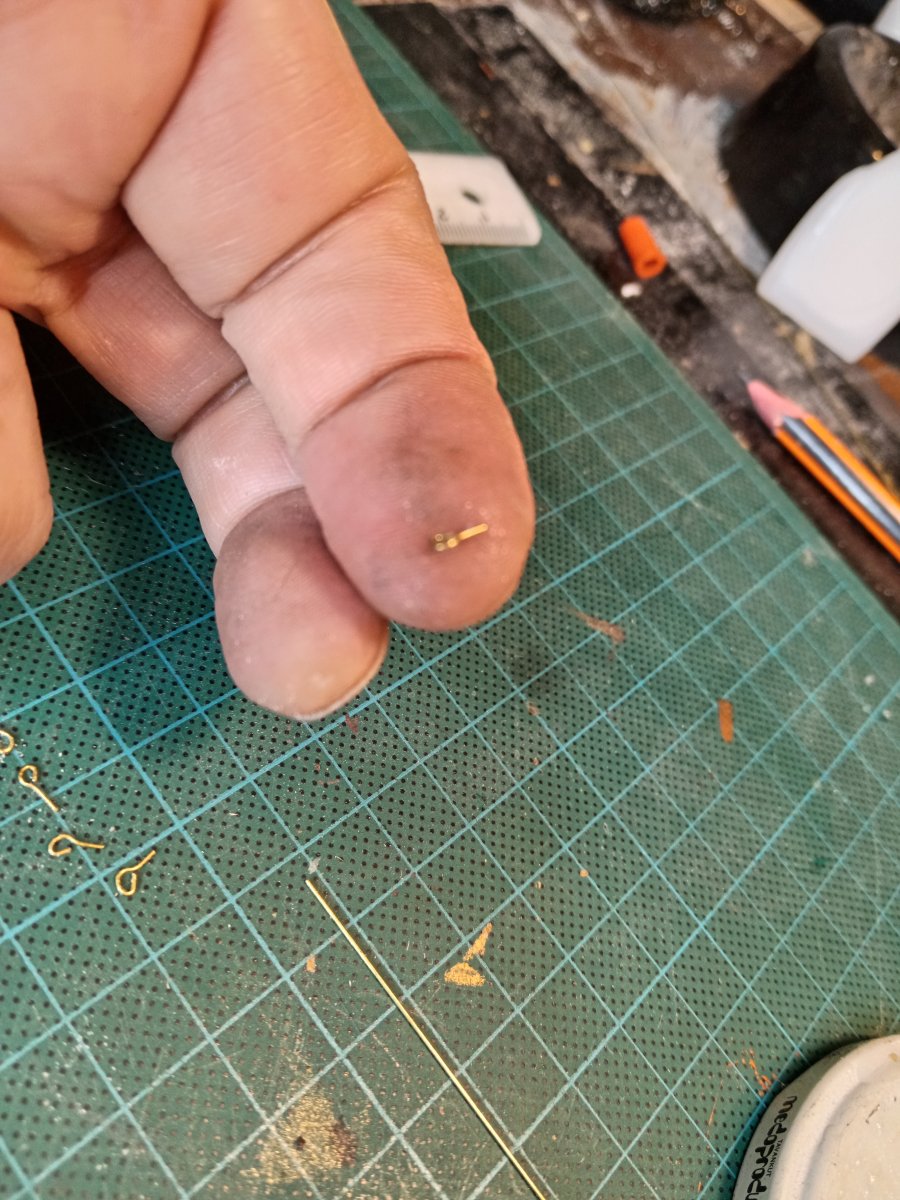
Working on mast, question arrises - metal fittings are small (1:100) and - which material to use for them?
e.g. yard holdings ... Galvanized **** for gutters I have is to rough and very hard to fit. Cu foil I have (0,3mm) is very thin and elastic and can not hold yard.
Brain storming idea - to cover Cu foil with thin layer of soldering?
And this is it!
Soldering gives it required strenght , even it is 4mm in dia at the hole part.

- GrandpaPhil, Keith Black and mtaylor
-
2
-
 1
1


Cutty Sark by NenadM
in - Build logs for subjects built 1851 - 1900
Posted
Thank you Simon for yourt support and nice advises. My brain started to work somewhere in background to find solution. Right now I am somewhere between trying with smaller deadeyes and simulation of dead eyes. We'll se what will happen.
Al the best.
Nenad