SaltyScot
-
Posts
867 -
Joined
-
Last visited
Content Type
Profiles
Forums
Gallery
Events
Everything posted by SaltyScot
-
 The planking is coming along nicely, I have made good progress on the one side. I was perhaps a little ambitious when I said I would finish this in one afternoon , I am taking my time and enjoying every minute of it: I added a stealer strake to get me back on line while I was working up the hull. I should have done that on the one above it (towards the sheer strakes, the hull is upside down right now), because there is a gap. That strake will be coming off again: I also steam bent a nice piece of walnut that I will be using as a false keel and up to the beakhead (you made me think of this @Kenchington when you described just what a false keel is). It will cover the nasty plywood that currently runs along the keel and keeps separating:
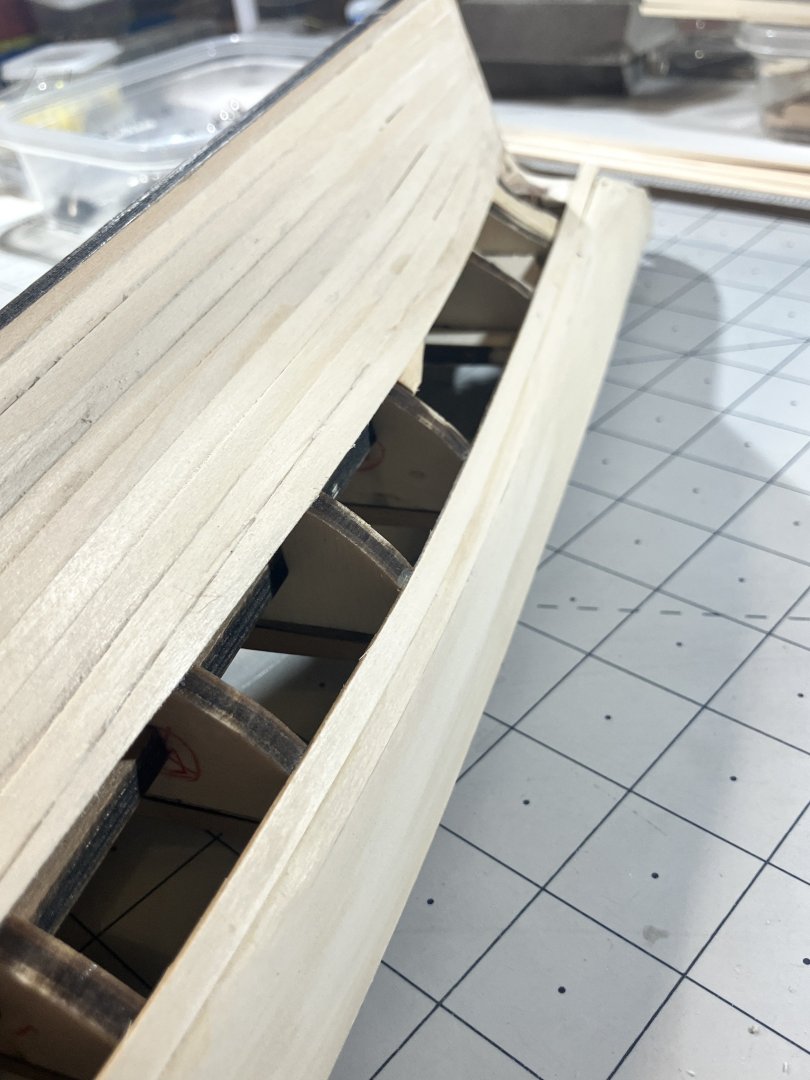
-
But you came up with a decent solution, Glenn. Nice save
- 241 replies
-
- 2
-

-

-
- Vanguarrd Models
- Harpy
- (and 1 more)
-
Well put, Phil. I have decided to run with it. this is a lesson learned and one that I am sure to be aware of in future builds. I am a little frustrated with myself for not getting that fairing right but am not going to lose any sleep over it.
-
Hmmm, that is slightly annoying if that is the case. My issue with that is, if I had faired those parts you mentioned any more than I already had, the strake from the forward bulkhead would have had a weird angle coming off that bulkhead and onto those pieces. Perhaps the whole forward section of the hull should have been faired a little more...... Well, the matter is moot now, unless I rip off all the planks and start over. That being said, while I was fighting with that splitting plywood yesterday, I very seriously considered actually starting again and making the bulkheads and keel (or whatever it's called) out of a decent piece of wood, so basically scratch building them using the plans. Food for thought.
-
Be sure to put a little varnish along the tape lines when you spray, that will prevent the paint bleeding through the tape (don't know if you knew that already mate )
-
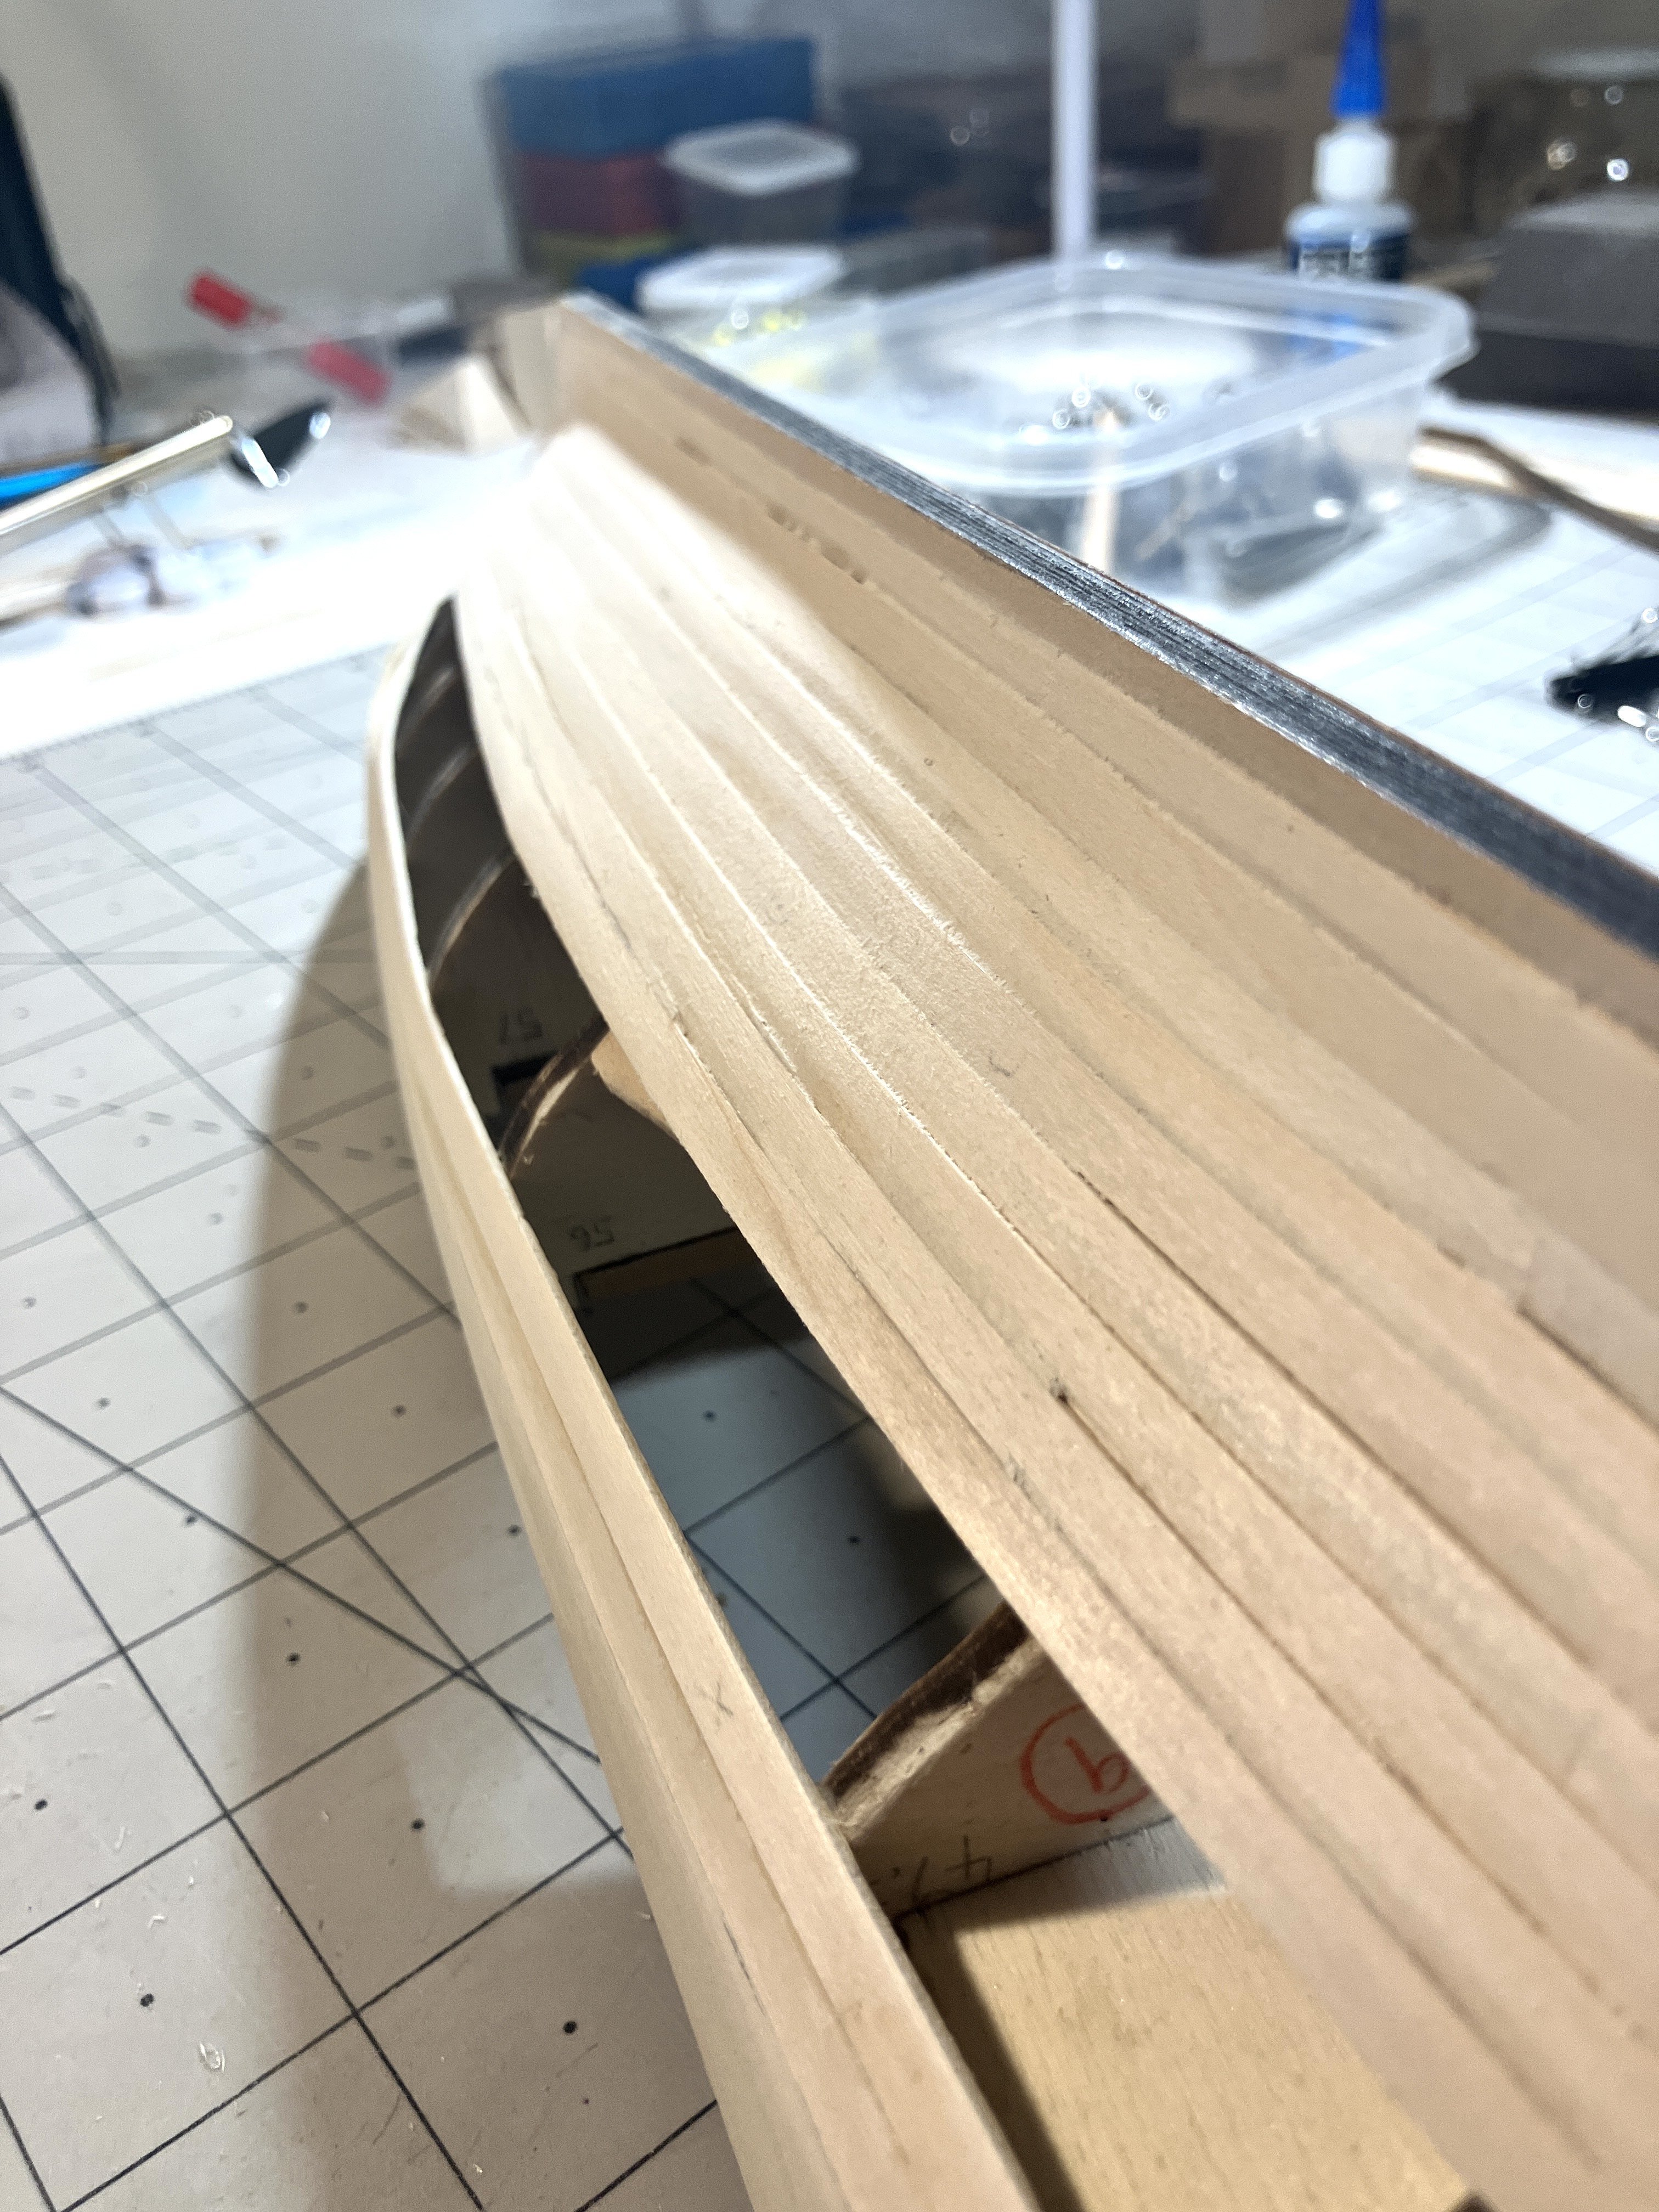
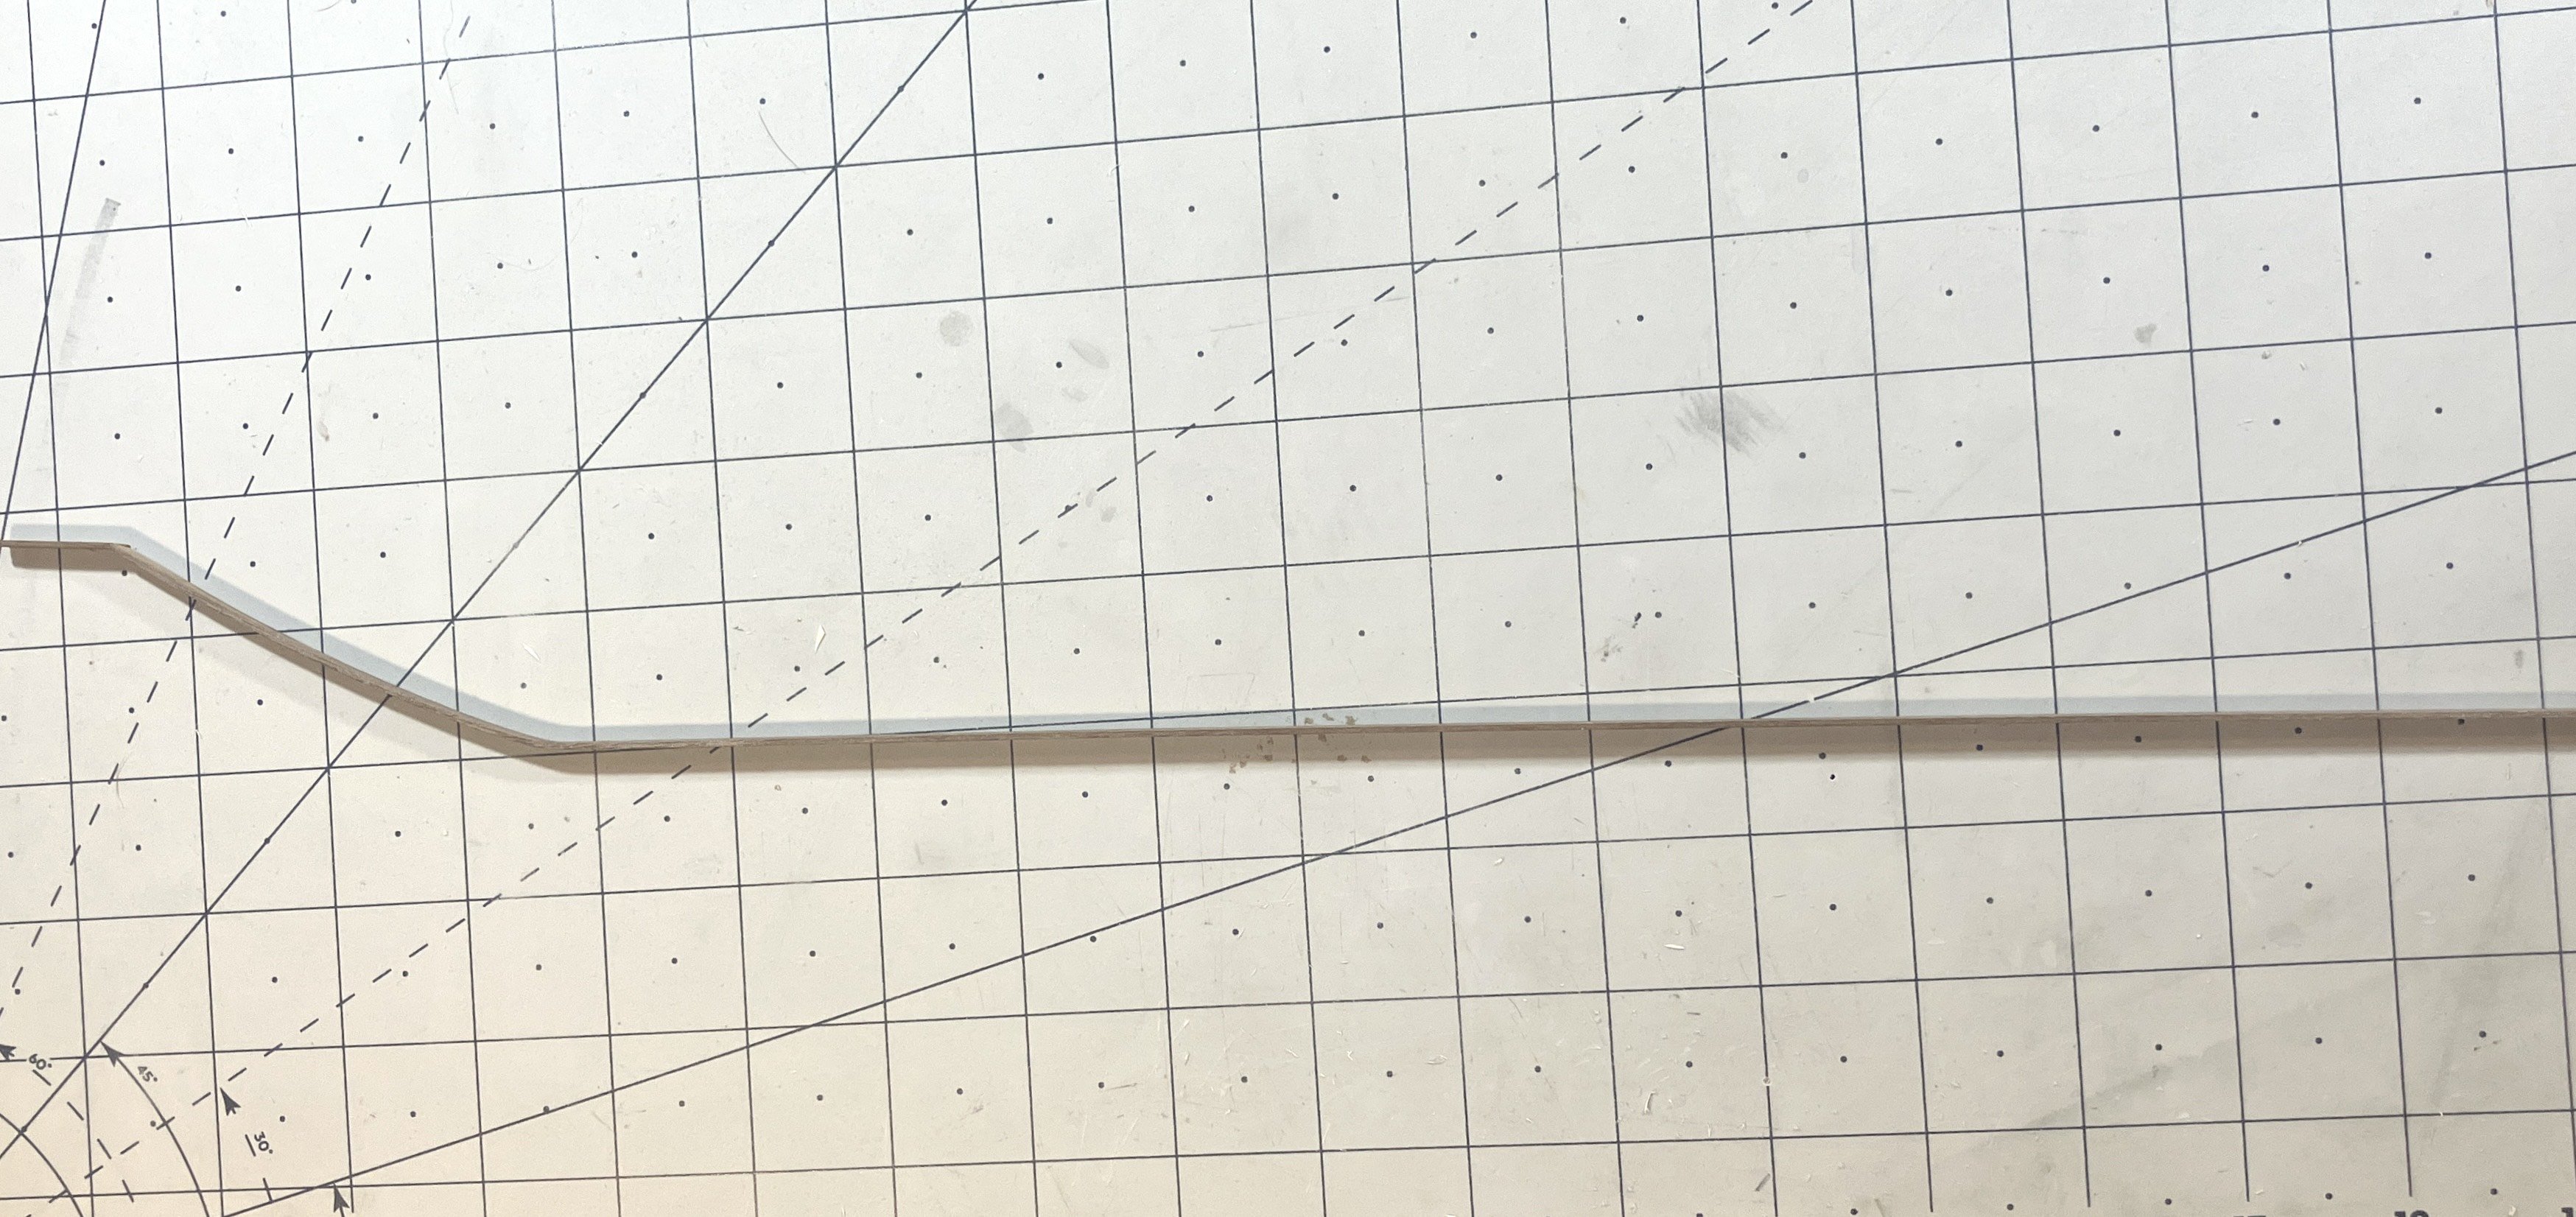
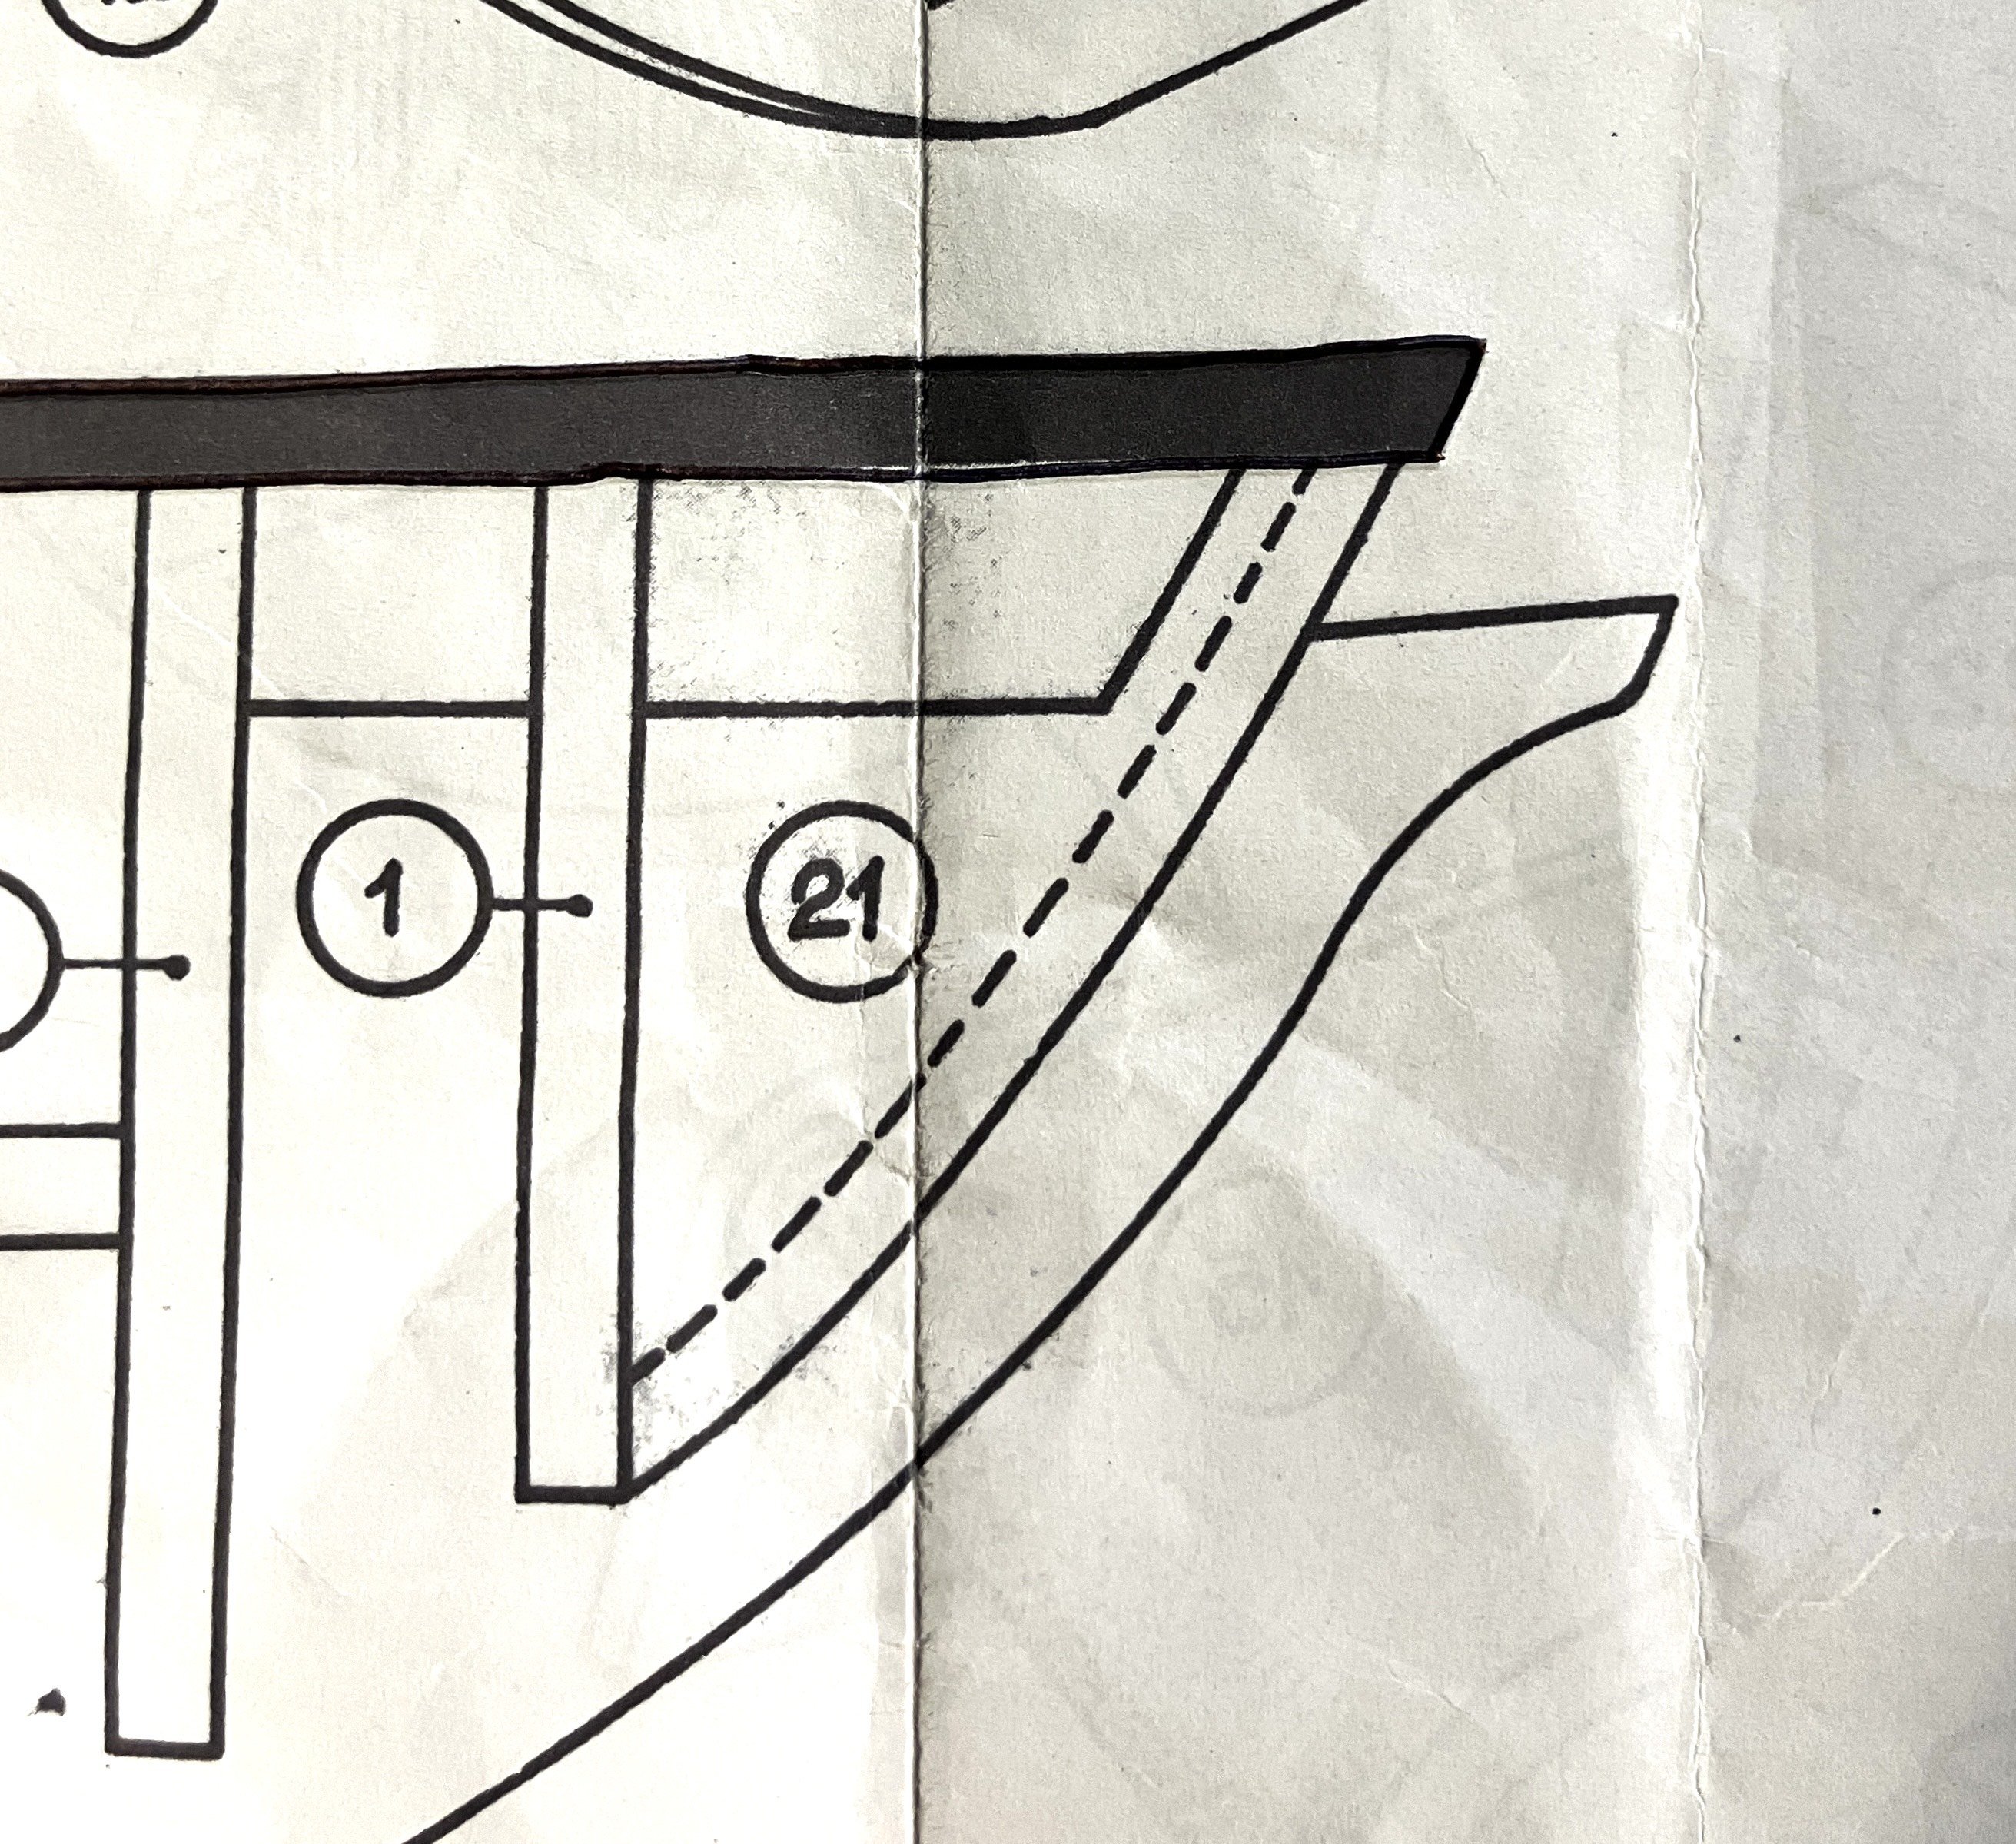
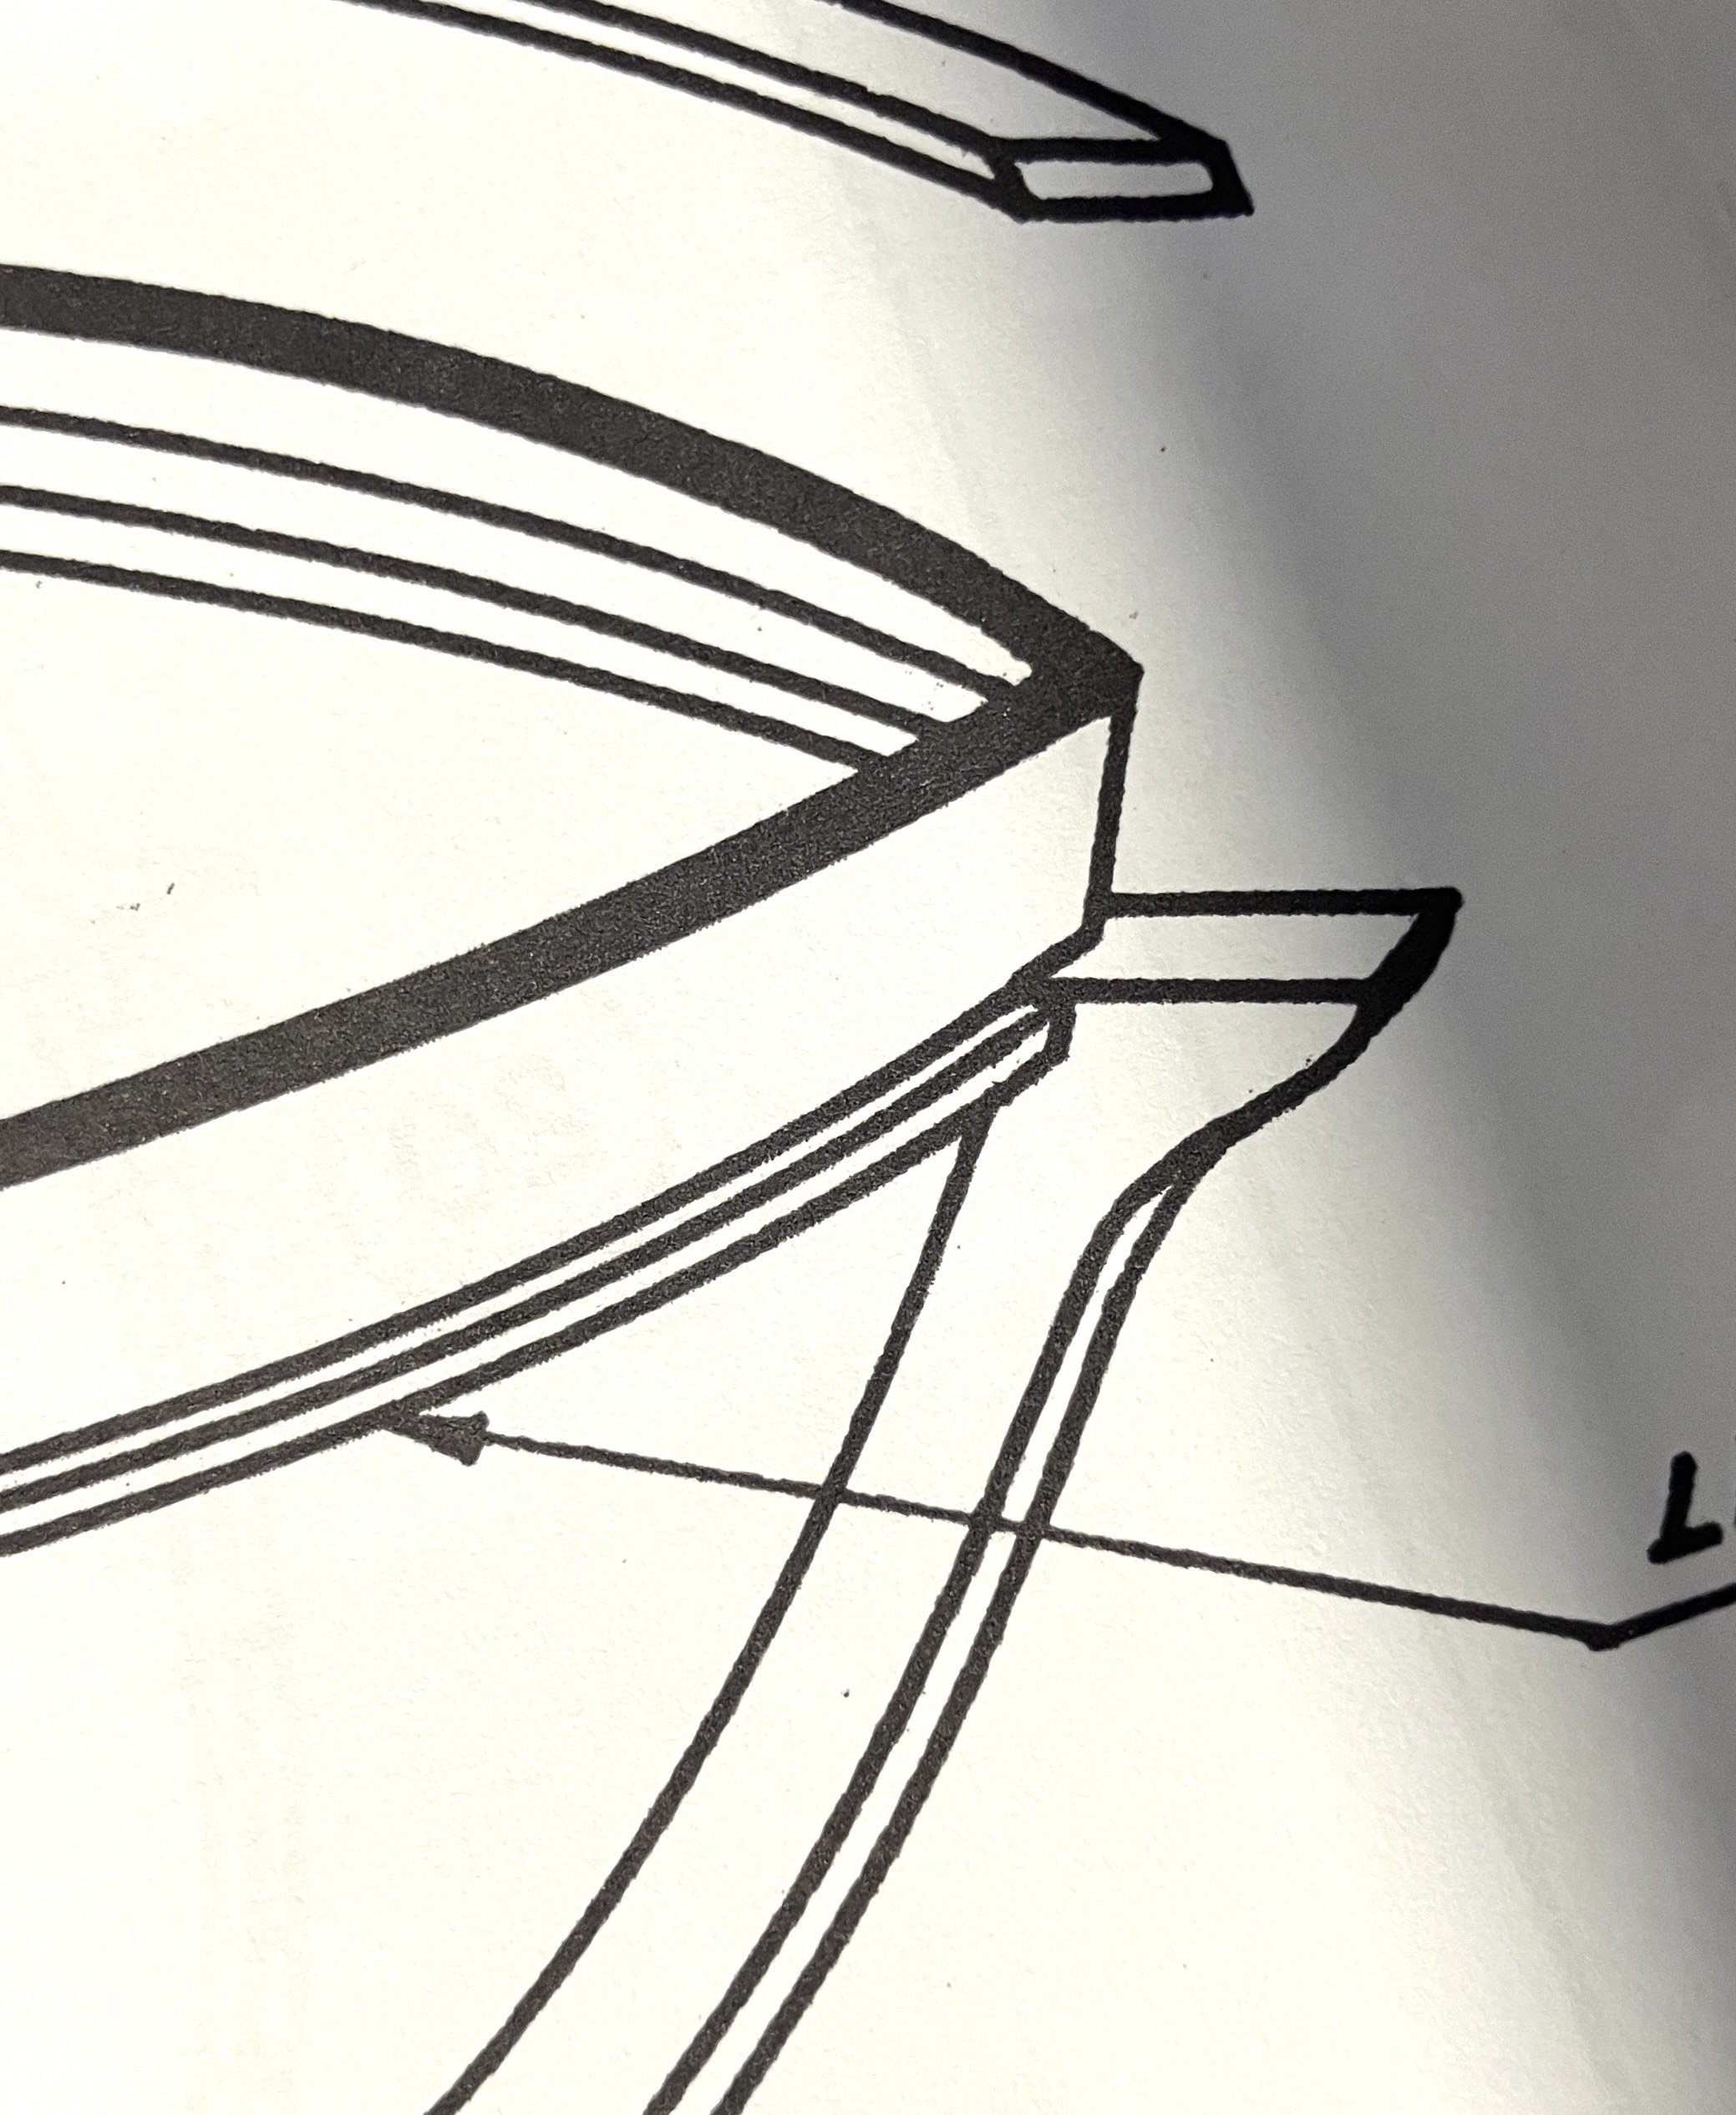
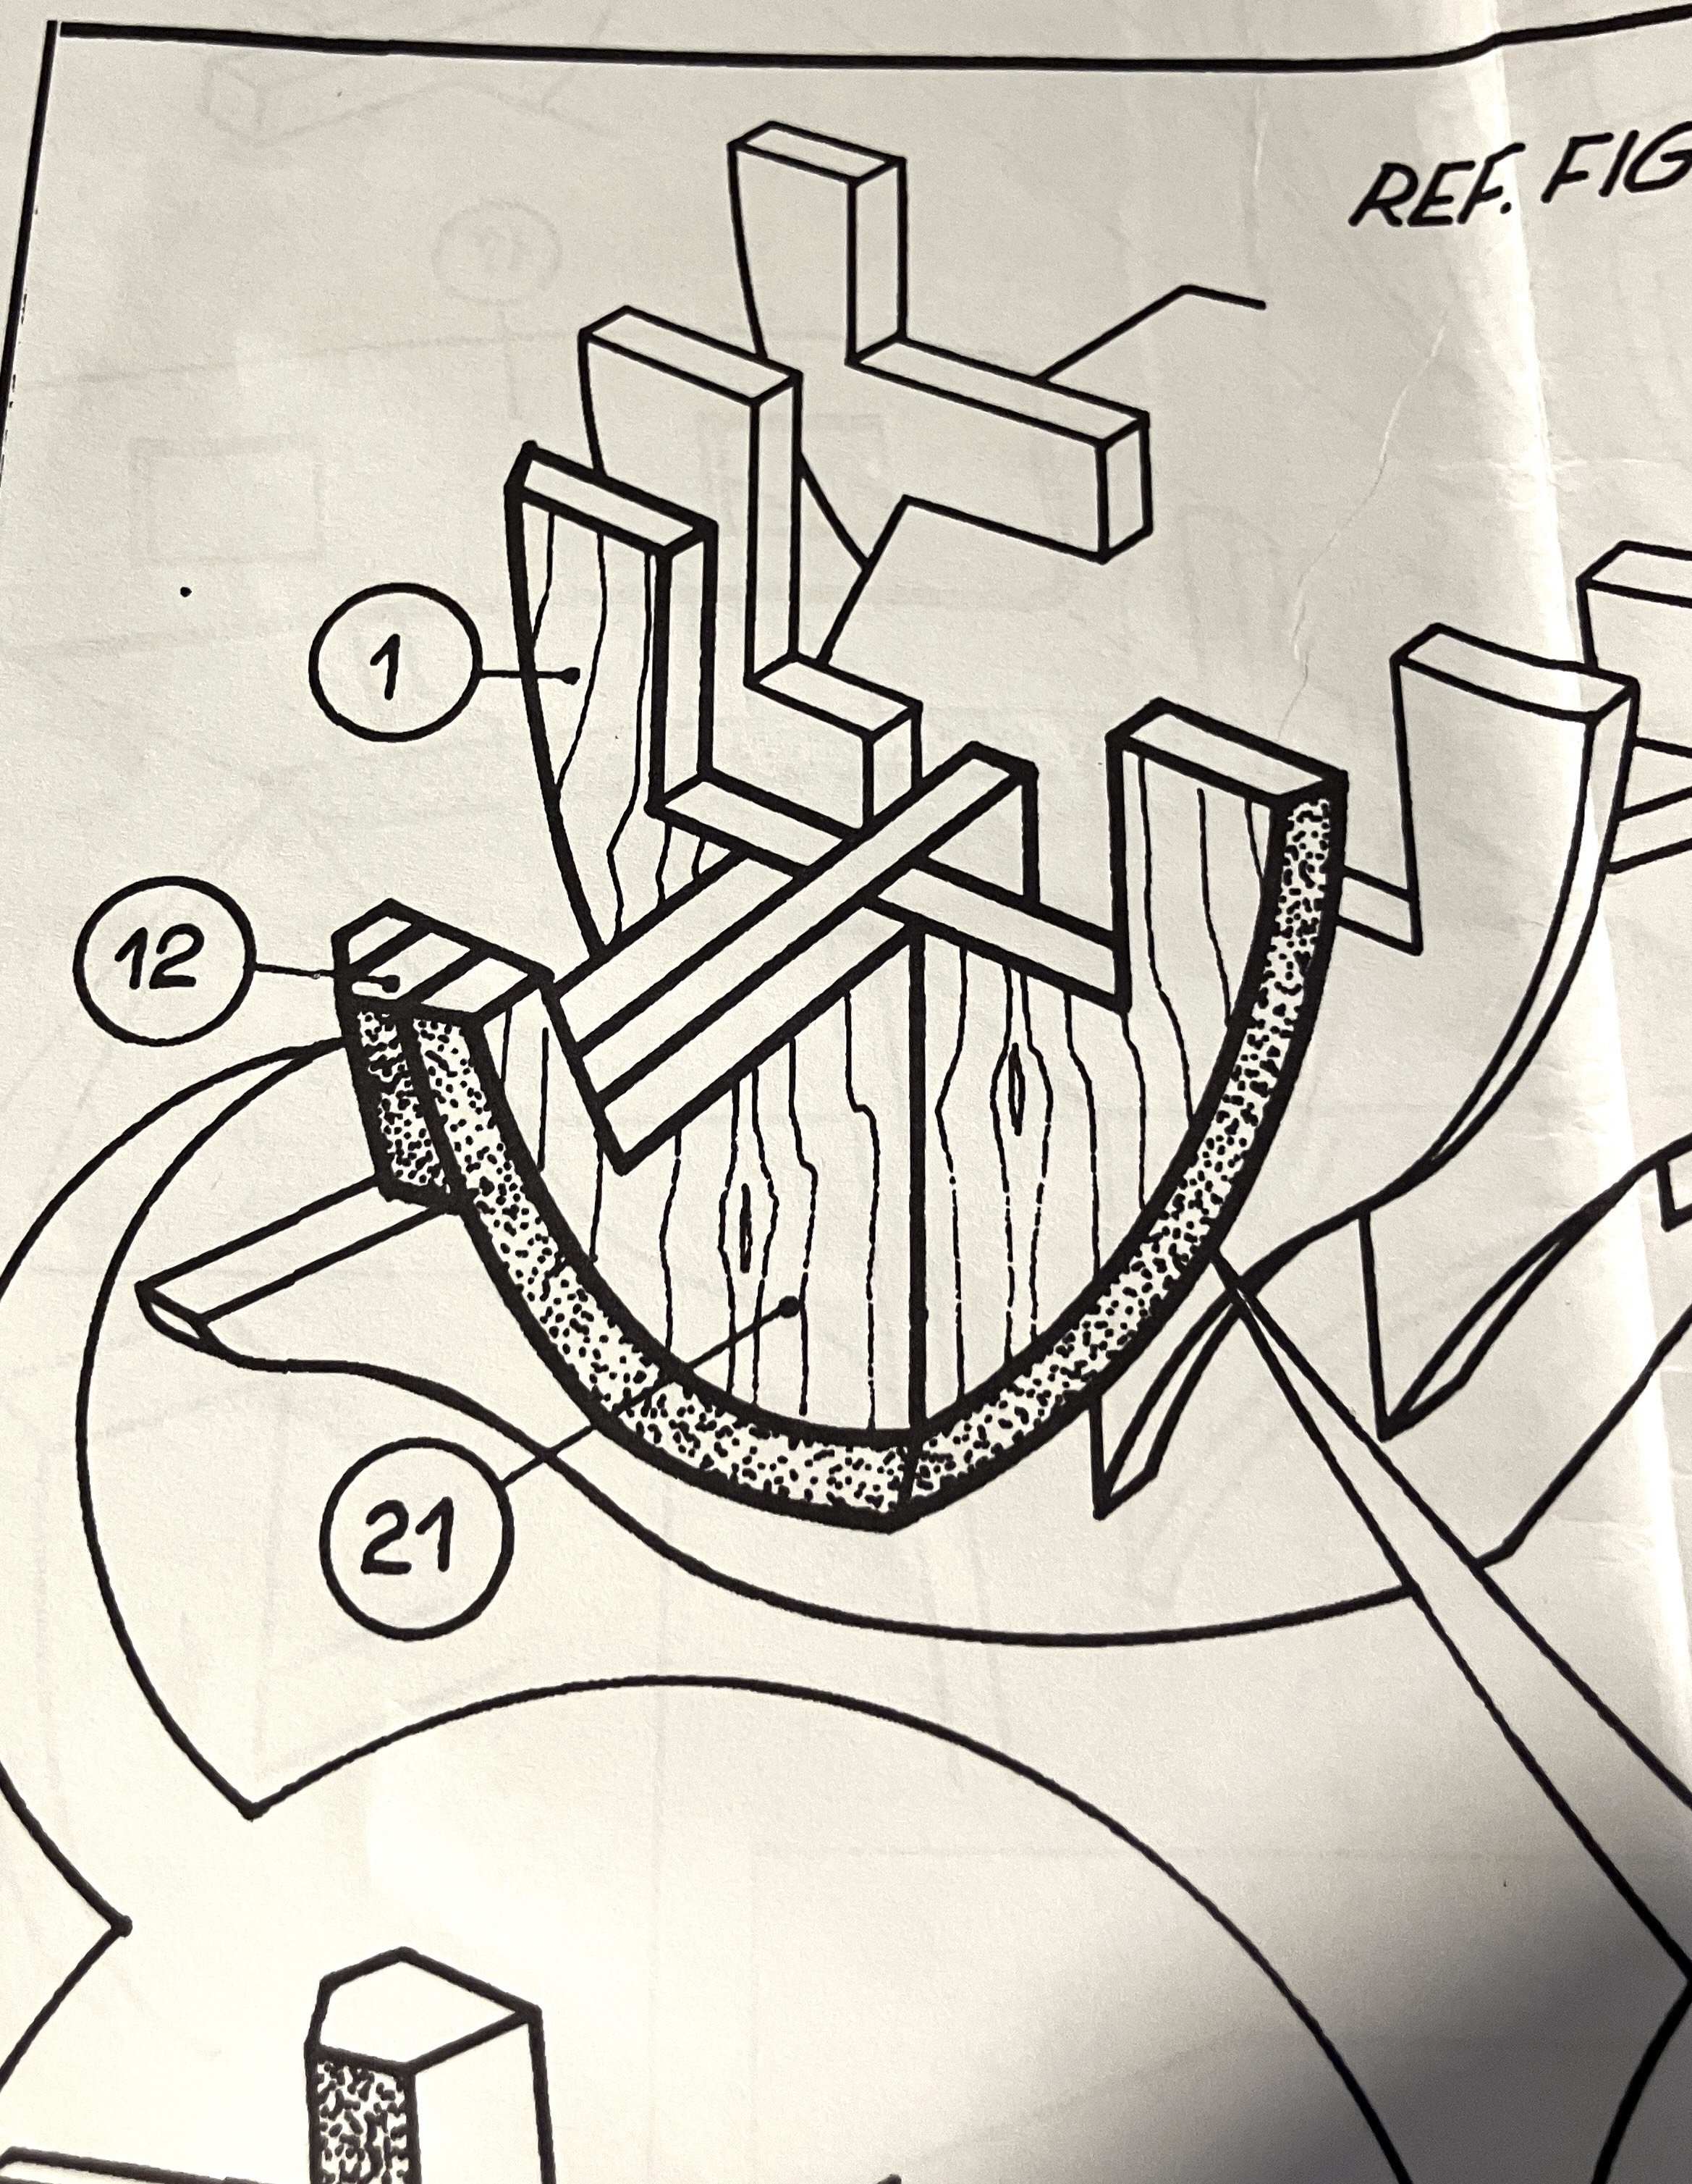
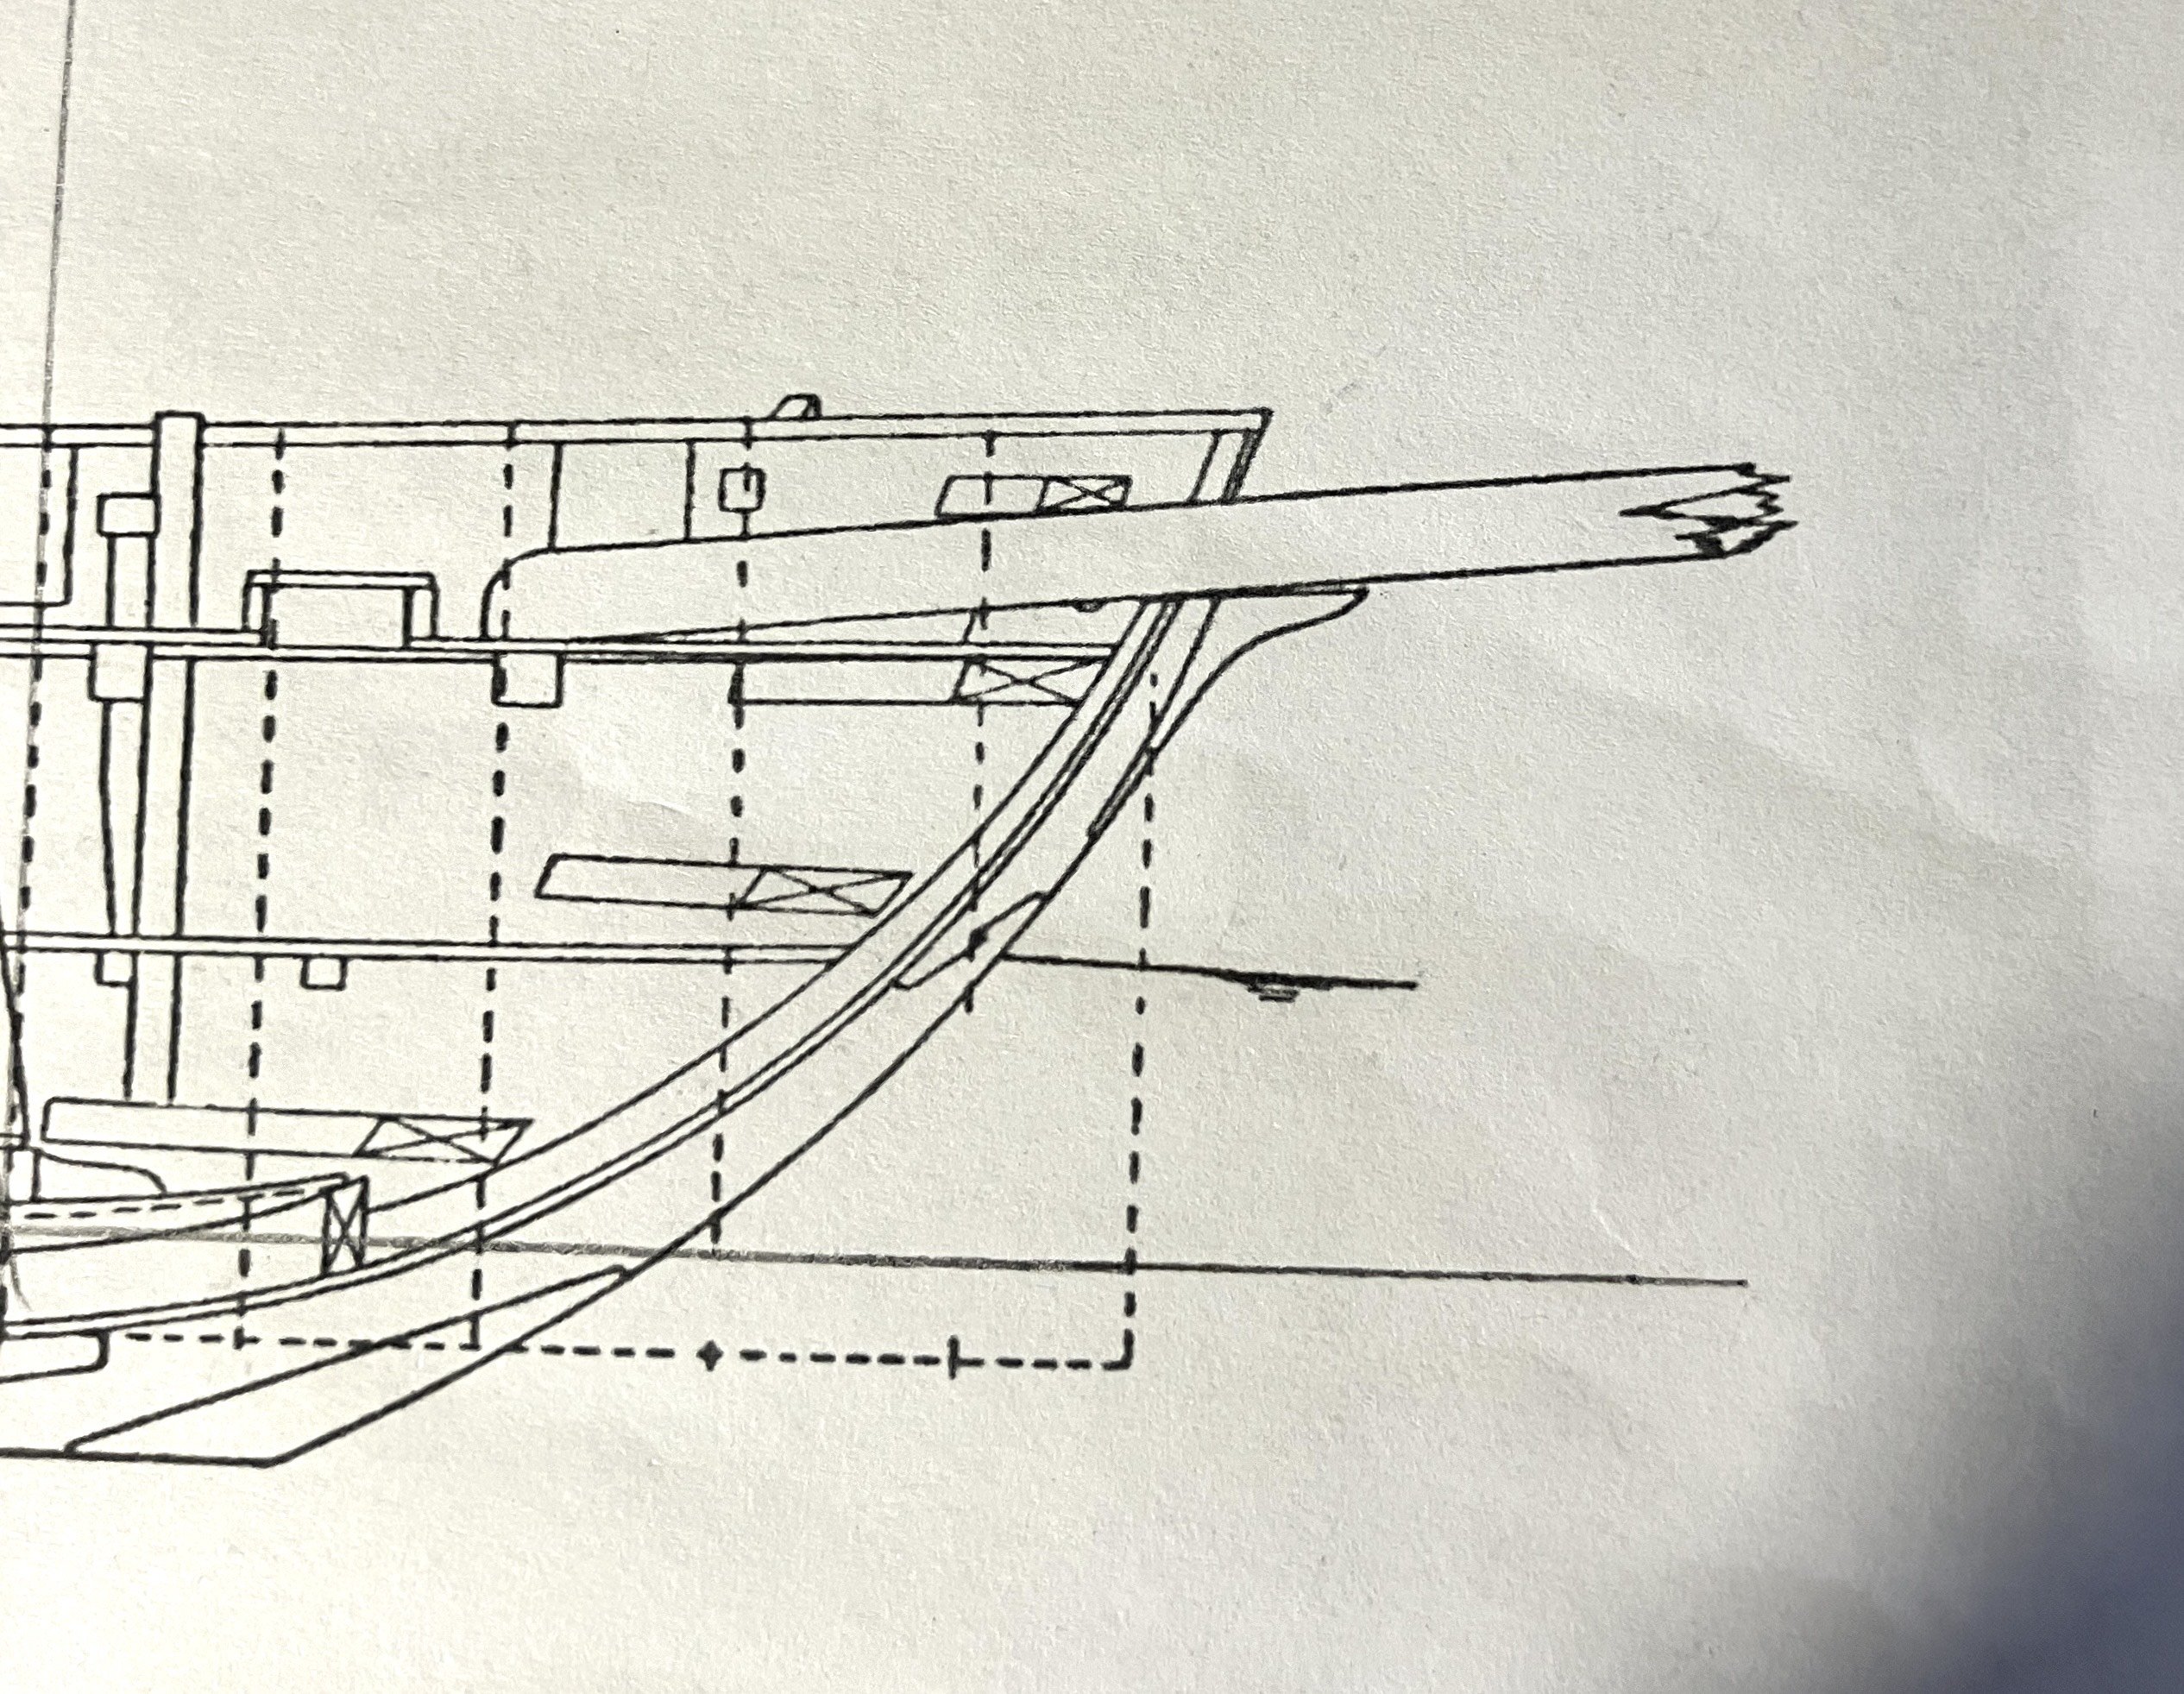
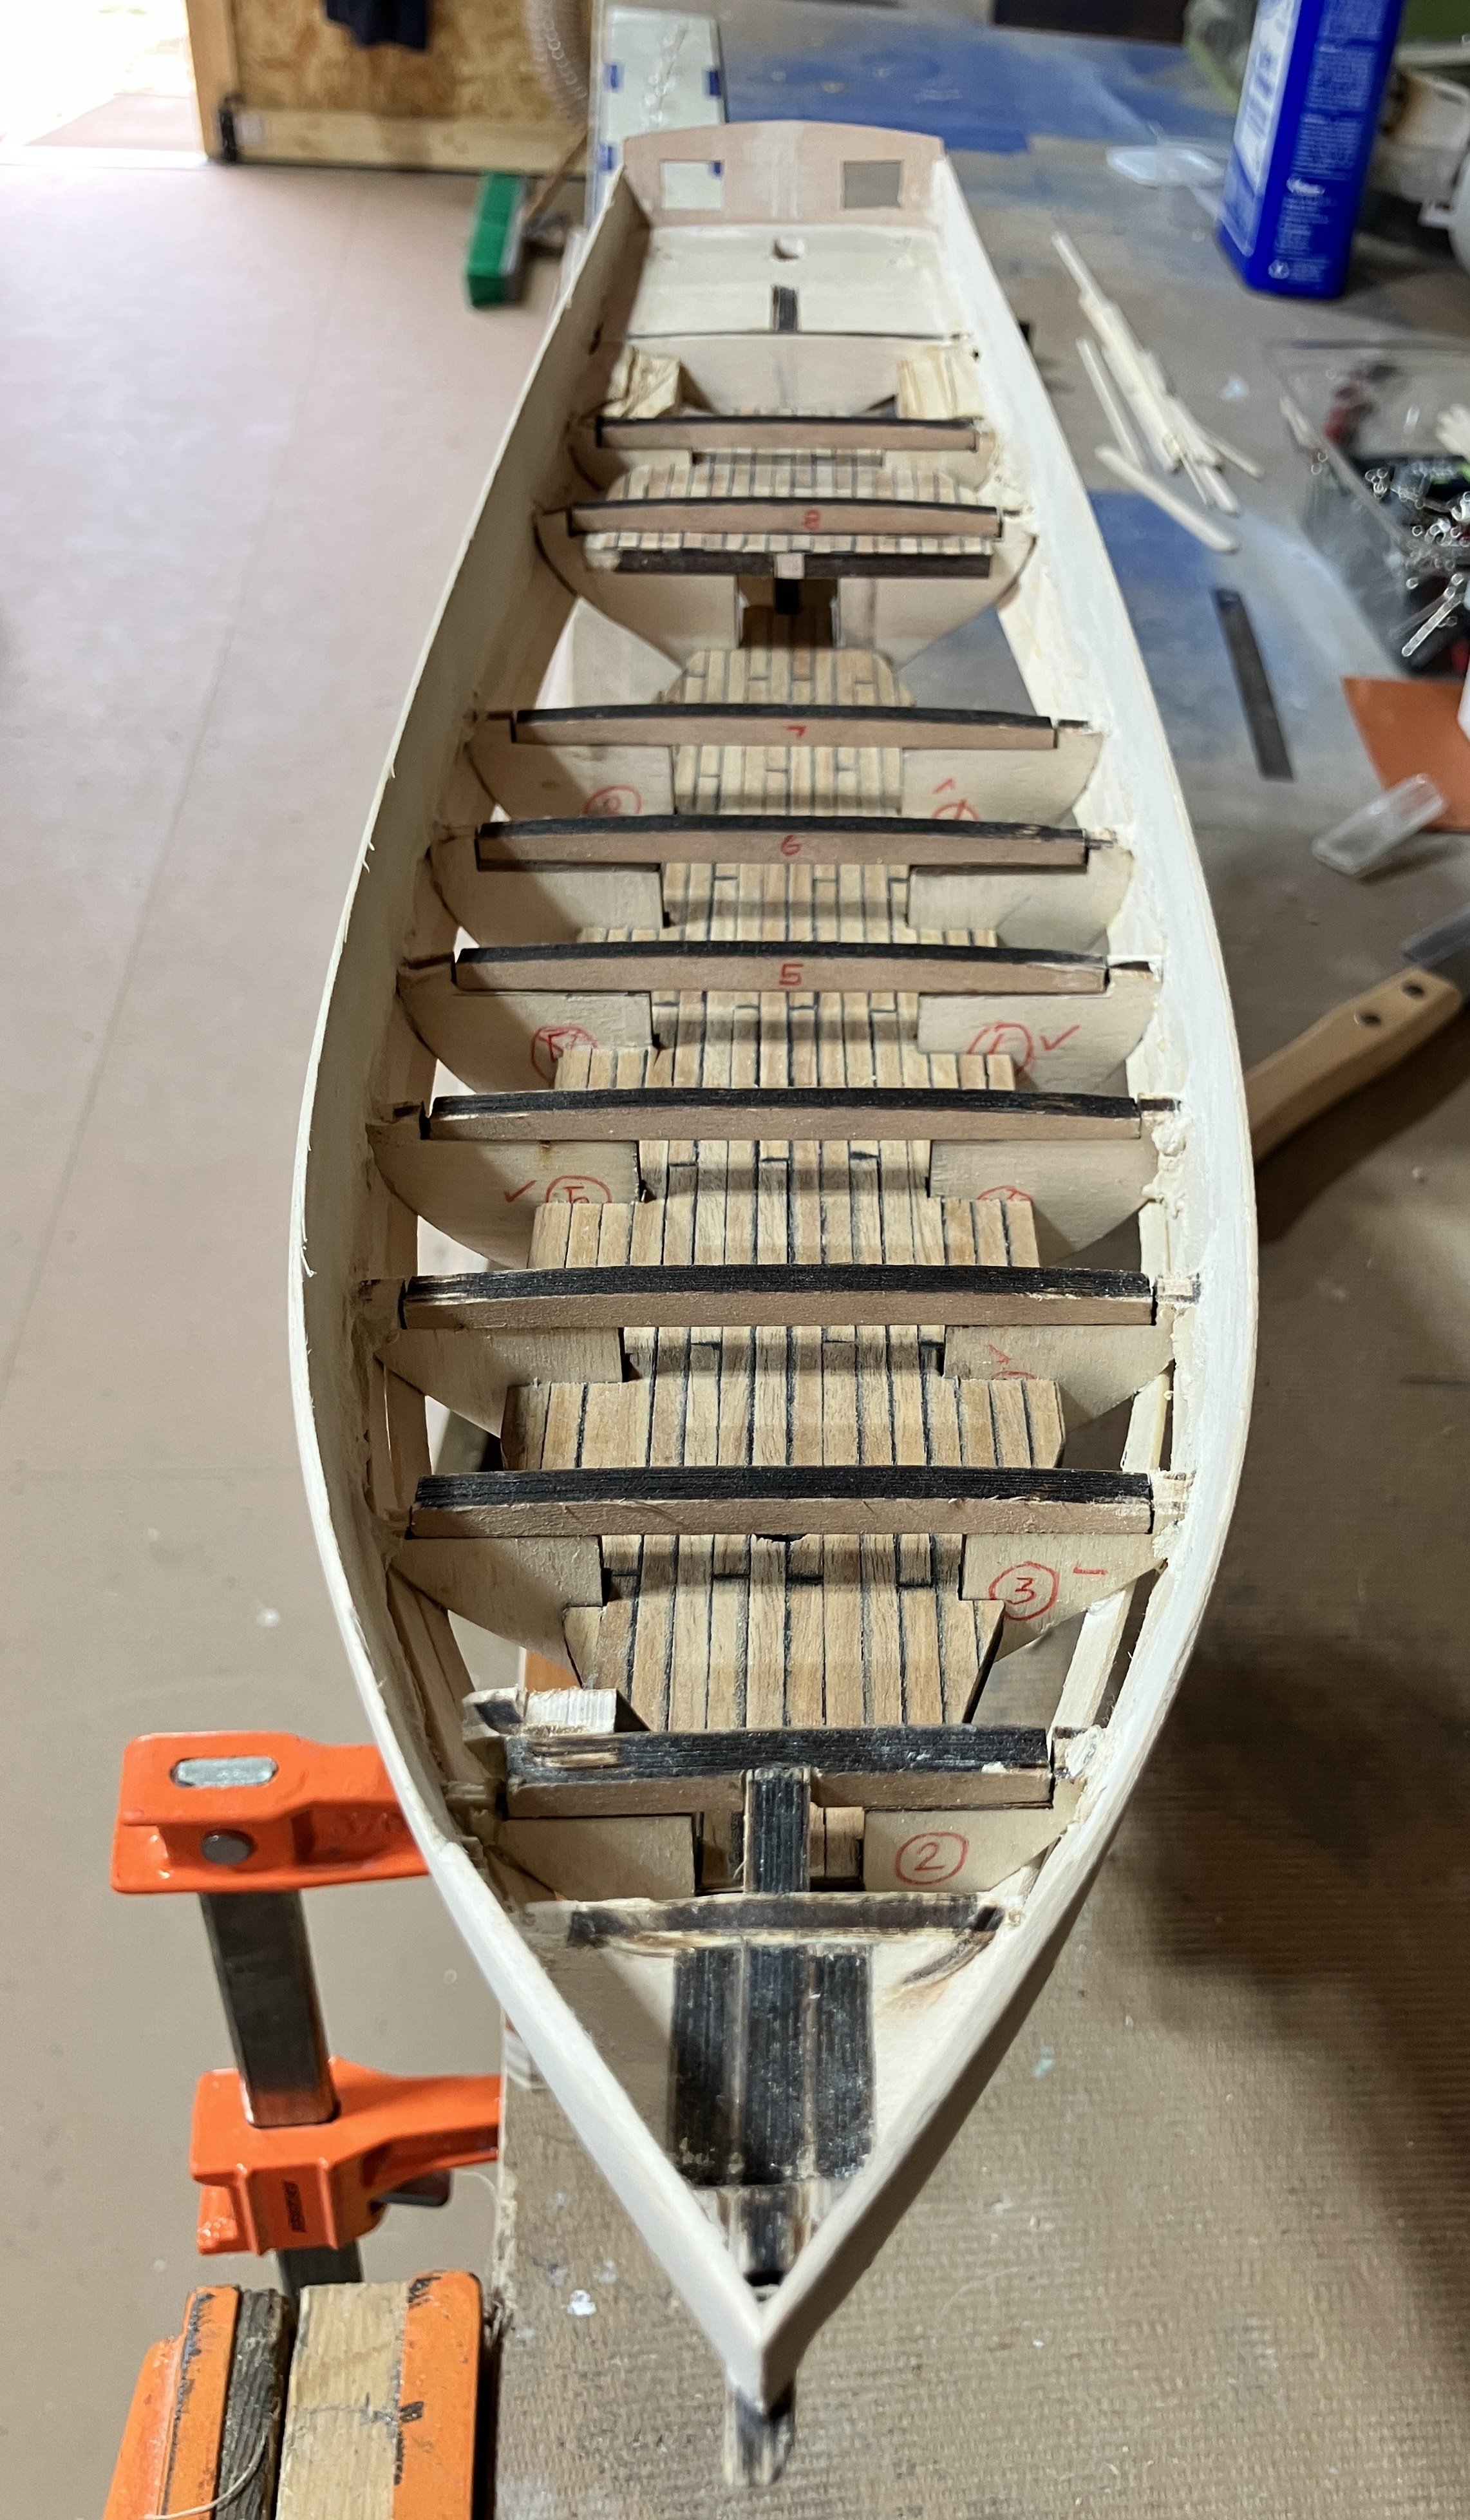
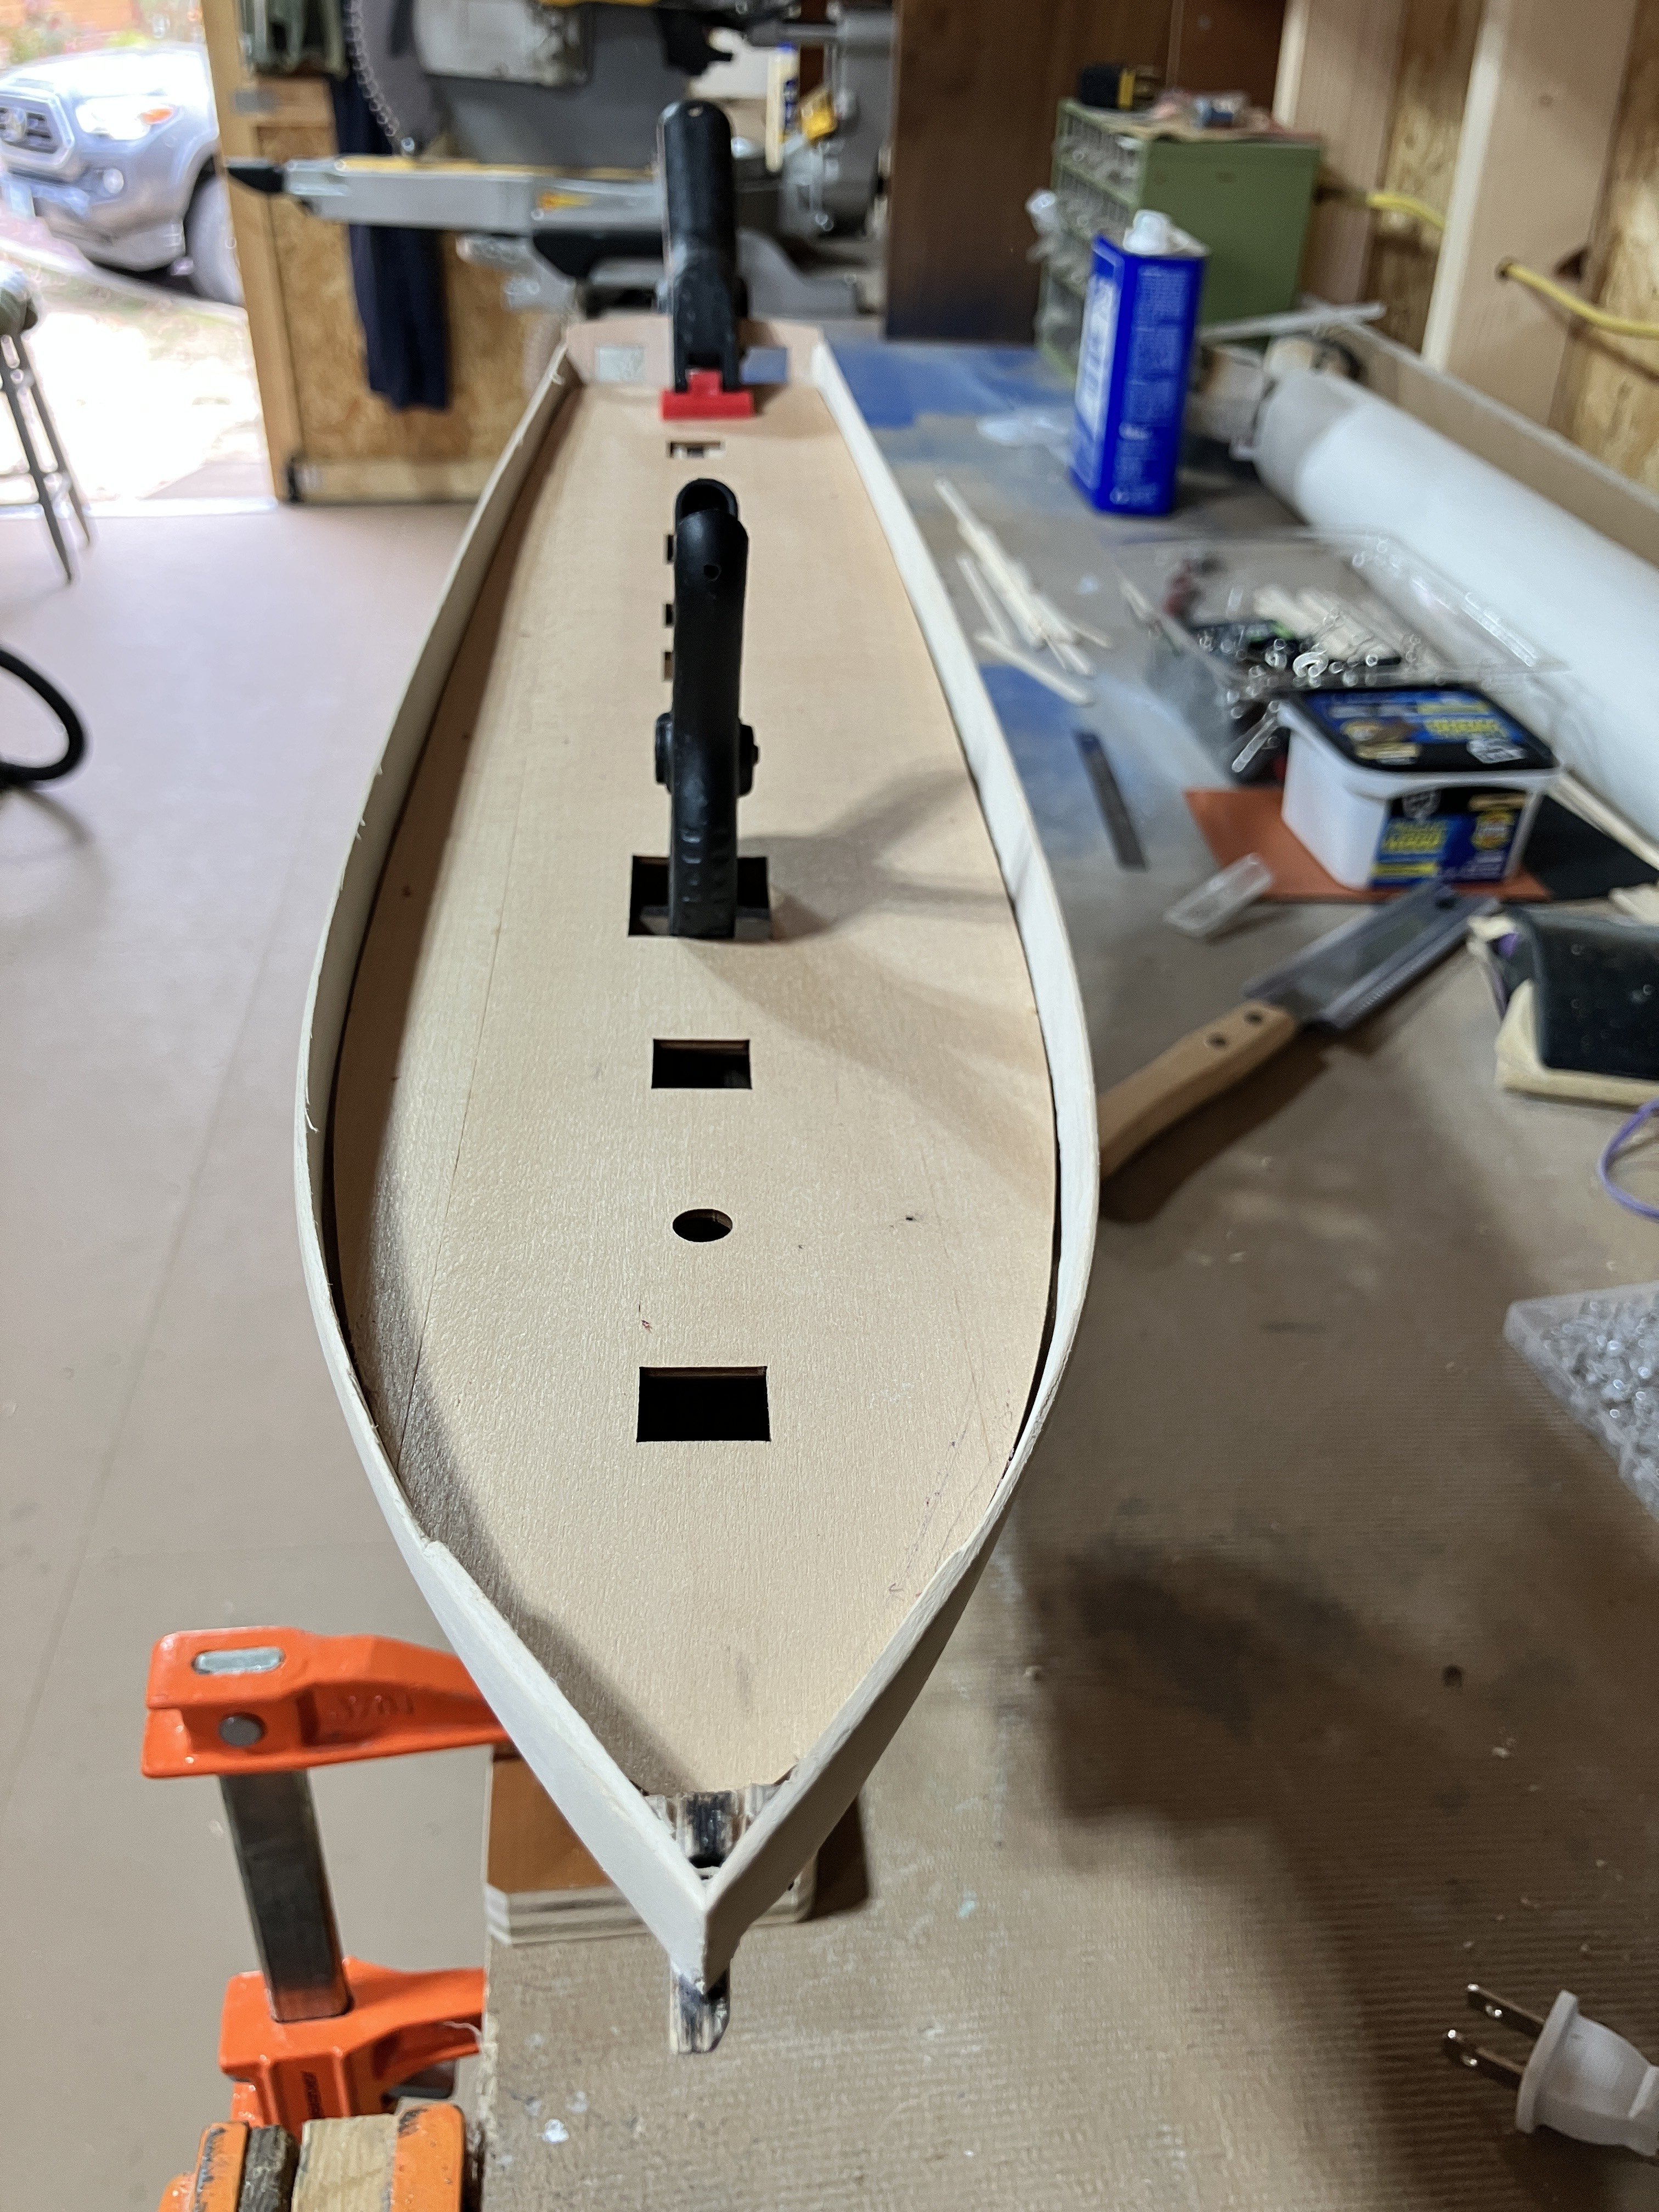
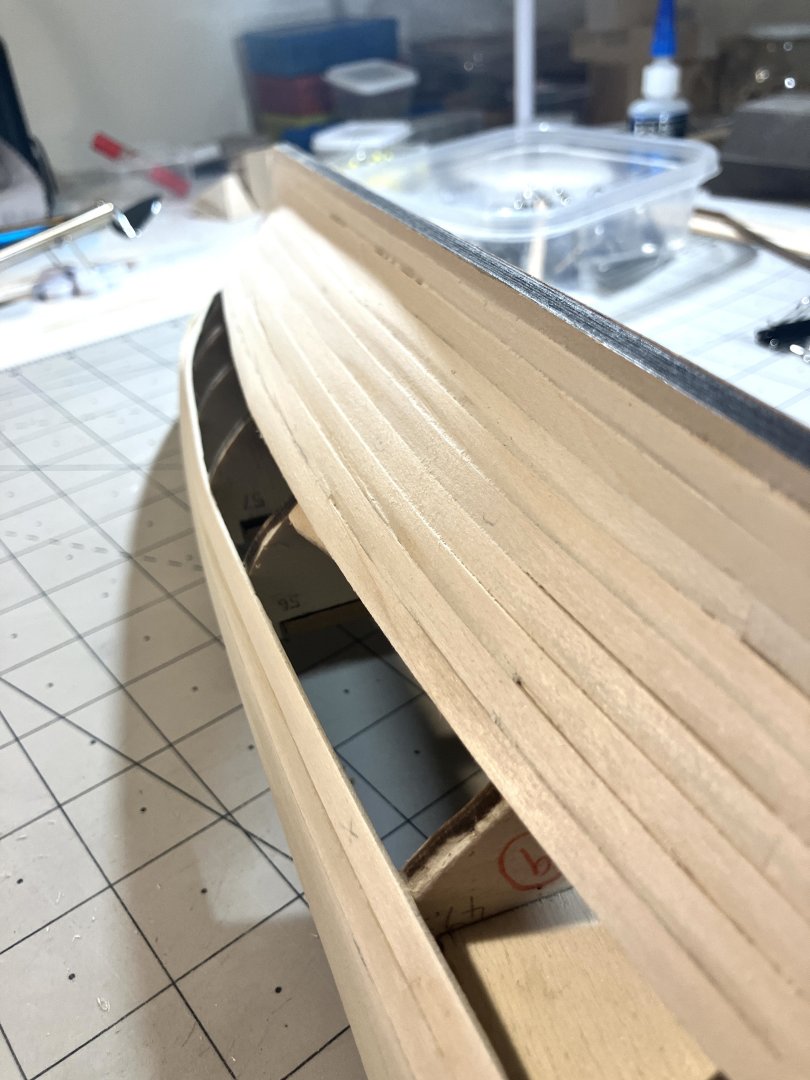
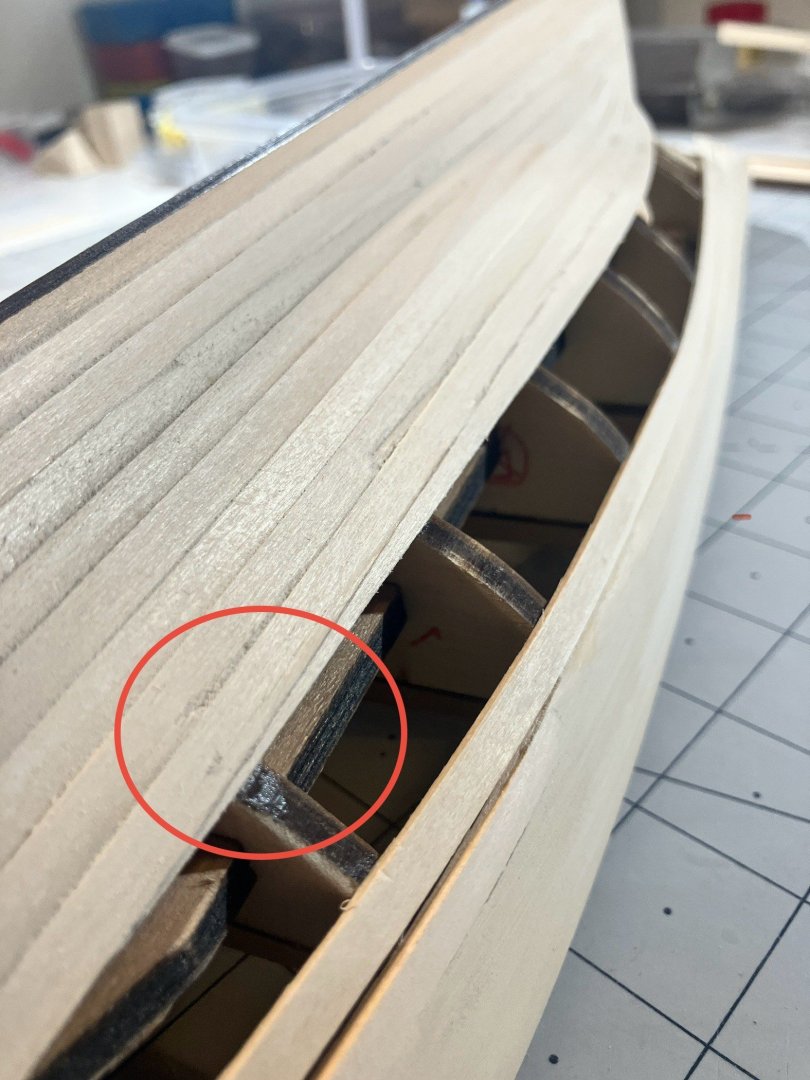
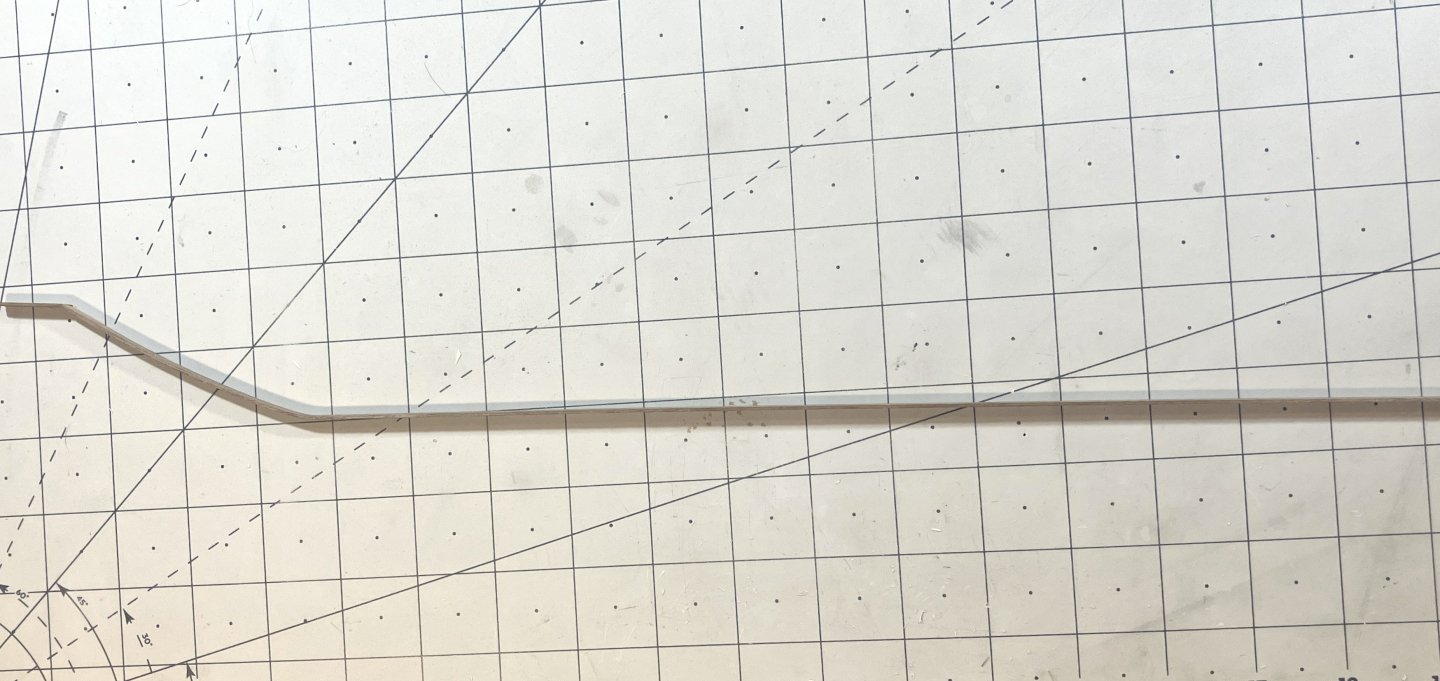
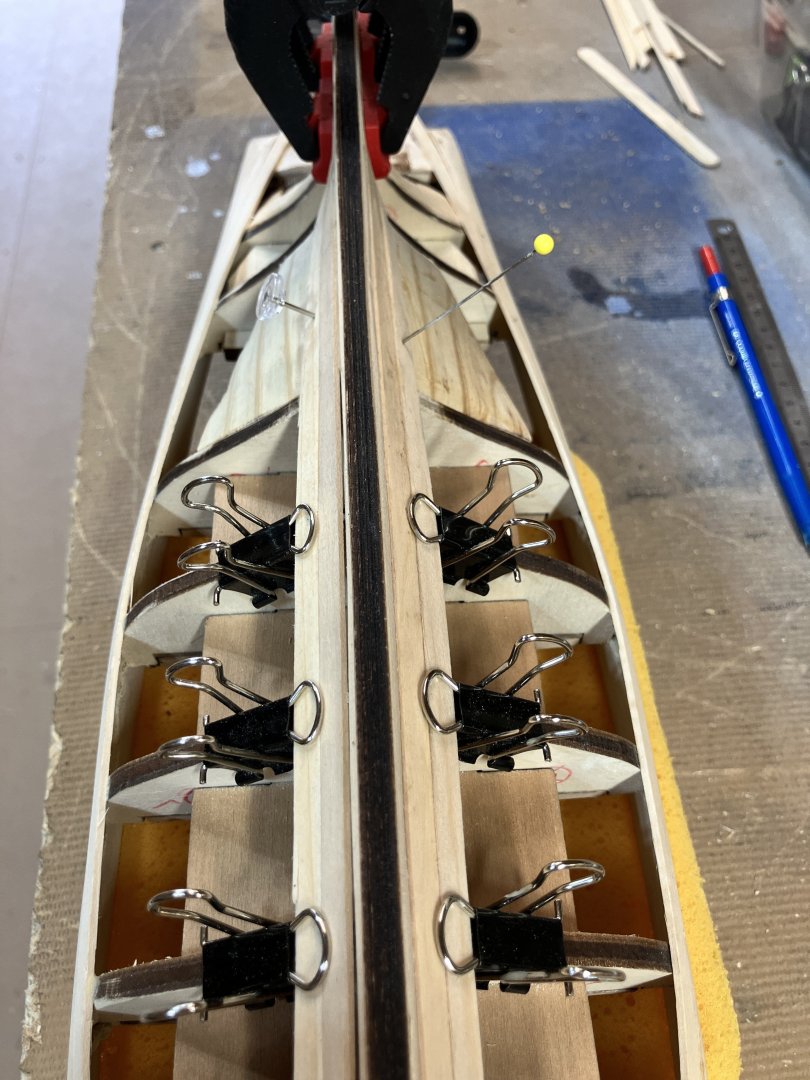
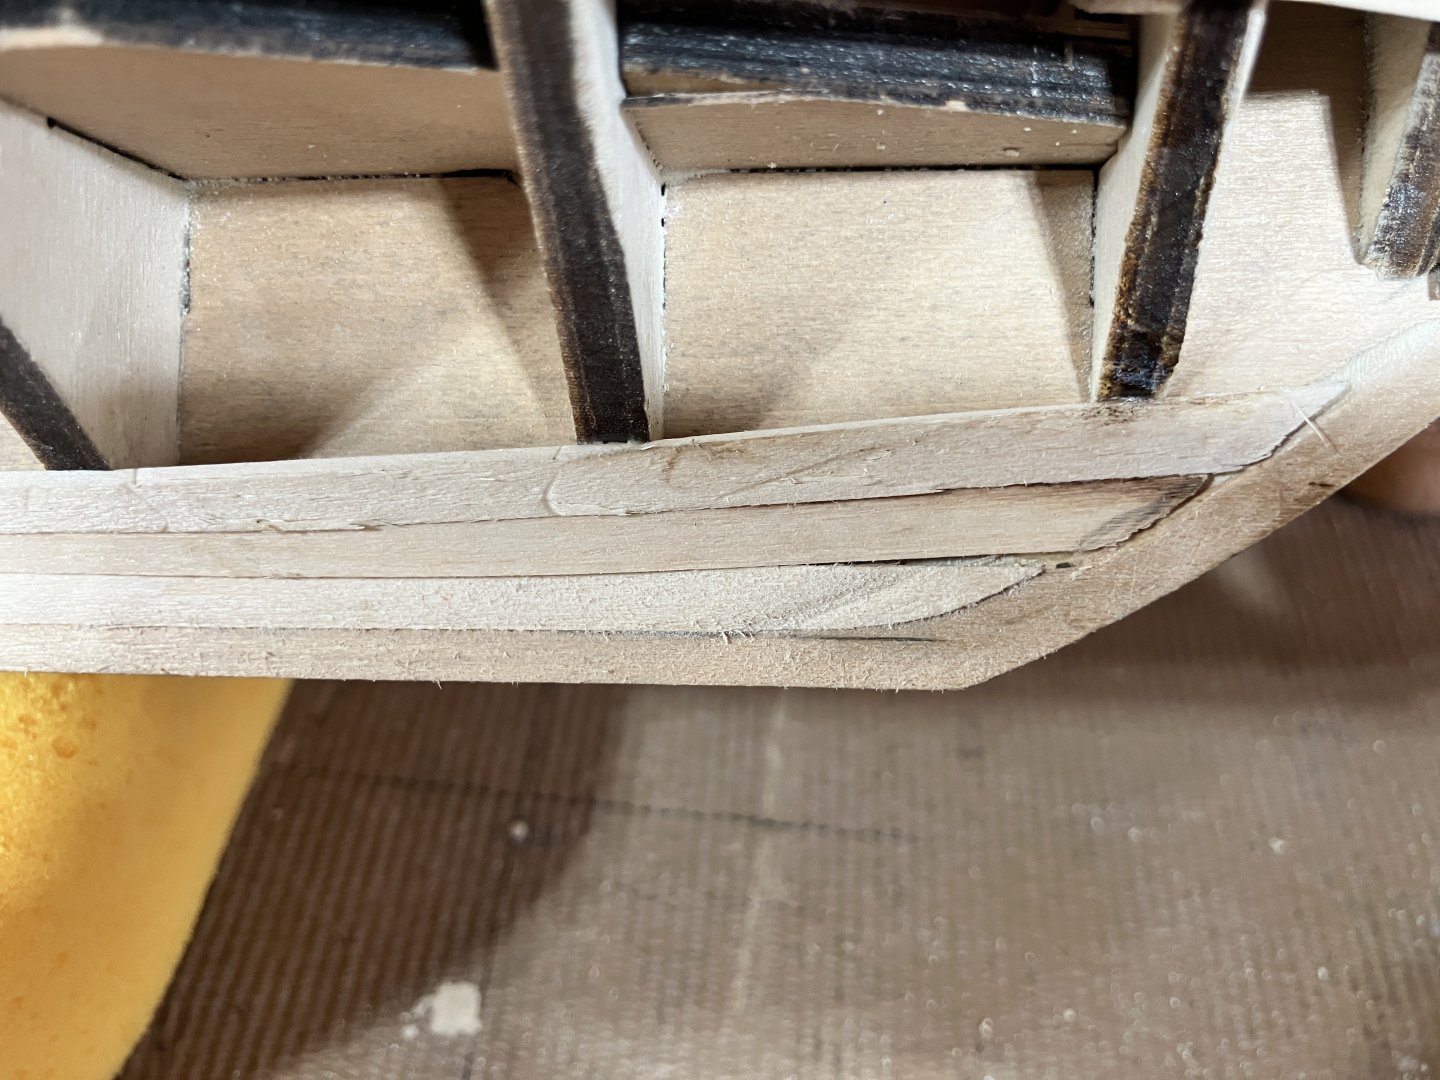
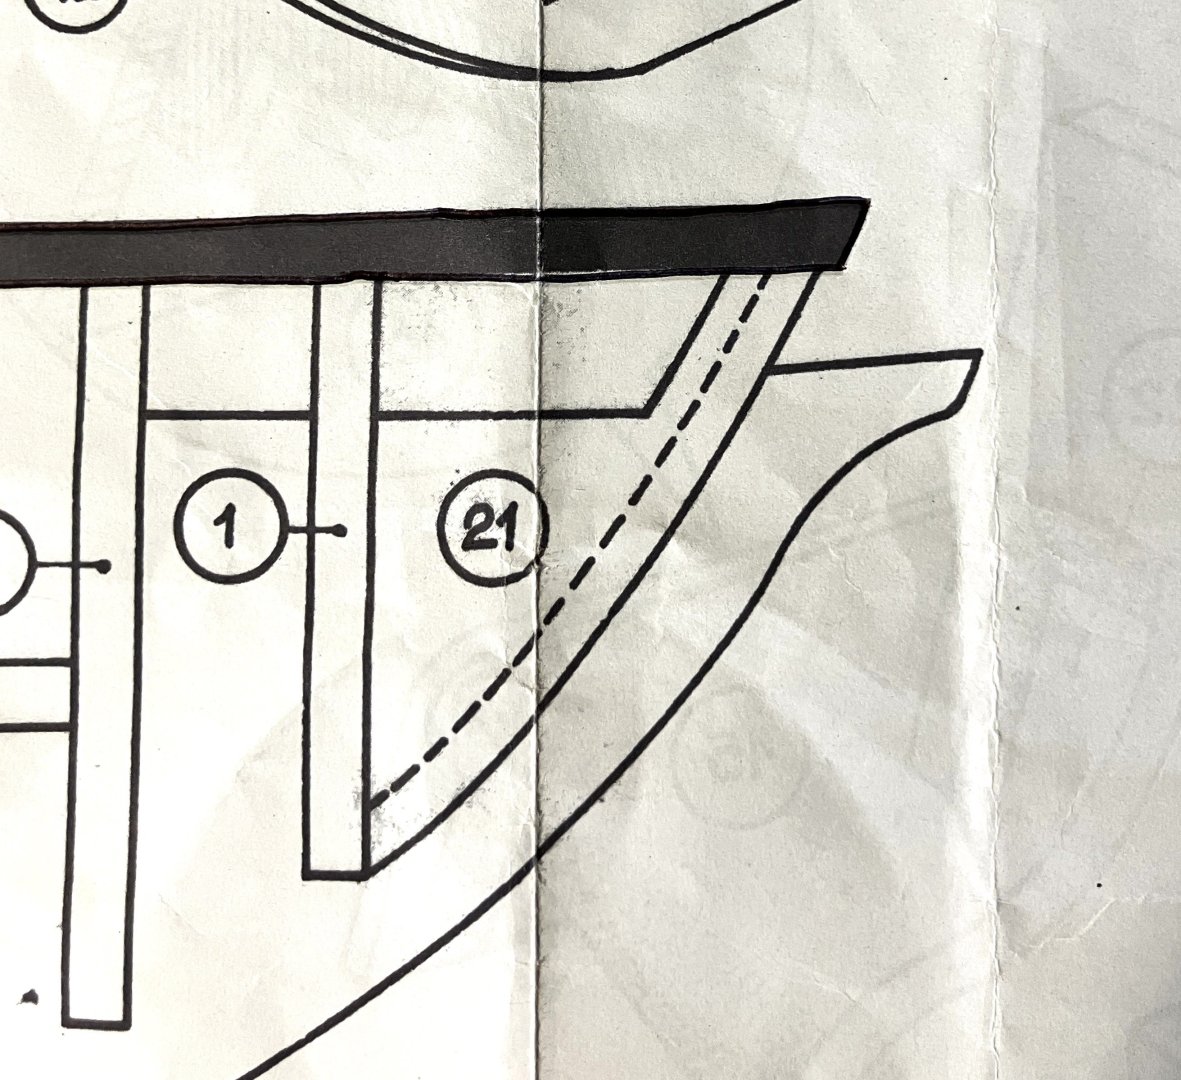
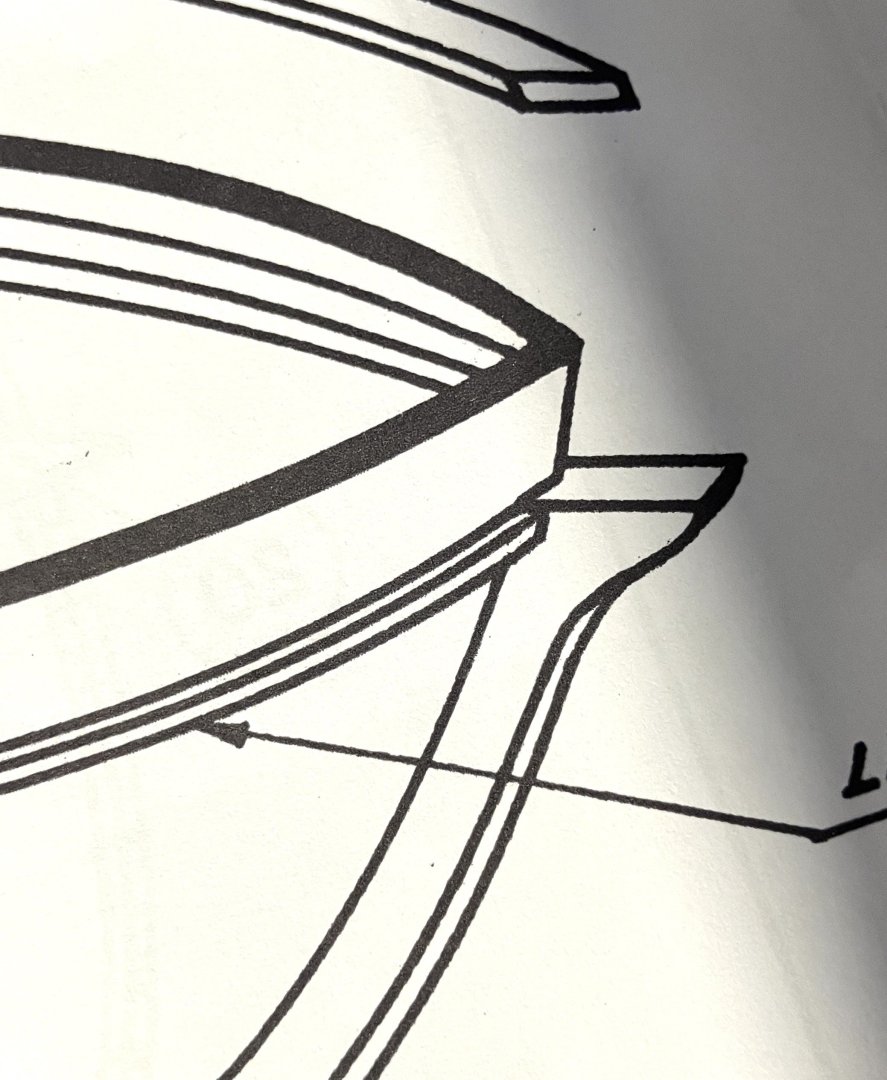
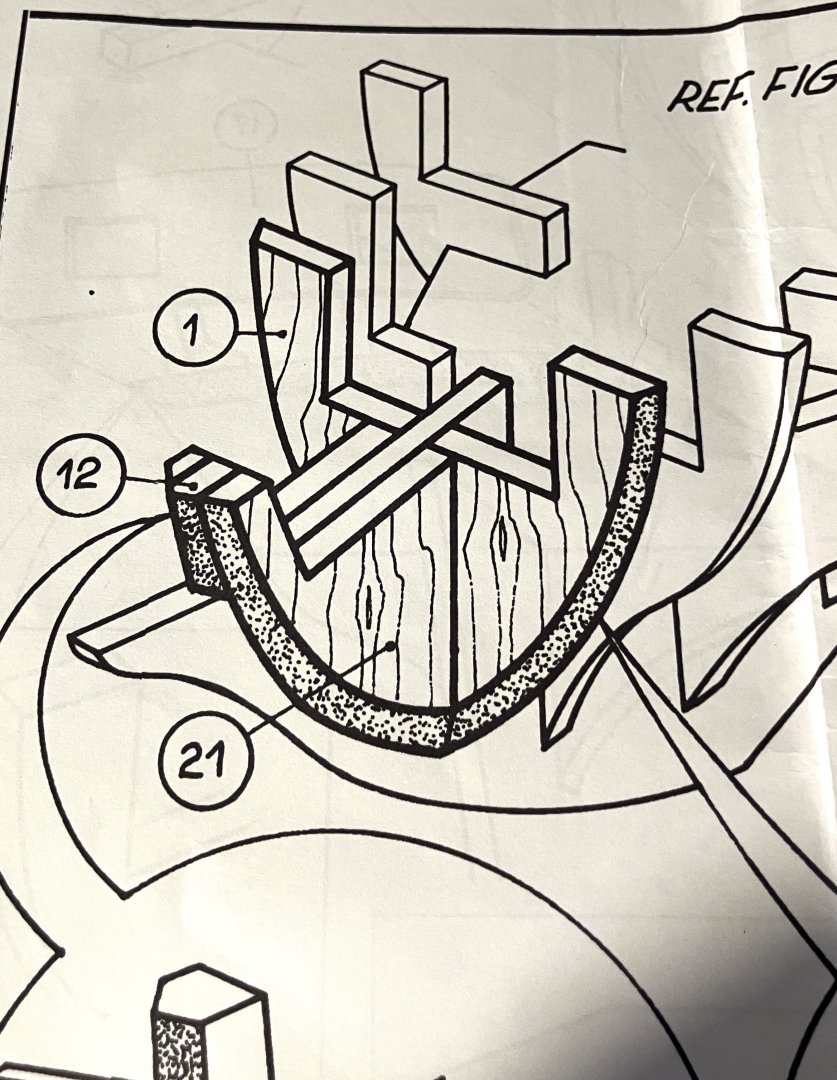
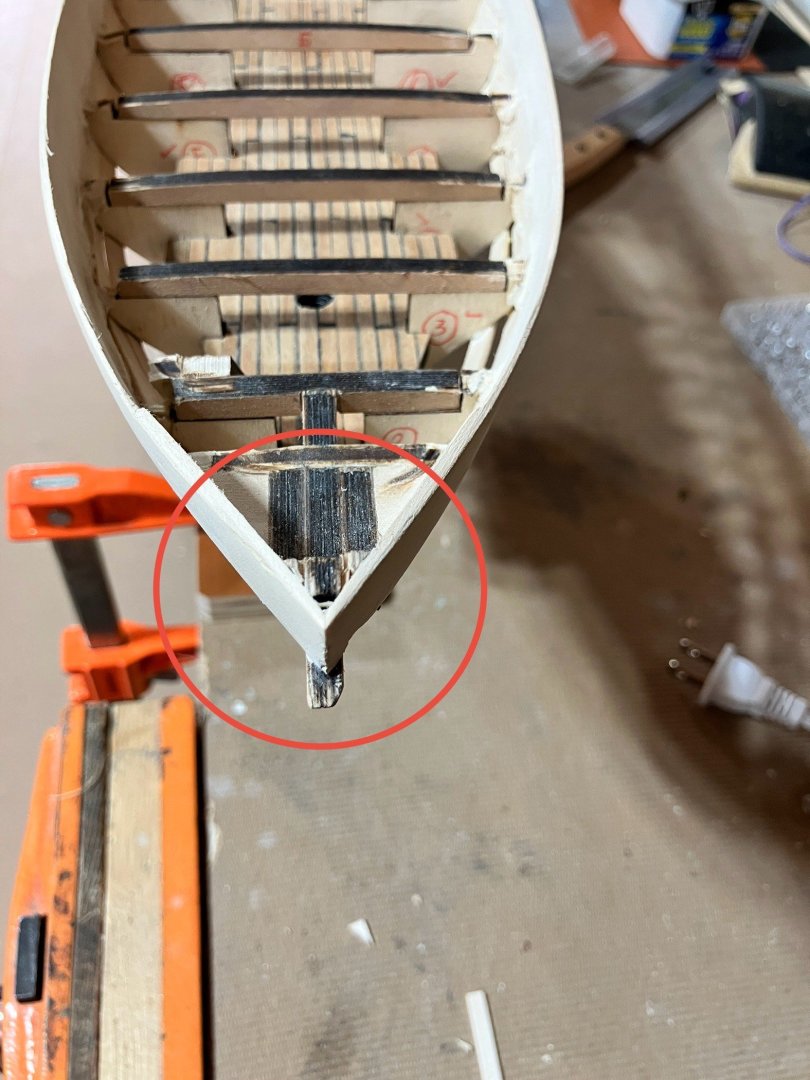
I enjoyed my time in the wood shop/shipyard today. I still have to tackle the beakhead issue (unless it is something I am over reacting about) but more about that in a bit. I fitted the garboard strakes this afternoon using @Dr PR's method explained here (thank you, Phil). Using the small flat iron plank bender certainly helped things along very nicely: Now, onto my issue with the beakhead. The plans clearly show the beakhead protruding nicely out a ways from the point of the bow: The problem I am having is that the way the false keel was made, the point of the bow sits way too far forward for there to be any significant gap from that point to the tip of the beakhead. Here is an image showing the initial hull fairing. Note the distance from the tip of the false keel (there may be a correct term for it but I am not aware of it), and the tip of the beakhead: Once the planking is on and following those faired pieces at the bow, there is no way to achieve the gap shown in later images in the plans. Here is what it looks like on my build at this time: And here the plans from Chapelle's book: So, tell me, am I making a big fuss about nothing or do I have to extend the beakhead somewhat? I would hate for the bowsprit to not have enough to sit on. All that being said, I like the way the hull is shaping up, she certainly has nice lines: I also removed all the tabs from the bulkheads and did a dry fit of the sub deck just to see how I was doing. It went quite well: Tomorrow I hope to finish the first planking and get her sanded down. I did apply some filler here and there on the sheer strakes to strengthen them up a little after I removed the bulkhead tabs. I will trim all that up once she is fully planked.


-
You enjoy that, sir. It is a beautiful part of the world. I spent some years in my youth in the south of Wales and fell in love with the place. Anyone reading who was not familiar with that border region and the nomenclature would think you were going to watch a marching band
- 332 replies
-
- 4
-

-
-
- Harpy
- Vanguard Models
- (and 1 more)
-
Oh, yes, I am familiar with these. I wasn't aware they were called Turk's heads. Are you going to weave it onto the tiny tiller yourself or carve it out of wood?
-
Trevor, I am finding that replacing some of the kit provided material (in my case it is very unstable plywood) is saving me a lot of frustration. O look forward to seeing your rudder solution, sir and the wood you finally choose to make it from. The tiller on my build will be getting a make over too, obviously nothing as complex as your setup but it will enhance the final appearance in my opinion. What is a turk's head grip?
- 167 replies
-
- 2
-
-
- Norwegian Sailing Pram
- Model Shipways
- (and 1 more)
-
That is true, Jo, but in instances like that, the harder one tries to get it right, the more seems to go wrong. Stepping away and taking the mind off it is a good alternative (that way the model doesn't end up flying across the room or ending up in the trash 🤣🤣🤣)
-
Yes, Phil, sunshine and that nice breeze coming off the water were very relaxing. Food for the soul let me tell you.
-
Today was not a particularly productive day in the shipyard, for several reasons. It started off as one of those days where everything I tried to do went wrong. I put up with that for about an hour and then deiced to step away. My plan had been to modify the bow because the kit seems to have an error, the beakhead appears to be too short. When I compare the run of the bow planking on the model and the images in the plans, there seems to be a big difference between the two in the length of the beakhead that protrudes away from the bow. Because I have the enlarged Mosquidobit images from Chapelle's book here, I could see that I needed to make some adjustments. Things didn't run all that smoothly this morning and, after stepping away and then taking everything outside to my wood shop (it was 72F here today [that's 20C for you European folk]), things didn't improve. I decided to take an adult beverage down to our dock and enjoy the sunshine. After that, funnily enough, my mind appeared clearer and I had a decent game plan. Things did move in the right direction somewhat (I took no pictures sadly), and tomorrow is a new day! I shall report back with some updates and images of my progress then.
-
Hi, Yorick. Welkom op het forum. Like others have mentioned above, if you have amny questions at all, there are always plenty of people here willing to help you out. Do not be afraid to ask! Bon Voyage!
-
I am sure it will be the finest tiller, sir
- 167 replies
-
- 1
-
-
- Norwegian Sailing Pram
- Model Shipways
- (and 1 more)
-
Yep, it's the little things that we don't see that come around the corner one day and trip you up. Nice fix, sir.
-
A sight to behold for sure. Very nice work, Glen.
- 301 replies
-
- 3
-
-
-
- Constitution
- Bluejacket Shipcrafters
- (and 1 more)
-
To be honest, Trevor, those floor planks look quite good. They look natural in a haphazard, random kind of way. I guess the look you were going for was nice and neat with straight lines?
- 167 replies
-
- 1
-
-
- Norwegian Sailing Pram
- Model Shipways
- (and 1 more)
-
What a rewarding project. It helps enormously when the standard of the part is as good as this is. It looks good, Phil.
- 482 replies
-
- 3
-
-
- minesweeper
- Cape
- (and 1 more)
-
For some reason I cannot explain, I prefer the run-in option too. Cleaner, unbroken line of sight along the outside of the hull maybe. It just feels kinda right 🤔
- 332 replies
-
- 3
-
-
- Harpy
- Vanguard Models
- (and 1 more)
-
Good call, Glenn. It wasn't worth pounding through a frustrating situation like that where there was no solution in sight.
- 241 replies
-
- 1
-
-
- Vanguarrd Models
- Harpy
- (and 1 more)
-
Yes, I like that natural look as well, Trevor. As you know, the first coat of any oil on "new wood" does tend to soak in quite quickly and not really give a true example of the final look. Once this dries completely you will have a better idea as to the necessity of adding another coat or not. She looks good on that stand too.
- 167 replies
-
- 1
-
-
- Norwegian Sailing Pram
- Model Shipways
- (and 1 more)
-
Shiny moon is a great name for her, Jo. I agree with your rudder choice too. If you wanted more firepower you could opt to put a couple of swivel cannons up at the bow, some of those schooners had them and you can find that info in Marquardt's book. I think it is one of the last chapters.
-
BR-18 Locomotive by Greg Davis - OcCre - 1/32
SaltyScot replied to Greg Davis's topic in Non-ship/categorised builds
The measurements are so precise, Greg, and (so far) everything seems to fit very nicely. This is a nice kit! -
That just looks so very nice, Trevor. Nice job on those thwarts (I thought they were called seats......... 😉)
- 167 replies
-
- 2
-
-
- Norwegian Sailing Pram
- Model Shipways
- (and 1 more)
-
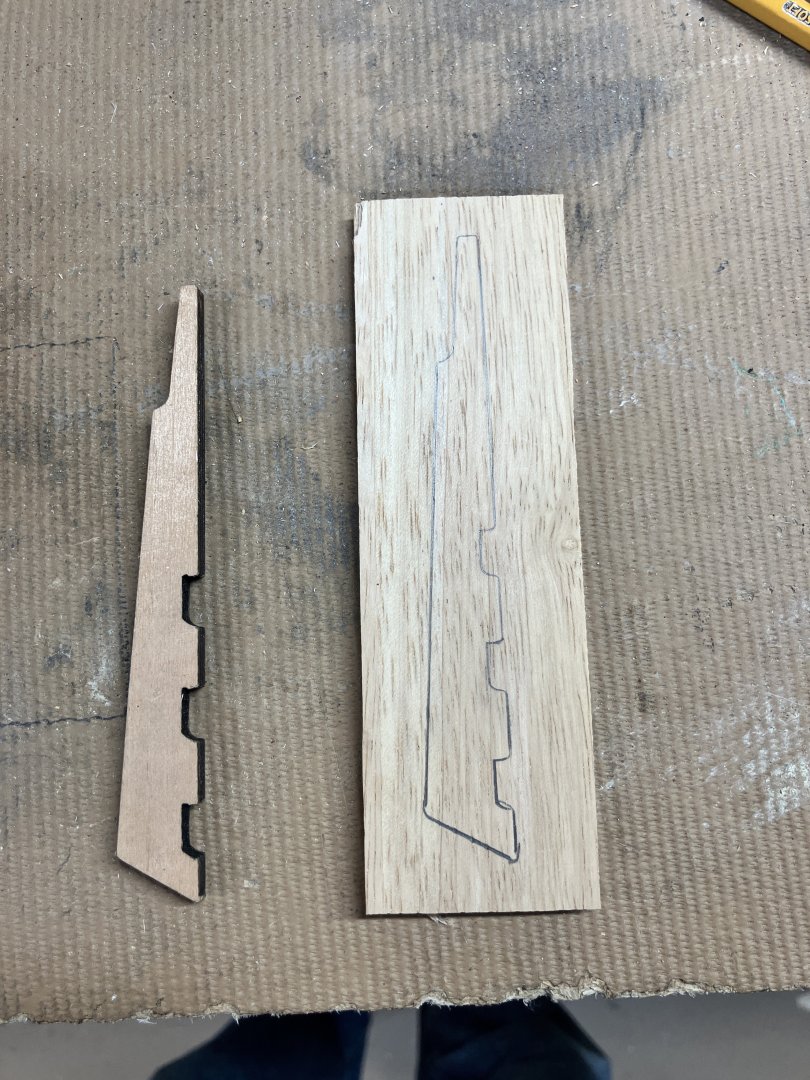
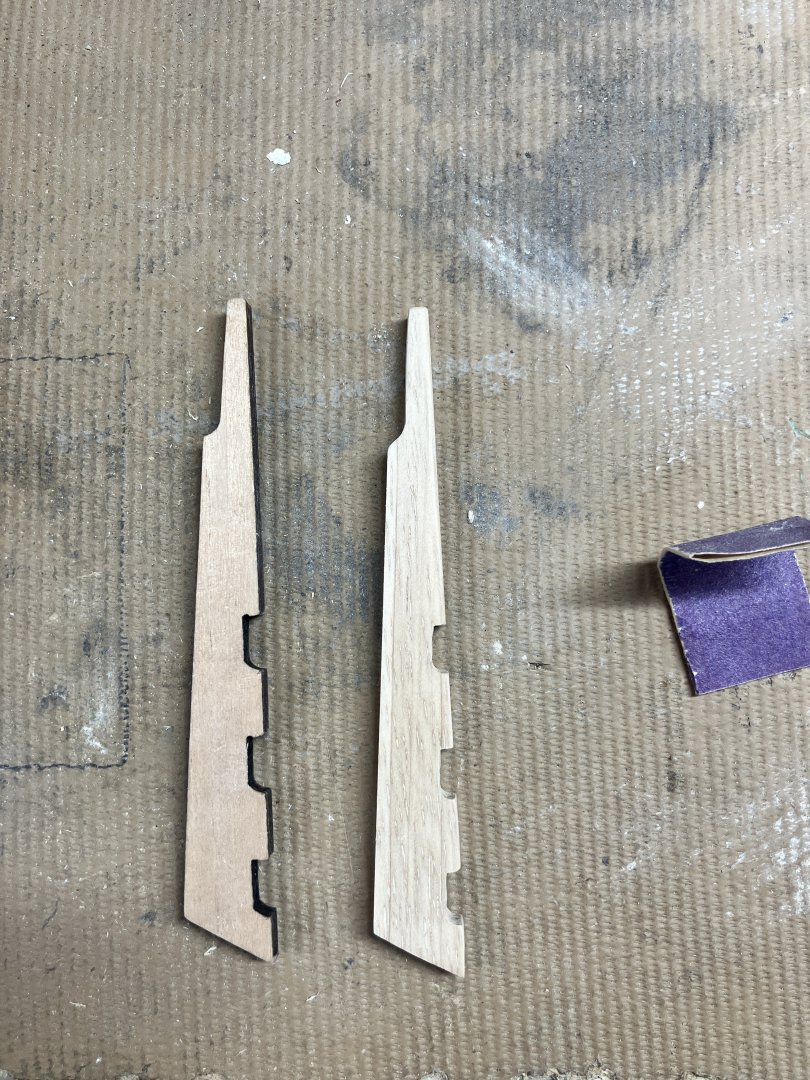
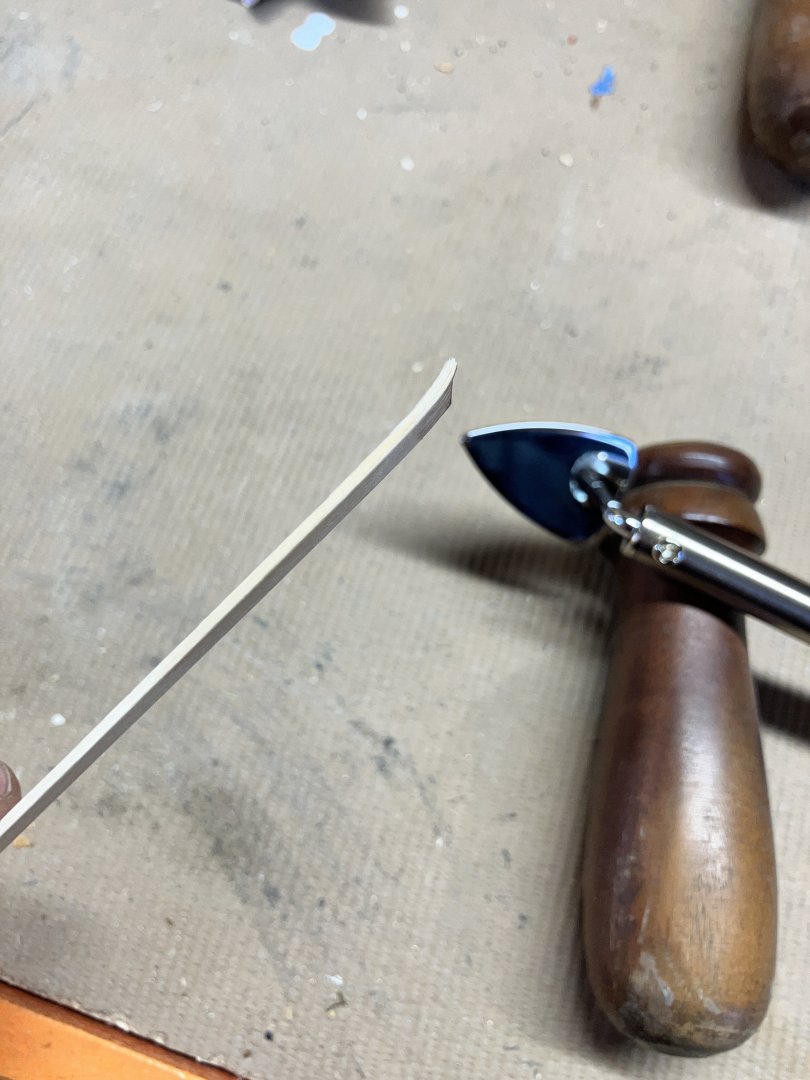
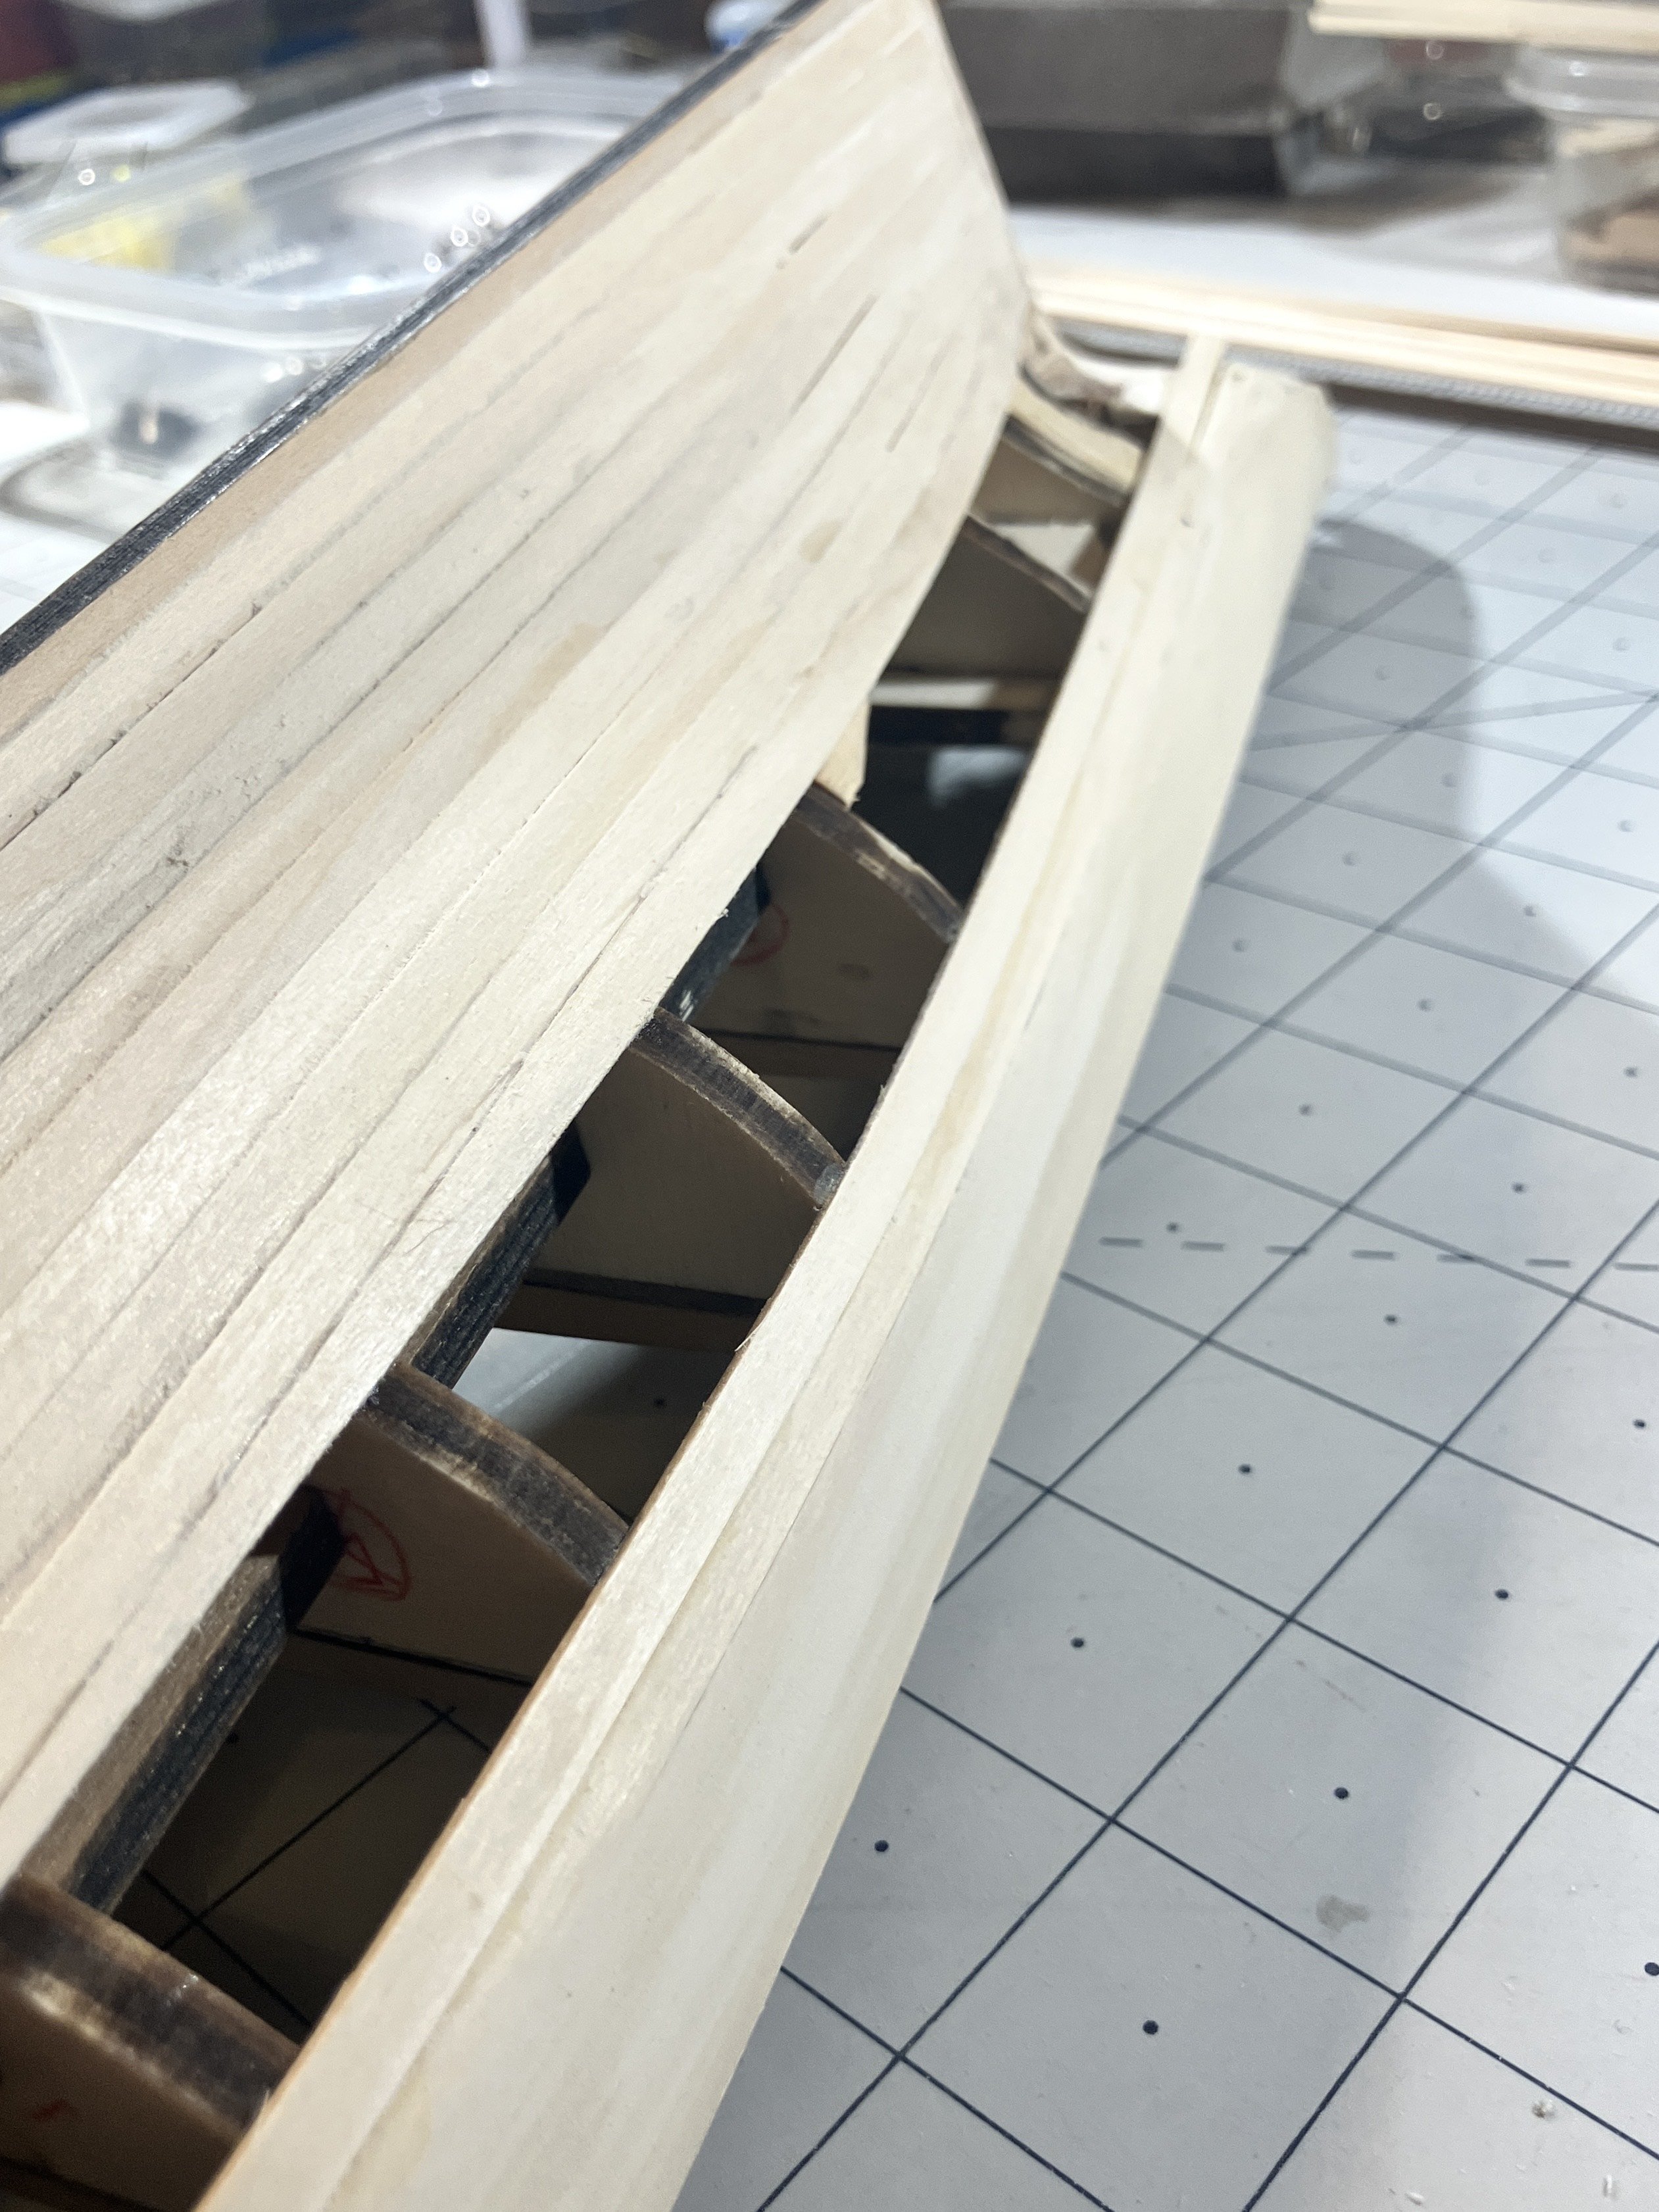
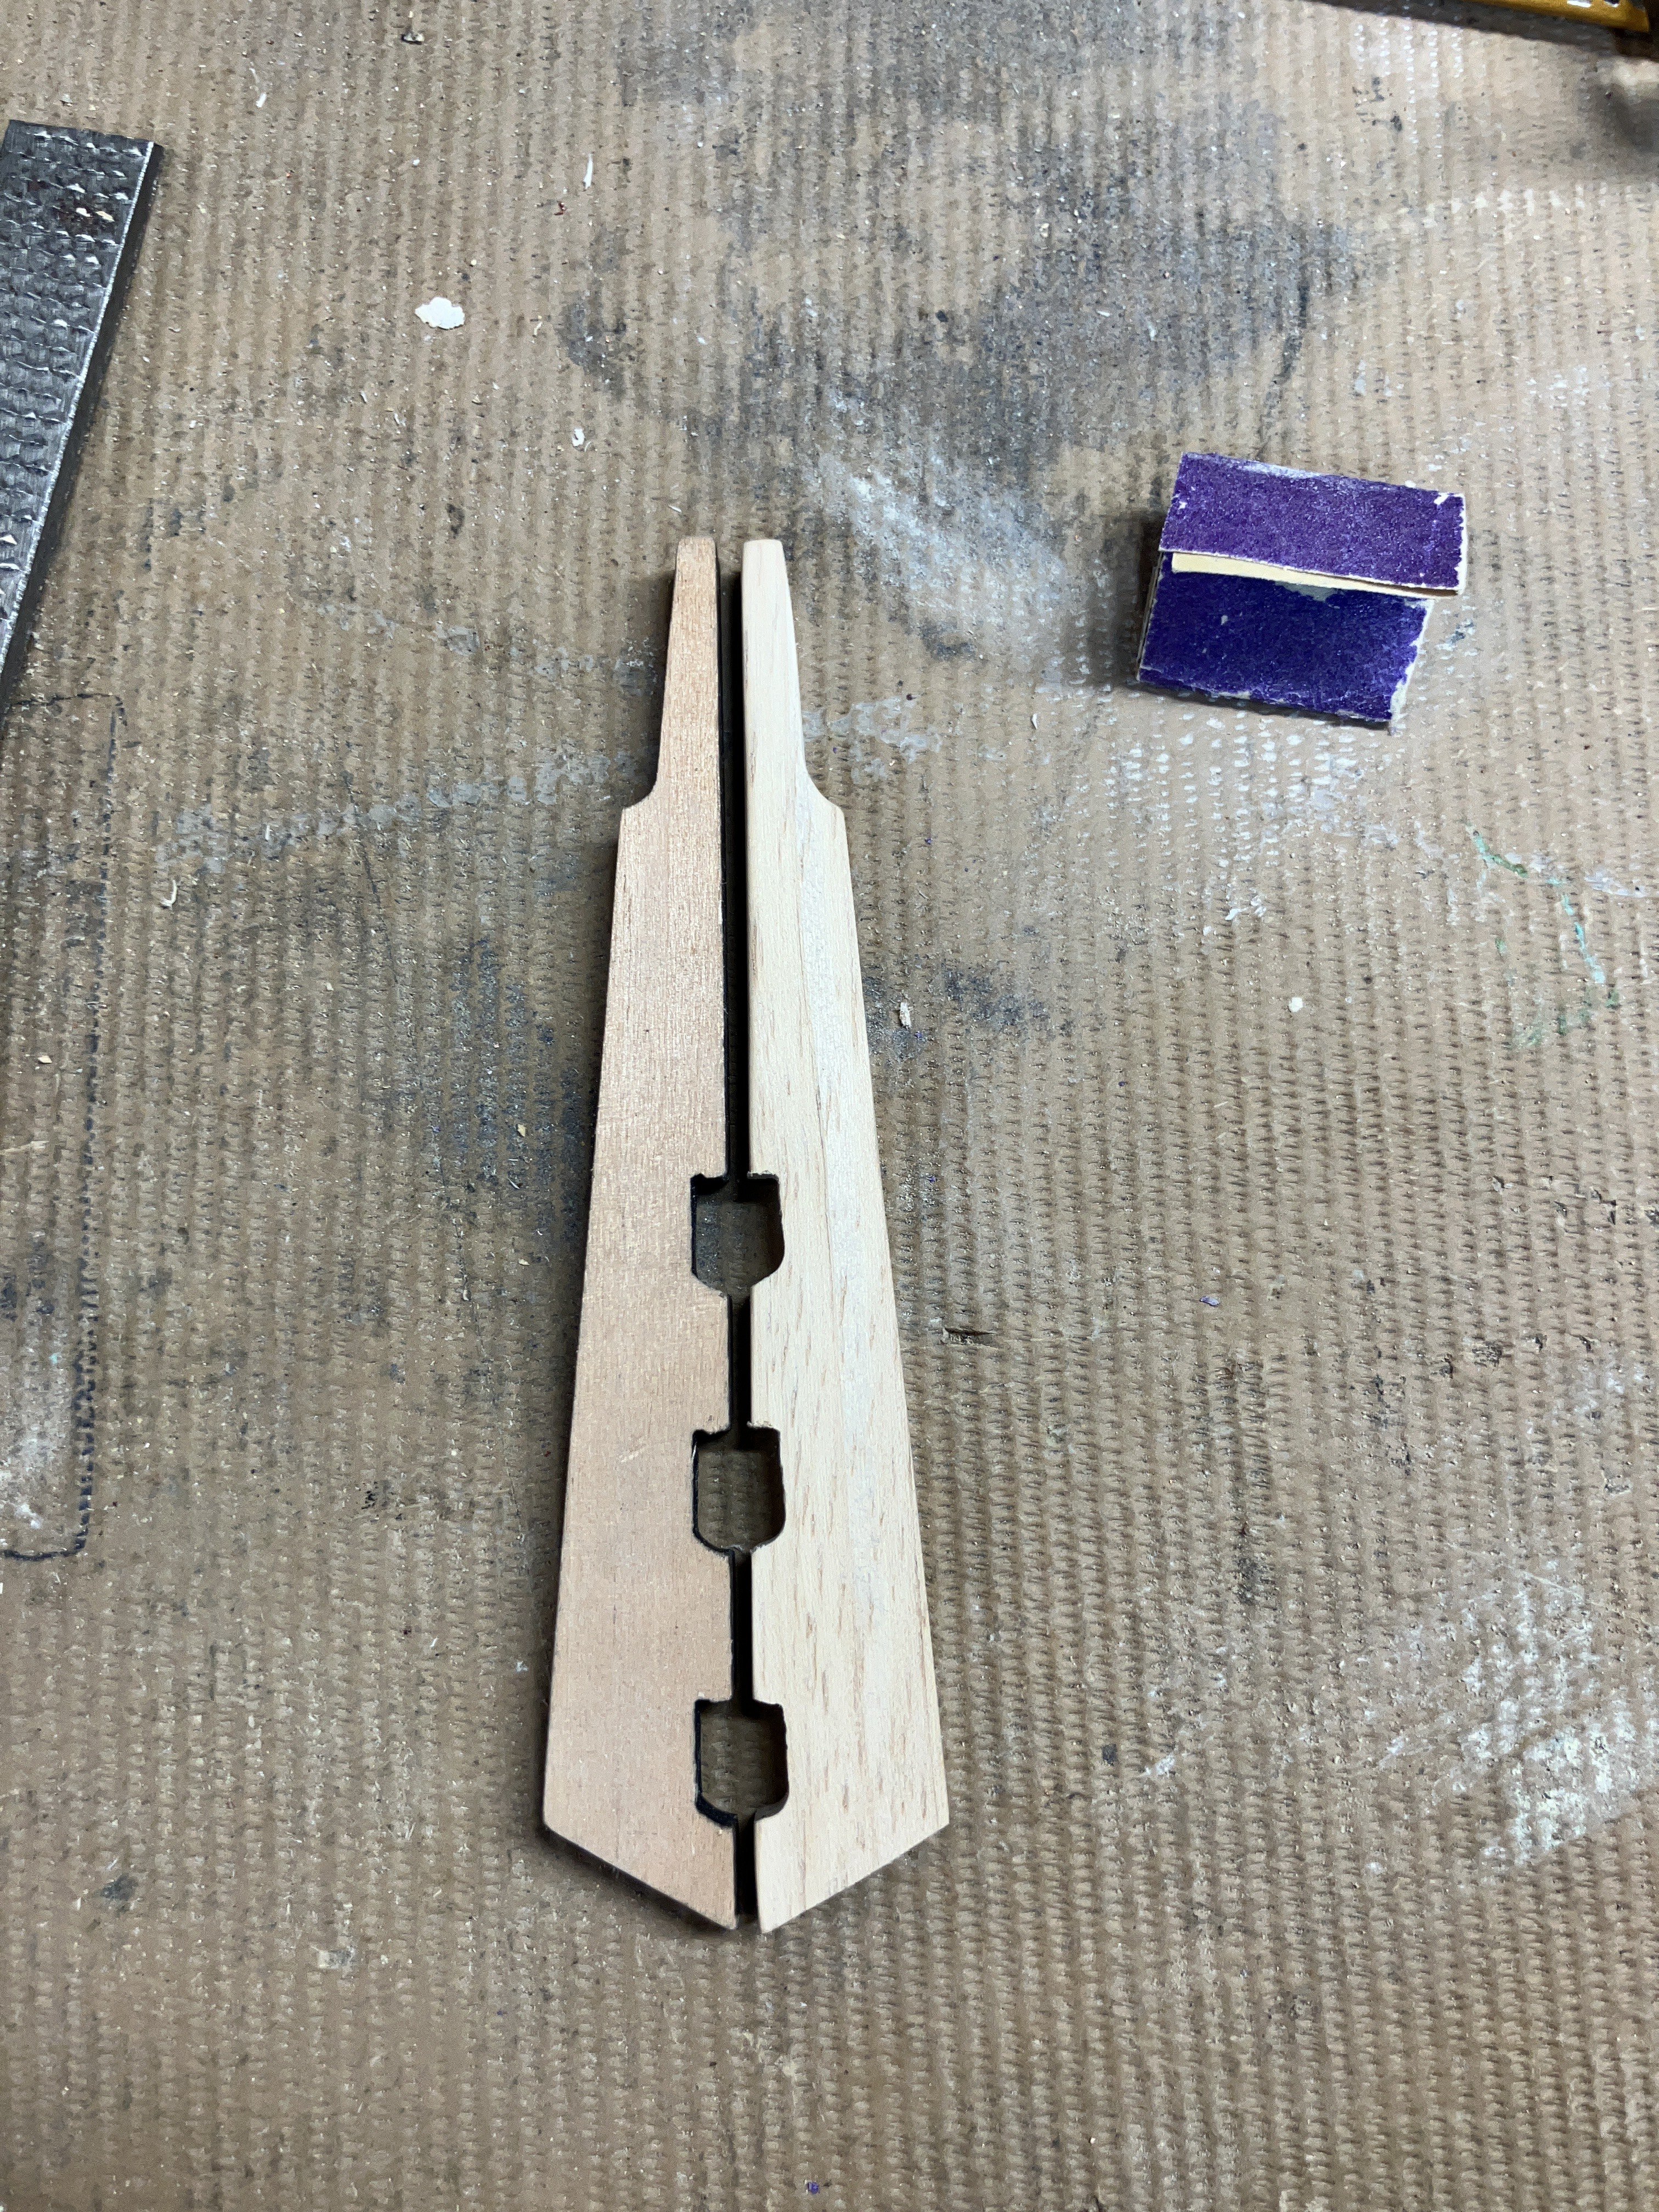
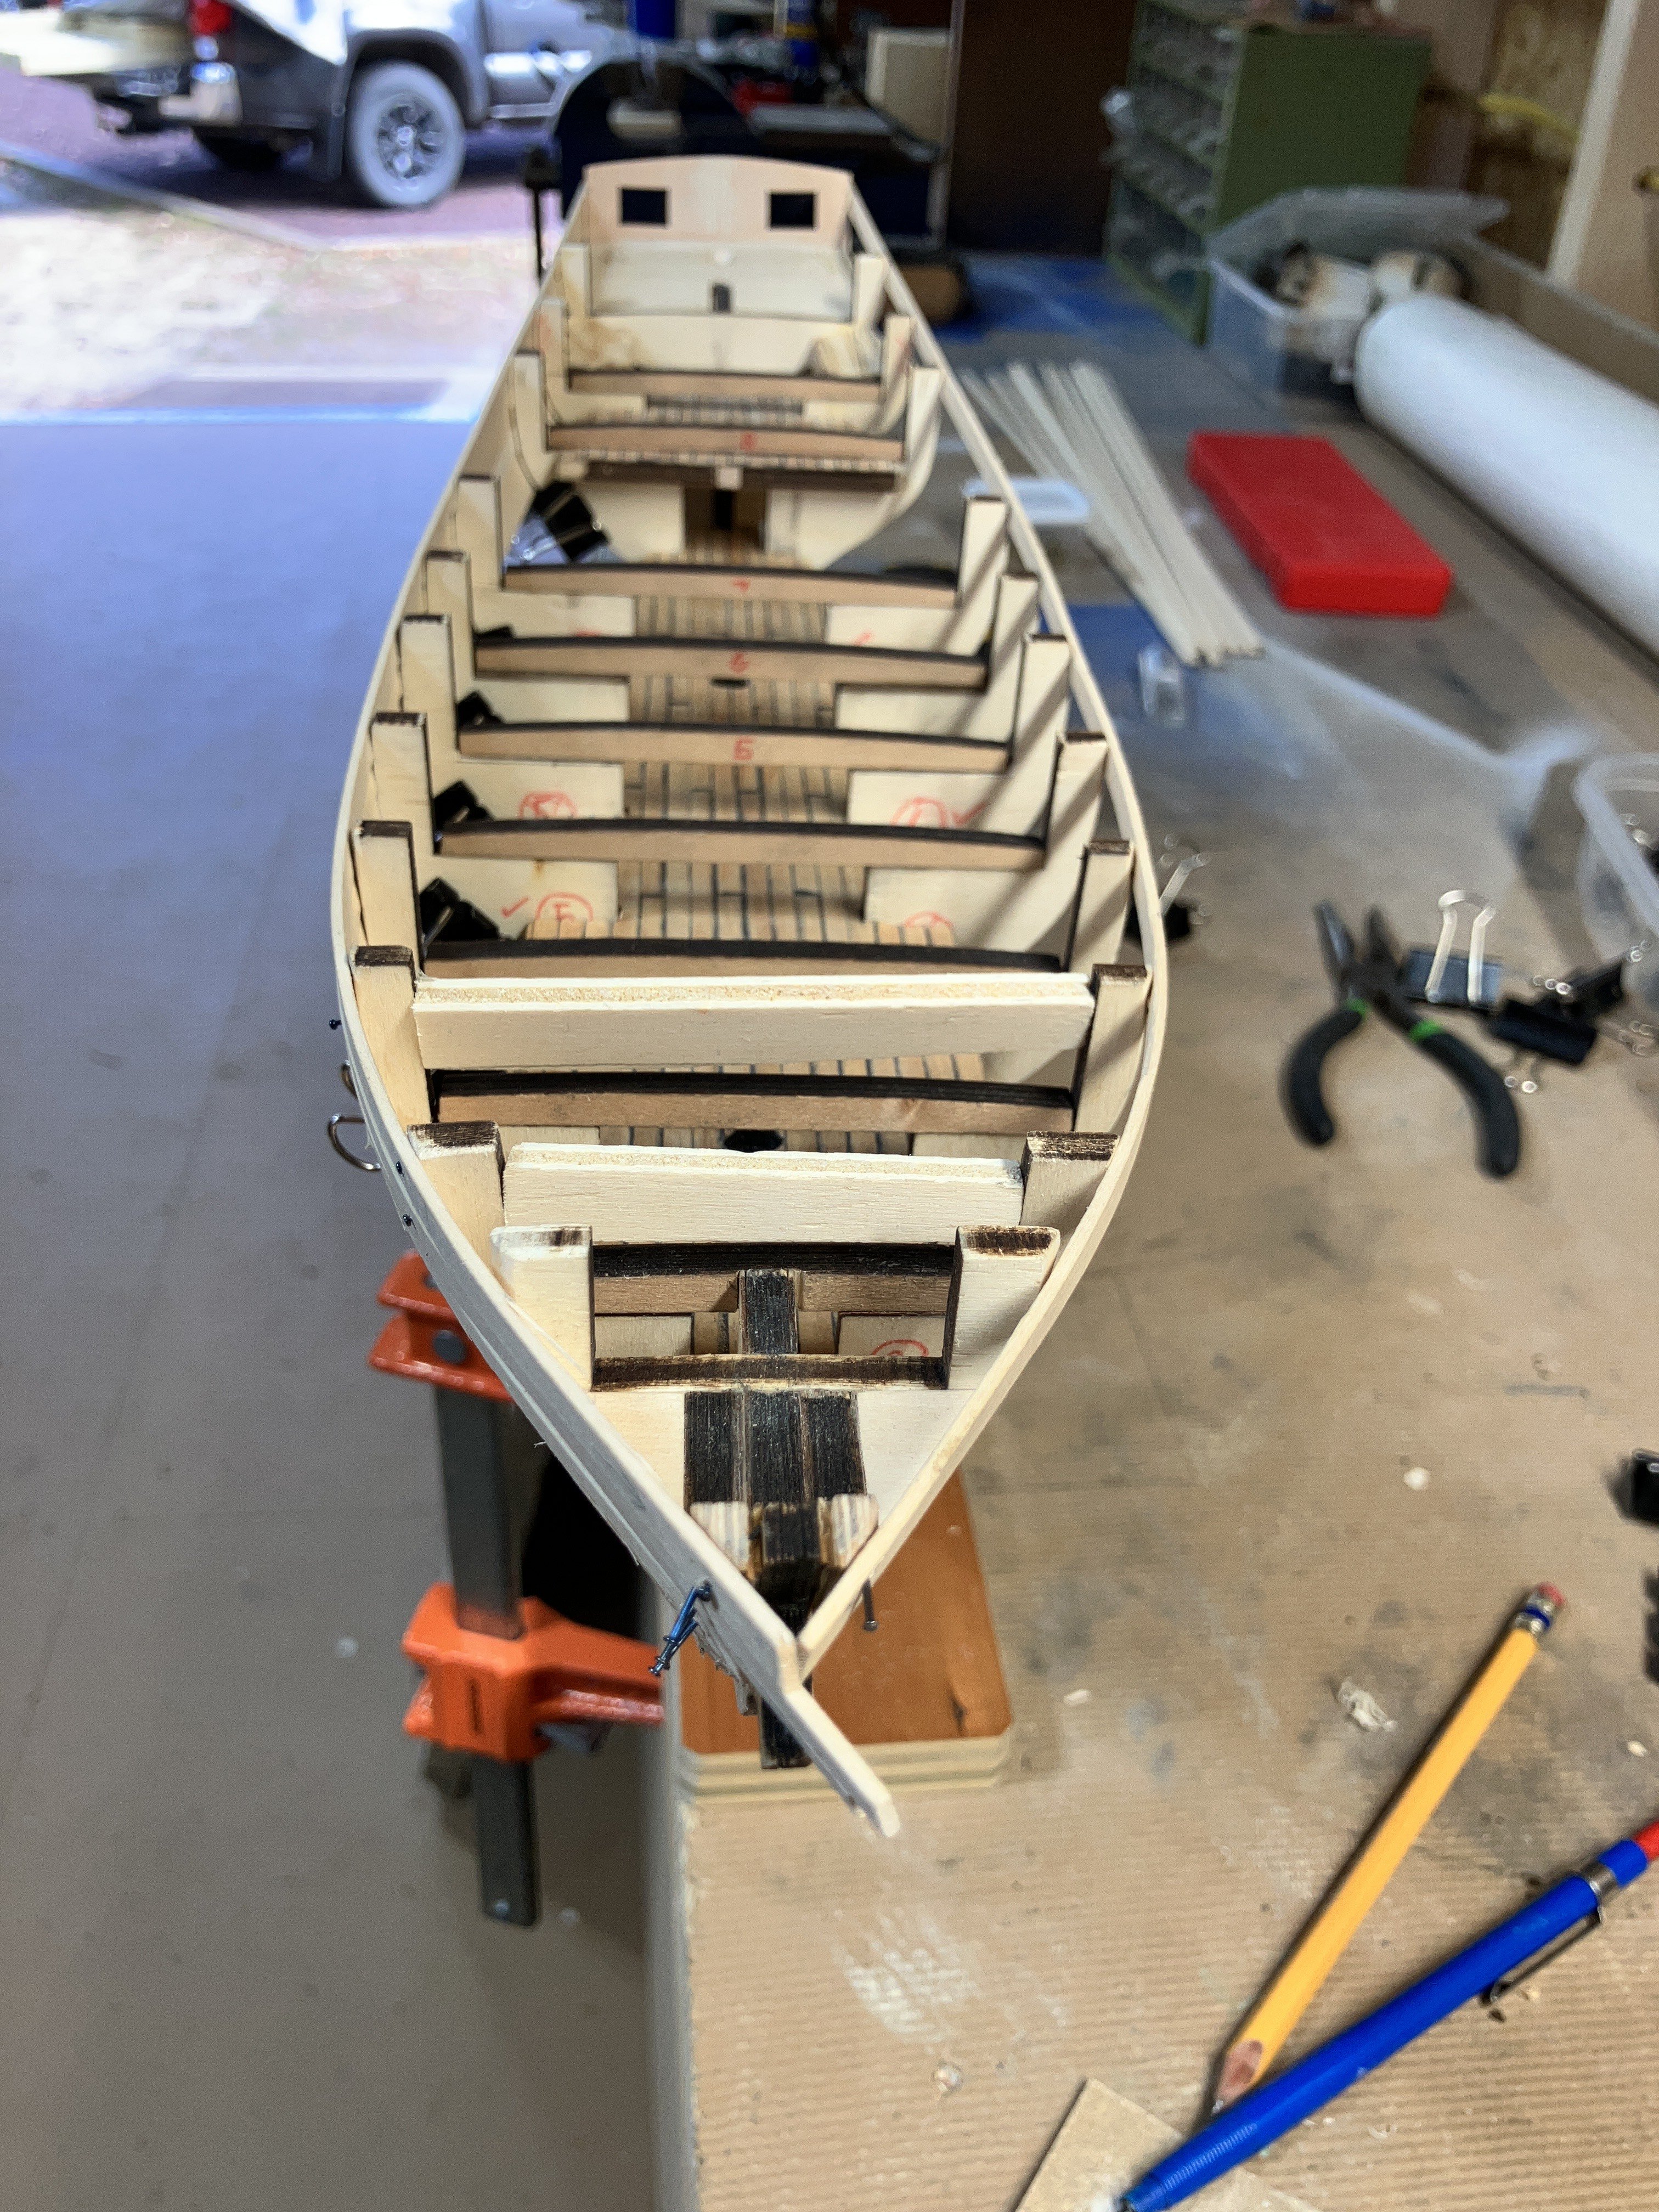
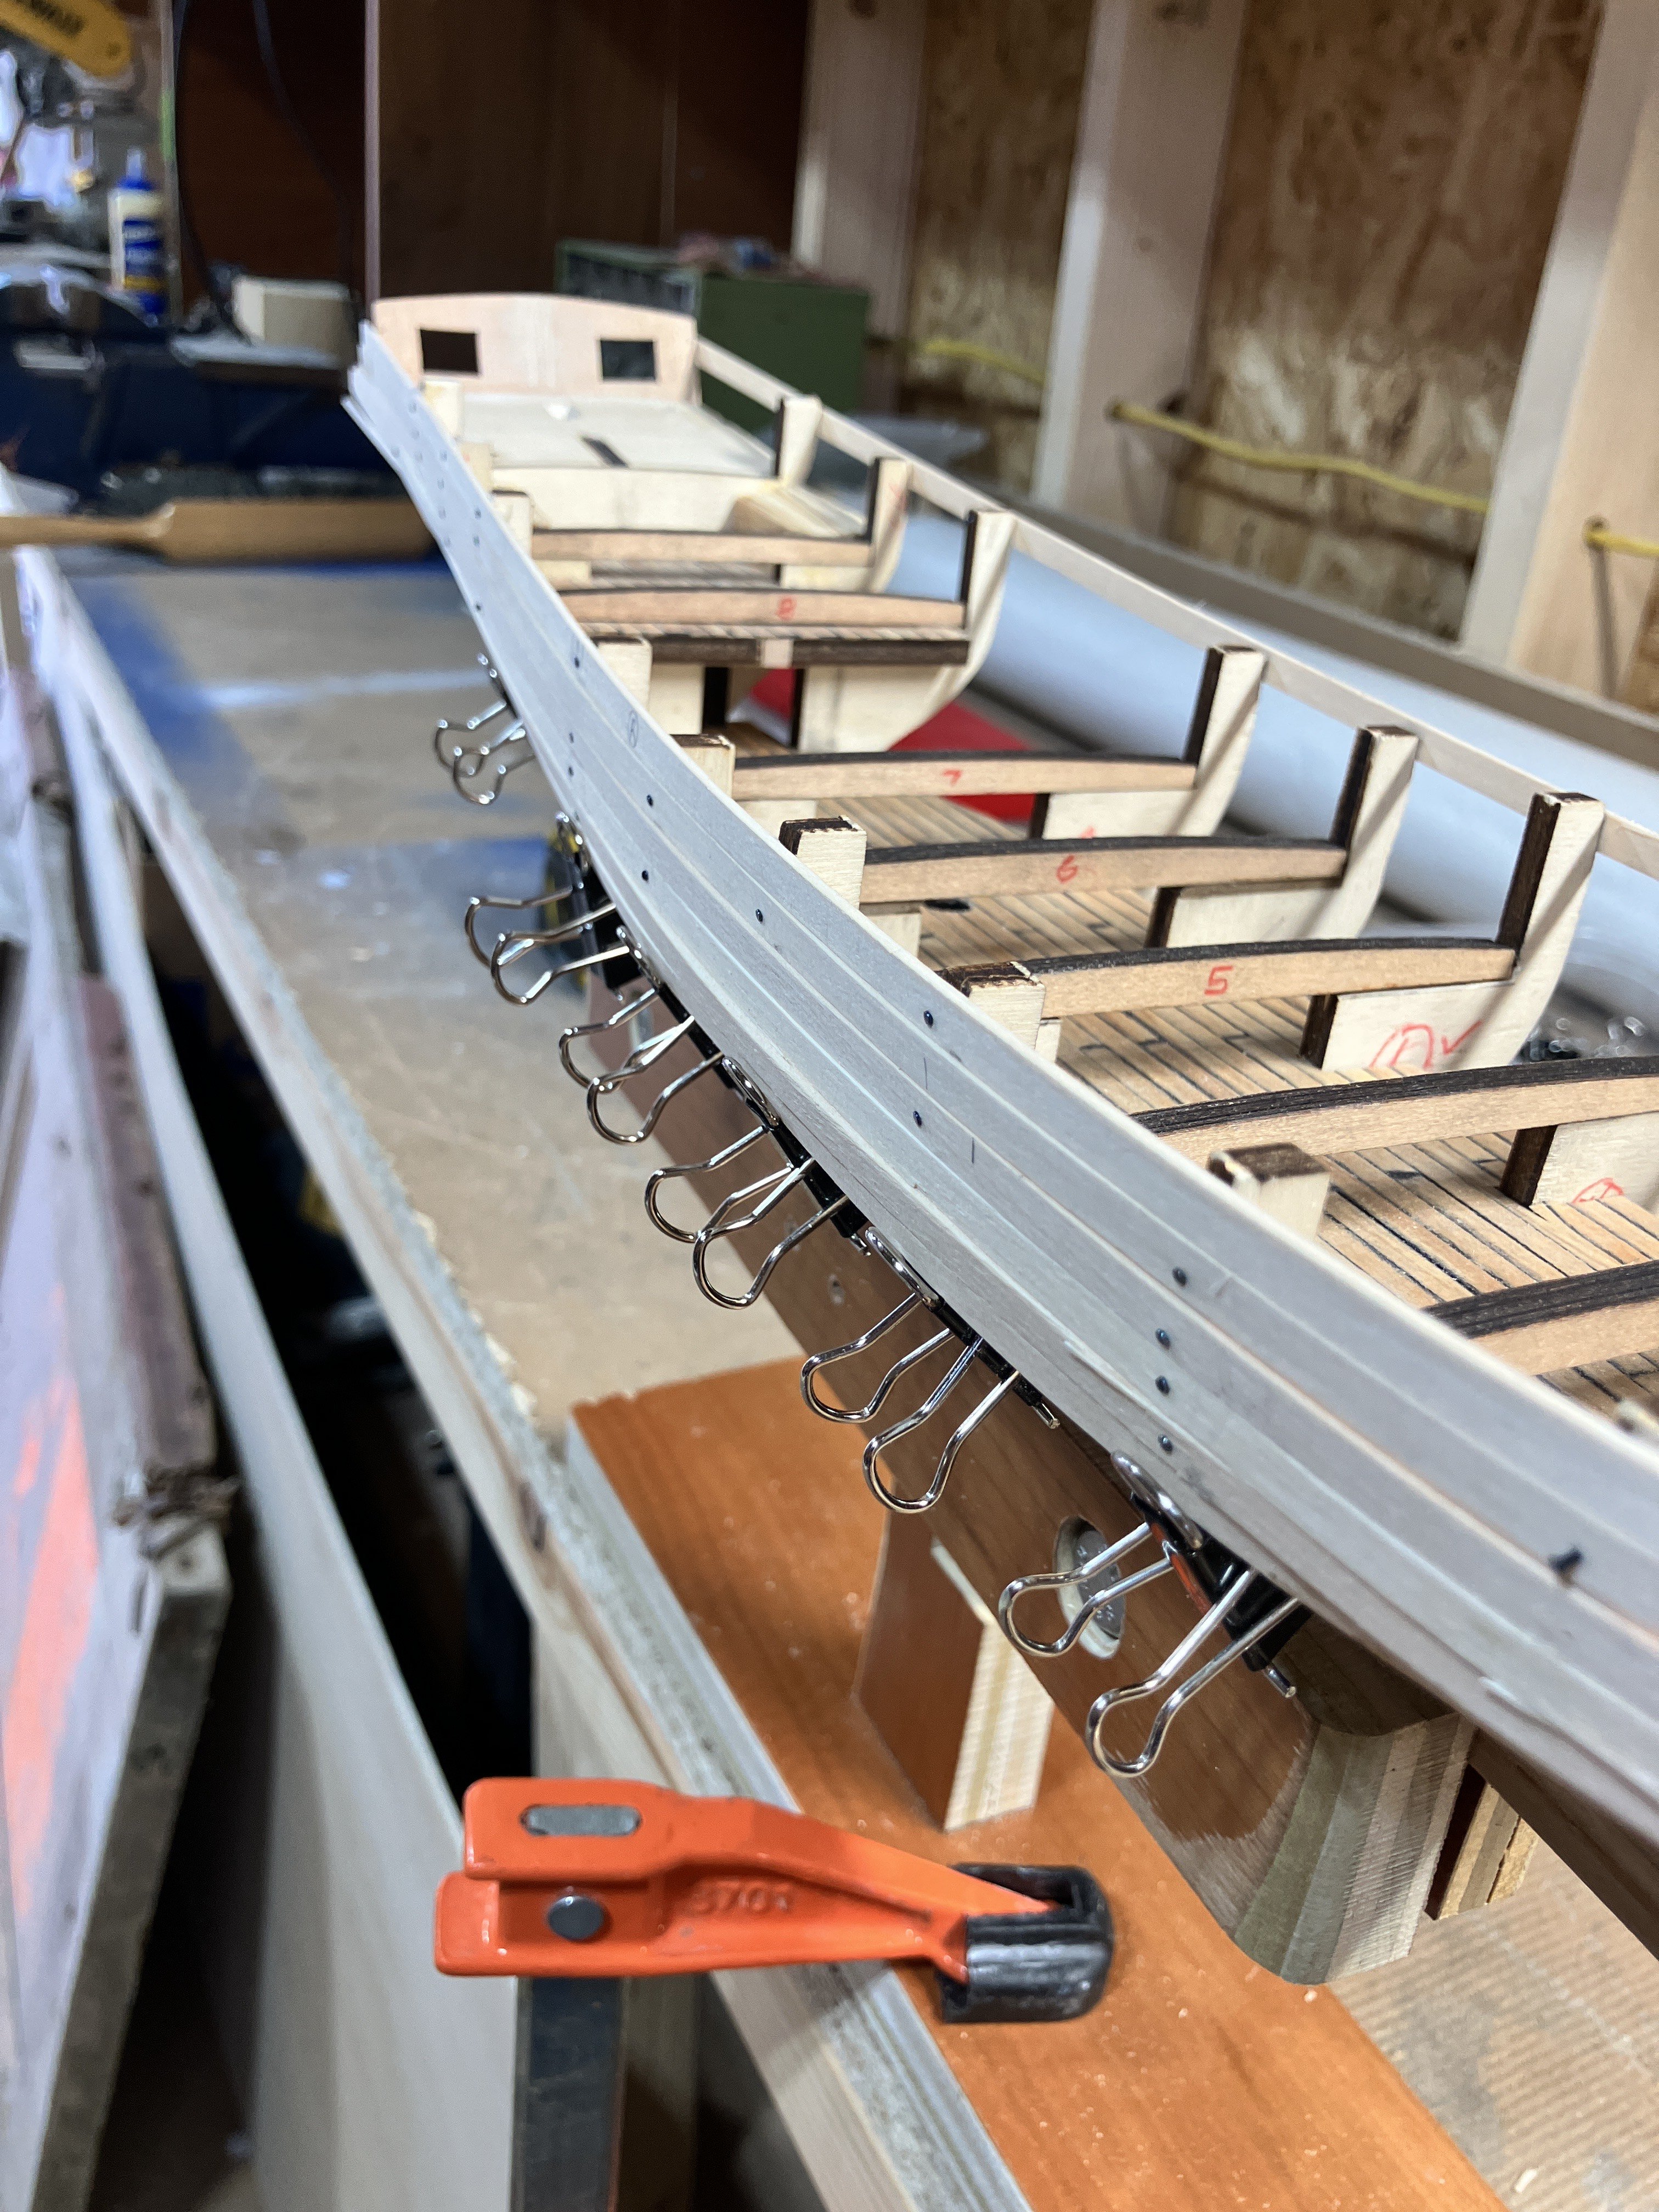
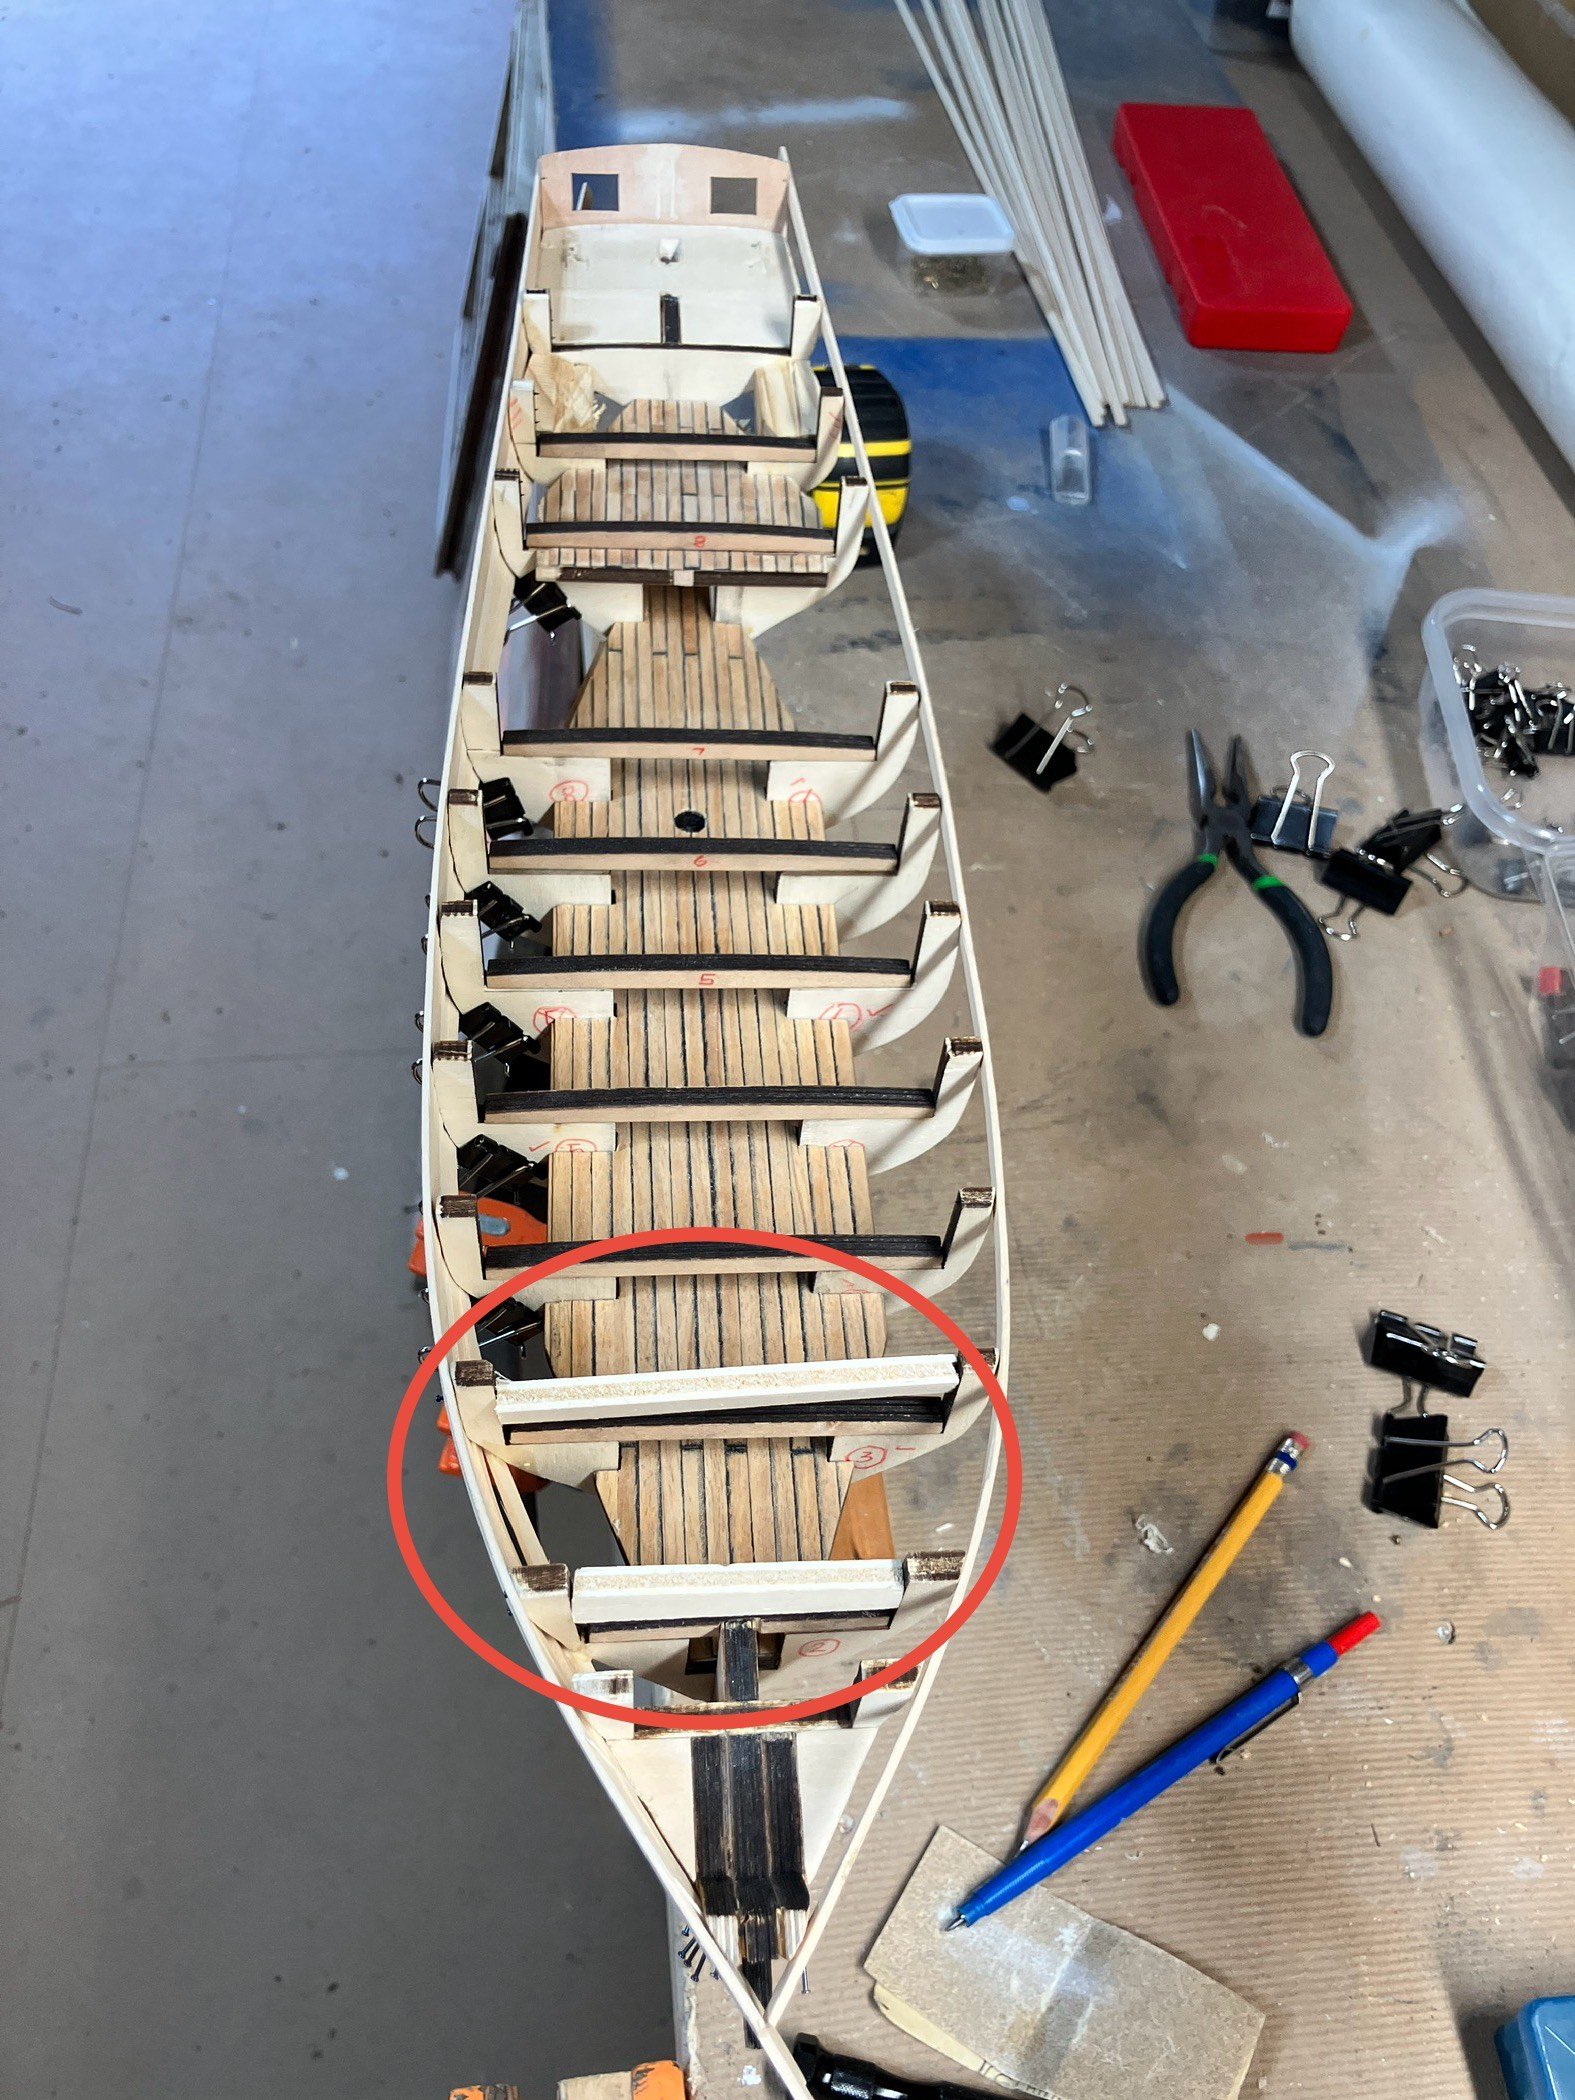
Hi Folks, here is my latest update on the current build. As a side note, the sale of my mother-in-law's house is eating up a lot of our time right now, despite being ready to go on the market we always seem to have stuff still to do, hence my absence here and there (sometimes unexpectedly). I decided to remake the rudder out of solid wood. I didn't really trust the brittle plywood to accept the nails I will be putting into it later on when the rudder gets mounted. I made it out of a nice piece of acacia wood that I had left over from a butcher block counter top we installed a few months ago: I started work on the sheer strakes too. The tricky thing with this build is that the bulkhead "tips" will be cut off flush with the deck once the planking is complete. Because of this, I didn't want to glue the sheer strakes in place right away. I planned on putting the first 4 rows on and securing them with nails then, once the planks got below deck level, I would start gluing them on. The strakes above would be removed and then glued down onto the fixed ones below deck level, if that makes any sense. It was really the only way I know how to get them secure and in the right place: The plank bending iron worked like a charm. I used it to shape the end of the first glued plank so that it would fit nicely in the rabbet: I had to add temporary bracers across the first two bulkheads because (as I mentioned earlier) the plywood is not of the best quality and they were suffering when I knocked the support nails in, despite me holding them: I hope to make more progress tomorrow