


Jim Lad
-
Posts
9,197 -
Joined
-
Last visited
Content Type
Profiles
Forums
Gallery
Events
Posts posted by Jim Lad
-
-
-
-
Cheers, Popeye! I'm not all that fussed about it - it's not a killer error - I'm just annoyed with myself for making such a stupid blunder.
John
-
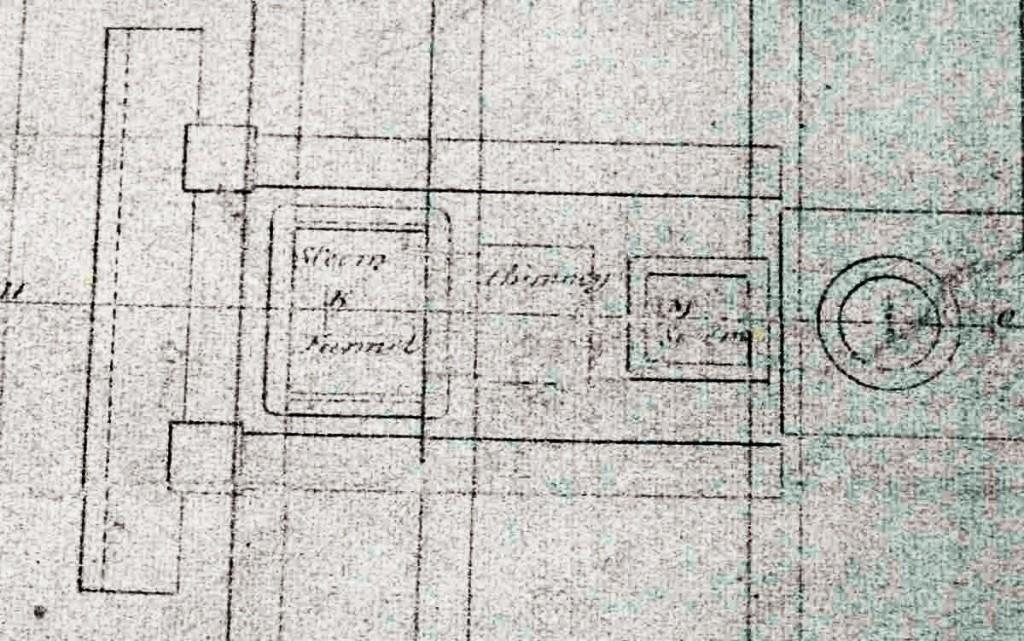
Remco,
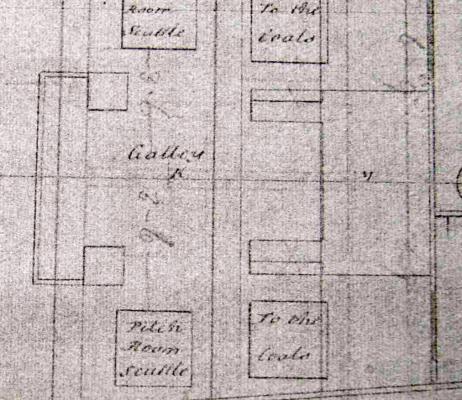
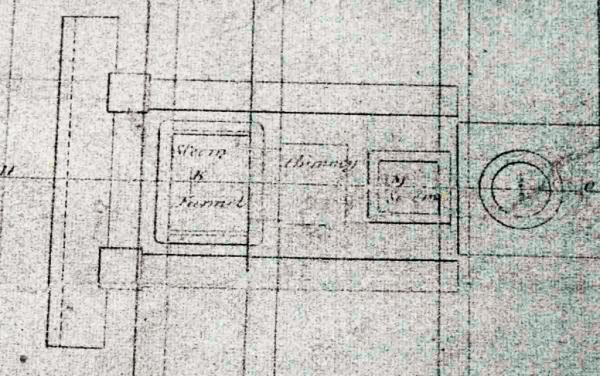
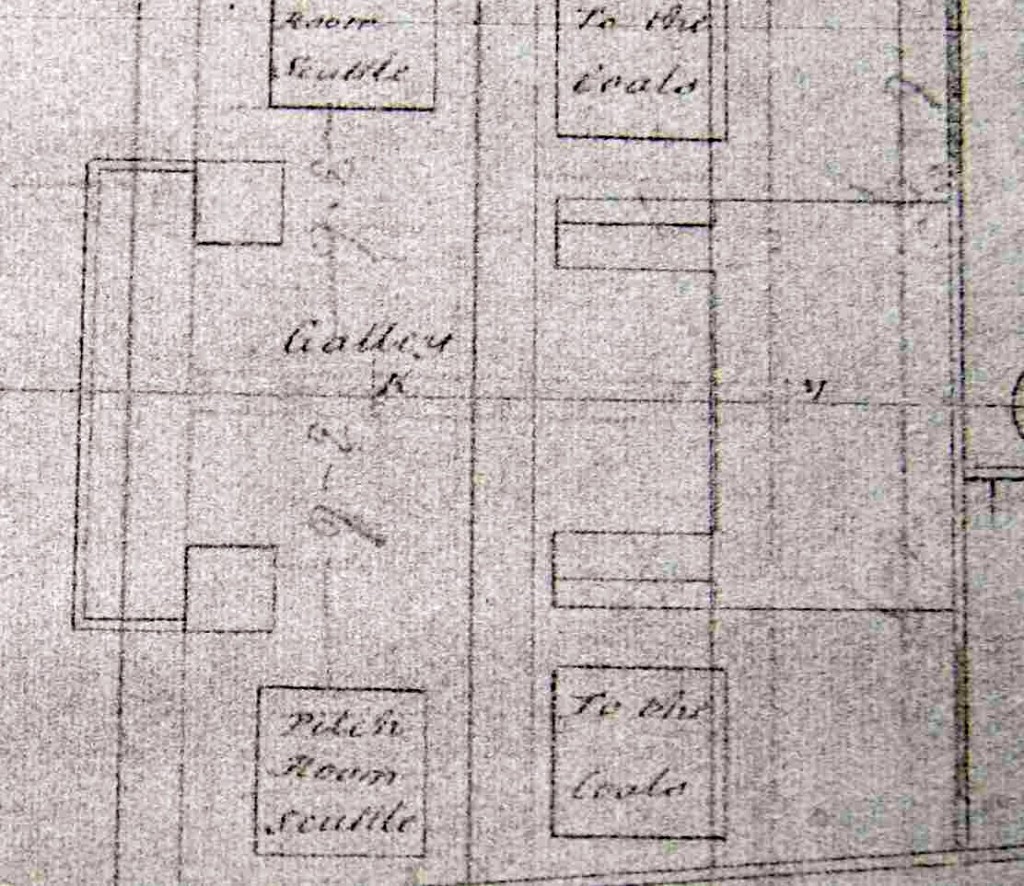
There's certainly no doubt about the two labels 'Galley' and 'Chimney', so that would seem clear.
I can't quite make out the writing on the other opening, but it does look rather like a coaming.
I've tried to enhance the contrast two of your pictures but I still can't make out the writing - perhaps you'll have better luck.
John
- Elia and Elmer Cornish
-
 2
2
-
-
Sometimes plainer looks better, Tom!
John
-
Or the 0.5 you showed previously also looks good, Ollie - have you tried the small holes with the filler?
John
- ringbolt2013, egkb and olliechristo
-
3
-
That deck has come up really well, mate!
John
-
Looks like you're making good progress.
John
-
Grant - nice to know that my secret's safe!

Bob - if you're referring to the cant frame rabbets, they're measured from the last square frame and the lines marked with a squar held against the bottom of the keel.
John
-
Russ - I'll just leave them as they are and watch myself when fitting the cants.
Ron - those first few frames on the left are for right at the stern.
John
-
Ah! The keel laid - and very nicely worked scarphs, too!
John
-
Major surgery successful, Popeye!
John
-
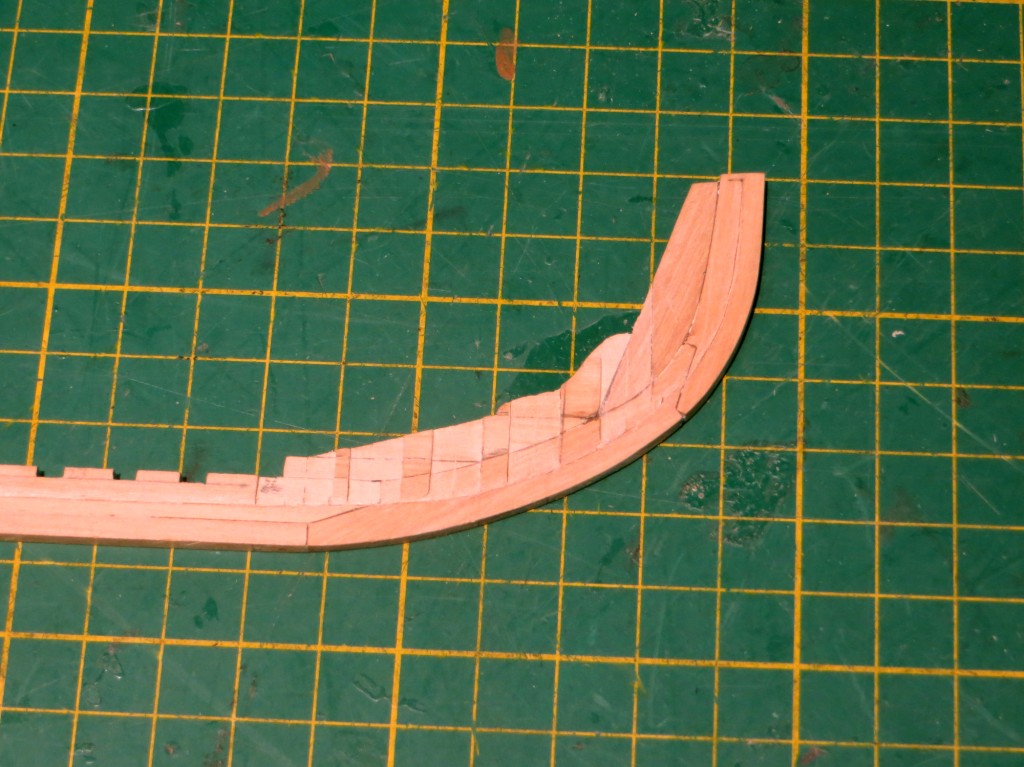
Bugger!!!
 I'm such a genius of a model maker that I only need to mark one face of my frames on my plan; so naturally when I marked out the forward cant frames I measured from the wrong side of the frame and the rabbets I cut were all 1/8" too far aft, so I've had to re-do them and the rabbets are now twice as wide as they should be. The mistake will be hidden once the model is planked, and all I have to do is to make sure the cant frames are hard against the forward edge of the rabbets when I fit them, but it's still really annoying!!!
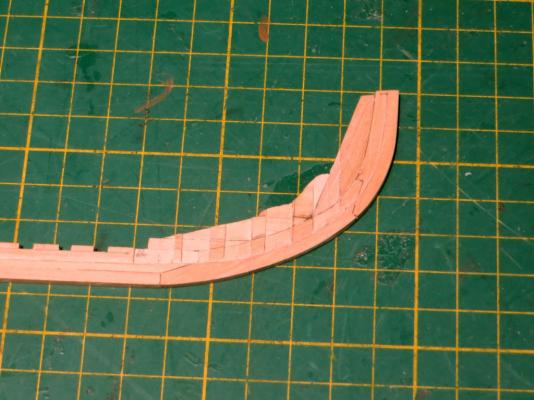
Here are my extra wide cant frame rabbets (just don't tell anyone I'm such a muppet!)
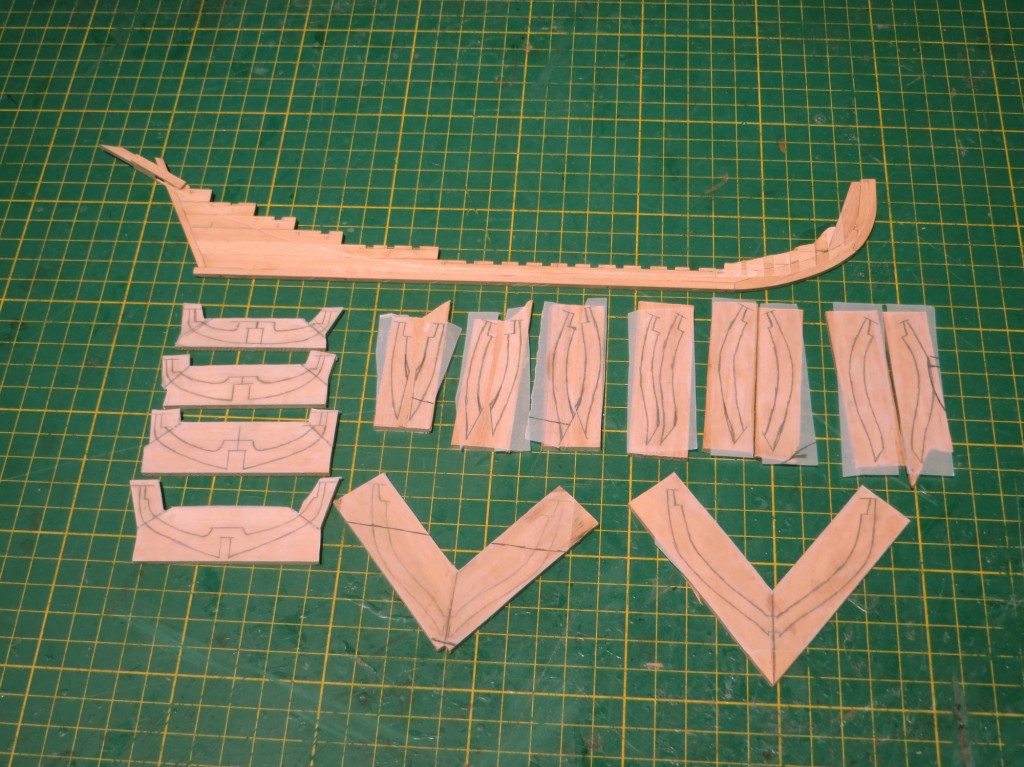
At least I've got some more frame blanks cut out. Very soon I'm going to have to make up a framing jig and start cutting out and fitting frames.

The frame blanks that I've made so far.
John
- WackoWolf, garyshipwright, Adrieke and 6 others
-
9
-
-
It's hard to find an image looking right up under the bow, but I think I agree with Nigel on this. The "sharp pointed" plank is actually under the fairing piece at the bottom of the wale.
John
-
Just catching up, Remco. I've tucked that washer idea away for future use.
John
-
-
Now that makes her look a lot better!
Can't wait to see her with the bottom paint on.
John
-
Just catching up, Gary. Beautiful work on the pump rhodings!
John
-
There are no rules laid down for the width or length of hull planks on British merchant ships - only the thickness and the spacing of the plank butts. In practice, a plank width averaging about 8 inches would be OK - this would be about 4mm at your scale. Remember that the planks on a ship are not parallel sided, but vary considerably with the shape of the hull. The widest planks will normally be found at the stern and the narrowest at the bow. With an average 4mm wide plank you should aim for no more than about 6mm for the widest planking and narrowing to no less than about 2mm. The average plank length would be no more than 25 to 30 feet in real practice, which would equate to roughly 150 to 180 mm on you model. When planking the 'shift of butts', you should try and plan for a minimum plank length of about 6 feet, or about 36mm on the model.
John
- olliechristo and WackoWolf
-
2
-
That looks very impressive, Augie!
It's good to see that you lot in the U.S. finally got around to having a new year - make it a good one.

- augie and popeye the sailor
-
2
-
That should make a very interesting model Stuart.
A pity you live so far north - it's not so easy for you to get to Portsmouth to see the original!
John
-
A little filler might help, but if she looks OK to the eye, then that's fine. Cameras can make our good work look terrible at times. As Popeye says, the final paint job will also help!
John
HM Colonial Cutter Mermaid by olliechristo - FINISHED - Modellers ShipYard -
in - Kit build logs for subjects built from 1801 - 1850
Posted
Just catching up after some time away, Ollie - she's coming along very nicely.
I'm not sure what the discussion was re the margin planks, but as Tom says, they were definitely cut in around the frames.
John