And now it’s time to start the rigging. I would like to be able to write all kinds of words to describe the rigging but I think the pictures can say it much better than words. So here is a start on the standing rigging of the main mast. More later.
And now it’s time to start the rigging. I would like to be able to write all kinds of words to describe the rigging but I think the pictures can say it much better than words. So here is a start on the standing rigging of the main mast. More later.
Please accept my apologies because, as usual, many of you on this forum will have been through all this and may regard it as somewhat basic. I am recording my experiences mainly for those, like myself, who are new to the game and no doubt have faced many of the same questions as I have when learning to make blocks.
The blocks to progress
Over the last few weekends, when I was able to get away from the demands of work, I concentrated on making blocks. The primary reason is that the guns have been made and they have been waiting very patiently for the gun tackle while I busied myself making a ship’s boat (and on which I continue to work). The secondary reason is that the skill of block making is going to be very useful for the rigging and for any future model as well. So I thought I might as well spend time to get it right.
And time it has been taking. There were three main elements that slowed me down:
The first was the simple one of trying to make blocks of a reasonably identical shape and size.
The second was trying to make the holes in the double blocks parallel.
The third was finding out how to use the circular saw properly.
An accurate block?
Starting with accuracy of size, I made a CAD drawing in TurboCAD of a double block according to the recommendations in Zu Mondfeld. This was scaled to 1/64 and long lines of them printed.
I had been thinking that by doing this it would be easy to drill the holes for the rope in the correct position, accurately and in perfect line using my small drill and drill stand. All it would take then would be to saw them off and sand them.
So a line from the printed sheet was then stuck (using Elmer's Rubber Cement) to a strip of hardwood that had been cut to the right dimensions with my circular saw. For the hardwood I was using old oak floorboards that I’d picked up off a street near our home as I reckoned I’d be making many mistakes and didn’t want to waste anything expensive. This proved to be a good call as there were a lot of attempts!
After gluing the strip, the job was then to drill the holes and cut the blocks using my favourite small tool (a razor blade holder). You can see the sequence in the following photos.
Not quite!
Although this gave reasonable results, there were some problems. The main one was that I had cut no grooves to simulate the sheaves so the holes left the blocks looking a bit unrealistic. This partly resulted from my decision to orient the print out so that all the holes would be in line – something that was more to do with the fact that I was drilling the holes using my drill stand.
I then found that my method of separating the blocks from the strip led to a problem with sanding the edges. After quite happily using the razor blade holder to separate the blocks from the strip, I found that sanding the blocks wasn't so easy as the wood often simply disintegrated. (I realised much later that this was primarily due to my choice of wood -- the floorboards were made of oak which at small scale is harder to work. You'll see that I returned to the simple slicing of blocks later on in the post -- although with a different orientation of the holes for the sheaves.)
In order to avoid this my second attempt involved rounding the edges before separation using a triangular file between the blocks, then cutting with a razor saw. The results were really messy. The rubber cement I was using for the print out was not strong enough to withstand filing or sawing and although I got round this by making a mark with a scalpel, my filing was so inaccurate that I lost sight of where to cut. The fact was that the triangular file was at too great an angle and I hadn’t thought through the fact that there should be almost no angle between blocks when lined up side by side. I had overlooked the fact that all the sources that show how to make blocks from a strip of wood show them lined up end to end and not side by side as I had done.
So my attempts thus far had been a failure – but I had learned from the attempts. I had also been wary of the traditional method which uses a table saw because I didn’t trust my accuracy with the table saw to cut the line for the sheaves.
However, trying to use dividers to run lines down a strip of wood turned out to be a waste of time as the grooves were not at all distinct and it was very hard to keep the lines parallel.
So should I buy the ready-made blocks?
It was at this stage that I seriously considered buying ready-made blocks. Chuck’s looked oh so very tempting. But I said to myself that so many thousands of modellers previously had patiently made blocks for themselves, and if I didn’t do it I’d probably be losing an opportunity to learn a new and useful skill.
Naw! Coward I am not!
So I went back to the traditional method of lining the blocks end to end before cutting, and turned to the saw. As I have said, it had been something that I had been fearful of as I really didn’t believe I was capable of cutting the tiny grooves for the sheaves in those very narrow strips (2.5mm square) of wood.
I made lots of attempts to run grooves down a strip with the saw, but they all ended in failure. It wasn’t until there was a discussion about the correct way to use a table saw on this forum (see the discussion that starts at http://modelshipworld.com/index.php?/topic/2470-microlux-tilt-arbor-saw-problems/#entry63704) that I finally learned the simple trick of using a featherboard clamped to the table top to hold the strip from the side. I also learned how important it is to cut strips on the side away from the fence. Once I’d grasped all that it was relatively easy. Nay. It was wonderfully exciting to discover I could do it properly!
Re-thinking the block size
I also made it easier for myself by thinking carefully about the size of the holes I’d be drilling and the rope I’d be using. The correct size for rope going through the double blocks on the guns is 0.25mm diameter. However, my saw blade size is 0.6mm, so any 'sheaves' I would make would have to be 0.6mm.That meant that I’d have to make a double block 2.7mm wide (two 0.6mm holes, 0.5mm between them, and 0.5mm on either side. Previously I’d been making 2.5mm wide blocks. I reckoned that although my blocks would be slightly oversize at scale, such a discrepancy would hardly stand out against all the other discrepancies from perfection in my build. Far more important for me at this stage is to get the hang of basic skills and allow time to improve them.
The featherboard
The following shows the simple featherboard clamped to the table and holding the strip against the fence. I made the clamp from a couple of 6mm bolts I found in my spares box and a bit of pine from that continuing wonderful wood source – the streets round my home. You’ll see some holes already drilled in the strip – this was because I’d already cut the grooves on both sides and was starting on the holes before I remembered to photograph the process. This time the wood was boxwood – cut from an old boxwood ruler I bought on eBay (thanks to a tip from ‘Blue Ensign’ when I asked him about his sources of boxwood in the UK).
One thing you'll want to note is the use of a strip of wet & dry paper which is glued to the underside of the featherboard clamp. This is not mentioned in the article posted by Mark Taylor in the discussion referred to above, but is important as it really holds the featherboard very firmly.
For those wondering how I set the saw to a height of 0.5mm, I simply used the digital vernier caliper -- which I also used to determine the distance of the saw from the fence.
…and is the Proxxon FET up to the job? No, stop right there. The question should be: am I up to the job?
Just as an aside, there’s been a lot of discussion recently about the merits of the Proxxon FET table saw. I do realise it’s not as wonderful as the Byrnes saw but now I have come to understand how to use it, it really does do the jobs I have asked of it. Maybe a better way of putting this is that my skills are not up to the standard attainable with the Proxxon saw – so I doubt very much whether I’d be able to obtain better results with the Byrnes’ saw!
The next stage is drilling the holes. I use a simple jig for the Proxxon Drill as you can see in the photo. It was while doing this that I found out that the grooves provided a natural way to place the drill bit – I could feel the drill bit sliding into the groove, so that told me exactly where to drill. The pencil marks on the top of the strip are there to show where to cut the blocks.
You can see the strip with the drilled holes in the following photo:
Cutting of the blocks
Now for the cutting of the blocks. You'll now see that I reverted to the simple idea of cutting the blocks without trying to file the joins (the method suggested by many books). This is as suggested by Hubert at his site Wooden Ship Modelling for Dummies. Just before cutting, though, the corner edges of the strip were lightly sanded to save sanding them once they were cut.
In order to cut the strips accurately, rather than using the hand-held razor blade holder I had used previously, just for fun I used the Proxxon drill with a small saw blade mounted horizontally in the drill stand. It was easy to set it all up so that the cut was vertical and at right angles to the end by using the marks on the cutting board as reference points.
Most people will worry that the blocks would go flying off into the far corners of the room. This was easily avoided (i) by moving the saw slowly through the block, and (ii) by having double-sided sticky tape on a block of wood underneath (an idea I derived from something Hubert showed on his site (referred to above). Note in the second photo below that the vice is not square to the saw bit: this was just an error when setting up the photo.
Having cut off the blocks, they needed to be sanded. I used Hubert’s method of gluing a strip of 400 grit wet and dry to a stick and sanding by hand. I had thought I’d try to build a drum sander, but instead decided to stick with Hubert’s method for the while. You can see the results in the following photos. You’ll notice that some blocks came out better than others: That's simply because my technique gradually improved between first and last! I still have to think how to finish them (oil, varnish) and also will now have to work out how best to add the strops and hooks. Oh, and I do realise that I made no grooves for the strops. That’s something I’ll reserve for the next set of blocks!
It's not perfection, but the basics are now more in place than they were a month ago.
I mounted the bow and stern sprits, added the bulwarks and cap rail and put in eye bolts all over the deck for the rigging. I painted and put the hand rails on the cabin roof. I also added the companion way hatch, which still needs painting. If you look carefully you can see the anchor chocks at the bow, and that reminds me, I will need to make an anchor. Ah well, one thing at a time. Next are the masts, booms and gaffs and all the little bits that hold them together.
Nice looking guns, Clare. One thought... if you're interested. Get some ScotchBrite pads (the green ones) in fine grit. You can then polish the brass on the lathe and get rid of any tooling marks.
Funny thing about this hobby... we have to be masters at woodworking, metal work, machining, sail making, carving, and knot-tying. The real shipyards had different people doing all this work.
I always cut my planking from 3 or 4 inch wide sheet. If the planks are from a 1/32" thick sheet, I tape a brass bar 1/32" thick by 3/4" or 1" wide to my table, leaving the front edge of the brass without tape. I then use another brass bar on top, overlapping the first by as wide as I want the plank. Now I can slid the wood under the upper piece of brass until it rests against the lower piece of brass and I have an edge to run my blade against. With this setup I can cut as many planks as I need.
I always cut my planking from 3 or 4 inch wide sheet. If the planks are from a 1/32" thick sheet, I tape a brass bar 1/32" thick by 3/4" or 1" wide to my table, leaving the front edge of the brass without tape. I then use another brass bar on top, overlapping the first by as wide as I want the plank. Now I can slid the wood under the upper piece of brass until it rests against the lower piece of brass and I have an edge to run my blade against. With this setup I can cut as many planks as I need.
I mounted the bow and stern sprits, added the bulwarks and cap rail and put in eye bolts all over the deck for the rigging. I painted and put the hand rails on the cabin roof. I also added the companion way hatch, which still needs painting. If you look carefully you can see the anchor chocks at the bow, and that reminds me, I will need to make an anchor. Ah well, one thing at a time. Next are the masts, booms and gaffs and all the little bits that hold them together.
I mounted the bow and stern sprits, added the bulwarks and cap rail and put in eye bolts all over the deck for the rigging. I painted and put the hand rails on the cabin roof. I also added the companion way hatch, which still needs painting. If you look carefully you can see the anchor chocks at the bow, and that reminds me, I will need to make an anchor. Ah well, one thing at a time. Next are the masts, booms and gaffs and all the little bits that hold them together.
I mounted the bow and stern sprits, added the bulwarks and cap rail and put in eye bolts all over the deck for the rigging. I painted and put the hand rails on the cabin roof. I also added the companion way hatch, which still needs painting. If you look carefully you can see the anchor chocks at the bow, and that reminds me, I will need to make an anchor. Ah well, one thing at a time. Next are the masts, booms and gaffs and all the little bits that hold them together.
I mounted the bow and stern sprits, added the bulwarks and cap rail and put in eye bolts all over the deck for the rigging. I painted and put the hand rails on the cabin roof. I also added the companion way hatch, which still needs painting. If you look carefully you can see the anchor chocks at the bow, and that reminds me, I will need to make an anchor. Ah well, one thing at a time. Next are the masts, booms and gaffs and all the little bits that hold them together.
I wasn't sure so I went out and cut a curve. If you are cutting a convex curve you can rotate the material very close to the cutting edge of the blade and by cutting off a little at a time, make very small discs. The problem is with the concave curve where the thickness of the blade and the width of the blade causes binding as you cut the curve. The tightest I could cut with my 3/8" blade was a 1 3/8" (35mm) radius or a 2 3/4" (70mm) inside diameter.
The boat I am making now is 30 feet long. At 1:48 scale the beam is 2 1/2". For this the scroll saw is what I used.
I mounted the bow and stern sprits, added the bulwarks and cap rail and put in eye bolts all over the deck for the rigging. I painted and put the hand rails on the cabin roof. I also added the companion way hatch, which still needs painting. If you look carefully you can see the anchor chocks at the bow, and that reminds me, I will need to make an anchor. Ah well, one thing at a time. Next are the masts, booms and gaffs and all the little bits that hold them together.


 captainbob got a reaction from yvesvidal in Malabar Jr by captainbob - FINISHED - 1:48 - 30' gaff rigged yawl
 captainbob got a reaction from Piet in Malabar Jr by captainbob - FINISHED - 1:48 - 30' gaff rigged yawl
 captainbob got a reaction from BareHook in Cutting stripwood for deck planking
 captainbob got a reaction from tkay11 in Cutting stripwood for deck planking
 captainbob got a reaction from The Sailor in HM Schooner Pickle by The Sailor - FINISHED - Caldercraft - Scale 1:64
 captainbob got a reaction from Salty Sea Dog in Half Moon by popeye the sailor - Billing Boats - 1:40 scale kit
 captainbob got a reaction from SkerryAmp in Half Moon by popeye the sailor - Billing Boats - 1:40 scale kit
 captainbob got a reaction from Martin W in Malabar Jr by captainbob - FINISHED - 1:48 - 30' gaff rigged yawl
 captainbob got a reaction from Sjors in Half Moon by popeye the sailor - Billing Boats - 1:40 scale kit
 captainbob got a reaction from popeye the sailor in Half Moon by popeye the sailor - Billing Boats - 1:40 scale kit
 captainbob got a reaction from capnharv2 in Gwenfra by Piet - FINISHED - 1:25 scale - self-designed Friendship Sloop
 captainbob got a reaction from Wishmaster in Bracera by Wishmaster - FINISHED - scale 1:20
 captainbob got a reaction from Anja in Malabar Jr by captainbob - FINISHED - 1:48 - 30' gaff rigged yawl
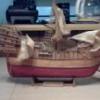 captainbob got a reaction from Walter Biles in Malabar Jr by captainbob - FINISHED - 1:48 - 30' gaff rigged yawl
 captainbob got a reaction from Richard Bradfield in Malabar Jr by captainbob - FINISHED - 1:48 - 30' gaff rigged yawl
 captainbob got a reaction from mtaylor in Malabar Jr by captainbob - FINISHED - 1:48 - 30' gaff rigged yawl
 captainbob got a reaction from SighingDutchman in Band or scroll saw?