
paul carruthers
-
Posts
133 -
Joined
-
Last visited
Content Type
Profiles
Forums
Gallery
Events
Everything posted by paul carruthers
-
Dampen the damage area, it should lift some of the indentation
-
Thanks, but yours is better than mine, I couldn’t bring myself to paint mine after sweating over it lol.
-
Don’t paint that planking!

-
Yes but the loss in flexibility is not an issue
- 587 replies
-
- 2
-

-

-
- Indefatigable
- Vanguard Models
- (and 1 more)
-
I always pull my thread thro’ beeswax and then hit with a hair dryer when under tension, minimises the fluff.
- 587 replies
-
- 2
-
-
-
- Indefatigable
- Vanguard Models
- (and 1 more)
-
After all that planking I couldn’t bring myself to paint it lol.
- 443 replies
-
- 4
-
-
- Indefatigable
- Vanguard Models
- (and 1 more)
-
If you have to enlarge the hole use a band of cartridge paper to hide the gap, it’s all painted black and will not be seen
-
I used a mini iron, the type used for covering model aircraft, I lightly wet the planks as per Chuck’s lateral bending method but I bent the planks into shape on the hull’s primary planking and held them in place with the iron, it gave a good result. I found chamfering the rear top of the planks essential to a tight fit.
- 443 replies
-
- 5
-
-
- Indefatigable
- Vanguard Models
- (and 1 more)
-
What hides the dark centreline where the etched deck is joined?
- 443 replies
-
- 2
-
-
- Indefatigable
- Vanguard Models
- (and 1 more)
-
James, can you include a few shots of the full hull with your hand adjacent for size comparison, thanks.
- 488 replies
-
- 3
-
-
- Indefatigable
- Vanguard Models
- (and 1 more)
-
If you divide cost by build time it’s not a huge amount of money, compare to golf club membership etc.
-
Mine warped too despite usin CA and clamping. I re-clamped it against a steel rule and removed most of the warp.
- 476 replies
-
- 2
-
-
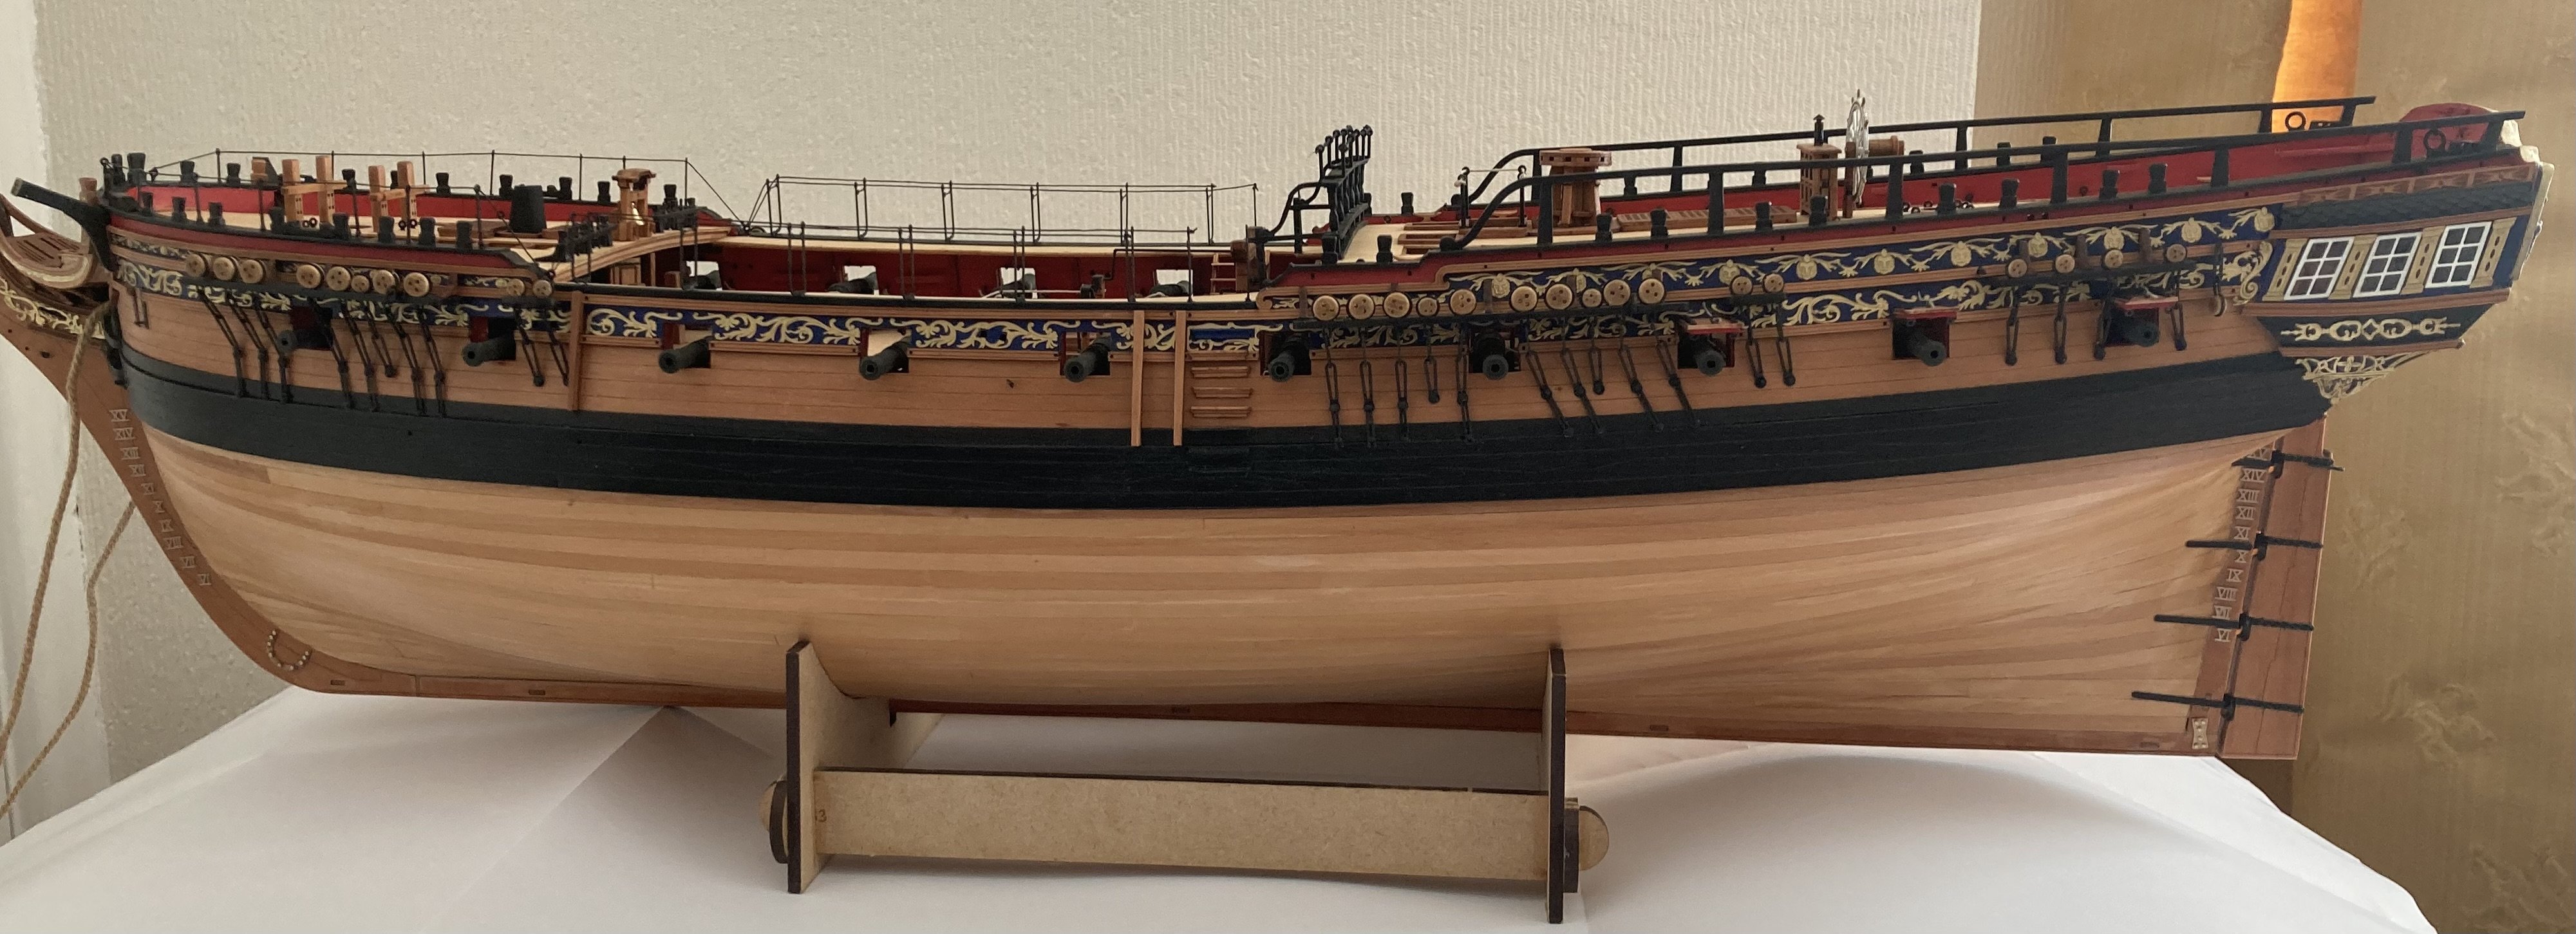
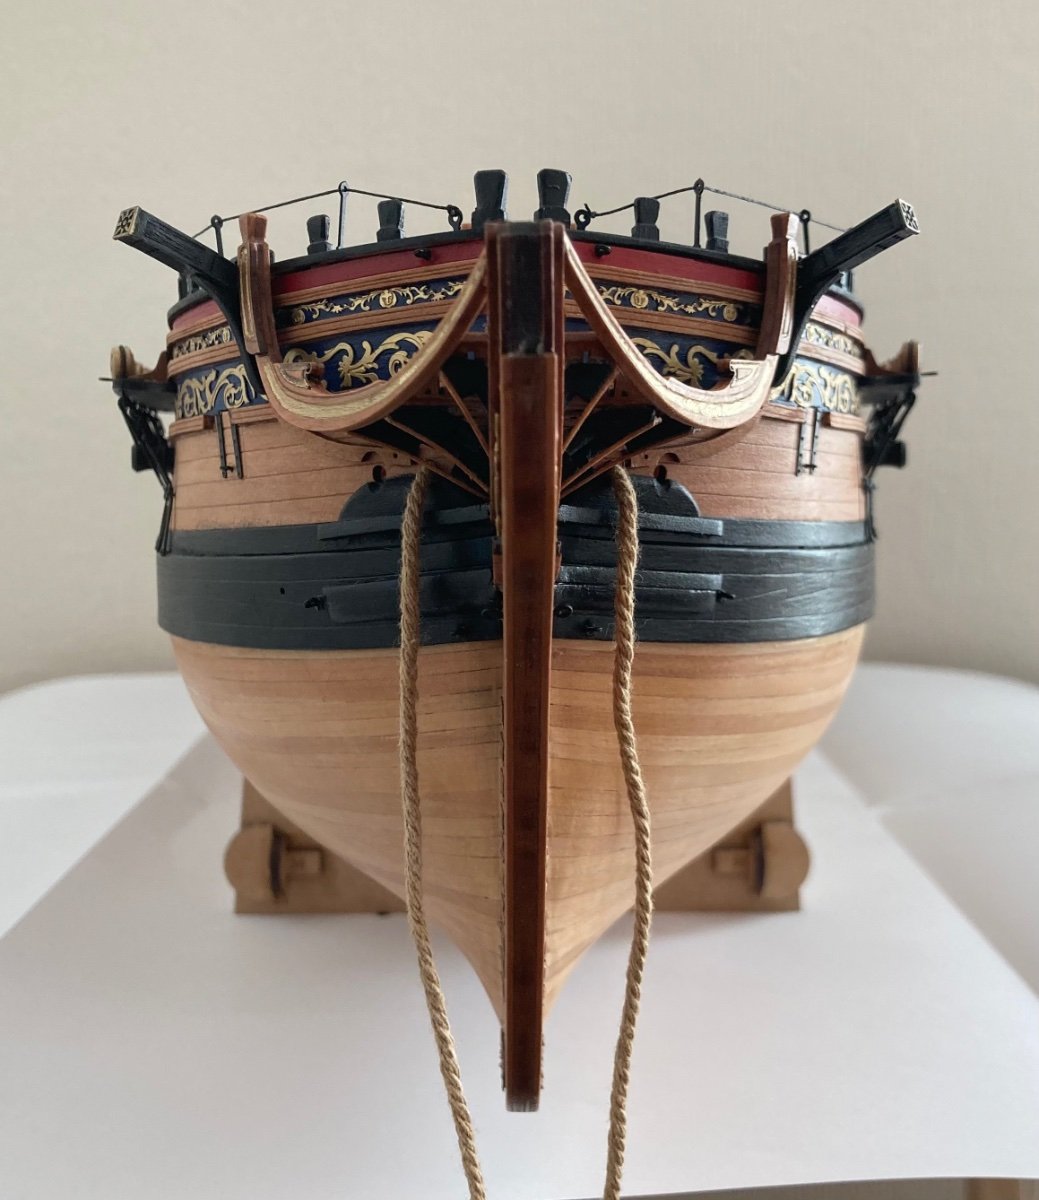
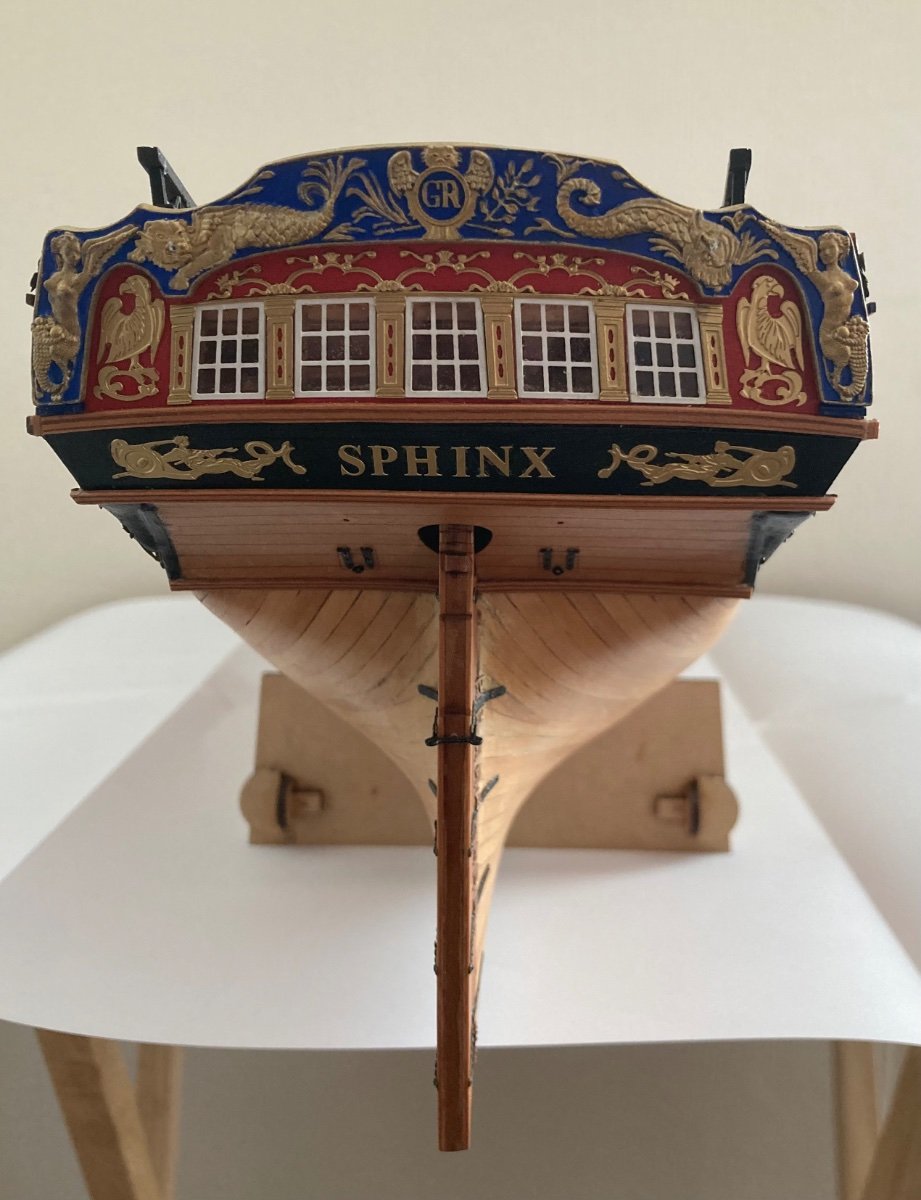
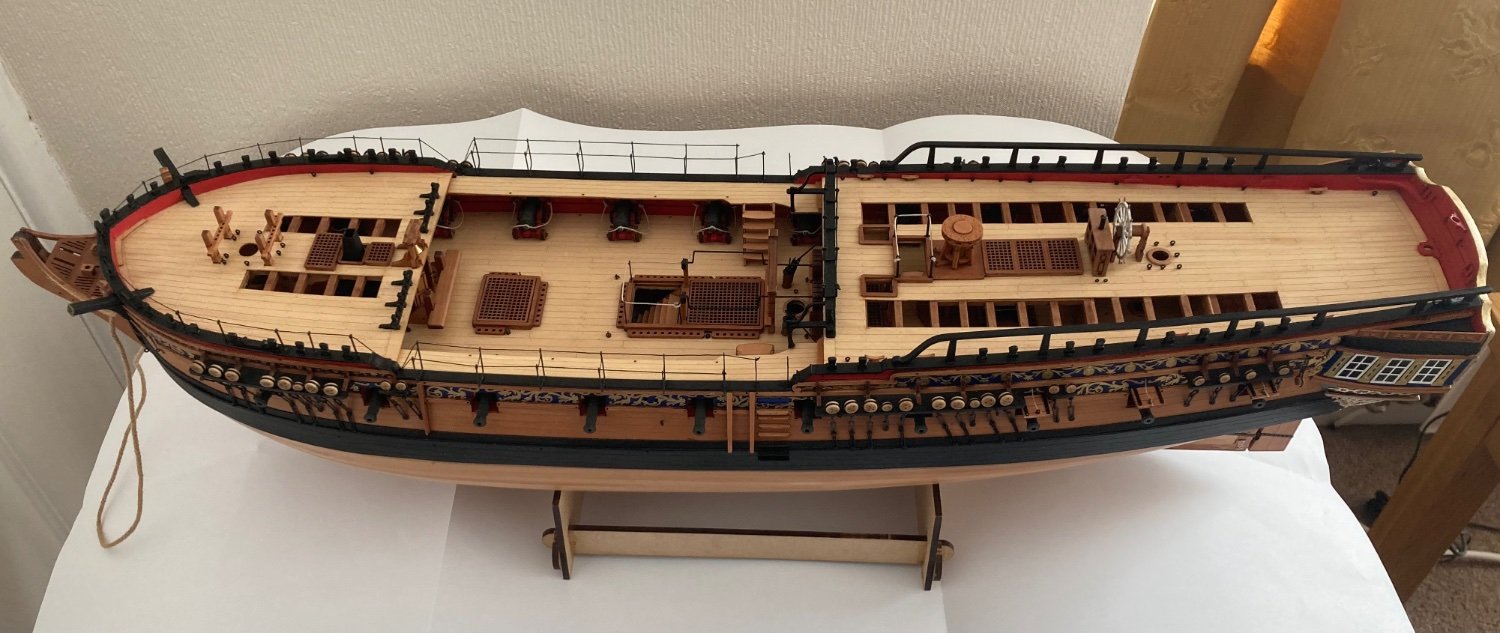
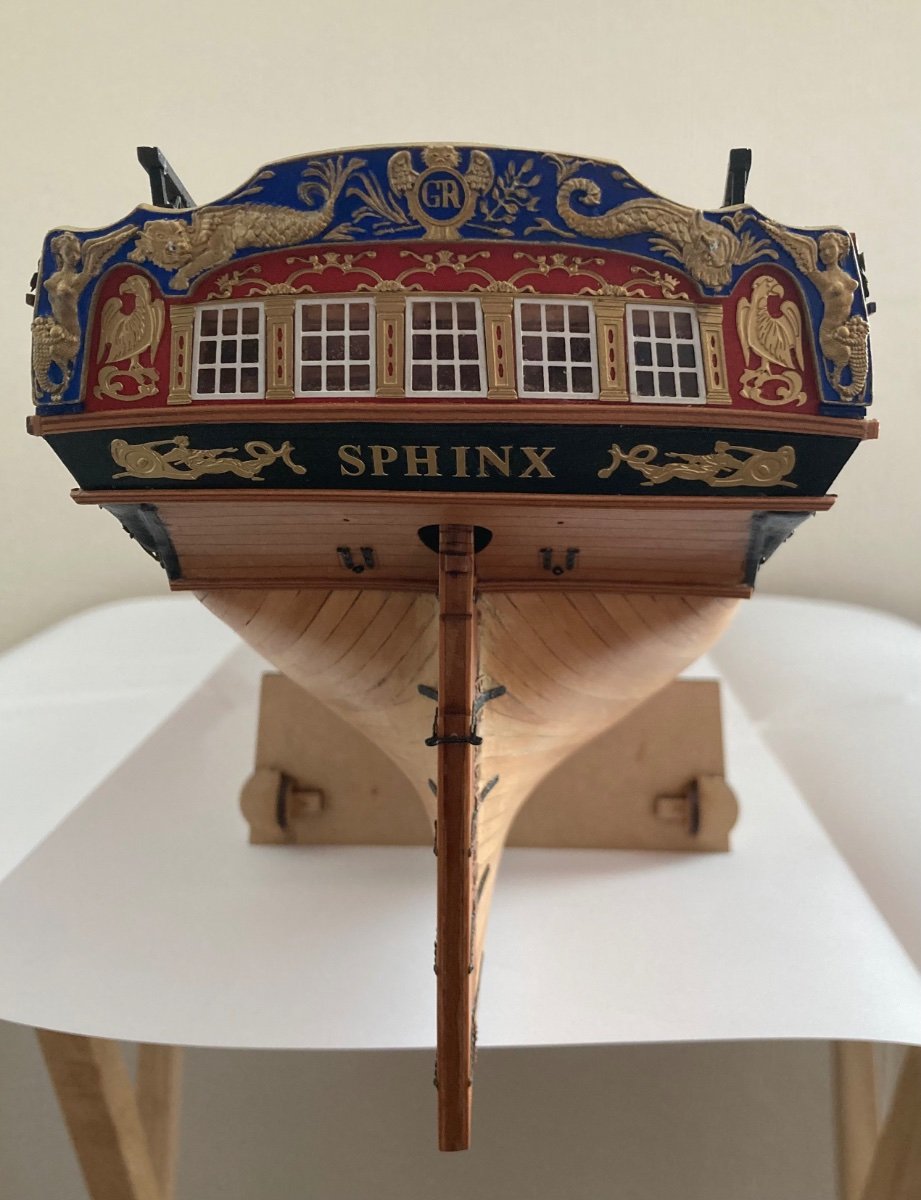
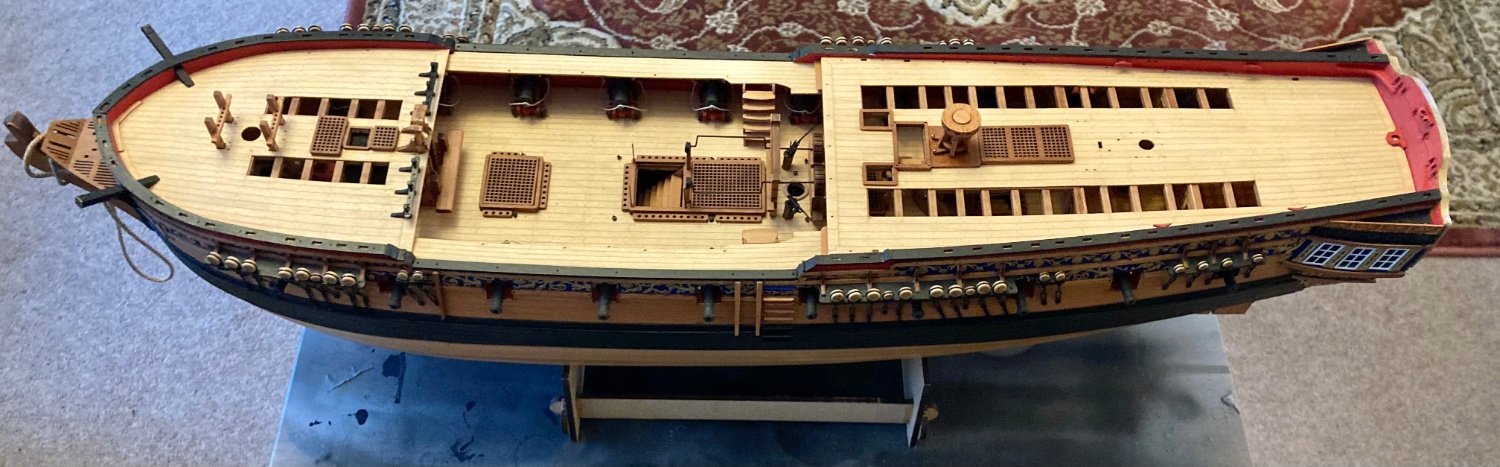
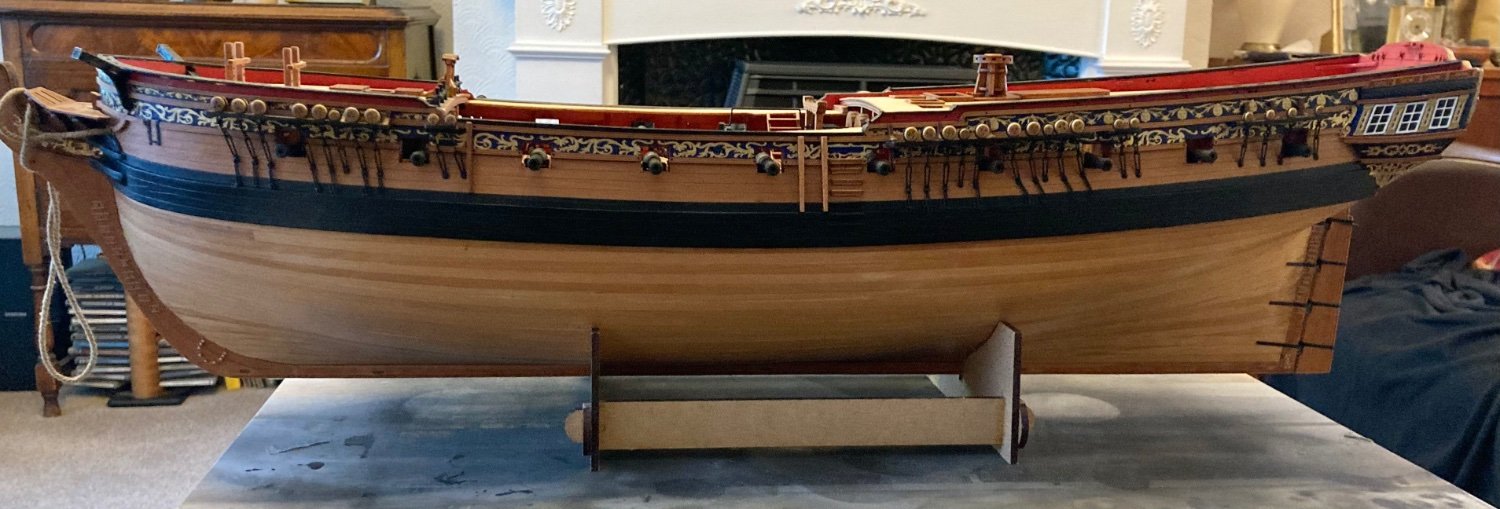
- sphinx
- vanguard models
- (and 1 more)
-
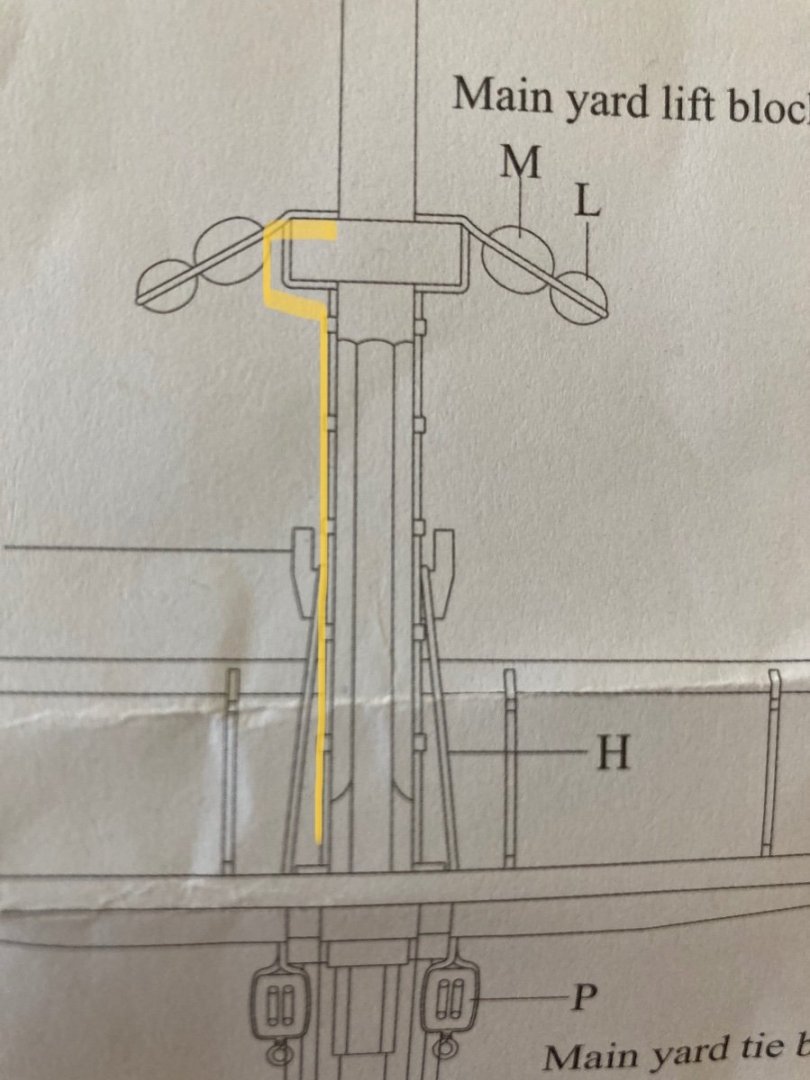
I’ve not posted for a bit, to be honest struggling with shaping the mast profiles but I’m getting there. from the drawing hilited I’m struggling to understand the band running vertically, is it a metal strip? thanks.
-
Well the boats are beyond my skills and patience I’m afraid, hopefully 3D printed options will be available. James H must be applauded for completing these on the build for the manual.
-
Thanks for that, I guess slow and measure is the best way as you recommend
-
Any how to’s on mast shaping? I don’t have a lathe, only modelling tool I have is a proxon disc sander, razor plane and the usual sanding hand tools. Thanks
-
Update, ready to commence the small craft, look challenging.


-
Beautiful build, well done.
-
Time for a break, my rudder gap is too large but I’ve not the courage to try and remedy at this point.


-
Great model build, You’ve probably thought of this but I’d sort the cat heads now, I’ve limited experience and I’m following the manual, which is great but I found fitting them as per the manual difficult
- 855 replies
-
- 2
-
-
- Sphinx
- Vanguard Models
- (and 1 more)