Wintergreen
-
Posts
1,002 -
Joined
-
Last visited
Content Type
Profiles
Forums
Gallery
Events
Everything posted by Wintergreen
-
Clever move. It is all about the conformity of lines...our eyes are very picky when it comes to anomalies, right? Lovely little bark, I must say. Makes me almost wanna try our Swedish cousin...but then again, no. Not yet, anyway.
- 641 replies
-
- 4
-

-
- greenwich hospital
- barge
- (and 1 more)
-
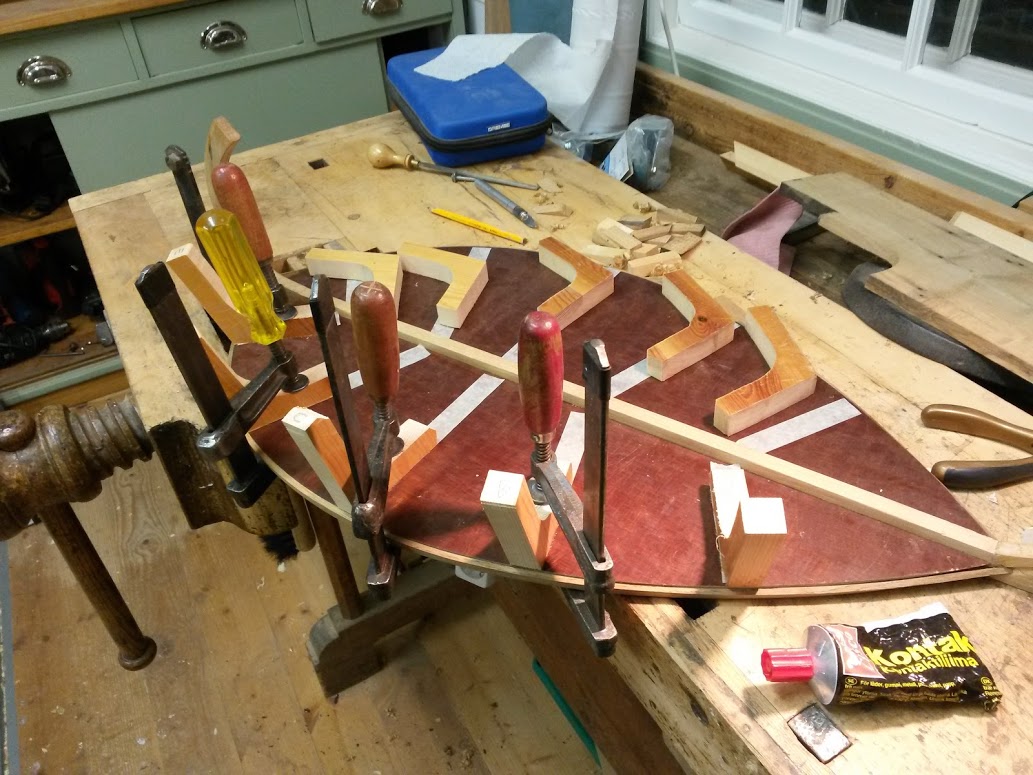
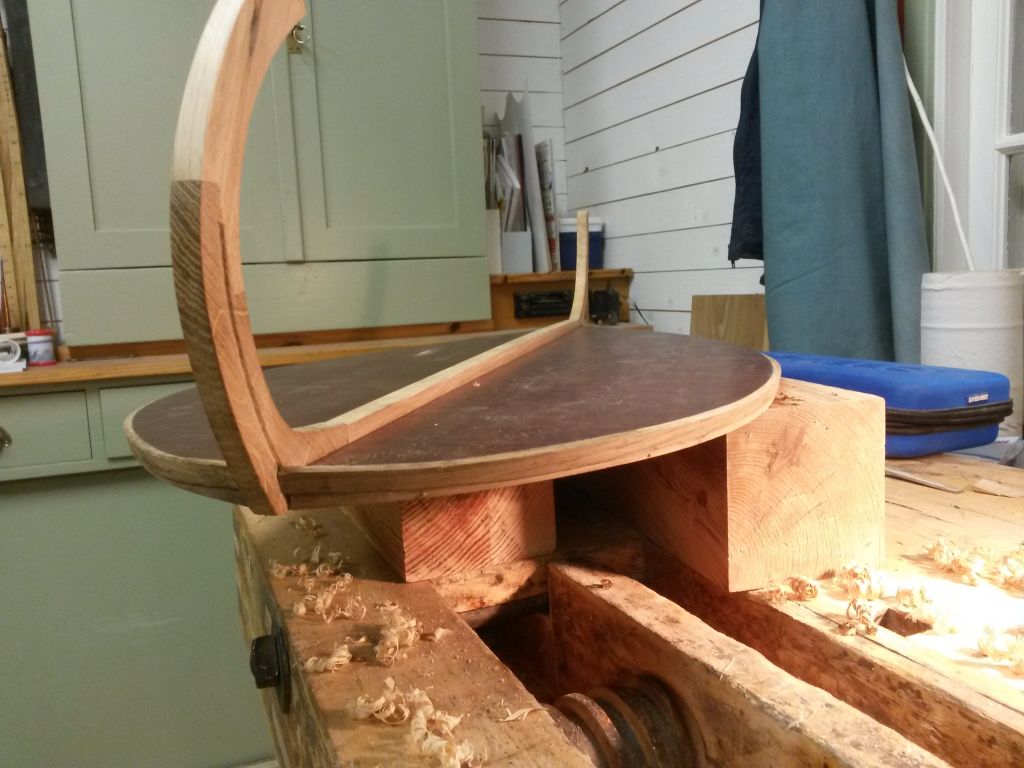
A while ago I descided to add floors to the hull. Not that it will be visible when on display filled with 3-4cm of sand. But the again, how many builders here on MSW add stuff that will be forever out of sight? The floor boards are 5 mm thick and varying width. I use contact cement to stick to the brown bottom and ordinary white glue on the edges.
-
Thanks for the "likes" and to Carl and John. Yes, "if at first you don't succeed, try and try again..." planking is a skill which I'm only in the beginning of acquiring. Of course I could have selected a softer wood than oak for a start, like birch. But I wanted the durability of oak since the item will be on public display in our church. Note to self - "don't be hasty" as Merry puts it in Lord of the Rings. Planking cant be rushed. Well, well, it can only be better next time. The over sized planks will also take a lot of sanding and then it will look much better. now what? ... humm, where did I put those notes...
-
So, guess this marks some kind of tollgate...fully planked. Bring forth the elbow grease and some sparkling new 80 grit paper cuz I'm ready to go.

-
Thanks Michael and Carl for the salute. Yes, they tell me that being a grand-parent is like picking the fruit out of the cake ;-) Needless to say, the little one is adorable.
-
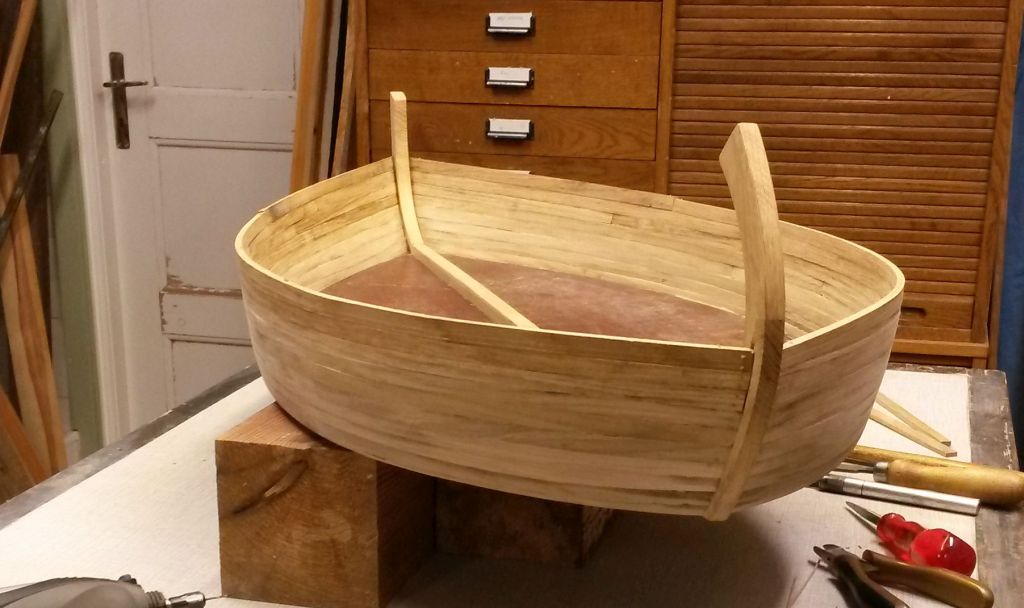
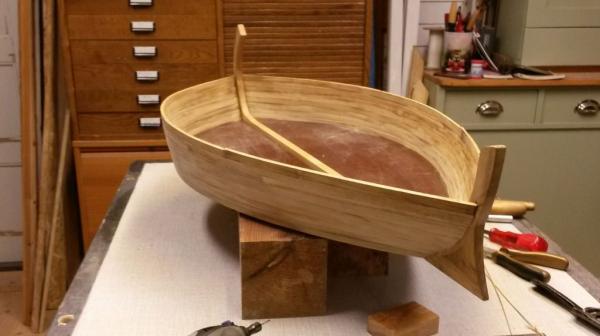
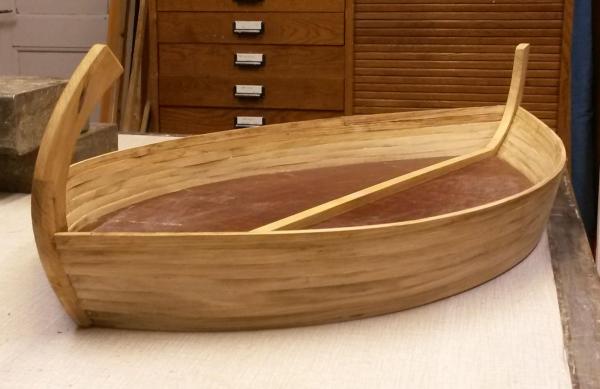
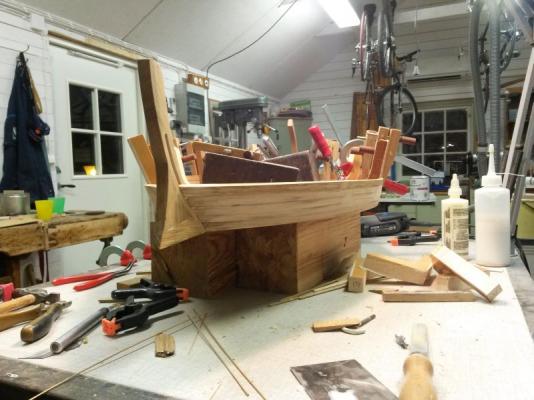
Before I called it a day, I decided that cleaning was a good idea. This is how it stands now. Two more strakes to go and after that it is time for some frames. Well...actually more like 'L'-shaped supports than frames. (note to self - dig out that compass timber you have out in the garage...)
-
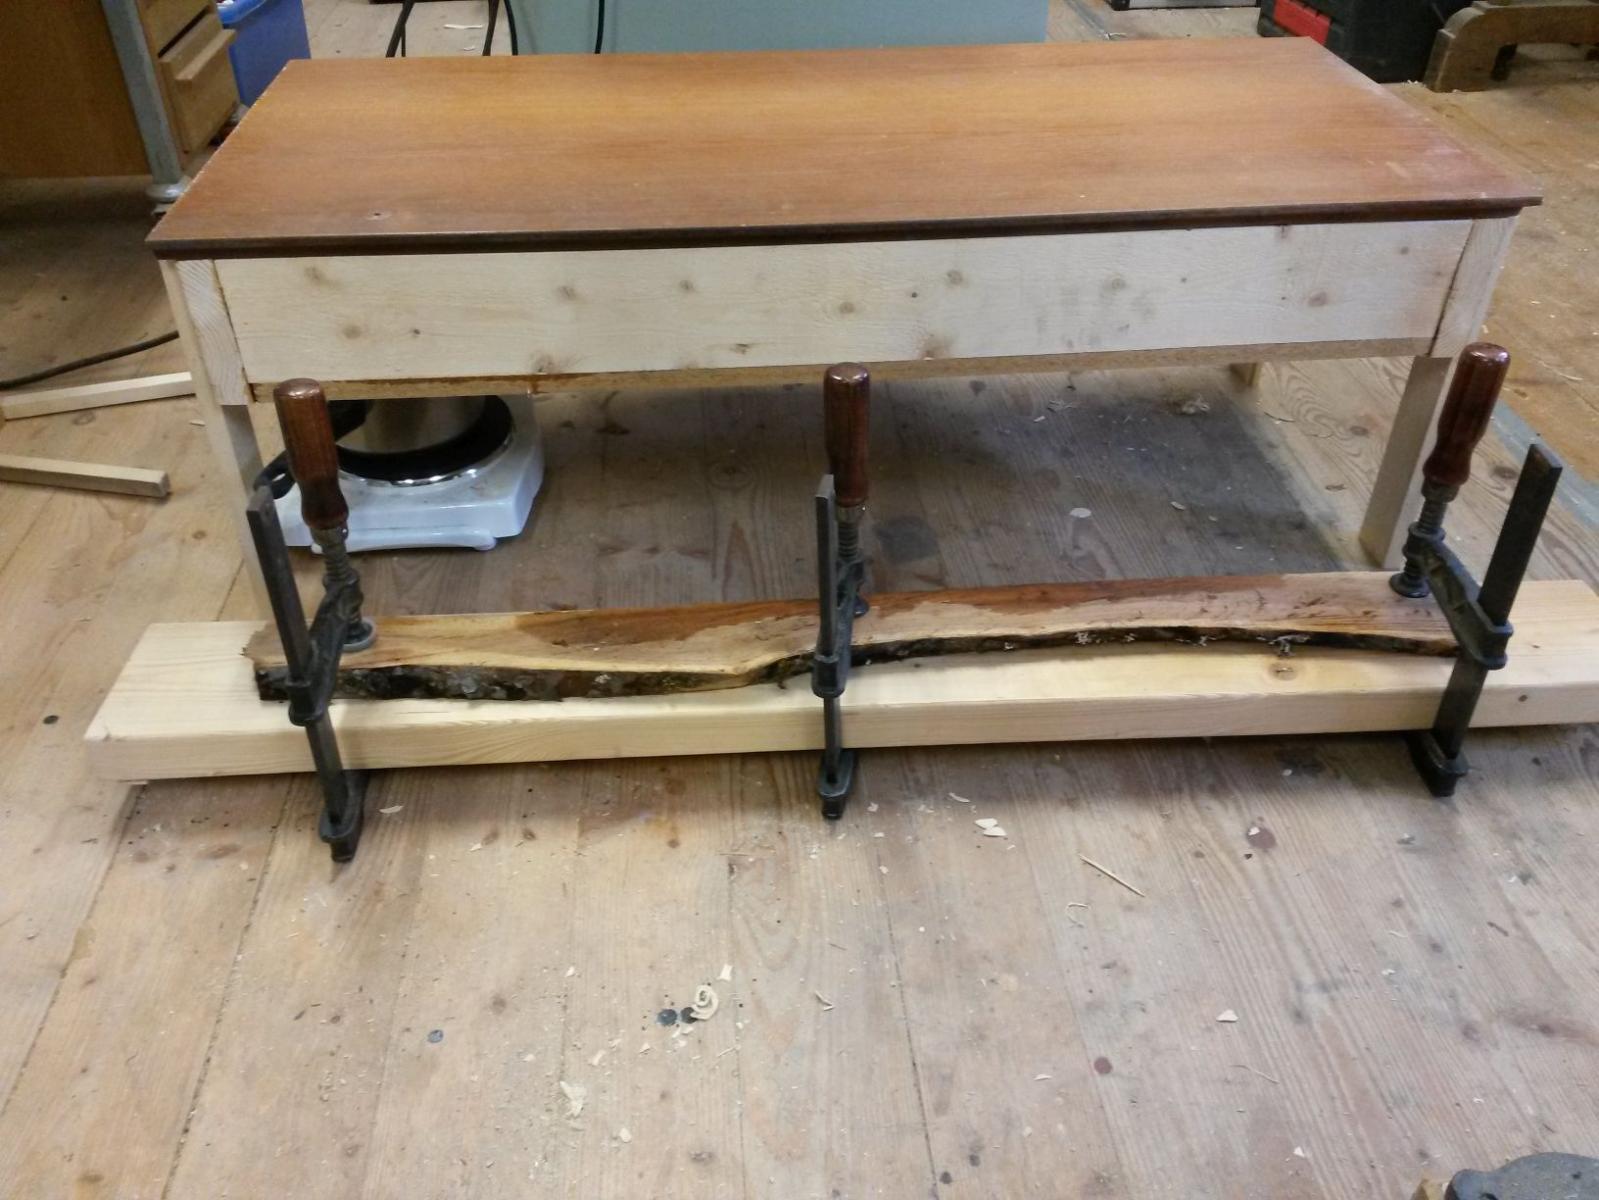
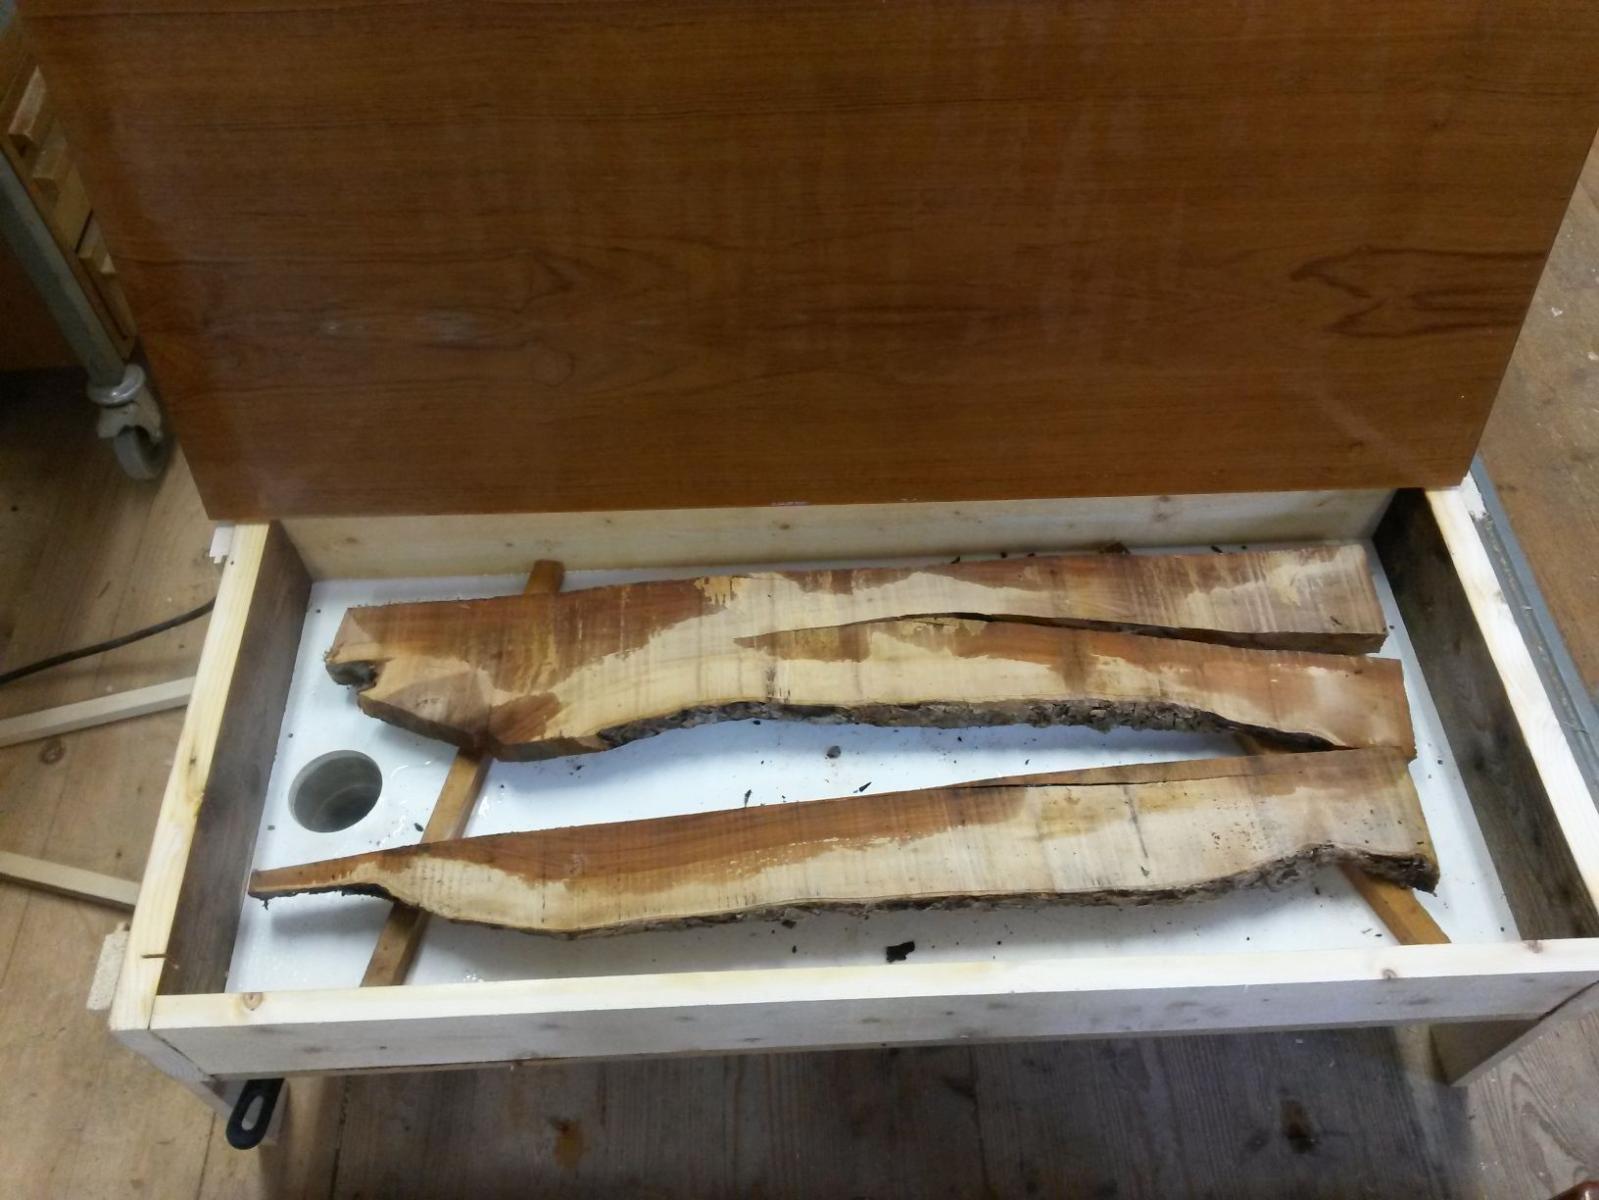
Since Michael nicked my idea for a steam chest, I decided to come up with something new...(just kidding Michael, I keep you in the highest respect, seen your abilities to construct small engines...fantastic). The apple tree I harvested, several years back now, warped during seasoning. It has bugged me all along. Today I put together a "slightly" larger steam chest to facilitate steaming of these billets/timbers. It is ca 95x45 cm (3' by 1'6"). After an hour in the Turkish sauna I clamped the pieces to some sturdy timber for drying out. I will let them be there for 24 hrs. Oh, another milestone passed this week as well...Gods wonder in a small child, my first of the "grand" type ;-)


-
as I said earlier... Michael, your standard is very good and we are our own worst critics. However, a picture can both enhance an hide what we consider defects on our builds. I agree with John above though.
-
Hi Christian, I've missed your updates since last summer. Very nice and convincing half model for a start. And 1:32...that's Geatan style, impressive. Clean job on the keel so far, very nice.
-
Its such a pretty little ship, John. Hope you are well.
- 745 replies
-
- 3
-
-
- francis pritt
- mission ship
- (and 1 more)
-
Laying deck is messy regardless of scale it seems. In full scale the sikaflex used for caulking decks, smeared all over...gah. And then it is scraped off...lika caterpillat turning butterfly. I think we all look forward to coming posts, Michael.
-
Thank you fellows for likes and comments. Ed, the clamps work really well with good power. Cred to you for initially posting about tool making in your Naiad log. The steambox, however crude in appearance, works really well. I have it on the floor so I dont have to bother about the condensation dripping allover. The rubber bands keep the lid tight to the box so the steam only can escape through the 10mm hole in the far side. The oak planks get so soft so that I have to watch out for them not bending too tight round the uprights. Which can be spotted in some of the pics... The kettle takes 3 liters while I usually only fill it to half in order to save boiling time. Thanks for asking, Ed. Michael, no worries. Its just a straight forward box that anyone would've come up with. A down-scaled version of the real deal.
-
Michael, you started just before Xmas with drafting and now you are onto laying the deck? Don't you have anything better to do? Just kidding! Please keep on your delightful building. One note on the mast hoops, when I saw that you used the gummed paper I thought it to be a slightly bad idea since the gum softens with water and this would be a pond model...but so a simple error would you not let yourself to I saw reading on. Excellent build.
-
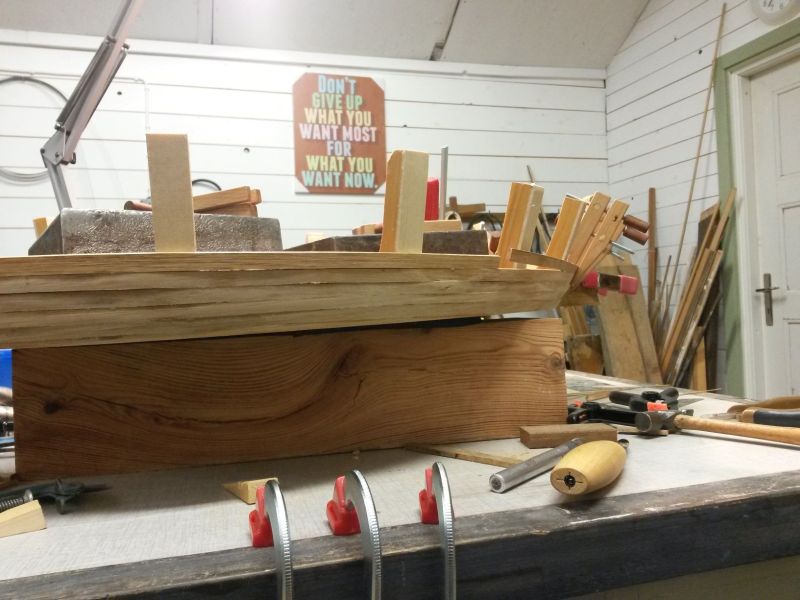
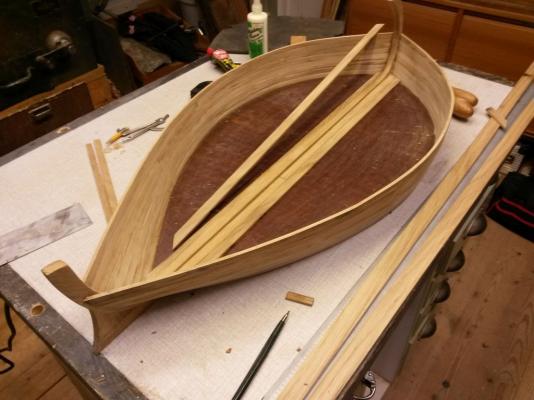
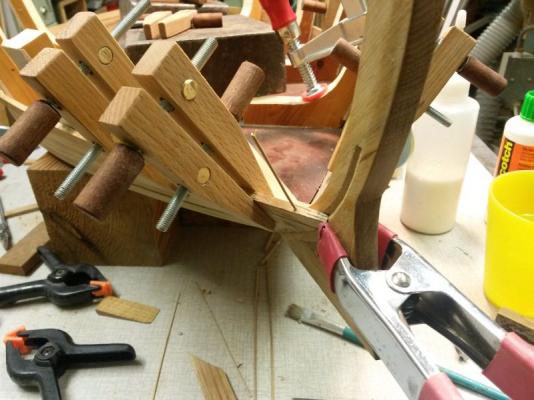
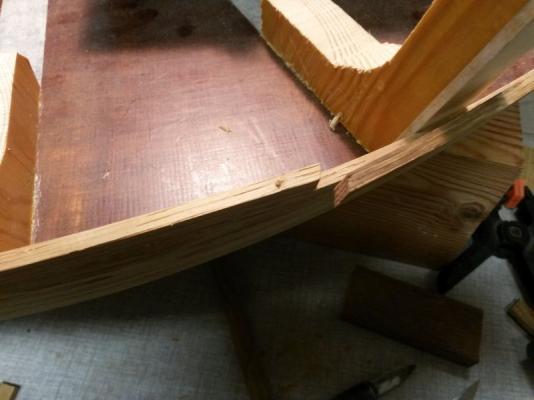
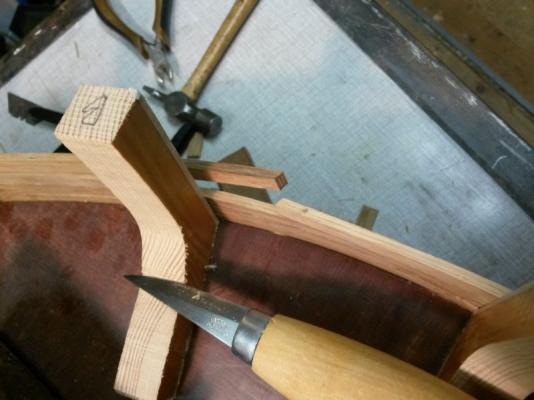
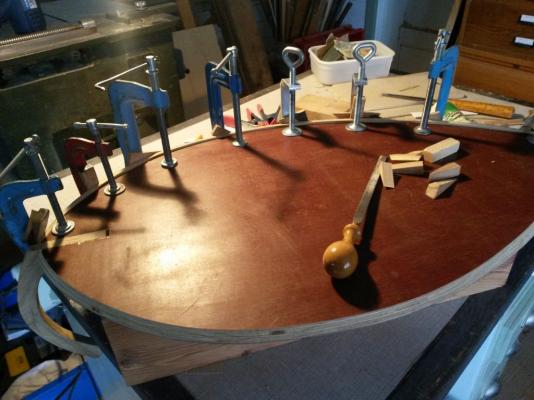
Another update. Not that I've been busy as a bee, but things are nevertheless progressing. (it can also be the fact that our pastor asked about it the other day...) The first strakes I put in, without scarfs. Really tedious and hard to get proper alignment and nice joints to stem and stern. So, to ease my burden I changed the habit and cut the planks in two. The joint is a simple box joint, slightly angled. I will not put a covering piece on the inside, instead there are pins drilled through the topmost plank , into the underlying plank. This is also done at stem and stern. The aftermost plank goes on first and the pin at the rear helps keeping the plank in place longitudinally. While the furthermost plank gets the pin in place prior to gluing to aid in proper fitting in the box joint. A really sharp carpenters knife is useful to work away the waste. Apart from that, ordinary files are used and a little no 12 Stanley low angle block plane to work on the plank height (or width, whatever you want to call it). Also notable in the pictures are my very untidy workplace. As can be seen in the pictures is the crude hull shape. Lots of dents and gaps and so. But since the plank thickness is 4 mm there is no real danger for me to be able to sand through the sides. As for the gaps, I will try wood filler of the sort that cabinet makers use. Here is the sequence. Plank bent to shape... ...and fitted to stem. The open joint where the rear plank is glued and pinned in place. at another angle and the tool. Held and glued in place And finally the clamps gone, Alas this is of course the other side. Clamps at the rear are holding next two planks in place so we are really picking up pace here... About the sign on the wall in the first picture...did I mention that I bought a blue ocean sailing yacht, late august? Didn't I? But I DID! A long long dream come true and I am so so happy!

-
Ed, I'm not online here very often, but every time I do login, I turn to your log for inspiration and to keep the interest re ship modelling fed properly. Sincere thanks for your splendid work and presentation. The flywheels are just stunning.
- 3,618 replies
-
- 5
-
-
- young america
- clipper
- (and 1 more)
-
Ah, I see. Thanks. So its basically a long drop on deck. But a dozen men on a boat of 15m? And she seems fully loaded as well, sitting low in the water.
- 745 replies
-
- 3
-
-
- francis pritt
- mission ship
- (and 1 more)
-
"Dunny" John? Nice progress and up to your usual standard as well.
- 745 replies
-
- 3
-
-
- francis pritt
- mission ship
- (and 1 more)
-
Thank you fellows! Yes Crackers, I think I saw that when I started this project. Searching on Google and ending up at MSW...funny that :-)
-
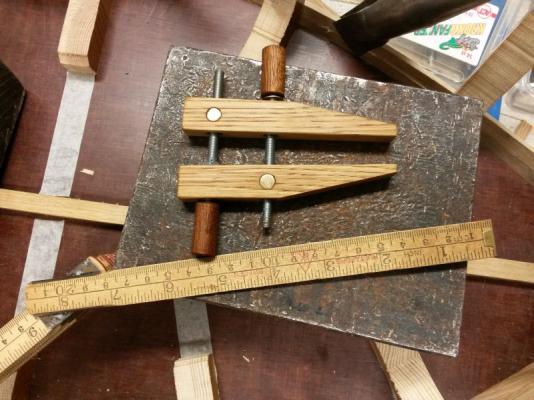
Hopefully the updates will come a bit more frequent from now on. As previously noted, an awful autumn, but recovering is steady. Yay. Strake no 3 in place and 4 on the go. Did one of those silly mistakes again. Cut a plank a couple of mms too short...gah! Good practice to fit new ones though... And before you ask, a close up of the new homemade clamps. When comparing to Eds original I realize I some day might want longer rods to widen the gap. Well, they were quite easy to put together so over time they might get siblings.

-
Inspirational progress Ed! I can really image one or two thoughts passing through before you put the saw to the bulwarks...but as always, excellent execution.
- 3,618 replies
-
- 3
-
-
- young america
- clipper
- (and 1 more)
-
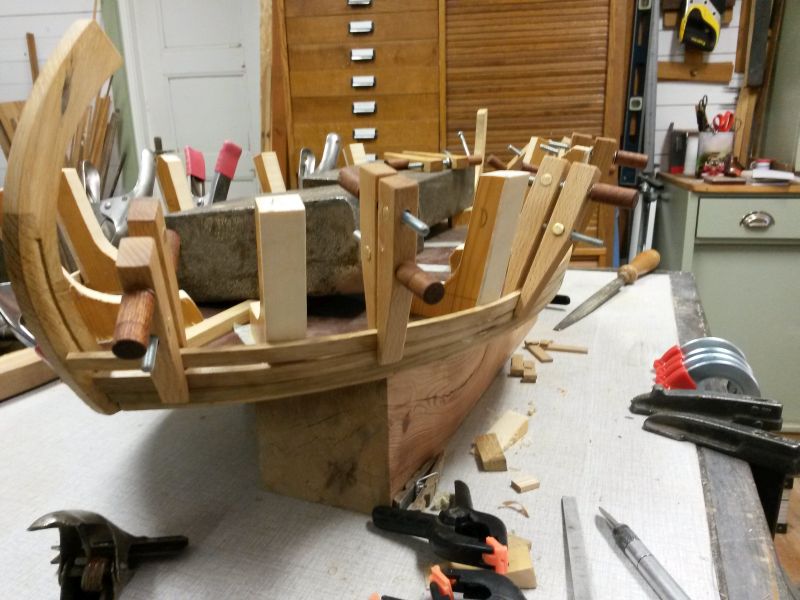
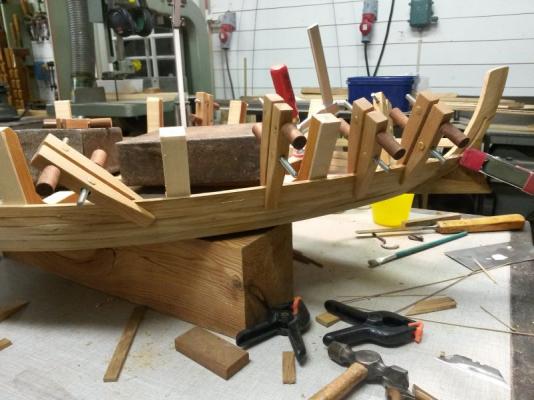
So, finally I figured it out...it took me only, what? 6 months on how to proceed... No, not really. Day-job, you know, and the dreaded wall of fatigue was close up front. Didnt bang into it though, for which I'm glad. Anyway, two strakes on, how to get the rest on without bulkheads. Some simple and crude frames might be the solution. The masking tape is to get the positioning of frame pairs equal. Contact cement between the tape and the frame will make for a desent bond I hope. And not to cumbersome to peel off when I get to that.

-
Hi Carl, sorry for my absence...work took the better part of my life during spring so no time in the shop at all. Not even time to live, wich is sad. However, I have been compensated The boat sits nicely on my carpenters bench, waiting, probably as you do too...any day (week, month) now, I will get back to it.
-
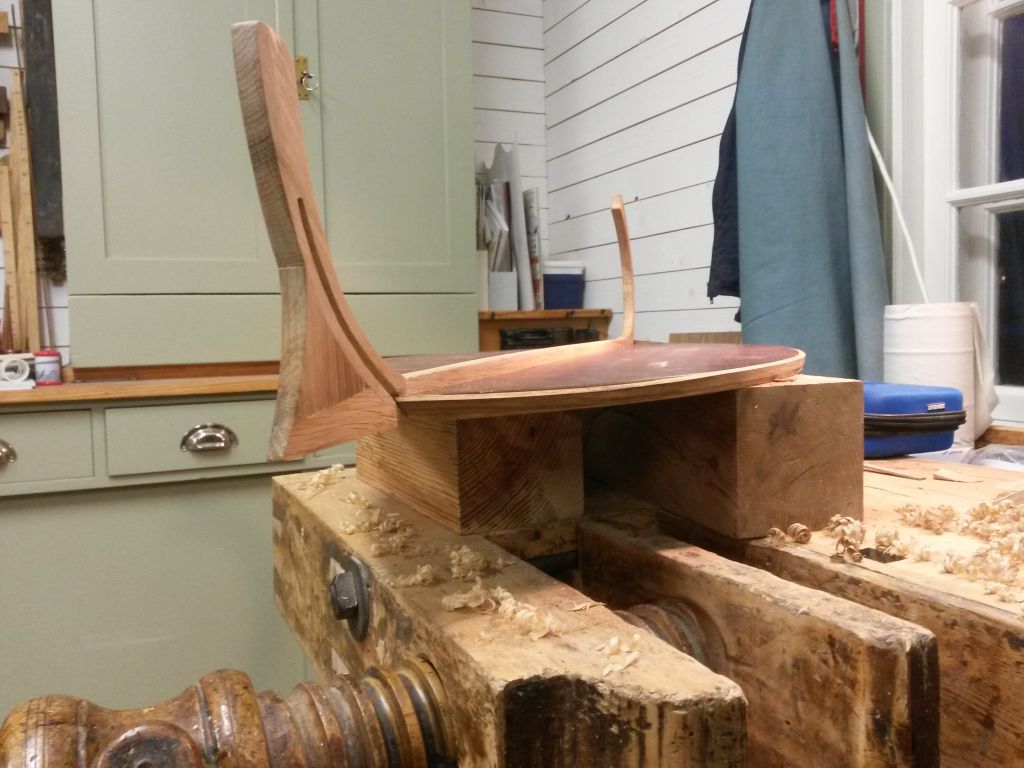
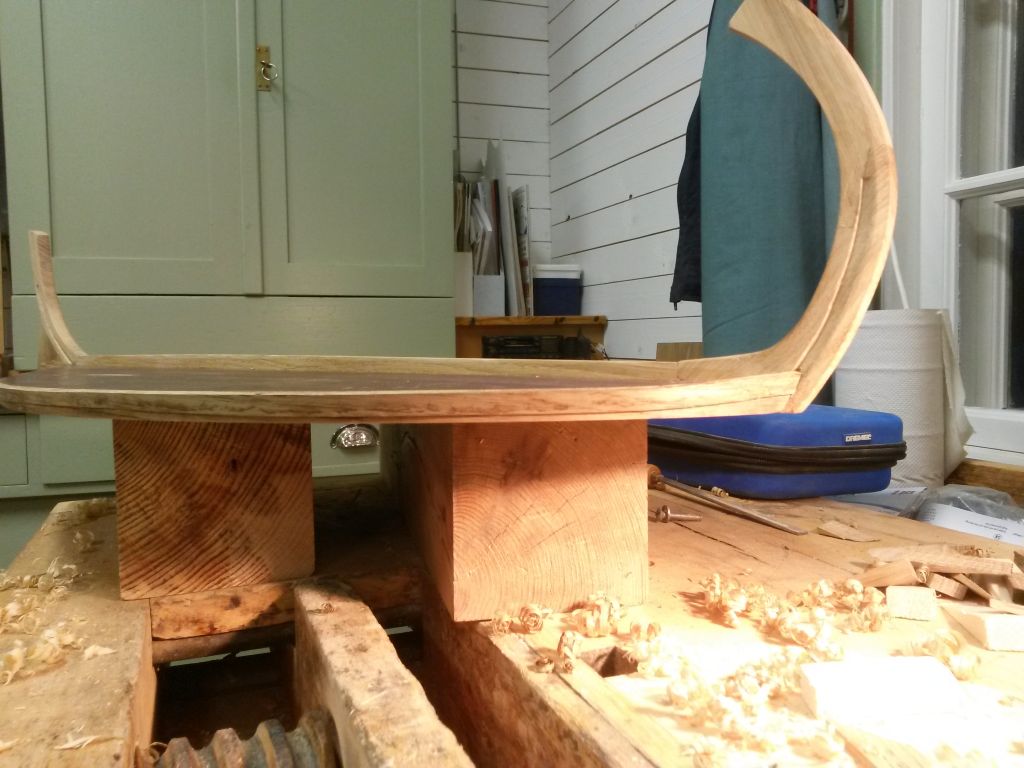
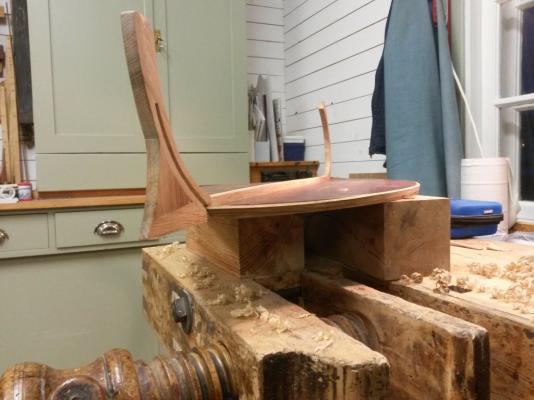
So, first 2 + 2 strakes on. Not without a struggle though. And as they say on the tube "mind the gap" Nothing a good sanding and filler wont hide so I am happy for the time being. Next up I need to make some dummy frames to clamp to the floor board. Otherwise I guess I will be in too much trouble fitting planks. Speaking of which, the steam chest worked like a charm. I know from reading that oak bends really well when steamed, but it was still fun to see with my own eyes. From a couple of different angles, here is the evidence.


-
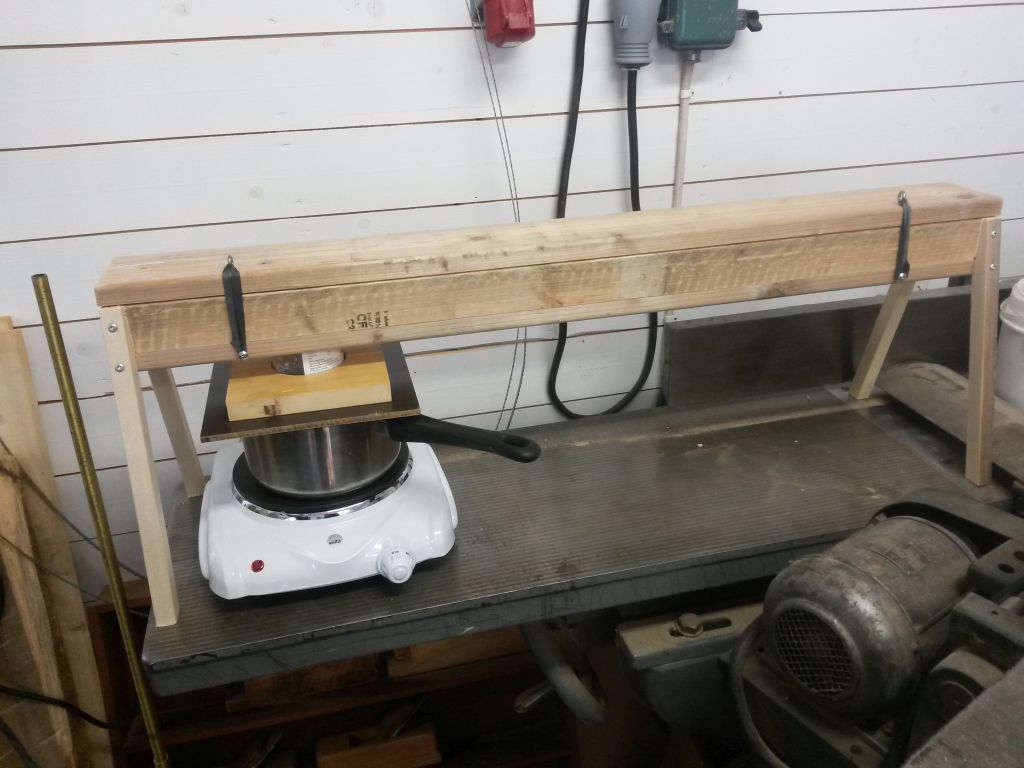
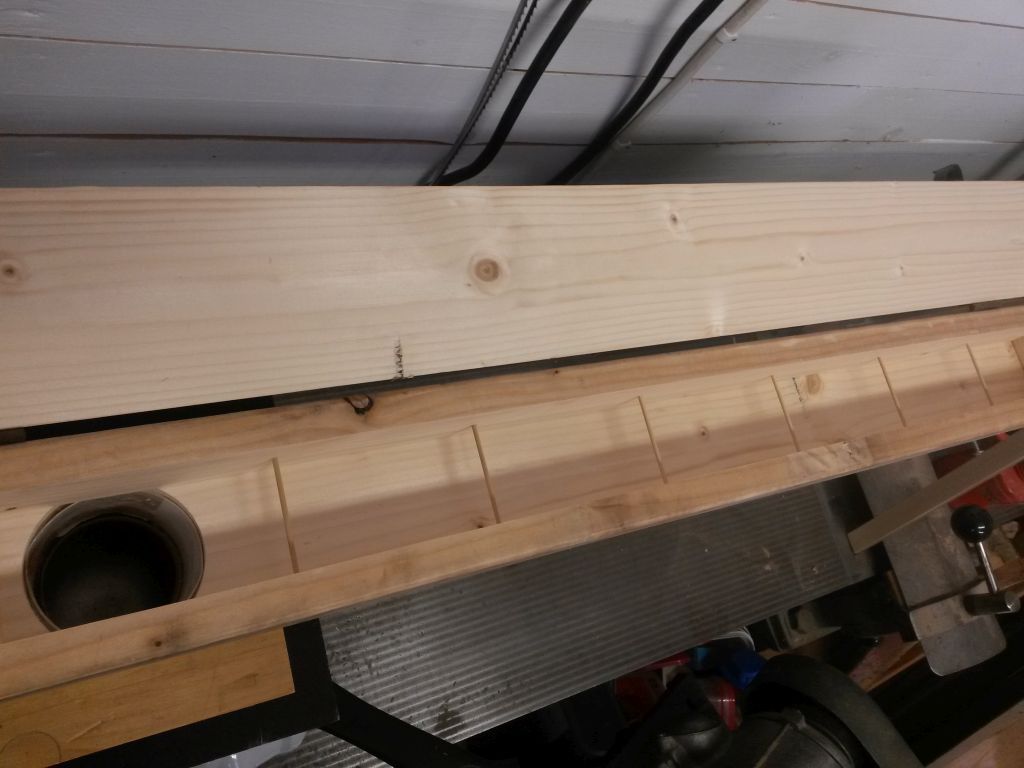
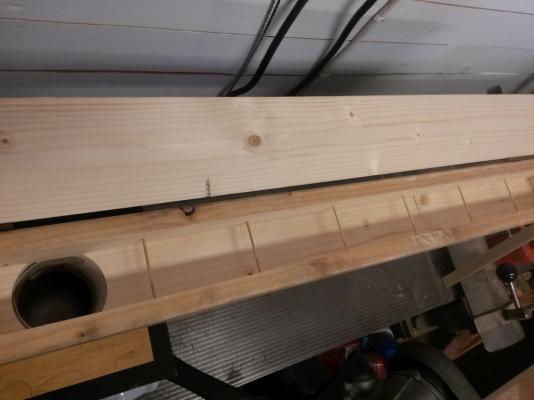
So, was a bit creative the last day...bought a stove good for 2,5 hp (funny, you never relate to electric equipment that generates heat in horsepower...always the dull kW...) "My heatgun can blast at 2 hp!" Nope, you never hear that. Anyway, a couple of pictures. The construction was straight forward. No glue, just stainless steel patio screws. The lid was firstly put on to tight so I had to rearrange the hinges at add a sealing profile. Drilled a 10 mm hole in the far end of the lid also to let the steam out. The box is 90 cm long, inside height 45 mm and inside width ca 55 mm. And the inside. Planks rests on elevated bamboo skewers. Finally, take two on the first plank. In a gleaming "time to lock up and go inside" kind of light.

-
Thanks for the "Likes" and tips, mates. I have a heat gun, but I guess I was a little to eager because it didnt soften the oak. Or so I thought. Since I am planning on actually do more scale ship modelling I will invest time in a proper setup for a steambox. Shouldnt be too complicated I think. And of course I could just drop the planks in hot water. But then again, safety of handling hot water and so.. Oak, yes, Mario, why take the easy path down life???