DelF
-
Posts
1,409 -
Joined
-
Last visited
Content Type
Profiles
Forums
Gallery
Events
Everything posted by DelF
-
 Welcome aboard Glenn. I wouldn't feel I was doing my job if I wasn't encouraging you to buy even more tools - you do it to me often enough!
 -
Thanks Nipper. I've found the most important part is the planning and preparation prior to gluing. Once that was done actually fitting the patterns to the hull was comparatively easy. I had much more difficulty with Speedy where I had to resort to a steam iron to get the kinks out of the pattern (see here). Fortunately my technique has improved since then! Thanks Jim. As I said, I learned a lot from the advice you gave on earlier logs.
-
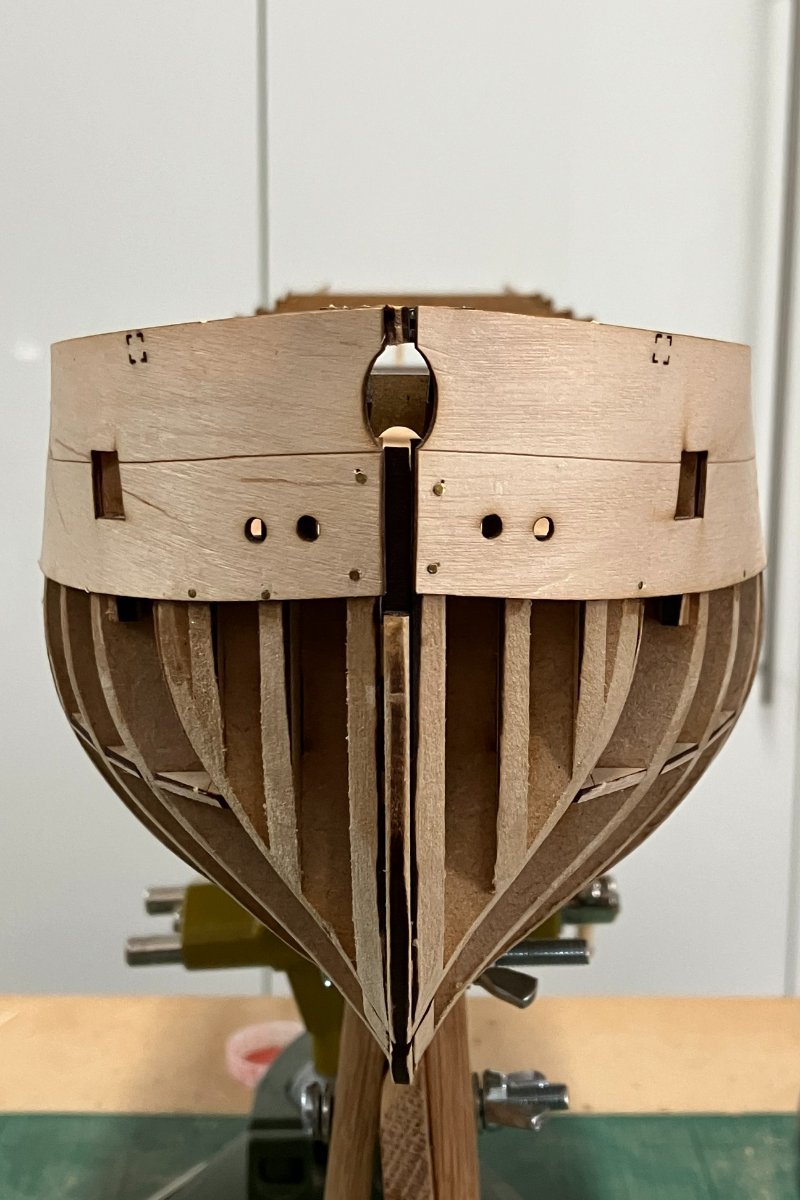
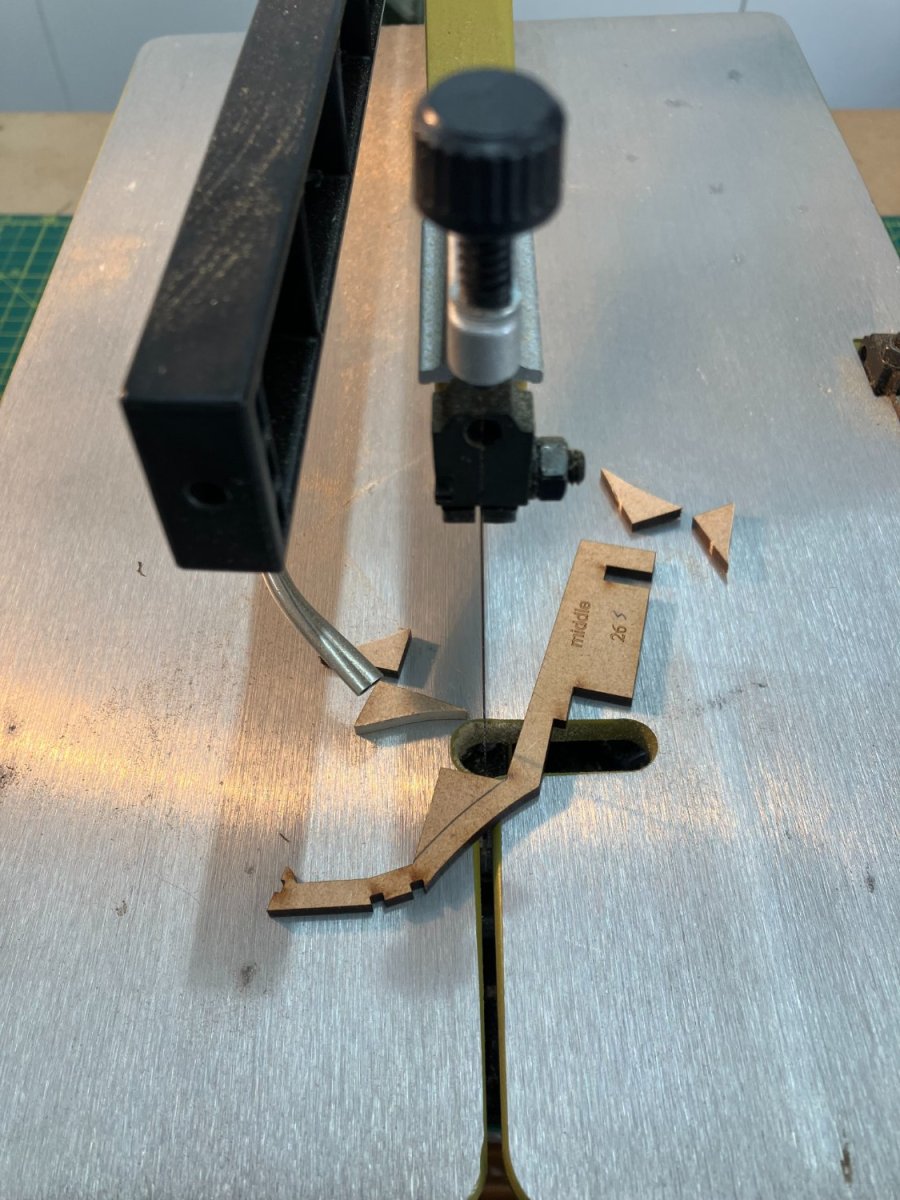
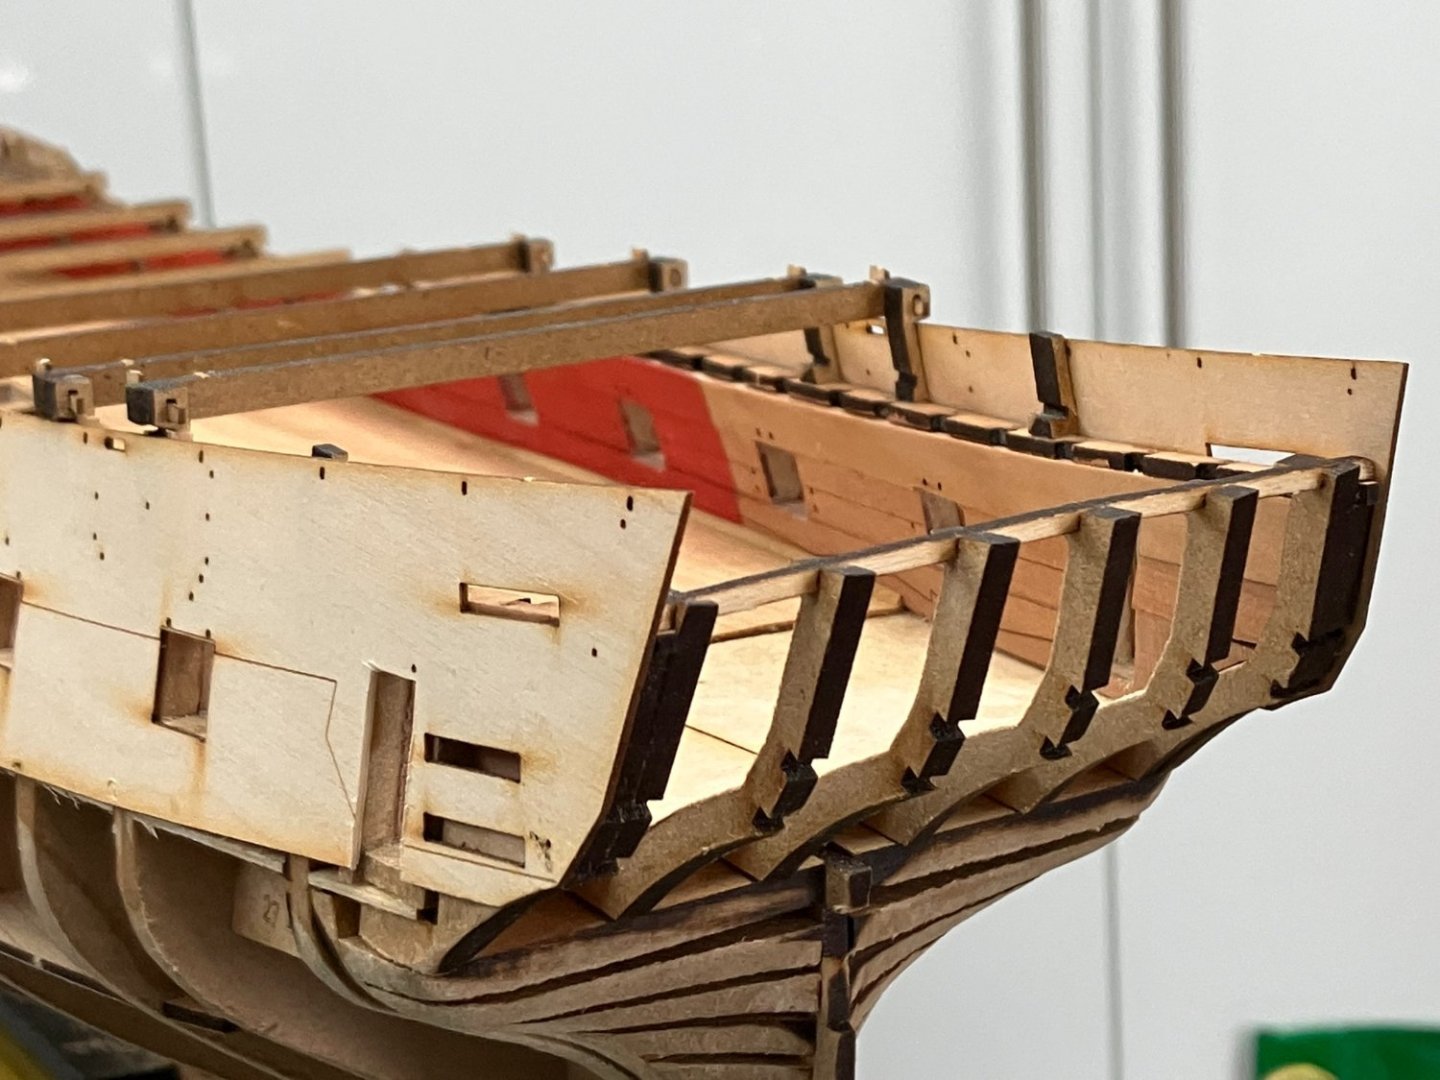
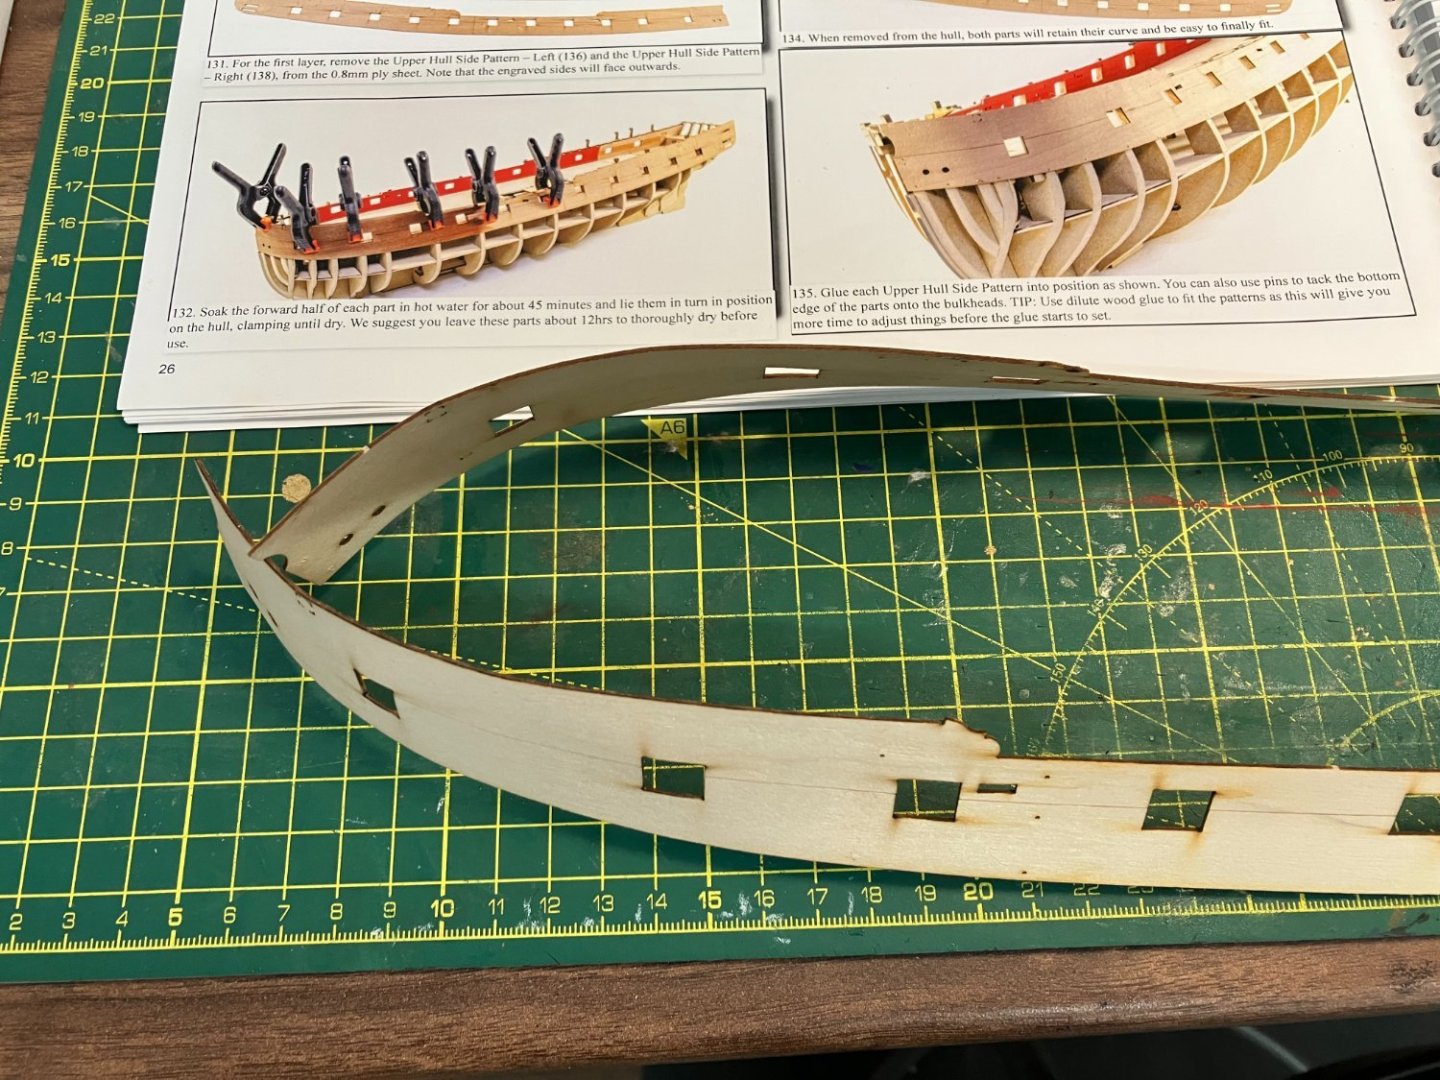
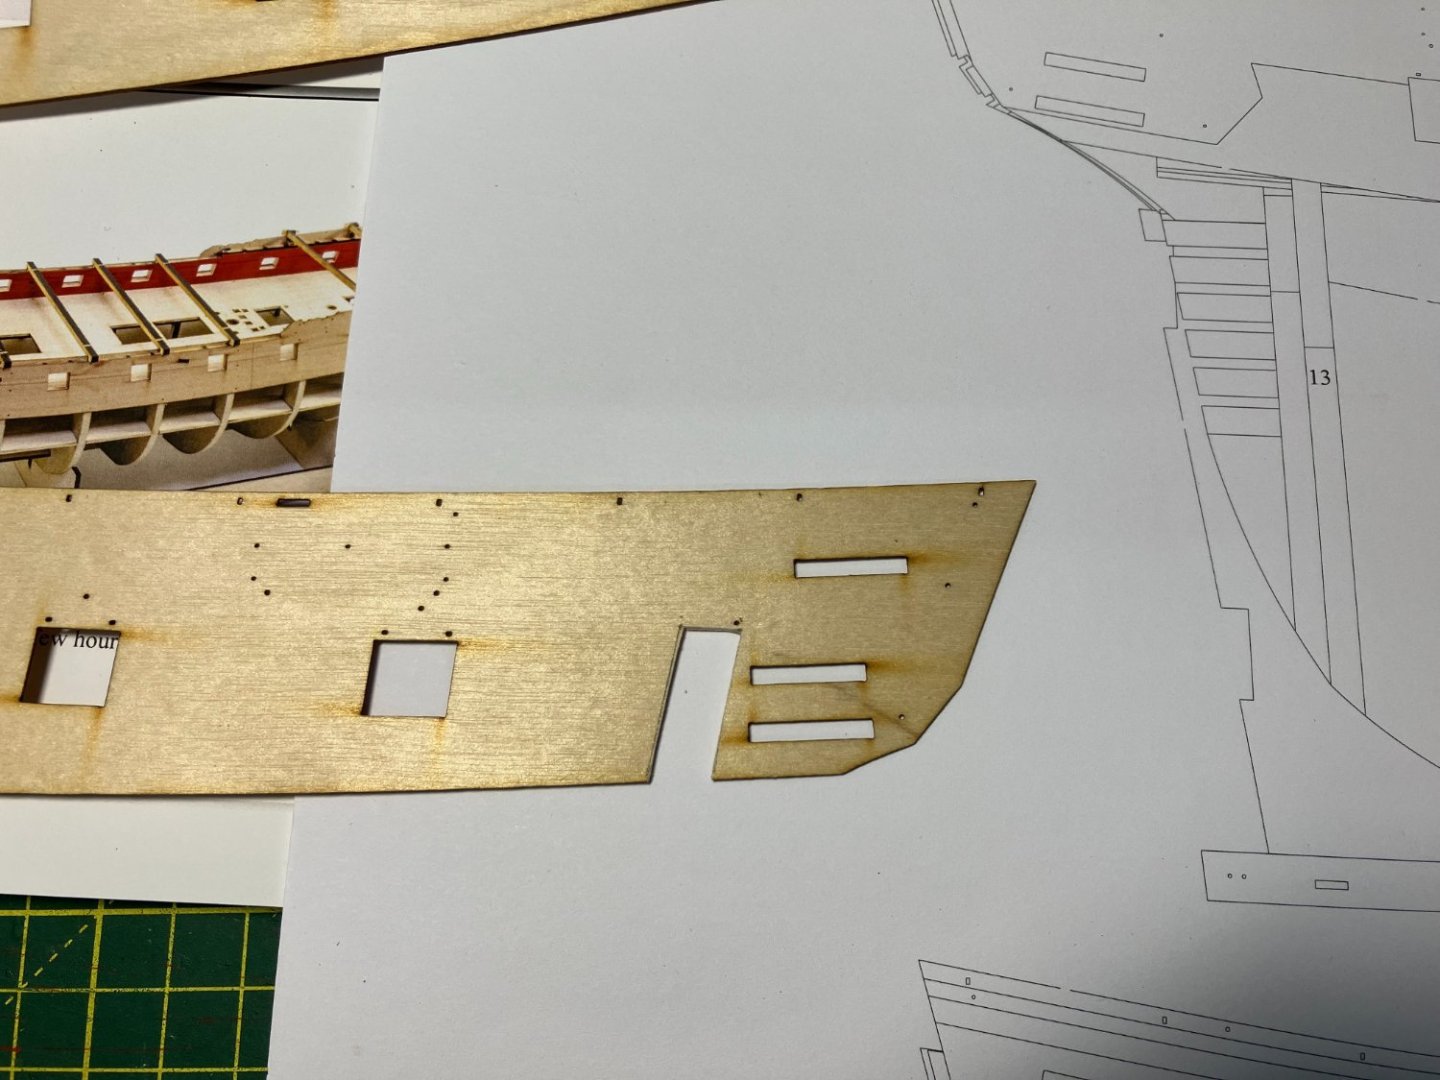
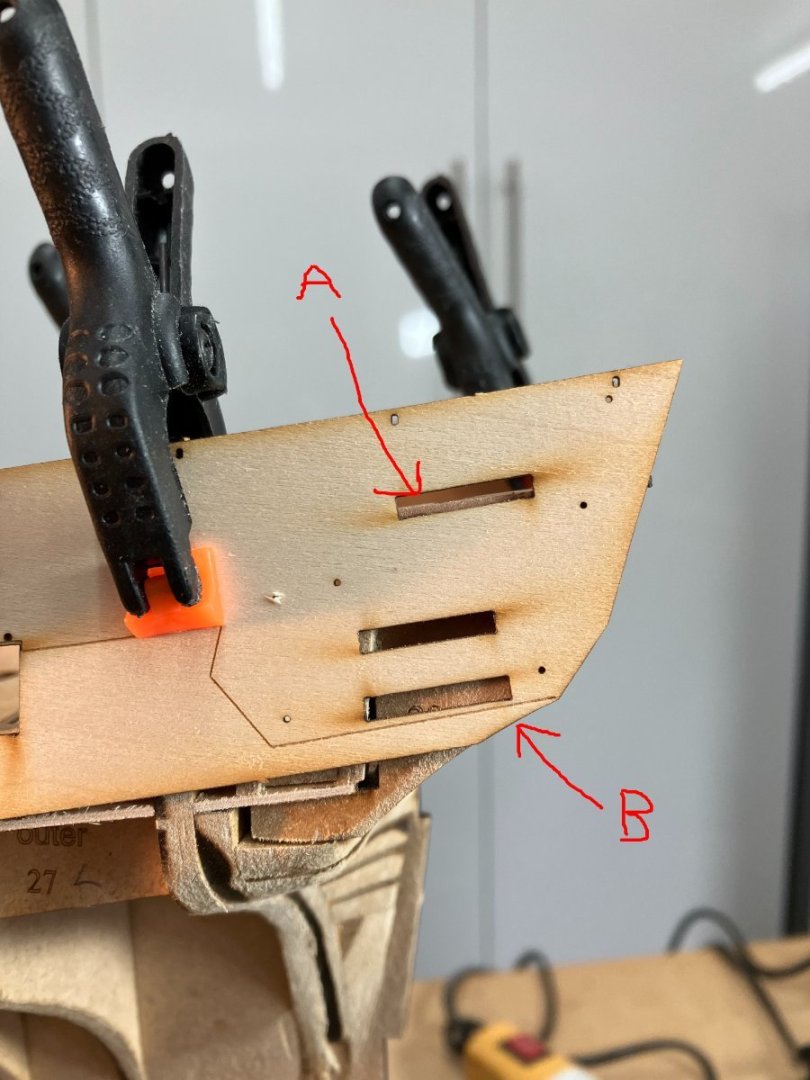
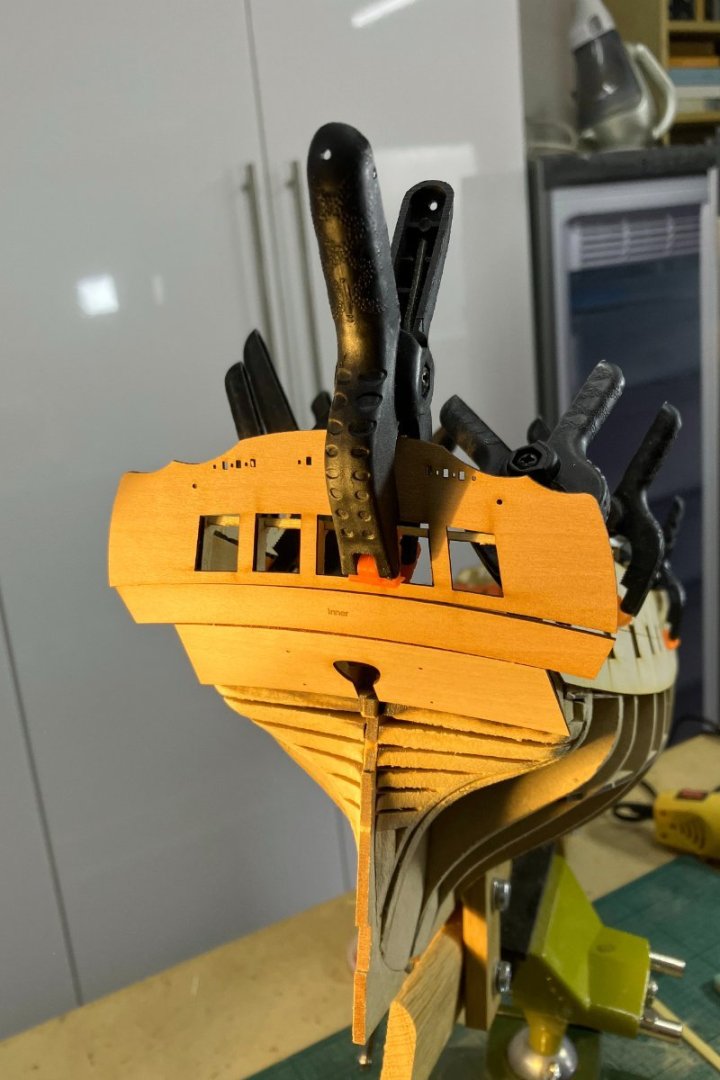
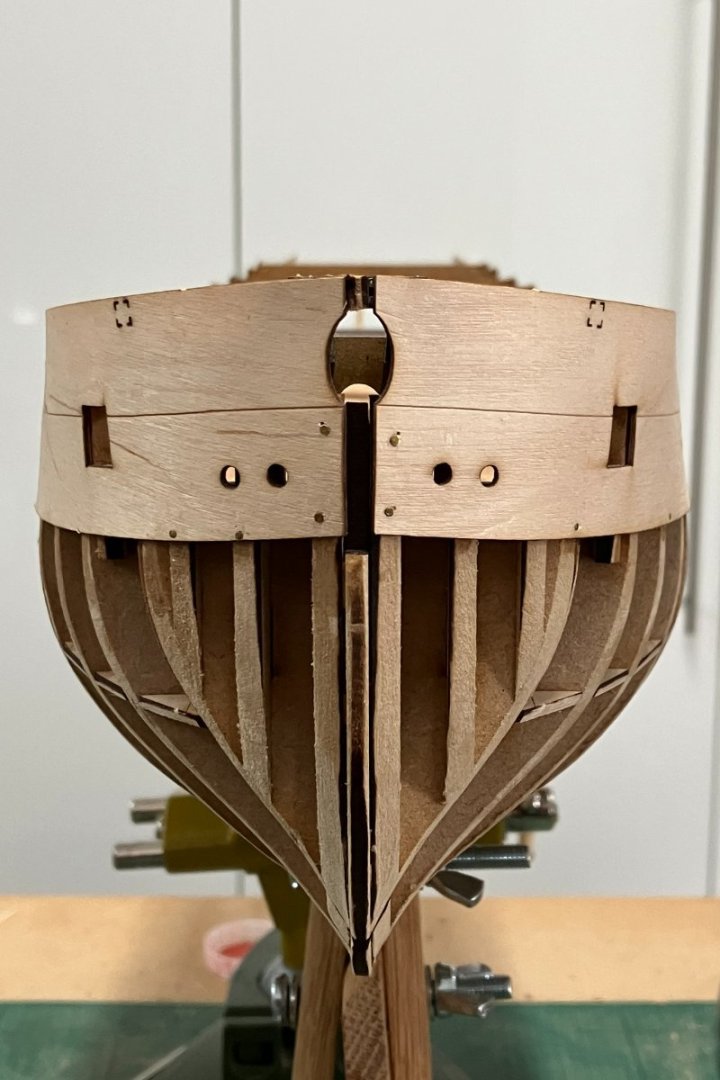
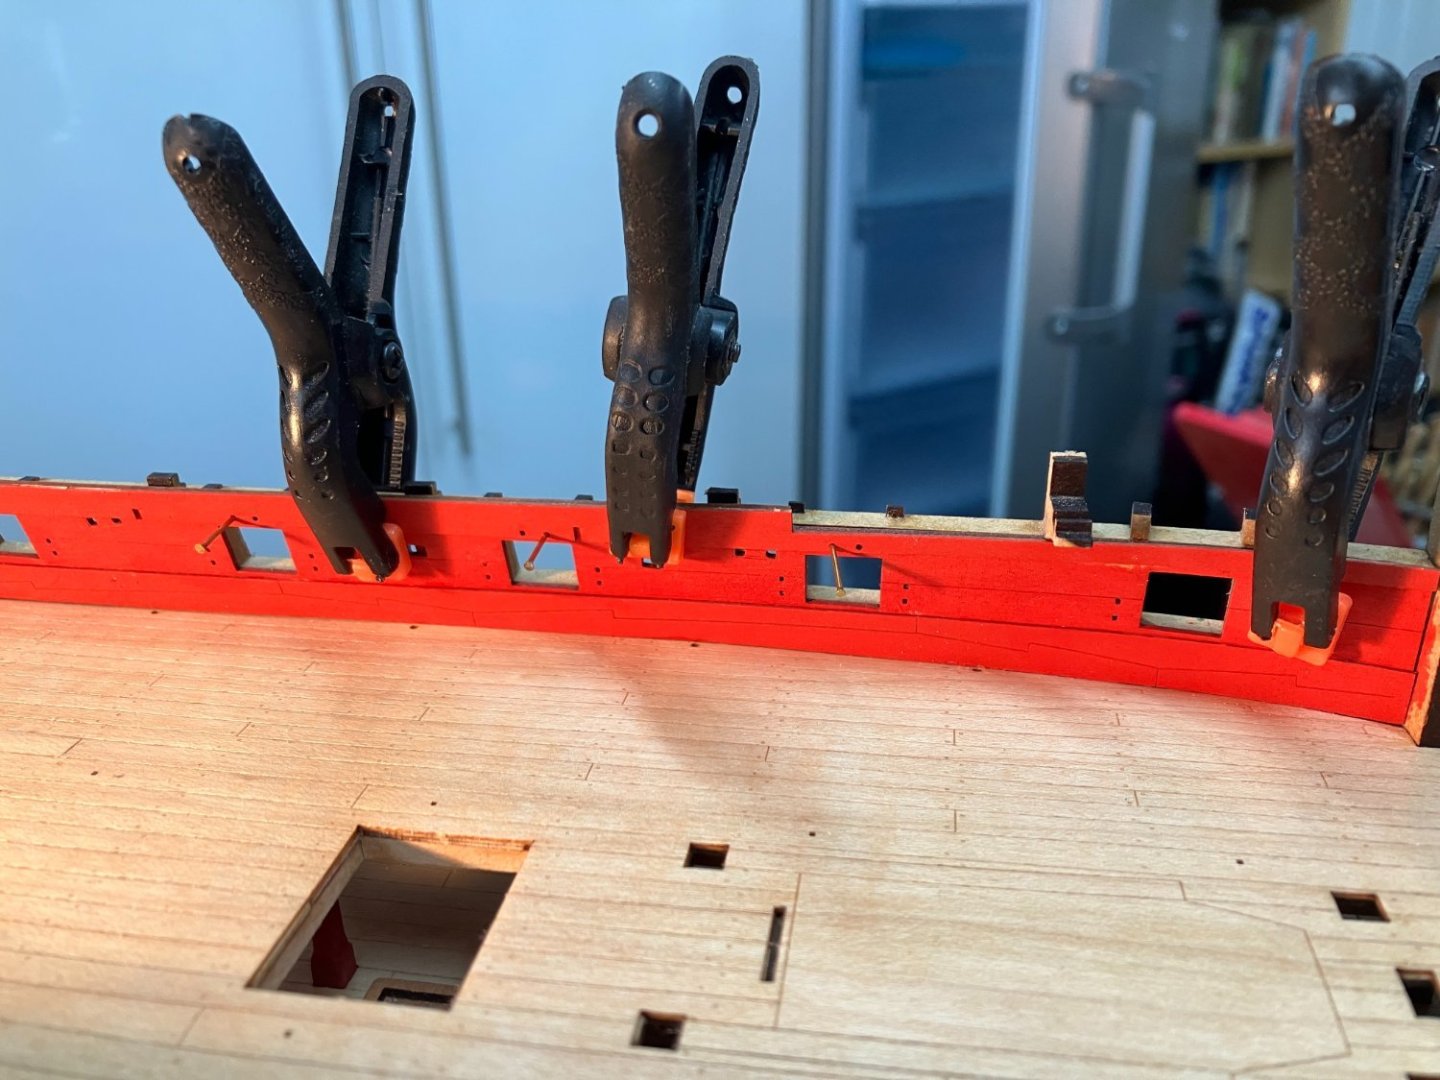
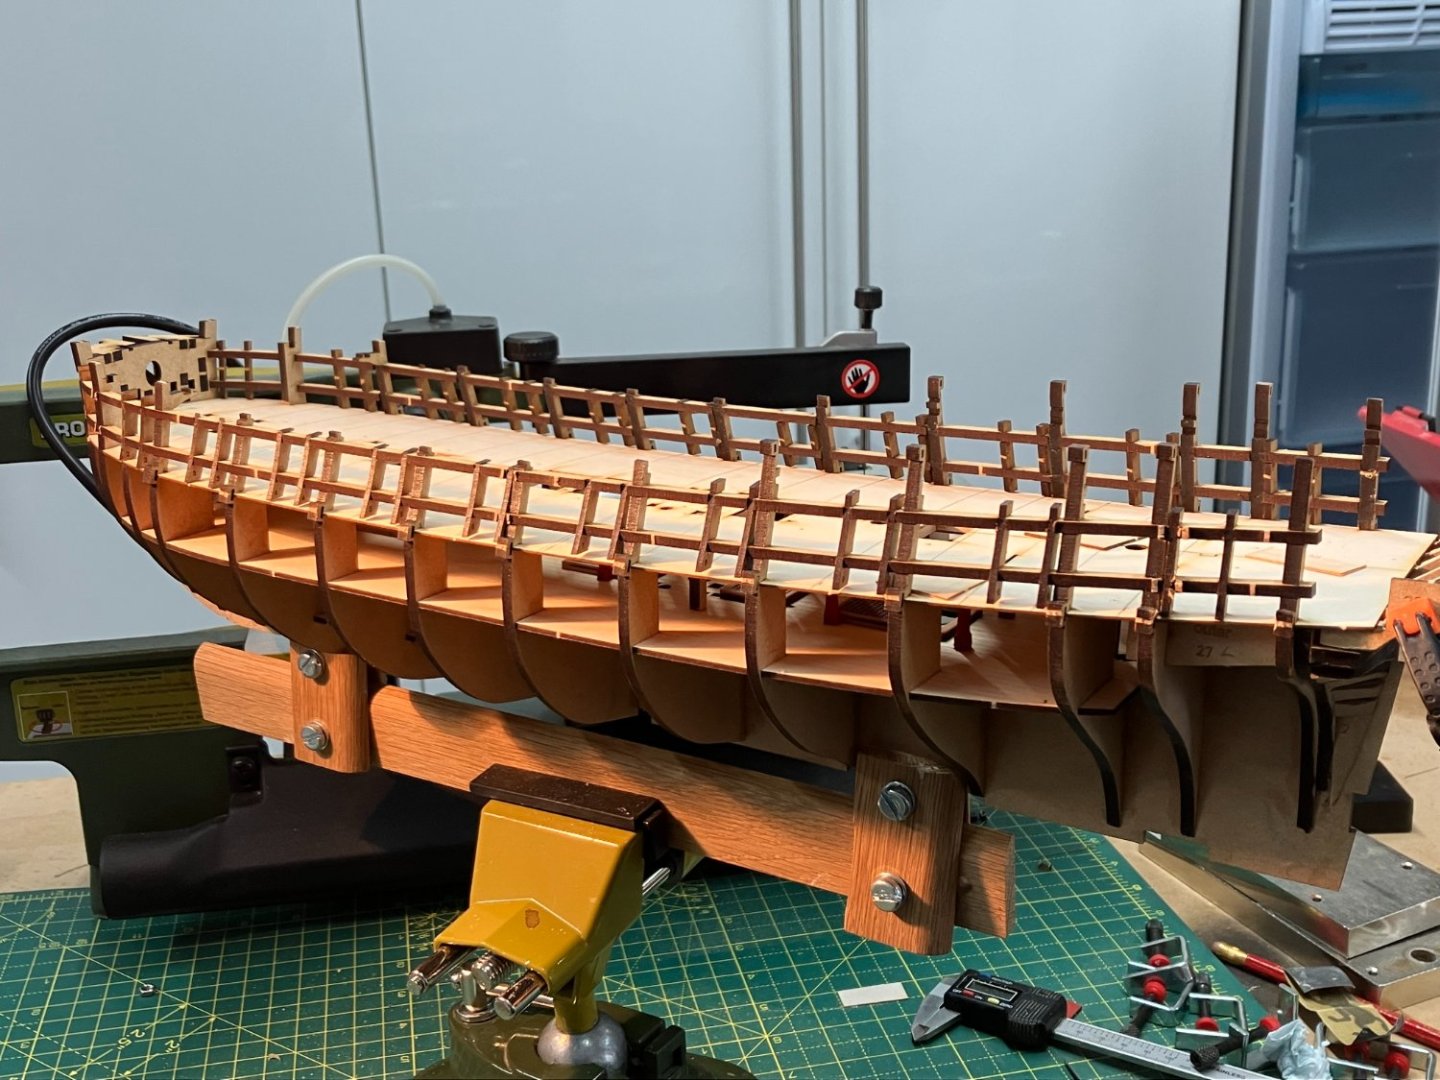
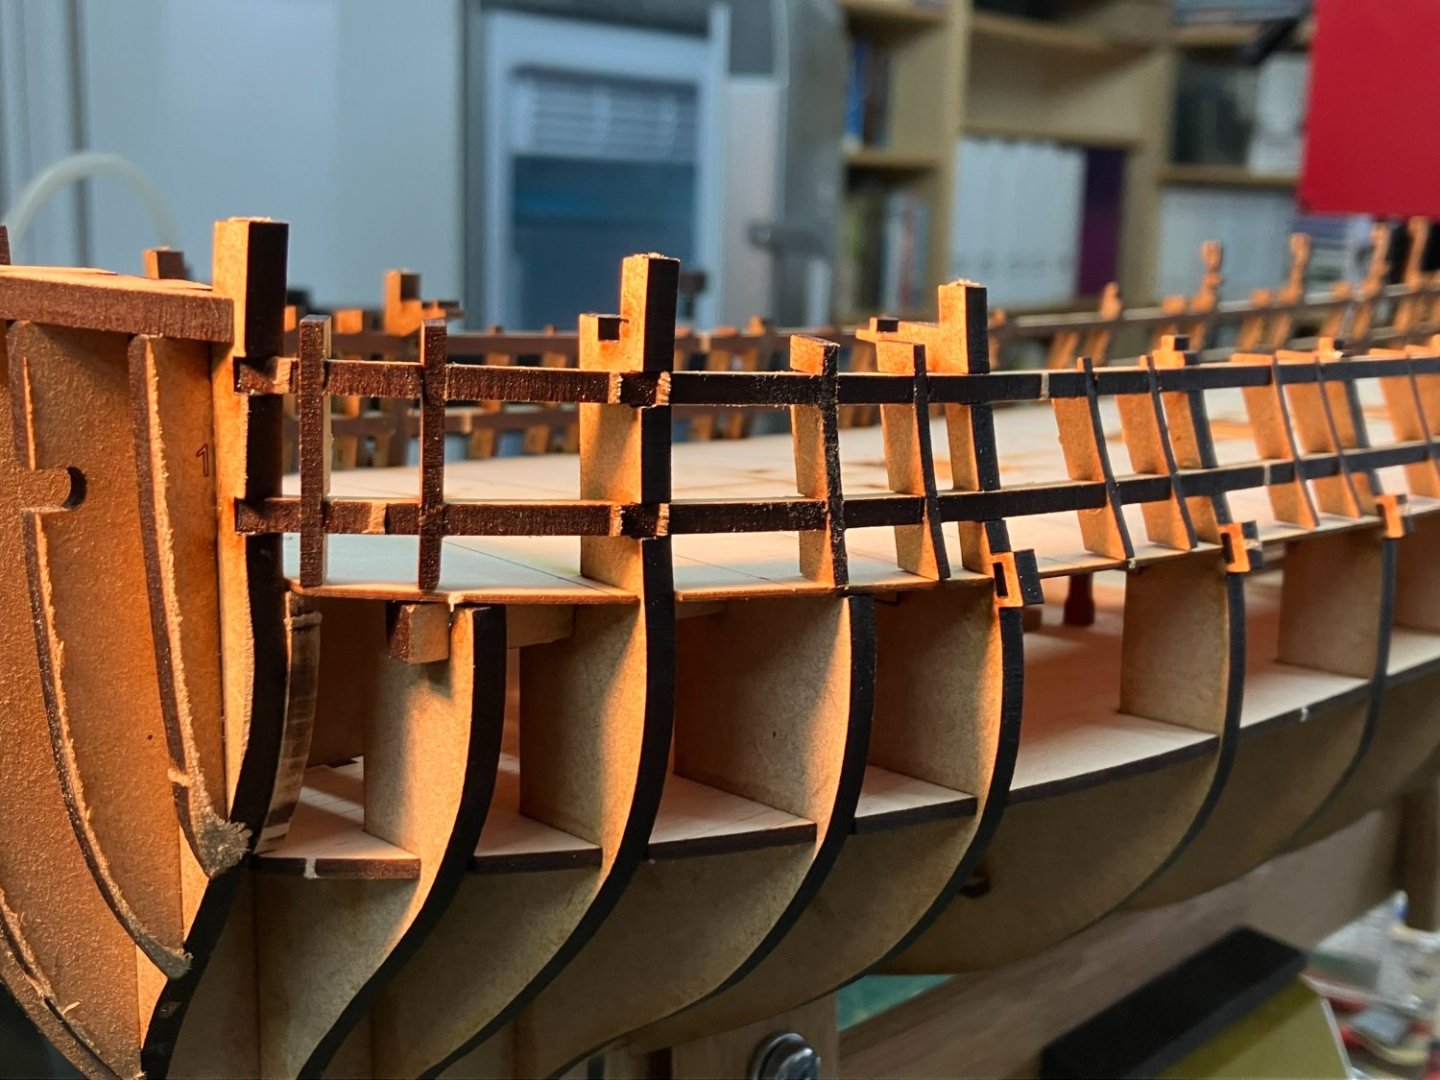
Upper hull side patterns Fitting these patterns is one of the more critical early stages in the build. As others have pointed out, it is essential to look several steps ahead because the slightest misalignment at this stage can cause problems further down the track. I learnt a lot by reading @Blue Ensign and @Glenn-UK's logs, and the advice Jim Hatch offered on them. However I soon found that simply following others’ logs isn’t enough to avoid problems. For example, B.E. spotted a difference between his build and the manual – the slot marked ‘A’ in the shot below was partially above the bulwark in the manual but not in his. However the kit plan drawings seem to support BE’s model. Try as I might I couldn’t get the patterns to sit low enough to match BE’s Sphinx without losing alignment with the gunports. My alignment looked closer to that in the manual. I was concerned because I knew BE’s model turned out fine (more than fine, actually!). I took some comfort from the fact that the curve marked ‘B’ in my photo lined up perfectly with the corresponding curve on the hull, but decided the only way to proceed with confidence would be to temporarily fit the stern patterns to make sure everything lined up. Here’s the three patterns fitted with double sided tape and clamps (not very well adjusted at this stage!): One of the key tests is where the upper side patterns meet the upper stern pattern – there must be sufficient room for the capping rail that will eventually sit on the side pattern, without it sticking above the stern pattern. This shot suggests there will be sufficient gap: I can’t explain the differences between my findings and BE’s. I can only guess that, no matter how accurately the parts are designed and produced, tiny differences will creep in between models as they are built without necessarily impacting the final result so long as care is taken to test everything for (reasonable) alignment at every stage. I want to open up the quarter gallery so before gluing the upper patterns I needed to mark and cut out the doors (I’ve already done that for the inner bulwark patterns but forgot to log that). I clamped the patterns in place and marked the door opening as accurately as I could with a sharp point... ...then used a jeweler's piercing saw: I’ll tidy up when the patterns are glued in place. Next it was on to pre-bending the patterns. Ever since I permanently shrank one of the Duchess’s patterns by using boiling water I’ve been nervous about this process, preferring to use dry heat where I can. I wasn’t sure that would suffice with these patterns so I soaked them in moderately hot water for 45 minutes, clamped to the model, blasted with a hot air gun for good measure then left overnight. The result was fine, with the bent patterns requiring very little persuasion to conform to the shape of the hull when I glued them in place: I used dilute wood glue as suggested in the manual, to allow time for getting the alignment just right, supplemented with fine pins to hold the lower edges of the patterns tight against the frames. I only had enough clamps to do one side so I took my time with this, allowing each side to dry overnight. Everything looks OK so far: I'm pleased that the patterns follow the gentle concave curves of the upper hull as shown in the last shot. Planking next! Derek


-
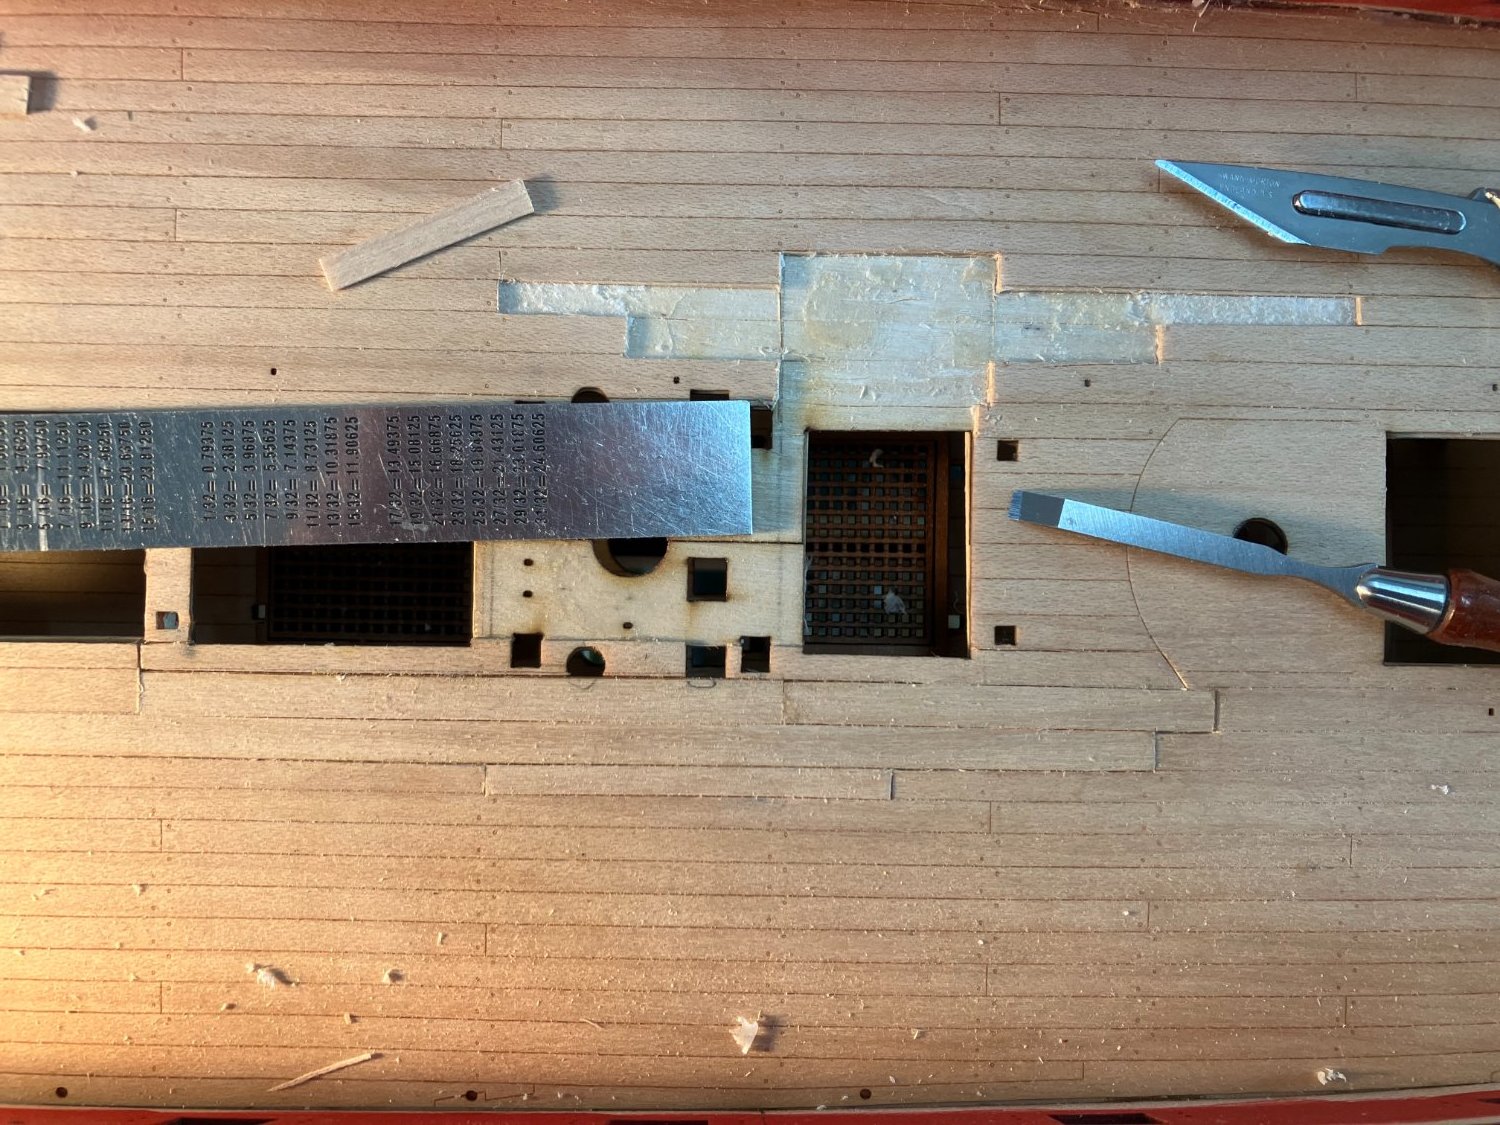
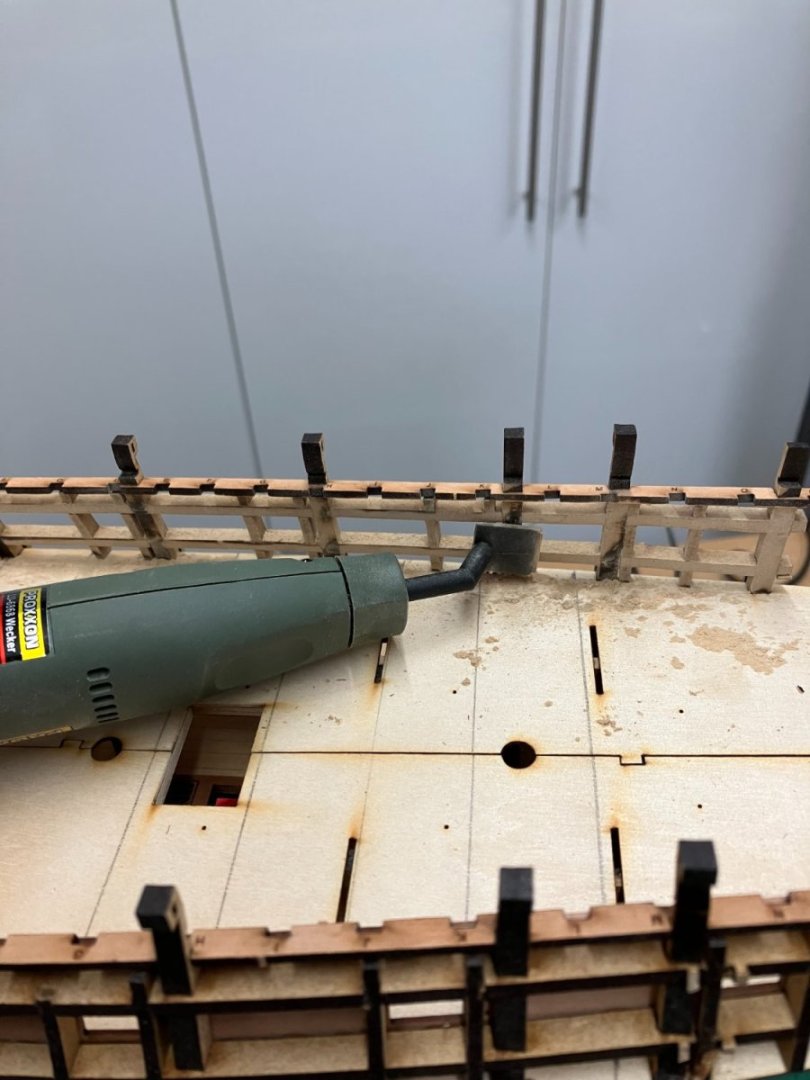
Fairing Thanks for all the likes! Before starting on the fairing marathon I tried out the various jigs that Chris has provided to maintain the shape of the bulwarks during subsequent operations. These all fitted perfectly, which suggests everything is well-aligned so far: I took the fairing very steadily, just a short session every day in between chores around the property, and I’m reasonably pleased with the result. The proof will be in the planking. The large number of bulkheads, the gunport frames and the extra shapes in the bow and stern sections make it fairly straightforward to sand down to the correct hull shape – along with constant testing with a planking strip to check. My only slight difficulties were in the bow and stern sections, and that was because I was too timid in sanding these off the model and consequently left myself with a lot to do after they were glued in place and access became more difficult. However with my new pen sander and a small drum sander on the Dremel I was able to get into the awkward places. Here’s the result: Here’s the tools I used for fairing: The next job was trimming the gunports. I did the initial work with a scalpel, then finished with a barrette file. The file’s triangular shape ensure you only cut the face you are working on, and not the adjacent sides. The way the gunports are framed in MDF makes trimming the inner bulwark patterns very easy: Finally I cut up some of the 4mm MDF fret to frame the quarter gallery doors: Next job will be preparing and attaching the two upper hull side patterns. Derek


-
Coming along very nicely Dave. I think you are right to go with the 0.1mm line for your ratlines. When in doubt I usually prefer to go with a thinner thread because I believe undersized always looks better than oversized on a model. Besides, I've found that the thread supplied in kits is often larger than the nominal size. Always best to measure for yourself. Btw, I was impressed by your mouses - I've not gone for the woven look before, but seeing how realistic yours are I'll have to give it a go. Thanks for sharing. Enjoy your trip to the west country. Derek
-
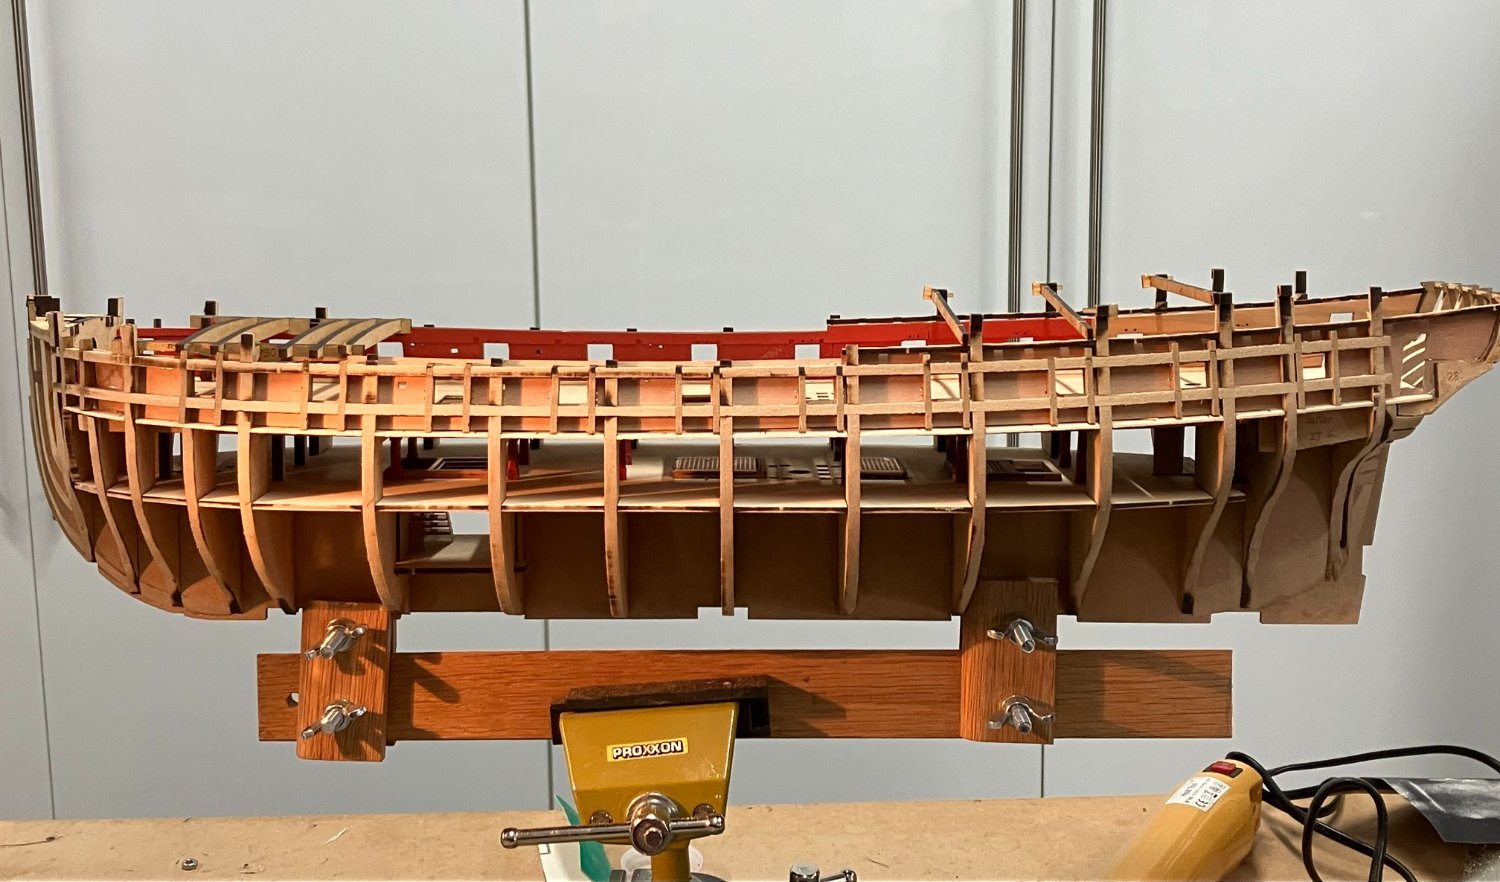
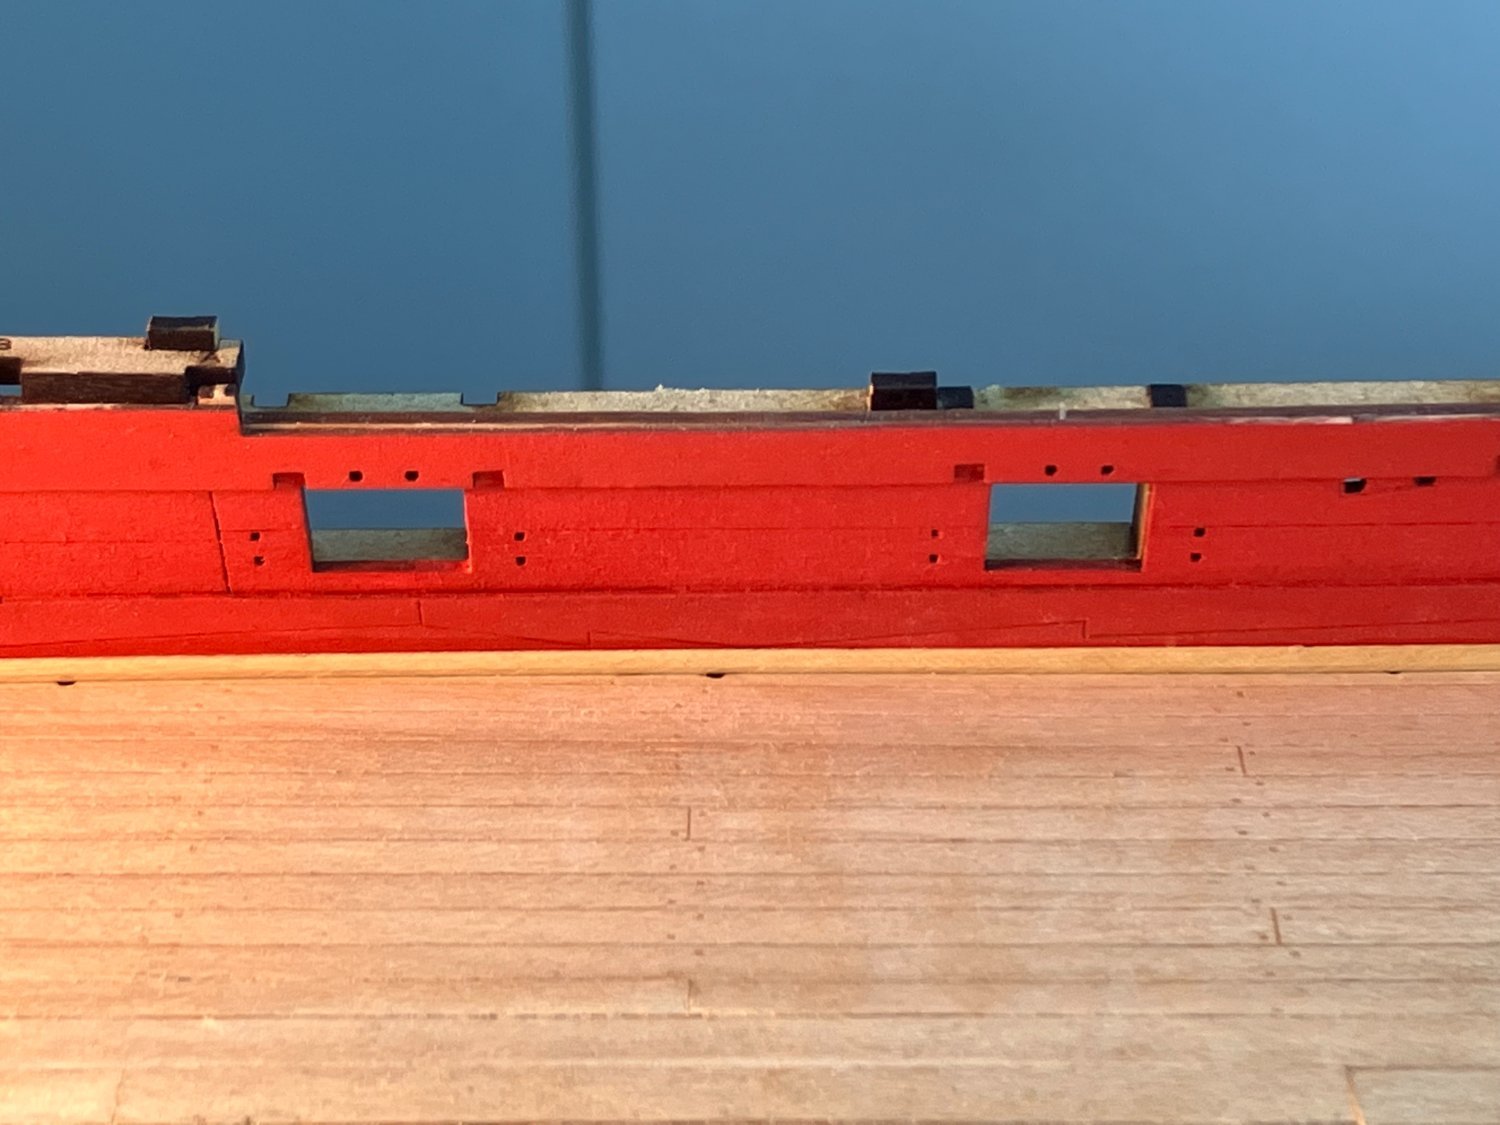
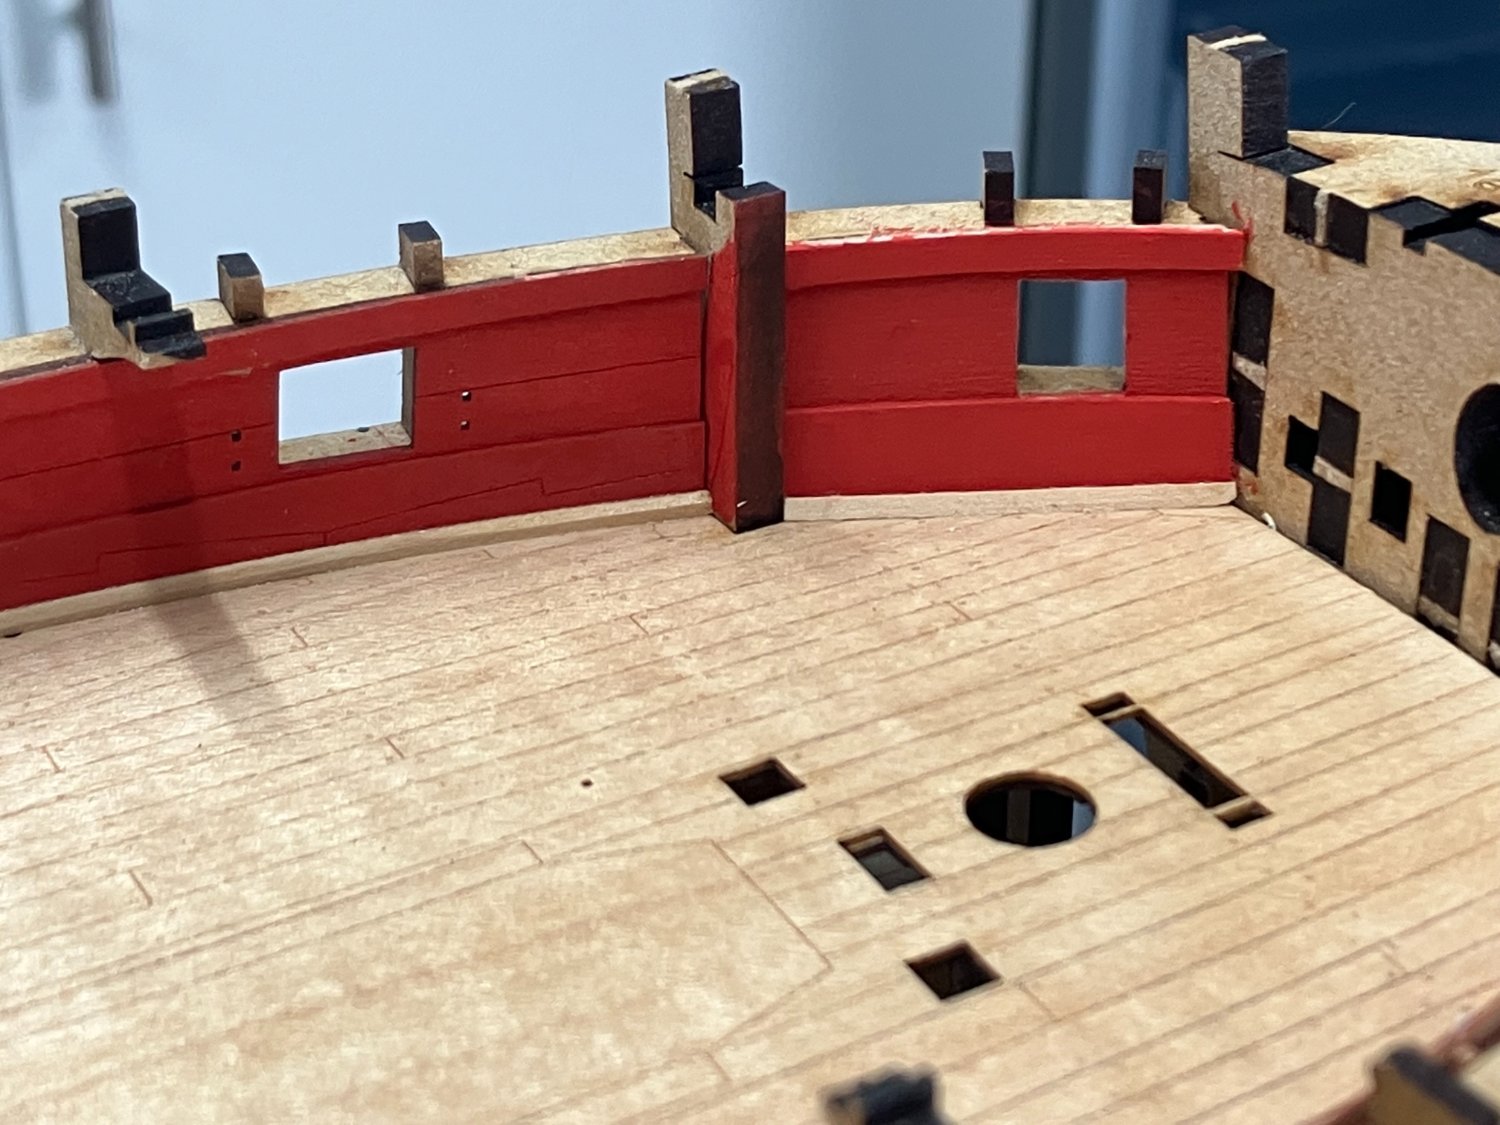
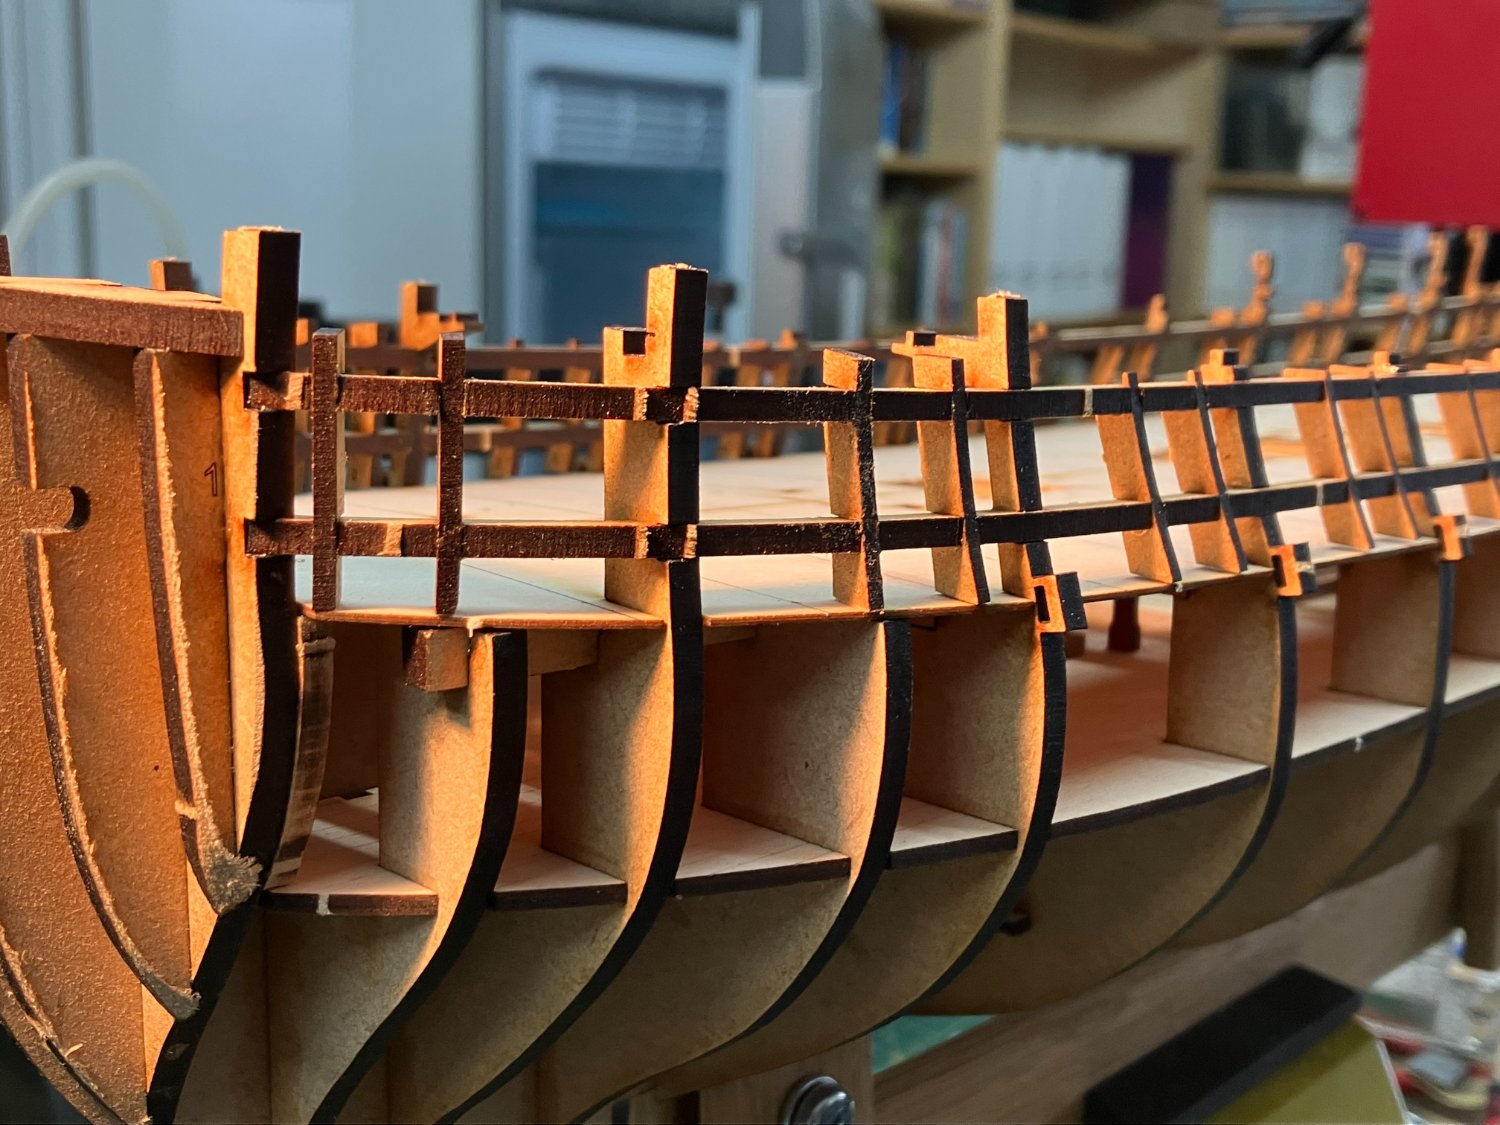
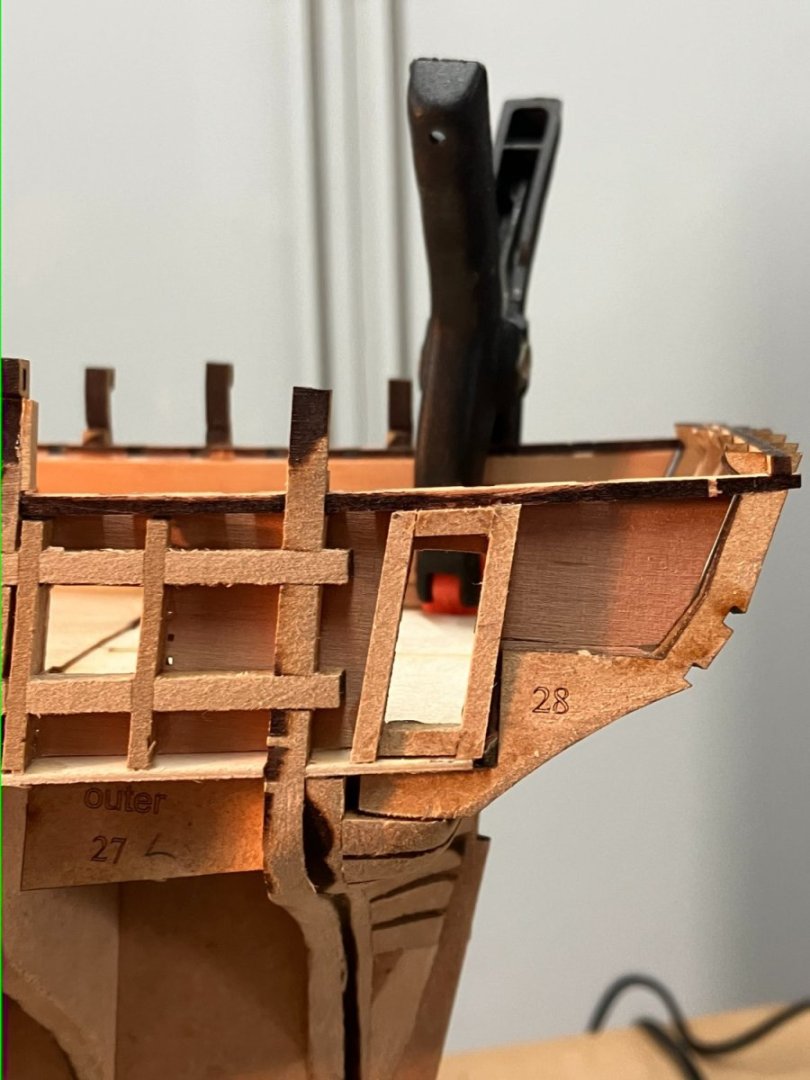
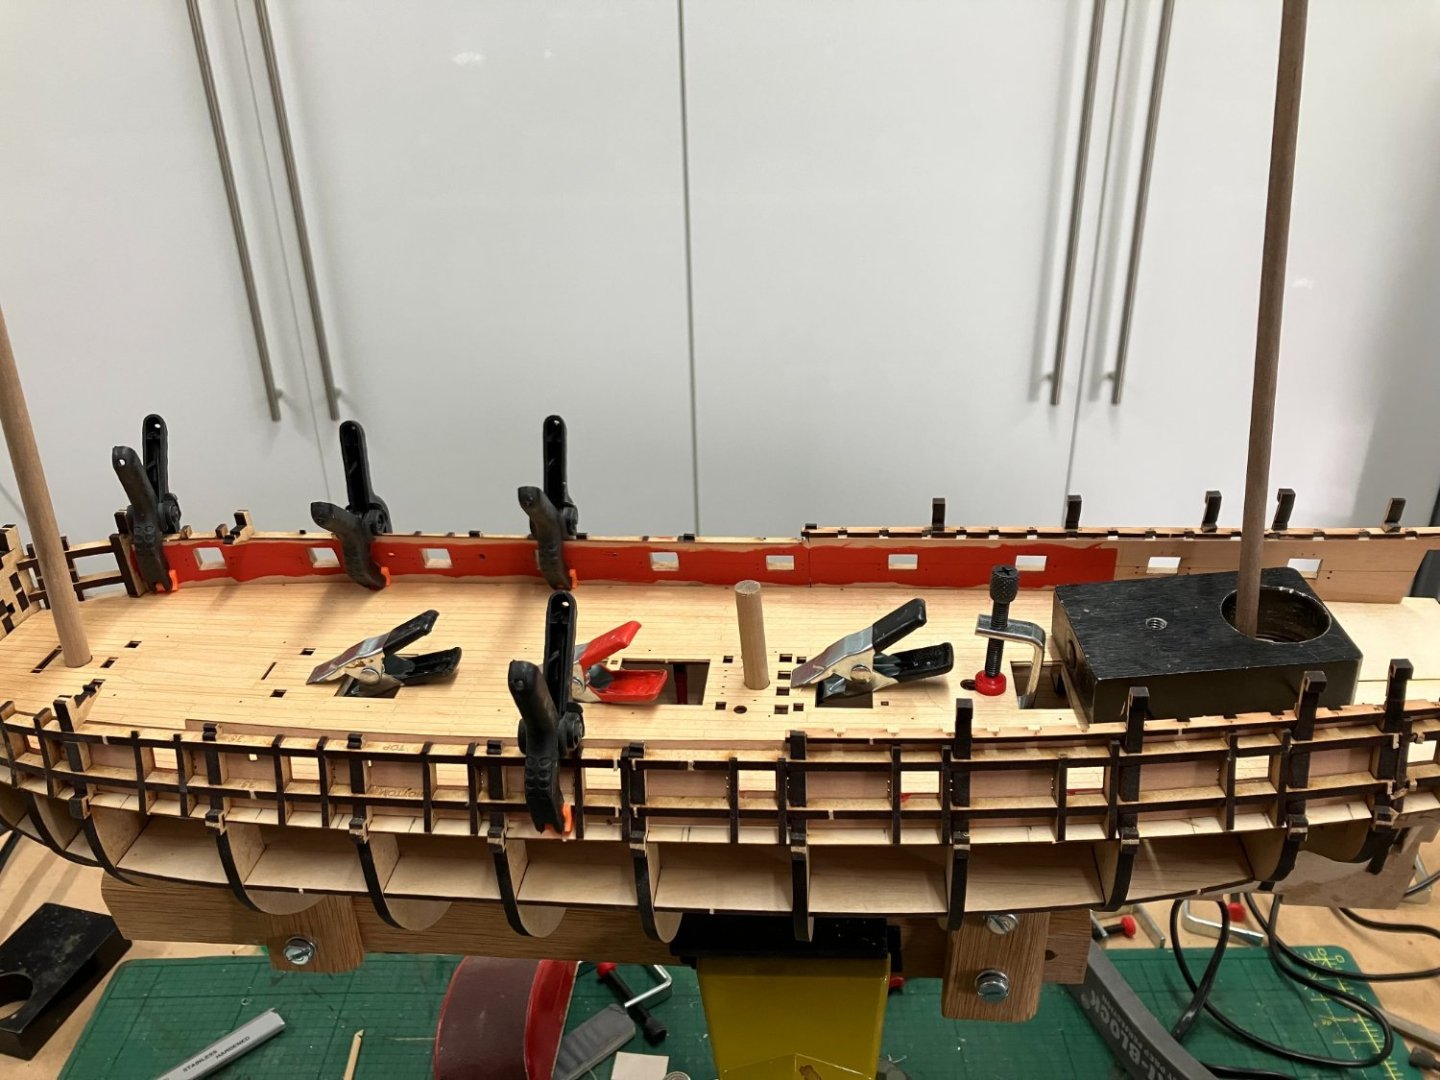
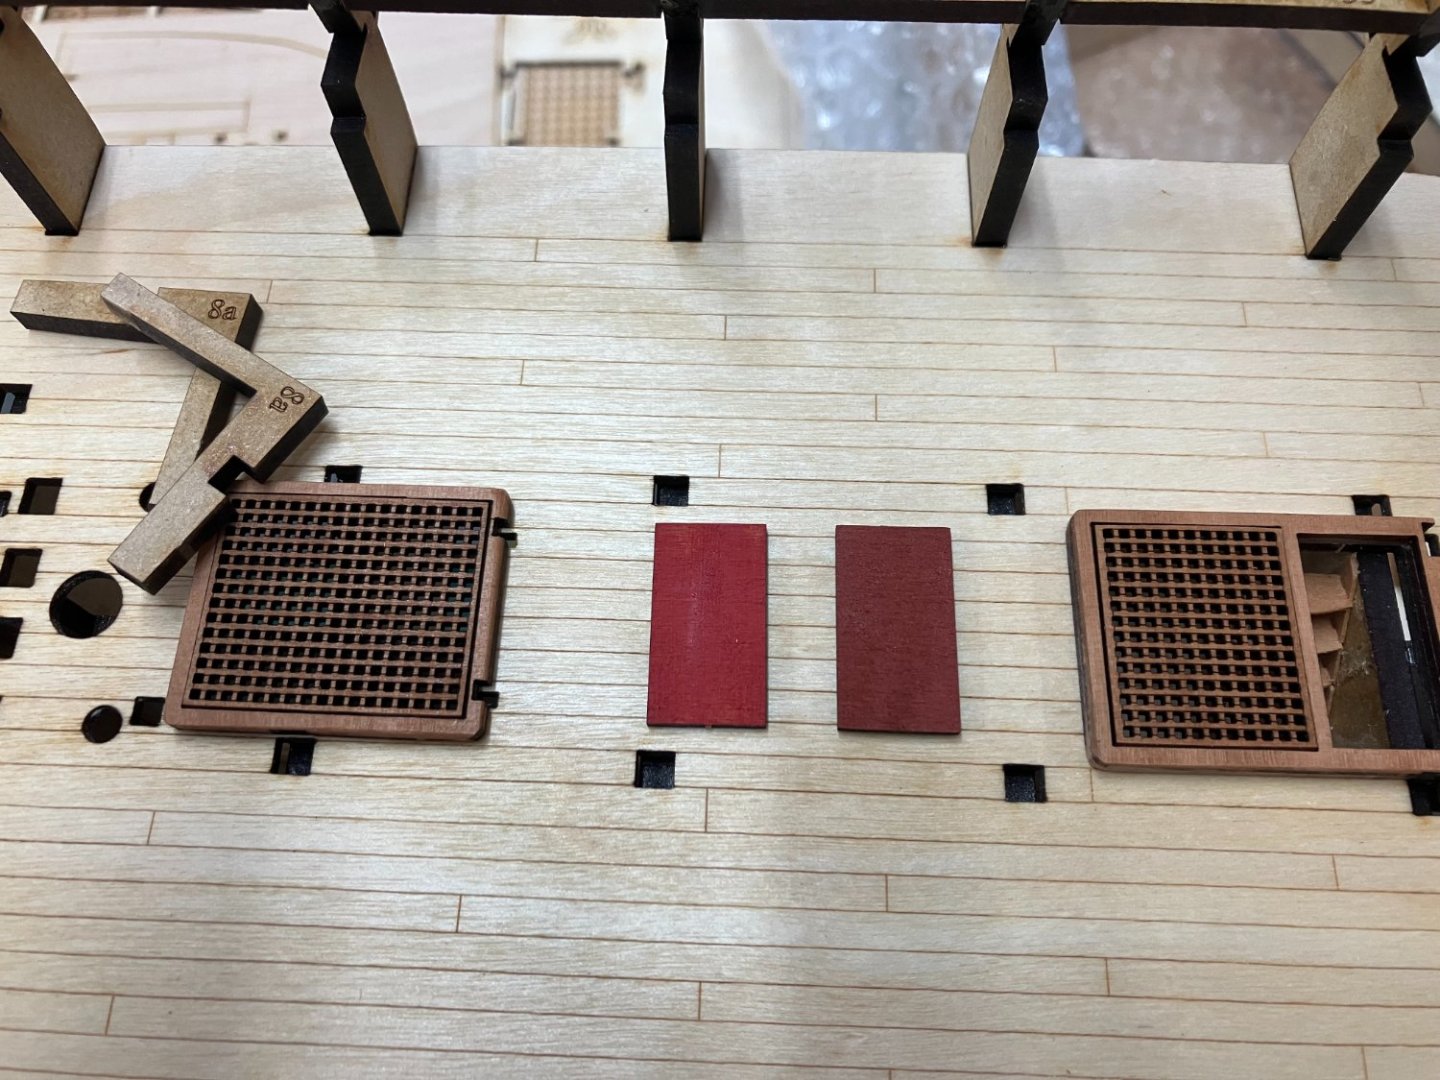
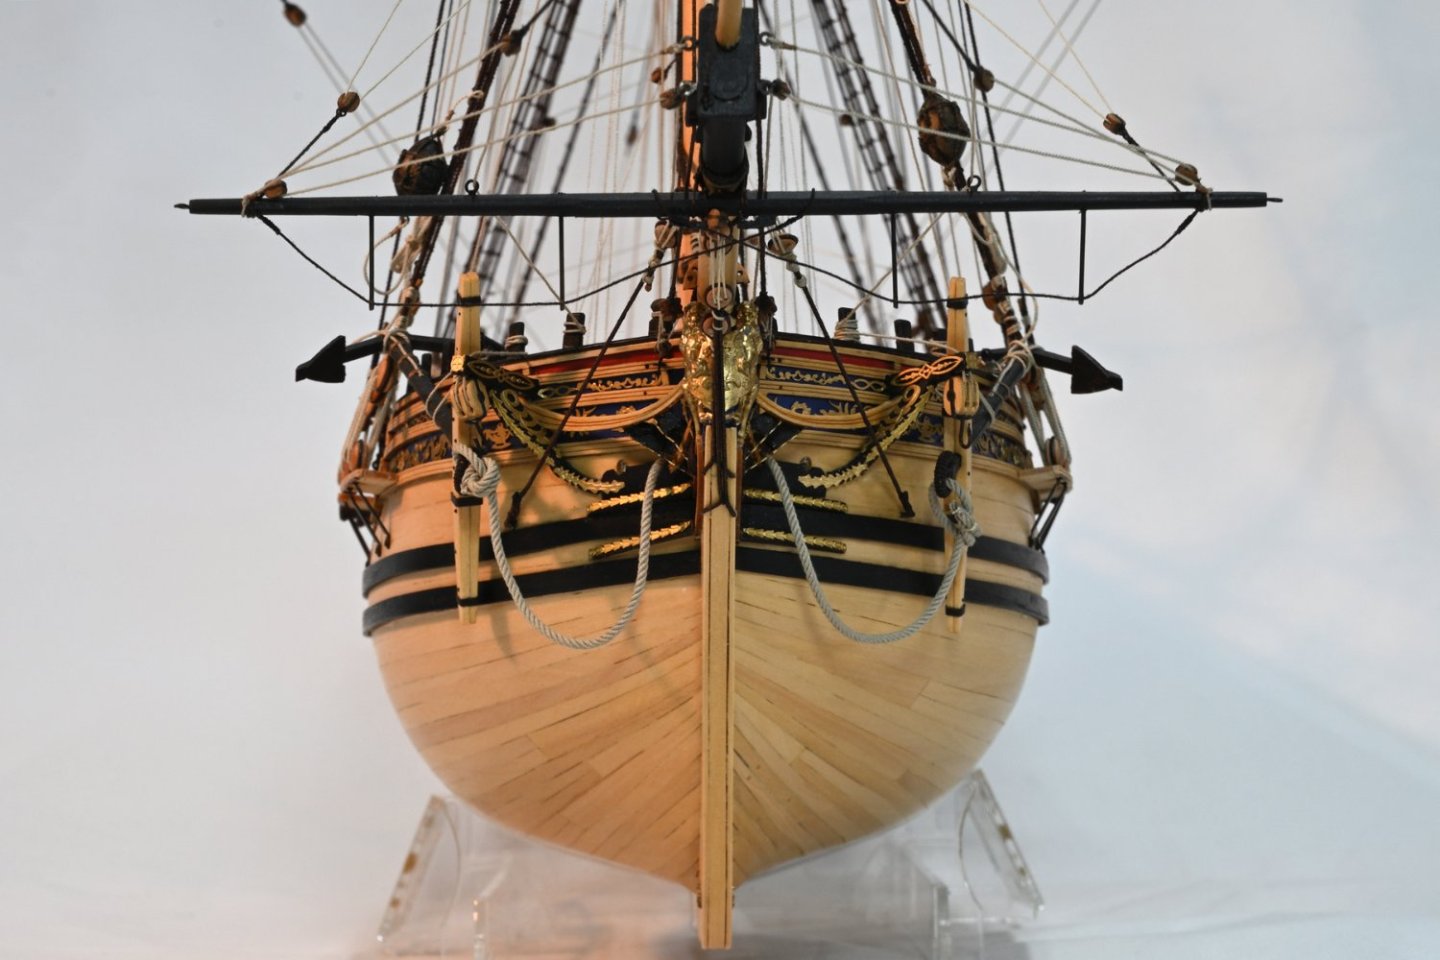
Gundeck bulwarks - finishing off Fitting the spirketting to the bottom part of the gundeck bulwarks was straightforward and as per the manual. The deck clamp patterns that run along the top edges of the bulwarks came next. The manual suggests fixing these so that the top edges come slightly above the top edges of the bulwarks. This felt slightly imprecise so I decided to use pins through matching holes in the patterns and the bulwarks to hold them in place whilst the glue dried: For the colour I decided to try matt red in AK Interactive's 3rd Generation acrylic range, as recommended by @James H and sold by Vanguard Models. I was very impressed how this brushed on and covered, and I'm looking forward to trying it in my airbrush. I never think bulwarks look complete without a waterway so I departed slightly from the manual by fitting my own. I used a spare length of boxwood cut to a an angle on the table saw as described here in my Duchess log. I'll drill out the scuppers later. Next I looked at the area in the bows around the bridle ports, which is not covered by the bulwark pattern supplied with the kit. Here's the section around the starboard bridle port, just ahead of the stove: This area will just about be visible if the bridle ports are shown open so I decided to follow @Blue Ensign's lead and finish them off with some spare material from the bulwark and spirketting frets: A tad crude, perhaps, but in this barely visible area that'll suffice. A mammoth fairing session next. Deep joy! Derek


-
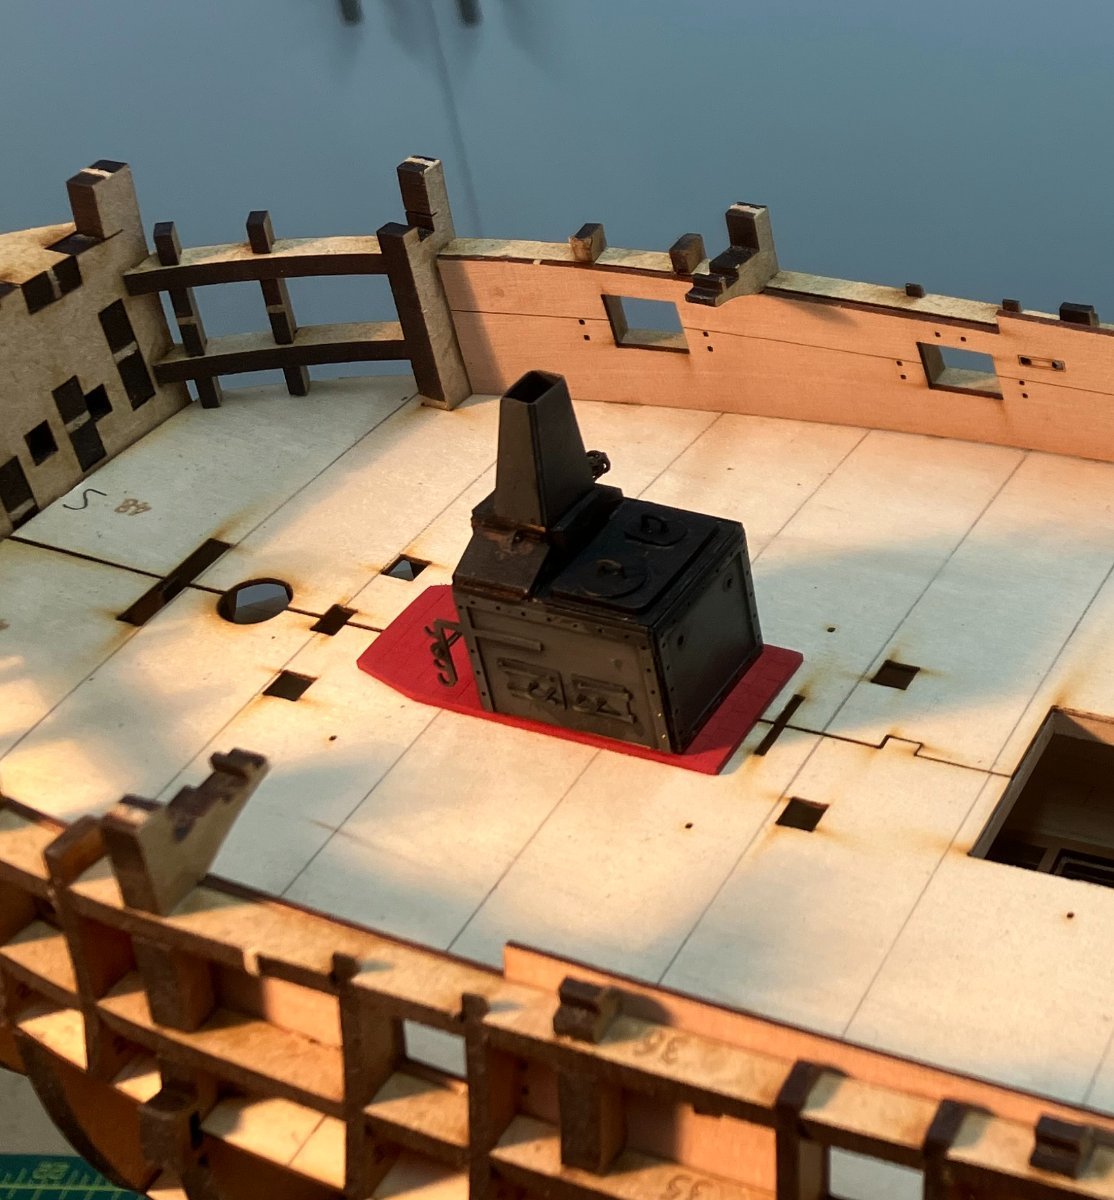
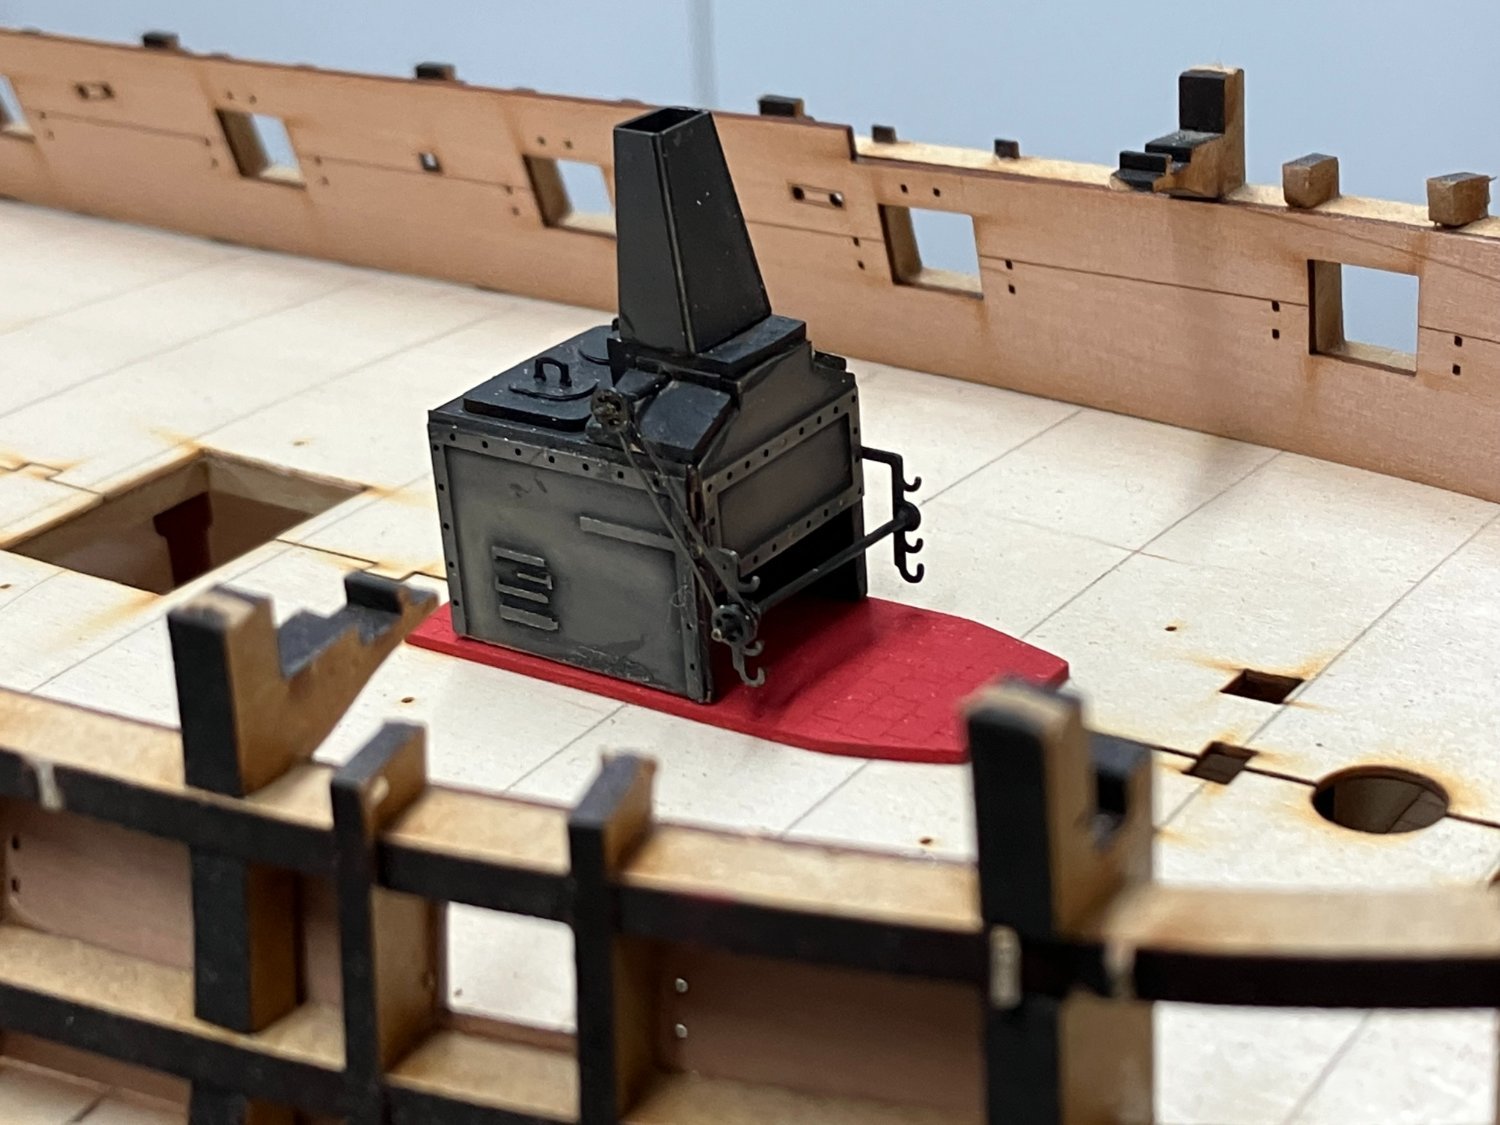
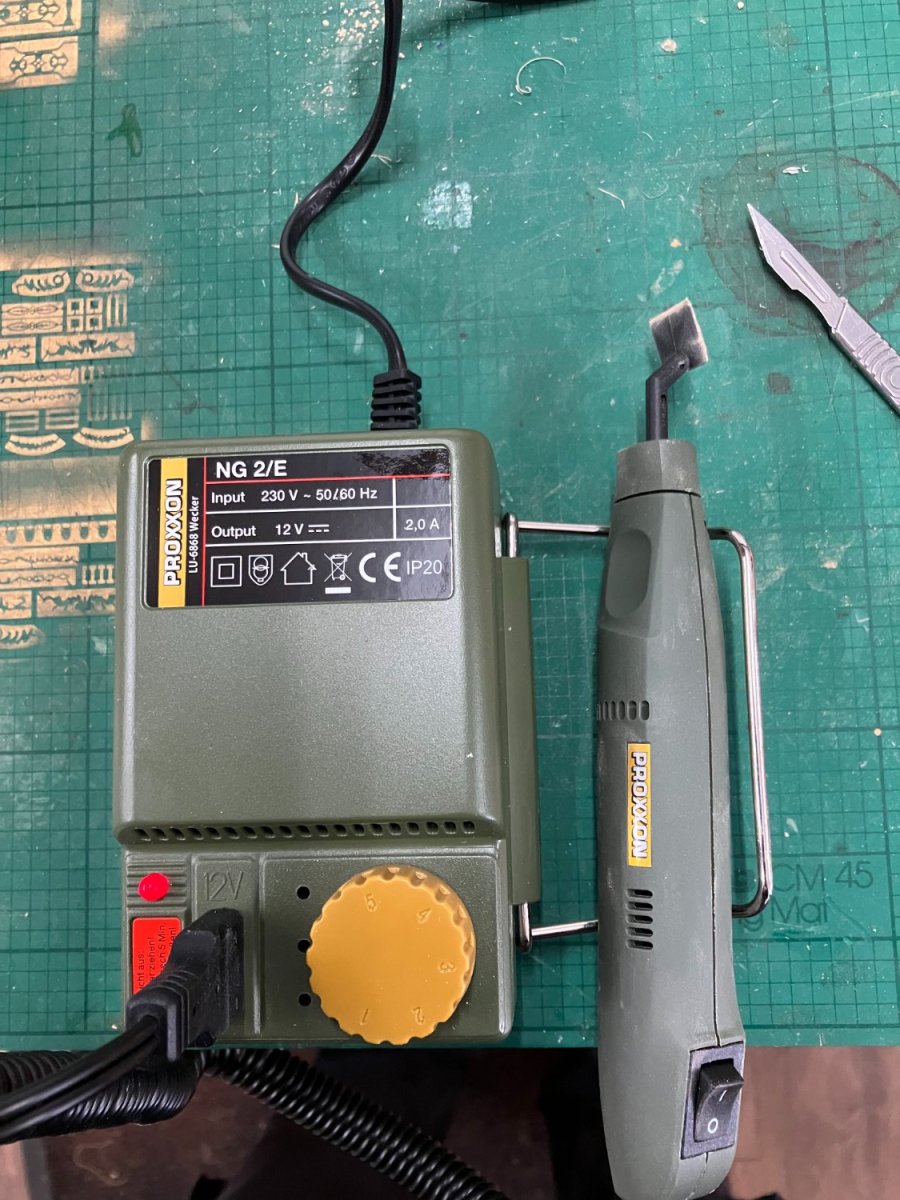
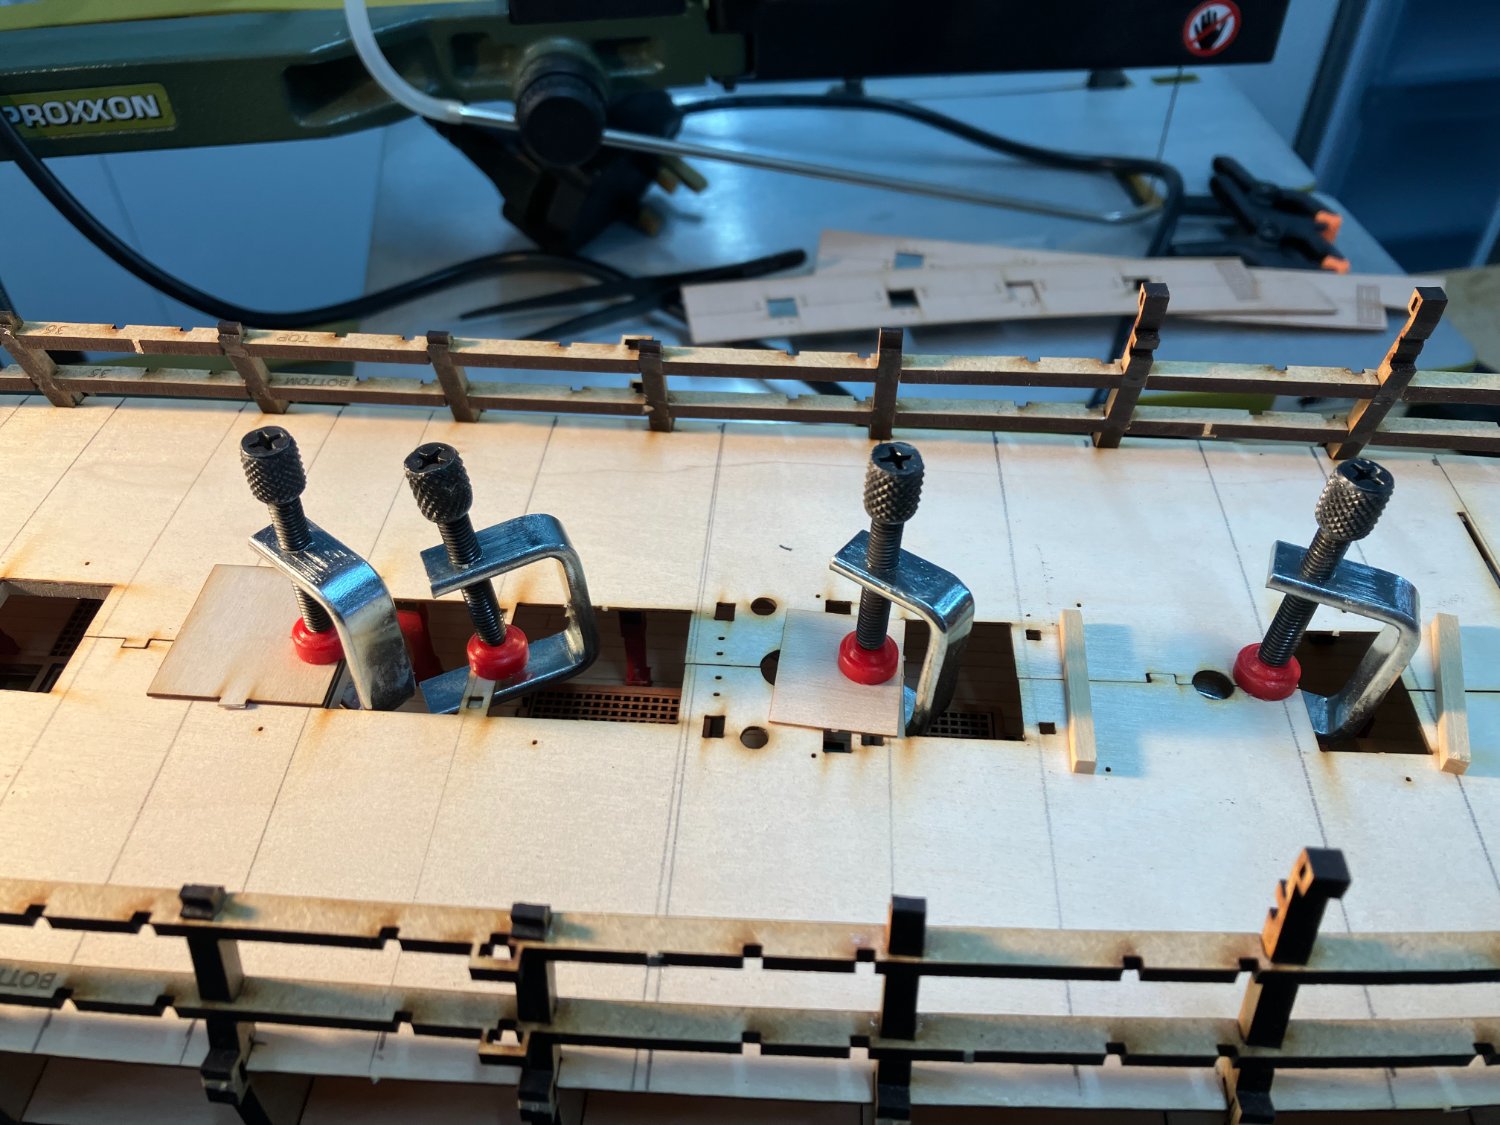
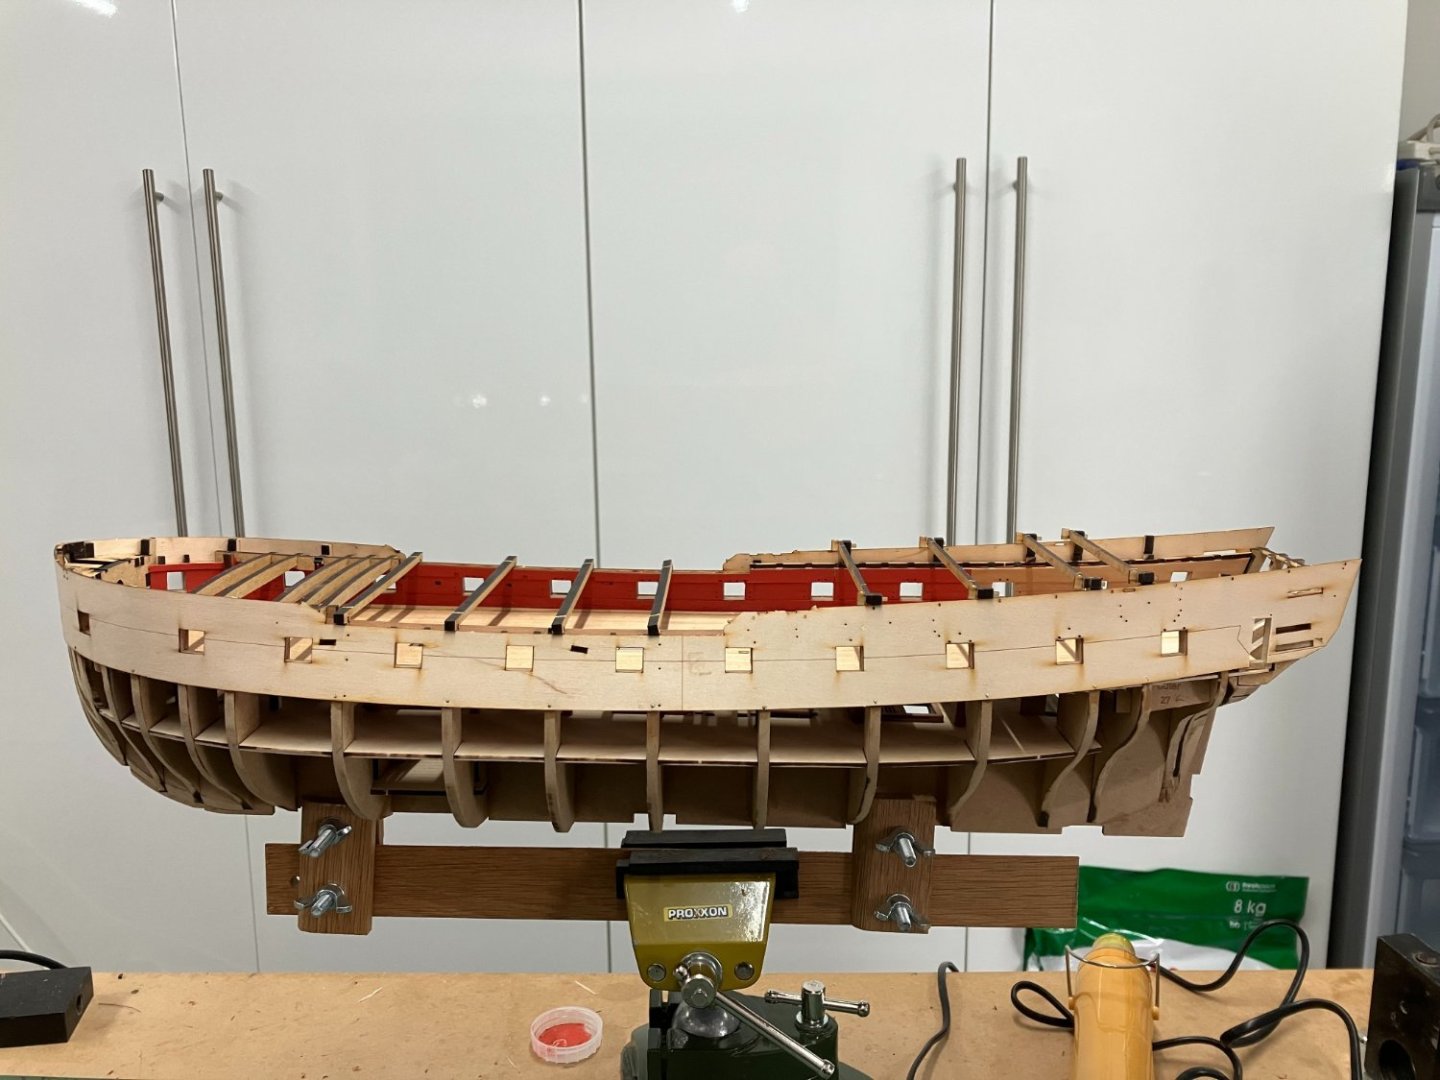
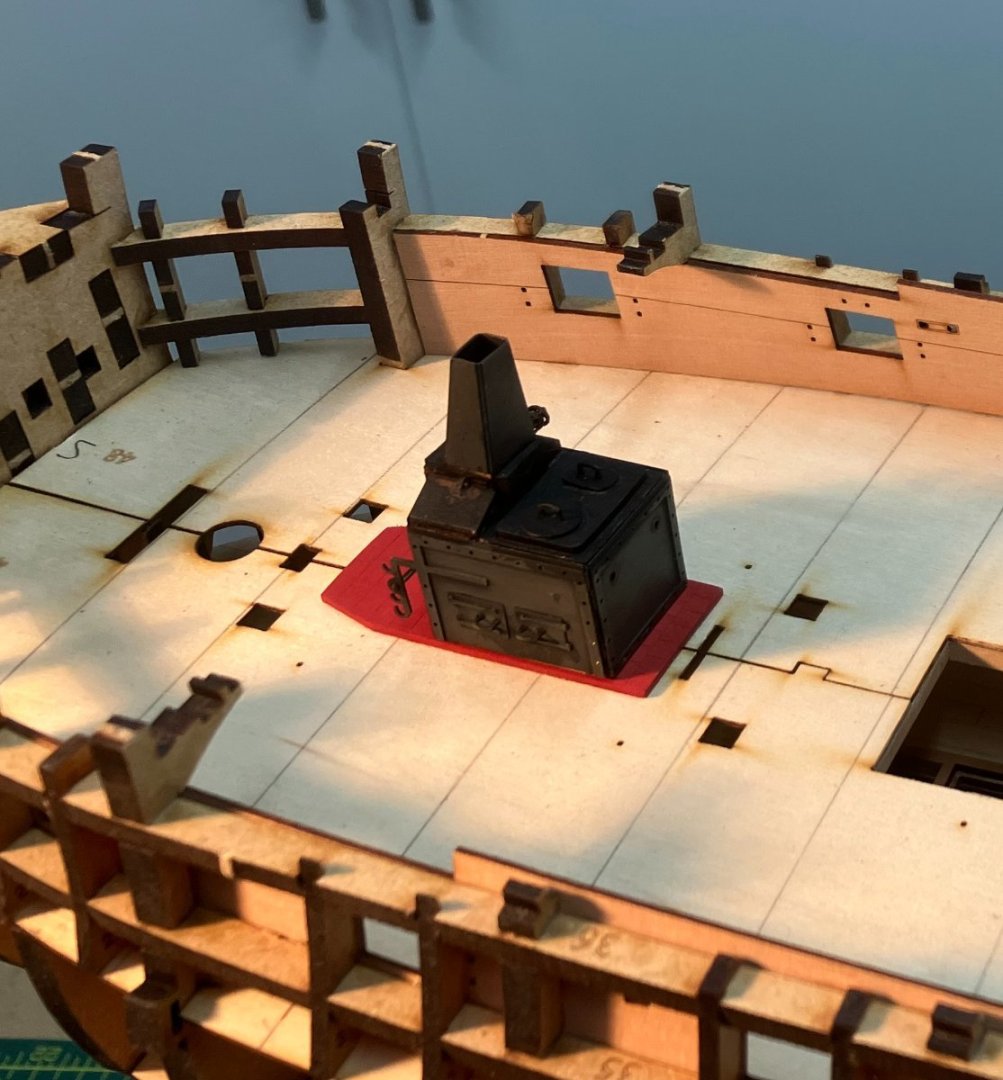
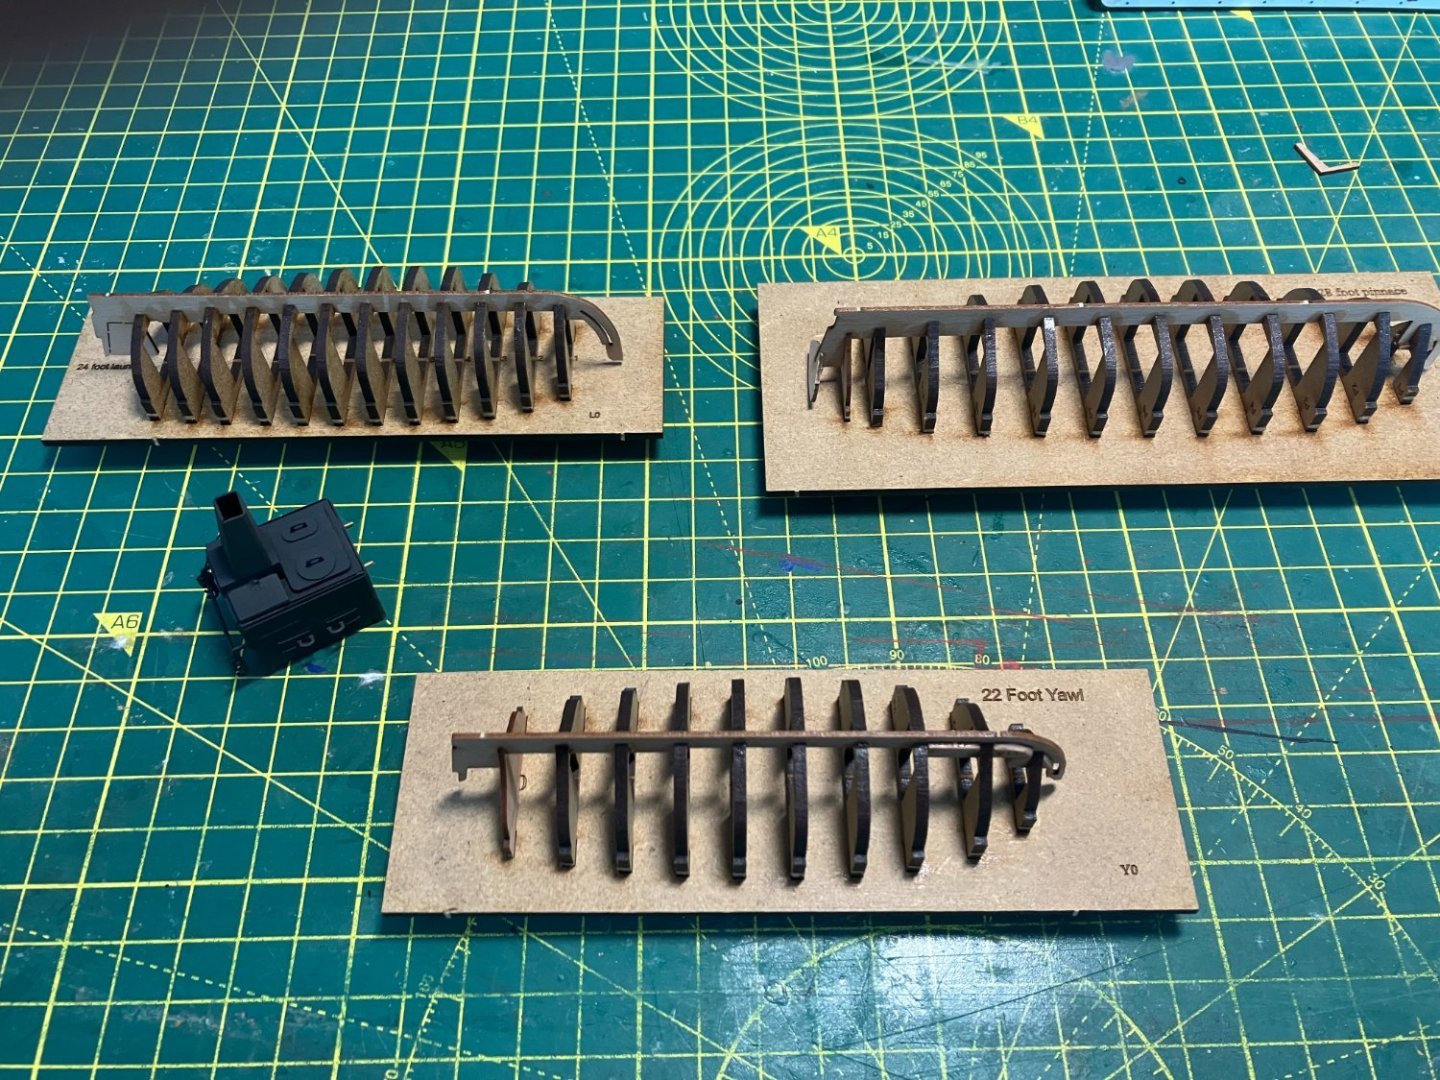
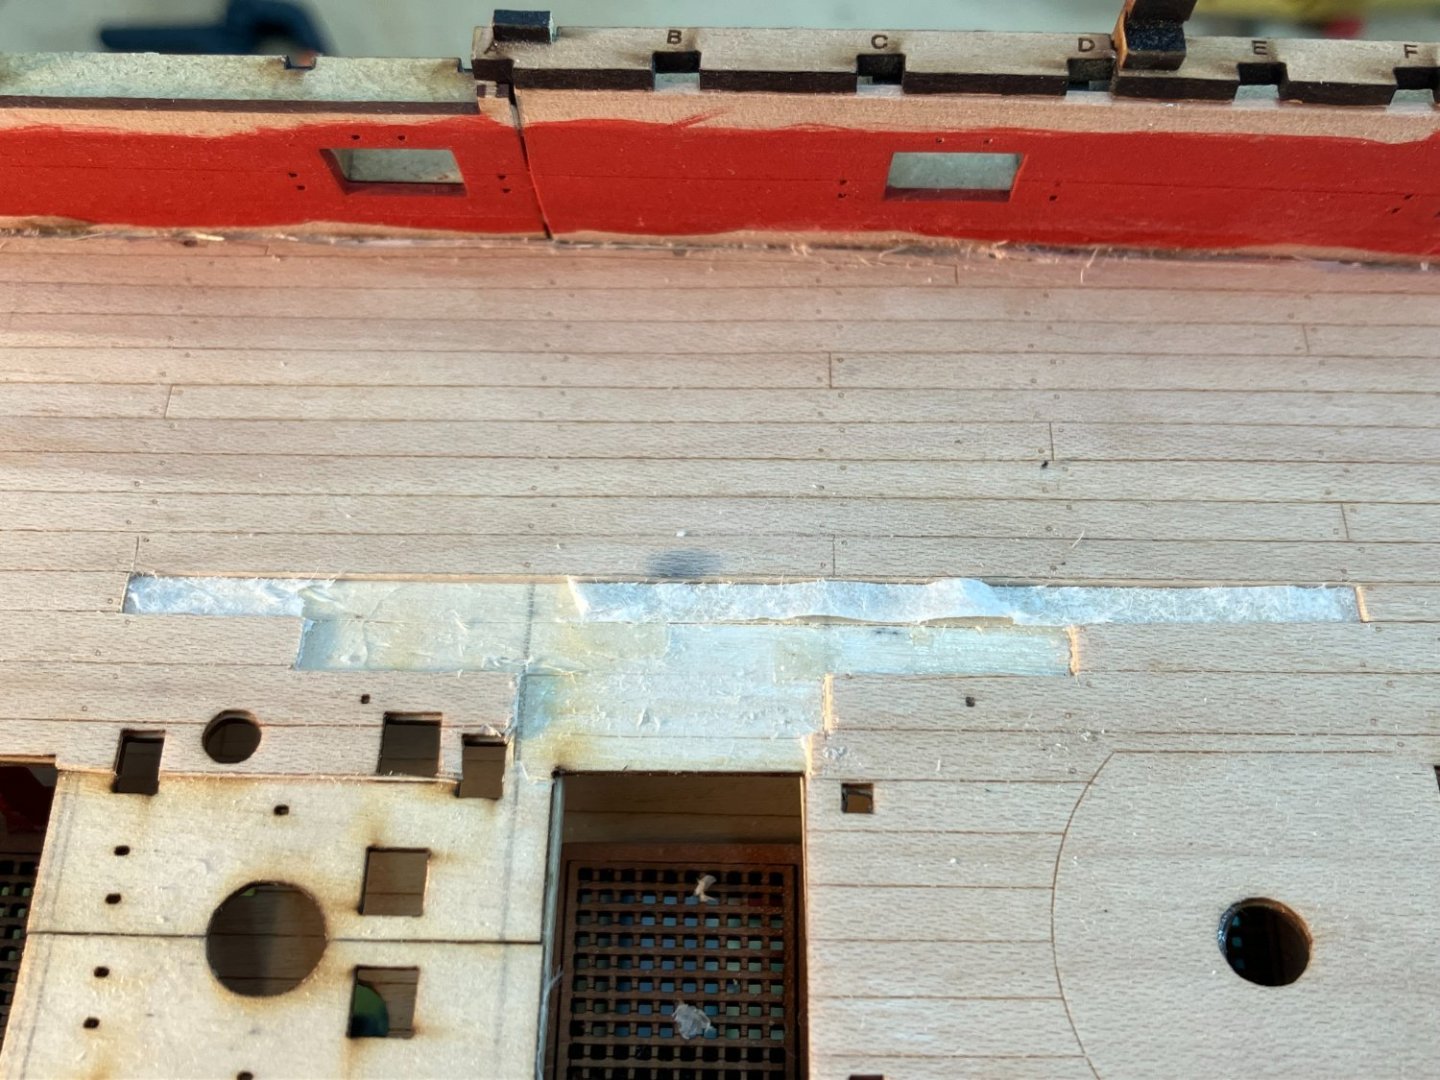
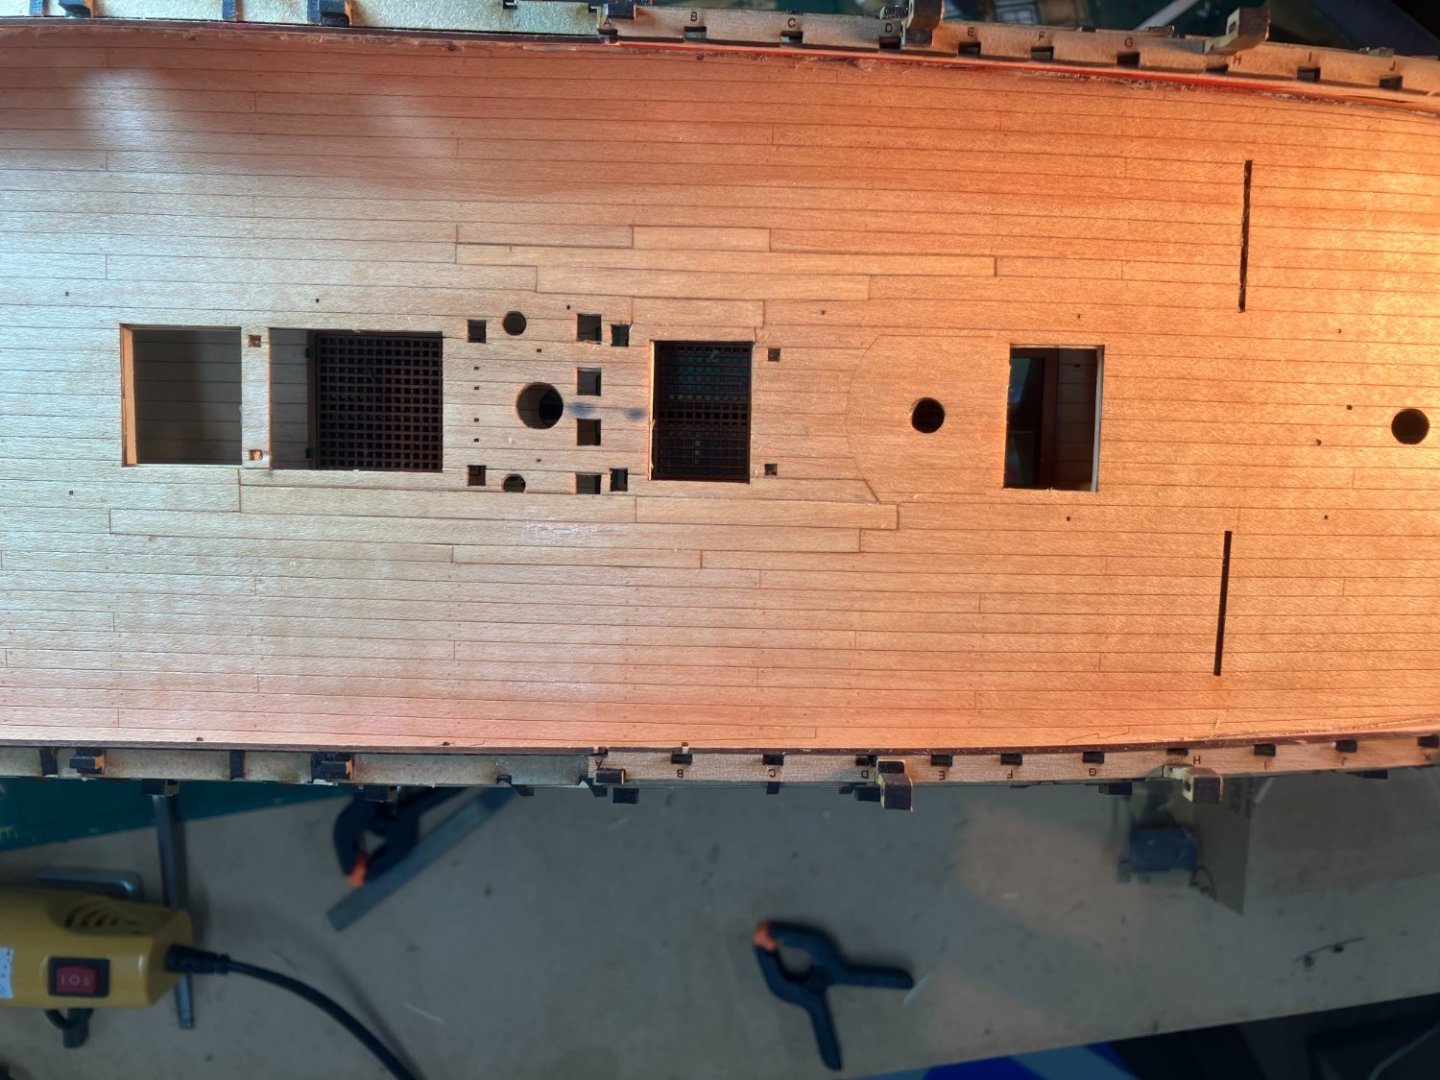
Update Progress has been somewhat chaotic over the last month, with log keeping falling by the wayside. Shaping then fitting the filler pieces to the keel was straightforward: I started fairing the inside faces of the frames to prepare them for gluing the bulwarks. However I found this very laborious and decided to order a Proxxon pen sander to speed the work. Unfortunately my supplier was out of stock and I ended up waiting a fortnight for the tool to arrive. In the meantime I made a start on the ship's boats and got as far as attaching the keels to the frames: You'll see I couldn't resist making a start on the stove. When the sander finally arrived it did a good job. These shots show it on it's transformer and in action: Fitting the four sections of the gundeck bulwarks in place went very smoothly, with no bending required. In this next shot the front bulwarks have been fitted and the quarterdeck beam spacing patterns are being glued in place prior to the rear bulwarks: Here's the stove, just waiting for some steel weathering powder to add highlights. I'll probably add a grill and drip tray before finally fixing it in place. With the bulwarks fitted I decided to see what the etched deck it looked like. I was so impressed I went against my earlier decision to fit my own deck planks. Here's the deck glued and clamped, with dowels in place of the three masts to keep everything aligned: So far so good. It was at this stage that the wheels started to come off. Part of the deck around the main mast felt springy and clearly was stuck down properly. There was no easy way to inject more glue, so I thought if I soaked the deck around the springy area and applied weight, that might revive the existing glue get it to stick. This actually worked surprisingly well, but unfortunately I hadn't taken sufficient care in setting up the weight. I used my miniature anvil and, although I put a sheet of paper under it, the water soaked through the paper and leached some muck of the anvil thereby staining parts of the deck. I'm not sure what the stain was, but it had soaked into the wood. I was faced with a choice - lift the whole deck and revert to Plan A, ie make my own deck, or try to repair it. I opted for the latter, and with the help of some sharp tools I managed to lift the ruined planks and replace them with ones cut from the same maple sheet as the deck. Here's some shots of the work: The remaining stain near the mast will eventually be hidden, and to the naked eye the repairs look almost invisible. That's enough excitement for one month. I'm hoping to report more normal progress in future! Derek


-
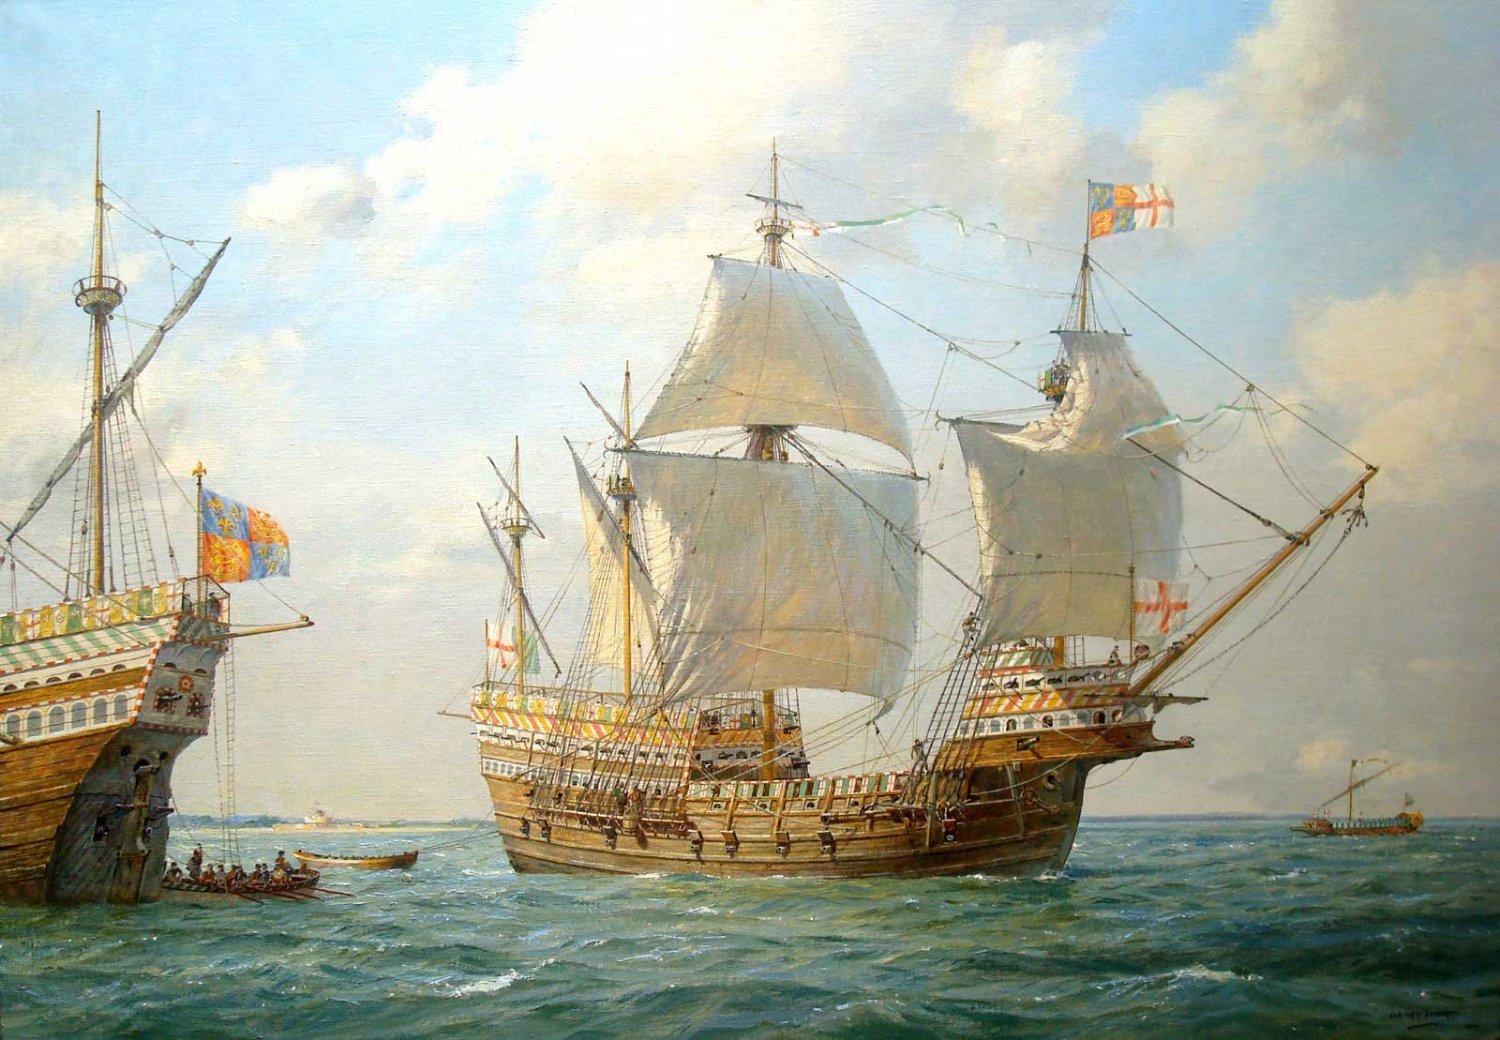
Hi Bill She actually looks quite plain compared to many ships of the era, for example some of Henry Vlll's fleet such as the Mary Rose and Henry Grace a Dieu. They were actually earlier vessels, both built in the 1510s. As you say, shipwrights at that time didn't have electric saws. Neither did they keep plans nor (until much later) did they produce accurate dockyard models. So unfortunately the evidence for most ships of the period is limited to paintings, drawing, written accounts and archaeology/wrecks, none of which can provide sufficient information to guarantee a totally accurate model. I think the word authentic can have a slightly less strict interpretation. For example, the painting of the Mary Rose above is modern, but it is based on a contemporary 16th century painting of the original ship. Furthermore it is by a marine artist, Geoff Hunt, who understands ships and how they are sailed. He would also have had access to information from the wreck of the ship which is now preserved in Portsmouth. So I would argue that the painting is an authentic representation of the Mary Rose as it is based on the best information currently available on the real ship. For me, one of the pleasures of this hobby is research. So much is available online now it might be worth doing some digging on the San Bartolome to see if you can answer your own question on the authenticity of the model. Derek

-
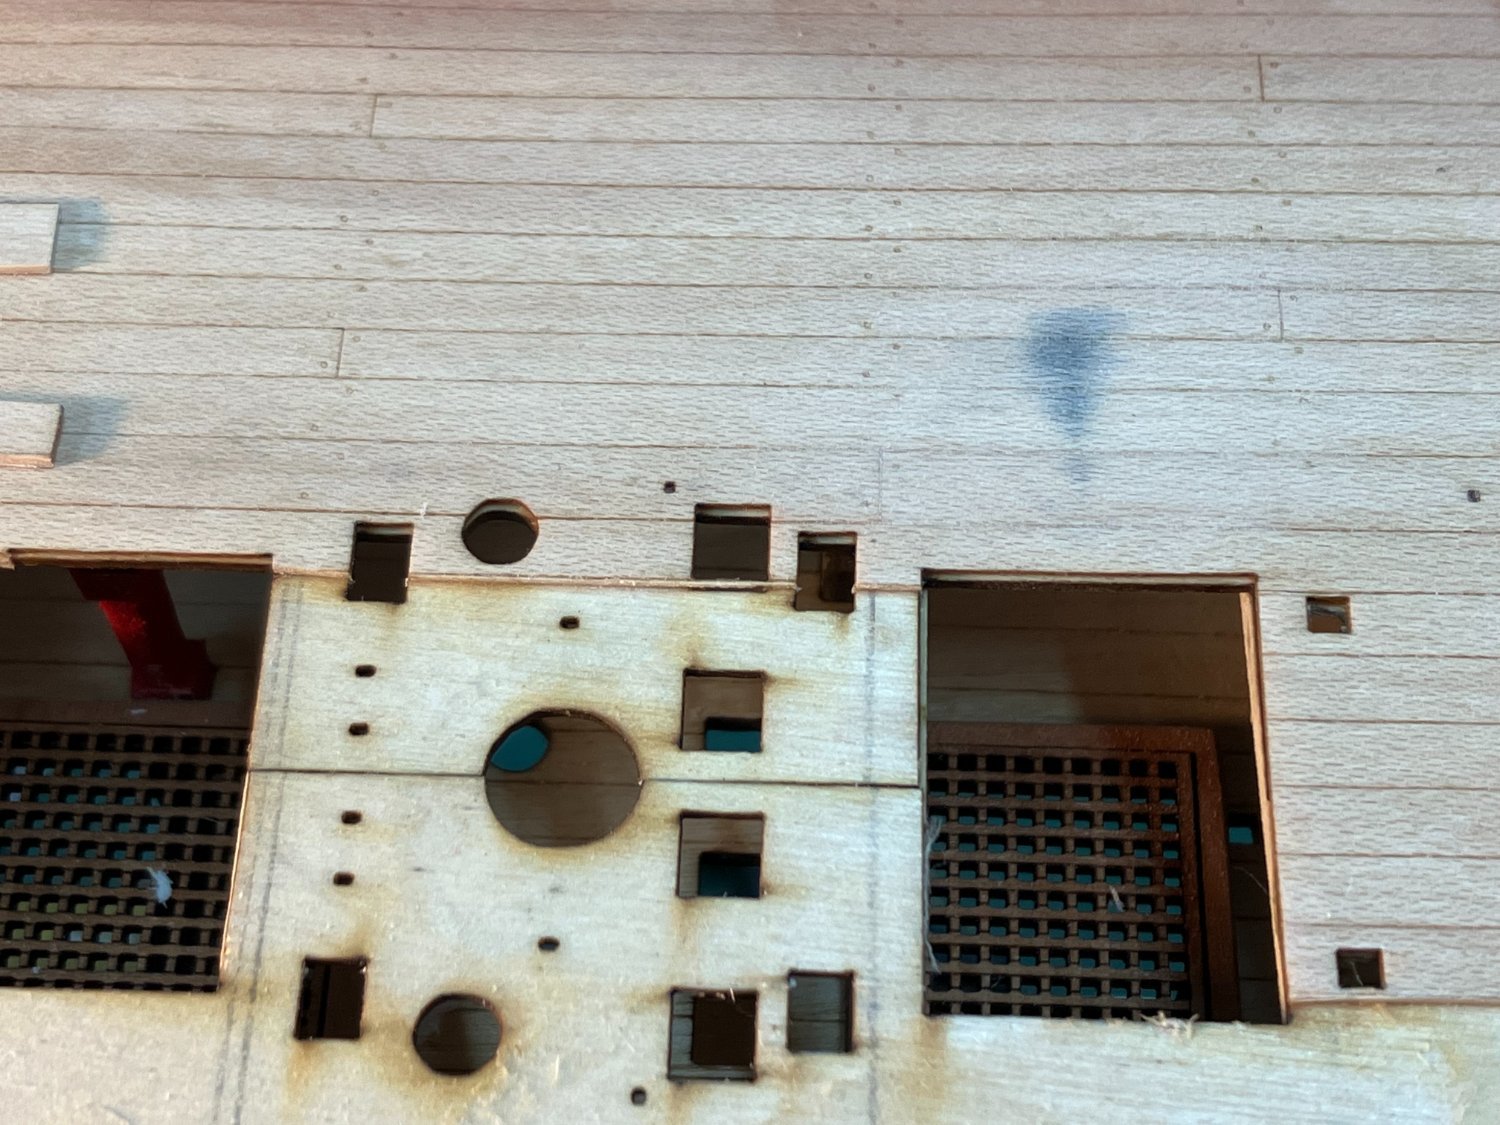
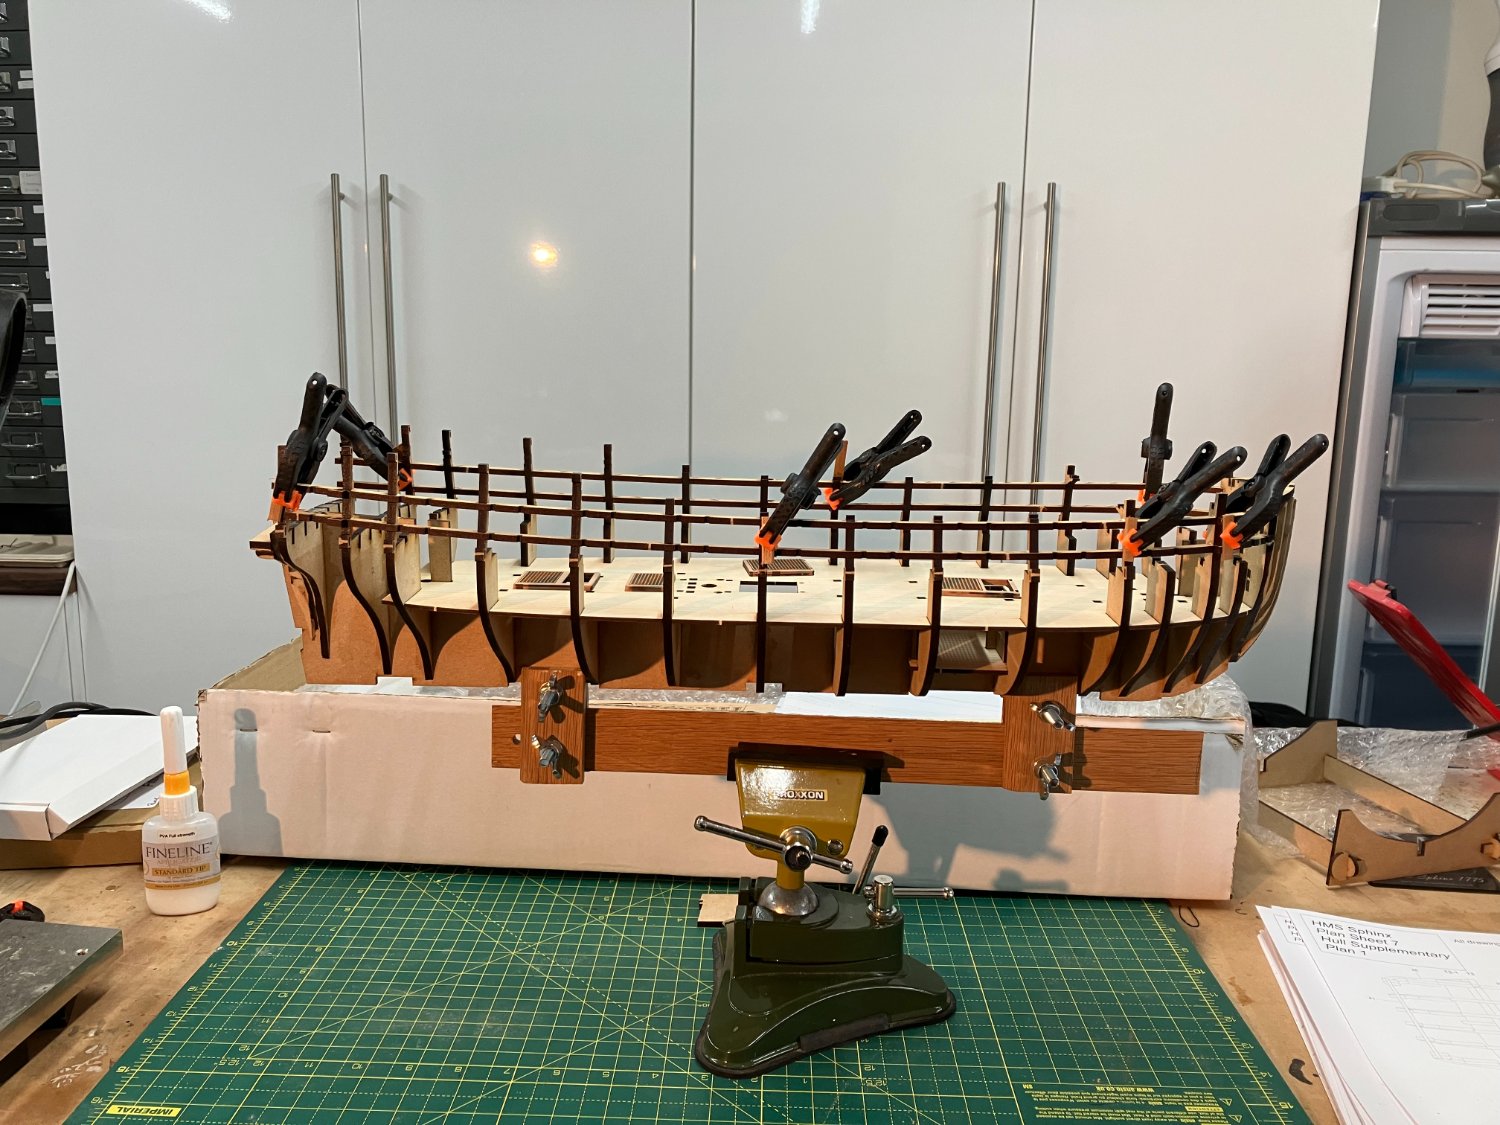
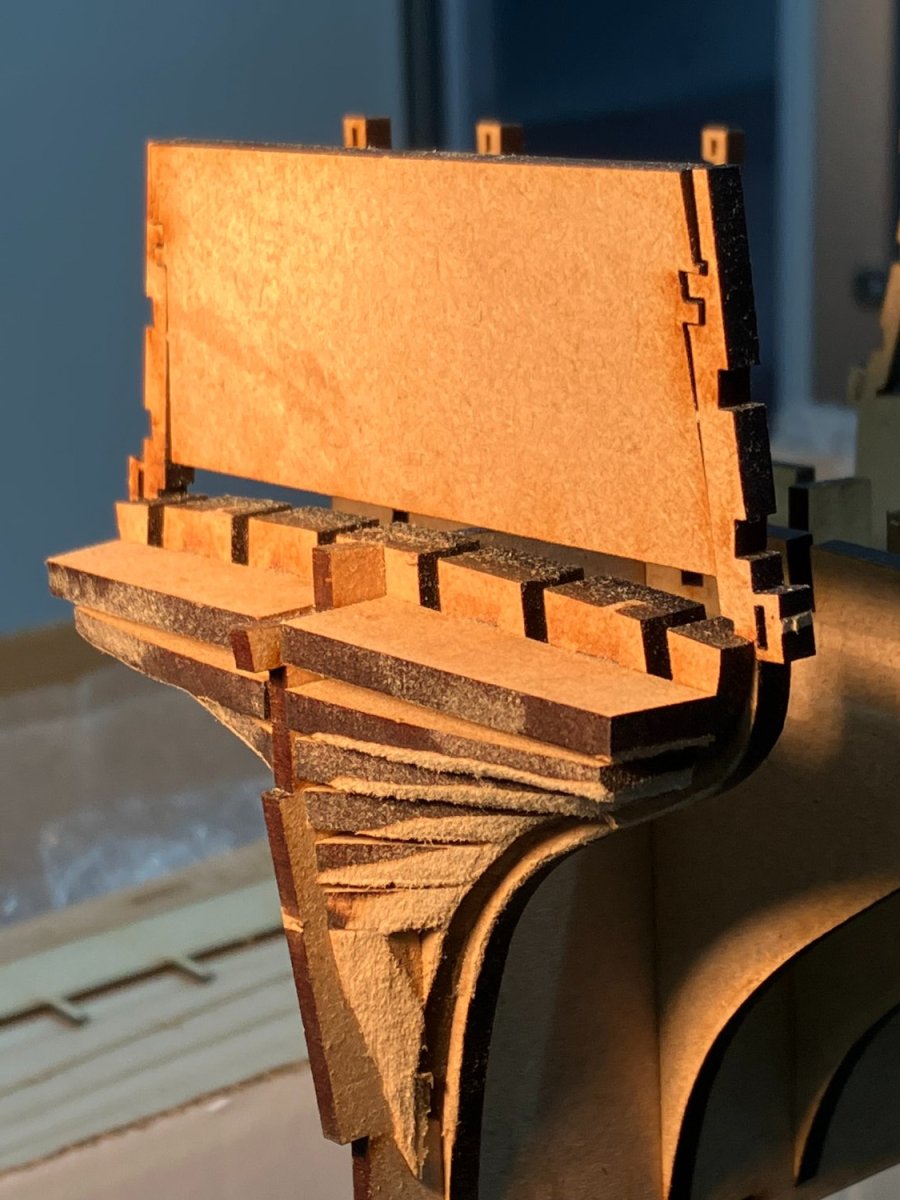
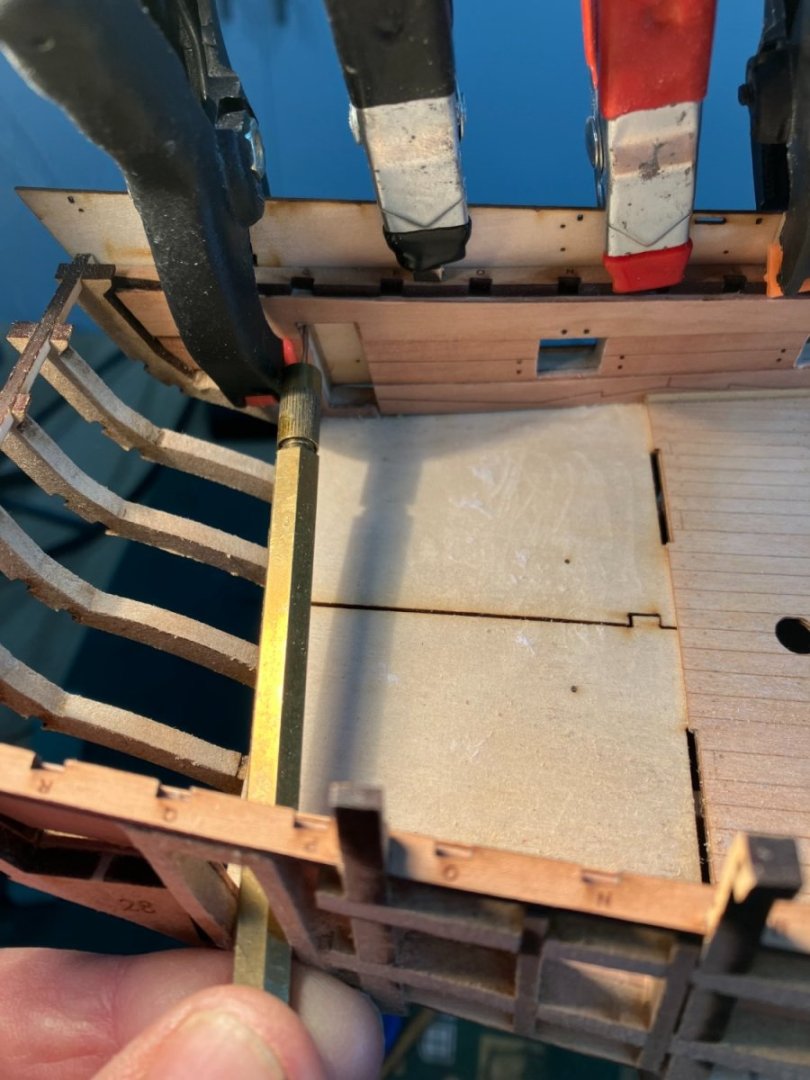
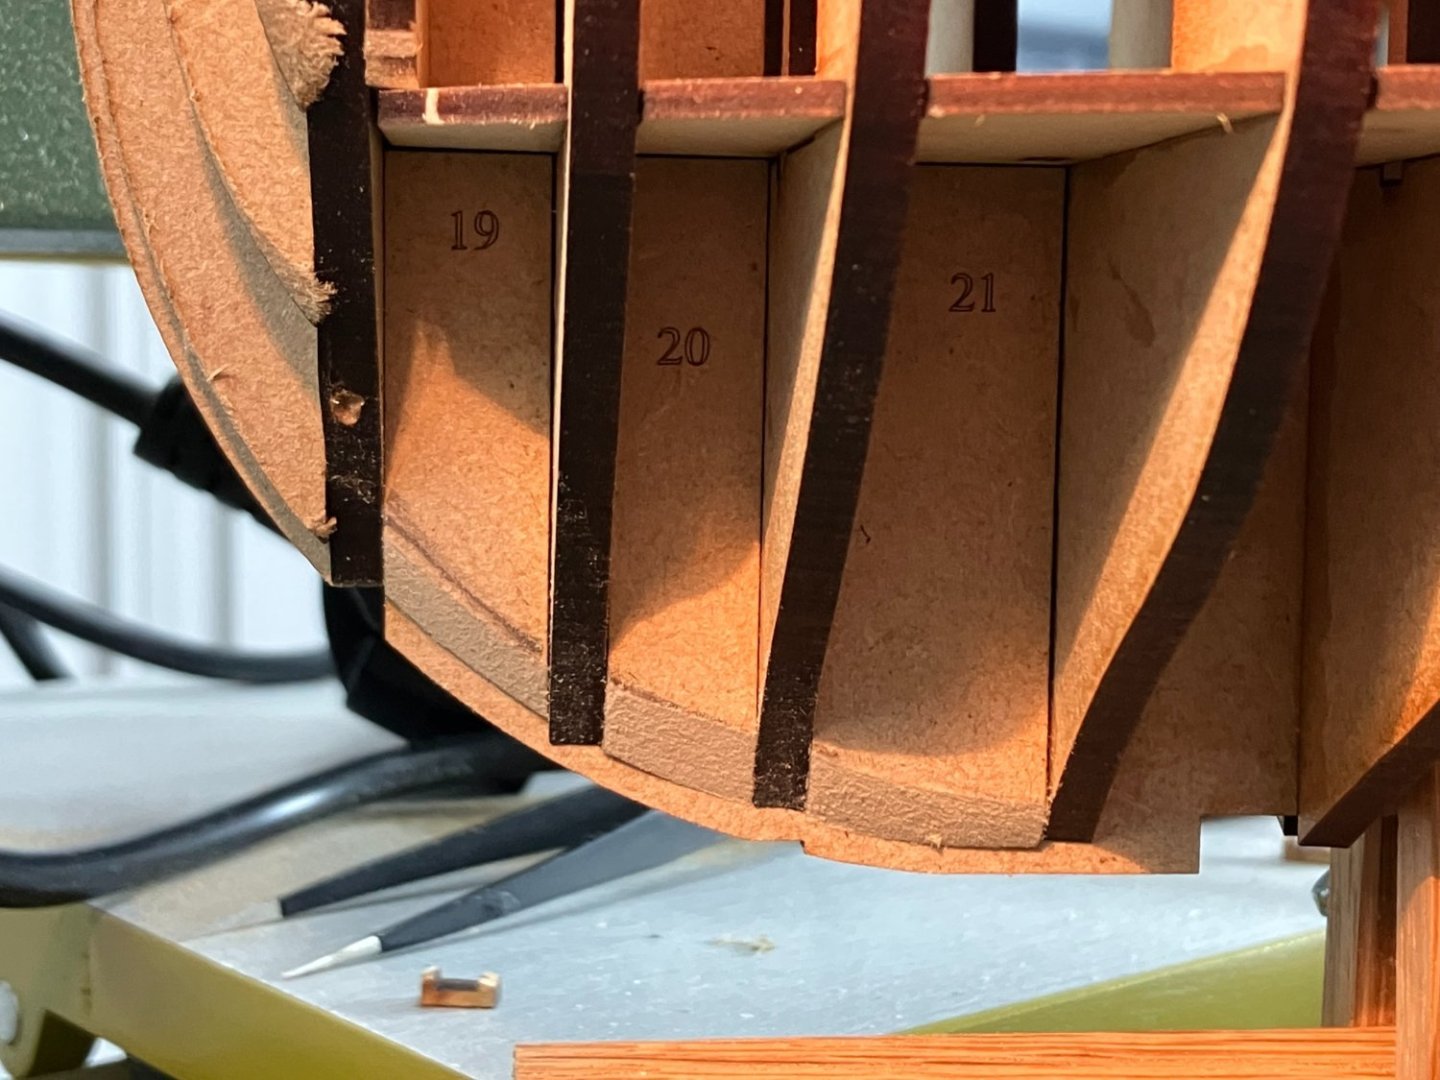
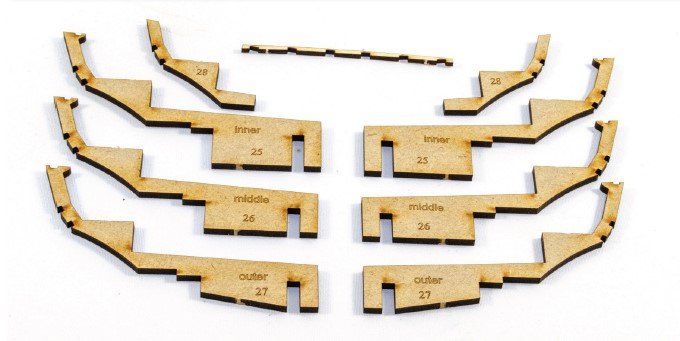
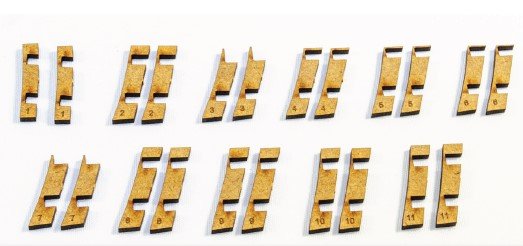
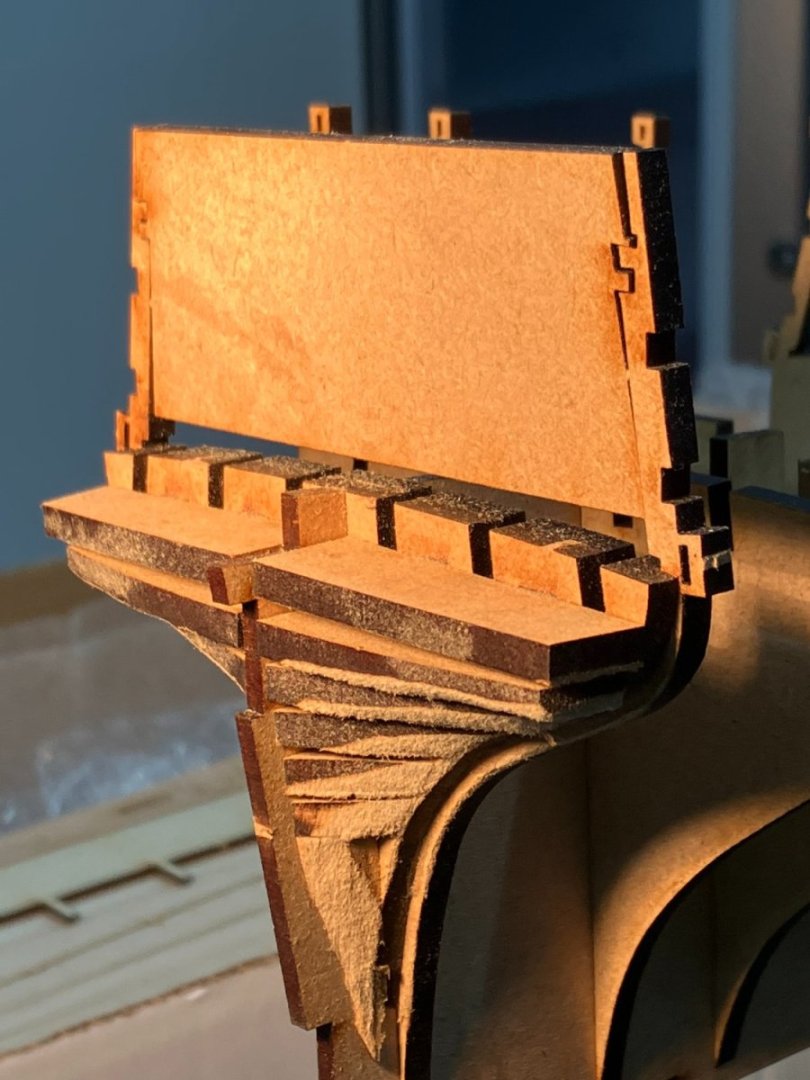
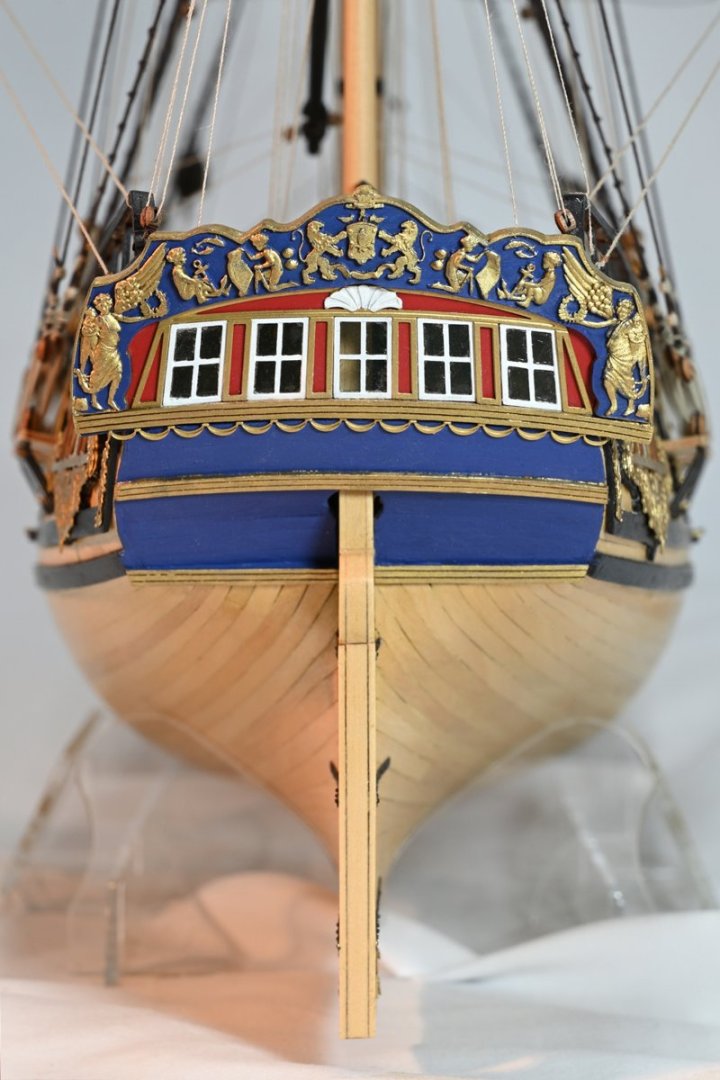
Stern frames, lower sub-deck & gunports Thanks B.E., and all the likes. As designed, the shape of the stern fames incorporates a bench seat in the great cabin: As others have noted, and I checked in my copy of AOTS Pandora (a virtually identical frigate) this bench is over-size and too high up. Following @Blue Ensign's lead I got to work with the Proxxon scroll saw and trimmed the components back to the bare frames, the idea being to construct the bench separately later in the build. The gundeck subdeck was fairly easy to install, only requiring light sanding in a couple of areas before the two halves fitted in to the slots in the hull frames. With the engraved maple deck glued to the subdeck I'm sure the resulting surface would be very solid. However I've already more-or-less decided I'm going to cut and fit my own boxwood deck planks, so I had to provide extra support for the two halves of the subdeck, especially down the middle. Not for the first time I followed Blue Ensign's lead. Like him I glued frames under the ladderways and hatchways using some boxwood from the scrap bin cut down to 3mm square: It was tricky to locate and clamp the frames so I had to tackle the job in stages: The end result feels solid. The next task was fitting the gunport frames. There are 44 of these in total - two frames per gunport per side. Here's the frames from one side of the ship: Note how all components are numbered. It's worth pointing out that each pair is different, making sure that each exactly fits its position on the hull. In fact they're so well designed and produced that there is absolutely no slack in their fitting. I found you have to orient each piece precisely as you offer it up to the hull otherwise it won't slot in to place. Here's the result: More filler pieces to fit to the false keel next. Derek


-
- 5 replies
-
- 10
-

-

-
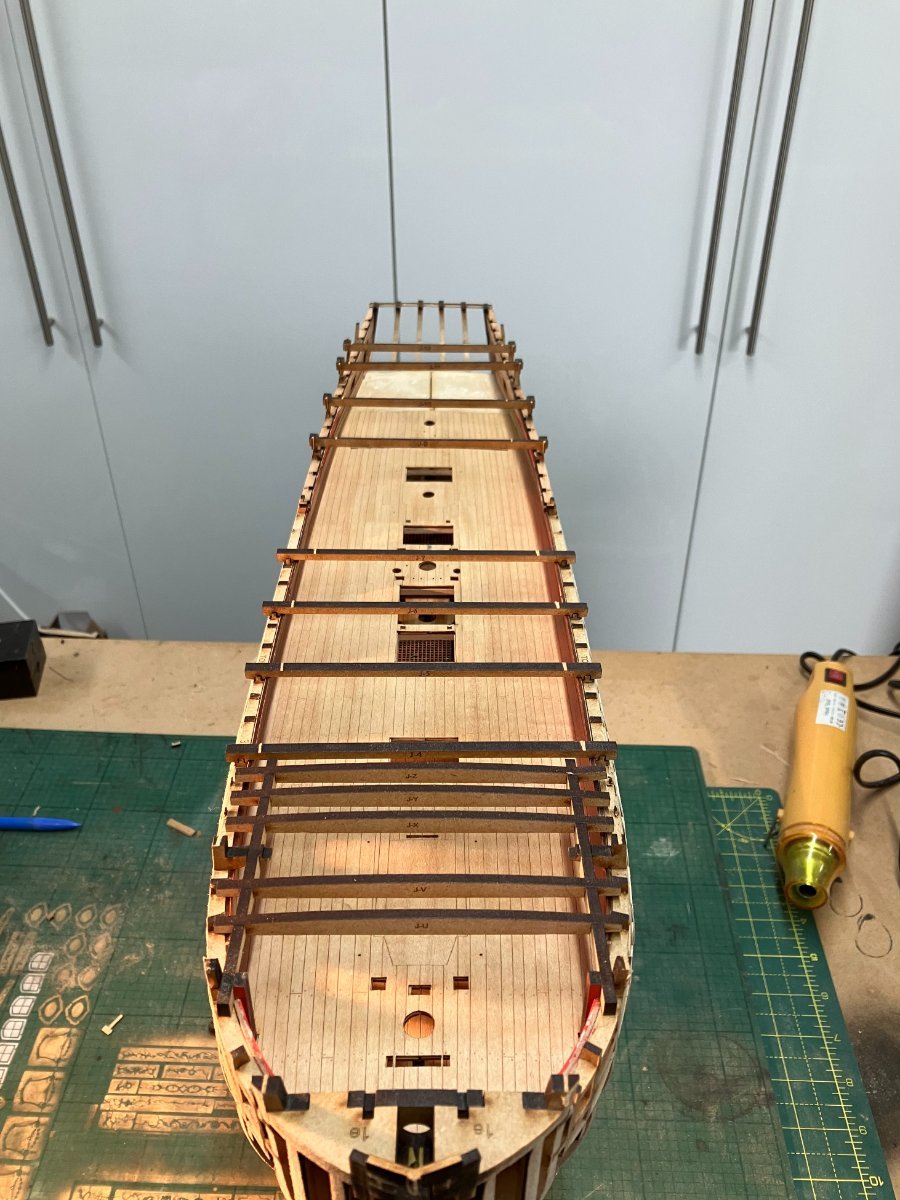
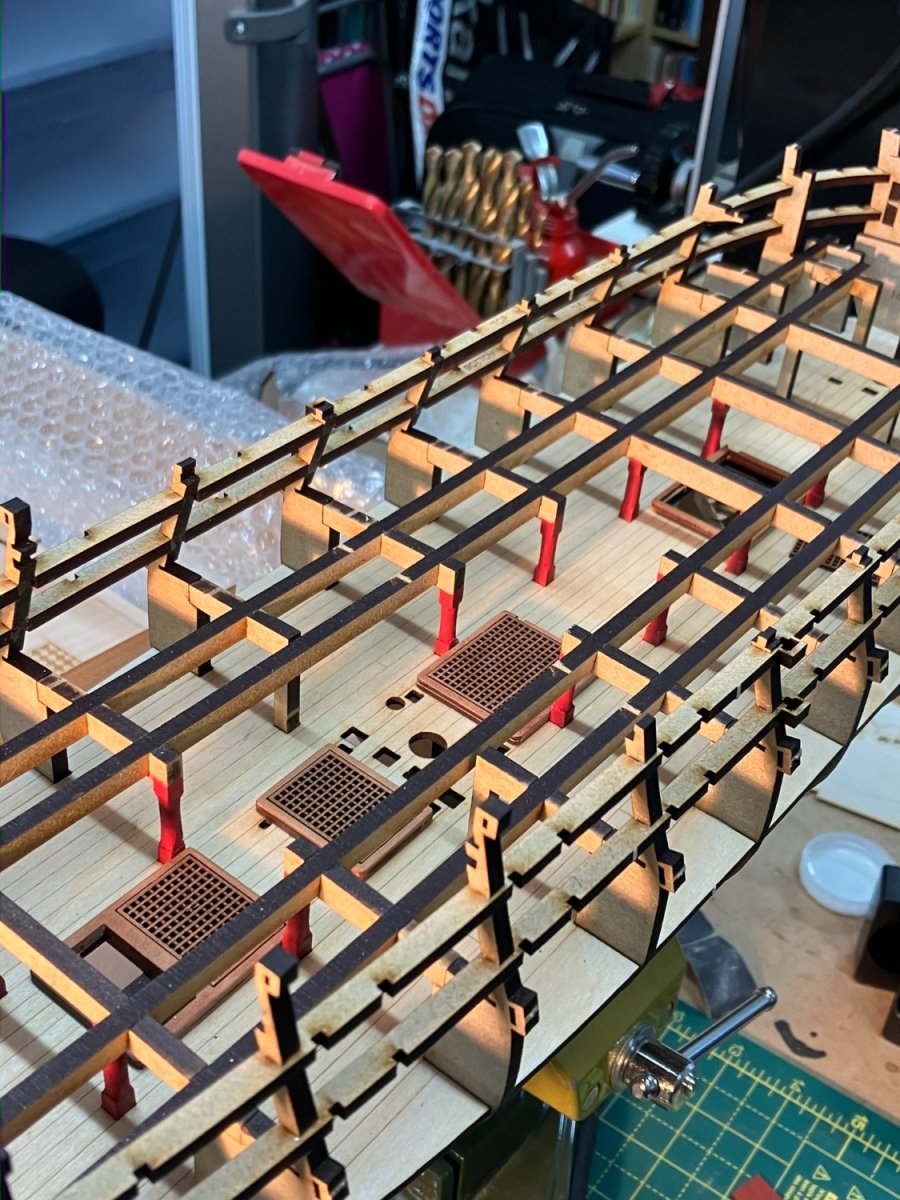
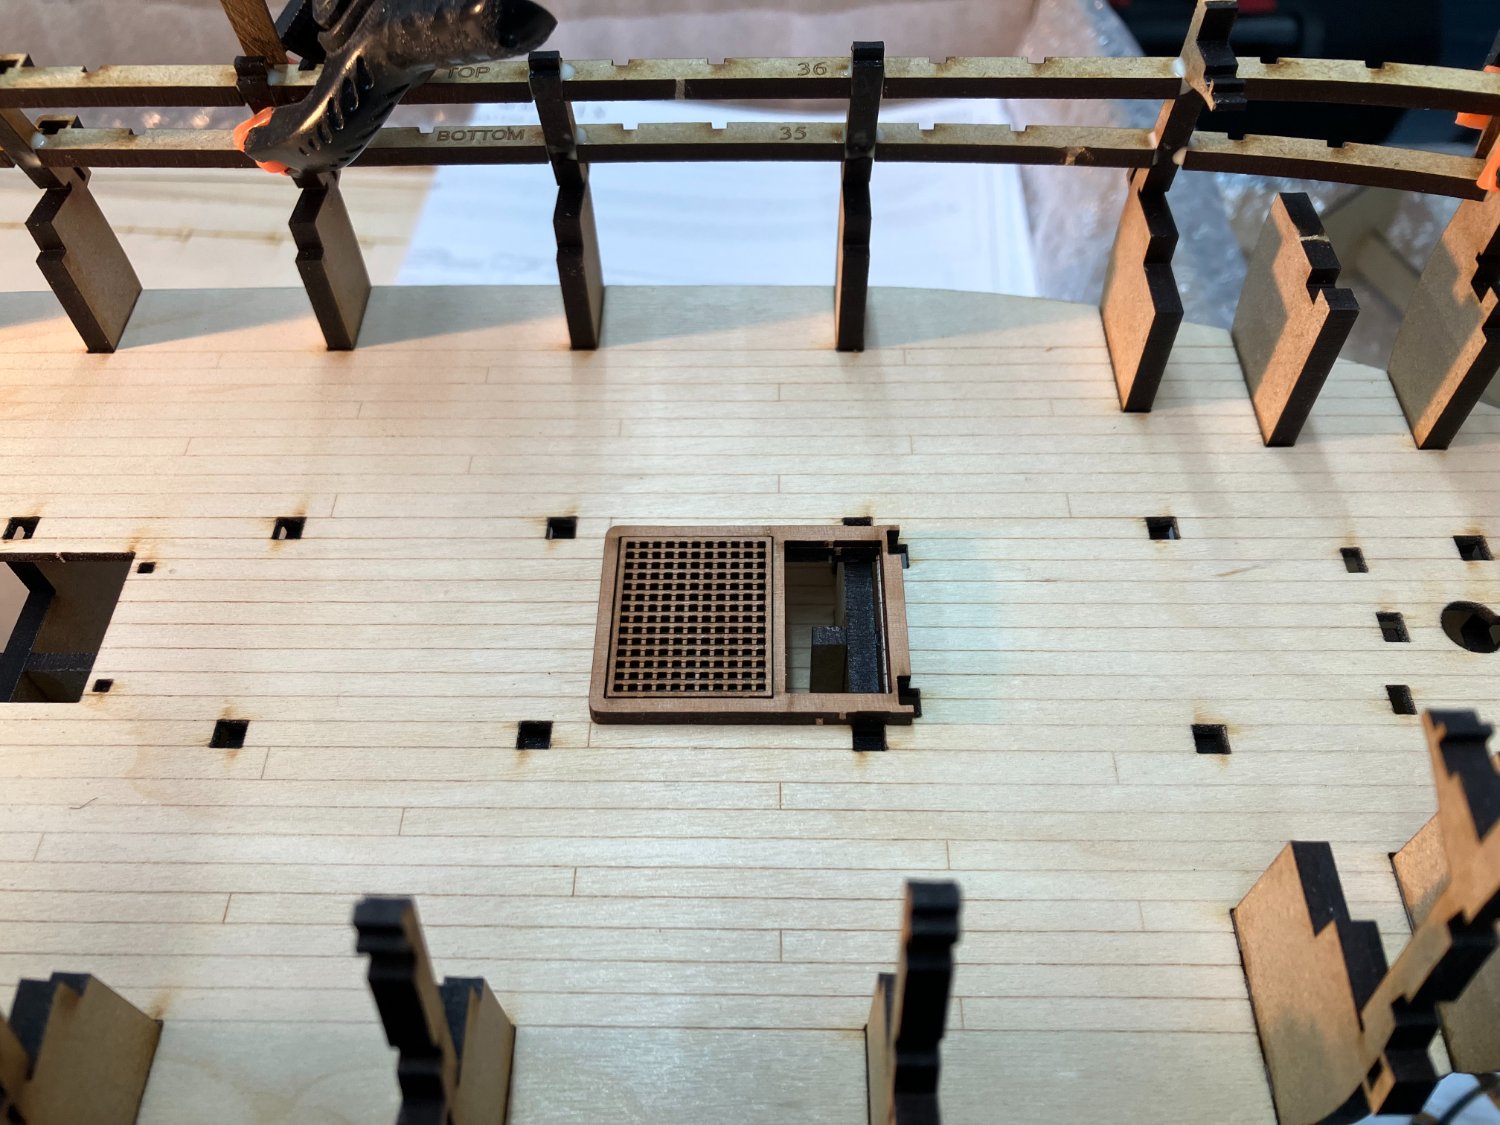
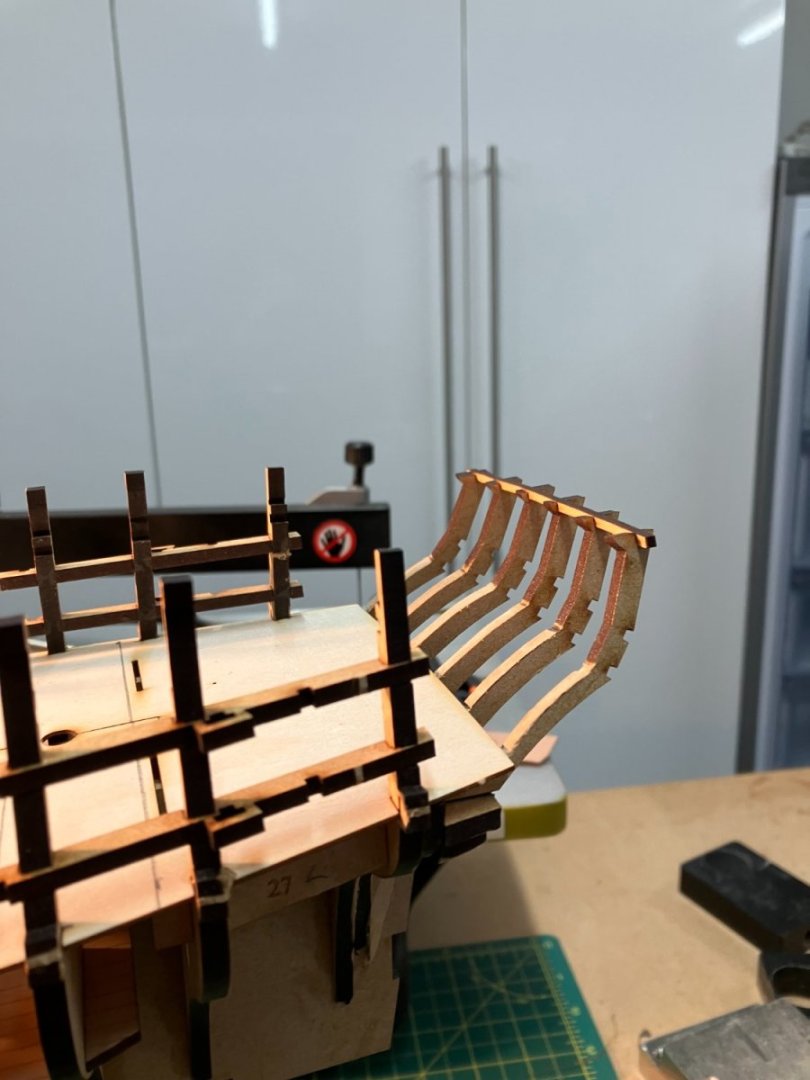
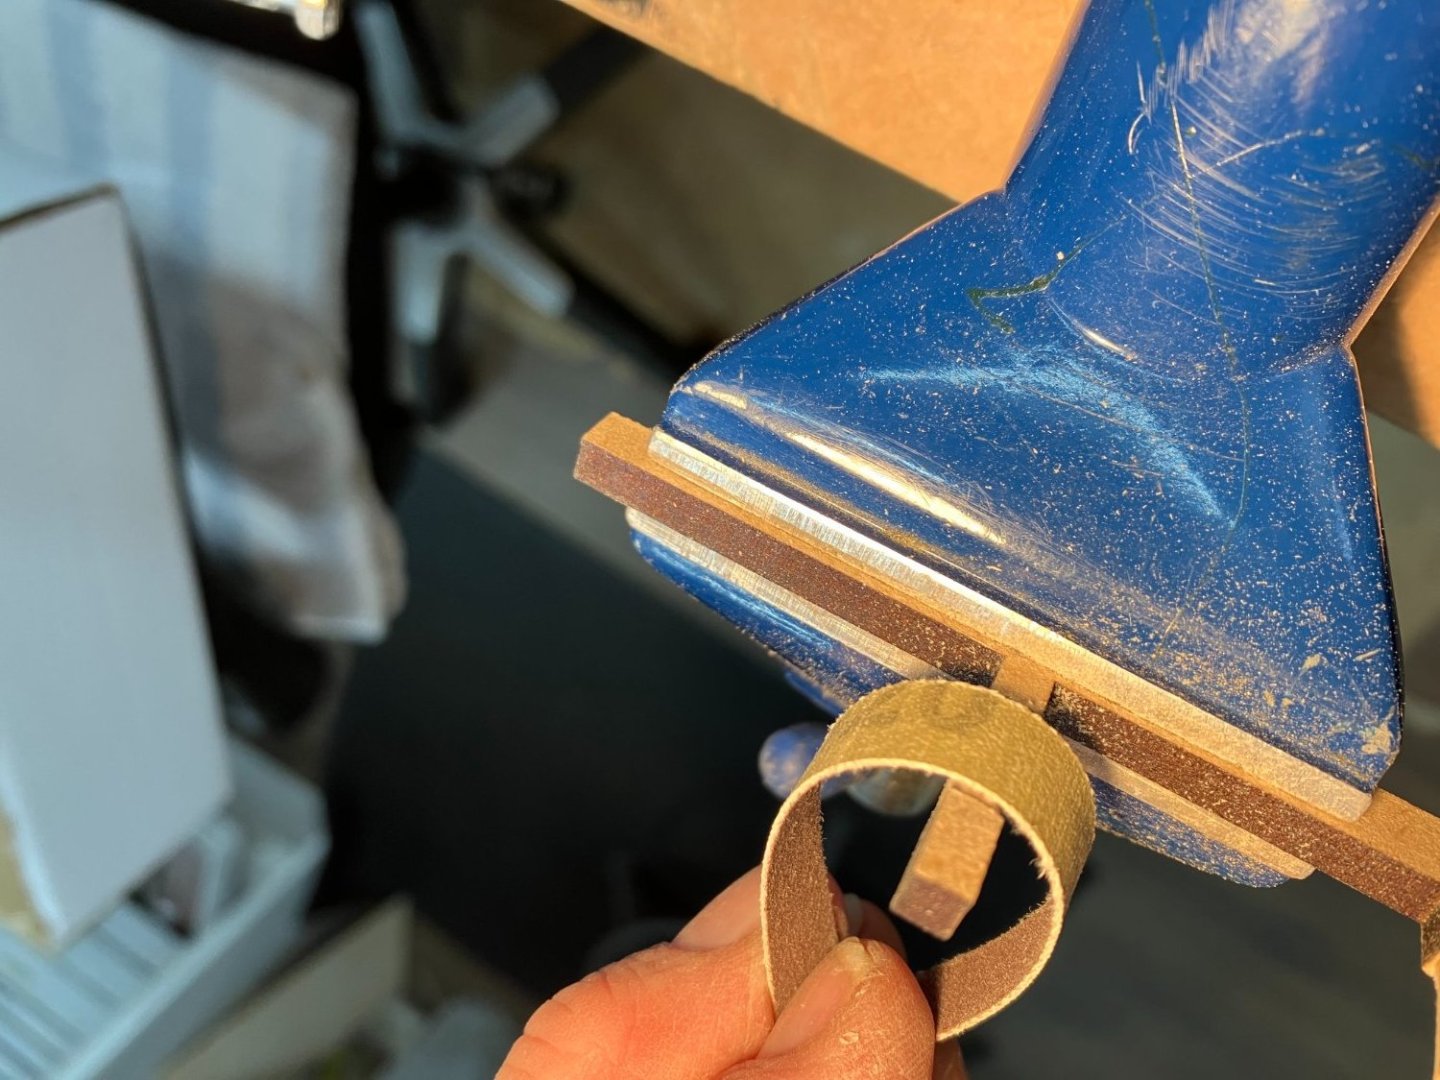
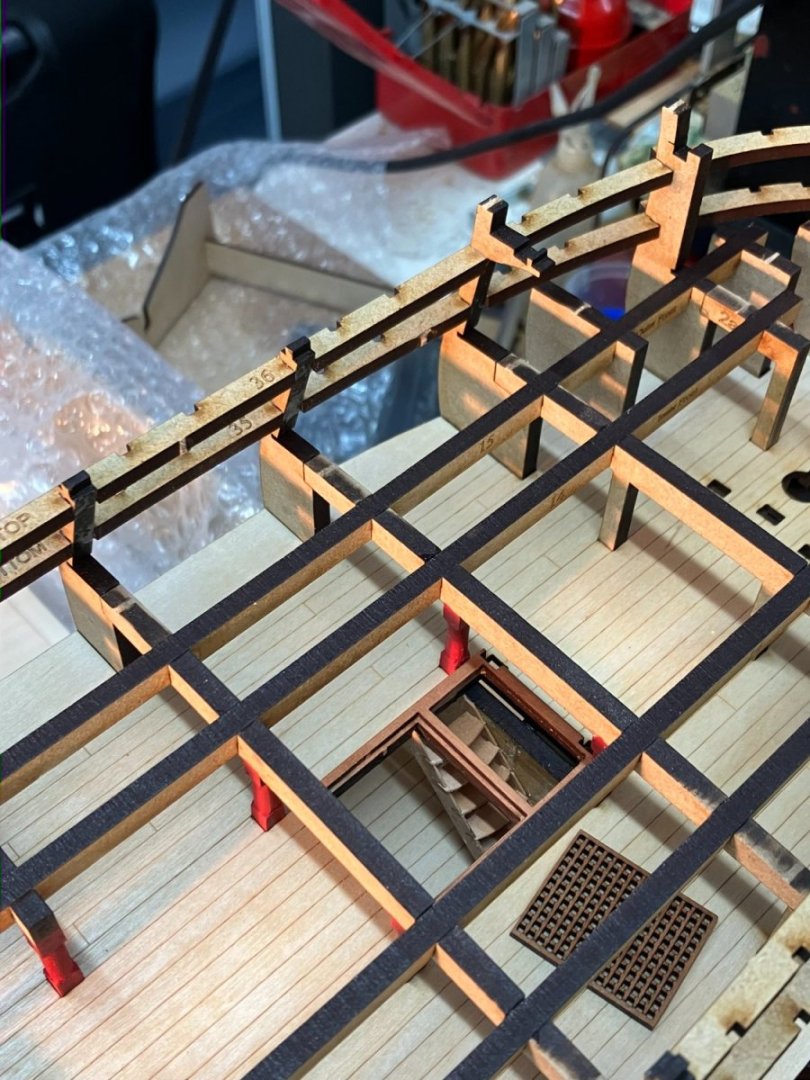
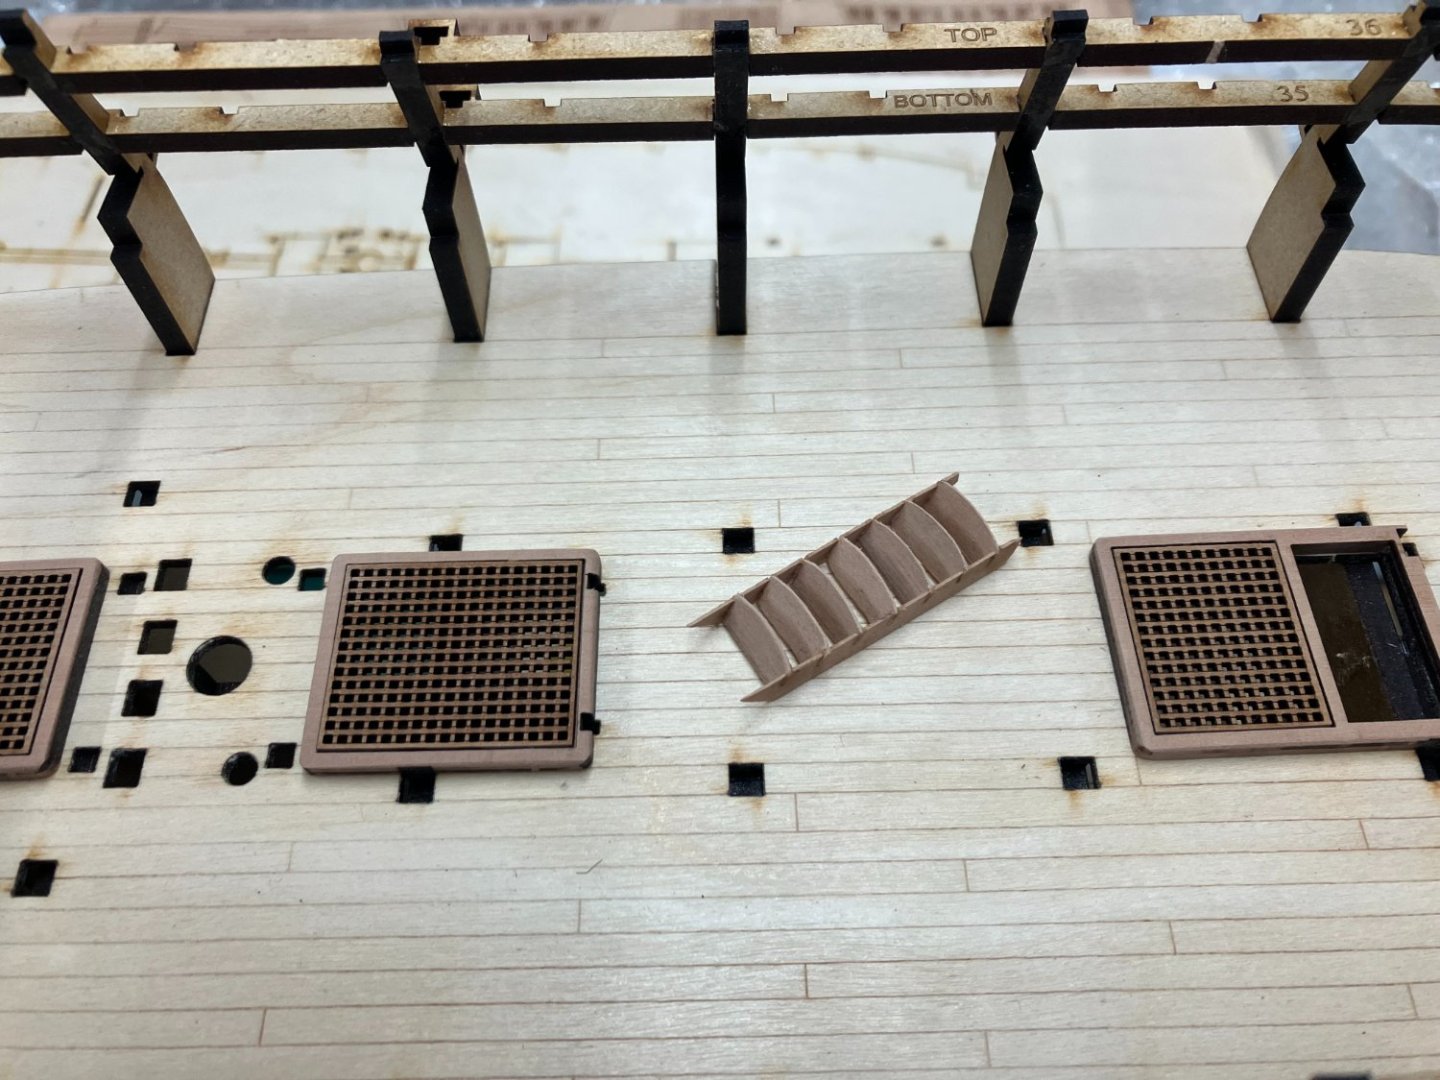
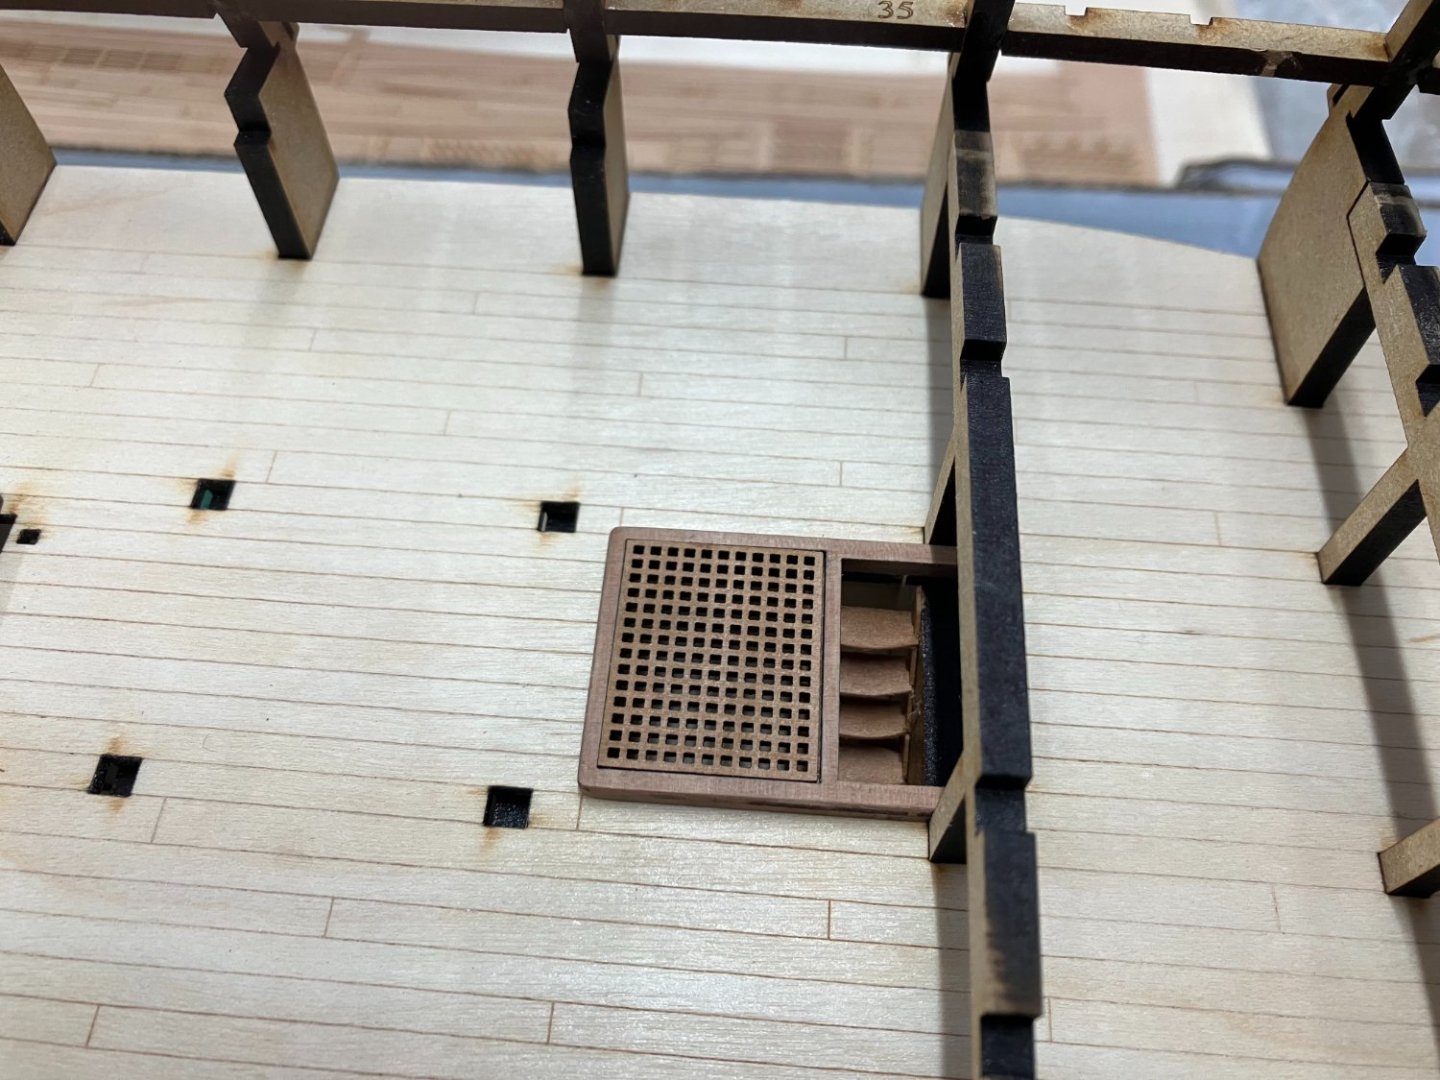
Gundeck Support Beams I'm on tenterhooks this morning as I wait for UPS to deliver Indefatigable. Nevertheless I found time to finish fitting the gundeck support beams, some parts of which needed to be shaped to represent the rounded columns under the beams. I had considered cutting these parts off and replacing them with wooden columns turned on the lathe. However I re-read Blue Ensign's log and noted that he advised against this as it might weaken the structure. In the end I compromised, threw caution to the wind and mounted the whole component in the lathe: To my relief it worked, at least for the single columns. For the doubles I fell back on more conventional and safer methods - initial cuts with a scalpel followed by sanding. I found the best method was to cut a strip of sandpaper to the width of the rounded part of the column and use it on the component mounted in a bench vice: The next choice was colour. To decide between Vallejo Flat Red and Admiralty Red Ochre I painted a couple of test pieces: The Vallejo on the left won hands down, despite having looked far too bright fresh out of the bottle. NB The hatch coamings are not glued to the deck at this stage. When dry fitting the various components on this deck I found that the coamings were a very tight fit between the support columns, so I glued the columns and beams in first, then sanded the edges of the coamings until they fitted. I was glad I hadn't glued them earlier. Here's the current state of play, with the support beams in place together with the four longitudinal beams. I lightly sanded the coamings to soften their sharp edges. A subtle change but giving a more realistic impression, I think. In the last shot I'm considering leaving grating off the foremost hatch in order to display the deck below. If I do I'll have to neaten the side of the ladder I made earlier. On to the stern frames next. Thanks for looking in , and the likes and comments. Derek


-
I emailed Chris to ask when the furniture I wanted might be available. He replied in less than an hour to say it was back in stock, he just hadn't had time to update the website. He also offered to post in the Indefatigable delivery due next week to avoid extra shipping charges. What service! I don't know how he manages to keep all the plates spinning, what with running the business, producing current kits, designing new ones and answering customer queries. I'm just grateful he does.
-
Thanks, I hadn't thought of that. I'll order some furniture as soon as the selection I want is back in stock. Derek
-
Thanks Sam. The trouble with Chris Watton is that he designs and produces kits far faster than I can build them. I've got Indefatigable on order so no doubt she'll sit on the shelf tapping her foot impatiently for a year or so while I build Sphinx. Still, having too many kits to choose from is better than having too few. Your Endeavour is coming along nicely so hopefully Sphinx won't have too long to wait. Best wishes Derek
-
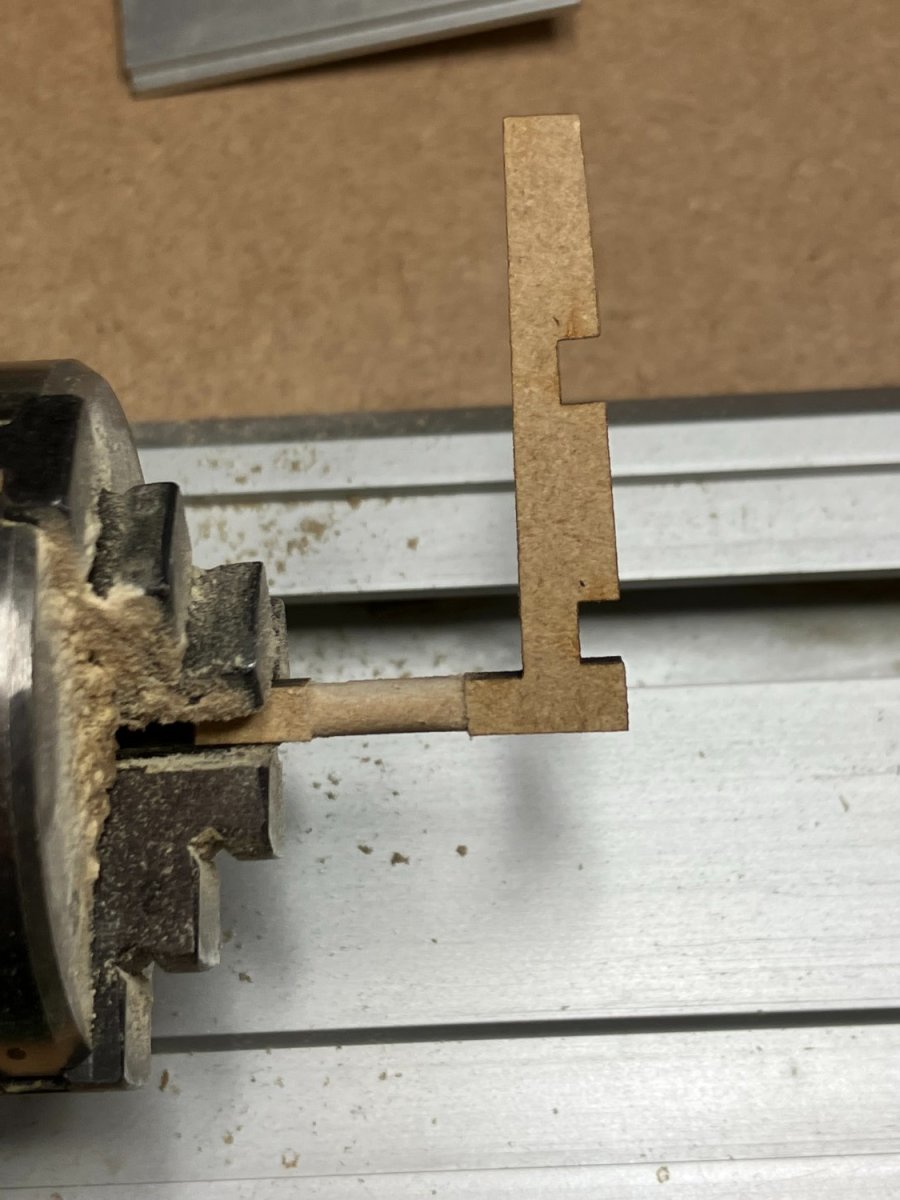
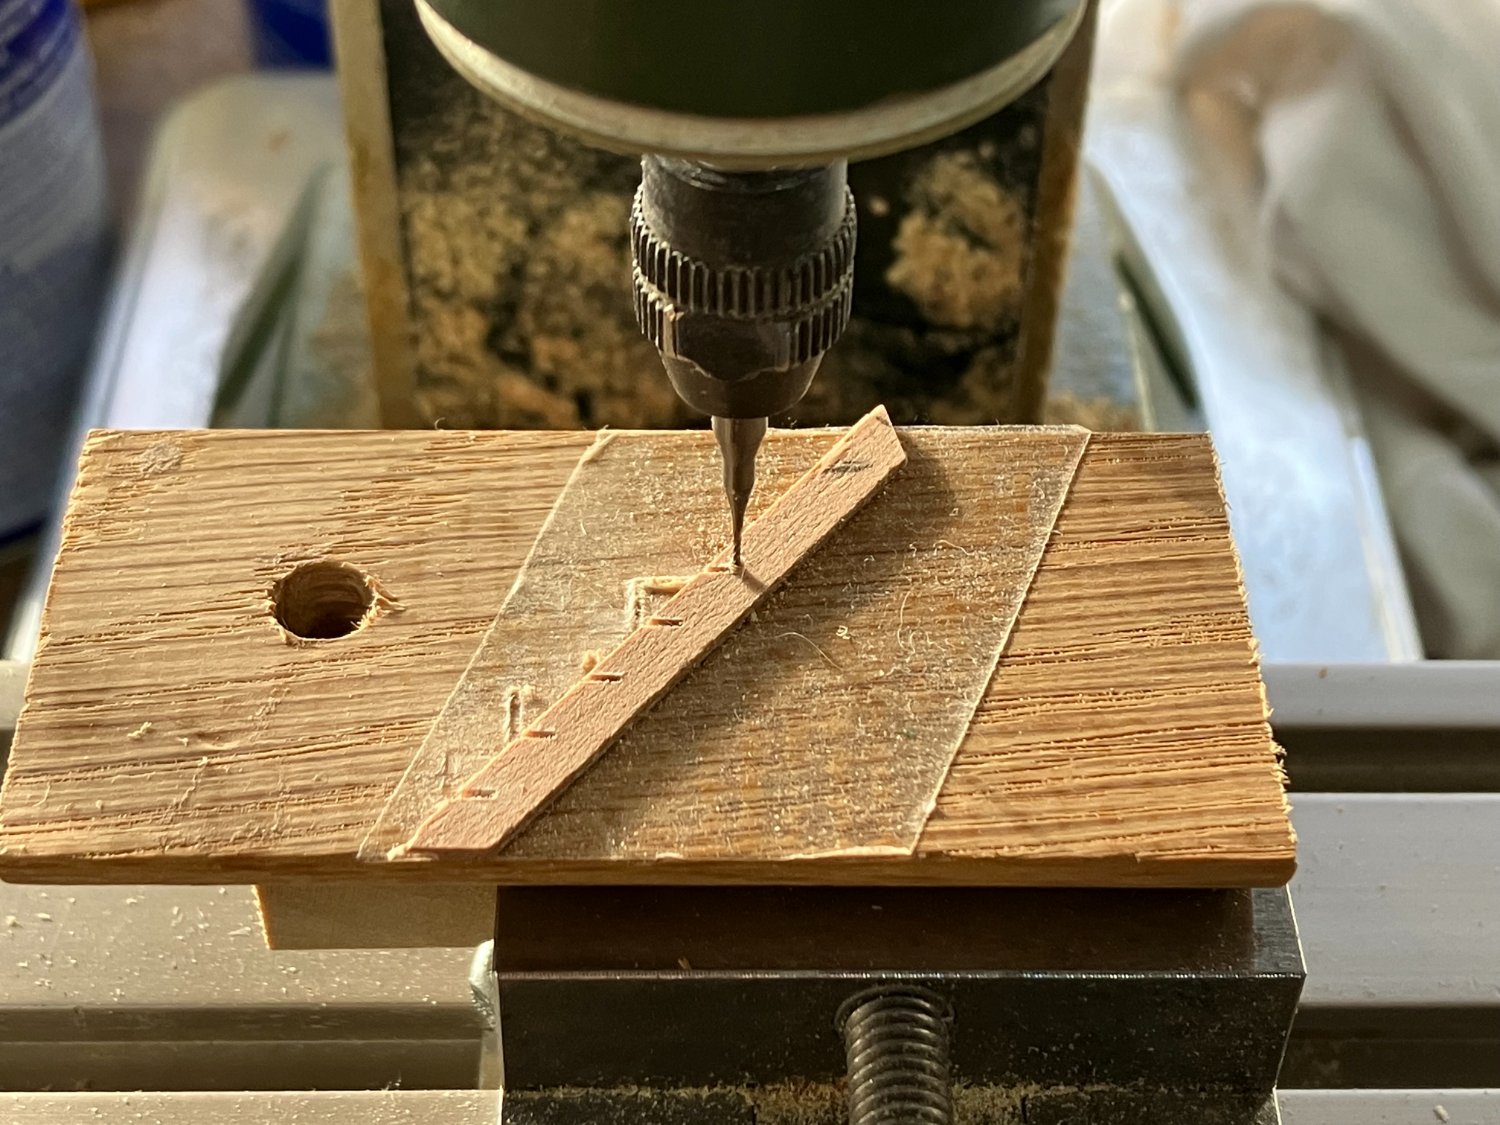
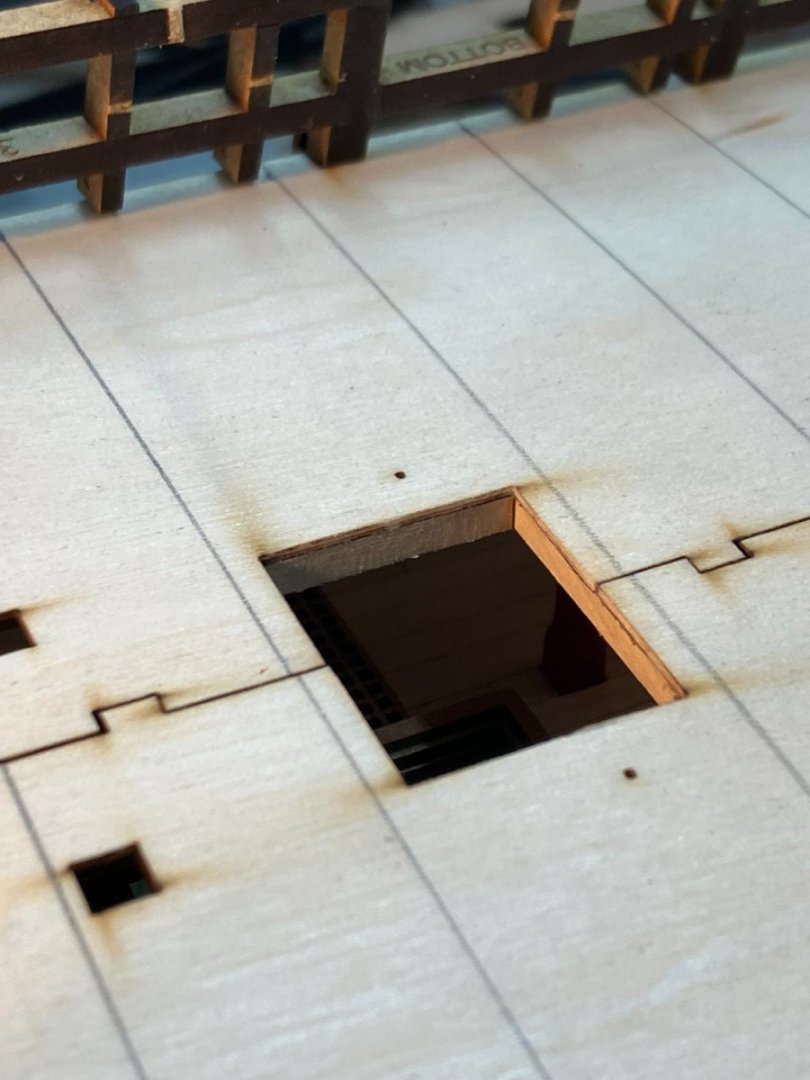
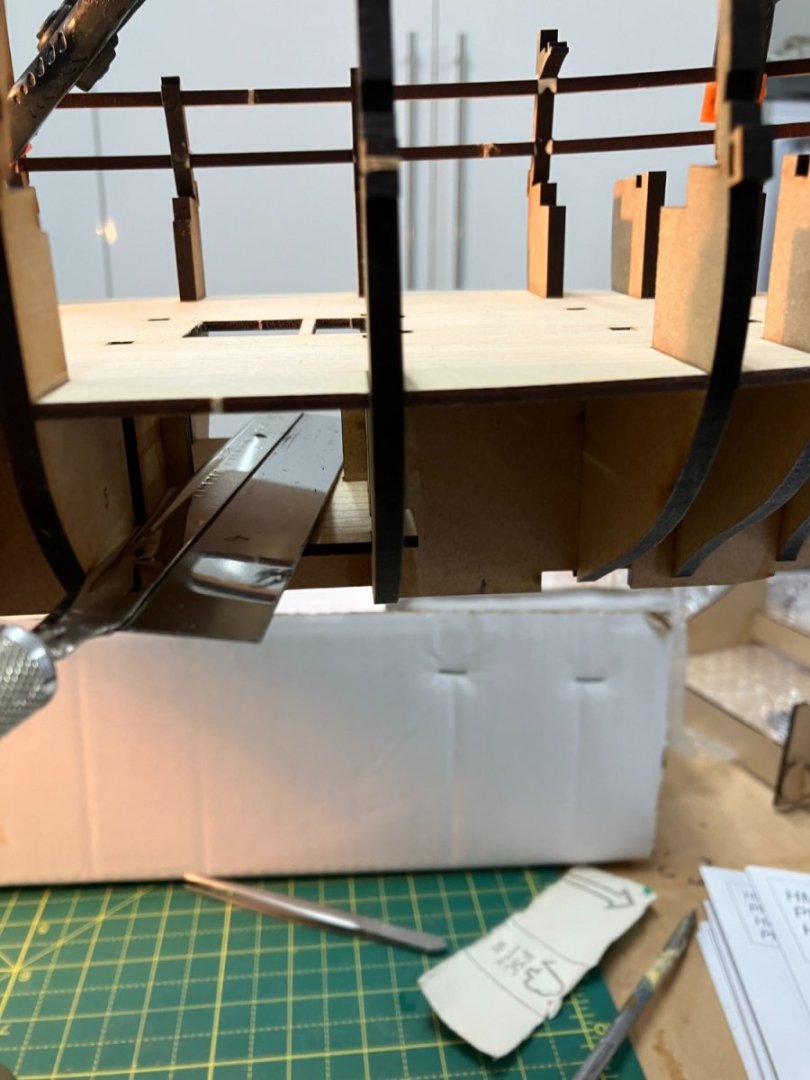
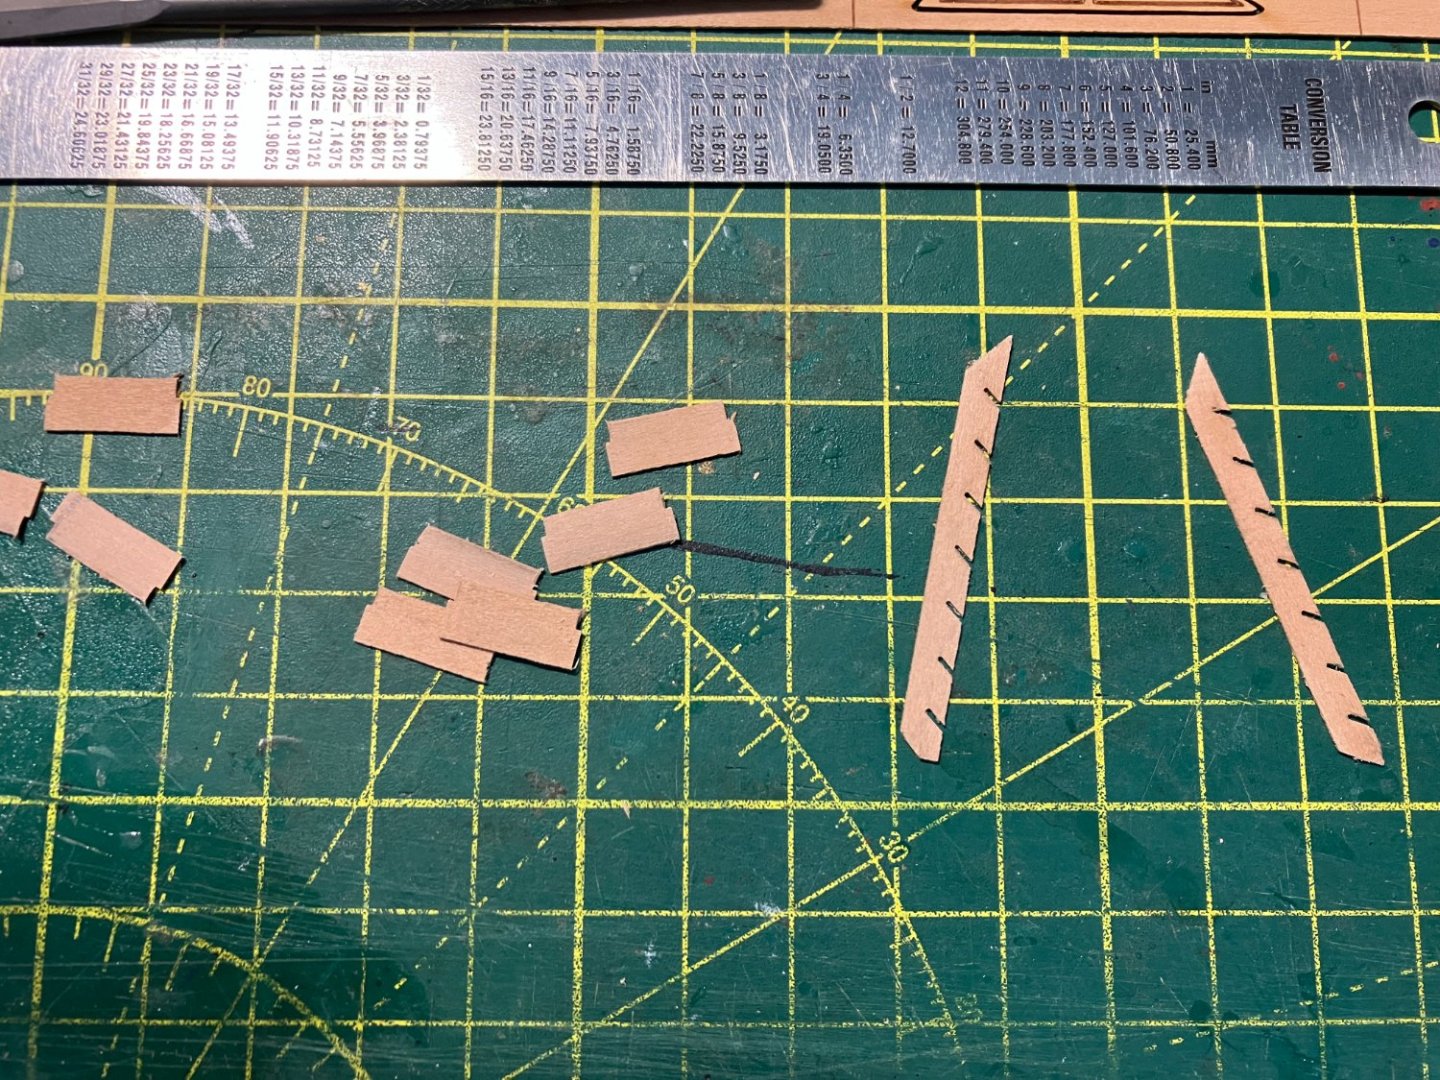
Lower deck decisions Blue Ensign's Sphinx underwent extensive surgery to some of her bulkheads and her keel to allow access from the lower deck to the fore and aft platforms. The fore platform is provided in the model. but B.E had to make the rear platform and the ladder leading to it. I initially decided that neither mod justified chopping bulkheads in half and other such hair raising alterations. I reasoned that neither would be very visible once the upper decks were in place, with the rear platform in particular requiring an endoscope to get anywhere near it. So I glued the lower deck in place, sans mods. Of course as soon as I looked at the result the lack of access looked right back at me. In particular, the top of bulkhead 4 and the keel visible through the foremost ladderway stuck out like a sore thumb. Consequently I tried to come up with a practical and hopefully non-destructive way of recovering the situation, at least for the fore platform. I eventually concluded it would be too difficult to cut a chunk out of bulkhead 4. Instead I decided to chop the short length of false keel (the one at right angles to the bulkhead in the photo above) short enough to allow a ladder to fit over it. My crew will be slimmer than B.E.'s and therefore their ladder will comfortably fit in the space next to the bulkhead . I used a razor saw to cut the keel: The kit ladders are laser cut from 0.6mm pearwood. I used a spare piece from the kit sheet to cut the ladder sides and treads, then it was over to the Proxxon mill to use an 0.6mm end mill to cut the necessary slots: I used double sided tape to fasten the ladder sides to each other and to a wooden table made with a couple of pieces of scrap glued together and held in the vice. The mill is fairly low powered, and with such a small end mill the tape was sufficient to hold the workpiece rock steady. Here's the slots cut: I used a sanding stick to round the treads before gluing them in their slots: And here's the final result - probably the last clear view anyone'll have of the ladderway! I'll plan more carefully in future. Derek PS just noticed that hatch is upside down and you can't see the realistic ledges and battens (visible in the preceding photo)- fortunately it's not glued yet


-
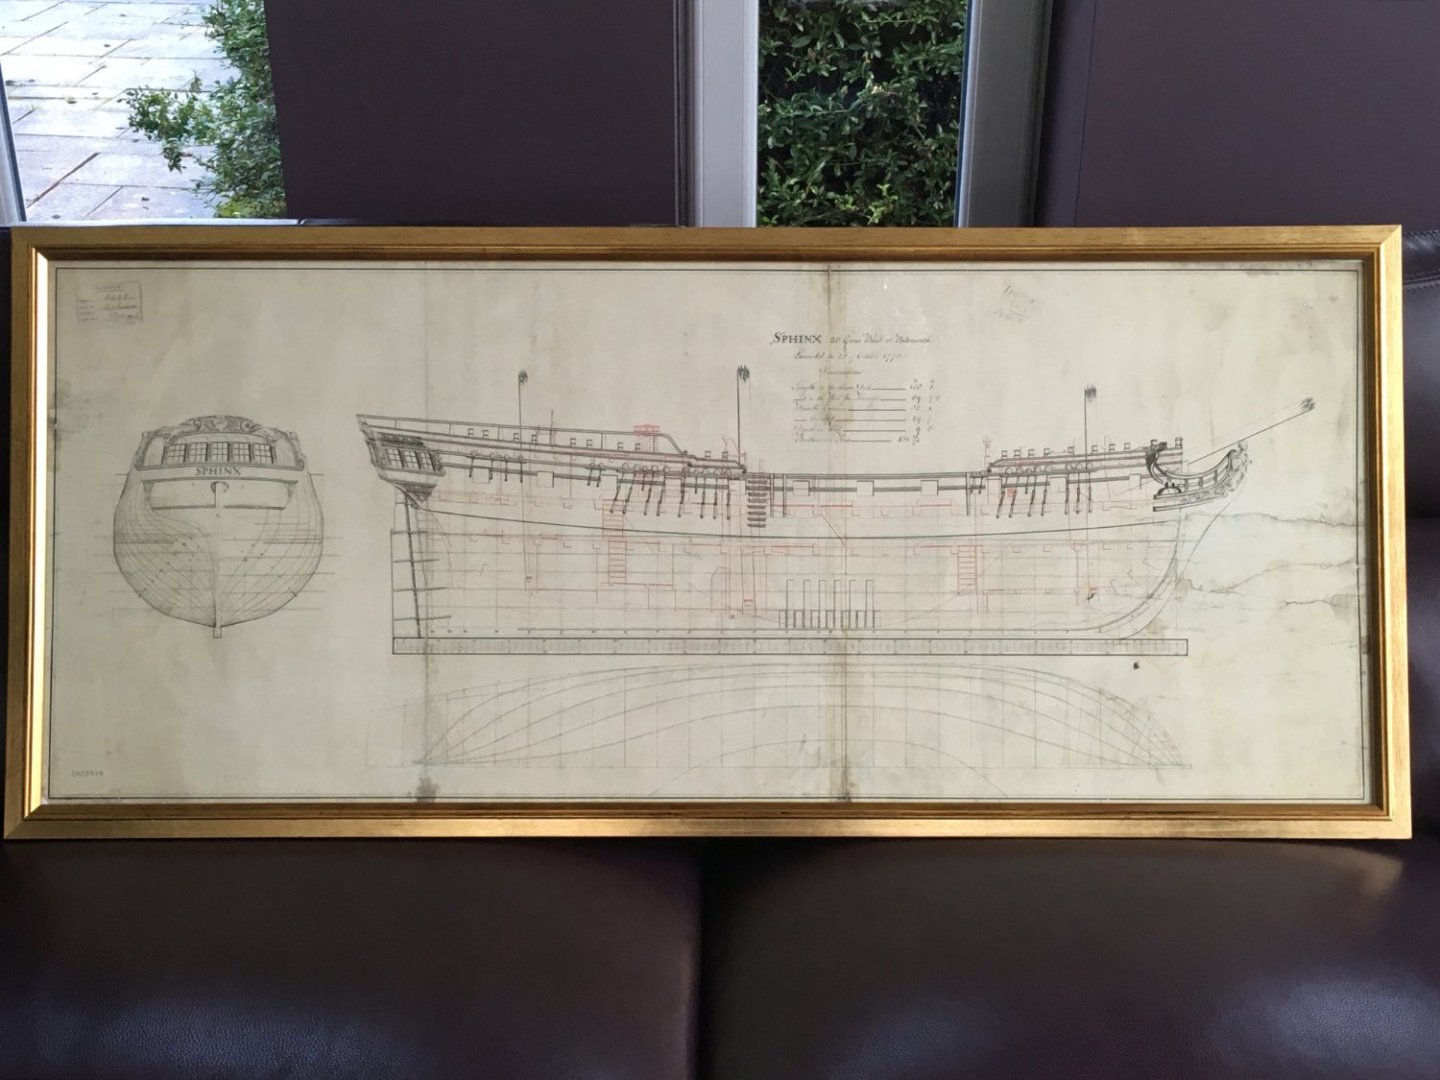
Having completed HMS Speedy and The Duchess of Kingston I'm moving on to my third kit from Vanguard Models. I received HMS Sphinx in late 2021 and apart from opening the box to drool over the contents she has stayed on the shelf whilst I built the Duchess. Shortly after ordering her I bought a copy of her original draft from Greenwich and had it framed, which at least kept the interest alive: I have always intended to build Sphinx as a Navy Board style model, with no masts and with at least some of the decks missing to expose internal detail. I was very nearly tempted away from that plan by Ron (@hollowneck)'s magnificent rendering of the kit as HMS Camilla, complete with sails in a most realistic seascape. However I reluctantly put temptation aside and decided to follow in the footsteps of another fine builder, Blue Ensign (@Blue Ensign) who led the way down the Navy Board route. Others have described how well packaged and presented the kit is, so I won't repeat that here. Neither do I intend this log to be a blow-by-blow account of the build. I see little point in simply recording steps that are perfectly well described in the excellent manual. Rather, I will limit the log to points of particular interest - problems encountered, solutions found, novel tools and techniques and any kit bashing/enhancements. I got to this stage fairly quickly and with no problems or deviation from the manual: I built the supplied building cradle (right, in the photo) but at this early stage chose to use my homemade keel clamp. As with all the Vanguard kits I've had, I was impressed by how accurately the components had been cut, and how well they fitted together. The only issue I had was around how much fairing to do off the model. The manual seems to suggest a fair bit to the bow and stern assemblies but I bottles it, and have probably left myself with a lot to do later in the build. Here's my half-hearted attempt at the stern: Thanks for looking in. Next, I'll describe the first departure from the kit. Derek

-
Thanks Dave. I've just started HMS Sphinx and will open a log shortly. There are some great builds already out there and I shall be shamelessly copying from the likes of Maurice and Ron ( @Blue Ensign & @hollowneck ). Good luck with your own build. Derek
- 345 replies
-
- 2
-
-
- Duchess Of Kingston
- Vanguard Models
- (and 1 more)
-
Thanks David, I appreciate your kind comments, but there's no need for embarrassment on your part. I've just looked at your log and seen the extra details you've added to your shrouds, such as the leather caps on the ends and the crossing turns on the seizings, and you should be pleased with the result. We all want to improve, but don't beat yourself up when you're already achieving a good standard. And I'm still jealous that you've gone one better than me and included a ship's boat! Best wishes Derek
-
To round the log off, here's a couple of shots from the Antarctic trip I've just returned from - a land of stark beauty. Amongst many other things we had fun spotting weird shapes in icebergs, including the lion in the second photo: We sailed from Ushuaia which is billed as the southernmost city in the world, so I was surprised to find out that there are cities in England that are closer to the North Pole than Ushuaia is to the South Pole. Thank goodness for the Gulf Stream! Derek


- 345 replies
-
- 7
-
-
- Duchess Of Kingston
- Vanguard Models
- (and 1 more)
-
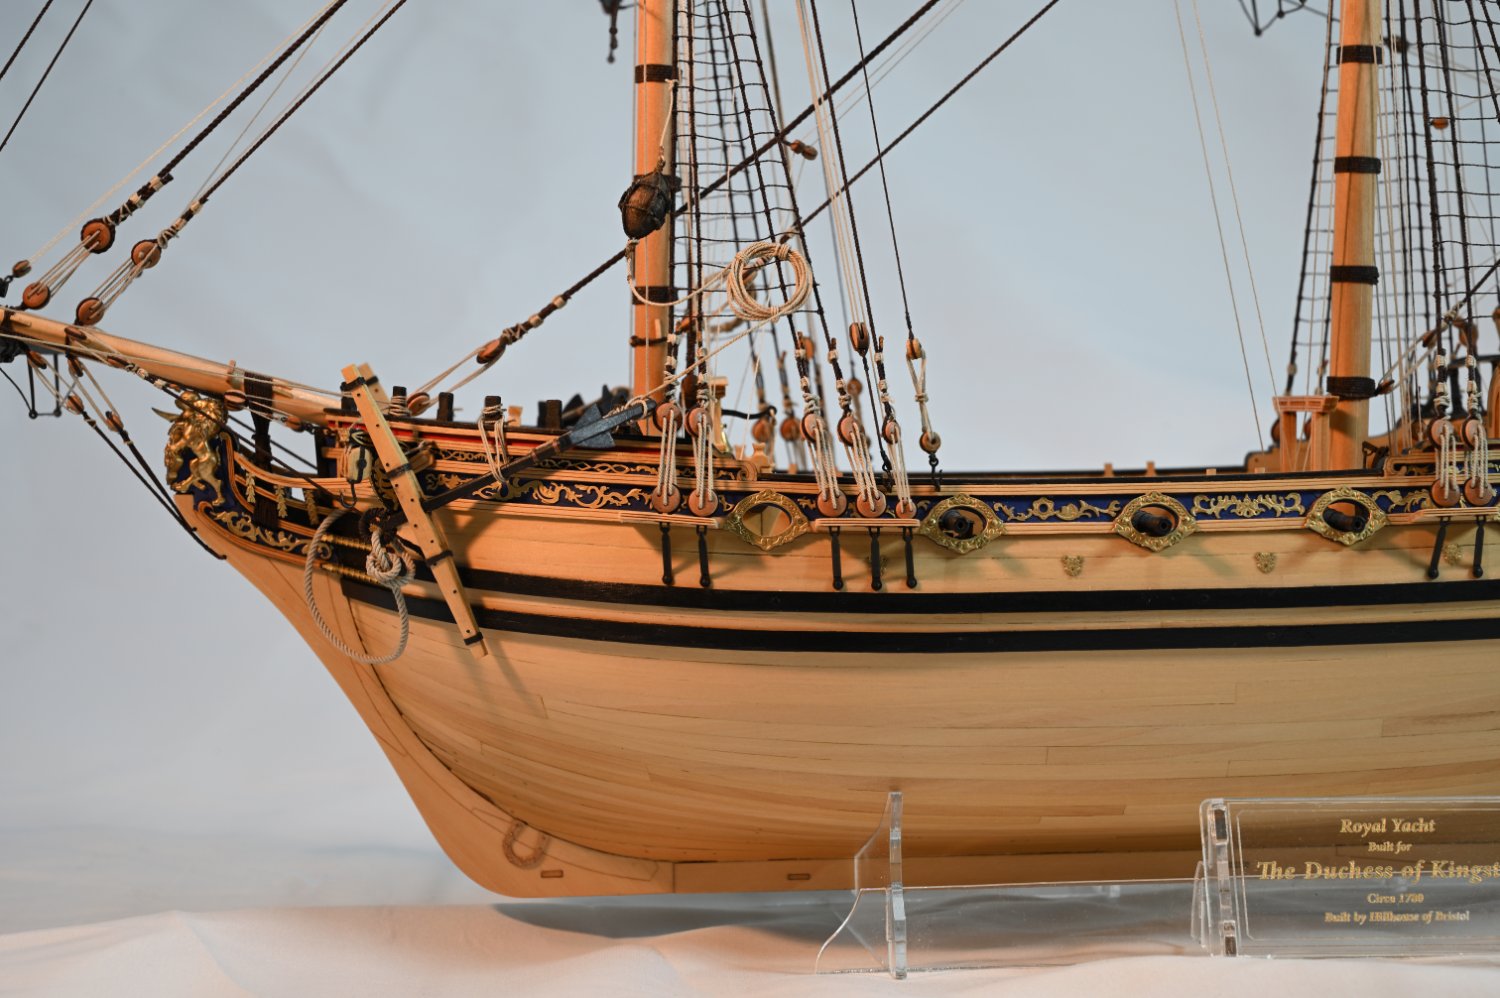
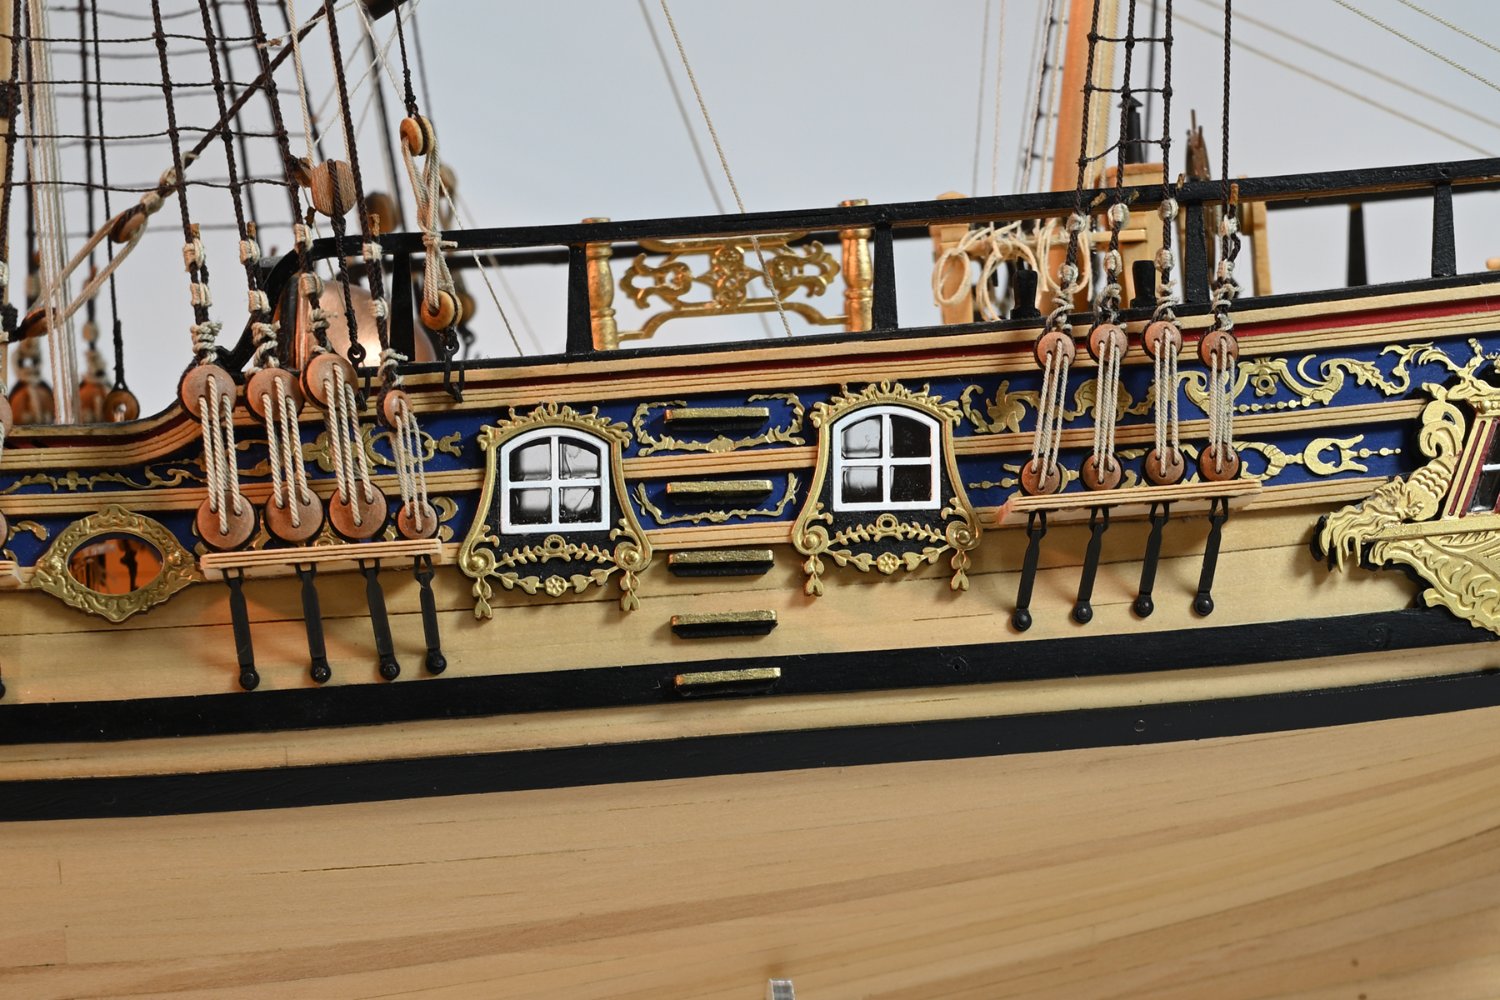
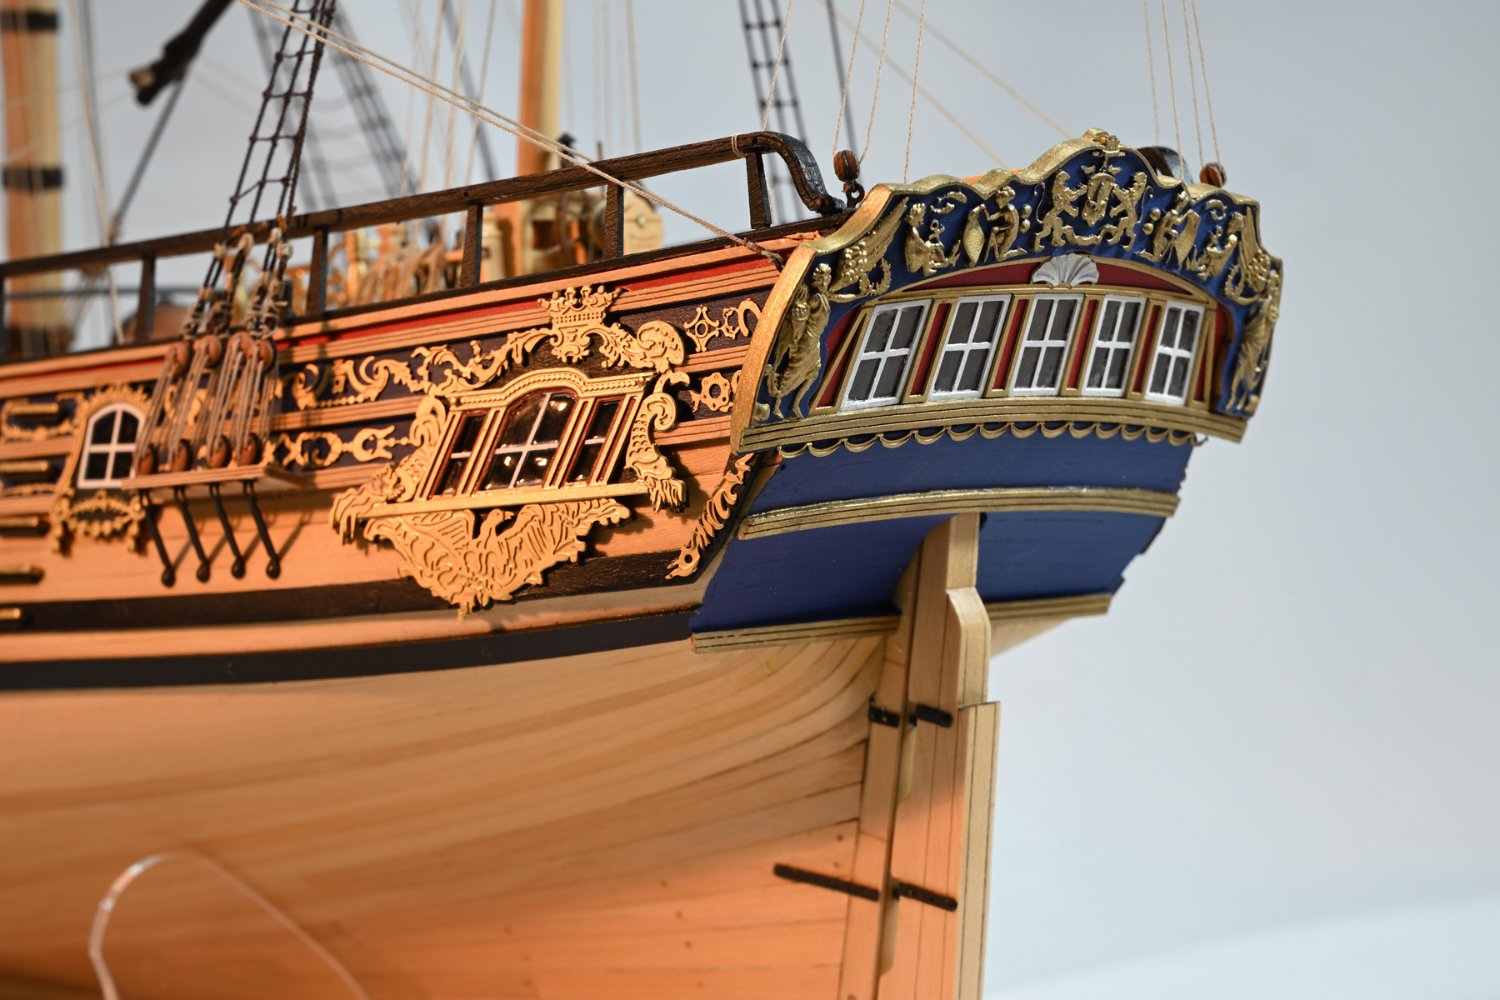
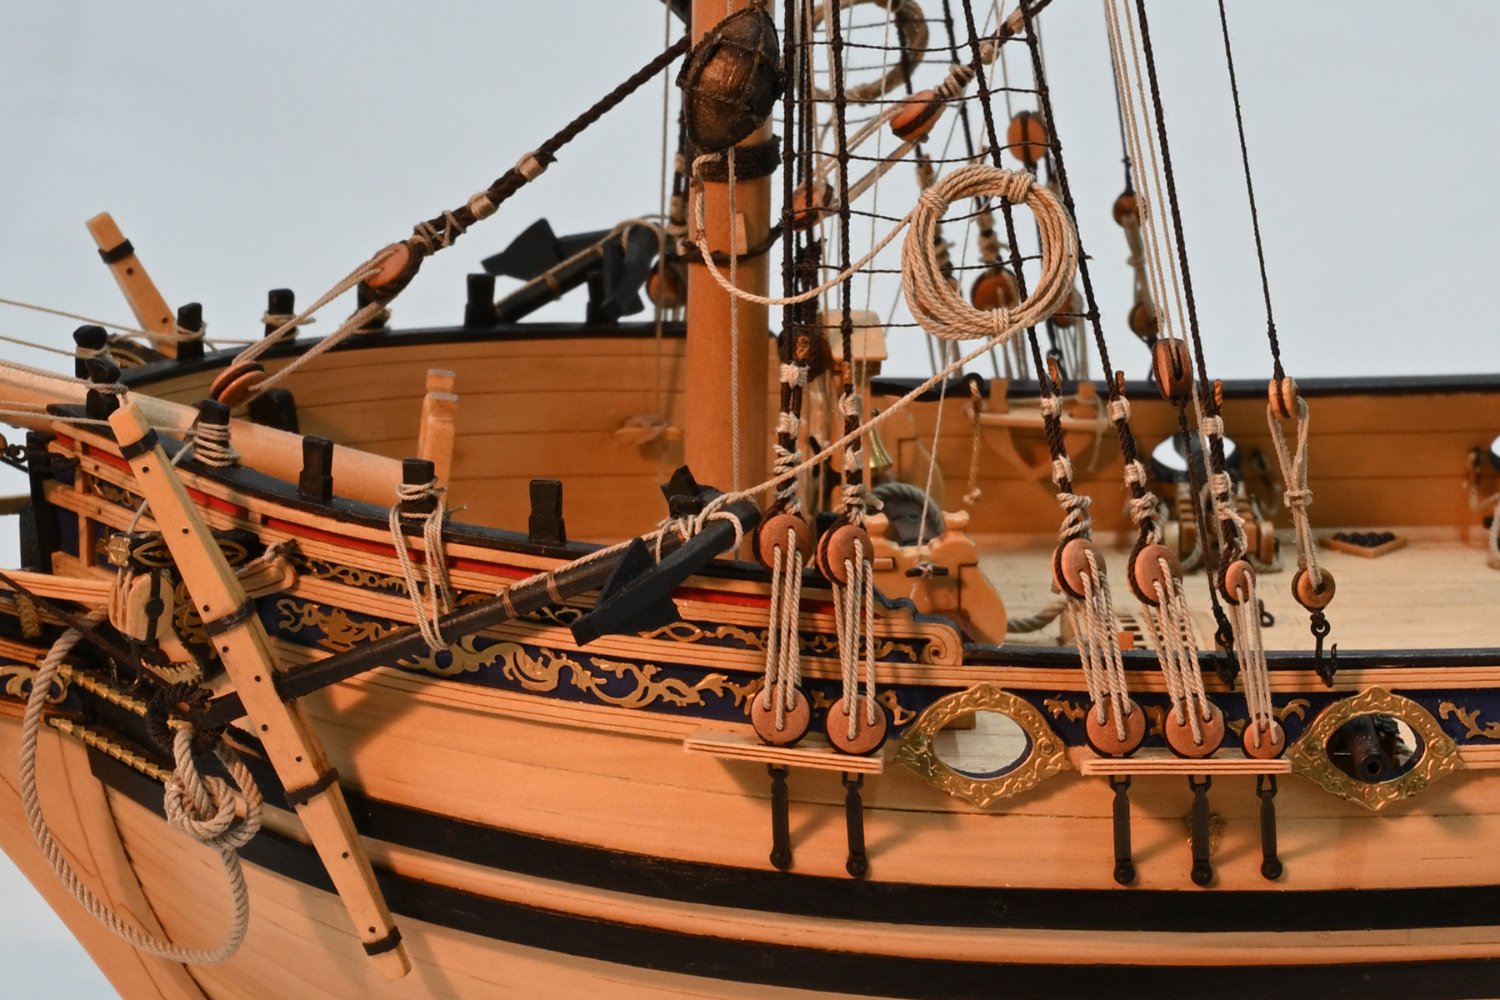
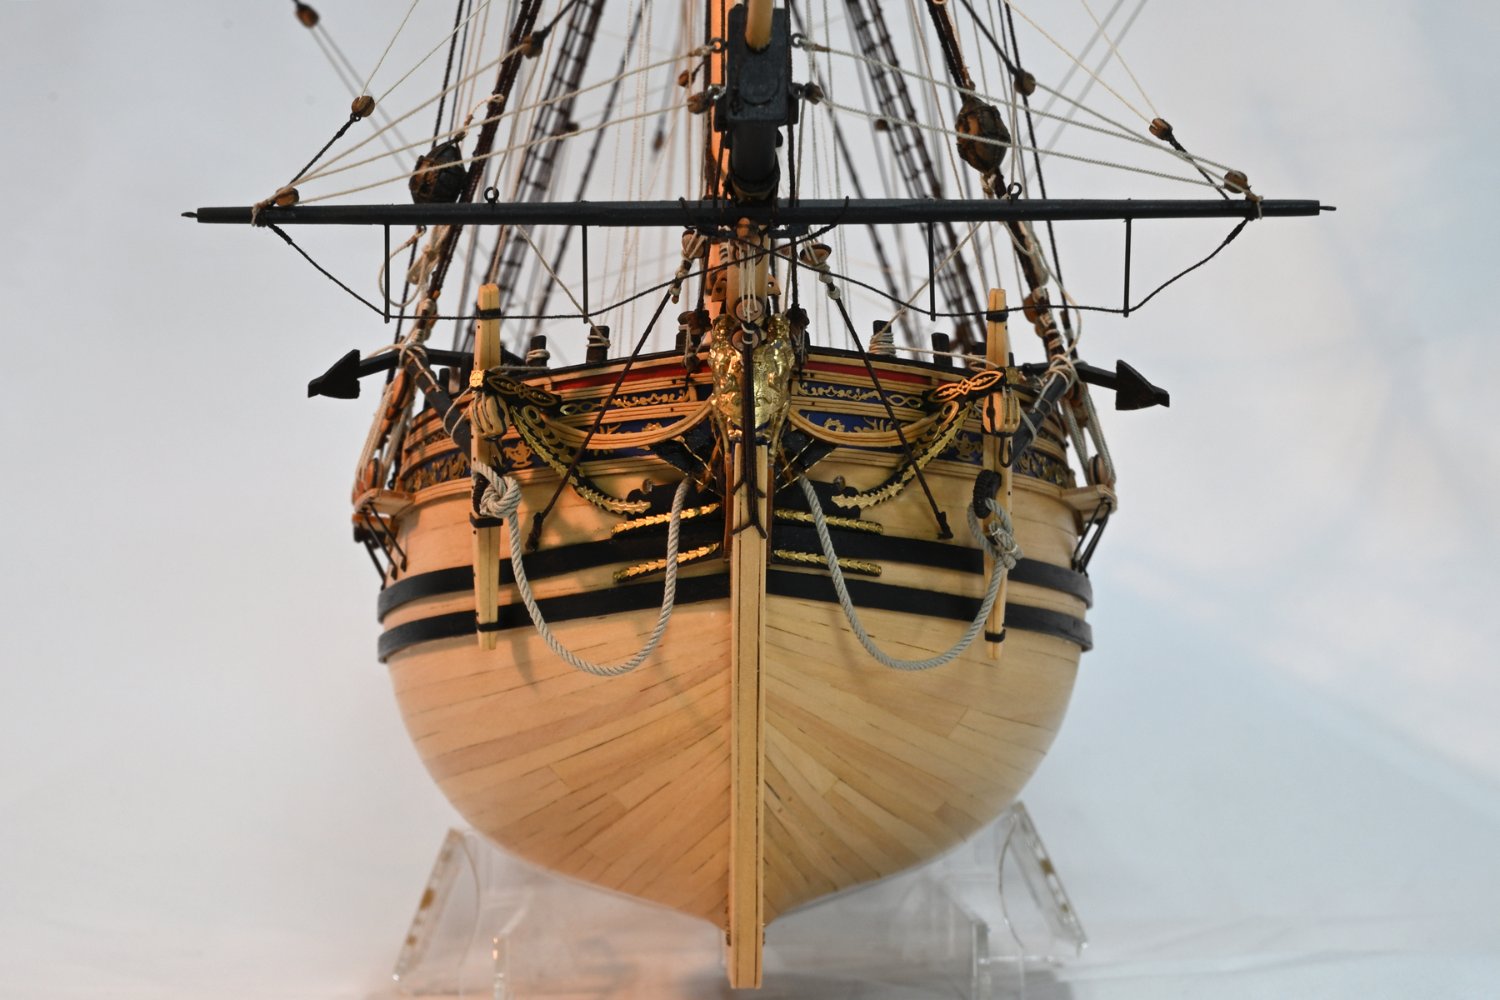
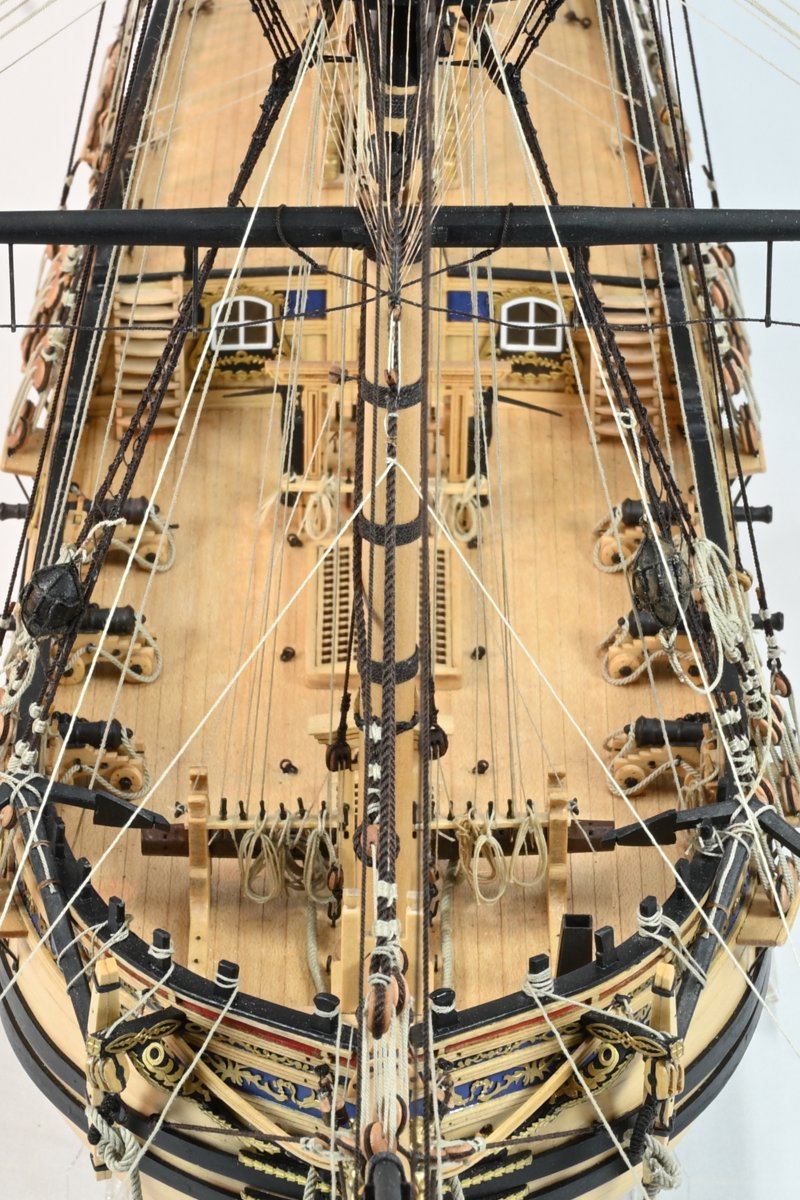
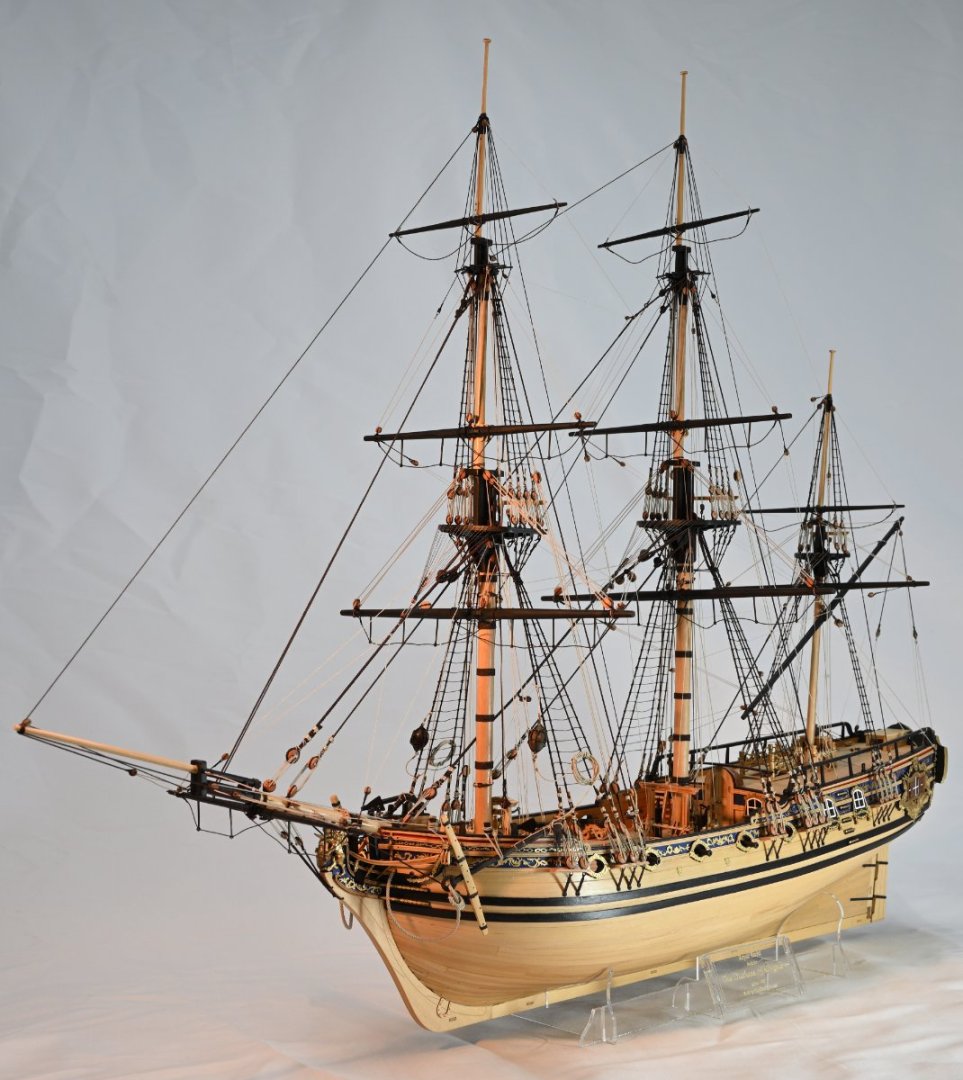
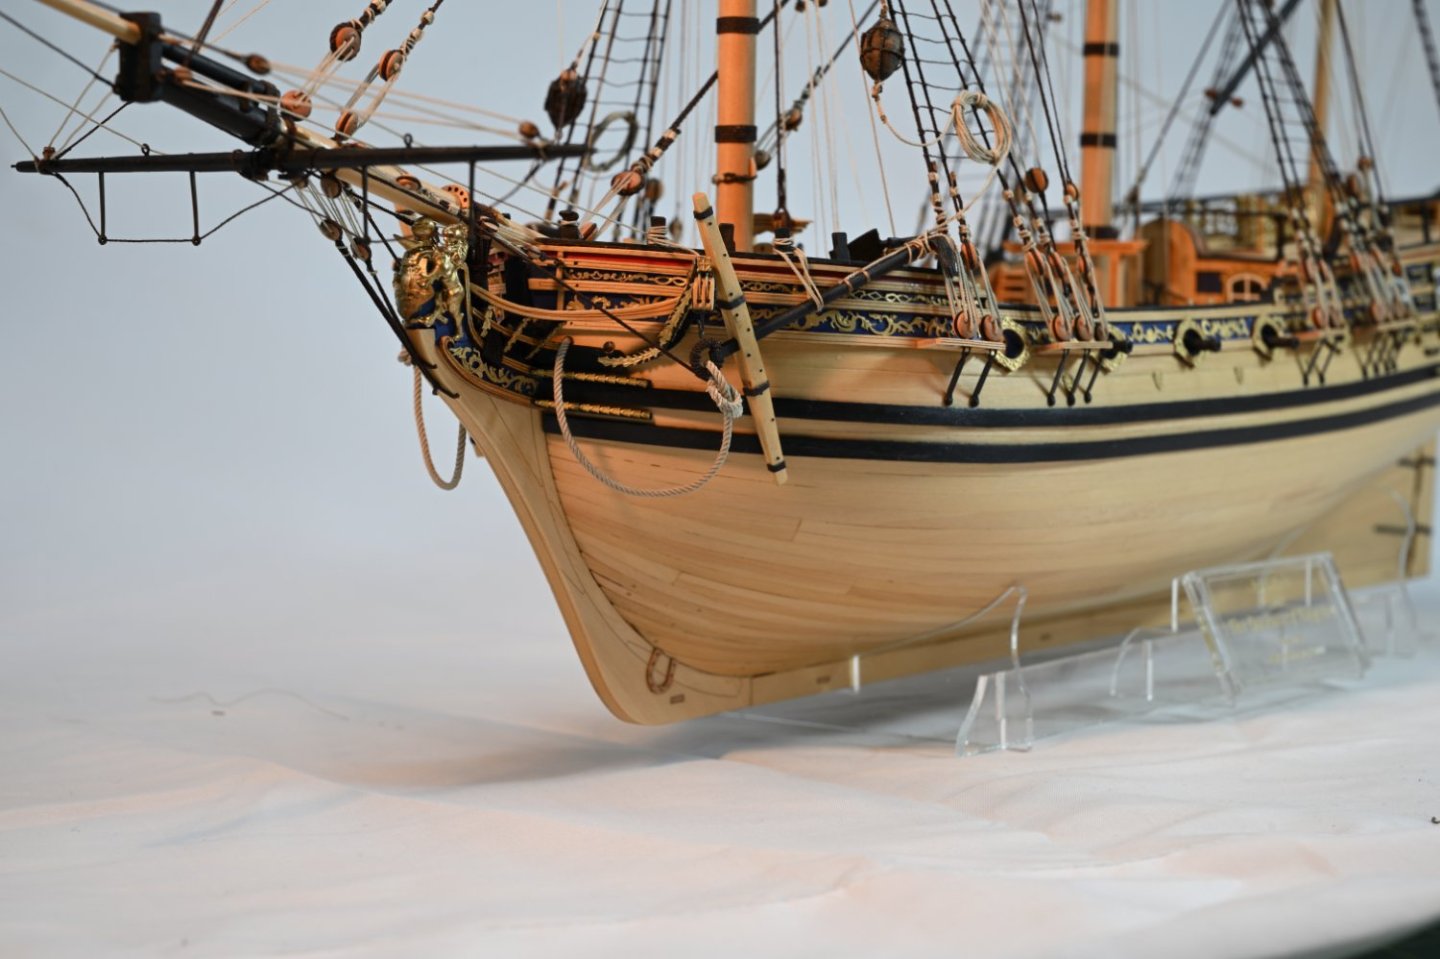
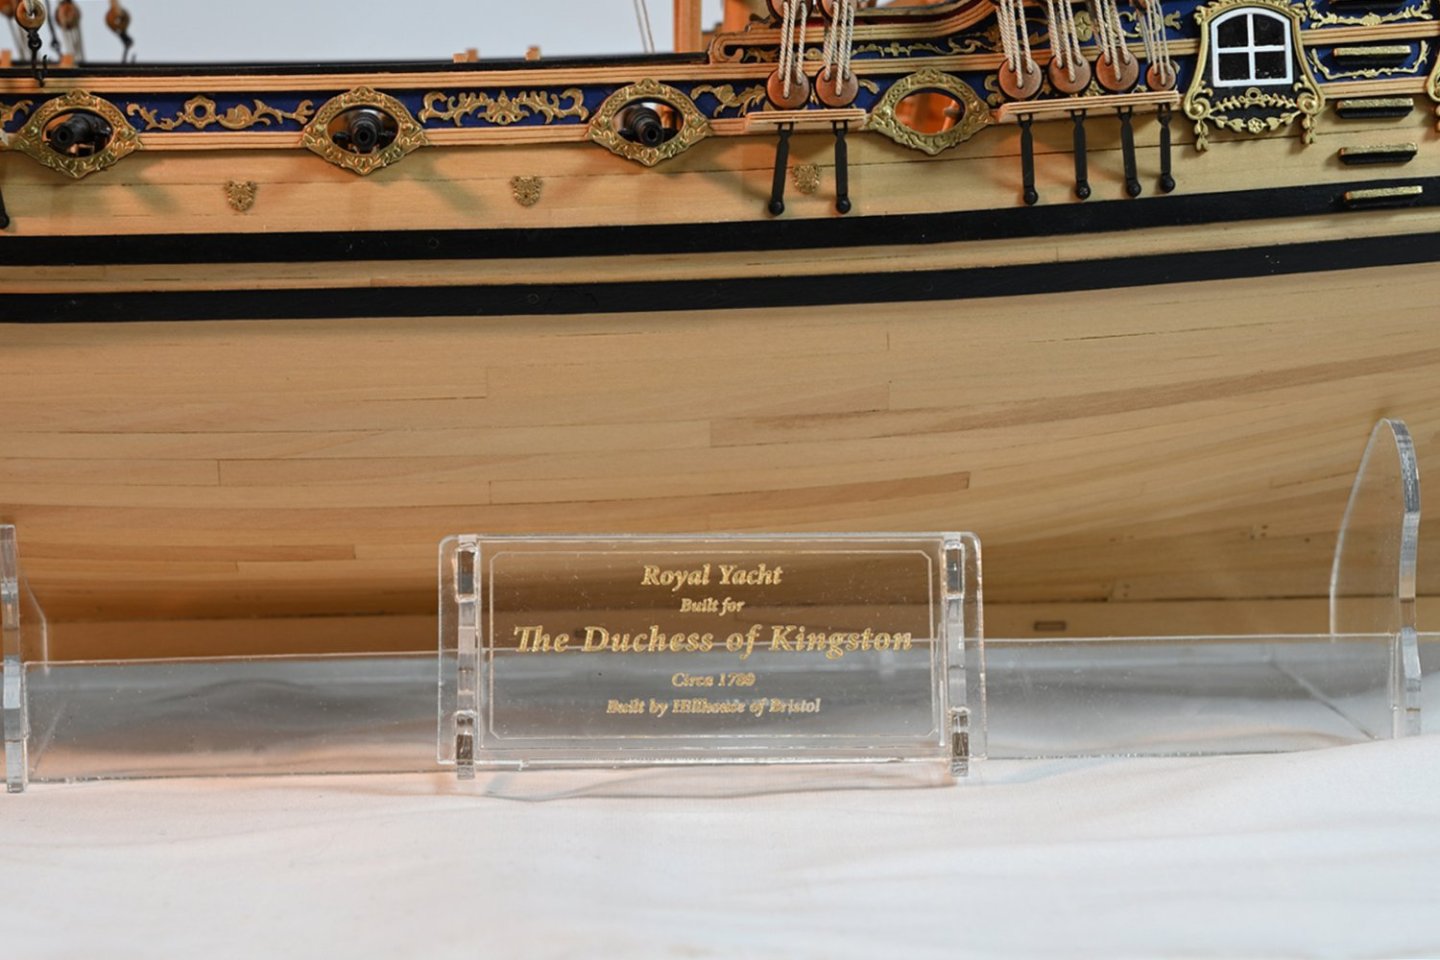
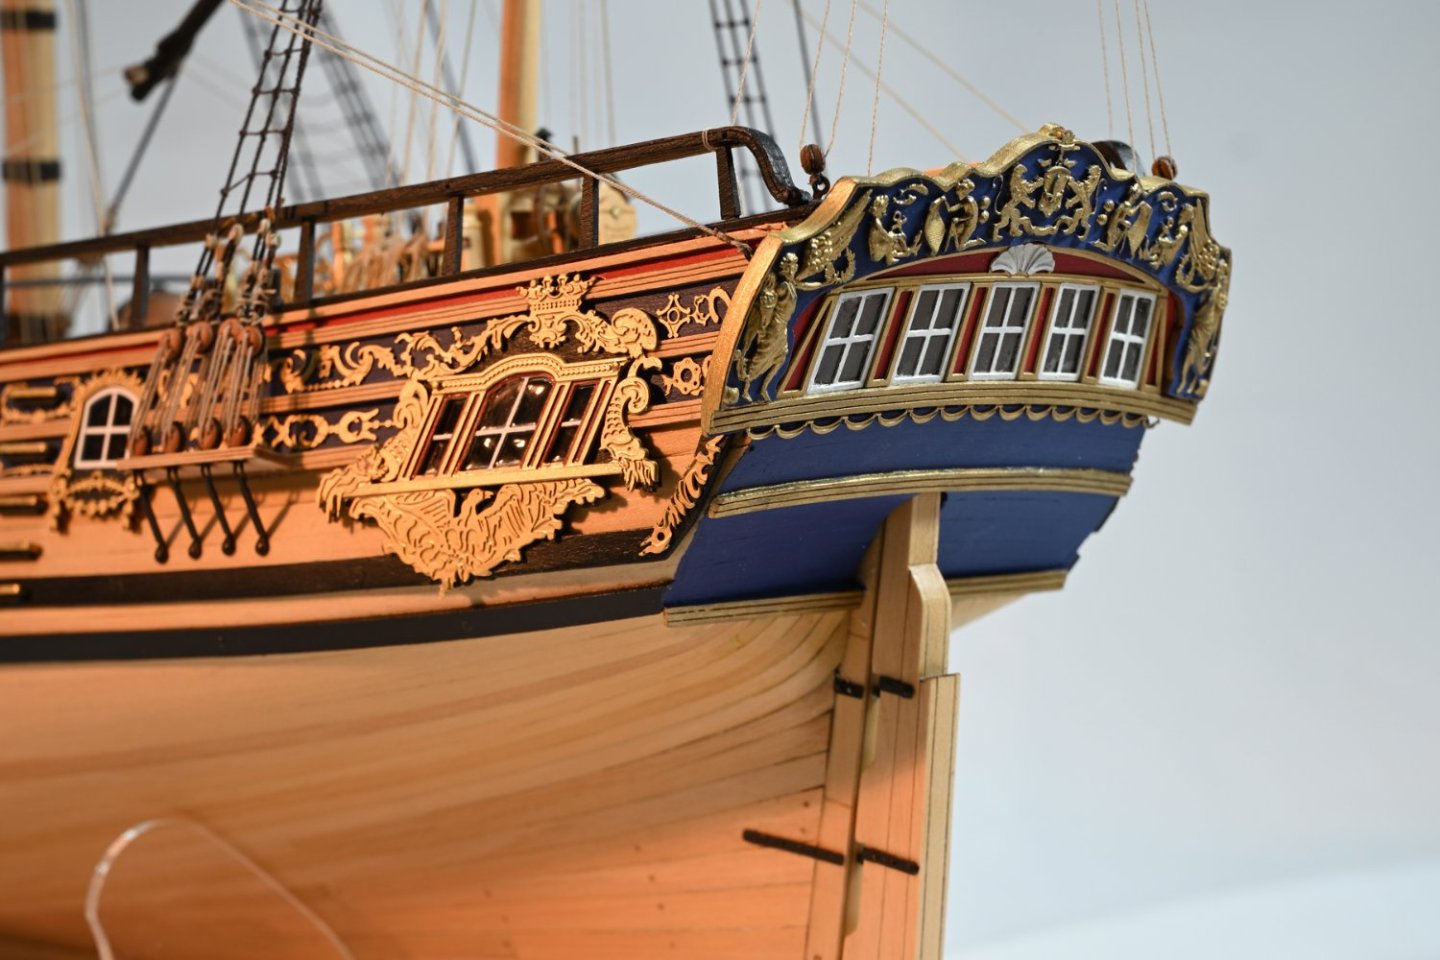
The Last Lap After 18 months of enjoyable modelling and with everything on the Duchess complete, barring the permanent stand, I'm marking her as finished. As with my first Vanguard model, I must give huge thanks to @chris watton for designing and producing such a great kit, and to @James H for his inspirational prototype build log and manual. Thanks also to those early starters whose logs informed and encouraged me - Glenn @glennard2523, Rusty @Rustyj and David @desalgu. Apart from producing my own rope and a very few minor enhancements such as the anchor buoys and glazed windows, I built the Duchess more or less out of the box which I regard as a testament to the quality of the kit and the materials. Here's some final photos: On to HMS Sphinx! Thanks to everyone for following along, and for all the likes and kind comments. Derek 16 February 2023


- 345 replies
-
- 29
-

-
-
- Duchess Of Kingston
- Vanguard Models
- (and 1 more)
-
Good to see you back, and hear that your cataract operation went well. Your gammoning looks fine.