HOLIDAY DONATION DRIVE - SUPPORT MSW - DO YOUR PART TO KEEP THIS GREAT FORUM GOING! (Only 20 donations so far - C'mon guys!)
×

Nunnehi (Don)
-
Posts
316 -
Joined
-
Last visited
Content Type
Profiles
Forums
Gallery
Events
Everything posted by Nunnehi (Don)
-
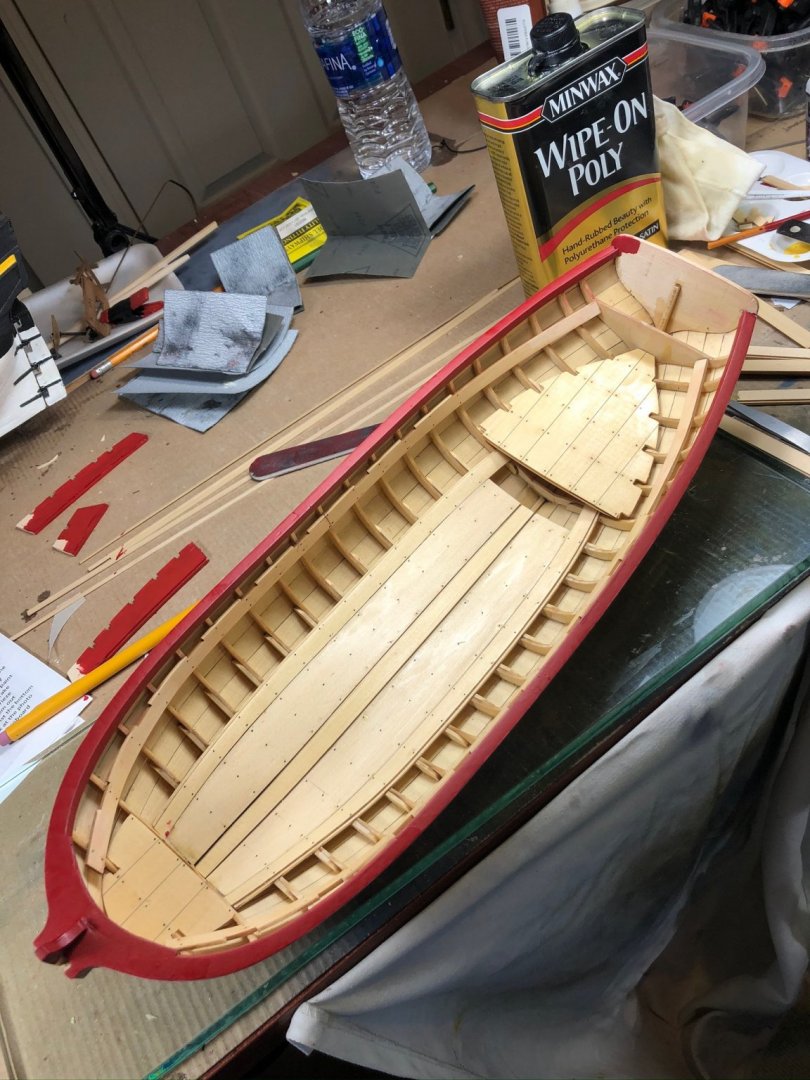
I would very much like to see how it looks with a little light sanding and some wipe on poly.
-
Luekutus, I have this model on the shelf and will be following your build with interest. I really like the planking - that adds a lot and looks great! Don
-
Beautiful work! I’m really enjoying your log and learning from it - thanks for the details! Don
- 335 replies
-
- 1
-

-
- alert
- vanguard models
- (and 1 more)
-
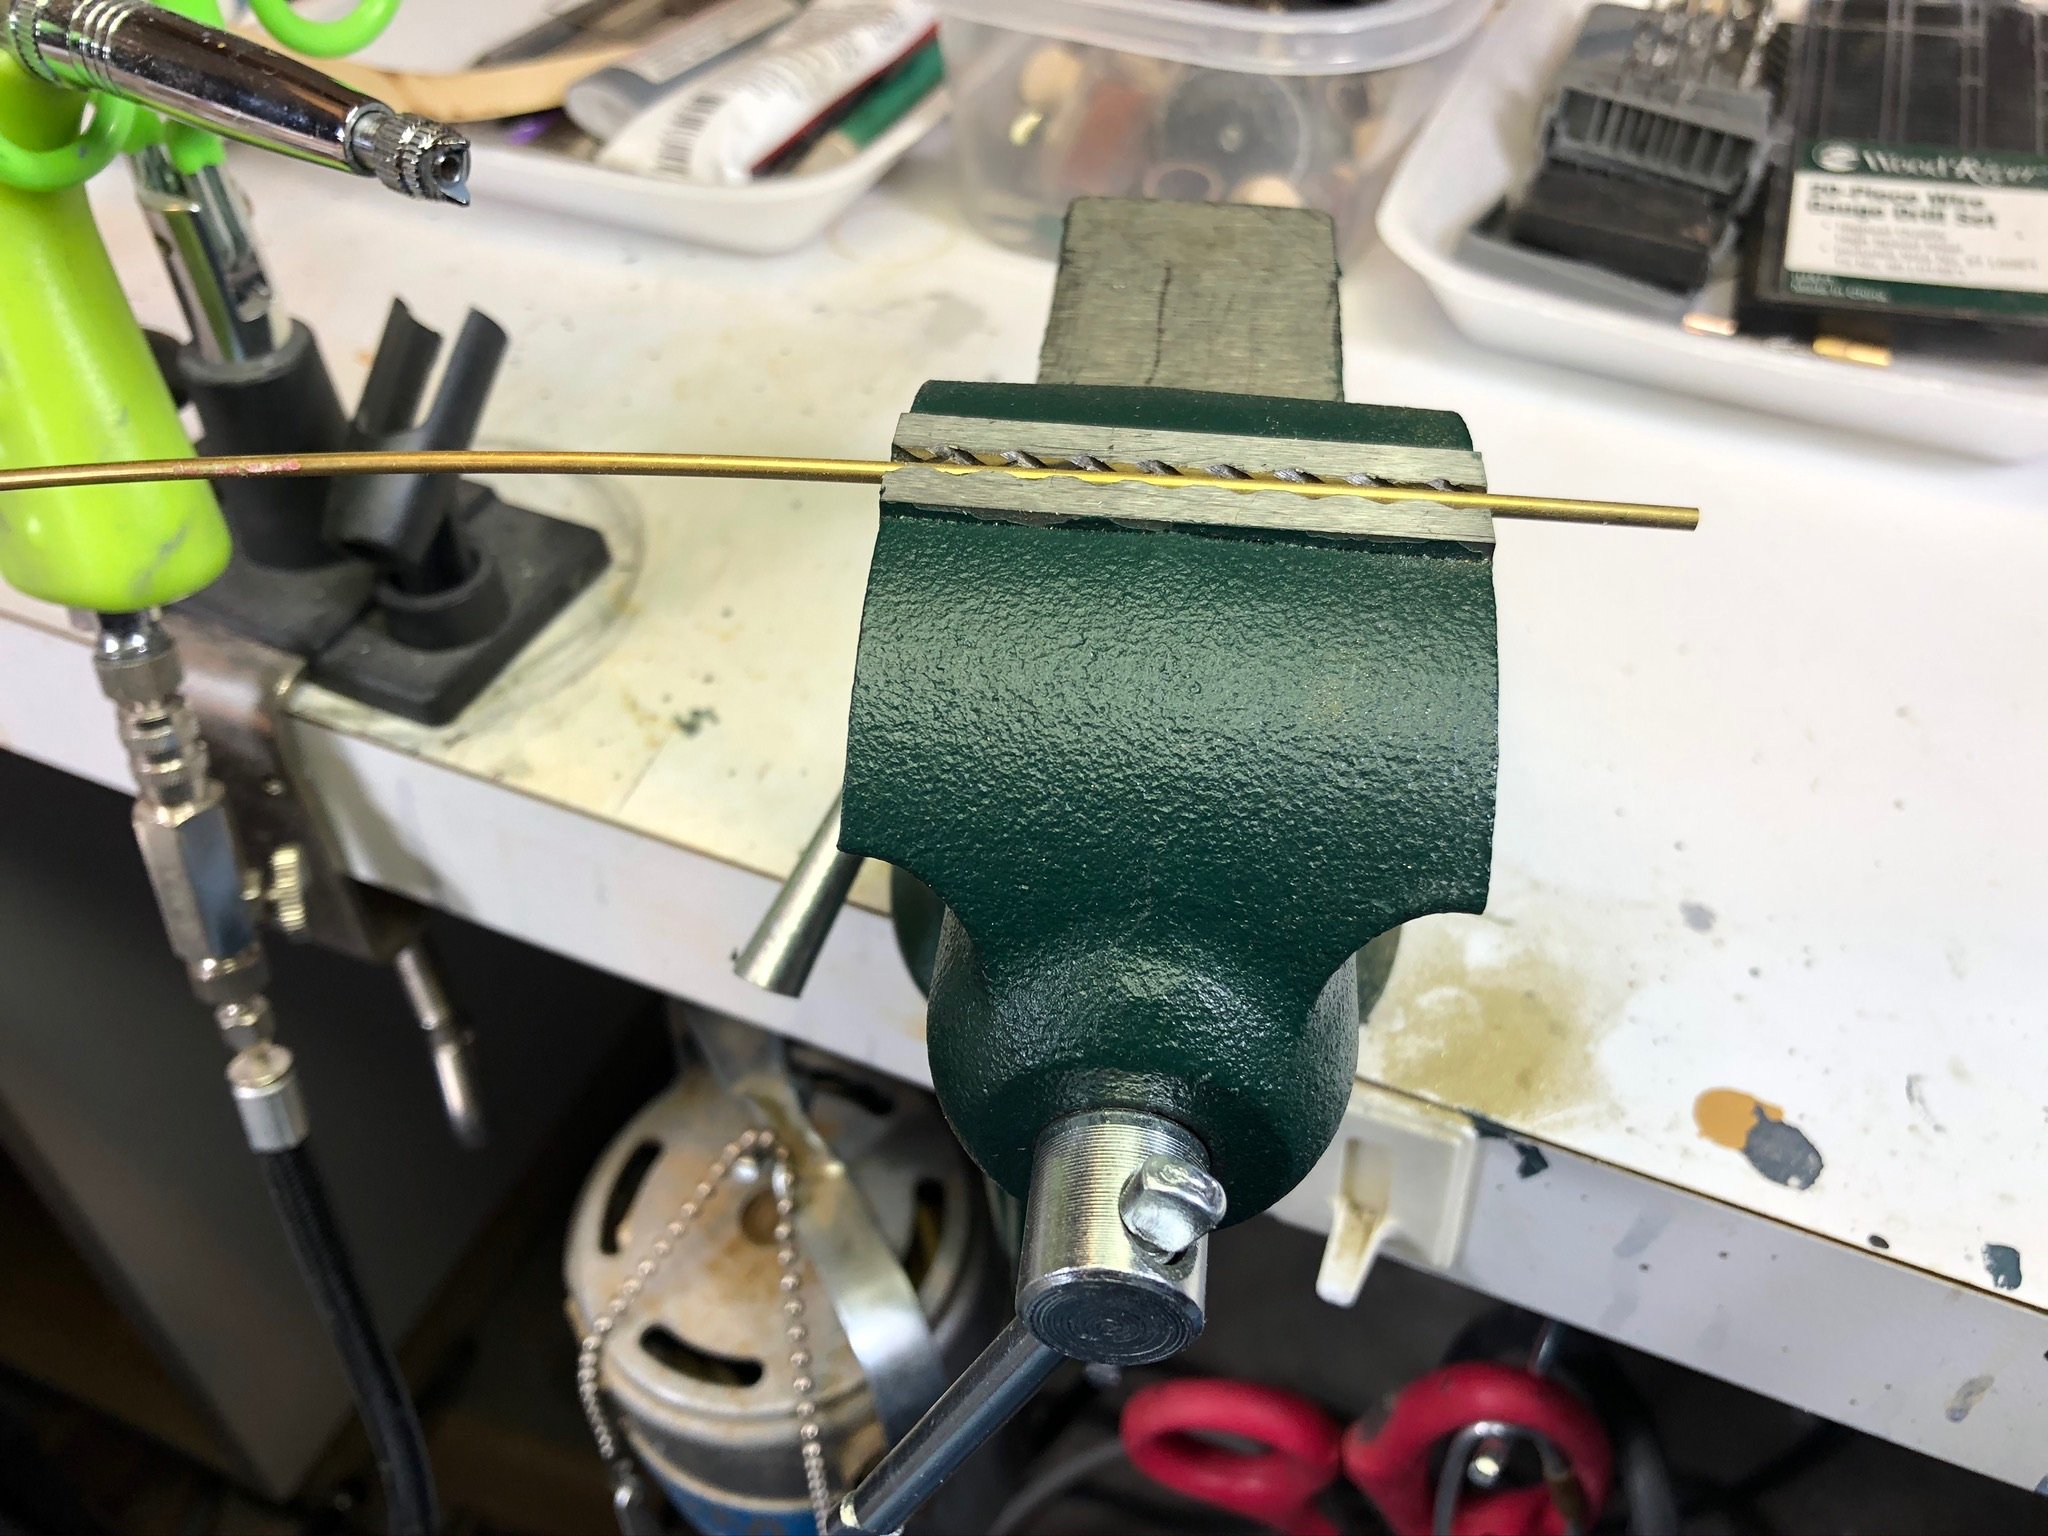
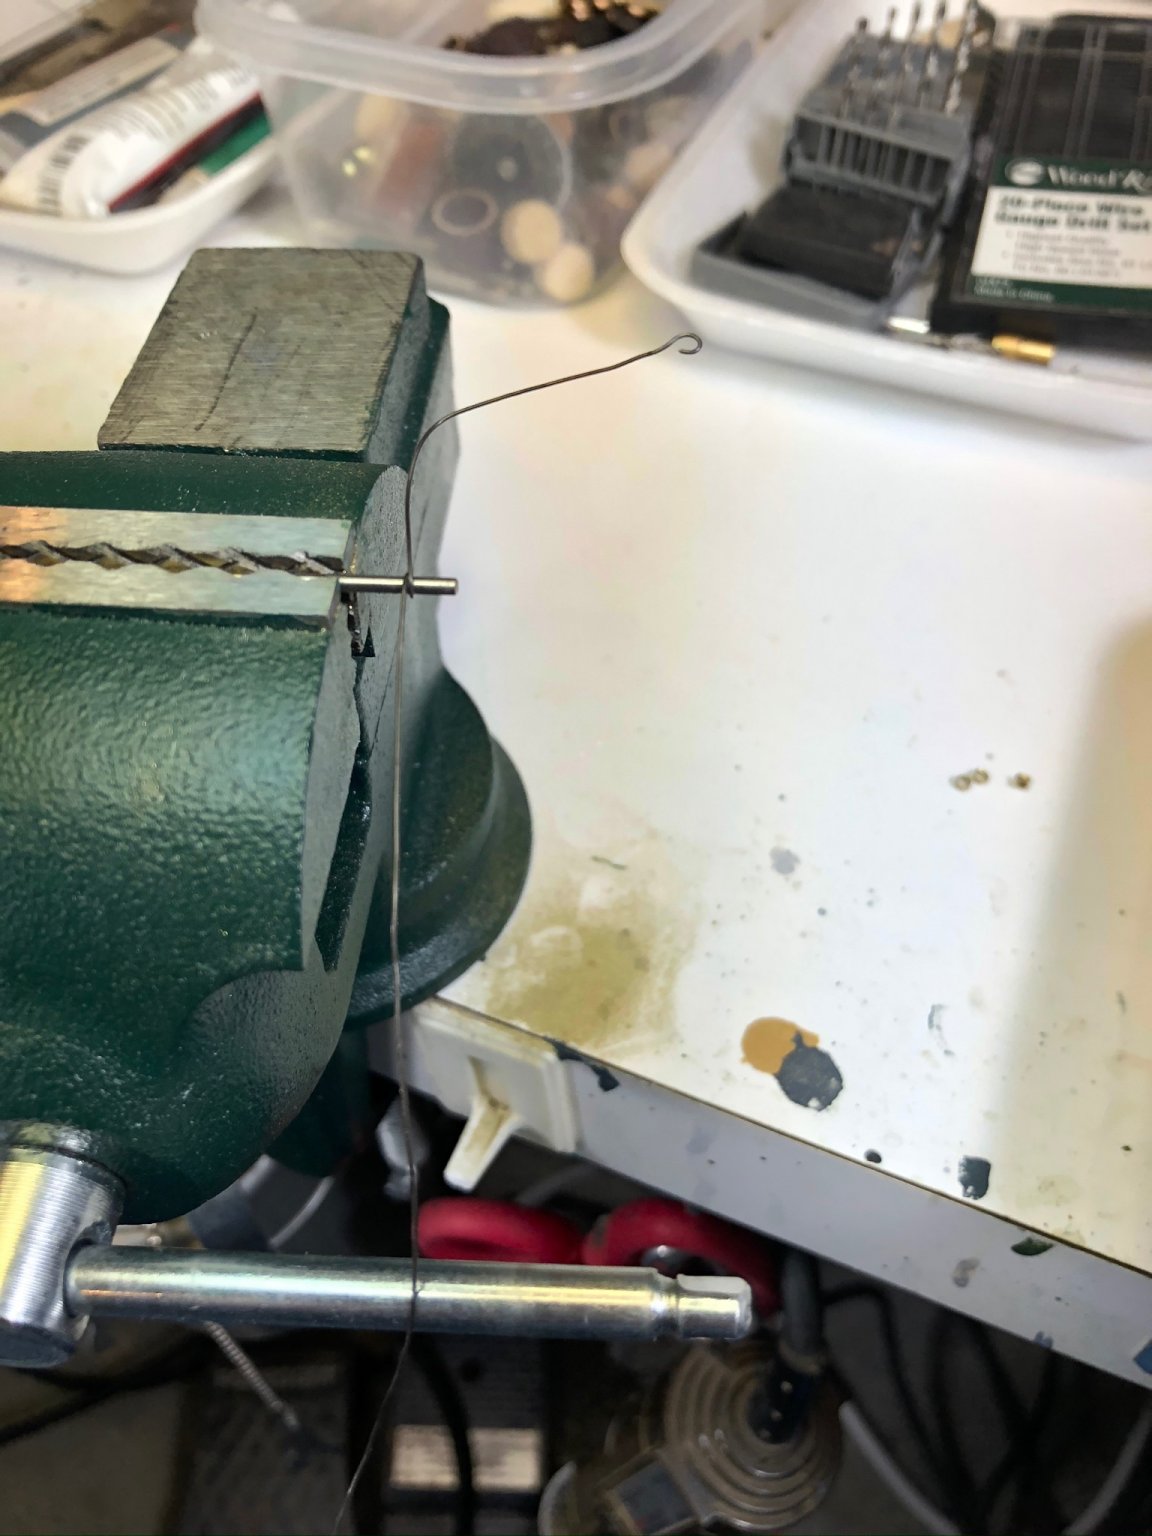
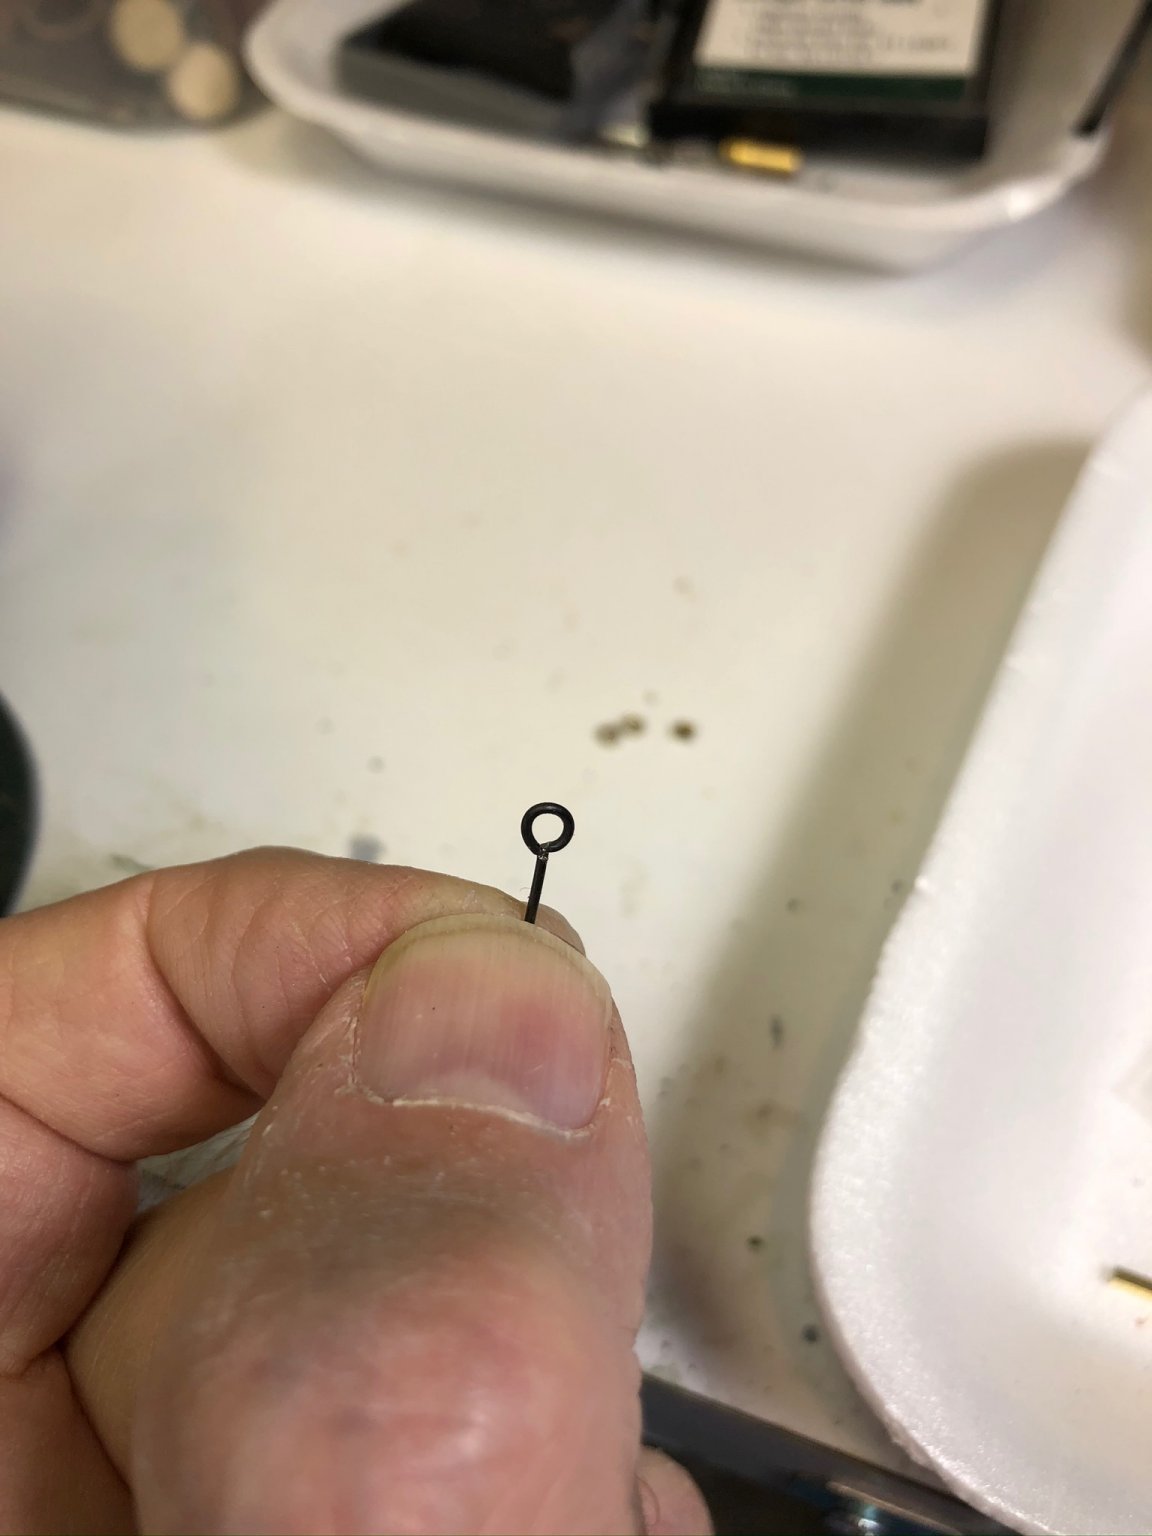
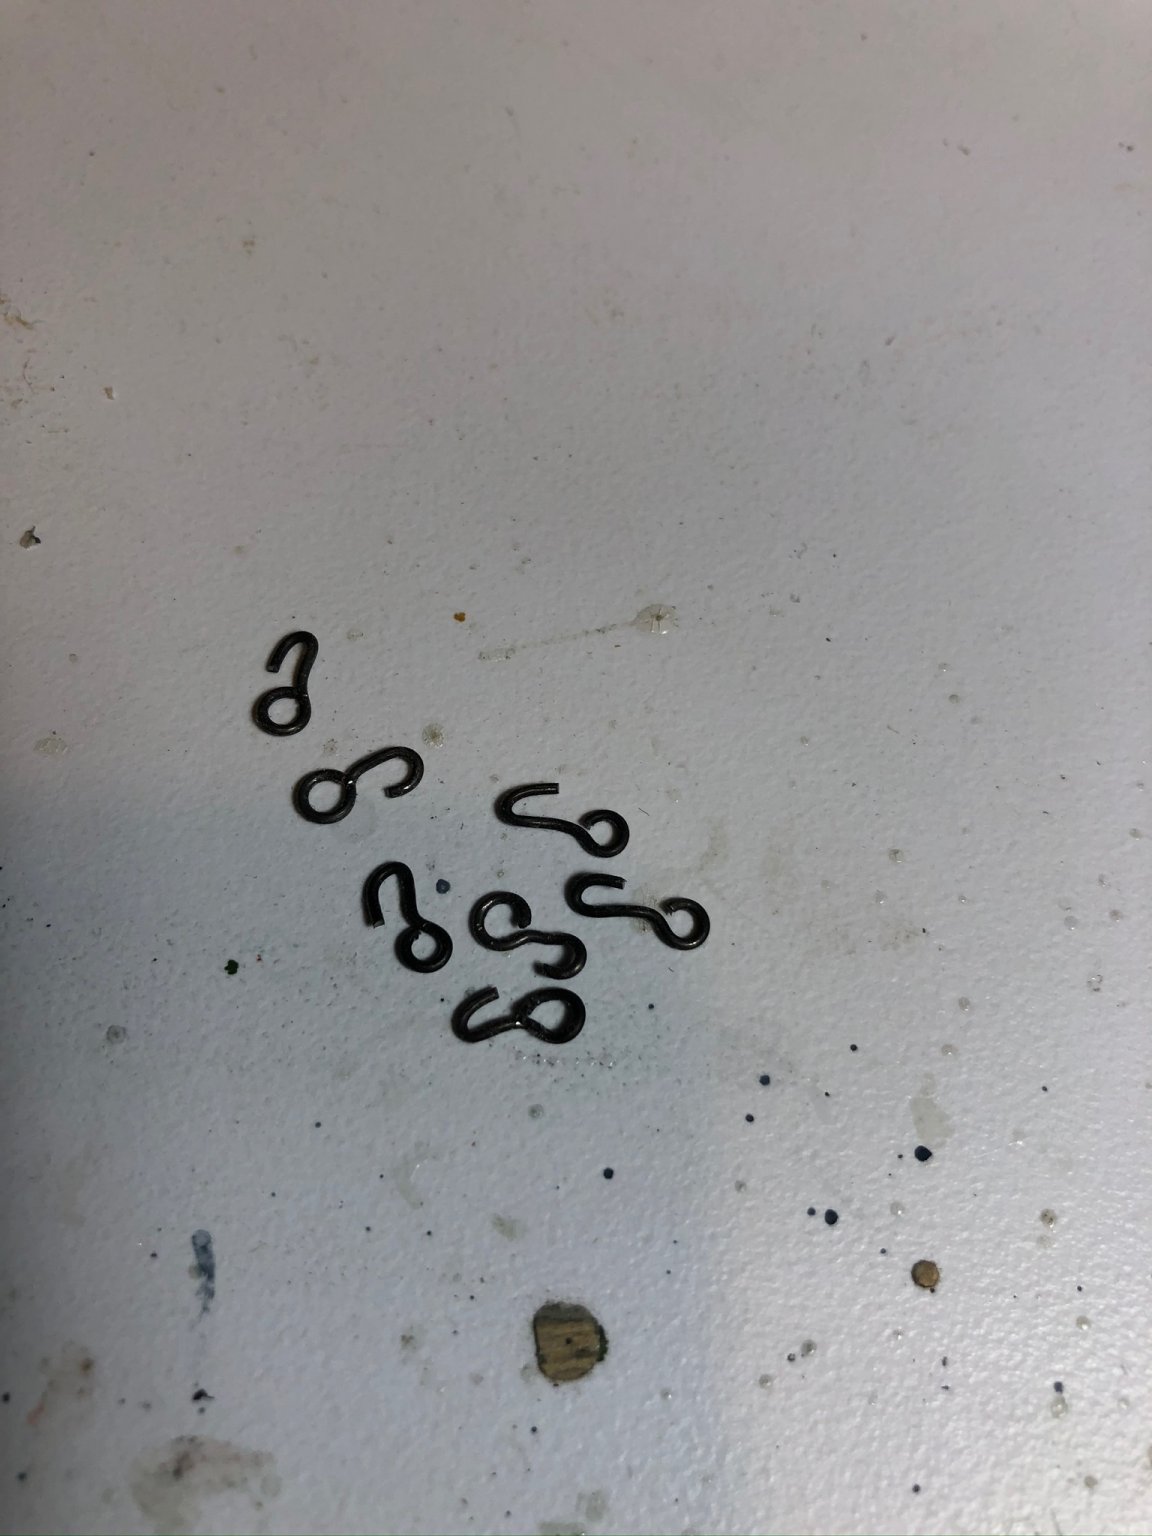
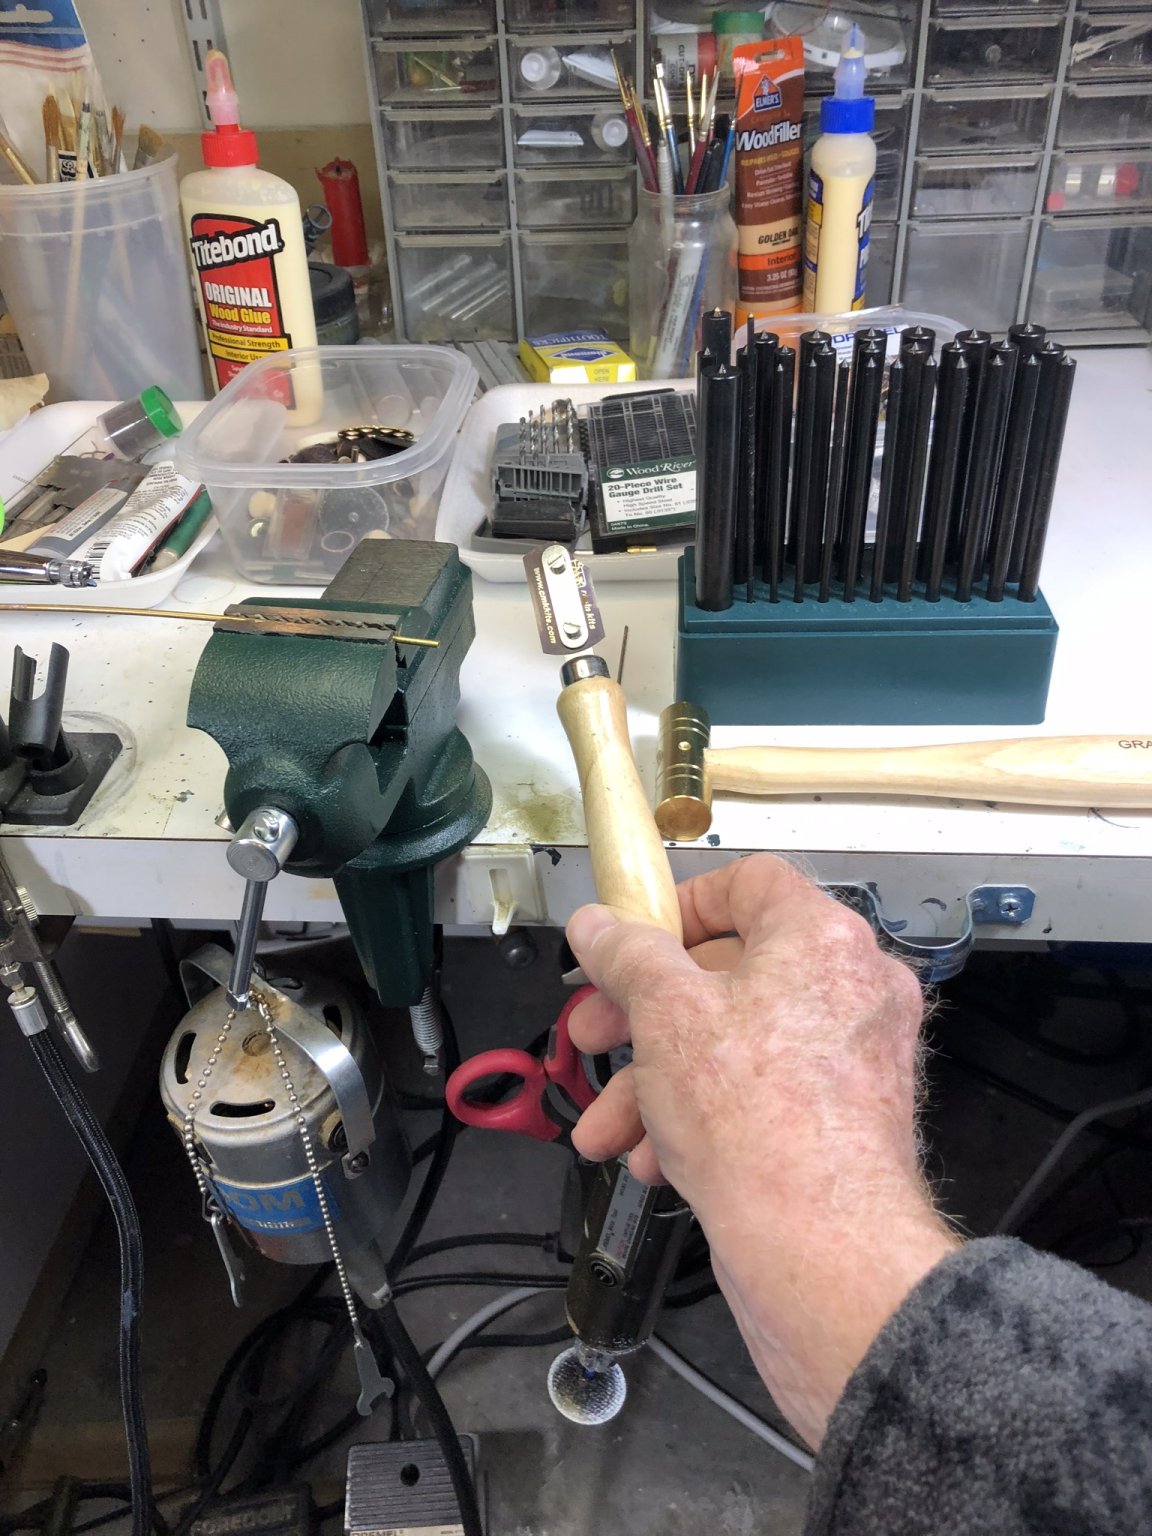
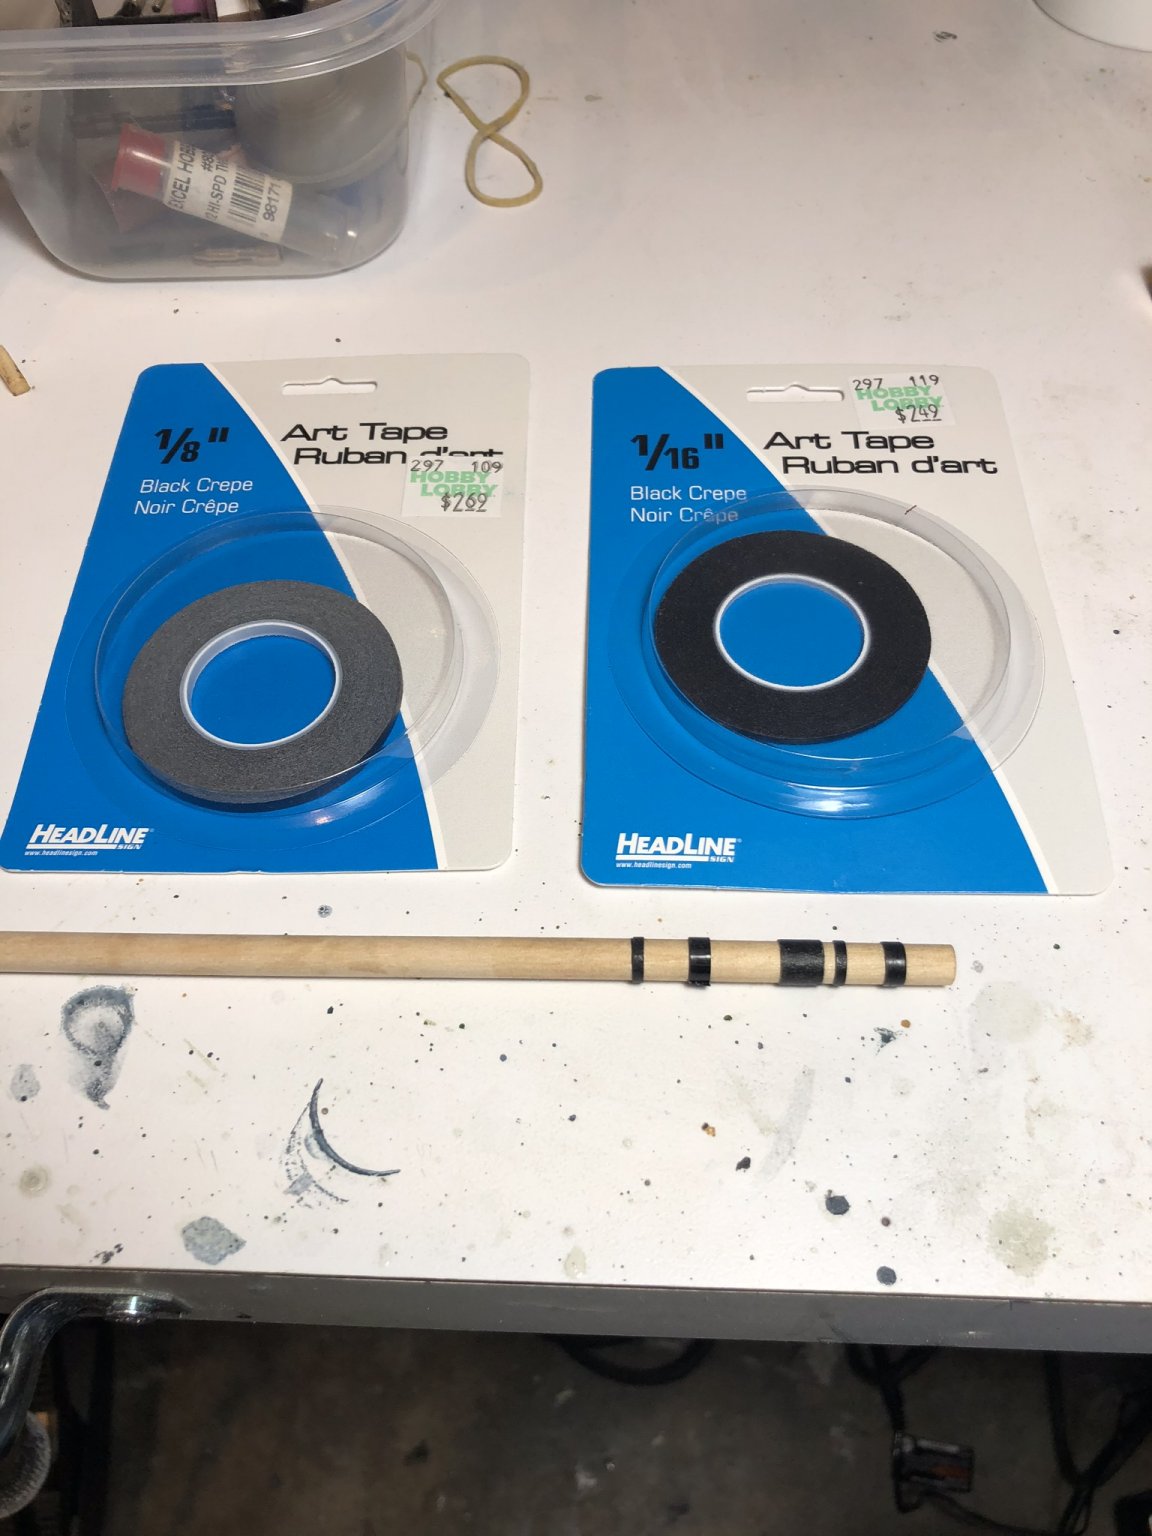
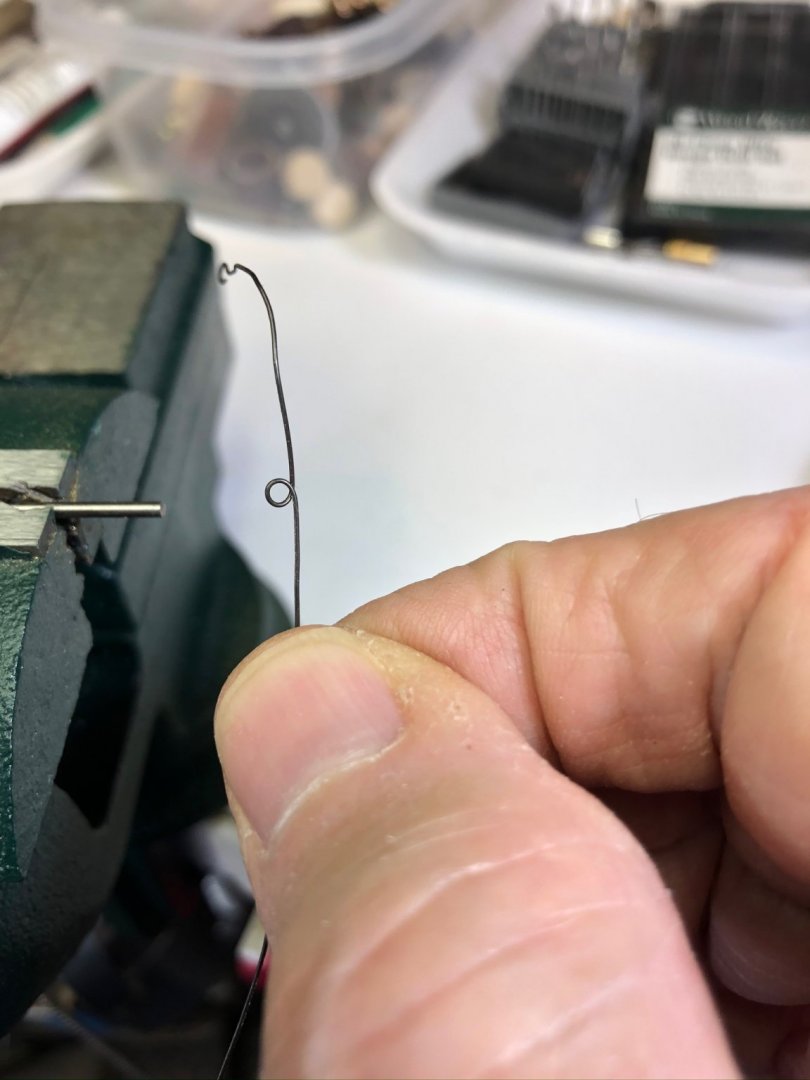
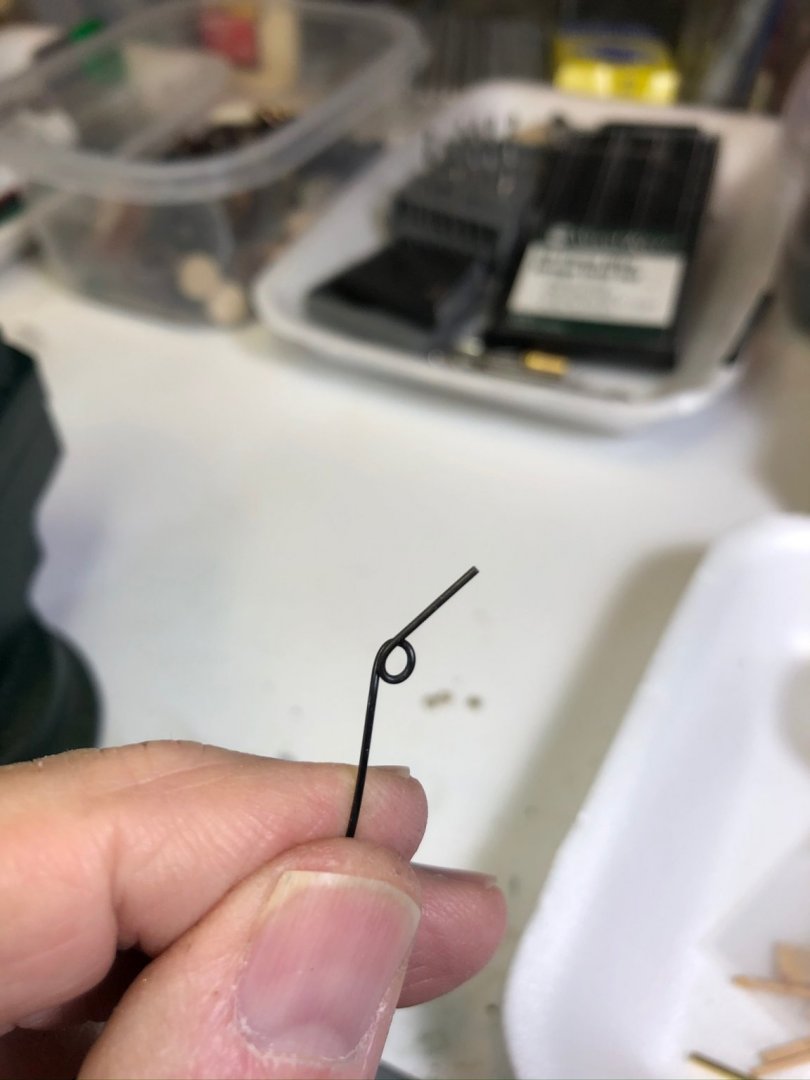
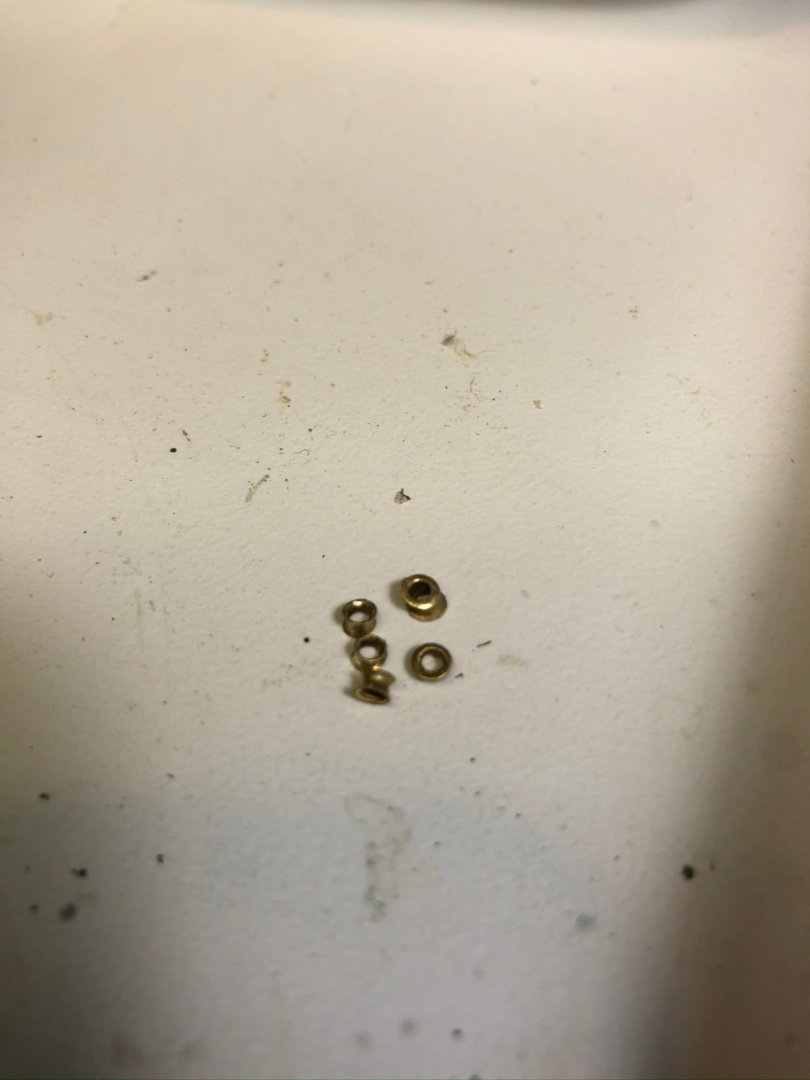
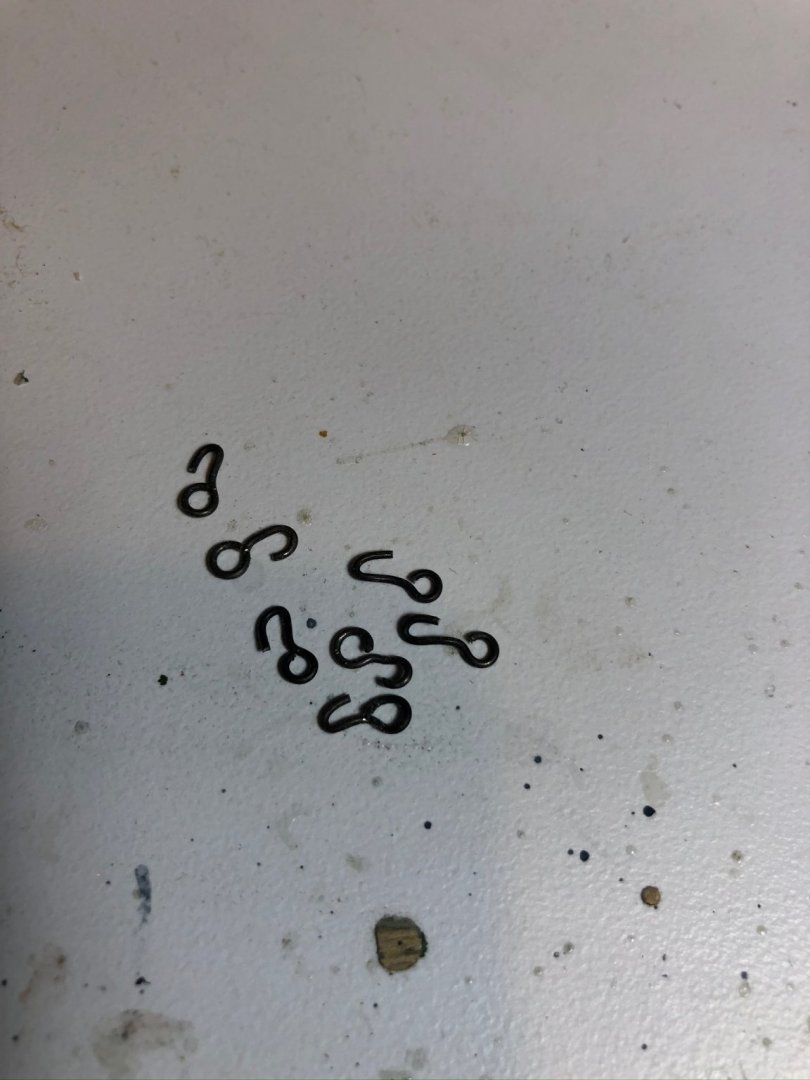
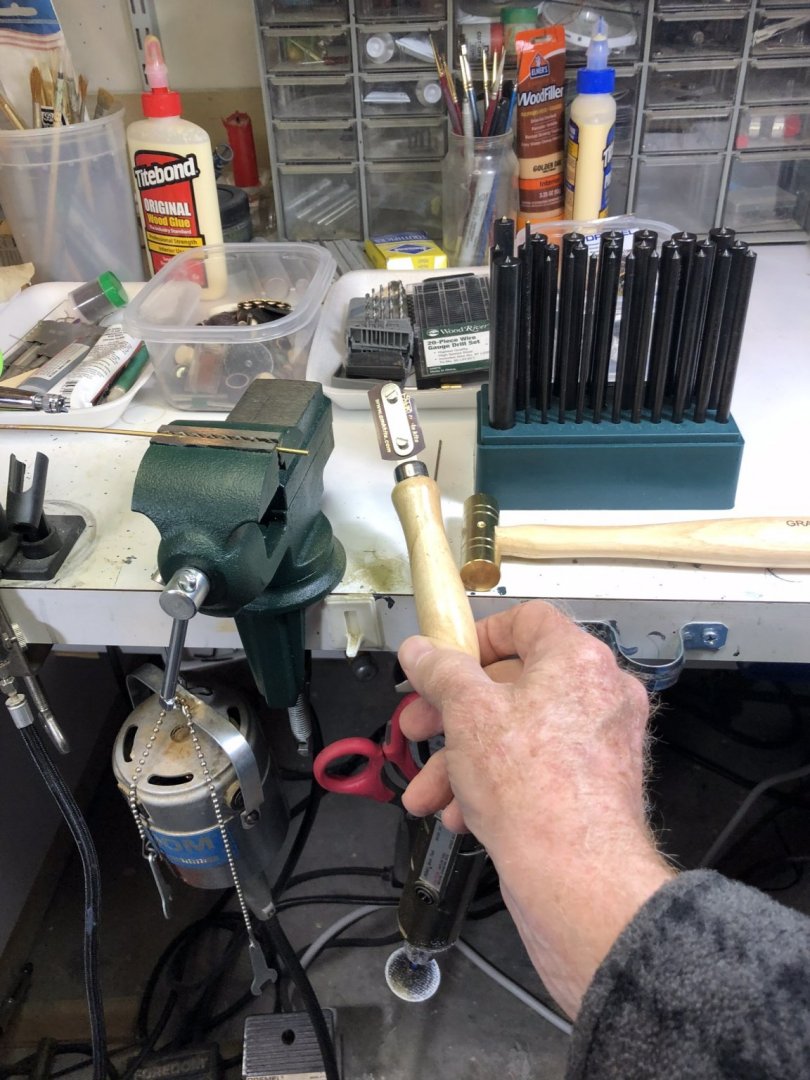
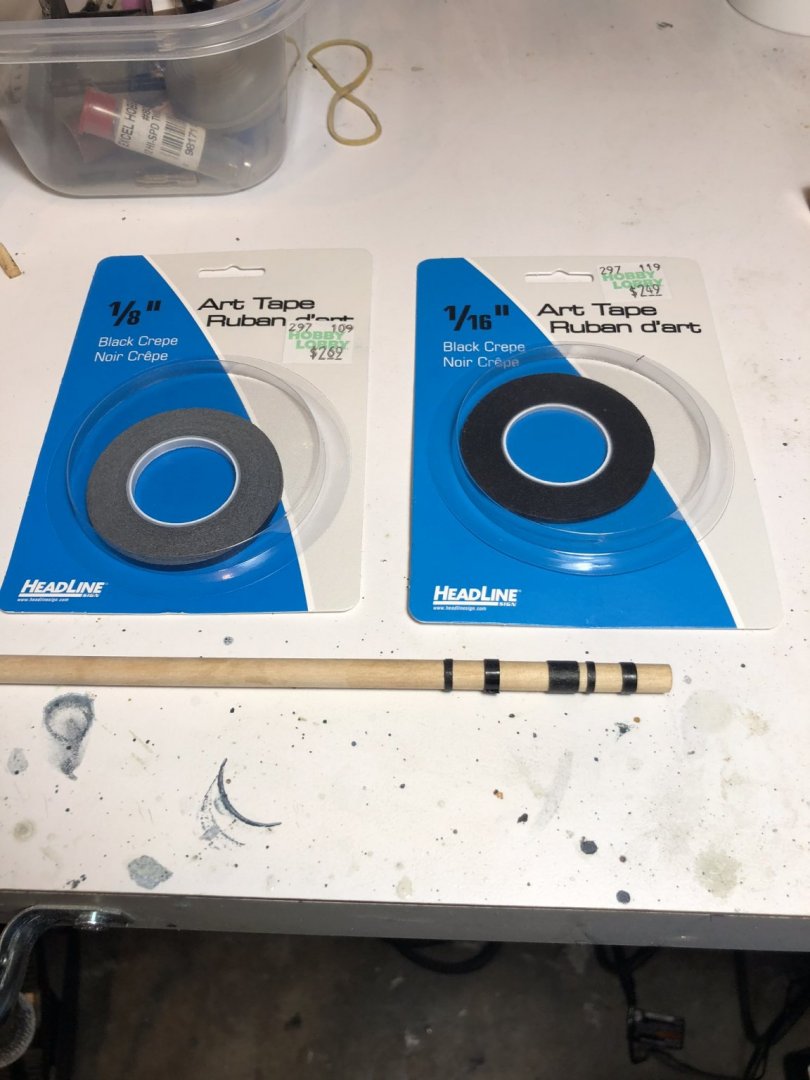
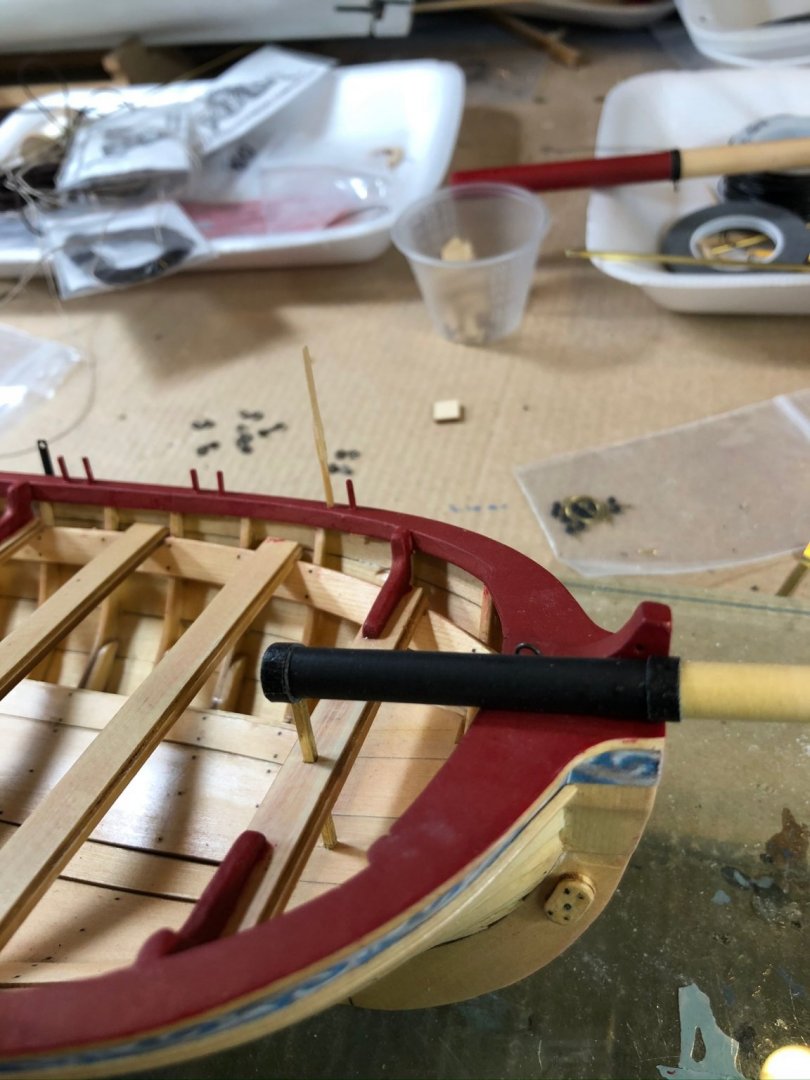
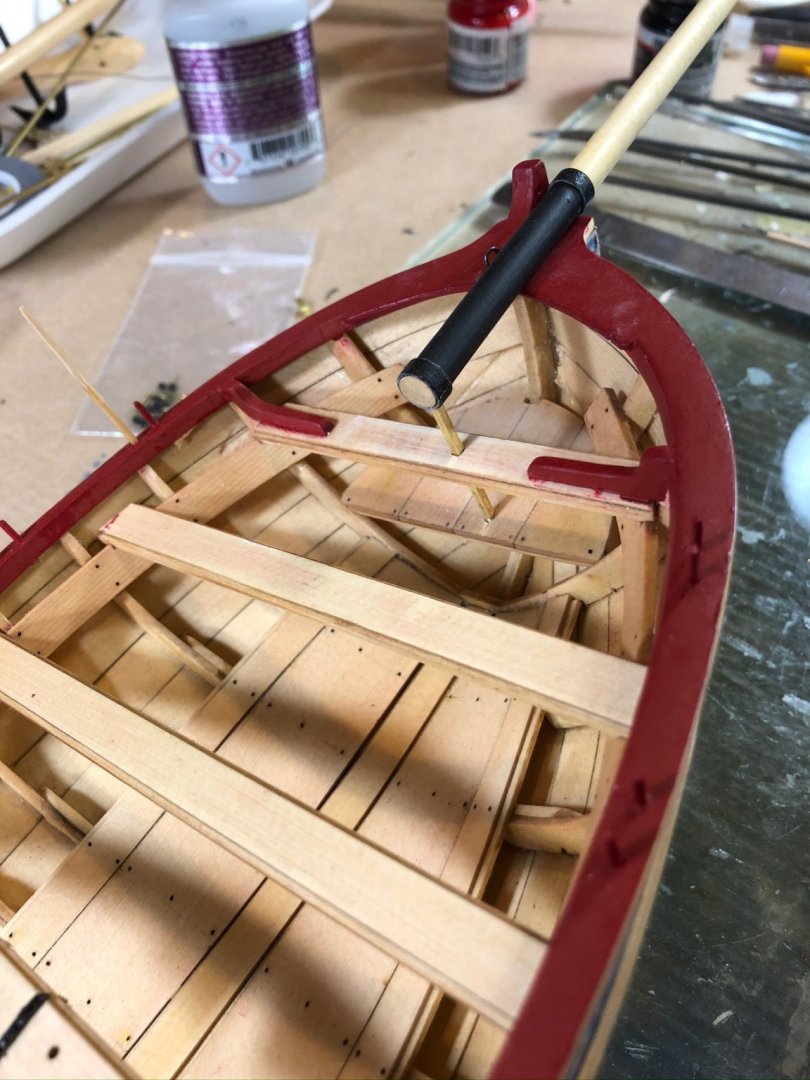
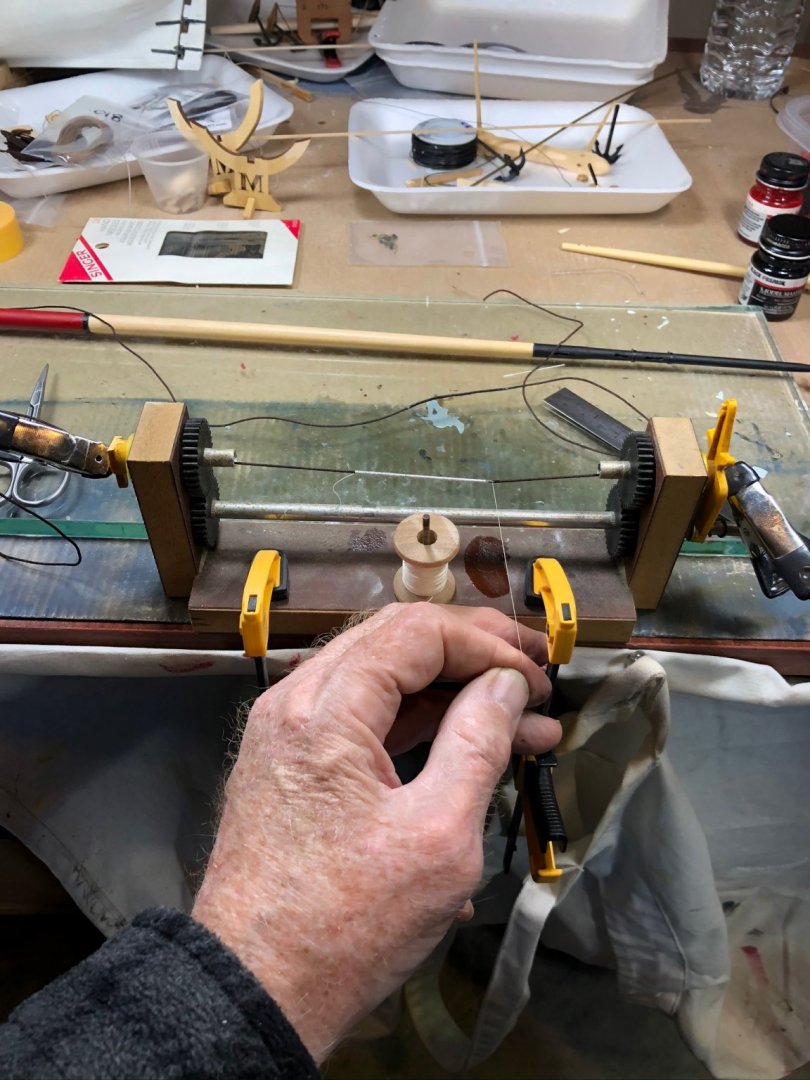
Bob, Great save on the mast! I’m going to keep that one in my “save for future reference” file! The jury is still out out on the block buster, I tried it but was not completely happy so wound up finishing the deadeyes by hand - more to come on that. On the parrel beads, my kit included them - wouldn’t have a clue about how to make them although they look a lot like beads my Boy Scouts use to make Native American beadwork. Yes, I made the hooks and eyebolts from the wire included in the kit. I mounted a small drill bit in my bench vice and wound the wire around it to create the eye, then snipped it off with some spru cutters and finished shaping with pliers I use for bending photo etch. Not as pretty as Chucks but it worked. The mast bands are art tape that I picked up at a local Hobby Lobby. It comes in several widths and a couple of different finishes. This was a first for me and it worked great - I just wound it around until the thickness looked right to me. I’m experimenting with making the thimbles. I keep a stock of brass tubing for other projects but was unsure how to cut it small enough without flinging it off into the carpet monster. The solution was to mount it in me vice and cut it with a razor saw. I then used a punch to flare per Chucks instructions. Don


- 46 replies
-
- 5
-
-
- medway longboat
- Syren Ship Model Company
- (and 1 more)
-
Thanks, Chuck, I really appreciate it. This project has really stretched my skill set with a number of firsts and I’m really enjoying it. I’m making a list and will post later but one example is using art tape to simulate iron bands - I would have never thought of that. By the way, are you going to re-open your store soon? I really want one of your serving machines and need some other stuff. Don
-
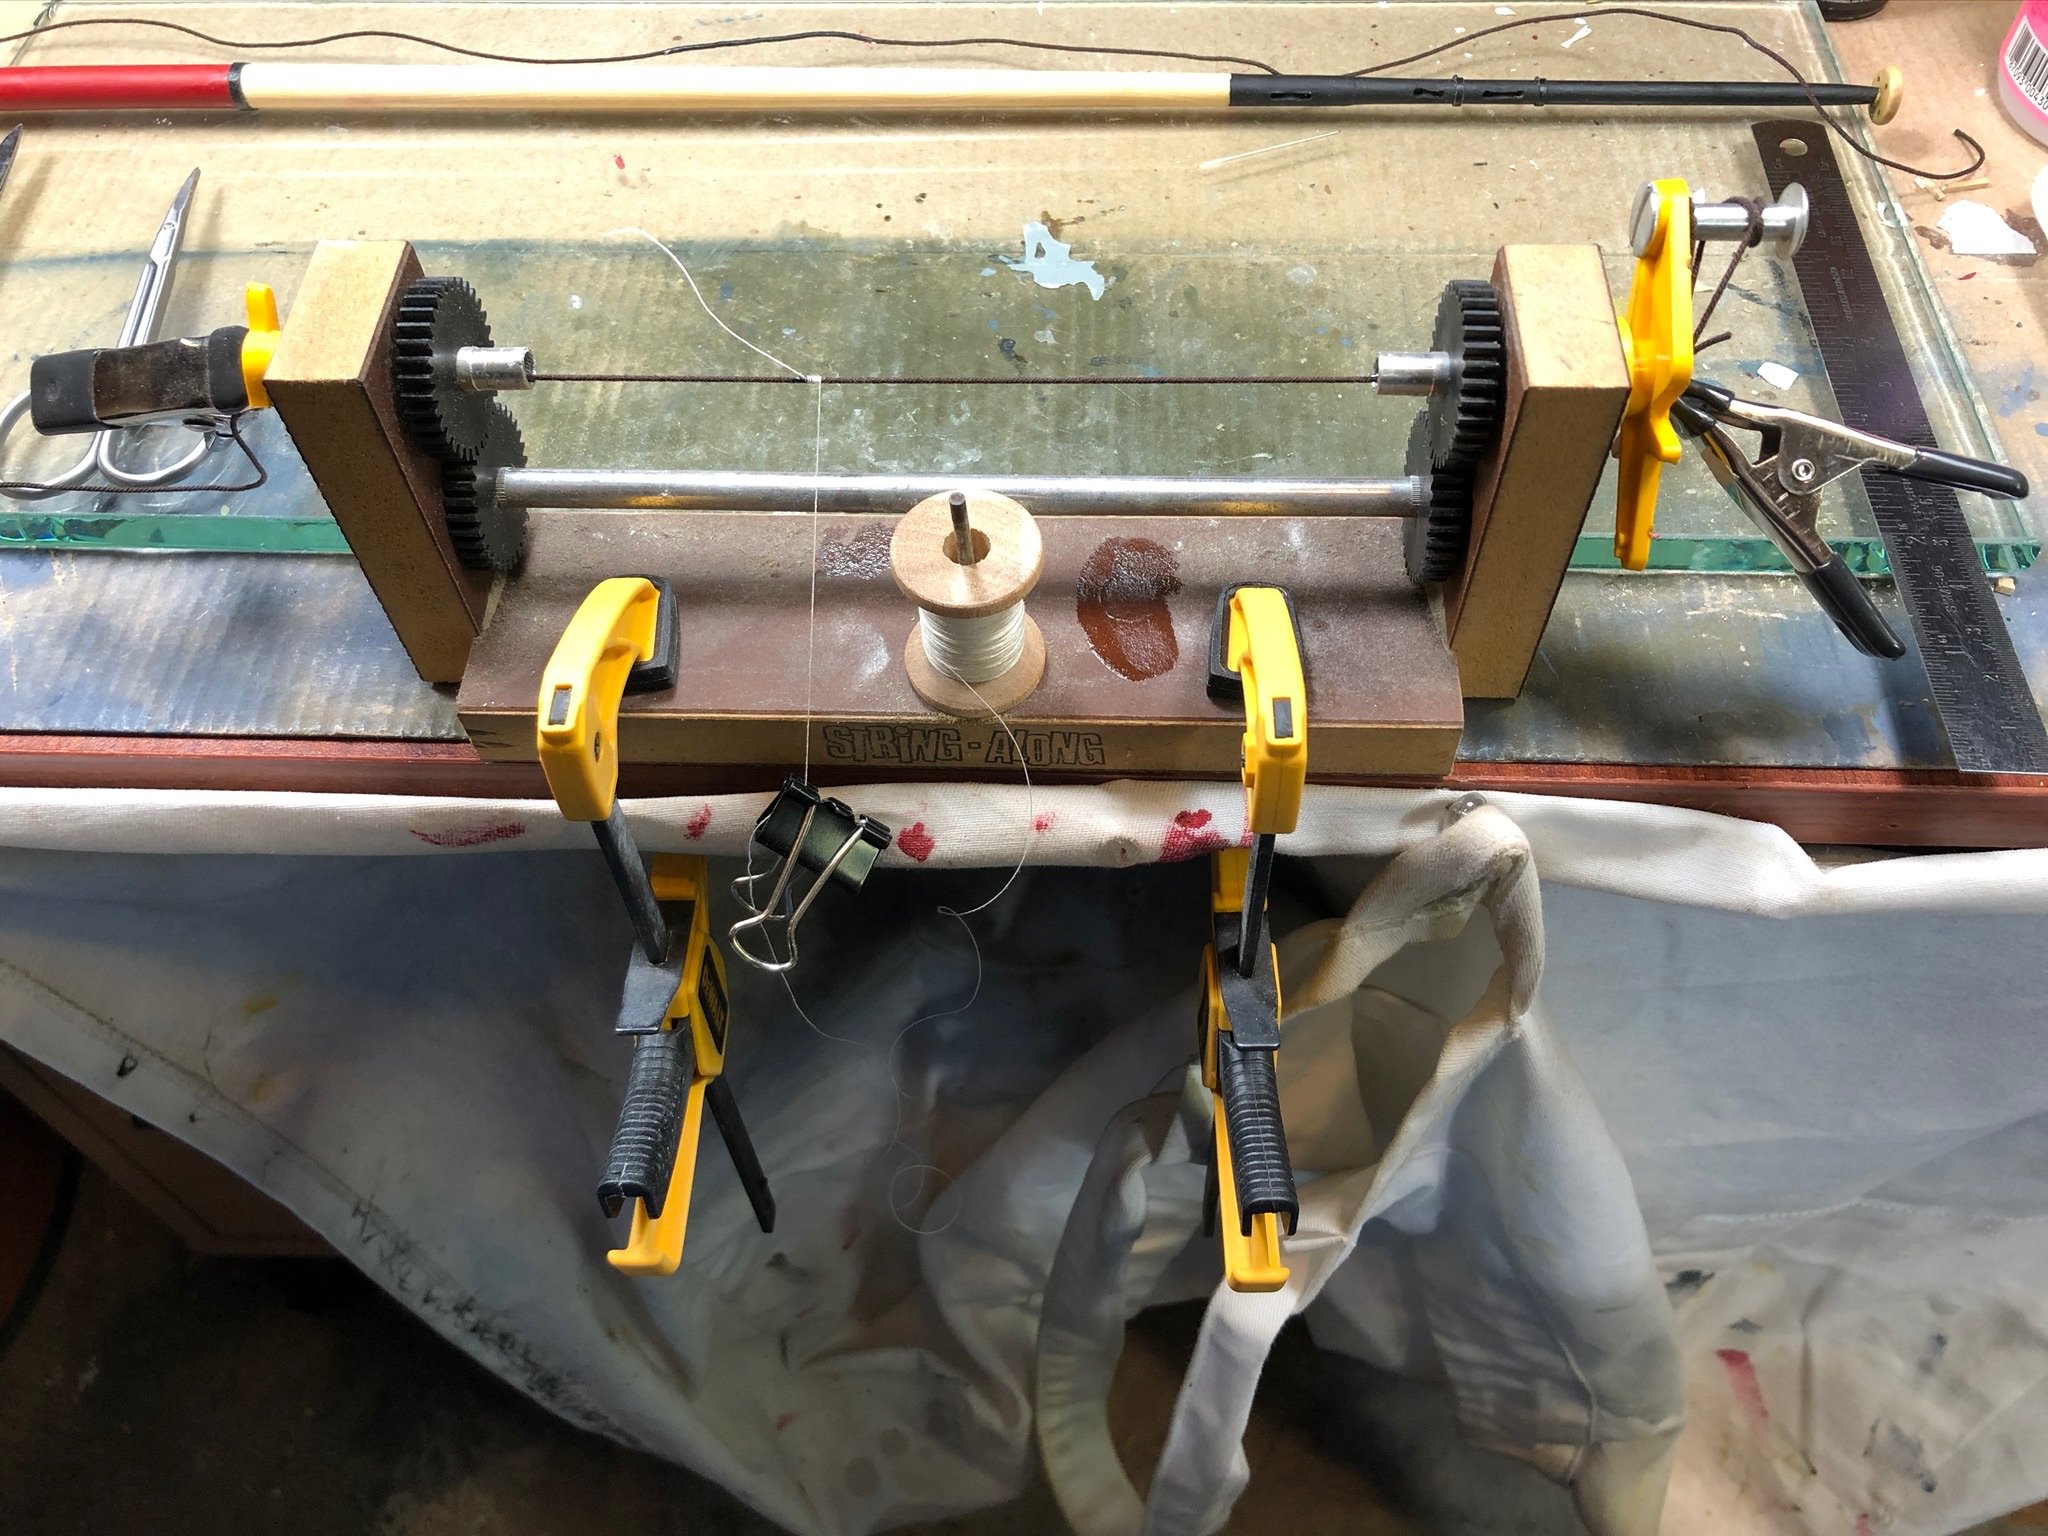
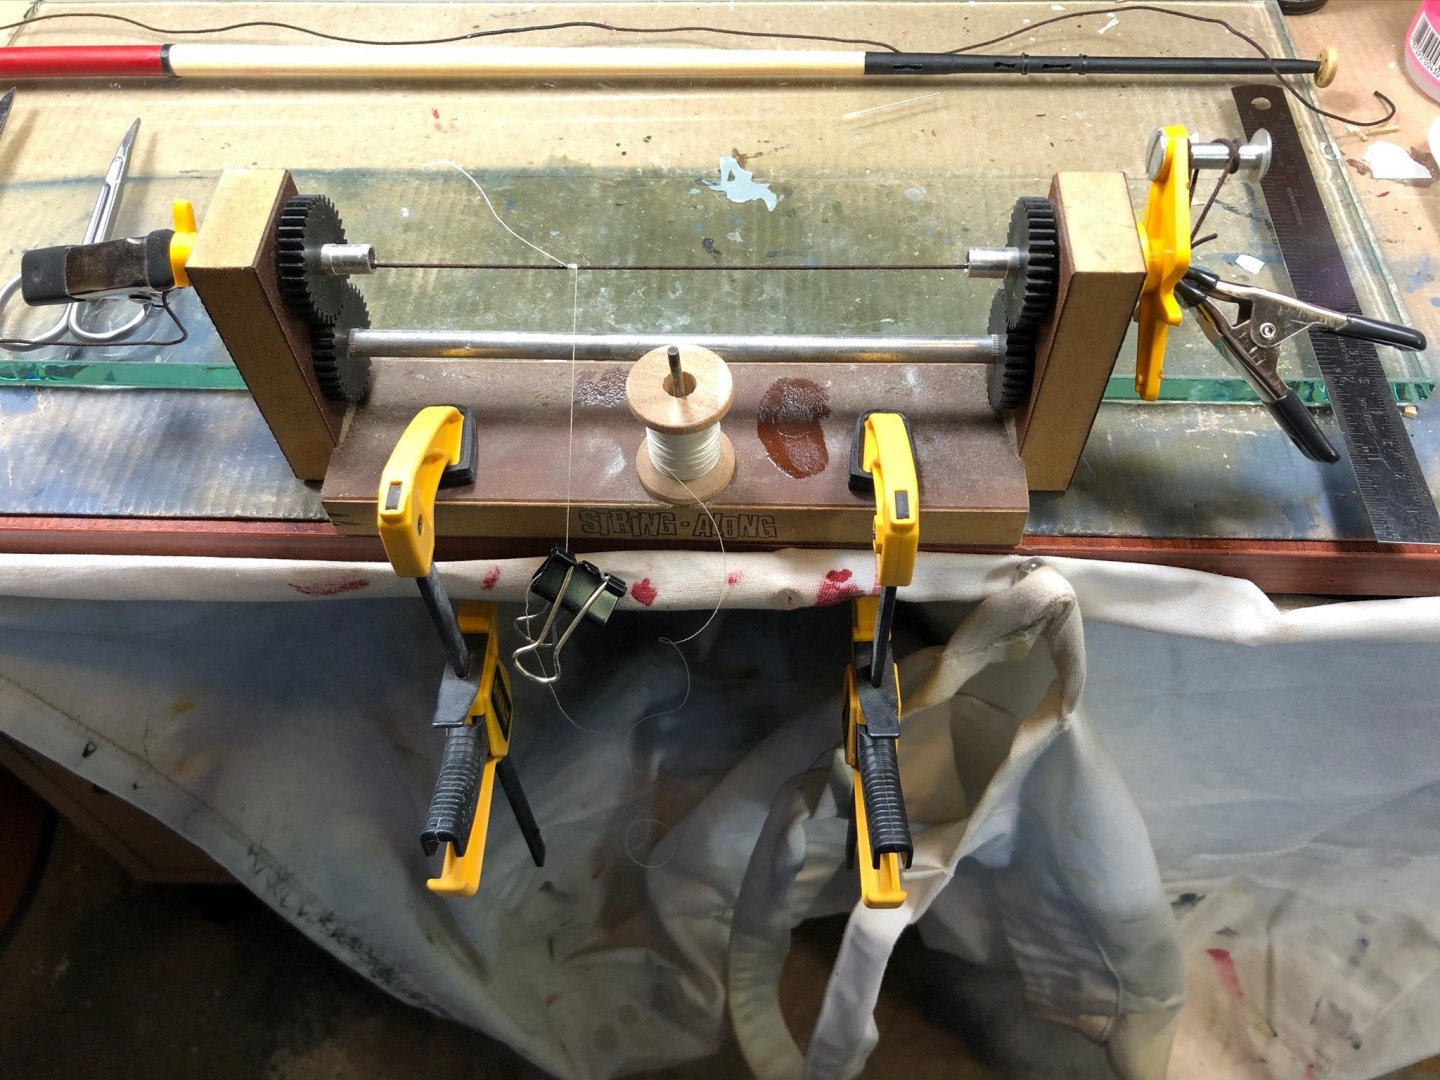
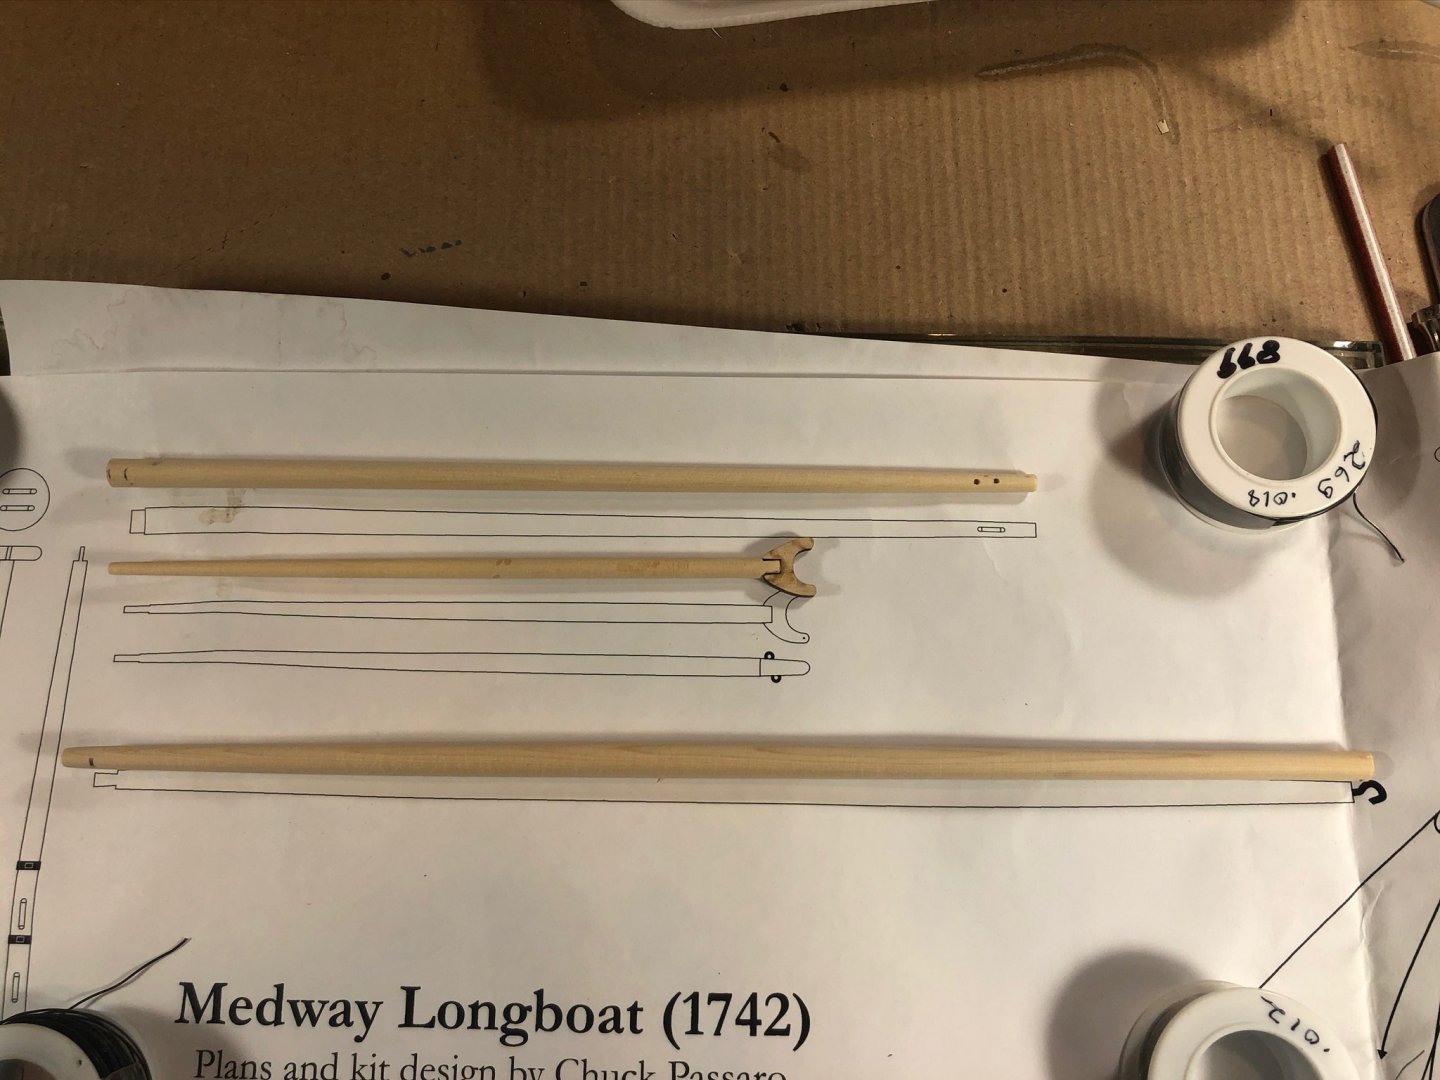
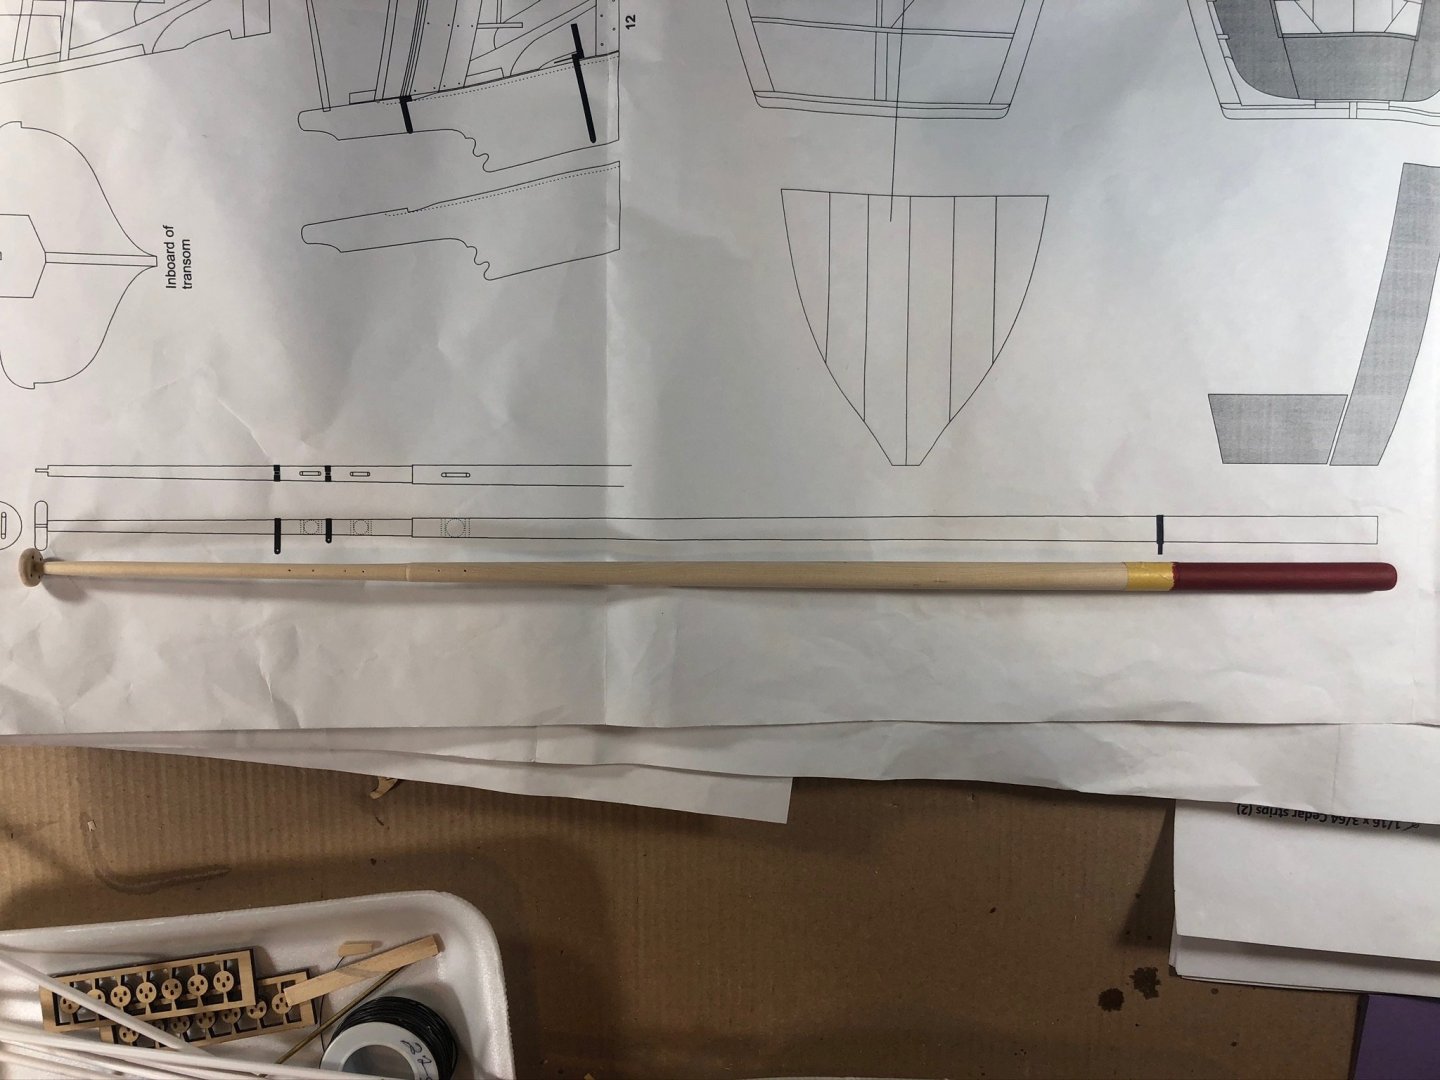
More progress. While waiting on a block tumbler from Model Expo, I went ahead and made and fitted the bowsprit and cut/served the shrouds, the backstays, and the forestay. I didn’t have a dark thread for serving so darkened it with a sharpie. Also received the beautiful stand from Chuck. Bob, I watched several YouTube didgeridoo videos and am impressed! I didn’t realize how many different sounds can be made with one - still working on the circular breathing.


- 46 replies
-
- 8
-
-
- medway longboat
- Syren Ship Model Company
- (and 1 more)
-
Bob, I’m just using an iPhone for the pictures without doing anything special other than adjusting some lamps to minimize glare. They automatically transfer to my iPad (easy to set up) and I’m posting from there without any additional editing. I have done some serious photography in the past, but this is not and it’s really easy. Circular breathing is required for really serious musicians and I admire folks who can do it, but I haven’t really learned it yet - will give it another shot and look up some of those YouTube videos. The hardest part of playing bari is breath support, especially on the low notes. Congratulations on turning the windlass bars, I broke a couple too. It’s good that Chuck included extra wood as I also over-sanded one of the planks and had to make a replacement - part of the learning process. Don
- 46 replies
-
- 1
-
-
- medway longboat
- Syren Ship Model Company
- (and 1 more)
-
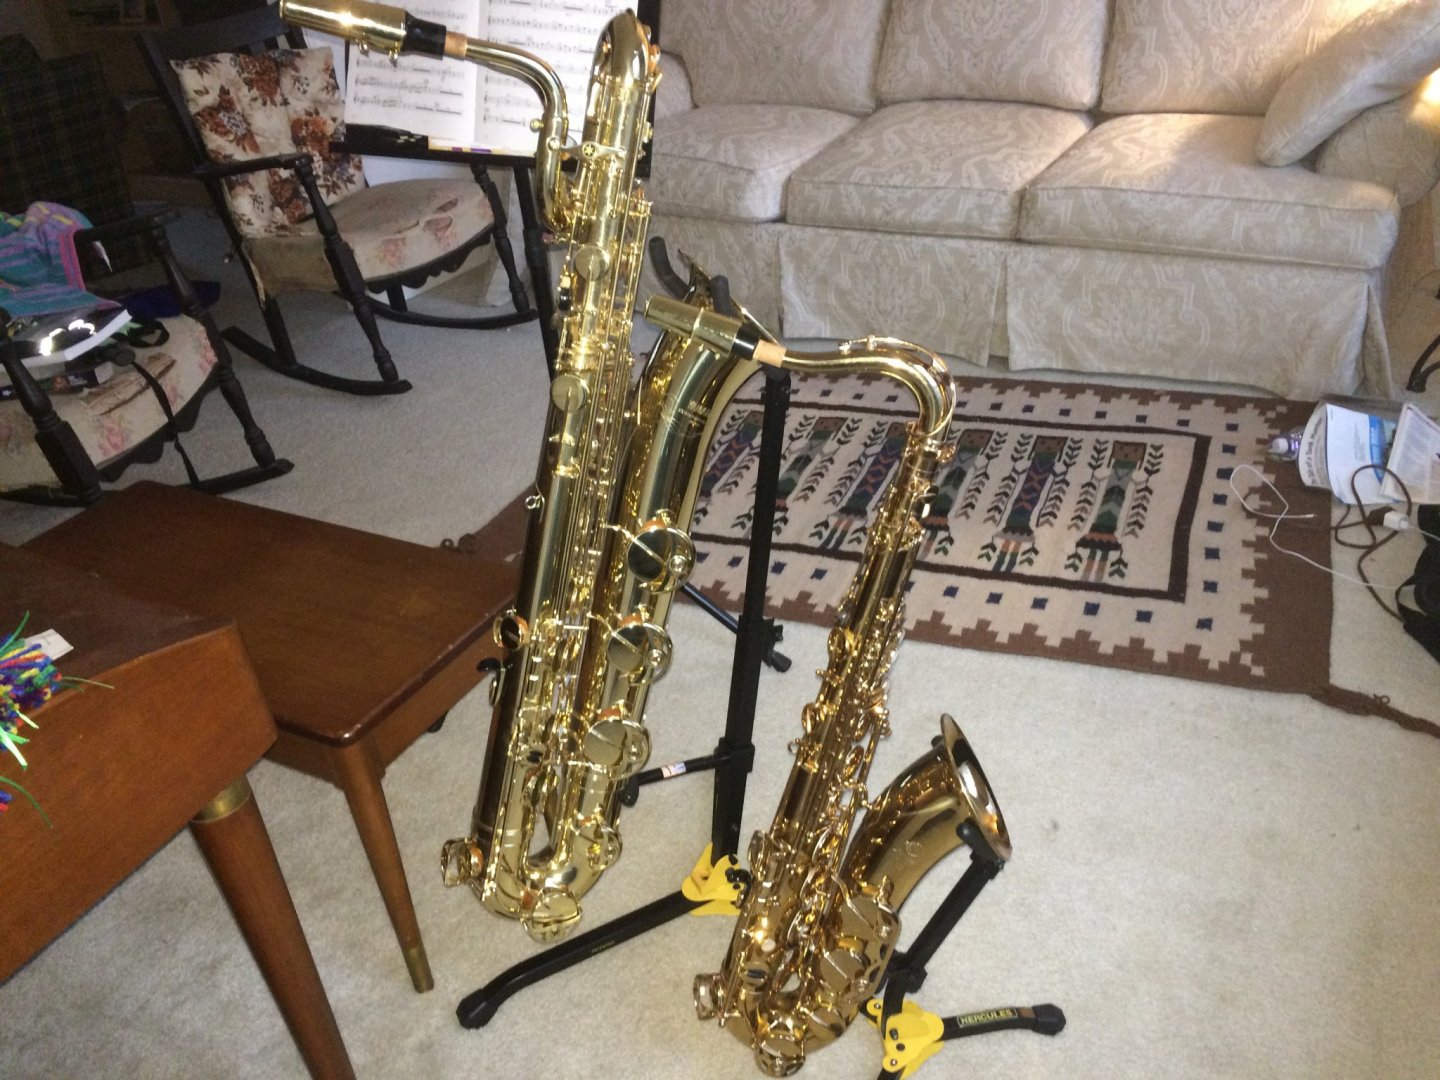
Bob Thanks! I like to joke with my buddies who played football back in the day and can’t walk now that we’re still in the band and going strong! The Admiral (flute) and I play on a weekly basis in a variety of local community concert and dance bands with occasional Church gigs - a bari sax can roughly double a cello for the Church crowd. Does your son still play? Sop is probably the most challenging sax to play, I’m impressed! Do you still do anything with your flutes? I’ve always wanted to do something with a guitar but that’s just one too many..............😊 I’m intrigued by your didgeridoos. This is probably not the right place, (but it is making stuff out of wood) do you have pics? Don
- 46 replies
-
- 1
-
-
- medway longboat
- Syren Ship Model Company
- (and 1 more)
-
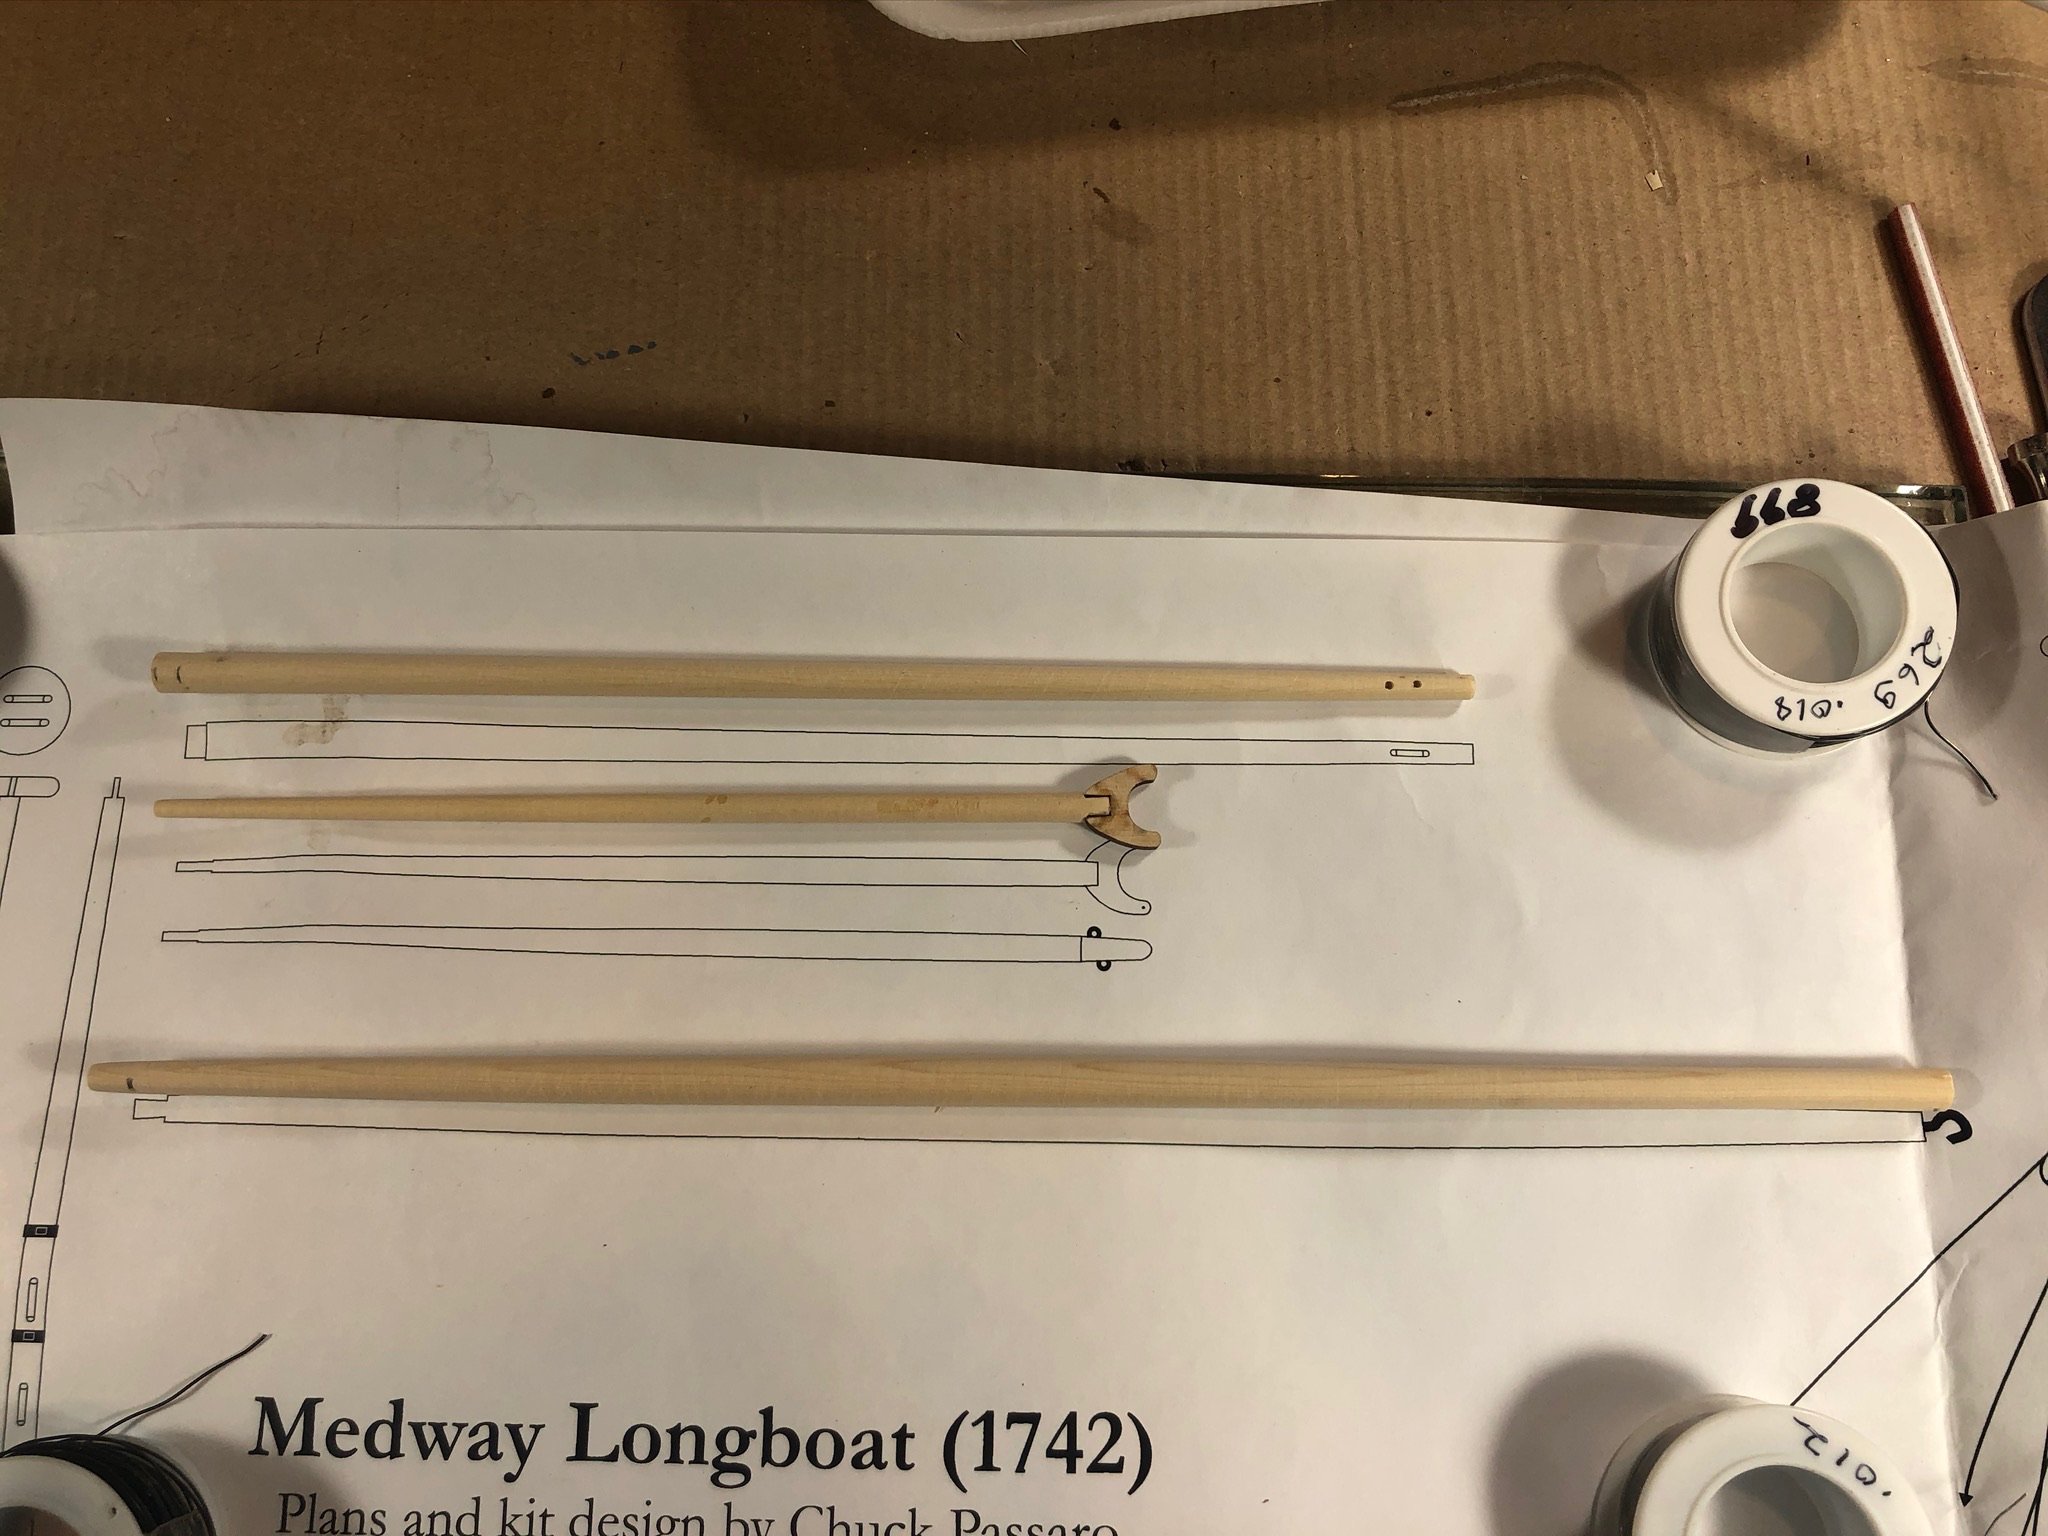
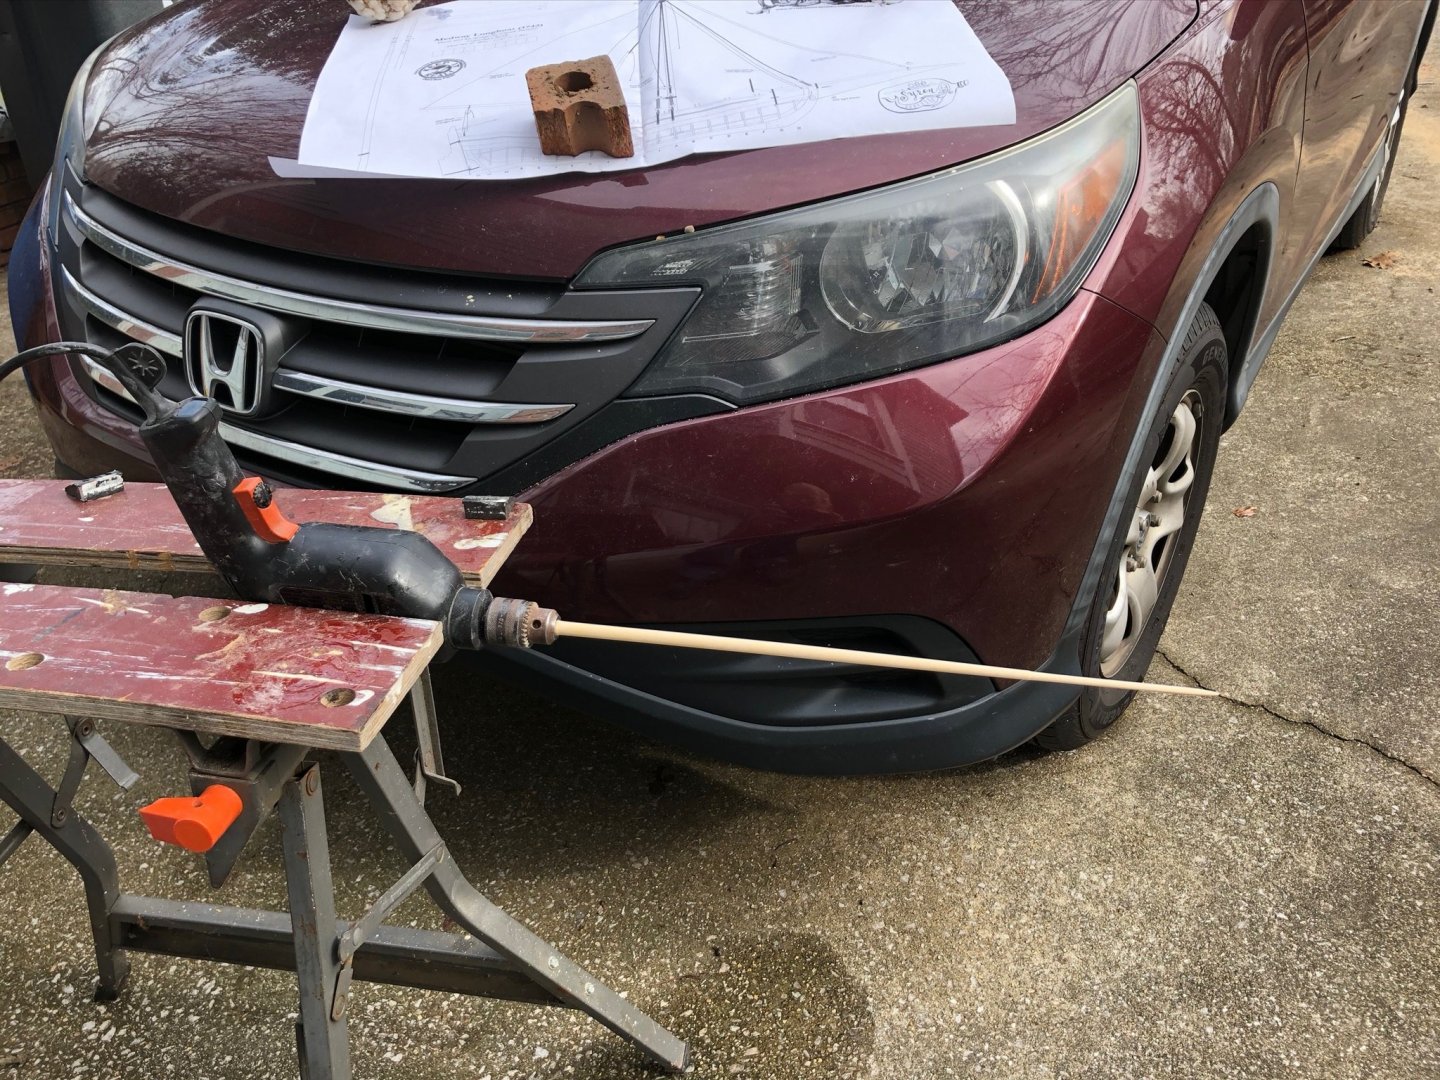
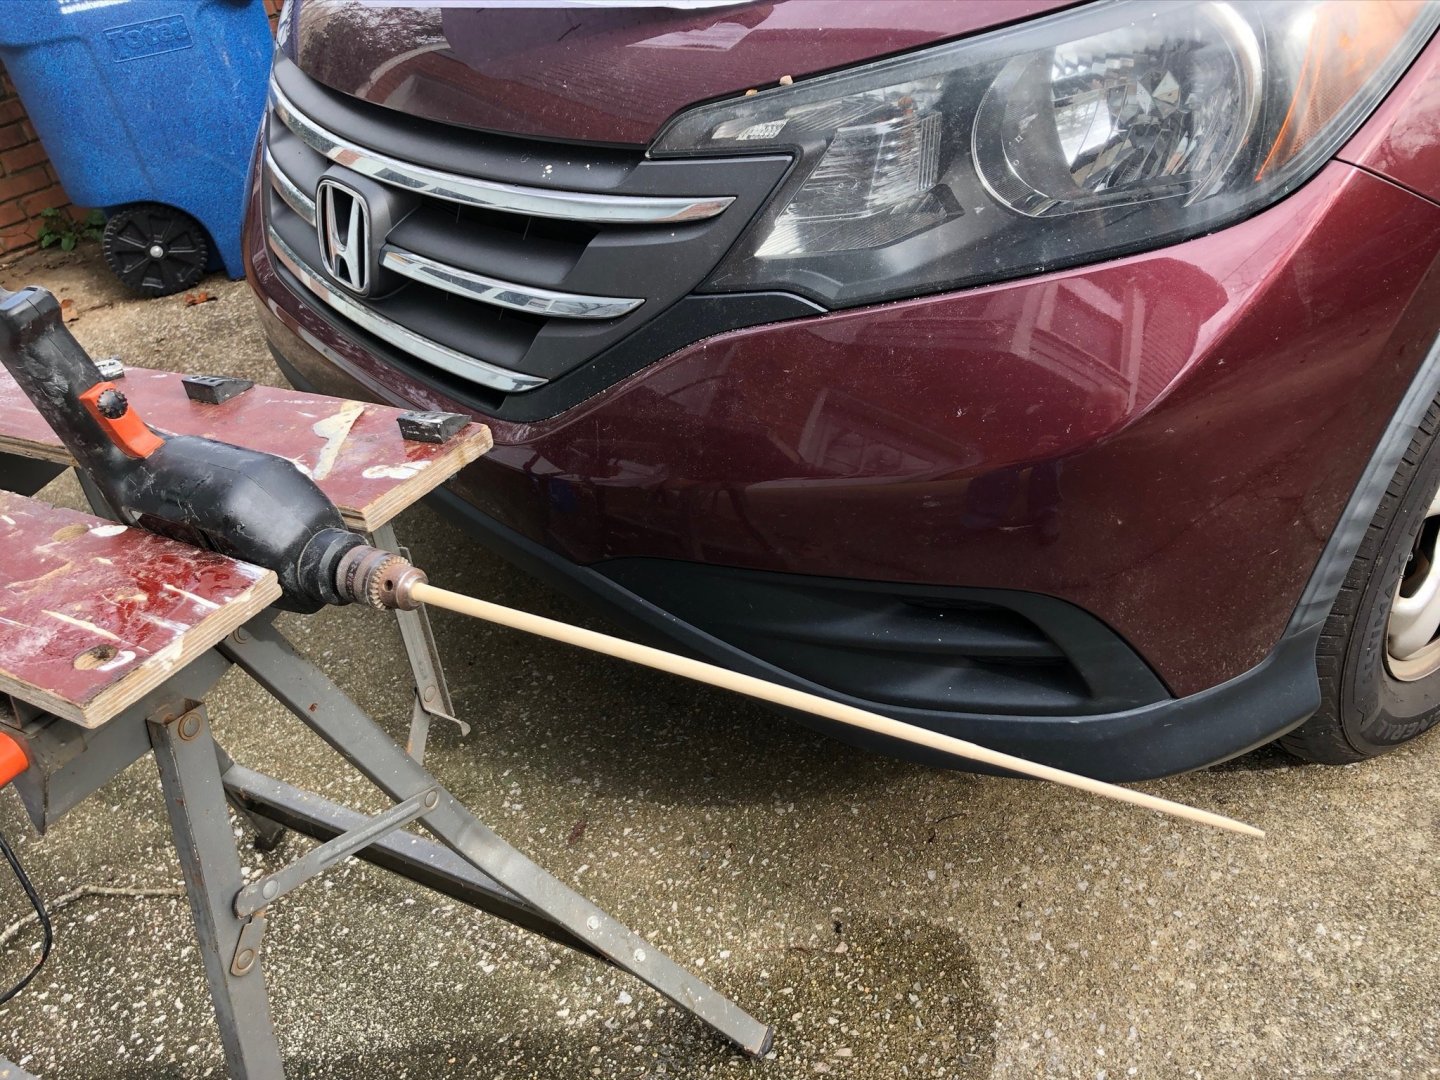
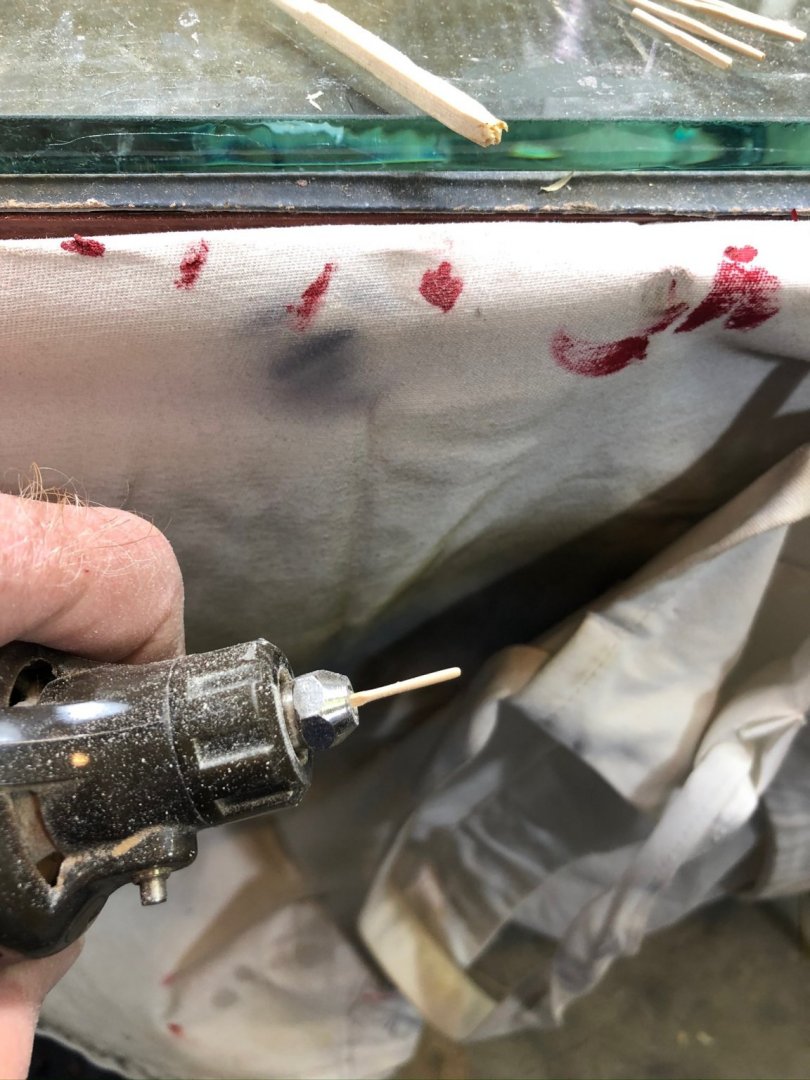
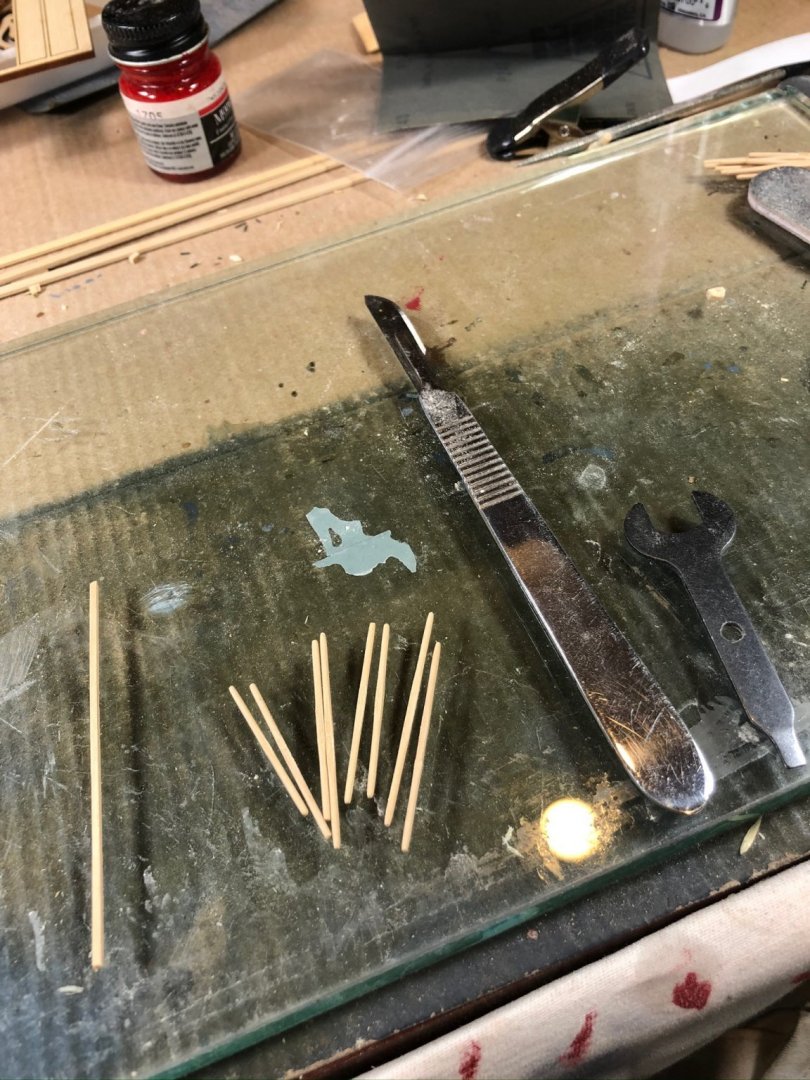
Bob The drill method worked fine to taper everything with a caveat. I followed Chucks instructions about pre drilling holes for rigging line and shaving off the corners to create an octagon before chucking in my drill. Despite my best efforts though, I could not get them to fit absolutely square in the drill which resulted in some wobble. I was able to operate the drill with my left hand and sand with my right which also controlled and largely eliminated the wobble. I pretty much tapered by eye with frequent comparisons back to the plans (see the pictures above) using a 120 grit to get the basic shape and finishing with a 320. Luckily I’ve had a lot of experience with photo etched brass on other projects and feel very comfortable with it. I don’t have any experience with blackening it, but have found that it holds enamel paint well so that’s the direction I’m heading. my other hobby
- 46 replies
-
- 7
-
-
- medway longboat
- Syren Ship Model Company
- (and 1 more)
-
Thanks, Bob - it has been a learning experience! This will be my first real attempt at rigging and I feel like a lost ball in tall weeds. I followed the instructions for tapering the mast using a hand drill and it worked pretty well so am moving forward. Yes, I have purchased the Winchelsea frame kit and the parts for Chapter 1. I’ve been closely following the builds posted here as well as Chuck’s tutorials and have joined the Winnie group. I really feel like I’m in way over my head and am somewhat intimidated but am retired so have the time to devote to it. Almost everything I’ve done before this has been plastic so working with wood has been challenging but very satisfying and I’m really enjoying it. Don
- 46 replies
-
- 2
-
-
- medway longboat
- Syren Ship Model Company
- (and 1 more)
-
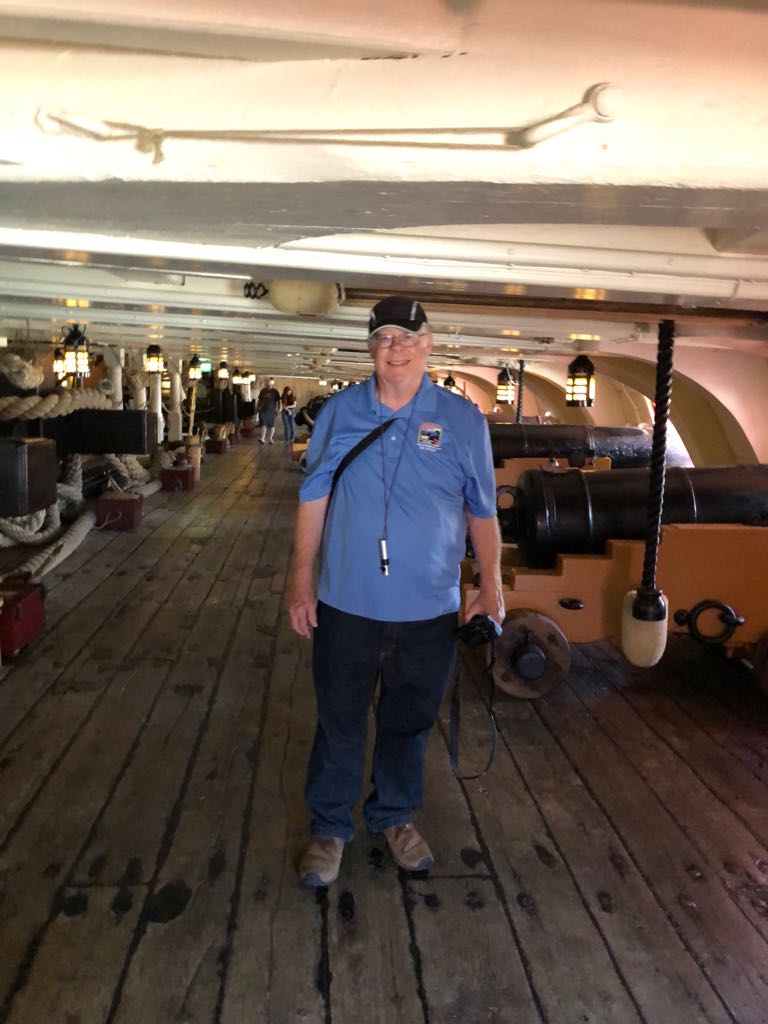
Thanks, Ryland, I appreciate it and am very much enjoying watching your build! I see you are a member of the Hampton Roads Ship Model Society. I recently visited the Mariners Museum and spent quite a bit of time with the Docent who was manning the model booth and who, I think, is also a member. Unfortunately, I can’t remember his name and I’ve lost his card, but we had a great conversation and I picked up some really good ideas from him. Great Museum and some really great people!
- 46 replies
-
- 1
-
-
- medway longboat
- Syren Ship Model Company
- (and 1 more)
-
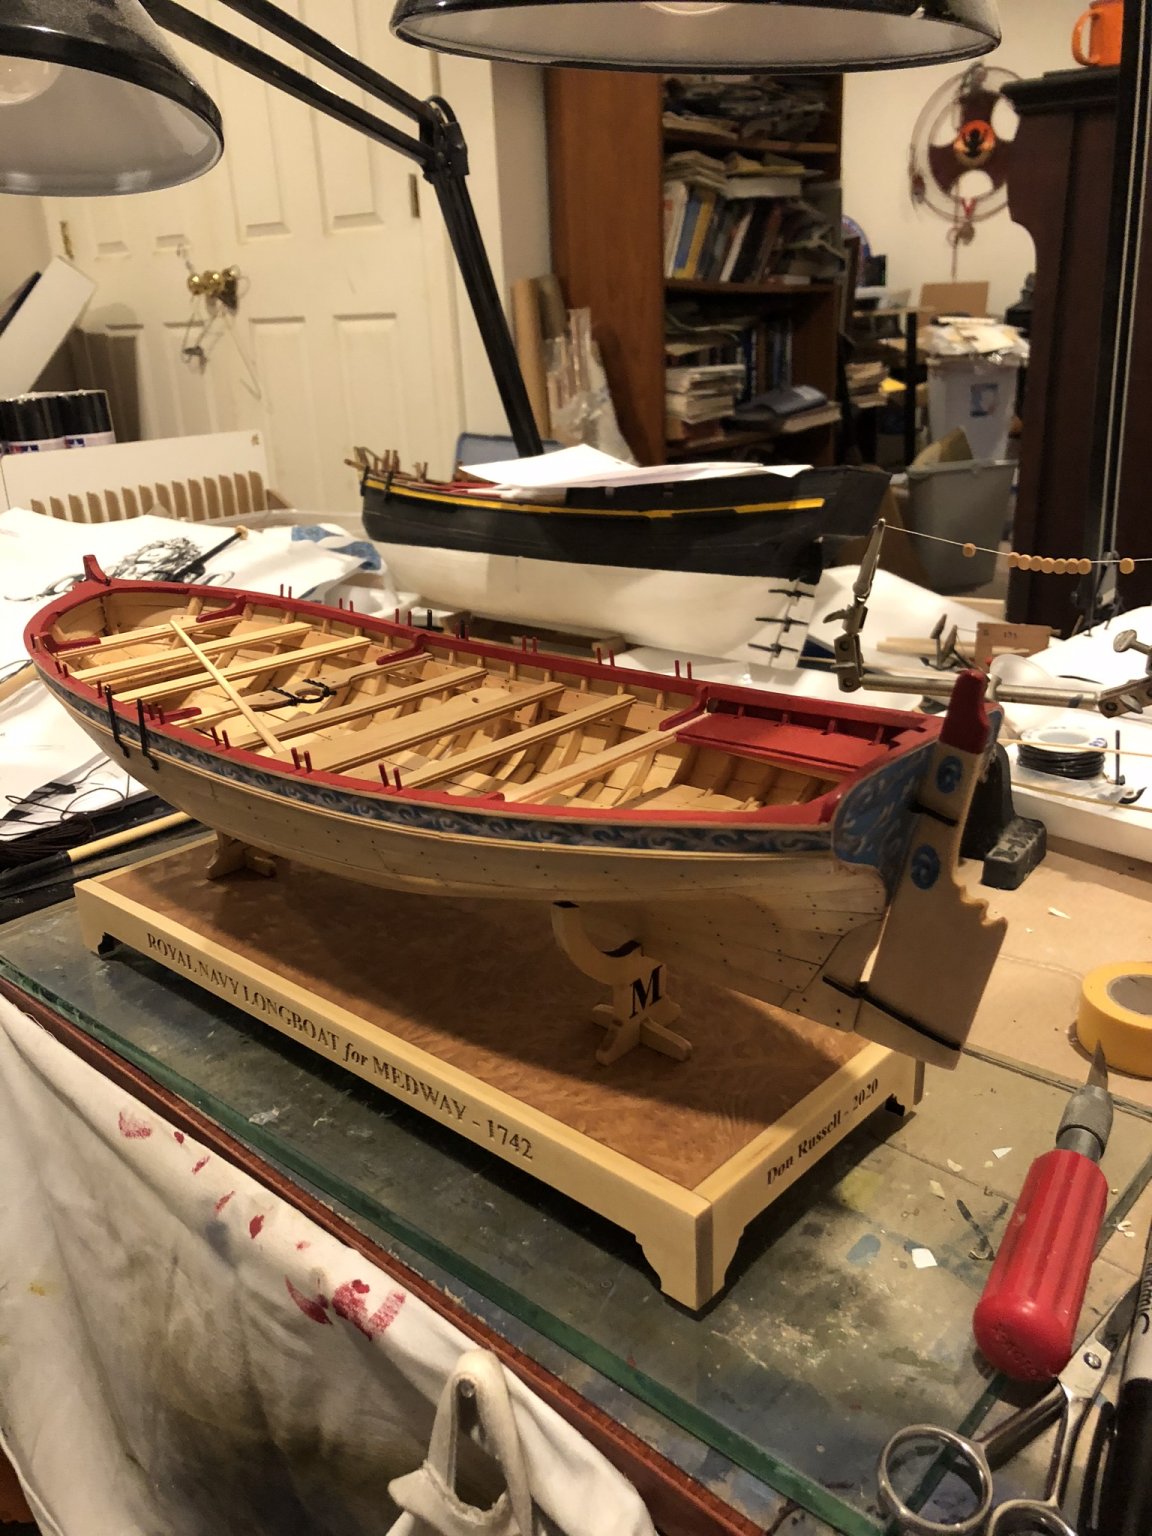
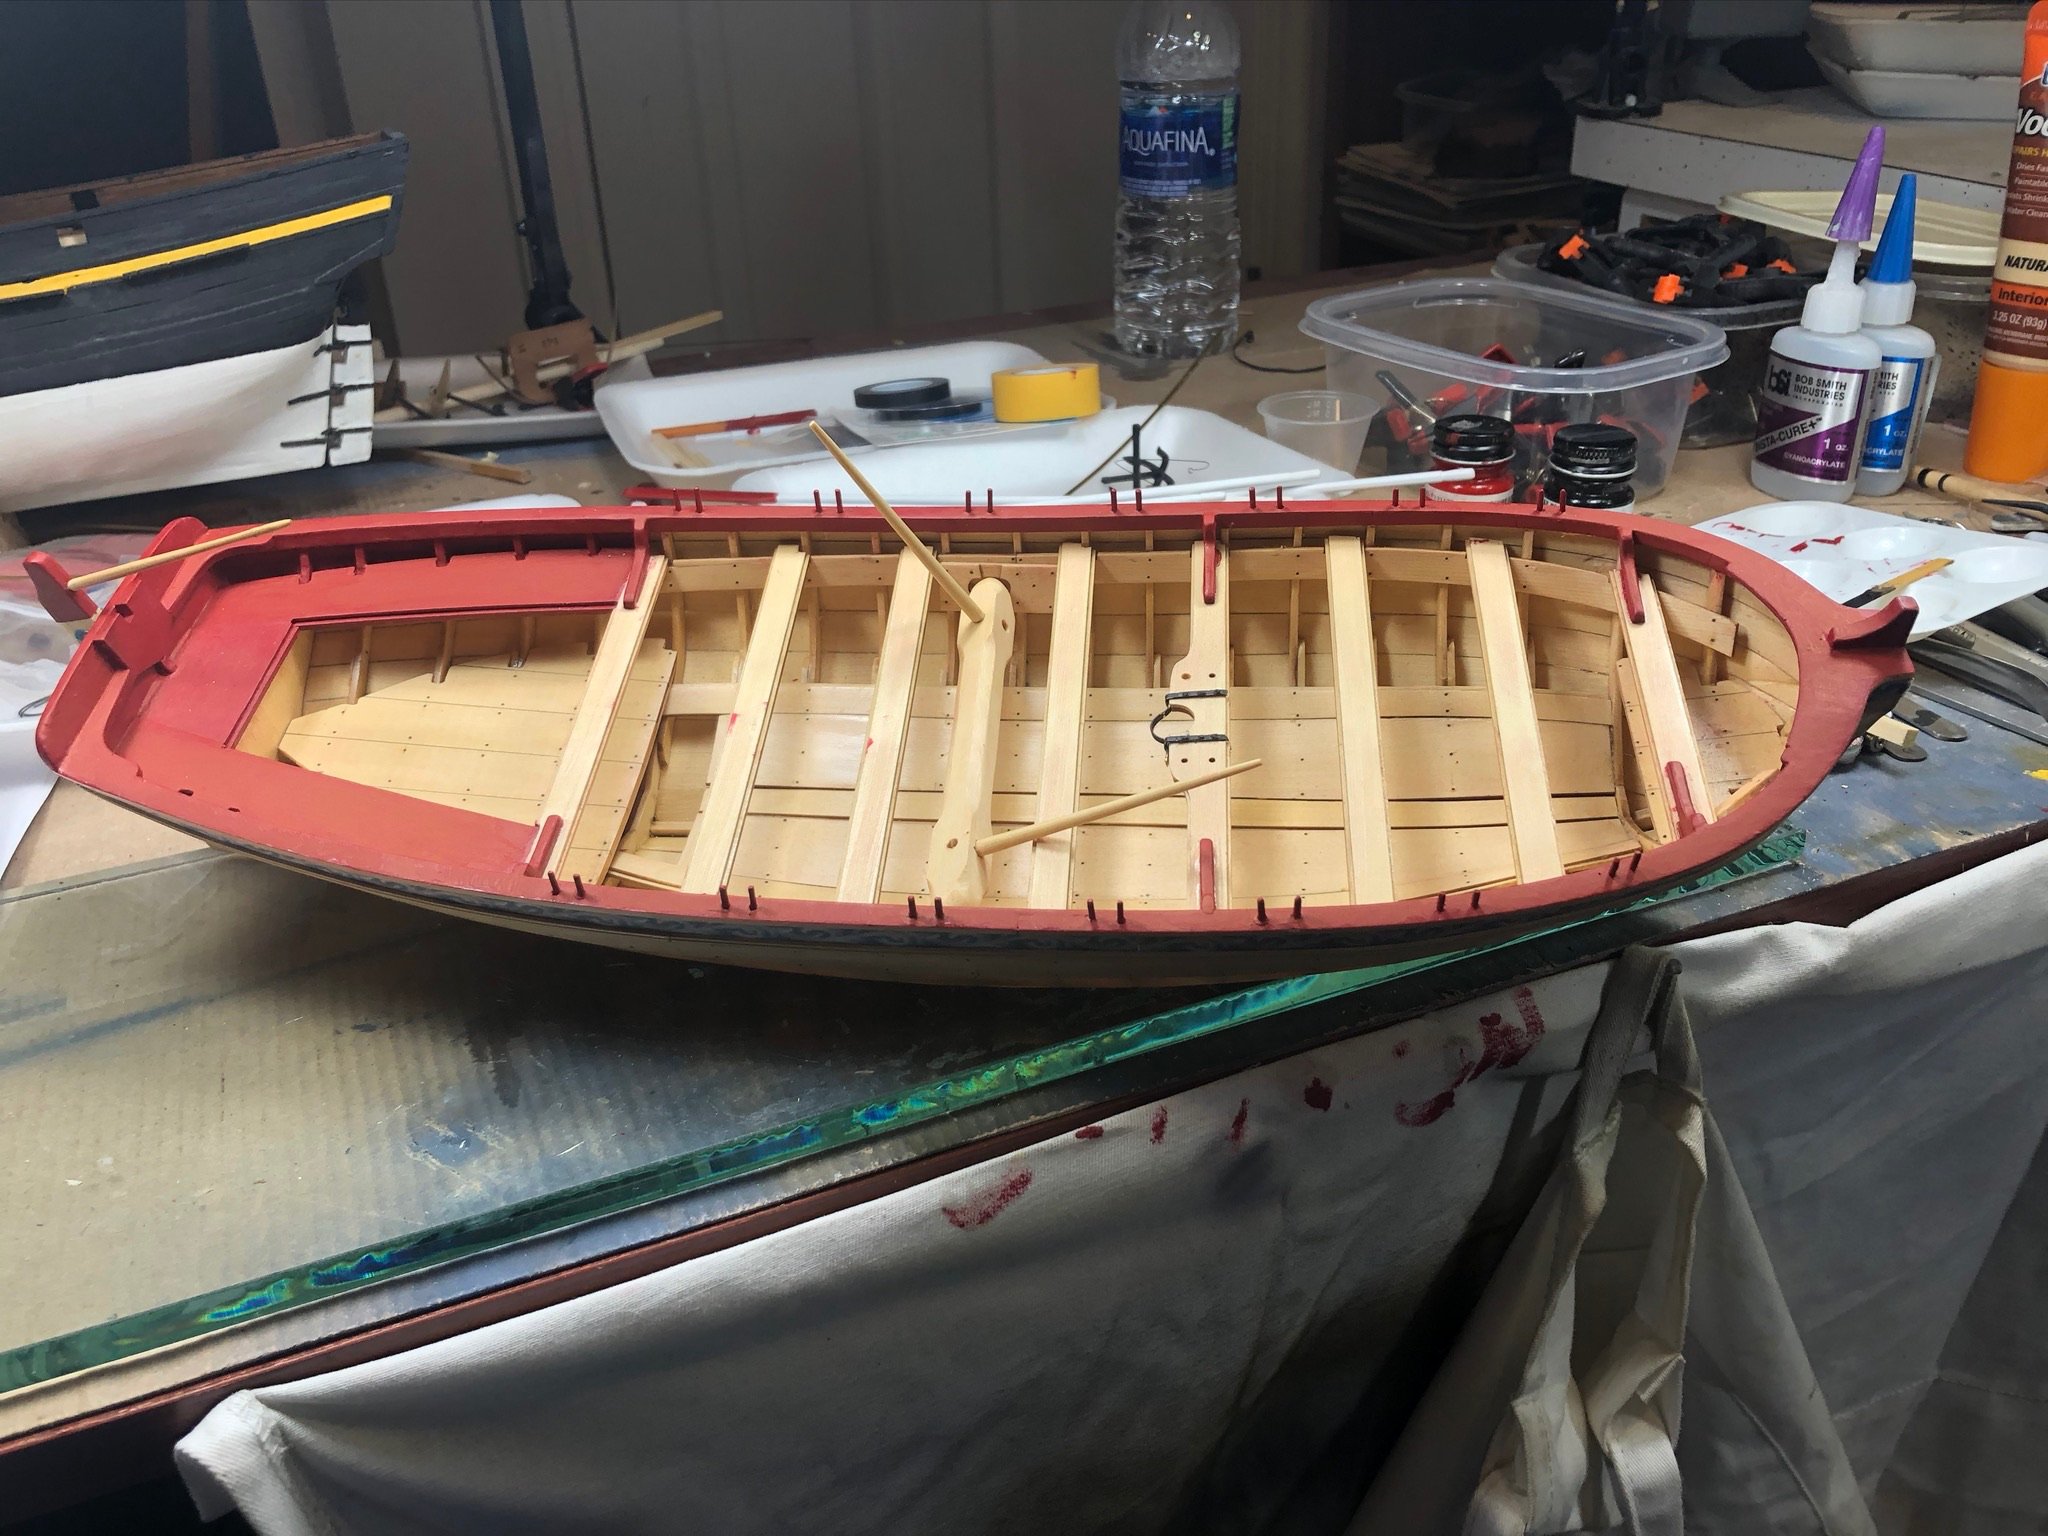
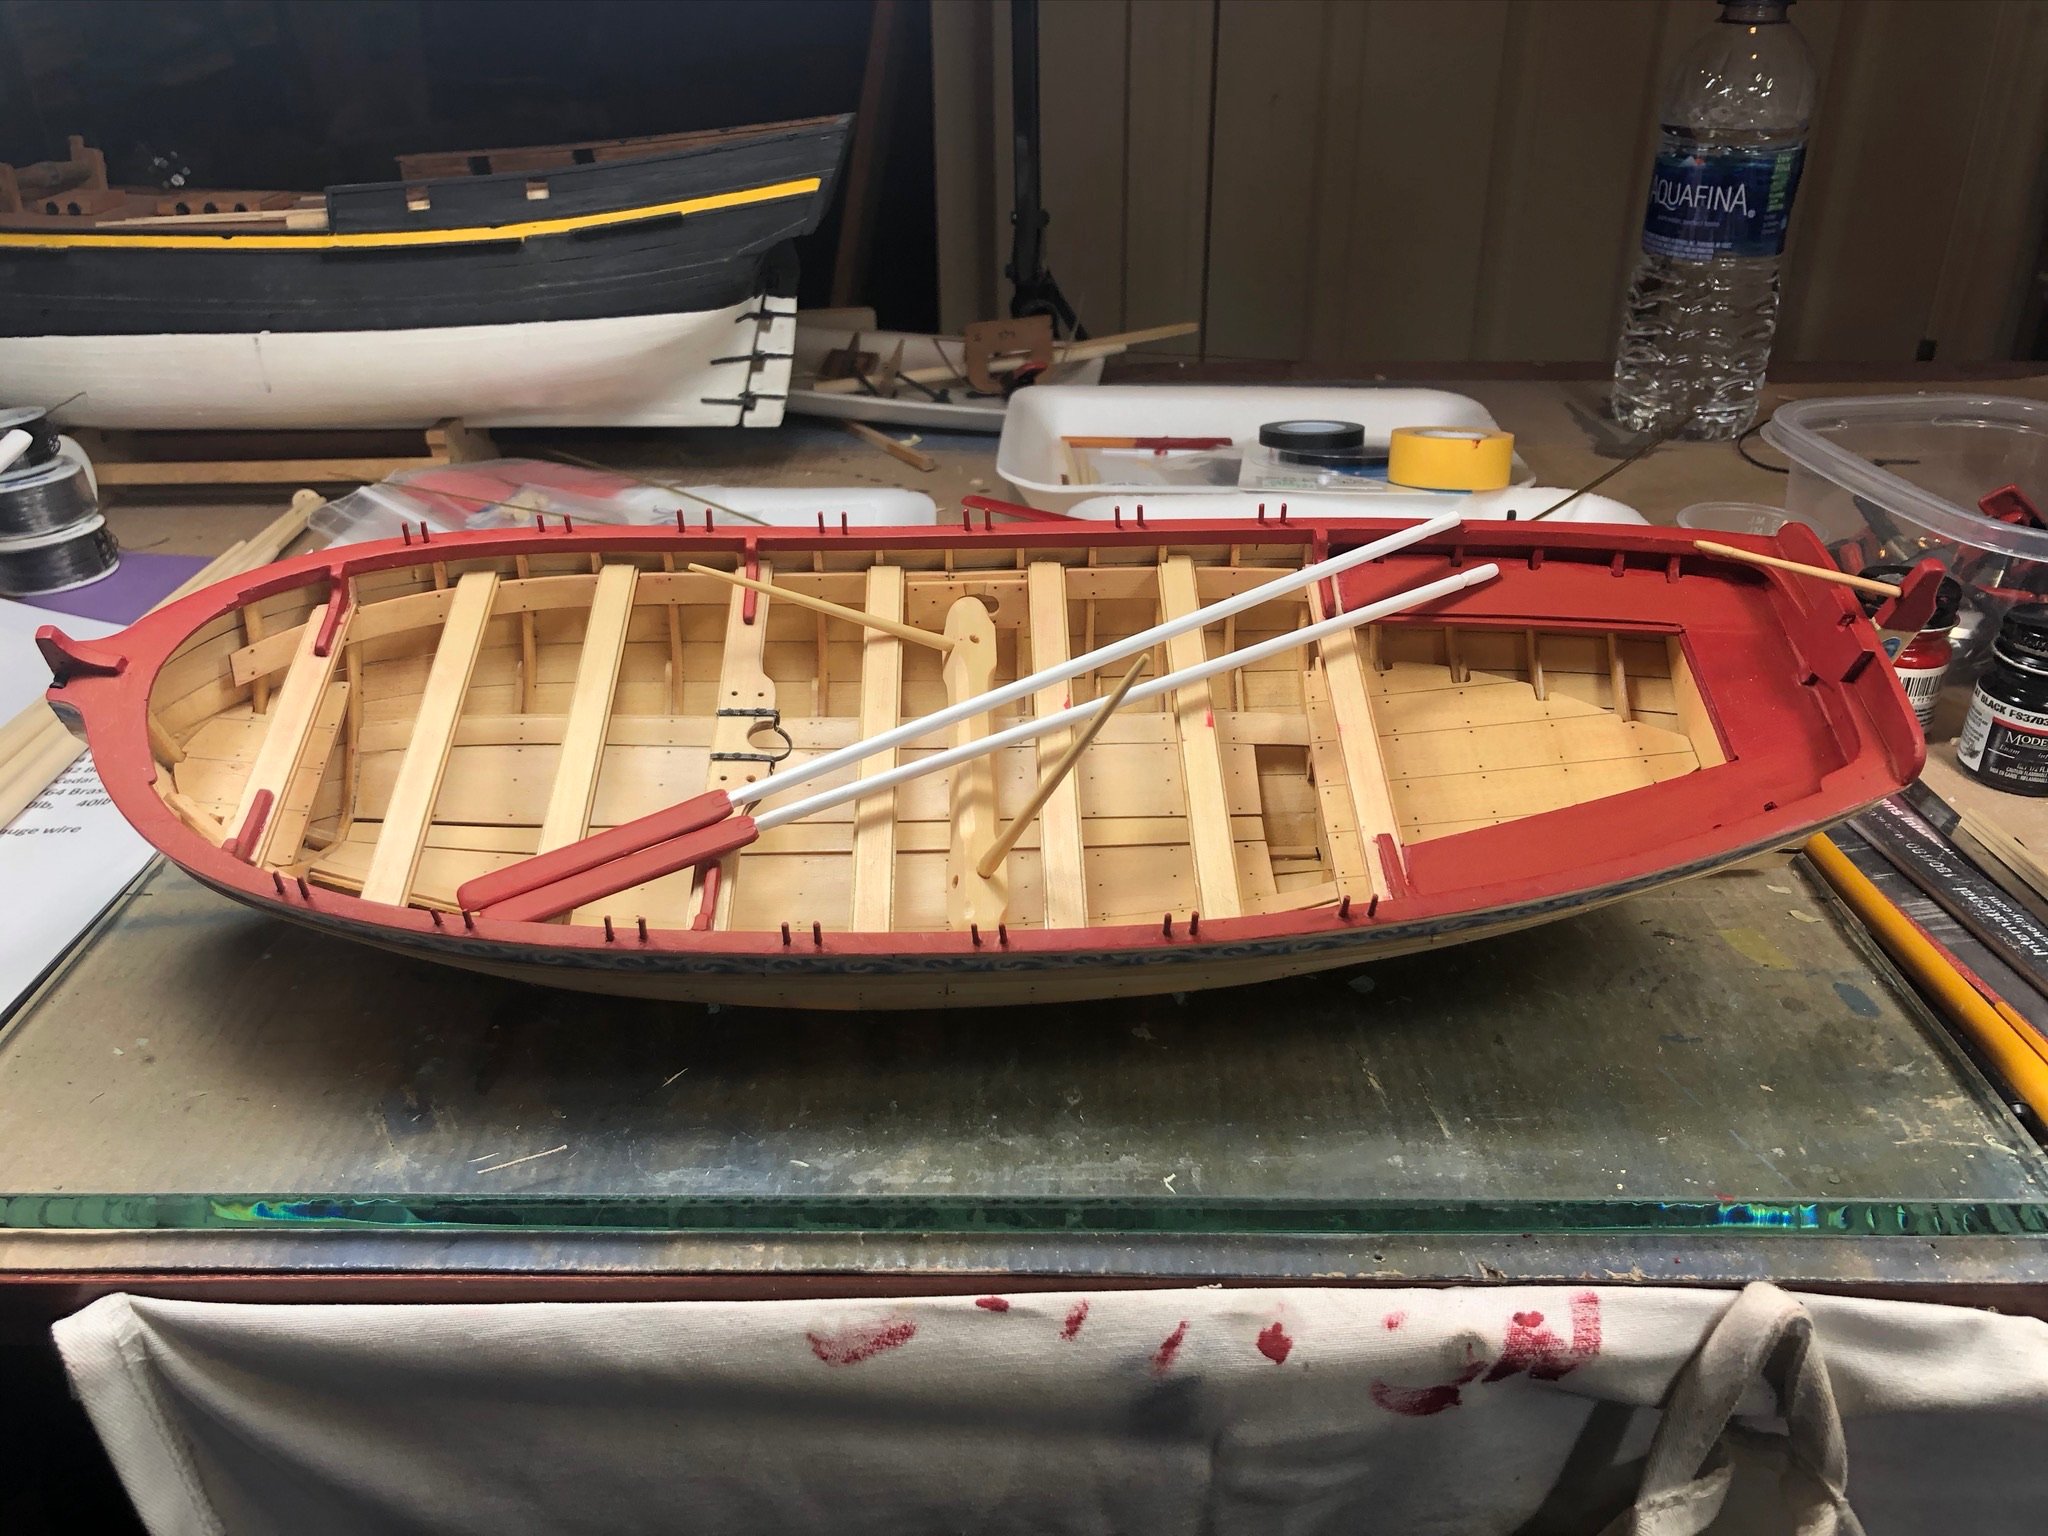
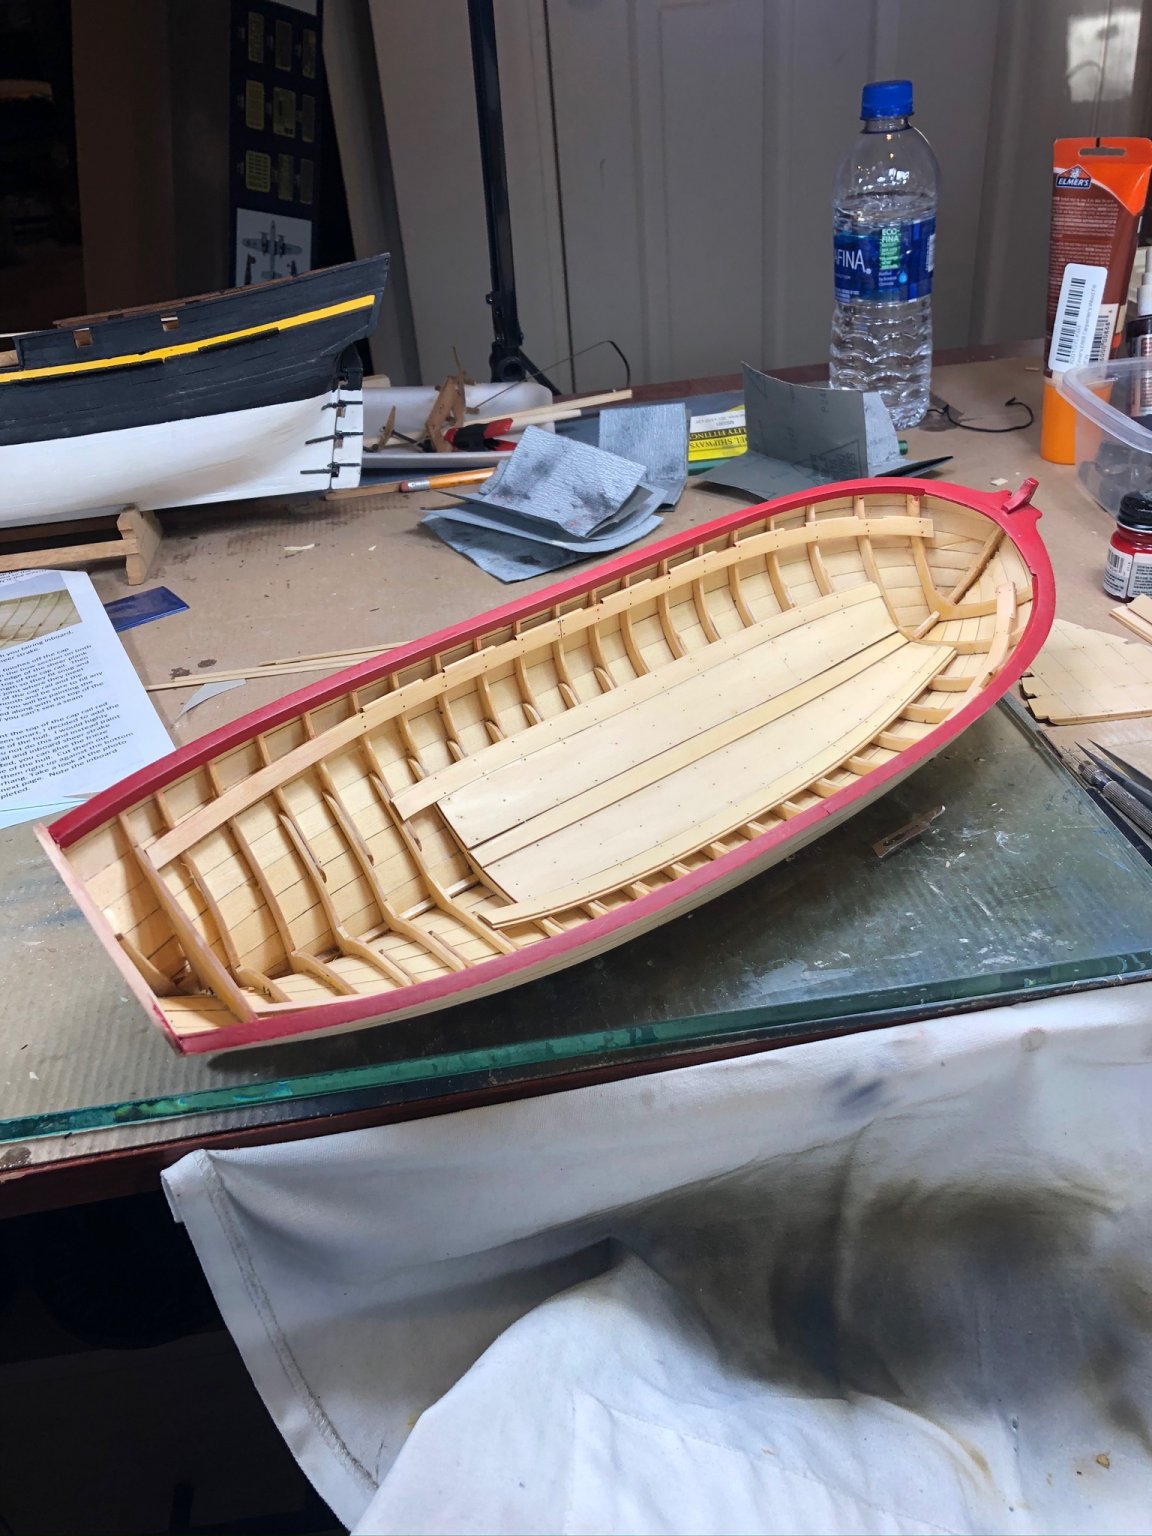
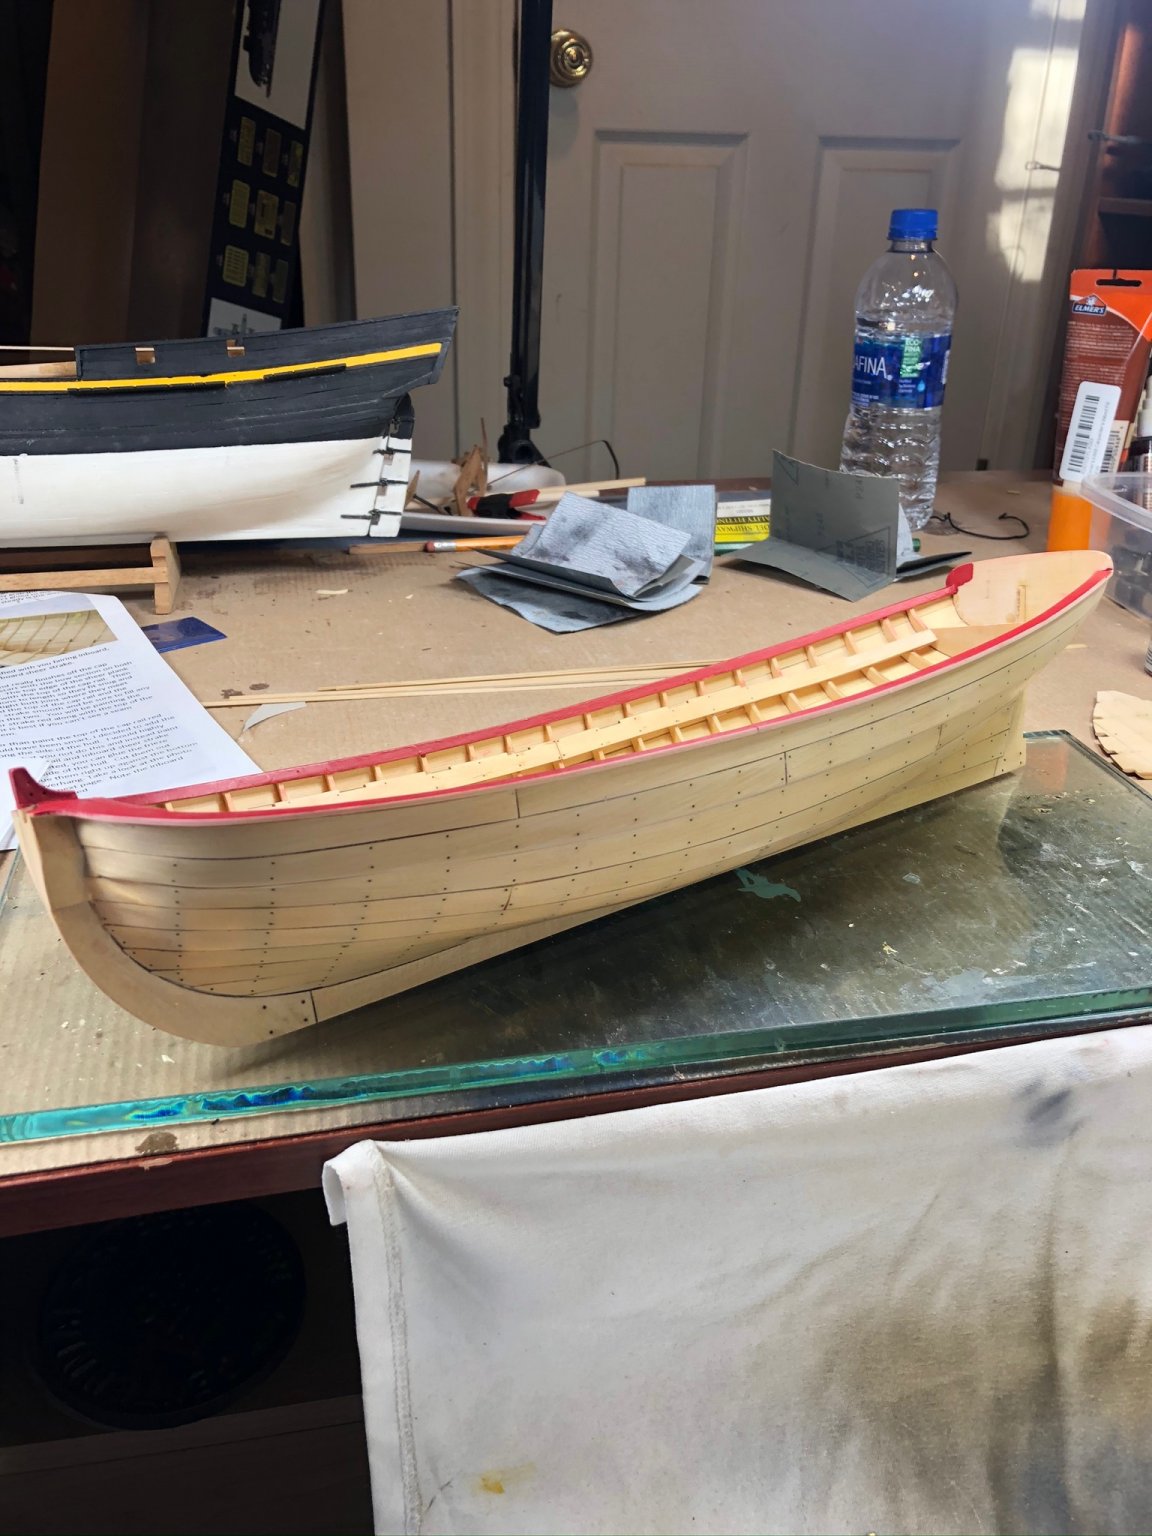
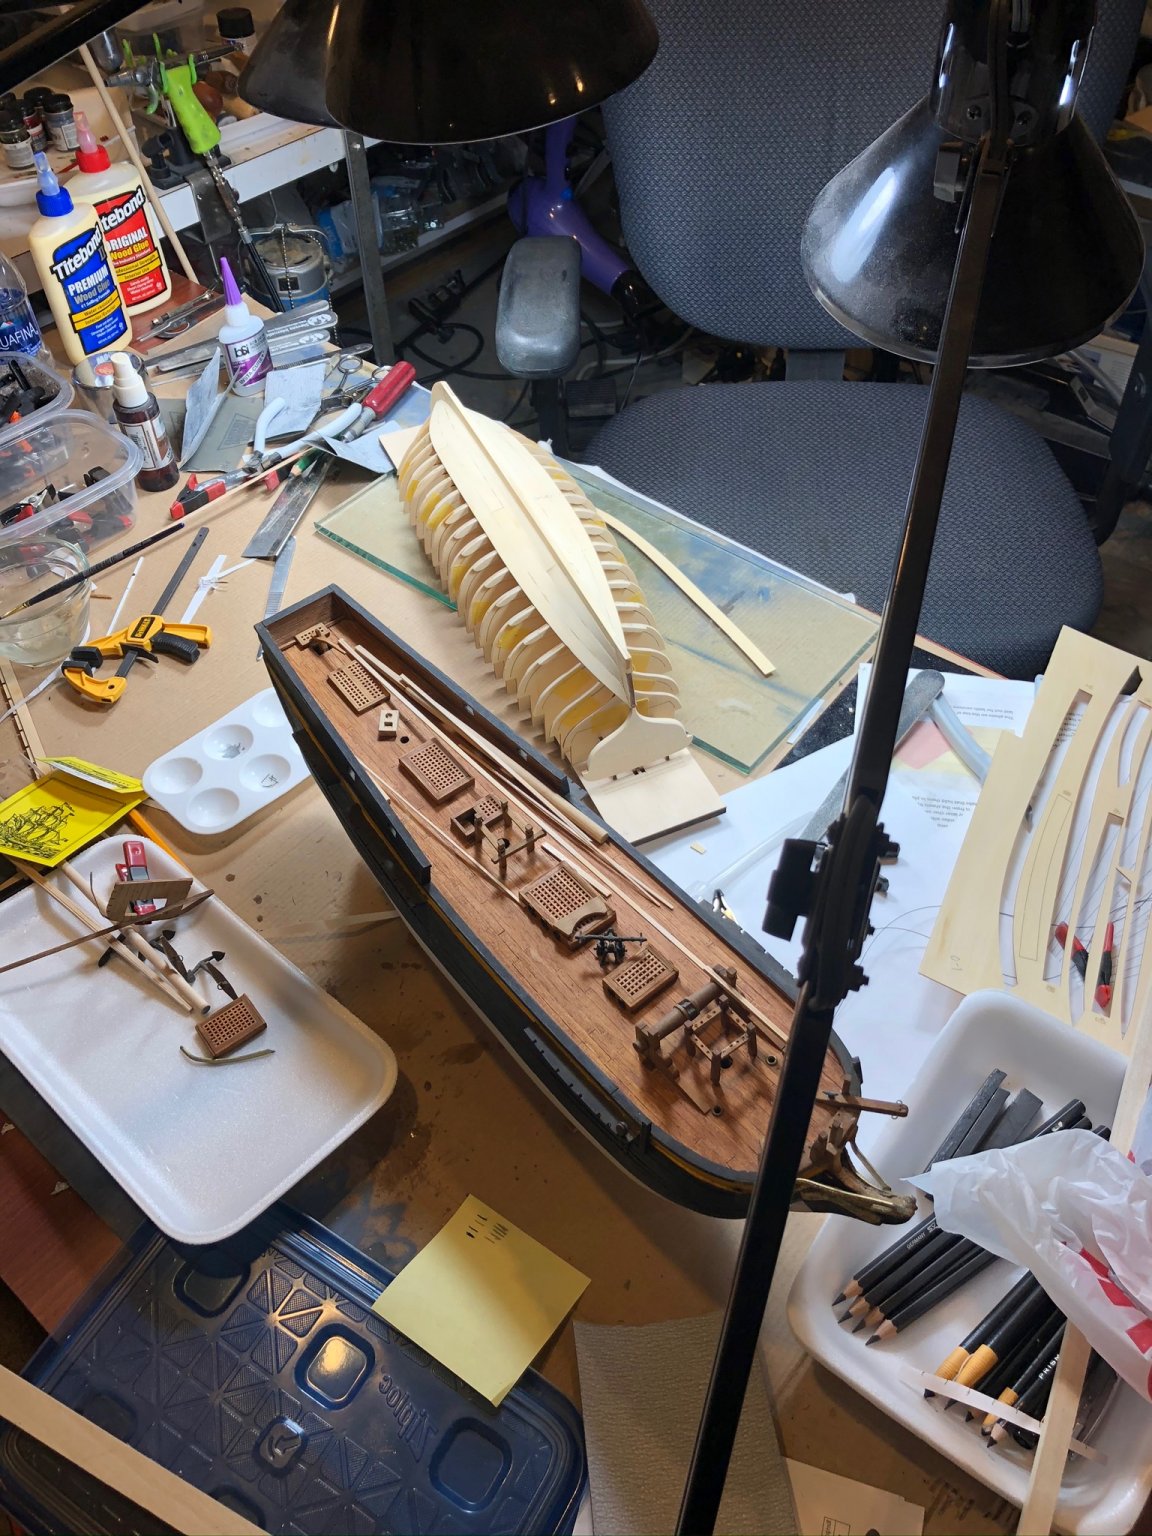
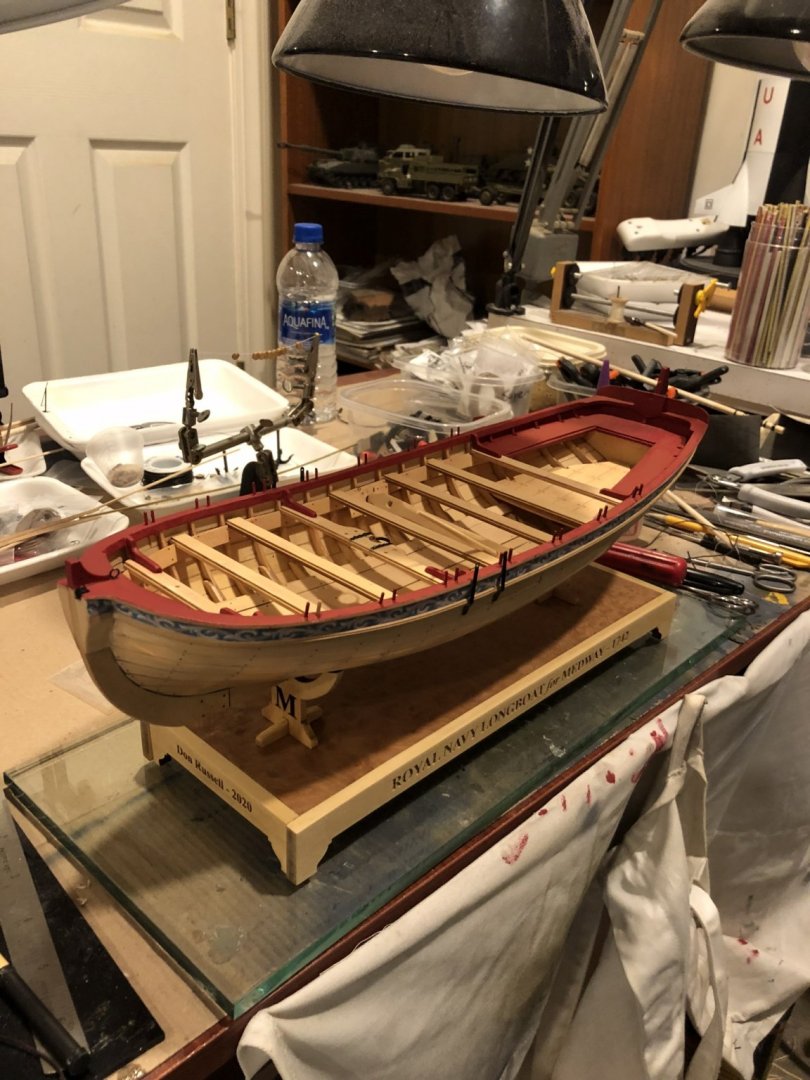
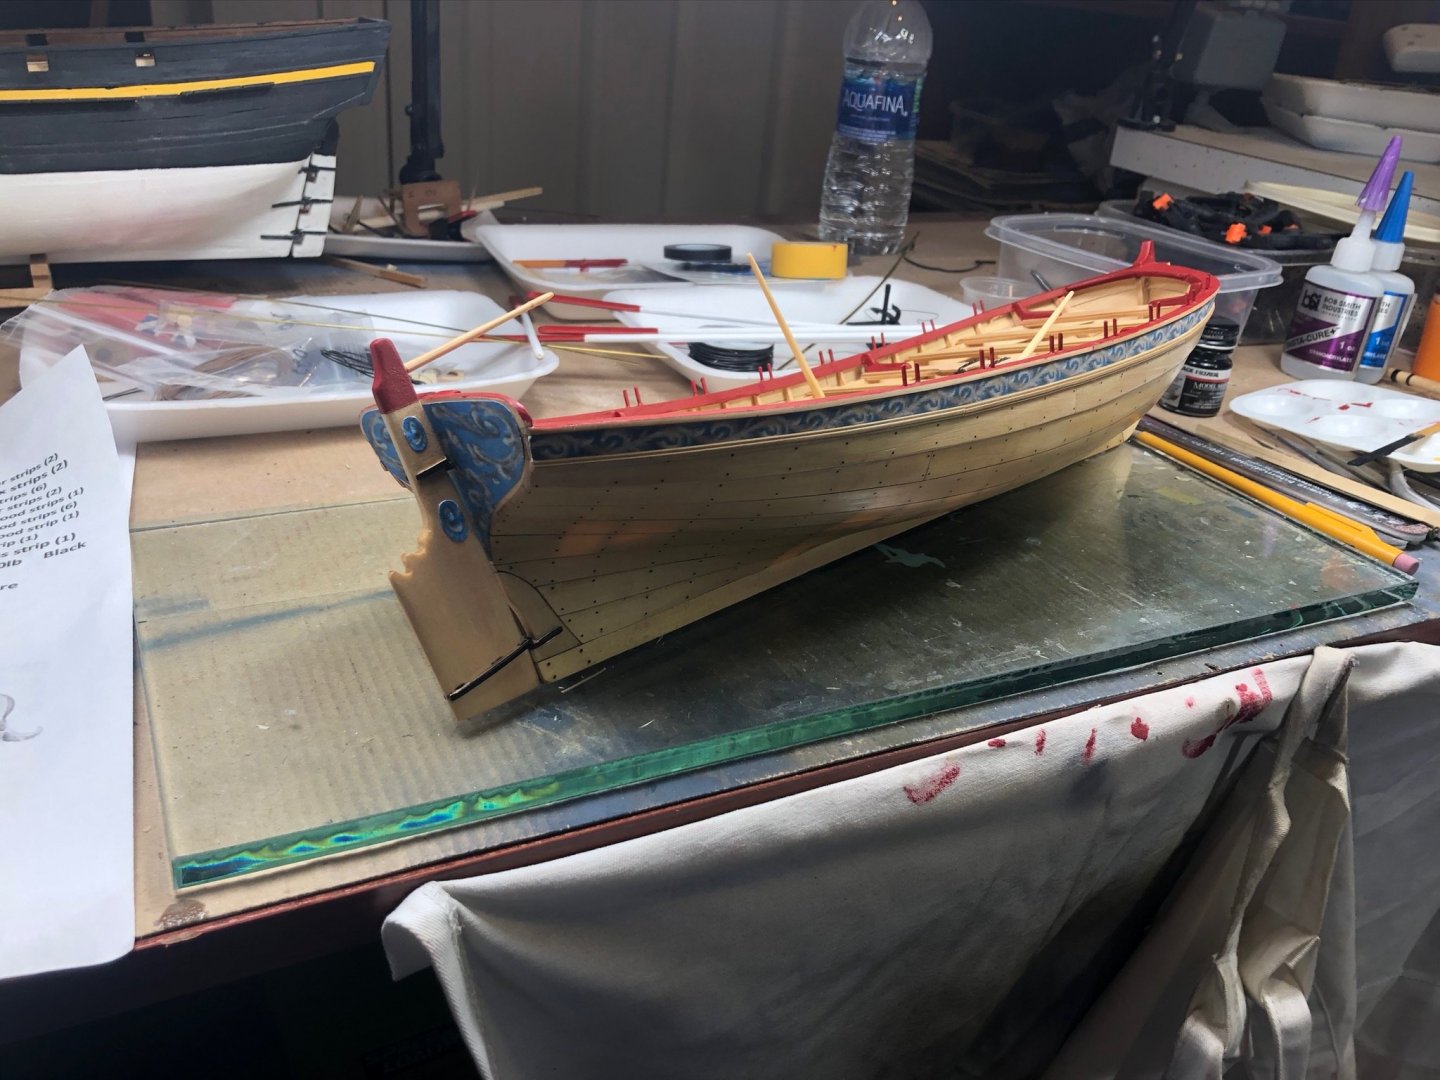
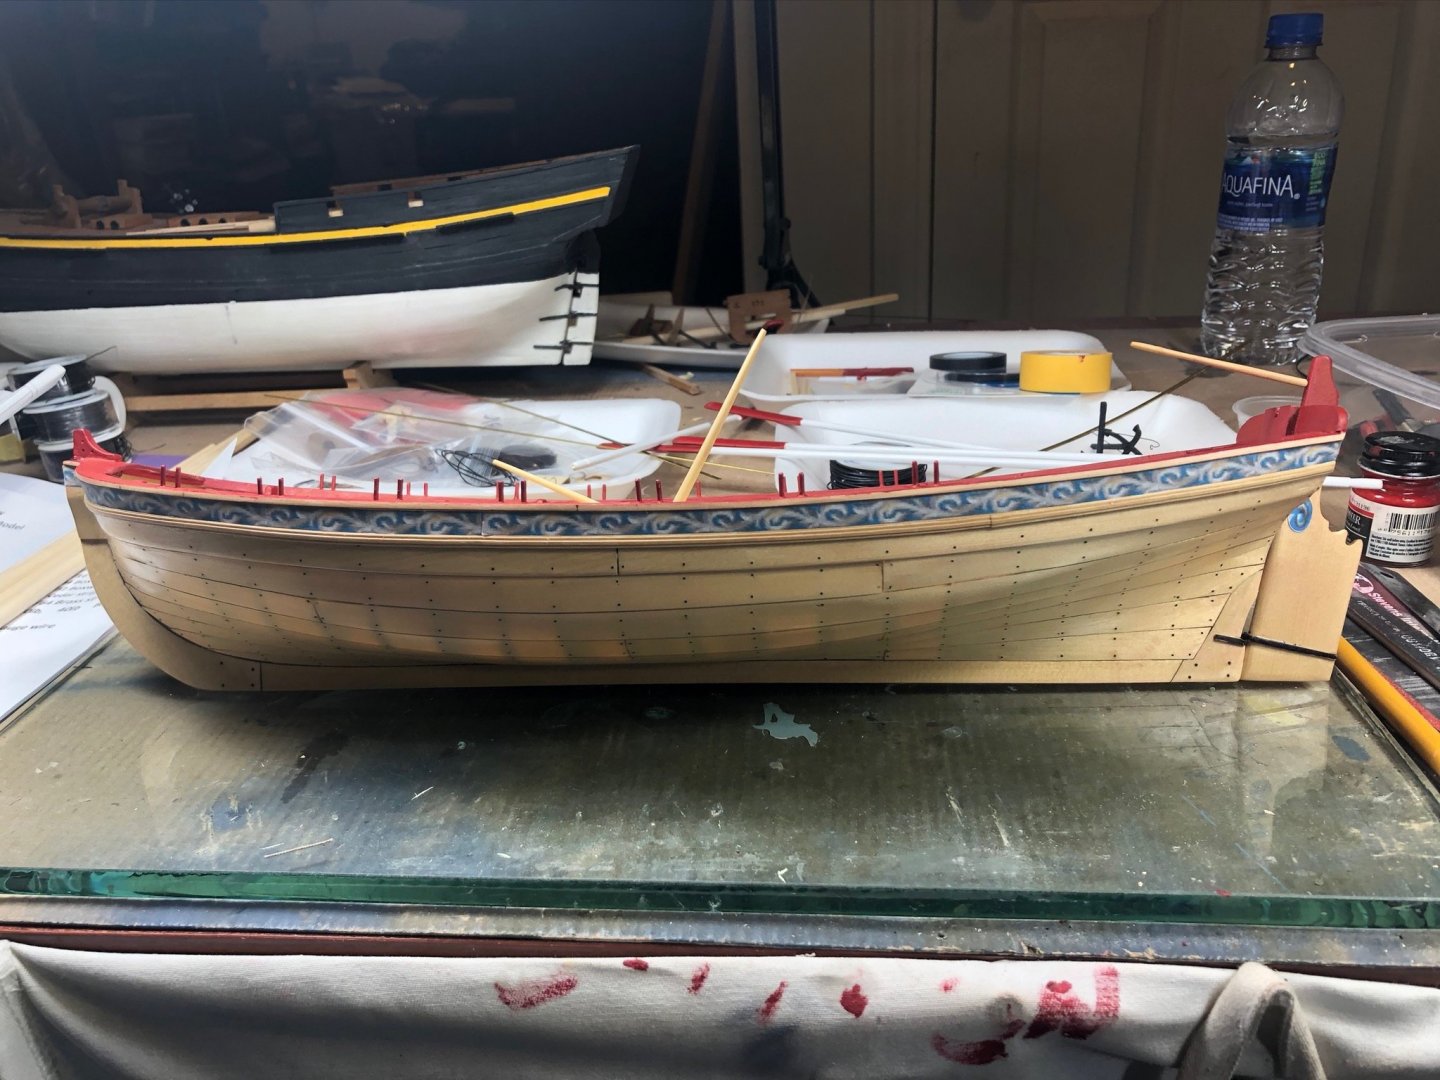
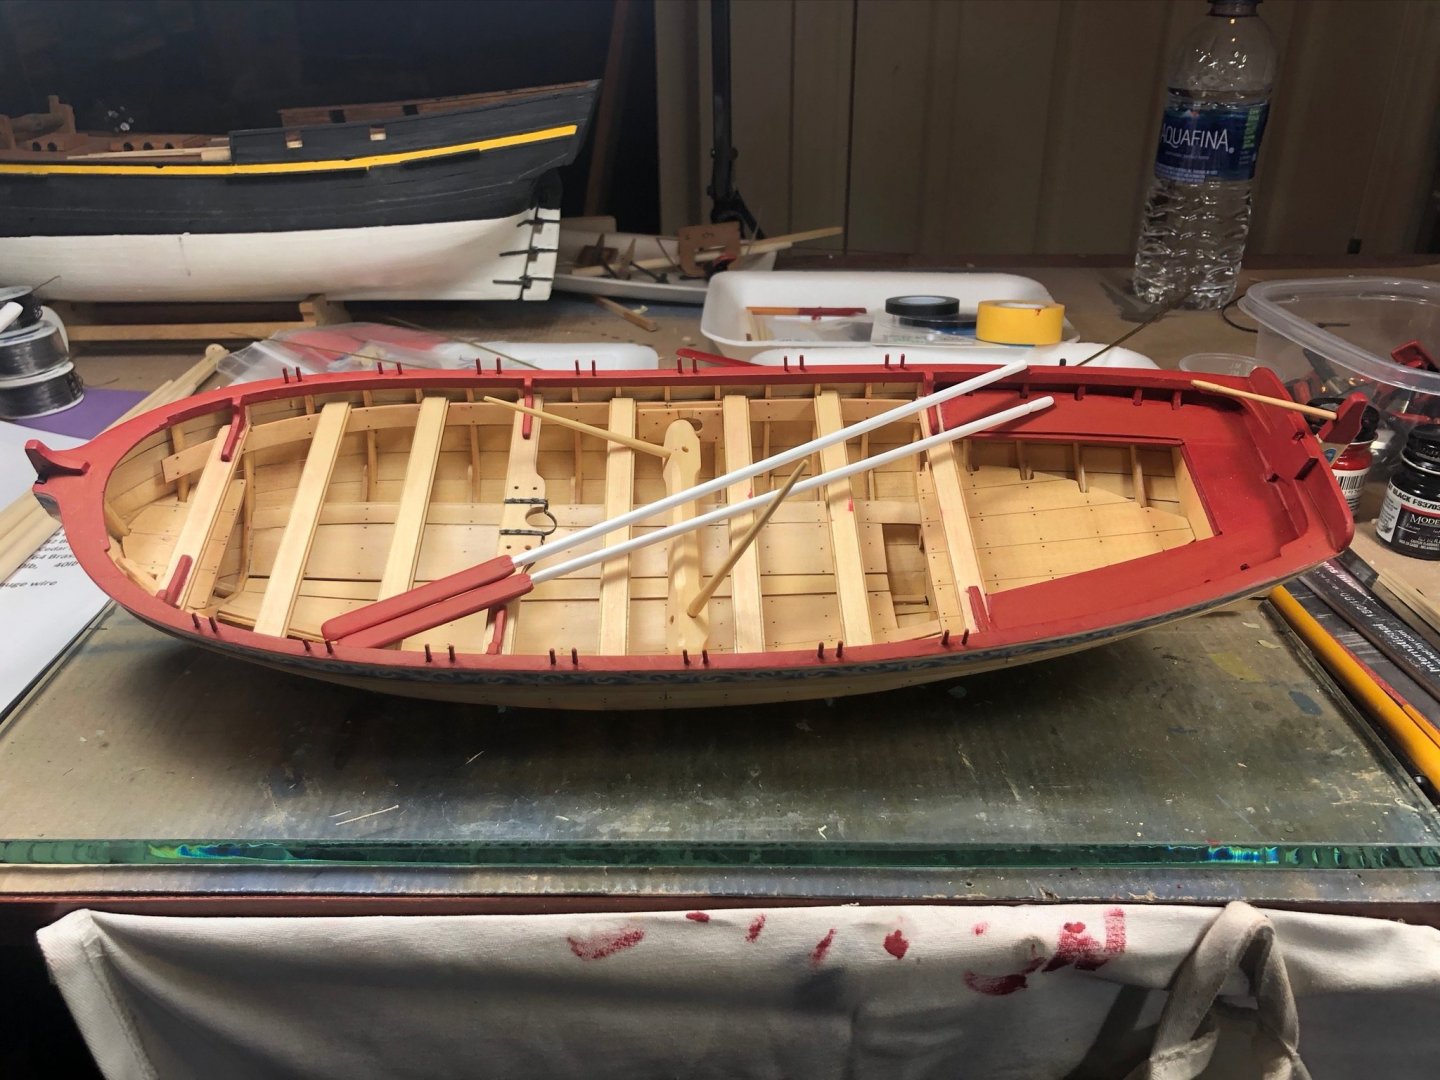
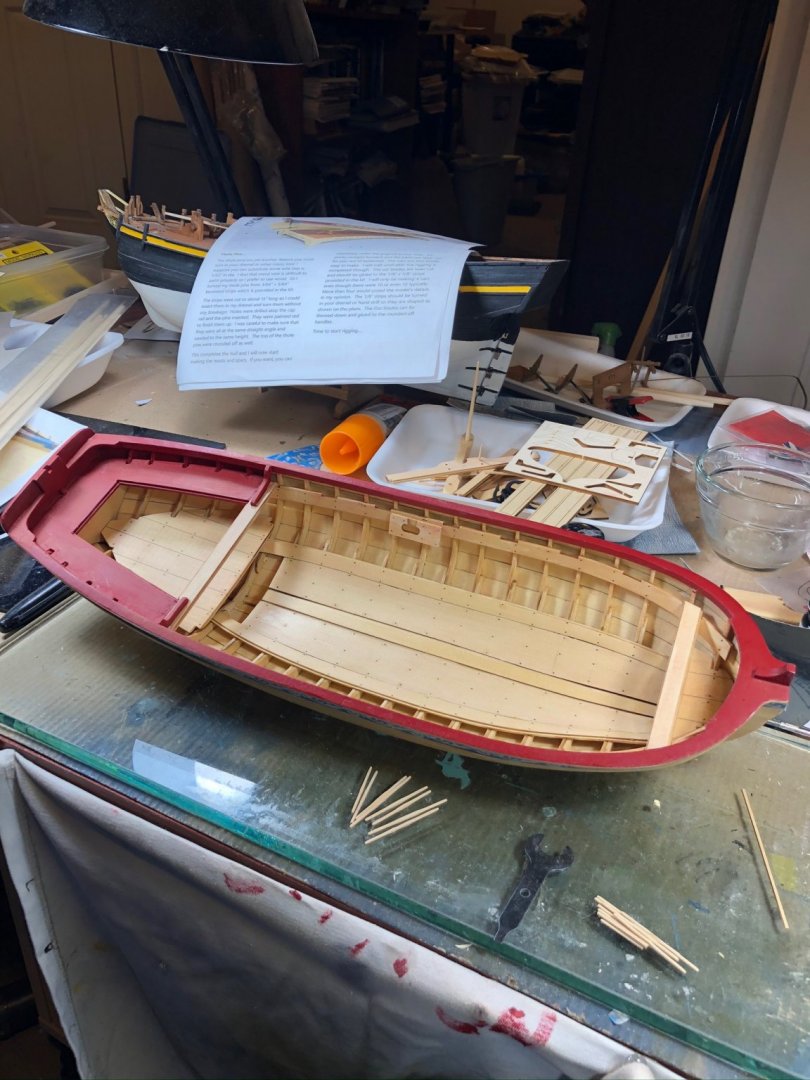
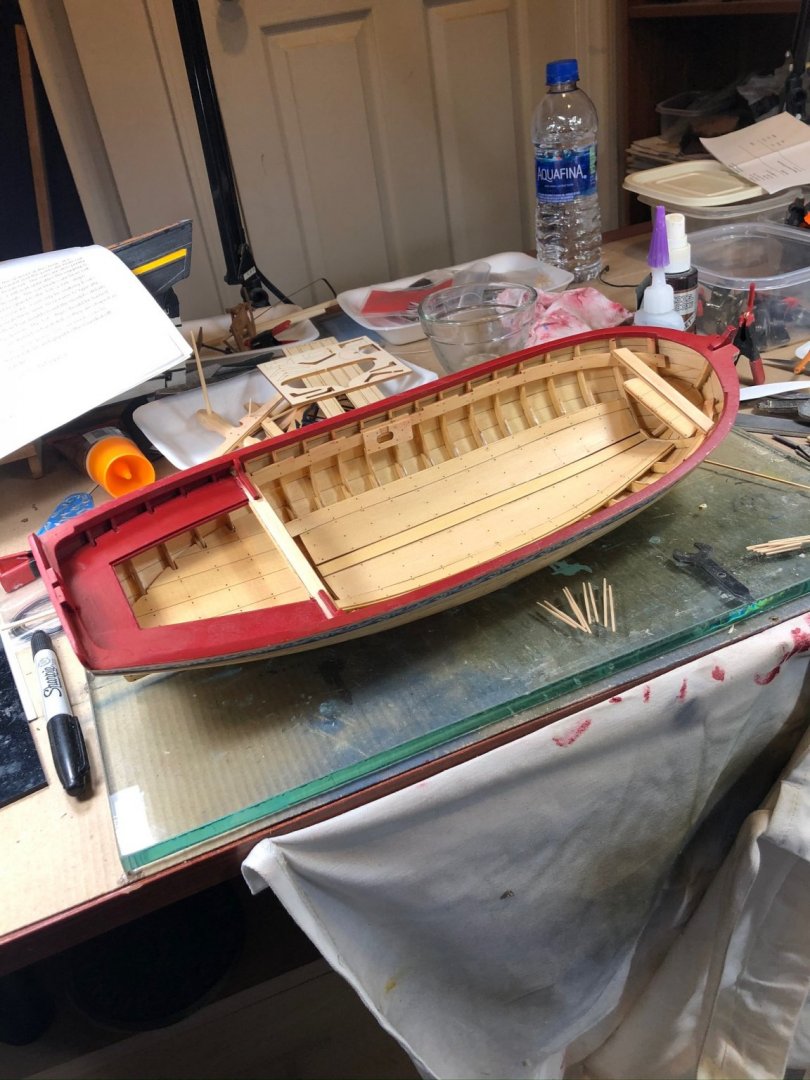
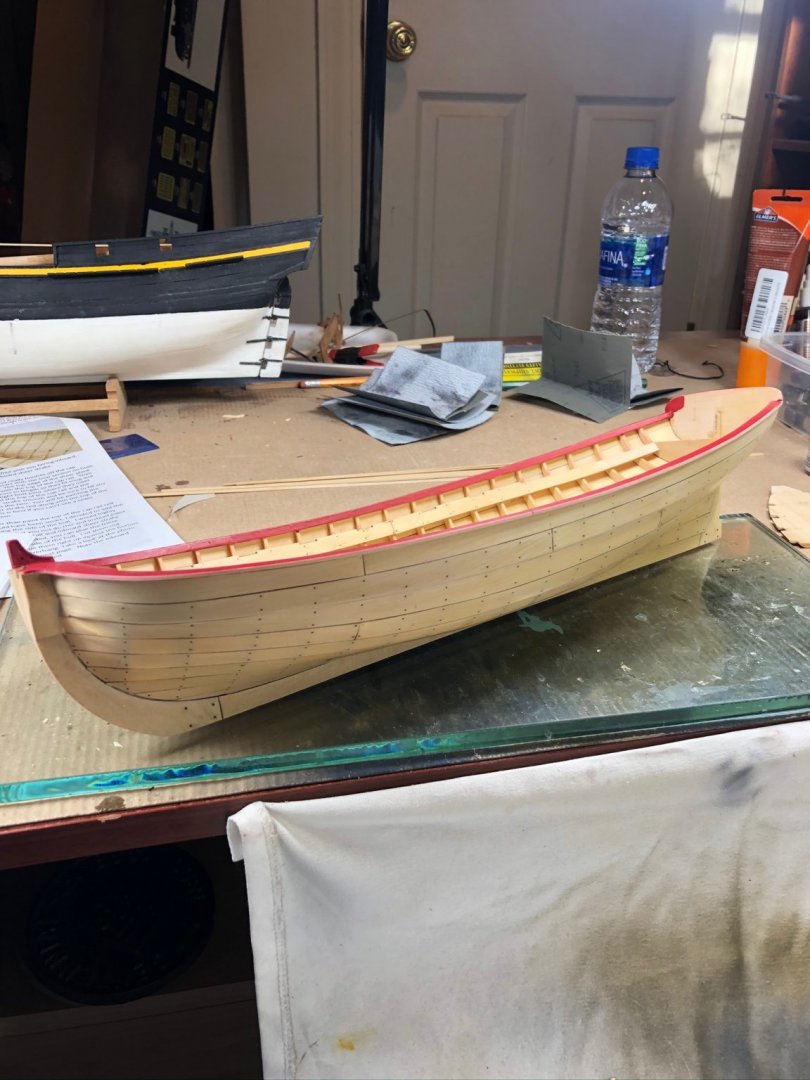
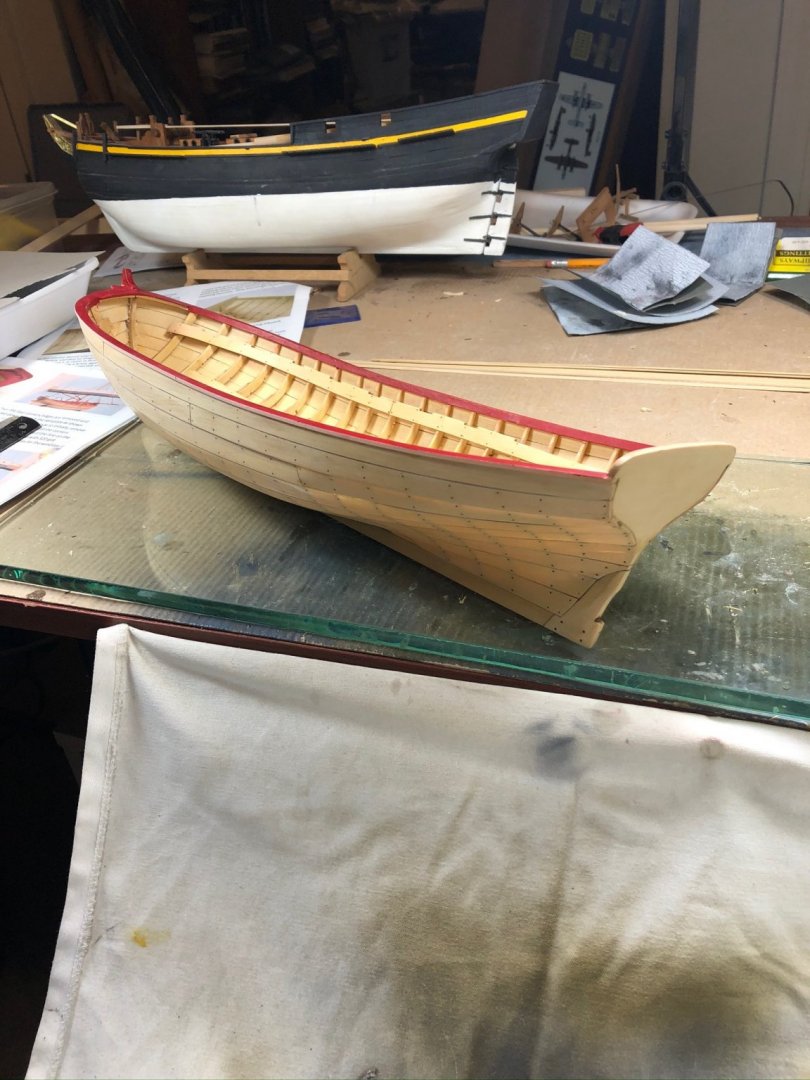
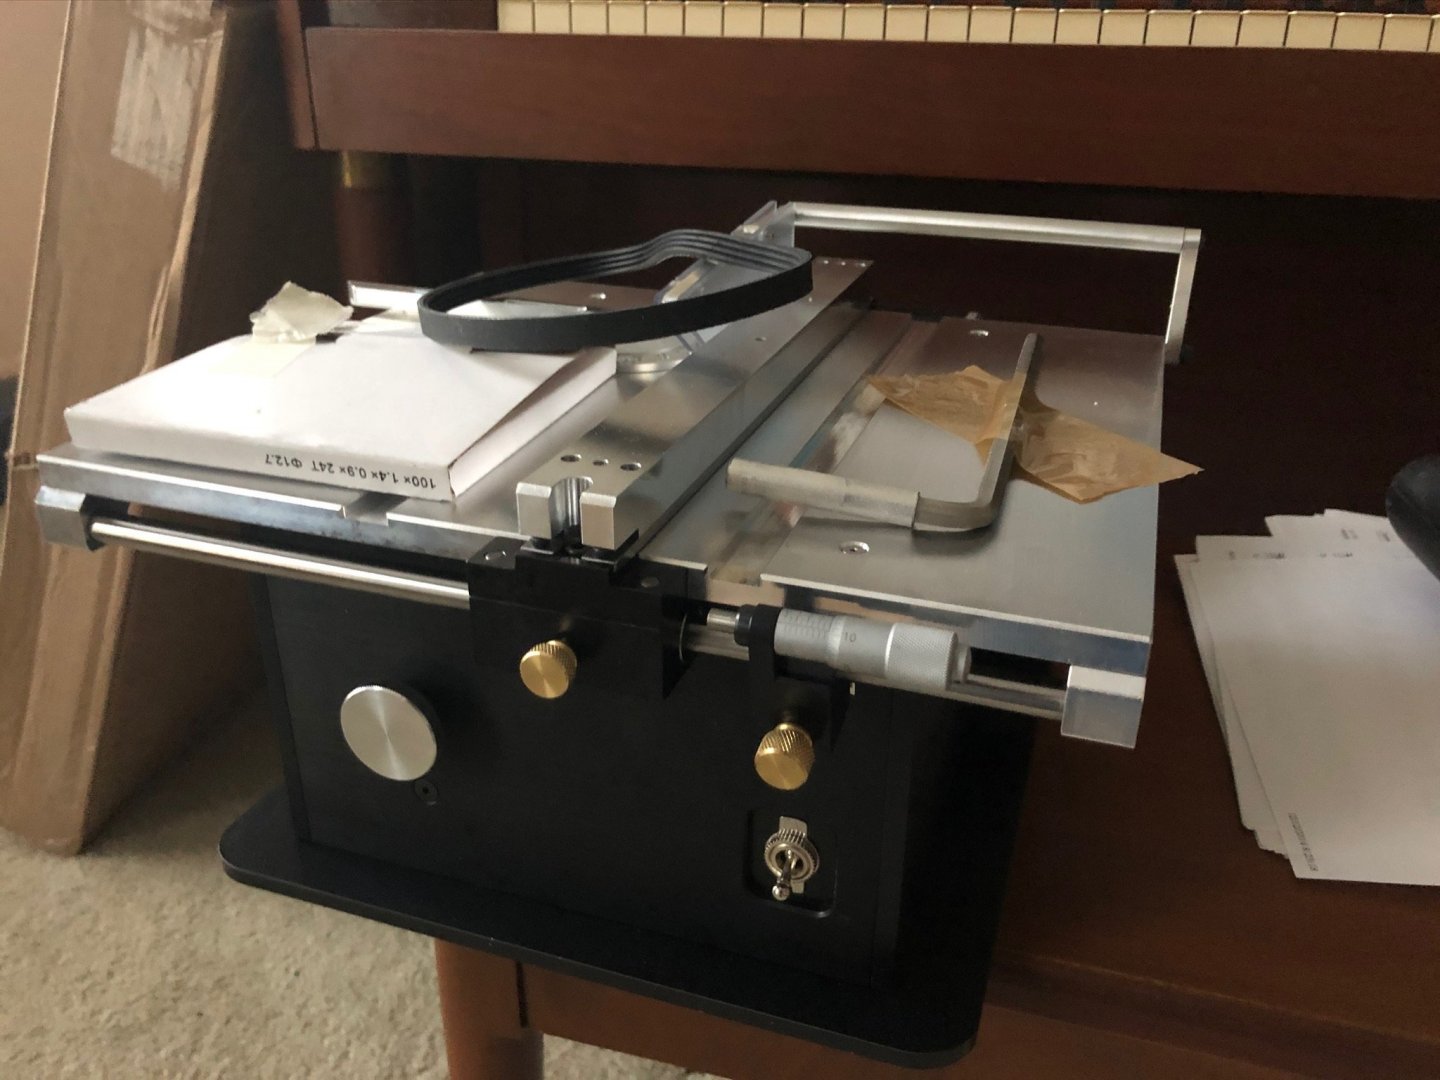
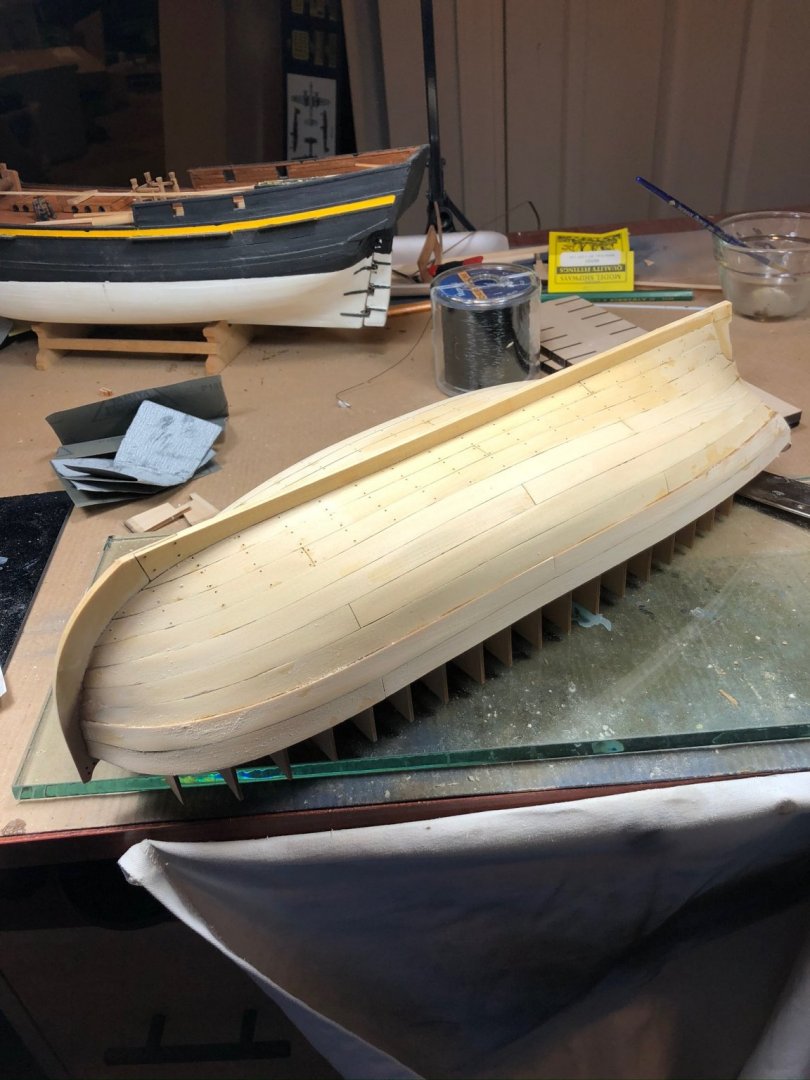
Almost done, just a bit of cleanup and touch up and then on to rigging! While fishing for compliments today from the Admiral (who absolutely does not understand why I had to spend several hundred dollars on a saw), her first comment was “nice........... you’ve built a fancy rowboat!” 😽😸🤣. Am looking forward to a nice stand from Syren and getting started on the Winchelsea, but that’s probably a bit down the way.

- 46 replies
-
- 7
-
-
- medway longboat
- Syren Ship Model Company
- (and 1 more)
-
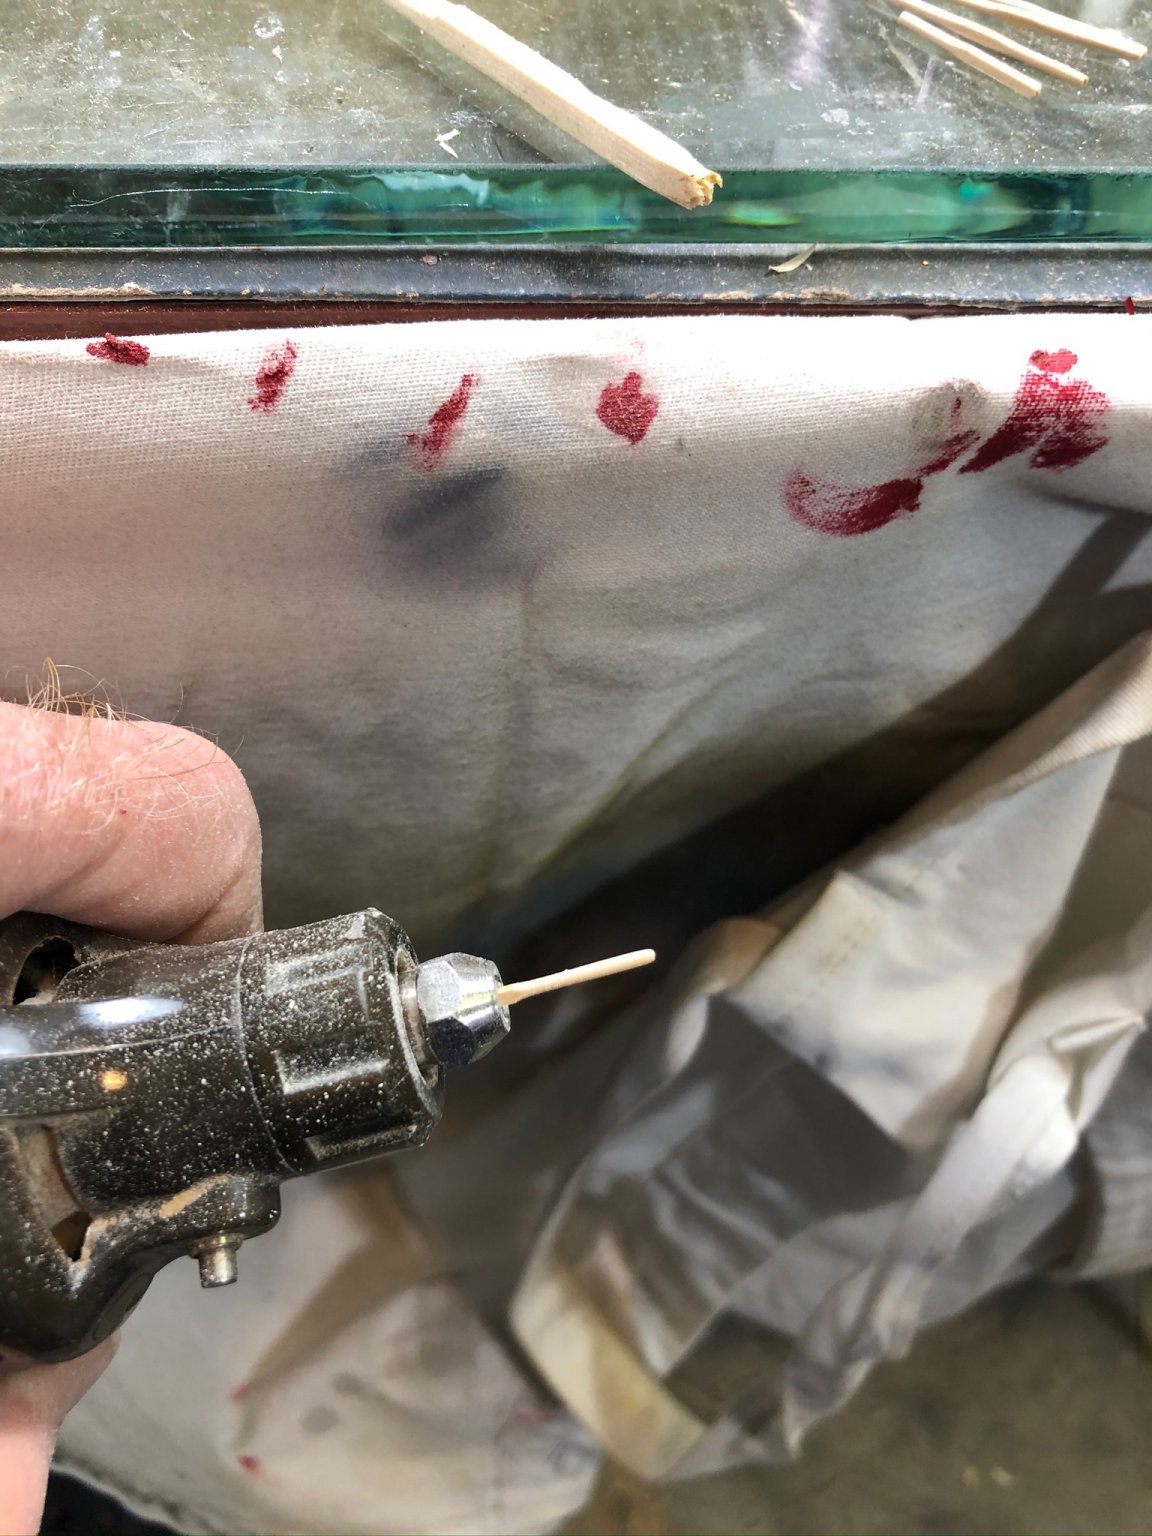
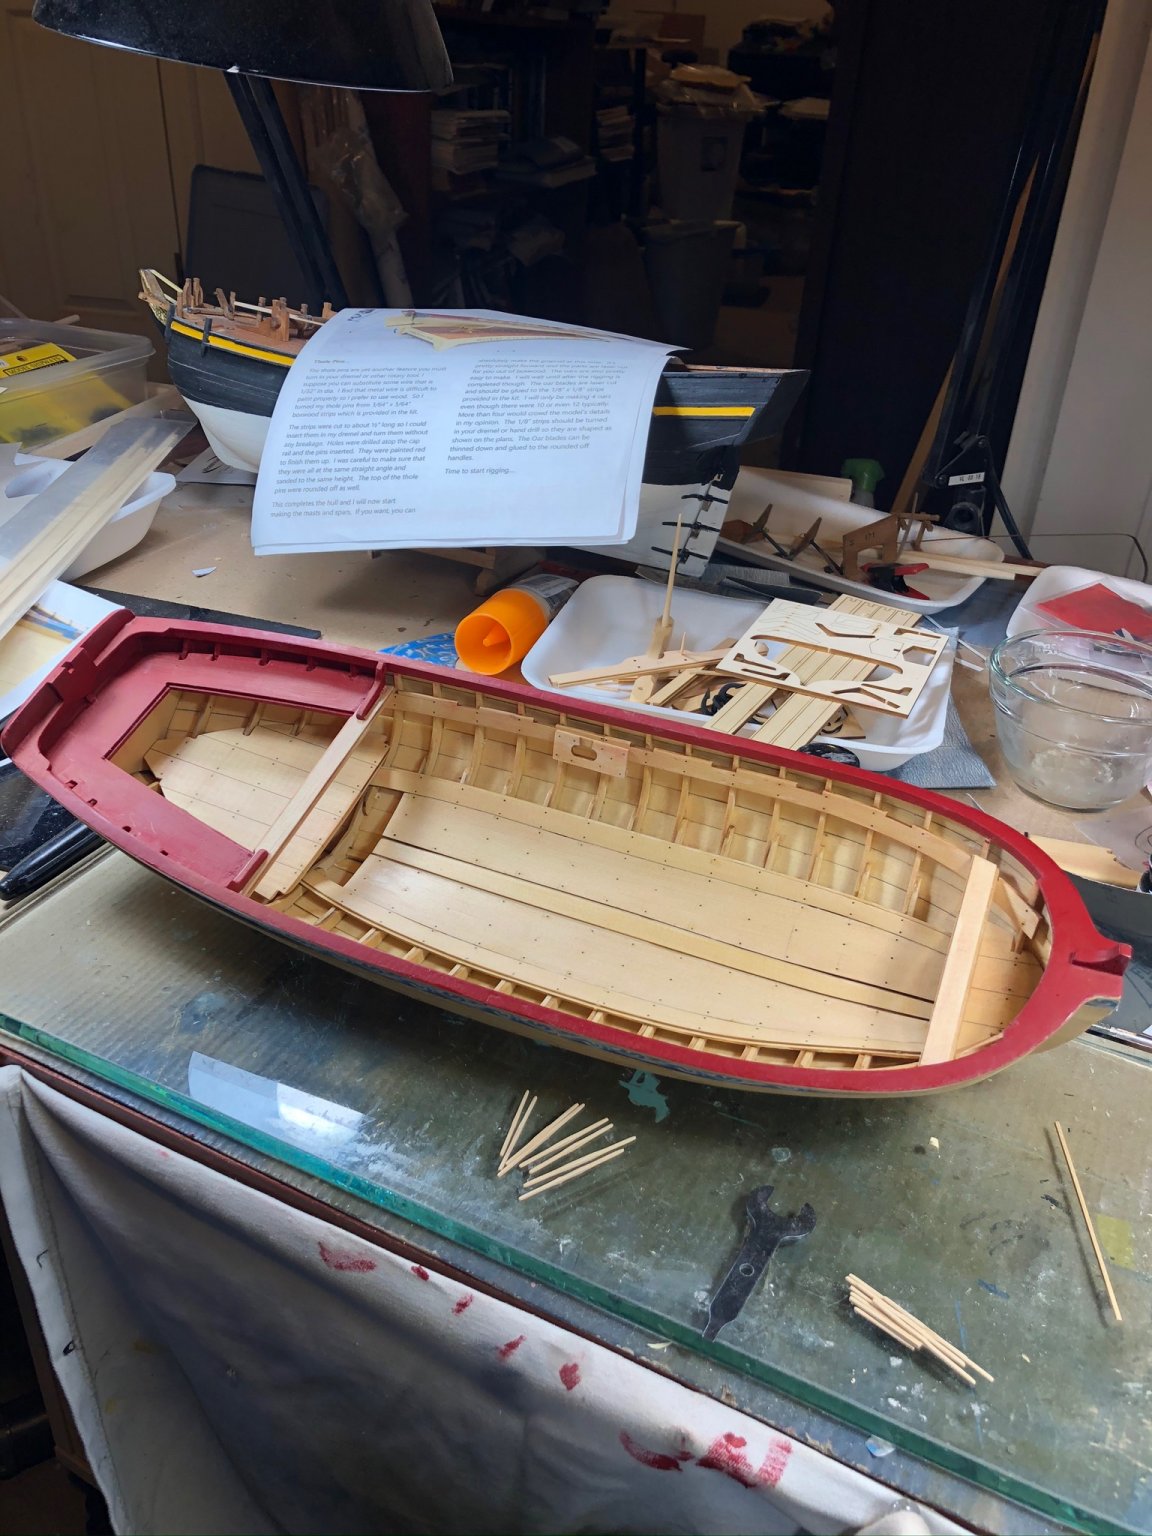
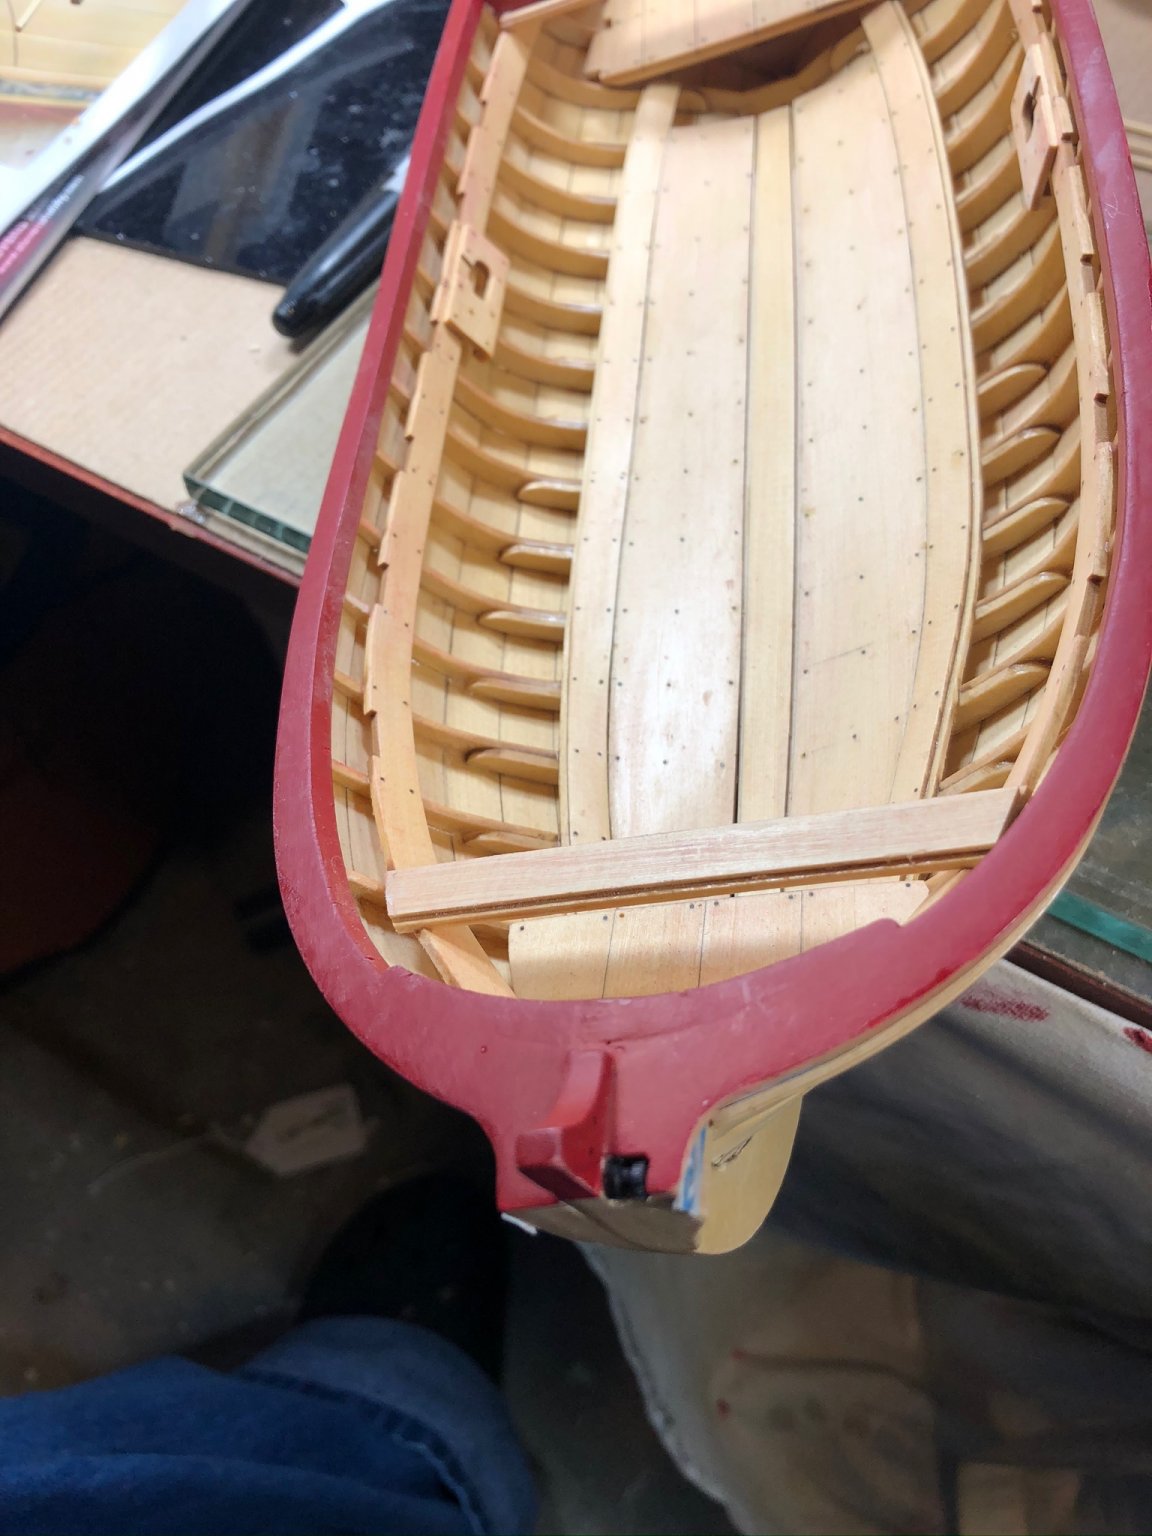
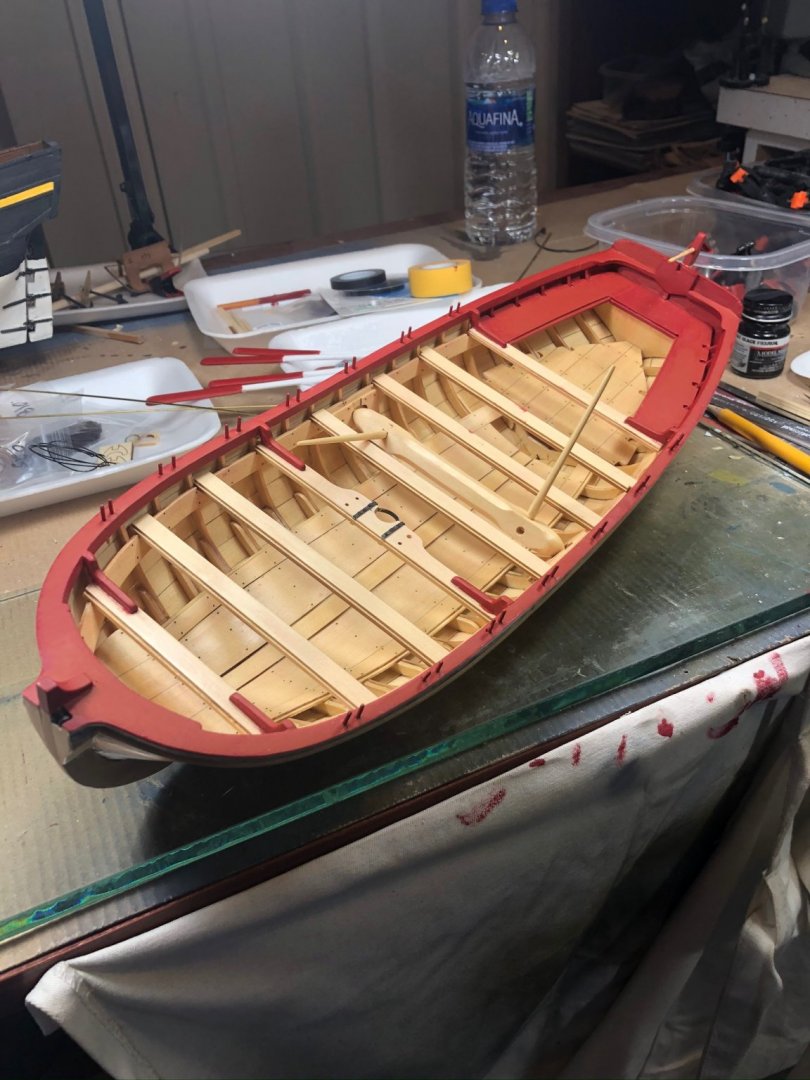
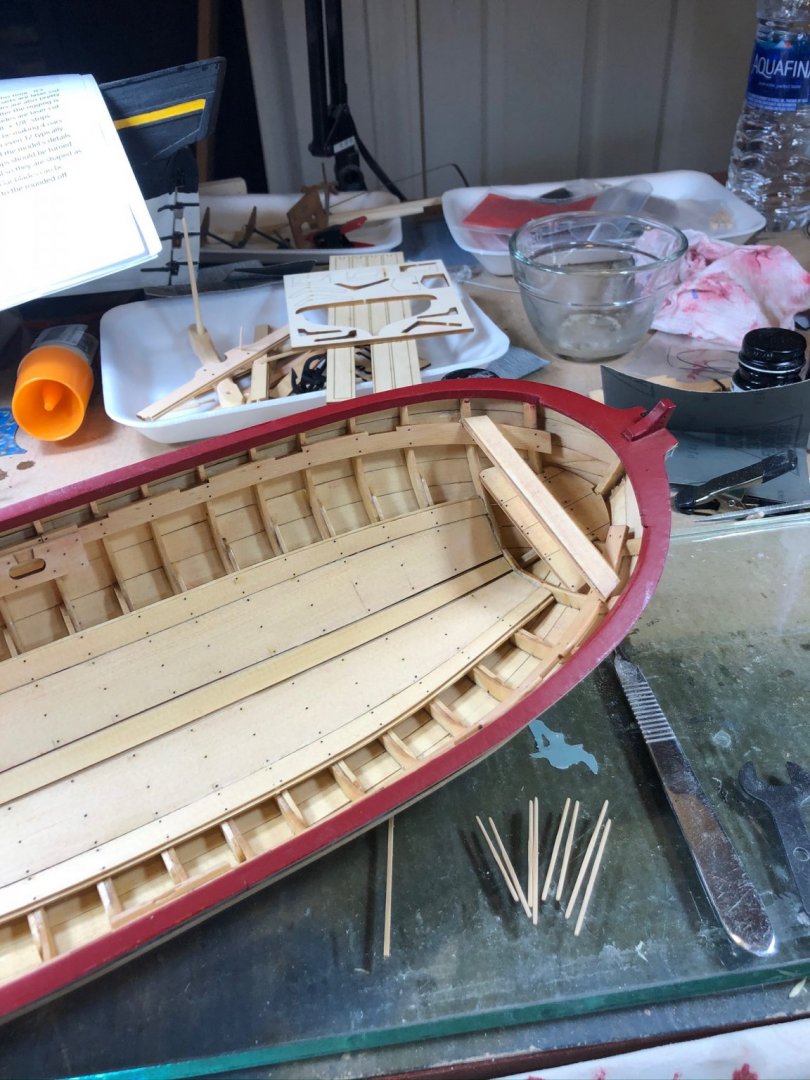
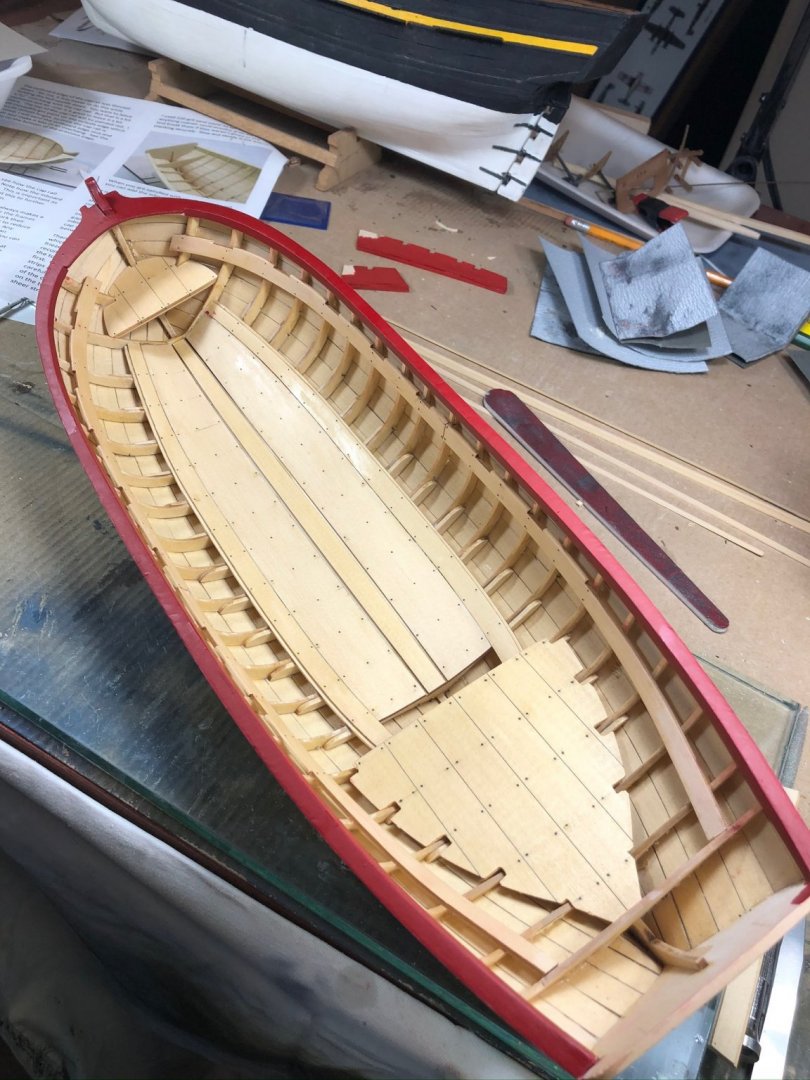
More progress! Got the platforms installed as well as the cockpit seats. As I was assembling the seats, I realized that I had glued both sides up to be identical so that the decorative edges were not correct when installed. There was enough extra wood that I was able to make another set - thanks, Chuck! Was also able to use my Dremel to make the bow roller, belaying and thole pins, as well as using my hand drill to prep the mast. This is my first time doing this and it worked great although it did make a mess. The weather was unusually nice for this time of the year so I went outside to make the mast. Don

- 46 replies
-
- 5
-
-
- medway longboat
- Syren Ship Model Company
- (and 1 more)
-
Thanks, Bob! I tend to work in fits and spurts but being retired helps, and learning is definitely occuring😸. Slowing down is one of the hardest things for me to do but I realize it’s necessary. Almost all of my other efforts have been plastic so, for me, working with wood has been a real eye opener and I’m awed by some of the work posted on this forum.
- 46 replies
-
- 1
-
-
- medway longboat
- Syren Ship Model Company
- (and 1 more)
-
Thanks, Chuck, I appreciate it!
-
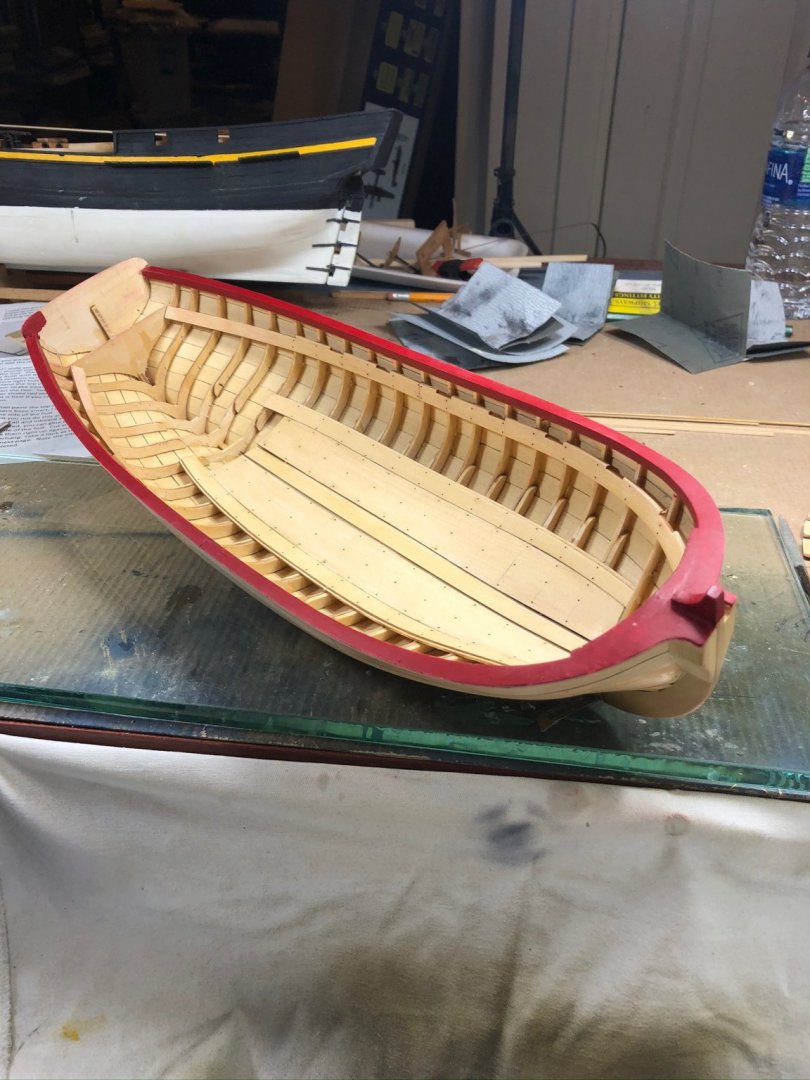
A bit of progress over the Holidays - managed to get the caprails installed and painted, the floorboards and risers installed and the platforms made but not yet permanently installed. I’ve added the simulated nails and a couple of coats of wipe on poly bus am holding off applying the friezes until I’m through with painting.

- 46 replies
-
- 9
-
-
- medway longboat
- Syren Ship Model Company
- (and 1 more)
-
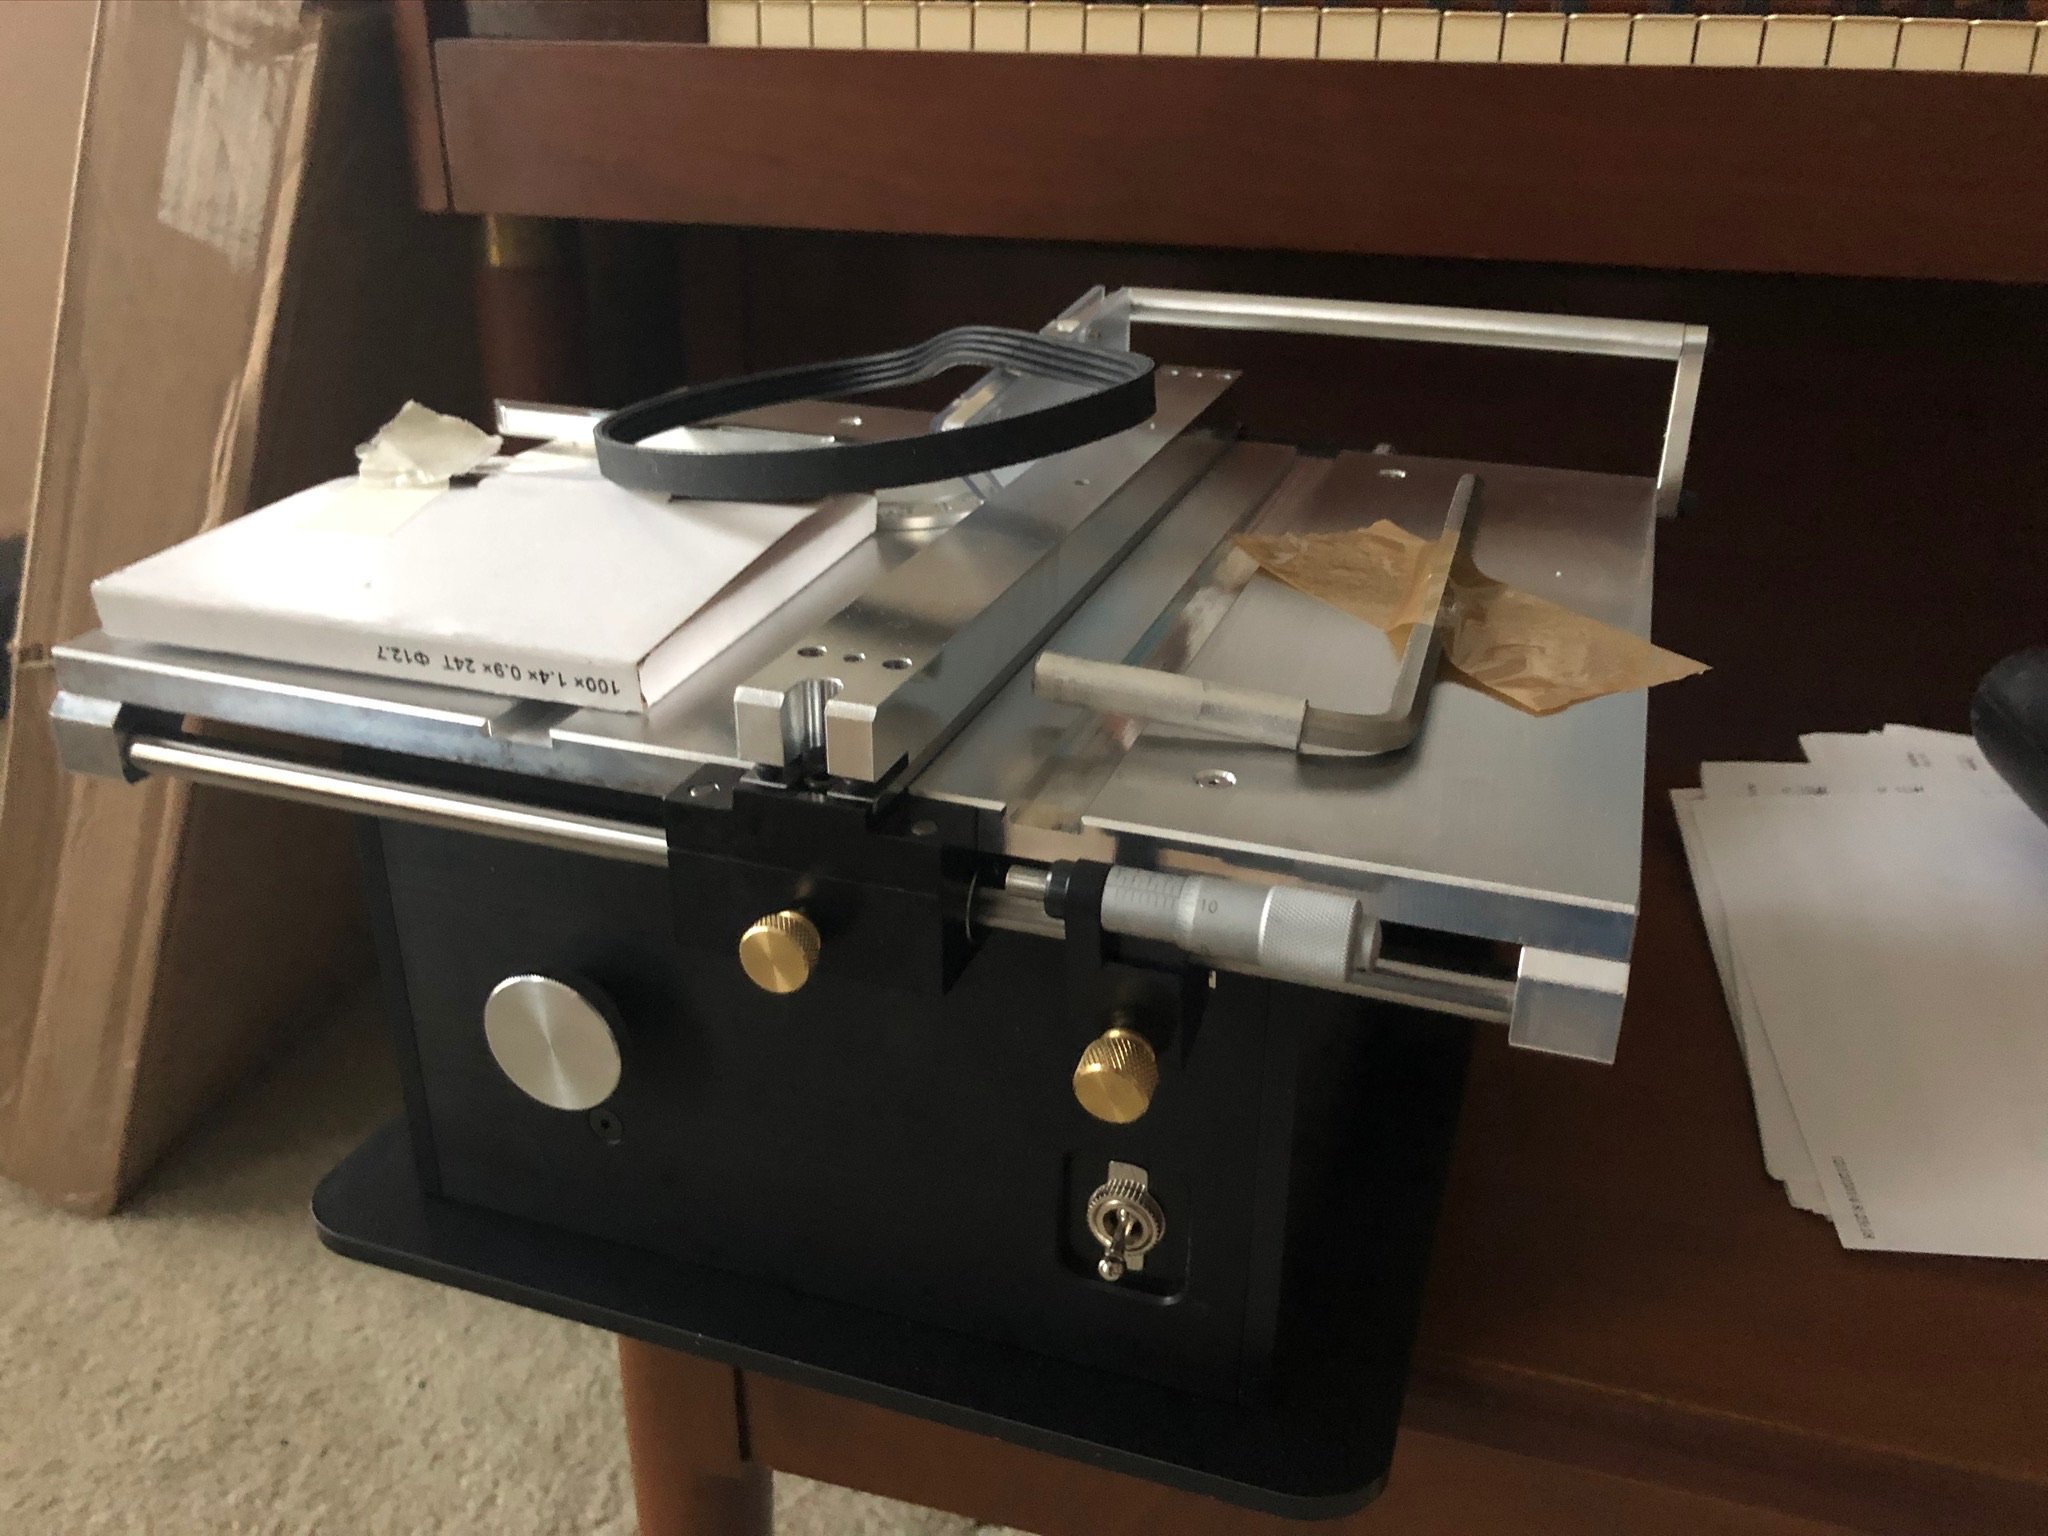
Can i live without a BYRNES TABLE SAW
Nunnehi (Don) replied to shihawk's topic in Modeling tools and Workshop Equipment
Christmas arrived early!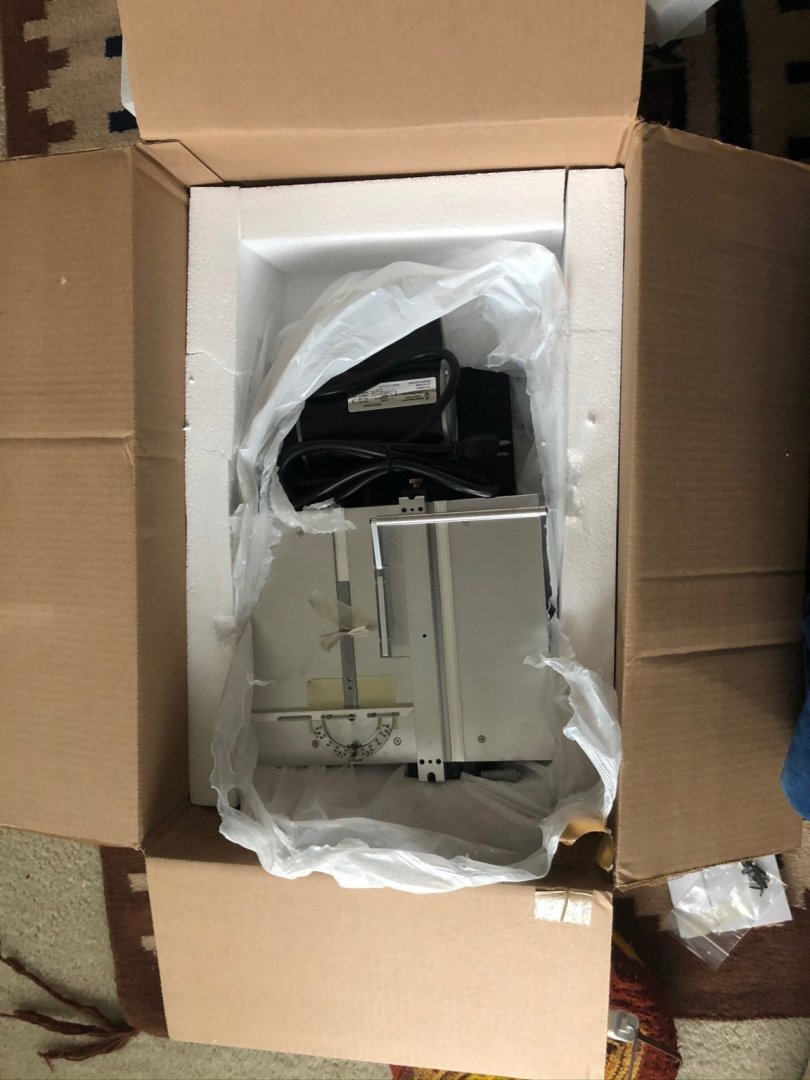
-
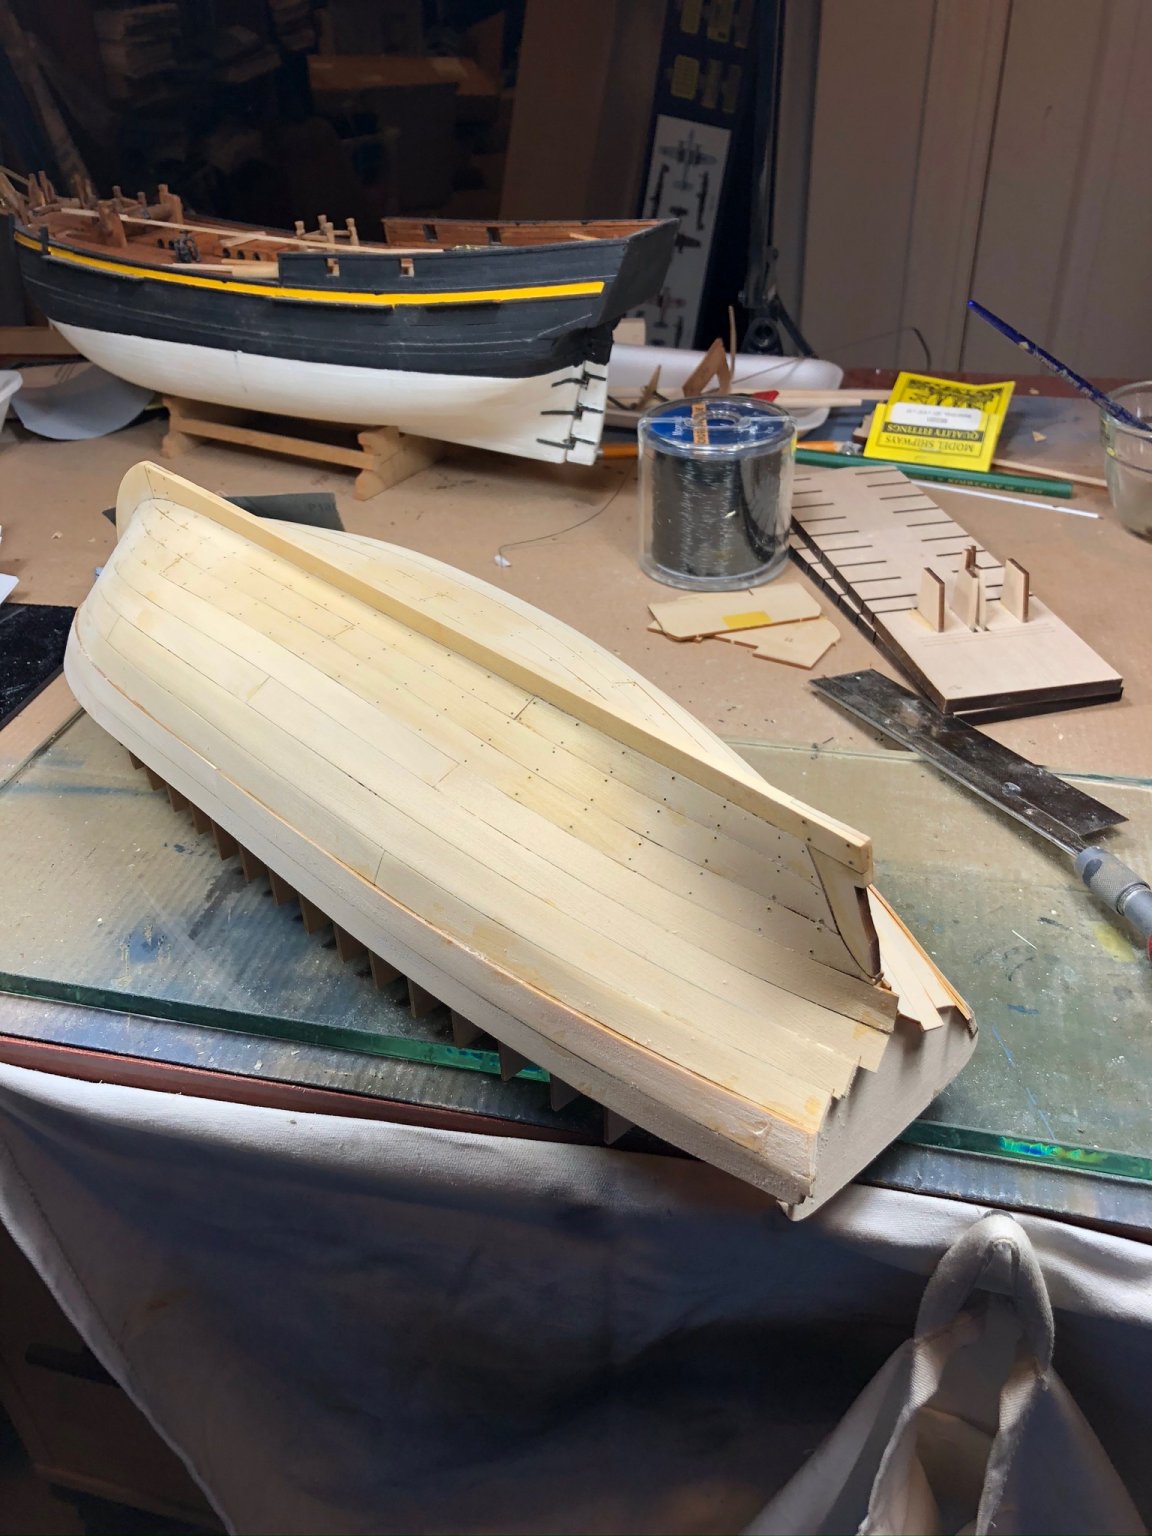
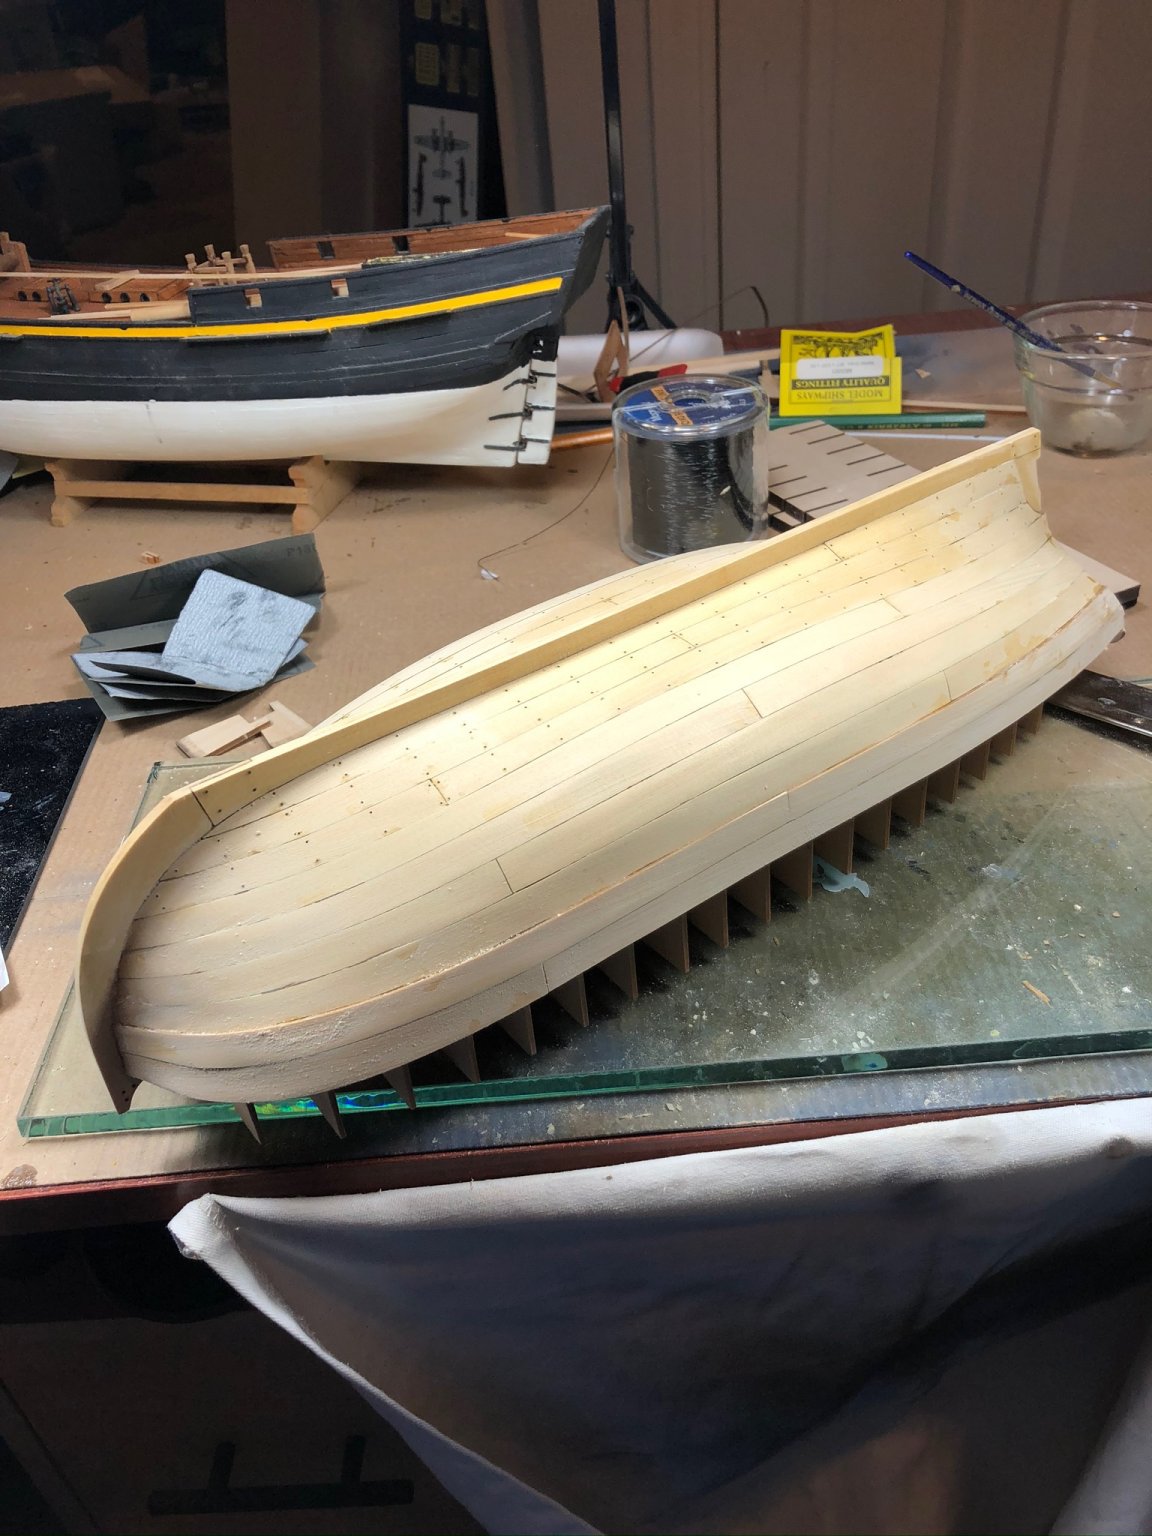
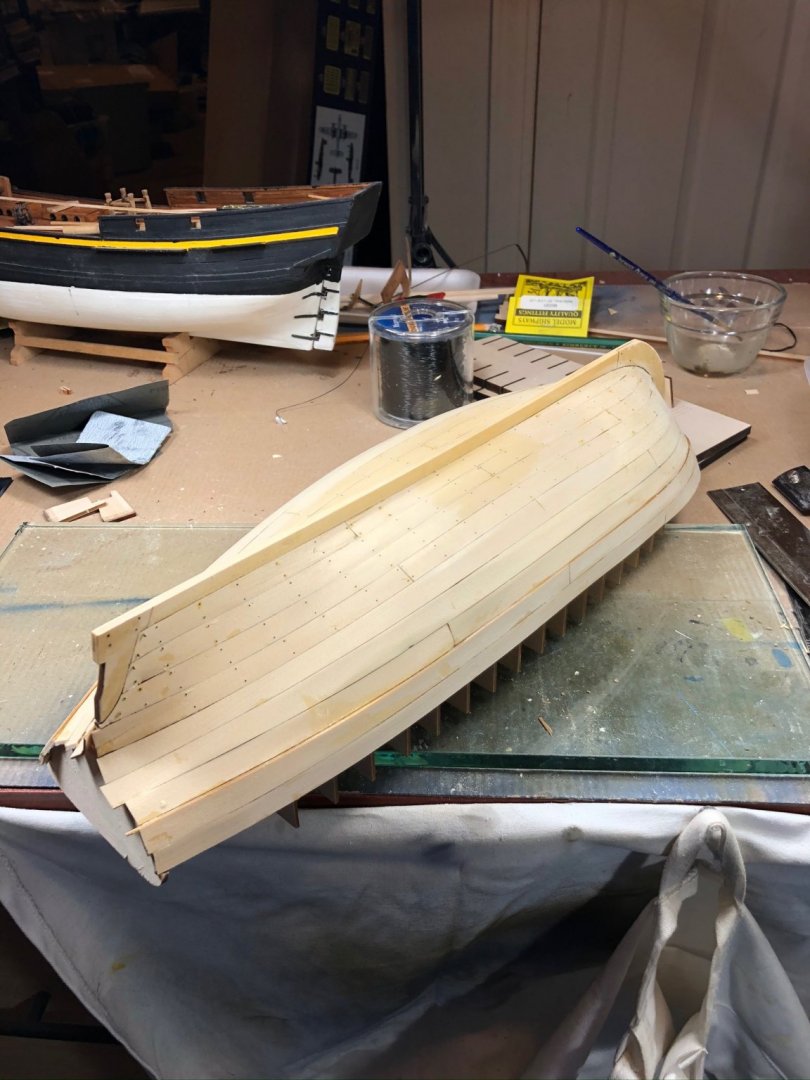
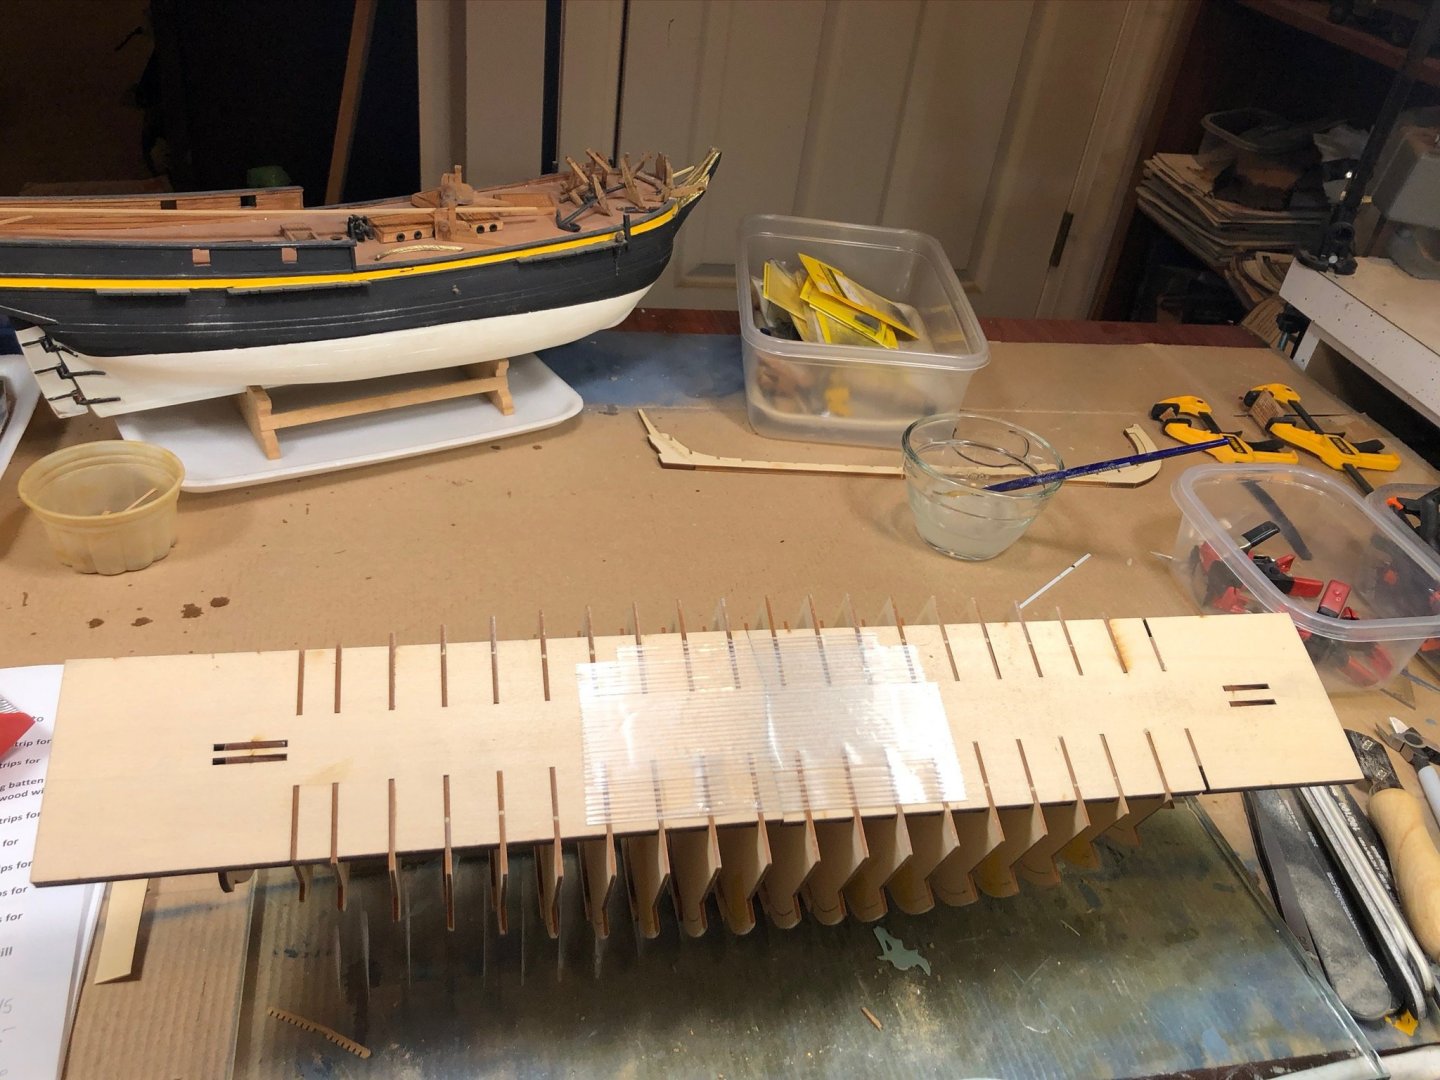
More progress - finished the planking and removed the baseboard and frames. I’m not real happy with the planking, but I’ve learned a lot. I’ve done some sanding and cleanup but much more to do.

- 46 replies
-
- 8
-
-
- medway longboat
- Syren Ship Model Company
- (and 1 more)
-
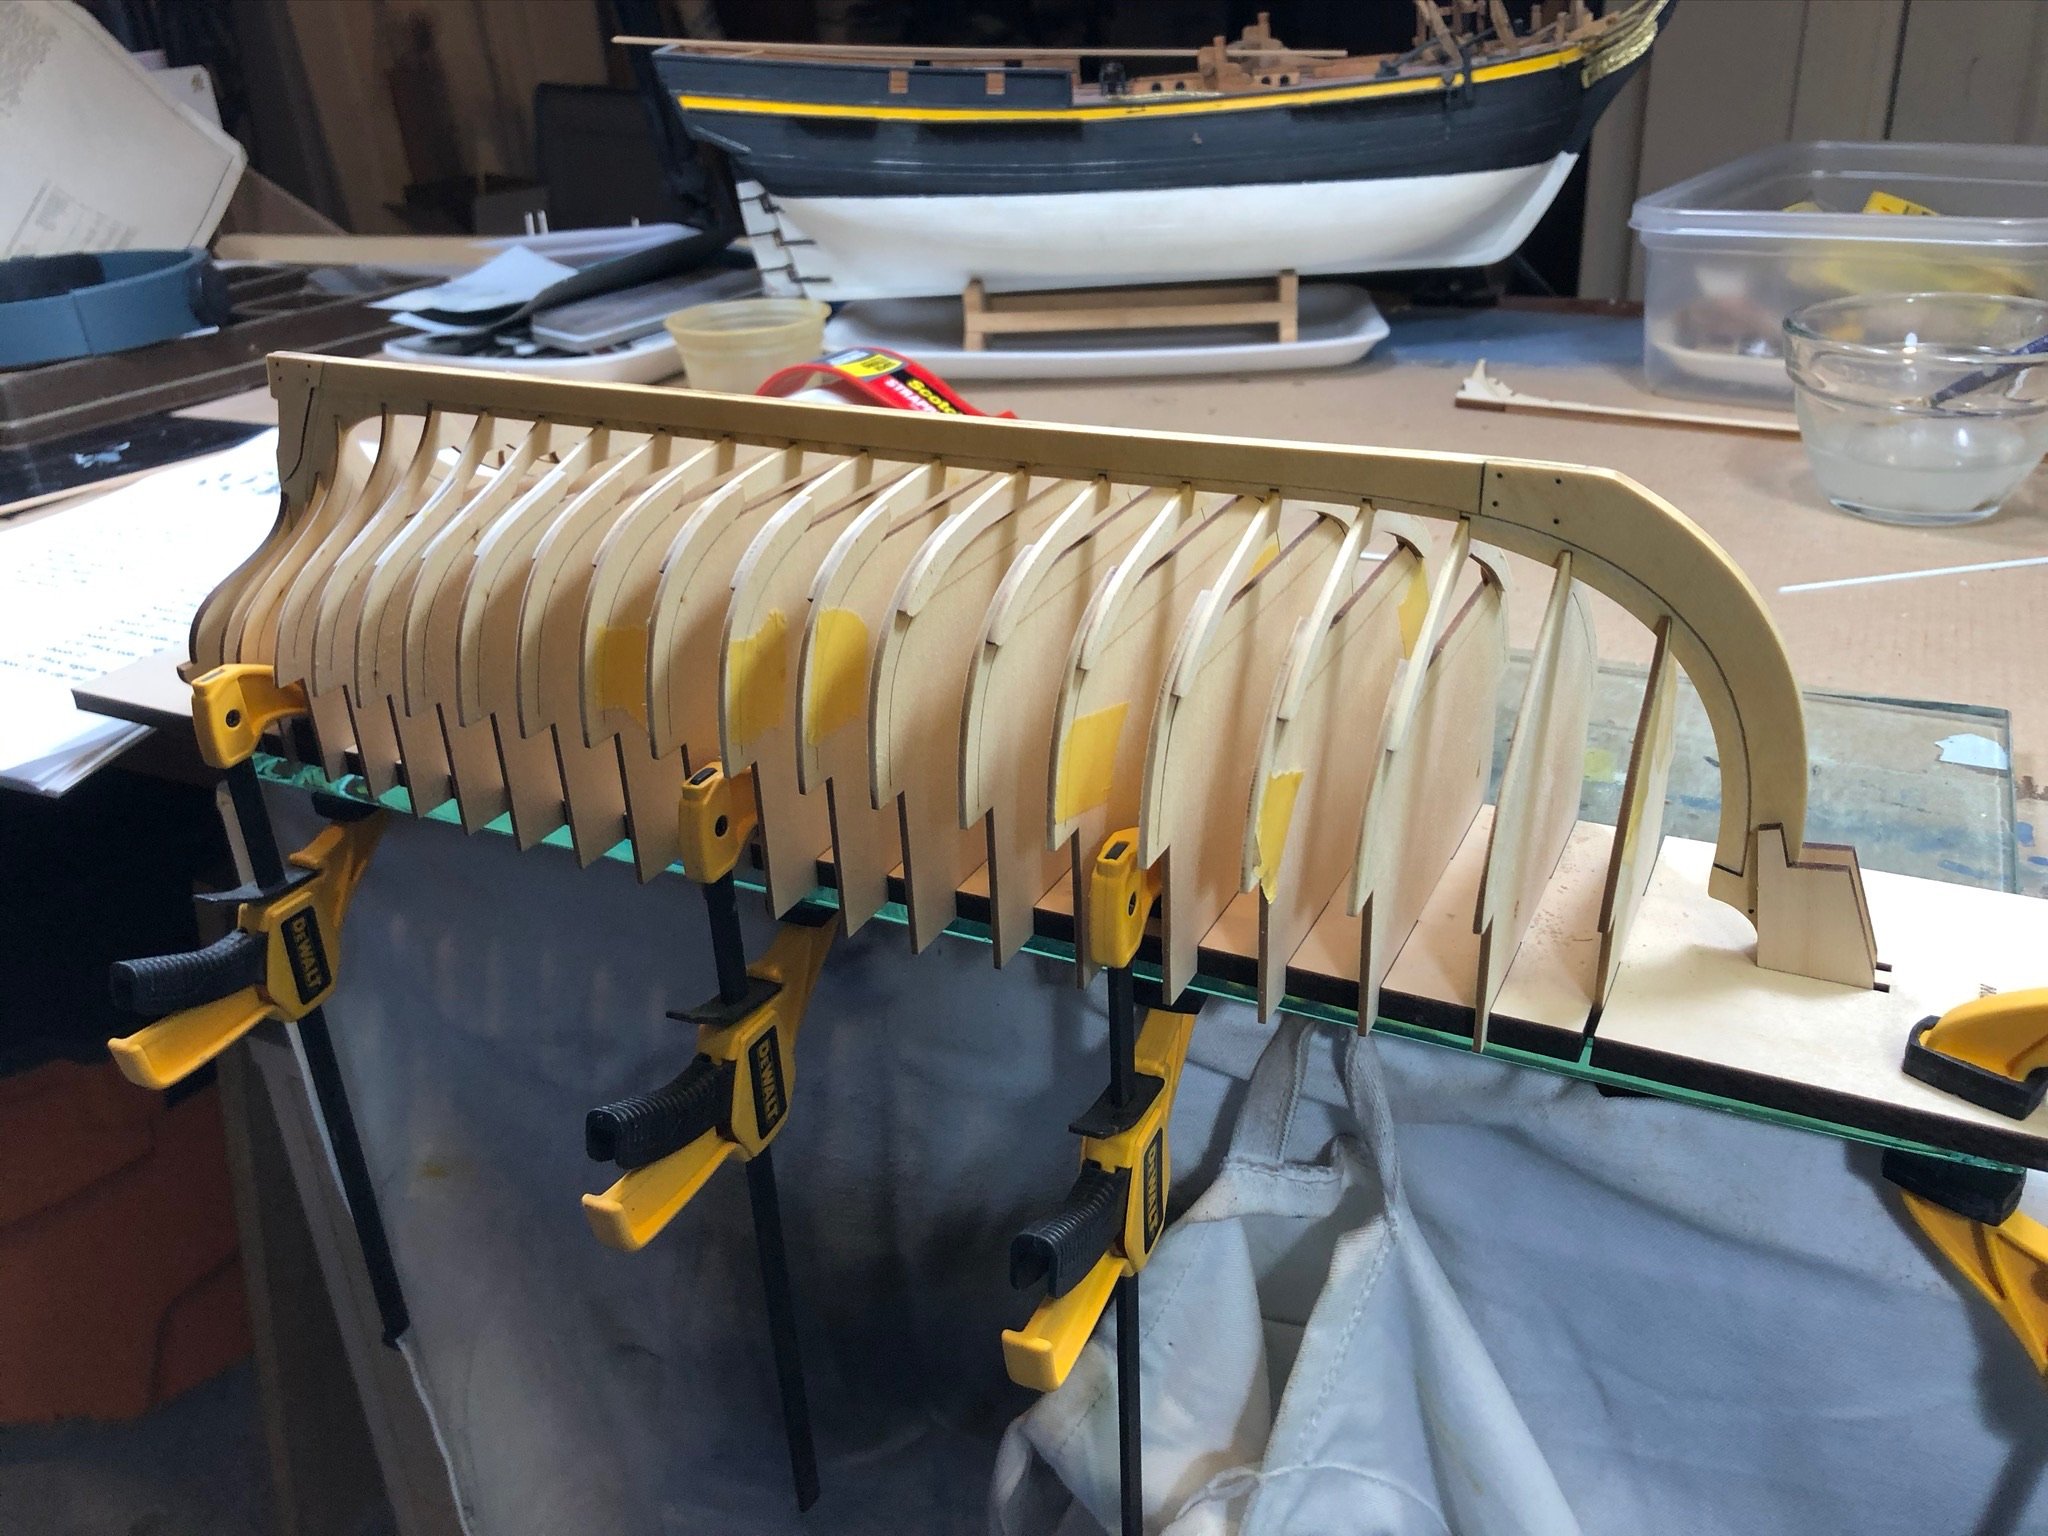
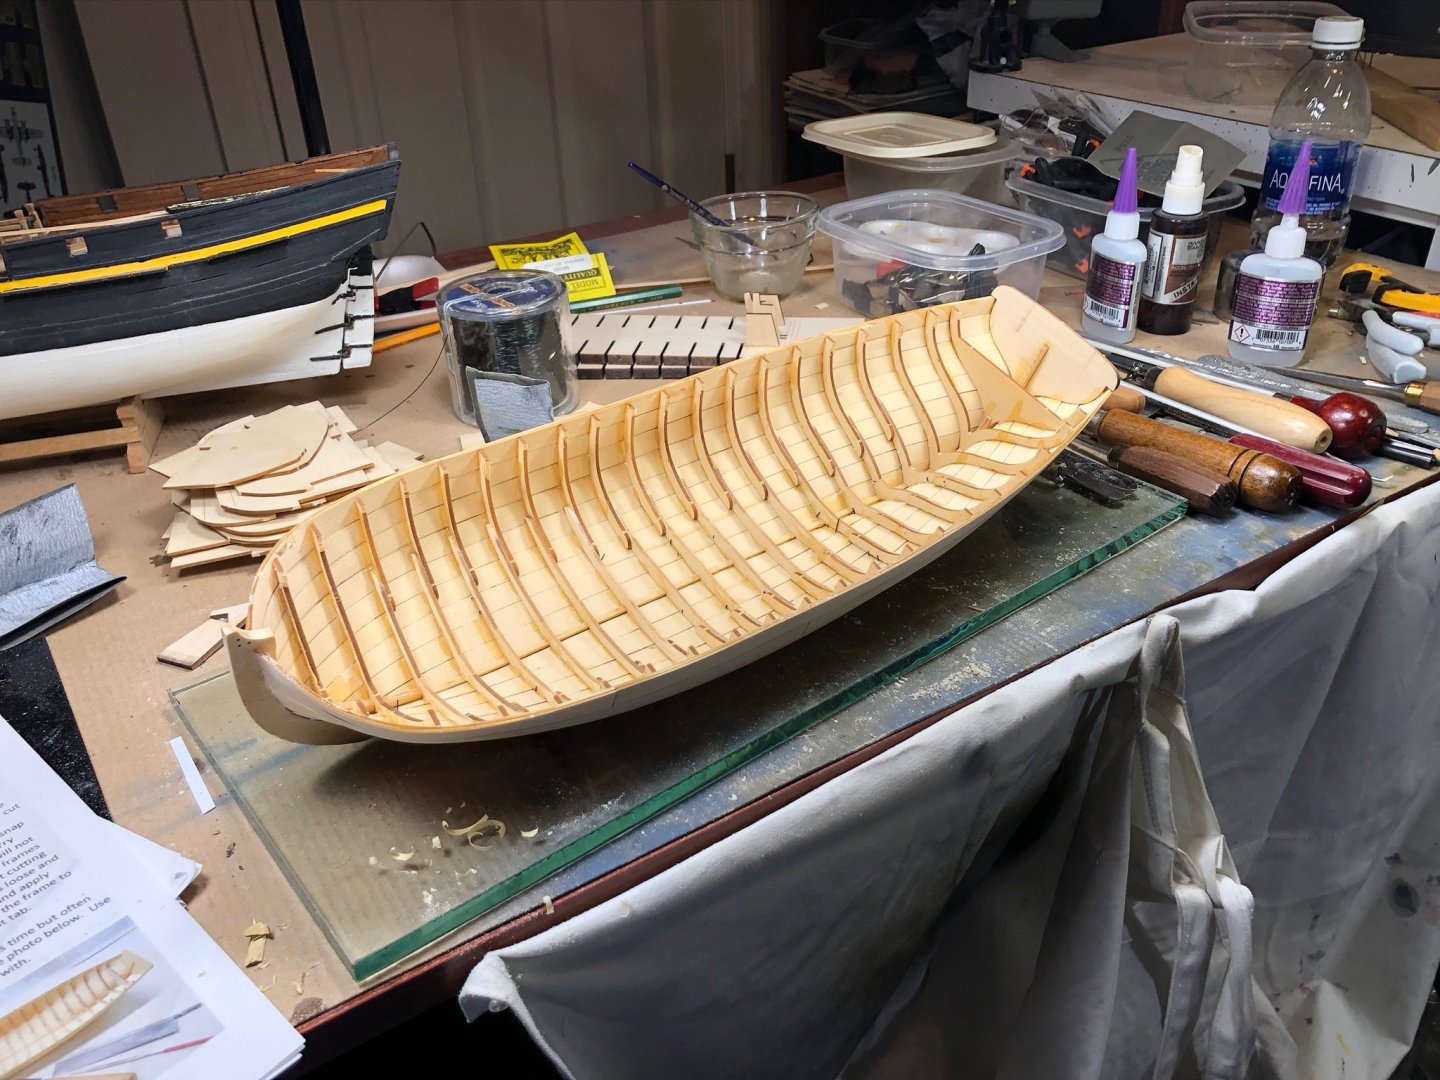
An update - have been away for a few weeks, but have made some progress and installed the first three strakes and done a little sanding. Although you can’t really see it, I followed Chucks instructions about lining off the hull and it’s helped.


- 46 replies
-
- 4
-
-
- medway longboat
- Syren Ship Model Company
- (and 1 more)
-
Beautifully done!
-
Thanks KHauptfuehrer!
-
Beautiful! Impressive and well done!
-
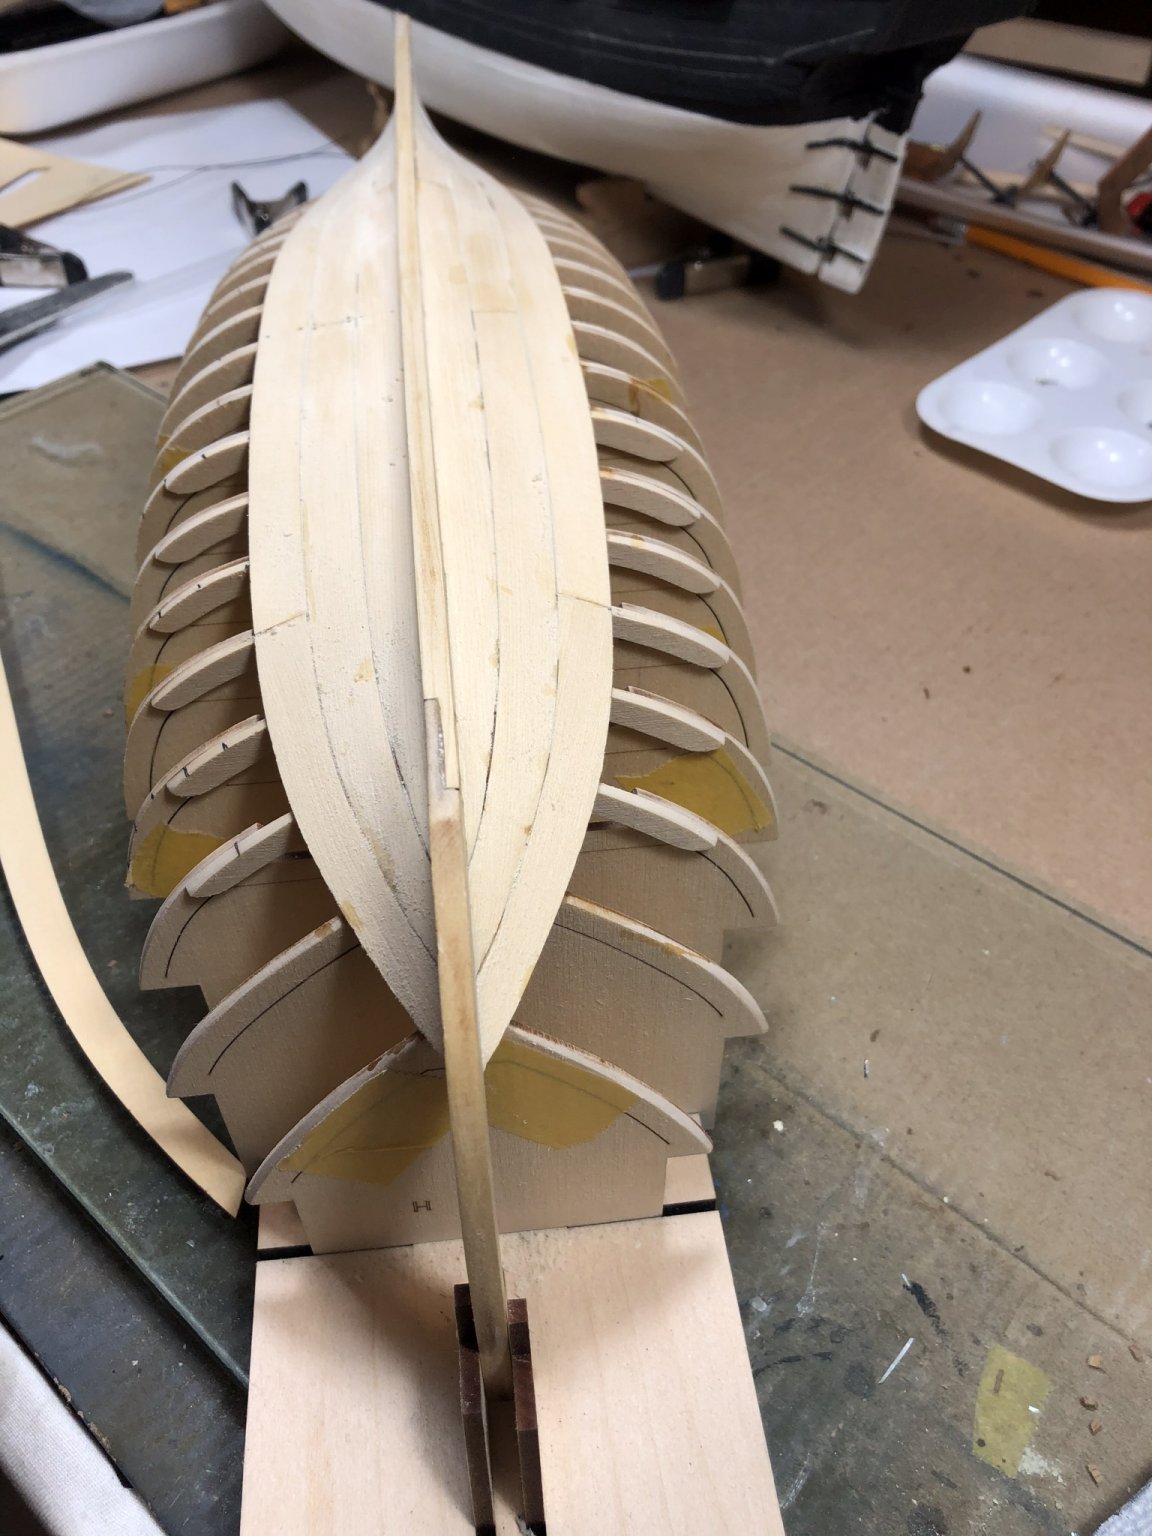
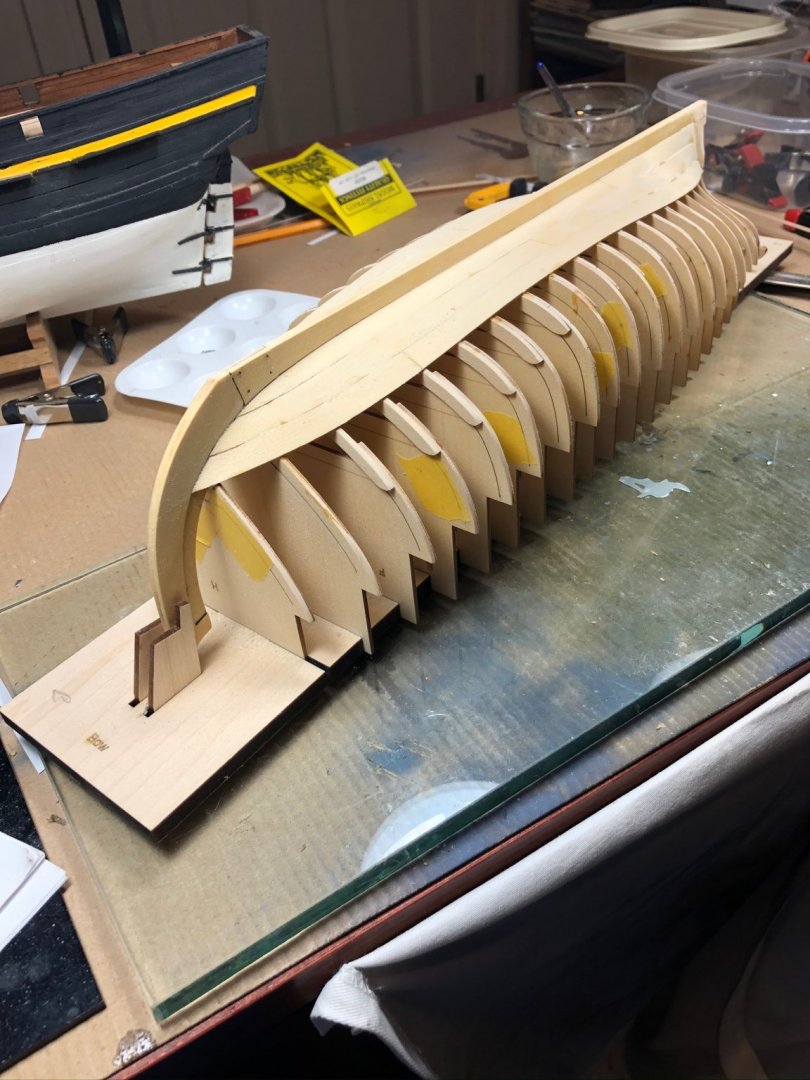
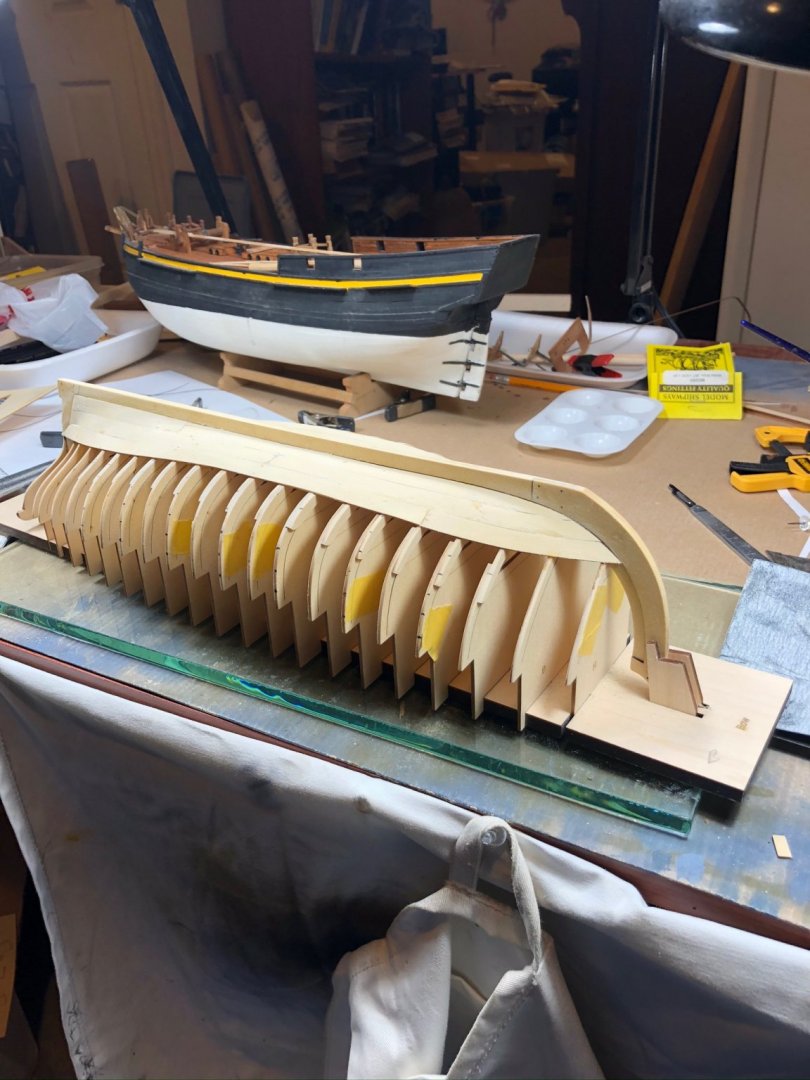
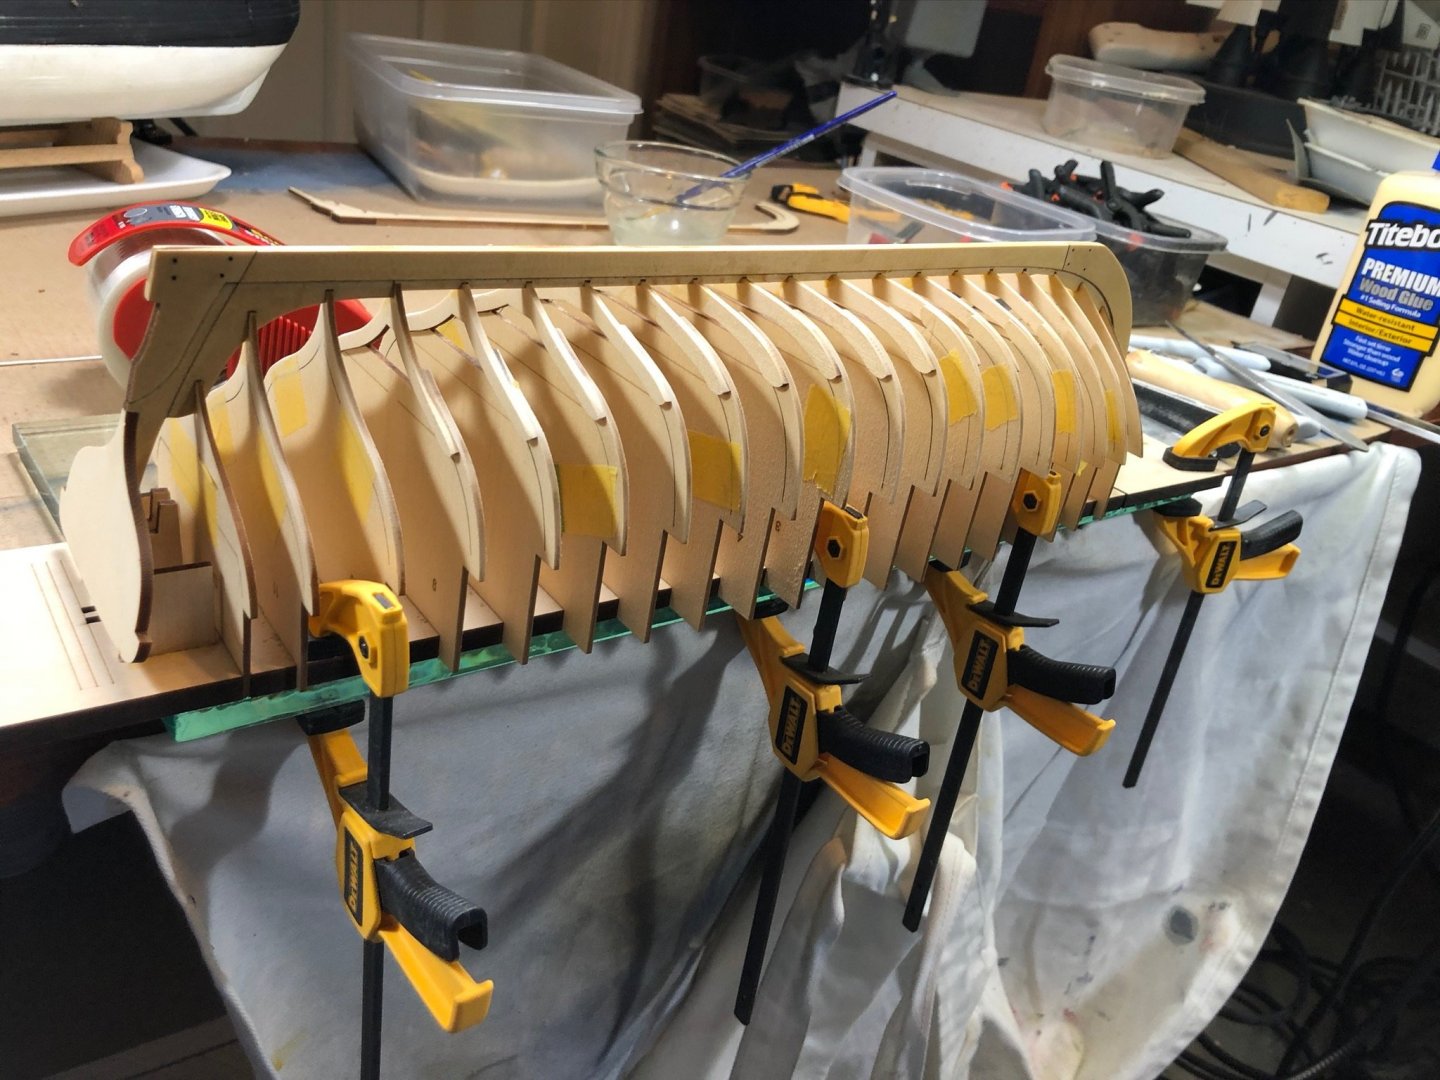
Frames in place, now time for fairing...............

- 46 replies
-
- 6
-
-
- medway longboat
- Syren Ship Model Company
- (and 1 more)
-
Thanks, Chuck, I really appreciate it! I’m using the complex one but built both for practice and am following your instructions closely. I must say that both the model and your instructions are a breath of fresh air, especially after the Hornet with sub-millimeter photo etch that you cant see after it’s installed. Don
- 46 replies
-
- 2
-
-
- medway longboat
- Syren Ship Model Company
- (and 1 more)