HOLIDAY DONATION DRIVE - SUPPORT MSW - DO YOUR PART TO KEEP THIS GREAT FORUM GOING! (Only 20 donations so far - C'mon guys!)
×

Nunnehi (Don)
-
Posts
316 -
Joined
-
Last visited
Content Type
Profiles
Forums
Gallery
Events
Everything posted by Nunnehi (Don)
-
Bob, She’s looking really nice! I’m impressed with your precision and planning with the deck layout and look forward to more. Don
-
Brian, will be following this with interest. We visited the Cairo in Vicksburg a couple of years ago and I’ve been really interested in a model every since - really looking forward to your build! Don
-
Thanks Lou. Yes it’s a bit of a dog today but probably state of the art 20 years ago. Any kit where the first thing you do is cut off about 1/3 of the hull is suspect. 😎 Yes, have looked at that kit for the copter. Don
- 36 replies
-
- 2
-

-
- calypso
- billing boats
- (and 1 more)
-
Capt. Nemo, Will be following along with interest, I too have some Mamoli kits in my stash and a partially finished Bounty. I especially like your creative use of Legos - what a great idea! And your sidekick is cool too!😸 Don
-
Thanks fnick and CDW, I appreciate it and glad to share. I just saw that National Geographic is working on a documentary about Cousteau and his life - really looking forward to it! Don
- 36 replies
-
- 2
-
-
- calypso
- billing boats
- (and 1 more)
-
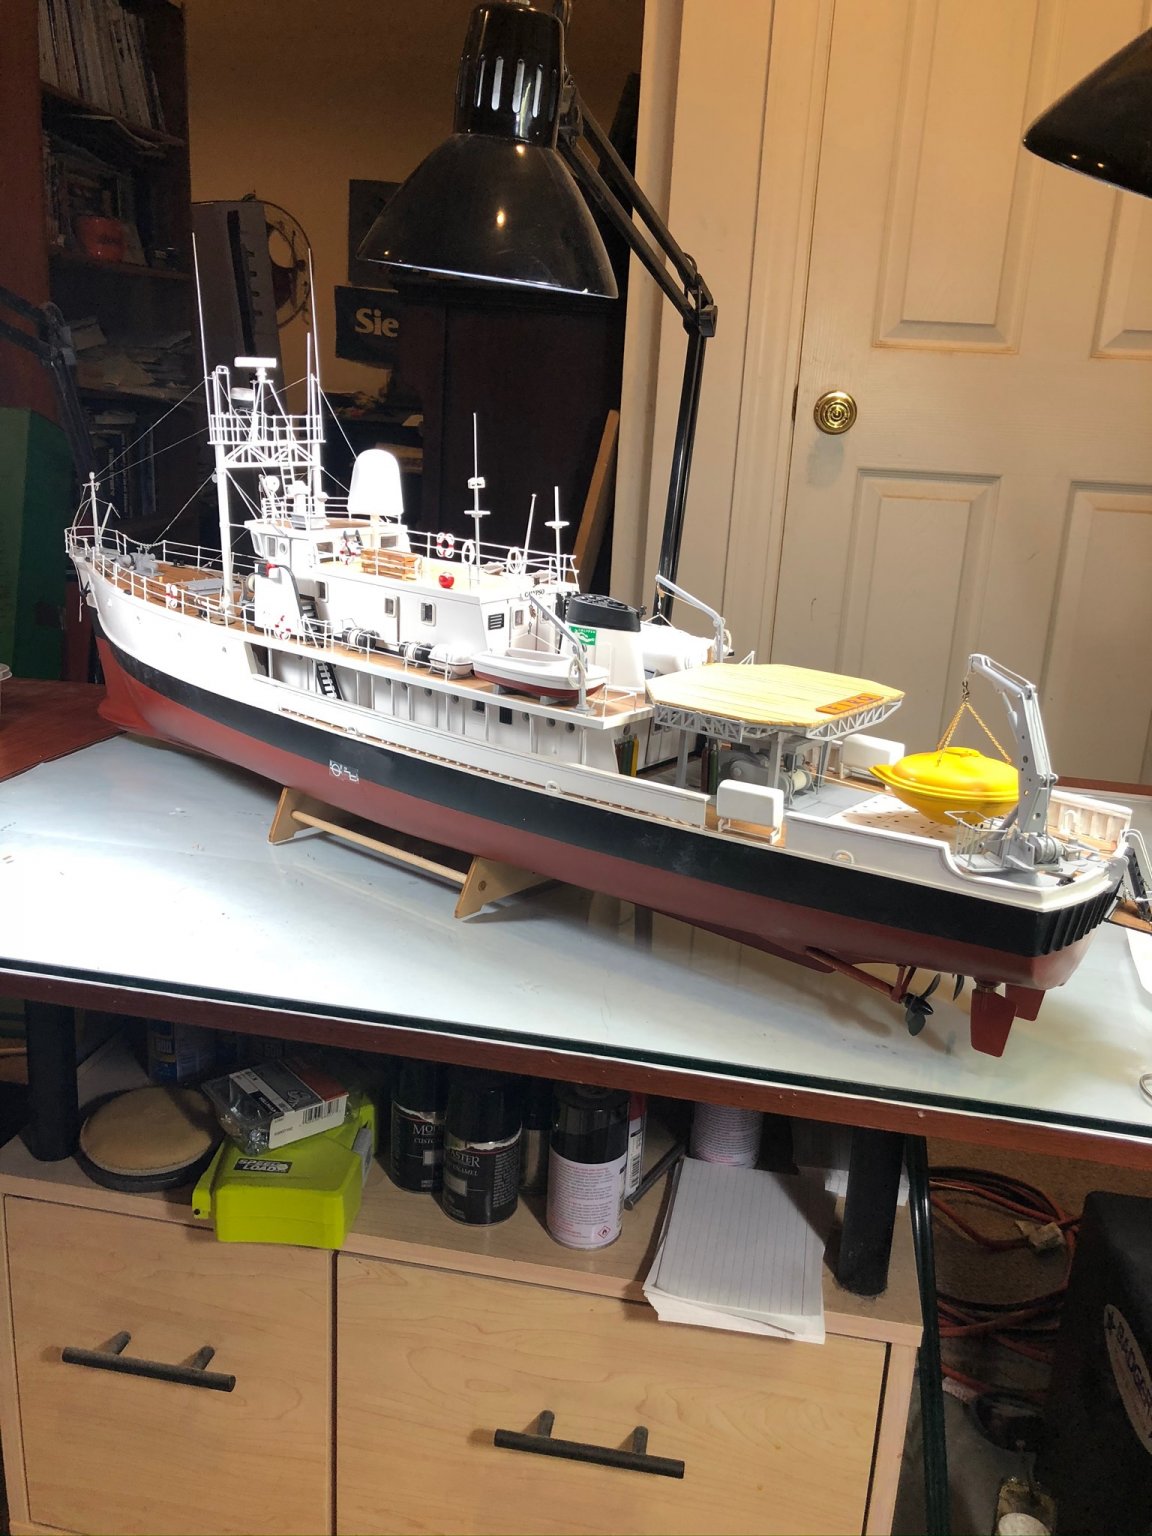
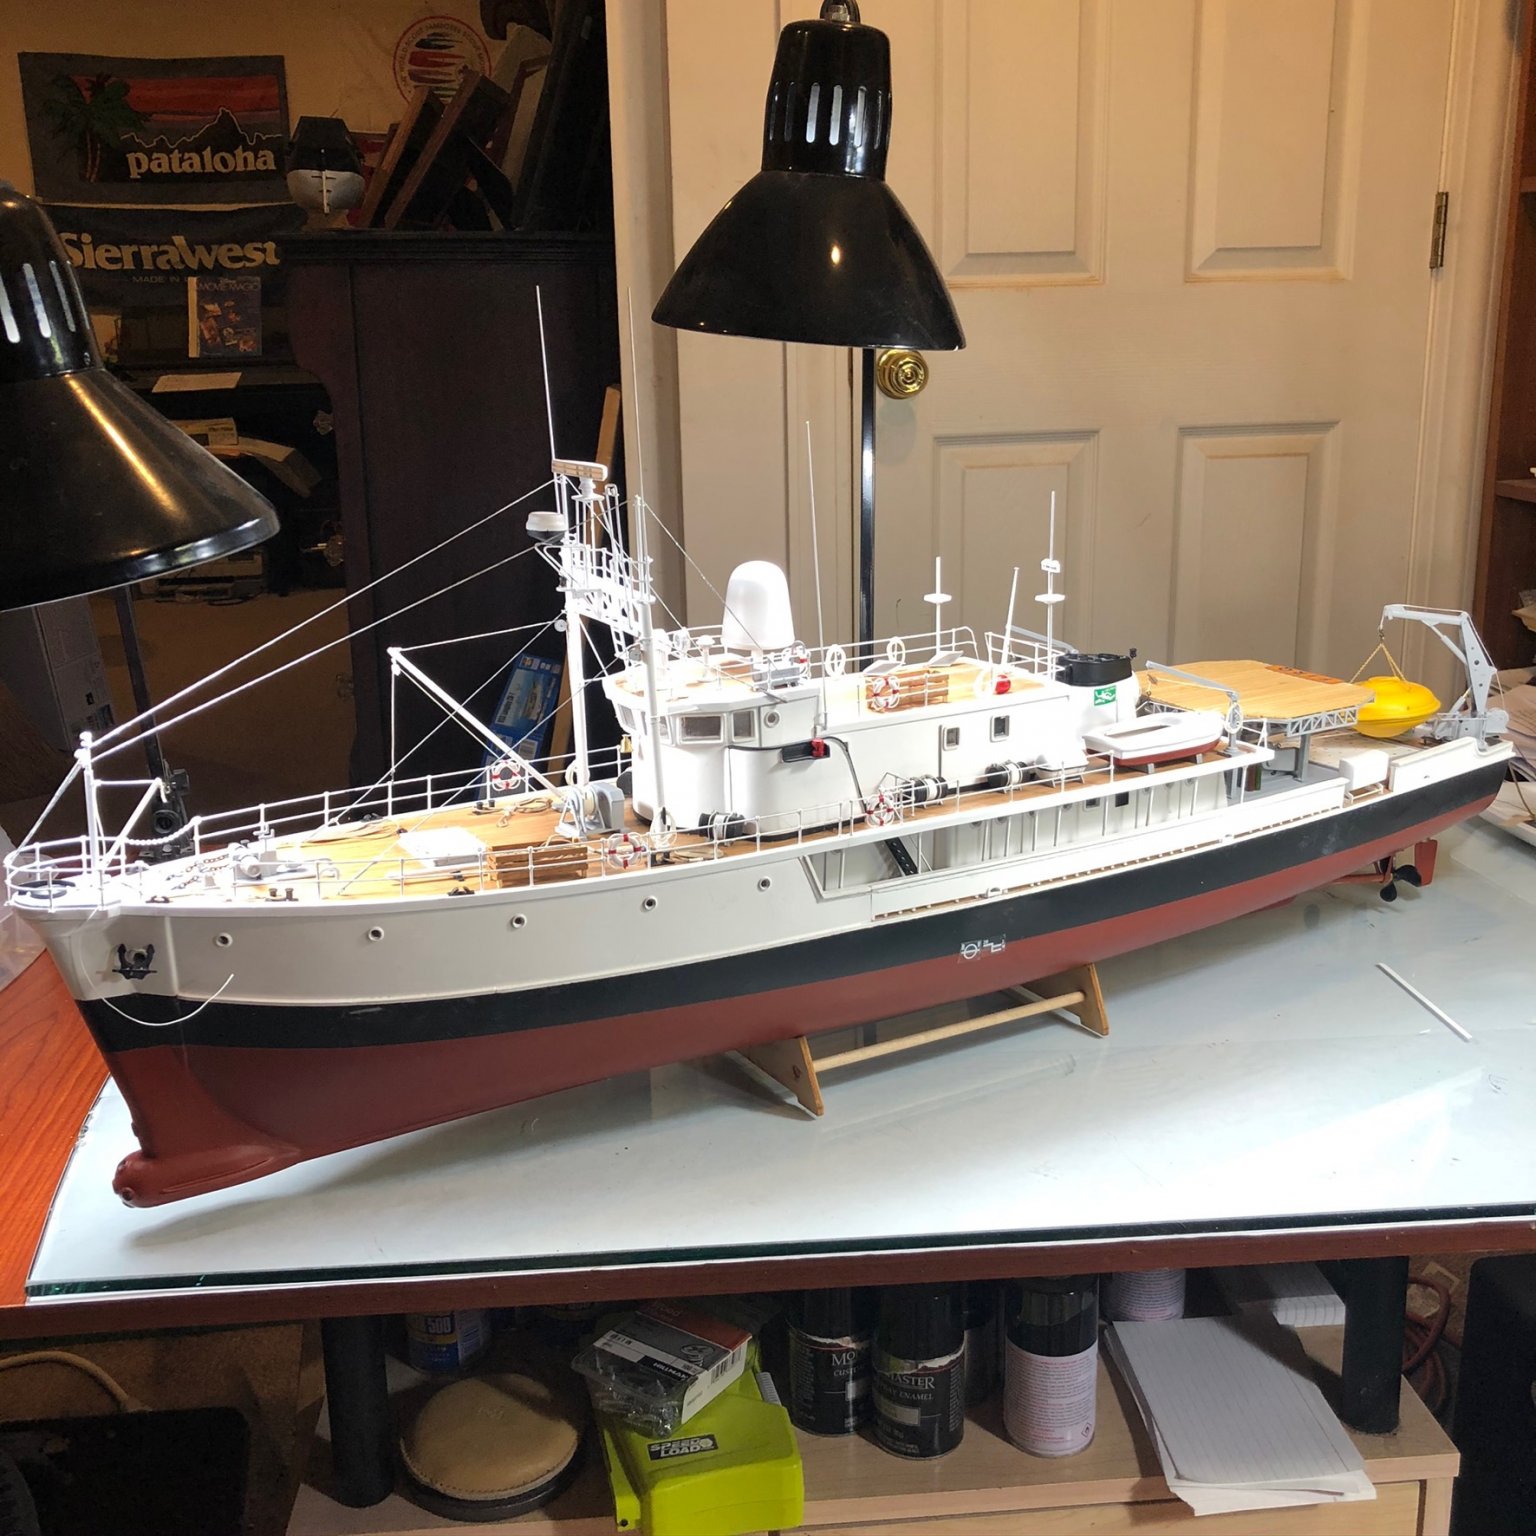
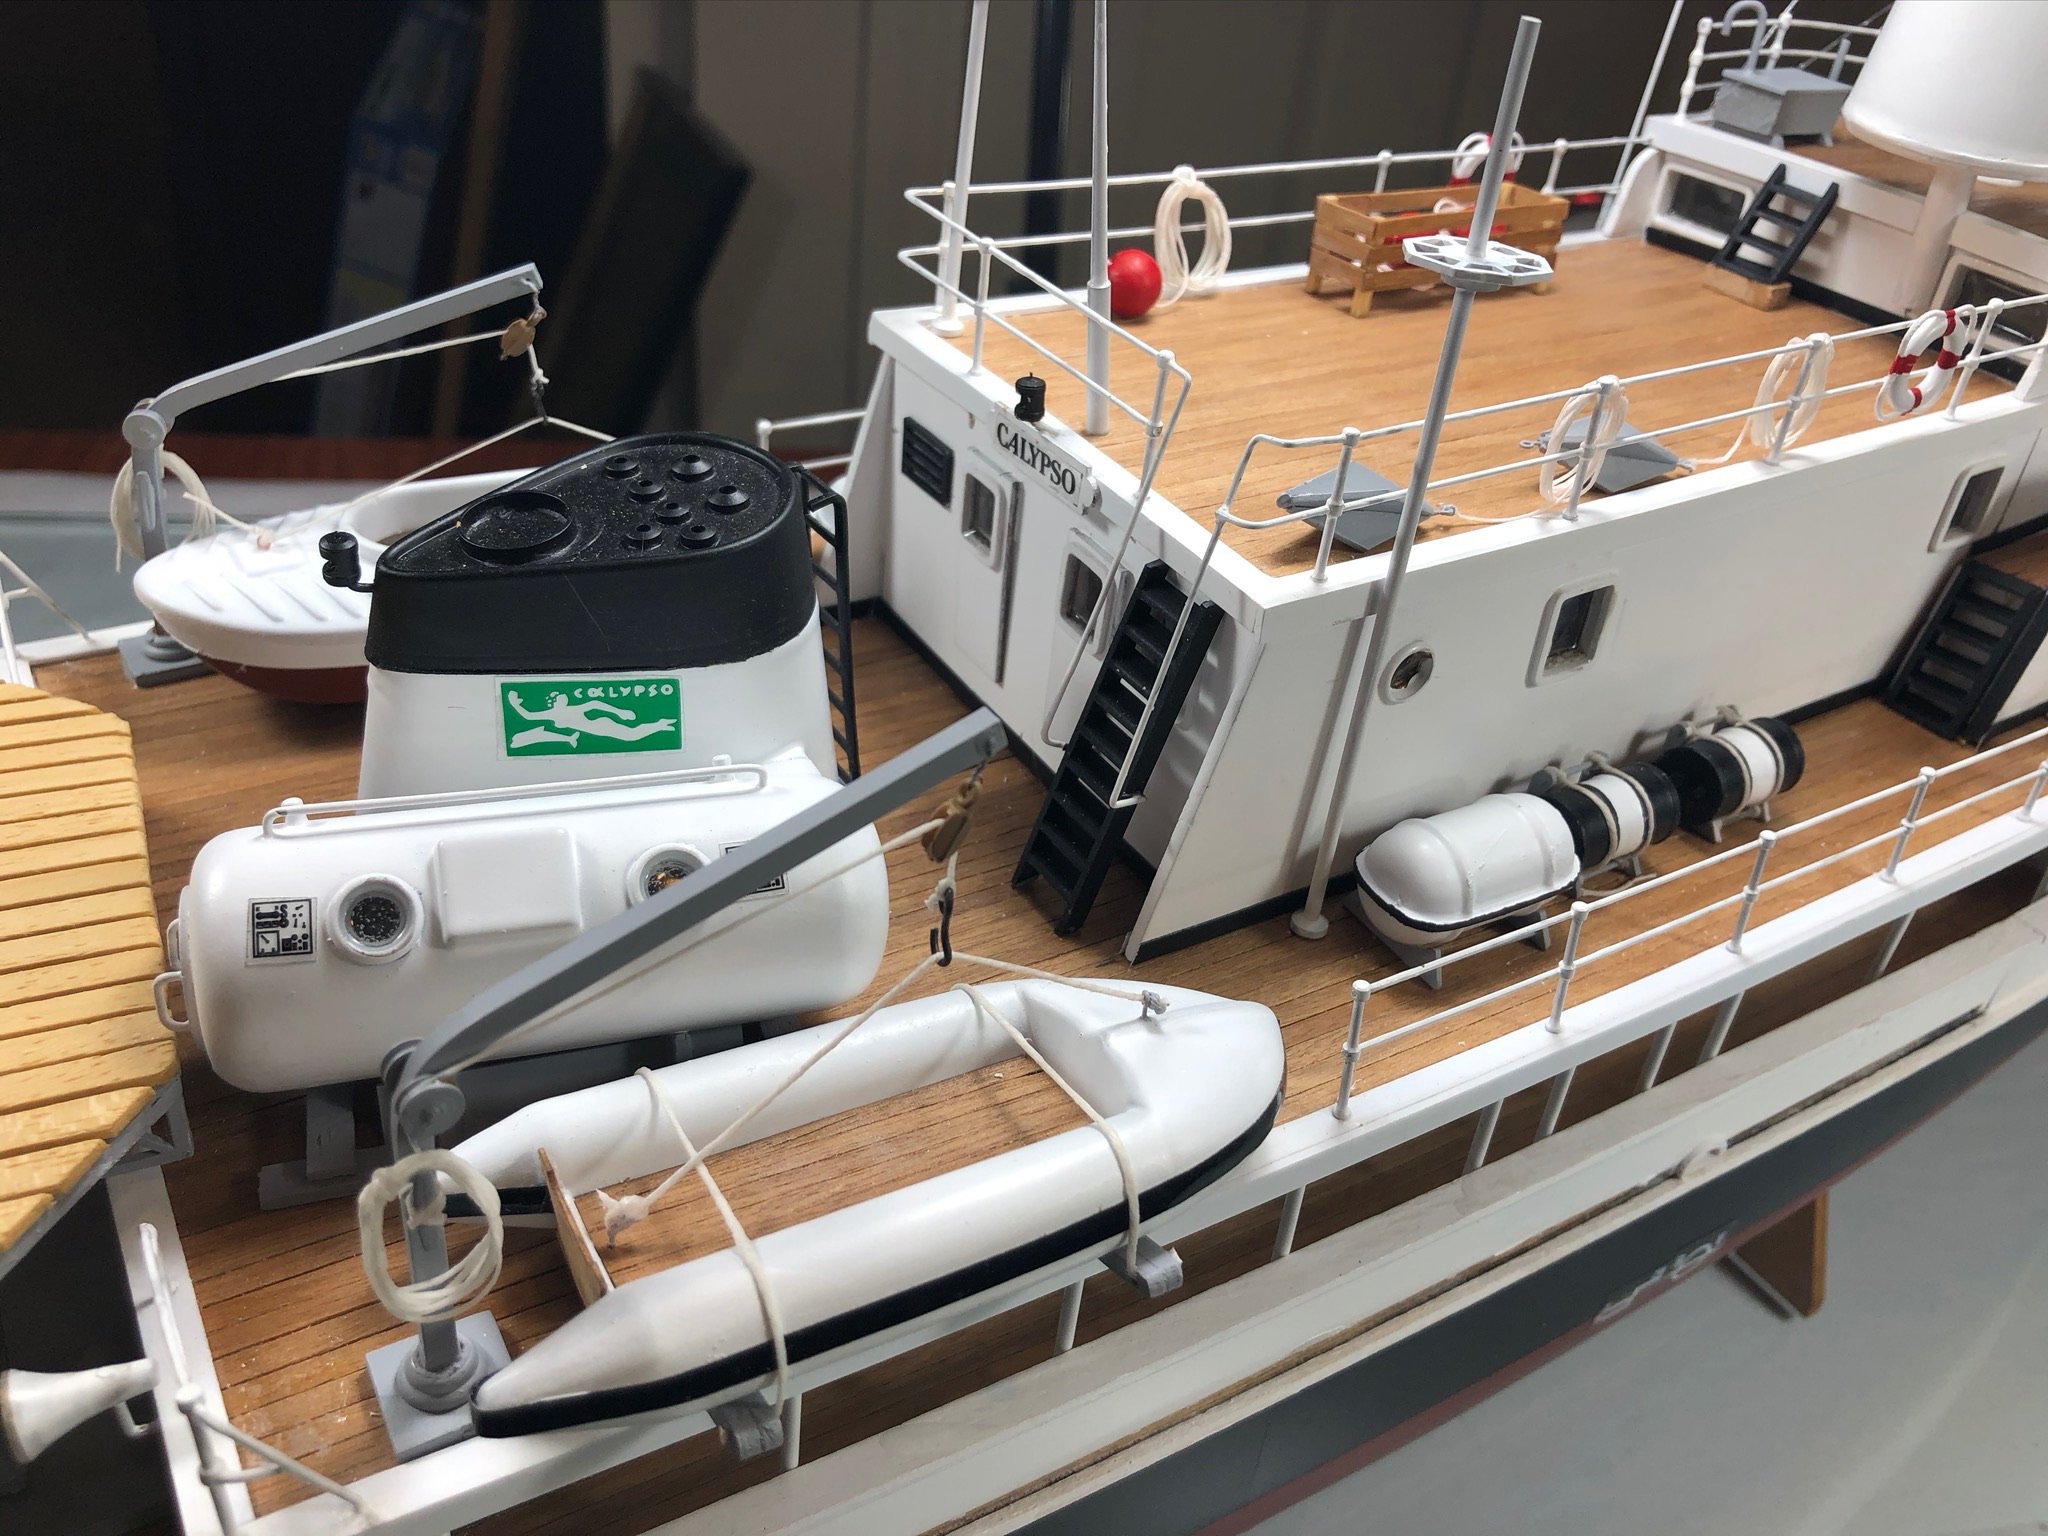
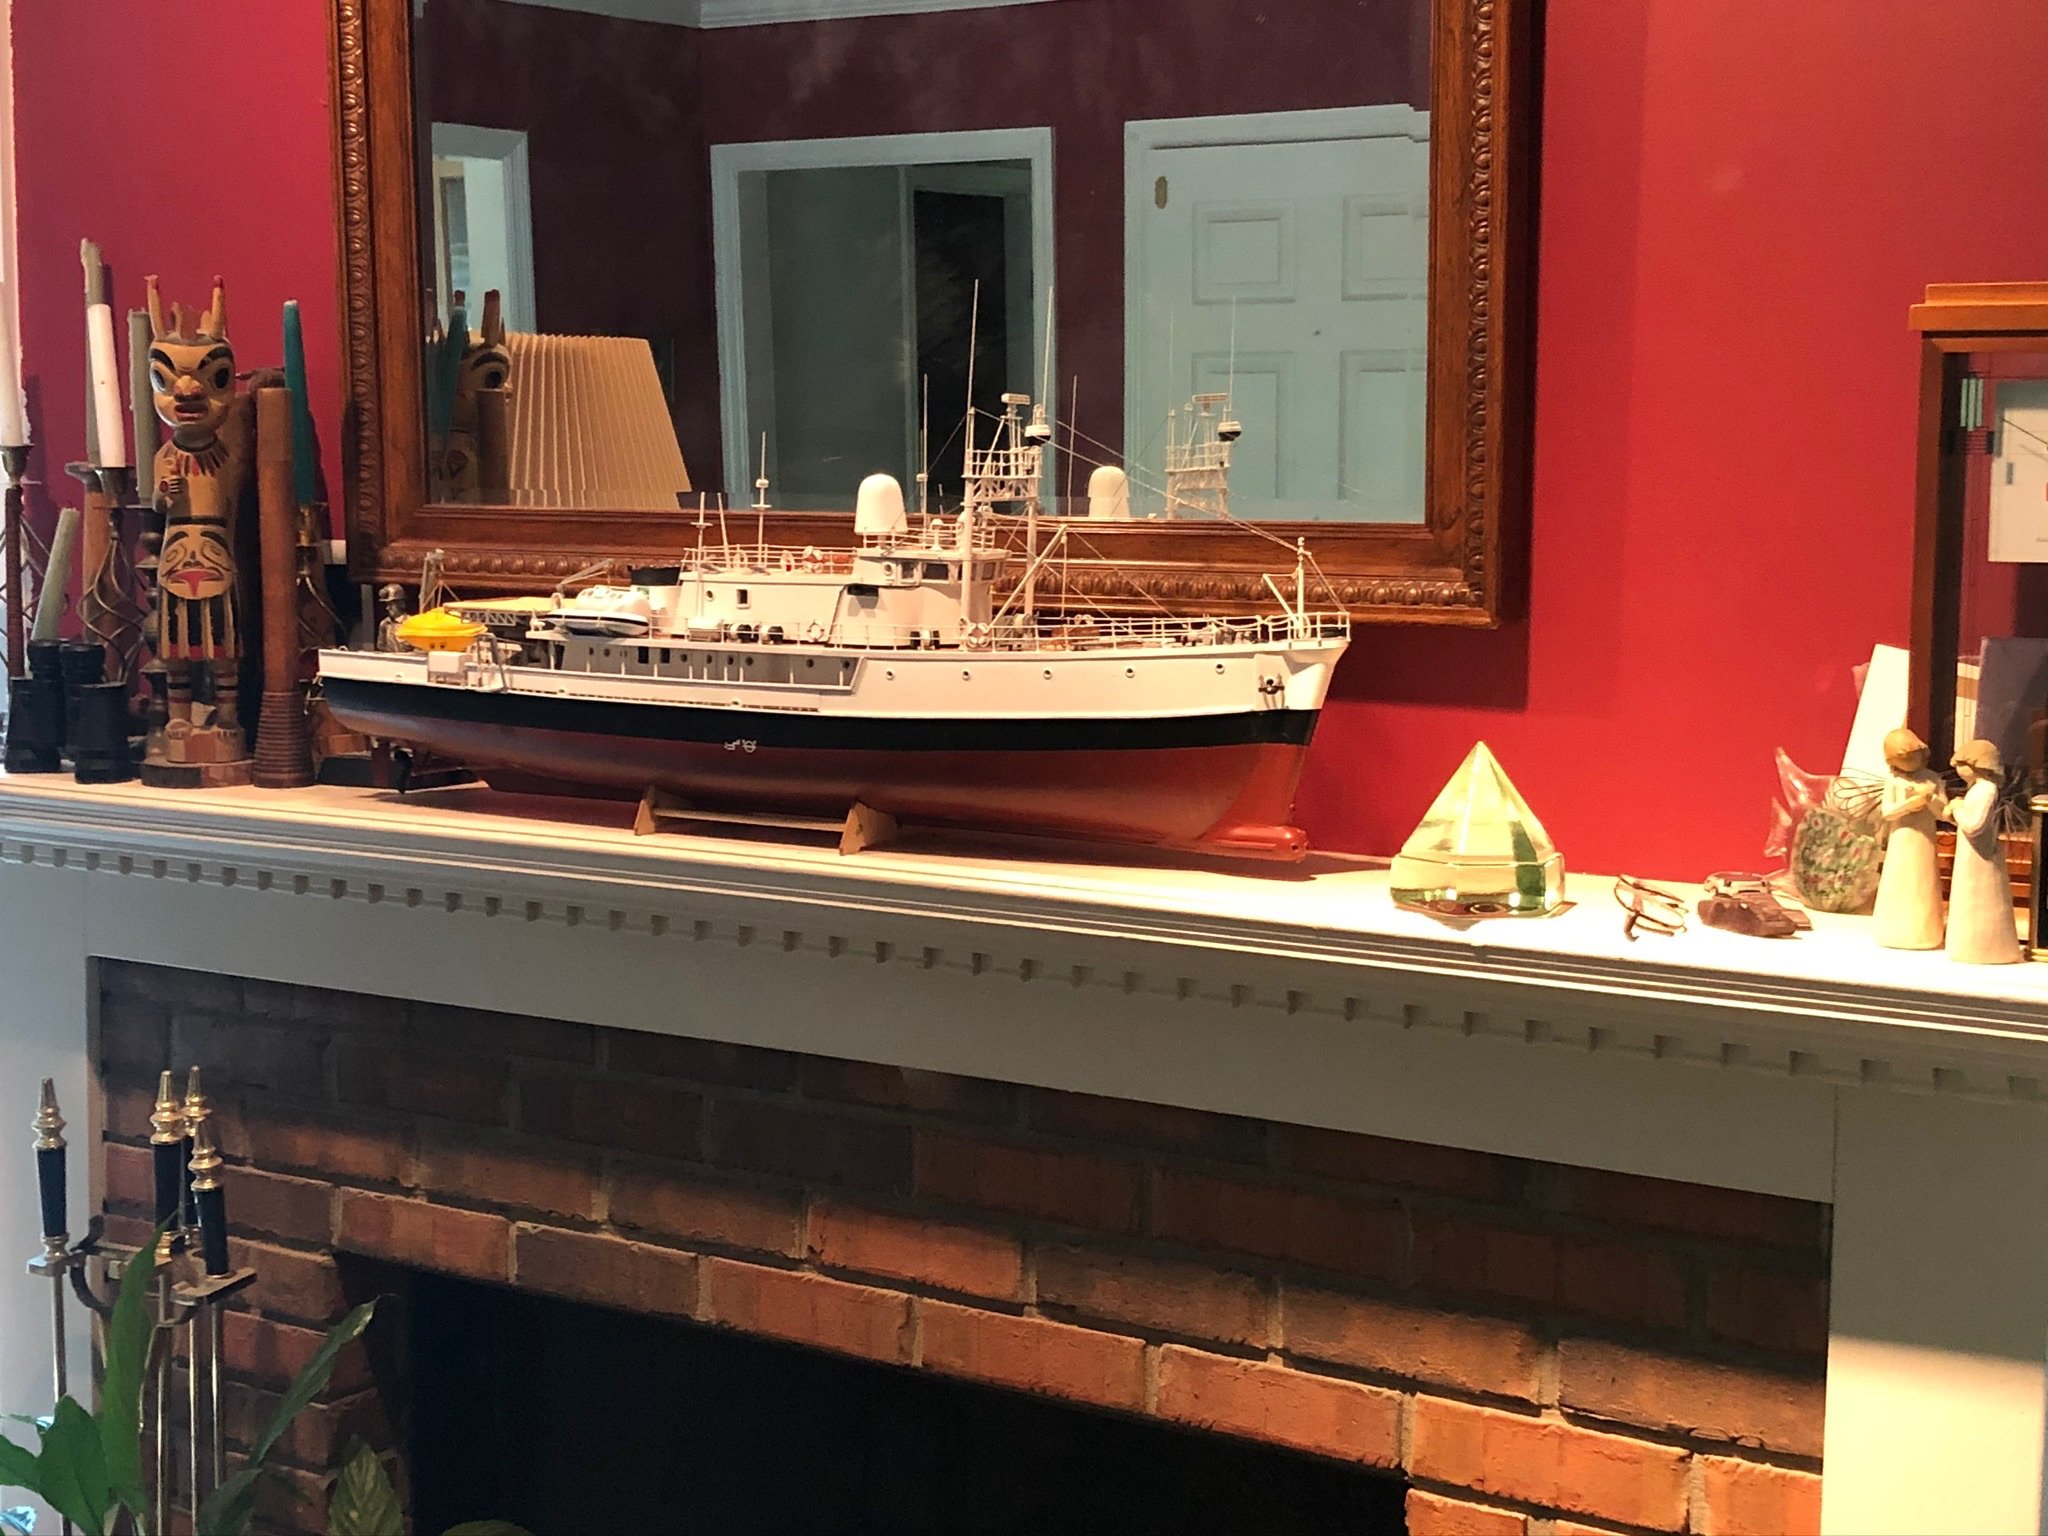
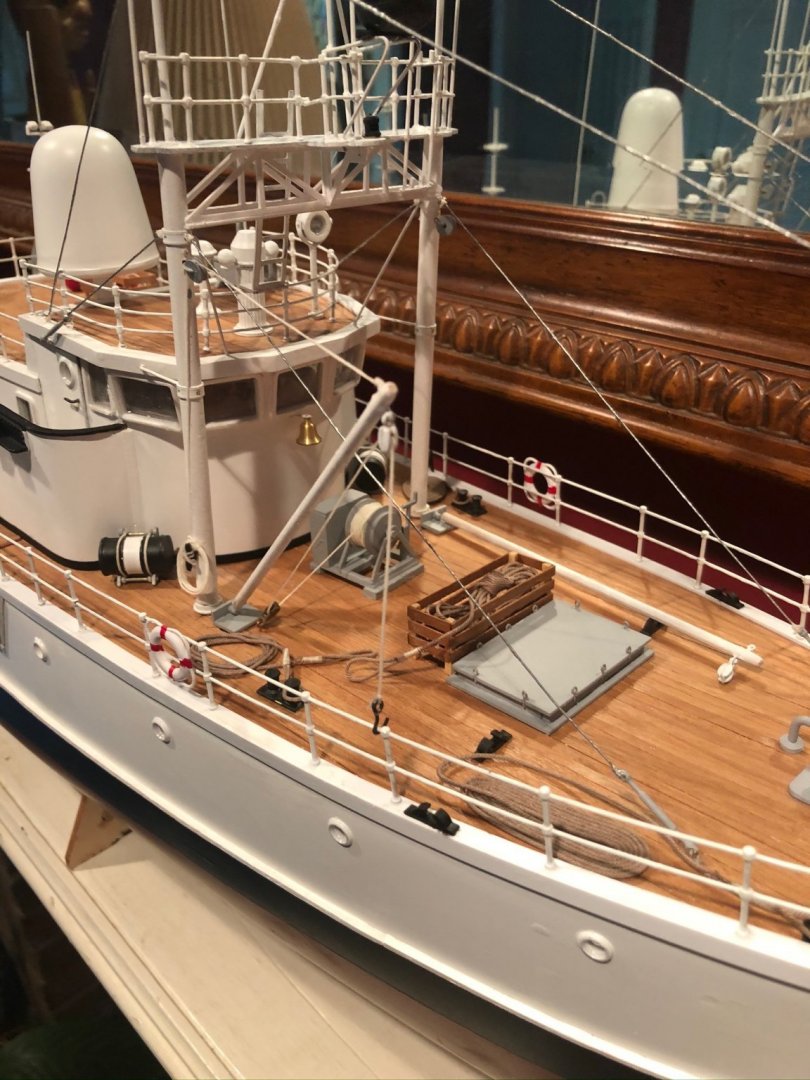
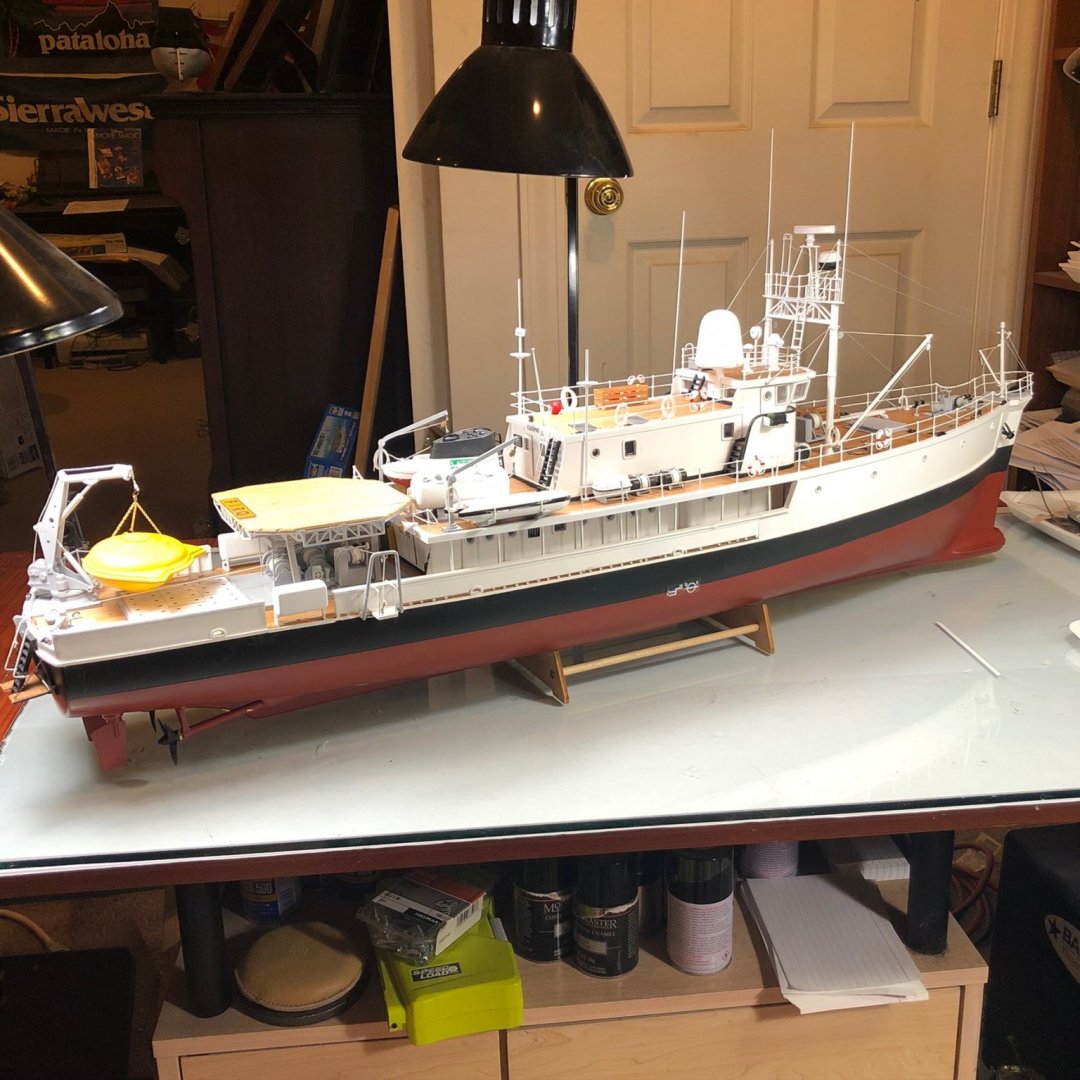
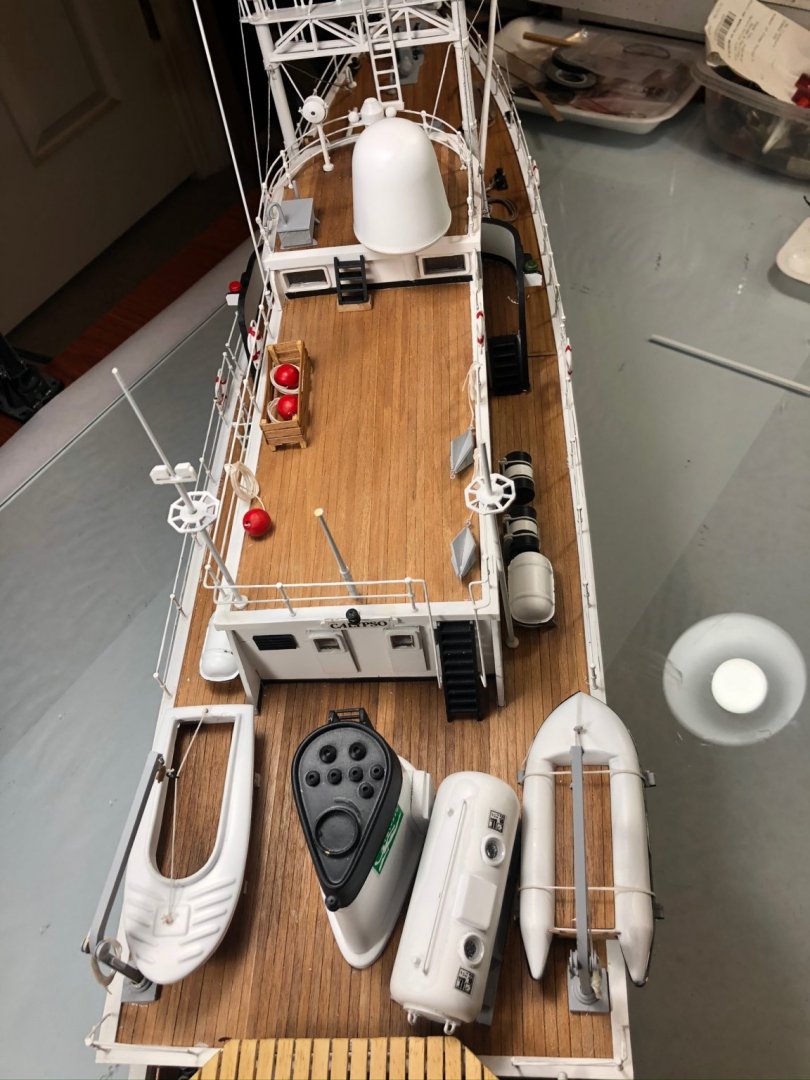
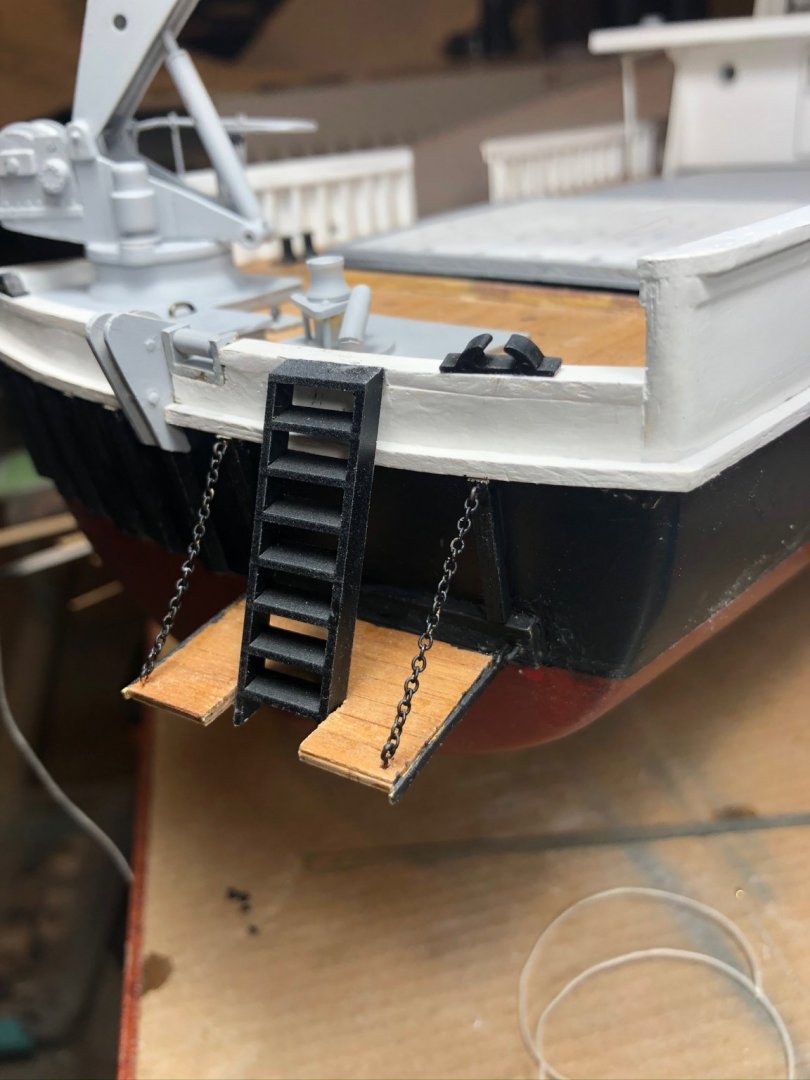
Bob and Yves, Thanks for the nice comments, it’s appreciated. Growing up, my family subscribed to National Geographic and I always looked forward to articles on Cousteau’s expeditions and research, so when this model showed up at my local hobby shop, I jumped on it. It has been an interesting build but somewhat frustrating as my research has not been able to turn up some of the details, particularly with respect to the rigging, and Billings documentation is somewhat lacking. Bob, with your experience actually spending some time on her, can you comment on the picture below. It made sense to me that the hoist just forward of the deck house would be rigged to be used with the two booms on the forward deck, and that’s what I did - pretty much speculation on my part. Does this make sense? I’m also really envious and deeply impressed that you were able to spend time on her and work with Cousteau! Bob, I also want to thank you for encouraging me to post this - it’s been a nice interlude, but time to get back to the Longboat. Will be referring to your excellent log for guidance. Don
- 36 replies
-
- 10
-
-
- calypso
- billing boats
- (and 1 more)
-
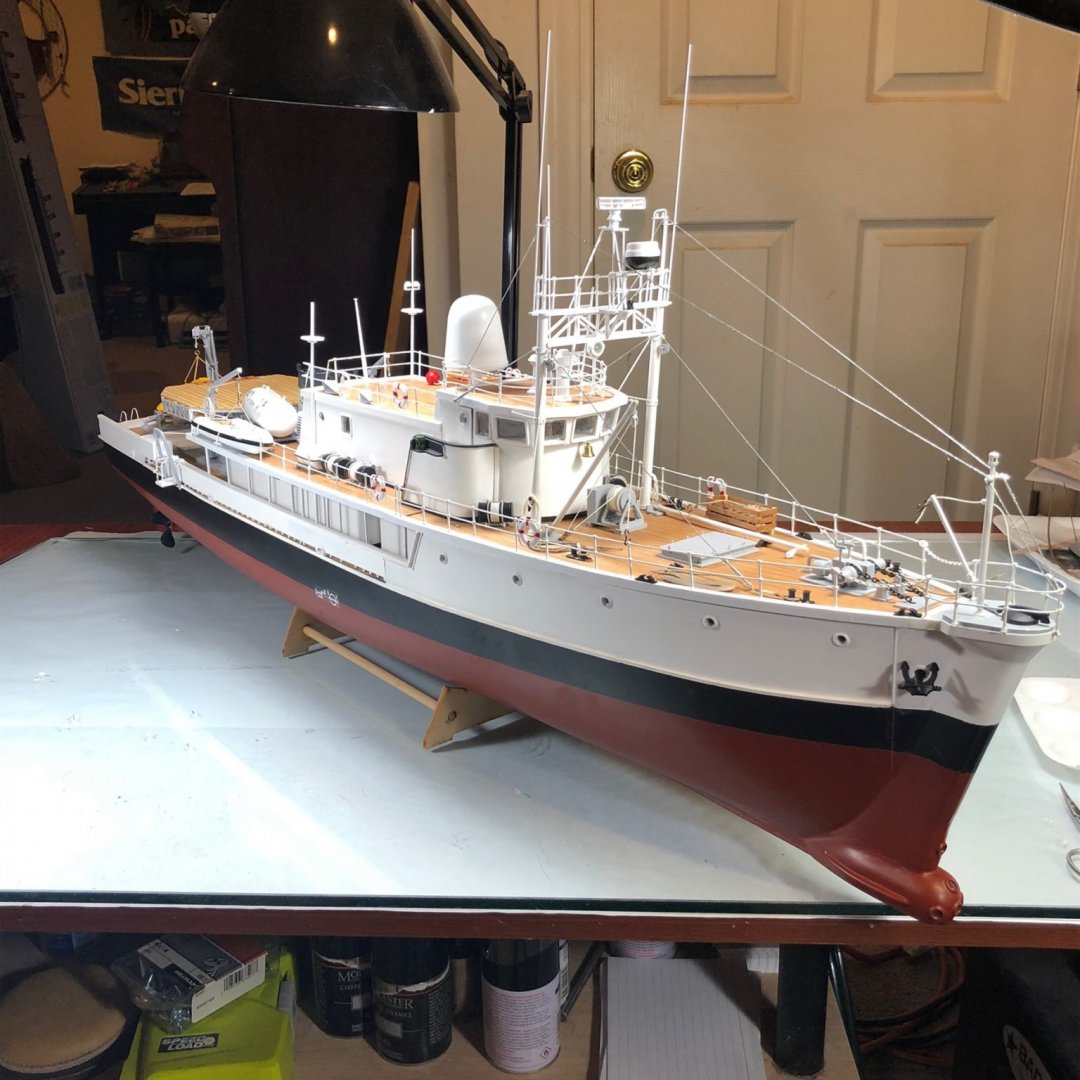
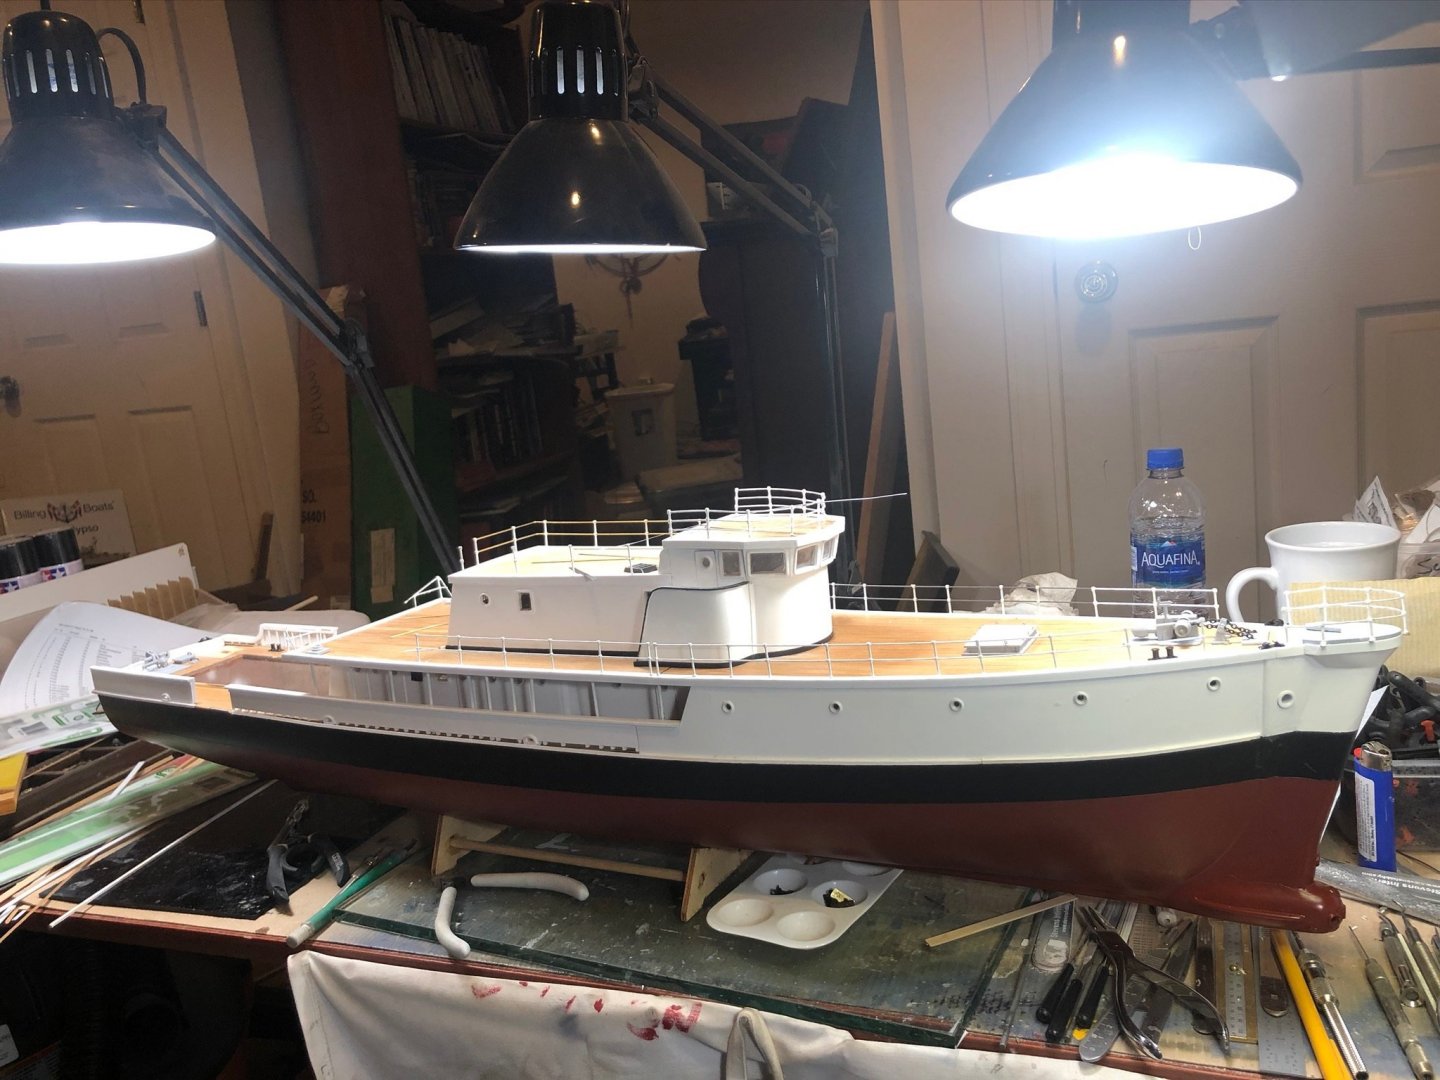
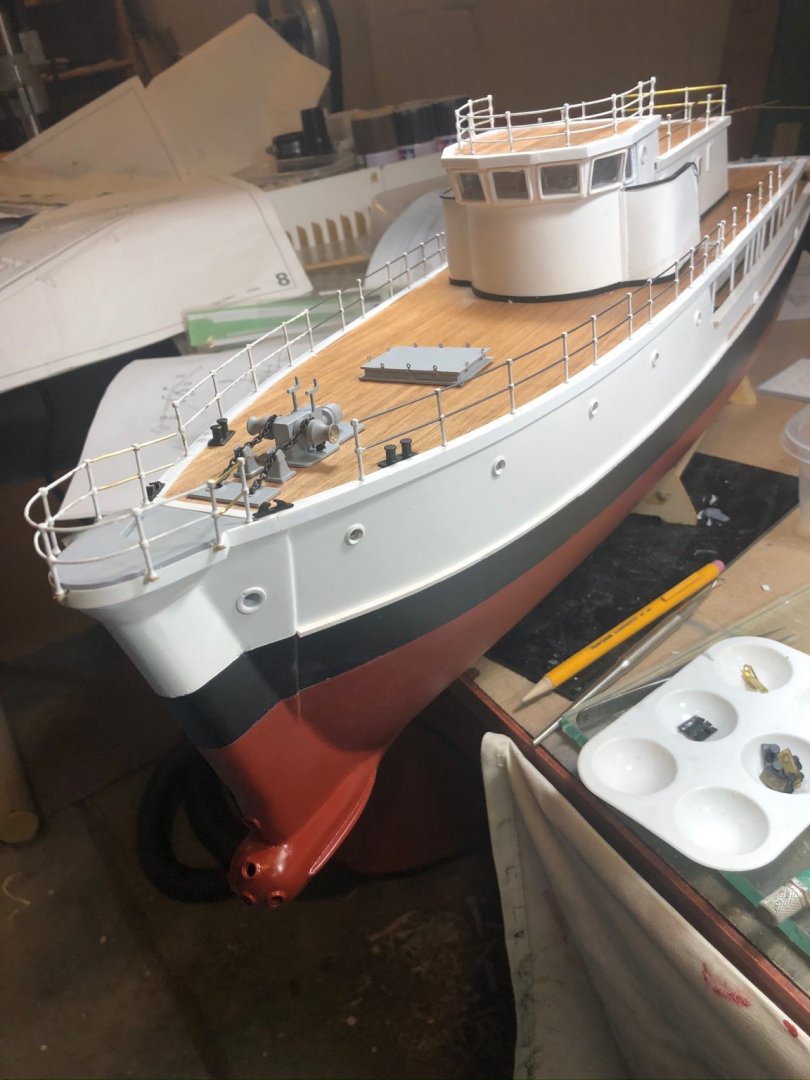
Back in February, Luekutus started a build log for the Billings Calypso which jogged me into finishing a project that I started probably 10 years ago. I really appreciate that he has planked his, it looks great and I’m looking forward to seeing more! My goal was to build a nice model for the mantel that was a good scale and not a warship. While I’ve done some basic research, my model is not 100% accurate and I’ve taken some artistic license in some areas. The Billings kit is crude by today’s standards but can be spiced up with a bit of detailing and is the best available today in a large scale. The helicopter supplied is AWFUL! I’ve given up on trying to make it look nice and am looking for an after market substitute in 1:48 that’s close. I added some 1:48 welding gas cylinders that look fine and the rope I’ve used is the truly nice stuff from Syren. Most of the trim is Evergreen and a lot of the wood is from my spares stash. Enjoy, Don


- 36 replies
-
- 24
-
-
- calypso
- billing boats
- (and 1 more)
-
Bob, The scale has to be a consideration. For example, I do a lot of stuff in 1:200 and 1:350 where the laser etched or printed decks look great. I have seen a couple of examples of planking or painting at those scales and, although I’m really impressed with the effort, life’s just too short and my stash is too big😎. Don
-
Rusty, that’s just beautiful! Well done! Don
- 642 replies
-
- 3
-
-
- winchelsea
- Syren Ship Model Company
- (and 1 more)
-
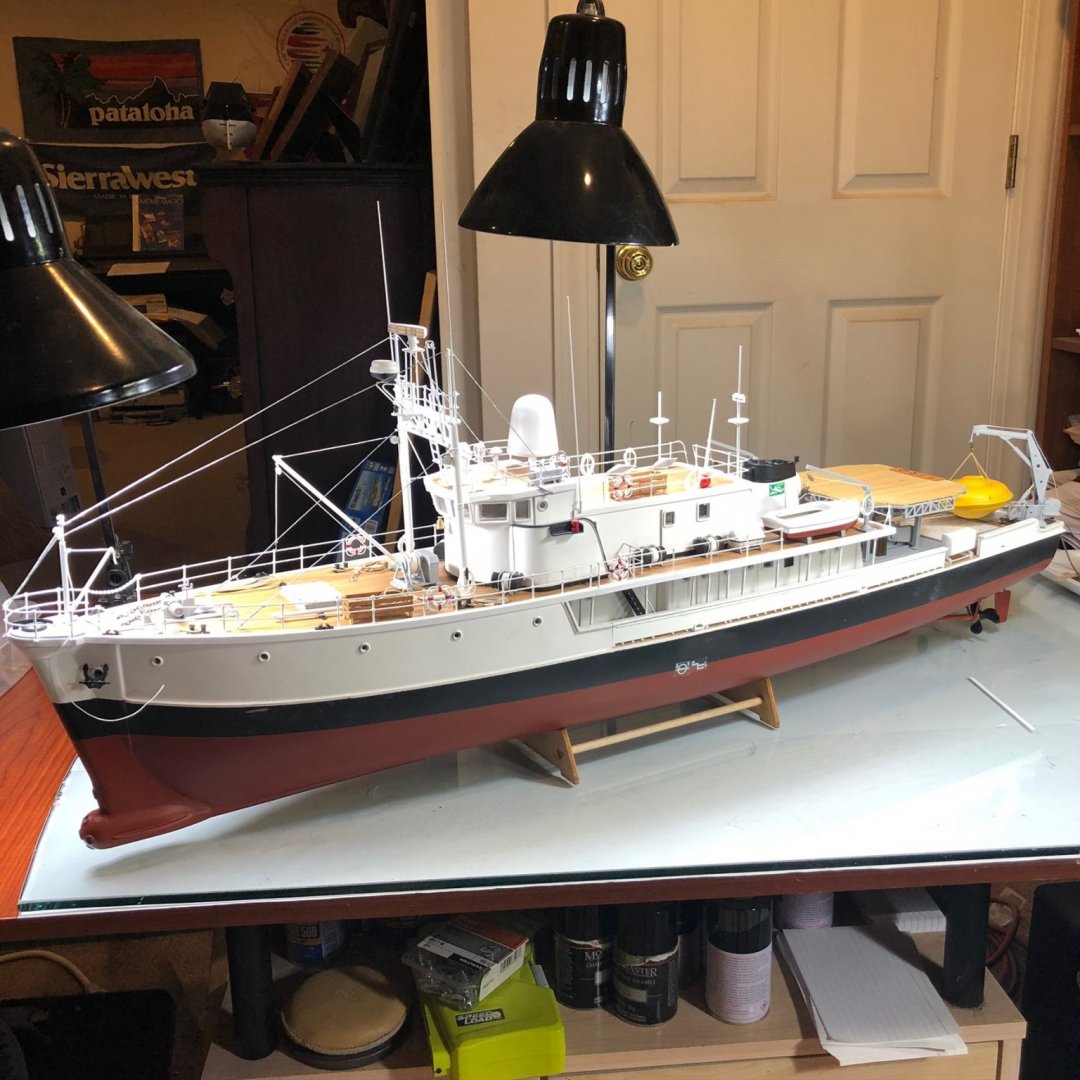
Bob, Your longboat is beautifully done and I’ve thoroughly enjoyed following your journey and the side conversations we’ve had. I especially like your fine documentation and will be referring to it often as I get started back on mine to finish up the rigging. The Calypso should be done by this weekend and has turned out well if not completely historically accurate - I may post a pic or two. I really look forward to your next project. Don
- 170 replies
-
- 1
-
-
- medway longboat
- Syren Ship Model Company
- (and 1 more)
-
Hank, Model Expo just had their version on sale for well under $100.00 so just couldn’t pass it up - so far am happy. Not sure why I wanted to do this, but just for kicks I chucked a small Starrett pin vice with a #77 bit and it worked great. By by the way, I’ve really enjoyed your workshop renovation posts and am envious, but it’s time to finish that up and get back in the ship business 😸😎. Don
-
Bob, Yes, the build log Leukutus started on the Calypso prompted me to get back on mine with the goal of a quick and dirty but nice model for the mantel. Did I see on another log that you actually got to spend some time on her? Am envious. I don’t want to do a full log, but here’s where I am right now:
- 170 replies
-
- 3
-
-
- medway longboat
- Syren Ship Model Company
- (and 1 more)
-
Ryland, she looks great, very nicely done! Don
- 263 replies
-
- 3
-
-
- Medway Longboat
- Syren Ship Model Company
- (and 1 more)
-
Bob, I'm glad I could have been some small help, I'm going to use yours now to help guide me with the rigging. Your close up pics really show some fine detail that I haven't seen elsewhere and explain a lot. My build is temporarily on hold as I got distracted (easily done as I have a roaring case of ADD) working on another project that had been sitting on a shelf half finished from several years ago. Its a Billings Calypso that, while crude compared to Chuck's offerings, is building into a nice model for the mantel. Should get this done quickly and will back to the good stuff soon. Don
- 170 replies
-
- 1
-
-
- medway longboat
- Syren Ship Model Company
- (and 1 more)
-
Beautiful, just beautiful! Well done, Bob! Don
- 170 replies
-
- 1
-
-
- medway longboat
- Syren Ship Model Company
- (and 1 more)
-
Nice work on the ammo racks, I’m going to borrow your technique when I get to mine! Don
-
Chris, I’d do that in a heartbeat, it looks great! Many of us have a lot of experience with tiny photo-etched parts common to the “other” side of the hobby, especially the 1:200 scale offerings currently available and, by those standards, it looks pretty straight forward. Like many of us on this site, I’m sort of new to working with wood and the learning curve has been steep but marvelous and truly enjoyable. I have a couple of other projects on the bench but your Speedy is definitely on the horizon! Don
-
Bob, Thanks for posting all the close-ups, they look great! I really like your thimbles too, I may give those another shot. Don
- 170 replies
-
- 1
-
-
- medway longboat
- Syren Ship Model Company
- (and 1 more)
-
Bob, I know I’ve said it before, but I’ll say it again, beautiful work! You’ve jumped well ahead of me as I got distracted working on another project that had been sitting on a shelf for several years - will get back on it soon. Don
- 170 replies
-
- 1
-
-
- medway longboat
- Syren Ship Model Company
- (and 1 more)
-
Pathfinder, Bluejacket Shipcrafters has a set of plans for the Kearsarge that you can get separately from their kit. They are an NRG supporter and highly recommended. I bought a set of their Constitution plans to guide me on the Revell kit and have found them very useful. Good luck, Don
-
Beautiful job, I’m really enjoying following your build!
- 114 replies
-
- 2
-
-
- small
- Peterboro Canoe
- (and 2 more)
-
Bob, She’s beautiful! I really like your planking - it’s so precise! And thanks for starting your log, I very much look forward to more! Don
- 170 replies
-
- 1
-
-
- medway longboat
- Syren Ship Model Company
- (and 1 more)
-
Beautiful work, Rich, it looks great! Don
-
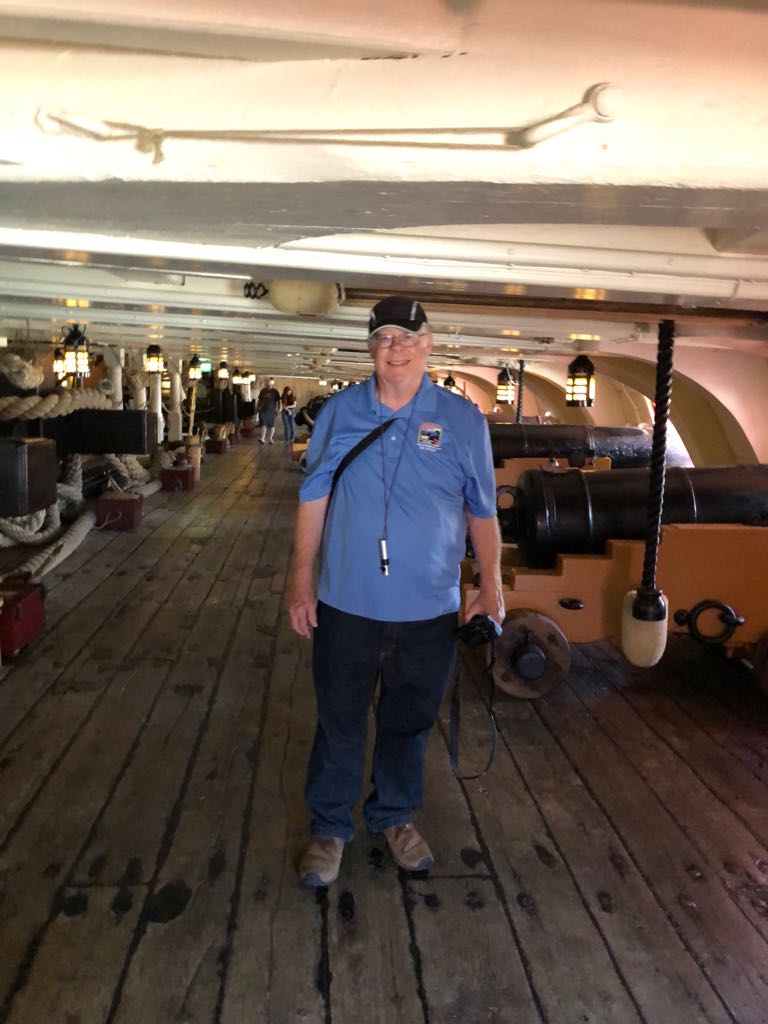
Bob, Its nice to see your post! I really like your canoe and have wanted to build one - your rowboat looks great! Your history with the Coast Guard puts things into perspective as well as some of the other things we’ve discussed in another forum. I, too, served in the early ‘70s but couldn’t see well enough to qualify for Navy ROTC but the Army was fine with it, so that’s the direction I took. I look forward to seeing some of some of your projects! Don