

puckotred
-
Posts
430 -
Joined
-
Last visited
Reputation Activity
-


-
 puckotred reacted to Vinnie in Block basics
Thanks very much for the help guys...those vids really helped puckotred, they were well explained. Finished my first rigged block! Many hundreds to go! 😁
-

-

-

-
puckotred reacted to marktiedens in Nuestra Senora del Pilar de Zaragoza by marktiedens - FINISHED - OcCre - scale 1:46
Hi everyone - a little more progress. The sides of the ship between the wales was painted yellow ochre.Then the lower line of gunports(the ones with lids)were lined. Then the upper planking was started & the bow deck and beakhead bulkhead were planked. Next will be finishing the planking aft of the waist & adding the wales. After all that,I may go ahead & put a finish on all that cherry. Haven't decided whether to use polyurethane or Danish oil - will do some experimenting to see what looks good.
Mark
-
puckotred reacted to marktiedens in Nuestra Senora del Pilar de Zaragoza by marktiedens - FINISHED - OcCre - scale 1:46
Update - the wales have now been added. I painted the edges black before gluing them on,then finished the painting after installing them. Also,some mouldings were added on the upper part of the hull. The instructions said to file a groove in some strips then round off the edges with sandpaper to make the mouldings. I have a better way - I got some of those micro shapers & had them made in no time at all.
As far as finishing the lower part of the hull,I coated some scrap pieces with Danish oil & polyurethane to see the difference. The upper one is the Danish oil finish,& the lower one is the poly finish. As you can see,there is very little difference. I am probably going to use the polyurethane because of the toughness of the finish. The oil finish looks nice,but any little glue spots(which there are a few) will show up as light spots because the oil won`t soak in. I`m afraid that I will sand clear through the veneer in places to get 100% of the glue spots off.
Mark
-
puckotred reacted to Tim Curtis in Phoenix by Tim Curtis - Master Korabel - Scale 1:72 - Russian Brigantine
The next step is to start cutting out the planks in swiss pear to match the precut planks in the kit. This is really easy and takes about 5 or 10 mins per plank.
I glued the kit plank to the strip of pear with UHU, so that they can be easily separated later. Then carefully cut around the plank with a sharp scalpel.
Finally I gently sanded around the edge of the two planks while they are still stuck together so that they are exactly the same shape. I used a nail file stick.
Then gently separate them, and hey presto, I have a plank in swiss pear that matches the Annegri kit plank exactly. Two finished examples set out below.
It still remains to see if the "iron on" glueing process will work. But preliminary tests have been encouraging.
Tim.
-
puckotred reacted to Tim Curtis in Phoenix by Tim Curtis - Master Korabel - Scale 1:72 - Russian Brigantine
A quick snapshot of where I am to date. My progress will be slow as I am still finishing my Scottish Maid, for which I have a separate build log.
-
puckotred reacted to Tim Curtis in Phoenix by Tim Curtis - Master Korabel - Scale 1:72 - Russian Brigantine
Here is some of the bulkhead planking which come as laser cut veneer sheets, with gunports already cut, and planking scribed by laser.
The external planking is in annegri wood, which has a pronounced grain which responds badly to staining with markers, so I ended up painting this (which took ages) with about ten thin layers of acrylic.
Internal planks are walnut, which I stained red, once, with permanent marker in about 2 minutes....
-
puckotred reacted to Tim Curtis in Phoenix by Tim Curtis - Master Korabel - Scale 1:72 - Russian Brigantine
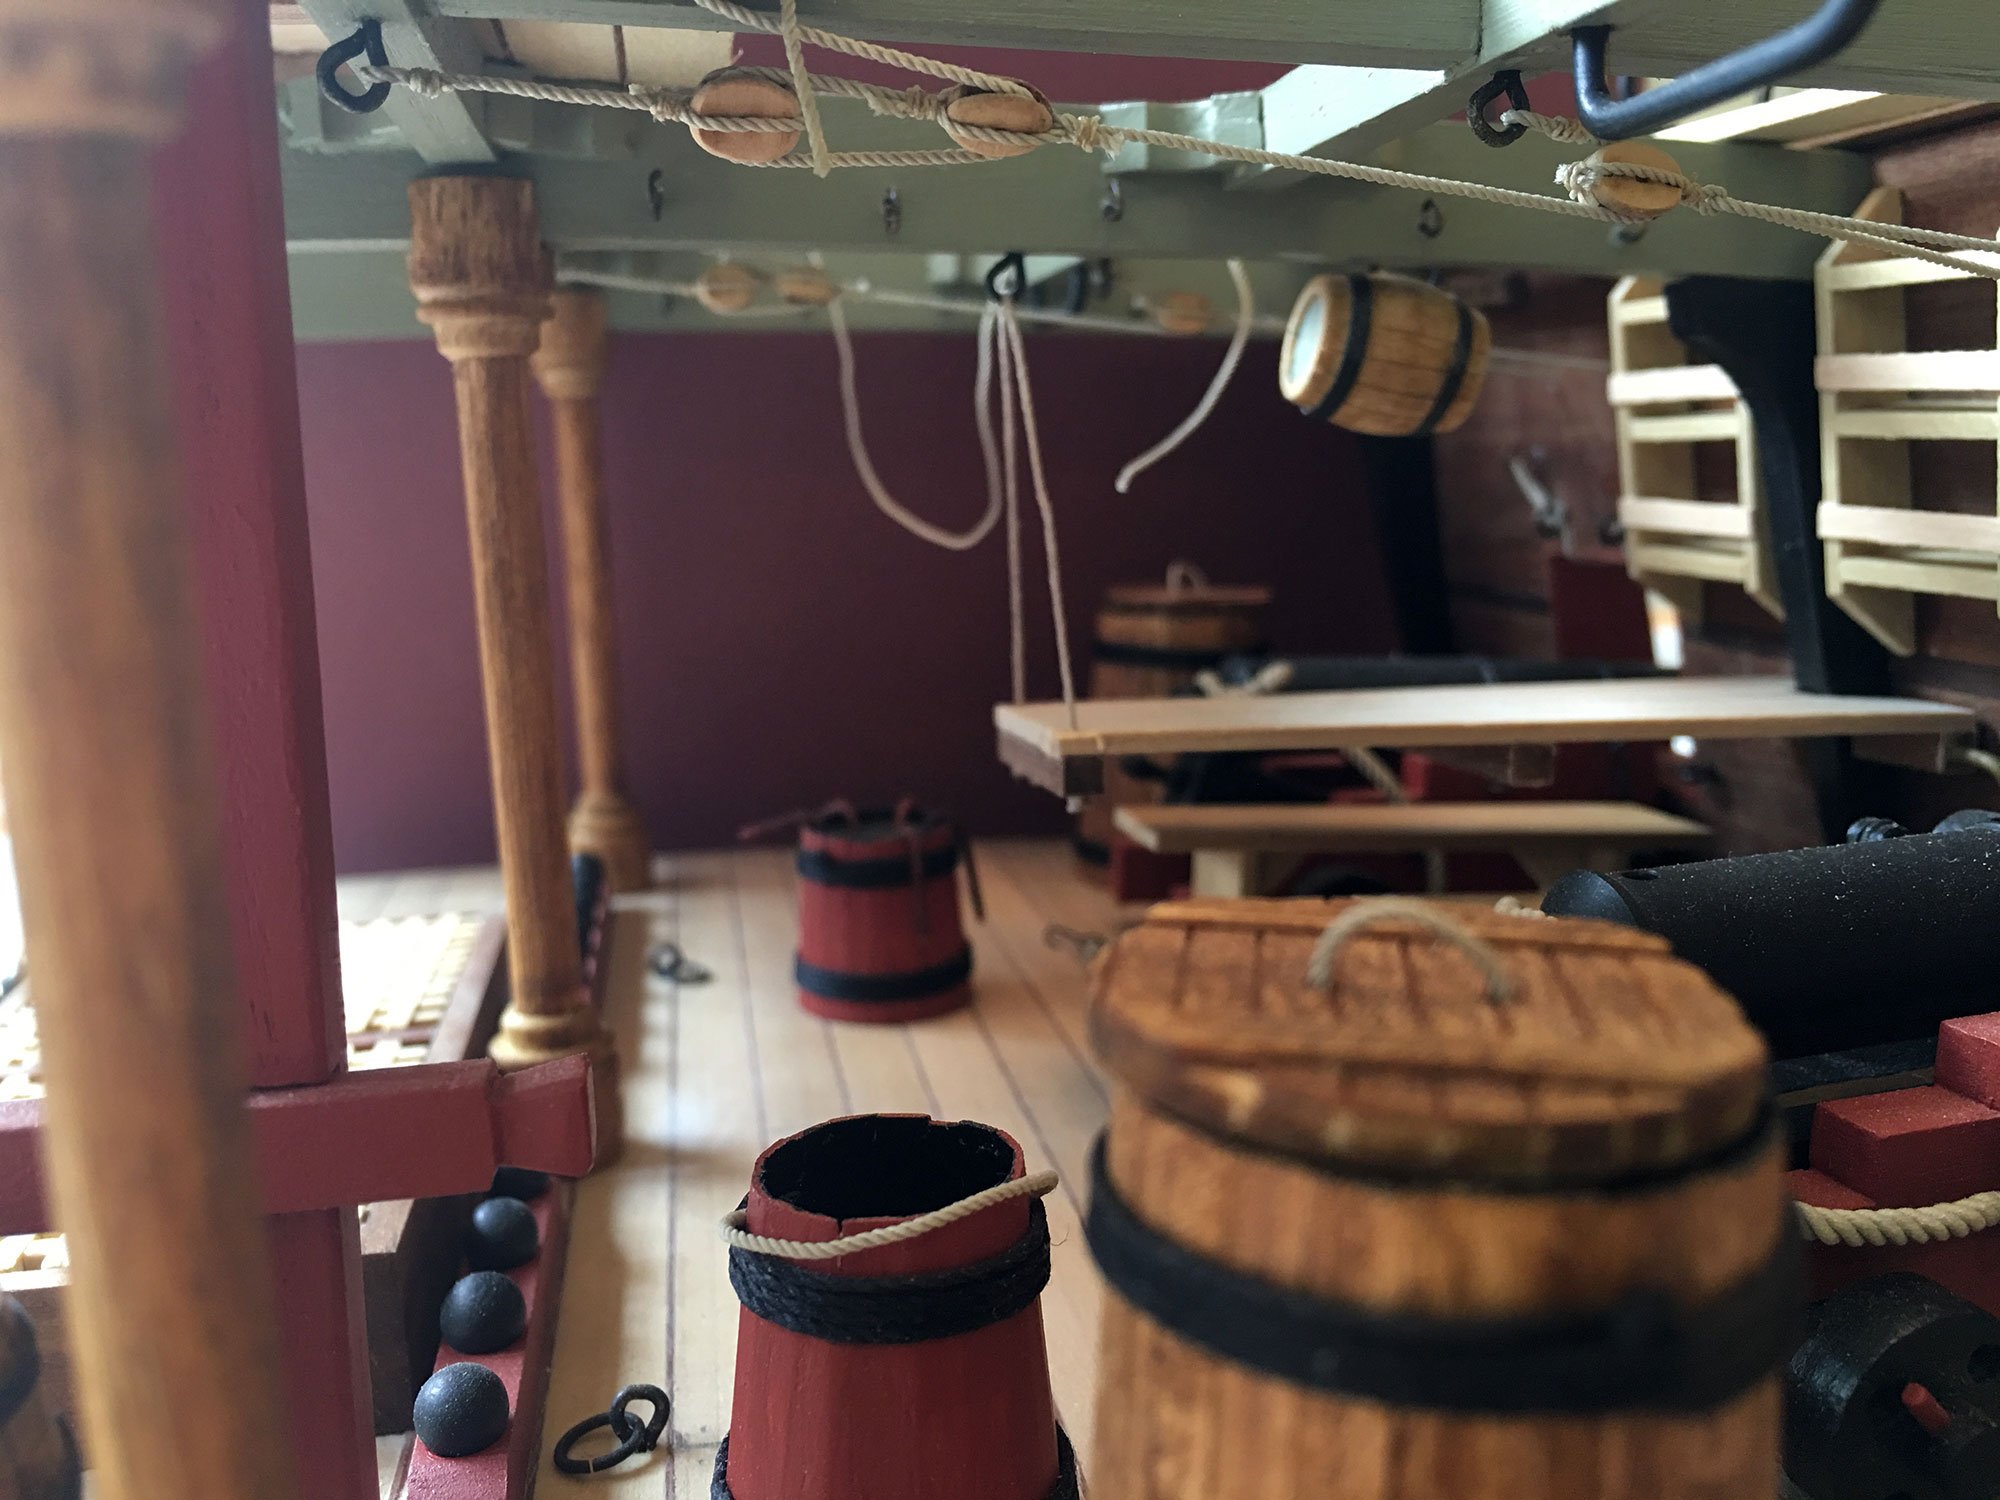
Here are a few photos of the cannons. Again pretty teensy at this scale.
They come as a separate little laser cut kit, with barrels cast including a vague royal seal.
There is some laser scribing in the wood which I like, partic the detailed capsquare. Ring bolts are PE brass, included in the kit, but I have not fitted them yet.
-
puckotred reacted to Tim Curtis in Phoenix by Tim Curtis - Master Korabel - Scale 1:72 - Russian Brigantine
Here is a photo of the windlass. It comes as a neat little kit of its own. I have stained the posts with permanent marker, which is quick and tidy.
-
puckotred reacted to Tim Curtis in Phoenix by Tim Curtis - Master Korabel - Scale 1:72 - Russian Brigantine
Here are some photos of the longboat. About 90mm long at 1:72. Its pretty teensy. But a good little kit with most of the wood being pear. Sadly the keel and prow are in very crumbly ply which is hard to work with, and has a poor finish.
Stained the wales, rail and top plank with permanent marker to get some tidy colour, without the difficulty of painting at this little scale.
-
puckotred reacted to Tim Curtis in Phoenix by Tim Curtis - Master Korabel - Scale 1:72 - Russian Brigantine
Here is a photo of the scribed decking. It was pre-scribed by laser cutter. I deepened and darkened the scribing and the treenailing with a 0.3mm 2H pencil. I am pleased with results, especially at 1:72.
-
puckotred reacted to Erebus and Terror in HMS Terror by Erebus and Terror - FINISHED - Scale 1:48 - POB - as fitted for polar service in 1845
A small update, folks. Negotiations with OcCre have progressed nicely and we have resolved the issue to my satisfaction. As soon as all the paper is signed I'll announce it on the forums. I was impressed by their handling of the issue; they take intellectual property and copyright pretty seriously. Thanks for all the support and advice from everyone here!
-
puckotred reacted to greenstone in AVOS 1806 by greenstone - Master Korabel - 1/72 - Russian Tender - test build
Good afternoon, colleagues!
Model of tender "AVOS" has been completed!
-
puckotred reacted to greenstone in AVOS 1806 by greenstone - Master Korabel - 1/72 - Russian Tender - test build
more photo
-
puckotred reacted to greenstone in AVOS 1806 by greenstone - Master Korabel - 1/72 - Russian Tender - test build
and some new photos
-
puckotred reacted to drobinson02199 in Heritage 46 Yacht by drobinson02199 - FINISHED - Amati - Scale 1:20 - SMALL
Finished the boat today! I've posted a gallery of pictures in the Completed Models Gallery, but here's one of the finished boat.
Thanks to all who followed along on this one.
Regards,
David
-
puckotred reacted to drobinson02199 in Heritage 46 Yacht by drobinson02199 - FINISHED - Amati - Scale 1:20 - SMALL
Tender is now completed -- and mounted on the boat.
Regards,
David
-
puckotred reacted to drobinson02199 in Heritage 46 Yacht by drobinson02199 - FINISHED - Amati - Scale 1:20 - SMALL
Getting close to the end now.
Bow area and railing done Side decks installed (I'm not fast -- I did these on a pre-cut framework while I was painting the hull) Swim platform installed Shafts, rudders and props installed Cleats installed The lower superstructure is now permanently mounted and glued. The flying bridge is still removable and will stay that way.
What's left: tender boat (which has some detail), and mast/boom (which looks like a detailed assembly).
Regards,
David
-
puckotred reacted to drobinson02199 in Heritage 46 Yacht by drobinson02199 - FINISHED - Amati - Scale 1:20 - SMALL
Bottom of hull painted and black stripe applied to waterline. As I mentioned earlier, I didn't like the light blue shown in the kit pictures, so I went with a royal blue instead.
Regards,
David
-
puckotred reacted to drobinson02199 in Heritage 46 Yacht by drobinson02199 - FINISHED - Amati - Scale 1:20 - SMALL
Now painting the hull. You can see what the unpainted hull looks like in my posts above.
The first picture shows the hull after two coats of spray paint. The poor look is a result of two things:
The spray paint doesn't penetrate well into the spaces between the larger planks. I wasn't confident that more coats would do it, and was concerned that if I sprayed too much or too close I'd get runs and drips. Much of the darker parts result from small gaps between the 1x1mm spacer strips and the planks. So to fill those gaps down inside the spaces, I troweled on wood filler across the whole hull, and then opened up the spaces again using spare 1x1mm wood strips as small shaping "trowels" to "re-sculpt" the spaces into the wood filler, followed by wiping down the hull to remove excess filler (and then cleaning up the spaces again). I then put on two coats of brushed-on paint to be sure the spaces were filled. Finally, about 3 more coats of spray paint/sanding plus some spot spray. The result is in the second picture.
If I was going to do this again from scratch, I'd first do one coat of spray to reveal the gaps, then wood filler, then 1-2 coats of brushed on paint, then spray.
Now I need to give this a full day to dry well, then tape the water line and spray the bottom of the hull blue.
Regards,
David
-
puckotred reacted to MarisStella.hr in News and Info from MarisStella Ship Model Kits
Yes, after the deck base, the deck is coming next! But the king plank and the covering board first… So, the king plank and the covering board are laser cut elements and they need to be glued onto the deck base… Then the deck planks are to be cut and placed between these elements… The main deck goes first and the forecastle deck after it … There is the inner planking at the forecastle deck, so the stanchions are to be set onto the covering board…
Altogether, there are the photos:
-
puckotred reacted to Andre in Wasa by Andre - FINISHED - Corel - 1:75
Continued with the items on deck.
Previously, I had made blocks with 2 sheaves, in which I used some messing discs as the pulleys inside.
However, inspired by fellow builders on this website (md1400cs; Michael), I decided to replace them in order to improve them.
I tried to use my proxxon milling machine, but had no small milling tips. Therefore, I made from several layers of wood, like I had done before. I made the internal pulleys by sawing small parts from a round wood, used sand paper to thin them and then drilled a hole in them.
The situation before the upgrade:
Making the block from wood planks:
All of them, before pplacing them on deck:
The upgraded blocks on deck: