catopower
-
Posts
1,900 -
Joined
-
Last visited
Content Type
Profiles
Forums
Gallery
Events
Everything posted by catopower
-
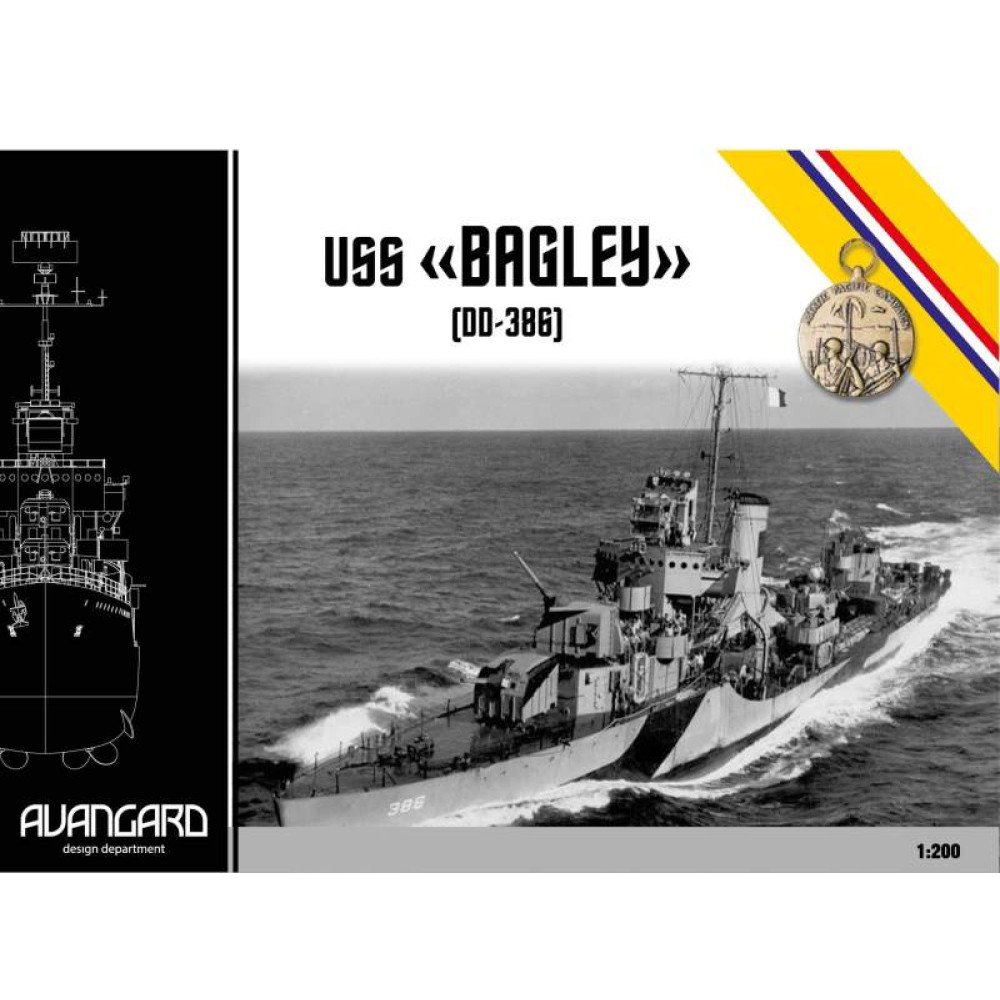
 Not much news on the V108 build, as I've been trying to make some progress on other model fronts. But, the V108, being a paper model, is so easy to sit down and work on. So, I did get a couple of the ventilators made and started working on the masts. Biggest news is that Orlik just refunded my order of the USS Bagley kit. So, that's no Orlik, no GPM, and no Fenton's. I think that's the last hope I have of getting it, unless something changes regarding the tariff situation. ☹️
- 106 replies
-
- 2
-

-
- digital navy
- v108
- (and 3 more)
-
Hello stevenba21, thank you for sharing your find! I'm sure many members of this forum will find this information interesting and of value. What size/scale is the cannon?
-
I've bought way more Woody Joe kits that I care to admit, all from Kazunori Morikawa's online shop Zootoyz.jp, or his newer site https://www.japan-wooden-model-kits-zootoyz.shop. I don't really understand why he started the second online shop, I think due to some server problems he was having with the first. Anyway, prices are MUCH better than most that you'll find on Amazon or Ebay, and his service is excellent!
-
Kerry, Nice article! I too had the opportunity to visit Woody Joe in 2016 and met with Mr Tsuneki, Mr Arata, and Ms. Gojo. Wish I could go back and visit again.
-
Not really sure. It's not a huge company, but they're producing a large number of products. Might have something to do with providing good standard of living to the employees. I don't think they sell huge volumes of kits. I used to think their kits were expensive, but with the exchange rate as it is, I feel less that way now. I've bought many of their kits in the $200-$250 range. Which kits are you looking at that you consider expensive?
-
The second stack didn't turn out quite as nicely and wasn't quite as easy as the first, but it's done. And the build continues...


- 106 replies
-
- 5
-

-
- digital navy
- v108
- (and 3 more)
-
The PE parts arrive the other day, so I sprayed them with gray primer and just added the first ones to the forward funnel. The locations are printed on the paper, but these rungs are a bit narrower than allowed for on the part. I decided to use the left-hand side as my registration line. I used a dress-making pin, pressed it against the printed mark, and spun the pin a bit. It actually kind of drilled a tiny hole or a big hole, depending on how hard I pressed and how much I spun the pin. But, it worked well enough. I did the entire column this way and then just eyeball the other end and used the same procedure. I inserted all the rungs and adjusted them, then I used some Aleene's Tacky Glue on the inside of the funnel where the rung ends stick out. I'm pretty satisfied that this is going to work. This went a lot more smoothly and quickly than I'd expected. Plus, I don't think it turned out half bad. I have one more funnel to do, and then I this there are a few on the superstructure below the bridge. Also, I want to figure out what to do about the guy wires leading down from the funnels. I have some fine EZ-Line, but I think it's actually too thin for these guy wires.

- 106 replies
-
- 7
-
-
- digital navy
- v108
- (and 3 more)
-
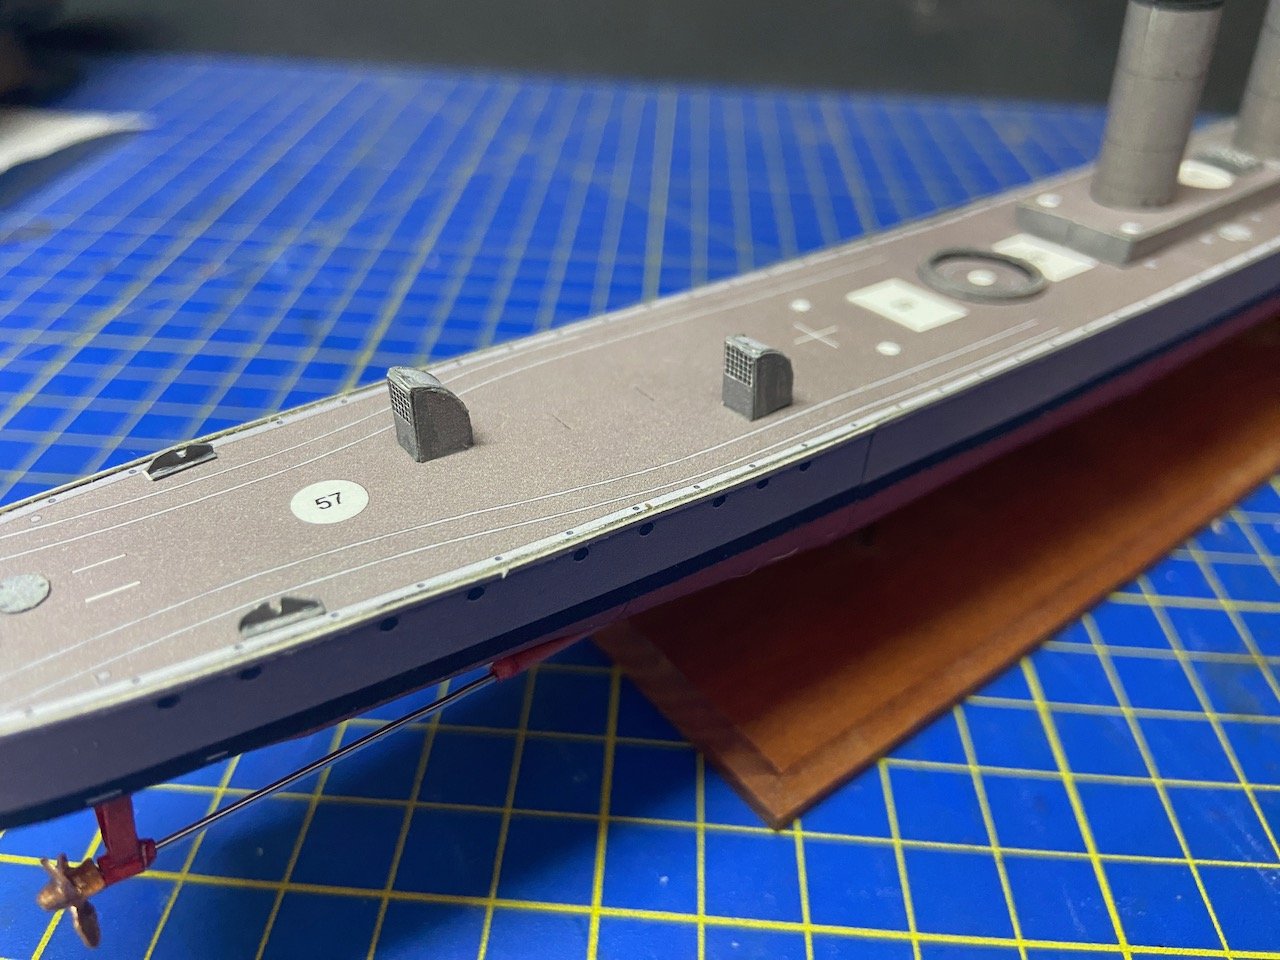
Progress continues on the V108. Had a meeting of the South Bay Model Shipwrights in Santa Clara on Saturday afternoon. I brought this along with me and that seems to have spurred me on to continue the work today. Added a few new details. I added what I assume are hose reels just aft of the big ventilator cowl. Also decided that the next assembly to complete were the torpedo launchers. So, while replaying the movie Greyhound for the umpteenth time, I built first the launchers barrels, then built the pedestals. I'm not sure how the bow launcher is supposed to work. It's actually too long to swivel from one side to the other without hitting a support post under the forecastle overhang. There's another reel at the aft end of the ship, four small ventilator cowls, and then the bridge detail to build next. A lot of this work should probably need to wait until next week. Still waiting for the PE parts for the funnel details. I'm also going to add support guy wires to the funnels, but will wait on that until I get the PE parts in place. Having a great time with this still!


- 106 replies
-
- 5
-
-
- digital navy
- v108
- (and 3 more)
-
I'll certainly post an update if the order arrives. I tried to see if I could order from GPM, but I don't think they're shipping to the US either – I just got stuck in a loop during the shipping address stage when I tried to process a small order.
- 106 replies
-
- 1
-
-
- digital navy
- v108
- (and 3 more)
-
I went ahead and ordered the USS Bagley and the two laser-cut sets that go with it from Orlik. At least the USA was still in the list of countries in the ship-to section of the online order form. We'll see if they ship it or if they cancel it. In any case, it's back to my current projects!
- 106 replies
-
- 5
-
-
- digital navy
- v108
- (and 3 more)
-
Thanks all for the ideas. I went ahead and bought some PE parts in 1/200 scale off of Ebay. We'll see how well they work. It's basically just railings and handholds. Don't know if I'll use them or not. Chris, I'm not sure about the Halinski kits, but I've been kind of eyeing some of the kits from the Ukrainian publisher Avangard. Do you know anything about them? The have the destroyers USS Farragut and USS Bagley (of classes of the same name), and the Gleaves-class destroyer USS Aaron Ward. Plus, I'm kind of intrigued by some of those Japanese Imperial Navy destroyers. There seem to be a few accessory sets available for these kits as well. I'm just not sure of the best place to buy their products.
- 106 replies
-
- 2
-
-
- digital navy
- v108
- (and 3 more)
-
I'm eyeing one of those Pinas cross section kits...
-
Thanks Phil! I ended up taking a few days off of work, so I've been able to spend some time with my projects. I'm shifting my attention between projects and it was time to work a little on the V108 . I started working a little on the bridge assembly, and you can see some of it in the first pic below. I decided not to mess with opening up the windows. I think it actually looks better to just leave them printed black, like all the portholes. Anyway, I don't think I could make them look right if I tried to make them clear windows. I also decided to build the pedestals for the ship's 3.5" guns. I also went ahead and mounted them on the deck, since the alternative was to keep them in my parts box and risk damaging or losing them. I also finished making all the skylights and mounting them. After that, I decided to tackle the big ventilator cowling that will fit between the stacks. That assembly went okay. It wasn't as hard as I thought it might be. Kind of wondering what to do about the inside of the cowling though. Leave it white? Or paint it and then what color? I don't know if I mentioned this before, but I'm generally not a Steel Navy modelers anymore. But, building this ship in paper has been a lo of fun and been very rewarding so far. I'd definitely consider doing another build in the future. Unfortunately, the subject and "kit" I find most intriguing, is the Fletcher-class destroyer that used to be published by Digital Navy, like the V108. Unfortunately, that website and its products have vanished from the Internet. 🫤 Well, I'll think about that after I get this one finished. Still a ways to go...


- 106 replies
-
- 7
-
-
- digital navy
- v108
- (and 3 more)
-
Thanks Druxey. We'll see if it stays looking good, and how long it takes me to get this project wrapped up... wish me luck!
-
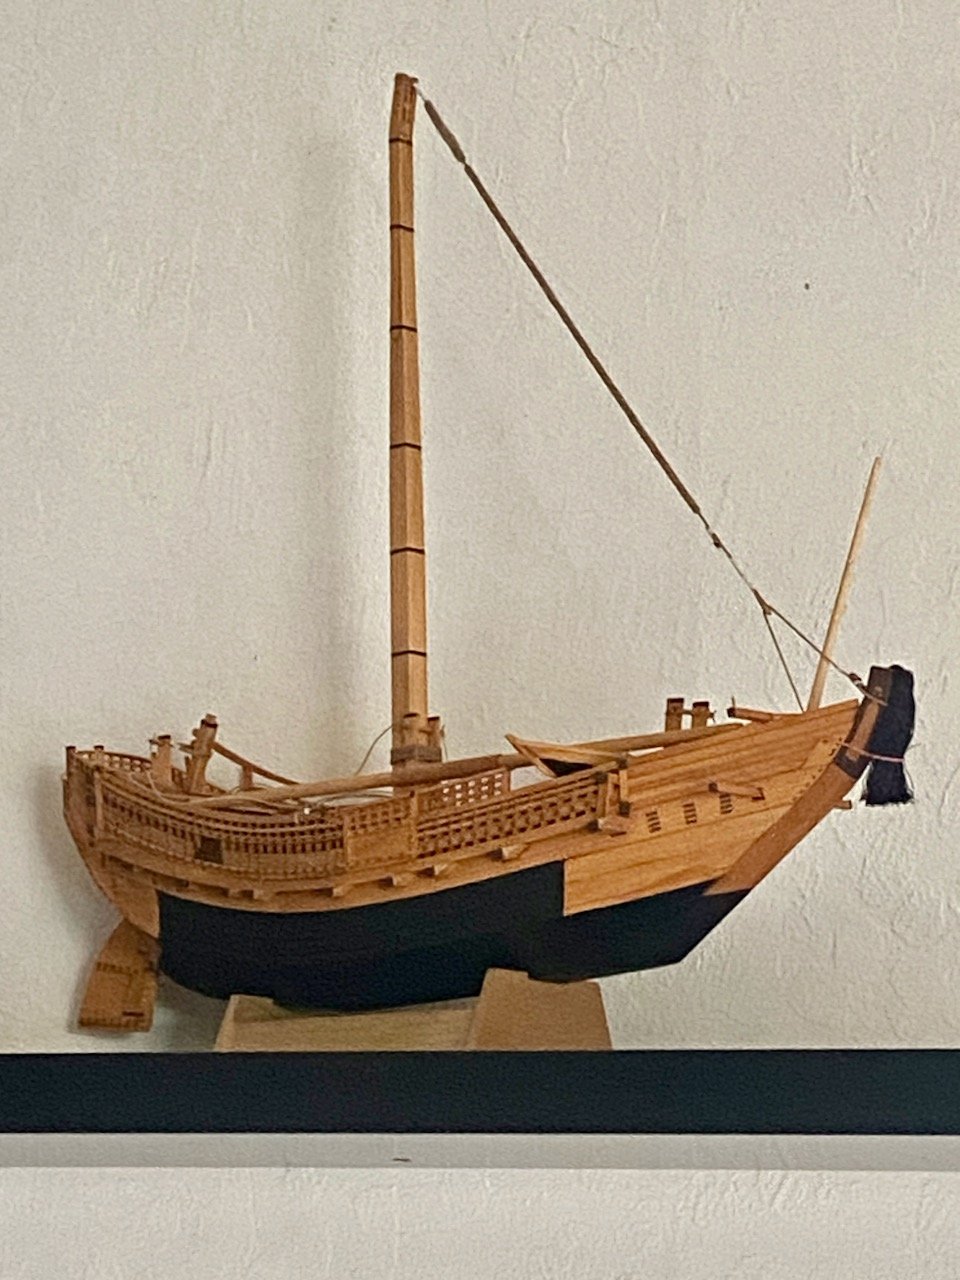
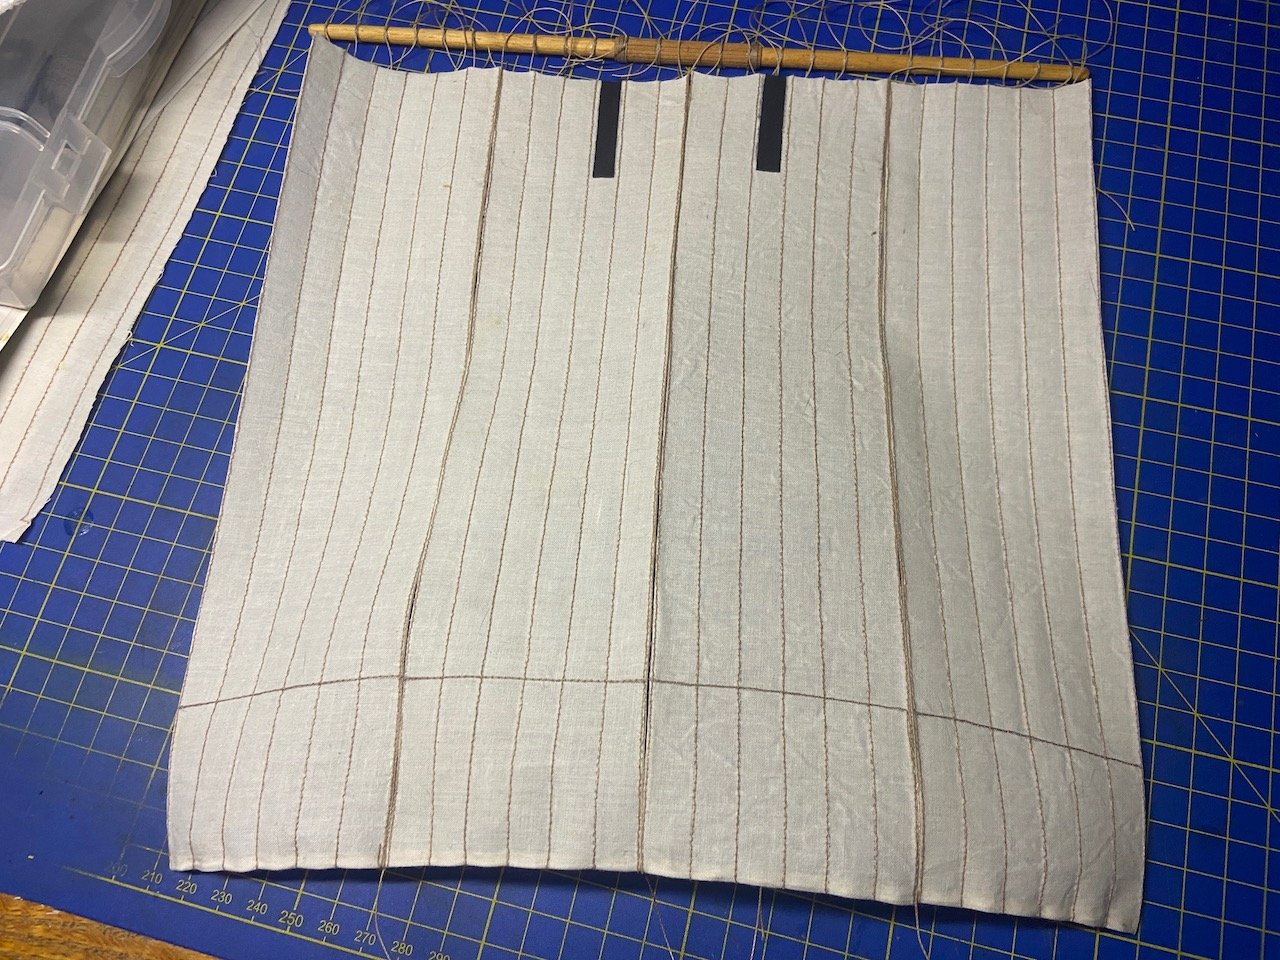
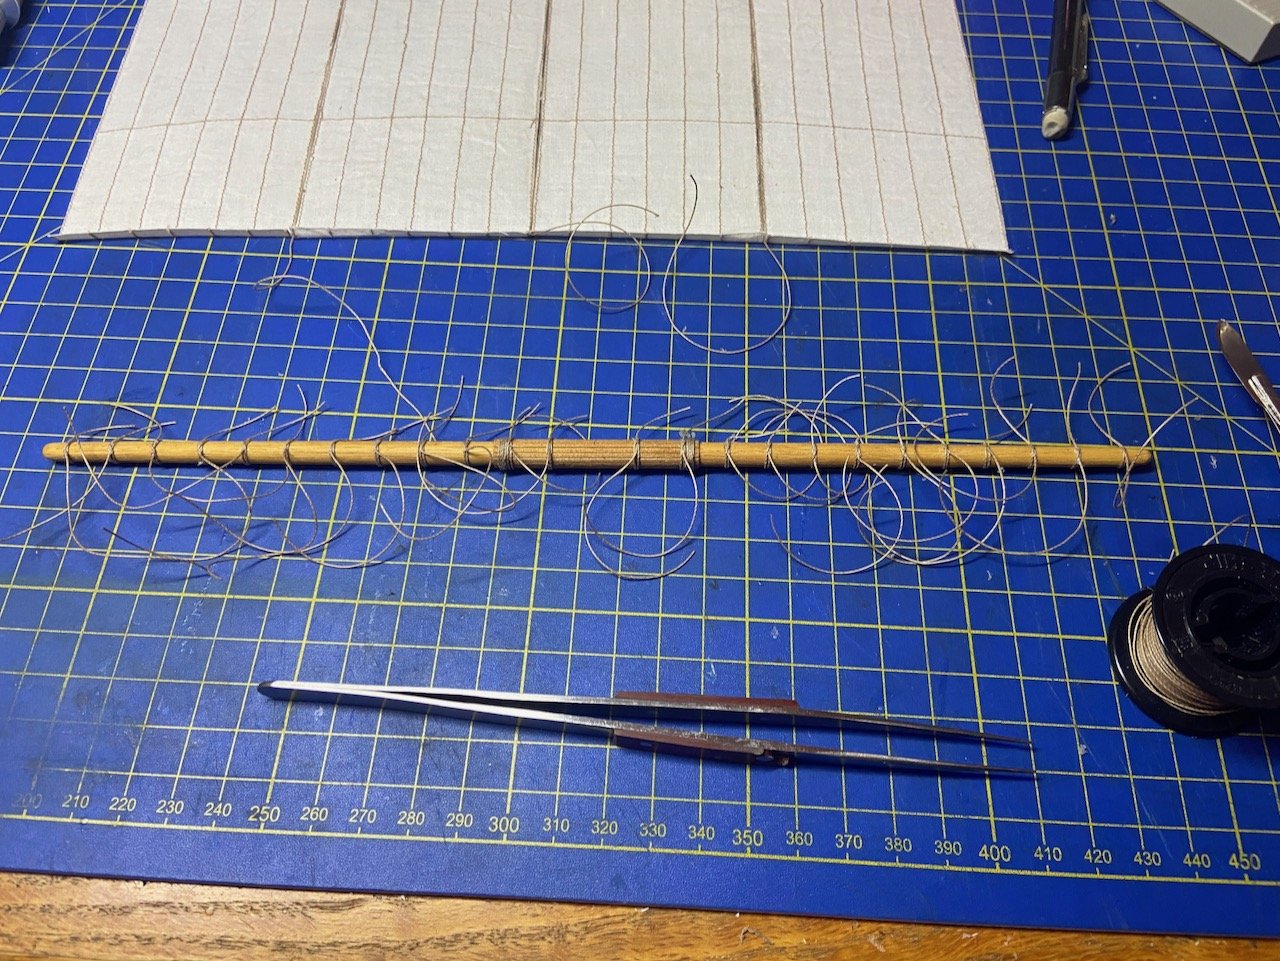
Since my last post, I glued rigging line to one edge of each the large panels, so that one piece of line would pass between each adjacent pair of sail panels, using Aleene’s Tacky Glue. There is a feature on kitamaebune that I didn’t is used on my previous higaki kaisen model. This is a marking on the main sail that identifies the owner of the ship. There are probably some known markings of famous Kitamaebune owners, but I just made up something that’s very simple, just black rectangles on the third cloth out from the centerline of the sail. I painted these using some artist’s acrylic that I use mostly for paper models. While paint and glue were drying on the sail, I decided to do the pre-rigging of the lines on the yard. For this, I simply followed the kit instructions and used the kit sail to get the proper spacing. The seams on my sails are actually slightly wider apart, but when attached to these lines, it should only work toward my attempt to make the sails look like Japanese-style sails. The knots on the lines on the yard are really just clove hitches. I'm used to tying these on ratlines, but on a thick yard, I had a hard time. The first 1/4 of them took me a long time, as I was using my fat fingers and also had a hard time seeing the ends of the lines. I finally got smart (or less stupid?) and broke out the headband magnifiers and rigging tweezers. The second quarter went better, but I needed a break. After that, the second half took me no time at all! The sail panels were all glued together here, and a length of coated wire was glued into the seam I made at the foot of the sail. In the photo below, you can see how it's giving some shape to the sail. Next, I need to attach the sail to the yard, then I'll need to cut small lengths of line to simulate ties that hold the panels together. I don't know that this will really have an accurate look, but I've seen a lot of Japanese museum models that have a similar look, so I think I'll be satisfied enough with it. There's a very small amount of running rigging to add after this, so I think it's safe to say I'm getting very near the end.

-
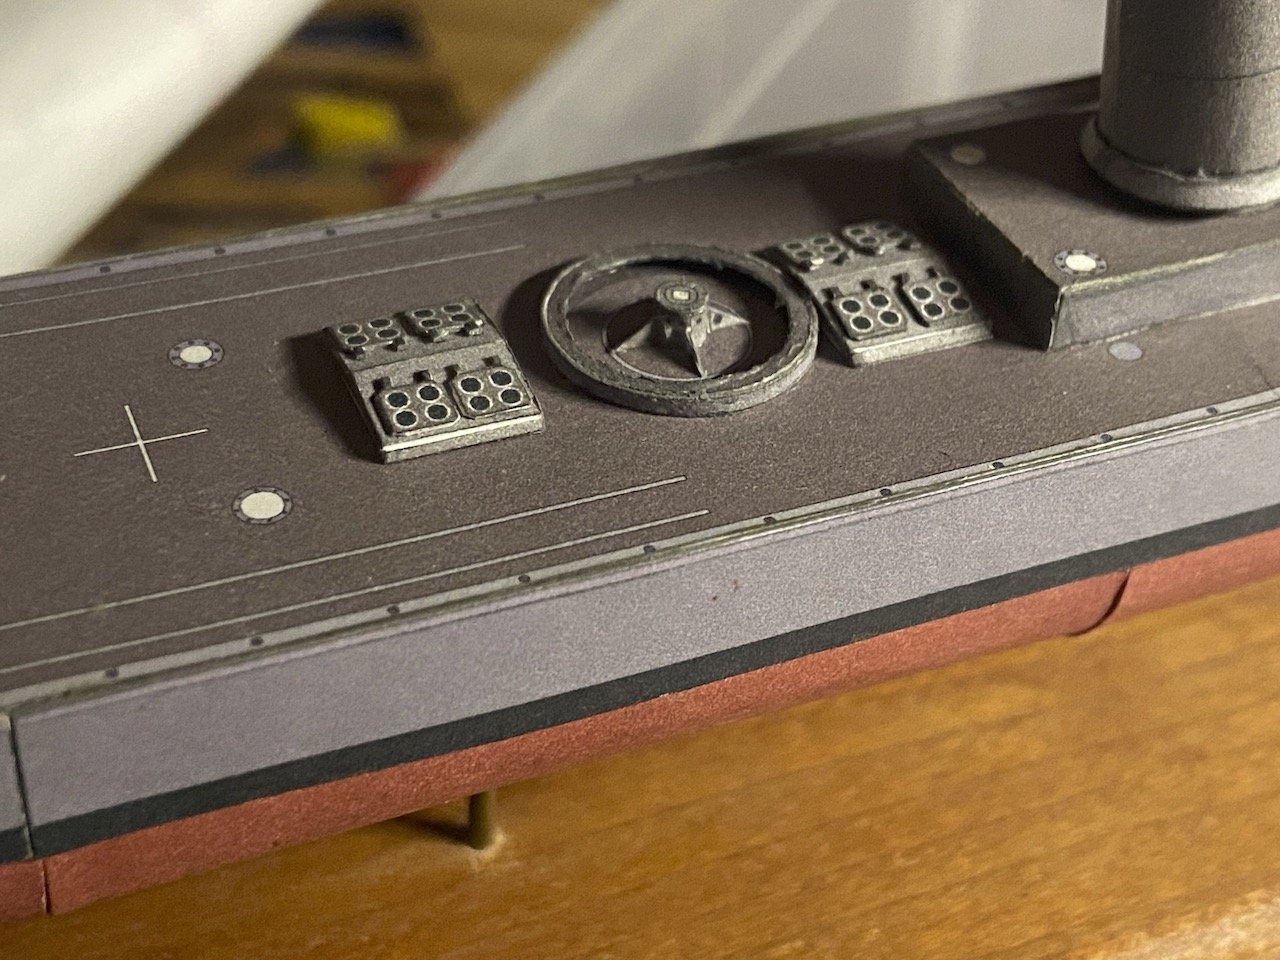
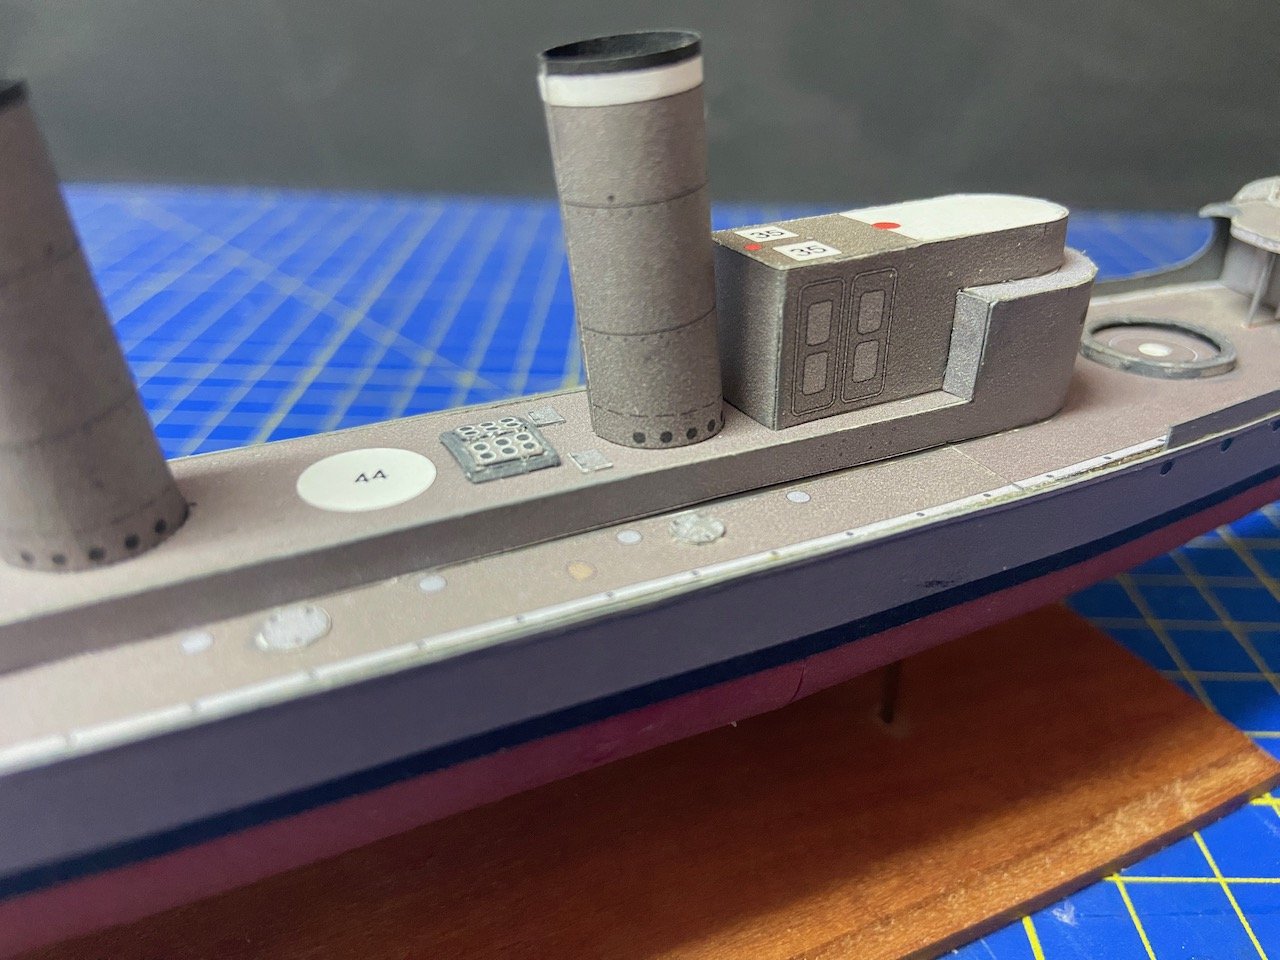
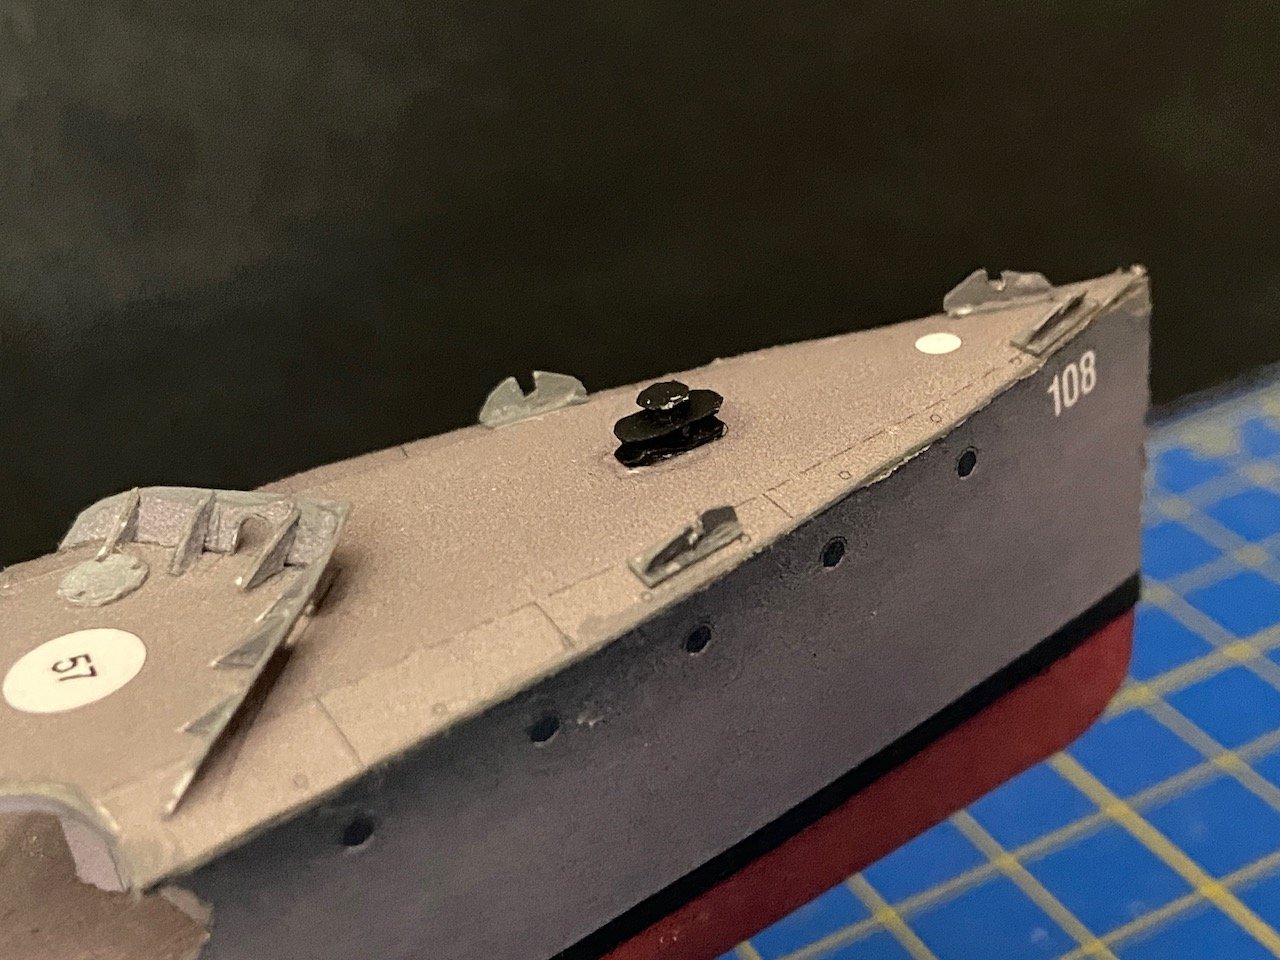
I had a little more time to work on my V108 yesterday. It doesn't really look much different, but I managed to add those cowlings on the af deck, and added the next assembly to the bridge superstructure. And, while I'd added the rudder last time, I managed to knock it off, so I'm leaving it off until a later stage. Chris, in his tutorial build log, mentions not knowing what these things are for. I don't know either, but I'm wondering if they could be smoke generators? Or, maybe they're just exhaust vents for blowing the hot air out of the engine spaces? Added to the bridge superstructure and added one of the skylight hatches. For mounting the superstructure assembly, I followed Chris's example of adding some guide strips to the deck. This helps align the parts and gives the glue a good surface and makes the added assembly pretty solid. And, finally, I added the little bollard or capstan assembly on the forecastle. There were too many little rings for me after making other parts, so I just cut some thin slices from a styrene rod instead, and painted it all black. These close-up photos make the model look so much worse than it does in real life. Or maybe my eyes are so bad, I can't see the missing paint, etc., except in close-up photos. Question: Not that I'm going to add any, but should there be some kind of screen inside the stacks? Right now, you can look down inside and see the big support piece there. I painted it black, so it's harder to see, but if there were a screen, you probably couldn't see any junk inside, so I'm just wondering.
- 106 replies
-
- 9
-
-
- digital navy
- v108
- (and 3 more)
-
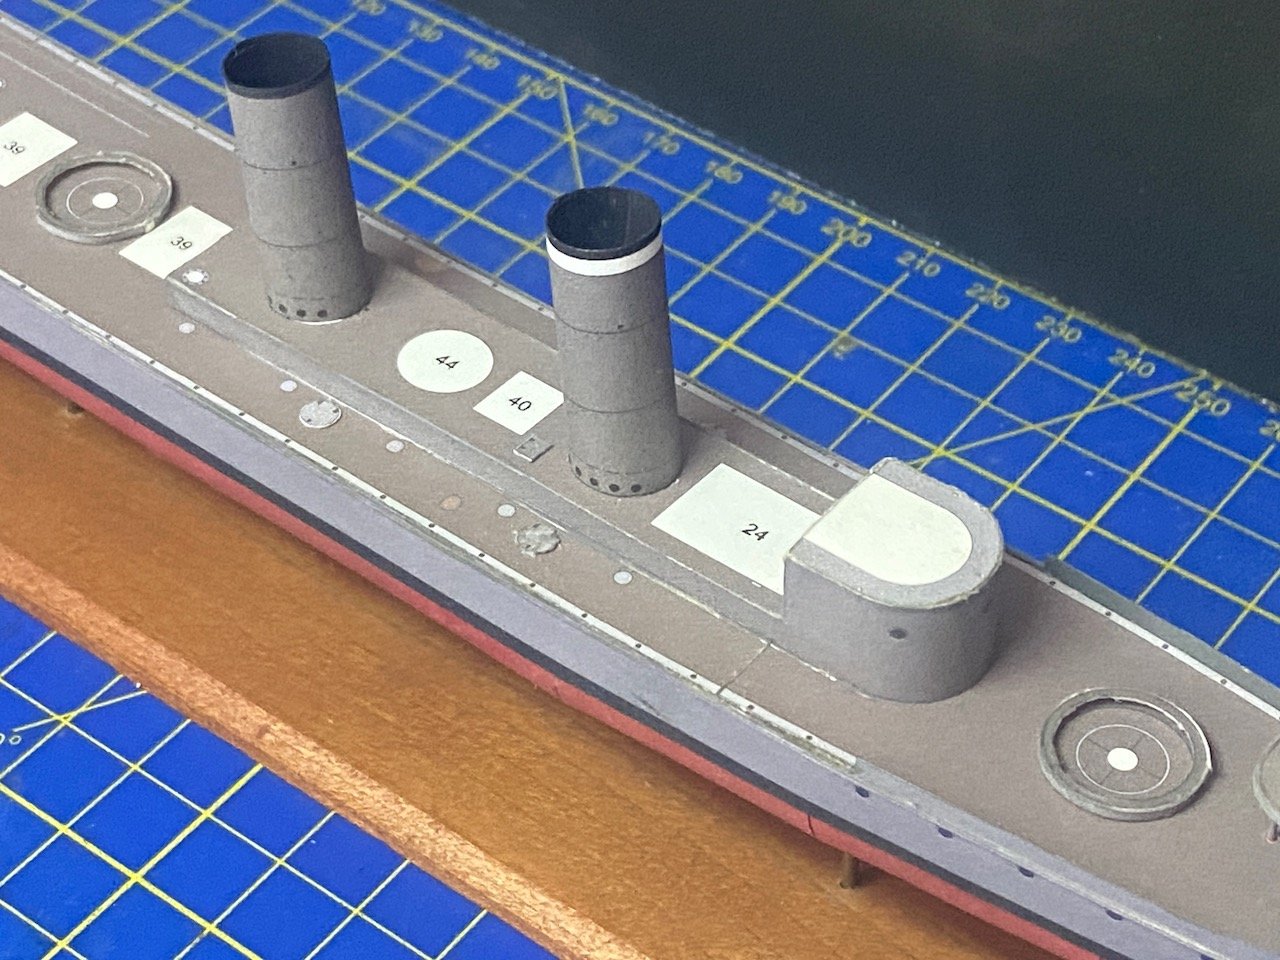
Since I had the time, I didn't want to pause the build right after a difficult session. So, I figured I'd make the funnels and the tracks for the torpedo launchers. For the torpedo tracks, I built them before I looked again at Chris's build log and his idea for making construction easier. Mine turned out okay, but I just had to glue the outer edge of the ring on, little by little, to keep it straight. The funnels are nice, large parts, changing the look of the slowly evolving model. I painted the interiors black, but you can still see he white areas of the superstructure. I'll finish that painting after the funnels are glued into place. For now, the torpedo launcher tracks and the funnels are only dry fit I still need to clean-up and paint the insides of the torpedo launcher tracks, but then I think I'll glue them into position. I think I'll leave the funnels unmounted until I decide if I'm going to try to detail them any. For now, they're pretty safe like that, and they make the model look more like a ship.
- 106 replies
-
- 5
-
-
- digital navy
- v108
- (and 3 more)
-
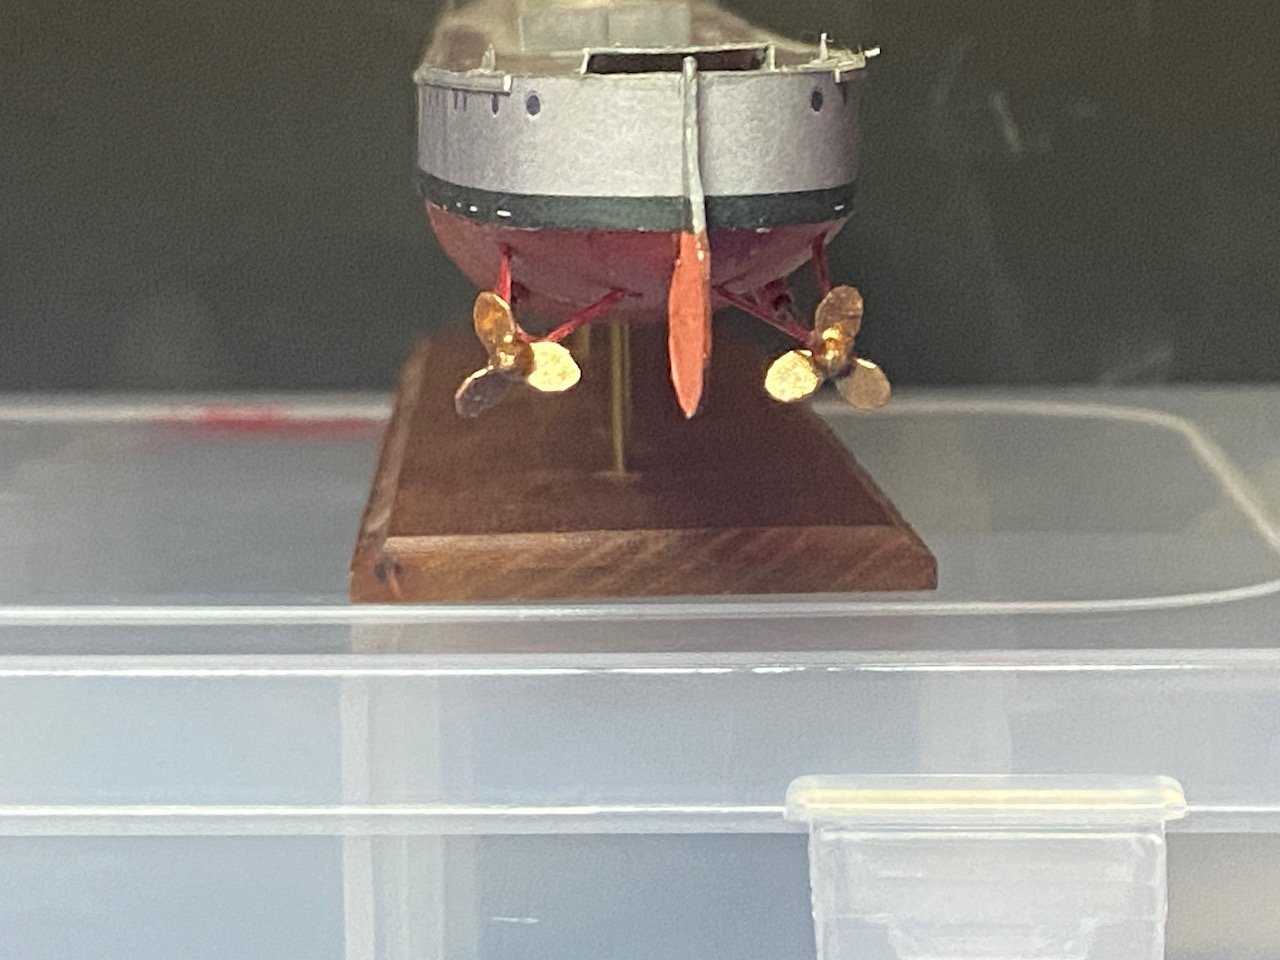
Thanks for the nice comments Richard, GrandpaPhil! Propellers and fairings... It's enough to make you want to stick to waterline models! 😀 But, now that these are done, I like the look, just not from TOO close!
- 106 replies
-
- 2
-
-
- digital navy
- v108
- (and 3 more)
-
Well, since Ages of Sail sells Vanguard Models products (and other those other European brands) and is in the US, that's still an option for US buyers, and no special paperwork is necessary. Pricing WILL need to be adjusted to cover the additional tariff cost, but as of this moment, it hasn't happened yet. There's been discussion about it, but I don't see anything happening before next week. Shipping to some countries though, is going to be tough. Canada requires the US sellers to collect the tariffs for them, and will bill the selling company. But, since this stuff is mostly products of Europe, there should be a way to ship that stuff to Canada without requiring tariffs anyway. But, it means a lot of paperwork.
-
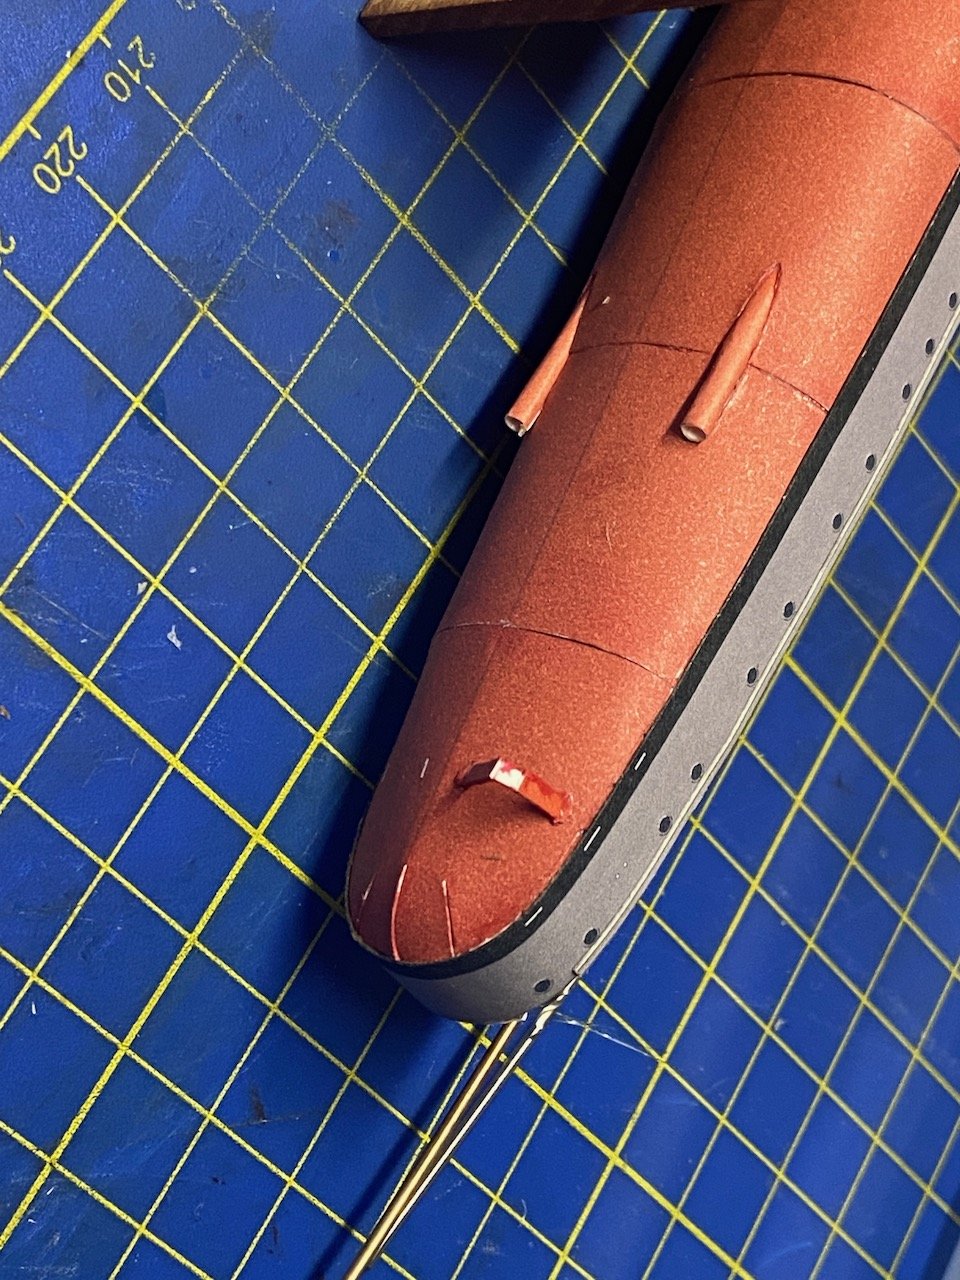
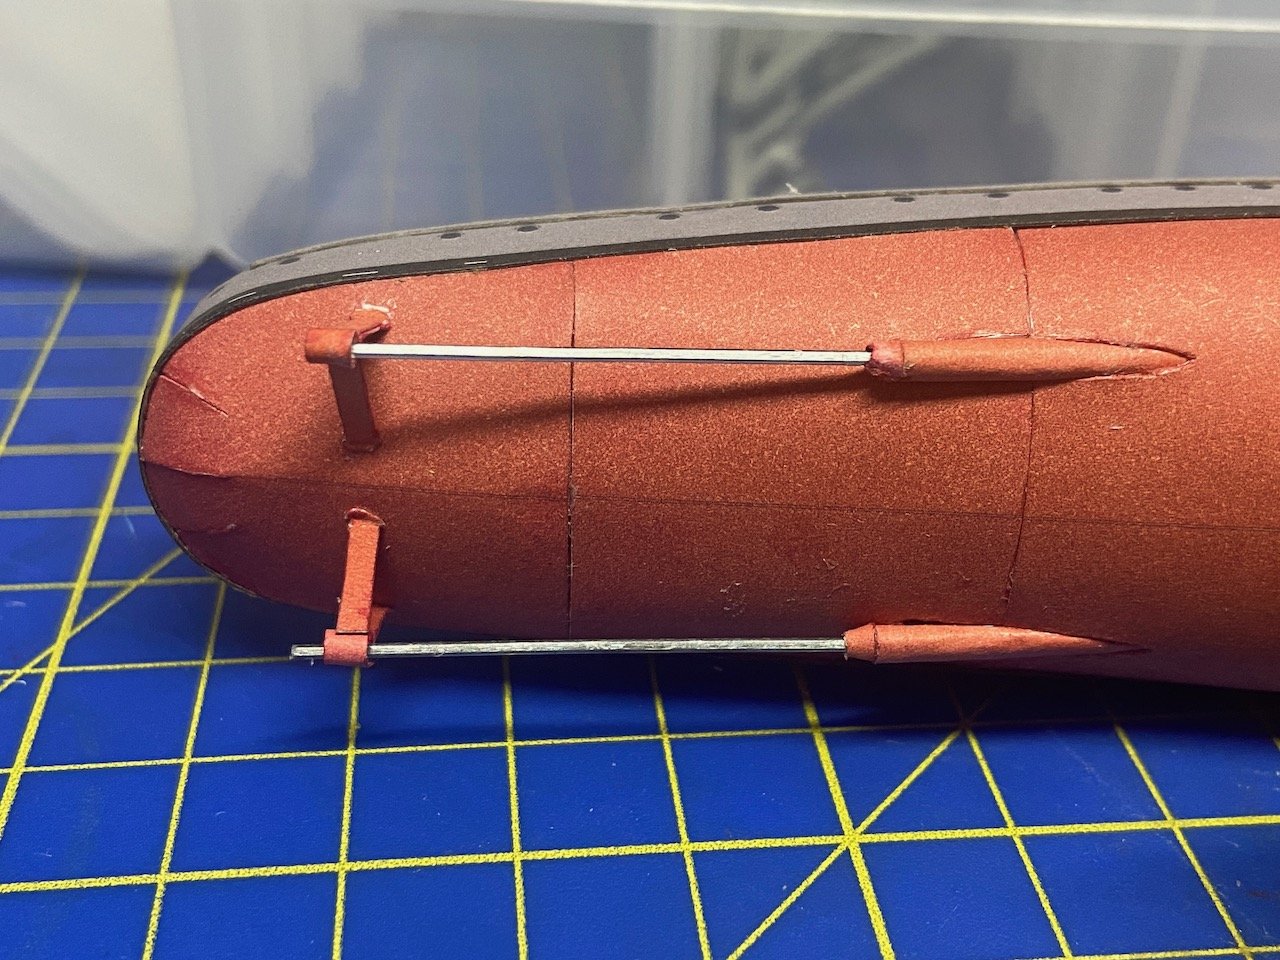
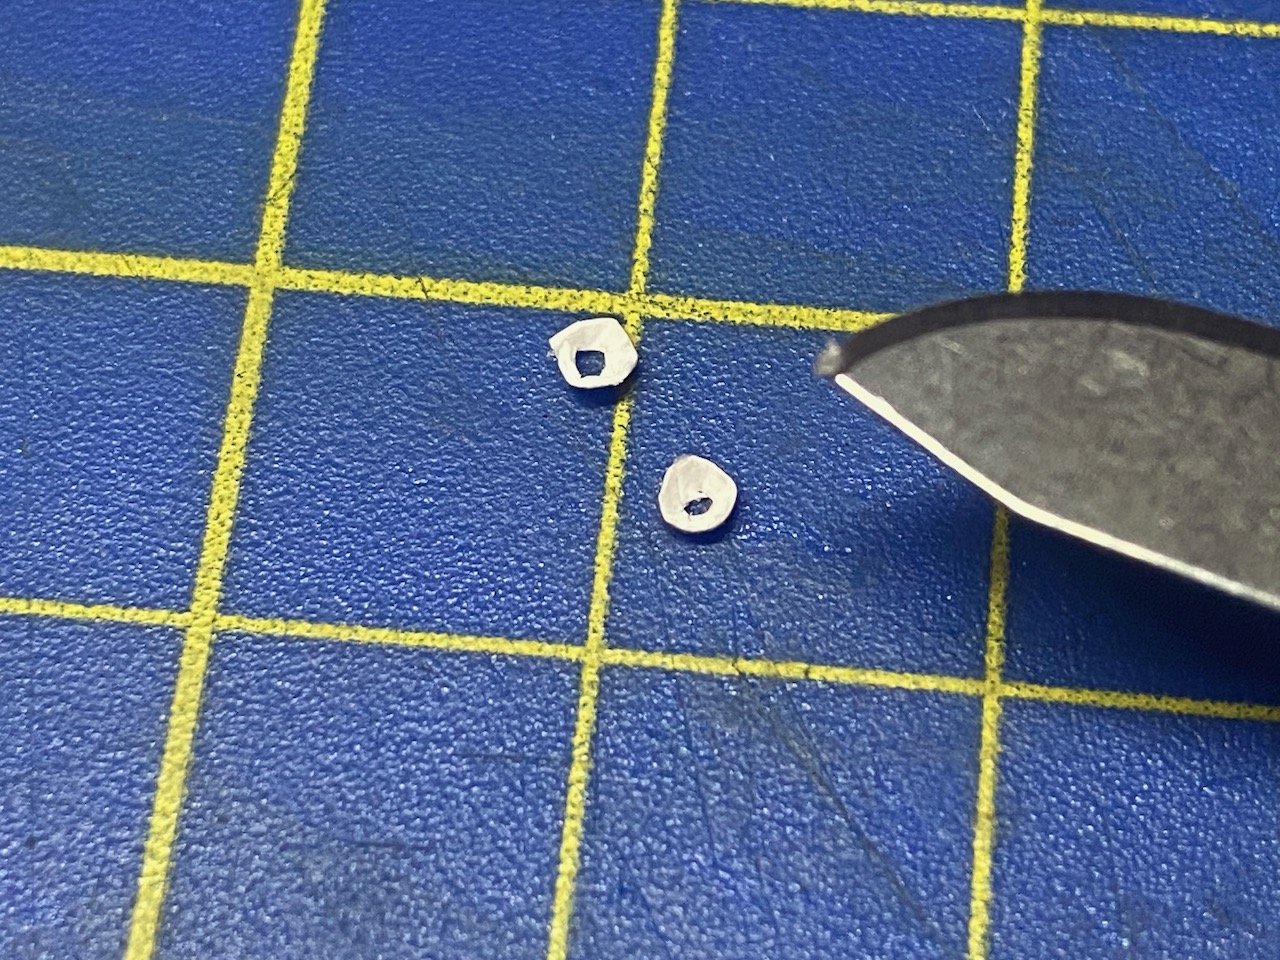
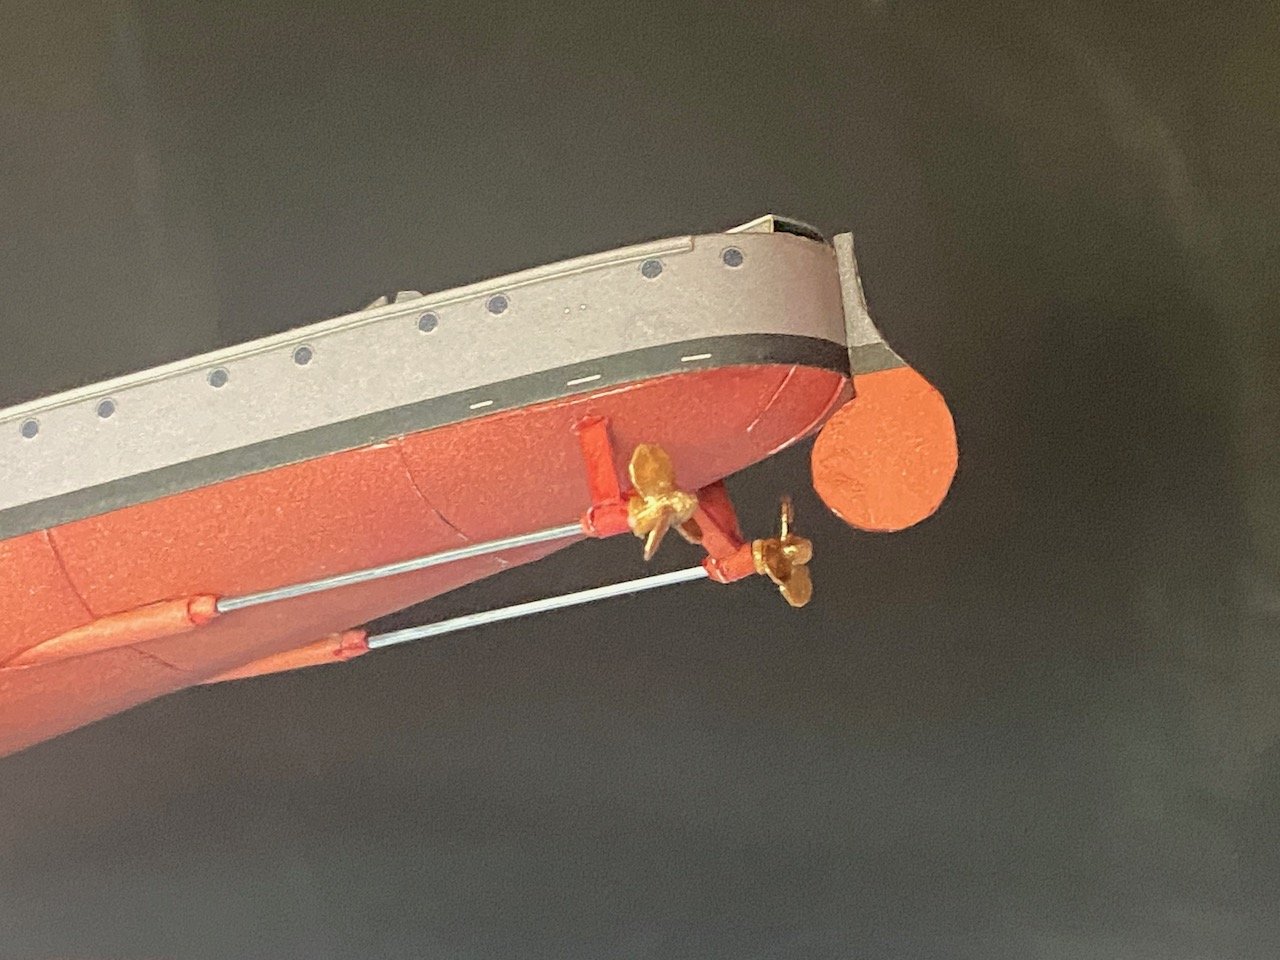
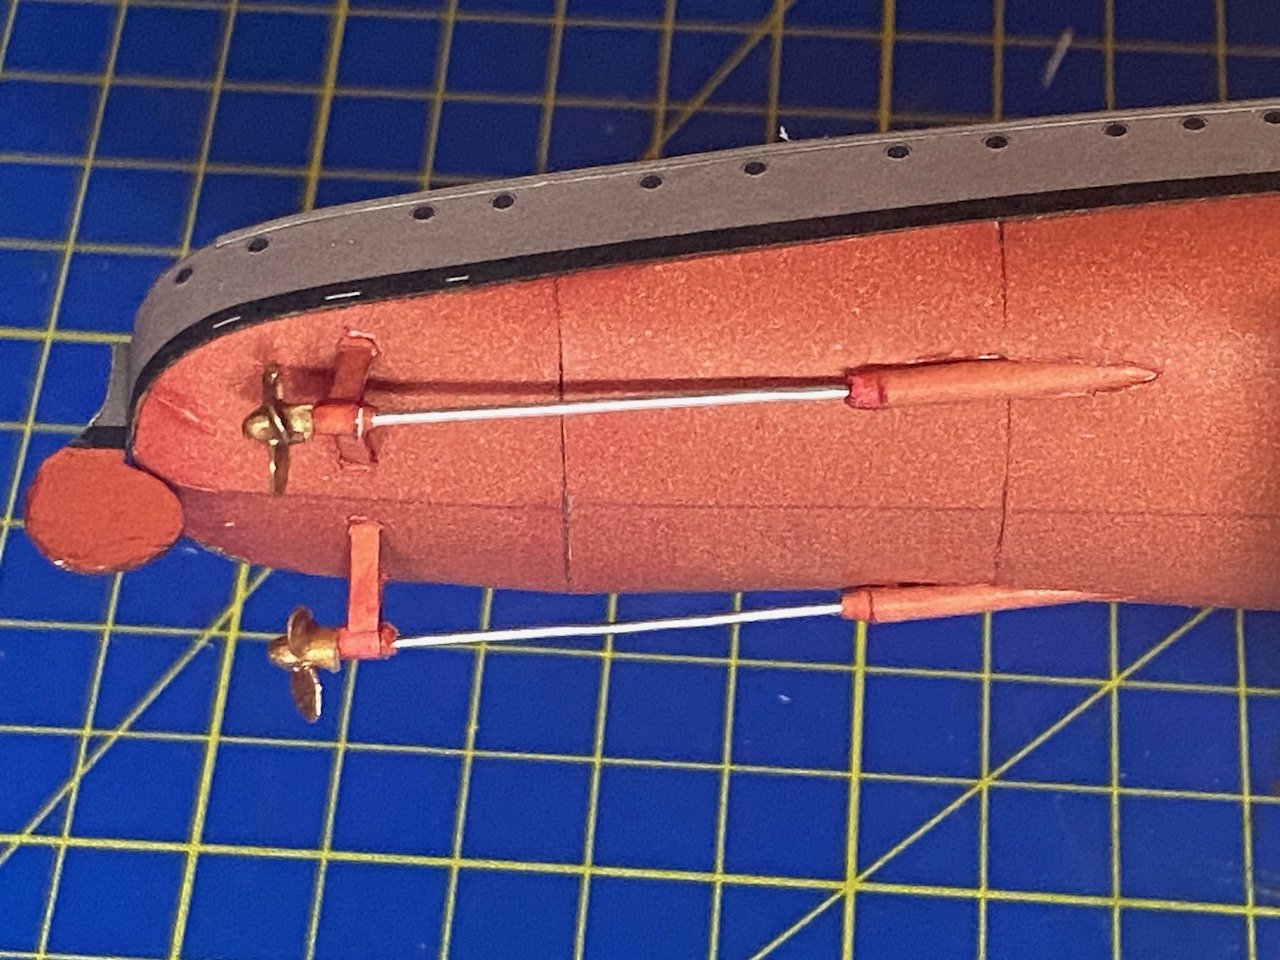
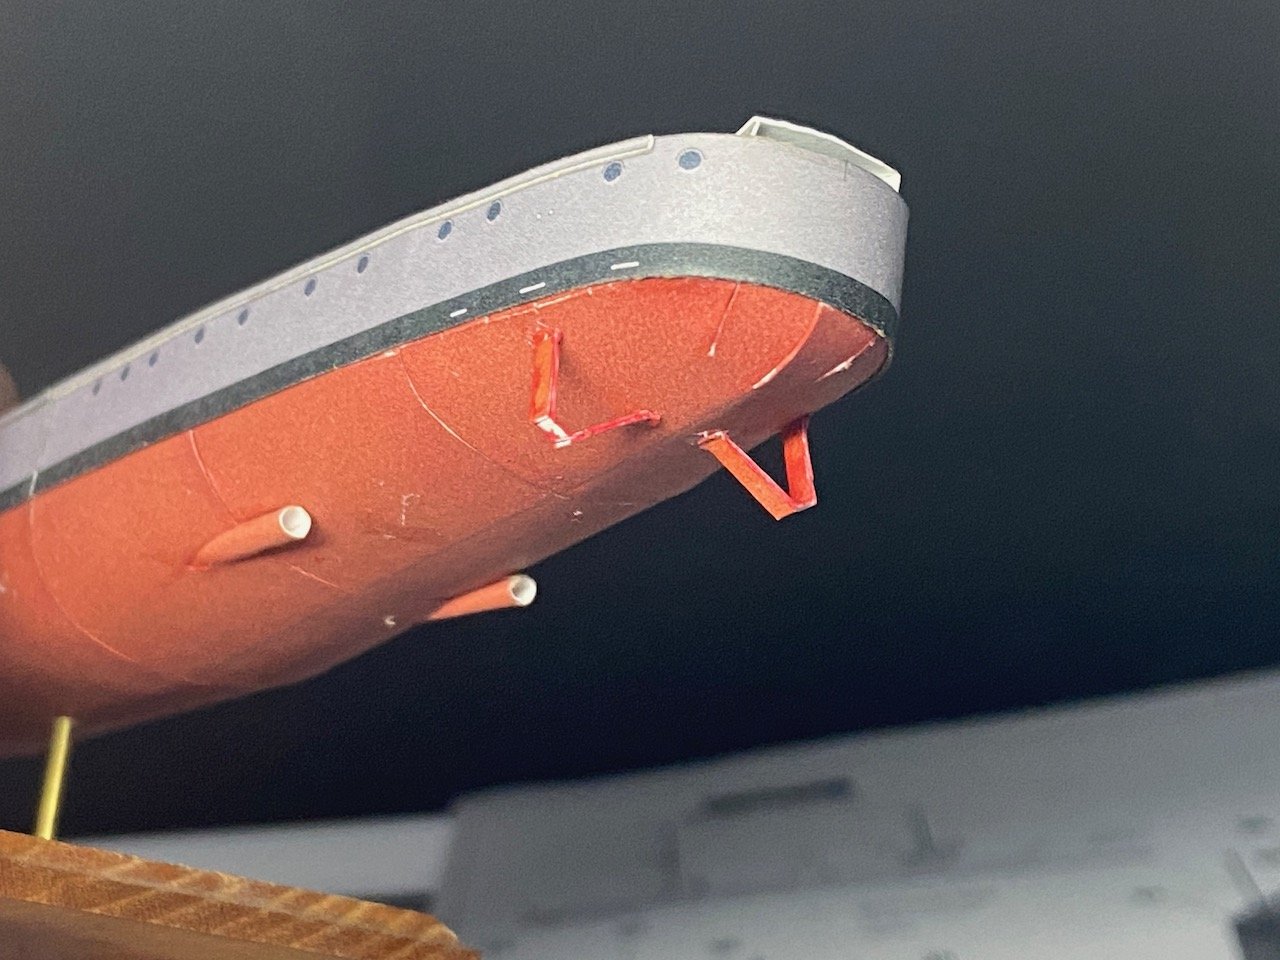
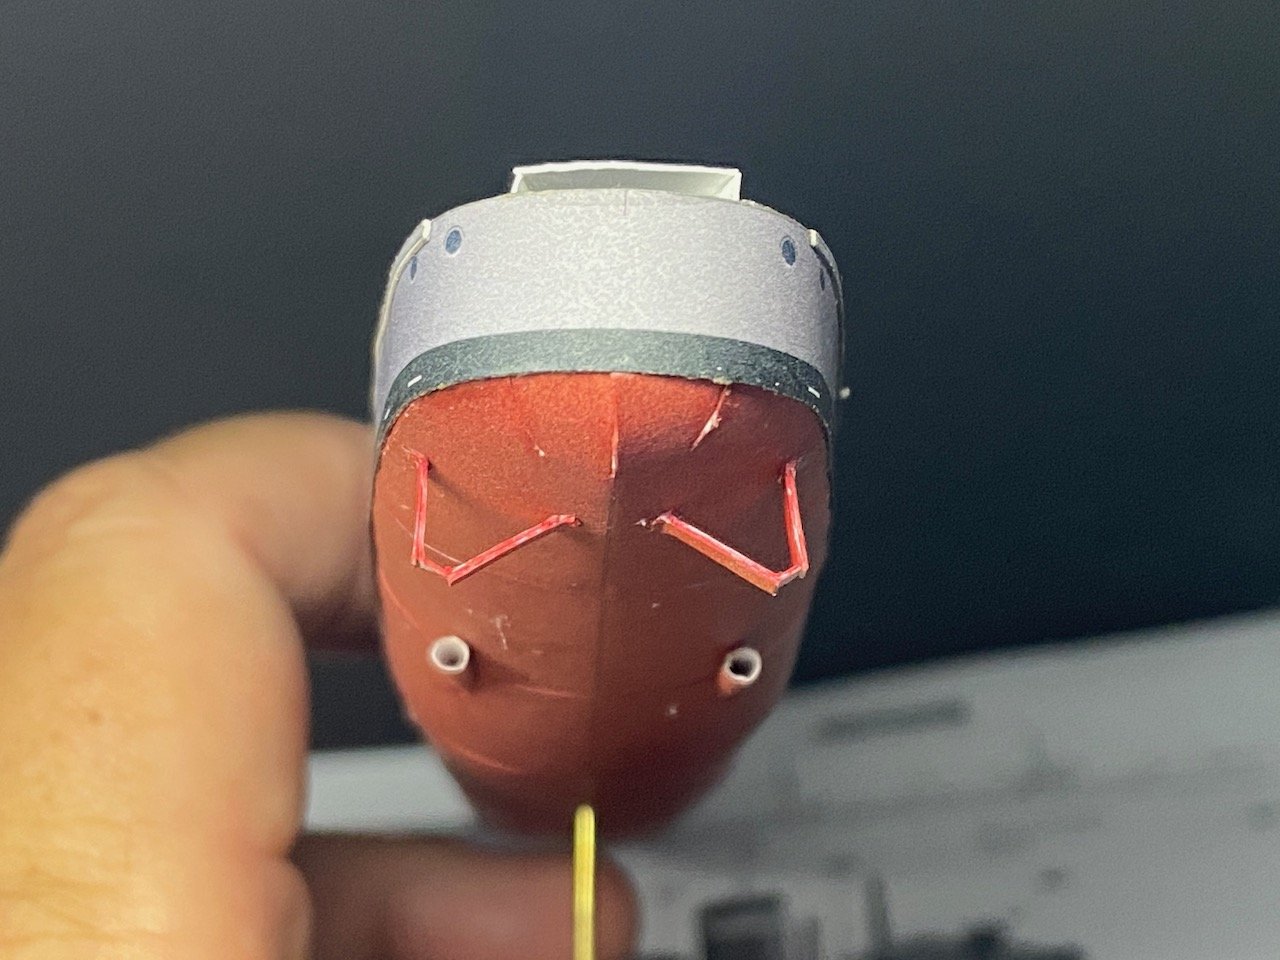
You know, sometimes modeling in paper makes a ship seem to progress so quickly. Then, there are those items which make you feel like you're doing eyeball surgery on bugs. Adding fairings that fit around the propeller shafts. I've had to remake parts about four times. Fortunately, I had printed extra parts sheets. I discovered that my propeller shafts were too big, so I went the next size down on the paper clips. The first shafts were about 1mm diameter and the new ones are 0.7mm. These tiny fairings wouldn't fit around the larger shafts, but the should fine with the new ones. Hopefully, I don't lose any more of these little parts, after it took so much effort to cut them out, roll them, and glue them up properly. The shape looks a little rough, but I'll bend them more nicely after the glue dries. I have to admit, I started wondering if I could just leave these things off. Would anybody notice? And... Finally done with the underwater portion of this build! That part of the ship doesn't look too bad now. Adds a lot of detail. But then, at this stage, anything will add a lot of detail. Still, this is the part that made my head hurt the most, and it's over. I do feel I spent way too much time stressing over this part. But, I also spent a lot of time on it today. I'll consider next steps. I'm considering adding the propeller guards next, but they kind of stick out from the hull and are pretty flimsy, so I'm wondering if I should wait on them and add some deck or superstructure details next...

- 106 replies
-
- 8
-
-
- digital navy
- v108
- (and 3 more)
-
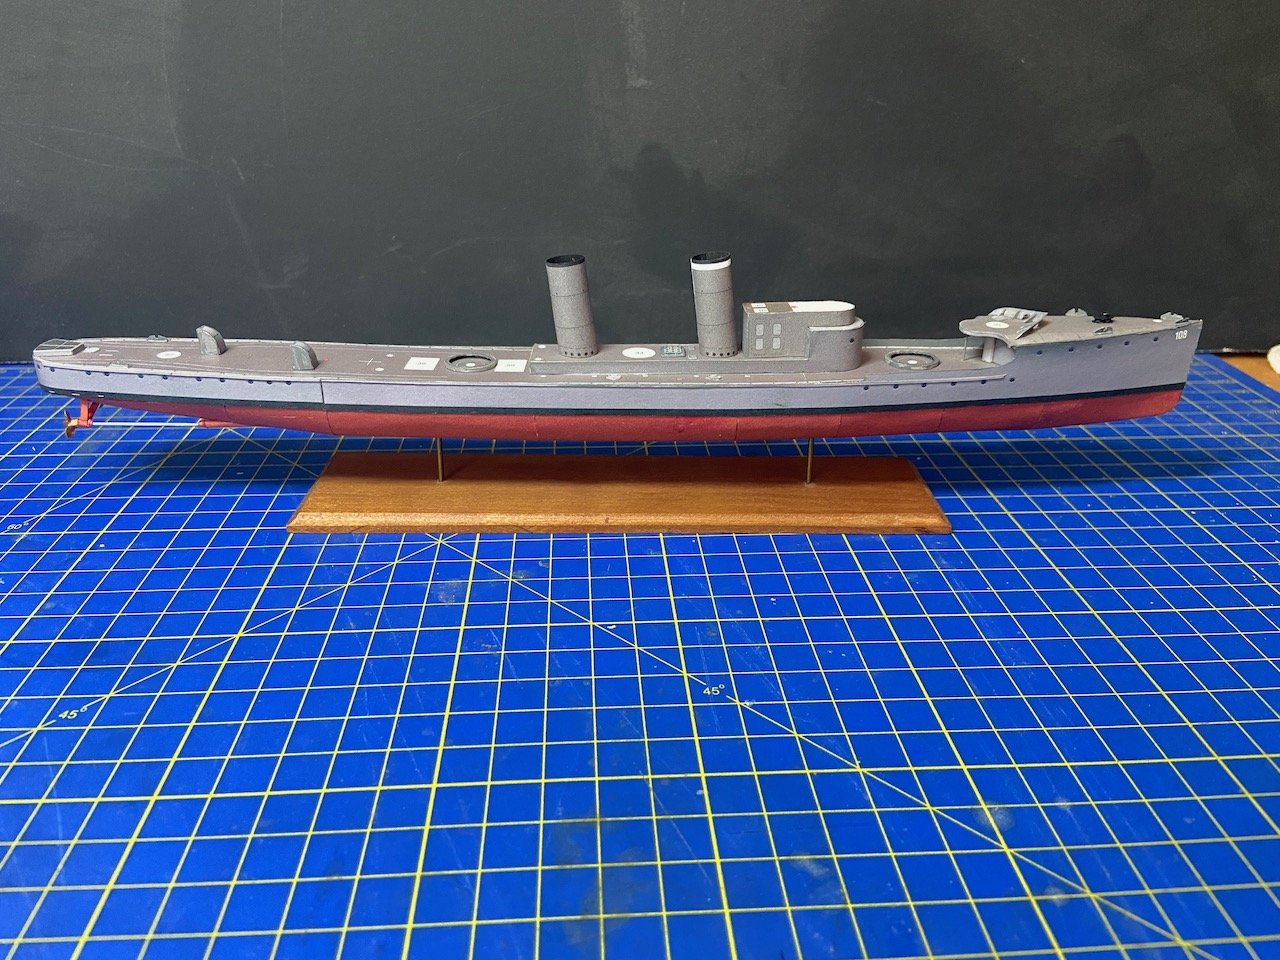
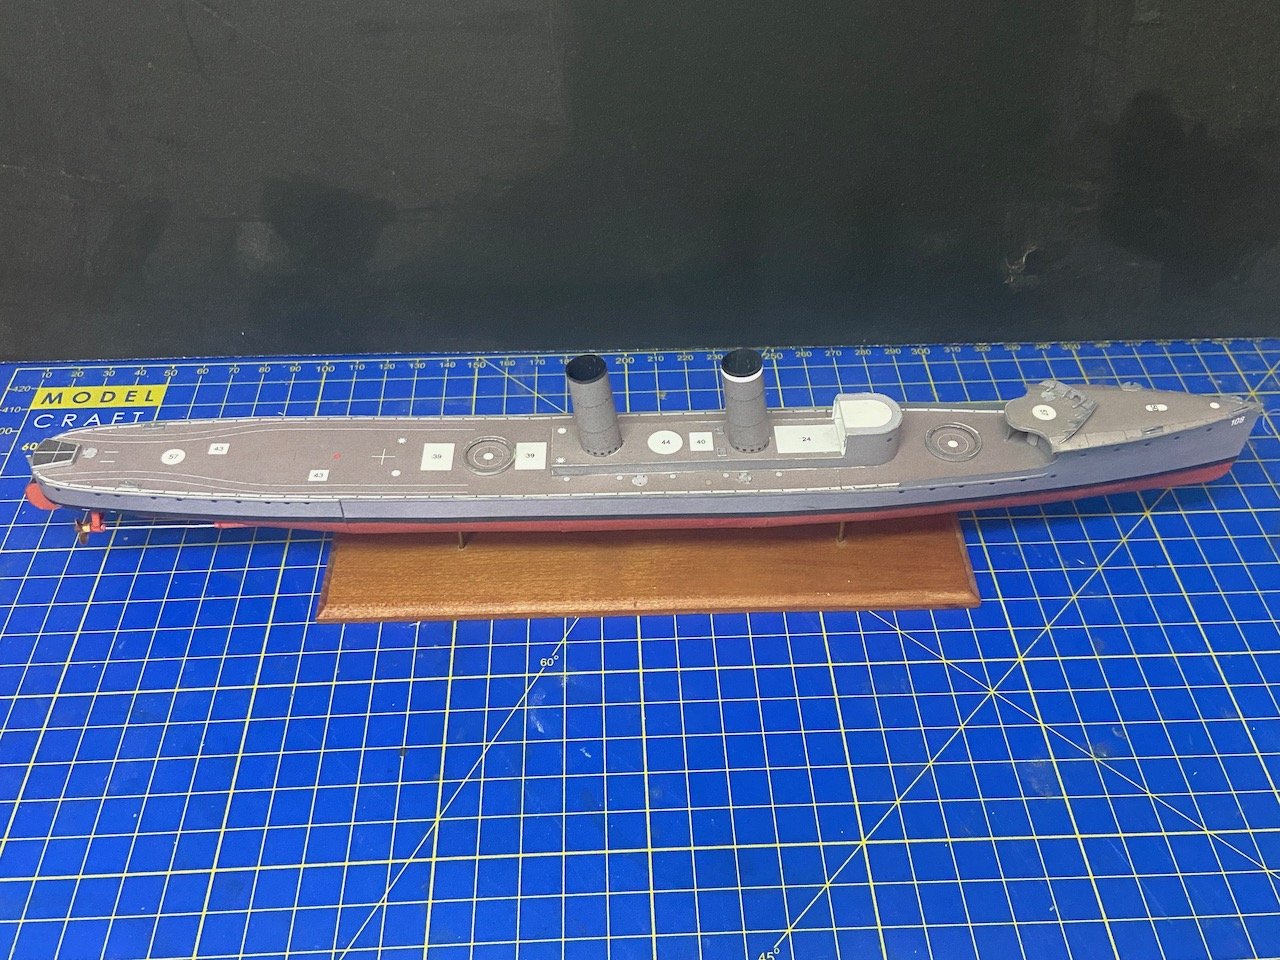
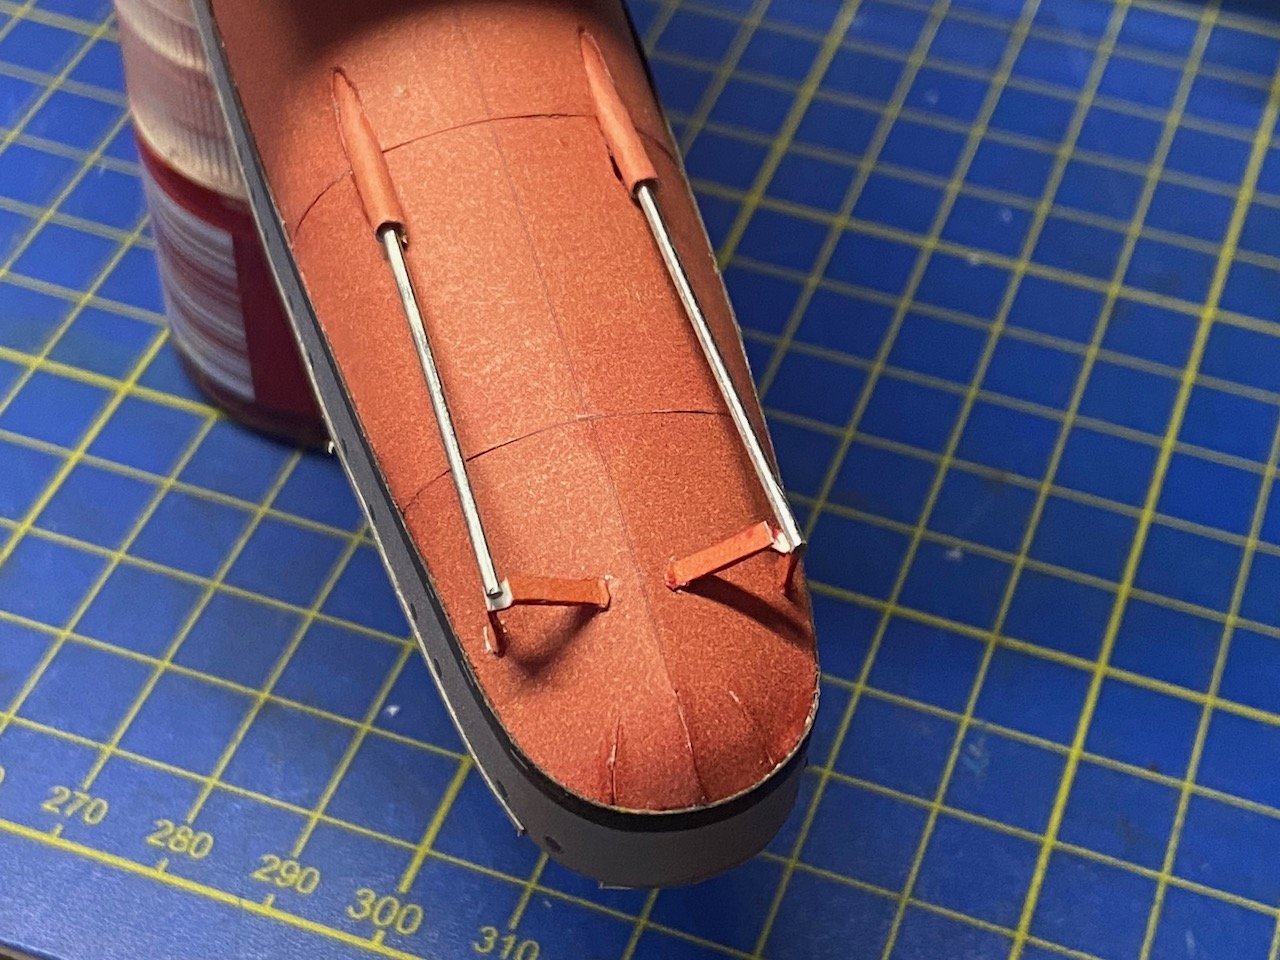
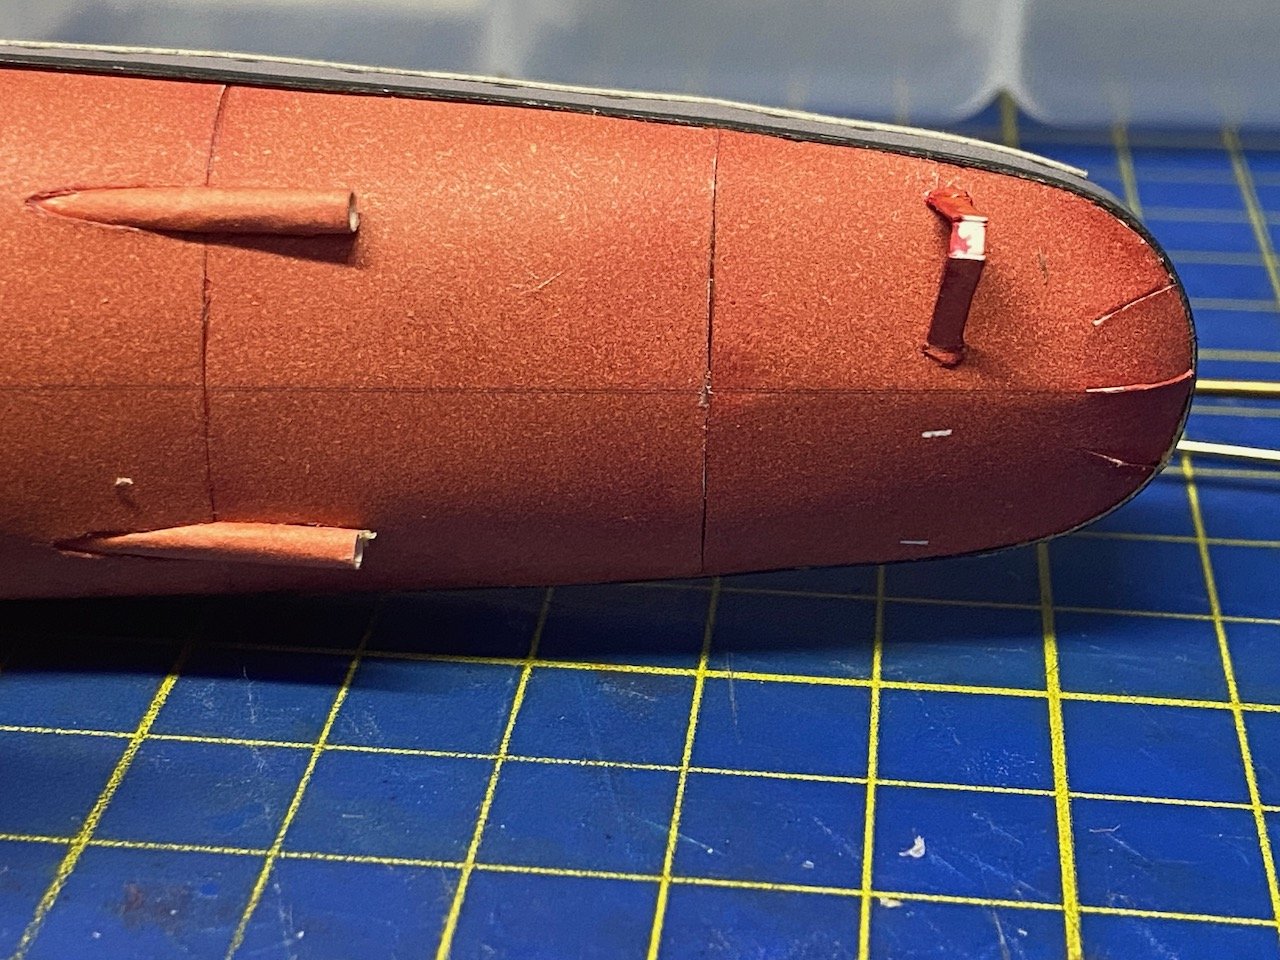
Inspired by Jan's (Amateur's) completed V108, and our recent ship modelers' gathering, where I brought my incomplete V108 to a new guy who is interested in both WWI era ships AND is "paper curious", I brought my V108 out of mothball. It's crazy that I started this 8 years ago... 😧 I'm waiting for a day off to work other projects in the works, but this one, I'm just taking a little spare time here and there to work on. The propeller shafts and struts kind of stopped me in the tracks, and I was reluctant to look at them again. But, I just put my head down and pushed forward. Managed to build the support struts, even though I found their construction particularly confusing. Did I build them correctly? I don't know, but I'm pretty sure what I have will work. For the propeller shafts, I wanted some steel rod, but couldn't find any in my stash. I ended up improvising, as I don't want to order parts and wait for them to show up. I found a large. paper clip, straightened it out as best I could, and cut it to size. I think it works pretty well. These aren't glued into place yet. I need to make the various fairings for the shafts first. I'll try to take less than another 8 years to post progress on this...

- 106 replies
-
- 7
-
-
- digital navy
- v108
- (and 3 more)
-
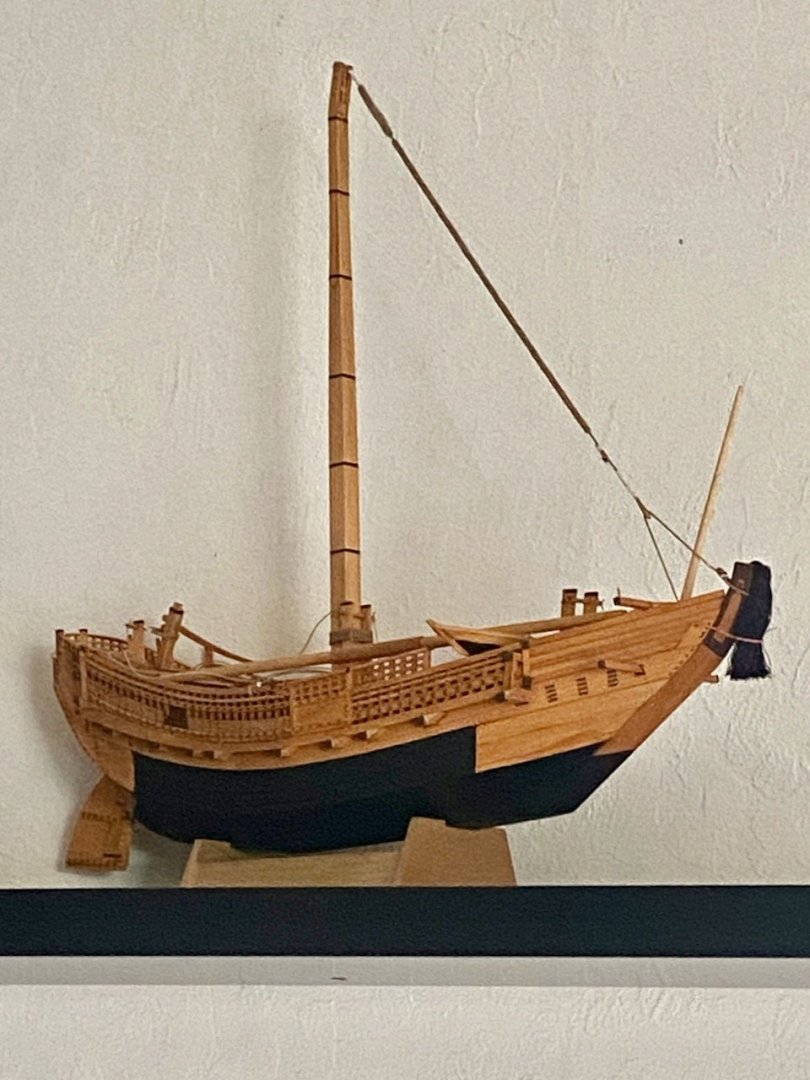
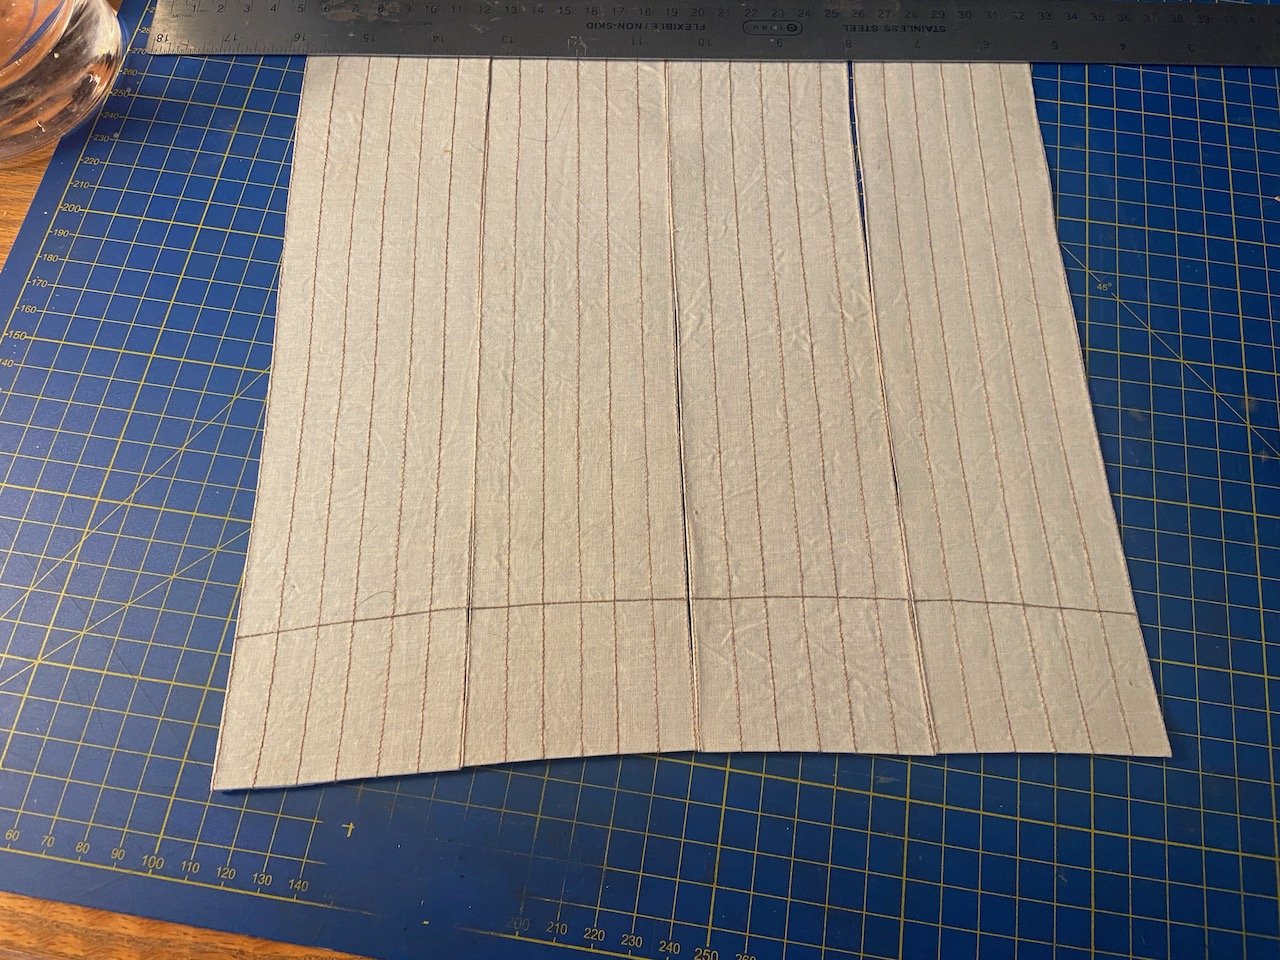
You know, when I put aside a project, I'm often amazed when I look at it later and realize how long it's been since I'd worked on it last. Kitamaebune... nearly 4 years! Fortunately, with some opportunities to display a few ship models this year, I was reminded of my past displays in San Francisco's Japan Center. So, a couple weeks ago, I contacted the bank that owns the room with its display window, and asked about the possibility of setting up my Japanese watercraft display again. About a week later, I got a positive response, and am now on schedule to set up my model display from October 21 through October 27. That gives me some time to clean-up and rebuild my display materials. So, I took my Kitamaebune model to the most recent local ship model meeting to get me thinking about it again, with the hope that I'll have it ready for the Janpantown display, and maybe another model display about a week before that. I still hadn't figured out how I'm going to end up making the sails! Back and forth... back and forth... Clearly I just have to do something. I rethought a couple ideas, and then I dug through the materials I had made before, now about 4 years ago. Realizing that I really just need to try SOMETHING, even if I'm not thrilled with the results, I found some sail sections I'd made before. I don't even remember when I did this. As the work pretty well fit my current line of thinking, I decided to start with these. I broke out the ironing board and iron and flattened out the sail work. The cloth is stiff, so clearly stuff I treated with Terial Magic. Also, the outer-most stitching I'd glued with Aleene's Tacky Glue to hold the stitches. Having found a test sail panel I'd worked with before, I figured I could cut the cloth very close to the glued stitching, and you can see how this worked below. The bottoms of the panels are cut and folded over now, so I should be able to insert some wire in the foot to help give is some shape. As you can see in the photo below, I used an idea from the Takasebune's sail, creating the appearance of the sail hanging a bit loosely between the seams, where the sail will be tied to the yard arm. The sail panel on the right has been trimmed, the panel on the left is yet to be done. Let's see if I can continue the work without changing course again or shelving the project!

-
A wonderful finish Jan! It's funny, because I started my V-108 a long time ago and just a couple weeks ago, took a look at the unfinished model on the shelf (which is setting along side numerous other unfinished builds) and thought I should finish mine too. So, your recent posts are very timely! Only problem with mine (or maybe I should say, one of the problems with mine) is that I need to reprint my parts sheets and I'd switched to cheaper inks, so the color is way off. I think I'm going to have to buy the expensive OEM inks, just to get the part colors to match up better, as I don't want to start over from scratch. Anyway, congratulations on another completed model!
- 64 replies
-
- 3
-
-
- v108
- digital navy
- (and 2 more)
-
Would be odd, since they copied his work.
-
As has been pointed out, Mold Shipways made the HMS Vanguard kit under license for a while, like they did with the Robert E. Lee kit. The MS Vanguard kit doesn't include the optional parts for HMS Elephant or Bellerophon. As Chris points out, the MS fittings may be different from the Amati ones as well. But, you can always buy Amati parts if you need any of them. Ages of Sail should have them.