catopower
-
Posts
1,900 -
Joined
-
Last visited
Content Type
Profiles
Forums
Gallery
Events
Everything posted by catopower
-
I agree that the Vanguard Models Sherbourne should be a great way to enter the hobby. And, as I DO have a connection with them 😉, I should mention that Ages of Sail, just down the coast from you is a Vanguard Models dealer. You'll find the prices, plus free domestic shipping (any order of $150 or more), and proximity of shipper should give you the best experience. Just sayin'! Welcome aboard, in any case Duane!
-
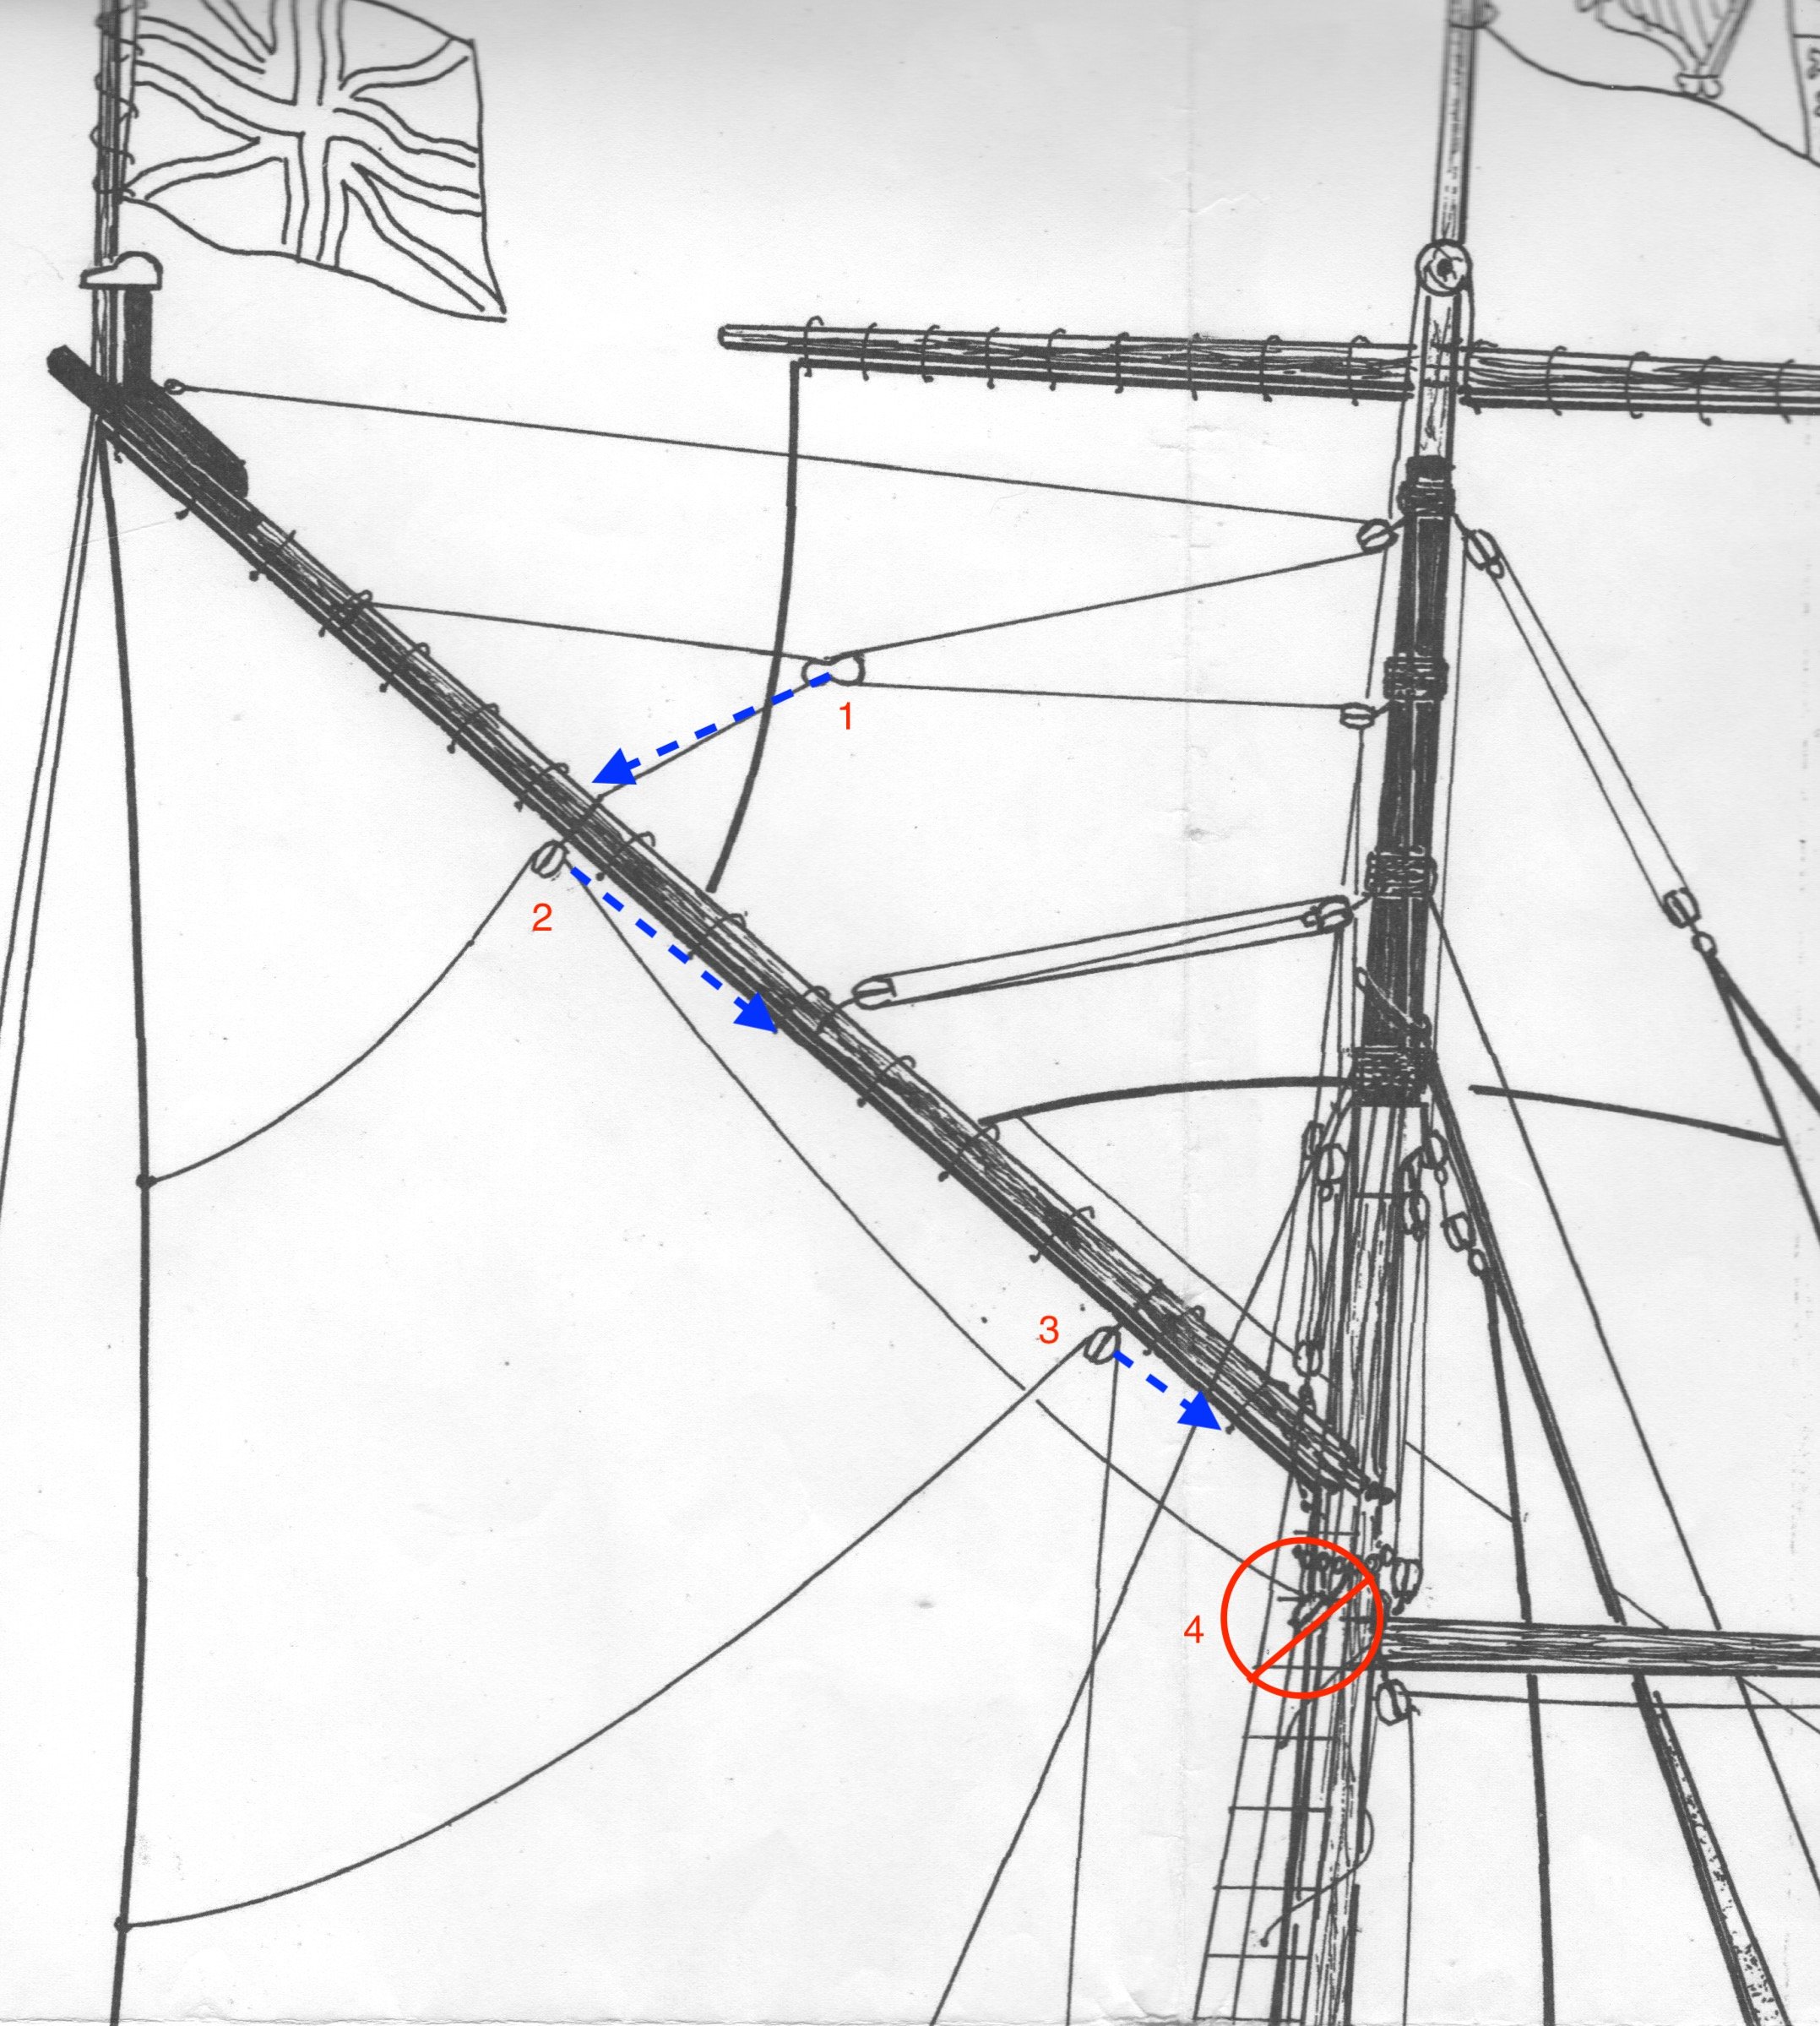
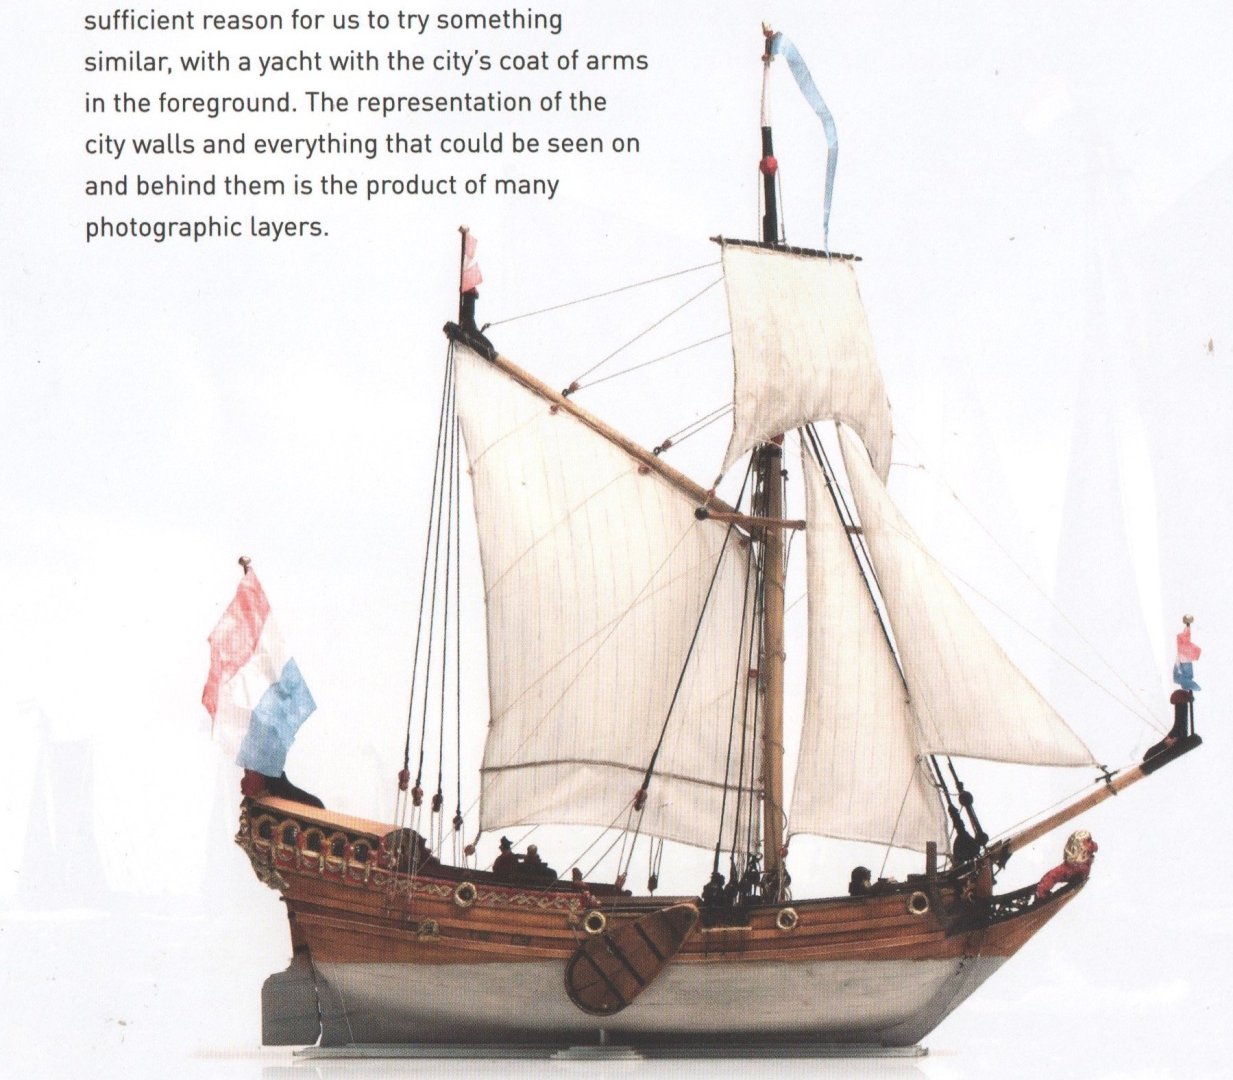
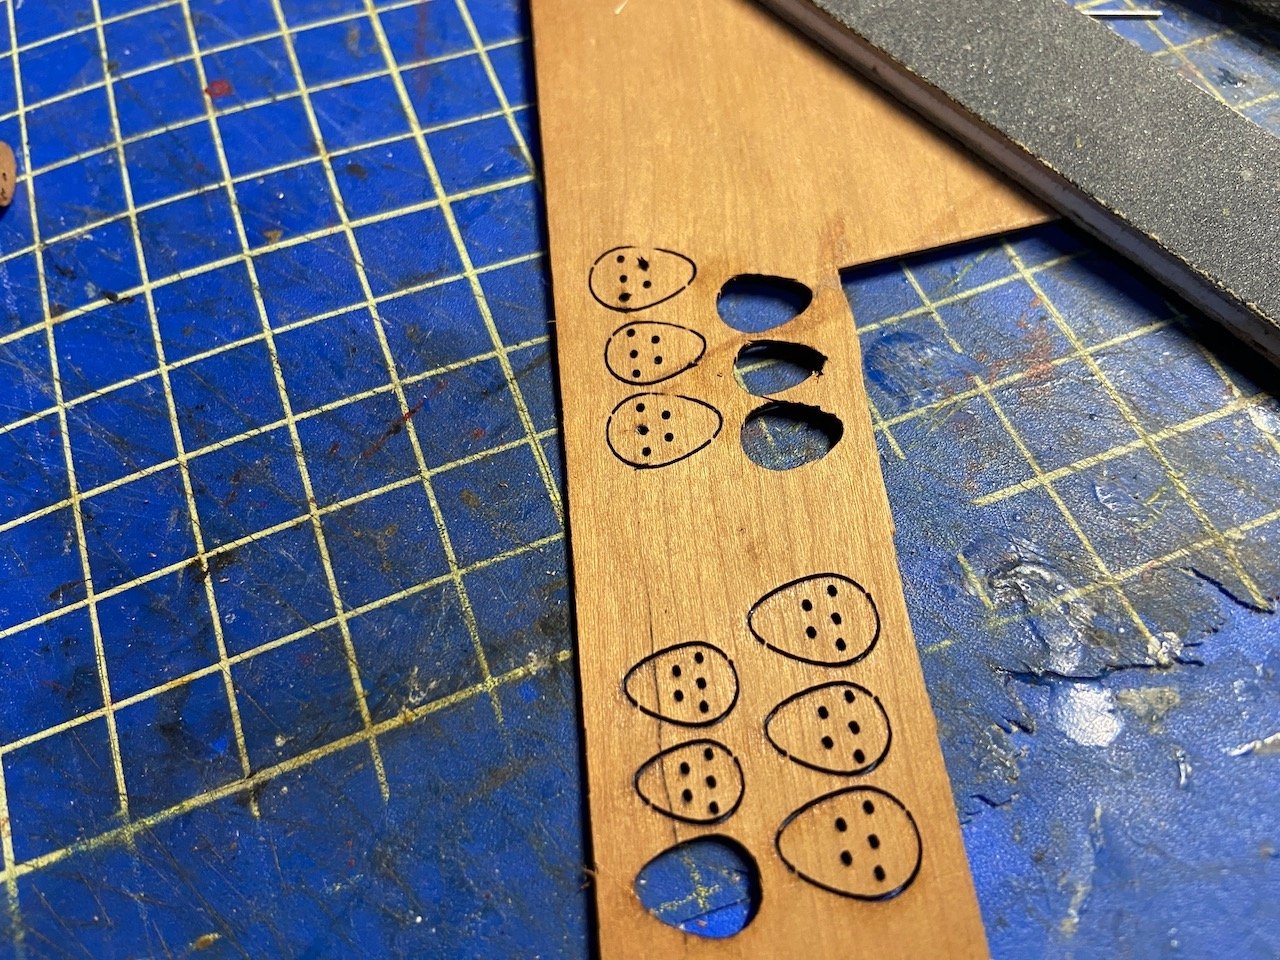
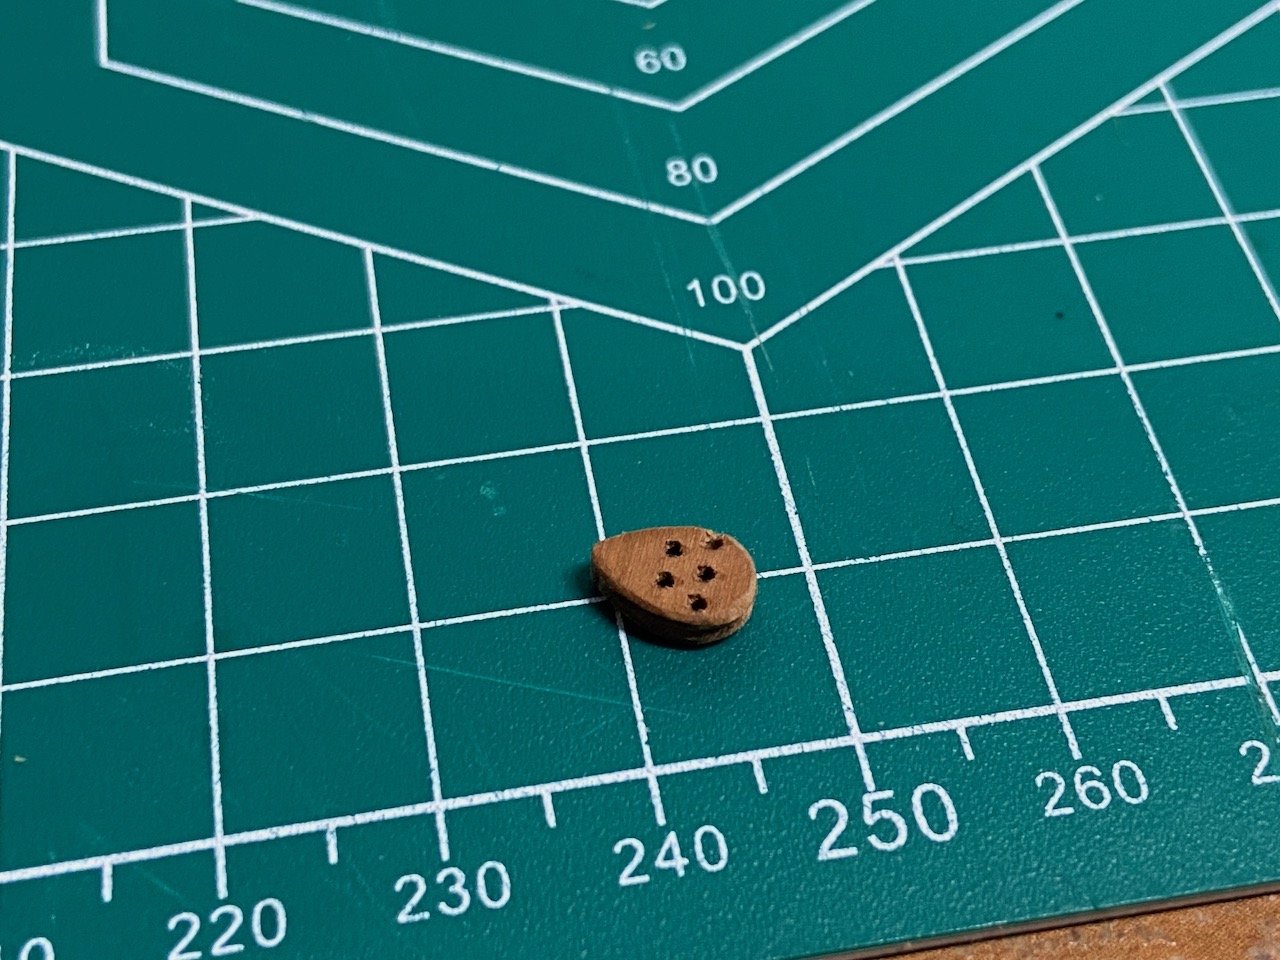
 Thanks Druxey. Nothing like a snugged up rudder. It's so nice to look at the model and not be instantly drawn to that huge gap! Well, I'm turning my attention to the rigging now. I've already simplified the rigging of the topsail and spreader yard, based on the great photos and paintings people have contributed. Now, I'm looking at the rigging of the gaff and mainsail. Below is from the Mamoli kit drawings. My plan is to make some small modifications based on the photos of the Utrecht replica. Special thanks to Gregory and Patrick(Baker) for the painting and Utrecht images. 1. I'm going to replace this block(Fiddle block?) with a single sheave block attached at the gaff. 2. This brail block will be moved down the gaff slightly. 3. This brail block will be move down and replaced with a double block, so the brail from block 2 will pass through and down to the deck. 4. No need for this extra block, since block 3 will have a pretty clear path down to the belaying points at the deck. Something else I noticed about the Utrecht replica and wondering about this on the Mary, is the lack of ratlines on the shrouds. It's been my plan to rattle down the shrouds. But, there's really no need for anyone to climb up the mast, except maybe a lookout. In the following excerpt from Ab Hoving's new book "Dutch 17th Century Ship Models in Paper", he shows another state yacht with no ratlines. Since this is essentially what the Mary was, would it have been without ratlines? Or, being a ship of the British Royal Navy, would they have added ratlines? I'm not quite at the stage where I have to worry about the ratlines, but we're getting very close. Any thoughts? Oh, and in the meantime, I decided to practice working with my laser cutter to make the 5-hole deadeye for the mainstay. I think this one is large enough, but I made parts for a slightly larger one. I guess I'll go ahead and make that one and see which looks better.
- 82 replies
-
- 10
-

-
- Yacht Mary
- Mamoli
- (and 1 more)
-
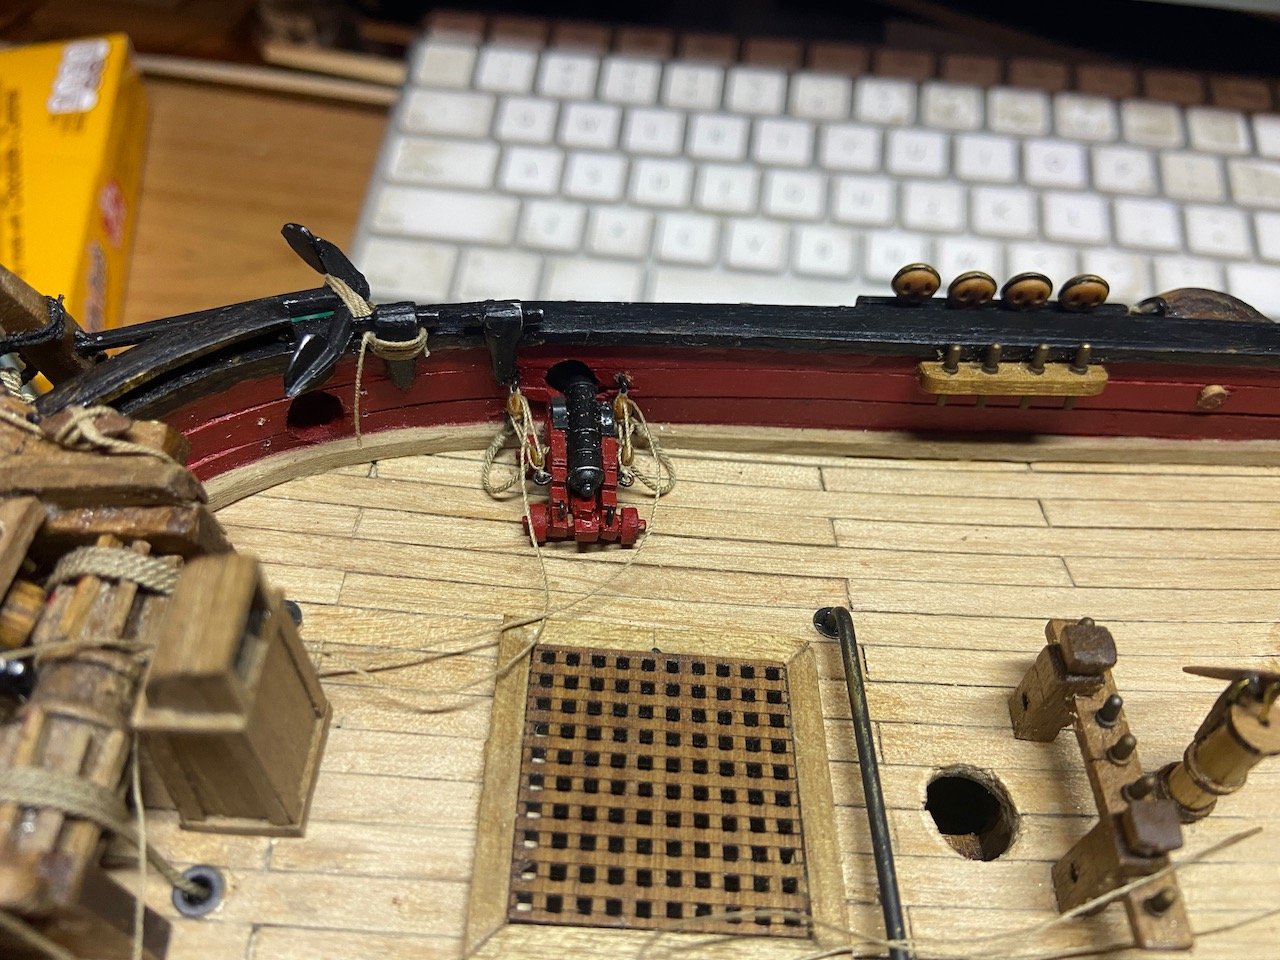
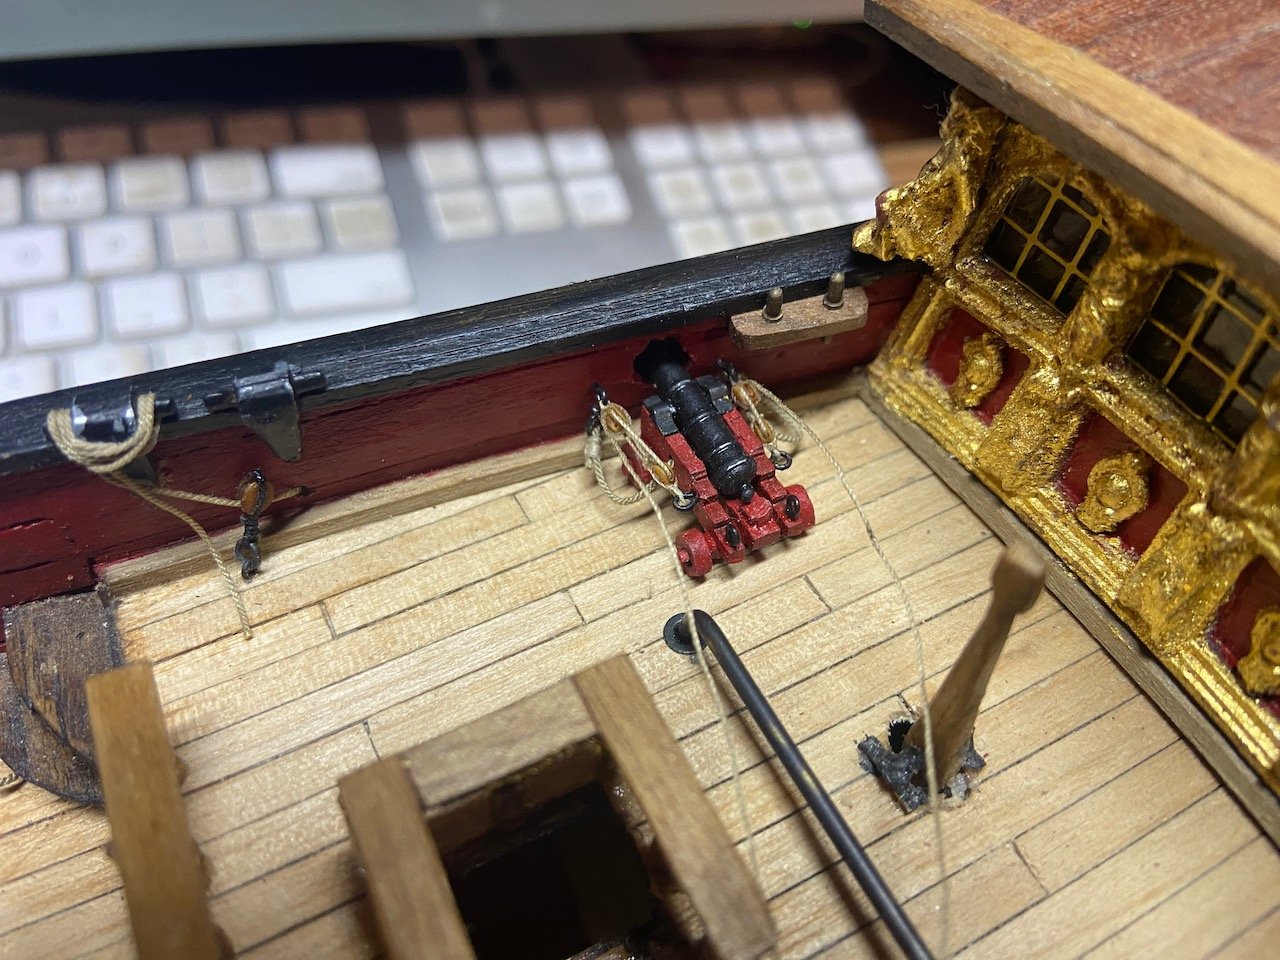
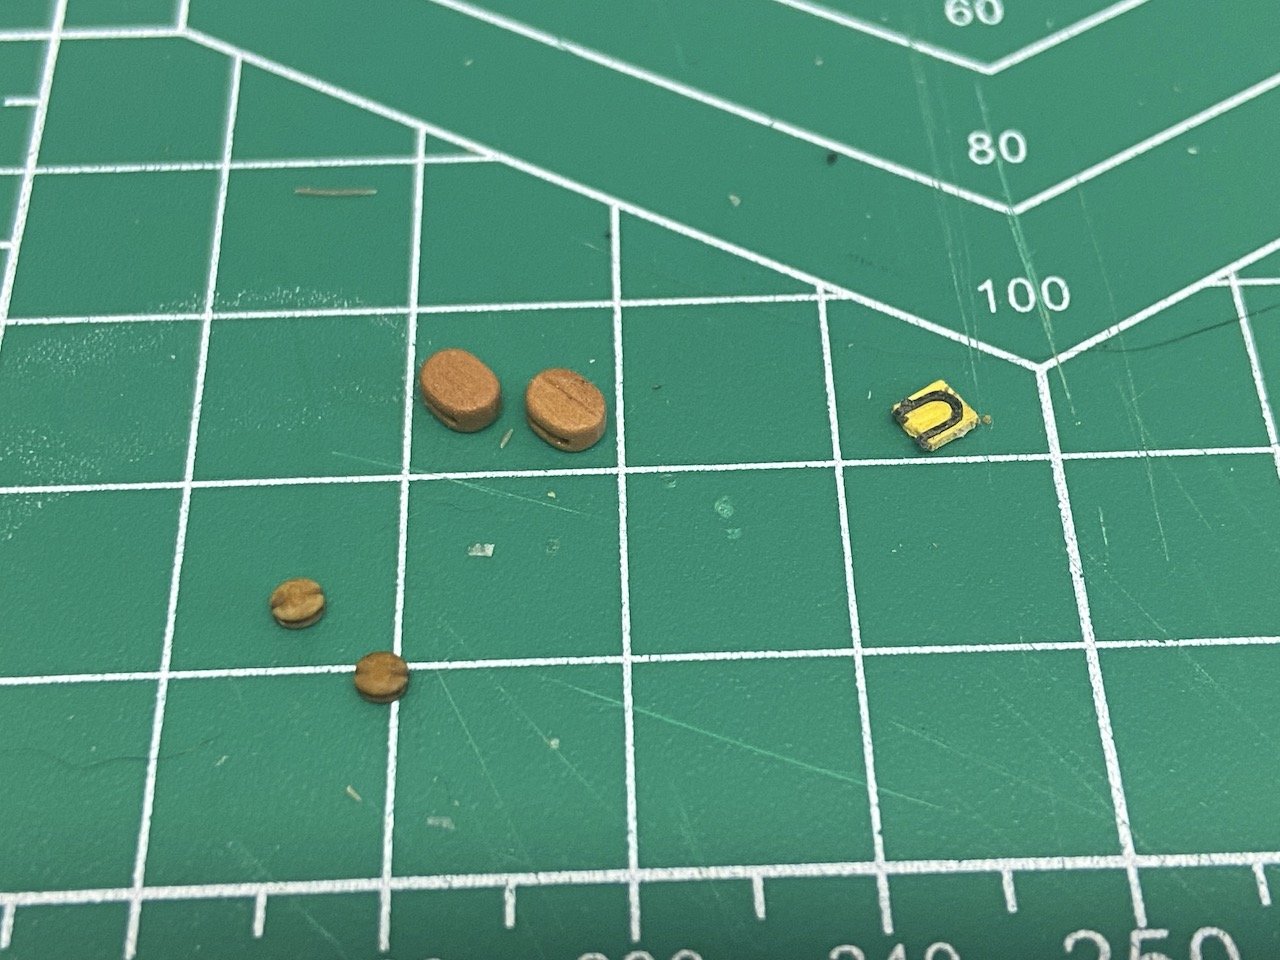
Thanks Patrick, John! I'm much happier with the appearance now. De-bugged, indeed! Meanwhile, since I was in the process of trying out the gun tackles, I went ahead and just rigged them all. Was a bit of a challenge with only a small amount of cursing. During the process of making the gun tackles, I'd managed to lose a couple blocks to the rug monster. Later, I decided to hunt around for scattered debris. Interestingly enough, I not only found the blocks I'd lost, but two other, larger blocks, that I didn't recall losing. And then, most important of all, the yellow item on the right side of the photo below. That's one of two sweep port lids, from my as yet unfinished HMS Wolf model, that I didn't realize I'd lost! 🤣 It's now safely in storage for when I return to work on that model. Hopefully, that will be sometime late next month.
- 82 replies
-
- 7
-
-

-
- Yacht Mary
- Mamoli
- (and 1 more)
-
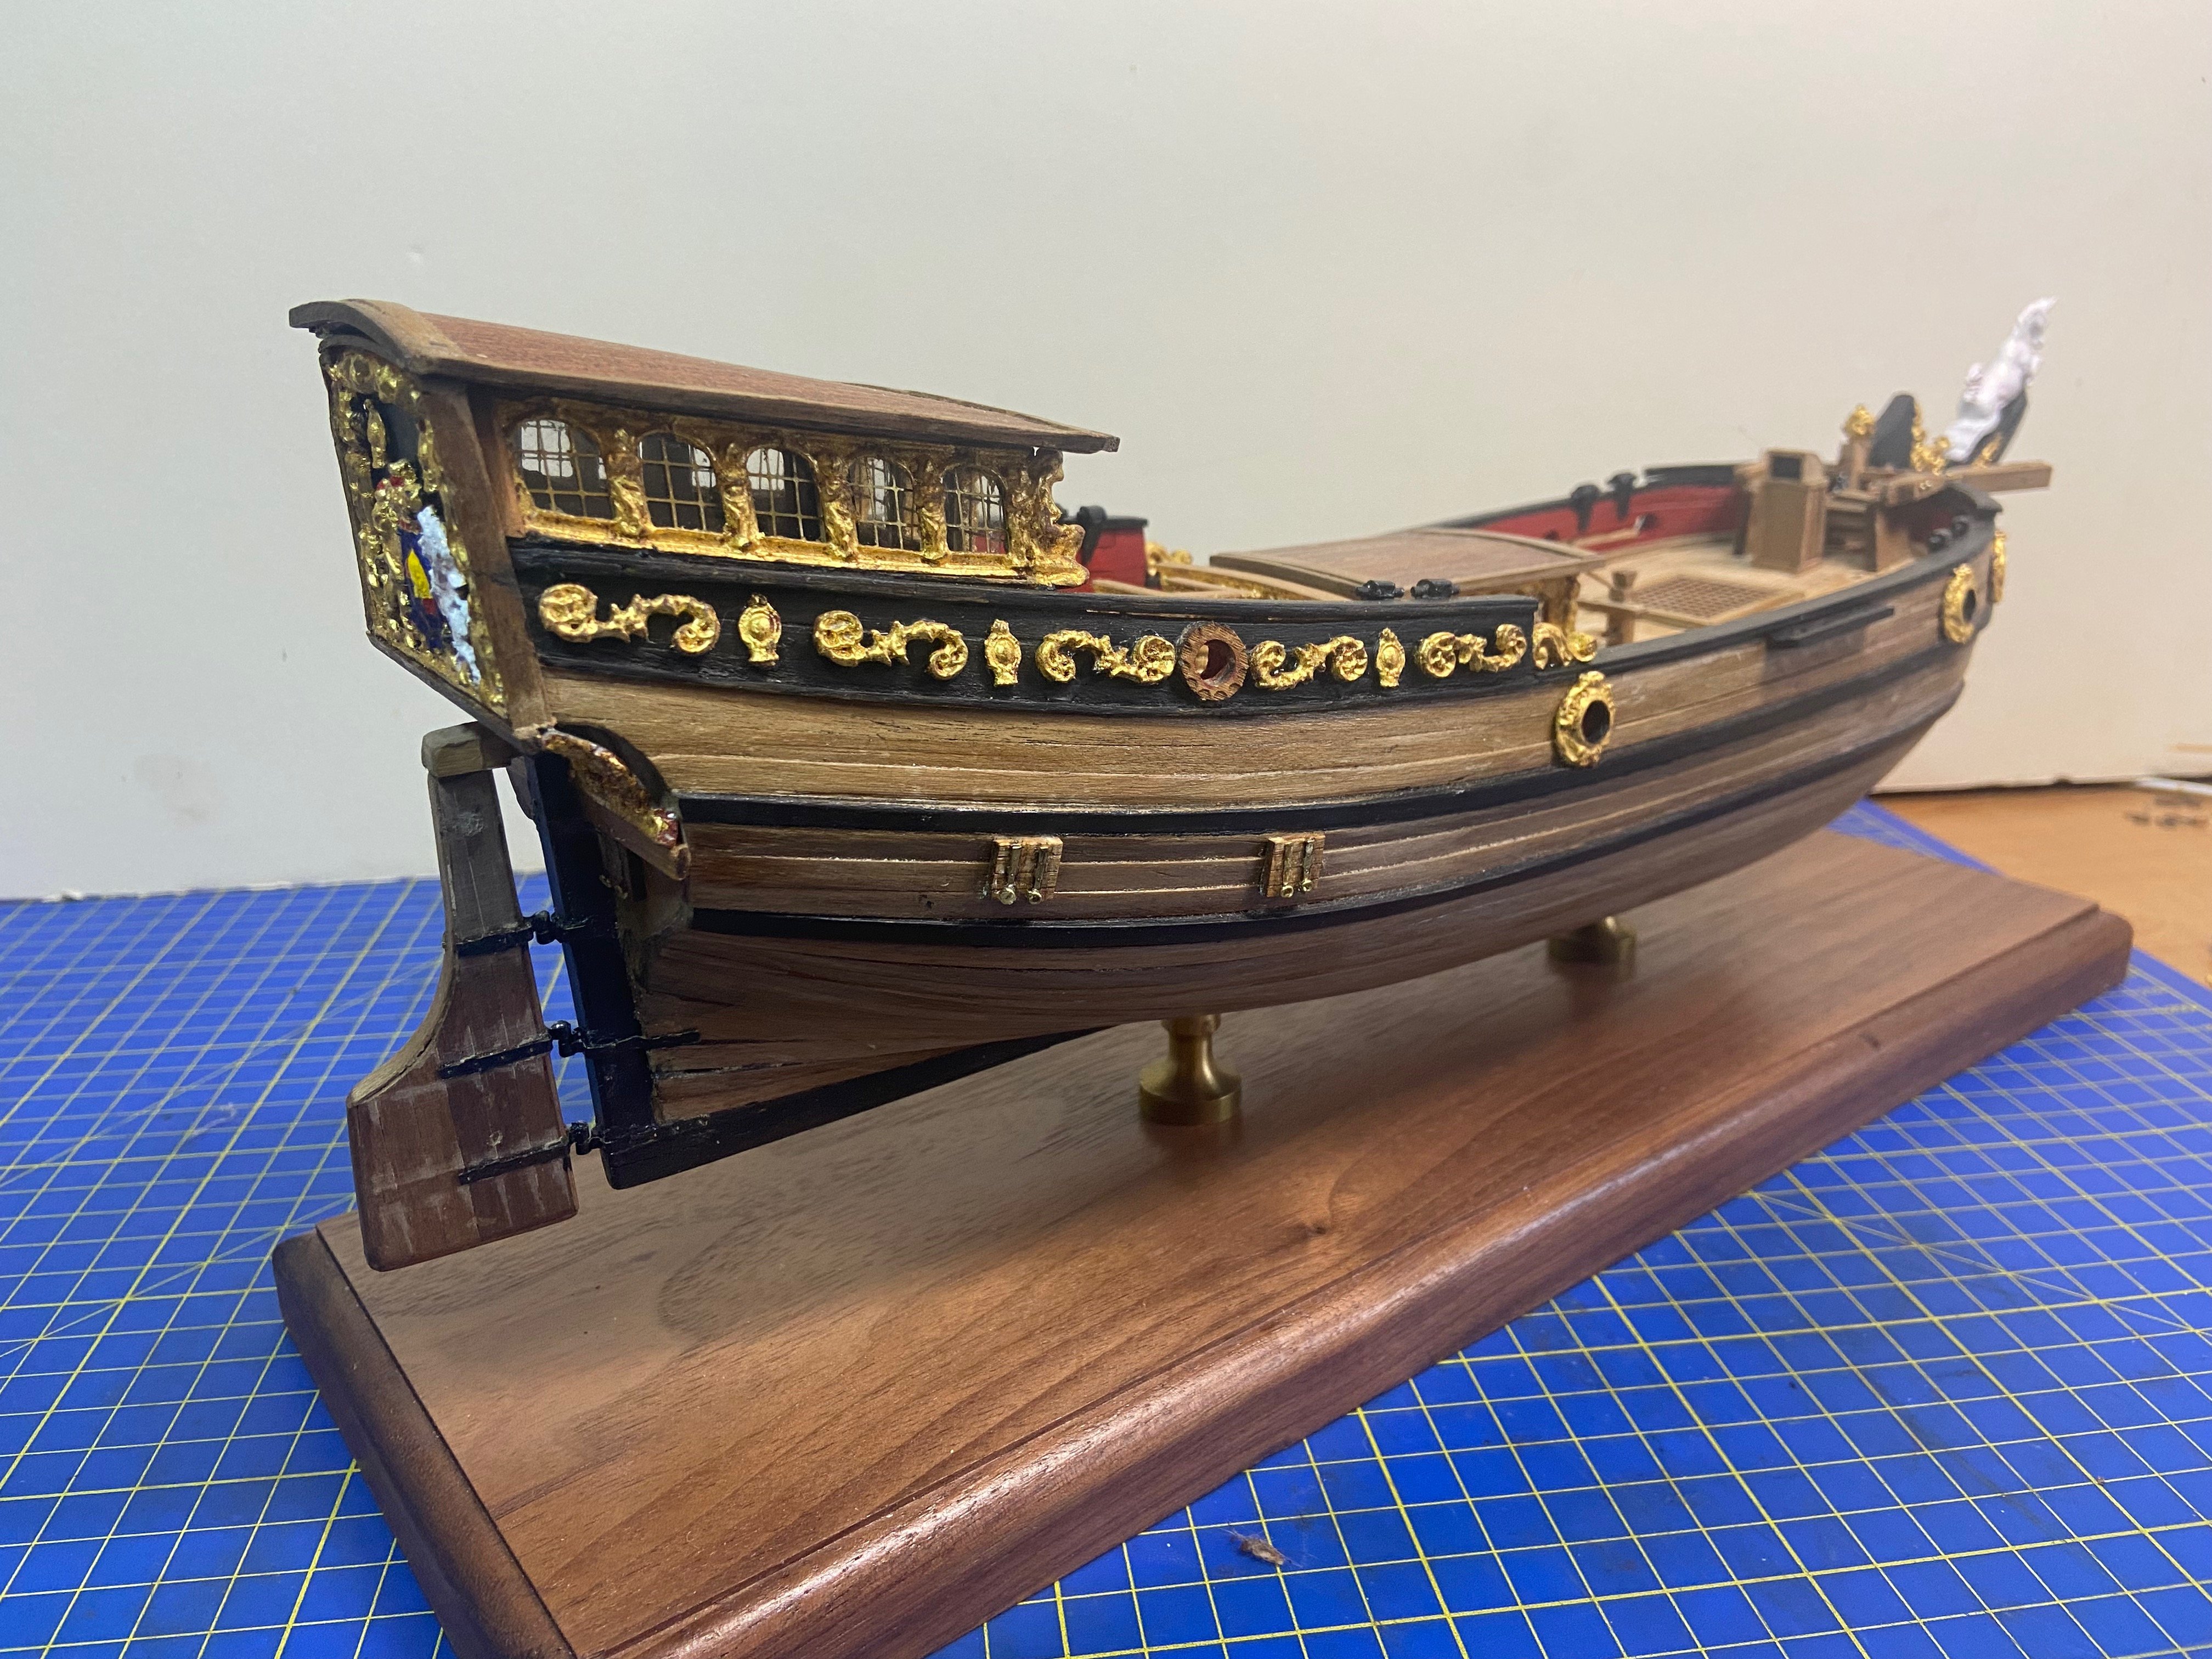
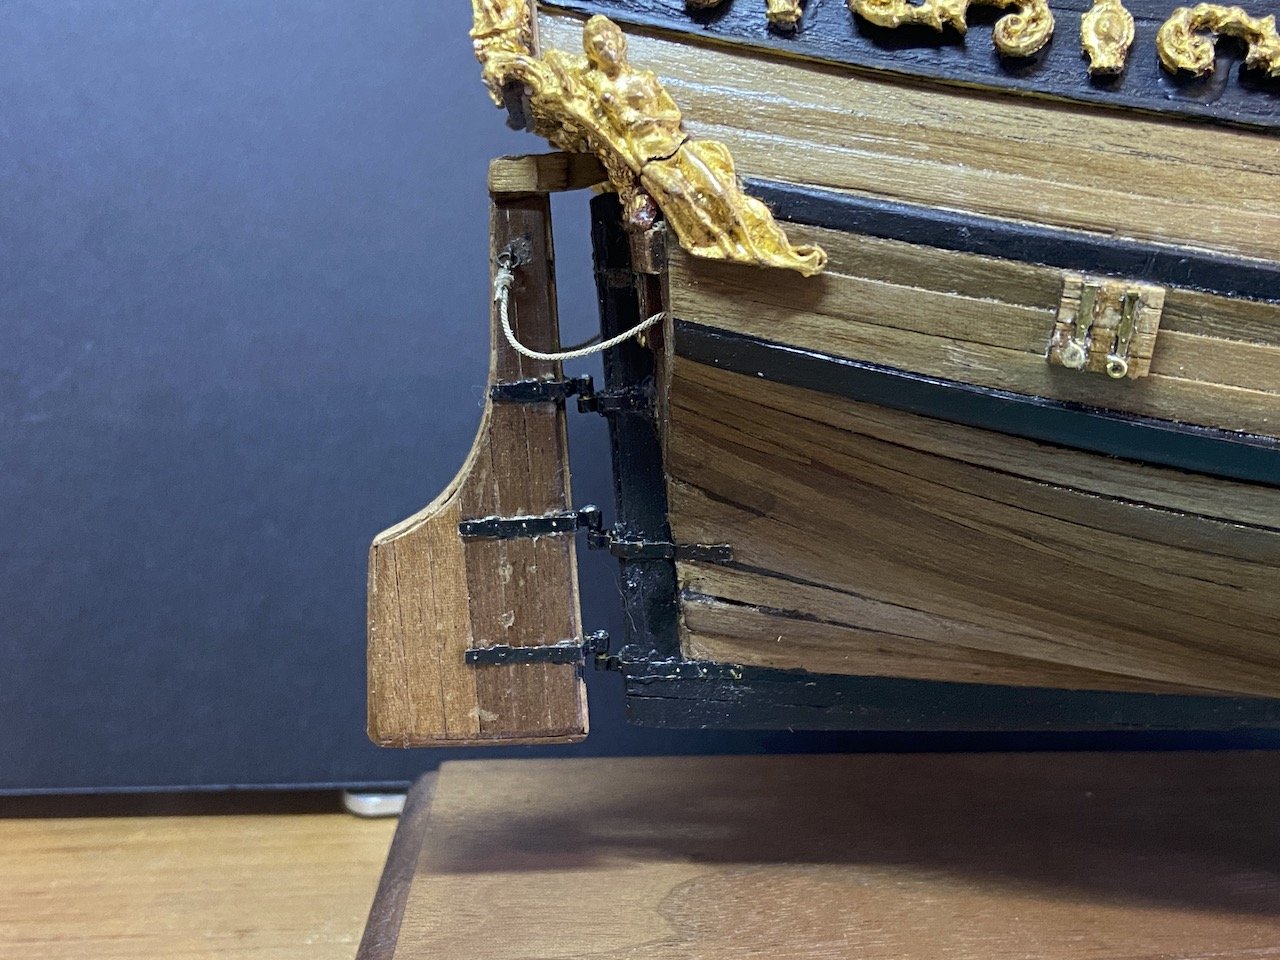
A minor update, but fairly significant for the model. Today, I got sick of the enormous gap between the sternpost and rudder and I clipped off the pintles and just pinned the rudder into place. I think it makes the model look a whole lot better! Yes, it's not perfect, and you can see one of the pins if you look closely. But, I'm not striving for perfection here. I'm just going for a better appearance, and I think this works. Now, I can move on to other things, as this is the last item that just bugged me!

- 82 replies
-
- 11
-
-
- Yacht Mary
- Mamoli
- (and 1 more)
-
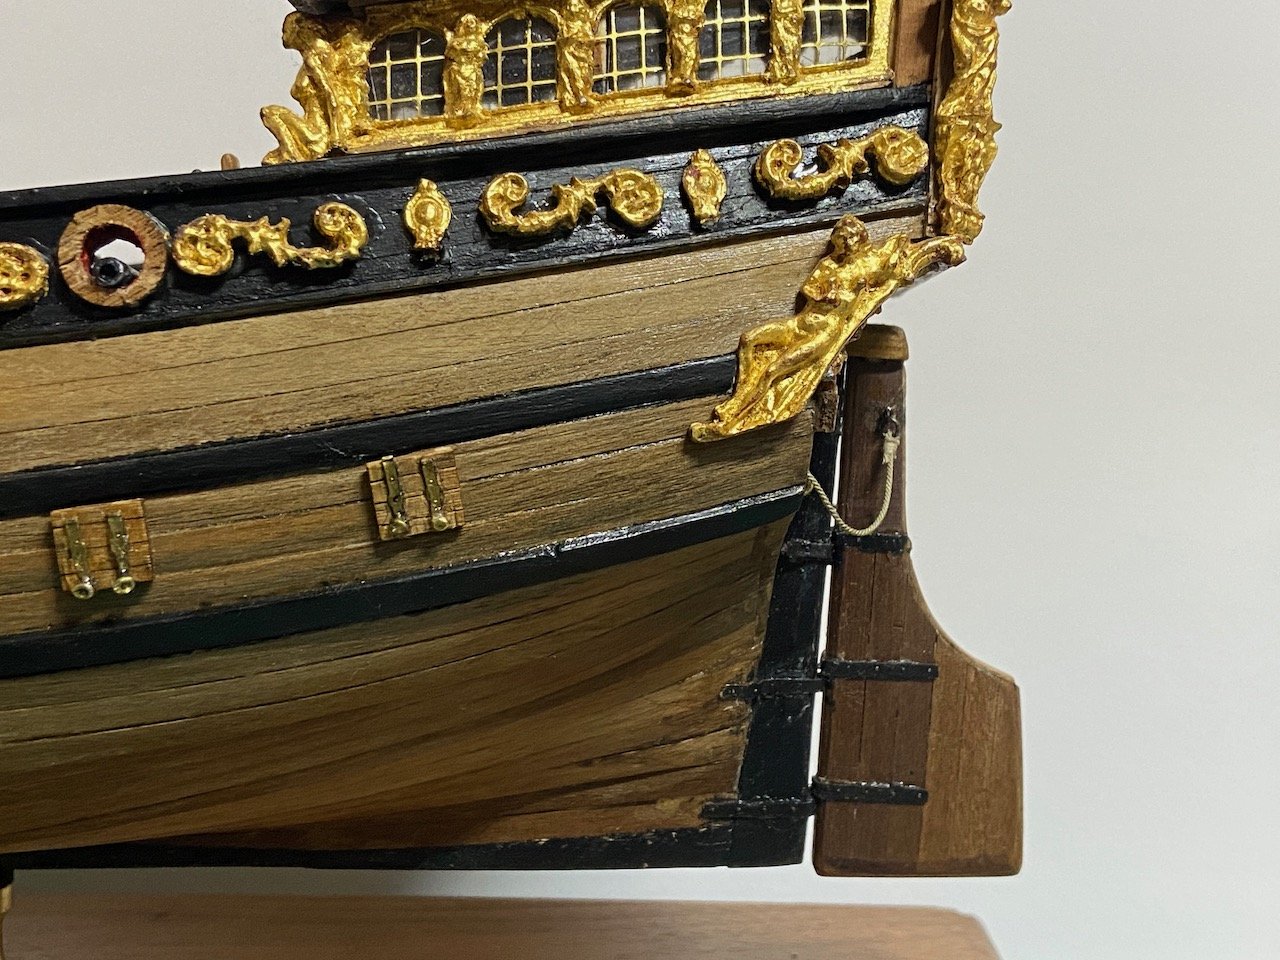
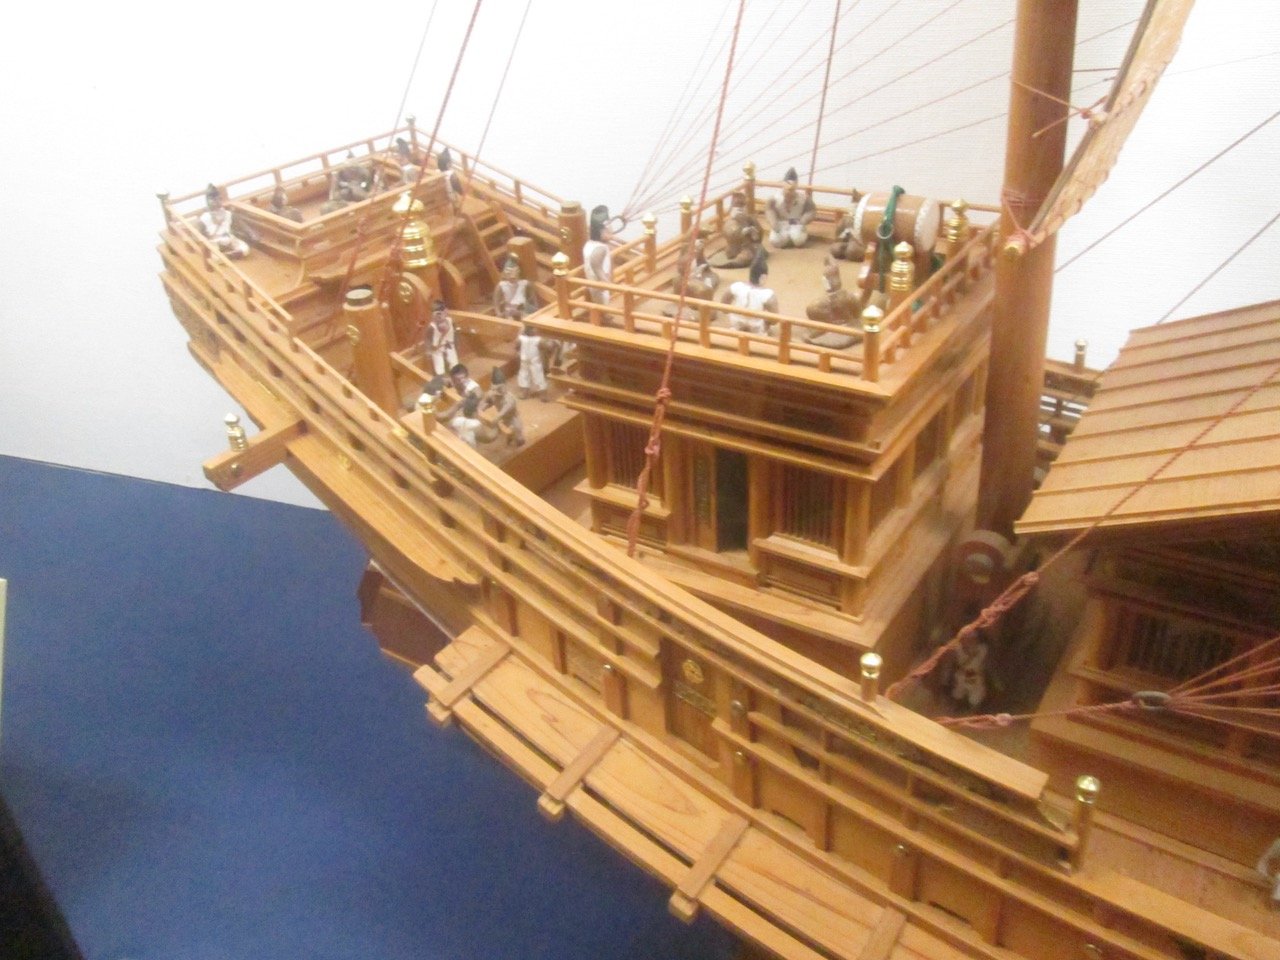
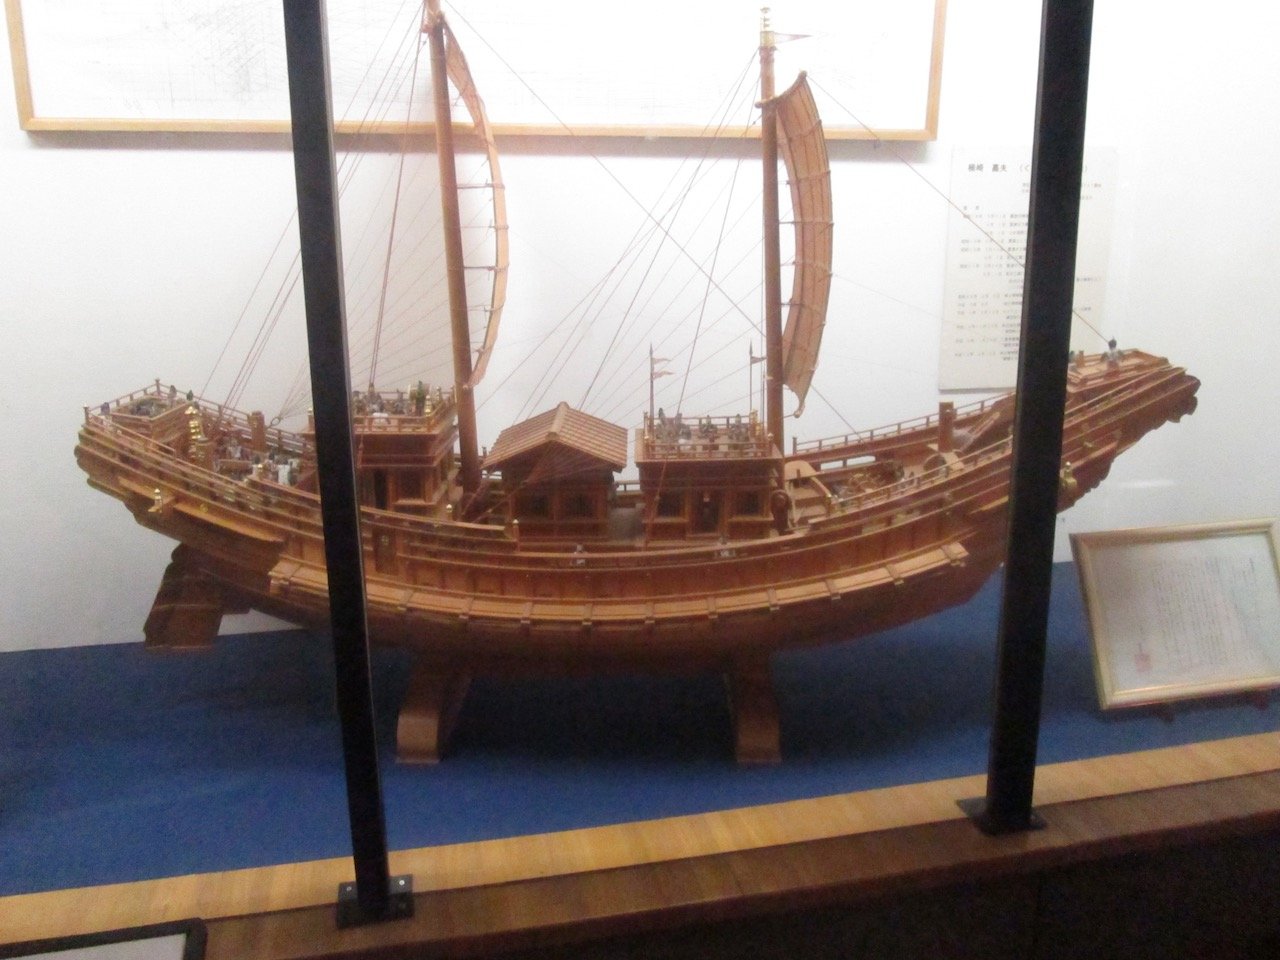
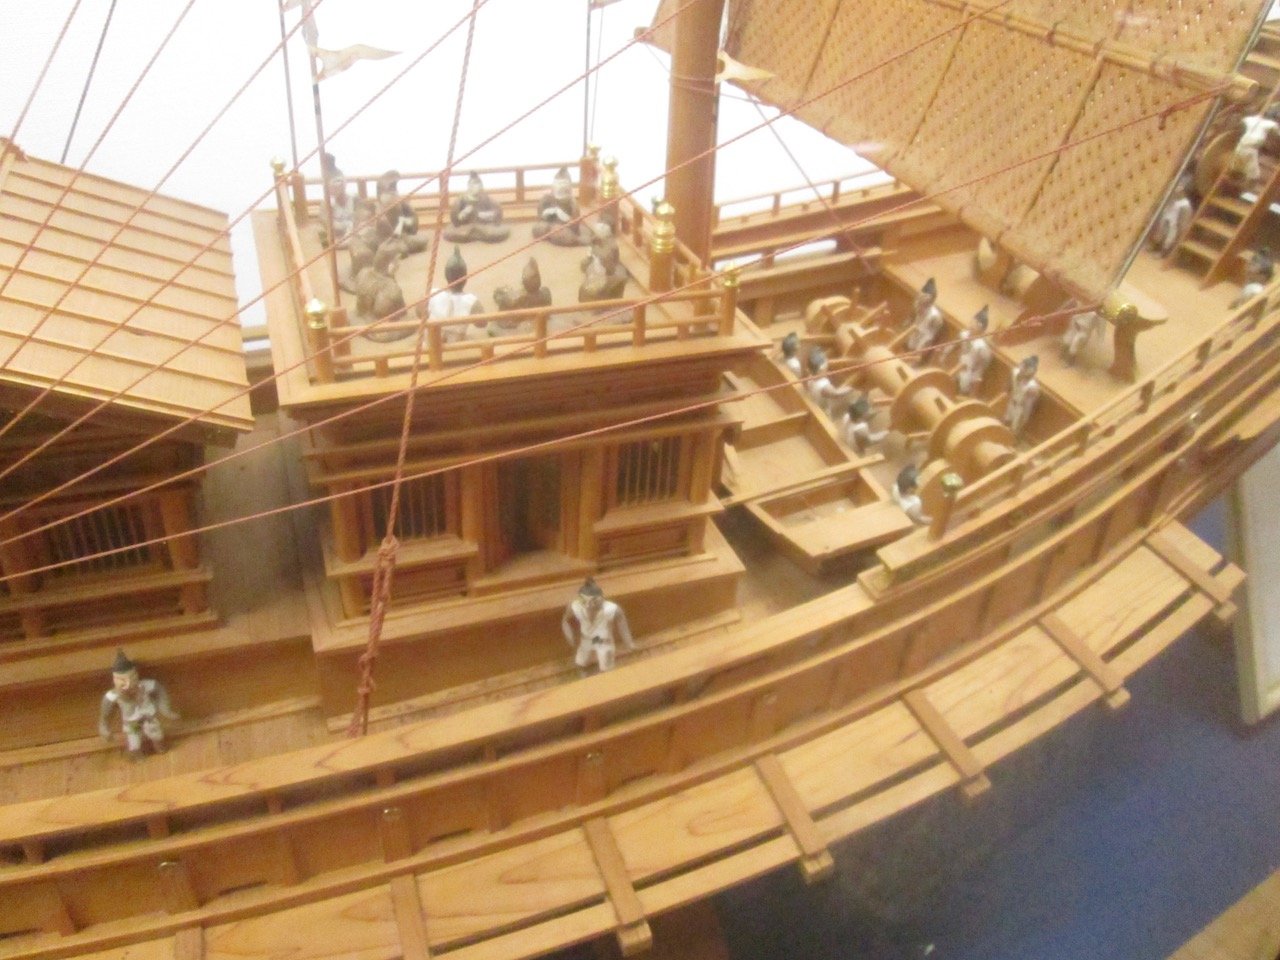
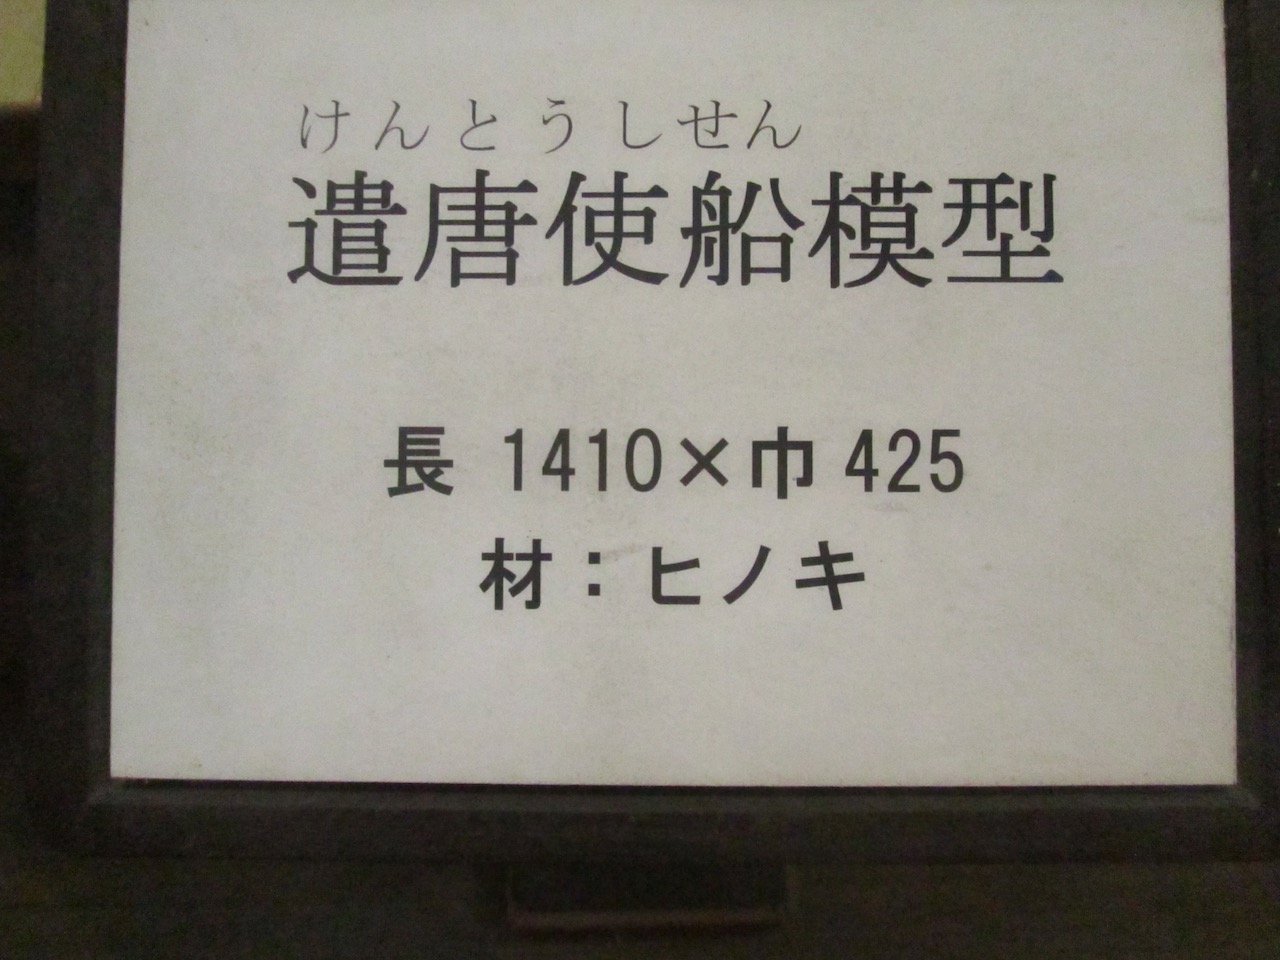
Hi Glen, Here are the pics, for what they're worth. The model scale wasn't specified, or at least I never saw it. It's a pretty good sized model, 1.4 meters long. It's an interesting model. But, models in Japanese museum models are often very so-so in accuracy, I've found. They're often there just to give people things to look at. Scale can be way off. In fact, in this same museum, there's a nice model of a Japanese Edo period warship. It has figures on it in one size, and then a giant figure sitting in a chair on it, depicting the daimyo, or clan leader. Probably not much here you can use, but they're interesting to look at... Of course, the term Kentoushi-sen is rather generic, and could refer to different ship designs that were all used as envoy ships at some point. Anyway, as you know, very little information regarding Japanese ships before the Edo period was documented. Most documentation seems to consist of an ancient scroll painting, and maybe a brief description. But your model looks like it's coming along swimmingly, and I'm enjoying watching your progress!
- 106 replies
-
- 7
-
-
- Kentoshi-Sen
- bottle
- (and 1 more)
-
Ah, got it. I do seem to recall something about this. Well, for those waiting, I hope the kits make it into production!
-
This is way too late to be of use to the original poster, but last I checked, the Clyde Leavitt plans were available from Taubmans Plan Service, now part of Loyalhanna Dockyard. It's been a long time since I've dealt with this place, so I don't know if they're even still in business. But, their website is still up, and they do list the Clyde Leavitt plans. Also, with all due respect to the responders here, but Gerard DID say up front that he knew the ship described by Davis was NOT the Lexington, and was still interested in building it anyway. And, it really IS a sweet looking ship!
-
Hi Black Dog, Not at all the same thing. Amati Prince DID reach the market a LONG time ago. It's just now out of production. But, the plans and all the fittings are available, even if you can't find the kit second-hand anymore. A couple years ago, I managed to acquire one with the hull already with first layer of planking. Some fittings were missing, but it was easy to order replacements for those. I hope to take this on sometime in the not TOO distant future (= a year or two away). I also bought a new set of plans, to make sure I had a good, complete set. These kits are out there, but you do have to get your name out there for people to find you when they're dealing with clearing out old kit stashes.
-
Gary, I just discovered this build log. I love that you're taking on an A.J. Fisher kit. I've ordered plans from them over the years, and always meant to try out one of their kits, but never got around to it. I've built a few solid hull ship models, but gave up on solid hull kits after building a couple. Now, I feel I'm being drawn back to them again. Seeing your build is making it more likely that I'll try building a solid hull kit again soon. Wonderful work and very inspiring!
- 121 replies
-
- 1
-
-
- Lucia A Simpson
- AJ Fisher
- (and 1 more)
-
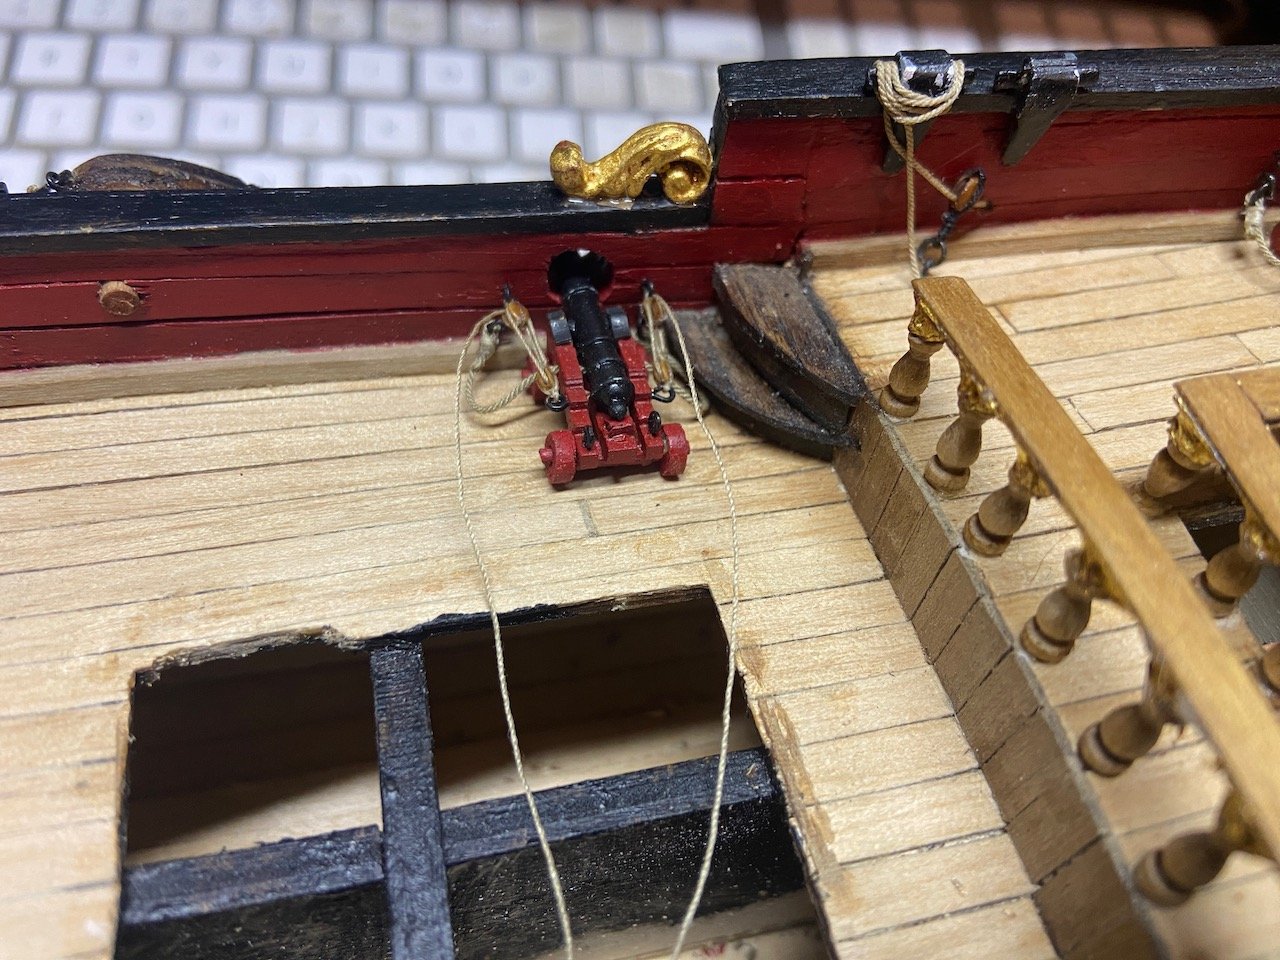
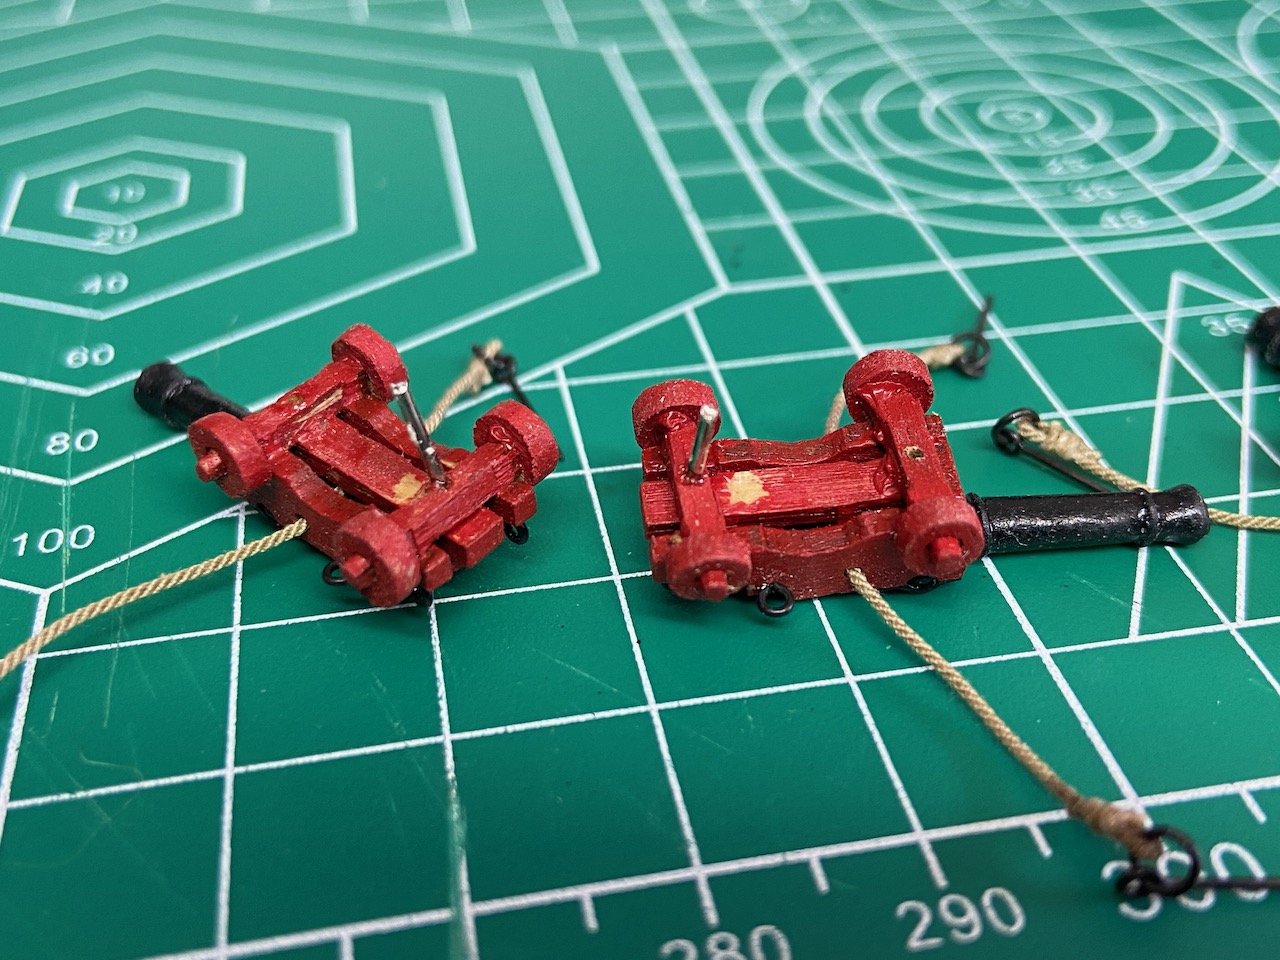
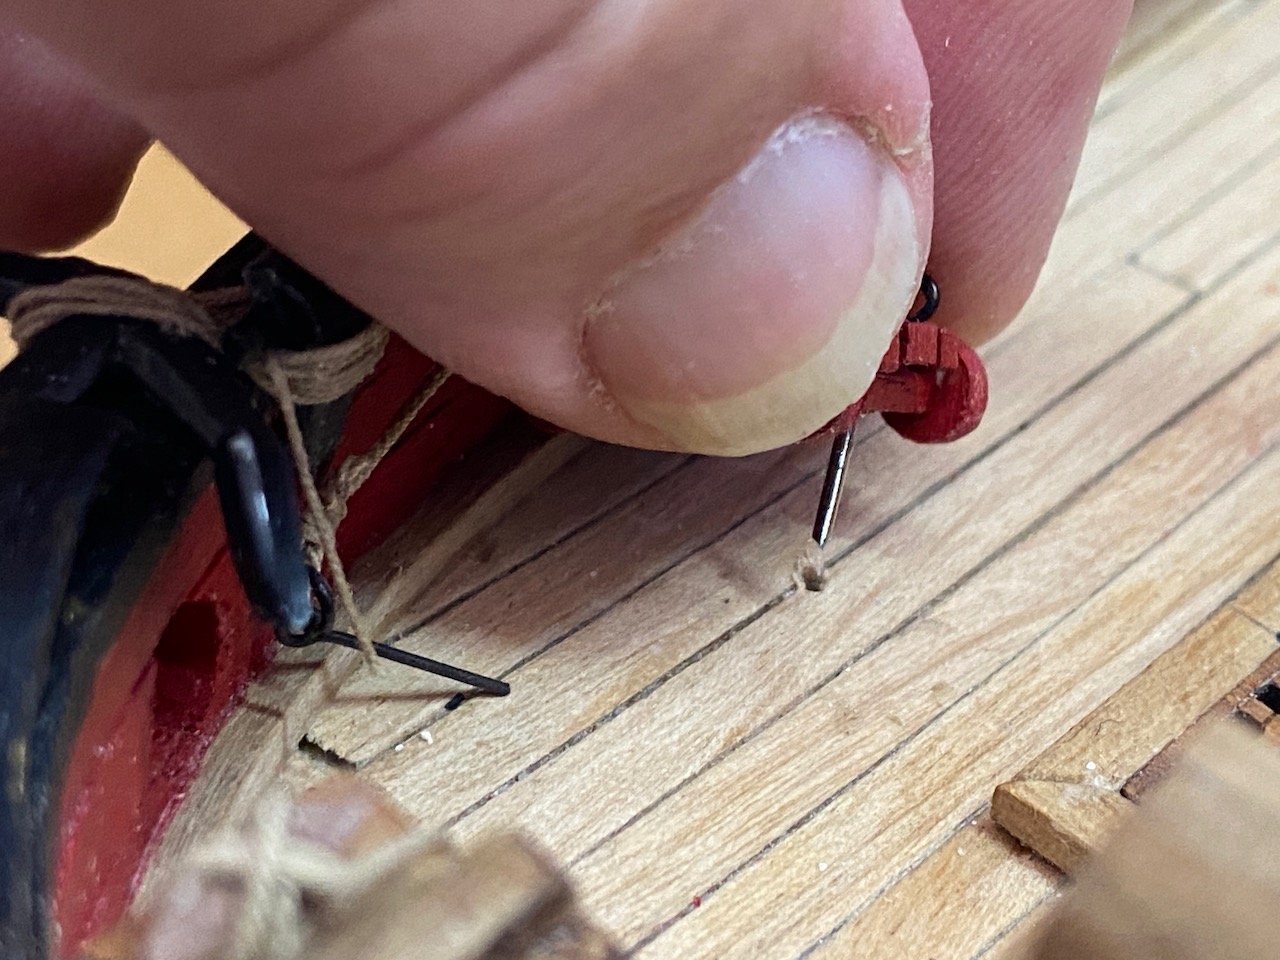
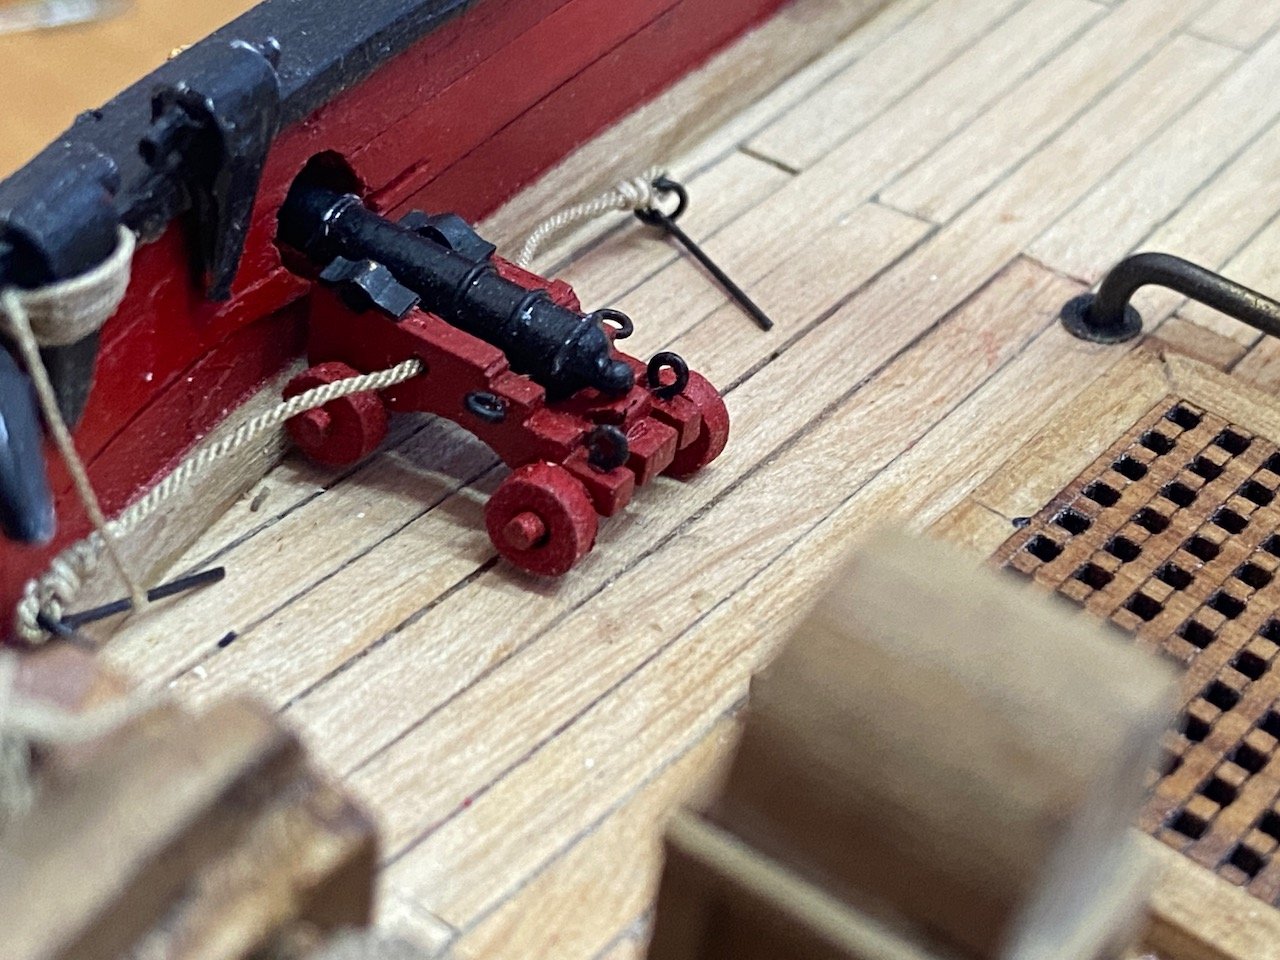
Okay, I broke down and started rigging the gun tackles on the Mary's cannons. The way I'm building her, she'll only need six guns. And, given that at this scale, they're not too tiny, that's about as easy a rigging job as there could be. It's not going to get any easier in the future, and perhaps this will help me decide if and how I can rig the guns on my smaller HMS Wolf model. First, in order to mount the guns securely, I've been pinning them to the deck. In this case, a sewing pin cut off and inserted into a hole I drilled into the bottom of the gun carriage. Don't ask me why I chose sewing pins and not just some brass rod. The pins are a hard steel and hard to cut. I tested out each gun in position, to locate where I need to drill a hole in the deck. Note that they don't line up quite right, but that's because the locations of the gunport in the hull are off slightly. But, that's the way it was built, and it's not actually very obvious. Then, test fitting each one. This particular gun gave me the most trouble. I don't think the carriage is quite square. I'll probably shorten the pins a little. Some are longer than they need to be. They seem pretty well hidden underneath those carriages, and then definitely keep the guns solidly in place. Now, I'm in the process of rigging the gun tackles. I'm using Chuck's 3/32" 3D printed blocks. To be safe, I drilled out the holes with a #78 bit, which worked well, and allows me to pass a his .008" Ultra rope through it pretty easily. I decided to do a simplified job of it, using no hooks, just tying the strop through the eyebolts. I don't have a photo of them, but I have double-blocks stropped through eyebolts that will be attached to the bulwarks. Oh, and I realize that this particular gun is missing the trunnion caps. That's because it was one of two "spares" I decided not to use. Then, during the rigging process, one of the eyebolts got stuck and broke off. So, I just put one of these spares back into service. It'll get it's trunnion caps shortly. My work schedule changed today, and I think I may actually have enough spare time today and tonight to complete these! 🤞
- 82 replies
-
- 12
-
-
- Yacht Mary
- Mamoli
- (and 1 more)
-
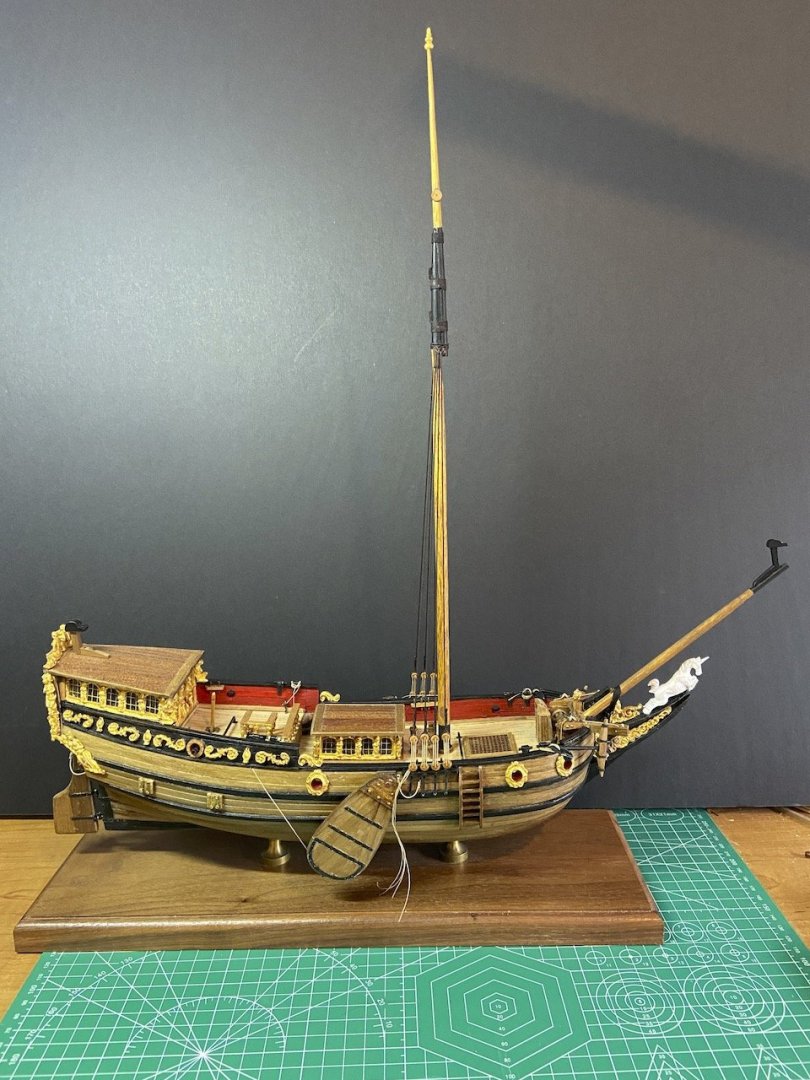
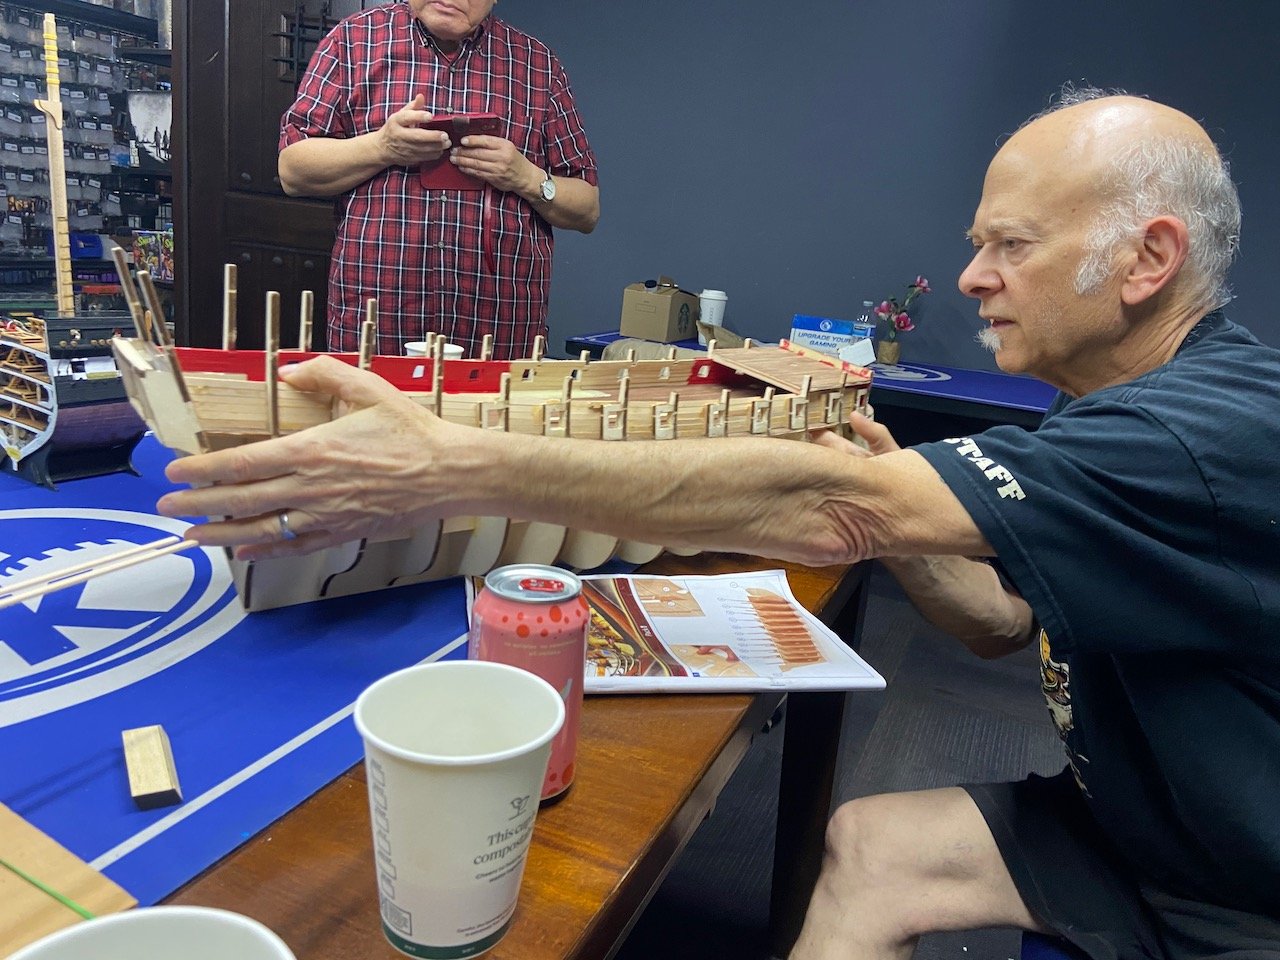
I FINALLY made some progress on setting up the shrouds on the Mary. I find this to be a lot of work and am usually much happier when I get to the part where I can just mindlessly tie clove hitches for the ratlines. Took me quite a while to be happy with the work I was doing, first seizing the shrouds around the mast head, then adding the deadeyes, and then seizing them into place. This was a good project for easing back into this process, since there are only four shroud pairs total. Note that the shroud lanyards are not yet secured, since the setup is only temporary, to make sure everything lines up okay. The slight variation in the line of upper deadeyes should mostly go away when I secure the lanyards. They're still loose enough to cause that bit of variation. This is also kind of a practice run for rigging the shrouds on my HMS Wolf card model, which is currently on hold, but I'll be getting back to shortly. All the rigging here is Syren's Ultra Scale Rope, and the deadeyes are also Syren's 3D printed swiss pear colored resin deadeyes. It's been a while since I made my own chain plates of this type, and stropped deadeyes with them. I had to handle and work the parts a lot to adjust the fit, which is why so much of the blackening has worn off the deadeye strops. I'll get back to working on my technique in future builds. While I was working on the model, I also decided to secure the anchors and run the hawsers around the windlass and down the chain pipes. The cat heads were made by my predecessor and had only one sheave, so I had to get a little creative with the rigging of the tackle. I think it works okay. The more I work on the model, and the closer it gets to completion, the more that rudder gap bugs me. I'm getting closer to the point where I'll probably just cut off the hinges, and pin the rudder into place. I hope to have the model done by the next meeting of the South Bay Model Shipwrights in Santa Clara. We had our most recent meeting this past Saturday. This month's was a small gathering, but we meet in a rather small meeting room anyway, so it wasn't crowded. I didn't really make that much progress on the model since the last meeting, so I decided to leave it at home and bring something that would hopefully inspire me to get back to. Below, you can see my 1/72 HMS Wolf model, sitting in front of a 1/72 Master Korabel kit of the Russian tender Avos. There's also a 1/72 Disar kit of l'Hermione, the French 32-gun Condorde-class frigate. And in the second photo is a USS Constitution cross section, and the Spanish treasure ship, Nuestra Seniora del Pilar de Zaragoza. Anyway, next, I will need to come to a decision on the rigging of the Mary's cannons. There are only 6 or 8 guns depending on what information source you use, so it shouldn't be TOO bad. But, I've been having such a hard time working with the small blocks needed to rig the gun tackles. Wish me luck...

- 82 replies
-
- 9
-
-
- Yacht Mary
- Mamoli
- (and 1 more)
-
And, I still really love the lines of that ship, whatever it actually is!
-
When I first began ship modeling, more than 30 years ago (!), I had the Davis books in paperback and tried building the Lexington. Having never built a wooden ship model before, I wasn't up to the task, lacking skills and knowledge, so it was a failed attempt. In fact, I don't think I got very far at all before I realized this was way too much for me at that time. I think it could be done if you have the plan set, but there may be easier or more well documented methods of building up a framed model from scratch. Also, it's been argued for decades how that ship is very unlikely to actually represent the Lexington. So, you should just be aware of that.
-
Glen, I'm really happy to see someone taking an interest in Japanese watercraft, and your Kentoshi-sen is looking great! I've been focussing my own study of Japanese boats to mostly coastal and river craft, so I don't know much about the oceangoing vessels of the earlier periods. There seems to be much less info on those. I recognized the term Kentoshi-sen, but don't know much about them. However, I do recall seeing a model at the Sea Folk museum in Toba, Japan, and I have a couple photos I took of it, if you're interested. A bit different from this one, though, and I don't know what information it was based on.
- 106 replies
-
- 4
-
-
- Kentoshi-Sen
- bottle
- (and 1 more)
-
Congratulations Tim on a beautiful build! Very inspirational. I haven't built a solid hull model in at least 10 years. You're making me think it's time to take one on again, and I've always had an interest in this particular ship and kit... 🤔
- 142 replies
-
- 2
-
-
- alfred
- solid hull
- (and 2 more)
-
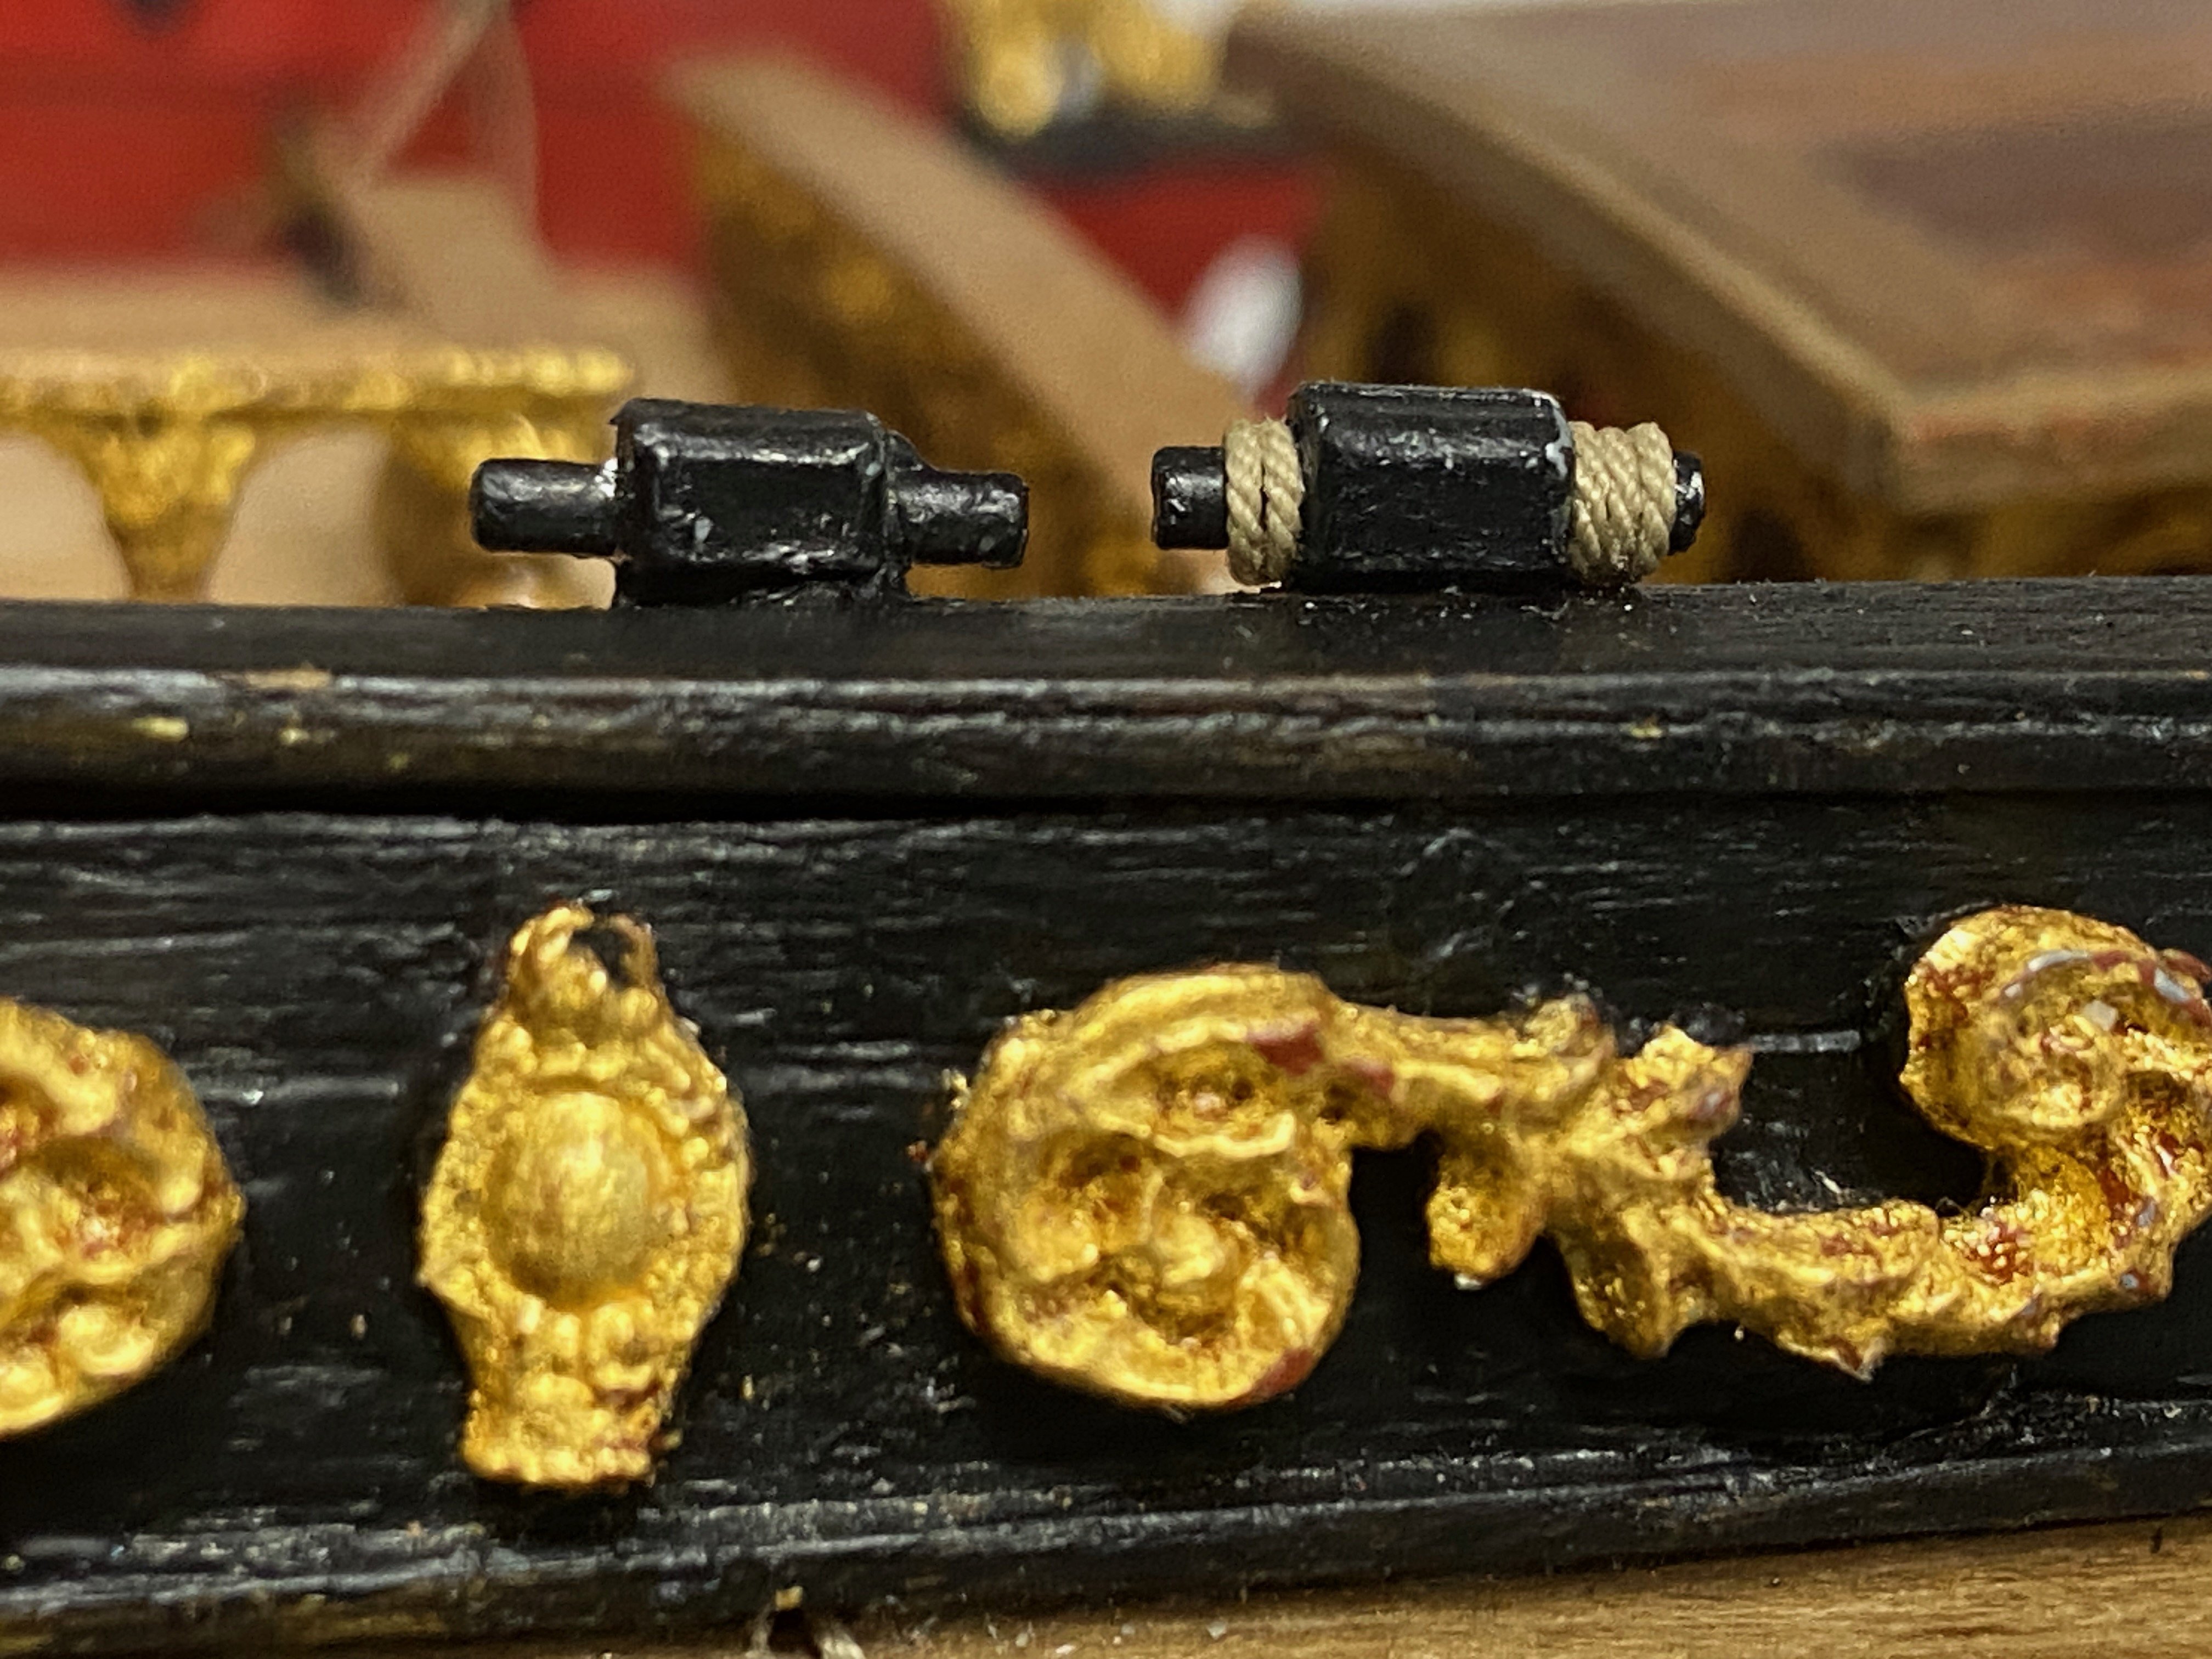
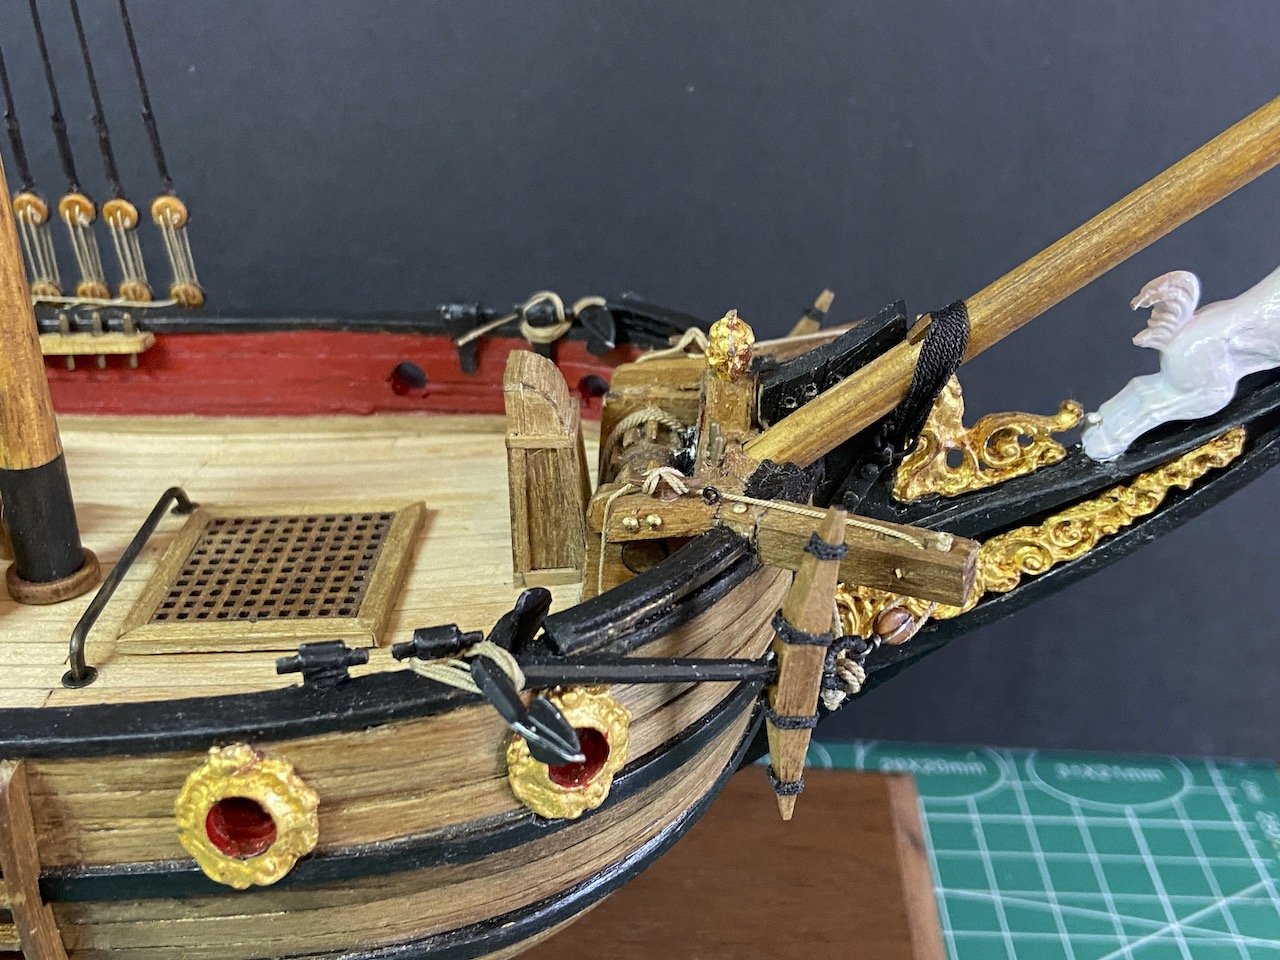
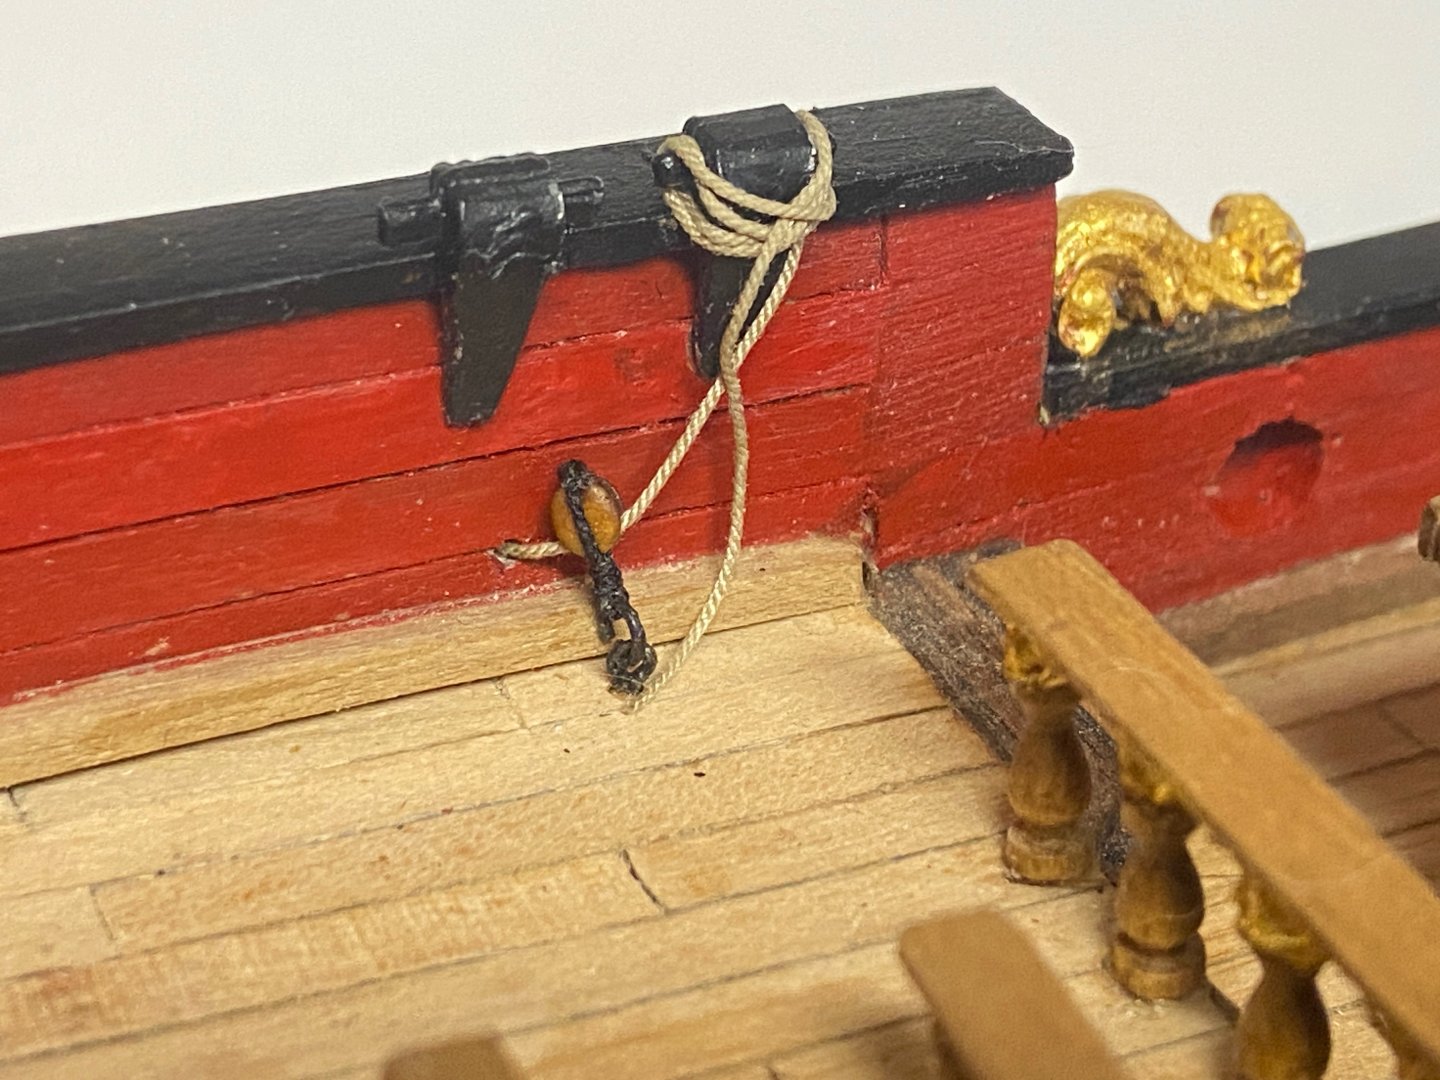
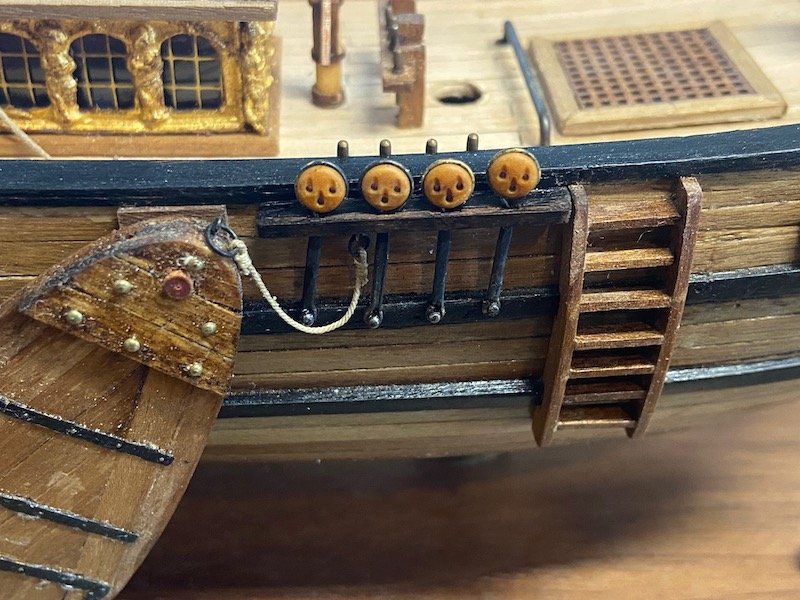
The next issue on the Mary is to fix the positioning of these fittings that work like cleats or kevels. Does anybody know the proper term for these Dutch belaying points? These fittings were mounted so low on the bulwarks that there was no room to wrap lines around them. I had to debond the glue that was used on them, which was some kind of rubbery adhesive. It made them easy to remove, but left a lot of rubbery glue spots and some hard to remove residue on the model. I did what I could and re-attached the fittings with thick CA glue. This allowed me to finally rig the lines for hauling up the lee boards. Rope coils to come later. Looking ahead at rigging the vangs, I noted that an image of the Utrecht reconstruction showed small pin rails at the bulwarks, aft. So, I added those to the Mary. I didn't have a whole lot of room to do this, as the forward wall of the stern cabin is about an 1/8" further forward than the plans show. This was an adjustment made by the original modeler. Made the spacing a little tighter, but I think the new pin rails should be okay.


- 82 replies
-
- 7
-
-
- Yacht Mary
- Mamoli
- (and 1 more)
-
Gregory, I just used them right out of the bag. There is some color variation between batches of blocks. But, not enough to worry about. I'm very happy with the deadeyes. Also, the 3D printed stuff seems pretty sturdy. I've had wooden blocks split when trying to wire strop them. But, not the 3D printed blocks.
- 82 replies
-
- 1
-
-
- Yacht Mary
- Mamoli
- (and 1 more)
-
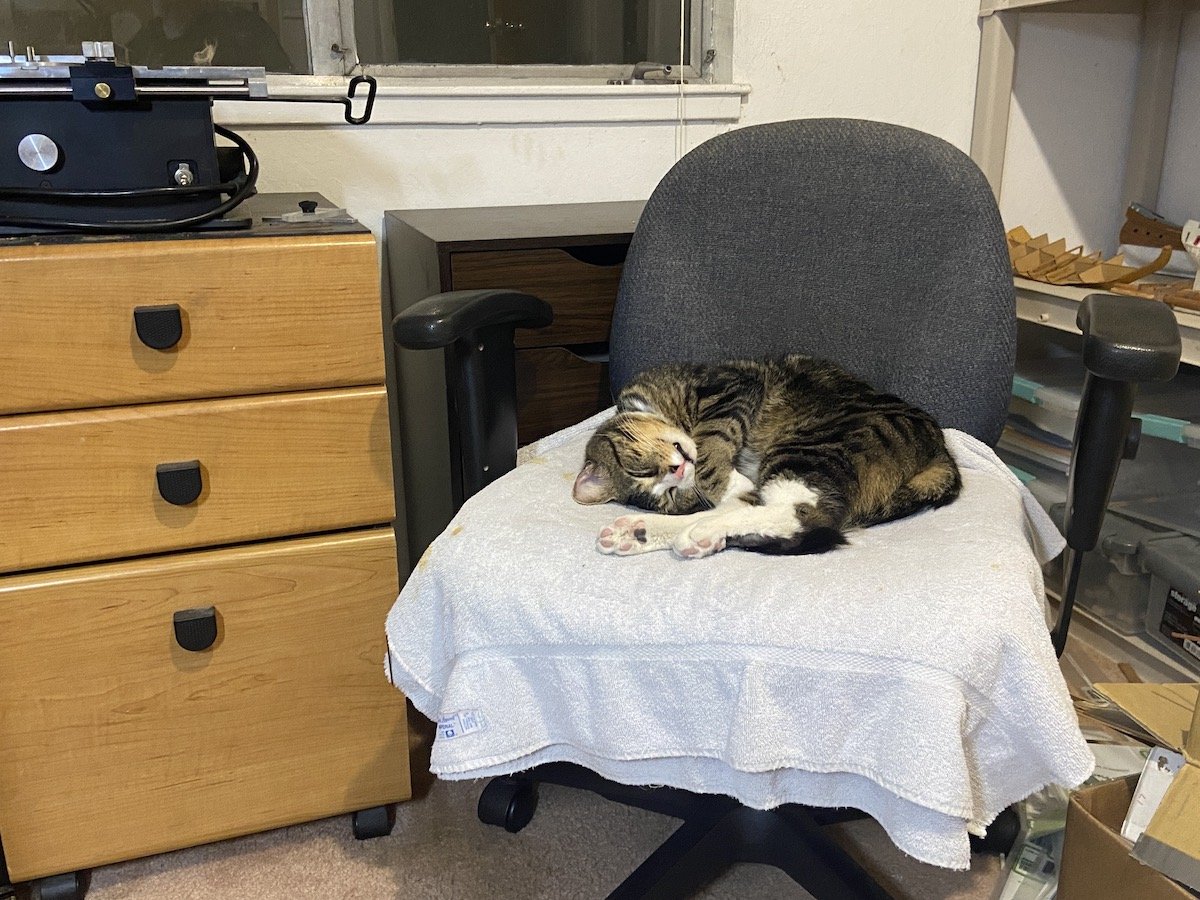
Trevor, thank you for the kind words. It is good to know that I'm not crazy for missing Sierra so much. Sebastian is a good, new companion, though he eats everything in sight, and then is ready for more! 😊
- 82 replies
-
- 3
-
-
- Yacht Mary
- Mamoli
- (and 1 more)
-
Thank you, Patrick. Her death has been really hard to take, we were very close. Two weeks ago, I was going crazy and decided that while I could never replace her, I needed to do find someone to take over her job at least. So, I adopted this little boy kitty from the animal shelter to serve as my new ship modeling supervisor and kitty overlord. I named him Sebastian, and he's been helping out a lot. It's taken him this long to get used to me, but we're managing pretty well now.
- 82 replies
-
- 8
-
-
- Yacht Mary
- Mamoli
- (and 1 more)
-
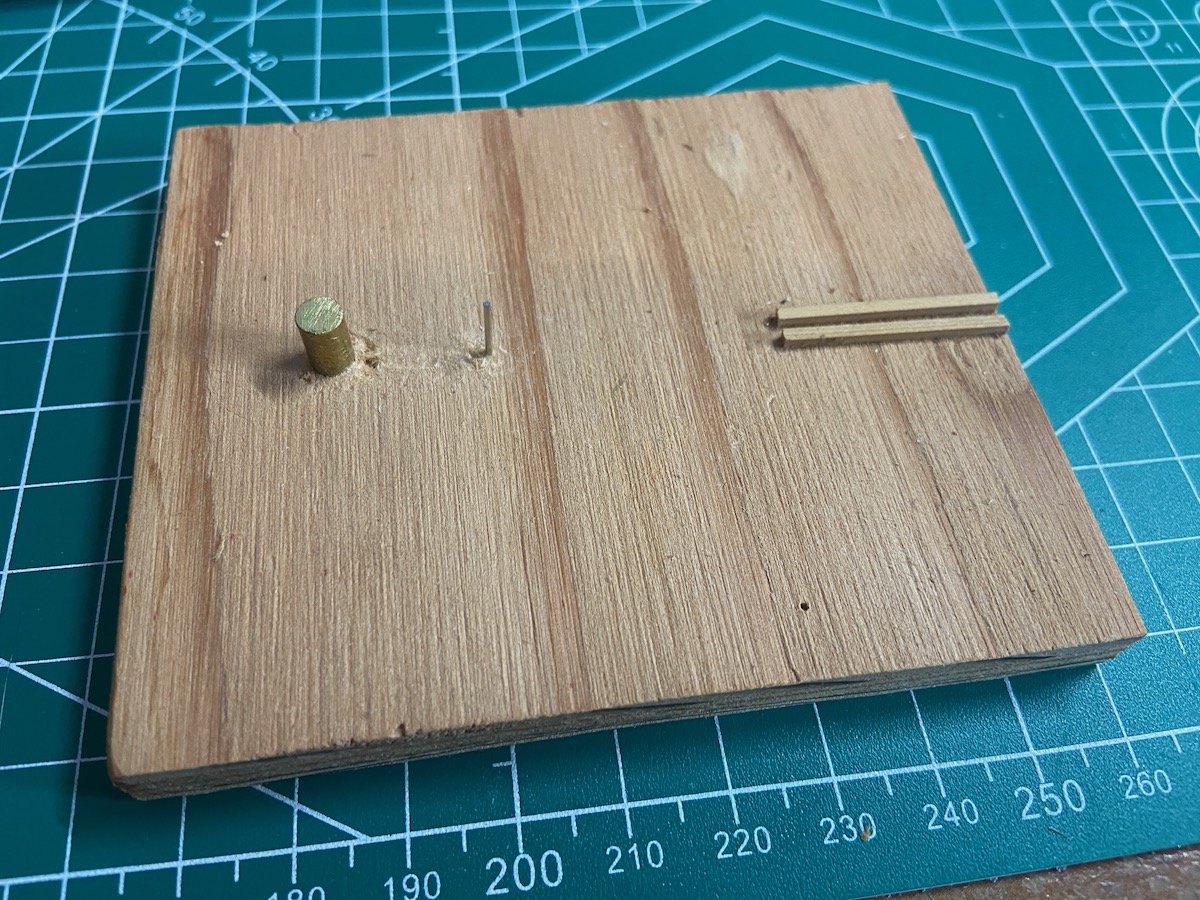
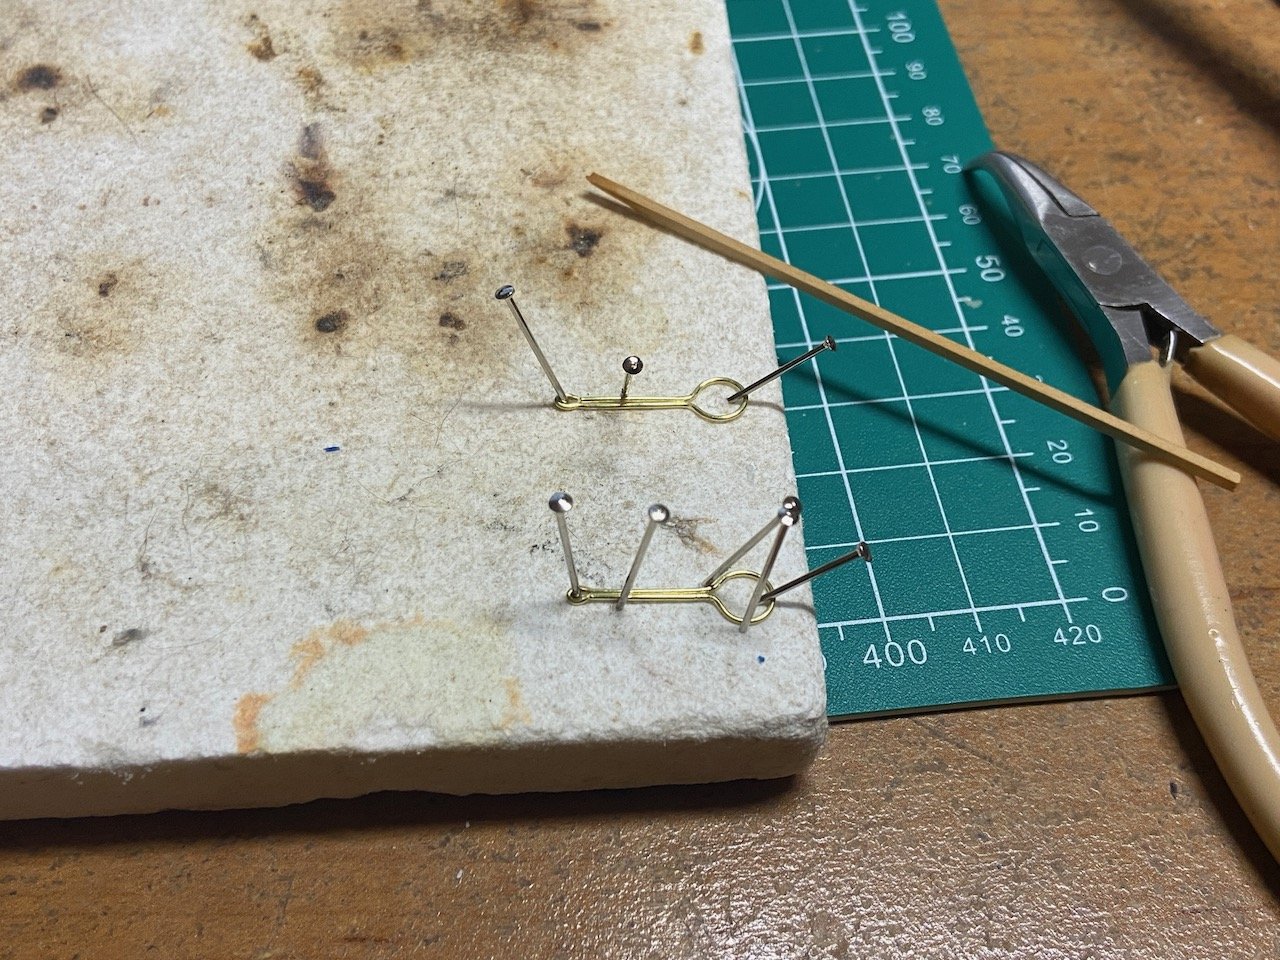
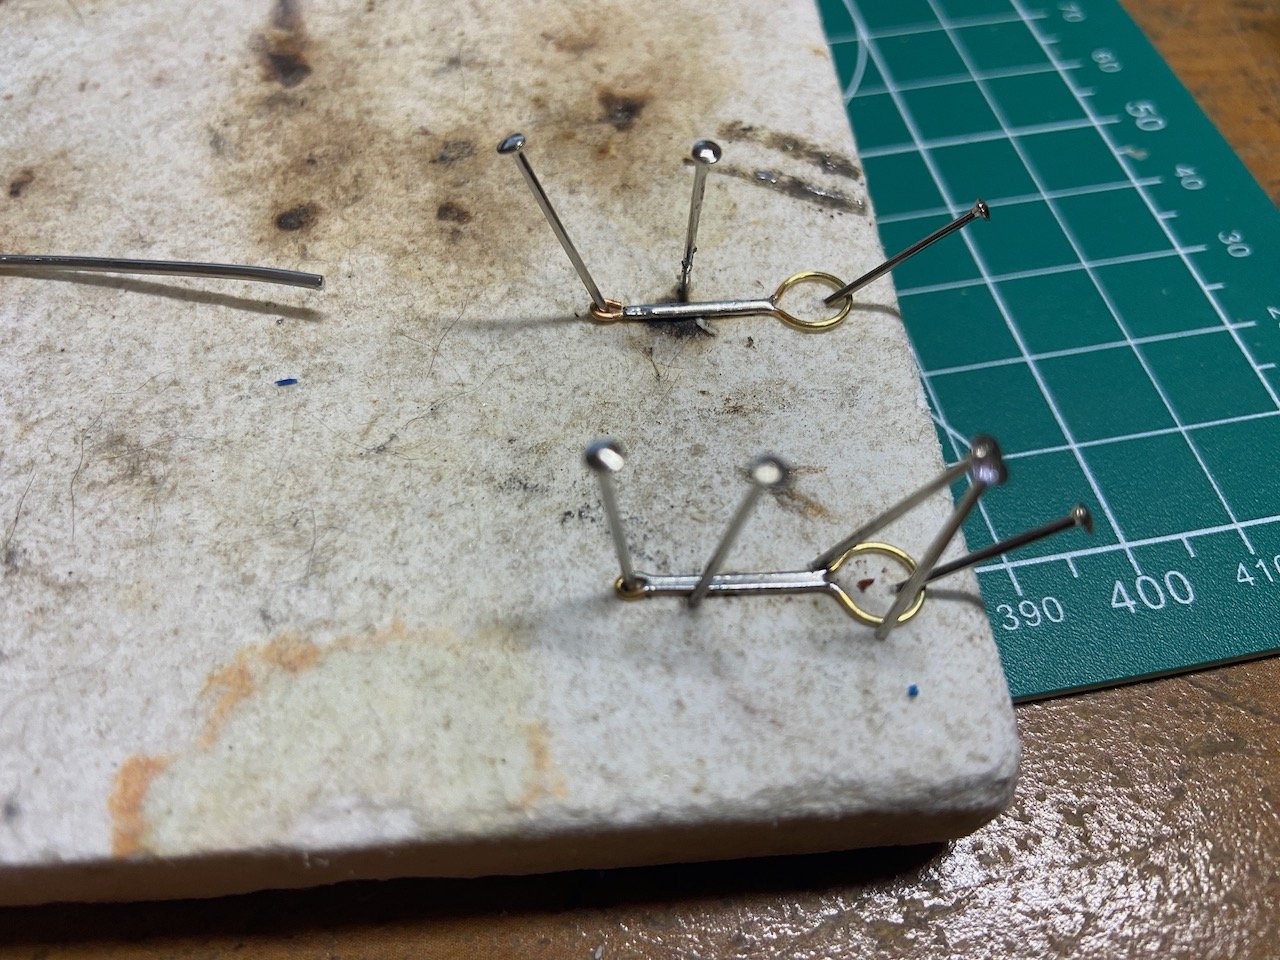
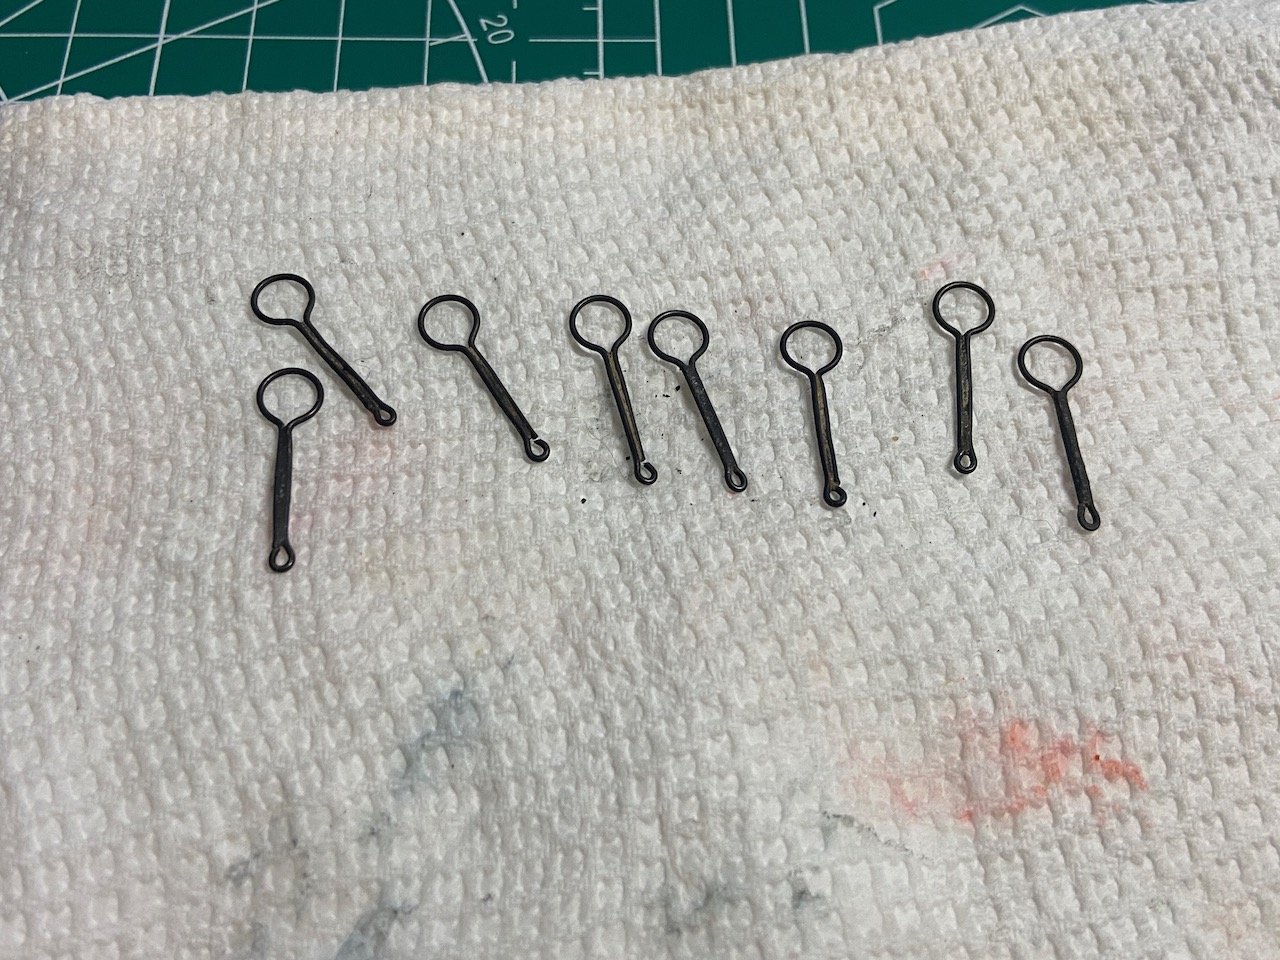
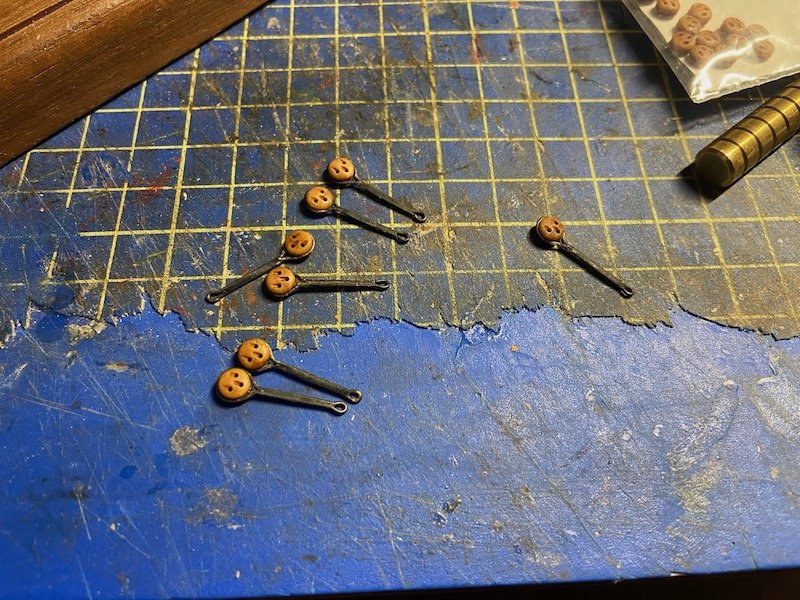
I've been having a really hard time working on my ship modeling projects. I started this topic a few days after my dearest kitty cat, Sierra, passed away. She'd been seriously sick for a couple weeks and couldn't hang on. I ended up having to work a lot extra to pay for her vet bills, plus had a hard time concentrating at home. So, things progressed very slowly, even though at times I thought things were getting better. Now, maybe they are getting better. I don't know. But, I did compile some of the work I've managed to accomplish over the last two-and-a-half weeks... I set the sails aside and started working on the main hold-up on this model, which is the making of chainplates. Once these are made, the shrouds can then be dealt with. It’s been a long time since I’ve made decent chainplates. On the Charles yacht model, they are simple wires that wrap around the deadeye and the bottom ends are inserted straight into the hull. I wanted something a little more sophisticated. So, I created chainplates from brass wire that are soldered to form flat plates with a loop at the bottom end for a nail. Took me a while to consistently form brass wire into the right shape. For this, I had to make a little fixture with a piece of brass rod for the big loop (for stropping the deadeye) and a hard, stainless steel pin for forming the small loop for the nail. It’s also been a long time since I’ve done much silver solder work, and I couldn’t find my silver solder and flux, so I had to buy more. I was sure I had some somewhere, but I guess it was hidden away somewhere some time ago. The soldering process turned out pretty well as you can see below. After soldering and cleaning up the new chainplates, I blacked them, starting by soaking them in vinegar (acetic acid) solution, rinsing them off, and them soaking them in a dilute solution of BlueJacket’s Brass Black solution. I find that BlueJacket’s metal toners work the best of any metal toners I’ve used over the past 30 years. Deadeyes are 5mm, 3D printed resin deadeyes sold by Syren Ship Model Company.
- 82 replies
-
- 7
-
-
-
- Yacht Mary
- Mamoli
- (and 1 more)
-
Yes, The Pilot Boat 'Phantom' Menace
-
Without these, I'd be useless at ship modeling...

-
Hi Bruce, I'm enjoying watching your progress on your Mary Taylor model. I also built the Mary Taylor many years ago. She's a beautiful schooner. Your model is coming along very nicely!
-
It's interesting to note another deviation from the Mamoli plans – there are no sheet blocks attached to that large topsail spreader yard. The sheet blocks are attached directly to the sail, and they "ride up" the braces. Means no need to have belaying points for the topsail sheets, and no sheet block slung under the spreader yard either. I've also noted there is no place to belay the vangs. The Utrecht reconstruction looks to have small pin rails on the bulwarks, near the tackles. Saw that on a photo somewhere, but don't see it now.
- 82 replies
-
- 3
-
-
- Yacht Mary
- Mamoli
- (and 1 more)