divarty
-
Posts
130 -
Joined
-
Last visited
Content Type
Profiles
Forums
Gallery
Events
Everything posted by divarty
-
 Well done Andy, she looks fantastic, something to be proud of. Now the big question, whats up next?
 -
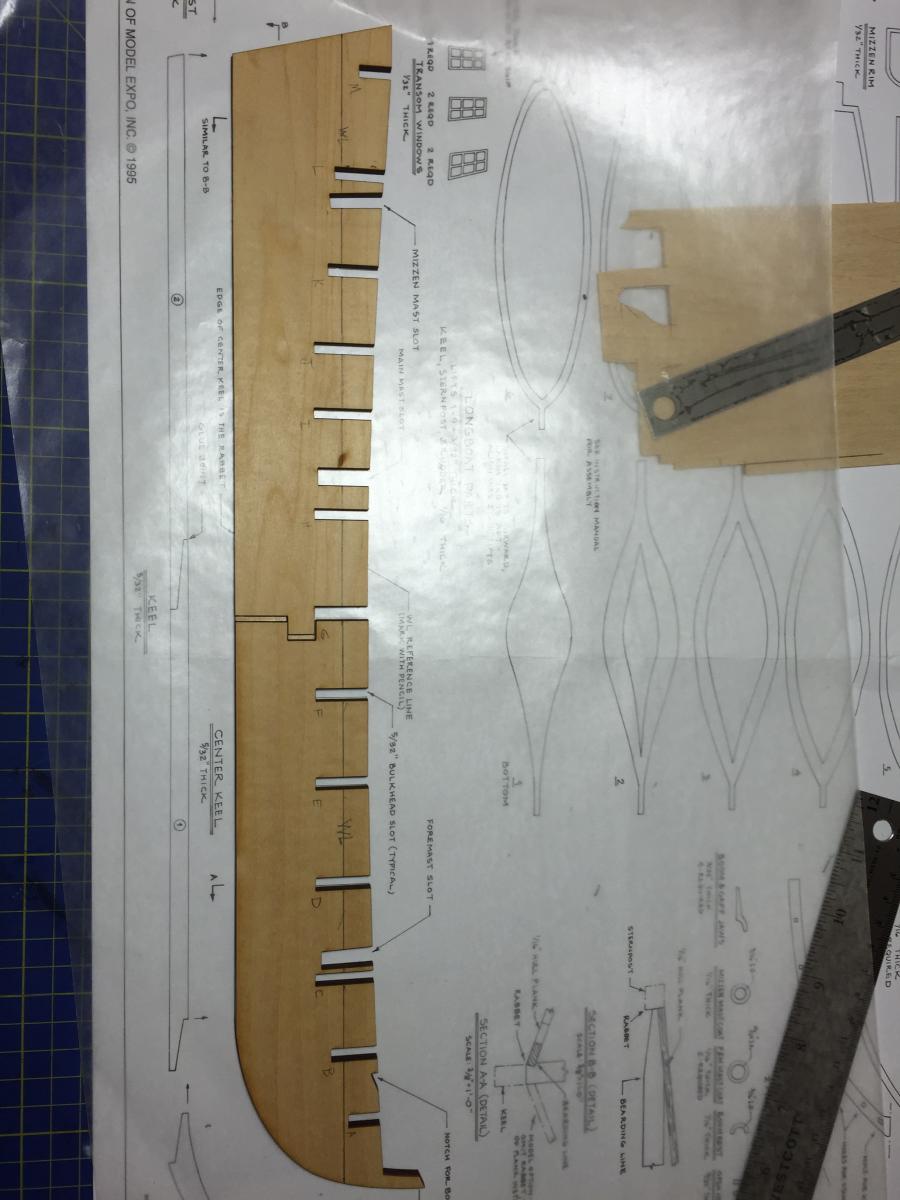
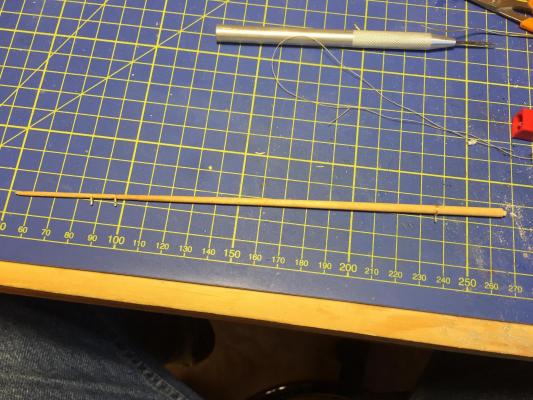
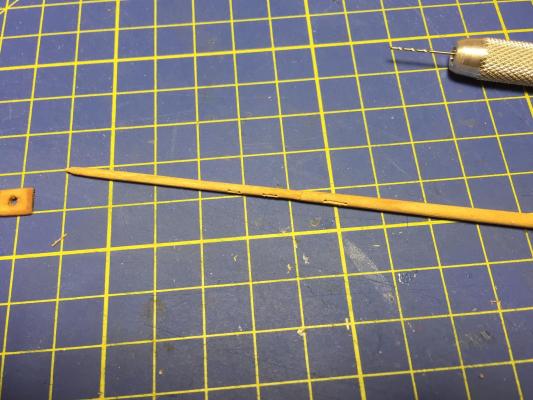
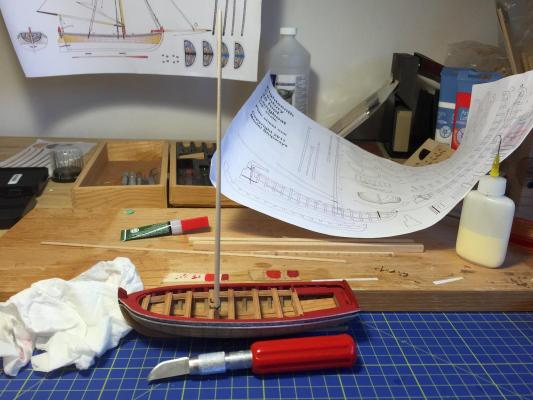
A minor update for my second post but this will be a long drawn out process, so I figure I will update anything that strikes me as useful for others/interesting to me. I spent the afternoon crawling through the parts, measuring all the wood, it seems I'm short some cordage and one sheet of laser cut wood, I'll put in a call to Model Expo to get them replaced later (nothing necessary for the start). I marked up the center keel with the waterline and bulkhead letters and matched it against the plans, it appeared the center keel was too short, thanks to the other logs this wasn't a huge issue and I shimmed it up before gluing. I still need to shim up the slot for bulkhead G but I'll do that when I fit the bulkheads. Then I weighed it down with the best flat heavyweight I could think of, which turned out to be quite fitting. I'll let it all set up then tomorrow I'll mark up the bulkheads with the waterline and start to place them onto the center keel.

-
Thank you! I used Windsor & Newton acrylic that I picked up at Michaels. For the wood it was excellent, for the metal it tended to flake off, although I think that was most likely my fault for not priming or prepping the metal correctly.
-
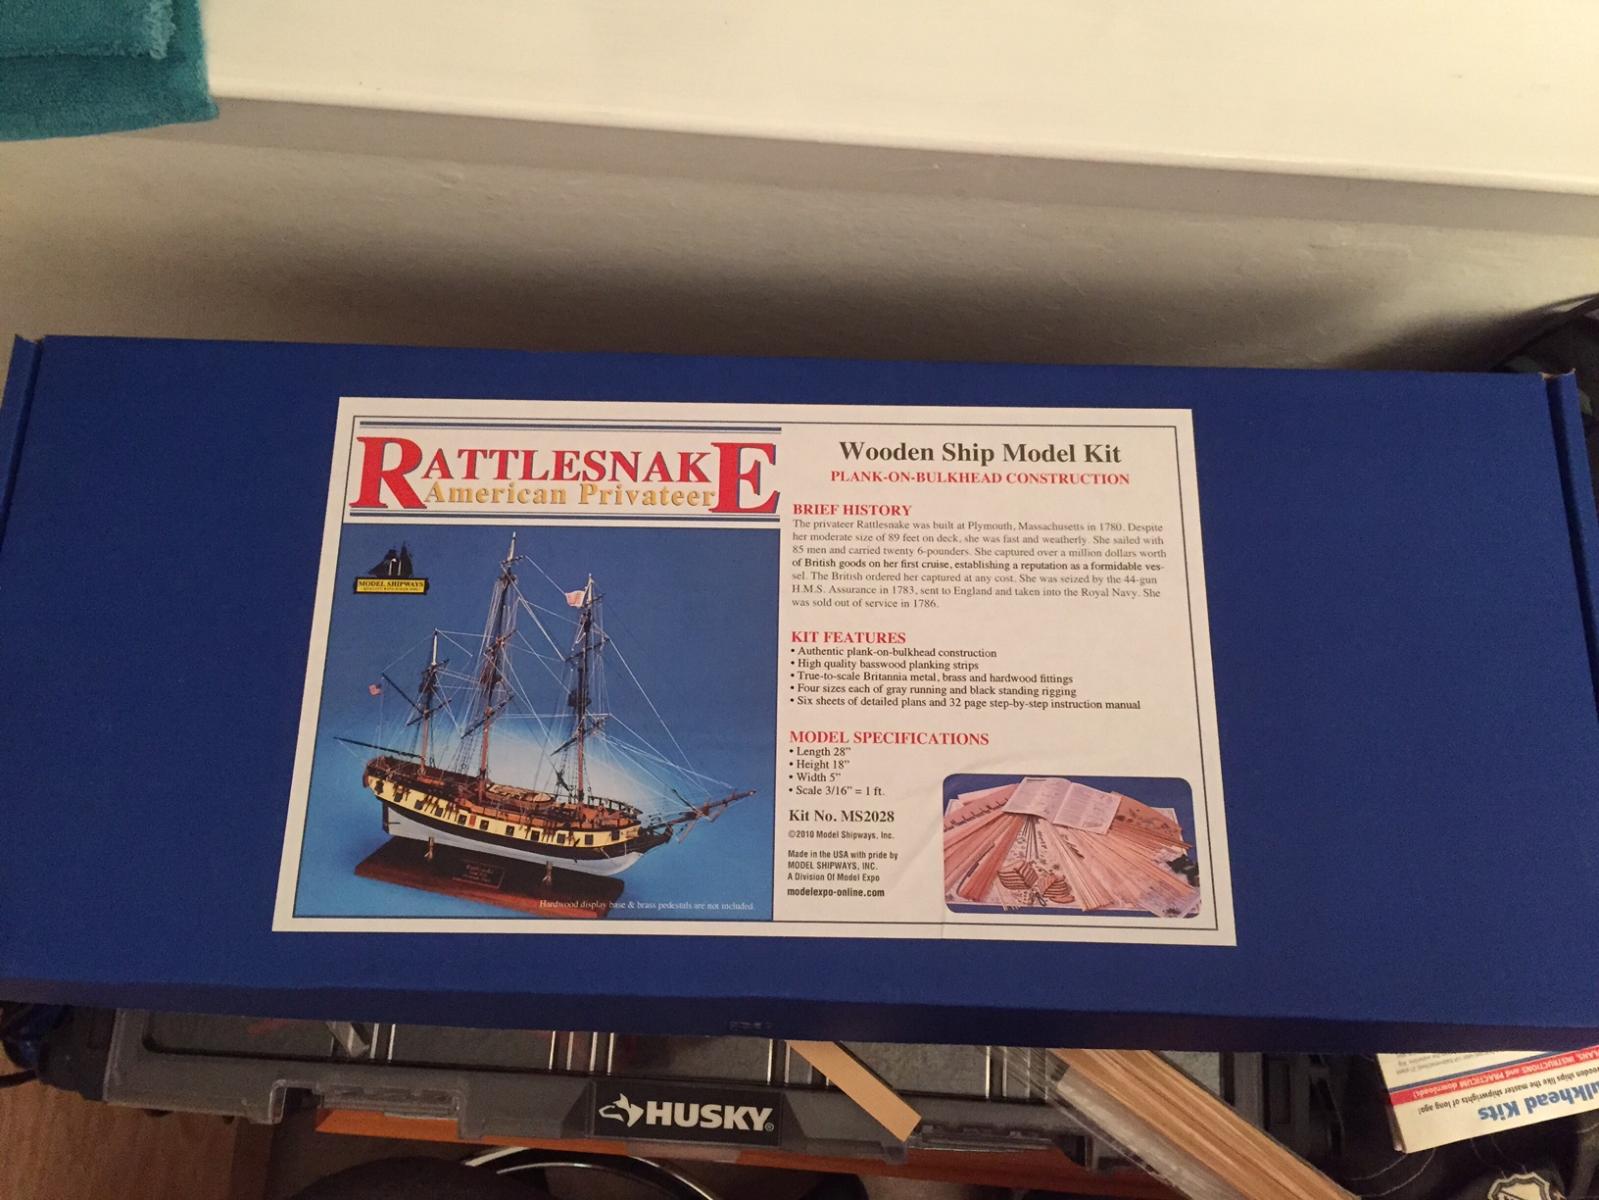
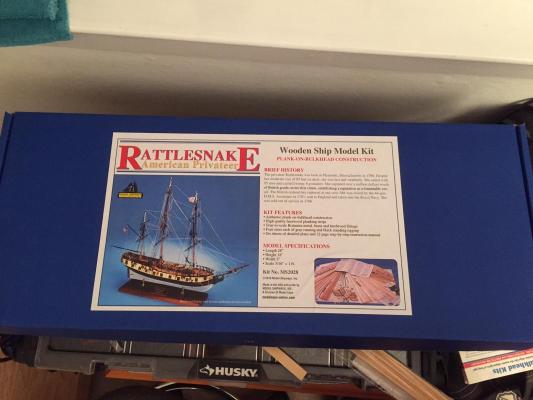
Throwing my hat into the ring with the Rattlesnake, I received the kit about two weeks ago but put it aside to finish my longboat. I picked up the fair a frame kit from modelexpo at the same time and started putting it together last night. After I get back from the family Christmas it will be time to implement a lesson learned from my longboat build, measure, separate and label all the wood, cordage, blocks, deadeyes etc to ensure I don't use the wrong size when I'm not paying attention then it will be off to the turtle races!
-
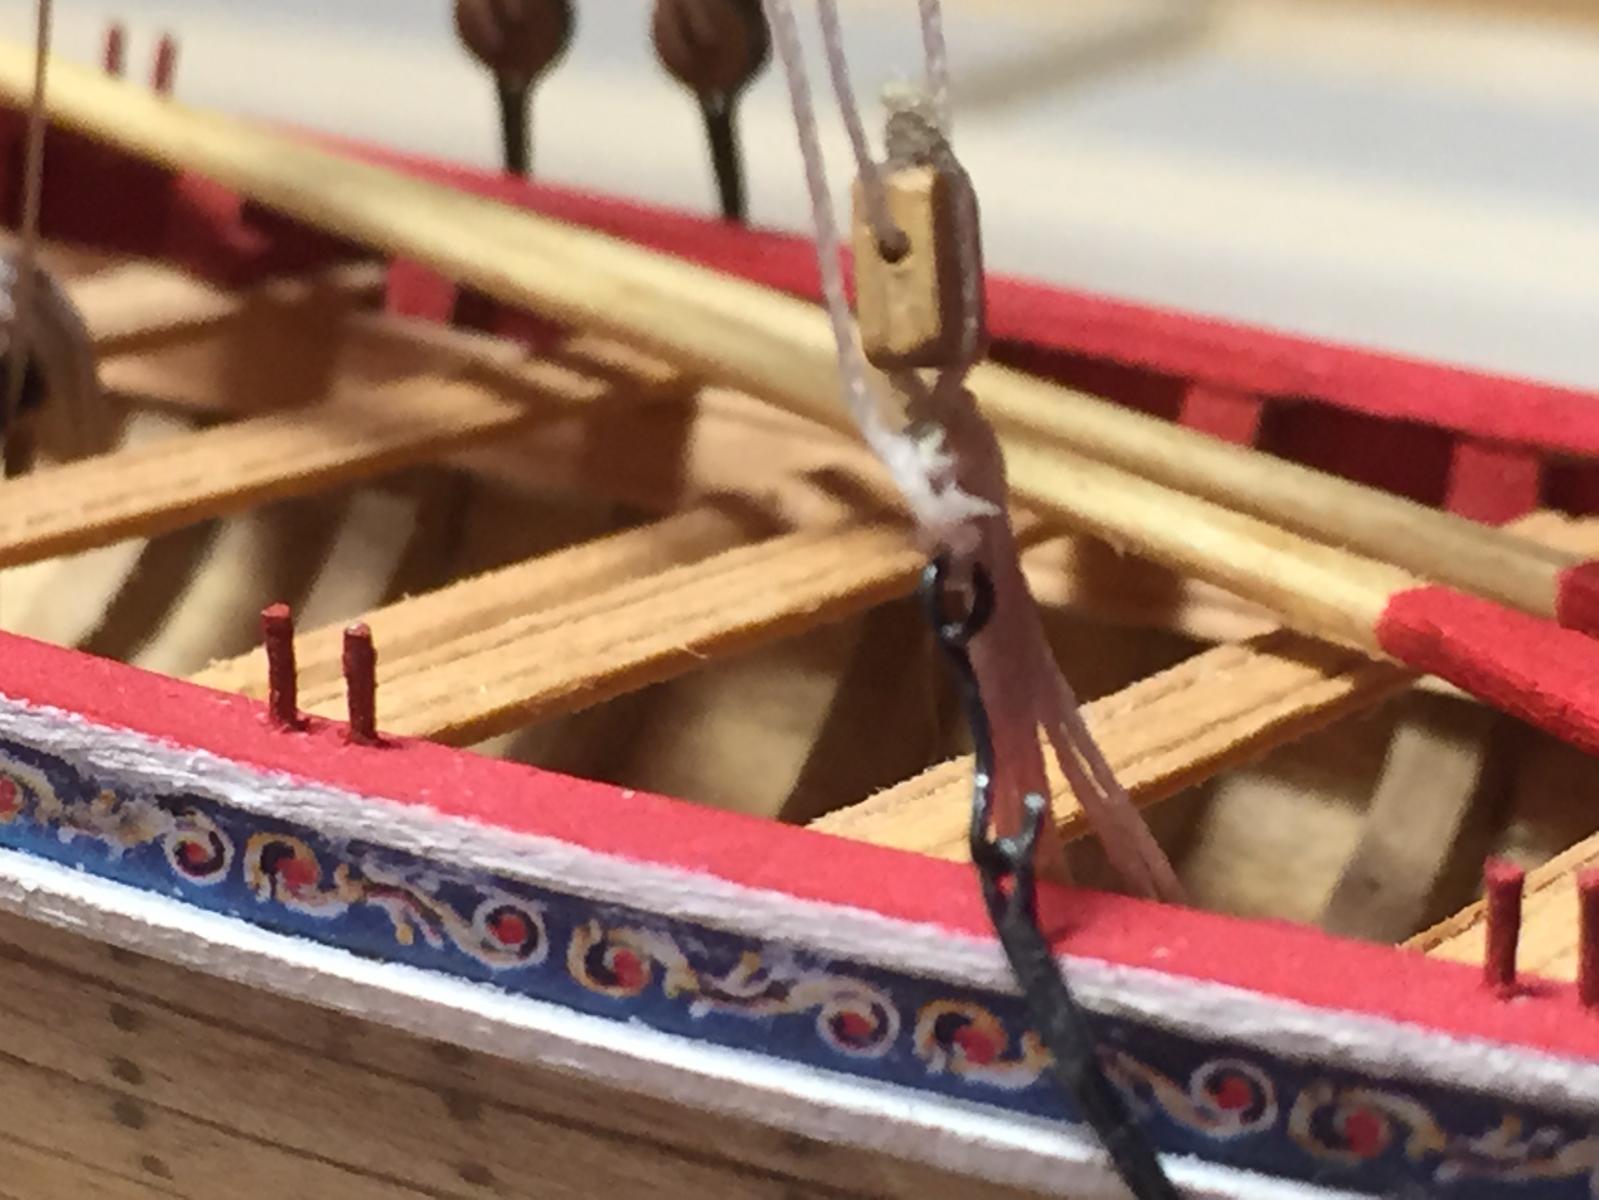
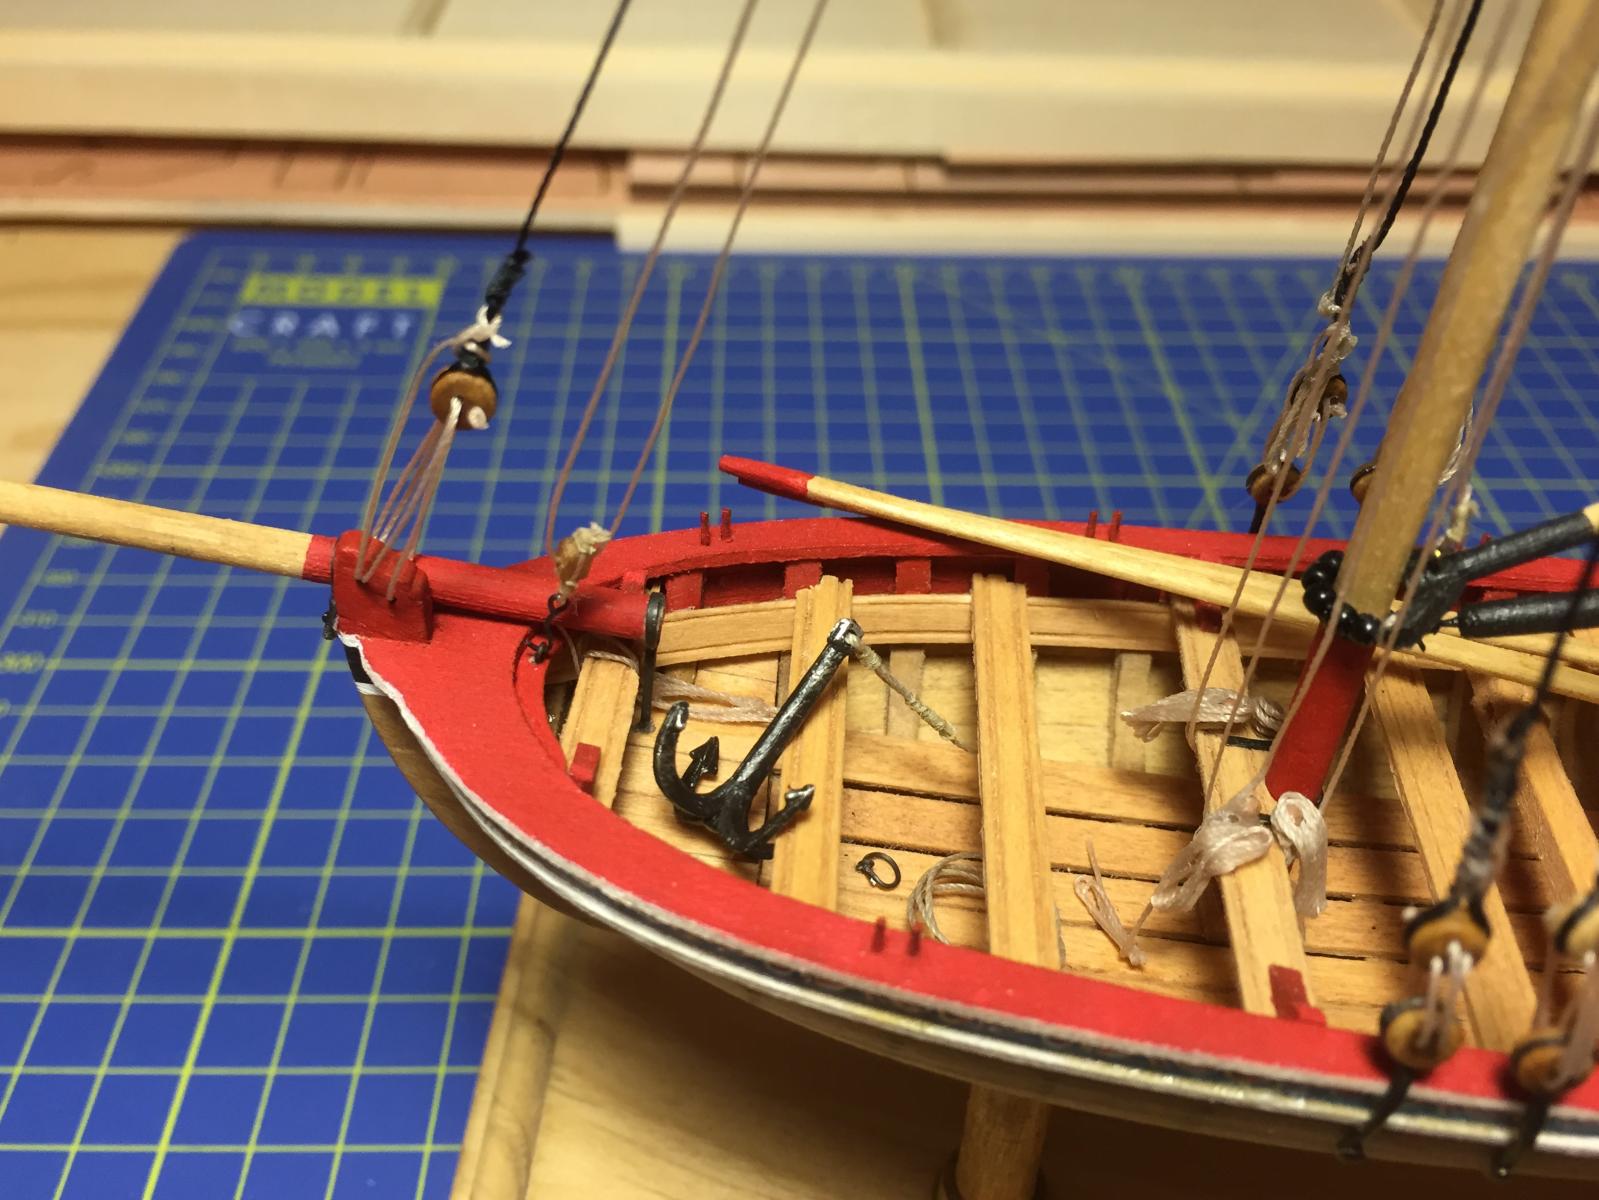
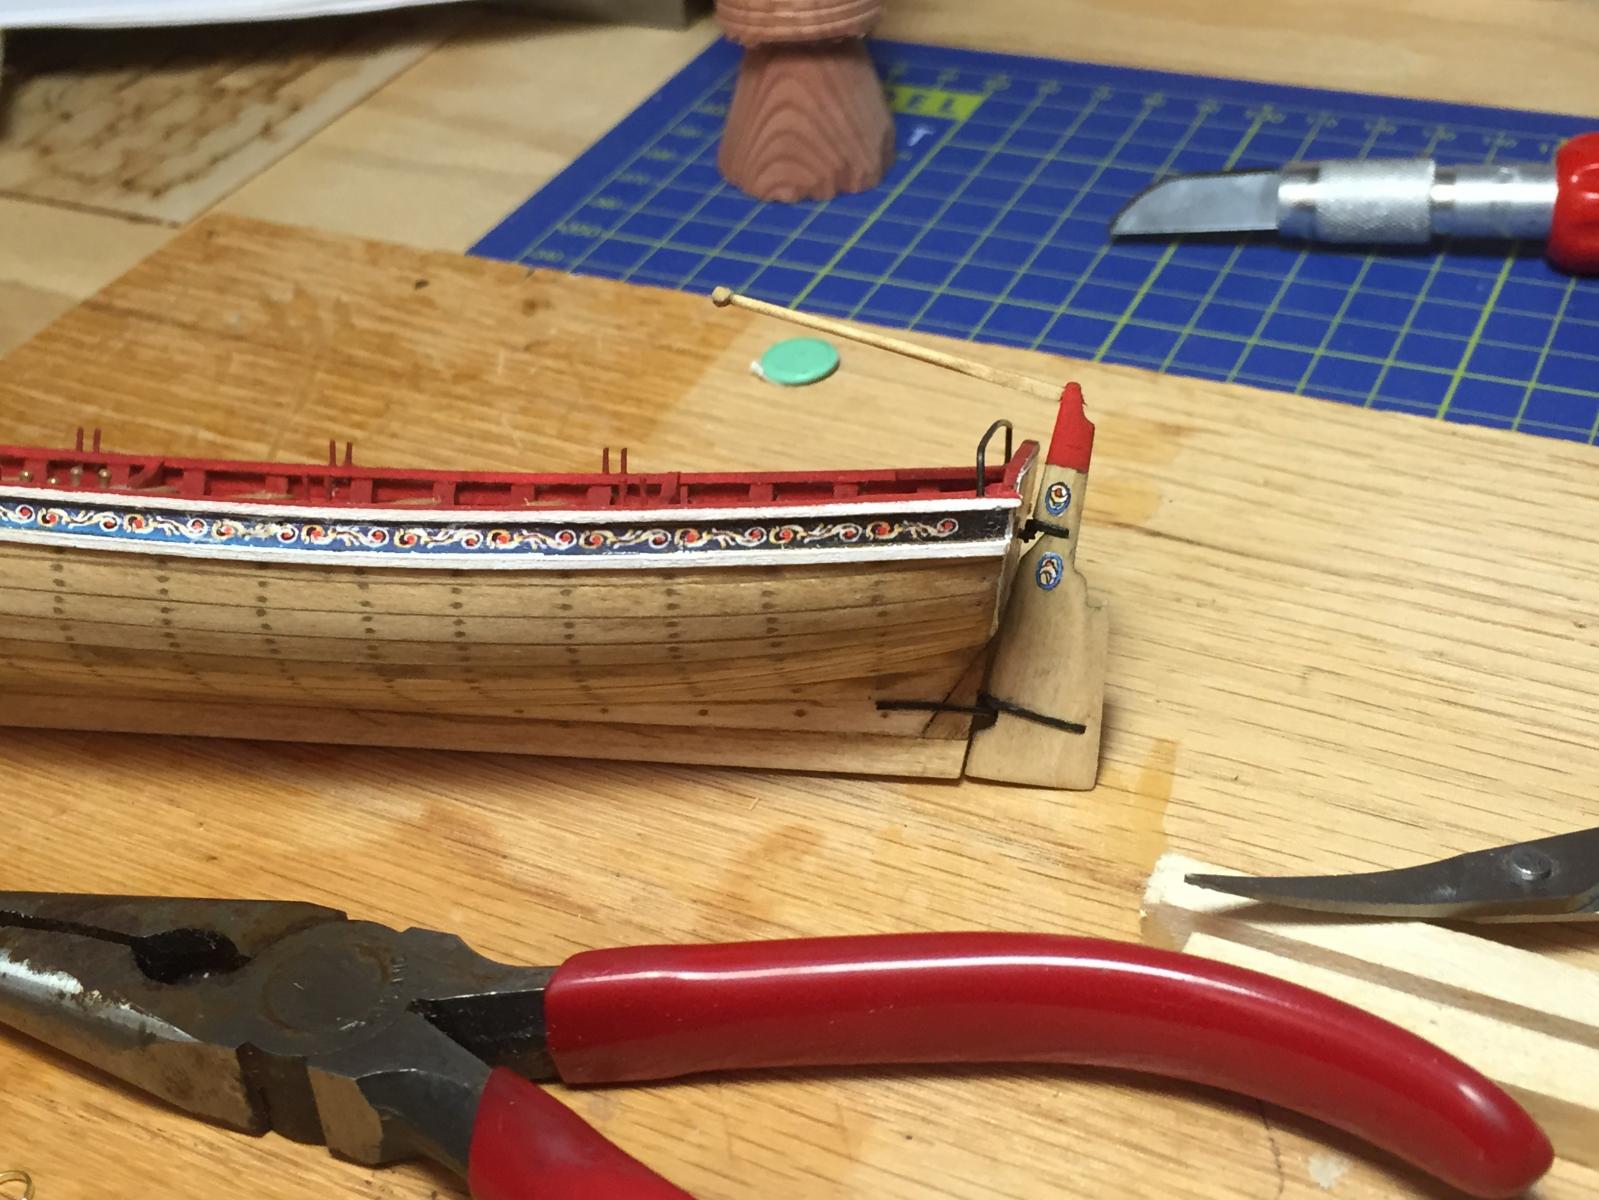
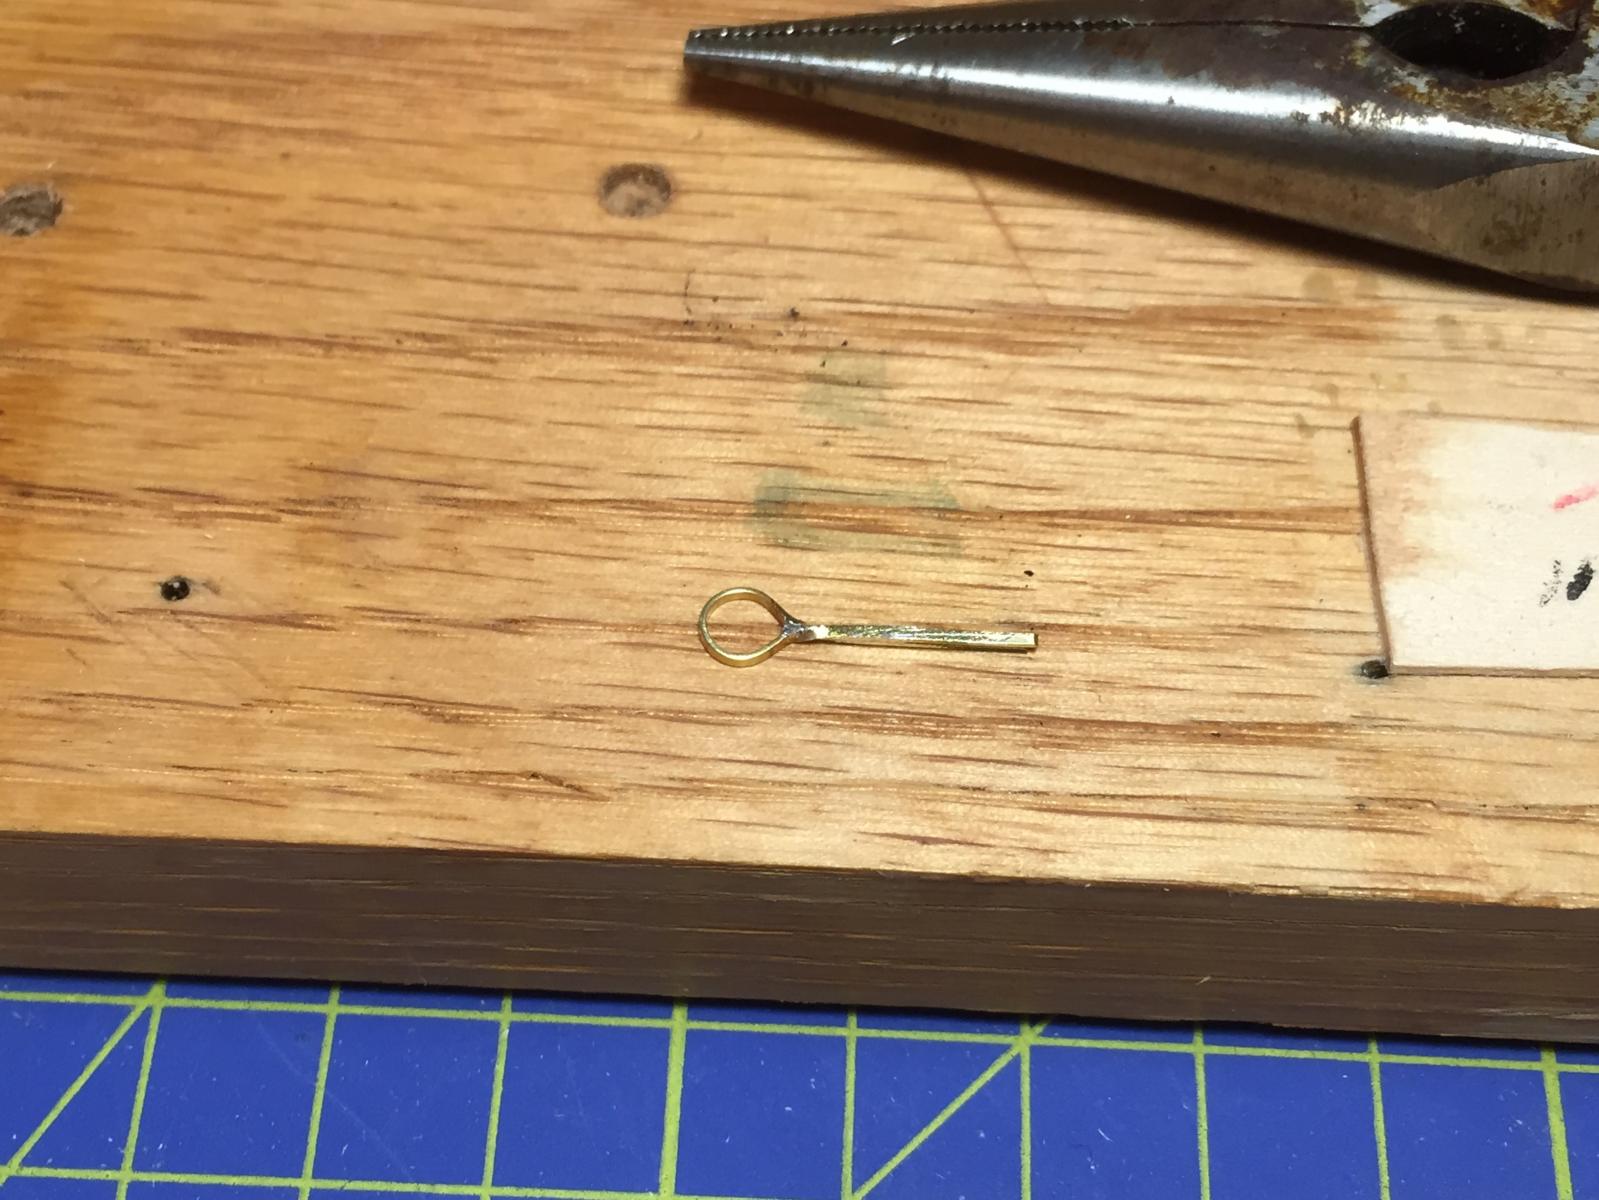
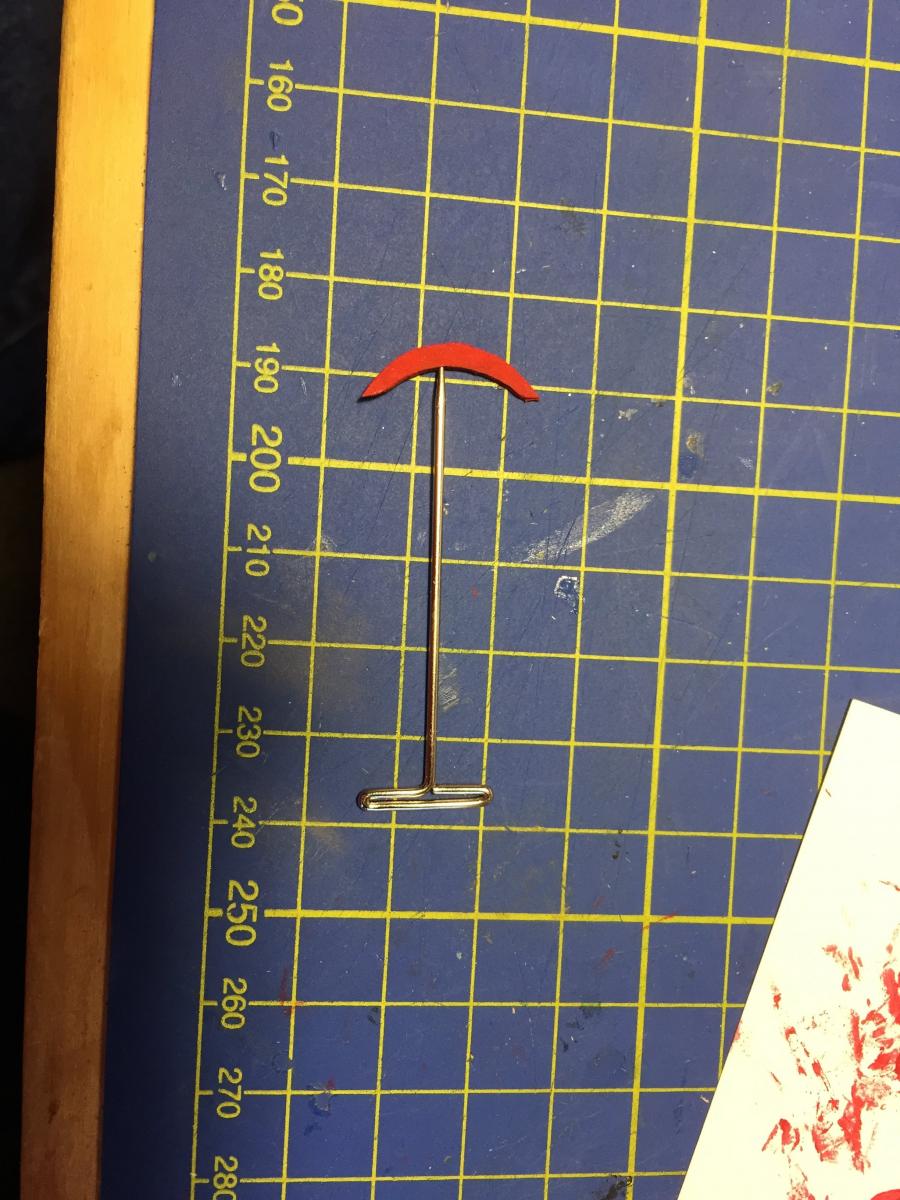
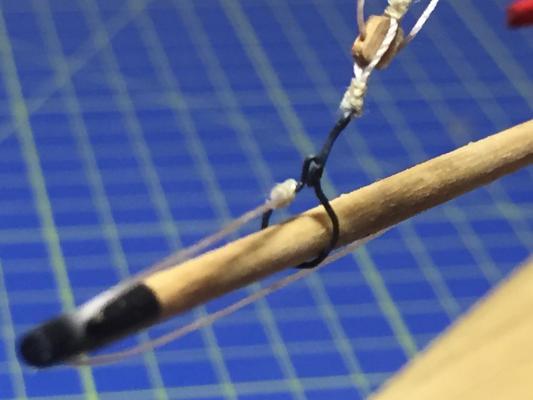
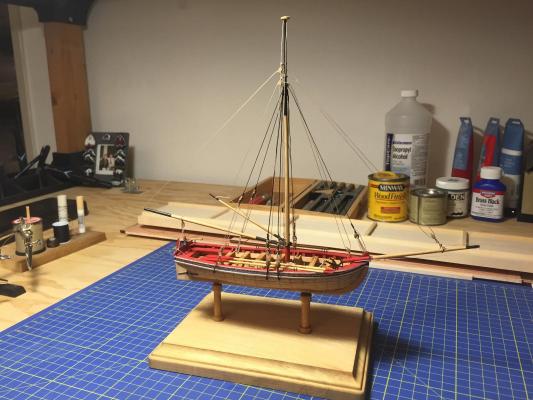
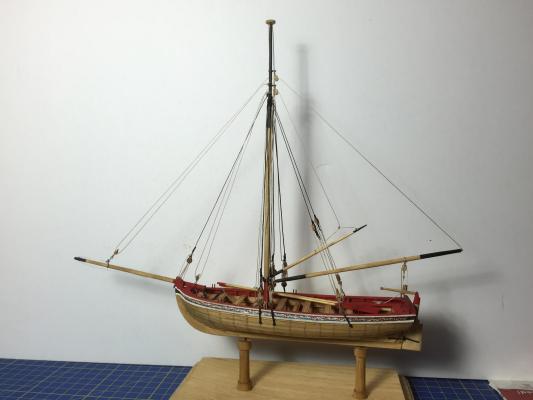
So a funny thing happened in the shipyard this weekend, I started early on Friday and was cranking along, next thing you know Sunday rolls around (I had some sleep in between) the boat was finished and I had failed to take progress pictures. Overall i would say the instructions through this final patch were solid, the only issue I had was it called for thread sizes that I didn't have, the black supplied with the kit only comes in two sizes and I don't think they match up with the sizes called for in the instructions. The hook on the backstay Anchor and forward area The traveller ring The full boat + stand And a quick pic of my next project, I hope I have the chops for it, time will tell, but I will take my time, review logs and try to focus on quality and perfection. All kidding aside I think it's a 2 to 3 year project for me, so thats where you will be able to find me. Thanks to all of the the folks the followed, commented and liked on this build, it's always more fun when people chime in or give you a thumbs up. Kudos to Chuck Passaro for fantastic little boat design, a lot of feeling and life in this little model, two thumbs up.


- 55 replies
-
- 10
-

-
- 18th century longboat
- model shipways
- (and 1 more)
-
Flying along now Jack, she looks great, good call on the thwarts, I know my sizes between instructions and plans varied but it may have been me measuring it incorrectly. For the thwart where the mast drops through you were spot on in using a wider piece. Thats a great tip by the way with the handkerchief, I'll file that one away for later use.
-
Todays visit to the ship yard is brought to you by the word "mistakes". I made all the chainplates and attached the eyes then mounted them to the boat, after I looked at it I realized that I h ad mounted them equal and fore of the mast instead of equal and aft of the mast I pulled the front two off, filled the holes with putty and stained it then drilled new holes aft of the mast and remounted the chainplates. "Doh" number one of the day I rigged the shrouds with the deadeyes and ran the lanyards to connect the chainplate deadeyes and shroud deadeyes. Everything was going well and I called it a day and cleaned up when I realized I had used the wrong size thread for the shrouds. I used the .012 black thread instead of the .021 "Doh" number two of the day it's all good though, I'll cut off all of the rigging I've done and redo it with the proper thread, at the same time I will redo two of the chainplates that sit too high above the cap rail. One thing I think I will deviate from the instructions when I rebuild them is to have the join of the wires that Chuck shows on top of the deadeye near the side or the bottom, it will be less obvious.
- 55 replies
-
- 6
-
-
- 18th century longboat
- model shipways
- (and 1 more)
-
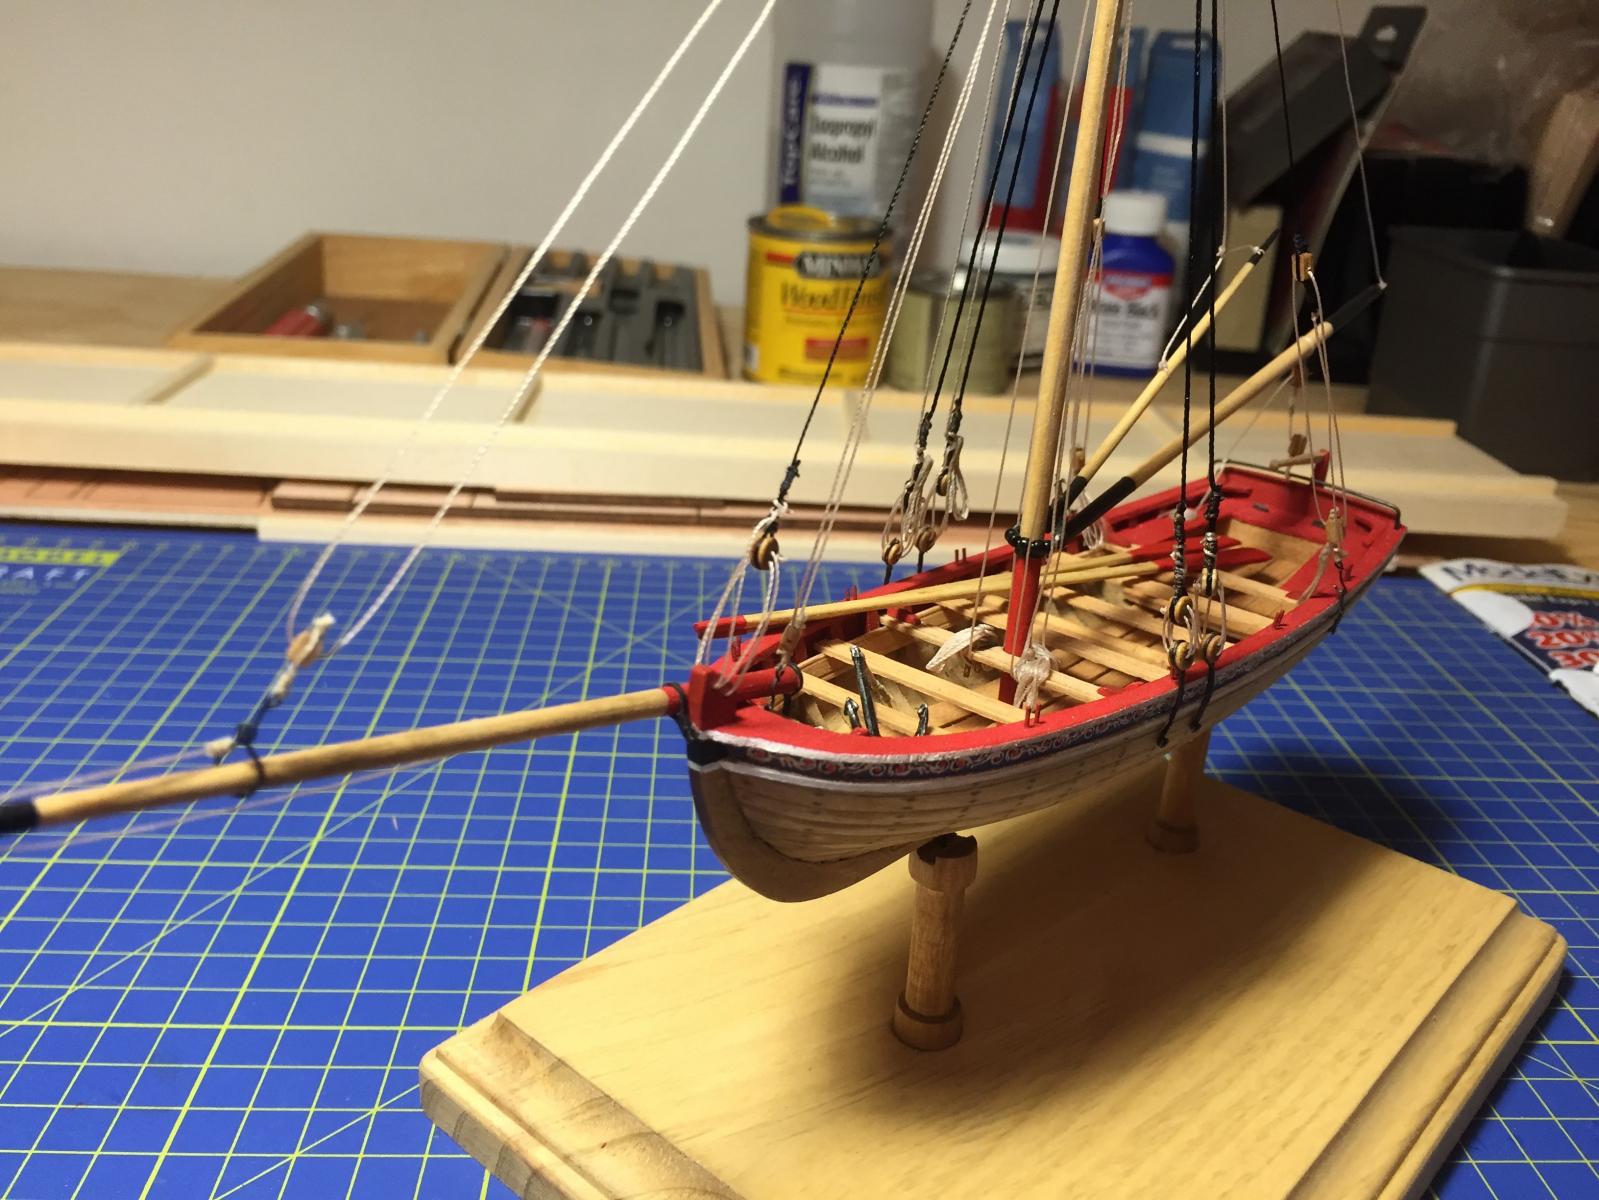
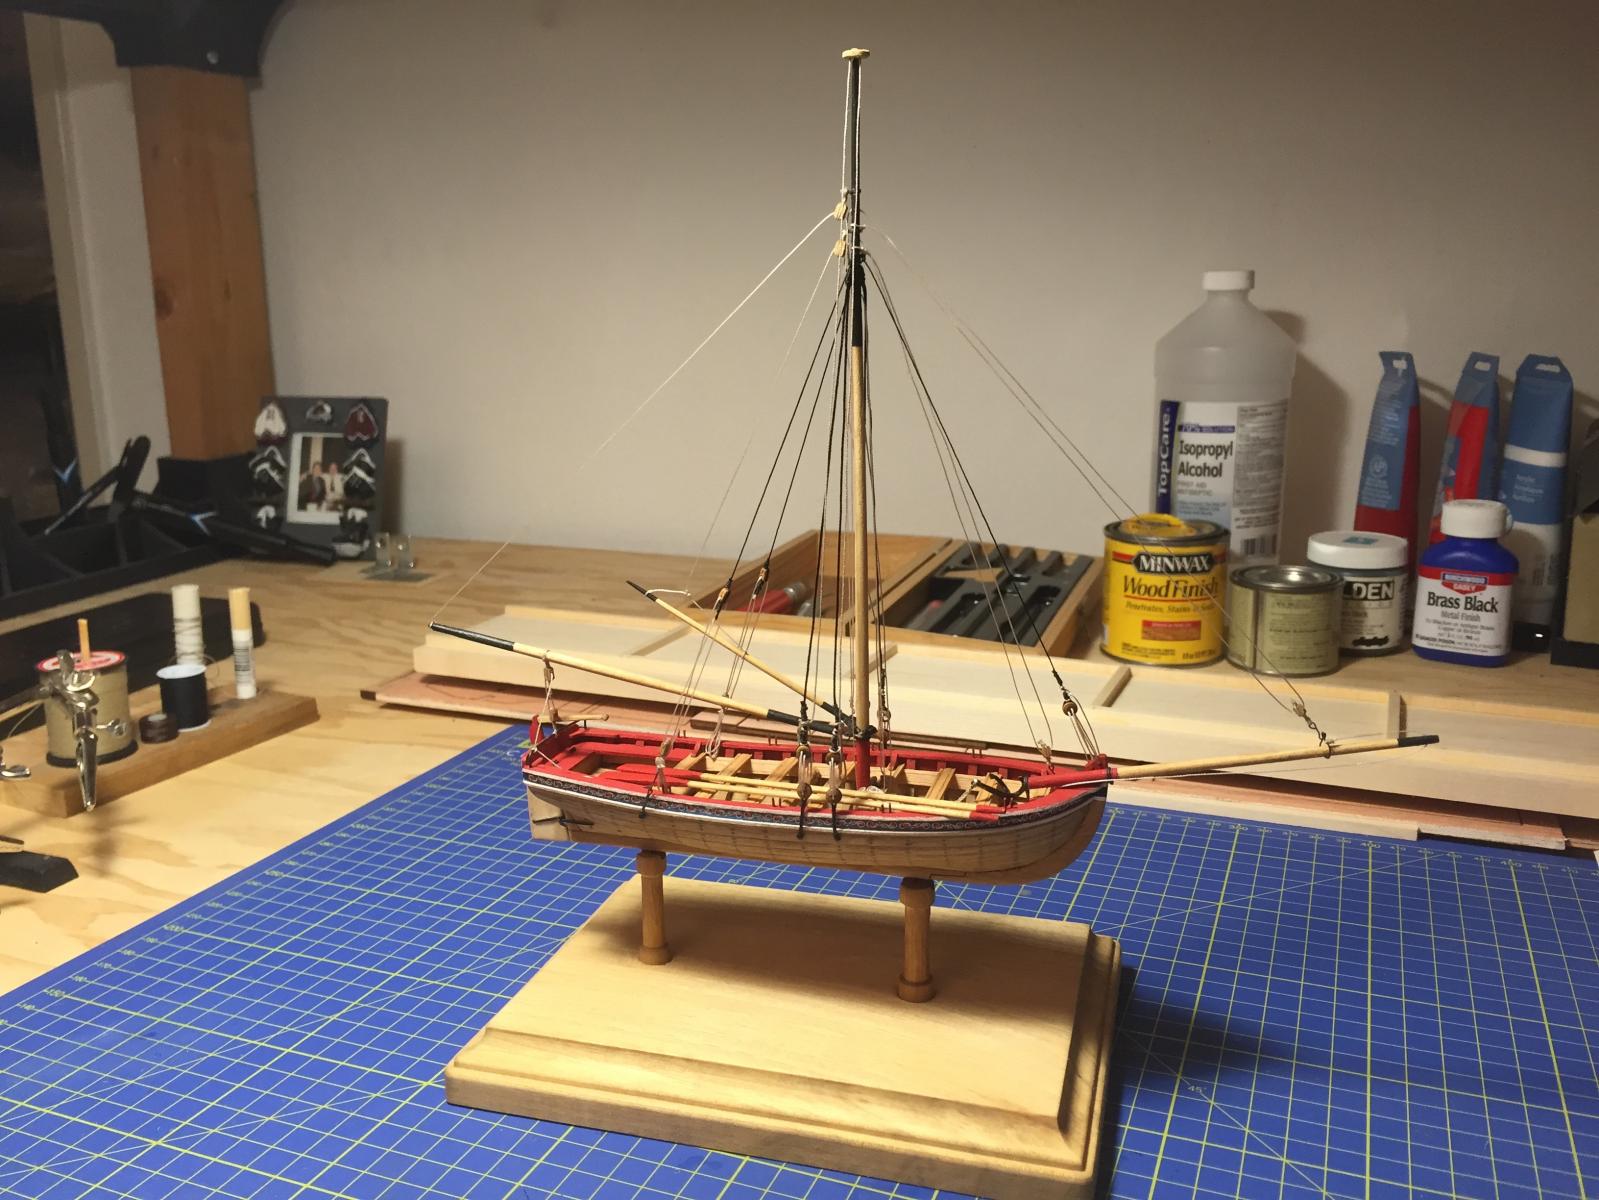
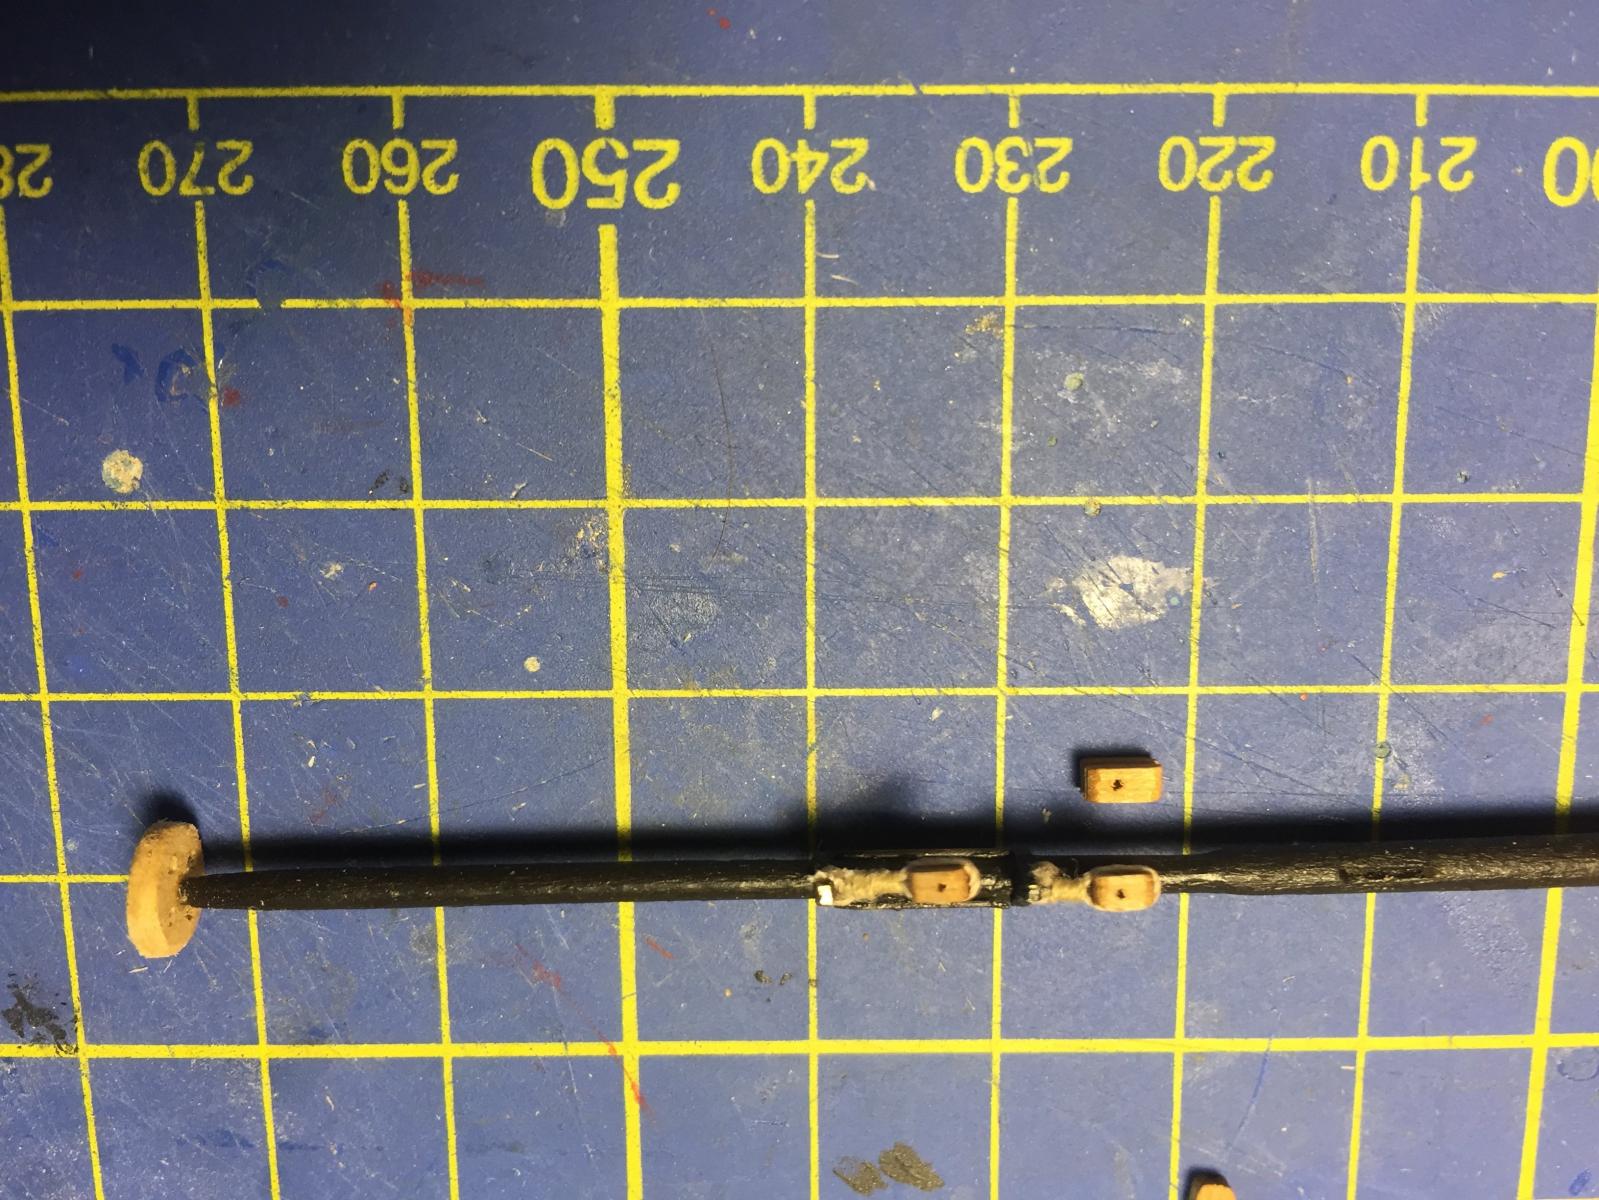
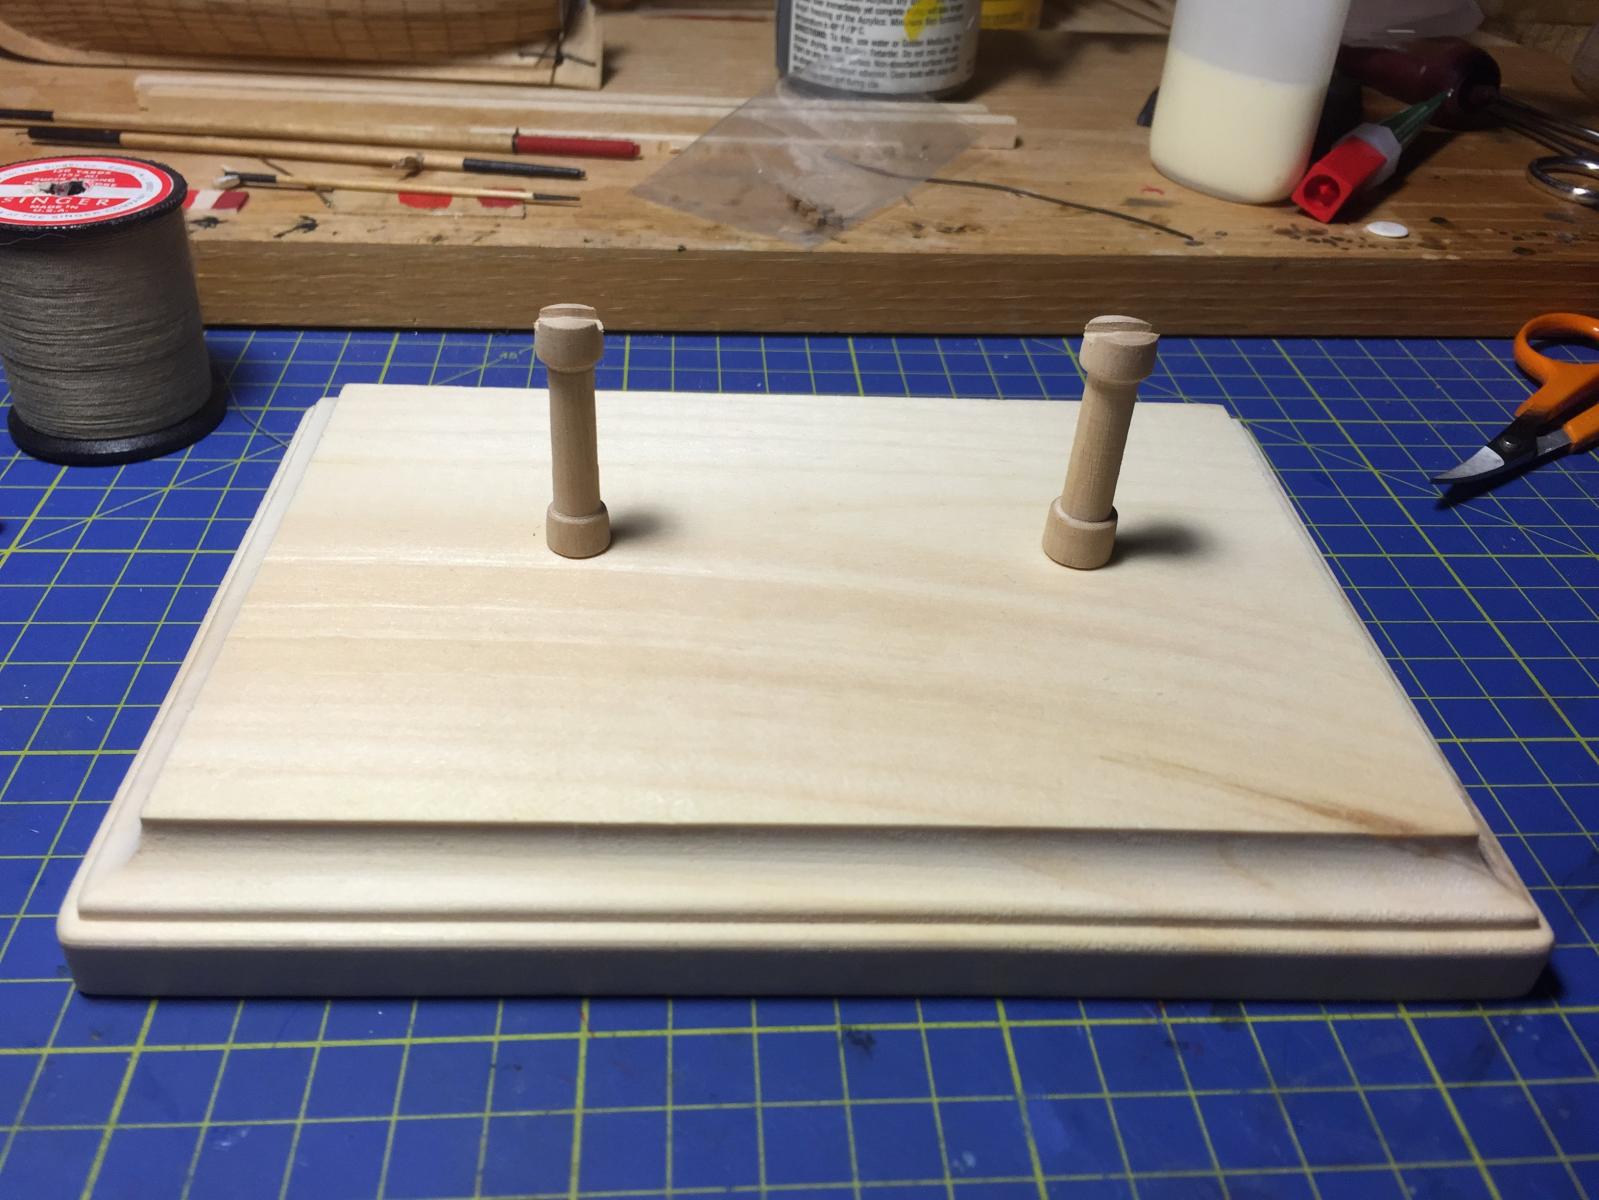
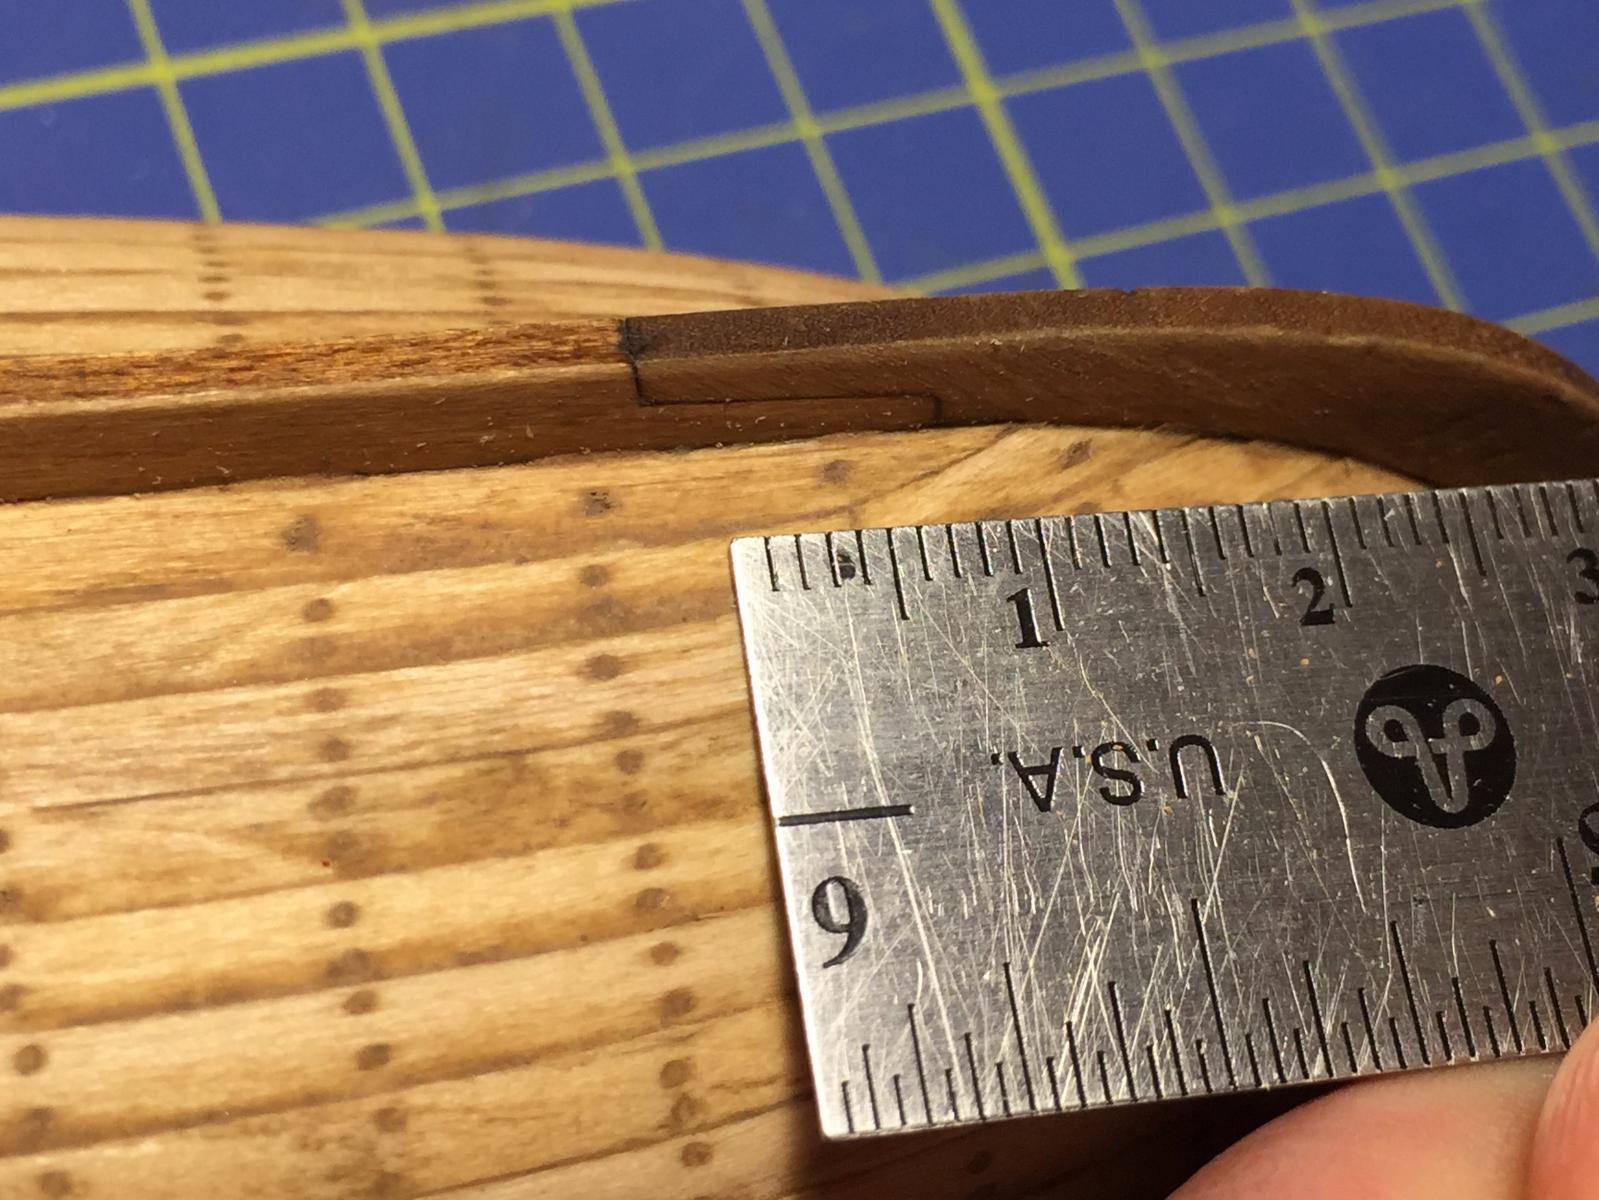
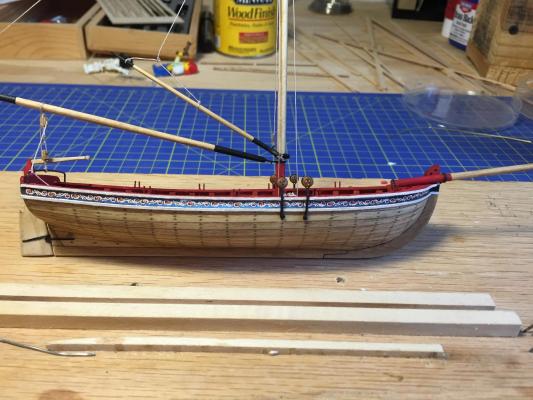
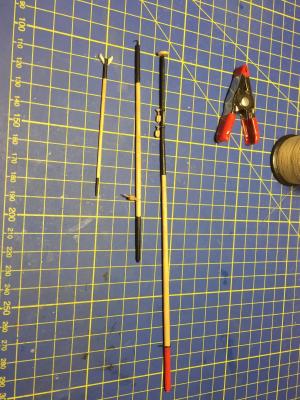
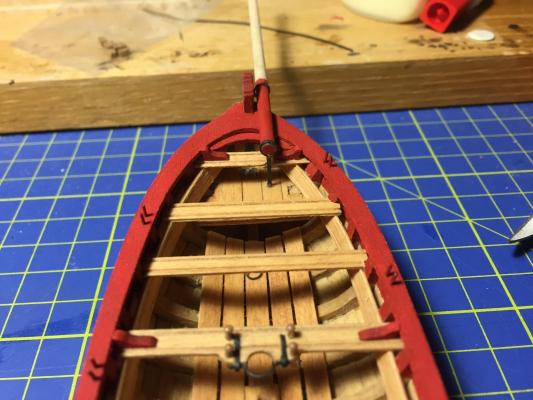
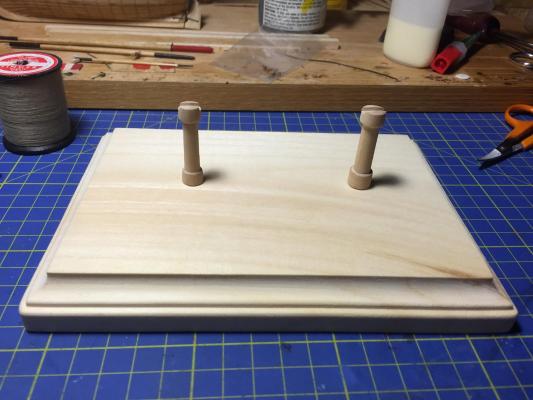
After a week of not going into the ship yard because of the broken mast I finally bit the bullet and went back to work. I glued the mast back together, it was still partially attached, and I used two strips of the brass to brace up the sides, I then painted them black. Overall not the ideal fix but I was dreading a redo as I had spent quite a bit of time getting my iron work up to snuff. From a short distance you can't even really see the "fix" (sorry for the blurry pic) I was working on the boom and the the gaff and trying to figure out how to tie the block for the boom (I couldn't find closeup photos that showed the loop when I came to the realization that I had used the wrong blocks on my mast. Doh. So I cut them off and redid them with the correct 1/8" single block. After finishing that, rereading the directions and finding some close up photos I finally figured out how to do the block for the boom. While tying these I remembered that ship building is like bomb disposal in one respect, make sure you know which thread you have in hand before you cut it or bad things happen. I finished up the boom and gaff, here's what all the stick work looks like in one place. I also mounted the bowsprit, the red goes beyond the ironwork because I had the bowsprit all set in place when I painted it, I failed to pay attention to the support in the boat however and after having finished painting I realized it was leaning backwards at a 30 degree angle, when I pushed it up to the correct 90 degree angle the red on the bow sprit was in front of the iron band, so I squared it up and called it good. Another good point to bring up, fortunately the simulated sheave ended up in the right location by pure luck, I failed to check its position before the glue set, in the future I will ensure I pay attention to the entire part when setting it. I've begun work on the stand for the boat as well, I purchased a pine display stand at Michaels and turned a couple of pedestals for the boat to sit on, I will either stain the base with the reddish Ipswitch pine that I used on the interior of the boat and the pedestals the same fruitwood stain as the hull of the boat or I will go with a darker stain overall, not sure yet.

- 55 replies
-
- 4
-
-
- 18th century longboat
- model shipways
- (and 1 more)
-
Just a quick tip on your proposed method of putting the pin into the bulkhead instead of through the plank. When the plank is wet where it presses up against the metal it will indent on the softened plank, slip a small shim in between pin and the plank and it will keep the plank safe. She's looking good so far, congrats on the promotion and I agree with Keith, take your time and enjoy the process, boat building shouldn't require schedules or milestones, it should only require dedication to making her look good when you actually get time in the yard.
- 153 replies
-
- 2
-
-
- swift
- Artesania Latina
- (and 1 more)
-
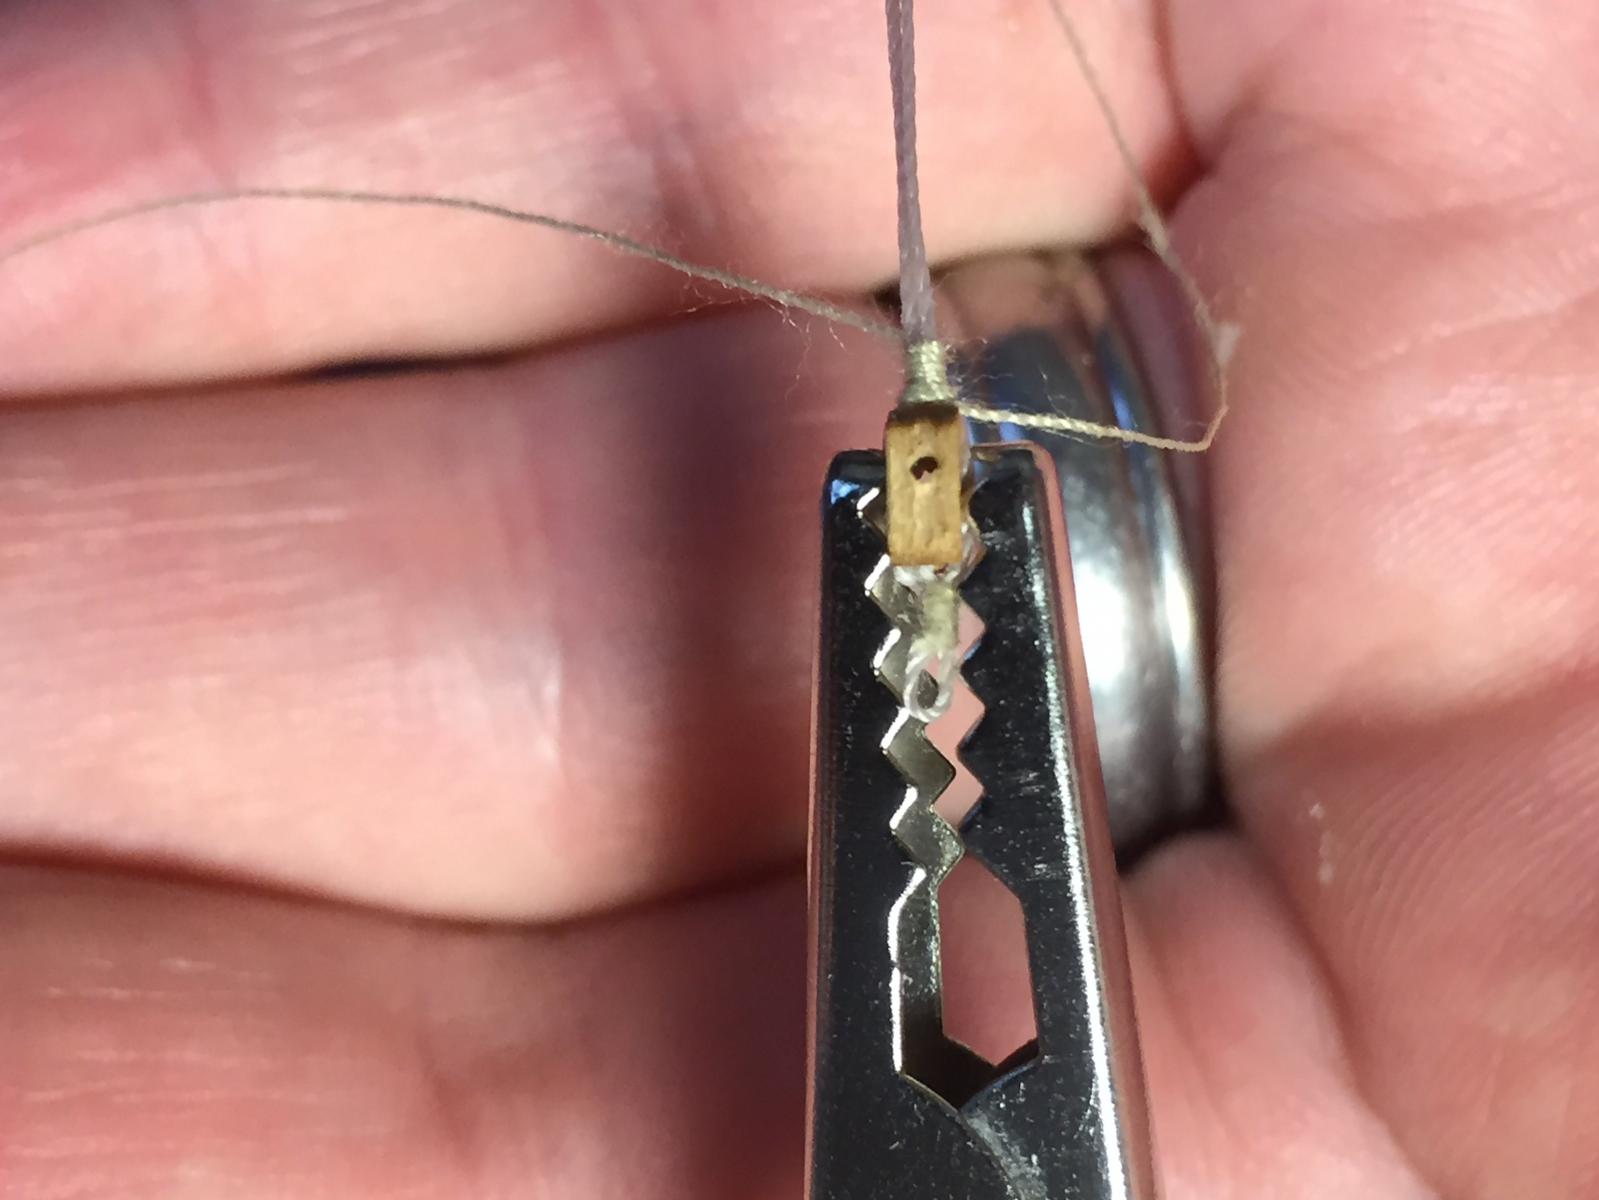
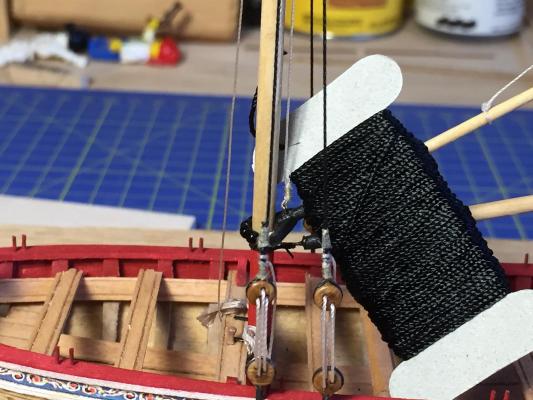
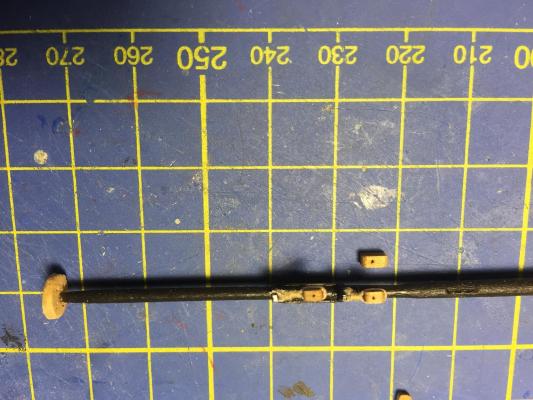
I got a little time in the yard before going to the gatherings yesterday. I was trudging along with the ironwork for the main mast, managed to break my 79 drill bit so moved down to the 78. After many tries I came up with some decent bands with a hole that didn't break out the side of the band. Then I painted and started work on the ball truck. Unfortunately as I was test fitting the ball truck I temporarily became stupid and instead of holding near the tip of the mast while pressing the truck down onto the tenon I had the mast gripped near the bottom. I'm sure you can see where this is going without a photo but here it is anyway. After a few choice words I walked away from the yard so I didn't follow up my moment of stupid with even more bad decisions while I was frustrated. Now I need to see if I can fix it of if I just need to rework a new one. It broke right at the upper simulated sheave.

- 55 replies
-
- 1
-
-
- 18th century longboat
- model shipways
- (and 1 more)
-
Jack excellent recovery! I'm glad you were able to sort out wetting them with the sponge and bending them back one at a time. I hope for your sake either the admiral agreed to giving you the cosmetic sponge or she never finds out
- 41 replies
-
- 1
-
-
- 18th century longboat
- model shipways
- (and 1 more)
-
Jack I took some close up pictures of my garboard strake for you, maybe they can help? I included a ruler to show how far in front of the scarf joint my garboard strake ended, and another shot showing the distance from where the curve started to the end of the garboard. I included one shot with just an overall view of it. I will tell you up front my planking is far from the best on the site but hopefully it helps . If I can provide pictures of anything else please let me know, I can even PM them to you so as not to clutter up your build log with my photos. Overall Distance from the scarf to the tip of the garboard (it appeared to be about 3mm) Distance from where the curve of the garboard starts to the tip of the garboard. (The curve down started around 9mm to 10mm)


- 41 replies
-
- 1
-
-
- 18th century longboat
- model shipways
- (and 1 more)
-
Ouch. Sorry to see that Jack. For how to figure out the curve and width of each plank check out BobF's build log and the tick strip method (http://modelshipworld.com/index.php/topic/1465-18th-century-longboat-by-bobf-ms-148-tri-club/page-2) I followed his log on my second go round of planking and it was invaluable. For the garboard I just eyeballed the curve vs the other builds on this site that I liked. Then I marked up the bulkheads using the tick strips and bent the plank, I would then gradually sand off the plank on the inner curve to get a smooth meeting with the plank below it and worked on the outer curve until it matched up against the tick marks. This method gave me a nice consistent curve and ensured that each plank was the correct width. I was only able to do one or two planks per side a day but the end result was head and shoulders above my first go at it. For the denting I had the same problem with the bass wood. Some members will suggest swapping out to boxwood, however instead of going through that extra expense you can take a couple of small pieces of scrap bass wood and place them between your plank and the clamp. any clamp marks go into the scrap wood instead of your final plank. The drying process takes a little longer as you have another piece of wet wood in the mix but it avoids most of the dings caused by the clamps and the ones that occur can be sanded out without taking off too much wood. ryan
-
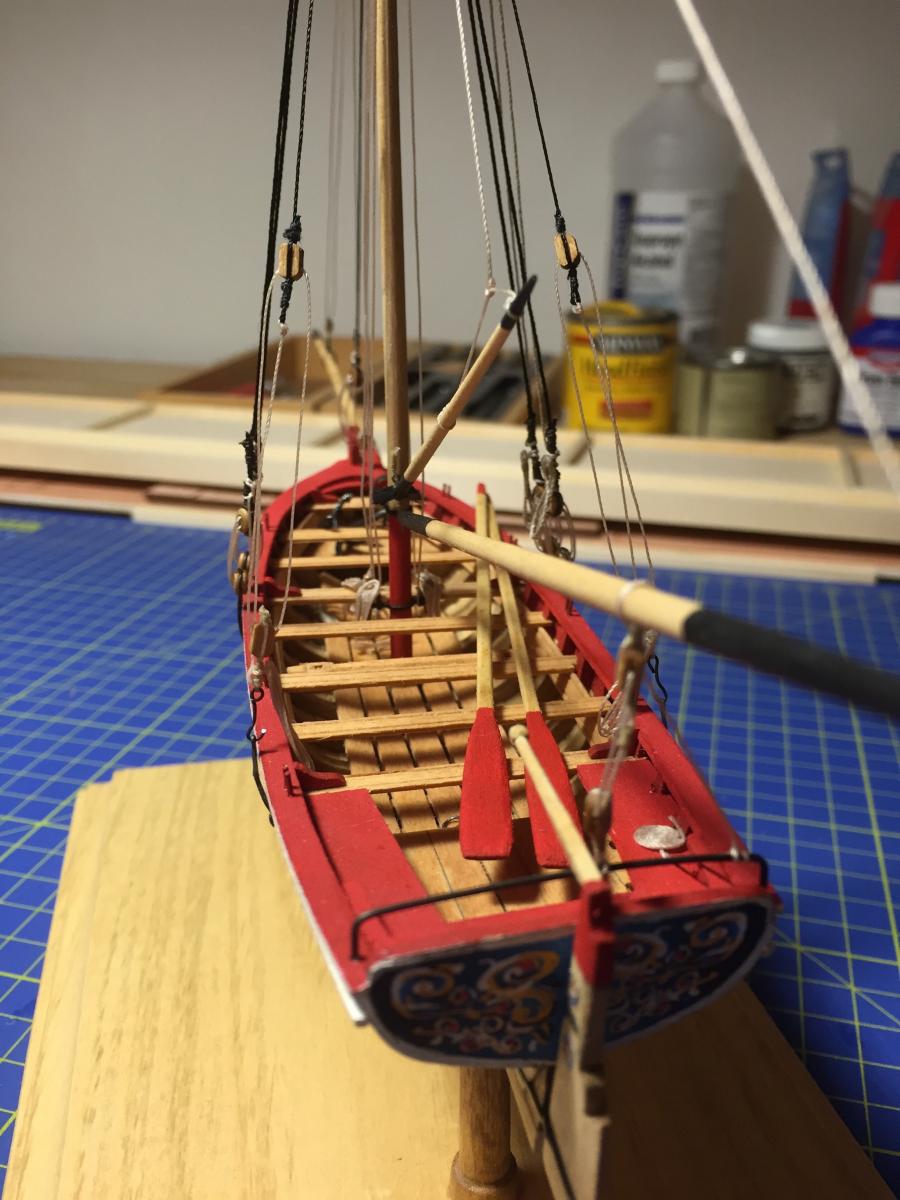
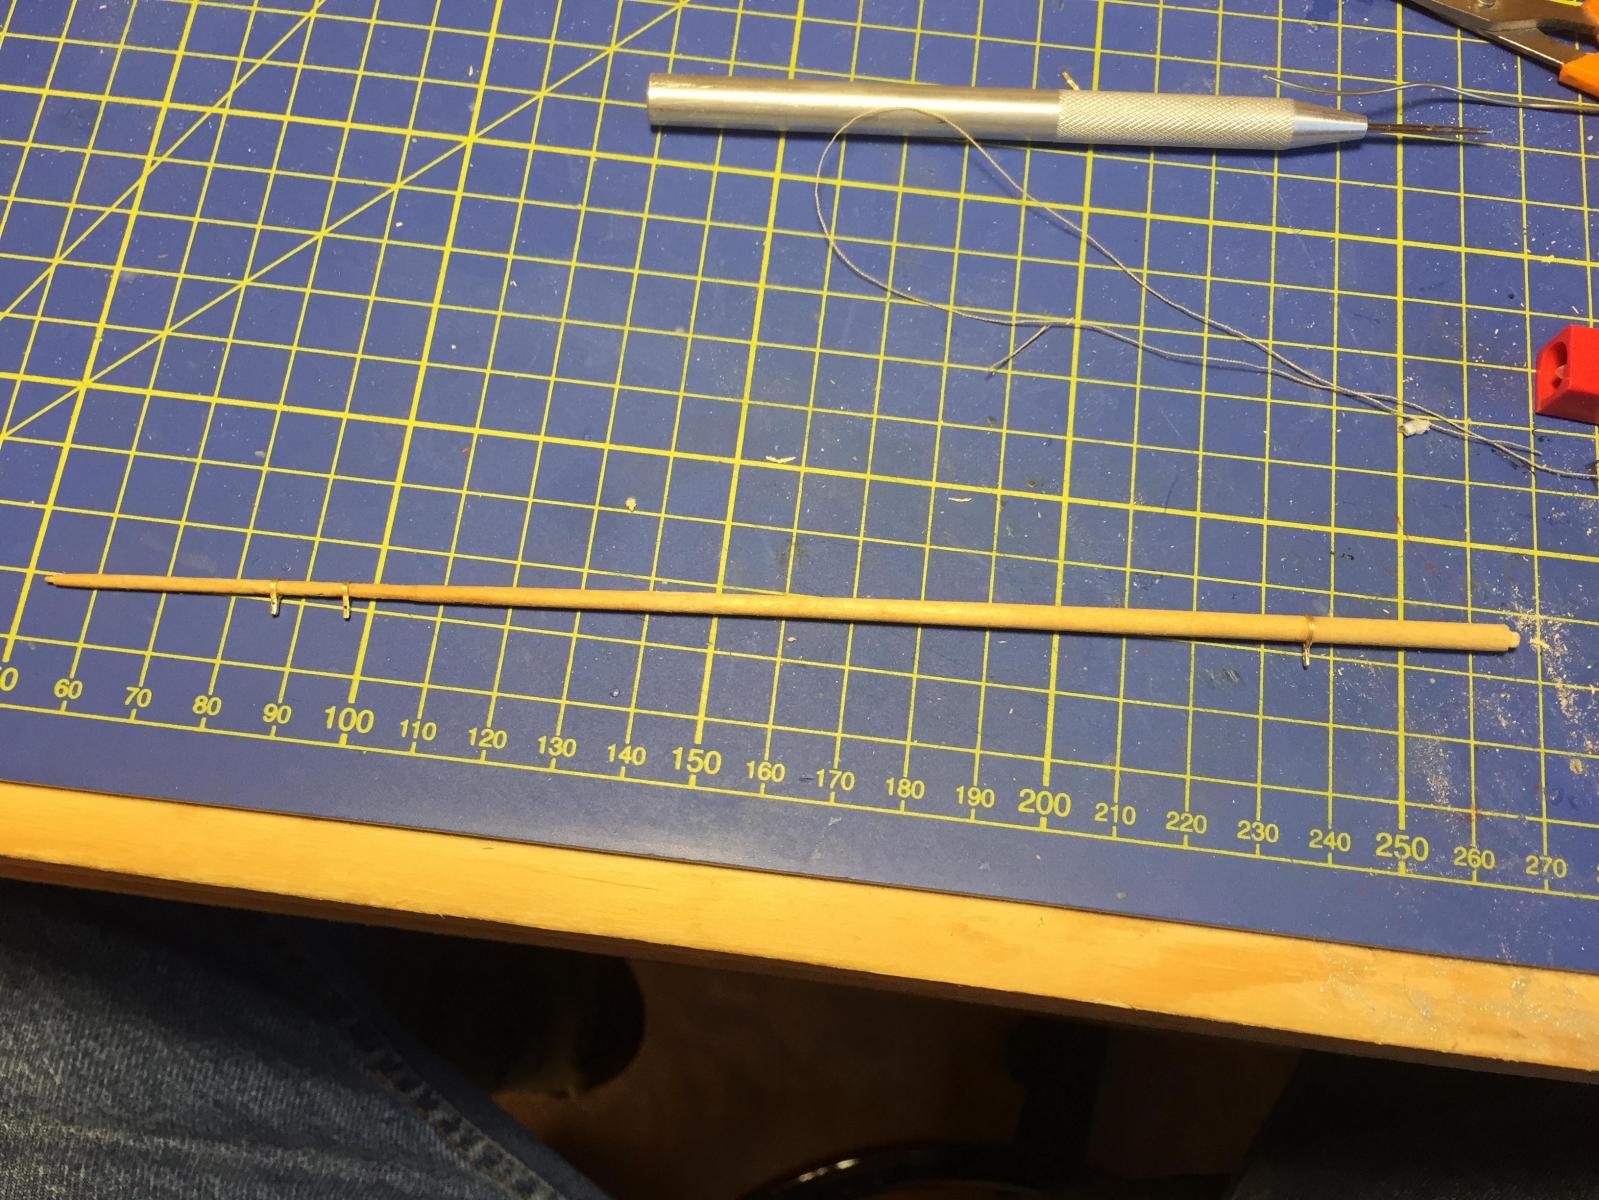
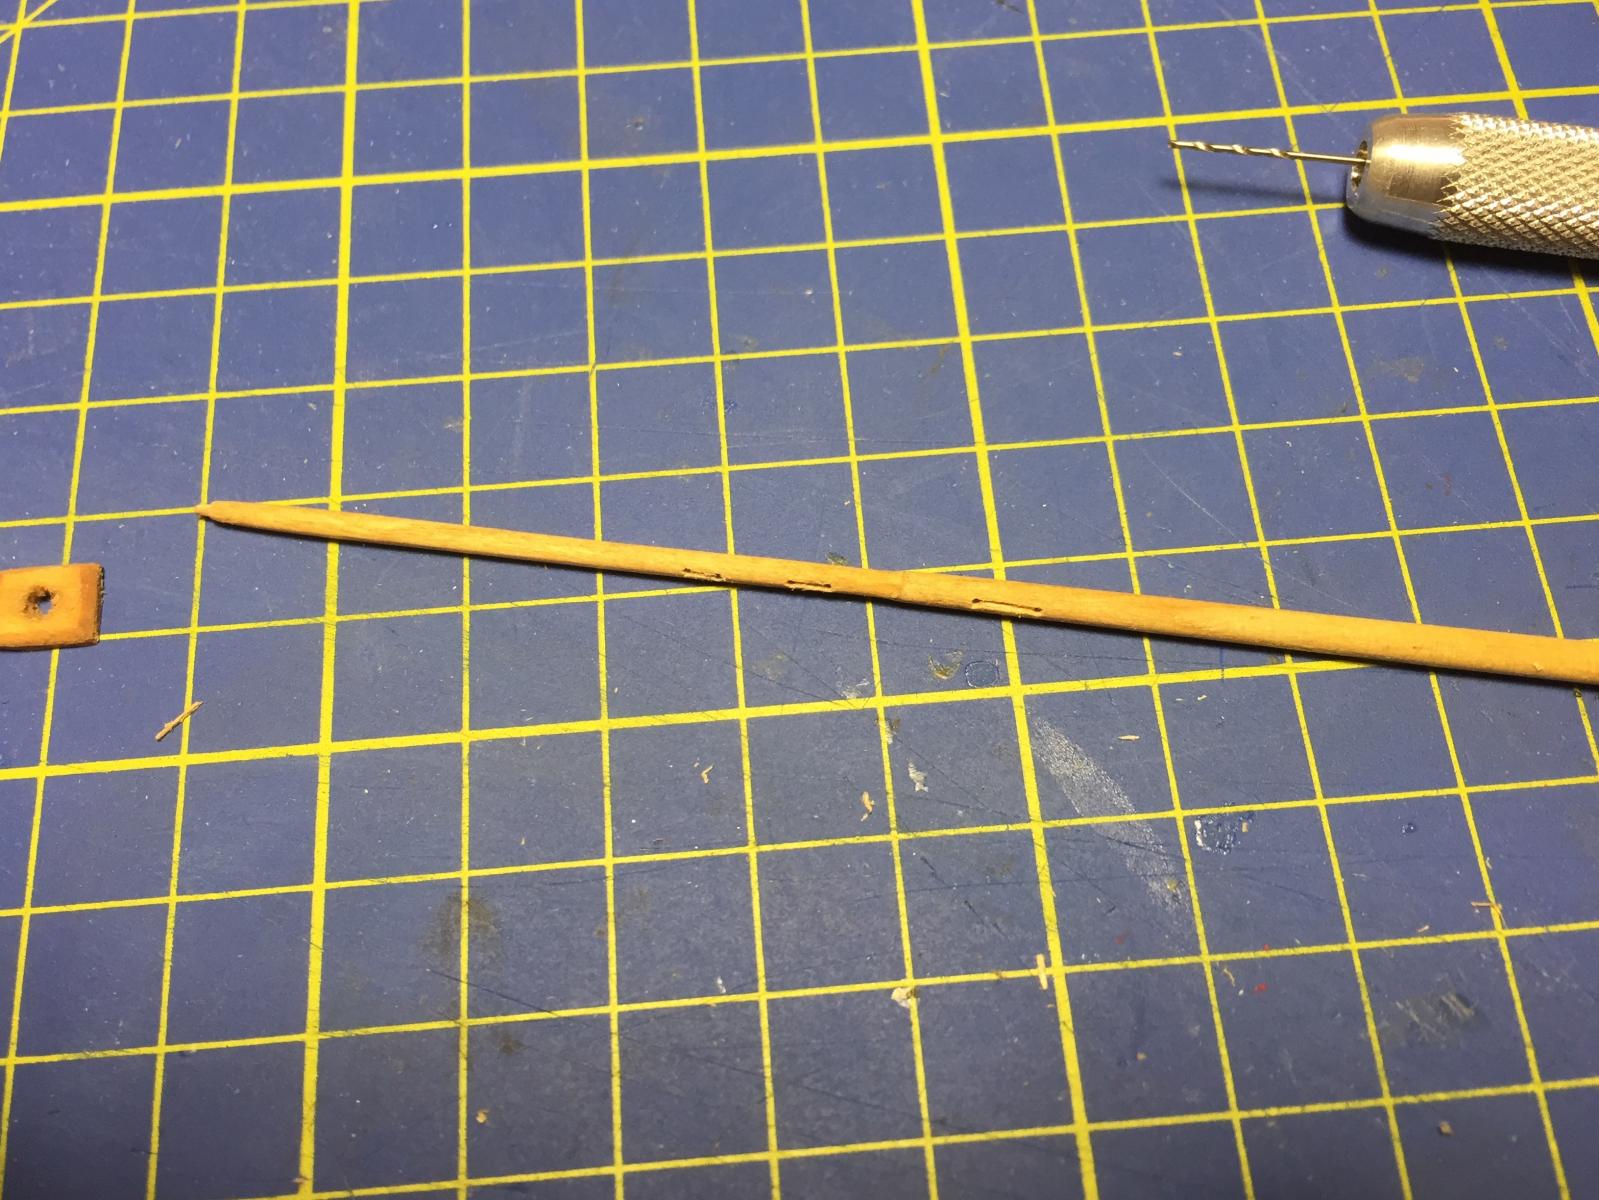
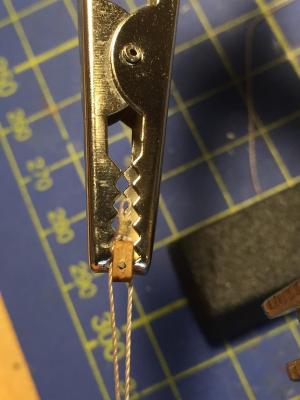
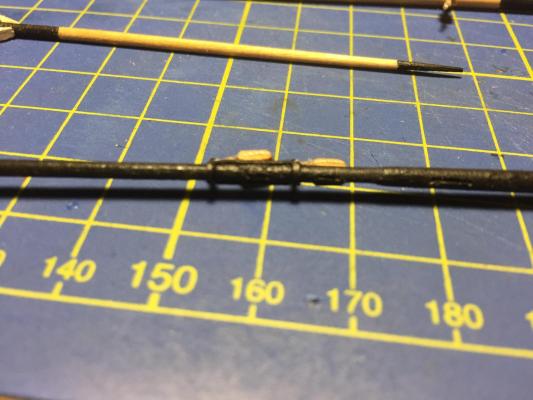
Made some progress this weekend, I finished up the rudder, the wire used to make the pins on the pintels was damn near impossible to work with, being so short it was very difficult to hold onto and hard to see without my magnifying headset, after quite a bit of struggle I finally got it all together. For the tiller I cut a piece of 1/16"x 1/16" wood and rounded out the upper 2/3rds and paired it all down very carefully. For the ball on the end I rounded the end of a 1/16" x1/16" stick with sandpaper then separated it using an xacto knife with a series of cuts to leave it fairly spherical, I wanted to avoid sanding this bit as it was so tiny that it was difficult to hold onto. I put in the eyebolt and attached the gudgeon then attached the rudder and tiller to the boat. I started to work on the mast a little more, I drilled all of the holes for the simulated sheaves then struggled for a little trying to figure out how to file down the groove between them. I finally settled on a v cut from both sides using a sharp xacto knife to take out a decent amount of wood then dragged a rounded tool through the cut to smooth it out. I made a little progress (very little) on the ironwork for the mast, I really only managed to start the ring for the boom, I bent it and soldered it but didn't have a chance to cut it down to size or blacken it/paint it. With turkey day coming up on Thursday I'll have a decently long weekend to get in some more time in the shipyard.


- 55 replies
-
- 6
-
-
- 18th century longboat
- model shipways
- (and 1 more)
-
Hey Jack, first things first great to see your build, it's a great little boat and a lot of fun to build. Some thing I have noticed on your build that might help you (and I know this because I struggled with them on my build) It seems that either your garboard strake comes too far forward or has the wrong curve, this caused the plank(s) above it to crowd together and ended up with you having to drop the plank in the middle. It does seem like you need another strake at the top of the bow section but at the mid line and aft you don't really have room for it. You will need to bring up the bow closer to the the slight indent in the keel, I'm not sure how to go about this at this point with the crowding at the midpoint and aft. I would take a look at the builds from BobF, Stuntflyer, and MikeY for assistance. Take my advice with a grain of salt, the longboat is only my third build Great to see your build and I will be following along. ryan
-
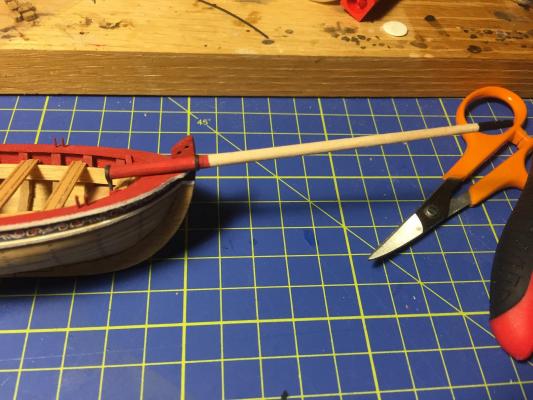
I've been thinking about the final display of the boat (I like to plan years in advance ) and had a question to throw out to one and all. If the longboat was under oar power would the mast be shipped and the rigging down? My google fu has turned up nothing that would answer the question. My thought was to somehow fix the oars in the oarlocks as if in use but I wouldn't want to do that if it meant the rigging and mast would be out of place. Or does that just over complicate the final display and it's crisper with a number of the oars perched across the thwarts? ryan
-
She looks great, you have some really top notch symmetry between the two sides.
- 153 replies
-
- 1
-
-
- swift
- Artesania Latina
- (and 1 more)
-
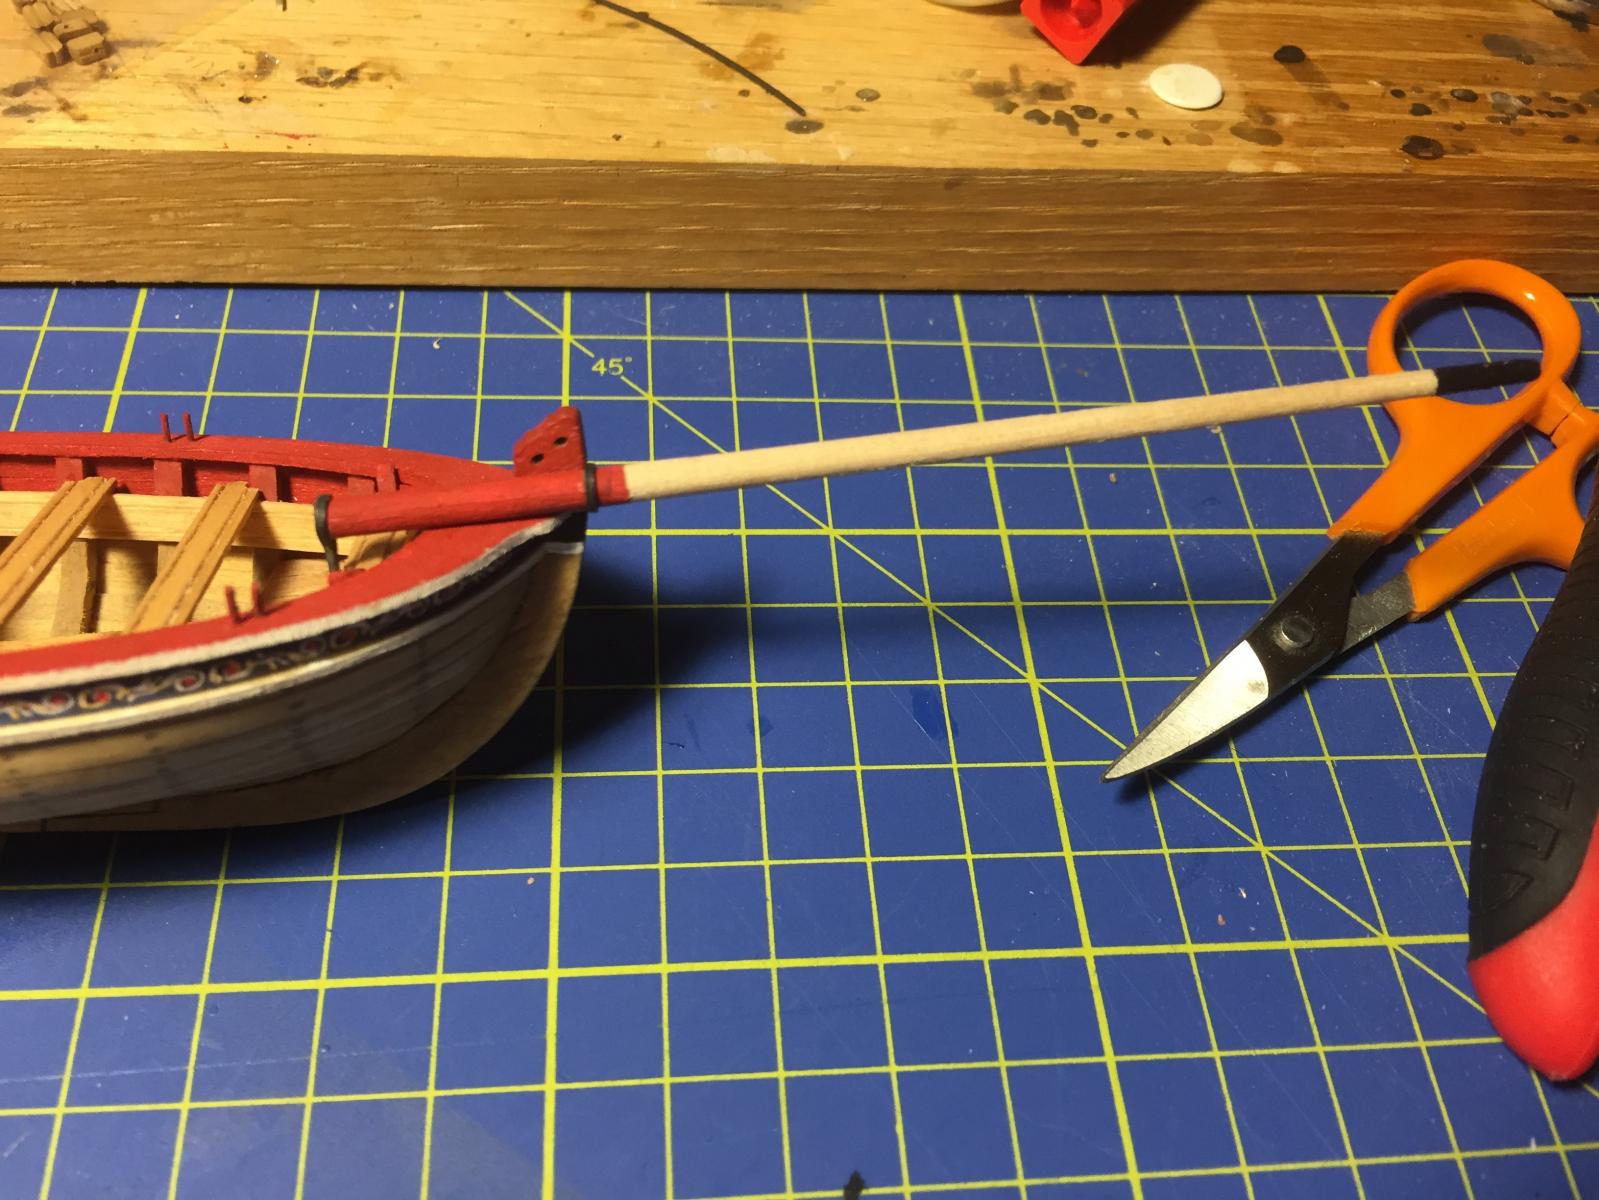
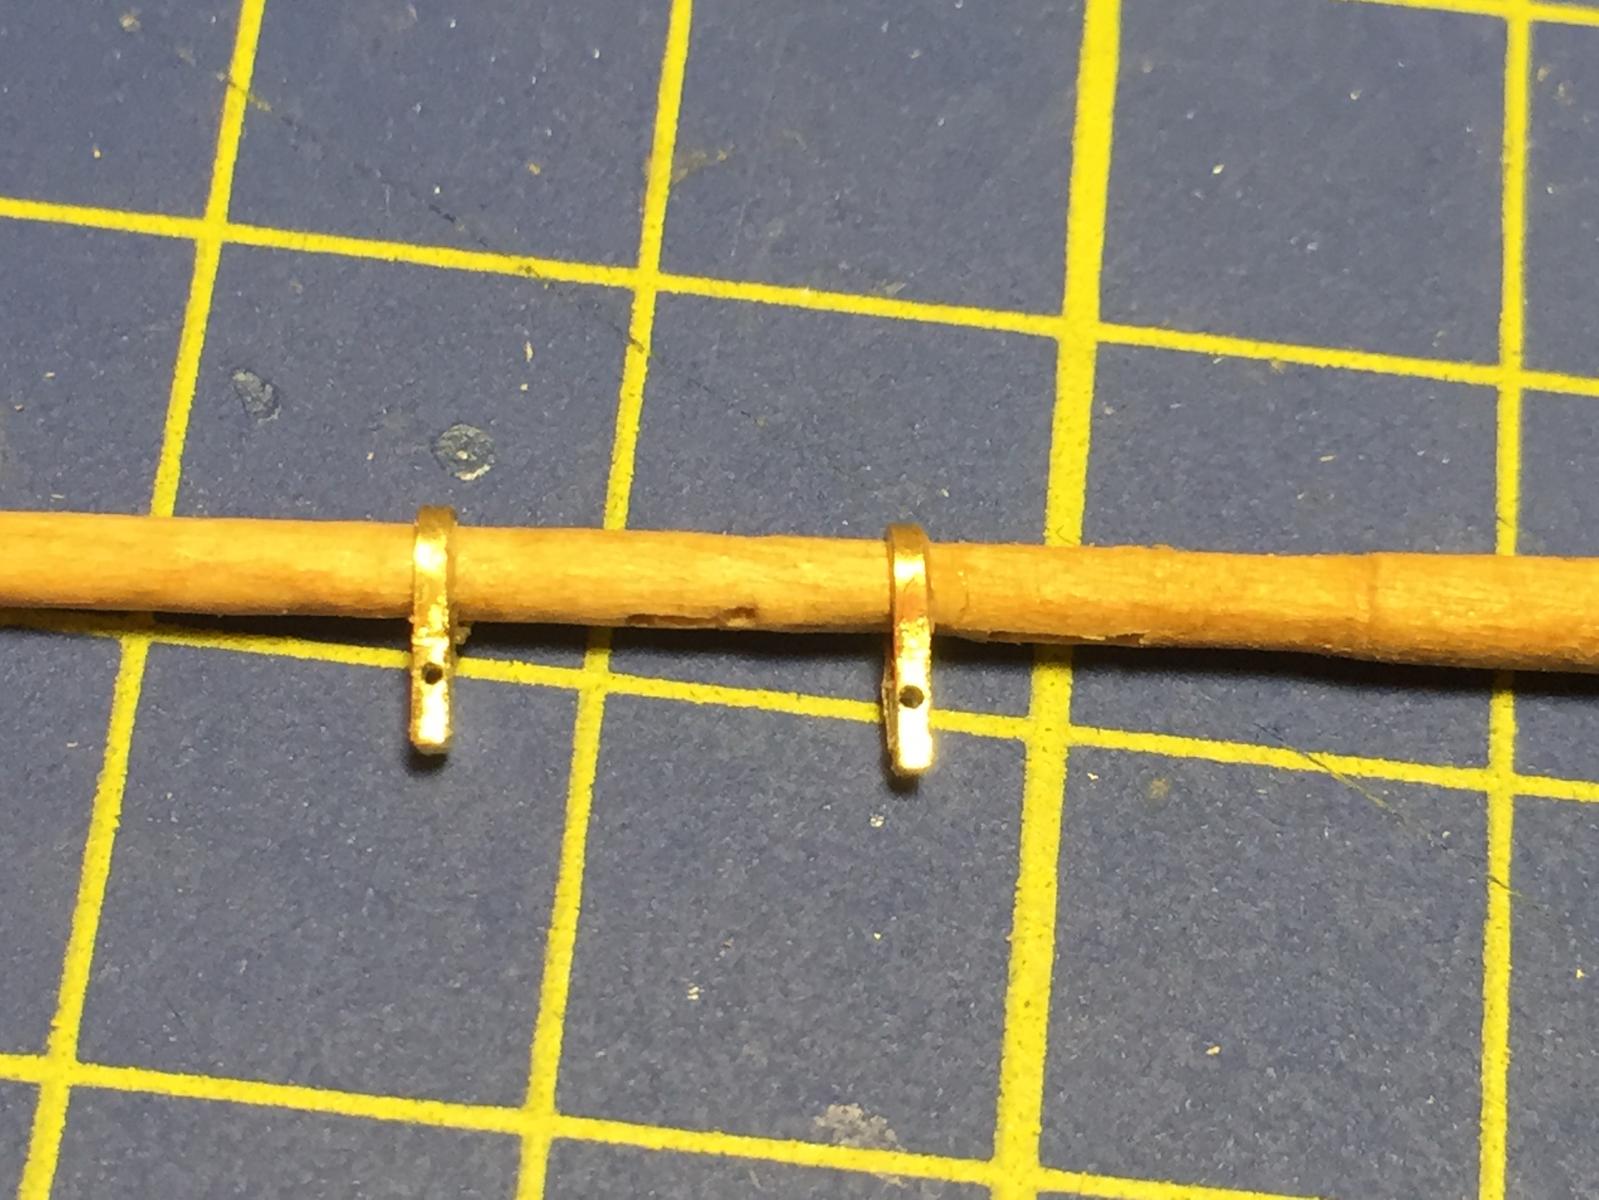
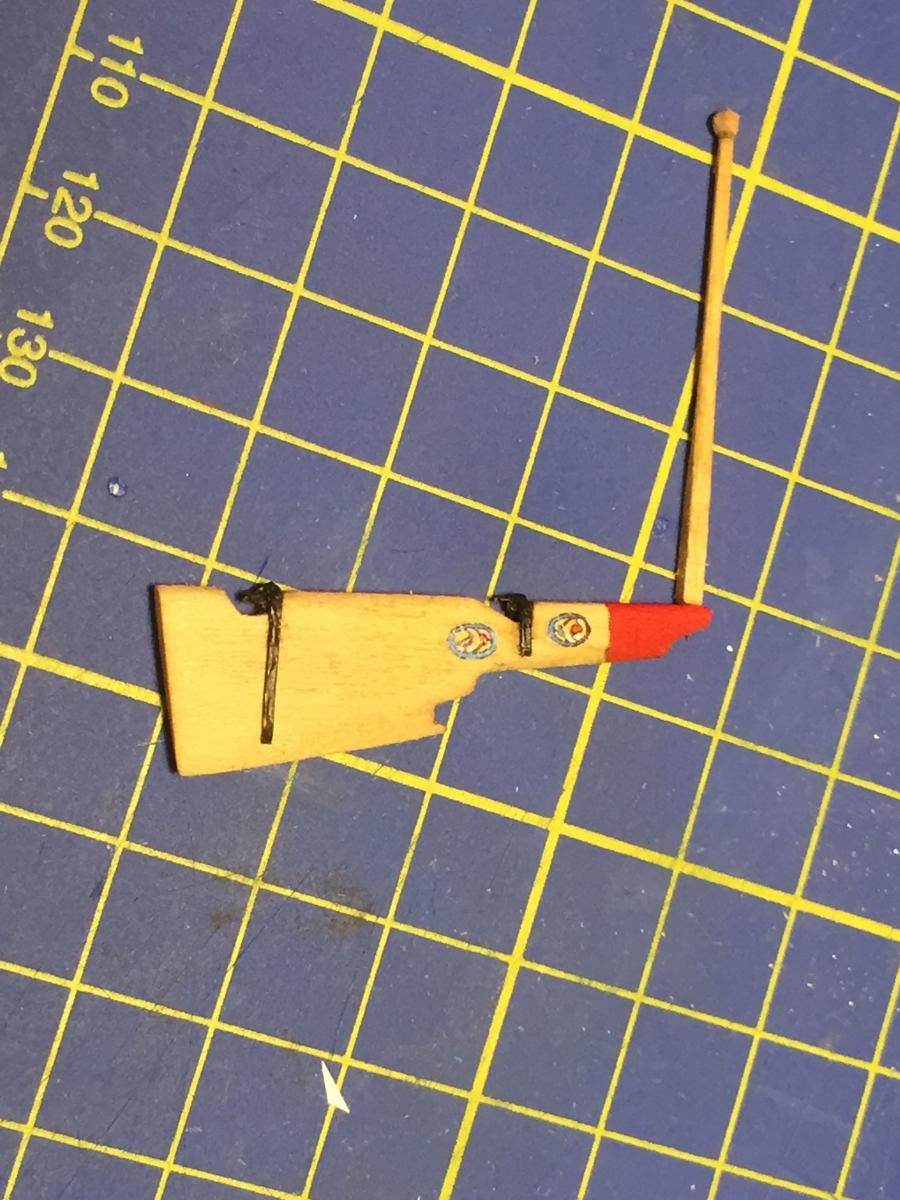
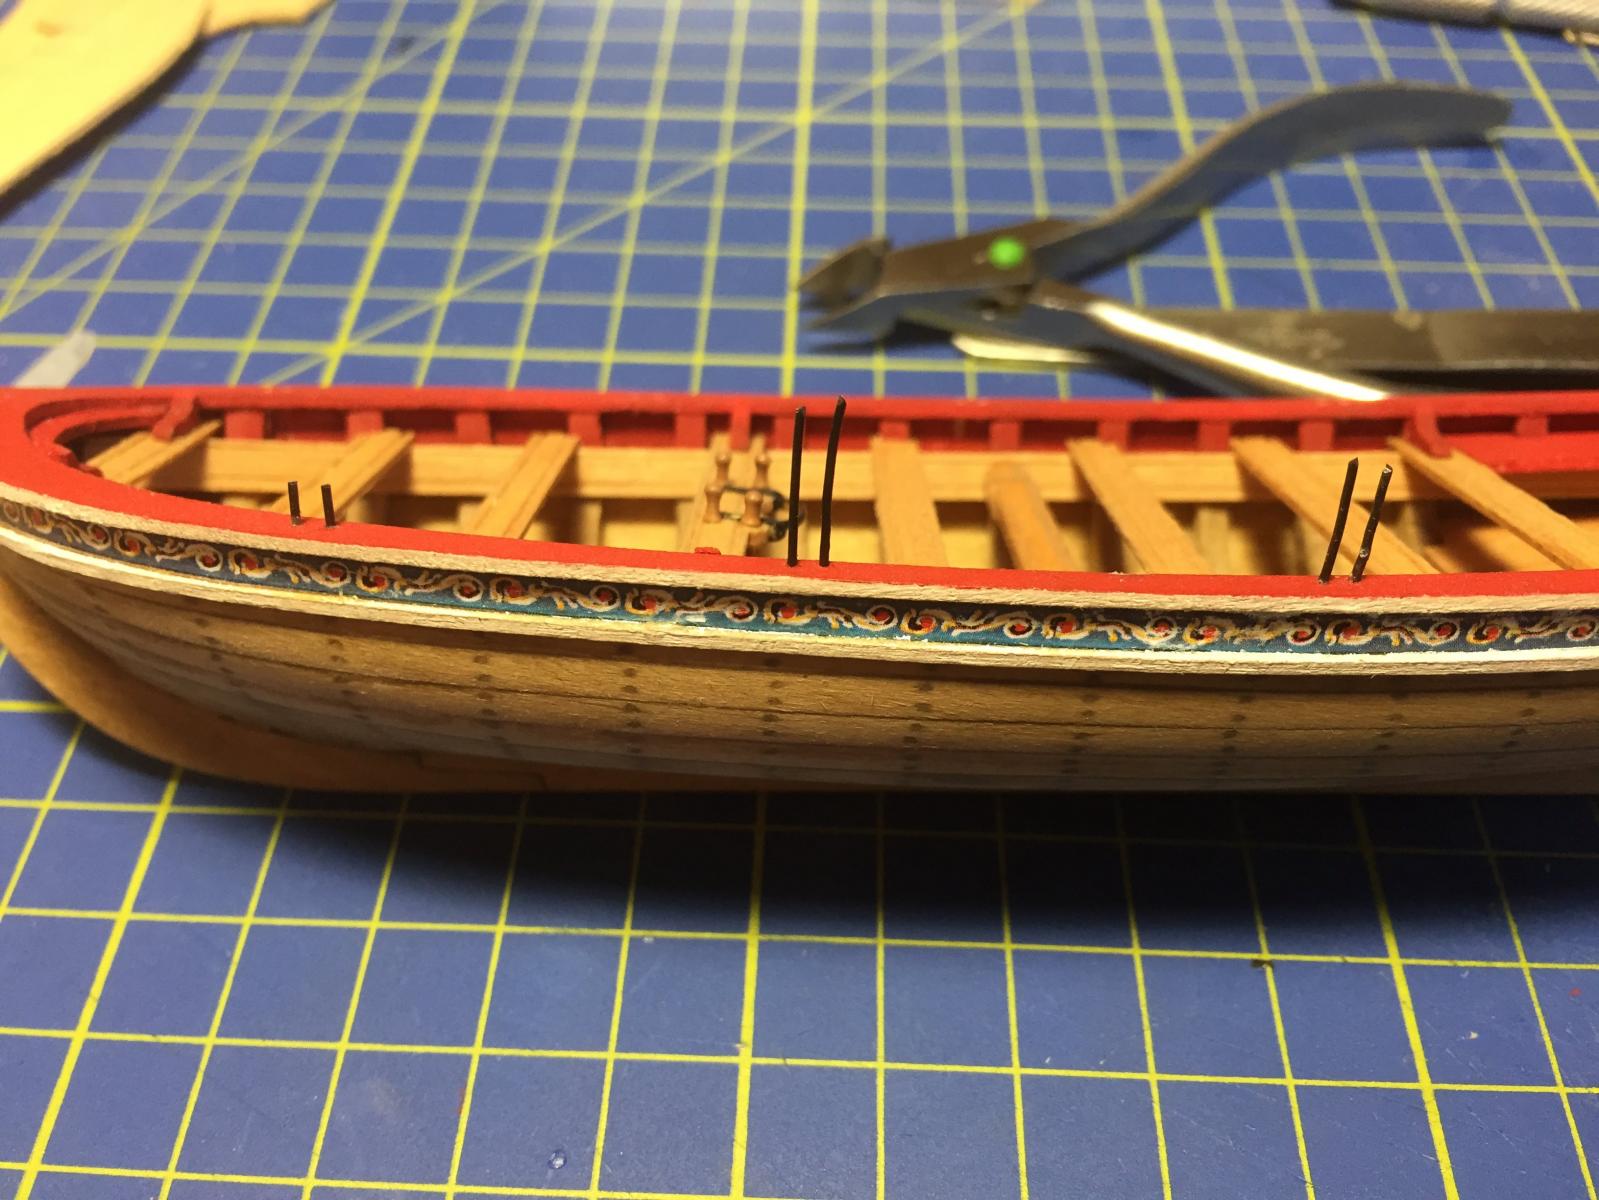
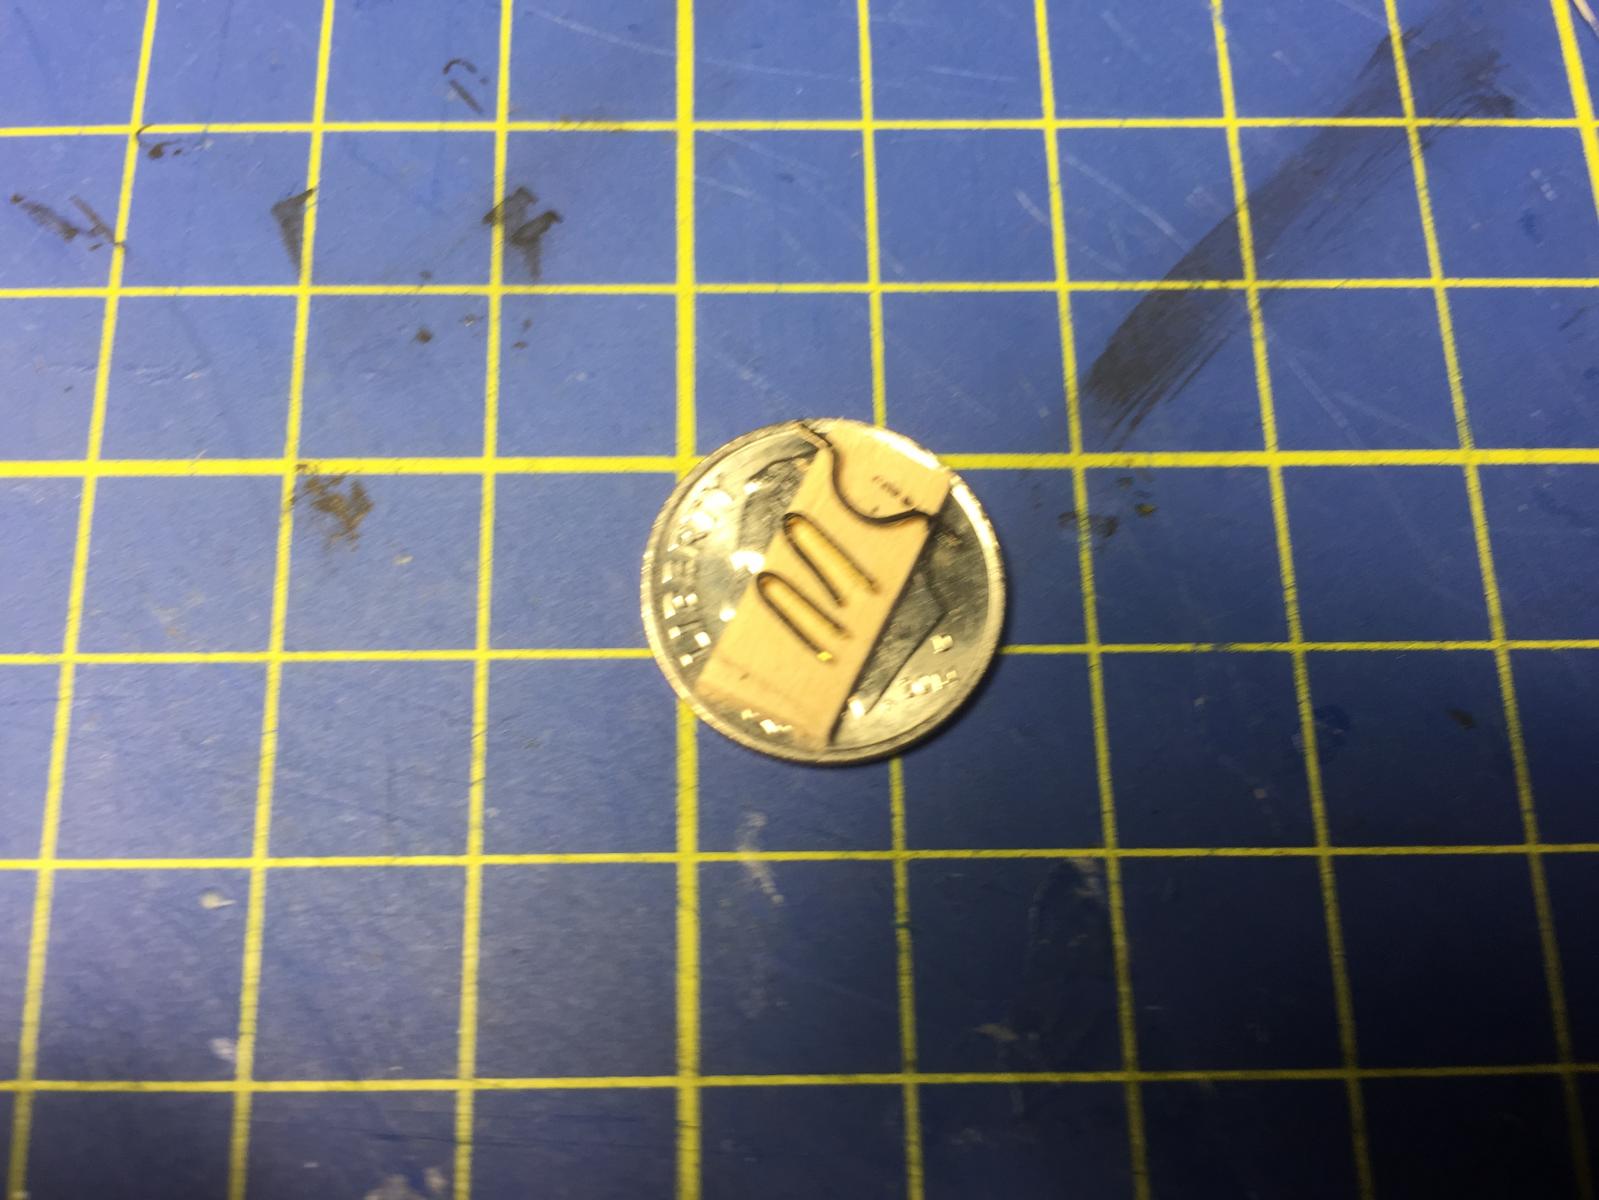
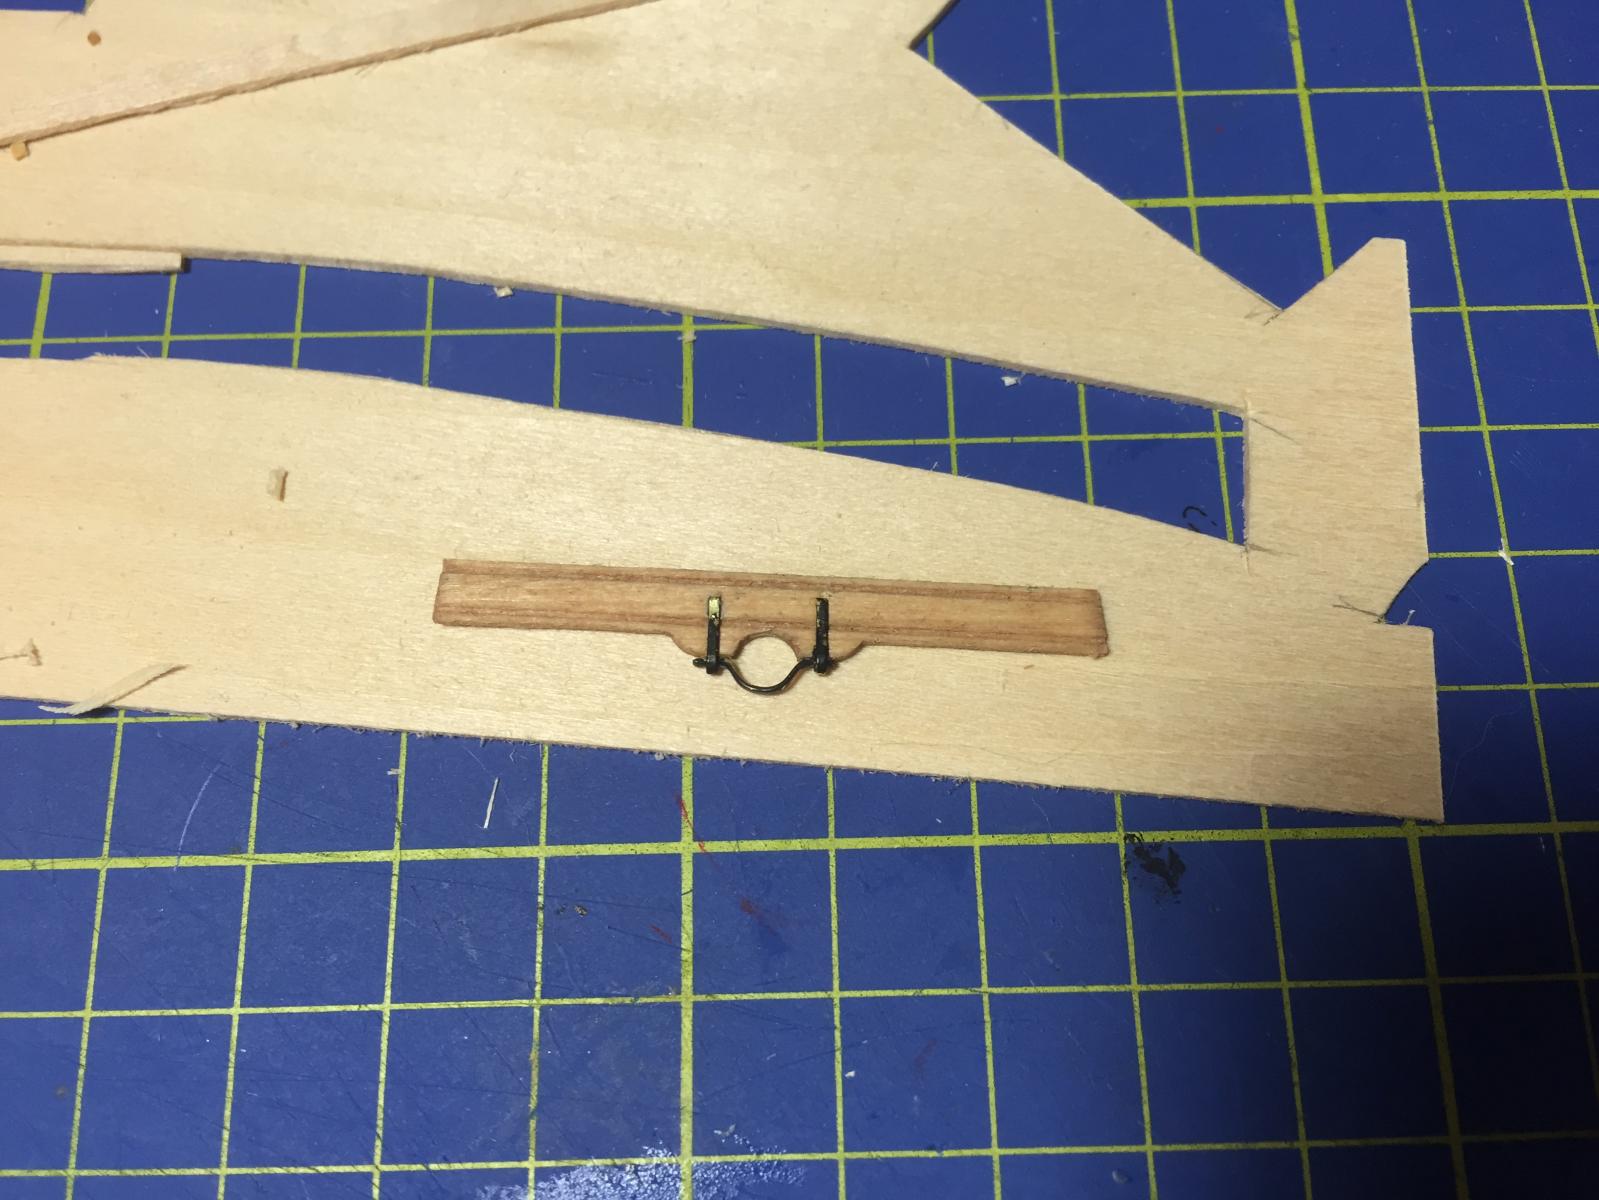
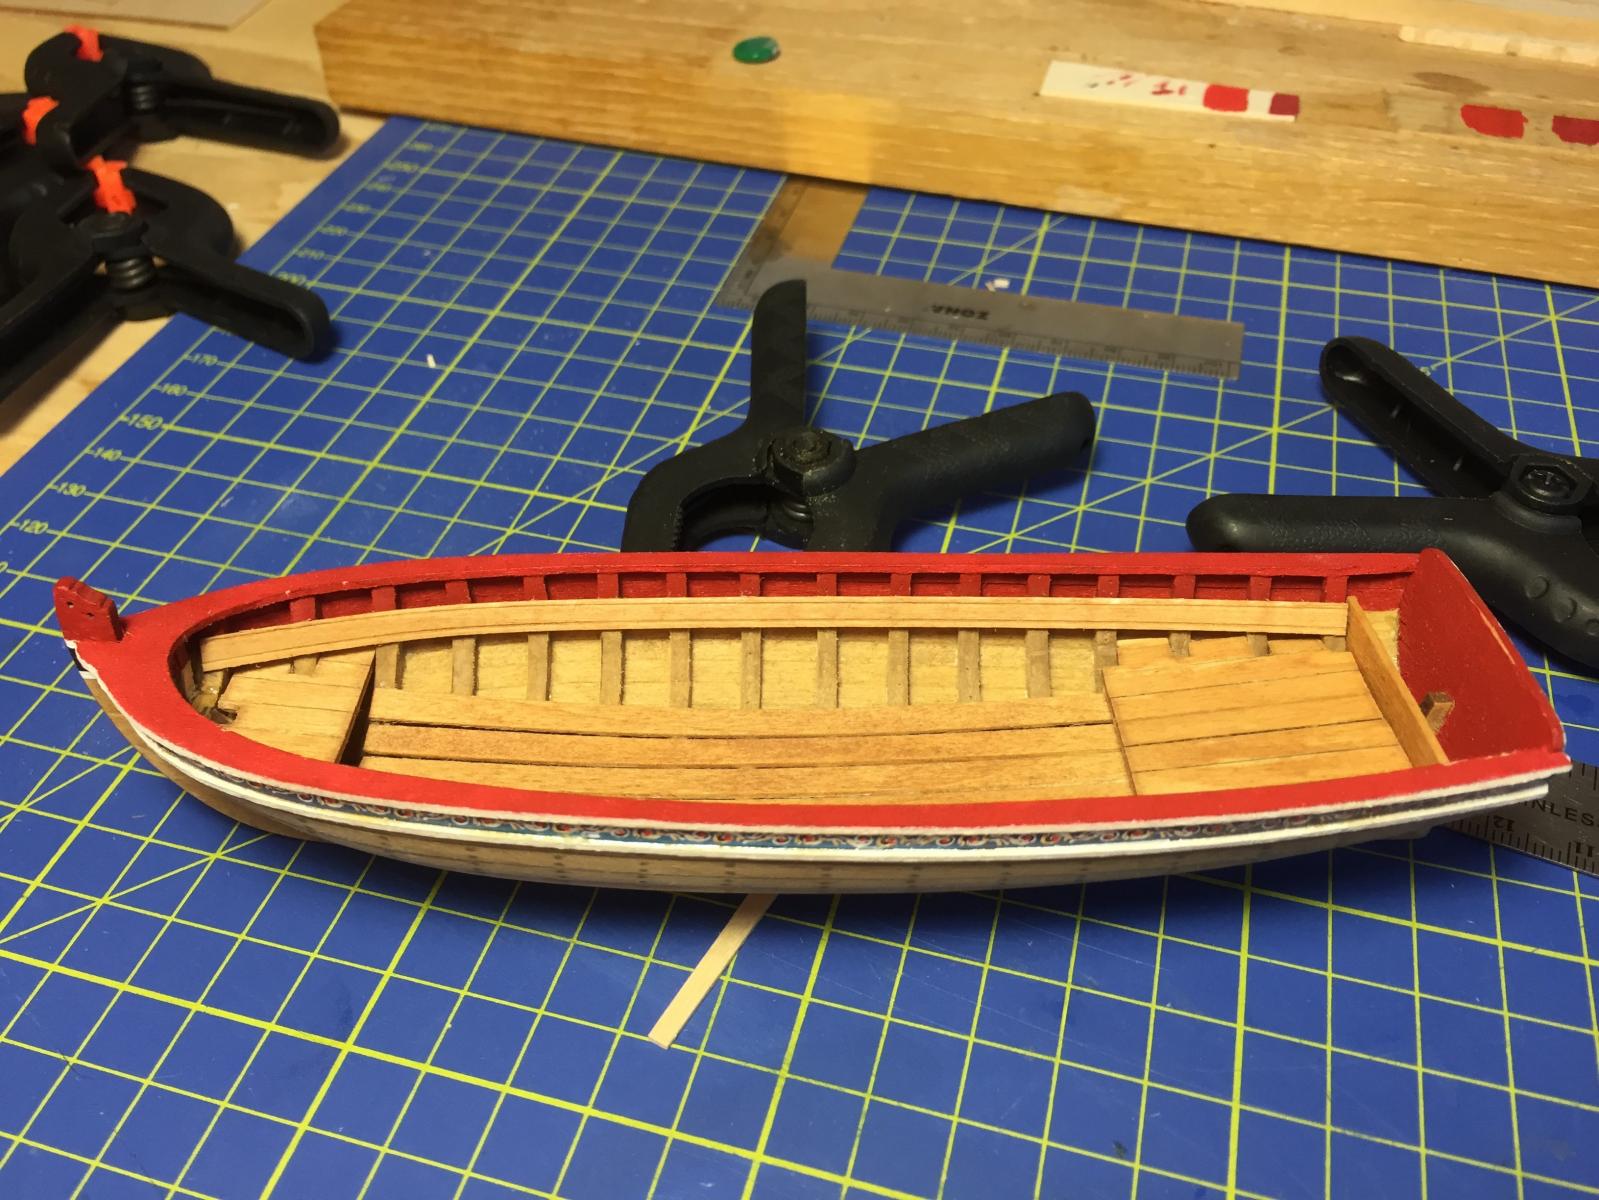
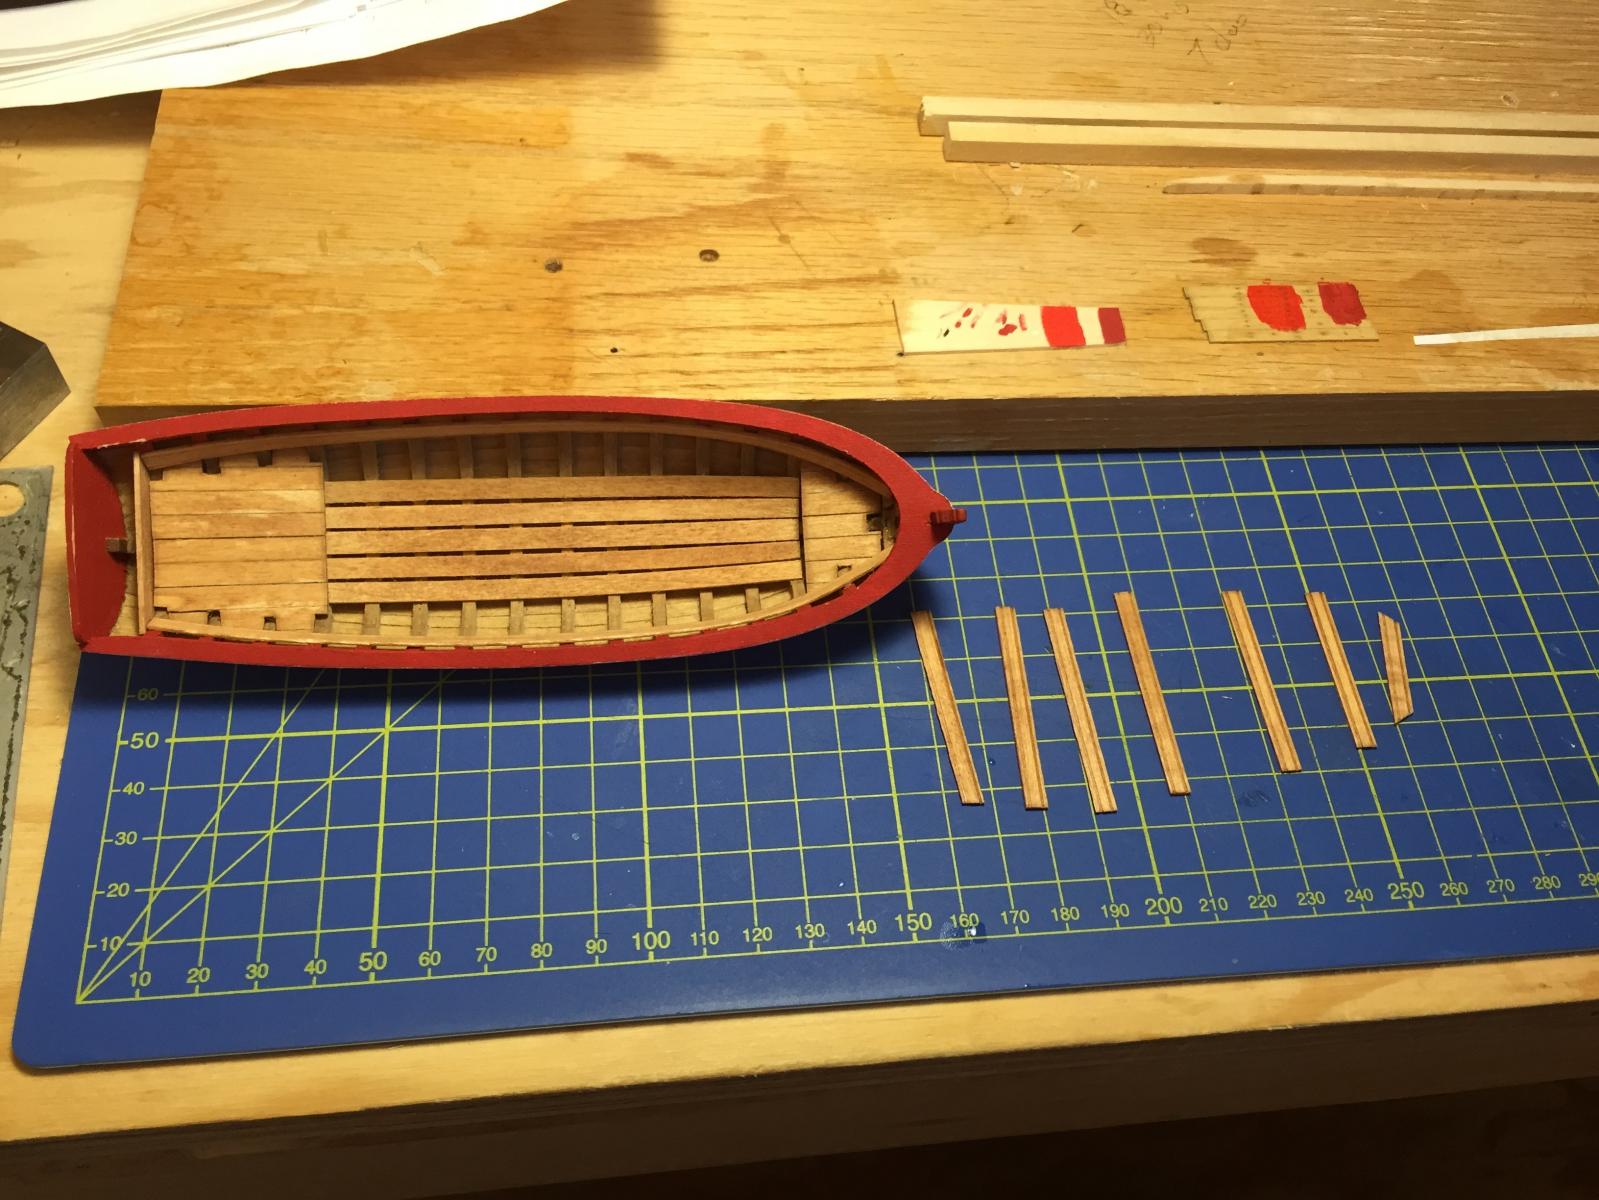
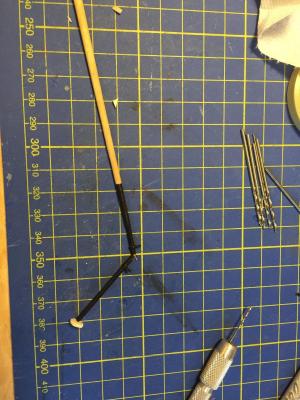
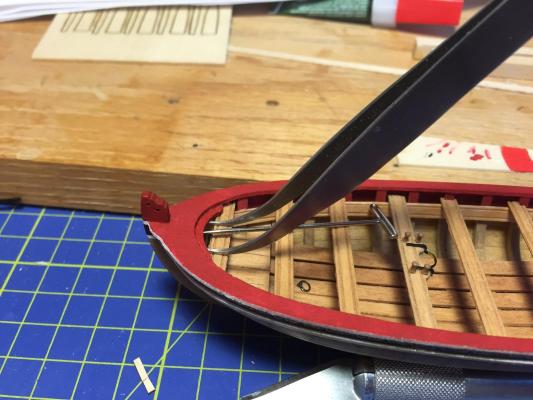
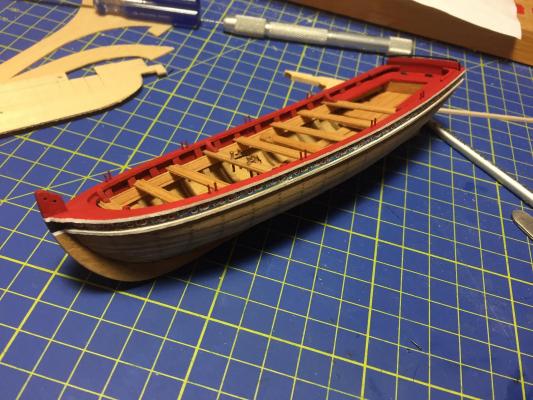
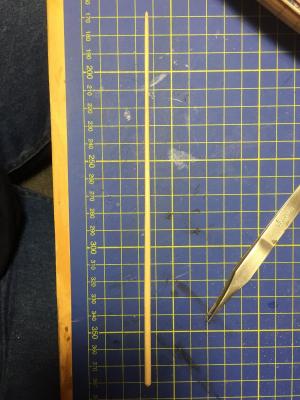
I had a random thought today that nail technicians would be outstanding model boat builders because they are so used to filing and sanding oddly shaped items down to a perfect spec. On that note progress was made int he ship yard this weekend. I used the new lathe to taper the mast, the dowel was far too whippy to actually use tools on so I ended up working it down with various grade of sandpaper, essentially using the drill method but on the lathe. It's still slightly larger then the plans call for at the top and doesn't have the small "step" near the midpoint but I still needed to drill the holes for the simulated sheave and I was worried if I take it down to the spec I wouldn't be able to do it without breaking the mast. And with a quick dry fit I was working on putting the knees in and I think they are the quite possibly the most fiddly little bits that I've had to work with yet in this kit. I wish I had installed the small board that fits under the front end of the cap rail (no idea what it's called) before I put the thwarts in because I couldn't get any angles to get it. I ended up putting a pin it to hold it and slide it into posistion. I used the pin to maneuver it into position with a touch of PVA on it and then a pair of curved tweezers to fulcrum it from below and push it tight to the cap rail. I completed and finished the windlass and two handles, following the instructions I only dry fit the handle for a visual but pulled it back off while I continue to work on the boat. This was also the point where I realized the kit came with rings and eyebolts for the lift rings on the floorboards, I had actually rigged some up from the wire stock that came with the kit, not perfect but already CA'ed into place so I'll have to live with them. Then it was off to the races on the oarlocks, following a lot of the other builds I built a quick jig withe two holes marked out to help me with spacing and height. I laid the jig on the cap rail and marked the hole placement for all the oarlocks, pre-drilled them then glued an over length piece of wire in place with some CA. I slid the jig down on top of the two wires and clipped them using a pair of flush side cutters. The admiral will probably kill me because I didn't control the end that was being cut off and they ended up hitting walls and rebounding all over the work room never to be seen again (until you walk through with bare feet that is) Finally I painted all the oarlocks and touched up everything I had dinged while putting all the various bits and bobbles together. I started work on the rudder but didn't make much progress so thats where this weekend in the shipyard ends. As always, it was an interesting, head scratching totally fulfilling weekend of work.


- 55 replies
-
- 6
-
-
- 18th century longboat
- model shipways
- (and 1 more)
-
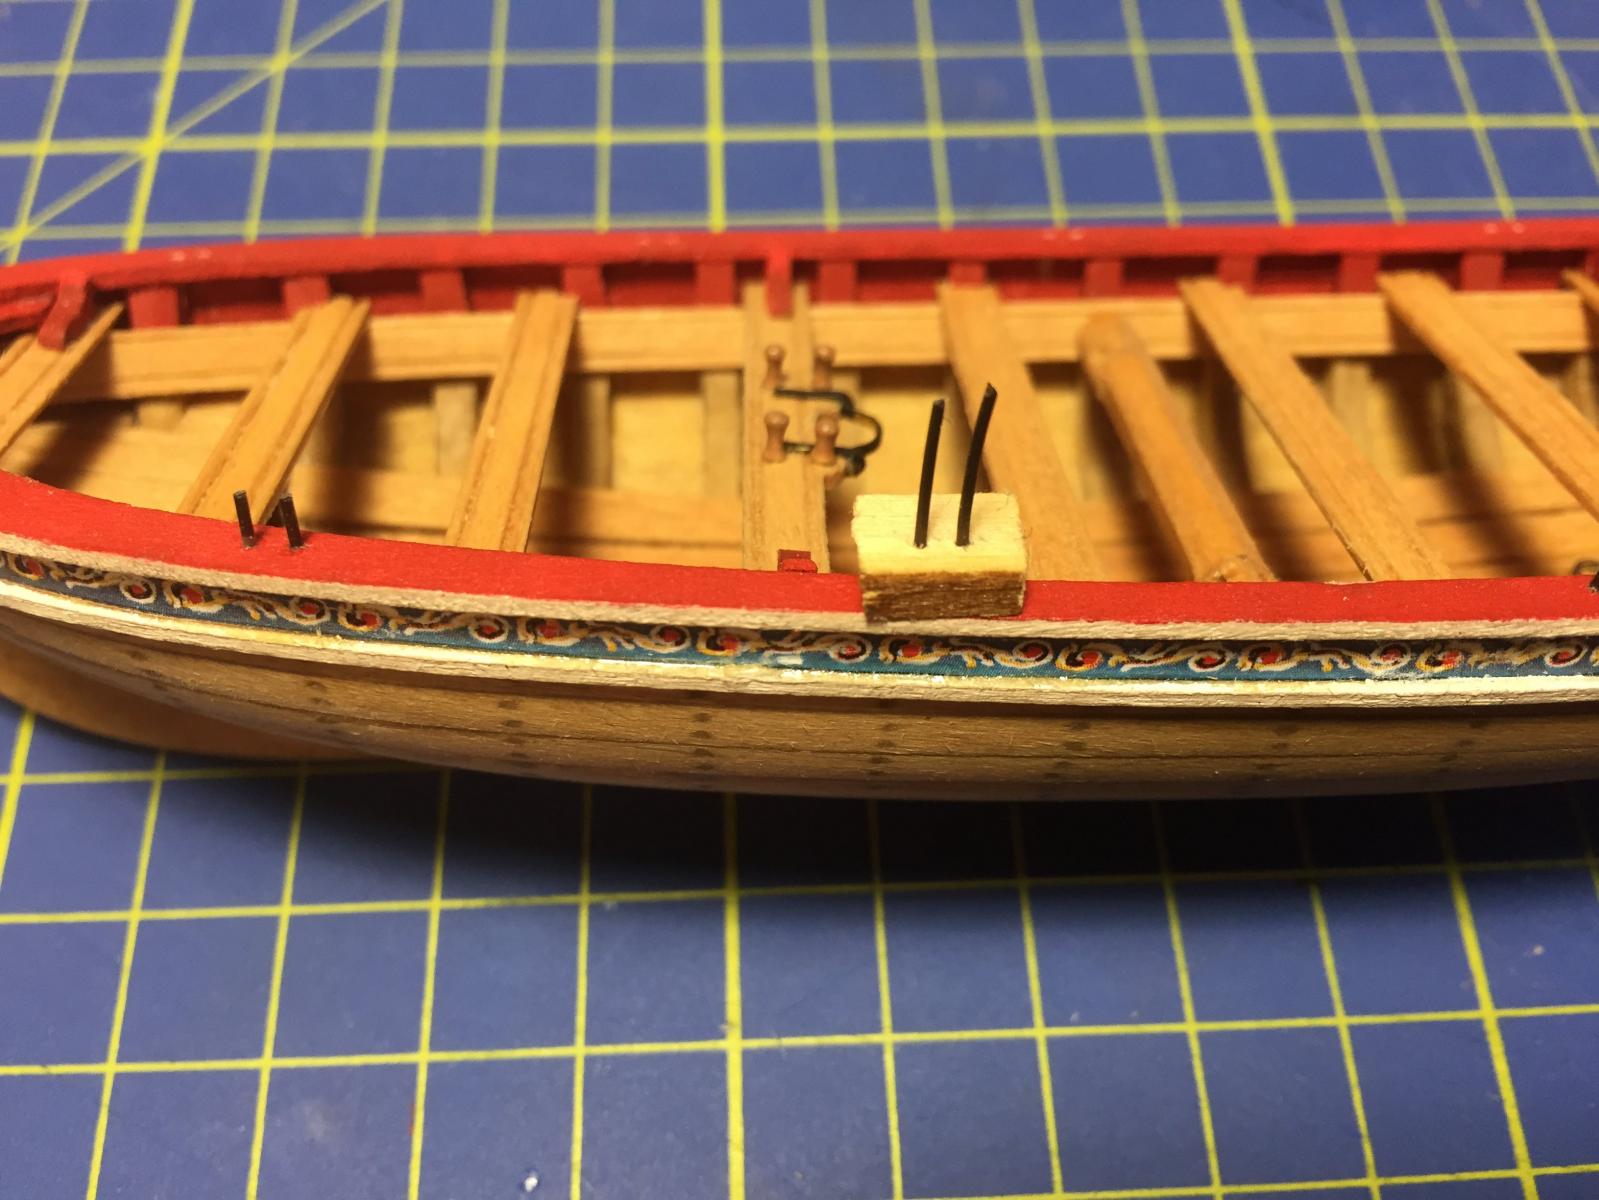
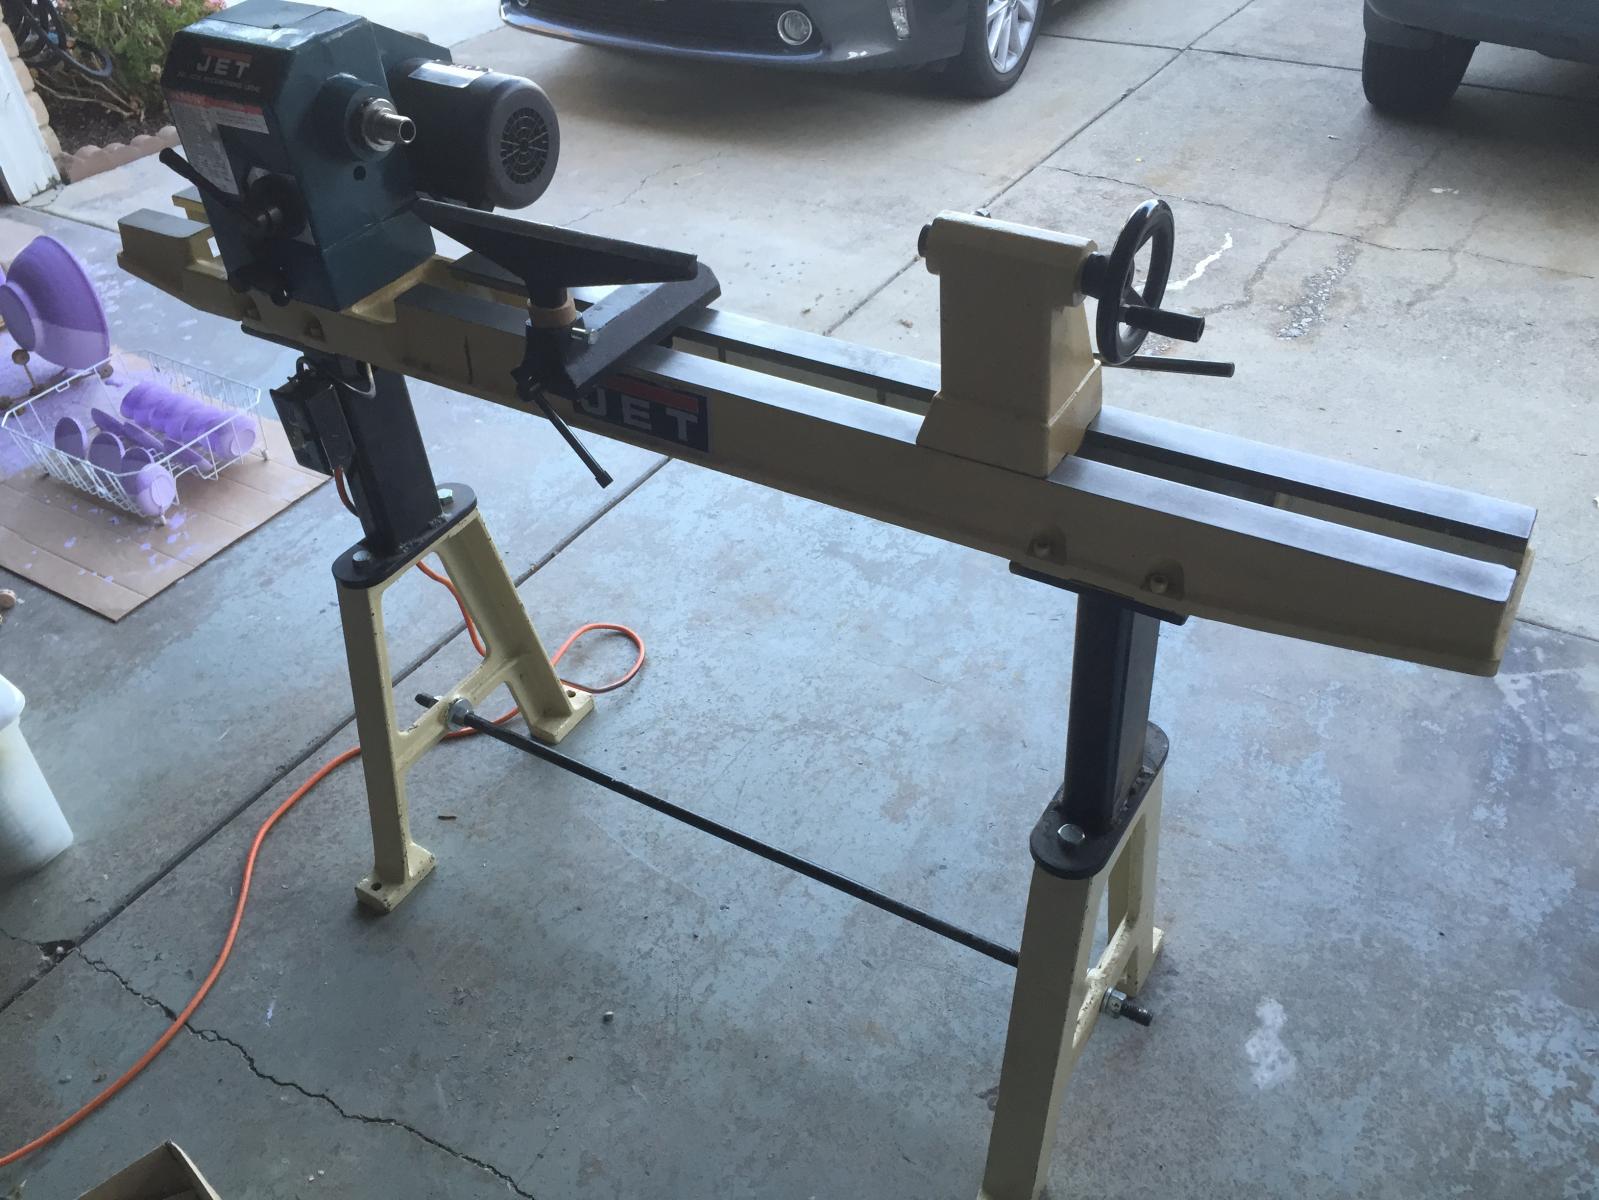
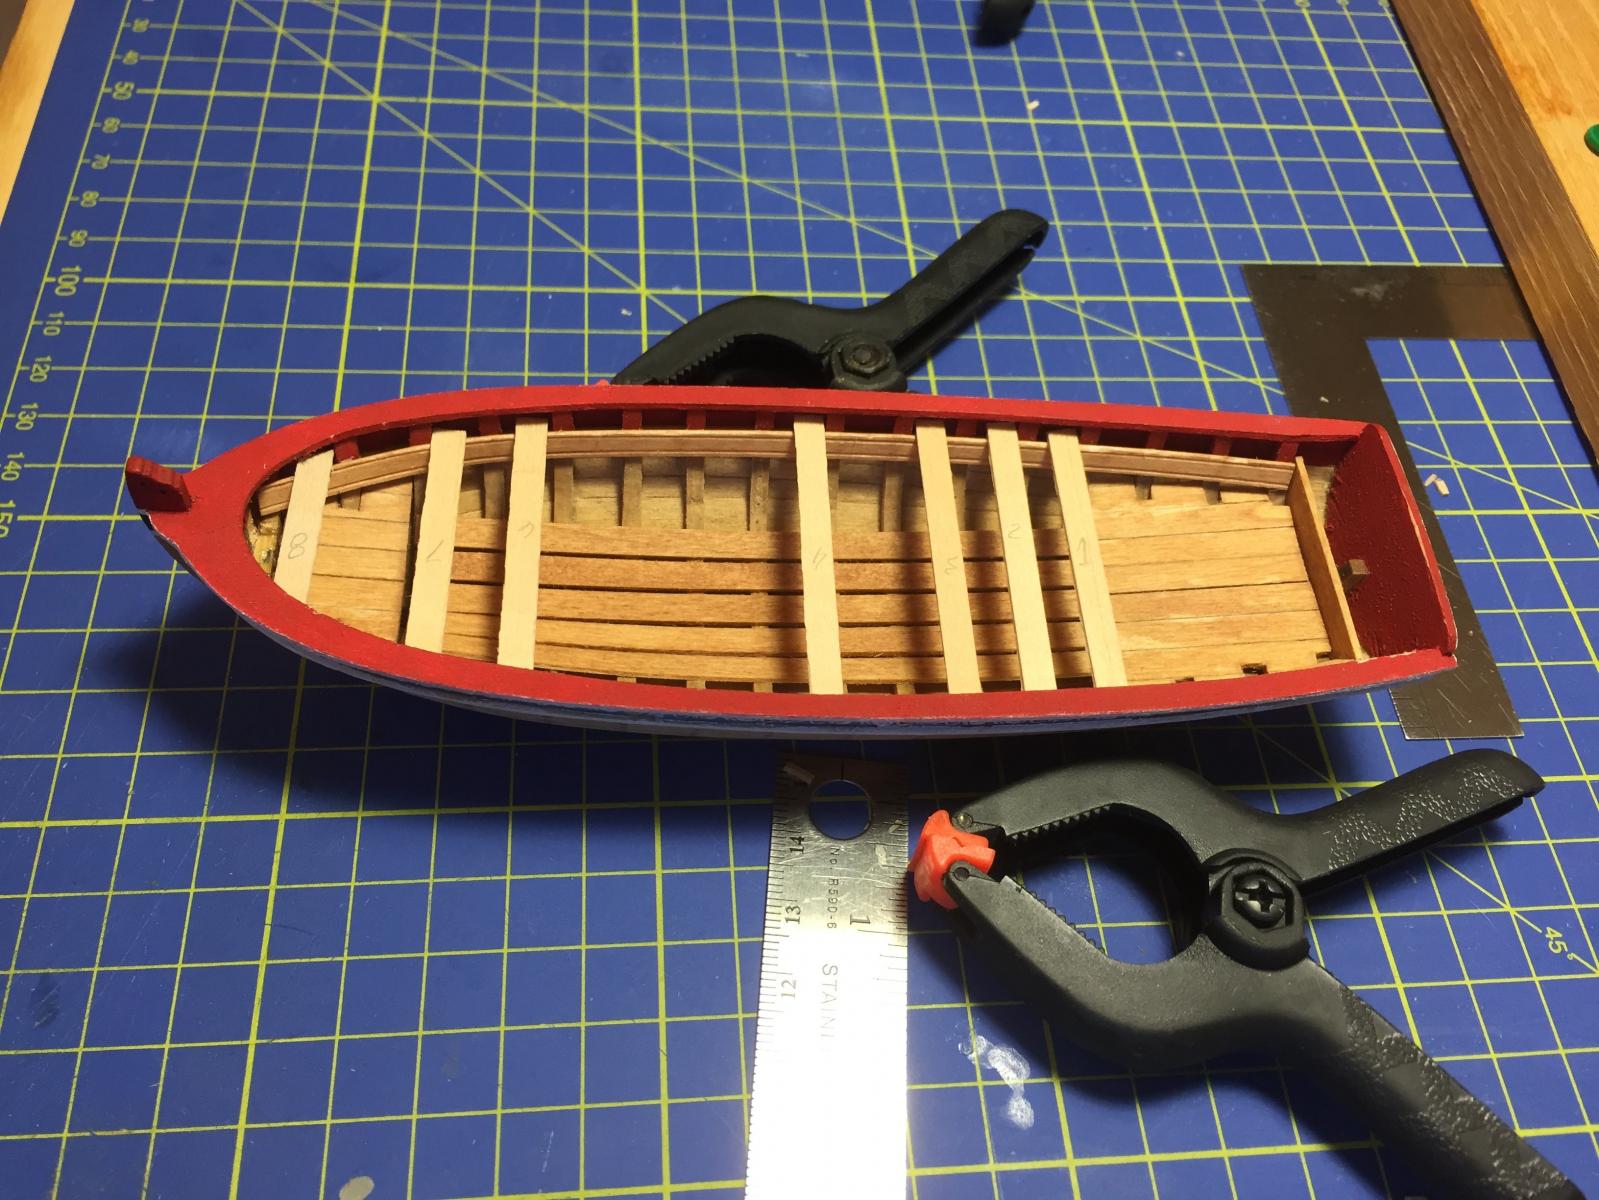
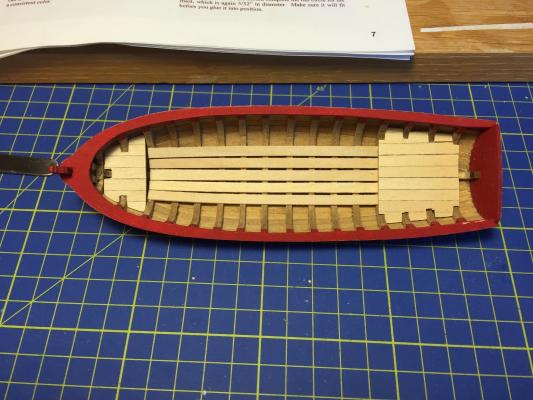
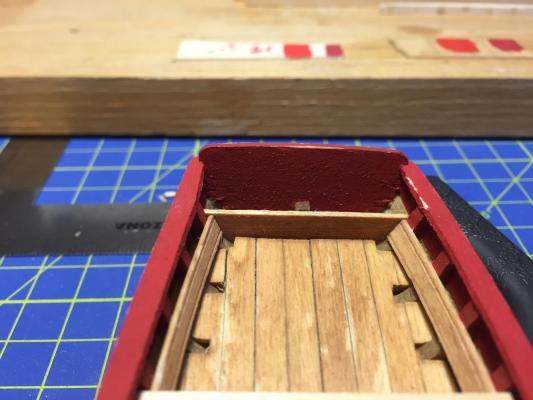
Didn't make a ton or progress this weekend I put the thwarts into their proper positions and finished off the rear cockpit seating and the first part of the rear enclosure. I also touched up all of the red that I had dinged on the transom and cap rail. I did the initial ironwork for the thwart that has the mast coming through it, painted it and prepped it. Unfortunately 5 stores later and no one in my area carries any brass blackener. The only place I didn't have a chance to stop by was the gun store. I'll order some on line for future use. In the meantime the acrylic paint I put on the brass chipped when while I was handling it to install it. Ill use some more acrylic paint along with my smallest brush to touch it up when I install it into the boat. Now the big news, I failed to make a ton of progress this weekend because I was cleaning up the garage and doing a ton of reorganization in order to make space for my new toy! The Admiral stumbled into a deal where the previous owner had purchased a new lathe and his Admiral was forcing him to sell his old one (Jet 1236) he offered it to me for $150. All I had to do was pick it up. Having no experience with lathes this will be quite the learning curve but I couldn't pass up a deal like that.


- 55 replies
-
- 2
-
-
- 18th century longboat
- model shipways
- (and 1 more)
-
Mike she looks lovely, very well done. Your build log was a pleasure to read through and your end results are fantastic. ryan
-
Thanks John, when you start up a build log I will certainly be in line to follow along and see how you are doing. I'll help where I can but I can only really tell you where I went wrong and be a cheerleader as I watch your build come to life! Thanks Adam, its a great little build, a lot of life out of this little boat. I have to tell you I have no idea how you keep 5 kits going at the same time, one is plenty for me to think about at a time.
-
Mike after seeing your work on the longboat I had to pull up and watch this, it looks outstanding so far! Are you spilling the planks from larger piece of wood or plank bending? Sorry it it should be obvious which route you're going with it I'm new enough to the hobby that it's sometimes hard for me to tell what procedure the builder is using.
-
Andy she looks great. I only wish I could have done a job of that quality on my sling. Your rigging looks fantastic, nicely done.
-
Hey Giantdog, just spotted this build and thought I would pull up a chair and follow along. Everything looks great so far and Keith is giving you excellent advice! I really love the thread between the planks, it really makes it pop. Looking forward to seeing the build as you progress.
- 153 replies
-
- 2
-
-
- swift
- Artesania Latina
- (and 1 more)
-
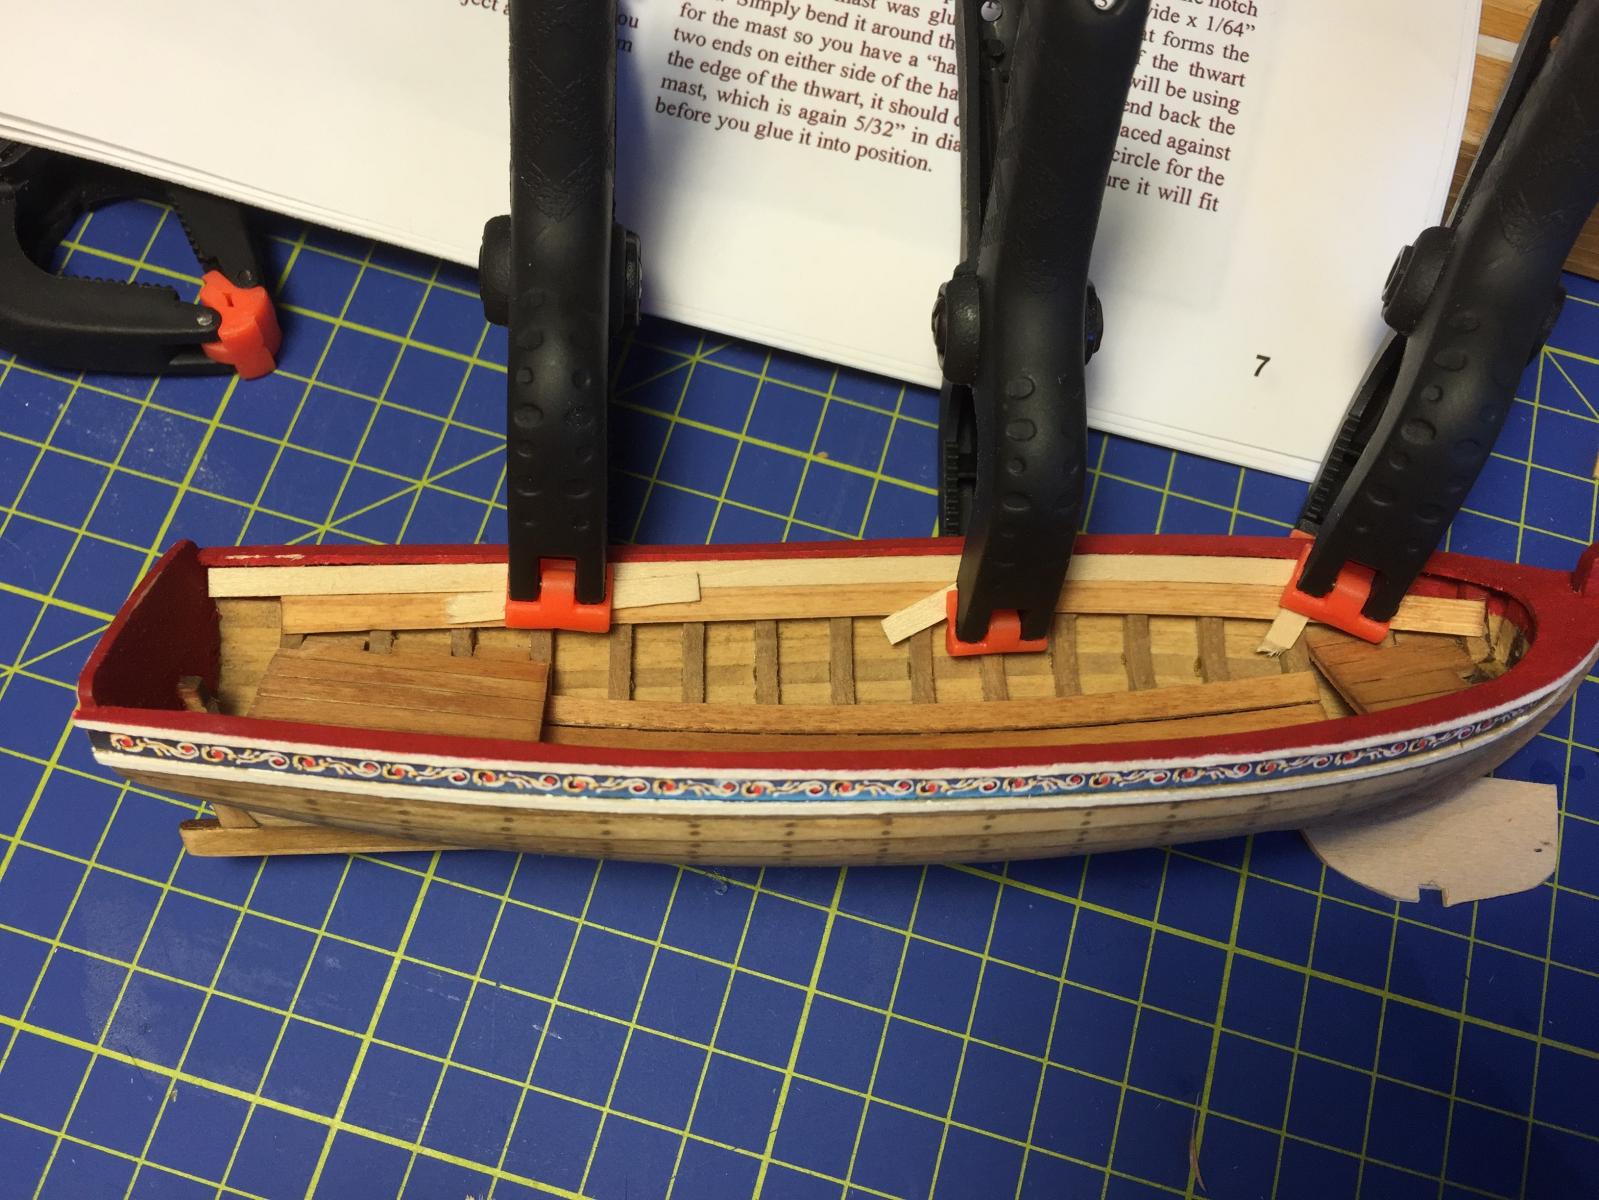
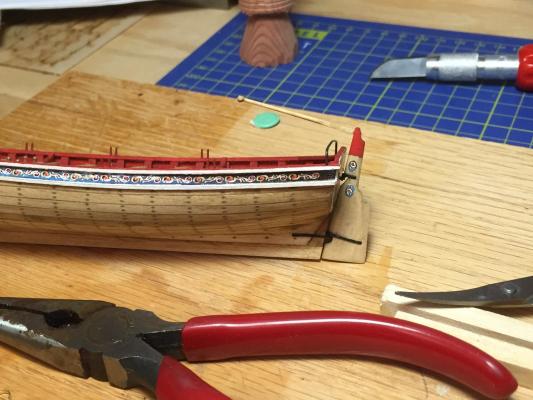
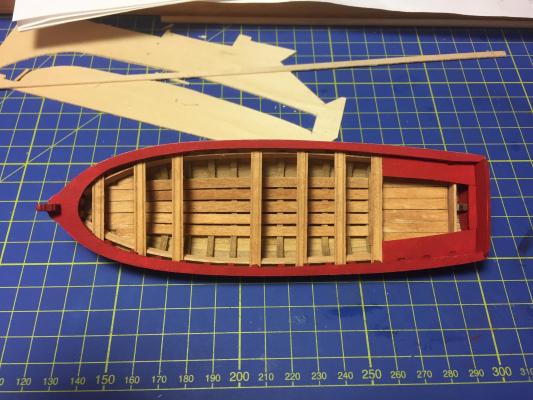
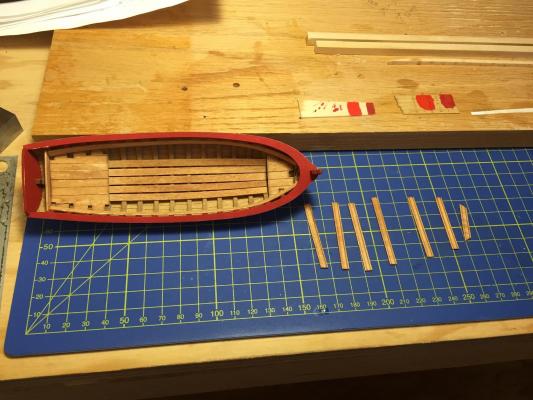
Today I started my work with the rear platform, after yesterdays mistake of the crooked eye I paid extra attention when gluing the planks that they were going to come in straight. It worked! I did notice that in the instructions the rear platform is cut so that it curves into a much smaller space as it moves toward the aft, after I finished I decided I was ok with the shape and size of mine. I then proceeded to the risers, I was careful to use a spacer underneath the cap rail to ensure that I had consistent distances along the entire run as well as ensuring that both sides were mirrors. I put in the front of the storage locker after completing the risers In this picture you can see the run of the boat inside, I used a slightly different stain on the floorboards, risers, platforms and thwarts. The planking and structure of the boat is MinWax Fruitwood 241 while the internal structures I went a hair lighter on and used Ipswitch Pine 221. The Ipswitch pine has a nice light reddish hue that I felt matched up nicely with the red on the cap rail and knees (hard to tell from the photos) I started playing around with the thwarts, I just have them dry fit and not accurately at this point And then I pulled them out, scribed and stained them. That will be the beginning of next weekends time in the shipyard, finishing the thwarts, cockpit and figuring out how to make the all important thwart where the mast comes through. I'll be poring over all the finished build logs to see how other folks have done that portion.


- 55 replies
-
- 7
-
-
- 18th century longboat
- model shipways
- (and 1 more)