divarty
-
Posts
130 -
Joined
-
Last visited
Content Type
Profiles
Forums
Gallery
Events
Everything posted by divarty
-
 I knew it was too good to be true, looking at stuntflyers build and his discussion with Chuck Passaro as well as pictures from the stickied post I brought the sheer strakes up too high at the stem and that will cause future problems with the cap rail so when I get back to the shipyard Ill be busy using the magic of isopropyl again to remove the strakes and move them down. I have to agree with my admiral though when she told me "Just enjoy redoing each part five or six times, then it will feel like you worked on a much larger model"
- 55 replies
-
- 1
-

-
- 18th century longboat
- model shipways
- (and 1 more)
-
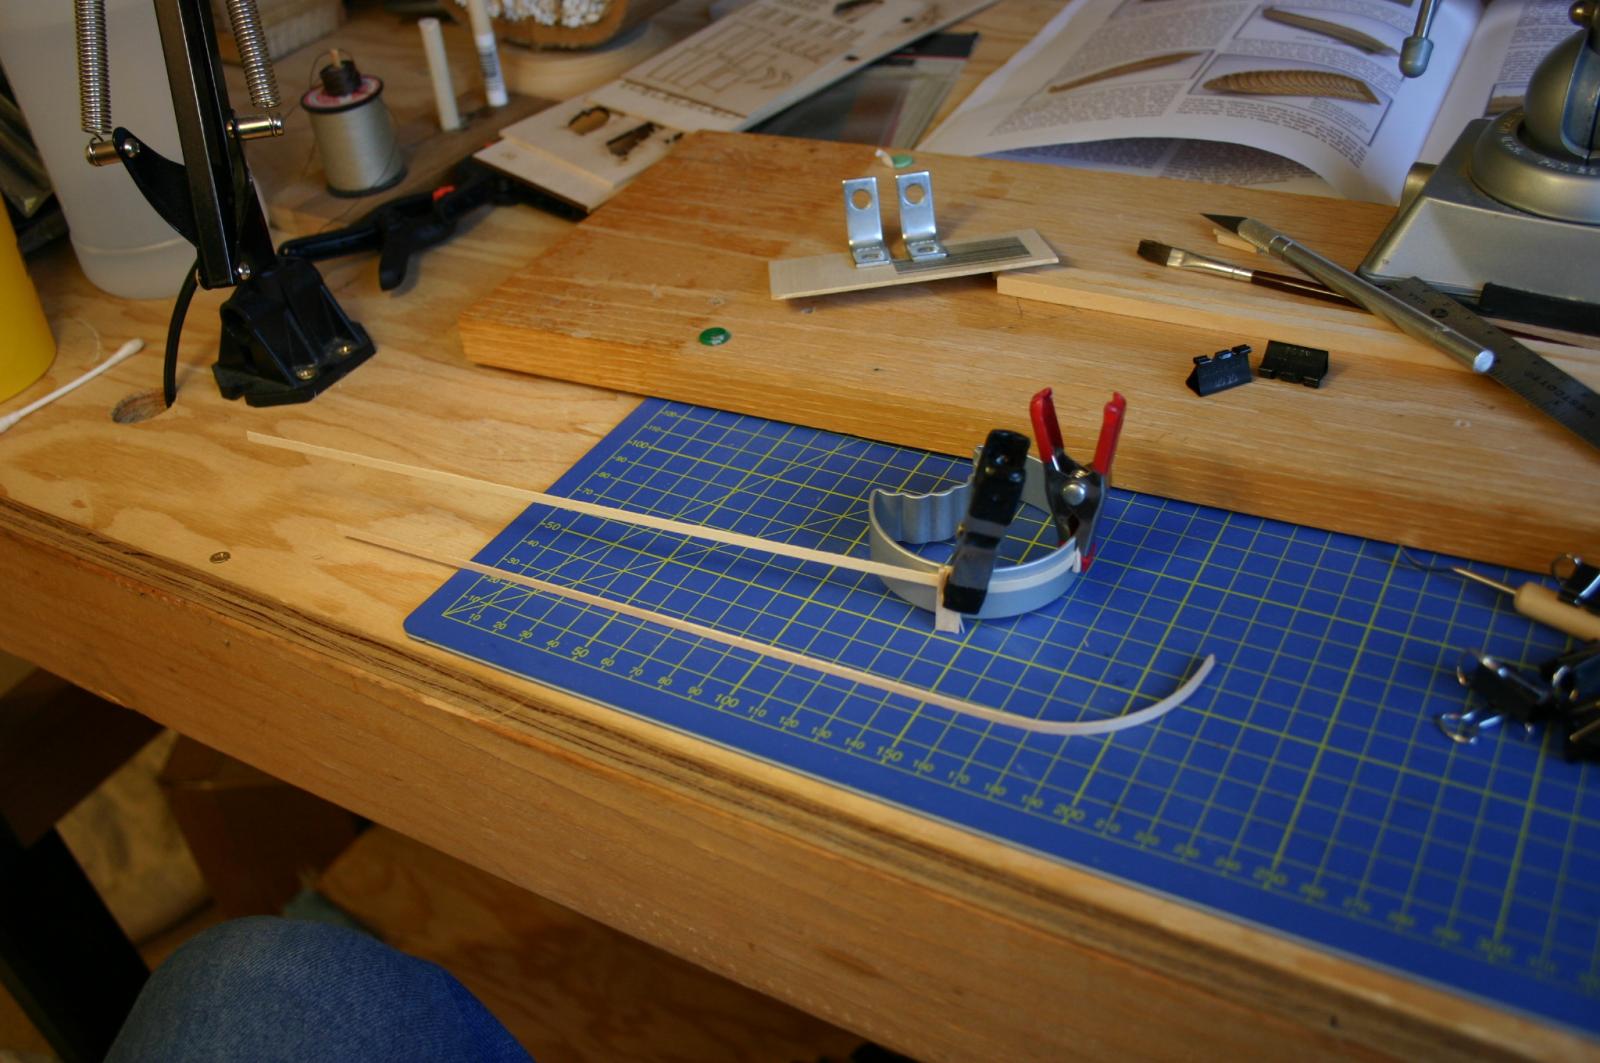
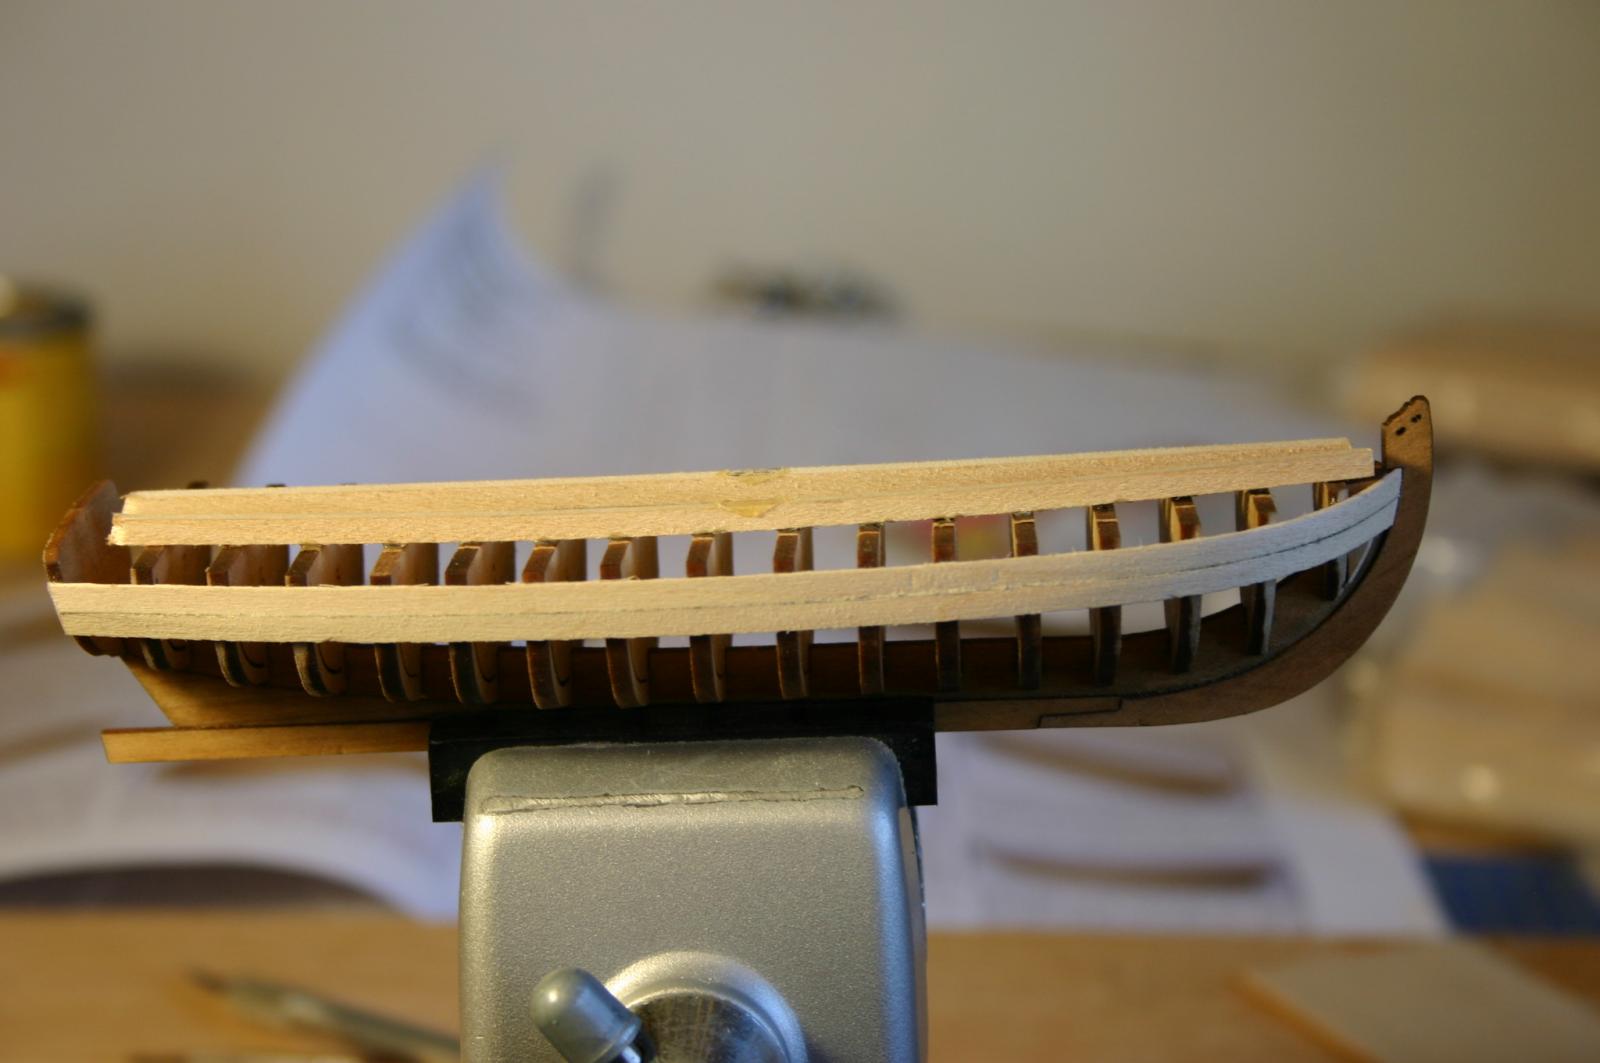
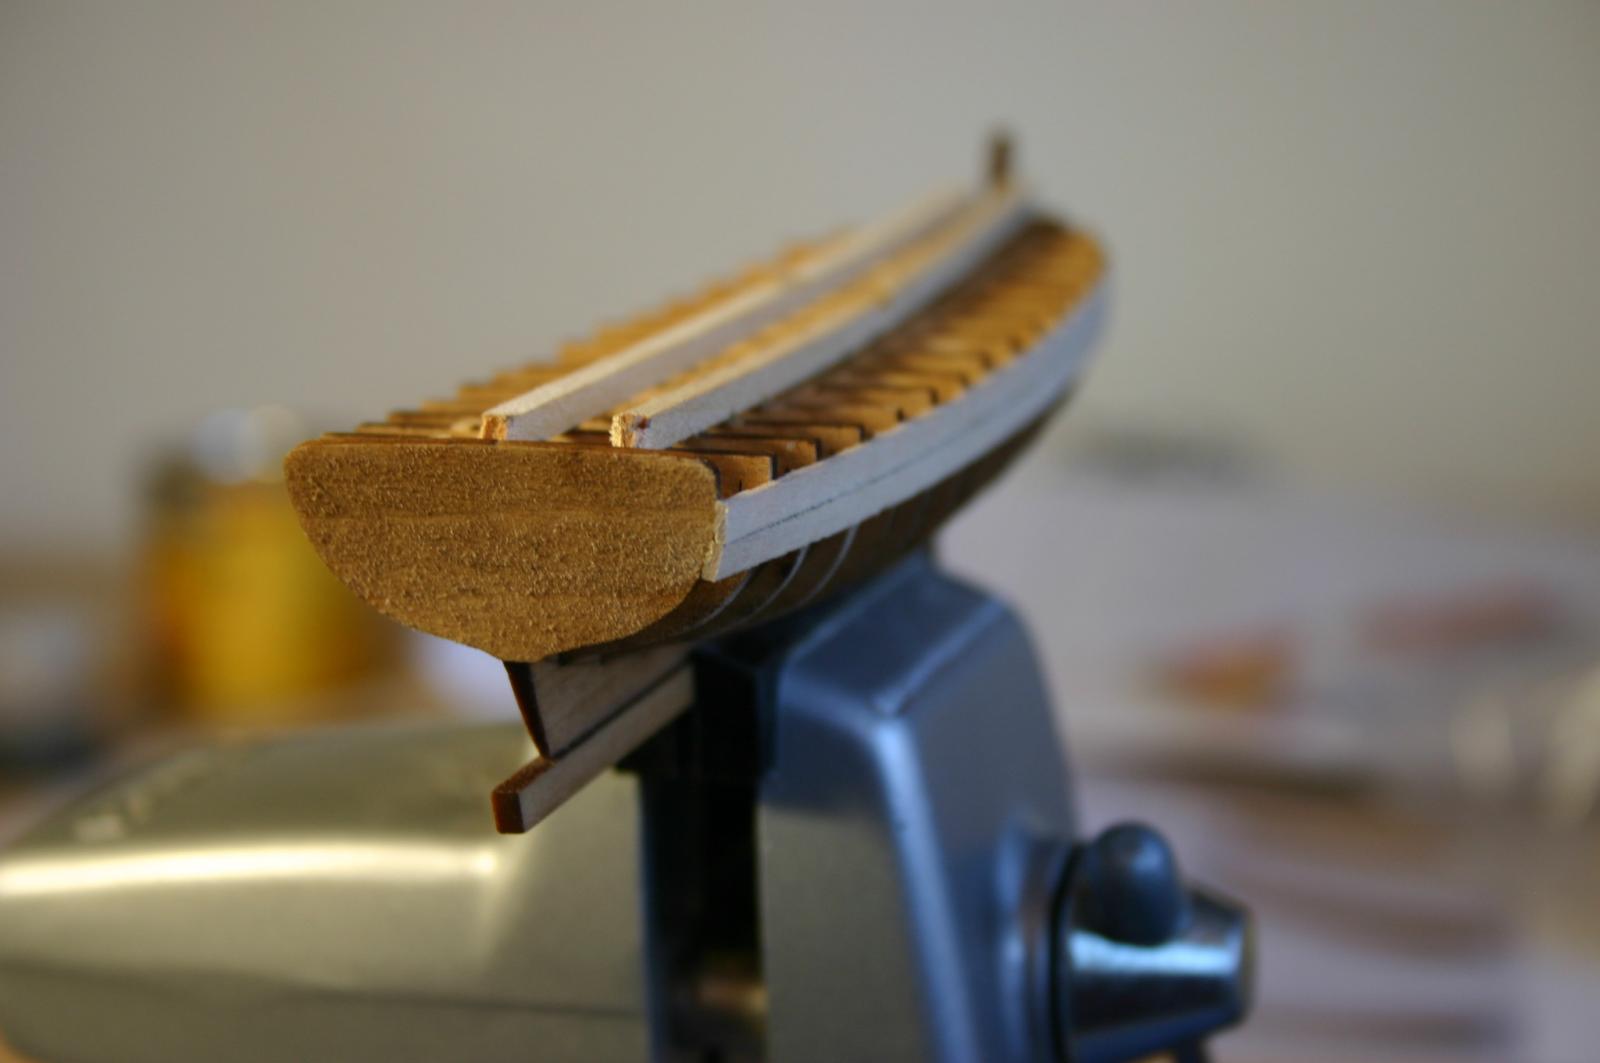
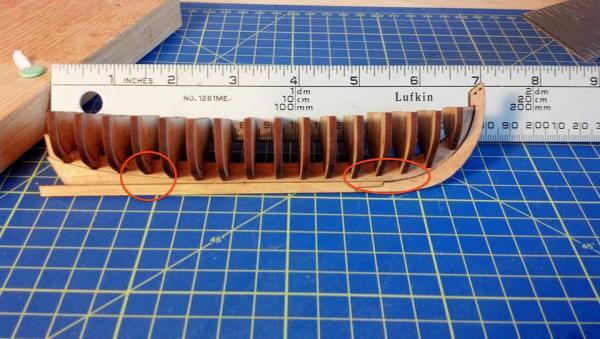
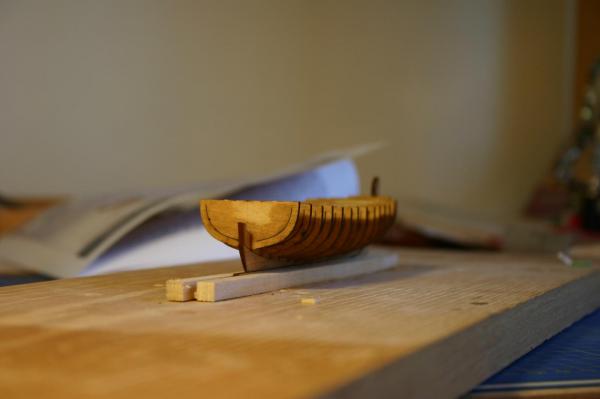
I was looking through the pictures I took of my build hours after I had closed up in the shipyard and I noticed that I had mistakes at bulkheads 4 and E, they didn't come down to the bearding line in the case of 4 and in the case of E it was a little high and threw the line off. Using the mighty powers of isopropyl I pulled them cleaned up the slots and reseated them properly, then it was off to the races truing the bulkheads and starting on planking. I decided to do some quick bending of the wood so I soaked it and went in search of a round item to bend it around. The directions from Chuck suggest a lid, I couldn't find one of the proper size, however while digging around I found one of the admirals cookie cutters that was the perfect size and shape. The use of this eventually led to a conversation with the admiral that included the words "What is the nice cookie cutter my mom gave to me doing on your work bench?" I begged forgiveness demonstrated that no harm would come to said cookie cutter and I can continue to use it for this plank job. I put the first two sheer planks on and I think it seems to have come together nicely, but looks they can be deceiving. I figure I would post up some photos for you experts to look at and someone can shout it they see something off that will haunt me further down the road. One thing I did note (I'm probably looking at the wrong thing) in the instructions it calls for leaving 1/16th of an inch from the top sheer rail to the top of the bulkheads then it instructs you to use the measurements off the plans, when I checked the plans it shows the sheer rail down 1/8th of an inch from the top or the bulkhead.


- 55 replies
-
- 4
-
-
- 18th century longboat
- model shipways
- (and 1 more)
-
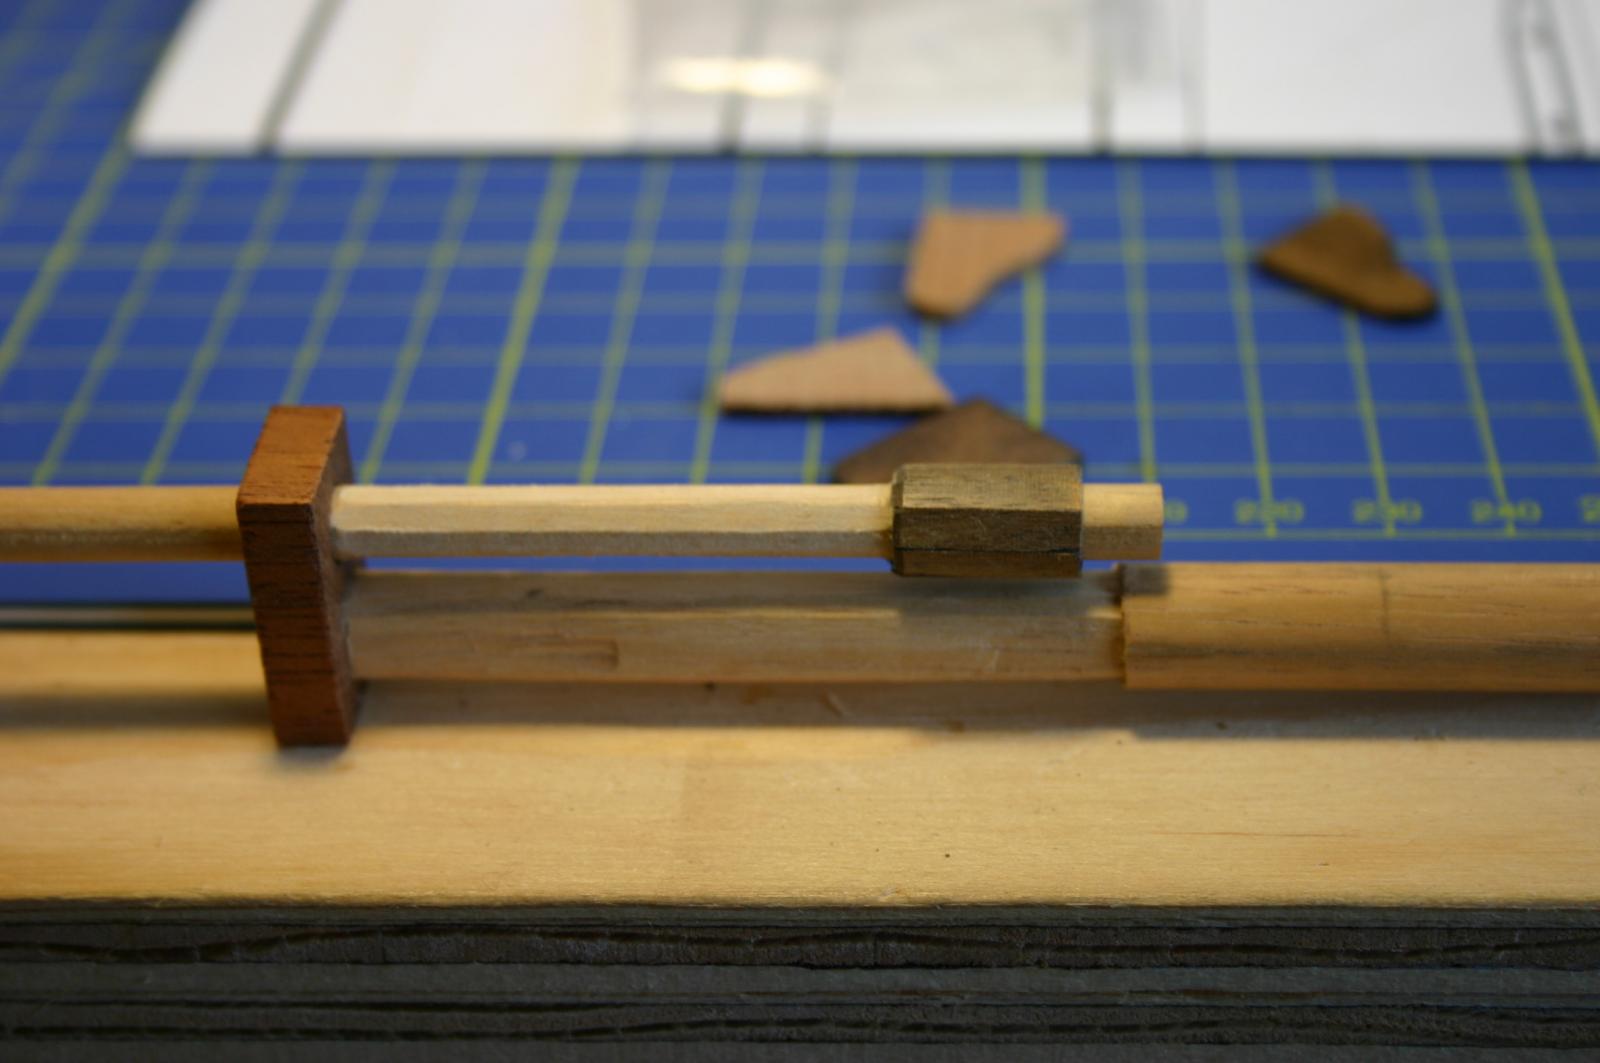
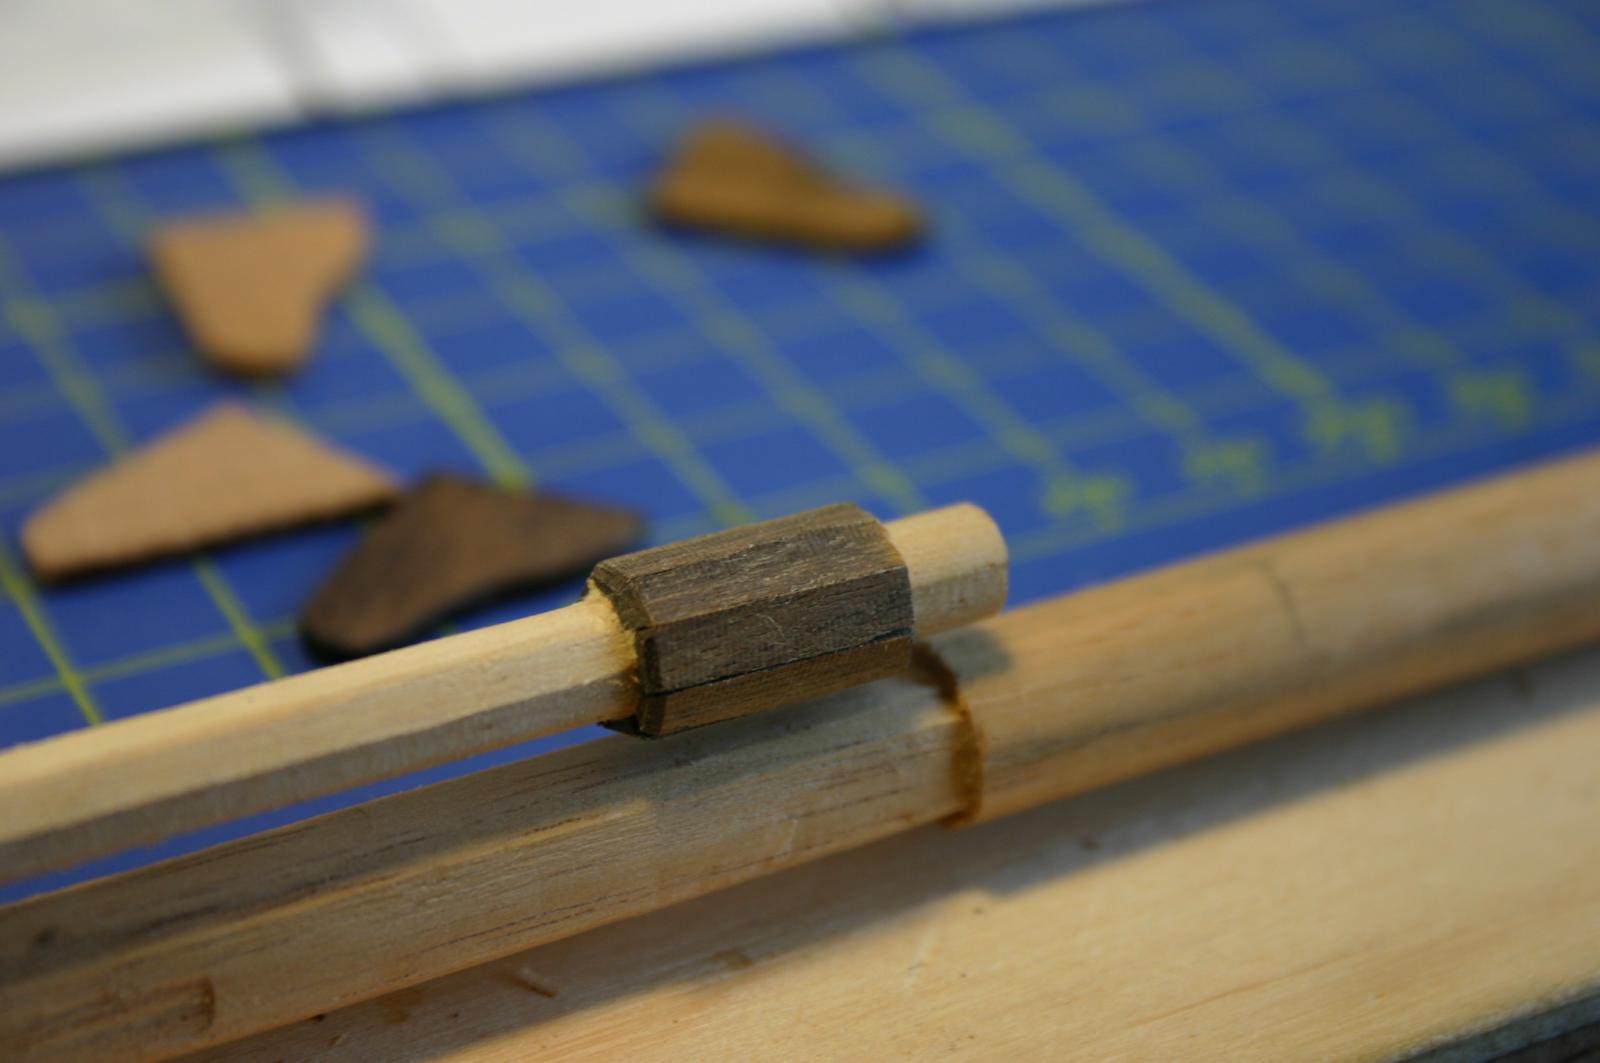
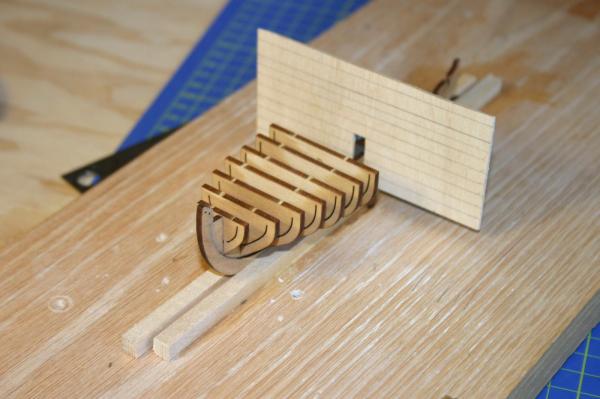
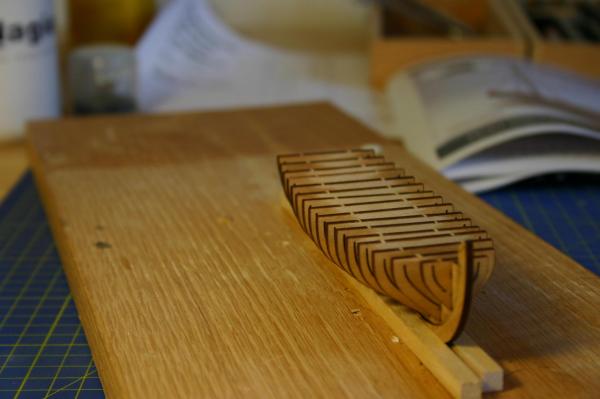
Thanks Chuck your log was really helpful in sorting out how to get all three dimensions to line up correctly, I don't have any power tools (like a table saw) that would allow me to cut a groove into a base board for the keel so instead of removing material from my base board to make the keel holding slot I went additive with two pieces of wood sandwiching a smaller piece all glued to the base board. I used another small sheet of wood, measured lines out and mounted it to two small L brackets. This allowed me to pull it tight to the bulkhead and make sure the bulkhead was squared in all directions, the lines allowed me to check the side to side level. Having to redo the bulkheads a couple of times was actually beneficial, I realized before I put it together for the last time I hadn't stained the bulkheads or the keel so I took care of that prior to putting everything together. Jig and first bulkheads From the bow with all bulkheads set From the stern with all the bulkheads set Hopefully what I have is close enough tolerance wise, I'm not sure how much tighter I could get it.
- 55 replies
-
- 7
-
-
- 18th century longboat
- model shipways
- (and 1 more)
-
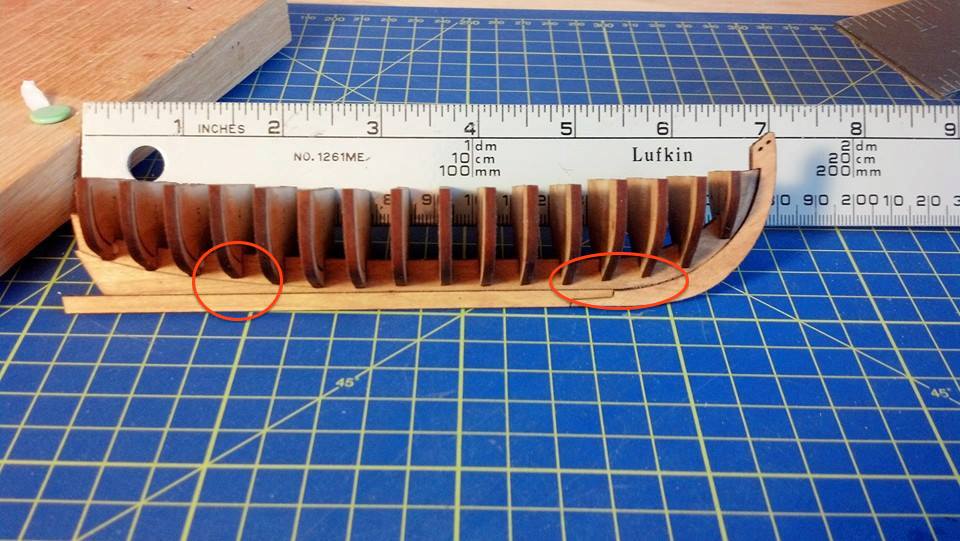
Very minor update, I had mounted 4 of the bulkheads and thought I had them correct with 90 degrees and flush on the top, turned out the first one I laid was off slightly and I followed with the rest so I pulled them all off and will be restarting the process again. Getting these bulkheads true may just drive me insane. When I have all of the bulkheads in should the flat top be level all the way across the boat or is there a little bit of tolerance wiggle room for some being slightly higher than others, and by slightly I mean roughly a 1/32" deviance.
-
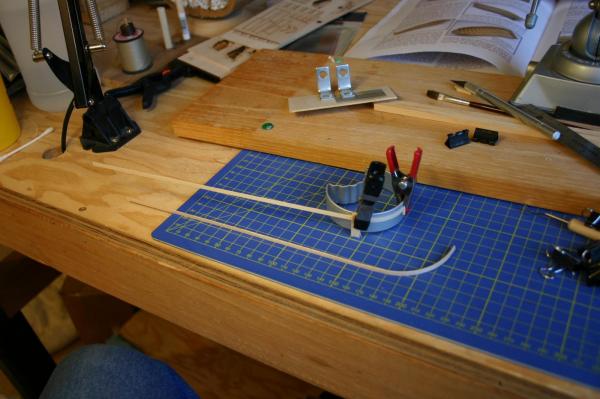
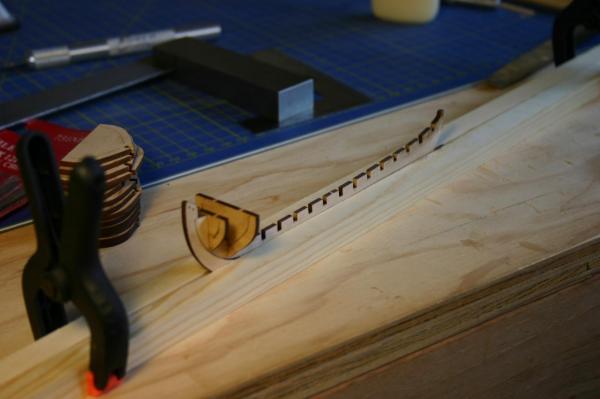
Throwing my hat into the ring with a long boat build as well. The kit came incomplete I'm missing the brass and fittings, eyes and blocks and cordage. I need to contact Modelexpo to get that sorted but was having some issues with the contact page, however it doesn't matter for the moment as I have enough to start on the bulwarks and planking. I filed/cut/sanded the false keel from the bearding line down and attached the keel and the stem to it, doublechecked the depth of the rabbet I have 1/32" all along so I think its all good. I dry fit all the bulkheads, each was off by a touch so some filing was required for each piece. I built a portable jig to hold the keel by using two pieces of square wood and clamping them together with the false keel sandwiched between them. I started to mount the bulkheads and I already made a mistake, the G bulkhead is square to the keel but not correct vertically so I'll have to sort out how to detach it and square it up again. The temp jig and my work so far. Pretty standard stuff for this group build Hopefully I can make it look as nice as some of the others in here.
- 55 replies
-
- 10
-
-
- 18th century longboat
- model shipways
- (and 1 more)
-
Just found your build log and was blown away, she looks absolutely incredible. Can't wait to see more.
- 1,319 replies
-
- 1
-
-
- caldercraft
- Victory
- (and 1 more)
-
Wow I just went through your build log, exceptional work, I wouldn't believe it was your first build if you hadn't mentioned it.
- 109 replies
-
- 1
-
-
- 18th century longboat
- model shipways
- (and 1 more)
-
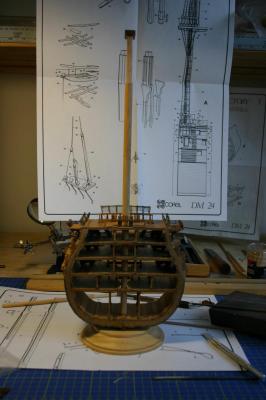
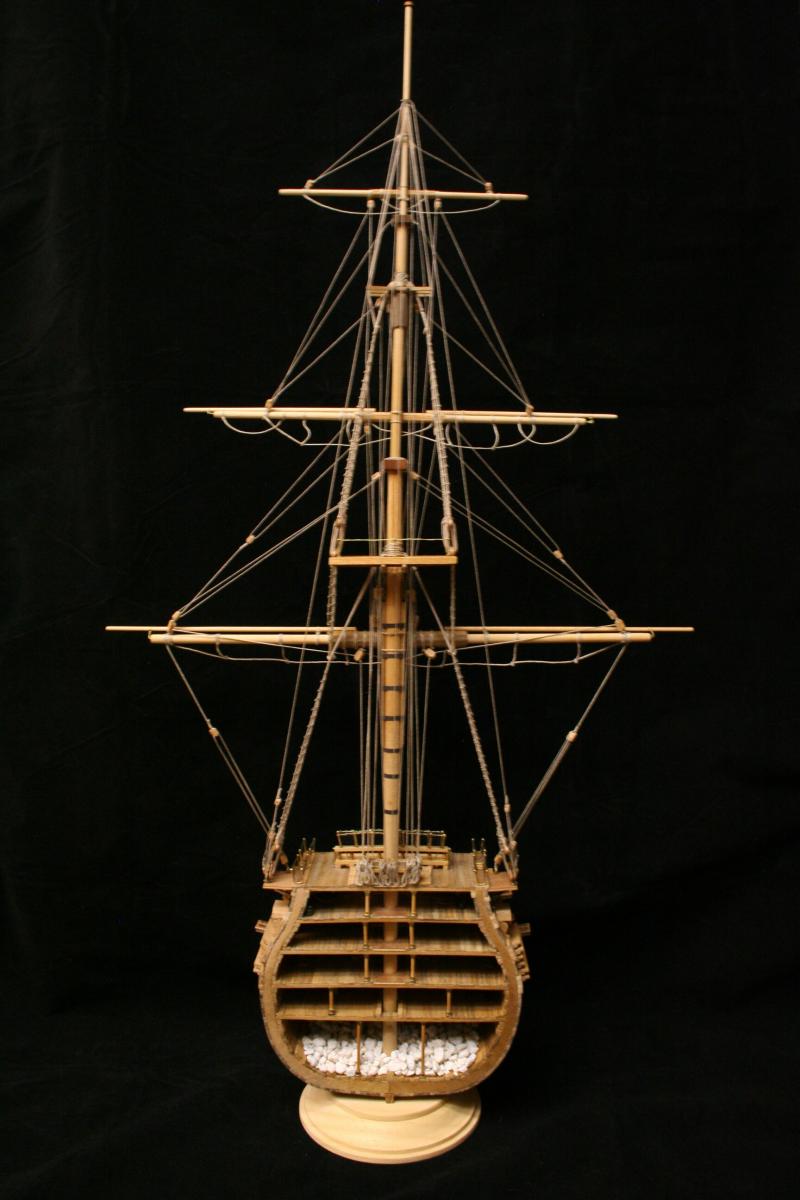
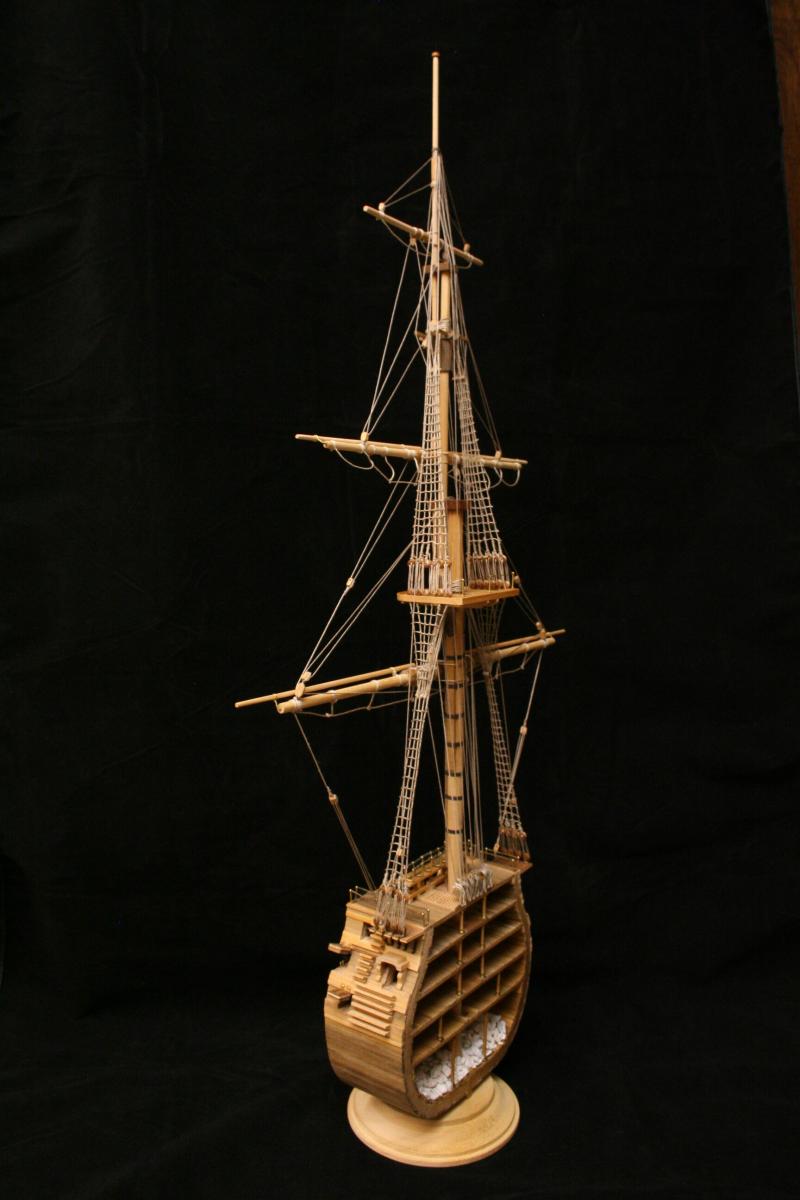
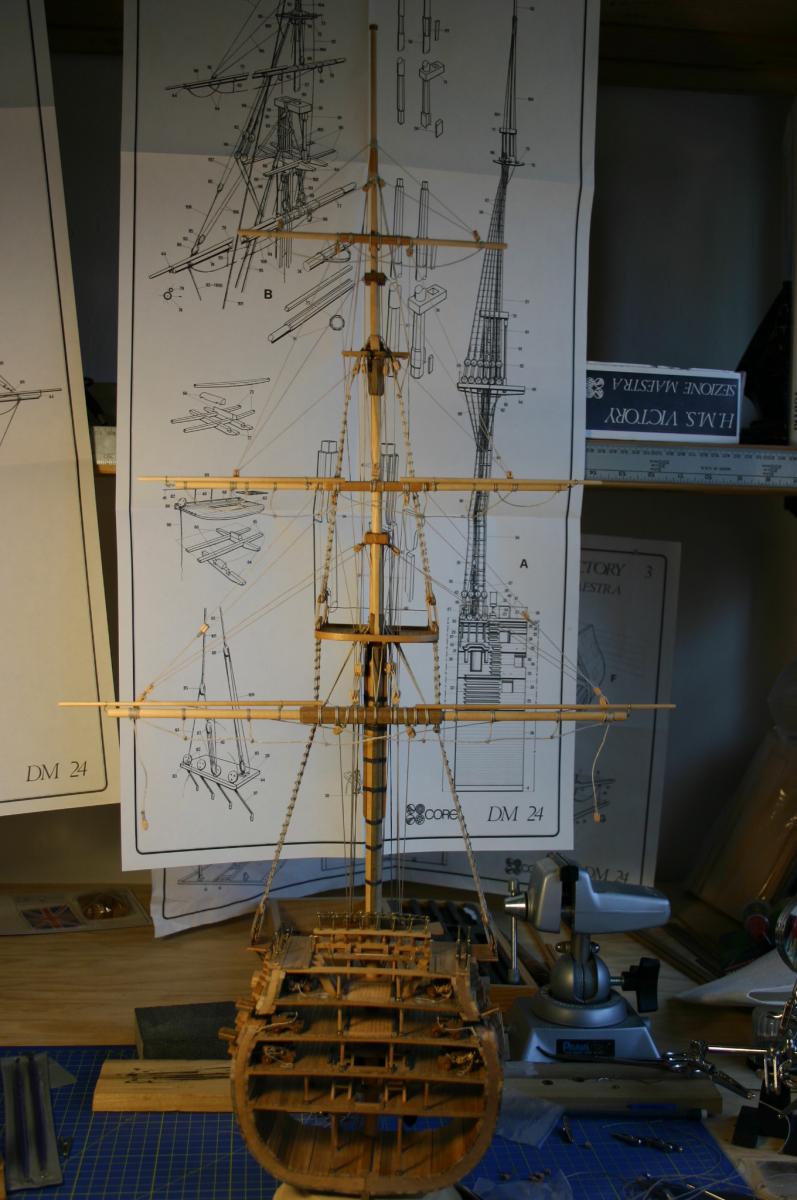
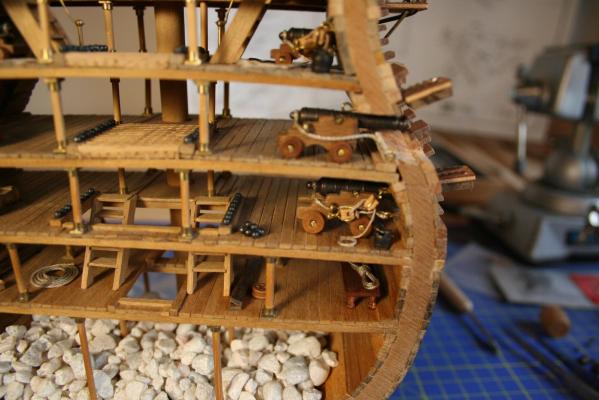
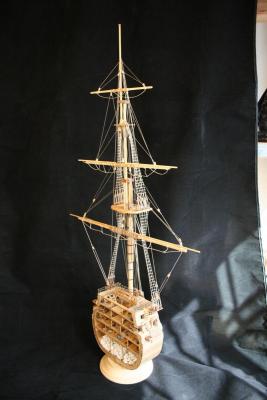
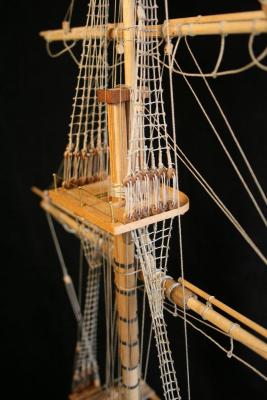
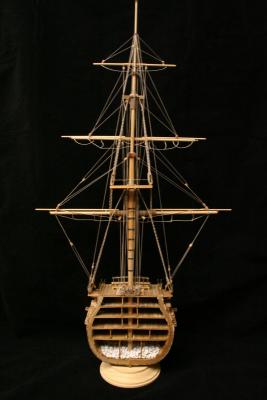
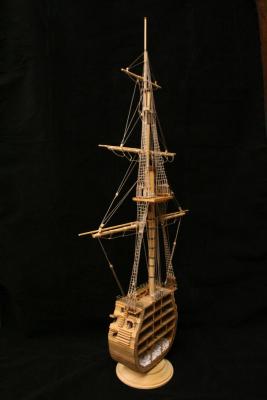
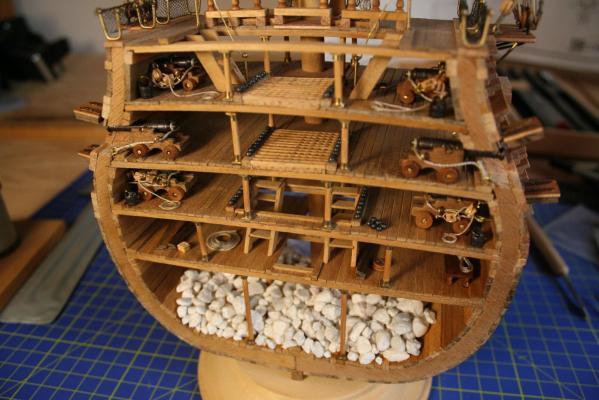
After a busy weekend in the shipyard and a lot of support from the forum on how to deal with my belaying pin rack issue my Victory cross section is complete. I still need to add in my barrels but prior to doing that I have to blacken the barrel hoops. The admiral took a ton of fine photos of the ship but I narrowed it down to the ones that really show her off and didn't duplicate pictures already in my build log. The balast on the bottom was interesting, I went round and round on it, finally I picked up some aquarium rocks, blocked off both side with some handy cardboard and clamps then drizzled diluted white glue on them, it worked it's way through the cracks and sealed it up nicely so they don't move around or fall out. I know that on a real man-of-war they probably wouldn't have random timber and rope haphazardly strewn around but I think it adds to the overall look of the model. Now I just need to figure out what to build next.

- 32 replies
-
- 11
-
-
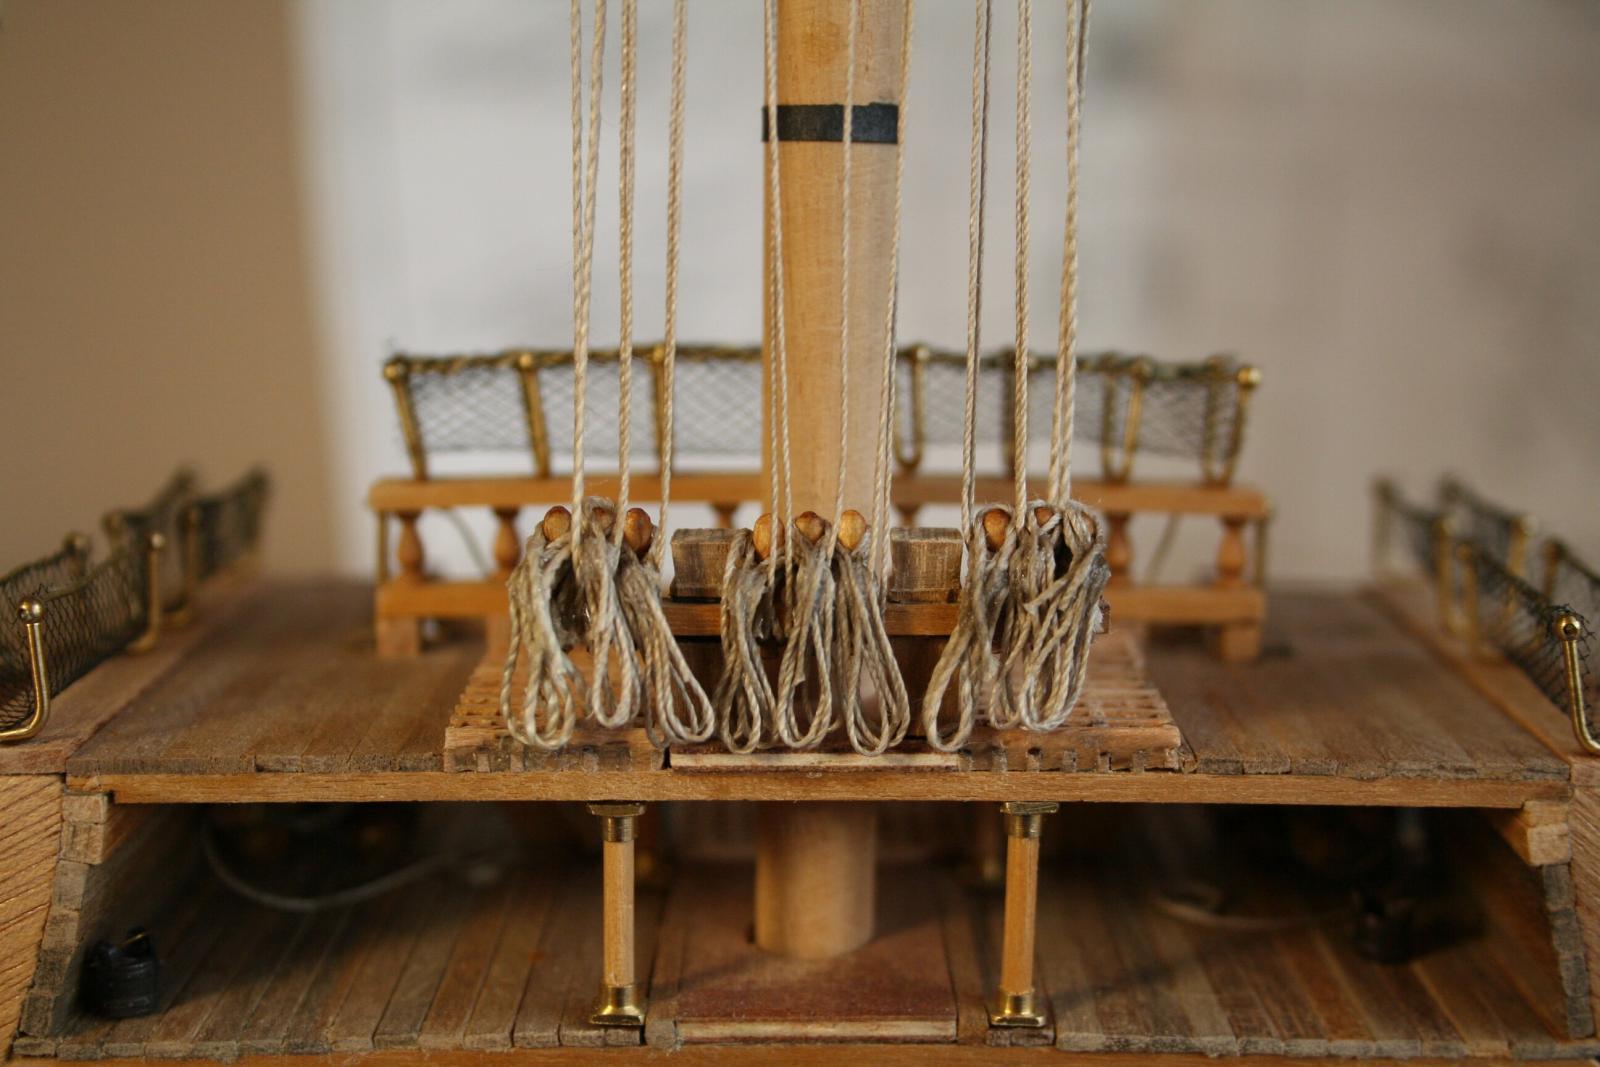
Not the trifocals just my inability to count past 6 , it is indeed 9 pins on the rack. Thanks for the input and the pictures Pete, much appreciated. ryan
-
Thanks Ulises, that makes a lot of sense, now I just have to decide how much work it would be to pluck those pins out. I would have to redrill the pin holes as they were tight to begin with, adding the cord is going to make it even tighter. And to be honest I'm not sure I have a lot of room on the rail to enlarge the holes enough for this. haha, sins indeed, I may need to cover the entire build in rope coils Jud the kit called for a single pin rail with 6 pins, I can't find any decent pictures that show the main mast pin rail on the victory but I found others showing the pin rail for the fore and aft masts and there are certainly more pins in those. I have enjoyed this kit but it has it's inaccuracies (E&T and AntonyUK have build logs for this same kit on the site and did quite a bit of kit bashing to bring more accuracy to it.
-
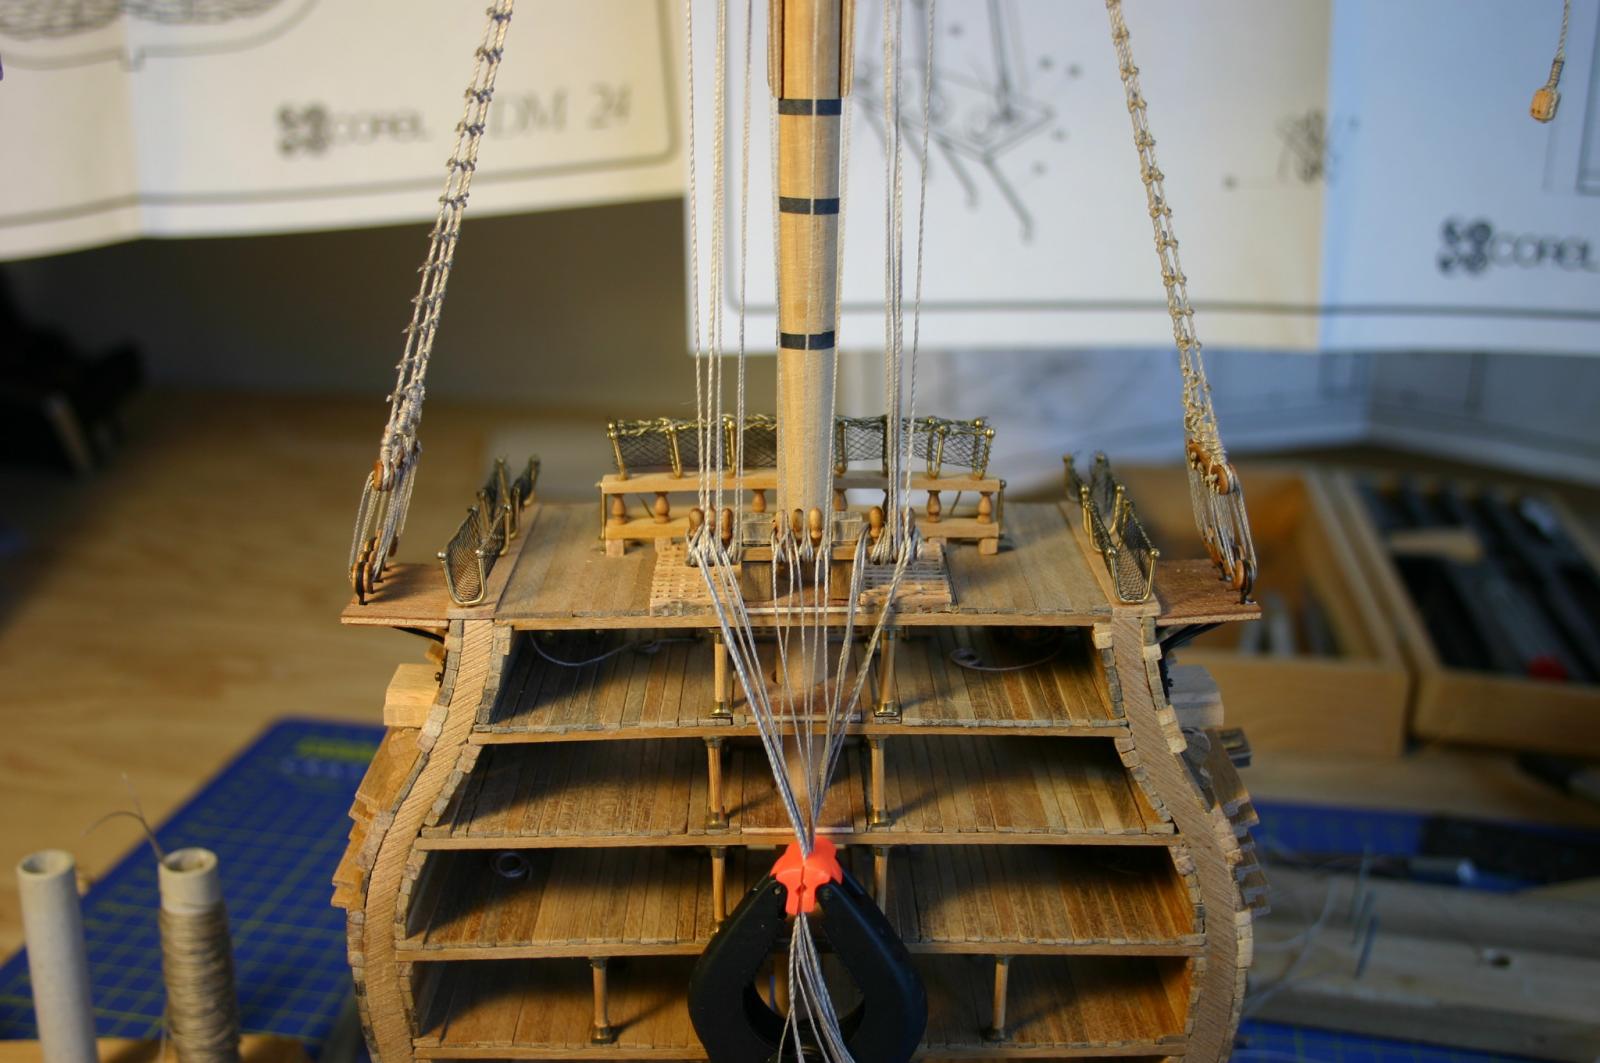
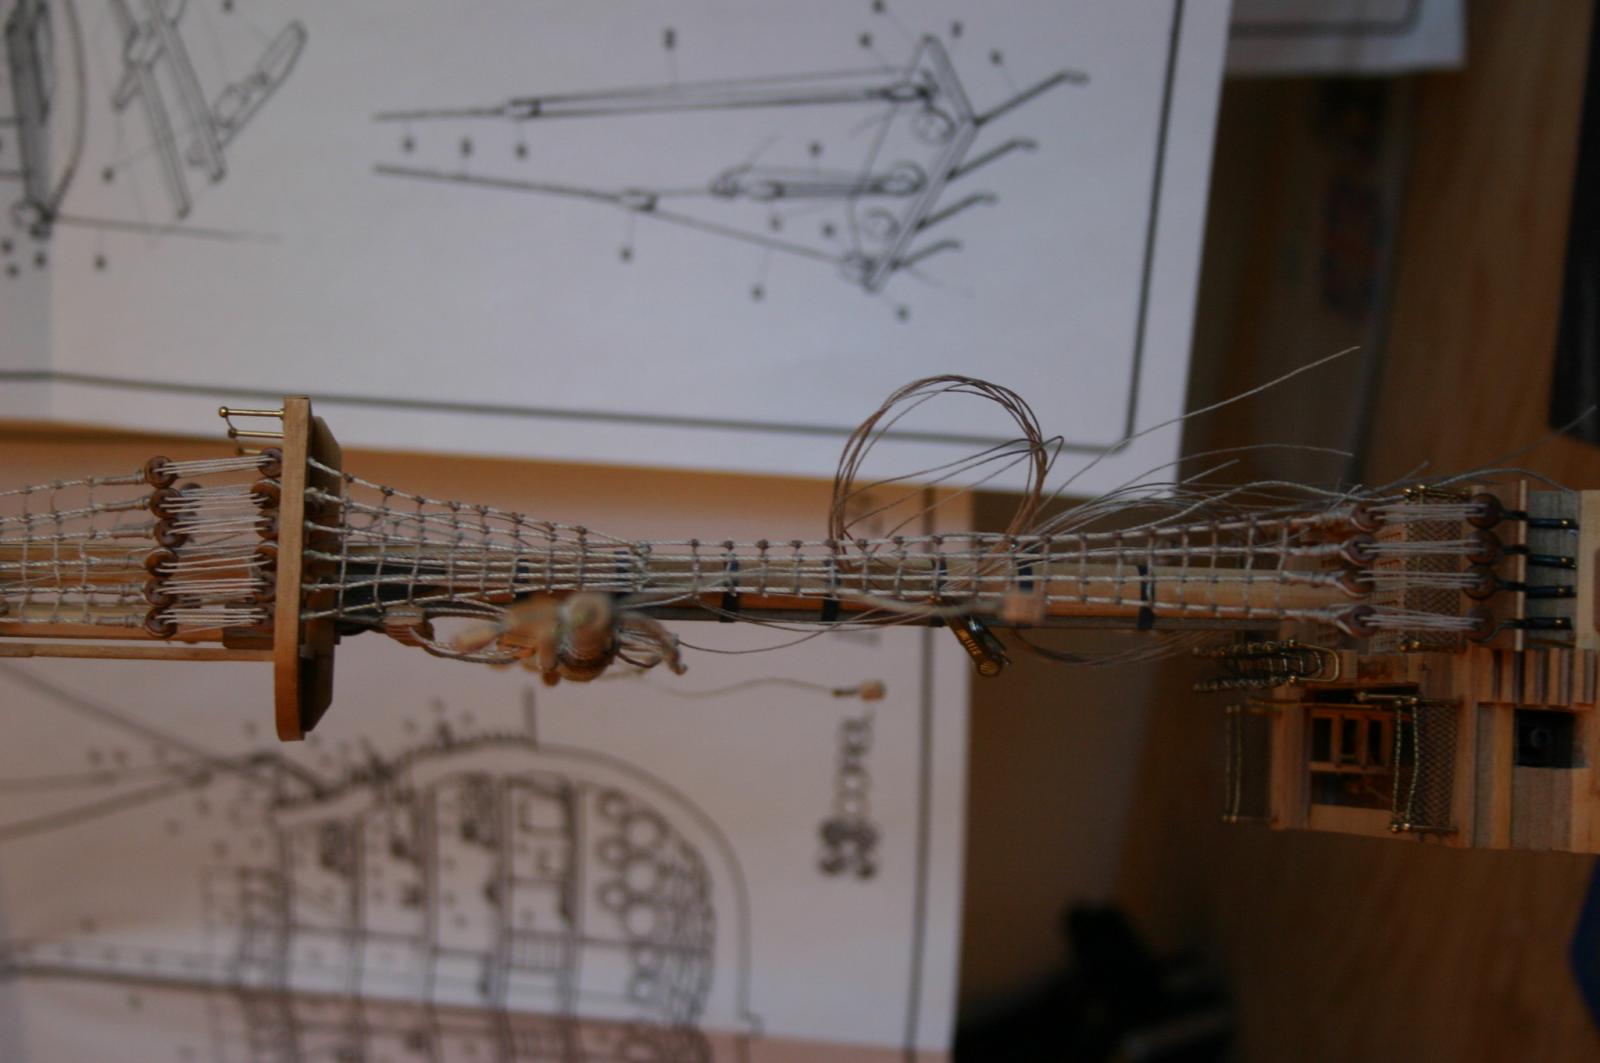
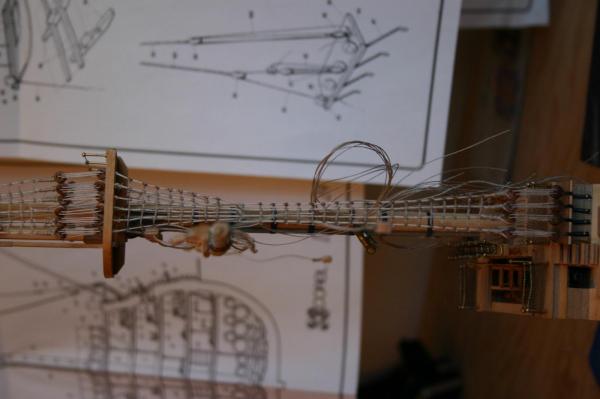
So I just brought all of my running rigging down to my belaying pin rack and it's pretty damn busy Whats the proper way to finish off the ropes? I was thinking about CA'ing what I have in place then making some rope coils to cover the ugliness? Any suggestions or criticism is welcome, nothing is permanent yet

-
I attached the main yard to the mast and added the sling, the sling itself is just a piece of line run over the mast cap and back down through the trestle tree, around the yard and finished off by an overhand knot around the sling again. After the main yard was attached I tightened up all of the running rigging and rattled it down to be placed on the belaying pin rail. The belaying pin rail has become very busy, I have some guesses as to what to do with it but I'm not certain. I was thinking some CA to lock all the ropes into place then clip the excess and make some coils that I can put over the pins to cover the mess? Hell, I'm not even certain I landed the ropes on the correct side of the belaying rail or if it would vary and you might have ropes off either side? In just the span of two days I have gone from a messy looking pile of sticks and strings with no end in sight to an almost completed ship section, by my count I have 6 blocks and two lines left to do then it's just a matter of putting in the details on the decks (buckets, balast, barrels, coradge, stacks of wood etc.)


-
She looks incredible Michael, I read through the entire build log and it is truly an impressive piece of work.
-
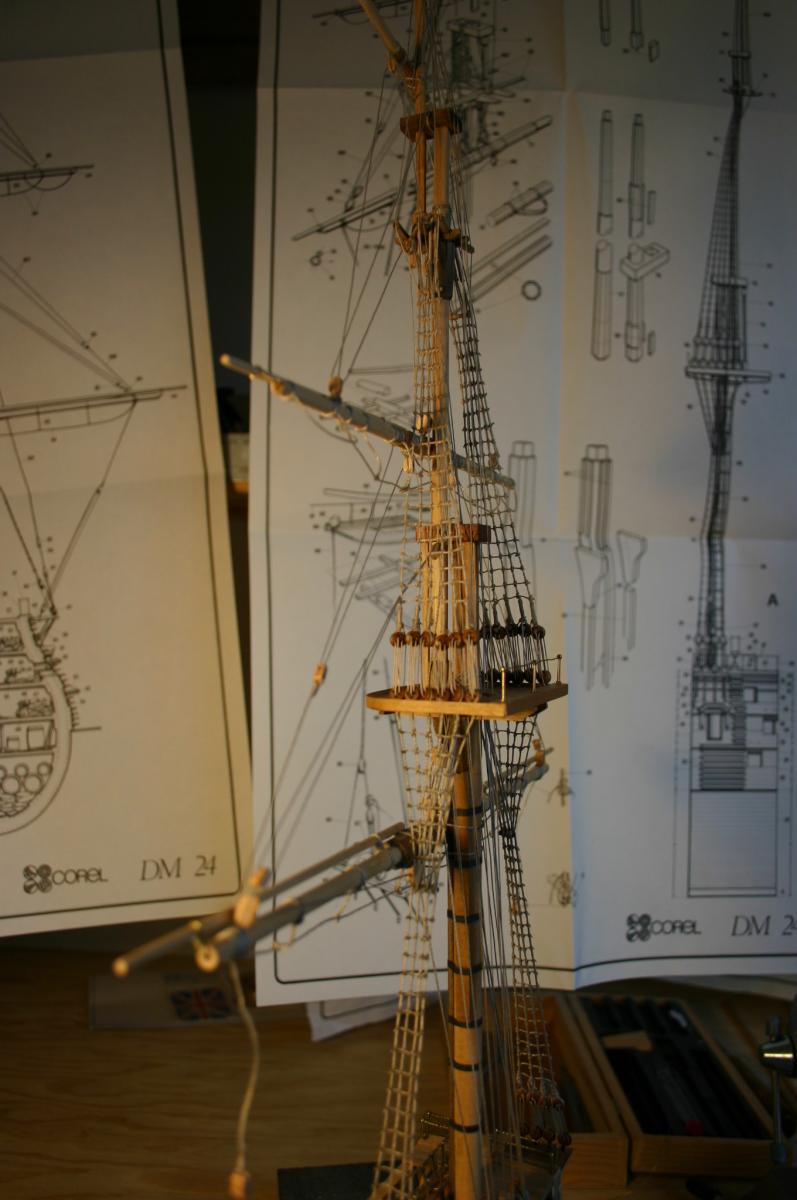
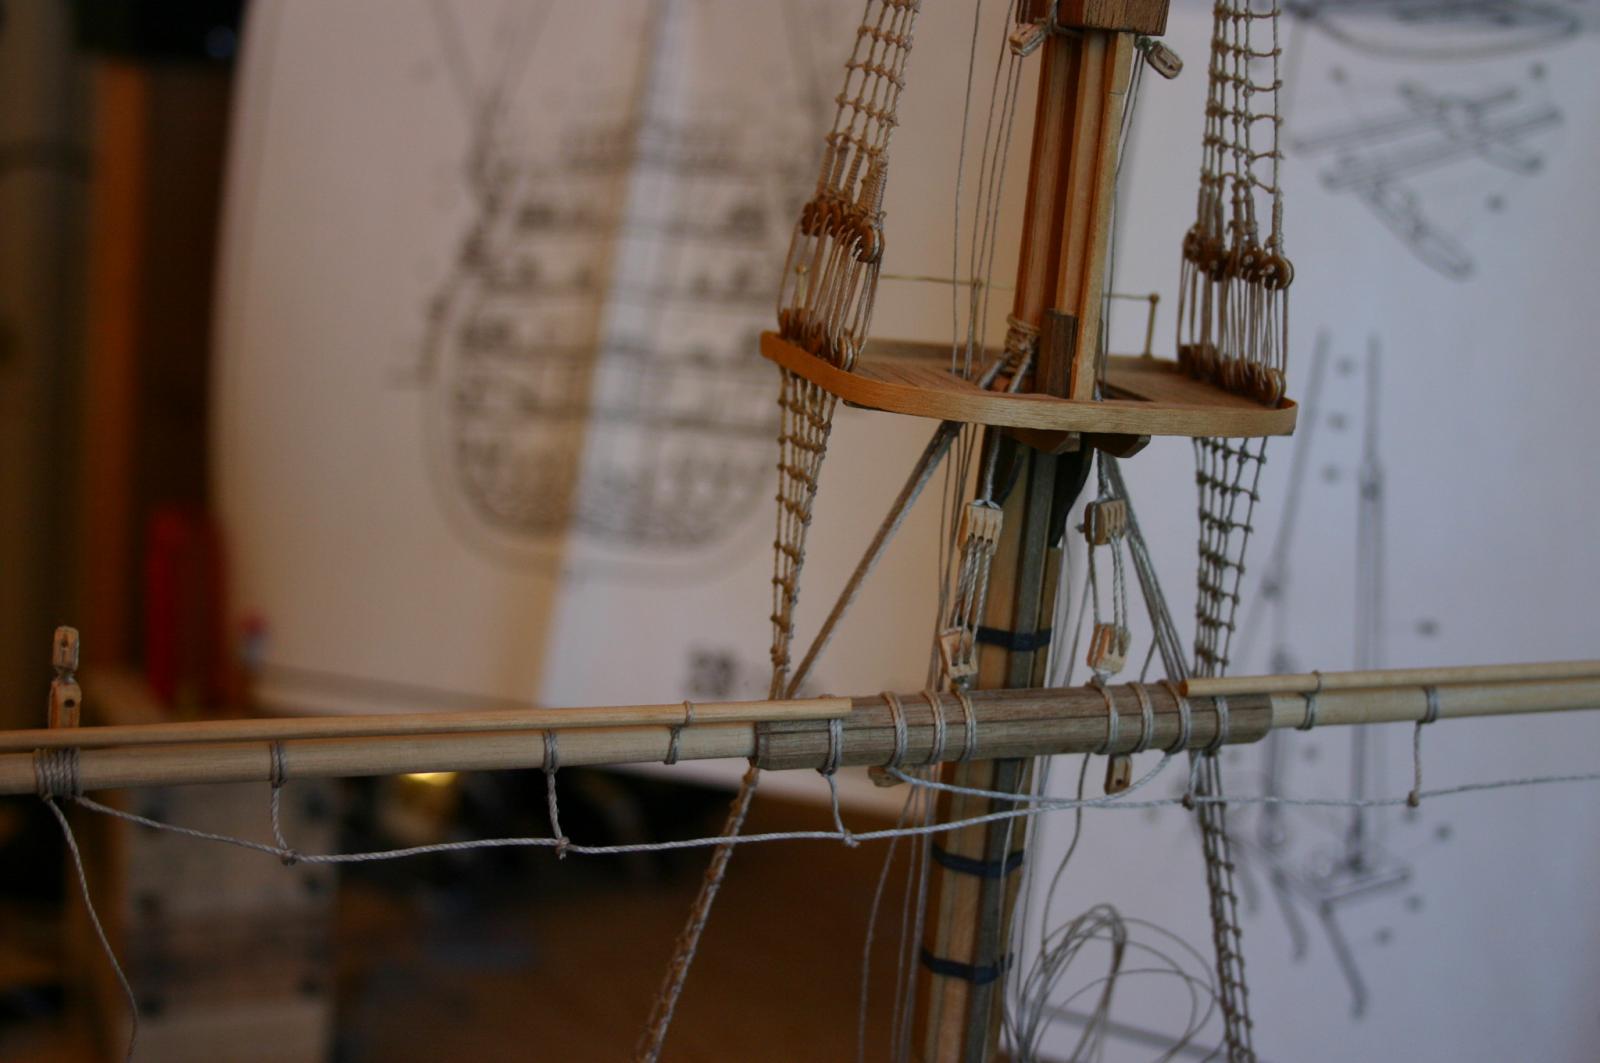
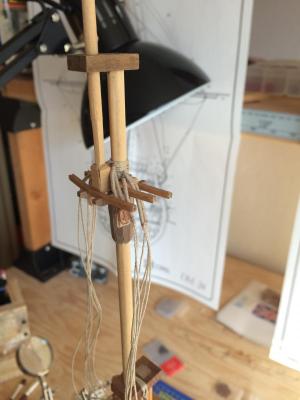
So thanks to July 4th my company gave me both Thursday and Friday off! That has given me quite a bit of time in the shipyard. I worked on the running rigging for the top gallant and top mast then finally decided to step the mast and glue it into place then begin work on the lower lanyards and shrouds. I had some issues with e futtock stave, I wasn't sure how to attach it or how to attach the futtock shrouds to them. I ended up using a little bit of CA and attaching the stave to the lower shrouds with it, I then dropped the futtock shrouds around the front, looped them around the stave, used a little bit more CA and brought it around the front again. It ended up being crowded and not as clean as I would have liked but it's set in cement (literally) at this point. Back of the futtock stave Front of futtocks stave I finished the ratlines over the lower shrouds and futtock shrouds And pulled up the yard I'm not sure how I'm going to do the sling, I don't have a lot of room between the fighting top and the mast to bring the sling down so I have to noodle on that one.


-
Pulling up a chair to watch as well, sounds like you have quite the plan going, I can't wait to see it come alive.
-
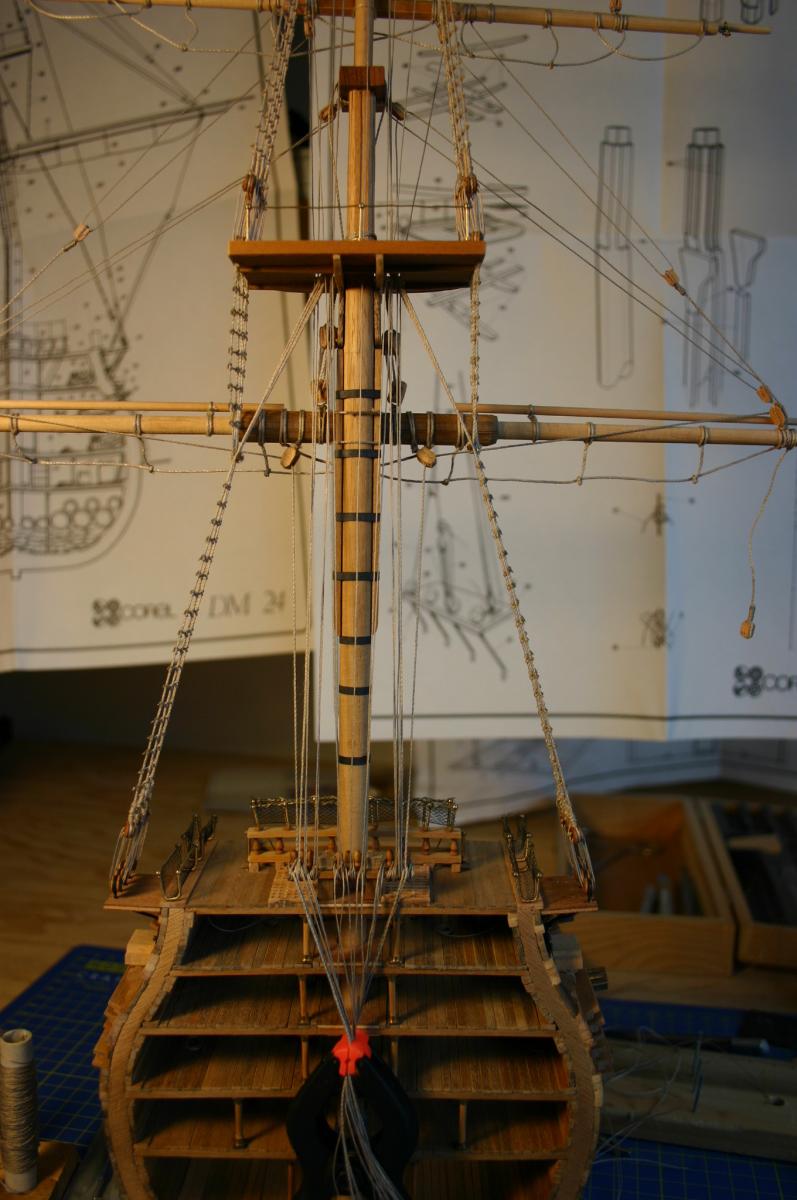
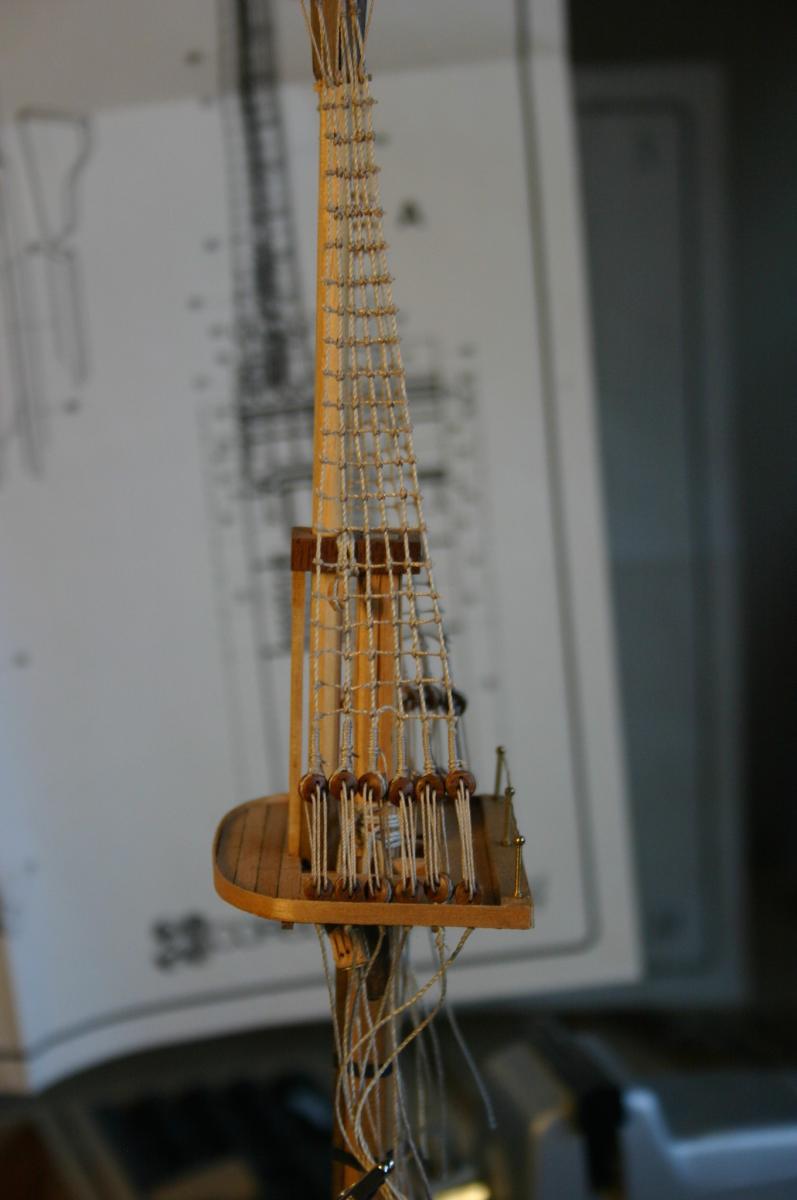
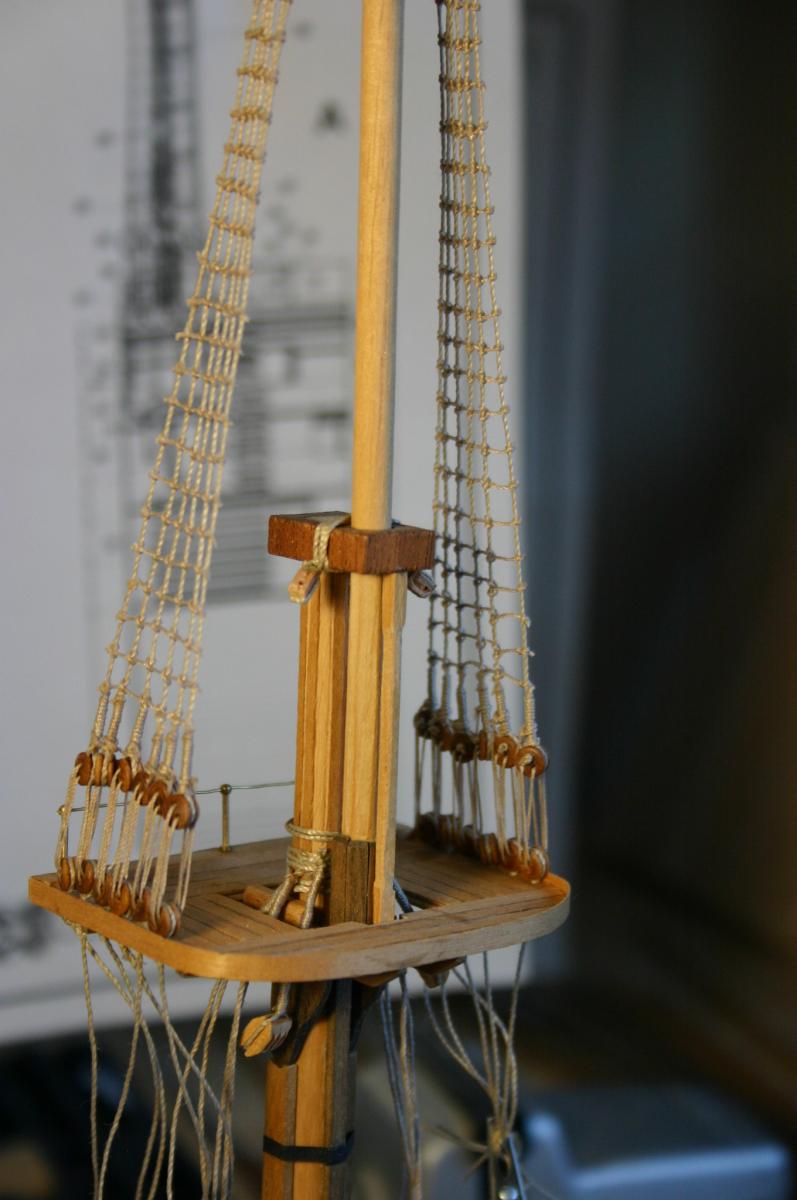
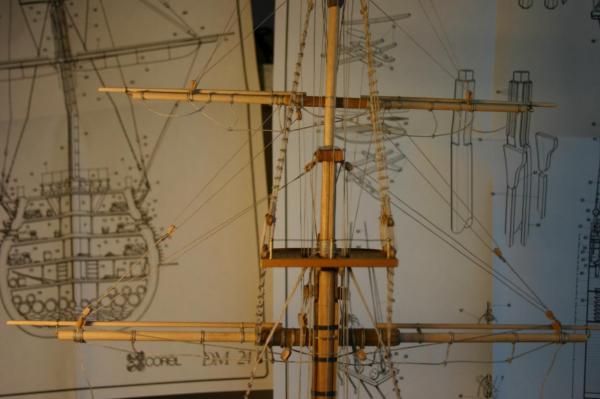
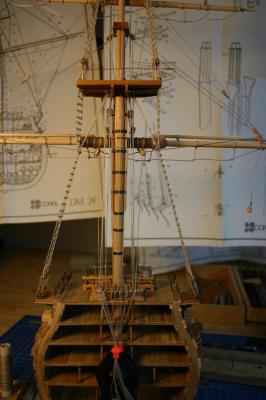
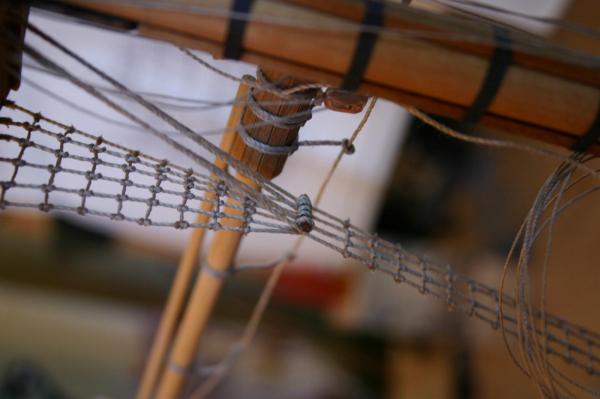
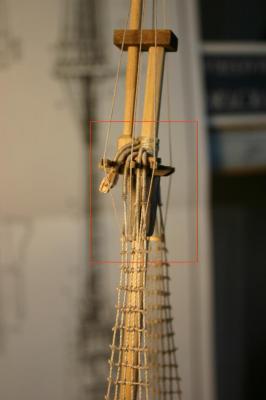
Another fine weekend at the shipyard. I learned a lot this weekend. First I mounted the main mast and was preparing to do the shrouds when I realized that having the mast mounted and doing the upper shrouds was going to be a bear. So I dismounted the main mast and went to work on the upper shrouds. After all was said and done I completed the top shrouds, ratlines and the top gallant lines. At the end of the day I ran out of my .25 mm cordage so work has come to a halt (more on order from model expo, hopefully I get it soon). Shrouds on one side with ratlines Shrouds and ratlines from both sides Better shot of the top, lanyards and ratlines Topgallant lines going over the trestle tree, what I was unsure of here was how much tension to put on the, as you can see from the photo the lines actually cause the top shrouds to bow out a little, I don't know if thats correct or not. I am guessing with aging some of the tension will fall off This next picture shows a problem area I had that I only discovered after running ratlines all the way up. You can see in the redbox on the photo I brought one of the shrouds over a different section of the trestle tree, this caused the shrouds to have an odd gap in them on the way down where the foremost shroud was too far apart from the rear two. On top of that I overdid the whipping on the shrouds bringing it down too far which caused the lines to be incredibly tight near the top, this turned the upper ratlines into more of a succession of knots instead of a nice line. Even with the errors and issues it was an incredibly pleasant and productive weekend in the shipyard.


-
Nice clean work Andy, you are certainly doing the ship justice. I'm taking inspiration from your rigging to bite the bullet on my Victory cross section and get the mast up and the shrouds in place.
-
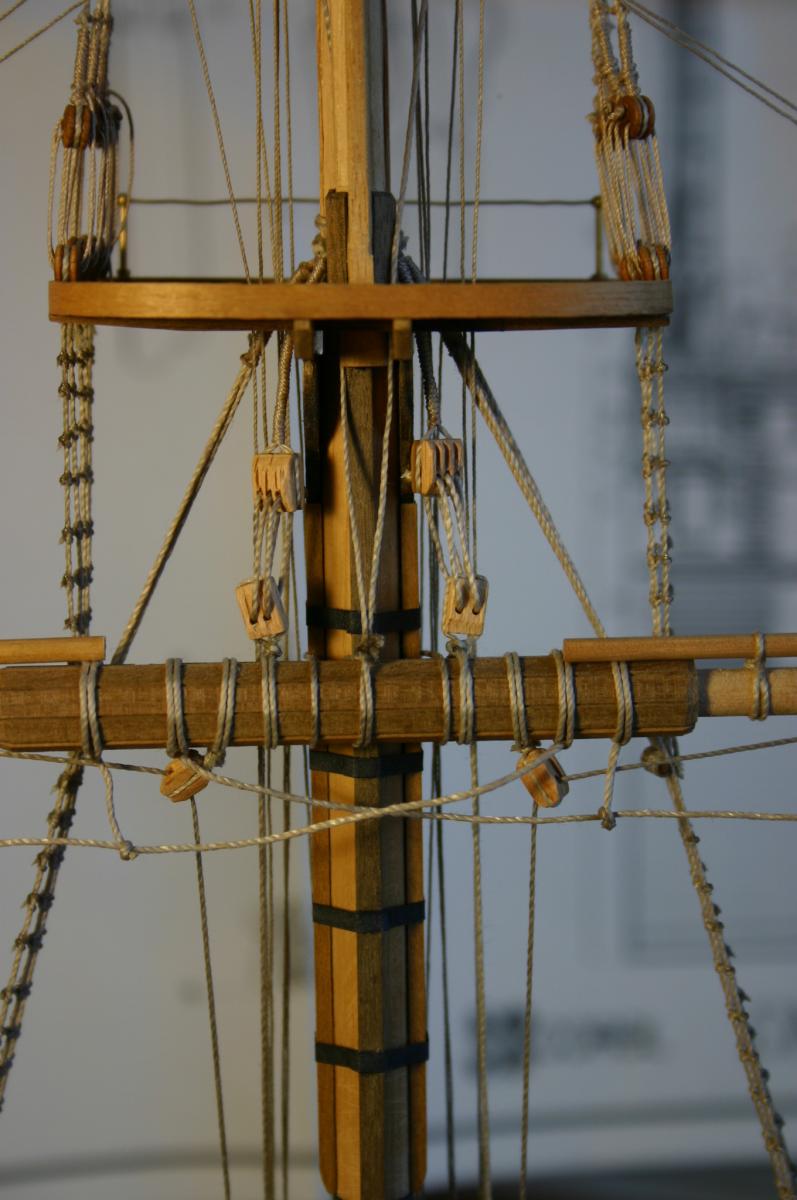
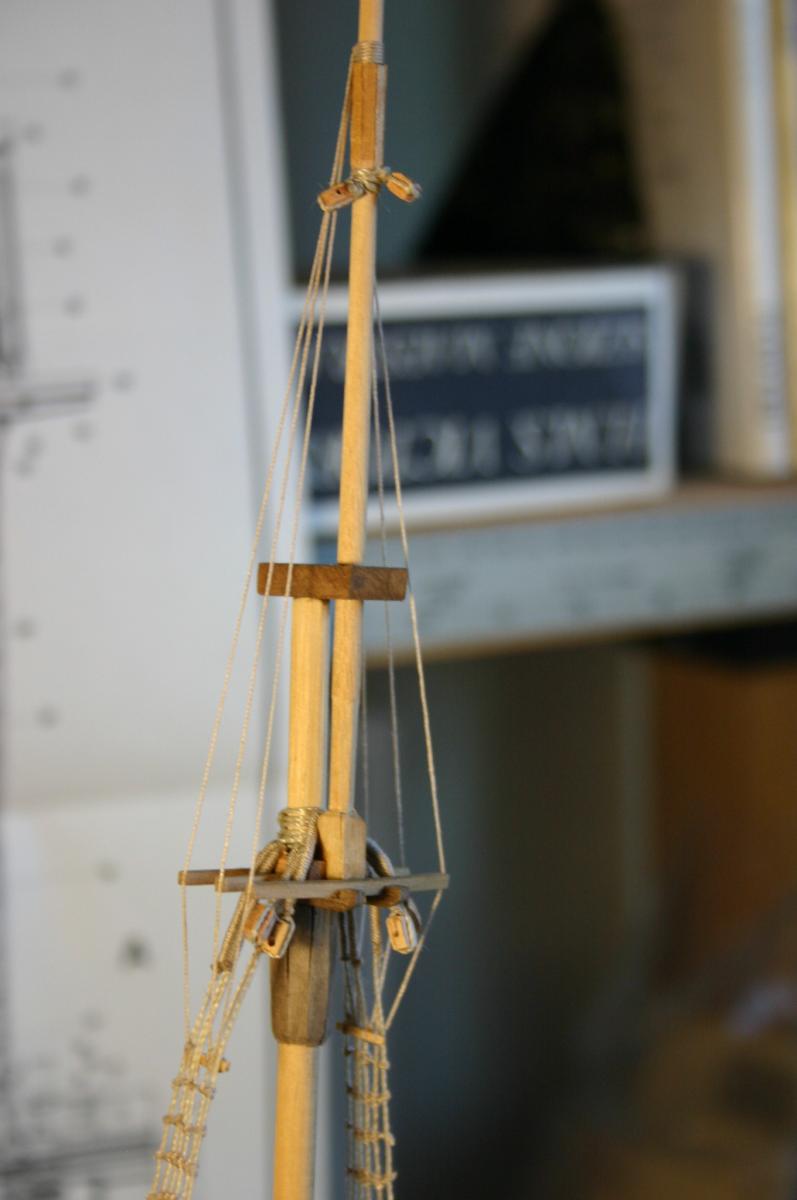
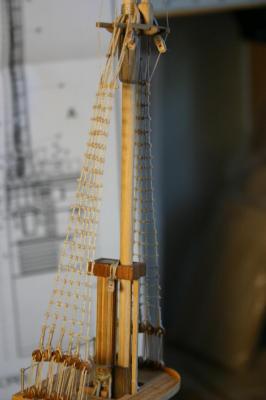
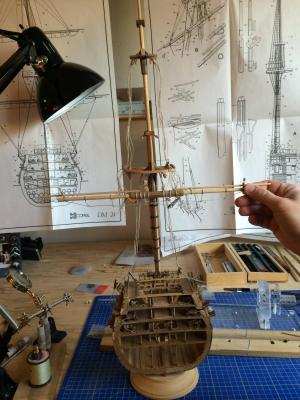
As the admiral was busy selling her artwork at a local festival this weekend I had a lot of time in the shop. After recently receiving my serving machine from Alexey (great piece of gear and excellent service) I got busy with my shrouds and the blocks as well as repairing the broken mast cap. The mast dry fit with a handheld spar to see how it's all coming together. The trestle tree all set with shrouds and blocks And the fighting top with all blocks and shrouds set. Next step will be fitting the mast permanently and putting the shrouds into place.

-
She looks lovely so far. I think the instructions can be hit or miss depending on the manufacturer of the kit, my current build has terrible instructions and I end up working off the sheets and looking at other folks builds to try to sort out what things should look like, but thats all part of the fun
- 51 replies
-
- 2
-
-
- bounty
- billing boats
- (and 1 more)
-
I completed all my yards over the long weekend and began getting blocks attached to all the masts. I ended up having to disassemble where I had attached the top mast to the lower mast, I realized I wasn't going to be able to put my shrouds on after serving them. When I was in the process of disassembling I managed to break my mast cap in half, so two steps forward three back. Progress ground to a halt after that Currently waiting on a serving machine so I can do the rest of my blocks and get my shrouds ready to go. I can see the end in sight, sometime next decade I think.
-
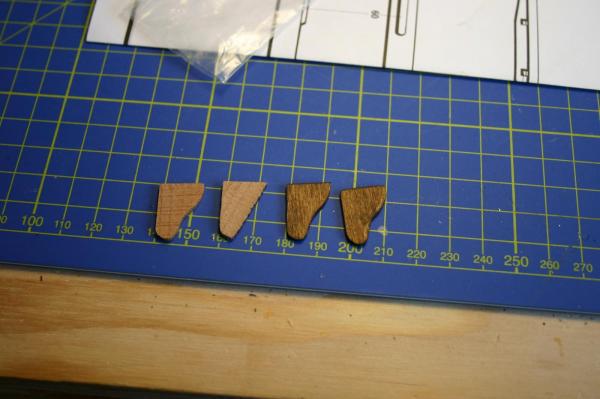
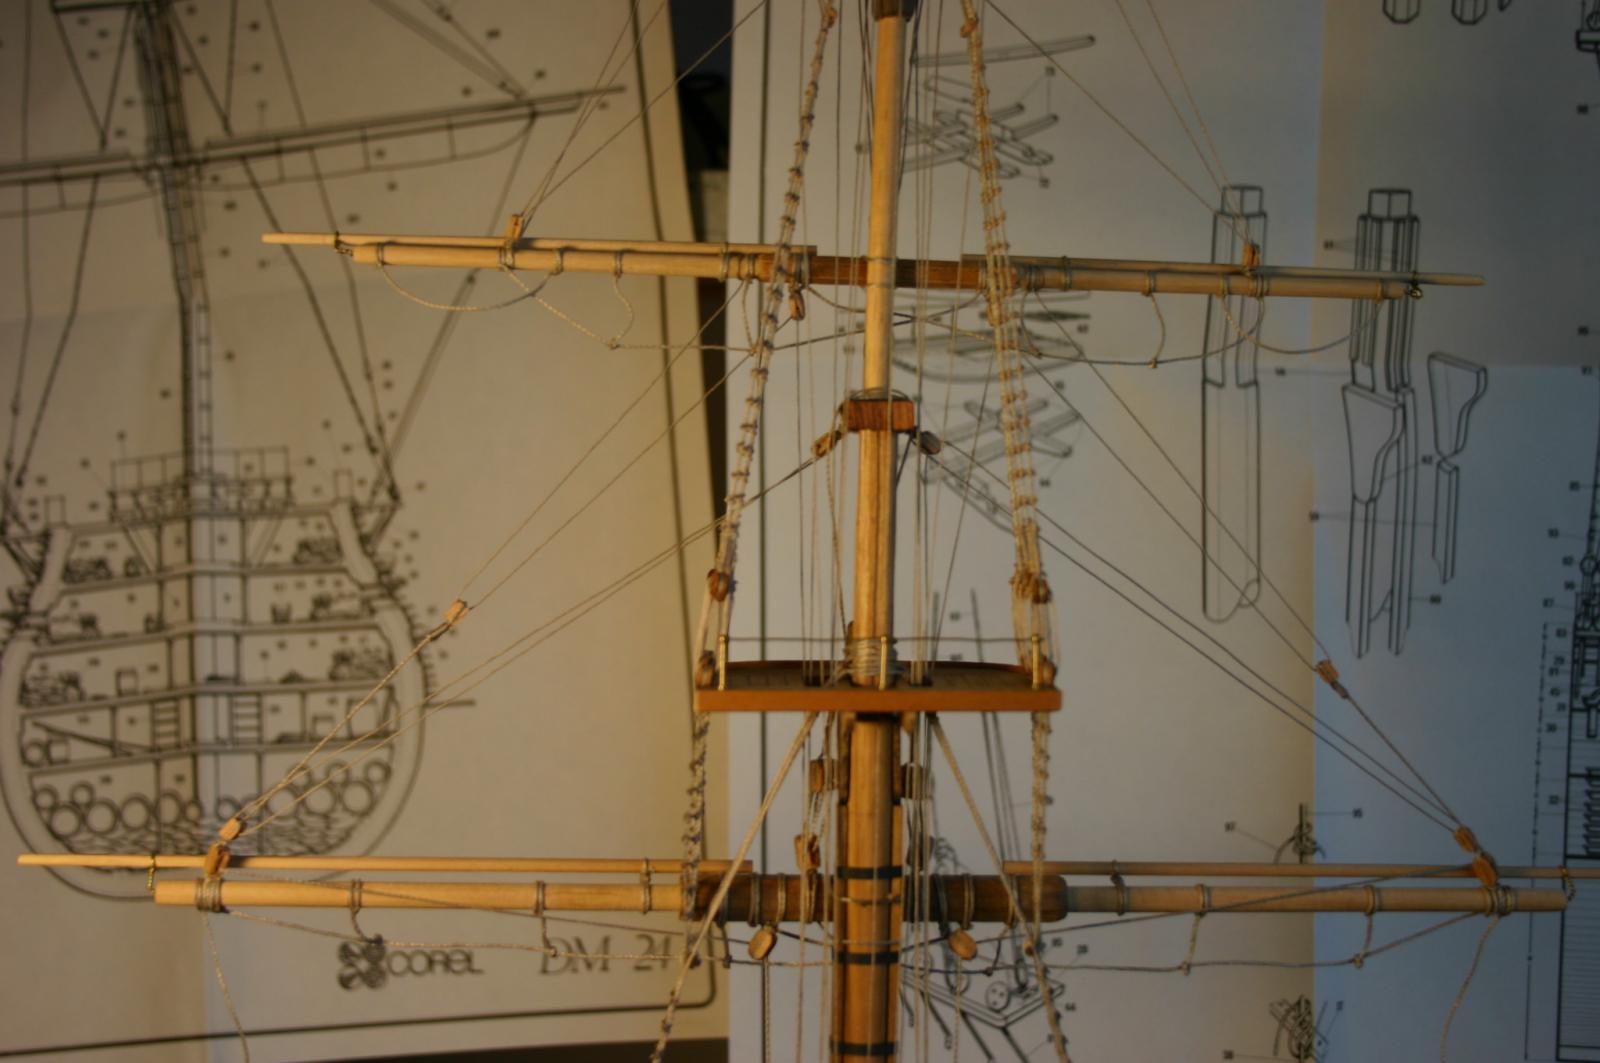
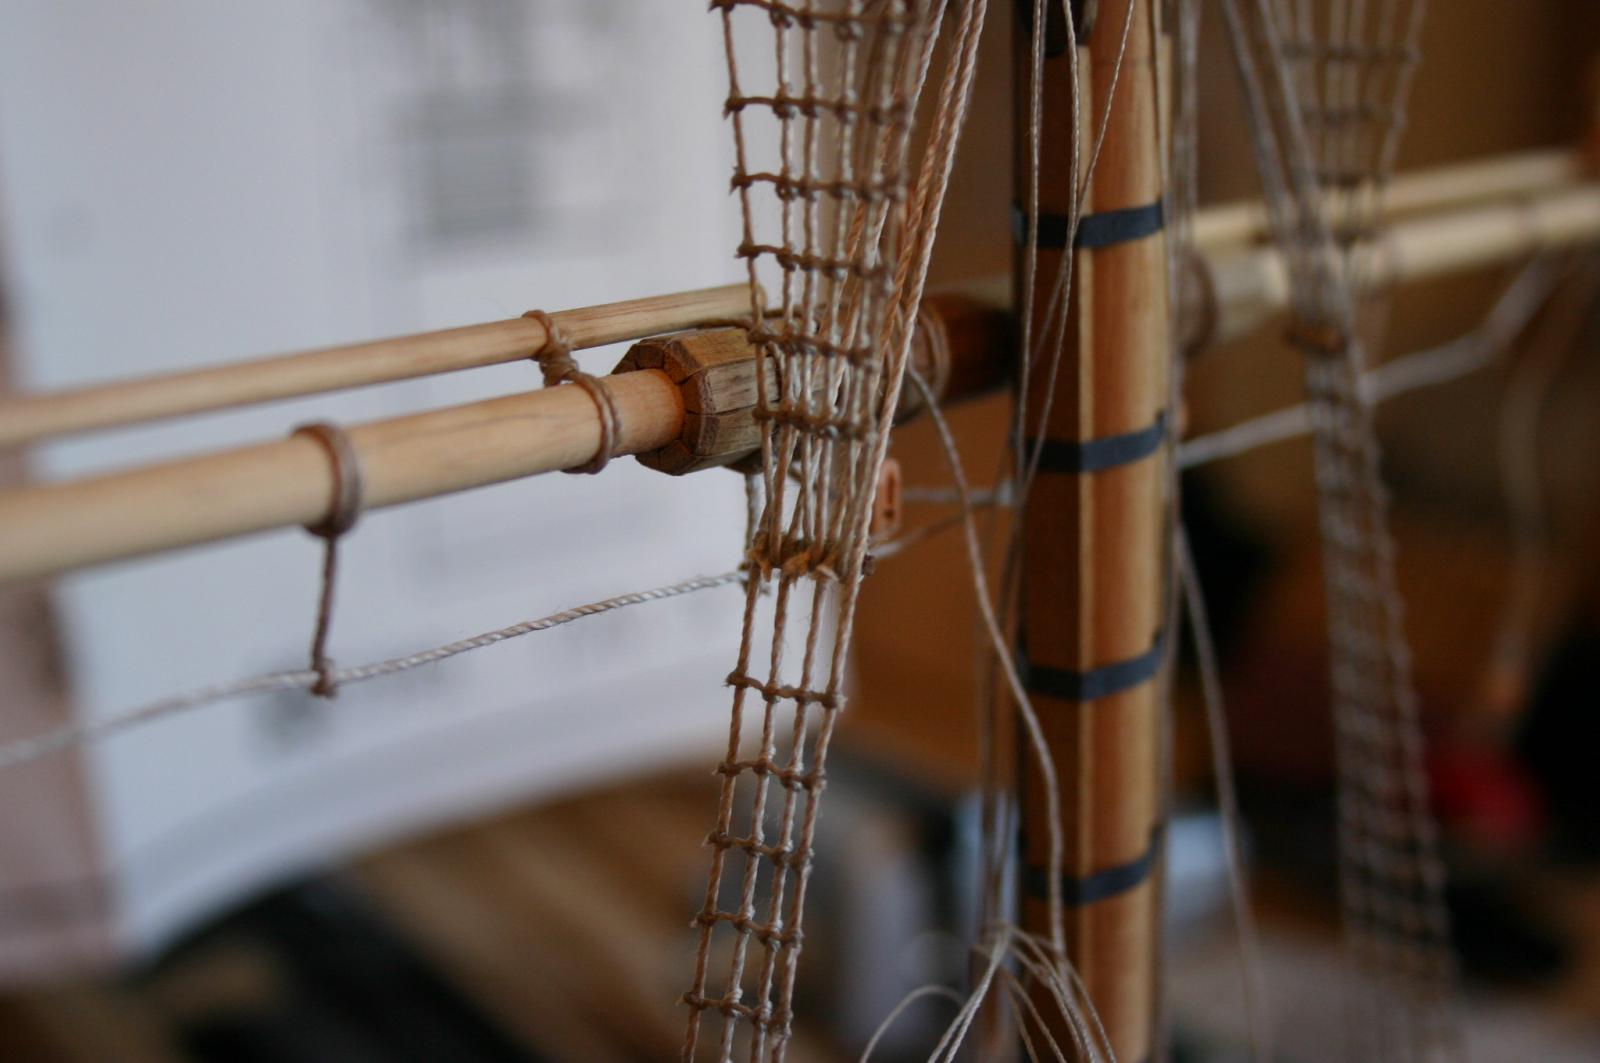
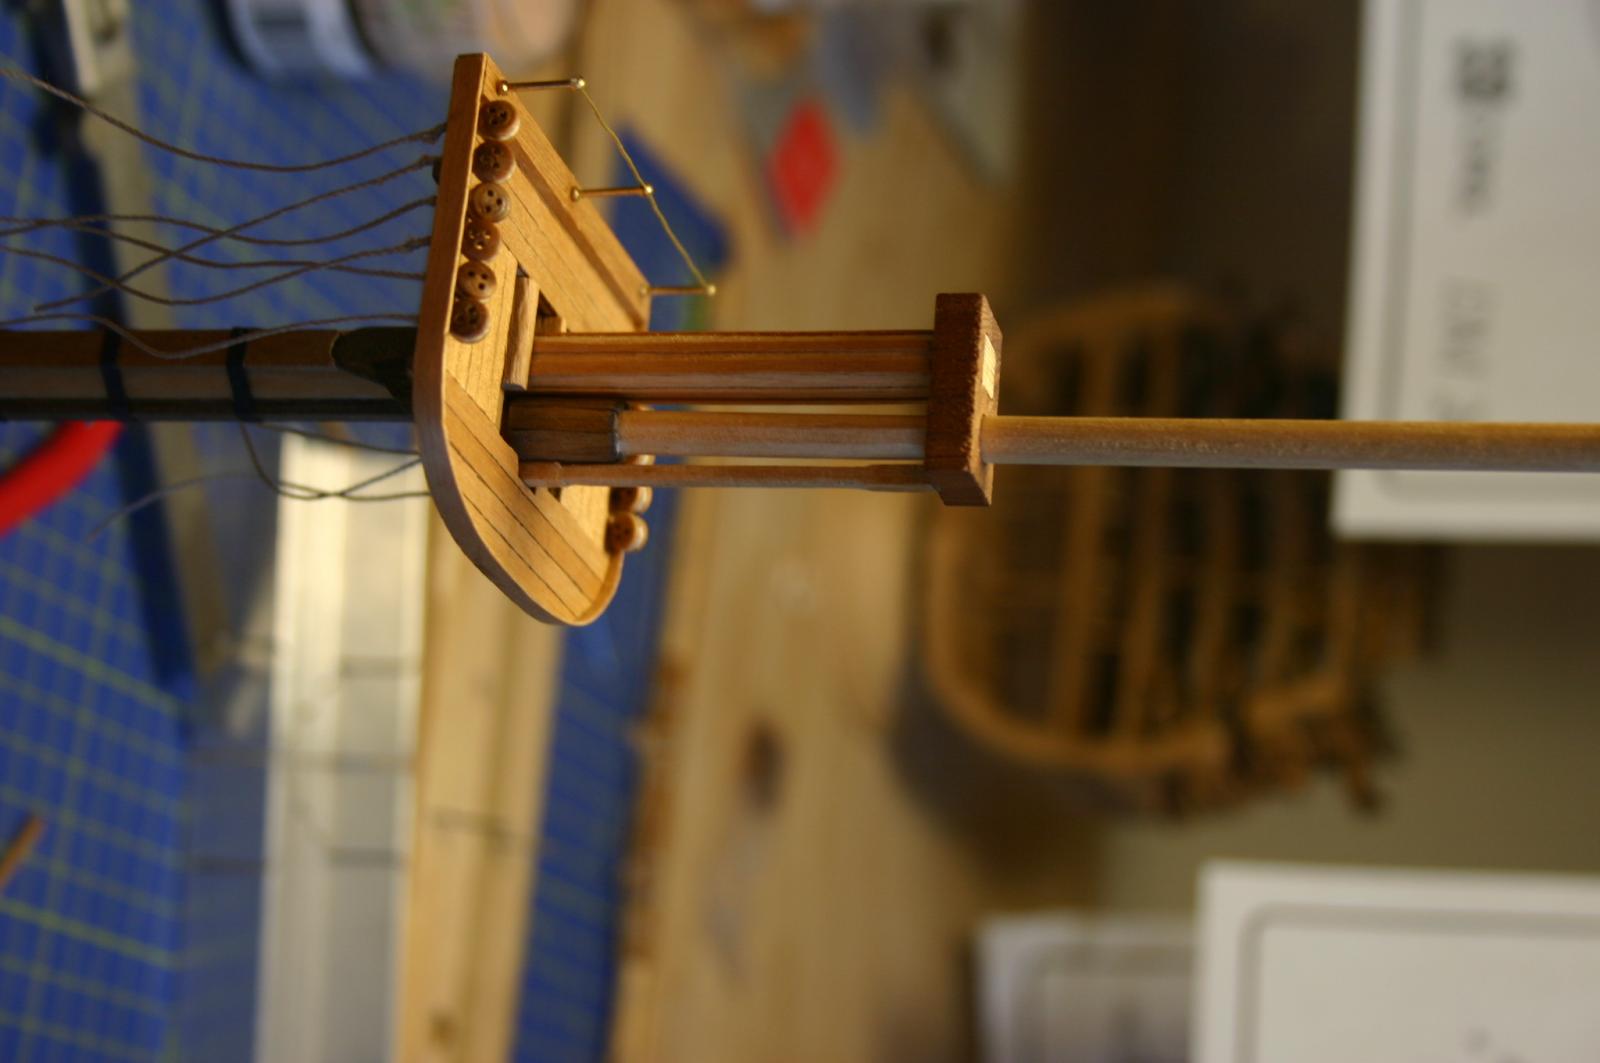
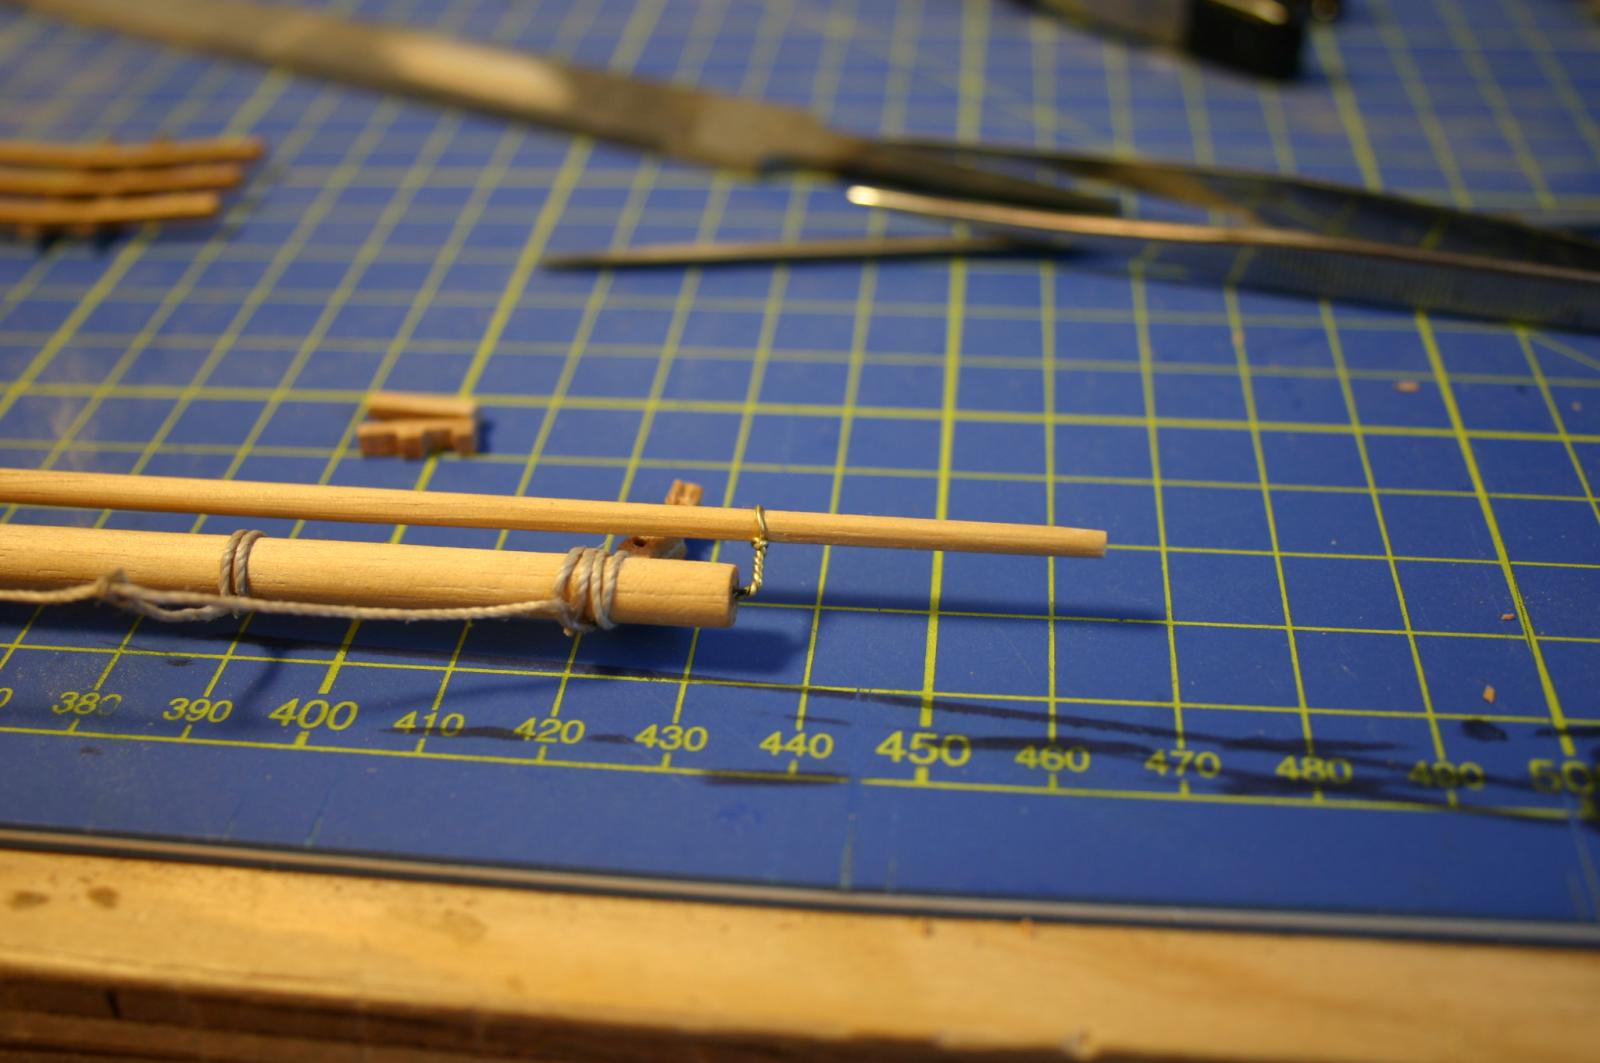
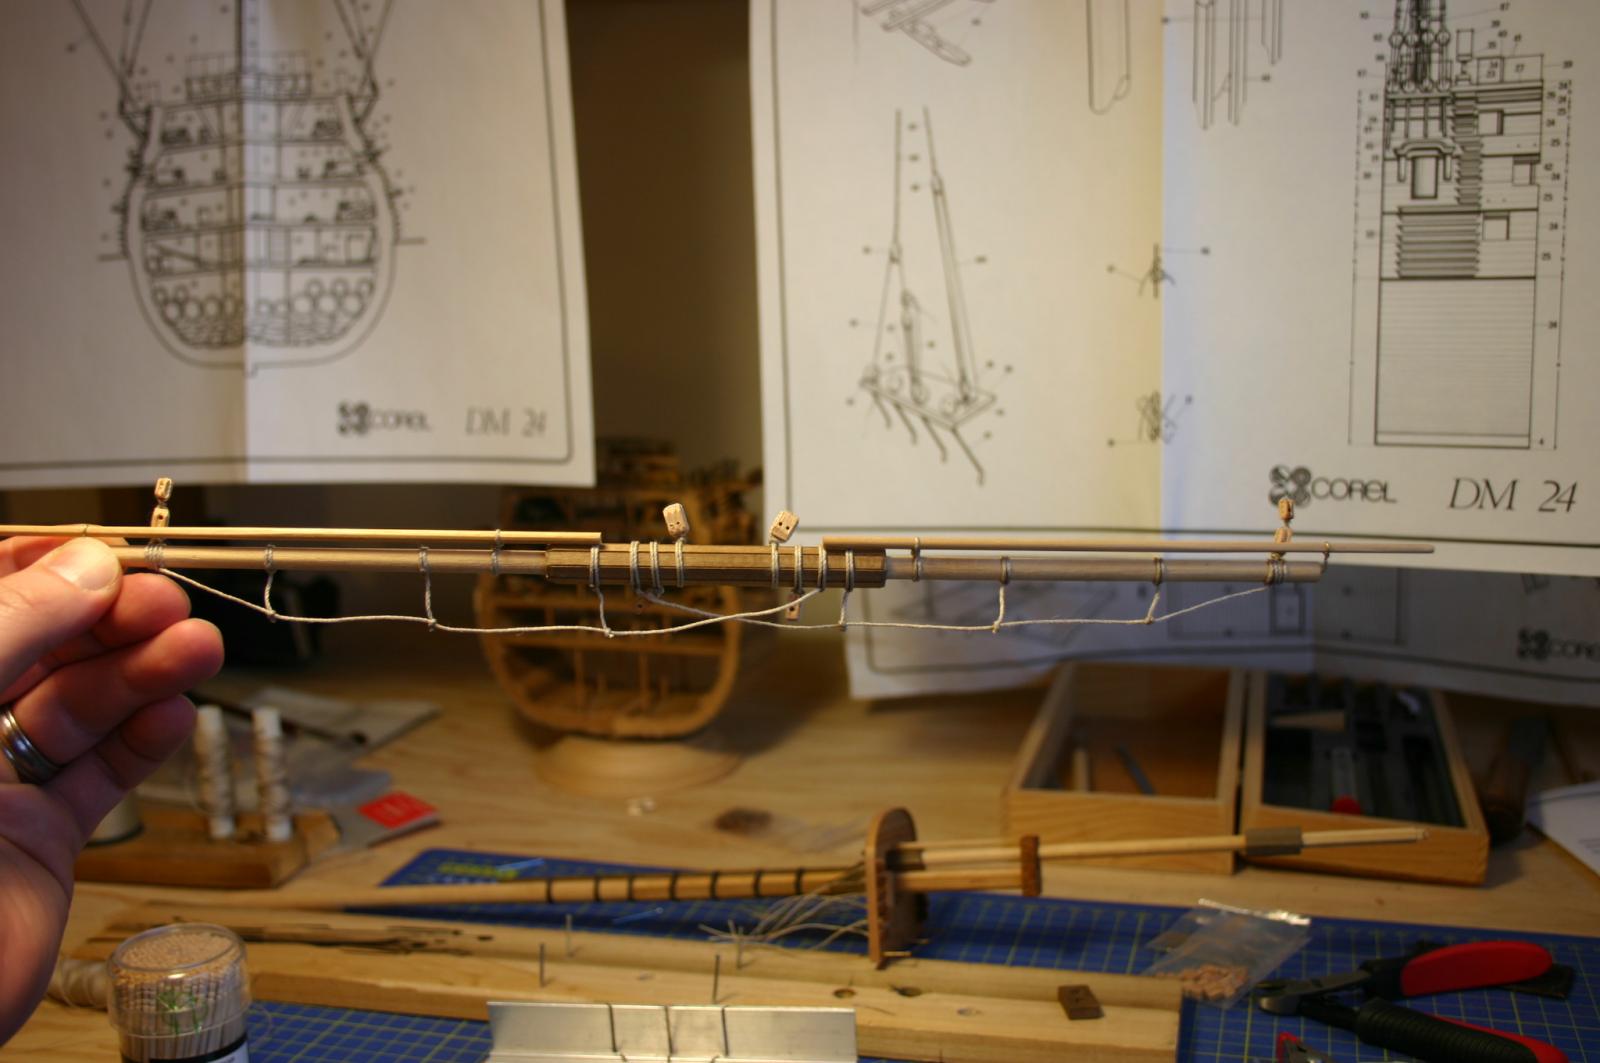
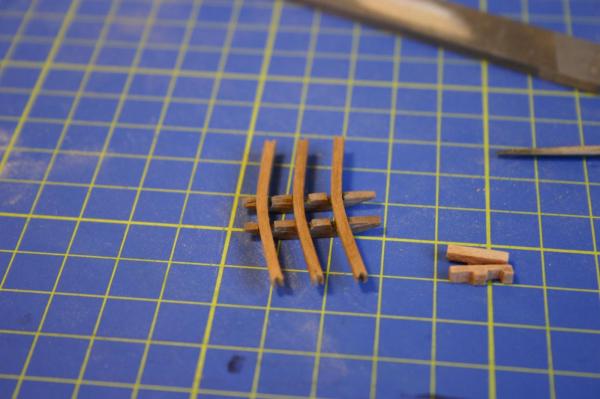
Thanks for the kind words Antony. It's been difficult to get solid time in the shipyard lately but I have managed to make some progress. Finished the lower mast with the fighting top I started with woldings made from rope then decided I didn't like the look on the model. Instead I used strips of paper cut to 2 mm wide and colored black with a permanent marker. I think the affect worked well. I got the top trestle tree put together. The lower yard was completed along with all the blocks for the rigging. The kit called for an eye bolt on the end of the yard to support the stunsail boom but the eye bolts that came with the kit are way too small. I ended up taking some of the copper wire that is used for railings and hammock nets and twisted it together on the boom. Not historically accurate or the best looking but there are enough other things going on with the model that I don't think that will be the focal point of everyones attention.


-
Andy I feel your pain on the point you're at, I'm lock step with you on my Victory cross section and trying to sort things out. I spent most of Sunday just working out what to do next and seize 10 deadeyes. The quality of your work so far speaks for itself slow and steady wins the race.
-
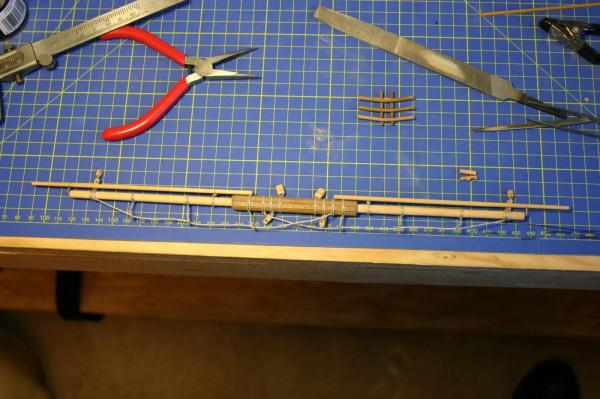
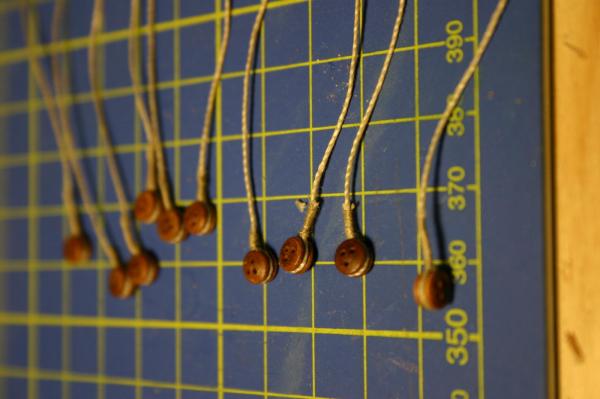
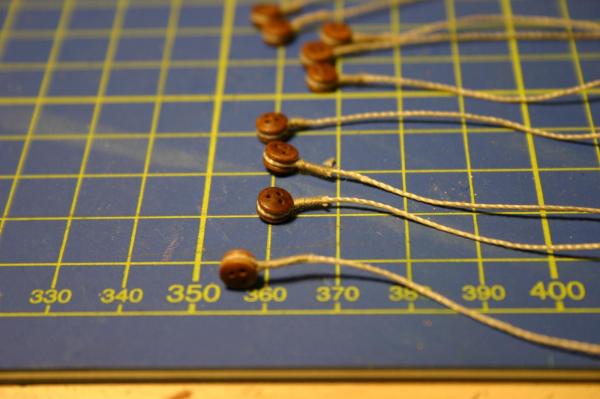
So I admit to being thoroughly overwhelmed with the rigging and masting, Im just trying to break everything down into manageable tasks. I started with the topmast deadeyes this morning and after 8 hours of work (interrupted by the need to play plumber and fix the non draining bathroom sink) I have 10 of my deadeyes set up. It took me quite a while to figure out how to seize the line correctly. The admiral pitched in and helped me make a couple of them as well. You really do need 3 or 4 hands to do this.
-
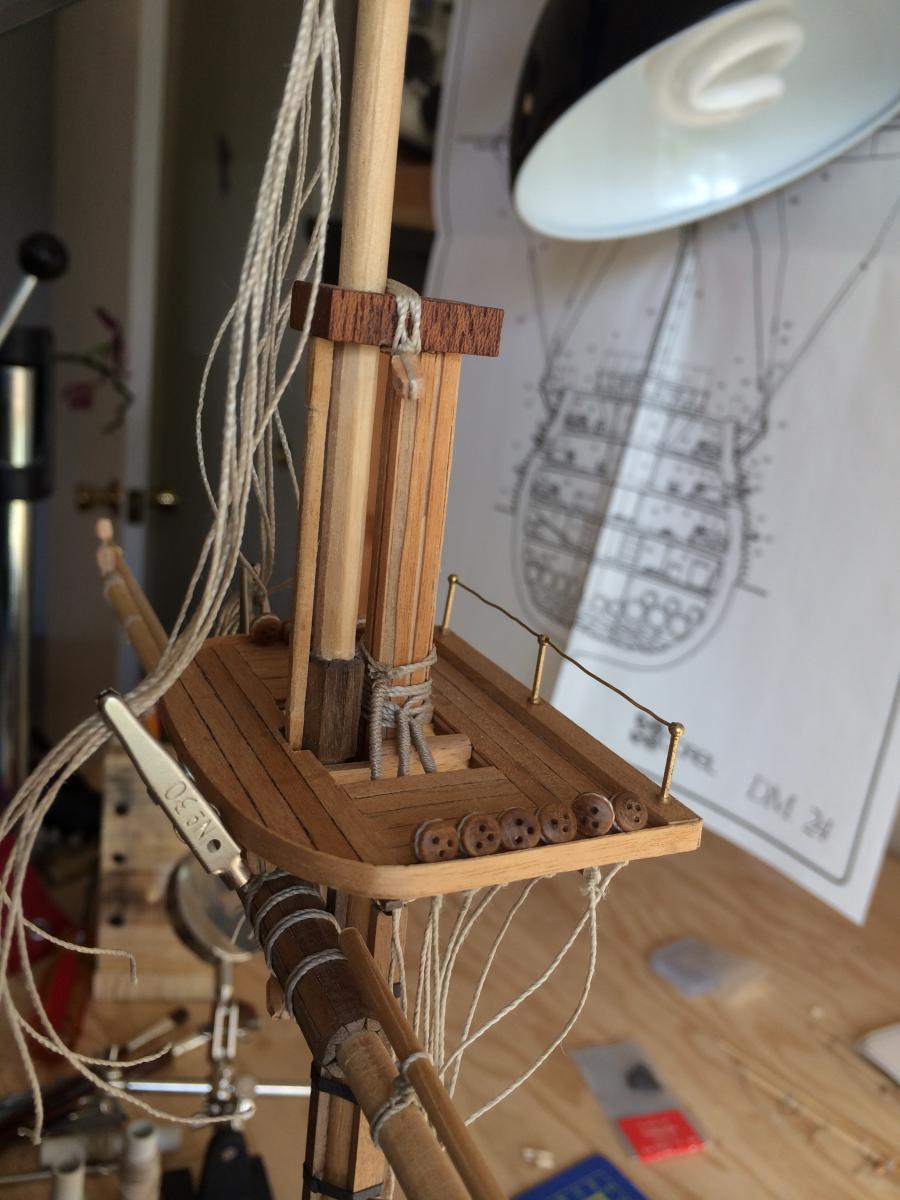
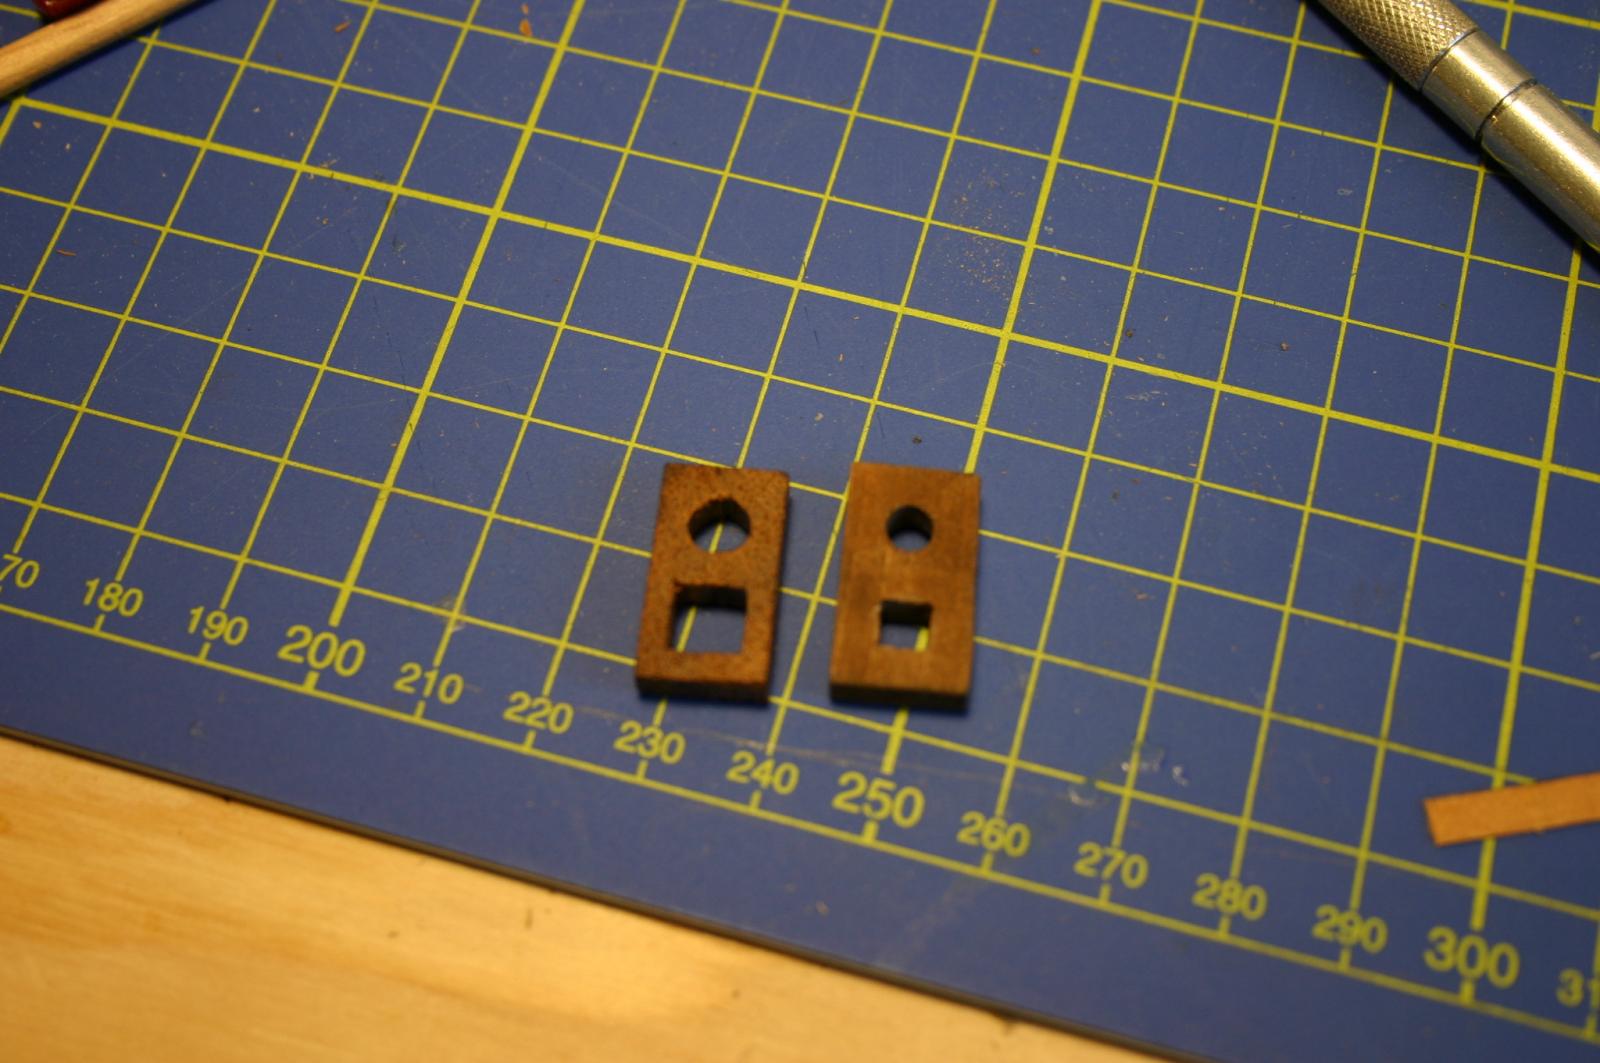
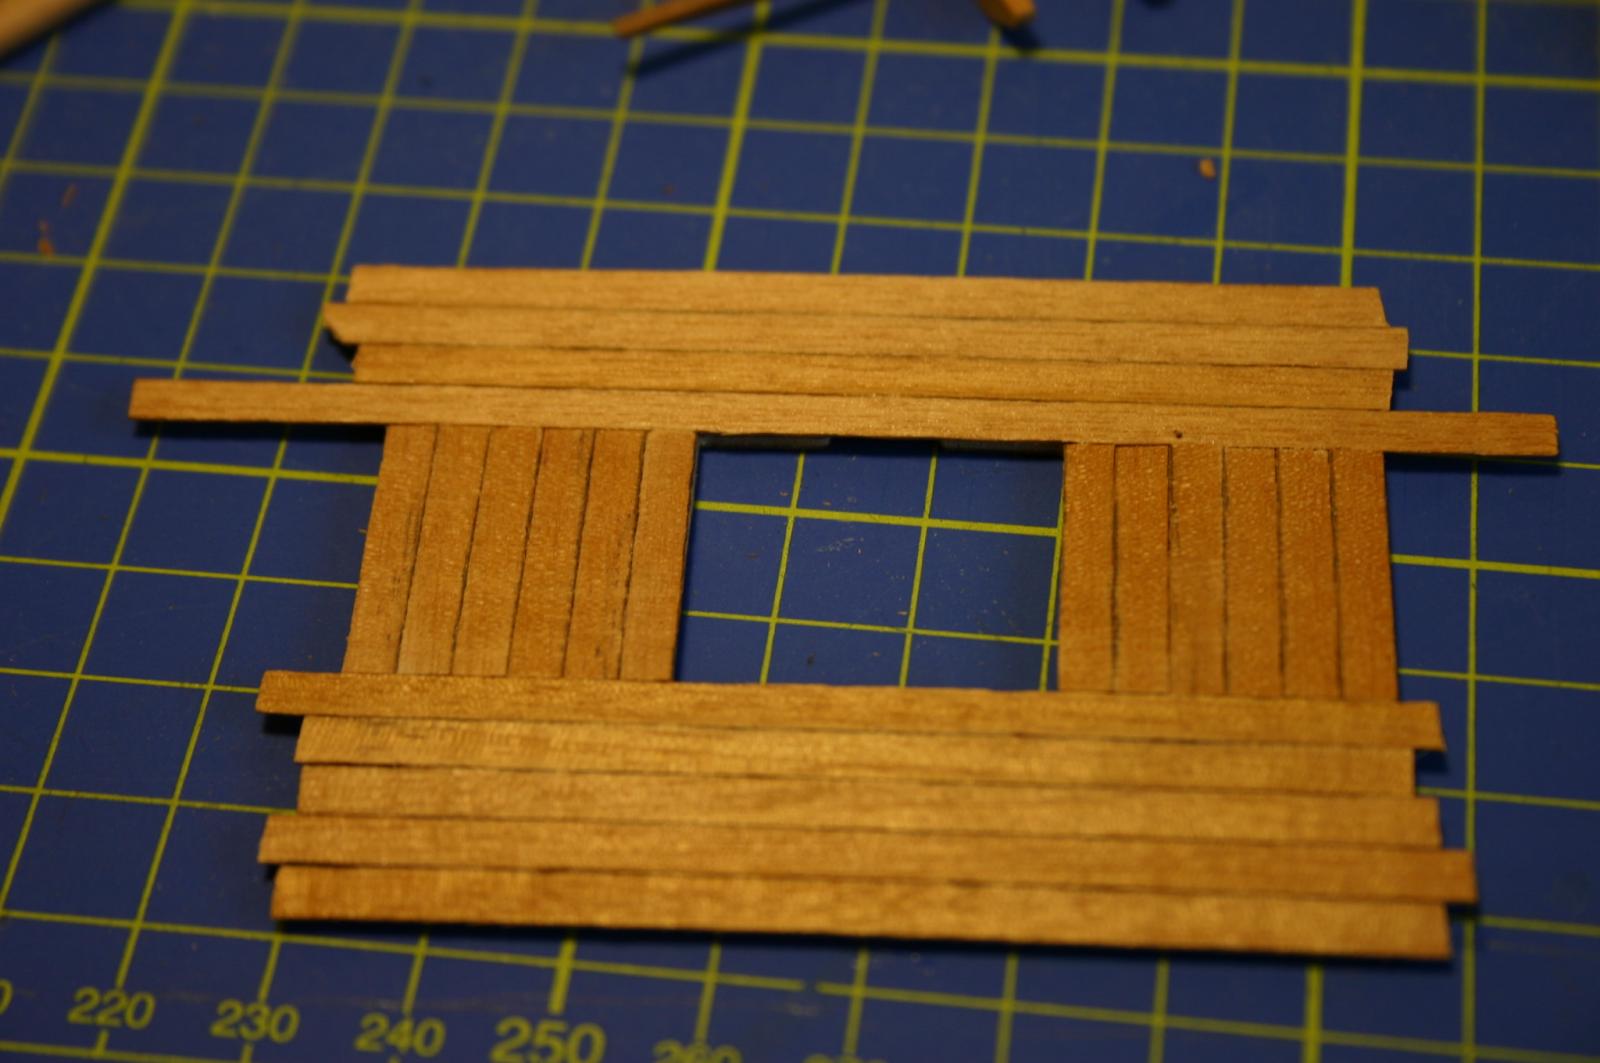
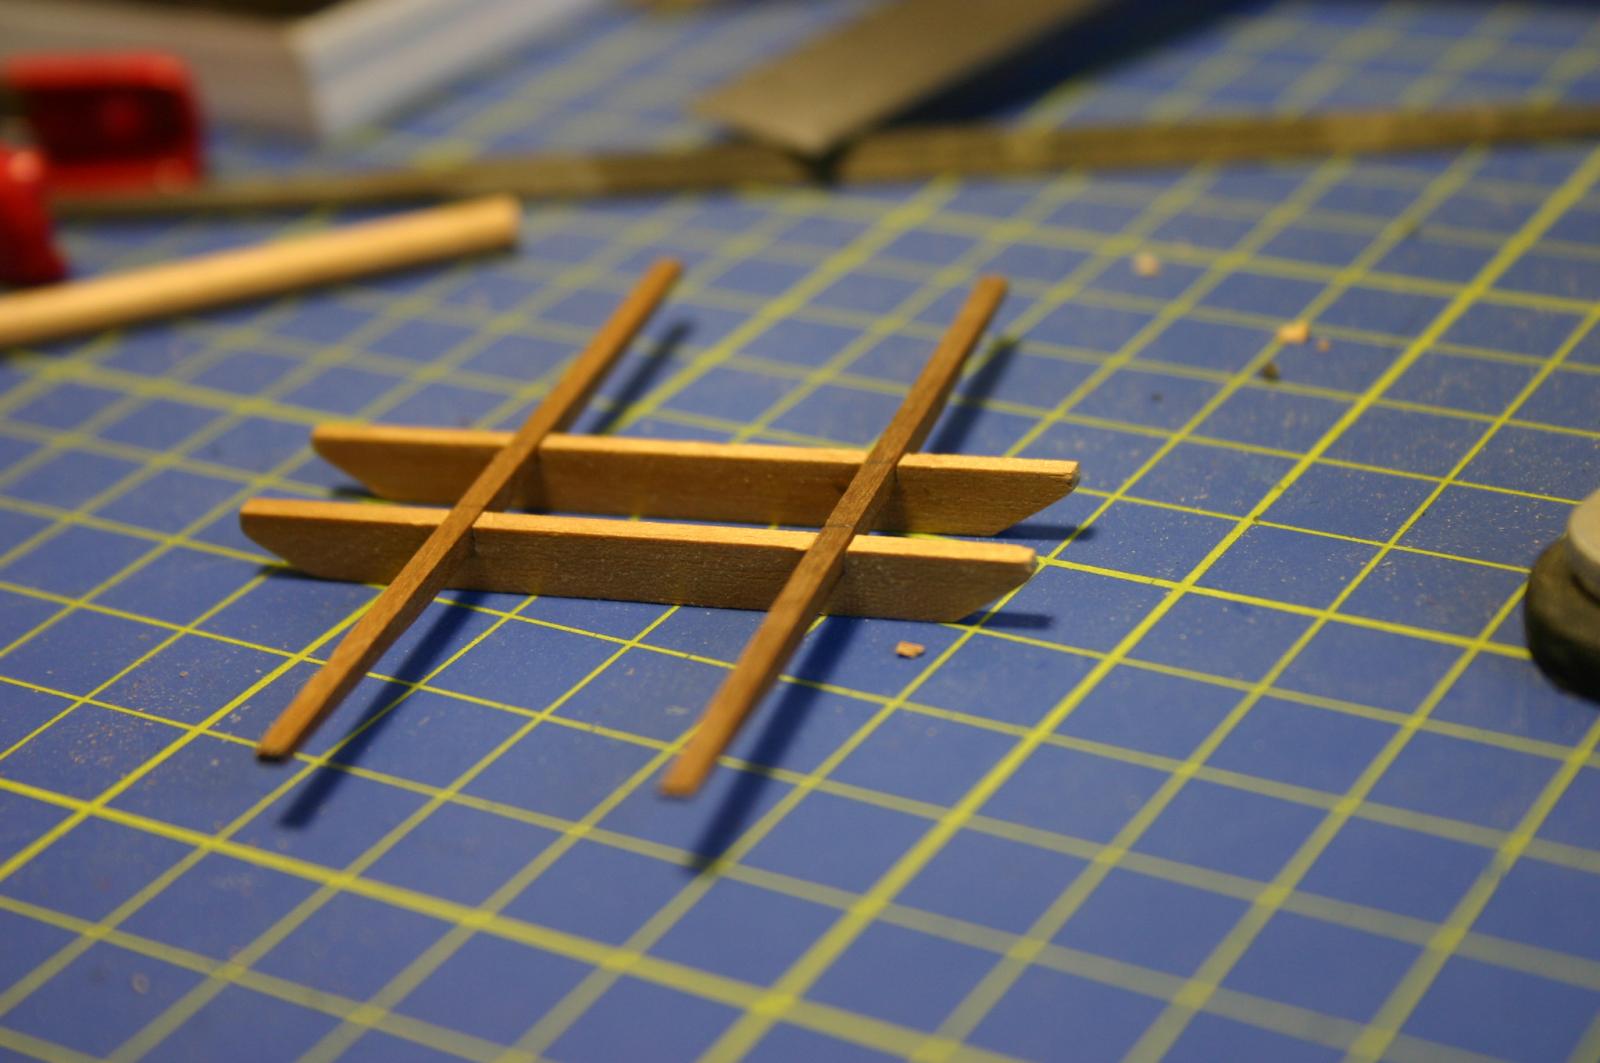
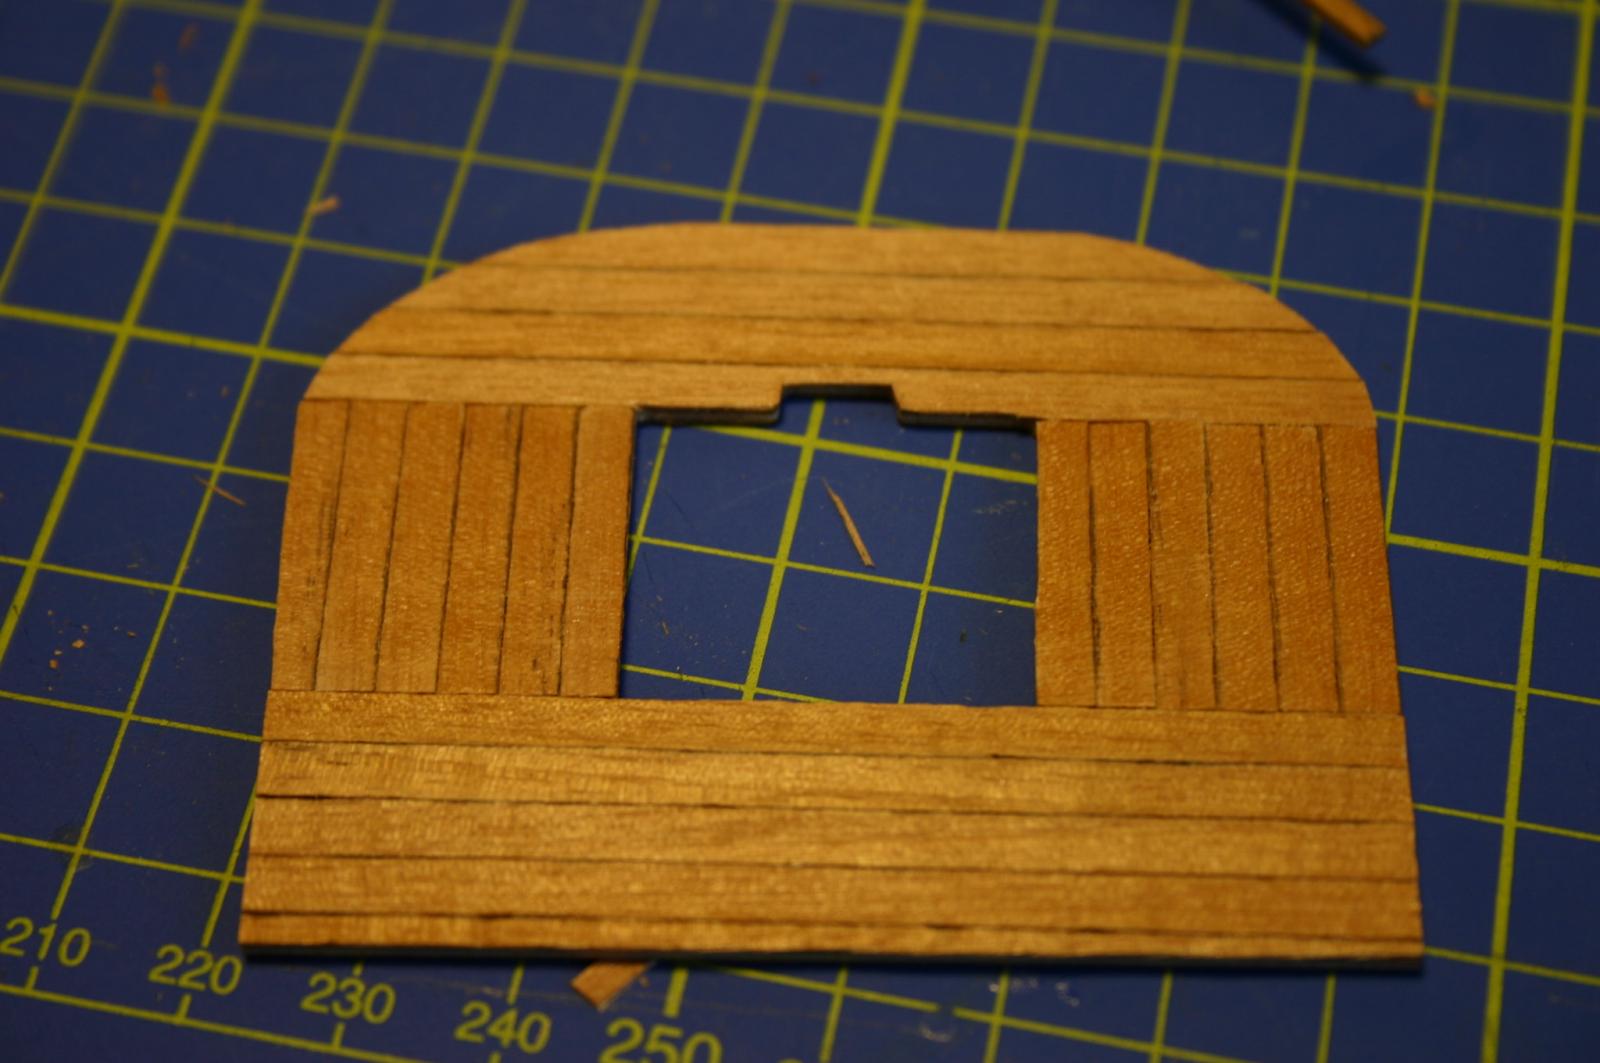
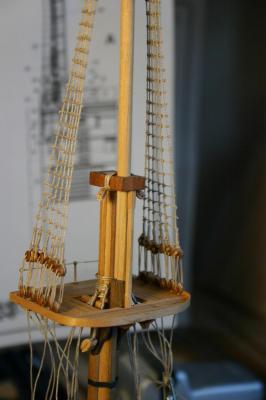
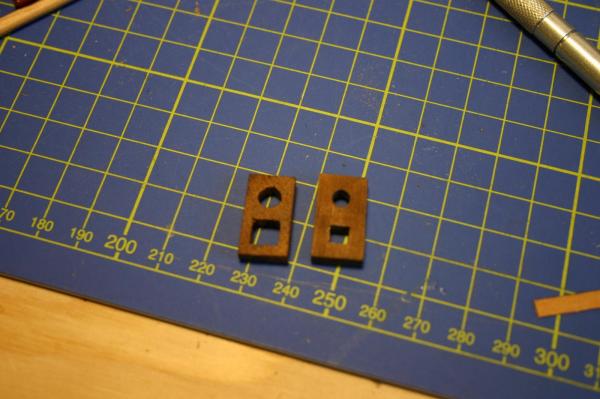
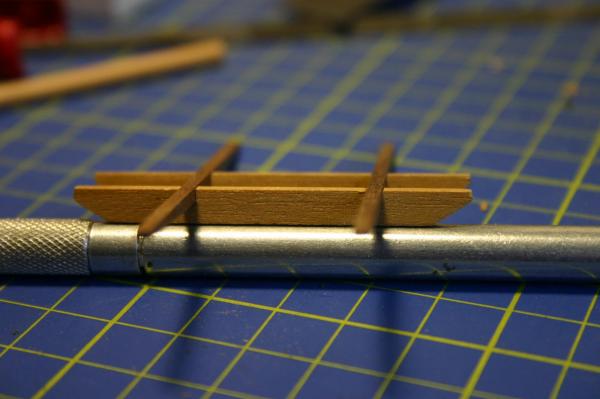
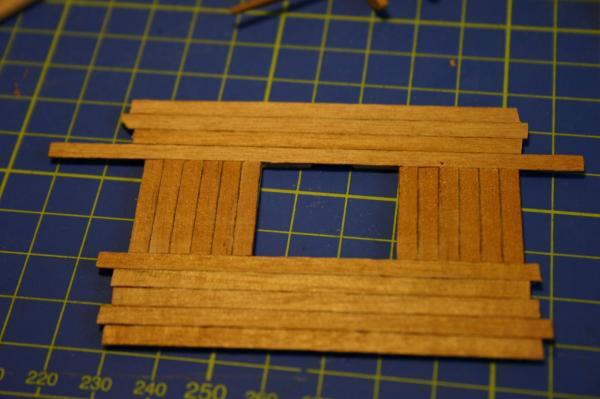
More updates today, was working on the masts and the fighting top, and I am here to tell you that I am apparently the slowest builder ever, thankfully this isn't a race or I would be pulled off the course after they close it down. The top mast cap that came with the kit was no good, the holes were too large, without even shaping the top mast it would pass right through the square and the top gallant would just fall through the circle (don't know if they have terms for the holes or not) so I built a new one out of boxwood and with a little water color paint borrowed from the admiral it came together fairly well. The trestle tree for the fighting top. For the fighting top I roughly planked it using a number 2 pencil on one edge of each plank. I didn't bother to measure the planks to length just put them on, waited for the glue to set then went around the edge with a sharp xacto knife and removed the excess. The shaping of the masts and finishing work took a lot longer then I expected but it's coming along, still need to do my work on the top gallant but I need to finish up the fighting top first. After I finish up the masts I'm off to the races working on the yards and setting up all my eyes and blocks for the rigging. It's all coming along nicely if I do say so myself.


-
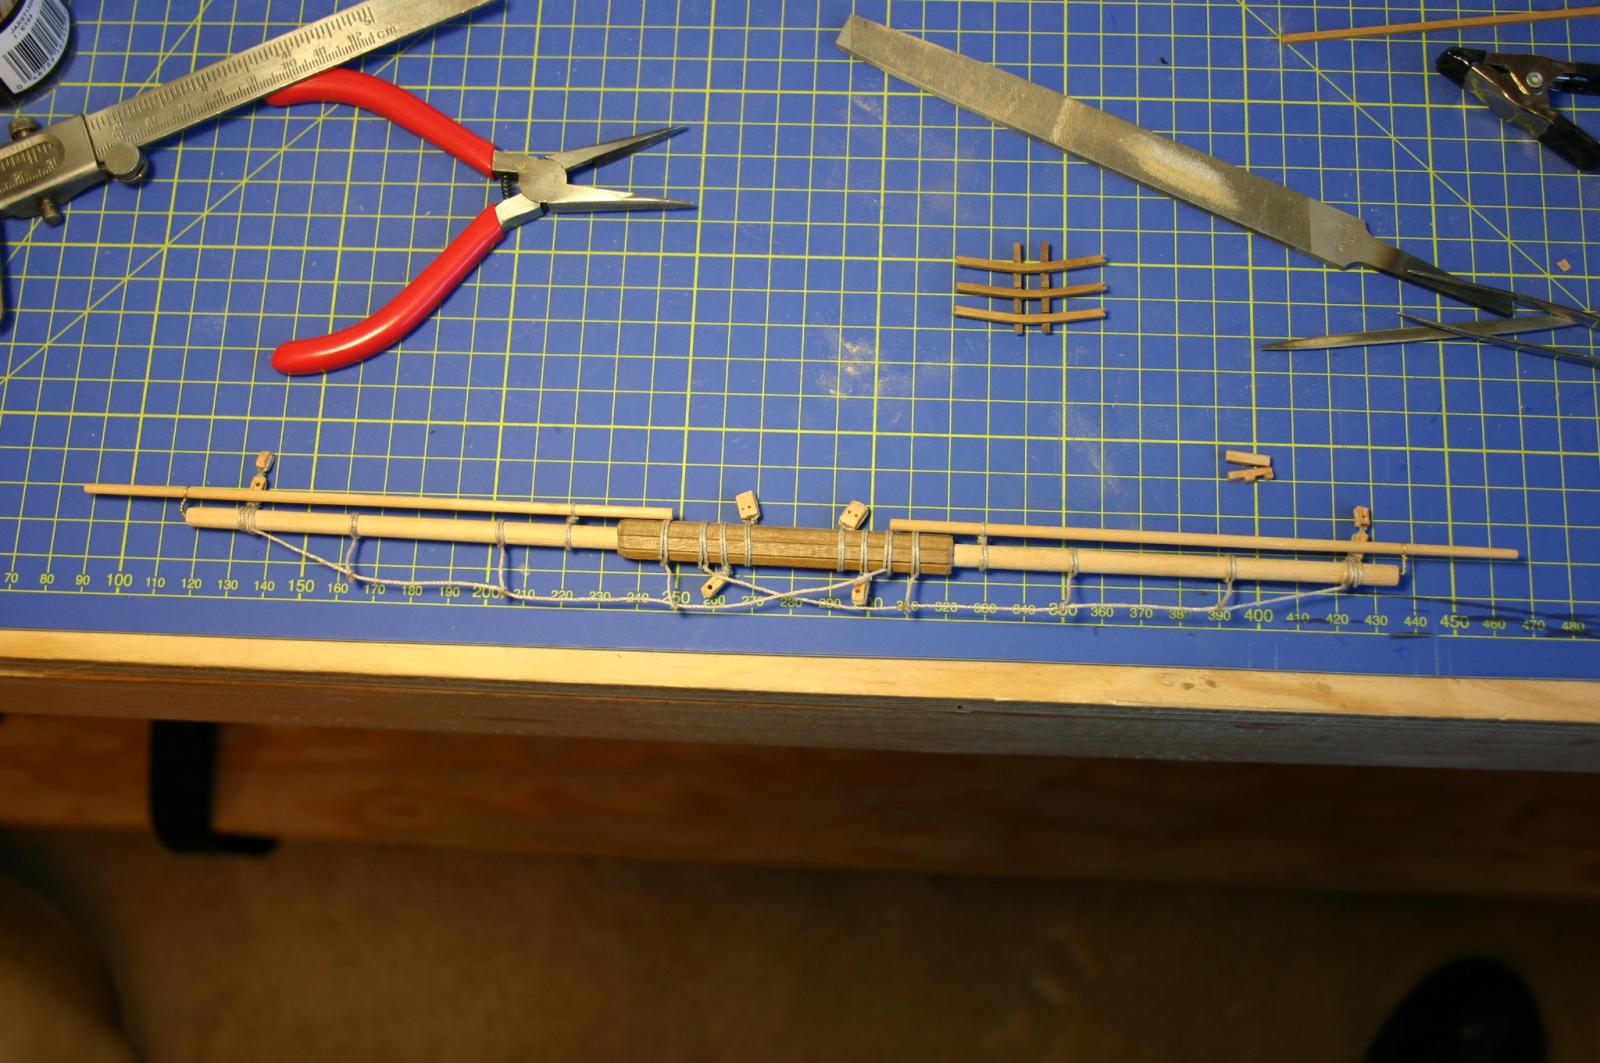
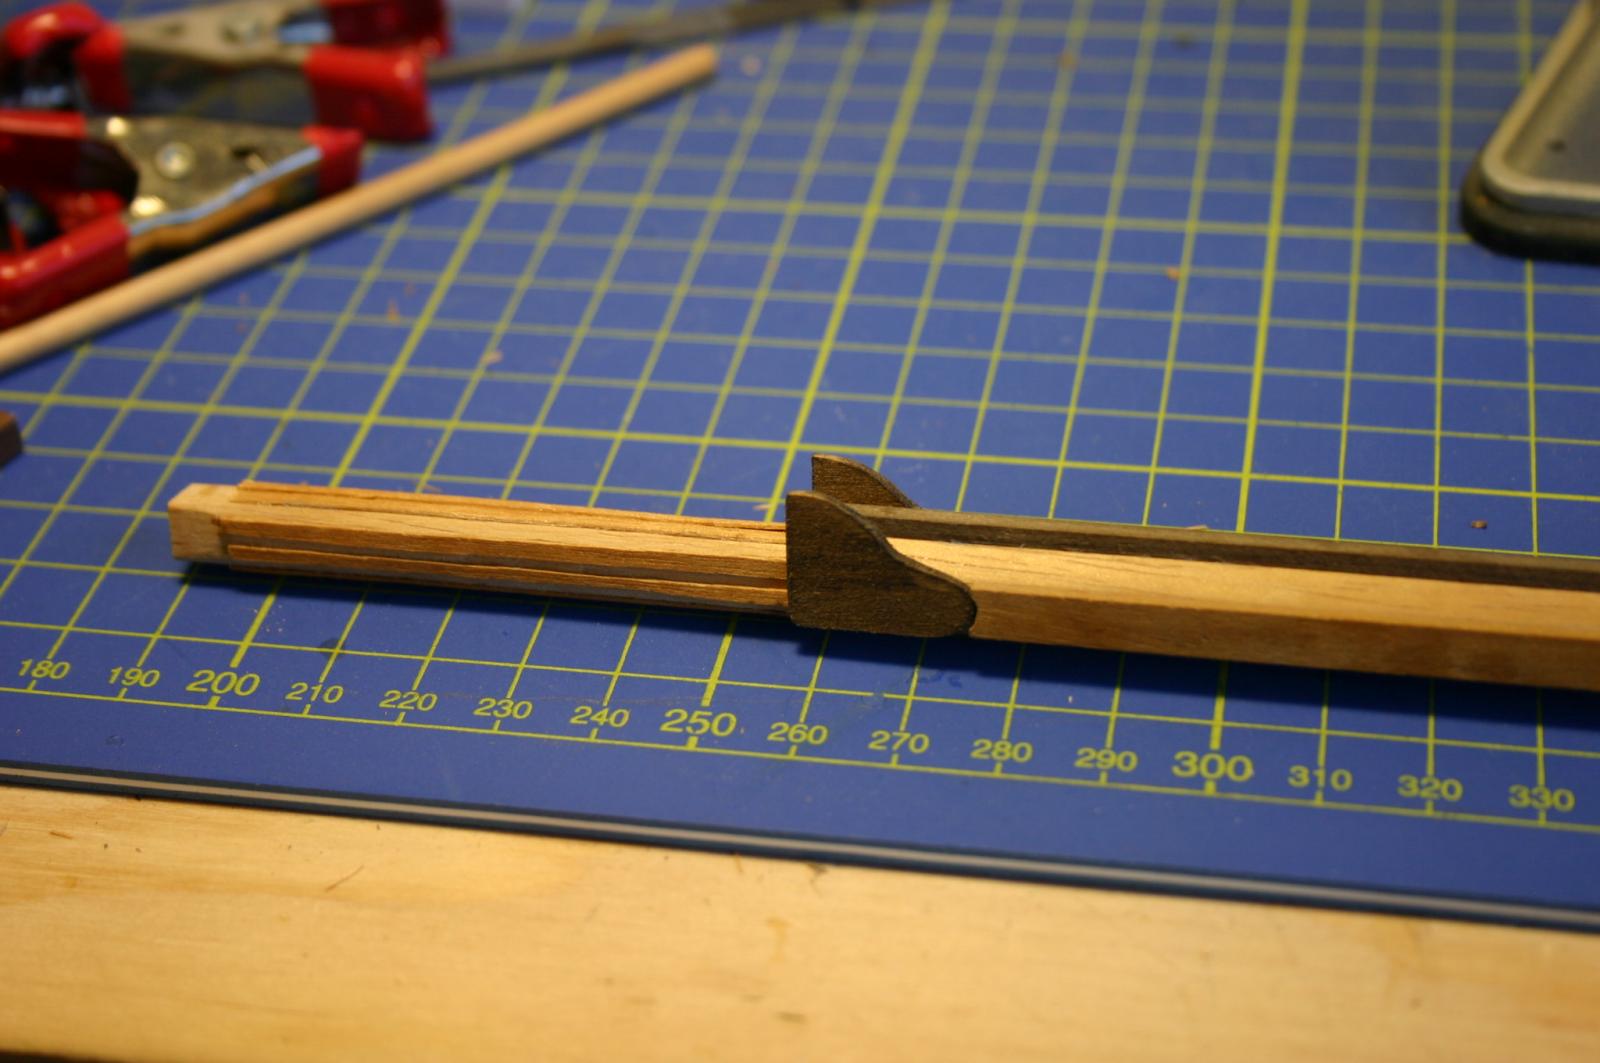
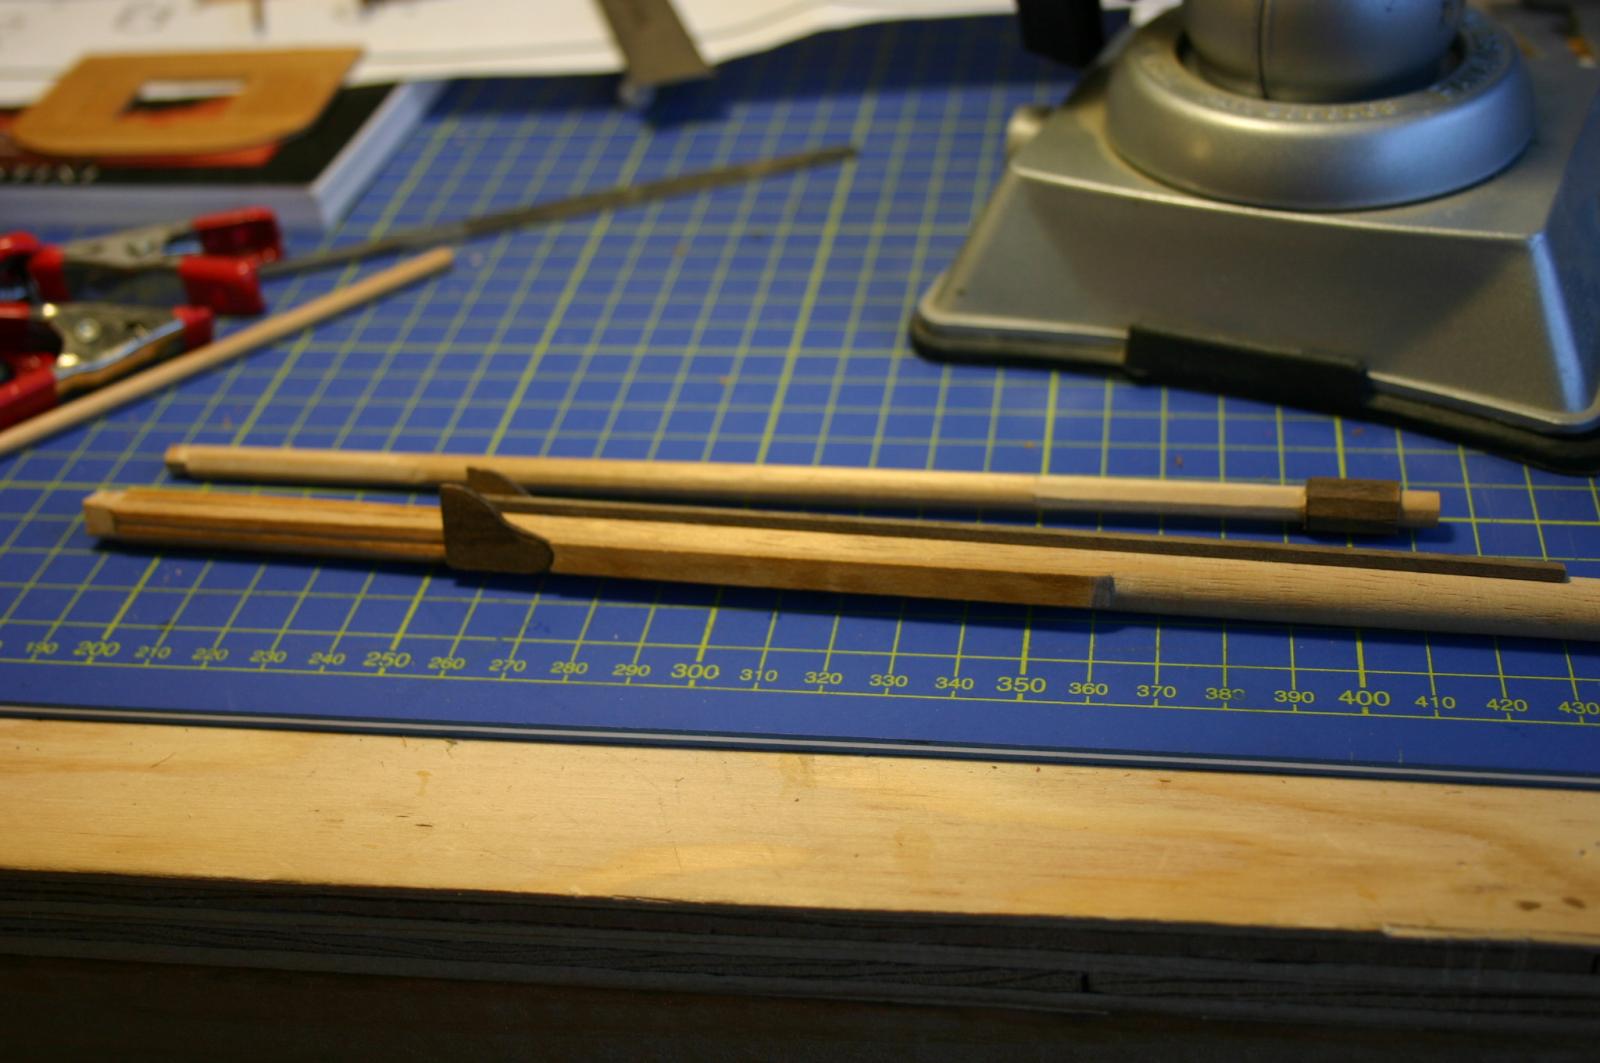
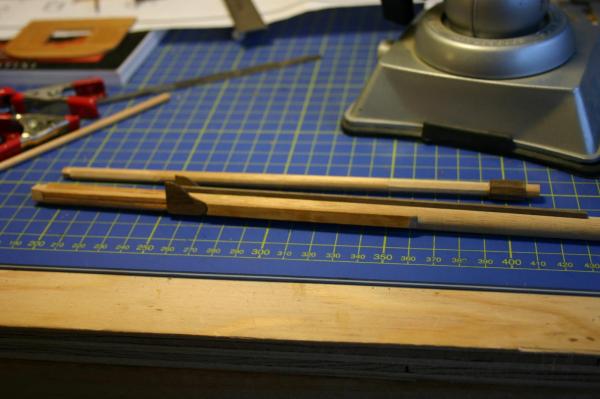
Finally back to work on the ship. I installed the second set of chain stays and deadeyes and began working on the masting. I put it off for a while because I was unsure of how to start and was afraid of making a mistake with the kit wood. I finally just bit the bullet and jumped in. For the shaping of the mast I put the dowel into a drill and using a heavy grit sand paper work it over the lower section of the mast to taper it. To square the mast on the upper portion I used a hand plane, that was not as successful as I had hoped so I ended up taking the blade out of the plane and just using the blade with no plane, it looks a little rough but it's serviceable. When I went to square up the top mast section I used a tip from Mastini's book and put the dowel into a vice and filed it flat, rotated the piece 90 degrees and filed it flat and did that until I had a square, then I filed the edges to get more of the octagon shape. In the future I will always use the second method of the file, quick and clean. The second set of chain stays (sorry about the sideways pic) The main mast dry fit The main mast and the top mast dry fit, still working on the trestle trees The cheeks that came with the kit were a little off so I cut new ones from some spare boxwood I had and used a little walnut stain to get them to the correct color.