divarty
-
Posts
130 -
Joined
-
Last visited
Content Type
Profiles
Forums
Gallery
Events
Everything posted by divarty
-
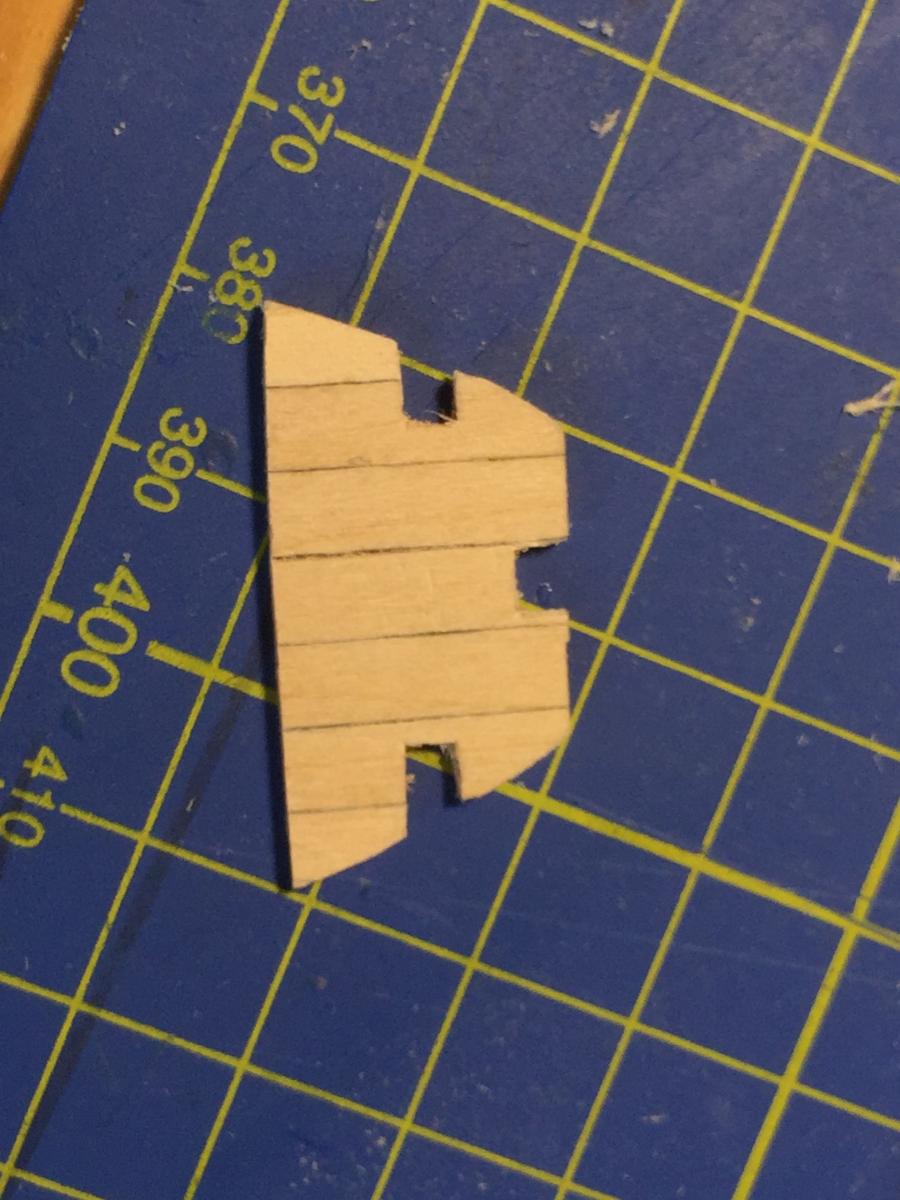
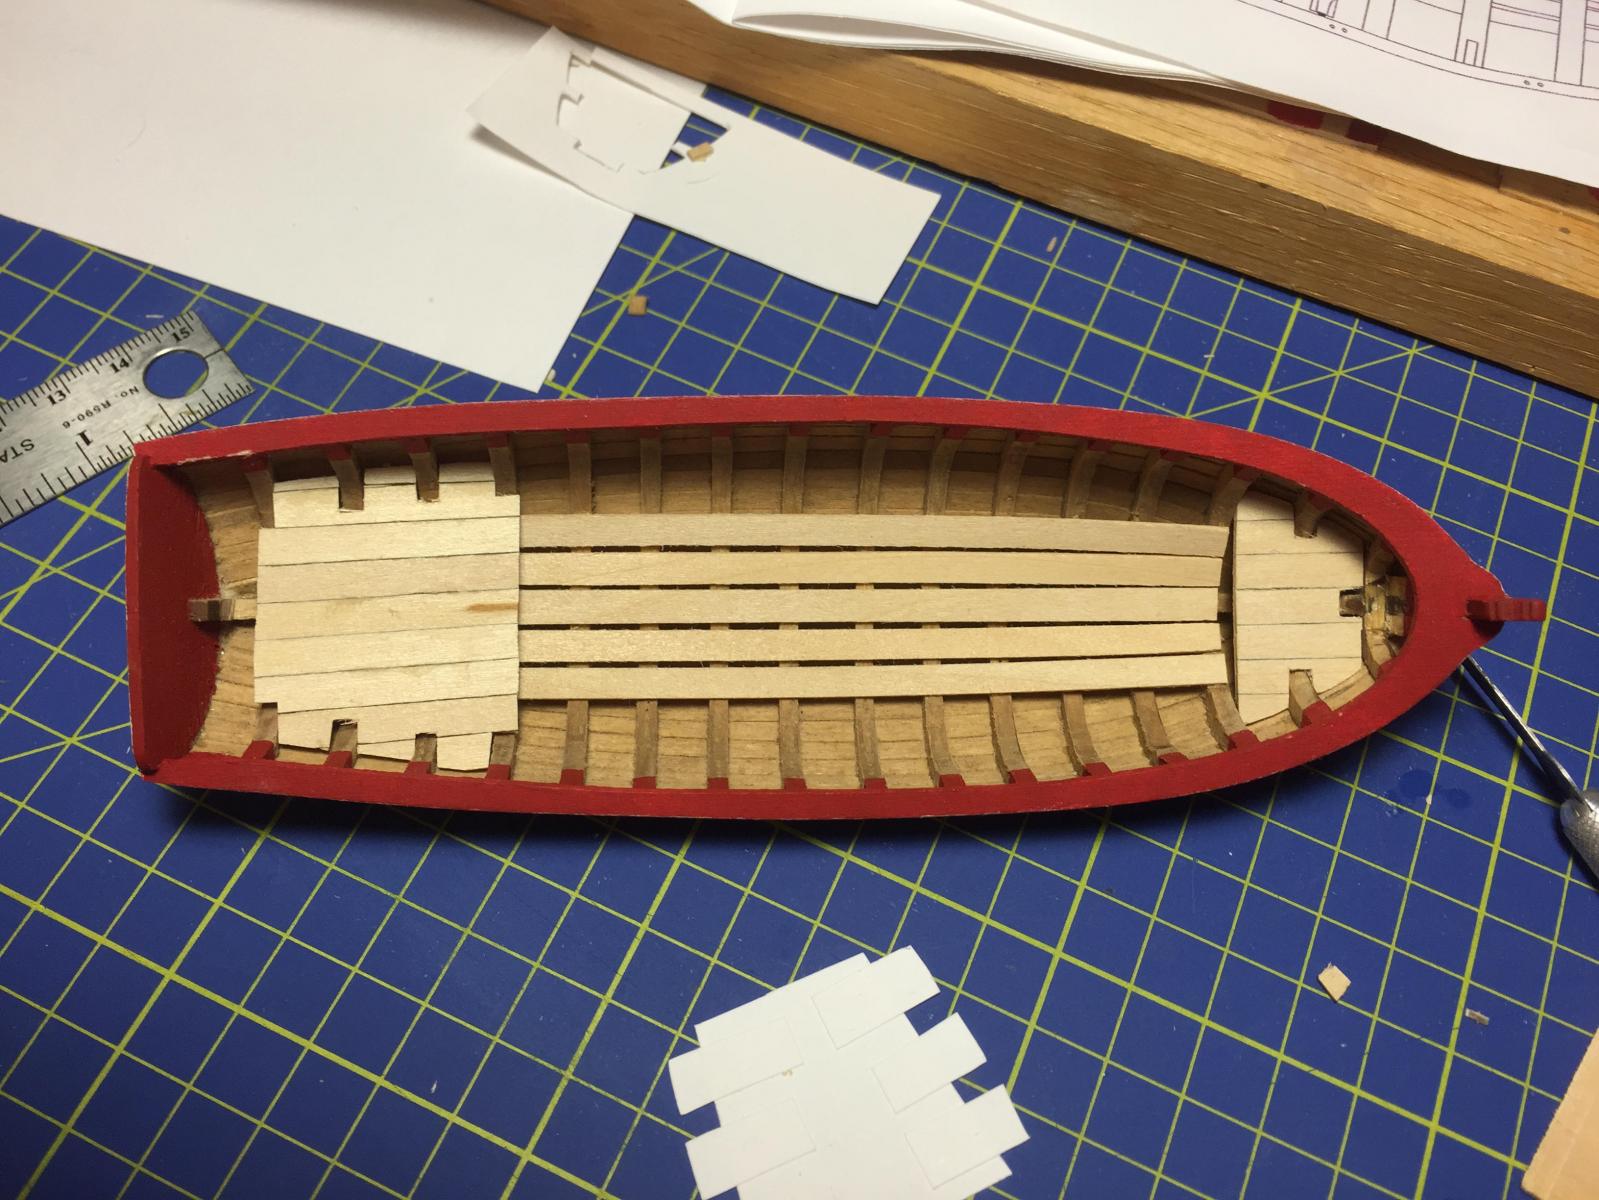
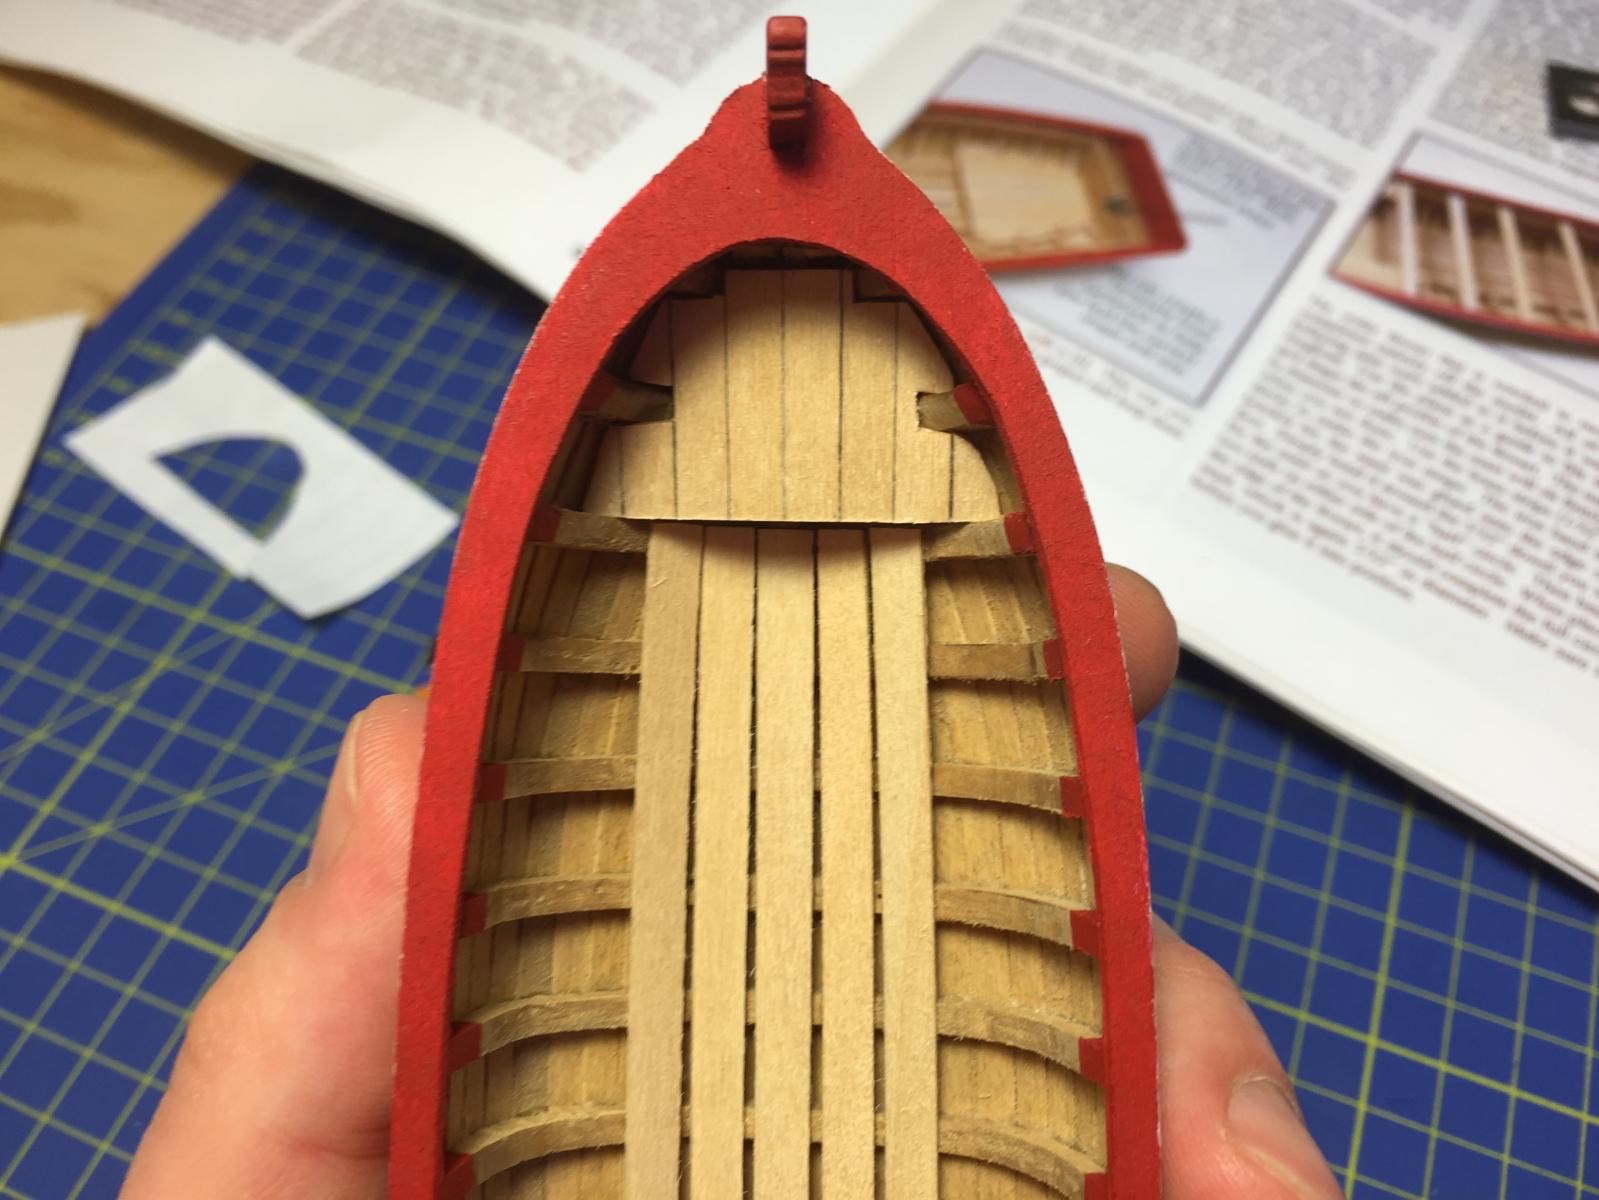
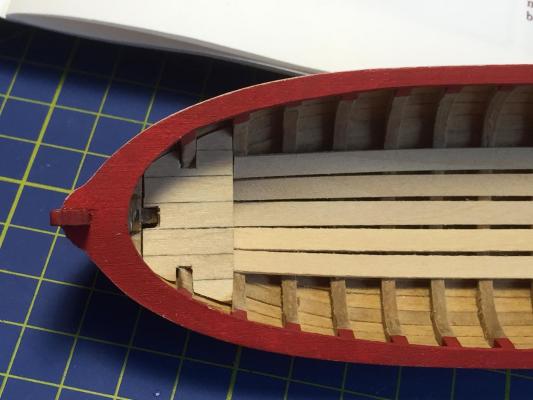
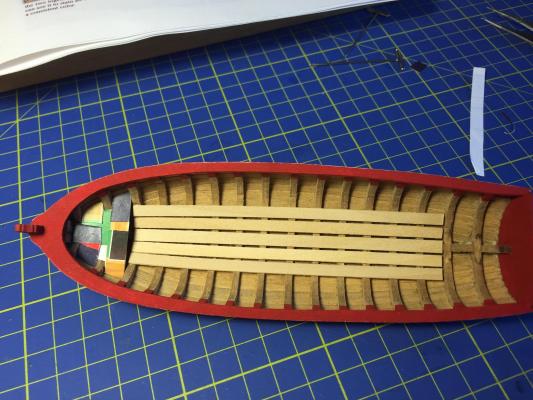
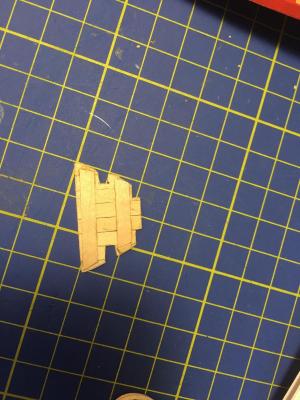
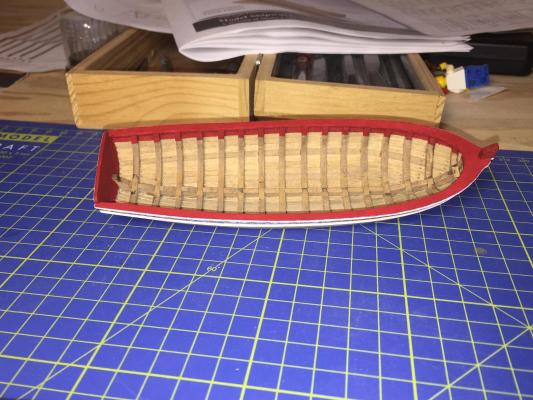
 Thanks John, much appreciated! Today in the shipyard I redid the forward platform, it came out much more to my liking and I ensured it left enough room for the risings (many thanks to Ryland for the PM reminding about that little gotcha.) Then installed it permanently After finishing up the forward platform I built up a template for the rear platform, put it on a 1/32nd sheet of basswood, planked it up and started the dry fit. All I can say is OOPS, I started another mockup and will plank it and install it tomorrow. After I finish up the rear platform tomorrow I'll roll forward with the risings and seats. I picked up some new stain, a slightly lighter one than what I used on the planking, it will hopefully make the floorboards, forward platforms and seats stand out a little more. I will also be retouching the red paint on the cap rail that got dinged while I was working around it.
- 55 replies
-
- 2
-

-
- 18th century longboat
- model shipways
- (and 1 more)
-
She looks great Alex! That's a build to be proud of. I like the cherry base board as well, it makes it look like she's escaping a whirlpool.
-
Andy it's coming along well when the running rigging comes up everything should pull into place very nicely. Nice work!
-
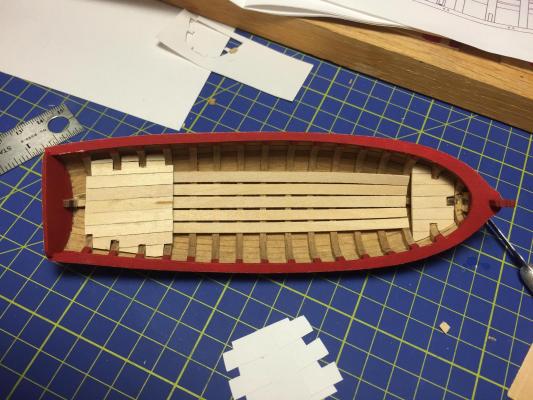
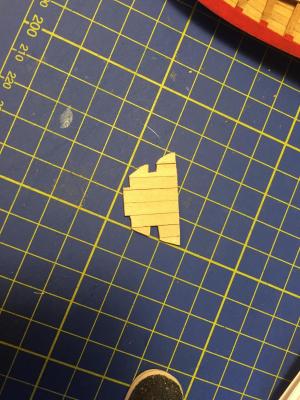
Thanks Adam, much appreciated! Today I put in the floorboards and started work on the forward platform. I think I got a pretty good setup on the floorboards, I used some pushpins in between the boards to keep the same space along the length. In the photo above you can see my initial mockup of the forward platform, fortunately (or unfortunately) election season is upon us here in the states so I have plenty of heavy card stock flyers from candidates to chop up and use for the platform template. Here is the final platform. And during a simple dry fit To be honest I don't like the way it came out and so next weekend will be back to recreating the mockup and cutting a new platform. Instead of using the two cross pieces I think Im going to glue the planks to a 1/32nd piece of bass wood and then cut it to the profile of my new template.


- 55 replies
-
- 4
-
-
- 18th century longboat
- model shipways
- (and 1 more)
-
Today was filled with a trip to Michaels to pick up some brushes and acrylic paints. Once back in the dockyard it was time for amateur painter hour. The photos didn't come out that well but the red turned out exactly as I wanted. Tomorrow will be attempting to start on the interior work with the flooring and the two platforms.

- 55 replies
-
- 4
-
-
- 18th century longboat
- model shipways
- (and 1 more)
-
Antony beautiful work as always, top notch craftsmanship, an absolute privilege to take a look at.
-
Thanks Floyd, I like the way the stain and faux tree nailing came out so for paint I'm just going to stick with white on the edge of the moulding and cap rail and the red on top of the cap rail and inside. I'm looking forward to seeing your progress on the longboat!
-
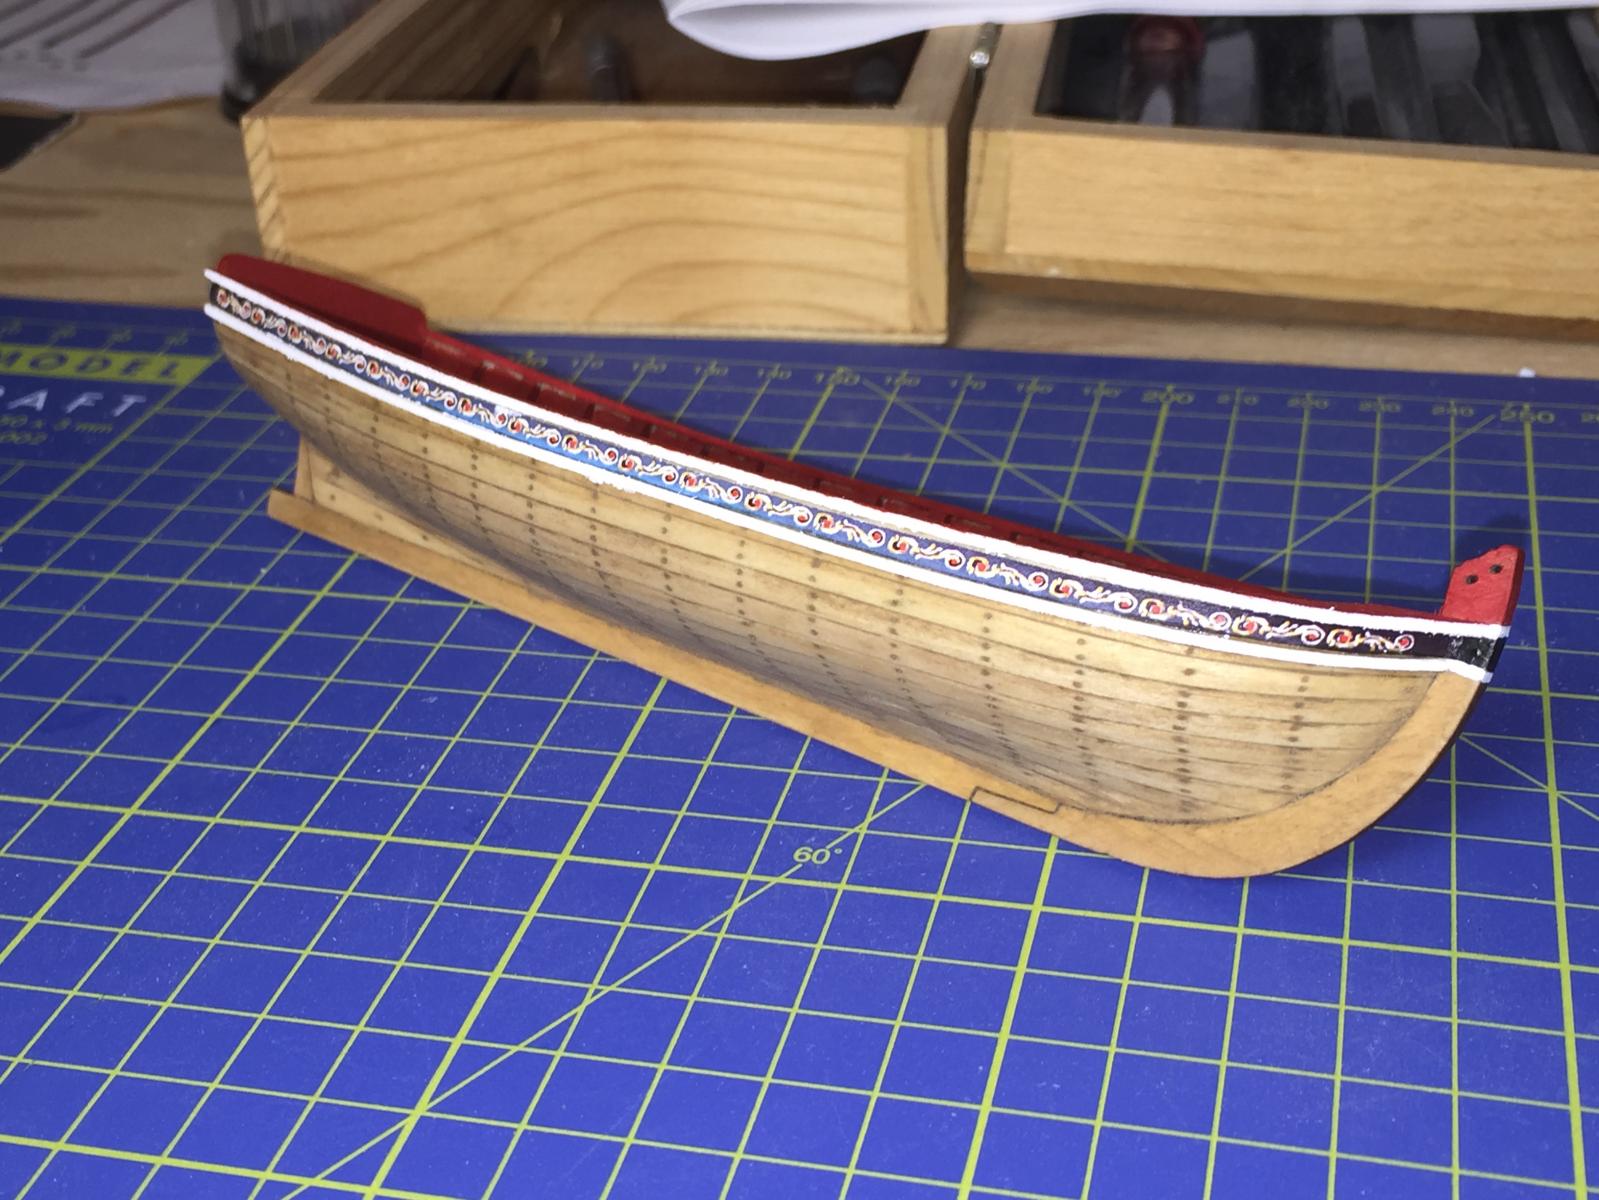
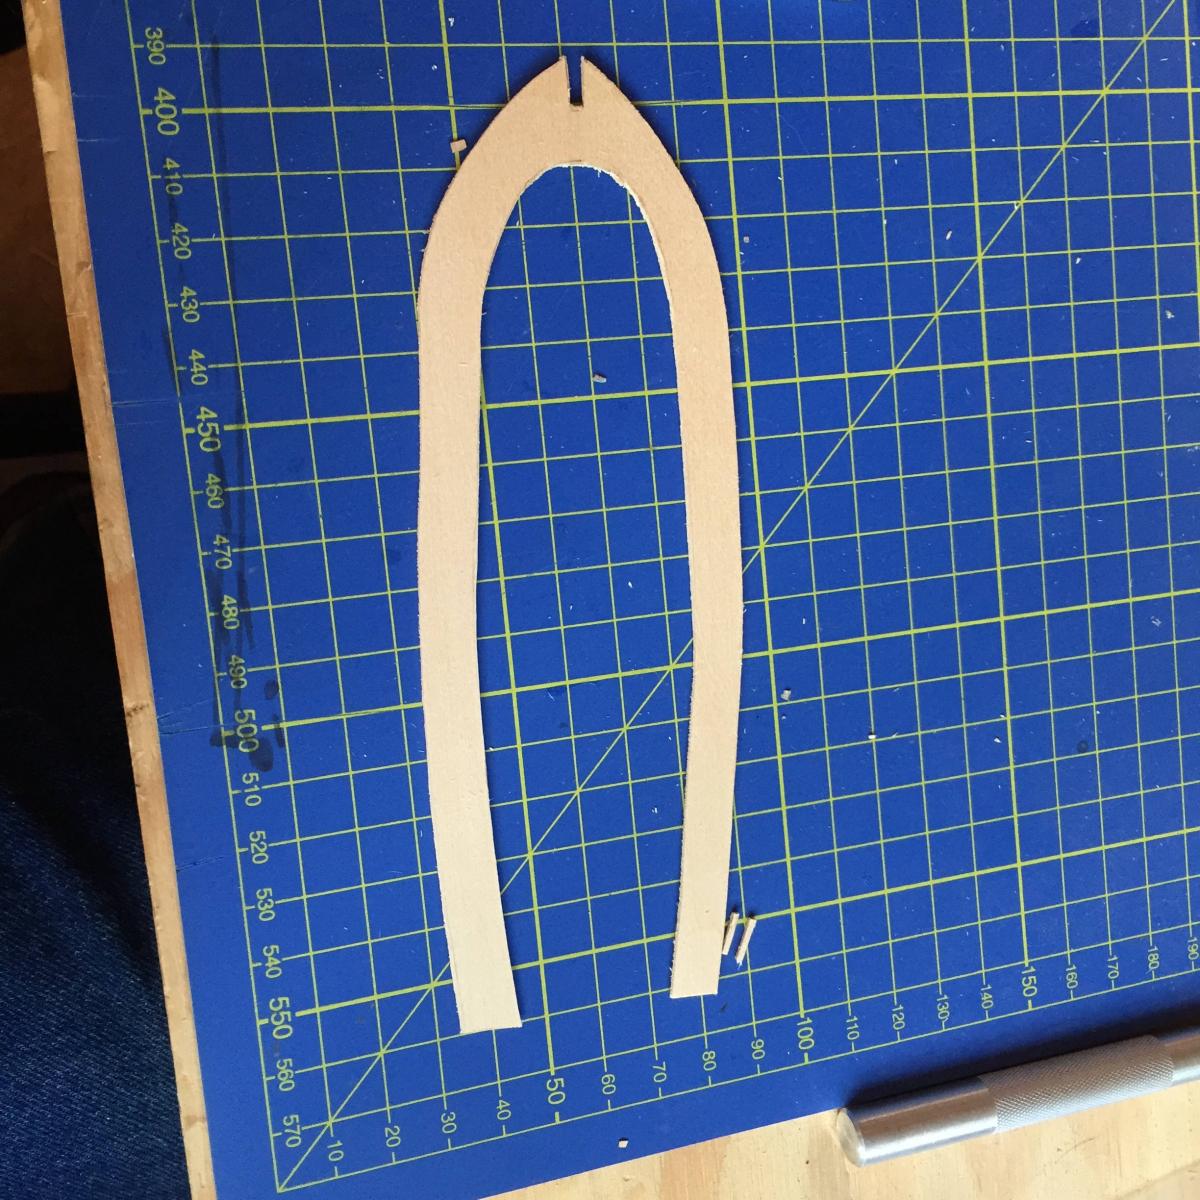
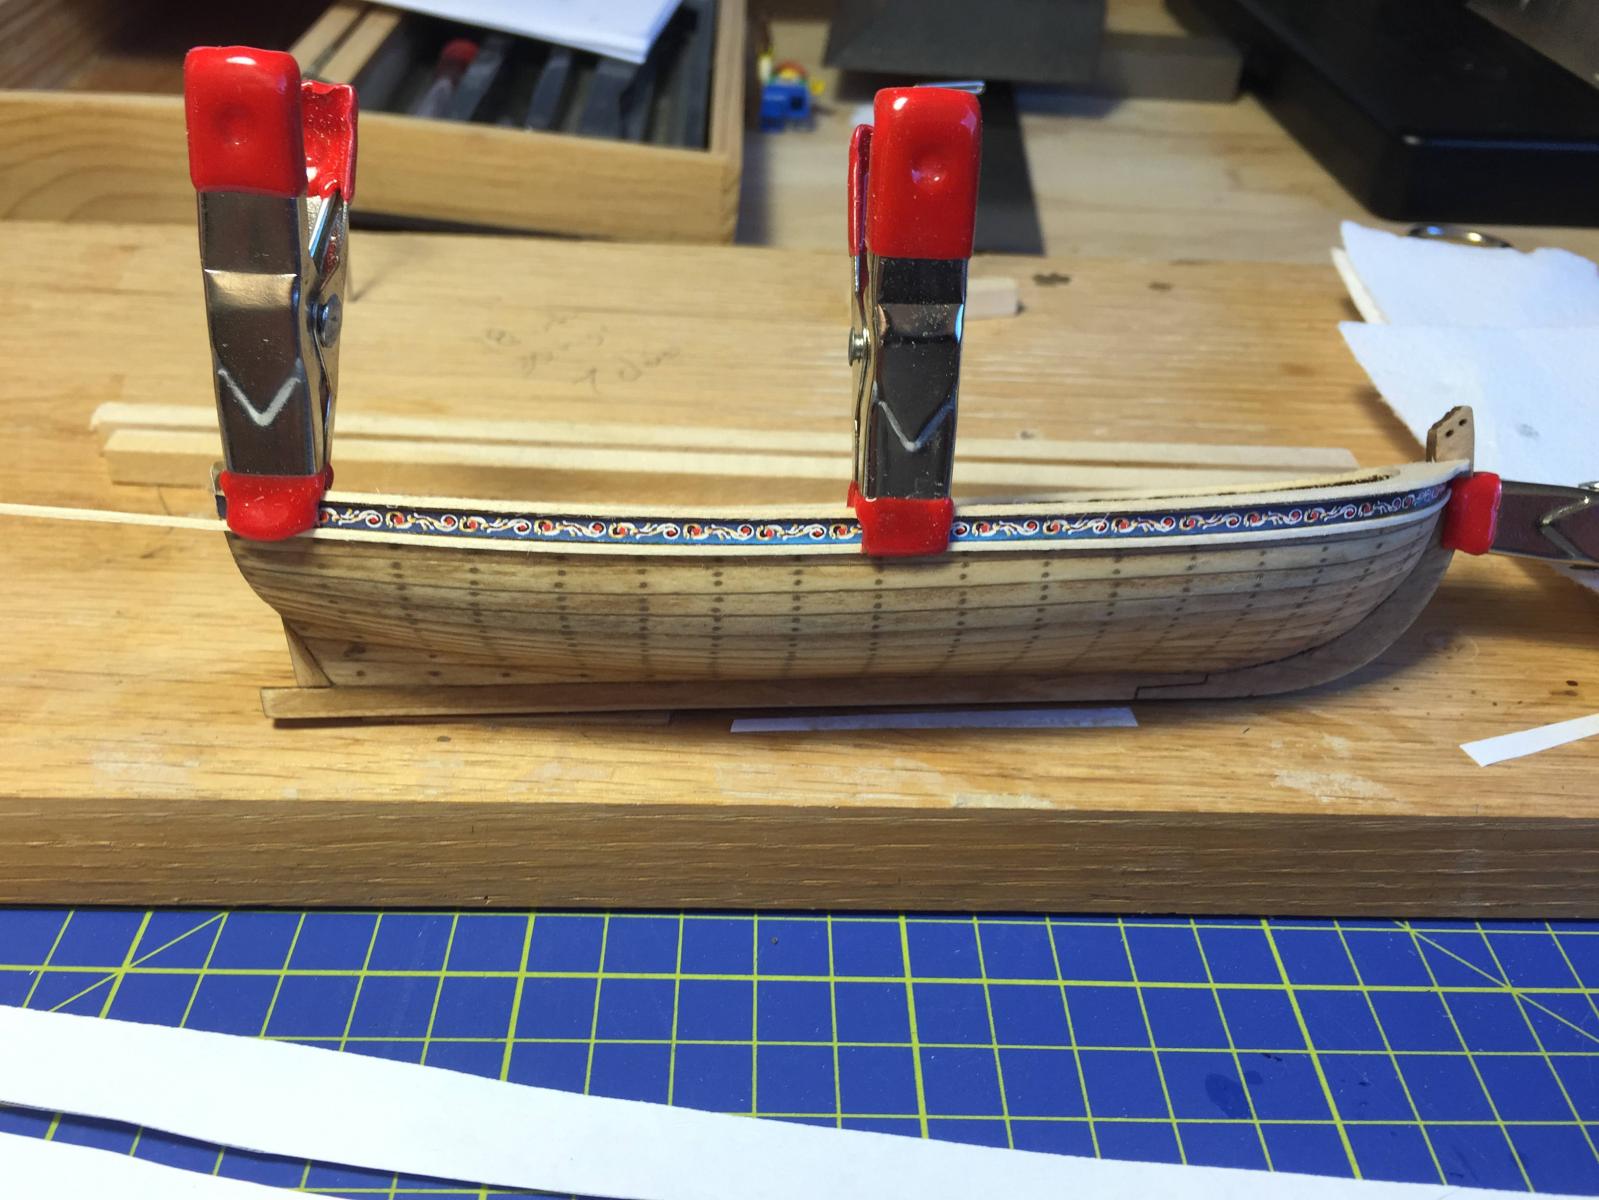
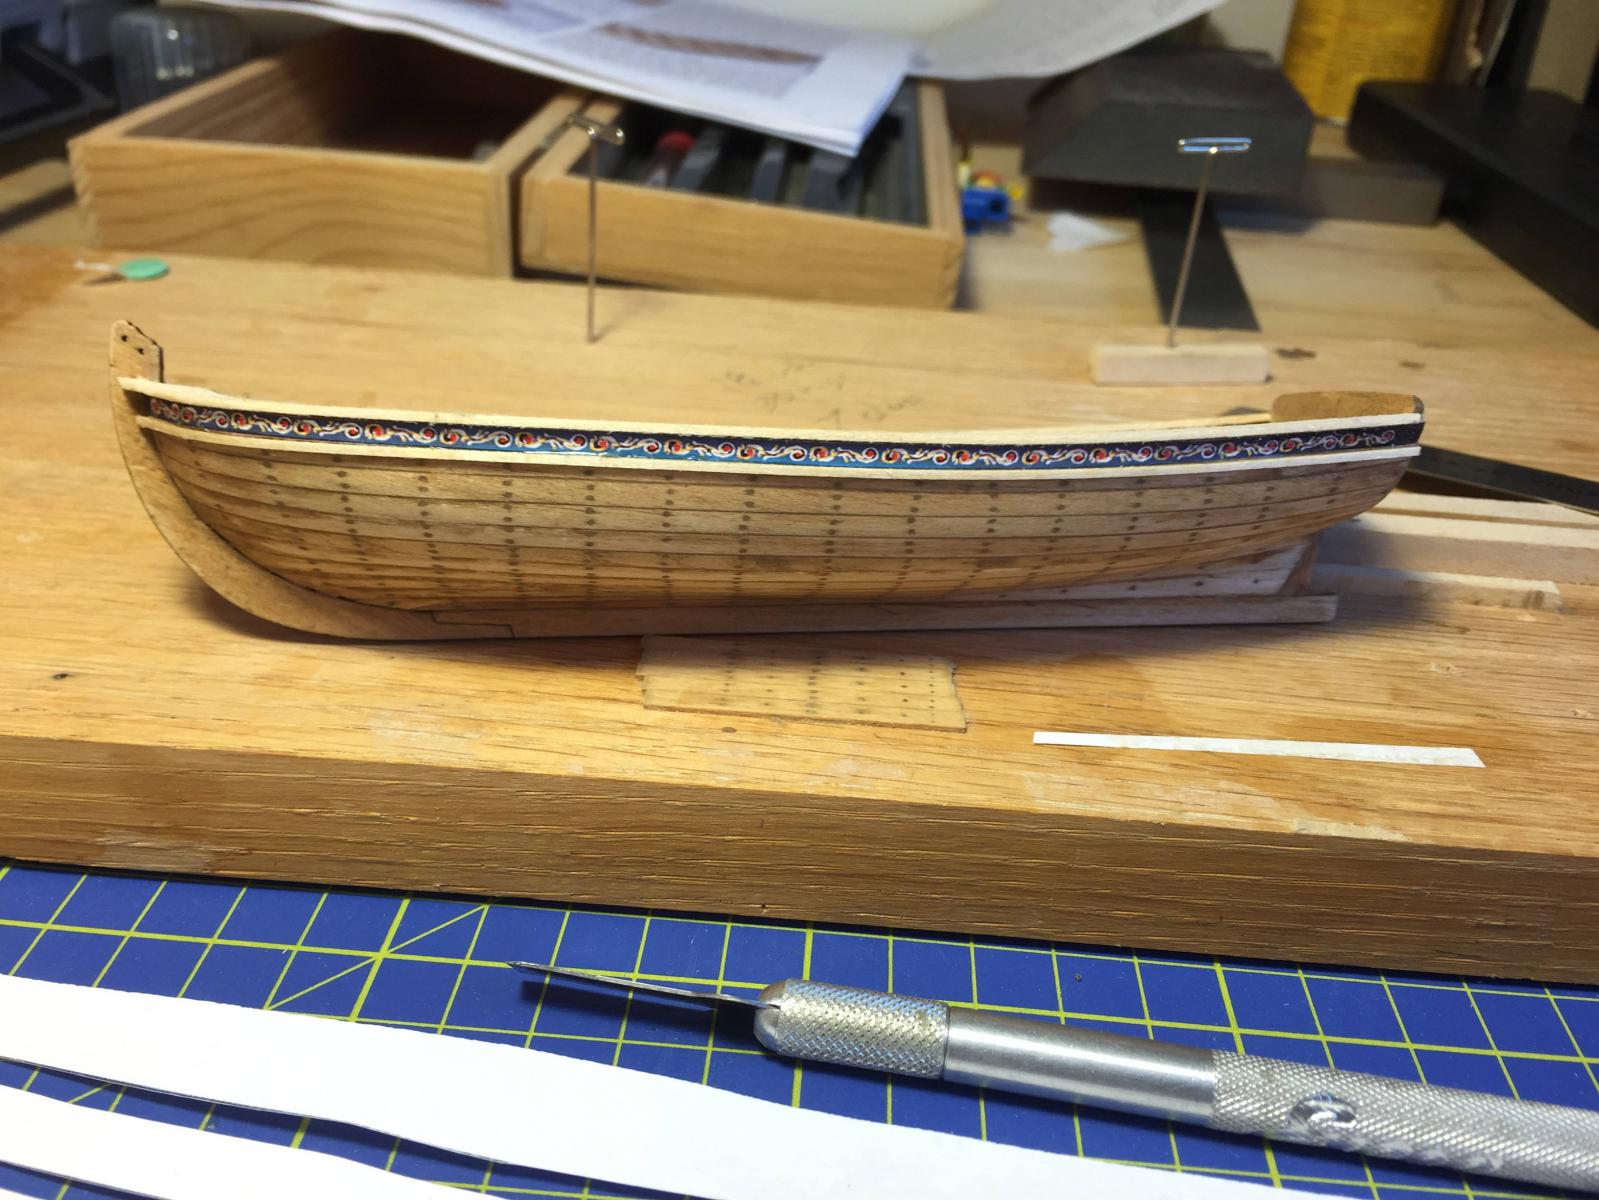
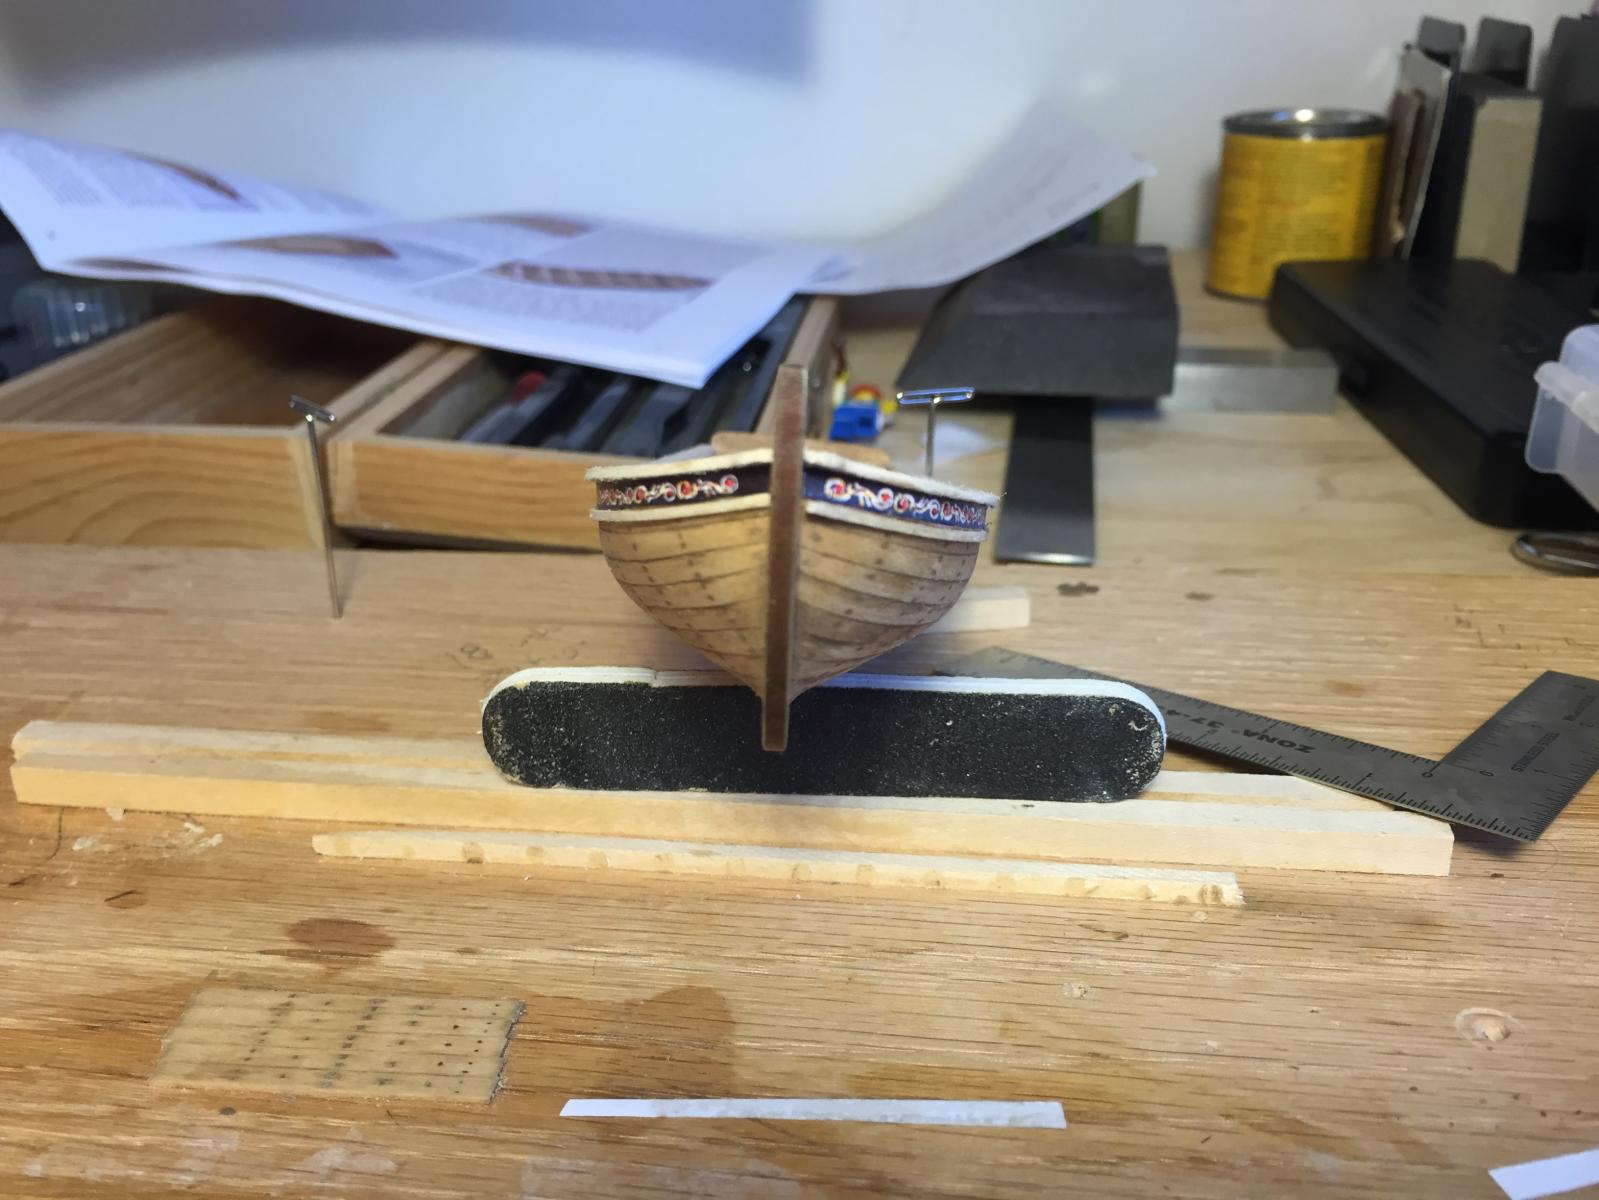
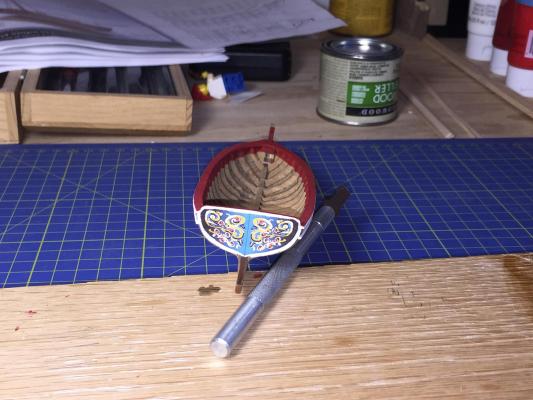
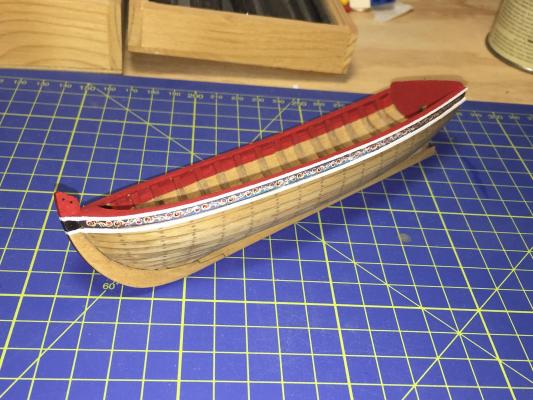
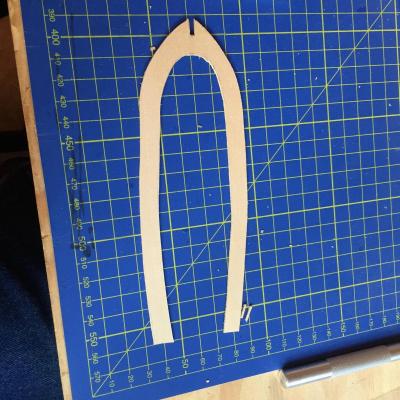
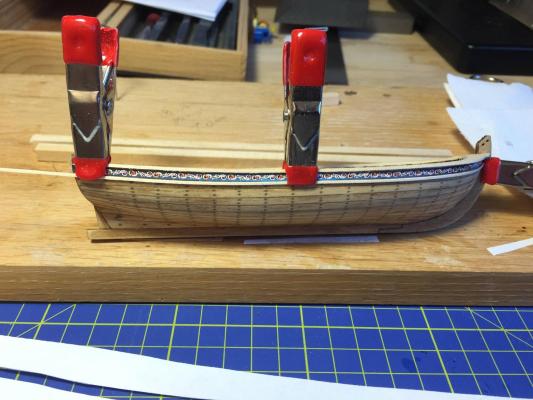
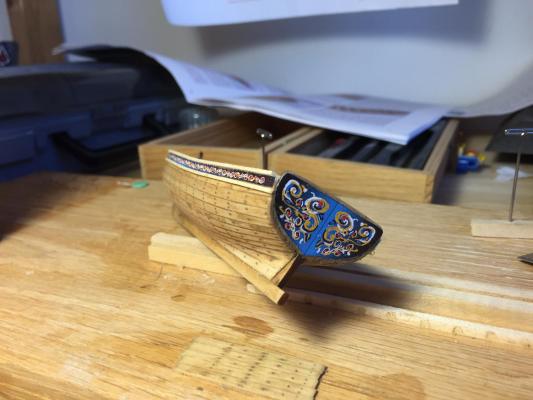
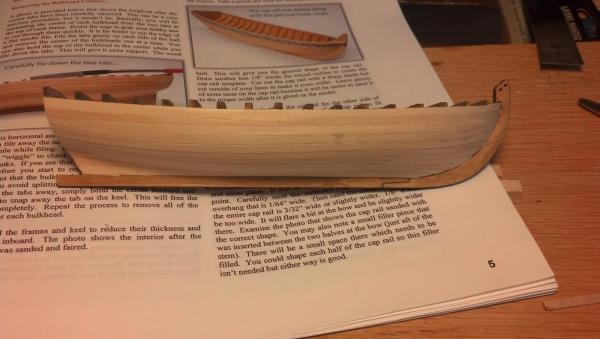
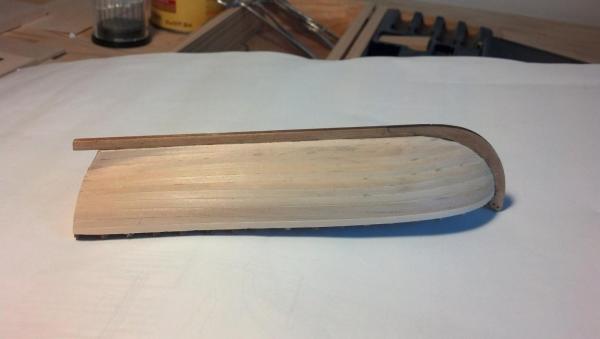
I decided to go with a single piece cap rail and used my two parts as a template to cut a new one. I used a drum attachment to trim down the bulk of the cap rail and then moved to a sanding stick and sharp xacto knife. At the end of the day it's a hair larger then called for in the instructions but I think it looks ok. I didn't trim down the frames deep enough to get to the measurements set by the instructions. After finishing up the cap rail I set to the friezes using a spray adhesive (word of warning, that stuff is difficult to work with and not have your entire work area glued together) None of the friezes for the transom fit so I trimmed it down with no white left and placed it When i am doing the white on the edge of the cap rail and moulding I will also paint the edges of the transom around the rear frieze. Adding the caprail, the friezes and the moulding underneath the frieze really adds a lot of character to the boat and this is turning into a great little build.


- 55 replies
-
- 4
-
-
- 18th century longboat
- model shipways
- (and 1 more)
-
Kees I just saw this in the completed build forum and came back to find your log. I am amazed, it's absolutely perfect, the weathering is top notch. When I showed the pictures to my admiral she at first thought it was a real boat. You are a master builder, thank you for sharing your work with us.
-
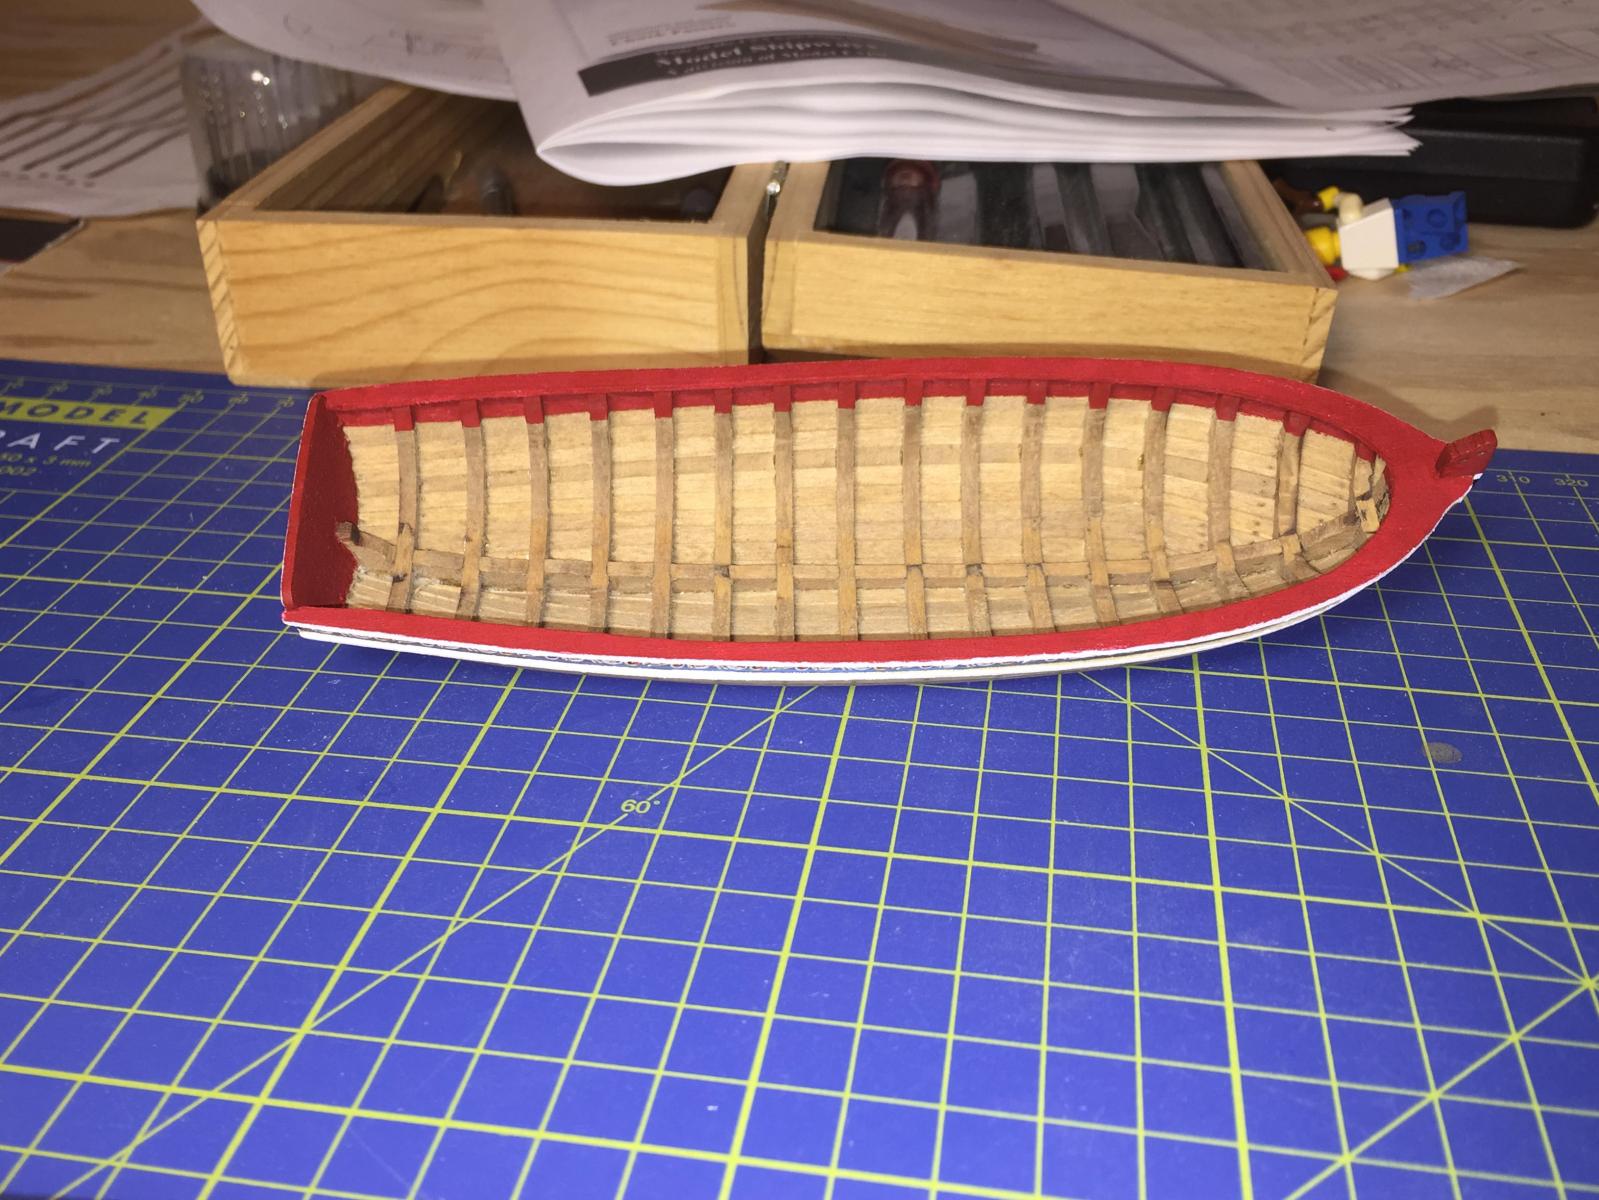
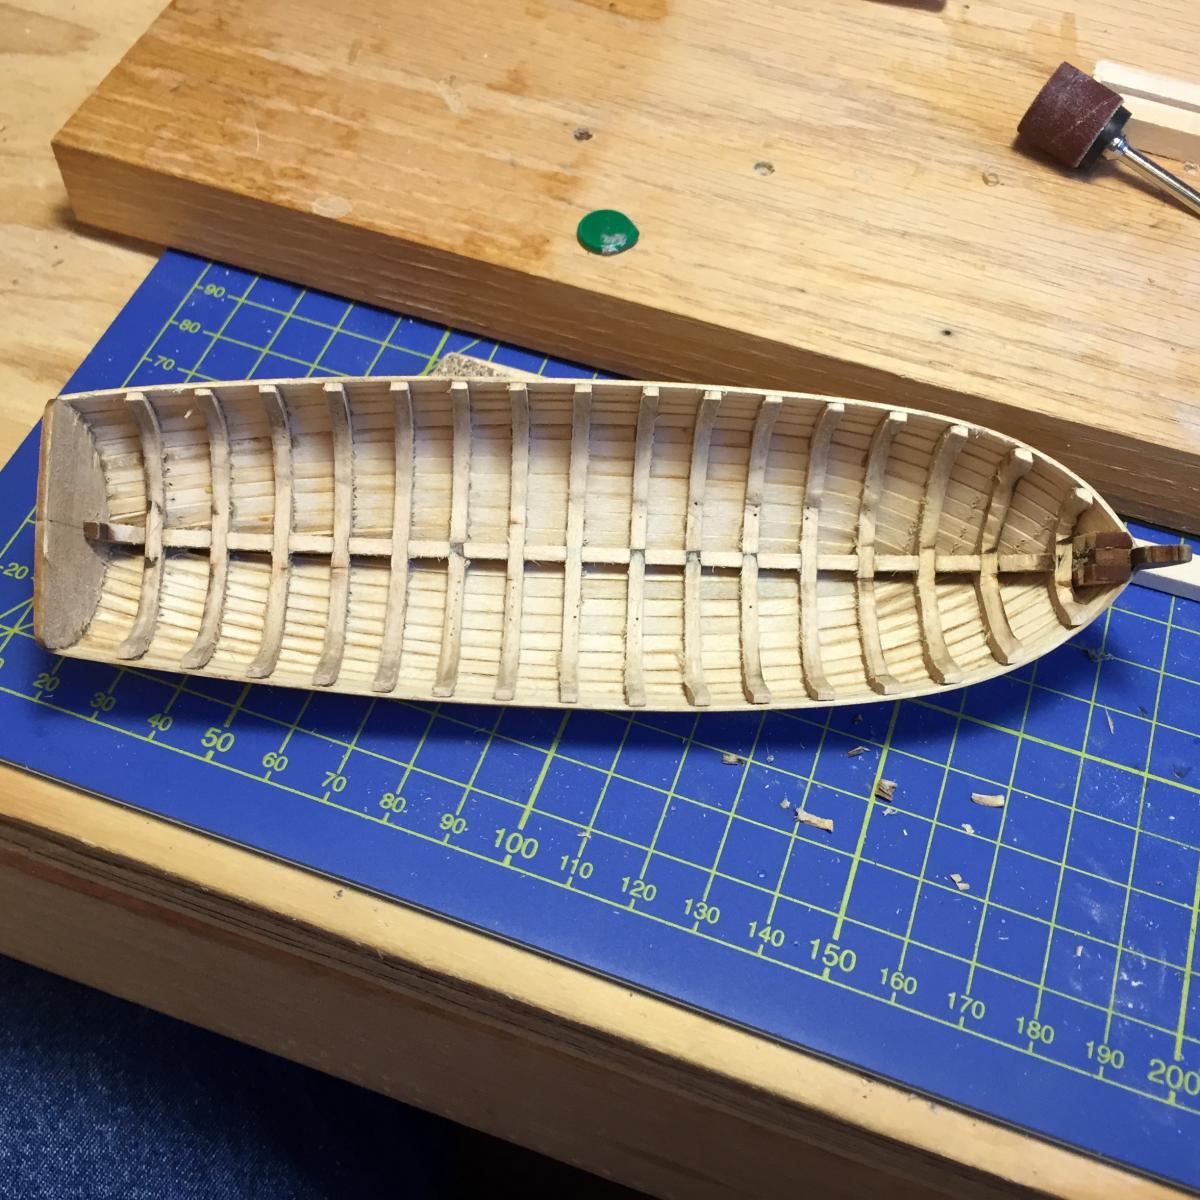
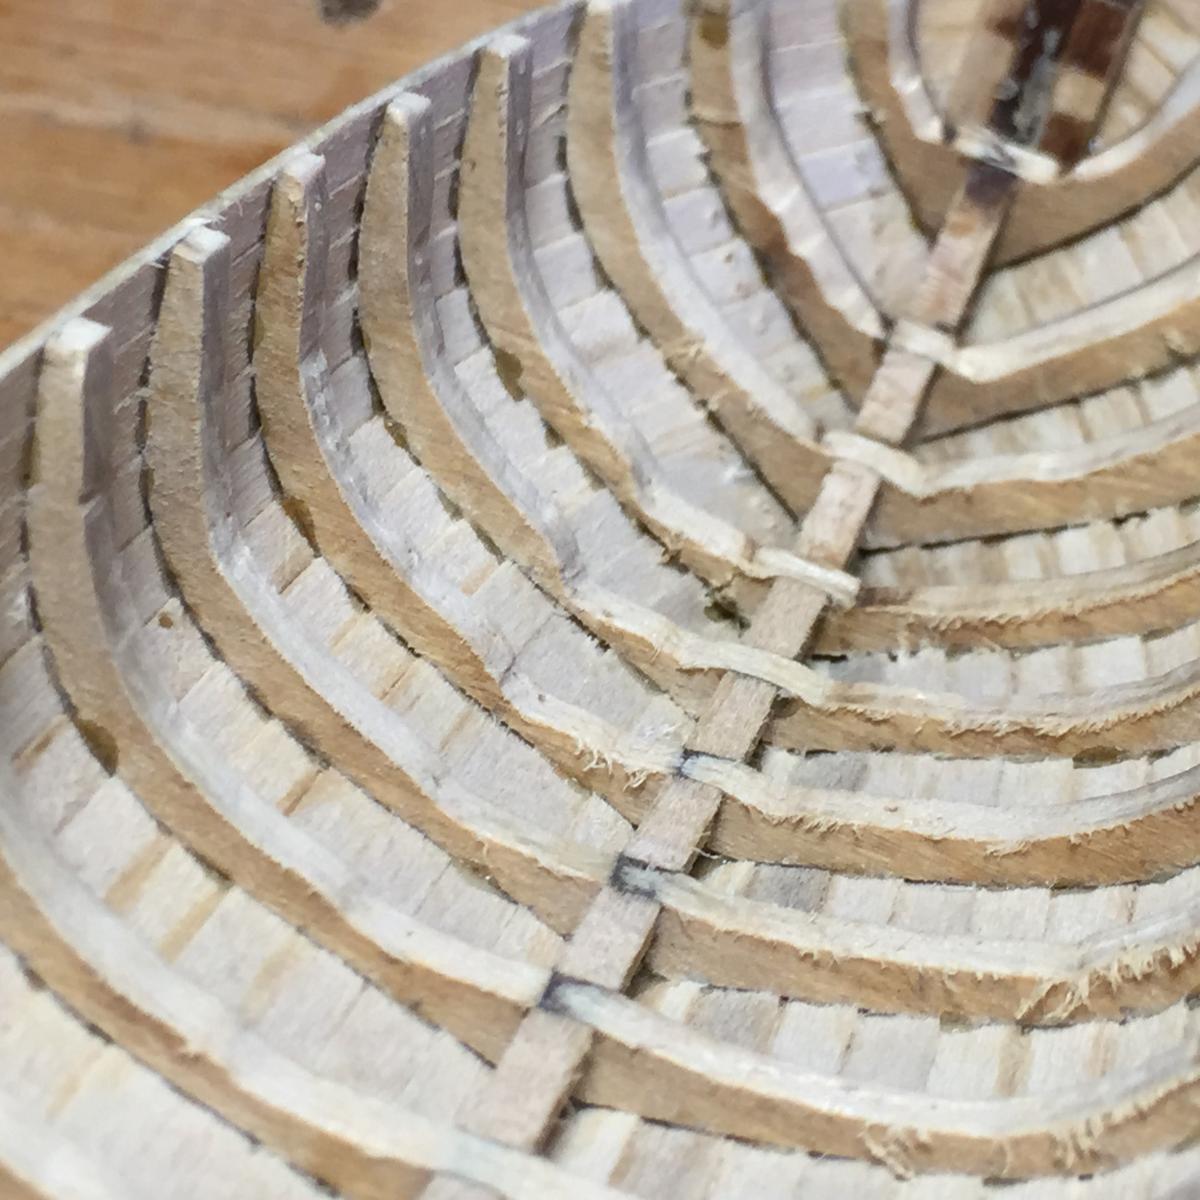
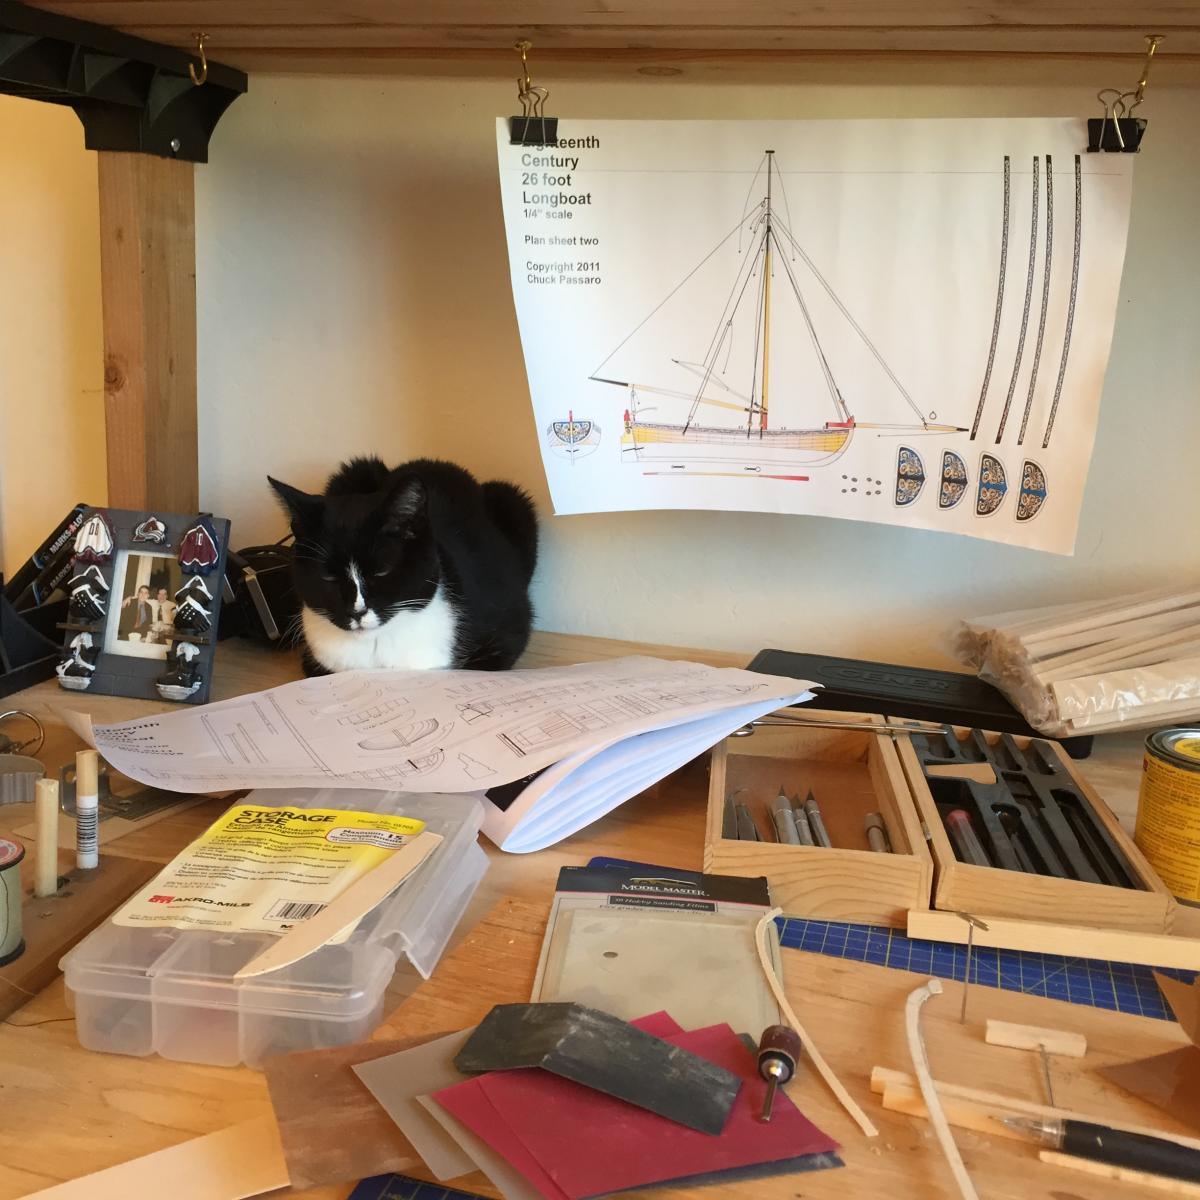
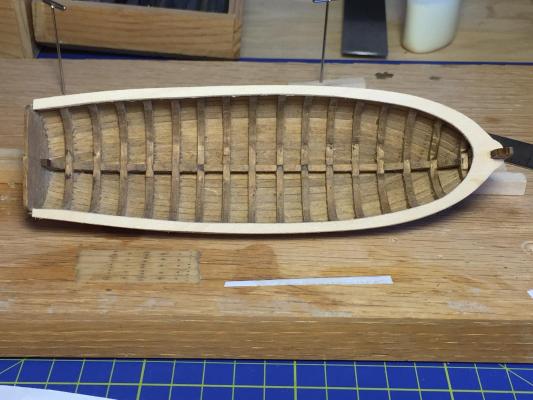
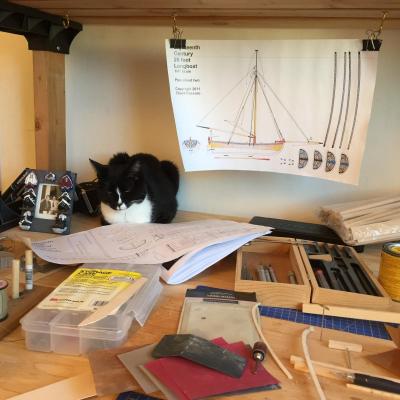
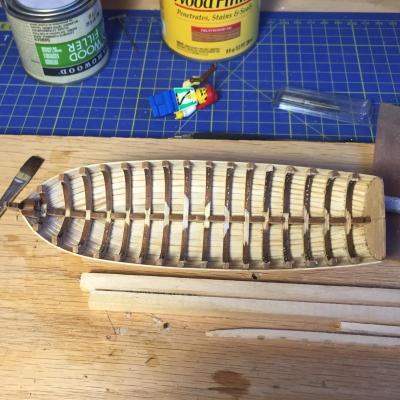
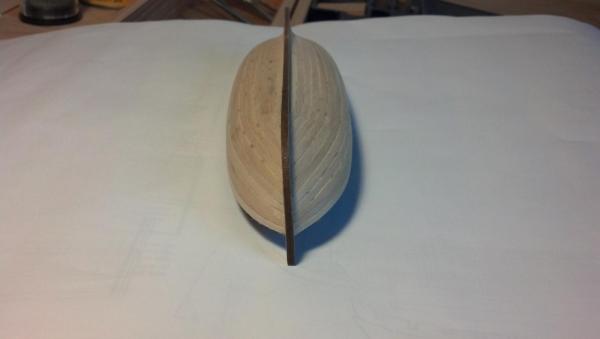
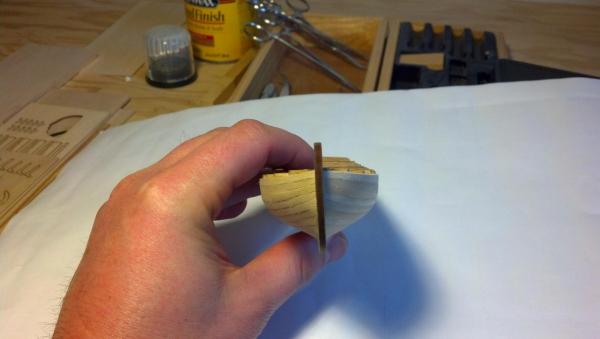
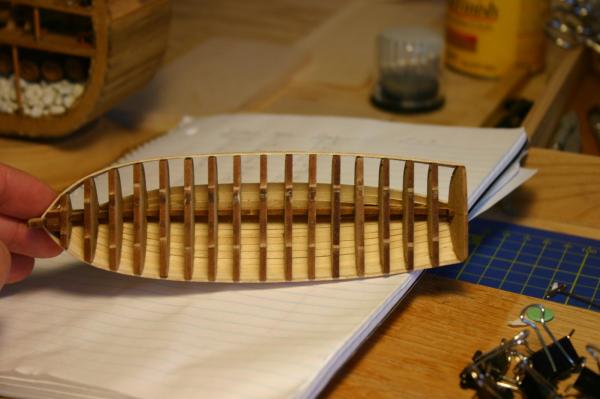
Today I started working down the bulkheads and getting ready for the cap rail. I used a small sanding disk on my Dremel (220) to start to bring everything down to size. Everything was coming along swimmingly I took the boat outside and used some compressed air to blow out the dust from teh sanding and I discovered that I had made a huge error, I was only paying attention to one side of the sanding disk and the far side damn near went through the frames and planking on the port side. Fortunately I caught the issue before I wrecked the entire boat and I believe that the damage will be covered by the floorboards when I put those in. After I finished sanding down the frames I stained the inside. On a side note we recently snagged a stray/feral cat that we had been feeding on our doorstep and she's adapted to life on the inside fairly well, and by that I mean she appears to be my new assistant. After I finished up the staining I started to cut the cap rails, after burning through the supplied by wood cutting it incorrectly (I traced the boat and put an additional marking inside at 1/8th of an inch but failed to leave extra wood on the outside ) and a trip to the hardware store where they happen to carry a lot of balsa and basswood I managed to craft what I call BACR or big *** cap rails. I cut two separate rails and was planning on applying them to each side but looking at BobF's build and Chucks build it appears they cut the cap rail from a single piece, anyone want to chip in on single piece vs two separate ones? I think I may backtrack and lay my current cap rails down as a template and cut a single piece to avoid having a seam. On a side note I've already been seduced by modelexpos adds and have been looking at what I would like to do next. I'm really drawn to the Model Shipways Rattlesnake but I am having doubts after looking at various build logs if I have the chops to do the kit justice. I love the Syren as well but if I don't think I have the chops for the Ratt I definitely don't have the skill set for the Syren. Tomorrow hopefully I'll have some time to bring the BACR down to just a standard cap rail and move on with the build!

- 55 replies
-
- 2
-
-
- 18th century longboat
- model shipways
- (and 1 more)
-
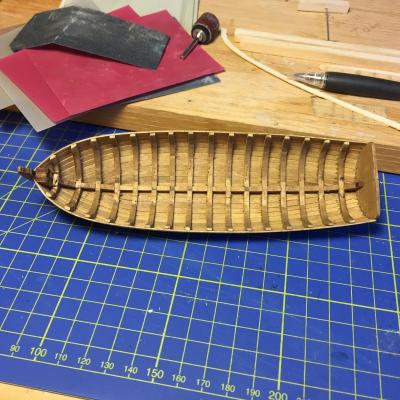
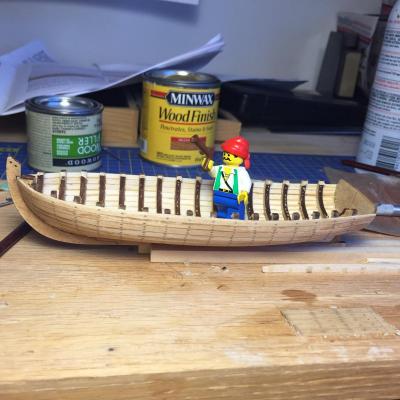
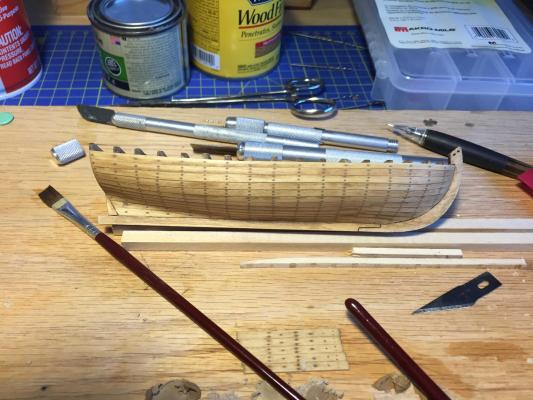
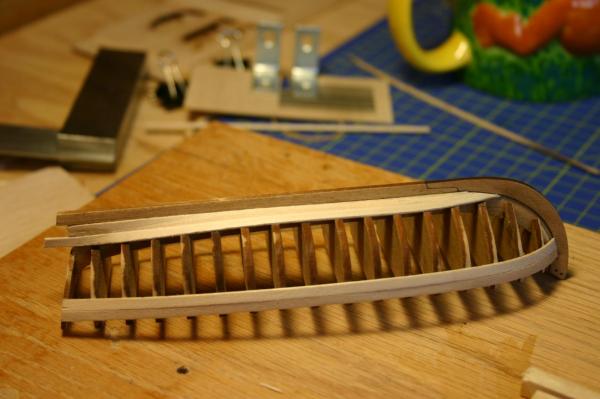
Today I finished up the tree nails on the second side of the boat then filled and stained it. Another round of sanding and scraping and I feel like I have a reasonably decent result Then it was on to taking out the bulkheads and getting the boat ready to sand down the frames and tidy up the glue on the inside. The admiral insisted her lego pirate become involved with the project Next weekend will be onto thinning the frames and getting her set up for the caprail work.


- 55 replies
-
- 4
-
-
- 18th century longboat
- model shipways
- (and 1 more)
-
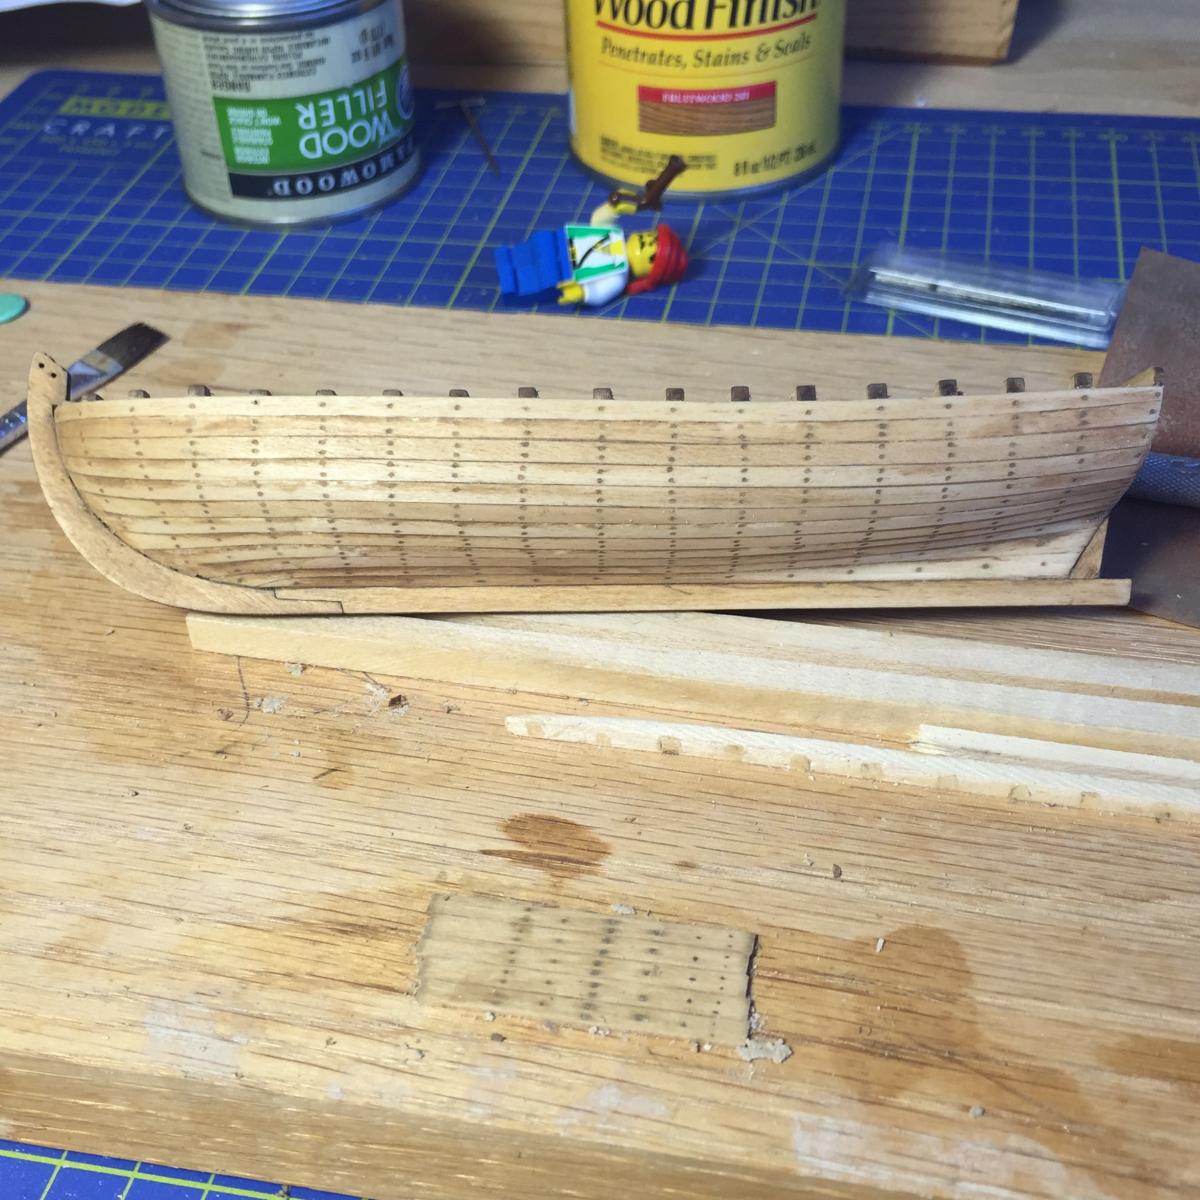
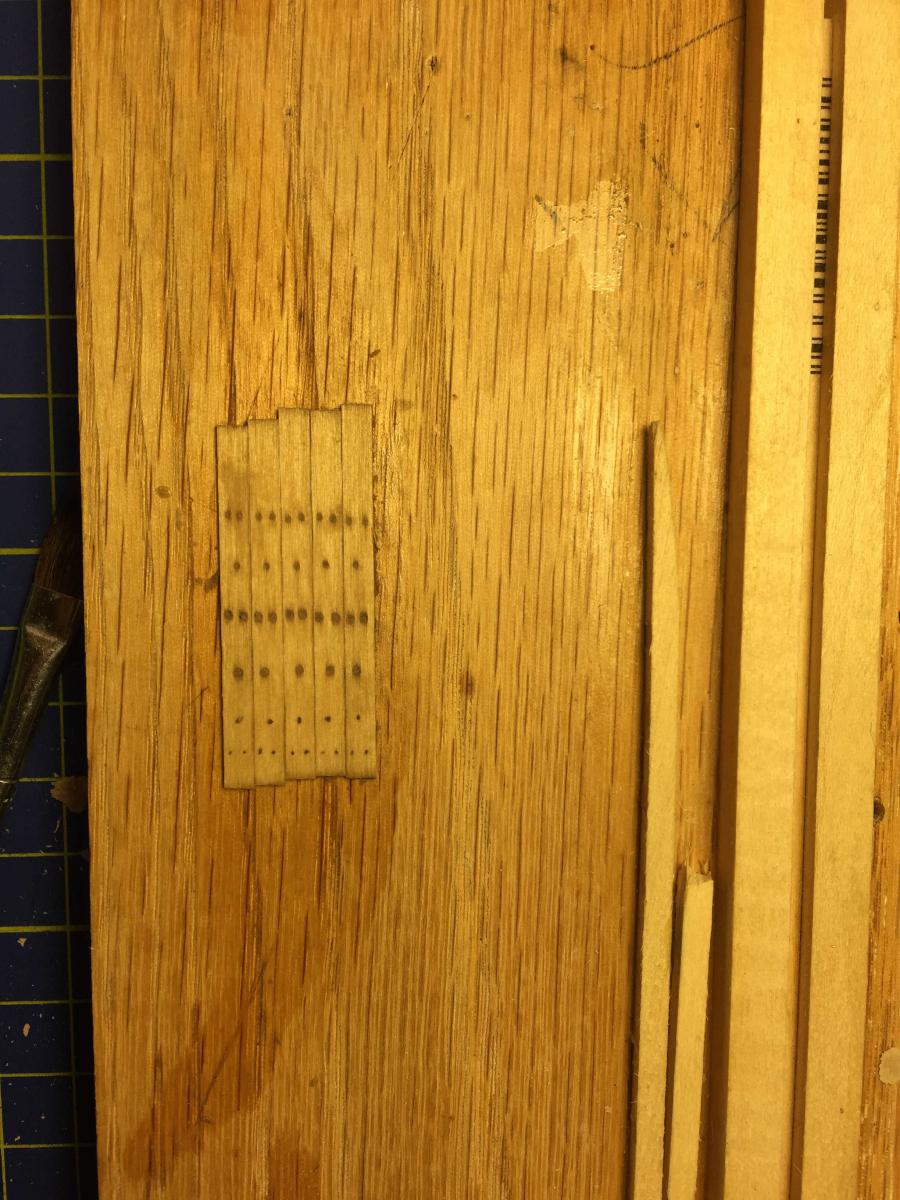
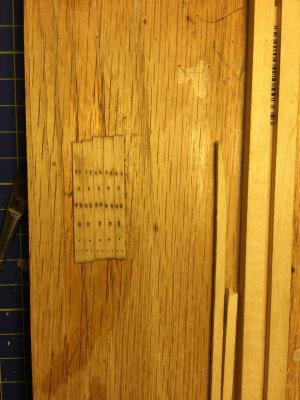
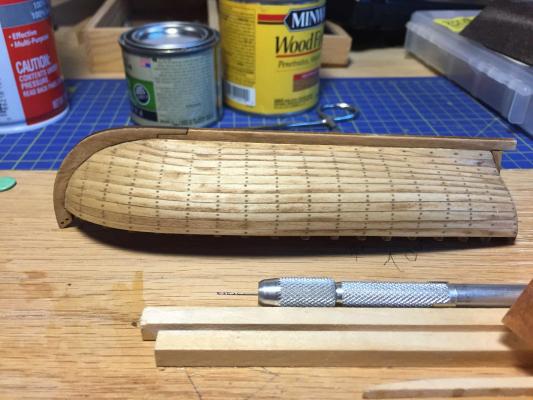
BobF, the glue staining is actually from where I had excess between the planks, it appeared to have come all the way through but it's only pronounced right where the planks meet, I did some test runs and it looked fine with stain. And I was wrong in my last post, the next step was not the bulkheads and cap rails it was tree nails and staining the hull. I put together a quick tester to see how I wanted to do the tree nails. I tied three sets on a test piece, pencil with one nail and two nails, two size drill bits with one nail and two nails filled with wood filler then stained. I decided to go with the smallest drill bit and two holes per plank (where the plank was wide enough to support two) Then a quick sanding to get rid of some of the cruft followed by filling A light sanding after that and then stain I'm of a mixed opinion about the end result, the admiral likes it and says it looks fine, I like it but I think its a bit cartoonish? A little fuzzy not as perfectly defined as some of the other builds. I think it will work well if I finish off the rest of the boat as a "working" boat.
- 55 replies
-
- 2
-
-
- 18th century longboat
- model shipways
- (and 1 more)
-
Thank you guys for the kind words. Floyd I hope you manage to hit that curve ball and get back to doing what you enjoy. Thank you John. BobF I appreciate the compliment, I do have to say I used your build log to guide me on my second go at the planking, it was incredibly instructive and I wouldn't have gotten my long boat to this point without it! One of the things that I'm curious about are the glue stains that seem to have bled through the planks to the surface. I used standard carpenters glue and was very judicious (or so I thought) on how much I used but you can still see the stain. Ill have to test a spare piece to see if the bleed through affects the stain. Has anyone else seen the same problem? How did you handle it? Sanding doesn't work as it's bleed through the wood from the bottom. The other issue I had/have is the "furriness" of the basswood and the softness. I dented the hell out of the false keel and the transom as well as any wet wood the I used clamps on. Next up in the build saga will be dismantling the bulkheads and working on the cap rail.
-
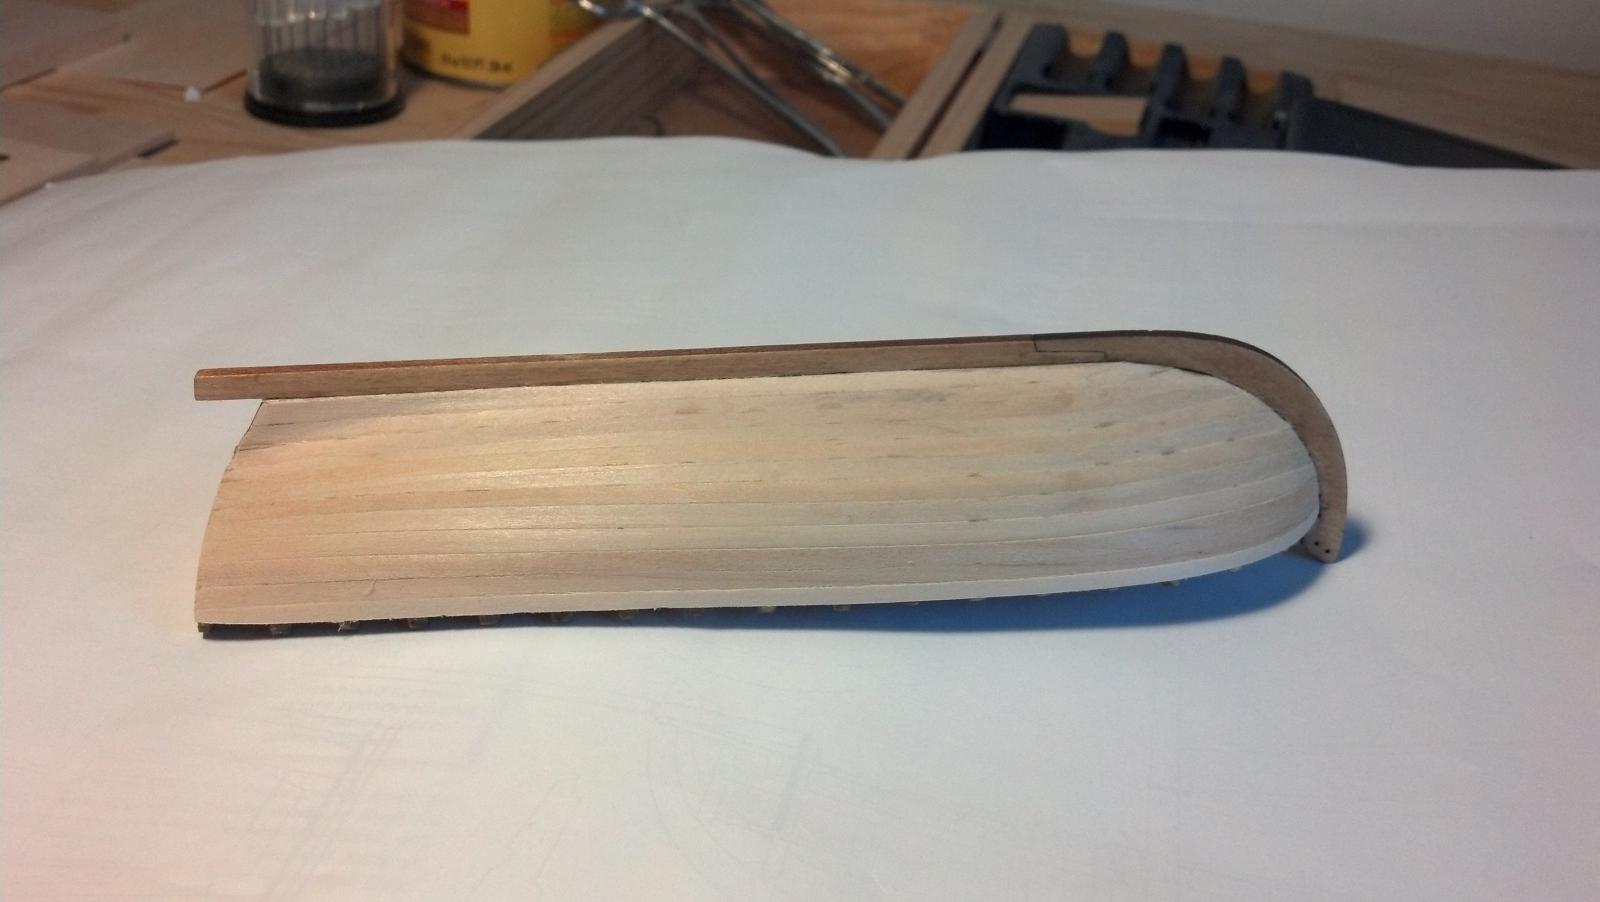
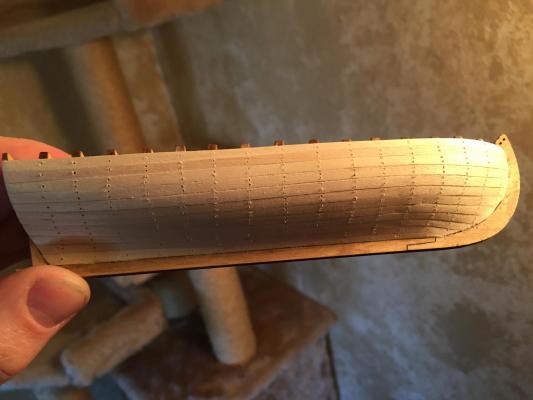
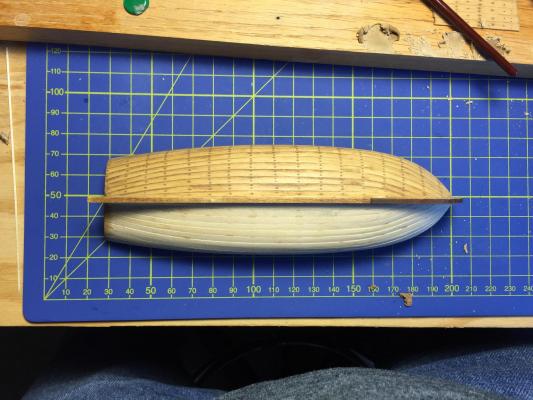
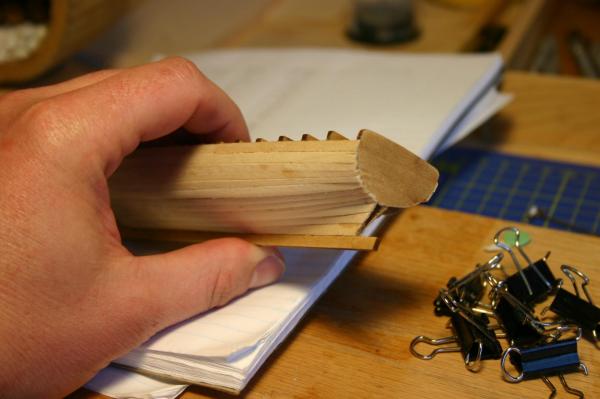
The planking redo is done! While not at the level of some of the other fantastic builds I've seen on this site or the original I'm happy with it.... disclaimer this is the first time I've ever planked a build so I have nothing to base it on Hopefully the sheer is a good form, I know I was a little too high on some of my bulkheads vs the plans but cutting the sheer plank down any more would have just looked wrong. Any and all honest feed back is appreciated, specifically if what I did is going to screw me up further down the line and make some other portion of the build impossible.

- 55 replies
-
- 3
-
-
- 18th century longboat
- model shipways
- (and 1 more)
-
Andy she's really looking good. When I did the Vic cross section I worked from the top down when putting up the yards. The main yard had the most work that needed to happen (slings, bollards etc) so I used the other yards to get my sea legs and get comfortable with the process. Plus that ensured that I would complete a yard and rattle the rigging down and not have other items in the way of my rigging run.
-
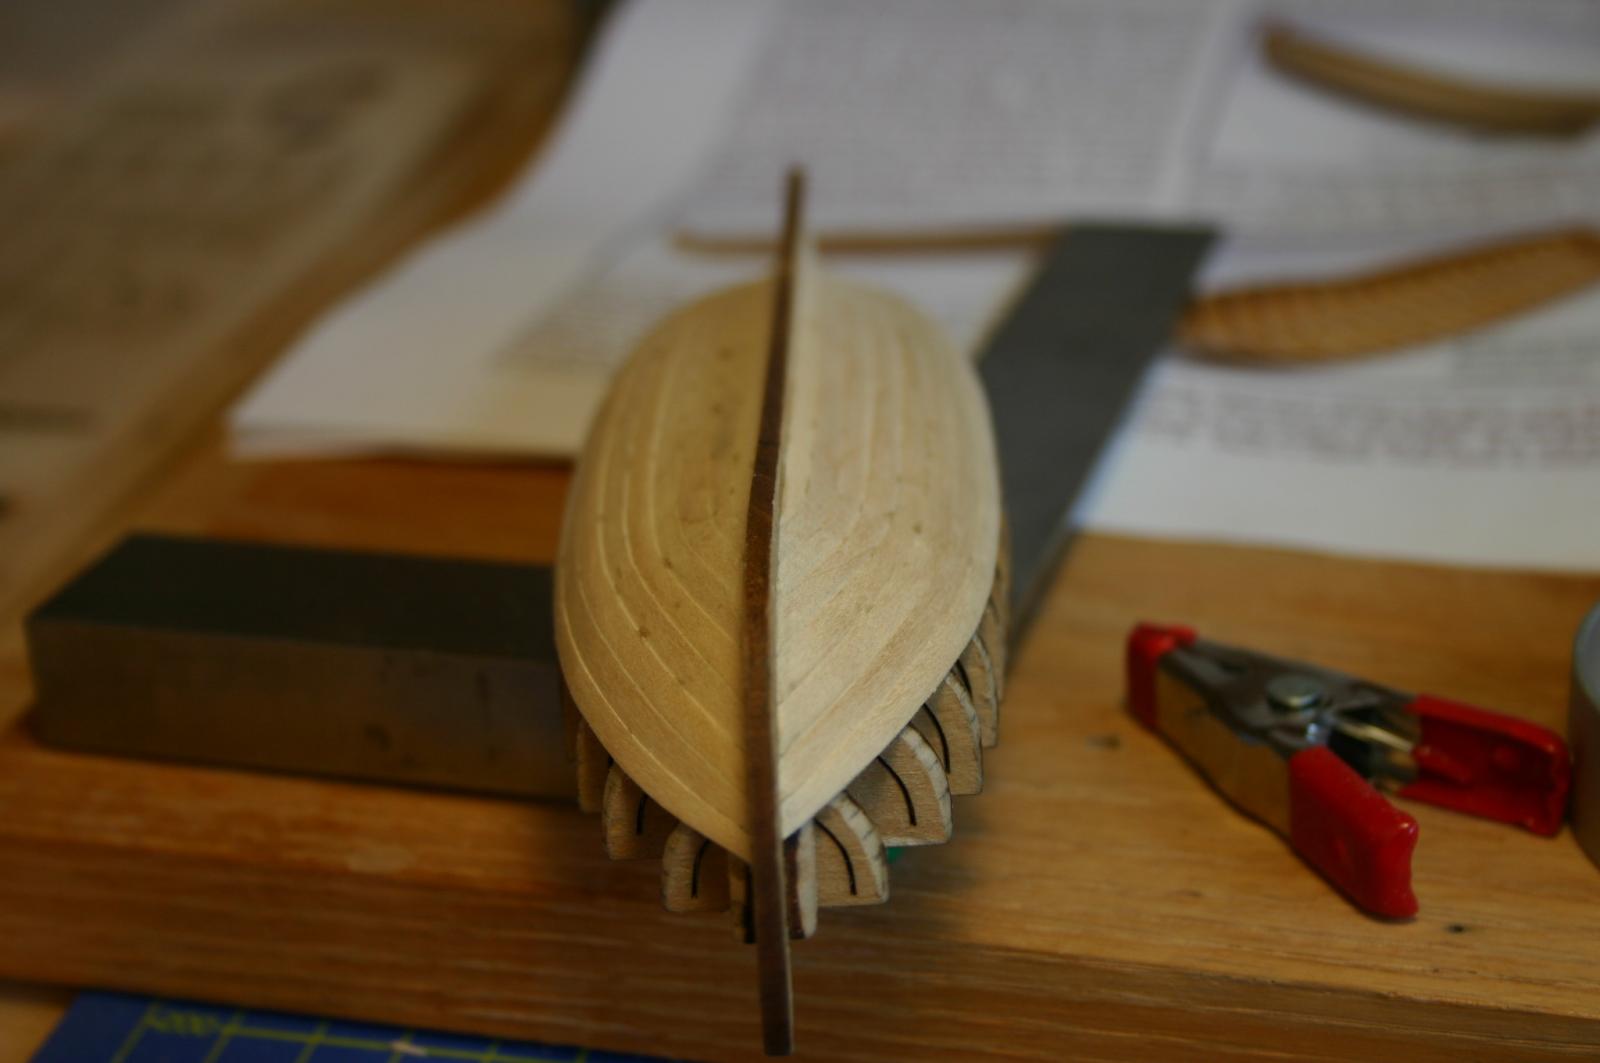
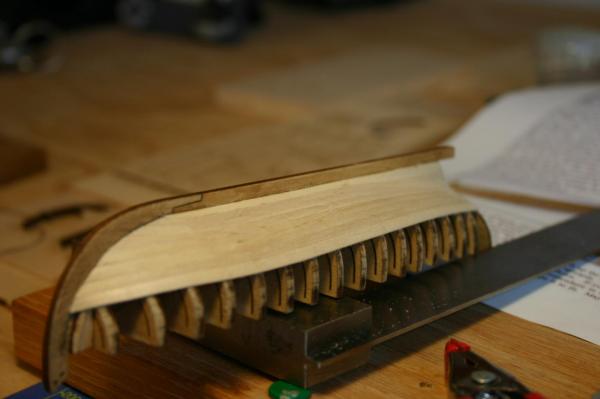
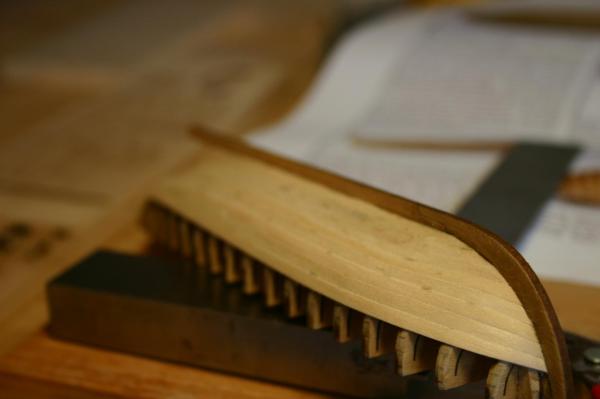
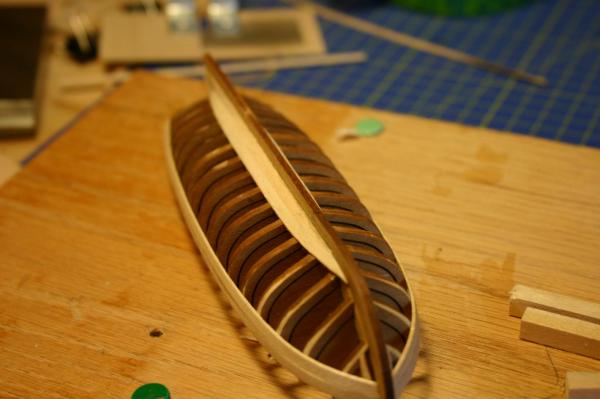
Following the advice from Pops about using the tick strip method (many many thanks to both Pops and Mike Y for the kinds words and advice about starting over again) I peeled everything off. I spent some additional time truing up my bulkheadss better (easier to see where I was off before) and spent some quality time making up strips and transferring the information to the bulkheads. I decided against putting on the sheer strake to start with and began planking both sides from the garboard strake on up. I have 4 more planks per side but it's coming along quite well. Hopefully I have left enough room on the bow and it won't end up biting me that I skipped putting on the sheer strake. Thats all from the shipyard this week, hopefully Ill get some time this week or next weekend to finish up the planking and begin the process of removing the bulkheads.


- 55 replies
-
- 4
-
-
- 18th century longboat
- model shipways
- (and 1 more)
-
Thanks Pops, I have looked at your log quite a bit and it's fantastic, one of the reasons I decided to redo it was seeing what you had done with your build and remembering it's not just about just finishing the model but doing it right and having built something that you are proud of. I have been looking at BobF's build log, yours and Mike Y's and will begin with the tick strip method and spending the time to lay it out before I put wood together. (after I deconstruct what I have ) Mike thanks for the feedback, I think both of your boats look amazing. I had not considered boxwood but I will keep it in mind for the future. Depending on how this order of basswood strips I got goes I may have to order even more replacement wood and I'll take a look at the Hobbymill boxwood.
-
I have been looking at the instructions and photos that were supplied with the kit and crawling through all the build logs and I am unhappy with my end result compared to all the other builds. I'm not sure if I put too many planks on (12) or if it was all a matter of not tapering the first couple that I put on but the end result of my planking just doesn't look right. I think I may strip off everything I have and try it again. The other builds have more consistent size across the planks where each plank is very very close to the same size at the bow of the ship, in addition they come in "flatter" where as mine seem to arc upwards. If I redo it (leaning heavily towards yes on this) I will need new wood as I don't have enough left, what recommendations do folks have on getting new strips? Is there a vendor that has a wood replacement or upgrade kit specifically for the longboat or would I just go to hobbymill and get a stack of new strips? I have ordered additional wood from model expo and will strip off what I have and clean up the glue while I wait for the new materials to arrive. I will also continue to pour over the instructions and the other build logs to see where I went astray.
- 55 replies
-
- 1
-
-
- 18th century longboat
- model shipways
- (and 1 more)
-
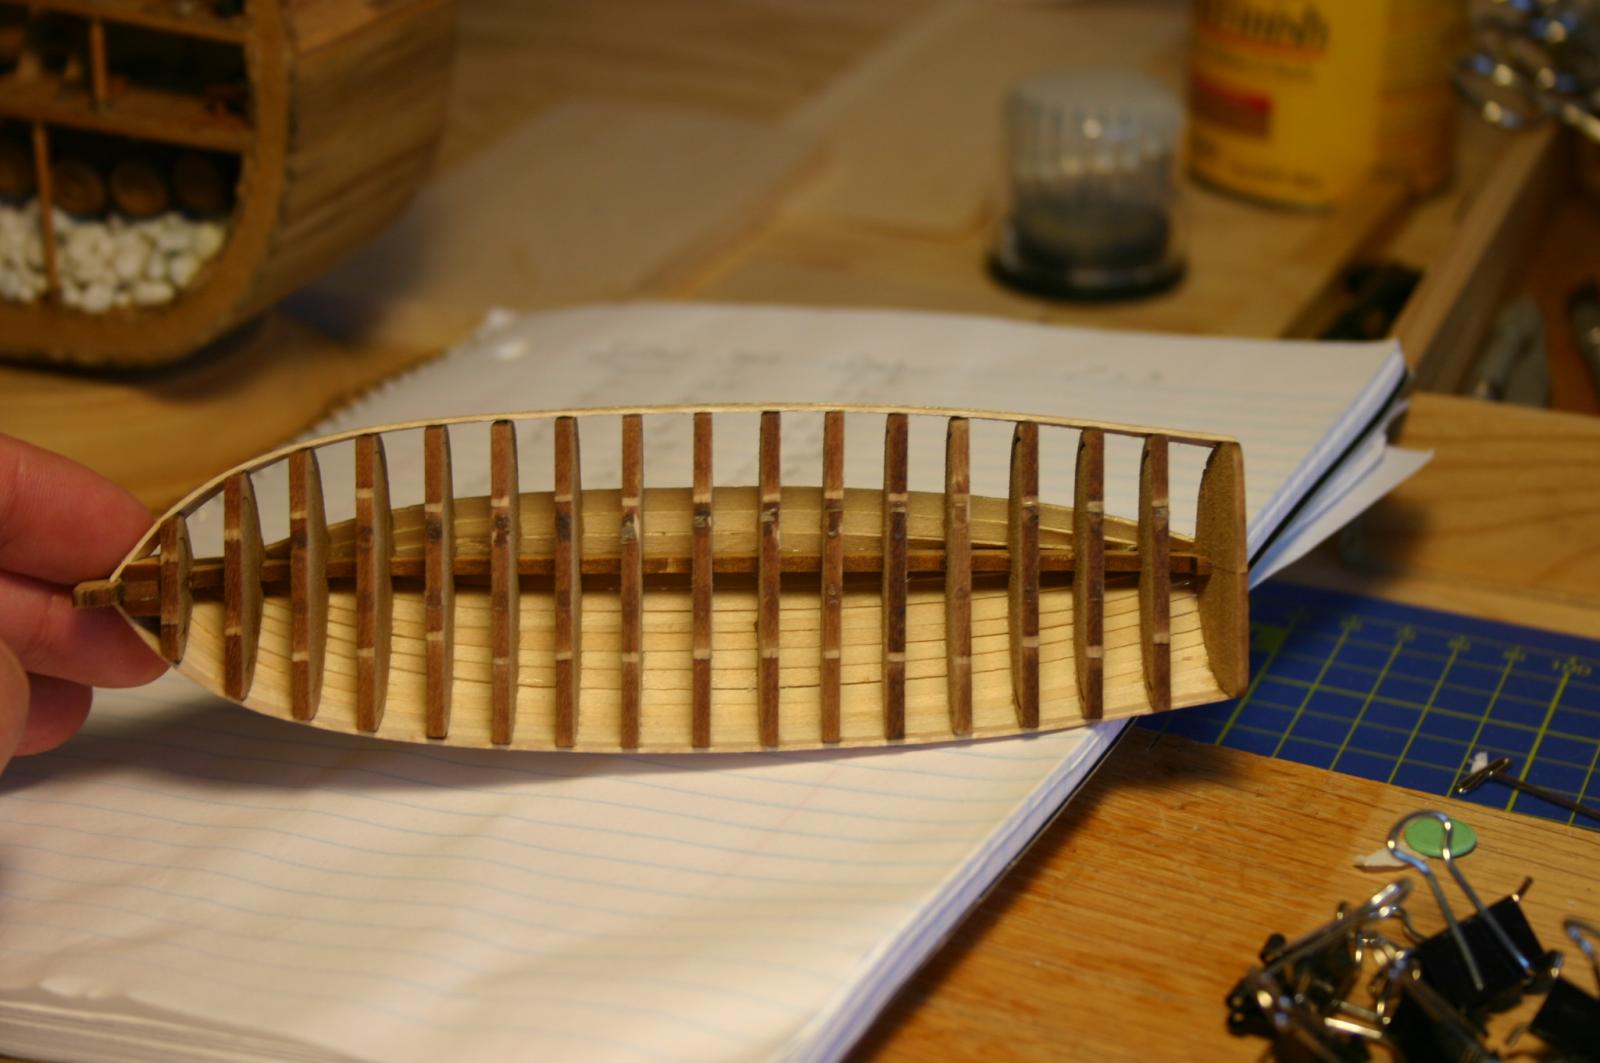
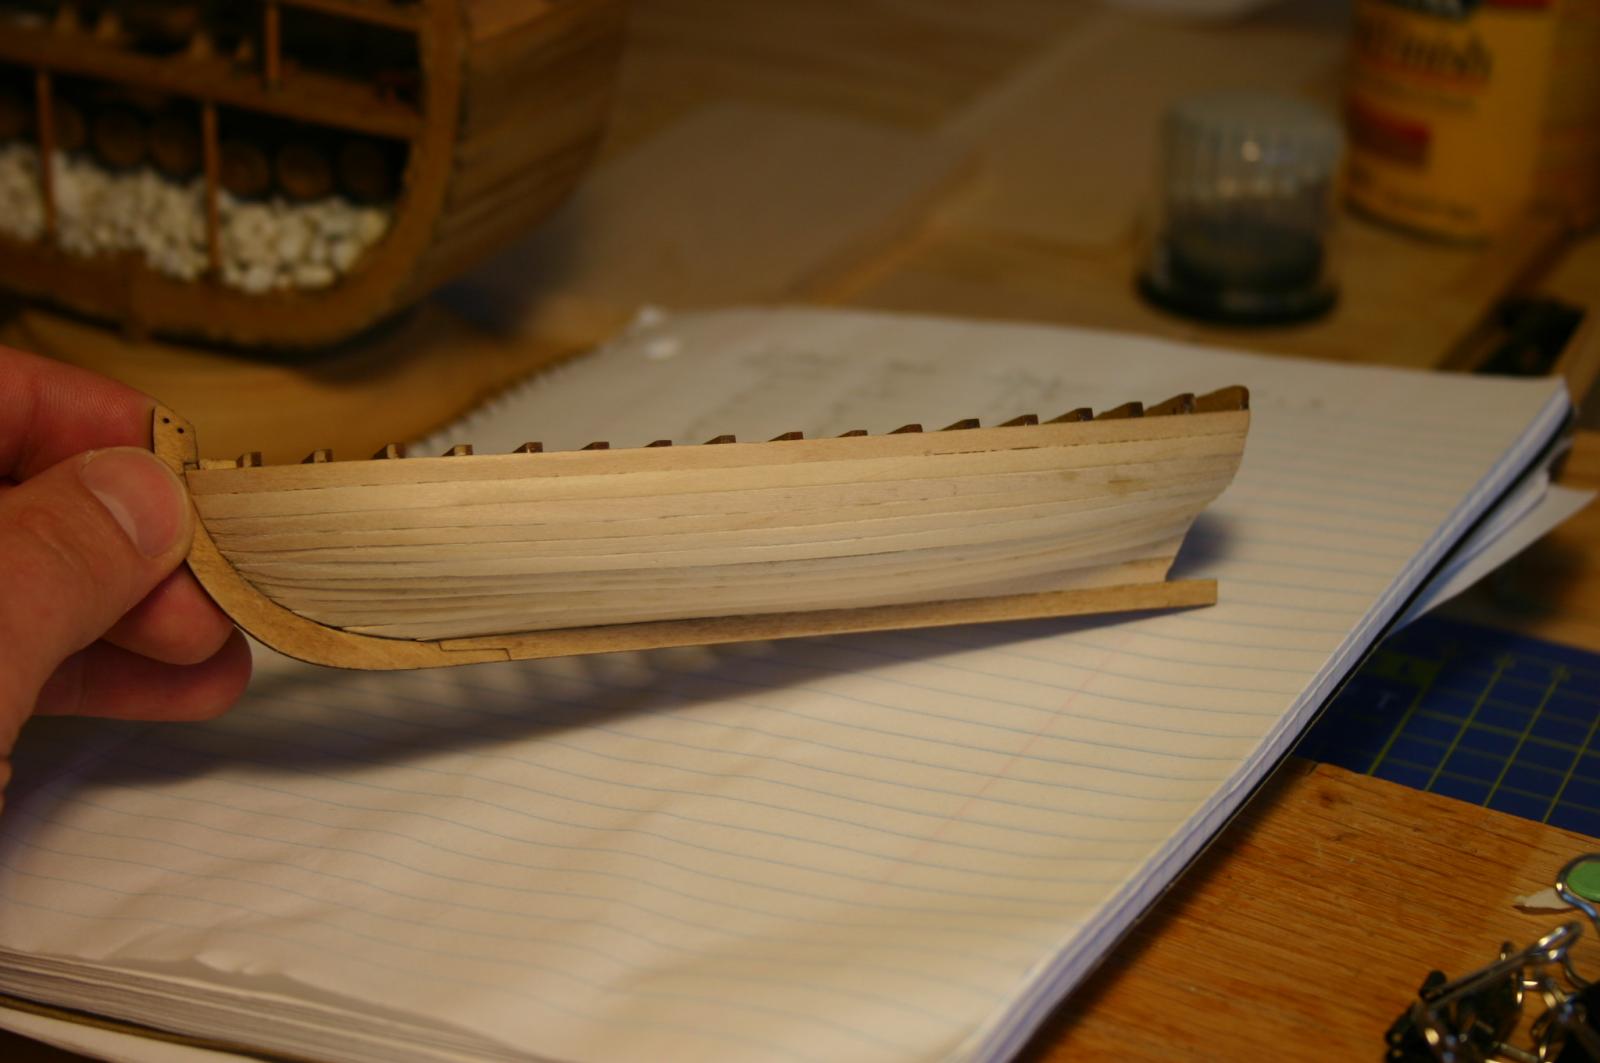
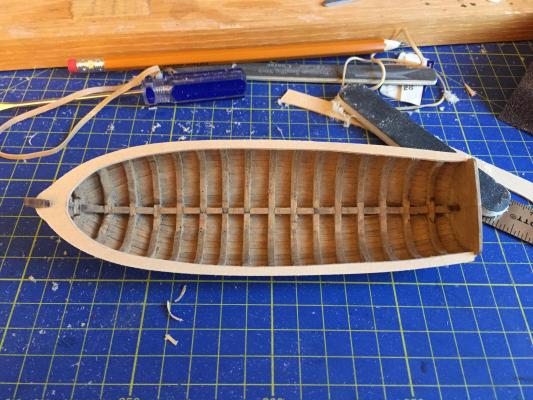
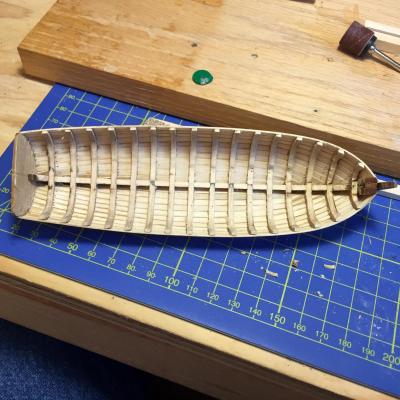
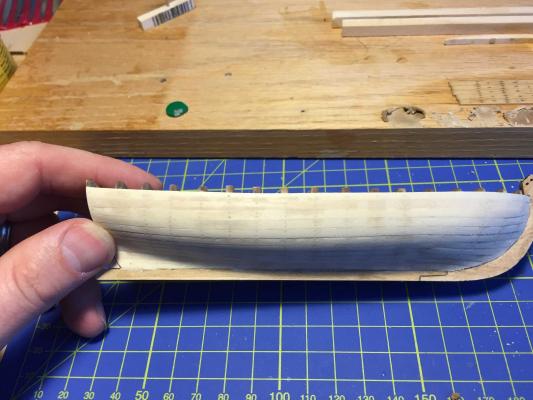
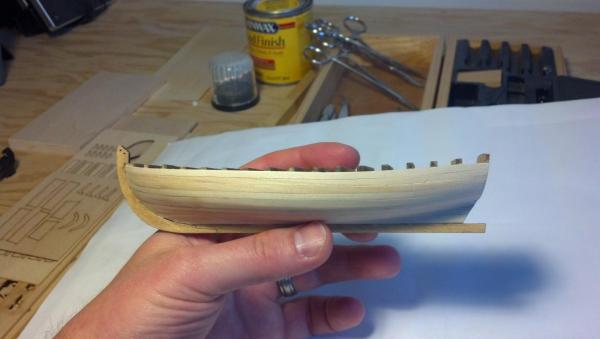
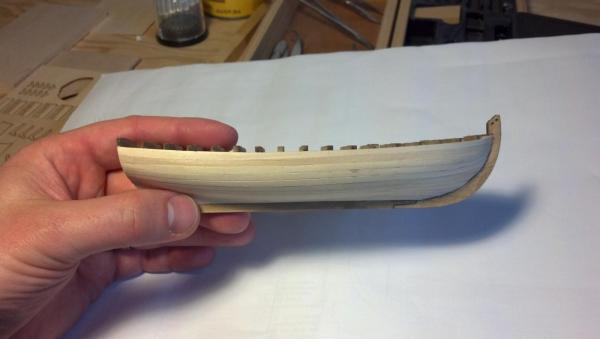
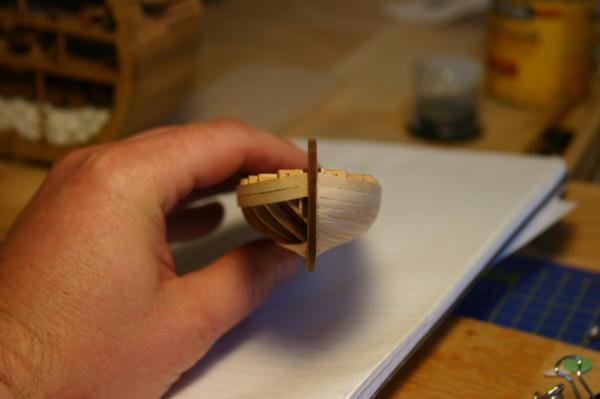
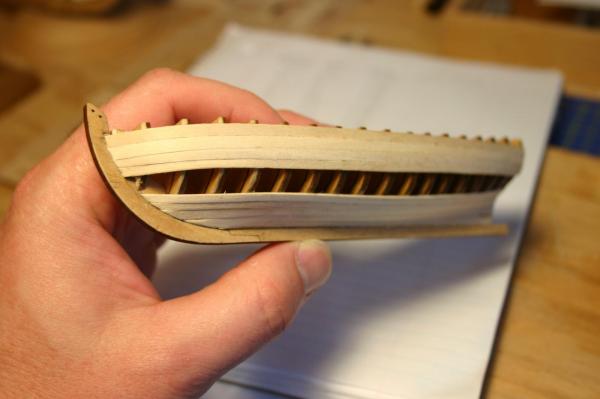
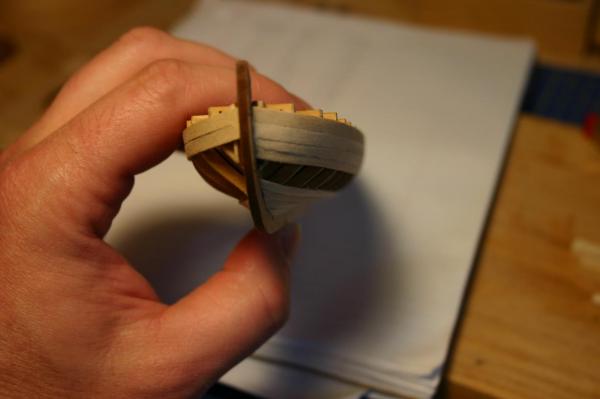
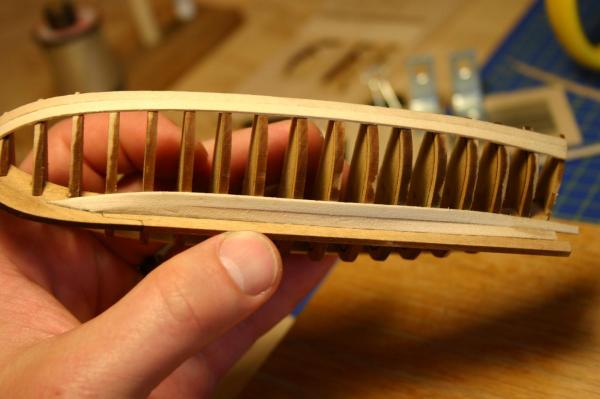
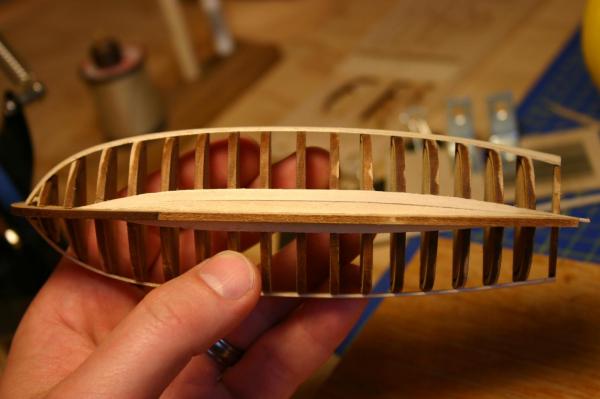
Thanks Skerry Today I finished up planking on one side of the boat and came to some conclusions. 1. The four planks that I placed (2 above the garboard and the 2 at the sheer) should have been trimmed down from a full 3mm width to something slightly under that. This would have allowed the other planks to have less taper. 2. My tapering ability is non existent 3. Once you get down to just a plank or two left you don't have any place left to clamp so use something that dries faster than standard wood glue, or be prepared to just sit for a long time holding planks in place 4. The last plank was by far the most fiddly. Here are the pics of the finished side. After looking at everyone else's log and seeing the job that Chuck Passaro did I decided that a real boat should be ugly and uneven in appearance and should have gaps where it can leak and keep the sailors busy bailing it out. I'm hoping some of my lessons learned will help me on the other side and I can do a cleaner job, I can always make this the wall side or as someone else on the forum said get a 5x5x5 foot case to put this little guy into so you can only view it from a distance.

- 55 replies
-
- 3
-
-
- 18th century longboat
- model shipways
- (and 1 more)
-
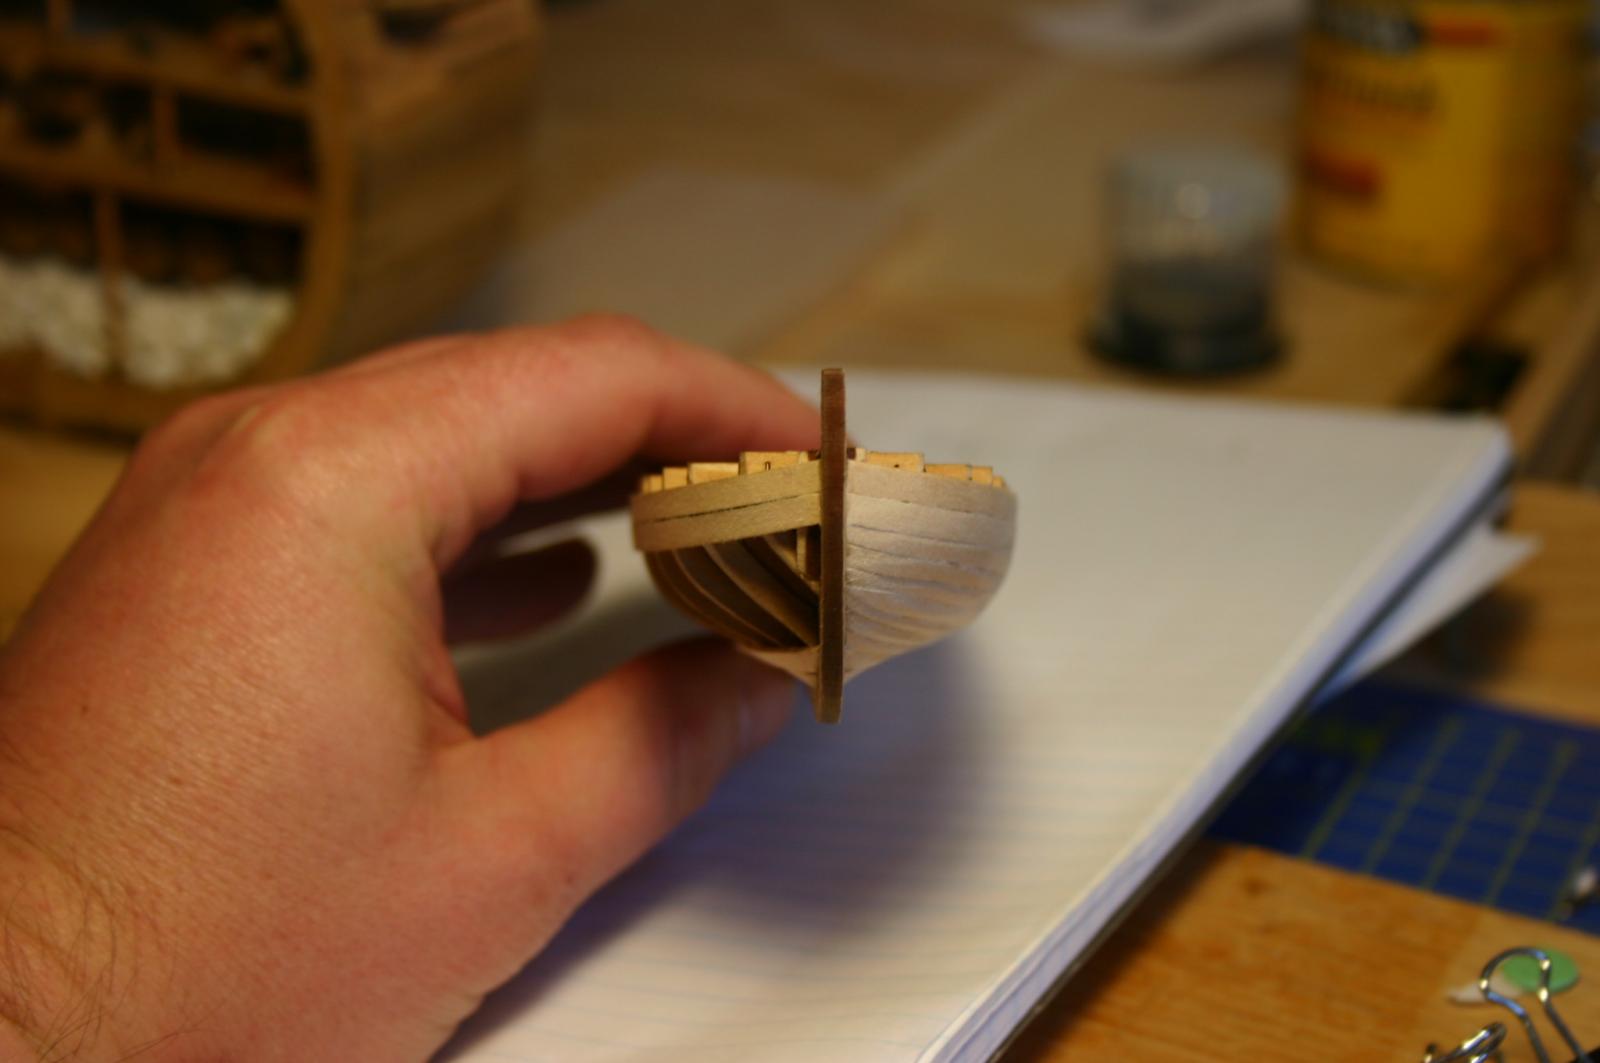
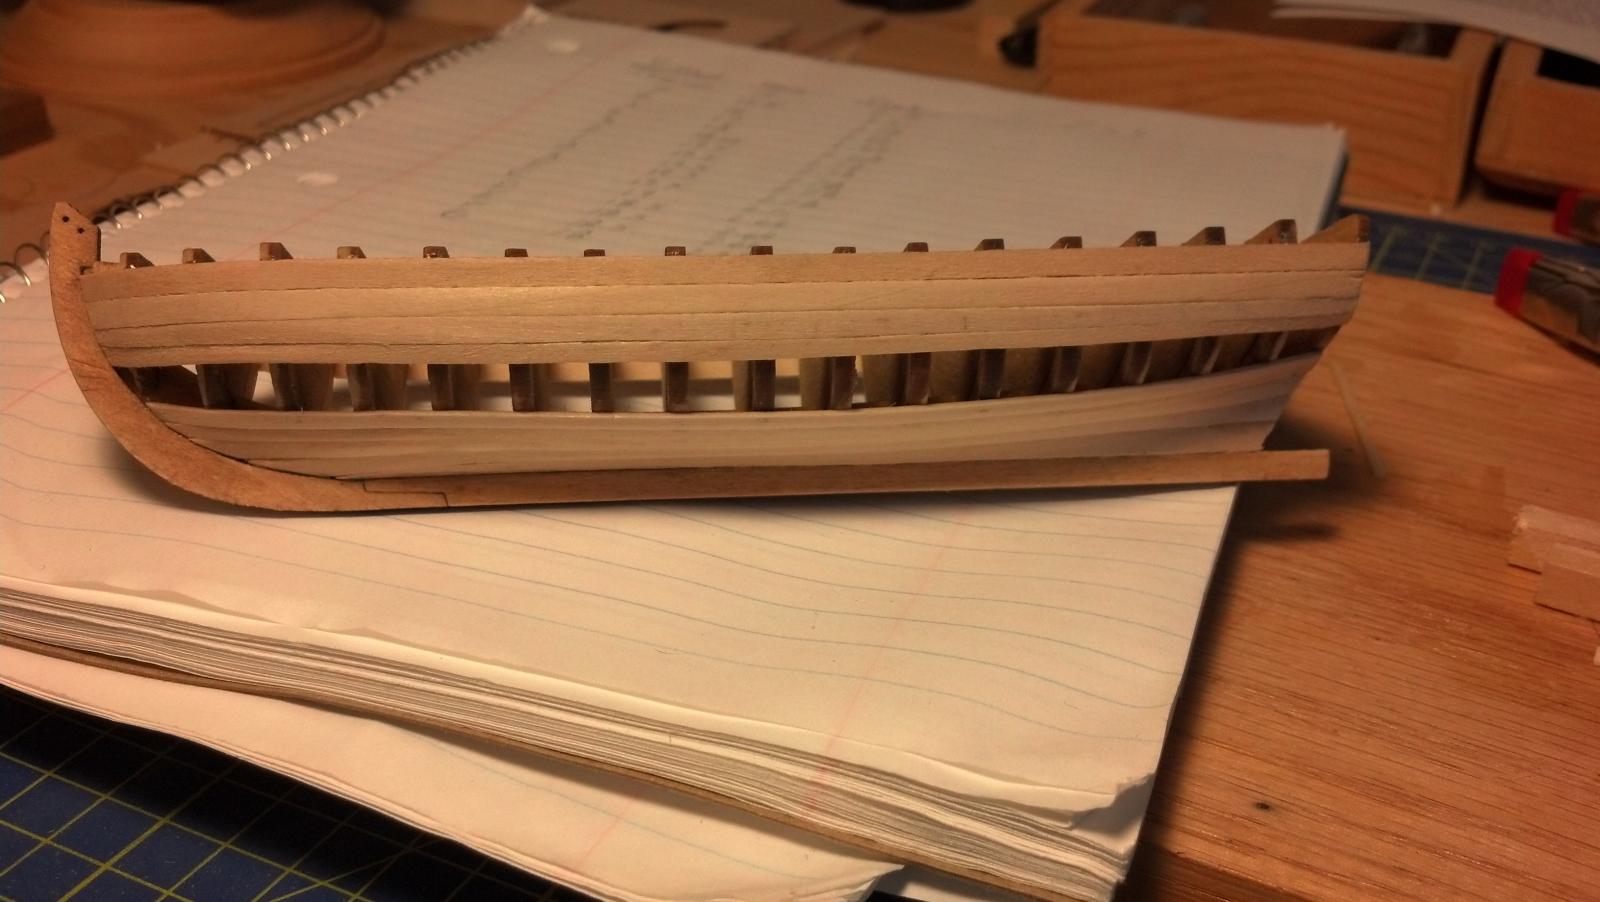
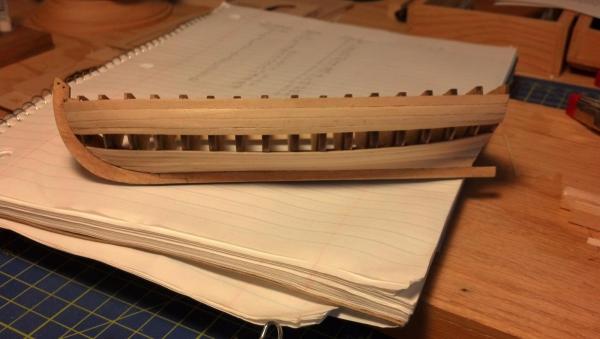
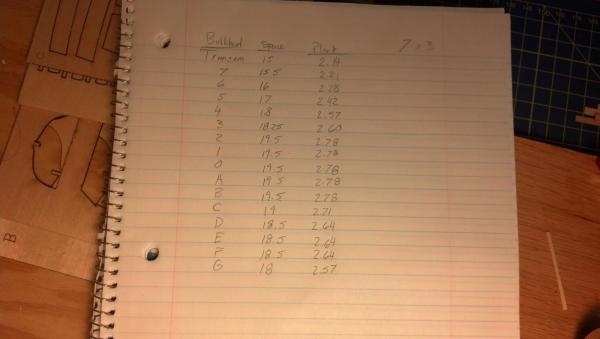
Progress has been made! I can almost guarantee that someone who has done this before will look at it and tell me the progress is flawed but progress none the less! The pictures make it look fairly poorly but in person it's not as horrible. I do see a lot of places where my connections aren't quite precise and where a plank is too high or has a gap but at this point I'm running with it. The method I'm using to figure plank width was to measure the open space left on the bulkhead and divide by the number of planks I had left (I had 7 more to place) I used this instead of the tick strip method.

- 55 replies
-
- 4
-
-
- 18th century longboat
- model shipways
- (and 1 more)
-
Hey Alex, think Ill pull up a chair to watch this one, you have a good start going and you have a great mentor in Antony he won't steer you wrong.
- 33 replies
-
- 1
-
-
- Black Queen
- Mamoli
- (and 2 more)
-
Ollie I have to second what the other gents have said, your first build is gorgeous, clean and well crafted. If you fee like you can't make the headway on your current build because of other commitments or it just doesn't call to you don't throw it out or sell it just shelve it and move to something that takes less commitment I have a whaleboat and the Cutty Sark shelved right now because they were beyond the scope of time I could commit and my ability, however at some point I will go back to them. Find a build that calls to you and fits in the scope of time that you have. At some point Endeavour will call to you again.
-
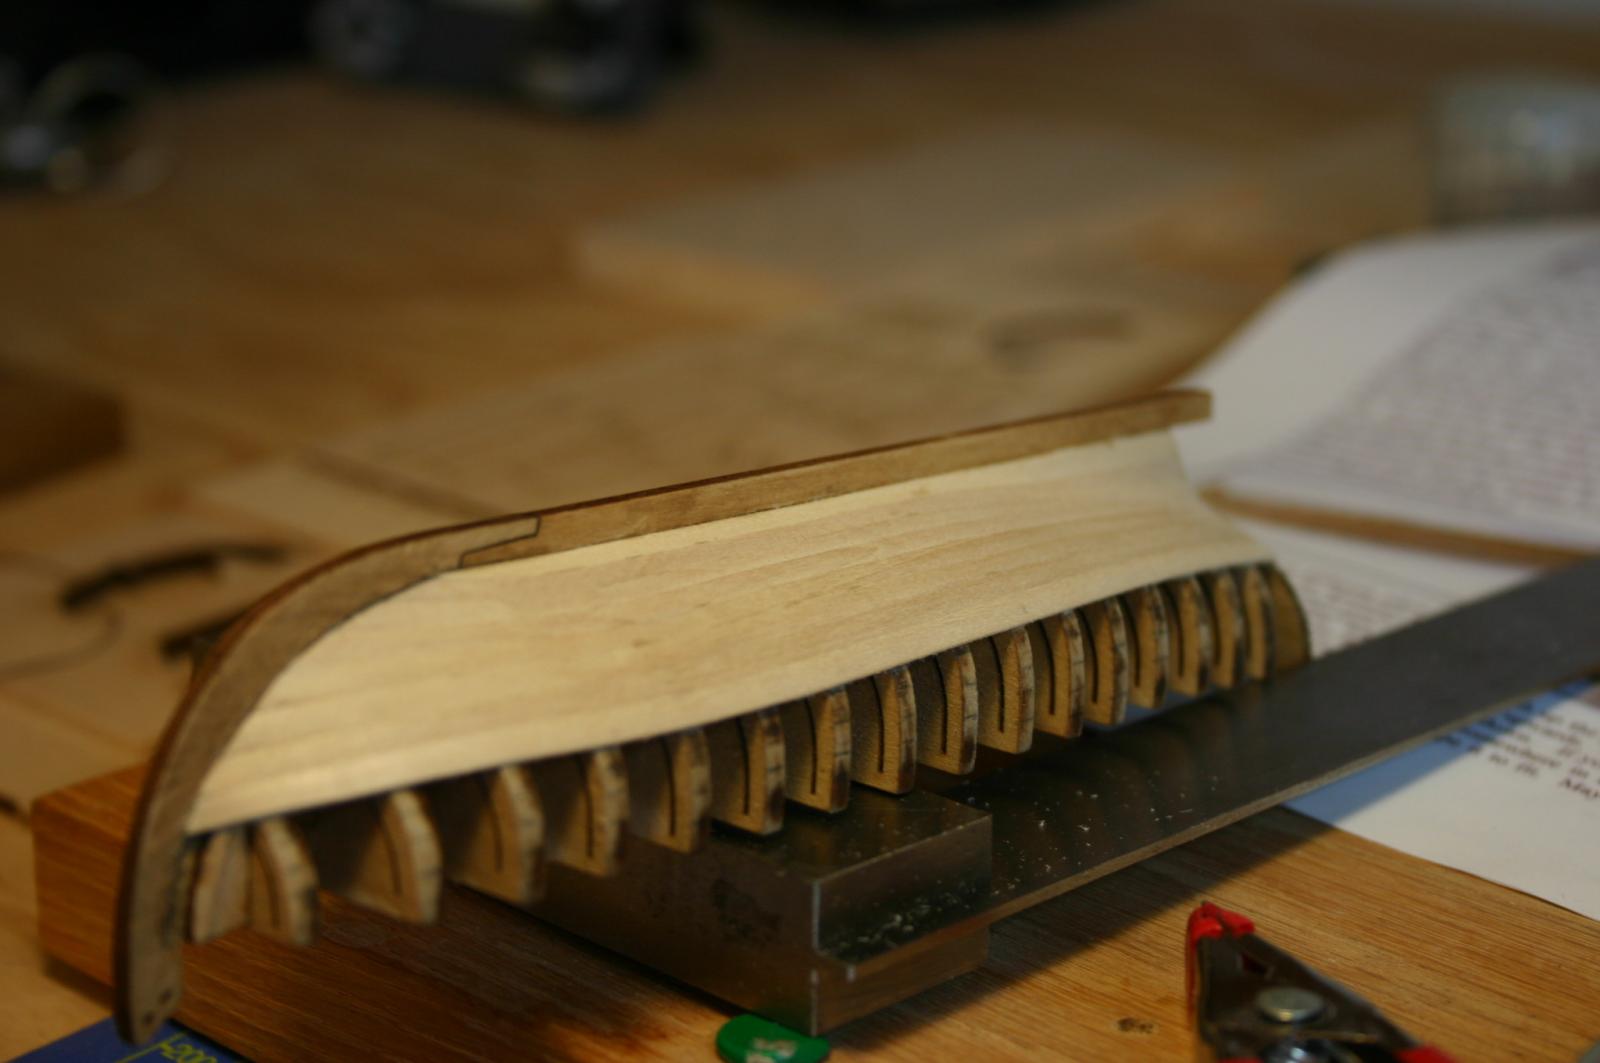
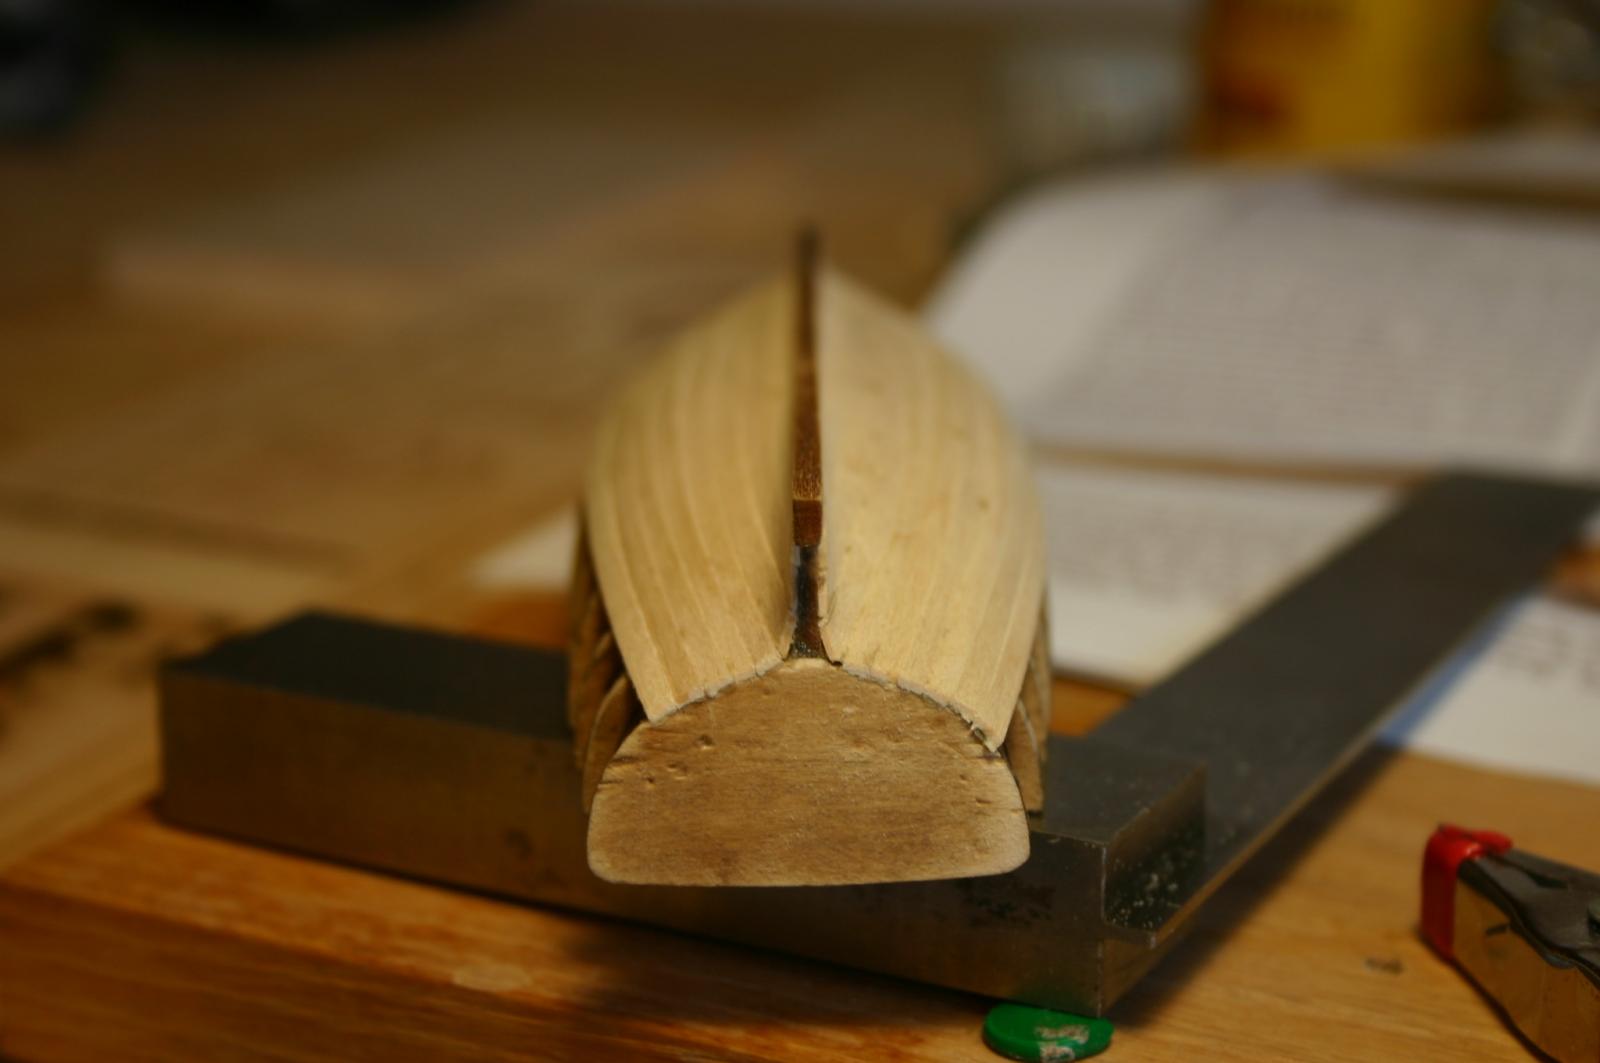
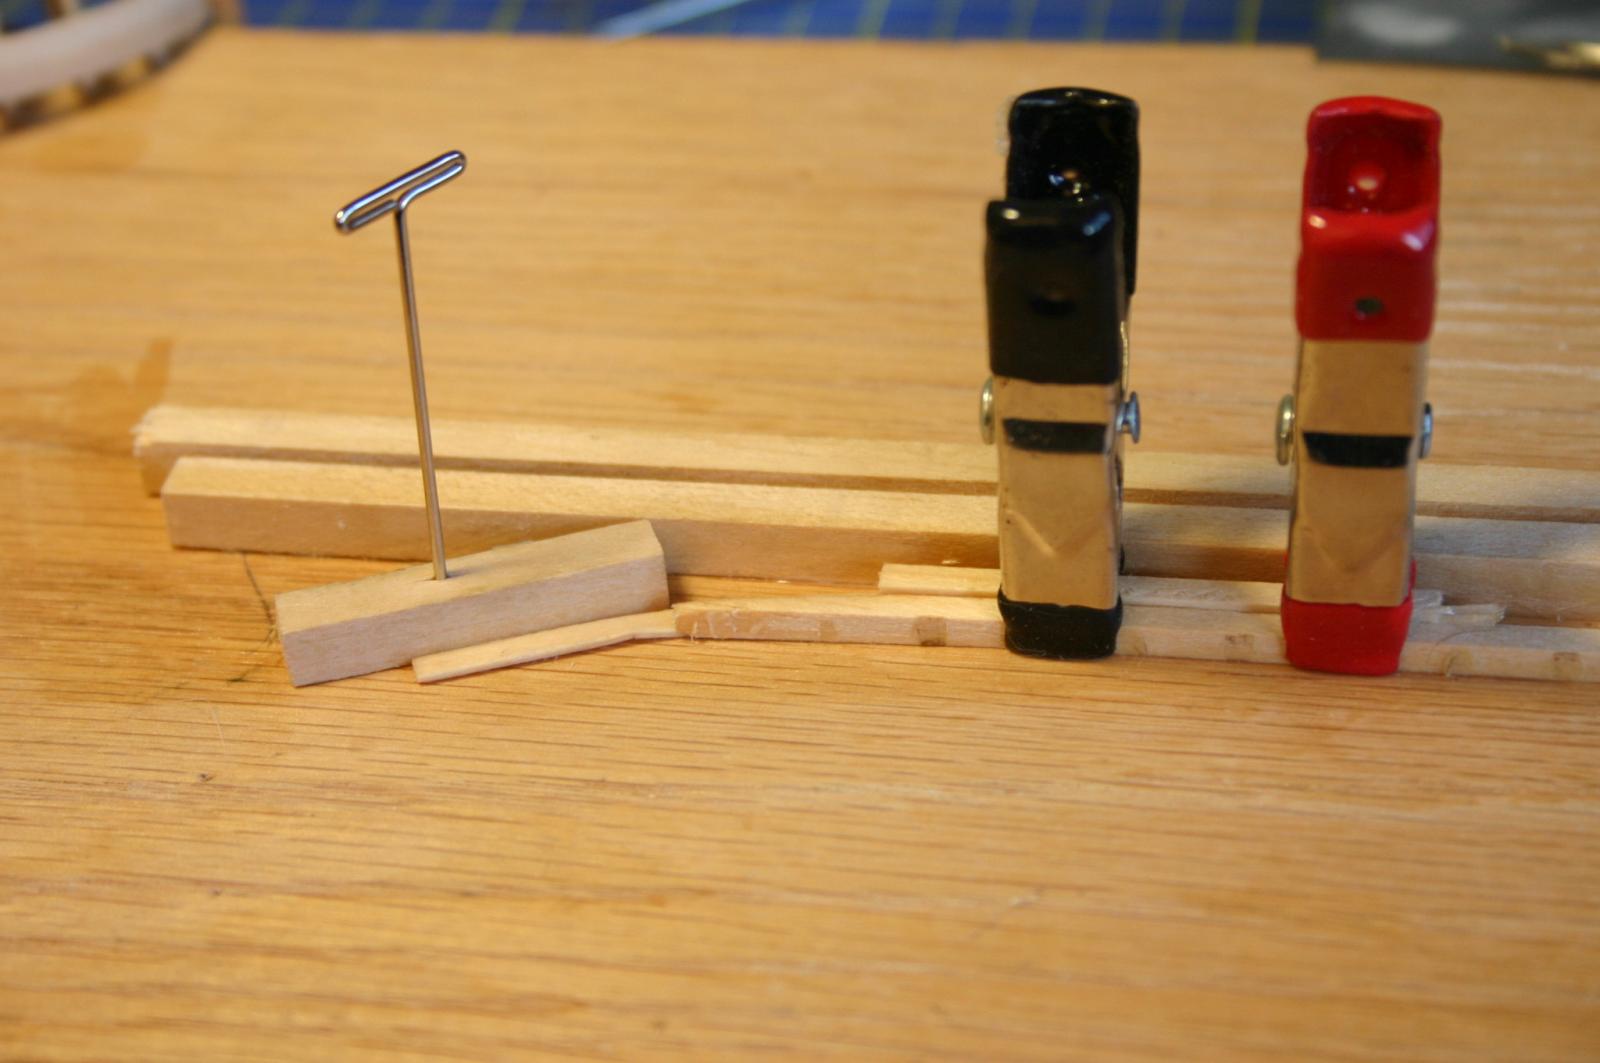
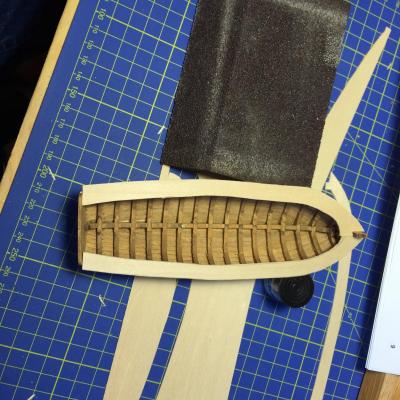
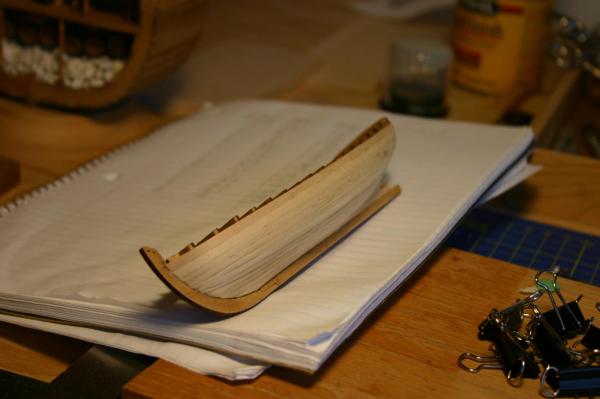
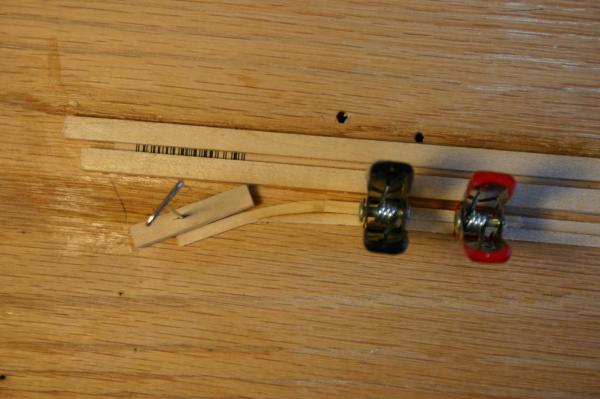
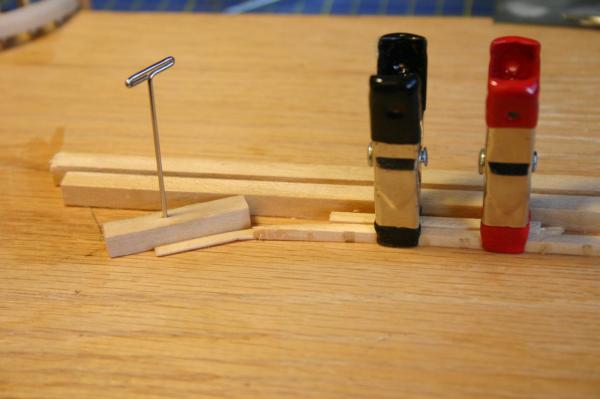
I have decided that edge bending is something that I do not enjoy I finally came up with a jig that seems to work by tracing the garboard strake curve onto a slightly thicker piece of wood, I then carved the curve out and glued it to my working board. I'm then able to wet a plank, clamp it down (using another piece of scrap to protect it) and slowly curve it using a pushpin and some more scrap to hold it in place. I use a heat gun to dry it then rewet it, bend it a little more heat gun it again, finally wetting it, bending it to the final position and letting it air dry naturally, I do get a little spring back but with some careful sanding of the inner curve and then attaching it first to the keel and clamping it tightly I am able to bend the rest of the plank into the proper posistion and fix it to the bulkheads with glue. So after today I have both garboard strakes in place and the first plank above it on one side with the next plank drying in the edge bending jig. The plank edge above the garboard strake is slightly higher then the garboard stake edge but I think I can fix that when it comes time to sand down the hull. That step is only about 9 months out and thankfully gaps can be filled on this lower section and it will be covered over with paint.
- 55 replies
-
- 4
-
-
- 18th century longboat
- model shipways
- (and 1 more)
-
Working on the boat today I came to the realization that I think the bulwarks are off by a smidgeon, but I'm to deep into it to back out now I redid the sheer strakes to leave more room at the stem and I fit the garboard strakes. After the garboard strakes I tried to fit the next plank only to realize the edge bend was too severe and I needed to pull the garboard strakes off and redo them with less of a profile so I did that and spent the next couple of hours trying to edge bend a single plank to fit over the new profile of the garboard strake without having it snap or flex up. All told I worked in the shipyard for 6 hours and managed to form but not attach two planks All in all another good day in the shipyard. Will provide pics of the planks later once I've attached them.
- 55 replies
-
- 2
-
-
- 18th century longboat
- model shipways
- (and 1 more)
-
I'm pulling up a chair to watch this build. I have no doubt looking at your other work that this is going to be fantastic. Are you putting the San Juan Bautista on hold while you build this or doing both at once?