Geoff Matson
-
Posts
720 -
Joined
-
Last visited
Content Type
Profiles
Forums
Gallery
Events
Everything posted by Geoff Matson
-
 Jay I am not sure about the dying either. I think if I can find the right color of line I will try to go natural. However If I were to dye the line I will have to experiment with it to see which way works best. I am leaning toward making the line and then dying it. Thanks for your interest.
 -
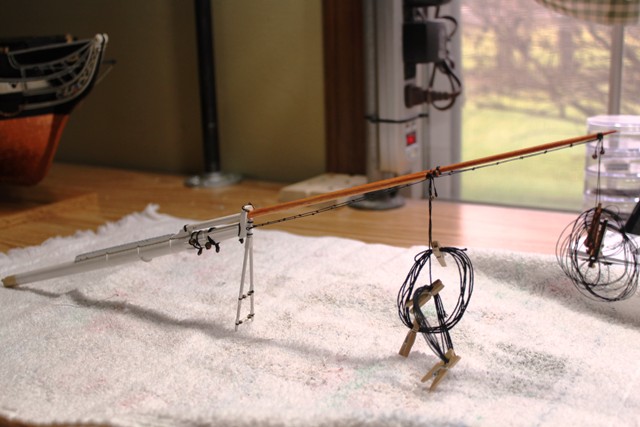
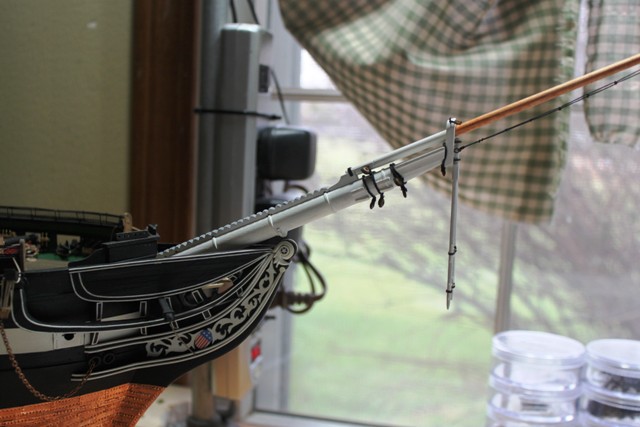
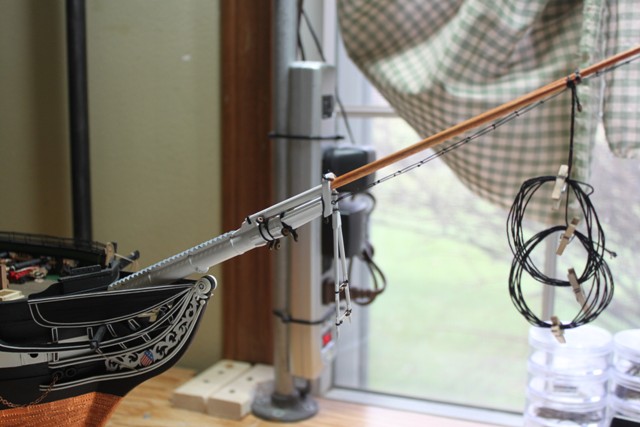
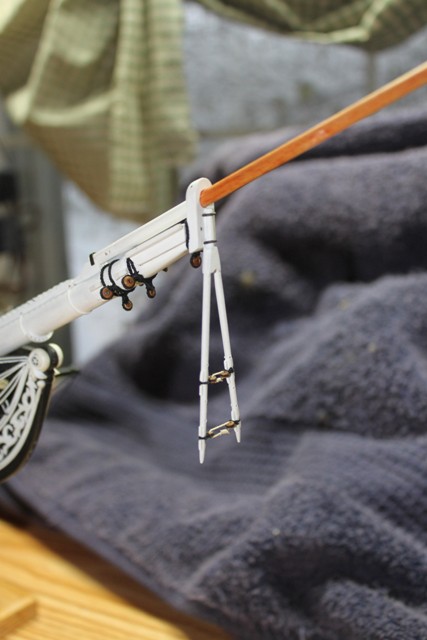
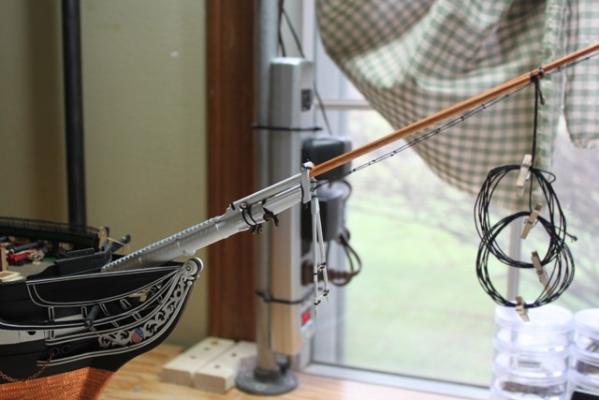
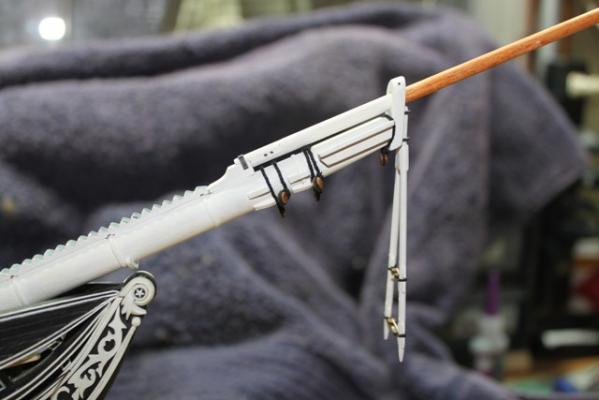
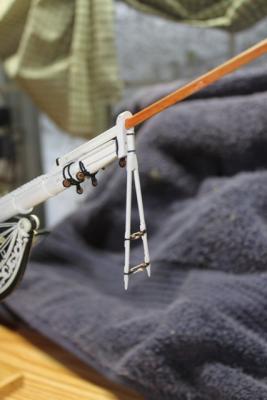
I have finished my off the model rigging of the Bowsprit. I was happy with rope made on the Byrnes ropewalk. Here are few pictures. The bowsprit was just dry fitting into the hull. Now onto the shrouds.


-
Jay So far I am on the Standing Rigging and am happy with the natural result of the black mercerized cotton line. So no dying yet. Will have to access things when I get to the running rigging.
-
Thanks for you post Jay. It will help me when I get to that part on my Conny.
-
The main hatch turned out great. Nice job on adding details that could have been left out. I just did not feel good about making it that way, but that was a few years back, now maybe I would give it try. You are going to have a beautiful Conny when you are done.
-
Harvey I know what you mean with the cats. That is why I built the enclosed area for the Conny. You will find the figure eight knot works great for the attachments. I am working on the lift blocks and the foot ropes next. It will be fun to watch each others progress. Just remember it is not a race
-
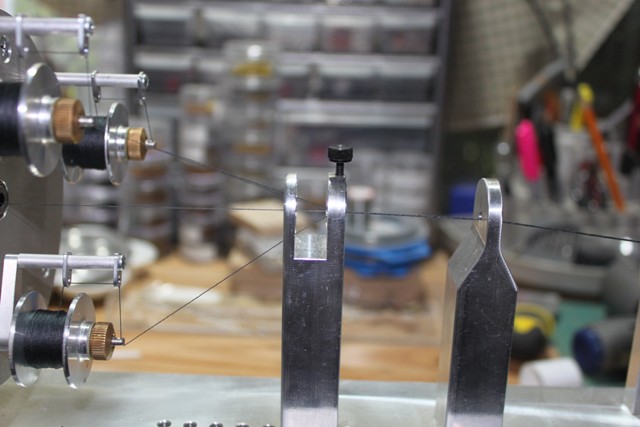
So...... I think I have my rigging all figured out. I will be making all my line for the Constitution with the Byrnes ropewalk I will be using mercerized cotton line from Coats and Clark, 30wt and 35 wt, Gutermann 50wt, DMC #5,#8,#10,#12,Lizbeth 20wt,80wt, and Aunt Lydias #10 and #3. All can be purchased at Hobby Lobby or Joanne Fabrics. This gives me 11 sizes of 1 strand, 11 sizes of three strand and 11 sizes of 9 strand. This gives me a range in size of .006" up to .062" or about 30 plus sizes of line. This will give me all the sizes I need to rig the Constitution. All the line will be seized with Gutermann 50wt. Here are few of the first pictures of my rigging showing the Bobstay Bulleyes, Bowsprit Shroud Collars, and the Dolphin Striker bullseyes. Most of the lines were attached using a figure eight knot.

-
Yes John, doing a real ship appeals to me. That why I picked the Constitution. Last summer my son made a trip out East and visited the Conny and took some pictures for me.
- 2,250 replies
-
- 1
-

-
- model shipways
- Charles W Morgan
- (and 1 more)
-
Furniture looks great. I use the Birchwood Casey, but I use the Blacked It and also soak it in white Vinegar and then use an old toothbrush to help clean it and have had great results.
-
Looking good John. This model is on my want list.
- 2,250 replies
-
- 1
-
-
- model shipways
- Charles W Morgan
- (and 1 more)
-
Jim Byrnes Model Machines
Geoff Matson replied to Mahuna's topic in Modeling tools and Workshop Equipment
Happy birthday Jim and continued success -
When to serve and when to seize?
Geoff Matson replied to Geoff Matson's topic in Masting, rigging and sails
Thanks for the picture Jay. -
When to serve and when to seize?
Geoff Matson replied to Geoff Matson's topic in Masting, rigging and sails
Thanks popeye I was thinking to serve any line that might cause chafing. And you are on my bucket list to come visit the Constitution sometime -
I am beginning to rig my MS Constitution and was wondering if there are set rules for serving line and seizing line? Are there any books that would explain this? thanks for your help.
-
Looking great Dan, It is really funny how the closer you get to the model meeting, the more you get done Hope to see you on Sat.
-
Welcome Alexi. Glad to have with the group. There are several Conny builders here and any and all I am sure will be able to help you. Be sure to post a build log so we can follow your progress.
-
Way to go Robin! Can't wait to see the Syren go together.
-
Hey Happy birthday Bob.
-
Nice to see you have been busy. Boats are looking good and so is the Conny.
-
Jay Thanks for tour of your shop. Looks like a lot of thought went into all your tools. Now if you get ride of the car you could have a bigger shop
-
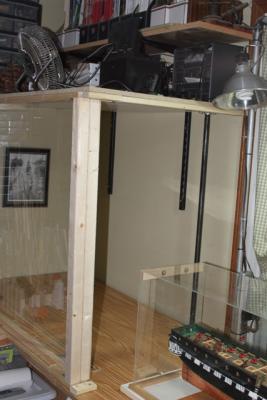
Wes I eventually want to go over to the dark side and give the scratch building a try. So I figure the more tools the easier it will be. As for the ropewalk it is an outstanding product as are all of Jim Byrnes tools. The main thing about the rope walk is that it gives you the option to make many sizes of line. Once you have the ropewalk the thread to make the rope is not very expensive at all. The other thing is that there is a lot of waste with rigging line. It always seems to take a foot of line to tie one small knot. The cost is not too bad if you figure you will be modeling for awhile. With all the kits I have I will need to live to about 108 to finish them all so I figure I will get my moneys worth . Scott The double case is only until I start the masting, then it will be just the big dock. That way it will wasy to slide the Conny out and work on her and then slide her back in when done for the day.
-
Boy you are really branching out. First an outstanding modeler and now you going on to film Look forward to seeing more.
-
Thanks for the tip Wes. I am familar with Andys log. I will check out your reference.He is doing a great job on his model.
-
Thanks guys for all your kind thoughts. For the rigging I have decided on using Coats and Clark cotton thread and some thread by Lizbeth all from Hobby Lobby. The thread will be used from single strands on up depending on the sizes needed. The thread is in five weights, 30wt, 35wt and 50wt for the Coats and Clark and 20wt and 80wt for the Lizbeth. Not too bad, with five spools of thread I will be able to come up with most of the sizes of rope show on the plans. I plan on seizing and serving where needed. For gluing the line I will be using dilutedwhite glue (Elmers) Once the rope is made, I harden it by hanging it with some weight on the ends. I haven't decided on wheather to treat the line with anything. I have beeswax, (both natural and black), and some museum wax (micro-crystalline) to treat the line with. On the black line (standing rigging) the wax leaves a light greyish color on the line. I guess I should expect this because it is a wax. There is no problem on the euchur (running rigging) because the line in lighter in color.
-
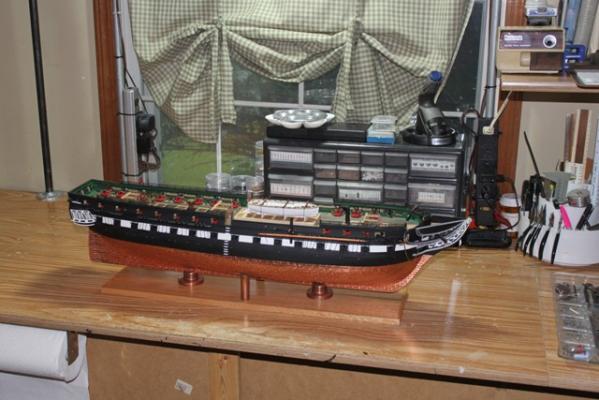
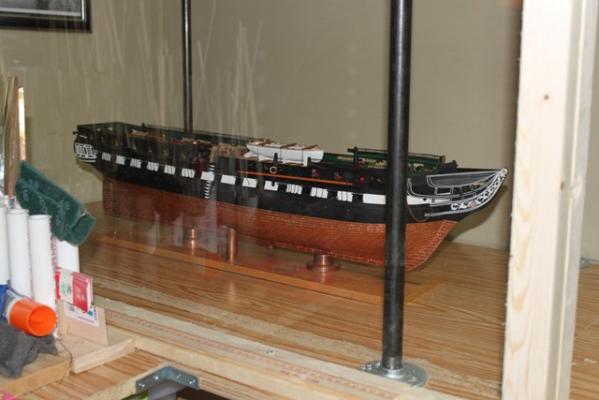
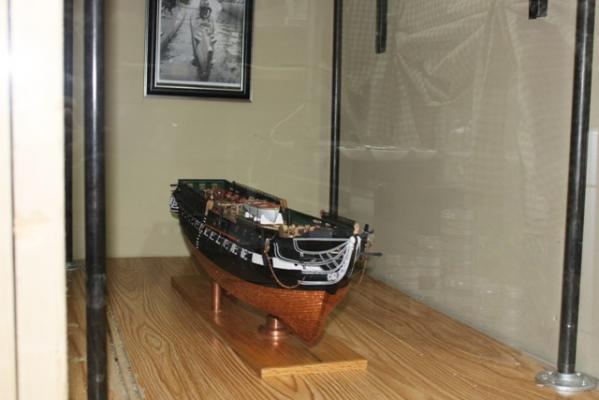
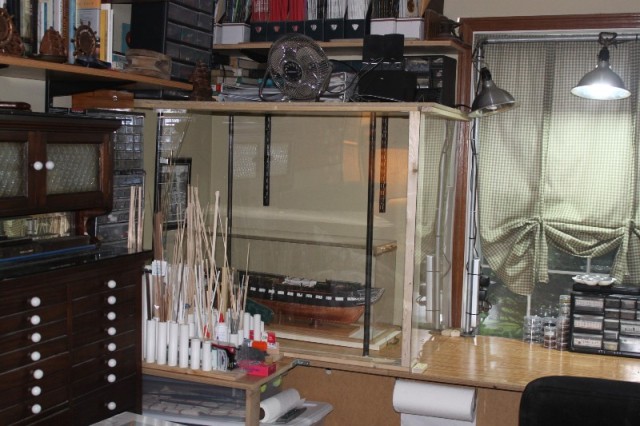
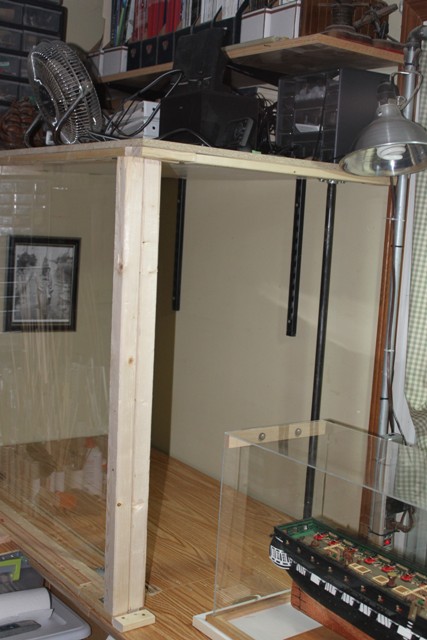
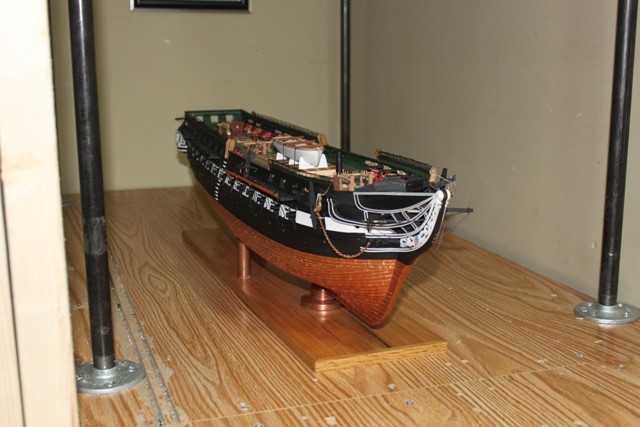
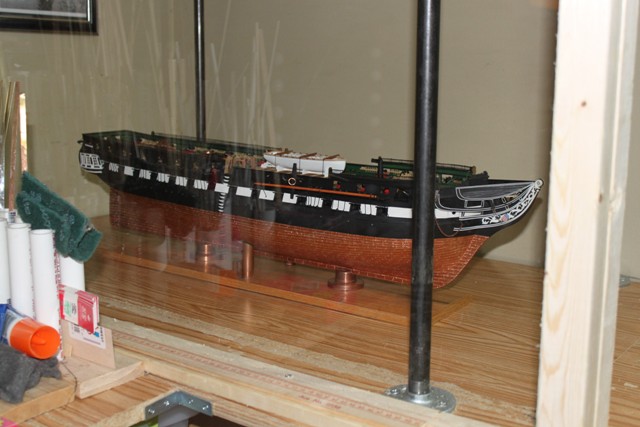
Here are some pictures of my work area boat dock for the Conny This new arrangement will make it easy to slide the Conny out, work on the rigging and then slide it back in its case.