Geoff Matson
-
Posts
720 -
Joined
-
Last visited
Content Type
Profiles
Forums
Gallery
Events
Everything posted by Geoff Matson
-
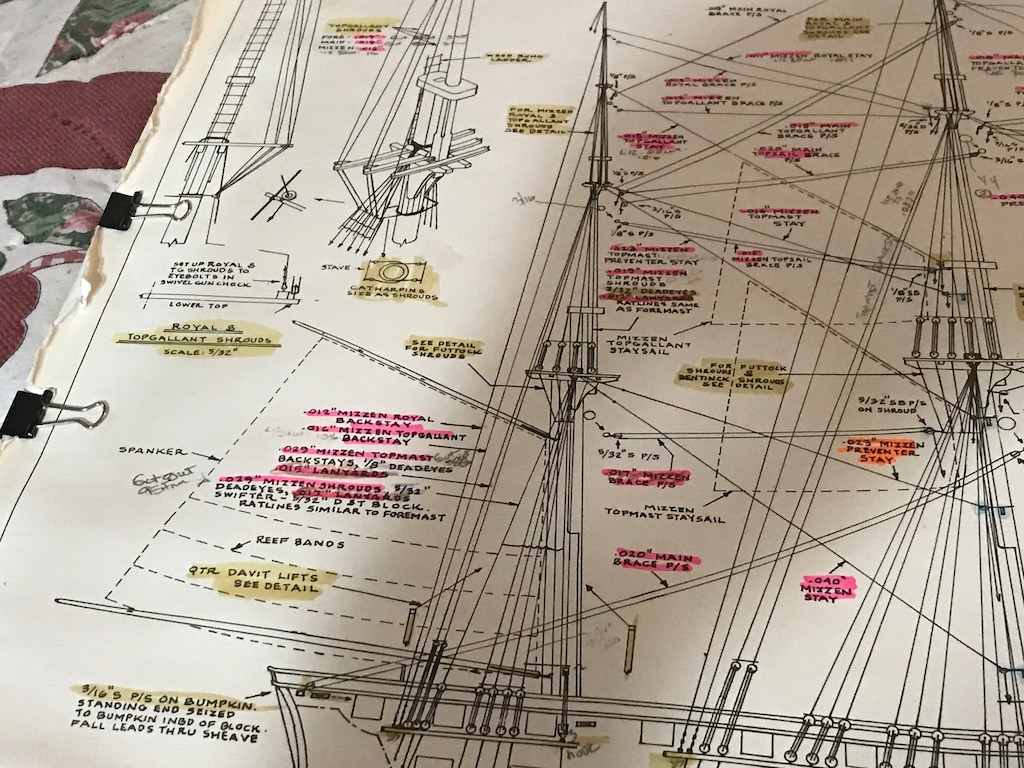
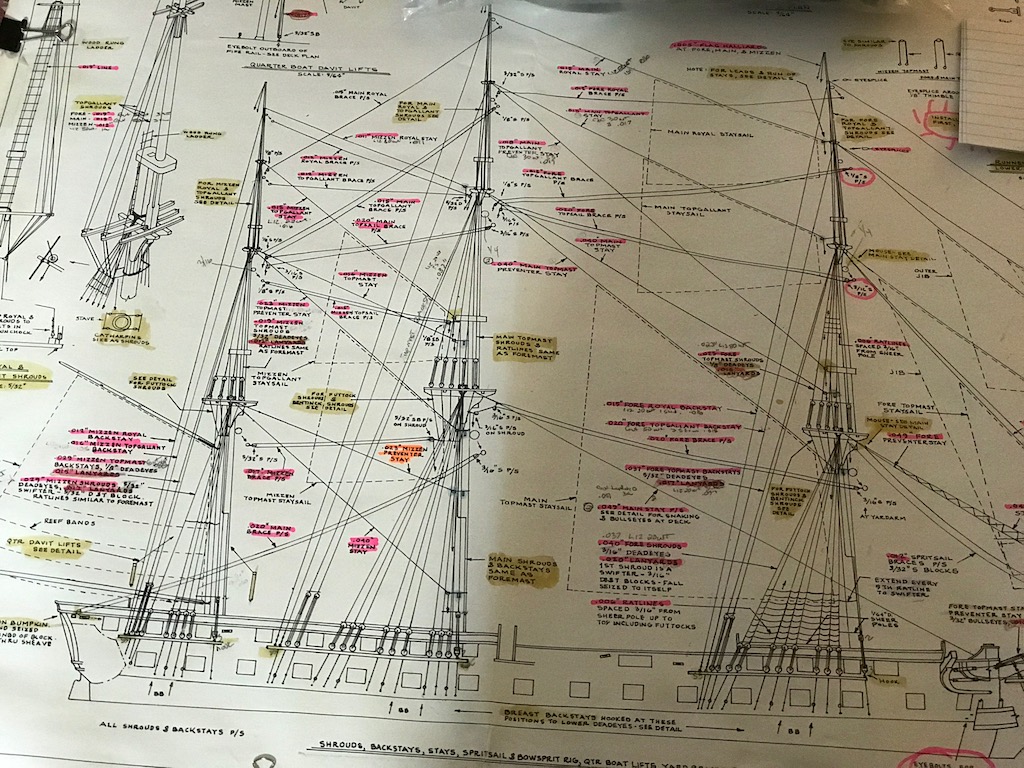
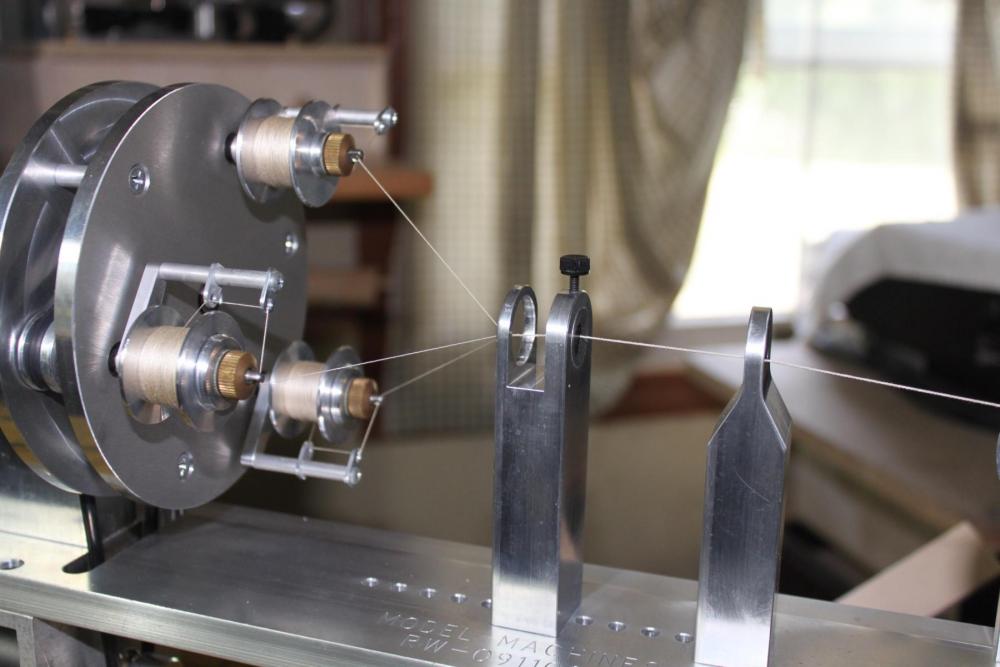
 Well, I have finished all my pressing projects and made it through the holidays and am glad to be back to modeling. I am working on rigging the mizzen top mast. I am making my own rope with the Byrnes ropewalk. All my line is made with cotton thread in single strand, three strand twist and nine strand twists to get the sizes I need for the Conny. I took the line sizes off the plans and scaled the cotton thread to the sizes needed. I have made a ton of line and think I have it all figured out. I will be posting a few pictures to so how my process works. The plans a well marked up and that is how I planned my rigging.


-
Hello Dave. I will be following with interest. I love to see how other modelers solve similar problems.
- 742 replies
-
- 7
-

-
- constitution
- frigate
- (and 1 more)
-
Your Conny build is comping along great. You will have a GREAT model when you finish. I really admire your talents. Again great job Ken
-
Tom, Sorry for your loss. Thoughts and prayers your way.
- 1,354 replies
-
- 2
-
-
- constitution
- model shipways
- (and 1 more)
-
Great hint for the dust cover. A build like the Conny takes awhile to build and dust can be a problem.
- 1,354 replies
-
- 2
-
-
- constitution
- model shipways
- (and 1 more)
-
Looking great. The boats were a lot of fun. They were like little kits by themselves. Looking forward to more progress
- 1,354 replies
-
- 1
-
-
- constitution
- model shipways
- (and 1 more)
-
Breaks are always good. For me they seem to refresh my attitude and I return to the build with a new attitude. The one thing I promised myself is to finish my build before I start a new build!
-
Great score on the Philadelphia kit. Any day you get a new kit is a great day.
- 701 replies
-
- 3
-
-
- phantom
- model shipways
- (and 1 more)
-
Thanks for the interest and tip Jay
-
Glad your back Jay. I know how that side track works.
- 572 replies
-
- 2
-
-
- constitution
- frigate
- (and 1 more)
-
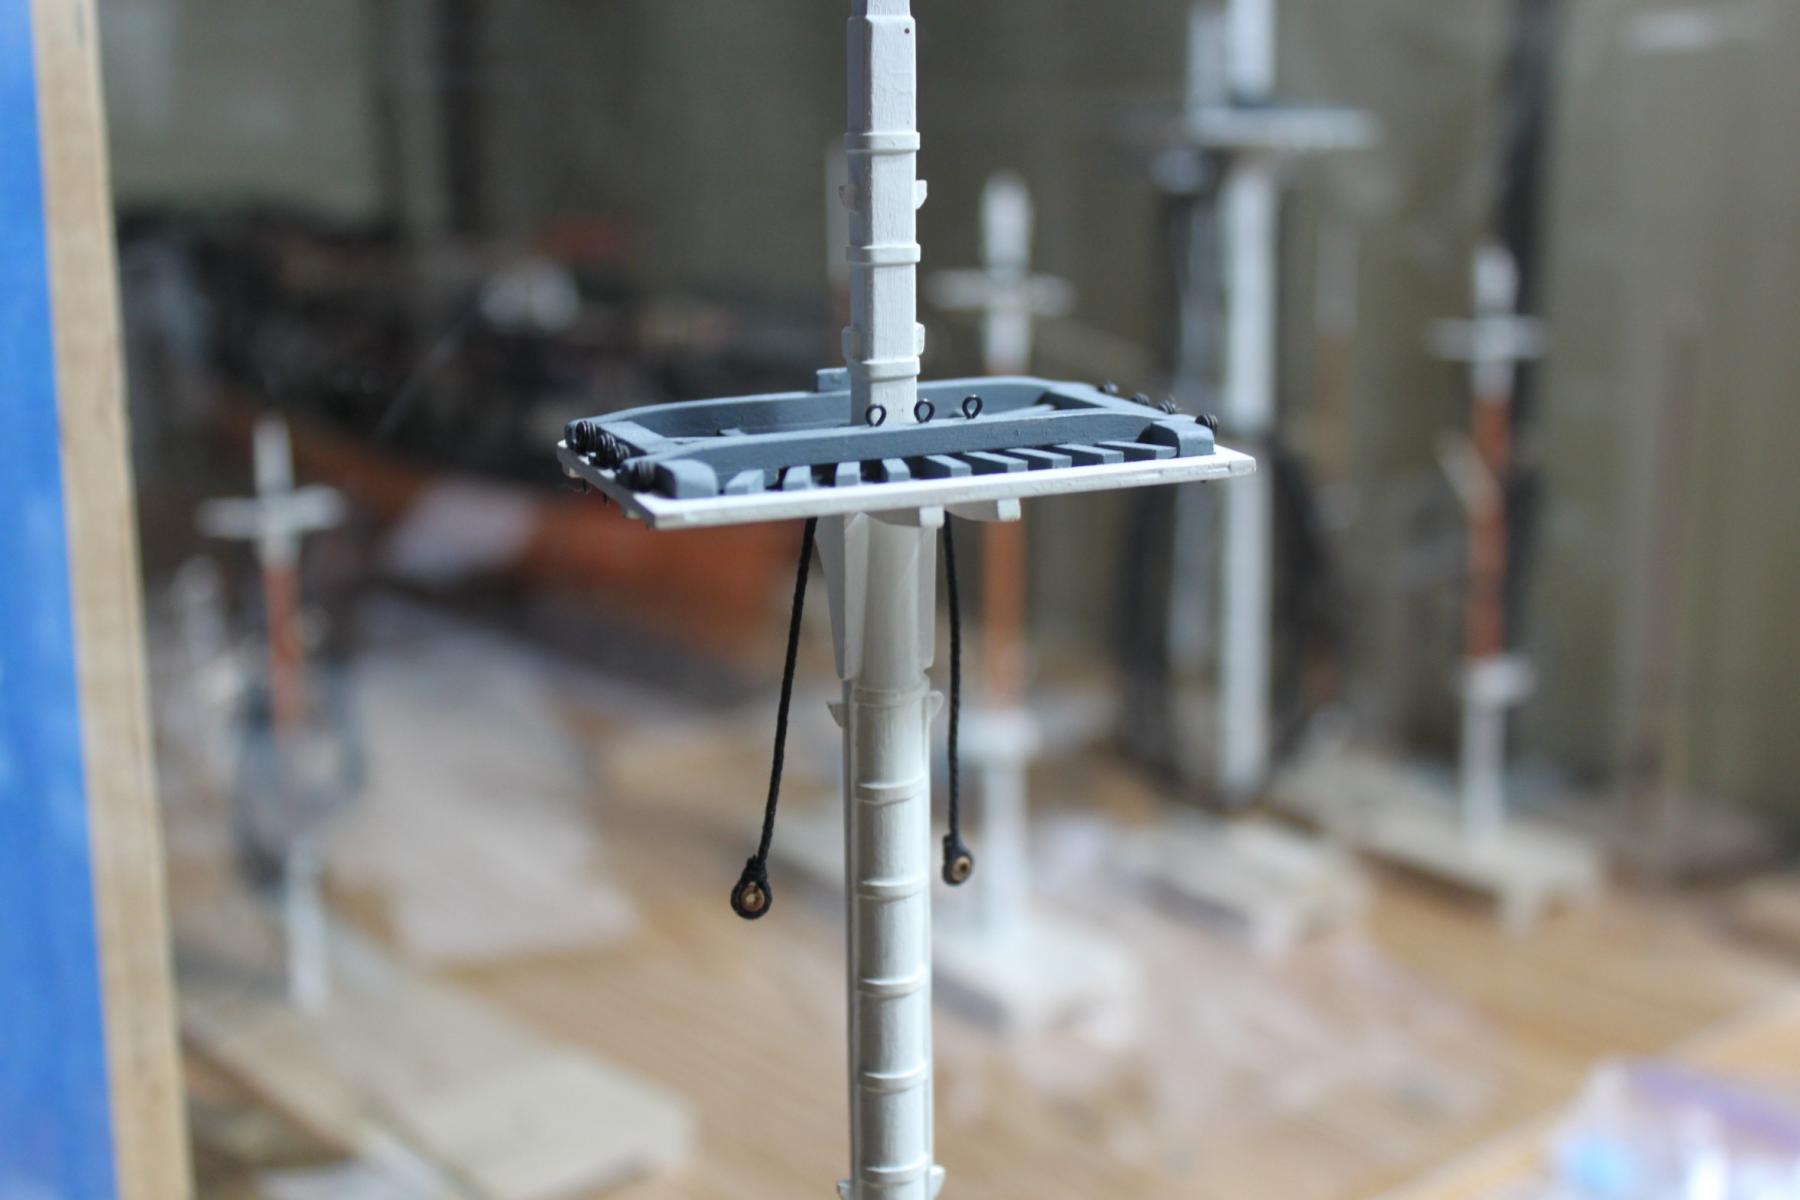
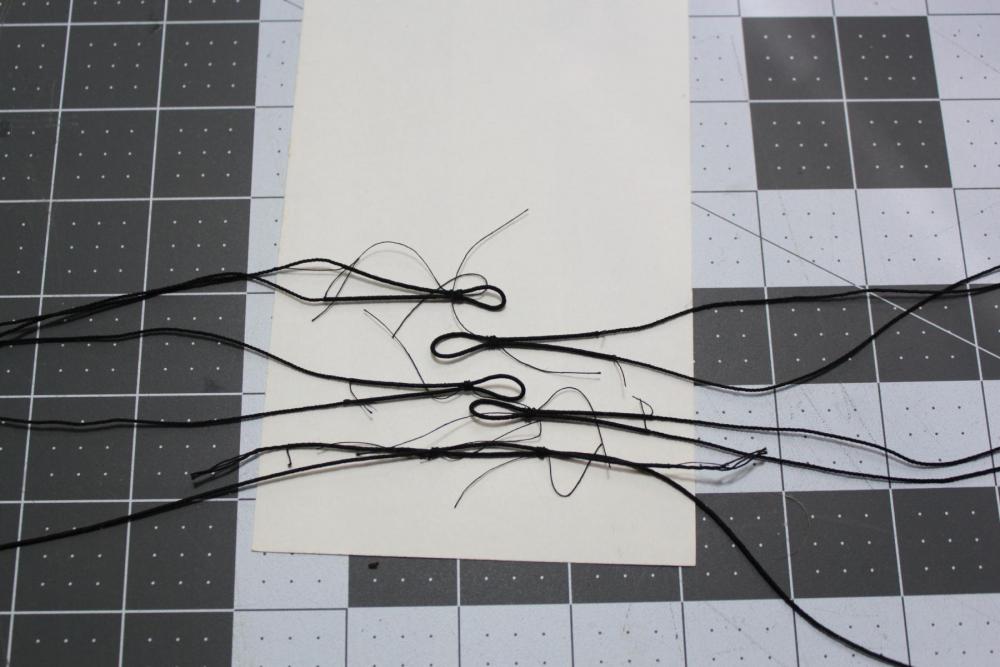
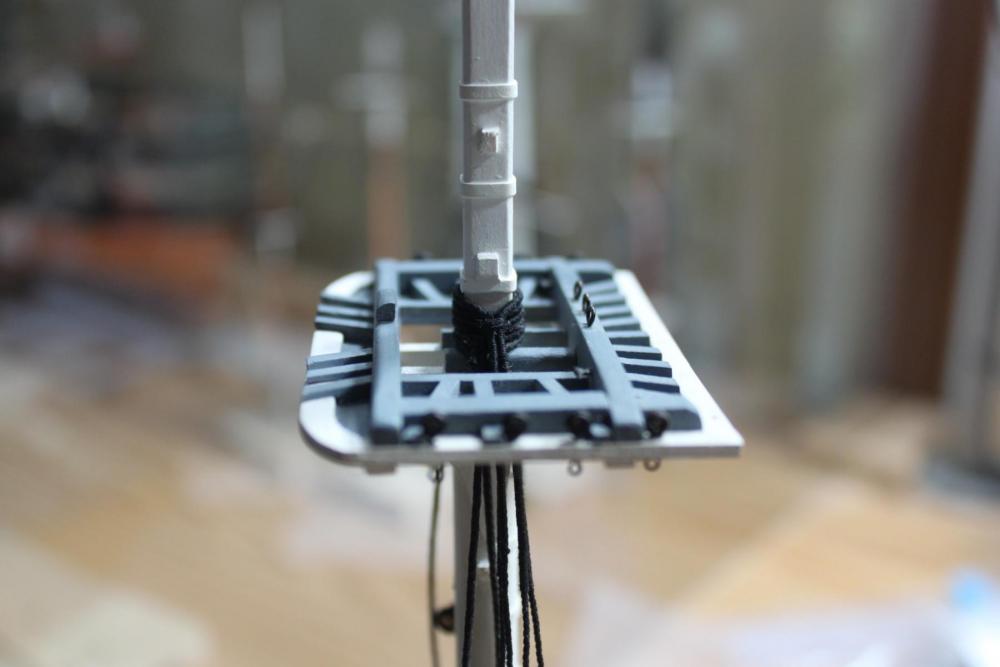
I finished the lower shrouds on the Mizzen Mast today Here're the pennants. Here are the shrouds and swifter ready to install Here are few pictures of them installed. Now on to the top mast shrouds.


-
Steve Thanks for the tip. I am familiar with them.
-
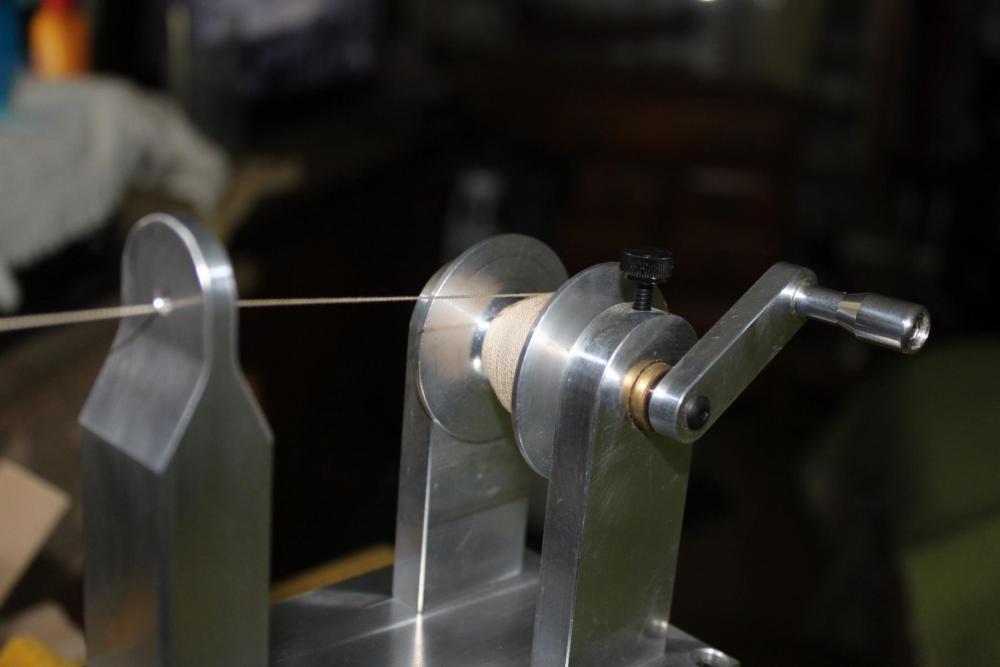
I finished up making most of the rest of the rigging lines for the foremast and main mast. I am all ready now to start on the mizzen mast. I did take a little break and worked on making some of the line for yards and lanyards. I really love my Byrnes Ropewalk.
-
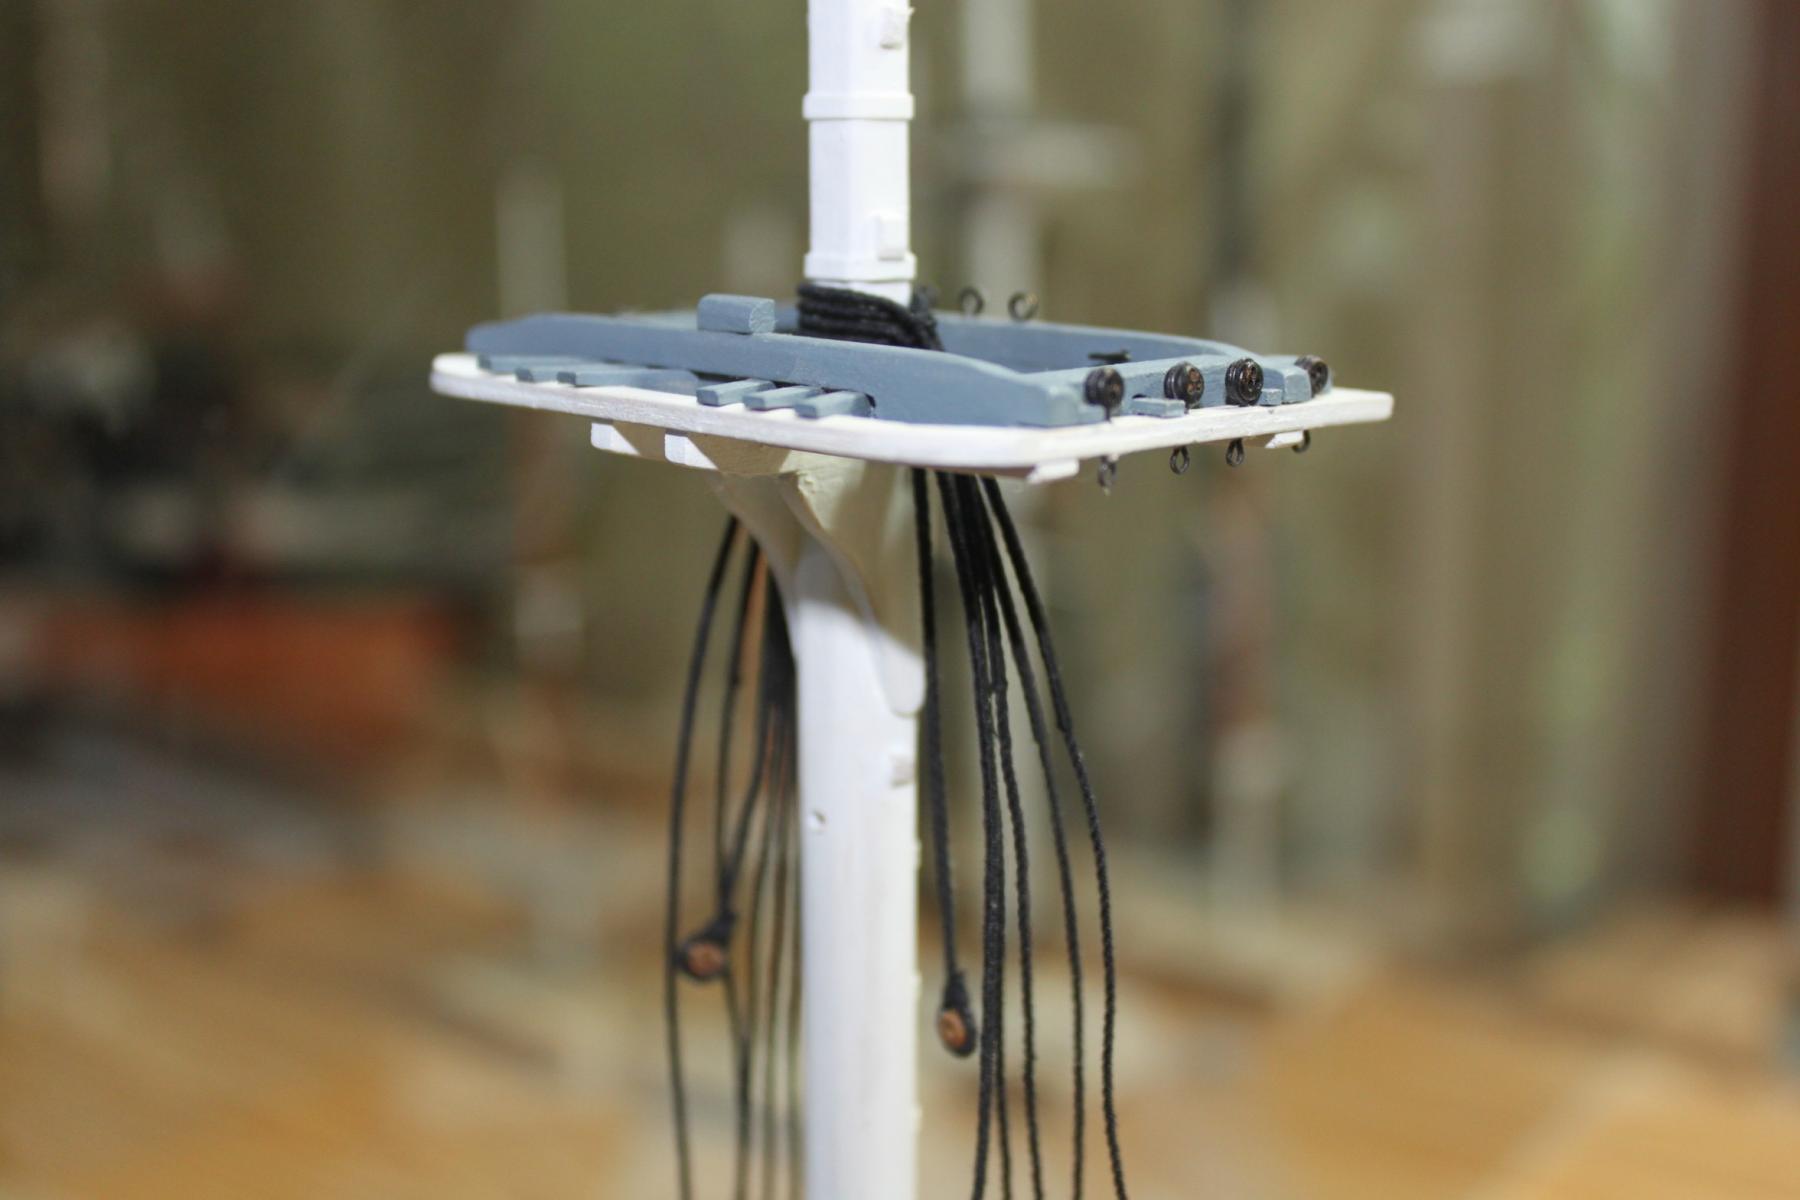
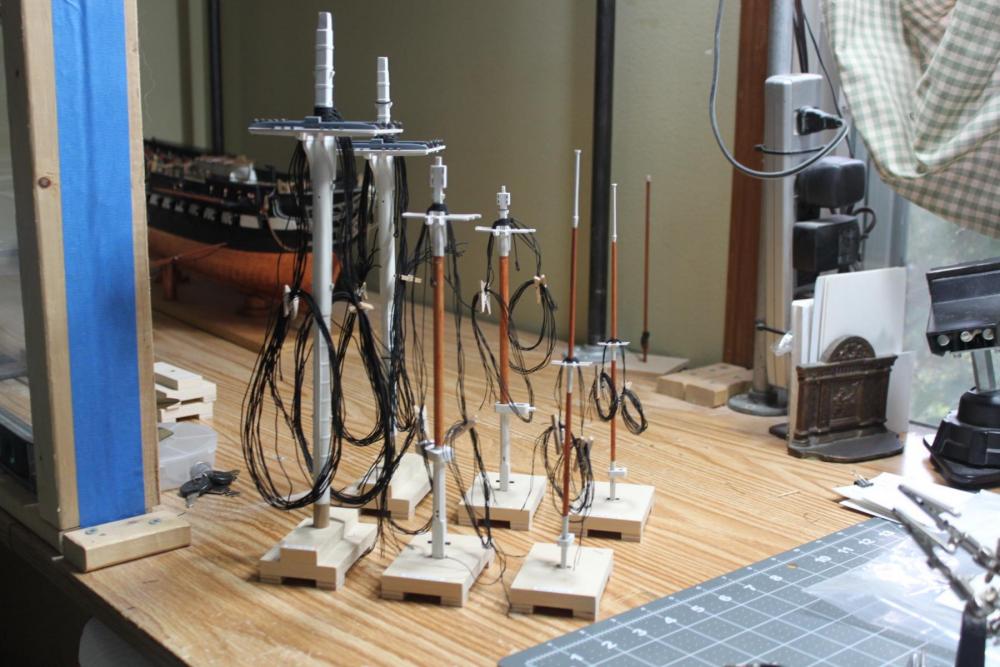
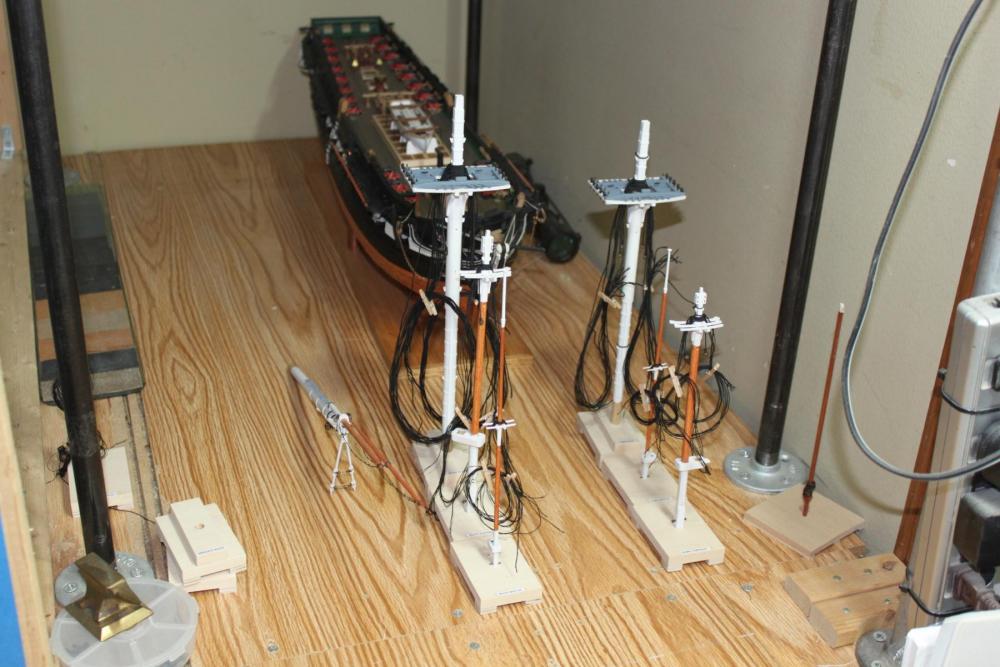
I made the stands to help me do my rigging off the model. I want to install the lower ones and rig the shrouds and ratlines. Once that is done I will step the masts in three sections. Then I plan on installing the spars. My plan is hopefully to figure out how to do the rigging without damaging what I done. I am a retired horseshoer or farrier as you down under might call me. I have big hands and they always seem to get in the way. Again, that is why I have the stands so I can easily work around the mast as I install the rigging. Thanks again for you interest in my build
-
Bob The case looks great! Great job!
- 277 replies
-
- 3
-
-
- model shipways
- 18th century longboat
- (and 1 more)
-
Well, I finished the Fore and Main mast rigging for the shrouds. They will be installed in stages. Here is a picture of of the bowsprit, fore main mast prior to installing. I have most of the lines fore the foremast made and ready to go. I am presently working on the mainmast lines.
-
I know its been awhile, but my summer chores are coming to an end and I promise I will be back rigging my Conny by the end of week!
-
Ken Another way to solve a unique problem in a fantastic way. Your working with bass is exceptional. Great job!
-
Ken It is really great to see people tackle difficult building problems in so many different ways. Great job!
-
David If something bothers you, fix it. You always feel better after doing it. Look forward to your pictures
- 117 replies
-
- 5
-
-
- constitution
- model shipways
- (and 1 more)
-
David If you have any problem with the styrene you can use a heat gun on low heat or steal your wife's blow dryer to help coax the styrene to the shape needed. Just don't get too aggressive and I would practice on some scrap.
- 117 replies
-
- 4
-
-
- constitution
- model shipways
- (and 1 more)
-
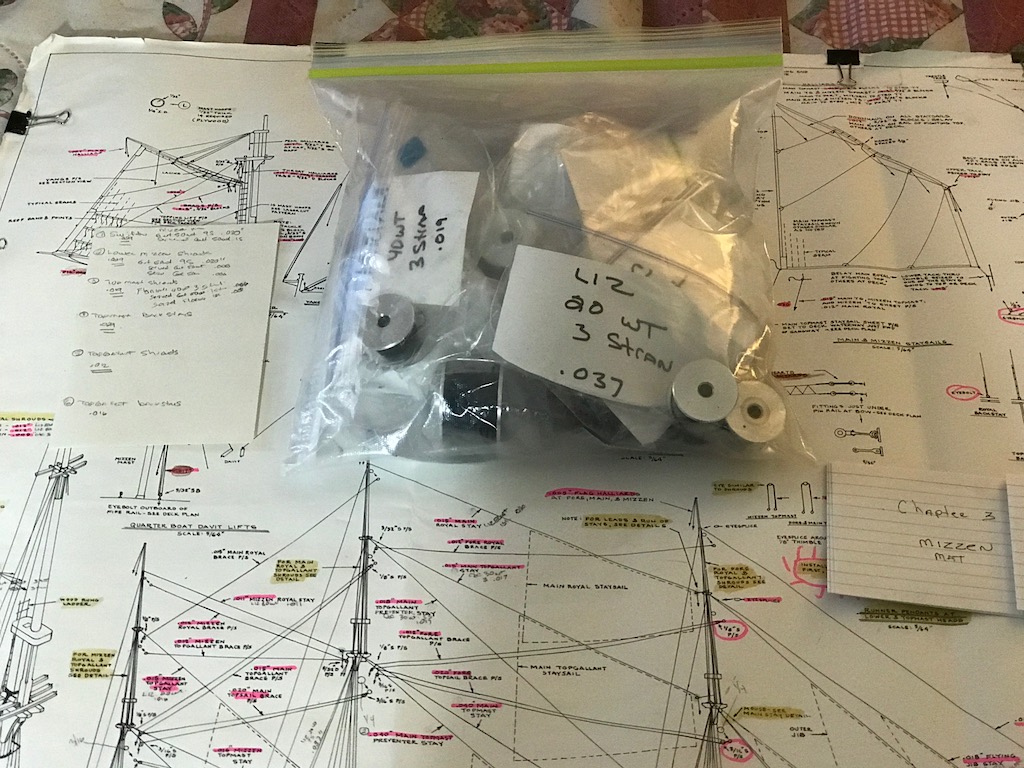
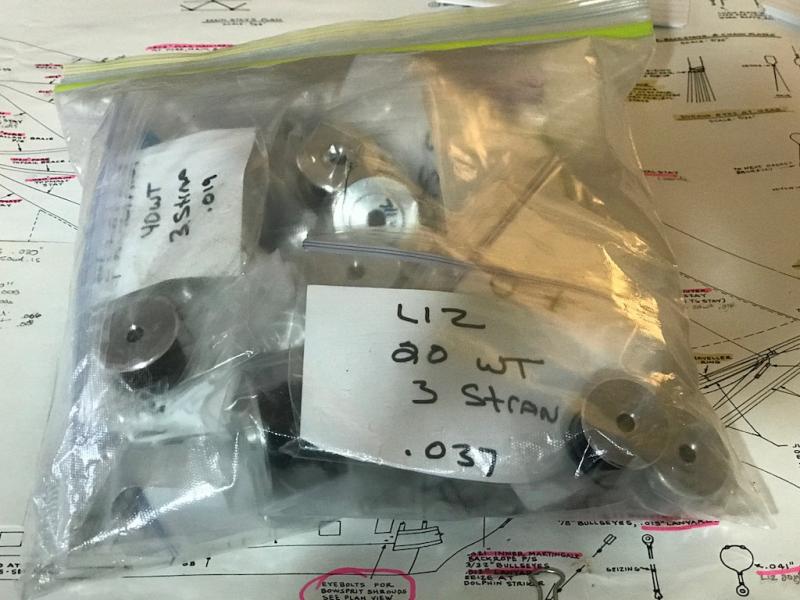
JT: I use a Byrnes ropewalk and like it very much. In the beginning there was a little learning curve but I quickly caught on. David: With the scale of the Constitution being 1/76th the rigging can be a little hard to make thing look right. I use cotton line. It is usually Black for standing rigging or Euchre for the running rigging. The reason I use cotton thread is; One because I can stain it if I want to. Second I can set the line with thinned white glue, and Third, it doesn't unravel like the synthetics. Almost any fabric store will have what you need. I use Hobby Lobby, Joanne's fabric, and the internet to purchase my thread. With the thread, the smaller the number the thicker the line. The higher the number the thinner it becomes. I use Coats and Clark 30wt and 35wt from Joanne's fabric. I also get Gutermann 50wt from Joanne's. From Hobby Lobby I use DMC cotton #5,#8, and #12. I also use Lizbeth 20wt, and 80wt. cotton. If you ever need really thick line you can get Aunt Lydia's #10 and #3 cotton from Hobby Lobby. I found Madeira 80wt, Presence 60wt, and Florin 40wt on the internet. Just check around and use goggle, you should find what you need to supplement you kit supplied line. If you get a spool of each one you can see how the different sizes will work for you. Hope this helps
-
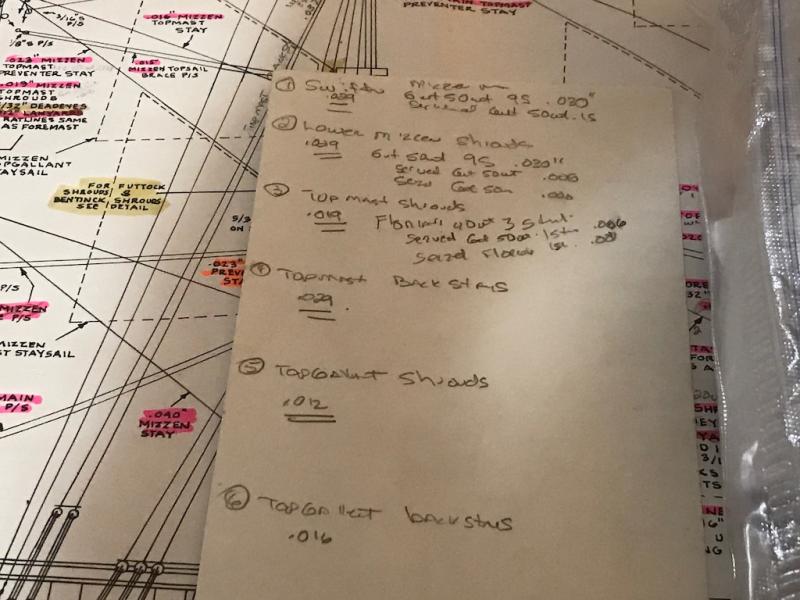
Hello David Bob made his practicum some time ago and I if I remember right there was some mast dowel problems with Model Expo.I used the ship plans for mast sizes. I also junked the dowels that came with kit. They kind of looked like my arthritic fingers or an old Clint Eastwood cigar. I made my mast out of square stock and shaped them accordingly. If you look at sheet 6 of you plans they give the all the mast sizes. I have taken all my measurements from the ship supplied plans during my build. Hope this helps and feel free to ask any questions you may have. I have busy making line and tying knots making all the line for my rigging. If you look at sheet 7 of the plans it gives a vast number of sizes for the rigging line. That is what I have been working on with my ropewalk. I found the kit supplied line to be inadequate and opted to make my own. So far I have been happy with results and you can see the gradual difference in sizes of the line. I will post some pictures soon. Happy modeling
-
Hello Ken I really admire your building skills. Sorry to hear of your rebuild. I know from past experiences of my own you are doing the right thing. Great job on making things right. When you are finished you will a great model you can be proud of.