HOLIDAY DONATION DRIVE - SUPPORT MSW - DO YOUR PART TO KEEP THIS GREAT FORUM GOING! (Only 36 donations so far out of 49,000 members - C'mon guys!)
×


Glenn-UK
-
Posts
3,156 -
Joined
-
Last visited
Content Type
Profiles
Forums
Gallery
Events
Everything posted by Glenn-UK
-
 Thanks Bob I have always struggled with fairing. I think you always need to take off more than you think. That said with the Sphinx it was much easier than I was expecting. Using the removal of the laser char as the guide was certainly the best method, thanks to @James H for this tip in his build log.
 -
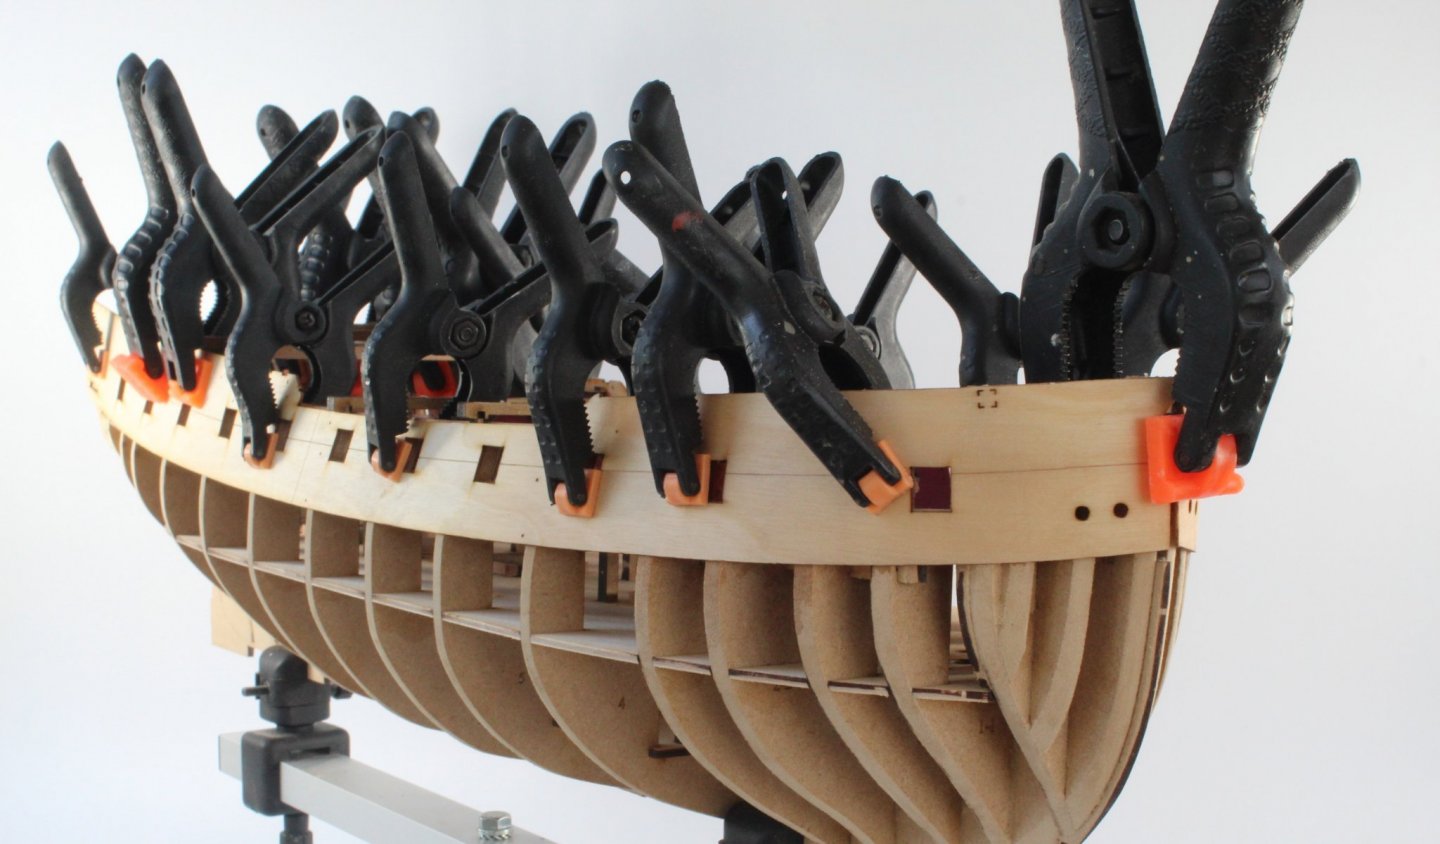
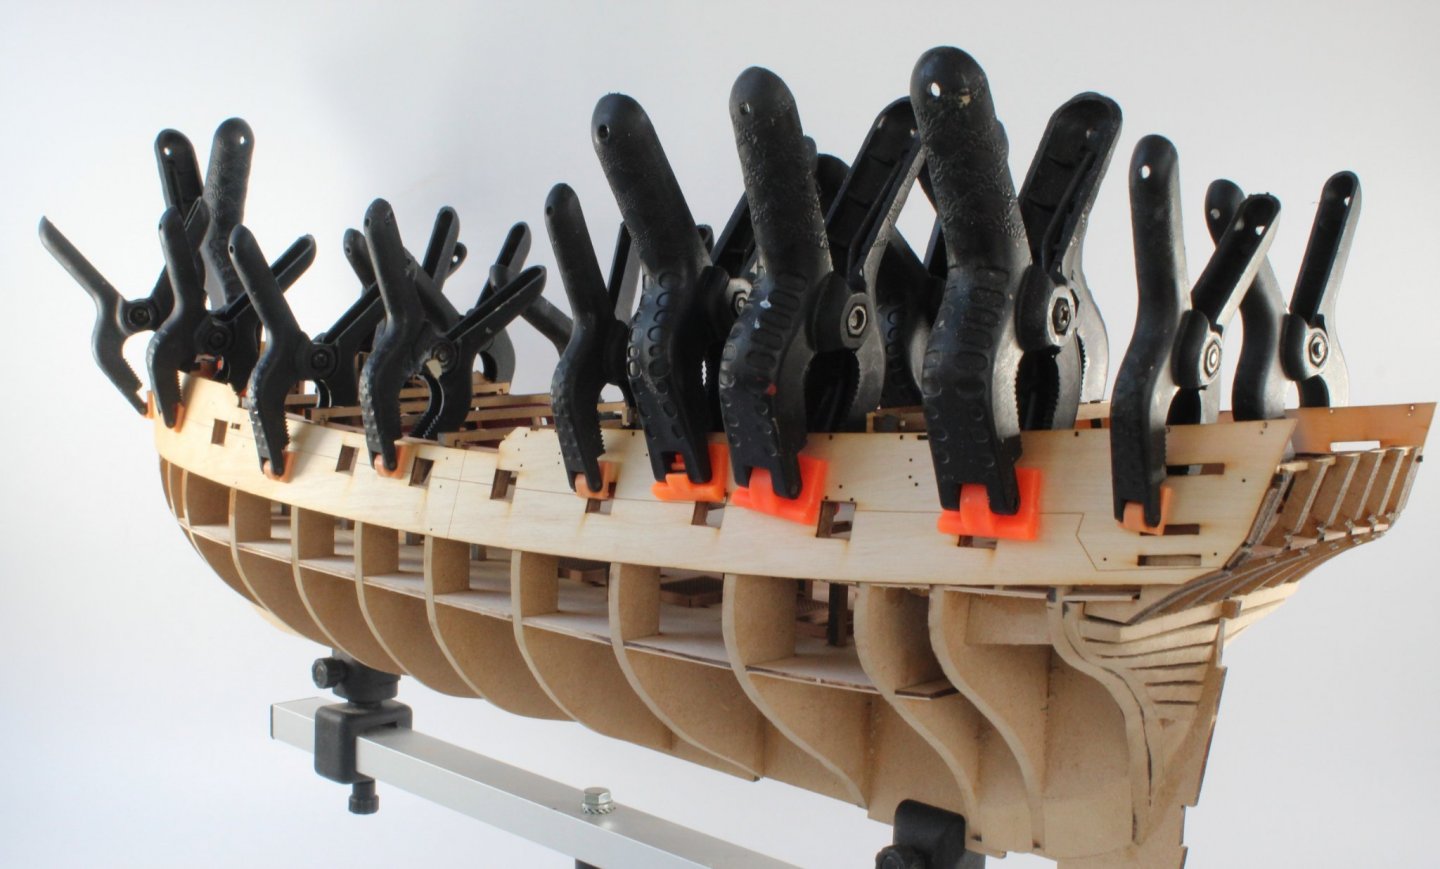
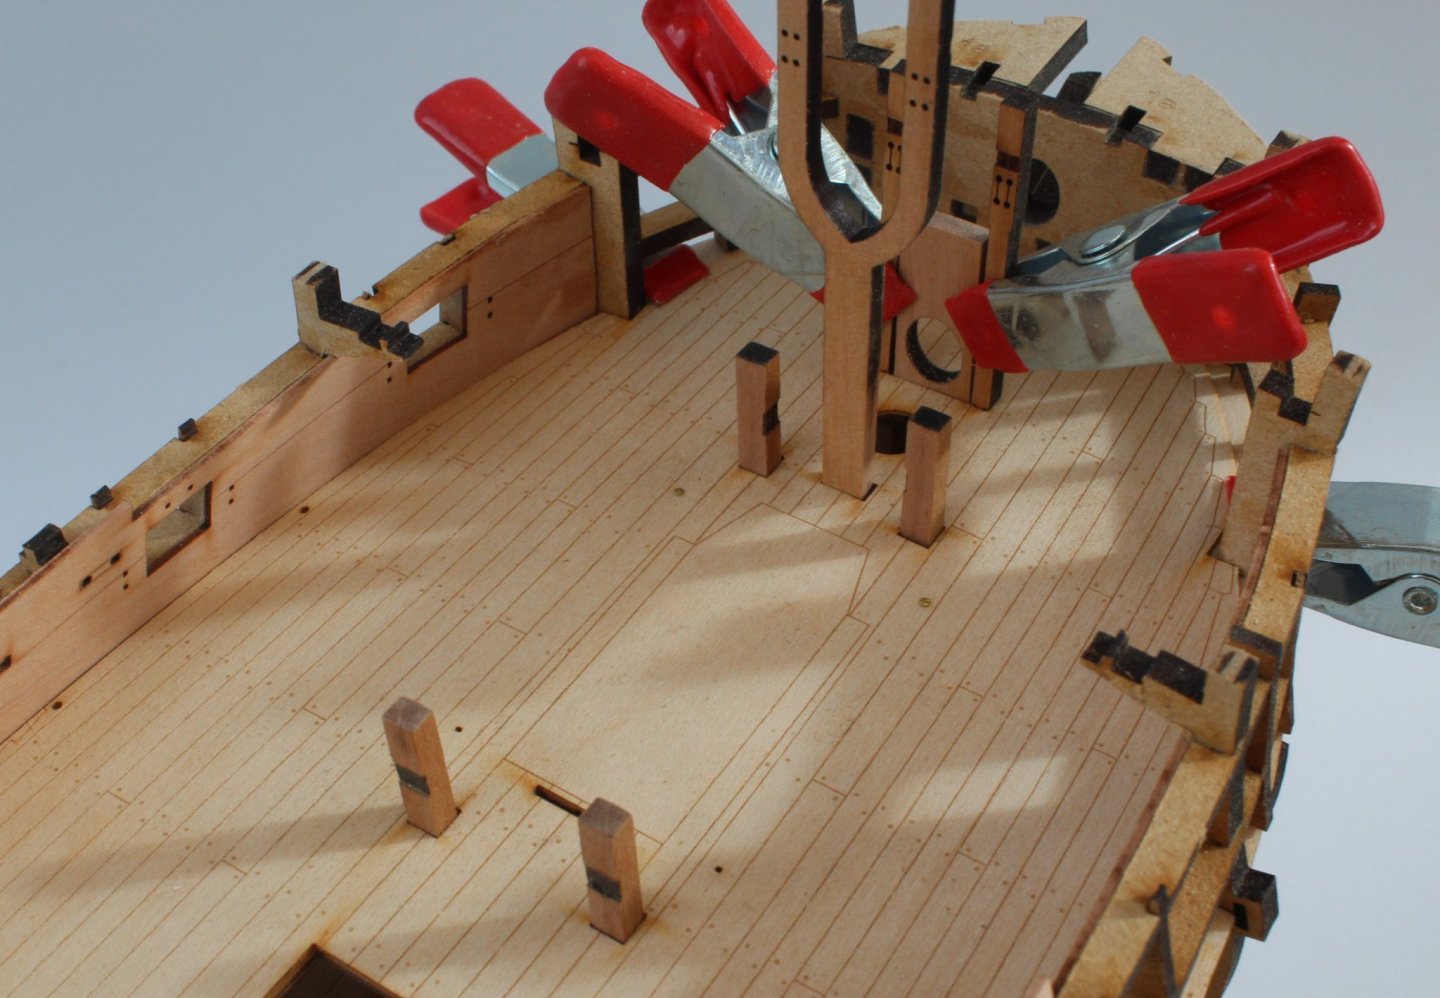
Thanks @chris watton. I was not overly concerned about the broken tabs, knowing all would be OK once the outer pattern had been fitted. I was more concerned with the apparent slight bulging of the outer pattern. I'm sure there will be a simple solution, probably fairing related. Will start the 1st planking, hopefully in the morning.
-
I second this comment. The coaster, as with the previous Vanguard kits received in a very nice touch and greatly appreciated.
- 355 replies
-
- 7
-

-
- vanguard models
- Sphinx
- (and 1 more)
-
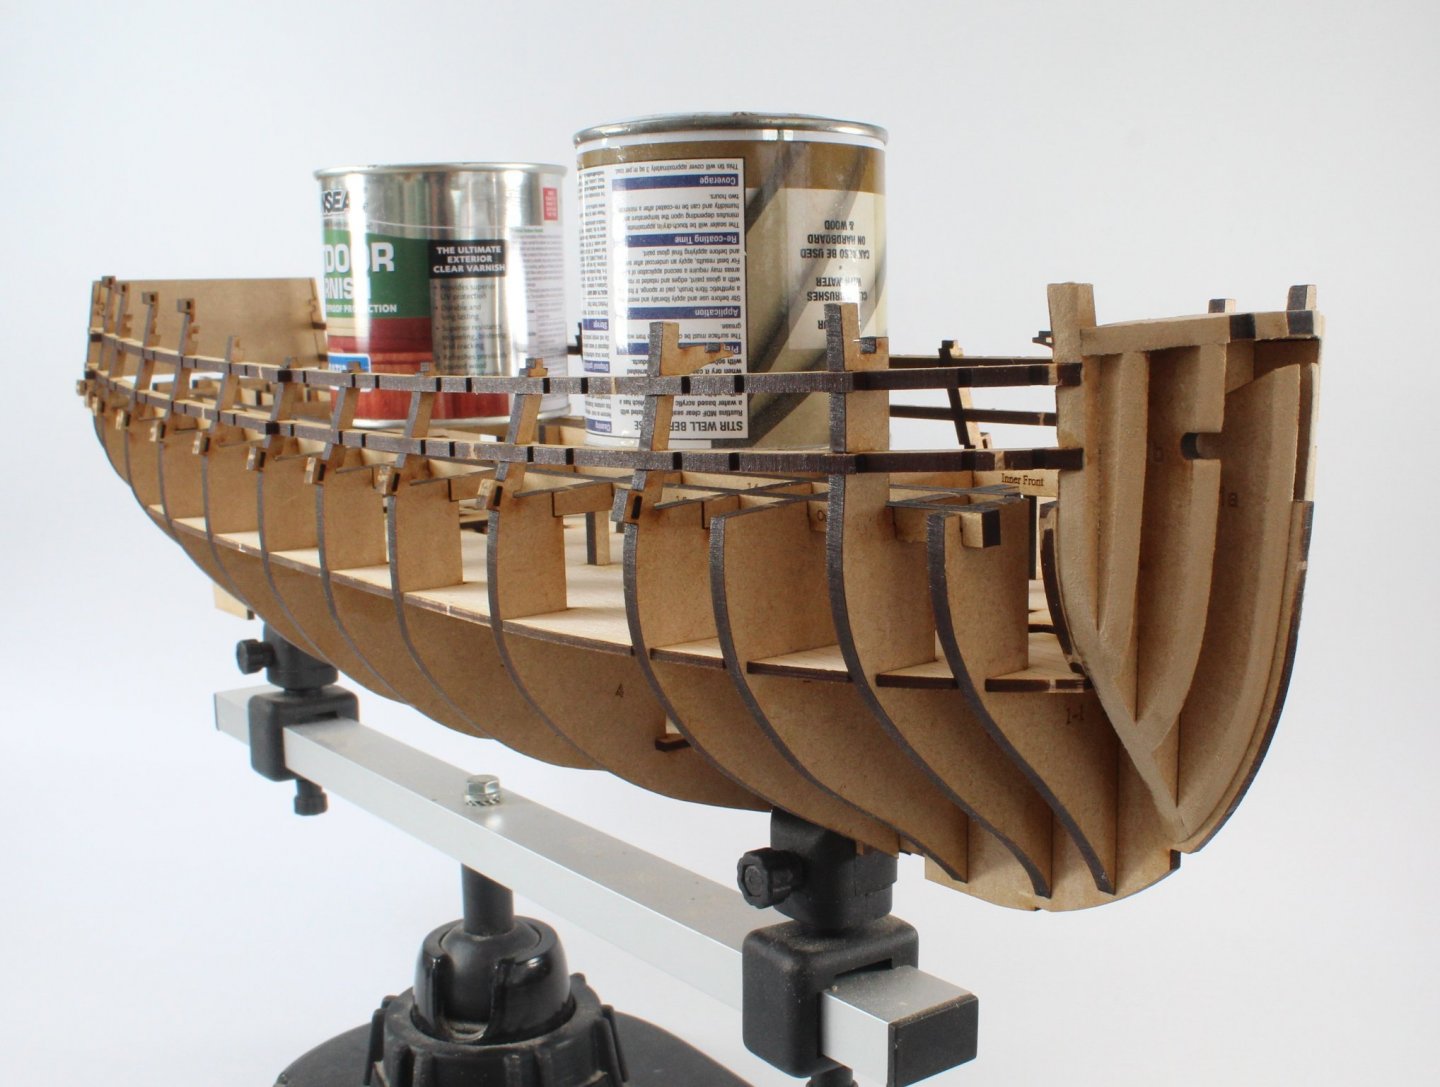
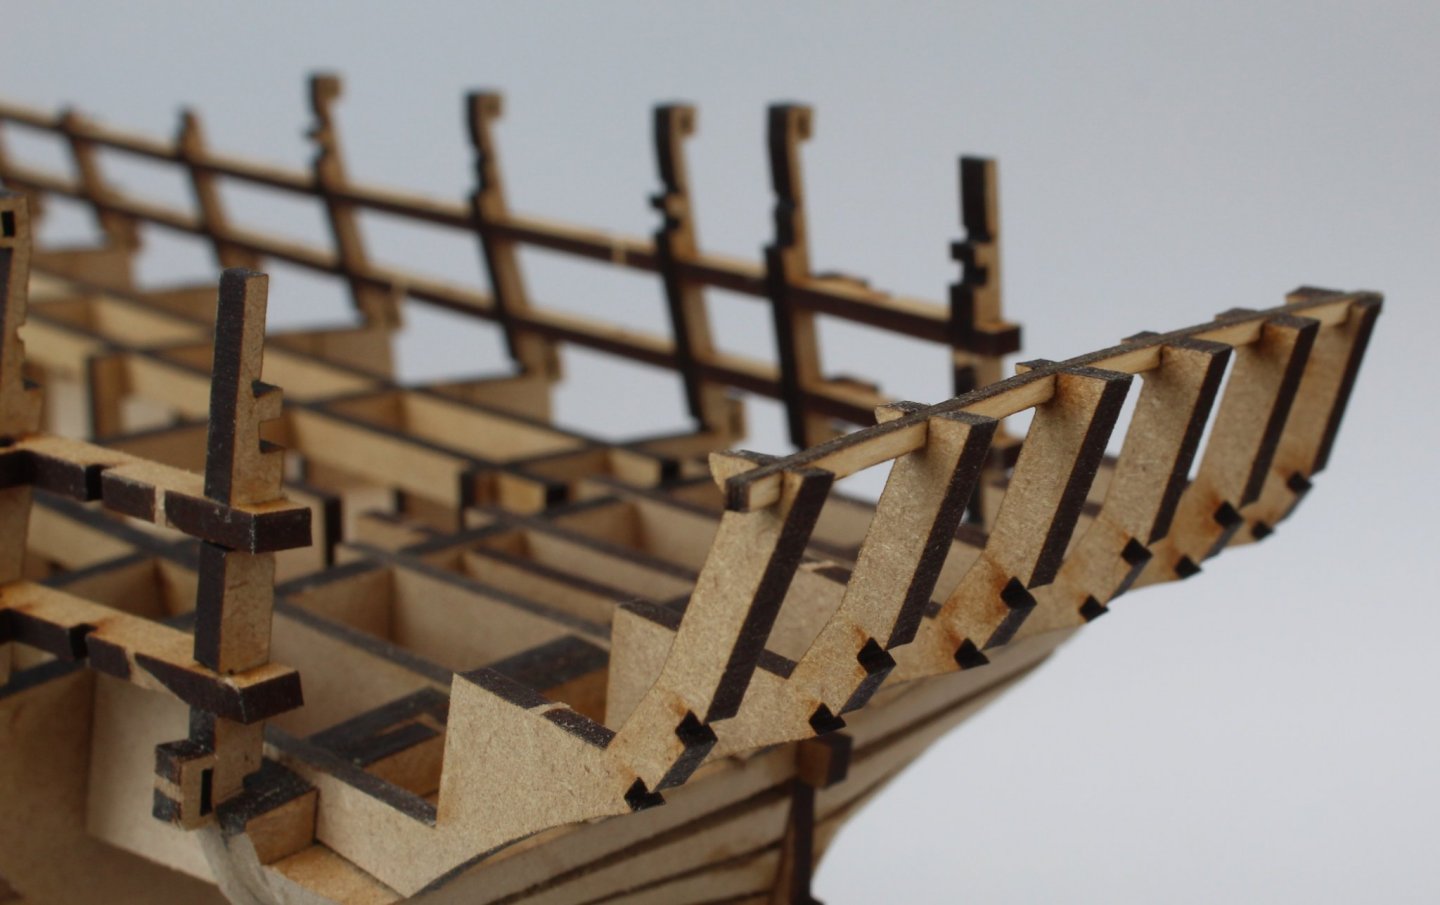
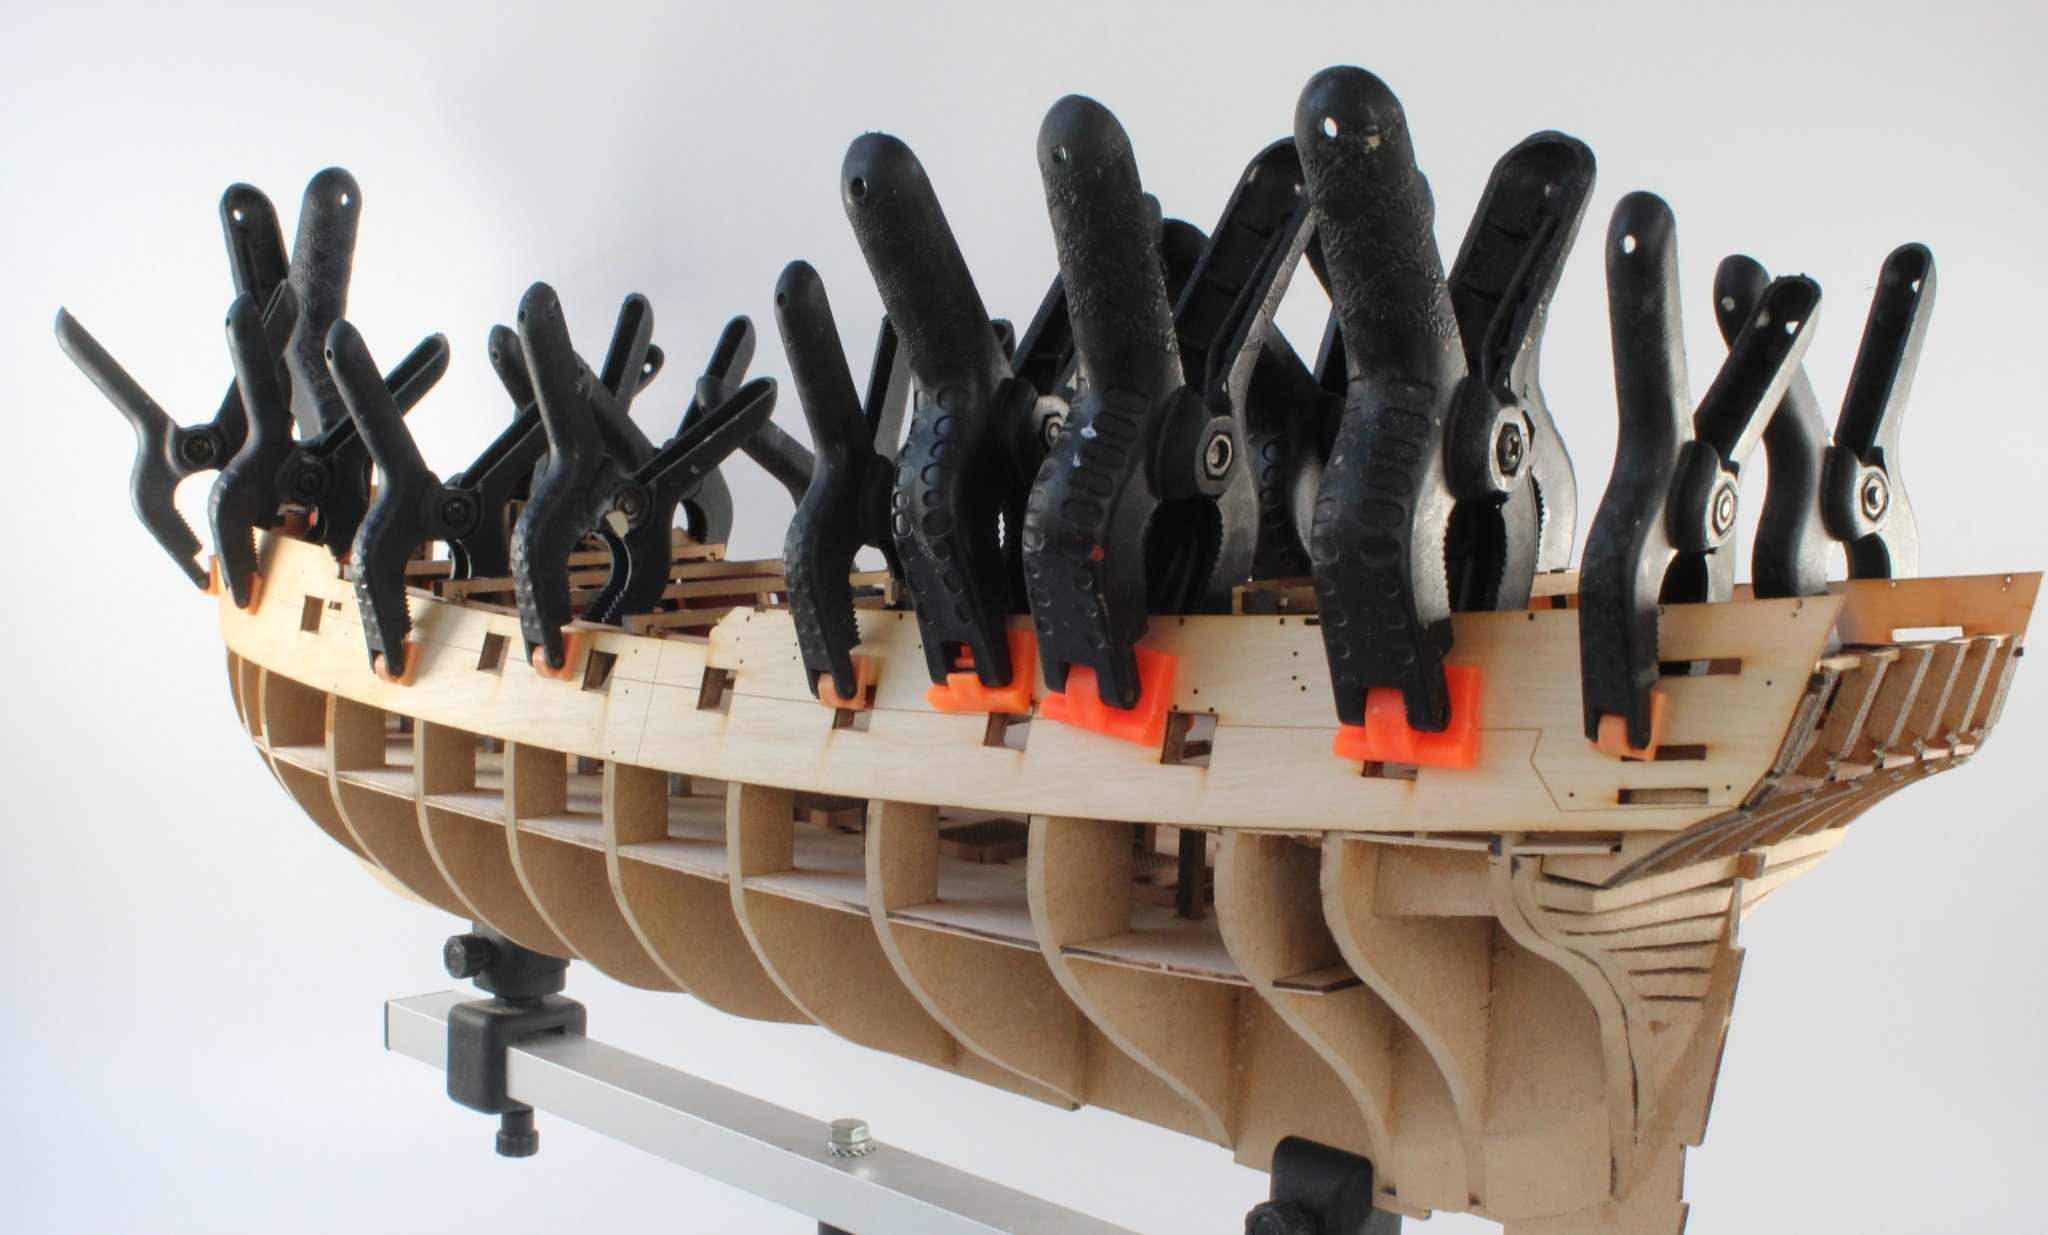
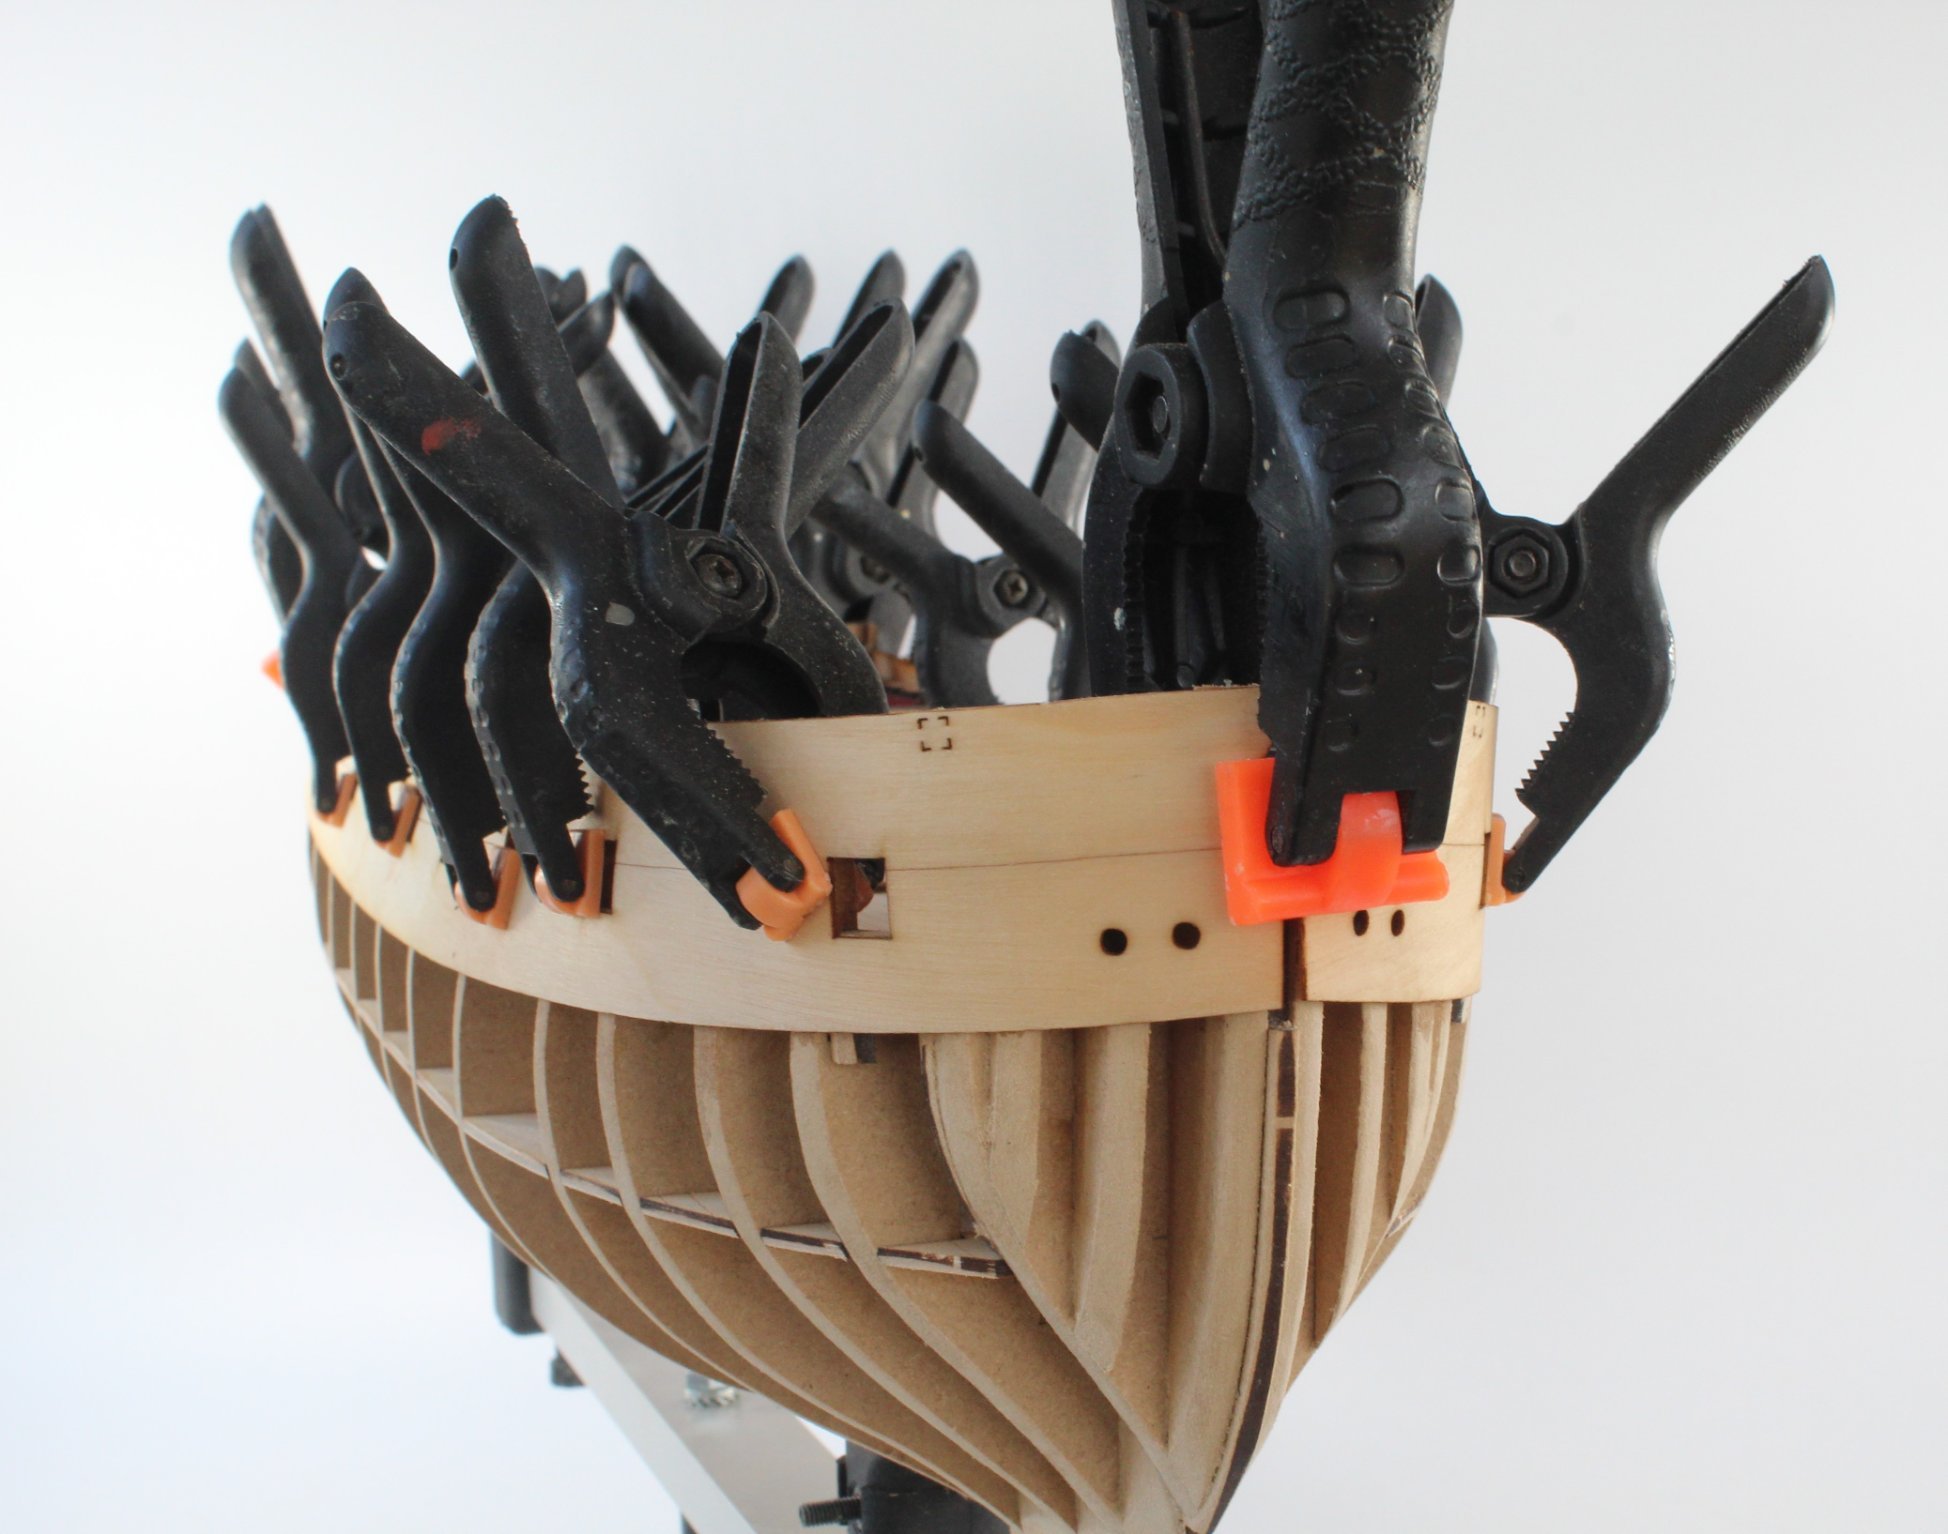
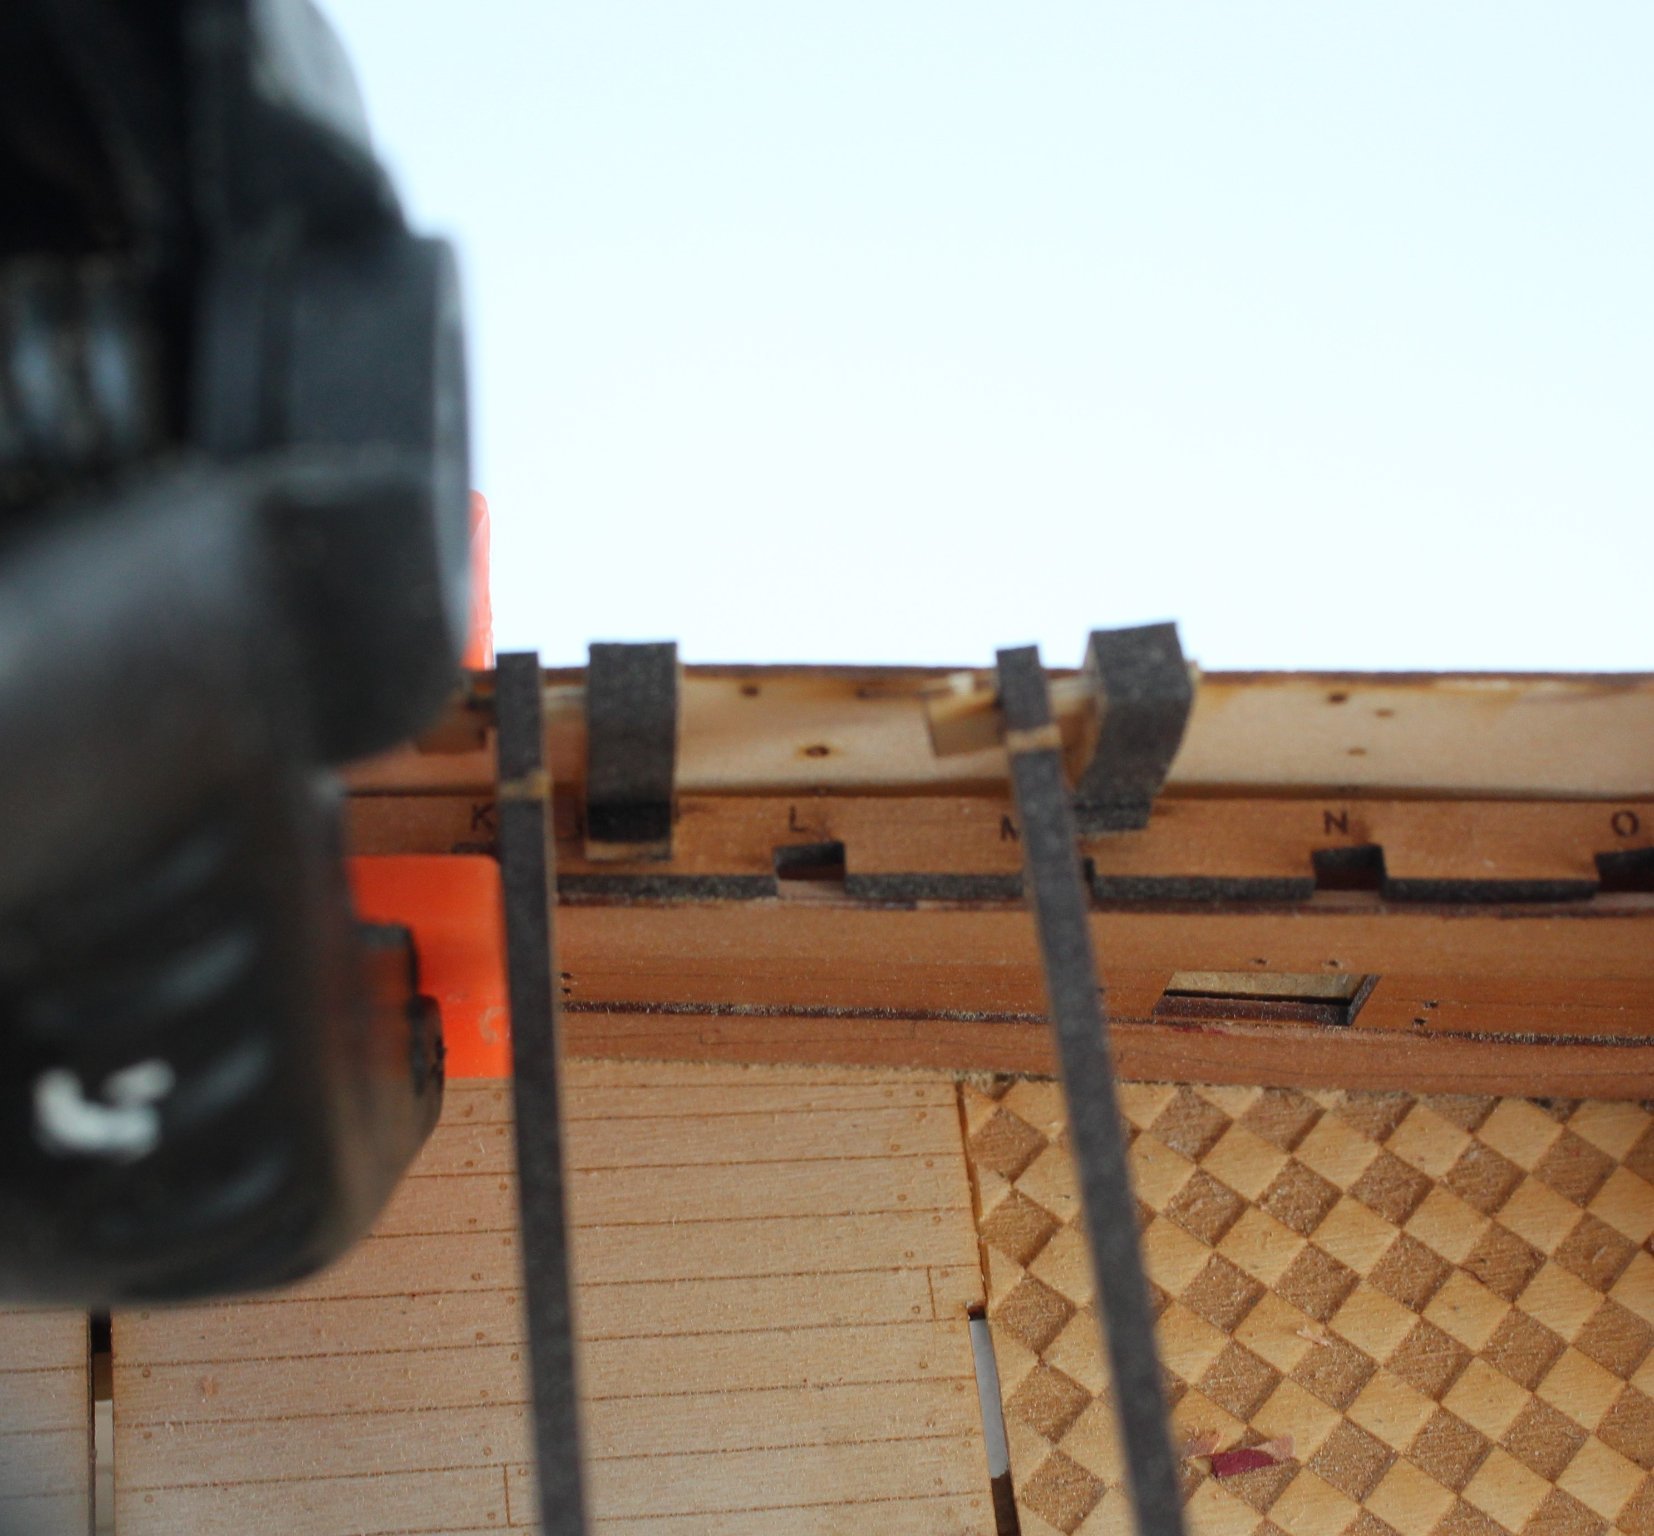
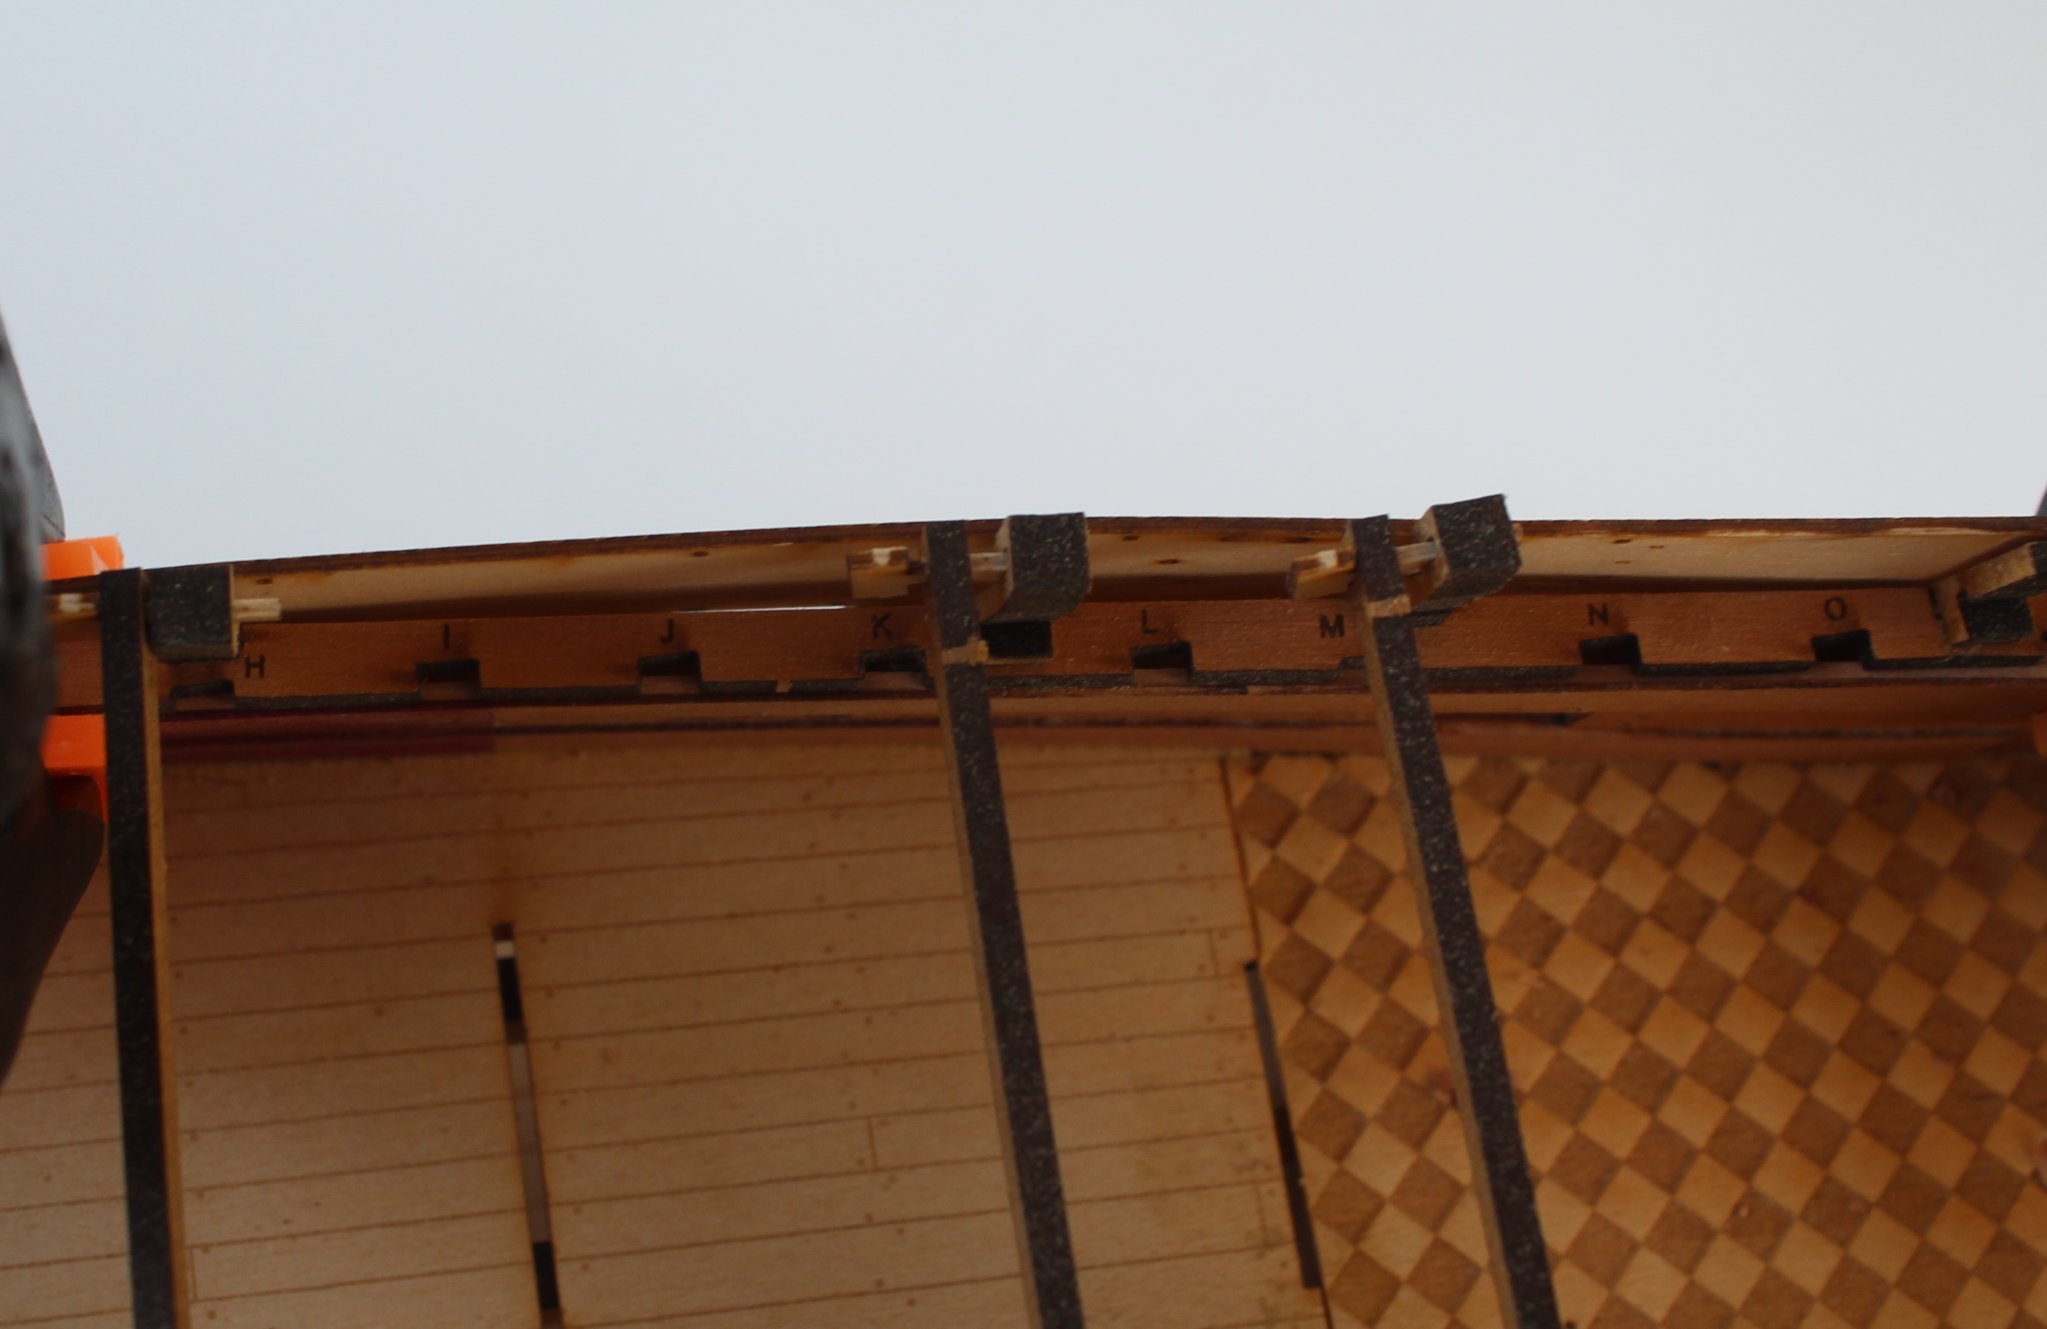
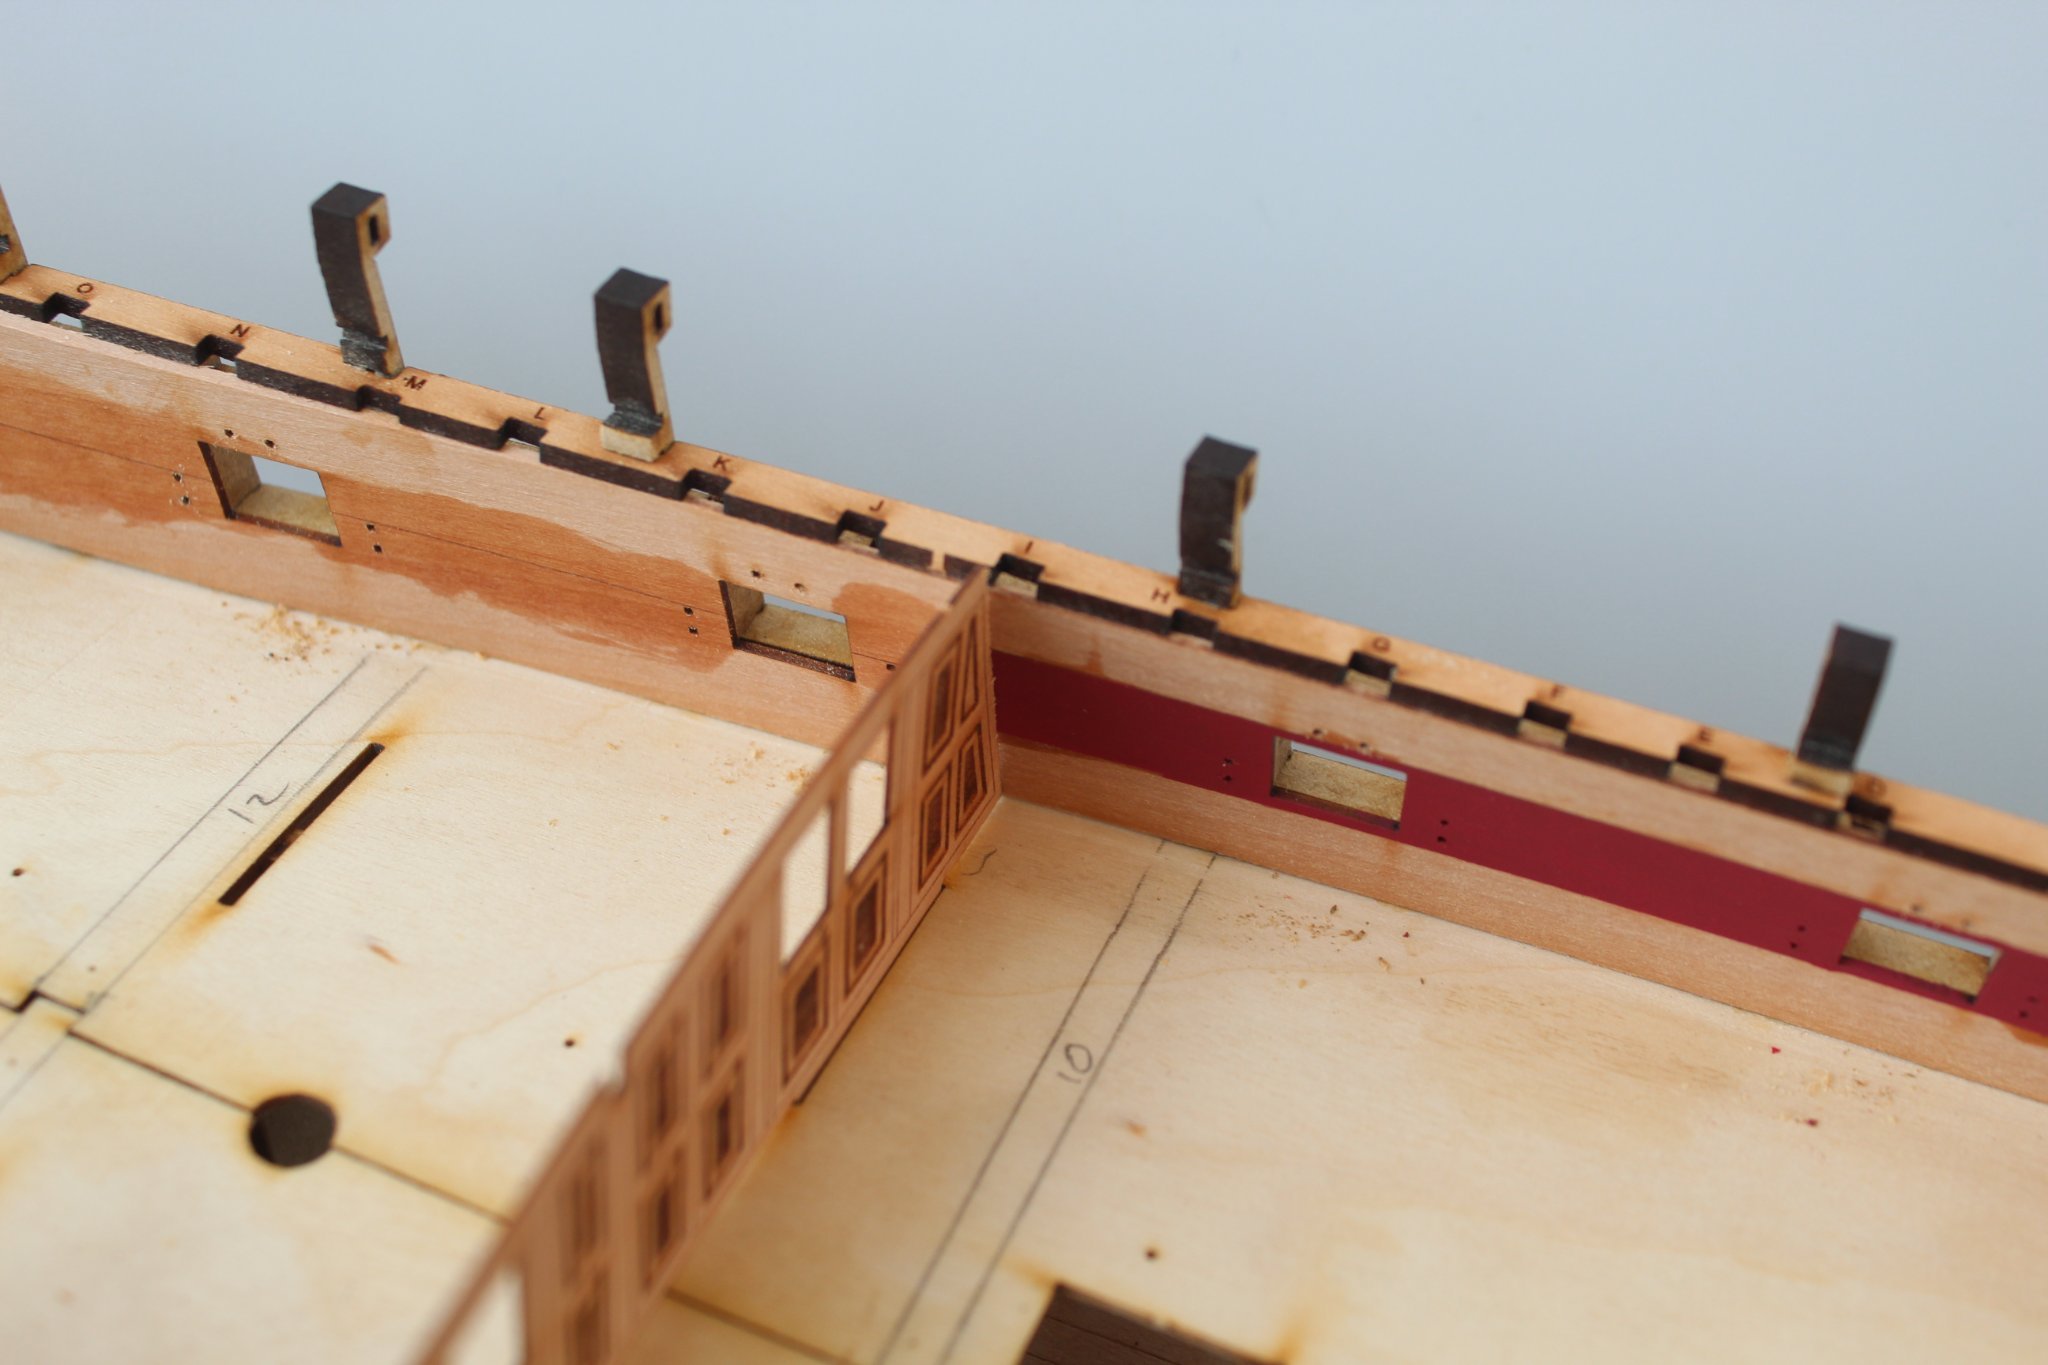
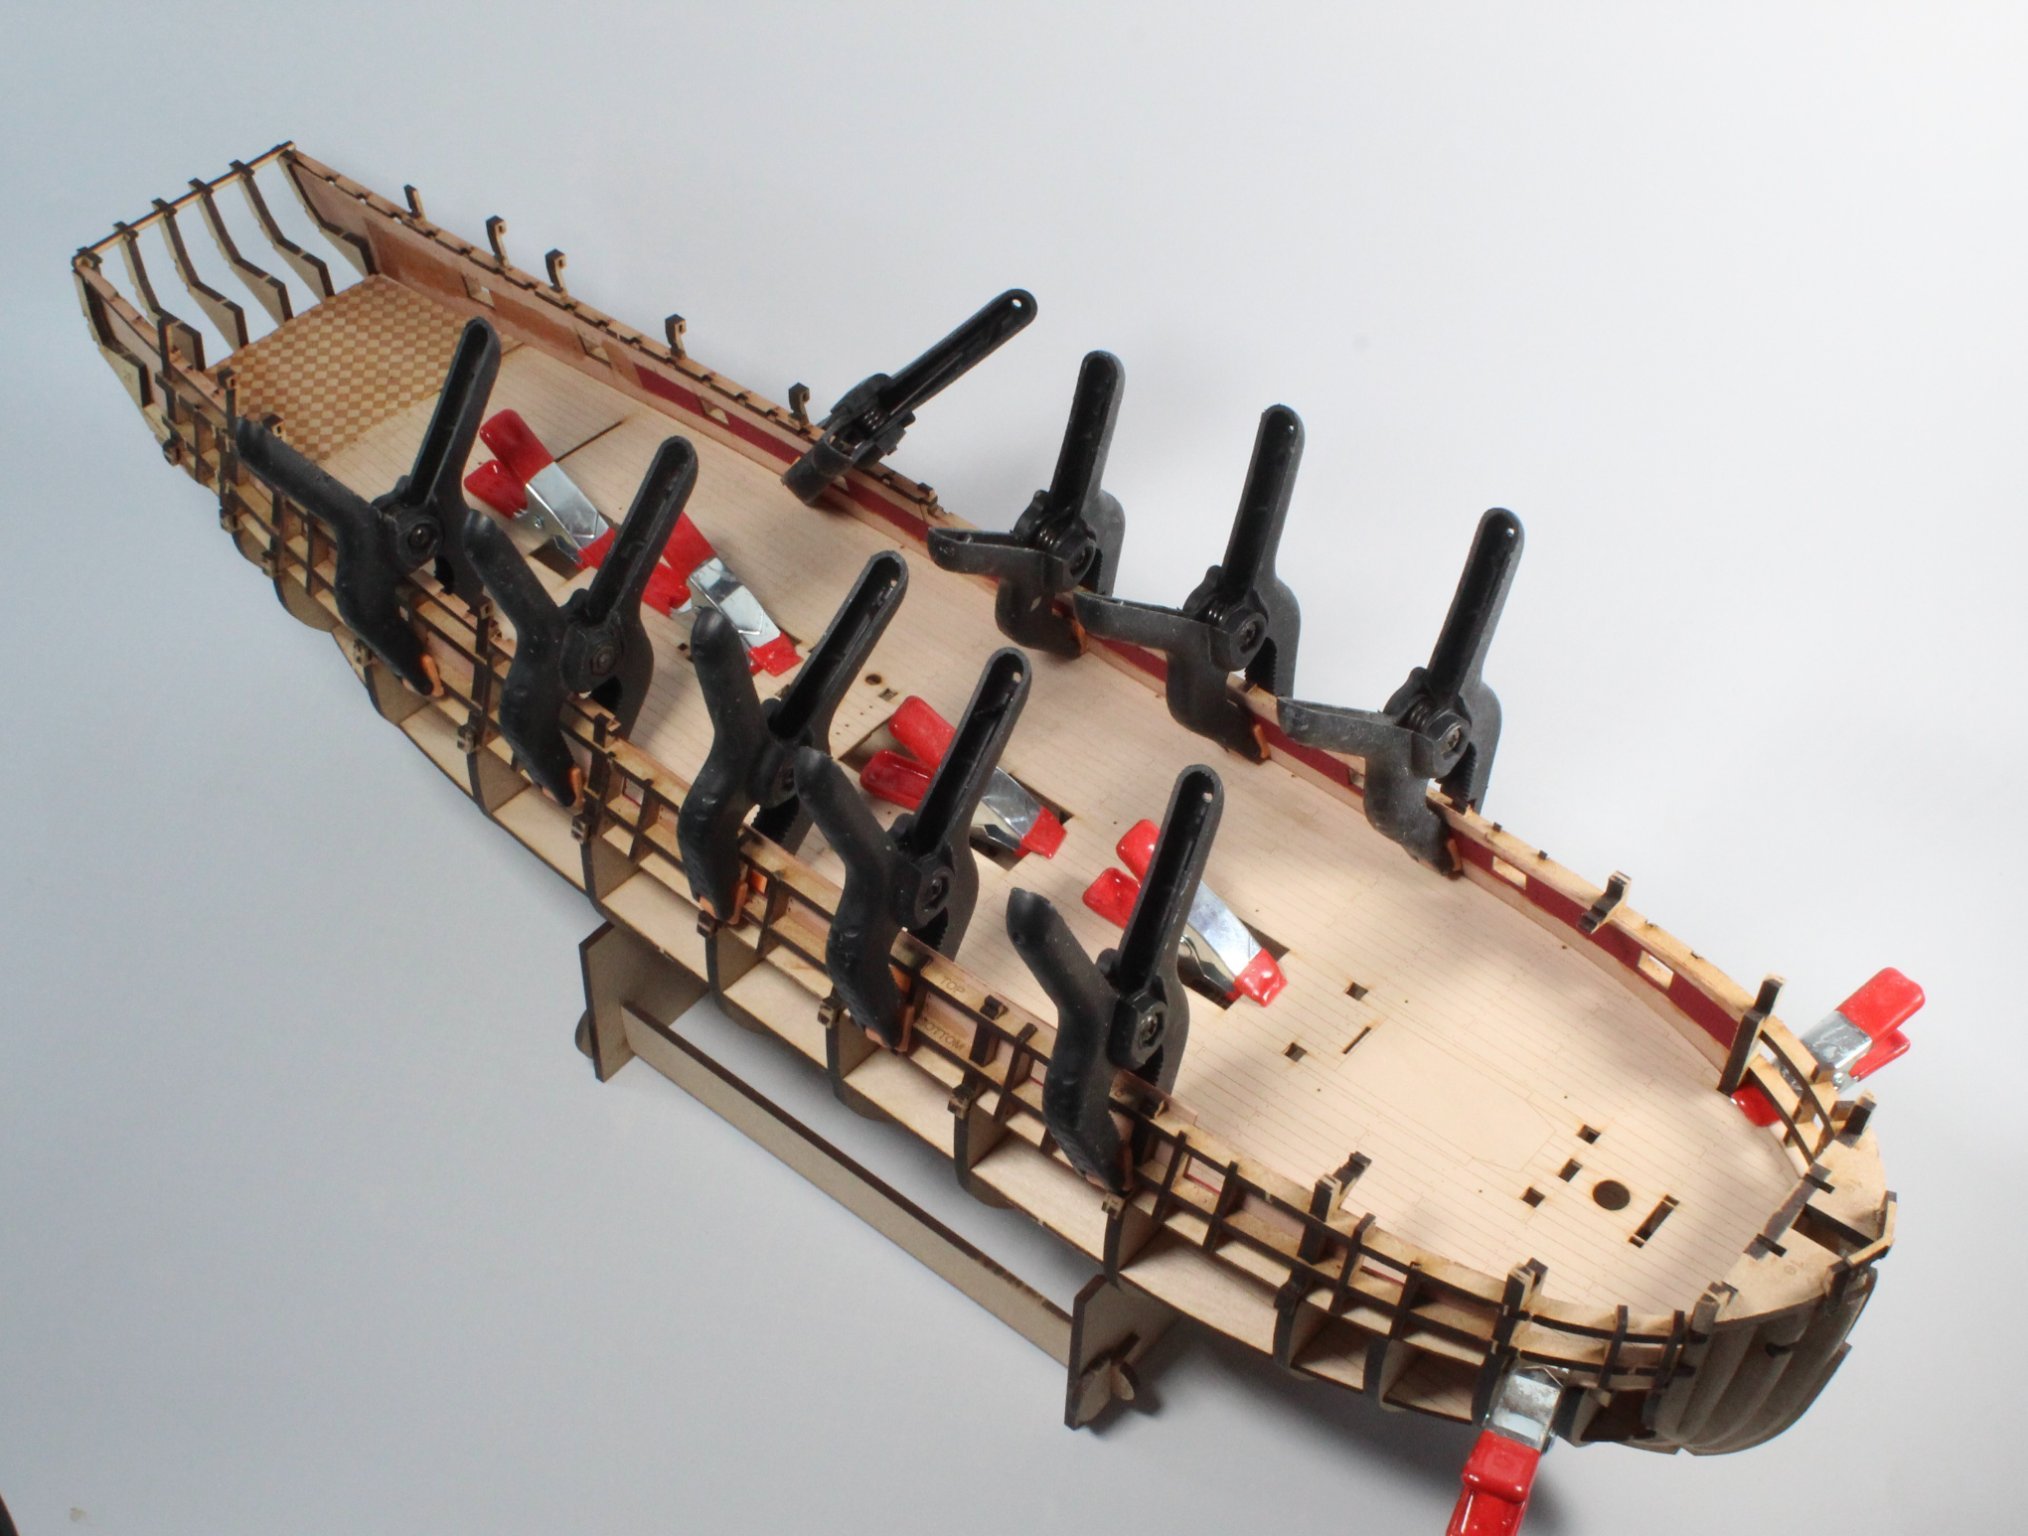
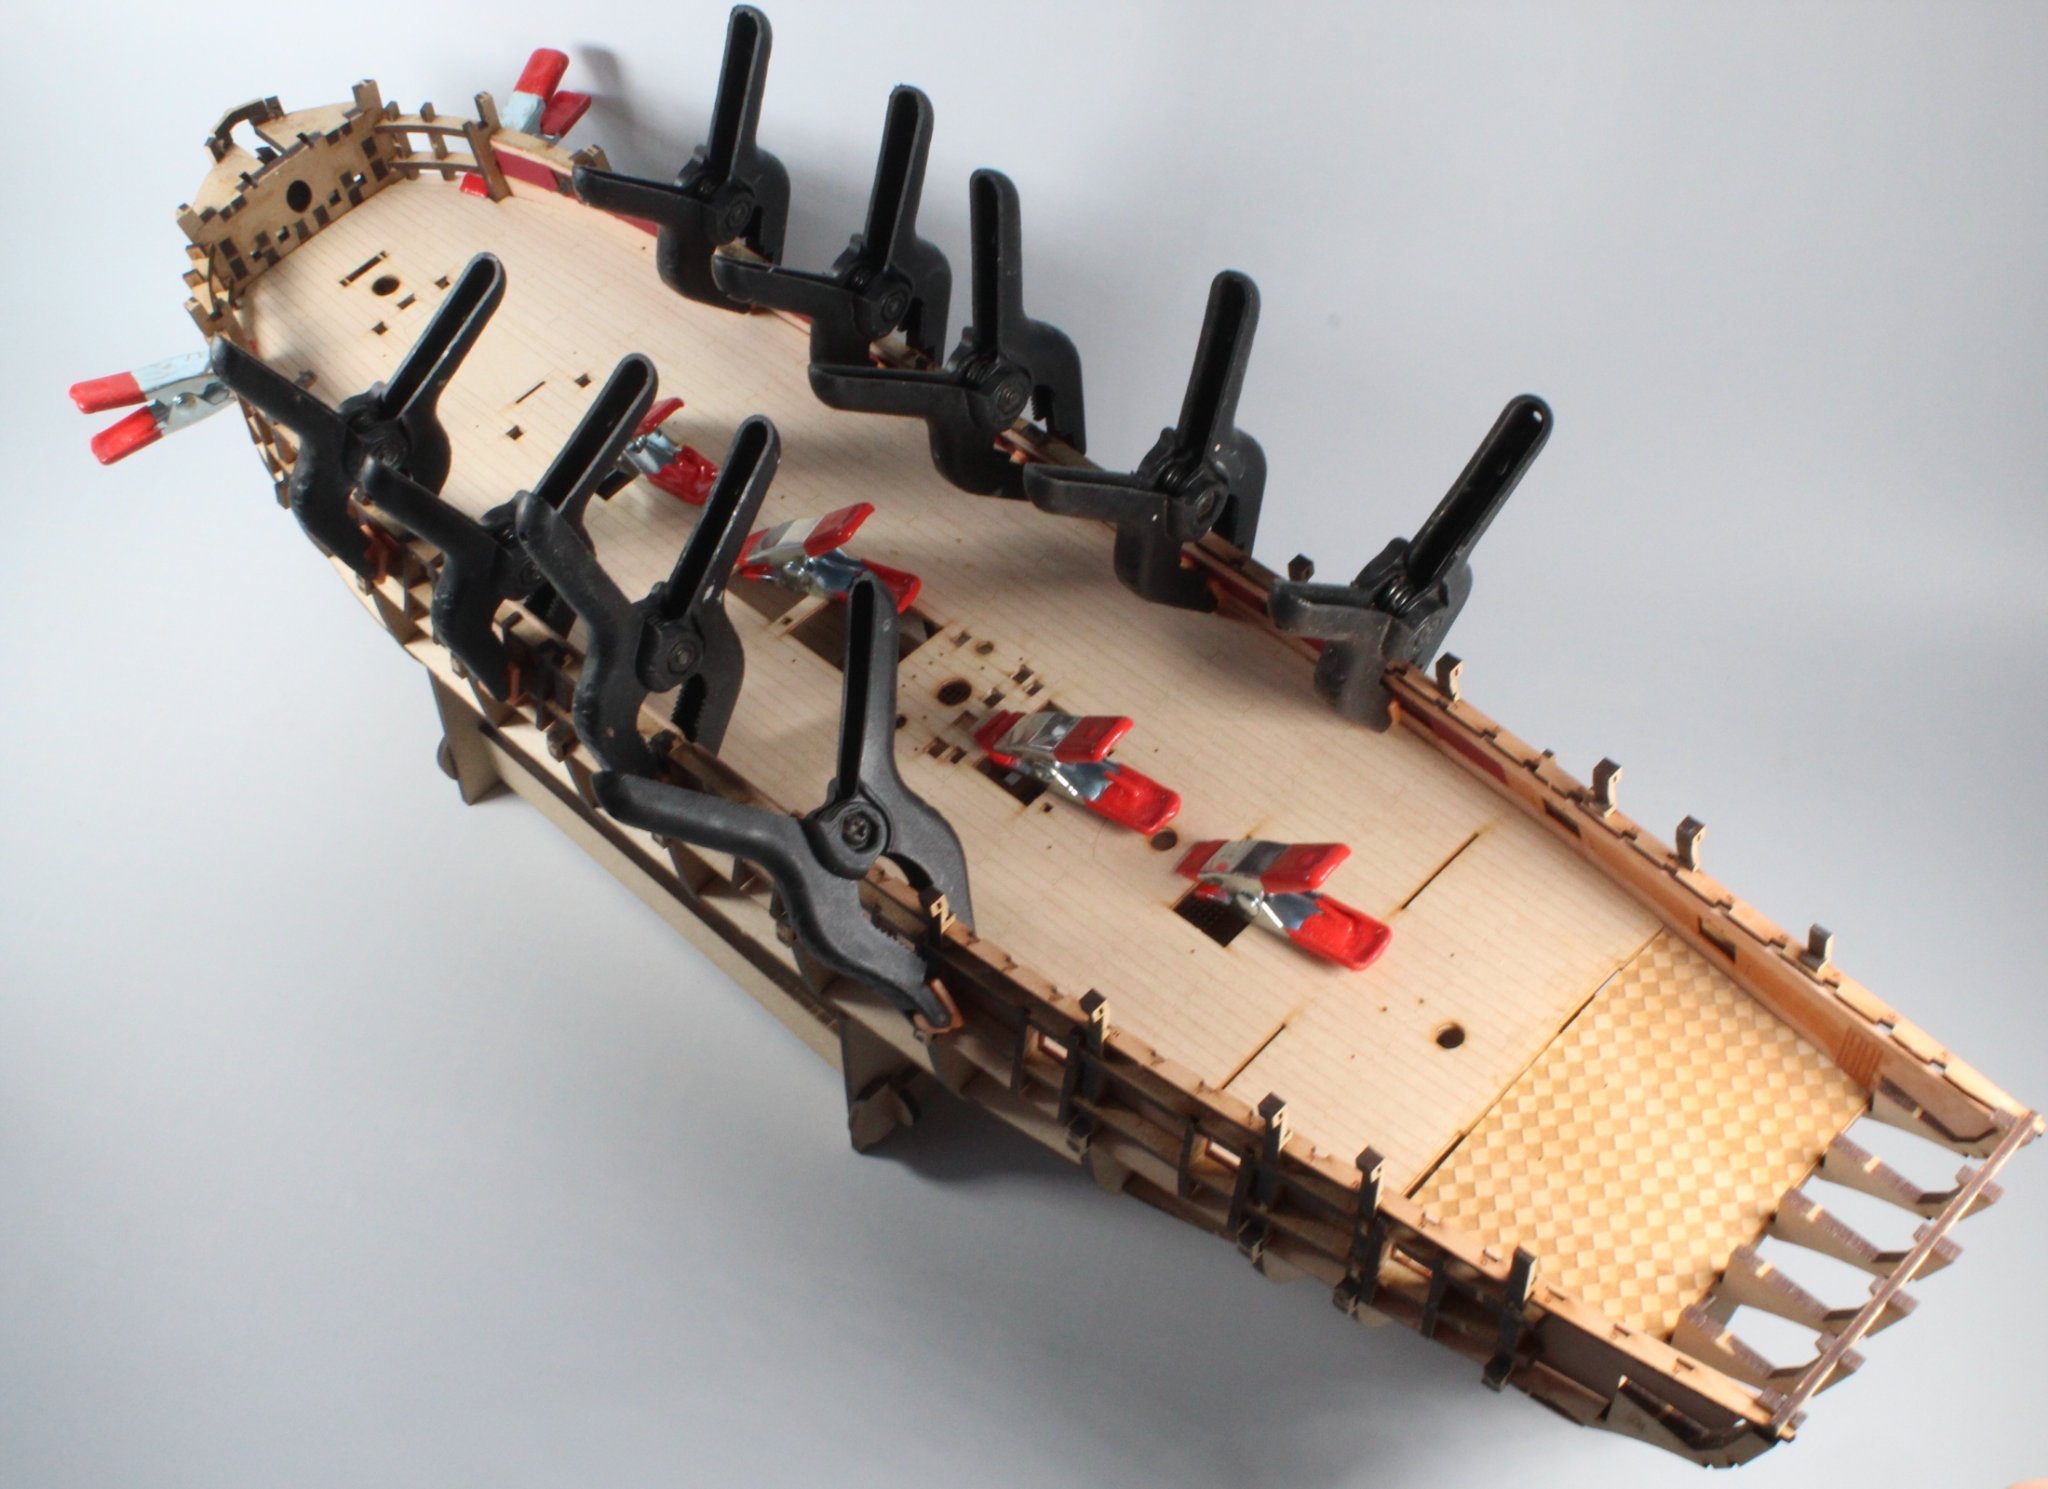
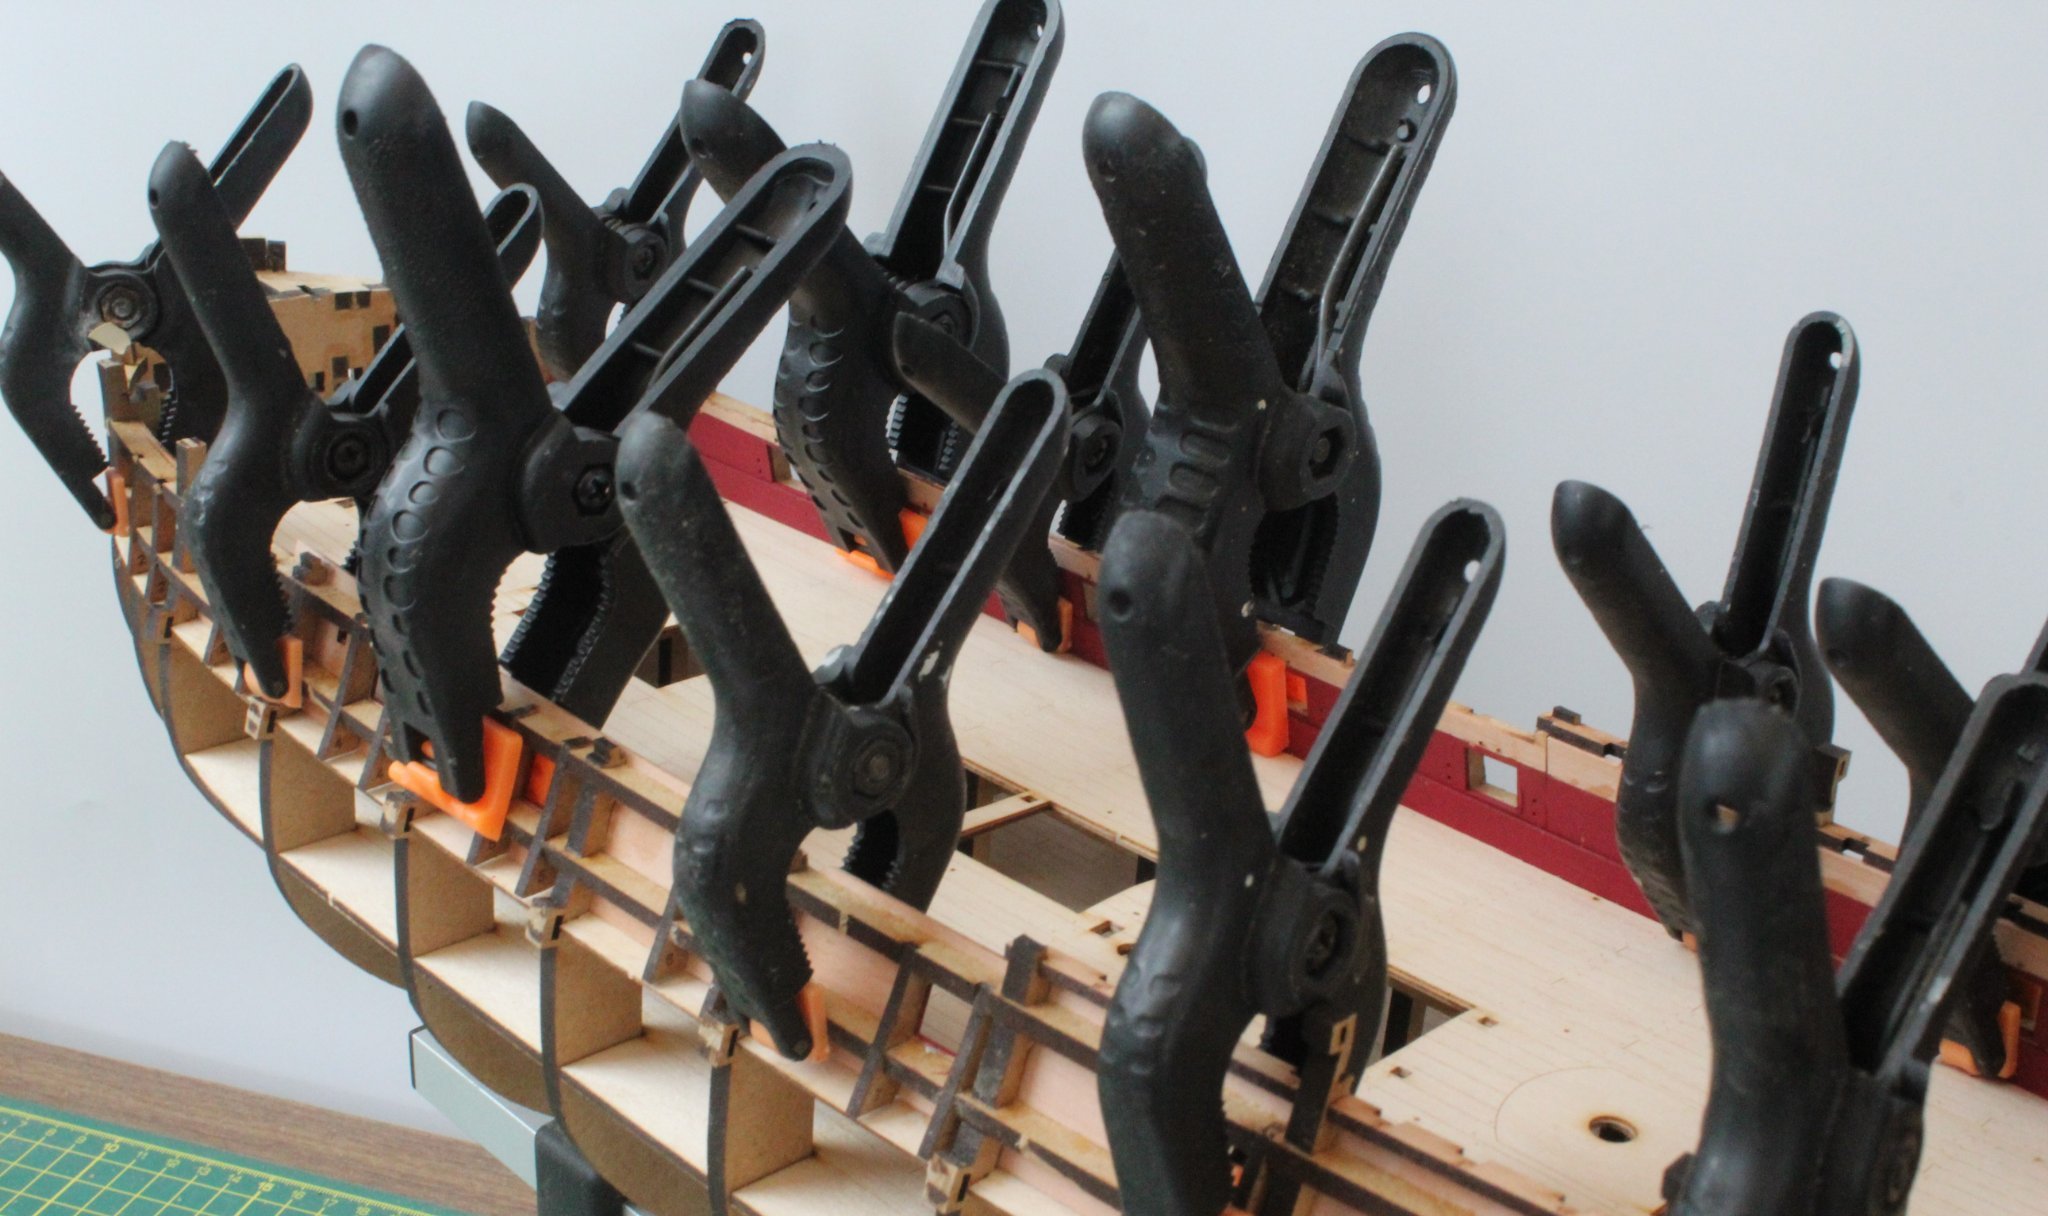
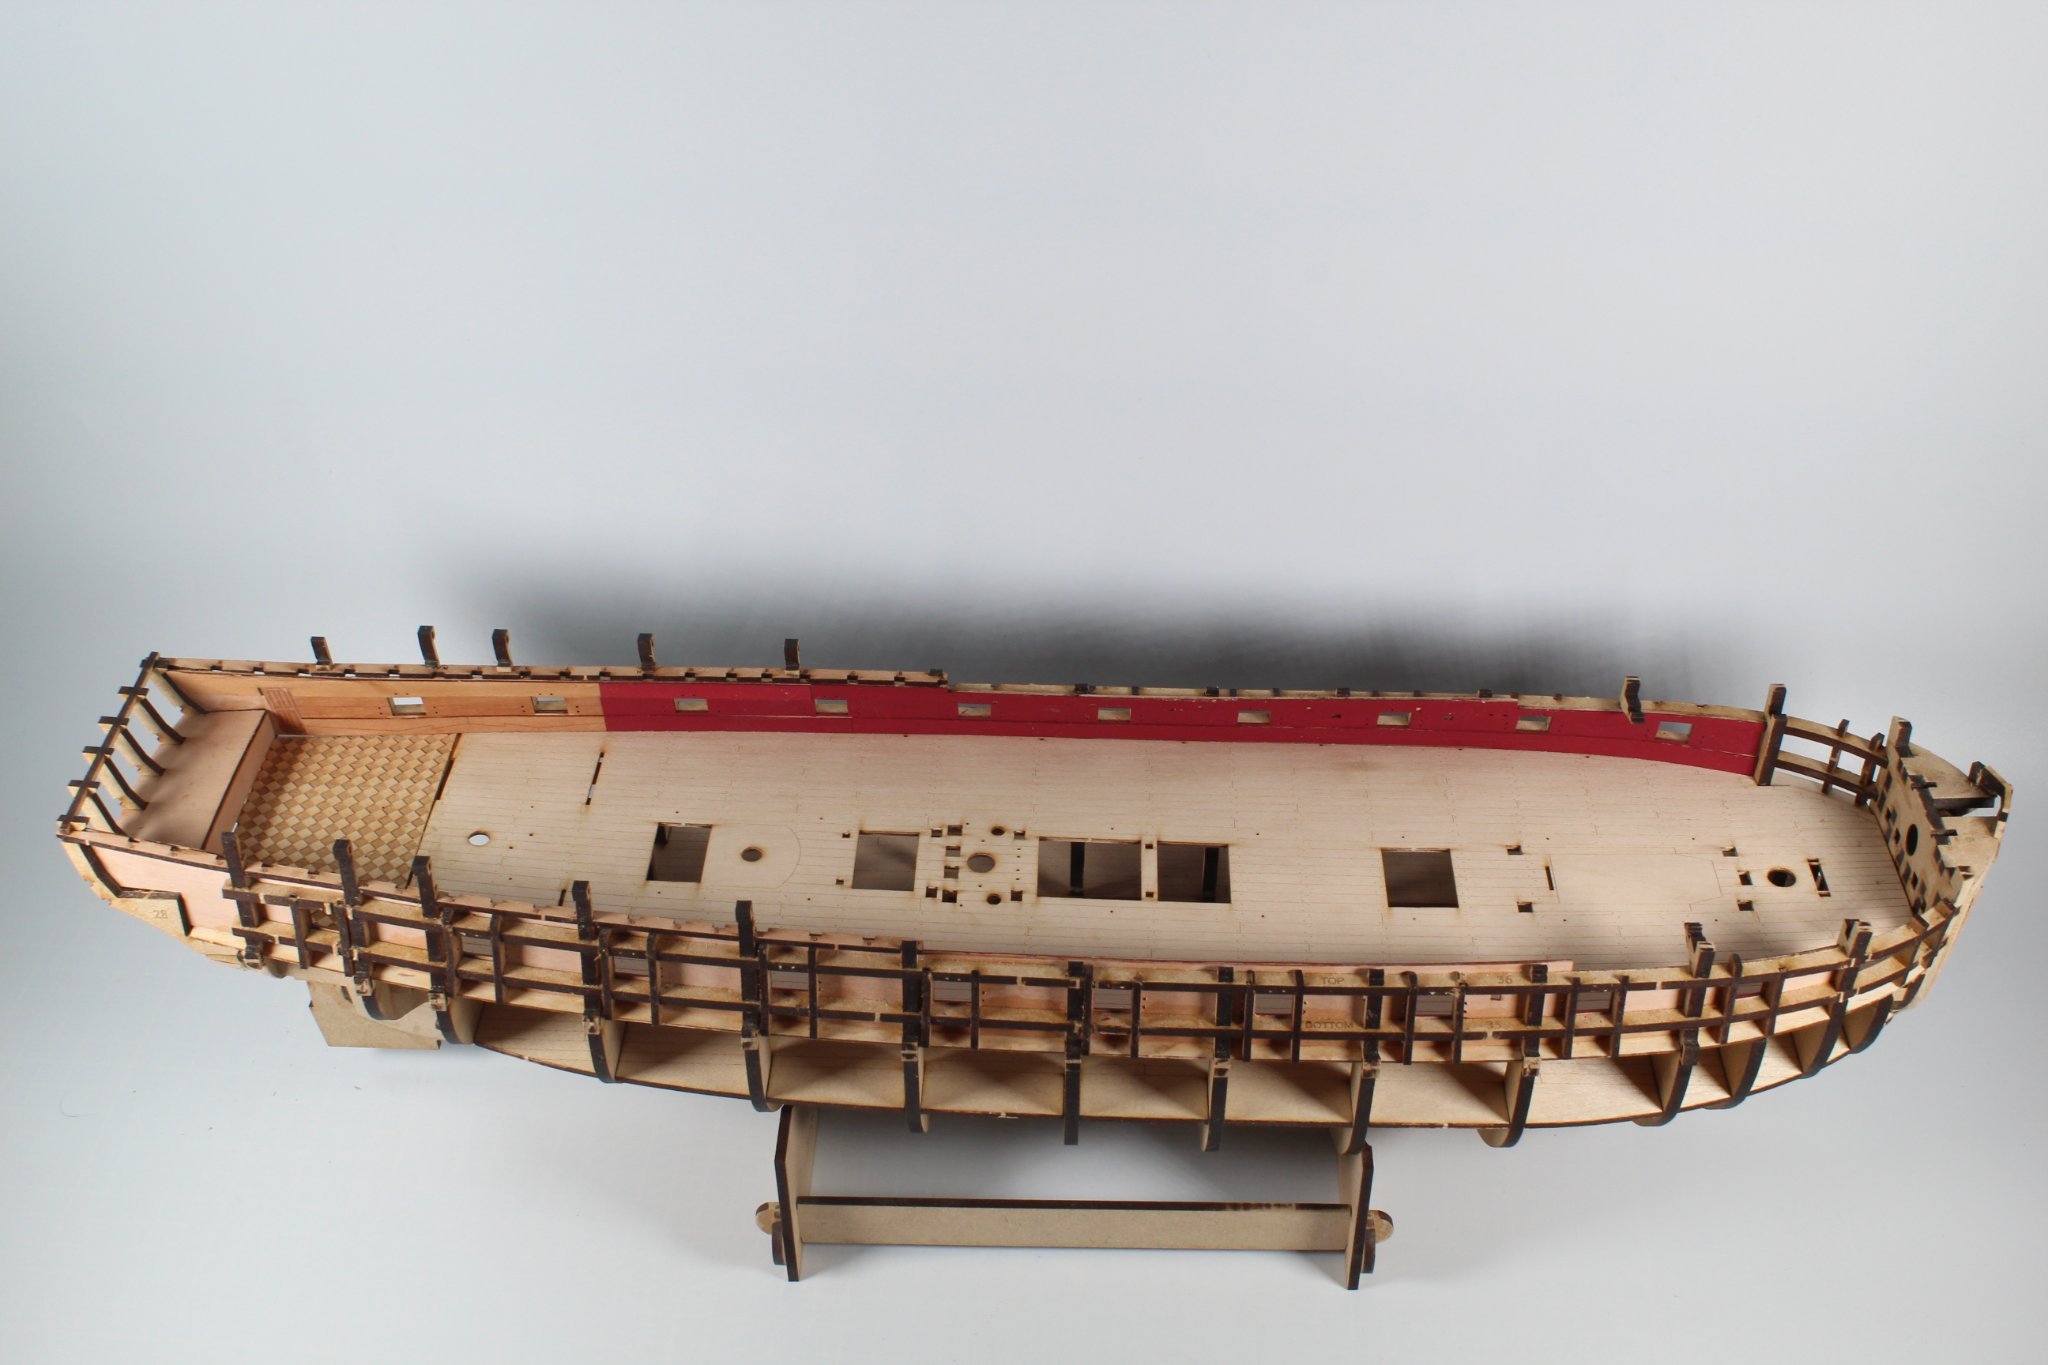
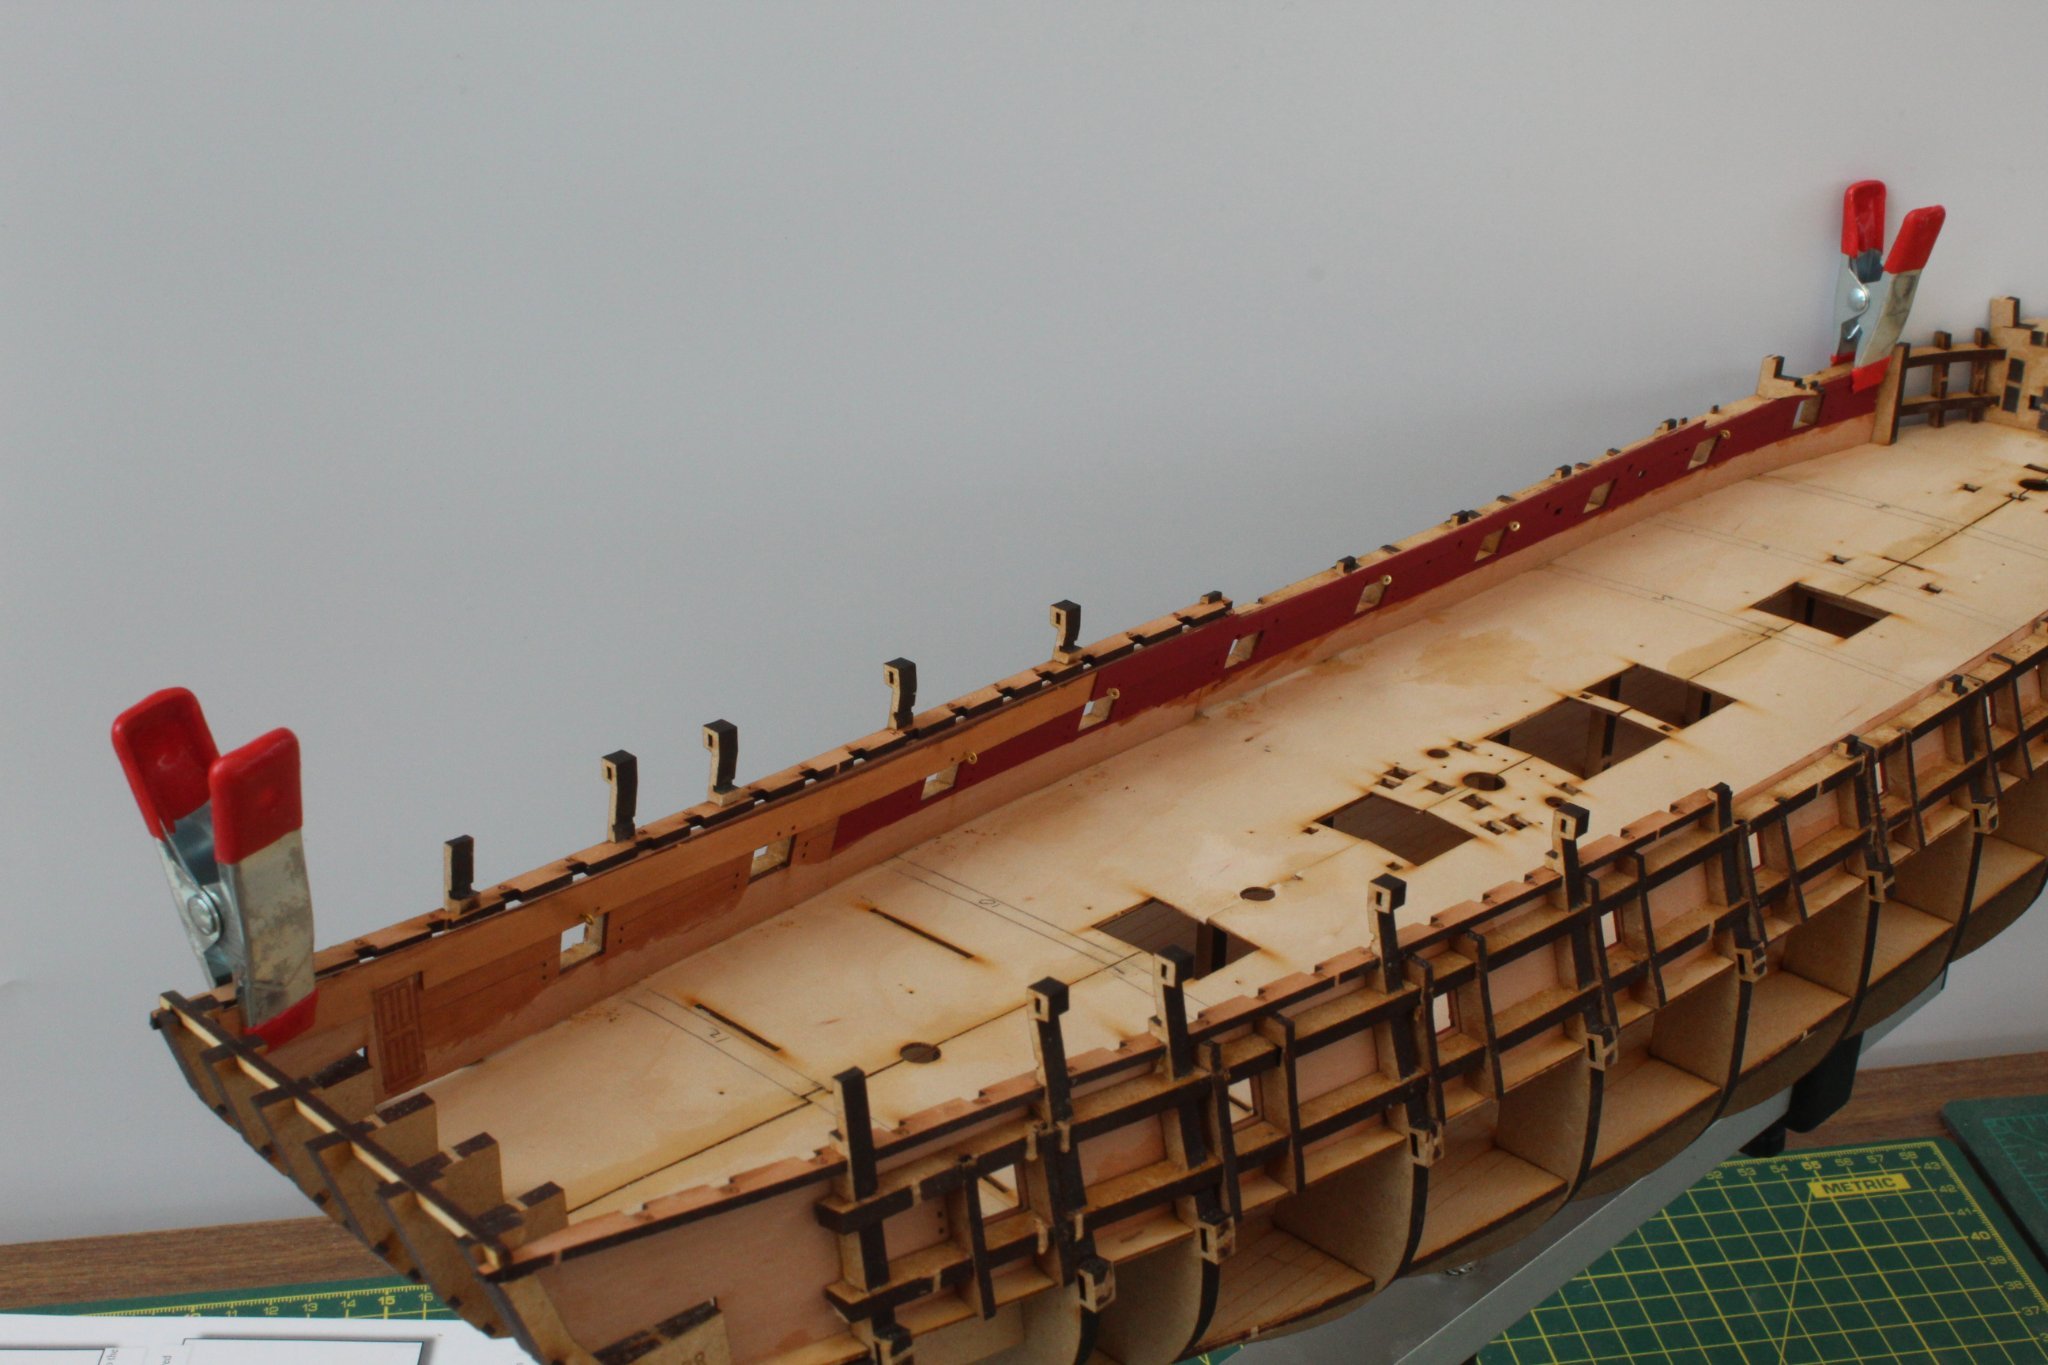
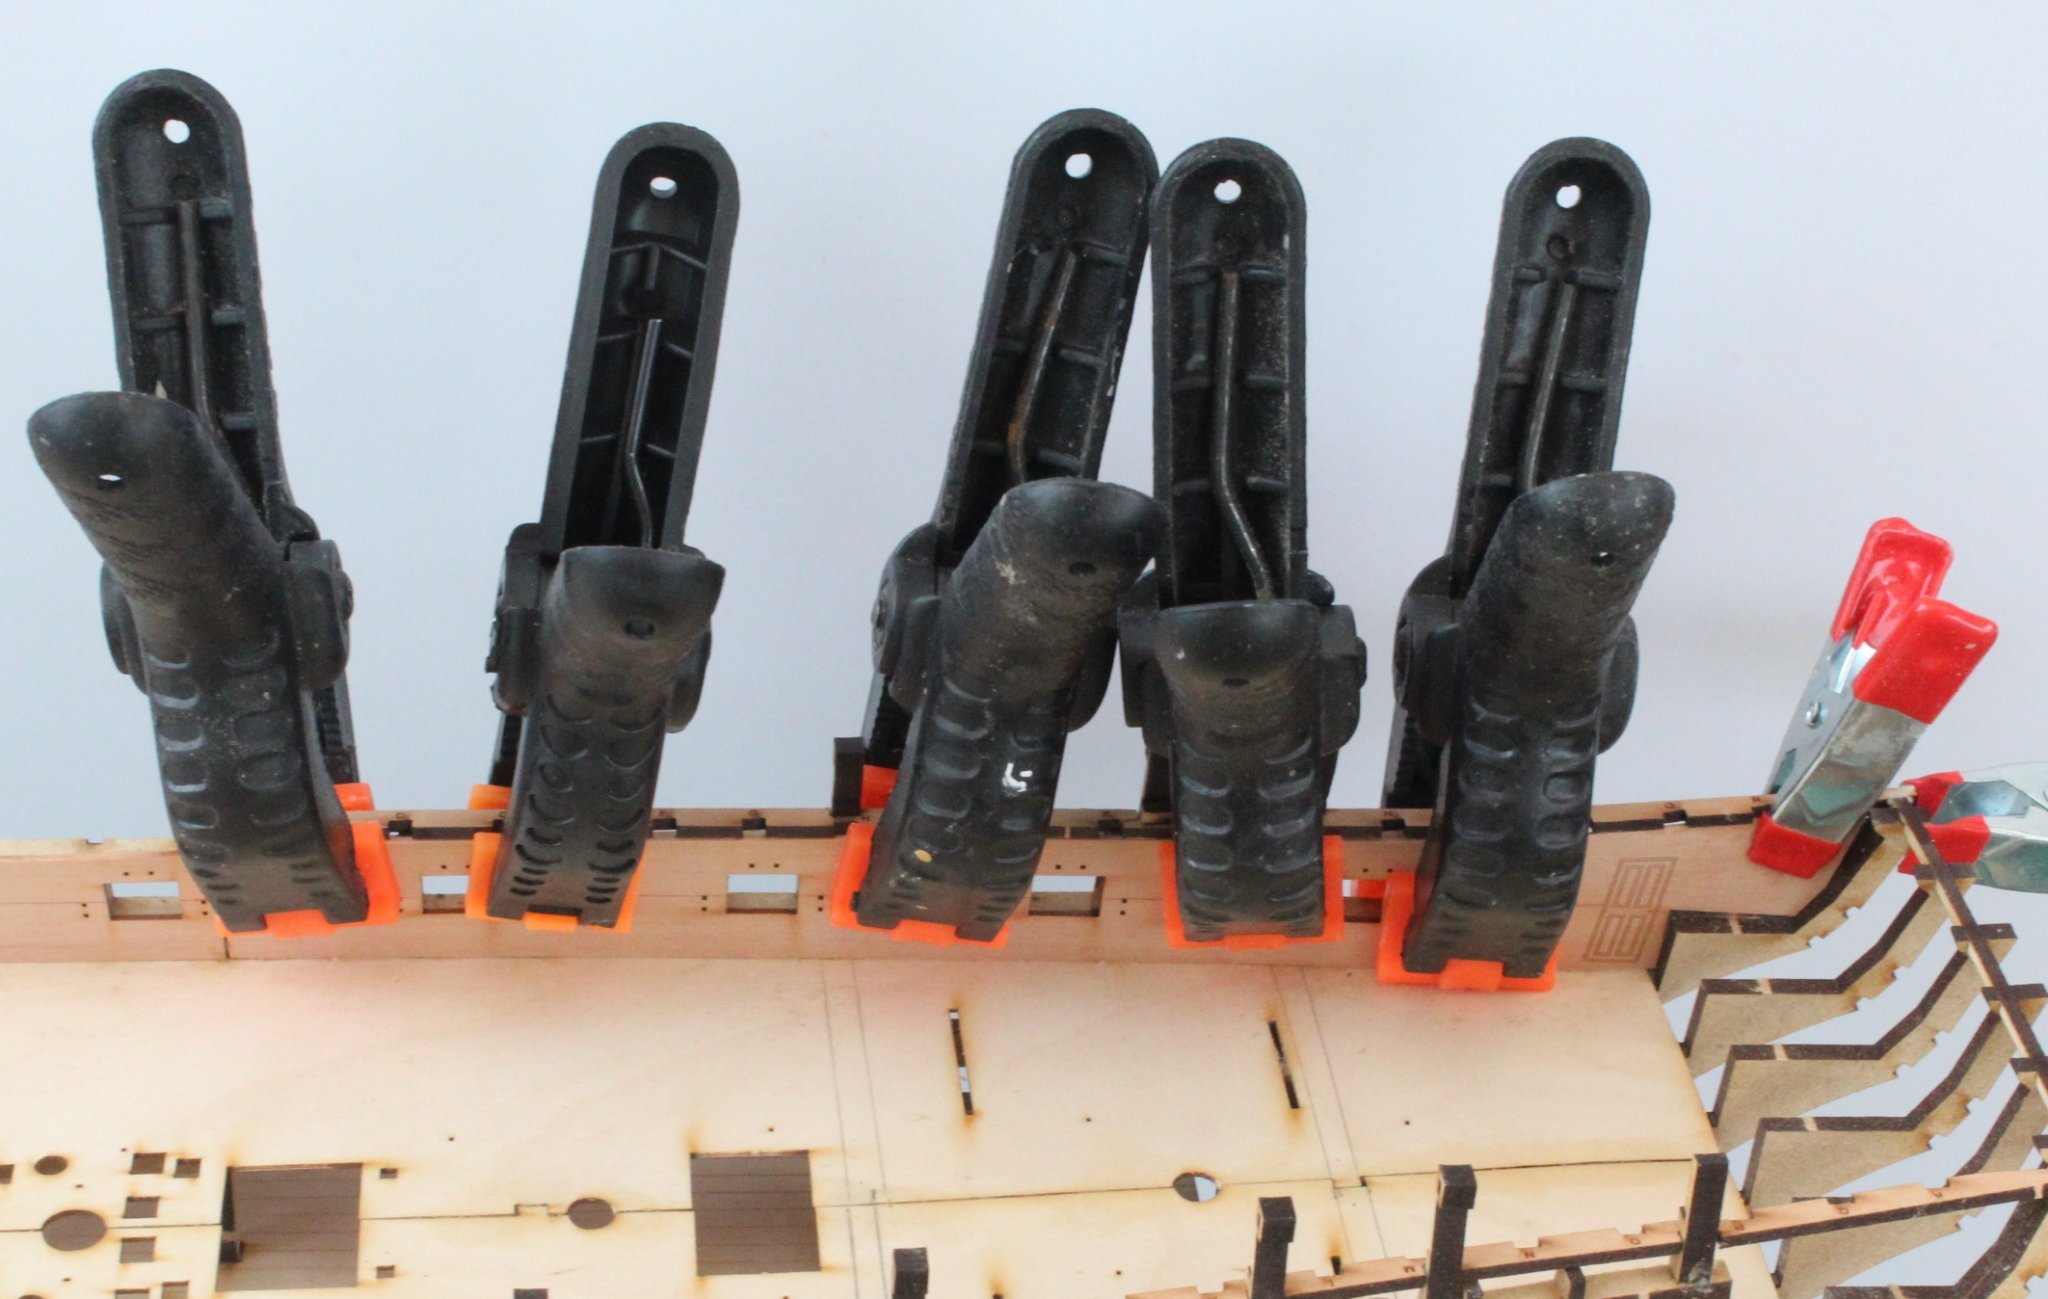
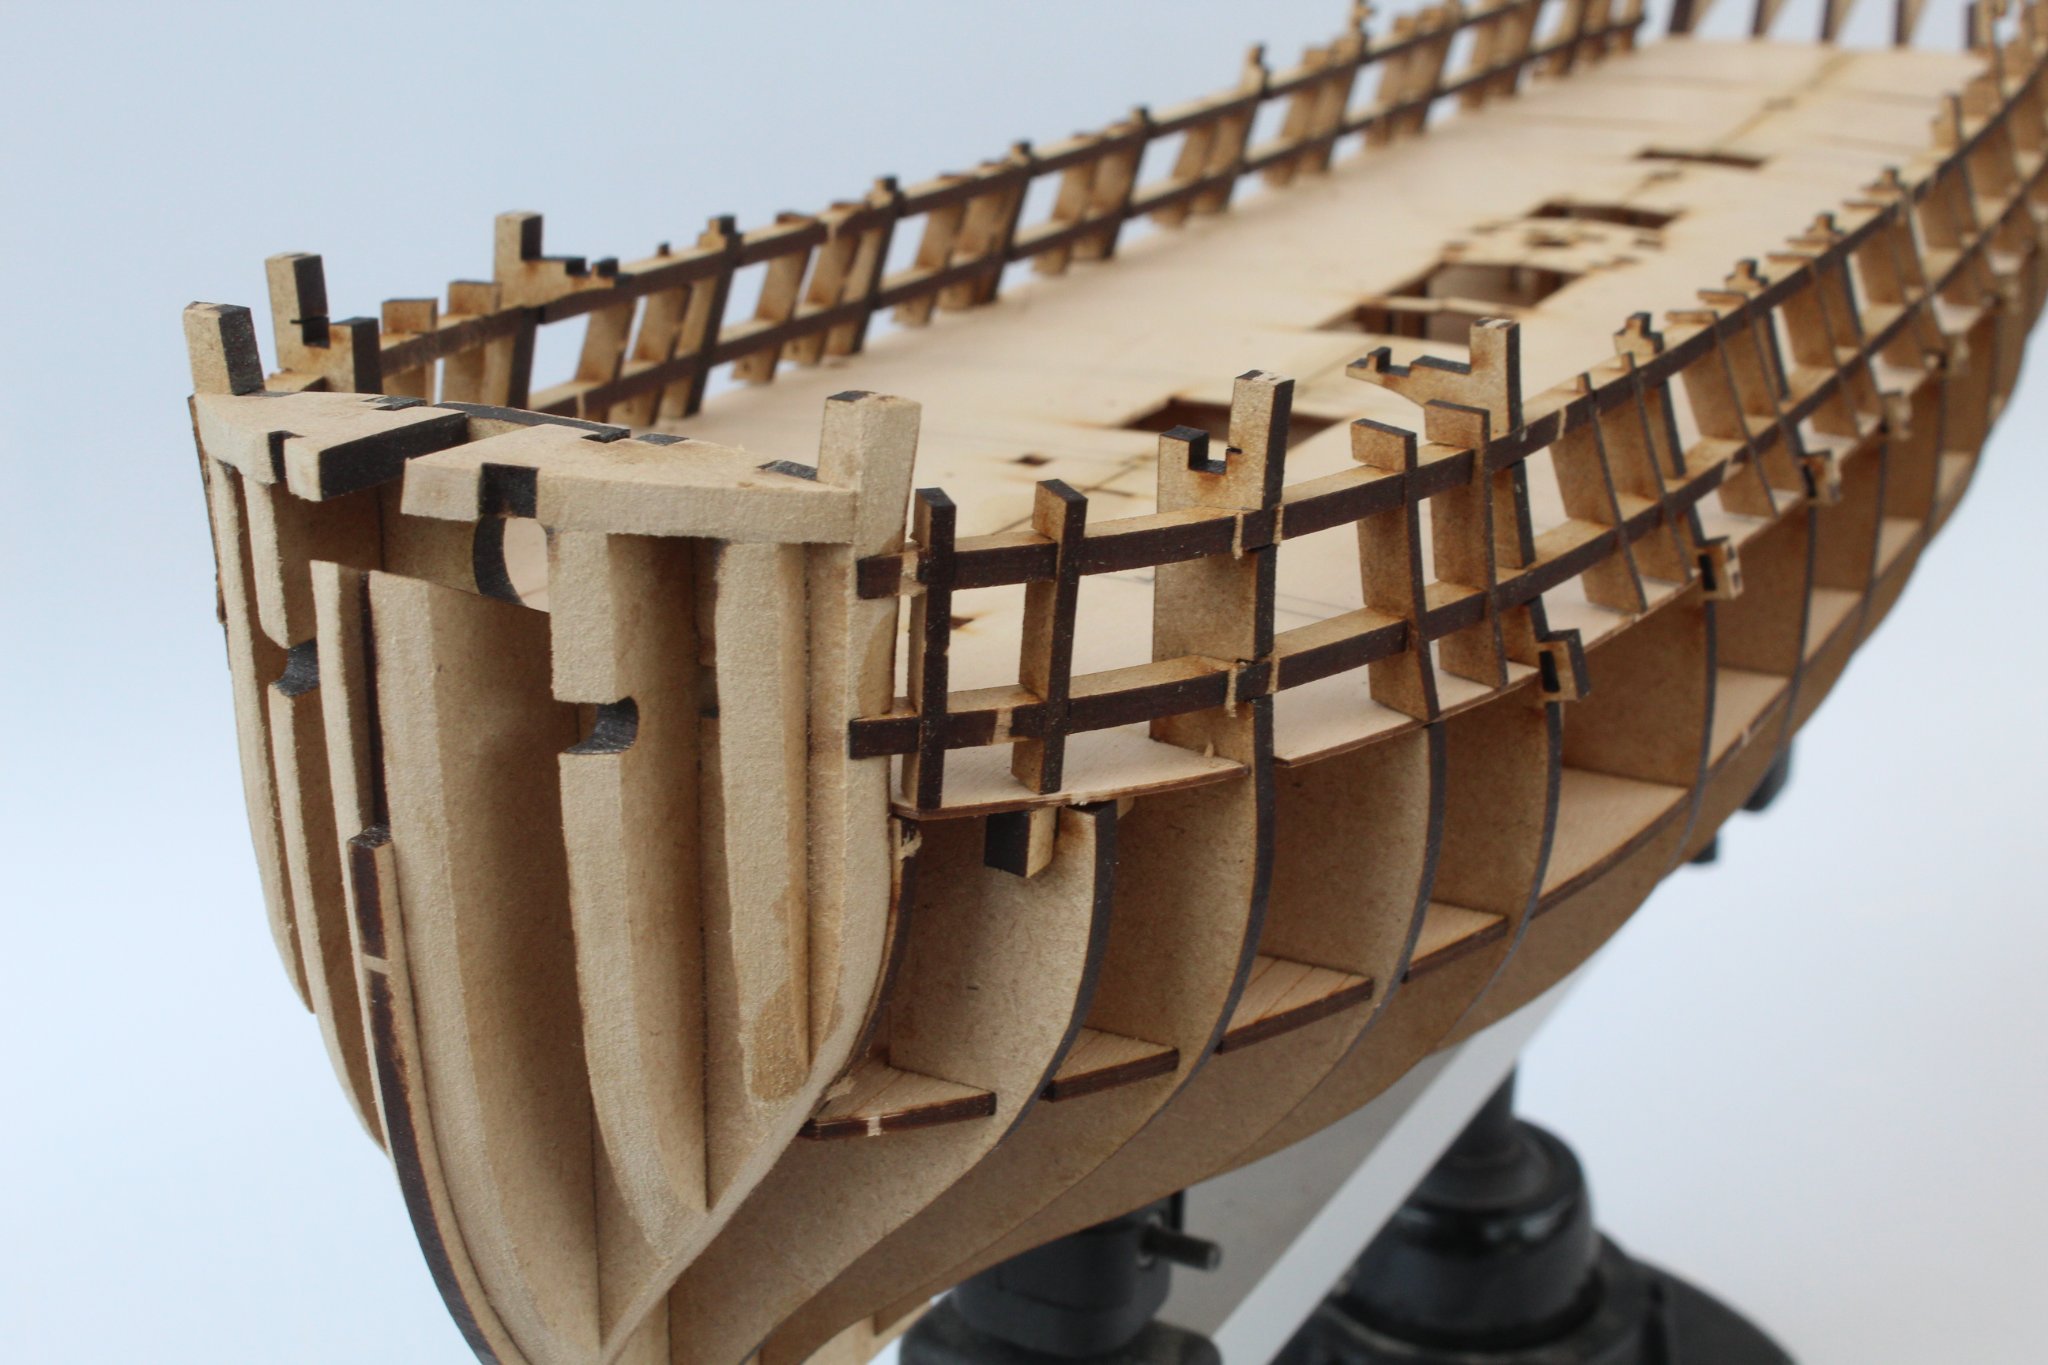
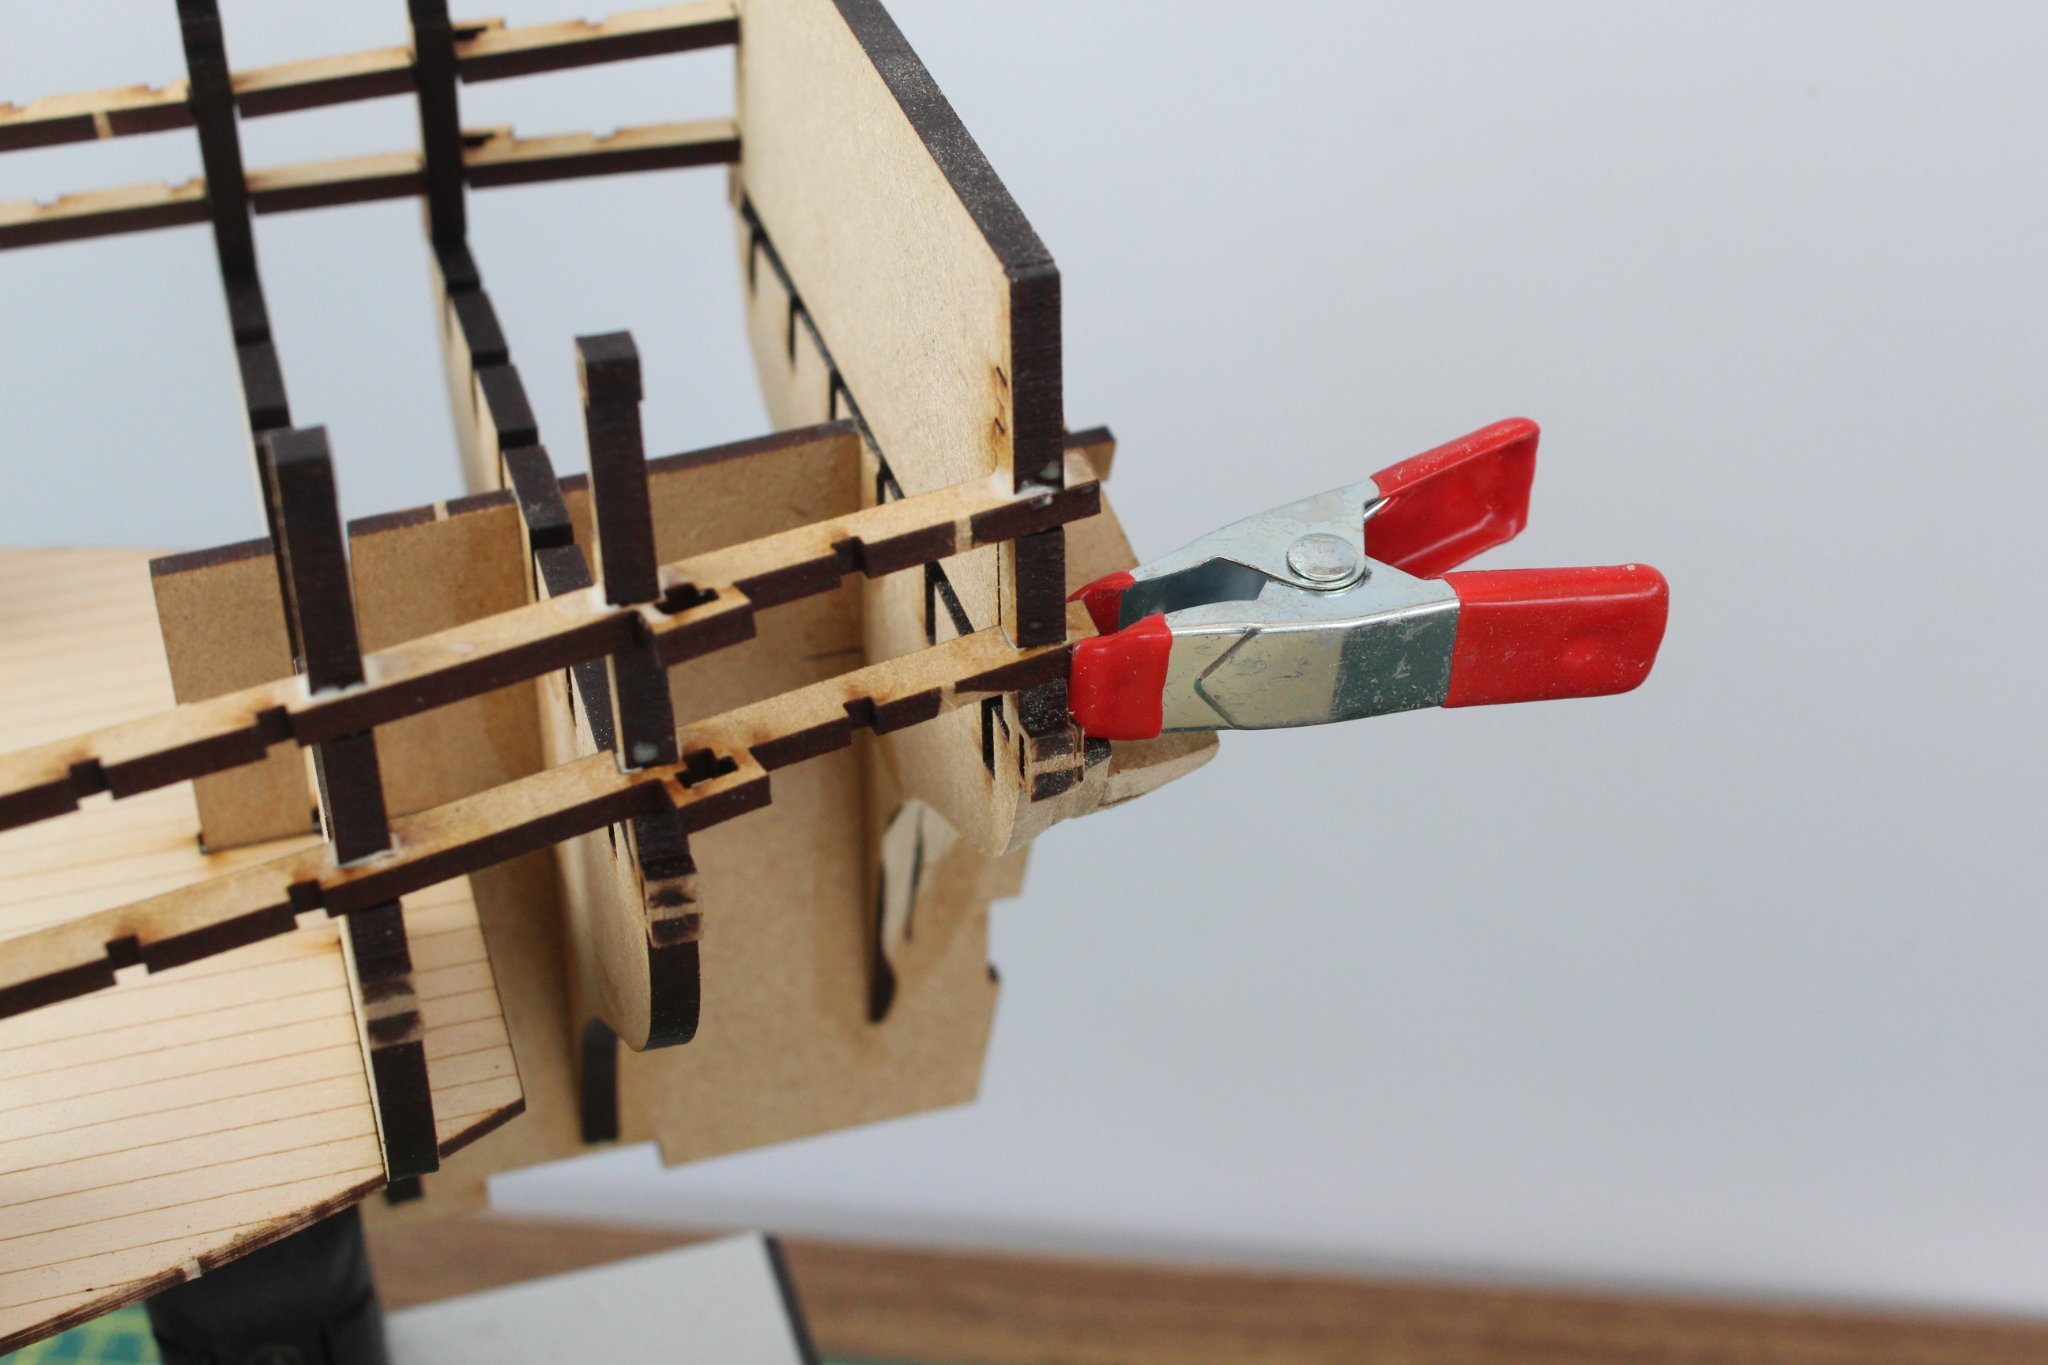
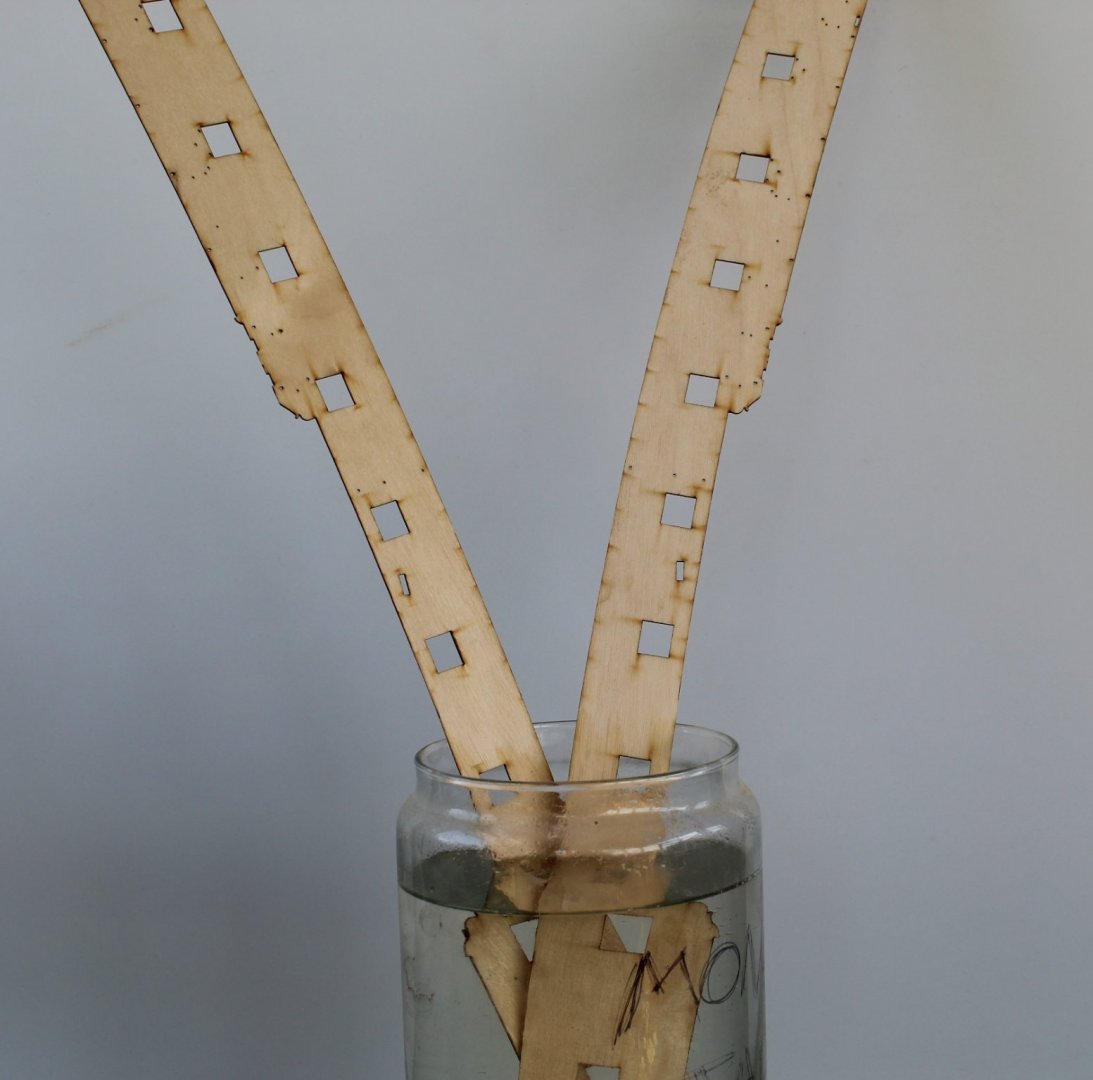
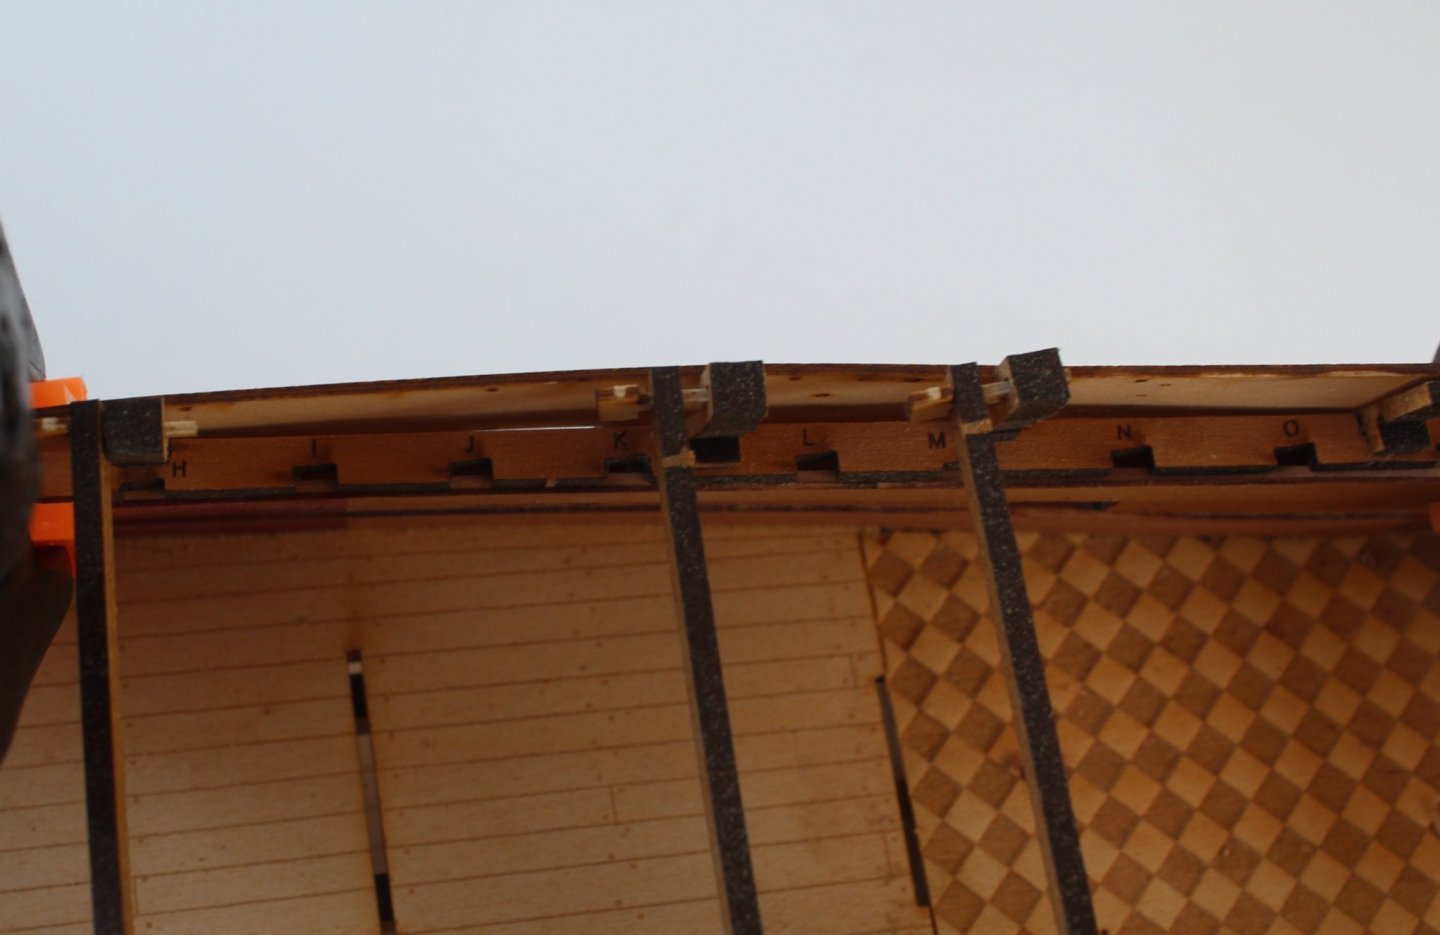
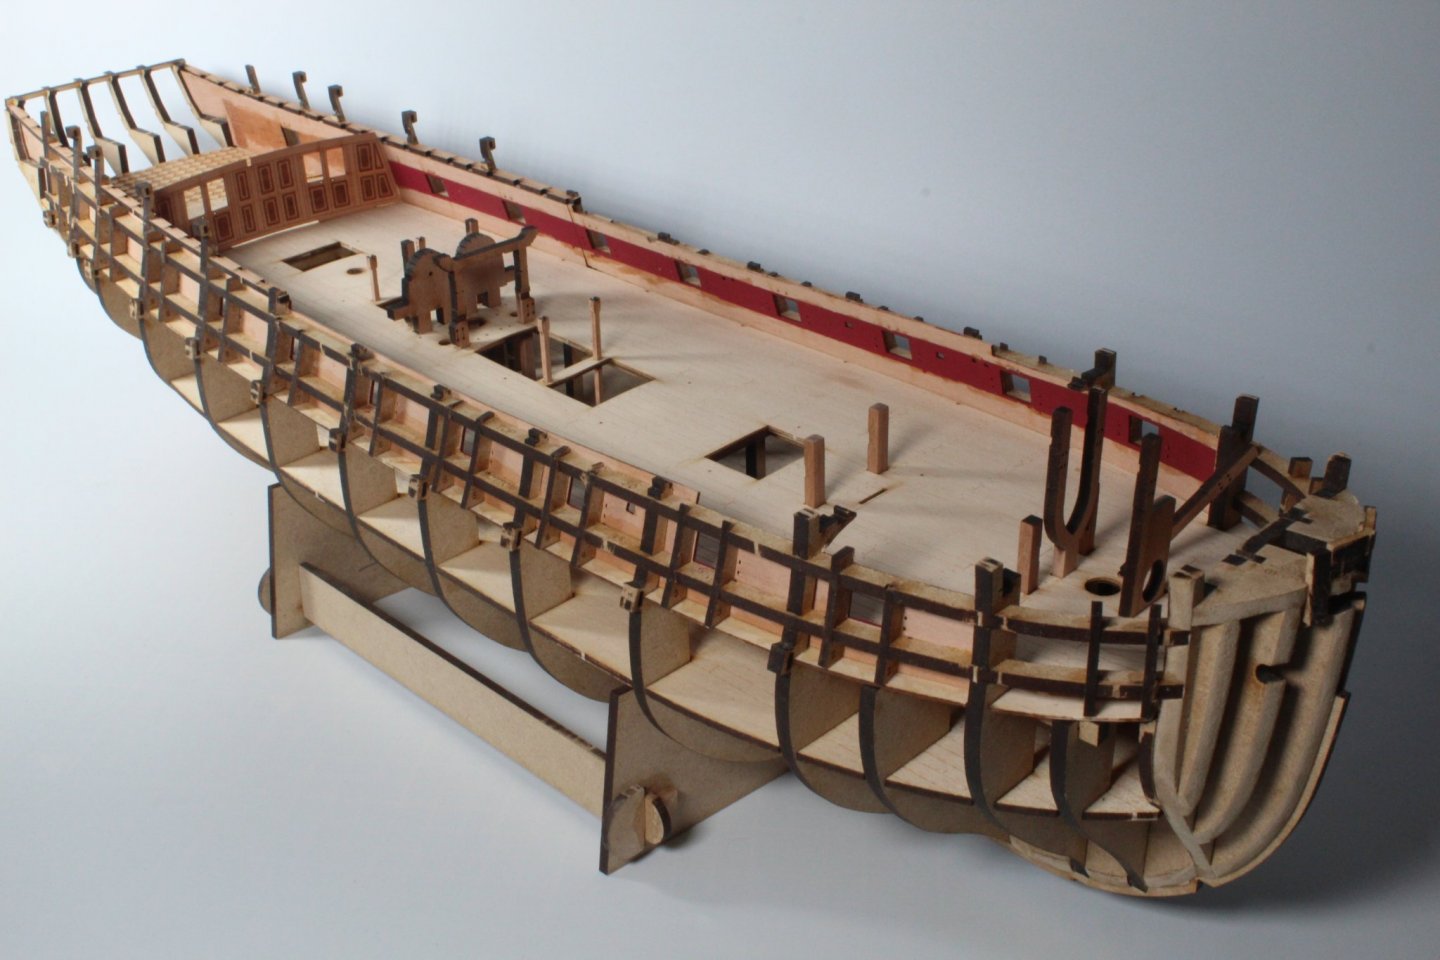
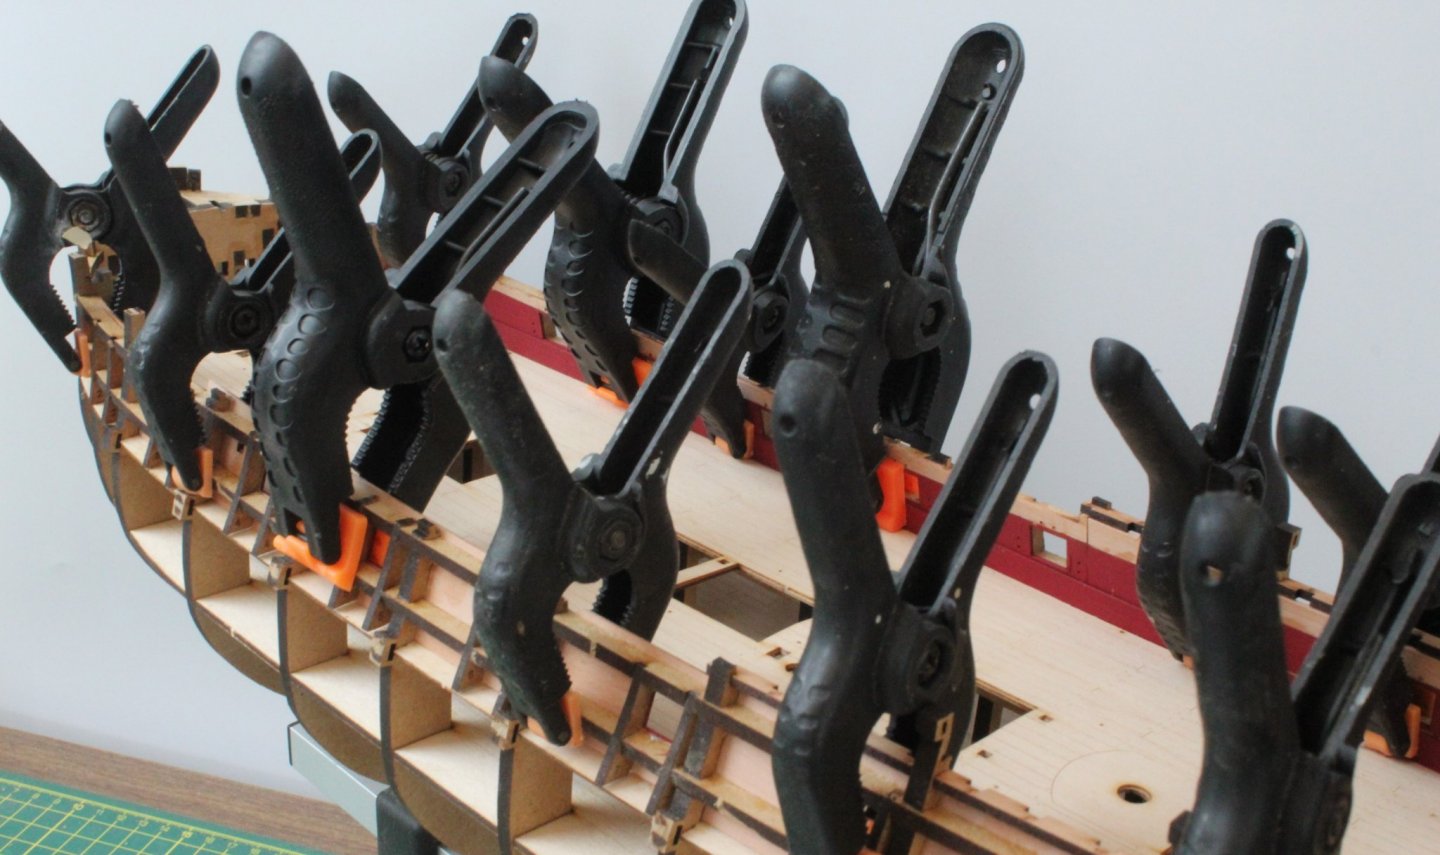
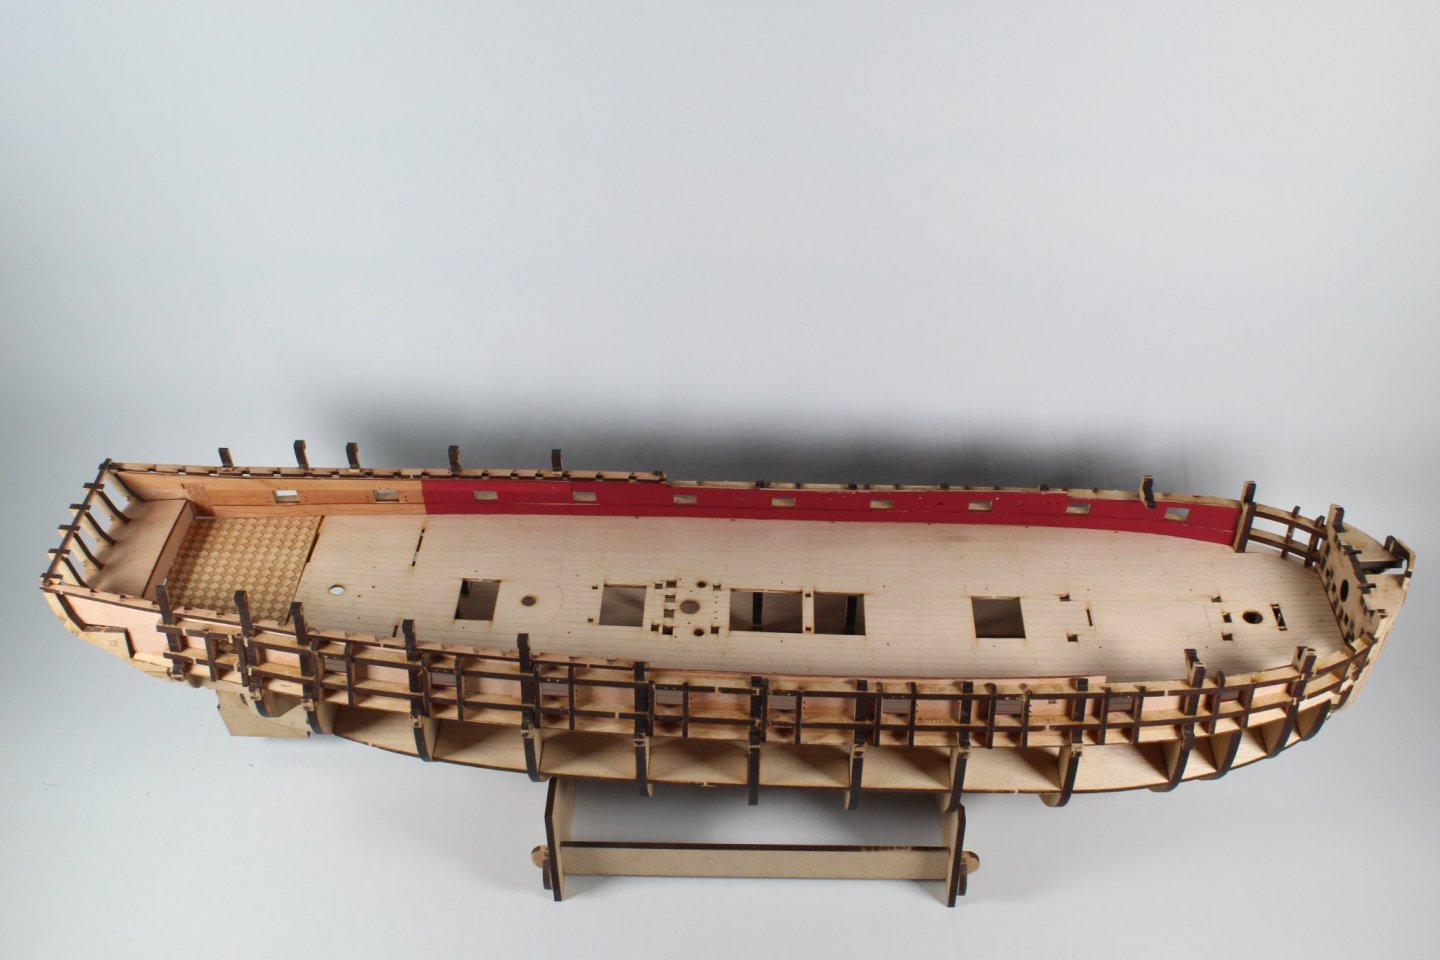
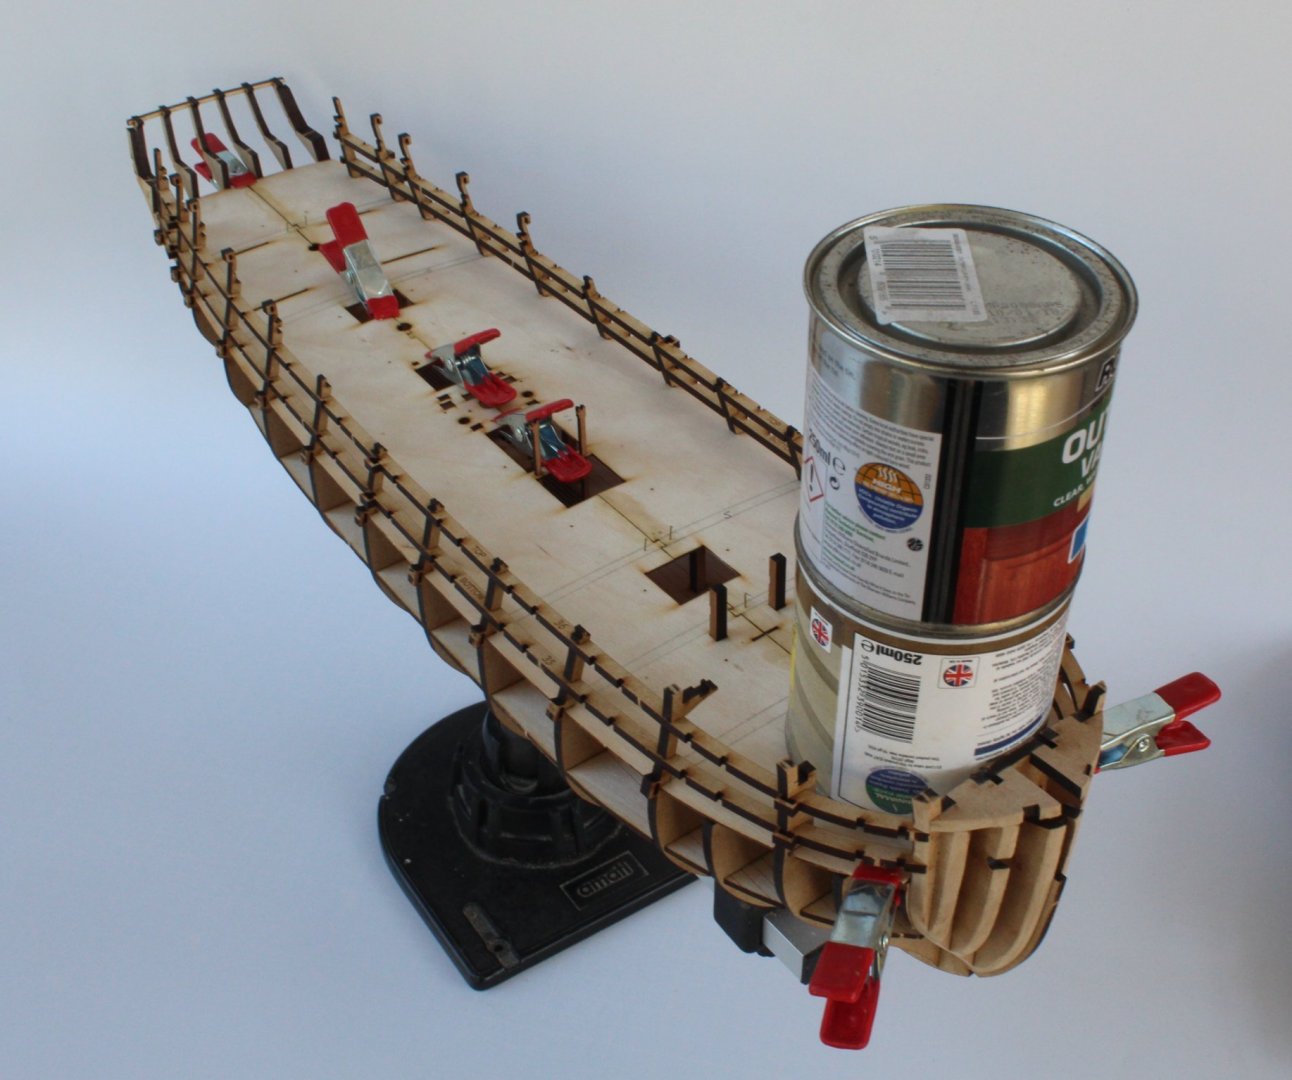
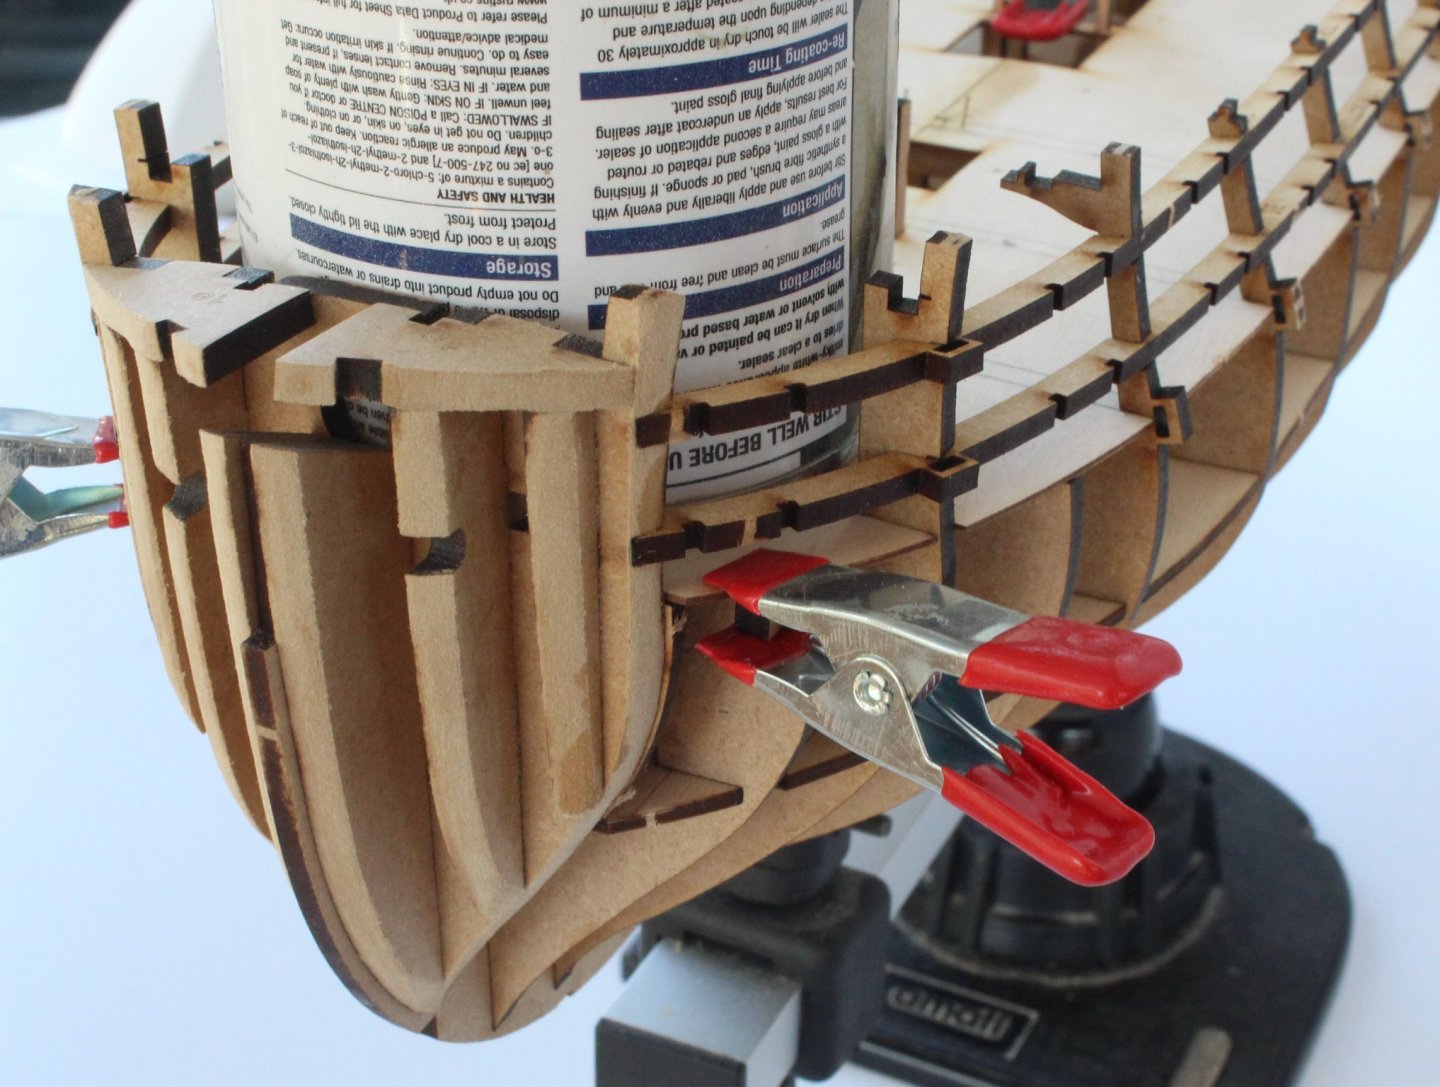
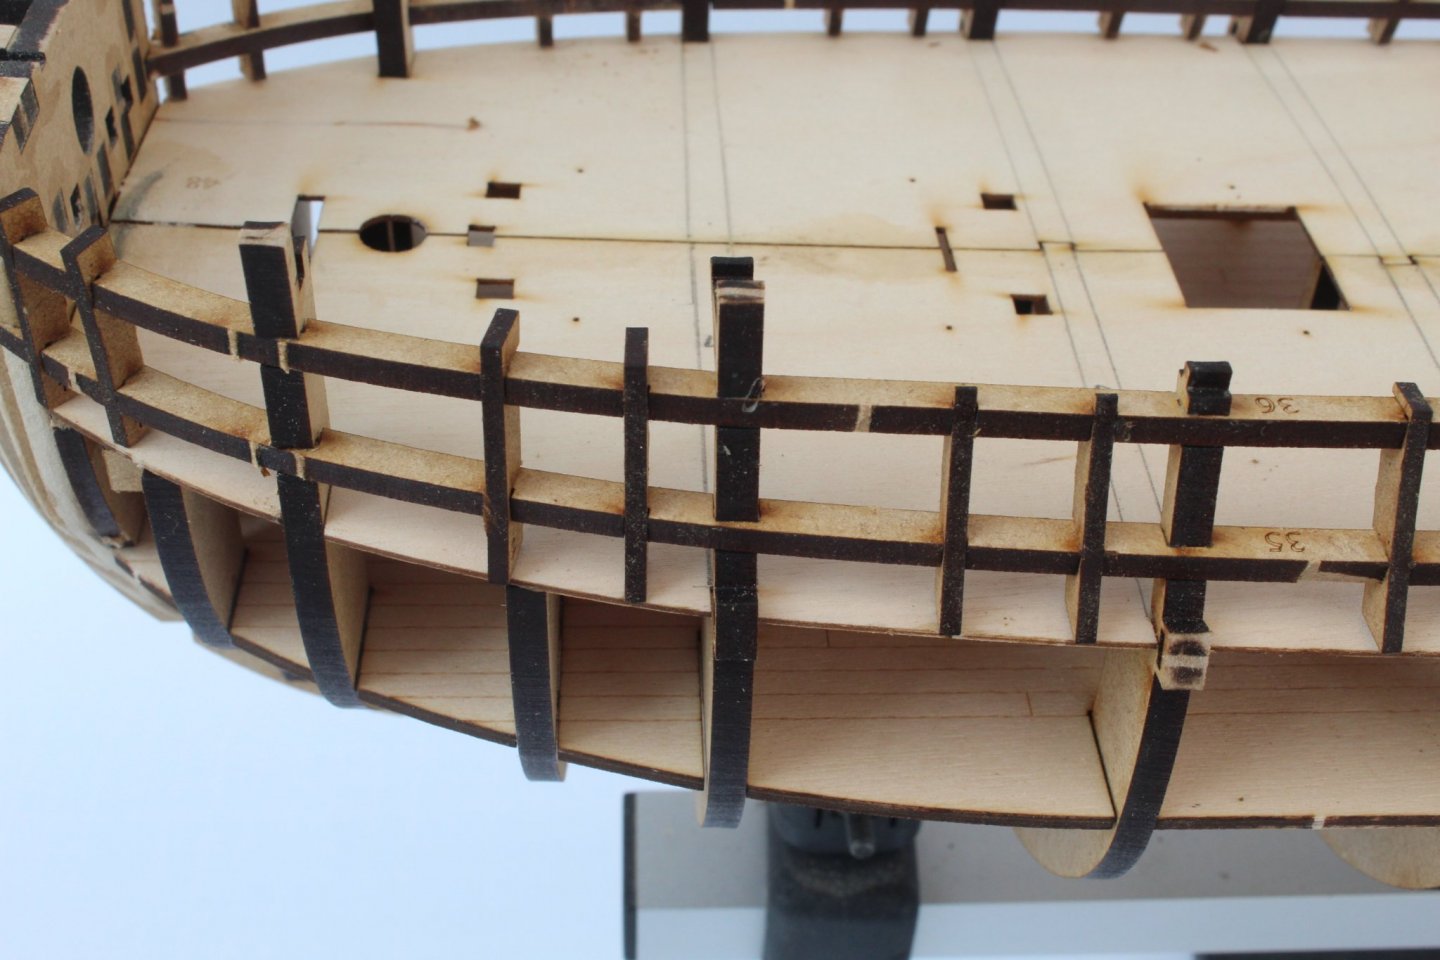
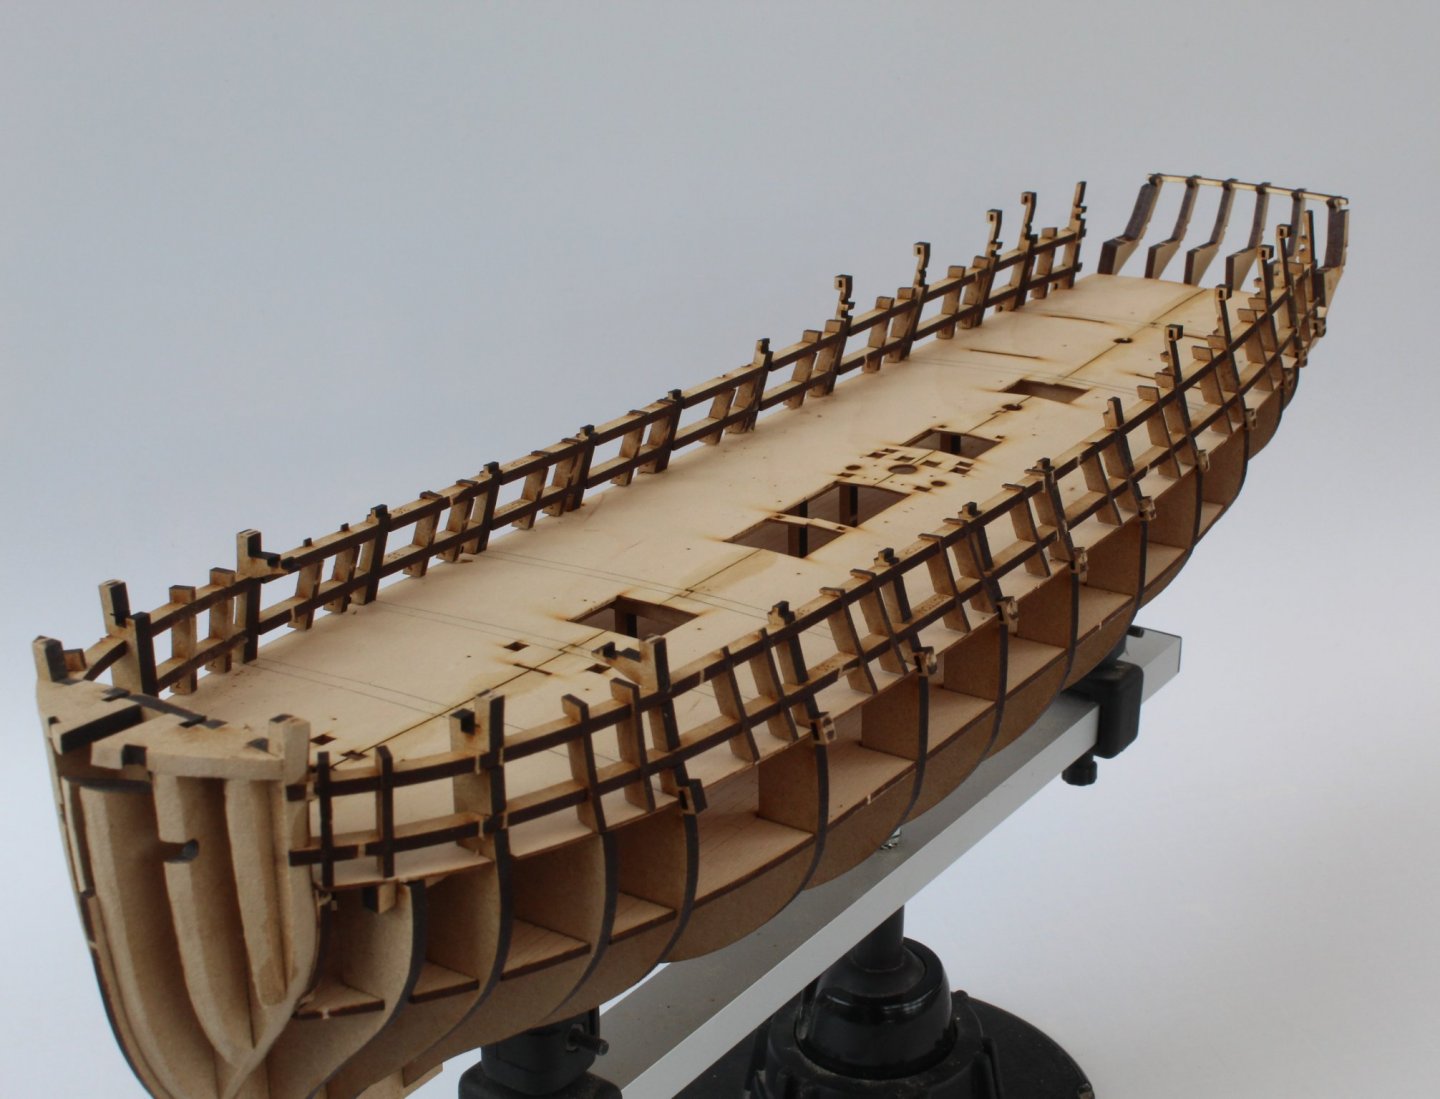
GUN DECK ASSEMBLY FAIRING THE HULL BUILD MANUAL STEPS 128 - 133 LINK TO MY BUILD LOG INDEX Tools Used Craft knife Flory sanding sticks (thin and standard) 100, 120 & 180-grit sandpaper Sanding block Power sander Gathering the materials required The following kit parts are required for this section of the build: 136, 138 Assembly Process The fairing of the hull was quite time consuming as there was quite a bit of material to remove as the both the longitudinal and vertical gun port frames sat proud of the bulkheads. I suspect these parts may not have been fully seated in some places when fitted, but at the time I was certain they had been. It took me about a couple of hours per side to fair the hull, using the removal of the laser char as a good guide when all the excess material had been removed. I performed a few checks using a planking strip up and down the hull to ensure they were laying flush against each of the faired bulkheads and I concluded everything look good. A word of warning, the ears on bulkheads 9, 10, 11 and 12 sit proud are very fragile. I managed to break all of the port side during the fairing process when I inadvertently rested the hull side on my leg to get a better angle for sanding a particulate area. Thankfully I was able to glue them back in position (sort off) using the jigs (J9 to J12) to ensure the correct spacing can be maintained. They will be protected once the upper side panels have been glued in place, noting the will removed after the quarterdeck has been fitted much later in in the build process. Using a sharp craft knife blade in conjunction with a thin sanding stick I trimmed the inner bulwarks gun ports opening so they matched the gun port frame openings. This picture was taken at the start of the process after I had trimmed the bottom edge but before trimming the side edges. Next the bow ends of the two upper hull side patterns were soaked in hot water for around 45 mins. There patterners were then carefully positioned and will now be left clamped to hull until the morning to ensure the parts have dried fully out. When clamping the two upper hull side patterns I noticed a slight gap towards the stern (on both sides), where it is difficult to clamp with the jig beams in place. I investigate and, if necessary, do a little bit more fairing to resolve the problem, once the patterns have fully dried out. With a clamp in position, there is a gap but it is difficult to see on the photo The gap is more noticeable without a clamp As can be seen in the photo below there is still some char along the top edge which may be the problem. I need to be careful as I do not wish to damage the ears.


-
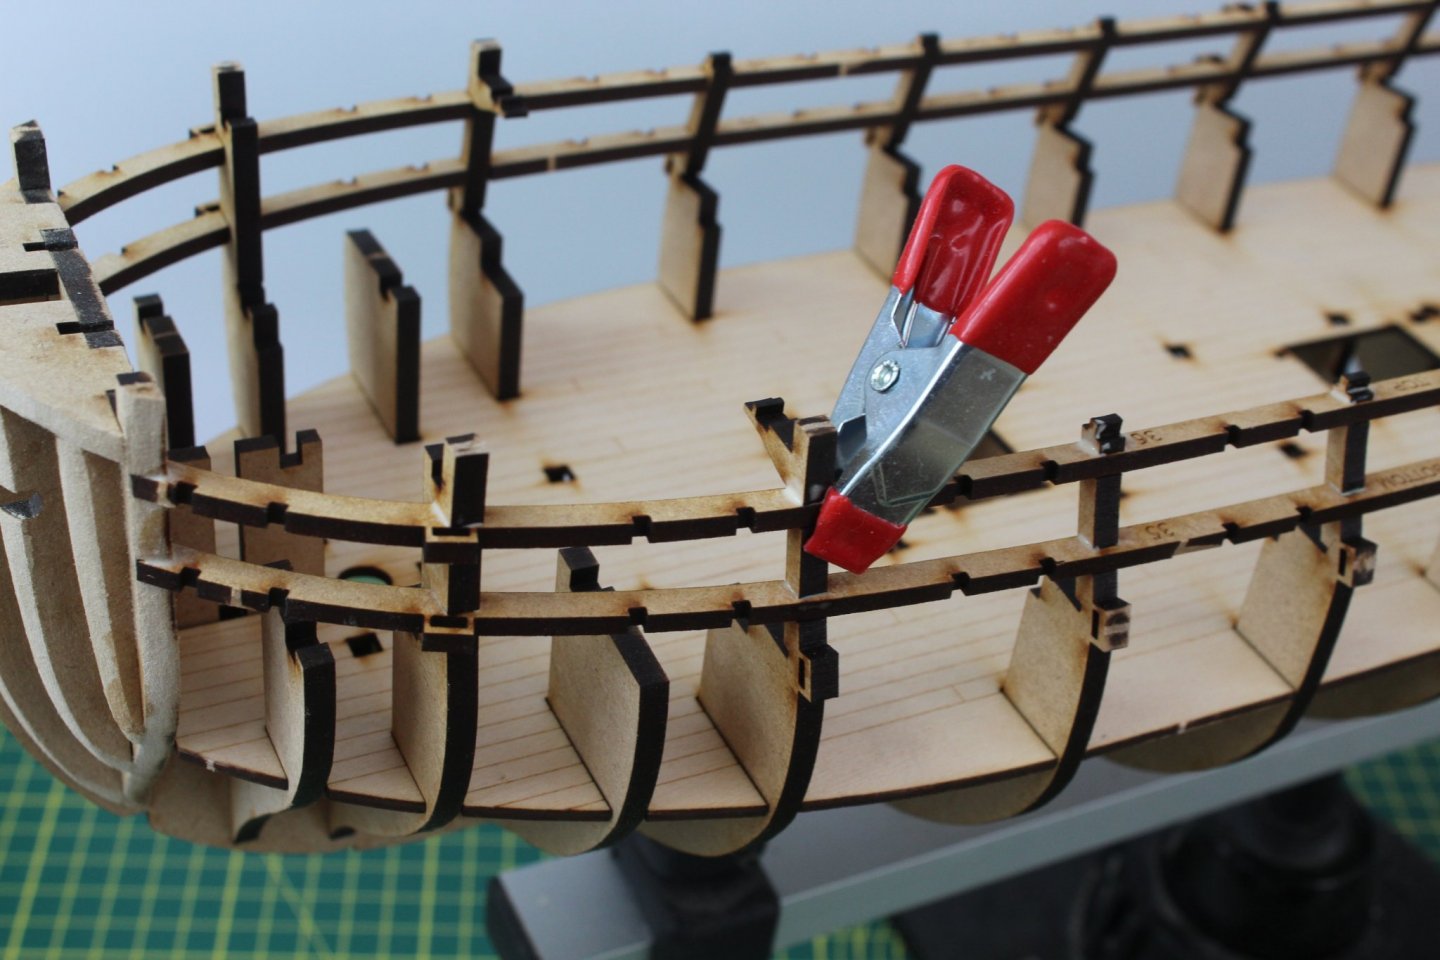
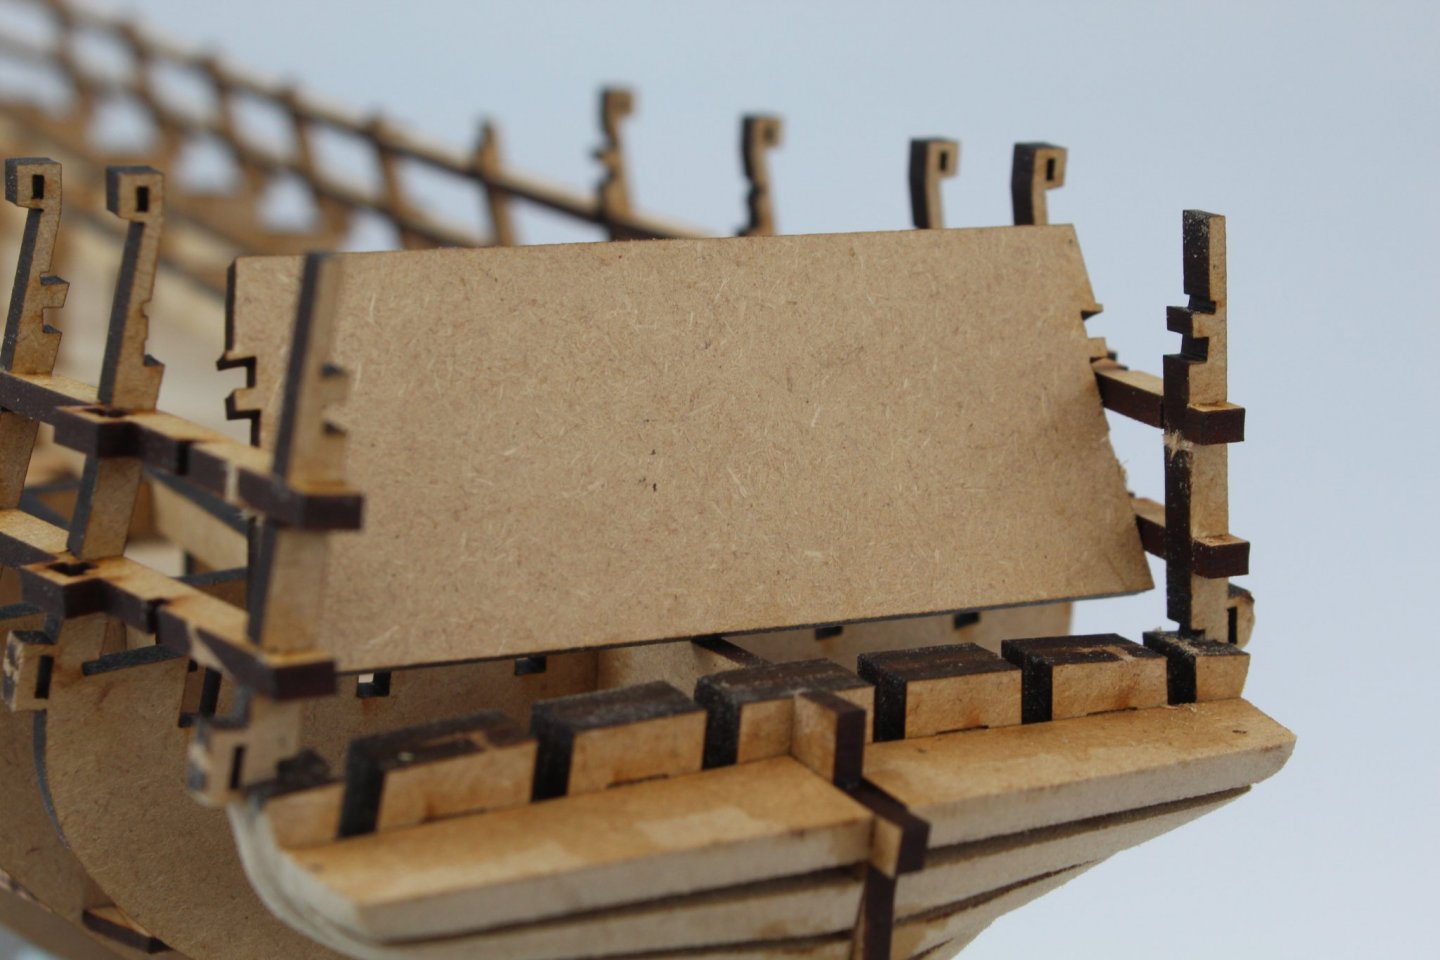
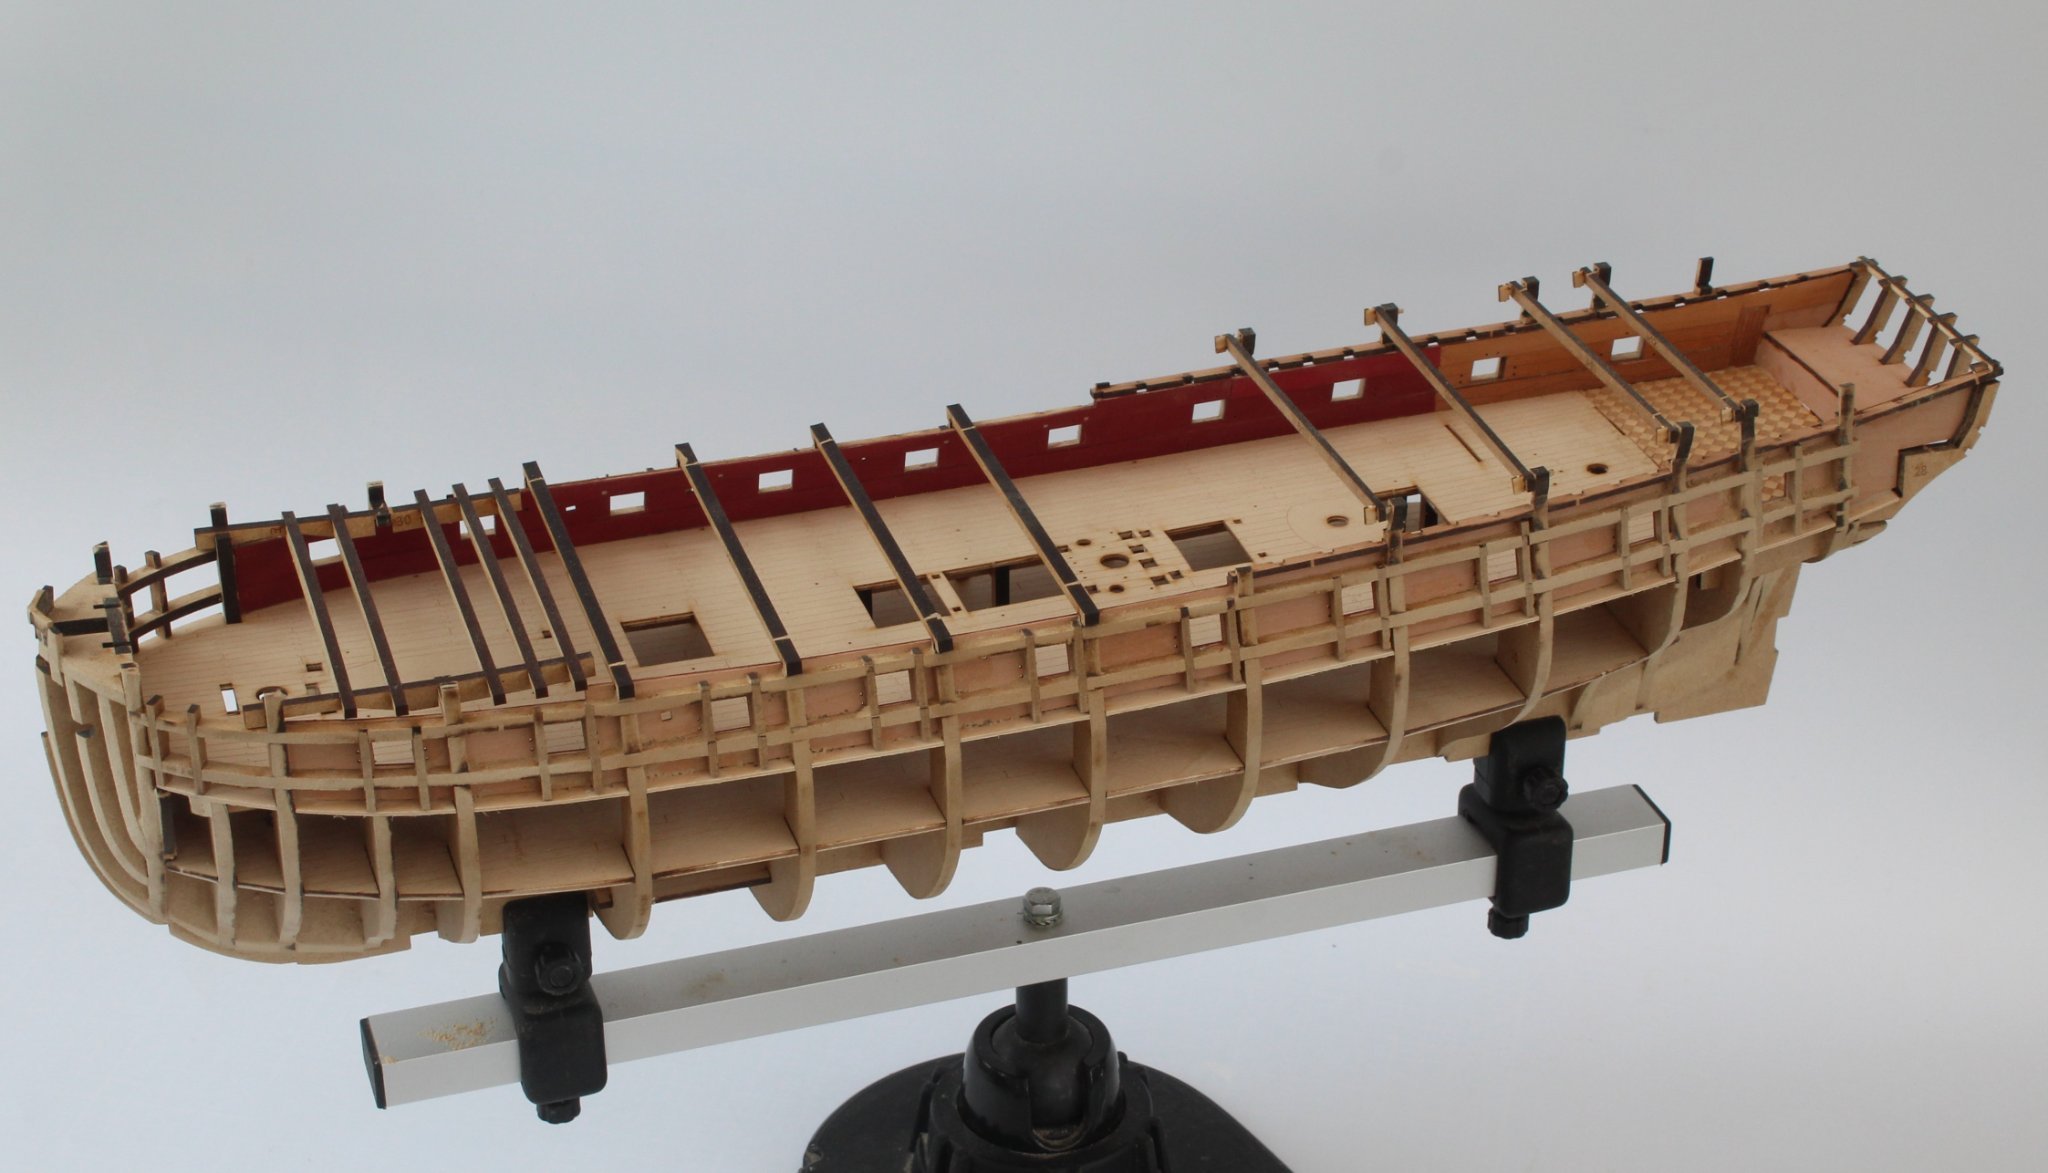
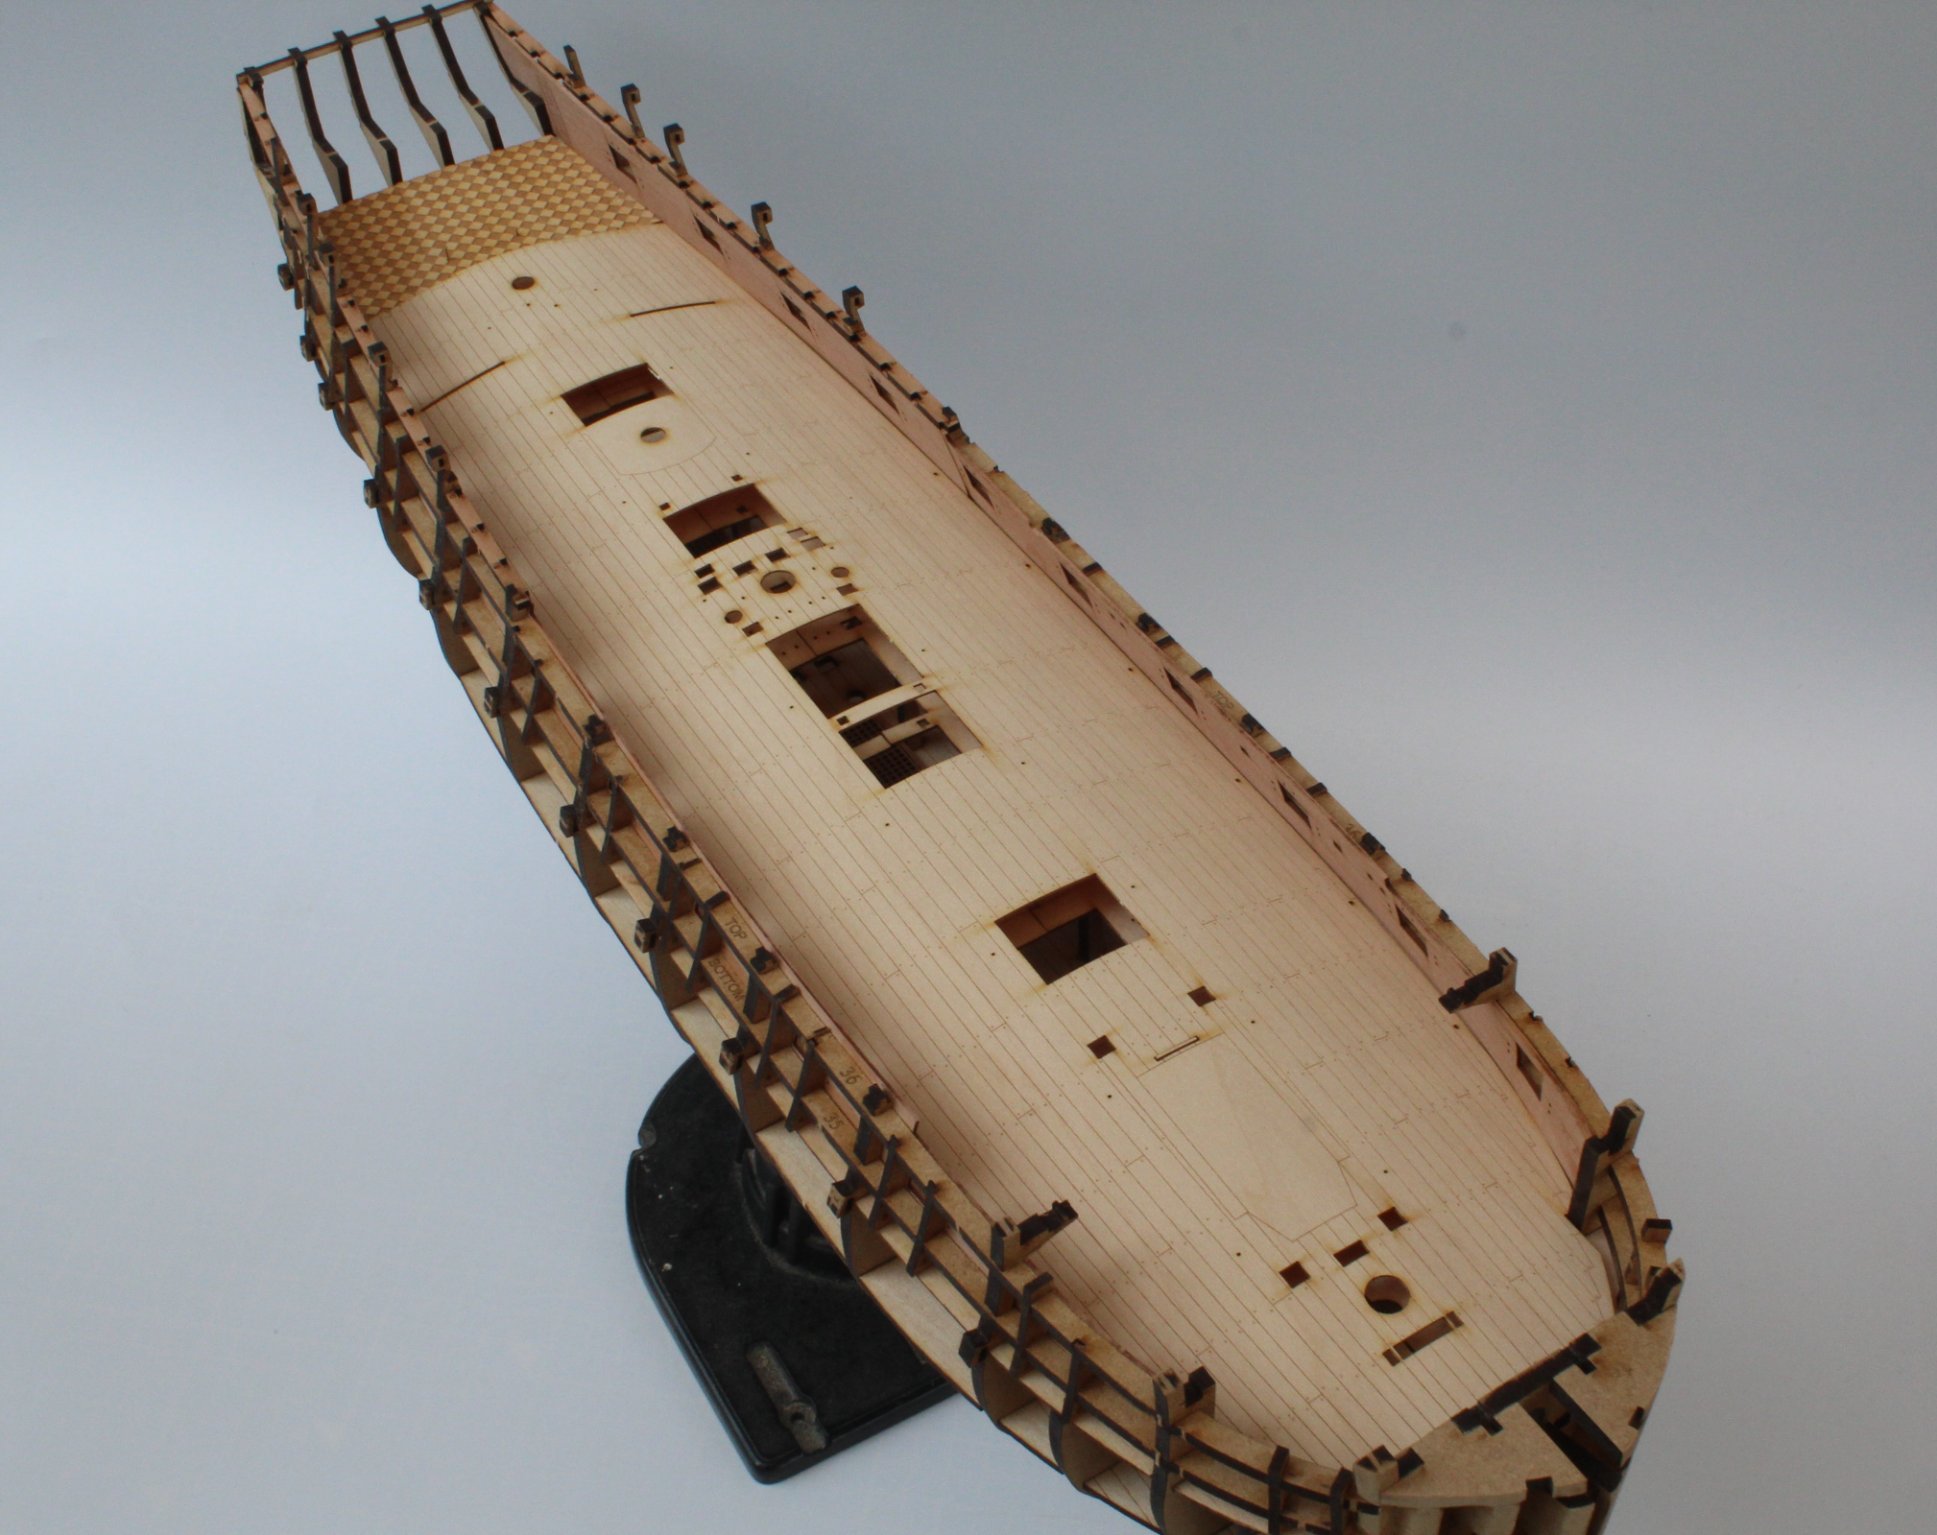
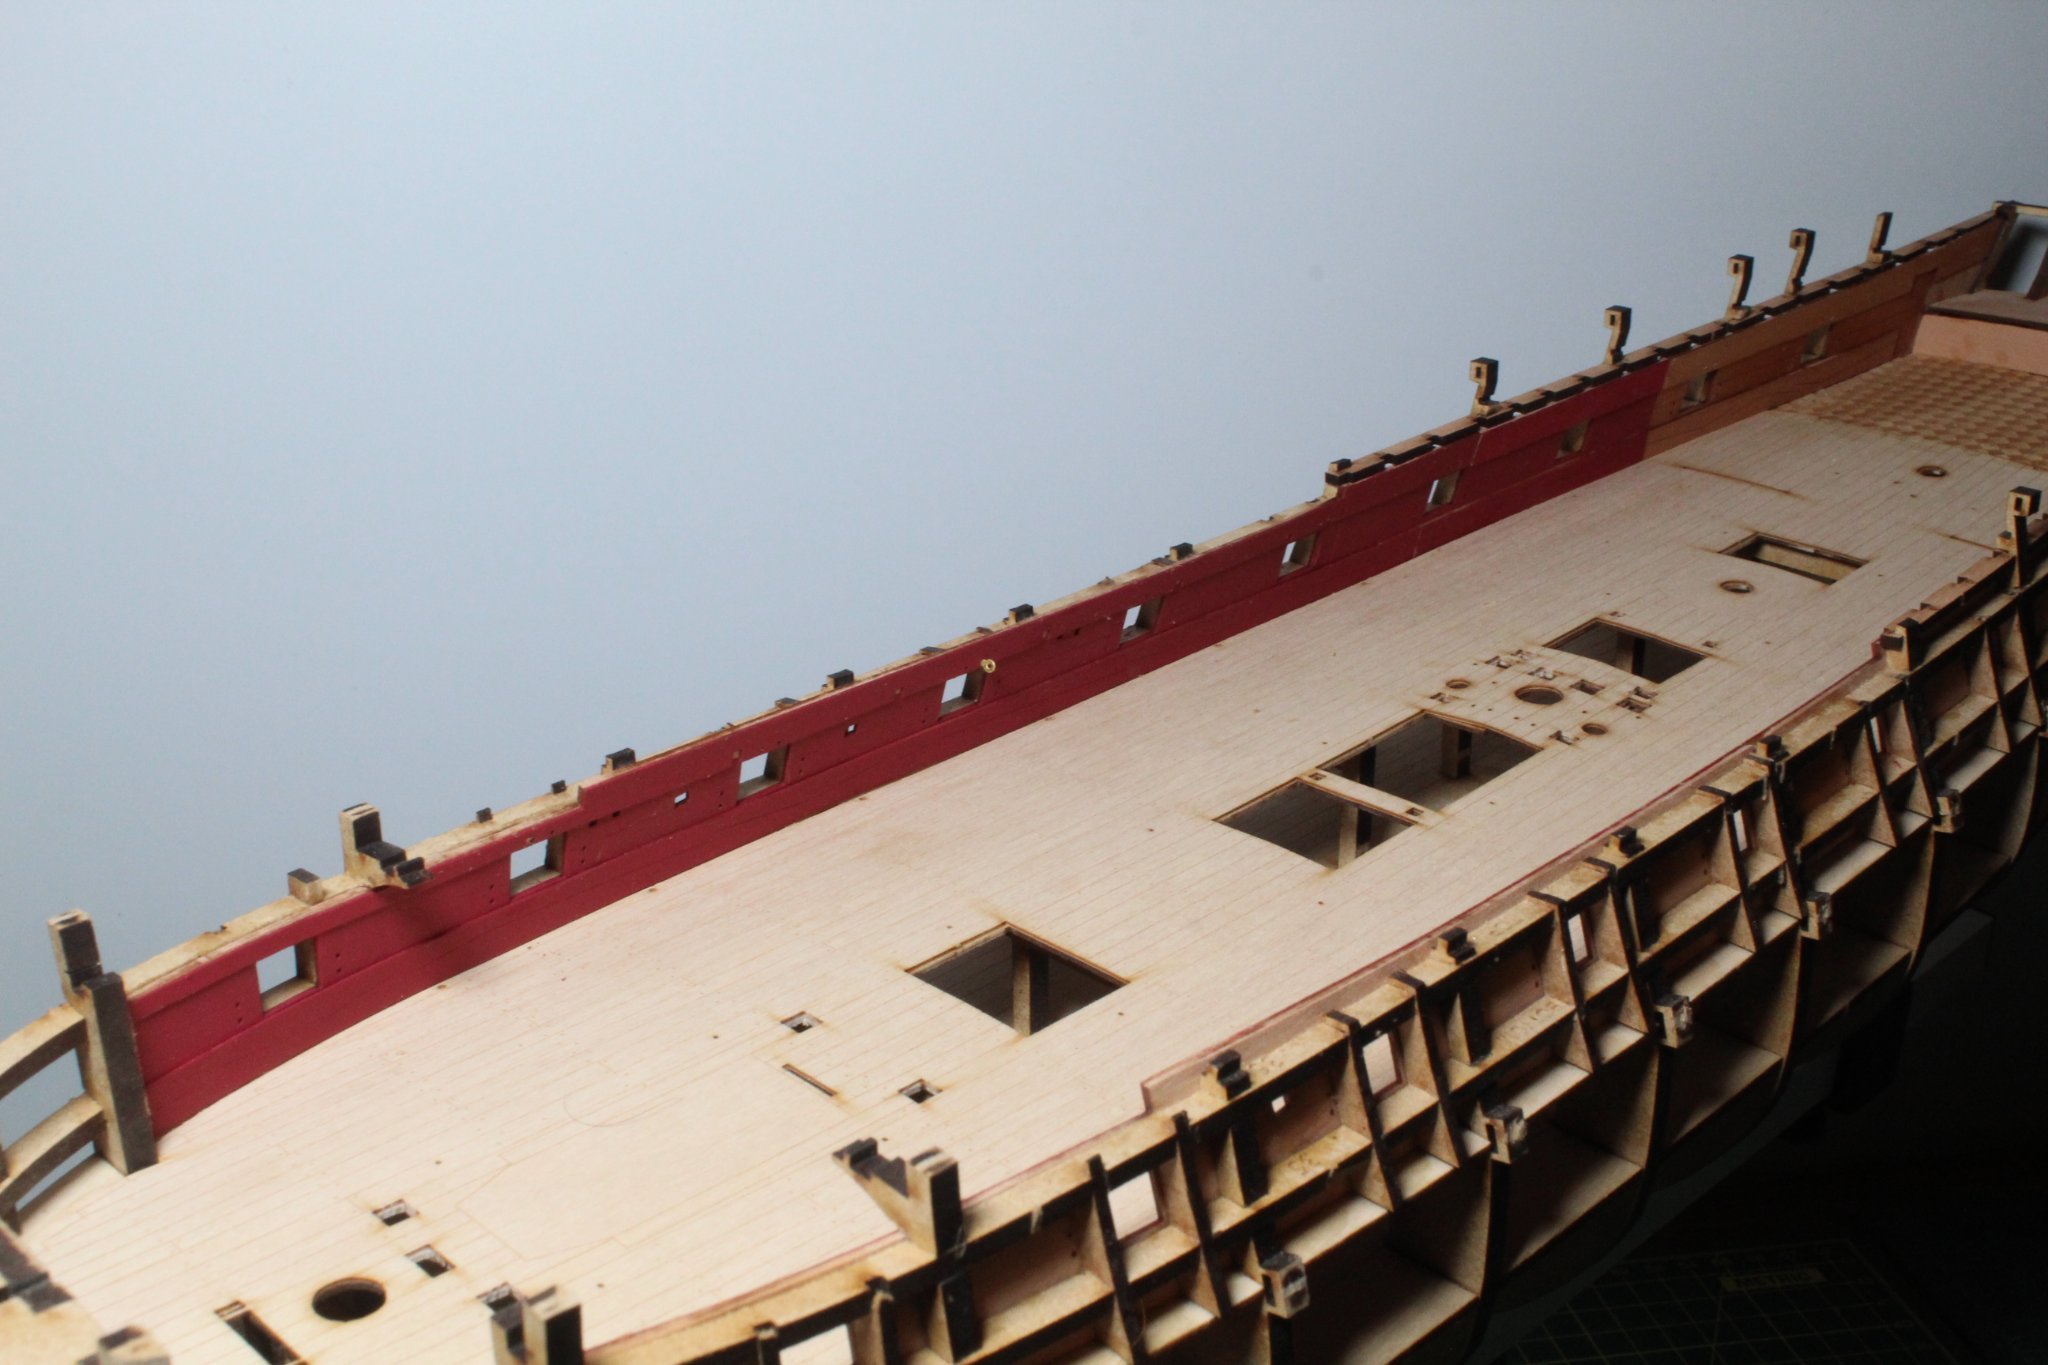
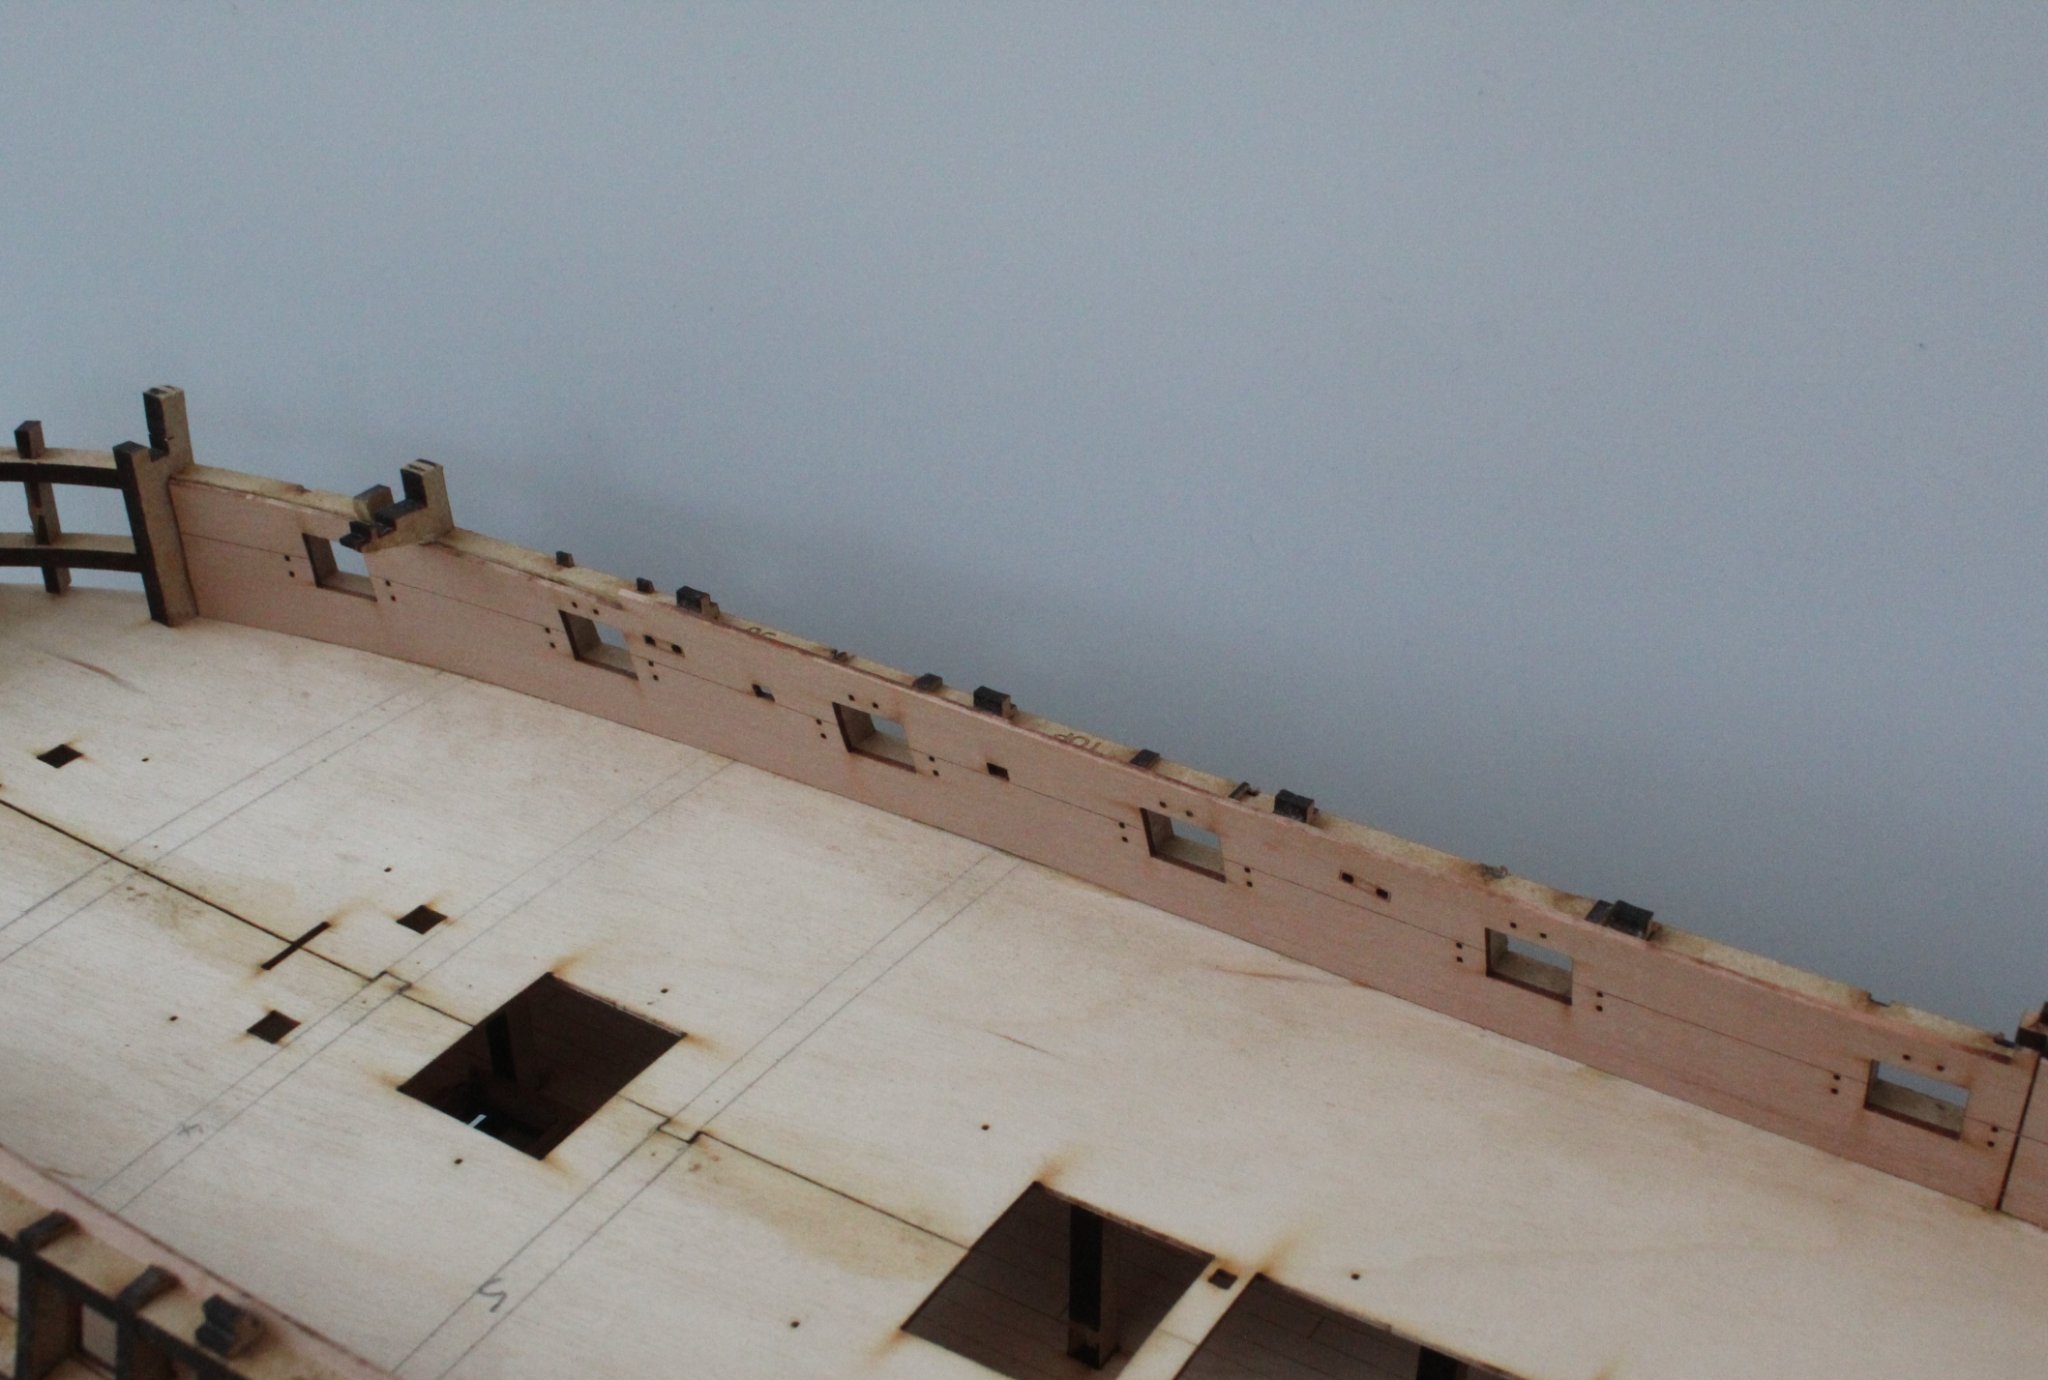
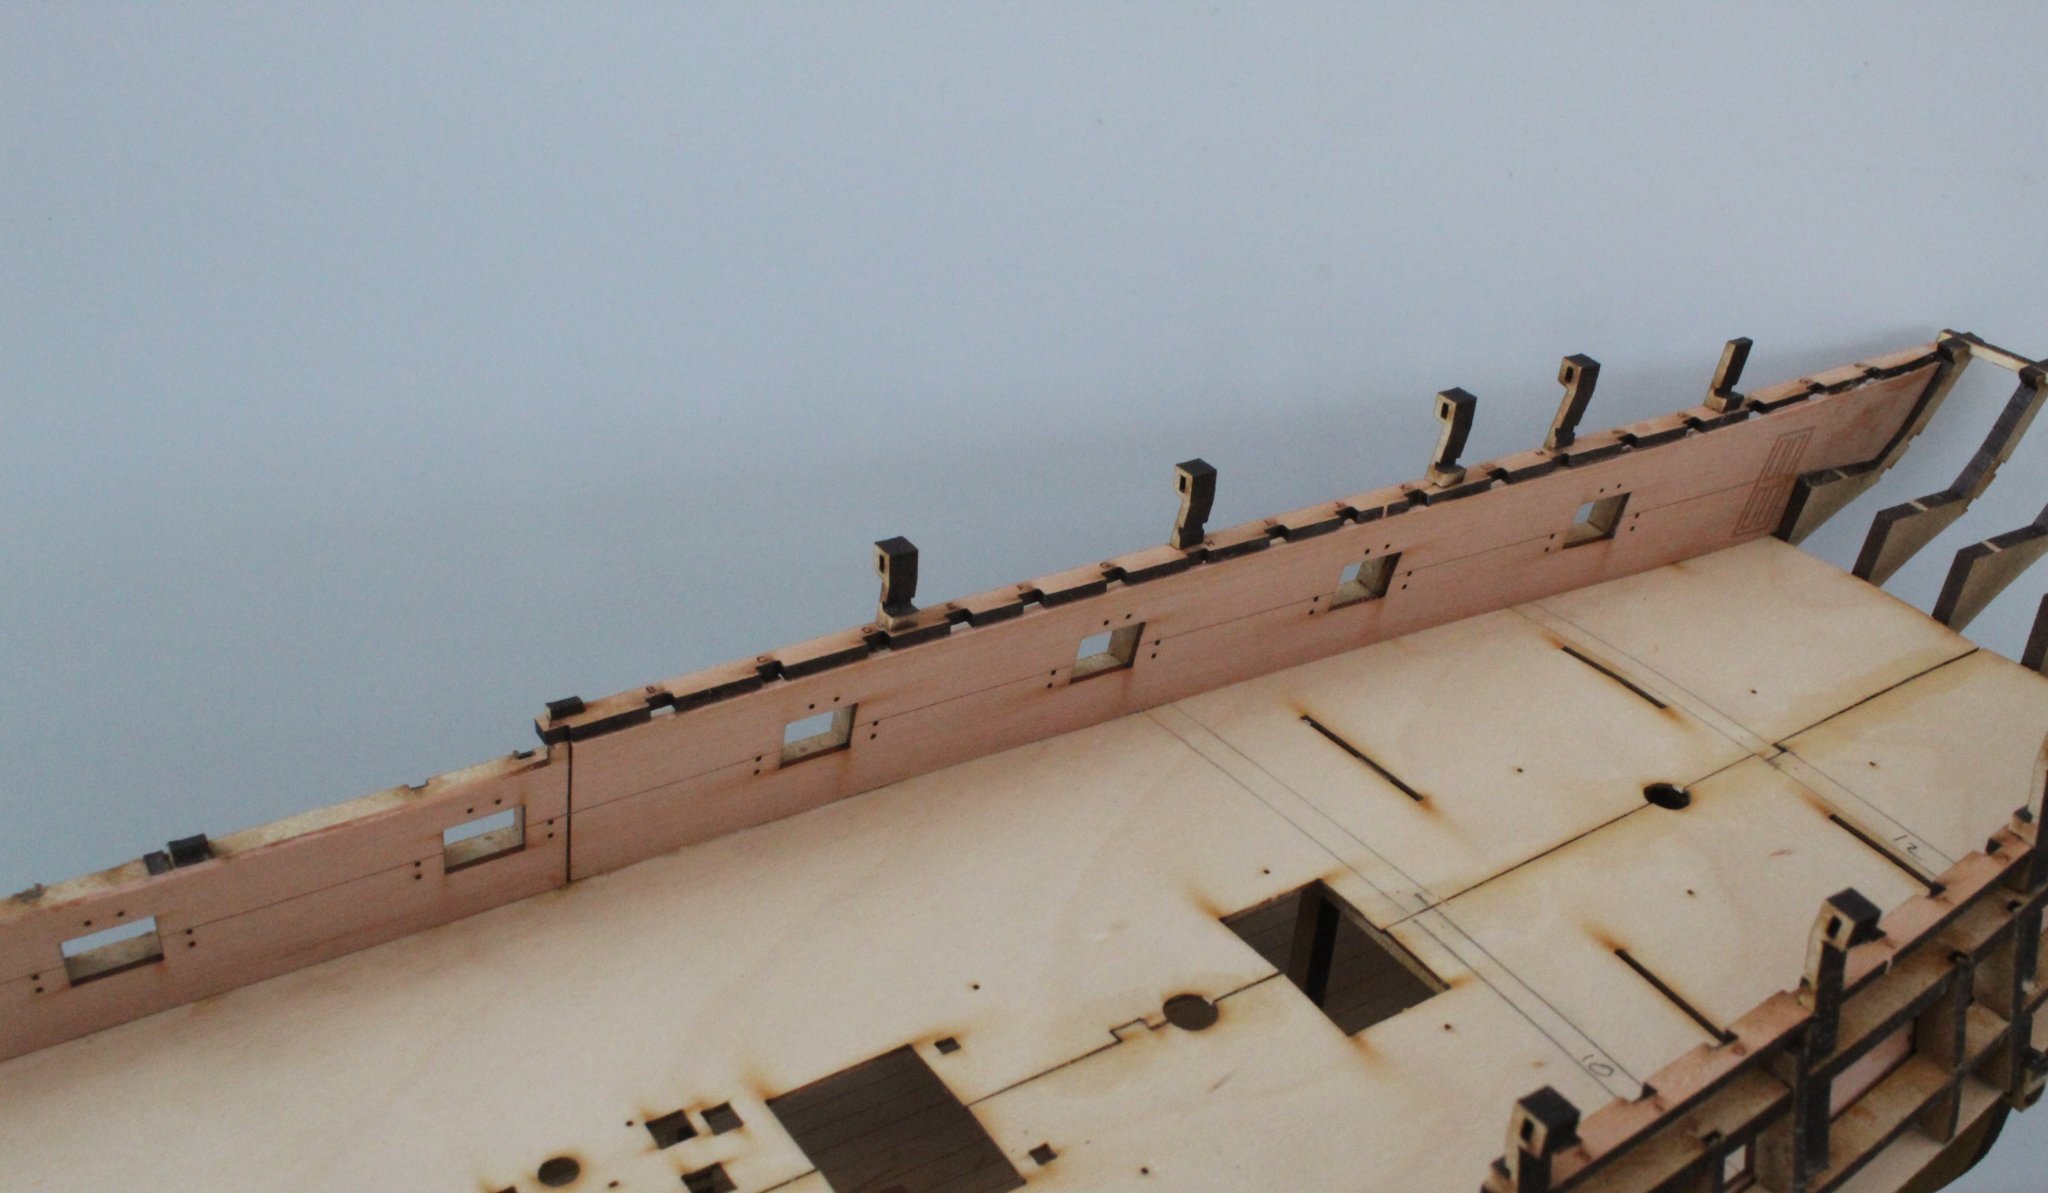
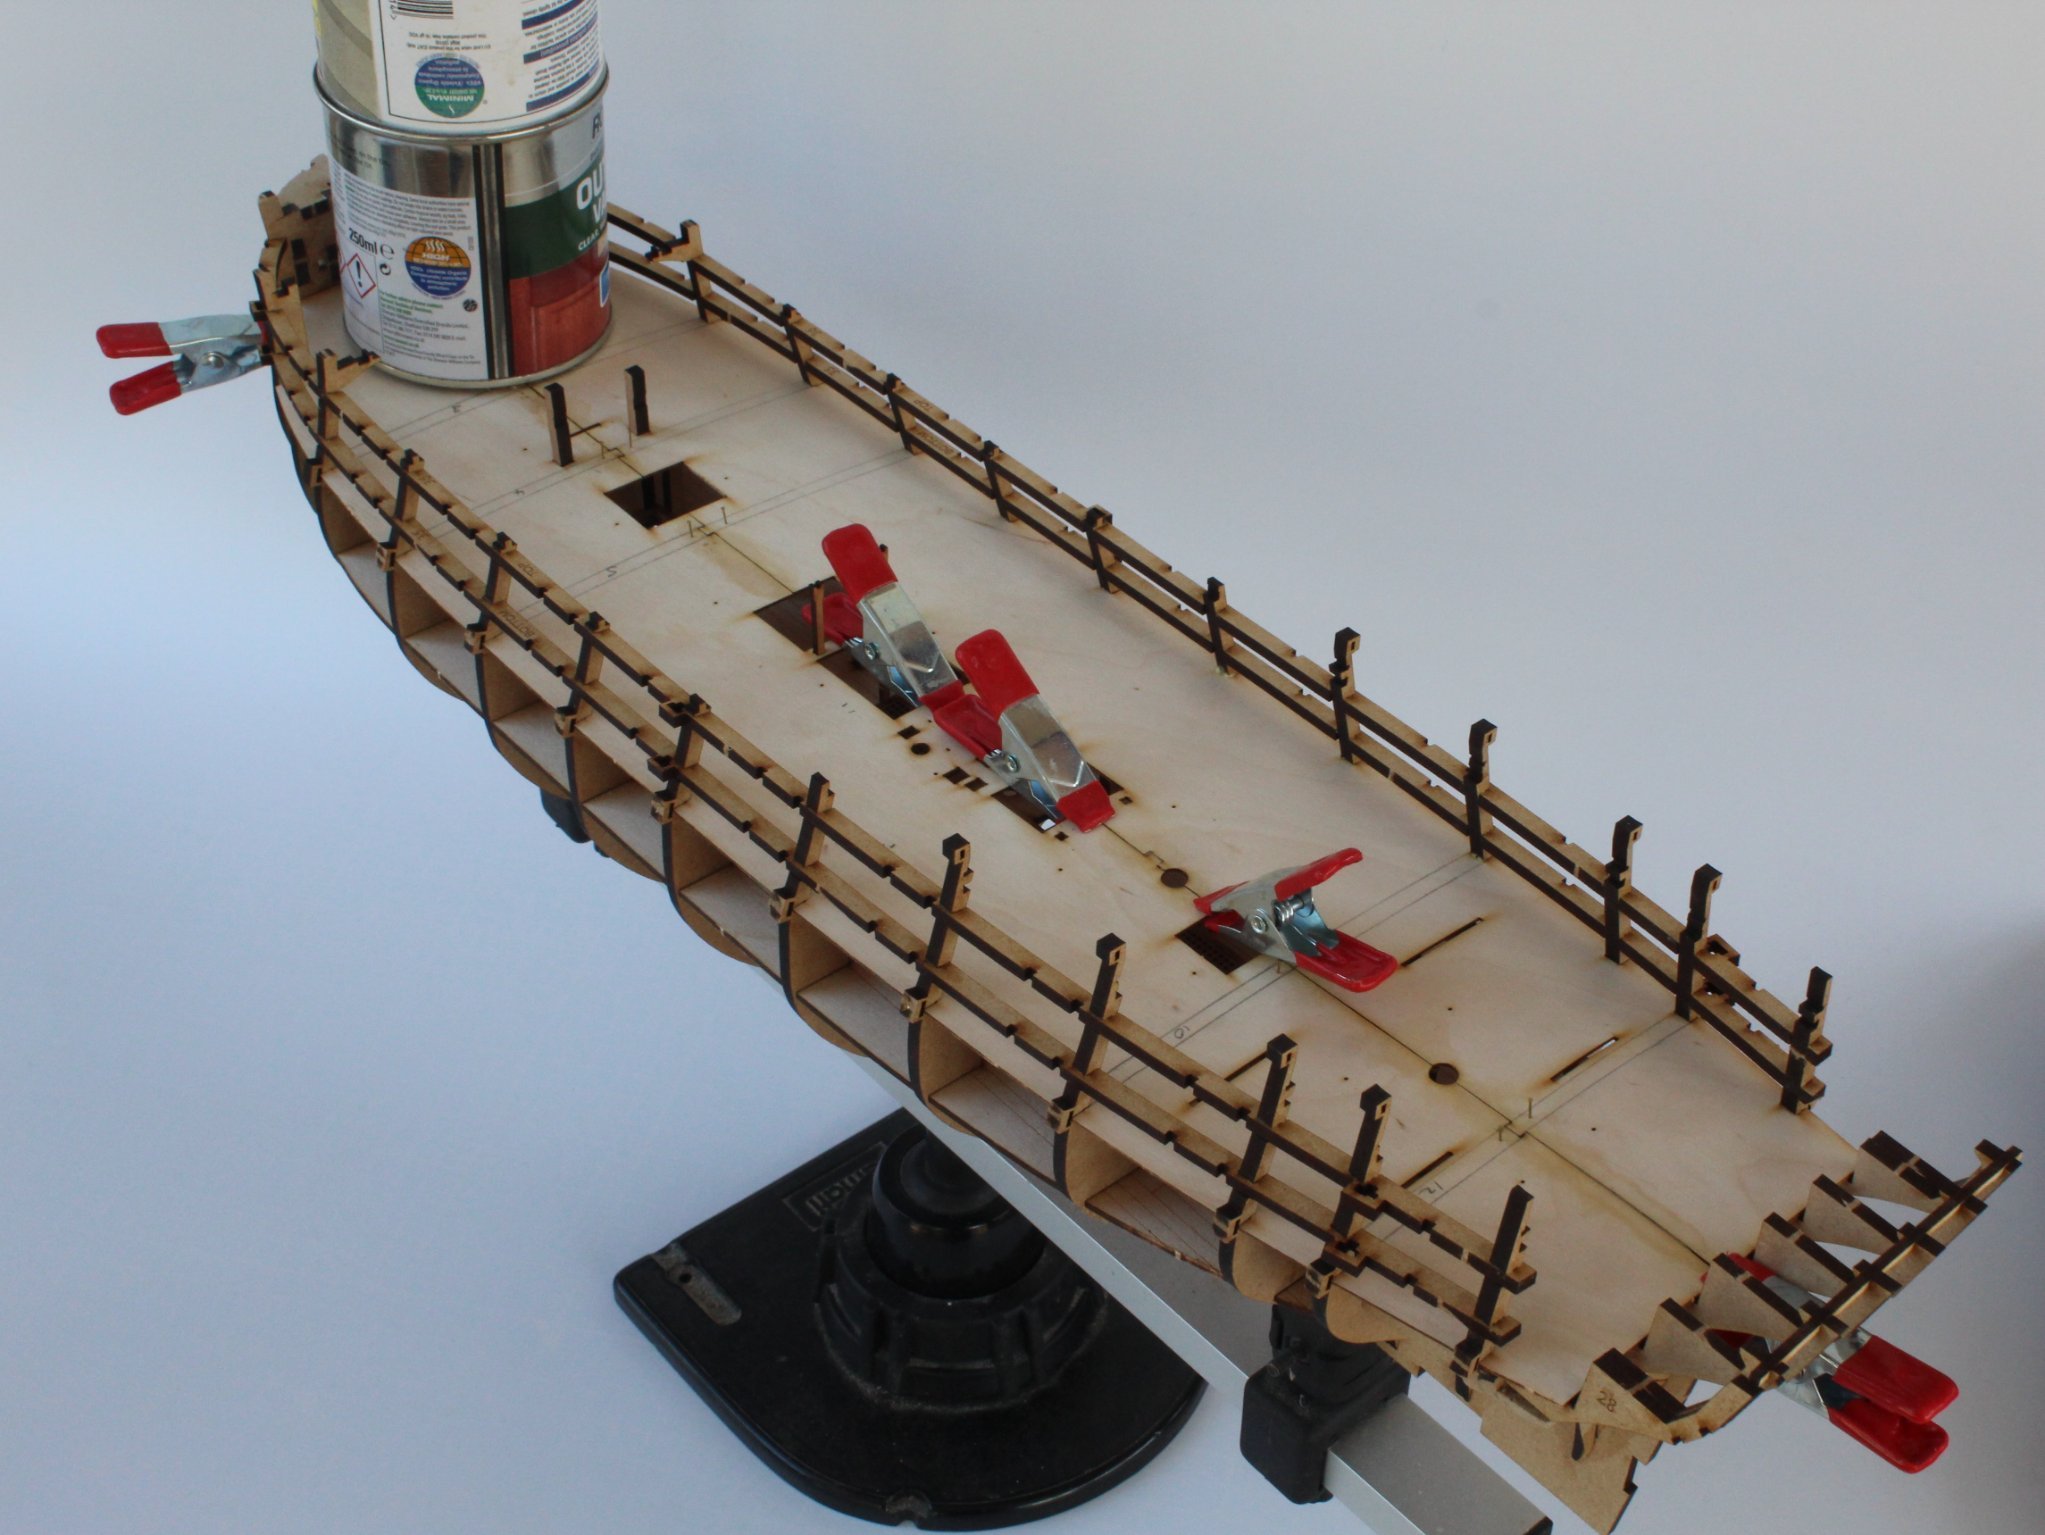
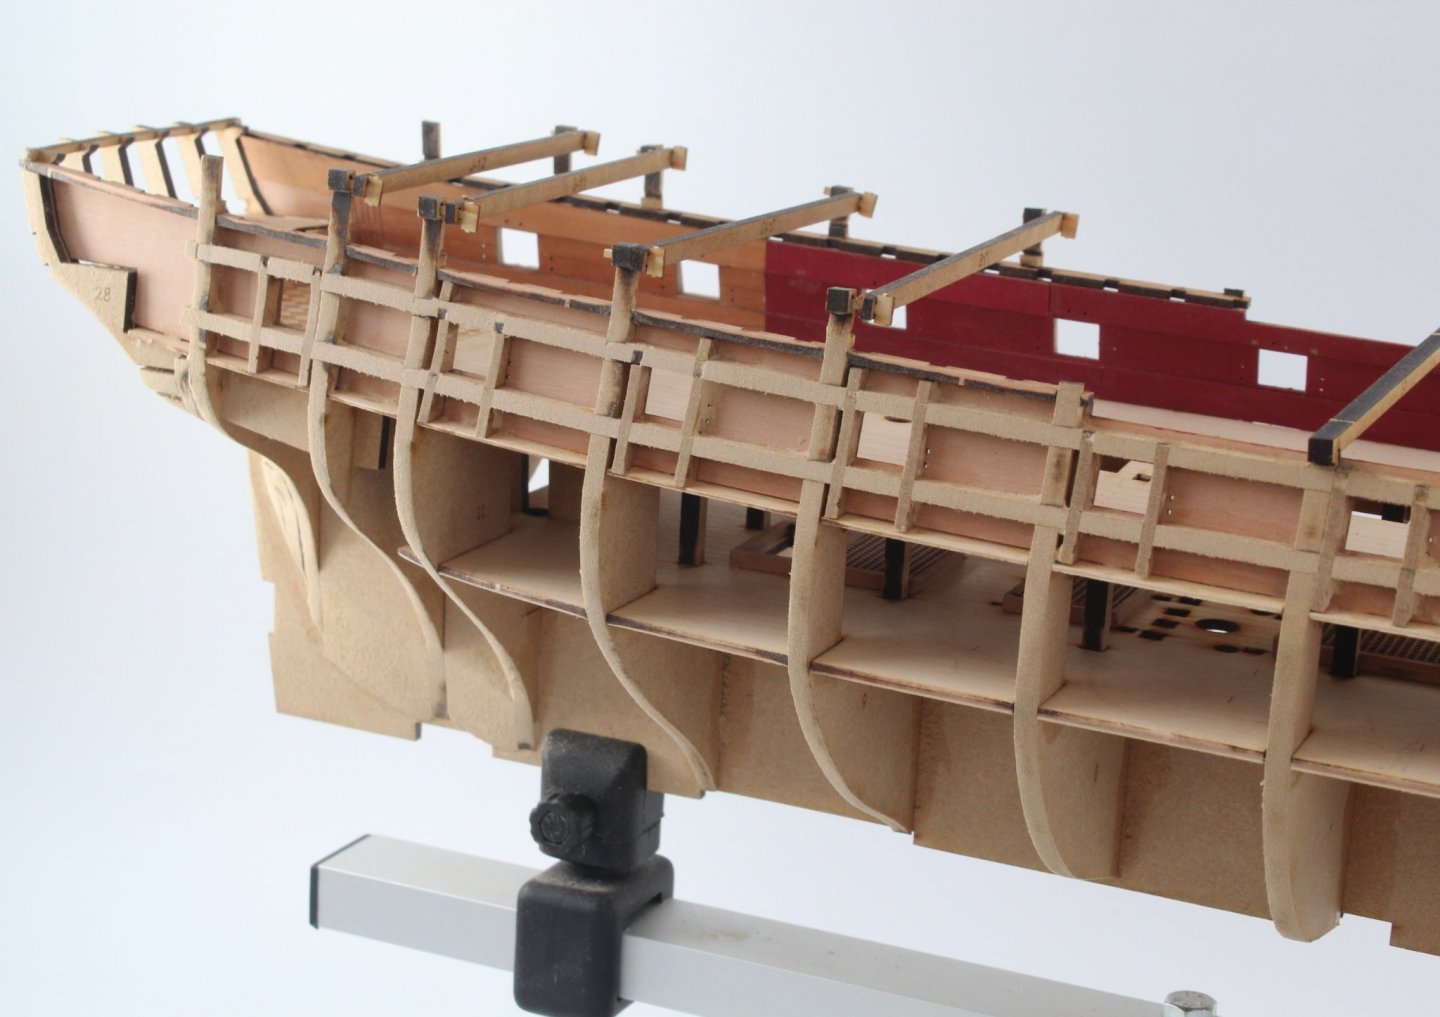
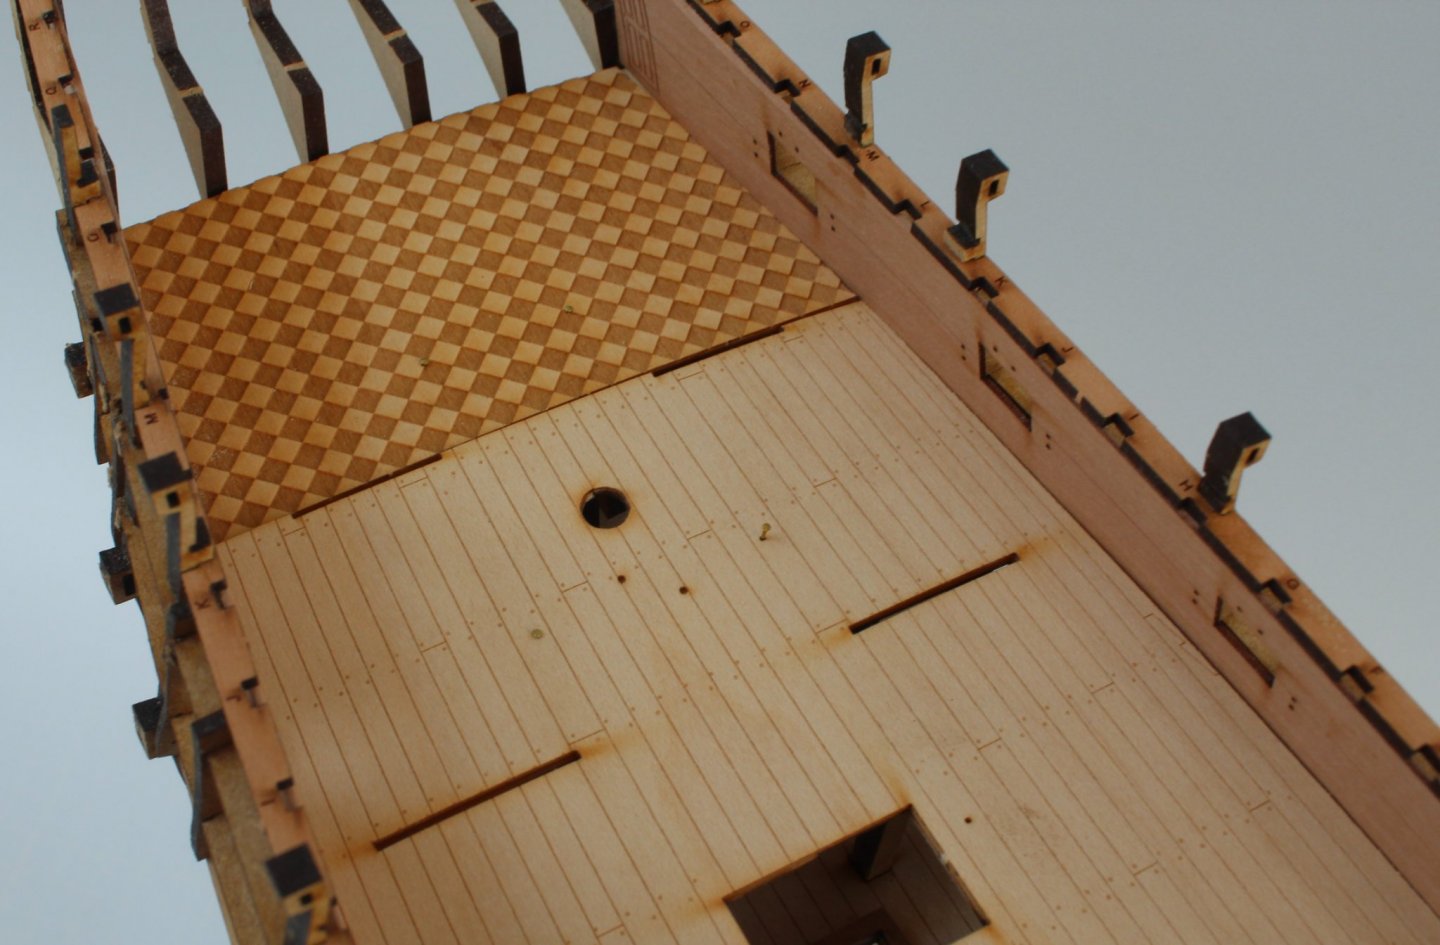
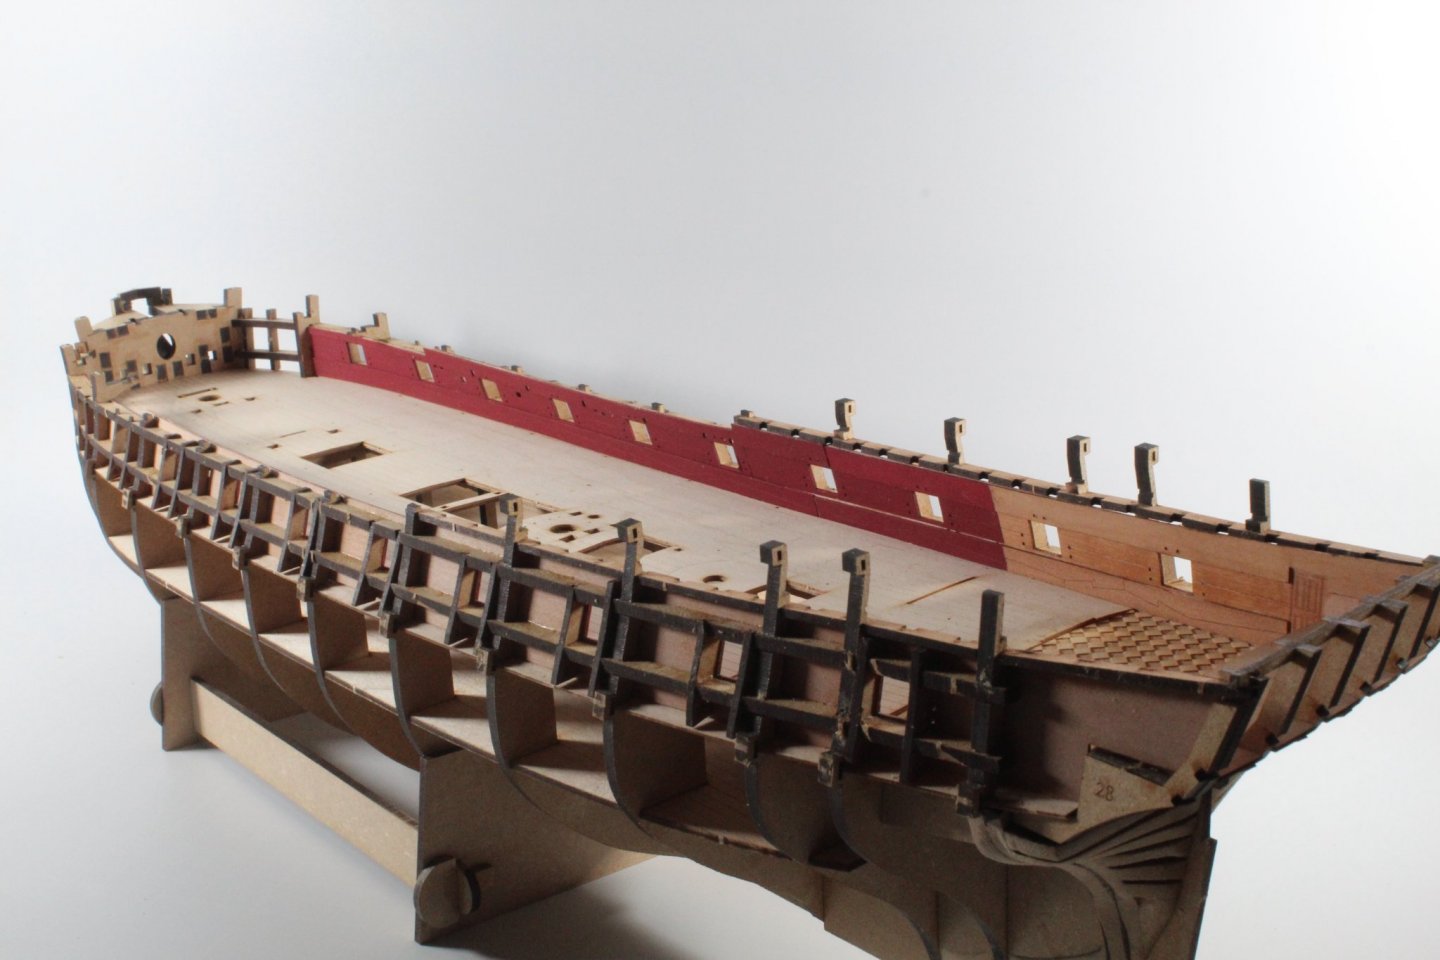
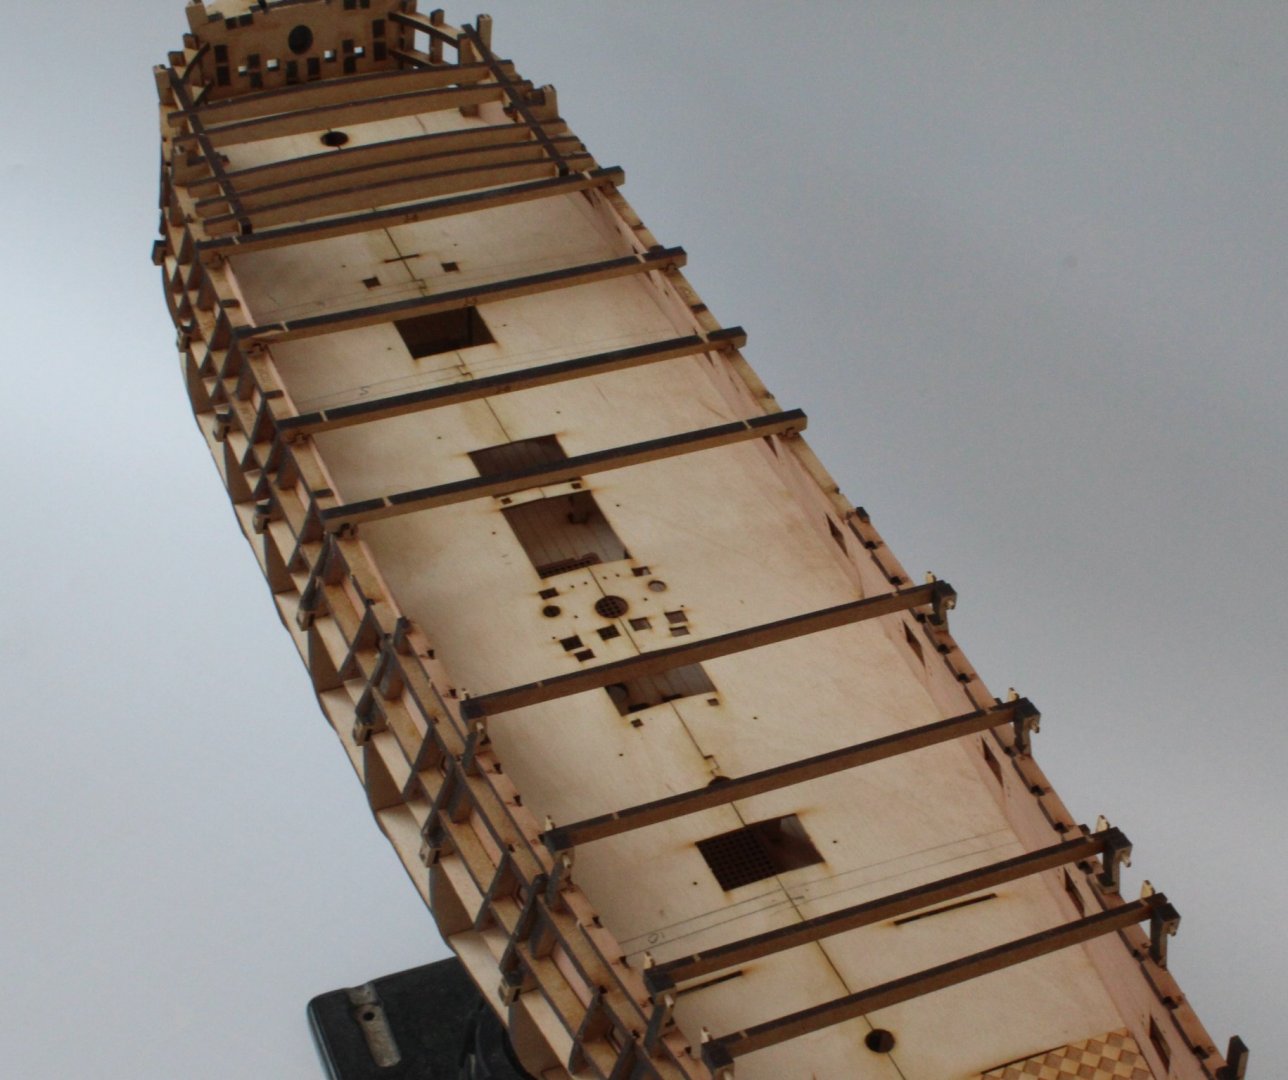
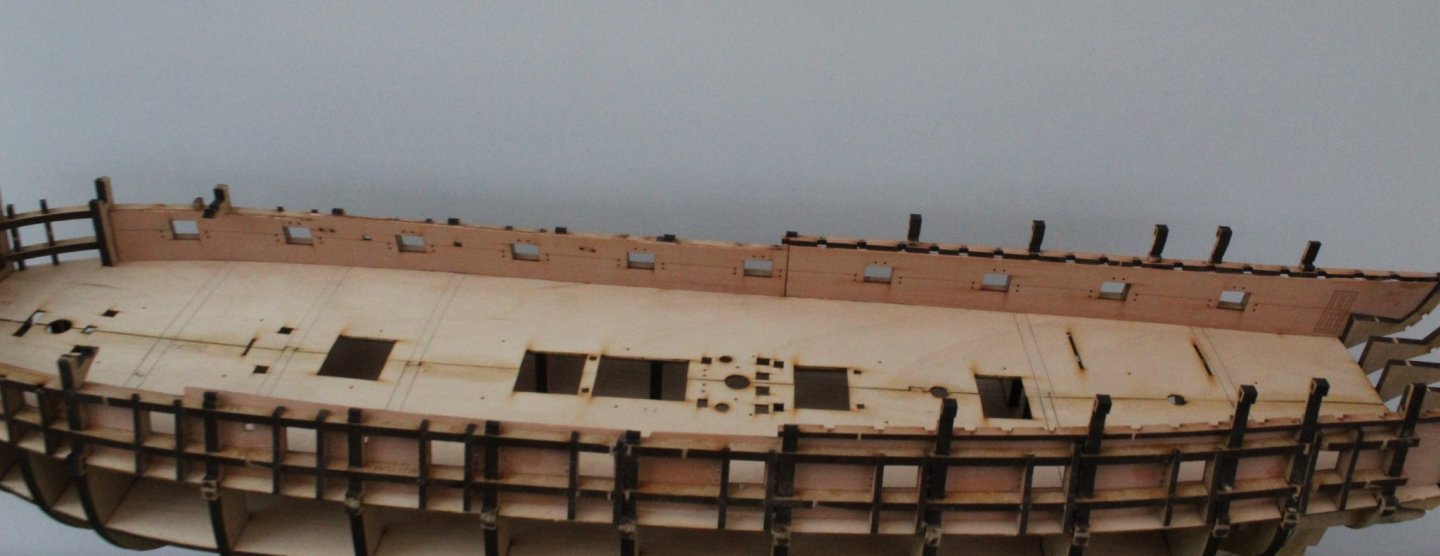
GUN DECK ASSEMBLY PAINTING INNER BULWARKS & SPIRKETTING FITTING GUN DECK PATTERN AND CHEQURED PATTERN DECK FITTING SPIRKETTING & STERN CABIN SEAT FITTING FORECASTLE BULWARK PATTERNS BUILD MANUAL STEPS 98 – 122 LINK TO MY BUILD LOG INDEX Tools Used Craft knife Flory sanding stick Amati’s special cleaner sanding block loaded with 120 grit sandpaper Brass pins Titebond original glue Old paint brush Polyeuthane clear matt varnish (Ronseal Ultra Tough Internal) Red Ochre (Admiralty Paint) Vallejo red arylic paint Tape (6mm) Clamps 0.8mm micro drill Gathering the materials required The following kit parts are required for this section of the build: 16, 17, 18, 37 (X2), 53, 54, 59, 106, 107, 108, 109, 110 (x2), 111 (X2), 197, 198, Assembly Process – Preparing the Deck Patterns The chequered deck pattern was test fitted. It did not fit and required a little bit of work. I used a combination of the sanding block and sanding stick to remove the excess material. To check the chequered deck pattern was correctly positioned I used brass pins to ensure the two holes in the deck pattern were aligned with the two holes in the gun deck base. The process was repeated with the gun deck pattern. As can be seen in the photo below the pattern was not a perfect fit initially. Brass pins were used to ensure the various eyebolt holes were aligned between the gun deck pattern and gun deck base. I also ensured the various deck items that pass through the gun deck slots would locate in the slots on the lower gun deck. It was necessary to open the slot for the fore jeer bitt which was detailed later on in the build manual, as per build step 523. Please refer to my earlier post which shows this in more detail. aligning deck pattern post The deck patterns are aligned, the brass pins can be seen. Checking the deck items will fit, note the fore jeer bit slot had not been opened when this photo was taken The two deck patterns were put to one side ready to be fitted later in the build process. Assembly Process – Painting the Inner Bulwarks and Spirketting To get the best paint finish I applied a thin (diluted) coat of polyurethane varnish to the spirketting parts and the inner bulwarks. I tried to avoid varnishing the top and bottom area of the inner bulwarks to ensure (when glued) the spirketting was bonded wood on wood. I masked off areas on the inner bulwarks where the spirketting would be fitted, using 6mm tape. I also marked and taped the point on the inner bulwarks where the Forward Gundeck Cabin Bulkhead is to be located as there is no need to paint beyond that point. I then painted the spirketting and inner bulwarks with a base coat, using red ochre paint. I had forgotten to mask and paint the top rear spirketting patterns in the photo below To complete the painting process I added two coats of Vallejo red paint, which was thinned with a little bit of tap water. Assembly Process – Fitting The Chequered and Gun Deck Patterns Please refer to my build tip on aligning spirketting post prior to fitting the two deck patterns. I spread some diluted wood glue of the back of the chequered pattern deck and placed it on the gun deck base. Brass pins were used to ensure the holes were aligned. I used some clamps to hold the deck in place while the glue cured. I then repeated the process for gluing the gun deck pattern, using pins and deck items to ensure the gun deck pattern was correctly aligned. Once again clamps were used to ensure the gun deck pattern was held in position while the glue cured. Checking the deck items could be fitted. Assembly Process – Fitting The Spirketting and Stern Cabin Seat I spread some diluted wood glue of the back of the two lower forward spirketting and then I added some clamps to hold in place. Repeating the same process, the two lower rear spirketting were glued in place. When fitting the top spirketting I used some eyebolts to ensure the holes on the spirketting were aligned with the same holes on the inner bulwarks. The two stern cabin seat patterns were test fitted and once I was happy with the fit they were glued in place. Assembly Process – Fitting The Forecastle Bulwark Patterns The patterns 16, 18 and 37 (x2) were glued in place before pattern 17. The remaining safety gates were also removed from the hull. The Sphinx hull is now ready to be faired. I do need to touch up the painting on the top edge of the lower spirketting patterns


-
I spend quite a bit of my time in the dummy corner. I made a notch on the front right inner bulwark pattern which was fouling on bulkhead 3. Thankfully I realised that this was actually the front left pattern before I glued the part. The notch will not be visible once the spirketting pattern is added and is also under the gangway.
- 505 replies
-
- 9
-
-
- vanguard models
- Sphinx
- (and 1 more)
-
I had no issues with the deck parts, took my time to make sure they were fully enaged in the bulkhead locating slots.
- 505 replies
-
- 3
-
-
- vanguard models
- Sphinx
- (and 1 more)
-
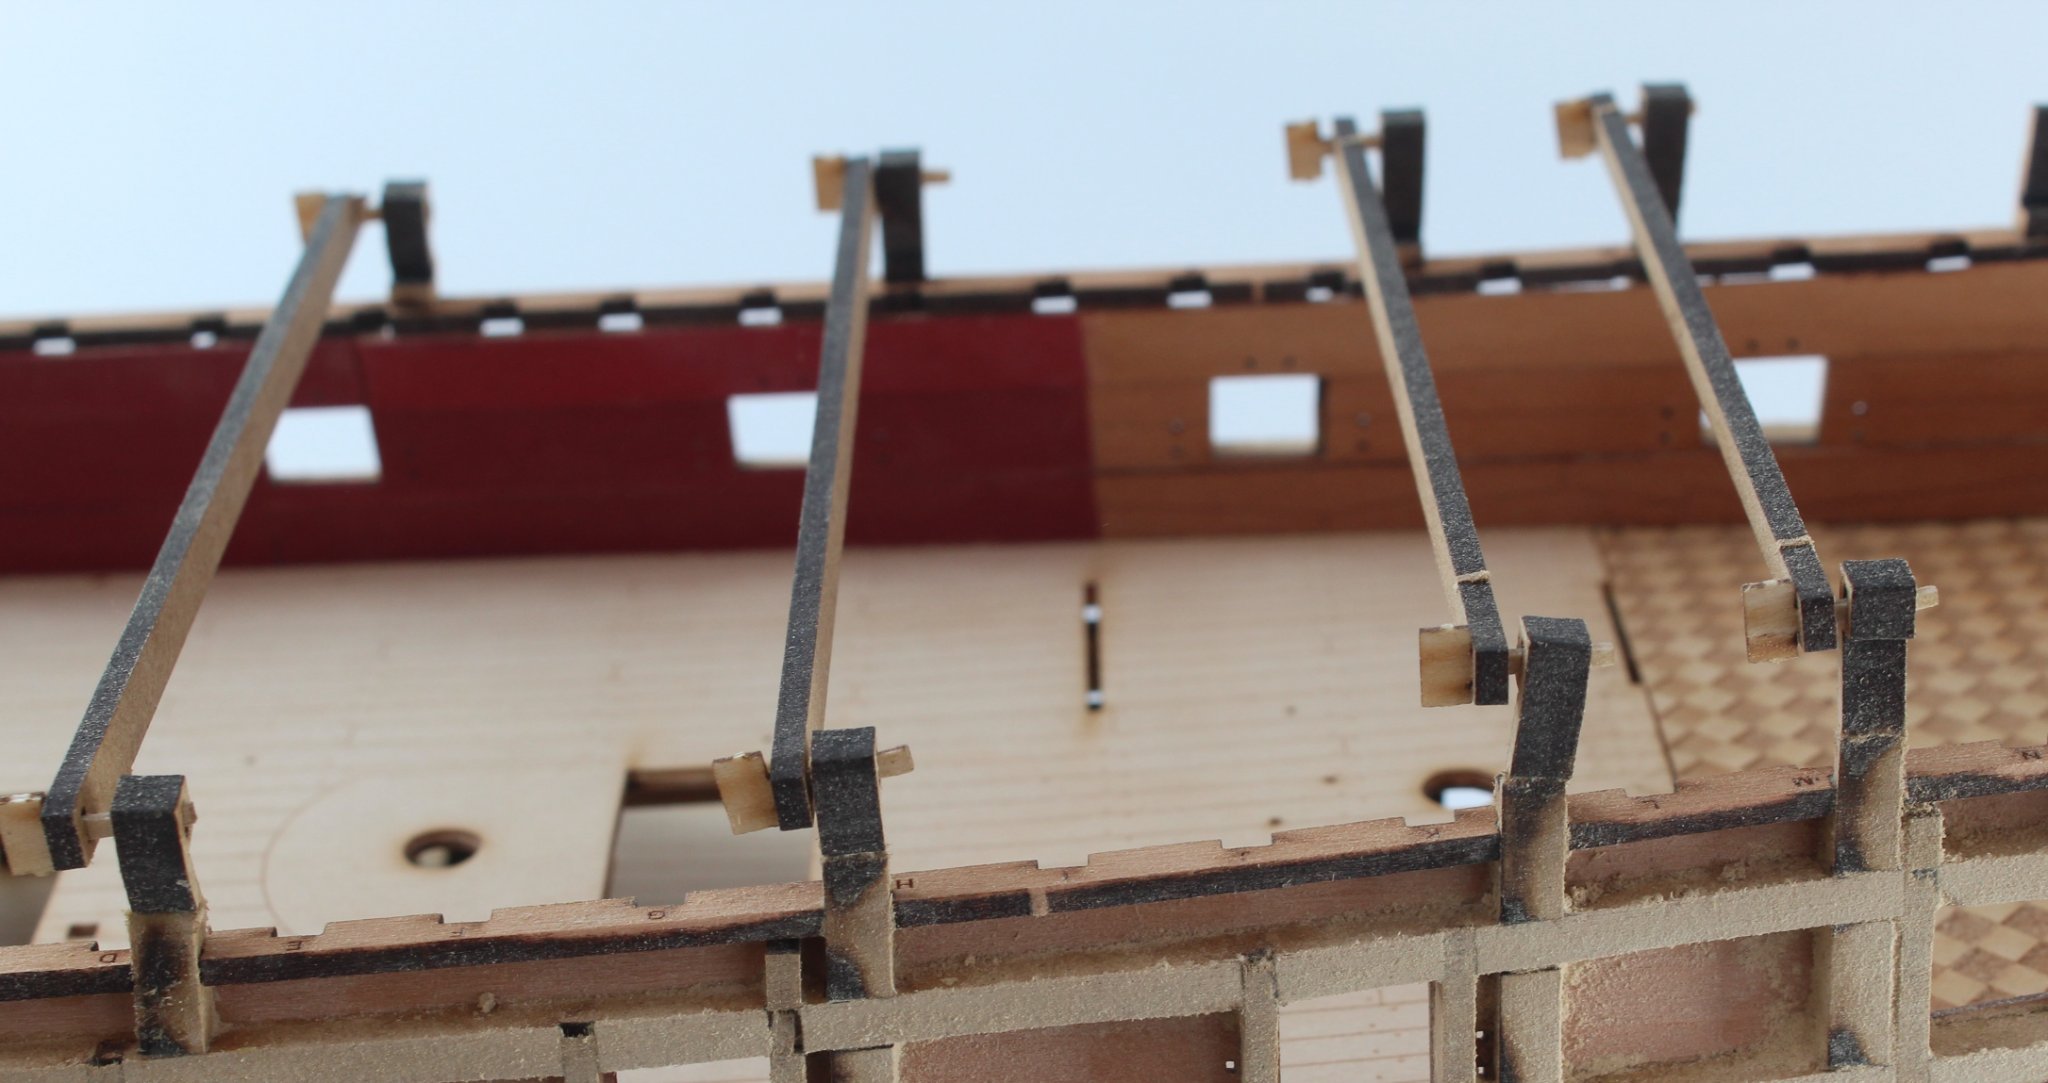
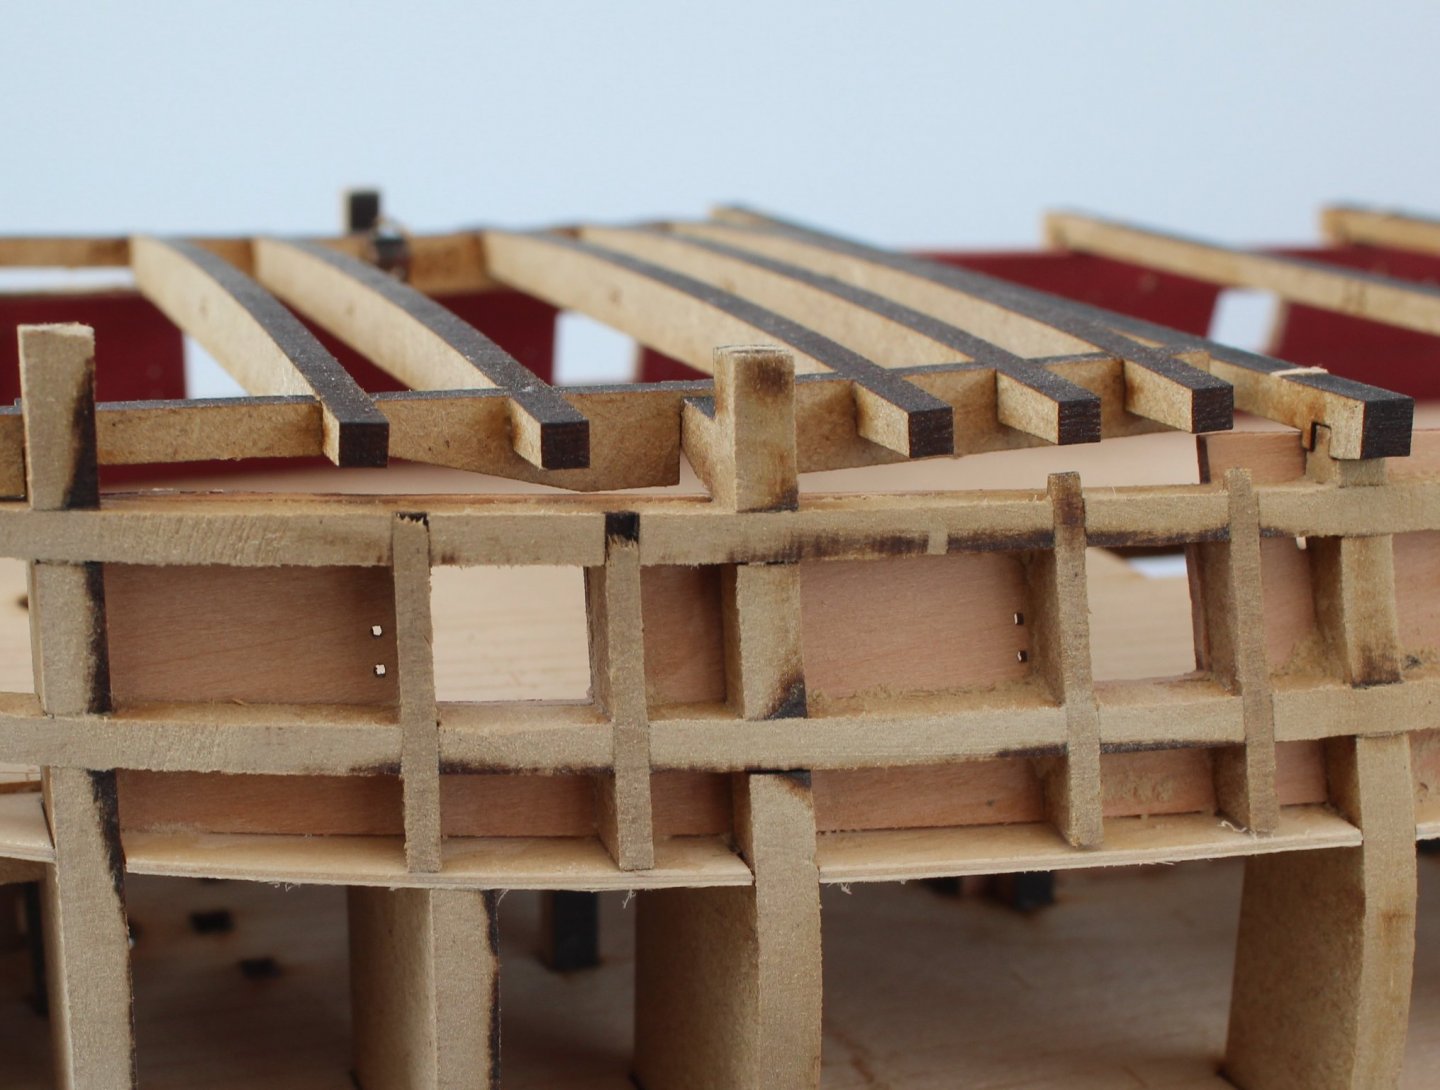
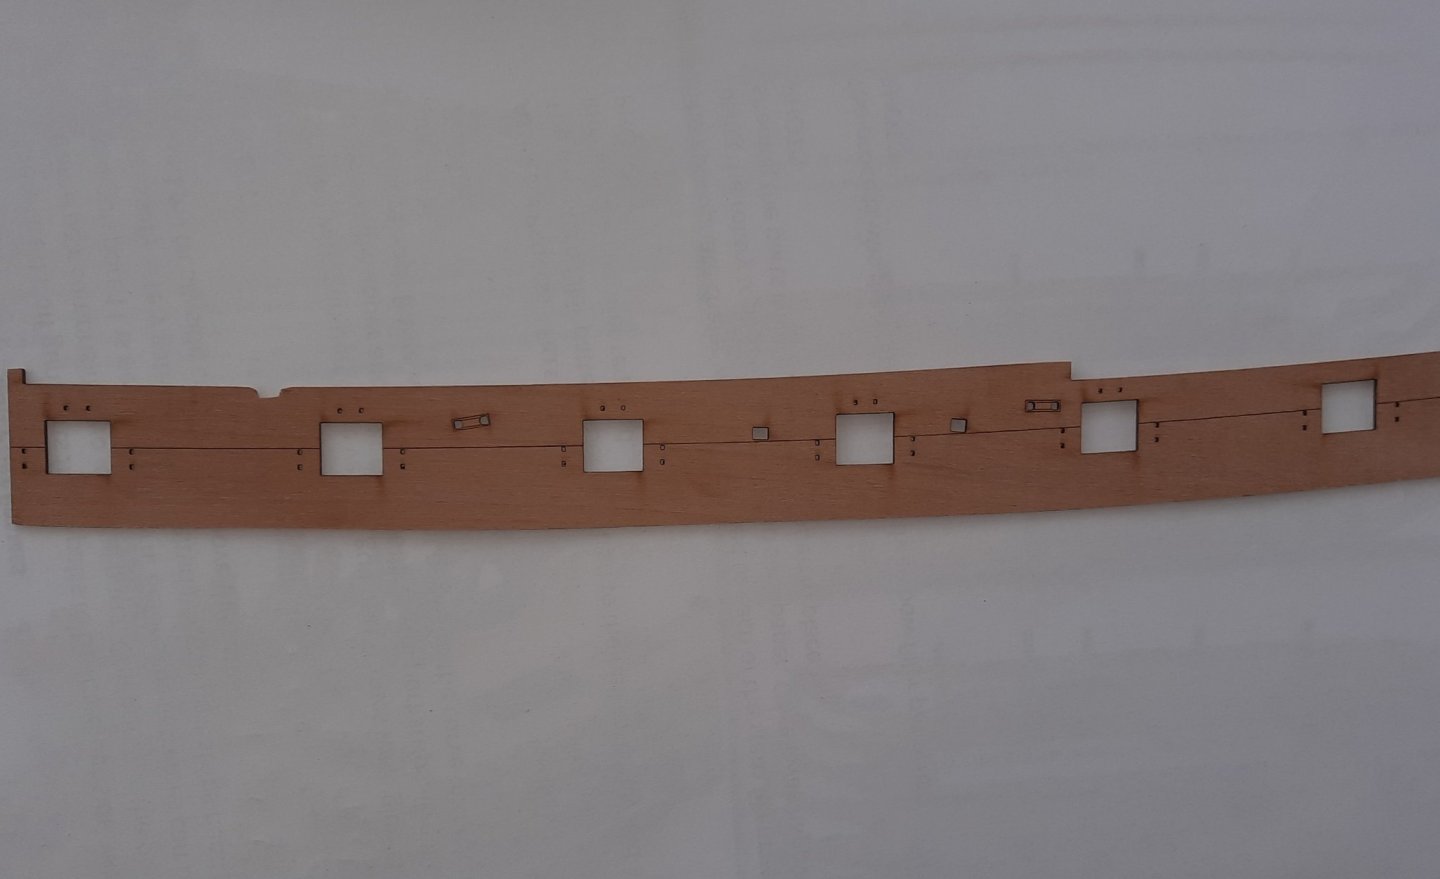
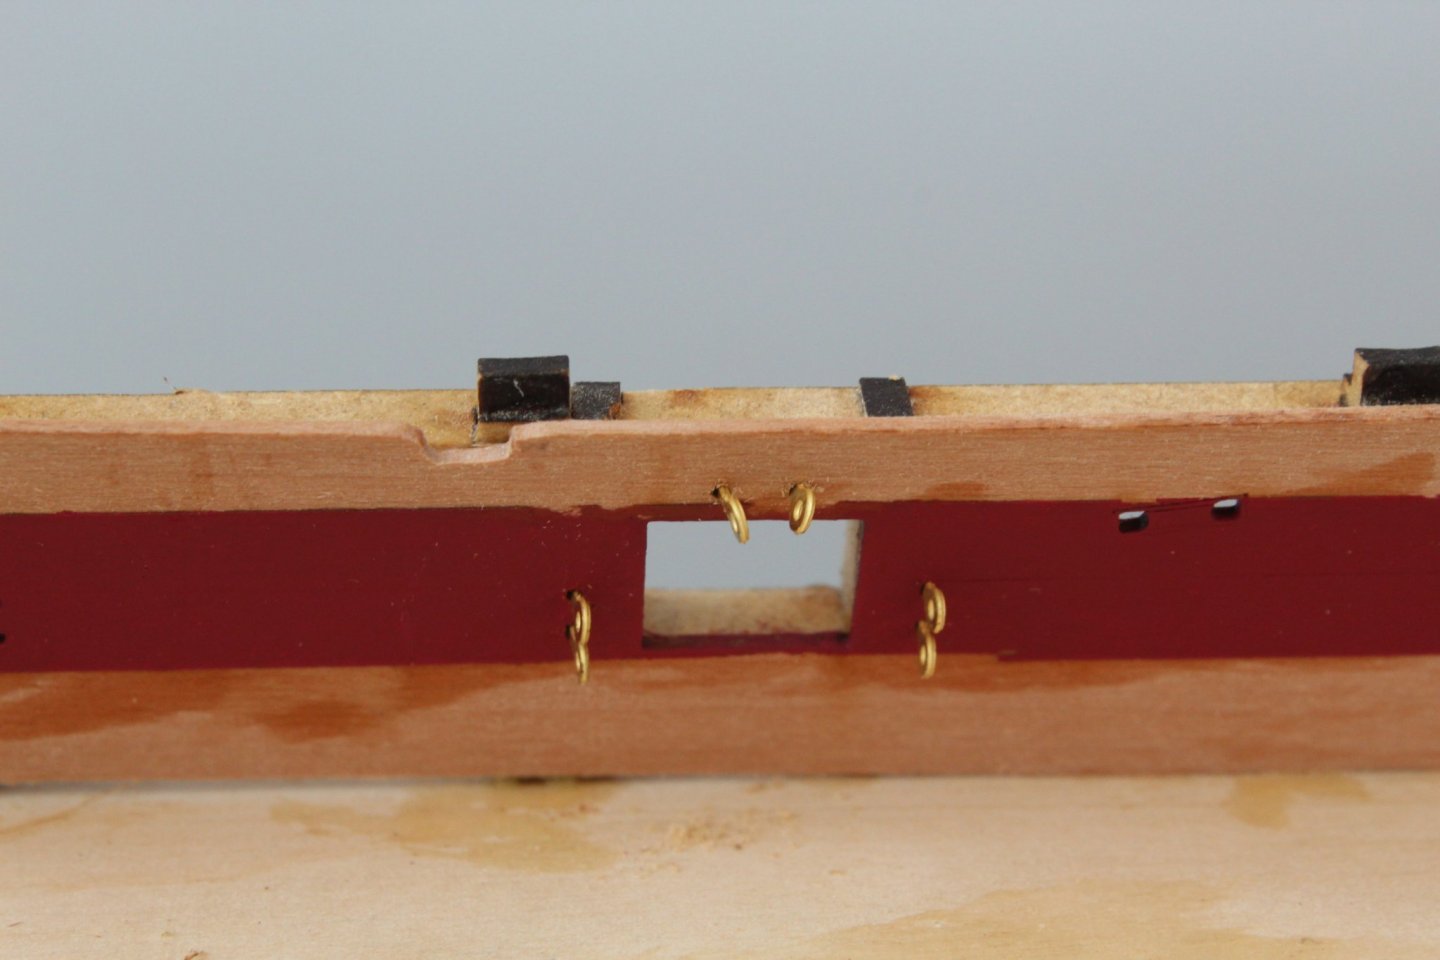
BUILD TIP ALIGNING THE SPIRKETTING PATTERNS LINK TO MY BUILD LOG INDEX Build Tip I am in the process of fitting the gun deck patterns and spirketting patterns. The top spirketting pattern has a set of holes for eyebolts which need to be aligned with the holes on the inner bulwarks. To aid this process I find it beneficial to dry fit the eyebolts to the inner bulwark gun ports. This does not take too much effort. I used a 0.8 micro drill to increase the depth of the top pair of holes / gun port so the eyebolts could be fully inserted. It is not strictly necessary to increase the depth, but I prefer to do so. Close up of one gun port with the 6 eyebolts dry fitted I then did a trial fit of the top spirketting patterns, using the eyebolts to help align them. I now have confidence these patterns can be correctly positioned when they are ready to be glued in place. Before I glue the spirketting patterns I will need to fit the gun deck and chequered deck patterns. Close up, the left hand top spirketting may need a slight trim to ensure it buts up to the right hand pattern, as it currently overlaps. I also need to paint to the left hand pattern up to the forward bulkhead cabin pattern position. A view of both spirketting patterns

-
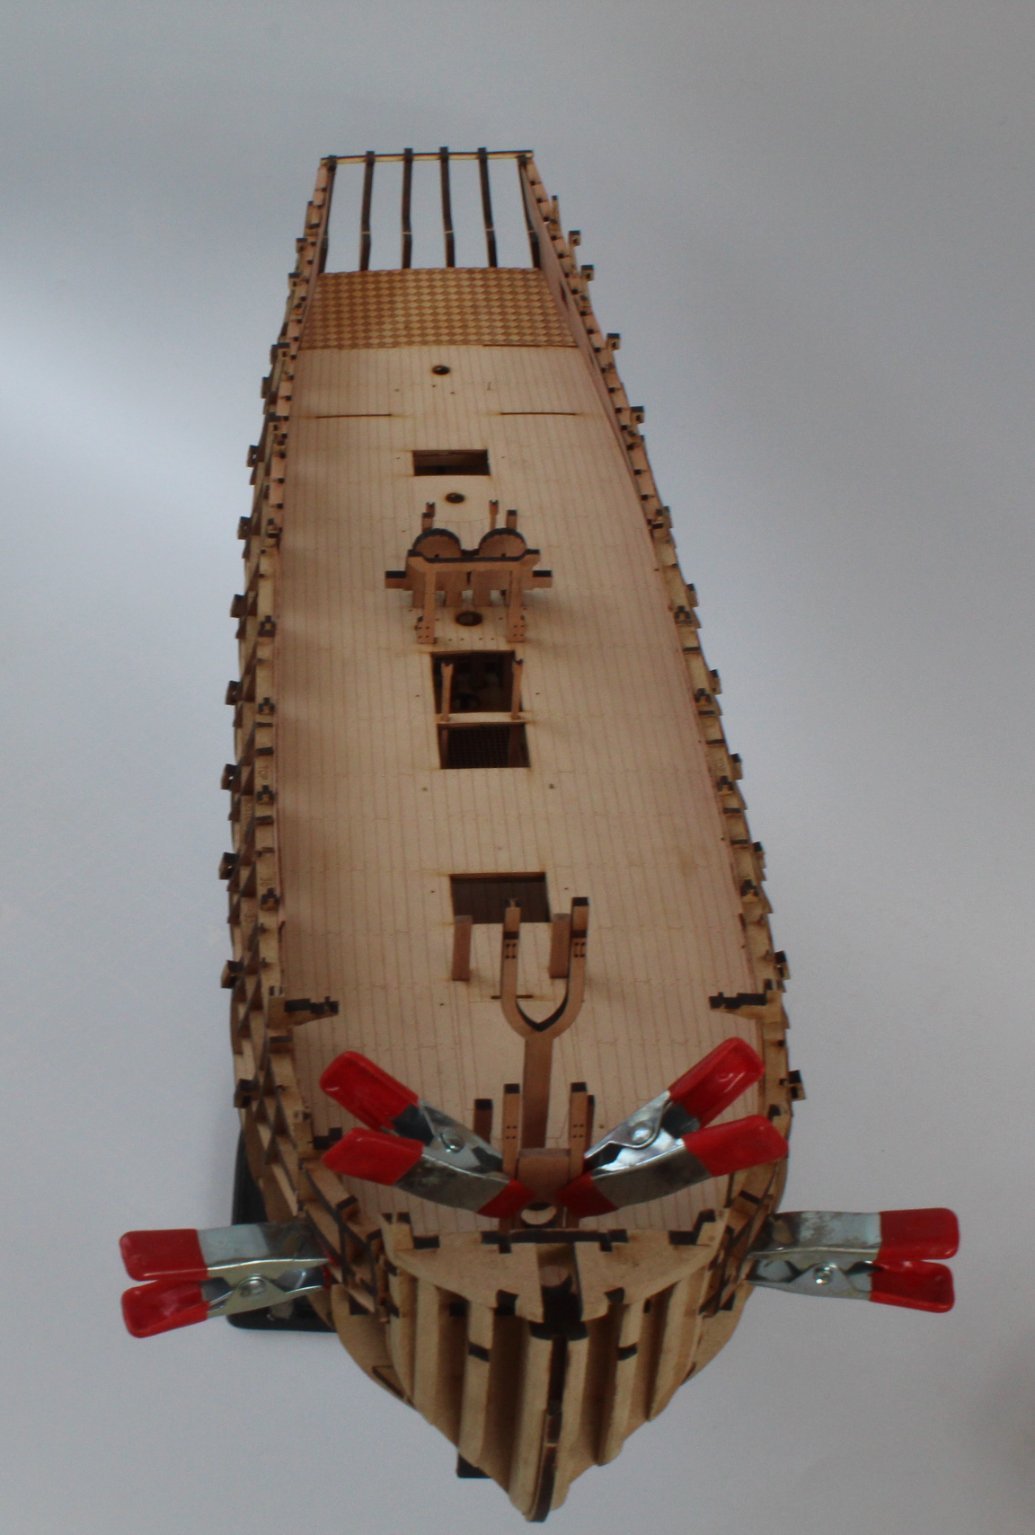
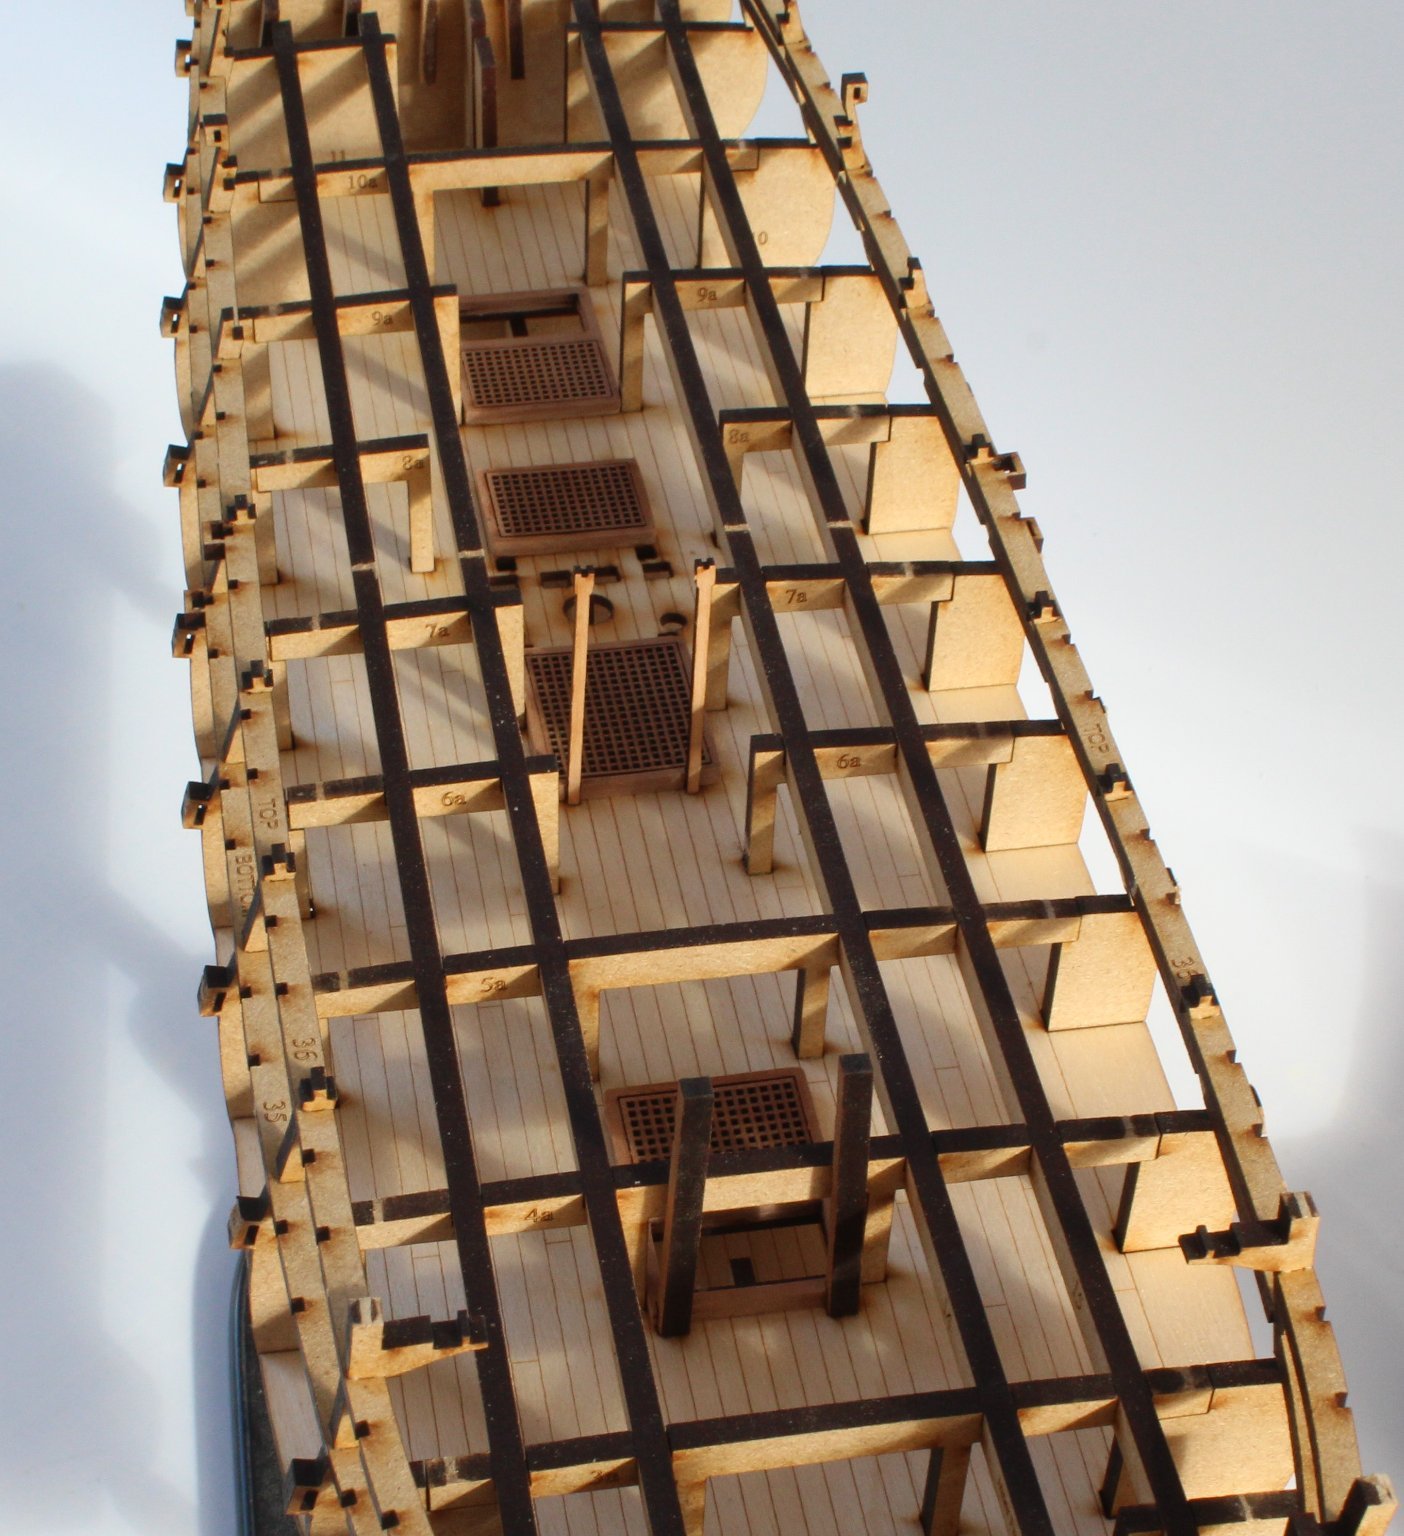
BUILD TIP PREPARING TO FIT THE GUN DECK PATTERN AND THE CHEQUER PATTERN DECK SECTION With some previous builds I have sometimes had an issue with fitting parts that have to pass through different deck levels, especially after the hull has been planked. Given the excellent design work undertaken by @chris watton this has not been an issue so far for the HMS Sphinx. Noting there a quite few parts that have to pass through the gun deck to locating slots on the lower deck I have been checking the fitting the parts as each level is to added. By doing this I have found it much easier to make adjustments to ensure everything is correctly aligned. With regards to fitting the Gun Deck Pattern and Chequer Pattern Deck section the edges required a bit of trimming in order for them to fit on top of the gun deck base. My first check that the pattern deck parts were correctly aligned as they were being trimmed was to use small brass pins to see if they would drop through the small holes. The pins can be seen in the photo below. The next test was to see if I could dry fit the various deck items. With the majority of parts it was necessary to remove the laser char below the gun deck level, noting the laser char has to be removed from all the above deck areas. Without the hull planking it was much easier to ensure the parts were locating fully in the slots on the lower deck. Checking the midships, the fully inserted parts can be seen through the opening. Bow section. The two clamps are used to hold the bitts in place as the do not pass through to the lower deck. The brass pins can also been seen in this photo. The whole deck view. I has also used a couple of clamps to test securing the bow section of the gun deck pattern to the gun deck base. I will also make sure the three masts and two pump dowels can be fully inserted. This is not normally an issue as the dowels can be slightly tapered if needed.


-
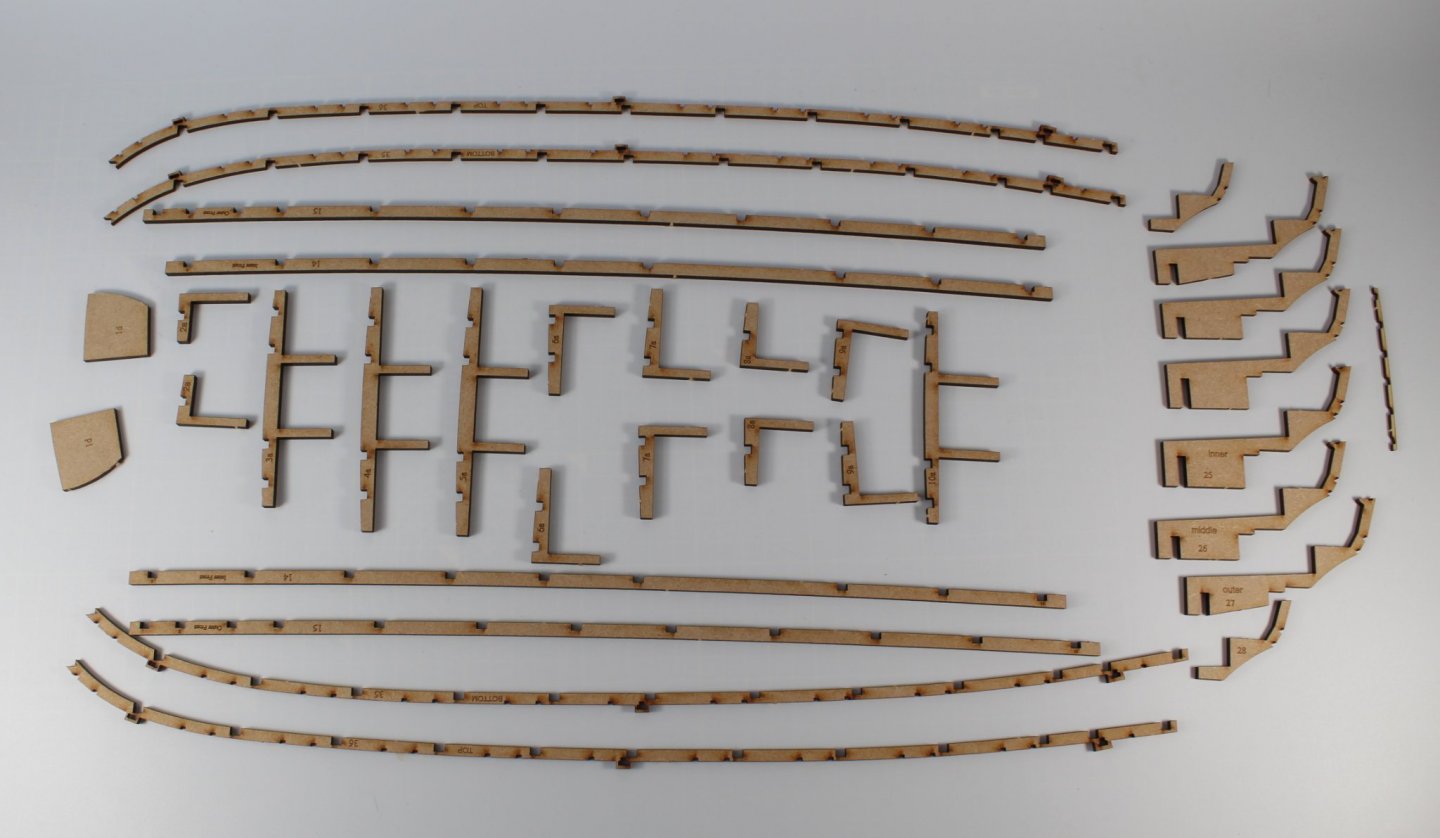
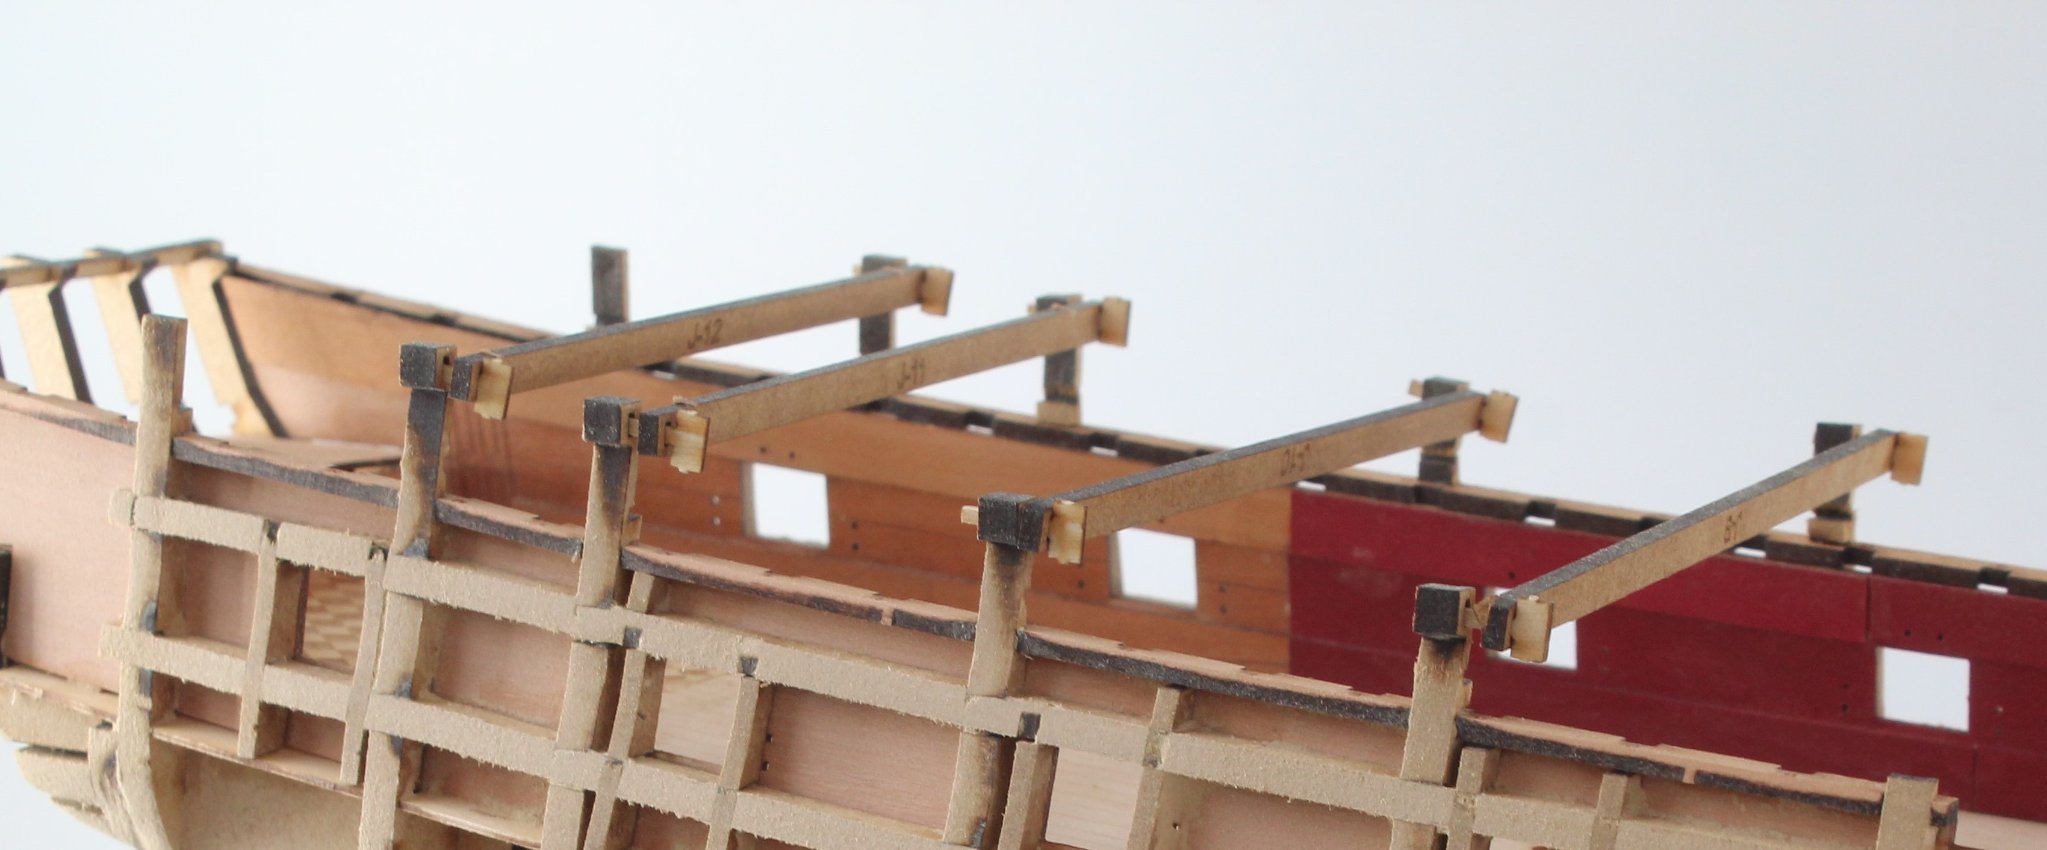
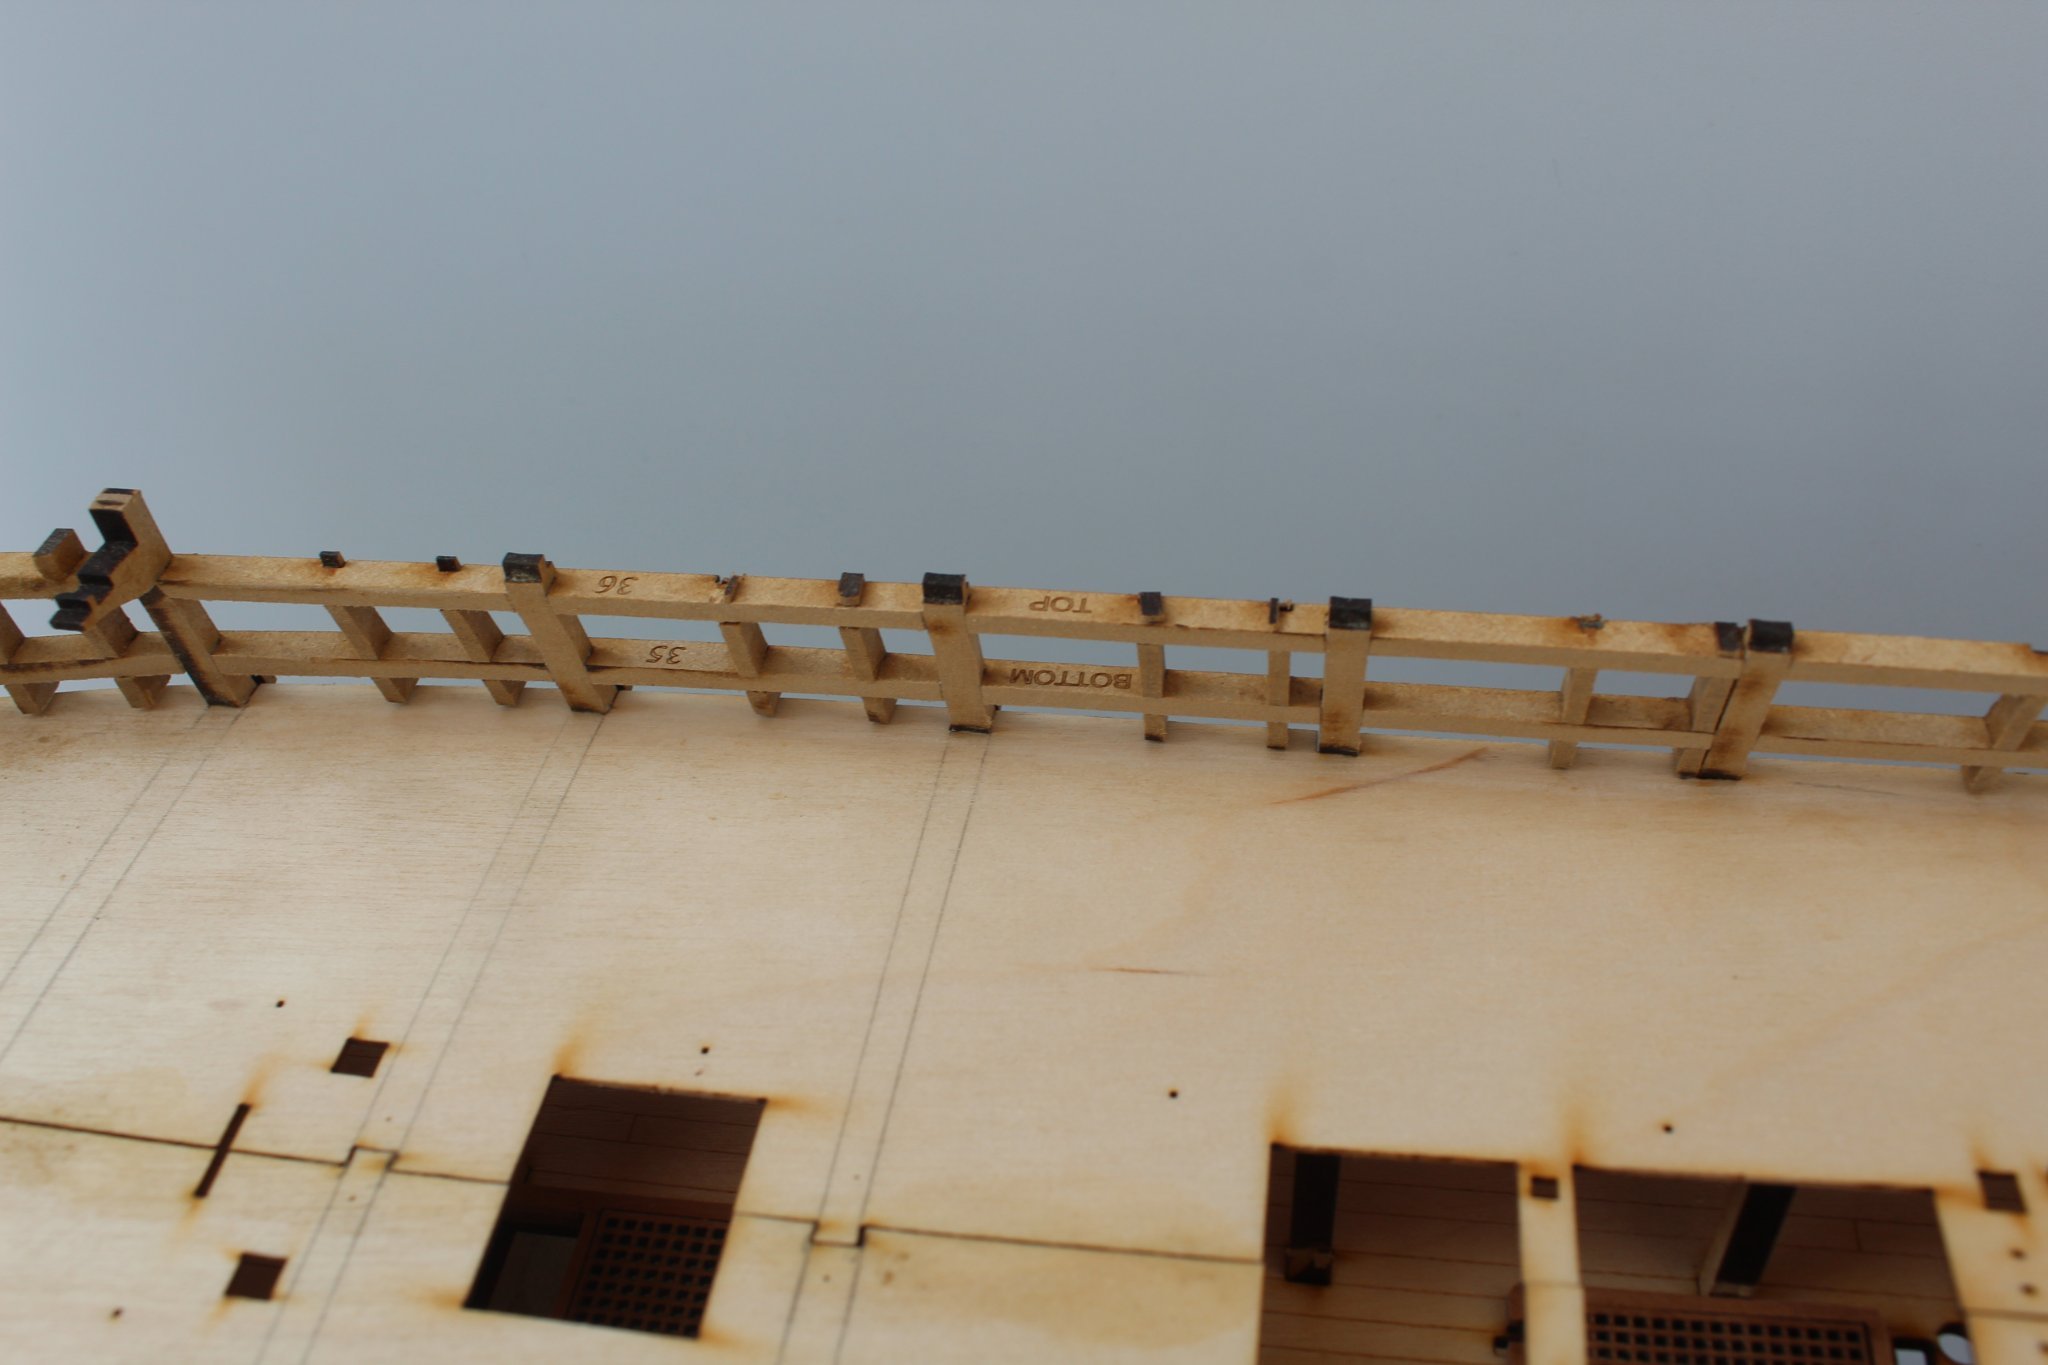
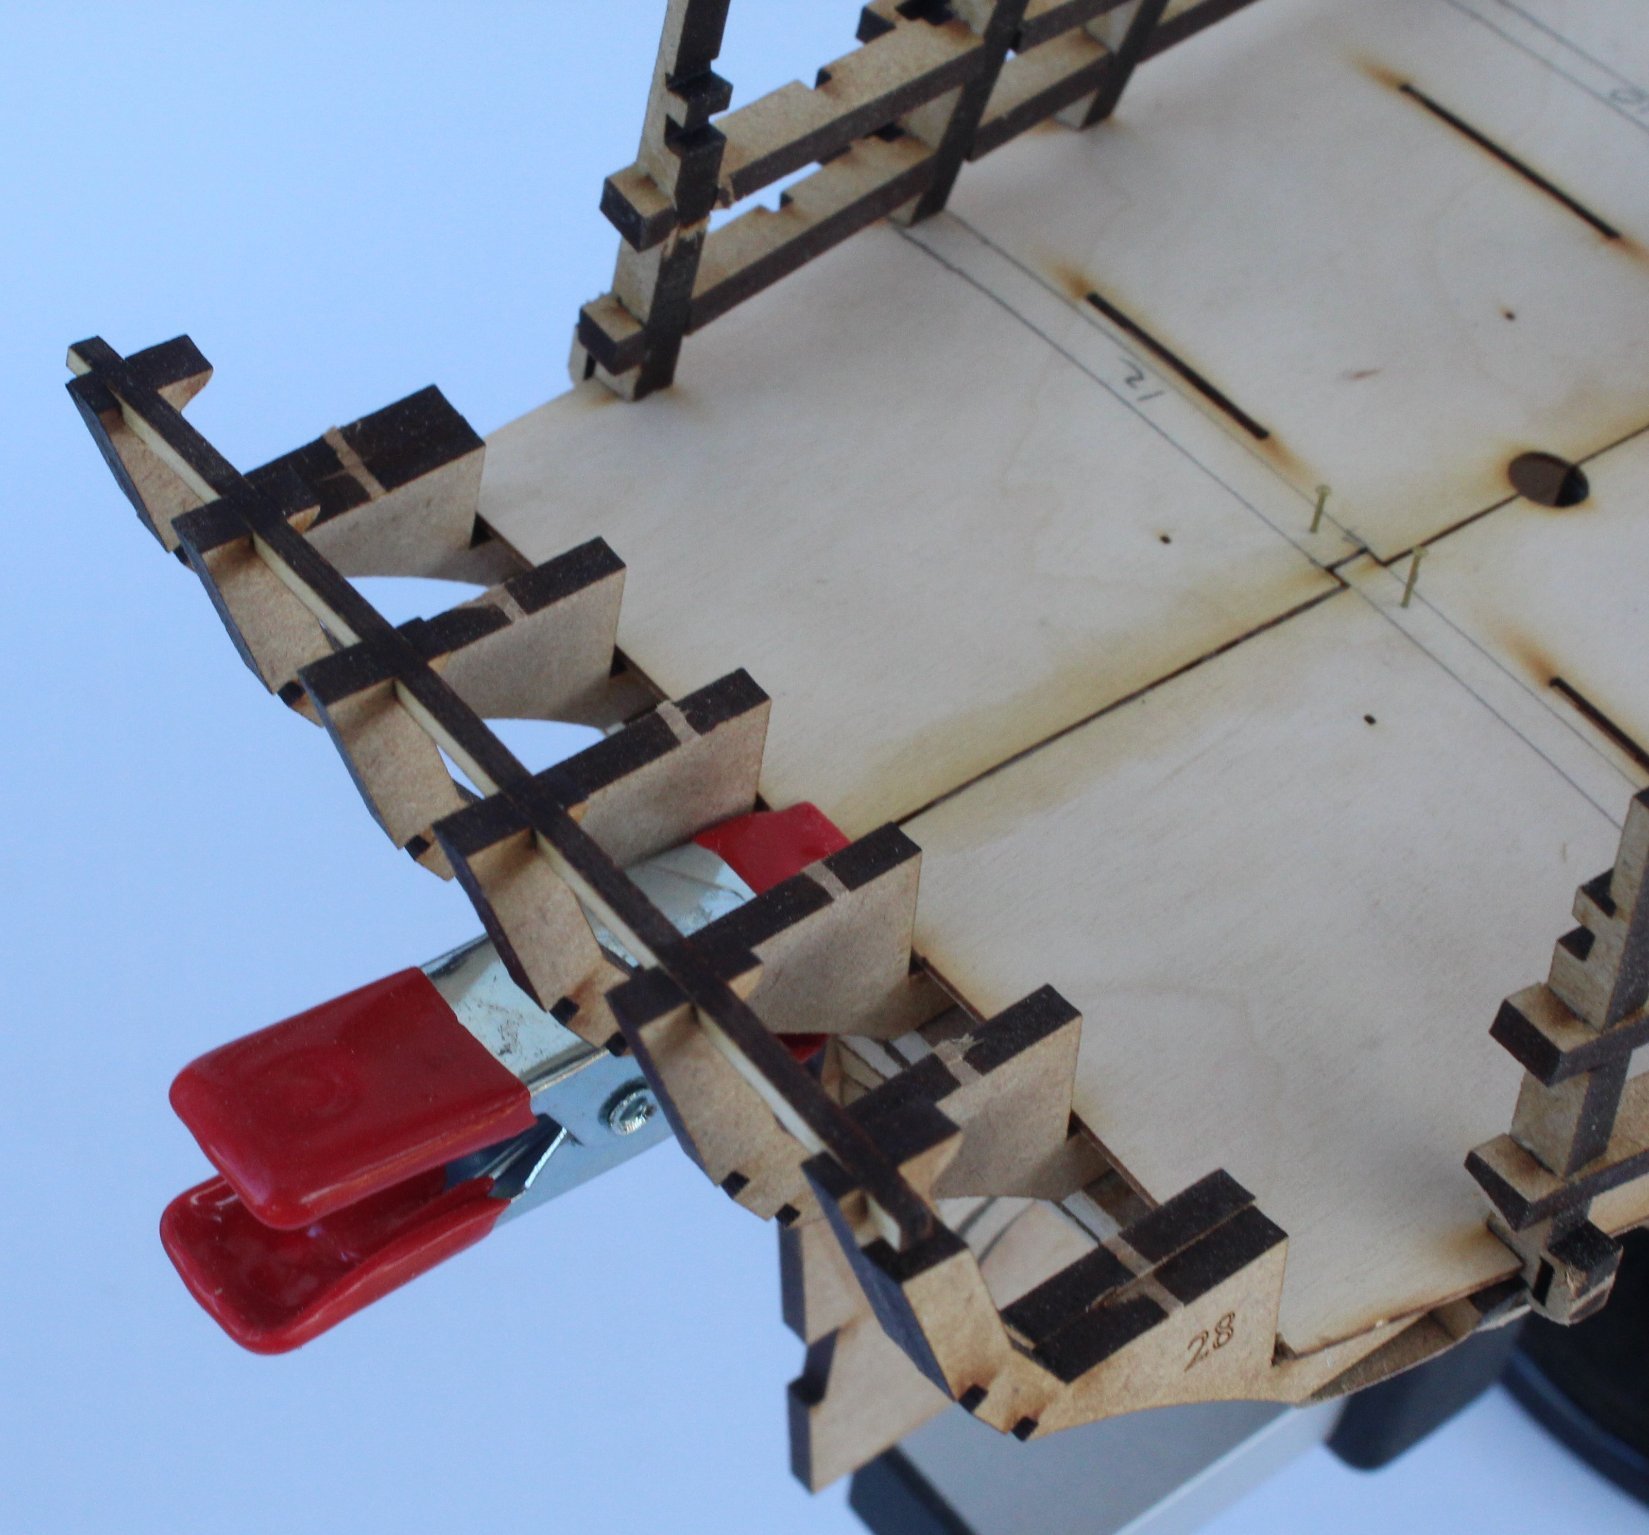
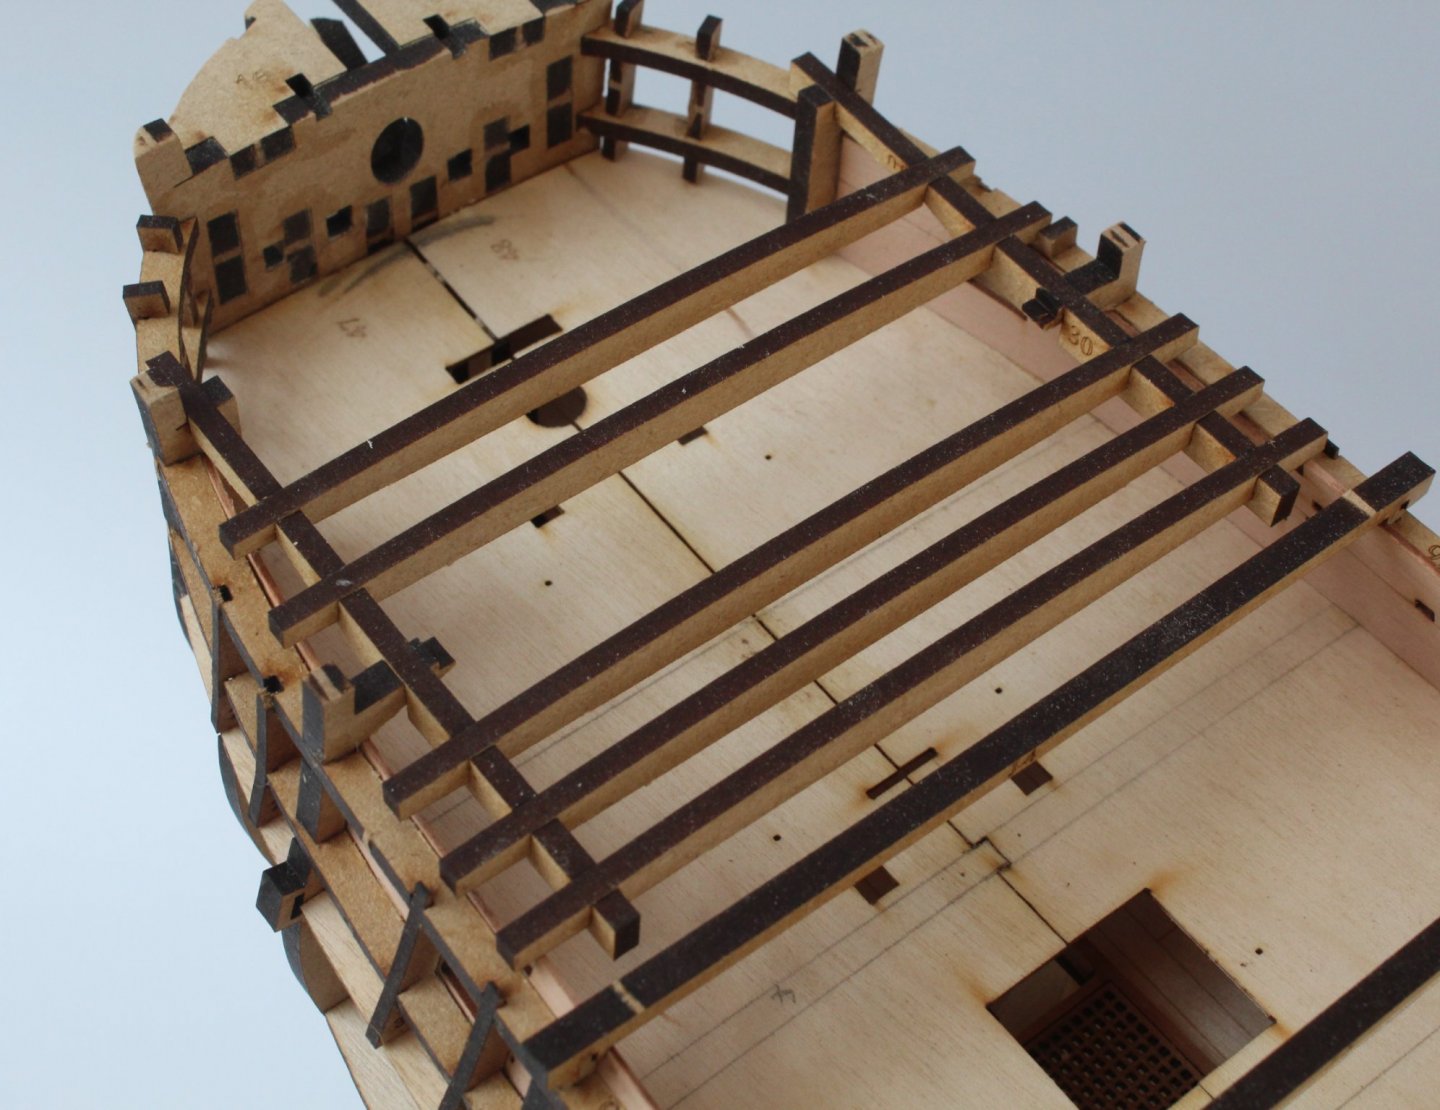
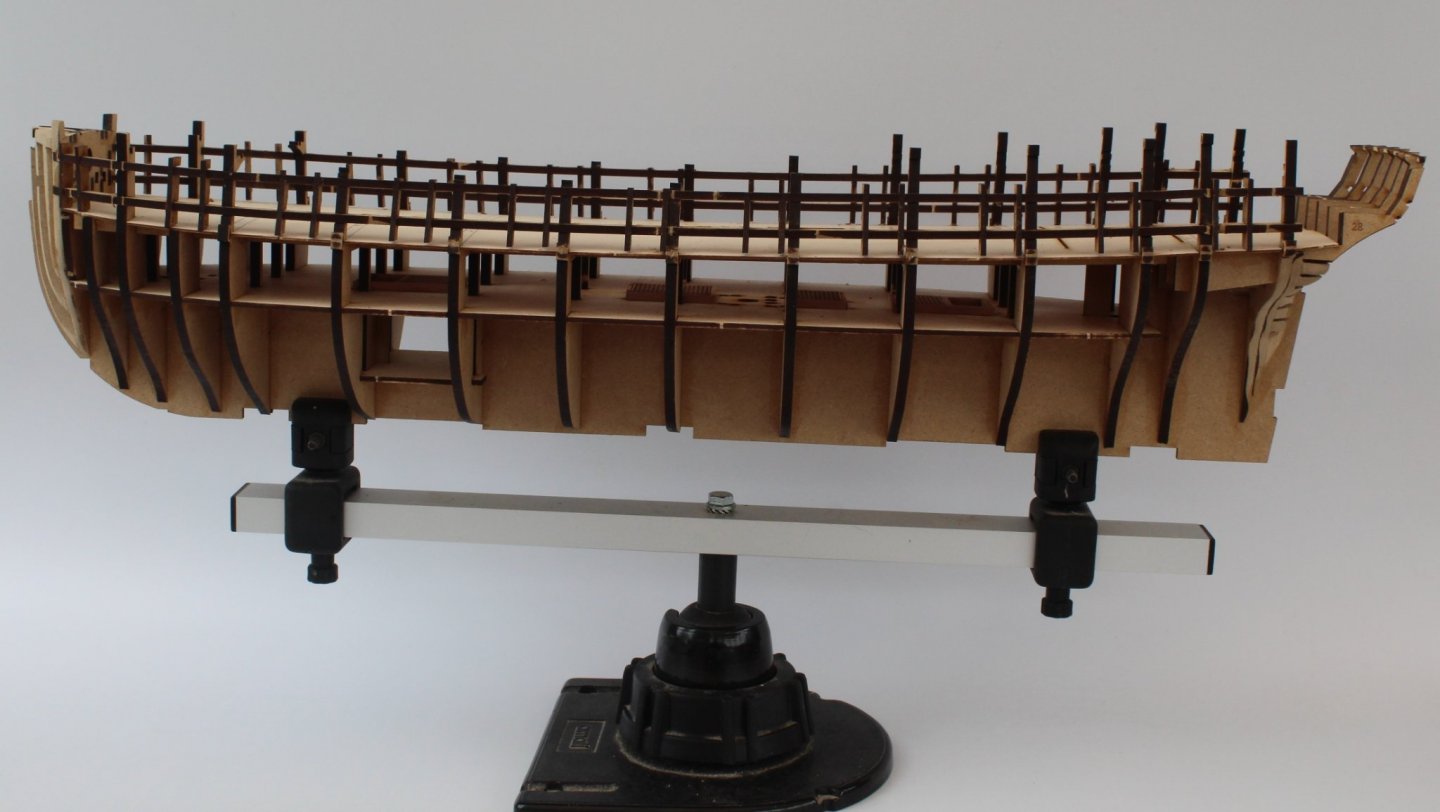
I have jumped a few steps in the build process for this very minor build task, a very simple task but I have included in my build log for completeness. JIGS FOR HULL BUILD MANUAL STEPS 123 - 127 LINK TO MY BUILD LOG INDEX Tools Used Craft knife Flory sanding stick Titebond original glue Old paint brush Gathering the materials required The following kit parts are required for this section of the build: J0 (x8), JU, JV, JX, JY, JZ, J4, J5, J6, J7, J9, J10, J11, J12, 30 (x2) Assembly Process The various jigs are to help ensure the correct hull width spacing is maintained. They are not to be glued to the hull as they will discarded later in the build process. The jig beams JU- JV were glued into the respective slots of the 2 off longitudinal jig beams. The completed forecastle deck jig frame was then test fitted without any problems, as can be seen in the photo below. Jig beams J4 – J7 were test fitted and proved to be a perfect fit, as can be seen in the photo below. Jig beams J9 – J12 are secured in their respective bulkheads using pegs. I found it necessary to remove the laser char from the pegs to ensure a smooth fit. A photo showing all the jigs in place.


-
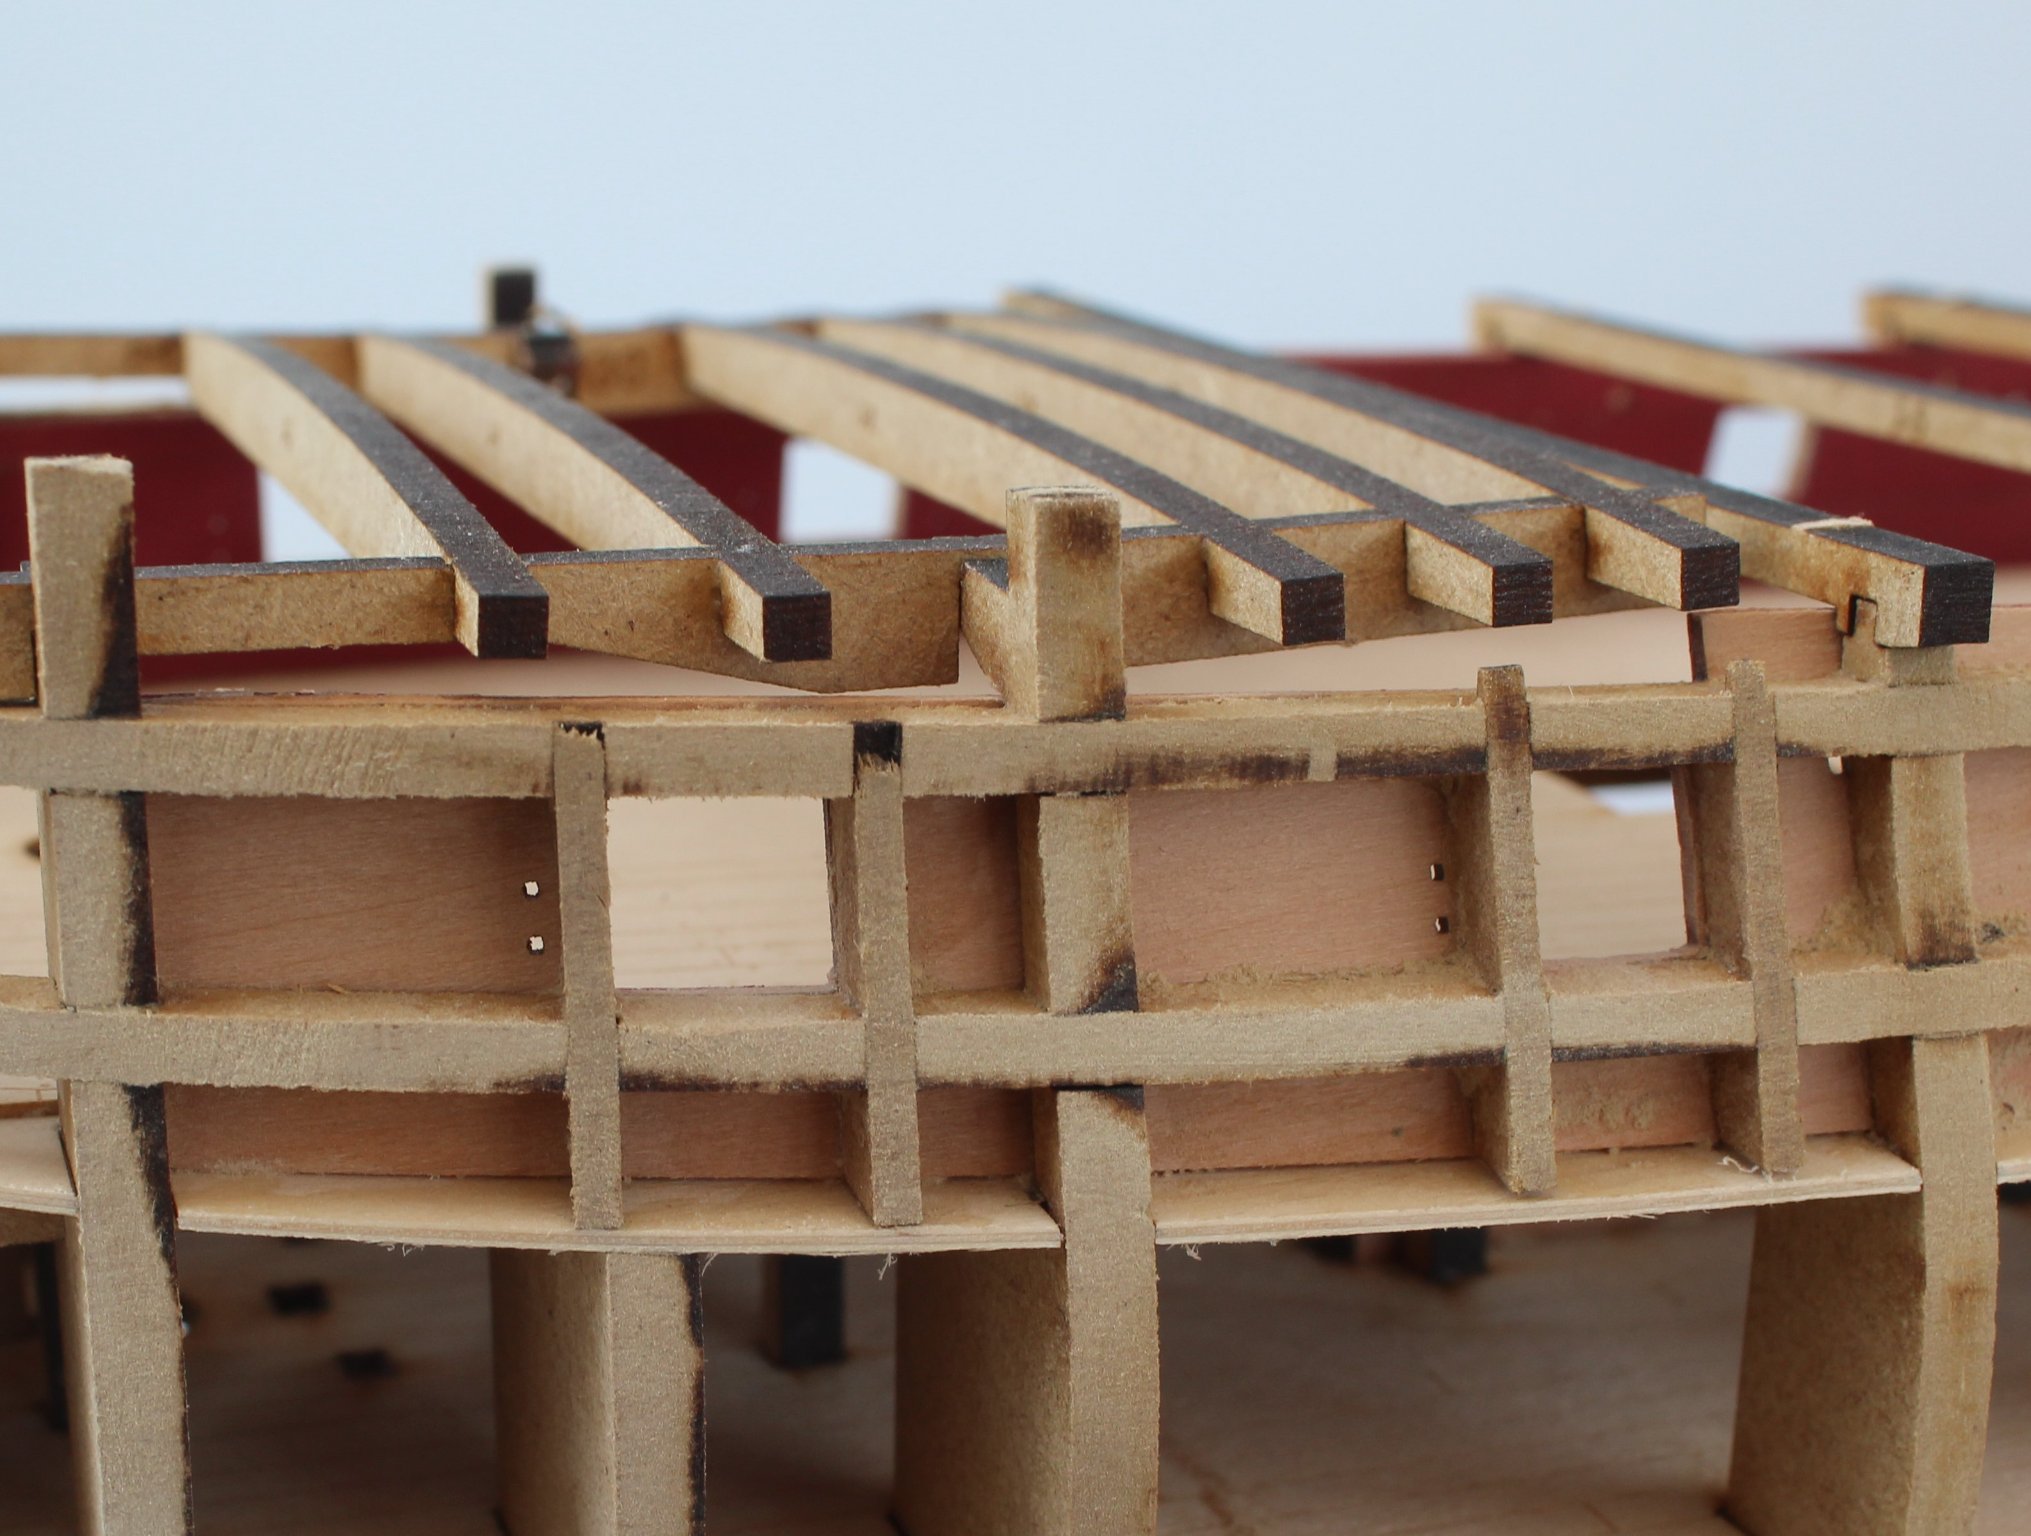
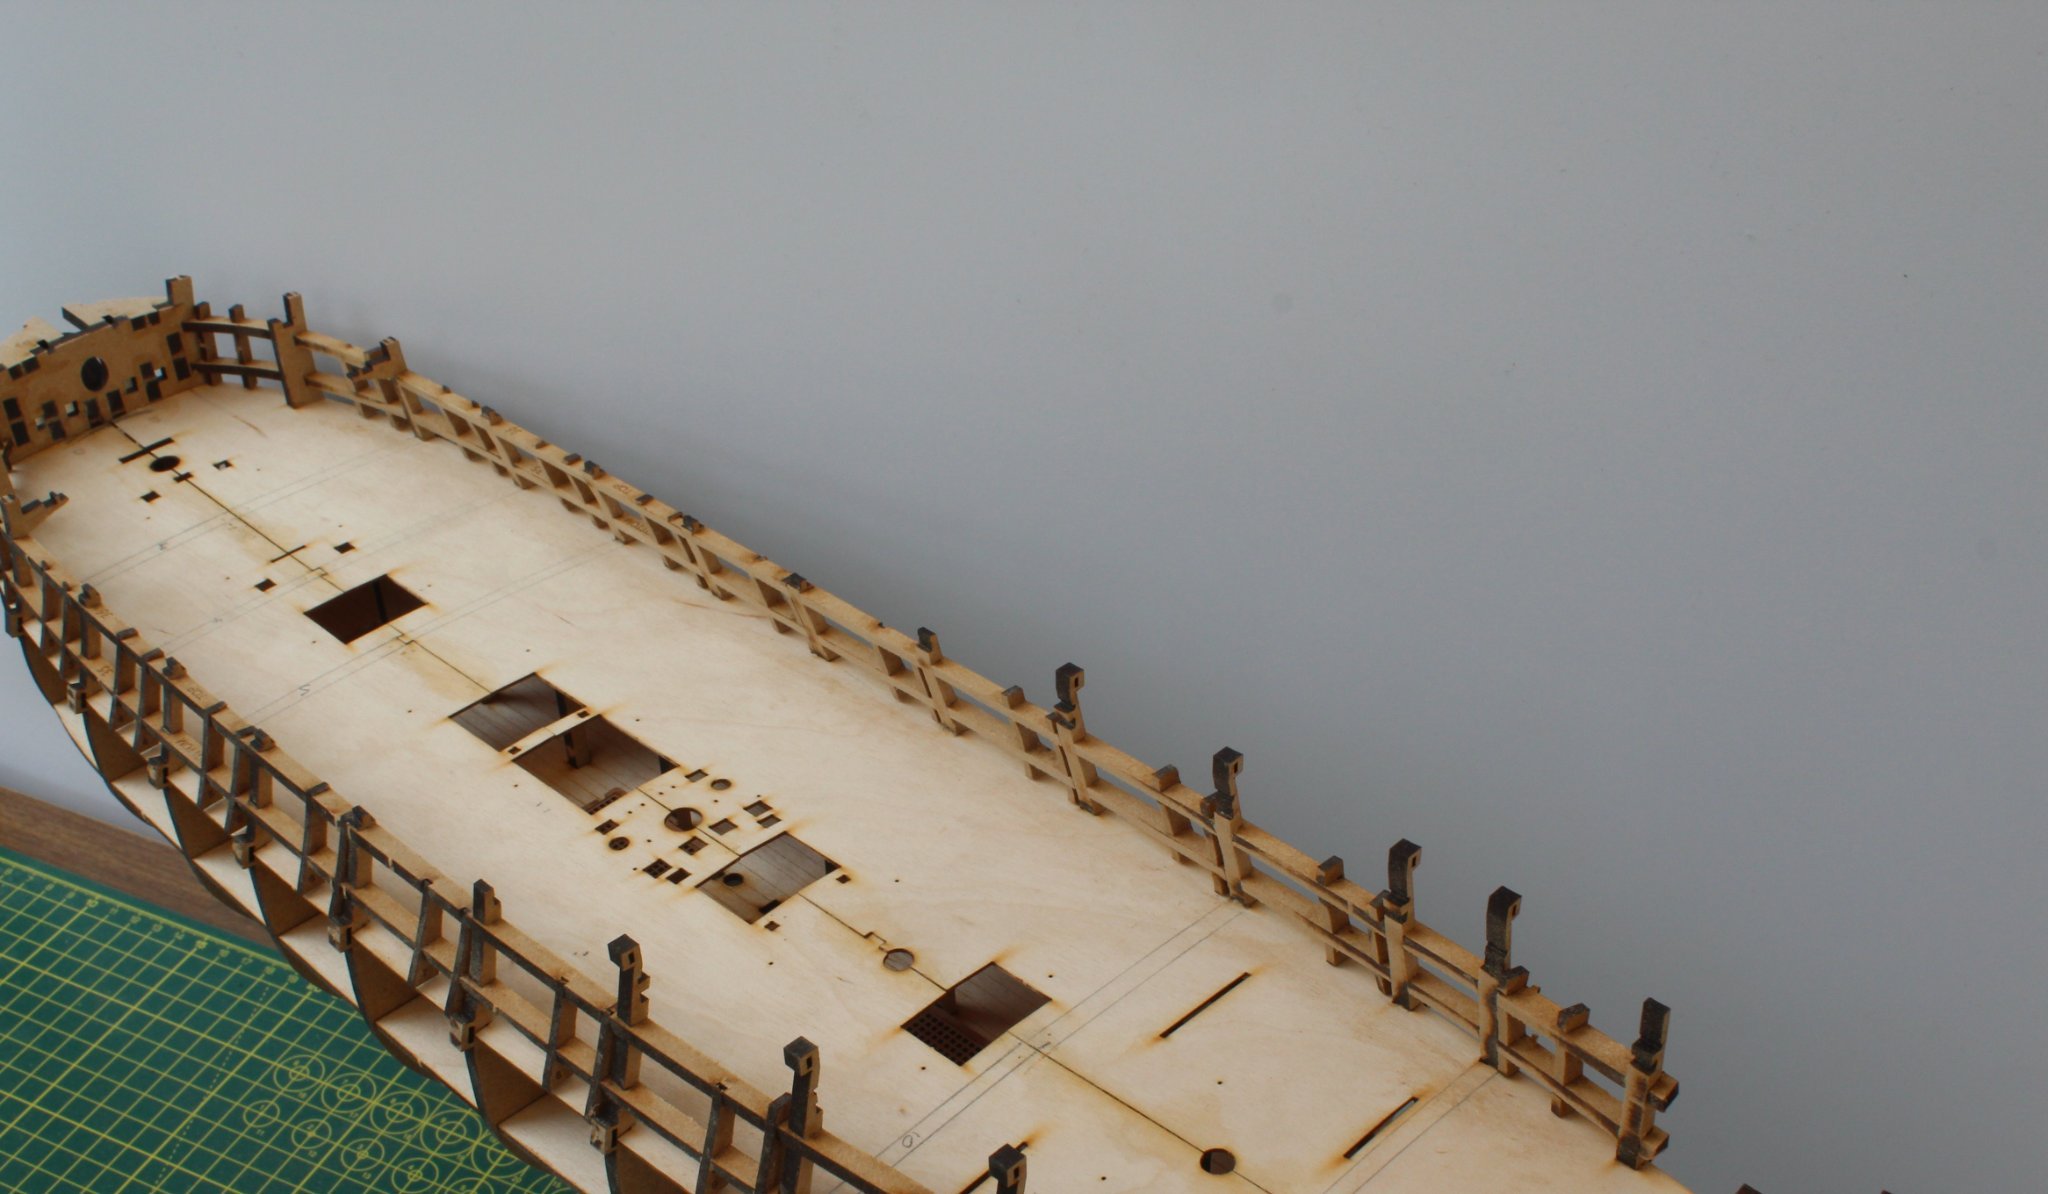
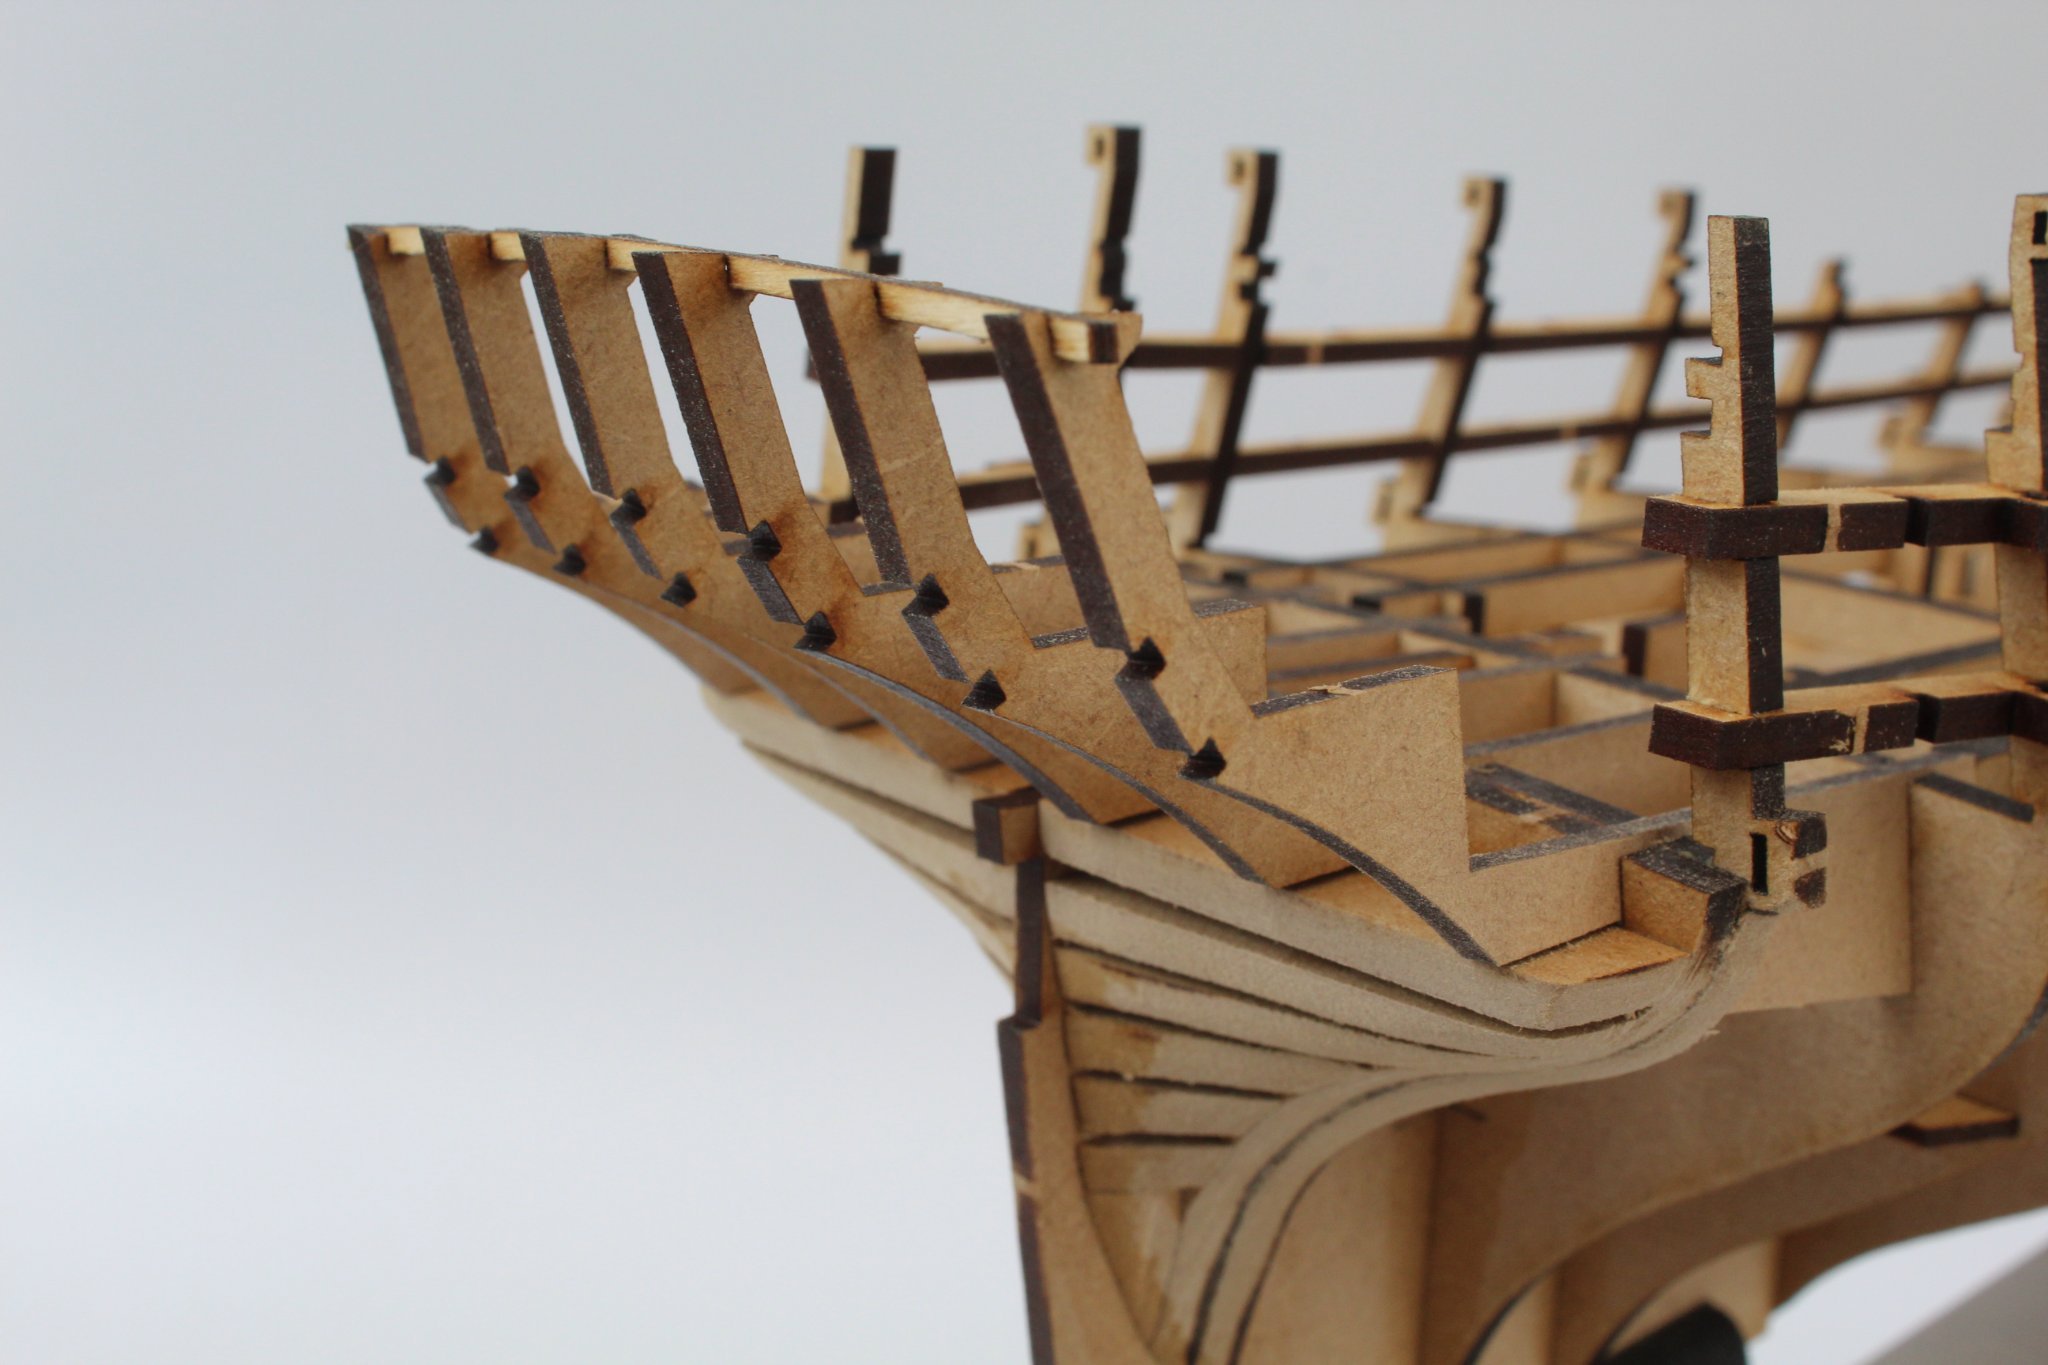
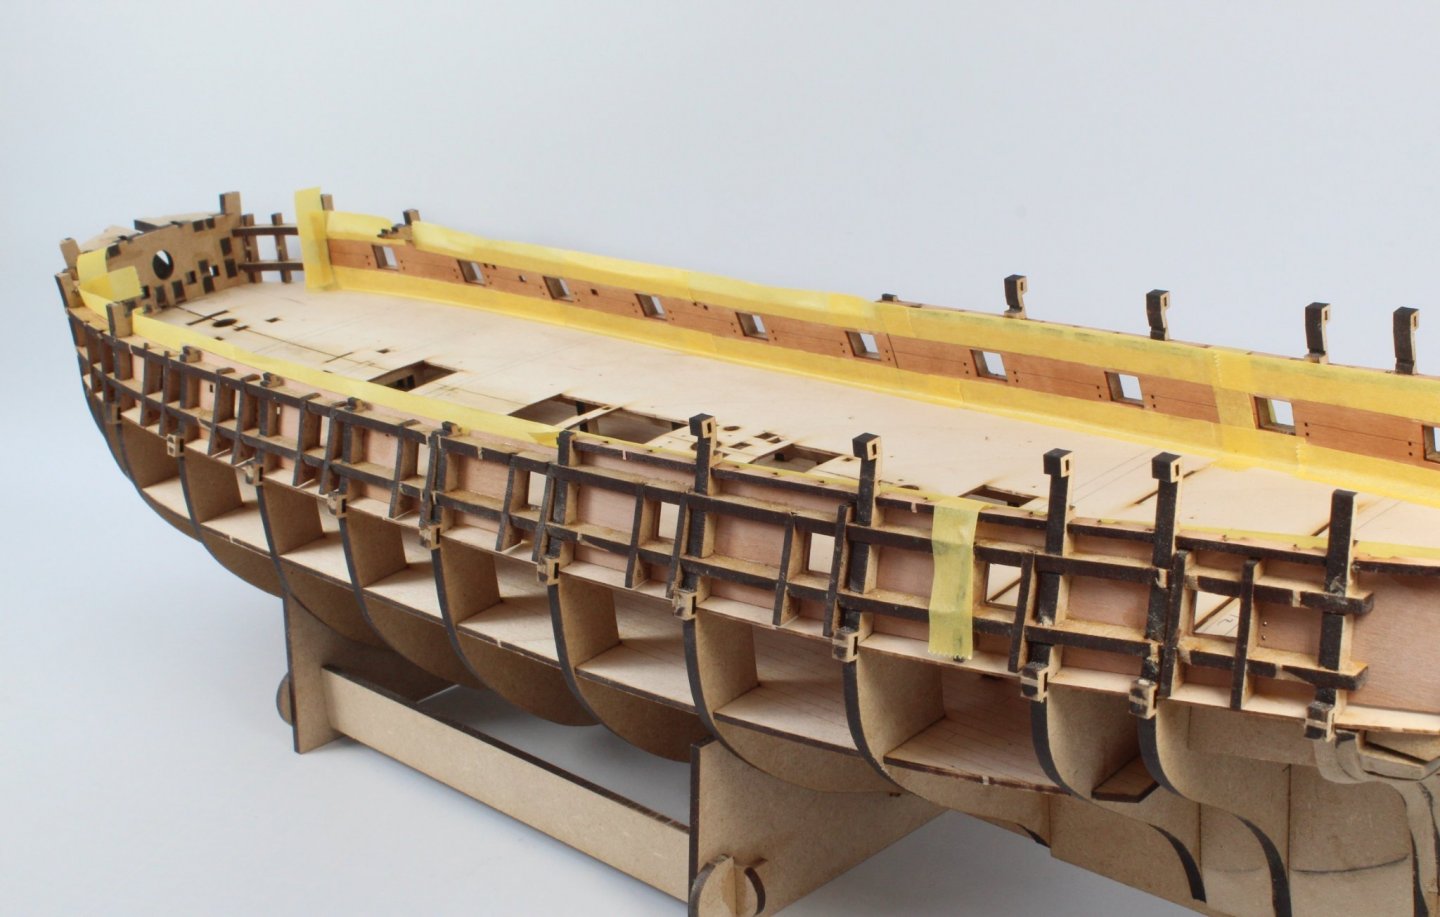
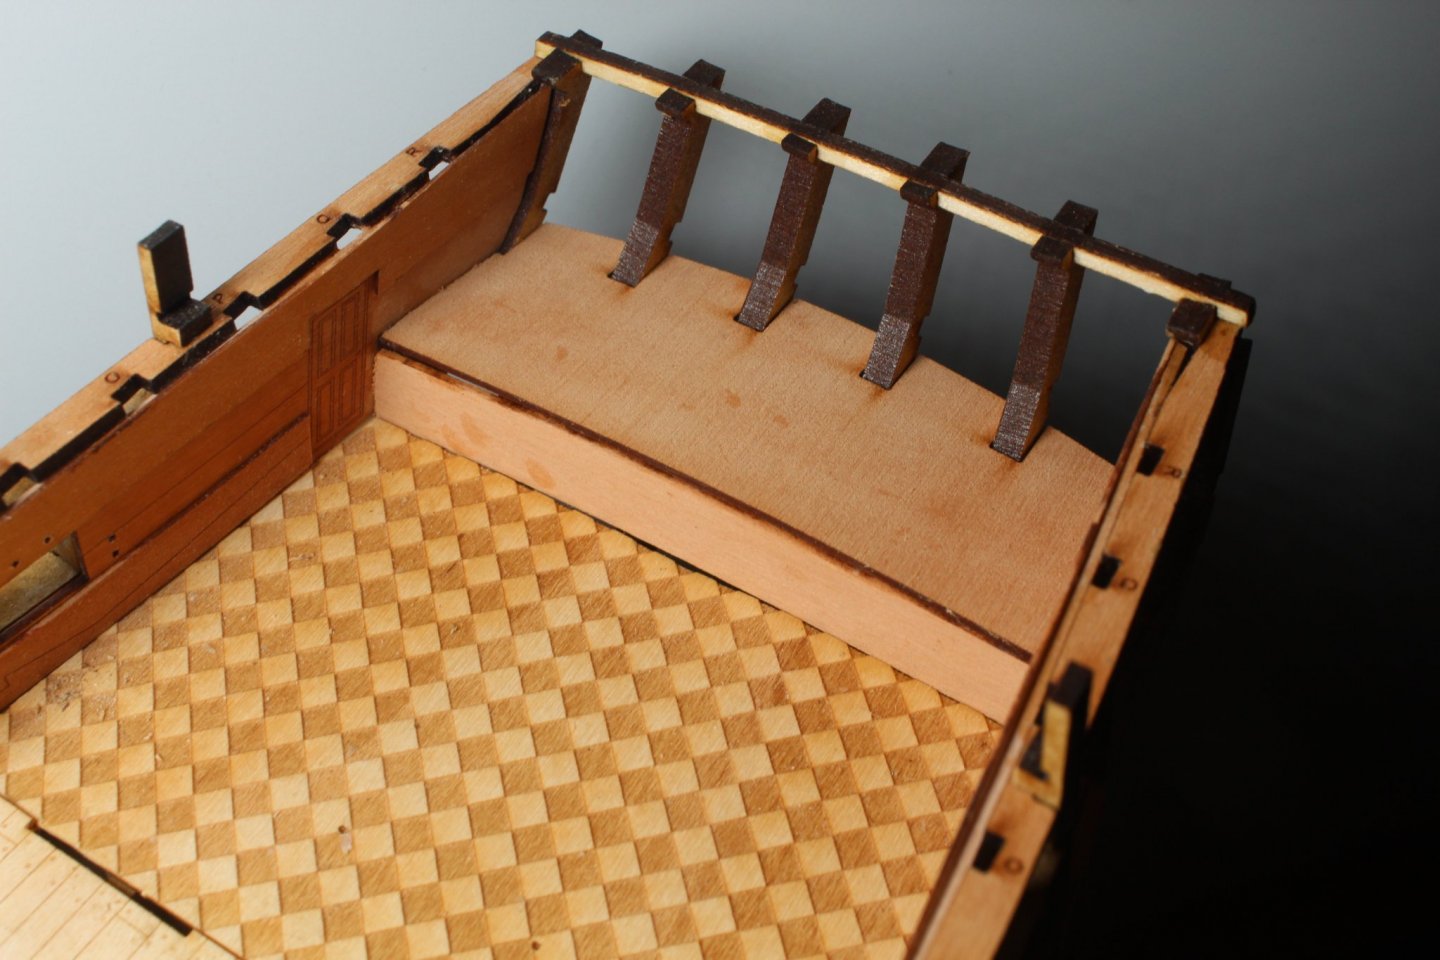
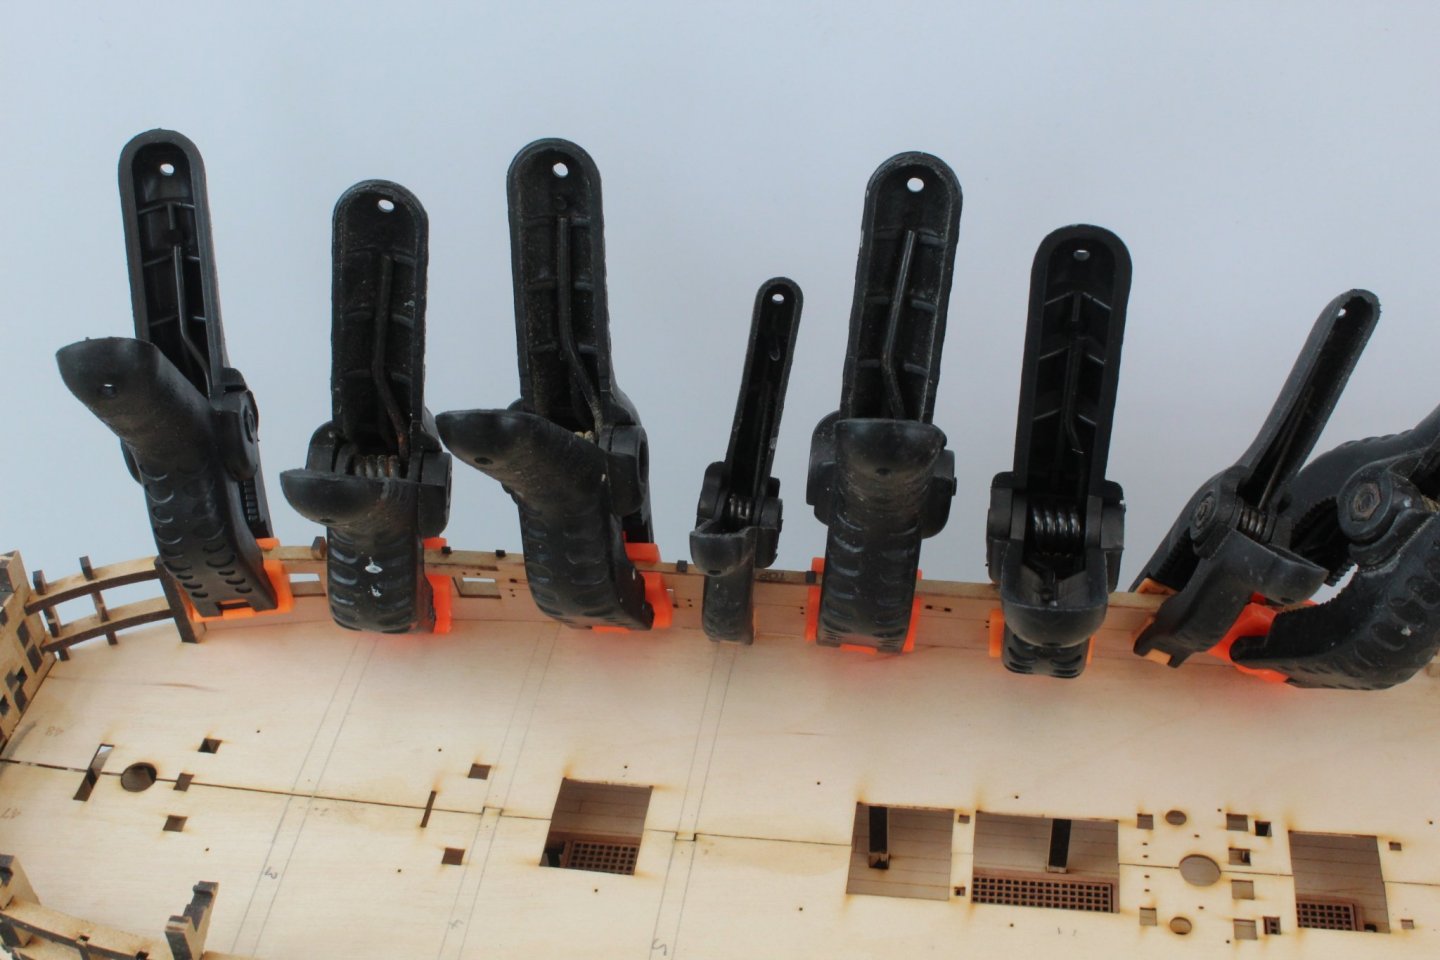
ADDING THE INNER BULWARK GUN DECK PATTERNS BUILD MANUAL STEPS 87 - 97 LINK TO MY BUILD LOG INDEX Tools Used Craft knife Flory sanding stick 120 & 400-grit sandpaper Titebond original glue Old paint brush Clamps Gathering the materials required The following kit parts are required for this section of the build: 213, 214, 215, 216, 409, 410 Assembly Process Before any work can be carried out it is important that the inner framework is sanded smooth to enable to inner bulwarks to fit flush. For this task I used a mixture of sandpaper and sanding sticks. As indicated in the build manual the removal of the laser char as a good guide to indicate when the surfaces are flush. The port and starboard forward inner gundeck bulwark patterns were aligned along the length. I decided to apply the glue to the framework before adding the patterns Clamps were then used to hold the bulwarks in place and some diluted glue brushed into the joints for good measure Clamped in place Clamps removed Next the quarterdeck beam spacing patterns were glued to the stern bulkheads. There are very fragile so great care is needed when handling these parts. The port and starboard rear inner bulwark gundeck patterns were test fitted and seemed to be a good fit, just a slight bit of light sanding for a perfect fit. Glue was then applied to the framework and the rear inner bulwark patterns added and clamped. Diluted glue was also brushed into the joints. Rear Bulwarks clamped in place Clamps removed Task completed


-
I have added your build log to my Sphinx index, looking forward to watching your progress. You've made a good start
-
I have added your build log to my Sphinx index, looking forward to watching your progress.
- 505 replies
-
- 3
-
-
- vanguard models
- Sphinx
- (and 1 more)
-
Thanks Chris I worked out it would not be a problem if I did damage them when looking how the build progresses but figured it better to try to keep them in tack.
-
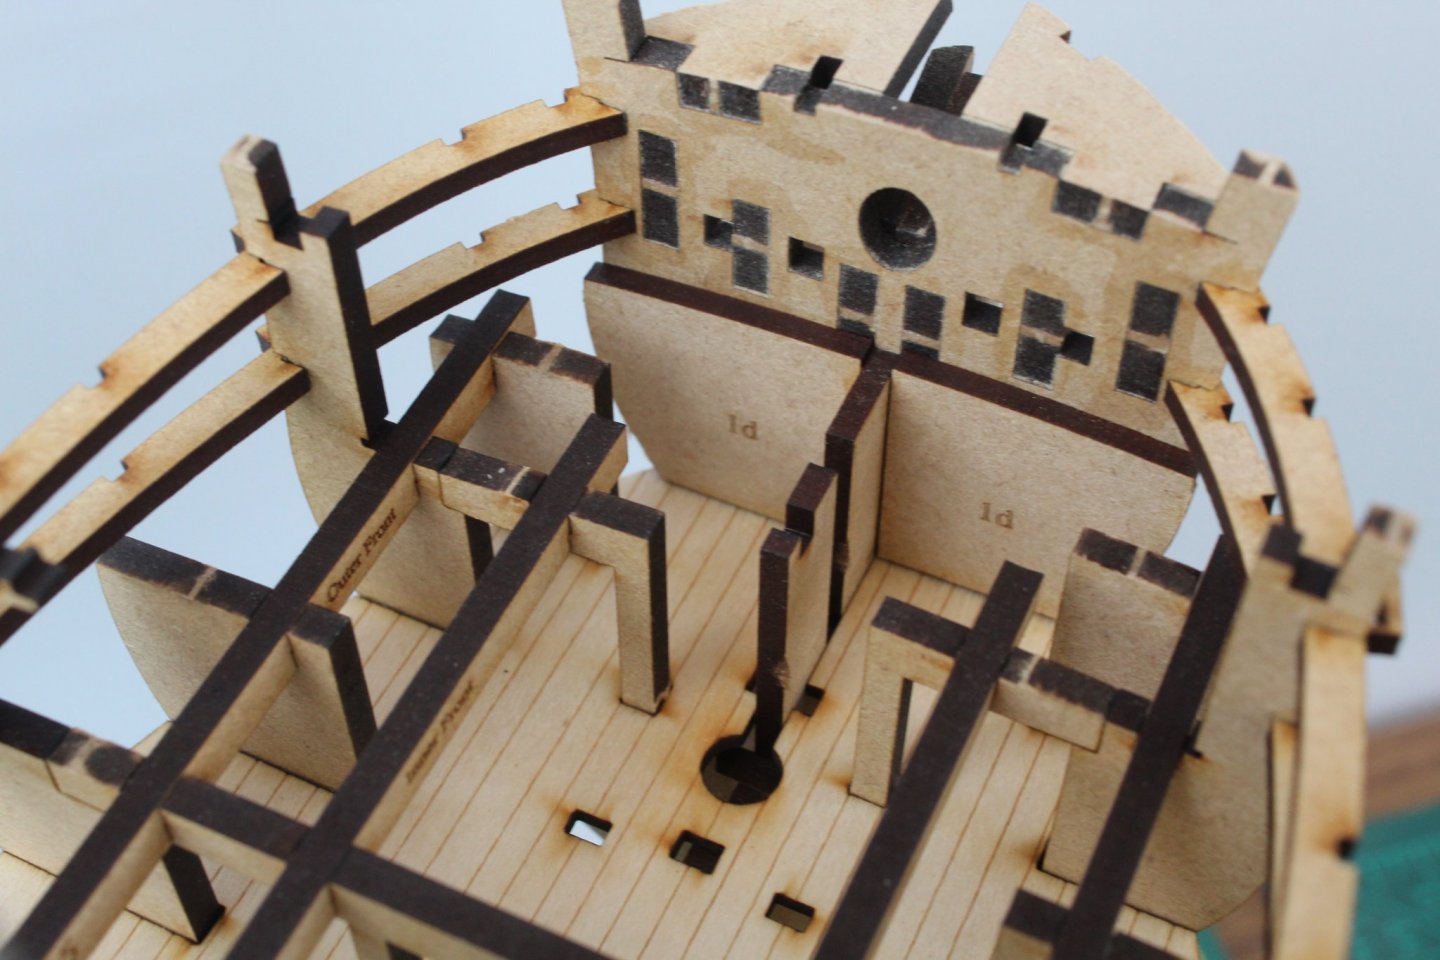
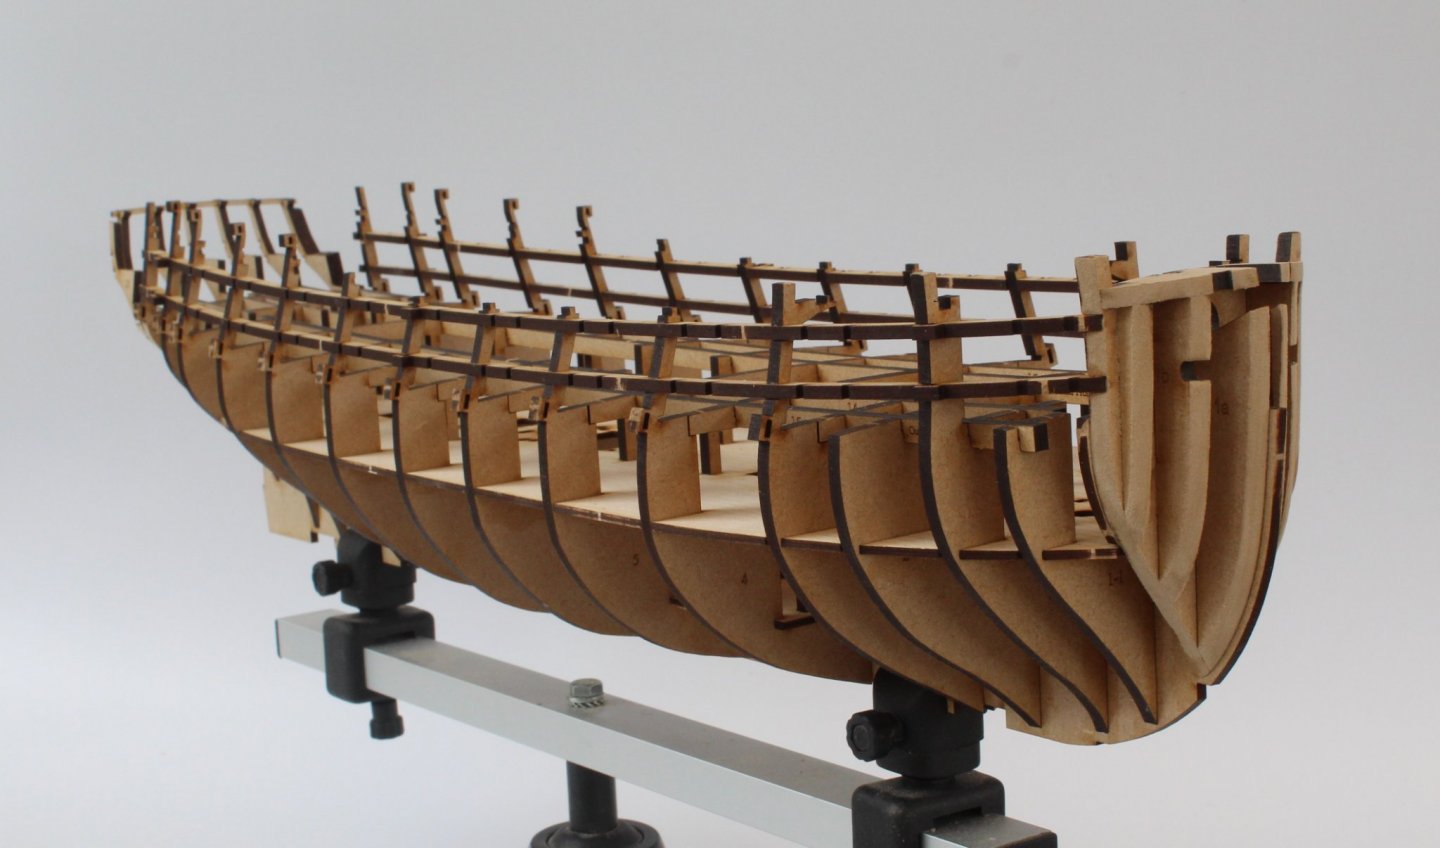
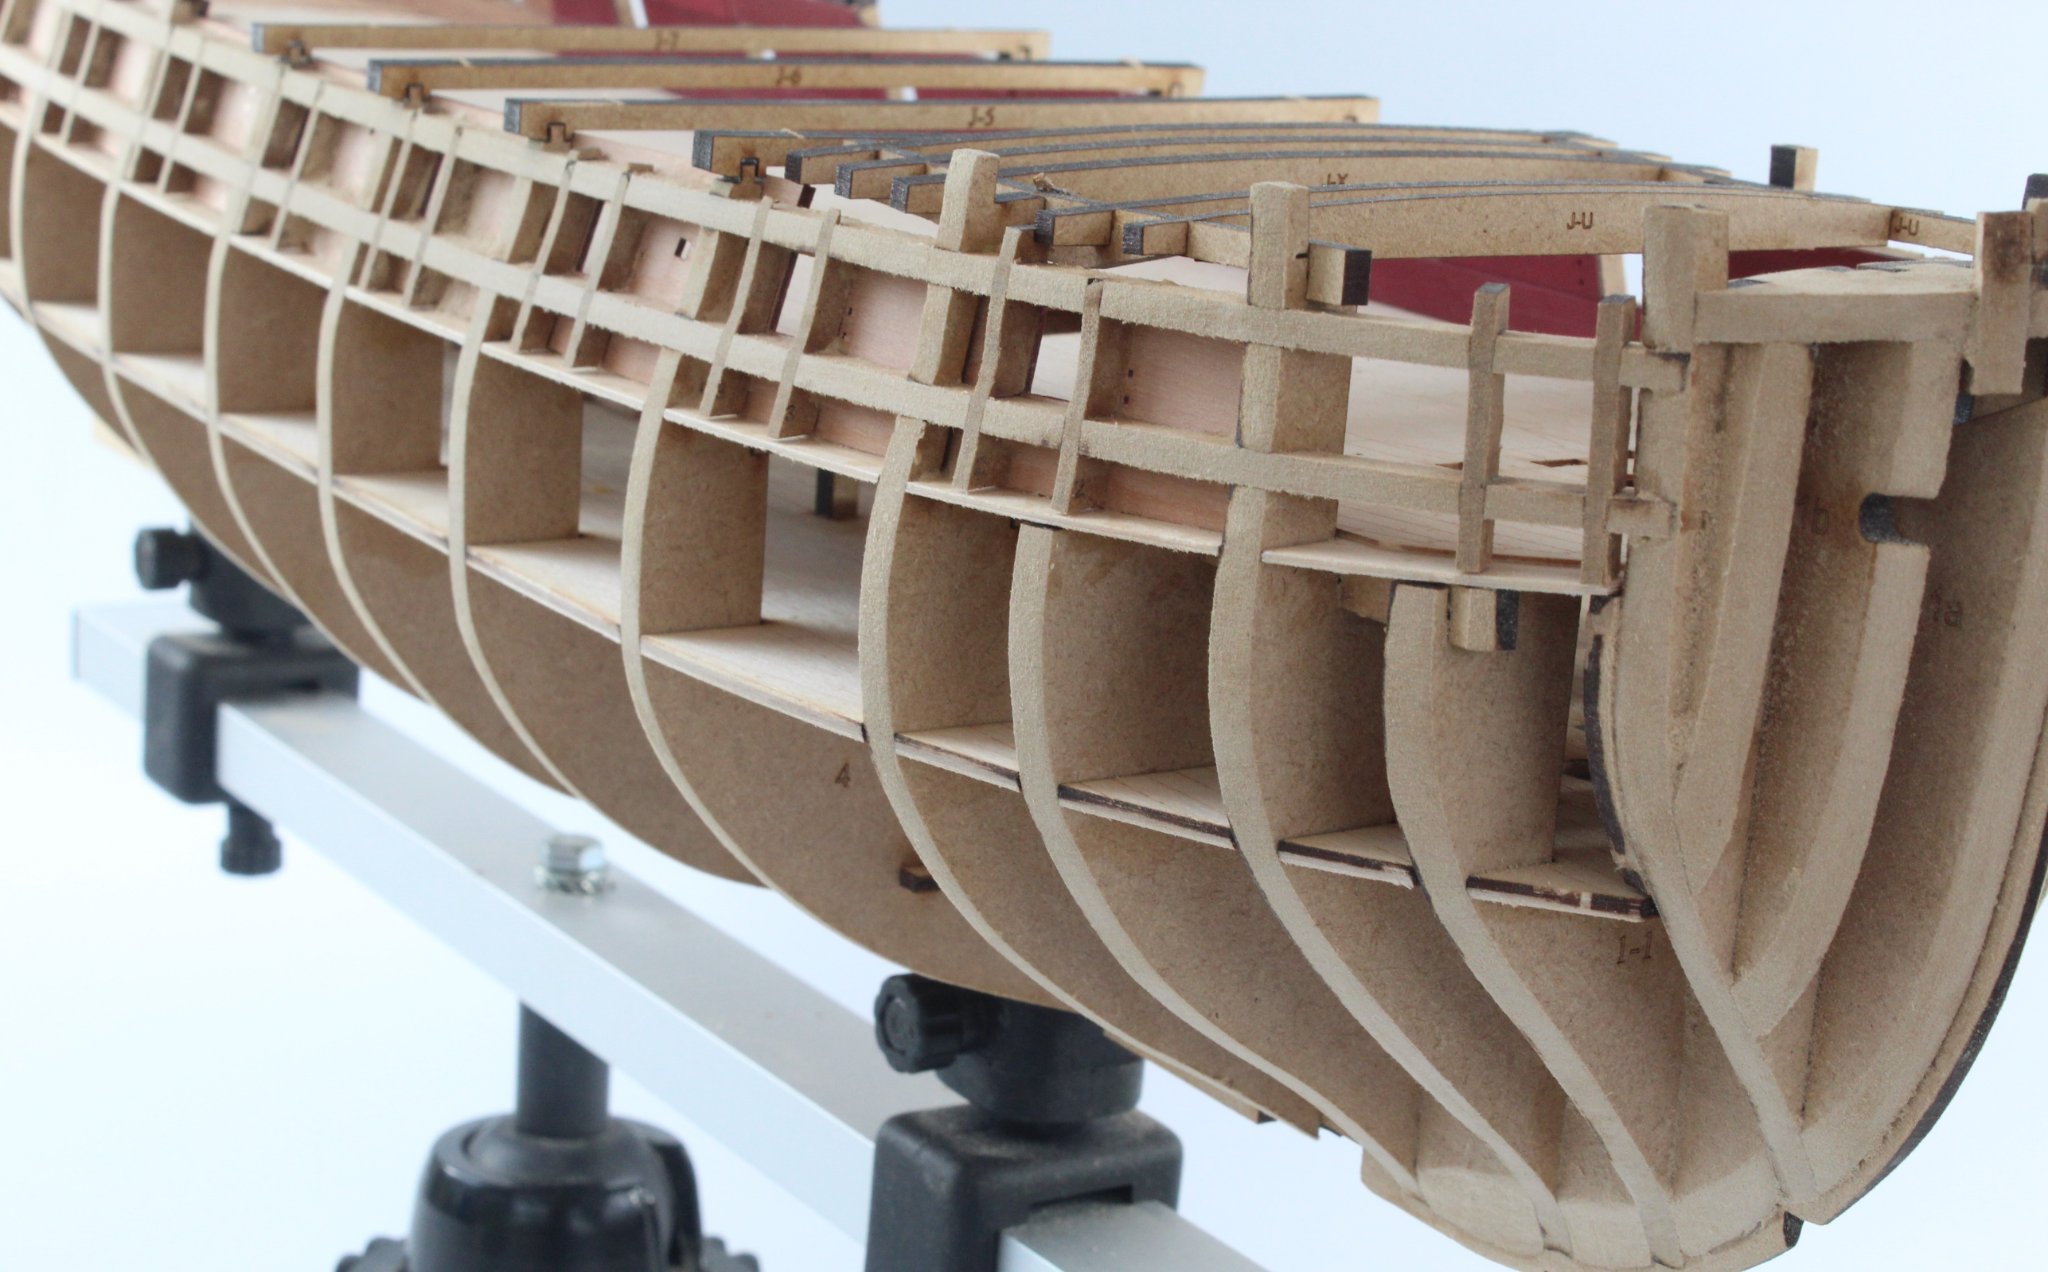
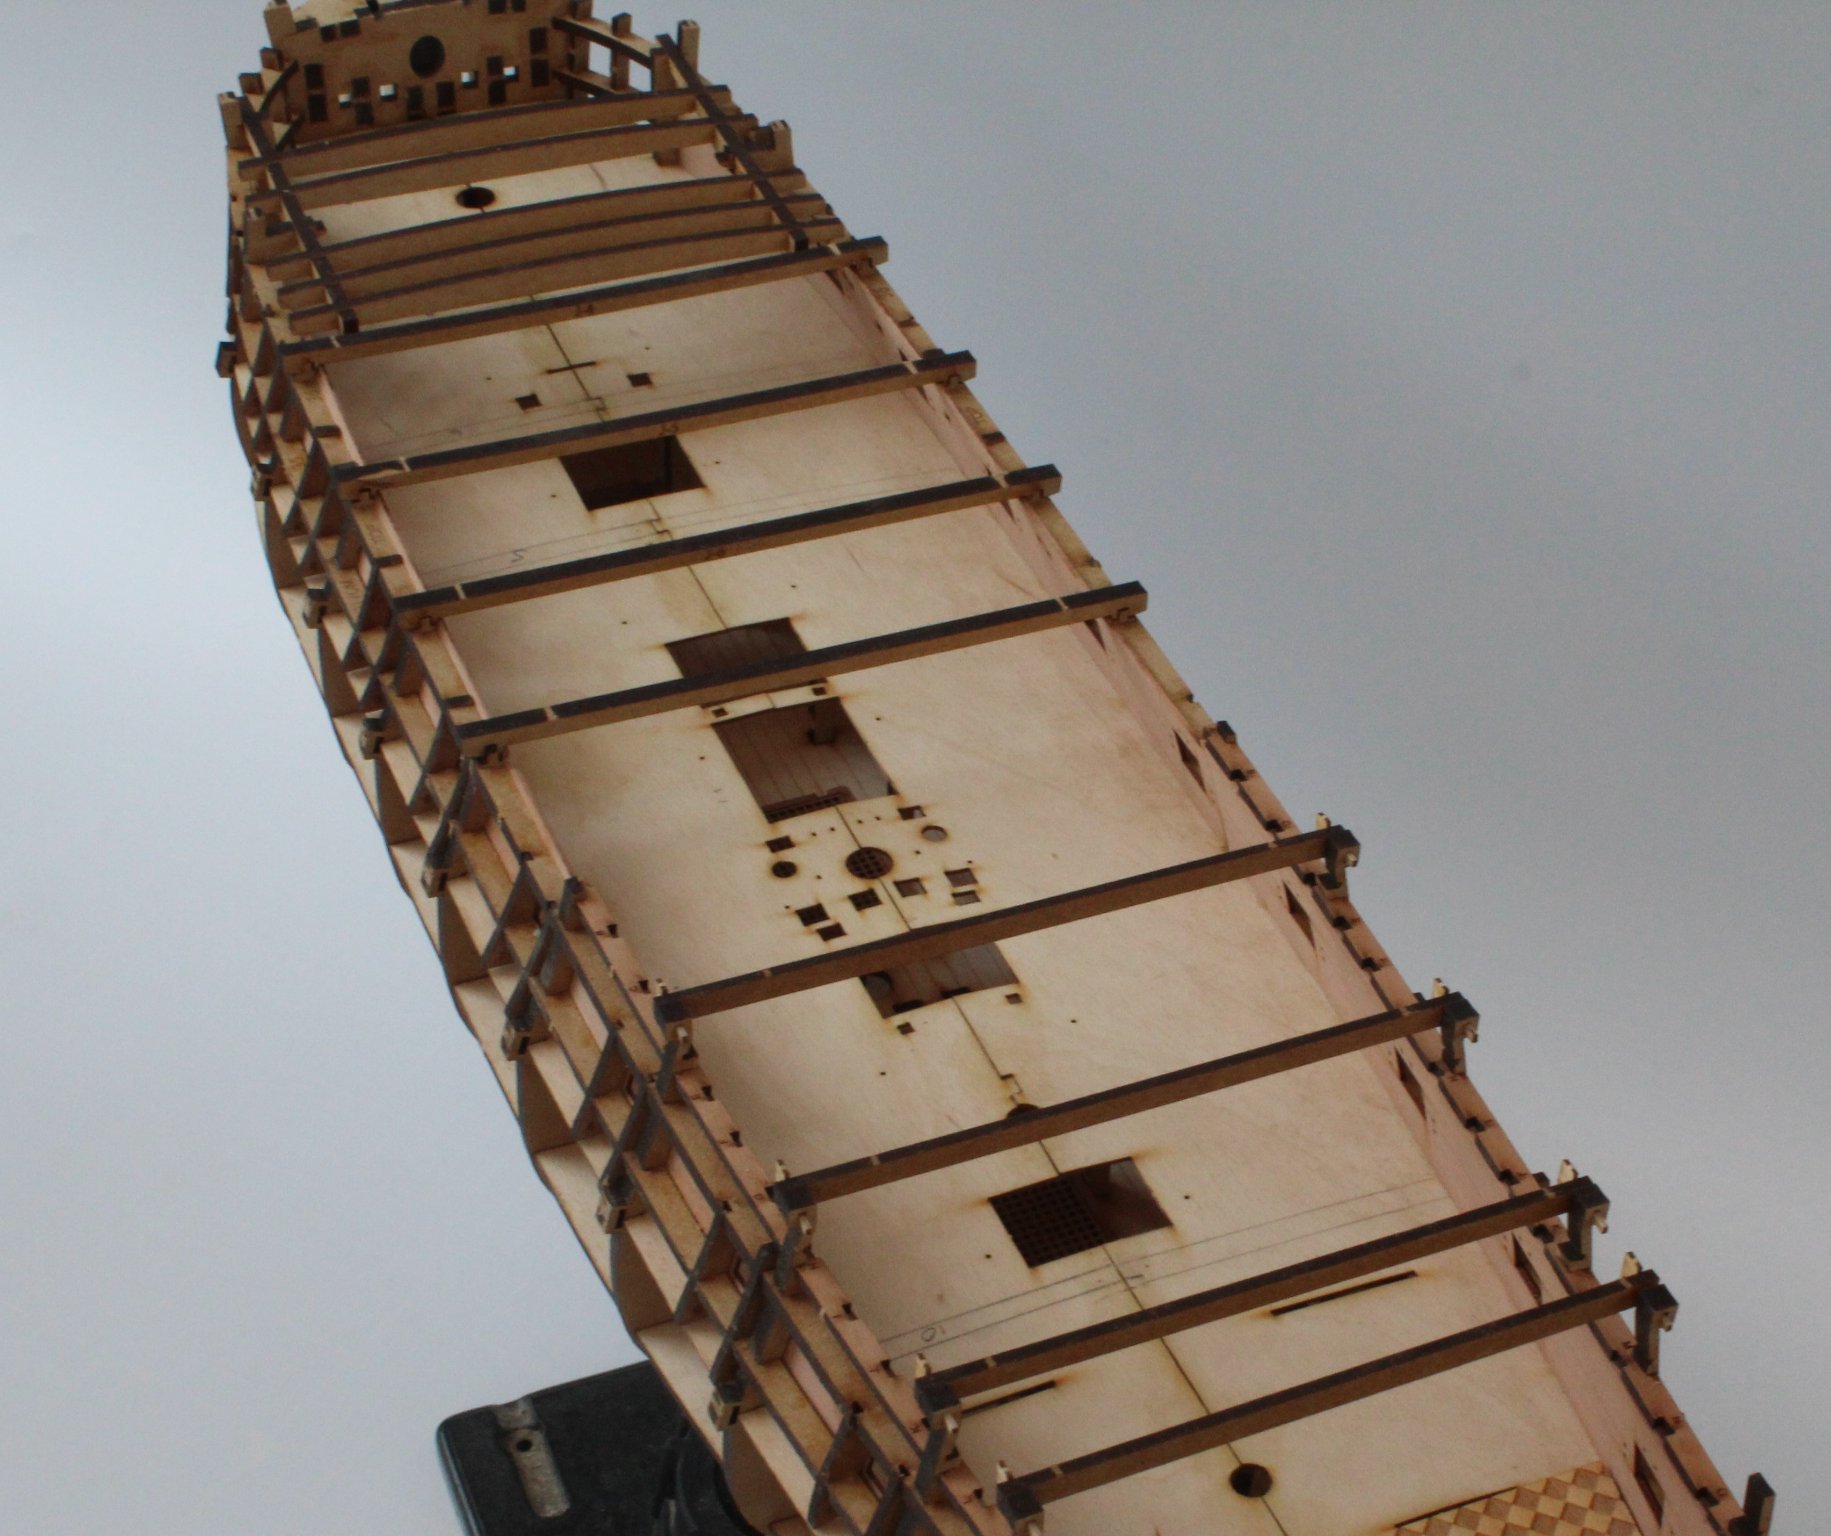
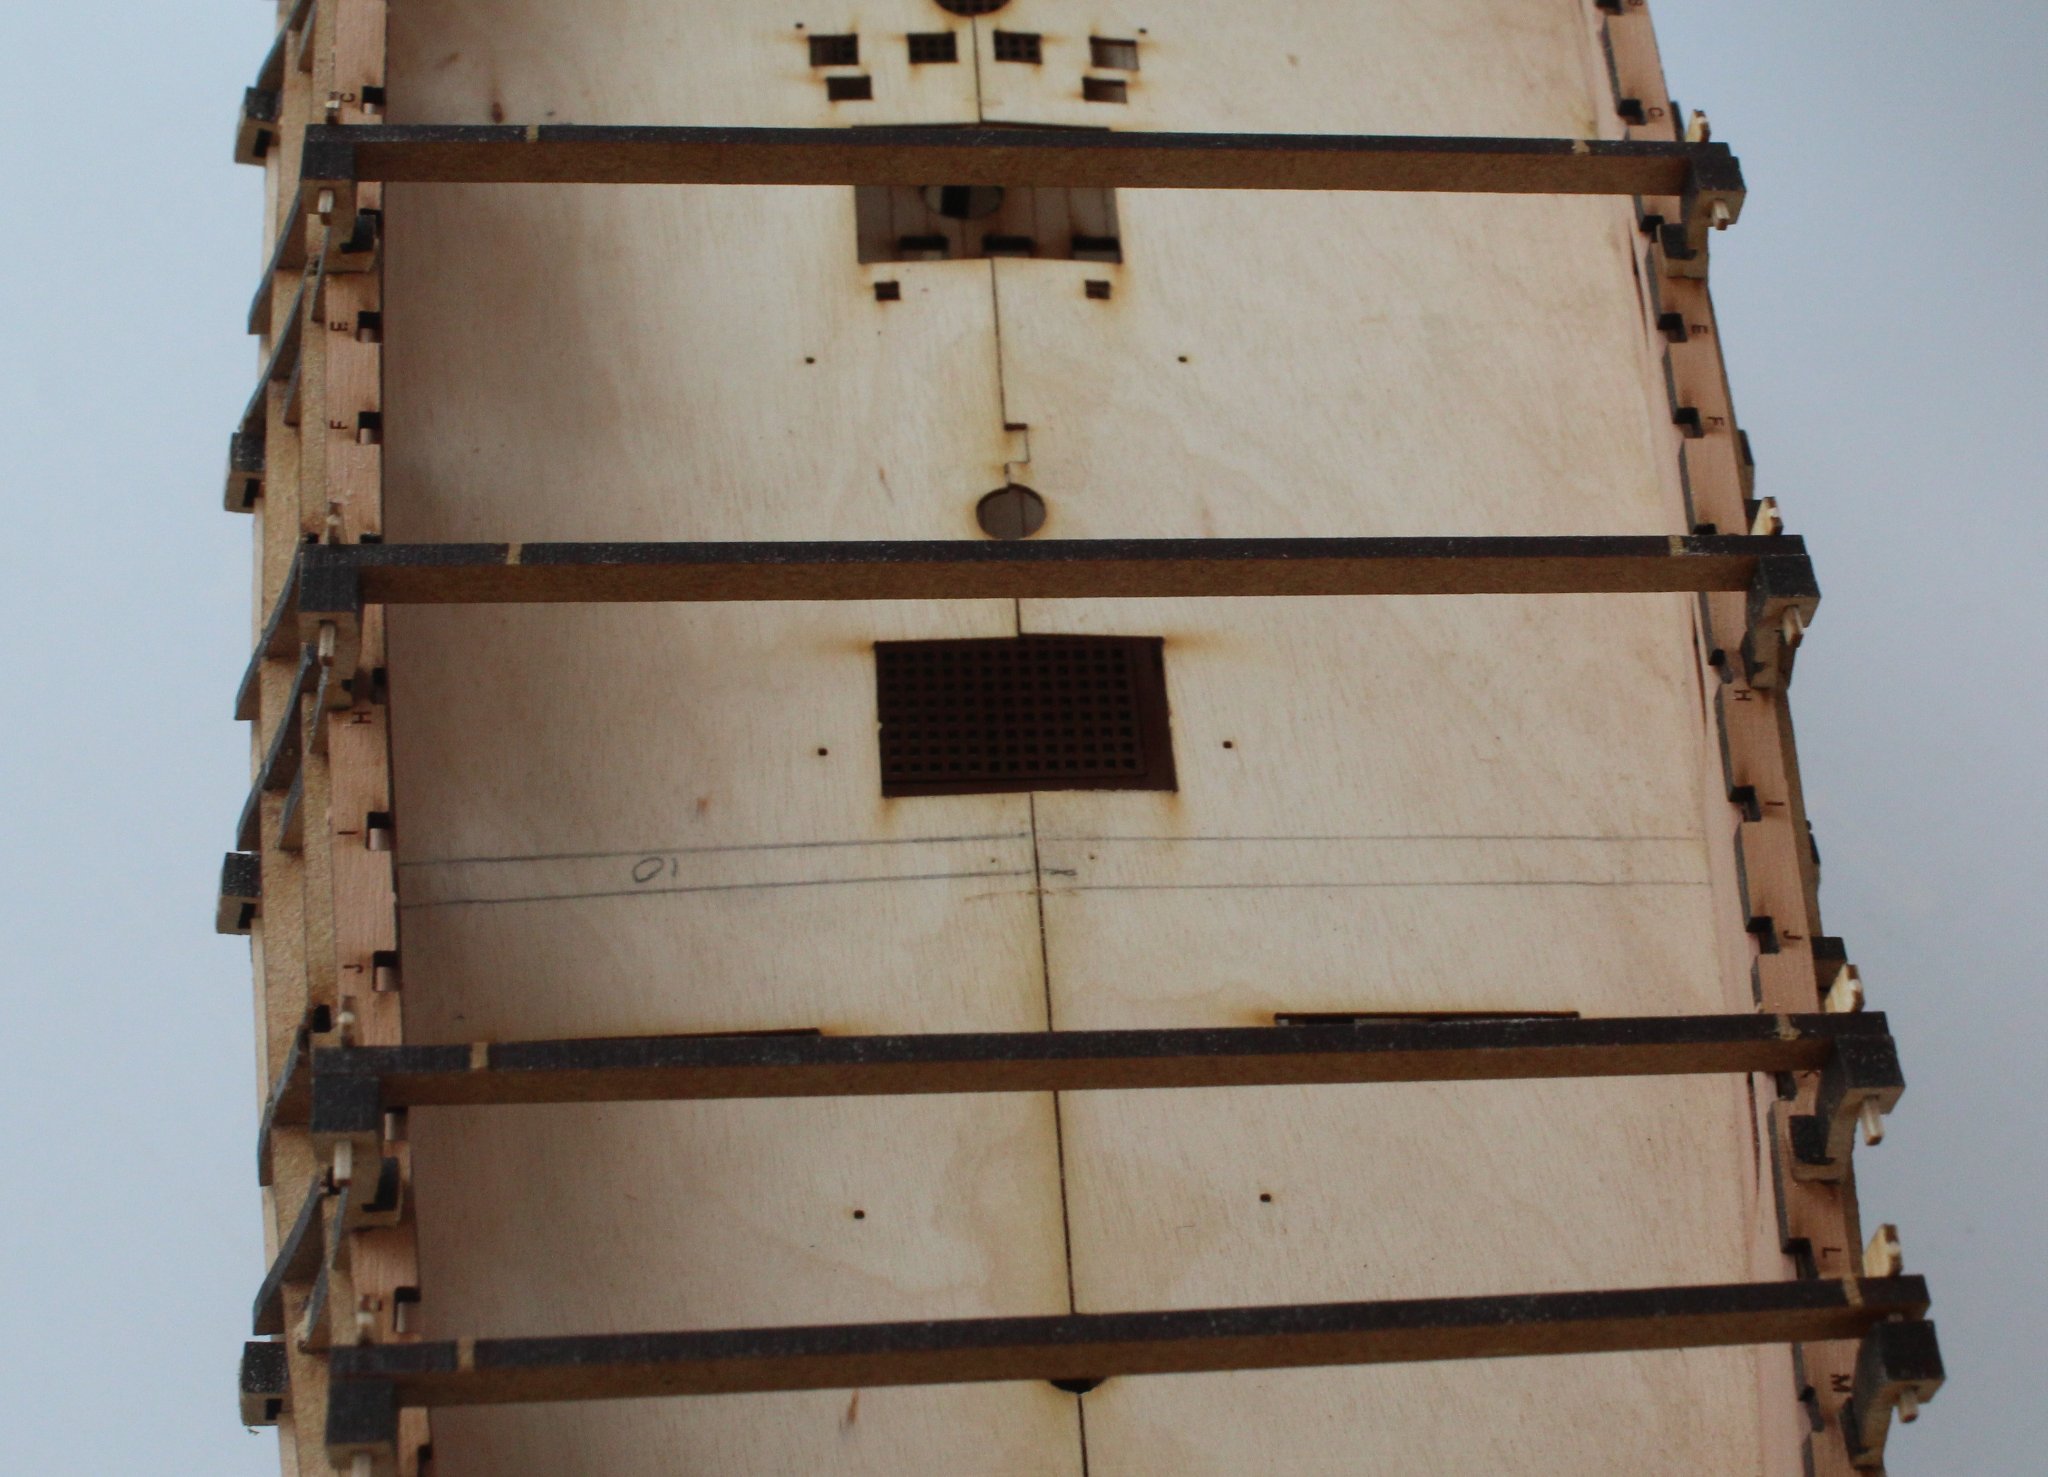
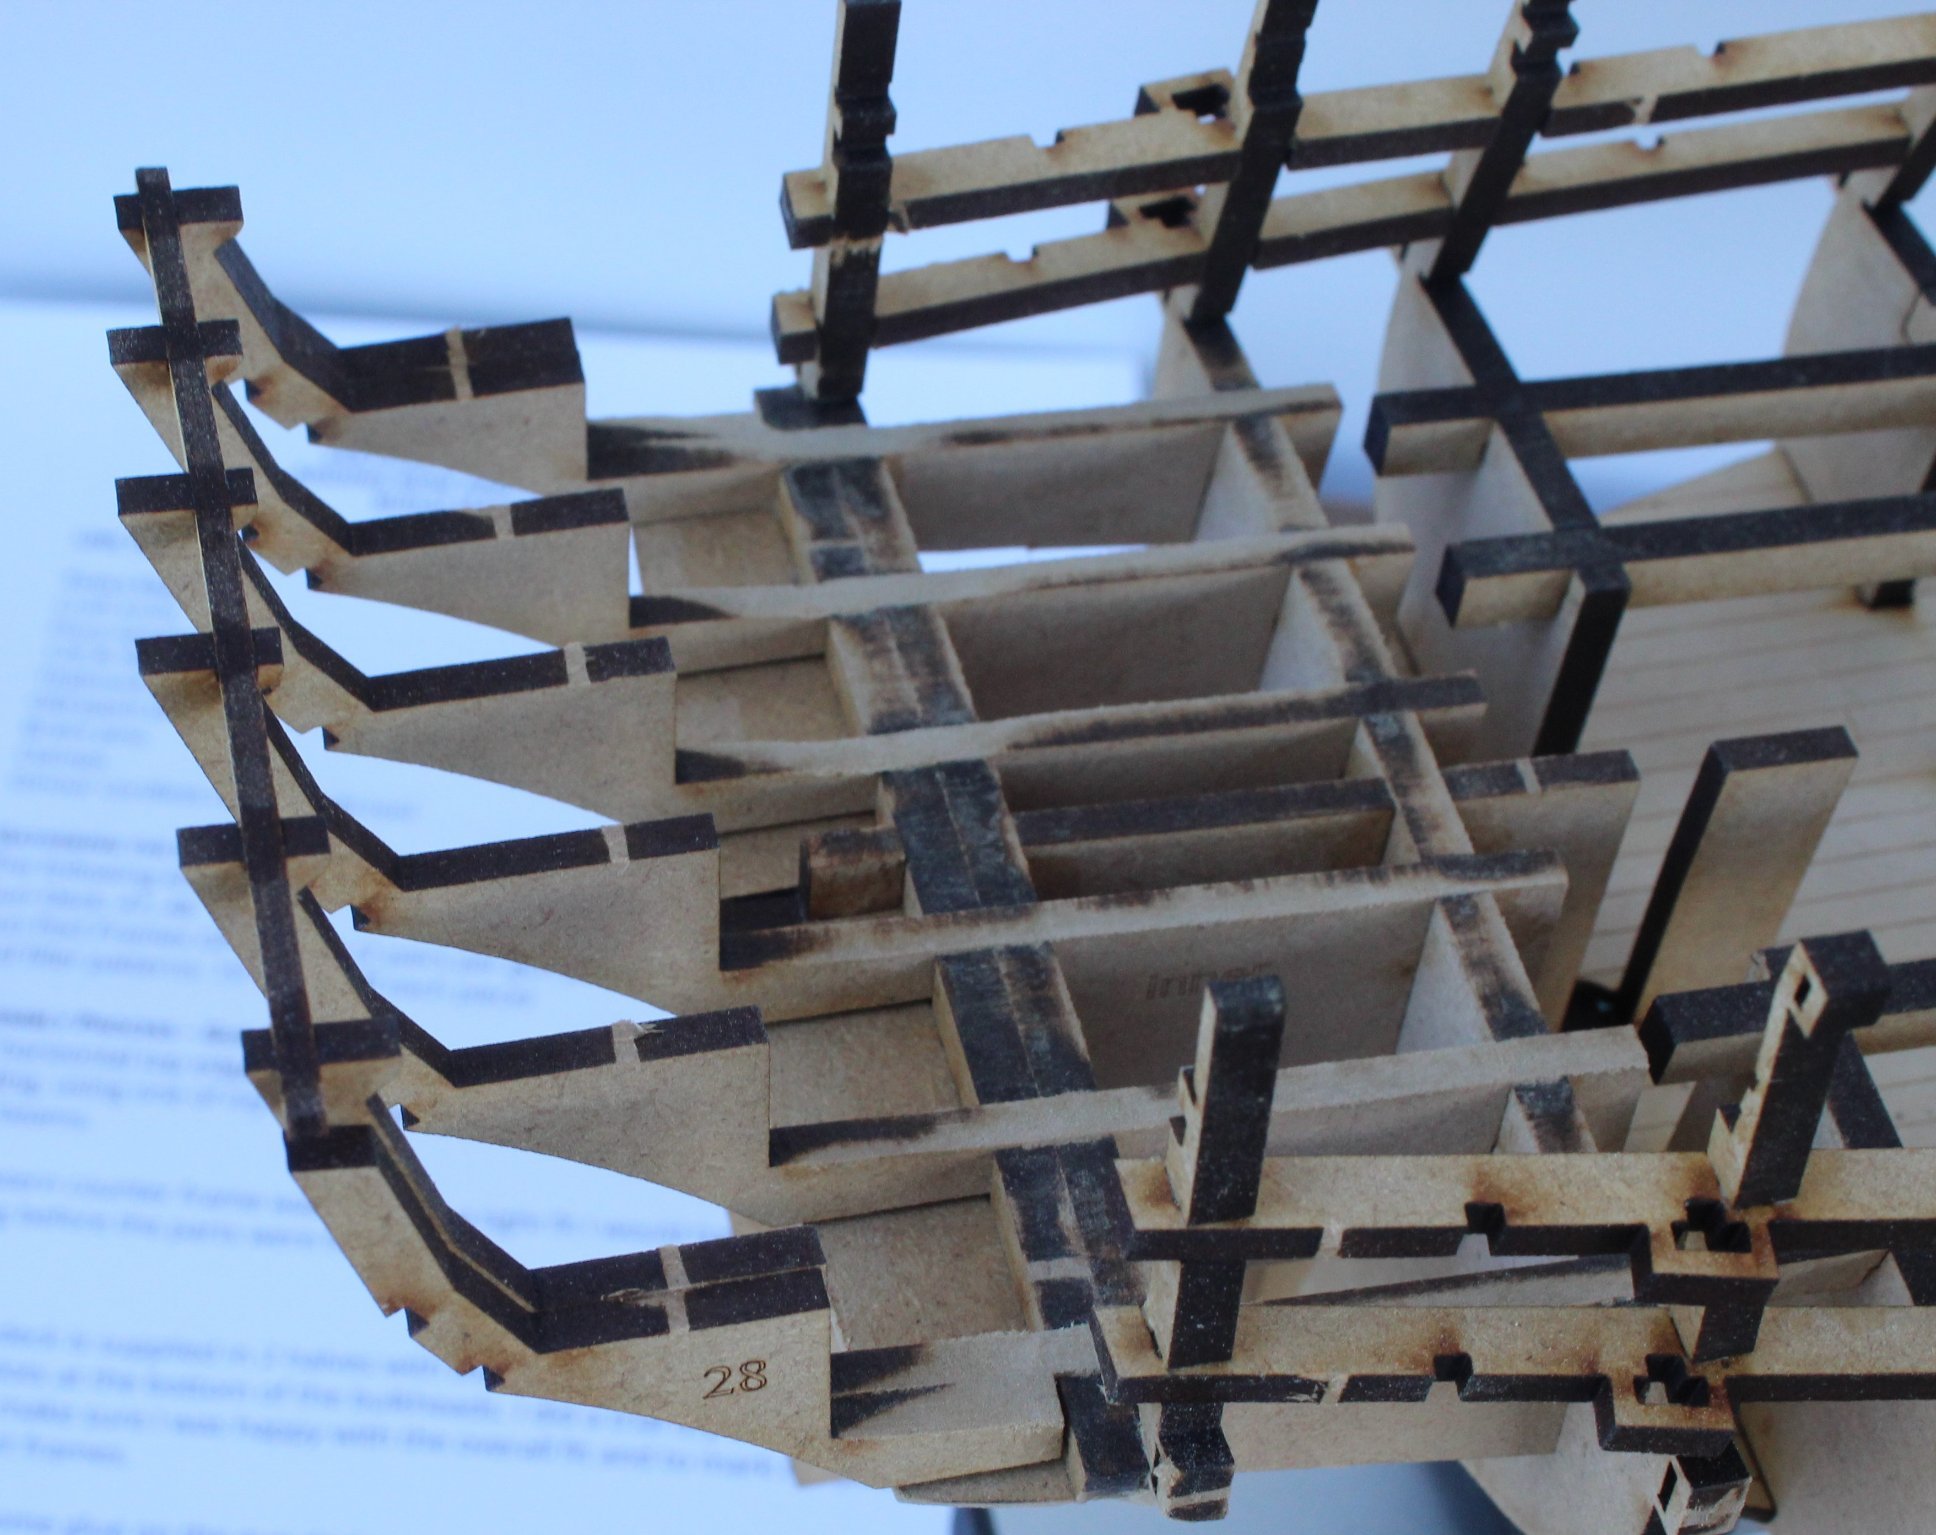
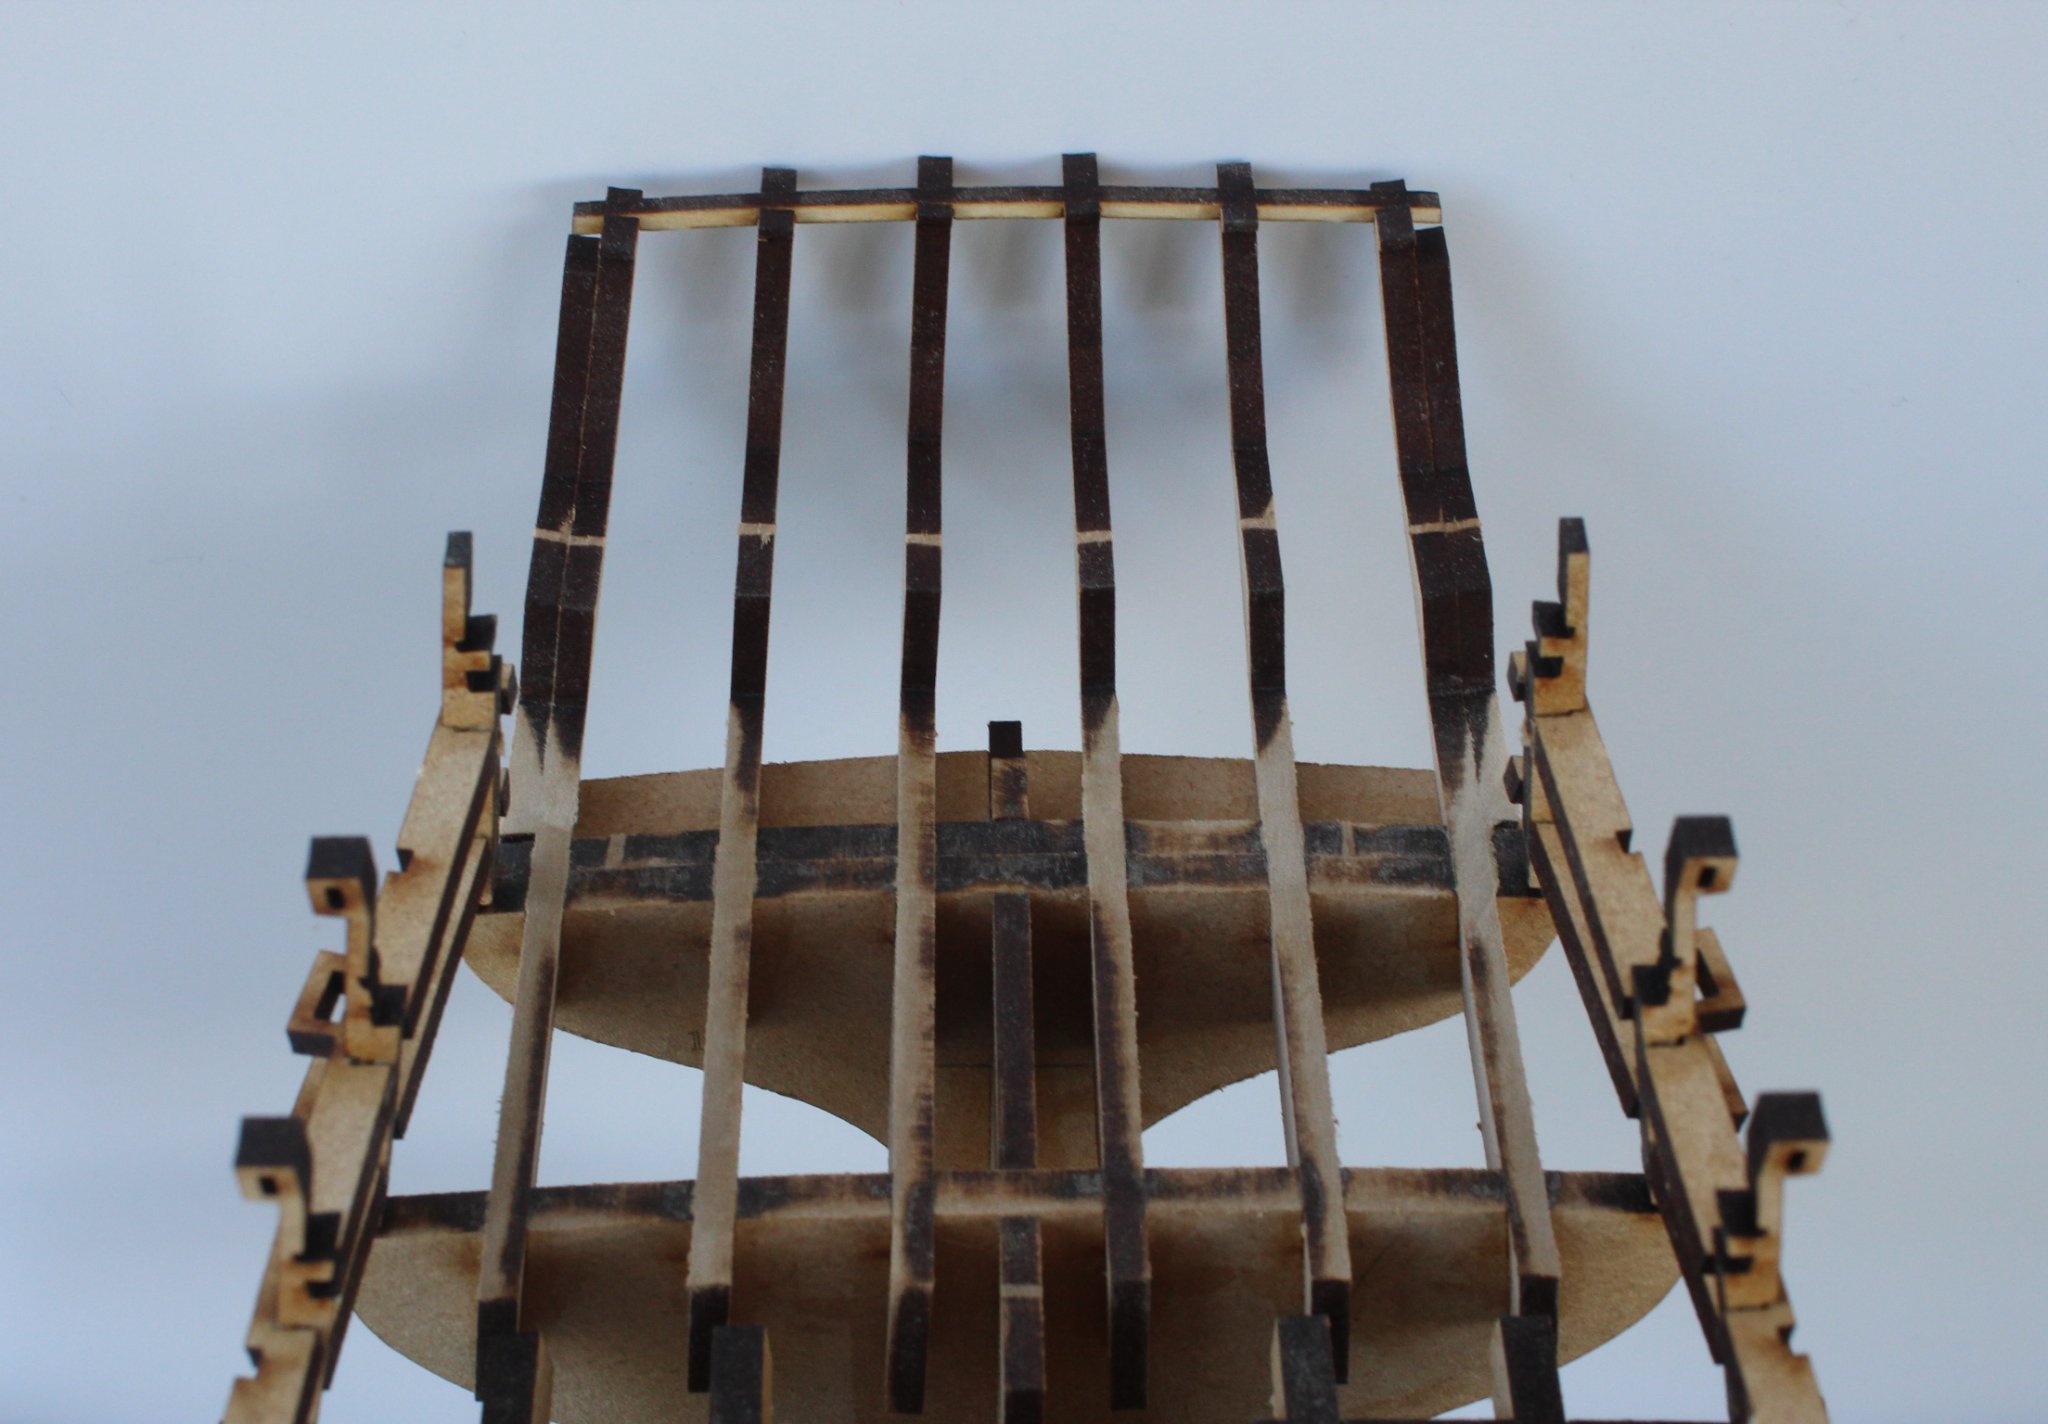
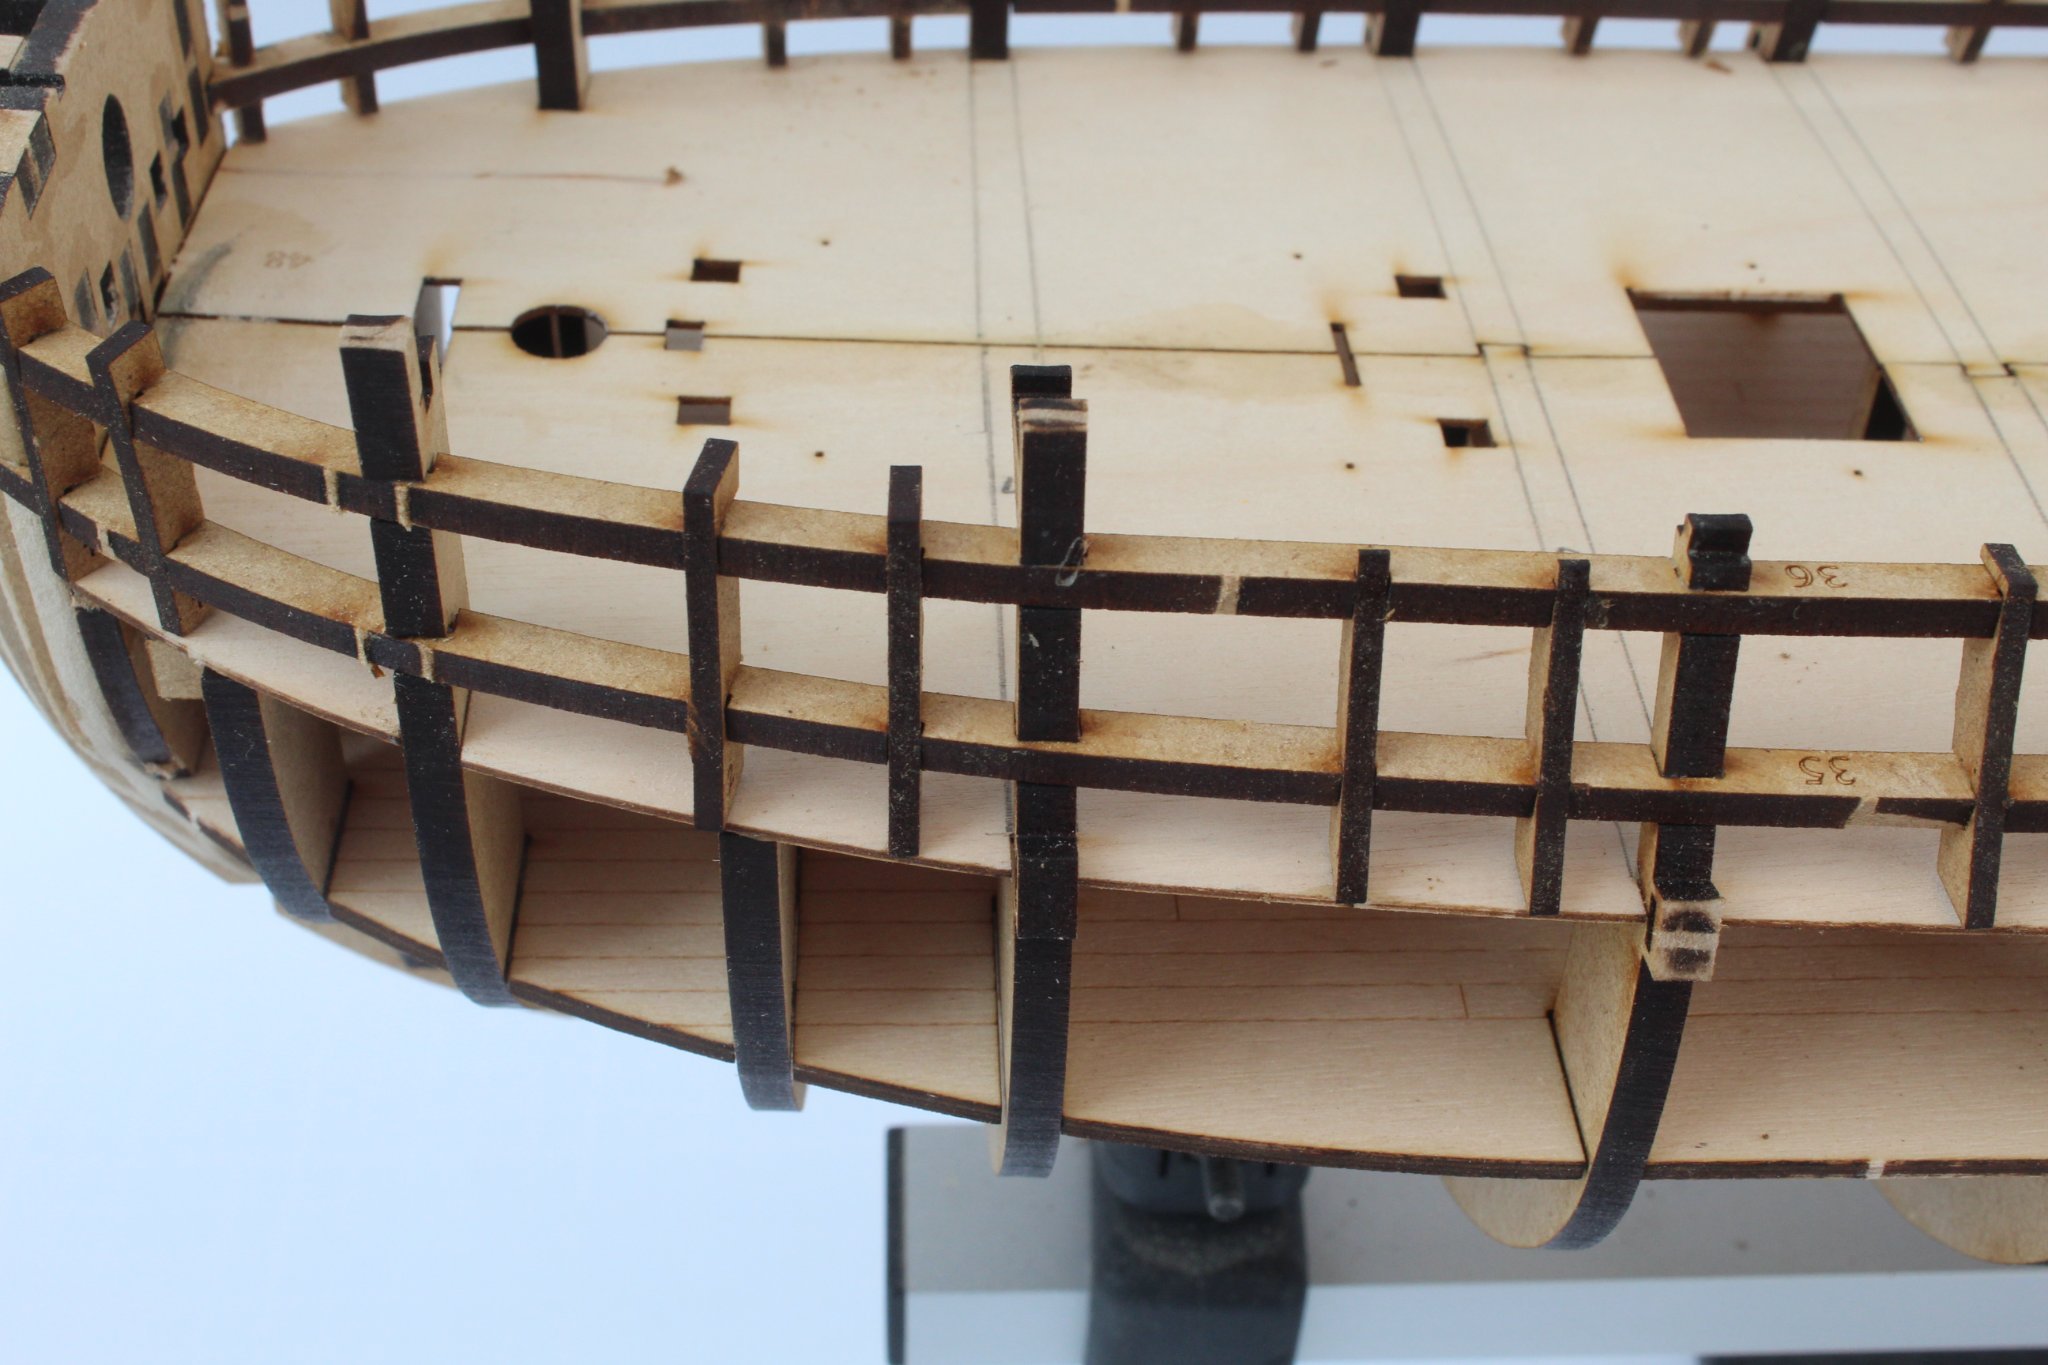
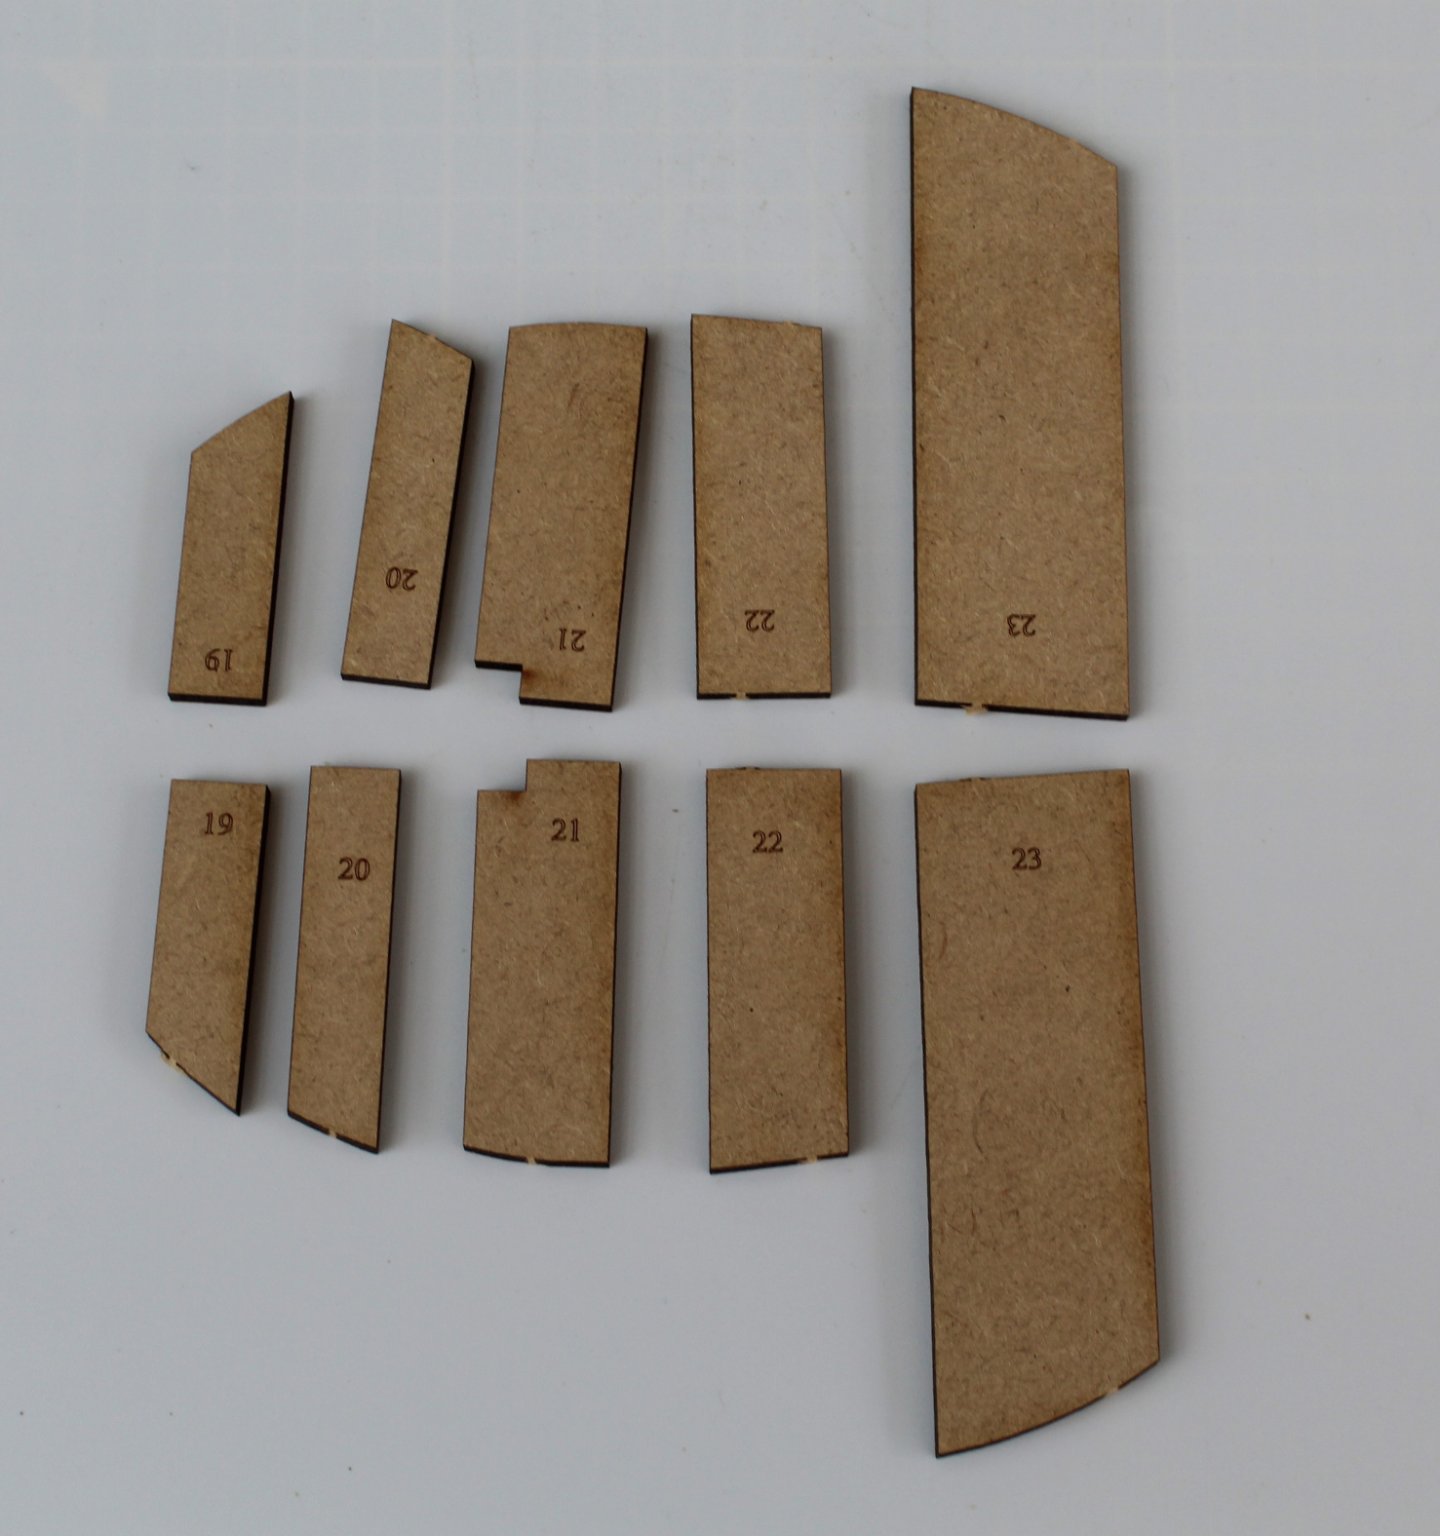
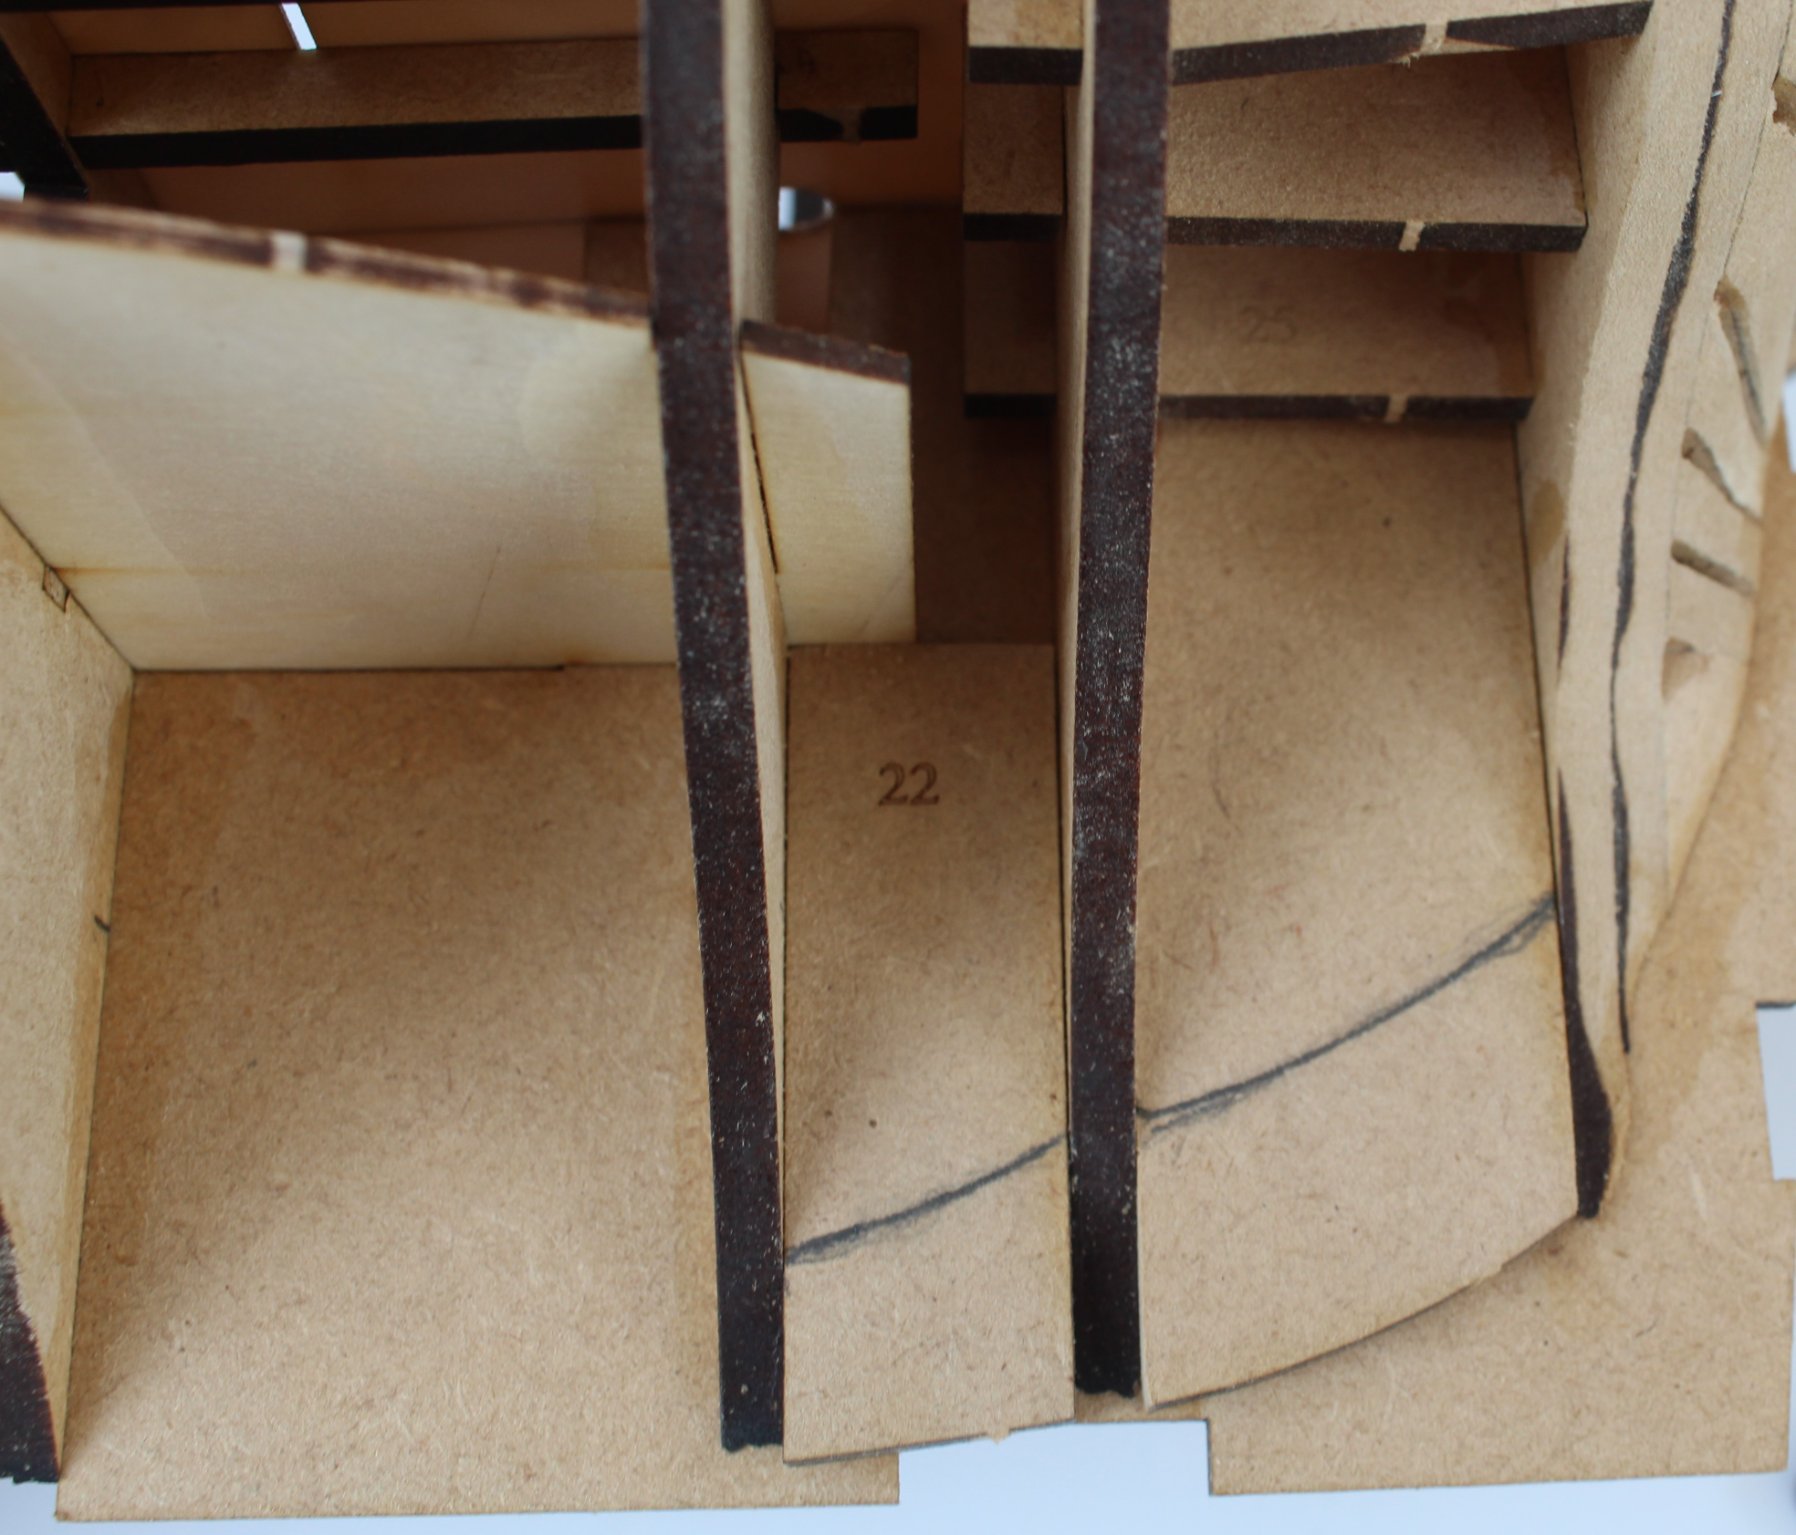
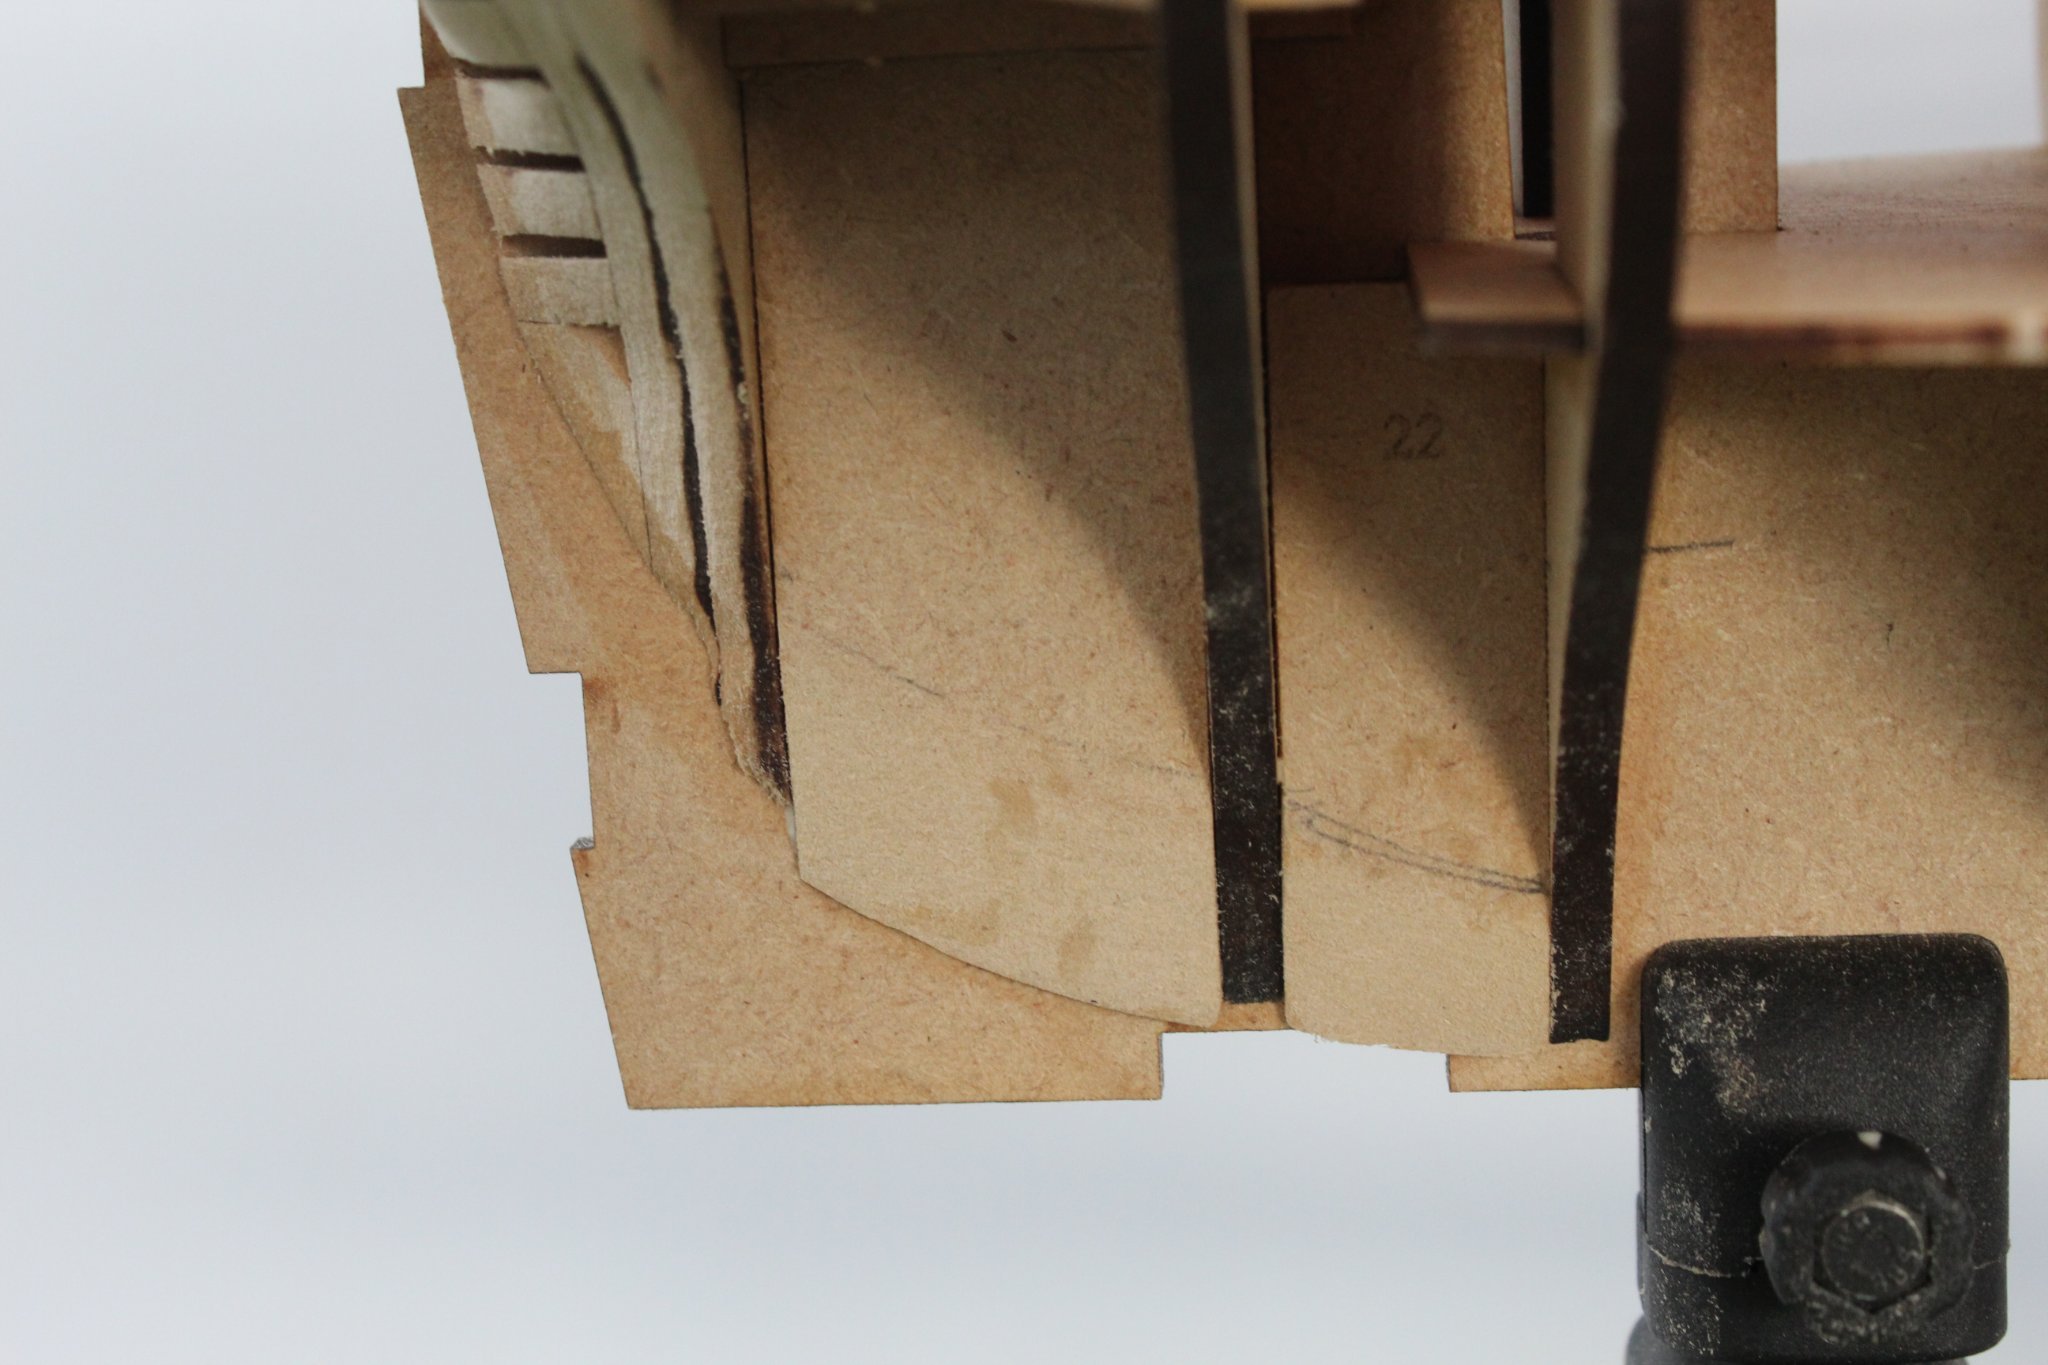
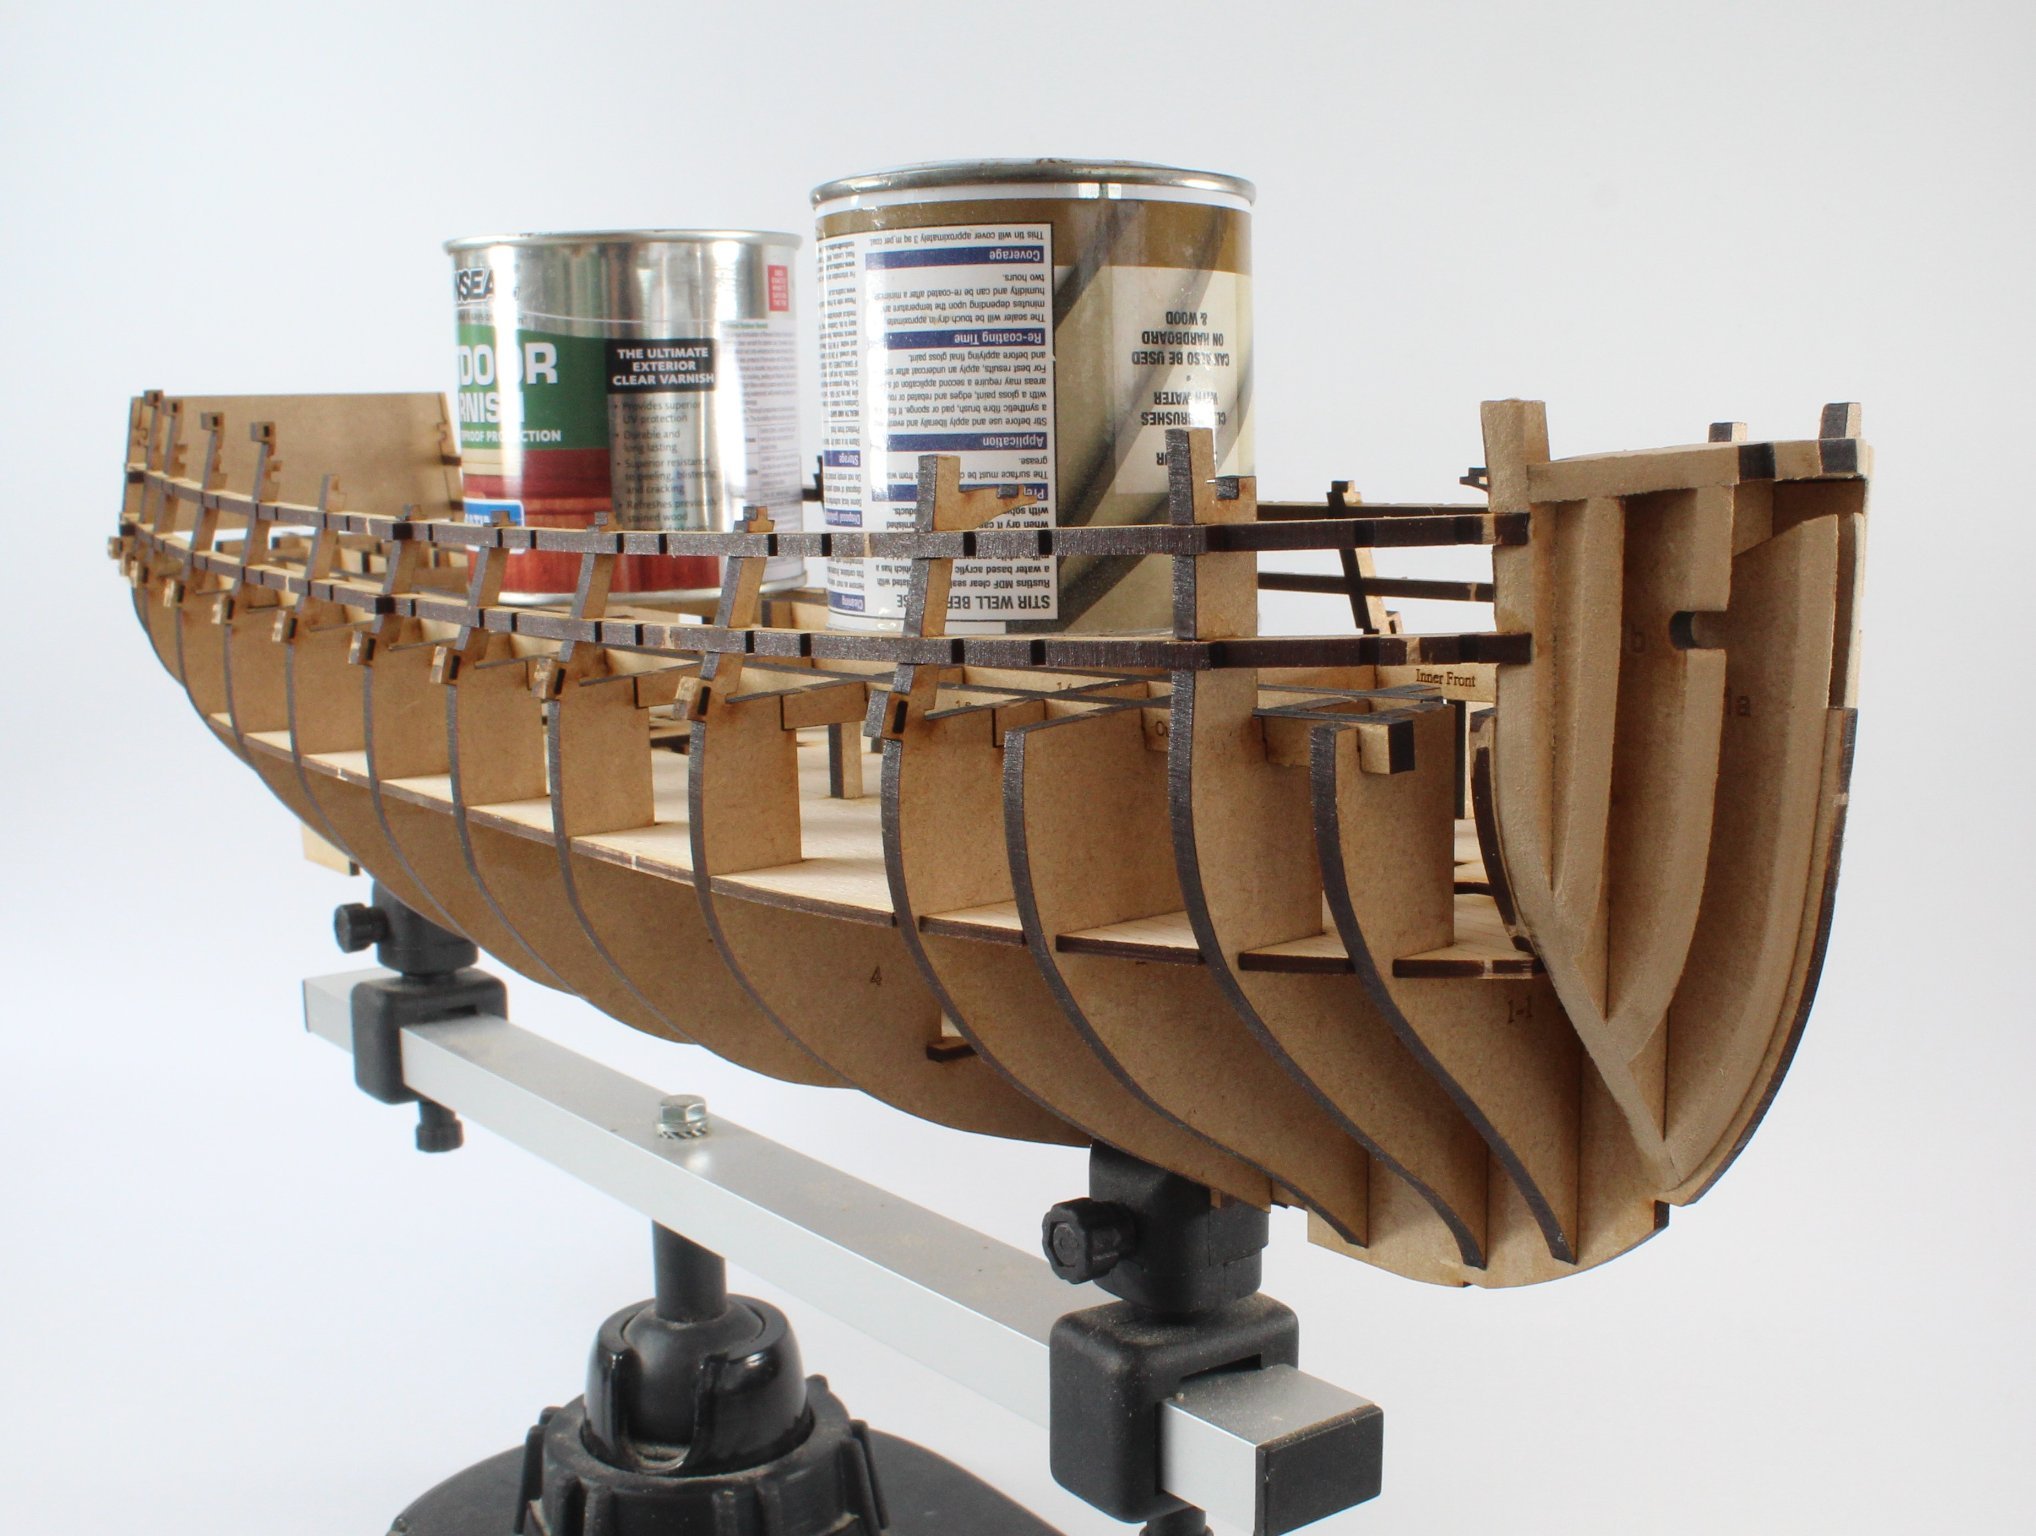
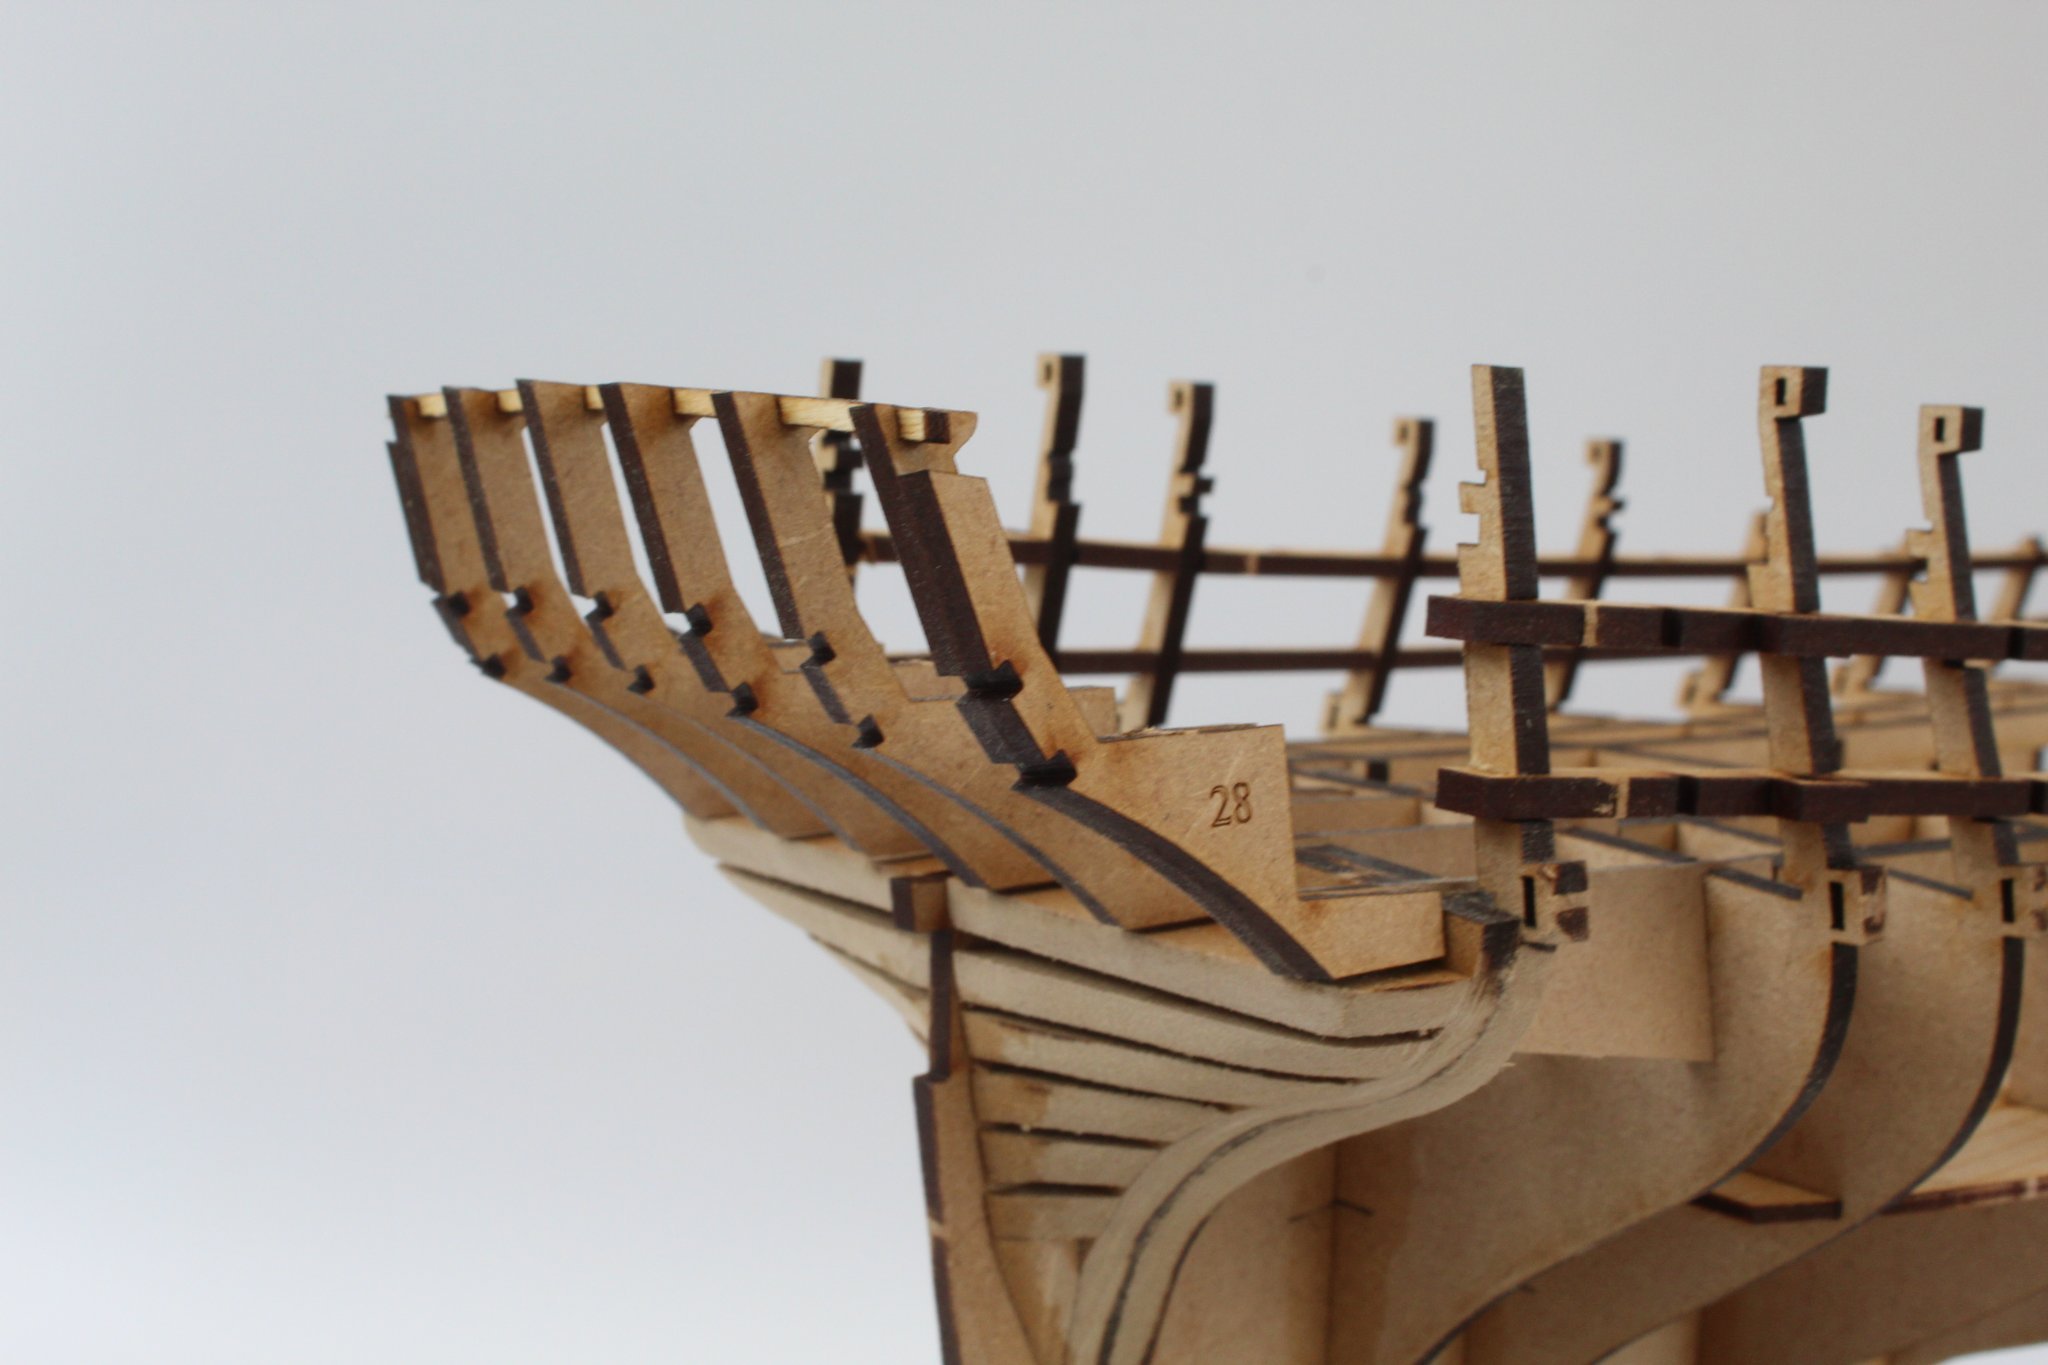
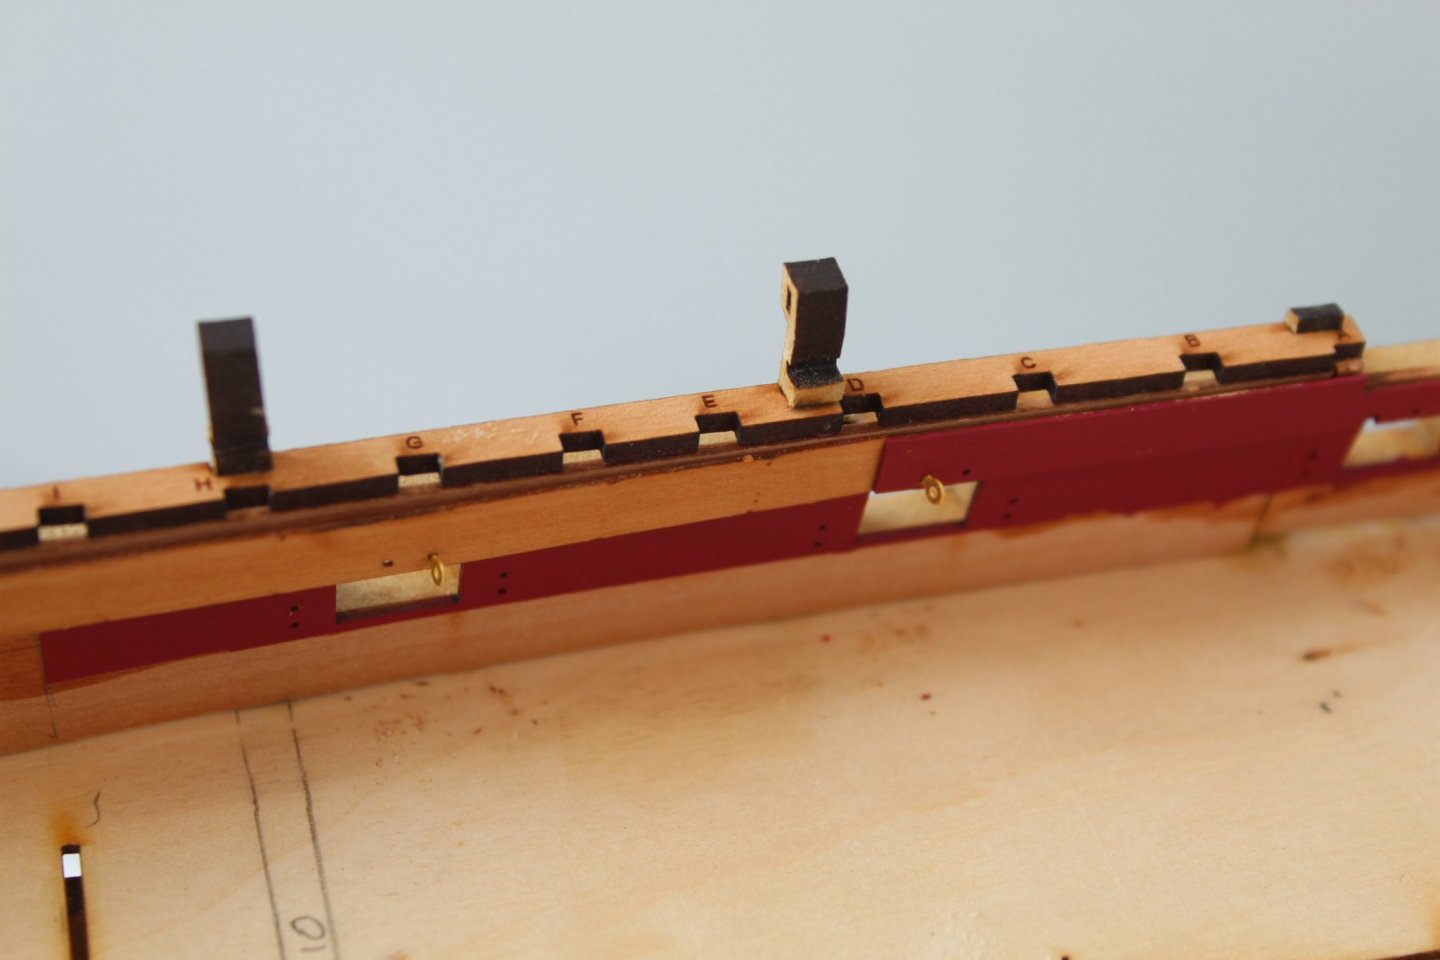
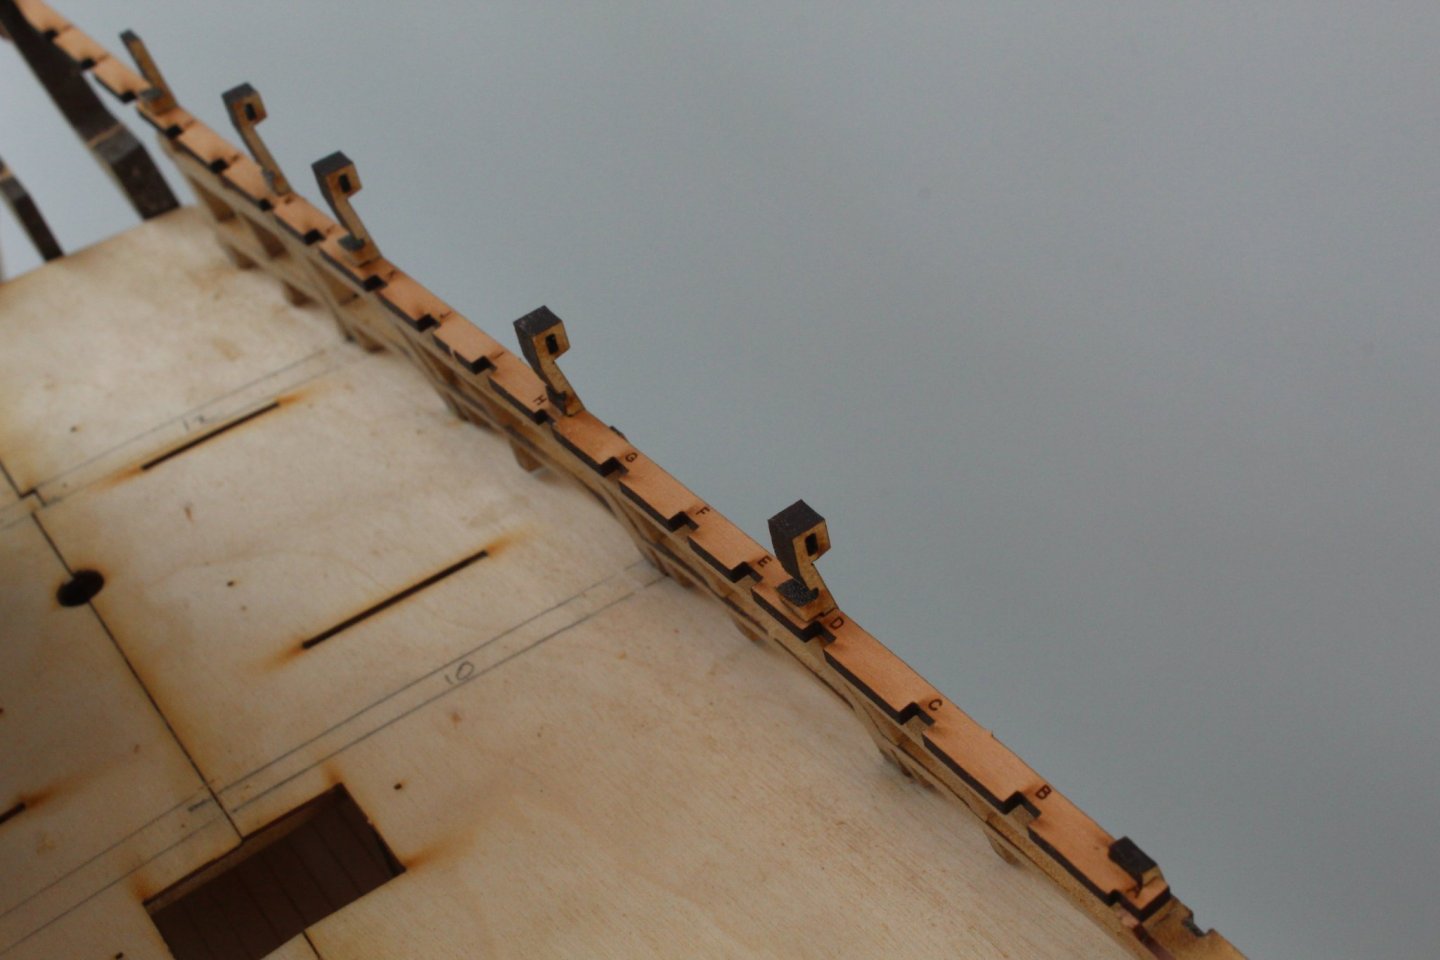
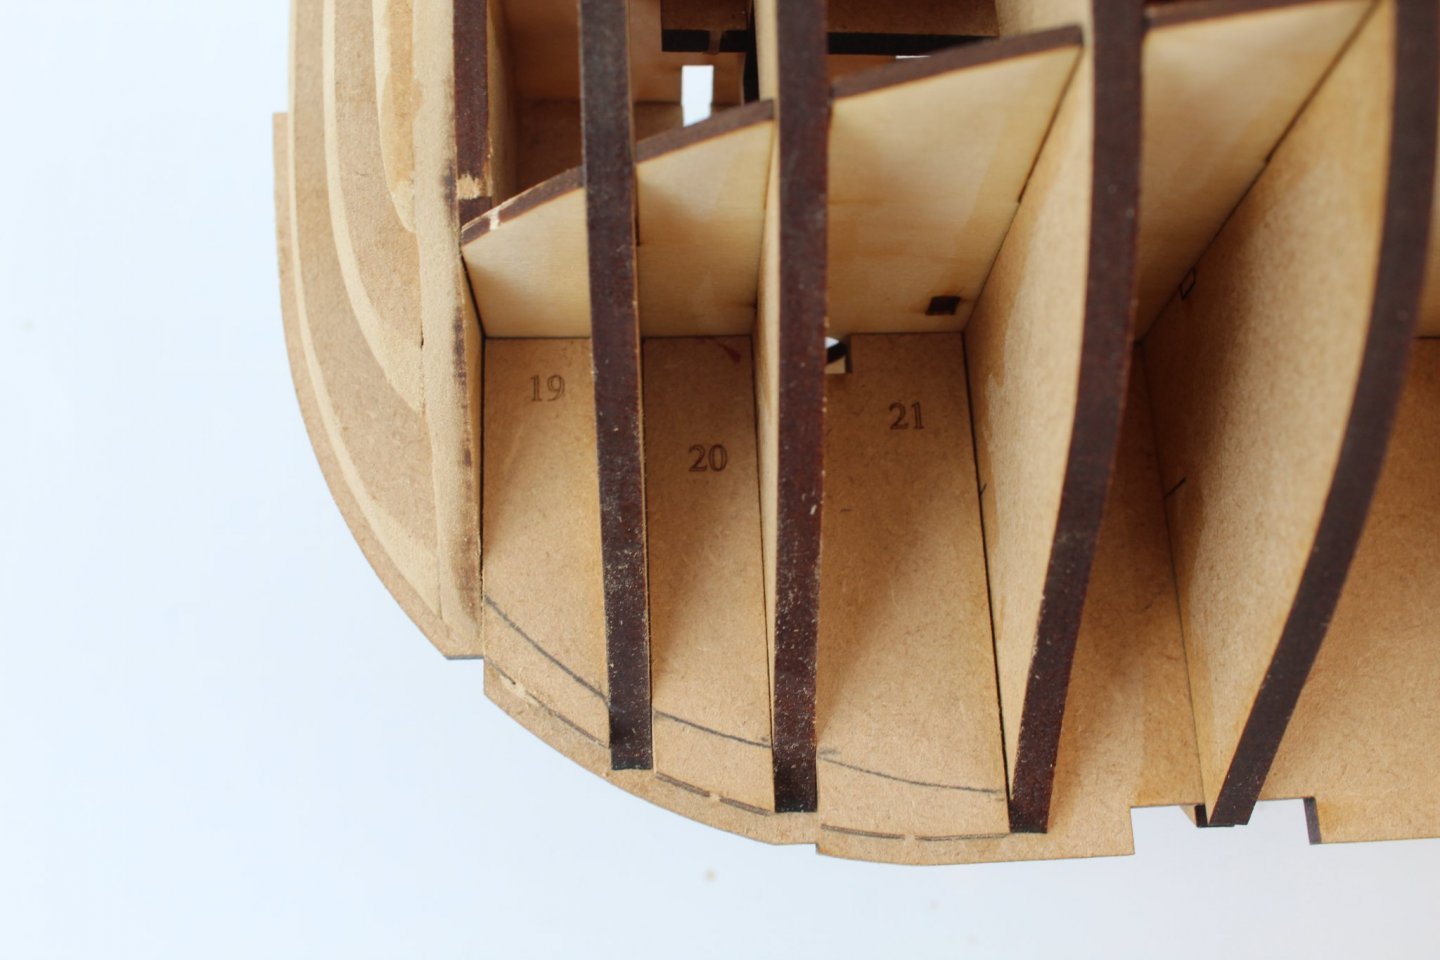
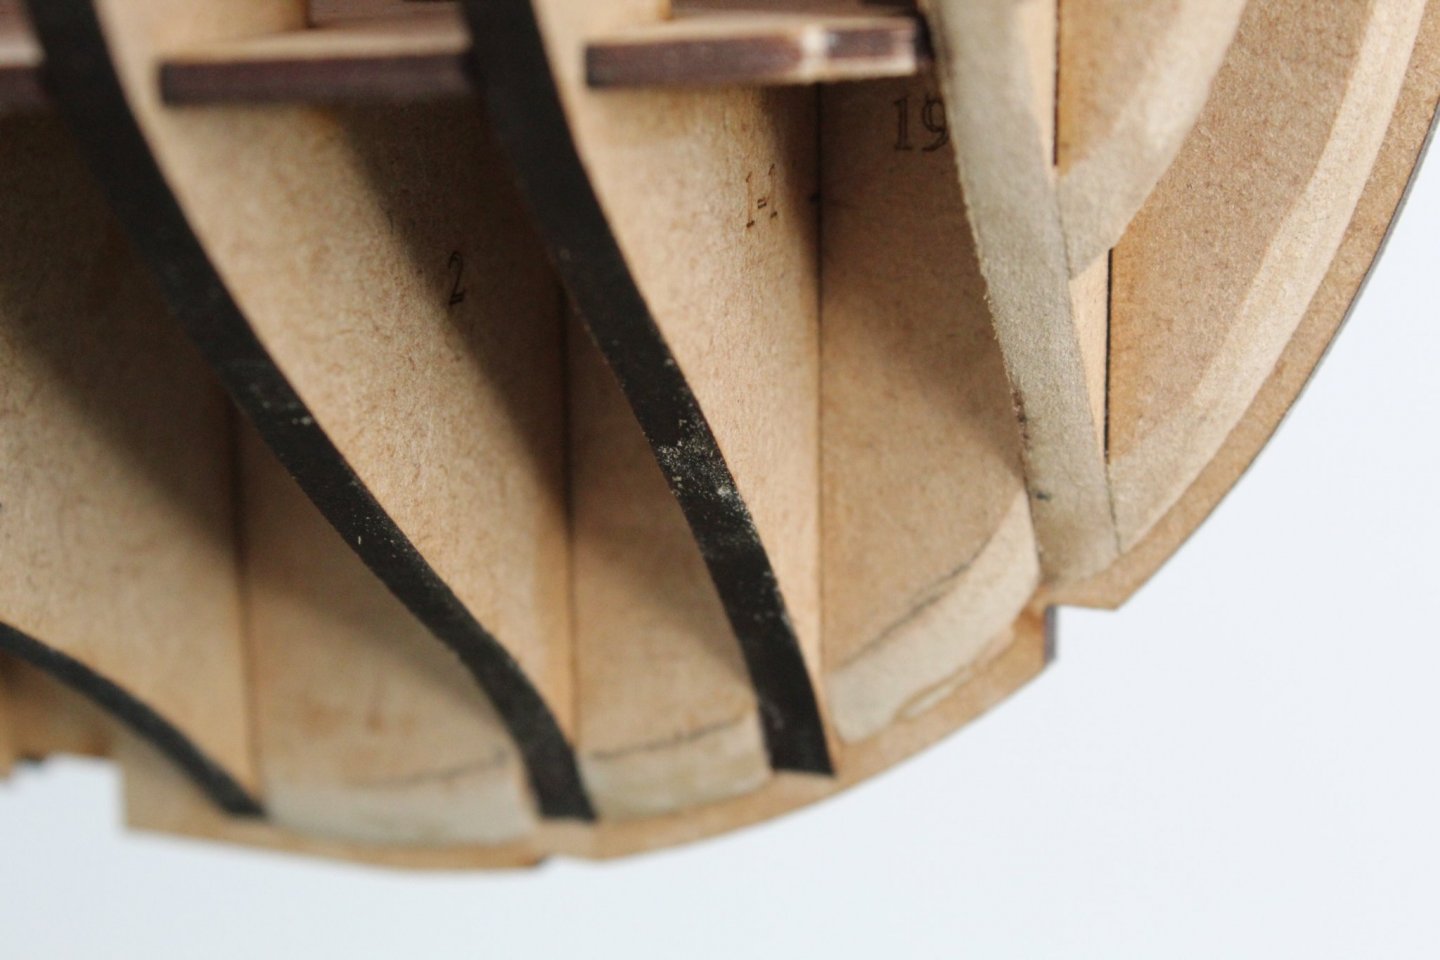
GUN DECK ASSEMBLY VERTICAL GUN PORT FRAME ASSEMBLY ADDING BOW AND STERN FILLER PATTERNS BUILD MANUAL STEPS 66 – 86 LINK TO MY BUILD LOG INDEX Tools Used Craft knife Flory sanding stick 120 & 400-grit sandpaper Titebond original glue Old paint brush Brass pins, clamps and weights Ginour cordless rotary multi-tool Side cutters Gathering the materials required The following kit parts are required for this section of the build: Gun Deck: 47, 48 Gun Port Frames GP1 – GP11 (2 pairs per gun port) Hull filler patterns: 19 – 23 (2 off each piece) Assembly Process – Gun Deck The horizontal top edges of the stern counter frames required a some sanding so they were followed the curvature of the bulkheads. Once I had inserted them I did not wish to risk damaging them but trying to remove them as they were a very tight fit. Otherwise I would have undertaken the initial shaping before the parts were fitted. That said using a combination of sandpaper and thin and thick sanding sticks I was able to complete the sanding process in situ. I was extremely careful to ensure I did not break anything. The gun deck is supplied in 2 halves with the outside edges locating and locking into the slots at the bottom of the bulkheads. I did a trial dry fit of each deck half in turn to make sure I was happy with the overall fit and to mark the position of some of the support frames ready for pinning. I brushed some glue on the gun deck support frames and inserted the two gun deck parts. Brass pins, clamps and weights were used along the centre section as necessary. The hull assembly was then left to allow time for the glue to full cure. I also test fitted some of the parts that locate in slots on the lower deck to check the alignment, as can be seen in the photos below. Assembly Process – Gun Port Frames There are 11 off gun ports frame pairs to be fitted per side, with each gun port frame pair comprising two identical parts. Gun port 1 is the port nearest the bow and gun port 11 is nearest the stern. Before the gun port frames are added to the hull I removed the safety gates on the longitudinal gun port strips (3 off per side) using my trusty side cutters. I struggled to fit the starboard side gun port frames as there were a very tight fit and very fragile I was reluctant to apply too much force for fear of breaking them. I found the answer was to remove the laser char from the top and bottom edges of the two slots in each gun port. With a small out of glue applied to the sanded slots the port side gun port frames were added without any issues and did not take too much time or effort to complete. Assembly Process – Filler Patterns There are 5 filler pieces per side, 2 for the stern and 3 for the bow. The stern filler patterns dry fitted to the hull assembly and lines drawn to indicate the chamfer required. The appropriate chamfer was then applied to each of the stern filler patterns, using a combination of the rotary tool and sanding stick. Once I was happy with the shaping the parts were glued in place. The process was then repeated for the bow filler patterns Sorry about the quality of this photo Tomorrow will be a day of sanding of the inner fames in readiness for adding the inner bulwarks. I think this will take me quite a bit of time as I need to be careful to ensure I do not break anything and will only be able to using sanding sticks and sandpaper.


-
The step process works for me, a side effect of 40 years working as a system designer and project manager for major computer related engineering projects for the Armed Services, Oil & Gas industry and Power Generation.
-
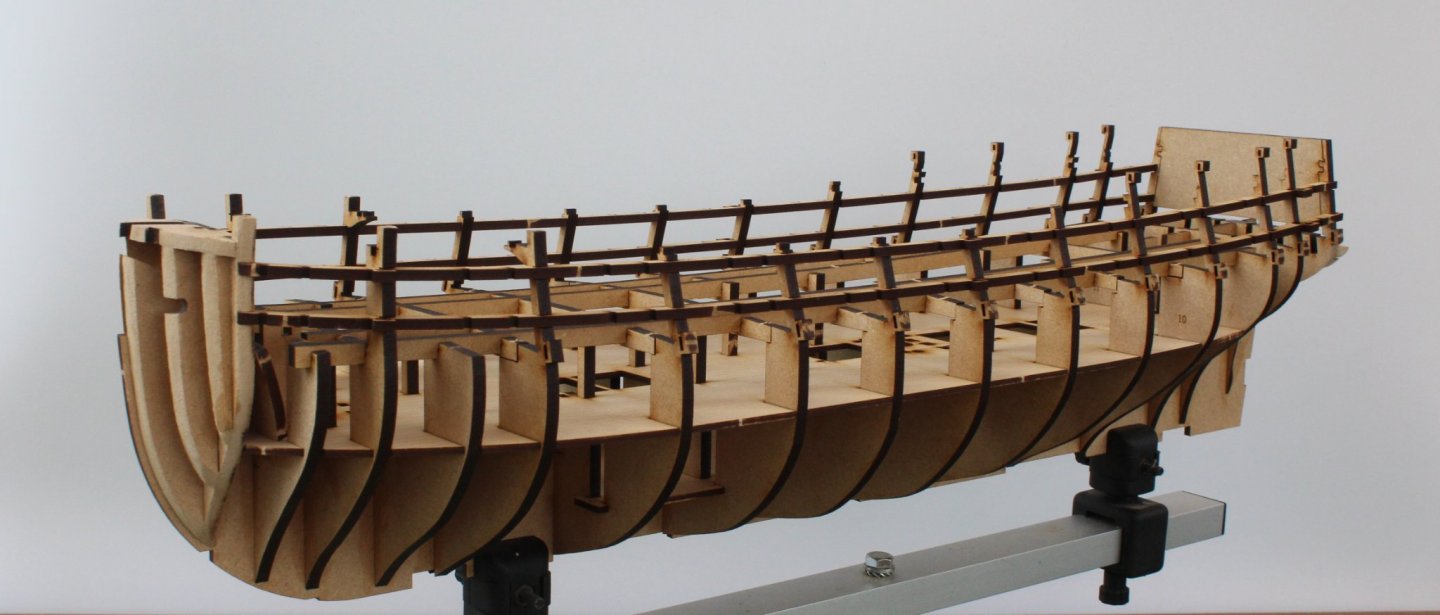
The build sequence is excellent, I have a nice looking and very solid hull after a few short hours work. I know my posting will not be quite so regular as the build progresses when the finer details starts to get added. Gun Deck and gun port frames is tomorrows plan of action. Rigged by Sunday.
-
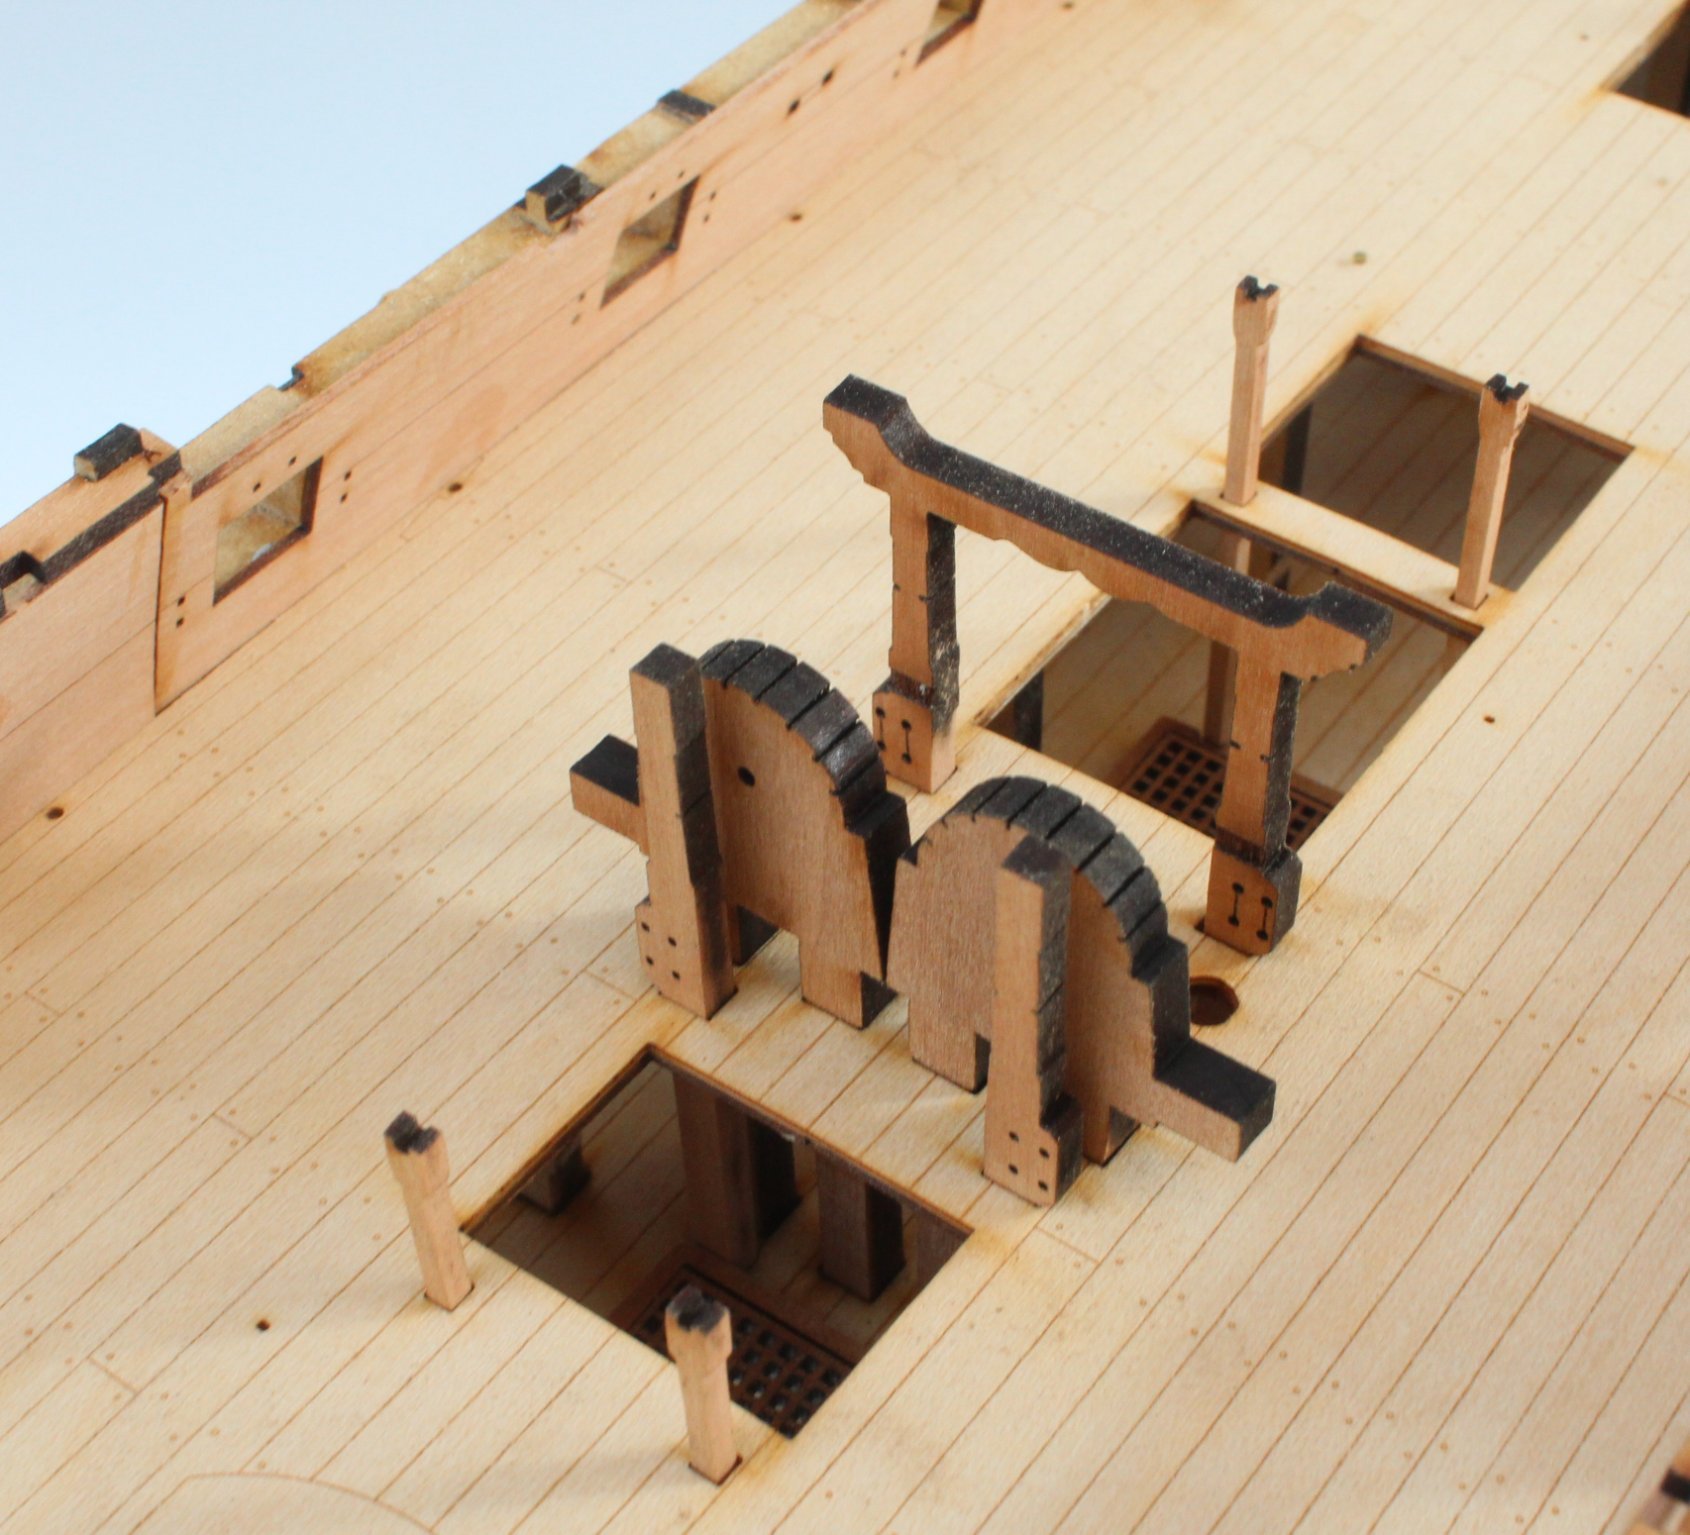
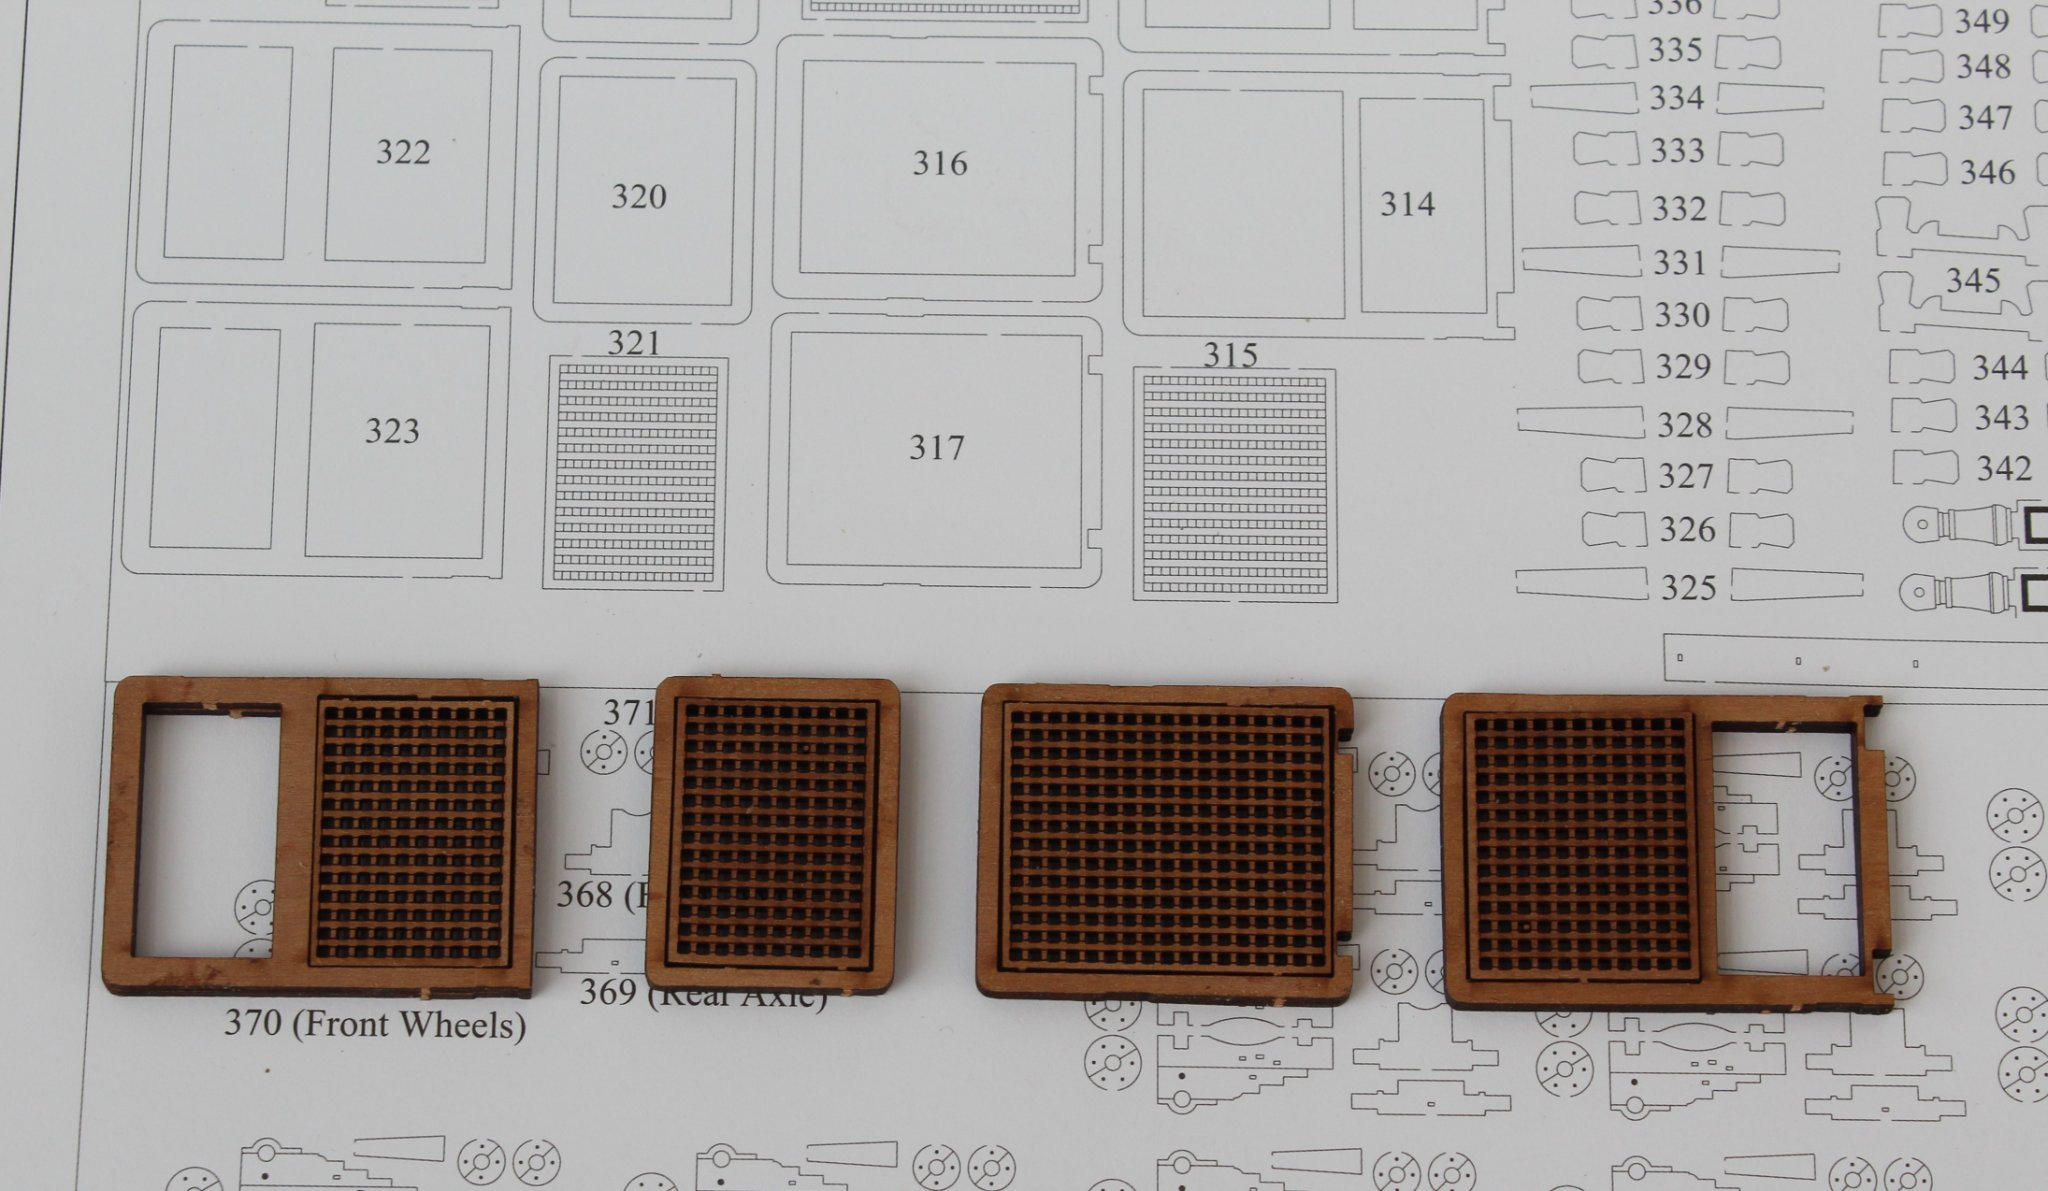
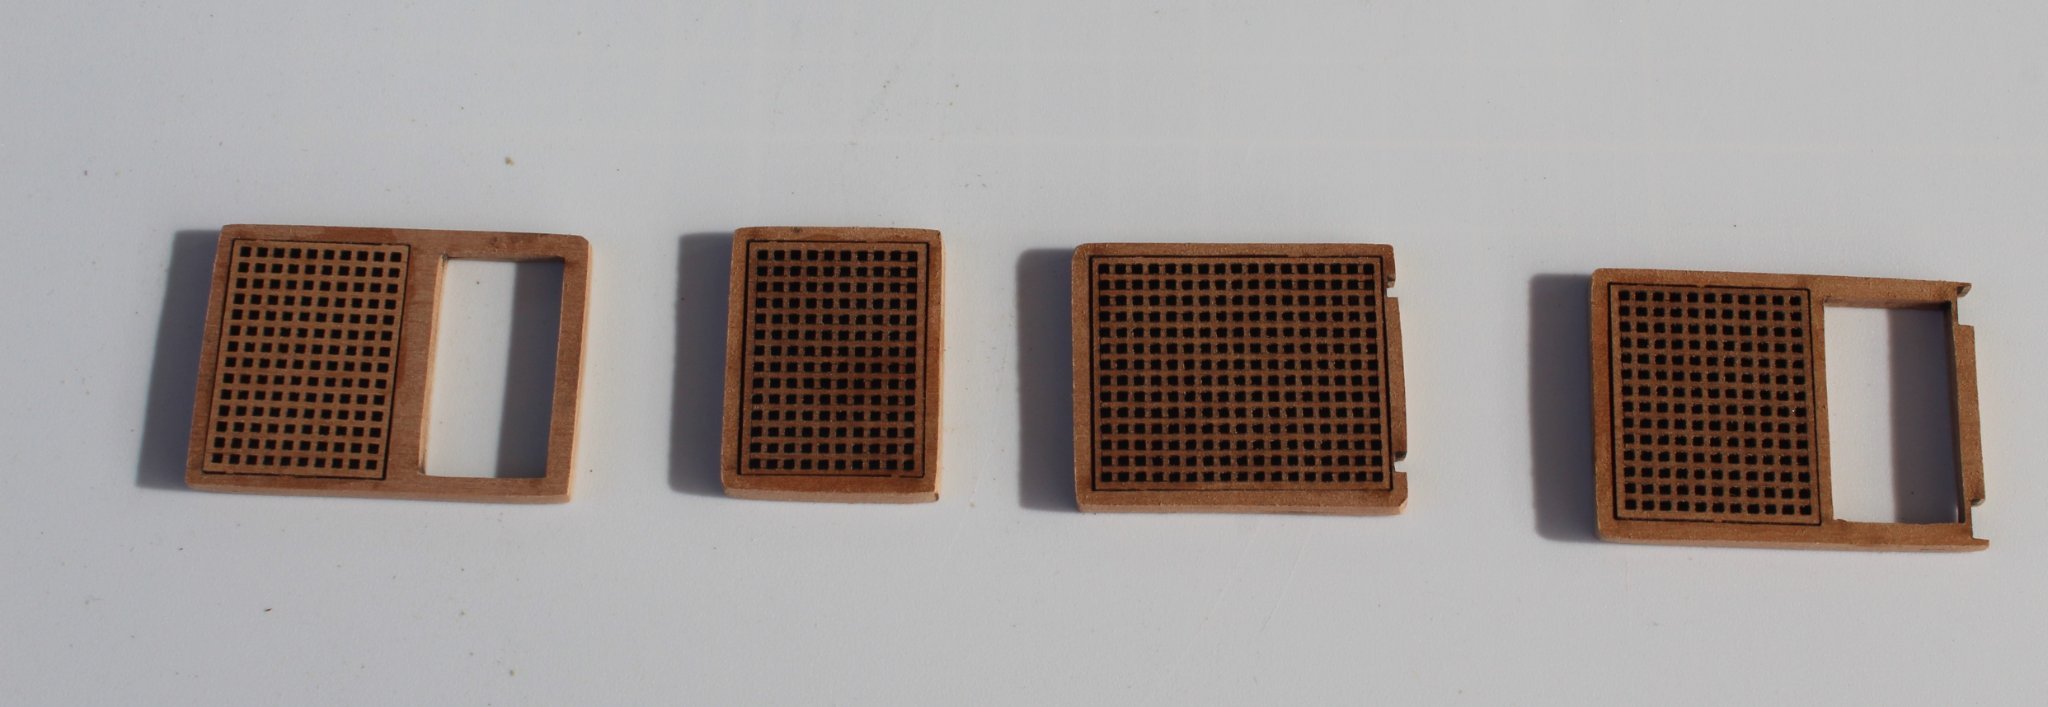
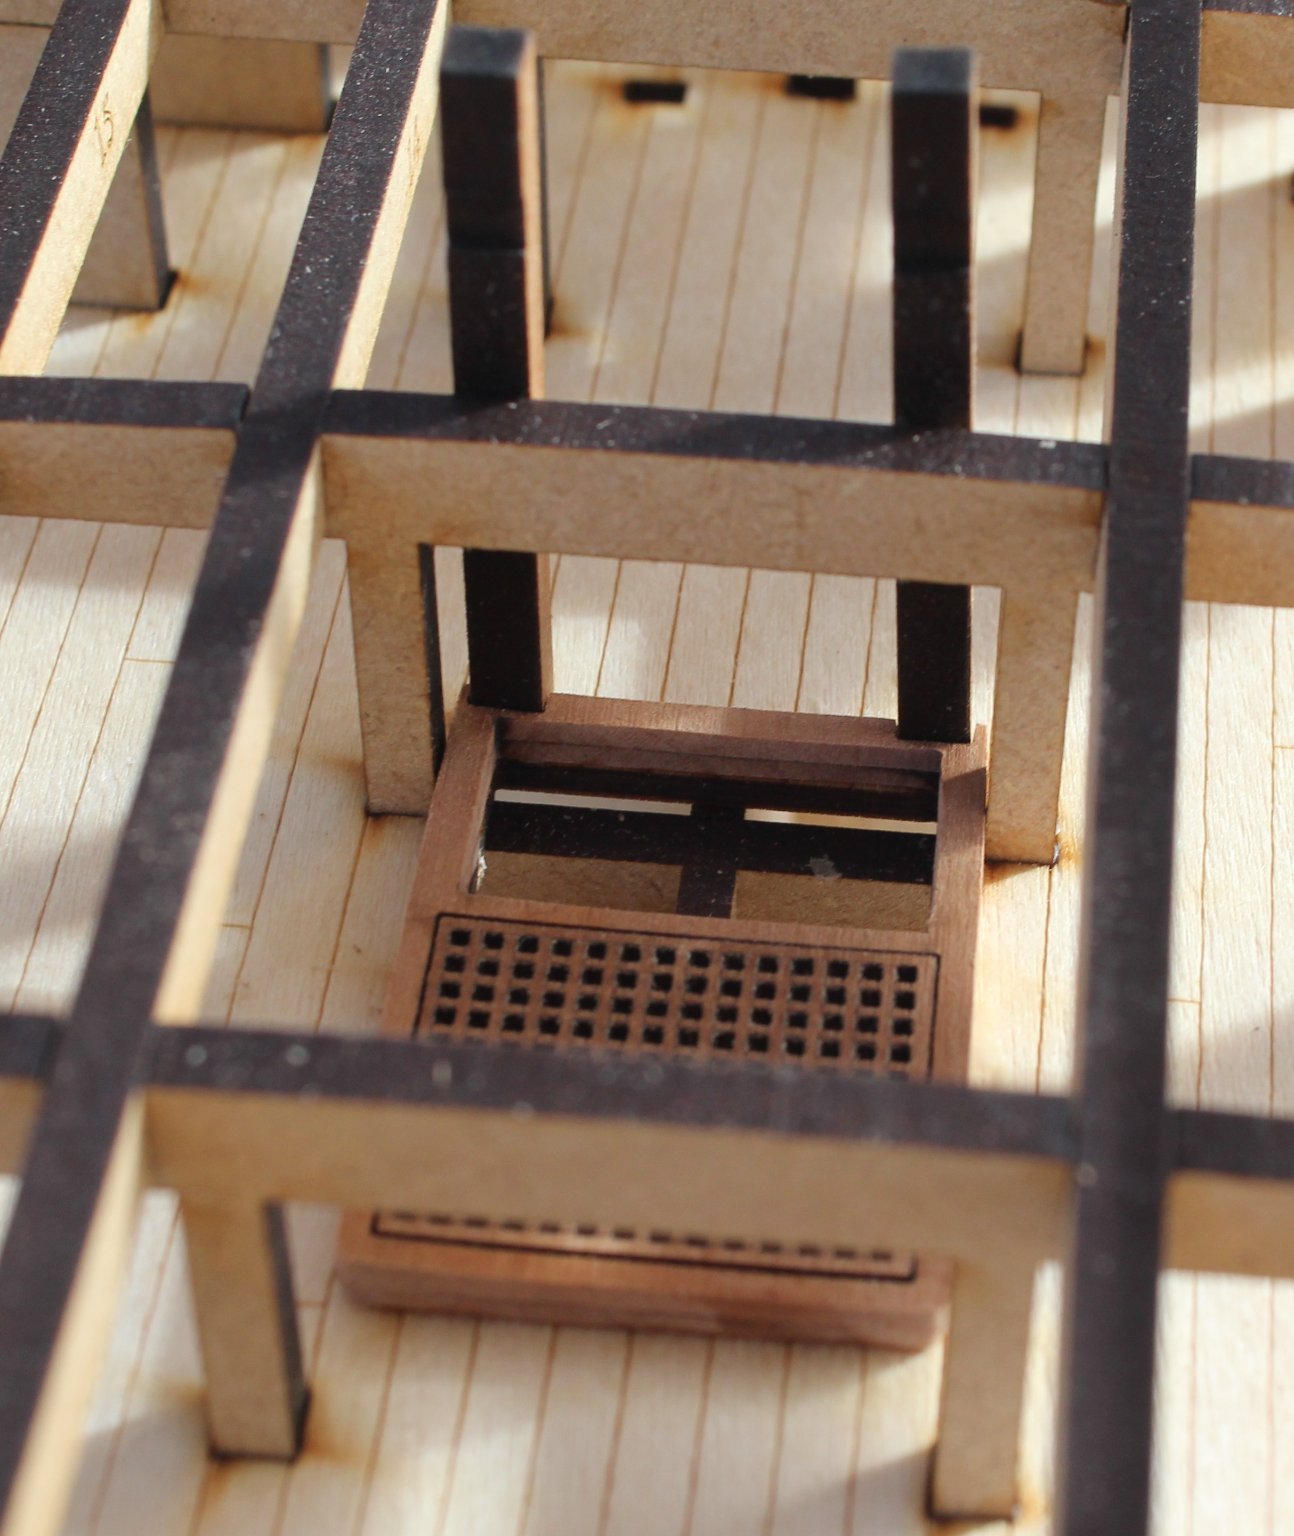
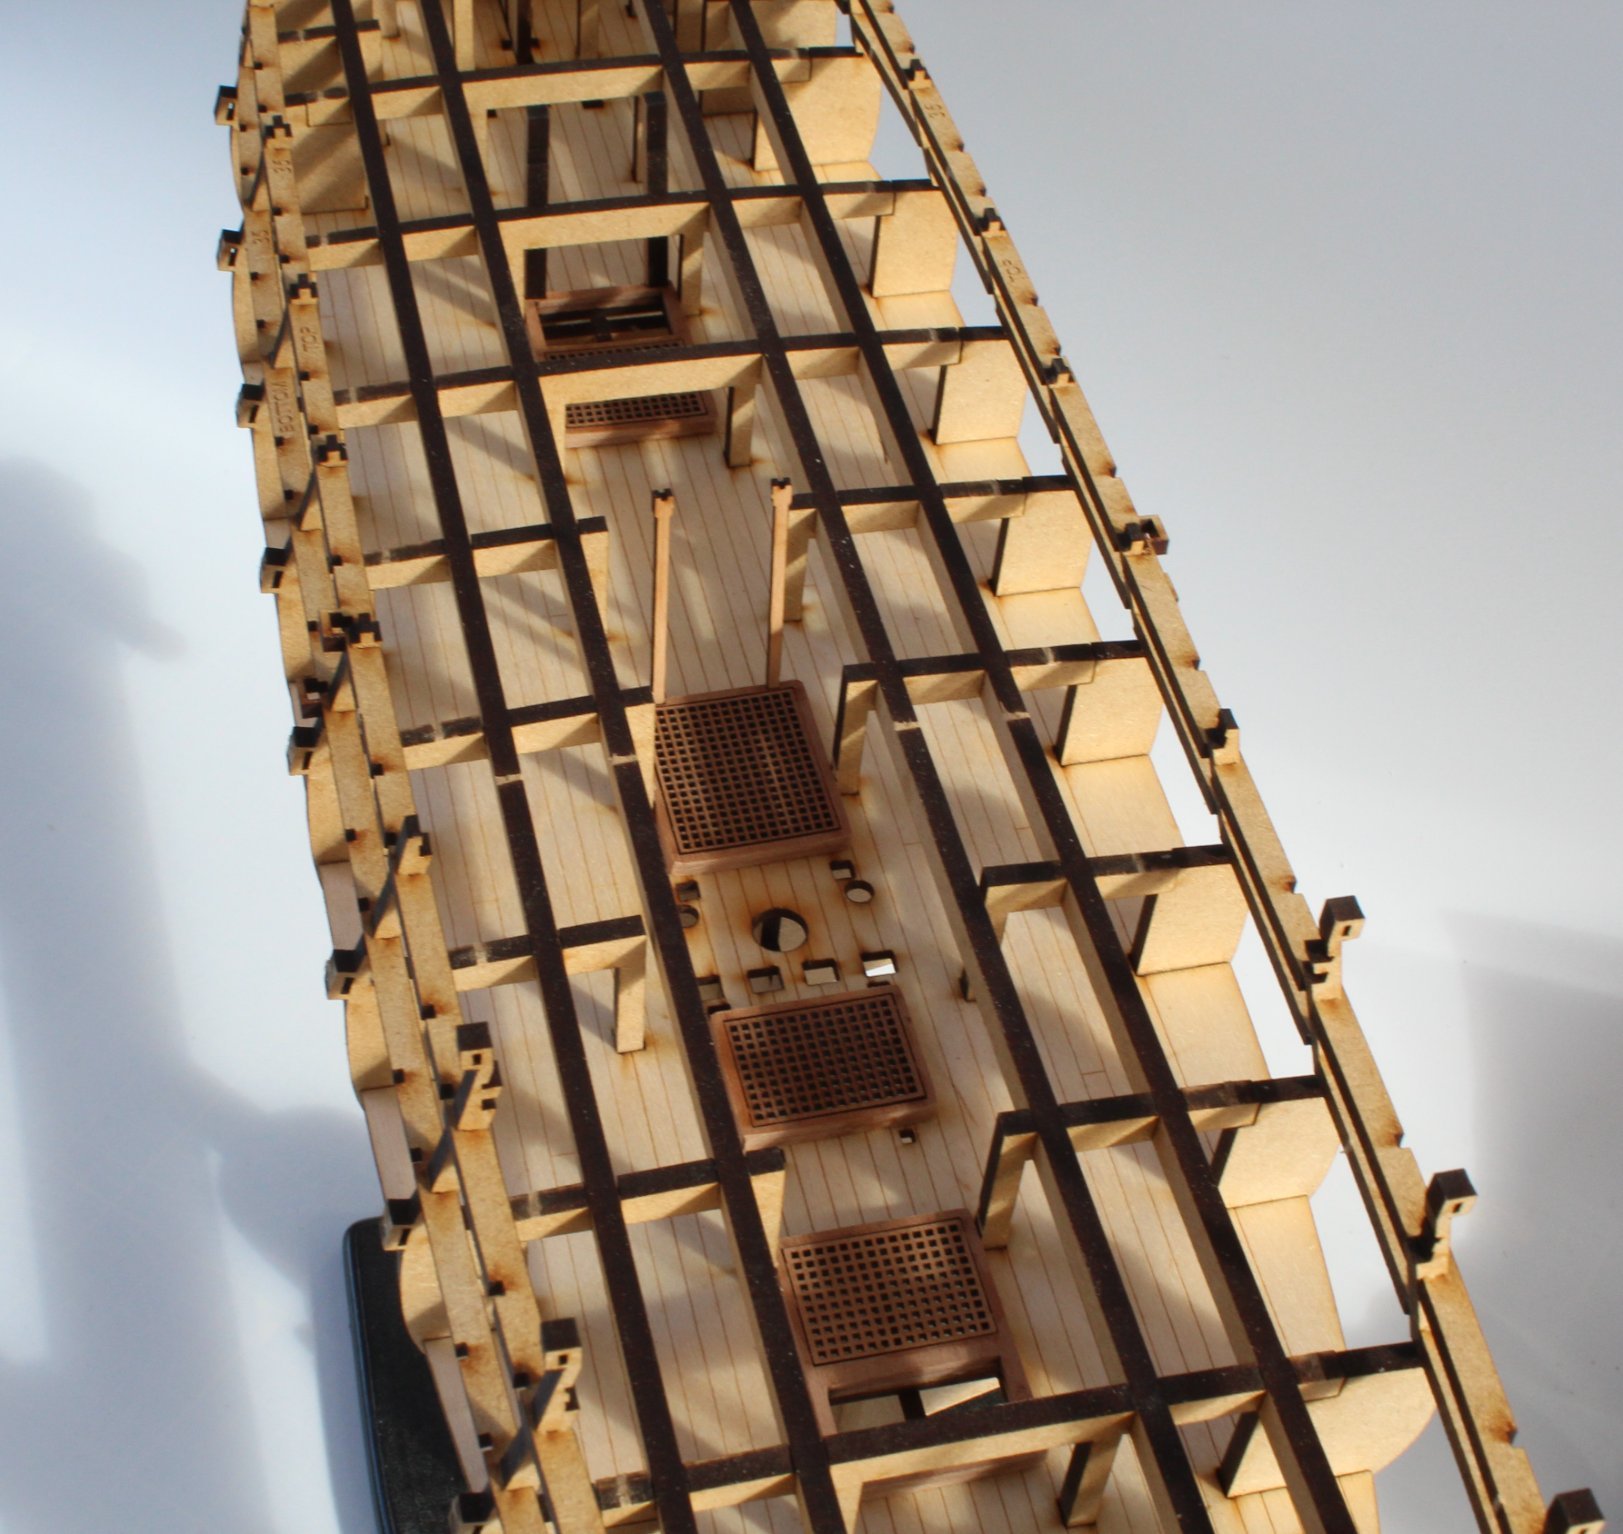
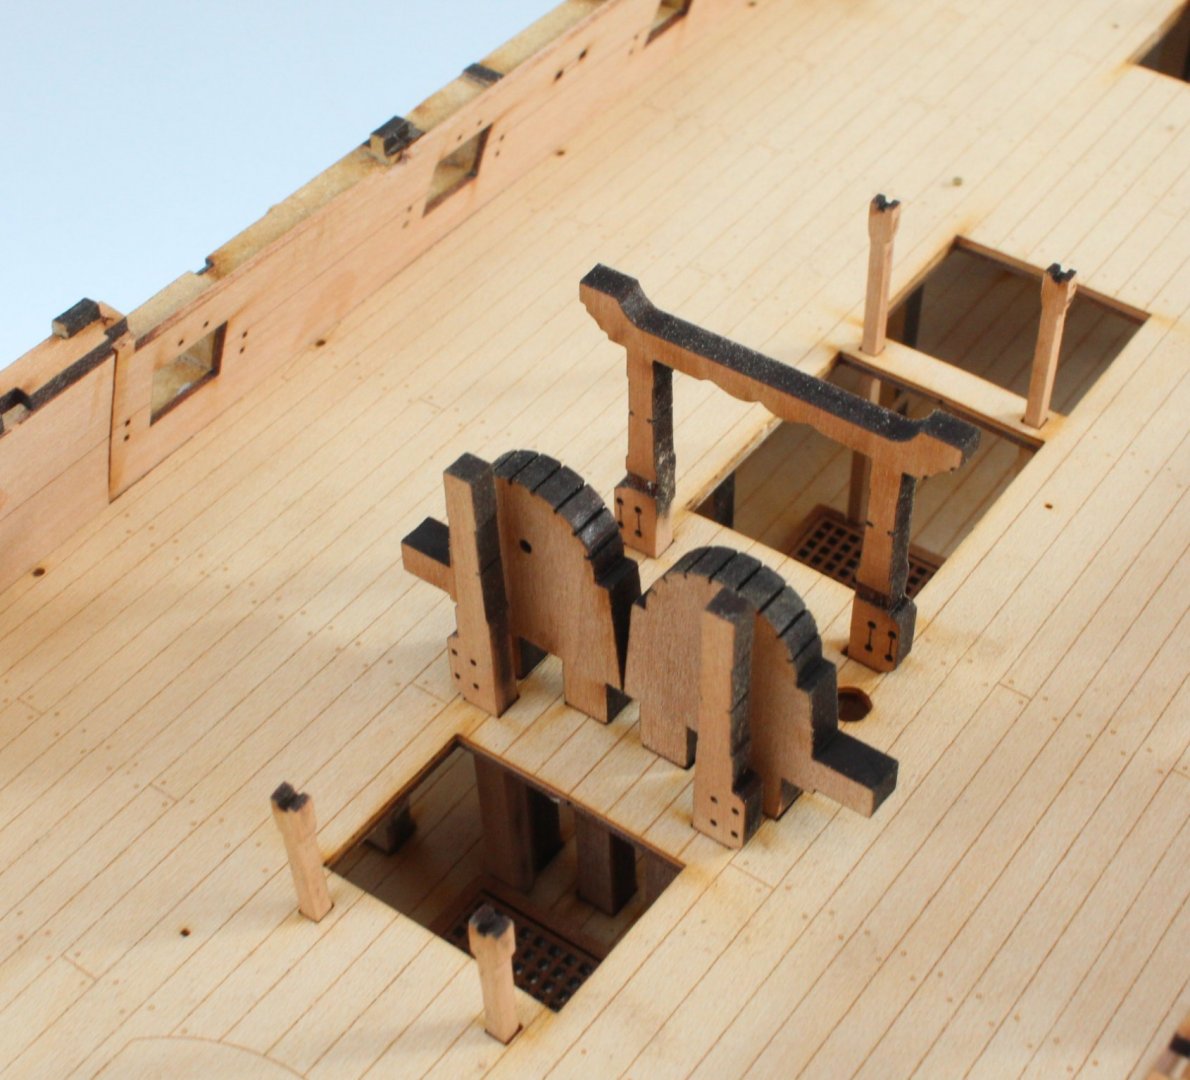
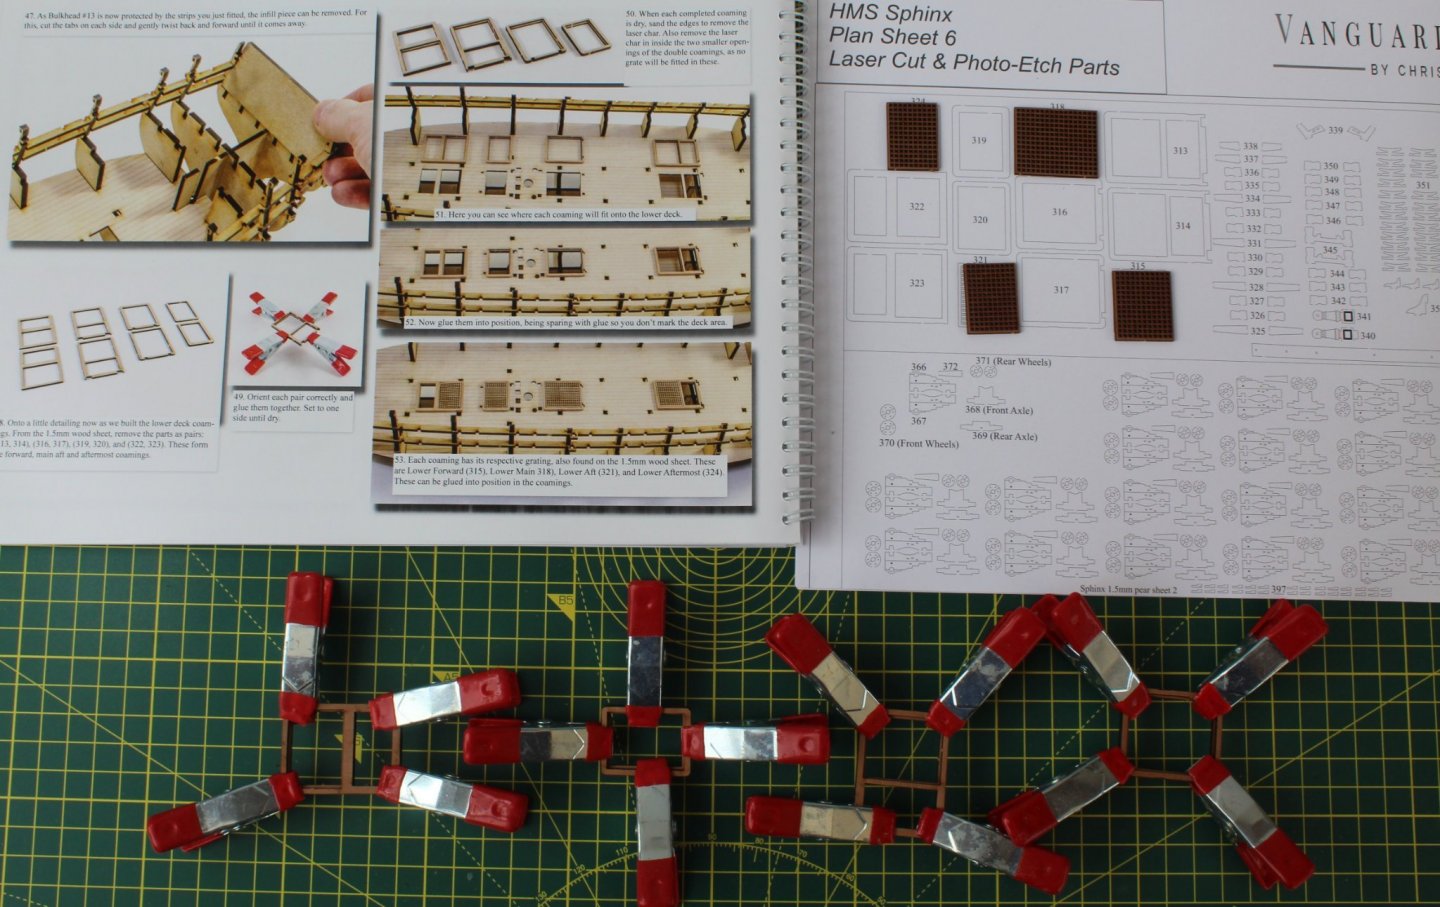
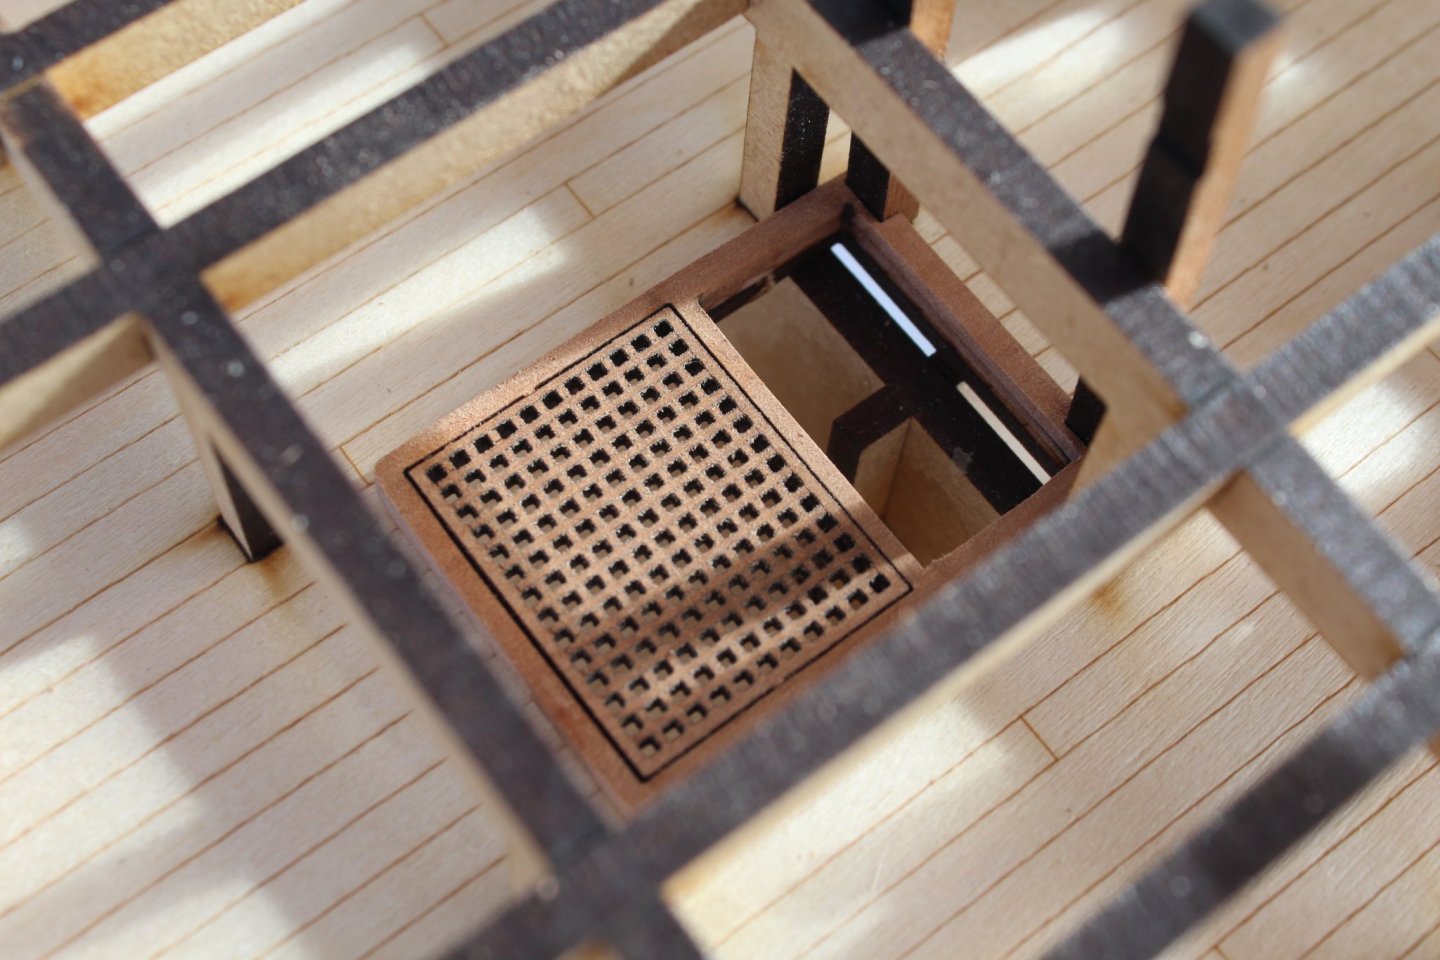
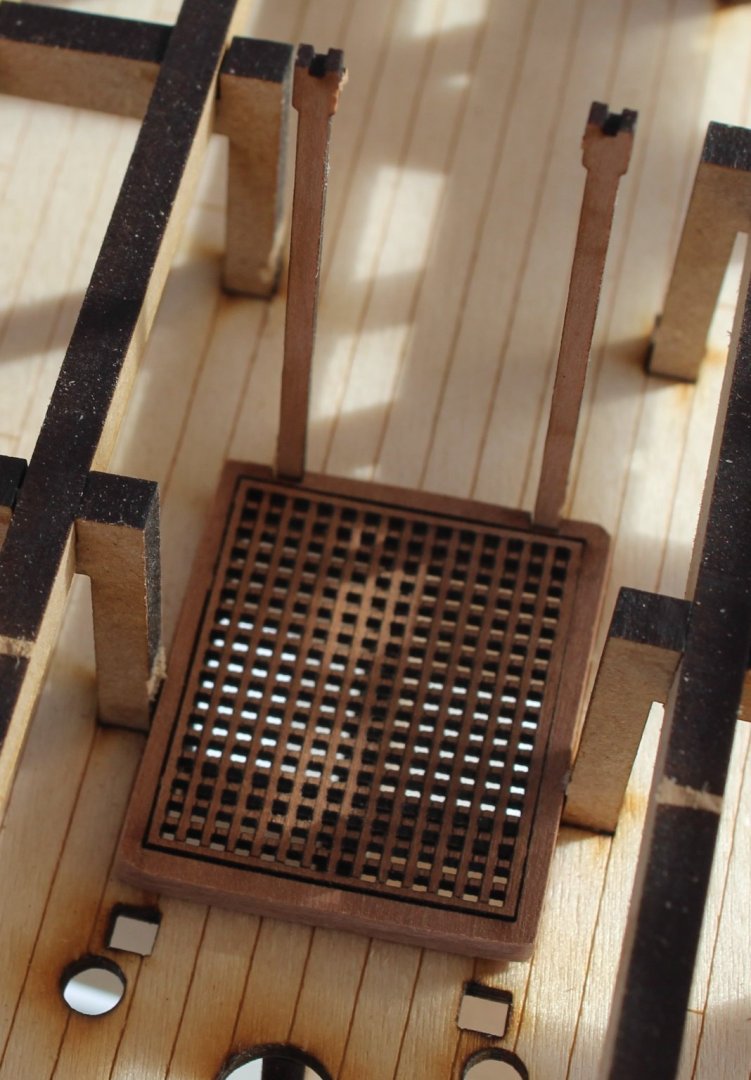
LOWER DECK COAMINGS ASSEMBLY BUILD MANUAL STEPS 48 - 53 LINK TO MY BUILD LOG INDEX Tools Used Craft knife Flory sanding stick 120 and 400-grit sandpaper Titebond original glue Old paint brush Clamps Gathering the materials required The following kit parts are required for this section of the build: 313, 314, 315, 316, 317, 318, 319, 320, 321 322, 323, 324 Assembly Process There are 4 off coaming assemblies required for the lower deck. Each coaming comprises three parts, a top frame, a bottom frame and a grating. After each frame pair was removed a small amount of pva was applied to the bottom edge of the top frame and it was then placed on top of the bottom frame. Once they were correctly aligned clamps were added and the assemblies were put to one side to allow time for the glue to cure. I applied some glue to the inner edges of the coamings and then added the gratings. Once the glue had started to cure the laser char was removed from the all the outer edges and from the inner edges of the two coaming apertures which were not fitted with gratings. BUILD TIP The first two coamings have slots for items to be seated through holes on the lower deck. To ensure the coamings were correctly aligned the items were dry fitted. A very small amount of pva was applied to the bottom edge of these two coamings and they were then placed on the lower deck. All excess pva glue was immediately removed using a wetted paint brush. The remaining two coamings were then glued in place using the same method details above.


-
Hello @BobG I use both methods depending on what I am gluing. I find painting diluted glue works when there are slots involved as the diluted glue fills up all the gaps and when cured seems strong enough.
-
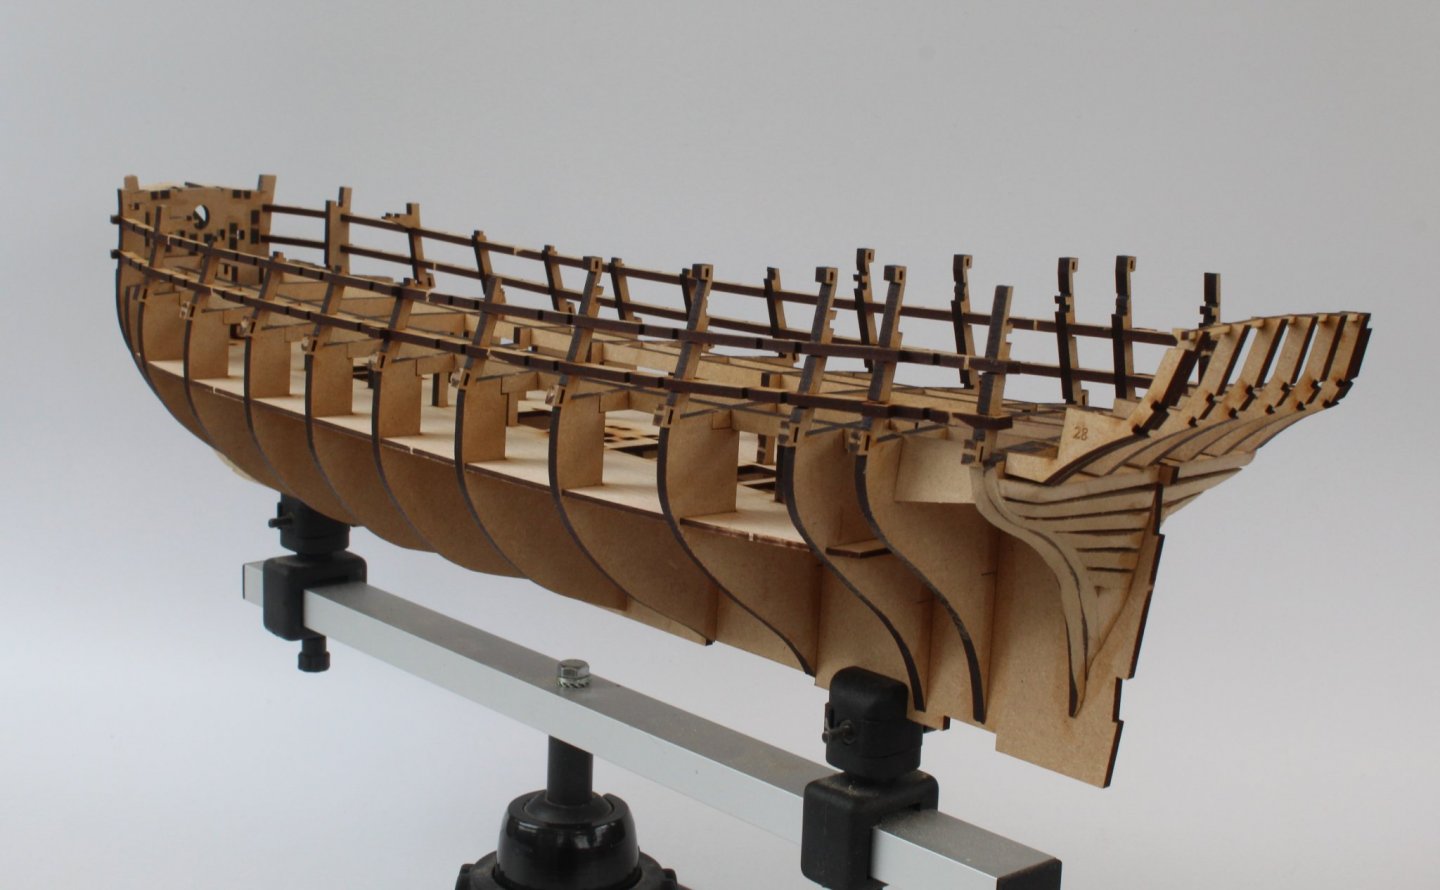
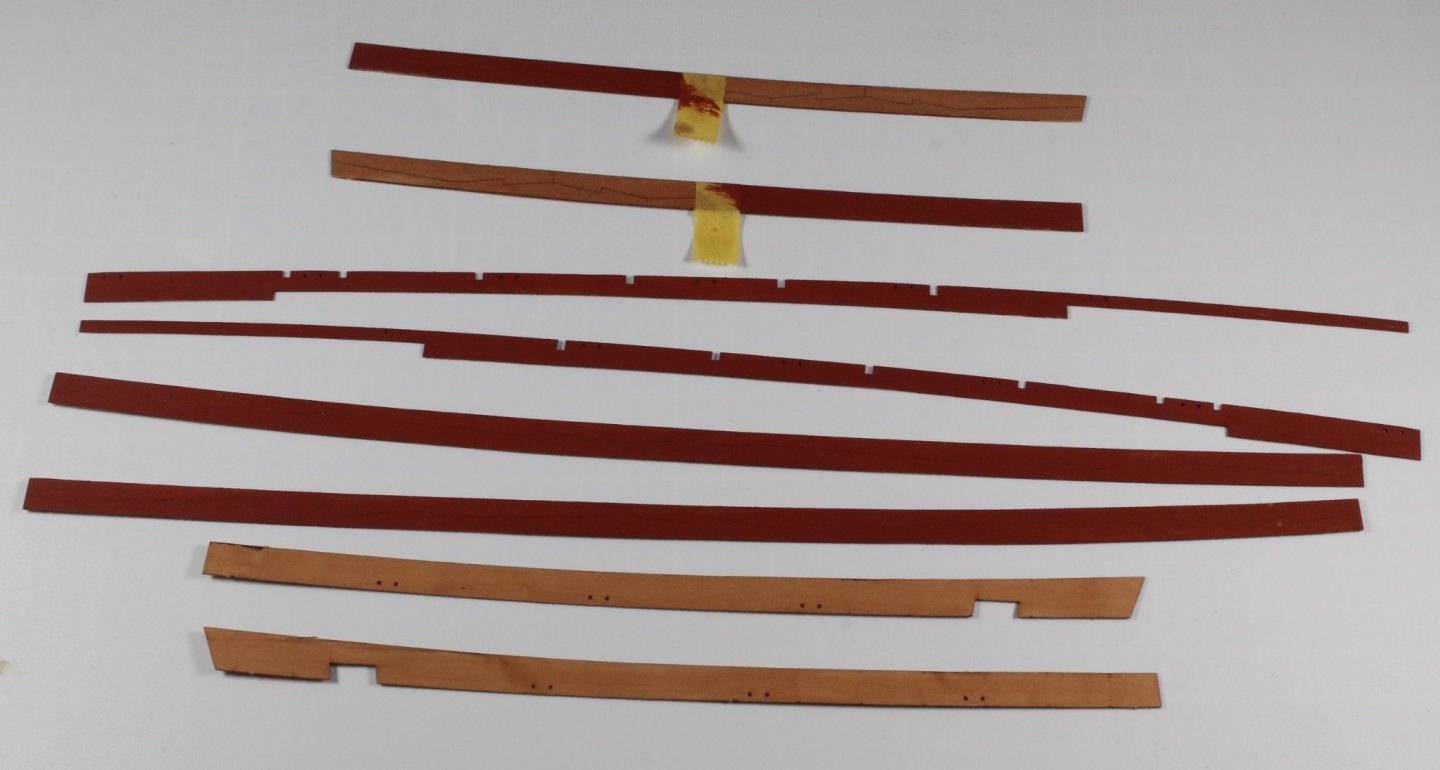
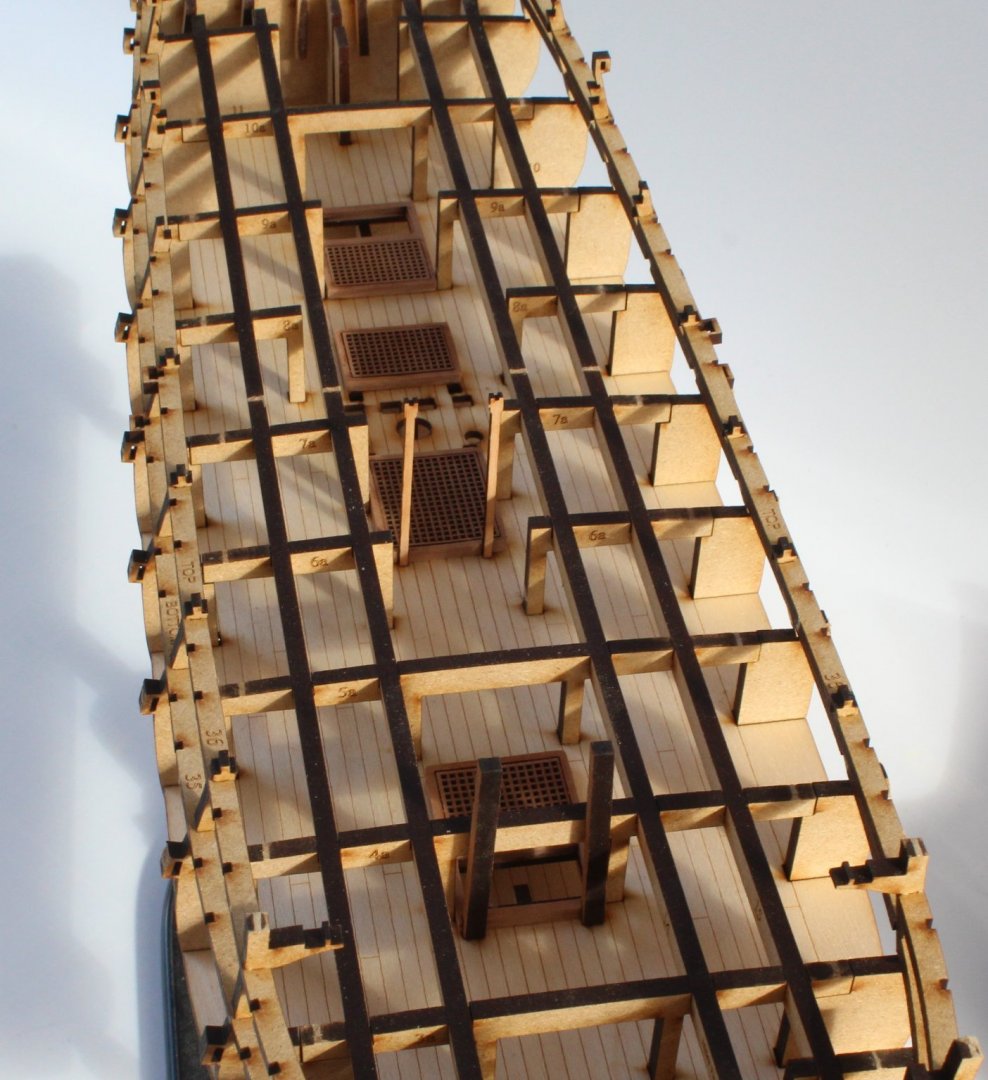
LONGITUDINAL GUN PORTS FRAMES GUN DECK SUPPORT BEAMS STERN COUNTER FRAME ASSEMBLY BUILD MANUAL STEPS 41 – 71 WITH EXCEPTION OF STEPS 48-53 LINK TO MY BUILD LOG INDEX Tools Used Craft knife Flory sanding stick Titebond original glue Old paint brush Clamps Gathering the materials required The following kit parts are required for this section of the build: 1d, (x2), 2a (x2), 3a, 4a, 5a, 6a (x2), 7a (x2), 8a (x2), 9a (x2), 10a, 14 (x2), 15(x2), 25 (x2), 26 (x2), 27 (X2), 28 (x2), 35 (x2), 36 (x2), 41, 47, 48 I took care with removing these items, making top and bottom cuts on the securing tabs with my craft knife and removing any excess tab material using a sanding stick as each part was removed. I decided it would be beneficial to dry fit the parts except for the stern frame assembly (due to bulkhead 13’s infill piece). I found it necessary to very lightly sand the posts of gun deck frame 10a and 9a to ensure they could be fully seated. PLEASE NOTE: The steps 48 -53 which cover the assembly and fitting of the 4 off lower deck coamings will be covered in a separate post. On reflection it may have been better to fit them before the gun deck support fames were added. Assembly Process – Longitudinal gun port frames I started with the bottom frames and took my time to ensure they were fully engaged in the slots on the bulkheads. Once I was happy the frames were fully inserted at each bulkhead position a diluted pva solution was brushed into all the joints. I then repeated this process for the top frames. I did end up using a couple of clamps to ensure the strips remained fully seated as the glue cured. I also brushed some glue on to the surface of the 2 two gun deck support patterns and pushed them on to the face of bulkhead 1. Assembly Process – Gun Deck support beams Next the various gun deck support beams were added. With the support beams correctly positioned the inner and outer longitudinal deck beams were added. I started with the two inner beams. I brushed some glue into the slots and took my time to ensure they pushed down fully into all bulkhead beam slots. The process was then repeated for the two outer beams. I did add a couple of weights to ensure the beams remained fully seated as the glue cured. Assembly Process – Stern Counter Frame and gun deck assembly Removing the infill part of bulkhead 13 was relatively straightforward. I carefully cut through the tabs (on both sides) and I was then able to gently remove the infill, using my round nose pliers with a light bit a very gentle twisting back and forth. The various stern counter frames were then slotted into place, starting with the two inners, then the two middle and then finally the two outer stern counter fames. There were all a very tight fit and each piece required a gentle sanding before they could be inserted without undo force. With all 6 frames in place the stern frame spacer beam was positioned in the slots that run along the top of all of the stern counter frames. With the space beam fully seated in all 6 slots diluted pva glue was brushed into all the joints. The two filler patterns were then glued to the outside edge of the outer stern counter frames and once I was happy with the position they were clamped. My HMS Sphinx is starting to take shape.