HOLIDAY DONATION DRIVE - SUPPORT MSW - DO YOUR PART TO KEEP THIS GREAT FORUM GOING! (Only 24 donations so far out of 49,000 members - C'mon guys!)
×


Glenn-UK
-
Posts
3,155 -
Joined
-
Last visited
Content Type
Profiles
Forums
Gallery
Events
Everything posted by Glenn-UK
-
 Many thanks, I am making the kit without modifications.
 -
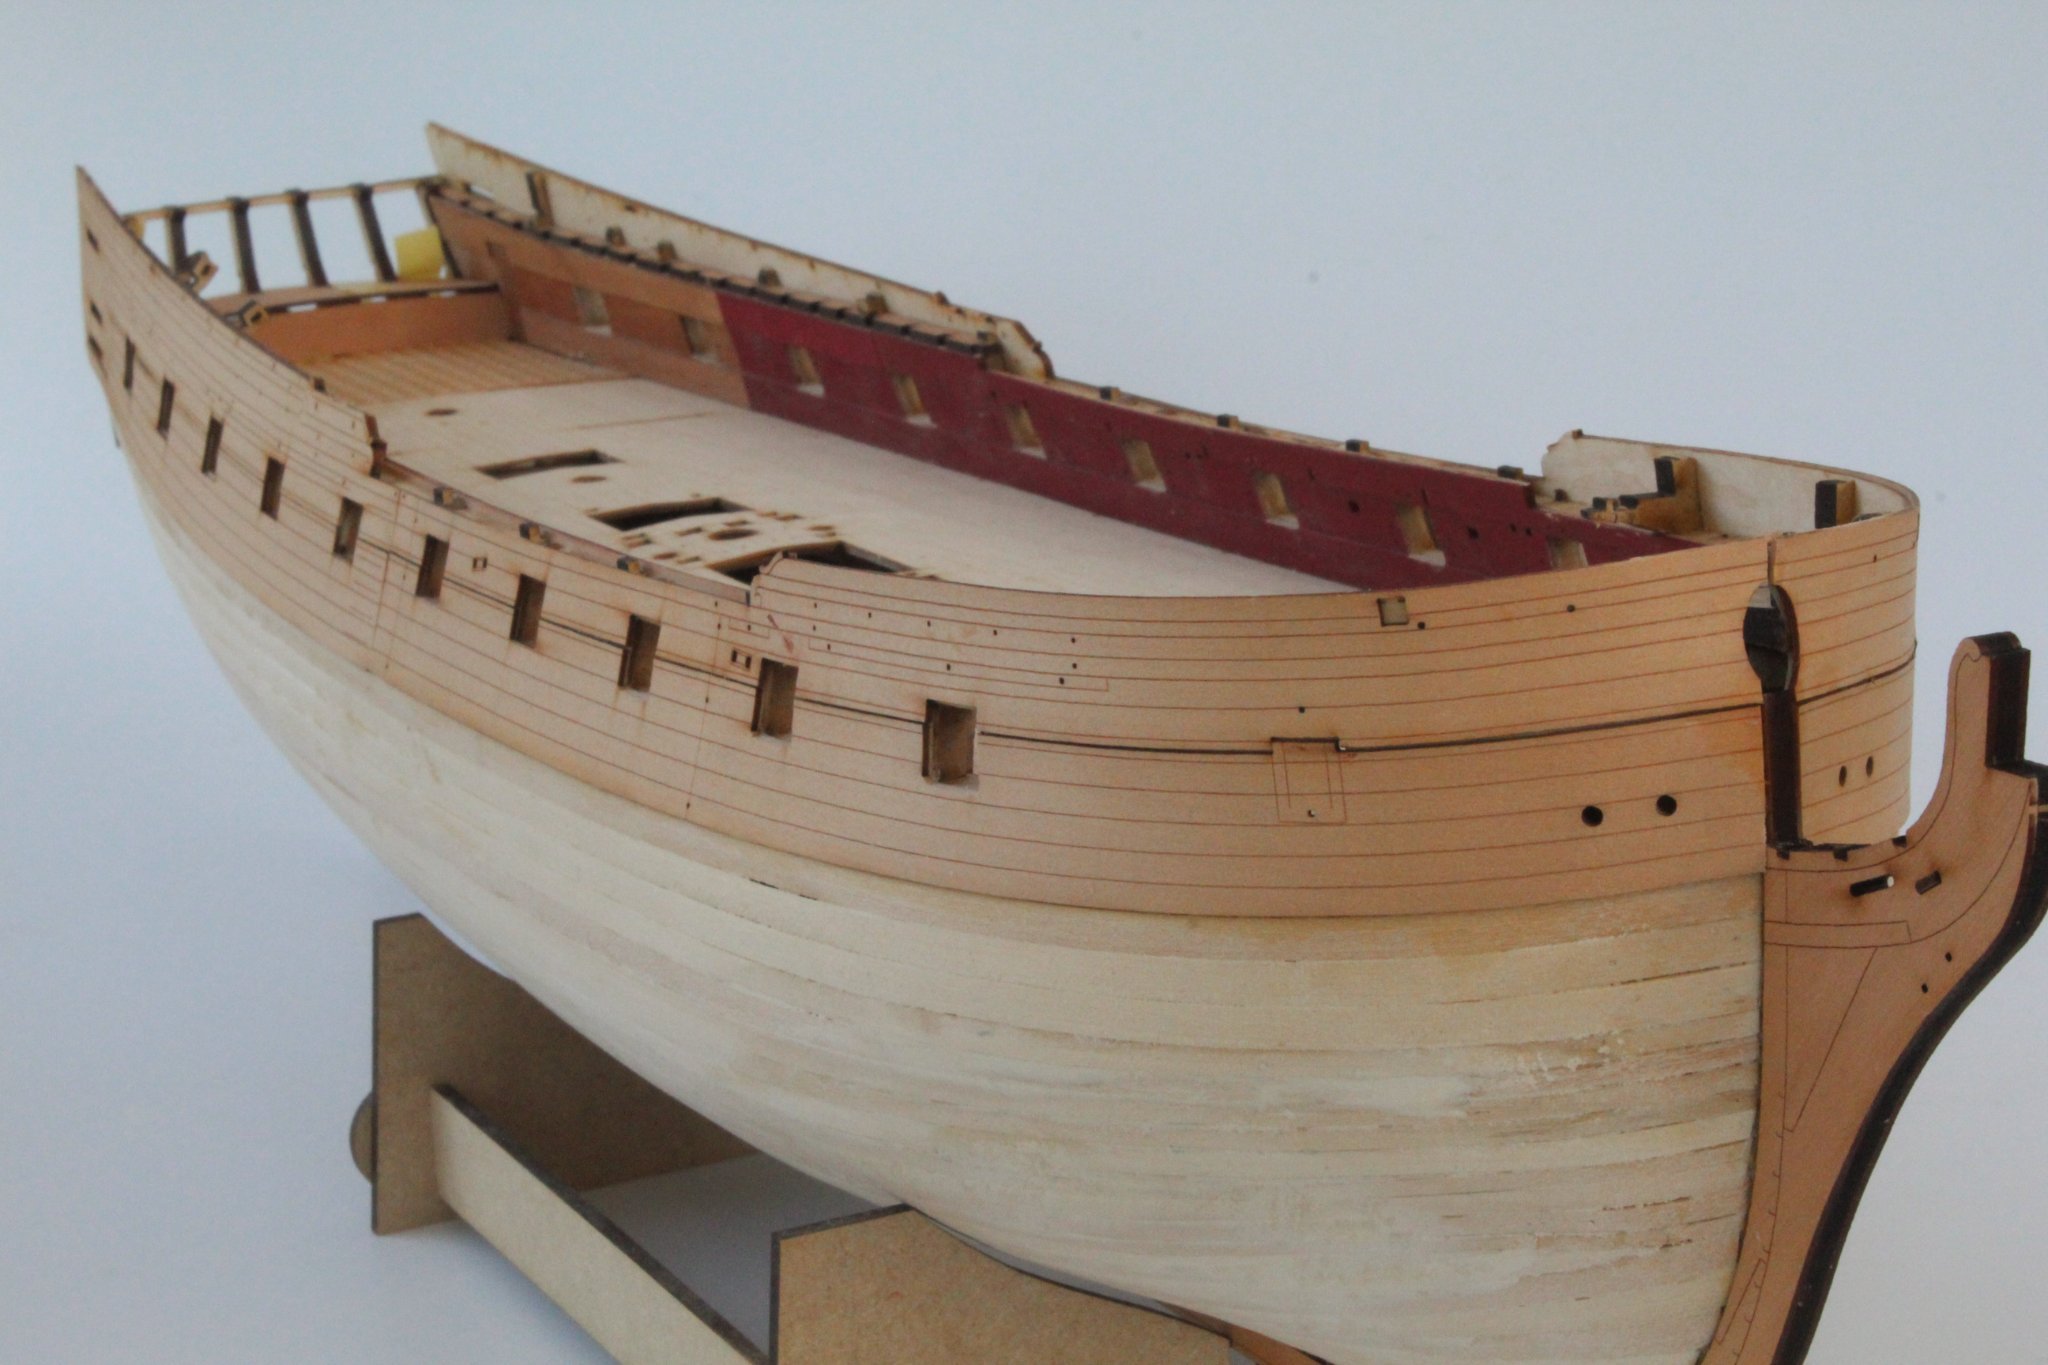
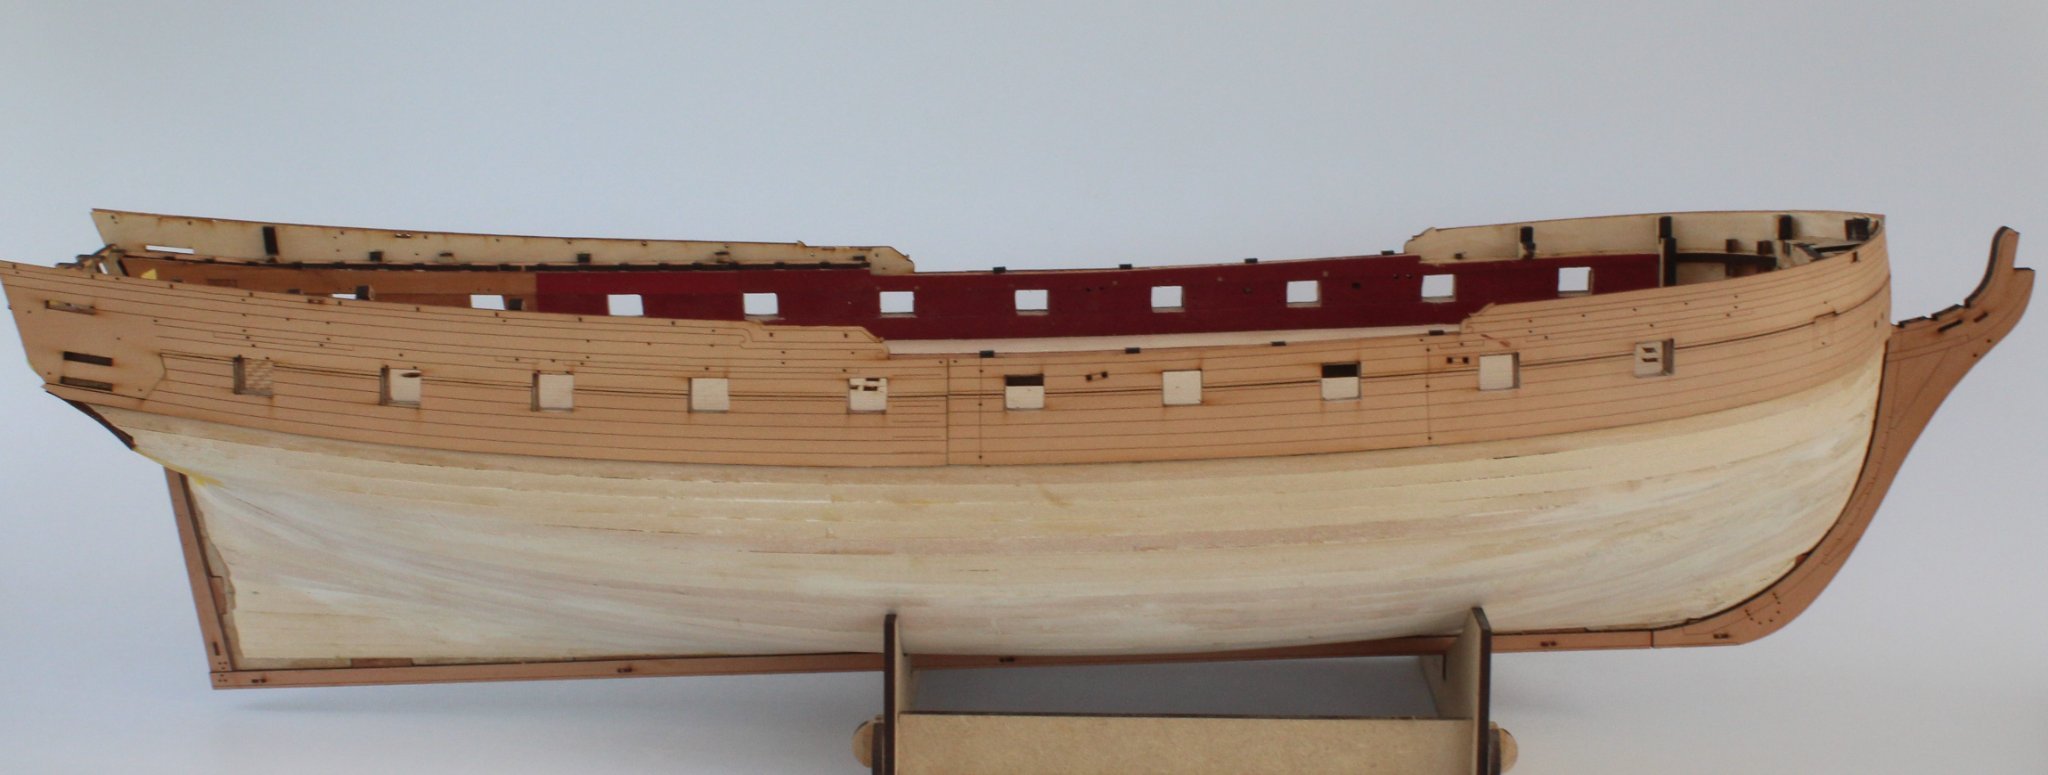
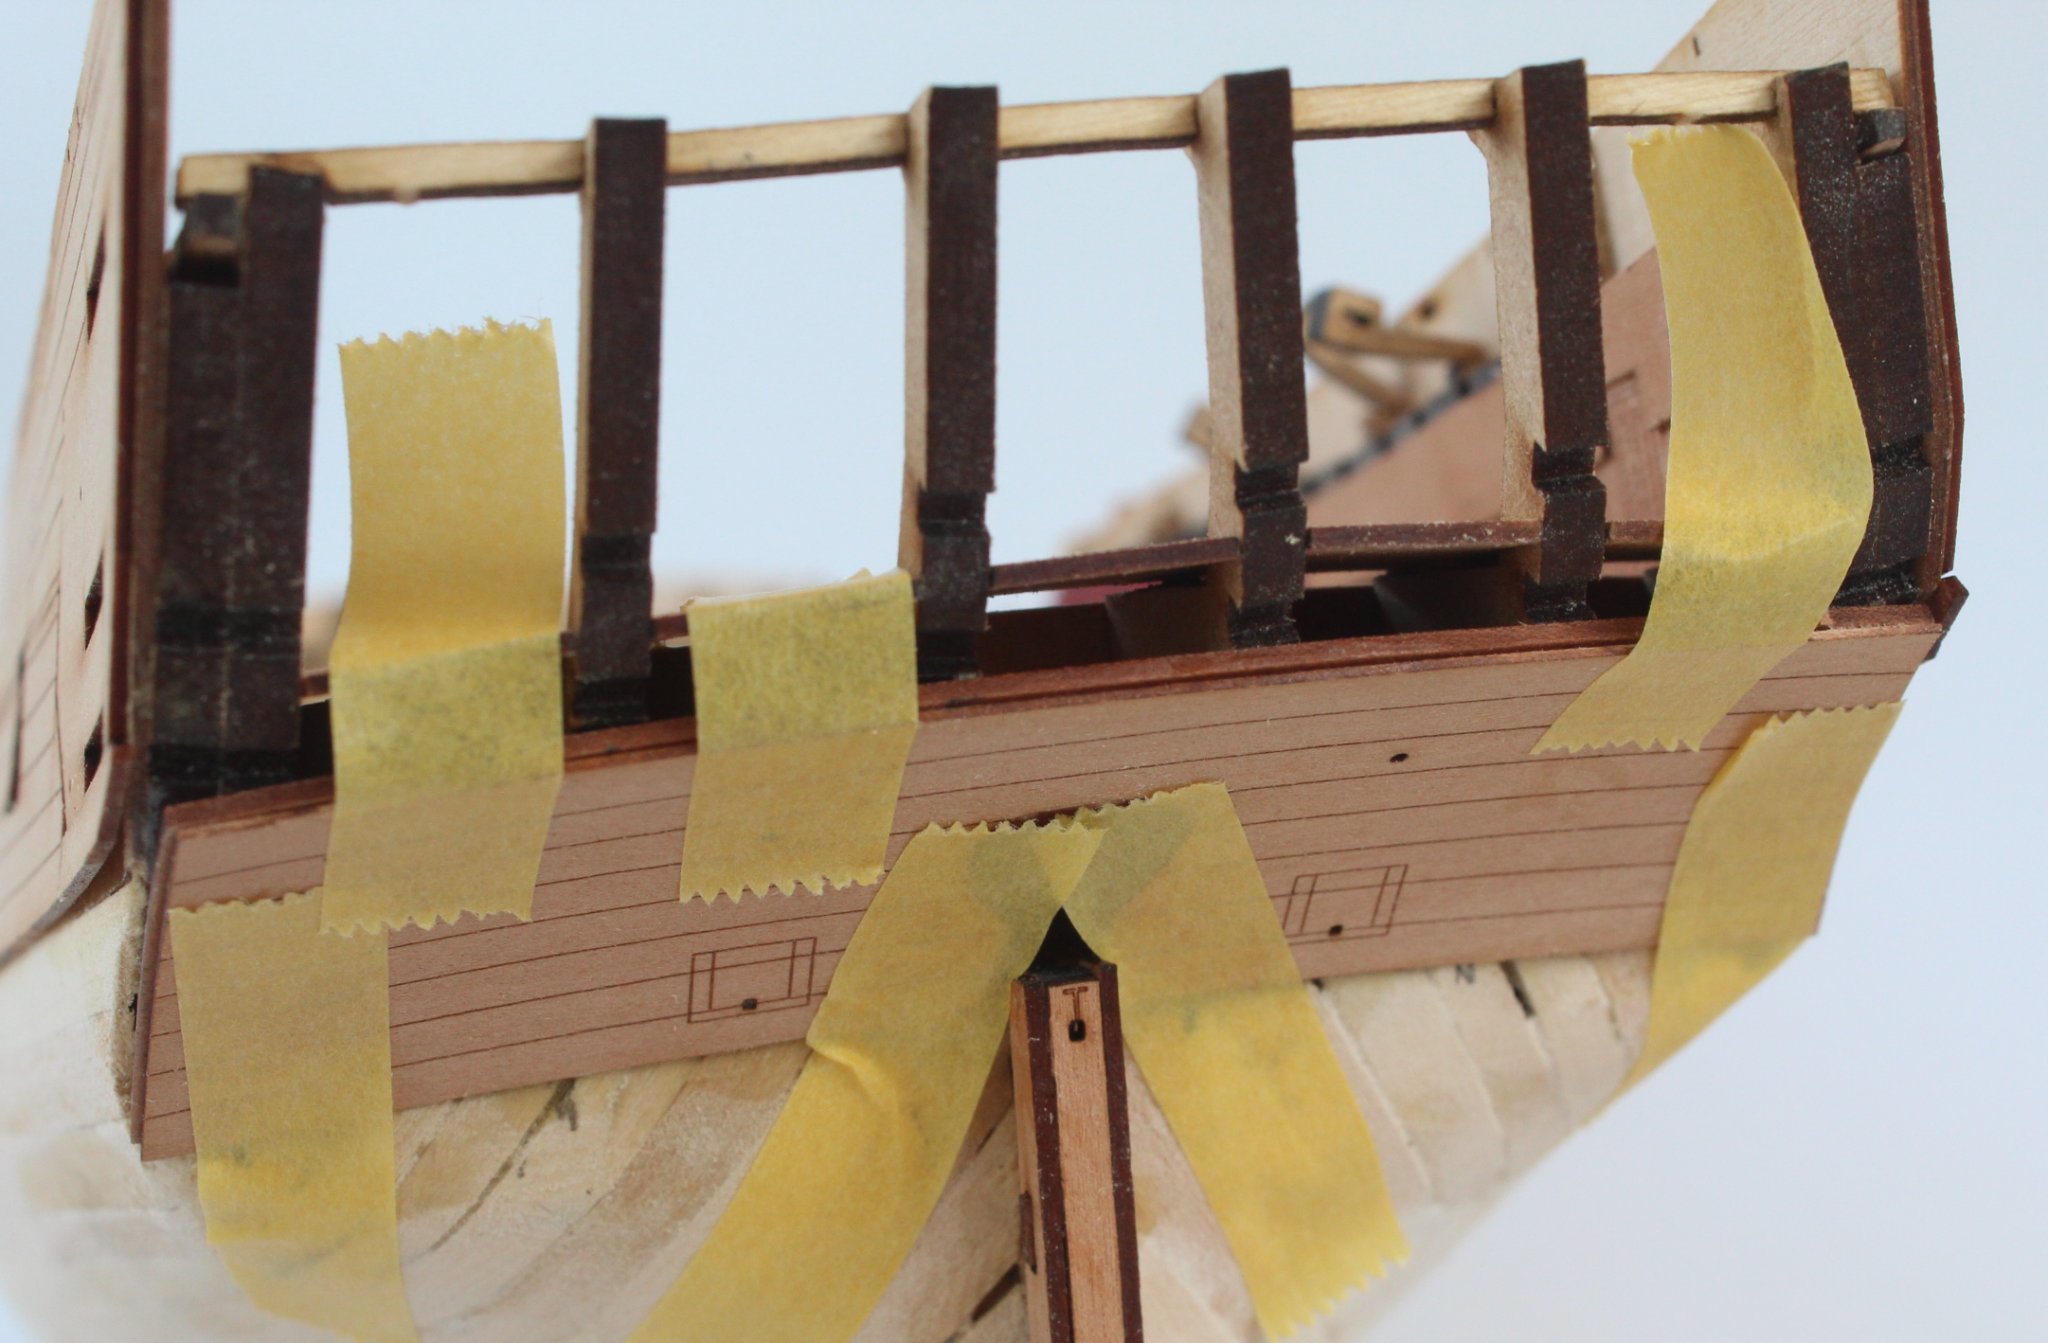
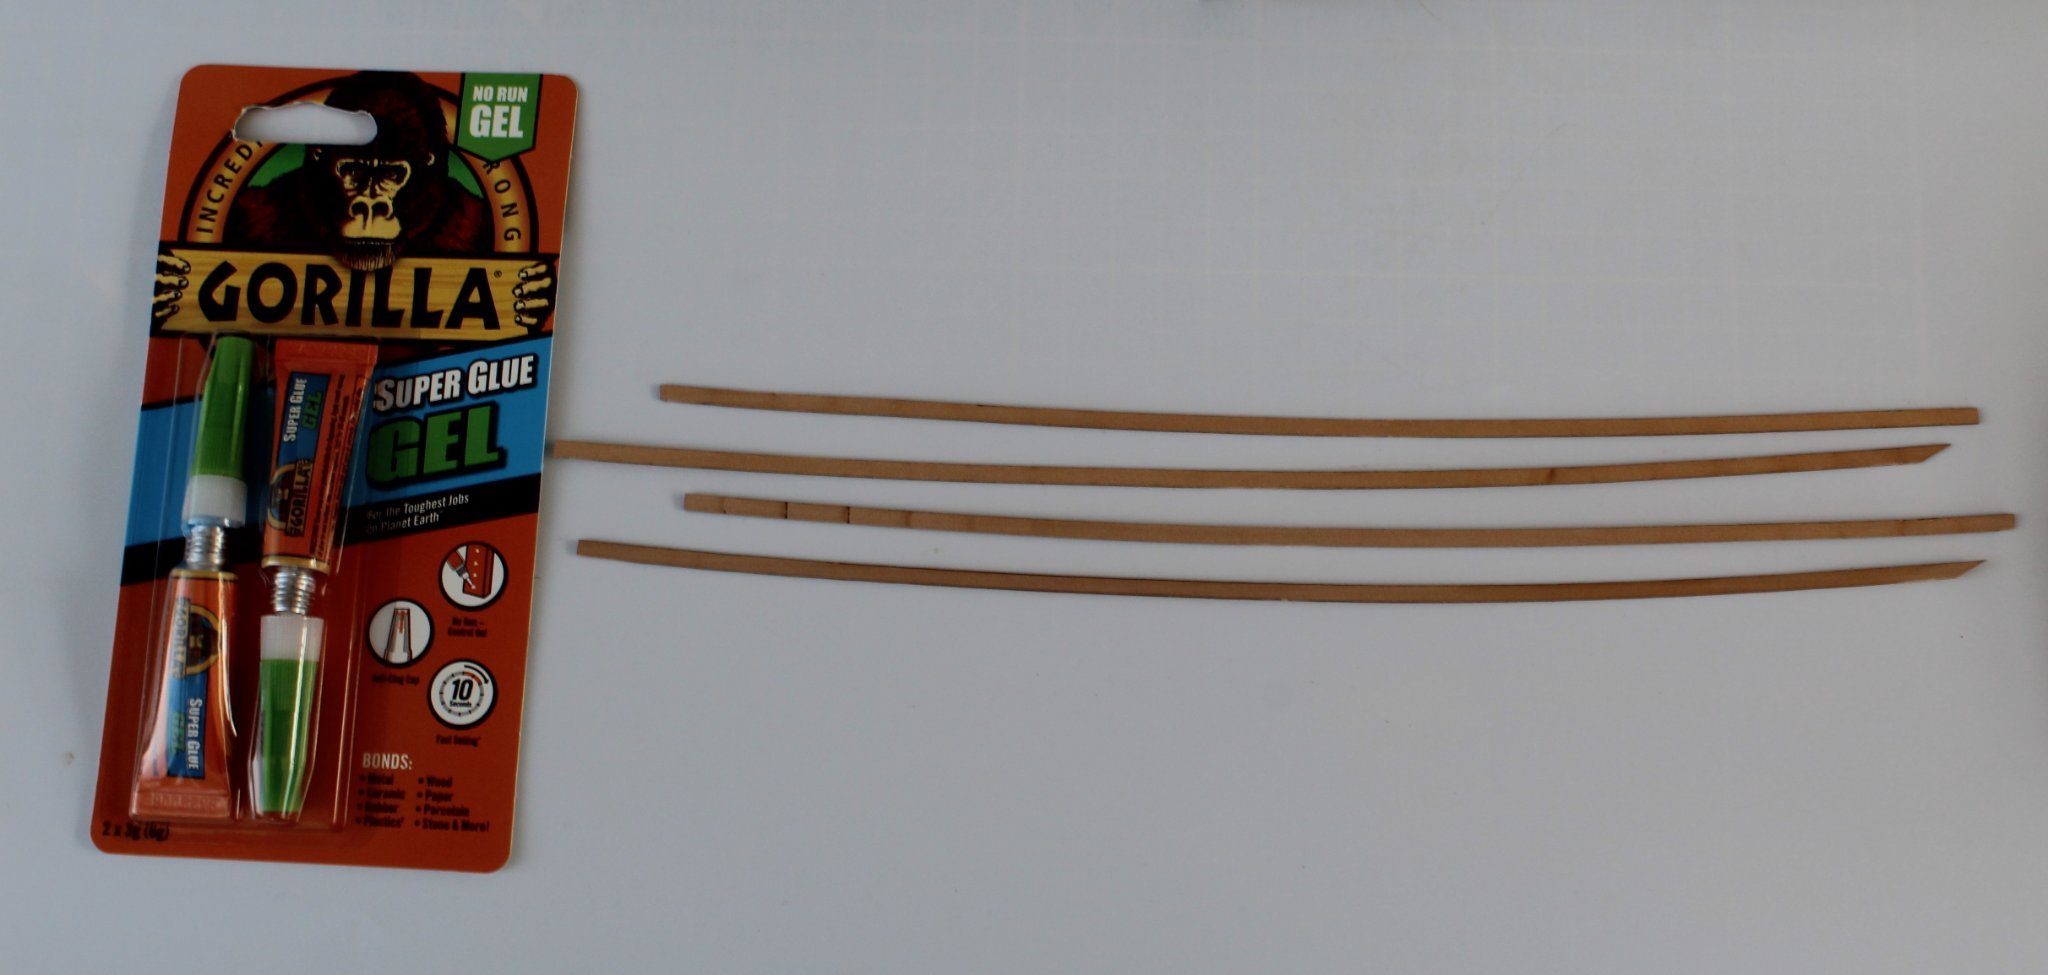
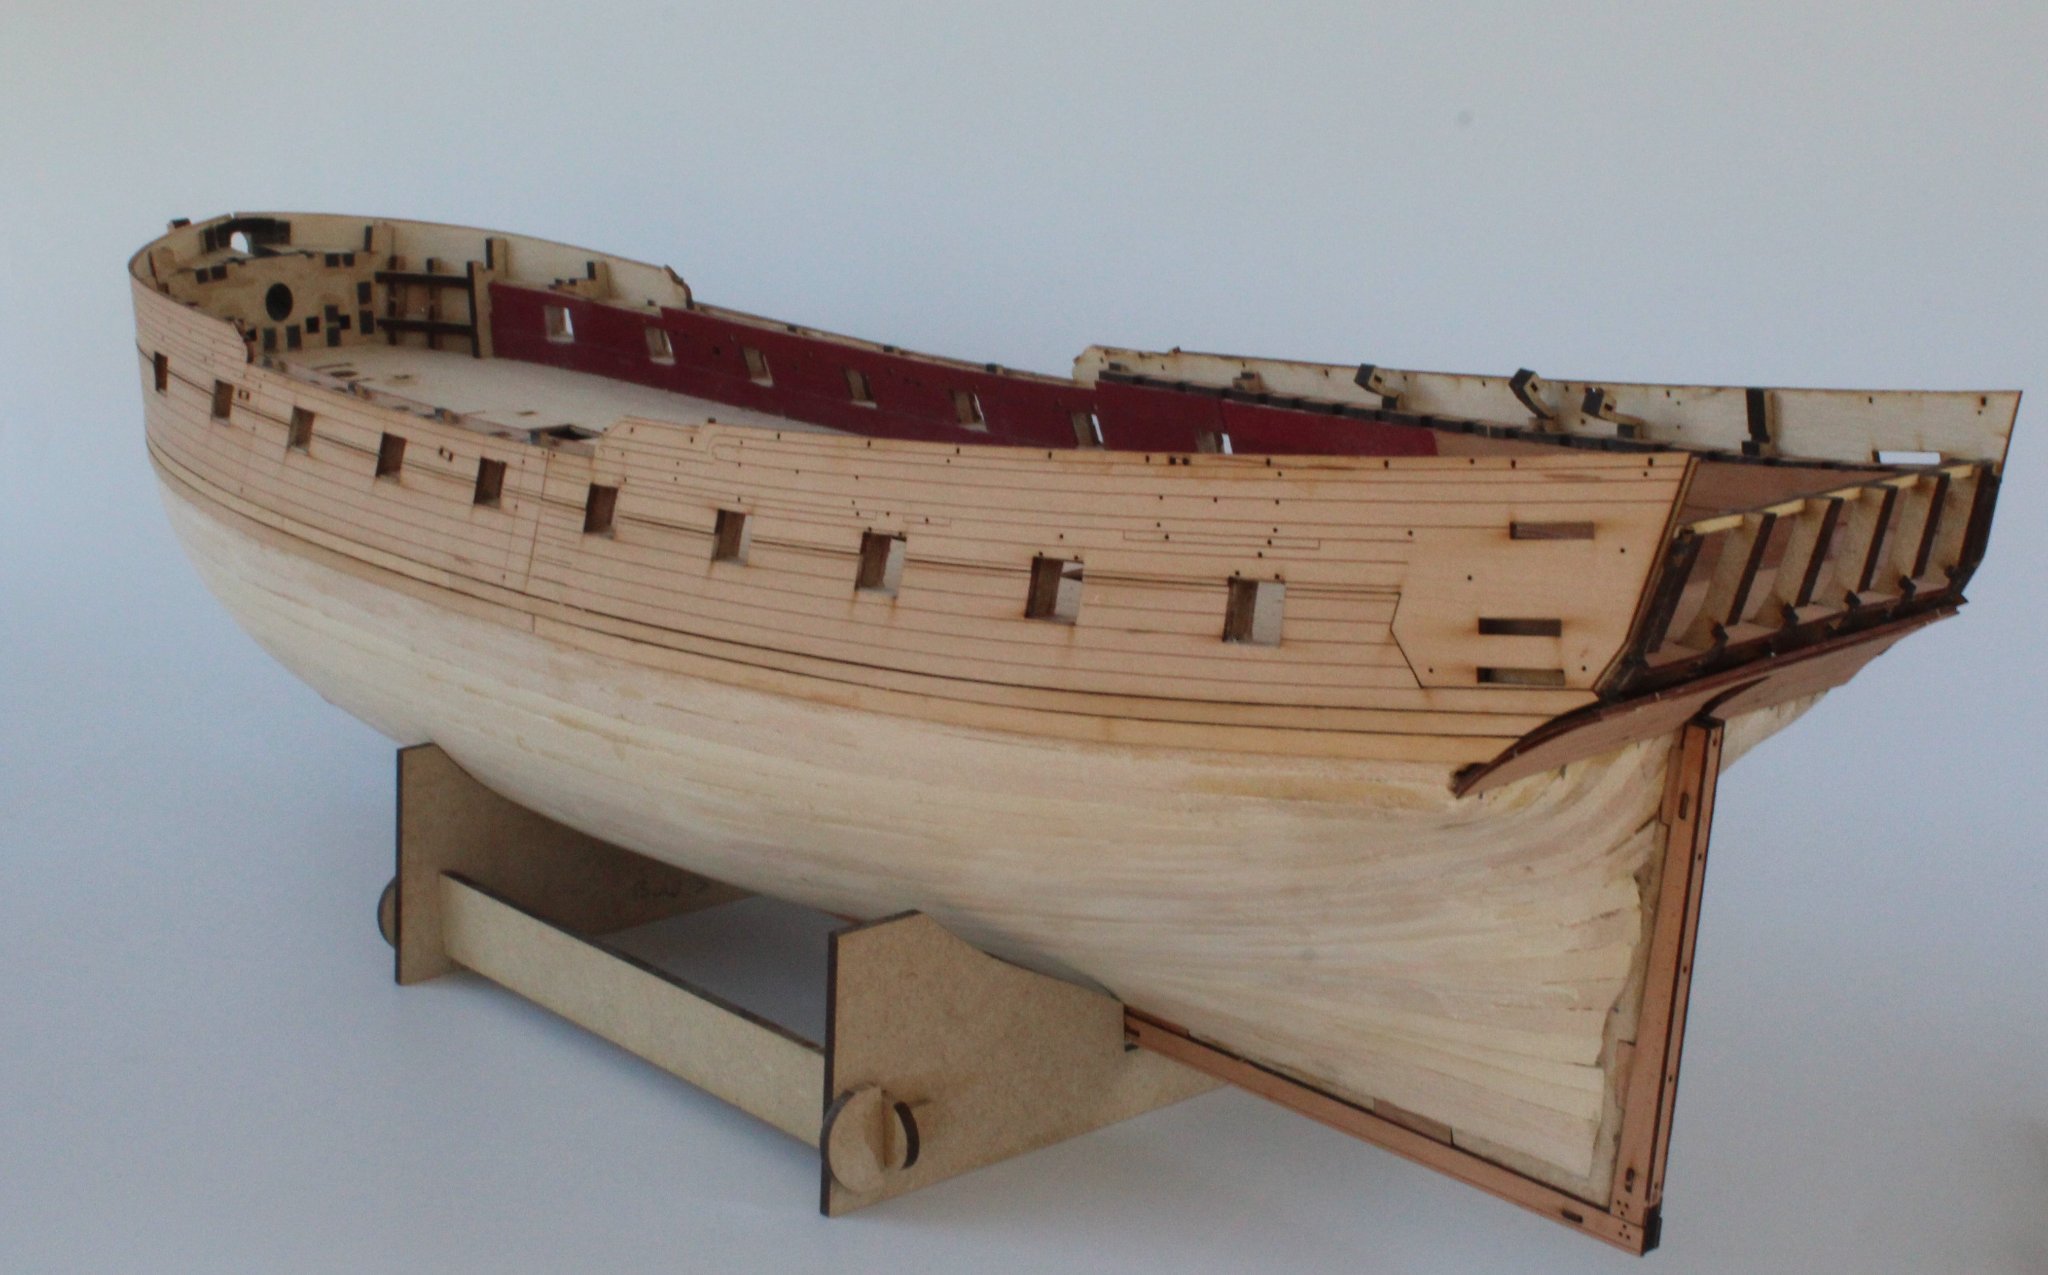
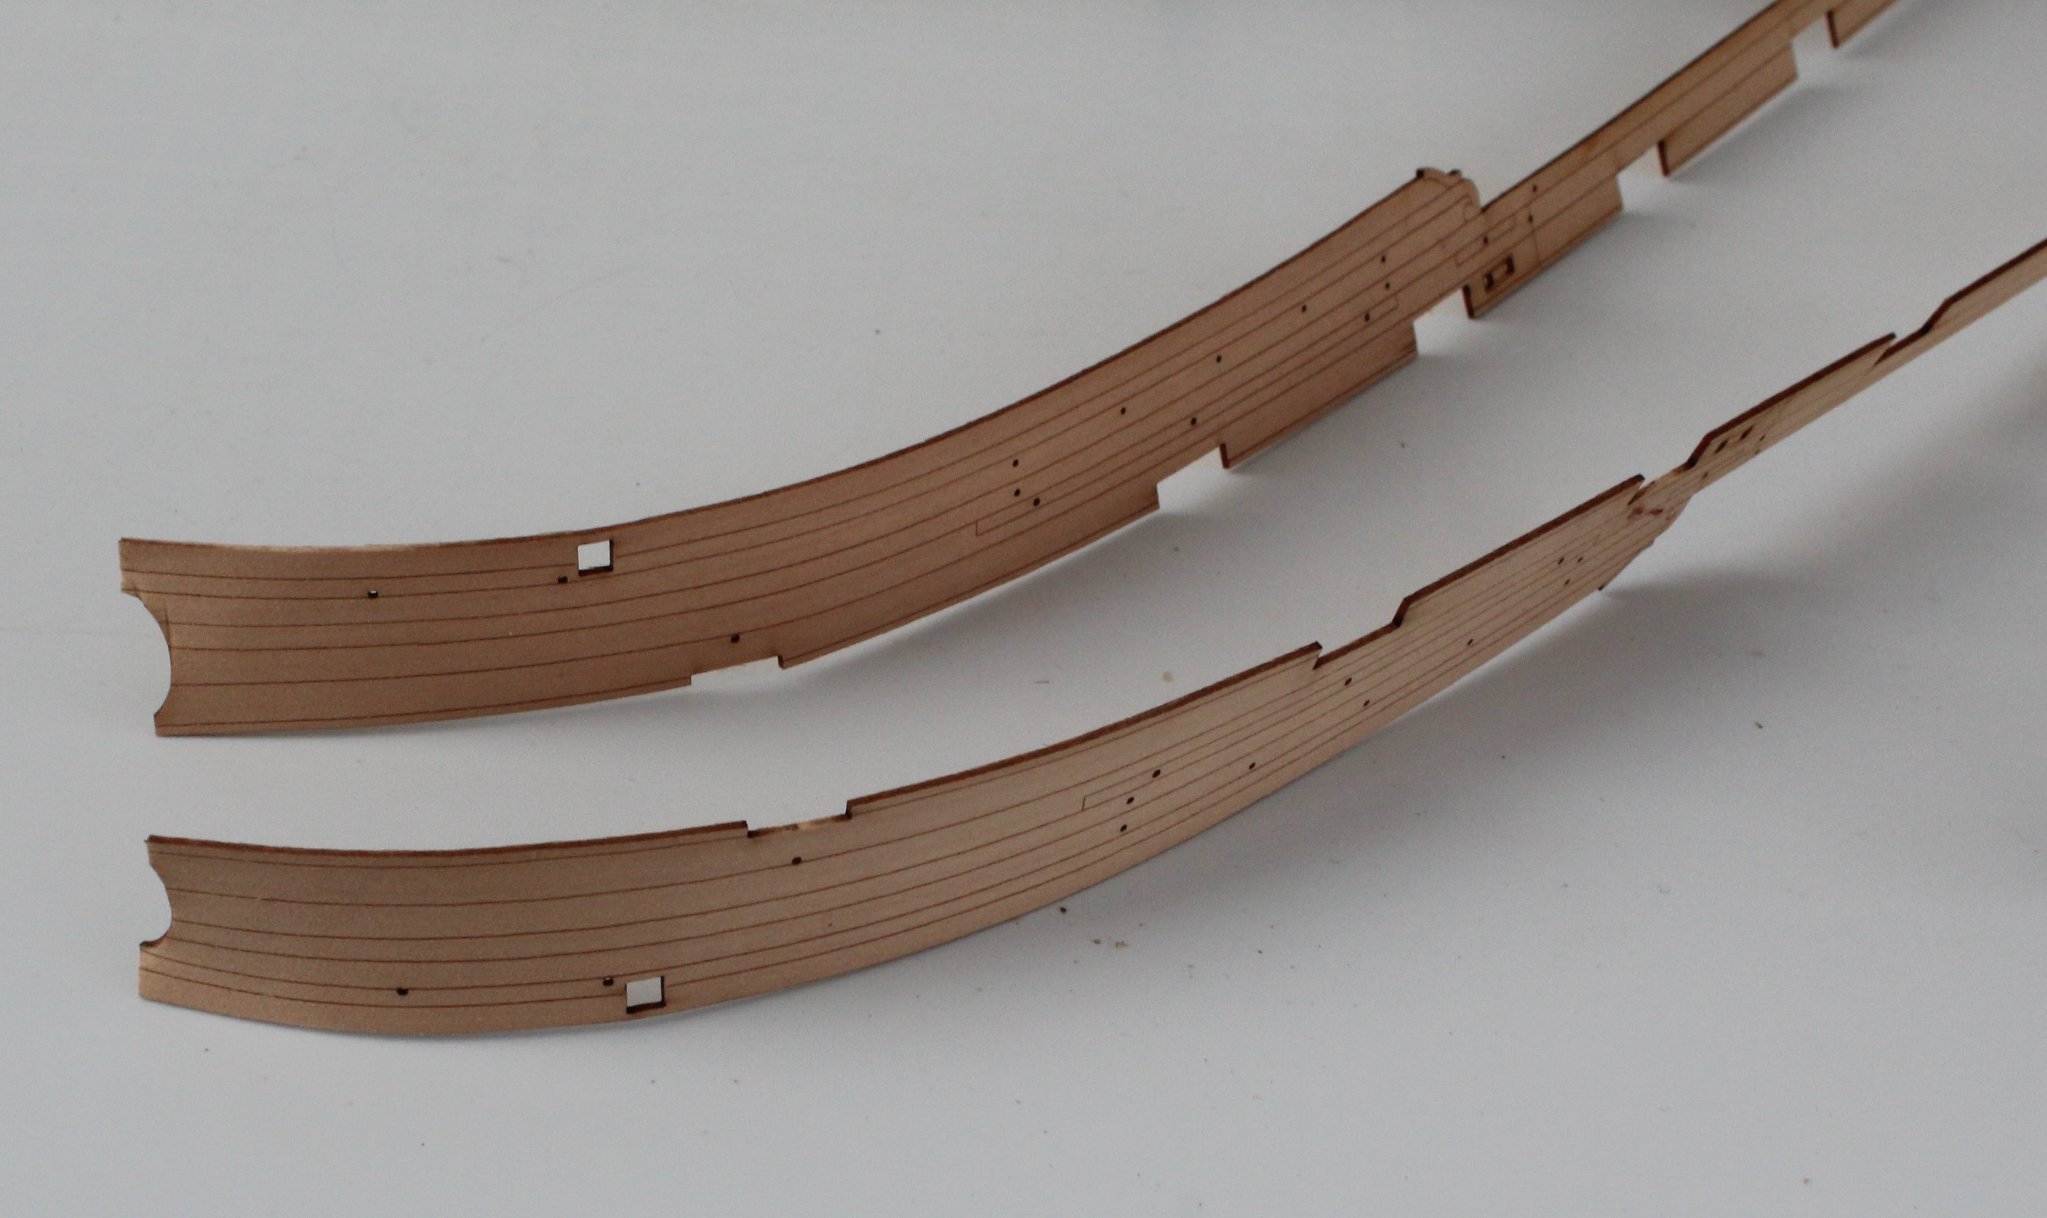
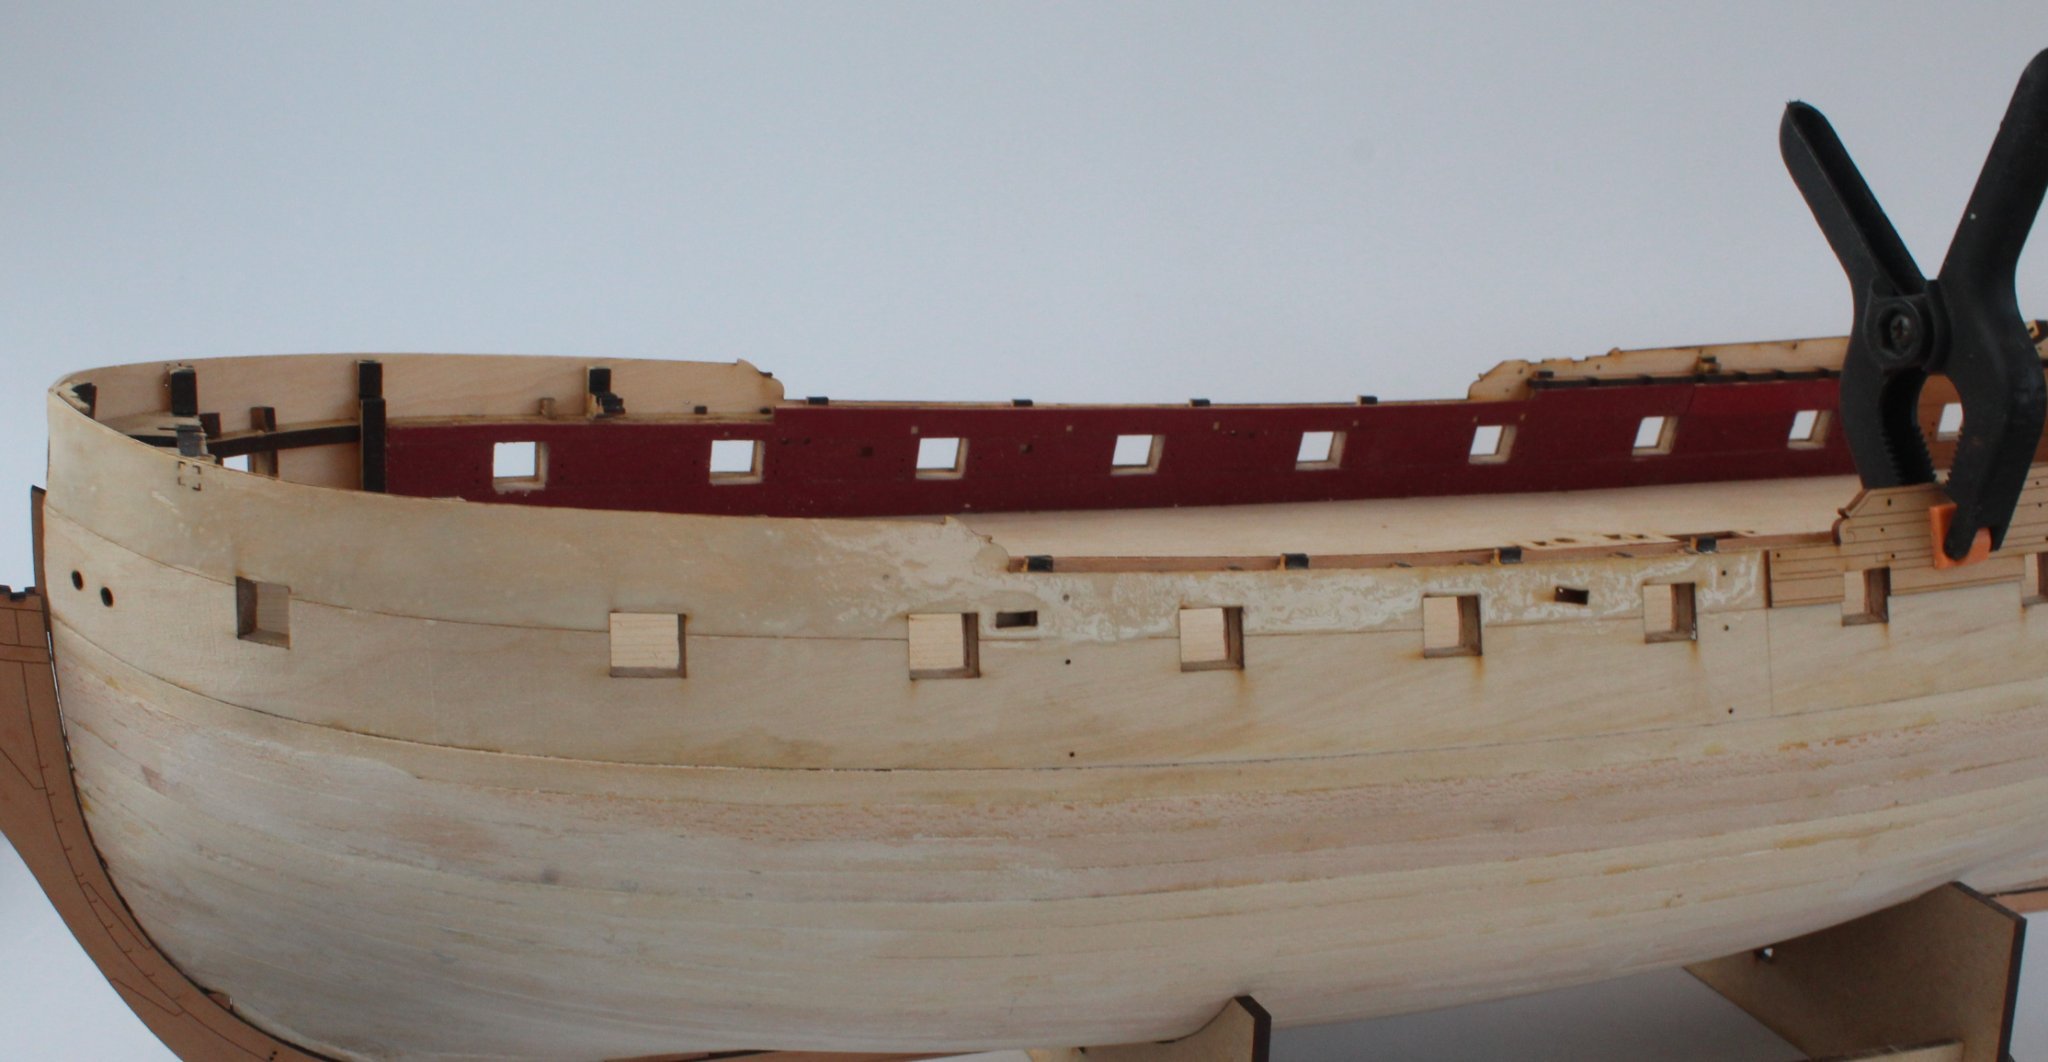
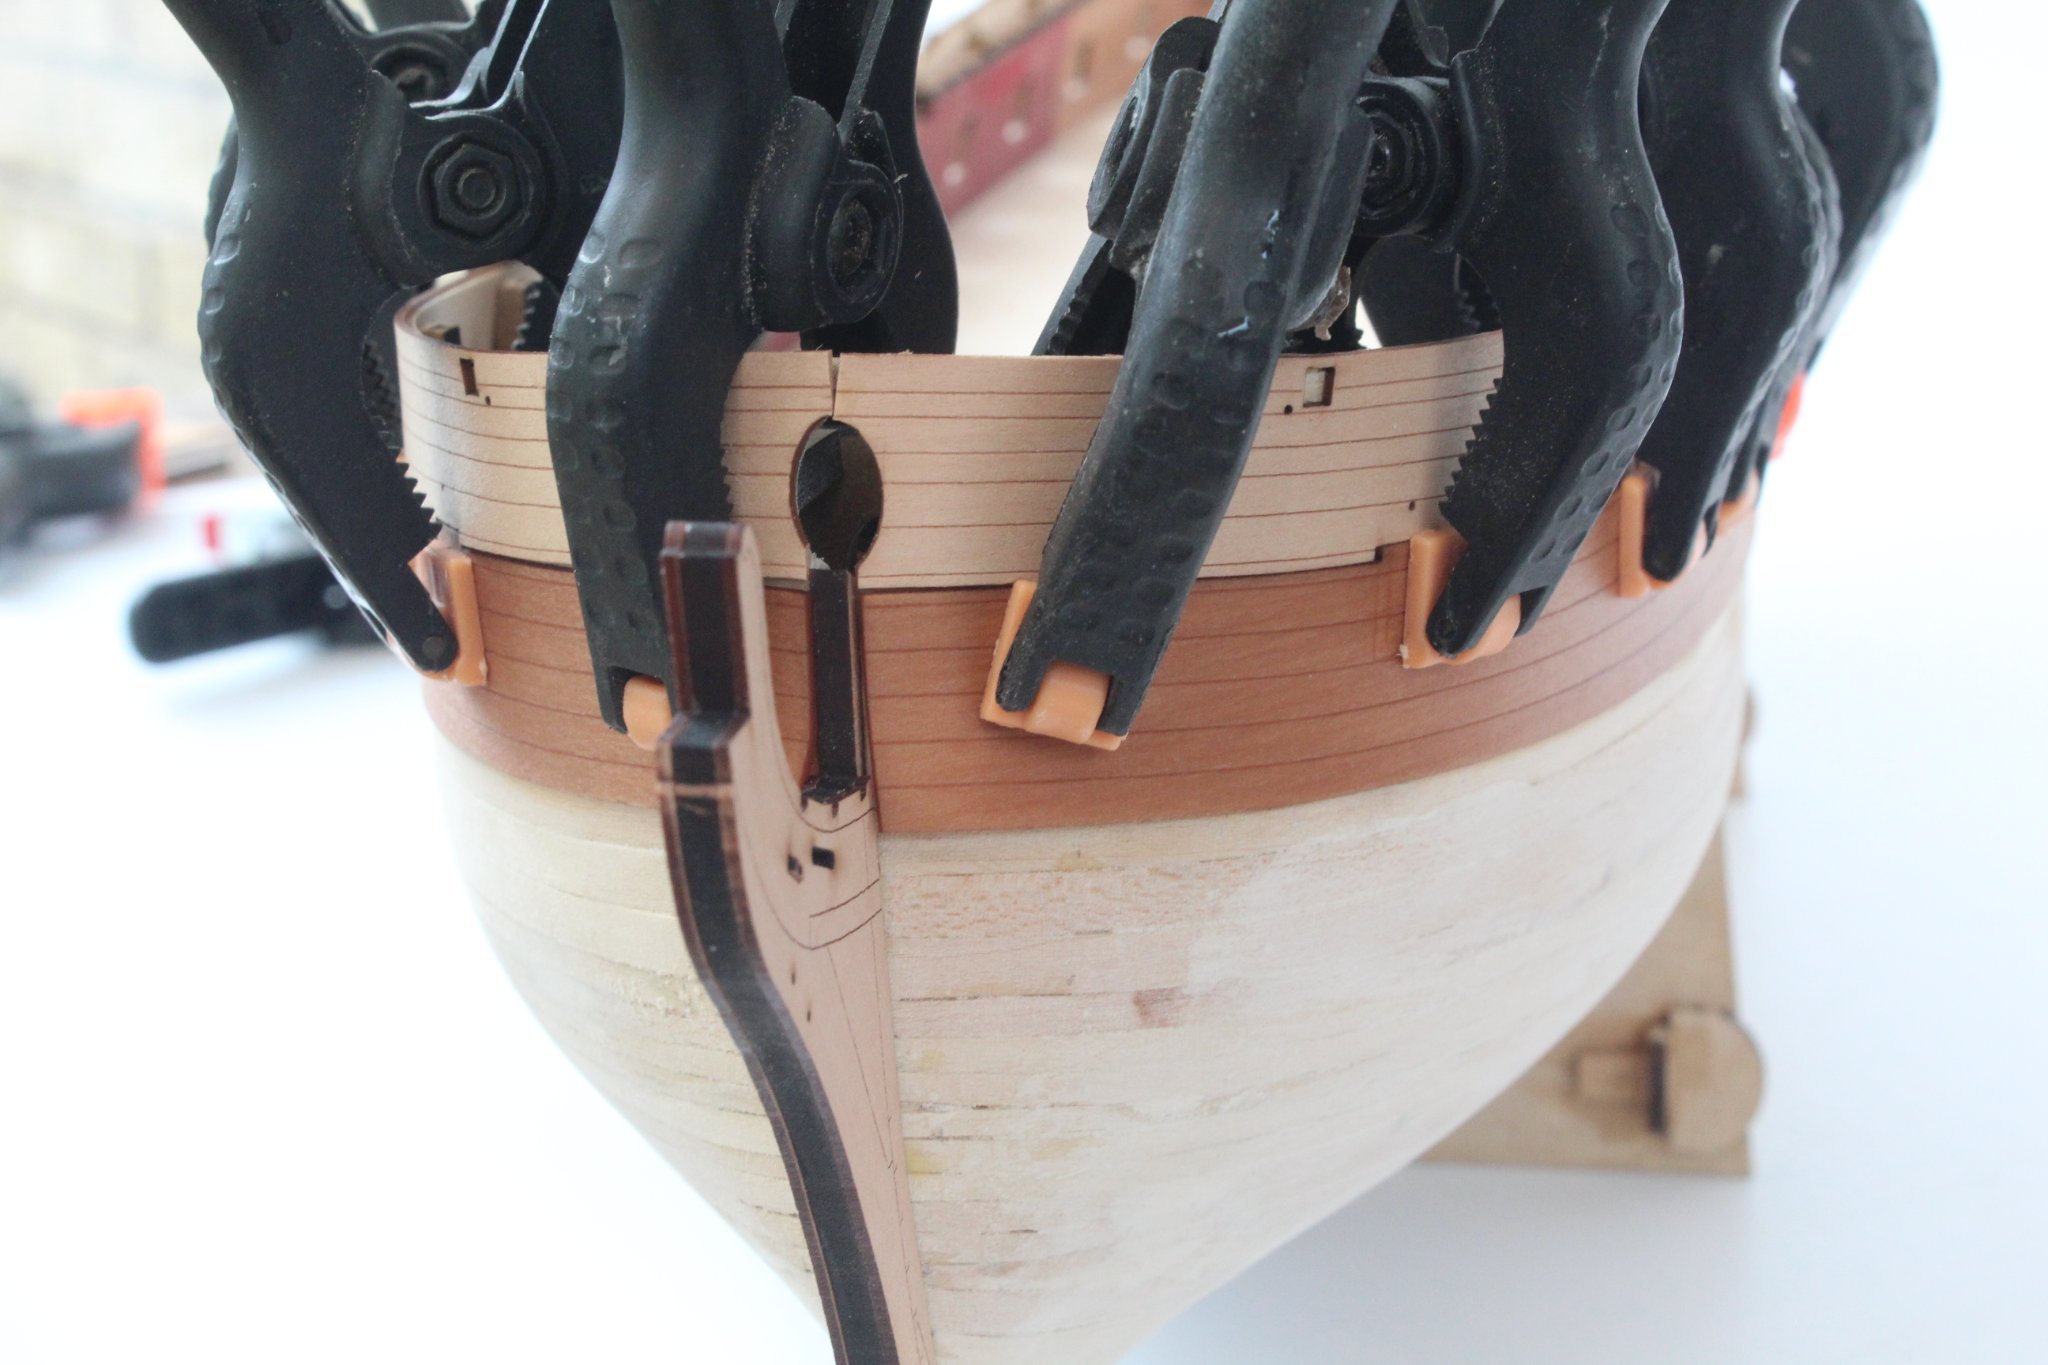
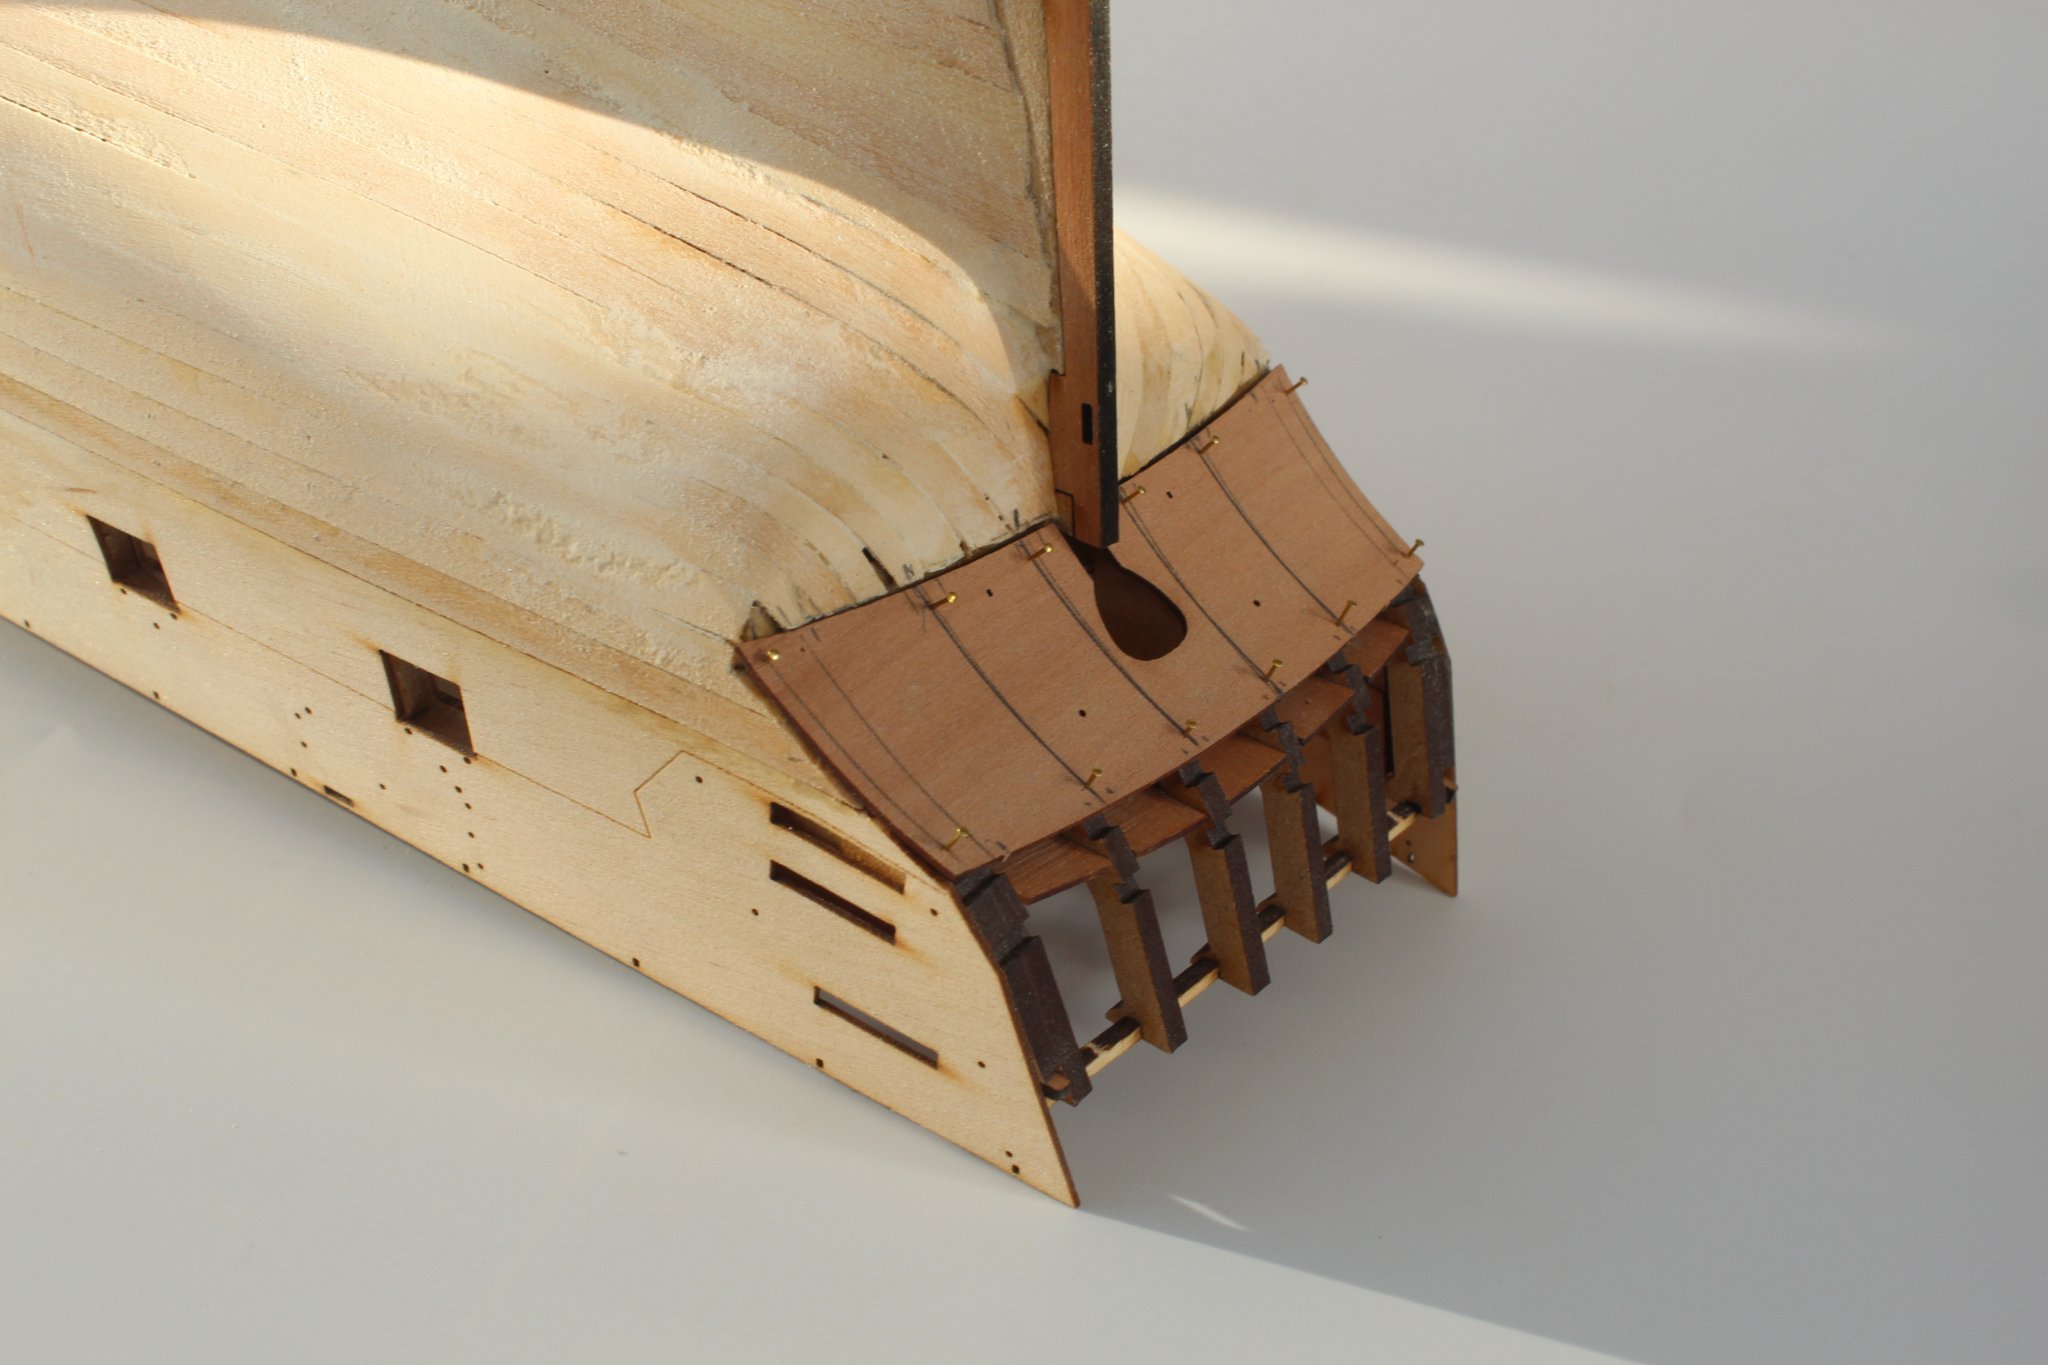
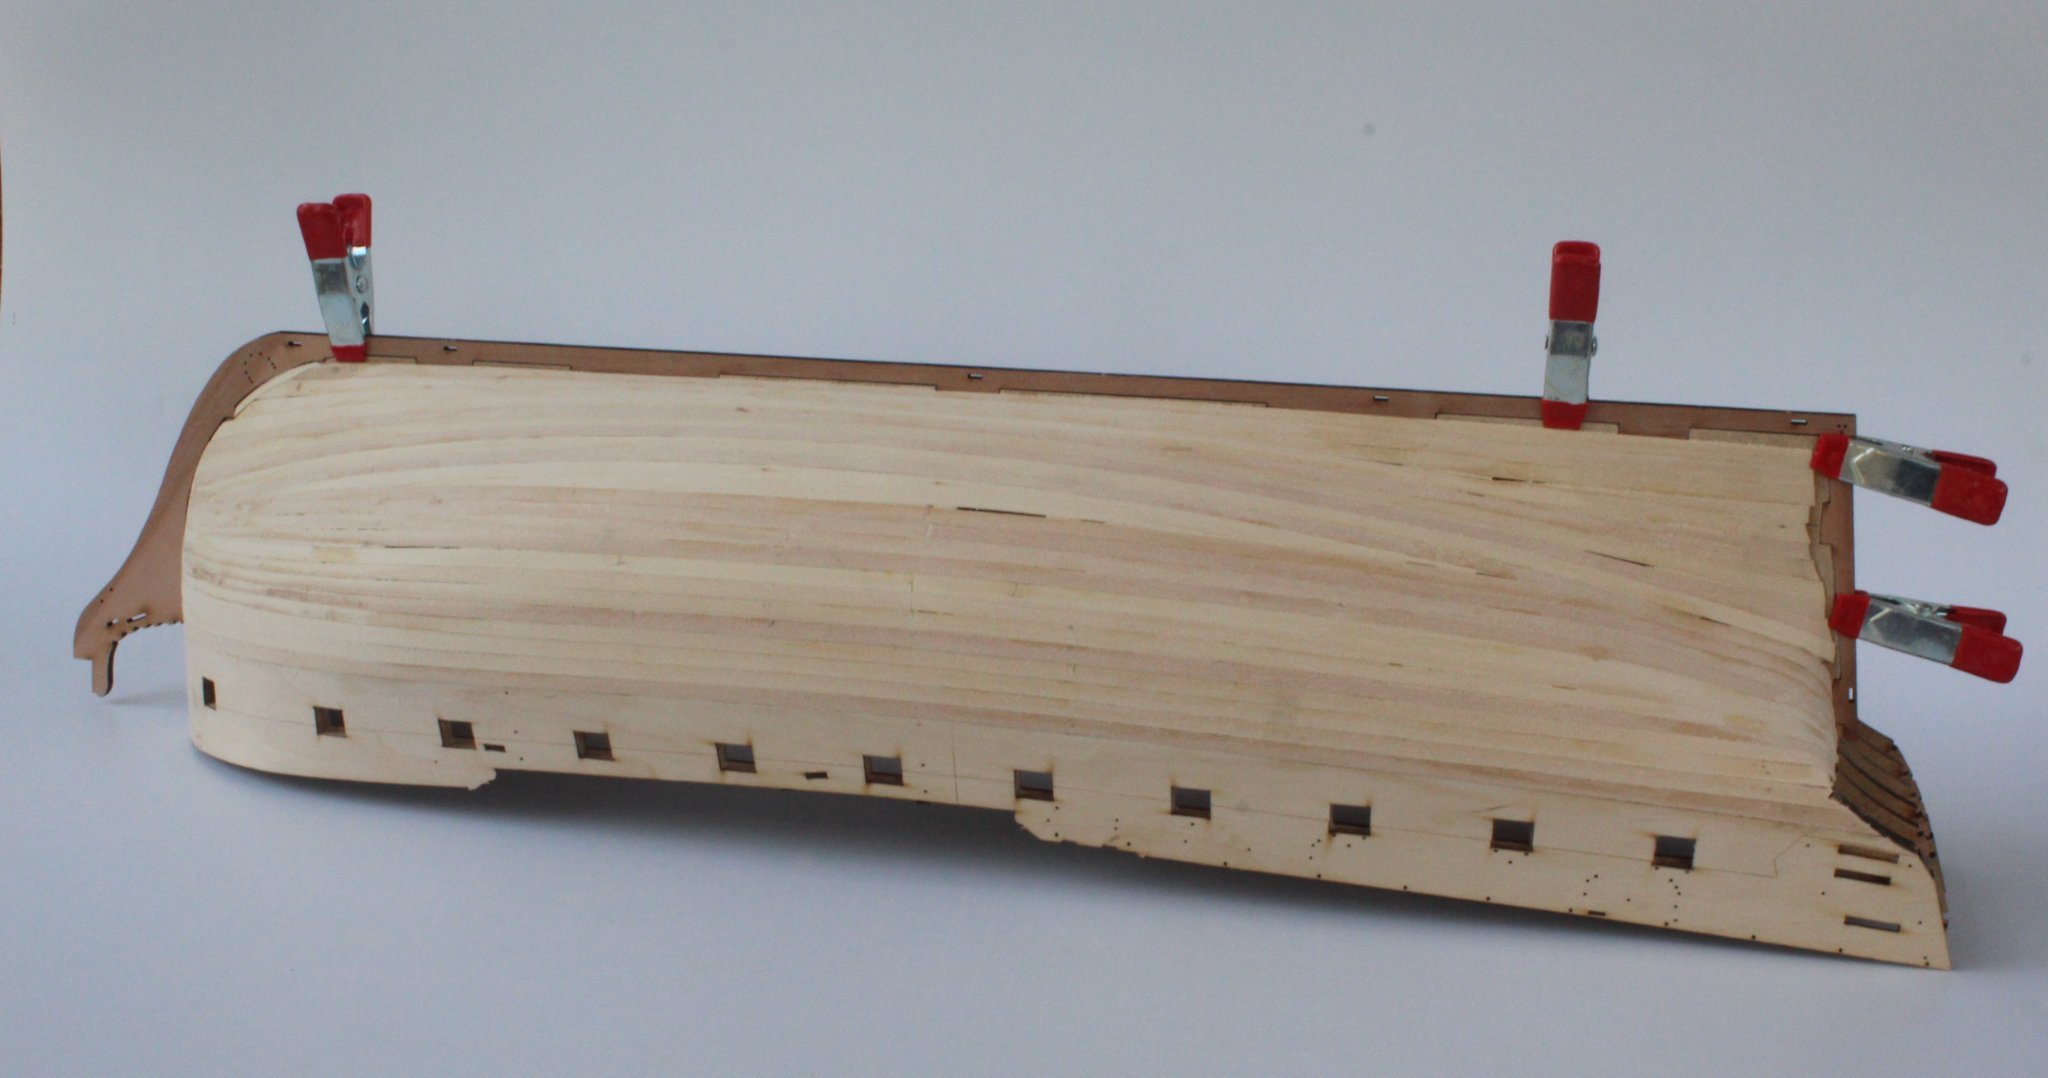
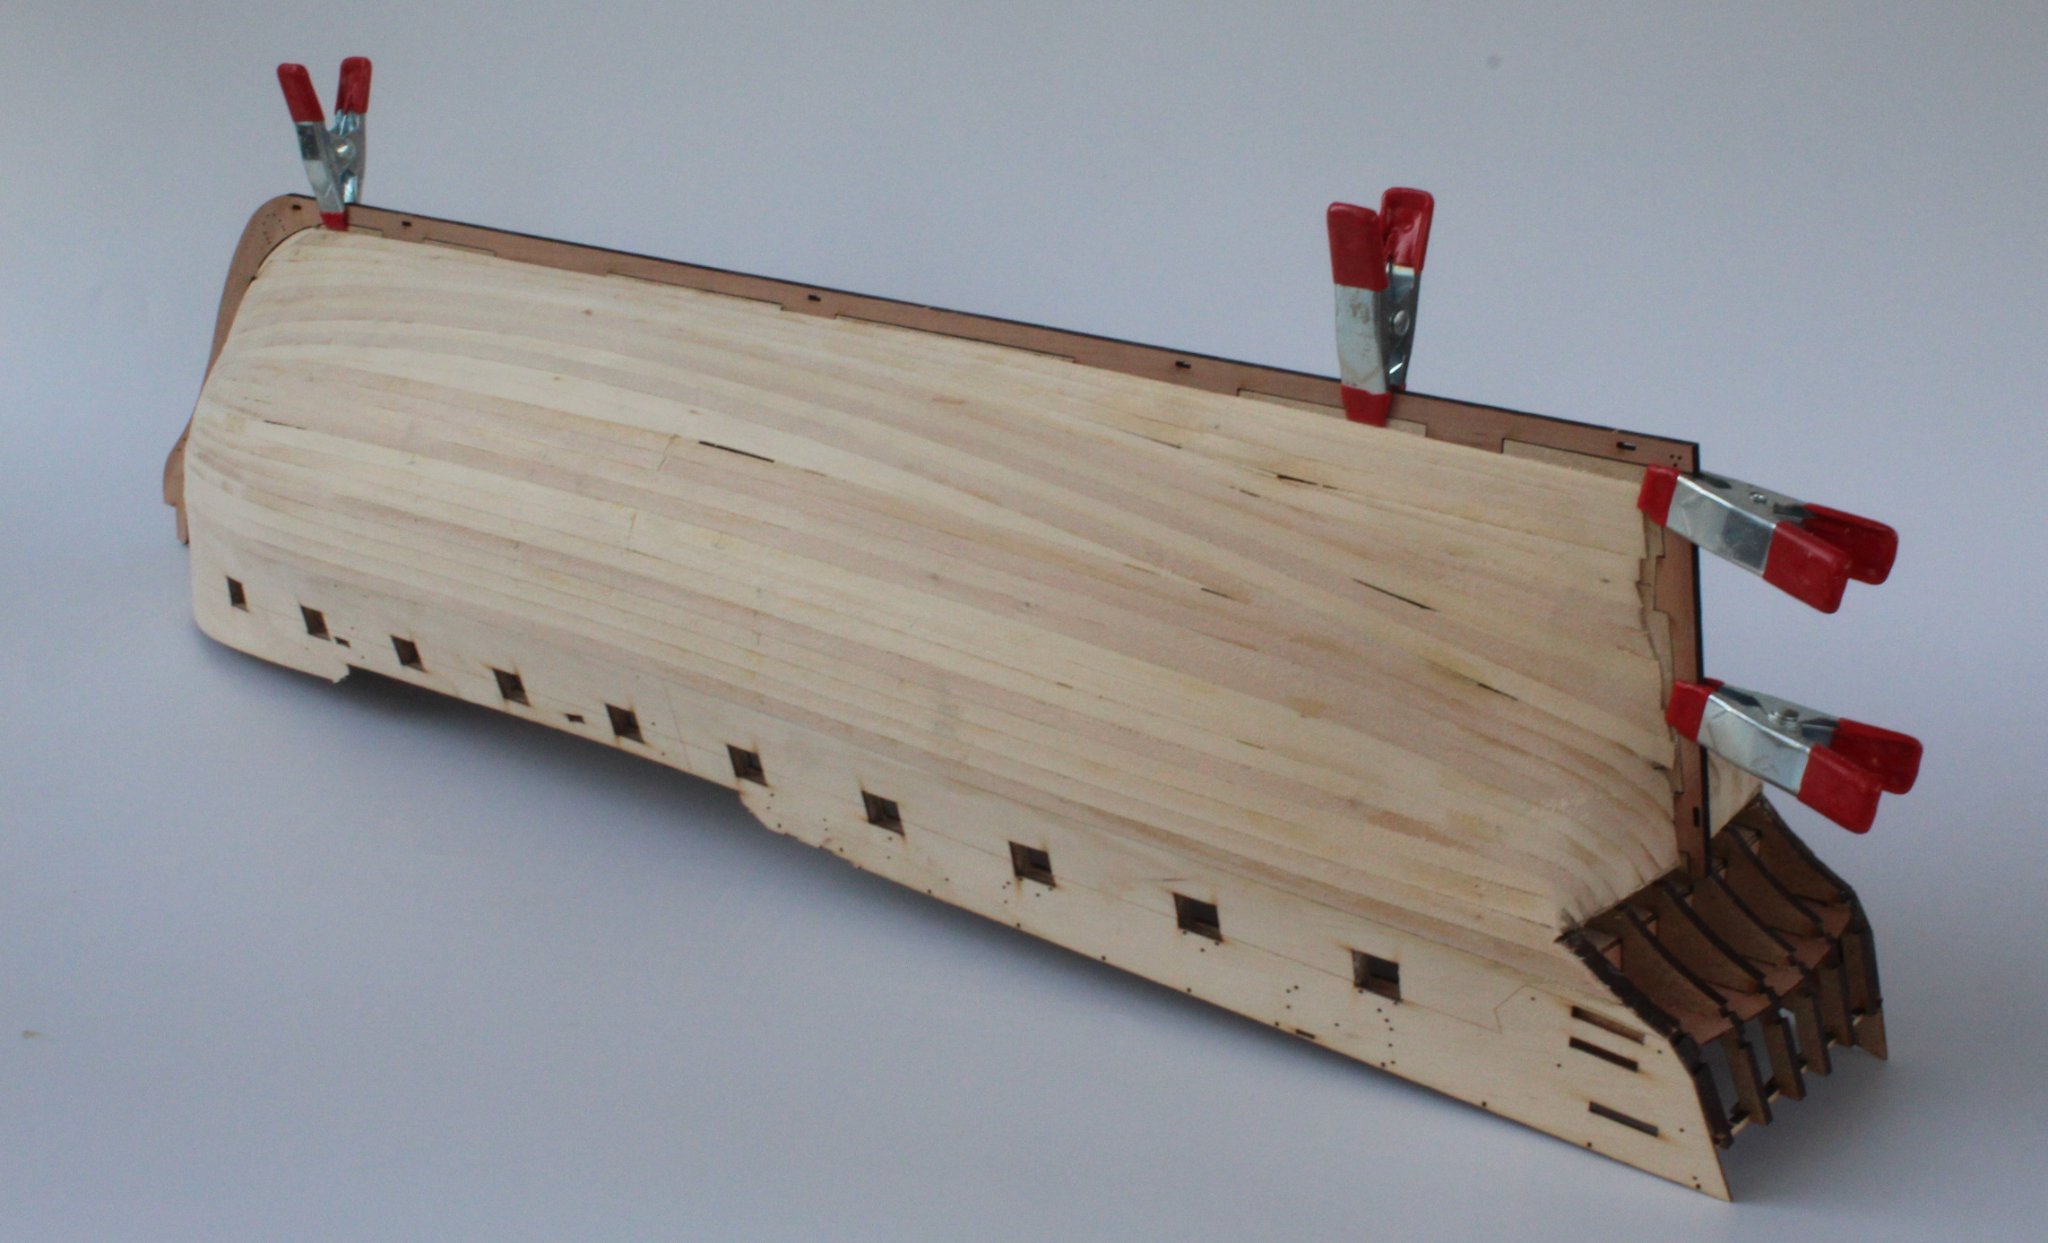
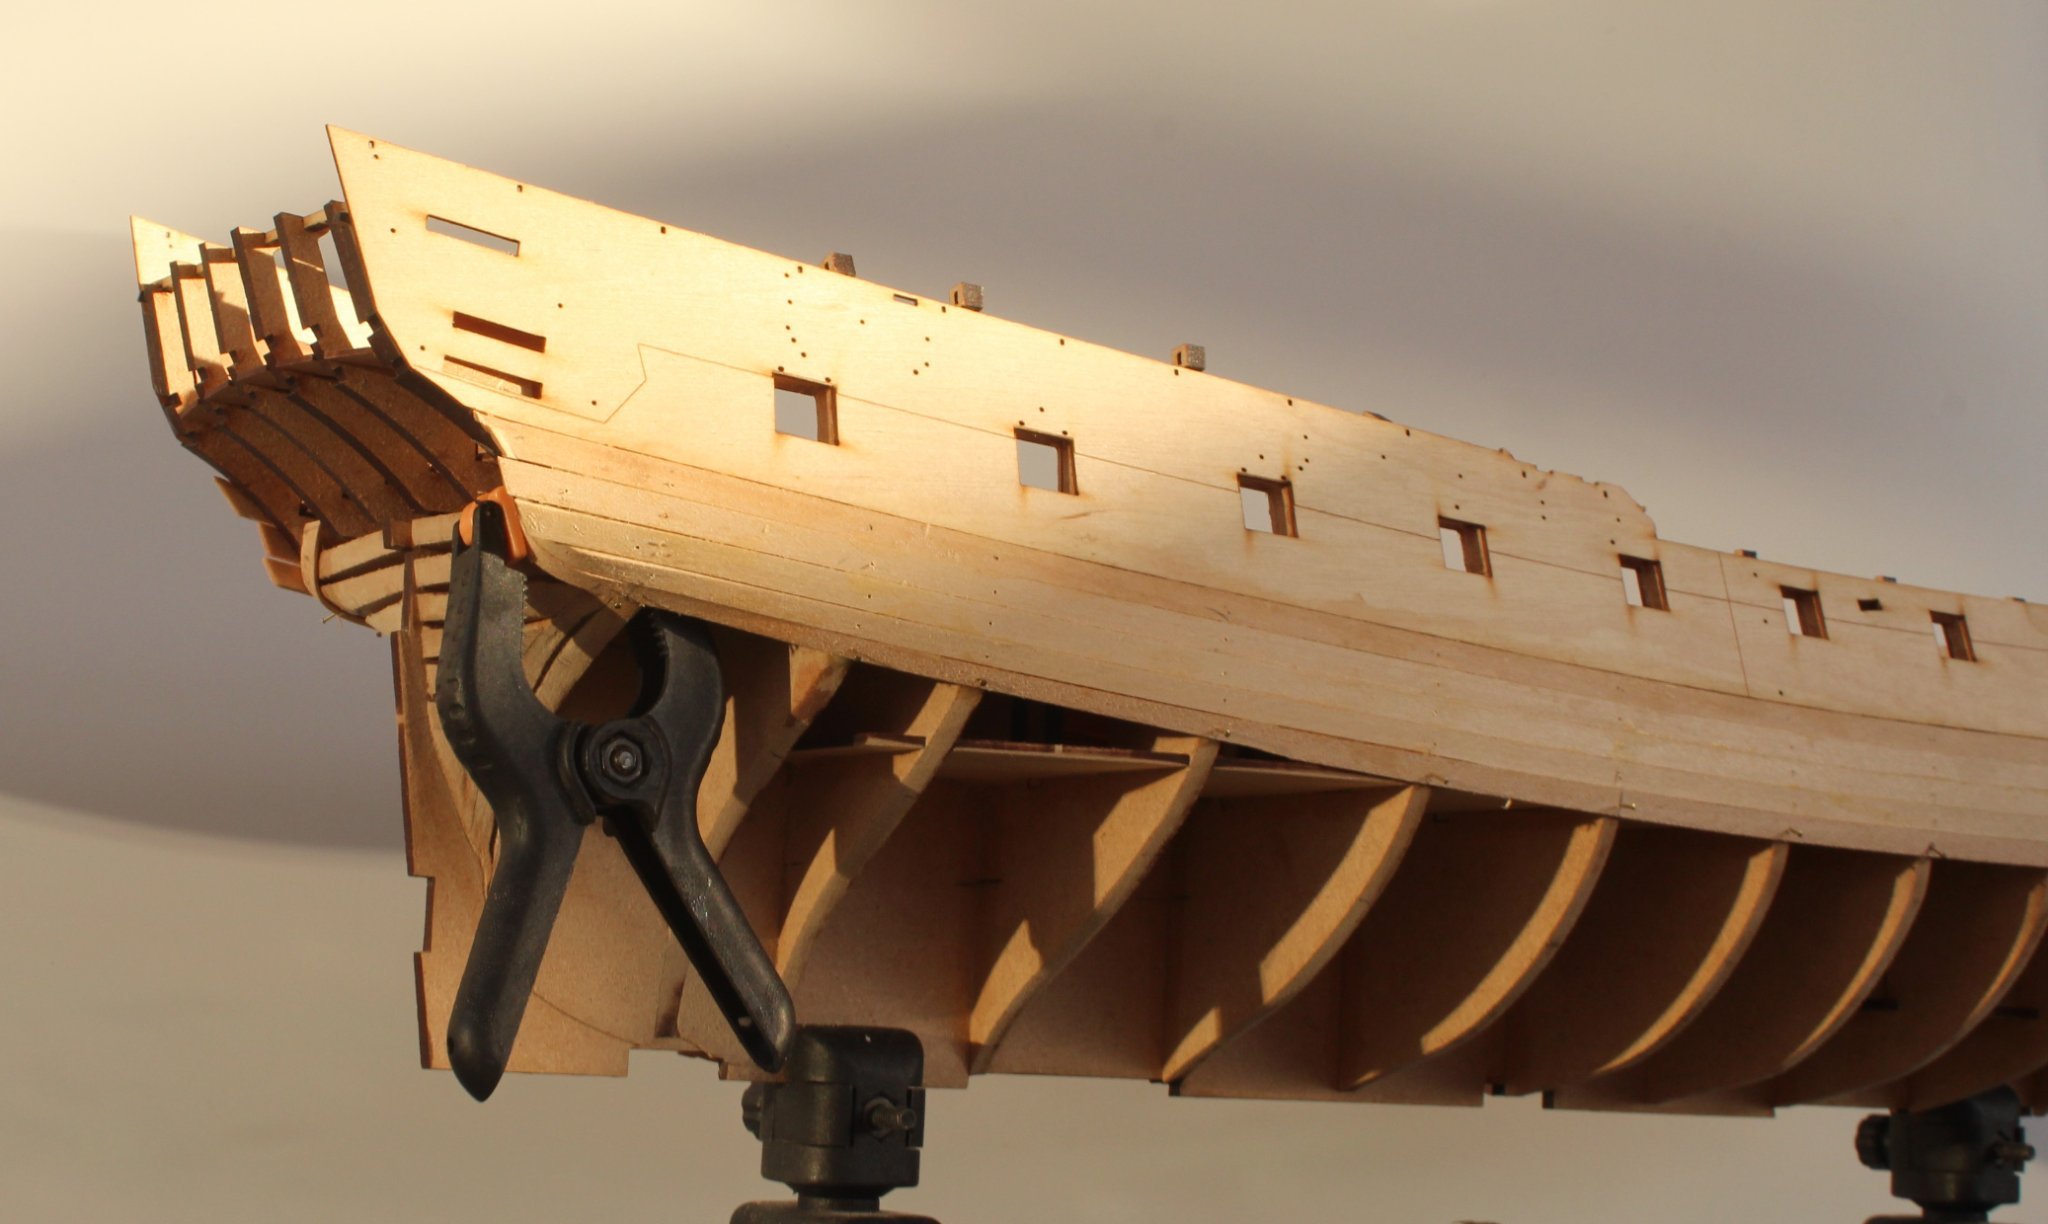
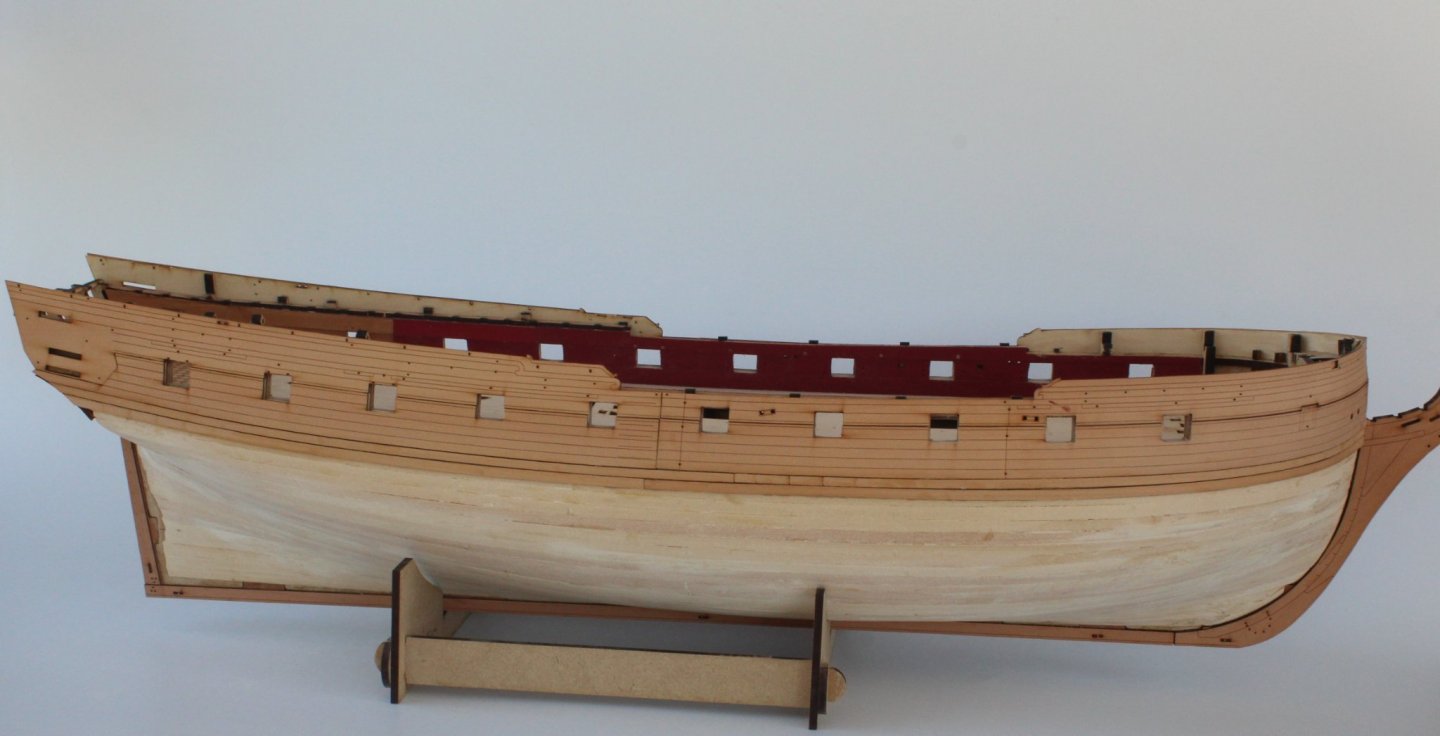
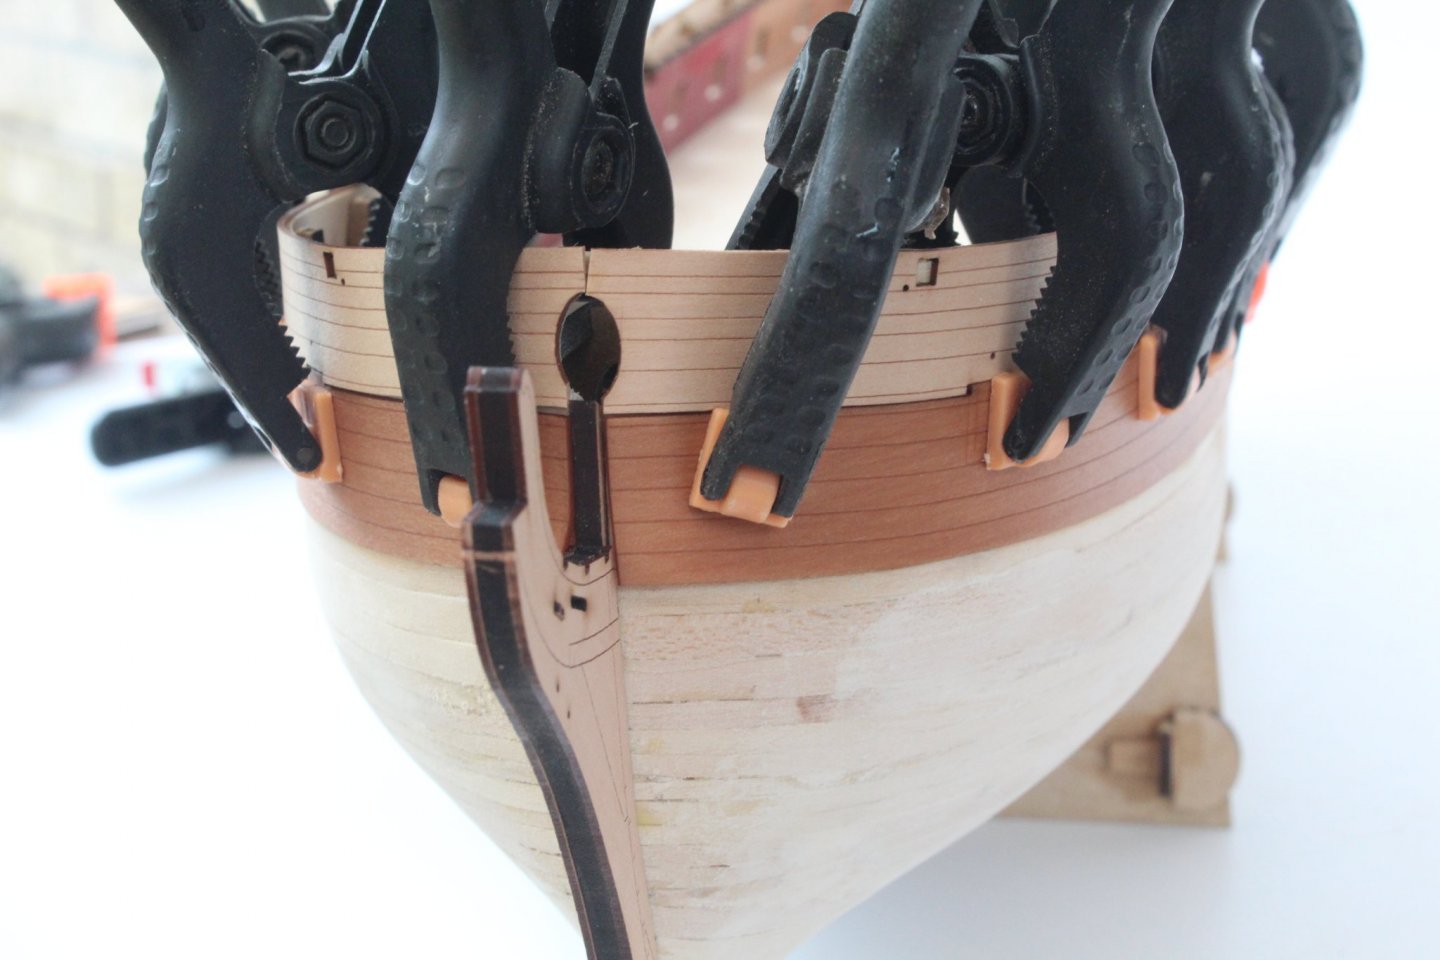
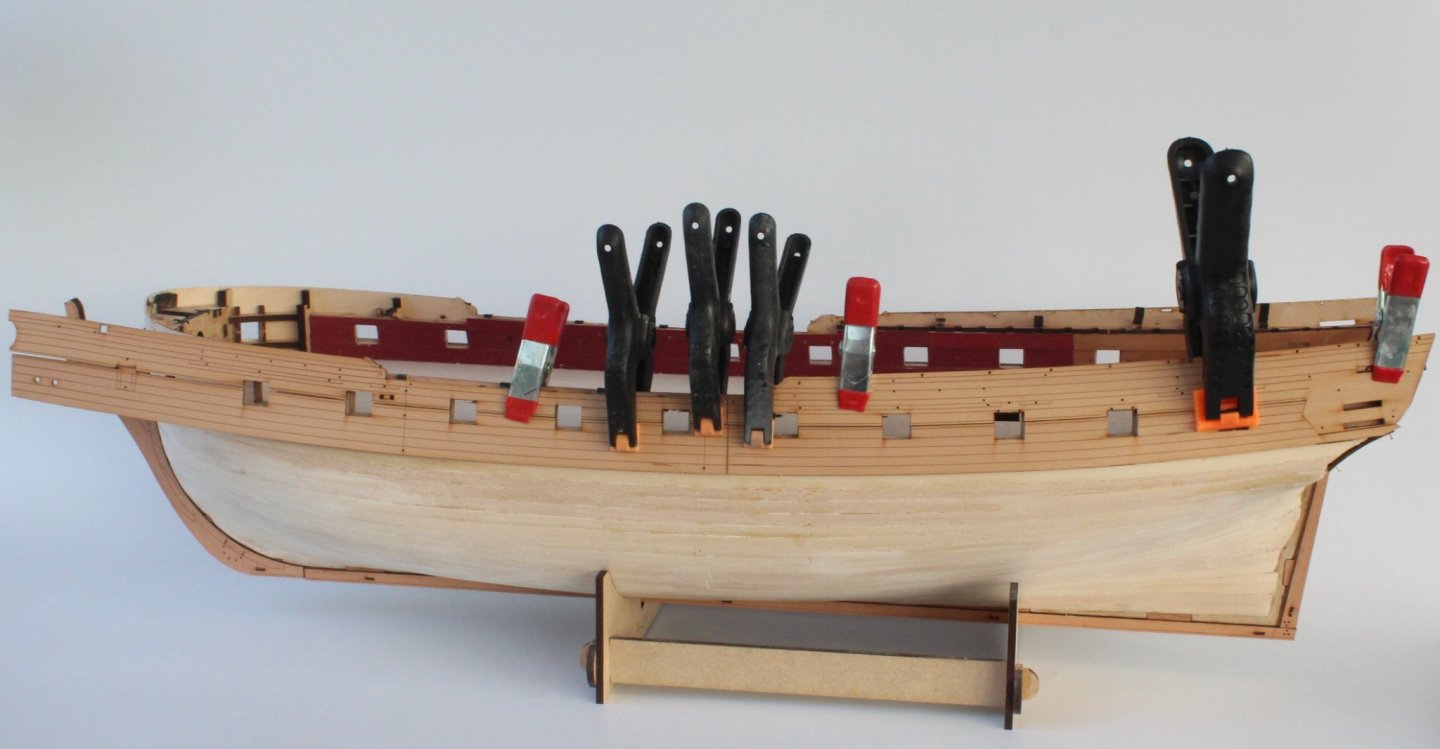
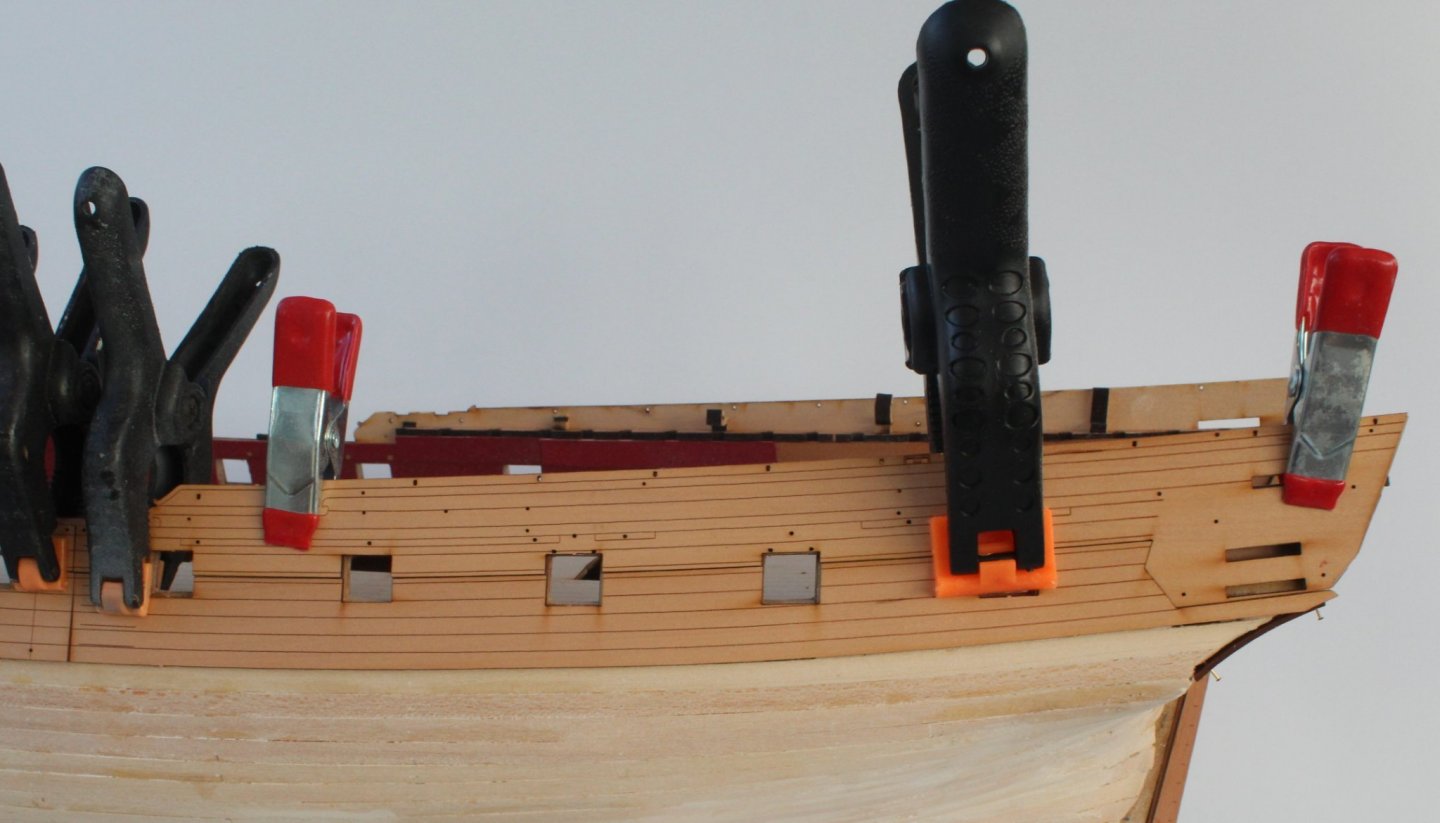
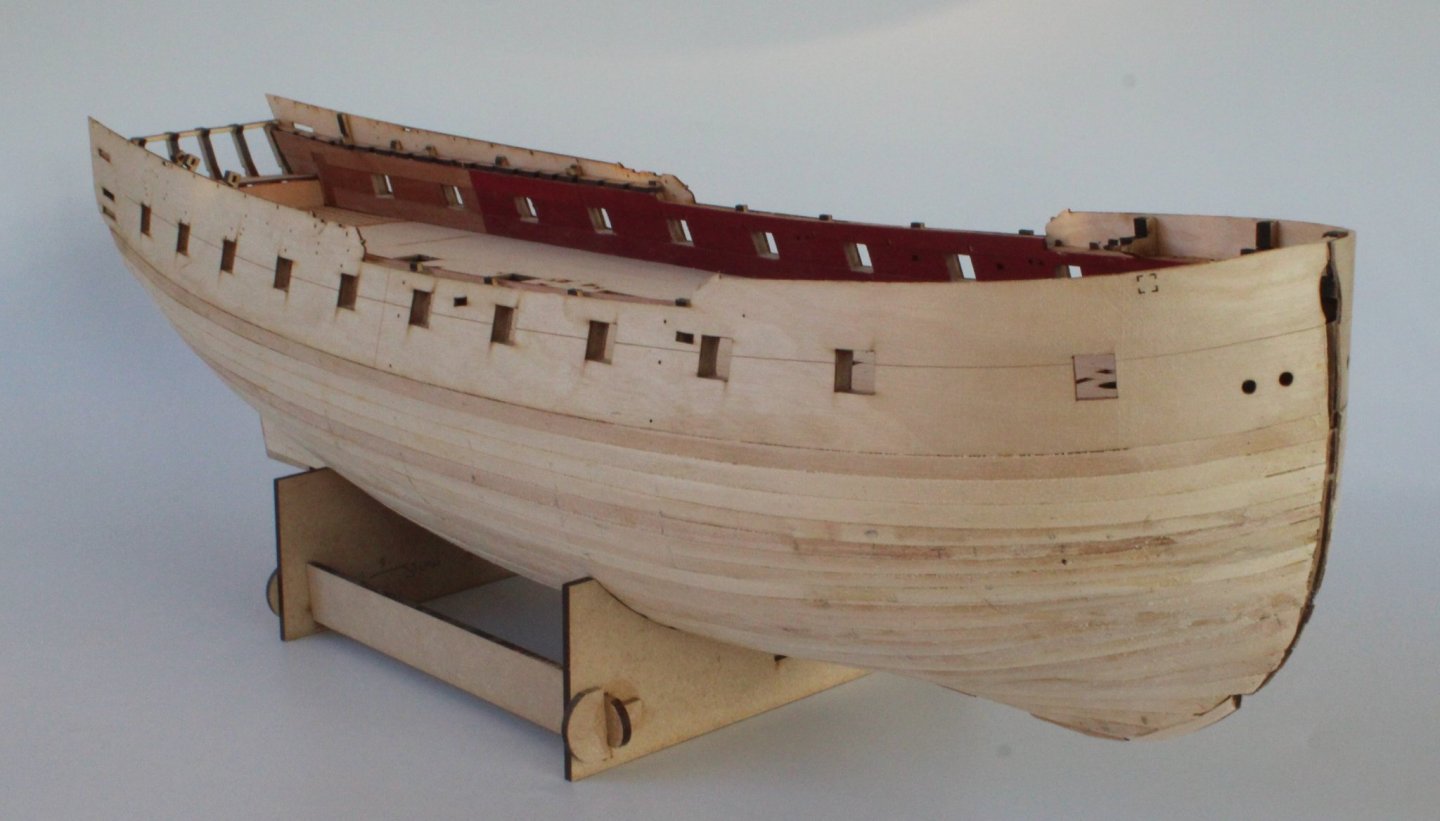
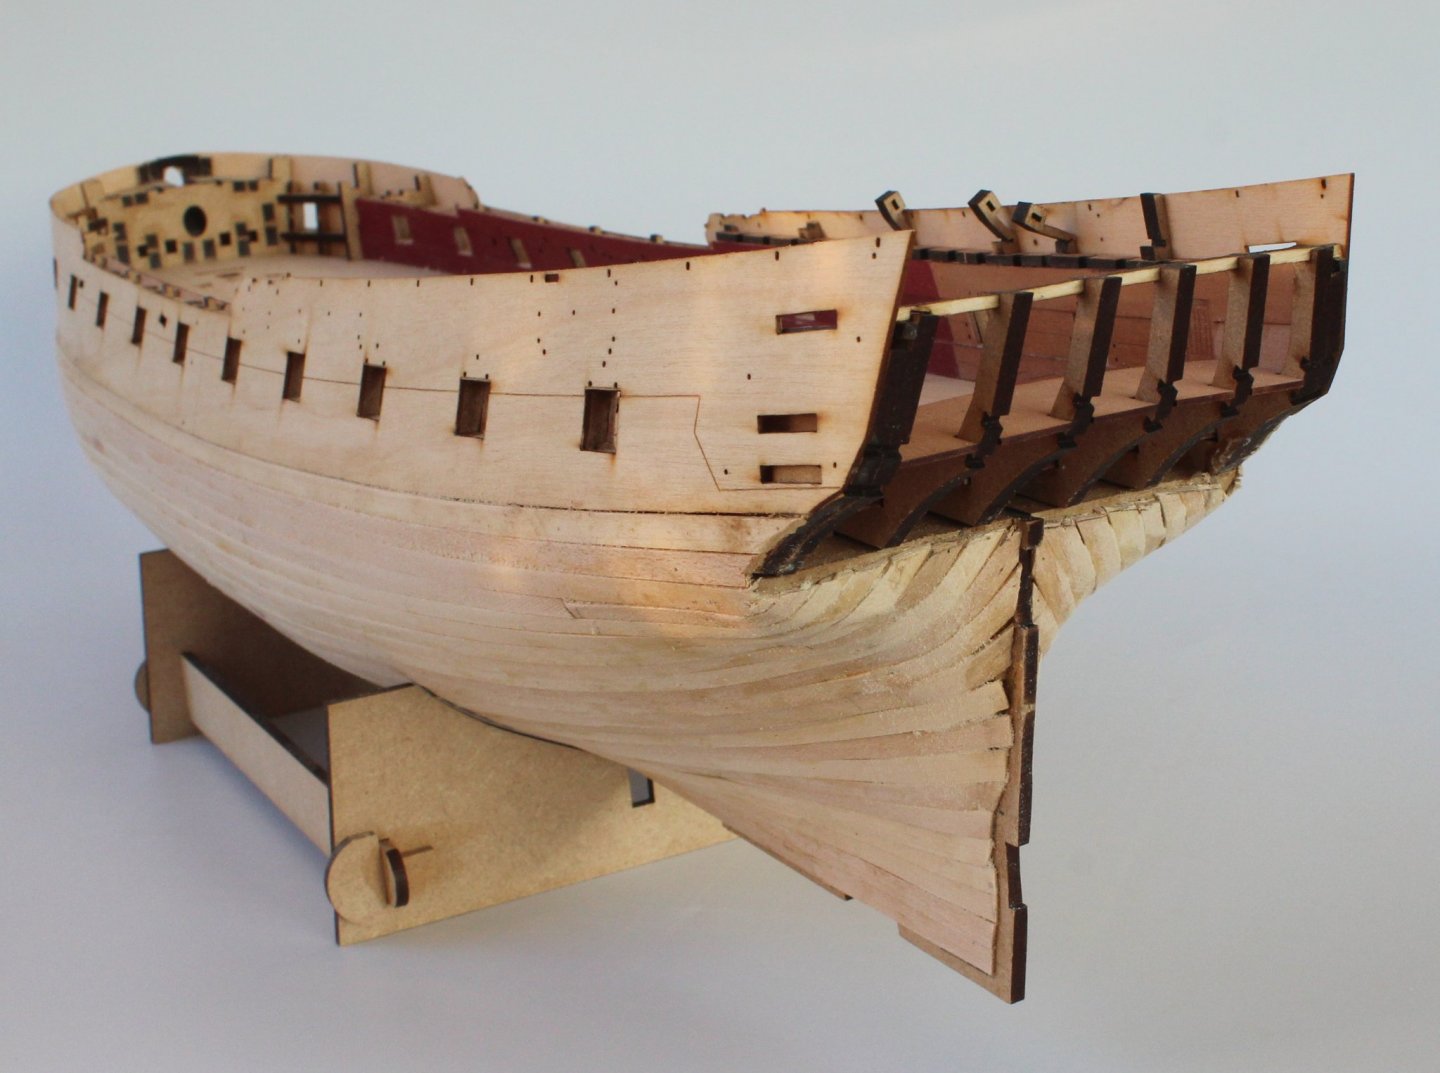
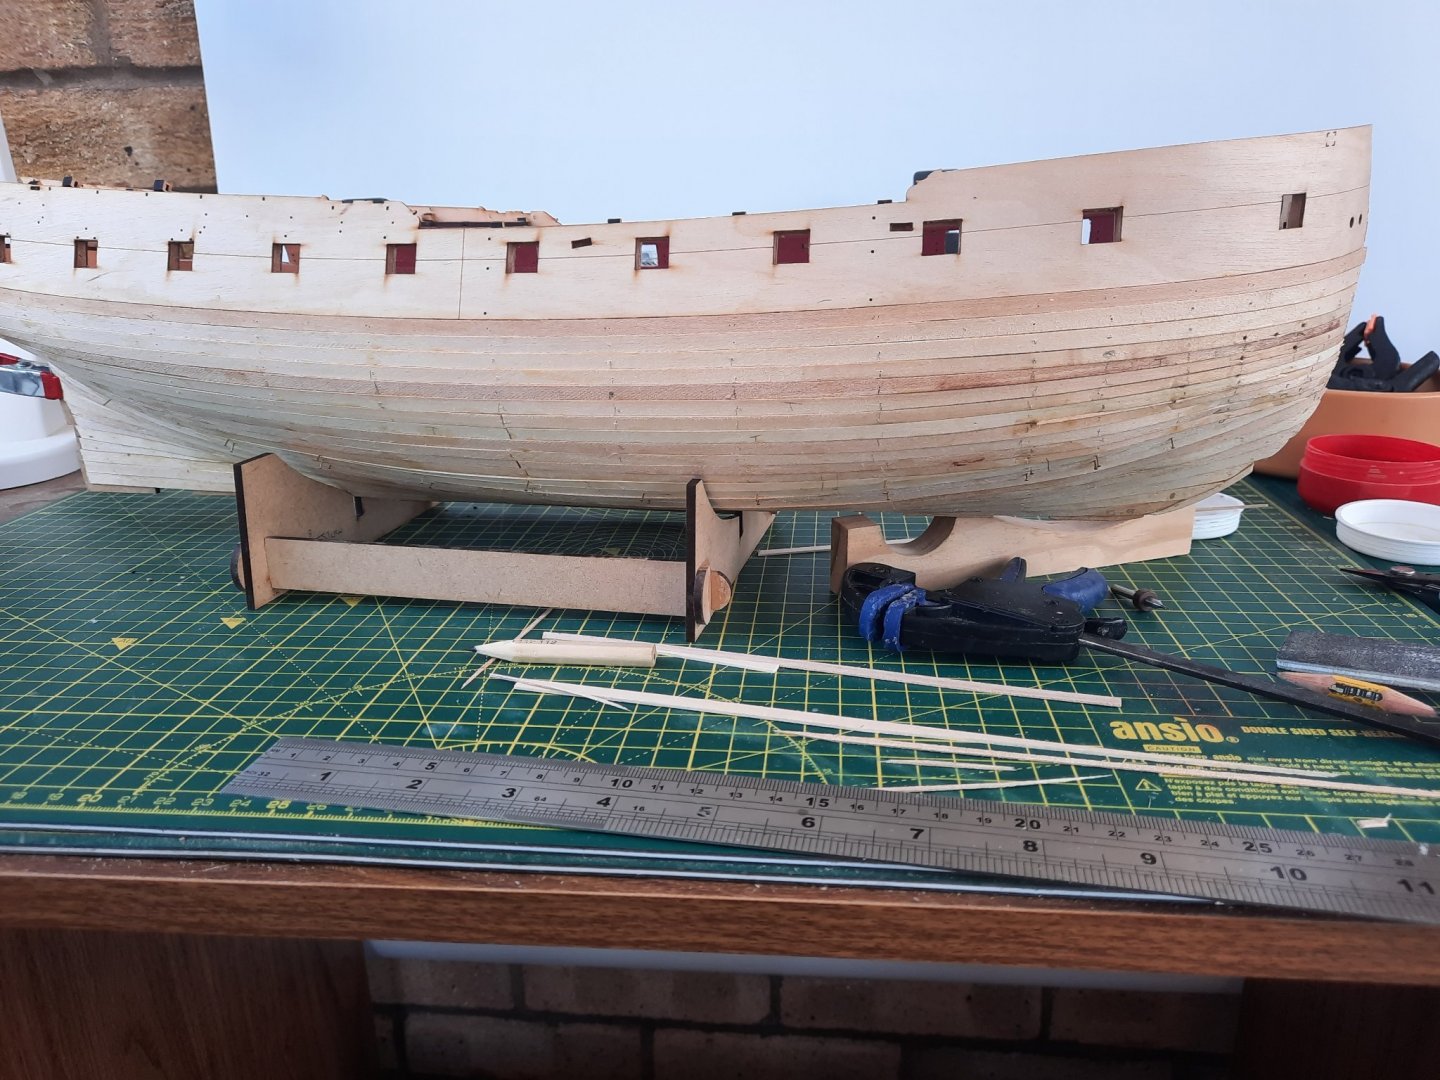
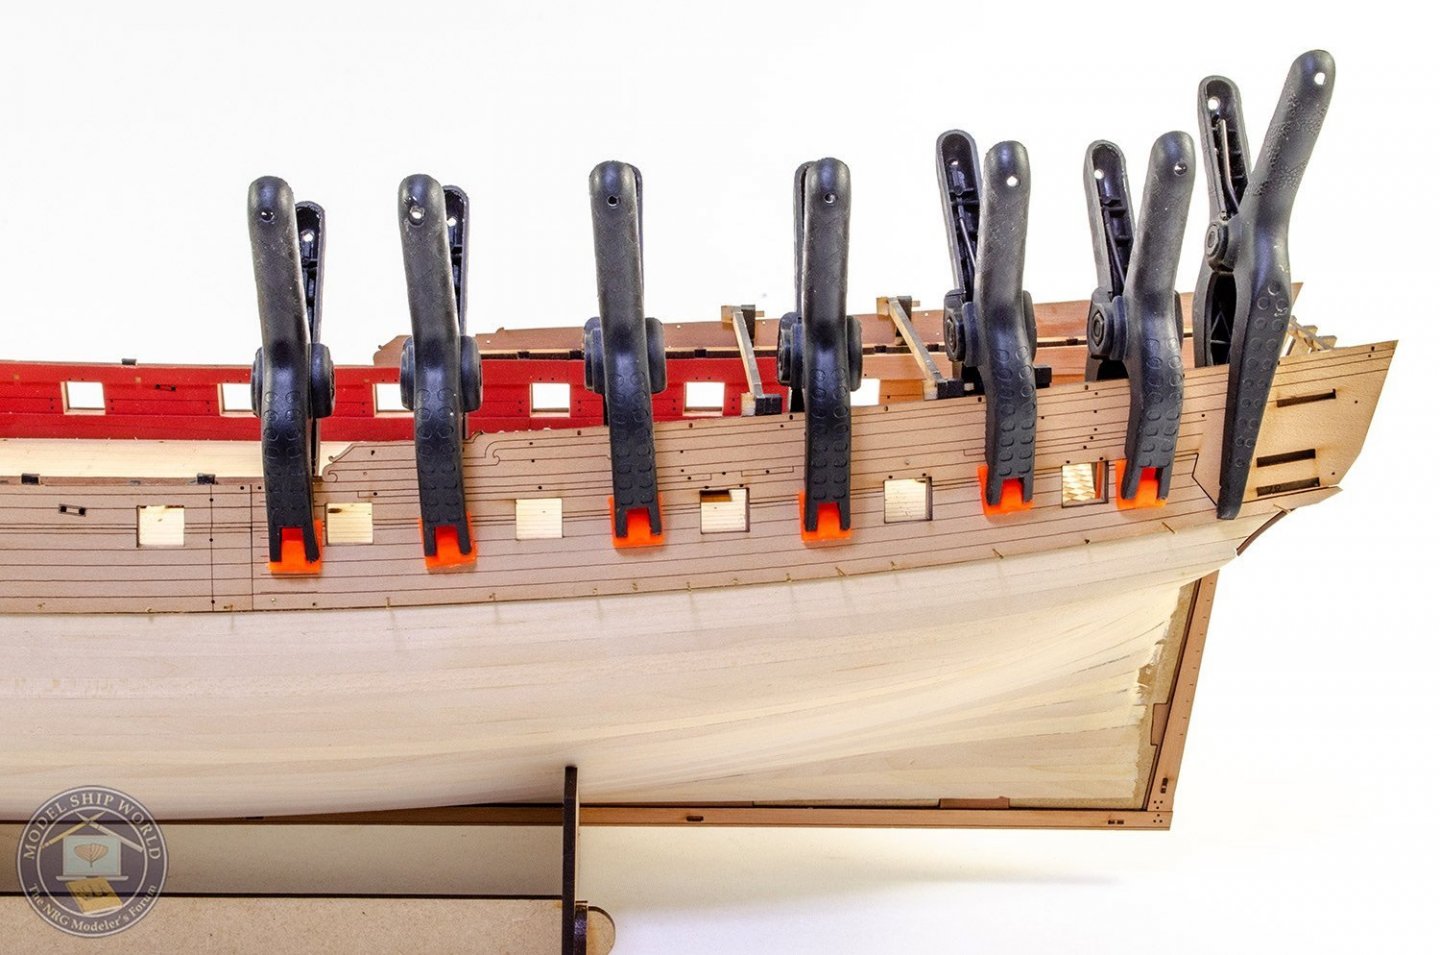
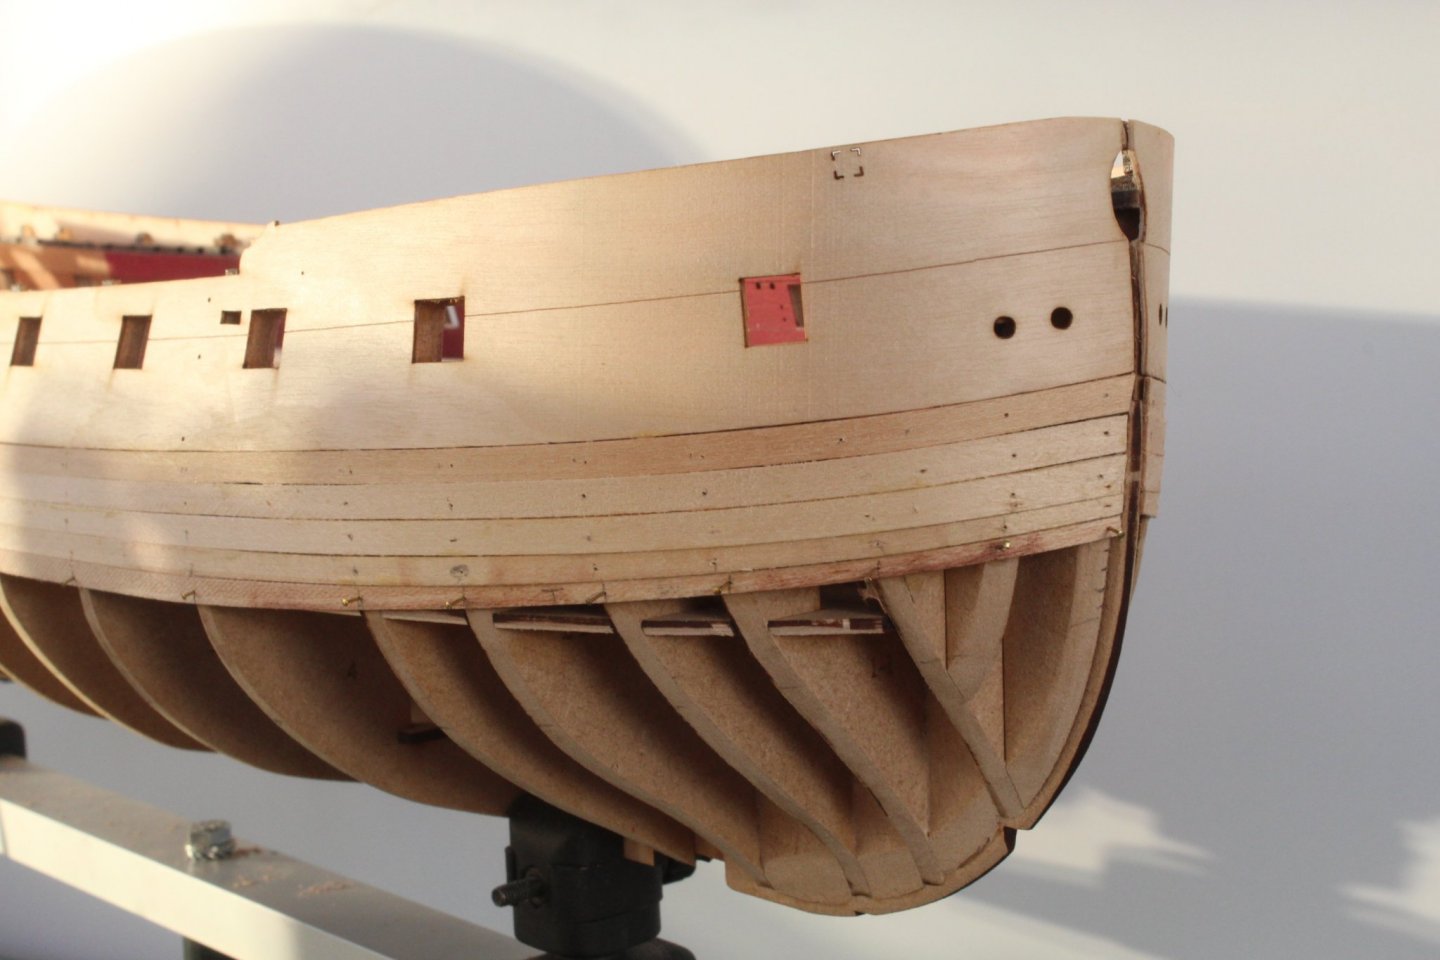
HULL PLANKING OUTER PLANKING PATTERNS BUILD MANUAL STEPS 164 - 181 LINK TO MY BUILD LOG INDEX Tools Used Titebond original glue Gorilli super glue gel Old paint brush Clamps and tape Gathering the materials required The following kit parts are required for this section of the build: 76, 271, 272, 273, 274, 305, 306, 307, 308, 309 (x2), 310 (x2), 311 (x2), 312 (x2) Assembly Process – Sanding The Hull The fore upper planking patterns that had been clamped to the hull and left to dry overnight had retained the required shape. As a guide I clamped the left-hand side aft upper planking pattern in position. I then applied some diluted Titebond glue to the hull, using an old paintbrush, ready for the fore upper planking pattern. The left-hand fore upper planking pattern was then positioned and clamped in place. Great care was taken to make sure everything was correctly aligned. The guidelines provided on the upper hull side pattern was a great help, another great feature of the kit design. The left-hand aft upper planking panel was also glued and clamped in place. I waited for the glue to cure before repeating the process for the right-hand side upper planking patterns, due to a lack of clamps. The lower fore planking patterns were then soaked in hot water for 30 minutes and then clamped to the hull and left to dry for a minimum of 12 hours. The lower planking patterns were glued in place. I noted a slight alignment issue with some of the gun port edges. This was soon corrected with a bit of trimming and sanding. The stern lower counter pattern was then added. I used Titebond for this. The final task was to fit the two lower plank patterns to each side. I opted to use gorilla super glue gel. Despite being very careful I still managed to get more glue on my fingers than the planks. The hull is now ready for the 2nd planking stage.


-
Thanks for the kind words @Malcolm Greig
-
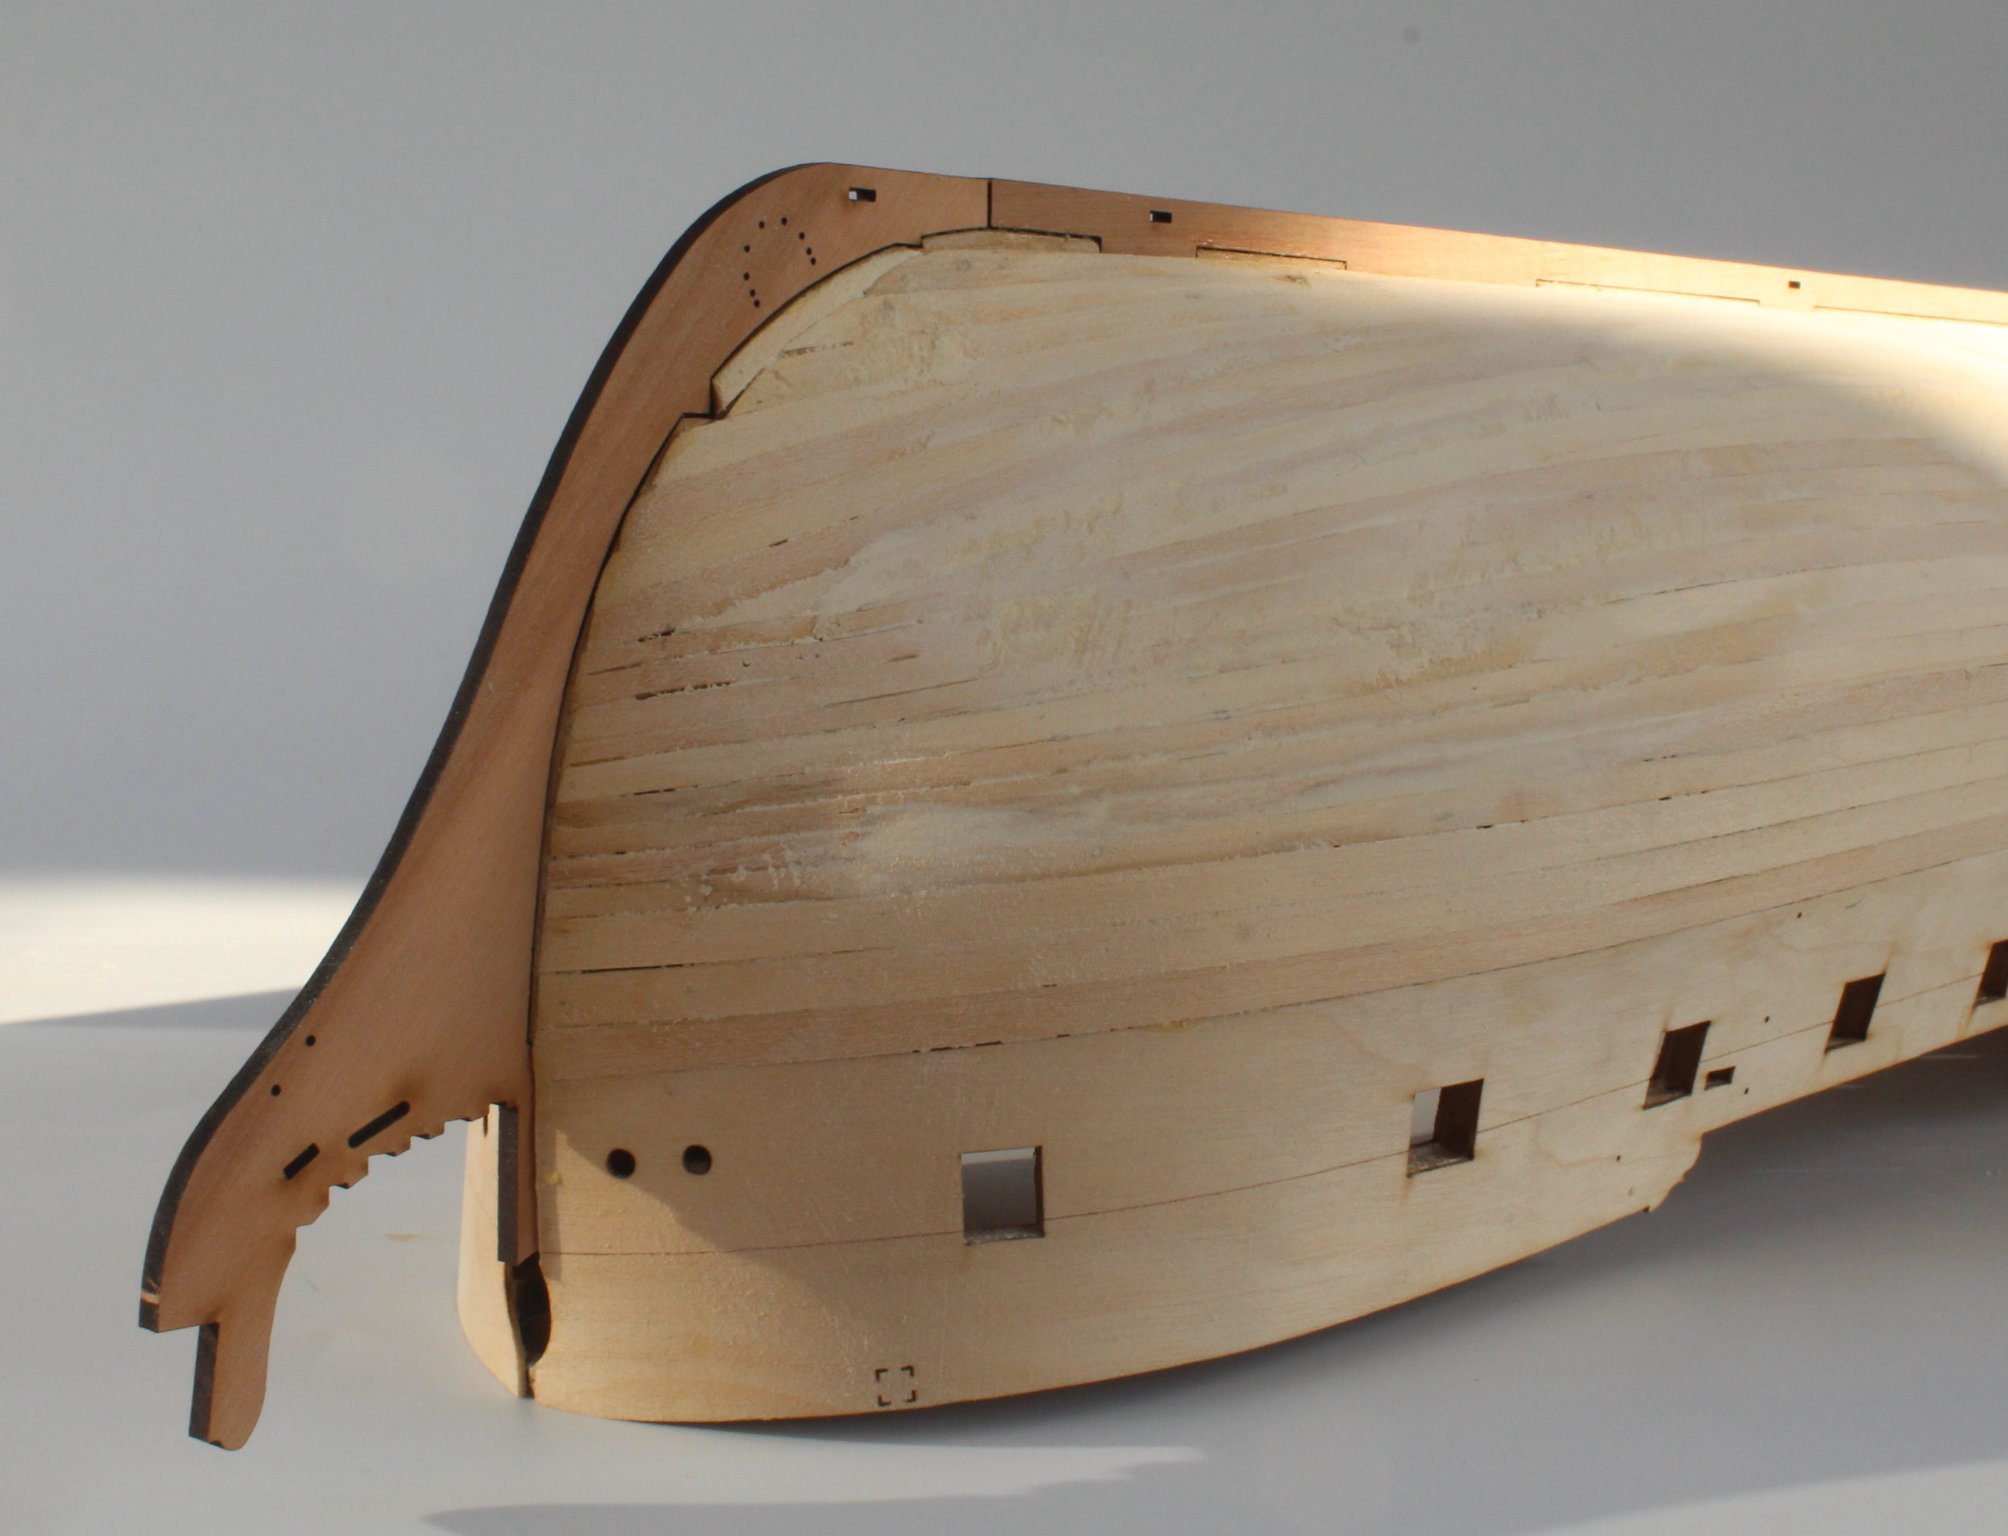
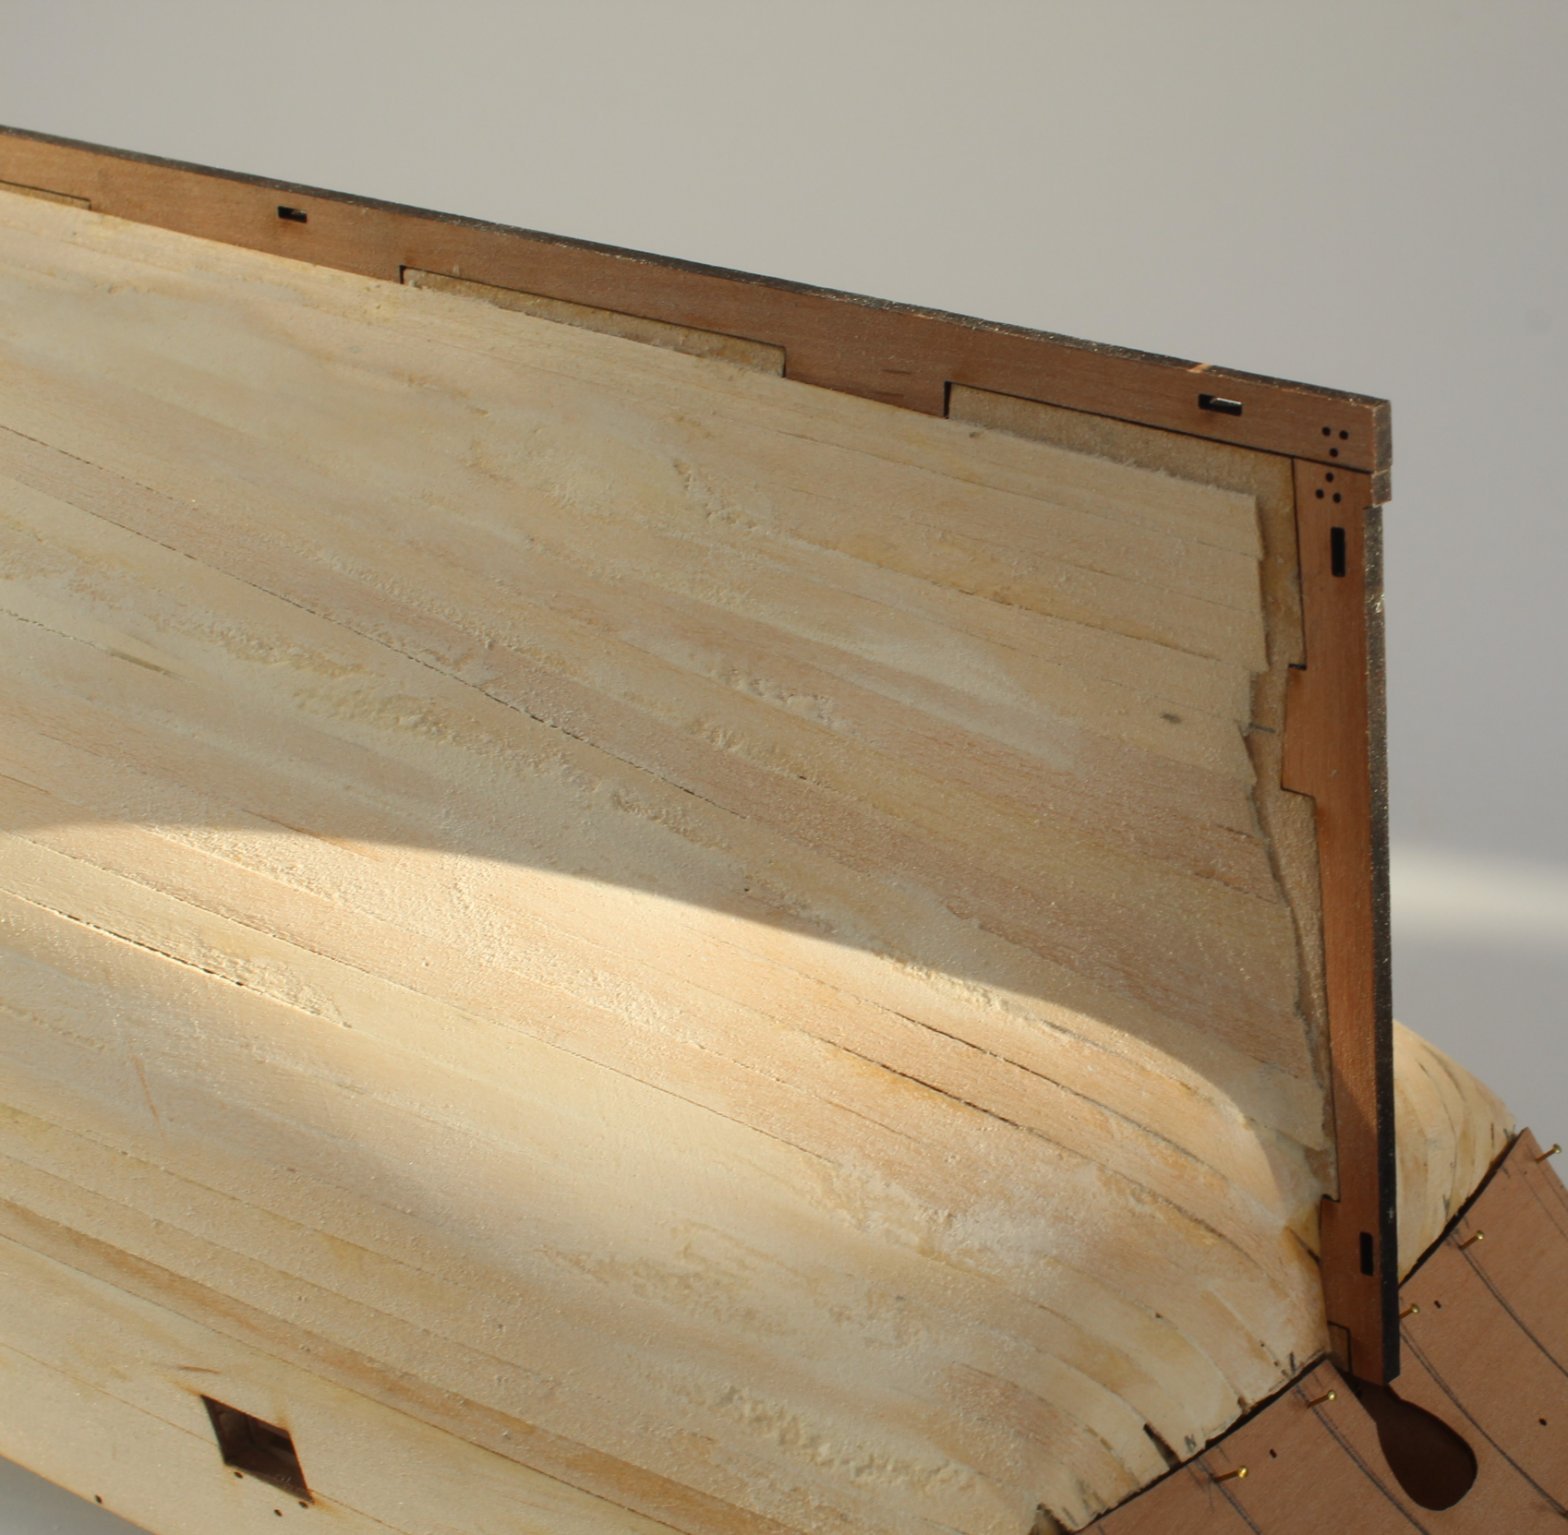
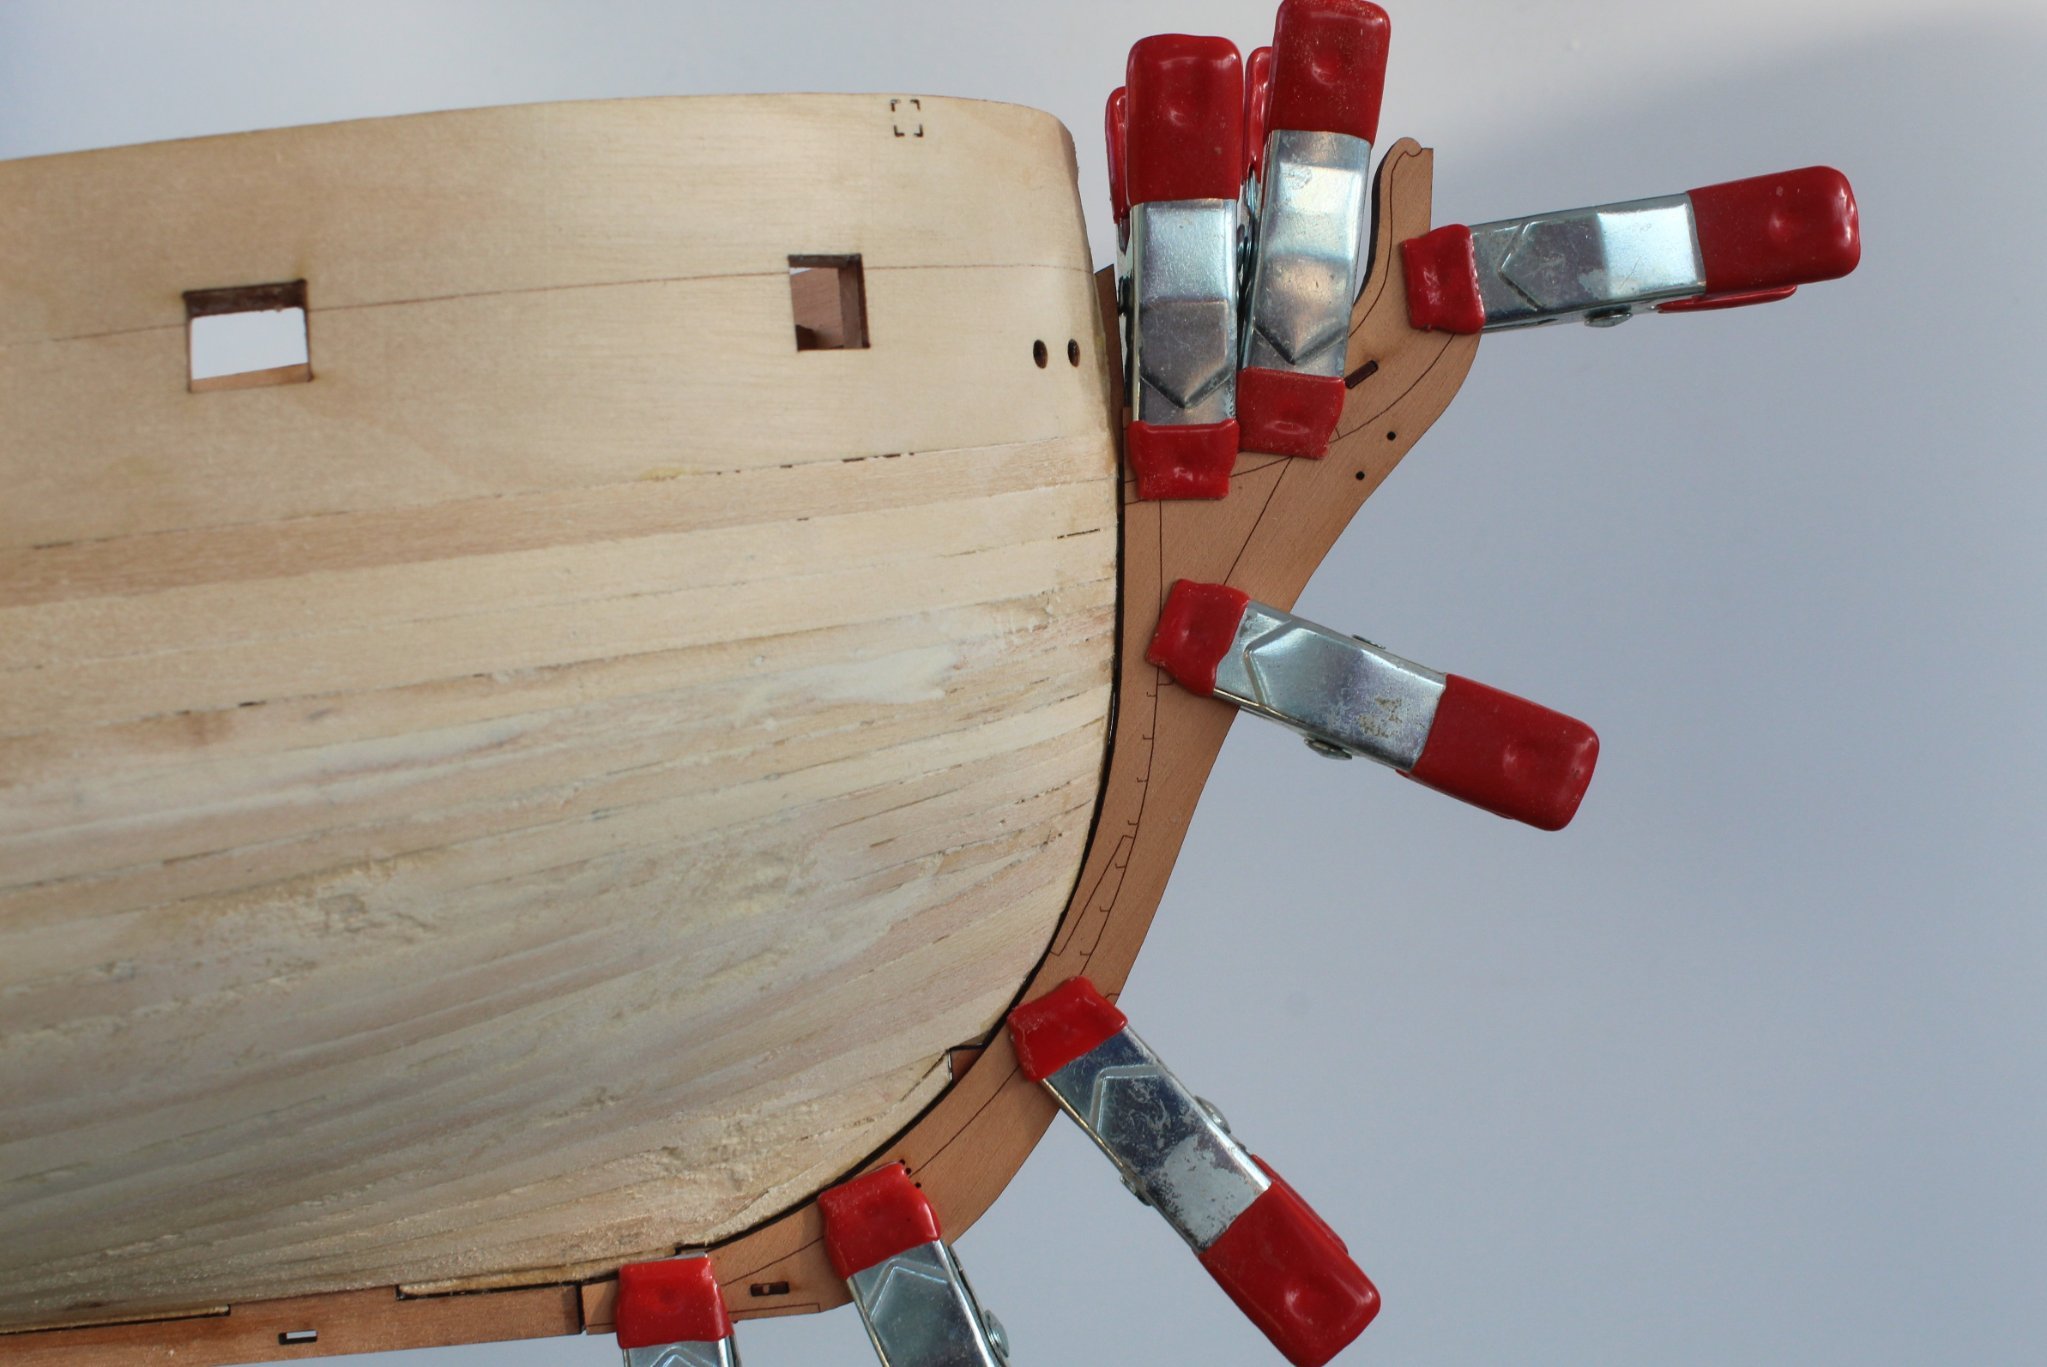
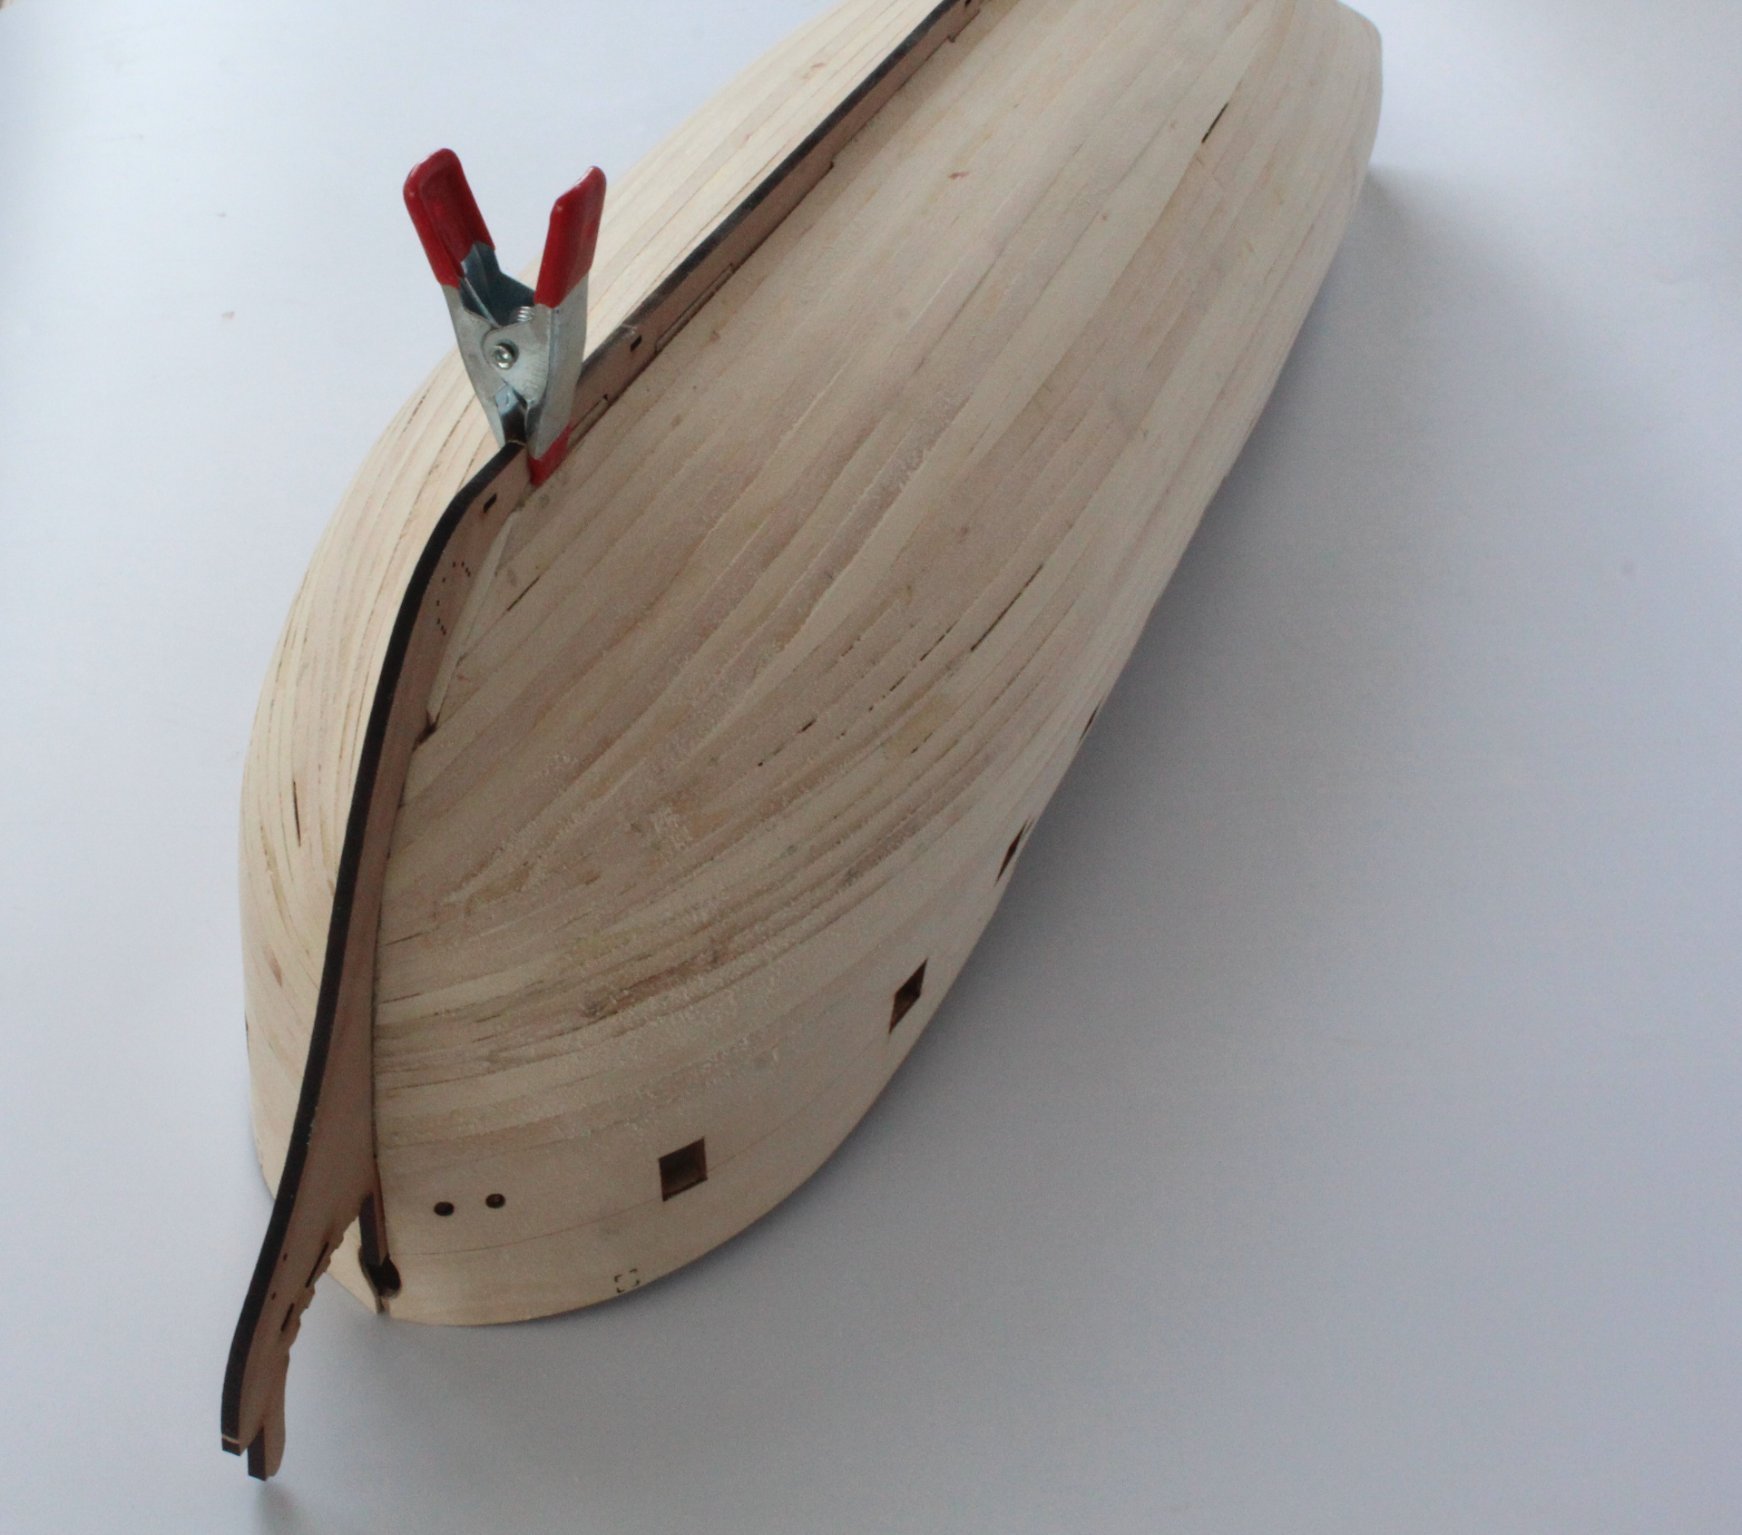
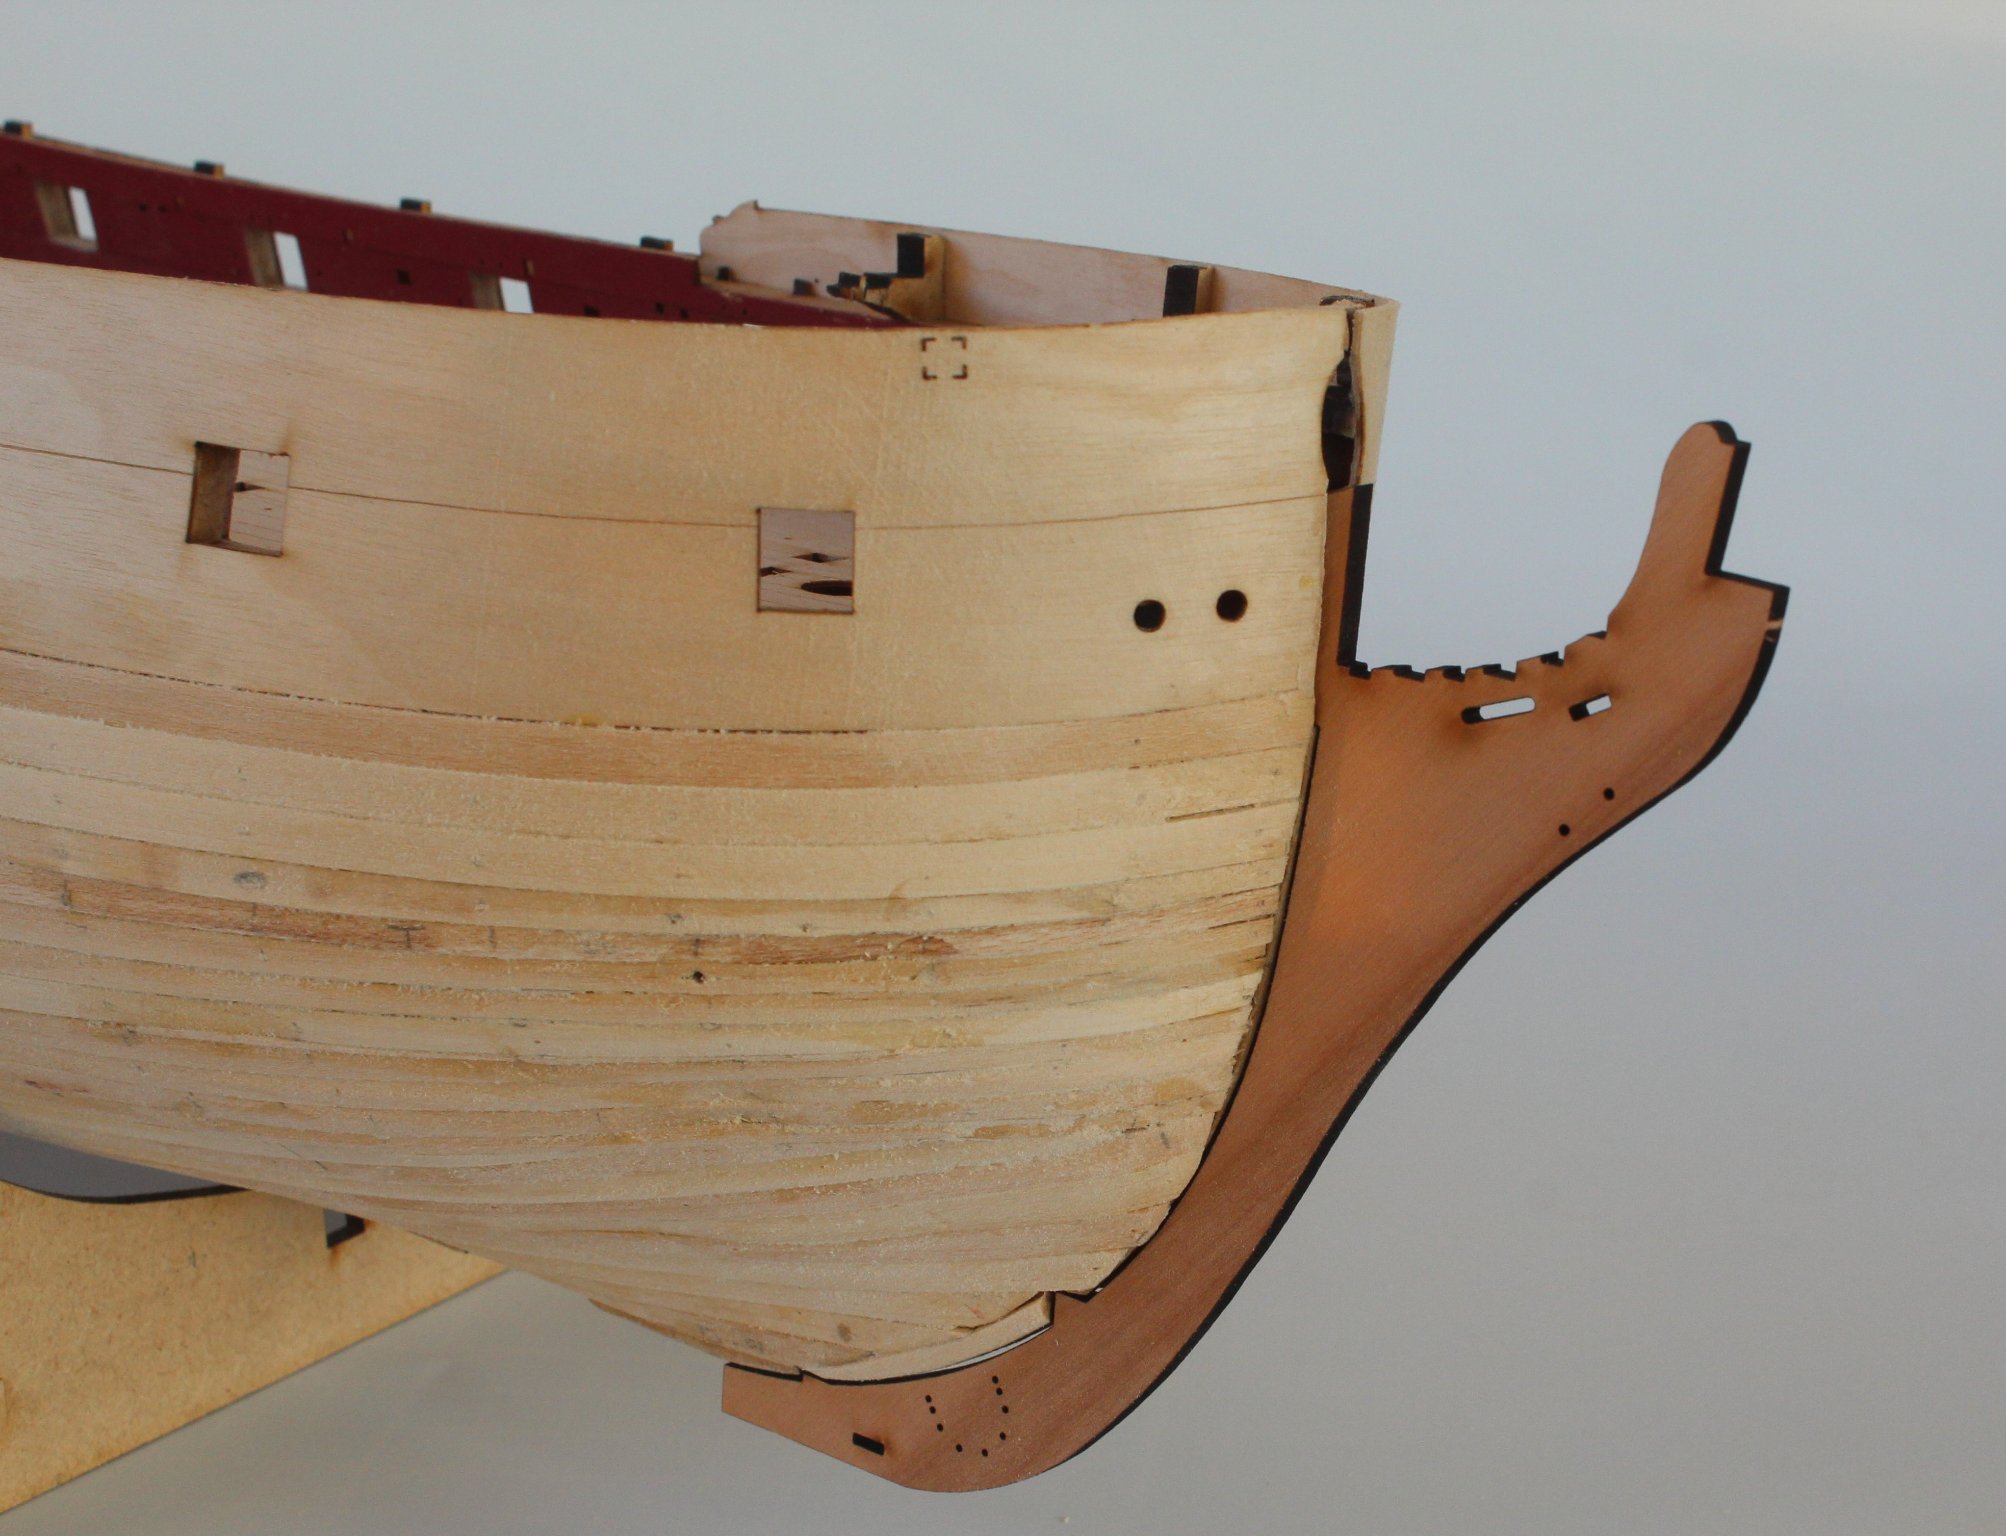
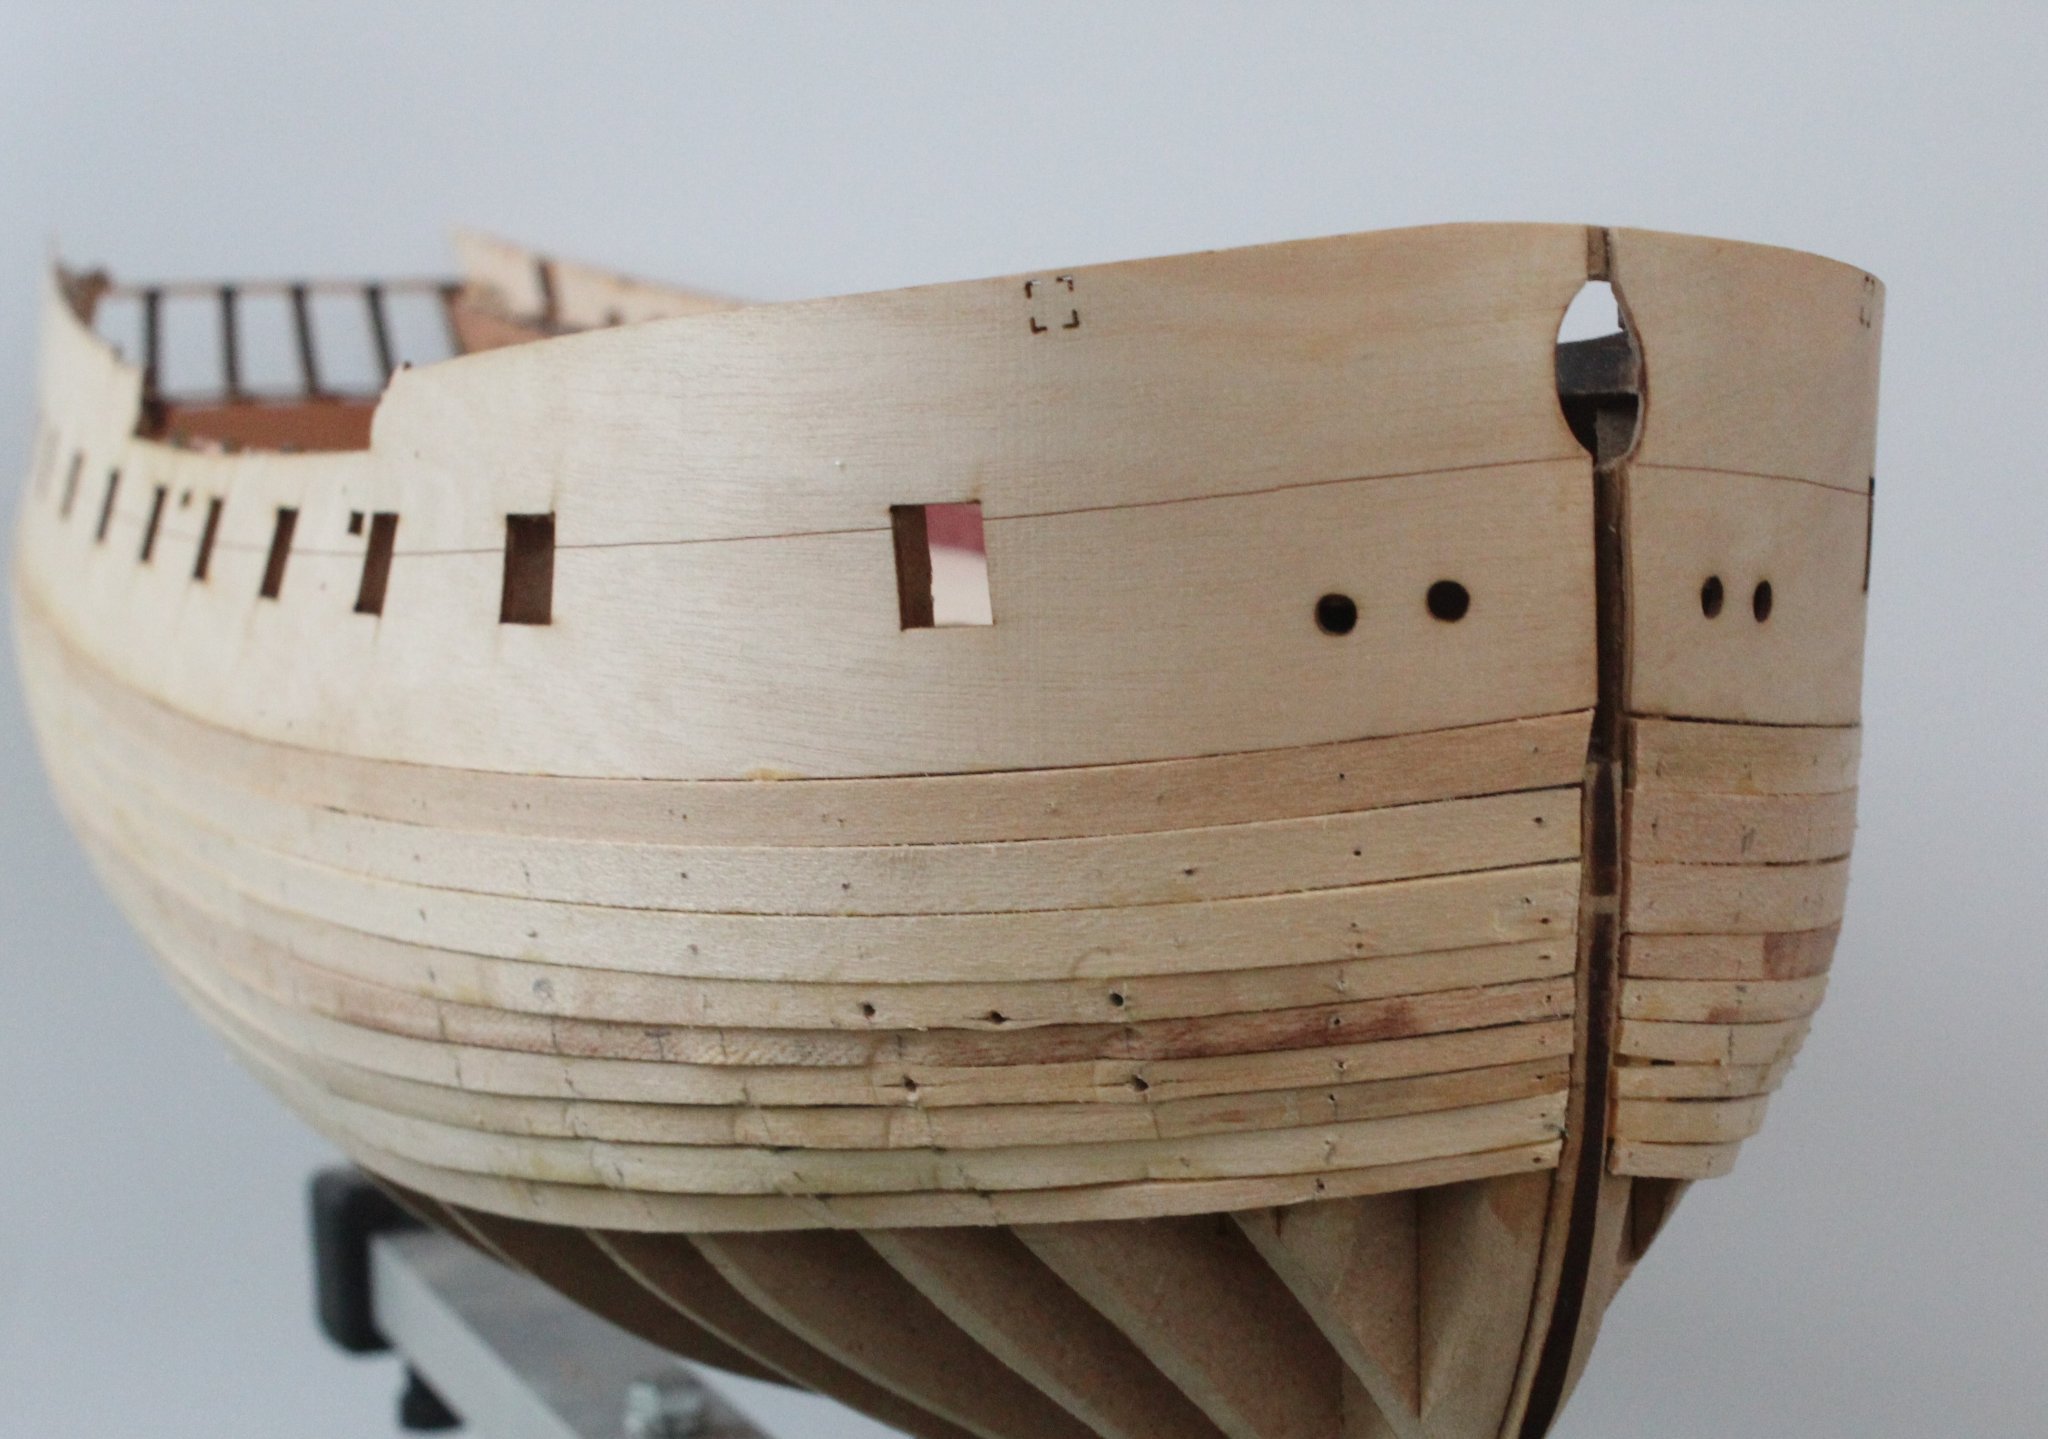
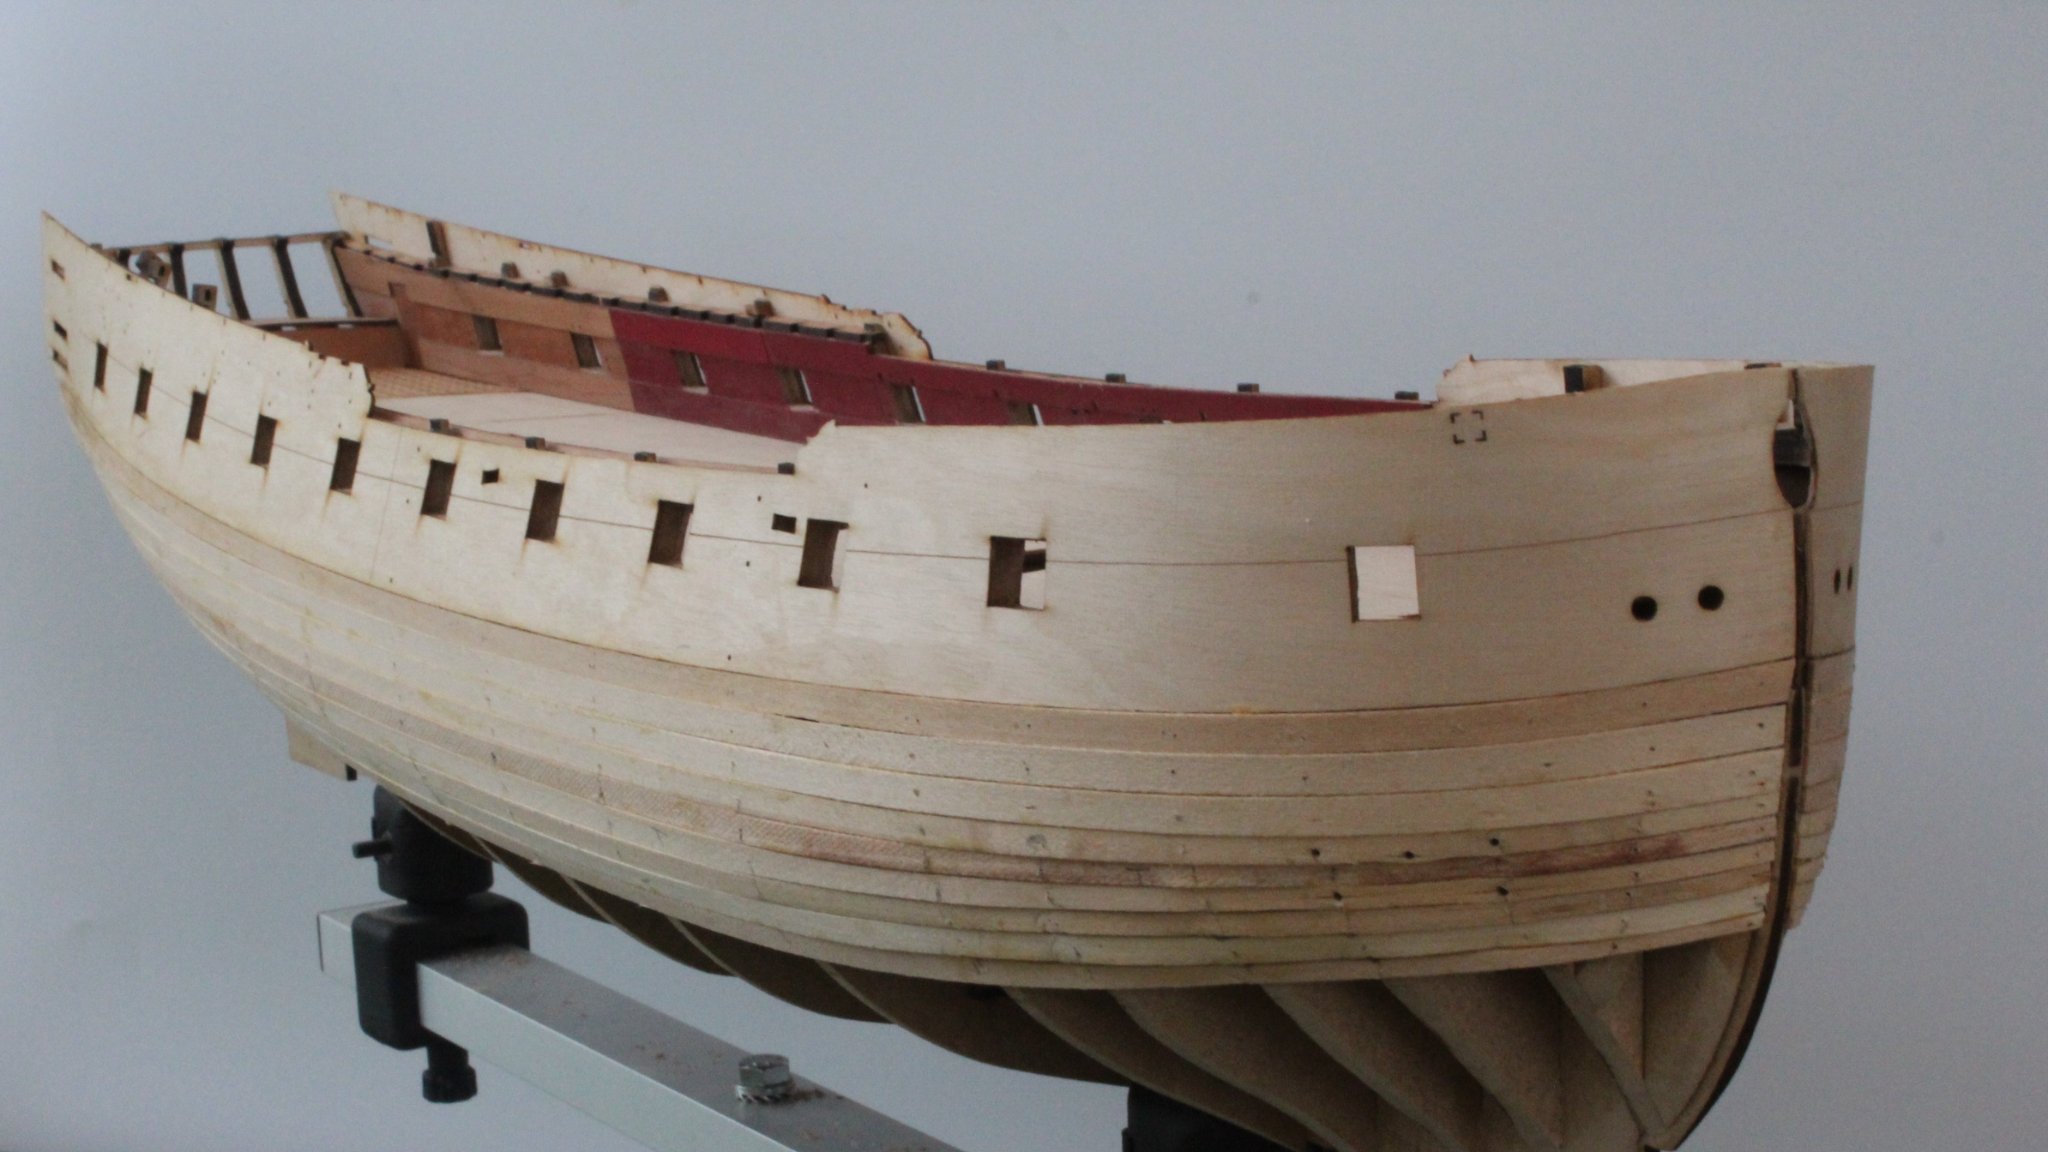
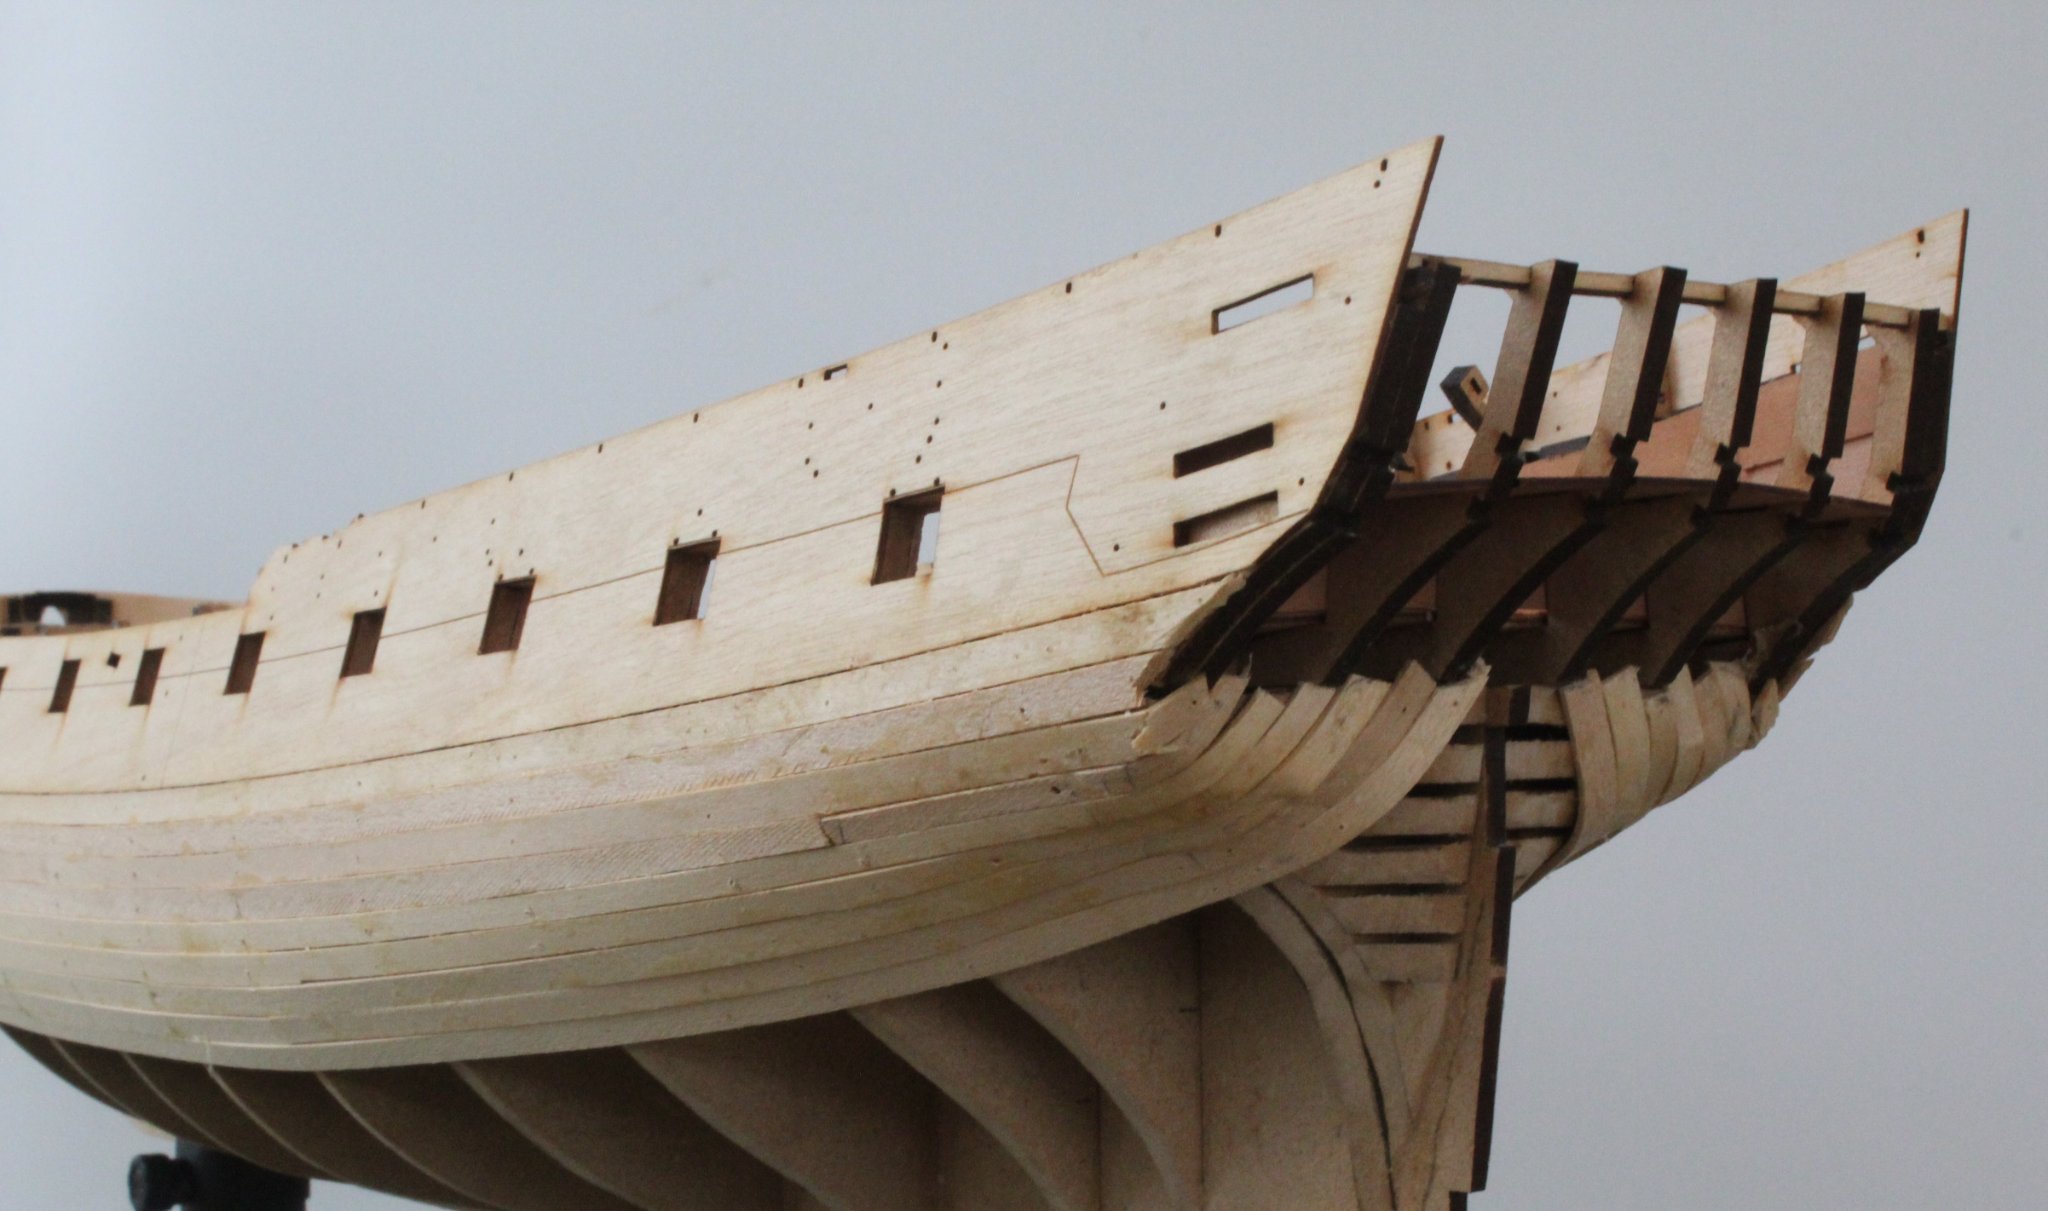
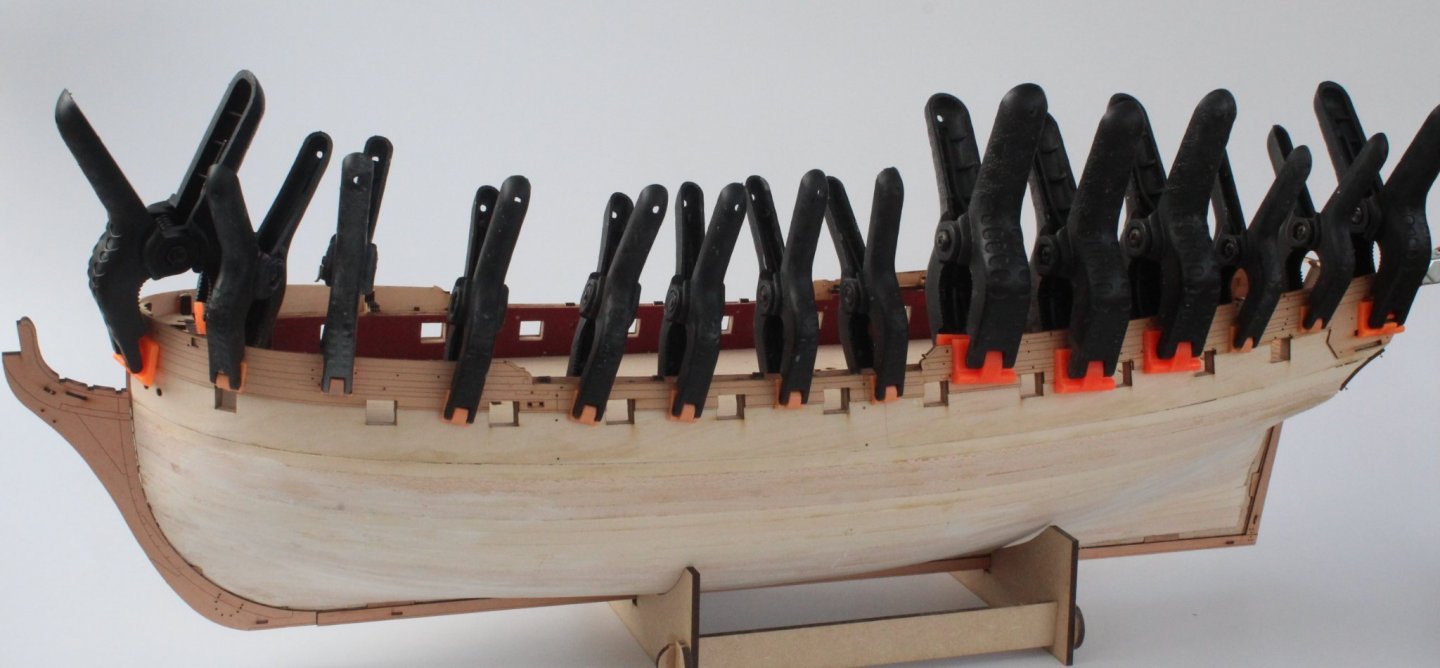
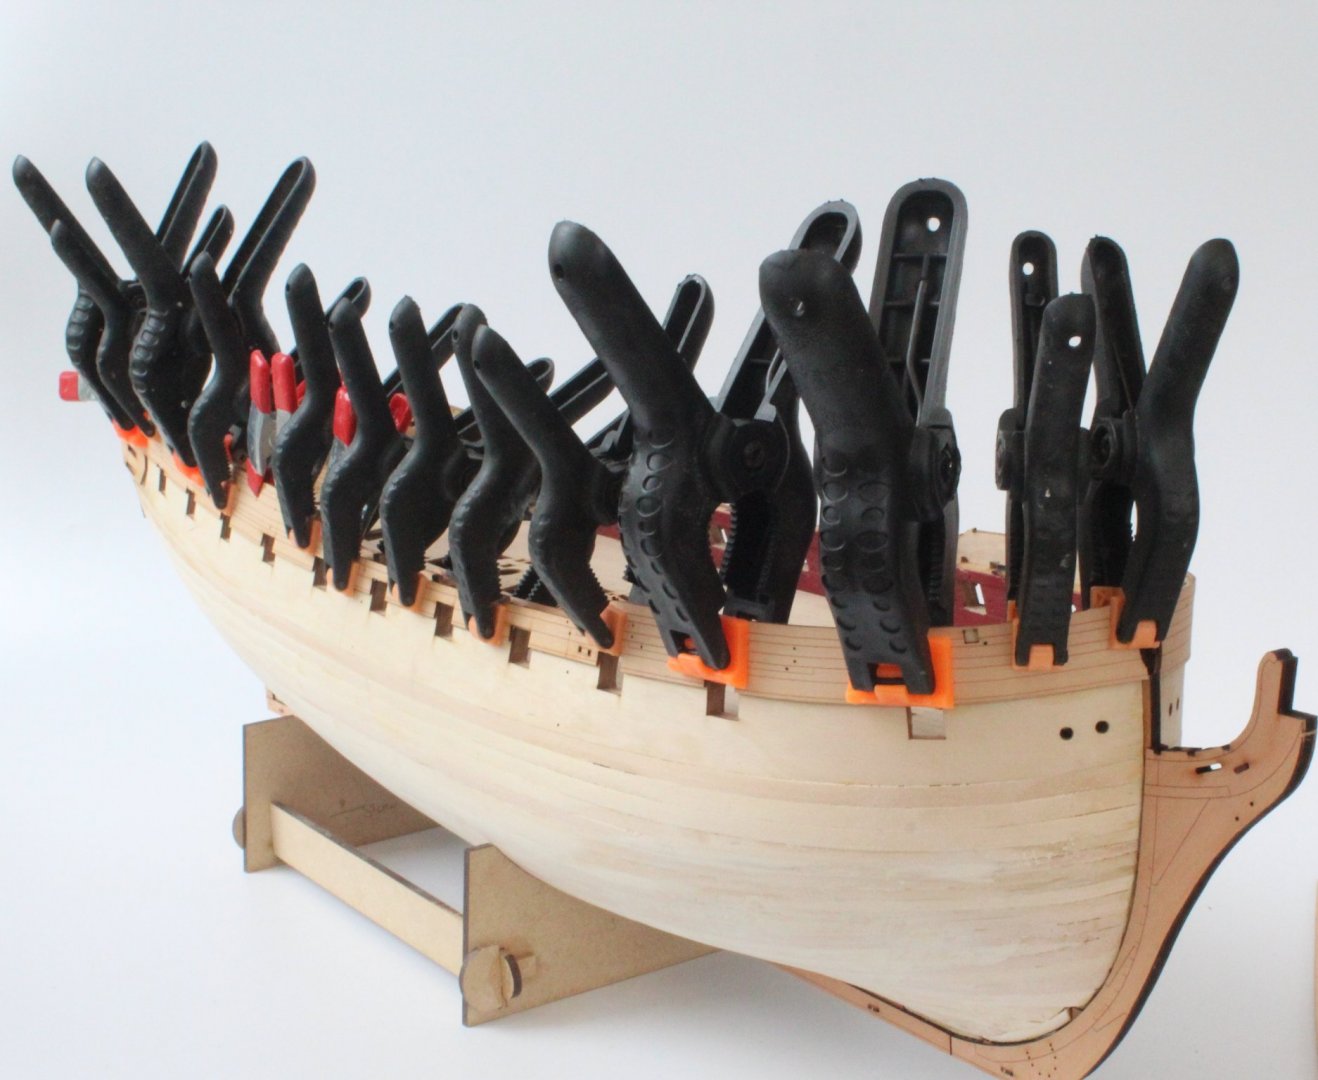
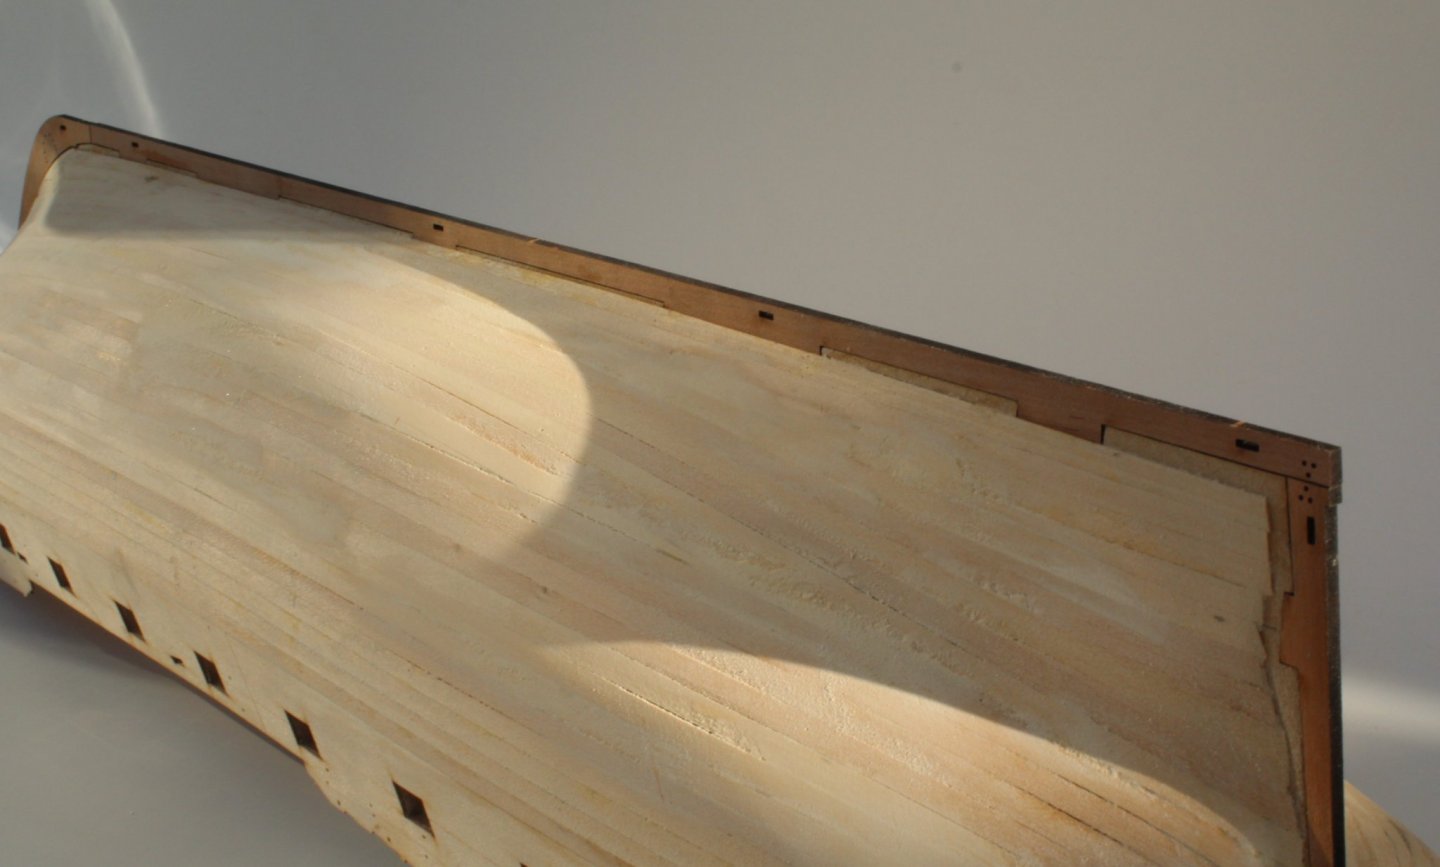
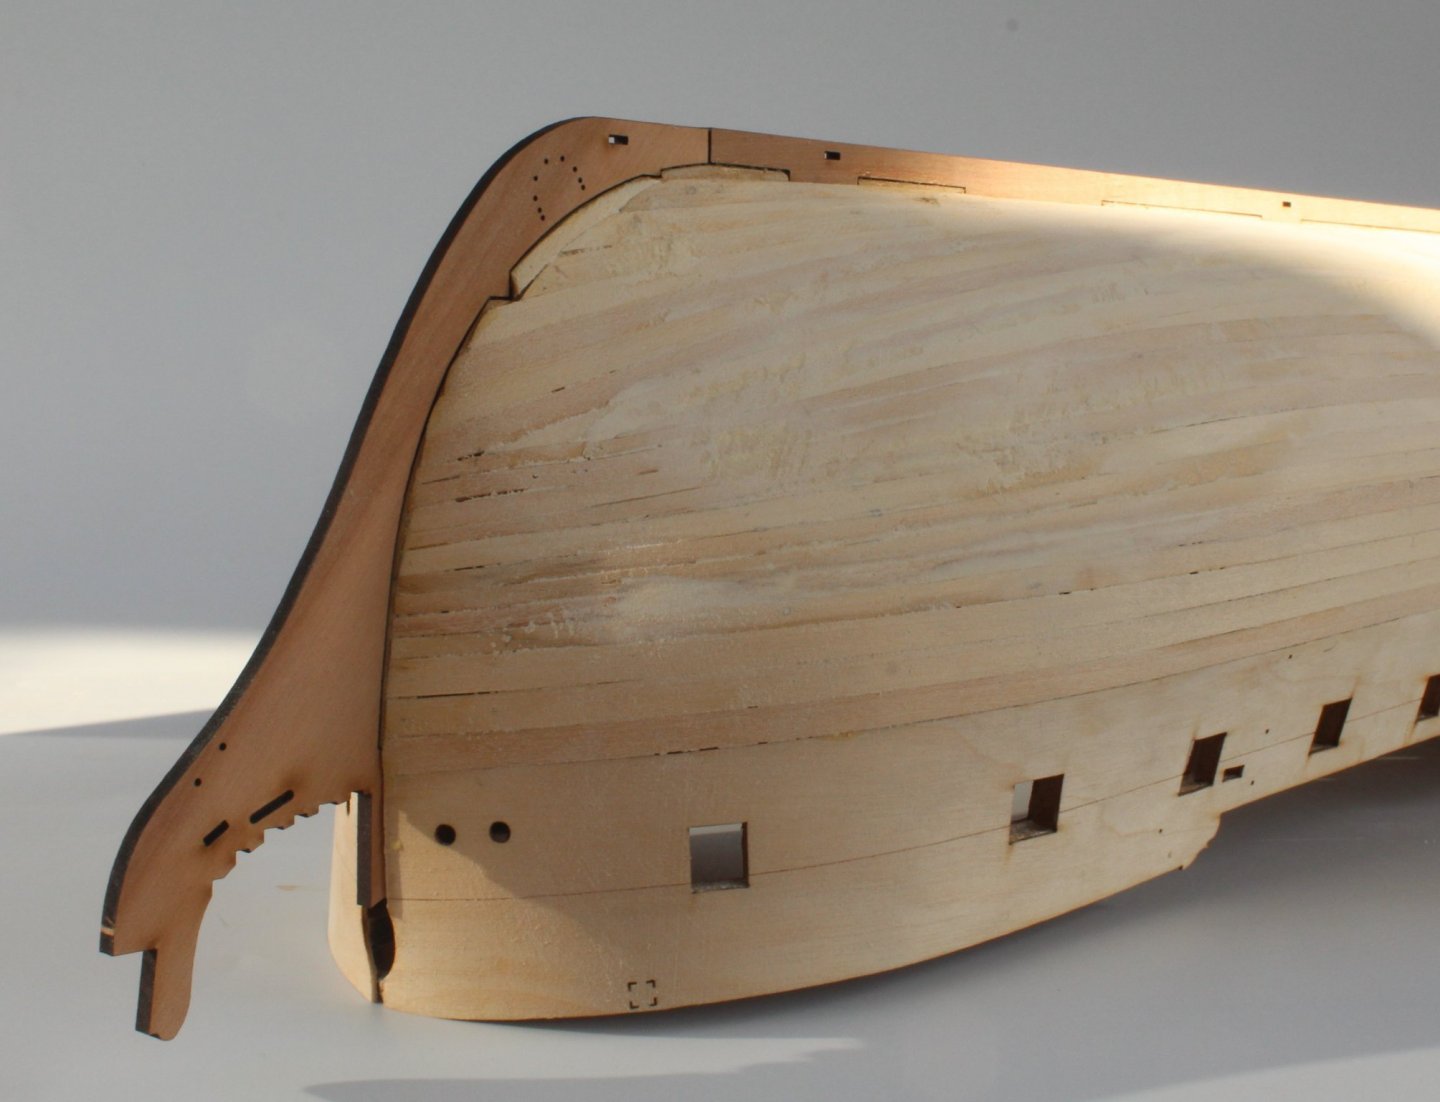
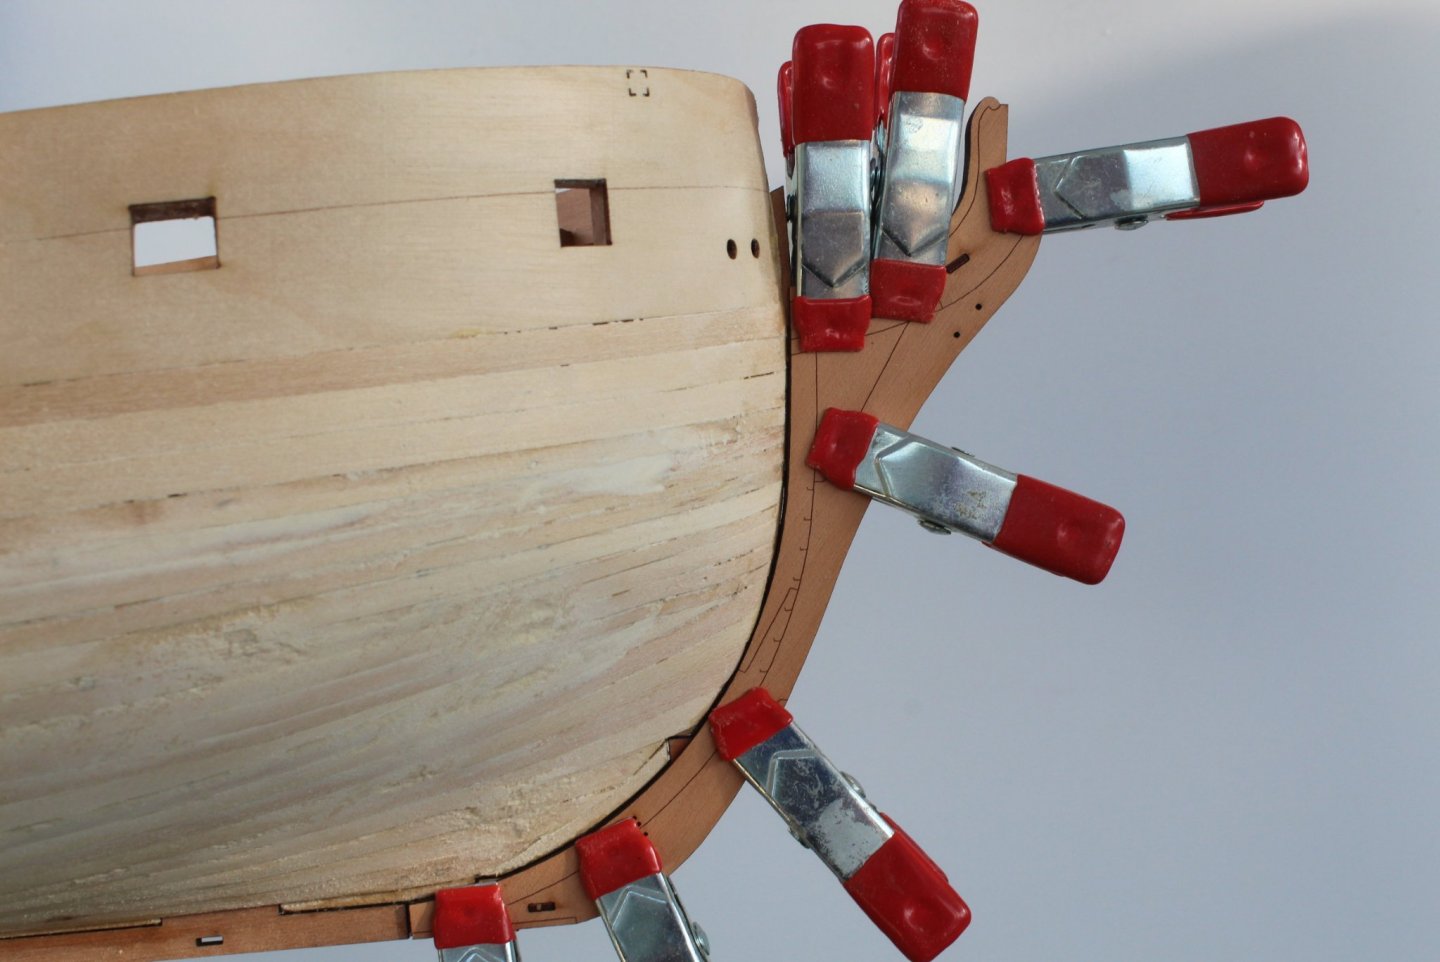
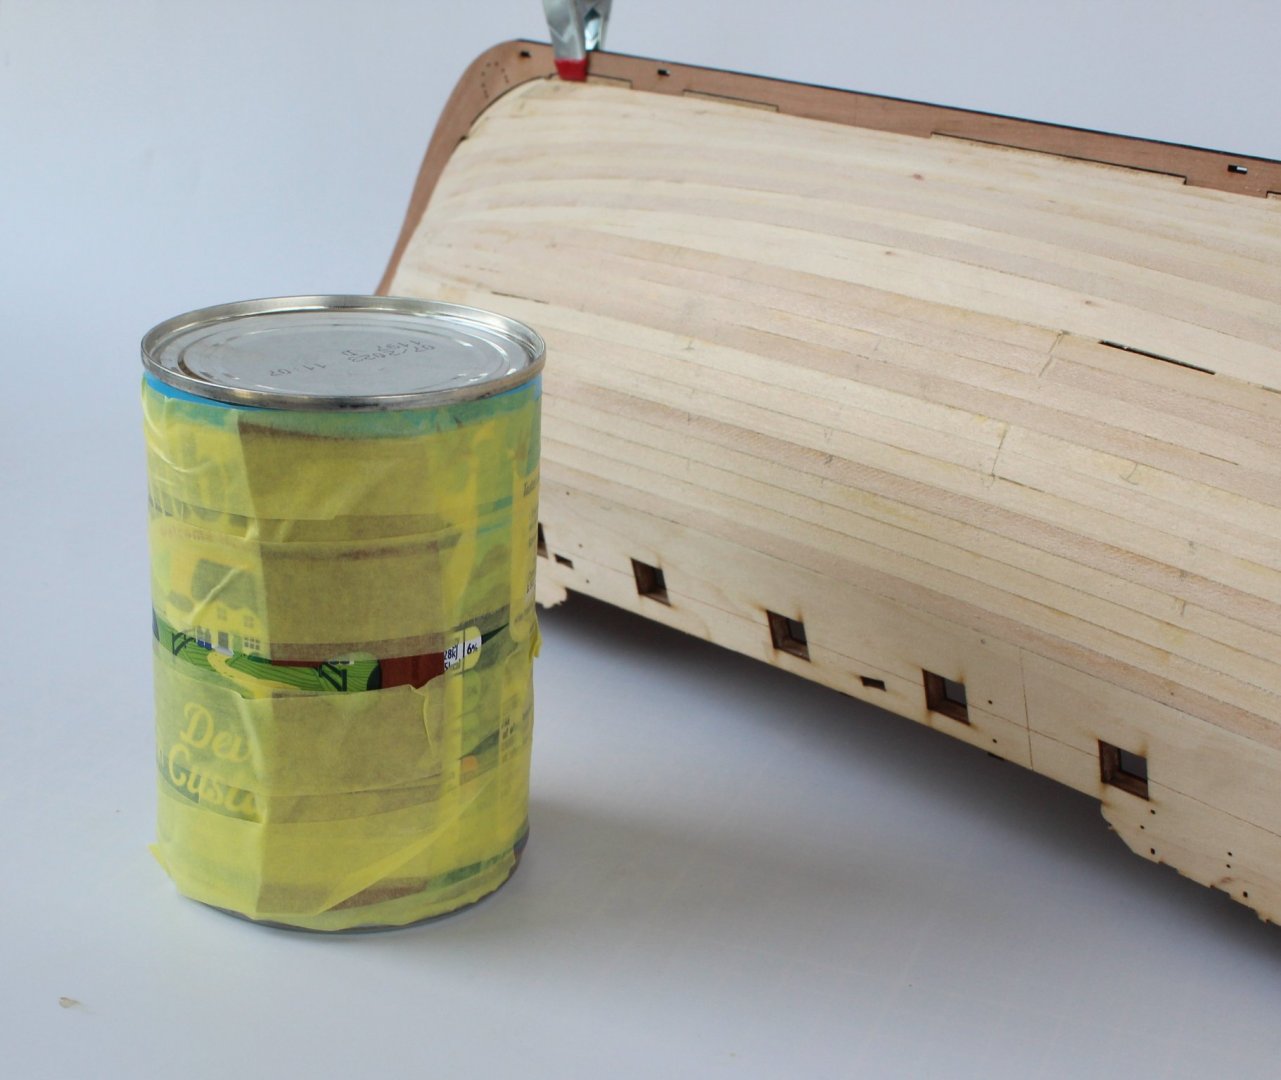
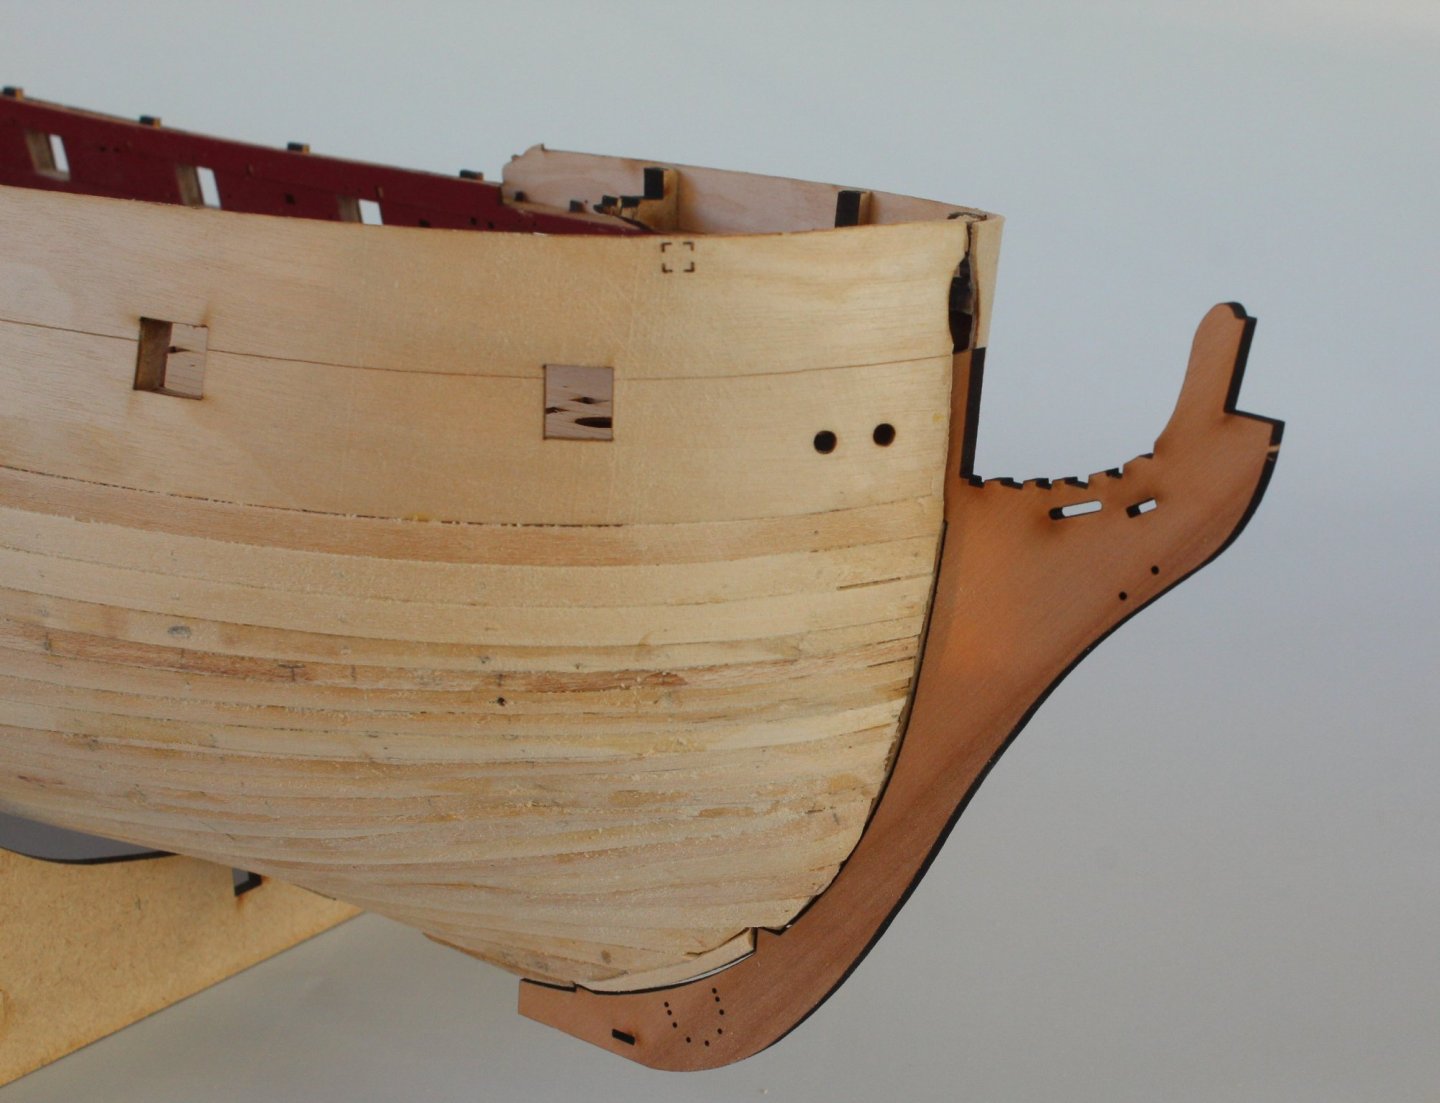
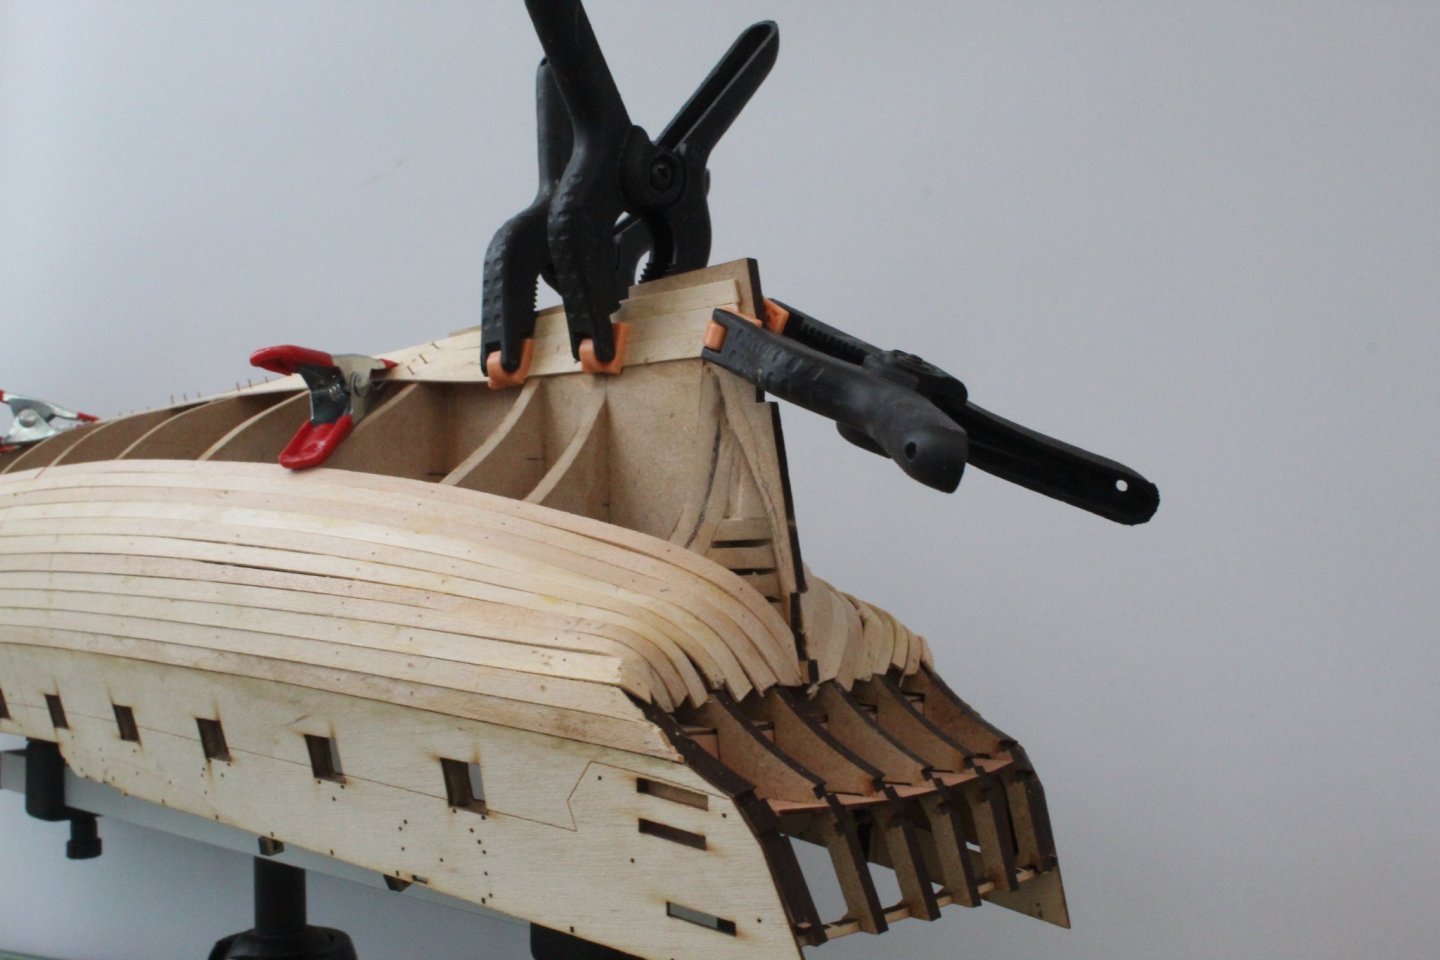
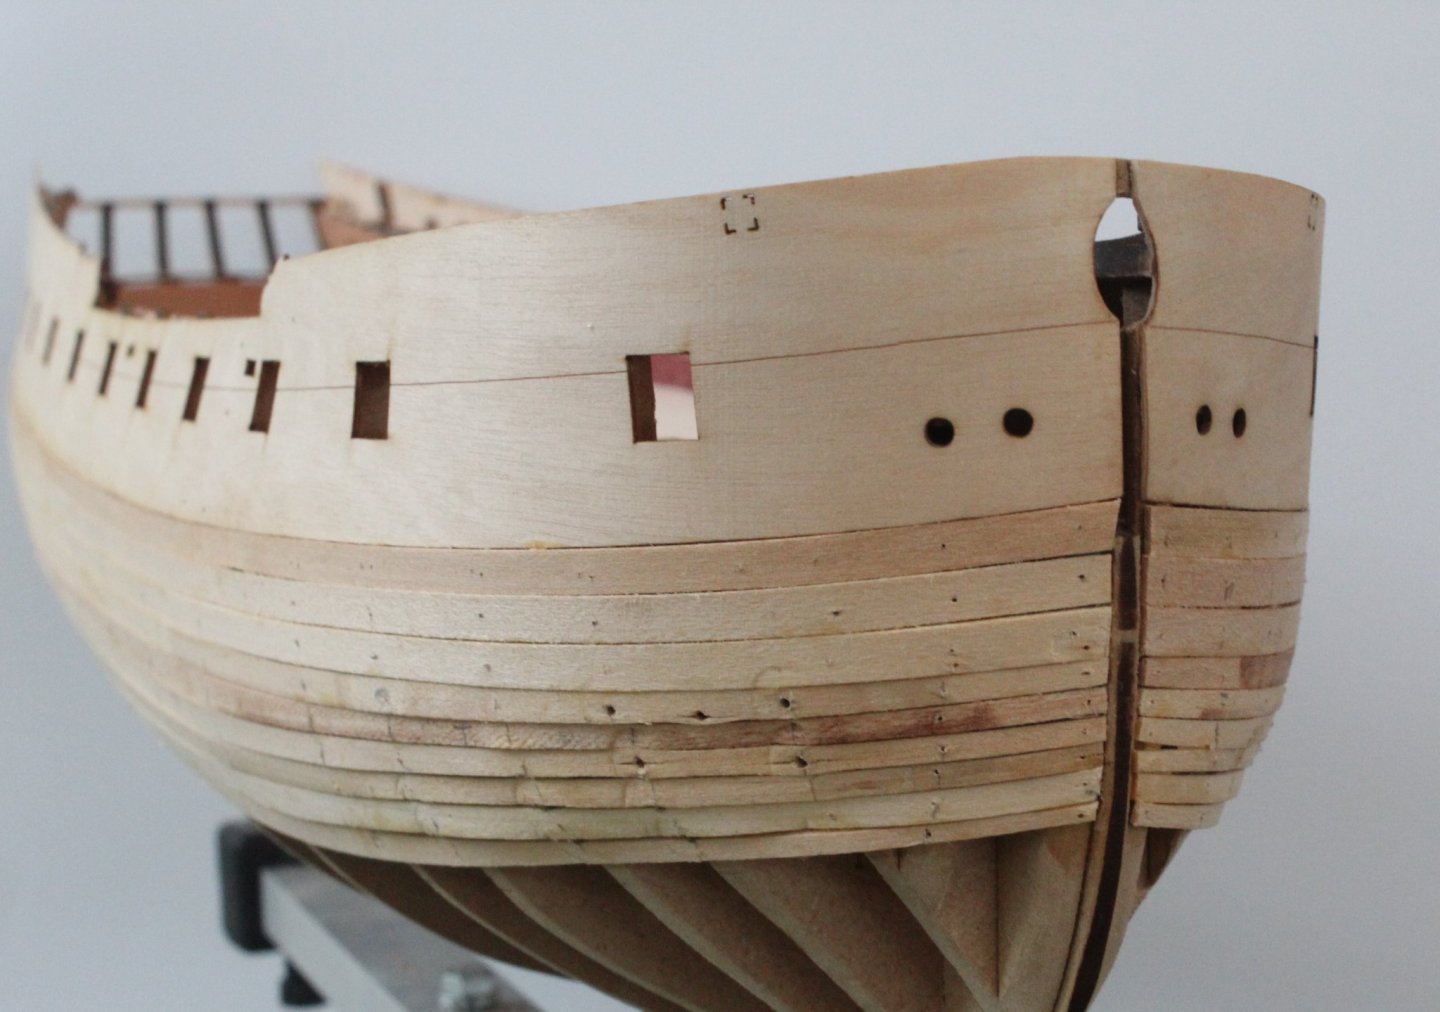
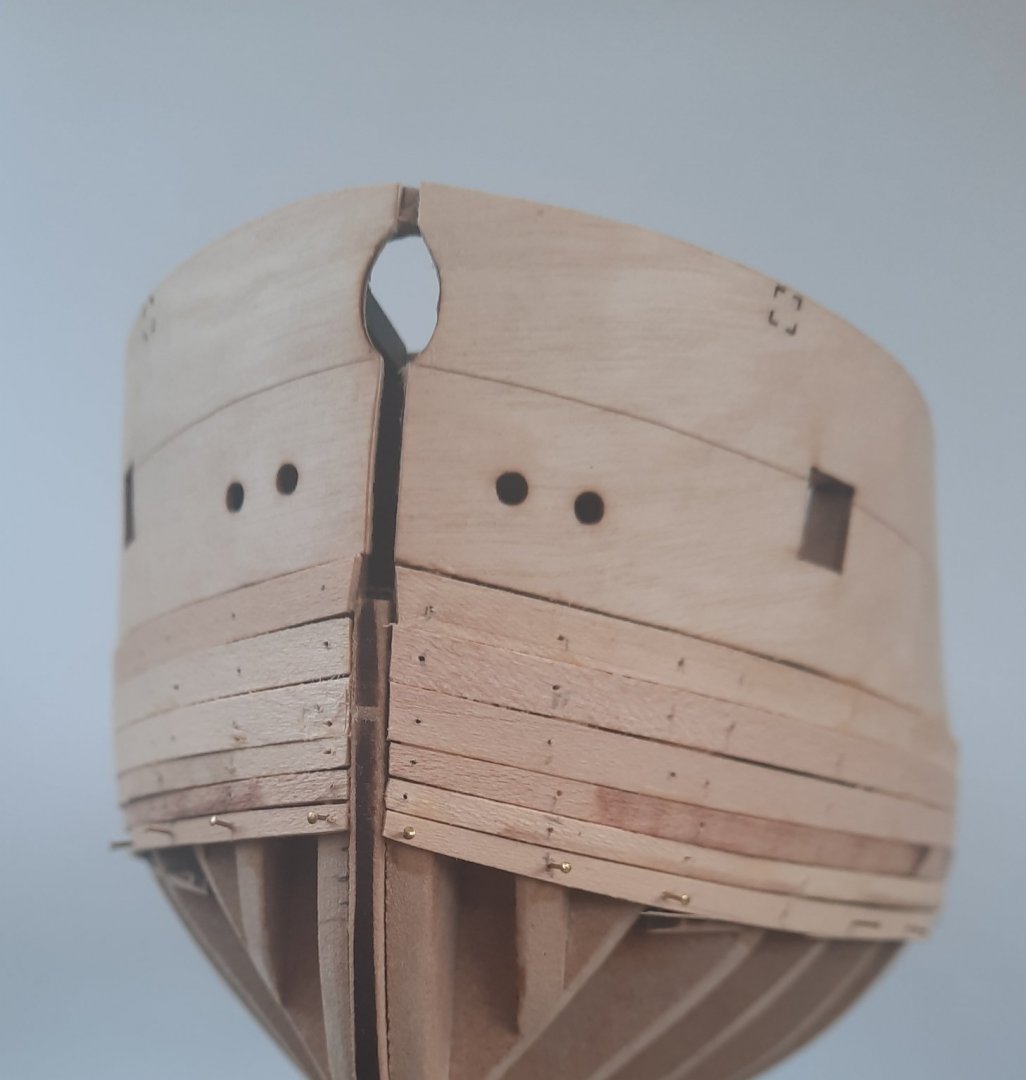
HULL ASSEMBLY FIRST PLANKING – SANDING FITTING LOWER STERN, PROW, KEEL AND RUDDER POST PATTERNS BUILD MANUAL STEPS 144 - 163 LINK TO MY BUILD LOG INDEX Tools Used Sandpaper 120-grit and 400-grit Titebond original glue Old paint brush Clamps Gathering the materials required The following kit parts are required for this section of the build: 155, 187 (x8), 188, 189, 190, 191, 192, 193, 196, 272, 274, 445, 446, 447, Brass pins Assembly Process – Sanding The Hull I was reasonably happy with how the first planking turned out and did not take as much sanding as I was expecting. I started with 120- grit sandpaper. After about an hour the hull looked smooth. I mixed some wood filler with water and titebond and applied the paste to a few areas and then once it had dried sanded the areas smooth. I completed the sanding process using 400-grit sandpaper. The lower stern counter pattern had already been bent around a tin can. I applied glue and pined the lower counter in place. There is a couple of areas will be filled before the 2nd planking stage. Taking note of the build instructions I positioned the top edge stern counter pattern with the stern timber slots. The prow, keel and rudder post patterns were then glued in place. Once the glue had dried the outer patterns were fitted, using the location pegs to align each pattern. The outer patterns were clamped in place. I then tried a test fit of the outer planking patterns and I was happy with how these parts looked. Finally fore outer planking patterns (272 & 274) were soaked in hot water for 30 minutes and then clamped to the hull. They will be left to dry overnight ready to be glued in place in the morning along with the aft outer planking patterns (271 and 273). I did contemplate soaking and clamping the lower fore outer patterns also but I decided that I was not going to rush this stage so this will be done once the upper patterns have been glued in place.


-
Thanks Malcolm
-
Just a quick update, not in my normal build log format. The 1st planking turned out better than I first thought and looks smooth after about an hours work sanding with 120-grit sandpaper. It will need a bit more sanding with a finer grit sandpaper. I have not needed to use any filler so far but I will fill some of the small gaps. I have tested fitted rudder post, prow pattern and keel pattern and everything looks good. I have also soaked the Inner Lower Counter Pattern in hot water for 30 mins and it has now been taped to a tin can (Devon Custard) and will be left to dry for the next 12 hours.


-
Thanks @James H. I had already noted that in the build manual and it will be fitted as instructed so hopefully everything will line up.
-
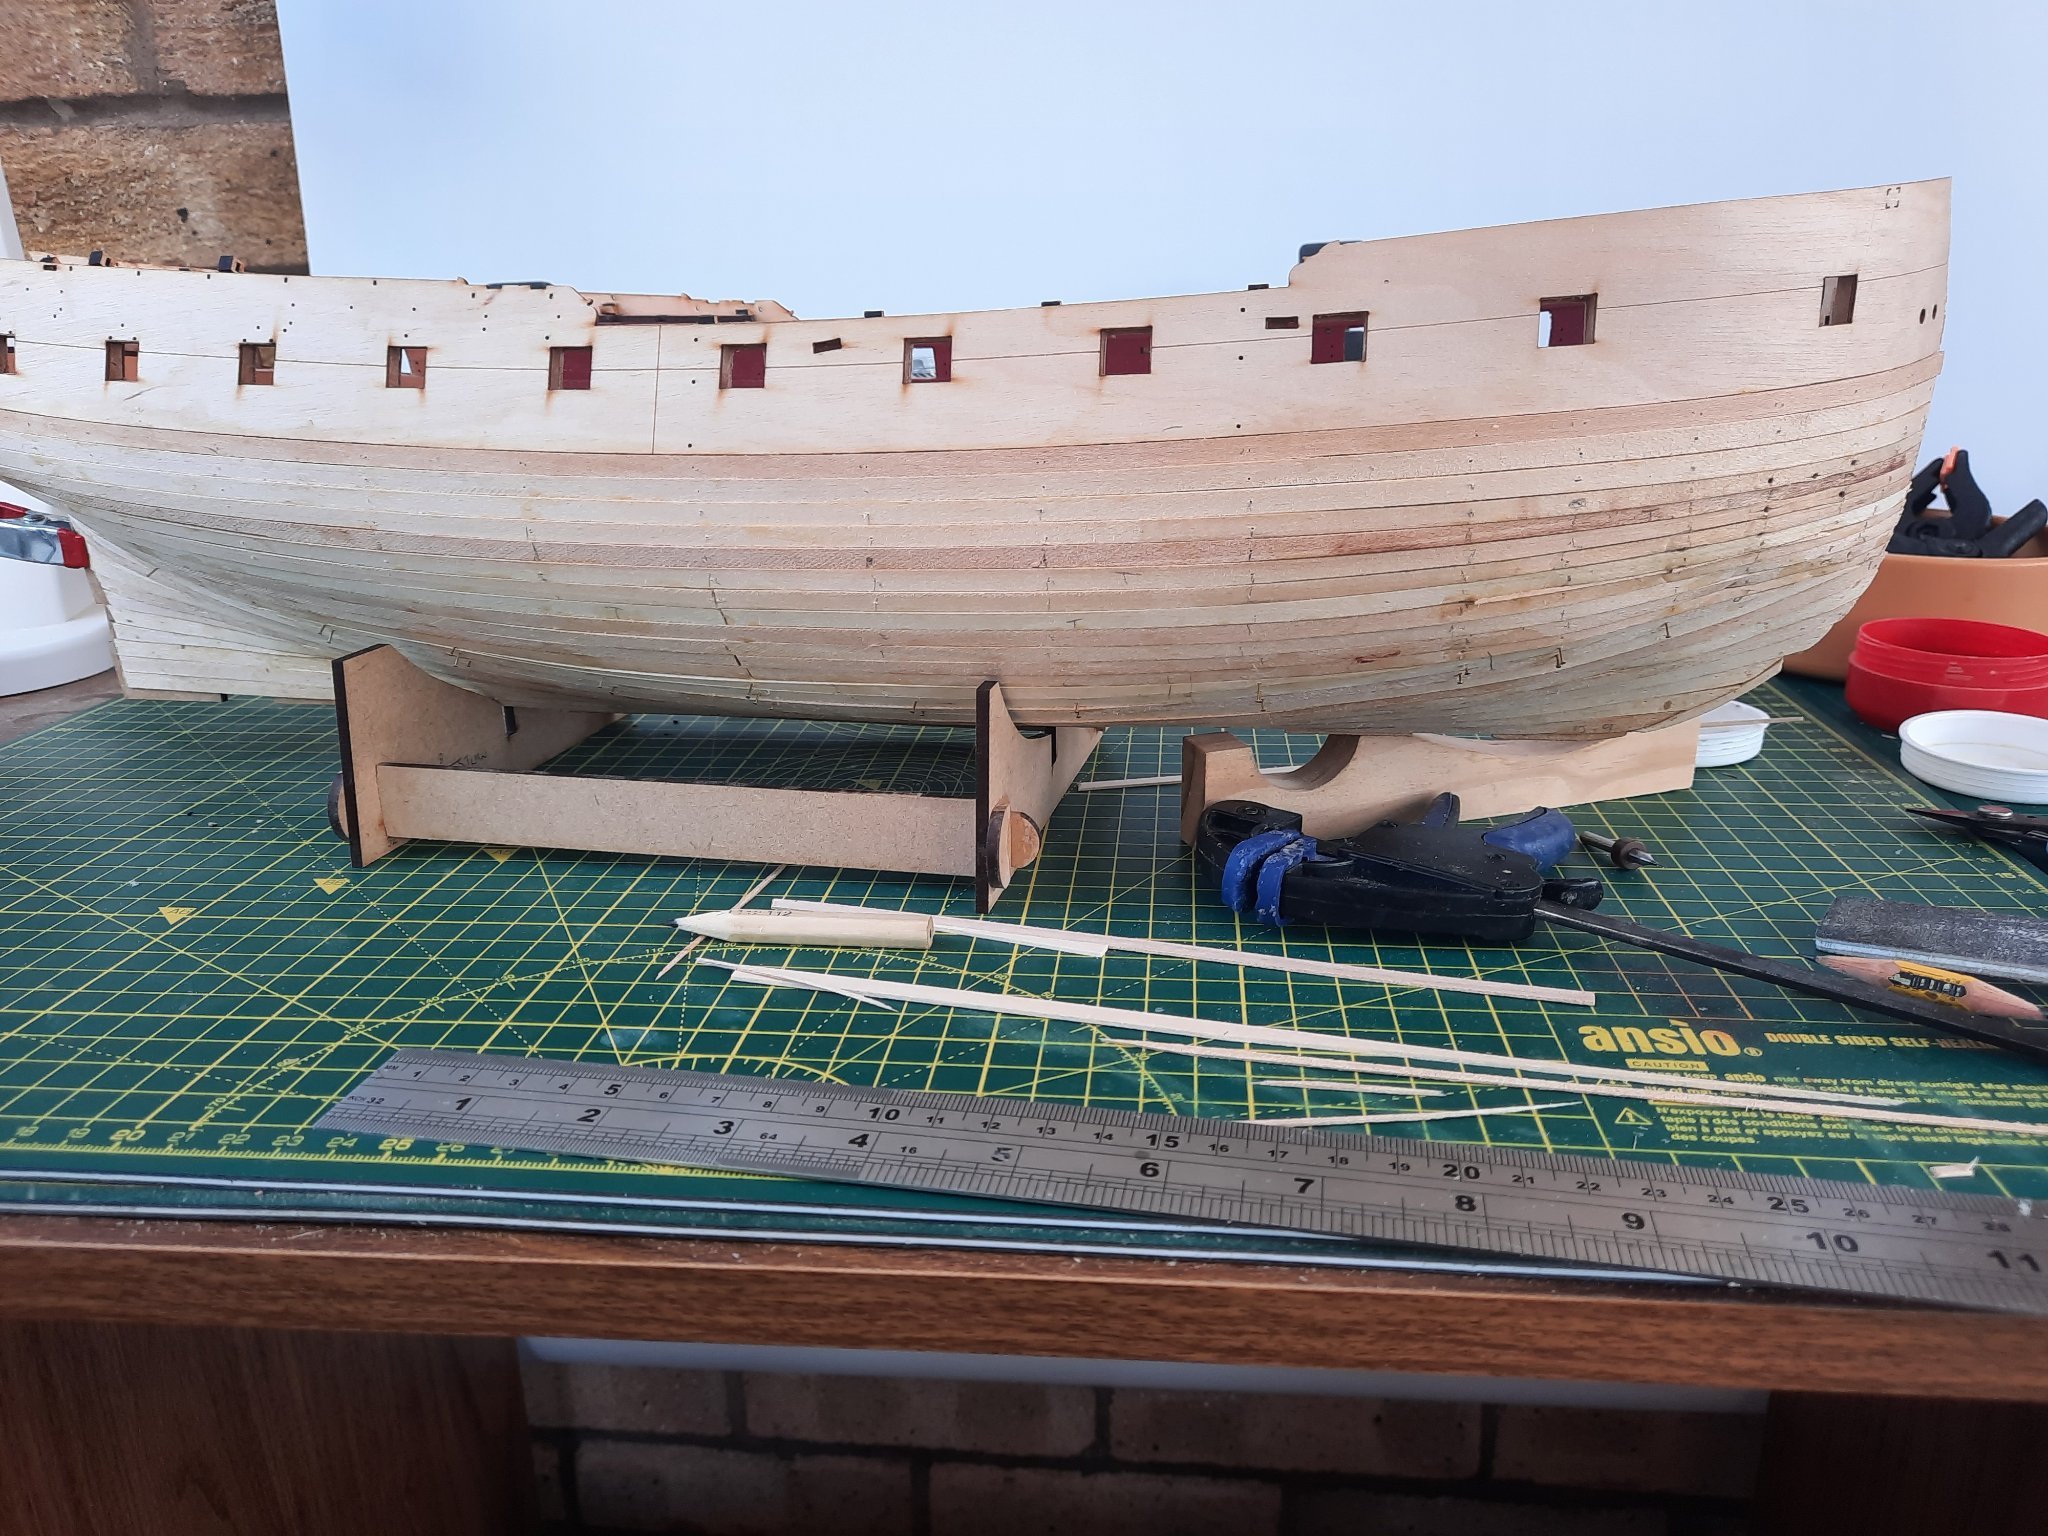
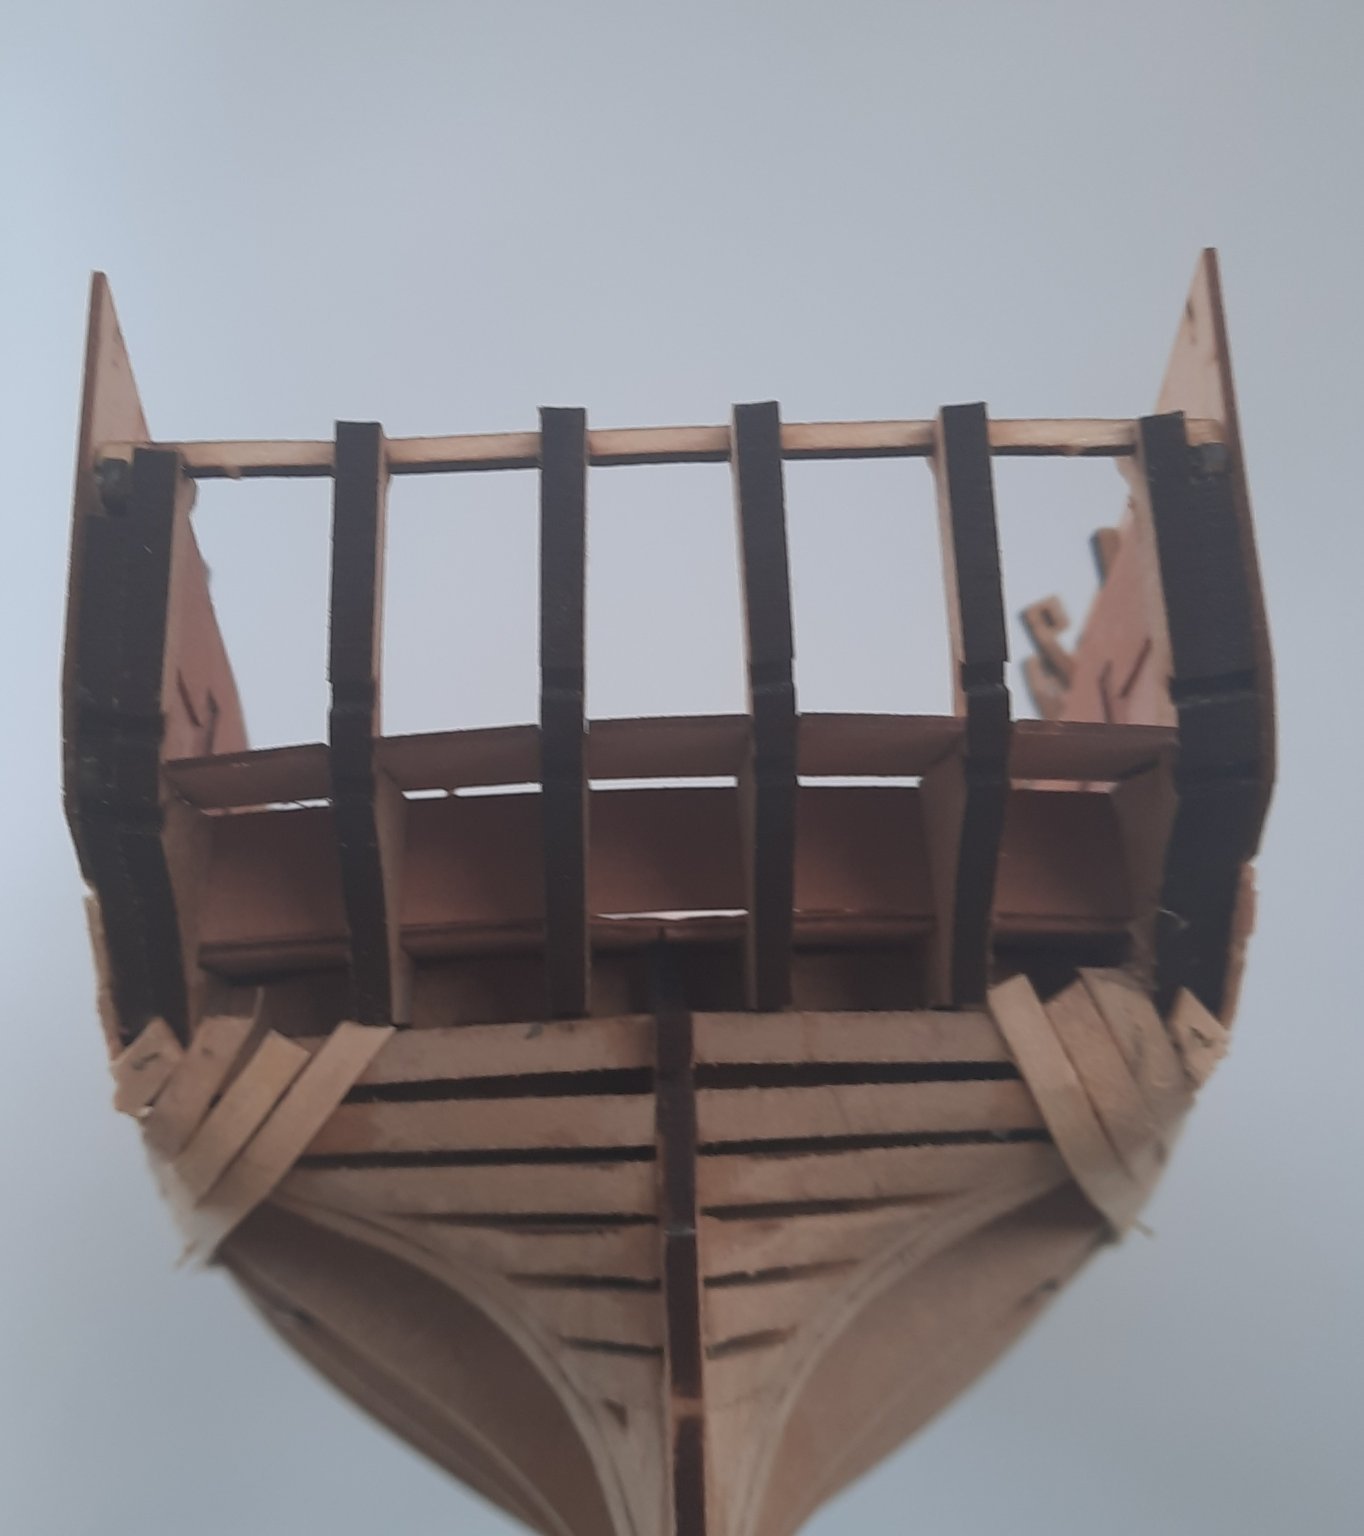
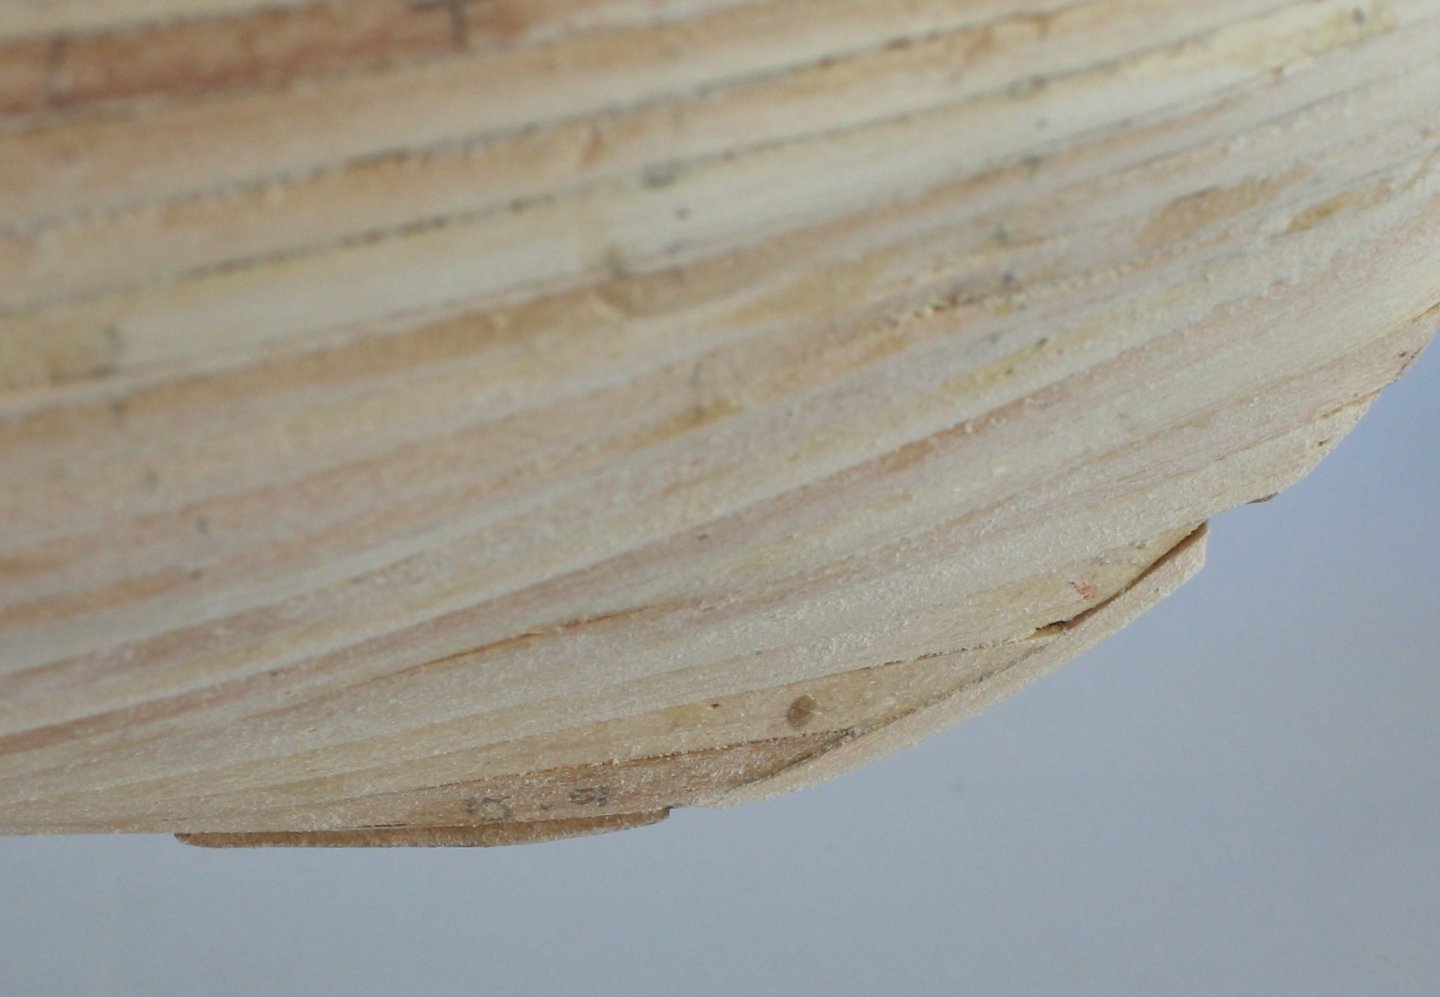
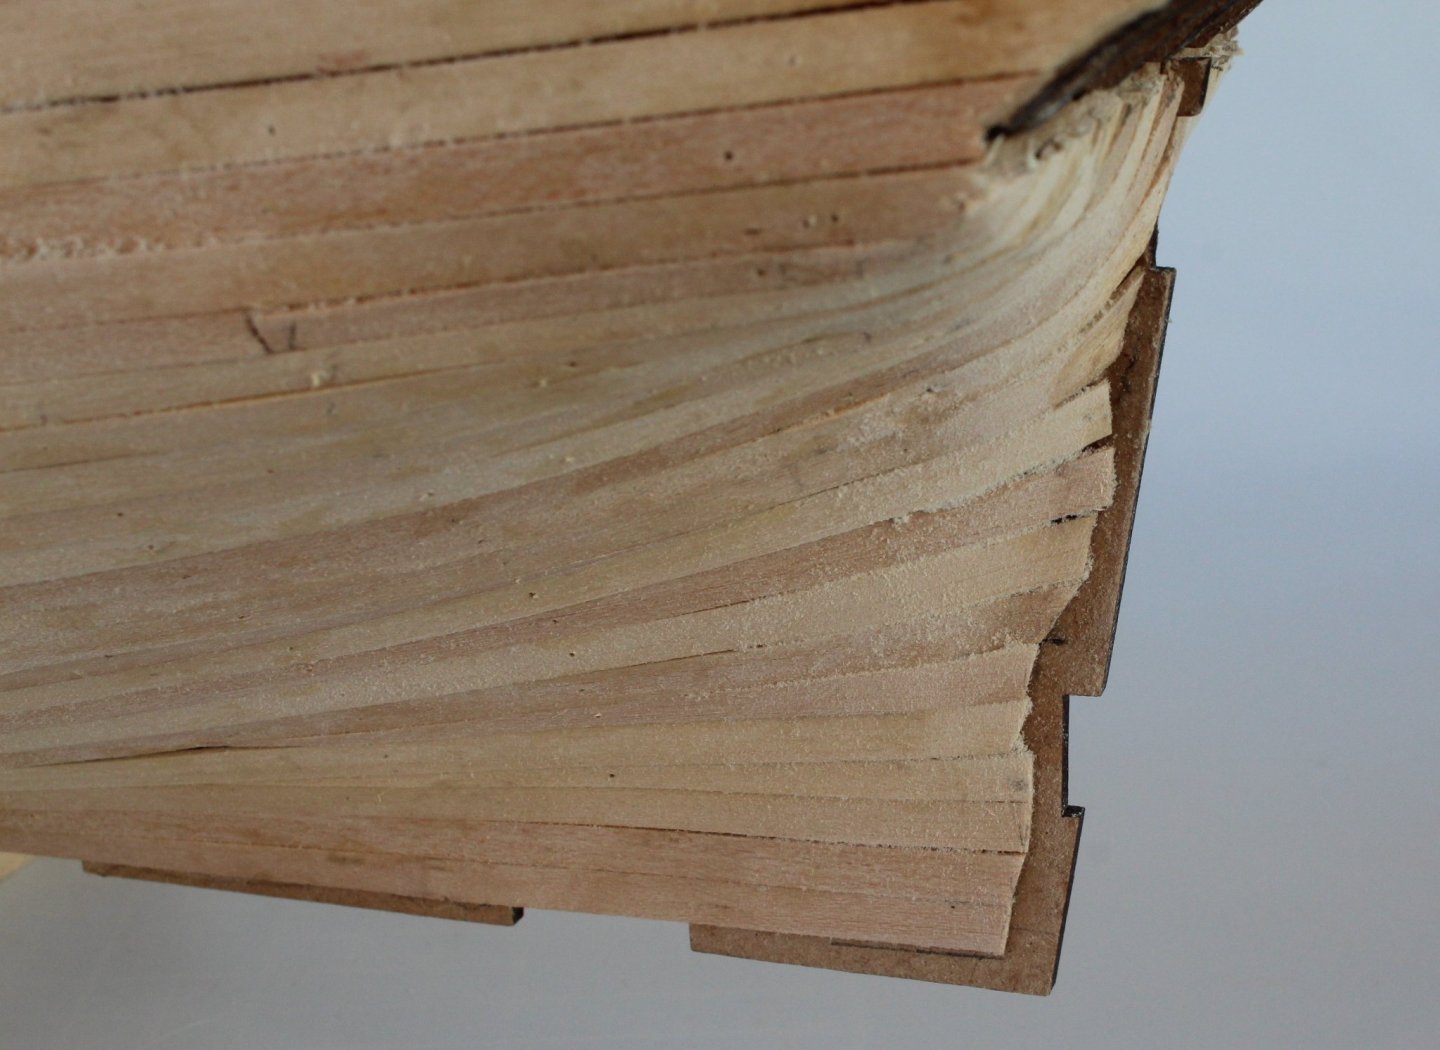
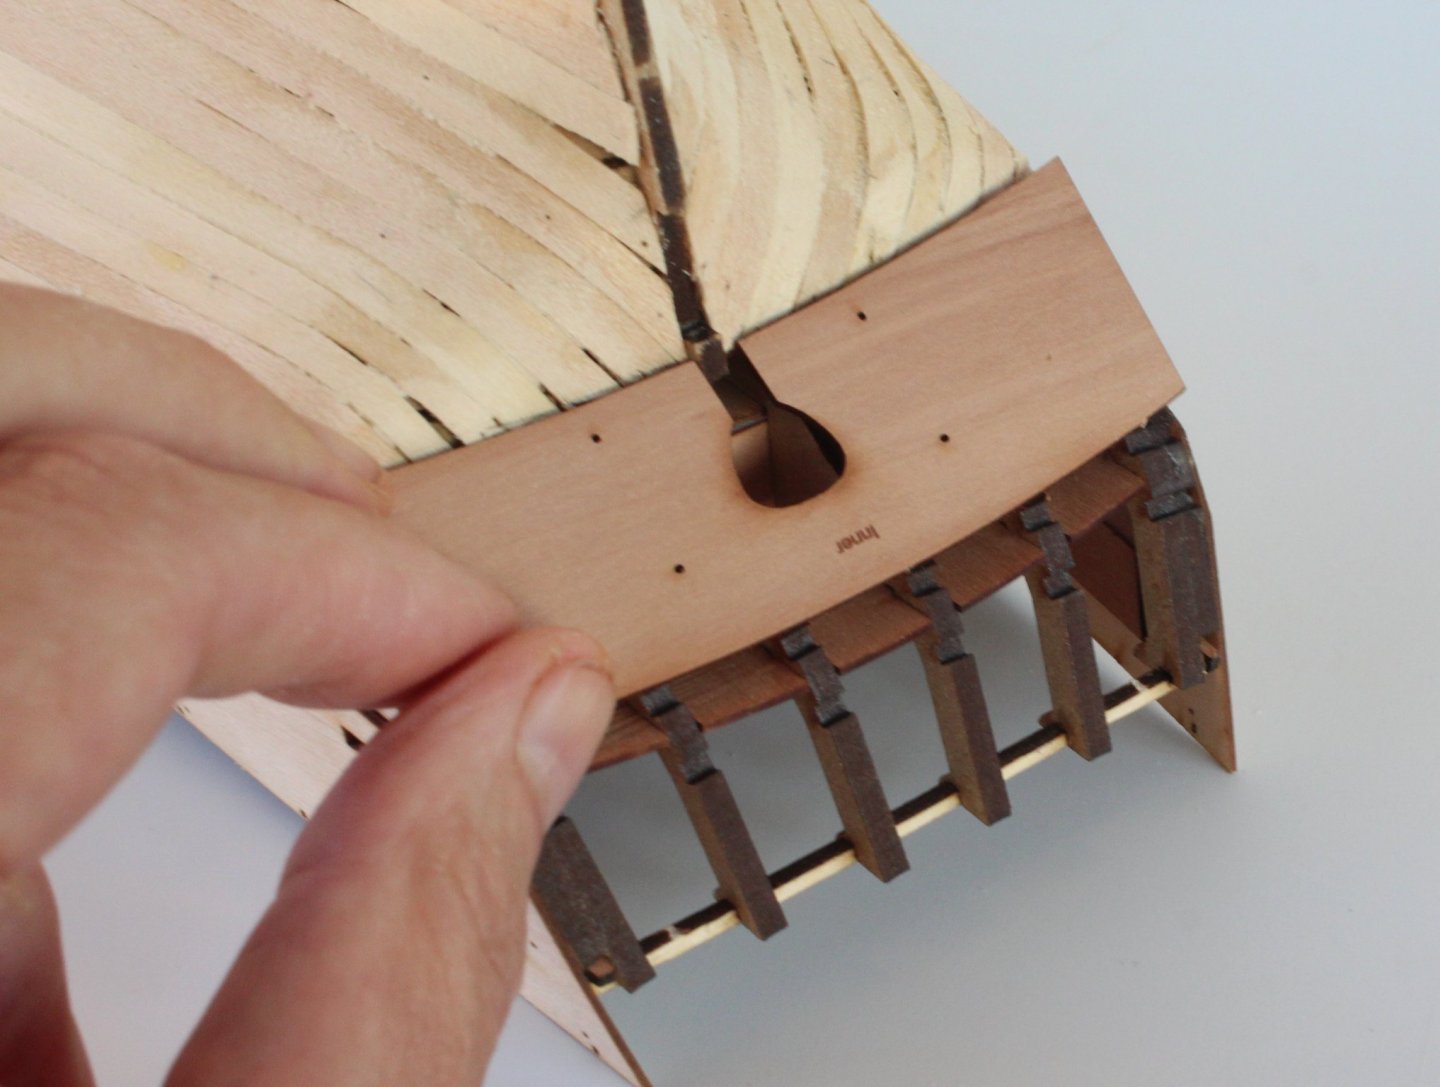
HULL ASSEMBLY FIRST PLANKING – PART 4 BUILD MANUAL STEP 142 - 143 LINK TO MY BUILD LOG INDEX Tools Used Titebond original glue Old paint brush Clamps Gathering the materials required The following kit parts are required for this section of the build: F-43 1mm x 5mm x 650mm strip – Limewood Brass pins Assembly Process – Keel When looking at the photo of the garboard plank(s) in my previous post I noticed I had left the planks short at the bow end, as can be seen in the photo below It was a relatively easy task to cut and fit a filler piece, as shown in the next photo. After fitting the three keel planks I then proceeded to complete the planking task by planking in both directions. I made sure I left the stern planks a bit short so I could taper the ends in this deadwood error down to 0mm when I get to sanding the 1st planking. I also found it better to fit a couple of stealers. The first planking layer is now complete and ready to be filled where necessary (I have noted a few areas) and then it can be sanded smooth. I can forecast a large dust cloud forming in the Scarborough (UK) region over the weekend. The bow filler piece can be seen but overall the bow profile looks reasonably Ok The stern area will require a little bit of filler I did trim the ends at the stern and tried a test fit of the lower stern counter pattern – inner. It looks to be a good fit. I will bend the pattern before it is fitted. I might fit a couple of mini stealers to fill the two small gaps on the left side. I also test fitted the prow pattern and I was pleased to see it was a good fit. This picture really shows the importance of adding the small bow filler piece.

-
I've just finished my 1st planking. Time to go for my daily run so the glue can cure on the last three planks. I had exactly 23 plank widths on one side and 22.8 plank widths on the other side.
-
You have done a great job so far, so there is no need to worry to much about how it looks as it gets sanded smooth, filled and then covered with the 2nd planking. I have altered my planking approach as I fit the few planks per side as helps me to speeds up the process and also helps me get a better shape requiring less filling and sanding. I hope to complete my 1st planking either later today or tomorrow morning.
-
I will continue to watch you progress with great interest.
- 857 replies
-
- 2
-

-
- Sphinx
- Vanguard Models
- (and 1 more)
-
You've done a very good job so far.
-
Thanks Glenn (USA), good to know we're all singing from the same Hymn sheet.
-
I hope that works out for you. I did the same on my DOK build but I still had to sand the 2nd planking for a flush fit. This time I am following the method shown on the build manual, as shown in the following photo taken from James Hatch's build log
-
Did you trim the planks at the stern?, i.e no planking in the deadwood area, ready for 2nd planking to align with rudder. Good idea not to trim bow until after glue cured.
-
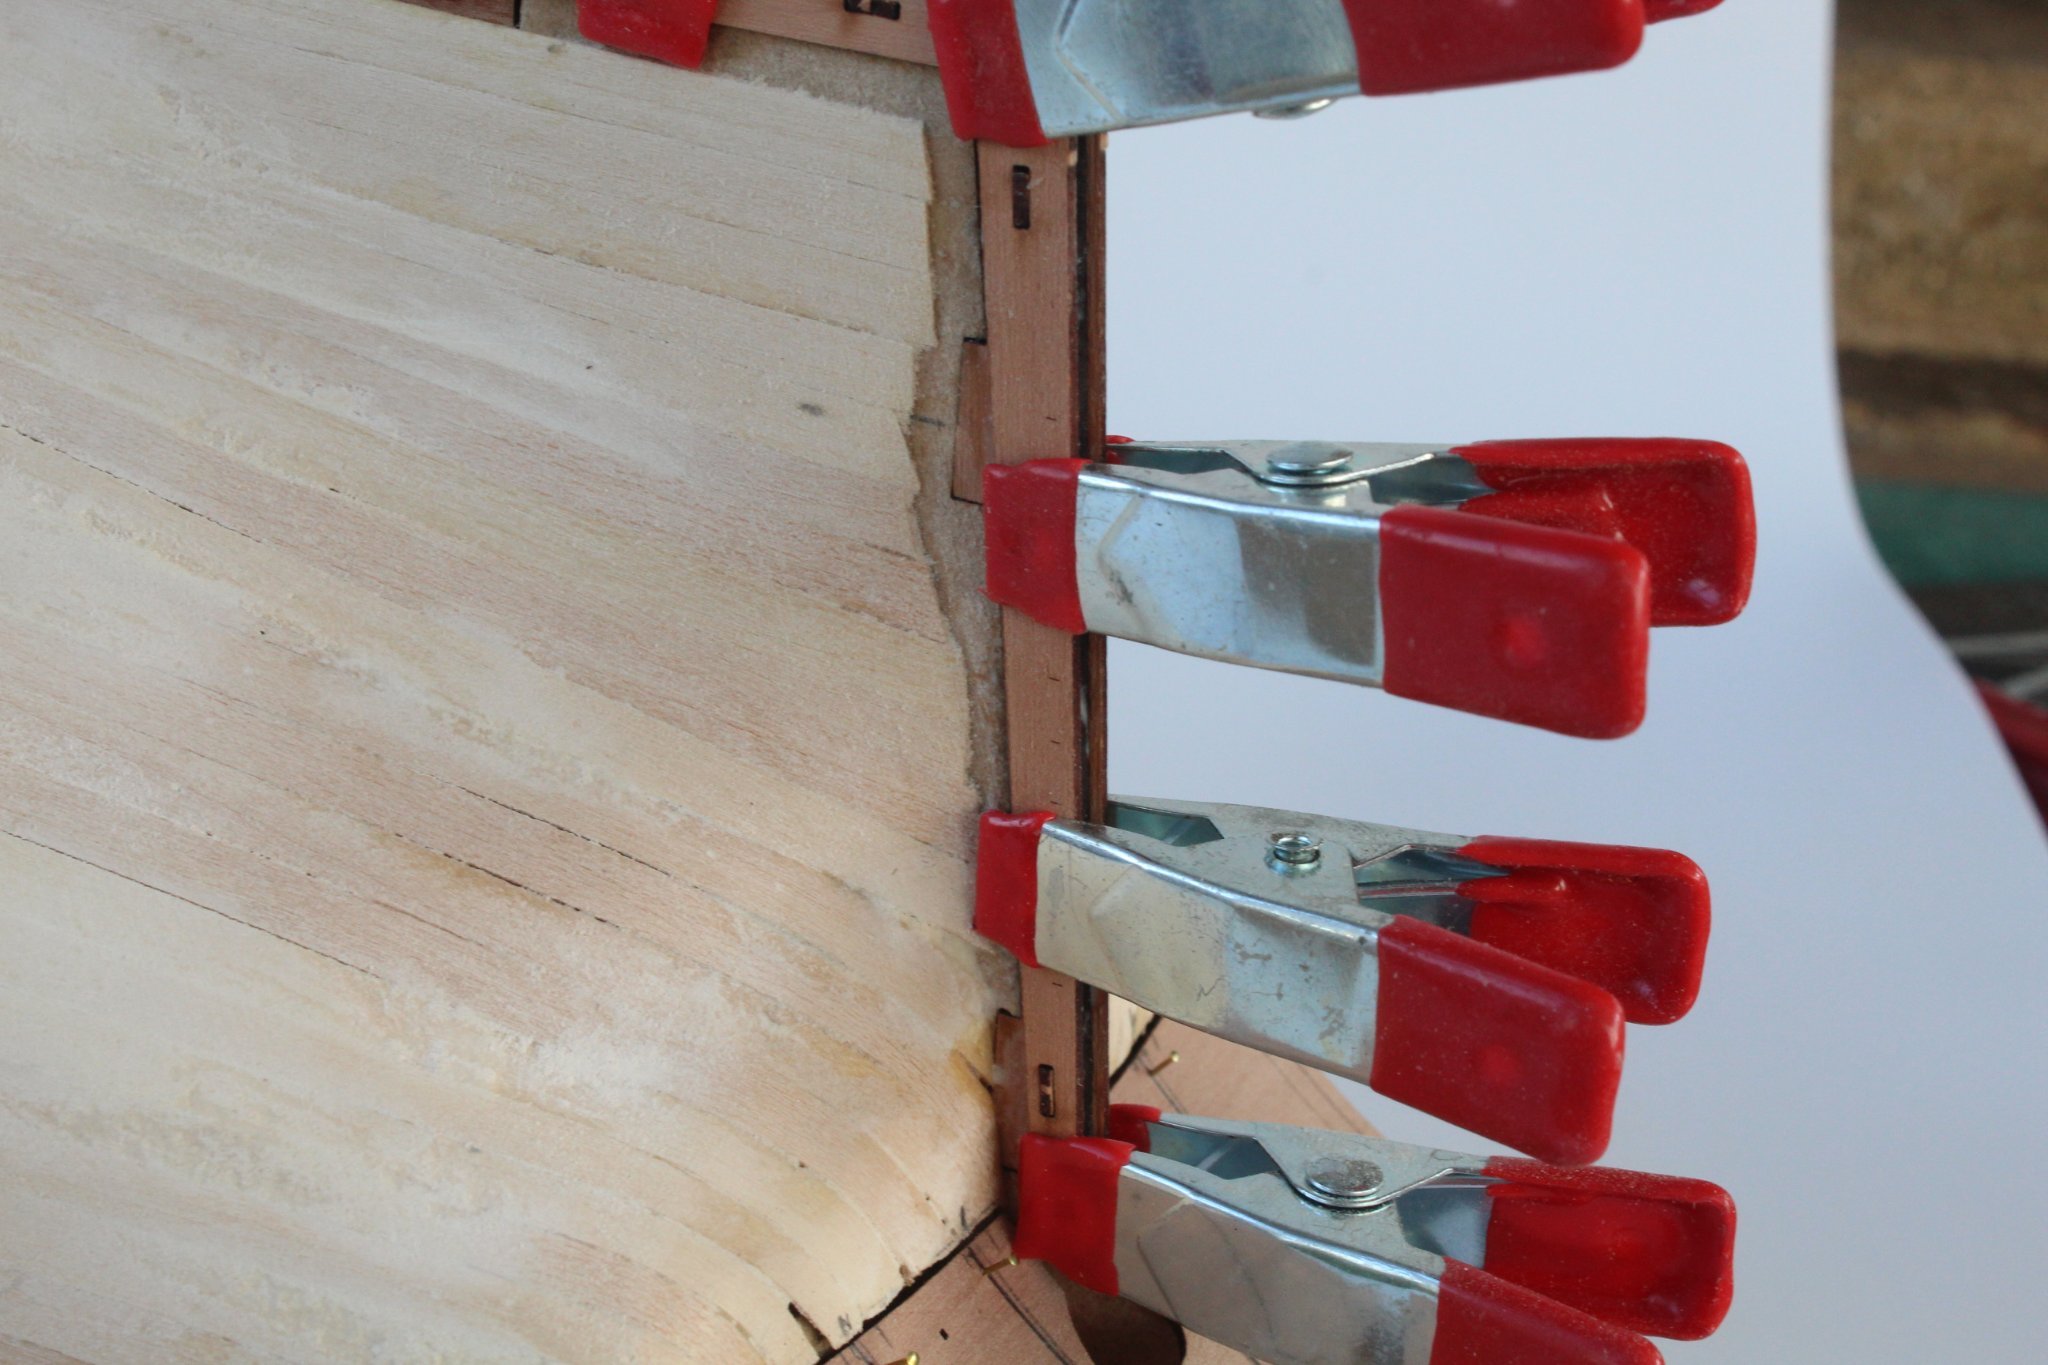
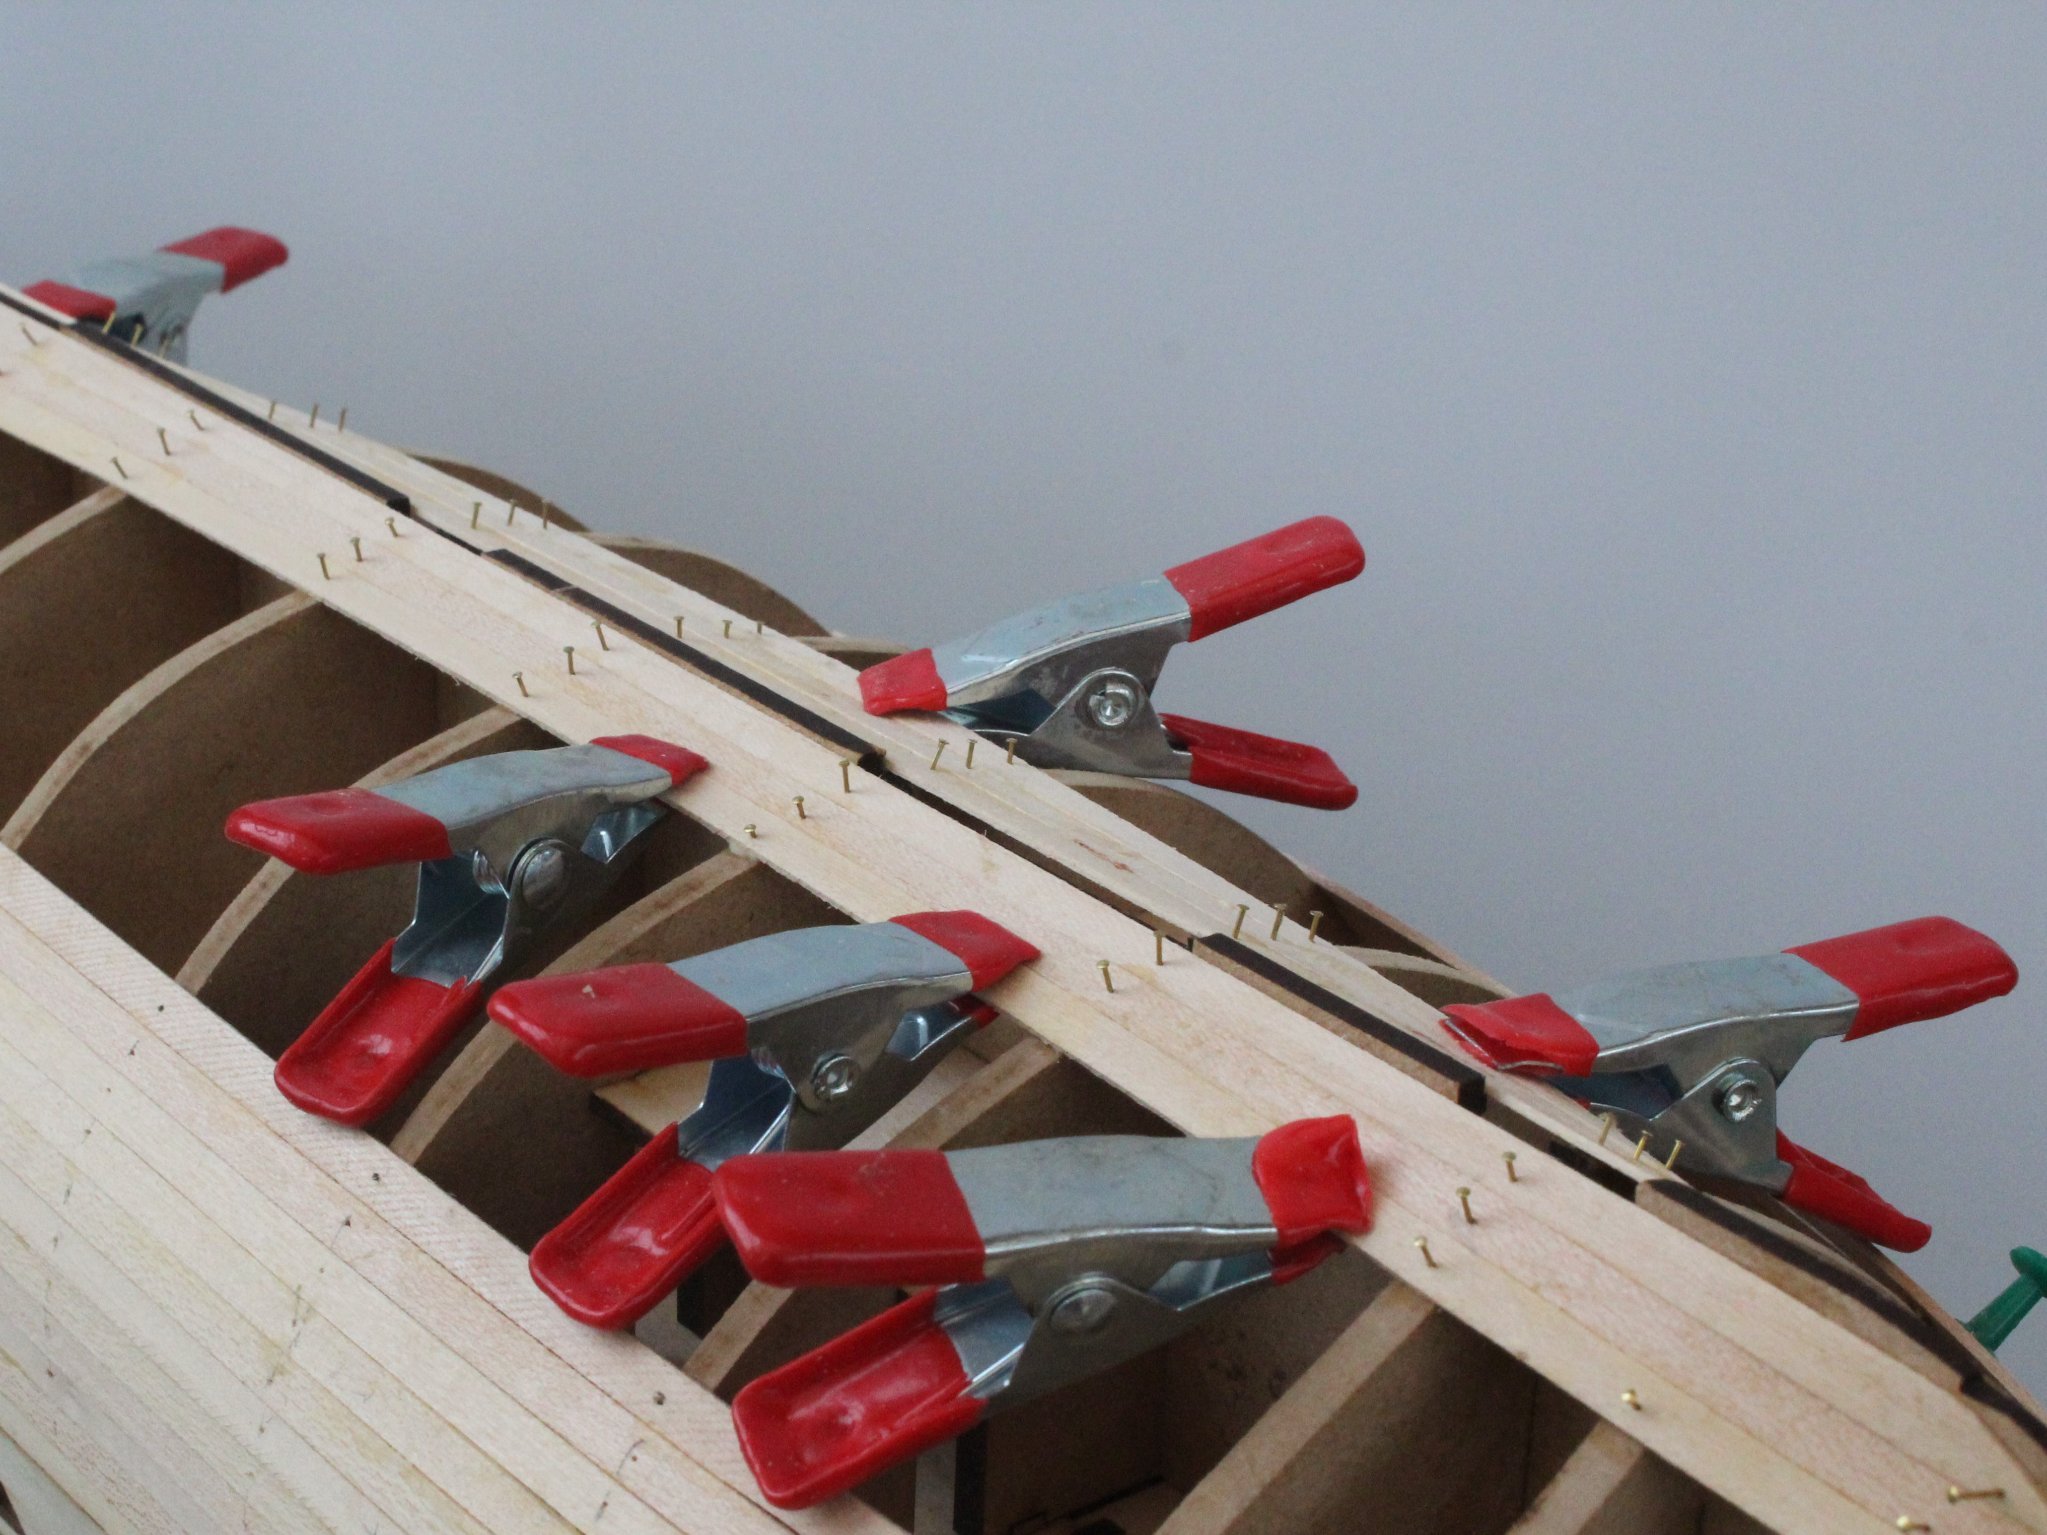
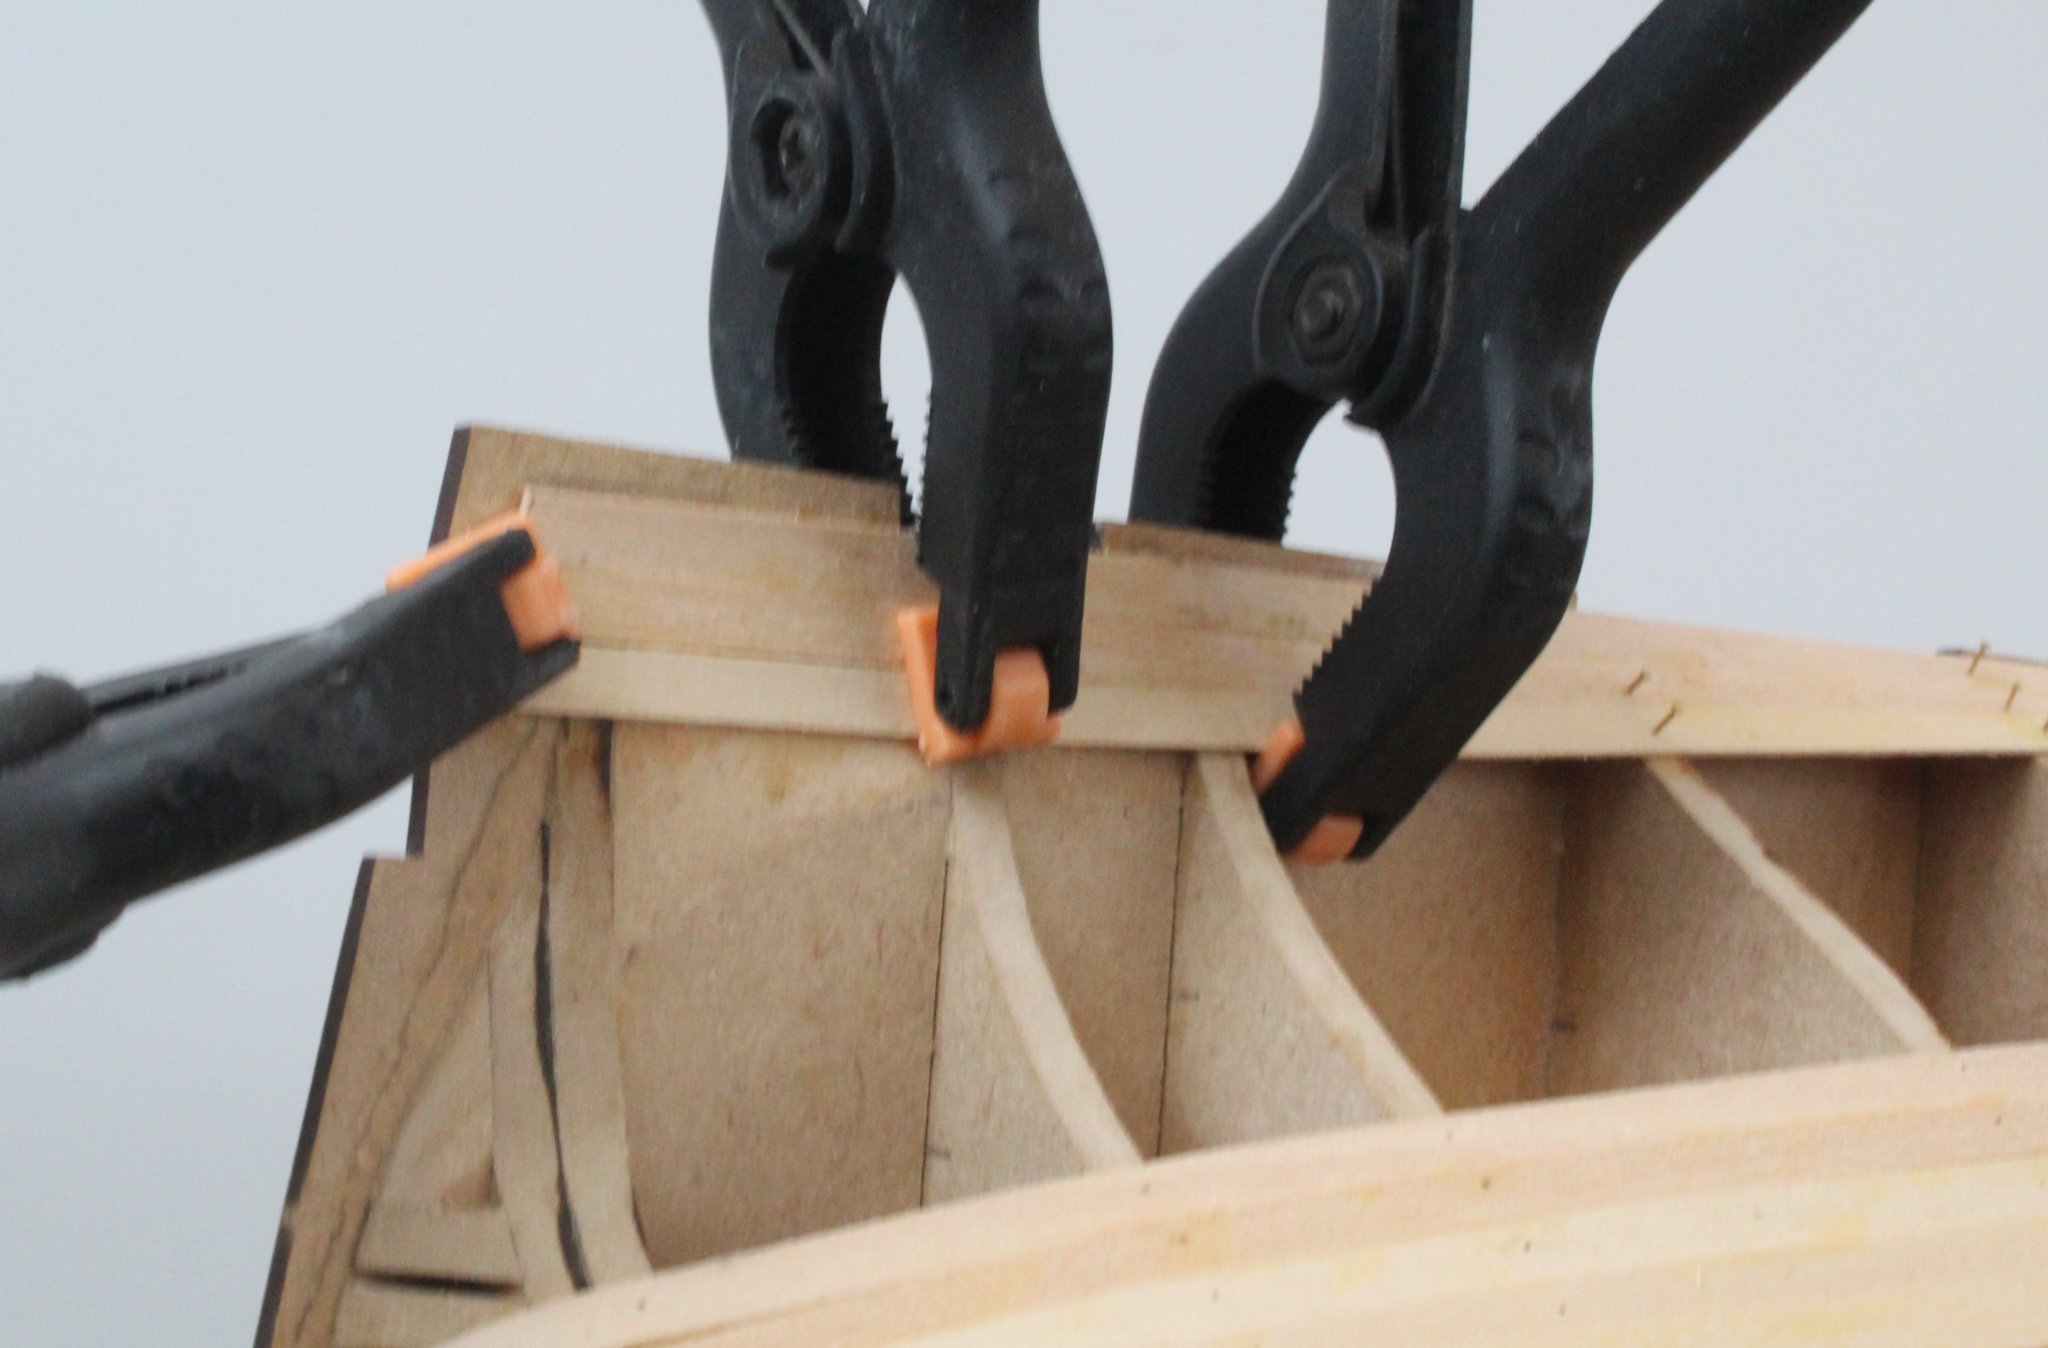
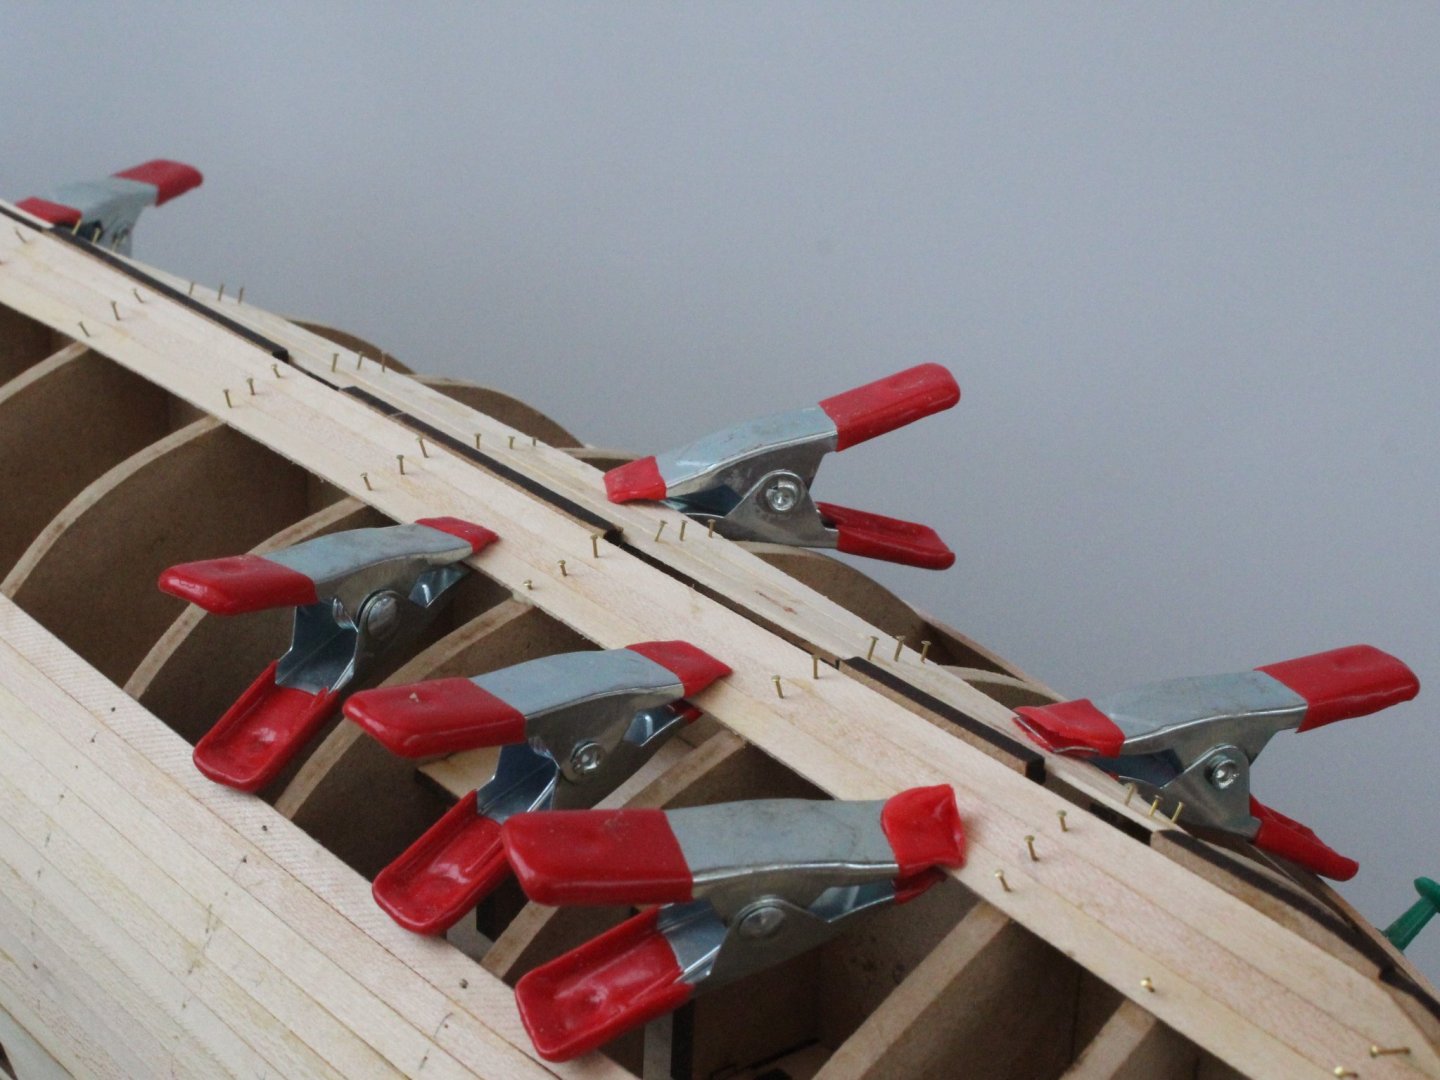
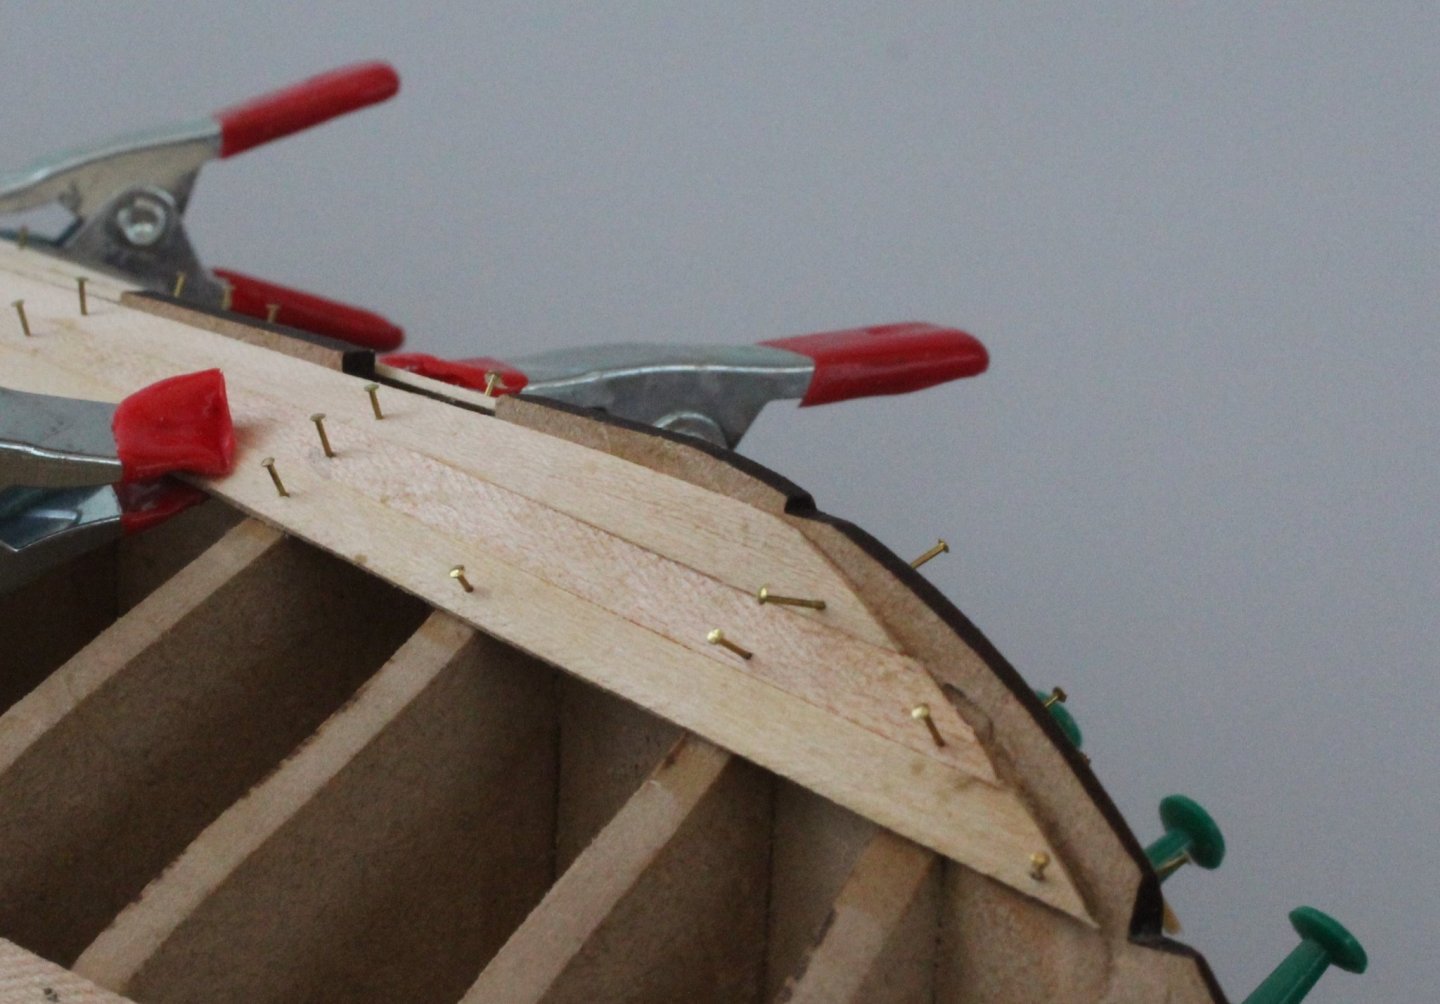
HULL ASSEMBLY FIRST PLANKING – PART 3 BUILD MANUAL STEP 138 - 141 LINK TO MY BUILD LOG INDEX Tools Used Titebond original glue Old paint brush Gathering the materials required The following kit parts are required for this section of the build: F-43 1mm x 5mm x 650mm strip – Limewood Brass pins Assembly Process – Keel After adding a couple more planks this morning, I reached the point where I like to start planking up from the keel. Although I have measured the width, at the widest point, to be an exact number of plank widths, experience has proven this never usually the case in practise when once they have been glued in position. If I need a slightly thinner plank I prefer to fit it a few planks up from the keel. I have now fitted three full planks from the keel. Bow I found using the clamps, as shown, helps to keep the planks together I have not planked right to the end as this area needs to be left so the 2nd planking will line up with the rudder and keel You can see what a mess I have made of the planking around the stern counter area. Once the edges have been trimmed and then filled & sanded as necessary it will not look to bad.

-
Great work
-
Around 30 seconds on each side of the central clamp. I brushed water on before applying the heat. I don't think the plank bender heats the plank to the same amount as a travel iron, which Chuck uses. I used a hairdryer in a previous build which works well but suffers with thermal shutdown
-
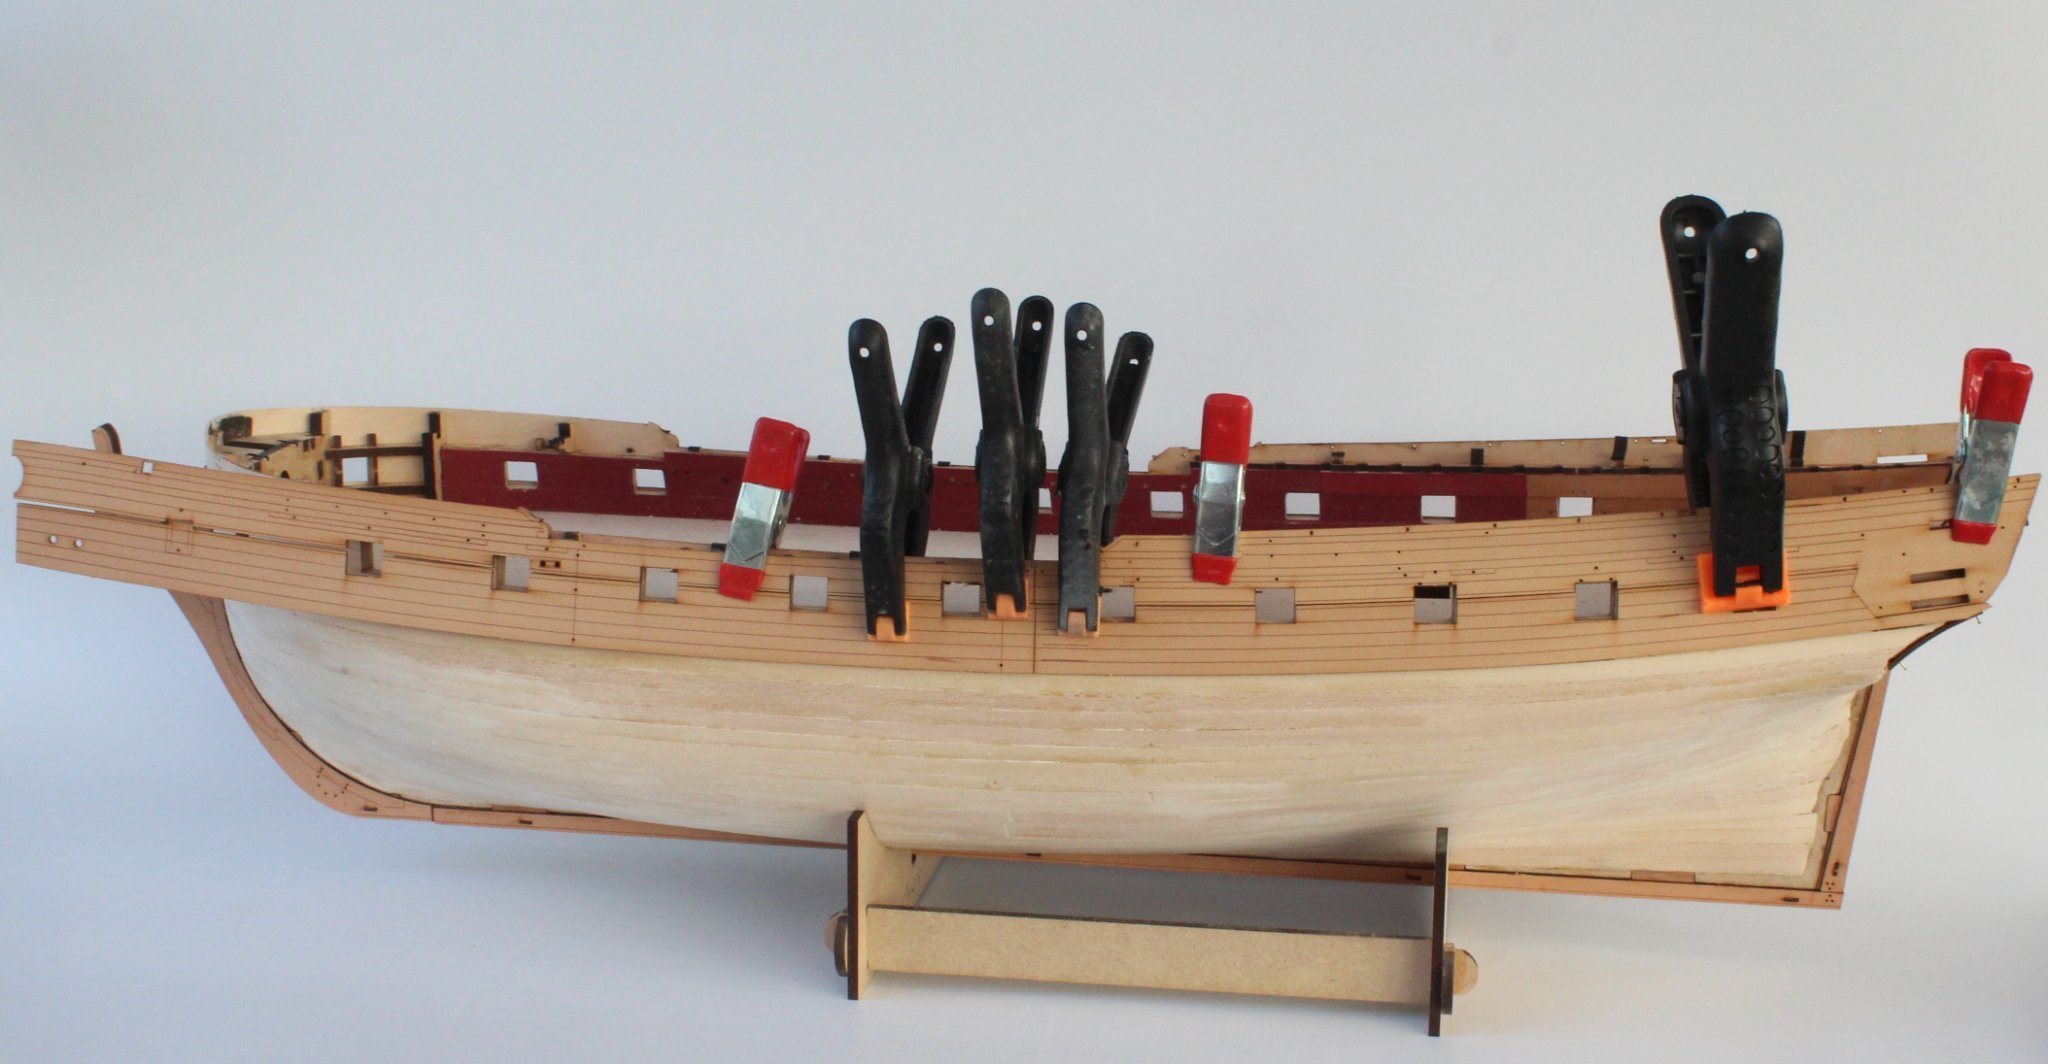
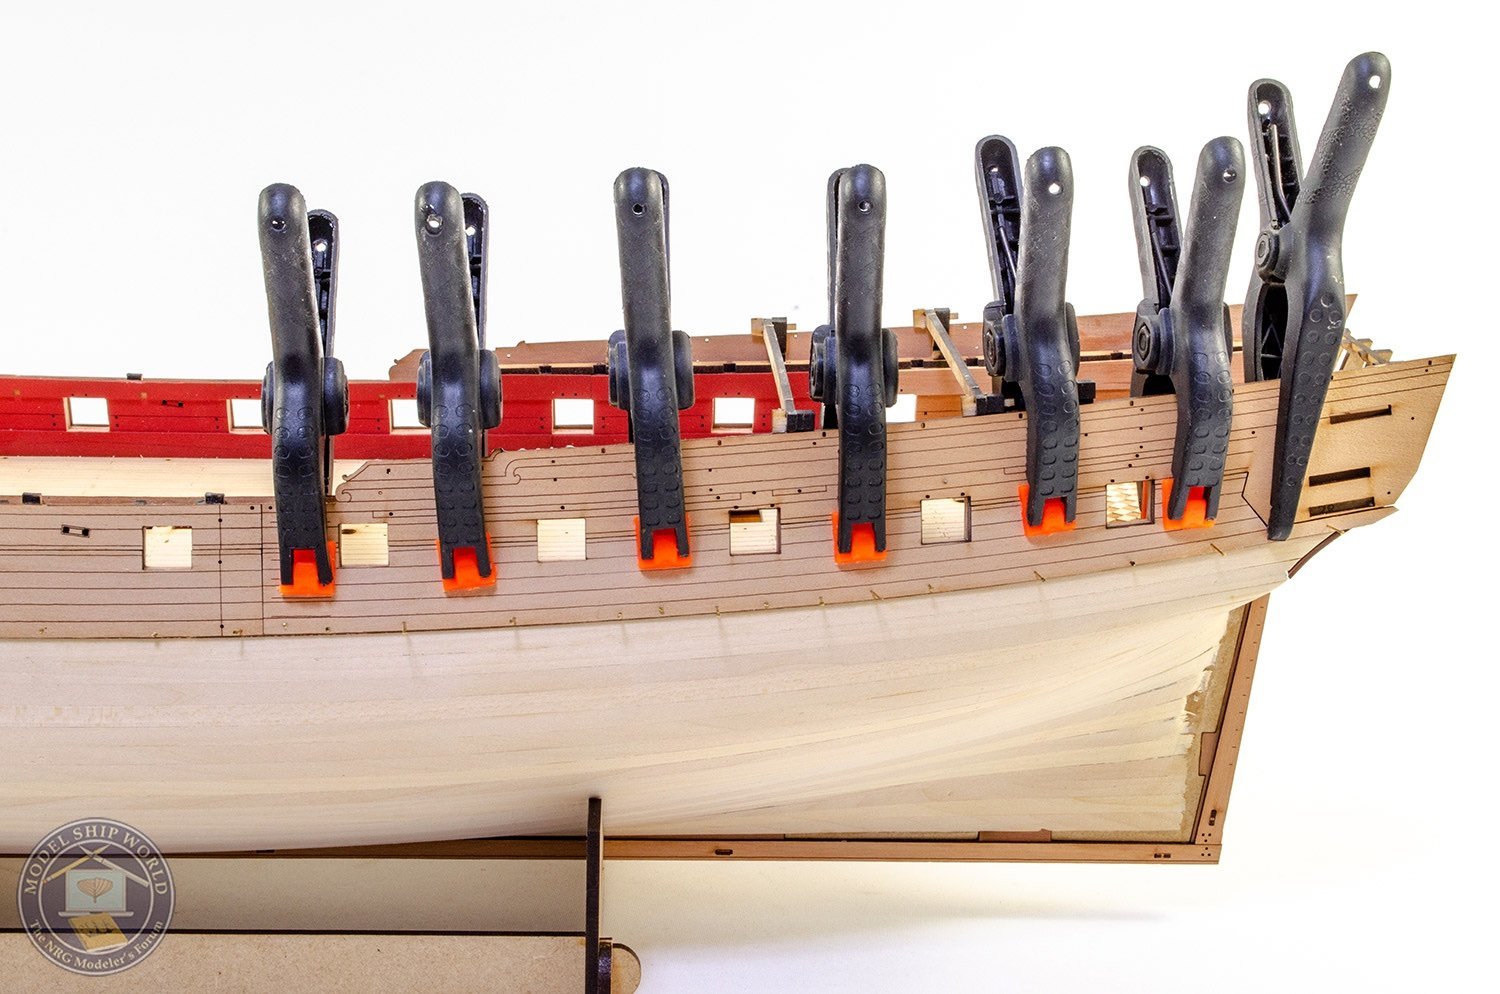
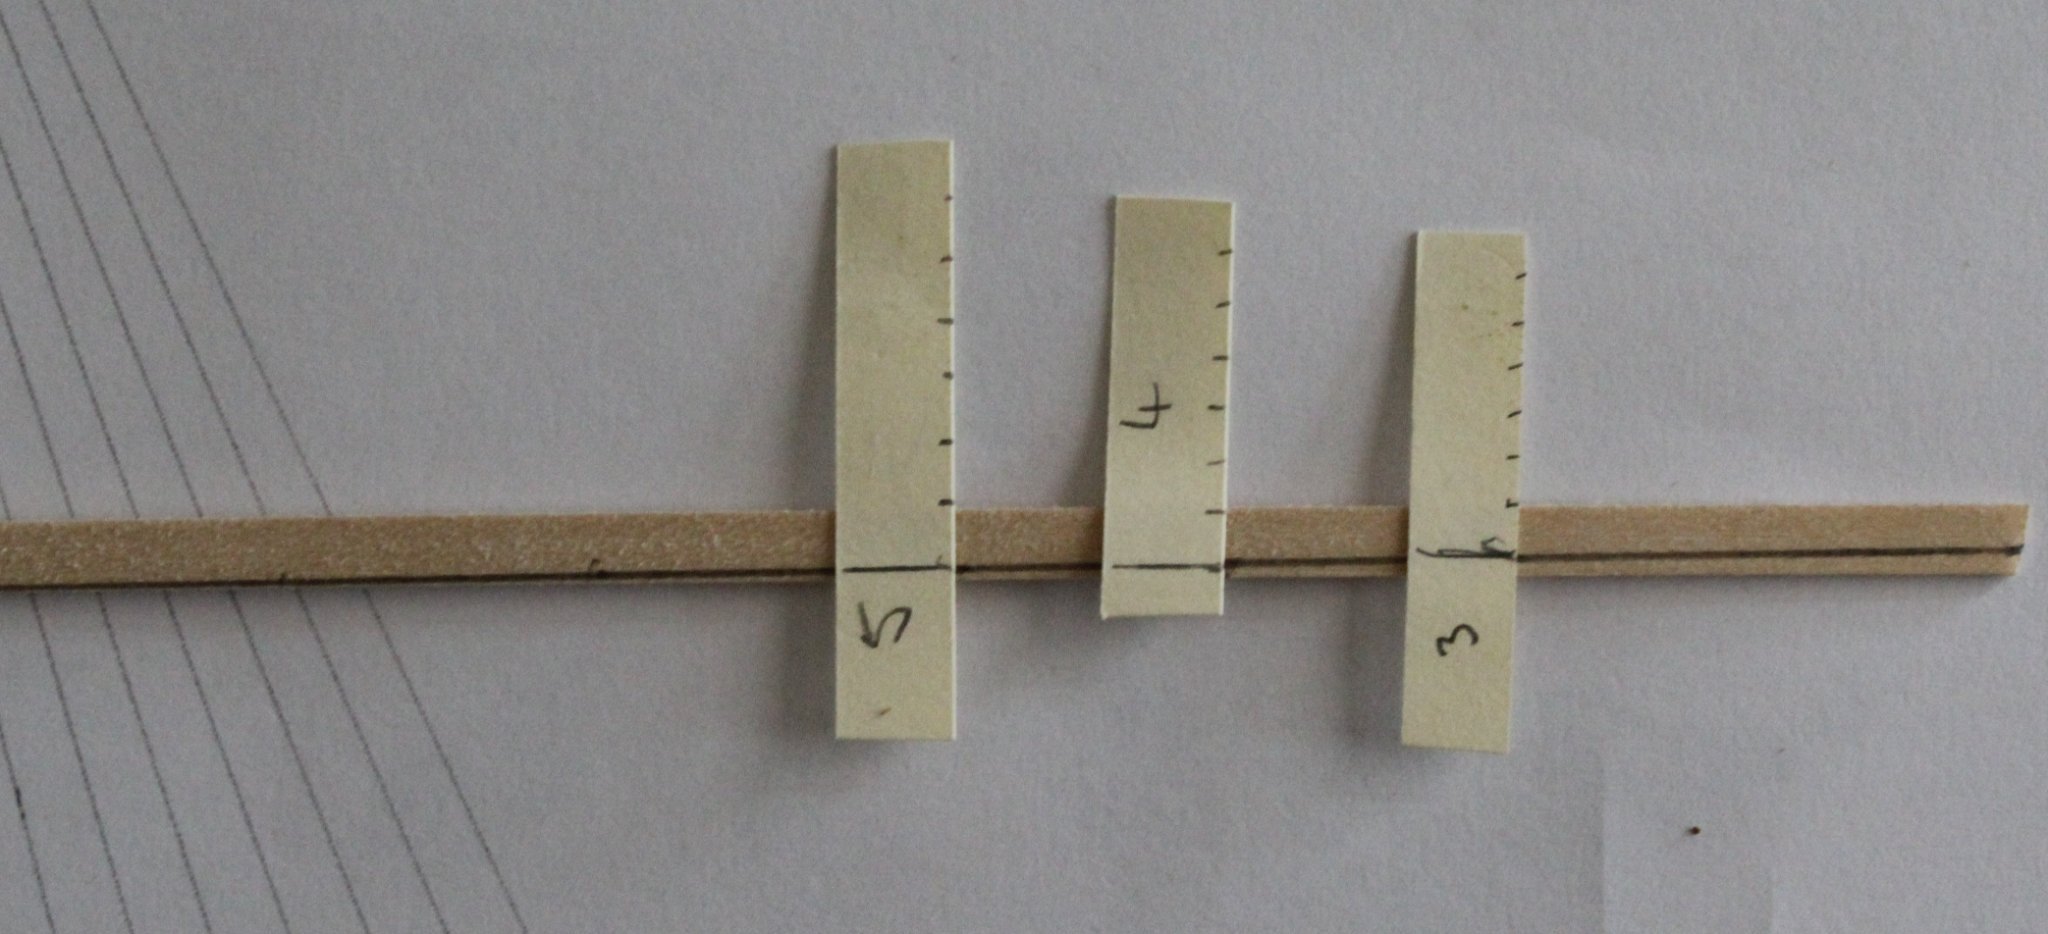
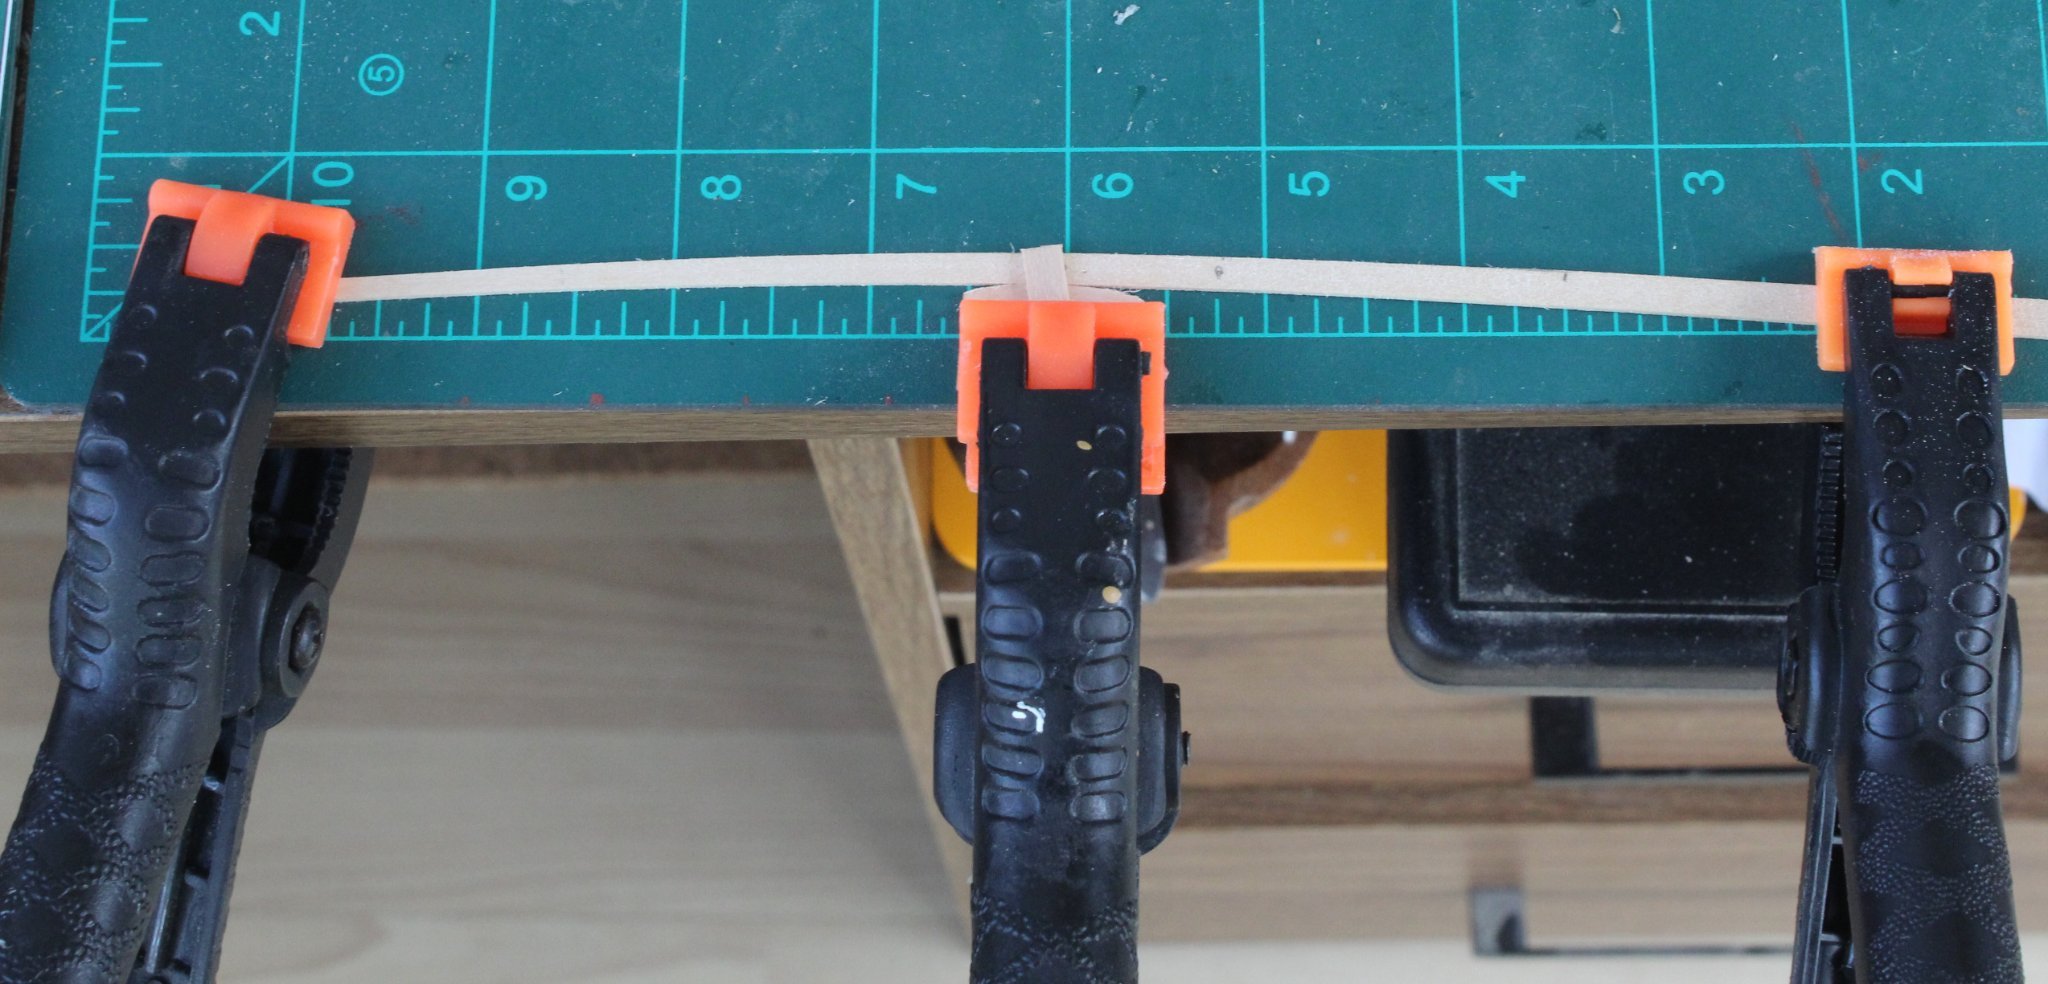
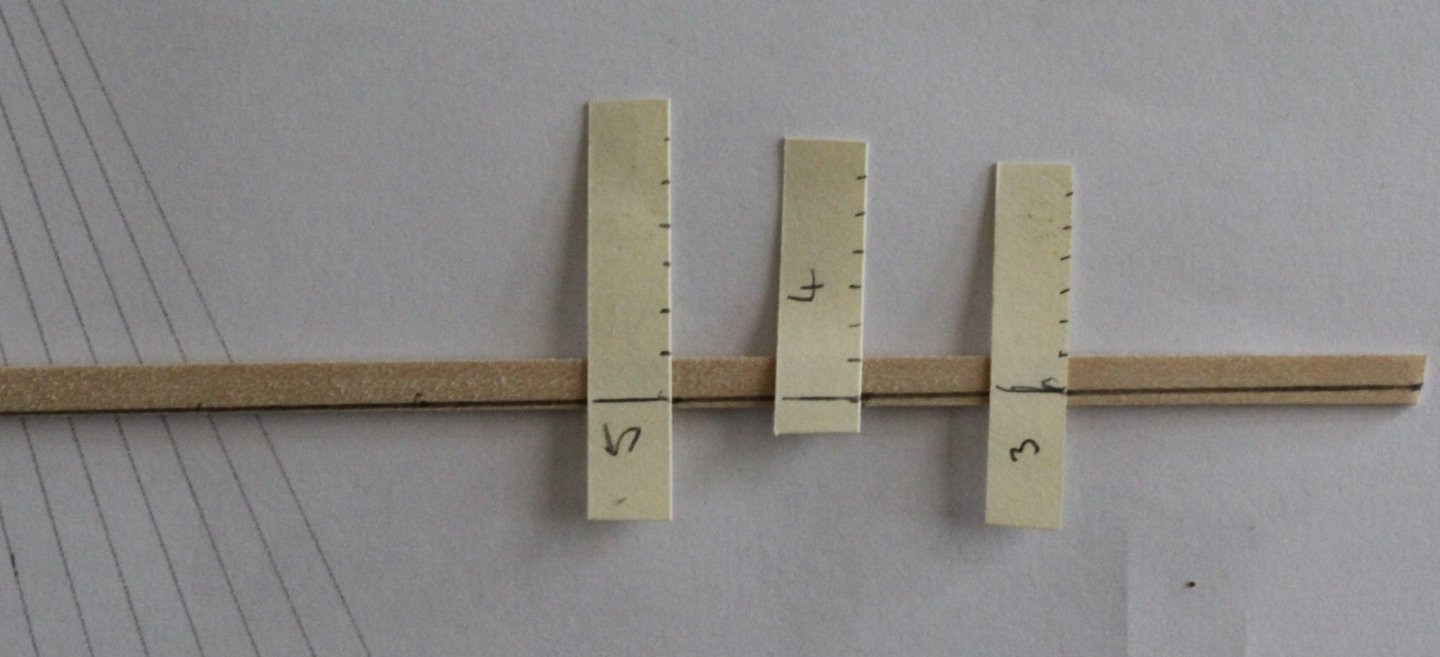
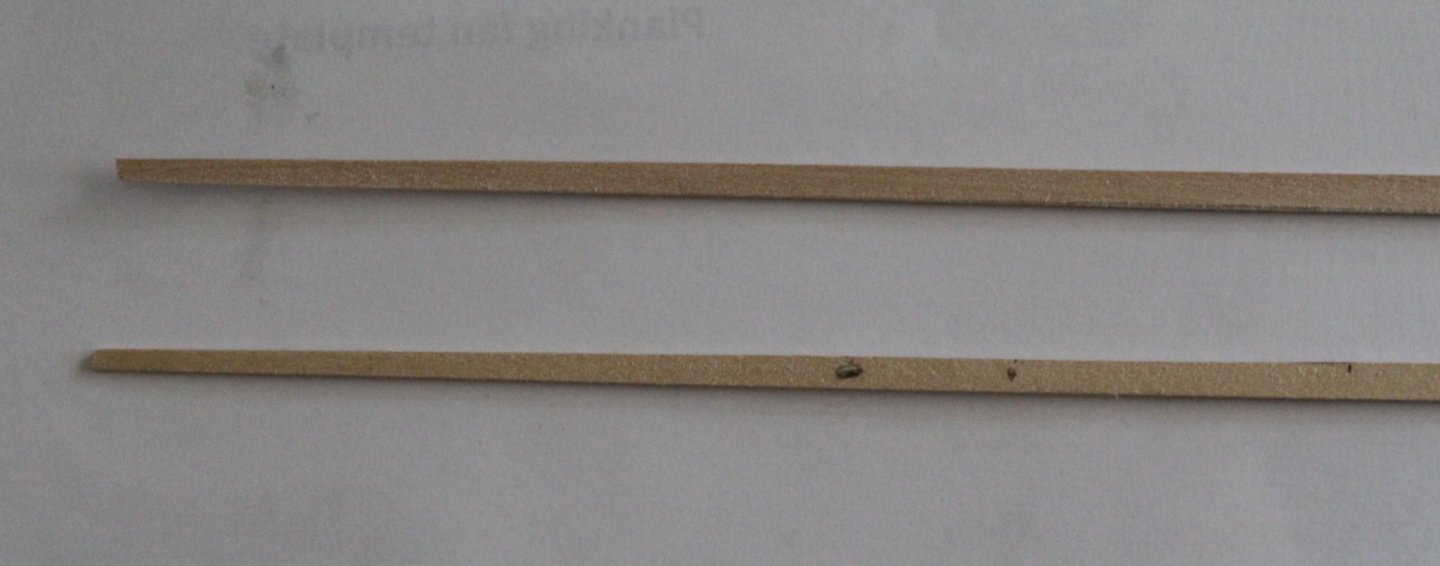
HULL ASSEMBLY FIRST PLANKING – PART 2 BUILD MANUAL STEP 138 - 141 LINK TO MY BUILD LOG INDEX Tools Used Titebond original glue Old paint brush Heated planking bender Gathering the materials required The following kit parts are required for this section of the build: F-43 1mm x 5mm x 650mm strip – Limewood Brass pins Assembly Process – Band 1 Planking The first band is 35mm (7 planks) at the widest point which covers 5 of the central bulkheads. Using the dimensions in my banding spreadsheet I marked the required plank widths at the different bow bulkheads for the first right-hand side plank and drew a straight line. I then double checked the line using my tick strip. The first plank is ready to be tapered I repeated the above process for the first left-hand plank, aiming to have a matching pair. Following the method outlined in Chuck’s YouTube video’s I marked the point of the widest gap and then clamped the plank in my bending station. I brushed some water on the plank and then applied some heat, using my plank bender. The bent plank was test fitted and looked to be a good fit. I then tapered the stern section of the plank. I used my plank bender to achieve the required sharp bend up to the stern counter. I applied some glue to the various bulkheads and along the top edge of the plank and secured it place using brass pins. Bow section I found it necessary to use a clamp to secure the plank for the stern counter bend. I have now fitted all the planks in the first band. Bow section. I have kept the bow planking even as both left and right sides are a reasonably good match The discolouration is from the heated plank bender used on fairly dry planks. The major mistake I've made, in my opinion, was applying a slight taper to some of the stern planks. The left and right sides are not a good match. Thankfully this will not be seen when the 2nd planking has been added.


-
I can get the sharp stern bend with my heated plank bender. I think I will try half planks for the next row of planks.
-
I totally agree. I have fitted 3 tapered planks per side, the bow looks nice but the stern is not so nice. I am finding it very time consuming to fit each plank at the moment

-
I am in the process of tapering the 4th plank which is currently clamped in my bending station. From my banding calcs I only need to taper the stern end of the planks from 5mm to 4mm. I know the planking will not be seen but I'm trying to improve my technique so I can practise with the 1st planking. I have not broken any so far and have 12 off spare 5mm x 1mm limewood strips from a previous project. I can always get more stock from Cornwall Model Boats.
-
Are you planning to join the planks midships. I have been considering this option.
-
I also muddle through my planking but I am trying to take my time and get it looking better for this build.
-
No matter how clamps I have I always seem to be one short😂