


Glenn-UK
-
Posts
2,658 -
Joined
-
Last visited
Content Type
Profiles
Forums
Gallery
Events
Posts posted by Glenn-UK
-
-
Hello David I was at Old Trafford last night so I was one very happy bunny! I love the goons so will certainly tune in on Friday
-
Well done Jerry. I'm currently working on the cat heads which I hope to install in the next couple of days.
-
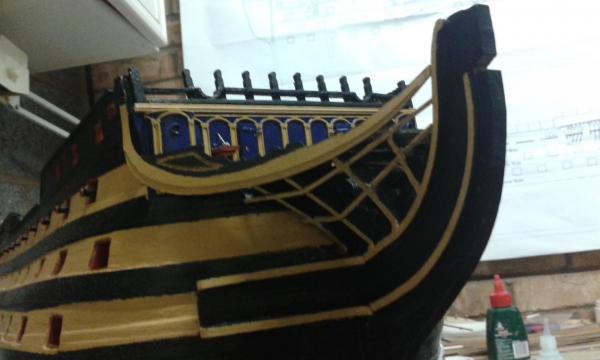
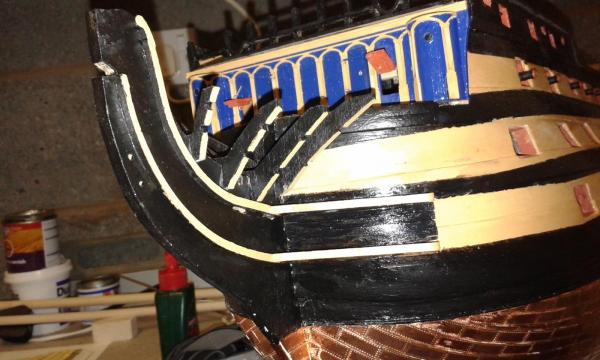
First part of the bow assembly is now complete with exception of the blue 2mm strips on the tiberhead side edges which will be tomorrow nights task.
Turned out to be quite a tricky task, and if I had my time again I would do it differently, but hindsight is a wonderful ability which I do not have!
In the end its not turned out too bad.


- WackoWolf, Harvey, mort stoll and 1 other
-
 4
4
-
A very nice plate to commemorate your build. I to miss your posts but I will continue to ask you questions as my build progresses.
- Shipyard sid and mort stoll
-
2
-
Hello Patrick, David and Jerry
Many thanks for your visit and kind comments.
-
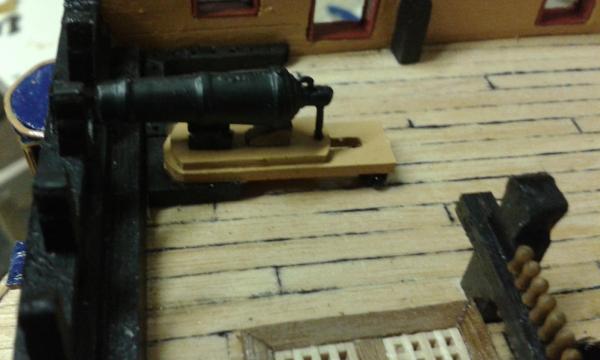
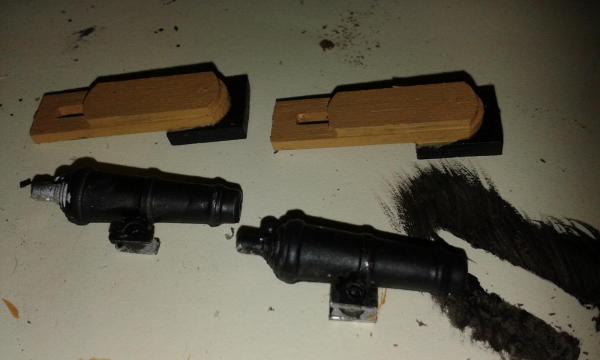
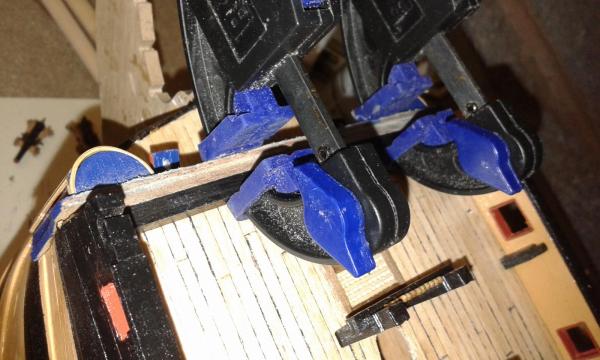
Carronades completed, ready for rigging. Planning on rigging the cannon later on.
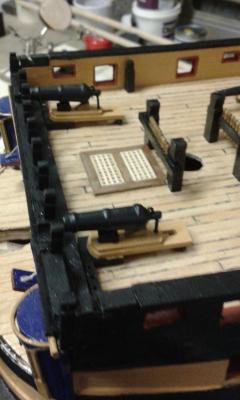
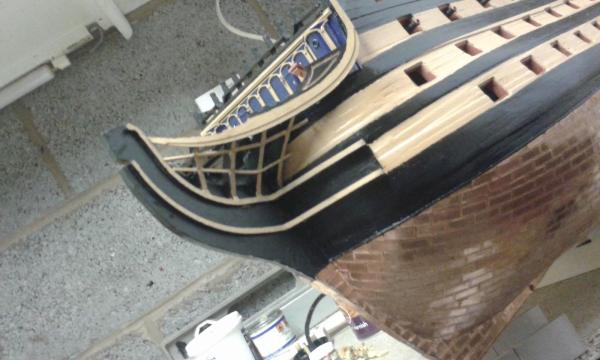
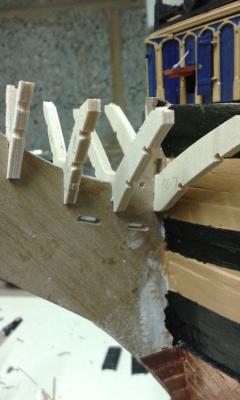
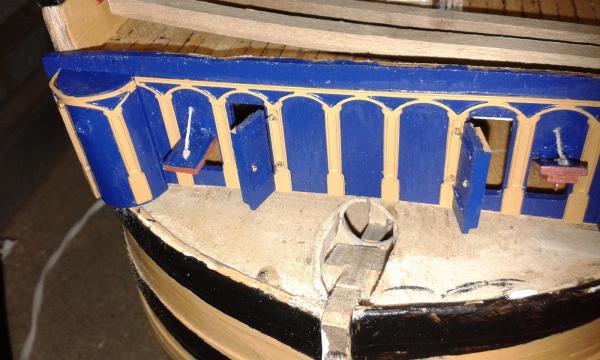
First part of bow assembly completed with the curve bow rails painted and fitted.
The hair bracket and lower bow cheek rail also painted and fitted.
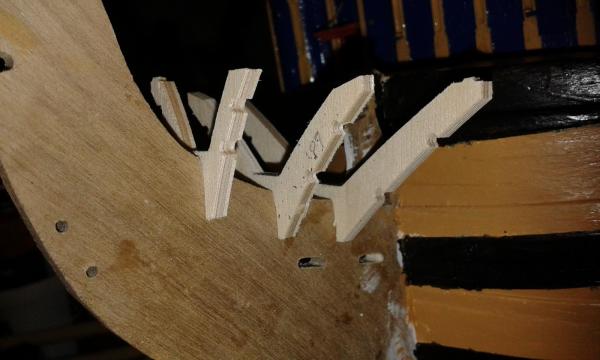
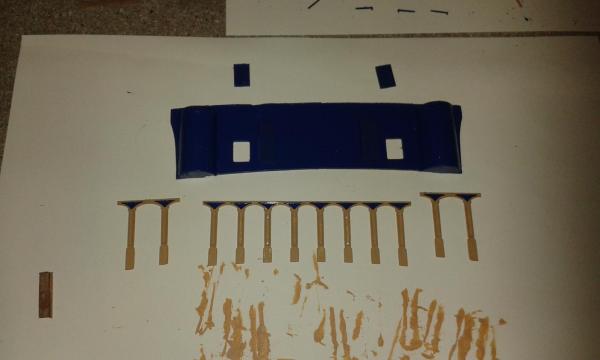
The four timber heads have been painted, but are only dry fitted in the following photos.
I will need adjust the timber head slots for the rails so the fit properly when fitted
-
Sorry can't help with your question, but you seem to have it all under control.
-
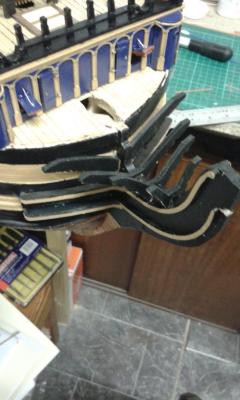
Beakhead capping build error has now been corrected, didn't take to long and I'm now happy with how it looks.
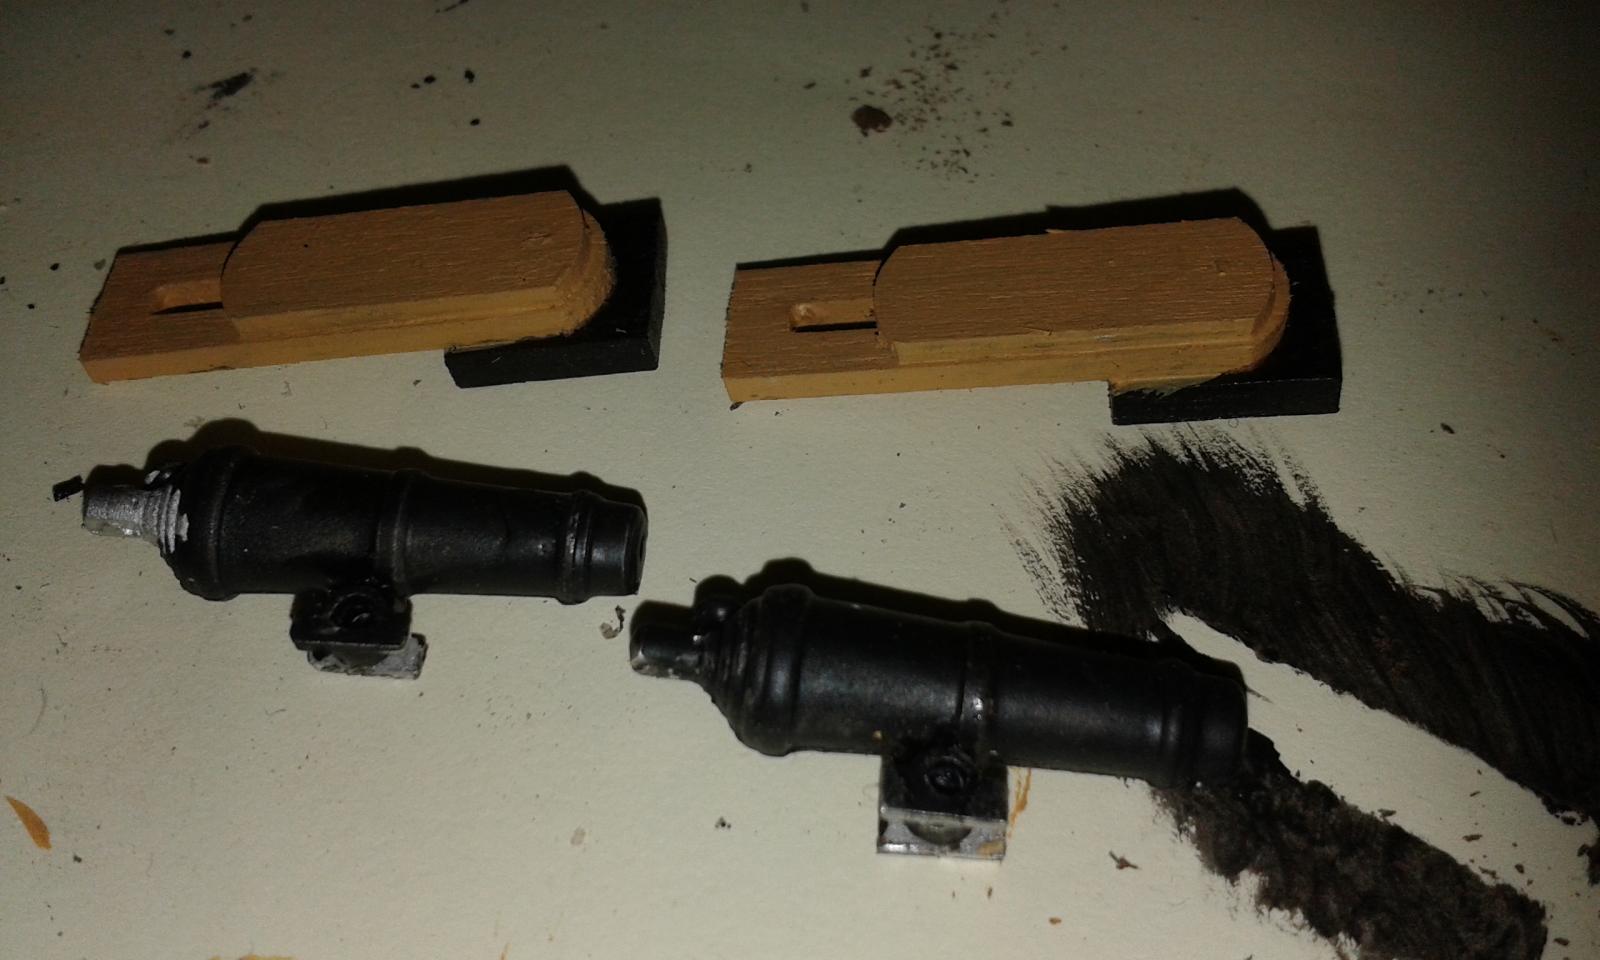
Work on building the two carronades, it is progressing slowly but I'm happy to take my time
Base section assemblied and painted
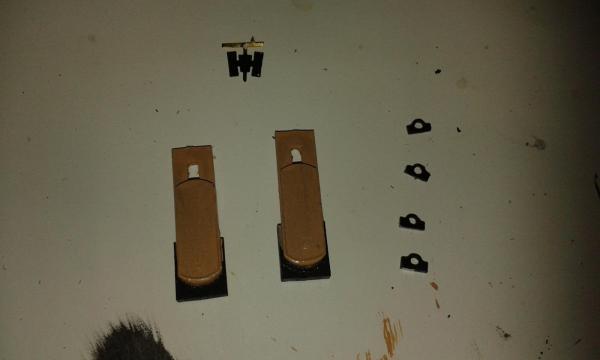
I may remove a little bit of the black front end to bring more in line with the actual HMS Victory carronades.
Slight bit of yellow paint leakage to be corrected as well.
Also front edge of lower yellow block need to be painted black
I will be taking time with the bow assembly phase as I think it will be quite a tricky task to complete.
Plenty of pre painting and dry fitting seems to be the order of the day.
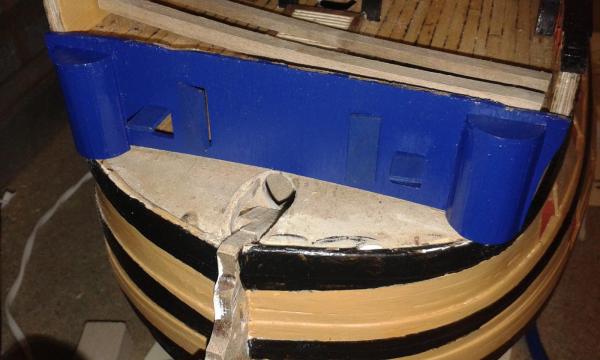
FIrst dry fitting.
This part is too big to fit in the slot, slight modification required

Part has been modified; dry fitted, post modification.
These parts have now been removed and are currently undergoing the painting process.
- mort stoll and Rich.F
-
2
-
Hello David
I wouldn't mind but I did take my time with the beakhead capping assembly. I had all the parts cut and prepared a few days ago and did several dry fits and still got it wrong.
For some reason I got it into my head that the slots on the timberheads for the carronade port ring should be forward facing and not side facing.
It was clear on the jotika plans but I still chose to ignore that yesterday thinking the plans were wrong and I was right.
I will be going extra slow for the bow assembly phase, that's for sure. Plenty of trial dry fits and I will not committee to anything permanent until I'm 100% sure its right (famous last words).
-
Hello Jerry
I discovered my error when looking at your build log for the carronade and bow construction phases.
I them confirmed my error when I looked at Gil's Log.
Many thanks for your empathy.
-
When reviewing some build logs I realised I have installed the beakhead capping assembly incorrectly; this seems to be a common theme with my build.
I know something wasn't right yesterday, but couldn't put my finger on it.
I need to rotate all the timberheads through 90 degrees as I have not installed the carronade access port correctly.
Hopefully I can break the glue / paint seals tonight and correct
Arggggggggg when will I ever learn!!!!!!
-
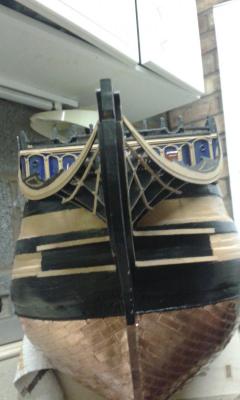
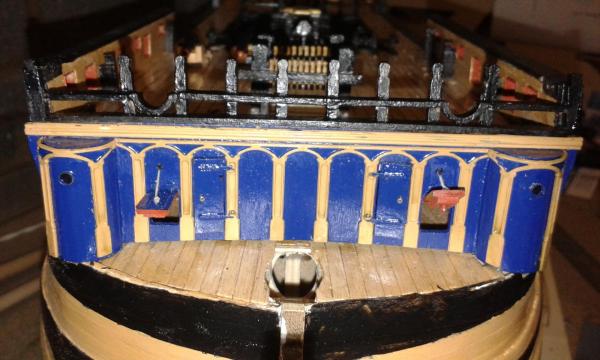
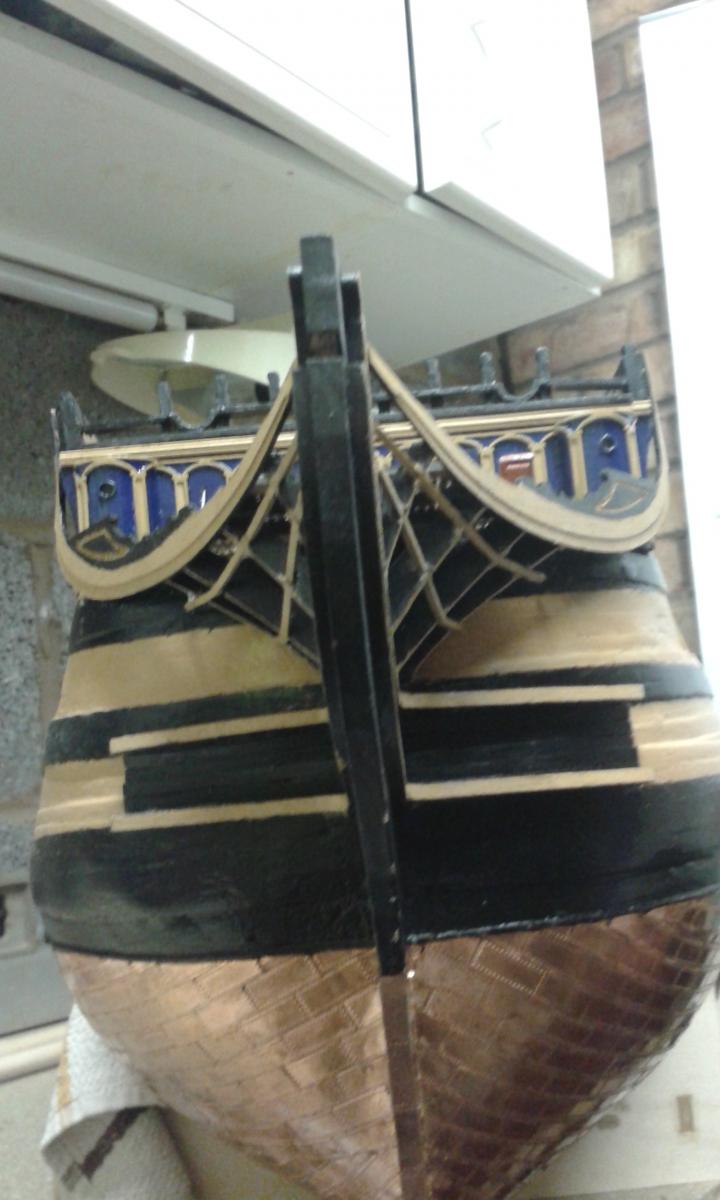
Beakhead capping completed.
Paintwork will need a touch up once the glue has dried.
Realised I had missed the top brass profile on the beakhead bulkhead

View from hull, showing beakhead capping and shot garlands.
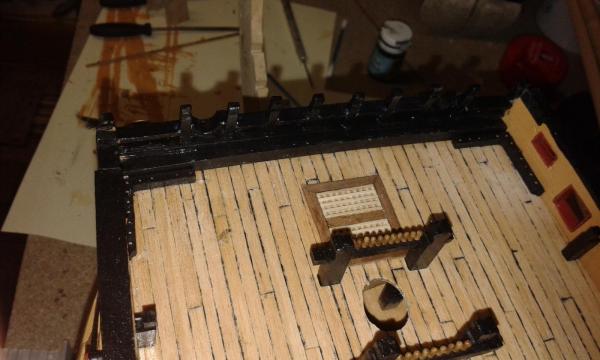
Brass profile, painted yellow, now attached
Once the two forecastle Carronade's have been assemblied the work will move on to the bows assembly phase, which looks will take some time and plenty of hard work to get right.
-
Nice to see you have started another build and you've made an very good start. I'm sure the Victory build will have stood you in good stead for this build. I will follow with great interest.
-
Fantastic work, description and detail. Many thanks for sharing.
-
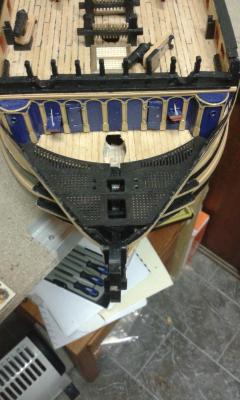
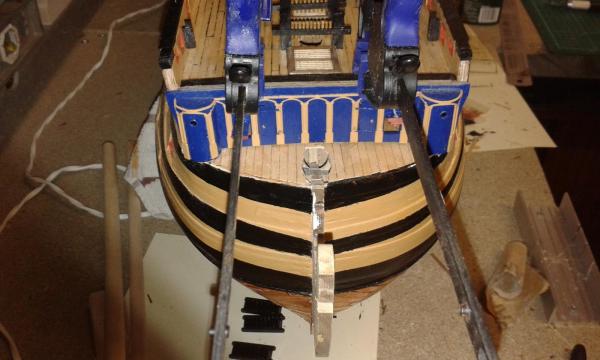
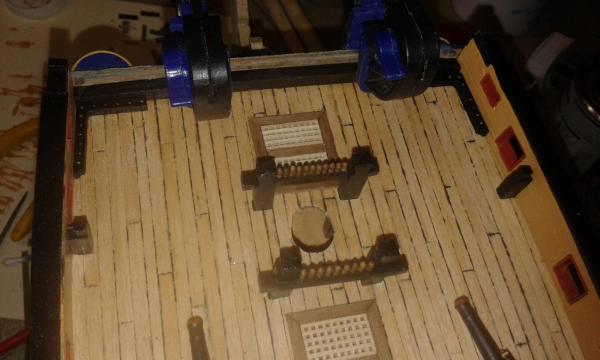
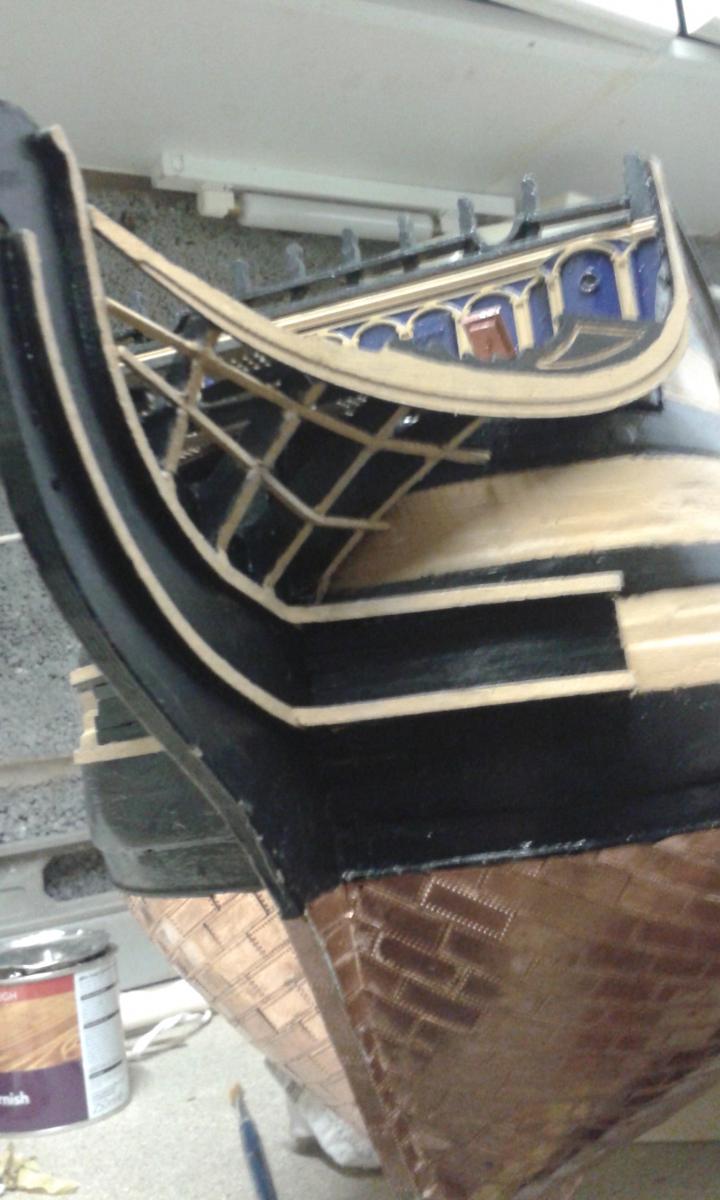
Good news the beakhead assembly has finally been glued to the hull.
As can be seen the portholes have been painted black,
There is a bit of dust following fitting the cat tails and filing the top edge smooth
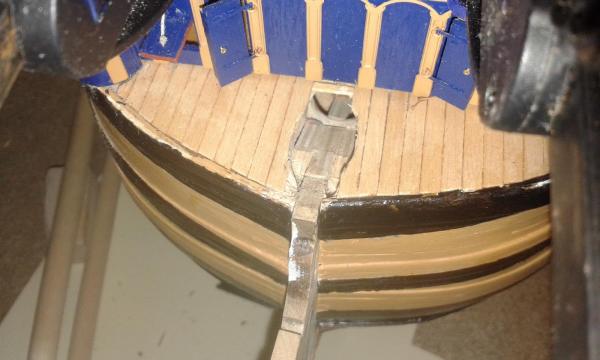
Was a quick and easy task to fit the beakhead deck planking.
The cat tails have been fitted, and clamped whilst the glue is drying
The two shot garlands have been painted and dry fitted. Will glue in place once the clamps have been removed.
I have started reposting some earlier pictures which have gone AWOL from this build log; I hope to complete this task over the next week or two, providing I can locate all the missing pictures!
-
The labour of love that is the beakhead roundhouse assembly is nearing completion and tomorrow and I move on to fitting the cat tails.
I decided to experiment with different rigging methods.
Here is my attempt at splicing the thread with a needle
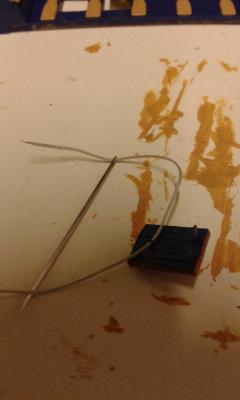
The problem with this method was the neddle was too big which resulted in damage to the thread.
I did try to twist the thread to compensate, but still looked a mess so I abandoned this method.
The doors are fully functional, and I added to handles to spruce up the build.
At this stage I had not fitted the roundhouse portholes and some of the painting needs touching up.
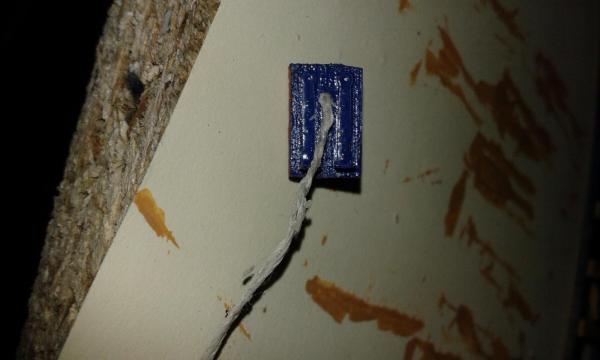
If you refer to page 58 of the Haynes Manual for the Victory there is a nice picture of the gun port lid.
I replicated this by added another piece of wood to the bottom of the gunport lid and then added a single eyelet.
As per my earlier post there is only one rigging thread per lid, so I replicated this.
I did experiment with adding sleeves and parrel bids to simulate the rigging entry point at the beakhead.
I didn't like the end results. I may simply add a touch of black paint to replicate the sleeve.
Portholes are now fitted and paintwork touched up.
Just need to paint the inner porthole circle black to replicate the window
-
Thanks David
I already had secured some insulated sleeving which I was going to use to cover the thread through the hole.
-
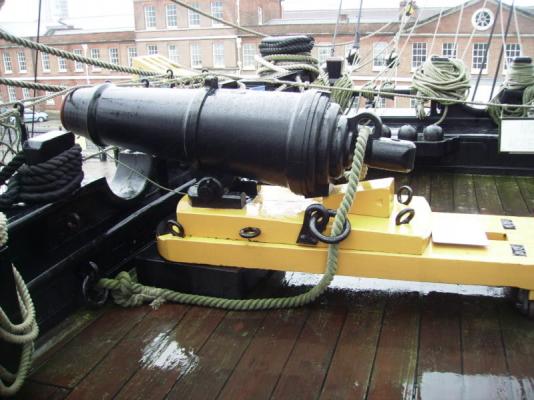
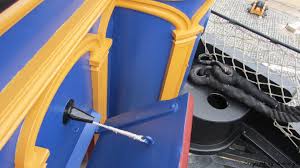
I was doing some research and found the following picture which shows the actual rigging of the beakhead gun port lid; located adjacent to the roundhouses.
Most builds seem to have two eyelets / rigging lines fitted, one each at the end of the hinge.
I think I will try to replicate this tonight.
I have already modified the red side of the lid to match the picture shown in the owners Haynes manual.
I will post some pictures of my arrangement when I have completed the task.
-
Hello David
Many thanks for the kind words. I have been in contact with Yon. He's lost all the pictures due to a hard drive failure but may have a few on another computer but can't check that out until next week sometime. Doors and pilasters have been fitted and doors fully functional.Hinges fitted to the two gun port lids. Plan to fit tomorrow night as I'm waiting for glue and paint to dry fully.
-
-
-
Hello Jerry
Many thanks for your kind comments.
I'm looking forward to completing this assembly and getting to grips with fitting my first ever gun port lids.
I hope the finished result lives up to the initial promise!
I have also made a small jig so I can set the hinge back 1mm from the edge of the gun port lid
-
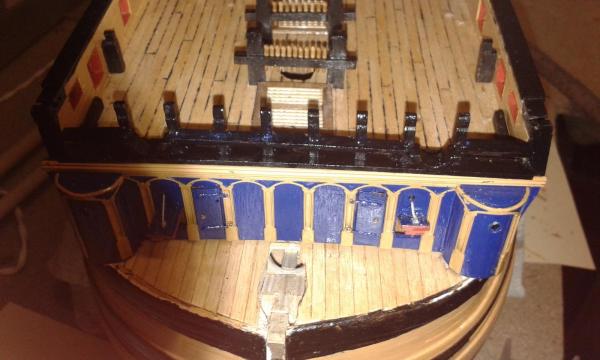
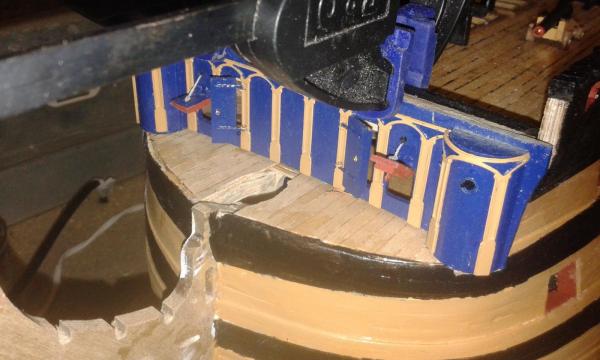
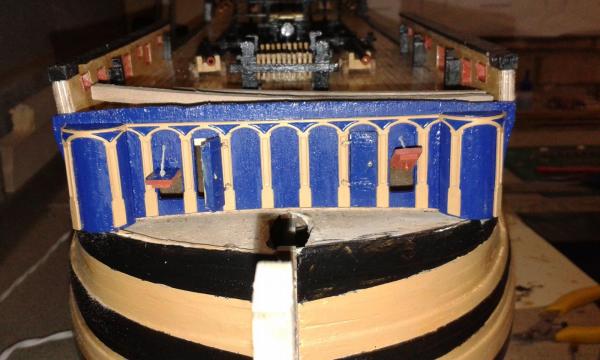
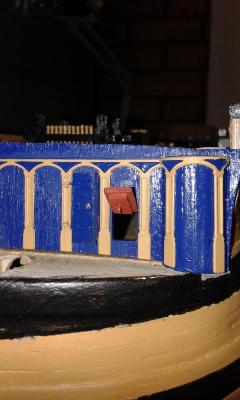
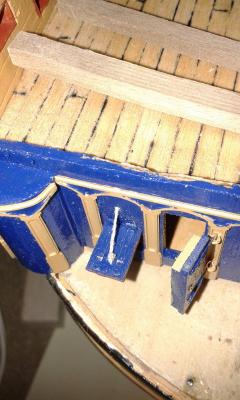
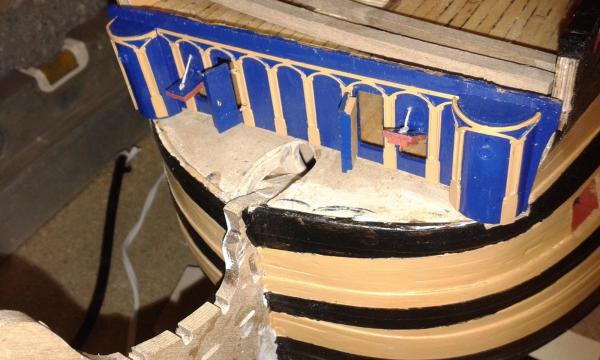
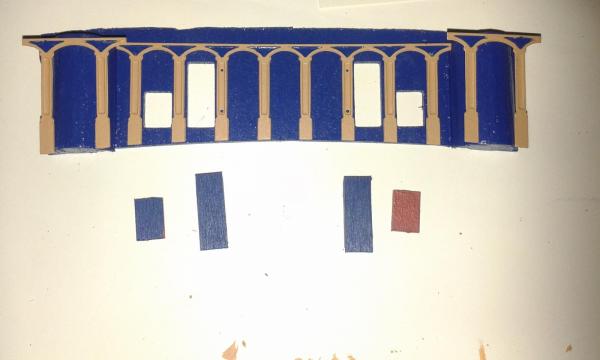
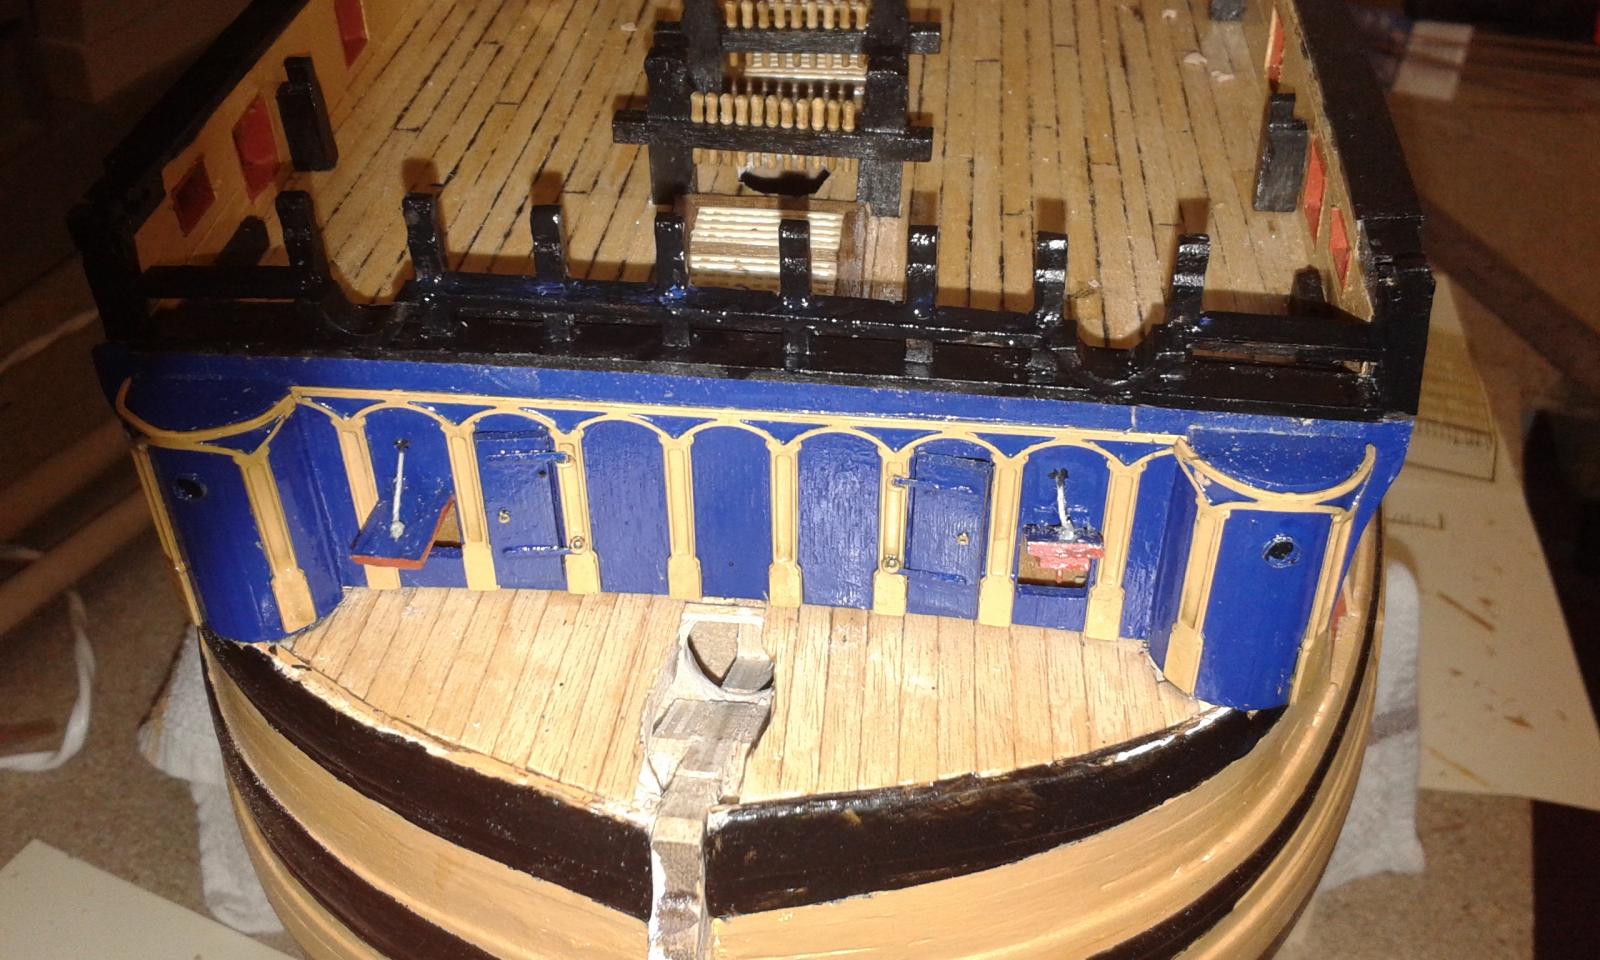
Next stage of the beakhead roundhouse assembly.
The roundhouse assemblies are now complete and painted blue
Dry fit of the roundhouse assembly to the hull.
YOu will note that I have also dry fitted the doors and gun port lids, just for fun.
It has taken a couple days to paint the pilasters, so I thought I would dry fit them.
I think they look good. The roundhouse pilasters still require bending to fit correctly.
I plan to glue the pilasters to assembly tomorrow night and will also fit the hinges, doors and gun port lids.
Bottom and edges of lids painted red, slight leakage of red paint on one lid to correct
- Harvey and mort stoll
-
2
-
Congratulations on a job well done; a fantastic acheivement, cant wait to see the Victory in your display case.


HMS Victory by Glenn-UK - Caldercraft - 1/72
in - Kit build logs for subjects built from 1751 - 1800
Posted
Hello Gundorph
Many thanks for your visit and very kind d comments. Enjoy your build and perhaps you can make the Victory your next project