


Glenn-UK
-
Posts
3,004 -
Joined
-
Last visited
Content Type
Profiles
Forums
Gallery
Events
Posts posted by Glenn-UK
-
-
Latest Build Update.
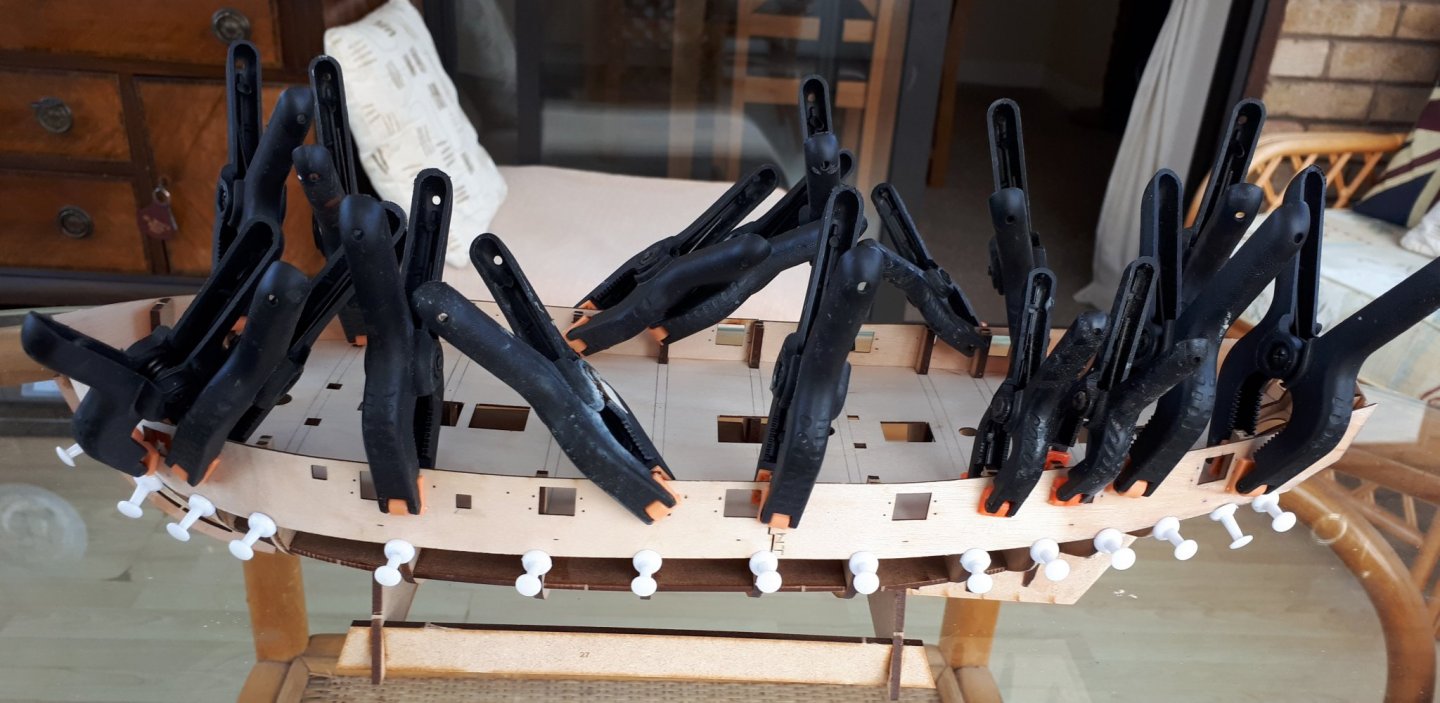
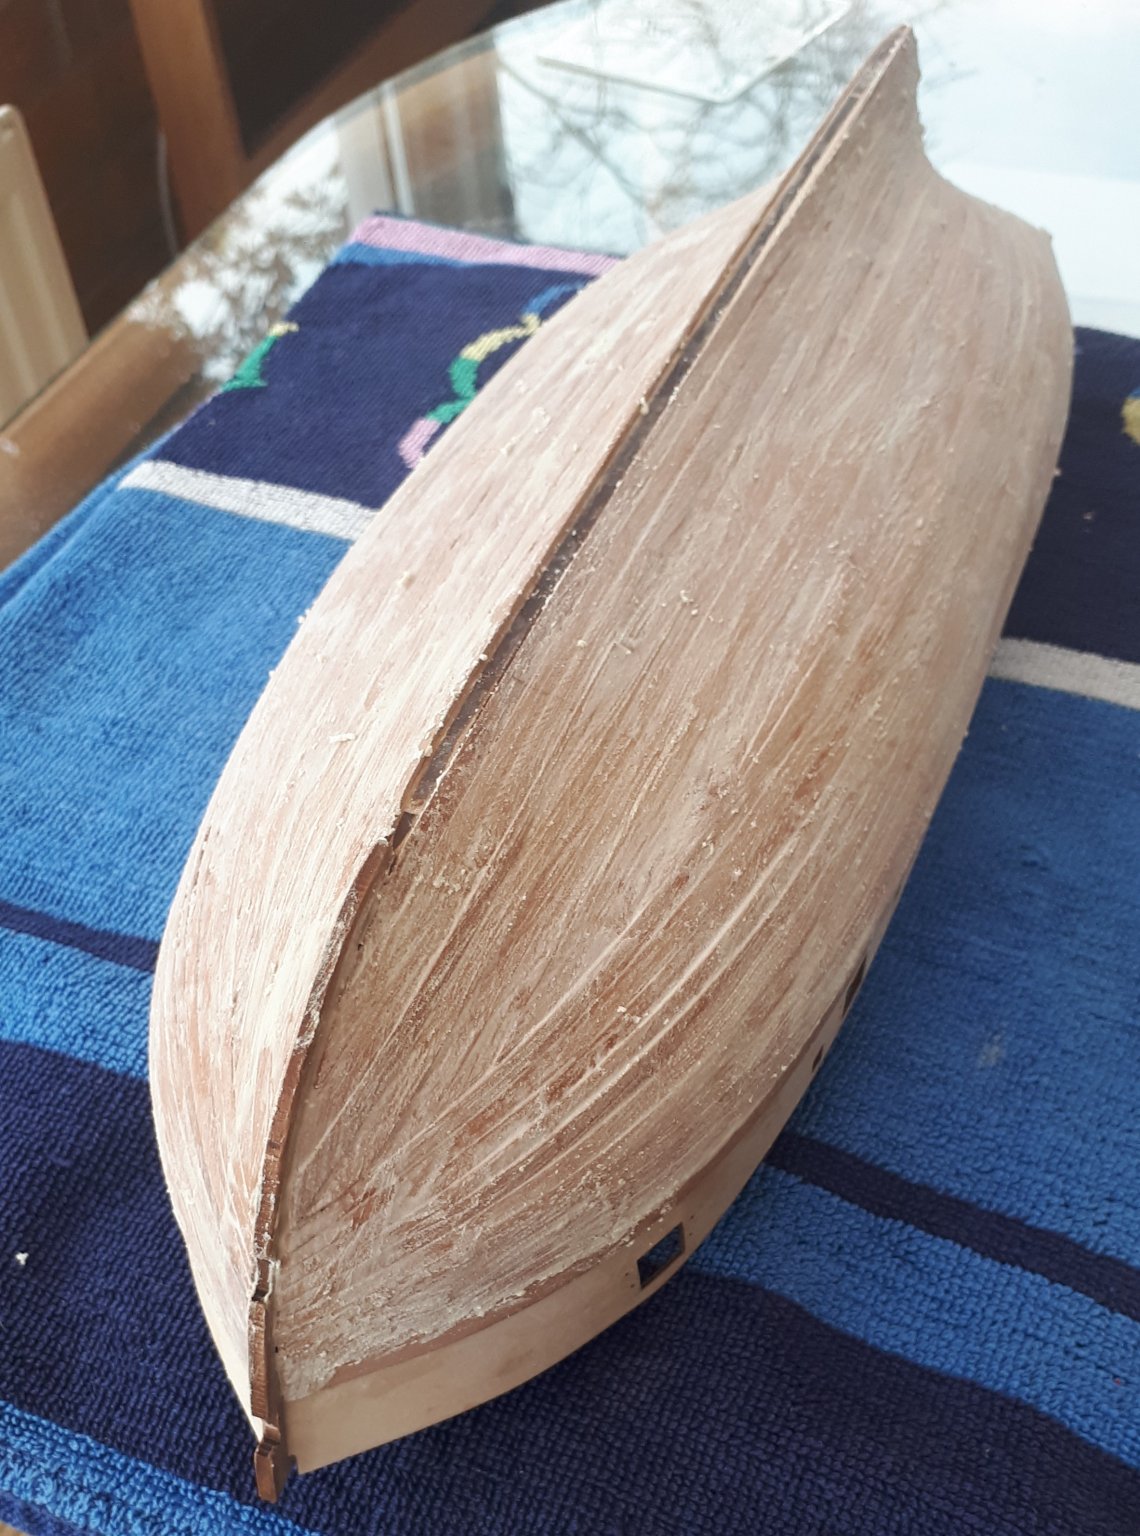
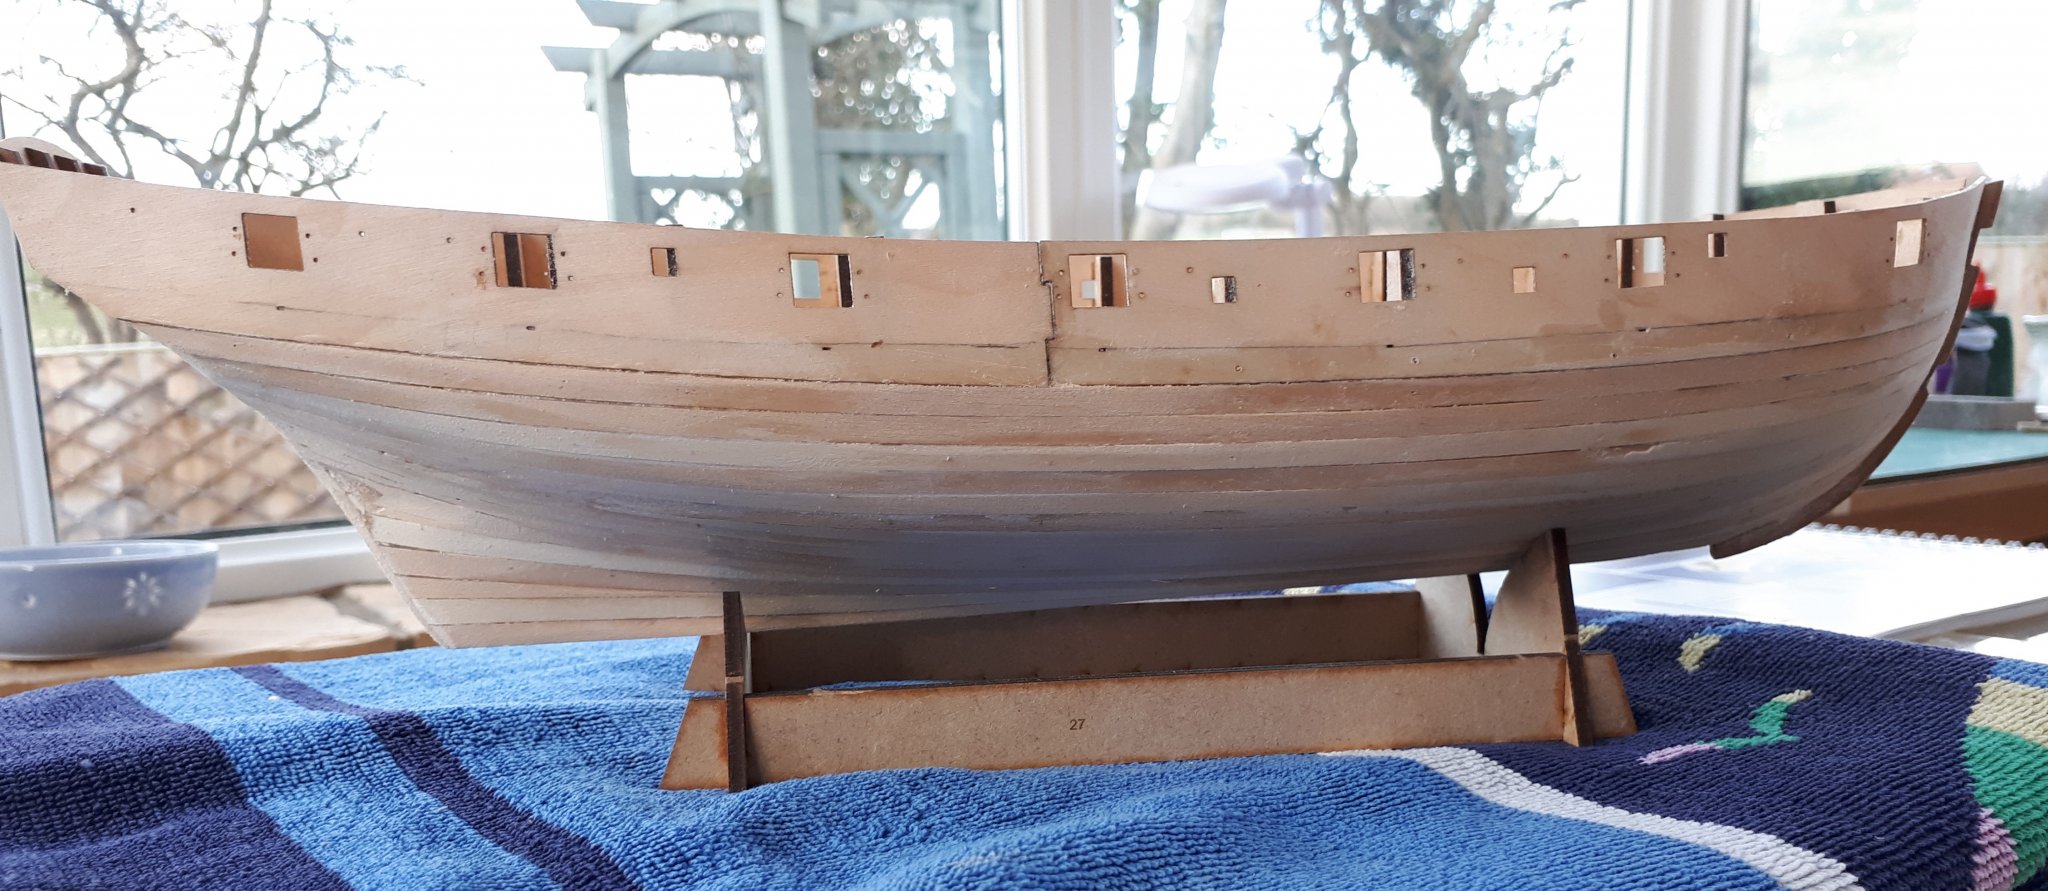
I have now completed the 2nd planking and it didn't take as long as I was expecting. I used Chucks' edge bending for all the planks above the waterline. For some of the planking below the water line I used some of the plank off-cut, thus saving a few planks (which could be used elsewhere if necessary or can be added to my general stock of materials).
I used a medium ca glue for this task, gluing each plank a bit at a time. It seemed to work really well and I didn't end up with too much ca glue on my fingers!!!!
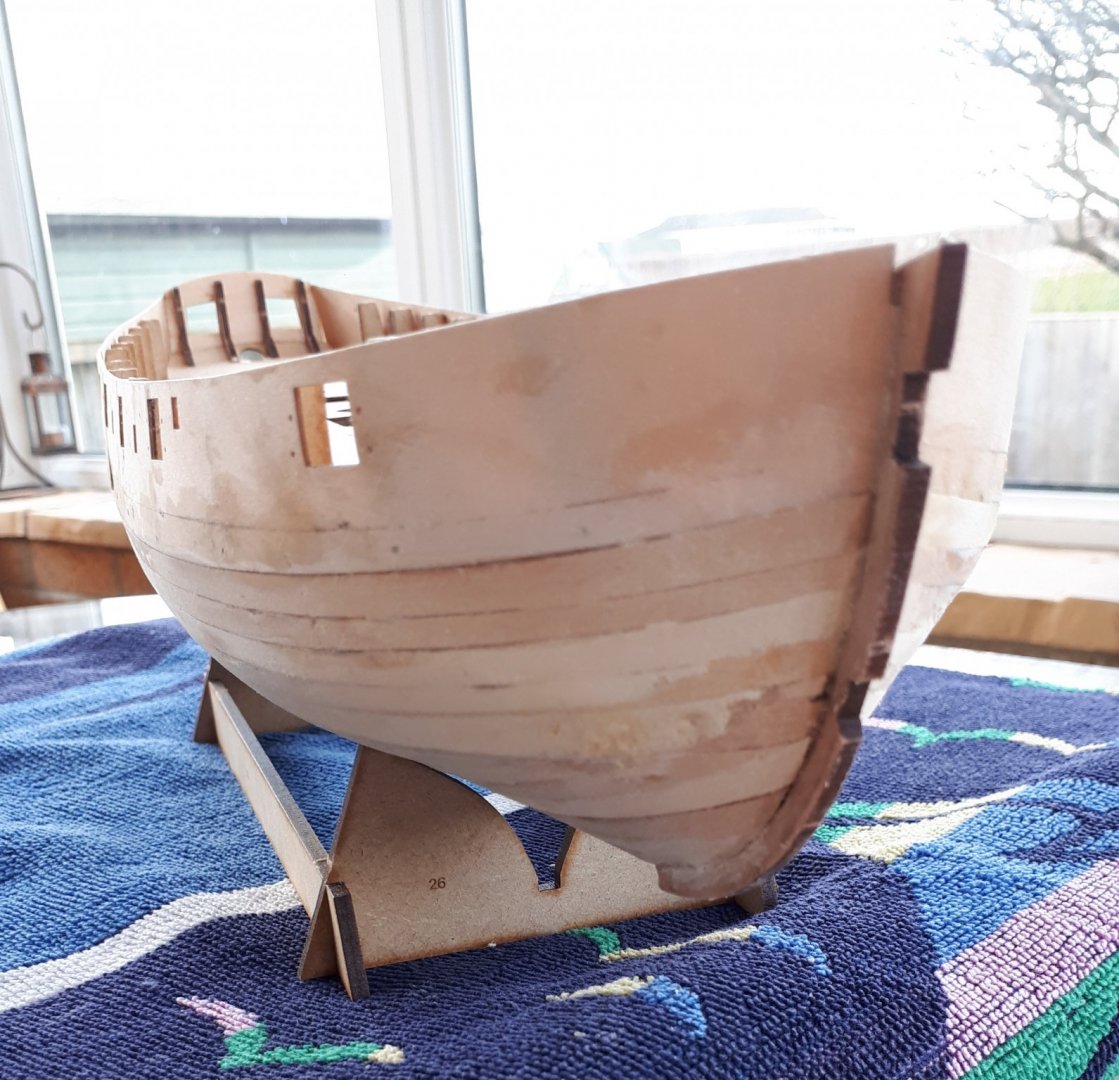
Once the planking was complete I then applied a wash of water mixed with neutral (Ronseal) wood filler. This serves 3 main purposes for my build;
a) The mix of water and filler easily fills any gaps between the planks.
b) As the wash dries it helps to highlight any uneven surfaces (below the water line) which may need further attention during the sanding process.
c) Provides an additional level of adhesion between the planks.
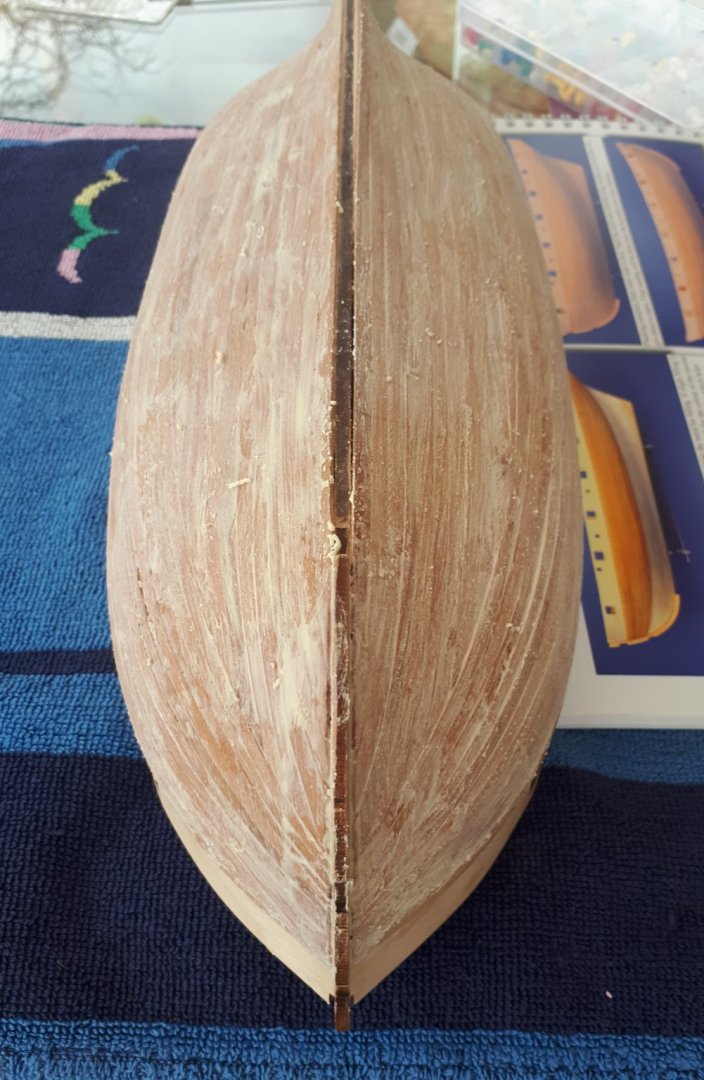
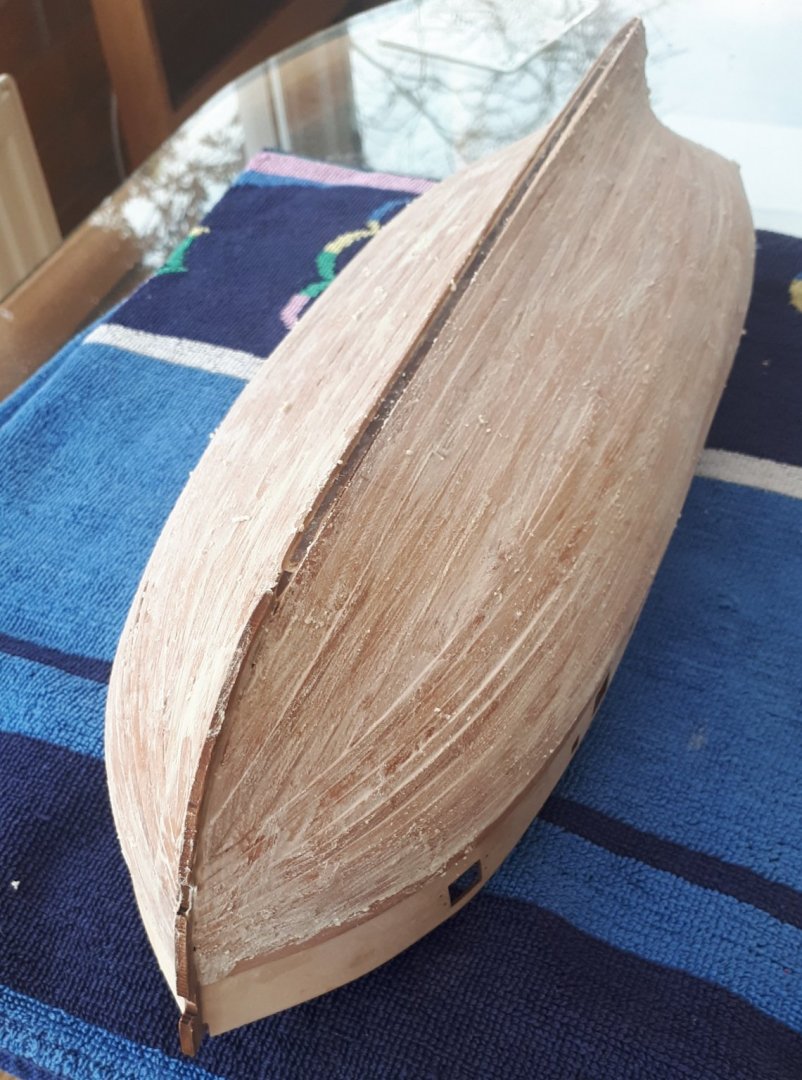
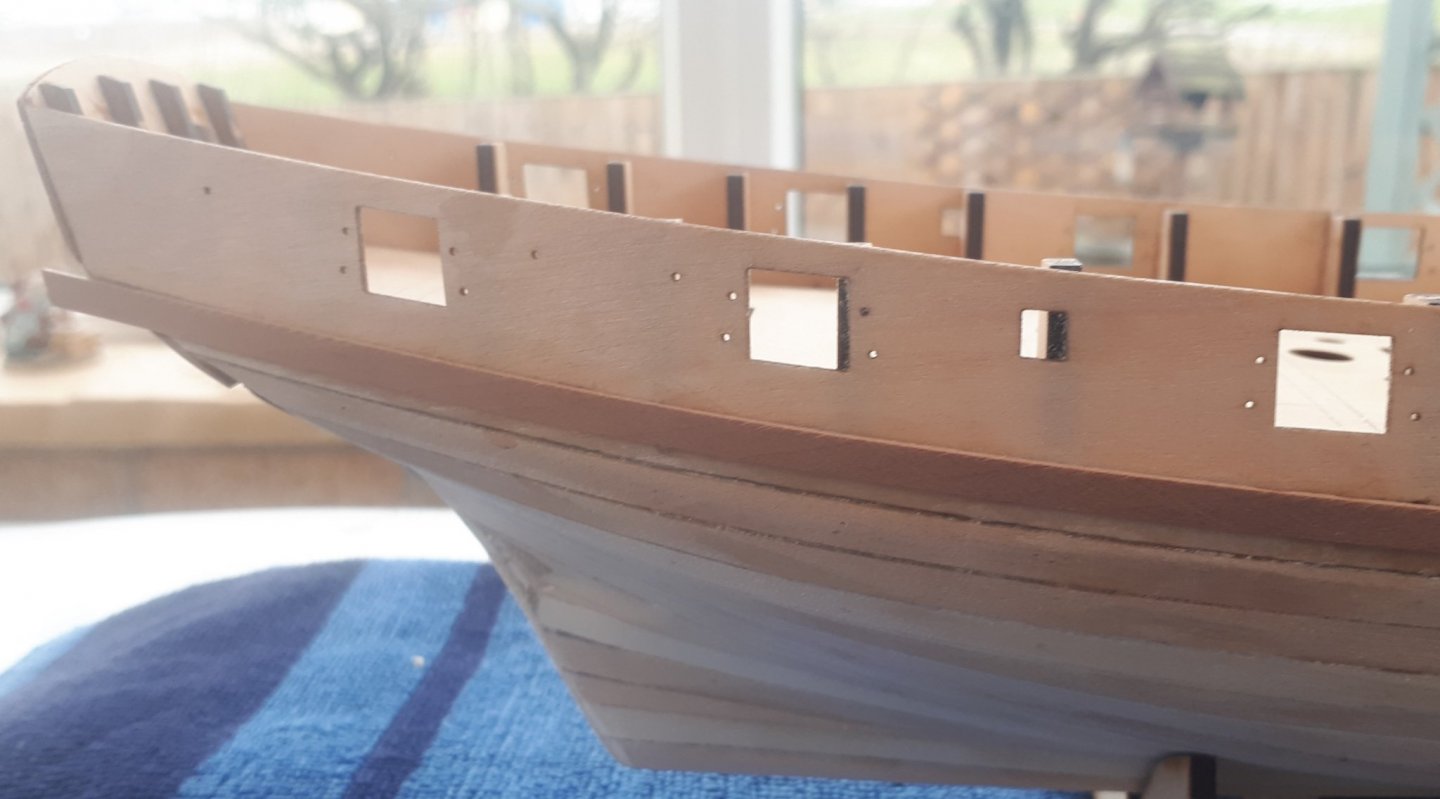
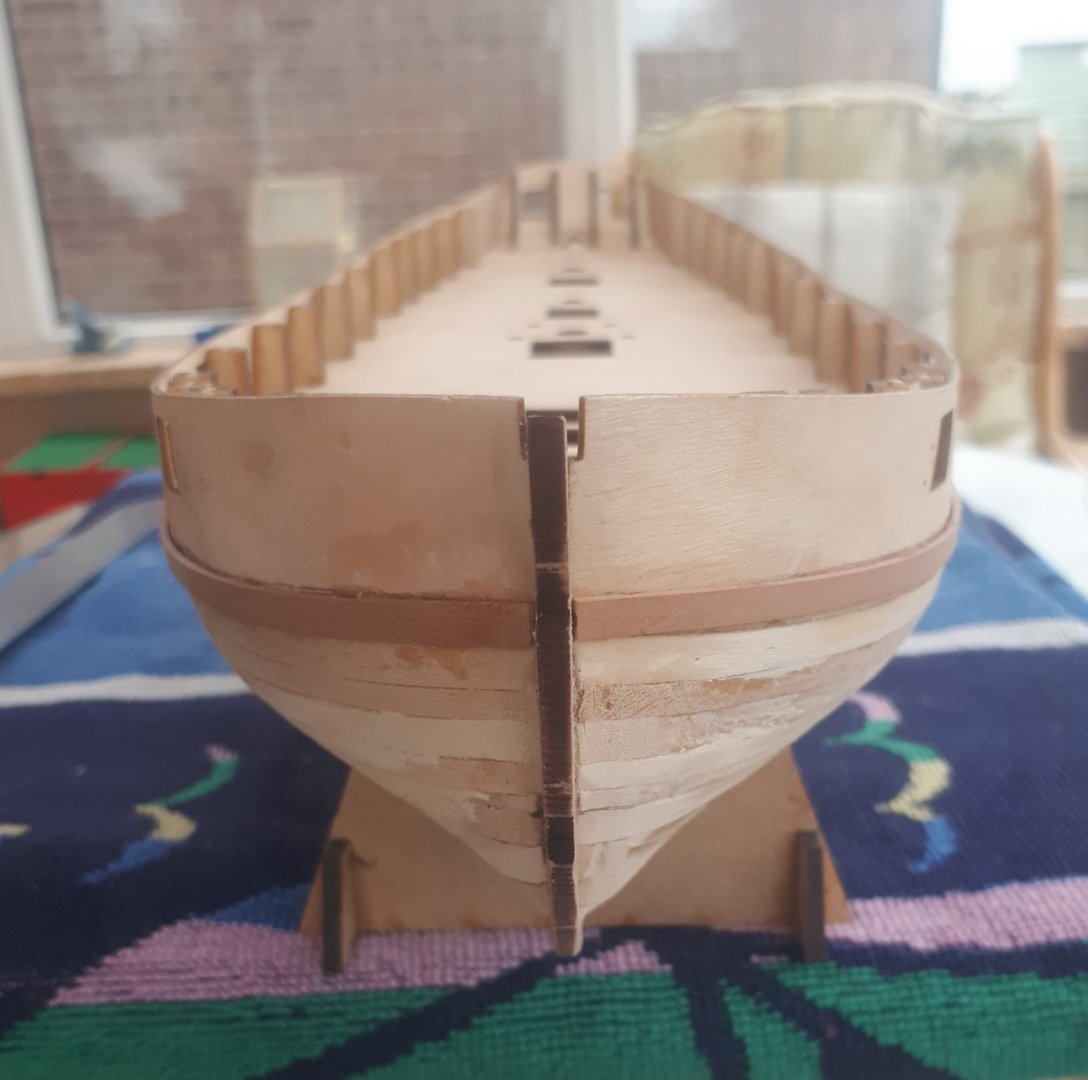
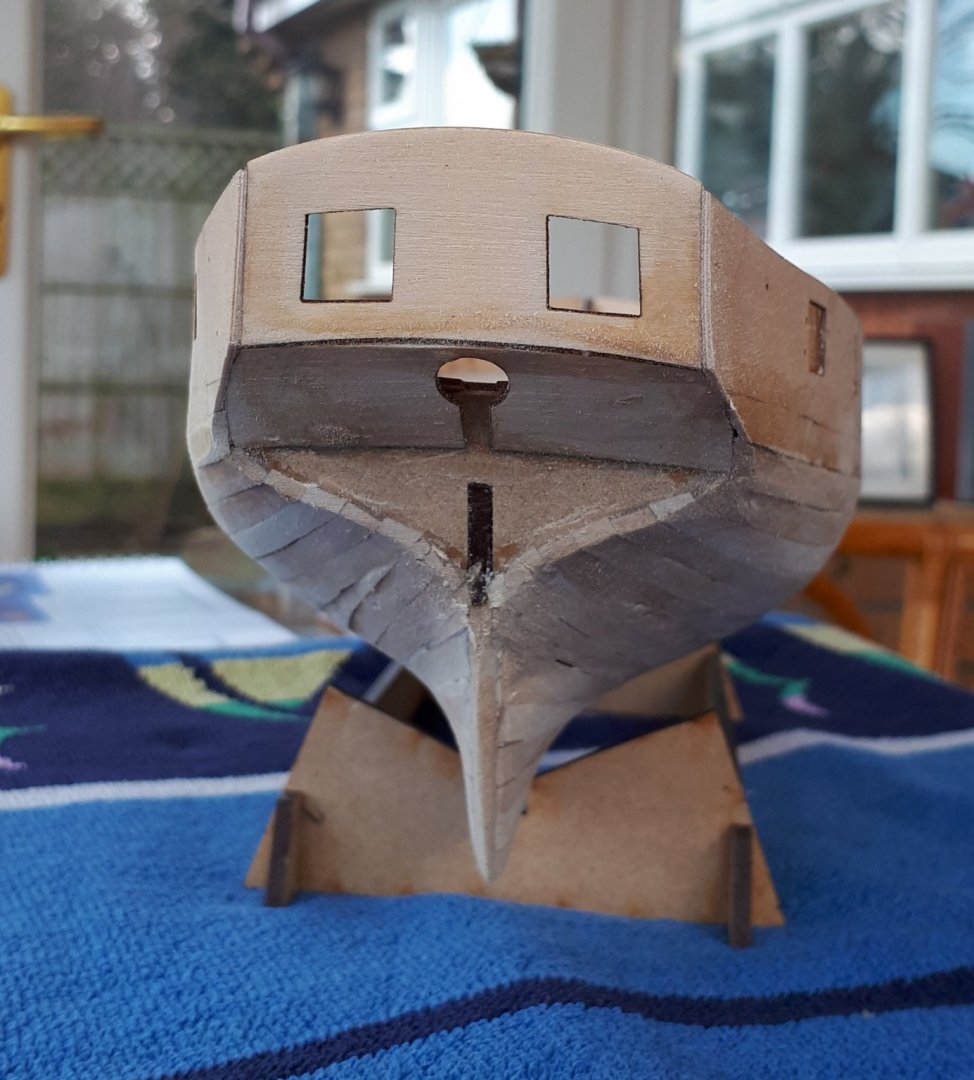
Once the wood filler wash has had time to dry I will sand the hull. The pictures below show the completed hull with the wood filler wash applied prior to the sanding.


- egkb, Edwardkenway, GrandpaPhil and 5 others
-
 8
8
-
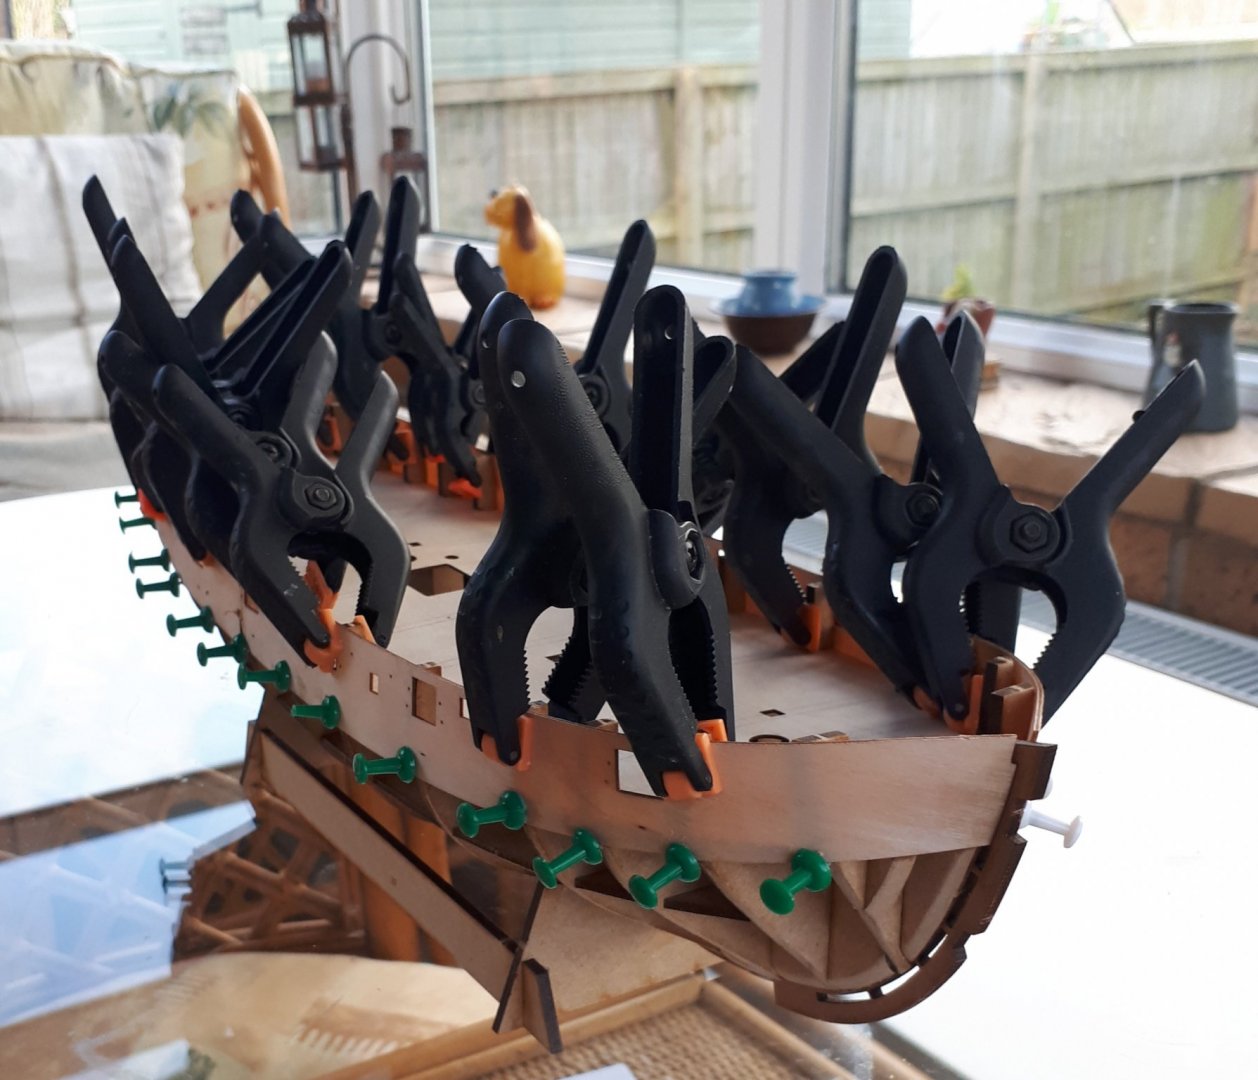
I have made a good start to the 2nd planking of the hull this afternoon. I have never used edge bending before but I'm finding it very easy and not that time consuming.
I am also extremely pleased with the results.
I am tapering the planks to 2mm width at the bow end. I did taper a couple of the stern planks (also to 2mm) but the last two planks did not require any tapering where they terminate on the edge of the lower stern panel.
I have been using a medium ca glue and I tend to give each plank a quick sand with a fine grit sanding stick after installation to allow the sawdust to fill any gaps.
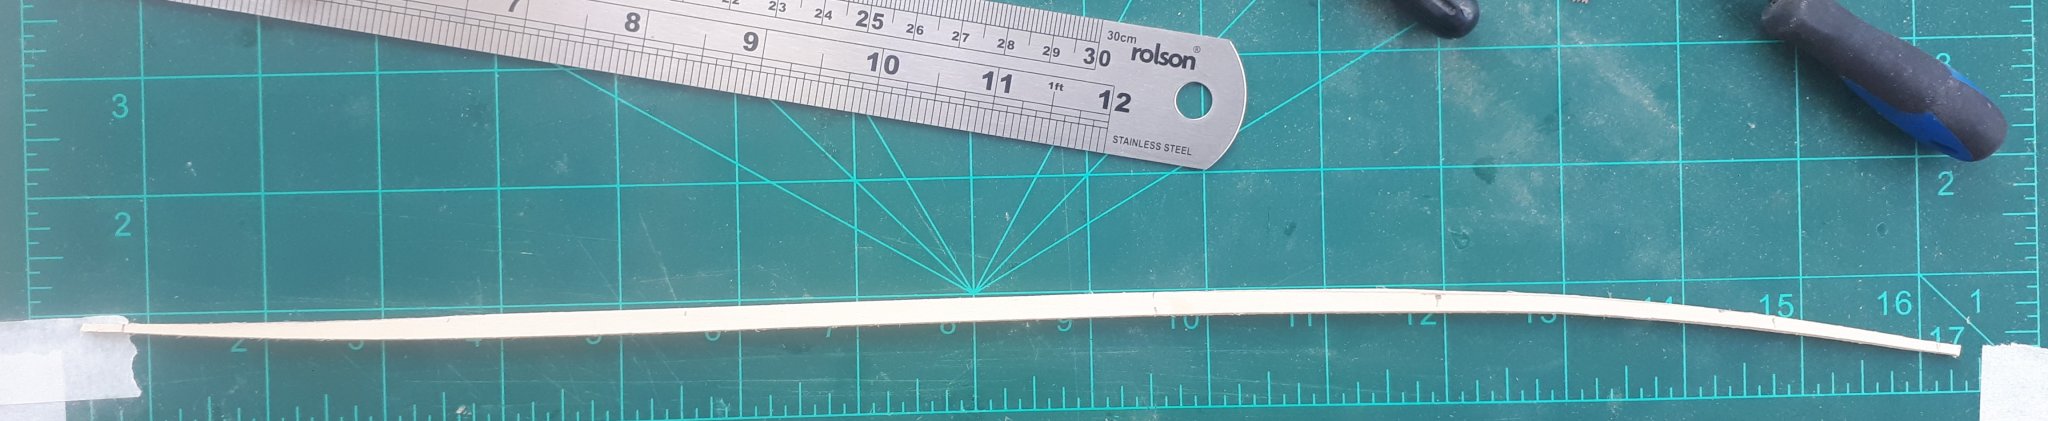
Plank Bending Station


-
-
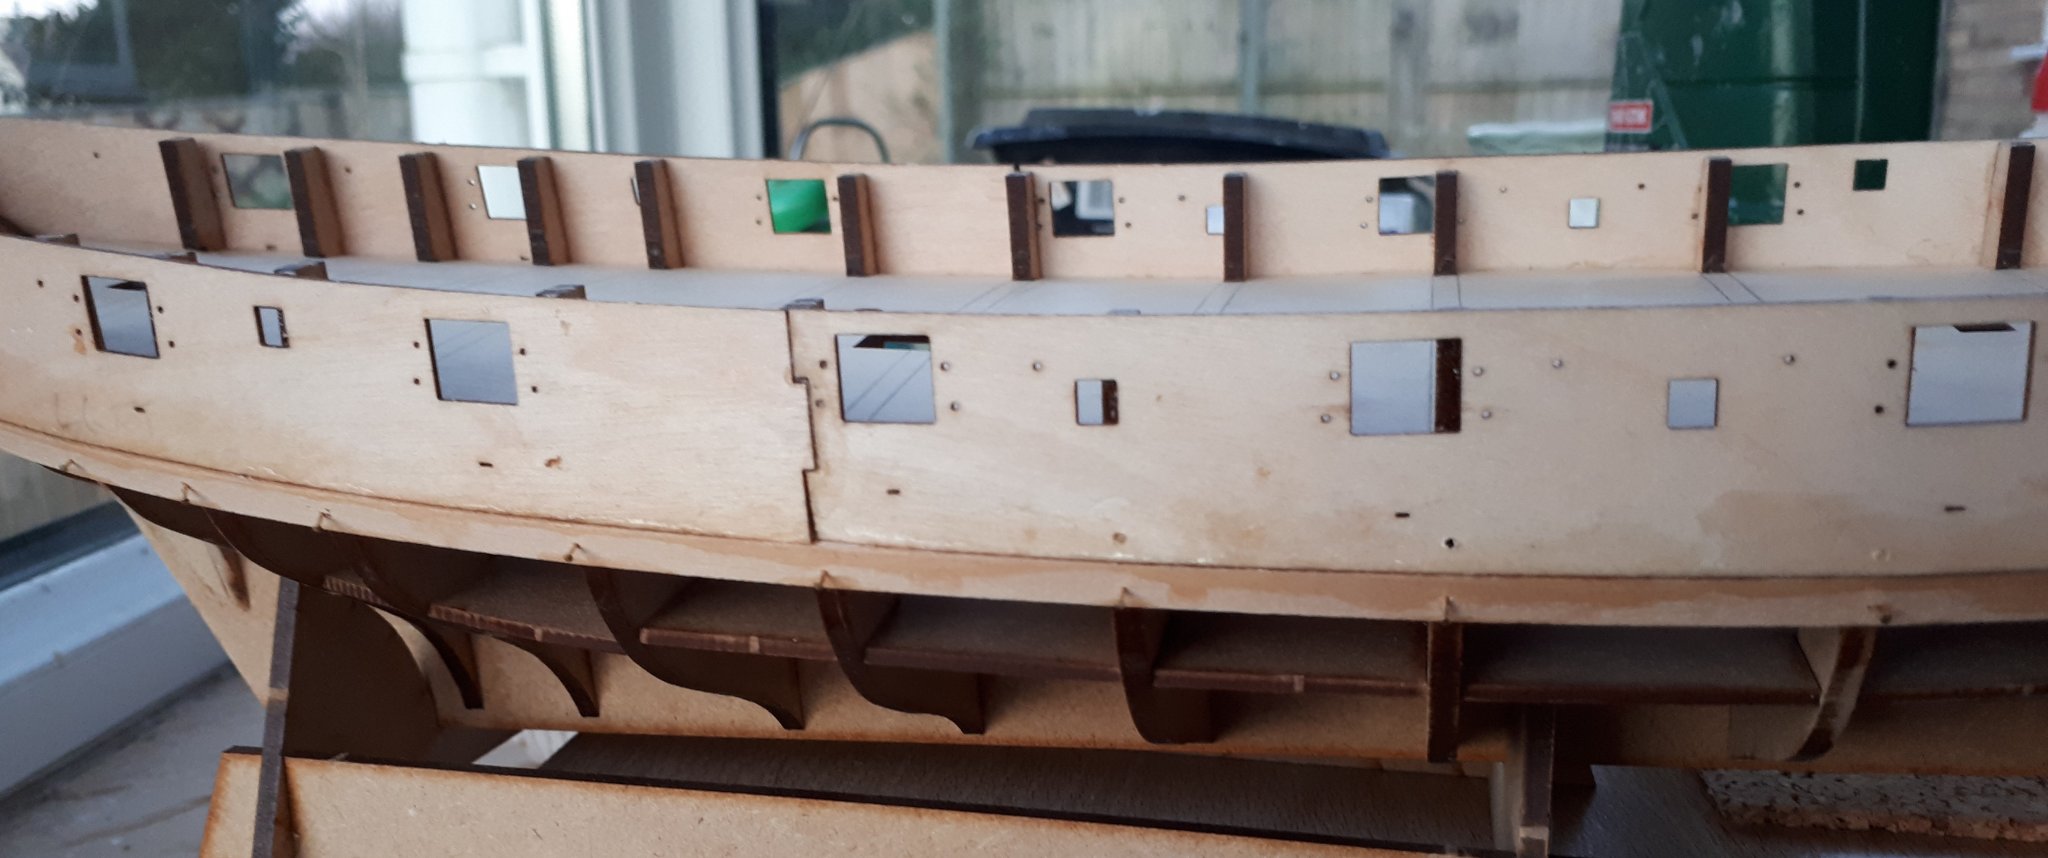
I have started the 2nd planking of the hull. I used the laser etched marking on the gun sport strips to line up the 1st plank. The first two planks were fitted without any shaping or tapering.
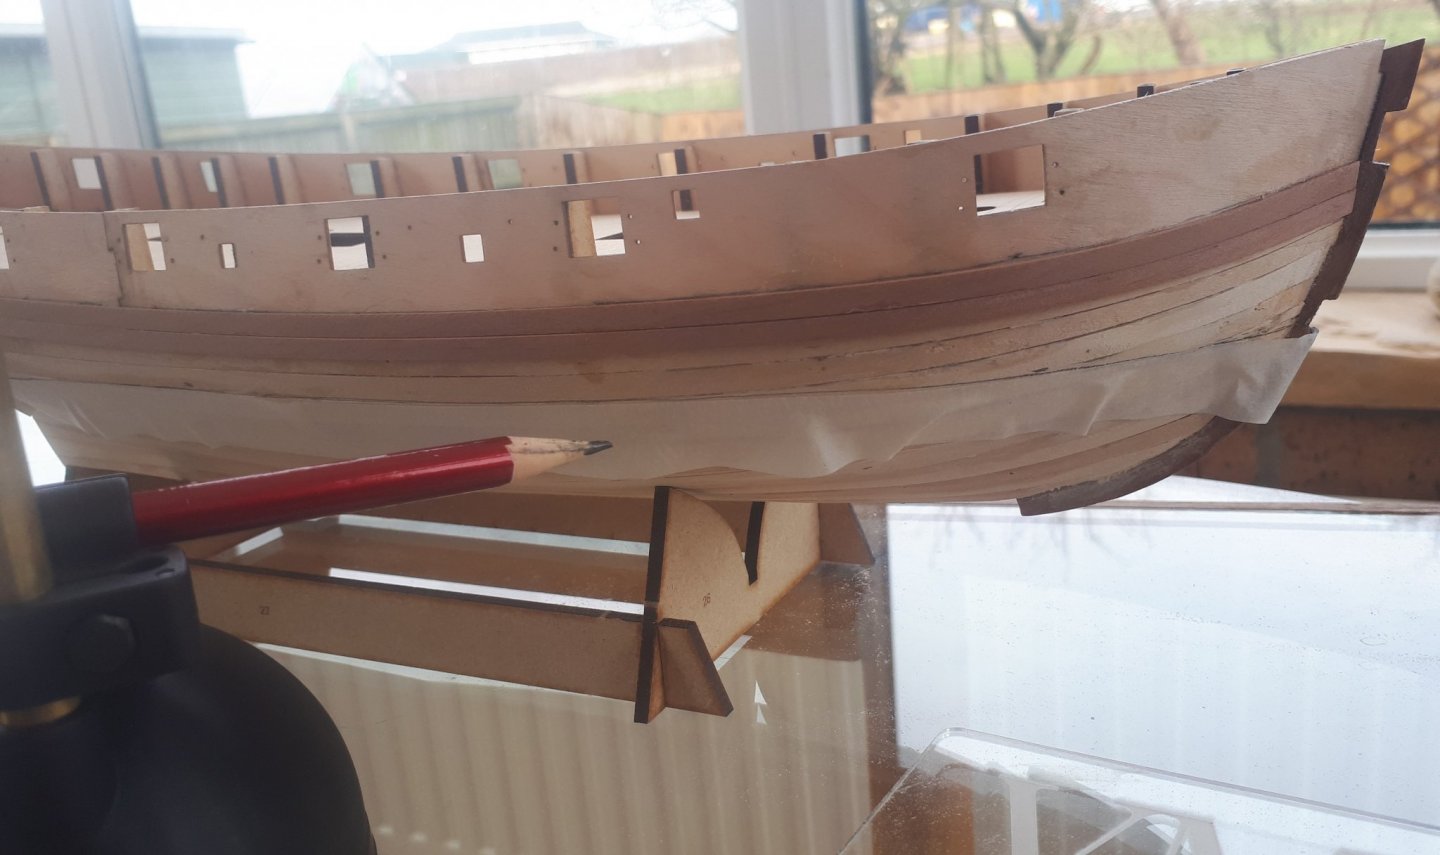
After the first two planks had been fitted I decided to mark the position of the waterline, so I knew the area of the 2nd planking that would remain visible, and the area which would require copper plating. I then added some tape after the waterline had been drawn.
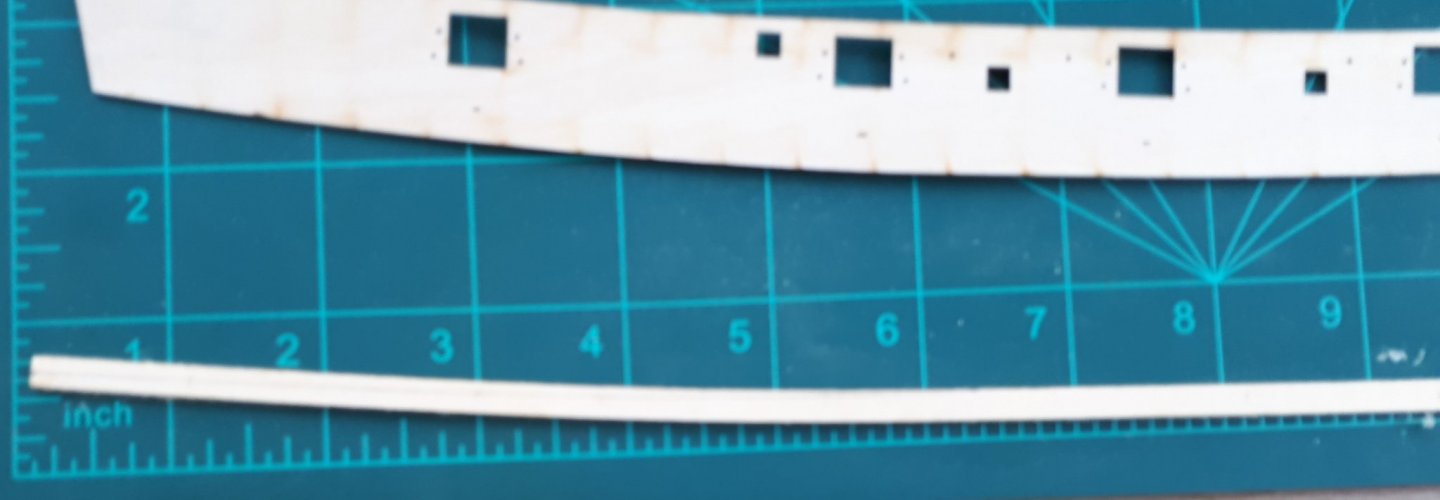
Before starting with fitting the next plank I took some measurements (I used the gun ports as the reference points plus a one near the stern and one near bow). The measurements indicated that twenty planks would be required at the widest point (80mm) with a taper width a 2mm at both the stern and bow. I used a old piece of planking material to make a test plank and then edged bended both ends. On reflection the stern end of the plank did not really require an edge bend. I was very happy with how the test plank fitted after it had been bended.

- egkb, GrandpaPhil, VTHokiEE and 5 others
-
8
-
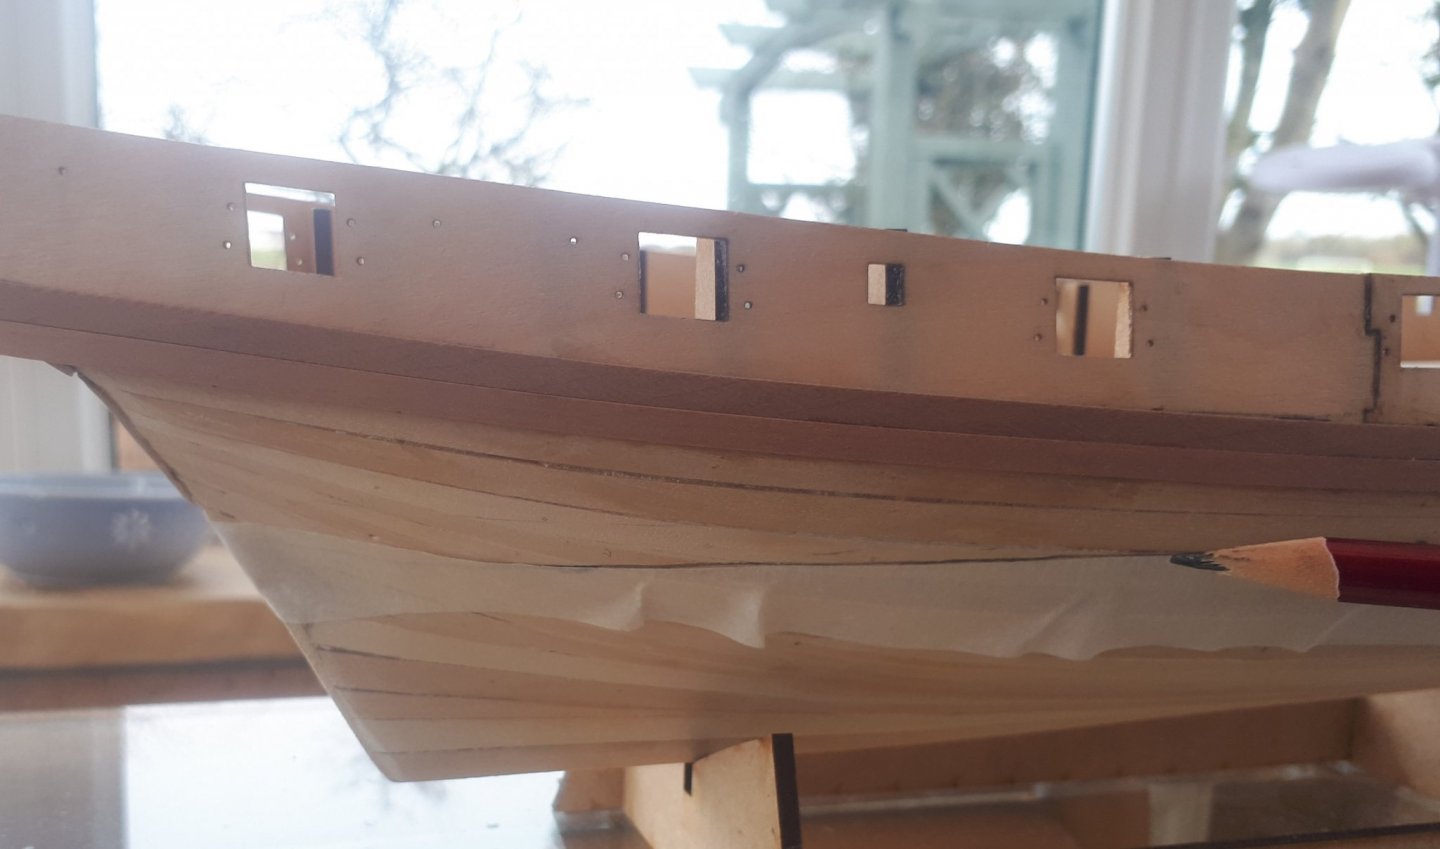
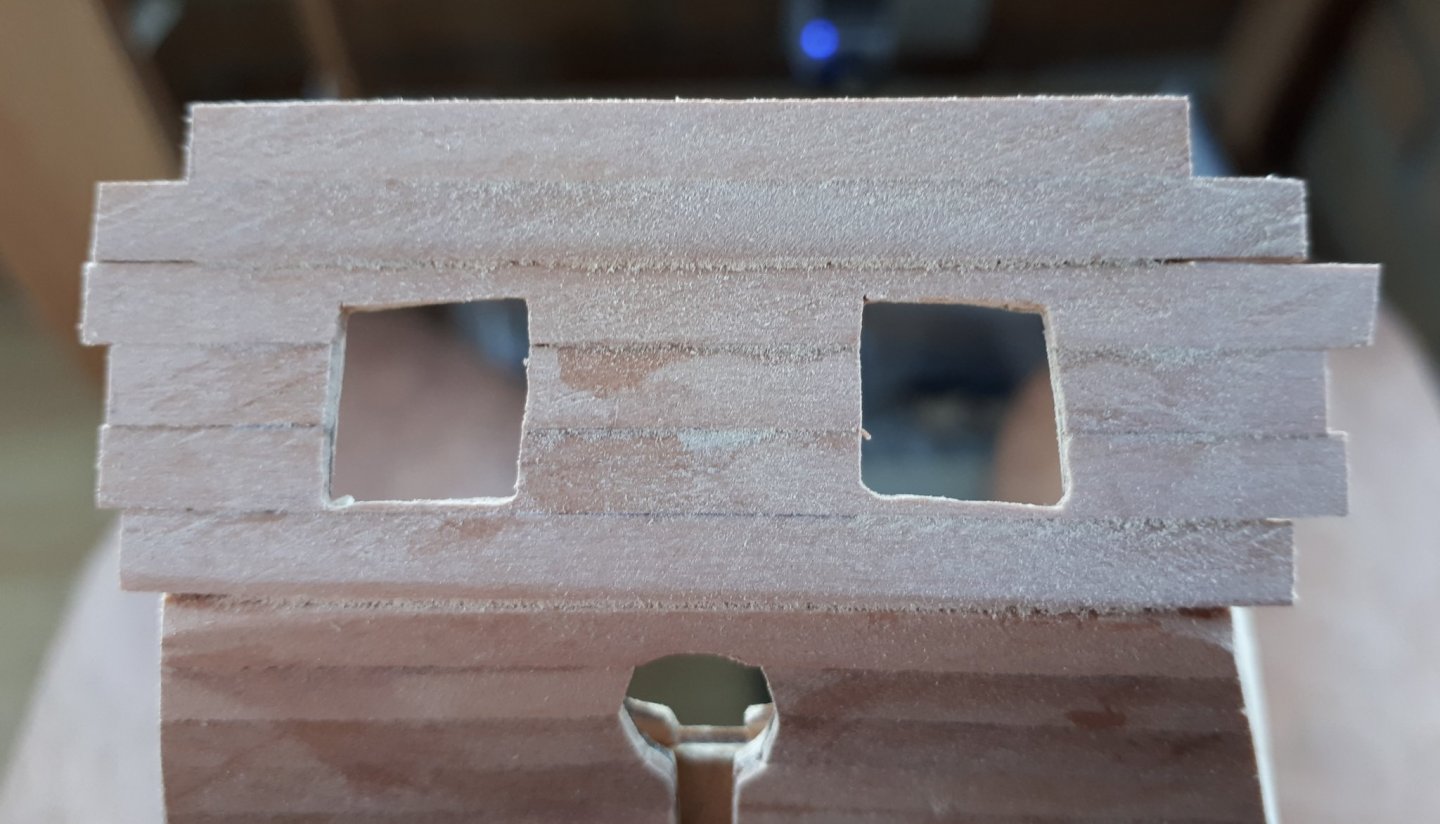
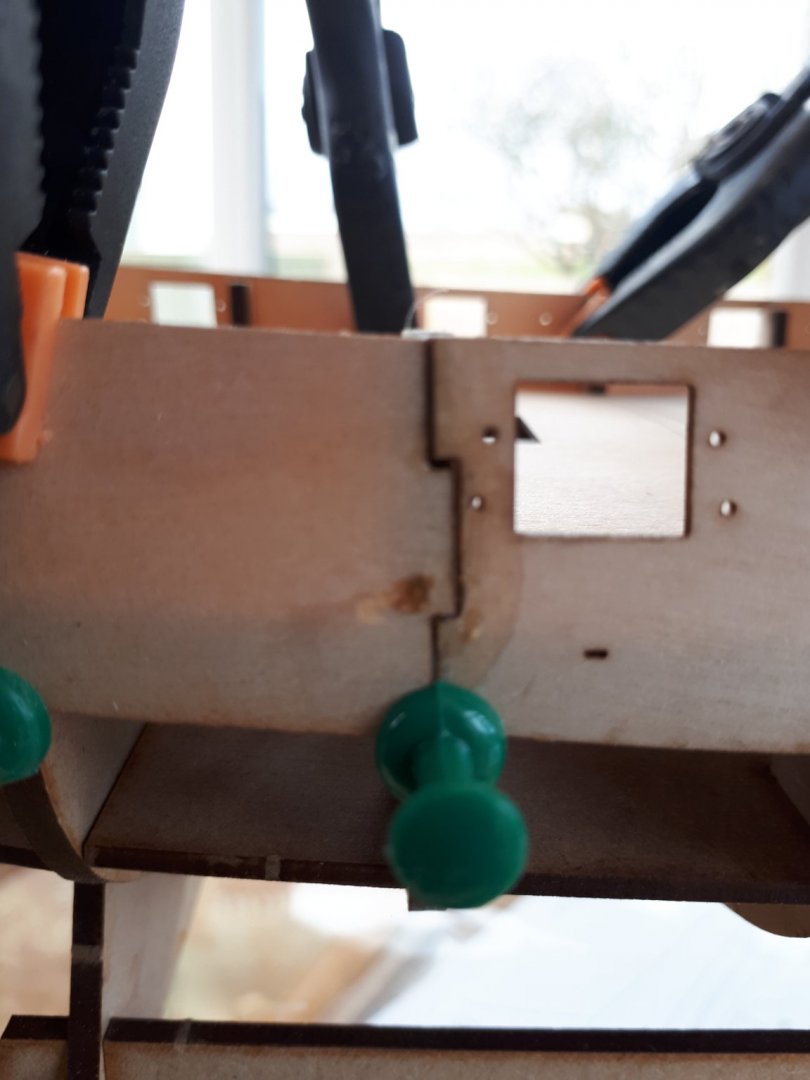
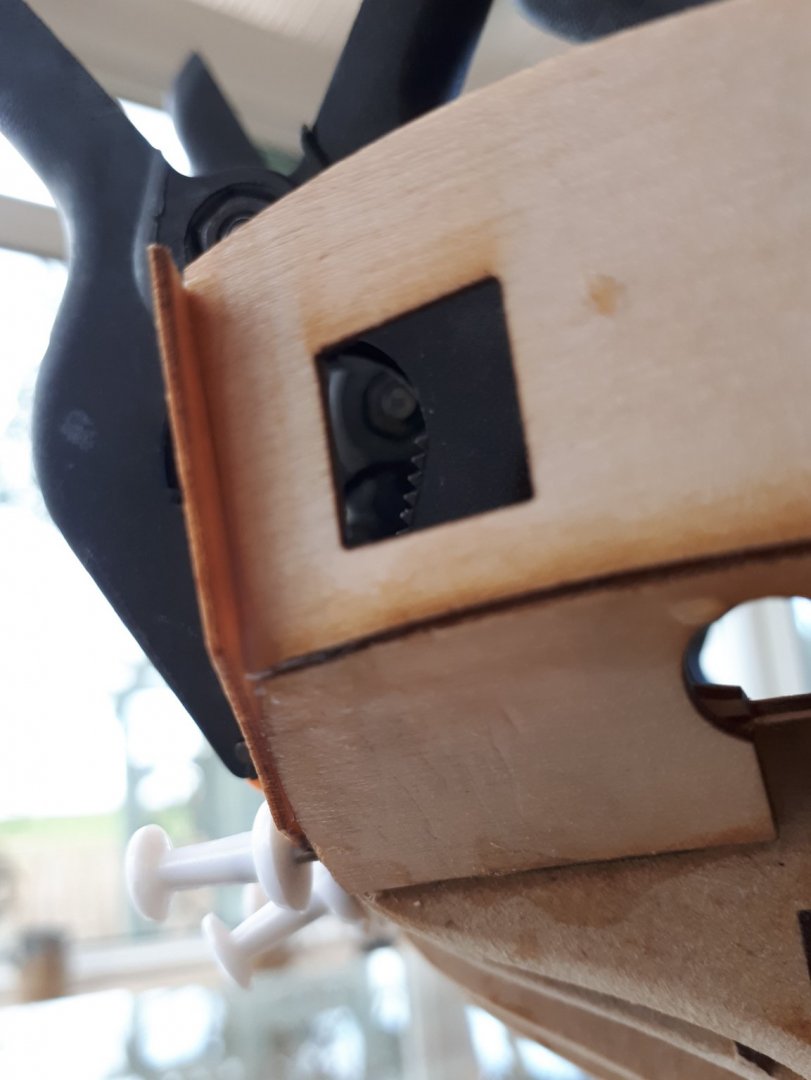
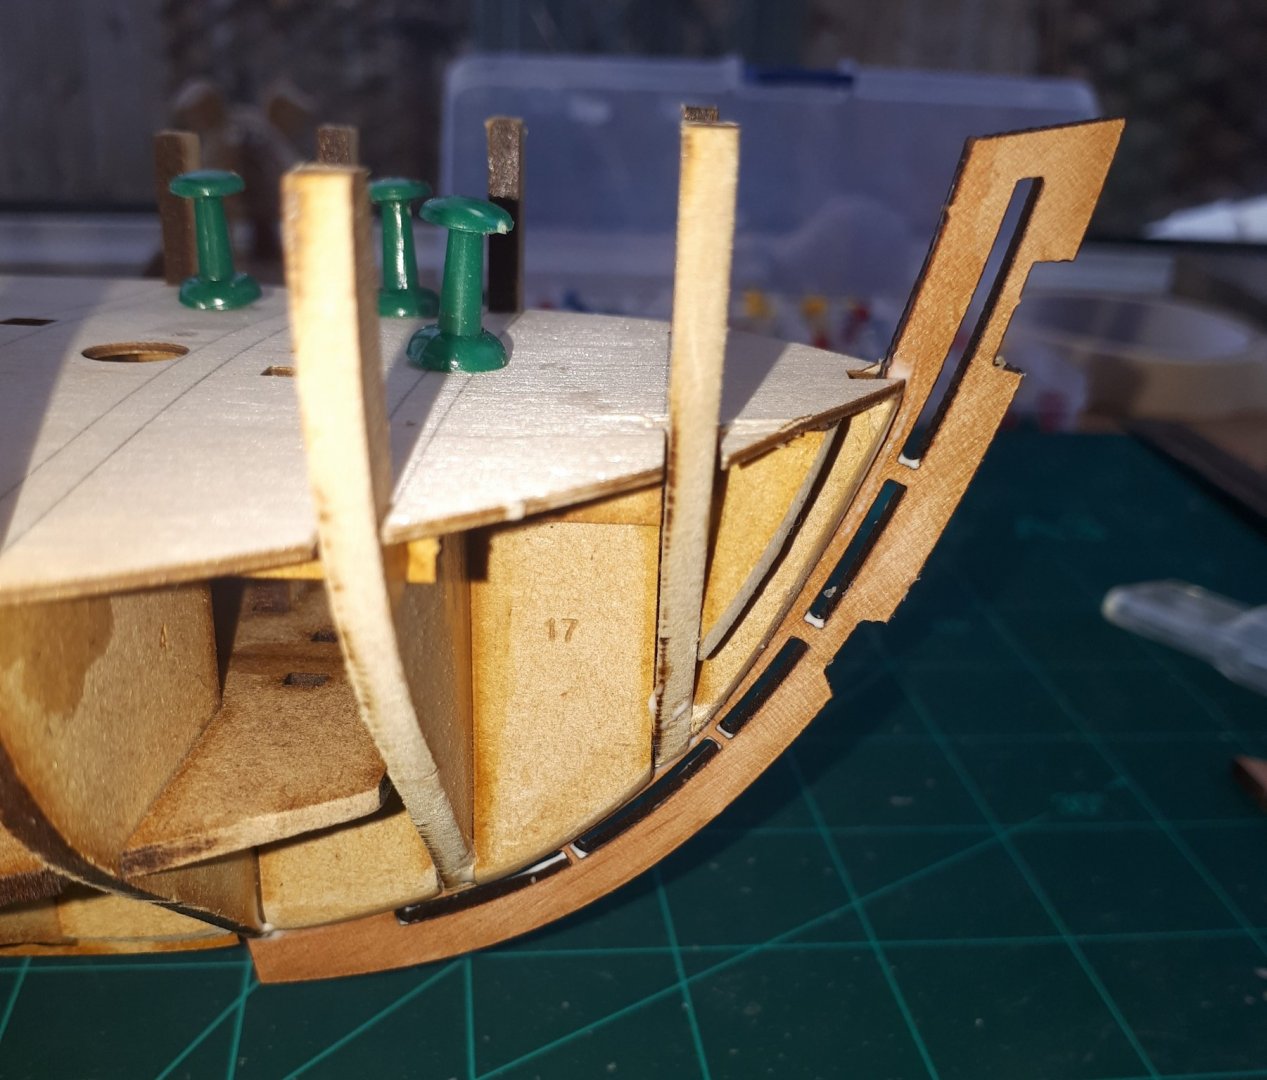
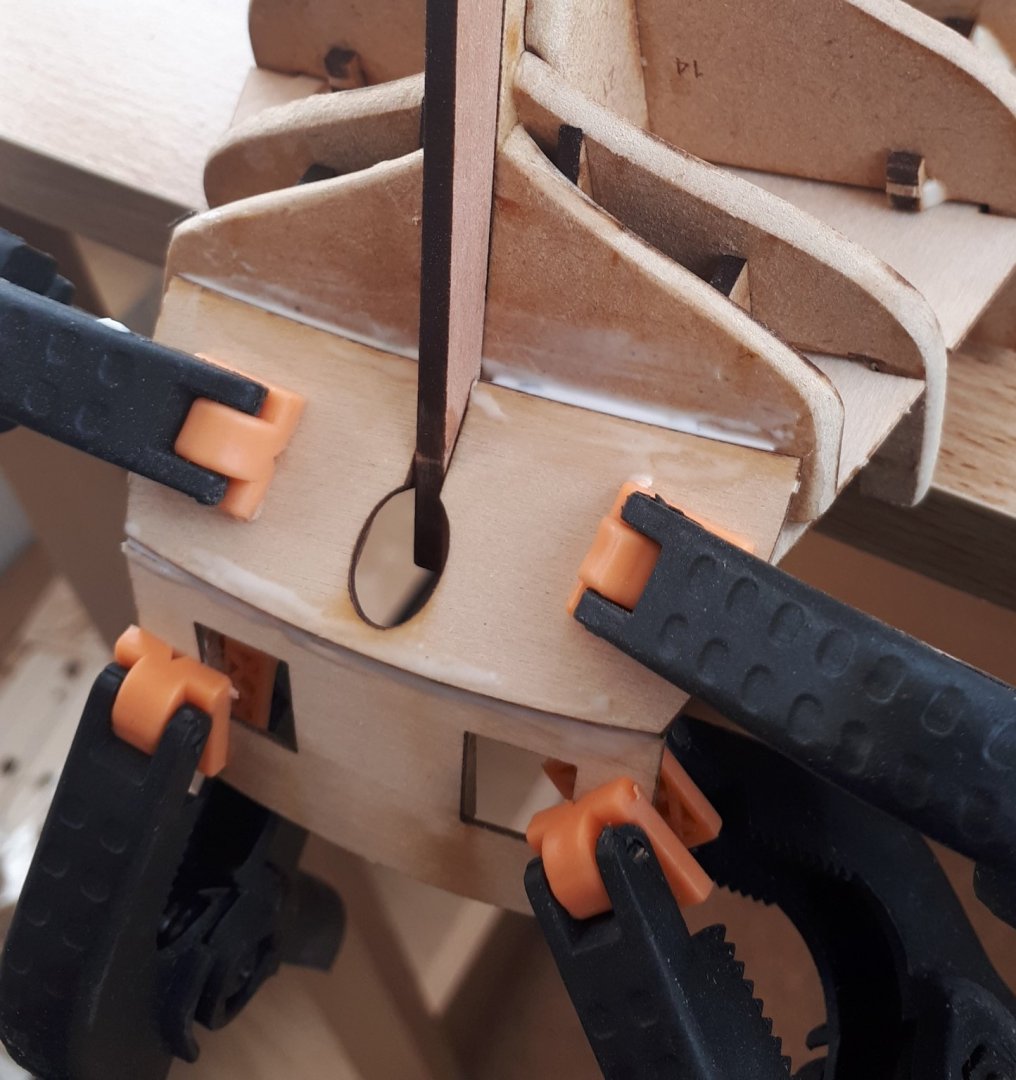
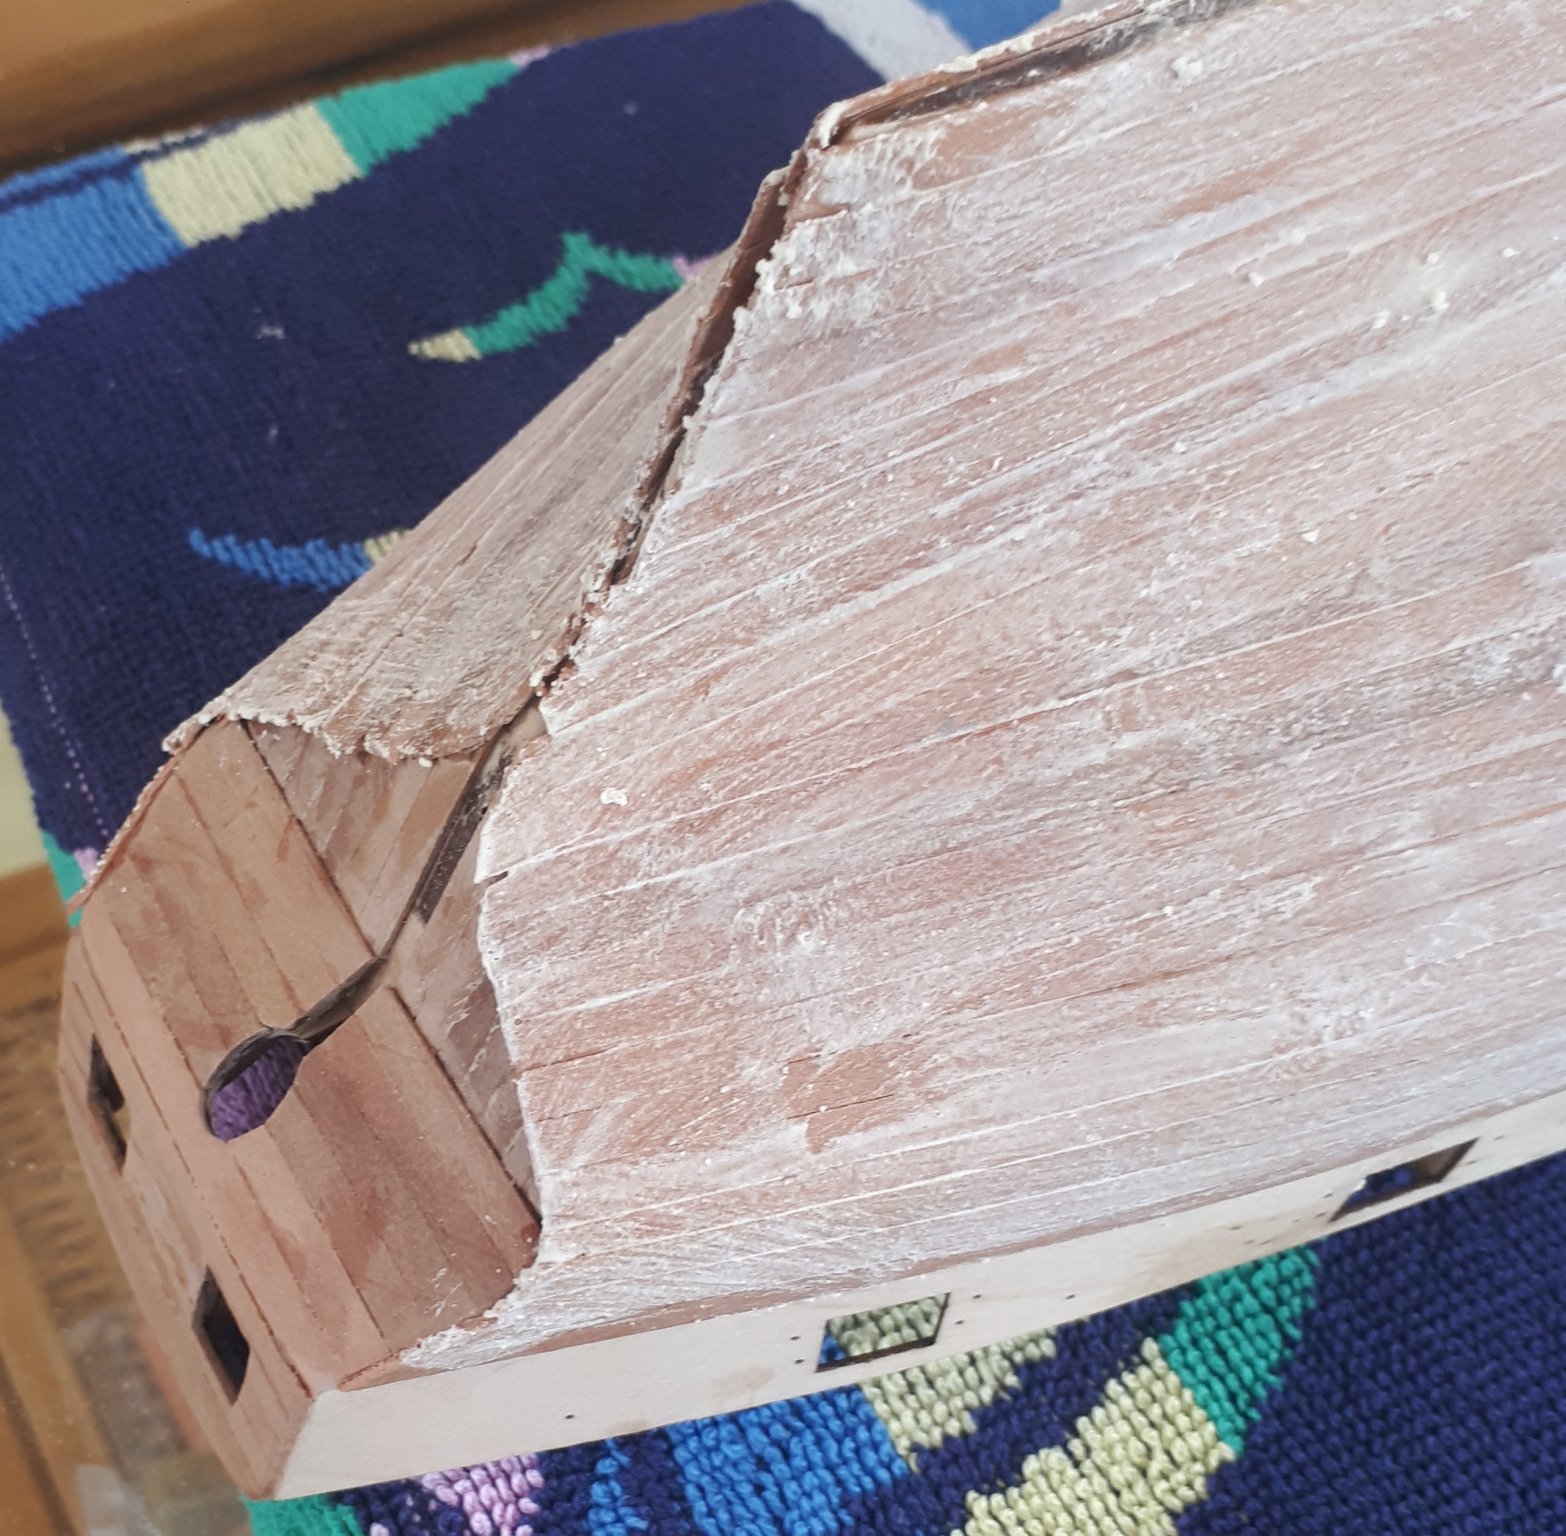
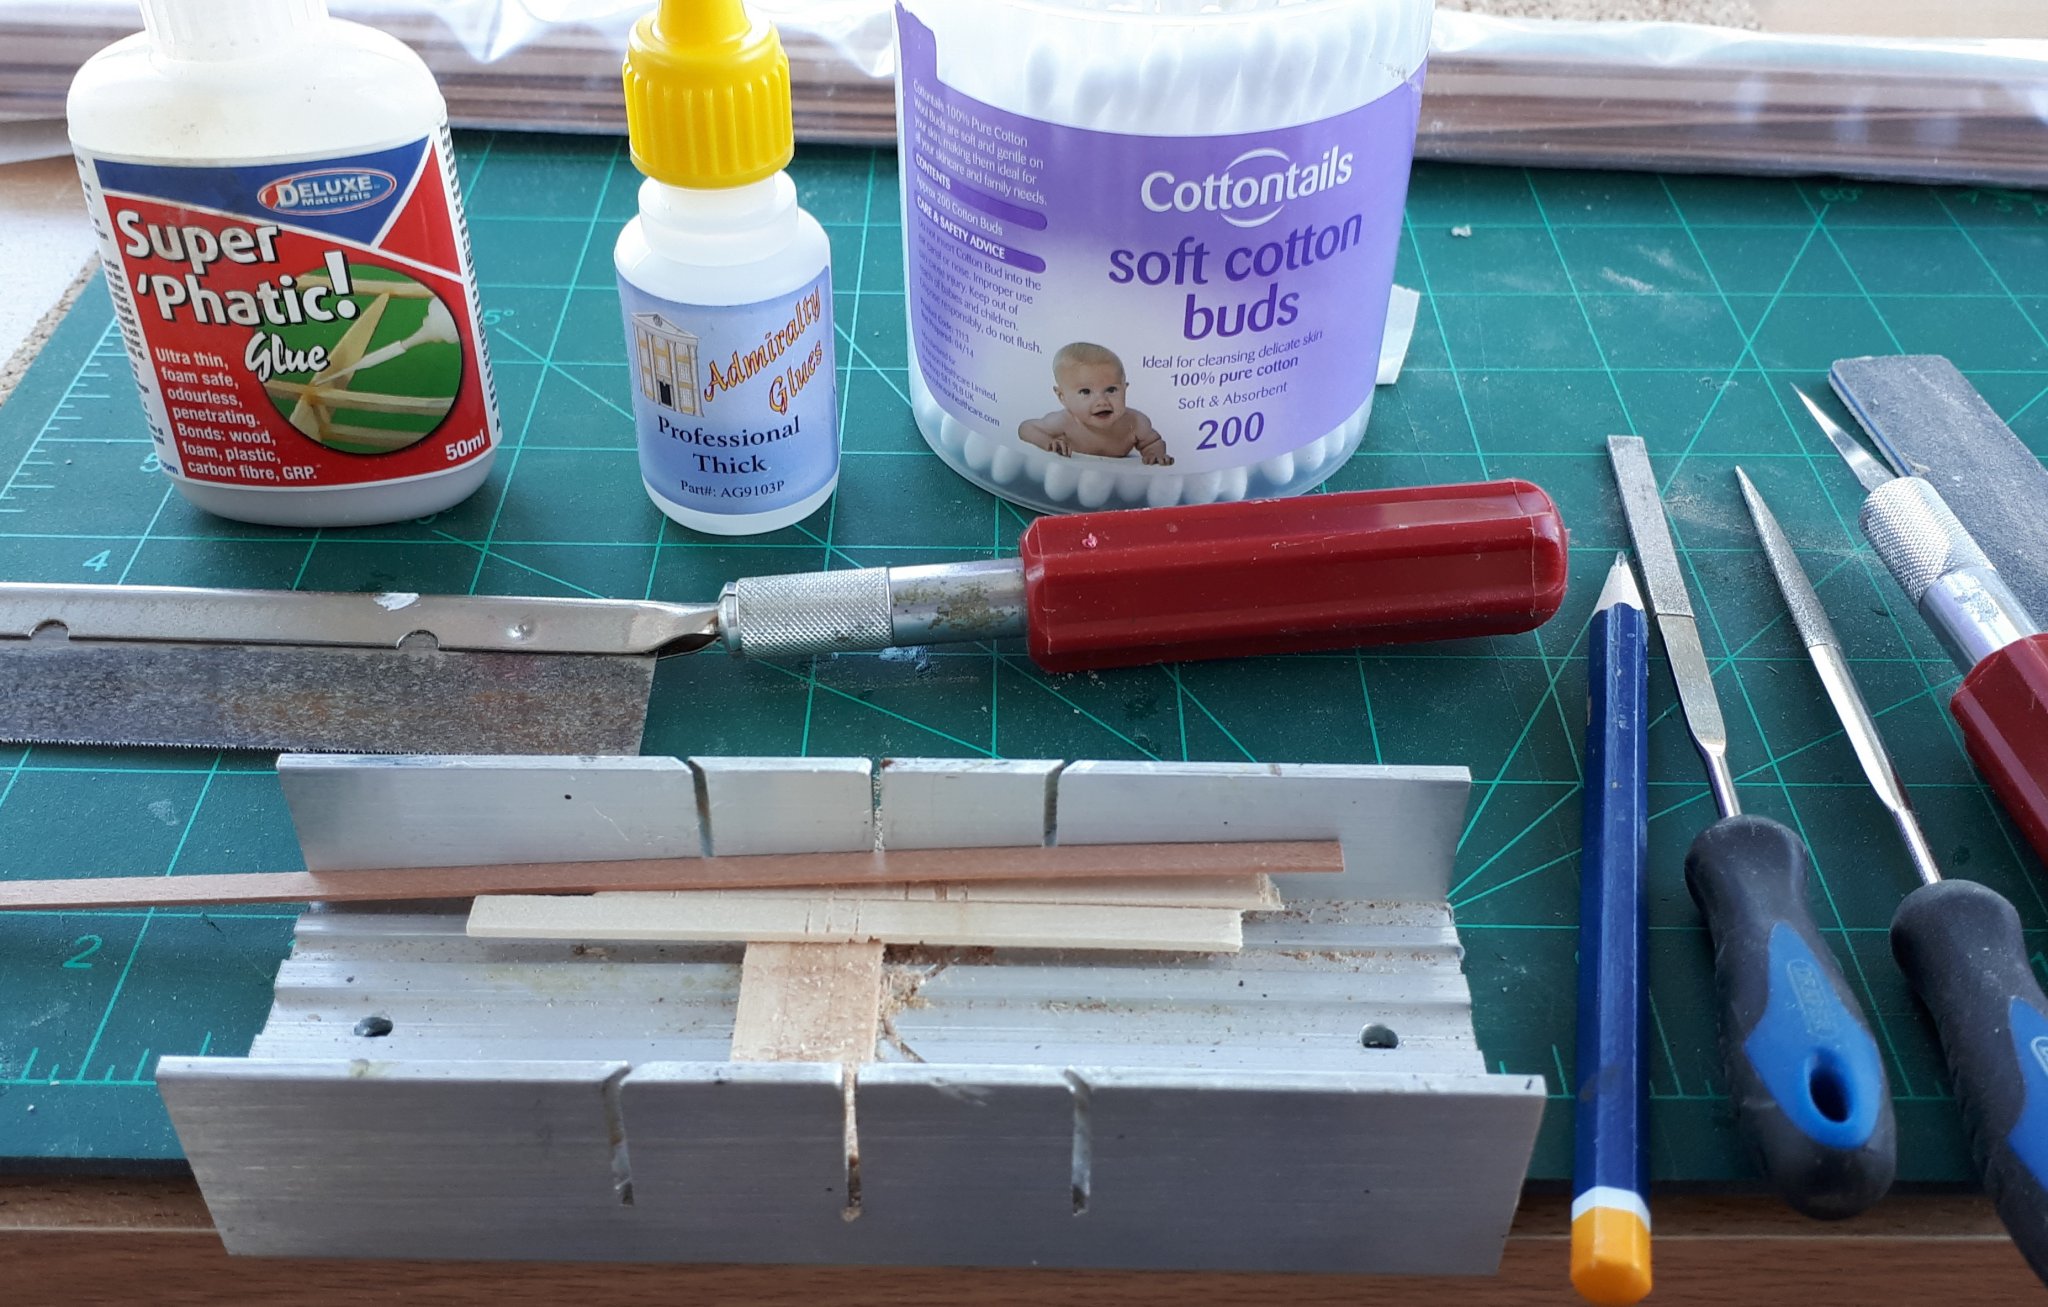
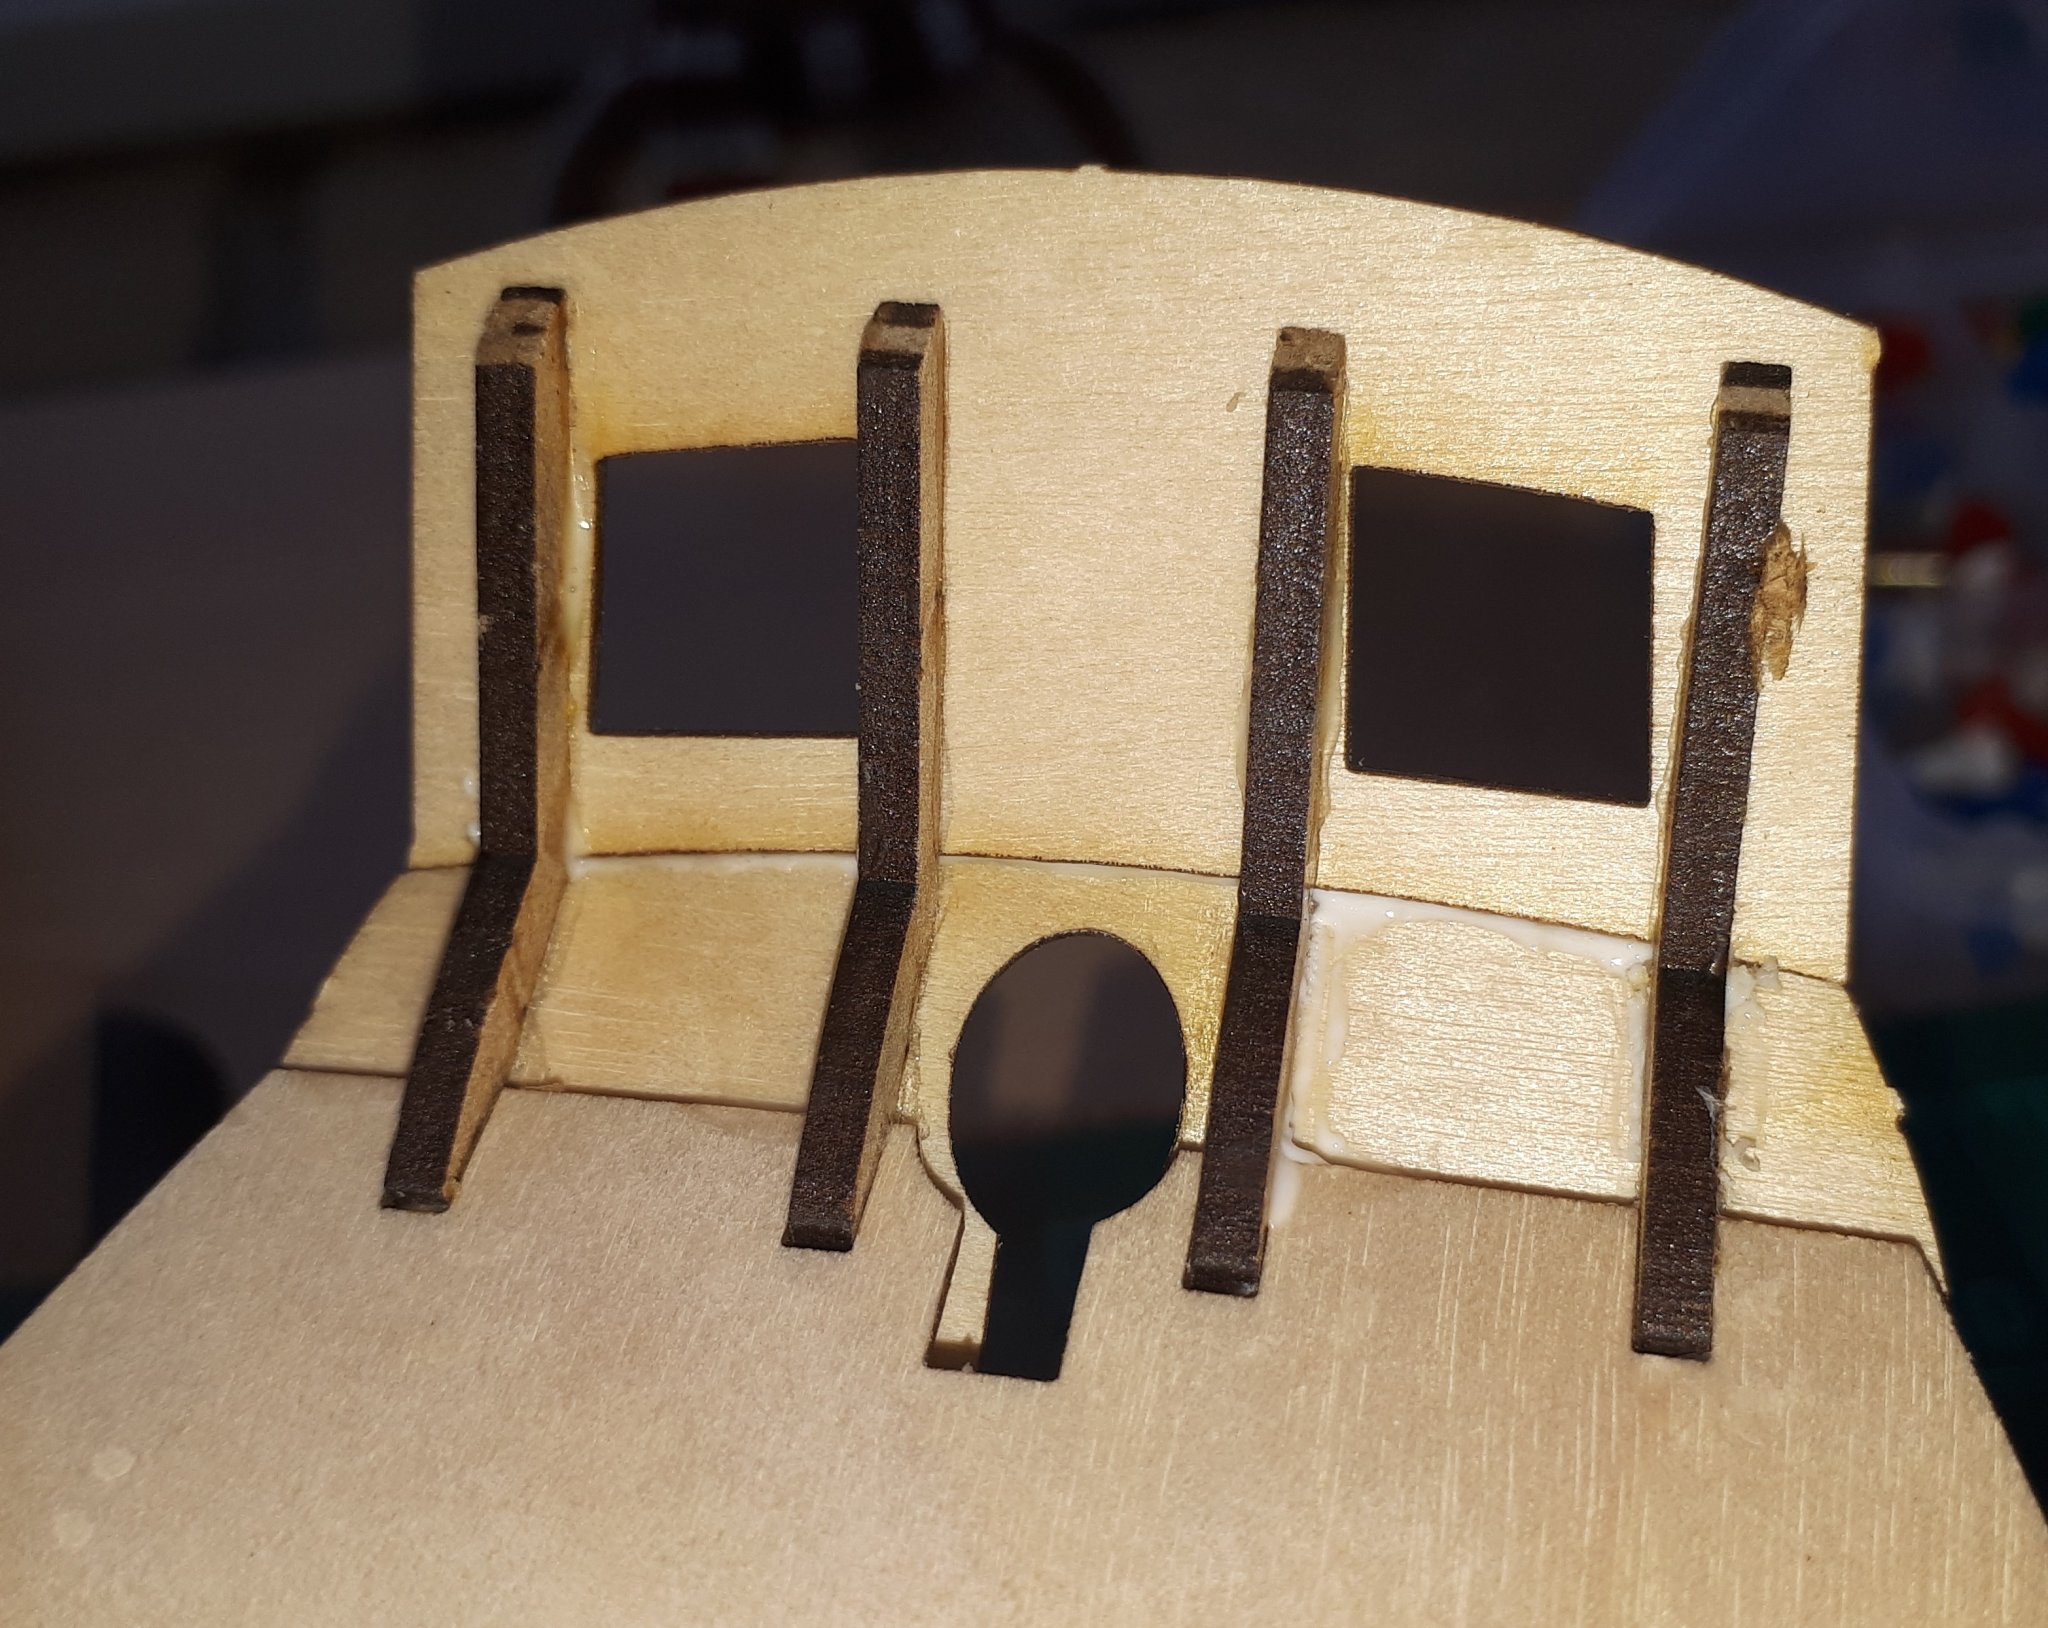
I have now completed the planking of the 3 stern patterns without any problems. I thought I would share the method I used for shaping the planks for the top stern pattern, which has the window openings.
I thought I would start with a picture of my workstation which I had set up for this task. I had all the necessary tools, materials and adhesives ready to hand. I used the thick CA glue to fix the planks to the pattern. I then applied a thin wash of the super phatic glue so it would bond with the joints. I then gave the top of the planks a very light sand so some of the sawdust could, where necessary, bond with the glue.

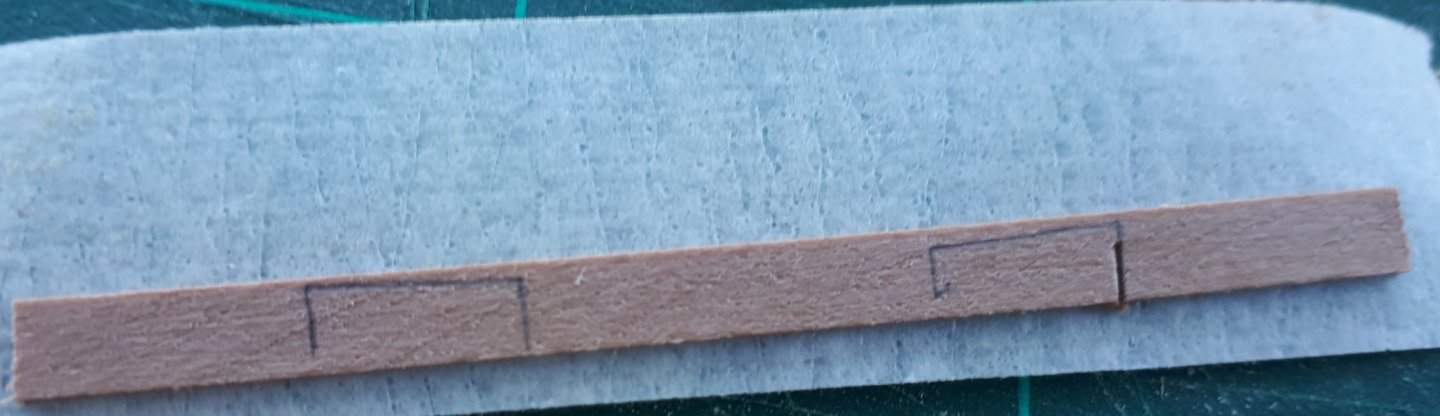
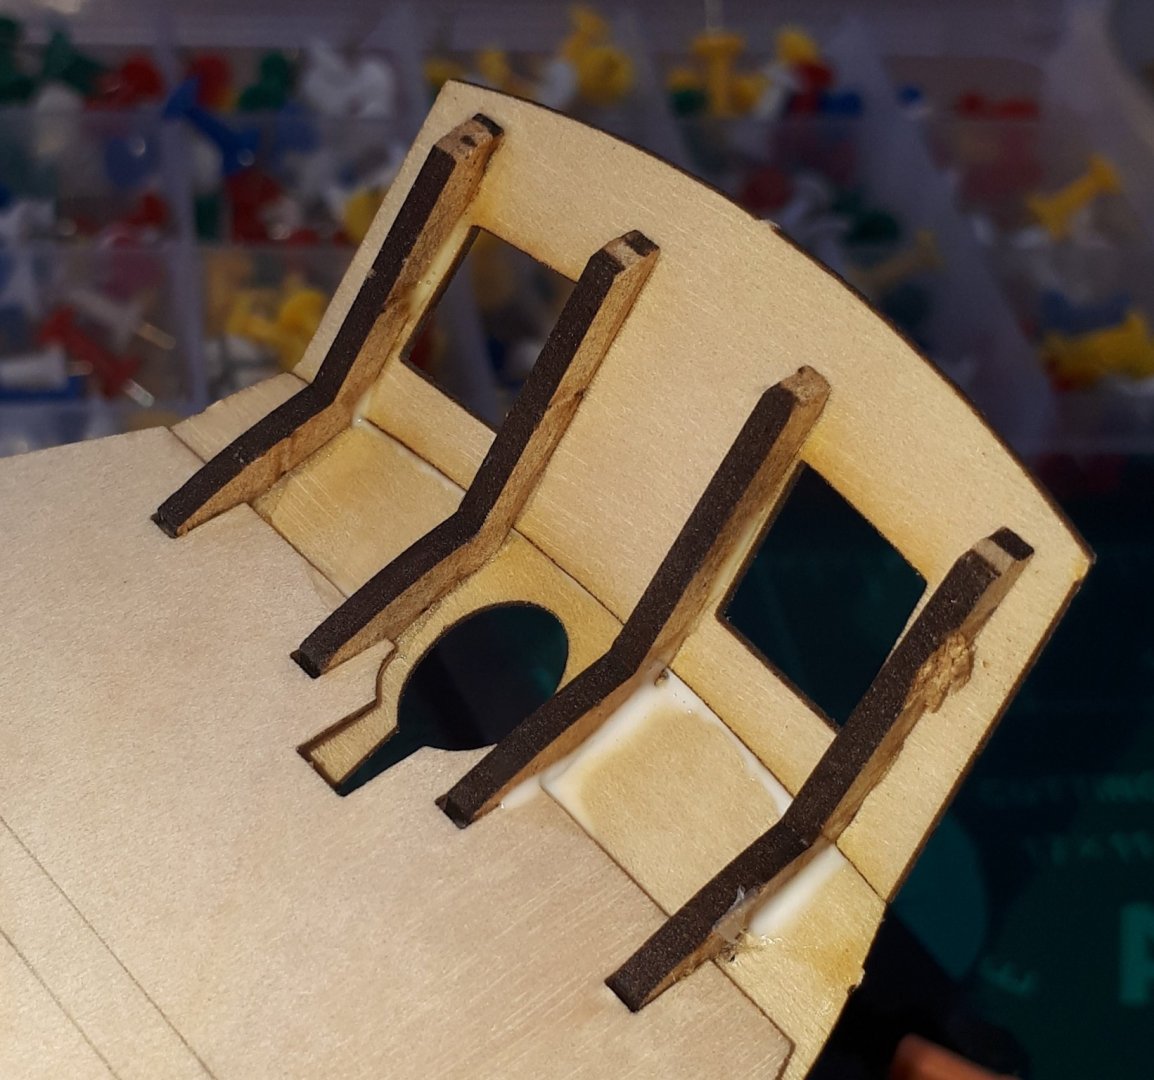
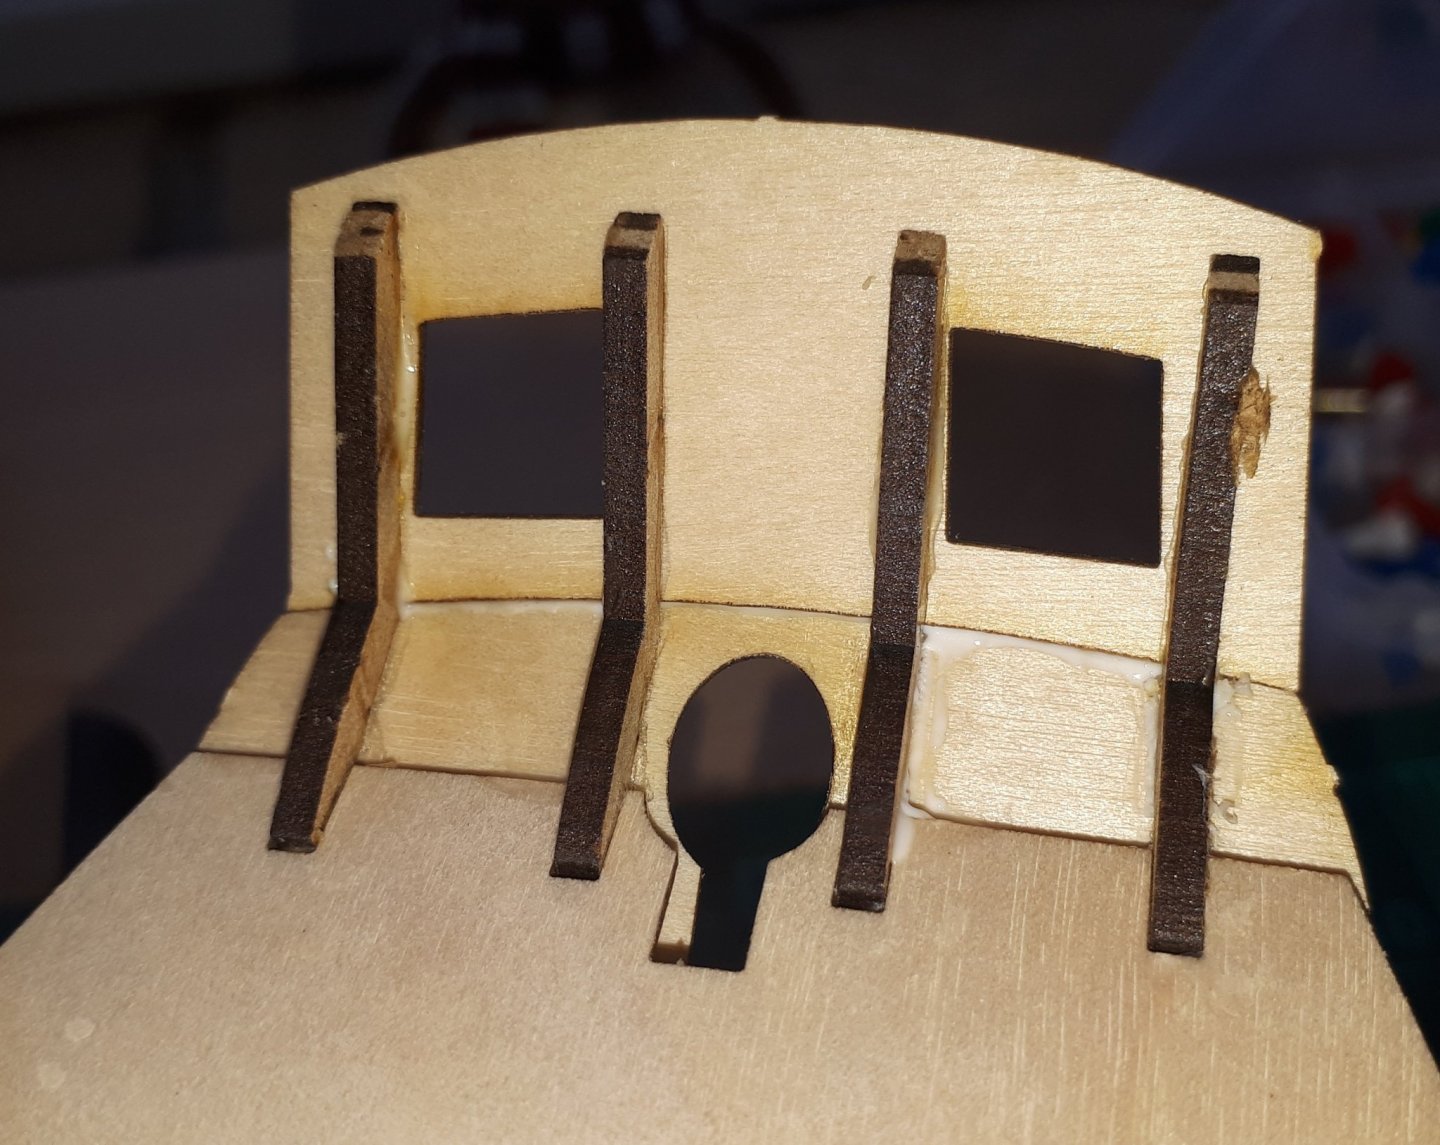
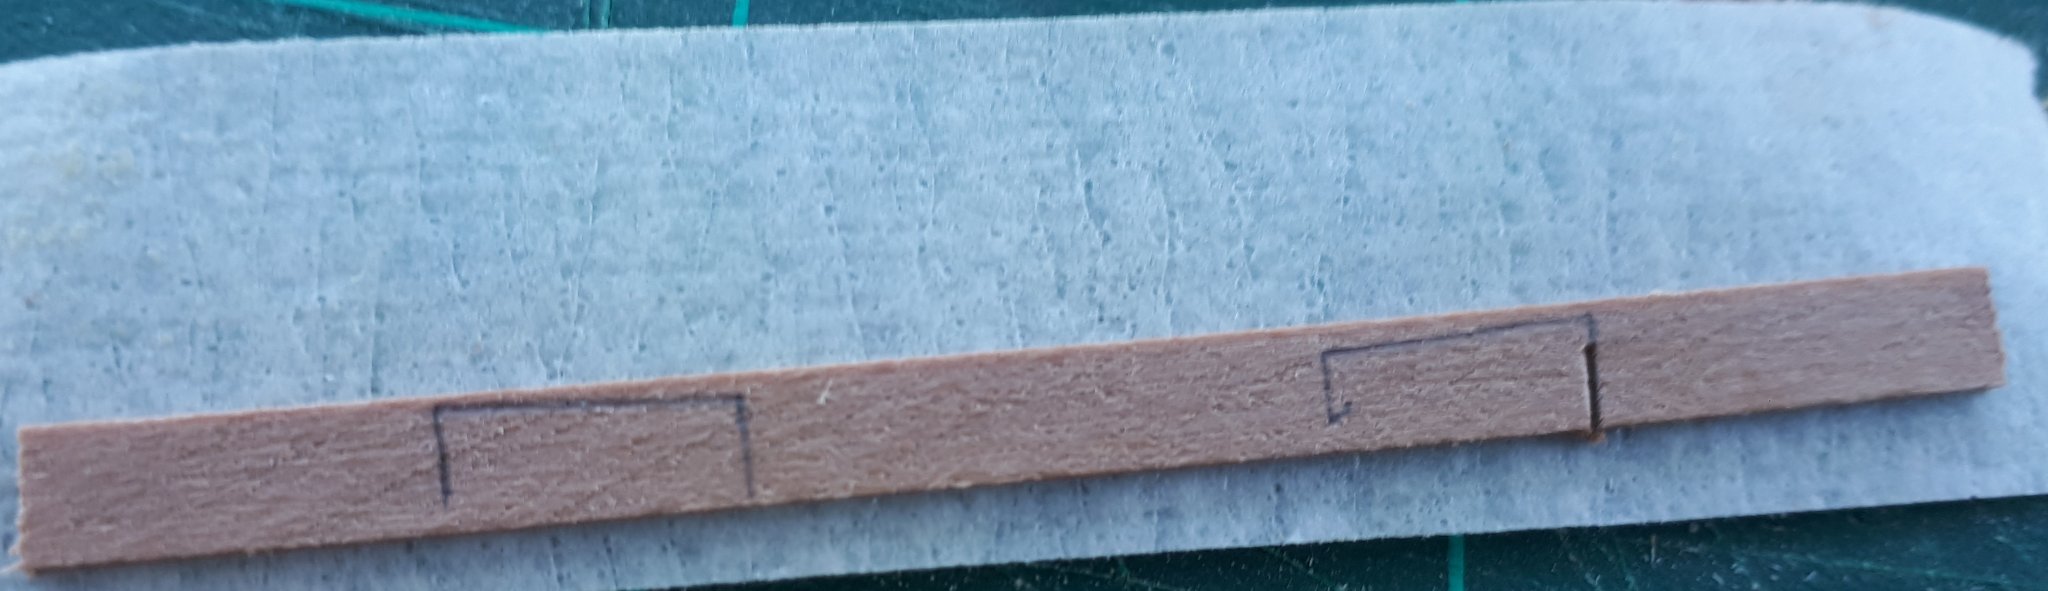
The first difficult plank to cut to size cover the lower section of the windows. I positioned a plank and then marked the position of the required cut-outs (from the reverse side).

With the position of the cut outs marked I then placed the plank on a piece of tape, so there was less chance of the wood splitting along the grain. In the picture below I have started to make the first cut ( far right).
The tape backing worked and I was able to remove the cut-outs without any problems.
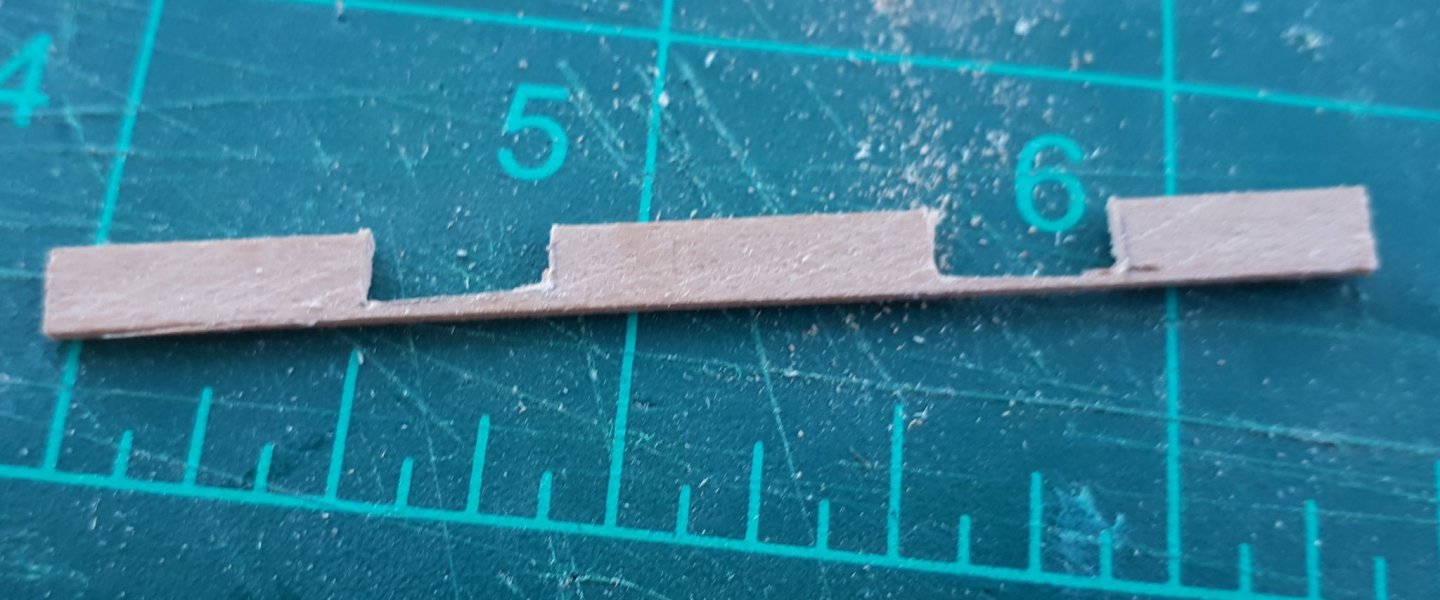
Once I double checked the plank would fit OK I used the CA glue to fixed the plan to the stern pattern.
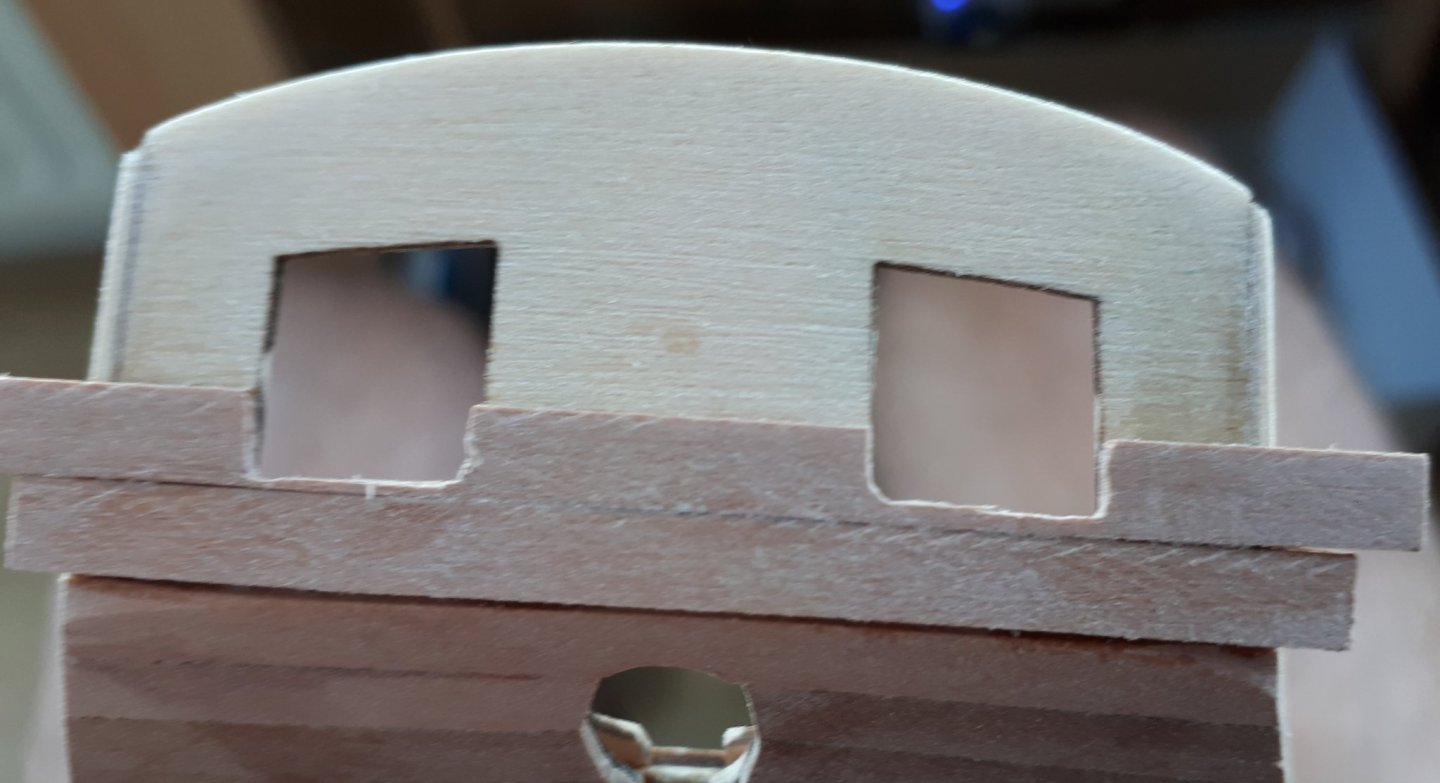
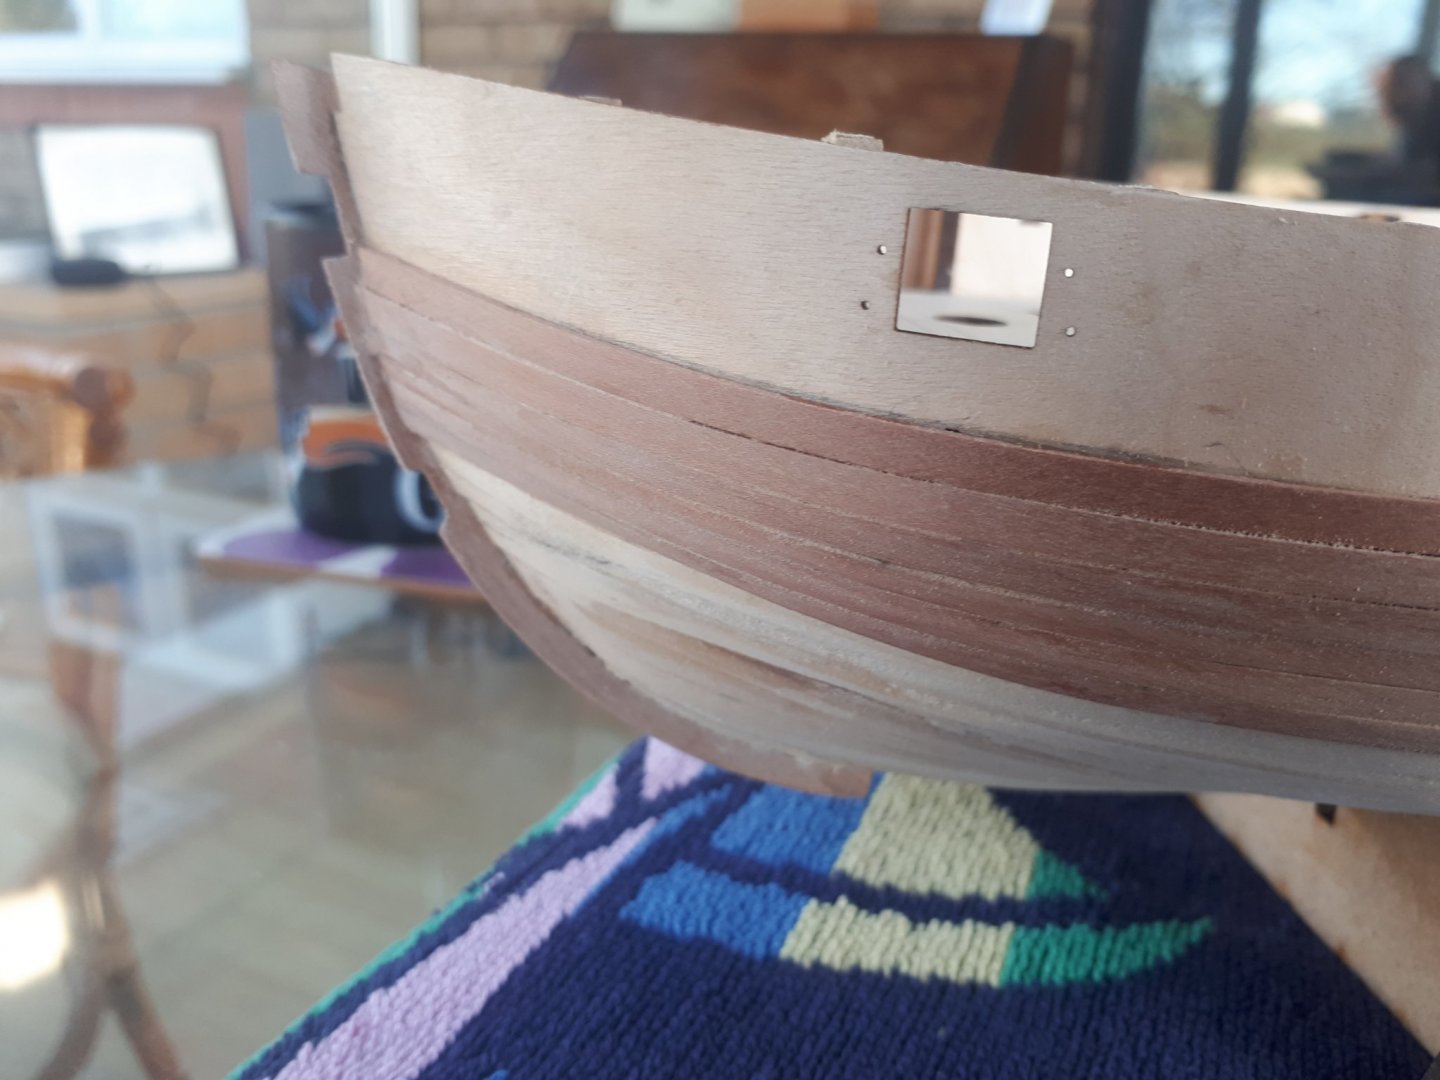
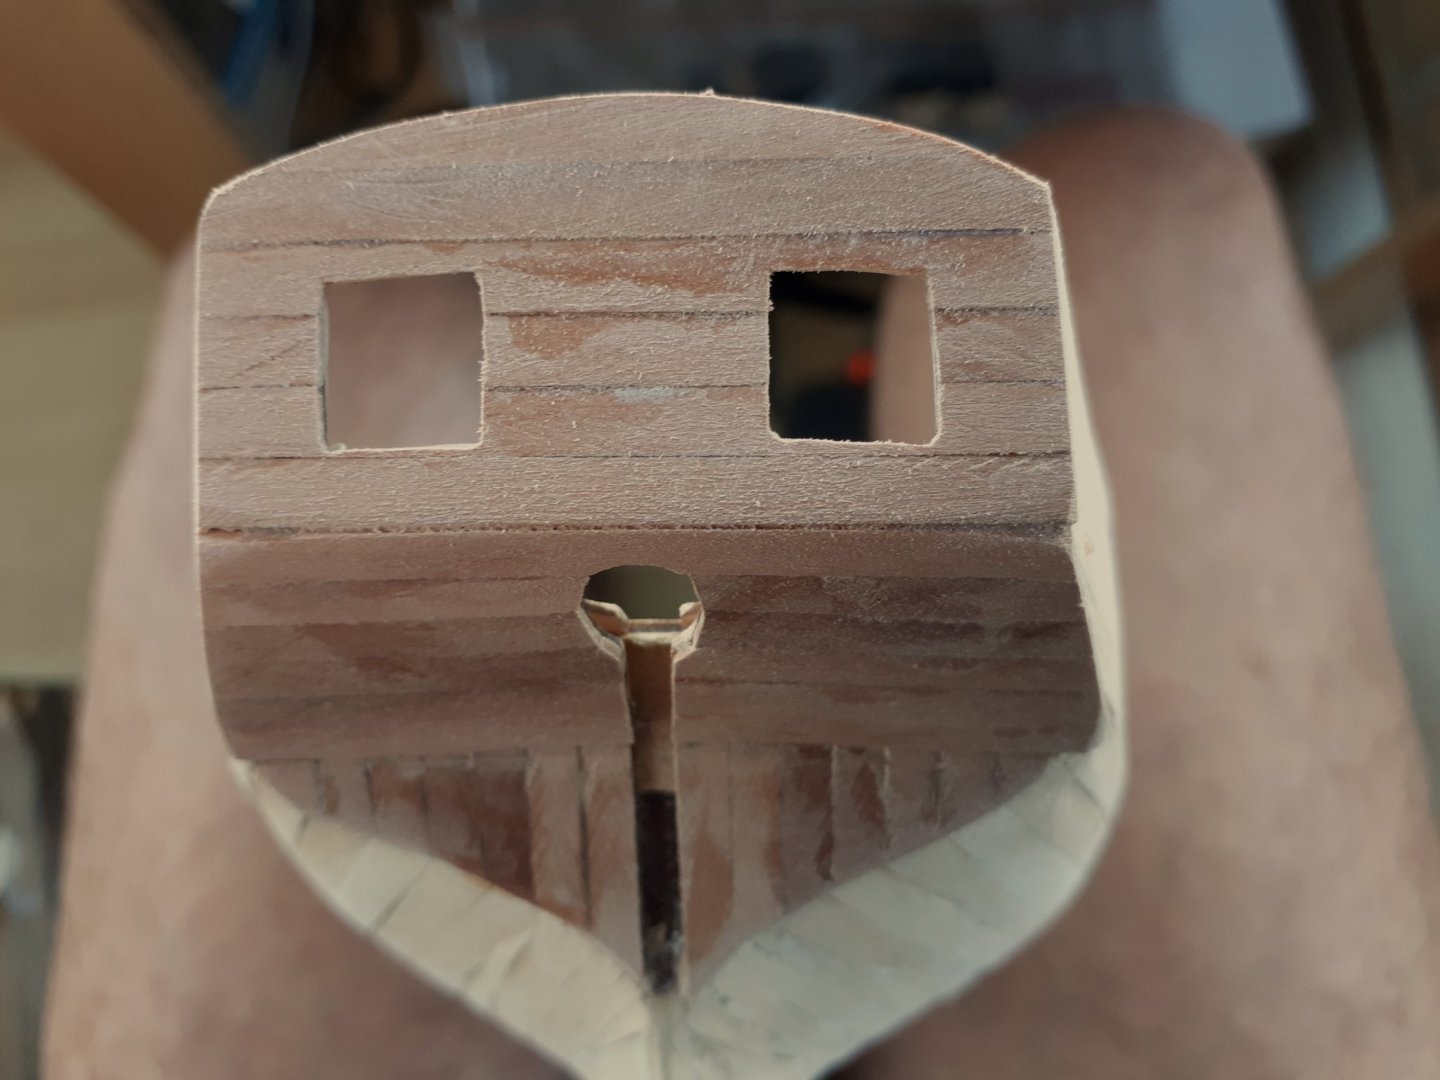
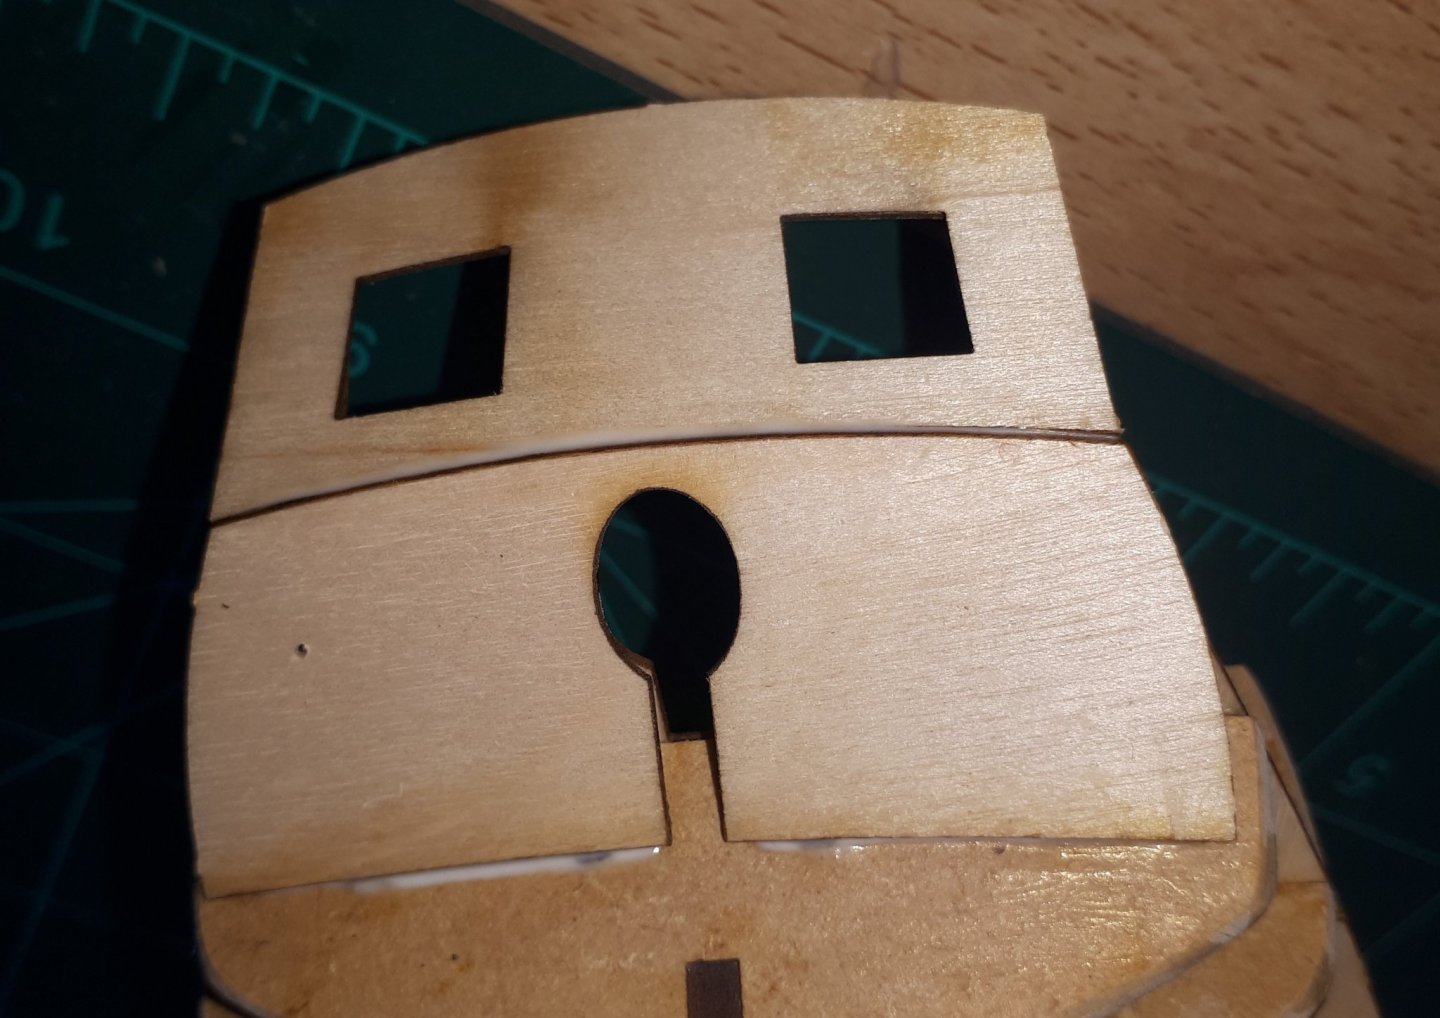
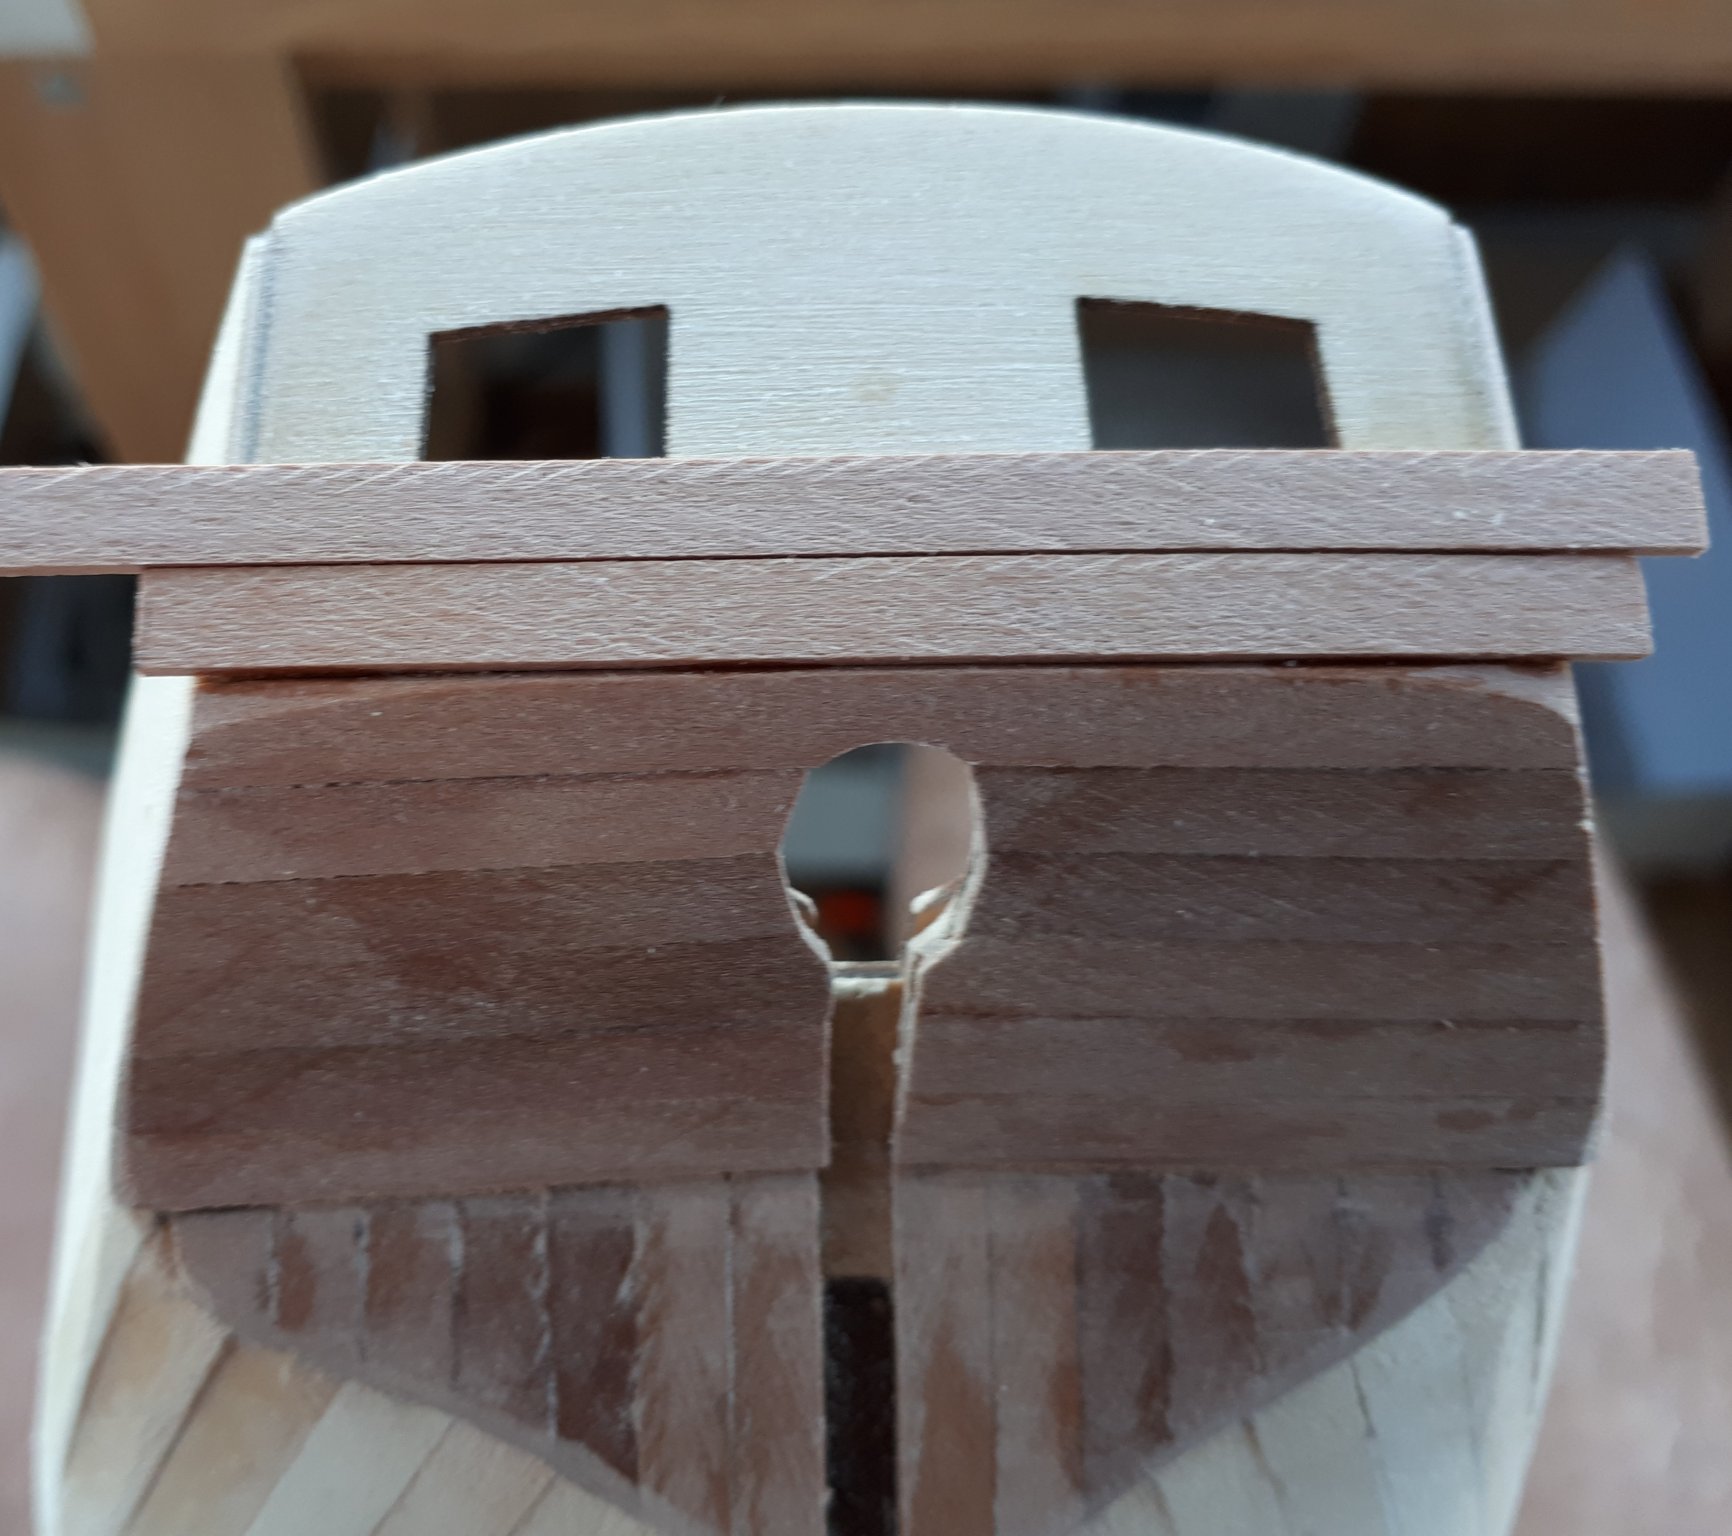
I continued to plank, noting that I opted to removed the remaining excess wood around the window frame after each plank had been fitted. The two pictures below show the end results. The first one is before the edges were cut and sanded and then second one is after the sanding. I did adjust the left window (top right) after I took these pictures. After a careful fine sanding of the planked area I will apply a few coats of matt varnish.
- KARAVOKIRIS, egkb, JayCub and 5 others
-
8
-
25 minutes ago, DelF said:
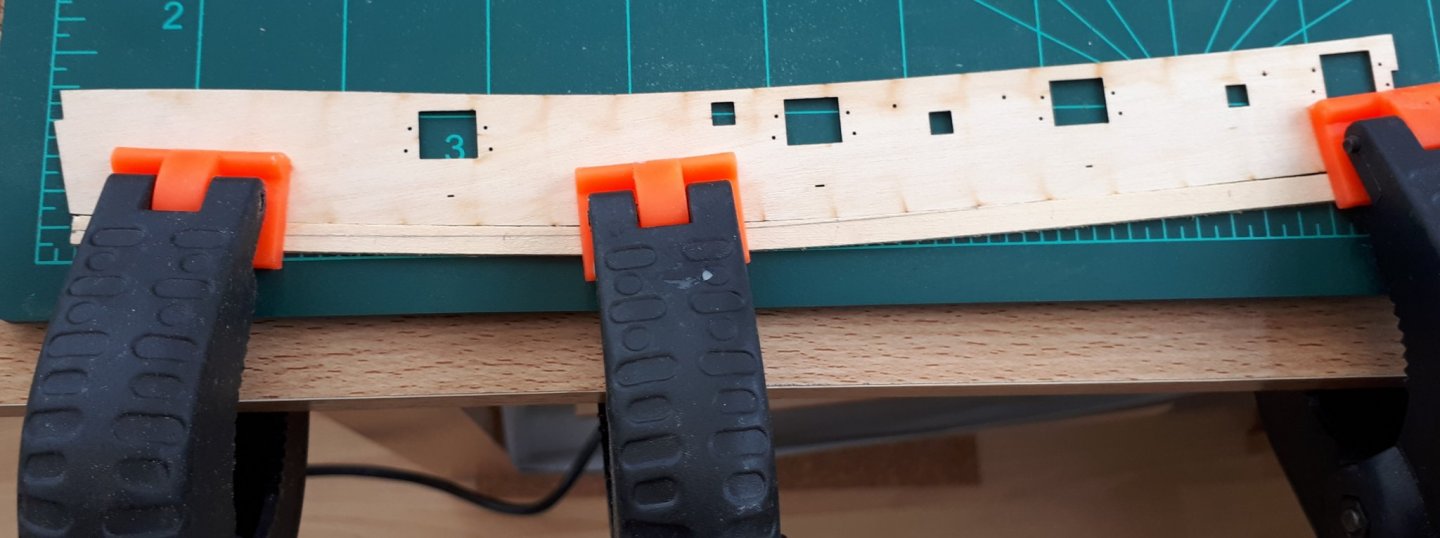
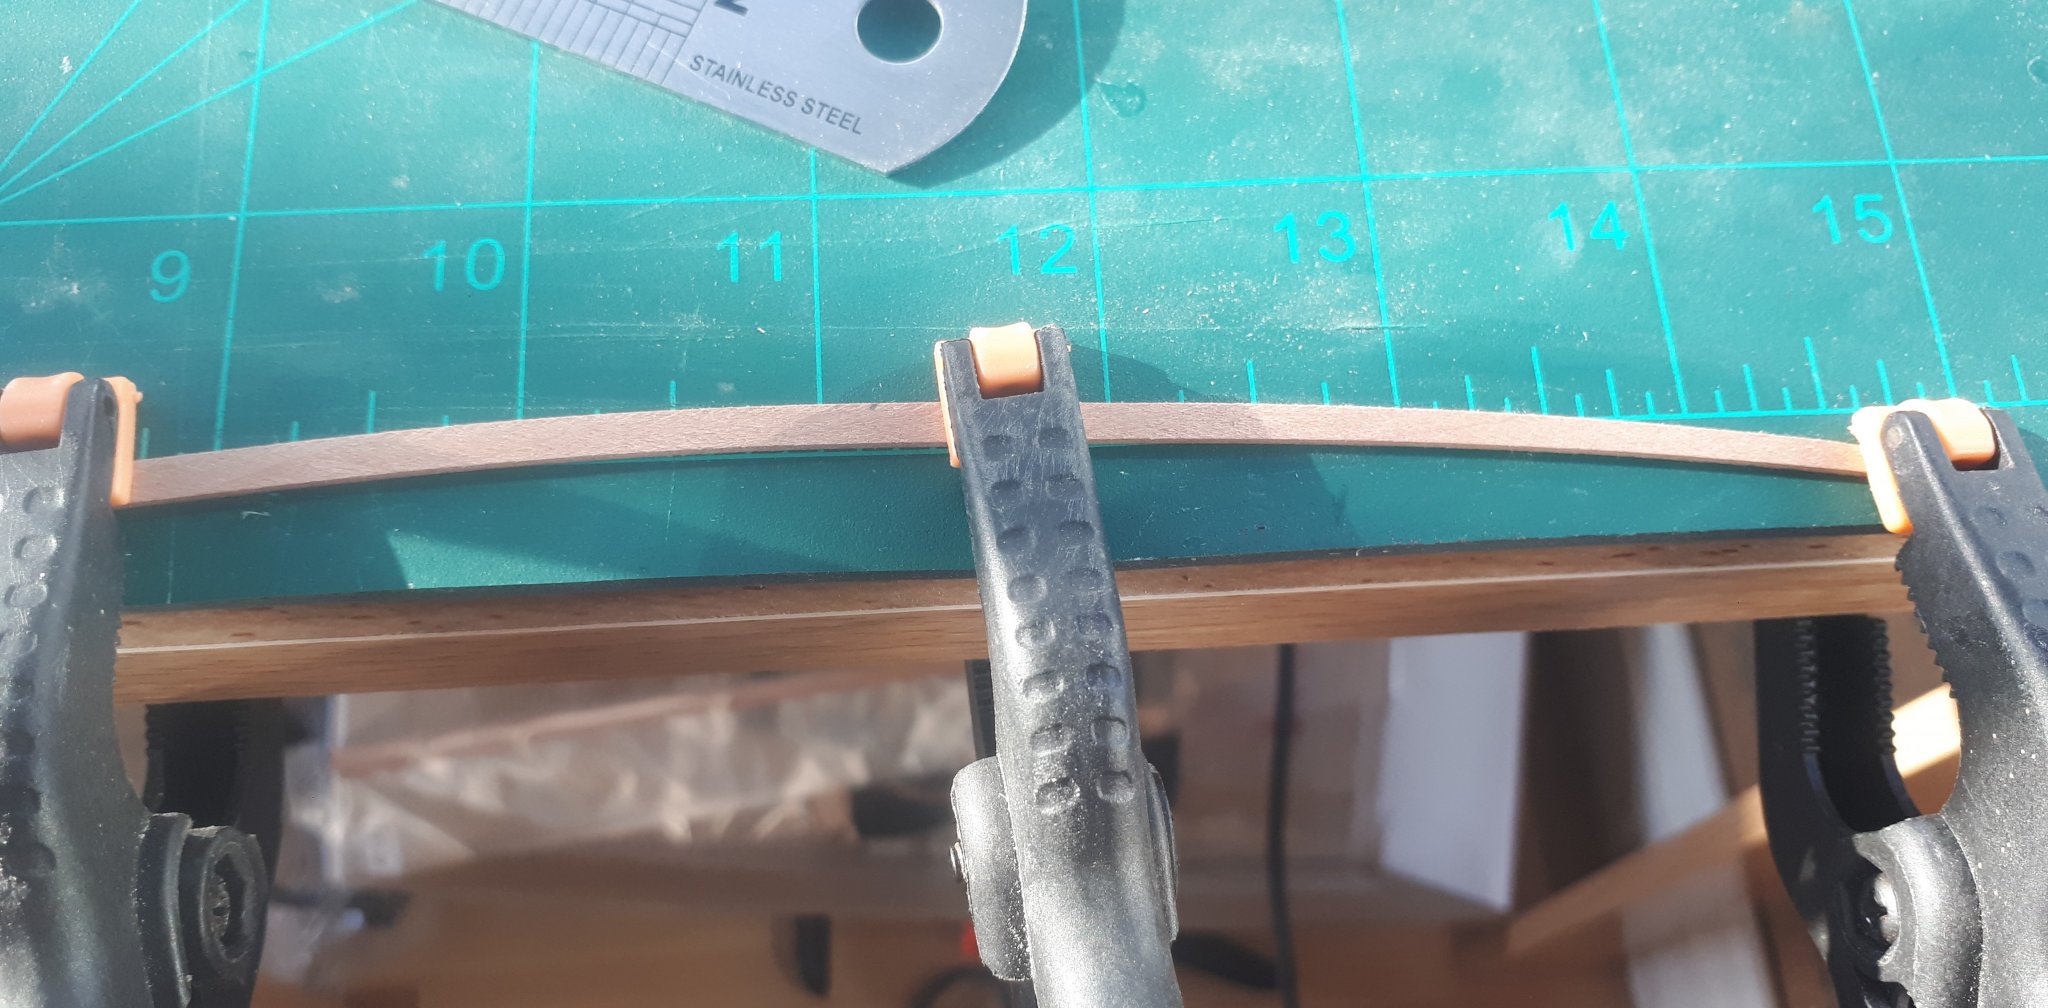
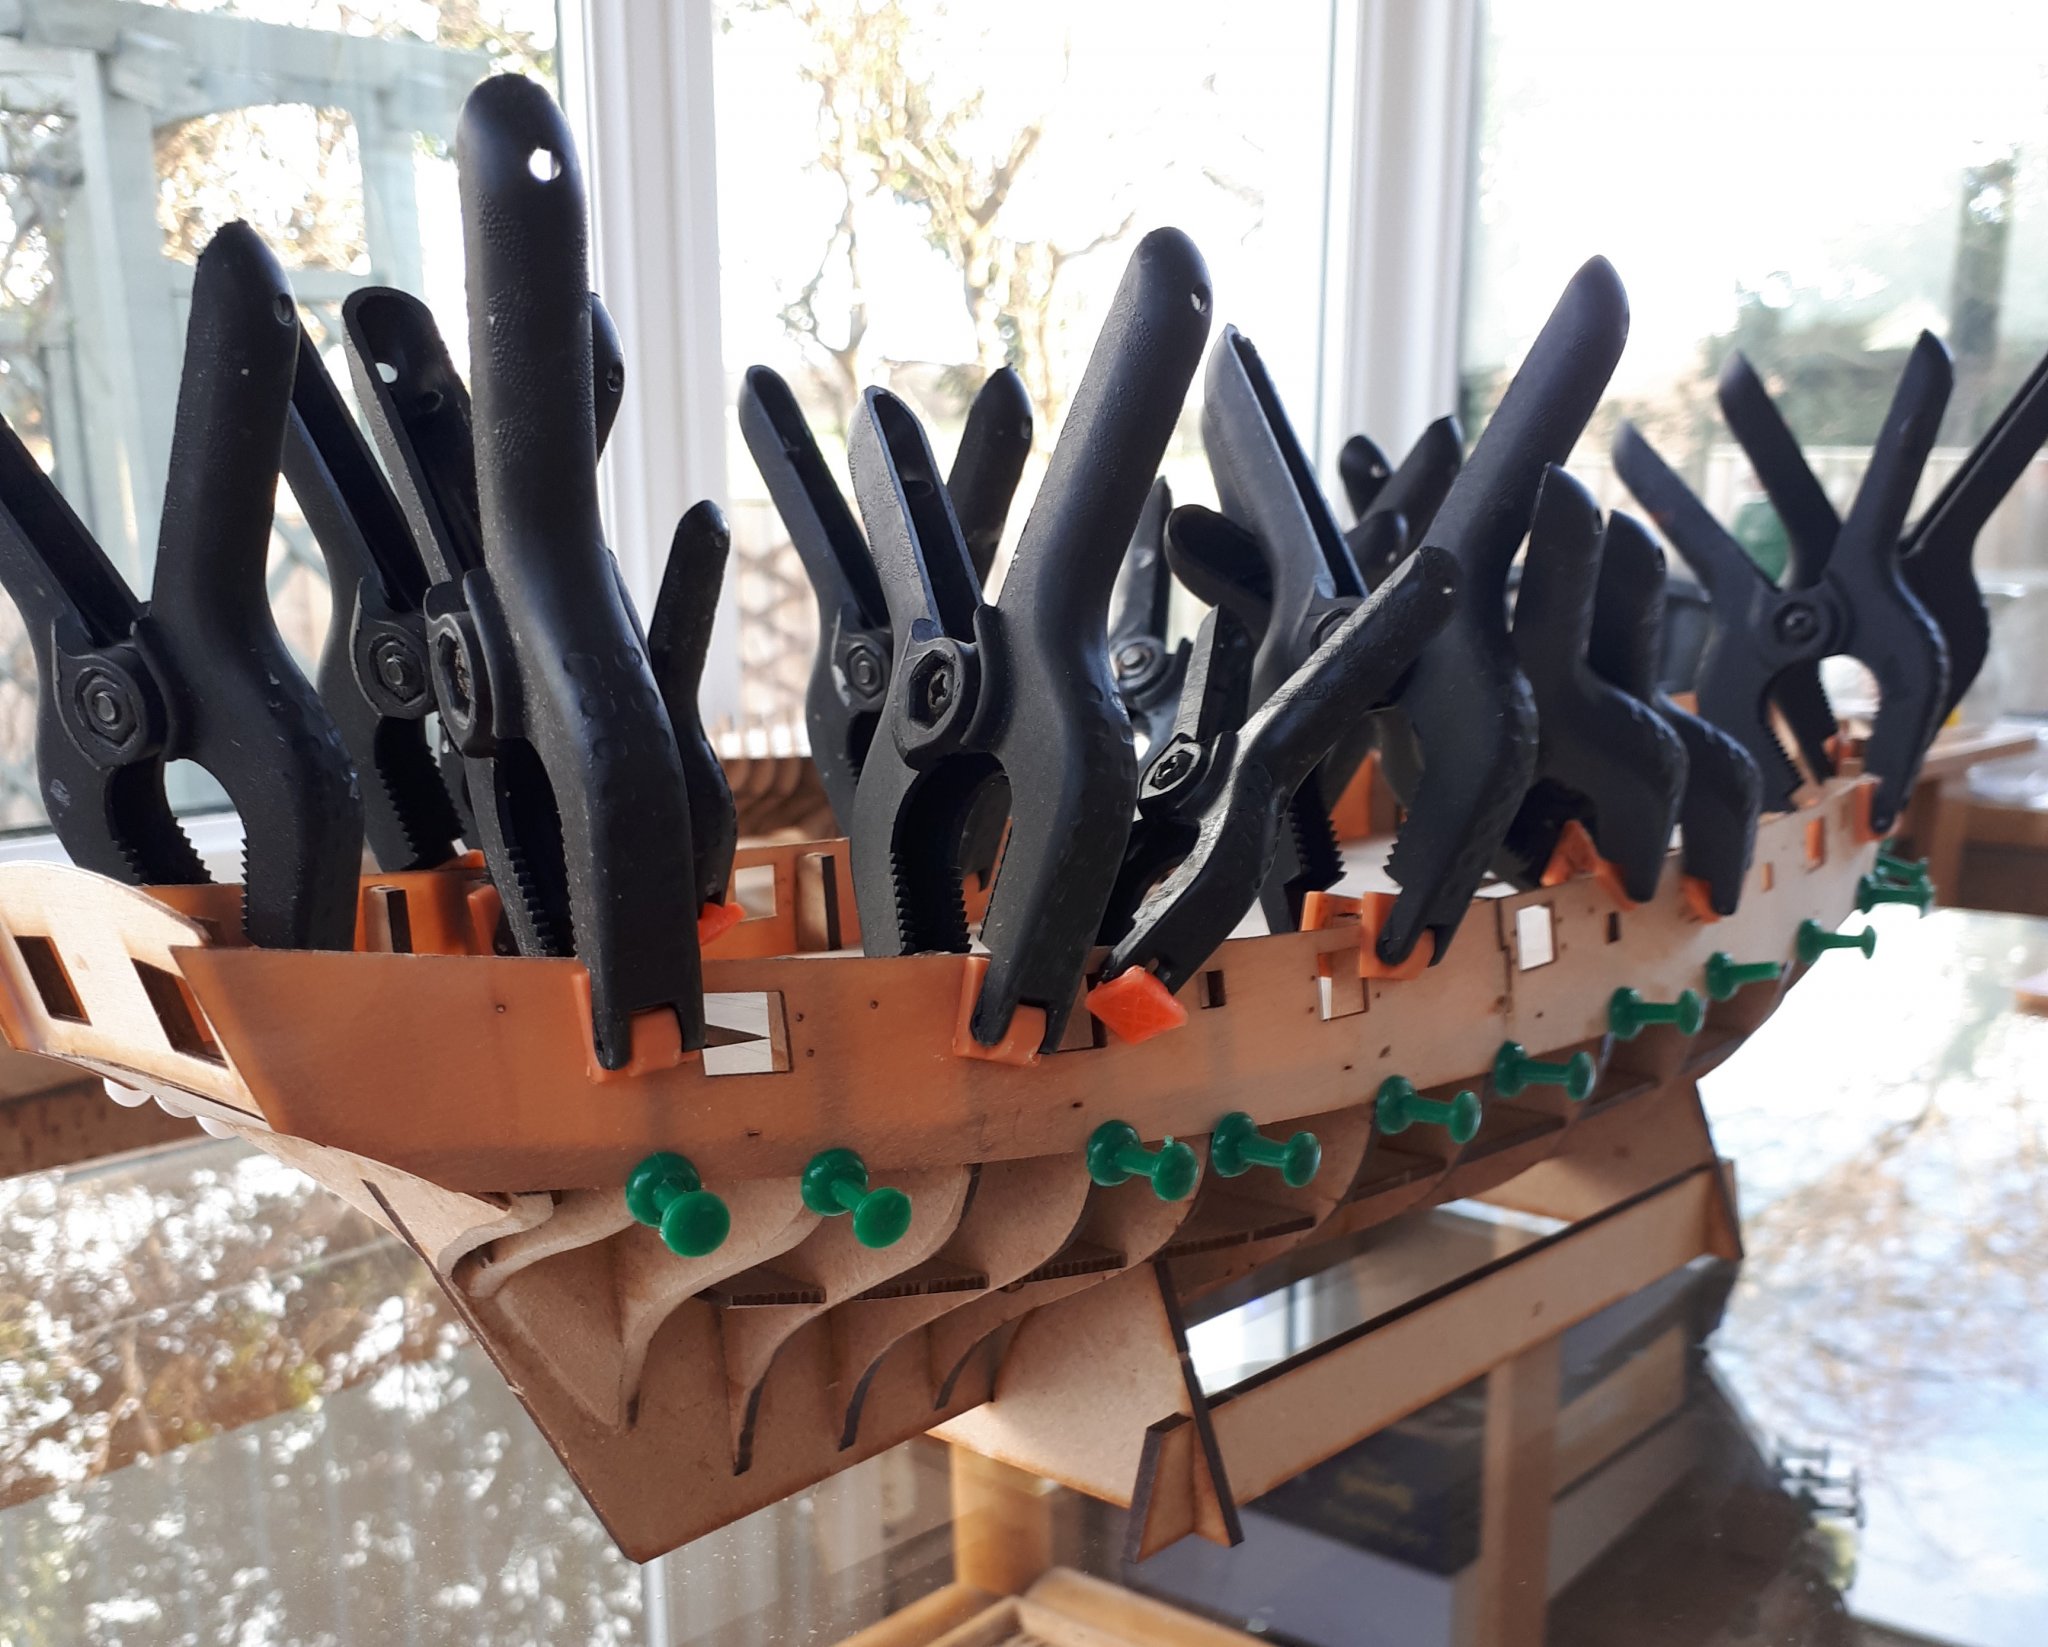
Not an update as such -second planking progresses slowly but steadily - but I thought I'd share my one aspect of my approach to plank bending:
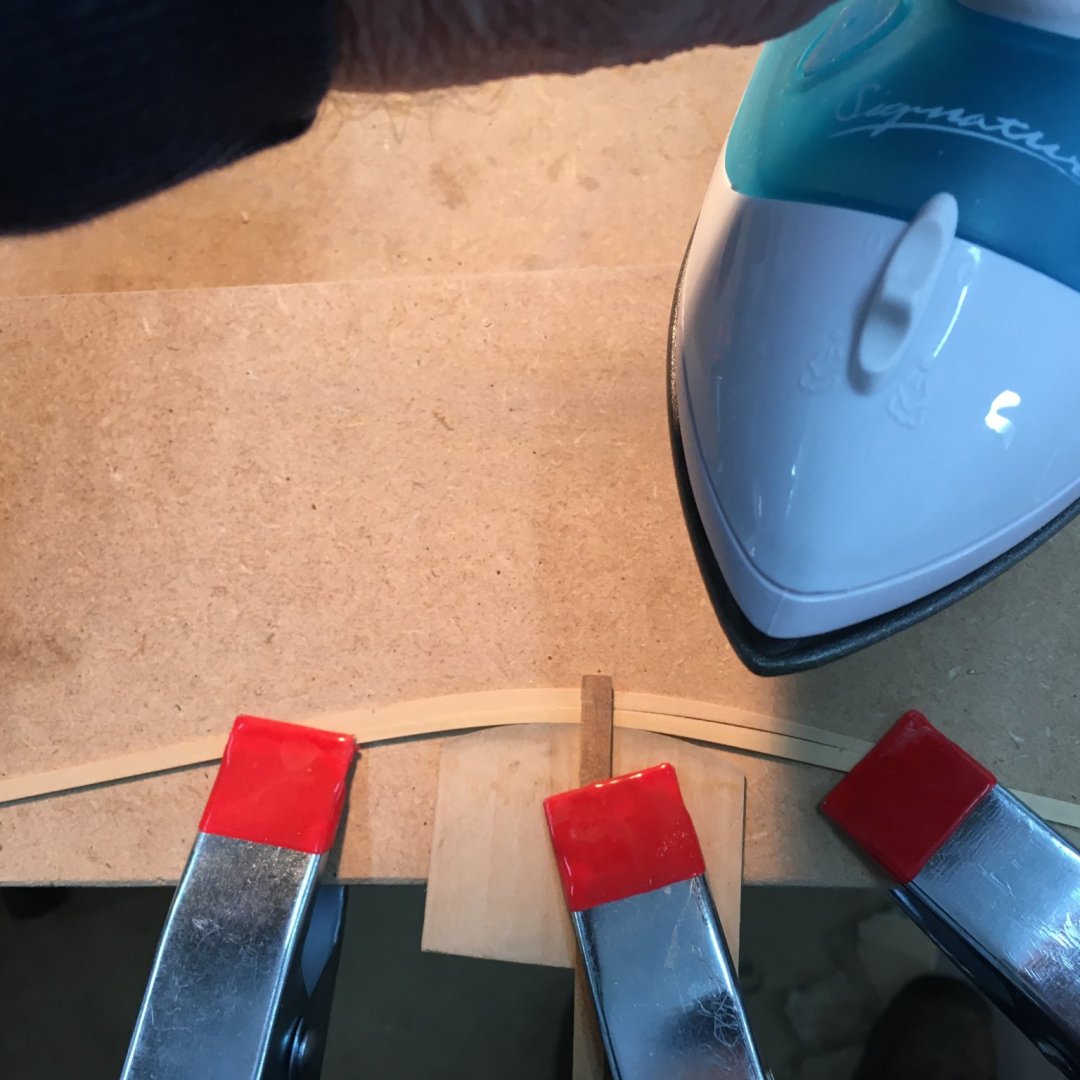
As you can see, I'm using Chuck's edge bending method, but instead of doing one plank at a time I'm doing two. I've been trying to work as symmetrically as possible, port and starboard, so the tapering, the point of maximum bend, and the amount of bending should be the same on both sides. Obviously the two planks have to point in opposite directions to bend correctly as they are mirror images of each other, but so long as you put a little arrow indicating the position and direction of bend on each plank (as per Chuck's videos) you can't go wrong.
I like to leave the planks in the jig for some time to ensure the bend is 'set', so doing two at once saves considerable time. Equally important, the method seems to work just as well with two in the jig as with one.
Derek
Nice idea, bending two planks at the same time.
-
1st Planking Task Completed
I was pleased with how this went, the preformed rabbet in the stem post really helped. I used Super Phatic Glue to fixe the planks to the bulkheads. I really using this glue as it gives a good solid bond, and cures so much quicker than normal wood glue.

Once I have finished with the sanding I will commence the 2nd planking phase.
I have never used Chuck's edge planking method before but will certainly use it for this project. My bending station has been set up and is go to go. I may go out a purchase a travel iron as the hair dryer I used when testing the method had some issues with thermal overload.
- egkb, ccoyle, KARAVOKIRIS and 6 others
-
9
-
Looks nice. I'm undecided with my build, but I'm more inclined toward the laser cut deck at the moment but I'm tempted to try replicate the laser cut deck with actual deck planking.
-
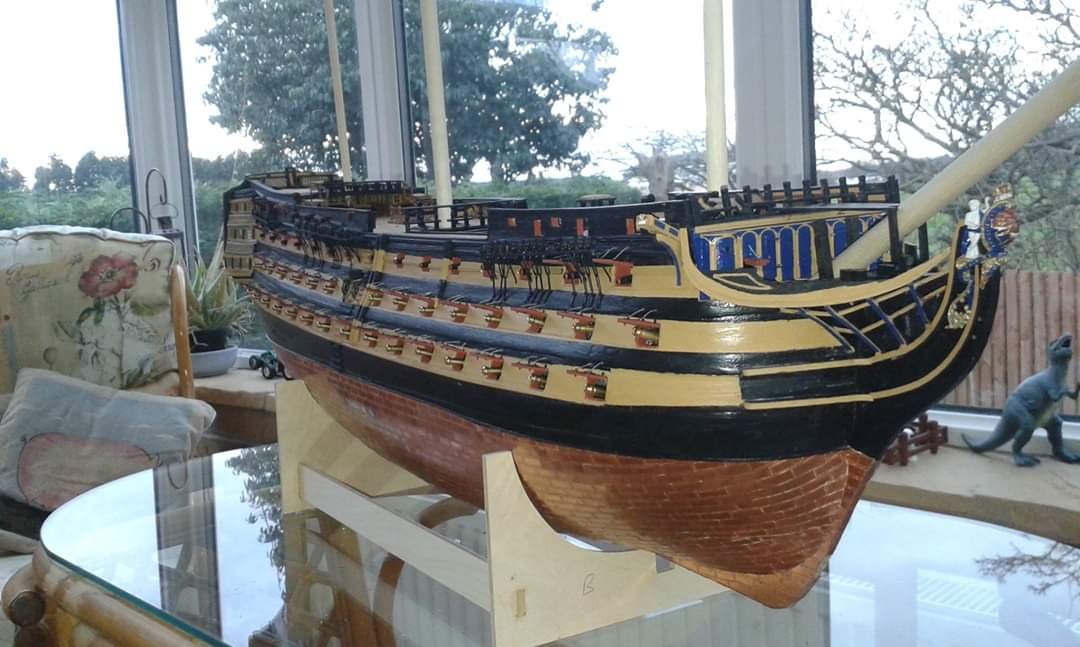
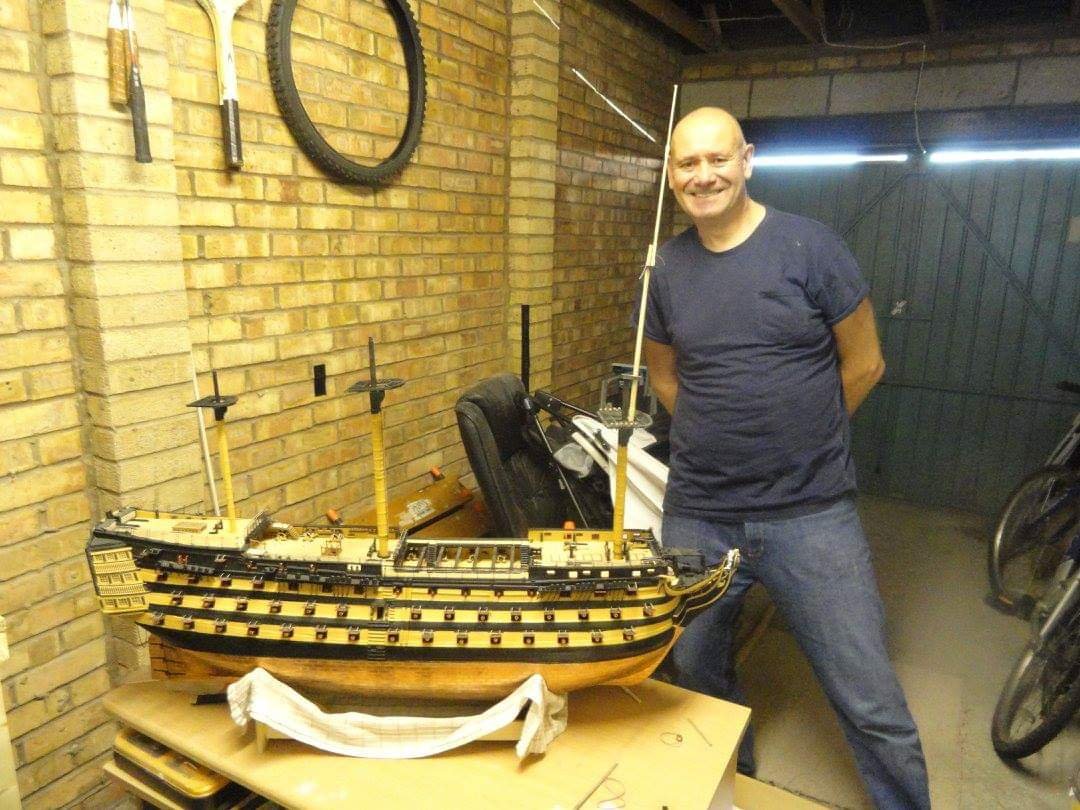
I had over 3000 copper plates to fit when I built Caldercraft HMS Victory. It was quite time consuming but looked really good when completed.
- DelF, Captain Poison, GrandpaPhil and 3 others
-
6
-
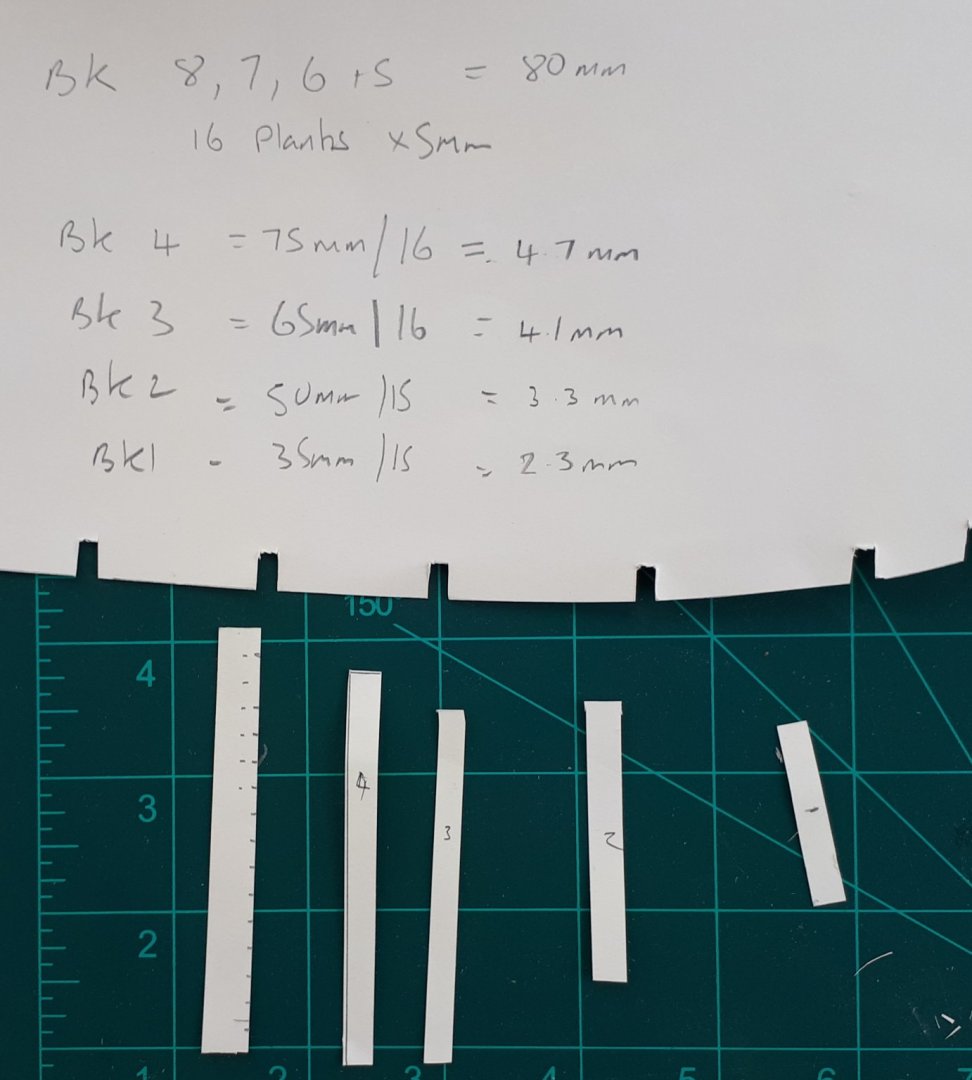
In reply to the question "How did you determine the taper width on the stern" I used carboard strips and got the following measurements from bow to stern
Bulkhead position 1 = 35mm
Bulkhead position 2 = 55mm
Bulkhead position 3 = 65mm
Bulkhead position 4 = 70mm
Bulkhead position 5 = 78mm
Bulkhead position 6 = 80mm
Bulkhead position 7 = 80mm
Bulkhead position 8 = 80mm
Bulkhead position 9 = 80mm
Bulkhead position 10 = 80mm
Bulkhead position 11 = 80mm
Bulkhead position 12 = 80mm
Bulkhead position 13 = 80mm
Bulkhead position 14 = 45mm
Bulkhead position 15 =38mm
I believe there will be 16 x 5mm planks required for the 80mm dimensions, however this will be reduced to 15 planks towards the stern.
I fitted the first plank as a complete untapered plank and then tapered for the second plank but I only tapered at the bow end based on the above measurements using approx. 2.2mm as the stem post plank width. I also fitted the bottom two (keel) planks and I think I will continue to plank in both directions.
-
Looking good. I've just started the 1st planking on my build so it is good to have other builds to look at.
-
I don't think it is essential for 2nd planking, with thin strips and ca glue. I will trying to make neat joints to the stem post when I start the 2nd planking.
-
While I waiting for the gun port glue to cure I decided to experiment with Chuck's planking bending. I used one of my spare gun port strips as the curve template. Heat was applied to the plank using a hair dryer.
Bending Station
Resultant Bent Plank
I also cut some cardboard strips and measured the length of the bulkheads to get an idea of the required plank widths.
I then started work on the planking. After much debate and testing I decided the first plank could be fitted without any tapering. Once again the preformed rabbet slot made the task of test fitting and installation so much easier.


- egkb, GrandpaPhil, Edwardkenway and 1 other
-
4
-
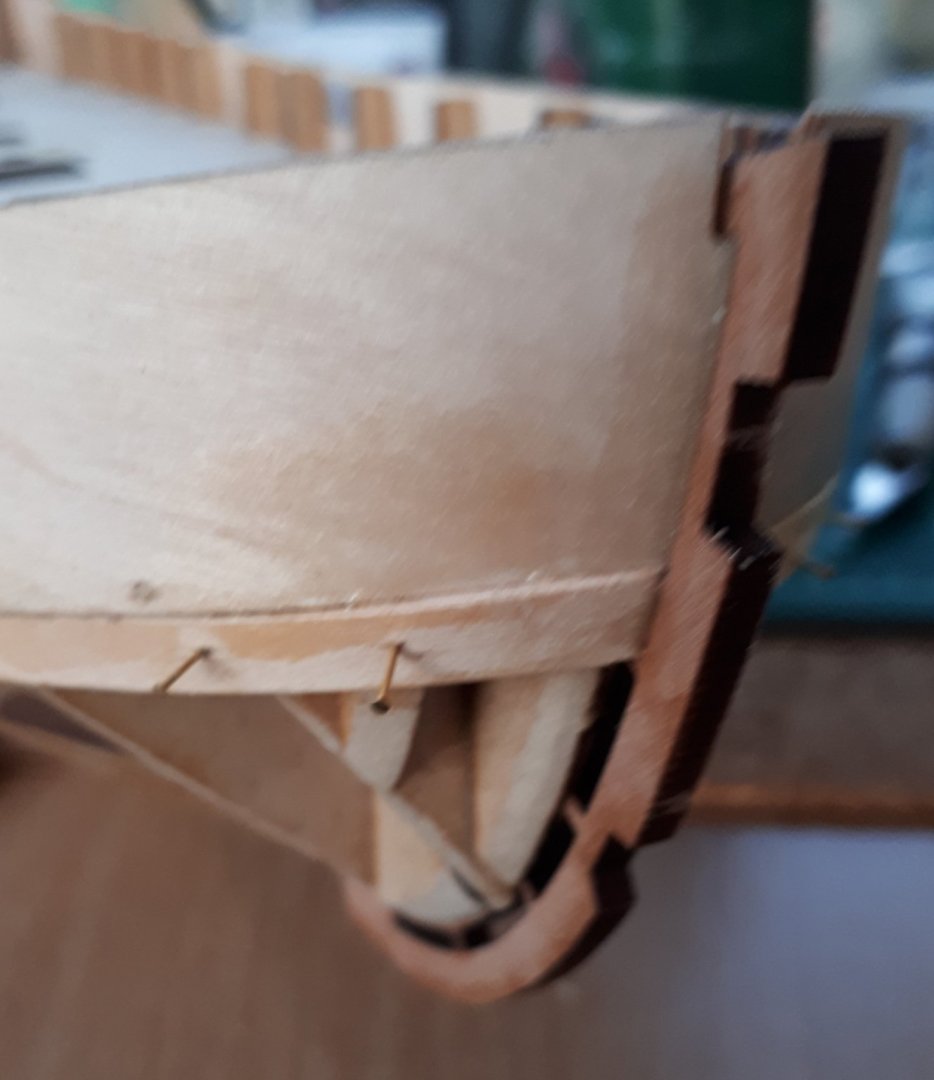
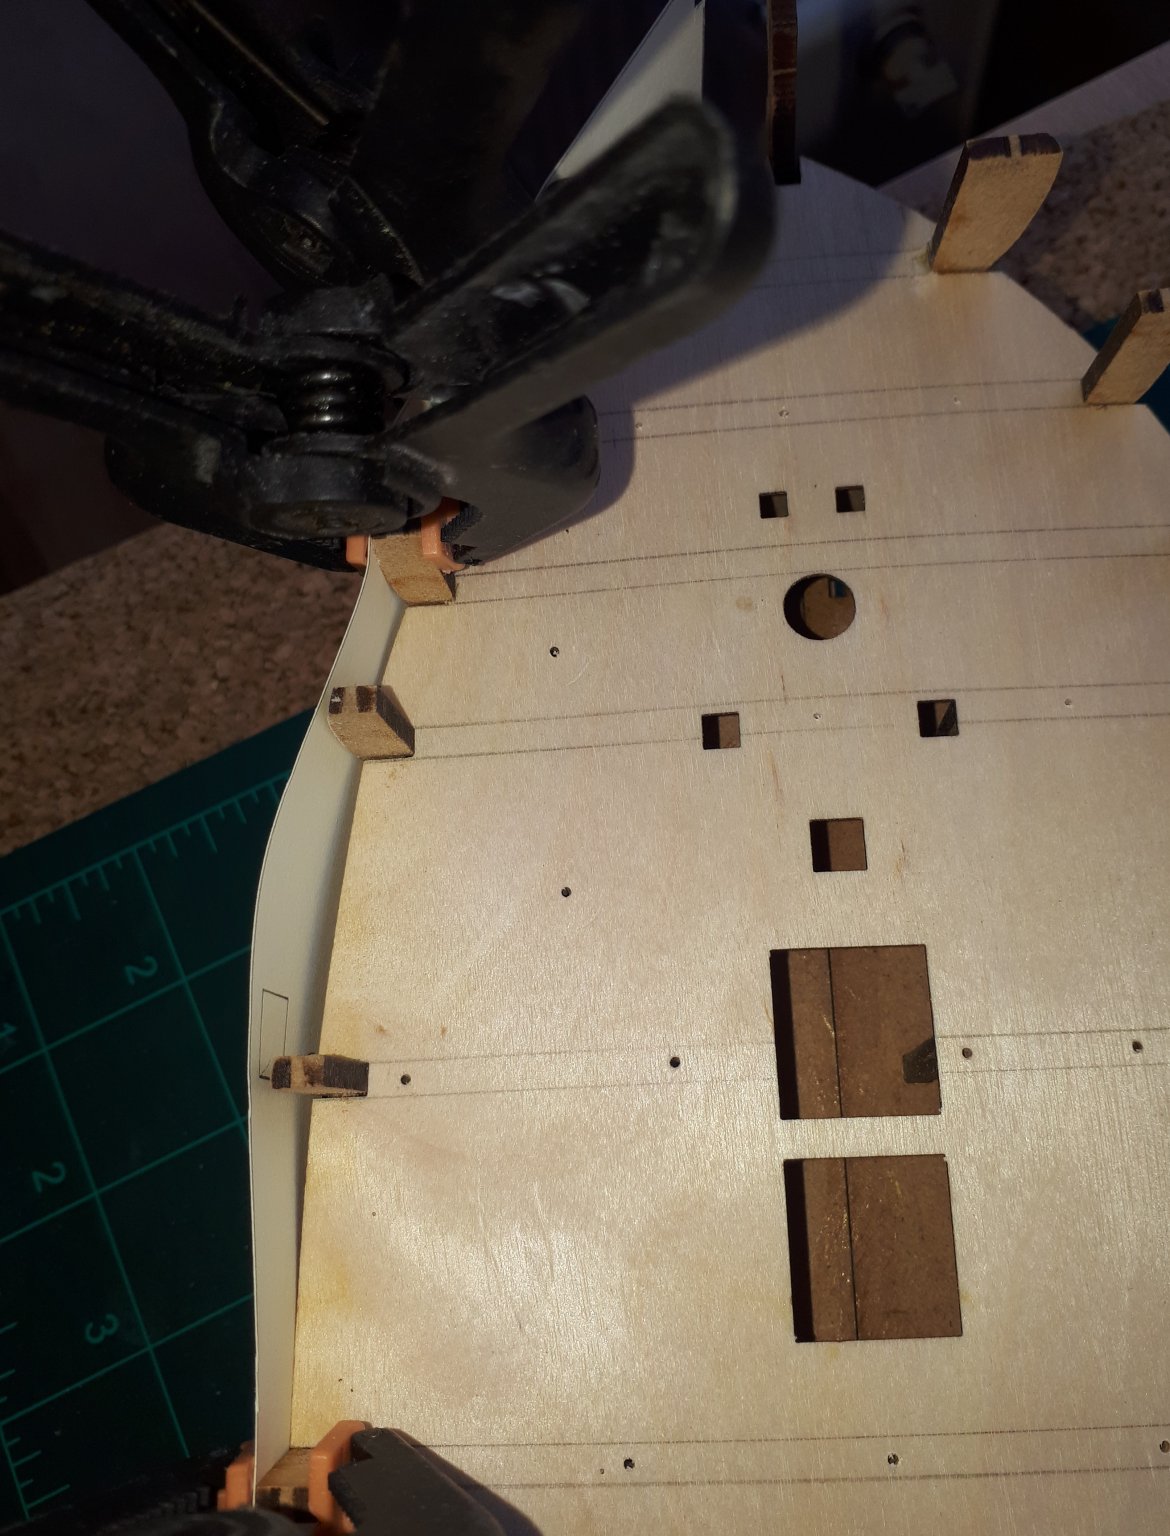
I have attached the 4 off gun port strips this morning. I soaked the 4 gun port strips in hot water for 30 mins.
I started with the bow starboard gun port and located the front end tab in the rabbet slot and then carefully bent the strip around the bulkheads clamping as I went along, ensuring the gun port port strip top edge followed the top edge of the bulkheads.
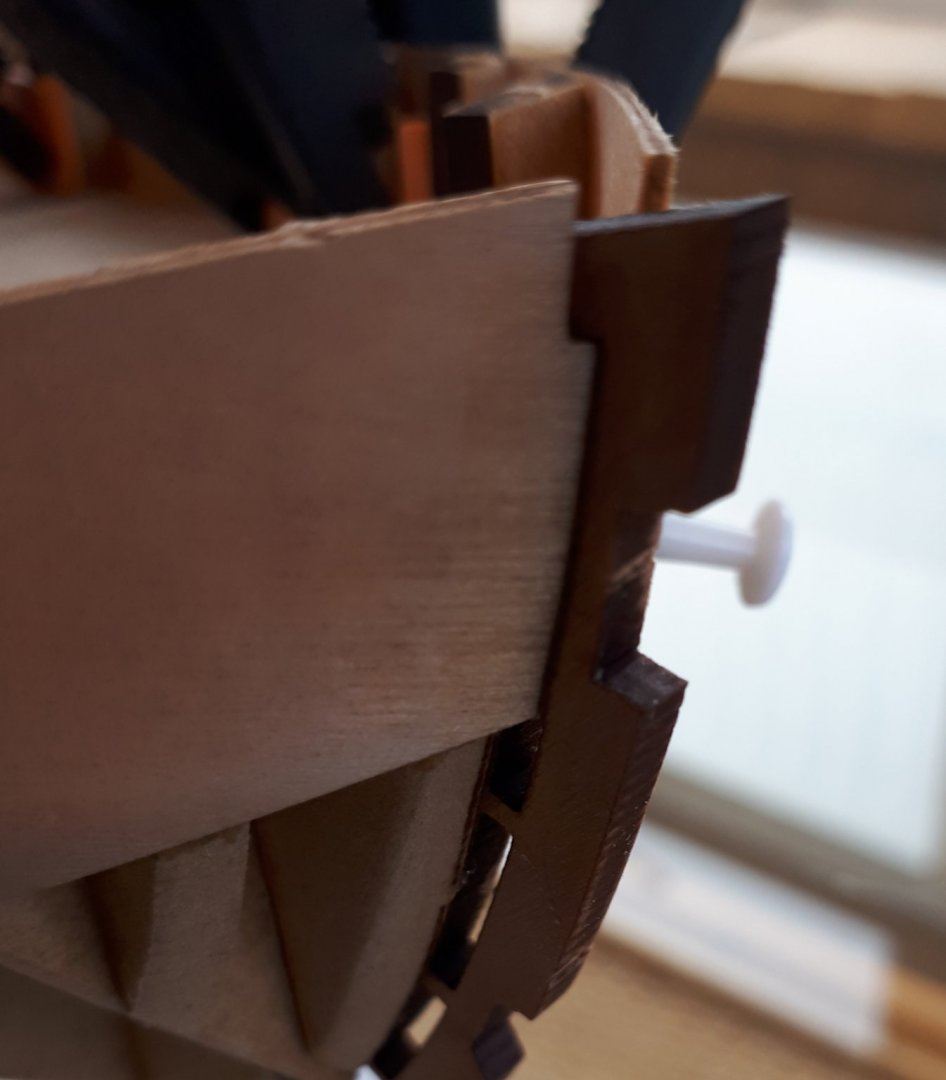
I was pleased to find the back end of the gun port strip back lined up perfectly on last bulkhead. I then used some pins to secure the lower edge of the gun port strip to the bulkheads. I then repeated this process for the port side bow gun port, and once again everything was a perfect fit.
The two stern gun ports strips were then fitted, again without any problems.
Both gun port strips were a perfect fit around the stern patterns. As noted in the instruction manual there will be a bit of sanding to remove the excess strips once the glue has fully cured.
Once again the precision Chris has taken in design and manufacturing this kit is awesome and makes the task of building this model so much easier.

- Sjors, VTHokiEE, Edwardkenway and 6 others
-
9
-
I'll do my best to start slicing some flesh when I start the planking.
-
Hi Spyglass
I have never dropped a boat before. I am usually very careful. I was shocked to see the damage. The stem post had shattered along the rabbet and although I did try to repair the broken parts there was too much damage to make it possible.
No blood on my boats either, famous last words.
-
I had a major, self inflicted problem, last week. I managed to drop my assembly on to a concrete floor when starting to fit the gun port patterns and damaged the build beyond repair. I did try to repair it. Thankfully Chris has been able to supply me with the necessary replacement parts and it has only taken my a few short hours to get the build back to the same stage.
I have now moved my build area away from the concrete floor.
This time around I was confident how the bits would fit together so I went ahead and glued the parts together without any dry fitting. Like Vane I managed to snap off the fragile stern frame patterns (all 4 off them in my case) this time around when I has fitting the main deck. Thankfully I was able to glue to lower stern pattern to the remaining stem bits without any problem. Afterwards I was able to reattached the broken parts. I was then able to fit the upper stern pattern. Fingers crossed the gun ports will be fitted without any problems once the glue has fully cured overnight.
-
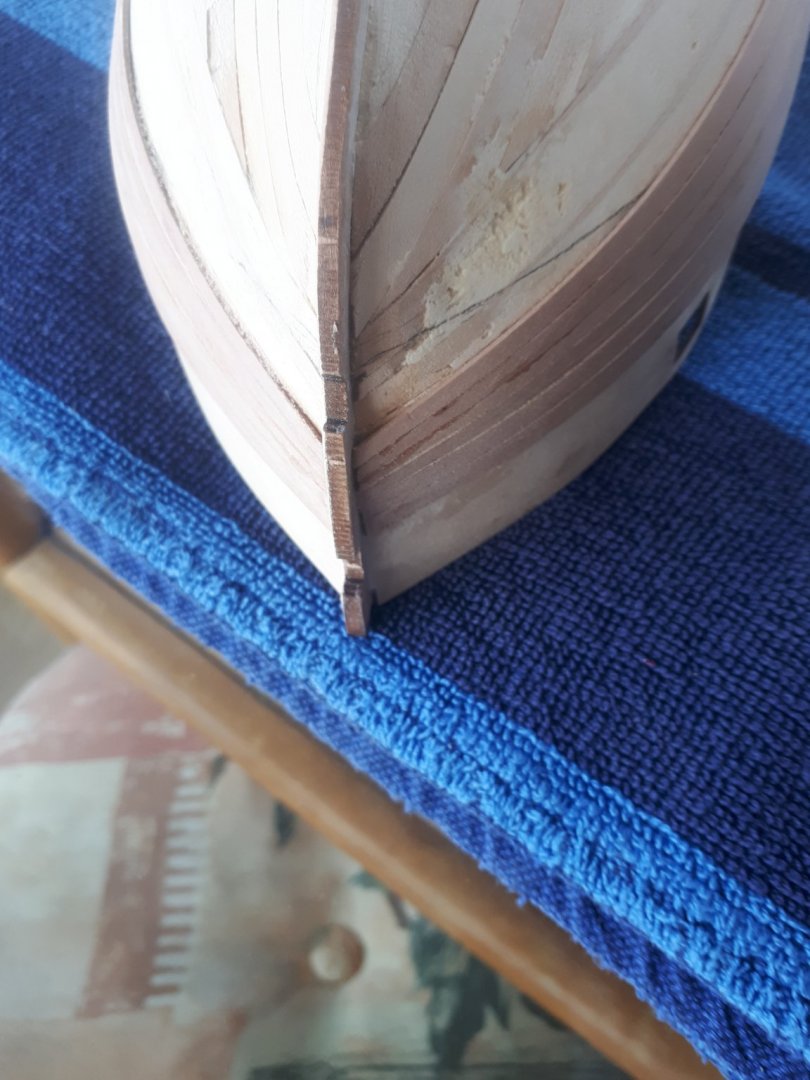
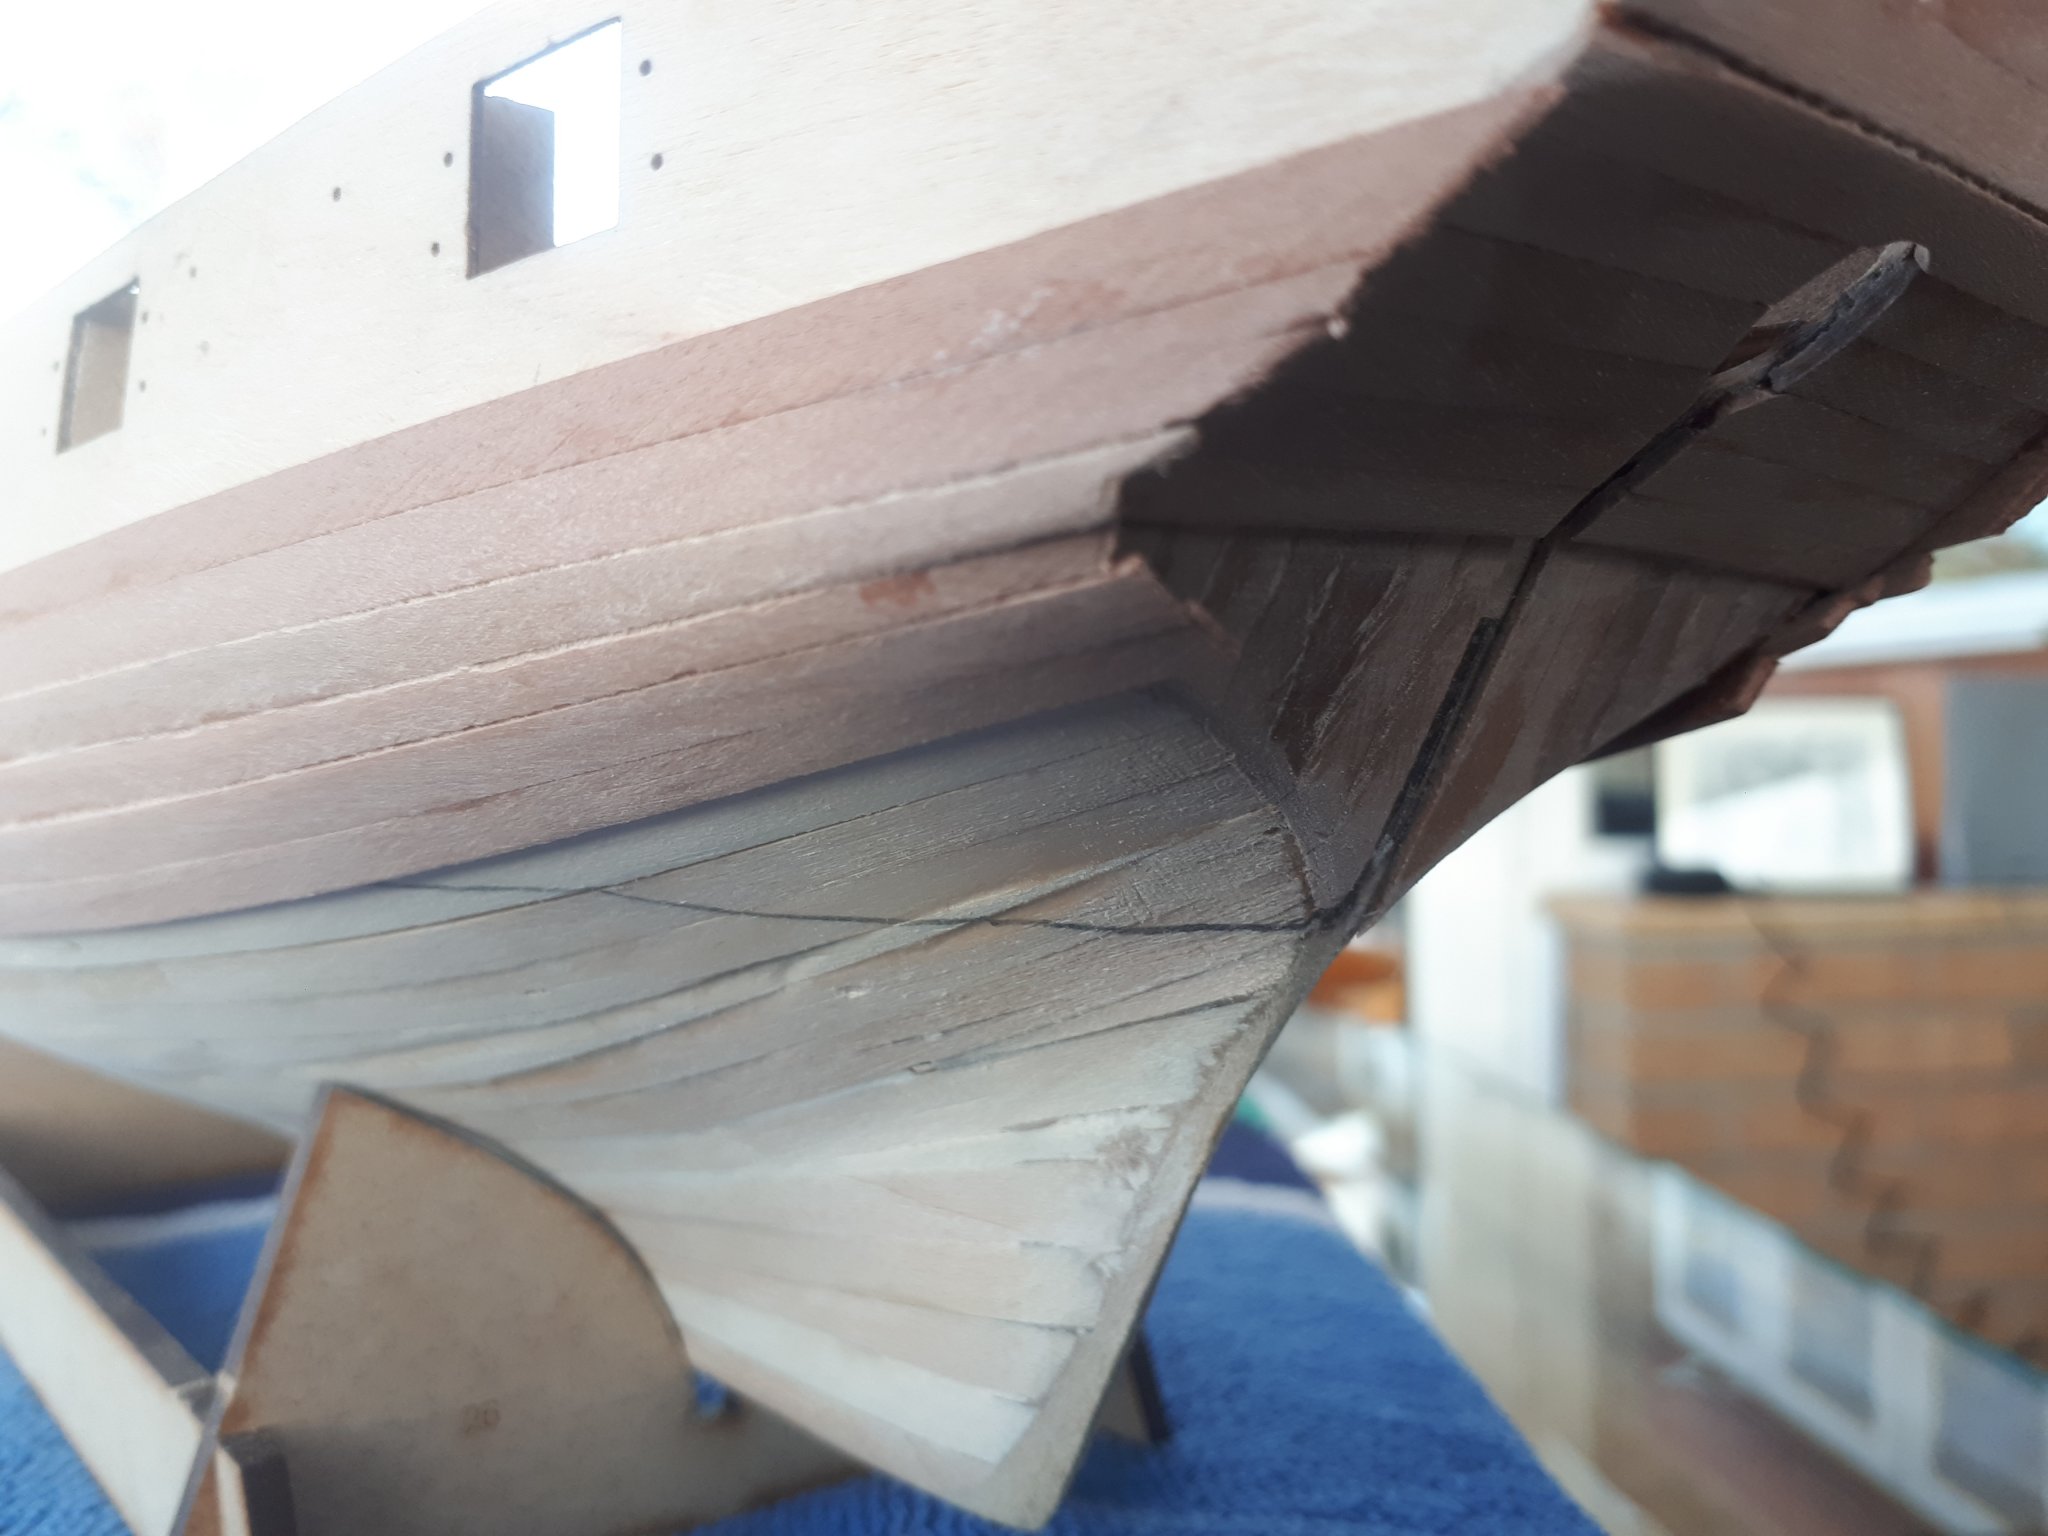
The stern post is clamped but not glued at this stage to enable the stern panels to correctly fitted. It is glued in place after the 2nd planking
-
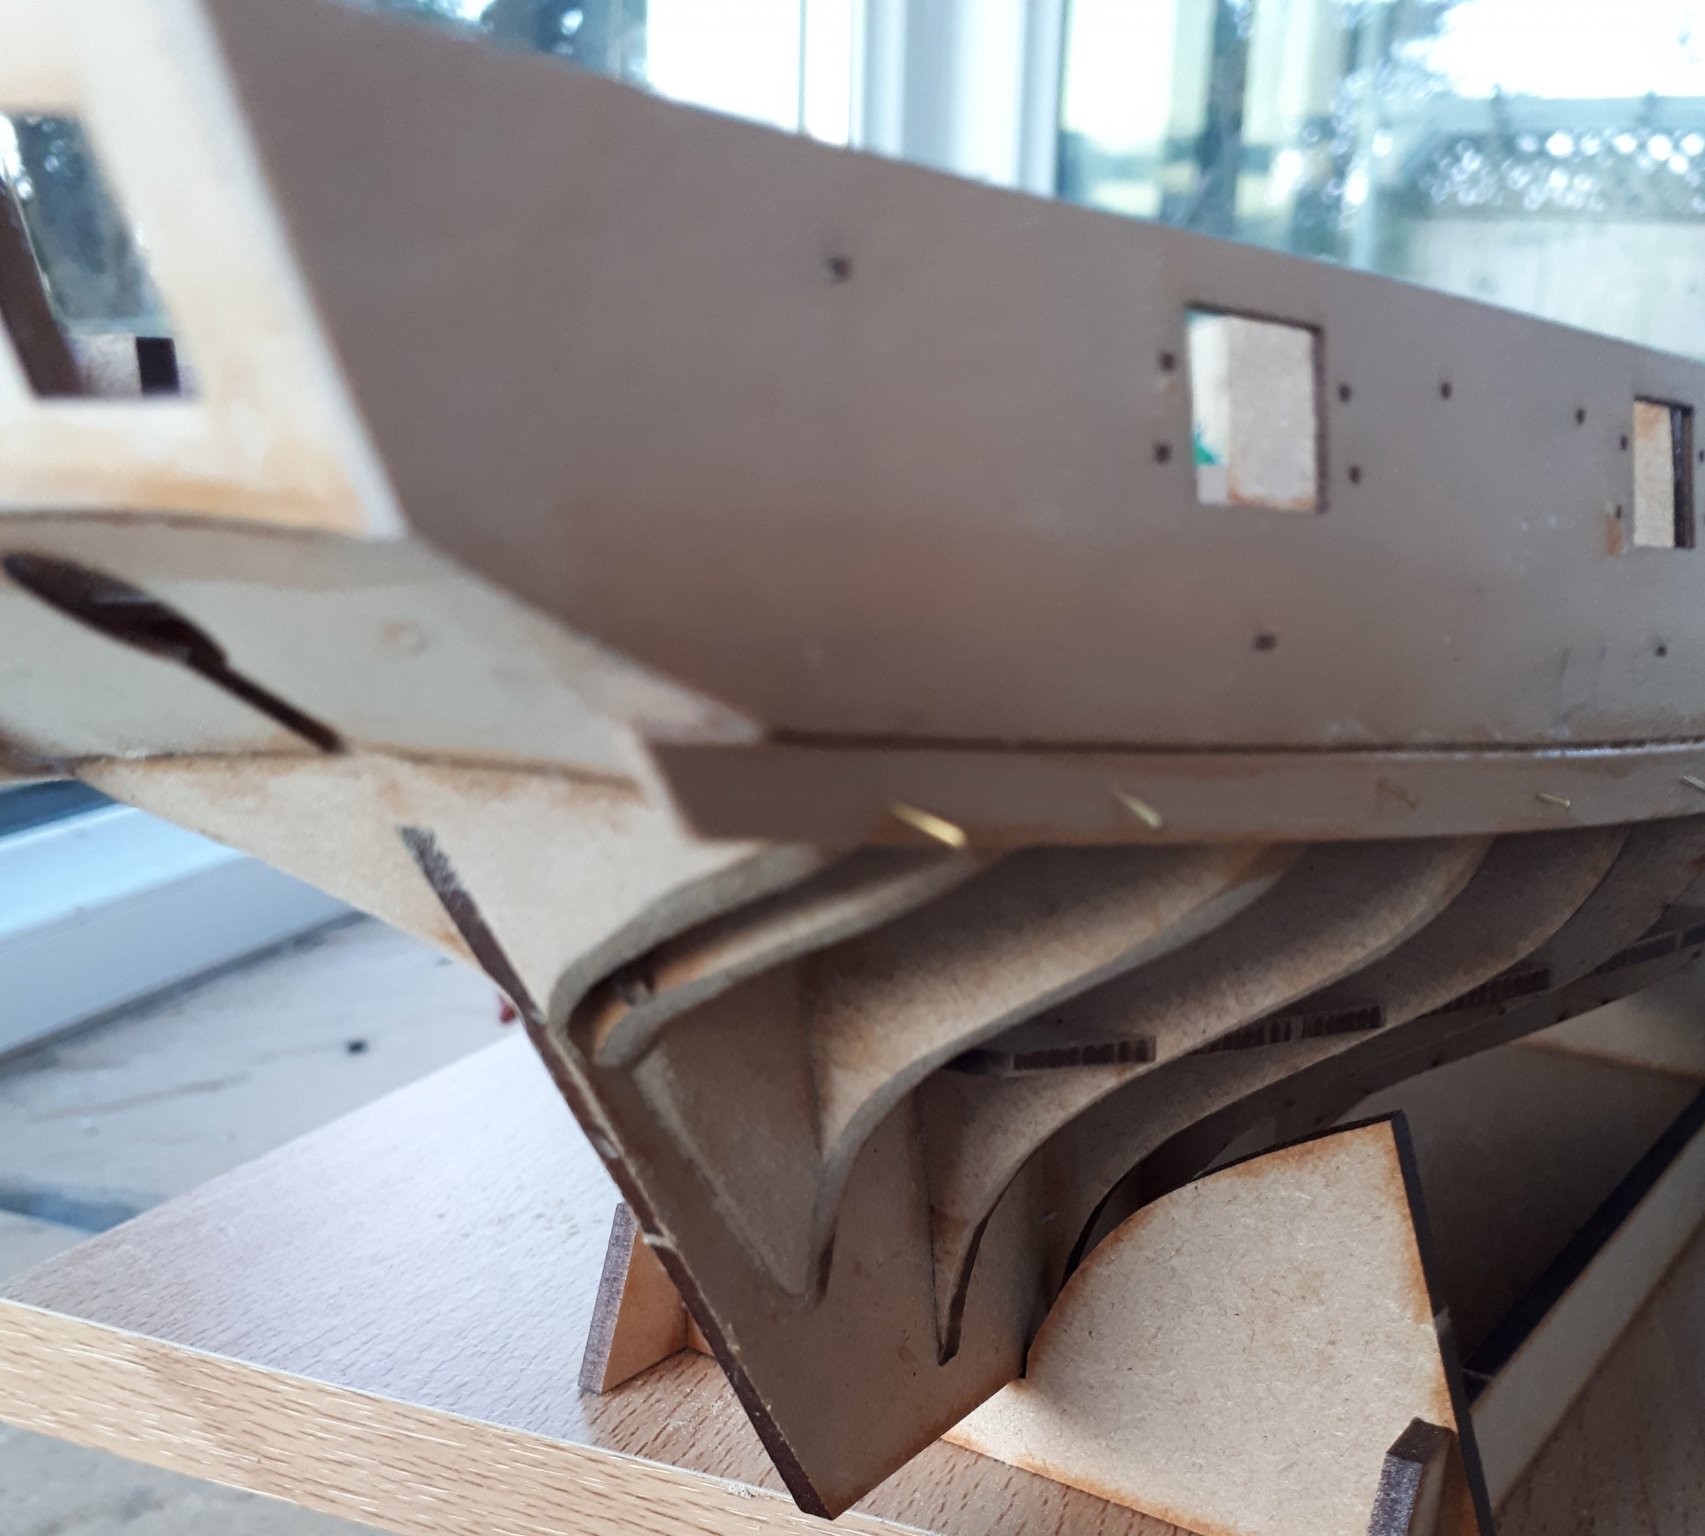
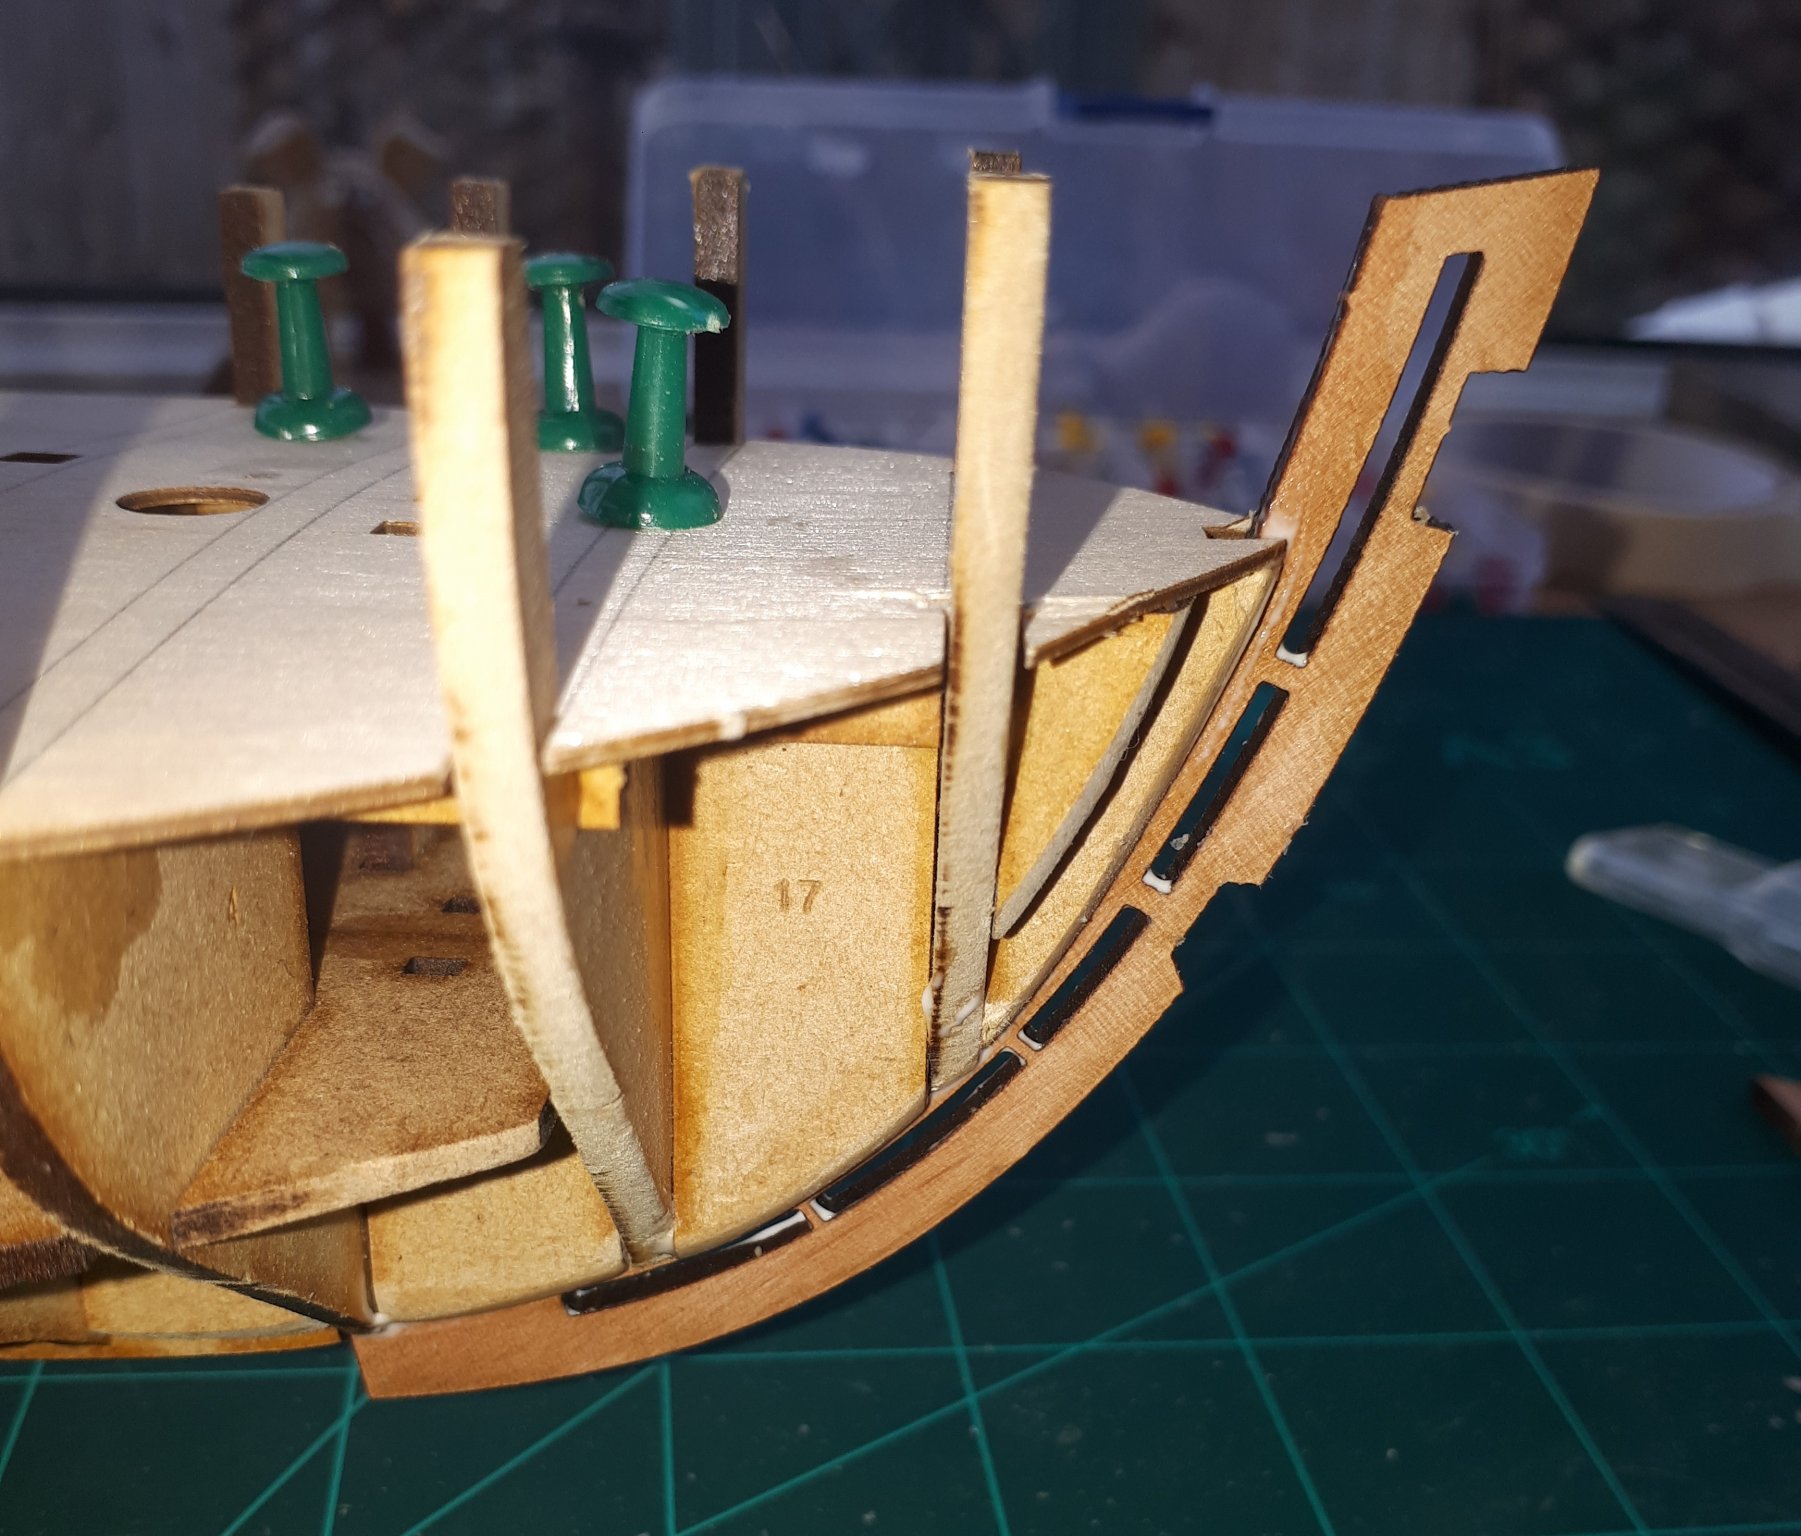
Stage 4 - Fairing the Bulkheads.
I made my first mistake with the build and fitted the inner stem post prior to completing the fairing. I actually thought the bulkheads were looking pretty good and would not need much more work. The inner stem post was a tight fit and it is not possible to see if this part is correctly fitted to the false keel. As far as I can tell it is correctly fitted. If I doing this build again I would dry fit this part prior to fitting bulkhead parts 17 and 18 and make some pencil parks to indicate when it is correctly fitted. I would then keep it in place, using some tape if necessary, until I need to complete the fairing process when it can be removed.
Stern Post Fitted
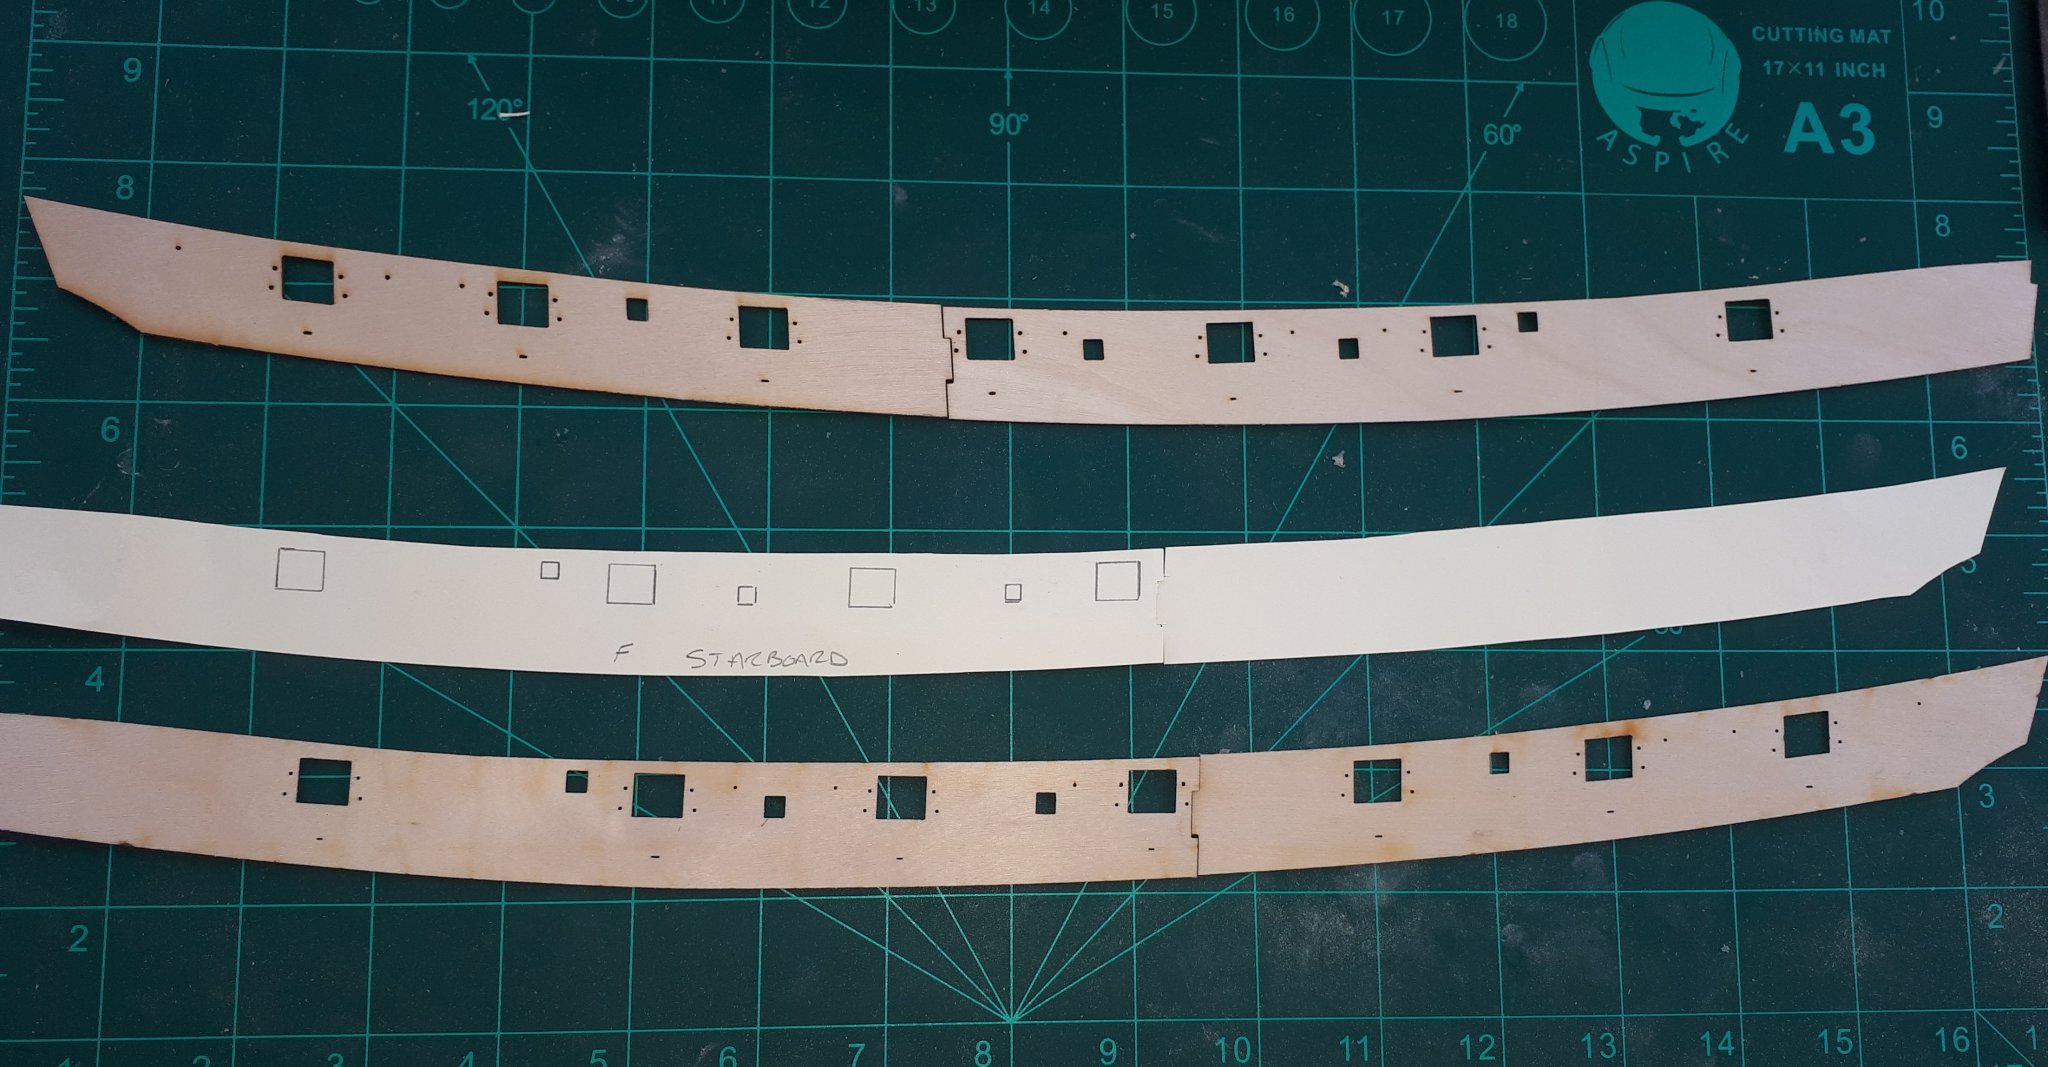
Templates
To ensure the bulkheads were properly faired for the gun port strips I decided to make cardboard templates. This proved to be a good call and did highlight that some of the bulkheads required a bit more fairing.
The template showed that a couple of bulkhead required some more work

Template is now seated nicely on each bulkhead. I then repeated this process for the stern gun port strip.

Fairing
Once I was happy with how the gun ports strips would fit I proceeded to fair the rest of the bulkheads, using an old planking strip to check the contact areas on each bulkhead. Pre fitting the inner stem post made it a bit tricky but not impossible. It did not take too much effort before I was happy with the end result. Chris's suggestion of bevelling some of the bulkheads and filler pieces prior to installation certainly helped.


Total Build Time: 7 hours.
-
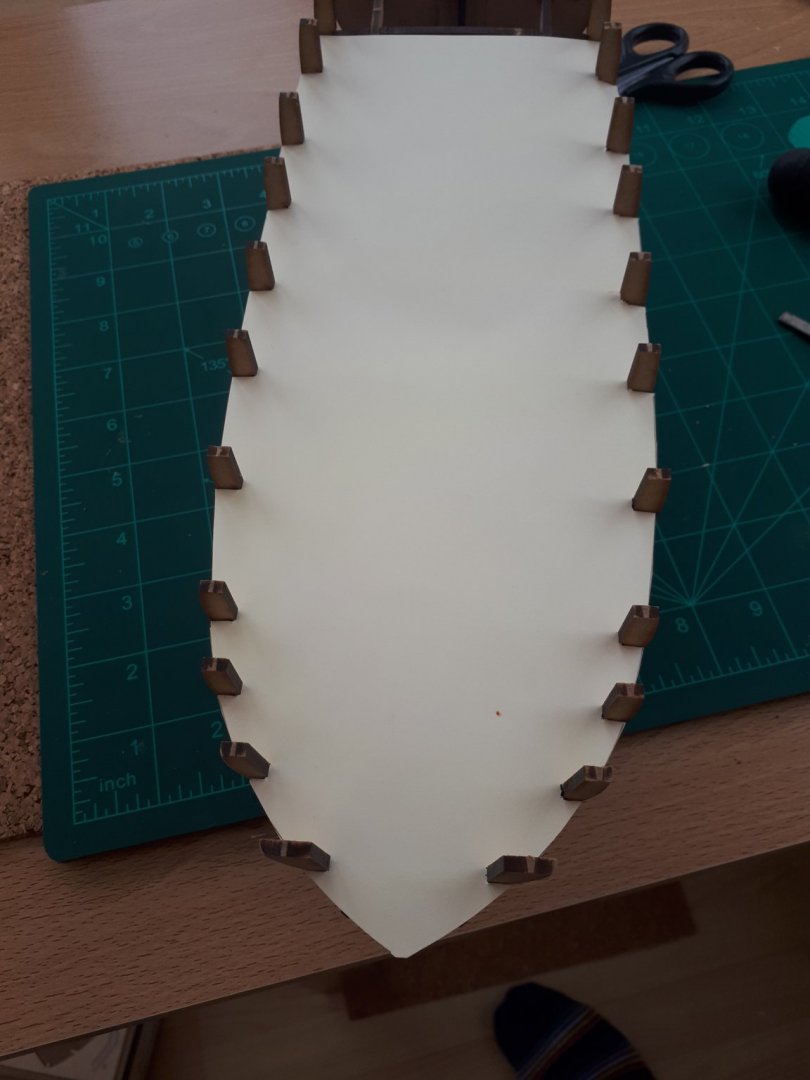
Stage 3 Fitting Deck Park 36 - Part 2
As the test fit with the cardboard template did not reveal any fitting issues I went ahead and installed the deck plank. It went in much easier than I was expecting. After checking all the contact areas I added pins where necessary to keep the deck fully in contact with the supporting frame.
Deck Pinned

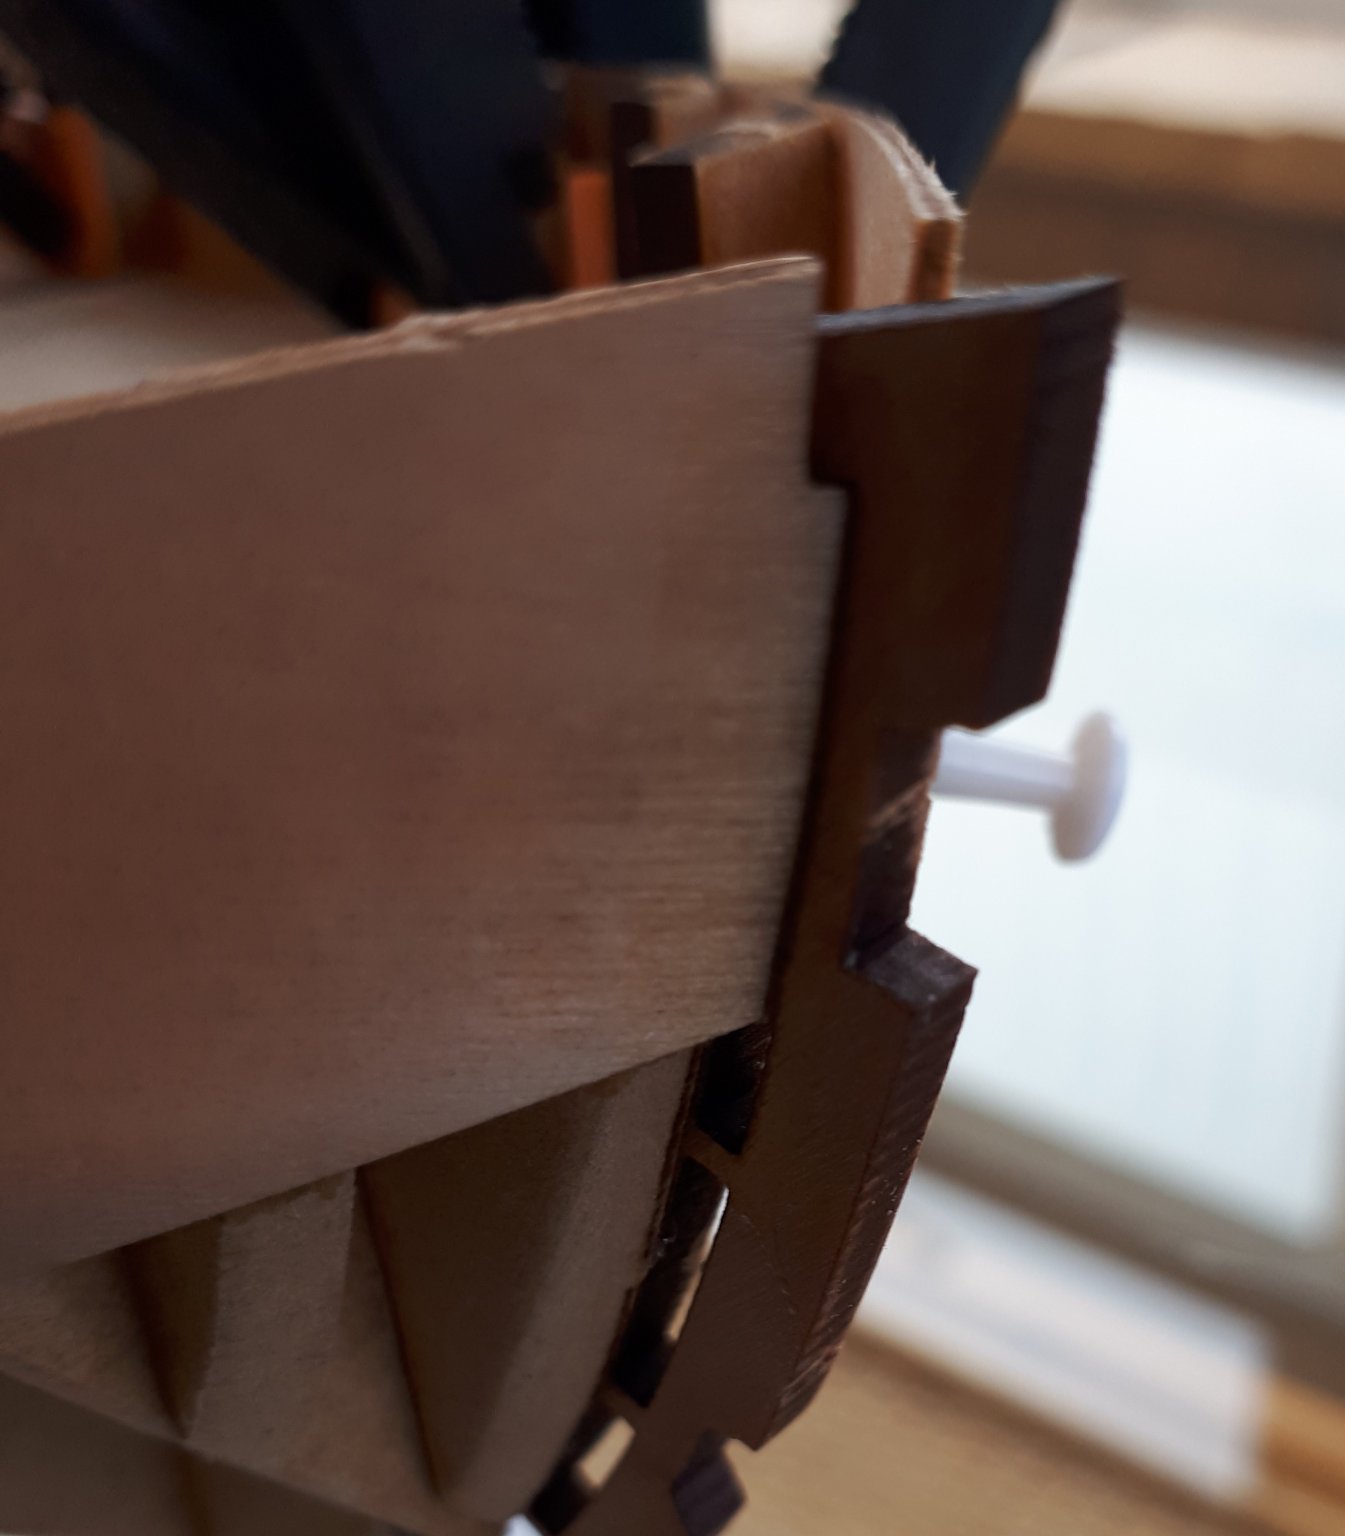
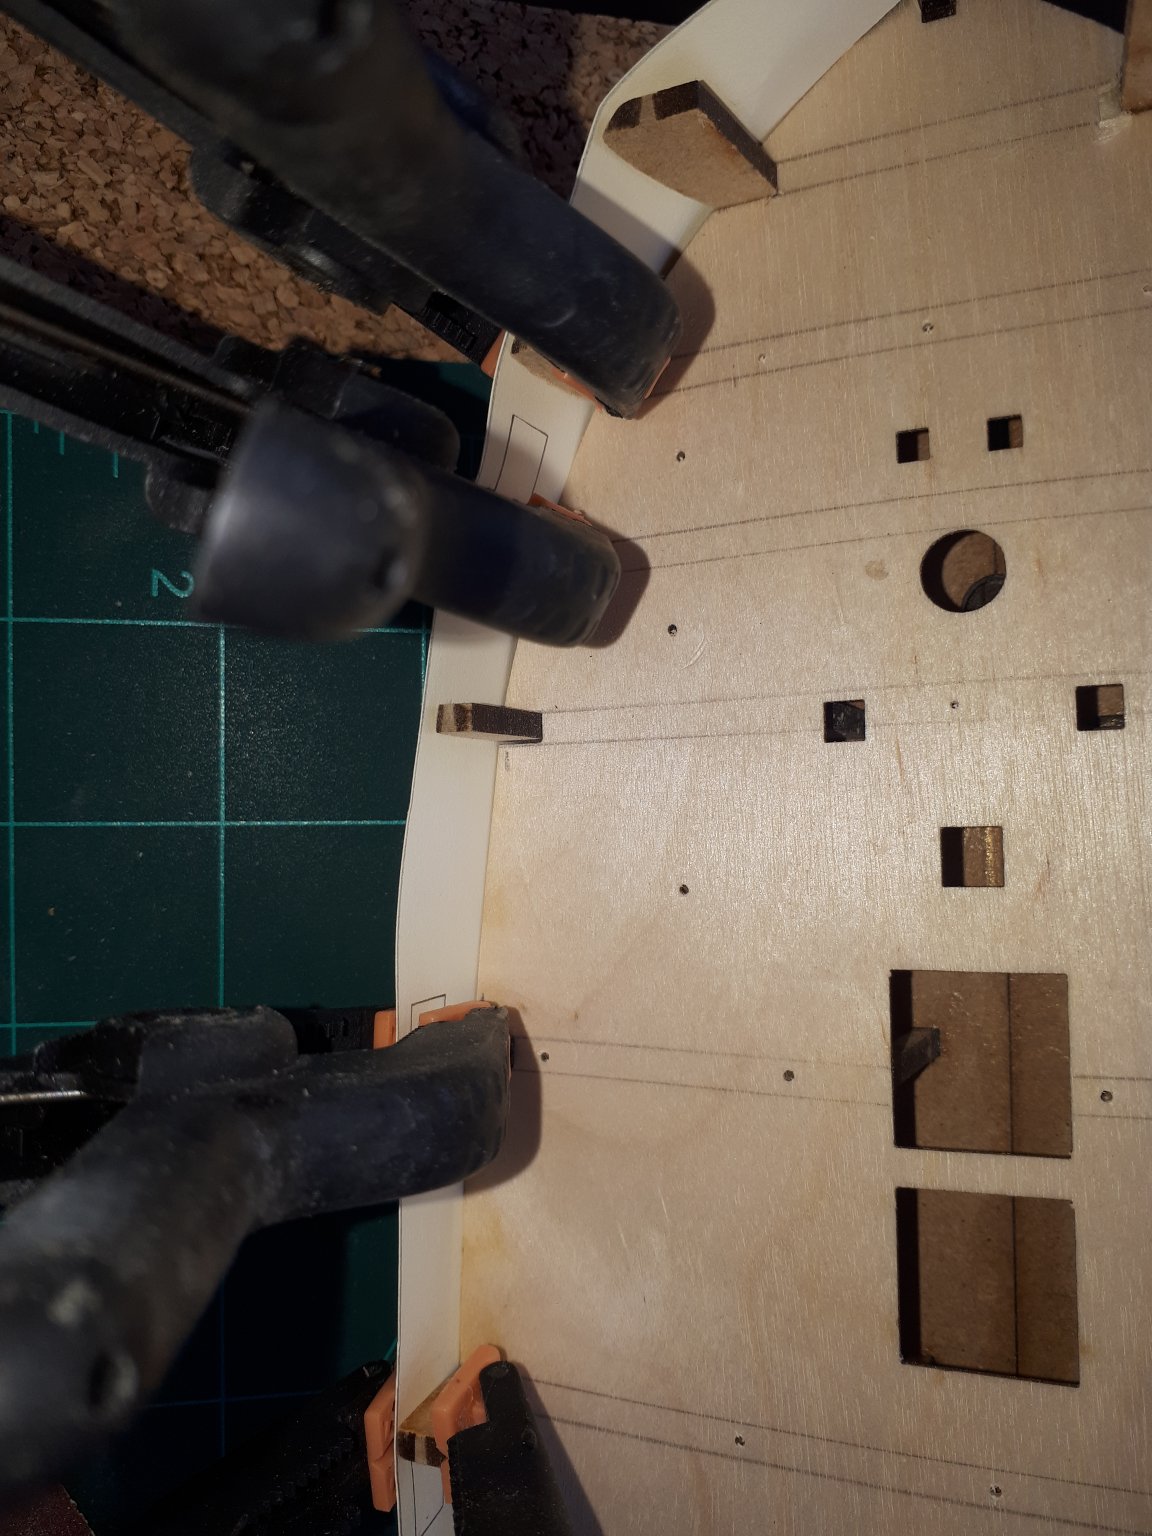
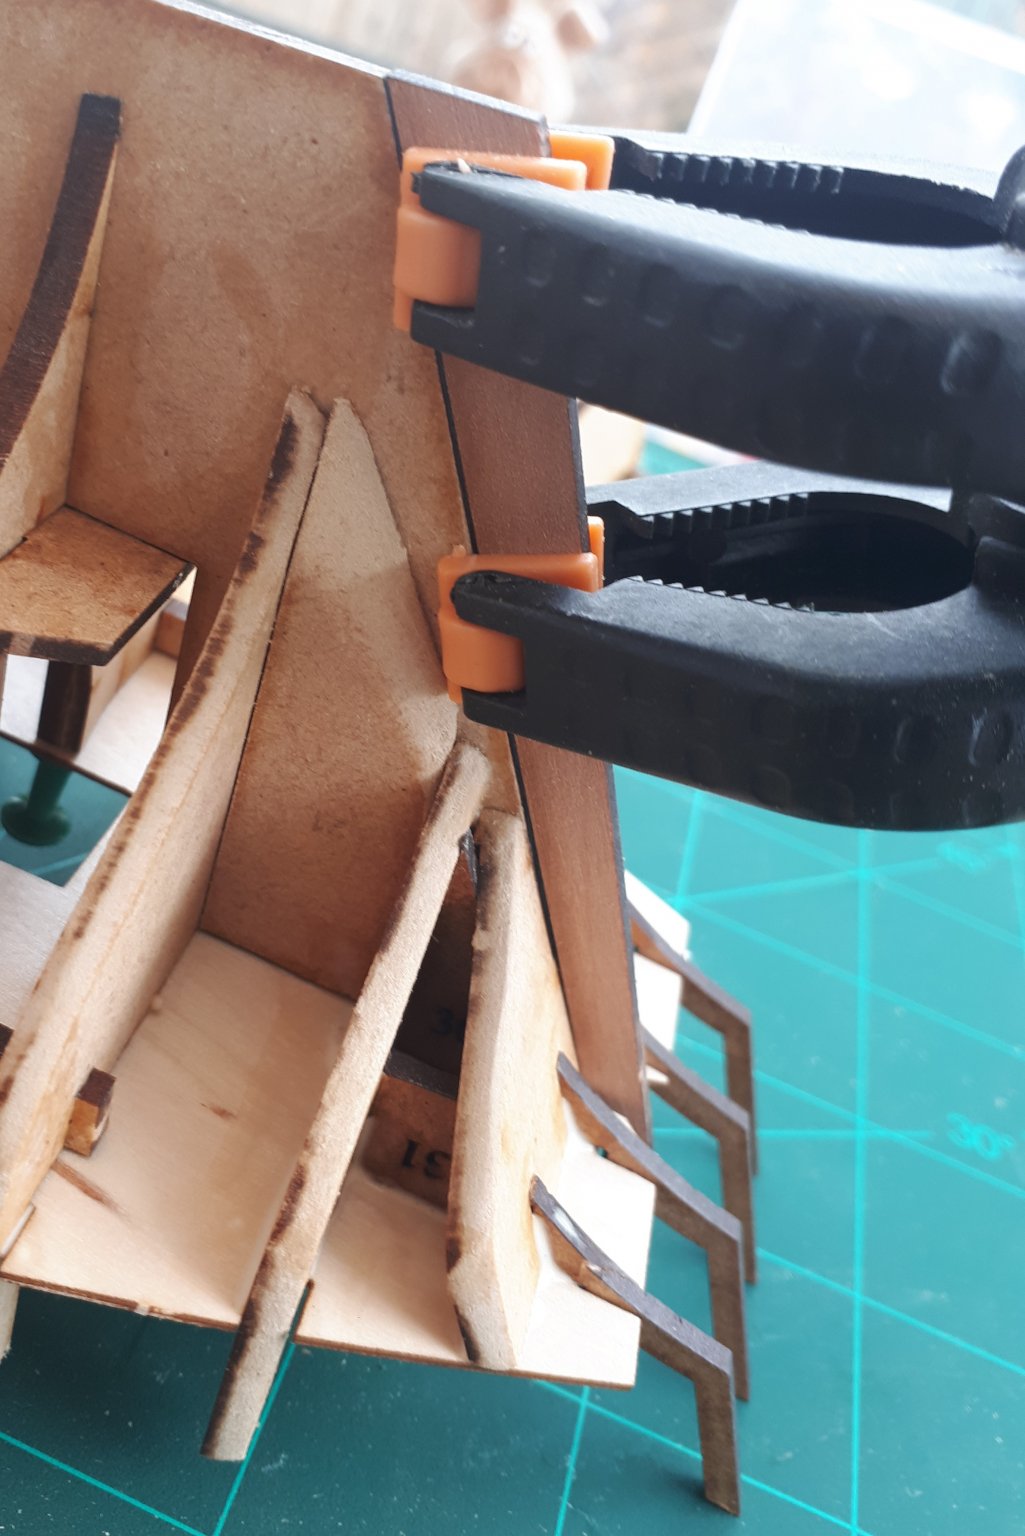
As I was keen to prevent any damage to the fragile stern frames I also fitted the two stern patterns. The first task was to clamp the rudder in place to ensure the lower stern pattern is correct positioned.
Rudder Clamped
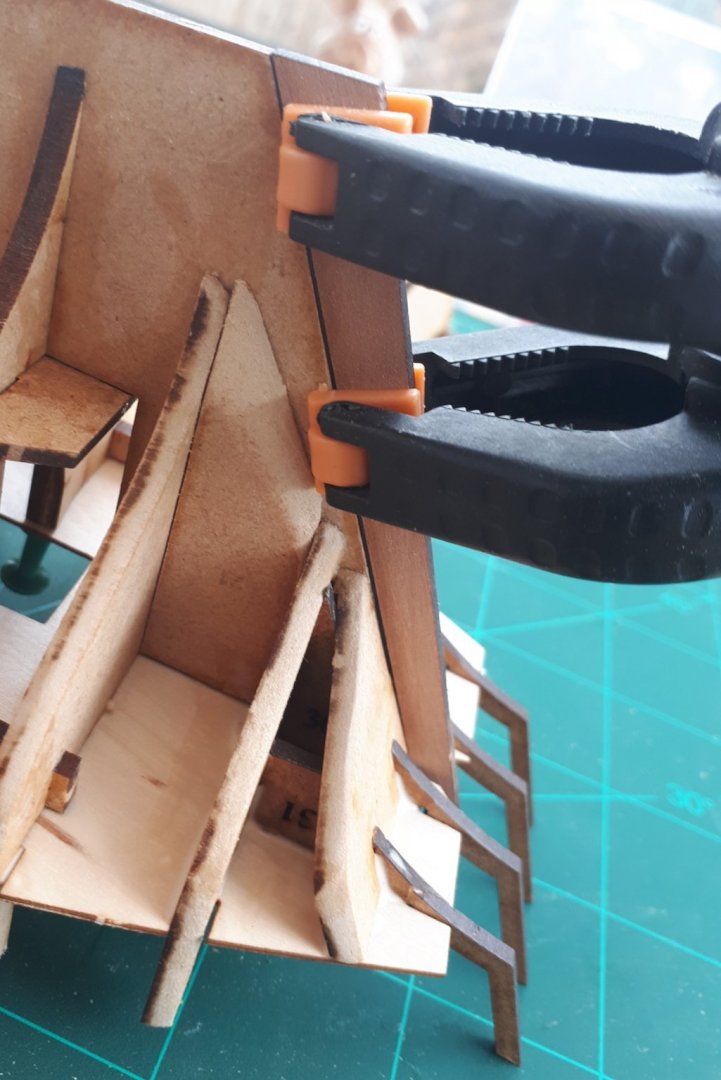
I used a mixture of CA and wood glue for the lower stern pattern, using the CA for the curved contact areas and wood glue to seal all the joint contact areas. I used wood glue for the upper stern pattern. Clamps were used to ensure the stern patterns remained in contact with the frame. I did remove the excess wood glue that is shown in the following pictures.
Time spend on build 5.5 hours.
- JayCub, Sjors, GrandpaPhil and 4 others
-
7
-
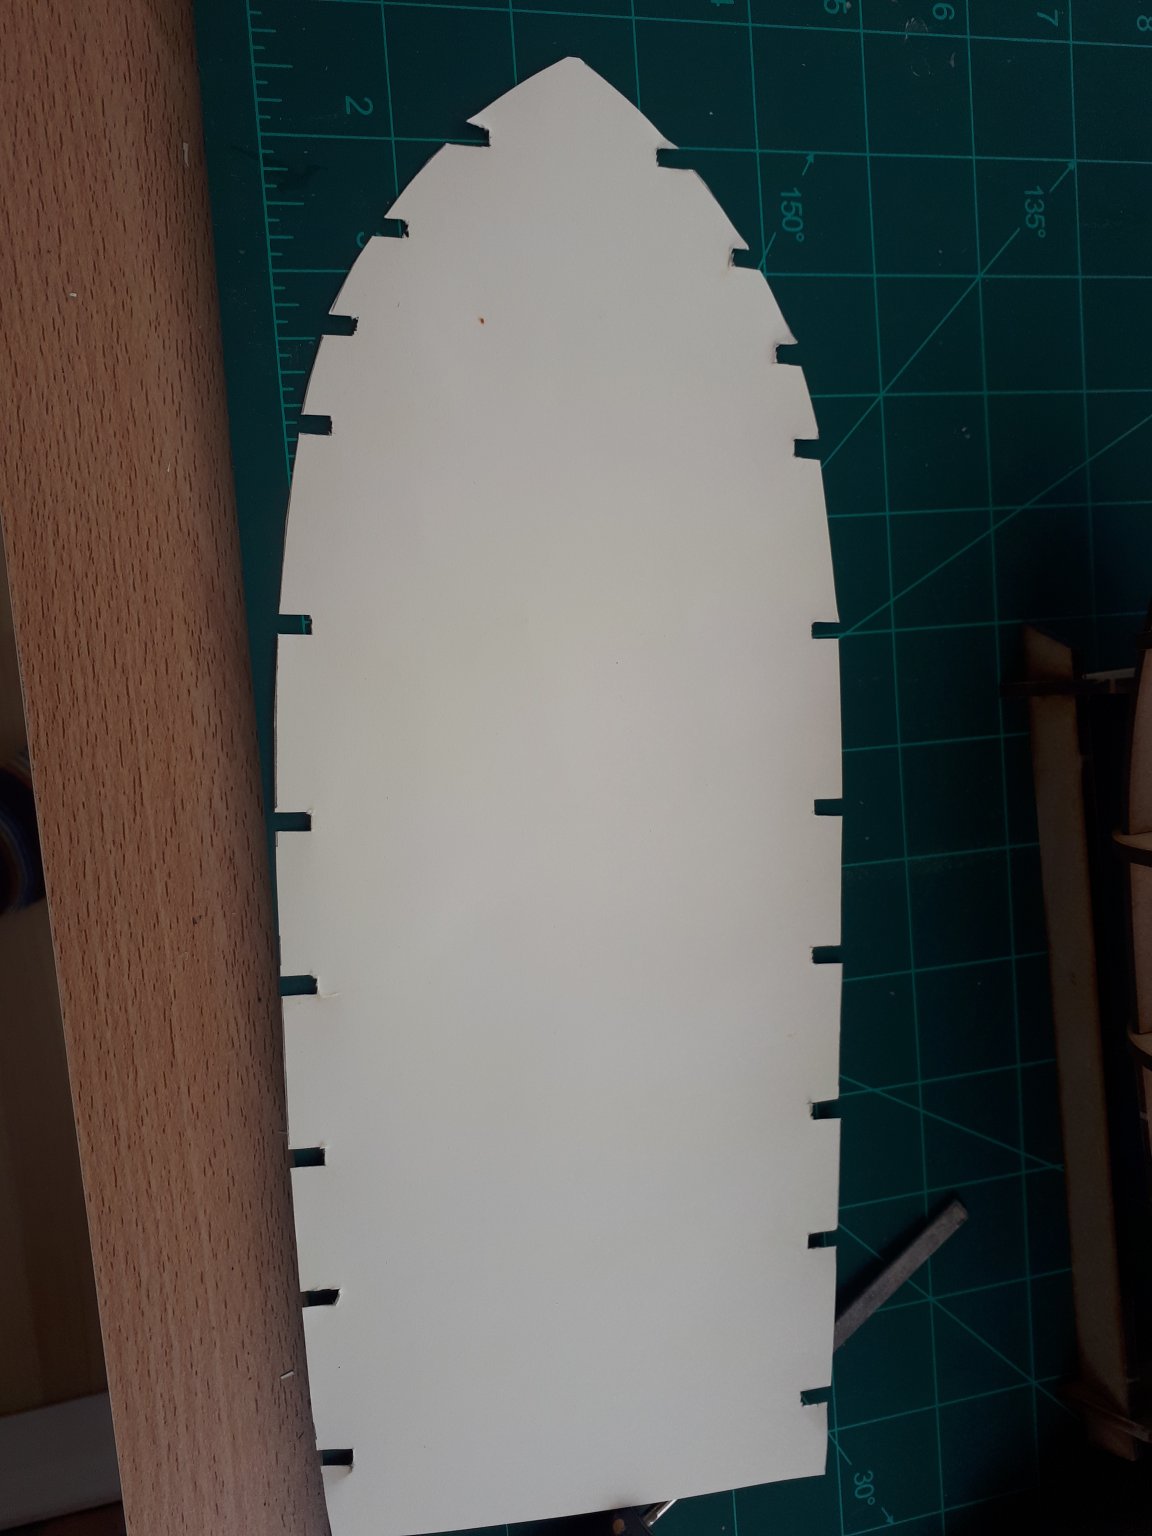
Stage 3 Fitting Deck Park 36 - Part 1
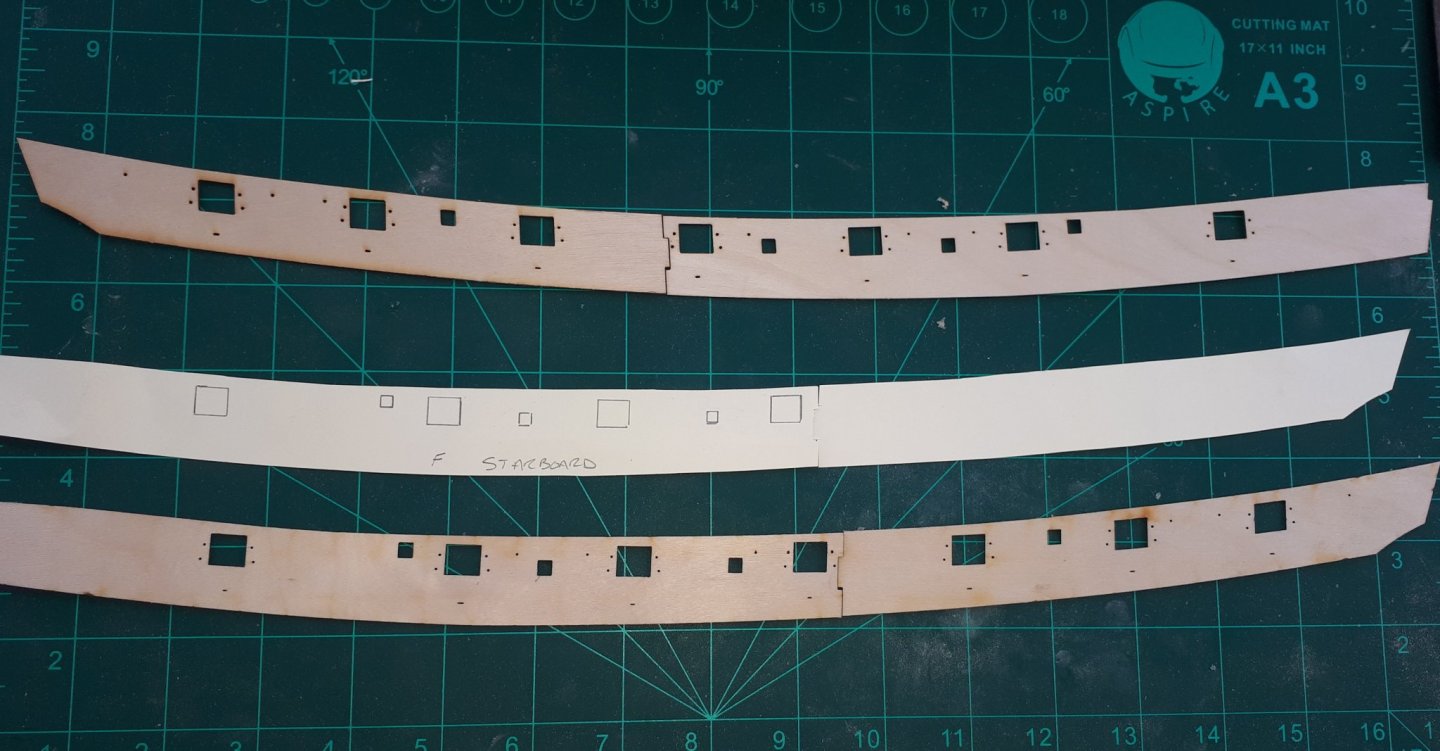
In order to get confidence the deck part 36 would fit OK without any modification I opted to make a cardboard template.
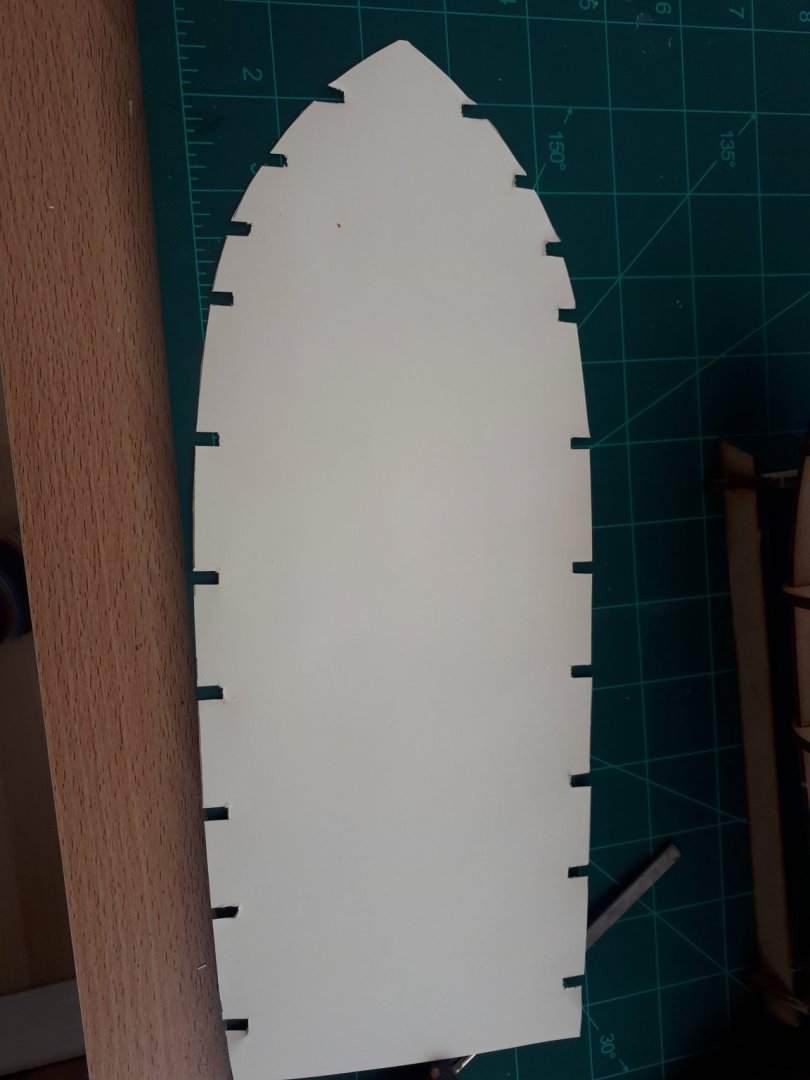
The cardboard template seems to fit OK so I should now have the confidence to simply glue the actual deck part in place.
- DelF, chris watton, KARAVOKIRIS and 1 other
-
4
-
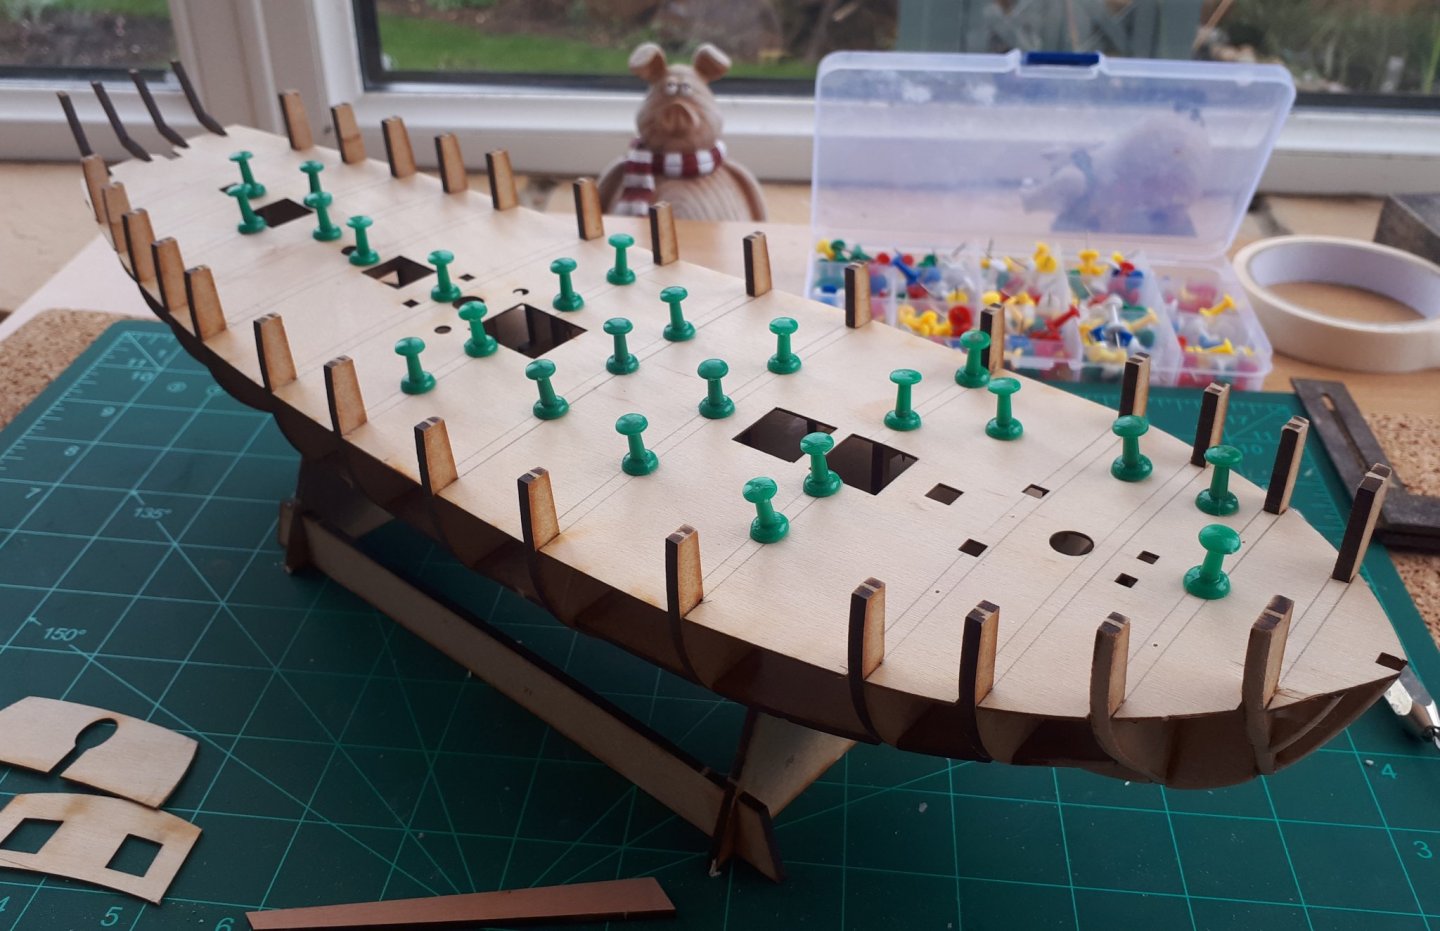
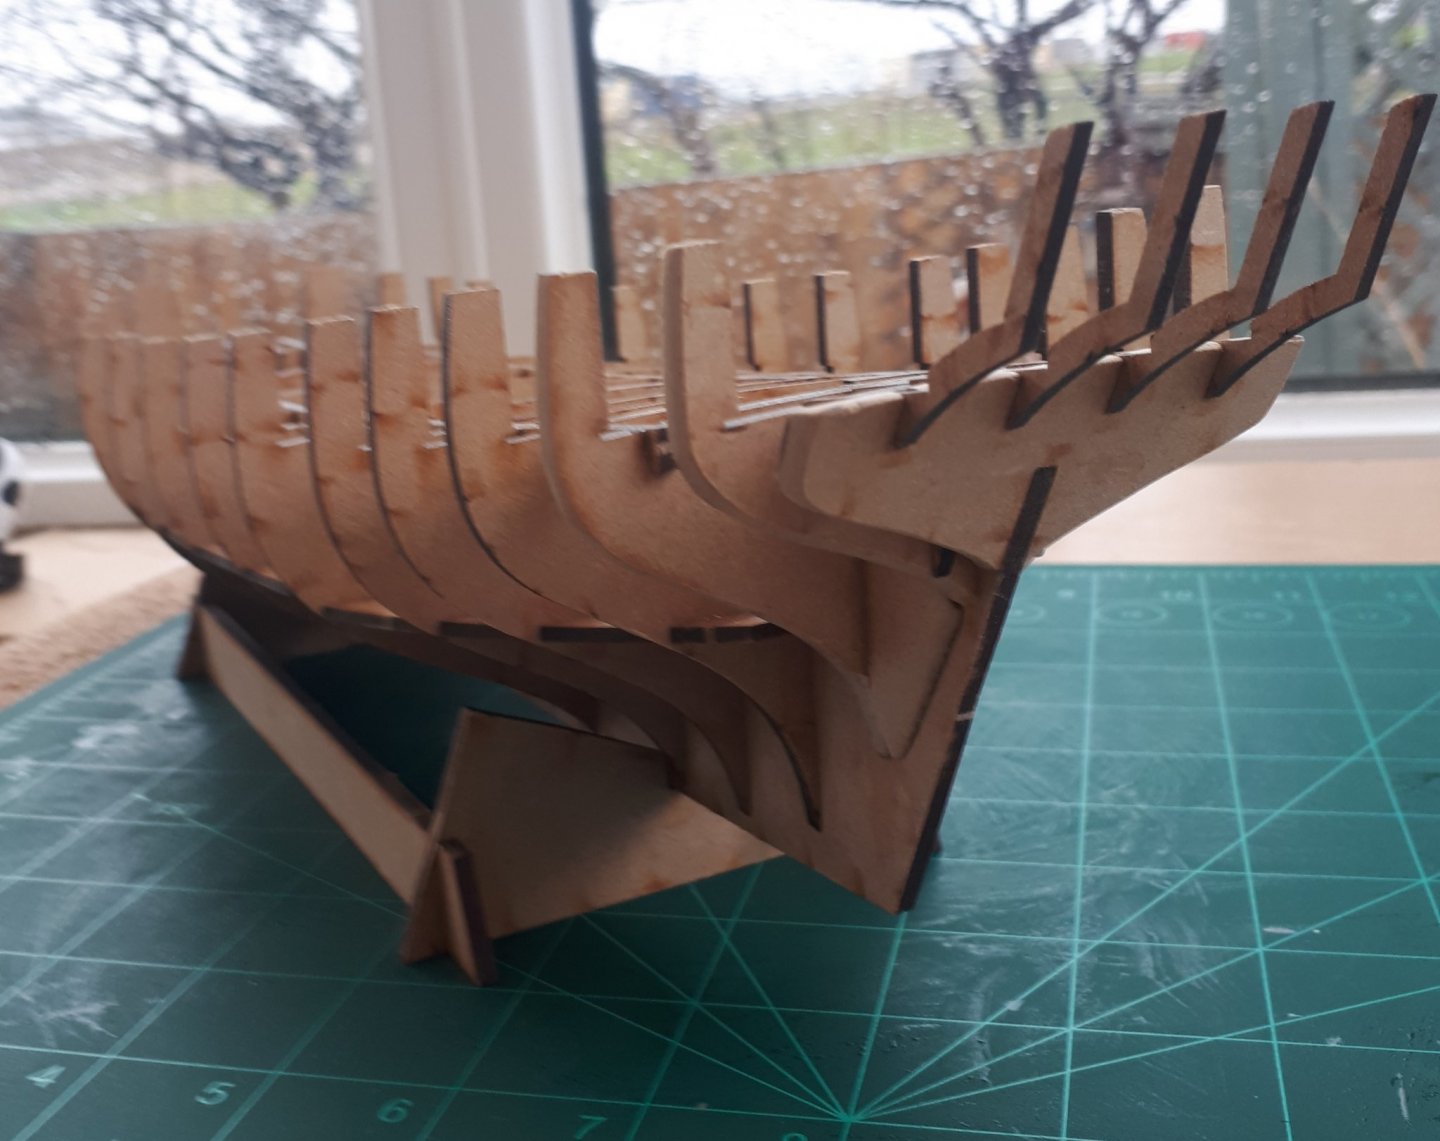
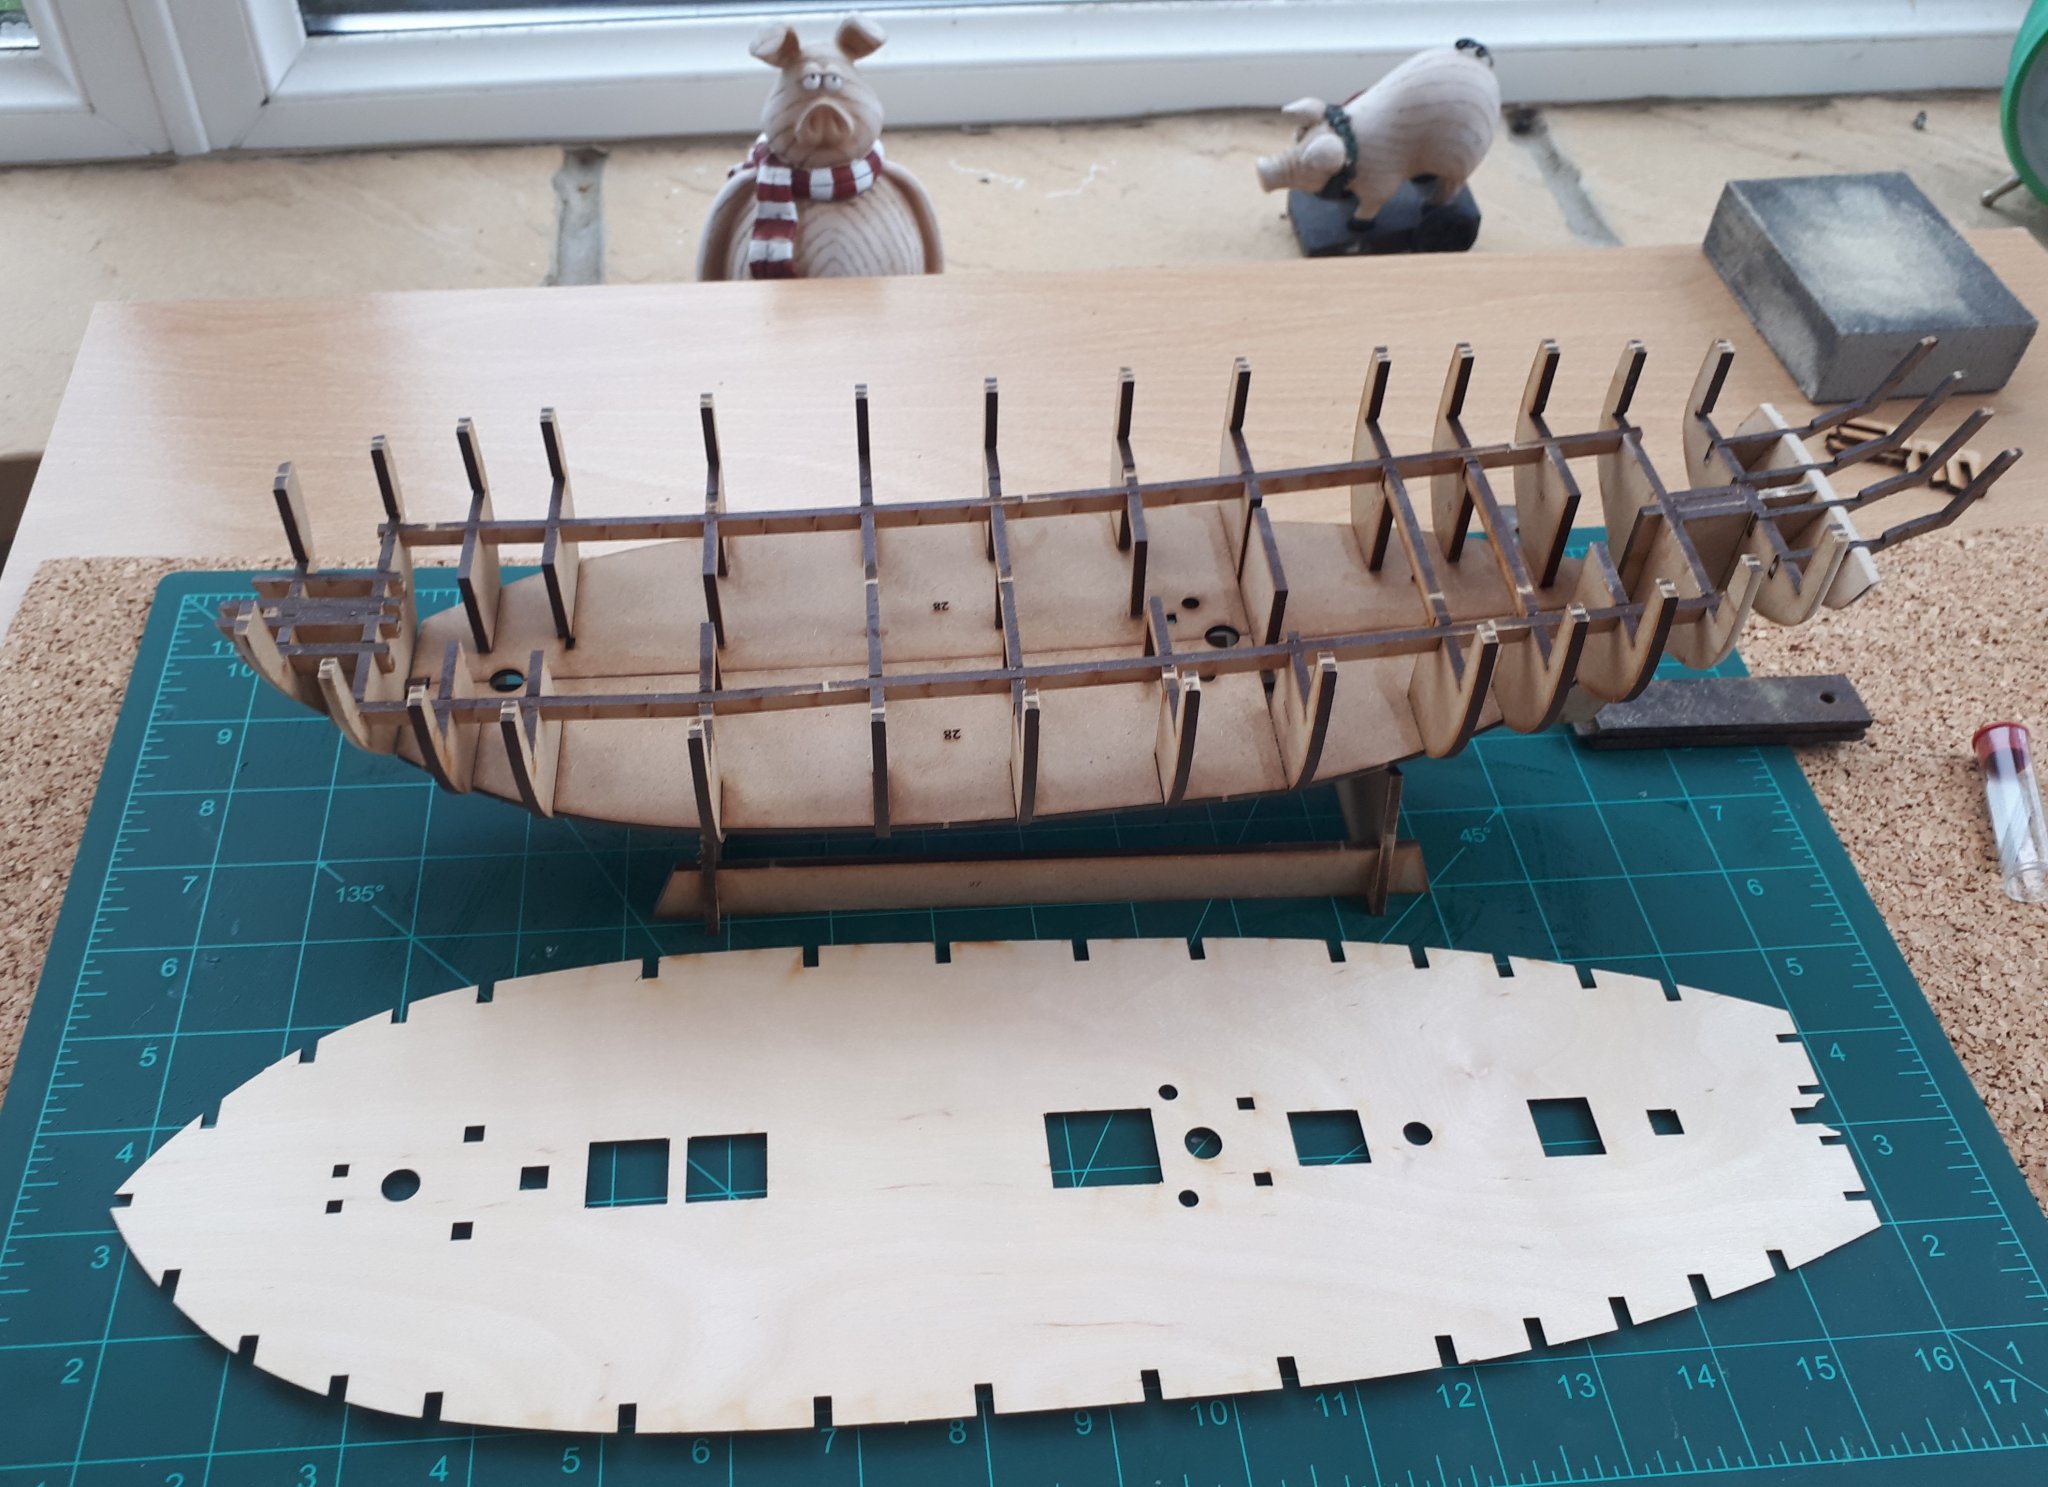
Stage 2 Assembly of the bulkheads, lower deck and deck beam supports
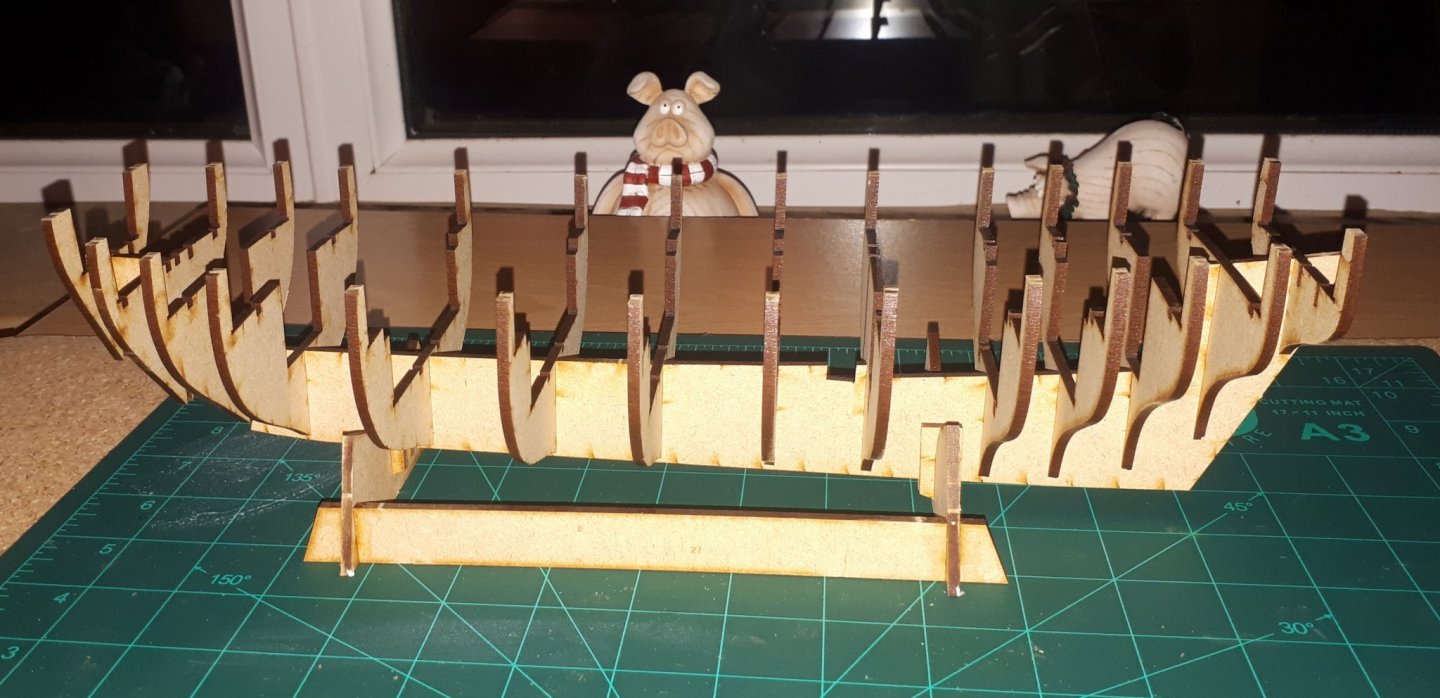
I did a dry fit of the bulkhead and deck support beams and everything fitted without the need to adjust any of the pieces. The design of the kit makes the build progress very easy as everything fits together so well. The crew are watching the build with interest!
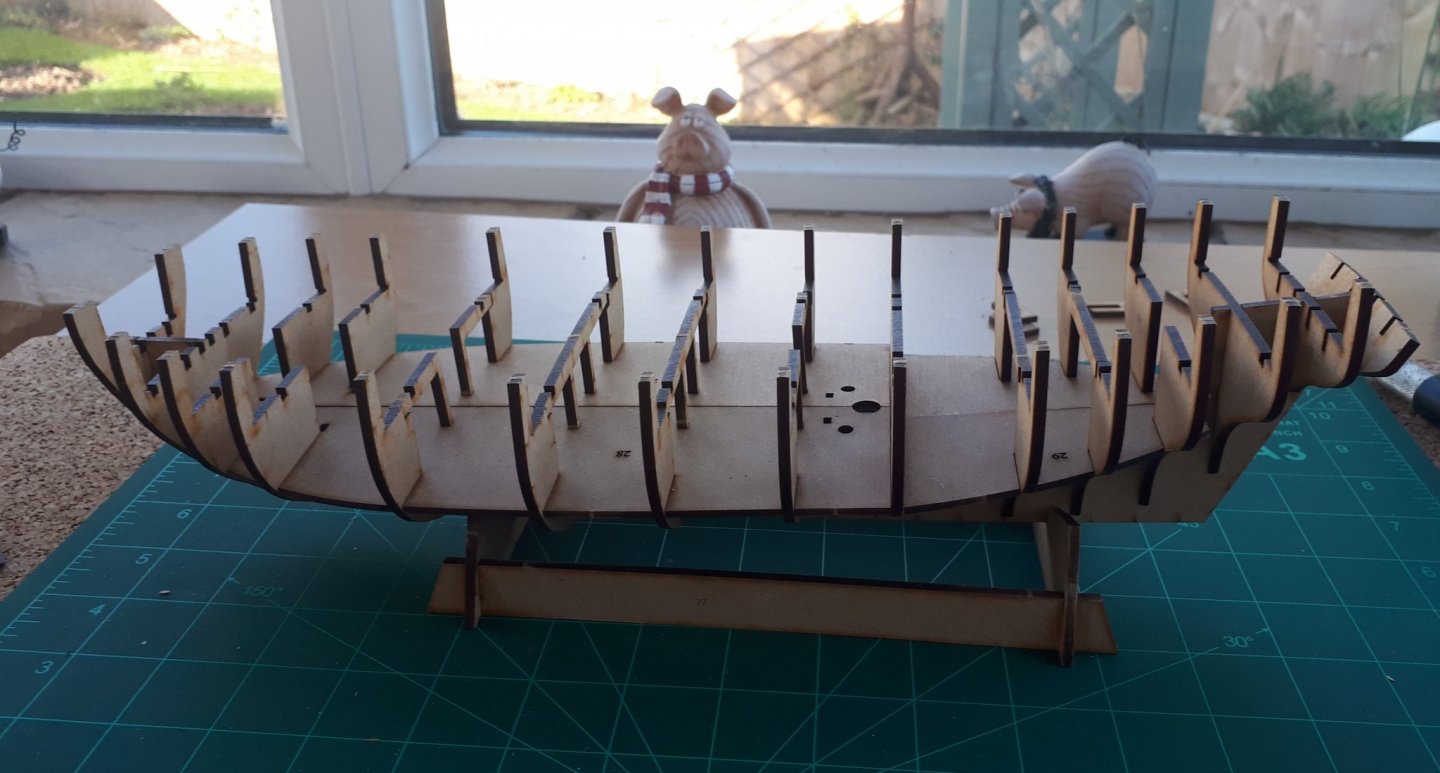
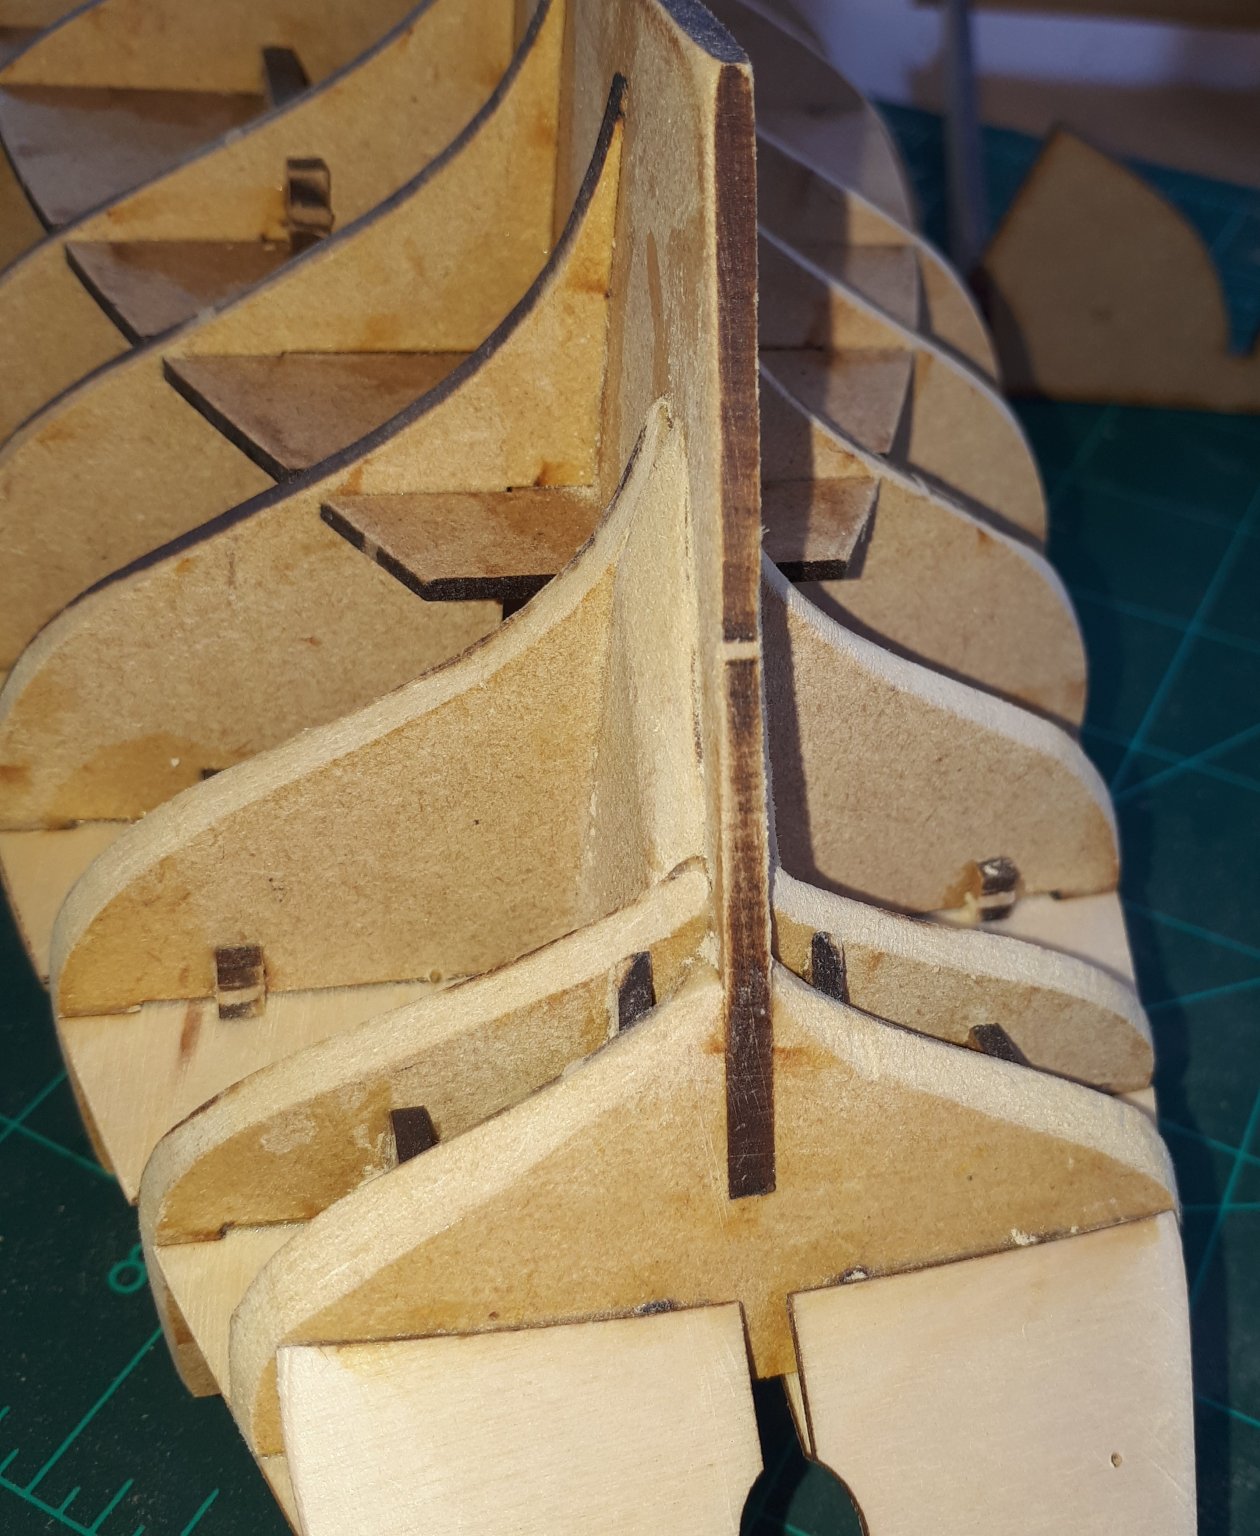
As I was very happy with the dry fit I glued everything in place and left it overnight to allow the wood glue to fully cure. I followed the advice in the build manual and bevelled the edges of bulkheads, 2, 3, 14, 15 and 16 before gluing in place. This, in my opinion, is a great way to go as it made the sanding job so much easier. I also bevelled the edges of the various filler pieces before gluing on place. I think it will only require minimal sanding to finish the fairing prior to fitting the gun port strips and 1st planking.
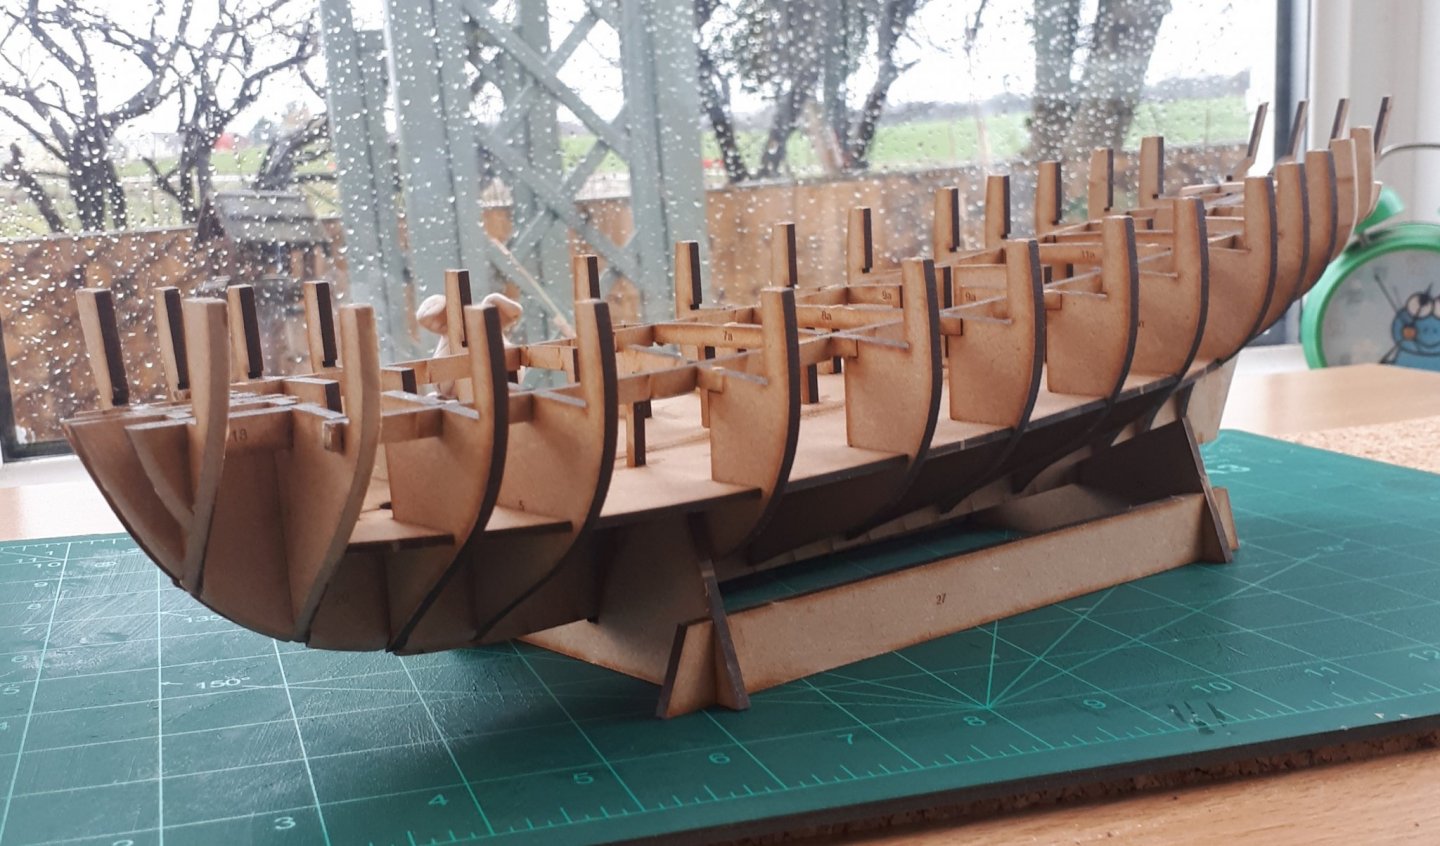

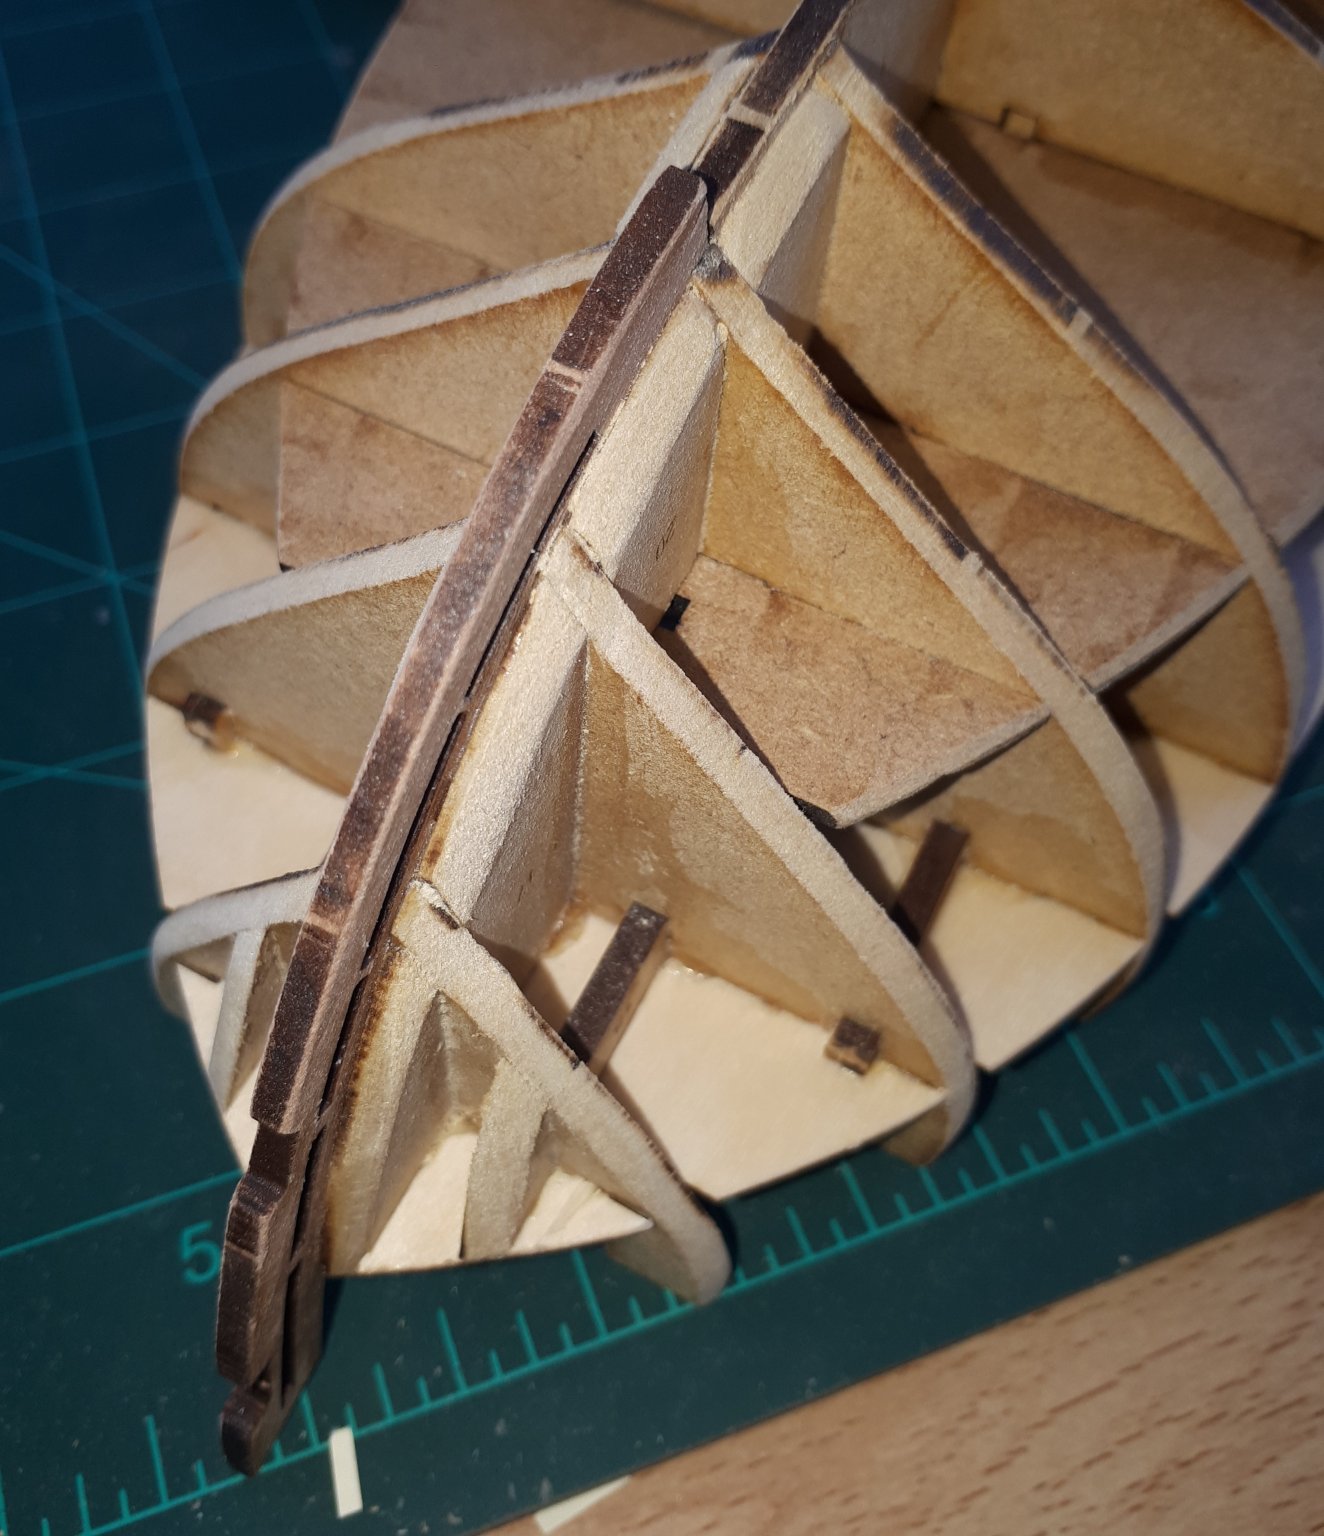
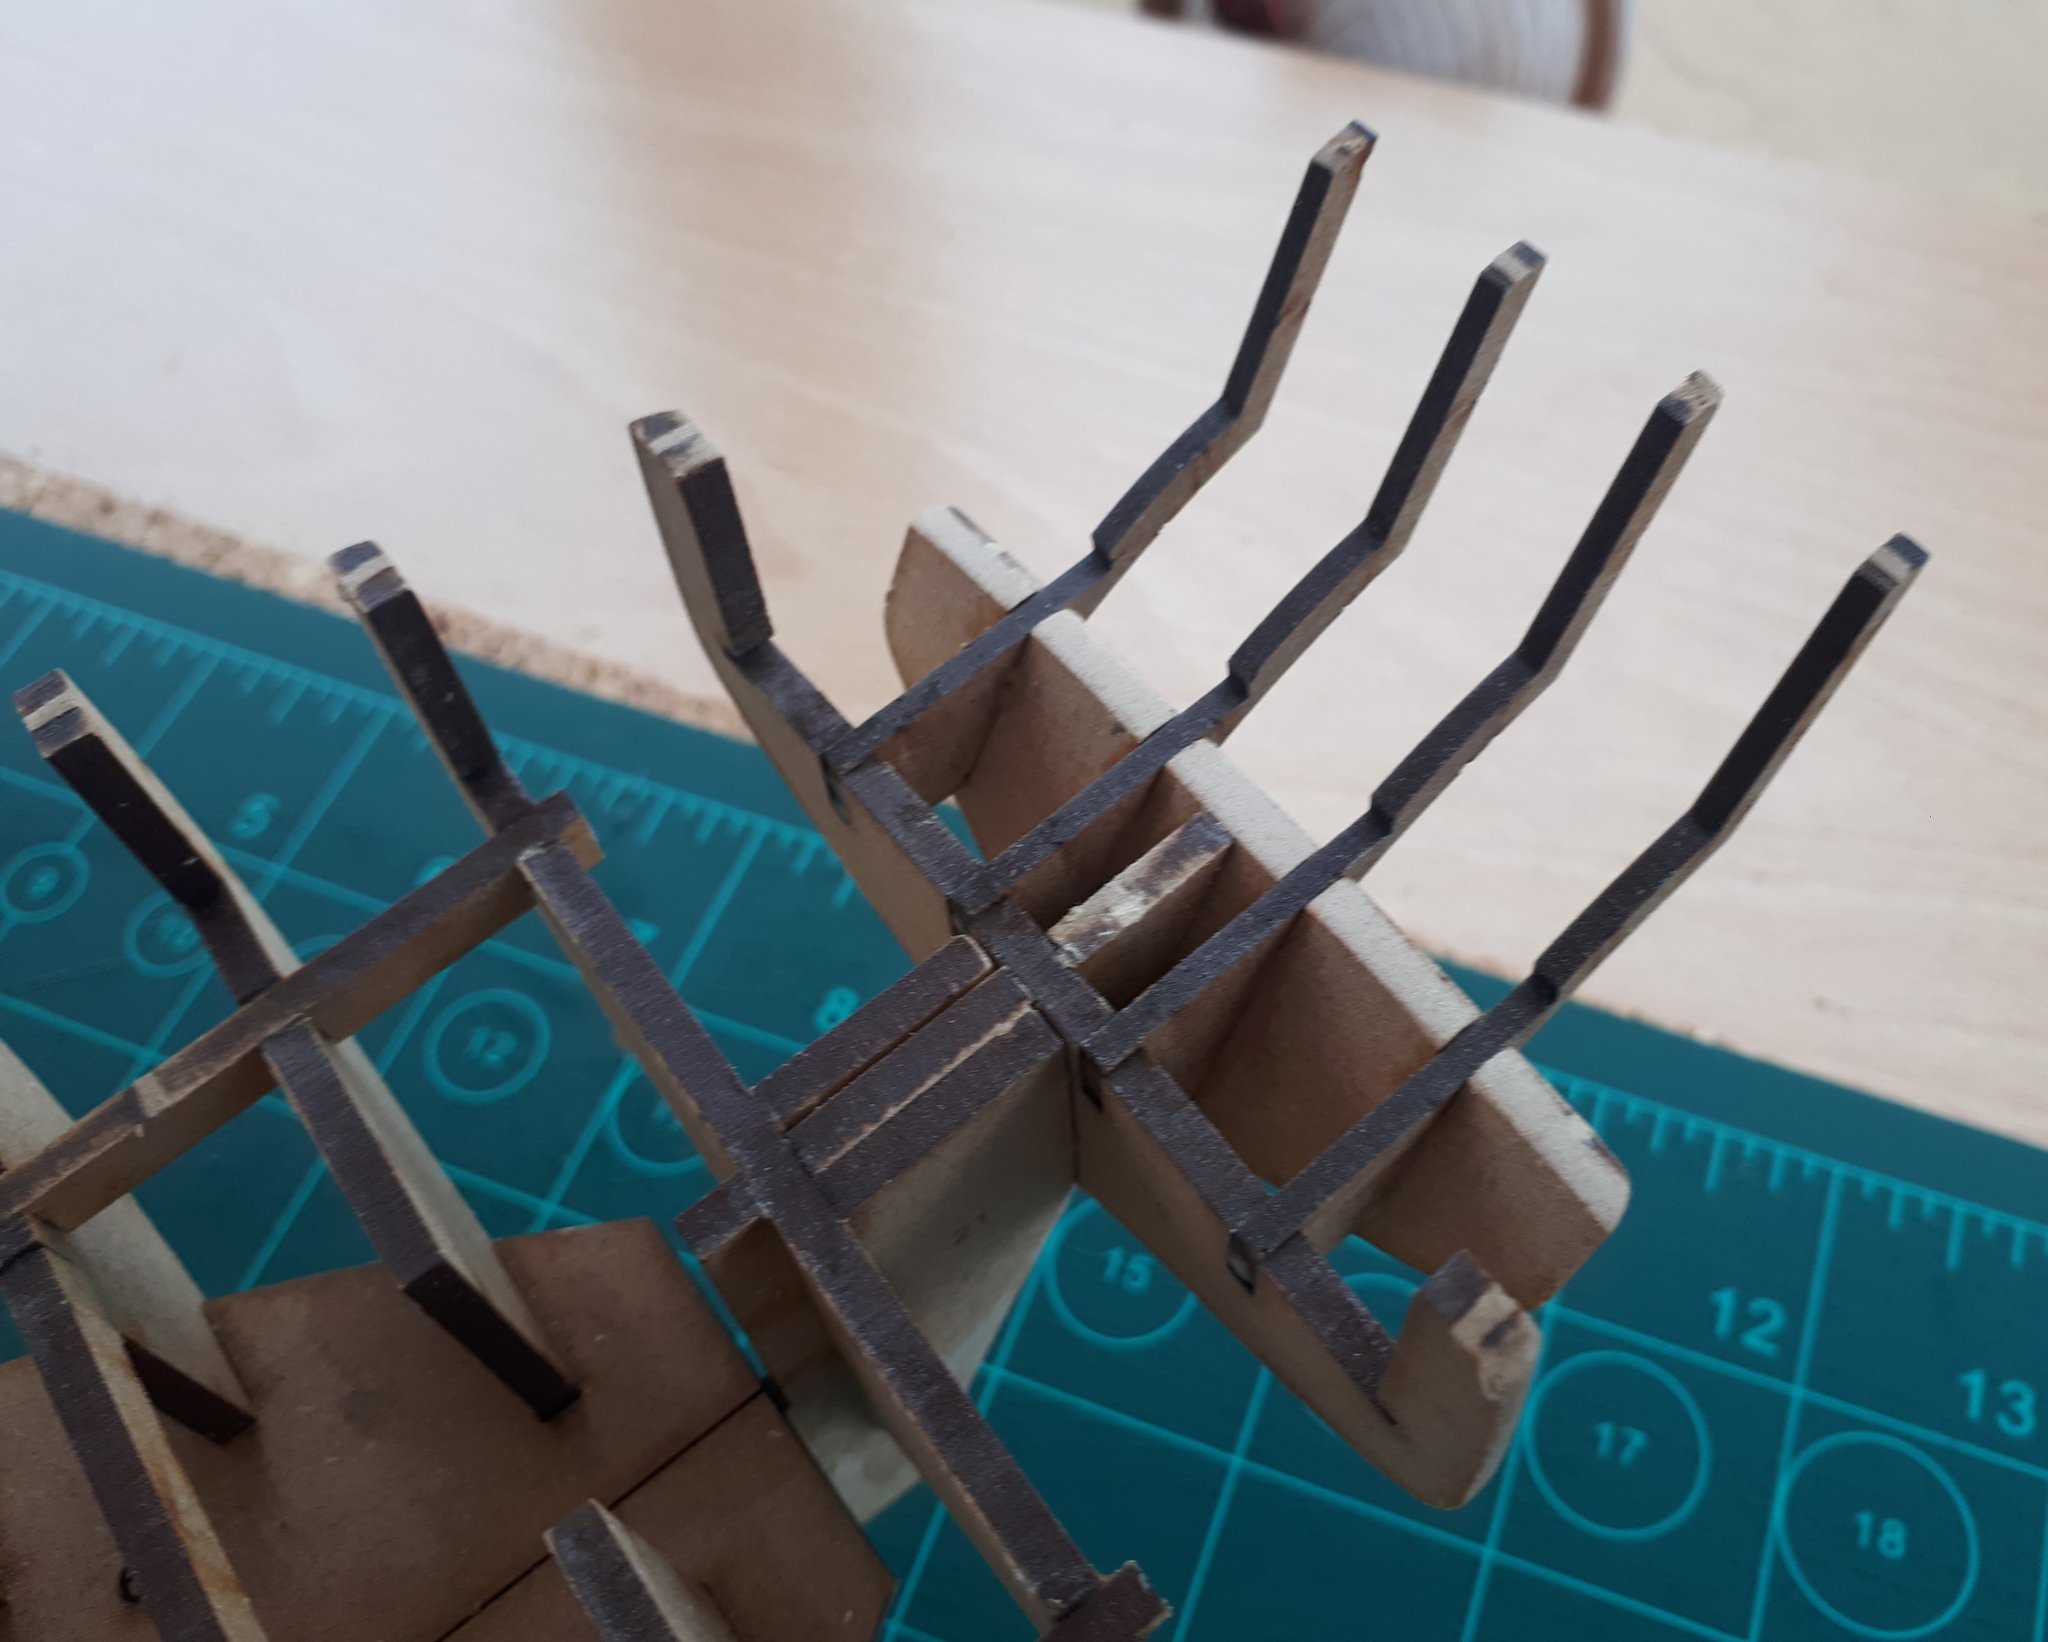
The stern frames (30 and 31) have been fitted. These parts are fragile so the stern patterns will be fitted to add strength as soon as the main deck has been glued in place.

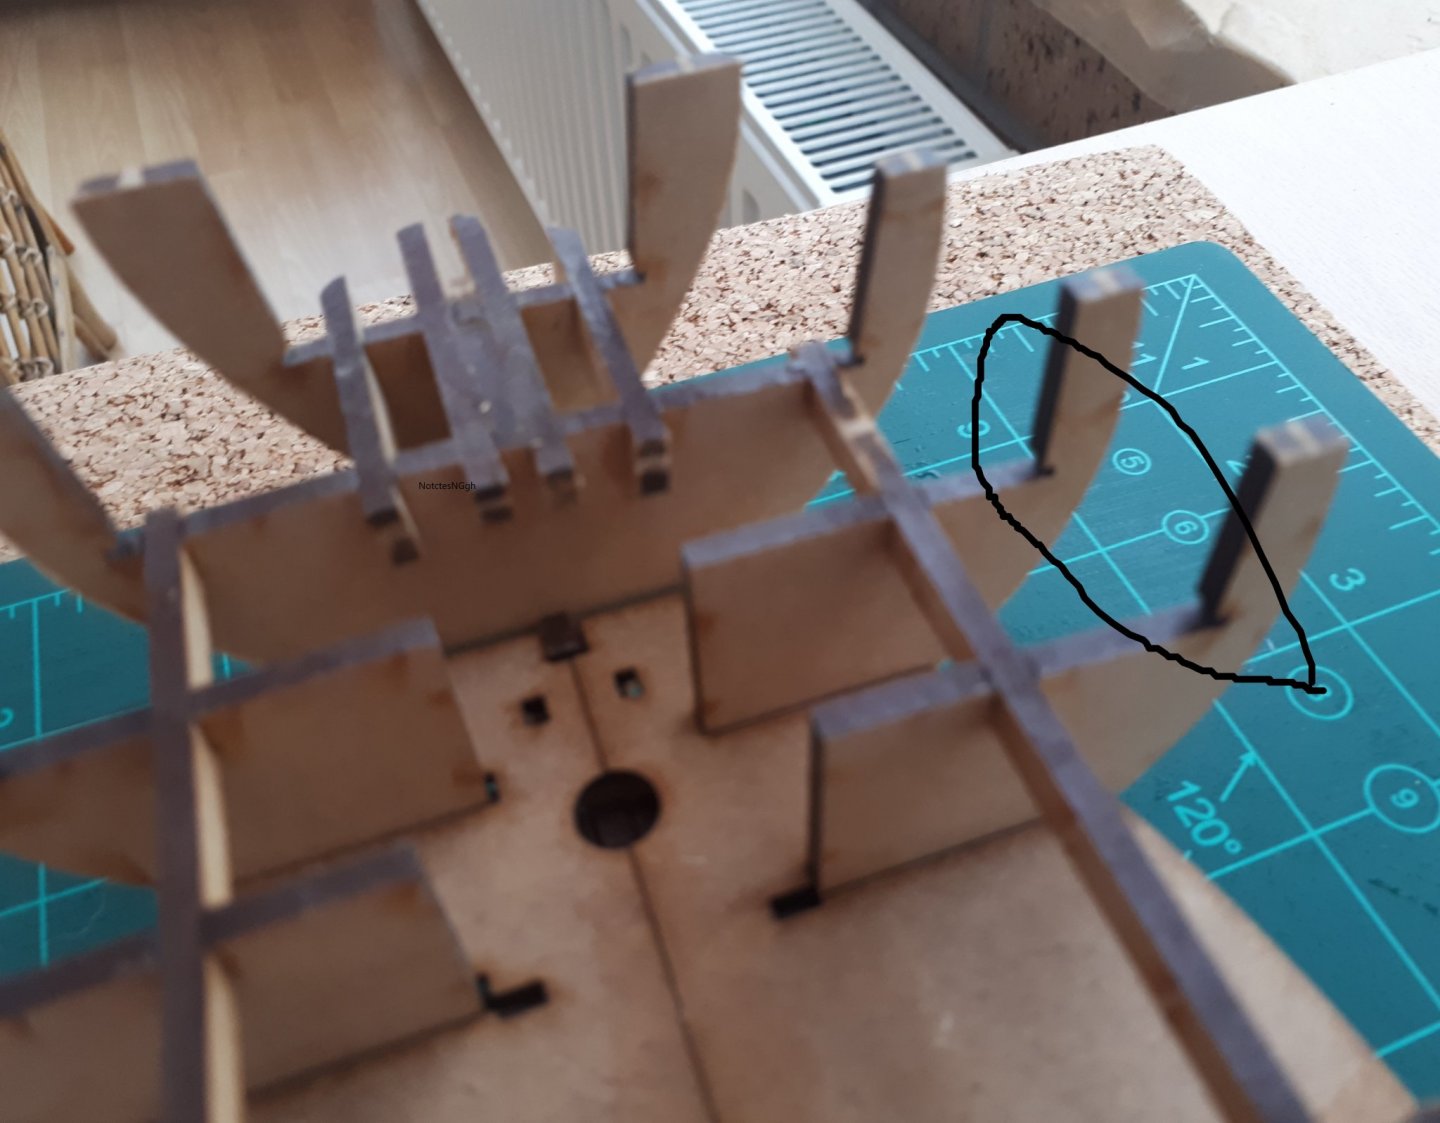
I am now ready fit the deck and I hope it will fit Ok without and need to enlarge the slots but I think it is going to be difficult to assess as one of the design ideas that Chris has added is a slot to hold the deck in place, as seen the following photo.
I am a little worried that if I dry fit the deck to make sure it fits OK will I not then be able to remove it so I can then add the glue.
I think the deck will require a large degree of bending when it is fitted and I trust I will not snap the deck.
 The crew is still watching waiting for my next move.

Time on the build to date is 4 hours.
- DelF, GrandpaPhil, KARAVOKIRIS and 2 others
-
5
-
Hello Chris
H.M. Brig Sloop Speedy kit has arrived safe and sound. I was very impressed with the care taken with the packaging of the kit. My first impression is that the material supplied all look to be very good quality. The instruction book and plans are very well put together and contain a wealth of information.
I have dry fitted bulkheads 2 to 15 to the false keel last night as a test and I am very pleased to report that the slots did not require any sanding which is an added bonus. They were all a perfect fit which was brilliant. I plan to dry fit a few more parts later today to get a general idea of the build process for this kit before starting the build in earnest. I have noted the build estimate of 50 to 70 hours. I plan to take it slow and steady (which is very unlike me!) so I fully expect my build time will exceed this.
I have started a build log where I will chart the progress of the build.
- ccoyle, VonHoldinghausen, mtaylor and 3 others
-
6
-
My first impression of the kit is very good. The kit was very well packaged, both externally and internally and the quality of the materials looks first rate. The instruction manual is very well put together and the layout plans all look very detailed.
The estimated build time quoted in the instruction book is 50 to 70 hours. I plan to take my time with this build so I fully expect my build time will greatly exceed this.
Stage 1 - Building Cradle and Dry Fit of Bulkheads 2 to 15 to False Keel
I have assembled the MDF building cradle, which was all I was going to do today. However as this task took very little time I decided to release the false keel (1) and bulkheads (2 to 15) from the MDF sheets and then to dry fit them.I am very impressed with the way the bulkheads slot easily on to the false keel without the need to file, see picture below.
Time spent of the build is 50 minutes.
- Edwardkenway, GrandpaPhil, Sjors and 3 others
-
6


HM Brig-Sloop Speedy by glennard2523 - Vanguard Models - 1/64
in - Kit build logs for subjects built from 1751 - 1800
Posted
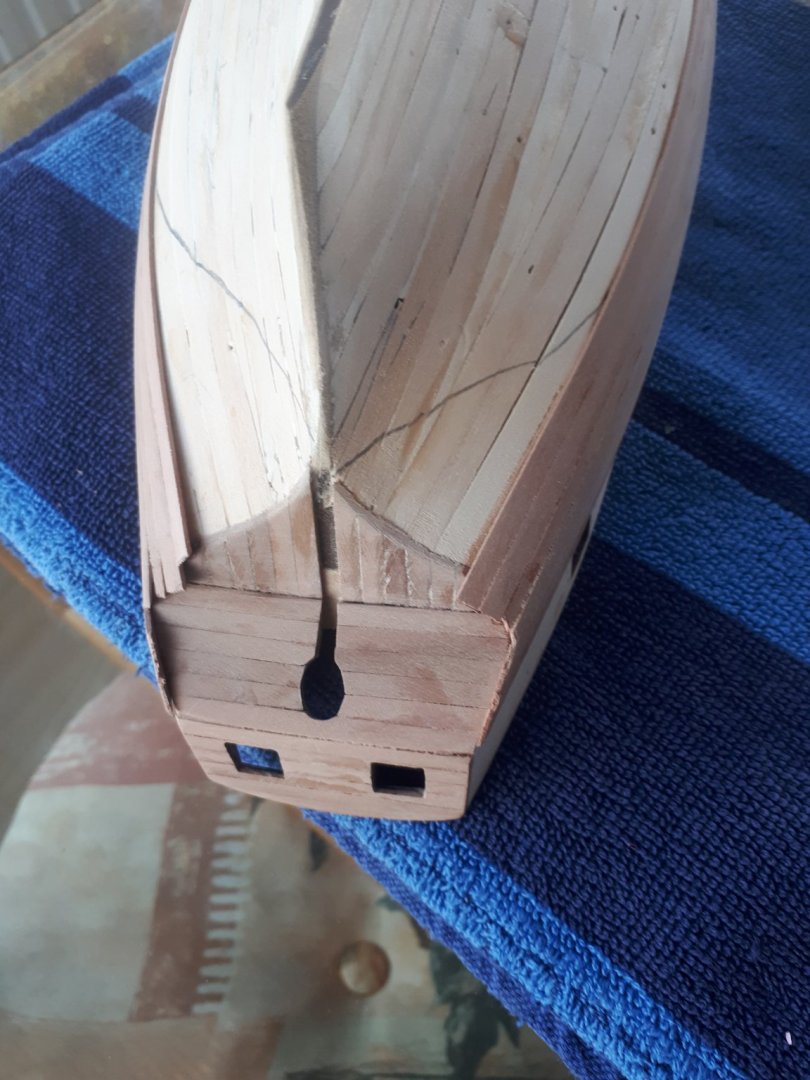
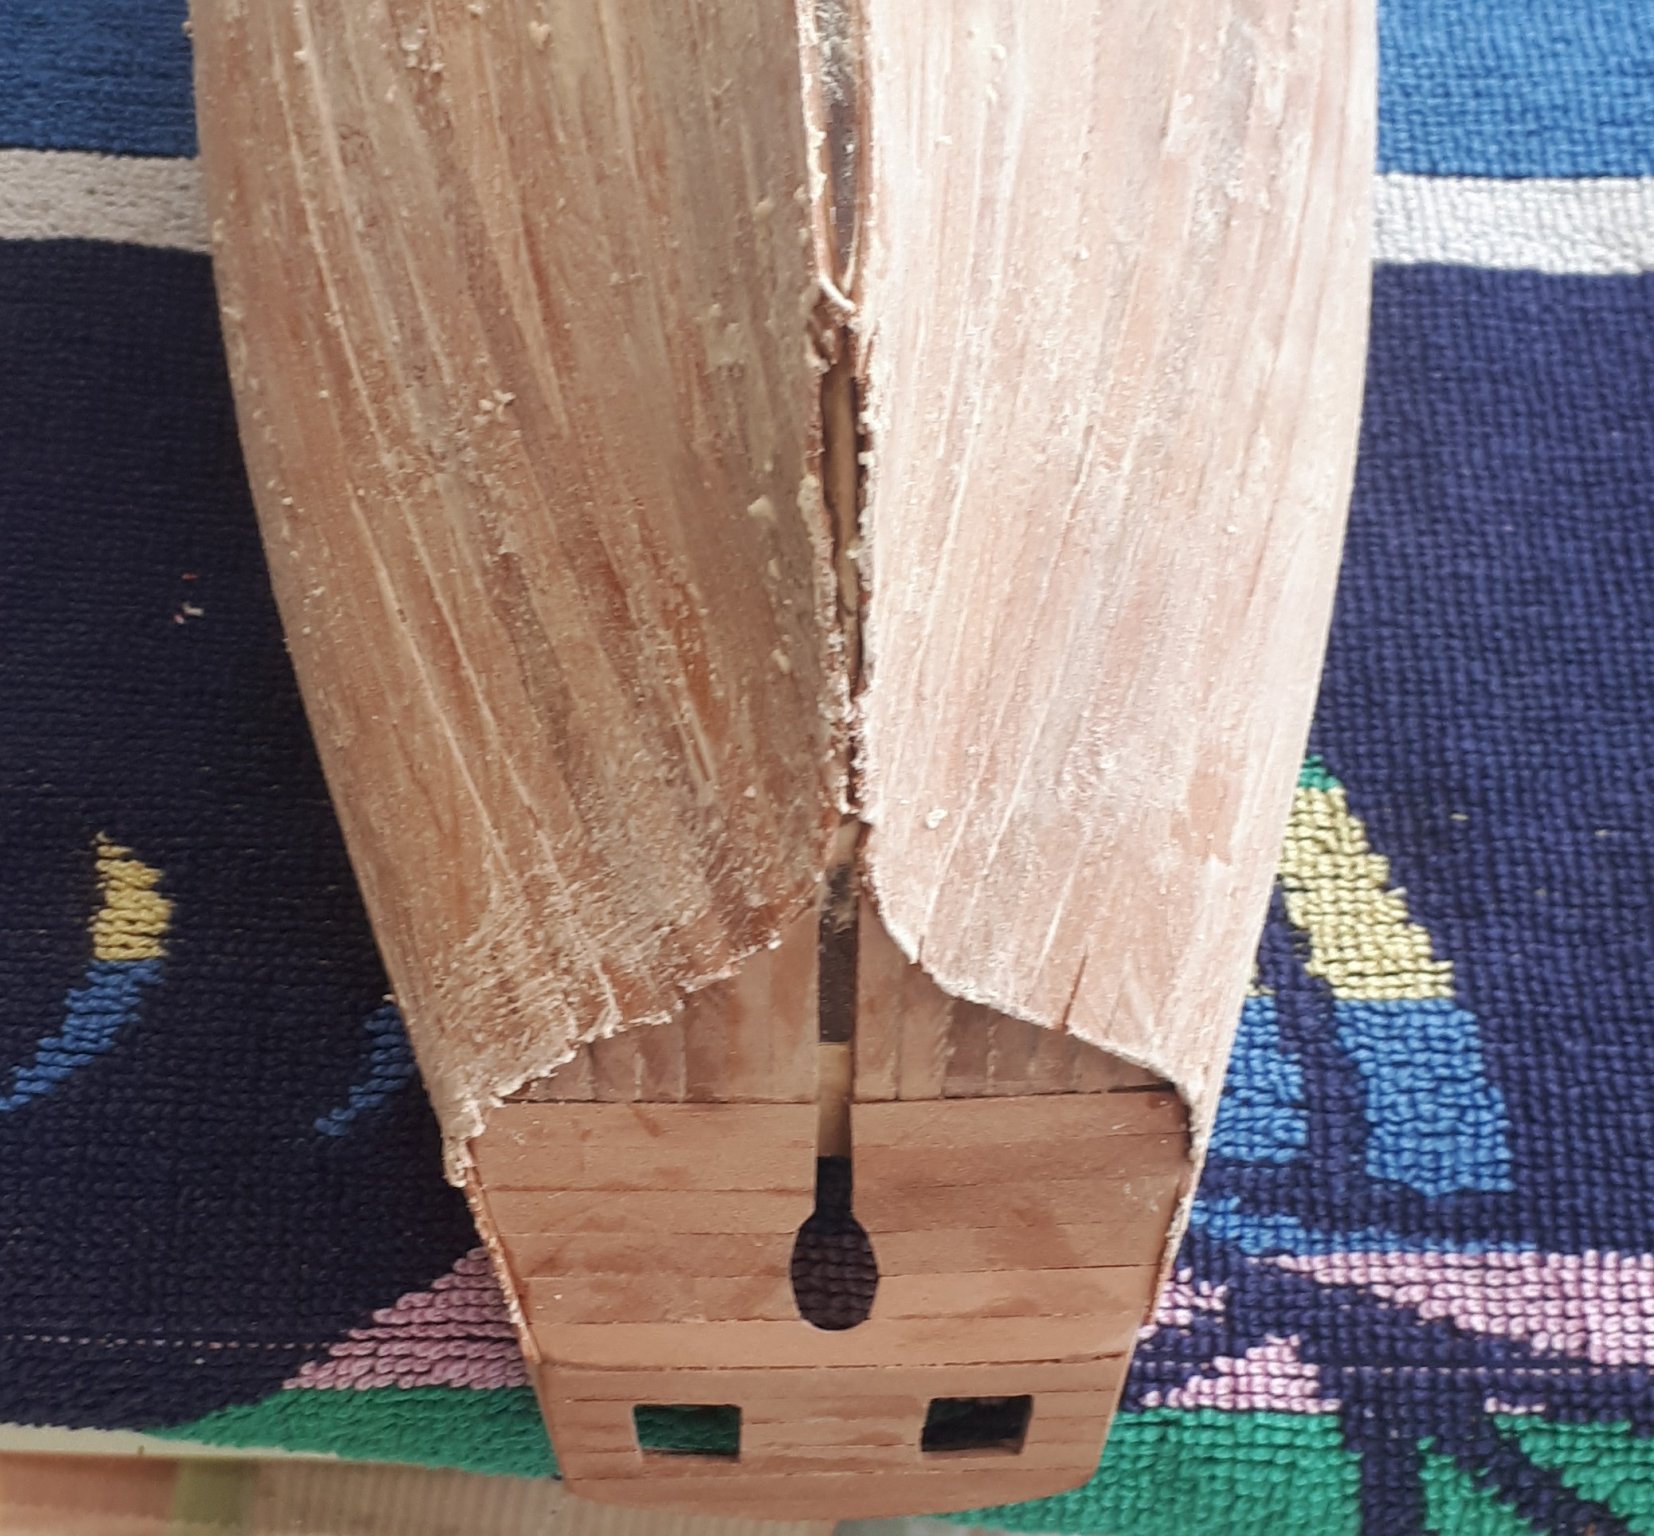
Hello DelF
I have attached a picture after 5 minutes of gentle sanding. You can clearly see the imperfections where the filler has not been removed. I'm not that concerned for the areas under the wales and beneath the waterline. I know the visible planking will look good once the sanding task has been completed.