HOLIDAY DONATION DRIVE - SUPPORT MSW - DO YOUR PART TO KEEP THIS GREAT FORUM GOING!
×


Old Collingwood
-
Posts
12,098 -
Joined
-
Last visited
Content Type
Profiles
Forums
Gallery
Events
Everything posted by Old Collingwood
-

MRAP ATV by CDW - FINISHED - Rye Field - 1:35 Scale
Old Collingwood replied to CDW's topic in Non-ship/categorised builds
I once loaned a book from a library on this very subject many years ago - what an amazing stratergist he was. OC. -
Thats a good quetion Mike, as I have flat white acrylic paint that would have to painted by brush, and a rattle can of flat black laquar paint - so it would be a bit of a mix. OC.
-
MRAP ATV by CDW - FINISHED - Rye Field - 1:35 Scale
Old Collingwood replied to CDW's topic in Non-ship/categorised builds
"Corky blimy" I'm here. OC. -
I'm in (Kenko Lou) OC.
-
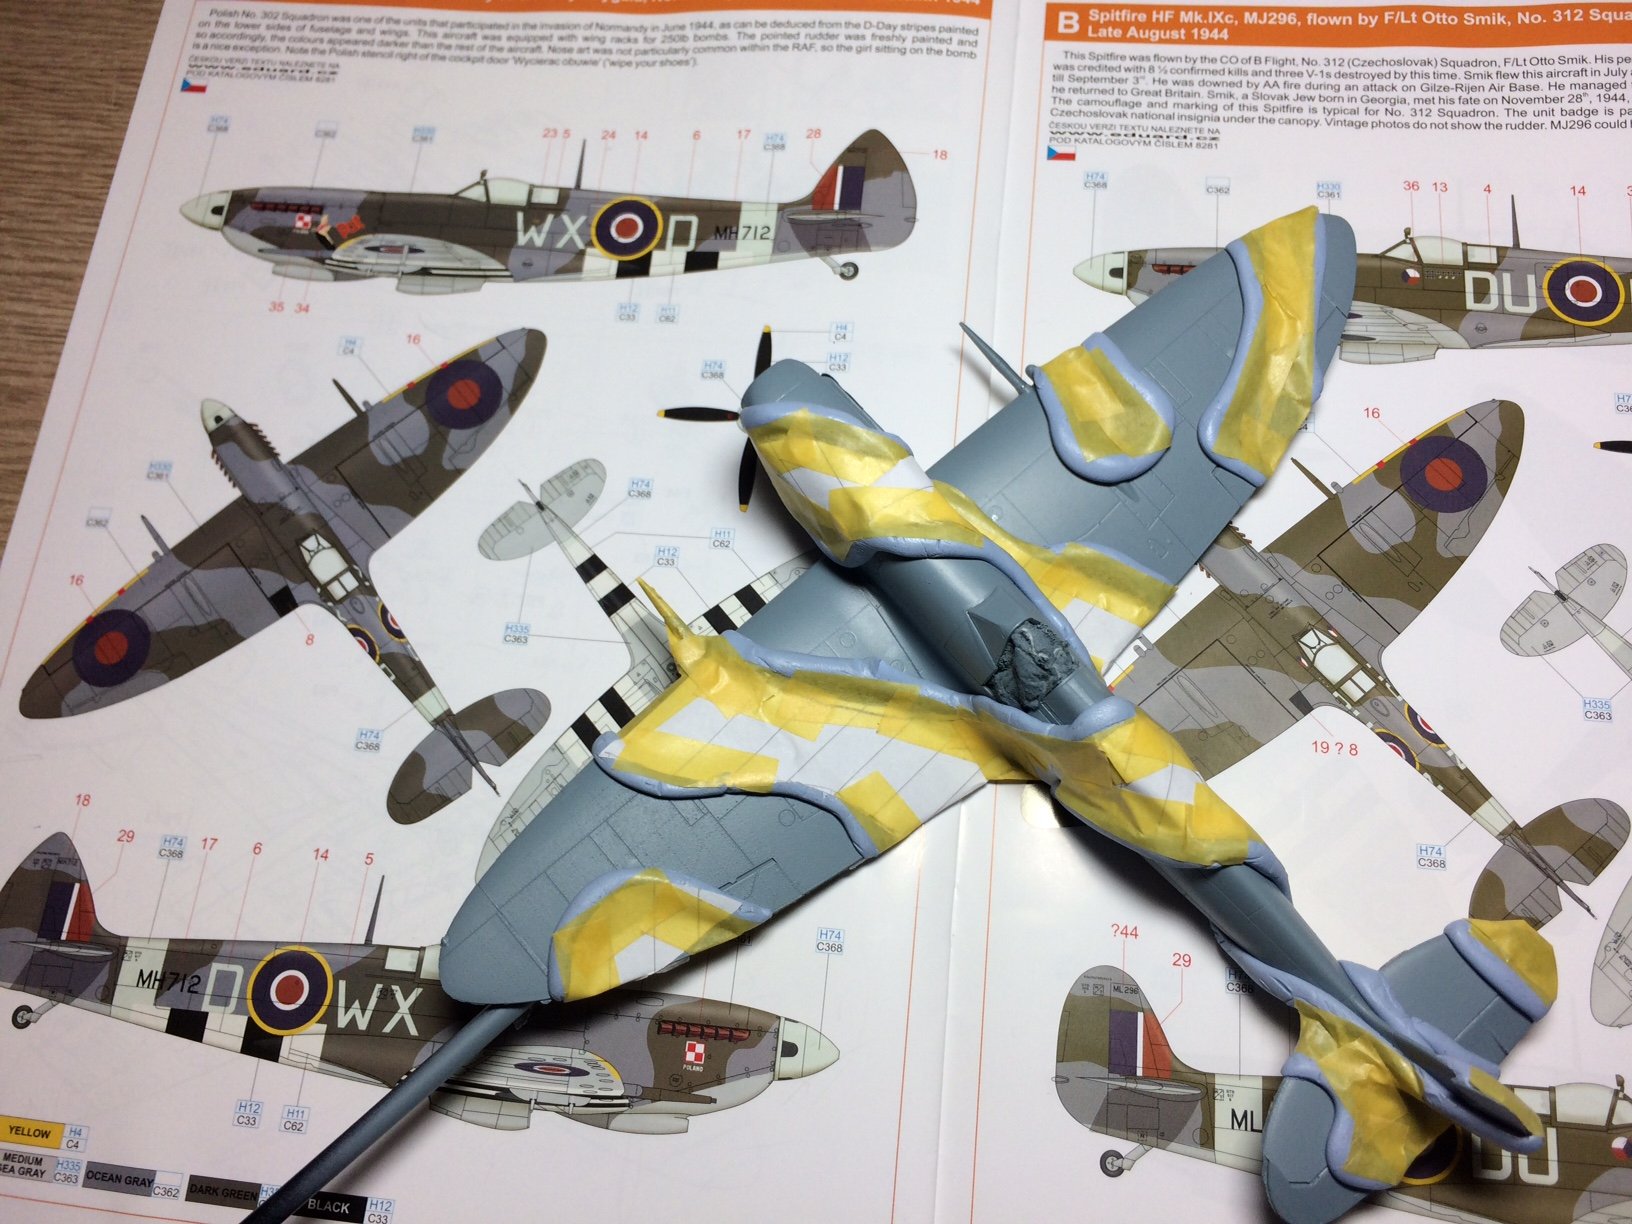
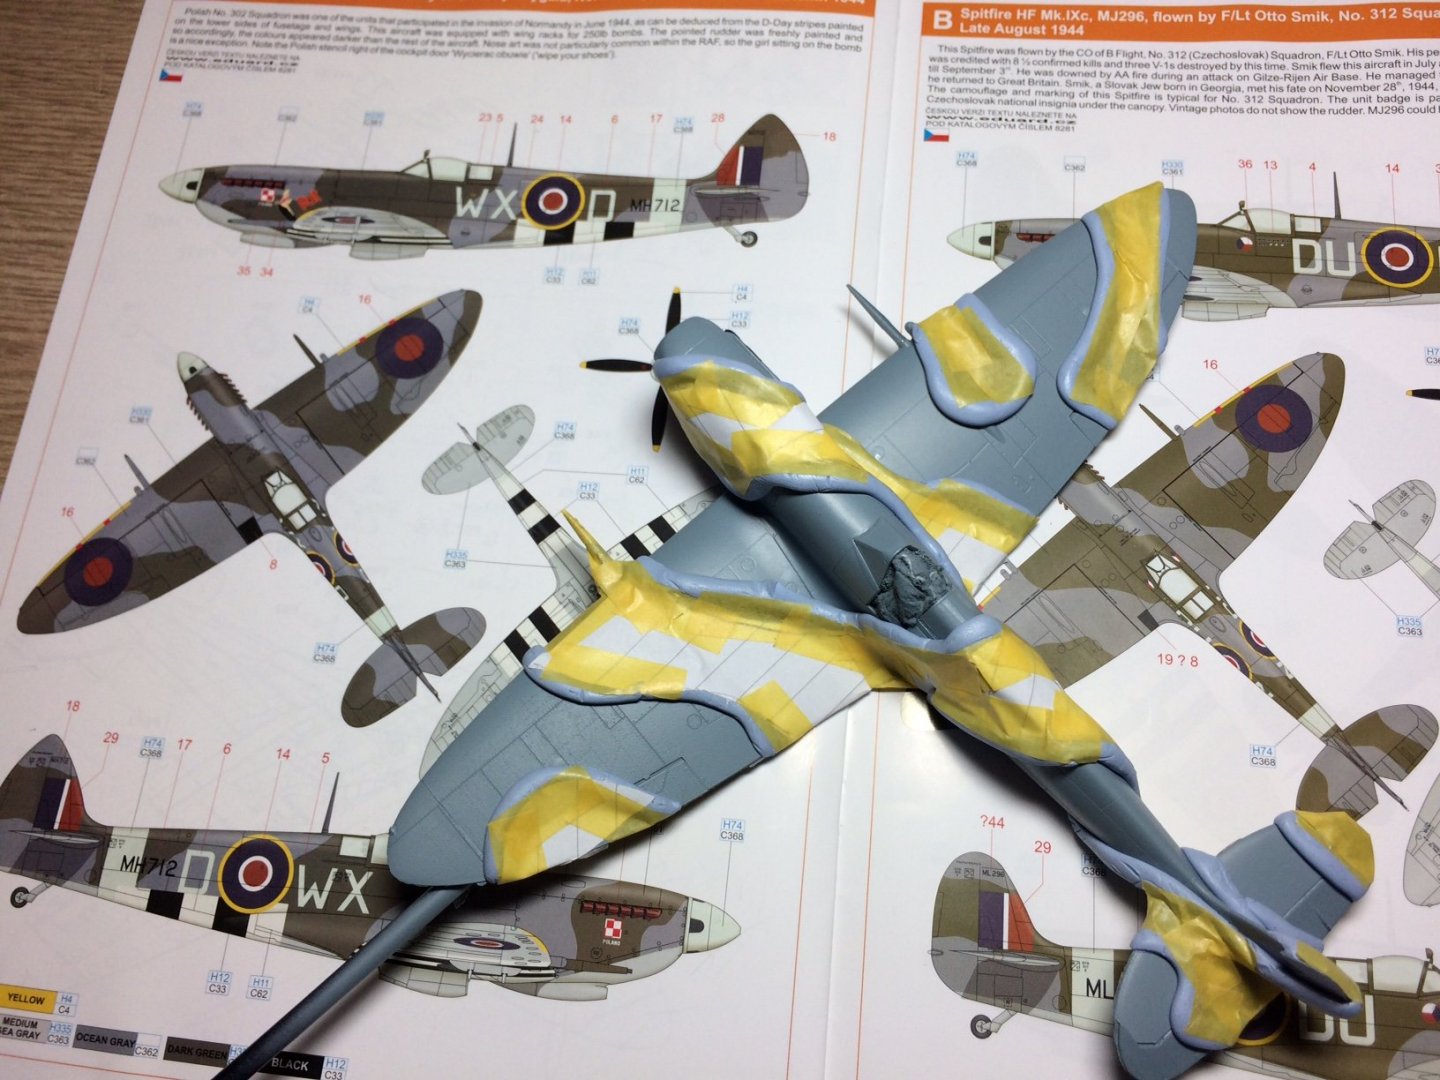
Hi all, now mossie is finished I have returned to the Ix, first job was to mask for RAF Green using my normal blu tak / paper and tamiya tape, before spraying I thought I would show the masking against the colour plan. OC.
- 298 replies
-
- 14
-

-
So very kind of you to say - Thank you. OC.
-
Thank you so much. OC.
-
Thanks Mark. OC.
-
Thanks Carl, sure had a few moments that was hit or miss. OC.
-
Thanks Lou. OC.
-
Thank you kindly Edward. OC.
-
Thank you Mark. OC.
-
Thanks Ken, will take some bettter pics when I can. OC.
-
Military Wrecker - Revell - 1:32 Scale - PLASTIC
Old Collingwood replied to CDW's topic in Non-ship/categorised builds
Very nice finish - she has come up a treat - looks the business with the boom and pullys attached. OC. -
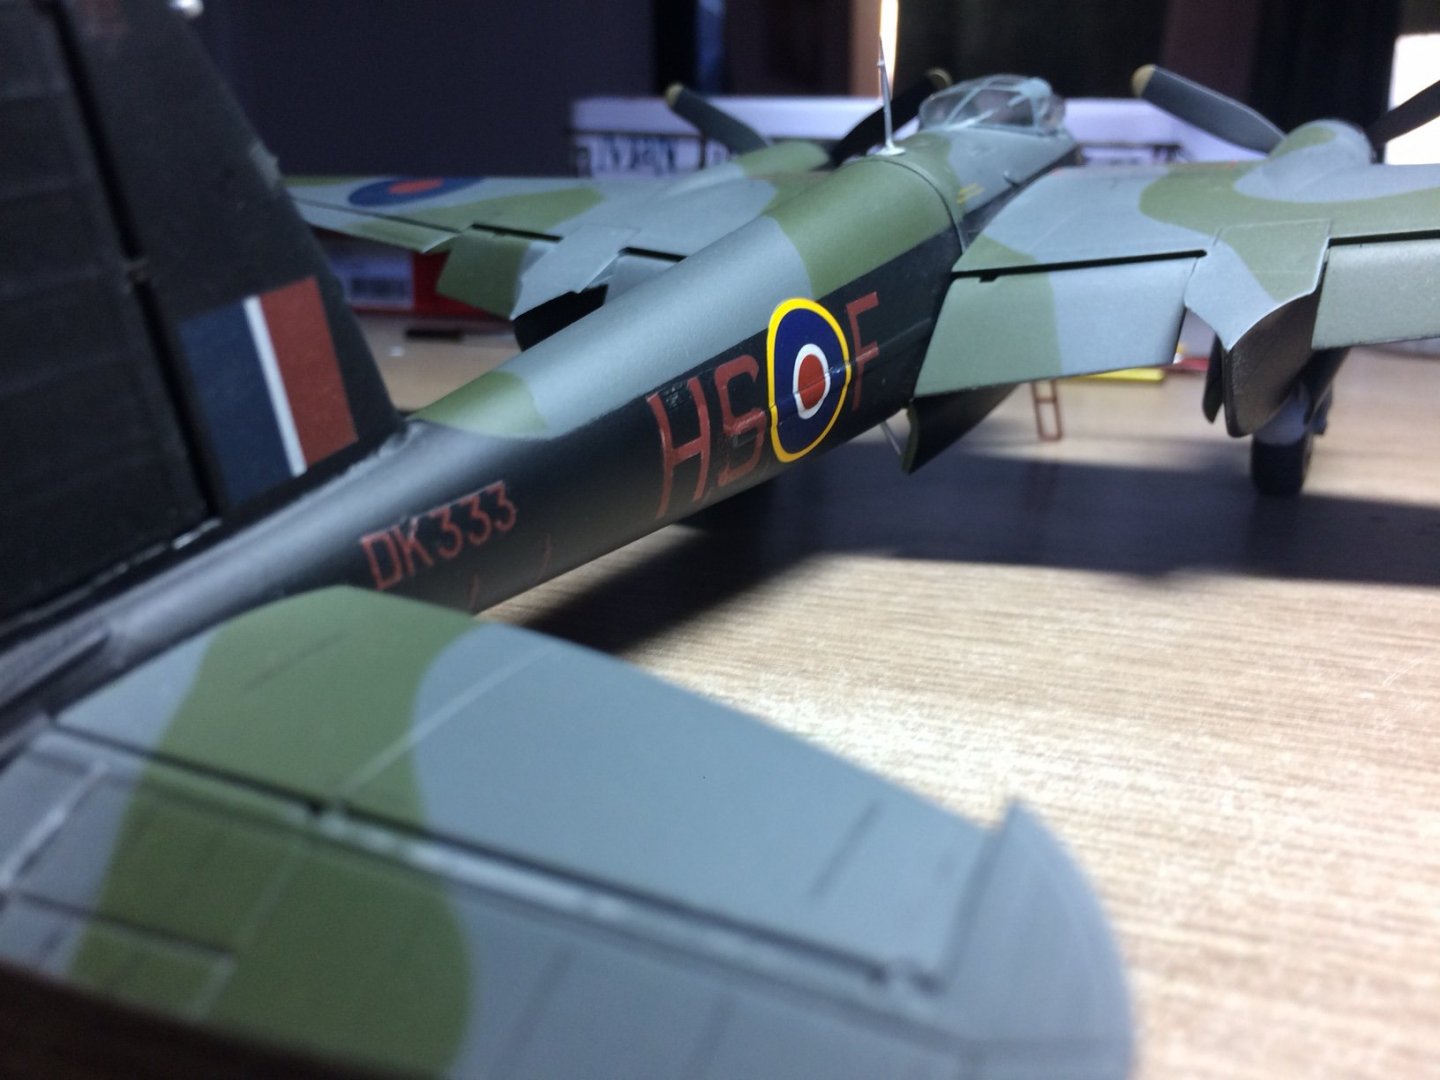
Evening all, spent the most part of the day on the back patio making the most of the dry wather (quite rare here), then this evening I added a few coats by brush of flat top coat to the 500s, they turned out not too bad - then I clued them in place. So this finishes my Mossie "Here you go dad - this is for you and everyone else who served" Just a few pics as I will need to take some better pics when I have more room. Sincere and warm wishes and thanks to all the followers - on lookers - those who comented and those who hit the like button, its you guys who make these builds worth doing. OC.

- 932 replies
-
- 15
-
-
I will look forward to see what you do. OC.
-
Old age or to much sun on our back yard or both lol. OC.
-
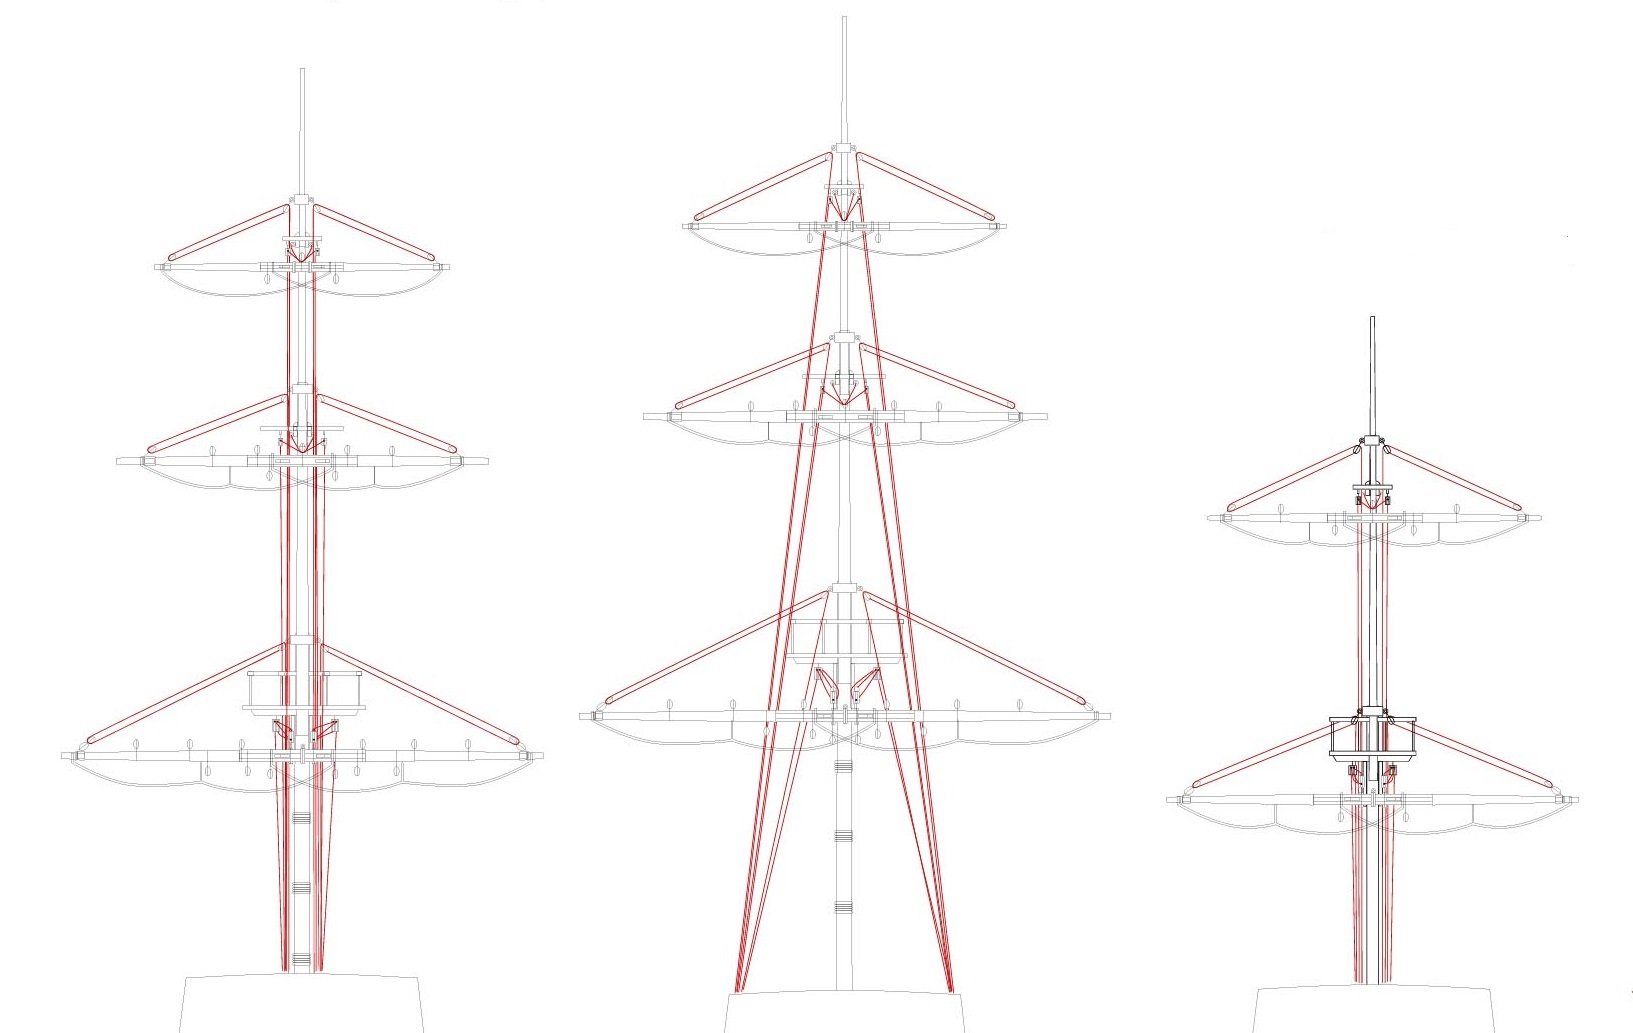
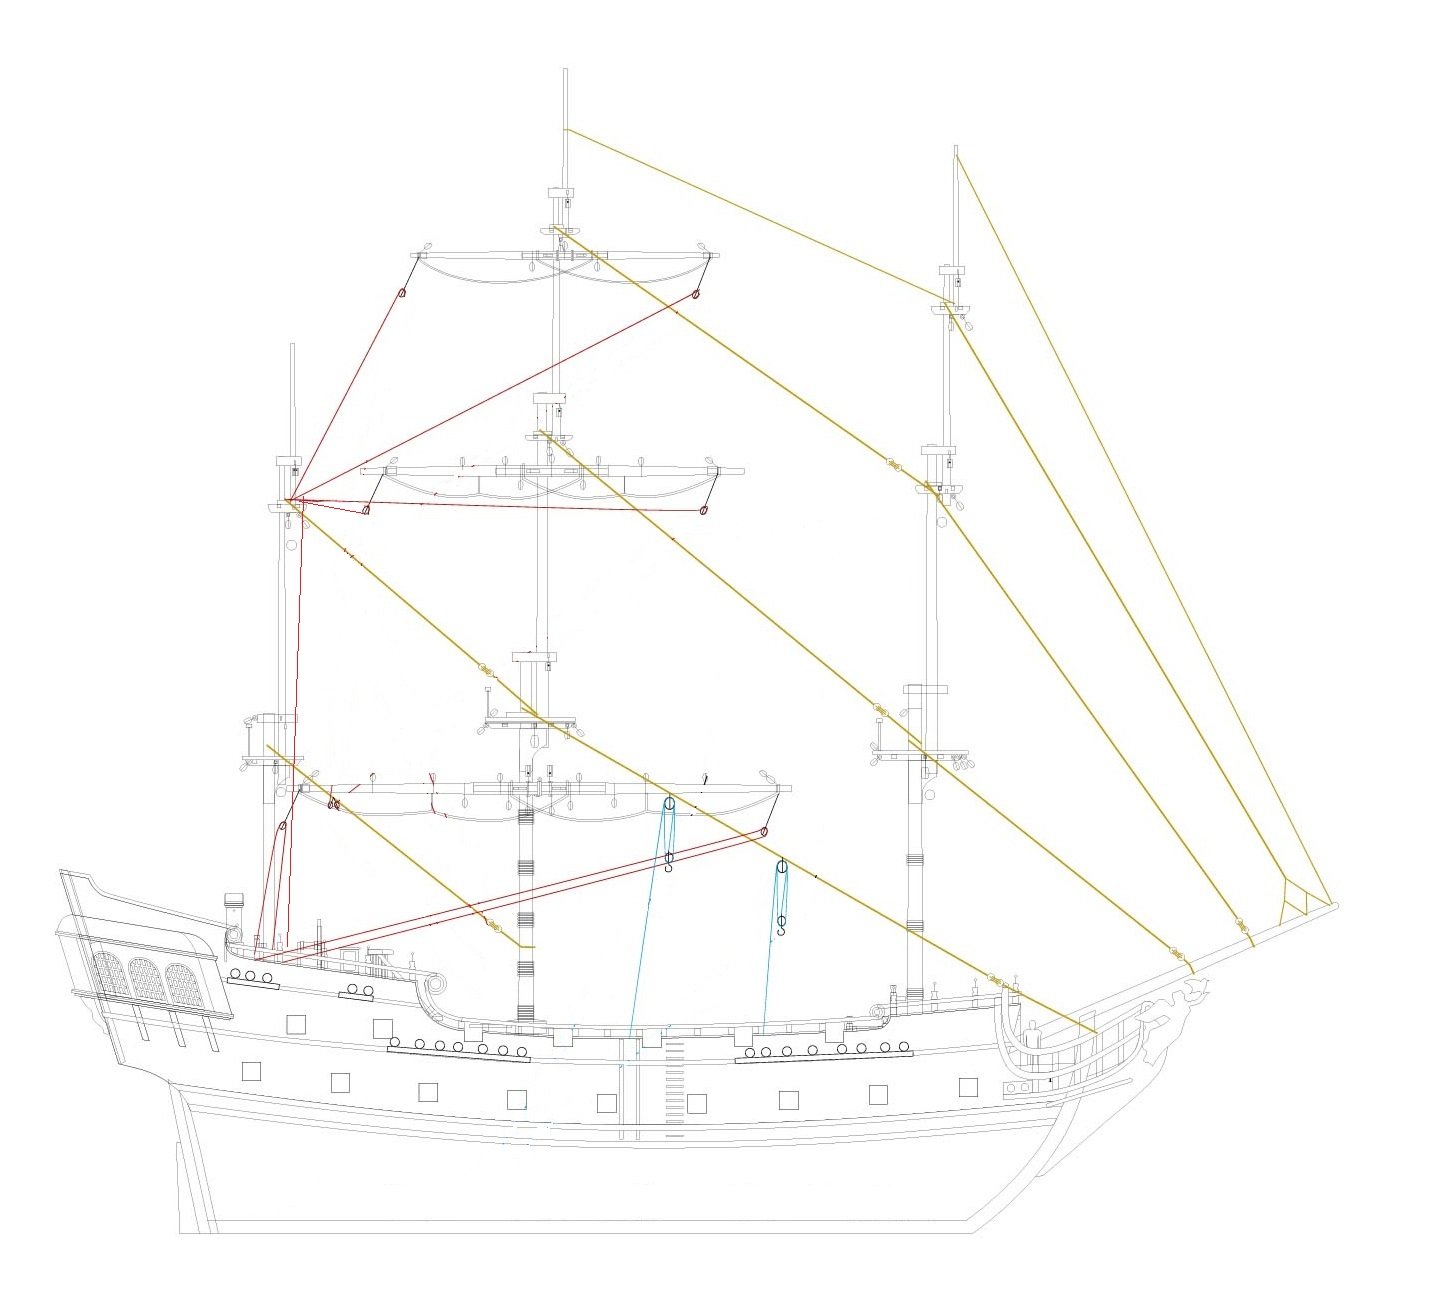
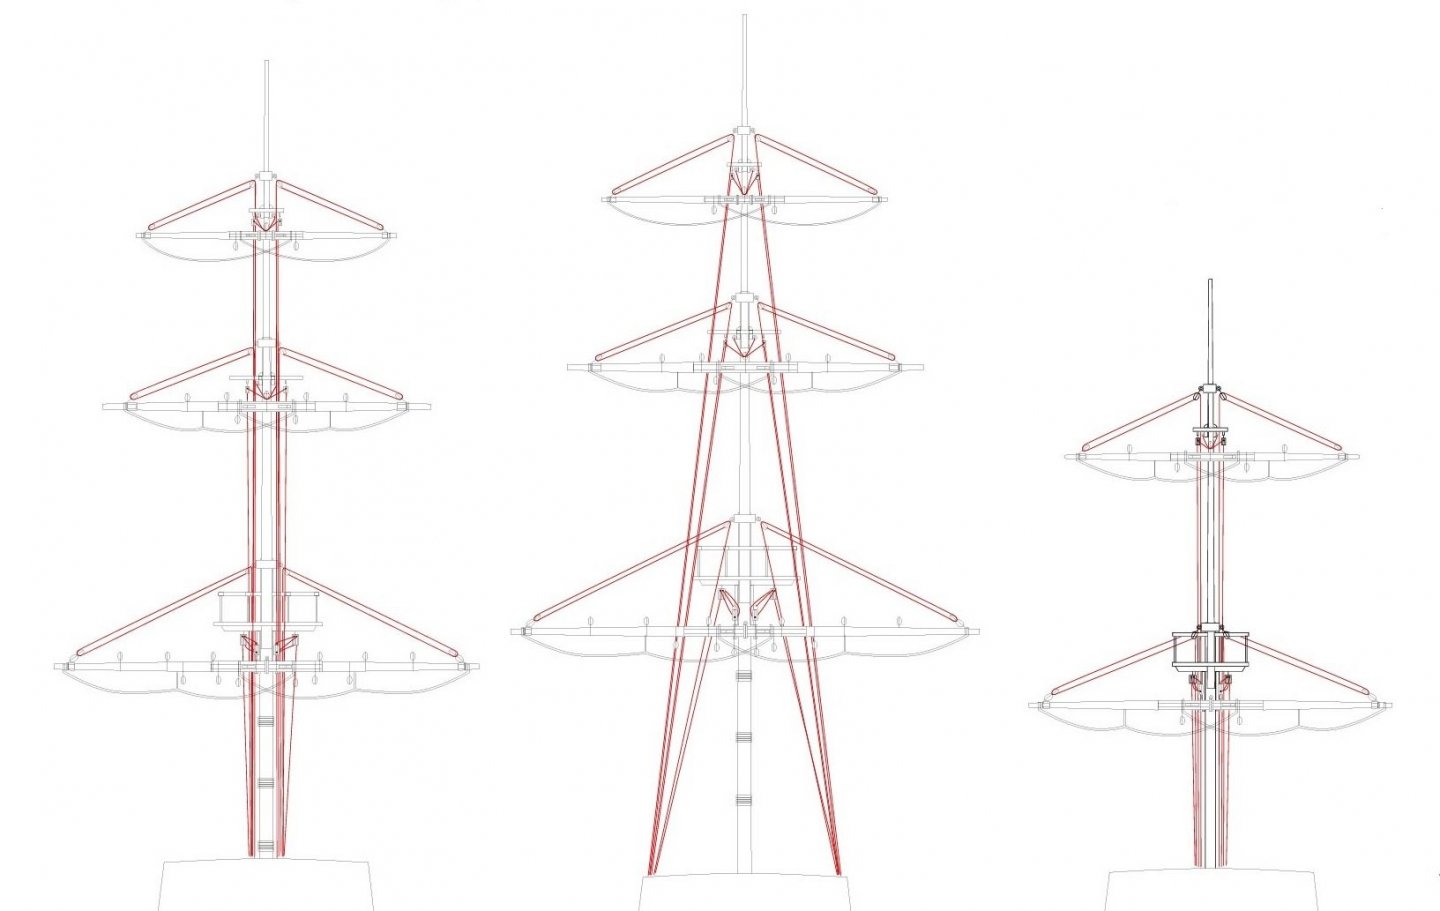
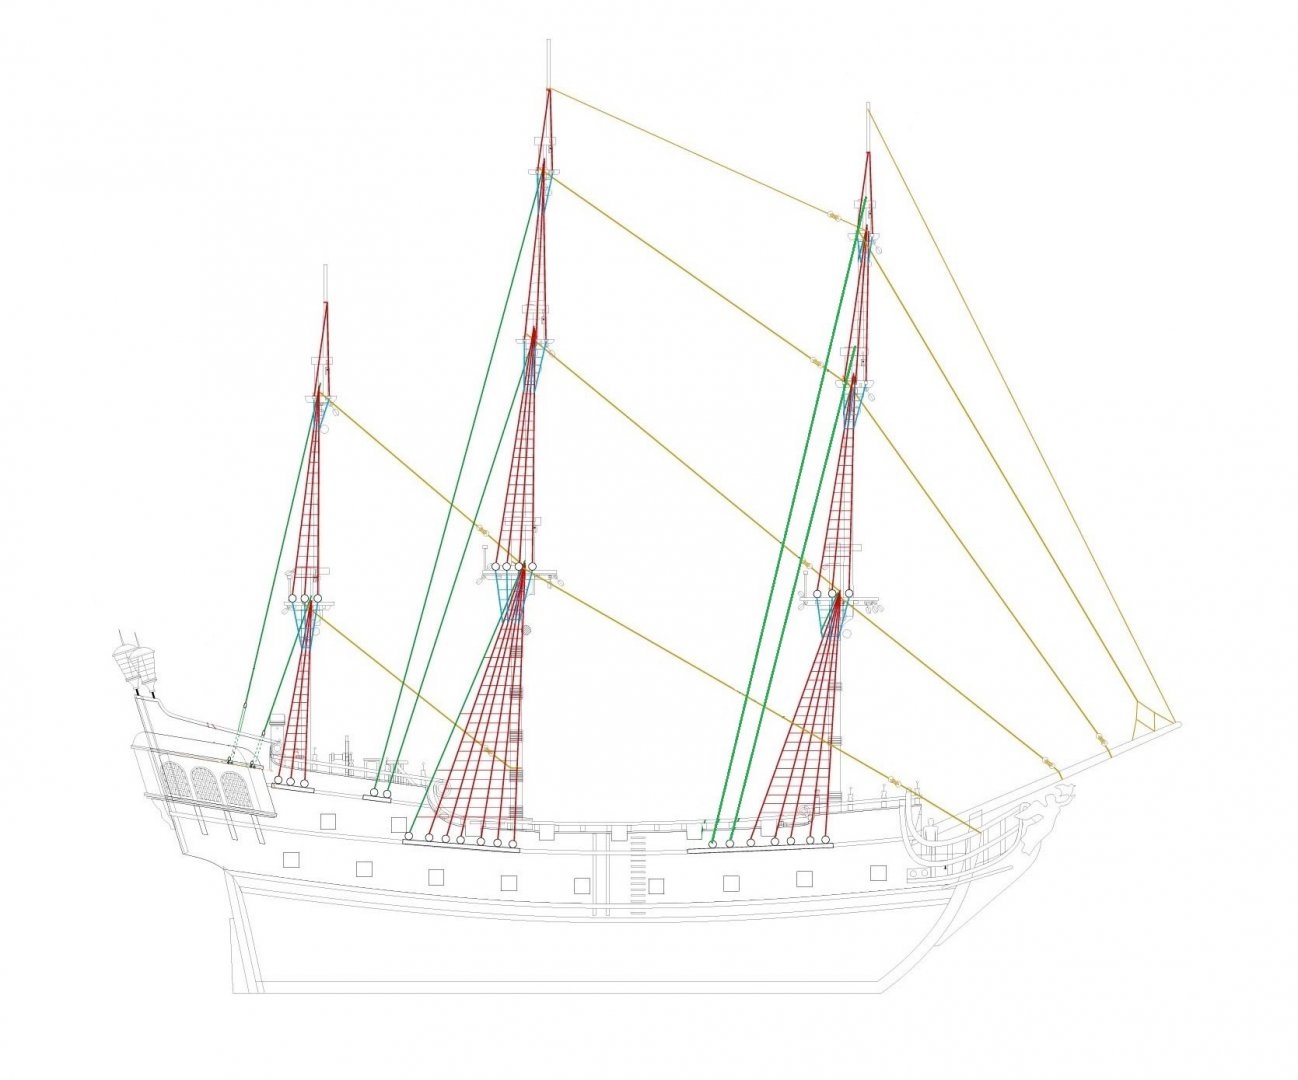
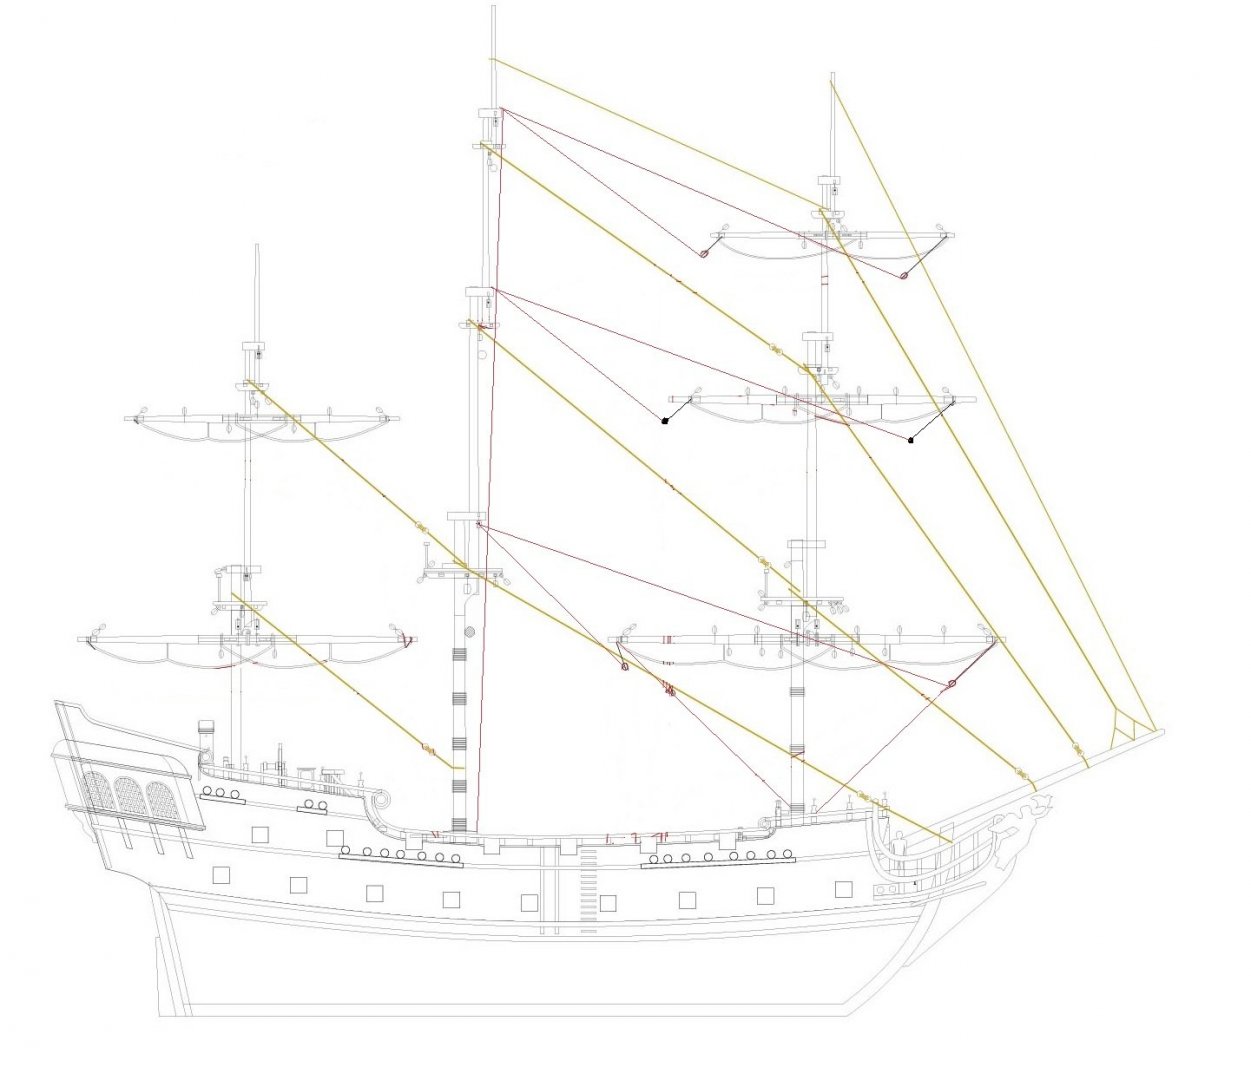
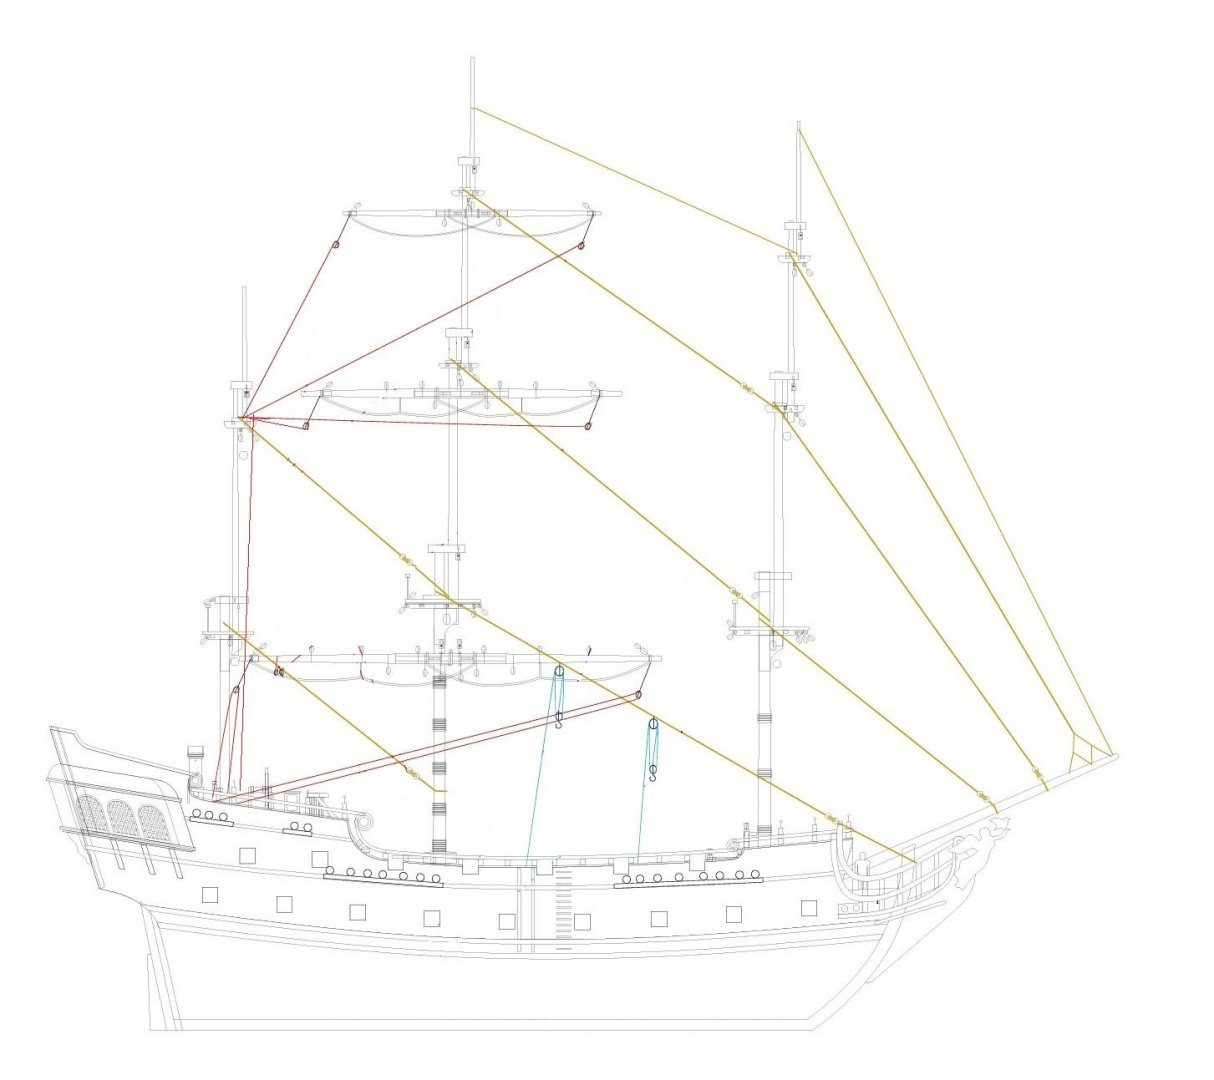
I built her in here in the ship build section I also have a few plans I worked off - I started the riging from this stage - And here are some plans - OC.
-
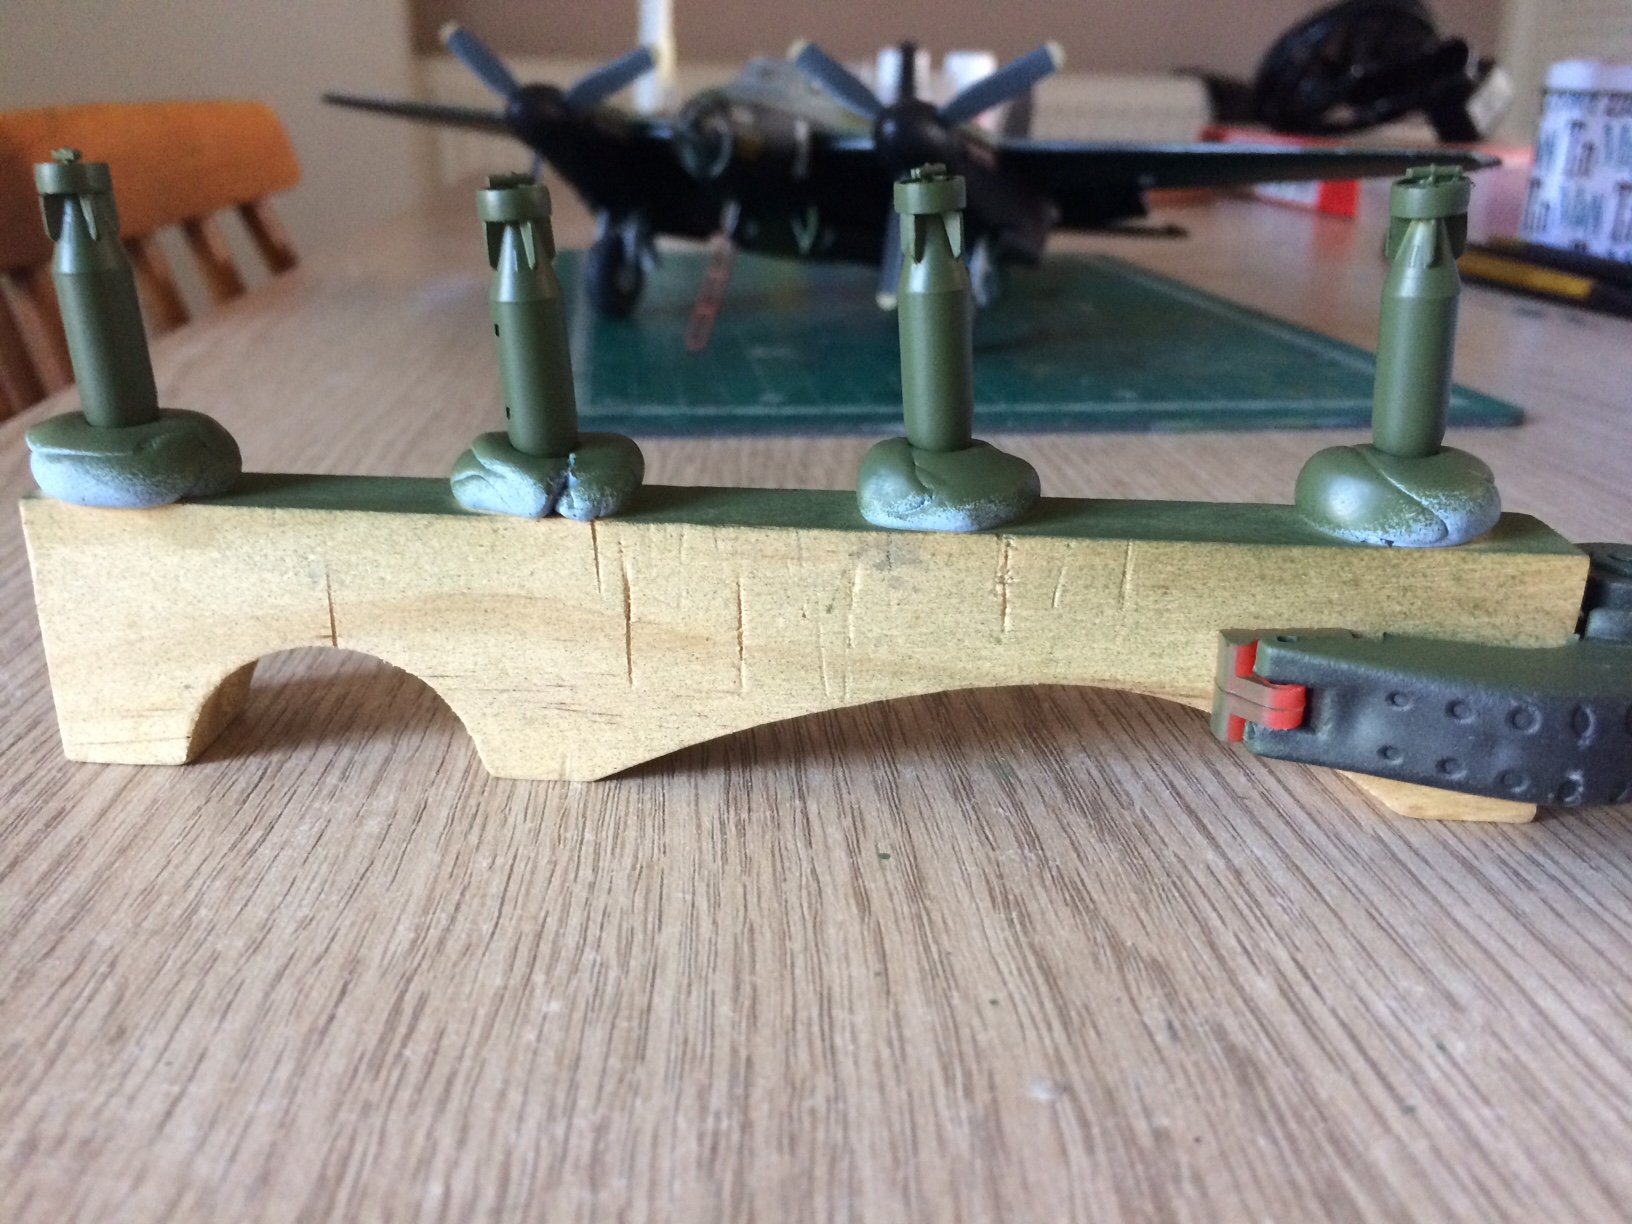
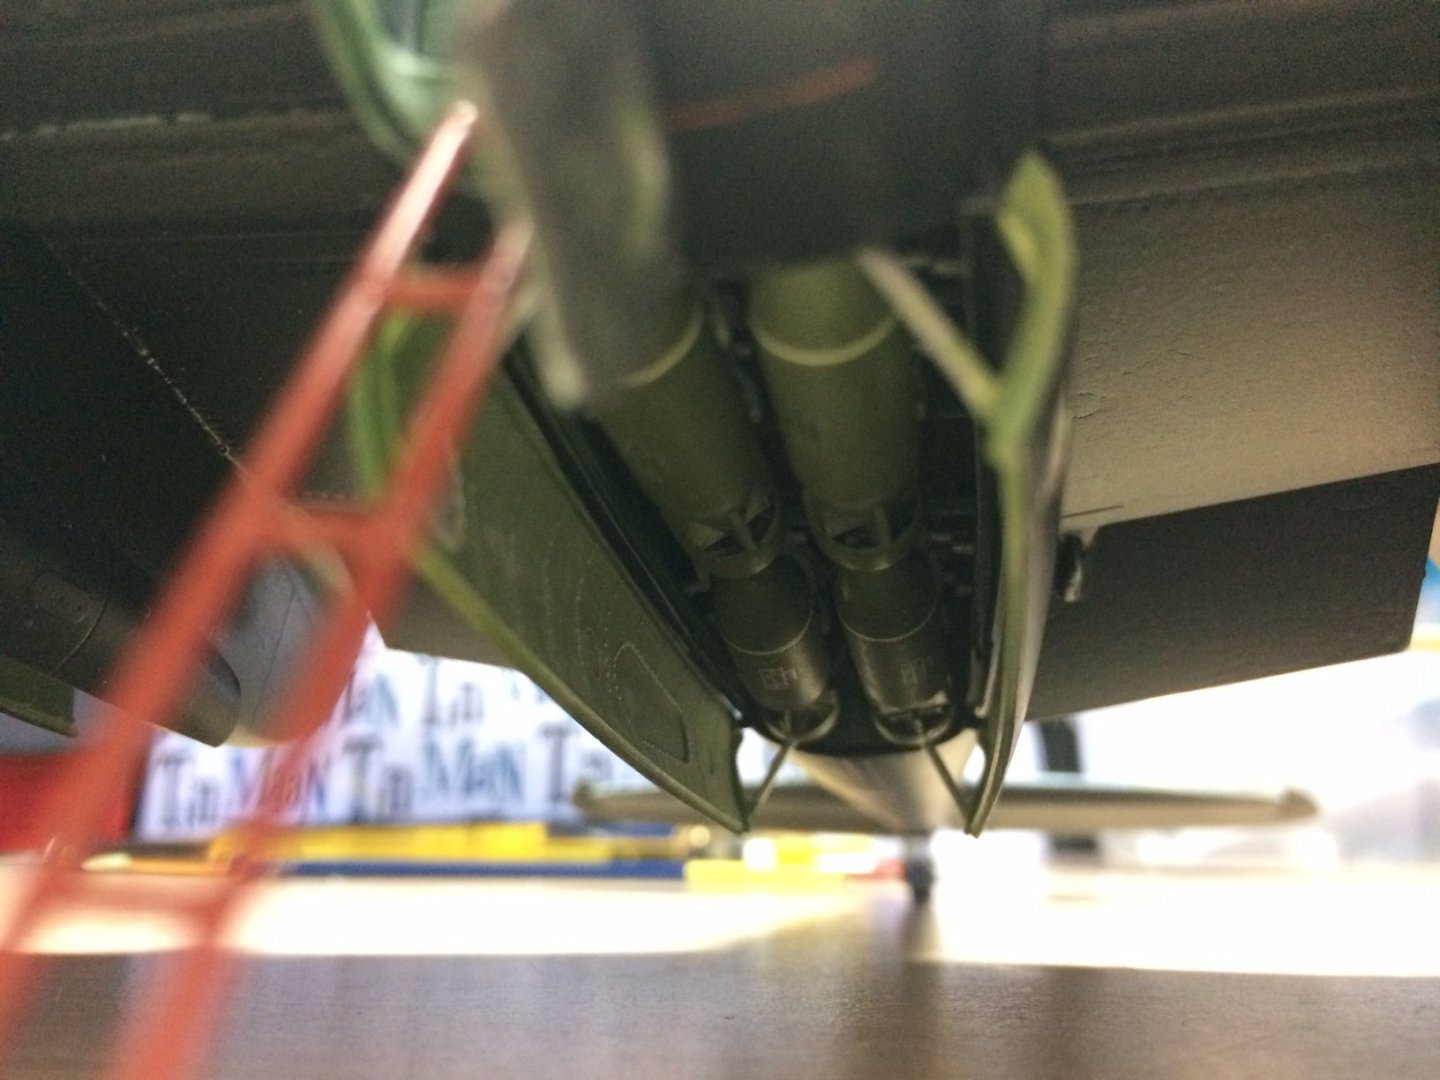
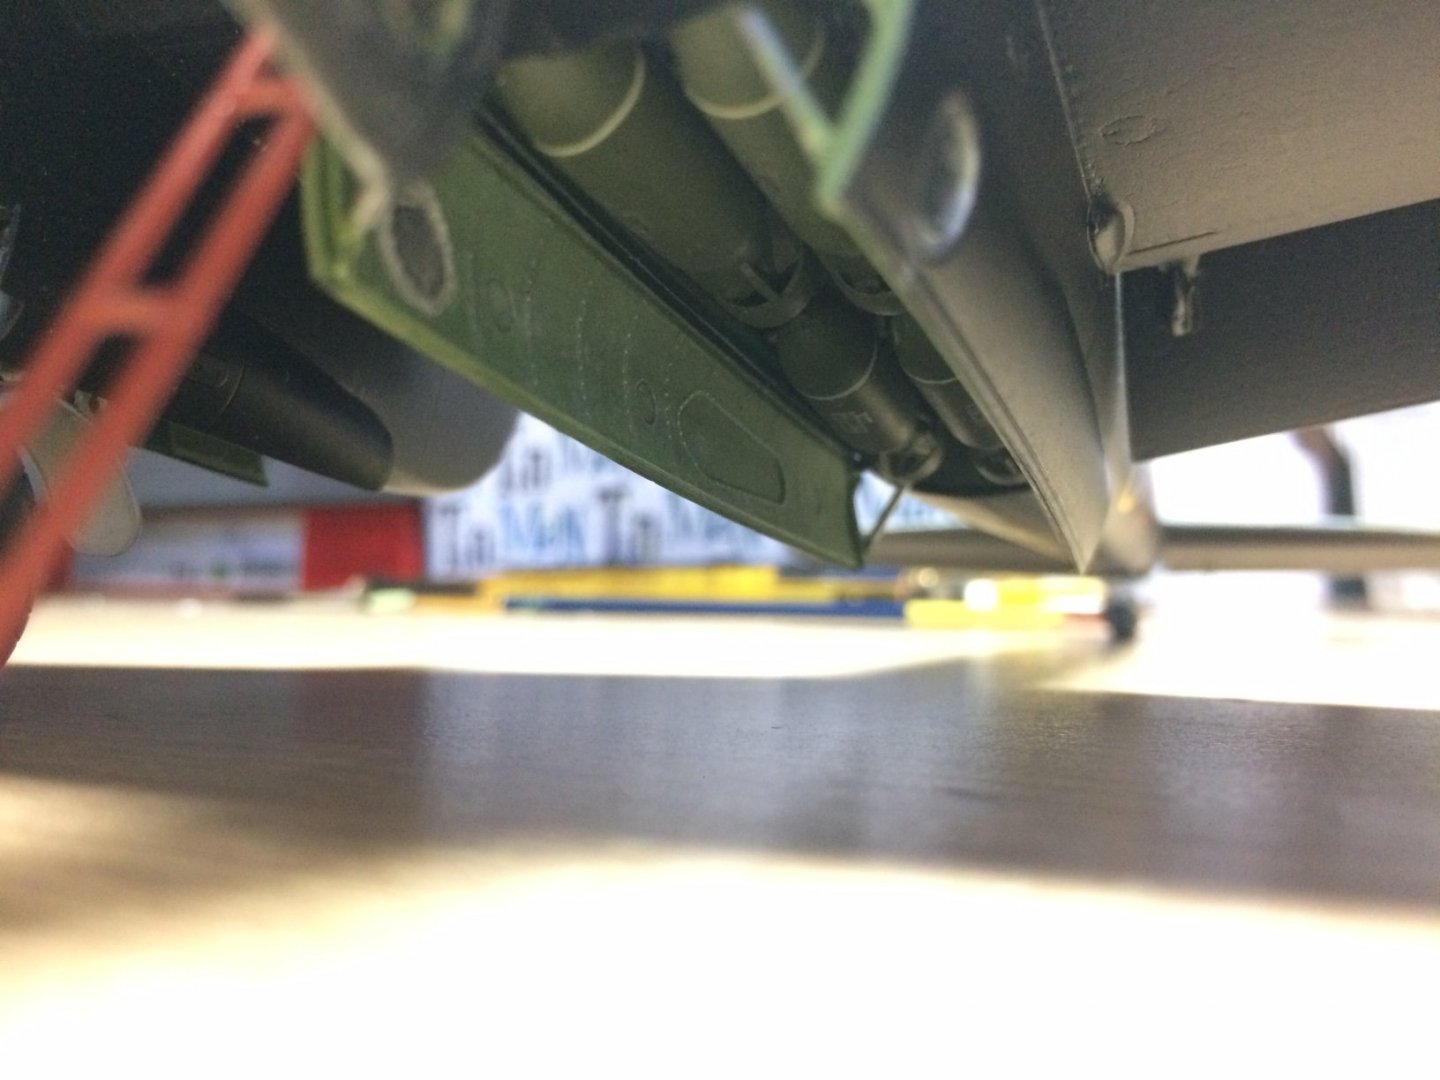
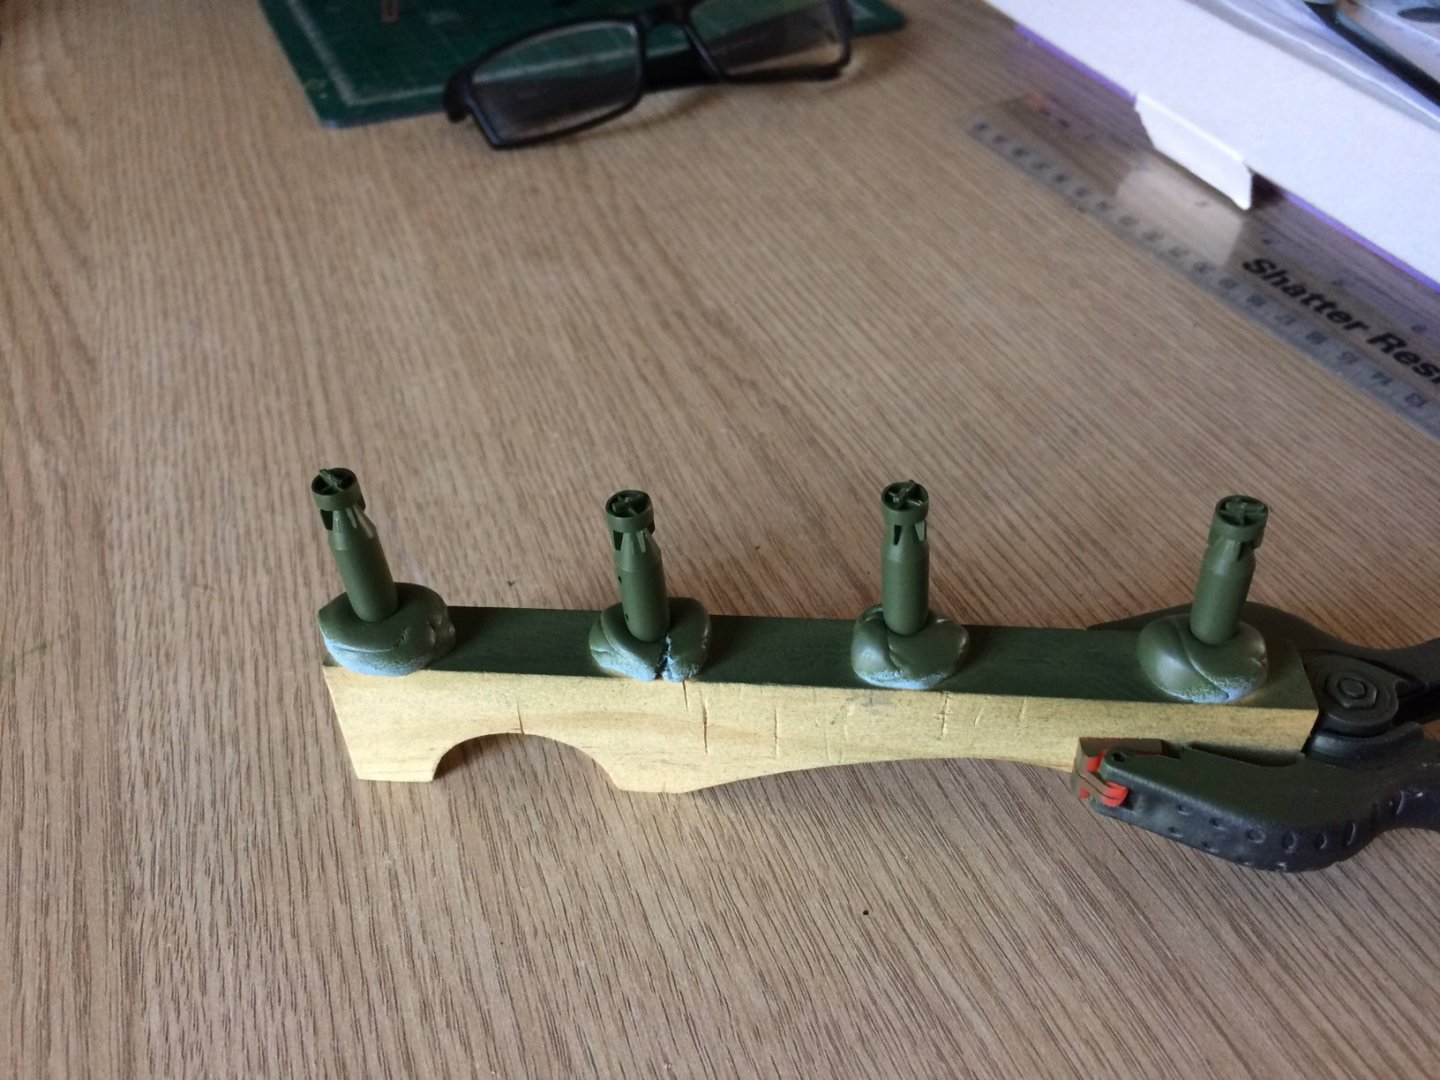
Evening all, I managed to do a bit more on the bombs this evening, this consisted of applying decals with bomb markings and a light green/blue ring around each nose cone - fiddly even under my magnifier. Anyway they are on just need to settle now before I can brush over some flat coat. No pics though too iddle lol. OC.
-
Seriously good Joe - perfect finish. OC.
-
Some great kits out there including 1/48 scale B-1B Lancer Revell kit, B-52H not sure think its a vac form kit, seriously large kits. OC.
-
Imagine building the whole C5 at 1/35 scale - that would have a Wopping 6.3 feet wing span - "Hugeeeee" OC.
-
Right then, the 500s have thier paint coat - just a little weathering and armoured code rings to paint on. OC.

-
Thank you so much Edward. OC.
-
Anyone know the auto restore series on the Tv where the same team take in cars and restore them back to the owner - there was a really nice Mustang they did up in one of the programs. OC.